Posted on — Leave a comment

Vegetarian Enchiladas Recipe: Easy Black Bean & Veggie Enchiladas

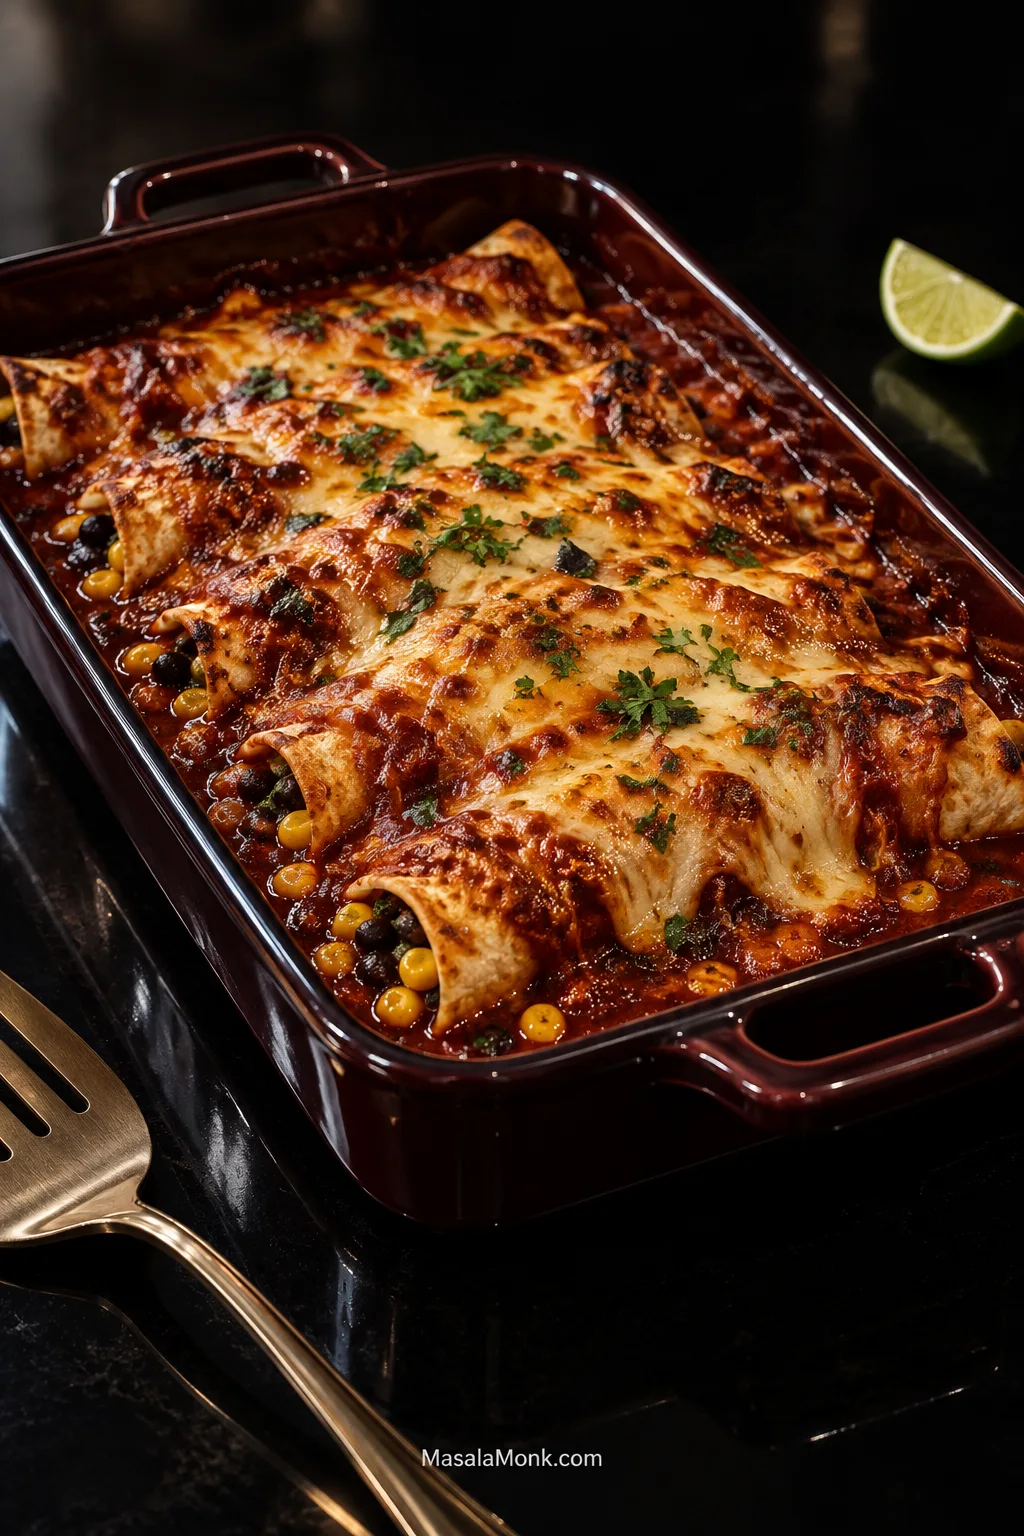
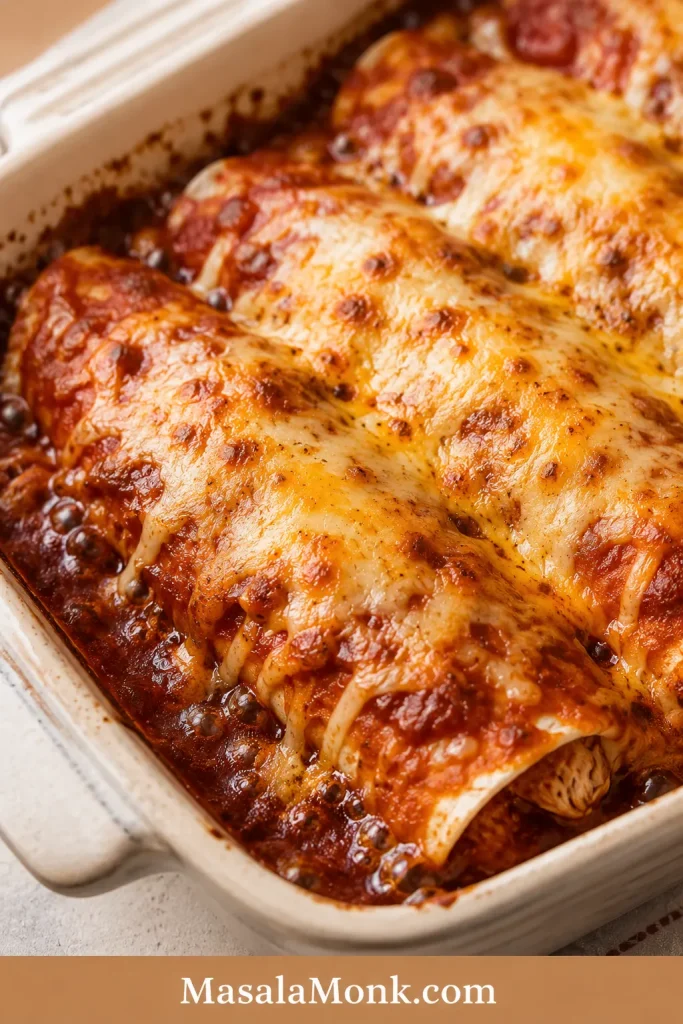
Baked vegetarian enchiladas in a dark red casserole dish with glossy red sauce, browned melted cheese, and black beans and corn visible around some tortilla edges.

A good pan of vegetarian enchiladas comes to the table still bubbling: red sauce in the seams, browned patches of cheese, sweet corn, toasty cumin and lime underneath. The tortillas stay soft through the middle, while a few exposed edges catch enough oven heat to toast.

Keep the easy parts easy. The filling cooks in one skillet, store-bought enchilada sauce works perfectly well, and there is no need to dip every tortilla individually before rolling. What matters more is how wet the filling is, whether the tortillas bend cleanly and how long they sit in sauce.

Black beans, corn, bell pepper, onion and garlic make up the filling. A few of the beans get crushed against the skillet so everything holds together inside the tortilla; the rest stay whole, giving you a hearty center without turning the filling into bean paste.

Saucy, not soggy is the aim. The recipe itself is straightforward; the extra guidance farther down is there for the few places enchiladas tend to get awkward.

Quick answer: To make vegetarian enchiladas, sauté onion, bell pepper and corn until tender and no loose water remains. Add black beans, lightly crush some of them, then season with cumin, chile, lime and a little red enchilada sauce. Taste before rolling. Fill 8 medium flour tortillas or 10–12 small corn tortillas, arrange them in a lightly sauced 9 × 13-inch / 23 × 33-cm dish, top with the remaining sauce and cheese, and bake at 400°F / 200°C for 18–22 minutes.

Jump to: the recipe · corn or flour · prevent sogginess · make ahead & freeze · troubleshooting · what to serve

Black Bean & Veggie Enchiladas

If you have never rolled enchiladas before, don’t let that make the recipe look fussy. Once the tortillas are flexible and you know how much filling they comfortably hold, the rest of the pan goes quickly.

Recipe at a Glance

Yield8 medium flour-tortilla enchiladas or about 10–12 smaller corn-tortilla enchiladas; about 4 servings
Total timeAbout 50–60 minutes, including resting
Active timeAbout 30 minutes
Pan9 × 13 inches / 23 × 33 cm
Bake400°F / 200°C for 18–22 minutes
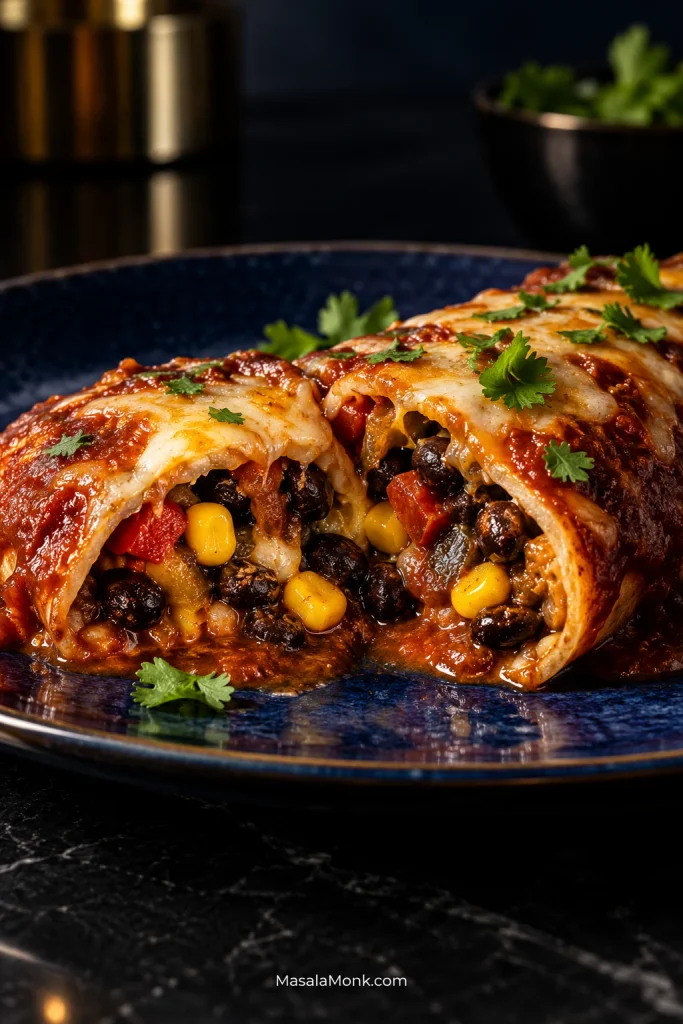
Two cut-open enchiladas on a deep blue plate showing black beans, corn, red bell pepper, onion, melted cheese and red sauce inside the tortillas.
A useful filling should hold together without becoming dense. You still want to see whole black beans, corn and peppers when the enchilada is cut, rather than one compact paste.

Ingredients

  • 1 tablespoon / 15 ml olive oil or neutral cooking oil
  • ½ medium onion, finely diced, about 80 g. Red, yellow or white all work.
  • 1 medium red bell pepper, diced, about 150 g. A small dice makes enchiladas easier to roll and eat.
  • 1 cup corn, about 160 g. Fresh, frozen or well-drained canned corn all work.
  • 3 garlic cloves, minced
  • 1½ teaspoons ground cumin
  • 1 teaspoon American-style chili powder. Use the relatively mild seasoning blend sold as “chili powder” in the US, not pure cayenne or another very hot ground chile.
  • ½ teaspoon smoked or sweet paprika
  • ½ teaspoon dried oregano
  • 1 (15-ounce / 425-g) can black beans, rinsed and thoroughly drained, about 240–260 g drained
  • 2 cups / 475 ml red enchilada sauce, divided. One 19-ounce can usually gives enough. Packaged sauce keeps this easy; this red enchilada sauce recipe makes about the right amount.
  • 1 tablespoon / 15 ml fresh lime juice, plus wedges for serving
  • Fine salt, as needed after tasting
  • 8 ounces / 225 g / about 2 cups shredded melting cheese, divided roughly in half. Monterey Jack is an easy choice; Jack with sharp cheddar adds bite; Oaxaca works well too. Any mild cheese or blend that melts smoothly can stand in.
  • 8 flour tortillas, about 8 inches / 20 cm each
  • Or 10–12 corn tortillas, about 6 inches / 15 cm each. Expect closer to 12 at roughly ⅓ cup filling each; capacity varies with size and thickness.
  • Neutral oil as needed, optional, for corn tortillas that remain fragile after warming

Cooking for vegetarians? Check enchilada sauce for meat stock and choose cheese made with vegetarian or microbial rennet if that matters to you. Canned refried beans may contain lard too, so check the label if using them as a swap.

Before You Start

  • Taste the sauce. A salty or very spicy sauce means the filling needs more cautious seasoning.
  • Bend one corn tortilla. A cracked edge tells you the batch needs warming before you start filling.
  • Drain the beans and canned corn well. Water carried into the filling eventually reaches the tortilla.

1. Sauce the Baking Dish

Heat the oven to 400°F / 200°C.

Spread about ⅓ cup / 80 ml enchilada sauce across the bottom of the baking dish. A thin coating is enough to flavor the underside and prevent sticking.

2. Cook the Vegetables Until the Pan Looks Dry

Heat the oil in a large skillet over medium to medium-high heat. Add the onion and bell pepper and cook for 5–7 minutes, stirring occasionally, until tender and beginning to color.

Add the corn and cook for another 2–3 minutes.

Lower the heat to medium and stir in the garlic, cumin, chili powder, paprika and oregano. Within about 30 seconds the pan should smell warmer and toastier, with the cumin and chile coming through before anything has a chance to scorch.

Drag the spatula through the vegetables. Water should not immediately flood back into the cleared path. You want glossy, juicy vegetables with a fairly dry skillet underneath them.
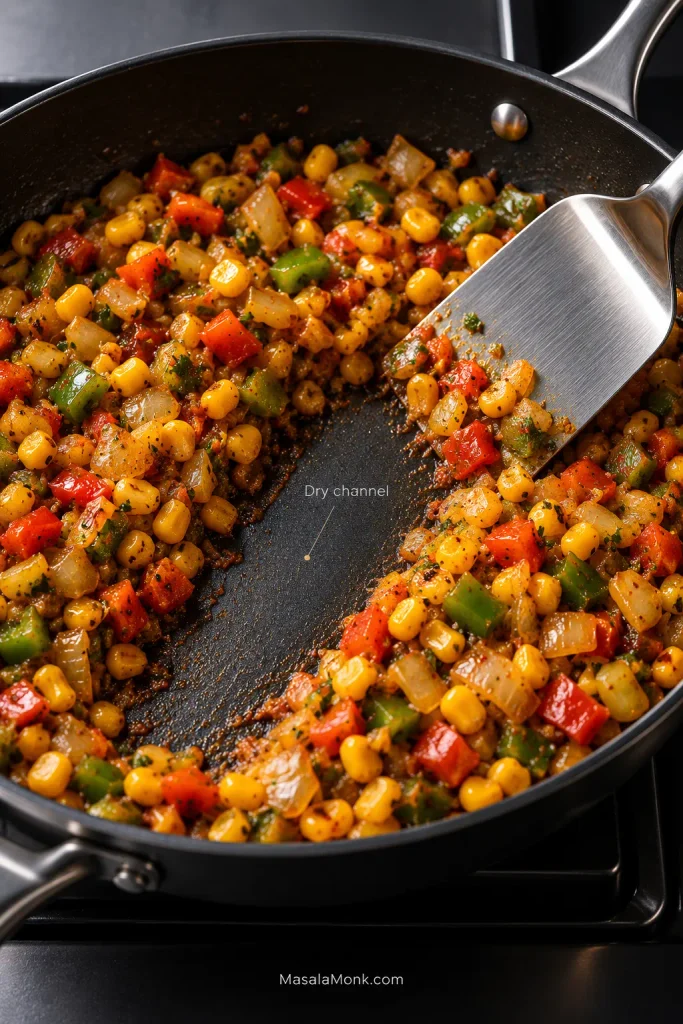
Cooked corn, onion and bell pepper pushed aside by a metal spatula in a dark skillet, leaving a dry strip of pan with no loose liquid running back into it.
This is the easiest moment to catch excess moisture. Once beans and sauce go in, extra vegetable water is harder to recognize—and much more likely to end up inside the tortilla.

3. Add the Black Beans and Finish the Filling

Add the drained black beans. Lightly crush about one-third against the skillet with the back of your spoon; leave the rest whole.

Stir in another ⅓ cup / 80 ml enchilada sauce and the lime juice. Scoop up a spoonful. It should stay together as you carry it to a tortilla, with no watery liquid left behind in the skillet.

If the filling loosens after the sauce goes in, cook it for another minute or two until the excess liquid has reduced and the spoonful holds together again.

Keep the sauce split simple: ⅓ cup under the rolls, ⅓ cup in the filling and about 1⅓ cups over the top.
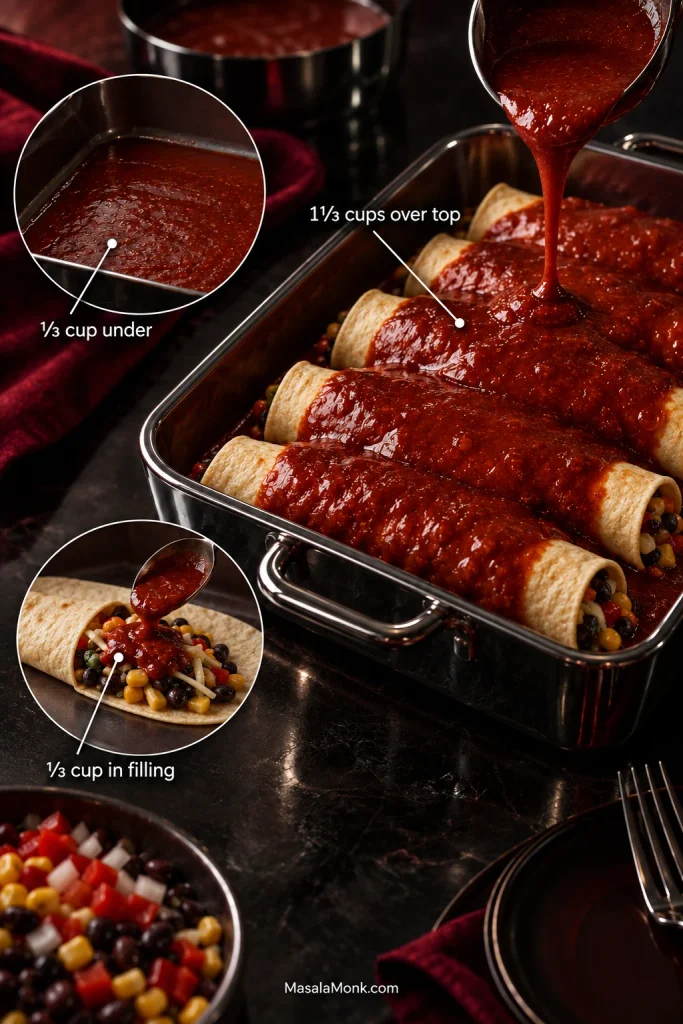
Enchilada sauce guide showing one-third cup beneath the rolls, one-third cup mixed into the filling, and one and one-third cups spread over the top while the tortilla ends remain exposed.
The same amount of enchilada sauce behaves very differently depending on where it goes. Distribution matters more than simply cutting the quantity: too much underneath creates pooling, while most belongs over the rolls.

4. Taste Before You Roll

Taste the filling now. Beans soften seasoning, and both the sauce and cheese will add salt later.

Add salt if it needs it. A little more lime can wake up a heavy filling; another small pinch of cumin or chili powder can deepen one that tastes flat. Adjust it now, before the filling disappears inside the tortillas.

5. Warm the Tortillas

Flour tortillas: soft and flexible straight from the packet? Use them. There is no prize for adding an unnecessary warming step.

Corn tortillas: wrap the stack in a slightly damp kitchen towel or paper towel and microwave for about 20–30 seconds. Bend one. A batch that still cracks usually needs another 10 seconds. You can also use a hot skillet for about 10–20 seconds per side. Keep the warmed stack covered while you work.

Particularly brittle tortillas may benefit from a very light brush of neutral oil and another few seconds in the skillet. Pull them while they still bend easily.
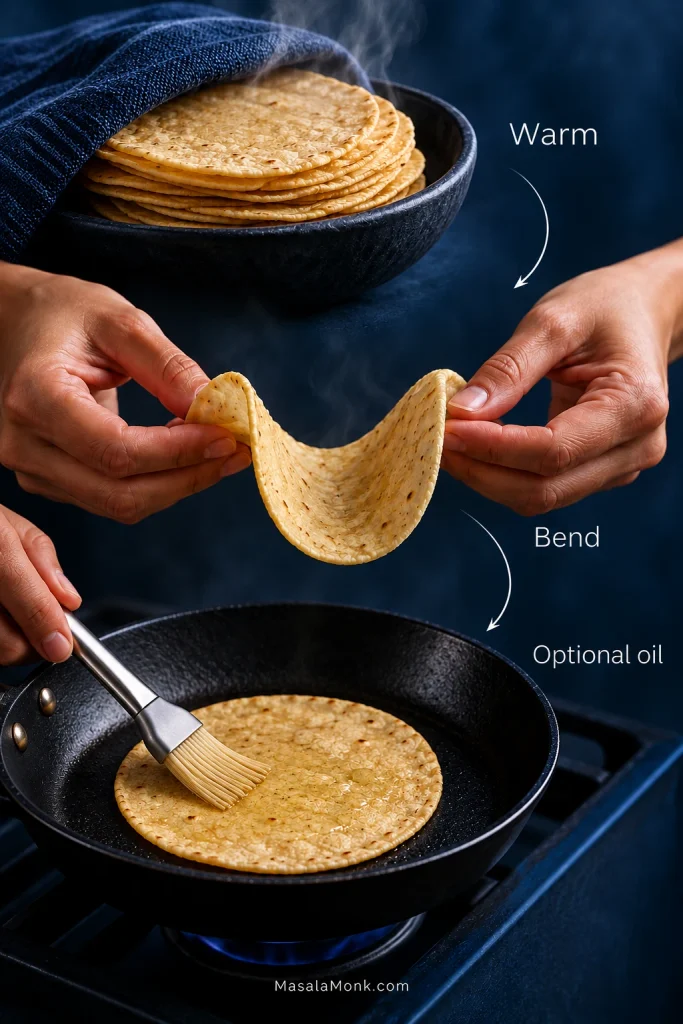
Three-step corn tortilla guide showing warmed tortillas, one bending into a U shape without cracking, and another being lightly brushed with oil in a skillet as an optional step.
Corn tortillas need enough flexibility to roll, not a mandatory oil treatment. If warmth alone gets them there, stop—extra steps should solve a problem, not become ritual.

6. Fill and Roll

The first tortilla is your test enchilada. A crack means the remaining tortillas need more warmth; filling bulging heavily from both ends means the next one needs a smaller scoop.

Use about ½ cup / 120 ml filling for each 8-inch / 20-cm flour tortilla or about ⅓ cup / 80 ml for each 6-inch / 15-cm corn tortilla.

Divide about half of the shredded cheese among the tortillas, roughly 1 cup in total.

Roll and place seam-side down in the dish. Don’t chase perfectly tight cylinders. Once the rolls are tucked beside one another, the baking dish does most of the holding. A small split is not a crisis; turn that side down and carry on.

By the third or fourth tortilla, the amount usually starts to feel obvious. From there, the pan fills quickly.
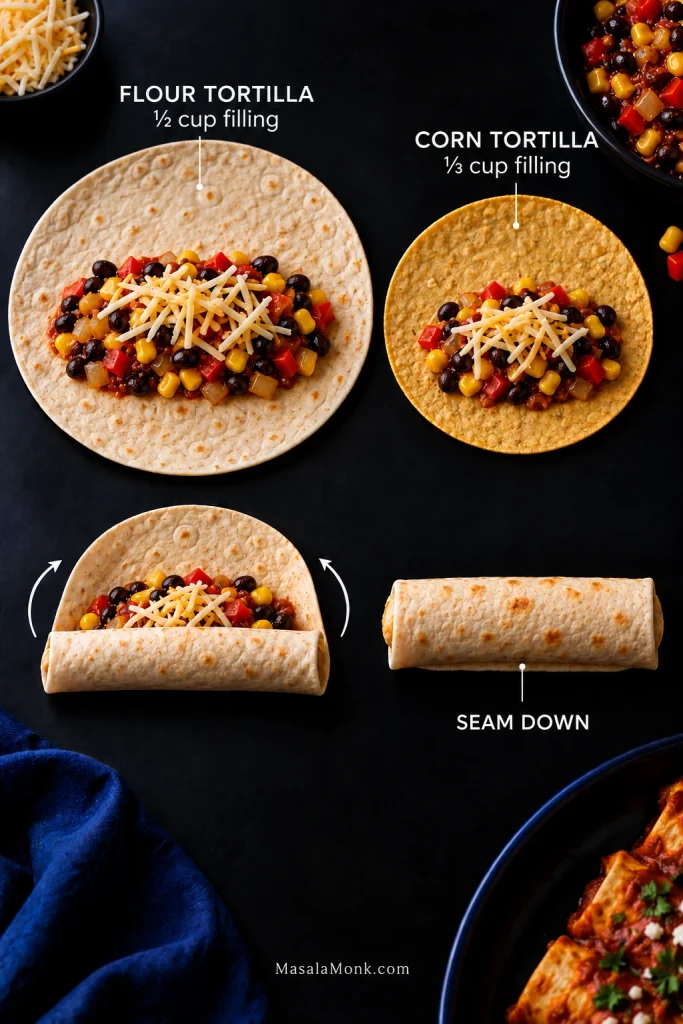
Overhead guide comparing a large flour tortilla with about half a cup of black bean and corn filling and a smaller corn tortilla with about one-third cup, followed by rolling and seam-down placement.
Treat the filling amount as a comfortable maximum, not a target you must force into every tortilla. If the seam strains to close, the better fix is a smaller scoop, not a tighter roll.

7. Add Sauce and Cheese

Sauce the centers and leave a little tortilla exposed at the ends. Spoon over the remaining sauce, about 1⅓ cups / 315 ml, then scatter the remaining half of the cheese over the top.

8. Bake Until Bubbling, Then Rest

Bake uncovered for 18–22 minutes. Look for red sauce bubbling between the rolls, melted cheese with a few golden patches and tortilla tips beginning to toast.

A hot pan with a pale top only needs a minute or two under the broiler/grill. Leaving the whole dish in the oven longer will only dry the filling and exposed tortilla edges.

Rest for 5–10 minutes. While the pan settles, cut the lime and get any toppings ready. The enchiladas will lift more cleanly when you come back to them.
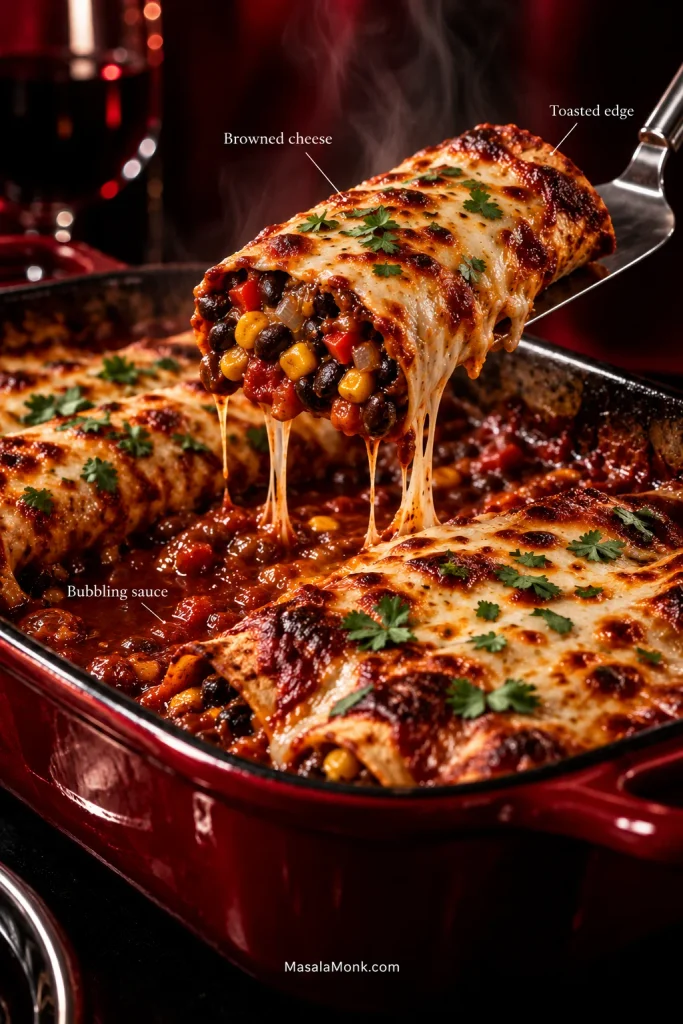
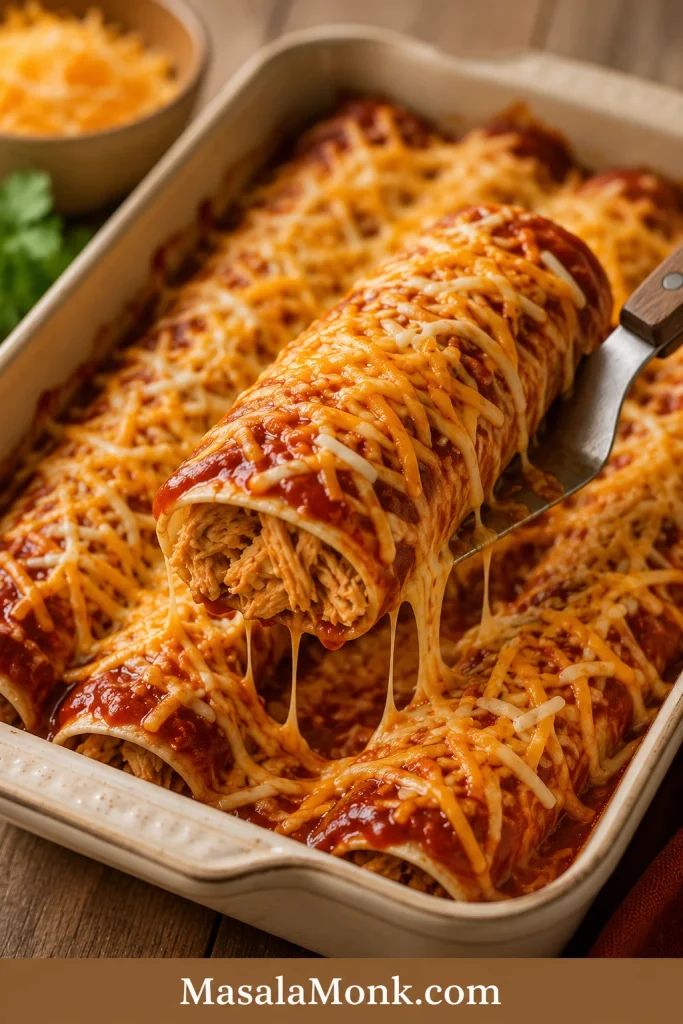
A spatula lifting a baked enchilada from a red casserole dish, with black beans, corn, red pepper and onion visible inside, surrounded by bubbling sauce, browned cheese and a toasted tortilla edge.
Use a broad spatula when serving: supporting the whole softened roll from underneath matters more than trying to lift it by one end, especially with corn tortillas.

If the pan is already in the oven, dinner is handled. Everything below is optional. Use it when you want to change the tortillas or filling, make the pan ahead, or work out why an earlier batch behaved differently.

Corn or Flour Tortillas for Enchiladas?

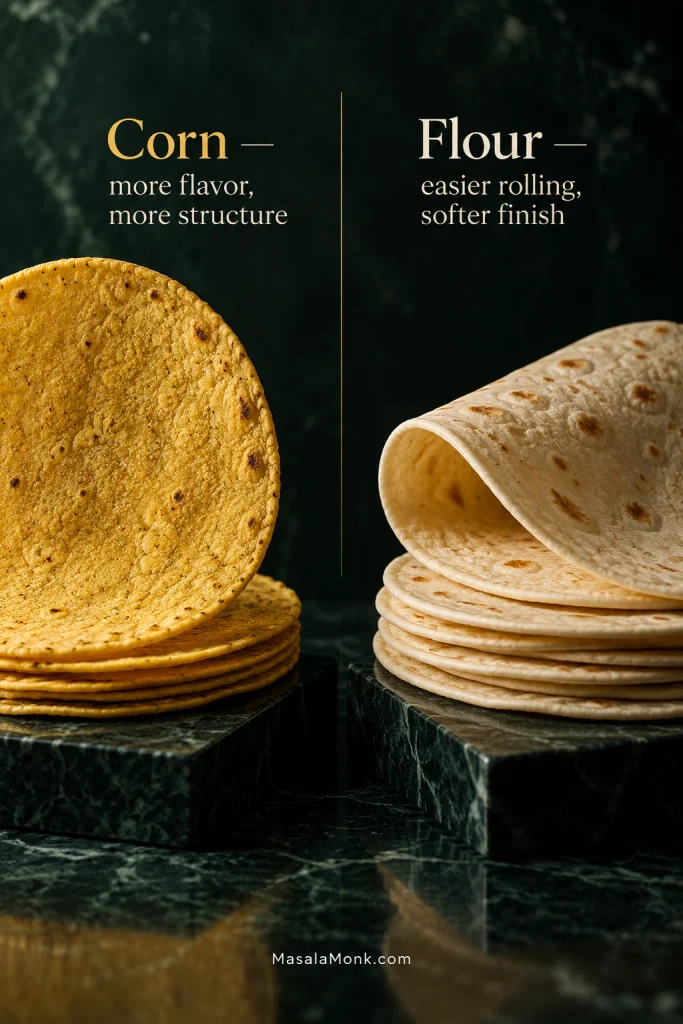
Corn tortillas are the traditional Mexican starting point for enchiladas. For this baked home-style version, flour tortillas are also useful when easy rolling matters more than pronounced corn flavor.

If you want…ChooseWhat changes
More corn flavorCornYou still taste the corn tortilla underneath the sauce.
Firmer tortilla texture under sauceCornProperly warmed corn tortillas keep more of their own texture as they bake.
The easiest rollingFlourThey are soft and forgiving.
A very soft finished enchiladaFlourFlour tortillas soak up sauce faster as they bake and sit.
Side-by-side stacks of yellow corn tortillas and pale flour tortillas, labeled that corn offers more flavor and structure while flour is easier to roll and gives a softer finish.
Think about when you plan to eat them. Flour tortillas are wonderfully forgiving for same-day enchiladas, while corn usually keeps more of its own character after longer contact with sauce.

Do Corn Tortillas Have to Be Fried?

Not for this baked version. A quick oil pass makes corn tortillas easier to roll and gives them a little more protection from the sauce. If yours already bend cleanly after warming, you can skip it.

Freshness, thickness and brand all matter. If you’ve got masa harina and want to make the tortillas too, this homemade corn tortilla recipe explains what properly hydrated, flexible dough should feel like.

For especially fragile tortillas, Bon Appétit also describes a brief oil treatment for sturdier enchiladas. Whatever method you use, the tortilla should still bend easily when it reaches the filling.

Whichever tortilla you choose, moisture eventually matters more than the label on the packet.

Saucy, Not Soggy: How to Keep Enchiladas From Falling Apart

Soggy enchiladas usually come down to moisture and time: a wet filling, sauce pooling underneath, or tortillas sitting in sauce for hours before they bake.

Soft is not the enemy here. A good enchilada should be tender where tortilla meets sauce. The trouble starts when the tortilla becomes watery, gummy or so fragile that it cannot make the trip from baking dish to plate.
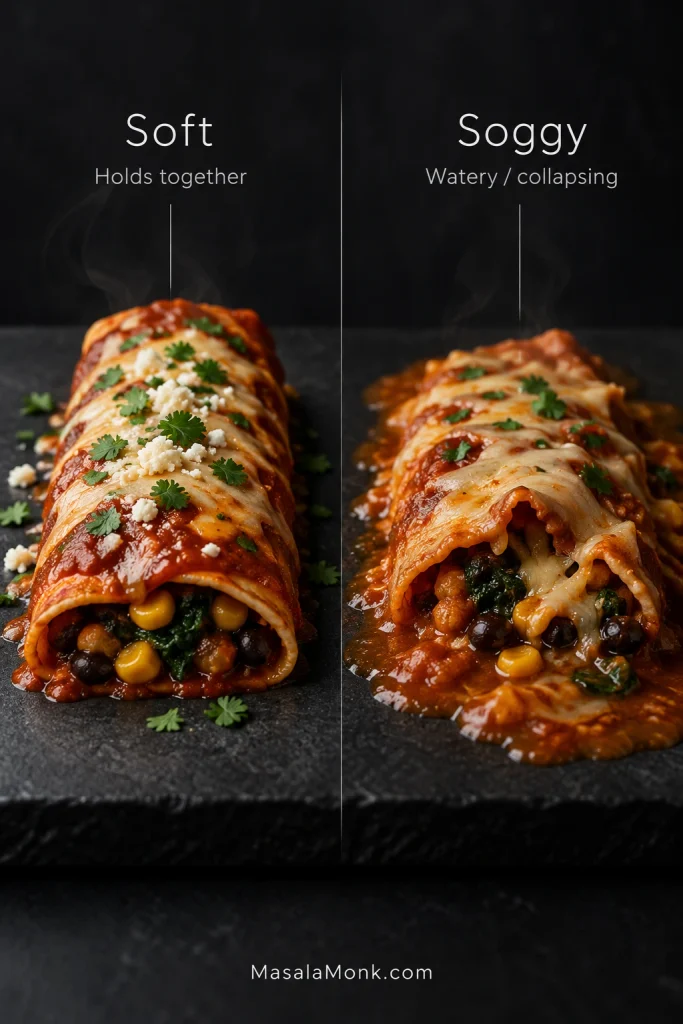
Two enchiladas compared side by side: the soft example remains intact, while the soggy example sits in excess watery sauce with a visibly collapsing tortilla.
For vegetarian enchiladas, the useful test is whether the tortilla still has structure. Tender tortillas are normal; pooling liquid plus a roll that collapses when lifted signals a moisture problem.

Most of the solution happens before the pan reaches the oven. Corn and peppers are fairly forgiving. Zucchini, mushrooms and spinach release much more water, so give those vegetables enough time in the skillet for that moisture to cook away.

Corn tortillas have the opposite problem at first: too dry and they crack. Warm them until they bend cleanly. Flour tortillas need almost no persuasion to roll, though they soften more quickly once they spend hours in sauce.

With the sauce, restraint underneath matters more than restraint on top. Give the bottom of the dish a thin coating, put a little sauce in the filling, then let most of it sit over the rolls. For a saucier serving, warm extra sauce separately and spoon it on at the table.

Sauce contact matters too. A pan rolled and baked now behaves differently from one that sits sauced for hours before it reaches the oven. If you are assembling ahead, the make-ahead method keeps that exposure under control.

Changing the Vegetarian Enchilada Filling

Poblano is the easiest place to start if you want to change the base without changing its character too much. It brings more chile flavor without adding much extra moisture. Extra corn makes the filling sweeter.

The important thing is volume: replace rather than endlessly add. A cup of something new should take the place of roughly the same amount of the original filling. Otherwise a flexible recipe quietly becomes enough for a second baking dish.

Vegetables That Need More Cooking

Wetter vegetables need a little more care before they go inside a tortilla.

  • Zucchini: dice it small and cook until the water it releases has evaporated.
  • Mushrooms: let them move past the wet, steaming stage and give them time to brown. Once browned, they make the filling much more savory.
  • Spinach: wilt thoroughly. Drain or squeeze frozen spinach before it reaches the filling.
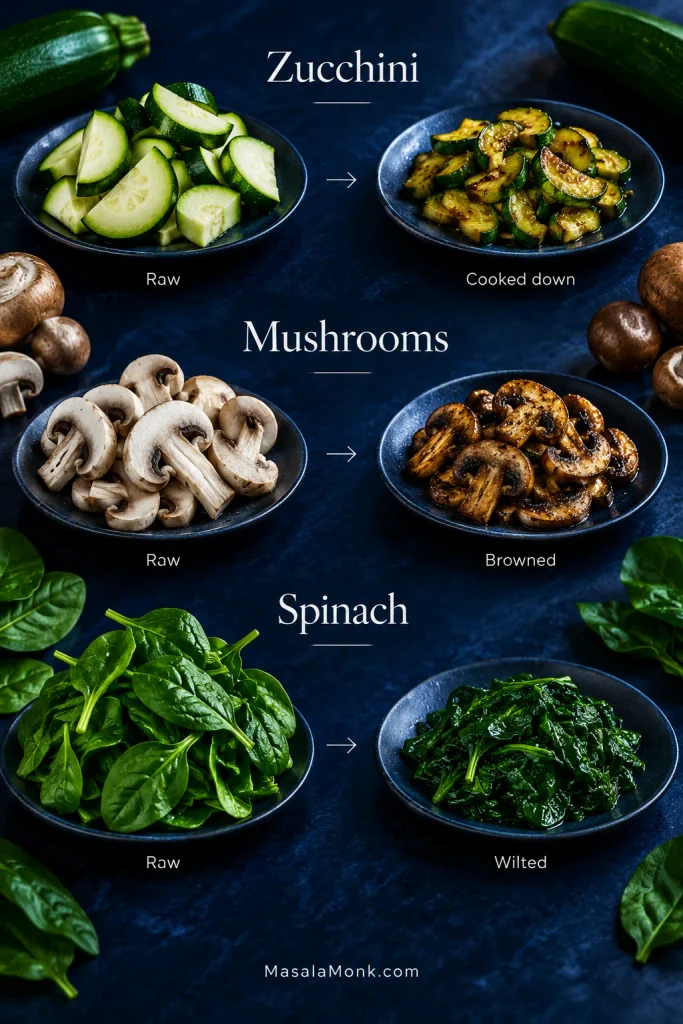
Before-and-after guide showing raw and cooked-down zucchini, raw and browned mushrooms, and fresh spinach beside a much smaller portion of wilted spinach.
Different vegetables change appearance in different ways, so color alone is a poor guide. For an enchilada filling, the more reliable endpoint is simple: the skillet should no longer be releasing loose water.

Sweet potato and butternut squash need a head start too. Cook them until tender before assembly; the short oven bake here is enough to heat the filling and melt the cheese, not enough to soften raw chunks of squash.

Black, Pinto or Refried Beans?

Black beans work especially well here because they hold their shape but crush easily enough to help bind the filling. Pinto beans are softer and milder and can replace them 1:1.

Refried beans give you a denser, creamier center. Check canned versions for lard if you are cooking for vegetarians. If you’d rather keep them on the side, this refried beans recipe from a can is a quick option.

Leaving beans out entirely calls for more cooked vegetables to take their place. Browned mushrooms with roasted cauliflower are one option. The tortillas should still feel properly filled when you roll them.

Red or Green Enchilada Sauce?

Red is the natural fit for the base recipe. Cumin, black beans and browned cheese sit especially well with its deeper chile flavor.

Green sauce changes what you notice. Lime, sweet corn, cilantro and the fresh toppings come forward, giving the same filling a brighter finish.
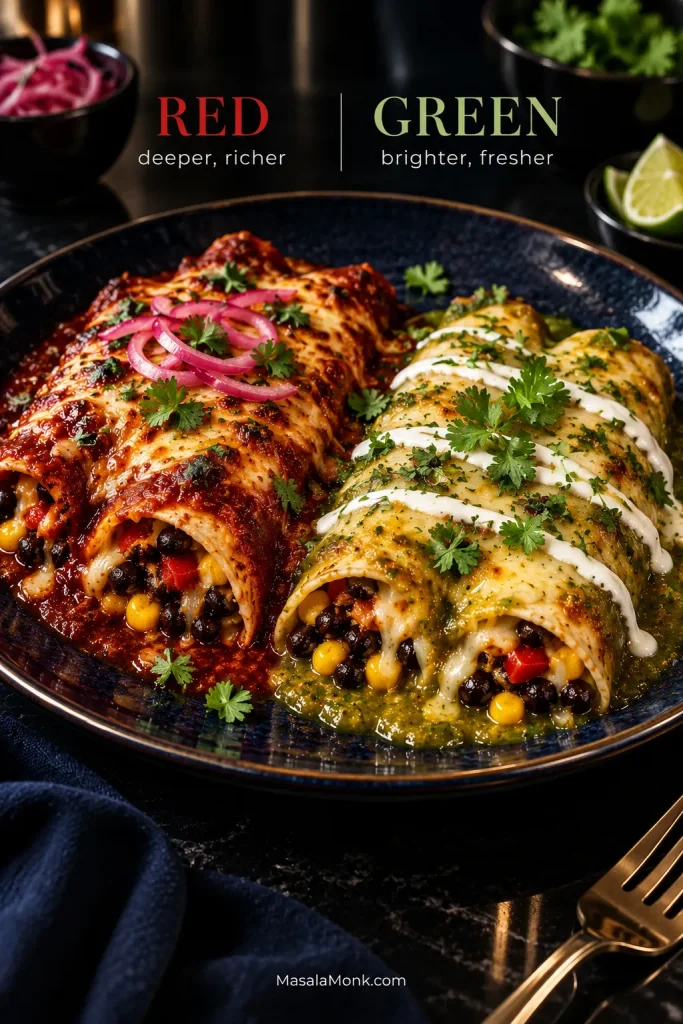
Two enchiladas with the same black bean, corn and red pepper filling; one has deep red sauce and pickled onion, while the other has green tomatillo sauce, crema and cilantro.
If you swap red for green enchilada sauce, keep the filling unchanged the first time. That makes it easier to taste what the sauce itself changes before adjusting lime, cumin or toppings.

Swap green sauce for red roughly 1:1. A pourable bottled green enchilada sauce can go straight in. If you’re using a thicker salsa verde, loosen it with a little water, vegetable broth or cooking liquid until it pours easily and coats the tortillas. This roasted salsa verde explains that adjustment as well.

Give any sauce a taste before it reaches the pan. One that pours almost like broth benefits from a short simmer. A salty sauce means the bean filling will need less salt.

Homemade sauce is worth making when you feel like the extra project. It should not be the admission price for enchiladas on a Wednesday night. Ready to cook? Return to the recipe and assemble the pan as written.

How to Make Vegetarian Enchiladas Ahead Without Getting Soggy

For an overnight pan, use the finished filling exactly as written but keep the exterior sauce off until baking time. That means no sauce in the baking dish and no sauce over the rolled tortillas while they sit in the refrigerator.

Let the cooked filling stop steaming, transfer it to a shallow container and refrigerate promptly. Once chilled, fill and roll the tortillas and keep them covered in the refrigerator. Store the sauce and cheese separately.
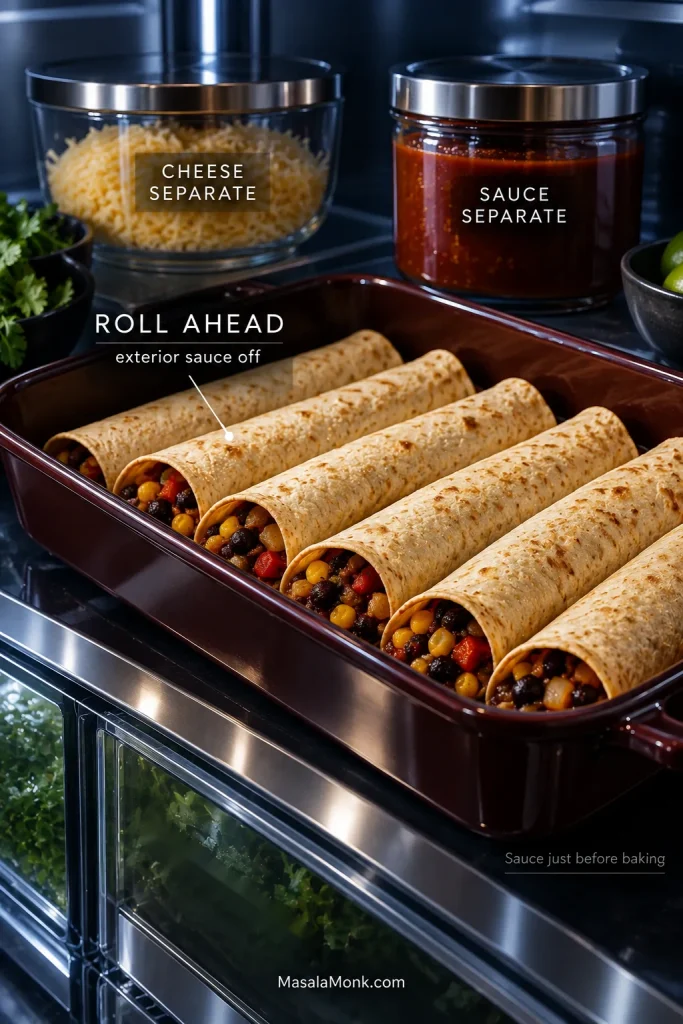
A refrigerator shelf holding rolled unsauced enchiladas in a baking dish with separate containers of red enchilada sauce and shredded cheese.
Cooling the filling before rolling keeps residual steam from condensing inside the covered pan. Then hold back the exterior sauce so the tortillas spend less time absorbing liquid before baking.
Prep styleWork before bakingWhat to expect
Components kept separateWarm tortillas, roll, sauce and add cheeseClosest to freshly assembled
Roll ahead; sauce laterAdd sauce and cheeseVery good texture with little work left
Fully assemble overnightBakeLeast work, but noticeably softer tortillas

Baking Chilled Enchiladas

A pan going into the oven straight from the refrigerator will usually need about 25–35 minutes. Cover loosely for the first 15 minutes, then uncover and continue until the sauce is bubbling through the pan and the center is hot. Cooking them fresh instead? Use the standard bake cues and timing.

Refrigerated glass bakeware needs a little extra care. Follow the manufacturer’s instructions before moving a cold glass dish into a hot oven because thermal-shock tolerance varies by product.

How to Freeze Vegetarian Enchiladas

For the closest texture to a fresh pan, freeze the cooked filling and sauce separately. For best quality, use them within 2–3 months. Thaw overnight in the refrigerator, then assemble with tortillas and cheese and bake as written.

A fully assembled pan works too. Chill the cooked filling first, assemble the enchiladas in a freezer-safe baking dish, add the sauce and cheese, wrap tightly and freeze. The tortillas will be softer after thawing, but almost all of the work is already done.

Thaw the assembled pan overnight in the refrigerator, then use the chilled-pan timing above. Straight-from-frozen baking is possible, but timing varies with the pan, its depth and how solidly everything is frozen. Thawing first gives you a more even bake.
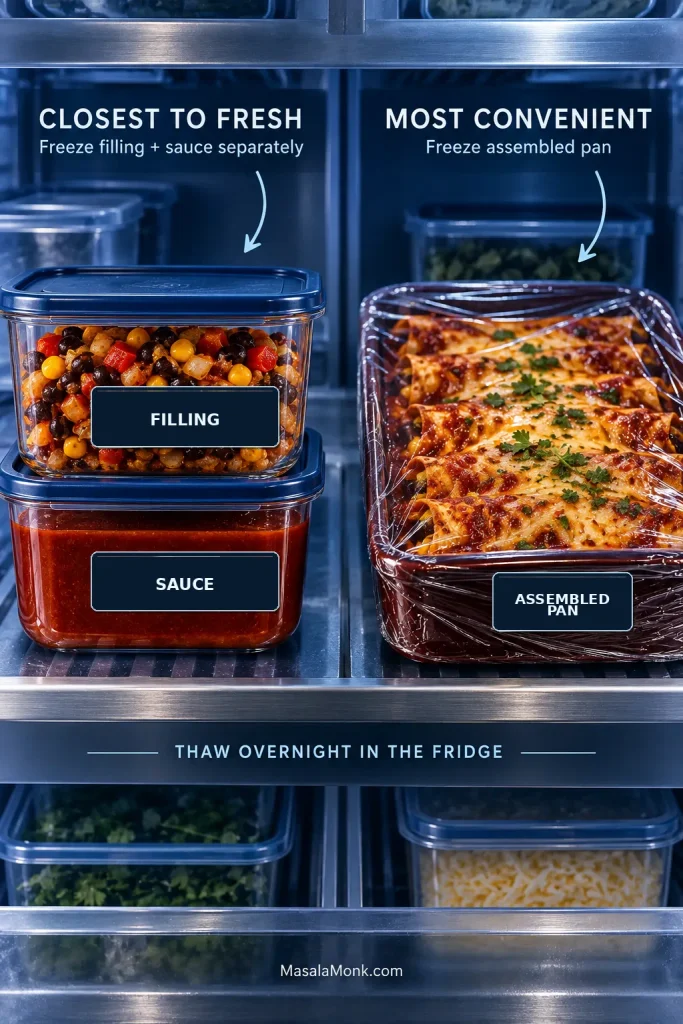
Freezer comparison showing cooked black bean and vegetable filling stored separately with red sauce on one side and a wrapped fully assembled pan of sauced, cheese-topped enchiladas on the other.
The freeze-thaw cycle is gentler on tortilla texture when the filling and sauce stay separate. An assembled frozen pan saves more work later, but the tortillas go through that cycle already sauced.

Store and Reheat Leftovers

Refrigerate leftovers promptly. USDA recommends getting perishable cooked food into the refrigerator within 2 hours and using leftovers within 3–4 days. Reheat them to 165°F / 74°C.

For freezer quality, USDA guidance lists casseroles at about 2–3 months. See its food-safety guidance for the broader recommendations.

An oven or toaster oven keeps more texture around exposed edges. The microwave is quicker and gives you a softer tortilla. At lunch, speed may win.

Fix My Enchiladas
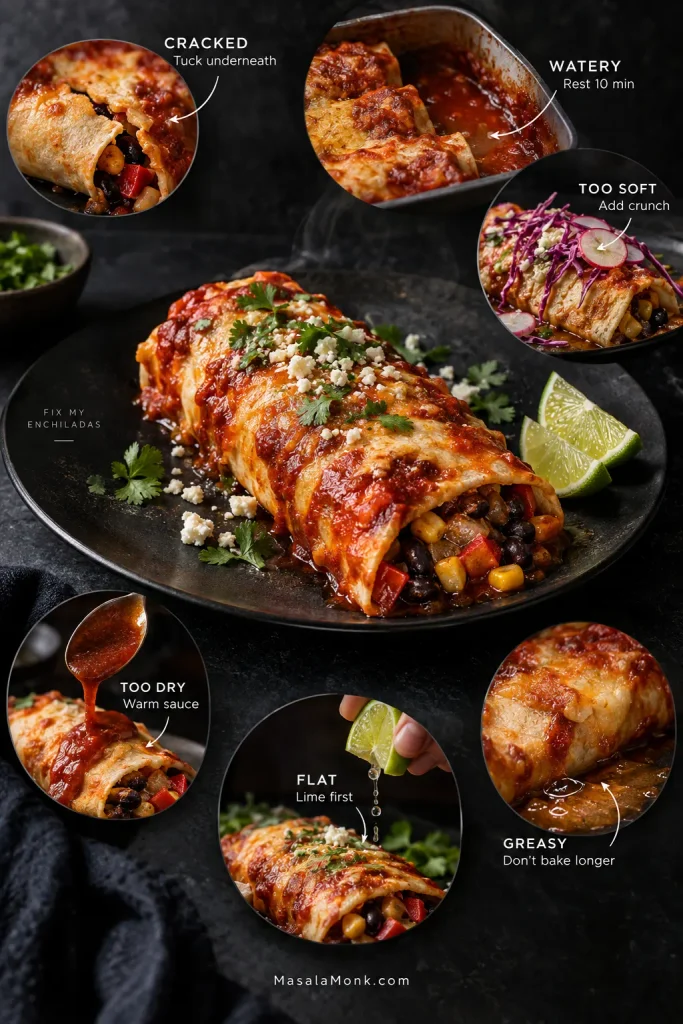
Troubleshooting guide around a baked enchilada showing six problems and fixes: cracked, watery, too soft, too dry, flat and greasy.
Most rescue moves change one thing at a time: structure, moisture, brightness or contrast. More oven time is rarely the answer once the enchiladas are already cooked.

My Corn Tortilla Cracked While I Was Rolling It

Tuck the split side underneath and keep going; a small crack rarely matters once the rolls are sitting snugly together. Before you roll the rest, revisit the tortilla warming method.

There Is Water Under the Enchiladas

Give the pan a full 10 minutes to rest before judging it. Some loose liquid may settle as the enchiladas cool slightly. Lift the rolls with a wide spatula and leave excess liquid in the dish. A very watery pan usually traces back to wet vegetables, unusually thin sauce or too much sauce underneath. For prevention next time, the Saucy, Not Soggy section brings those moisture points together.

The Tortillas Have Turned Very Soft

That doesn’t mean the pan is ruined. Let it rest a little longer, lift portions with a wide spatula and add something crisp such as cabbage, radish or pickled onion for contrast. For another overnight batch, use the make-ahead method and keep the exterior sauce separate until baking time.

The Enchiladas Are Too Dry

Warm some extra enchilada sauce and spoon it onto each plate. Crema, salsa or guacamole can bring moisture back too. On another pan, use the full sauce amount and stop baking once the center is hot and the sauce is bubbling.

The Filling Tastes Flat

At the table, lime is the fastest fix. Salsa, pickled onion, jalapeño or Cotija can help too. Next time, taste after the beans, sauce and lime are all together in the skillet.

If the filling falls out: don’t try to re-roll a hot, sauced enchilada. Spoon the filling back beside or over the tortilla and eat it as it is. During assembly, a little less filling and a few lightly crushed beans make the rolls easier to manage.

If the pan looks greasy: that sheen is often fat released by the cheese. Let the pan rest and spoon off any obvious excess around the edges if you want to. Extra oven time usually makes the problem worse.

What to Serve With Vegetarian Enchiladas

The enchiladas already bring warm tortillas, beans, chile sauce and cheese. You don’t need every topping in the refrigerator. Pick one cool thing, one sharp thing and, if you want it, something crunchy.

  • Cool: avocado, guacamole, sour cream or crema
  • Sharp: lime wedges, pickled red onion, salsa or fresh/pickled jalapeño
  • Crunchy: shredded cabbage, radish or a simple cabbage slaw
  • Cheese at the table: Cotija for a salty, assertive finish or queso fresco for a milder fresh-cheese crumble

Finish with cilantro if you like it. For a fuller meal, Mexican-style rice or a simple salad is enough.
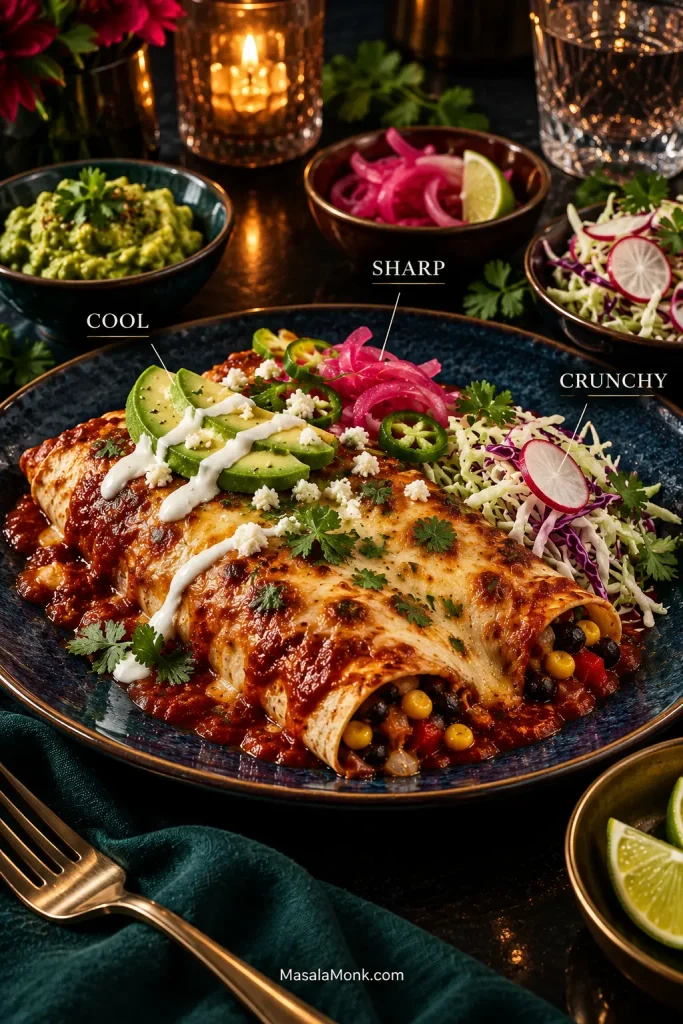
Plated vegetarian enchiladas with avocado and crema marked as cool, pickled red onion and lime marked as sharp, and cabbage and radish marked as crunchy.
Add contrast at the table, not before the bake. Cool crema, sharp lime or pickles, and crisp cabbage or radish stay useful precisely because they have not spent twenty minutes softening in the oven.

Vegetarian Enchiladas FAQs

Can I Use Black Beans Cooked From Dried?

Yes. Use about 1½ cups / 250 g cooked, well-drained black beans in place of the canned beans.

Can I Make These Gluten-Free?

Yes. Use certified gluten-free corn tortillas and check the labels on the enchilada sauce and any packaged seasoning blends.

Can I Make These Vegan?

Yes. The black bean and vegetable filling is already plant-based. Choose an enchilada sauce made without meat stock and use a dairy-free cheese that melts well, or leave the cheese off and finish with avocado, salsa and vegan crema. Without cheese, taste the filling carefully before rolling because you lose some salt and richness.

How Many Enchiladas Should I Serve Per Person?

For a main meal, plan on about 2 medium flour-tortilla enchiladas or 2–3 smaller corn-tortilla enchiladas per person. Substantial sides may bring that down; larger appetites may want more.

Back to the recipe · Back to top


When the pan comes out of the oven, give it those few minutes to settle. The sauce will still be bubbling between the rolls, the cheese will have browned in patches, and a few tortilla corners will be darker and drier than the sauced centers.

At the table, add the cold things: avocado against hot chile sauce, crema melting into the cheese, sharp pickled onion, a squeeze of lime over warm black beans and sweet corn.

Then it is simply dinner: bubbling sauce, browned cheese, lime, sweet corn, and a second enchilada that suddenly seems like a very good idea.
Posted on — Leave a comment

Red Enchilada Sauce Recipe: Easy, Homemade & Better Than Canned

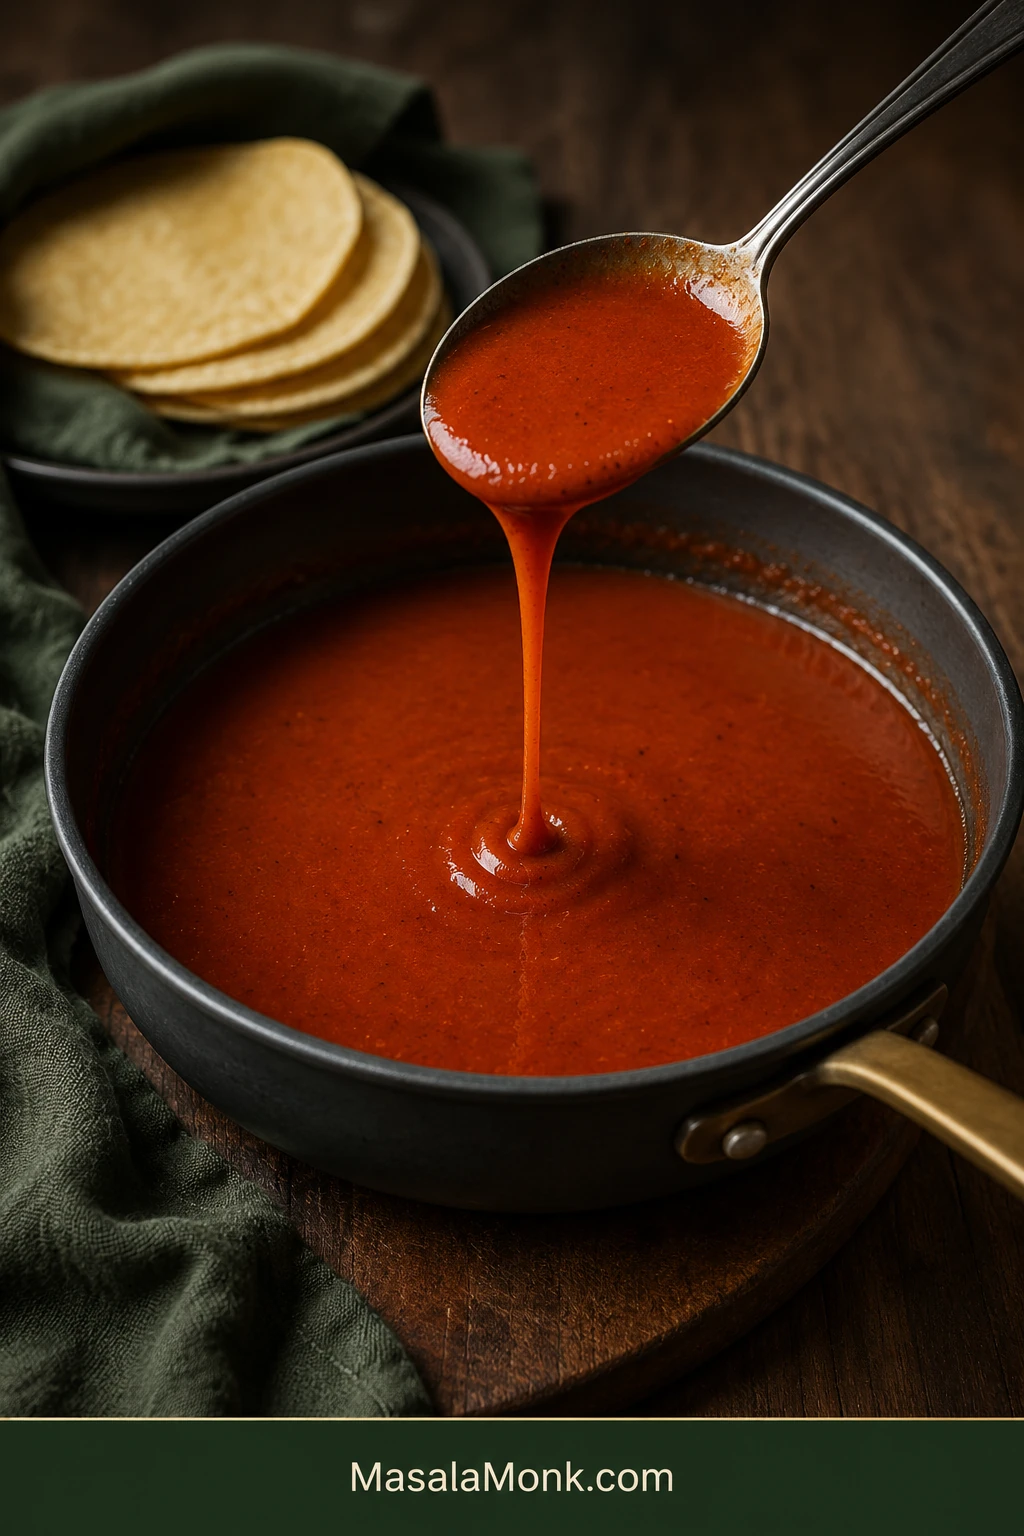
Spoon lifting smooth brick-red enchilada sauce from a dark saucepan, with a ribbon of sauce falling back into the pan and corn tortillas behind.

A good red enchilada sauce should pour in a smooth red ribbon, cling lightly to a tortilla, and taste of warm chile before the tomato underneath rounds everything out. Savory and flowing, it needs enough body to coat without becoming heavy.

And it does not need to turn dinner into a project. In about 15 minutes, one saucepan and one whisk give you about 2 cups, with no blender, strainer or dried-chile prep.

If you know what kind of chili powder you are using and what ready sauce looks like, you are most of the way there. After that, the sauce is pretty forgiving.

The short version

Four things matter most: keep the roux light, warm the spices only until fragrant, whisk the first splash of broth completely smooth, and take the pan off while the sauce still flows easily. Salt and a little apple cider vinegar bring the finished sauce into balance.

Whole-dried-chile sauces and darker Tex-Mex chili gravy follow different methods. This is the quick pantry-style red sauce for enchilada night.

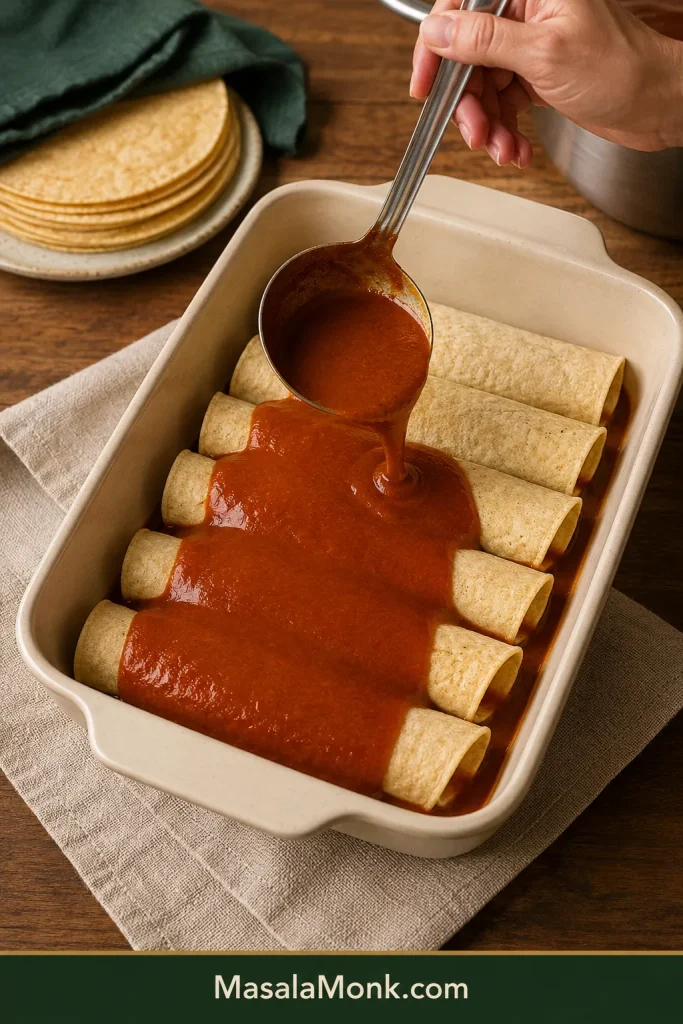
Red enchilada sauce being spooned over rolled corn tortillas in a cream baking dish, with the individual tortilla rolls still visible.
Keep the rolls visible beneath the sauce; generous coverage should not turn the dish into a pool.

How to make red enchilada sauce

Makes: about 2 cups · Time: about 15 minutes · Equipment: 2-quart (about 2-liter) or larger saucepan and whisk

Ingredients

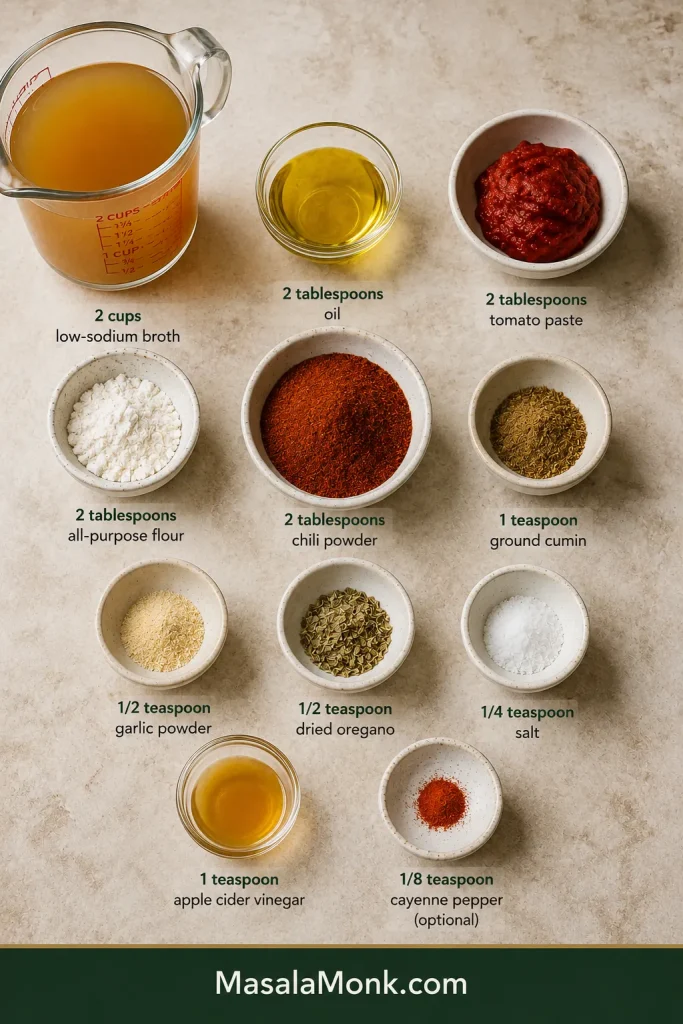
  • 2 tablespoons (30 mL) neutral oil or mild olive oil
  • 2 tablespoons (about 16 g) all-purpose flour
  • 2 tablespoons American-style chili powder — preferably a mild blend; if the brand is unfamiliar, use 1 tablespoon for your first batch
  • 1 teaspoon ground cumin
  • ½ teaspoon garlic powder
  • ½ teaspoon dried Mexican oregano or regular dried oregano
  • 2 tablespoons (about 32 g) tomato paste
  • 2 cups (480 mL) low-sodium chicken or vegetable broth
  • ¼ teaspoon fine salt, then more to taste
  • 1 teaspoon (5 mL) apple cider vinegar
  • ⅛ teaspoon cayenne, optional, for extra heat
Overhead arrangement of broth, oil, tomato paste, flour, chili powder, cumin, garlic powder, oregano, salt, apple cider vinegar and cayenne.
Measure first; once the pan is hot, the roux and spice bloom move quickly.

No American-style chili powder? Use the fallback below.

Method

  1. Get everything ready. Measure the broth and keep it beside the stove. Stir together the chili powder, cumin, garlic powder and oregano. Once those spices hit the hot pan, the broth needs to follow quickly.
  1. Cook the flour. Warm the oil over medium heat. Whisk in the flour and cook for about 1 minute. It should bubble gently and lose its raw-flour smell without becoming dark brown.
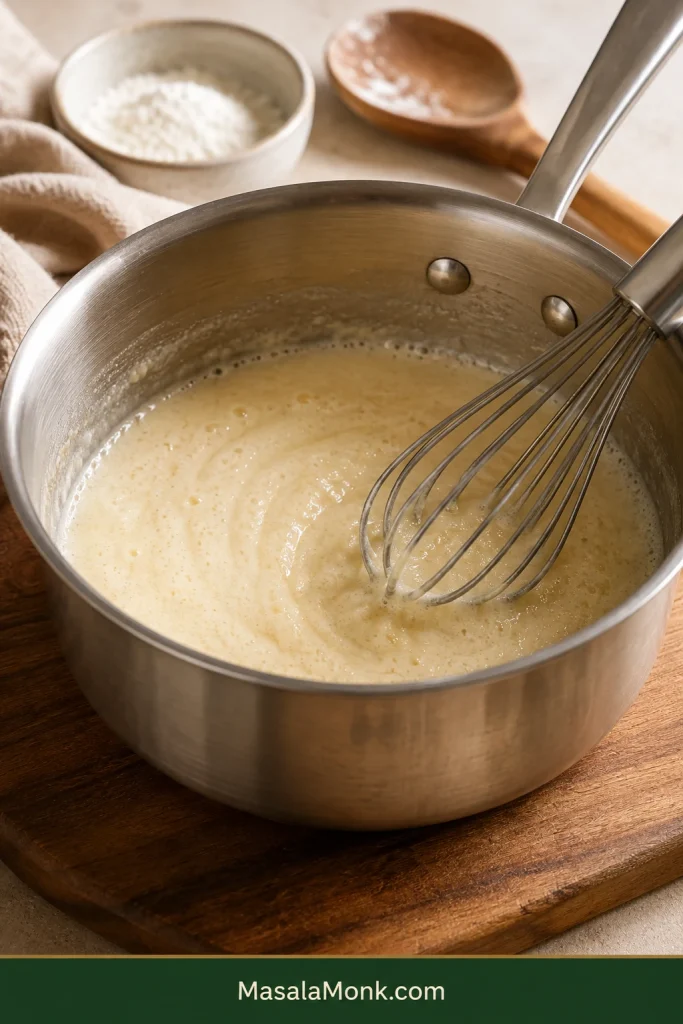
Pale flour-and-oil roux gently bubbling in a stainless-steel saucepan while a whisk moves through it.
Keep the roux pale so the chile and tomato stay in front.
  1. Wake up the spices. Whisk in the seasonings for about 15–20 seconds. Warm chile and cumin should become fragrant almost immediately. That aroma is your cue to keep moving.
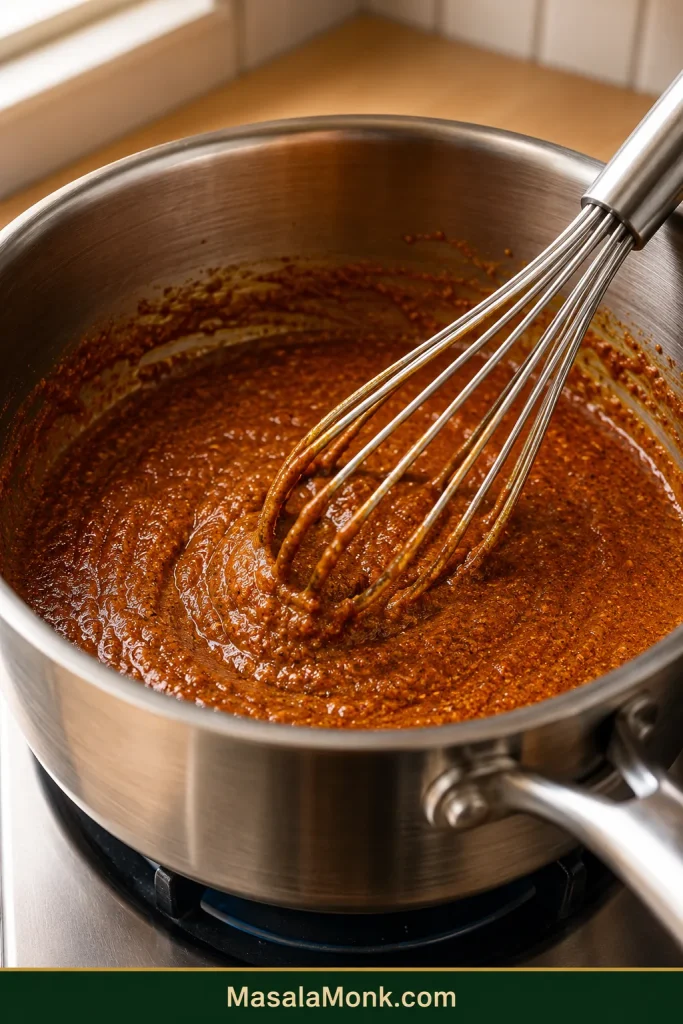
Rust-red chili powder and spices being whisked into a pale roux in a stainless-steel saucepan, forming a glossy paste.
Glossy is right; dry or scorched patches mean the pan is too hot.
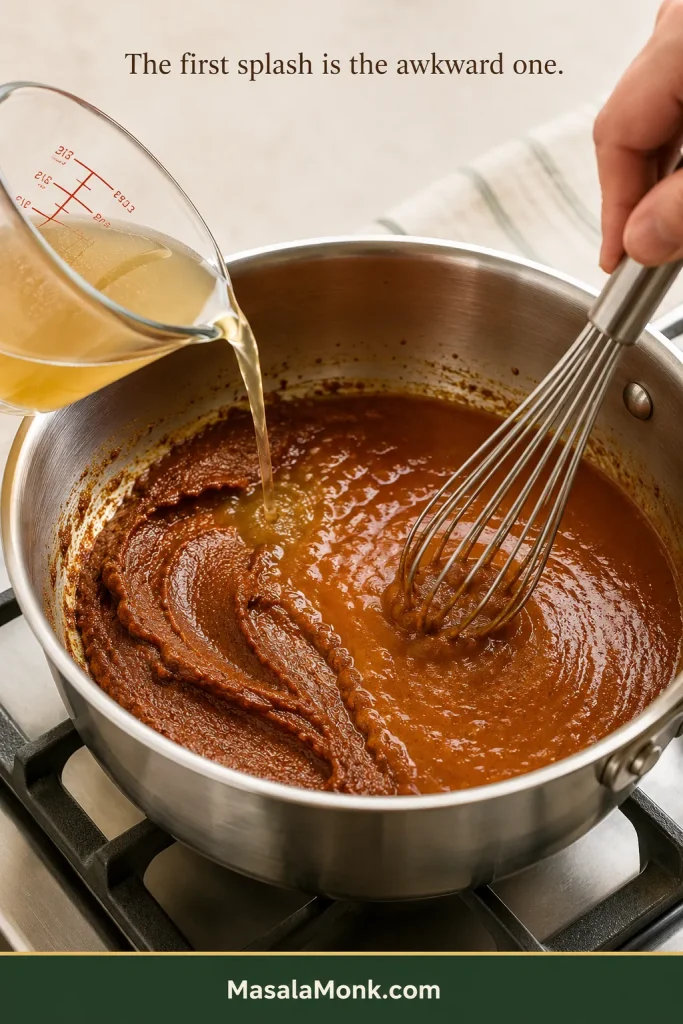
  1. Make the first splash count. Add ¼ cup (60 mL) broth and whisk until completely smooth. The first splash is the awkward one; when that is lump-free, the rest becomes easy.
Broth being poured into thick rust-red roux and spice paste while a whisk smooths the mixture into a cohesive sauce.
Whisk the first splash completely smooth before adding the rest.
  1. Add the remaining broth and tomato paste. Pour in the rest of the broth while whisking, then whisk in the tomato paste until no streaks remain.
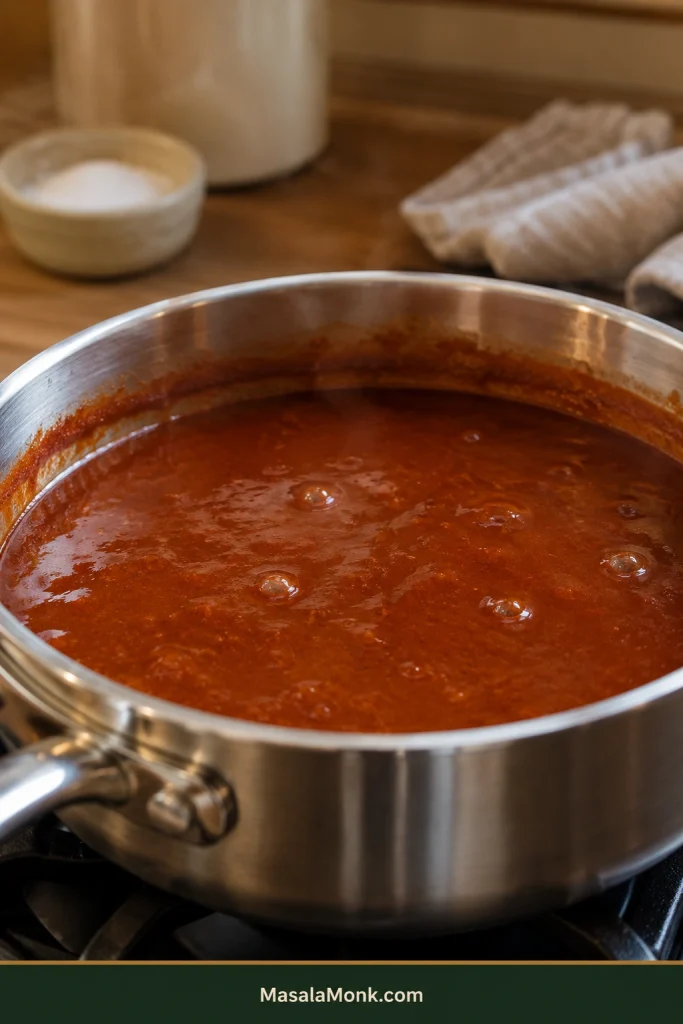
  1. Simmer until it coats but still pours. Bring the sauce to a gentle simmer and cook for roughly 2–5 minutes. Saucepan width and burner strength matter more here than the clock. Stop when it flows easily from a spoon but leaves a thin red film behind. Err slightly loose; the sauce thickens as it stands.
Smooth rust-red enchilada sauce gently simmering in a stainless-steel saucepan with a few small bubbles breaking at the surface.
A few lazy bubbles are enough; a hard simmer reduces faster.
  1. Finish the sauce. Stir in the vinegar and ¼ teaspoon salt. Taste before adding more salt or heat. The vinegar should make the sauce taste brighter, not vinegary. Add cayenne only when you want more fire.

How do you know when enchilada sauce is ready?

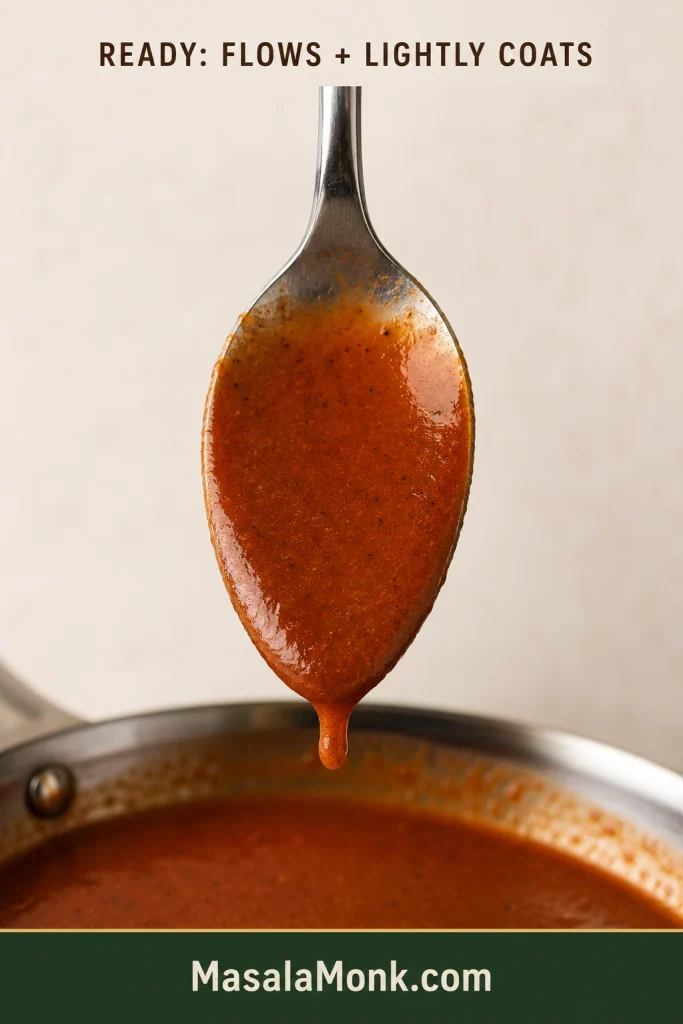
Enchilada sauce is ready when it pours freely, leaves a thin coating on a spoon and clings lightly to a tortilla.
Back of a stainless-steel spoon covered with a thin, even layer of brick-red enchilada sauce, with sauce dripping from its lower edge.
Tilt the spoon after coating it: ready sauce begins sliding again instead of holding its shape like gravy or dropping in a heavy lump.

Taste it too. You should get warm, earthy chile, savory broth and tomato underneath, with brightness at the end keeping everything lively. No single flavor should dominate.

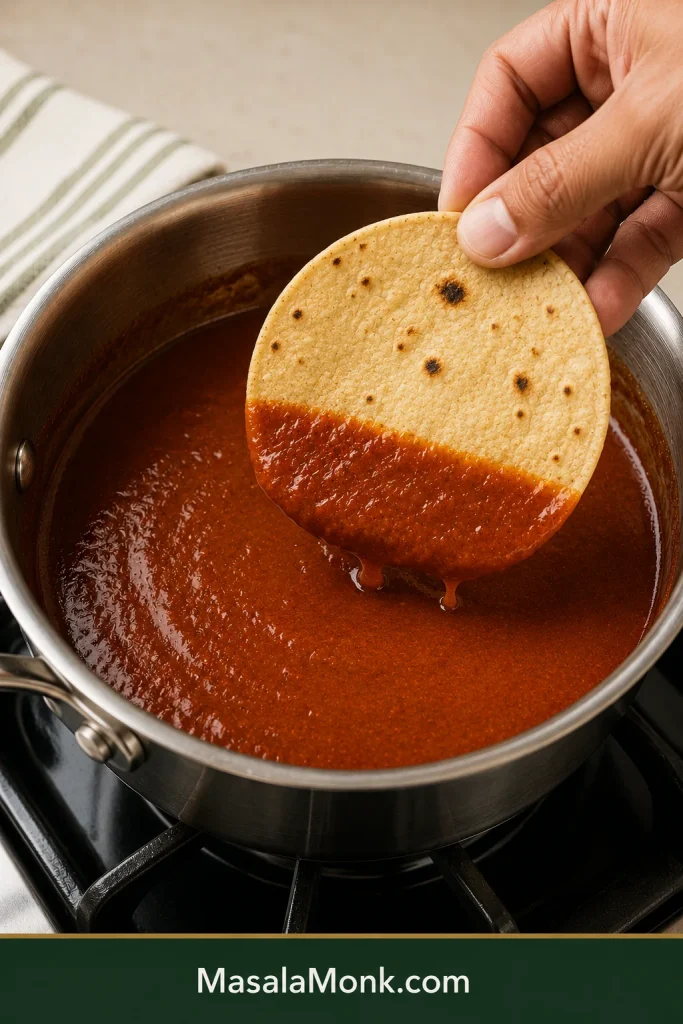
Drag the edge of a tortilla through the saucepan. The sauce should hang on instead of running straight off. Spoon it over a warm tortilla and that deep, savory chile aroma should arrive immediately—the sauce is there to make the filling and cheese taste richer, not simply wetter.

Hand holding a corn tortilla with its lower edge coated in smooth brick-red enchilada sauce and small drips falling toward the saucepan.
For a more practical test, look for a thin veil on the tortilla; a thick opaque layer suggests the sauce could use a little loosening before assembly.

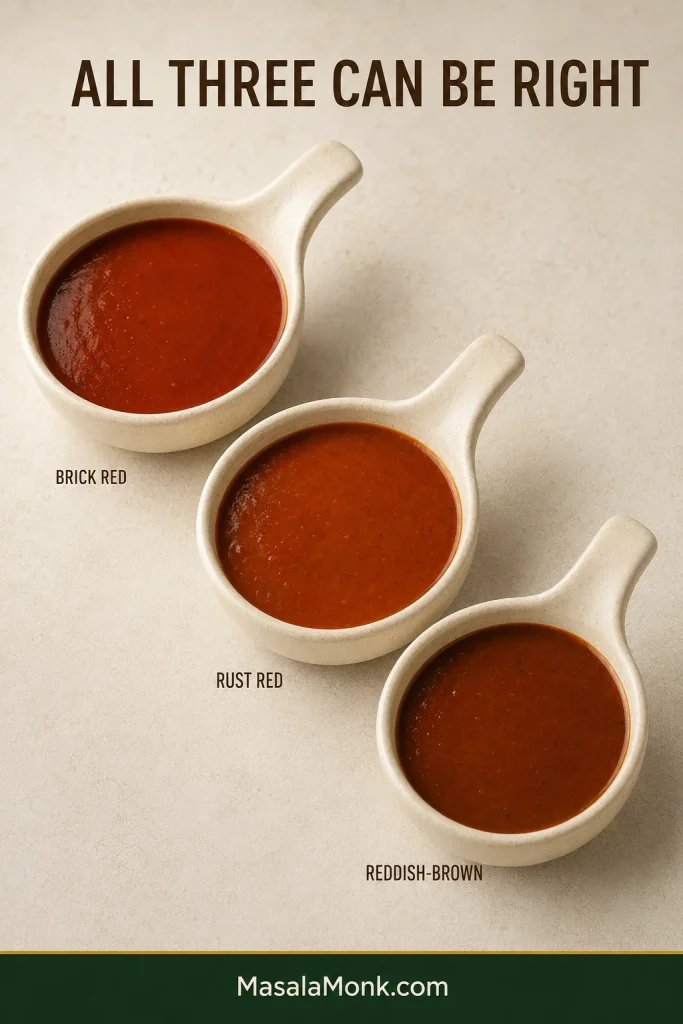
If your sauce comes out brick red, rust red or reddish-brown, that can still be exactly right. Chili powders vary considerably in color, so trust the texture and taste instead of trying to match one particular shade.

Three samples of smooth enchilada sauce displayed side by side in brick red, rust red and reddish-brown shades.
If the sauce looks browner than expected, resist correcting the color with extra chili powder; flavor and flow are the better tests.

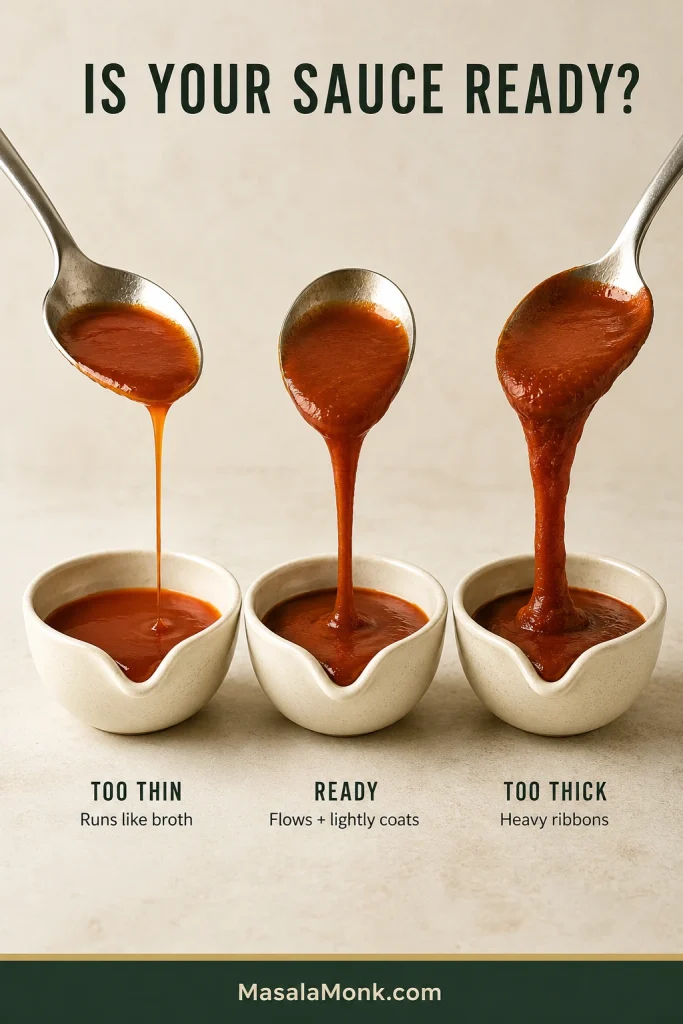
What if the enchilada sauce is too thin or too thick?

What you seeNext move
Runs almost like brothSimmer another minute and check again.
Pours freely and leaves a light coatingTake it off the heat.
Falls in heavy ribbons or sits like gravyWhisk in broth or water 1 tablespoon (15 mL) at a time.
Three spoons compare enchilada sauce consistency: thin sauce runs in a narrow stream, ready sauce flows while coating lightly, and too-thick sauce falls in a heavy ribbon.
When the spoon test feels ambiguous, judge the fall rather than the surface: movement separates thin, ready and over-thick sauce more clearly than gloss does.

Most consistency problems are easy to correct. Burnt chile is the stubborn one, which is why the brief spice bloom matters more than chasing an exact number of seconds.

If the chile tastes good and the sauce coats the spoon, you have already done the important part.

Sauce still not right? Go to troubleshooting →

What is red enchilada sauce made of?

This red enchilada sauce is made with chili powder, oil, flour, broth, tomato paste, cumin, garlic, oregano, salt and vinegar.

Chile drives the flavor and color. The roux is deliberately light—just enough to help the sauce cling to a tortilla while keeping it fluid. Broth and tomato paste build the base; cumin, garlic and oregano round it out, and salt and vinegar bring everything into balance.

Nothing here needs to shout. The ingredients should taste like they have settled into one sauce rather than arriving one at a time.

Most of them are straightforward. Chili powder is the exception.

Which chili powder should you use?

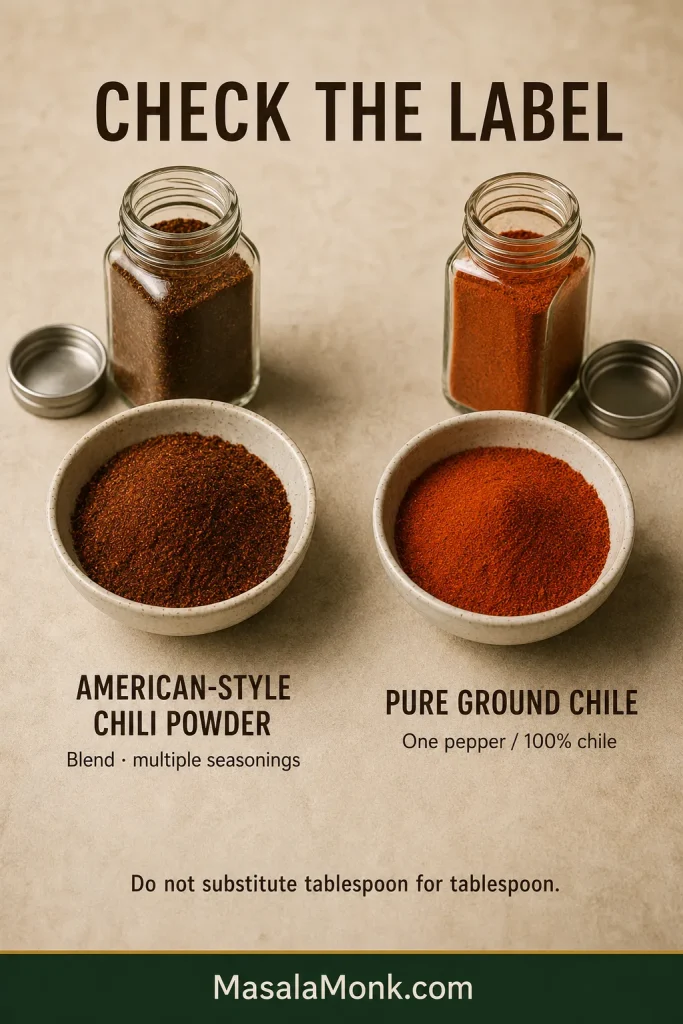
For this recipe, use American-style chili powder—a seasoning blend—not cayenne or the same volume of pure ground chile.

This is where recipes written in different countries can go spectacularly sideways. In the US and Canada, “chili powder” commonly means a fairly mild blend containing ground chile or paprika along with seasonings such as cumin, garlic and oregano. A tablespoon or two does not necessarily make a dish fiercely hot.

Elsewhere, a jar labelled “chilli powder” may contain only ground hot chile. If the ingredient list says 100% ground chile, cayenne, or names one hot pepper as the only ingredient, treat it as pure chile rather than the bulk seasoning used here.

American-style chili powder shown as a seasoning blend beside pure ground chile made from one pepper, with a warning against equal tablespoon substitution.
Before measuring, trust the ingredient list more than the words on the front: a single-pepper powder should not be dosed like the American-style chili-powder blend used here.

Cayenne and hot Indian red chile powder are better added by the pinch.

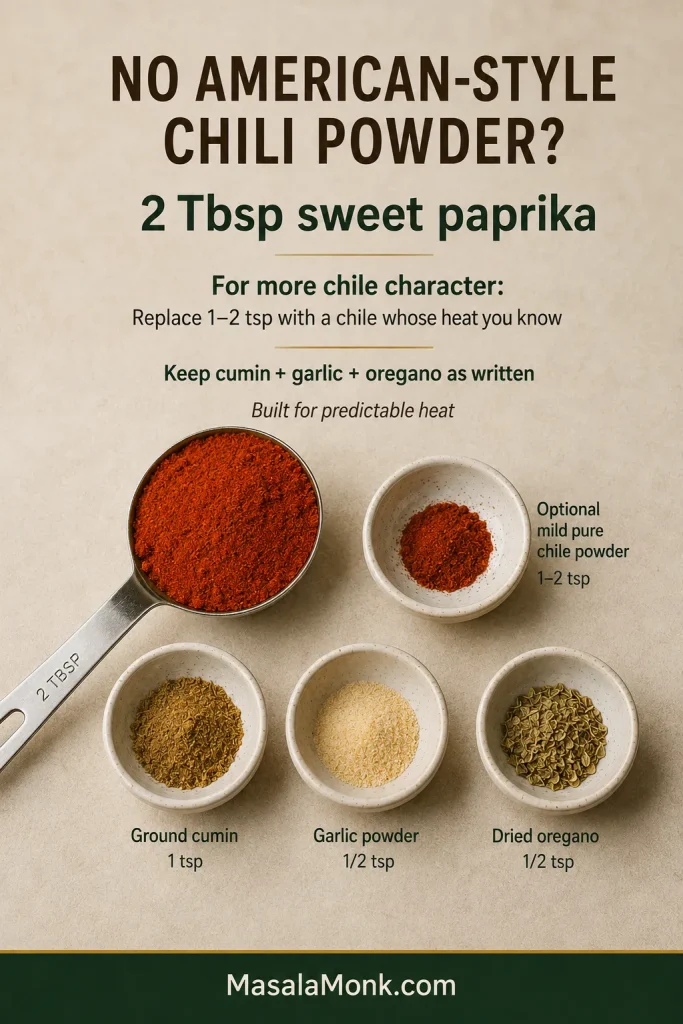
No American-style chili powder?

For the gentlest fallback, use 2 tablespoons sweet paprika as the bulk red seasoning.

For more chile character, replace 1 or 2 teaspoons of that paprika with a ground chile whose heat you already know—such as ancho powder or a familiar Kashmiri chile powder. Keep the cumin, garlic and oregano in the main recipe as written.

Substitute guide showing 2 tablespoons sweet paprika, an optional 1 to 2 teaspoons mild pure chile, plus cumin, garlic powder and oregano.
If the American blend is unavailable, sweet paprika can provide the seasoning volume and color, while a much smaller amount of familiar mild chile supplies character.

It will not taste exactly like every American chili-powder blend; the point of this fallback is predictable heat.

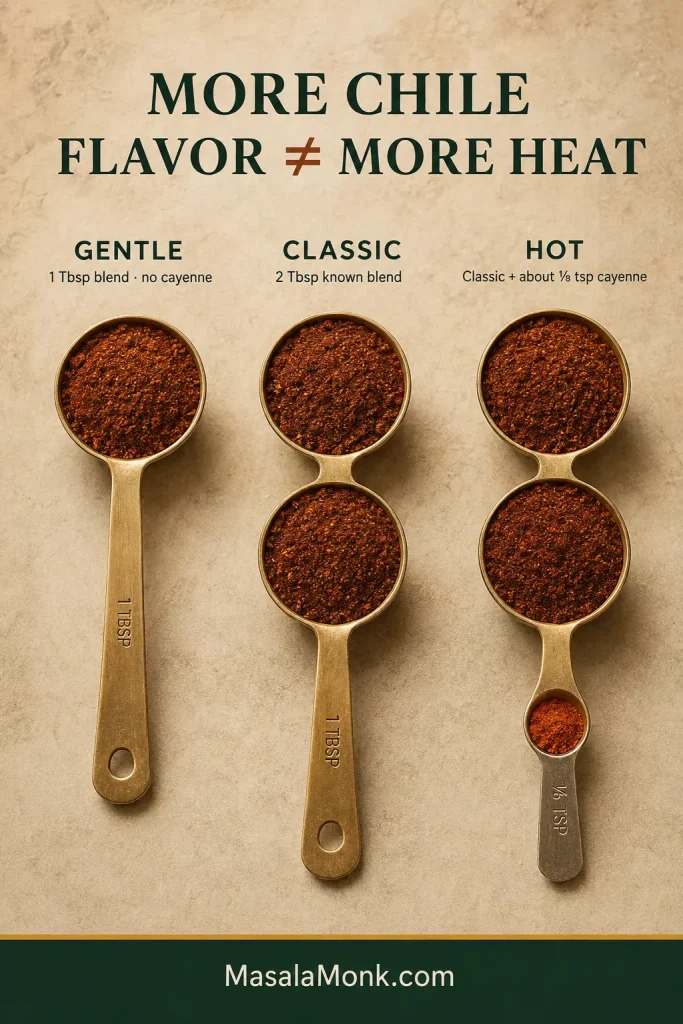
Choose your heat: gentle, classic or hot

More chile flavor does not have to mean more heat. Let the base carry the chile character; use cayenne or another hot chile when you actually want more fire.

  • Unfamiliar blend or heat-sensitive eaters: use 1 tablespoon American-style chili powder and no cayenne. For the first batch, stop there. Once you know the blend, use the full 2 tablespoons next time.
  • Classic: use the full 2 tablespoons once you know that amount gives you the heat you want.
  • Hot: make the classic version, then stir in about ⅛ teaspoon cayenne after simmering. Taste before adding another pinch.
Three heat levels for red enchilada sauce: Gentle with 1 tablespoon chili powder blend, Classic with 2 tablespoons, and Hot with the Classic amount plus about 1/8 teaspoon cayenne.
A little cayenne can raise the heat dramatically without changing the base seasoning.

Everyone seems to have a different definition of “medium.” Keeping the main batch comfortable and passing extra pepper sauce at the table is often easier than making the whole pan hot.

Already made it too hot? Go straight to the spicy-sauce rescue →

Still unsure what your jar contains? McCormick’s chili powder guide explains the difference between American chili seasoning and straight ground chile.

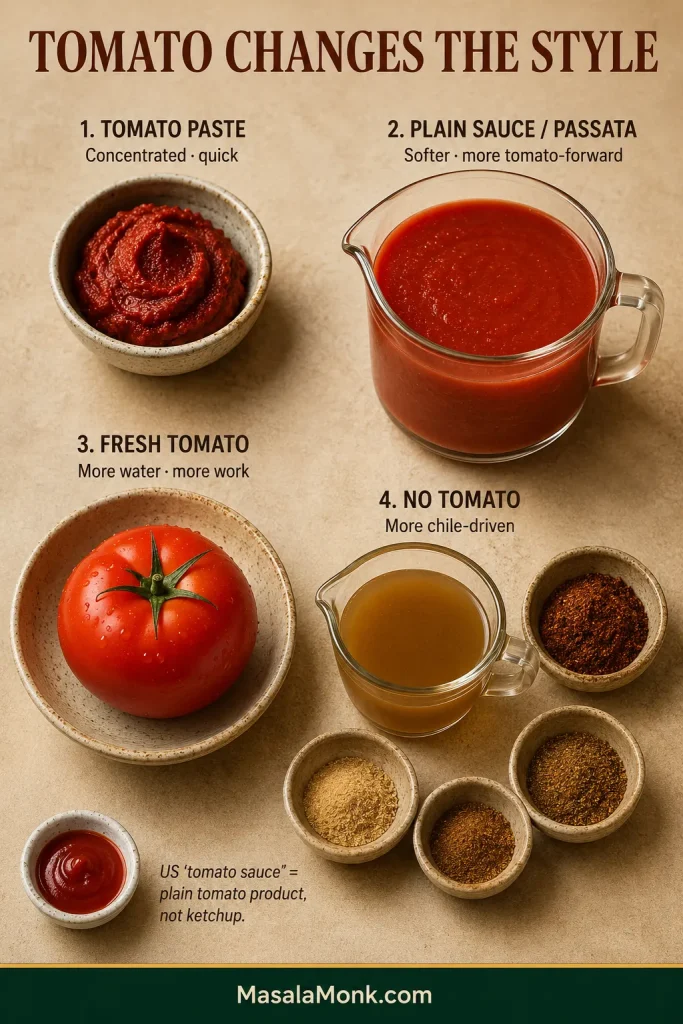
Tomato paste, tomato sauce or no tomato?

Tomato is a style choice, not a requirement in every red enchilada sauce. Some sauces contain none at all, while others use tomato as a major part of the base.

Tomato choiceWhat it gives you
Tomato pasteConcentrated depth and body with very little extra liquid
US canned tomato sauce / plain passataA softer, more tomato-forward sauce with more liquid
Fresh tomatoesFresh flavor but variable water; usually more cooking and often blending
No tomatoA sauce driven more directly by chile and broth
Four enchilada sauce approaches shown with tomato paste, plain tomato sauce or passata, fresh tomato, and a no-tomato broth-and-seasoning base.
Tomato paste adds concentrated depth with little liquid; passata or fresh tomato needs more reduction.

Two tablespoons of tomato paste give this version depth and body while keeping the cooking time short. The chile still arrives first; tomato fills in behind it instead of becoming the main event.

American “tomato sauce” is not ketchup

In an American ingredient list, canned tomato sauce generally means a smooth, fairly plain tomato product. Plain passata or strained tomatoes are much closer equivalents in places where that style of canned sauce is uncommon. Ketchup and seasoned pasta sauce bring much more sweetness, salt and seasoning.

Want a green tomatillo sauce instead? Our salsa verde recipe is the better fit.

Red enchilada sauce troubleshooting

Most batches that look a little wrong are still dinner. Find the closest problem, make one adjustment, then taste again before changing anything else.

ProblemFirst thing to do
Much too spicyAdd broth and tomato paste, then simmer briefly. For extreme heat, use the rescue below.
BitterCheck whether the spices scorched or the chile powder itself tastes bitter; compare the two causes below.
LumpyWhisk vigorously over gentle heat; see the lumpy-sauce fix below if needed.
Flat or blandAdd salt first, then a few drops of vinegar.
Floury or chalkySimmer gently; loosen with broth if the sauce also feels heavy.
Grainy or grittySimmer and whisk. Strain or blend briefly if coarse spice particles remain distracting.
Too tomato-forwardCheck the salt first. Extra tomato changes the balance; a large amount of raw chili powder will not restore it.
Too saltyLoosen with unsalted broth or water.

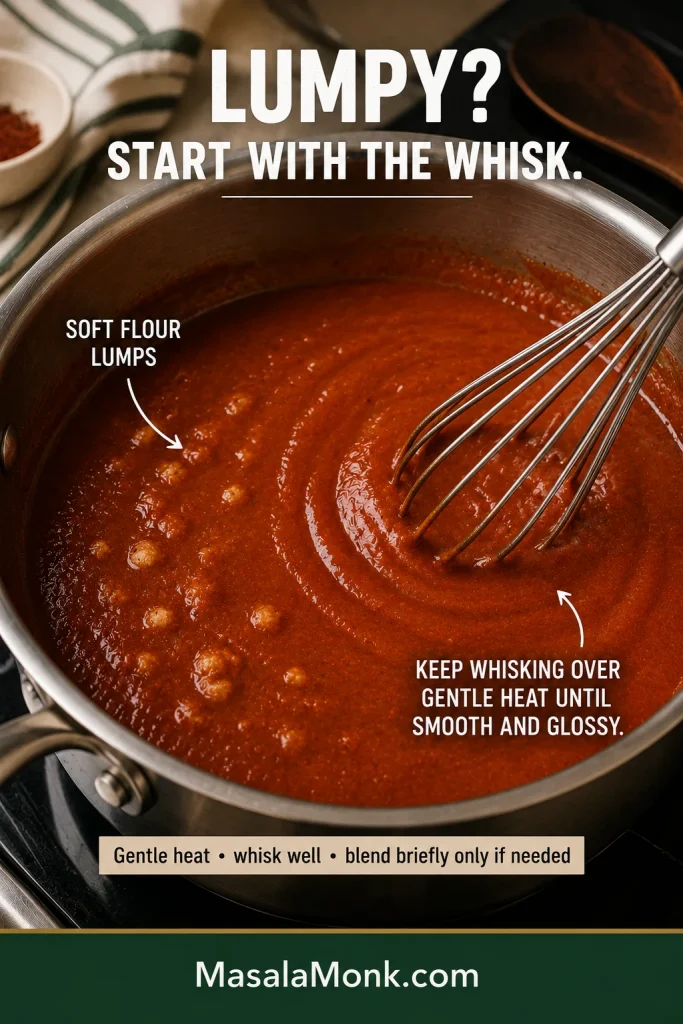
How to fix lumpy enchilada sauce

Start with vigorous whisking over gentle heat. If the sauce is also heavy, loosen it with a small splash of broth before reaching for a blender; soft flour pockets often smooth out once the sauce can move freely.

Red enchilada sauce with several small soft lumps on one side of a saucepan and smoother sauce forming where a whisk has worked through them.
If a lump softens and smears beneath the whisk, it is probably a flour pocket; hard or gritty particles suggest a different problem than simple roux lumping.

The sauce is painfully spicy. Is it salvageable?

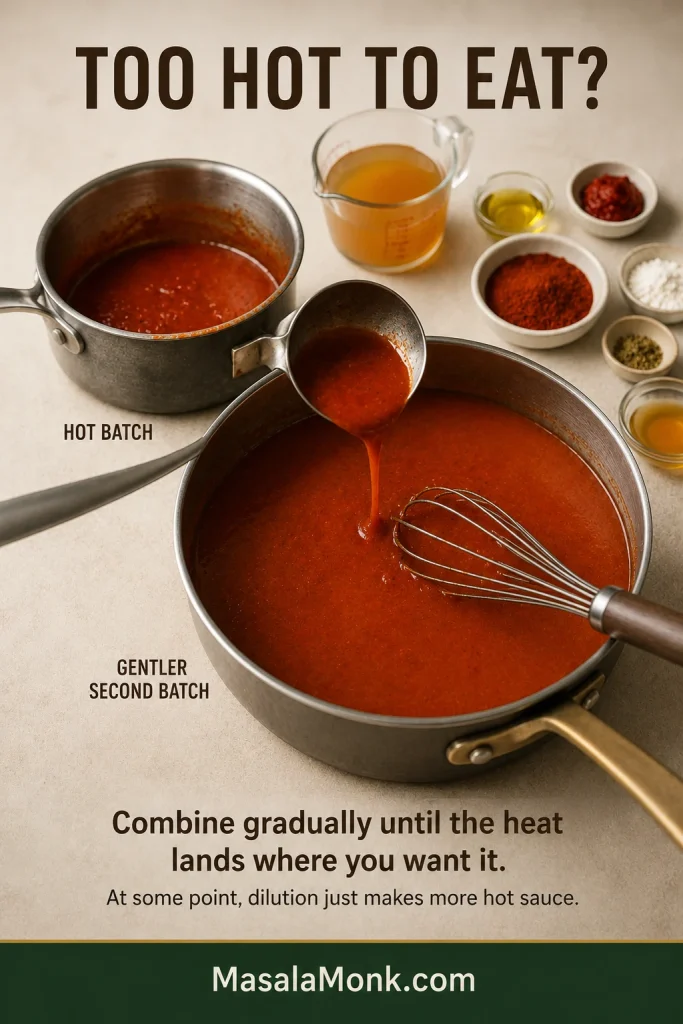
A sauce that is merely hotter than planned can usually take more broth and tomato paste; simmer briefly after adding them so the tomato paste blends back into the sauce. Once tablespoons of genuinely hot chile have gone into the pan, though, dilution has limits. At some point you are simply making more hot sauce.

A second batch made without the offending hot chile is often the cleaner rescue. Stir the fiery sauce into it gradually until the heat lands somewhere you actually want to eat.

Ladle transferring a small amount of very spicy enchilada sauce from one saucepan into a larger gentler batch, with a whisk ready to combine them.
Add the fiery sauce a little at a time rather than combining both pans at once; once the heat overshoots again, the rescue gets harder.

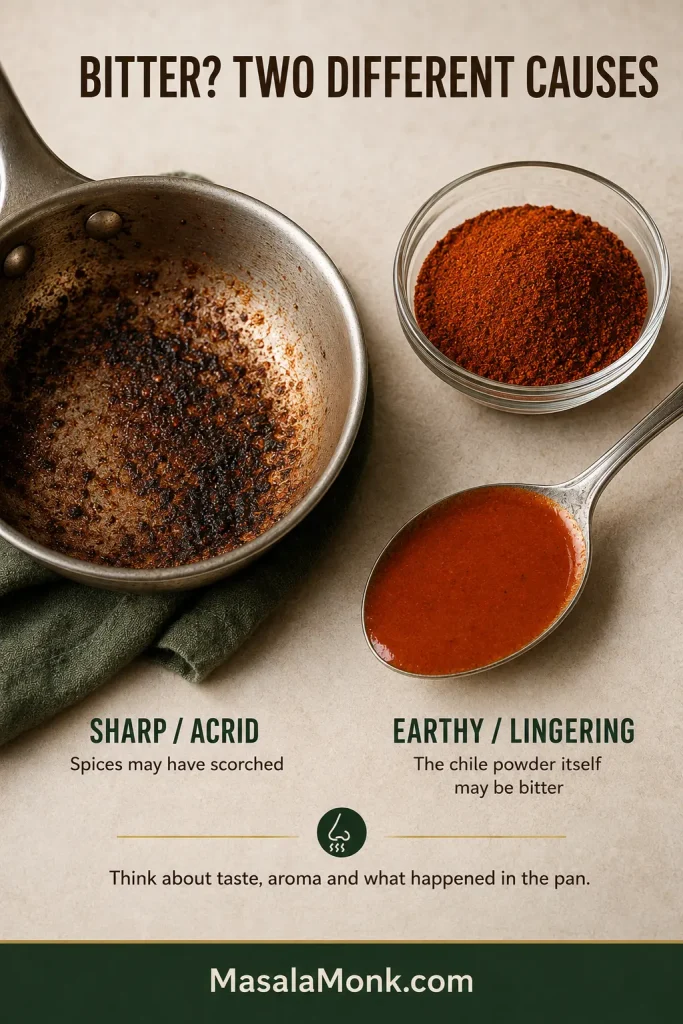
Why does enchilada sauce sometimes taste bitter?

Burnt bitterness usually tastes sharp and acrid, and you may remember the spices darkening quickly or smelling harsh in the pan. That points back to the spice bloom.

A more earthy, lingering bitterness can come from the chile powder itself. If nothing scorched but you still dislike the bitter edge, changing the chili powder next time may help more than changing your technique.

Scorched spice residue in a saucepan beside ground chile powder and normal red sauce, comparing two possible sources of bitterness.
Use both memory and aroma here: a harsh smell during the spice bloom is stronger evidence of scorching than the final sauce color alone.

↑ Back to top · Back to the recipe

How much enchilada sauce do you need?

How much homemade enchilada sauce equals one can?

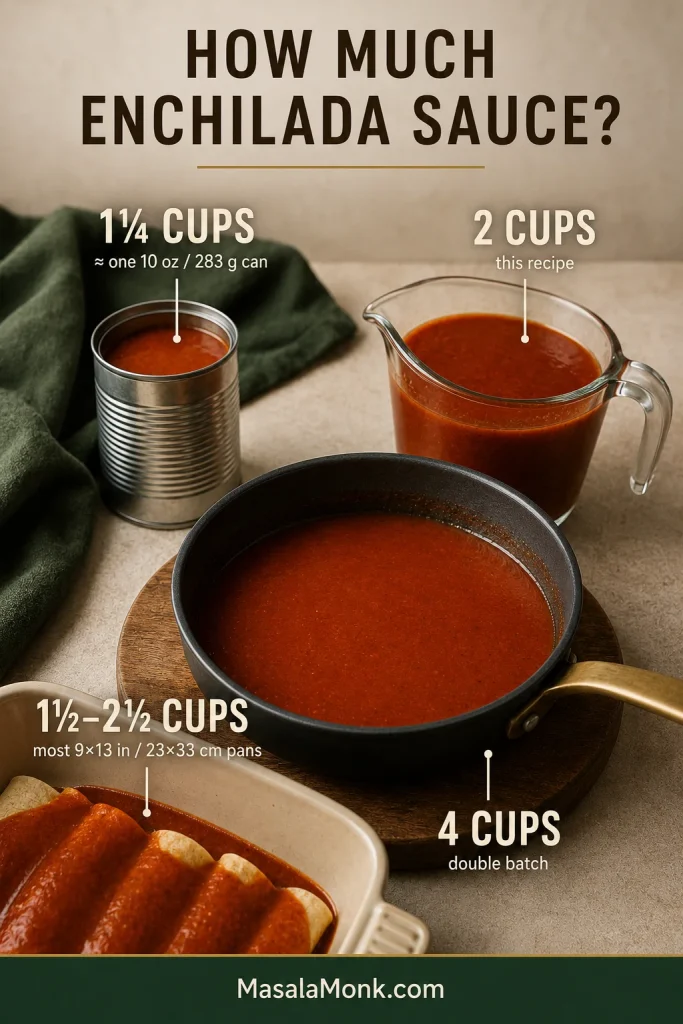
Use about 1¼ cups of homemade sauce in place of one standard 10-ounce (283 g) can of enchilada sauce. Brands vary in thickness, so a small difference in volume rarely matters in most recipes.

This 2-cup batch replaces roughly 1½ standard cans.

Enchilada sauce quantity guide showing 1¼ cups for a 10-ounce or 283-gram can, 2 cups for this recipe, 1½ to 2½ cups for a 9×13-inch pan, and 4 cups for a double batch.
Treat these amounts as working anchors rather than rigid rules; sauce thickness and where you use it can shift the total a little.

How much sauce for a 9×13-inch pan?

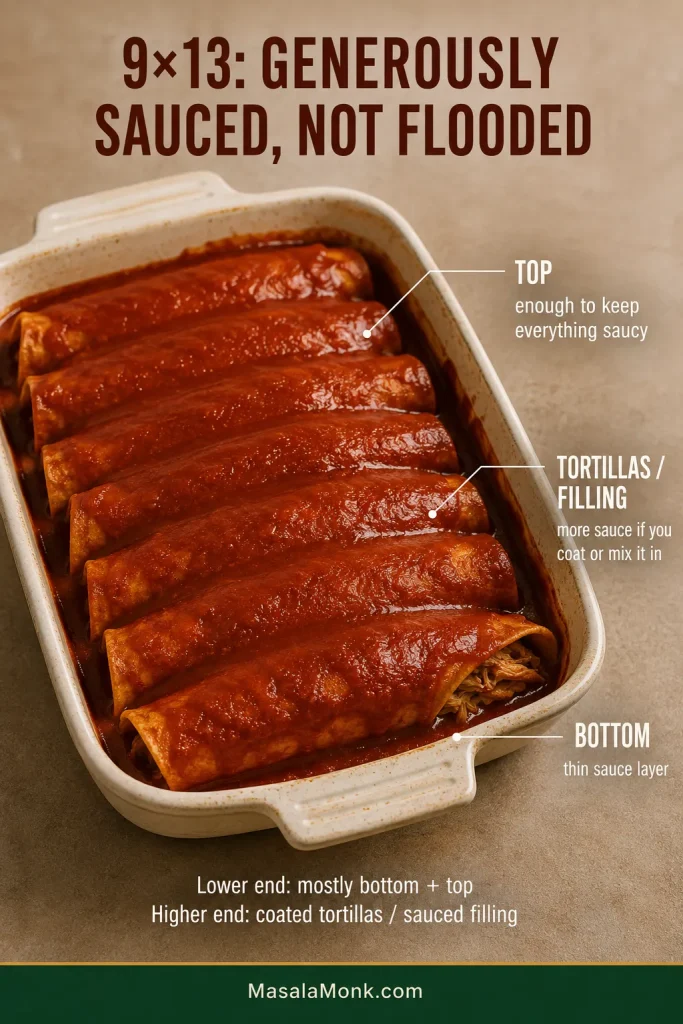
For most 9×13-inch (23×33 cm) enchilada pans, 1½–2½ cups is a useful range.

Sauce mainly underneath and over the top puts you near the lower end. Coat each tortilla generously or add sauce to the filling and you will use more.

Aim for generously sauced tortillas that still hold their shape. Tortilla preparation matters too, but flooding the pan can push the finished texture toward mushy instead of saucy.

Cream 9×13-inch baking dish of rolled enchiladas with sauce beneath and over the tortillas, with annotations showing where additional sauce may be used.
Look at the pan as well as the measuring cup: shallow pooling is useful; deep pooling is a warning sign.

Our easy chicken enchiladas show how sauce can be distributed across the bottom, filling and top without leaving the finished pan swimming.

Need more? Make 1½ batches for about 3 cups, or double everything for about 4 cups. A larger saucepan makes a doubled batch much easier to whisk.

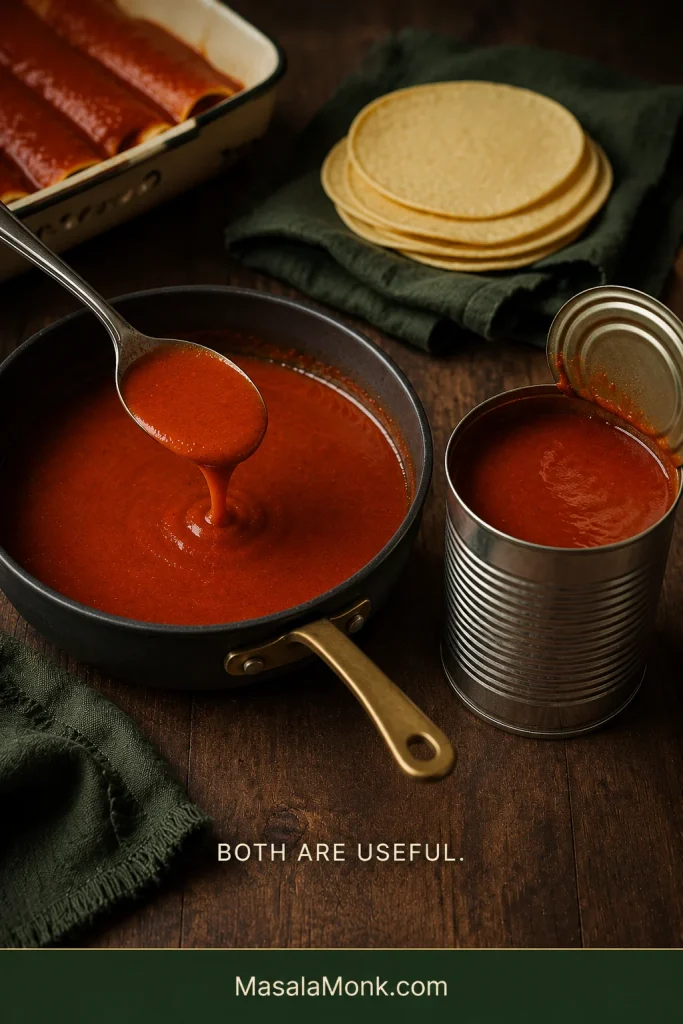
Already have a can? Use it.

Some nights, opening the can is exactly the right decision.

Homemade gives you control; canned sauce gives you dinner faster. Both are useful.

Homemade red enchilada sauce in a saucepan beside an opened unbranded can of red enchilada sauce, with corn tortillas nearby.
Warm canned sauce first; its thickness may tell you more than the label about what it needs.

Warm canned sauce before deciding what it needs. Broth can loosen a heavy sauce. Cumin or oregano can deepen one that tastes flat. A few drops of lime or vinegar can wake up a dull batch.

That is all “better than canned” needs to mean here.

Swaps and substitutions

Chicken or vegetable broth both work; use vegetable broth for a vegetarian or vegan sauce. Water works in a pinch, though you will want to pay closer attention to seasoning at the end. Neutral oil and mild olive oil both work too.

Gluten-free and flourless options

A cup-for-cup or 1:1 gluten-free flour blend designed to replace wheat flour is the closest swap for the roux. Different blends thicken differently, so trust the spoon test; the exact cooking time may vary. Need it strictly gluten-free? Check the broth and packaged spice-blend labels too.

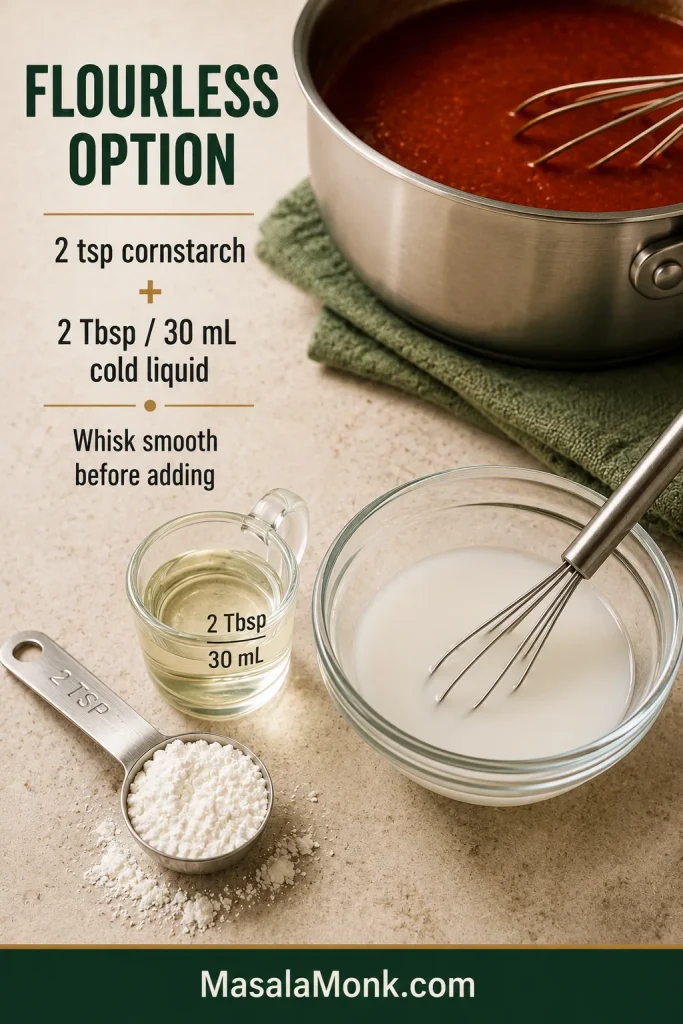
For a flourless sauce, skip the flour and initial roux. Briefly warm the spices in the oil, then add the broth and tomato paste. Start with 2 teaspoons cornstarch mixed with 2 tablespoons (30 mL) cold broth or water. Whisk the slurry into the simmering sauce, cook for about a minute and check the consistency before adding more.

Flourless thickening setup with 2 teaspoons cornstarch, 2 tablespoons or 30 milliliters cold liquid, and a bowl of smooth cornstarch slurry beside red enchilada sauce.
Mix cornstarch with cold liquid first; dry starch added straight to the hot pan is far more likely to clump.

Using tomato sauce instead? Tomato sauce brings much more water, so it changes both the flavor and thickness. For best results, use a sauce formulated around tomato sauce or passata.

Want to use whole dried chiles? If you want the deeper character of guajillo, ancho or other whole dried chiles, start with a sauce designed for them. They need their own soaking or toasting, blending and sometimes straining method.

← Back to the recipe · ↑ Back to top

Ways to use leftover or extra enchilada sauce

Even half a cup is worth keeping. Once it is in the fridge, think of it less as leftover sauce and more as a head start on the next meal.

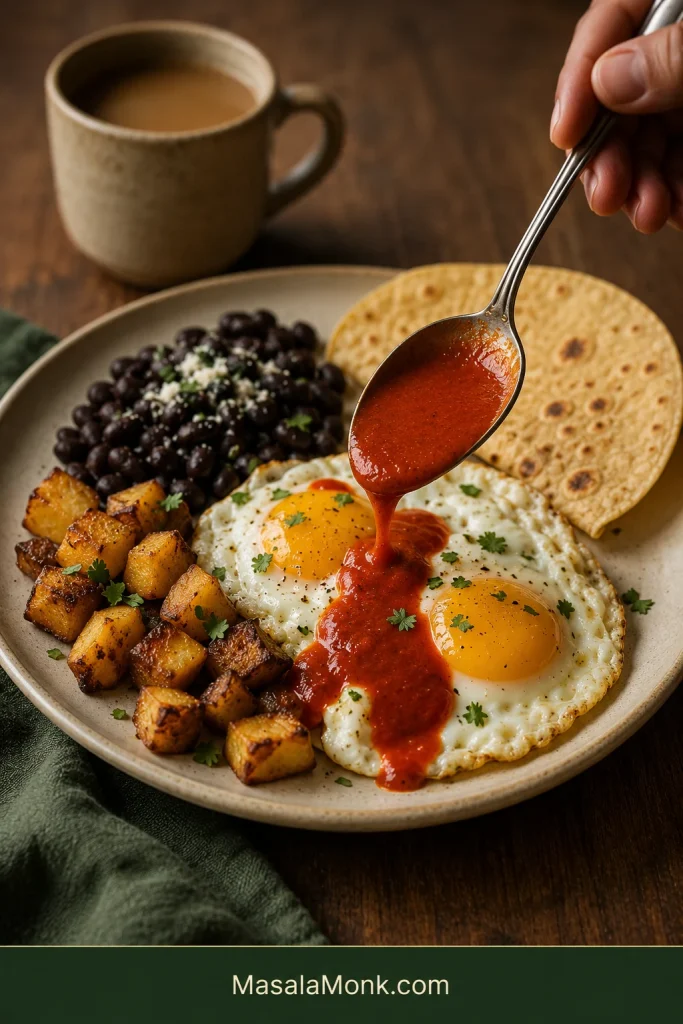
  • About ½ cup: spoon it over eggs, breakfast potatoes or beans, or add it after reheating one of our breakfast burritos.
  • About 1 cup: make a small batch of chilaquiles, stir it into rice or beans, or use it for a small tray of cheese enchiladas.
  • A full batch: use it for rolled chicken, beef, cheese or vegetable enchiladas.
  • About 3 cups: scaled-up batches work well for layered dishes; our chicken enchilada casserole is a good example.
Hand spooning red enchilada sauce over fried eggs on a breakfast plate with crispy potatoes, black beans and a warm corn tortilla.
Even a small leftover spoonful can carry eggs, potatoes or beans into another meal.

At the table, the enchiladas do not need a dozen competing sides. Something cool such as fresh guacamole is plenty against warm chile and melted cheese.

Storage, freezing and make-ahead

Refrigerator: Cool the sauce, transfer it to a covered container and refrigerate promptly. Plan to use it within 4 days. It will look thicker straight from the refrigerator; a splash of broth and gentle heat will loosen it again.

Make-ahead: Prepare the sauce ahead, cool and refrigerate it, then warm gently before assembling the enchiladas. Add a splash of broth if it has thickened.

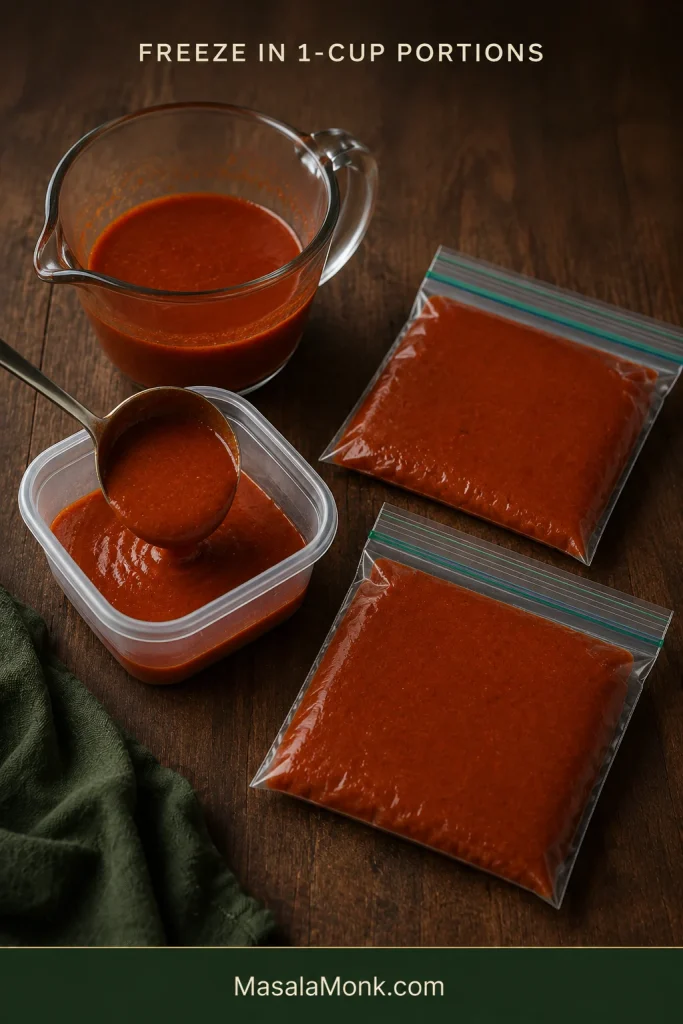
Freezer: Freeze cooled sauce in tightly sealed freezer-safe containers or bags. One-cup portions are especially handy. For best quality, aim to use it within about 3 months.

Cooled red enchilada sauce being portioned into a clear container beside two flat sealed freezer bags filled with sauce.
Flat one-cup portions stack neatly and thaw faster when the next meal needs only a little sauce.

Thawing and reheating: Thaw in the refrigerator, then warm over low to medium-low heat. A flour-thickened sauce can look slightly uneven after freezing. Gentle heat and a whisk usually bring it back together; add broth if it needs loosening.

Can this sauce be canned for shelf storage?

This roux-thickened recipe was made for the refrigerator and freezer, not shelf-stable home canning. For pantry storage, use a preservation recipe specifically developed and tested for canning. The National Center for Home Food Preservation explains why acidity, ingredient proportions and thickeners matter in tested tomato-and-chile preservation recipes.

If you make it, tell us which chili powder you used and how the heat landed—brand and country are especially useful here.

The first batch teaches you your chili powder—how strong it tastes, how much heat it carries and what you would change next time. After that, it becomes the kind of saucepan recipe you start making by feel.

Give the flour its minute, let the spices wake up, whisk the broth smooth, and take the pan off while the sauce still flows.

Then it is just enchilada night.

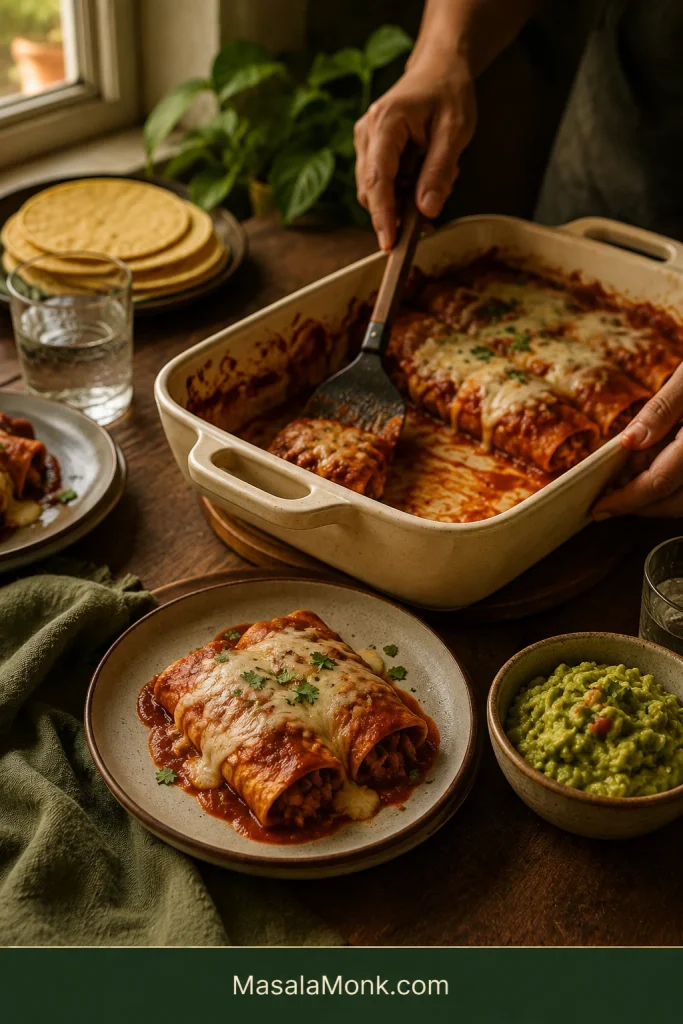
Partly served baking dish of cheesy red enchiladas on a dinner table with one plated serving, guacamole, tortillas, glasses and hands serving another enchilada.
The best finish is when the sauce supports the tortillas, filling and cheese—and then disappears into dinner.

↑ Back to top · View the recipe again

Posted on — Leave a comment

Easy Chicken Enchilada Recipe: Saucy, Cheesy, and Weeknight-Friendly

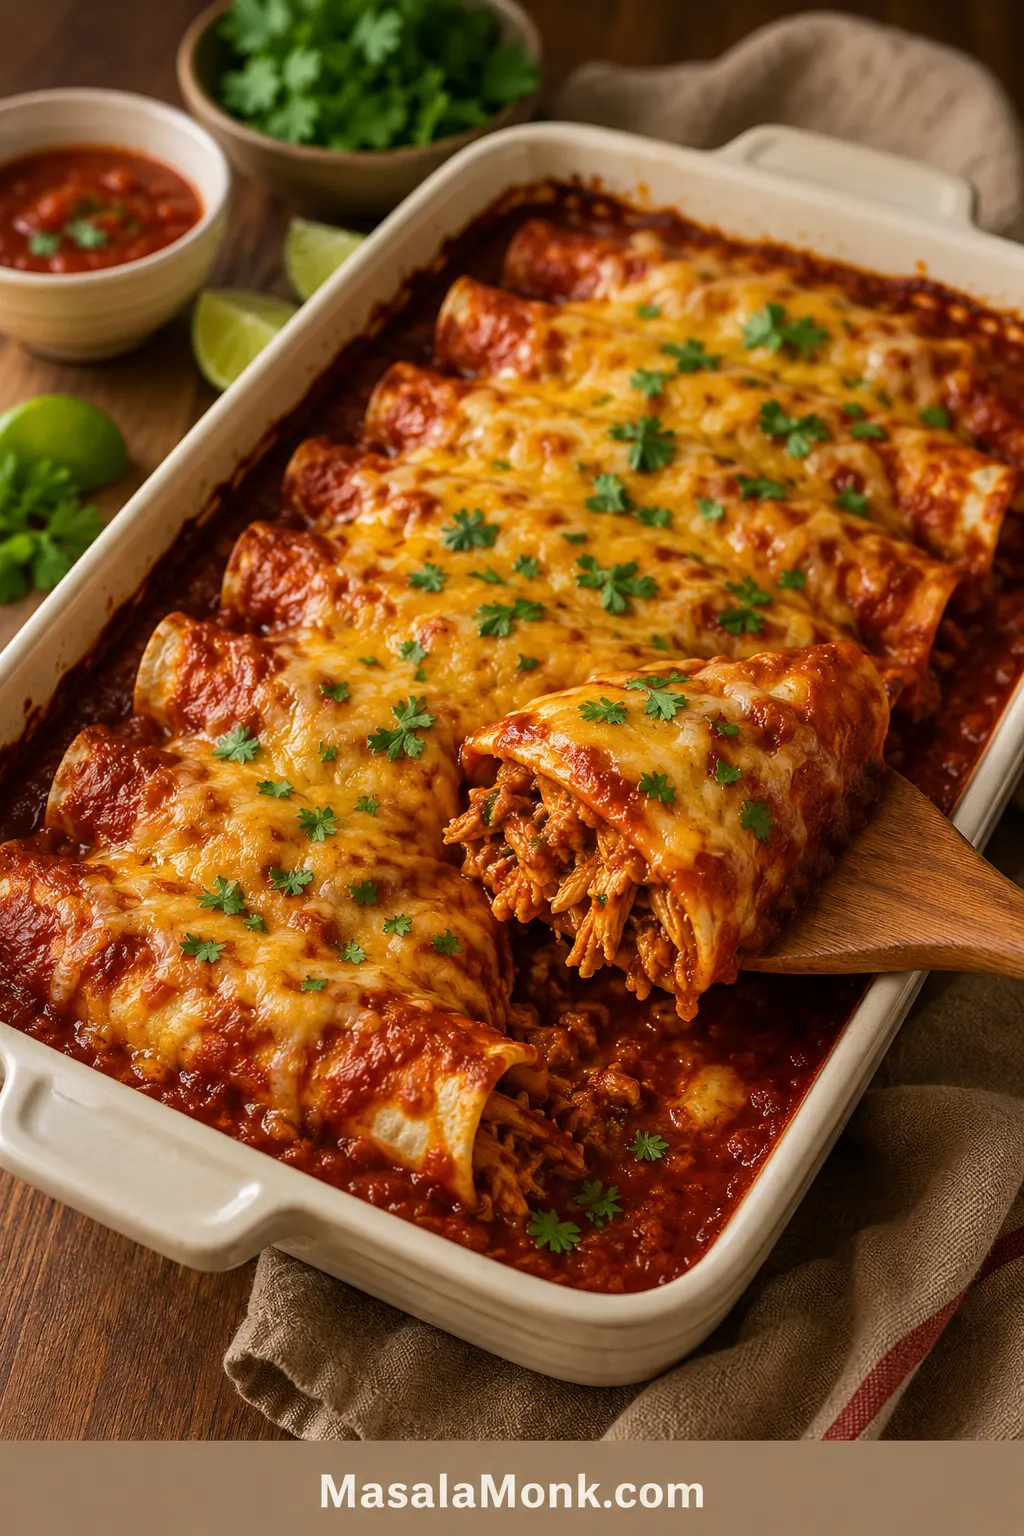
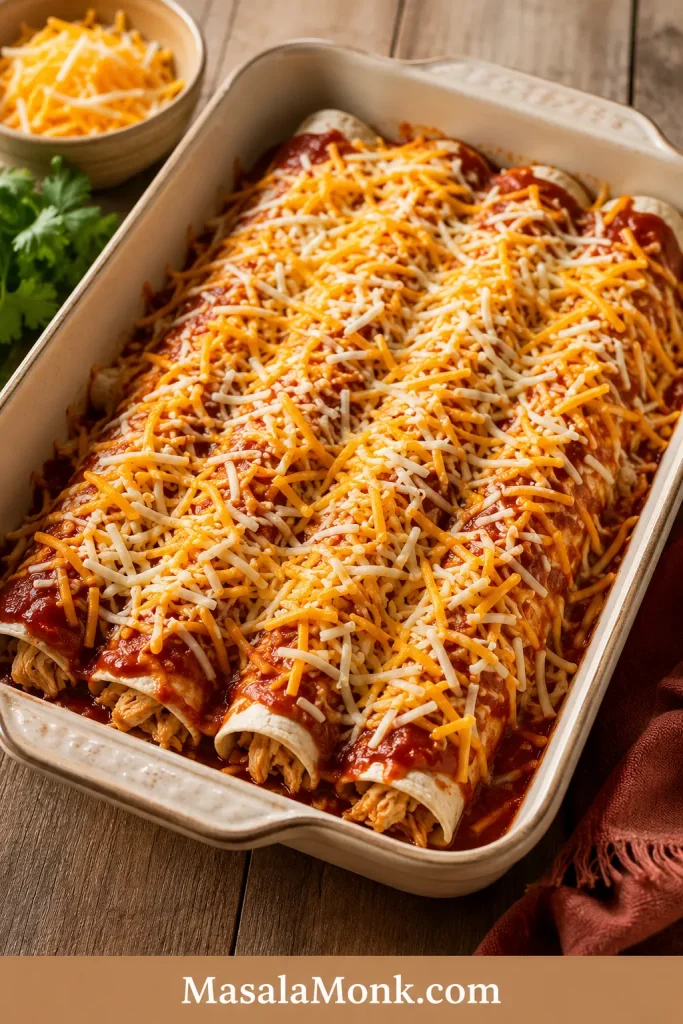
Baked red chicken enchiladas in a cream ceramic dish with melted cheese, cilantro, saucy edges, and one enchilada lifted to show shredded chicken filling.

You want chicken enchiladas that taste like a real dinner, not dry chicken wrapped in tortillas and hidden under cheese. This easy chicken enchilada recipe keeps the filling juicy, the sauce generous but controlled, and the tortillas soft enough to roll without turning the whole pan soggy.

It is the pan for nights when cooked chicken is already handled and you just need it to become dinner. Store-bought sauce, rotisserie chicken, and flour tortillas are not shortcuts to apologize for here. They are what make this a dinner you can actually cook tonight.

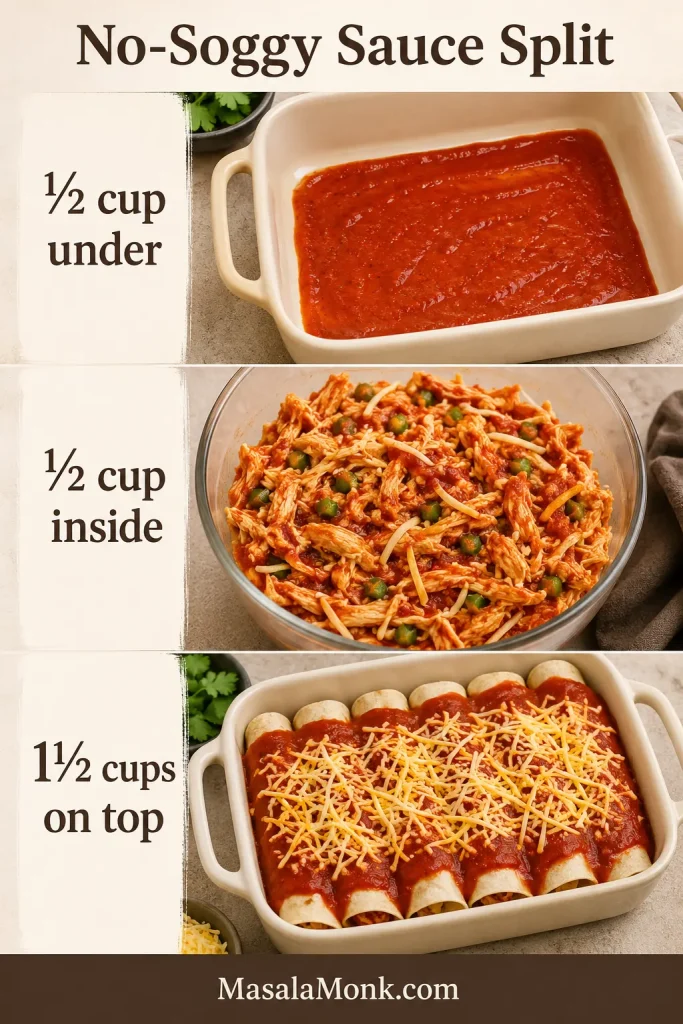
The best version gives you soft tortillas, juicy chicken, melted cheese, and saucy edges without a wet bottom. A simple trick makes that possible: the ½-½-1½ no-soggy sauce split, with a thin layer under the enchiladas, a little sauce in the chicken, and most of the sauce on top.

Quick Answer: Easy Chicken Enchiladas

Easy chicken enchiladas are made by filling warm tortillas with shredded chicken, cheese, spices, and enchilada sauce, then rolling them into a 9×13-inch baking dish. Top with more sauce and cheese, then bake at 350°F / 175°C for 22–25 minutes, until the cheese is melted and the sauce bubbles around the edges.

For one family-size pan, use 3 cups / 375–425 g cooked shredded chicken, 2½ cups / 600 ml enchilada sauce, 8 medium tortillas or 10 small corn tortillas, and 2½ cups / about 285 g shredded cheese. Let the pan rest for 5–10 minutes before serving.

The shortcut version uses rotisserie chicken and store-bought sauce, so most of the work is filling, rolling, topping, and baking. To keep the pan saucy but not soggy, use ½ cup sauce underneath, ½ cup in the chicken, and 1½ cups on top.

  • Fastest chicken: rotisserie chicken.
  • Main sauce: red enchilada sauce.
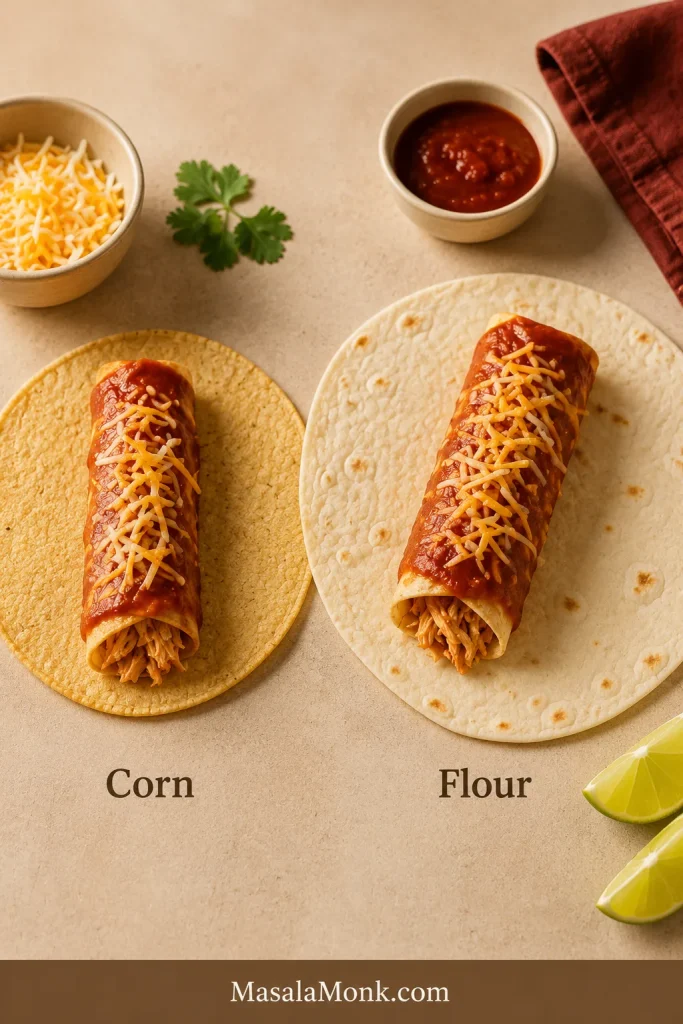
  • Beginner-friendly tortilla: flour tortillas.
  • More classic texture: warmed corn tortillas.
  • Best texture clue: saucy edges, melted cheese, and tortillas that lift instead of collapse.

Serving Chicken Enchiladas

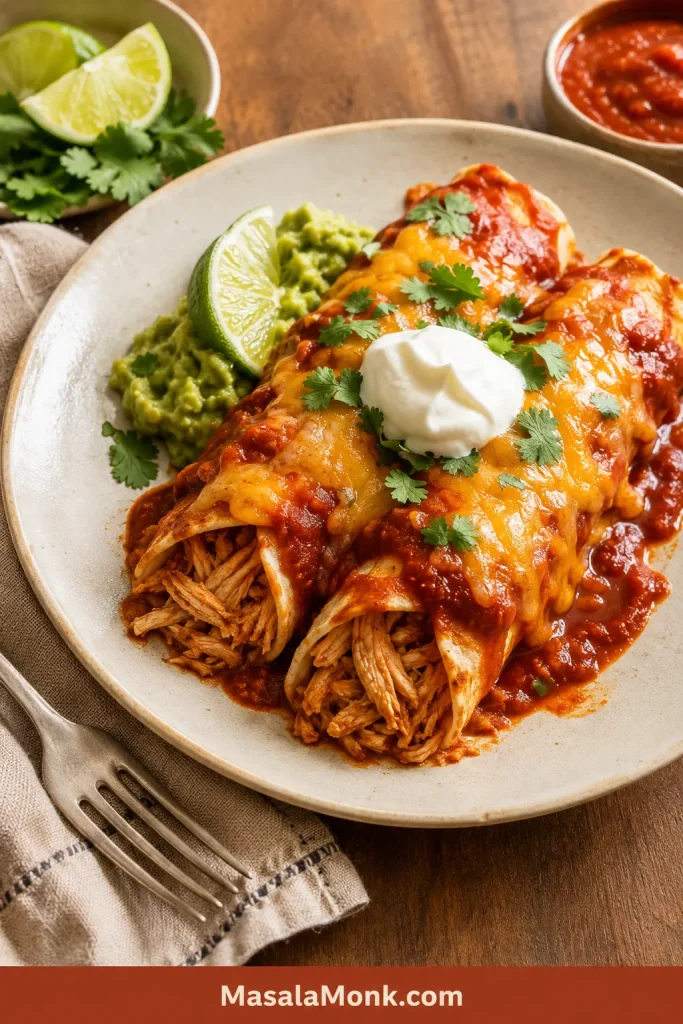
This plate shows the finished texture you are aiming for: saucy edges, melted cheese, and enough structure to serve with toppings instead of collapsing into the dish.

Two chicken enchiladas on an off-white plate with red sauce, melted cheese, sour cream, cilantro, lime, and guacamole.
After baking, add cooling toppings like sour cream, lime, cilantro, or guacamole so each serving tastes rich, fresh, and balanced.

Make This Now If You Have

  • Rotisserie chicken, leftover chicken, or any cooked shredded chicken
  • Red enchilada sauce or green enchilada sauce
  • Flour or corn tortillas
  • A cheese that melts well
  • A 9×13-inch baking dish
  • About 45 minutes

You do not need homemade sauce, freshly cooked chicken, or perfect tortillas to make this work. The recipe is built around cooked chicken, ready sauce, and a few small choices that keep the pan from turning heavy or soggy.

This is the kind of pan that still works even if one tortilla tears, the sauce came from a can, and the chicken came from last night’s dinner. Choose flour tortillas if you are worried about cracking. Pick corn tortillas if you want a more classic enchilada bite.

Make the card version first. The sections after it are there for the moments that usually cause trouble: dry chicken, cracked tortillas, too much sauce underneath, and messy first servings.

Easy Chicken Enchilada Recipe Card

Start here for the classic version: red chicken enchiladas with shredded chicken, warm tortillas, enchilada sauce, and melty cheese.

Recipe Details

Prep time15 minutes
Cook time22–25 minutes
Rest time5–10 minutes
Total time45–50 minutes
Servings4–6
Yield8 medium enchiladas or 10 smaller corn-tortilla enchiladas
Oven temperature350°F / 175°C
Baking dish9×13-inch / 23×33 cm

Equipment

  • 9×13-inch / 23×33 cm baking dish
  • Large mixing bowl
  • Measuring cups and spoons
  • Spoon or spatula
  • Skillet, microwave-safe plate, or clean towel for warming tortillas
  • Foil, optional

Ingredients

  • 3 cups cooked shredded chicken / about 375–425 g
  • 2½ cups red enchilada sauce / about 600 ml, divided
  • 8 medium flour or corn tortillas, or 10 small 6-inch corn tortillas
  • 2½ cups shredded cheese / about 285 g, divided
  • 1 can diced green chiles / 4 oz / 113 g, optional but recommended
  • ½ teaspoon ground cumin
  • ½ teaspoon garlic powder
  • ¼ teaspoon onion powder, or ¼ cup finely chopped onion
  • ½ teaspoon salt, adjust depending on the sauce
  • ¼ teaspoon black pepper
  • Oil or cooking spray, for the baking dish

For topping: chopped cilantro, sour cream, diced onion, avocado, guacamole, jalapeños, lime wedges, pico de gallo, or crumbled cotija.

The ½-½-1½ Sauce Split

  • ½ cup / 120 ml sauce for the bottom of the baking dish
  • ½ cup / 120 ml sauce mixed into the chicken filling
  • 1½ cups / 360 ml sauce poured over the top

This is the no-soggy rhythm: a little underneath so nothing sticks, a little inside so the chicken stays moist, and most on top where it can bubble into the cheese.

Instructions

  1. Preheat the oven. Heat the oven to 350°F / 175°C. Lightly grease a 9×13-inch / 23×33 cm baking dish.
  2. Add the bottom sauce. Spread ½ cup / 120 ml enchilada sauce across the bottom. The dish should be coated, not flooded.
  3. Make the filling. Mix the shredded chicken with ½ cup / 120 ml sauce, green chiles, cumin, garlic powder, onion powder, salt, pepper, and 1 cup / about 115 g shredded cheese.
  4. Warm the tortillas. Heat them until flexible. Use a skillet, microwave them wrapped in a damp towel for 20–30 seconds, or briefly warm corn tortillas with a little oil.
  5. Fill each tortilla. Spoon about ⅓ cup filling down the center of each medium tortilla. Use 2–3 tablespoons for small corn tortillas.
  6. Roll and arrange. Work snugly, then place each enchilada seam-side down in the baking dish.
  7. Add the top sauce and cheese. Pour the remaining 1½ cups / 360 ml sauce over the enchiladas. Sprinkle with the remaining 1½ cups / about 170 g cheese.
  8. Bake. Leave the pan uncovered for 22–25 minutes, until the cheese melts, the sauce bubbles at the edges, and the center is hot.
  9. Rest. Let the pan rest for 5–10 minutes before serving.
  10. Finish. Add cilantro, sour cream, avocado, lime, jalapeños, or your favorite toppings.

Recipe Notes

  • Use 2½ cups chicken for lighter enchiladas or up to 4 cups for very full enchiladas.
  • If using small corn tortillas, use about 2–3 tablespoons filling per tortilla and expect about 10 smaller enchiladas.
  • When the chicken filling is steaming hot, let it cool for 3–5 minutes before rolling so the tortillas do not soften too quickly.
  • Bake uncovered for the best texture. Cover loosely for the first 15 minutes only if you prefer very soft enchiladas.
  • If your enchilada sauce is already salty, reduce the added salt in the filling.
  • Dry filling needs 1–2 extra tablespoons of sauce. Loose filling needs a little more chicken or cheese.
  • For an 8×8-inch / 20×20 cm pan, halve the recipe and bake until the sauce bubbles and the center is hot.

Need help before rolling? Jump to the no-soggy sauce split, corn vs flour tortillas, or troubleshooting.

At a Glance

What mattersBest choice for this recipe
Oven temperature350°F / 175°C
Pan size9×13-inch / 23×33 cm baking dish
Chicken3 cups / 375–425 g cooked shredded chicken
Sauce split½ cup bottom, ½ cup filling, 1½ cups top
Tortillas8 medium tortillas or 10 small corn tortillas
Cheese2½ cups / about 285 g shredded cheese
Yield8 medium enchiladas or 10 smaller corn-tortilla enchiladas
Bake time22–25 minutes, uncovered, until bubbling
Rest time5–10 minutes
Total time45–50 minutes

In This Recipe

Back to top

Why This Recipe Works

This recipe works because it fixes the three places chicken enchiladas usually go wrong: dry filling, cracked tortillas, and a soggy bottom.

Sauce, spices, green chiles, and cheese go into the chicken before rolling, so the filling tastes seasoned instead of plain. Warm tortillas bend instead of splitting, and the thin bottom sauce layer keeps the underside coated without turning mushy.

Most of the comfort lands on top, where the sauce and cheese bubble together. Give the pan a few minutes to rest, and the first serving has a much better chance of lifting cleanly.

The ½-½-1½ No-Soggy Sauce Split

Soggy enchiladas usually come from too much sauce underneath, watery filling, cold tortillas, very hot filling, or steam trapped in the pan for too long. Instead, aim for better placement, not less sauce.

The split is easy to remember: ½ cup underneath, ½ cup inside, 1½ cups on top.

Three-part no-soggy sauce split guide showing sauce under the enchiladas, sauce mixed into chicken filling, and sauce poured over rolled enchiladas.
In practice, the ½-½-1½ split means a little sauce underneath, a little in the filling, and most on top where it can bubble into the cheese.

Rule of thumb: light sauce underneath, moist chicken inside, generous sauce on top, warm tortillas, uncovered bake, and a short rest before serving.

  • Underneath: a thin sauce layer keeps the enchiladas from sticking without soaking the bottom.
  • Inside: a little sauce in the chicken keeps the filling juicy.
  • On top: most of the sauce bubbles into the cheese where it belongs.
  • Very hot filling: let it cool for a few minutes before rolling so trapped steam does not soften the tortillas too quickly.
  • Extra sauce: serve it warm at the table instead of drowning the baking dish.

Use a Thin Sauce Layer Underneath

A light base layer protects the rolls from sticking, but the bottom of the dish should still look shallow and controlled.

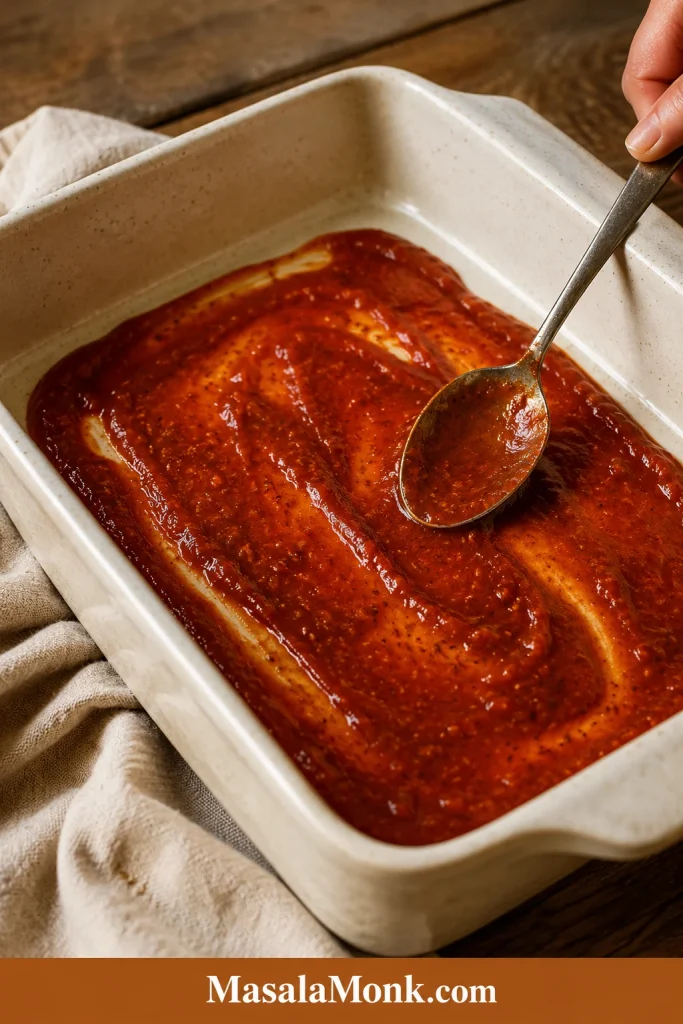
A spoon spreading a thin layer of red enchilada sauce across the bottom of a cream ceramic baking dish.
First, spread only a thin layer of enchilada sauce in the baking dish; this prevents sticking without turning the bottom soggy.

Do not chase perfect rolls here. Warm tortillas, seam-side down, sauce and cheese on top — that is enough. The first enchilada out of the pan is always the most likely to look a little rough, so let the dish sit while everyone grabs plates, sour cream, lime, and whatever toppings are already in the fridge.

Next decision: choose corn or flour tortillas, or go back to the recipe card.

Pan Notes That Matter

These small choices make the difference between a pan that tastes good and a pan that serves cleanly.

  • A 10-minute rest gives cleaner servings than cutting into the pan immediately.
  • Flour tortillas are easiest for beginners, but corn tortillas give a more classic enchilada bite.
  • Extra sauce works better at the table than poured into the bottom of the dish.
  • Monterey Jack melts smoother than sharp cheddar alone.
  • A torn tortilla is not a failure; place it seam-side down and cover it with sauce and cheese.
  • The corner pieces usually get the best saucy edges.
  • If the first enchilada comes out messy, serve that one to the cook and let the rest settle another minute.

Choose Your Chicken Enchilada Path

Keep the red-sauce version as the base. From there, you can make the dish brighter, creamier, lighter, or skip the rolling entirely.

What you wantBest move
Classic easy chicken enchiladasUse red enchilada sauce, shredded chicken, tortillas, and Monterey Jack or Mexican-blend cheese.
Fastest weeknight versionUse rotisserie chicken and store-bought enchilada sauce.
Green chicken enchiladasSwap red sauce for green enchilada sauce or salsa verde.
Creamier enchiladasAdd sour cream, cream cheese, or a small amount of creamy sauce.
Milder family panUse mild sauce, Monterey Jack, and keep jalapeños or hot sauce for the table.
No rollingLayer the same chicken, sauce, tortillas, and cheese as a casserole.
Less heavy versionUse chicken breast, corn tortillas, less cheese, and beans or vegetables.

Ingredients You Need

Because the ingredient list is short, the few choices you make matter: use chicken that is not watery, sauce you actually like, tortillas that bend, and cheese that melts.

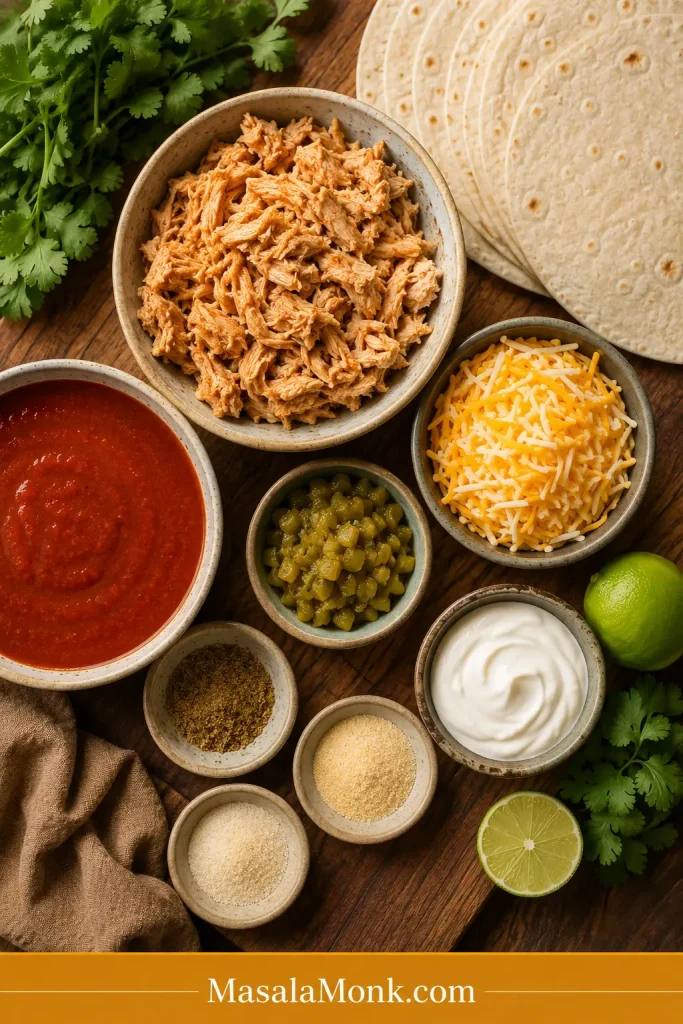
Overhead ingredient board with shredded chicken, red enchilada sauce, tortillas, shredded cheese, green chiles, spices, sour cream, cilantro, and lime.
Simple ingredients do the work here: cooked chicken, red enchilada sauce, tortillas, cheese, green chiles, and seasonings for a complete filling.

Chicken

Use cooked shredded chicken that is moist but not watery. Rotisserie chicken is the easiest choice, but leftover chicken, poached chicken breast, cooked thighs, or slow cooker shredded chicken all work.

If the chicken tastes good before rolling, the enchiladas will taste good after baking. Mix it with sauce, spices, green chiles, and cheese so every bite has flavor.

Enchilada Sauce

Pick a red enchilada sauce you would happily spoon over the finished pan, because it carries a lot of the flavor here. Store-bought sauce works well for a weeknight version; homemade sauce gives more depth if you already have it.

You will use 2½ cups / 600 ml sauce total. For extra-saucy servings, warm more sauce separately and add it at the table.

Using store-bought sauce? Warm it first and taste it before adding salt to the filling. When it tastes flat, add a pinch of cumin or garlic powder. If it tastes too sharp, stir in a small spoon of sour cream after warming. Want more heat? Add hot sauce, chipotle, or jalapeños at the table instead of making the whole pan spicy.

Tortillas

Corn tortillas taste more classic. Flour tortillas are softer and easier to roll. Both work, but cold tortillas crack and over-sauced tortillas get heavy.

Cheese

Cheese is not just topping here. It helps the filling hold together and gives the pan that melted, bubbling finish.

  • Monterey Jack: smoothest melt.
  • Mexican blend: easiest everyday option.
  • Cheddar-Jack: more flavor with good melt.
  • Oaxaca: mild, stretchy, excellent if available.
  • Cotija or queso fresco: better as a finishing topping than the main melting cheese.

Green Chiles

Diced green chiles are optional, but they make the filling taste more complete without adding much heat. They bring mild chile flavor, moisture, and a little brightness to the chicken.

Best Chicken for Chicken Enchiladas

Start with whatever cooked chicken you already have. The only real rule is that it should be cooked, shredded, and not watery.

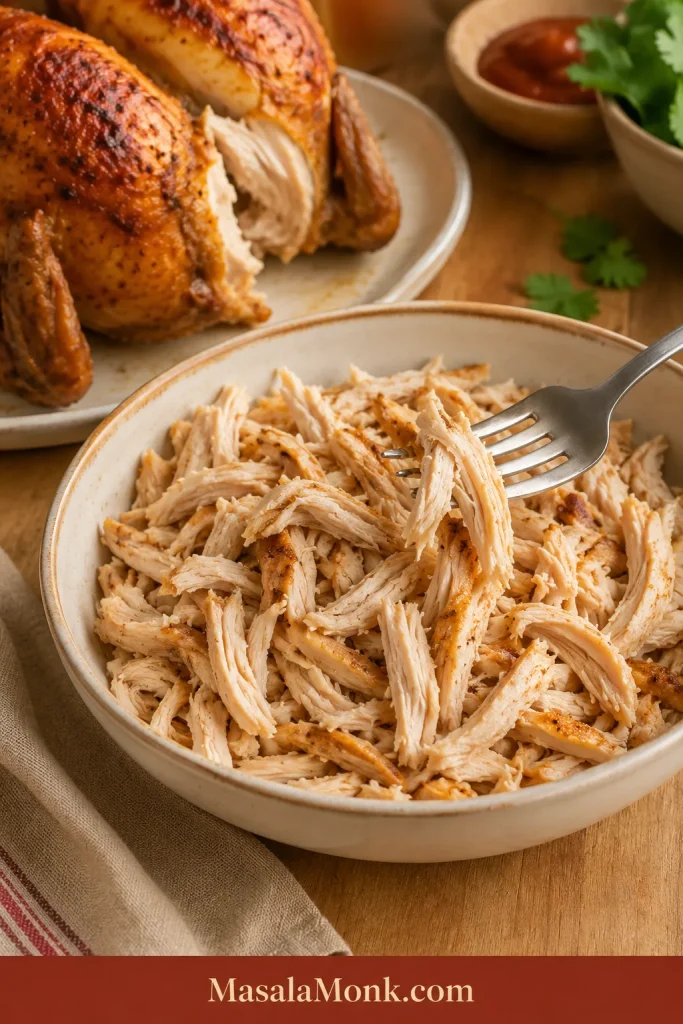
Shredded rotisserie chicken in a cream bowl with a fork pulling strands, with part of a roasted chicken in the background.
For the fastest pan, rotisserie chicken gives you cooked, tender meat that shreds easily and soaks up sauce and spices.
Best forChicken choice
Fastest dinnerRotisserie chicken
Juiciest fillingCooked chicken thighs
Leanest versionPoached or cooked chicken breast
Meal prepSlow cooker shredded chicken
Pantry emergencyCanned chicken, drained well

If you need a simple batch of shredded chicken before making enchiladas, the same basic method from Crock Pot Chicken Breast Recipes can be used here. Keep the chicken simply seasoned so the enchilada sauce still leads the flavor.

One medium rotisserie chicken usually gives about enough shredded meat for this recipe, depending on size. If you only have 2½ cups chicken, the enchiladas will still work. With closer to 4 cups, use large tortillas or make the filling a little fuller.

Only have canned chicken? Drain it very well, break it up gently, and season it with sauce, cumin, garlic powder, green chiles, and cheese before rolling. It will not taste as rich as rotisserie chicken, but it can still save dinner when the pantry is what you have.

Corn Tortillas vs Flour Tortillas

Tortillas are where many enchiladas go wrong. The filling can be perfect, the sauce can be good, and one cold tortilla can still split open before it reaches the pan.

Mini rule: do not use cold tortillas. Warm tortillas bend. Cold tortillas crack.

Warm Tortillas Before Rolling

Whether you choose corn or flour, warmth matters because a flexible tortilla rolls cleanly and is less likely to split at the center.

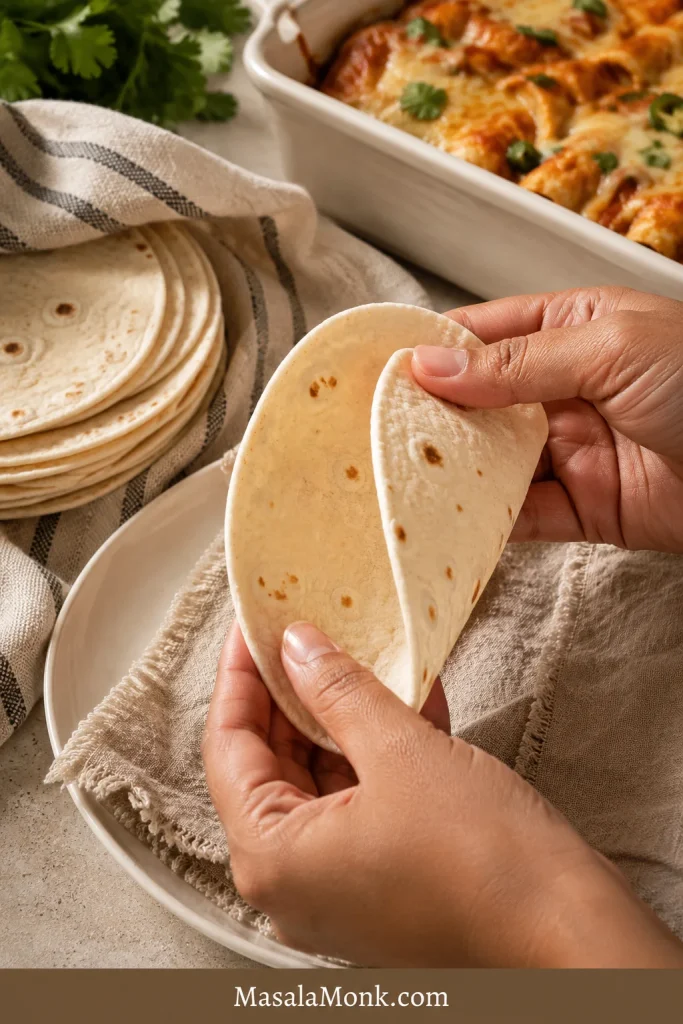
Hands gently bending a warm flour tortilla without cracking, with a stack of tortillas and enchiladas in the background.
A quick warm-up makes tortillas flexible enough to roll cleanly, while cold tortillas are more likely to crack or tear.
TortillaBest forWatch out for
Corn tortillasClassic flavor and better enchilada textureThey can crack if cold or dry
Flour tortillasEasy rolling and softer textureThey can become too soft if over-sauced
Small corn tortillasTraditional-style smaller enchiladasUse less filling so they do not tear
Large flour tortillasBigger, fuller enchiladasDo not overstuff or the pan becomes heavy
Corn and flour tortillas compared side by side, each topped with a small rolled chicken enchilada, red sauce, and shredded cheese.
For texture, corn tortillas give enchiladas a more classic bite, while flour tortillas are softer, larger, and easier for beginners to roll.

Once you pick the tortilla, check how much filling to use so the rolls close without tearing.

For corn tortillas, wrap them in a damp towel and microwave for 20–30 seconds, adding a few seconds more if they are still stiff. You can also heat them one by one in a skillet, or warm them quickly with a little oil.

Flour tortillas are more forgiving, but they still need sauce control. Keep the bottom layer thin and let most of the sauce sit on top, where it can bubble into the cheese instead of soaking the underside.

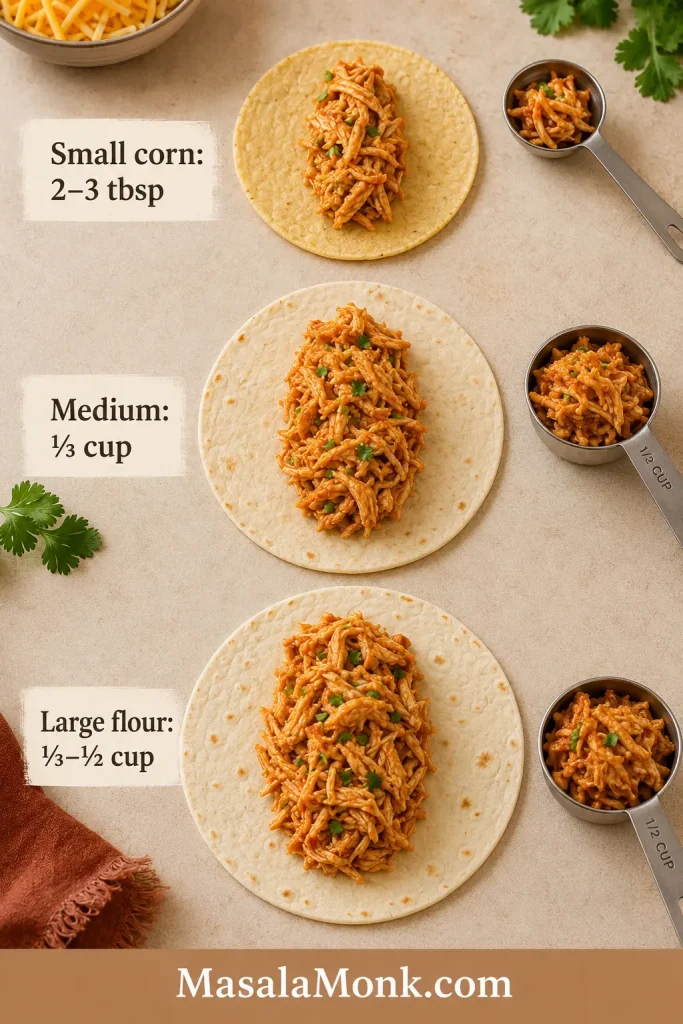
How Much Filling Goes in Each Tortilla?

  • Small corn tortilla: 2–3 tablespoons filling
  • Medium tortilla: about ⅓ cup filling
  • Large flour tortilla: ⅓–½ cup filling, depending on size

A good roll should close without strain. If you have to force it shut, use less filling.

Filling amount guide showing small corn, medium, and large flour tortillas with different portions of shredded chicken enchilada filling.
Smaller tortillas need less filling and large flour tortillas can hold more; either way, each roll should close without strain.

Sauce Options and Easy Variations

Keep the same rolling and baking approach, then change the sauce, filling, or toppings to match the dinner you want. Pick the sauce based on what sounds good, not because one version is more correct.

VersionHow to make it
Classic red chicken enchiladasUse red enchilada sauce, shredded chicken, green chiles, and Monterey Jack or Mexican-blend cheese.
Green chicken enchiladasSwap red sauce for green enchilada sauce or Salsa Verde. Finish with cilantro, lime, and sour cream.
White chicken enchiladasUse a creamy white sauce with chicken broth, sour cream, green chiles, and cheese.
Sour cream chicken enchiladasStir ½ cup / 120 g sour cream into the filling, or spoon sour cream over the baked enchiladas.
Cream cheese chicken enchiladasAdd 4 oz / 113 g softened cream cheese for a gentle creamy version, or up to 8 oz / 226 g for a heavier pan.
Pantry creamy enchiladasStir ½–1 can condensed cream of chicken soup into the filling or sauce.
Mild chicken enchiladasUse mild sauce, Monterey Jack, and keep spicy toppings at the table.
Spicy chicken enchiladasAdd pepper Jack, jalapeños, chipotle, cayenne, hot sauce, or spicy enchilada sauce.
Lighter chicken enchiladasUse chicken breast, corn tortillas, a lighter cheese layer, and beans or vegetables to make the filling feel generous.

Red feels cozy, green feels brighter, and creamy versions feel softer and richer. The same basic recipe gives you a very different dinner depending on the sauce.

How to Make Chicken Enchiladas

The recipe card gives you the measurements. Think of this as your texture checklist while the pan comes together.

Mix a Moist, Not Soupy, Filling

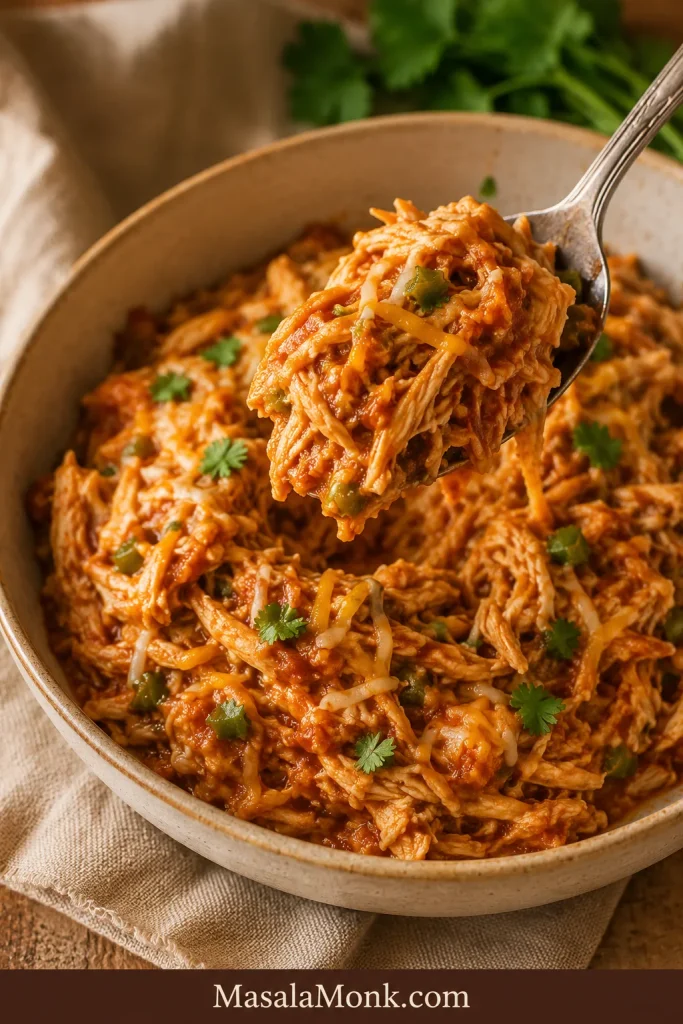
The filling should look seasoned and cohesive before you roll it. If it looks dry, add a little sauce; if it drips, add more chicken or cheese.

Shredded chicken filling mixed with red enchilada sauce, cheese, green chiles, and spices in a bowl, with a spoon lifting the mixture.
Next, mix the shredded chicken with enough sauce, cheese, green chiles, and seasoning to make the filling juicy, but not loose or dripping.
  1. Coat the dish lightly. The bottom should look sauced, not flooded.
  2. Mix a filling that holds together. It should look moist and seasoned, not loose or dripping.
  3. Warm the tortillas until bendable. A flexible tortilla rolls more cleanly.
  4. Fill without forcing. If the tortilla strains to close, use less filling.
  5. Place seam-side down. This hides rough edges and keeps the rolls in place.
  6. Top generously, not deeply. The tortillas should be covered, but not swimming.
  7. Bake until bubbling. The cheese should melt into the seams, and the sauce should thicken slightly at the edges.
  8. Rest before serving. The sauce settles, and the first serving has a better chance of lifting cleanly.

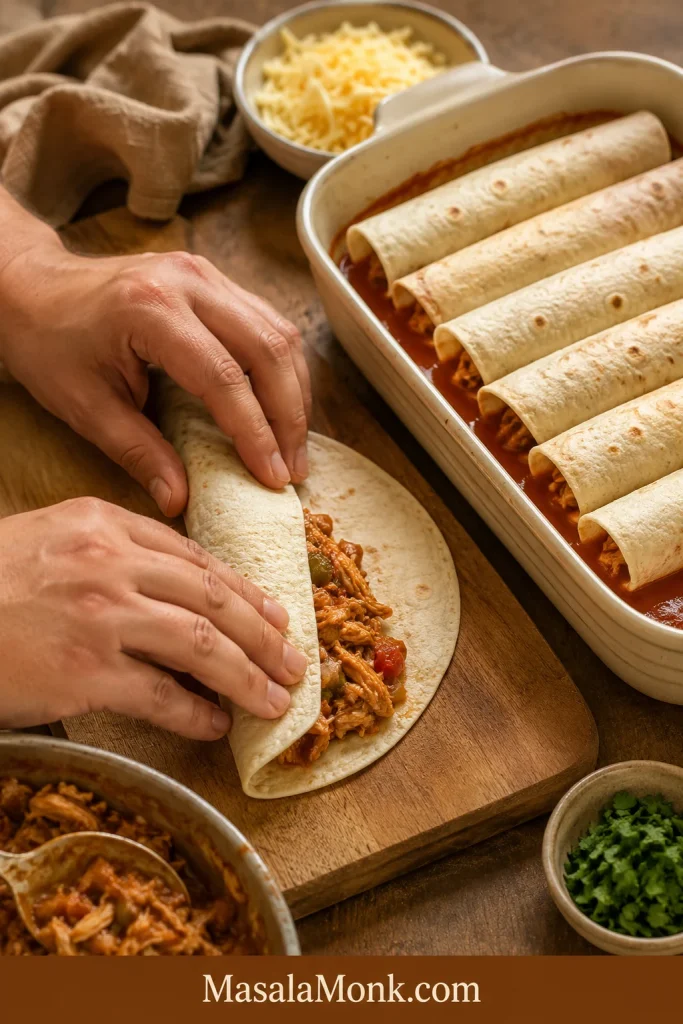
Roll Enchiladas Seam-Side Down

A snug roll helps, but the real insurance is placing the rough edge underneath so the filling stays tucked in while the sauce heats.

Hands rolling a tortilla around chicken enchilada filling beside a cream baking dish with rolled enchiladas arranged seam-side down.
Seam-side down keeps the filling tucked in place as the sauce and cheese bake around the rolls.

Add Sauce and Cheese on Top

Keep most of the sauce above the rolls, where it can thicken around the cheese instead of soaking the bottom of the pan.

Rolled chicken enchiladas in a cream baking dish topped with red enchilada sauce and shredded cheese before baking.
Once the rolls are in the dish, cover them with red sauce and cheese while keeping the pan coated, not flooded.

Before serving, check the doneness cues and why the pan needs to rest.

How to Know the Enchiladas Are Done

Chicken enchiladas use cooked chicken, so you are not waiting for raw meat to cook through. You are looking for heat, bubbling sauce, melted cheese, and a pan that has had a few minutes to settle.

Close-up of baked chicken enchiladas in a cream dish with bubbling red sauce and melted golden cheese on top.
Look for bubbling red sauce around the edges and cheese melted into the seams with a few golden spots.
  • Sauce bubbles around the edges of the dish.
  • Cheese is fully melted on top and settling into the seams.
  • A knife inserted into the center comes out hot to the touch.
  • The tortillas look soft but not drowned.
  • You can hear a little bubbling at the edges when the dish comes out of the oven.
  • After resting, the first enchilada lifts out without falling apart completely.

The best bite is usually from the edge of the pan, where the sauce has thickened into the cheese. Spoon any saucy edges over the top of each serving.

Rest Before Serving for Cleaner Pieces

Resting is not just a waiting step. It gives the sauce and cheese time to settle so the first piece comes out cleaner.

A spatula lifting one saucy chicken enchilada from a baking dish, with melted cheese stretching and shredded chicken visible inside.
A short rest helps the sauce settle, the cheese grip, and the first piece lift more cleanly from the pan.

What If I Only Have…

This is where the recipe gets flexible, because dinner rarely starts with a perfect fridge.

You only haveWhat to do
Flour tortillasThey are fine here. Keep the sauce layer underneath thin so they stay soft without turning heavy.
Corn tortillasWarm them well before rolling. Use less filling if they are small.
Store-bought sauceUse it. Taste before adding salt to the filling.
2 cups chickenMake slightly lighter enchiladas, or add black beans, corn, sautéed peppers, or extra cheese.
No green chilesSkip them, or add a little extra cumin, garlic, onion, or jalapeño.
Only cheddarUse it, but mix with Monterey Jack next time for a smoother melt.
Taco seasoningUse a small amount in place of the cumin, garlic powder, and onion powder. Taste before adding extra salt.

Dry filling needs sauce. Loose filling needs chicken or cheese. Cracking tortillas need warmth. Enchiladas are forgiving once the sauce and cheese settle in.

Want the Same Flavor Without Rolling?

If rolling tortillas feels like too much on a busy night, make the same chicken-sauce-cheese idea as a layered bake. This Chicken Enchilada Casserole Recipe gives you the flavor of chicken enchiladas without filling and rolling each tortilla.

The casserole version is also useful when your tortillas are tearing, when you need a scoopable dinner, or when you want enchilada flavor with less assembly.

What to Serve with Chicken Enchiladas

This is a rich, saucy, cheesy dish, so the best sides and toppings bring freshness, creaminess, crunch, or acidity.

  • Fresh: cilantro, lime wedges, pico de gallo, diced onion, simple green salad
  • Creamy: sour cream, Greek yogurt, avocado, Guacamole
  • Hearty: Mexican rice, cilantro lime rice, black beans, refried beans
  • Crunchy: tortilla chips, pickled onions, shredded lettuce
  • Sweet-fresh: Mango Salsa
  • Snack-table side: 7 Layer Dip

For a spicy pan, cool the plate down with sour cream, avocado, or salad. With a milder pan, bring heat at the table with jalapeños, hot sauce, pickled onions, or lime.

Make Ahead, Storage, Freezing, and Reheating

Make Ahead

You can assemble chicken enchiladas up to 24 hours ahead. Cover the dish and refrigerate until ready to bake. For the best texture, keep a little sauce and cheese aside and add them just before baking.

If baking straight from the fridge, add 5–10 extra minutes to the bake time. The center should be hot, the cheese should be melted, and the sauce should bubble around the edges.

Storage

Store leftover chicken enchiladas in an airtight container in the fridge for 3–4 days. The tortillas will soften as they sit, but the flavor usually gets even better by the next day. For general leftover timing and safe reheating guidance, see the USDA leftovers guidance.

Freezing

Chicken enchiladas freeze well. You can freeze them unbaked or freeze baked leftovers. Wrap the dish tightly, or freeze individual portions in airtight containers for easier reheating. For best texture, use frozen portions within 2–3 months.

Thaw overnight in the fridge before baking or reheating for the cleanest texture. If baking from frozen, keep the dish covered at first so the center heats through, then uncover near the end so the top does not stay wet.

For another freezer-friendly tortilla meal, these Meal Prep Breakfast Burritos use similar moisture-control logic: keep wet toppings out, cool the filling, and reheat with texture in mind.

Reheating

Reheat a larger portion covered in a 350°F / 175°C oven until hot. Reheat individual portions in the microwave. If the enchiladas look dry, spoon a little extra sauce over the top before reheating.

Troubleshooting Chicken Enchiladas

A cracked tortilla or messy first serving does not ruin the pan. Enchiladas are forgiving once the sauce and cheese settle in.

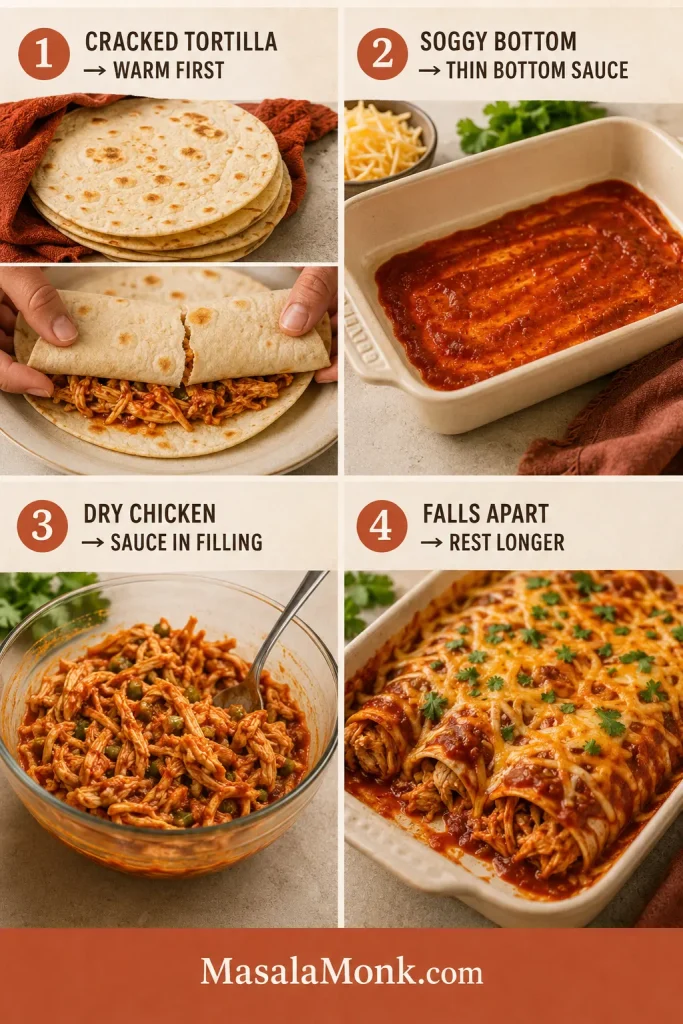
Four-panel chicken enchilada troubleshooting guide showing fixes for cracked tortillas, soggy bottoms, dry chicken filling, and enchiladas falling apart.
When enchiladas crack, turn soggy, taste dry, or fall apart, the fix usually comes down to warmer tortillas, controlled sauce, moist filling, and rest time.

Why did my tortillas crack?

The tortillas were probably cold, dry, or overfilled. Warm them before rolling, and use less filling if you are working with small corn tortillas. If one tortilla tears, tuck it seam-side down and let the sauce and cheese cover the rough edges.

What makes chicken enchiladas soggy?

Usually too much sauce on the bottom, watery filling, cold tortillas, very hot filling, or a pan that was covered too long. Use the ½-½-1½ sauce split, let steaming filling settle briefly, bake uncovered, and rest before serving.

Why is the chicken dry?

The chicken may have been dry before it went into the filling, or it may not have been mixed with enough sauce. Stir sauce, green chiles, spices, and cheese into the chicken before rolling.

Why did the enchiladas fall apart?

They may have been overfilled, over-sauced, or served too soon after baking. If the first enchilada comes out messy, the pan probably needed a few more minutes to rest.

What if my filling tastes bland?

Add a little more salt, cumin, garlic powder, green chiles, or enchilada sauce before rolling. The filling should taste good on its own before it goes into the tortillas.

What if my enchiladas look dry after baking?

Spoon warm enchilada sauce over the top before serving. Next time, mix a little more sauce into the chicken filling and check that the top is fully covered before baking.

Why did the cheese get oily?

Some cheese blends release more oil when baked. Use Monterey Jack, a good Mexican blend, or a cheddar-Jack mix, and avoid overbaking once the cheese has melted.

Fixed the issue? Go back to the recipe card, review the sauce split, or return to the top.

FAQ

Rotisserie chicken or cooked chicken breast — which is better?

Rotisserie chicken is fastest because it is already tender and seasoned. Cooked chicken breast works too; mix it well with sauce and spices so the filling does not taste plain.

Are corn or flour tortillas better for chicken enchiladas?

Corn tortillas are more classic and slightly firmer. Flour tortillas are softer and easier to roll. Both work if they are warm and not over-sauced.

How do you keep chicken enchiladas from getting soggy?

Use the ½-½-1½ sauce split: ½ cup under the enchiladas, ½ cup in the chicken, and 1½ cups on top. Warm the tortillas, avoid overfilling, bake uncovered, and rest before serving.

Should enchiladas be covered while baking?

Bake this pan uncovered unless you specifically want very soft enchiladas. For softer enchiladas, cover for the first 15 minutes, then uncover to finish.

Do tortillas have to be fried for enchiladas?

No, but corn tortillas benefit from a quick warm in a lightly oiled skillet. It makes them more flexible and helps them hold up better in sauce.

How much filling should go in each tortilla?

Use about ⅓ cup filling for medium tortillas, 2–3 tablespoons for small corn tortillas, and up to ½ cup for large flour tortillas.

What cheese melts best for chicken enchiladas?

Monterey Jack, Mexican blend, cheddar-Jack, and Oaxaca all melt well. Cotija and queso fresco are better as finishing toppings.

Is red or green enchilada sauce better with chicken?

Both are good. Red sauce tastes cozy and classic. Green sauce is brighter and tangier, especially with lime, cilantro, sour cream, and Monterey Jack.

How far ahead can chicken enchiladas be assembled?

Assemble them up to 24 hours ahead and keep them covered in the fridge. For the best texture, hold back some top sauce and cheese until just before baking.

Do chicken enchiladas freeze well?

Yes. Freeze them unbaked or freeze baked leftovers. Wrap tightly and reheat with a little extra sauce if they seem dry.

What is the difference between chicken enchiladas and chicken enchilada casserole?

Rolled enchiladas are filled and tucked seam-side down. Chicken enchilada casserole uses similar ingredients but layers them in a dish instead of rolling each tortilla.

Next Time You Want an Easy Tortilla Dinner

Once you have the tortillas out, it is easy to stay in that dinner lane. These Sheet Pan Chicken Fajitas keep the same weeknight rhythm: seasoned chicken, warm tortillas, and simple toppings.

For another tortilla meal, try this Breakfast Burrito Recipe. Need something quicker and lighter? The Shrimp Tacos Recipe keeps the same fresh-topping energy in a faster format.

Final Thought

Good chicken enchiladas do not need perfect tortillas, homemade sauce, or freshly cooked chicken. They need moist filling, warm tortillas, controlled sauce, and a few minutes of patience after baking.

Let the pan sit while the toppings hit the table, then spoon the saucy edges over each serving.

Do that, and the pan gives you what you came for: soft tortillas, juicy chicken, bubbling cheese, and saucy edges worth scooping from the dish.

Back to top