Posted on Leave a comment

Panang Curry Recipe: Chicken Panang with Store-Bought Paste

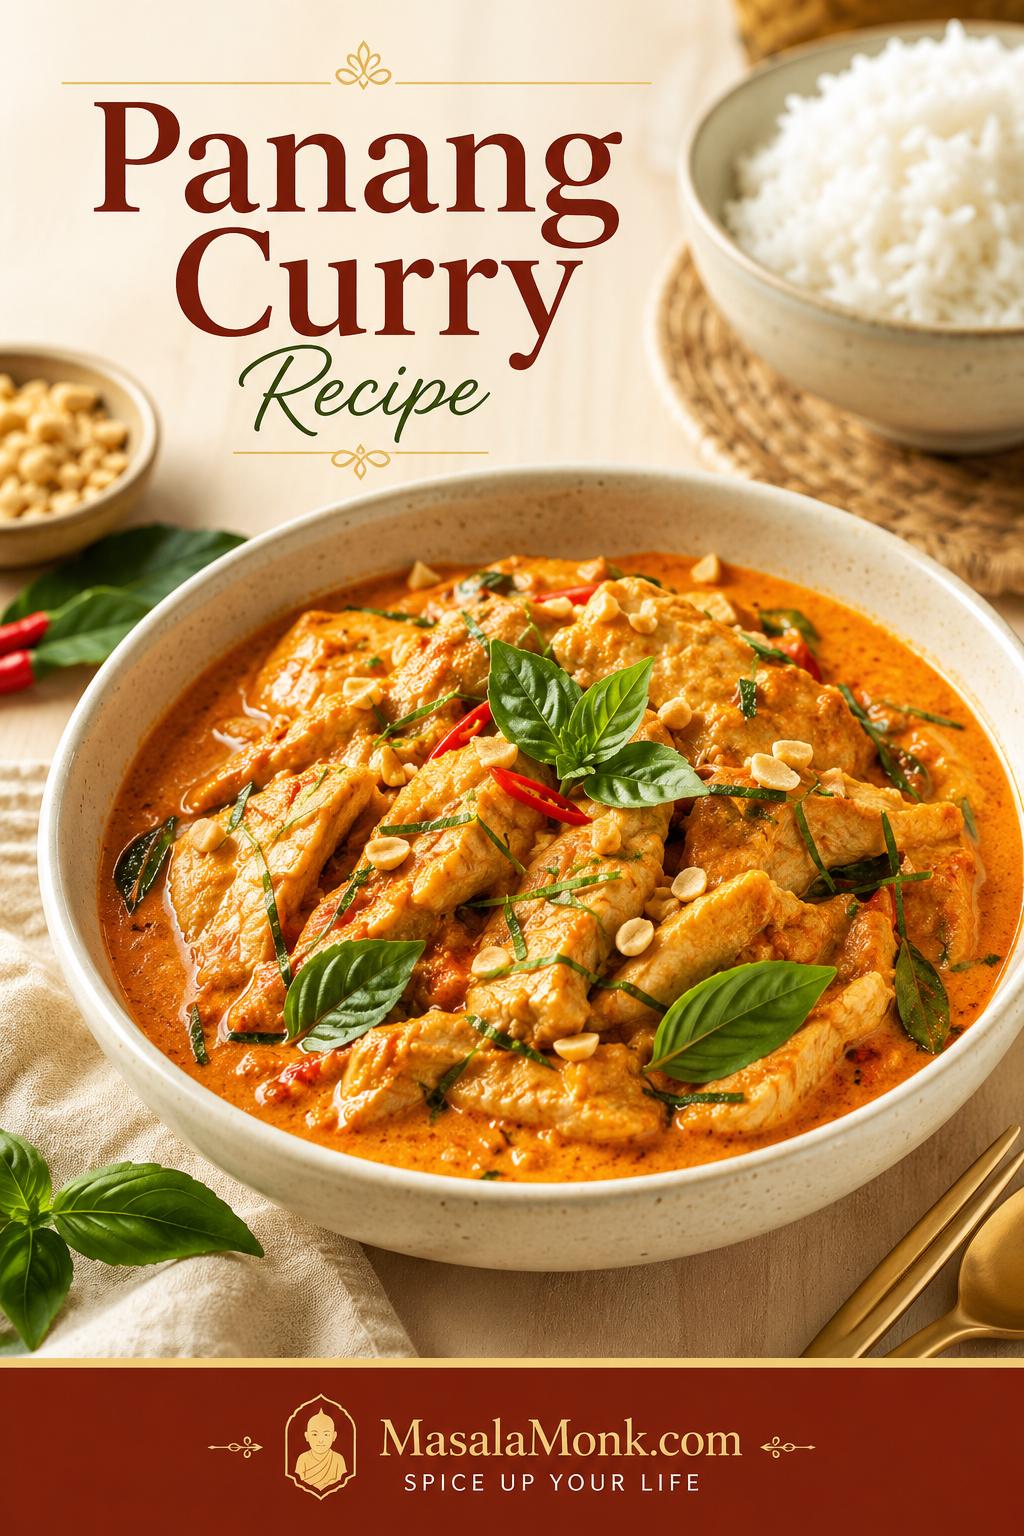
Bowl of chicken Panang curry with orange-red coconut sauce, sliced chicken, Thai basil, crushed peanuts, makrut lime leaves, and jasmine rice.

A good Panang curry starts changing the moment the paste hits hot fat: the raw edge softens, the chile smell deepens, and the pan begins to smell warmer almost immediately. When the coconut goes in, it turns orange-red around the paste. By the time the chicken is done, the curry should look glossy and generous, not thin or tired.

This Panang curry recipe is built for the home-cook problem most recipes do not talk about enough: store-bought paste can taste flat, watery, harsh, or too much like ordinary red curry when it is rushed. The fix is not a longer shopping list. It is better paste frying, full-fat coconut, and a few clear texture cues.

The result is a 40-minute curry that still feels special: tender chicken, glossy coconut sauce, fresh basil, jasmine rice, and enough depth that the store-bought paste never feels like a compromise. The base version is chicken Panang curry, also called Panang gai, but the same method works for beef, tofu, shrimp, or vegetables once you understand the texture.

It is generous weeknight food: fragrant, creamy, a little sweet, a little spicy, and made to spoon over rice. If you like fast Thai basil-heavy dinners, this Pad Kra Pao recipe is another bold option to keep nearby.

Table of Contents

Use this guide to make Panang curry that tastes creamy, balanced, aromatic, and clearly different from ordinary red curry.

Panang Curry Recipe: Quick Answer

Remember it as 3–400–680: 3 tablespoons / about 45g Panang curry paste, 13.5–14 oz / 400ml full-fat coconut milk or coconut cream, and 1½ lb / 680g thinly sliced chicken for a generous 4-serving curry.

Fry the paste first in oil or thick coconut cream until it smells deeper and less raw. Stir in the coconut gradually, then add fish sauce, palm sugar or brown sugar, torn makrut lime leaves, and peanuts or peanut butter. Simmer gently until the chicken is cooked through, finish with Thai basil, and serve with jasmine rice.

Think of this as your safe starting bowl: enough paste to taste full, enough coconut to feel creamy, and enough body for the curry to settle over rice instead of running through it. Add 1–1½ cups vegetables if you want a fuller chicken curry; keep the amount modest so the flavor stays focused.

Most important cue: the spoon tells you more than the timer. The curry should coat the back of a spoon in a glossy layer while still being loose enough to serve over rice. Need the exact visual cue? Jump to the spoon-coating test. Ready to cook? Go straight to the recipe card.
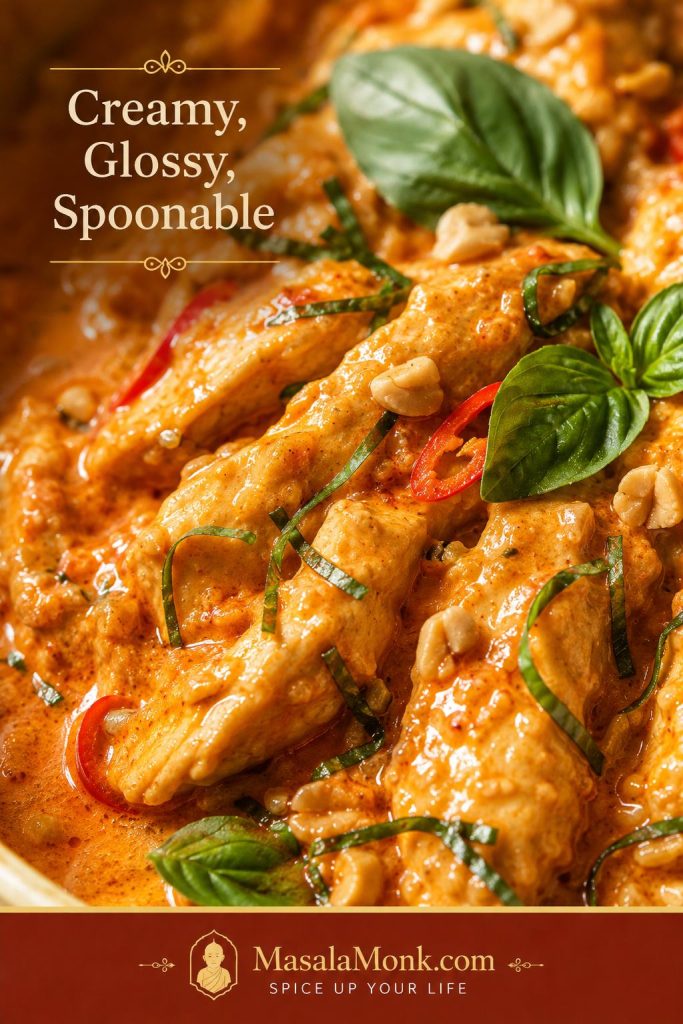
Close-up of chicken Panang curry with creamy sauce coating sliced chicken, red chile, Thai basil, peanuts, and makrut lime leaf garnish.
Look for sauce that clings to the chicken but still moves when spooned; that balance keeps Panang curry rich without making it heavy.

The Easy Panang Curry Formula

The 3–400–680 formula is not a test; it is a starting point. From there, you can adjust for paste strength, vegetable volume, protein choice, and how rich you want the final curry. More vegetables usually need a little more paste and a little more time in the pan. Saltier paste needs less fish sauce. Sweeter coconut needs less sugar.
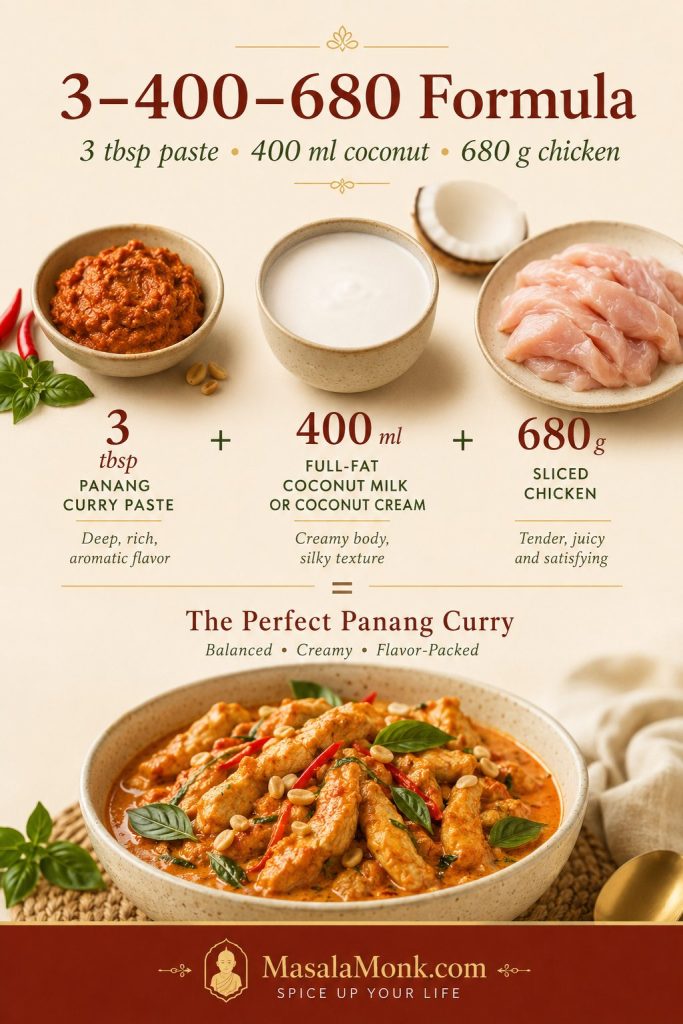
Panang curry formula guide showing 3 tablespoons curry paste, 400 milliliters coconut milk, and 680 grams chicken.
The 3–400–680 formula gives you a reliable starting point before you adjust for paste strength, vegetable volume, or spice preference.
For 4 ServingsAmountWhy It Matters
Panang curry paste3 tbsp / about 45gThe flavor base. Start lower if your paste is very spicy or salty.
Coconut milk or coconut cream13.5–14 oz / 400mlThe body of the curry. Coconut cream gives the lushest result.
Chicken or other protein1½ lb / 680g chicken, or equivalentEnough protein for a full dinner without overcrowding the pan.
Fish sauce1–1½ tbsp / 15–22mlAdds salt and savory depth. Use less at first if your paste is salty.
Palm sugar or brown sugar2 tsp–1 tbsp / 8–15gRounds heat and salt. Start low if your paste or coconut tastes sweet.
Makrut lime leaves4–6 leavesTorn leaves perfume the simmering sauce; finely sliced tender leaves can finish the curry.
Peanuts or peanut butter2 tbsp / about 15g crushed peanuts, or 1 tbsp / about 16g peanut butterBrings Panang’s quiet nutty note without turning the sauce into satay.

Taste after the curry has simmered for a few minutes, not when the paste first hits the pan. Early tasting can trick you because the coconut is still loose, the paste has not settled, and the salt has not concentrated yet. If your paste tastes too mild or too harsh, use the store-bought paste guide before changing the whole recipe.

Why This Recipe Works

The difference between a forgettable Panang curry and a good one is usually not the ingredient list. It is the order. Curry paste needs fat and heat before the coconut goes in. The pan sauce needs enough time to come together. Basil needs to go in at the end, when its aroma will stay bright instead of disappearing into a long simmer.

If your first few homemade Thai curries have tasted thinner than takeout, this is usually where things change. You are not adding fancy ingredients; you are simply giving the paste and coconut enough time to become a sauce.

Frying the paste prevents flat flavor
Let it sizzle in fat first, and the smell changes from sharp to warm, deep, and curry-like.

Full-fat coconut gives the curry body
Light coconut milk makes the flavor feel spread out. Coconut cream gives the richest result.

The final balance happens at the end
Fish sauce, sugar, lime leaves, peanuts, and basil let you tune salt, sweetness, aroma, and nuttiness before serving.

The finished curry lands rich without feeling greasy, spicy without tasting harsh, and gently sweet without becoming sugary. It tastes like Panang curry, not red curry with peanut butter stirred in.

What Is Panang Curry?

Panang curry, also written as Phanaeng, Phanang, or Panaeng, is a Thai coconut curry with a richer, more concentrated character than a loose red curry. The easiest way to recognize a good Panang is this: if red curry pours, Panang clings.

In the bowl, Panang feels creamy, rounded, aromatic, and concentrated enough to coat the protein. Coconut gives body, curry paste gives heat and depth, makrut lime leaves give a citrusy lift, basil adds freshness, and peanuts add a quiet roasted note in the background.

Peanut belongs in the background here; it rounds the curry without turning it into satay. Chicken Panang curry is often called Panang gai or gaeng Panang gai. “Gai” means chicken, so Panang gai simply means the chicken version.

Panang Curry vs Red Curry

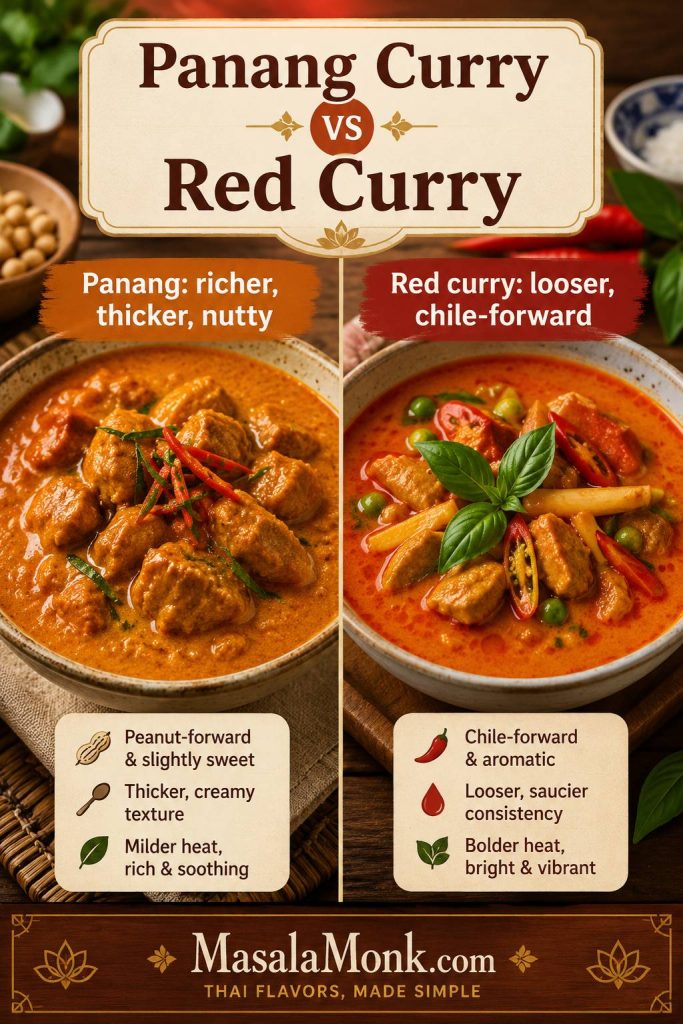
Panang curry and Thai red curry are related, but they should not taste identical. Red curry is usually looser and more chile-forward. Panang is creamier, richer, lightly sweet, and gently nutty. When homemade Panang tastes too much like red curry, the first fix is usually texture, then peanut and aromatic finish.

FeaturePanang CurryThai Red Curry
TextureThicker, creamier, more clingyLooser, saucier, more broth-like
FlavorRich, lightly sweet, savory, nuttyBrighter, chile-forward, more flexible
Paste profileRed-curry-style base with peanut and spice depthRed chile and aromatic base
Best cueCoats the protein clearlyPours more freely around the ingredients
Split-panel comparison of thicker Panang curry and looser Thai red curry with labels explaining texture and flavor differences.
Panang curry and red curry are related, but Panang is usually richer, thicker, and gently nutty, while red curry is looser and more chile-forward.

Quick fix: bring the curry back toward Panang by simmering the coconut base until it looks glossy, then finishing with peanut richness, Thai basil, and finely sliced tender makrut lime leaves if you have them.

If you are using red curry paste as a shortcut, add peanuts and a tiny pinch of warm spice so the sauce does not taste like ordinary red curry with coconut milk.

Panang Curry Ingredients

These ingredients are not equal. The paste, coconut, fish sauce, and lime leaves decide whether the curry tastes complete. Peanuts and basil finish the personality. Sugar is there to round the edges, not make the curry sweet.

The most important thing is timing. Paste goes first, coconut goes in gradually, protein cooks once the base has formed, and basil waits until the heat is low or off.
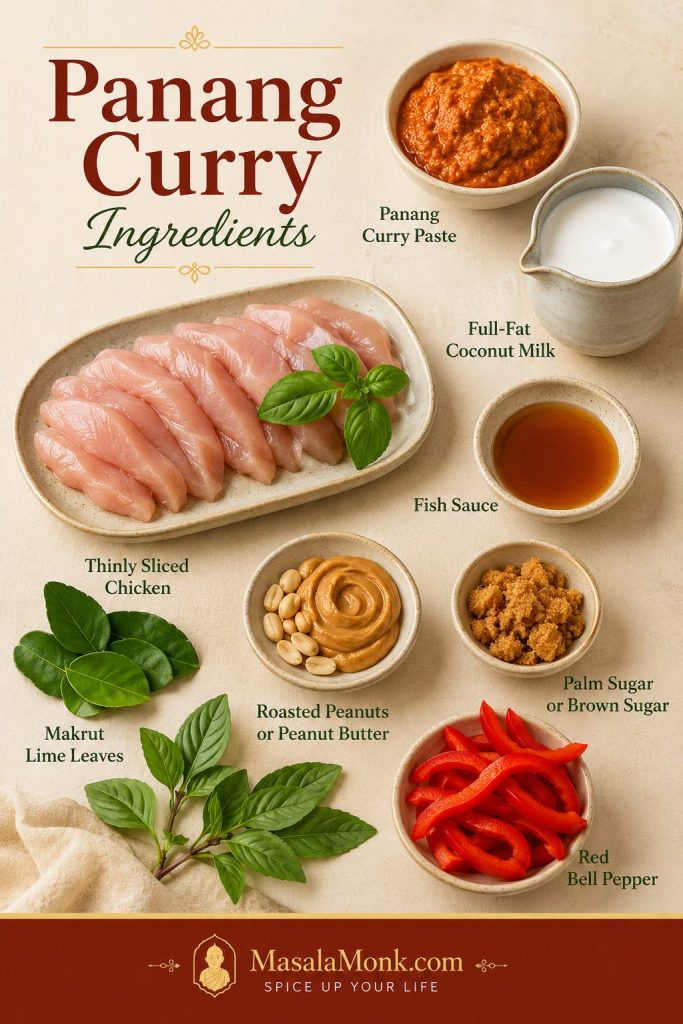
Panang curry ingredients including curry paste, coconut milk, chicken, fish sauce, sugar, makrut lime leaves, peanuts, Thai basil, and red bell pepper.
The ingredients work as a team: paste brings depth, coconut gives body, lime leaves add aroma, and peanuts round the curry without turning it into satay.

Panang curry paste

Use Thai Panang curry paste if you can find it. Some brands are stronger, saltier, and spicier than others, so start with a balanced amount and adjust. Thai Kitchen-style supermarket pastes are often milder, while Mae Ploy and Maesri-style Thai pastes are usually stronger, saltier, and more concentrated. Start lower if the brand is new to you.
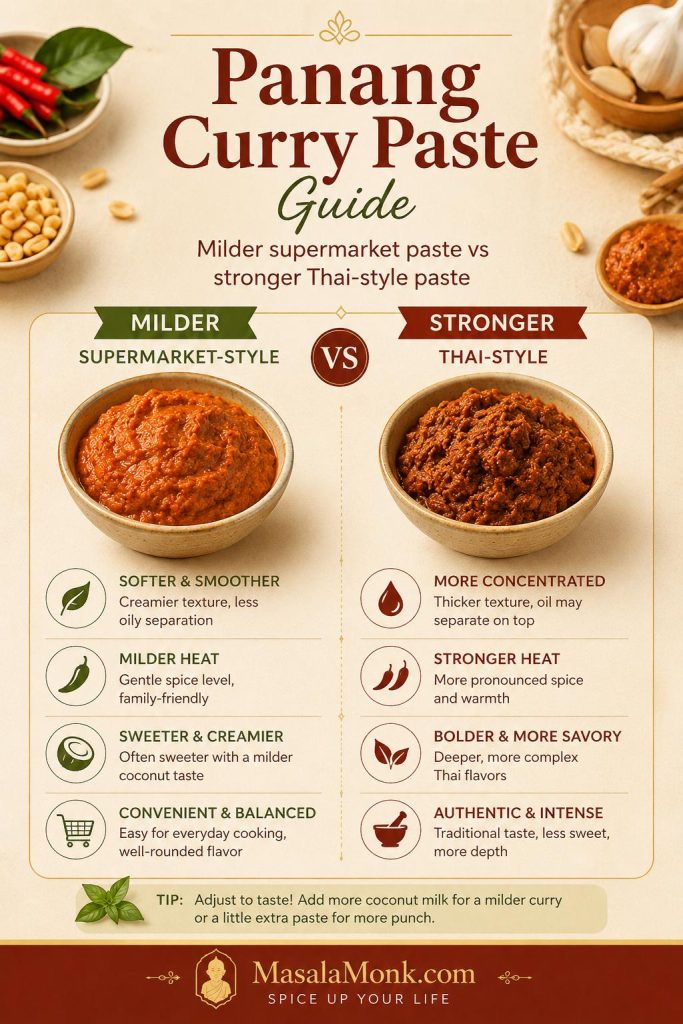
Guide comparing milder supermarket-style Panang curry paste with stronger Thai-style paste for homemade Panang curry.
Because Panang curry paste brands vary in salt, heat, and intensity, taste after simmering before adding more fish sauce, sugar, or paste.

If your paste is very salty, begin with 1 tablespoon fish sauce, simmer, then add the remaining ½ tablespoon only if the curry needs it. When homemade Panang tastes flat, the paste often needed a better start: fat, heat, and enough time to smell cooked before the coconut went in. For the deeper technique, see how to bloom the paste in fat first.

Coconut milk or coconut cream

Coconut cream gives the lushest result. Full-fat coconut milk also works well; it just needs a few extra minutes in the pan. Light coconut milk makes the curry harder to concentrate and easier to dilute.
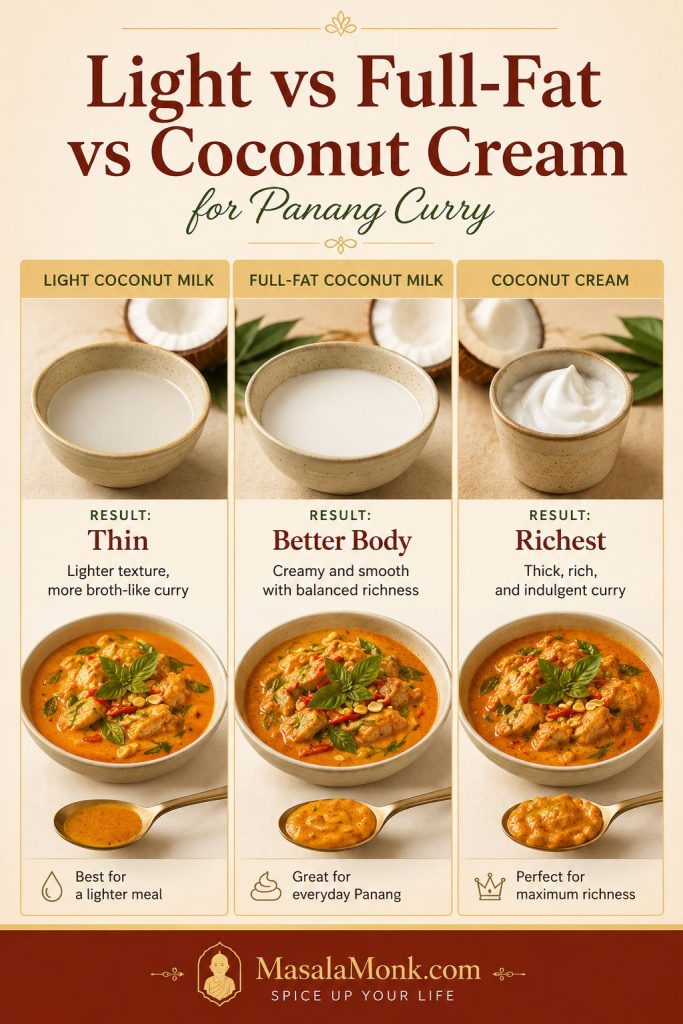
Comparison board showing light coconut milk, full-fat coconut milk, and coconut cream for Panang curry sauce texture.
For the richest Panang curry texture, full-fat coconut milk or coconut cream works better than light coconut milk, which can make the sauce feel thin.

How to use thick coconut cream first

If the can has a thick layer of coconut cream at the top, scoop that into the pan first and use it to fry the curry paste. Then add the thinner coconut milk gradually. This gives the pan a richer start and helps the paste bloom in fat.
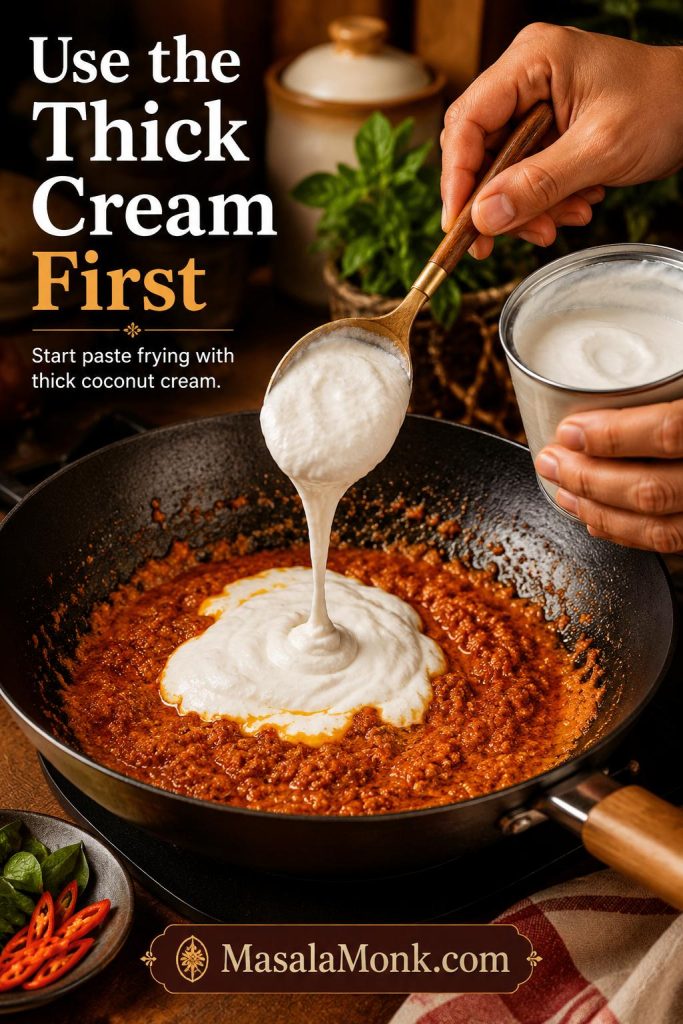
Thick coconut cream being added to fried Panang curry paste in a skillet to begin the curry sauce.
When a can has thick cream on top, use it first so the curry paste gets the fat it needs to bloom properly.

Fish sauce

Fish sauce keeps the coconut from tasting flat. You should not notice it as “fishy”; you should notice that the curry tastes deeper, saltier, and more complete. Add it gradually because the paste may already be salty.

For a vegan version, use soy sauce, tamari, or a vegetarian fish-sauce alternative. The flavor will be different, but the curry still needs savory depth.

Palm sugar or brown sugar

The sweetness should round the chile and salt; it should not announce itself first. Palm sugar gives a softer sweetness, while brown sugar works well in a home kitchen. Start with 2 teaspoons if your paste or coconut milk already tastes sweet.

Makrut lime leaves

Makrut lime leaves, often sold as kaffir lime leaves, are the ingredient that makes the curry smell alive. Tear whole leaves before adding them to the simmering coconut sauce so their oils release into the pan. If you have tender leaves, slice a small amount very finely and use it at the end for a sharper aromatic finish.

Fresh or frozen leaves are best. Torn whole leaves can be left in the curry for aroma and picked out while eating. Lime juice is not a true replacement; if you need a backup, a little lime zest is closer than bottled lime juice, but use it gently. The goal is aroma, not sourness.
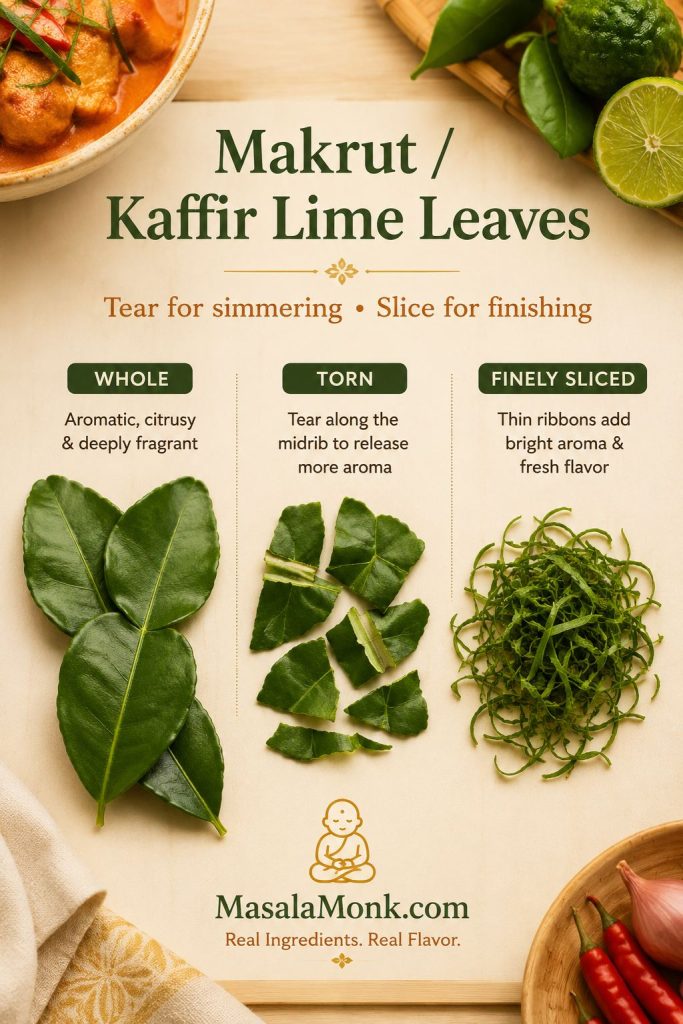
Makrut lime leaves shown whole, torn, and finely sliced, with guidance for simmering and finishing Panang curry.
Makrut lime leaves, often sold as kaffir lime leaves, give Panang curry its fresh citrus aroma without making the sauce sour.

Peanuts or peanut butter

Crushed roasted peanuts give texture and a more traditional feel. Peanut butter is a practical shortcut that blends smoothly into the sauce. Either works, but keep the amount modest. The peanut note should sit in the background, not make the curry taste like peanut sauce.
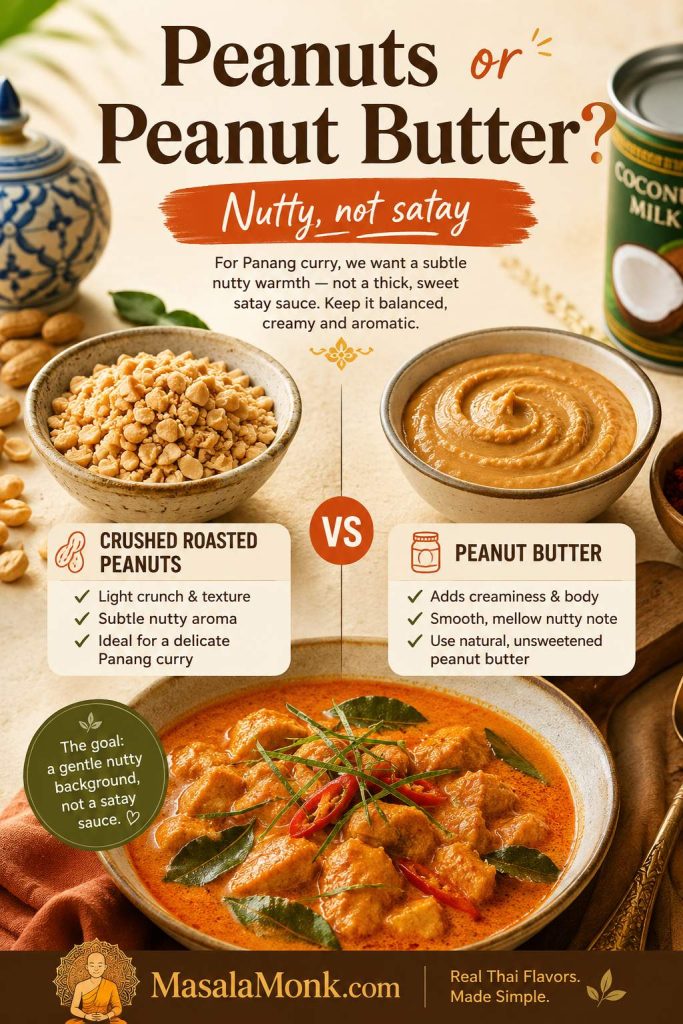
Split image comparing crushed roasted peanuts and peanut butter for adding a nutty note to Panang curry.
Crushed peanuts add texture, while peanut butter blends in smoothly; either way, the peanut flavor should stay gentle and balanced.

Thai basil

Thai basil gives the finished dish a fresh, peppery lift. Add it after the sauce thickens and the heat is low or off. If it simmers for several minutes, that fragrance fades quickly.
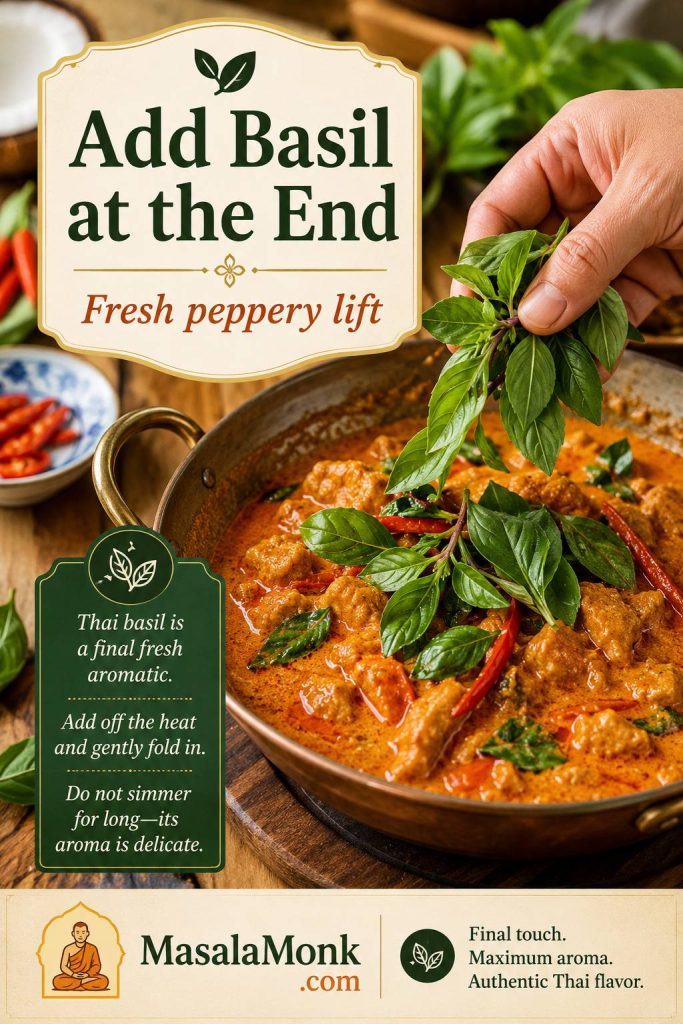
Thai basil being added to finished Panang curry as a final aromatic, with text about fresh peppery lift.
Add Thai basil near the end, because its peppery fragrance is strongest when it meets the hot curry right before serving.

How to Make Store-Bought Panang Curry Paste Taste Better

This is a home-kitchen Panang curry built around store-bought paste, but the technique is the point: fry the paste properly, use full-fat coconut, simmer until glossy, and finish with basil and lime leaf.

Fry it first
Cook the paste in oil or coconut cream until it smells warmer, deeper, and less raw.

Use full-fat coconut
Thin coconut milk makes the curry taste weaker. Full-fat coconut milk or cream gives body.

Finish the flavor
Fish sauce, sugar, lime leaves, peanuts, and basil make the sauce taste complete.

Bloom the paste in fat first

Traditional Panang methods often fry the paste in coconut cream until the oil separates. At home, canned coconut milk does not always separate well, so oil or the thick cream from the top of the can is more reliable.
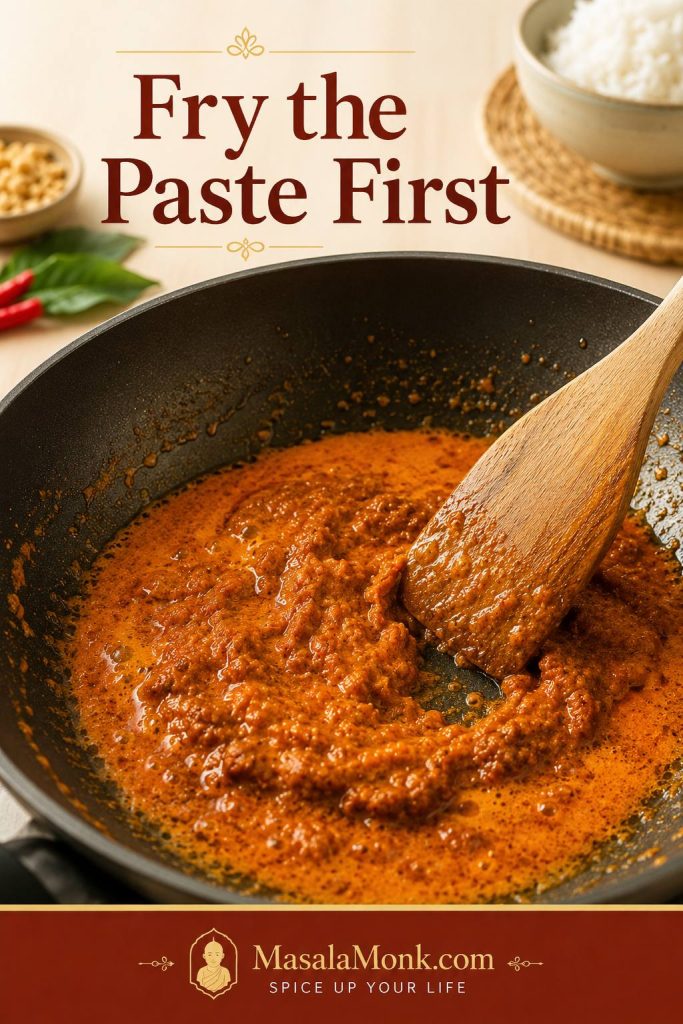
Panang curry paste frying in a skillet with oil or coconut cream while a wooden spatula stirs it.
Frying the paste first is the flavor-building step that makes store-bought Panang curry paste taste fuller and less raw.

What fried Panang curry paste should look like

The color change is subtle but useful: the paste turns a little darker, smells rounder, and loses the raw edge before the coconut is stirred in.
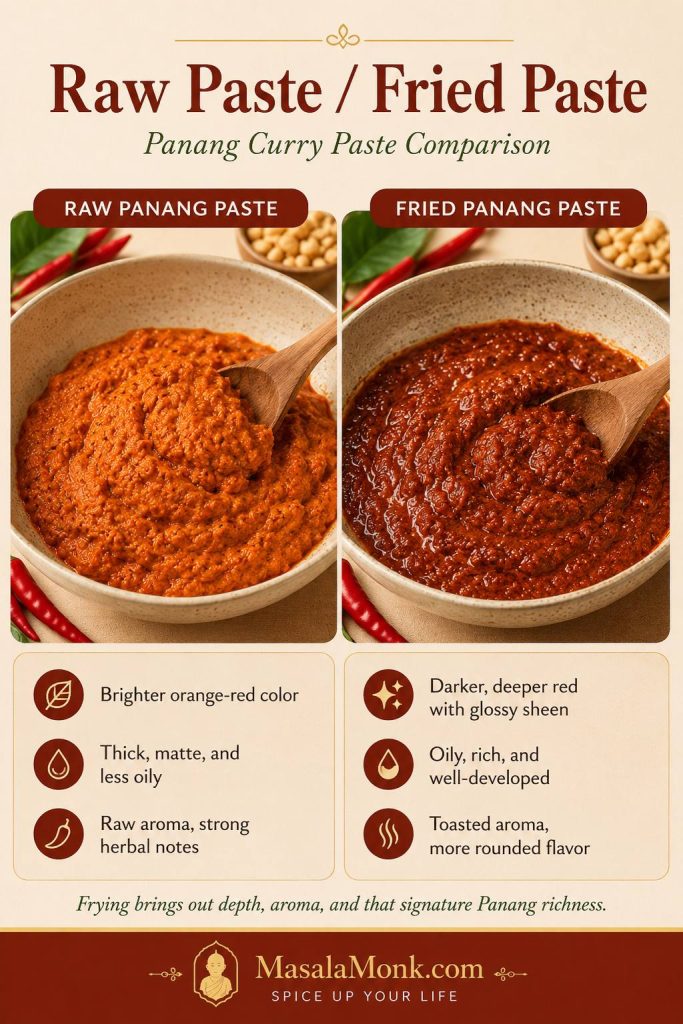
Side-by-side comparison of raw Panang curry paste and darker fried Panang curry paste in a pan.
The paste does not need to burn or dry out; it just needs to darken slightly and smell warmer before the coconut goes in.

Choose the right paste amount

For one 13.5–14 oz / 400ml can of coconut milk or cream, use this as your starting point:

StylePaste AmountBest For
Mild2 tbsp / about 30gKids, spice-sensitive eaters, or very strong paste brands
Balanced3 tbsp / about 45gMost homemade Panang curry
Stronger4 tbsp / about 60gRestaurant-style intensity or a pan with more protein and vegetables

Adjust after simmering

If the curry tastes weak after simmering, check the texture first. A thin coconut base can make even a strong paste taste dull because the flavor is spread across too much liquid. Let the pan settle into a glossy consistency, then decide if you need more paste.

When you do add more paste, avoid stirring it in raw. Fry another teaspoon or two in a small pan with a spoon of coconut cream, then stir that back into the curry. This keeps the added flavor cooked and rounded. For a deeper look at the paste itself, Serious Eats has a helpful Panang curry paste guide that explains the peanut and warm-spice notes that separate it from a basic red curry paste.

Using red curry paste instead? For every 2–3 tablespoons red curry paste, add 1 tablespoon crushed roasted peanuts or peanut butter, a tiny pinch of nutmeg, and a small pinch of ground coriander or cumin if the sauce tastes plain. Add torn makrut lime leaves if you have them. This shortcut is best for a weeknight curry, not for a strict traditional version.

Check labels for vegan or vegetarian versions

If you are cooking for vegan or vegetarian eaters, check the paste label carefully. Many Thai curry pastes contain shrimp paste, fish sauce, or other seafood ingredients. Use a vegan Panang curry paste, or use vegan red curry paste and adjust it with peanuts and warm spices.

How to Make Panang Curry

Once the paste and coconut are ready, the cooking moves quickly. A wide skillet, wok, or 12-inch saucepan gives the paste room to fry and helps the coconut base come together faster. Have the chicken sliced, vegetables cut, herbs ready, and rice started before the paste hits the pan.

Visual overview: how to make Panang curry
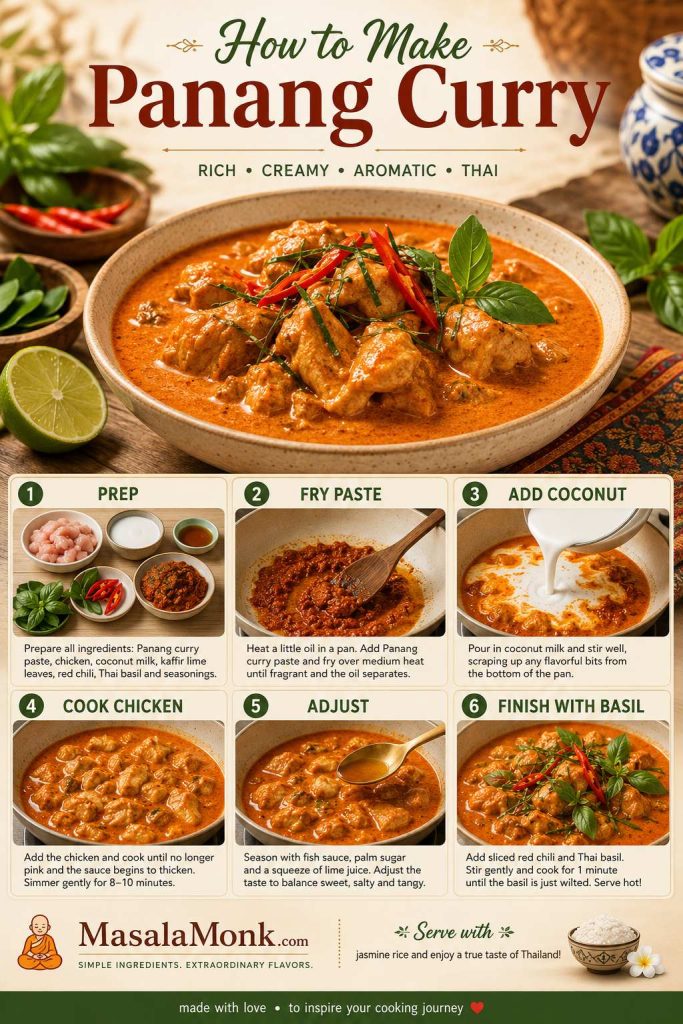
Step-by-step Panang curry board showing prep, frying paste, adding coconut, cooking chicken, adjusting, and finishing with basil.
Follow the visual order before you start cooking: prep first, fry the paste, build the coconut base, cook gently, adjust, then finish fresh.

1. Slice the protein thinly

Thin slices cook quickly and pick up the curry better. Cut chicken across the grain into bite-size strips. Slice beef very thinly against the grain. For tofu, cut into cubes or slabs and pat dry before cooking.

Avoid large chunks of chicken here. Thick pieces take longer to cook, which can push the pan past its best texture before the center is done.
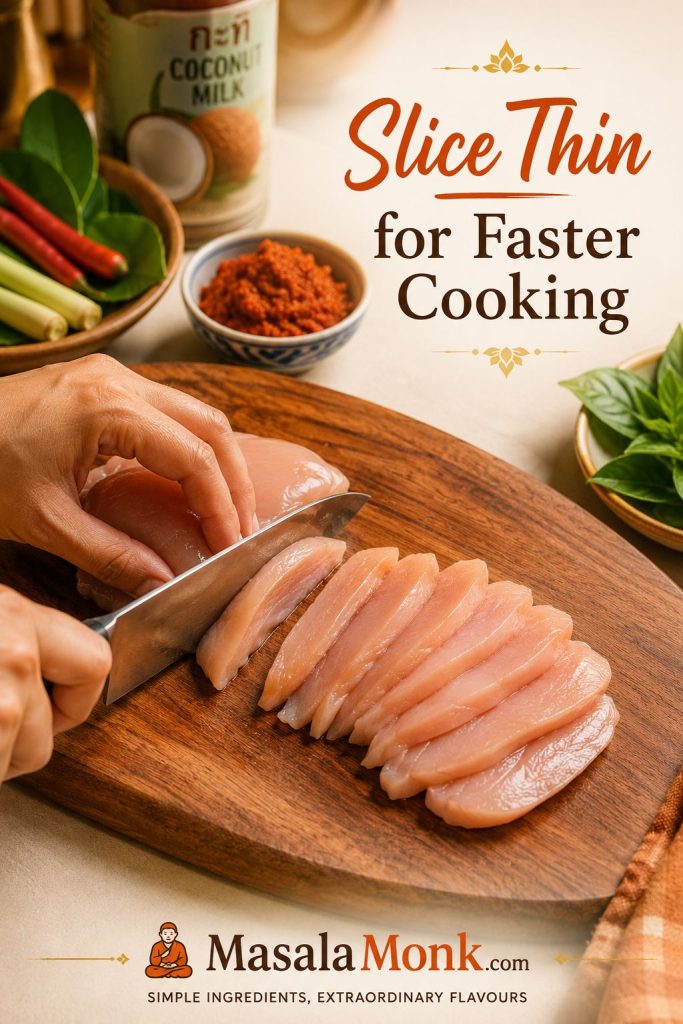
Hand slicing raw chicken into thin strips on a cutting board for Panang curry, with herbs and curry ingredients nearby.
Thin chicken slices cook quickly and absorb the curry better, so the meat stays tender while the sauce settles into the right texture.

2. Fry the curry paste

Heat neutral oil, or the thick cream from the top of the coconut milk can, in a wide skillet, wok, or 12-inch saucepan over medium heat. Add the paste and fry for 1–2 minutes for softer supermarket paste, or 3–5 minutes for a thicker Thai paste, stirring often, until it smells deeper and turns slightly darker.

When the paste starts sticking, lower the heat and loosen it with a spoonful of coconut cream or coconut milk. Water cools the pan, so use it only when you have no other choice.

This is the moment the curry starts smelling less like paste from a tub and more like dinner: chile, coconut fat, warm spice, and lime leaf waiting to open up.

3. Build the coconut sauce

Stir in the coconut milk or coconut cream gradually until the paste dissolves into a smooth sauce. Add fish sauce, palm sugar or brown sugar, torn makrut lime leaves, and peanuts or peanut butter. Keep the curry at a gentle bubble, not a hard boil.

At this point, the pan should look creamy and red-orange. Let it bubble for a few minutes before adding delicate vegetables or herbs. A good Panang base looks slightly more intense than you think it needs to be; rice will soften everything later. When you are unsure, use the spoon-coating test before serving.
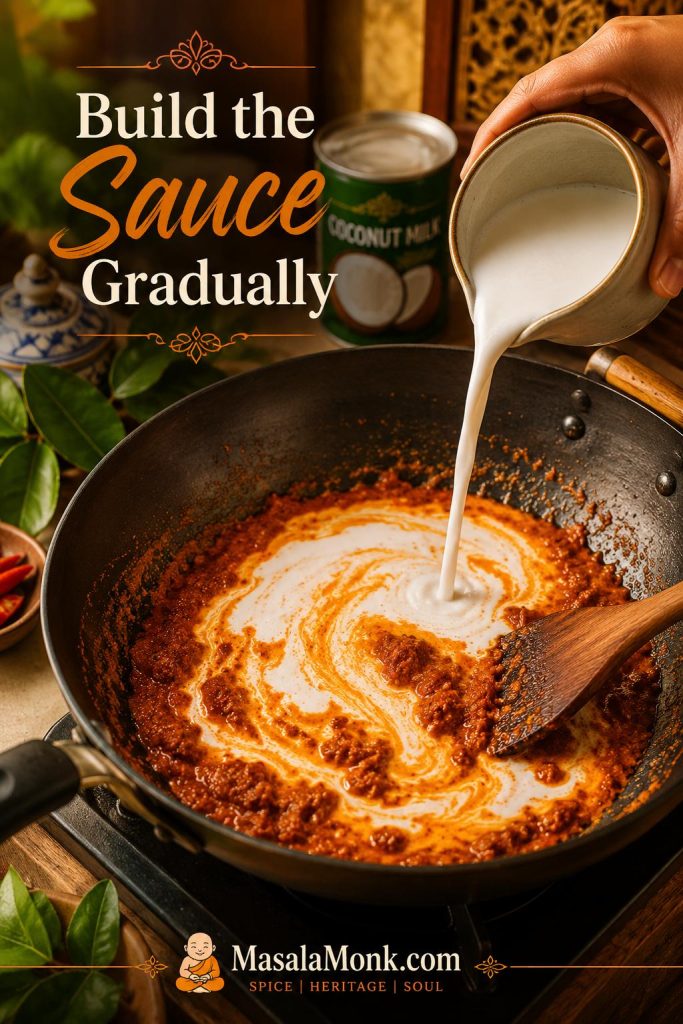
Coconut milk being poured into fried Panang curry paste in a wok, creating orange-red swirls as the sauce forms.
Add coconut gradually so the fried paste dissolves evenly; as it blends, the curry changes from separate ingredients into one smooth base.

4. Cook the protein and vegetables

Add chicken and firm vegetables such as carrots, green beans, baby corn, or broccoli stems first. Simmer gently until the chicken is cooked through; the thickest piece should reach 165°F / 74°C.

Add bell pepper, snap peas or snow peas, zucchini, or spinach later so they stay brighter and release less water. Save finely sliced makrut lime leaves for the end if you are using them as garnish.

Beef and shrimp go in later. Browned tofu can go in near the end so it keeps its shape.
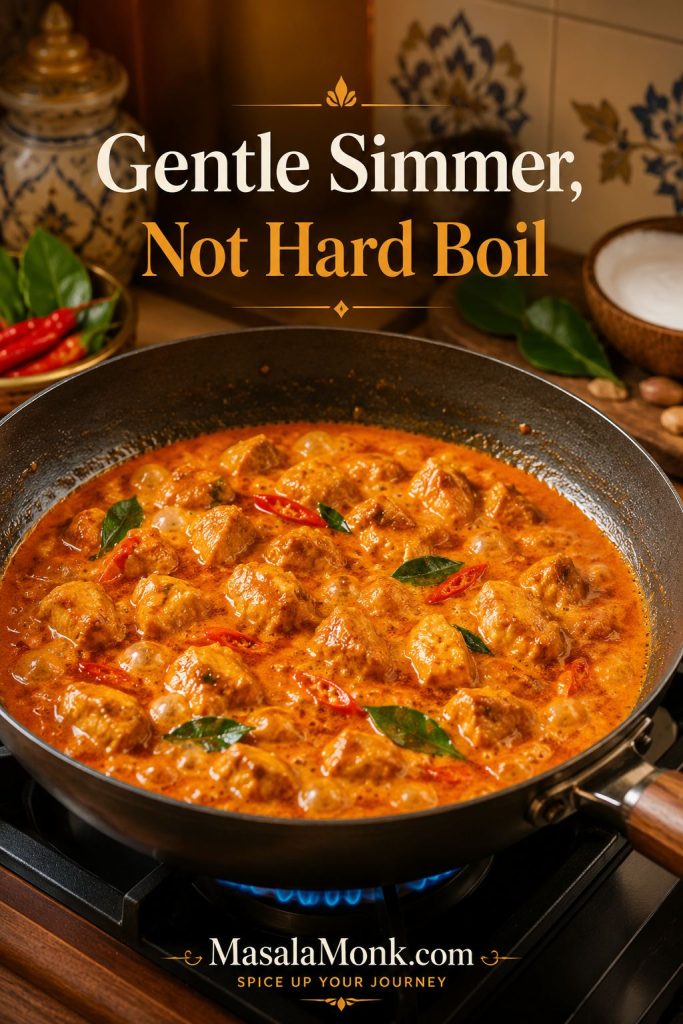
Chicken Panang curry gently simmering in a wide pan with small bubbles, orange-red sauce, chicken pieces, and herbs.
A gentle simmer gives the chicken time to cook while the coconut base thickens softly, without the rough look that comes from hard boiling.

5. Taste and finish

Give the curry a few uncovered minutes before final tasting. The flavor changes as the coconut settles: salt becomes clearer, sweetness rounds out, and the paste tastes less scattered.

Turn off the heat and stir in Thai basil right before serving. Add extra finely sliced makrut lime leaves, crushed peanuts, or sliced red chile for a stronger finish. The basil should smell fresh as soon as it hits the hot curry.
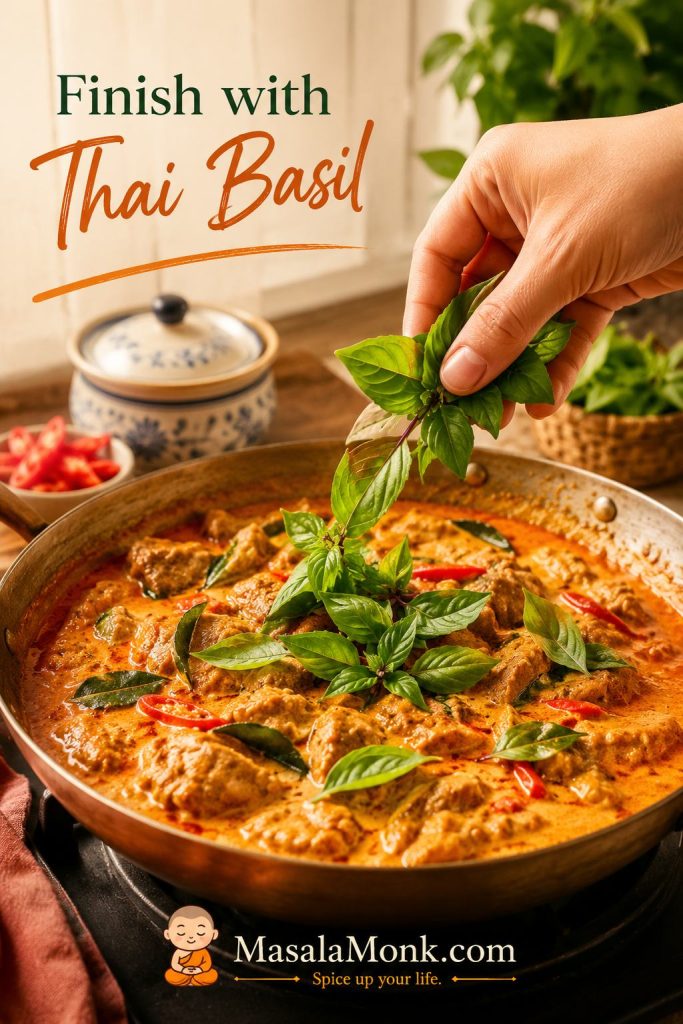
Hand adding Thai basil to finished chicken Panang curry in a pan with red chile and creamy orange-red sauce.
Stir basil in right at the end, then stop cooking; as a result, the curry keeps its fresh Thai basil aroma.

Chicken safety note: chicken should reach 165°F / 74°C in the thickest piece. FoodSafety.gov lists this as the safe minimum internal temperature for poultry in its safe minimum internal temperatures chart.

The Spoon-Coating Test for Panang Curry Sauce

When you are not sure whether the curry is ready, trust the spoon more than the clock. Dip a spoon into the pan and lift it out. The sauce should coat the back in a visible layer instead of sliding off immediately.
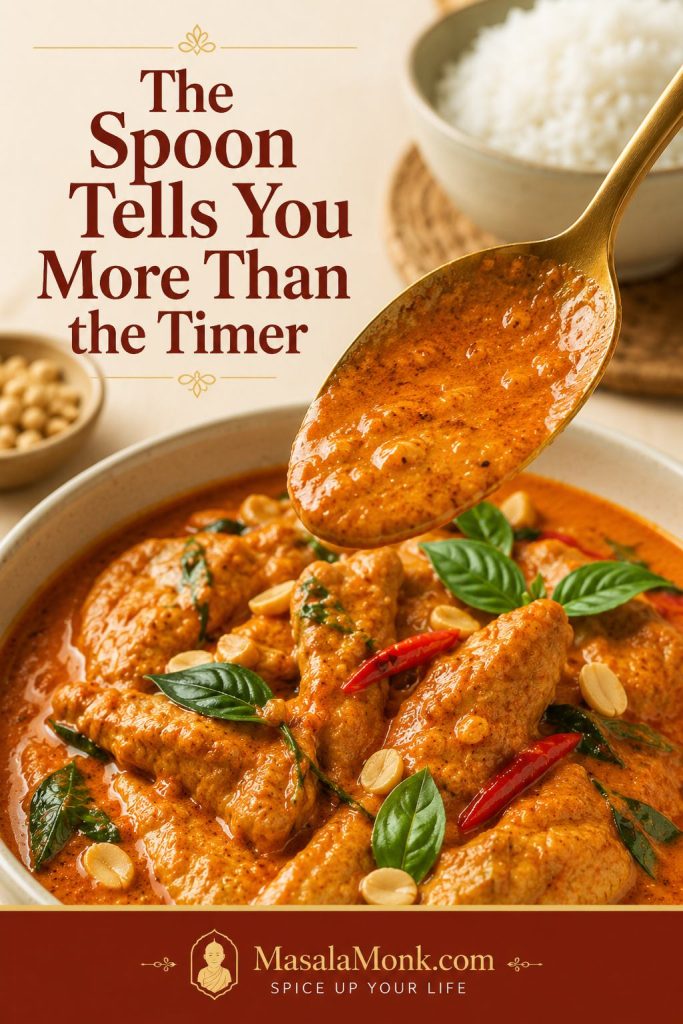
Spoon lifted from Panang curry showing orange-red coconut sauce coating the back of the spoon above the pan.
Once the curry coats the spoon in a smooth layer, it is concentrated enough for rice but still loose enough to serve generously.

When it is right, the sauce leaves a glossy trail on the spoon and settles over rice instead of disappearing into it. If it becomes too heavy, loosen it with a spoonful of coconut milk, water, or stock. Cornstarch can rescue a rushed sauce, but it should not be the first fix. If the texture is already off, go to the sauce fixes before serving.

How thick should Panang curry sauce be?

The best texture sits between runny and pasty: it coats the spoon, moves slowly in the pan, and still spoons easily over rice.
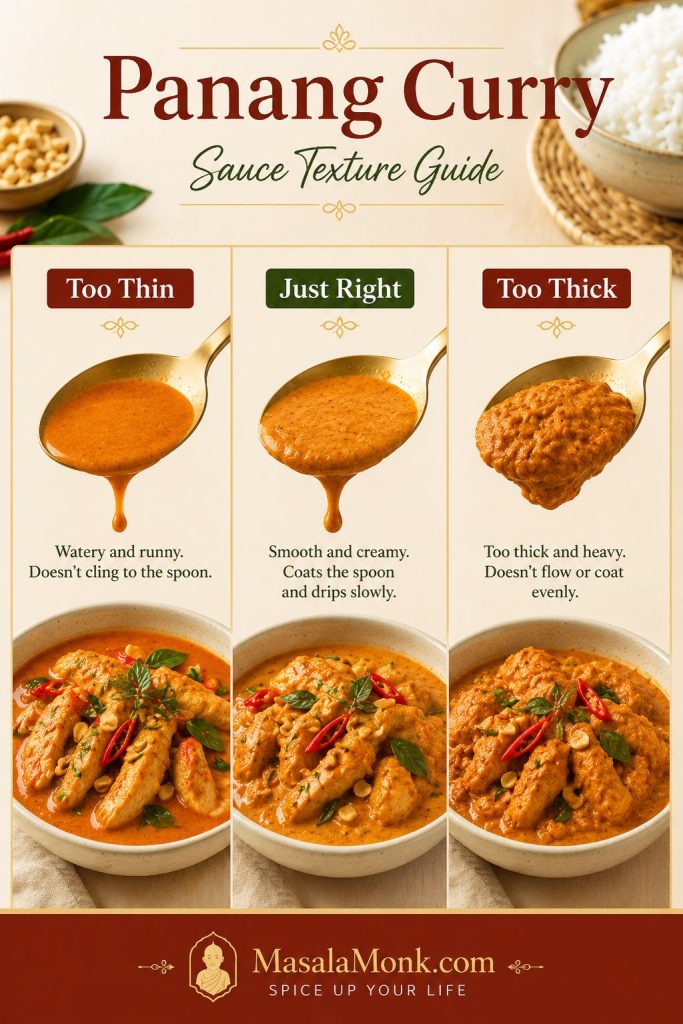
Three-panel guide comparing Panang curry sauce that is too thin, just right, and too thick.
Use this texture guide before serving: thin curry needs more simmering, while overly thick curry needs a small splash of coconut milk or water.

Texture goal: glossy and spoonable, rich enough to coat the protein, but still loose enough for rice.

Best Vegetables for Panang Curry

Vegetables can make Panang curry feel fuller and fresher, but they need good timing. Add firm vegetables first, tender vegetables later, and basil at the very end.
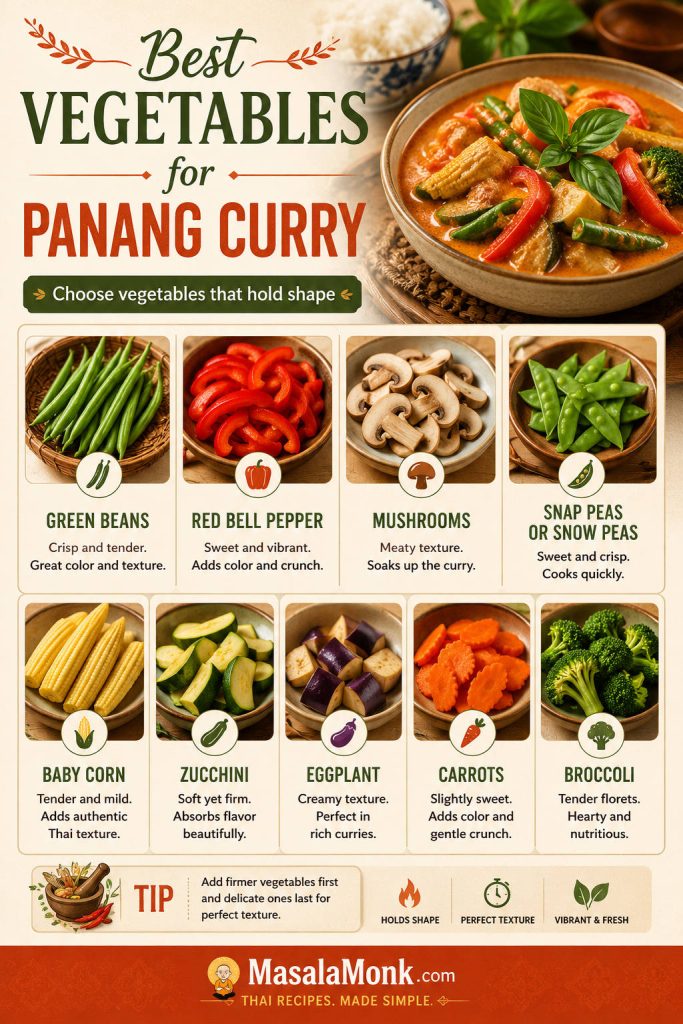
Vegetable guide for Panang curry showing green beans, red bell pepper, mushrooms, snap peas, baby corn, zucchini, eggplant, carrots, and broccoli.
Choose vegetables that hold their shape so the curry stays colorful, balanced, and concentrated instead of turning watery.

Keep watery vegetables modest, especially mushrooms, zucchini, and spinach. They are delicious here, but a crowded pan can turn a glossy Panang into a thinner curry.

When to add vegetables to Panang curry
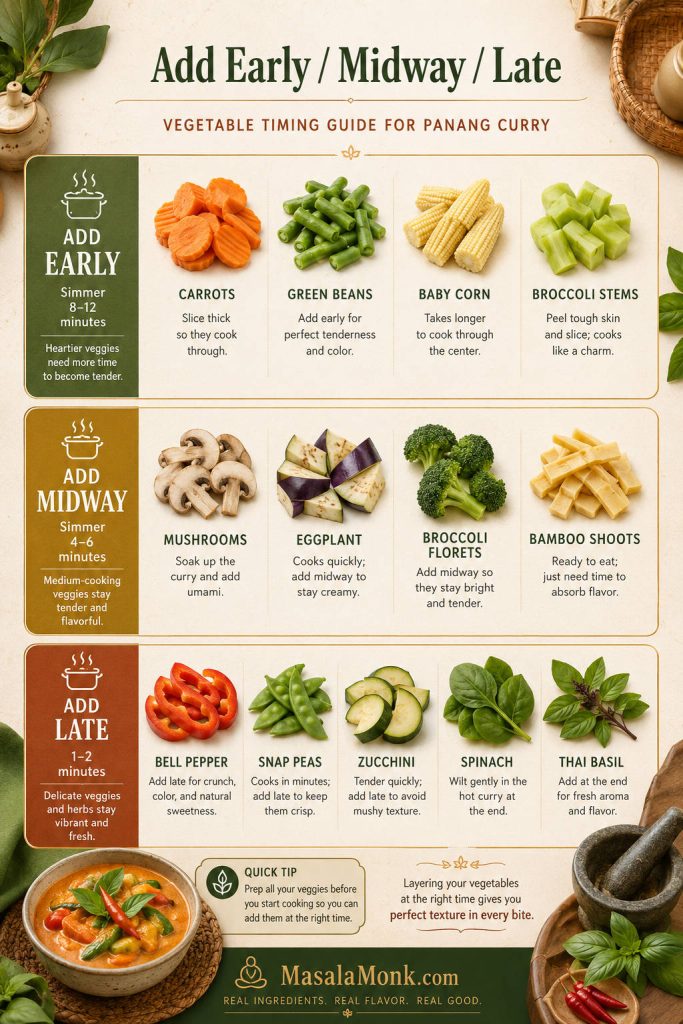
Vegetable timing guide for Panang curry with early, midway, and late groups for vegetables and Thai basil.
Add firmer vegetables first and delicate ones later; this way, the curry keeps both texture and fresh color.
Add EarlyAdd MidwayAdd Late
CarrotsMushroomsBell pepper
Green beansSmall eggplant piecesSnap peas or snow peas
Small cauliflower floretsBroccoli floretsZucchini
Broccoli stemsBamboo shootsSpinach
Baby cornThai basil

For a vegetable-heavy curry, use a little more paste and give the coconut base extra time to settle into the right texture. If you are skipping meat completely, jump to the vegetable Panang curry variation.

Chicken, Beef, Tofu, Shrimp and Vegetable Panang Curry

The curry base stays mostly the same, but each version has one thing to protect: juicy chicken, tender beef, intact tofu, just-cooked shrimp, or vegetables that do not water down the pan.

VersionHow Much to UseBest Method
Chicken Panang curry1½ lb / 680g chicken thighs or breastSlice thin and simmer until just cooked through. Thighs are juicier; breast cooks faster.
Beef Panang curry1–1¼ lb / 450–570g tender beefSlice thinly against the grain and add near the end so it stays tender.
Tofu Panang curry14–16 oz / 400–450g firm tofuPress if watery, brown if desired, then add after the sauce has reduced.
Shrimp Panang curry1 lb / 450g peeled shrimpAdd during the final few minutes and cook only until opaque.
Vegetable Panang curry3–4 cups mixed vegetablesAdd firm vegetables first and quick-cooking vegetables later.

Chicken Panang Curry

Chicken is the best first version because it is easy to cook and lets the curry shine. Thighs are the most forgiving choice because they stay juicy. Breast also works, but it needs thin slicing and close timing.

For the most reliable chicken version, use 1½ lb / 680g chicken, 3 tablespoons curry paste, one 400ml can of coconut milk or coconut cream, and 1–1½ cups vegetables. Red bell pepper, green beans, baby corn, mushrooms, and snap peas or snow peas all work well.

Beef Panang Curry

Use sirloin, ribeye, flank steak, flat iron, or another tender cut. Slice it thinly against the grain, then add it after the sauce is mostly finished. Simmer just until cooked through.
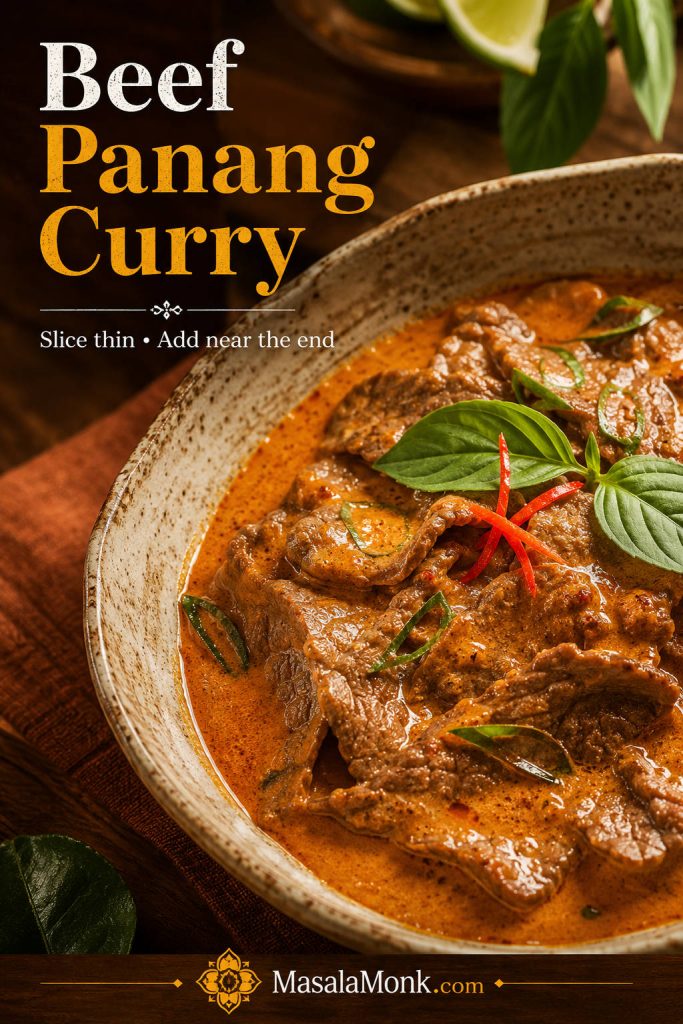
Beef Panang curry with thin slices of beef in orange-red coconut curry sauce, basil, makrut lime leaf garnish, and red chile.
Beef Panang curry works best with thin slices added near the end, so the beef stays tender instead of becoming chewy.

Do not simmer thin steak-style beef for 15 minutes the way you might simmer chicken. It can turn chewy, especially if it is very lean. For a slow-cooked beef Panang, use a tougher cut such as chuck or short rib and treat it as a separate slow-braised version.

Tofu or Vegan Panang Curry

Tofu Panang curry can be excellent, but the tofu needs texture and the curry paste needs a label check if you are cooking vegan. Use firm or extra-firm tofu. Press it for 15–20 minutes if it is watery, then cut it into cubes or slabs. For better texture, brown the tofu before adding it to the sauce.
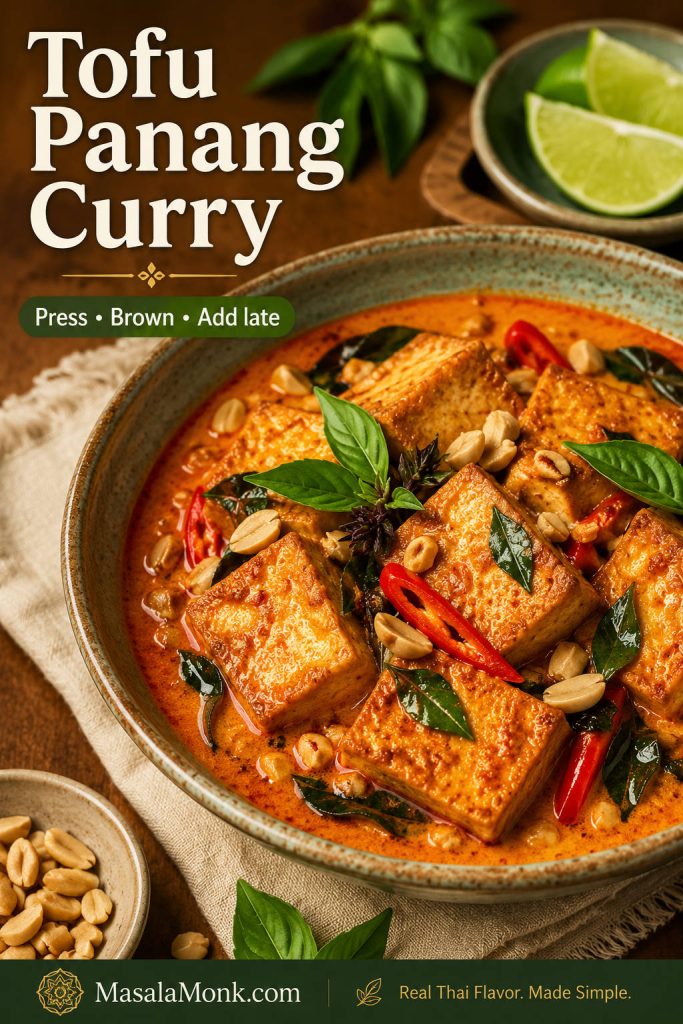
Tofu Panang curry with tofu pieces in coconut curry sauce, Thai basil, peanuts, red chile, and makrut lime leaf garnish.
Press and brown tofu before adding it to the curry; then it holds its shape and gives the sauce something firm to coat.

Vegan paste warning: many Thai curry pastes contain shrimp paste, fish sauce, or other seafood ingredients. Use a vegan Panang curry paste, or use vegan red curry paste and adjust it with peanuts, a tiny pinch of nutmeg, and a little coriander or cumin.

Replace fish sauce with soy sauce or tamari. Add tofu after the sauce has reduced so it does not break apart while the curry thickens. Finish with basil and crushed peanuts.

Shrimp Panang Curry

Shrimp Panang is the fastest version, but it asks for restraint. The sauce should be ready before the shrimp goes in, because shrimp only needs a few minutes to turn sweet, opaque, and tender.
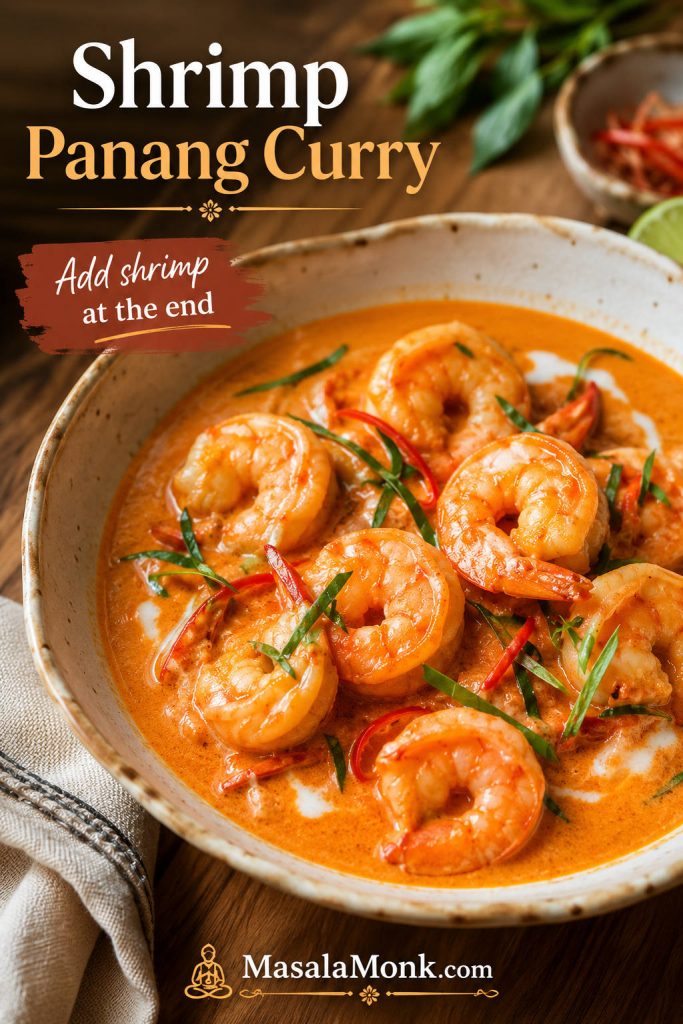
Shrimp Panang curry with curled shrimp in creamy orange-red coconut curry sauce, Thai basil, red chile, and lime leaf garnish.
Shrimp needs only a short finish in Panang curry, so build and balance the sauce before the shrimp goes into the pan.

Once the shrimp is in the pan, simmer only until it curls gently and loses its translucency. Serve right away.

Vegetable Panang Curry

Vegetable Panang curry works best when you choose vegetables that hold their shape. Green beans, bell peppers, mushrooms, broccoli, snap peas or snow peas, baby corn, carrots, zucchini, and eggplant can all work, but they should not all go in at once.
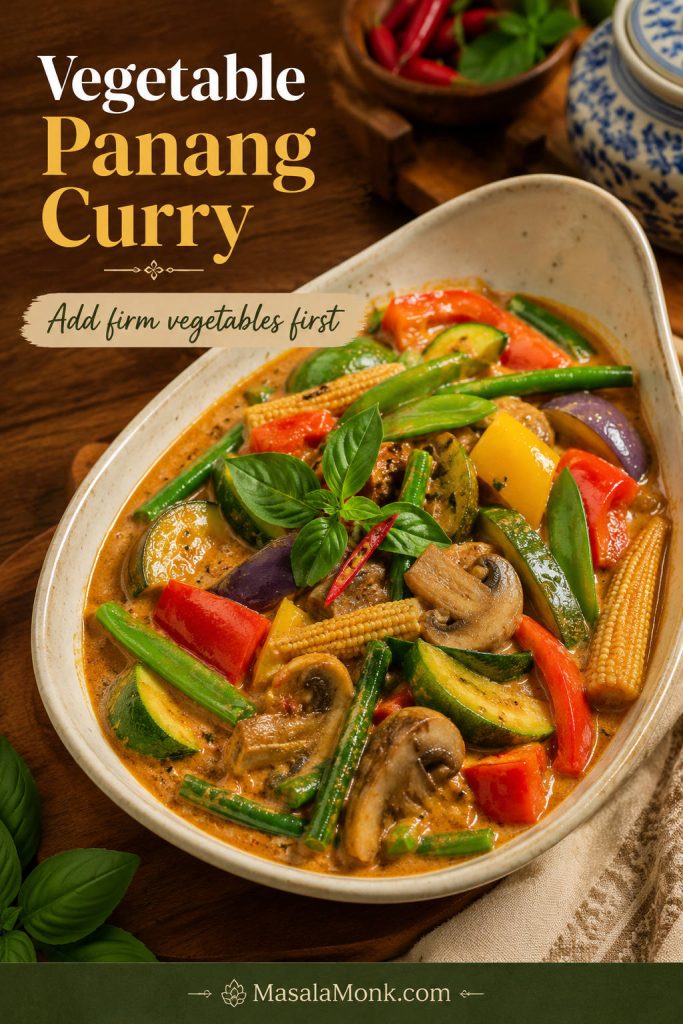
Vegetable Panang curry with green beans, bell pepper, mushrooms, baby corn, zucchini, eggplant, snap peas, and basil in coconut curry sauce.
Vegetable Panang curry works best when the vegetables stay distinct, bright, and lightly tender instead of collapsing into the coconut sauce.

Add firm vegetables first, quick-cooking vegetables later, and basil at the very end. For a vegetable-heavy curry, start with 1 extra teaspoon of paste. A very full pan may need up to 1 extra tablespoon. Once you have chosen the version, return to the recipe card for the base method.

How to Fix Panang Curry Sauce

This is the section to use when the curry looks wrong five minutes before dinner. Most Panang problems are not disasters; they are small balance problems. A watery vegetable, a salty paste, thinner coconut milk, or too much heat can throw the pan off, but most of it is fixable.

You are looking for sauce that visibly coats the protein, but still has enough movement to spoon over rice. When the protein is already cooked, remove it with a slotted spoon and fix the sauce on its own.

Quick fixes for Panang curry sauce
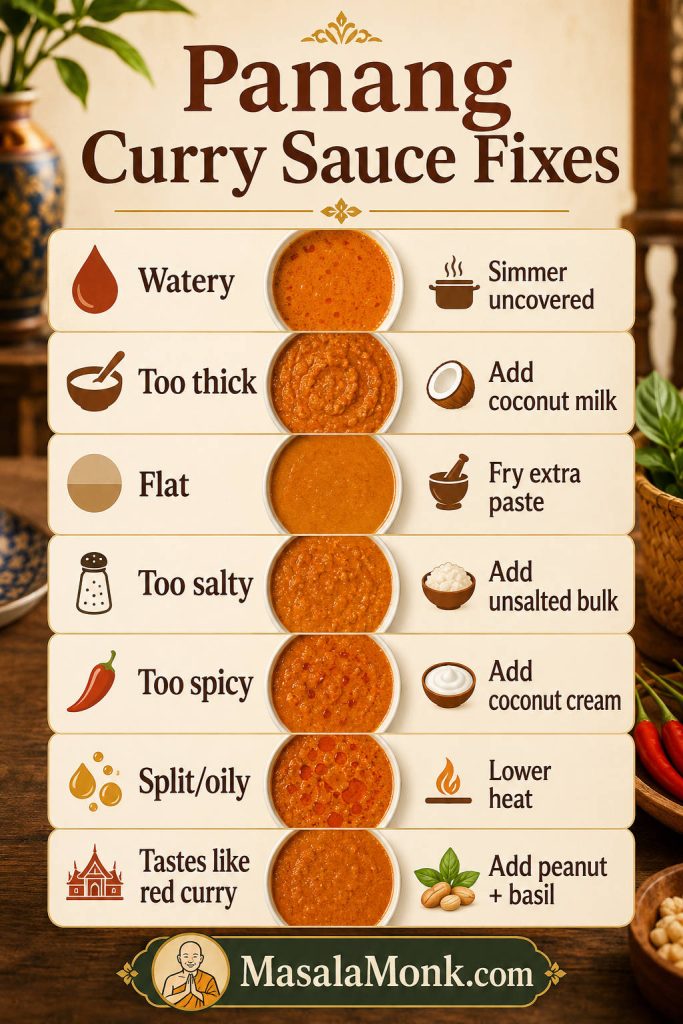
Panang curry sauce troubleshooting board with fixes for watery, thick, flat, salty, spicy, split, oily, or red-curry-like sauce.
Use this rescue guide before serving: most Panang curry sauce problems can be fixed with better simmering, coconut, paste, seasoning, or heat control.
Sauce ProblemWhat It Feels LikeHow to Fix It
Too wateryThe chicken looks like it is floating instead of coated.Simmer uncovered. If the protein is cooked, remove it and reduce the sauce alone. Use coconut cream next time.
Too thickThe curry looks heavy, pasty, or dry instead of glossy.Add coconut milk, water, or stock one spoonful at a time, then stop as soon as it turns spoonable.
Tastes flatThe curry smells fine but tastes dull or unfinished.Fry extra paste separately and stir it in. Add fish sauce, sugar, lime leaves, or basil.
Too saltyThe salt hits first and the coconut sweetness disappears.Add unsalted bulk such as coconut milk, vegetables, tofu, or chicken. Balance with a tiny amount of sugar.
Too spicyThe heat overwhelms the coconut and aromatics.Add coconut cream or coconut milk and serve with extra rice.
Oily or splitThe curry looks greasy around the edges.Lower the heat, stir gently, and add a splash of coconut milk.
Tastes like red curryThe curry is loose, chile-forward, and missing the rounded Panang note.Add peanuts or peanut butter, simmer briefly, and finish with Thai basil and finely sliced tender makrut lime leaves.

Panang Curry Recipe Card

A creamy chicken Panang curry with store-bought paste, full-fat coconut, makrut lime leaves, peanuts, and Thai basil. Rich, spoonable, and easy to adapt for beef, tofu, shrimp, or vegetables.

Yield
4 servings
Prep Time
15 minutes
Cook Time
25 minutes
Total Time
40 minutes

Ingredients

  • 1½ lb / 680g boneless chicken thighs or chicken breast, thinly sliced
  • 3 tbsp / about 45g Panang curry paste
  • 1 tbsp / 15ml neutral oil, or thick coconut cream from the top of the can
  • 13.5–14 oz / 400ml full-fat coconut milk or coconut cream
  • 1–1½ tbsp / 15–22ml fish sauce, plus more to taste, depending on paste saltiness
  • 2 tsp–1 tbsp / 8–15g palm sugar or brown sugar
  • 4–6 makrut lime leaves, torn, plus optional finely sliced tender leaves for finishing
  • 2 tbsp / about 15g crushed roasted peanuts, or 1 tbsp / about 16g peanut butter
  • 1 red bell pepper, thinly sliced, or 1–1½ cups mixed vegetables for the chicken version
  • ½ cup loosely packed Thai basil leaves
  • Optional garnish: sliced red chile, extra basil, crushed peanuts, finely sliced makrut lime leaves
  • Steamed jasmine rice, for serving

Instructions

  1. Prep. Slice the chicken thinly and prepare the vegetables, herbs, and garnishes before cooking.
  2. Fry the paste. Heat oil or thick coconut cream in a wide skillet, wok, or 12-inch saucepan over medium heat. Add the Panang curry paste and cook, stirring often, until fragrant and slightly darker — about 1–2 minutes for softer paste or 3–5 minutes for thicker Thai paste.
  3. Build the sauce. Stir in coconut milk or coconut cream gradually until smooth. Add fish sauce, sugar, torn makrut lime leaves, and peanuts or peanut butter.
  4. Simmer. Add chicken and firm vegetables such as carrots, green beans, or baby corn. Simmer gently until the chicken is cooked through: about 6–8 minutes for thin chicken breast or 8–12 minutes for thin chicken thighs. The thickest piece should reach 165°F / 74°C. Add bell pepper, snap peas or snow peas, zucchini, or spinach near the end.
  5. Adjust. If the sauce looks loose, simmer uncovered until glossy and spoonable. Taste after thickening, then adjust with fish sauce, sugar, coconut milk, or extra fried paste if needed.
  6. Finish. Turn off the heat and stir in Thai basil. Garnish with extra basil, crushed peanuts, sliced chile, or finely sliced makrut lime leaves.
  7. Serve. Serve hot with steamed jasmine rice.

Recipe Notes

  • Beef: use 1–1¼ lb / 450–570g thinly sliced sirloin, ribeye, flank steak, or another tender cut. Add near the end and simmer briefly.
  • Tofu: use firm or extra-firm tofu. Press if watery, brown first if desired, and add after the sauce has reduced.
  • Vegan Panang: use vegan curry paste and replace fish sauce with soy sauce or tamari.
  • Shrimp: build and thicken the sauce first, then add shrimp near the end and cook only until opaque.
  • Vegetable Panang: use 3–4 cups mixed vegetables and add 1 teaspoon to 1 tablespoon extra paste depending on volume.
  • Richer sauce: use coconut cream. For a milder curry, start with 2 tbsp paste and add more after tasting.

Once the paste smells cooked, the coconut turns glossy, and the basil hits the pan, the curry feels much easier to trust. Spoon it beside jasmine rice, add the final herbs, and you have the kind of weeknight Panang that tastes deliberate instead of rushed.

Instant Pot or Slow Cooker Panang Curry

Panang rewards stovetop control, so treat Instant Pot and slow cooker versions as backup methods. They are useful for convenience, but both need a final look at the sauce before serving.
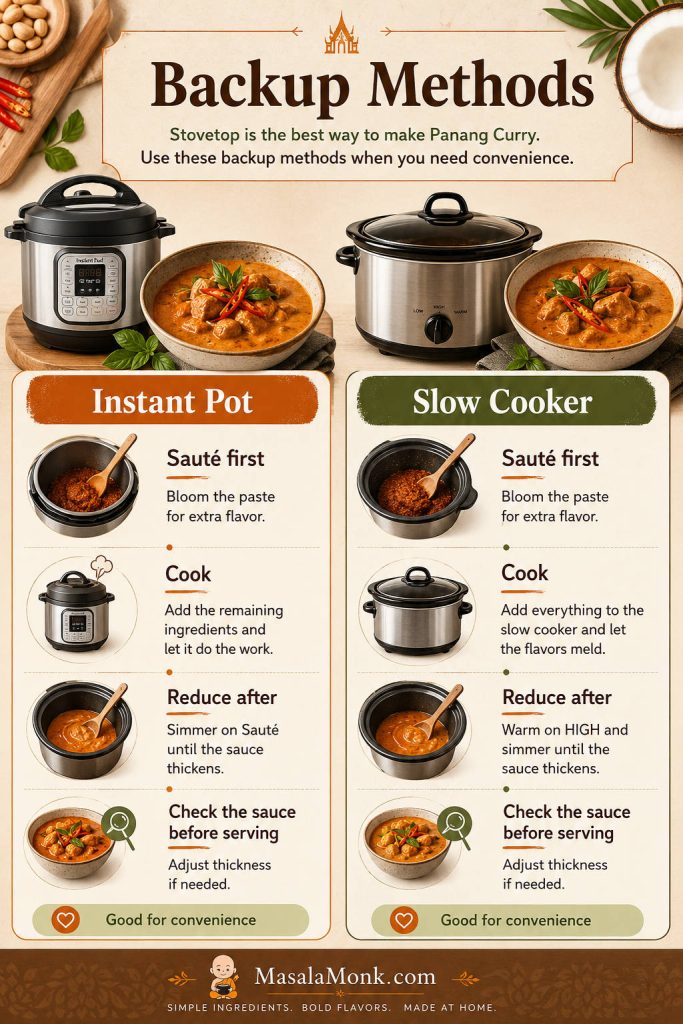
Backup-method guide for Panang curry showing Instant Pot and slow cooker options with sauté first, cook, reduce after, and check sauce cues.
Instant Pot and slow cooker Panang curry can be convenient, but the final sauce check still matters before the curry reaches the table.

Instant Pot Panang curry

Use sauté first. Fry the paste in oil or thick coconut cream for 1–2 minutes, then stir in coconut milk or cream, fish sauce, sugar, torn lime leaves, and thin chicken pieces. Pressure cook on high for 3–4 minutes, then quick release. Use sauté again to bring the sauce back to a spoonable texture, then finish with basil.

Slow cooker Panang curry

Slow cooker Panang works best with chicken thighs or beef, not thin chicken breast. Fry the paste separately first, then add it to the slow cooker with coconut milk, seasoning, and protein. Cook on low until the meat is tender, usually about 2–3 hours for boneless chicken thighs. If the sauce is thin at the end, reduce it uncovered in a saucepan before adding basil.

What to Serve with Panang Curry

Panang is rich, so the best sides either catch the sauce or cut through it. Jasmine rice catches the glossy curry; cucumber, herbs, lime, green beans, or Som Tam keep the bowl from feeling heavy. Planning leftovers too? Jump to storage and reheating.

What goes well with Panang curry?
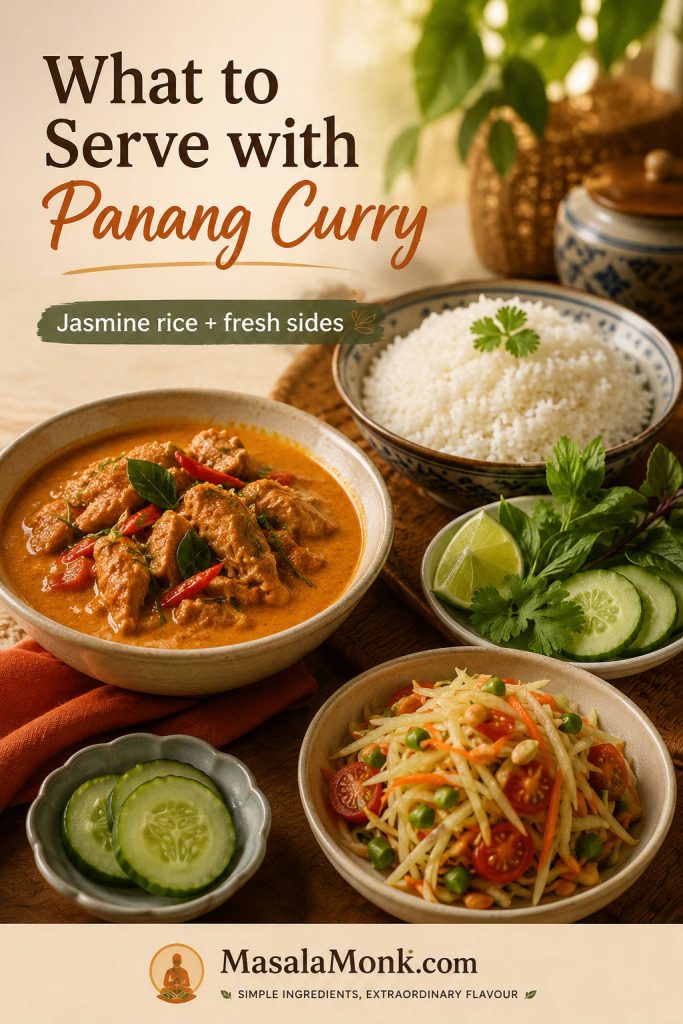
Panang curry served with jasmine rice, cucumber, herbs, lime, and a fresh Som Tam-style side dish on a warm table.
Pair Panang curry with jasmine rice and a crisp side so the meal has both coconut richness and fresh contrast.

Spoon the curry beside the rice rather than burying it. That way the first few bites stay glossy and concentrated, and the rice catches the sauce slowly instead of muting it all at once. If rice is the part that usually goes wrong, this guide to cooking perfect rice can help.

Serve WithWhy It Works
Steamed jasmine riceBest default; it absorbs the sauce without competing with the curry.
Cucumber salad, herbs, lime, or lightly steamed green beansFresh sides balance the coconut richness.
Roti, flatbread, rice noodles, or coconut riceComfort options for a fuller, more restaurant-style meal.

For a crisp Thai-style side, this Vegan Som Tam Salad gives the fresh, sharp contrast that works well beside a creamy coconut curry.

Storage, Freezing and Reheating

How to store Panang curry leftovers

Store leftover Panang curry in an airtight container in the refrigerator for 3–4 days. The sauce will thicken as it chills, so add a splash of coconut milk, water, or stock when reheating.
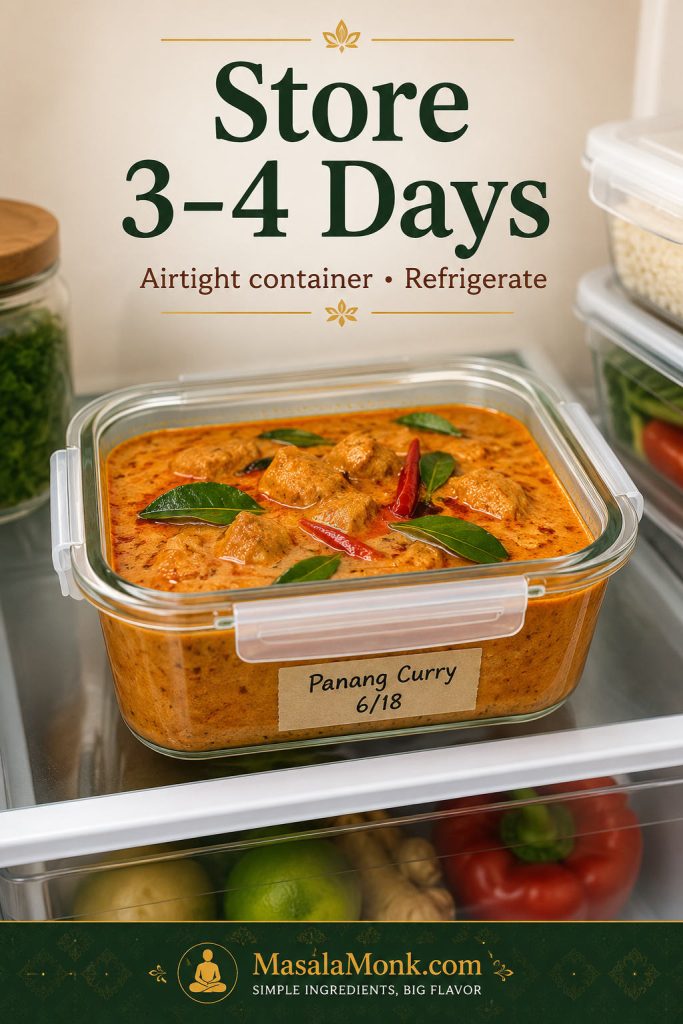
Panang curry leftovers stored in an airtight glass container on a refrigerator shelf with text saying store three to four days.
Leftover Panang curry keeps well for 3–4 days in an airtight container; for the brightest flavor, add fresh basil after reheating.

How to reheat Panang curry

Reheat gently on the stovetop over low to medium-low heat. Avoid hard boiling because coconut-based sauces can split. If the curry looks oily after reheating, lower the heat and stir in a small splash of coconut milk.
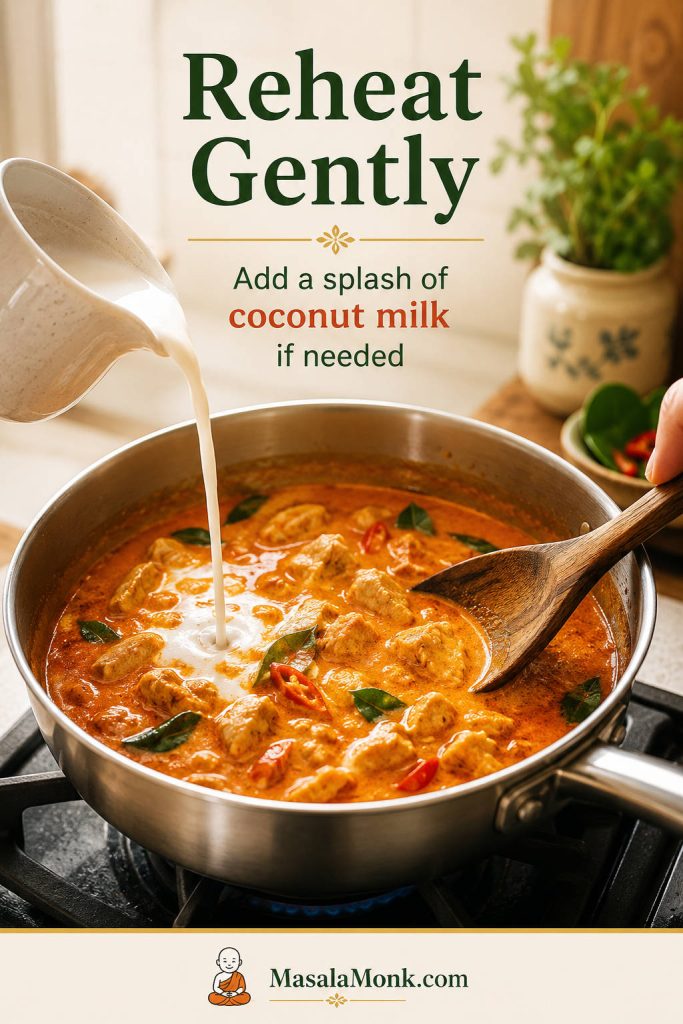
Panang curry reheating gently in a saucepan while coconut milk is poured in and the sauce is stirred with a wooden spoon.
Reheat Panang curry gently, adding a splash of coconut milk if needed, so the sauce turns smooth again instead of splitting.

The curry reheats well, but fresh basil does not. For make-ahead cooking, stop before adding the basil if you can, then add it after reheating so the curry tastes fresh again.

You can freeze Panang curry for up to 2 months, but the sauce may look slightly separated or grainy after thawing. Reheat gently and stir in a little coconut milk to smooth it out. Shrimp Panang curry is less ideal for freezing because shrimp can become rubbery after thawing and reheating. Tofu may soften slightly after storage, but it still tastes good.

Panang Curry FAQs

Is Panang curry supposed to be thick?

Panang curry is usually thicker and more concentrated than Thai red curry. It should coat the chicken, tofu, shrimp, beef, or vegetables instead of running like soup.

Is Panang curry very spicy?

Most bowls land in the medium-spicy range, but the paste controls the heat. Start with 2 tablespoons for a gentler curry and add more after tasting.

What does Panang curry taste like?

It tastes creamy, savory, lightly sweet, and aromatic, with a quiet peanut note. Peanut belongs in the background; it rounds the curry without turning it into satay sauce.

Why does my Panang curry taste like red curry?

The curry may be too loose or missing the rounded peanut and lime-leaf finish. Simmer the coconut base until glossy, then add peanut richness, basil, and finely sliced tender makrut lime leaves if you have them.

Can I use red curry paste instead of Panang curry paste?

Yes, as a shortcut. Add peanuts or peanut butter, a tiny pinch of nutmeg, and a little coriander or cumin to move it closer to Panang flavor.

What is the best coconut milk for Panang curry?

Full-fat coconut milk works well, while coconut cream gives the richest result. Light coconut milk makes the curry thinner and less satisfying.

Is Panang curry the same as Panang gai?

Panang gai means chicken Panang curry. “Gai” means chicken, so the method is the same here: thin chicken, coconut sauce, and a fresh basil finish.

Can I make Panang curry without fish sauce?

Use soy sauce, tamari, or a vegetarian fish-sauce alternative. Taste after simmering because substitutes vary in saltiness and depth.

Why is my Panang curry watery?

The coconut may need more time, the milk may be too thin, or the vegetables may have released water. Simmer uncovered before reaching for cornstarch.

Can I make Panang curry ahead?

Chicken, beef, tofu, and vegetable versions reheat well. For the freshest flavor, hold back the basil and add it after reheating.

What vegetables go well in Panang curry?

Green beans, bell peppers, mushrooms, broccoli, snap peas, baby corn, carrots, zucchini, and eggplant all work. Add watery vegetables late.

Can I make this with shrimp?

Build and thicken the sauce first, then add shrimp near the end and cook just until opaque. Do not reduce the curry after shrimp goes in.
Back to top

Posted on Leave a comment

Peanut Butter Rice Crispy Treats

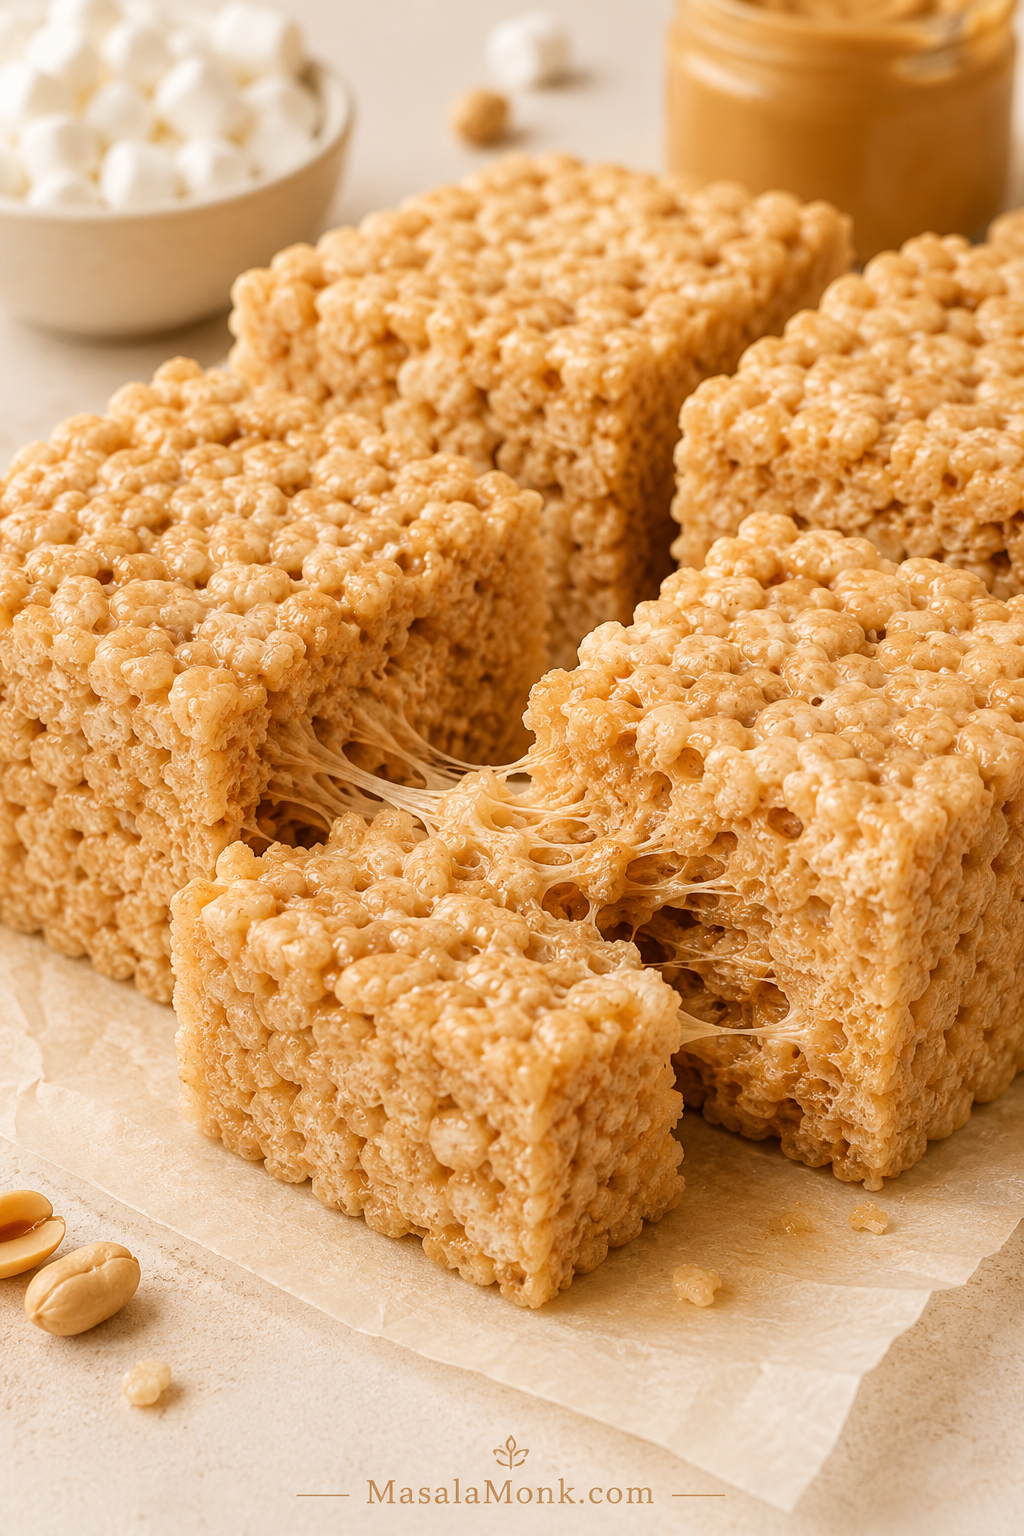
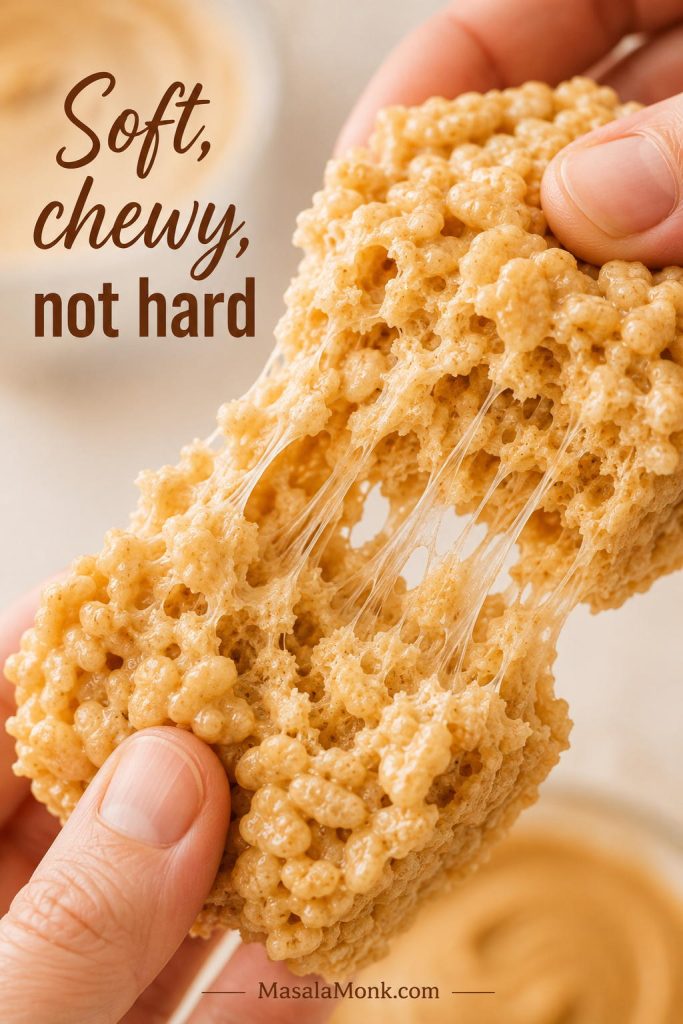
Thick peanut butter rice crispy treats cut into squares, with one piece pulled apart to show marshmallow strands and crisp cereal texture.

These peanut butter rice crispy treats are soft, chewy, salty-sweet no-bake bars with creamy peanut butter melted into the marshmallow mixture and a crisp cereal bite in every square. They taste nostalgic, but the peanut butter makes them richer and more satisfying than the plain version.

The best ones pull apart with soft marshmallow threads, hold their shape when you pick them up, and still have that little crackly bite from the cereal. They should feel homemade and tender, not hard, dry, greasy, or packed down like a brick.

Close-up of a hand pulling apart a soft peanut butter rice crispy treat with marshmallow threads and airy cereal pieces.
If the square bends and pulls instead of snapping, the marshmallows were melted gently and the pan was pressed with a light hand.

This is the kind of pan that disappears in uneven little cuts: one square for a lunchbox, one for the potluck tray, one warm corner piece while the bars are still setting, and then “just one more sliver” later in the afternoon.

You may know these as peanut butter Rice Krispie treats, but Rice Krispies cereal is not the only option. Any fresh crisp rice cereal works as long as the marshmallow mixture stays gentle, glossy, and well balanced.

This version is built around one goal: peanut butter rice crispy treats that stay soft instead of turning stiff. The details are small but important: low heat, fresh marshmallows, the right cereal range, and a light hand when pressing the mixture into the pan.

Quick Answer: How to Make Soft Peanut Butter Rice Crispy Treats

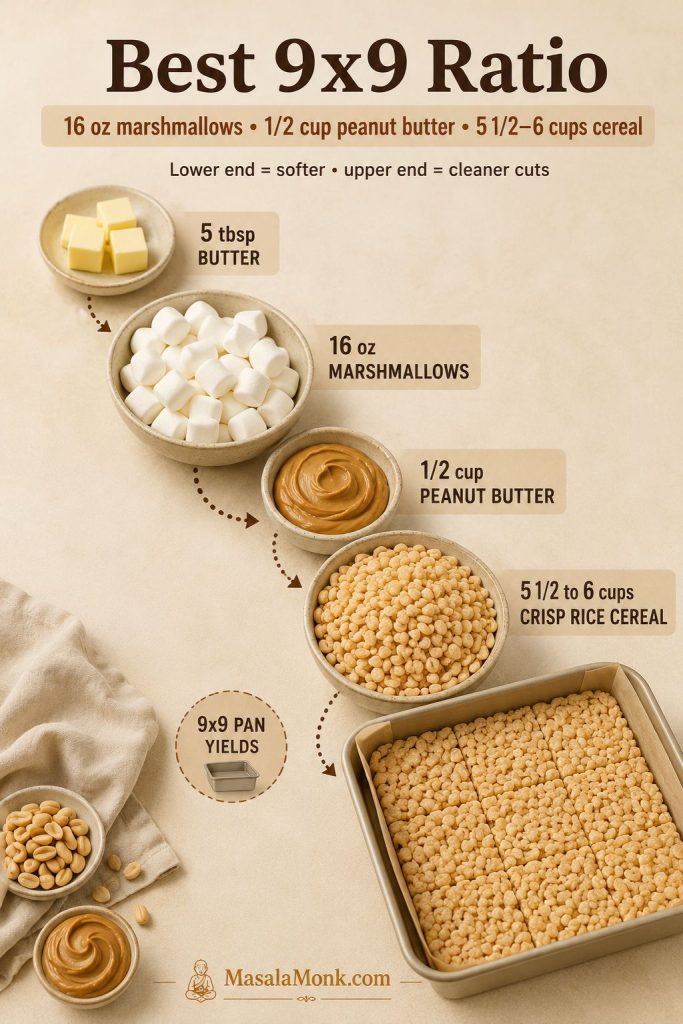
For soft peanut butter rice crispy treats, melt 5 tablespoons butter over low heat, add most of a 16-ounce bag of mini marshmallows, then stir in ½ cup creamy peanut butter, vanilla, and salt. Fold in 5½ to 6 cups crisp rice cereal, press the mixture lightly into a lined 9×9-inch pan, and cool before slicing.

Quick formula board for peanut butter rice crispy treats showing 5 tablespoons butter, 16 ounces marshmallows, 1/2 cup peanut butter, 5 1/2 to 6 cups cereal, vanilla, salt, and a lined 9x9 pan.
This quick formula keeps the base recipe easy to remember, while the cereal range lets you choose a softer or cleaner-cut pan.

For softer, gooier bars, use 5½ cups cereal and fold in reserved mini marshmallows at the end. For cleaner-cut squares, use the full 6 cups cereal and let the pan cool completely. Not sure which texture you want? Use the texture chooser before you start.

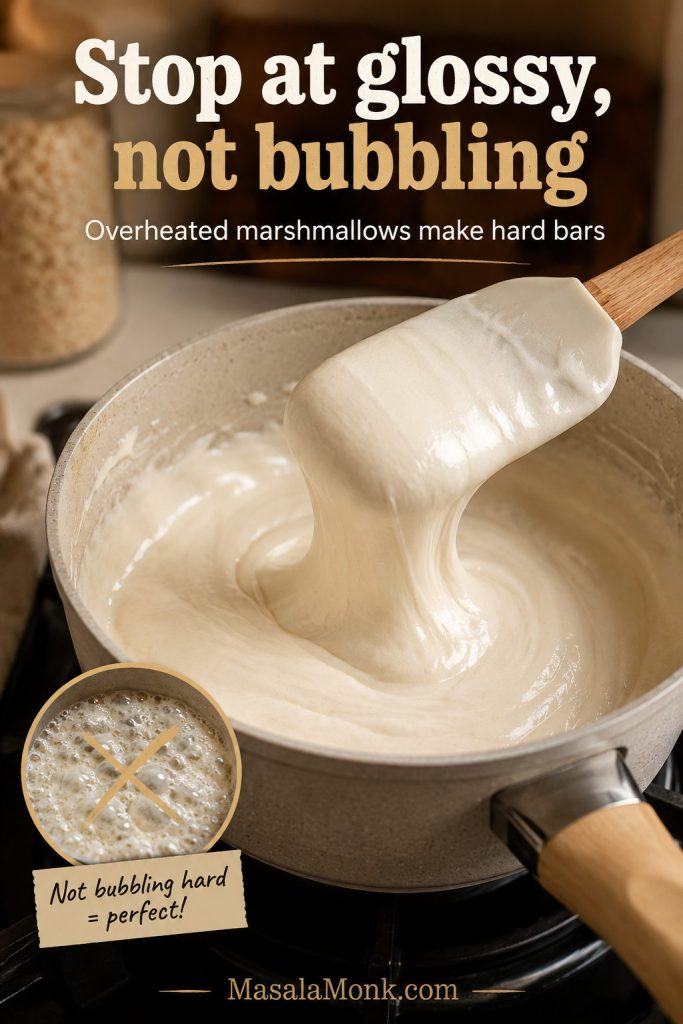
The key is gentle heat and light pressing. Stop when the marshmallow mixture is glossy, not bubbling hard, and nudge the cereal mixture into the pan instead of packing it down. That is what keeps the bars soft instead of brick-like.

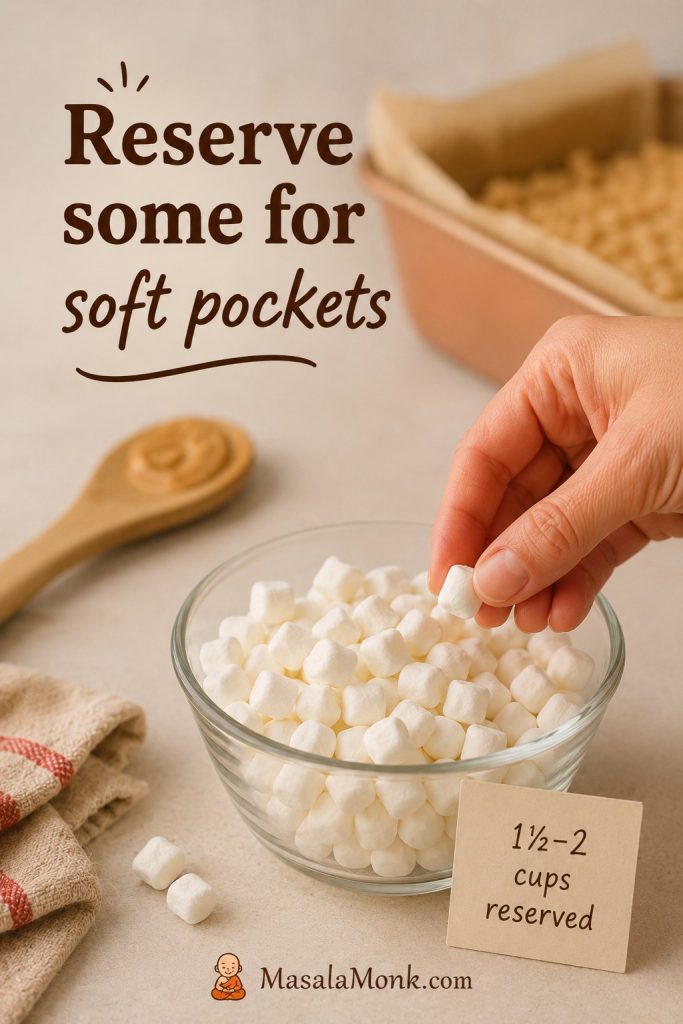
The move that keeps them soft: Melt the marshmallows gently, stop before the mixture bubbles hard, and fold reserved mini marshmallows in at the end. That gives you soft pockets instead of one dense, uniform chew. If your last batch turned stiff, check the troubleshooting guide.
Glossy melted marshmallows in a saucepan being lifted with a spatula before the mixture bubbles hard.
Stop at the glossy stage; once the marshmallows bubble hard, the finished treats are more likely to turn stiff.

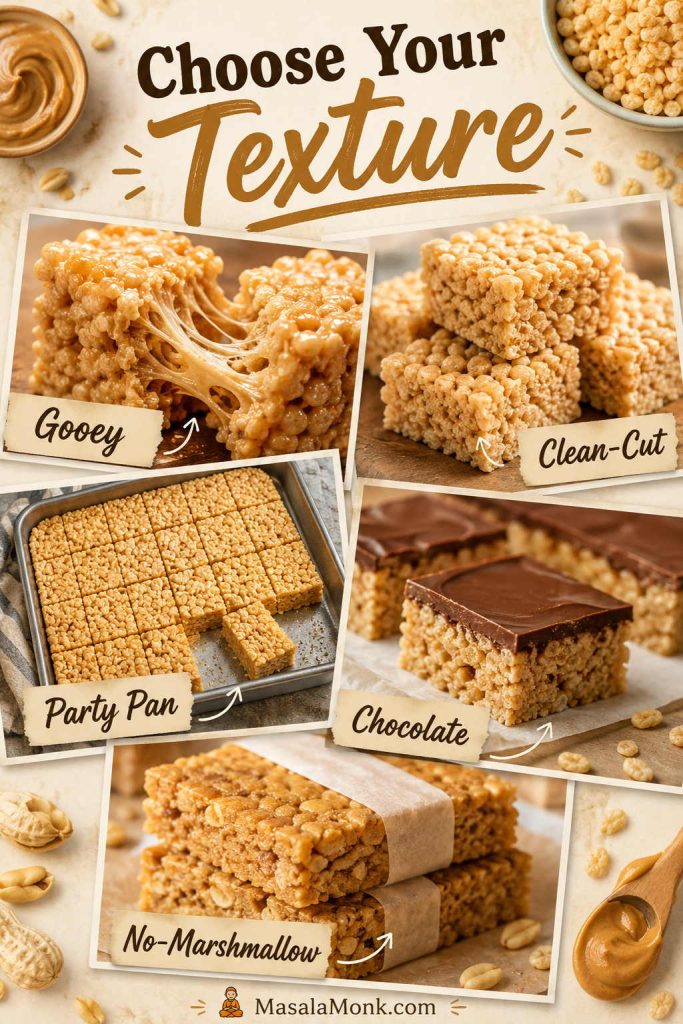
Choose Your Peanut Butter Rice Crispy Treats Texture

Before you start, decide what kind of treat you want from the pan. The same base recipe can turn soft and gooey for home, cleaner-cut for lunchboxes, chocolate-topped for dessert, party-ready in a 9×13 pan, or firmer and snack-bar-like without marshmallows.

What you want Best move Where to go
Softest, gooey bars Use 5½ cups cereal and fold in reserved mini marshmallows See the Ratio
Cleaner lunchbox squares Use 6 cups cereal and cool completely before cutting See the Ratio
Party tray Use the larger 9×13 pan scale instead of stretching the 9×9 batch Choose a Pan
Dessert-bar version Add the soft chocolate-peanut butter topping after the bars cool Add Chocolate
Firmer snack-bar style Use the peanut butter and honey or maple syrup version without marshmallows Skip Marshmallows
Chooser board with gooey, clean-cut, party pan, chocolate-topped, and no-marshmallow peanut butter rice crispy treat options.
Start by choosing the texture you want; then the cereal amount, pan size, and topping become much easier decisions.

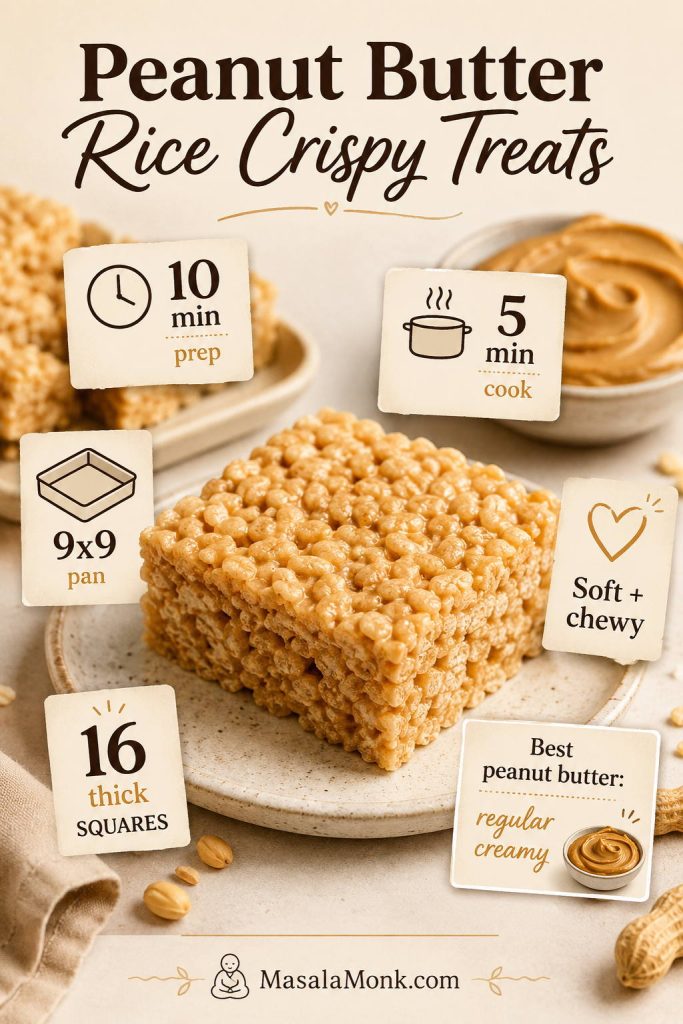
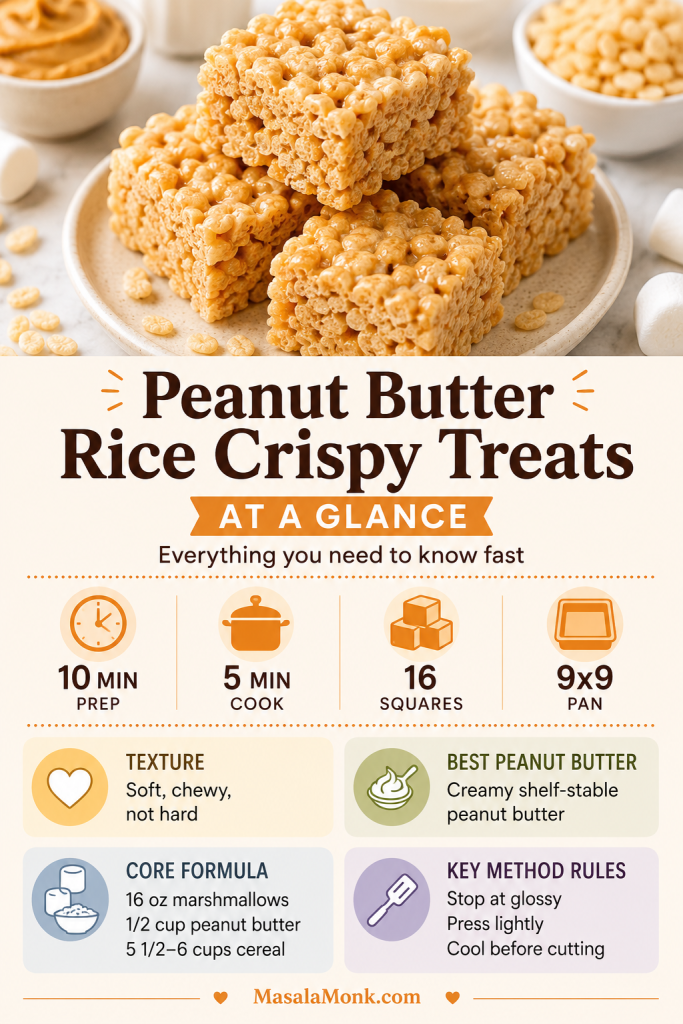
Peanut Butter Rice Crispy Treats at a Glance

Prep time 10 minutes
Cook time 5 minutes
Cooling time 30–45 minutes
Main pan 9×9-inch pan for thick bars
Party pan 9×13-inch pan for thinner squares
Yield 16 thick 9×9 squares, or about 24 thinner 9×13 party pieces
Texture Soft, chewy, lightly gooey, crisp around the cereal
Flavor Sweet-salty, peanut-buttery, marshmallowy
Best for Lunchboxes, bake sales, potlucks, parties, after-school snacks
Best peanut butter Regular creamy peanut butter
At-a-glance guide for peanut butter rice crispy treats showing prep time, cook time, yield, pan size, texture, core formula, and key method tips.
Use this quick at-a-glance guide to check the basic formula, 9×9 pan size, texture goal, and the key method rules before you start making peanut butter rice crispy treats.

Why These Peanut Butter Rice Crispy Treats Work

Peanut butter changes more than the flavor. It adds richness, saltiness, and body, so the bars taste fuller than plain marshmallow cereal treats. The tradeoff is that peanut butter also adds fat, which means the ratio matters: too much can make the bars greasy or heavy, while too little lets the peanut flavor fade into the marshmallow.

The balance is simple: enough marshmallow for pull, enough peanut butter for flavor, and just enough cereal to hold the bars together without making them stiff. You want a square that lifts cleanly from the pan but still bends a little when you bite it.

The peanut butter also keeps the sweetness from tasting one-note. Instead of plain marshmallow sweetness, you get a salty-sweet bar with deeper roasted peanut flavor, soft marshmallow pockets, and a crisp cereal bite.

The method matters too. Melt gently, stir the peanut butter in off the heat, fold without crushing the cereal, and press the mixture just enough to settle it into the pan. Think nudge, not pack.

Ingredients for Peanut Butter Cereal Bars

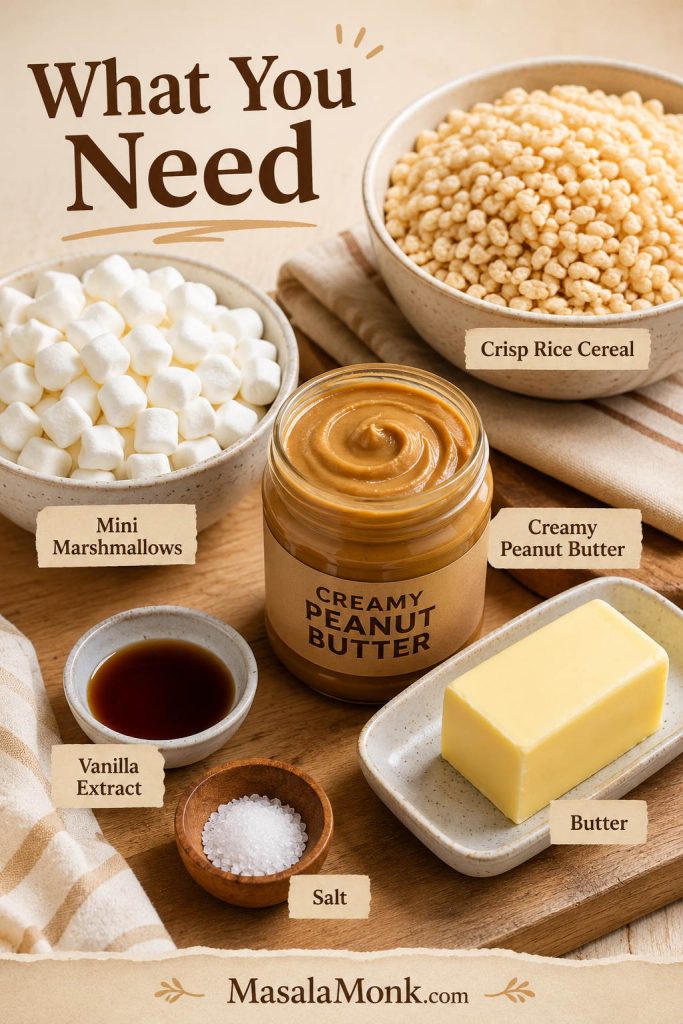
The ingredient list is short, so freshness matters. Soft marshmallows melt smoother, regular creamy peanut butter blends more reliably, and crisp cereal gives the bars that little crackle against the chewy marshmallow base.

Ingredients for peanut butter rice crispy treats, including marshmallows, peanut butter, cereal, butter, vanilla, and salt.
Because there are so few ingredients, stale cereal or dry marshmallows show up quickly in the final texture.

Crisp rice cereal

Any fresh crisp rice cereal will work here. Rice Krispies cereal is the branded classic, and the official peanut butter treats formula also uses butter, marshmallows, peanut butter, and crisp rice cereal; however, this version is built for thicker 9×9 bars with more softness and troubleshooting. See the official Rice Krispies peanut butter treats baseline.

Freshness matters: if the cereal tastes stale from the box, the finished bars will taste flat too, no matter how good the peanut butter mixture is.

Cereal volume can vary by brand and by how you scoop it, so the recipe gives a small range. Stay at the lower end for a softer pan, or use the upper end when you want neater squares.

Mini marshmallows

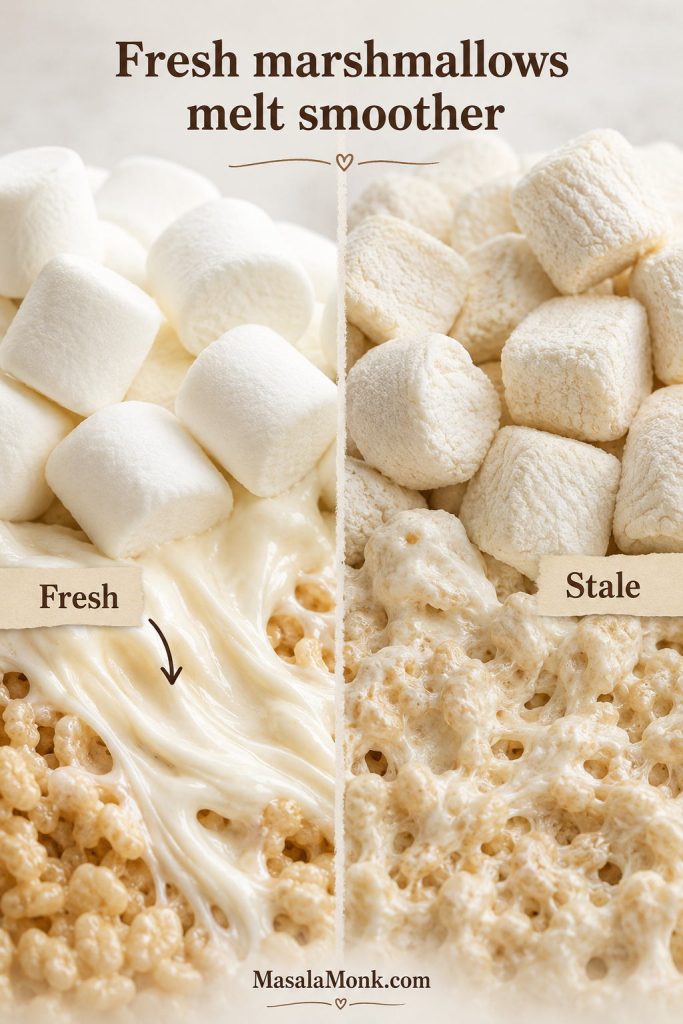
Mini marshmallows melt faster and more evenly than large marshmallows. If they feel dry, firm, or stale in the bag, save them for something else. Fresh marshmallows melt smoother and give you softer, stretchier bars.

Fresh marshmallows compared with stale marshmallows for making rice crispy treats.
Fresh marshmallows should feel soft and springy in the bag; dry ones melt unevenly and can make the bars tighter.

For the softest texture, reserve 1½ to 2 cups of mini marshmallows from the bag and fold them into the warm cereal mixture at the end. They will stay partly intact and create little marshmallow pockets throughout the bars.

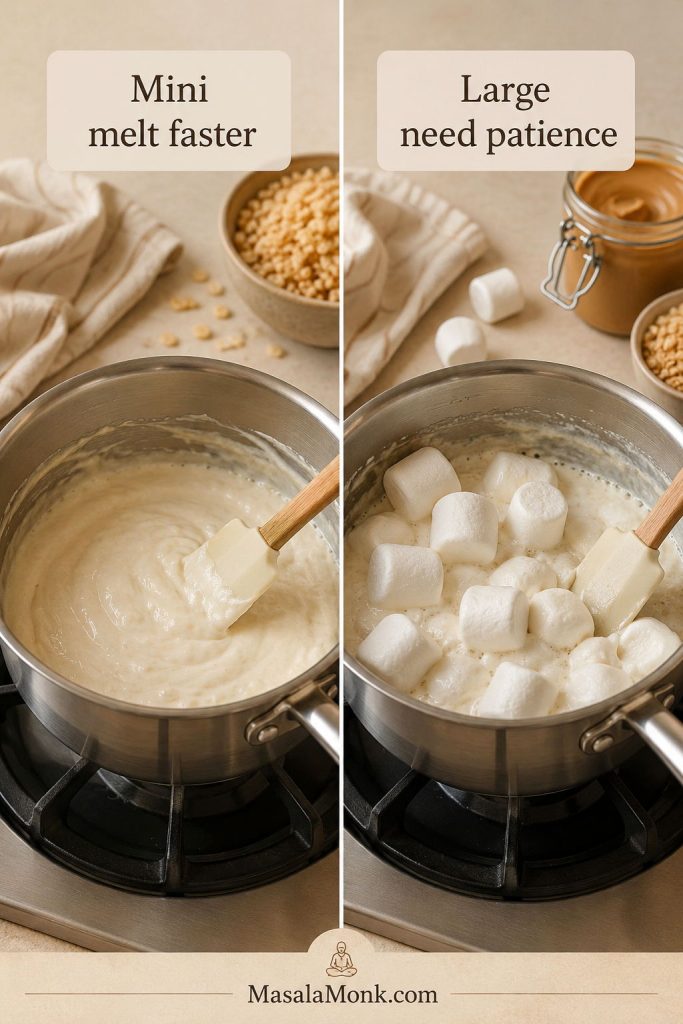
Large marshmallows

Large marshmallows work, but weight is more reliable than counting pieces. This recipe needs 16 ounces / 454 g marshmallows total. Large marshmallows melt more slowly than minis, so keep the heat low and stir patiently instead of increasing the heat.

Mini marshmallows melting faster than large marshmallows in a side-by-side saucepan comparison.
Mini marshmallows melt faster and more evenly; however, large marshmallows still work if you keep the heat low and stir patiently.

Creamy peanut butter

Regular creamy peanut butter is the safest choice because it blends smoothly into the melted marshmallows and gives the bars a consistent texture. Natural peanut butter can work, but it is more likely to separate, which can make the bars oily, loose, or crumbly.

Butter, vanilla, and salt

Butter helps the marshmallows melt smoothly and gives the bars a rounder flavor. Salted butter works well because peanut butter loves salt. If you use unsalted butter, add fine salt to the mixture.

Vanilla is optional in the strictest sense, but it makes the bars taste more finished. It softens the marshmallow sweetness and brings the peanut butter flavor forward.

Gluten-free and dairy-free notes

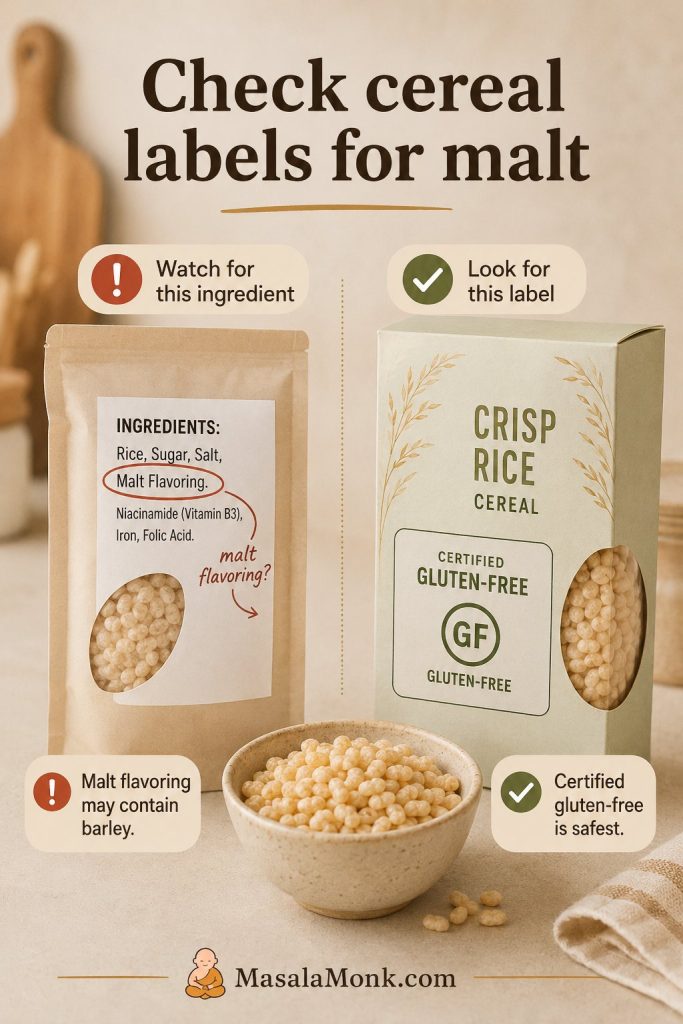
Making these gluten-free mostly comes down to the cereal label. Some crisp rice cereals contain malt flavoring, and malt is often made from barley, so use a certified gluten-free crisp rice cereal if gluten matters in your kitchen. The Celiac Disease Foundation explains why many crispy rice treats are not automatically gluten-free.

Crisp rice cereal label check showing malt flavoring as a warning and certified gluten-free cereal as the safer choice.
Check the cereal label first for gluten-free rice crispy treats because some crisp rice cereals include malt flavoring from barley.

Dairy-free bars need a dairy-free butter substitute and dairy-free chocolate if you are adding the topping. Vegan bars also need vegan marshmallows, or you can use the no-marshmallow peanut butter and maple syrup version below.

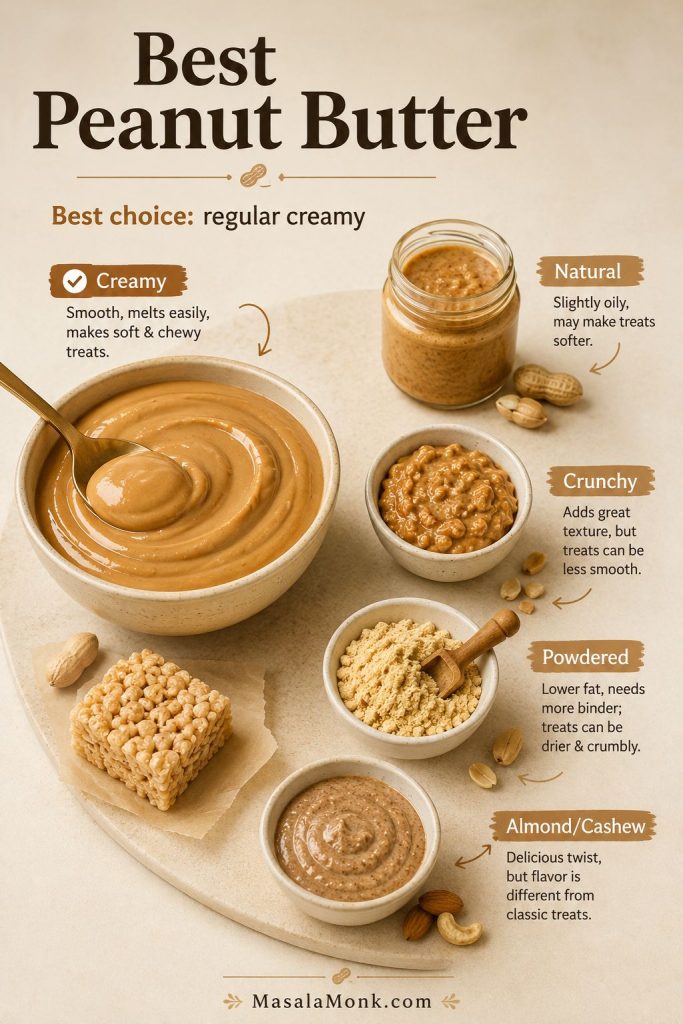
Best Peanut Butter to Use

Peanut butter is doing two jobs here: flavor and structure. A smooth, no-stir creamy peanut butter melts into the marshmallow base instead of fighting it, which is why it gives the most reliable bars.

Peanut butter chooser board showing creamy, natural, crunchy, powdered, and almond or cashew butter options.
Choose no-stir creamy peanut butter for the smoothest set; separated natural peanut butter needs extra mixing before it goes in.
Peanut butter type Does it work? What to expect
Regular creamy peanut butter Best choice Melts smoothly into the base and gives the cleanest, softest set
Natural peanut butter Possible, but riskier Can separate and make the bars greasy, loose, or crumbly
Crunchy peanut butter Yes Adds peanut crunch, but the finished bars will not feel as soft and uniform
Powdered peanut butter Not recommended Can make the mixture dry unless the recipe is heavily adjusted
Almond or cashew butter Yes, as a variation Works as a variation, but the flavor and set will be different

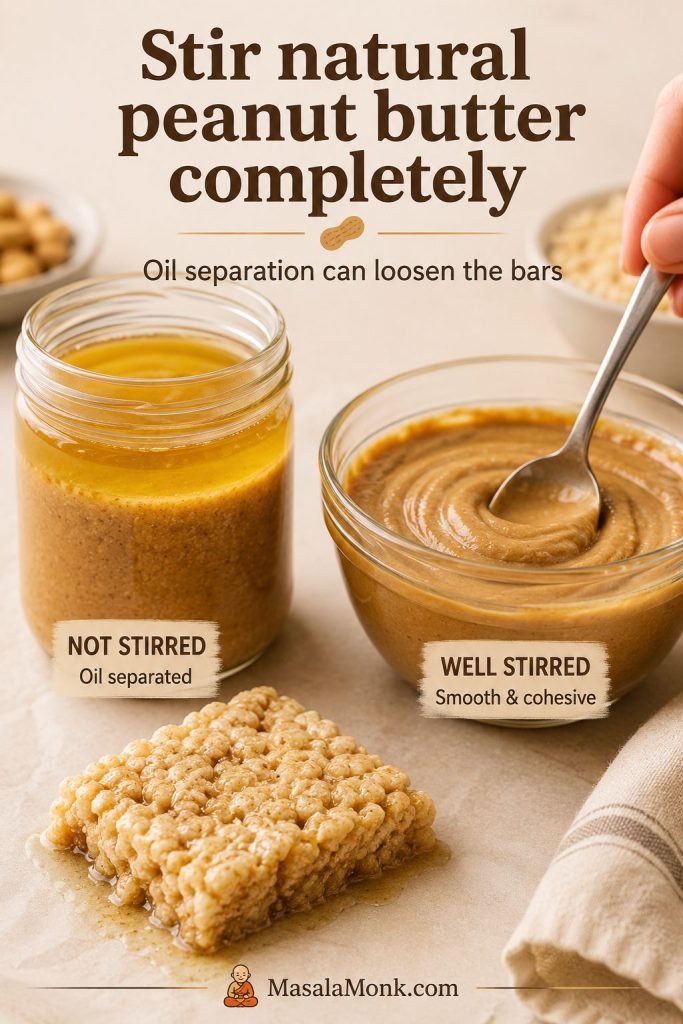
If you only have natural peanut butter, stir it extremely well before measuring. If oil is sitting on top of the jar, the bars are more likely to turn greasy. For extra structure, use the full 6 cups of cereal instead of 5½ cups. If your bars already turned oily or loose, jump to the fixes.

Separated natural peanut butter beside fully stirred peanut butter with a loose cereal bar texture cue.
Natural peanut butter can work, but it needs to be stirred completely smooth so the bars do not turn greasy or crumbly.

If peanut butter is the flavor you are here for, these peanut butter cookies are the baked, cookie-style route for the same salty-sweet craving.

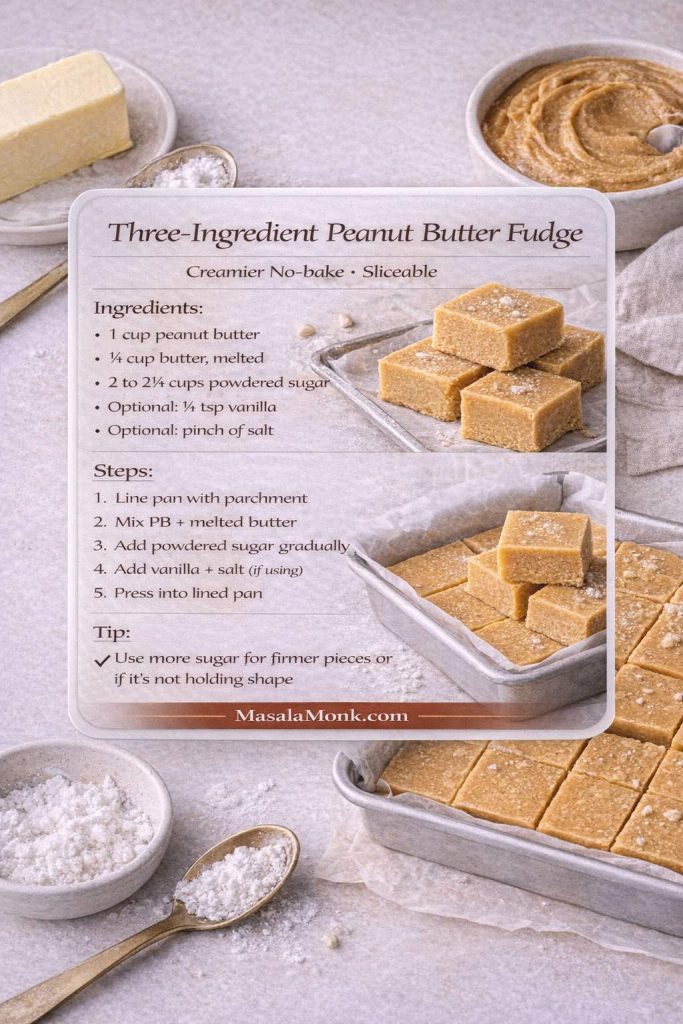
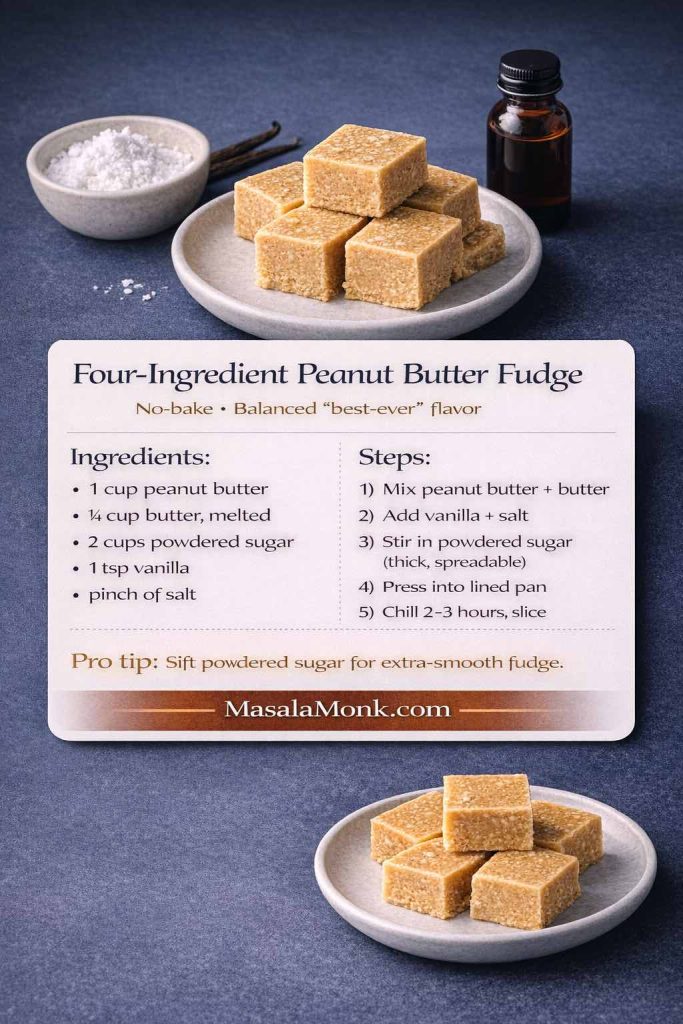
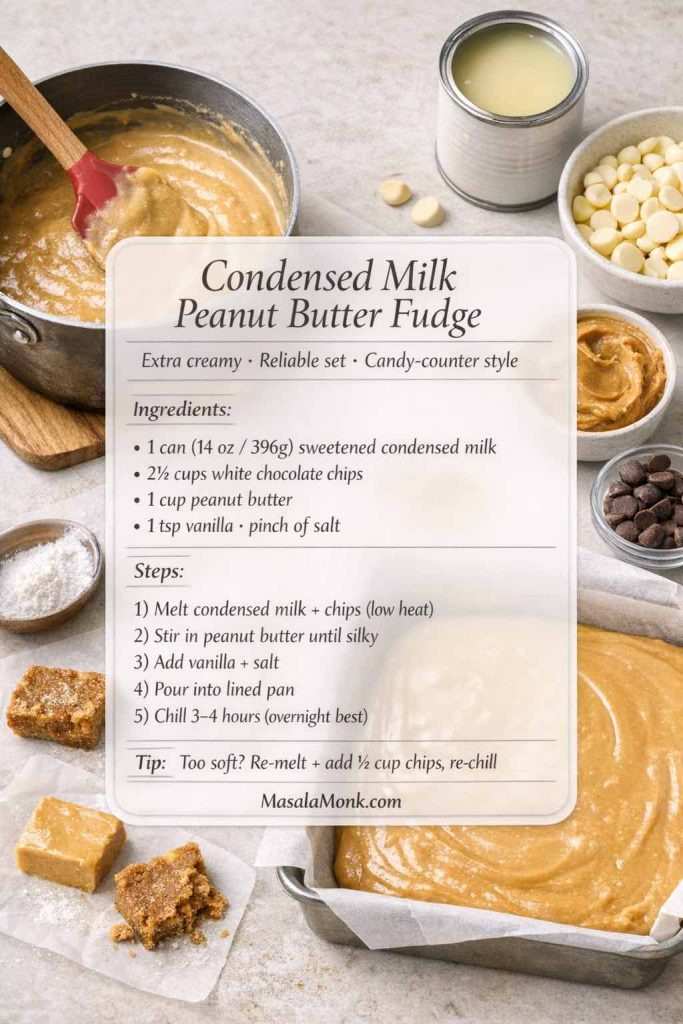
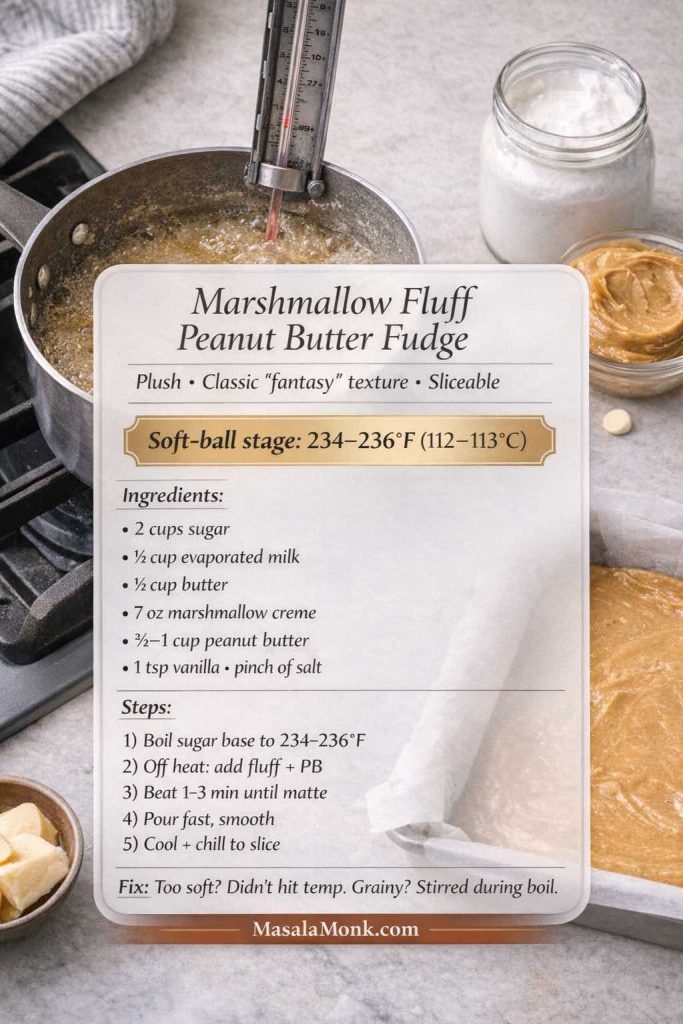
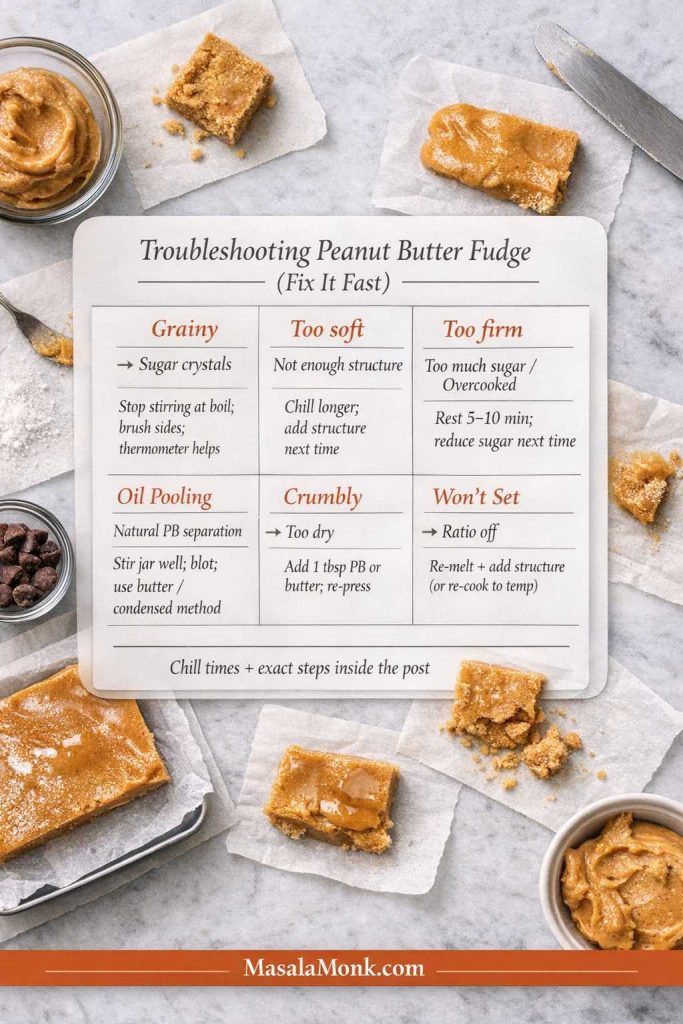
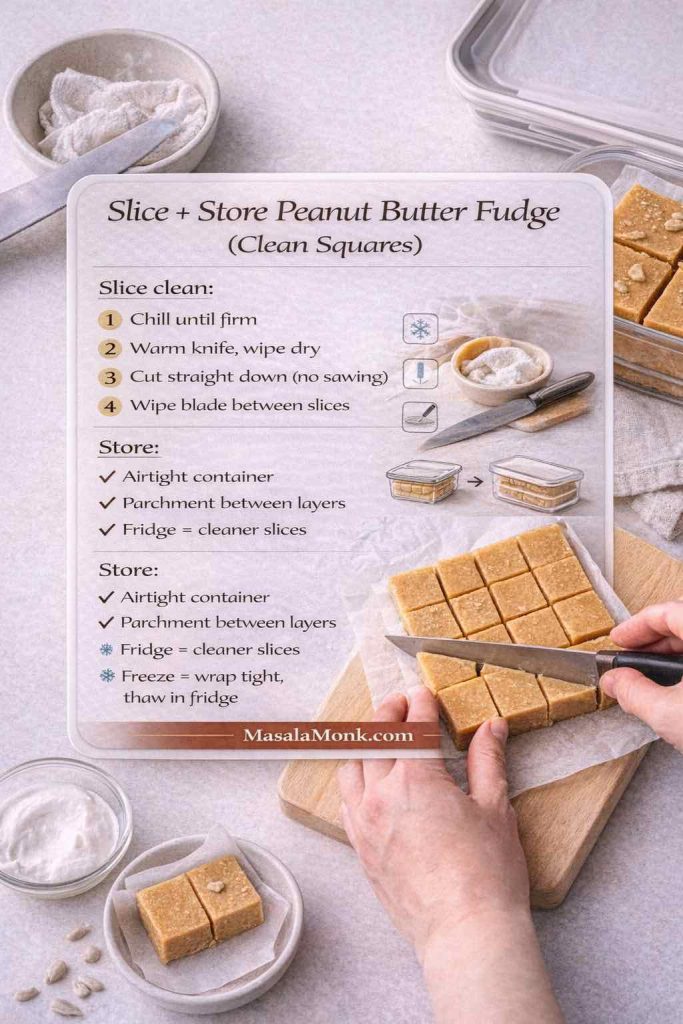
For a denser old-school peanut butter candy texture, this peanut butter fudge guide is the better next stop.

Best Ratio for Soft, Chewy Bars

Most hard, dry cereal bars are not really a cereal-brand problem. They happen when the binder gets stretched too far, the marshmallows get too hot, or the warm mixture gets packed down too firmly.

The goal is not just a sweet square. It is a bar that bends slightly when you bite it, tastes deeply peanut-buttery, and still has enough cereal crackle to keep it from feeling heavy.

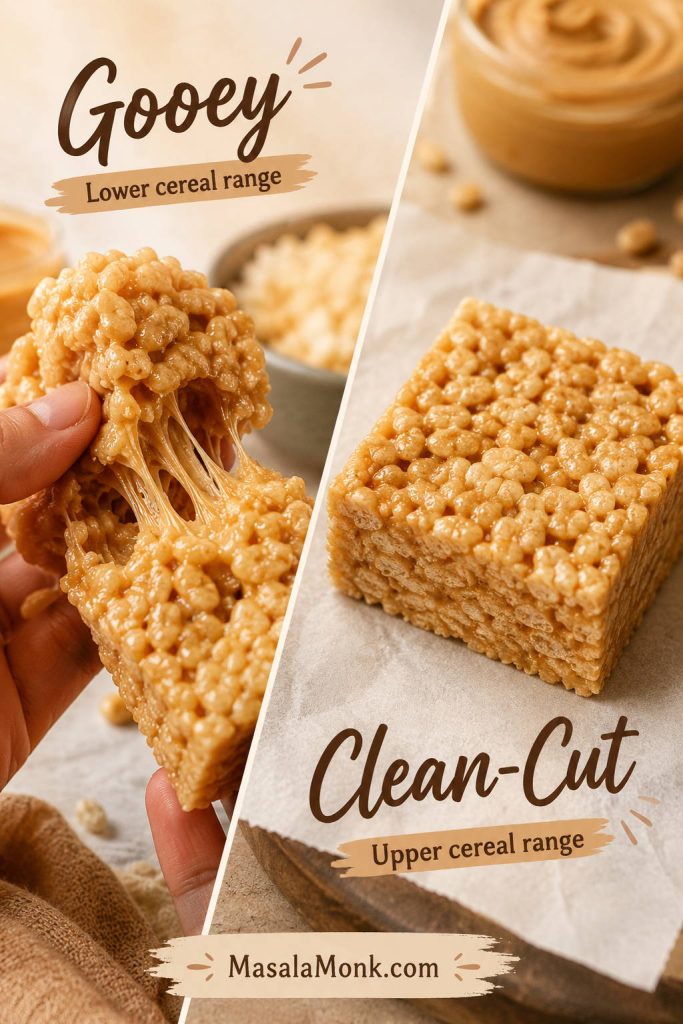
Comparison of a gooey peanut butter rice crispy treat beside a cleaner-cut square on parchment.
A lower cereal amount gives a softer, more marshmallowy bite, while the upper end holds better for lunchboxes and party trays.

This recipe uses a 9×9-inch pan as the main version because it gives thick, soft bars without making them too tall to bite. For thinner party bars, use the 9×13 scale below.

Main 9×9 ratio

Ratio guide showing marshmallows, peanut butter, cereal, butter, and a 9x9 pan for peanut butter rice crispy treats.
The 9×9 ratio balances marshmallow pull, peanut butter flavor, and enough cereal structure for squares that hold together.
Ingredient US amount Metric amount Why it matters
Salted butter 5 tbsp 70 g Helps marshmallows melt smoothly and adds richness
Mini marshmallows 16 oz bag 454 g Creates the soft, chewy binder
Creamy peanut butter ½ cup 125–130 g Adds peanut flavor without making the bars greasy
Crisp rice cereal 5½–6 cups 155–170 g Use less for gooey bars, more for cleaner cuts
Vanilla extract 1 tsp 5 ml Rounds out the flavor
Fine salt, if using unsalted butter ¼ tsp 1–1.5 g Balances the sweetness
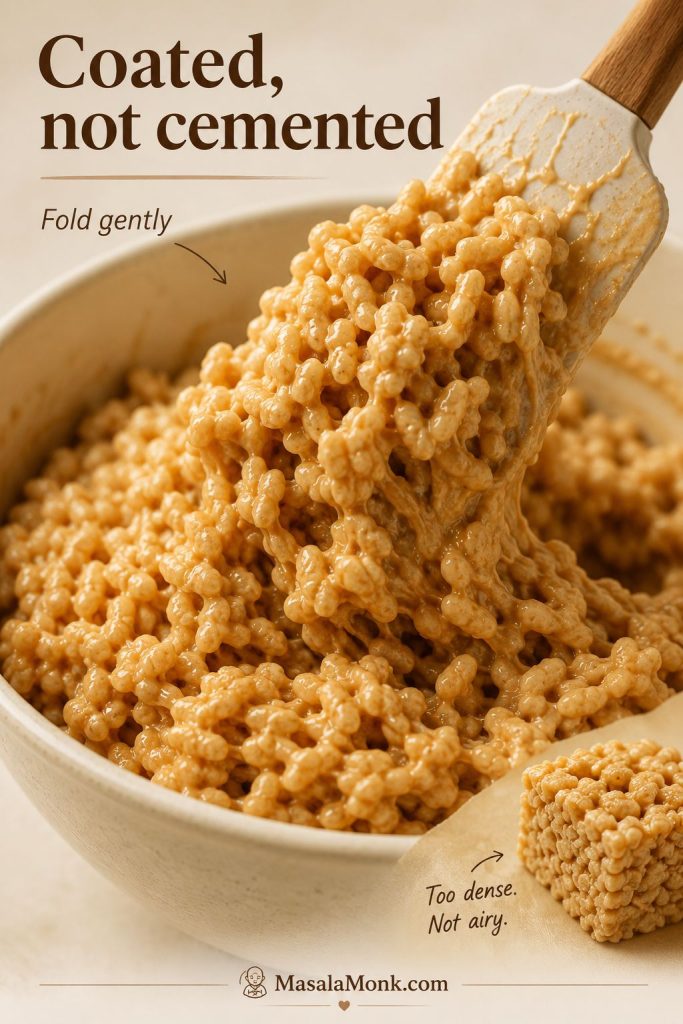
Ratio rule: The cereal should be fully coated but still loose enough to fold. If the mixture looks dry before it reaches the pan, do not fix it by pressing harder; use less cereal next time or melt the marshmallows more gently.
Cereal mixture being folded into marshmallow peanut butter base until coated but still airy.
The cereal should look coated and flexible, not cemented together, before it goes into the pan.

If you only make one version first, make the 9×9 pan with the softer cereal amount. It gives you the most classic pull-apart texture while still cutting cleanly enough for sharing.

Softer, gooier bars

For softer, gooier bars, go with 5½ cups cereal and reserve 1½ to 2 cups of mini marshmallows to fold in at the end. The bars will be a little stickier, but the texture is plush and marshmallowy.

Cleaner-cut squares

For cleaner-cut squares, use the full 6 cups cereal and let the pan cool completely before slicing. This version still tastes chewy, but it holds up better for lunchboxes, parties, and bake sales.

9×13 Party-Pan Scale for Peanut Butter Rice Crispy Treats

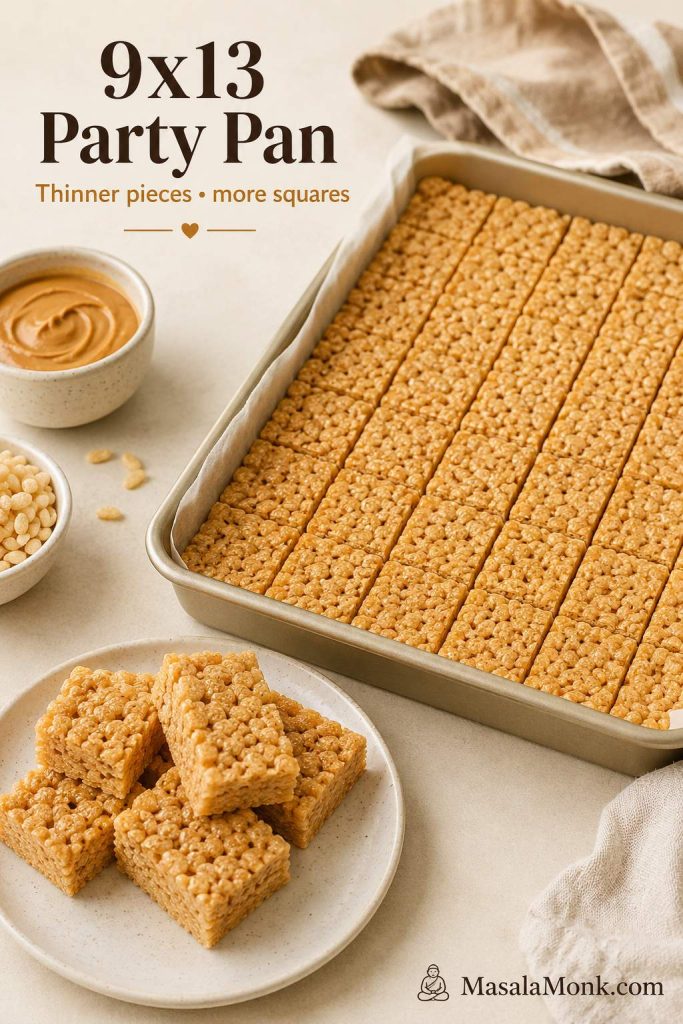
For potlucks, bake sales, and larger gatherings, use this 9×13-inch pan scale. It makes about 24 thinner squares, or more if you cut small party pieces. The full printable-style amounts are also included in the recipe card.

Do not simply spread the 9×9 recipe into a 9×13 pan unless you intentionally want very thin bars. The larger pan needs a larger batch.

Ingredient US amount Metric amount
Salted butter ½ cup / 8 tbsp 113 g
Mini marshmallows 20 oz 567 g
Creamy peanut butter 1 cup 250–260 g
Crisp rice cereal 8–8½ cups 225–240 g
Vanilla extract 1½–2 tsp 7.5–10 ml
Fine salt, if using unsalted butter ½ tsp 2–3 g
9x13 pan of peanut butter rice crispy treats cut into thinner party-size squares.
For a crowd, scale the recipe instead of stretching a smaller batch too thin; as a result, the pieces stay balanced and easy to serve.

Equipment You Need

You only need a 9×9-inch pan, parchment paper, a heavy-bottomed pot, and a silicone spatula for the main recipe. A kitchen scale helps with marshmallows and cereal, especially if you are using large marshmallows or a different cereal brand.

For the larger batch, use a 9×13-inch pan. For cleaner cuts, lightly grease your knife before slicing, especially if you added the chocolate topping.

How to Make Peanut Butter Rice Crispy Treats

This is a quick recipe, but it rewards a gentle hand. A few calm minutes over low heat are what keep the bars soft, stretchy, and easy to bite instead of stiff.

Once your ingredients are measured, the process moves quickly. Have the pan ready before you melt the marshmallows so the warm mixture can go straight in while it is still easy to shape.

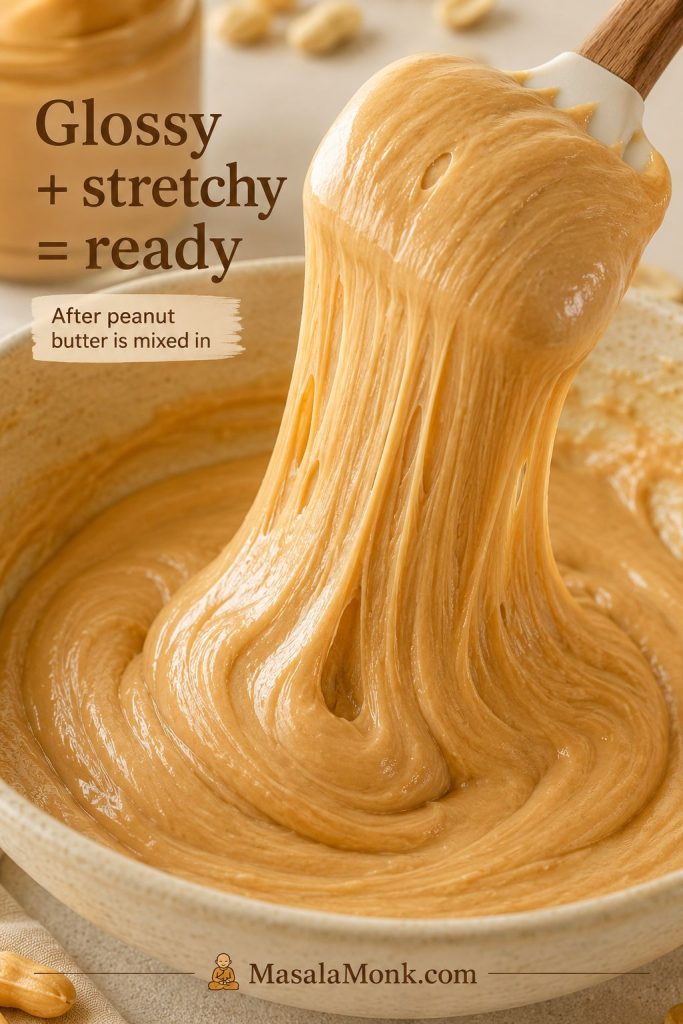
The mixture will look messy at first, then suddenly turn glossy, stretchy, and smooth. That glossy stage is the signal to stop cooking, stir in the peanut butter, and move quickly before the cereal mixture cools and stiffens.

Before you start: Do not boil the marshmallow mixture, do not add extra cereal just because the mixture looks sticky, and do not press the bars firmly into the pan. Those three habits are the most common reasons crispy rice treats turn hard.

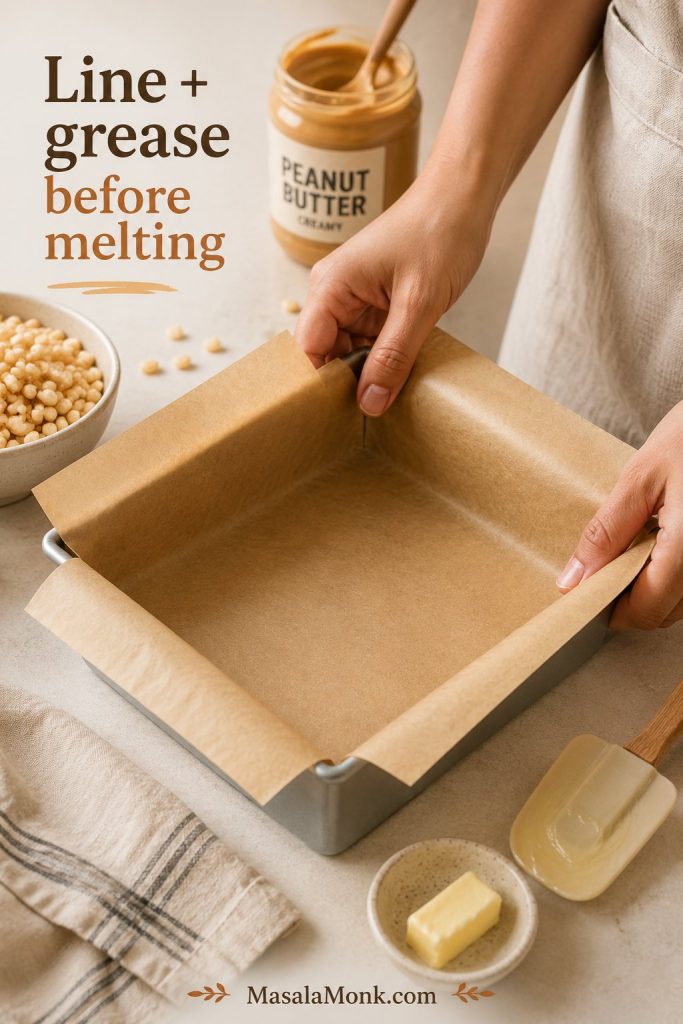
Step 1: Line and grease the pan

Line a 9×9-inch pan with parchment paper, leaving a little overhang so you can lift the bars out later. Then lightly grease the parchment, your spatula, and your hands before the marshmallow mixture starts getting sticky.

Hands lining a 9x9 pan with parchment paper before making peanut butter rice crispy treats.
Line and grease the pan before melting anything so the warm cereal mixture can go straight in while it is still flexible.

Step 2: Reserve mini marshmallows for soft pockets

Set aside 1½ to 2 cups of mini marshmallows from the 16-ounce bag before the pot goes on the heat. Because they are folded in at the end, they soften without disappearing completely.

Mini marshmallows reserved in a bowl for folding into peanut butter rice crispy treats at the end.
Reserving some mini marshmallows creates soft pockets throughout the bars, which makes the texture feel more homemade.

Step 3: Melt the base until glossy

Melt the butter in a large heavy-bottomed pot over low to medium-low heat. Add the remaining marshmallows and stir until they are mostly melted, glossy, and stretchy. A few small lumps are fine, but stop before the mixture bubbles hard.

Remove the pot from the burner, then stir in the peanut butter, vanilla, and salt until the base looks creamy and smooth rather than oily or separated.

Glossy marshmallow peanut butter base stretching from a spatula before cereal is added.
When the base holds a glossy ribbon on the spatula, it is ready for cereal before it starts cooling and tightening.

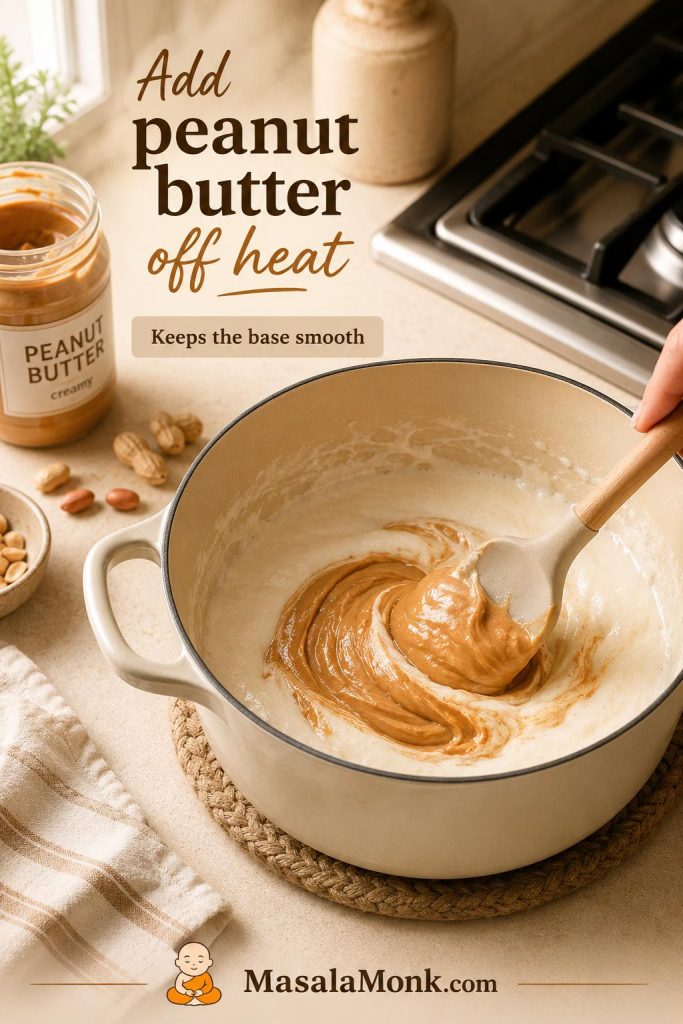
Step 4: Add peanut butter off heat

This off-heat moment is important because peanut butter needs gentle residual warmth, not direct heat. Stir it into the marshmallow base after the pot comes off the burner so the mixture stays smooth.

Creamy peanut butter being stirred into melted marshmallows in a pot moved off the heat.
Add the peanut butter off heat so it melts into the marshmallow base instead of separating or turning oily.

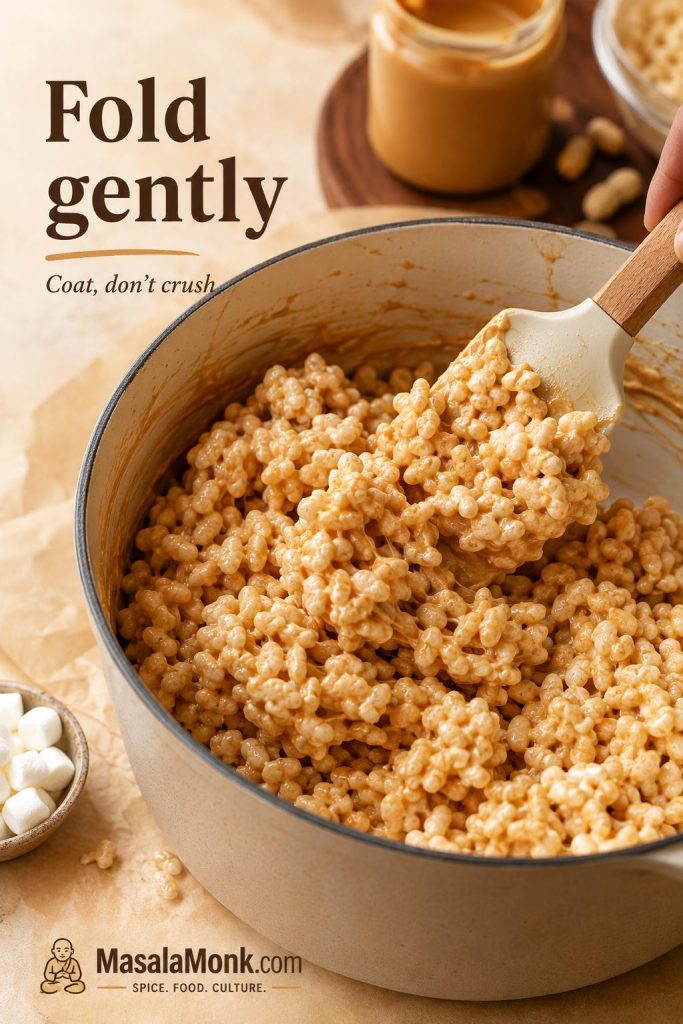
Step 5: Fold the cereal gently

Add the crisp rice cereal and fold with a silicone spatula until the pieces are coated but still airy. Stop once you no longer see dry pockets of cereal, then fold in the reserved mini marshmallows while the mixture is still warm.

Crisp rice cereal being folded gently into a glossy marshmallow peanut butter base with a spatula.
Fold just until coated because overmixing can crush the cereal and make the bars feel heavy.

Step 6: Press the mixture lightly

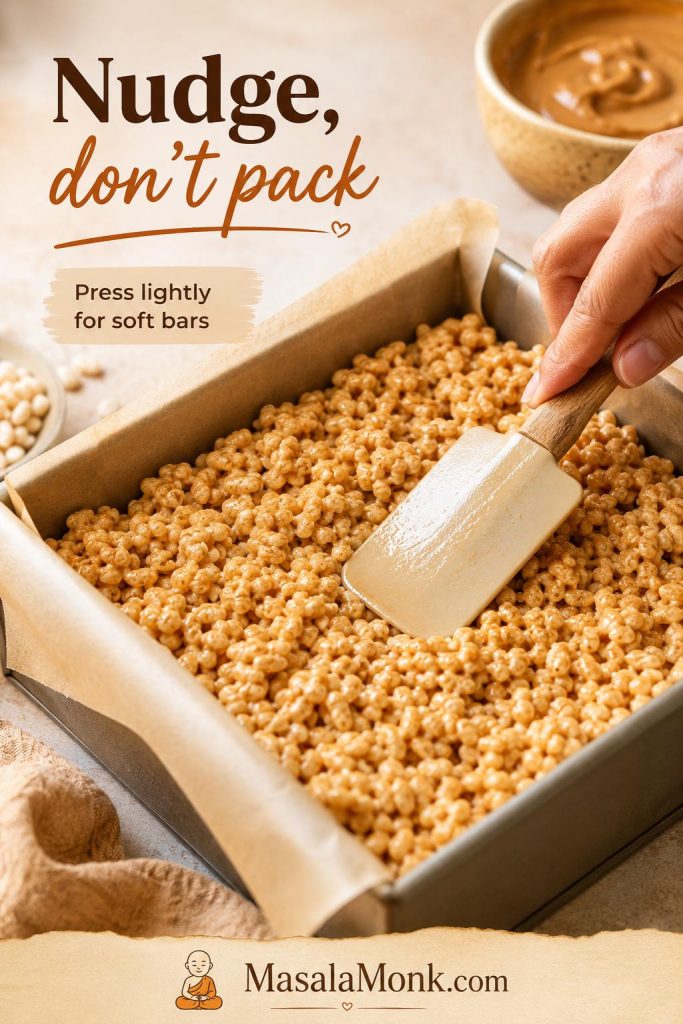
Transfer the mixture to the prepared pan and nudge it into the corners with a greased spatula or lightly buttered hands. Shape it while it is still warm, but do not pack it down or flatten the top hard.

Peanut butter rice crispy treat mixture being pressed lightly into a parchment-lined pan with a spatula.
Use the spatula to guide the mixture into the corners while keeping the top airy instead of flattening it hard.

Step 7: Cool before cutting

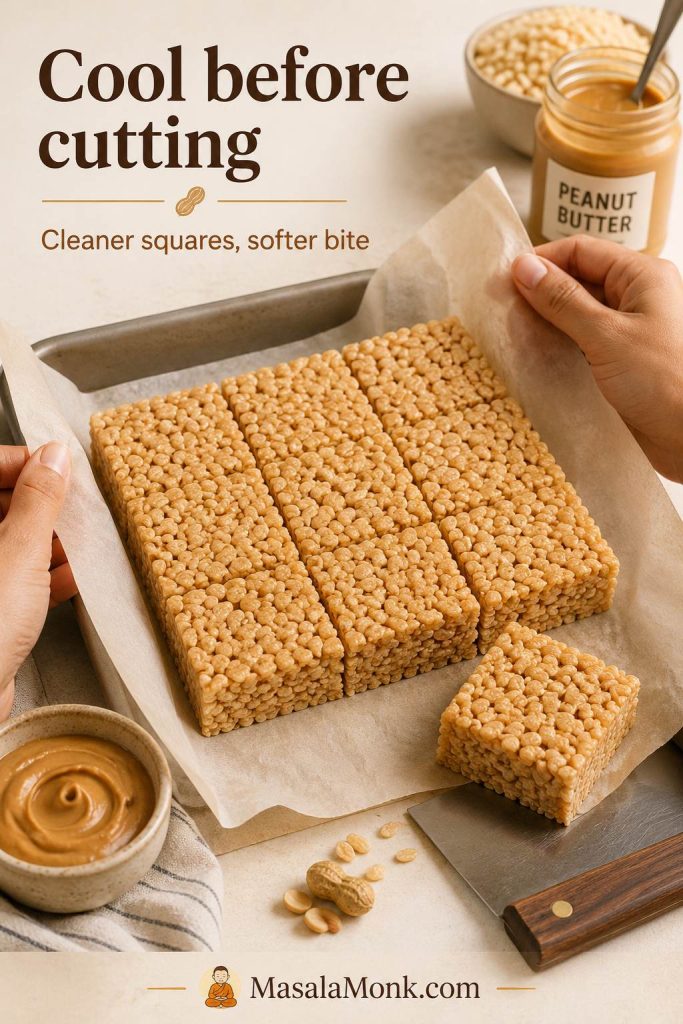
Let the bars cool at room temperature for 30–45 minutes, or until the top no longer feels warm and the slab lifts cleanly from the pan. Cooling helps the squares hold their shape without losing tenderness.

Peanut butter rice crispy treats lifted from a pan with parchment and cut into clean squares.
Let the slab cool until set so the knife cuts clean edges without smearing the still-soft center.
What good looks like: The melted mixture should be glossy, creamy, and stretchy, not oily or bubbling hard. The cereal should be coated but not crushed. When you press the mixture into the pan, it should mound softly and spring back a little. If it feels stiff before it reaches the pan, the marshmallows were probably overheated. If it sticks to your hands or spatula, lightly grease them instead of pressing harder.
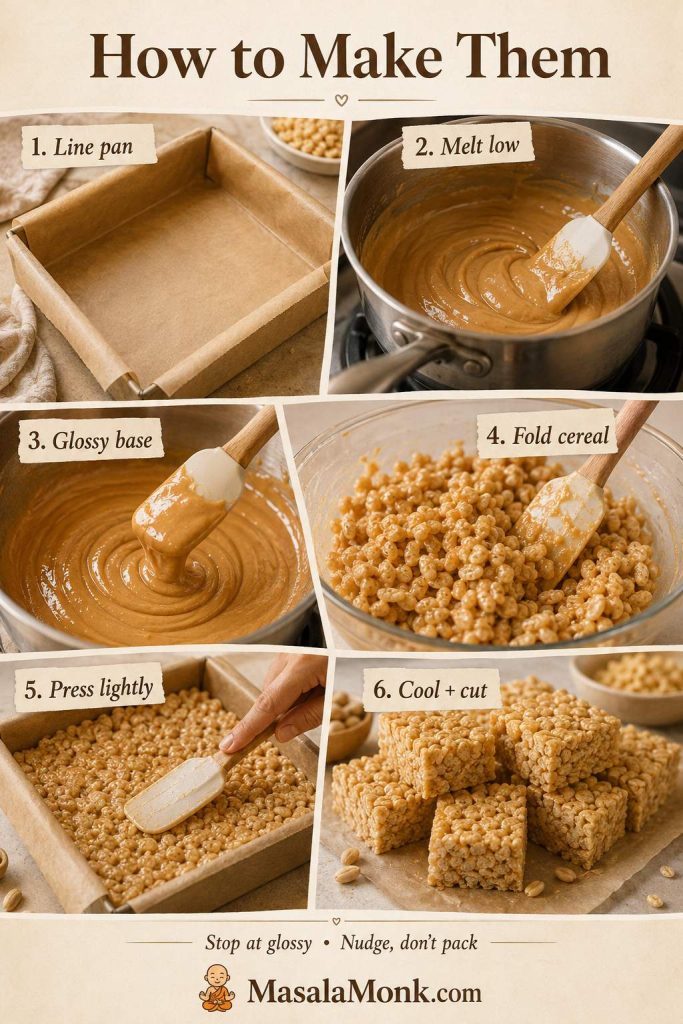
Step-by-step board showing how to line the pan, melt low, make the base, fold cereal, press lightly, and cut.
The method stays easy when you follow the cues in order: melt gently, coat the cereal, press lightly, and cool before slicing.

8×8 vs 9×9 vs 9×13 Pan

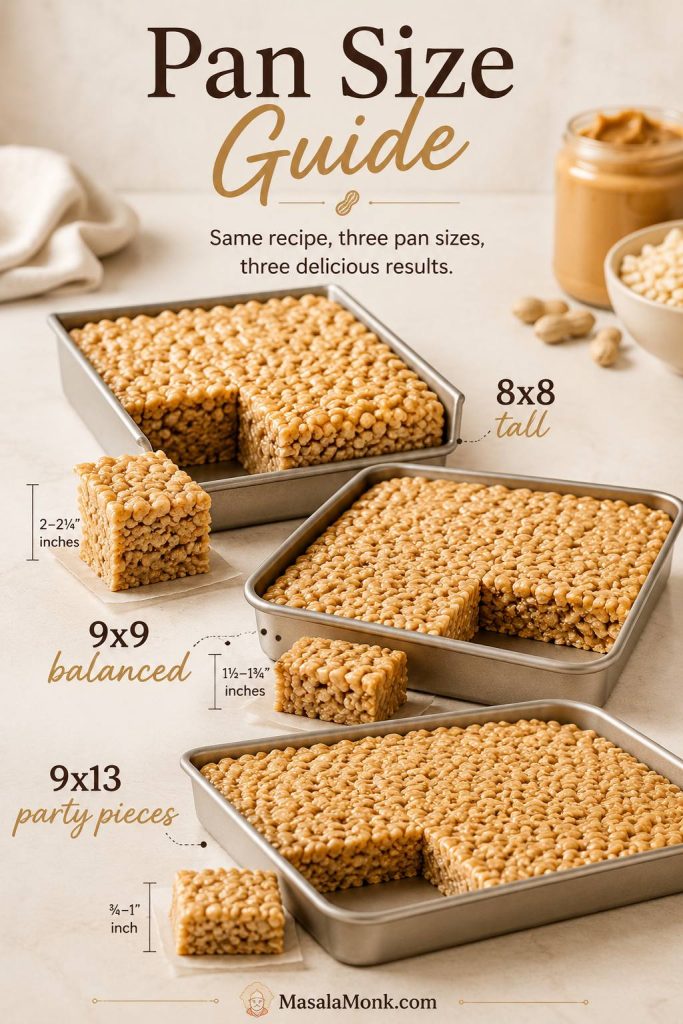
Pan size changes the whole eating experience. The same mixture can feel tall and gooey in one pan, thinner and firmer in another. Choose the pan based on whether you want thick home-style squares or neat party pieces.

Pan size Best for Result
8×8 inch Very thick dessert bars Tall, gooey, slower to cool, best for small batches
9×9 inch Main recipe Thick but manageable, soft center, clean enough cuts
9×13 inch Parties, lunchboxes, bake sales Thinner bars, more squares, faster cooling
Pan size guide comparing 8x8, 9x9, and 9x13 pans for different rice crispy treat thicknesses.
Pan size changes the eating experience: 8×8 makes taller dessert bars, 9×9 stays balanced, and 9×13 gives thinner party pieces.

If you spread the 9×9 recipe into a 9×13 pan, the bars will be thin, firmer, and less gooey. Use the larger scale if you want a true party pan.

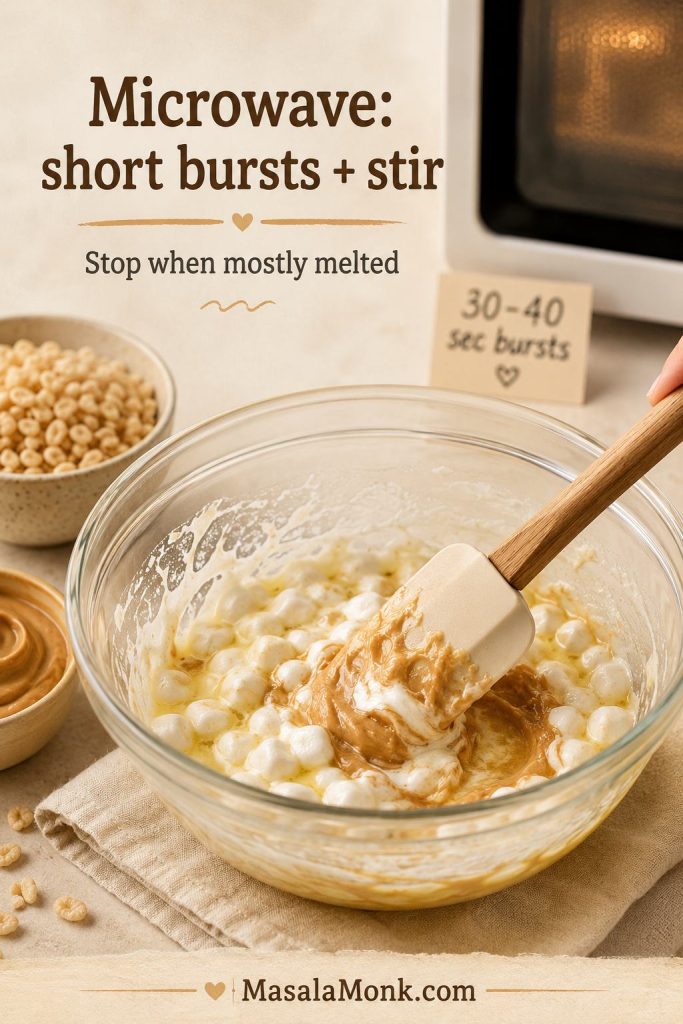
Microwave Method

The microwave is faster, but it needs short bursts and frequent stirring. Marshmallows can go from glossy to stiff quickly, so stop as soon as they are mostly melted.

  1. Use a large microwave-safe bowl with plenty of room for the marshmallows to puff.
  2. Add butter and most of the marshmallows.
  3. Microwave in 30–40 second bursts, stirring after each burst.
  4. Stop when the marshmallows are mostly melted and stir until smooth.
  5. Stir in peanut butter, vanilla, and salt.
  6. Fold in cereal and reserved marshmallows.
  7. Press lightly into a lined pan and cool before slicing.
Microwave-safe bowl of marshmallows and butter being stirred for peanut butter rice crispy treats.
For the microwave method, use short bursts and stir often so the marshmallows melt evenly instead of overheating.

If the marshmallow mixture looks dry, stringy, or stiff after microwaving, it was likely overheated. Start again if you can; adding more peanut butter will not fully fix overheated marshmallows.

The stovetop gives you more control. If you are making these bars for the first time, it is the safer choice.

Chocolate Topping

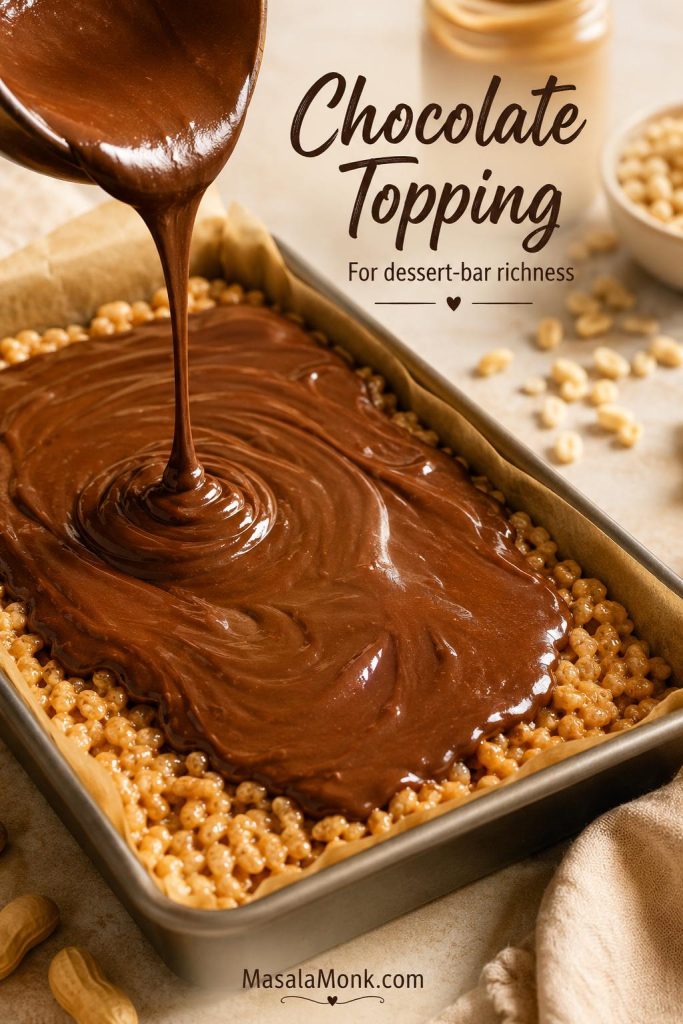
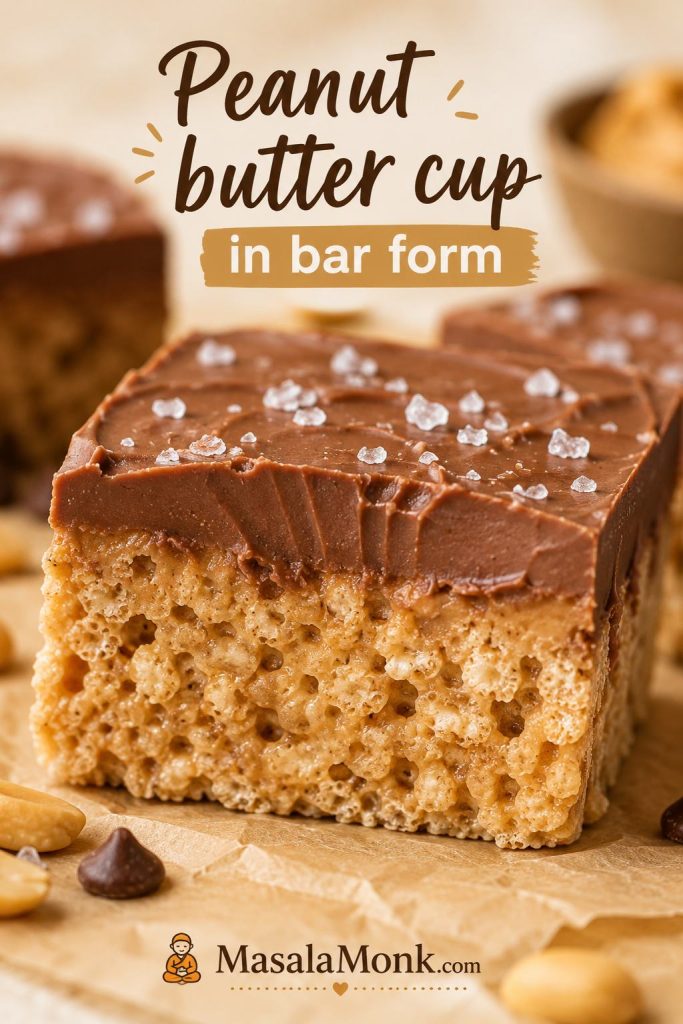
Add the chocolate topping when you want these to feel less like lunchbox squares and more like a peanut butter cup in bar form. The topping sets into a soft chocolate-peanut butter layer while the cereal base stays chewy, crisp, and marshmallowy underneath.

Chocolate peanut butter topping being poured over a pan of peanut butter rice crispy treats.
Add the chocolate topping when you want the bars to move from lunchbox-simple to richer dessert-bar territory.

A drizzle is enough for a lighter snack. However, a full layer turns the pan into something closer to a no-bake chocolate peanut butter bar.

Cross-section of a chocolate-topped peanut butter rice crispy treat with a soft chocolate layer and cereal base.
The chocolate layer should set softly, so every bite feels more like a peanut butter cup than a hard candy shell.

For another rich no-bake chocolate dessert, this avocado chocolate mousse keeps the chocolate flavor deep while staying creamy and spoonable.

Let the bars cool before adding chocolate. If the base is still warm, the topping can sink into the cereal instead of sitting neatly on top. That gives the topping a cleaner surface and helps it set evenly.

Balanced chocolate topping

Ingredient US amount Metric amount
Semi-sweet chocolate chips 1½ cups 255 g
Creamy peanut butter 2 tbsp 30–35 g
Flaky salt Optional Optional

Melt the chocolate chips with the peanut butter until smooth, then spread over the cooled bars. Add flaky salt if you like a sweet-salty finish. Let the chocolate set before slicing.

For a lighter version, use half the chocolate mixture and drizzle it over the top instead of spreading a full layer. For a thicker candy-bar finish, increase the chocolate chips to 2 cups.

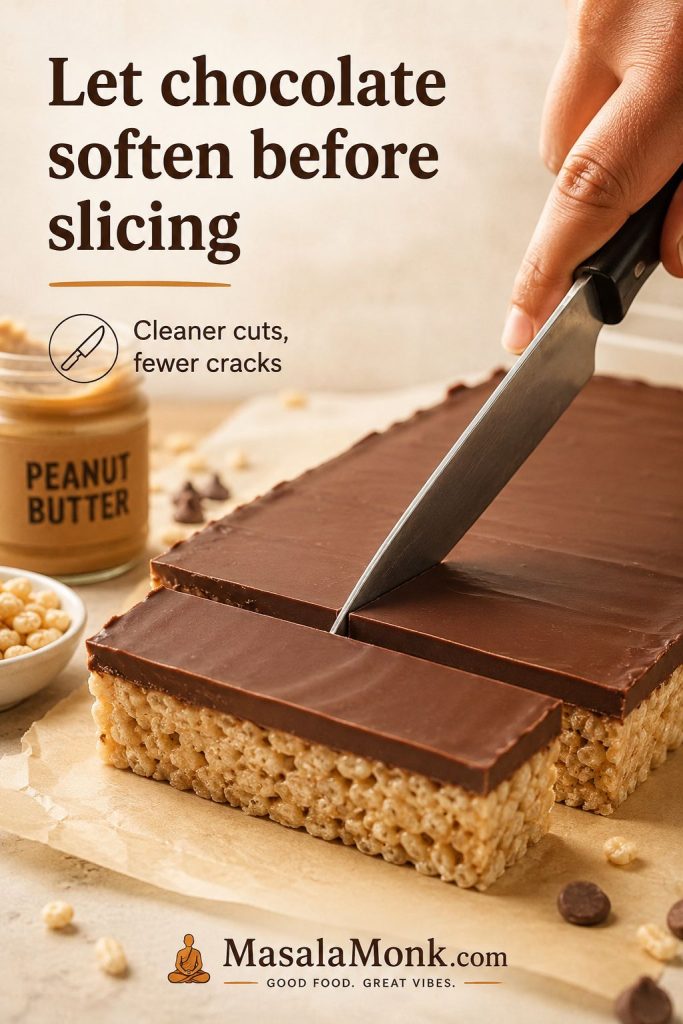
Cutting tip: If the chocolate layer is very cold, it may crack when sliced. Let the pan sit at room temperature for a few minutes, then cut with a sharp knife.
Knife slicing chocolate-topped peanut butter rice crispy treats with a clean cut through the topping.
If the chocolate layer feels too firm, let it sit briefly at room temperature before slicing to prevent cracks.

If you are building a no-bake dessert table, these bars sit naturally beside something creamy and chilled, like this no bake cheesecake recipe.

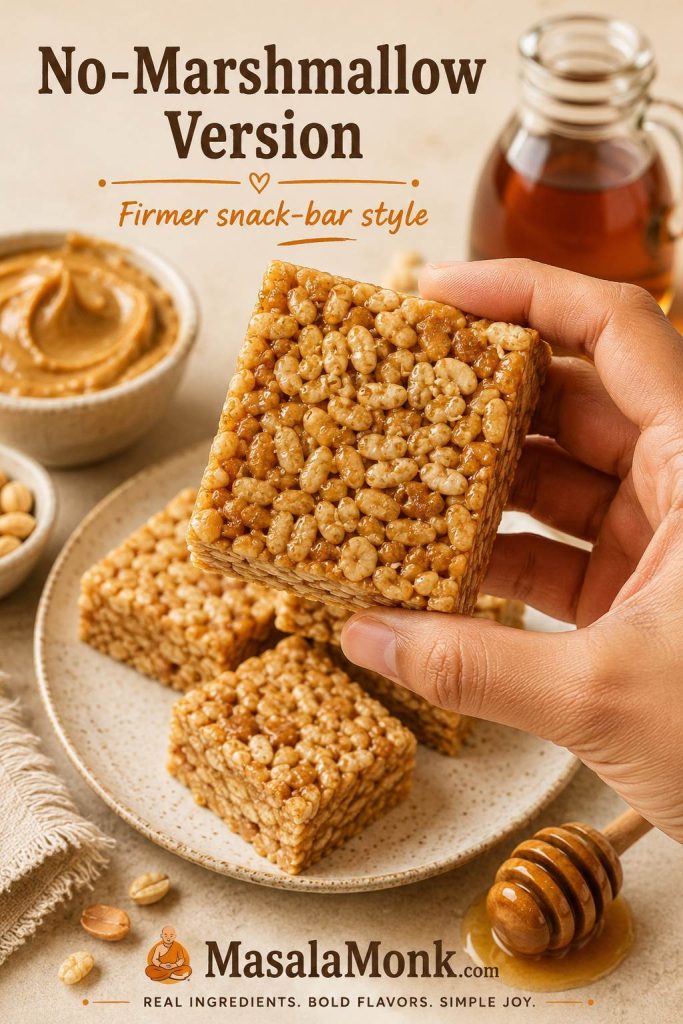
No-Marshmallow Version

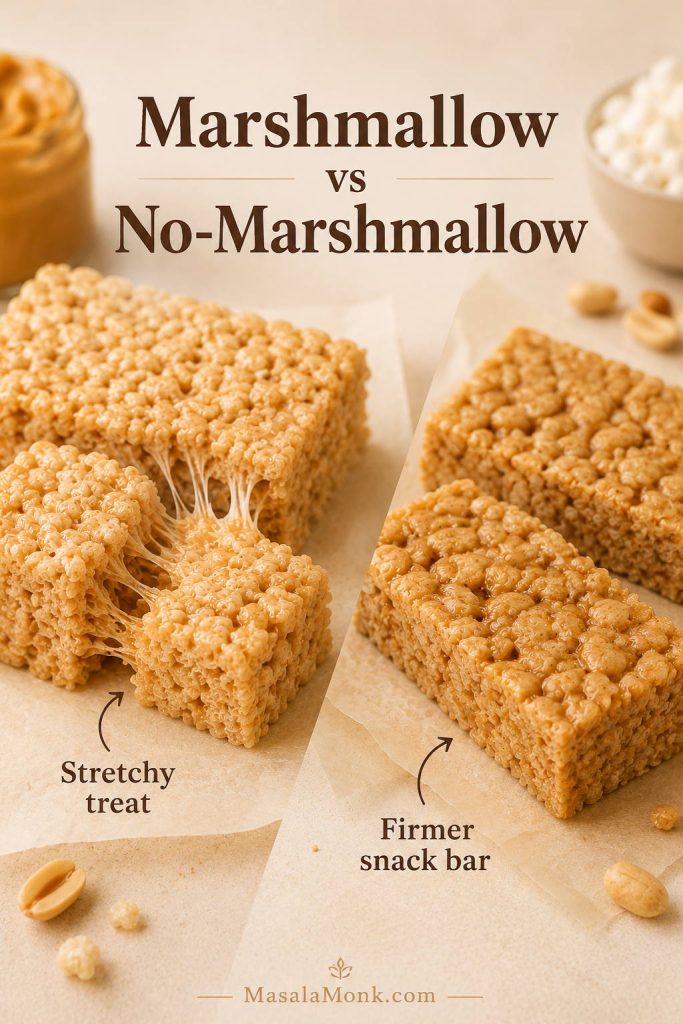
No marshmallows means a different kind of bar. Instead of stretchy, gooey peanut butter rice crispy treats, you get a firmer peanut butter snack bar held together with honey or maple syrup.

No-marshmallow peanut butter rice crispy bars made with peanut butter and honey or maple syrup.
Without marshmallows, these bars set from a peanut butter-syrup binder and taste more like a firmer snack bar.

Choose the marshmallow version when you want classic pull-apart cereal treats. Choose this version when you want something firmer, less candy-like, easier to chill, and more lunchbox-snack than dessert-bar.

Marshmallow peanut butter rice crispy treat with stretchy pull beside a firmer no-marshmallow snack bar.
The marshmallow version stretches like a classic cereal treat, while the no-marshmallow version sets firmer from peanut butter and syrup.

If that firmer snack-bar direction is what you want, this homemade granola bars recipe goes deeper into no-bake bar binders, texture, and lunchbox-style snacks.

Ingredient US amount Metric amount
Creamy peanut butter ¾ cup 190 g
Honey or maple syrup 6 tbsp 90 ml
Crisp rice cereal 3 cups 80–85 g
Fine salt Pinch Pinch

Warm the peanut butter and honey or maple syrup together just until smooth, then stir in the salt and cereal. Press the mixture firmly into a lined 8×8-inch pan and chill until set. This version needs firmer pressing and colder setting than the main recipe.

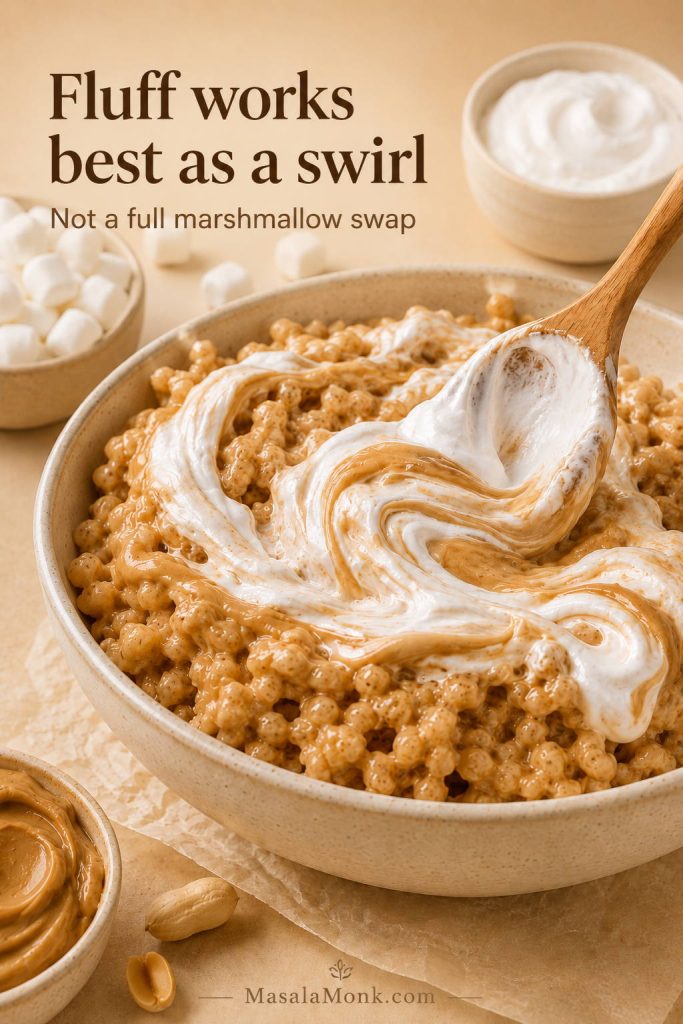
Can I Use Marshmallow Fluff?

Marshmallow fluff or marshmallow creme can work, but it behaves differently from regular marshmallows. It makes the bars softer, stickier, and harder to cut cleanly, so do not replace all 16 ounces of marshmallows with fluff unless you are using a fluff-specific recipe.

The safer move is to use fluff as a swirl. Fold ⅓ to ½ cup through the warm cereal mixture before pressing it into the pan, or swirl it over the top with a little melted peanut butter.

Marshmallow fluff swirled into peanut butter rice crispy treat mixture with a bowl of fluff nearby.
Marshmallow fluff behaves differently from regular marshmallows, so it works best as a swirl rather than a full swap.

If you are adapting a thinner 9×13 cereal-treat formula, a 7-ounce jar of marshmallow creme is often used as a substitute for a 10-ounce bag of marshmallows. Even then, the finished bars will be softer and stickier than bars made with regular marshmallows.

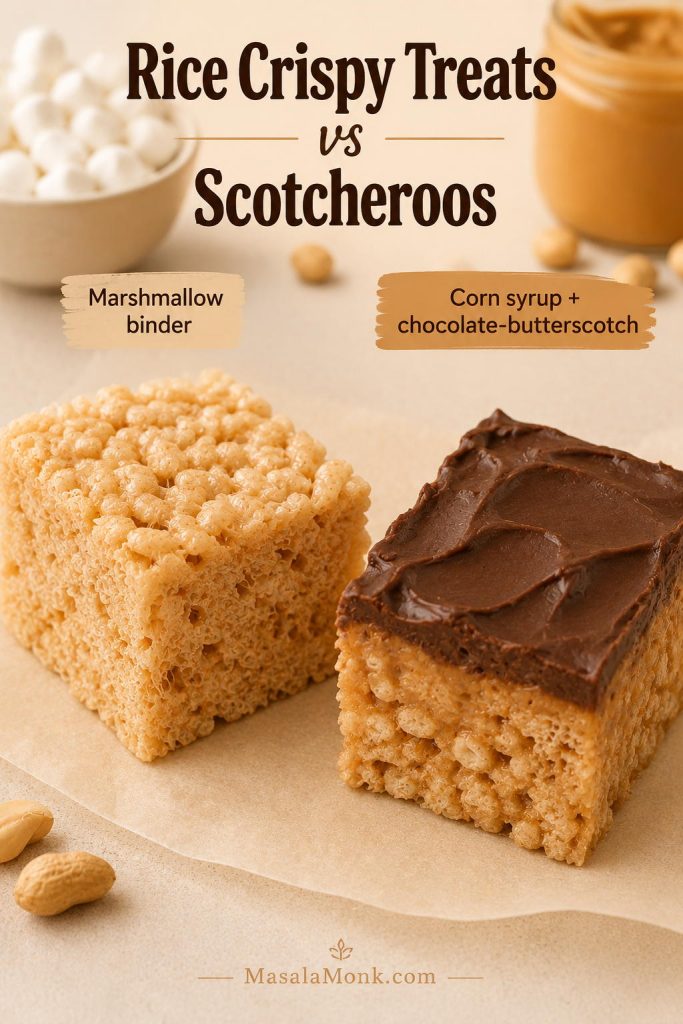
Peanut Butter Rice Crispy Treats vs Scotcheroos

These two bars are related, but the binder is different.

Peanut butter rice crispy treats usually rely on marshmallows, so they are softer, stretchier, and more classic cereal-treat-like. By contrast, Scotcheroos usually use peanut butter with corn syrup and sugar, then get a chocolate-butterscotch topping, so they are denser, sweeter, and more candy-like.

A quick clue: if the bar you remember had a glossy chocolate-butterscotch top and a firmer candy-like bite, you are probably thinking of Scotcheroos. If it was soft, marshmallowy, and stretchy when pulled apart, this is the recipe you want.

Peanut butter rice crispy treat compared with a chocolate-topped Scotcheroo on parchment.
Peanut butter rice crispy treats are usually softer and marshmallow-based, whereas Scotcheroos are denser and more candy-like.

Troubleshooting

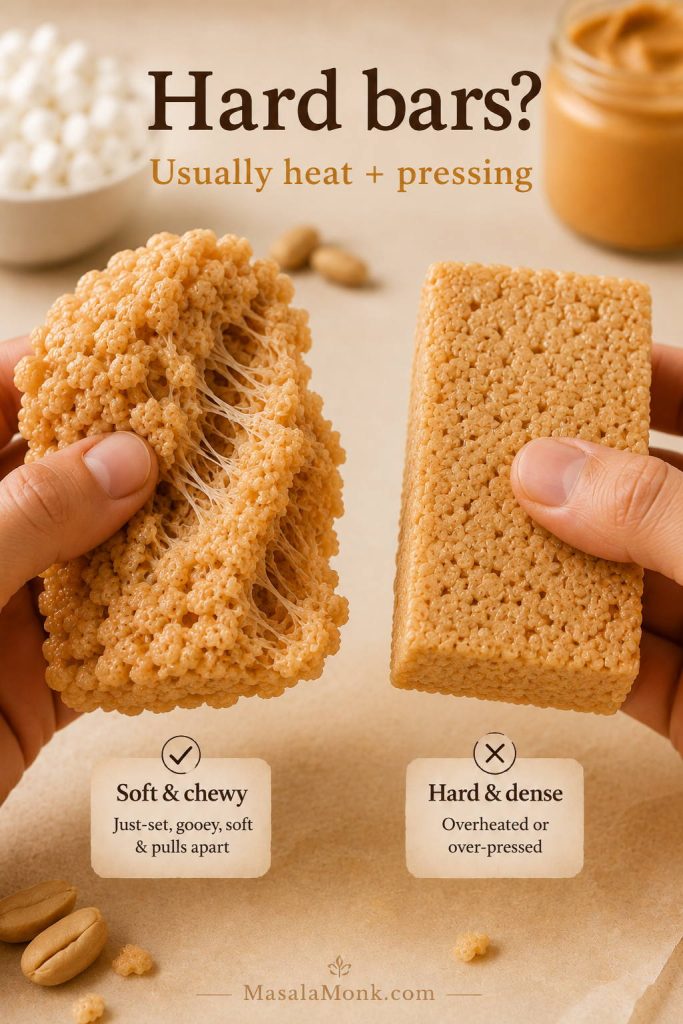
Even with a simple recipe, small changes can affect the final texture. If a batch turns hard, dry, greasy, or too sticky, the fix is usually one of four things: heat, ratio, peanut butter type, or how firmly the mixture was pressed into the pan. If your bars turned out well and you just need to keep them fresh, jump to storage.

Soft peanut butter rice crispy treat pulling apart beside a compact hard bar with no stretch.
Hard bars usually come from overheated marshmallows, too much pressure, or a ratio that stretches the binder too far.
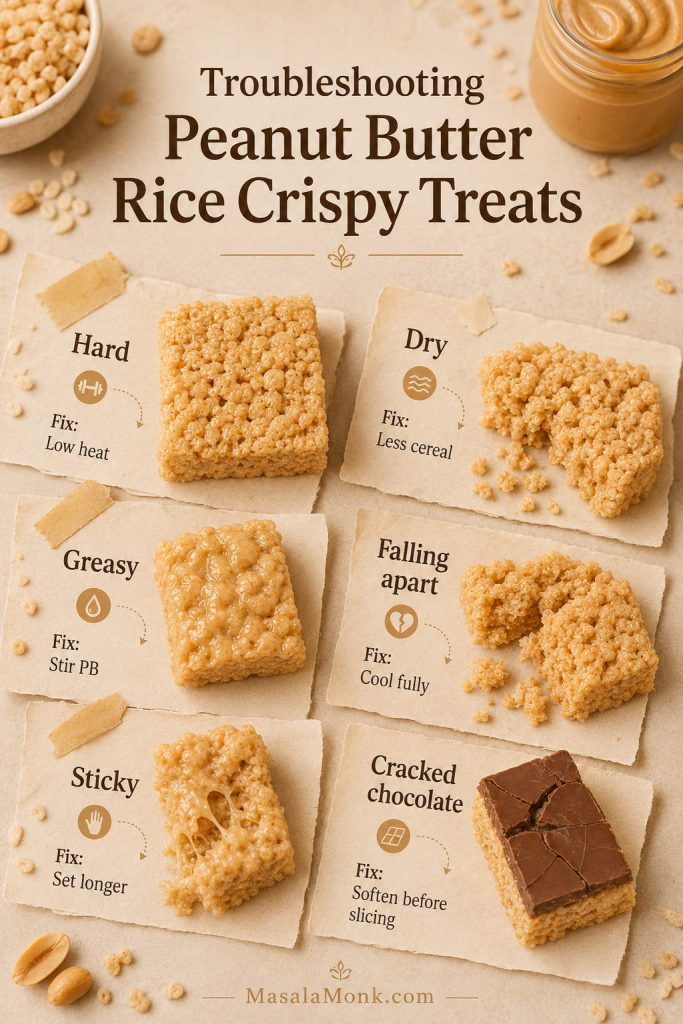
Problem Likely cause Quick fix next time
Hard bars Overheated marshmallows or packed-down mixture Use low heat, stop at glossy, and press lightly
Dry bars Too much cereal Use less cereal and fold more gently
Greasy bars Separated natural peanut butter Use regular creamy peanut butter
Bars falling apart Not enough binder or cut too early Cool fully before slicing
Sticky bars Too many marshmallows or not cooled Let them set longer
Cracked chocolate Chocolate layer too cold or too thick Let it soften slightly before slicing
Troubleshooting board for peanut butter rice crispy treats with fixes for hard, dry, greasy, sticky, falling apart, and cracked chocolate bars.
Most peanut butter rice crispy treat problems are fixable once you trace them back to heat, cereal amount, peanut butter type, or cooling time.

Why did my bars get hard?

The marshmallow mixture was probably overheated, the marshmallows were stale, too much cereal was added, or the mixture was pressed too firmly into the pan. Next time, use low heat, fresh marshmallows, and a gentler hand. Instead of packing the mixture down, nudge it into the pan just until it reaches the corners.

Why are they dry?

Dry bars usually mean there is too much cereal for the amount of marshmallow mixture. Next time, stay closer to the lower end of the cereal range, or add an extra handful of marshmallows to the melted mixture.

Why are they greasy?

Greasy bars often happen with natural peanut butter that has not been stirred well, or when too much peanut butter or butter is added. Regular creamy peanut butter gives the most reliable result.

Why are they falling apart?

The mixture may not have enough binder, the cereal amount may be too high, or the bars may have been cut before cooling. For the no-marshmallow version, the bars also need chilling time to firm up.

Why are they too sticky?

Sticky bars usually need more cooling time or slightly more cereal. If you folded in extra marshmallows, the bars may also be intentionally gooier. Let them sit longer before slicing.

Why did the chocolate topping crack?

The chocolate may have been too cold or too thick when sliced. Let the bars sit at room temperature for a few minutes before cutting, and use a sharp knife. Adding a little peanut butter to the melted chocolate also keeps the topping softer.

How to Store Them

These bars stay best when they are covered at room temperature: soft enough to bite, but still crisp around the cereal. Open air dries them out faster than time does.

They taste best the day they are made, when the cereal still has its crackle and the marshmallow base is soft. They stay good for about 2 days in an airtight container at room temperature. A third day is usually fine, but the bars will taste less fresh.

If stacking them, place parchment or wax paper between layers so the tops do not stick together. Otherwise, the soft marshmallow surface can cling to the layer above it.

Peanut butter rice crispy treats stored in an airtight container with parchment between the layers.
Store the squares covered at room temperature, with parchment between layers, so they stay easy to lift without drying out.

Avoid refrigerating plain bars because cold air can make them firm and dry. If you add a chocolate topping, you can chill the pan briefly just to set the chocolate, then move the sliced bars back to room temperature storage.

To freeze, place the bars in layers separated by parchment or wax paper inside an airtight freezer-safe container. Freeze for up to 6 weeks. Let them stand at room temperature before serving so the texture softens again. For the full batch formula, return to the recipe card.

Variations

Once the base is soft and reliable, the fun part is choosing what kind of pan you want: lunchbox-simple, candy-bar rich, salty-sweet, extra gooey, or full peanut butter cup.

Keep the base ratio steady, then change the personality of the pan with chocolate, crunch, salt, jam, or a thicker dessert-bar finish.

Five peanut butter rice crispy treat variations with peanut butter cups, chocolate chips, pretzels, jam, and flaky salt.
Once the base recipe is reliable, small add-ins like pretzels, jam, chocolate chips, or flaky salt can change the whole pan.

Chocolate and candy variations

  • Peanut butter cup bars: Fold in chopped peanut butter cups after the cereal is coated, or press them on top before the bars cool.
  • Chocolate chip bars: Sprinkle mini chocolate chips over the warm bars and press gently so they stick.
  • Cookie dough-style bars: Add mini chocolate chips and a little extra vanilla for a cookie-dough feel. If you want the actual spoonable version, make this edible cookie dough recipe instead.
  • Salted chocolate bars: Add the chocolate topping and finish with flaky salt.

Crunchy and salty variations

  • Pretzel bars: Replace ½ cup cereal with lightly crushed pretzels for a salty crunch.
  • Roasted peanut bars: Add ½ cup chopped roasted peanuts for extra texture.
  • Flaky salt finish: Sprinkle a little flaky salt over the top before the bars fully set.

Softer or richer variations

  • Brown butter bars: Brown the butter before adding marshmallows for a deeper, toasted flavor.
  • Extra marshmallow pocket bars: Fold in 2 cups reserved mini marshmallows at the end for a gooier bite.
  • Thicker dessert bars: Use an 8×8 pan and let the bars cool fully before slicing.

Lunchbox and snack-bar variations

  • Lunchbox squares: Use the full 6 cups cereal and cut smaller squares after the bars cool completely.
  • PB&J bars: Swirl a few teaspoons of jam over the top before the bars set, or sandwich a thin jam layer between two thinner layers of the peanut butter cereal mixture. Grape or strawberry keeps the classic lunchbox feel.
  • Protein-style bars: Use the no-marshmallow version as the base and add a small amount of protein powder only if the mixture still feels moist enough. For a no-bake protein dessert that is already built around protein powder, this protein cookie dough recipe is a safer next recipe.
  • Vegan-style bars: Use the no-marshmallow peanut butter and maple syrup version with a vegan crisp rice cereal.

Peanut Butter Rice Crispy Treats Recipe

Peanut Butter Rice Crispy Treats

Soft, chewy peanut butter cereal bars with a glossy marshmallow-peanut butter base, crisp rice cereal, and optional soft marshmallow pockets. Use 5½ cups cereal for gooier bars or 6 cups for cleaner-cut squares.

Prep Time 10 minutes
Cook Time 5 minutes
Cooling Time 30–45 minutes
Yield 16 thick 9×9 bars

Ingredients

  • 5 tbsp (70 g) salted butter, plus more for greasing
  • 16 oz (454 g) mini marshmallows, divided
  • ½ cup (125–130 g) regular creamy peanut butter
  • 1 tsp (5 ml) vanilla extract
  • ¼ tsp fine salt, only if using unsalted butter
  • 5½–6 cups (155–170 g) crisp rice cereal

Optional chocolate topping

  • 1½ cups (255 g) semi-sweet chocolate chips
  • 2 tbsp (30–35 g) creamy peanut butter
  • Flaky salt, optional

Instructions

  1. Line a 9×9-inch pan with parchment paper and lightly grease the parchment.
  2. Reserve 1½ to 2 cups of the mini marshmallows from the 16-ounce bag for folding in at the end.
  3. Melt the butter in a large heavy-bottomed pot over low to medium-low heat.
  4. Add the remaining marshmallows and stir until mostly melted, glossy, and stretchy. Stop before the mixture bubbles hard.
  5. Remove the pot from the heat. Stir in the peanut butter, vanilla, and salt until smooth.
  6. Add the crisp rice cereal and fold gently until evenly coated.
  7. Fold in the reserved mini marshmallows while the mixture is still warm.
  8. Transfer to the prepared pan and press lightly into an even layer. Do not compact firmly.
  9. Cool at room temperature for 30–45 minutes, then lift from the pan and cut into bars.
  10. For chocolate topping, melt chocolate chips with peanut butter, spread over cooled bars, sprinkle with flaky salt if using, and let set before slicing.

9×13 party-pan scale

  • Salted butter: ½ cup / 8 tbsp (113 g)
  • Mini marshmallows: 20 oz (567 g)
  • Creamy peanut butter: 1 cup (250–260 g)
  • Crisp rice cereal: 8–8½ cups (225–240 g)
  • Vanilla extract: 1½–2 tsp (7.5–10 ml)
  • Fine salt, if using unsalted butter: ½ tsp

Notes

  • For the softest bars, stay closer to 5½ cups cereal and press very lightly.
  • For cleaner-cut lunchbox or party squares, use 6 cups cereal and cool fully before slicing.
  • Regular creamy peanut butter gives the most reliable texture.
  • Natural peanut butter must be stirred completely smooth before measuring.
  • Measure marshmallows by weight if using large marshmallows or a different brand.
  • Store covered at room temperature so the bars stay soft and the cereal keeps some crackle.
Recipe card for peanut butter rice crispy treats with time, yield, pan size, core formula, and method rules.
Keep this card nearby for the two texture rules that matter most: glossy heat control and a light hand in the pan.

Once you have the low heat, fresh marshmallows, and light pressing down, this becomes the kind of no-bake recipe you can adjust from memory. Make it gooey for home, cleaner-cut for a party tray, or chocolate-topped when you want the pan to disappear faster.

FAQs

Are these the same as peanut butter Rice Krispie treats?

Yes. Rice Krispies is the branded cereal many people associate with classic crispy cereal bars, while crisp rice cereal is the generic ingredient. This recipe works with Rice Krispies cereal or another fresh crisp rice cereal.

What peanut butter works best?

Regular creamy peanut butter works best because it melts smoothly into the marshmallow base and stays stable. Natural peanut butter can work, but it must be stirred very well and may still make the bars softer or greasier.

Why did my treats get hard?

Hard treats usually come from overheated marshmallows, stale marshmallows, too much cereal, or pressing the mixture too firmly into the pan. Keep the heat low and nudge the mixture into the pan instead of packing it down.

How do I make them extra gooey?

Use 5½ cups cereal, keep the heat low, fold in 1½ to 2 cups reserved mini marshmallows at the end, and press the mixture lightly into the pan.

Can I use large marshmallows?

Yes. Use 16 ounces / 454 g marshmallows total, and give them more time to melt. Large marshmallows melt more slowly than minis, so keep the heat low instead of turning up the burner.

What if I do not have marshmallows?

Use the no-marshmallow version with peanut butter and honey or maple syrup. The texture will be firmer and more snack-bar-like, not stretchy and gooey.

Should I use an 8×8, 9×9, or 9×13 pan?

Use an 8×8 pan for very thick bars, a 9×9 pan for the best balance of thickness and easy cutting, or a 9×13 pan for thinner party squares. The main recipe is written for a 9×9 pan.

Do these need to be refrigerated?

No. They stay softer at room temperature in an airtight container. Refrigeration can make the cereal treats firm, so only chill briefly if you need to set a chocolate topping.

How far ahead can I make them?

They taste best the day they are made, but they keep well for about 2 days in an airtight container. For parties, making them the night before is a good compromise between freshness and convenience.

Can I add chocolate on top?

Yes. Spread melted semi-sweet chocolate chips with a little peanut butter over the cooled bars. Finish with flaky salt if you want a stronger sweet-salty balance.

Are these gluten-free?

They can be, but only if every ingredient is gluten-free. The cereal is the main thing to check because some crisp rice cereals contain malt flavoring. If gluten matters, use certified gluten-free crisp rice cereal.

What is the difference between these and Scotcheroos?

These bars usually use marshmallows as the binder, so they are softer and stretchier. Scotcheroos usually use peanut butter with corn syrup and sugar, then get topped with chocolate and butterscotch, so they are denser and more candy-like.

Back to top

Posted on 8 Comments

Peanut Butter Fudge: Recipes & Guide (8 Methods + Easy Variations)

Peanut butter fudge cover image with a thick buckeye-style layered fudge square and text “Peanut Butter Fudge: Recipes & Guide – 8 Methods + Easy Variations.”

Some desserts feel like a project. This one, thankfully, doesn’t have to. A peanut butter fudge recipe can be a two-minute stir-and-chill treat, a creamy slice that tastes like it came from a candy counter, or an old-fashioned cooked confection with that unmistakable “holiday tray” vibe. Even better, it adapts: you can turn it into chocolate-and-peanut swirls, a buckeye-style slab with a glossy cap, a peanut-free version for allergy-friendly sharing, or a sugar-alternative batch that still scratches the same sweet itch.

Because there are so many ways to make it, the smartest approach is simple: pick the style that matches your mood, then follow the steps. Along the way, you’ll also learn how to troubleshoot grainy texture, fix a too-soft set, and store slices so they stay tender instead of drying out.

Choose your peanut butter fudge style

If you want the shortest path, start with the 2-ingredient version. If you prefer a creamier bite that rarely crumbles, go for the condensed milk method. Meanwhile, marshmallow creme delivers that plush, classic texture that many people associate with “fantasy” style fudge. On the other hand, if you’re craving a true candy-shop finish, the cooked soft-ball stage method is the one.

Quick chooser infographic for peanut butter fudge styles. Shows five options with fudge squares: 2-ingredient no-bake (fastest), condensed milk (creamiest), marshmallow fluff (plush nostalgic), old-fashioned cooked (candy-shop classic), and corn syrup method (most forgiving cooked). Includes MasalaMonk.com branding.
Not sure which peanut butter fudge recipe to make first? Use this quick chooser to match your mood to the right method—2-ingredient no-bake for speed, condensed milk for extra creaminess, marshmallow fluff for classic ‘fantasy’ texture, old-fashioned cooked for candy-shop flavor, or corn syrup for a smoother cooked set.
  • Fastest: 2-ingredient easy peanut butter fudge
  • Creamiest: peanut butter fudge with sweetened condensed milk
  • Plush/nostalgic: marshmallow fluff peanut butter fudge
  • Candy-shop: old fashioned peanut butter fudge (soft-ball stage)
  • Most forgiving cooked: peanut butter fudge with corn syrup
  • Shortcut: frosting and peanut butter fudge
  • Low-sugar: keto peanut butter fudge / sugar free peanut butter fudge
  • Allergy-friendly: peanut free fudge (seed butter swap)

No matter which route you take, great results begin with great peanut butter. If you like controlling the texture from the start—ultra smooth, slightly chunky, or deeply roasted—this guide on how to make peanut butter at home is a useful foundation.


Ingredients and tools that make everything easier

Before jumping into specific methods, it helps to set yourself up for a smooth run. Even when a recipe is “easy,” small choices can make the difference between creamy slices and a crumbly pan.

Pan size and lining

An 8-inch square pan is the sweet spot for thick, giftable squares. For thinner pieces (or if you want more servings), use a 9-inch square pan.

Line the pan with parchment paper, leaving overhang on two sides. That overhang becomes handles, so you can lift the slab out cleanly and slice without gouging the pan.

Peanut butter choice

You can use either stabilized peanut butter (the kind that doesn’t separate much) or natural peanut butter. However, natural versions vary a lot: some are oily and loose; others are stiff and dry.

  • If your peanut butter is very stiff, you’ll often need a touch more fat (butter or coconut oil) to keep the mixture from crumbling.
  • If it’s very runny, you may need a bit more structure (powdered sugar, a little extra chill time, or a firmer method like condensed milk).
Photorealistic ‘Peanut Butter Fudge Cheat Sheet’ infographic. Lists how to choose a peanut butter fudge method: powdered sugar no-bake, condensed milk with white chocolate, marshmallow creme ‘fantasy’ style, cooked soft-ball, and corn syrup for smoother cooked fudge. Includes pan size guidance (8-inch thicker squares, 9-inch thinner more pieces) and peanut butter tips for natural vs runny peanut butter. MasalaMonk.com branding.
Save this peanut butter fudge cheat sheet to pick the right method fast—no-bake powdered sugar for speed, condensed milk + white chocolate for the creamiest reliable set, marshmallow creme for classic ‘fantasy’ texture, soft-ball cooked for candy-shop fudge, or corn syrup for a smoother cooked finish. It also shows the best pan size (8-inch vs 9-inch) and quick peanut butter tips so your batch sets the way you want.

Salt and vanilla in a peanut butter fudge recipe

Salt is the quiet hero here. Even salted peanut butter usually benefits from a pinch more. Vanilla is optional, yet it rounds the flavor and makes the final result taste more “finished.”

Optional tools

  • A sturdy silicone spatula (best for thick mixtures)
  • A heavy saucepan (for heated methods)
  • A candy thermometer (strongly recommended for cooked styles)

Storage and food safety

Fudge lasts well when protected from air. Still, many versions include dairy (butter, milk, condensed milk). For safe handling basics, the USDA’s guidance on leftovers and food safety is a solid reference.

Also Read: 10 Vegan Chocolate Cake Recipes (Easy, Moist, & Dairy-Free)


Method 1: Two ingredient easy peanut butter fudge (fast, firm, classic recipe)

This is the “I need something sweet right now” method. It’s also the simplest way to get that peanut-butter-candy vibe without turning on the stove.

What this style of fudge with peanut butter is like

The texture is firm and sliceable, with a sweetness that hits quickly and then fades into roasted peanut flavor. Because it sets through dry structure rather than cooking, the bite feels a bit like old-fashioned peanut butter candy—dense and satisfying.

Ingredients (8-inch pan)

  • 1 cup peanut butter (creamy works best)
  • 2 to 2½ cups powdered sugar
  • Optional: ½ teaspoon vanilla
  • Optional: pinch of salt
Photorealistic recipe card for 2-ingredient peanut butter fudge (no-bake). Shows ingredients (1 cup peanut butter, 2–2½ cups powdered sugar, optional salt and vanilla) and quick steps to mix, press into a lined pan, chill 2 hours, and slice. Includes tips to fix fudge that’s too soft or crumbly, with MasalaMonk.com branding.
This 2-ingredient peanut butter fudge is the fastest no-bake method: warm the peanut butter just until stirrable, mix in powdered sugar until pressable, then chill and slice. Save this card for those ‘need something sweet now’ moments—and use the quick fix tips if your batch turns out too soft or a little crumbly.

Step-by-step recipe

  1. Line the pan. Set it aside so it’s ready.
  2. Soften the peanut butter. Warm it gently—about 20 seconds in the microwave, or briefly in a small saucepan—just until it stirs easily. Avoid making it hot.
  3. Season it. Stir in vanilla and a pinch of salt if you’re using them.
  4. Add powdered sugar gradually. Start with 2 cups and stir until the mixture thickens into a soft dough.
    Next, add more powdered sugar a few tablespoons at a time until it holds together and feels pressable.
  5. Press into the pan. Use your spatula to compress it firmly. The tighter you press, the cleaner your slices will be.
  6. Chill until firm. Refrigerate at least 2 hours, then lift out and slice.

If it’s not perfect, fix it

  • Crumbly or dry: Warm 1–2 tablespoons of peanut butter and knead it into the mixture. Alternatively, add 1 tablespoon melted butter and mix again.
  • Too soft: Add a bit more powdered sugar and chill longer.

Also Read: Kahlua Drinks: 10 Easy Cocktail Recipes (Milk, Vodka, Coffee)


Method 2: Three ingredient peanut butter fudge (creamier and more forgiving)

This version keeps the no-bake ease, yet feels smoother and richer than the 2-ingredient batch. Because butter adds silkiness and helps binding, the texture often lands in that “creamy peanut butter fudge” zone.

Ingredients (8-inch pan)

  • 1 cup peanut butter
  • ¼ cup butter, melted
  • 2 to 2½ cups powdered sugar
  • Optional: ½ teaspoon vanilla
  • Optional: pinch of salt
Photorealistic recipe card for three ingredient peanut butter fudge (no-bake). Shows ingredients: 1 cup peanut butter, ¼ cup melted butter, 2 to 2½ cups powdered sugar, optional vanilla, and a pinch of salt. Includes steps to line an 8-inch pan, mix peanut butter with melted butter, add powdered sugar gradually, press into the pan, and chill 2–3 hours until sliceable. MasalaMonk.com branding.
This 3-ingredient peanut butter fudge is the creamier, more forgiving upgrade from the 2-ingredient version—melted butter adds silkiness so the texture stays smooth and sliceable. Save this card for a quick no-bake fudge that sets reliably in the fridge and tastes extra peanut-forward with a bigger pinch of salt.

Step-by-step recipe

  1. Prepare your pan. Line it with parchment and set aside.
  2. Melt the butter. Let it cool for a minute so it’s warm, not scalding.
  3. Combine peanut butter and butter. Stir until glossy and unified.
  4. Add vanilla and salt if using.
  5. Stir in powdered sugar gradually. Begin with 2 cups, then adjust. The mixture should be thick but still spreadable.
  6. Press and smooth. Push it firmly into the pan and level the surface.
  7. Chill 2–3 hours until sliceable.

Flavor upgrades for 3 Ingredient peanut butter fudge

A slightly larger pinch of salt makes this taste more peanut-forward. Additionally, a spoonful of finely chopped roasted peanuts gives a satisfying crunch without making slicing difficult.

Also Read: Cranberry Moscow Mule Recipe: A Festive Holiday Cocktail With Easy Variations


Method 3: Four ingredient peanut butter fudge (balanced, “best-ever” flavor)

Four-ingredient versions are popular because that extra ingredient—often vanilla—makes the fudge taste more intentional. Moreover, the method is still just stir, press, chill.

Ingredients (8-inch pan)

  • 1 cup peanut butter
  • ¼ cup butter, melted
  • 2 cups powdered sugar (plus extra only if needed)
  • 1 teaspoon vanilla
  • Pinch of salt (highly recommended)
Photorealistic recipe card for four-ingredient peanut butter fudge (no-bake). Shows fudge squares on a plate with a navy background and an overlay listing ingredients (1 cup peanut butter, ¼ cup melted butter, 2 cups powdered sugar, 1 tsp vanilla, pinch of salt) and steps to mix, add vanilla and salt, stir in powdered sugar until thick, press into a lined pan, and chill 2–3 hours. Includes pro tip to sift powdered sugar for extra-smooth fudge. MasalaMonk.com branding.
Save this four-ingredient peanut butter fudge recipe card for a balanced, ‘best-ever’ no-bake batch that slices clean. The vanilla + salt make it taste more intentional, and the pro tip (sift the powdered sugar) helps keep the texture extra smooth instead of gritty.

Step-by-step

  1. Line the pan and set it nearby.
  2. Stir peanut butter and melted butter until smooth.
  3. Add vanilla and salt. Mix thoroughly.
  4. Add powdered sugar and stir until thick and spreadable.
  5. Press into the pan firmly; smooth the top.
  6. Chill 2–3 hours, then slice.

A simple cocoa twist in 4 Ingredient peanut butter fudge

If you want a quick chocolate-peanut vibe without adding a full layer, stir 1–2 tablespoons cocoa into half the mixture and swirl it through before chilling. For an easy drizzle at serving time, this quick homemade chocolate syrup works beautifully on top of a slice.

Also Read: Iced Coffee: 15 Drink Recipes—Latte, Cold Brew, Frappe & More


Method 4: Peanut Butter Fudge with Sweetened Condensed Milk (extra creamy, very reliable)

This is the candy-counter style: smooth, rich, and easy to slice. To guarantee a firm set, this condensed milk version uses white chocolate chips for structure. Without a setting ingredient, the classic “condensed milk + peanut butter” combo can stay too soft—especially in warmer kitchens.

Ingredients (for an 8-inch pan)

  • 1 can (14 oz / 396g) sweetened condensed milk
  • 2½ cups white chocolate chips
  • 1 cup peanut butter (creamy is easiest)
  • 1 teaspoon vanilla
  • Pinch of salt
Photorealistic recipe card for condensed milk peanut butter fudge with a reliable set. Shows ingredients: 1 can (14 oz/396g) sweetened condensed milk, 2½ cups white chocolate chips, 1 cup peanut butter, vanilla, and salt. Includes steps to melt condensed milk with chips on low heat, stir in peanut butter, pour into a lined pan, and chill 3–4 hours (overnight best). Tip included for fixing fudge that’s too soft. MasalaMonk.com branding.
This condensed milk peanut butter fudge is the ‘candy-counter’ version—extra creamy, smooth, and reliably sliceable thanks to white chocolate chips for structure. Save this card if you want a gift-worthy batch with minimal effort: melt, stir, pour, chill, then cut clean squares.

Step-by-step

  1. Prep the pan: Line an 8-inch square pan with parchment paper, leaving overhang.
  2. Melt gently: In a heavy saucepan over low heat, warm the condensed milk and white chocolate chips, stirring constantly until smooth and glossy (about 3–6 minutes). Keep the heat low to avoid scorching.
  3. Add peanut butter: Stir in the peanut butter until fully unified and silky.
  4. Finish the flavor: Remove from heat and stir in vanilla and salt.
  5. Pour and smooth: Scrape into the pan, level the top, and tap the pan lightly to settle it.
  6. Chill to set: Refrigerate 3–4 hours (overnight is best for super-clean slices). Lift out and slice.

If it’s not perfect, fix it

  • Too soft: Chill longer first. If it still won’t set, re-melt gently and stir in ½ to 1 cup more white chocolate chips, then re-chill.
  • Too firm: Let slices sit at room temperature for 5–10 minutes before serving.

Condensed milk peanut butter fudge without white chocolate (works, but a different texture)

If you’d rather skip the chips, you can still use condensed milk—just add dry structure so it sets sliceable:

  • Warm 1 can condensed milk + 1 cup peanut butter over low heat until glossy.
  • Remove from heat and stir in 2 to 2½ cups powdered sugar until thick and spreadable.
  • Press into the pan and chill 3–4 hours.

This version is more “peanut butter candy” in texture than candy-shop fudge, but it’s still delicious and reliable when you want a no-chip option.

Also Read: Marinara Sauce Recipe: Classic Homemade Marinara


Method 5: Marshmallow Fluff Peanut Butter Fudge (plush, classic, nostalgic)

This is the classic “fantasy-style” approach: you cook the sugar base, then beat in marshmallow creme and peanut butter for that plush, sliceable, old-school texture. It’s much more reliable than simply mixing fluff and peanut butter and hoping it sets.

Ingredients (for an 8-inch pan)

  • 2 cups sugar
  • ½ cup evaporated milk (or whole milk)
  • ½ cup butter
  • 1 jar (7 oz / ~200g) marshmallow creme or marshmallow fluff
  • ¾ to 1 cup peanut butter
  • 1 teaspoon vanilla
  • Pinch of salt
Photorealistic recipe card for marshmallow fluff peanut butter fudge (fantasy-style). Shows a bubbling sugar base in a saucepan with a candy thermometer and lists the soft-ball stage temperature (234–236°F / 112–113°C). Includes ingredients (sugar, evaporated milk, butter, marshmallow creme, peanut butter, vanilla, salt) and steps to boil to temp, add fluff and peanut butter off heat, beat until matte, pour, cool, and chill. MasalaMonk.com branding.
This marshmallow fluff peanut butter fudge is the classic ‘fantasy-style’ version—plush, nostalgic, and sliceable when you hit the soft-ball stage (234–236°F). Save this card if you want that old-school candy-shop texture, plus the quick fixes for batches that turn out too soft or grainy.

Step-by-step

  1. Line your pan with parchment and keep it close by. This mixture sets quickly once it’s beaten.
  2. Start the base: In a heavy saucepan, combine sugar, evaporated milk, and butter. Heat over medium, stirring until everything is dissolved and uniform.
  3. Boil to soft-ball stage: Bring to a steady boil and cook until the mixture reaches 234–236°F (112–113°C). Once it’s boiling, avoid stirring—if needed, gently swirl the pan instead.
  4. Finish off-heat: Remove from heat. Immediately add the marshmallow creme, peanut butter, vanilla, and salt.
  5. Beat until it turns matte: Stir vigorously (with a wooden spoon or a mixer on low) until the mixture thickens, loses some shine, and starts holding soft shape—usually 1–3 minutes.
  6. Pour and smooth fast: Transfer to the pan right away and smooth the top. Let it cool until set, then refrigerate for cleaner slices.

If Marshmallow Fluff Peanut Butter Fudge is not perfect, fix it

  • Grainy: Usually from sugar crystals or too much stirring while boiling. Next time, stop stirring once it boils and brush down the sides of the pan early with a little water.
  • Too soft: It likely didn’t reach soft-ball temperature. You can re-melt the batch gently, bring it back to 234–236°F, then beat again and reset.
  • Too firm/crumbly: It likely cooked a bit too hot or was beaten too long. Next time, stop beating as soon as it thickens and turns slightly matte.

Also Read: Hot Chocolate Coffee: 3 Easy Recipes (Cocoa, Mix, or Espresso)


Method 6: Frosting and peanut butter fudge (icing shortcut that actually works)

This method is almost unfairly easy. Because frosting already contains sugar and fat in a stable ratio, combining it with peanut butter creates a fudge-like base that sets in the fridge.

Ingredients (8-inch pan)

  • 1 cup peanut butter
  • 1 container frosting (about 16 oz / 450g), vanilla preferred
  • Pinch of salt
  • Optional: ½ teaspoon vanilla (if your frosting is bland)
Photorealistic recipe card for frosting and peanut butter fudge (no-bake icing shortcut). Shows ingredients—peanut butter, vanilla frosting (16 oz/450g), pinch of salt, optional vanilla—and quick steps to warm frosting and peanut butter, mix until glossy, press into a lined pan, chill until set, and slice. Includes tip to add extra peanut butter and salt for better flavor. MasalaMonk.com branding.
This frosting and peanut butter fudge is the easiest no-bake shortcut—just warm, mix, press, and chill for smooth, sliceable squares. Save this card for last-minute dessert trays, and use the salt + extra peanut butter tip to make it taste less ‘store-bought.

Step-by-step

  1. Line your pan with parchment.
  2. Warm the frosting briefly. Microwave 10–15 seconds to soften it.
  3. Soften the peanut butter the same way—just enough to stir.
  4. Combine frosting and peanut butter until completely smooth.
    At first, it may resist; keep mixing and it will turn glossy.
  5. Season with salt (and vanilla if using).
  6. Spread into the pan and smooth the top.
  7. Chill 2–3 hours until set.

Make it taste less “store-bought”

Salt is essential here. Also, a little extra peanut butter (2–3 tablespoons) pushes the flavor forward and keeps it from tasting like frosting with peanuts.

Also Read: Strawberry Smoothie Recipes (12 Easy Blends + Bowls & Protein Shakes)


Method 7: Corn Syrup Peanut Butter Fudge (smoother cooked texture, less grainy)

Corn syrup is the quiet helper in cooked fudge. It makes the batch more forgiving by lowering the chances of that gritty, grainy texture that can sneak into candy. If you want old-fashioned flavor with a smoother finish and a little extra insurance, this is the cooked method to start with.

Ingredients (for an 8-inch pan)

  • 2 cups granulated sugar
  • ½ cup milk or evaporated milk
  • ½ cup light corn syrup
  • ¼ cup butter
  • 1 cup peanut butter (creamy is easiest)
  • 1 teaspoon vanilla
  • Pinch of salt
Photorealistic recipe card for corn syrup peanut butter fudge (Karo syrup style). Shows soft-ball stage temperature 234–236°F (112–113°C), ingredients (sugar, milk/evaporated milk, light corn syrup, butter, peanut butter, vanilla, salt) and steps to dissolve, boil without stirring, rest 3–5 minutes, stir in peanut butter, beat briefly, pour, cool, chill, and slice. MasalaMonk.com branding.
This corn syrup peanut butter fudge is the most forgiving cooked method—corn syrup helps reduce sugar crystallization so the texture stays smoother and less grainy. Save this card for the key cues: boil to 234–236°F, don’t stir at the boil, rest briefly off heat, then beat just until it turns slightly matte for clean slices.

Step-by-step

  1. Prep the pan first. Line an 8-inch square pan with parchment paper and leave overhang so you can lift the fudge out later.
  2. Start the base. In a heavy saucepan, combine sugar, milk, corn syrup, and butter. Heat over medium, stirring until the mixture is fully uniform and the sugar looks mostly dissolved.
  3. Boil without stirring. Bring it to a steady boil. Once it’s boiling, stop stirring (stirring encourages crystals). If needed, gently swirl the pan instead.
  4. Cook to soft-ball stage. Continue boiling until the mixture reaches 234–236°F (112–113°C) on a candy thermometer. (This range is where you get creamy fudge—not syrupy-soft and not crumbly.)
  5. Rest briefly. Remove from heat and let the pan sit undisturbed for 3–5 minutes.
  6. Add the peanut butter and flavorings. Stir in peanut butter, vanilla, and salt until completely smooth.
  7. Beat just until it thickens. Keep stirring for about 30–60 seconds, until it looks slightly thicker and loses some shine. Don’t keep going once it starts to resist—overbeating can make it crumbly.
  8. Pour and smooth fast. Scrape into the prepared pan immediately and smooth the top.
  9. Set and slice. Let it cool until firm at room temperature, then refrigerate for cleaner slices.

What makes this Corn Syrup Peanut Butter Fudge different

It’s still real cooked fudge, but the corn syrup helps keep the texture smoother and reduces the “grainy surprise” factor.

If it’s not perfect, fix it

  • Grainy: Next time, stop stirring once it boils, and brush down the sides of the pan early with a little water to remove sugar crystals.
  • Too soft: It likely didn’t reach temperature. You can gently reheat, bring back to 234–236°F, then finish again.
  • Crumbly: Usually cooked a touch too hot or beaten too long. Pull it off closer to 234°F next time and beat less.

Also Read: Sandwich for Breakfast: Breakfast Sandwich Recipe + 10 Variations


Photorealistic fudge-making cheat sheet showing soft-ball stage temperature for creamy fudge: 234–236°F (112–113°C). Background shows a saucepan of bubbling sugar syrup with a candy thermometer reading about 235°F and a wooden spoon nearby. Overlay lists three rules (stop stirring once it boils, brush crystals off pan sides, beat only until matte) and quick fixes for too soft, crumbly, or grainy fudge. MasalaMonk.com branding.
Save this soft-ball stage fudge temperature guide if you’re making old fashioned peanut butter fudge or any cooked fudge. Hitting 234–236°F (112–113°C) is the difference between creamy slices and a batch that’s too soft, crumbly, or grainy—and the quick rules here show exactly when to stop stirring and when to beat.

Method 8: Old-Fashioned Cooked Peanut Butter Fudge (classic soft-ball stage, candy-shop feel)

This is the true old-fashioned version—the one that smells like holidays and tastes like it came from a tiny candy shop. It’s a little more hands-on than the corn syrup method, but the payoff is big: a creamy, structured set and that classic “homemade fudge” character people remember.

Ingredients (for an 8-inch pan)

  • 2 cups granulated sugar
  • ½ cup milk or evaporated milk
  • ¼ cup butter
  • ¾ to 1 cup peanut butter (use 1 cup for bold peanut flavor)
  • 1 teaspoon vanilla
  • Pinch of salt
Photorealistic recipe card for old-fashioned peanut butter fudge. Includes soft-ball stage temperature (234–236°F / 112–113°C), timing cues to rest 5–10 minutes and beat 1–3 minutes until matte, plus ingredients and step-by-step instructions for a creamy candy-shop style set. MasalaMonk.com branding.
This old-fashioned peanut butter fudge is the classic candy-shop method: cook to the soft-ball stage (234–236°F), rest briefly, then beat until matte for that creamy, slice-clean set. Save this card if you want traditional holiday-tray fudge with the key timing cues that prevent grainy or crumbly batches.

Step-by-step

  1. Prep the pan. Line an 8-inch pan with parchment and set it right beside the stove. Timing matters later.
  2. Dissolve the sugar. In a heavy saucepan, combine sugar, milk, and butter. Heat over medium, stirring until the mixture is smooth and the sugar is dissolved.
  3. Boil hands-off. Bring to a steady boil. Once boiling, stop stirring. If you see sugar crystals on the sides early on, brush them down with a little water.
  4. Cook to soft-ball stage. Cook until the mixture reaches 234–236°F (112–113°C).
  5. Cool undisturbed. Remove from heat and let it sit 5–10 minutes without stirring. This short rest helps you land on creamy instead of gritty.
  6. Add peanut butter + finishers. Add peanut butter, vanilla, and salt. Stir until smooth.
  7. Beat until it turns matte. Stir vigorously until it thickens, loses gloss, lightens slightly, and starts holding its shape. This usually takes 1–3 minutes. Stop as soon as it reaches a thick, pourable stage—overbeating can make it crumble.
  8. Pour immediately. Scrape into the pan right away and smooth the top quickly.
  9. Set and slice. Let it set at room temperature, then refrigerate if you want extra clean edges when slicing.

Why this Cooked Peanut Butter Fudge is “classic”

The cooling pause and the beating step create tiny crystals that make fudge taste creamy and slice cleanly. The timing is the whole game.

If it’s not perfect, fix it

  • Too soft: It likely didn’t reach temperature. Reheat gently, bring back to 234–236°F, then finish again.
  • Grainy: Usually caused by stirring while boiling or crystals on the pan sides. Next time: hands off once boiling + brush down sides early.
  • Crumbly: Usually cooked too hot or beaten too long. Pull it off a touch earlier (closer to 234°F) and beat less.

Also Read: Paper Plane Cocktail Recipe + Best Amaro Substitutes & Tips


Chocolate peanut butter fudge and buckeye-style recipes

Chocolate turns a good batch into something that feels gift-worthy. Fortunately, you can add chocolate in several ways, depending on the mood.

If you want help choosing cocoa or chocolate types, MasalaMonk’s explainer on cacao vs chocolate vs dark chocolate is a handy read.

Photorealistic recipe card for buckeye fudge (chocolate peanut butter fudge with layers). Shows a peanut butter fudge base with a glossy chocolate cap and lists ingredients for the PB layer (2-ingredient or 3-ingredient base) plus chocolate topping (chocolate chips and butter/coconut oil). Includes steps to chill the PB layer, pour melted chocolate, chill again, and slice with a warm knife. MasalaMonk.com branding.
Buckeye fudge is the gift-worthy upgrade: a firm peanut butter fudge base topped with a smooth, glossy chocolate layer. Save this card for clean layers every time—chill the PB layer first, pour the melted chocolate cap, then slice with a warm, dry knife for sharp edges.

Variation A: Cocoa in the base (simple chocolate-peanut flavor)

Best for: a unified chocolate peanut fudge taste.

How to do it

  1. Make any base you like (no-bake, condensed milk, or marshmallow).
  2. Stir 2–4 tablespoons cocoa powder into the mixture.
    If it thickens too much, add 1–2 tablespoons warm peanut butter to loosen.
  3. Press, chill, slice.

Variation B: Buckeye fudge (peanut layer + chocolate cap)

Best for: clean layers and candy-shop vibes.

Chocolate cap ingredients

  • 1½ cups chocolate chips (milk or dark)
  • 1 tablespoon butter or coconut oil (for shine and easier slicing)

Step-by-step

  1. Make and set your peanut butter base fully.
  2. Melt chocolate chips with butter until smooth.
  3. Pour over the set layer and tilt the pan to spread evenly.
  4. Chill until firm, then slice with a warm knife.

Variation C: Swirl (marbled look with minimal effort)

Best for: an impressive finish without extra work.

Step-by-step

  1. Prepare your peanut layer, then spread it into the pan.
  2. Melt chocolate separately (or use a thick chocolate syrup).
  3. Spoon chocolate over the top and drag a knife through for swirls.
  4. Chill until set.

For a fast drizzle that looks elegant on a serving plate, this 3-minute chocolate syrup is an easy option.

Also Read: Katsu Curry Rice (Japanese Recipe, with Chicken Cutlet)


Keto peanut butter fudge (low-sugar direction, still rich)

Keto-style batches depend on the sweetener you choose. Because sugar alternatives vary, the texture can shift—sometimes firmer, sometimes softer. Still, a good base formula delivers a sliceable, satisfying result.

For a helpful overview of sweetener types, the American Diabetes Association’s PDF guide to sugar substitutes provides useful context. If you’re deciding on monk fruit specifically, Cleveland Clinic’s overview of monk fruit sweetener is a clear introduction.

Ingredients (8-inch pan)

  • 1 cup peanut butter (no added sugar)
  • ½ cup coconut oil or butter, melted
  • ¾ to 1 cup powdered-style keto sweetener blend
  • ½ teaspoon vanilla
  • Pinch of salt
Photorealistic recipe card for keto peanut butter fudge (low-sugar, no-bake, sliceable). Shows ingredients: peanut butter with no added sugar, melted coconut oil or butter, powdered keto sweetener (monk fruit/erythritol blend), vanilla, and salt. Includes steps to mix until glossy, add sweetener, press into a lined pan, chill 2–3 hours, and slice, plus a tip to rest pieces 5–10 minutes if they set hard. MasalaMonk.com branding.
This keto peanut butter fudge is a simple no-bake, low-sugar method that still tastes rich and slices clean. Save this card if you’re making sugar-free peanut butter fudge with monk fruit/erythritol—use powdered sweetener for the smoothest texture, then chill until firm and let pieces rest briefly before serving if they set extra hard.

Step-by-step recipe

  1. Line your pan with parchment.
  2. Stir peanut butter and melted fat until glossy and smooth.
  3. Add sweetener gradually and mix until thickened.
    Taste as you go; sweetness builds quickly with some blends.
  4. Add vanilla and salt, mixing thoroughly.
  5. Press into the pan firmly and smooth the surface.
  6. Chill 2–3 hours until set.

Texture note for keto peanut butter fudge

If it sets very hard, let slices sit at room temperature for 5–10 minutes. Conversely, if it stays too soft, add a bit more powdered-style sweetener next time.

Also Read: Almond Flour Pancakes (Easy Recipes) Fluffy, High-Protein, Keto & More


Sugar-free peanut butter fudge and candy-style squares

Sugar-free versions often feel closer to “peanut butter candy” than traditional cooked fudge. That’s not a downside—rather, it’s a different texture expectation. The goal is a cohesive, sliceable slab with clean sweetness and strong peanut flavor.

For a grounded take on sweeteners, the NHS overview on whether sweeteners are safe is a practical read. If you prefer a research-focused summary, Harvard’s Nutrition Source page on low-calorie sweeteners adds nuance.

Ingredients (8-inch pan)

  • 1 cup peanut butter
  • ½ cup butter or coconut oil, melted
  • ¾ to 1 cup powdered sugar-free sweetener blend
  • ½ teaspoon vanilla
  • Pinch of salt
Recipe card image for sugar-free peanut butter fudge (no-bake, candy-style squares). Shows stacked peanut butter fudge squares on a plate with ingredients in the background (powdered sugar-free sweetener, melted butter or coconut oil, vanilla, and salt). Text overlay lists ingredients (1 cup peanut butter, ½ cup melted butter or coconut oil, ¾–1 cup powdered sugar-free sweetener, ½ tsp vanilla, pinch of salt) and steps to mix, add sweetener gradually, press into a lined pan, and chill until set. Pro tip: use powdered sweetener (not granular) to avoid grit. MasalaMonk.com footer.
Save this sugar-free peanut butter fudge recipe card for an easy no-bake, candy-style treat that still slices clean. The key to a smooth bite is using a powdered sugar-free sweetener (granular can taste gritty). Mix, press into a lined pan, chill, and you’ve got quick peanut butter fudge squares without the sugar.

Step-by-step

  1. Line the pan with parchment.
  2. Combine peanut butter and melted fat until smooth.
  3. Add sweetener gradually until the mixture becomes thick and pressable.
  4. Stir in vanilla and salt to finish.
  5. Press into the pan firmly.
  6. Chill until set and slice.

Avoiding grit

Powdered-style sweeteners generally work better than granular ones in no-bake candy squares. Additionally, mixing thoroughly helps eliminate pockets of sweetness that can feel sharp.

Also Read: How to Cook Tortellini (Fresh, Frozen, Dried) + Easy Dinner Ideas


Peanut-free fudge (allergy-friendly recipe, still sliceable)

Peanut-free fudge is completely doable when you swap the spread. The method stays the same; the flavor shifts. For substitution ideas, Food Allergy Research & Education has a helpful list of peanut butter alternatives, including sunflower seed butter and soy nut butter.

Ingredients (8-inch pan, no-bake style)

  • 1 cup sunflower seed butter (or another peanut-free alternative)
  • ¼ cup melted butter (or coconut oil)
  • 2 cups powdered sugar (or suitable alternative)
  • ½ teaspoon vanilla
  • Pinch of salt
Photorealistic recipe card for peanut-free fudge made with seed butter. Shows sunflower seed butter (or soy nut butter) fudge squares and lists ingredients (seed butter, melted butter or coconut oil, powdered sugar or powdered sweetener, vanilla, salt) and steps to warm, mix, press into a lined pan, and chill 2–3 hours. Includes safety note to check labels for cross-contact. MasalaMonk.com branding.
This peanut-free fudge uses sunflower seed butter for an allergy-friendly, no-bake treat that still slices clean. Save this card for school events, parties, and potlucks—same easy method, different spread. Always check labels for cross-contact if you’re cooking for peanut allergies.

Step-by-step

  1. Line your pan with parchment.
  2. Warm the seed butter slightly so it stirs smoothly.
  3. Mix in melted butter until glossy.
  4. Add vanilla and salt.
  5. Stir in powdered sugar gradually until thick and spreadable.
  6. Press into the pan and chill until set.

Important reminder

Even when you use peanut-free ingredients, always check labels for cross-contact warnings if you’re cooking for someone with severe allergies.

Also Read: How to Cook Bacon in the Oven (Crispy, No-Mess, Crowd-Ready Recipe)


Troubleshooting: fix texture issues without panic

Even when you follow directions, fudge can surprise you. Fortunately, most problems have straightforward fixes.

Troubleshooting infographic for peanut butter fudge with quick fixes for common problems: grainy texture (sugar crystals), fudge too soft, too firm, oil pooling from natural peanut butter separation, crumbly/dry fudge, and fudge that won’t set. Includes simple solutions like chilling longer, adjusting structure, stirring techniques for cooked fudge, and re-pressing, with MasalaMonk.com branding.
Fudge didn’t turn out the way you wanted? Save this quick troubleshooting guide for peanut butter fudge—fix grainy batches, rescue fudge that’s too soft or too firm, handle oil pooling (common with natural peanut butter), and recover crumbly or won’t-set slabs without starting over.

If it’s grainy

Graininess usually comes from sugar crystallization in cooked batches. To reduce the chance:

  • Avoid stirring while the mixture boils.
  • Use a clean pastry brush and water to wash sugar crystals from the sides early.
  • Consider the corn syrup method if you want extra insurance. King Arthur’s explanation of corn syrup’s role is helpful for understanding why it works.

Your Peanut butter fudge is too soft

  • Chill longer first; many slabs firm up with time.
  • For no-bake versions, add a bit more powdered sugar (or powdered sweetener) next time.
  • For condensed milk versions, slightly increase peanut butter or reduce condensed milk a touch.

If it’s too firm

  • Let it sit at room temperature for several minutes before serving.
  • In future batches, reduce powdered sugar slightly, or add a bit more fat (butter/coconut oil).

And If oil pools on top of your peanut butter fudge

This happens most often with natural peanut butter that separates easily.

  • Stir the peanut butter extremely well before measuring.
  • Chill the slab, then blot any surface oil gently with paper towel.
  • Next time, use the 3-ingredient method or a condensed milk base for a more stable set.

If it crumbles when slicing

Crumbly no-bake fudge usually needs more binding:

  • Add a spoonful of warmed peanut butter and mix again.
  • Alternatively, add a tablespoon of melted butter and re-press.

Also Read: Benefits of Nuts and Seeds – Protein-Packed Superfoods


Slicing, serving, and pairing ideas

Slicing goes best when the slab is cold and firm. Use a long knife, warm it under hot water, wipe dry, and slice in decisive downward cuts. Then, wipe the blade between slices for clean edges.

Step-by-step infographic showing how to slice and store peanut butter fudge for clean squares. Includes tips to chill until firm, warm and dry the knife, cut straight down (no sawing), and wipe the blade between slices. Storage guidance includes using an airtight container, parchment between layers, refrigerating for cleaner slices, and freezing by wrapping tightly and thawing in the fridge. MasalaMonk.com branding.
Want clean, sharp peanut butter fudge squares? Save this slicing + storage guide: chill the slab, warm and dry your knife, cut straight down, and wipe between slices. It also shows the best way to store peanut butter fudge (airtight + parchment layers) and how to freeze it without the surface getting messy when thawed.

For a peanut-butter-themed dessert plate, pairing squares with cookies makes everything feel intentional. MasalaMonk’s peanut butter cookies fit naturally alongside any of these methods. Meanwhile, if you want a lighter contrast, these healthy oat cookies balance rich fudge nicely. Finally, for something bright and fruity on the same spread, MasalaMonk’s mango dessert ideas bring a fresh counterpoint.


A closing thought (and a simple way to pick your winner)

If you’re short on time, start with the 2-ingredient batch. If you’re after creamy reliability, choose the condensed milk method. And if you want plush nostalgia, marshmallow creme is the move. When you want true candy-shop character, go cooked soft-ball stage. After that, chocolate turns any version into a showpiece—especially buckeye-style with a glossy cap.

Once you’ve made two or three styles, you’ll notice something: the “best” one changes depending on the day. Sometimes you want the easiest pan imaginable. Other times you want a softer melt, a deeper cooked flavor, or an allergy-friendly swap so everyone can share. Luckily, all of those are within reach—one method at a time.

Also Read: High Protein Overnight Oats | 5 Recipes (Low Calorie, Vegan, Bulking & More)


FAQs

1. What is the best peanut butter fudge recipe for beginners?

If you’re new to fudge, start with a no-bake peanut butter fudge that uses powdered sugar (the 2-, 3-, or 4-ingredient styles). It’s straightforward, doesn’t require a thermometer, and sets firmly in the fridge. After that, try the condensed milk or cooked soft-ball versions when you want a more candy-shop finish.

2. What are the ingredients in peanut butter fudge?

Peanut butter fudge usually needs peanut butter + a sweetener/structure. Depending on the method, that structure can be powdered sugar, sweetened condensed milk, marshmallow creme, or a cooked sugar base. In addition, many recipes include butter, vanilla, and salt to improve texture and flavor.

3. How do you make two ingredient peanut butter fudge?

Two-ingredient peanut butter fudge is typically peanut butter + powdered sugar. Warm the peanut butter just until stirrable, then mix in powdered sugar until the mixture becomes thick and pressable. Finally, press it into a lined pan and chill until firm.

4. How do you make three ingredient peanut butter fudge?

Three-ingredient versions usually add melted butter to peanut butter and powdered sugar. The butter makes the mixture creamier and easier to spread. Once combined, chill until sliceable.

5. What makes four ingredient peanut butter fudge taste “best ever”?

Four-ingredient peanut butter fudge often includes vanilla (plus peanut butter, butter, and powdered sugar). Vanilla and salt make the flavor taste more complete, while the butter keeps the bite smoother. As a result, it reads more like a finished candy than a quick mix.

6. Can I make peanut butter fudge with sweetened condensed milk?

Yes. For a reliable, creamy set, condensed milk versions usually need an additional “setting” ingredient (commonly white chocolate chips) or extra dry structure (like powdered sugar). Otherwise, condensed milk and peanut butter alone can stay too soft, especially in warmer kitchens.

7. What is marshmallow creme or fluff peanut butter fudge?

Marshmallow creme (or fluff) versions are often called fantasy-style peanut butter fudge. Typically, you cook a sugar base to the soft-ball stage, then beat in marshmallow creme and peanut butter. Consequently, the texture turns plush, cohesive, and sliceable for days.

8. How do you make old fashioned peanut butter fudge?

Old fashioned peanut butter fudge is a cooked method that usually requires reaching the soft-ball stage (about 234–236°F / 112–113°C). After cooking, you cool it briefly, then beat until it thickens and loses some shine before pouring into the pan. That timing is what creates the classic creamy bite.

9. What is corn syrup peanut butter fudge, and why use it?

Corn syrup versions are cooked fudge with an extra helper ingredient. Corn syrup helps reduce crystallization, which can lead to a smoother texture. In other words, it’s a more forgiving route when you want cooked fudge flavor without as much risk of graininess.

10. How do you make chocolate peanut butter fudge?

You can add chocolate in three easy ways: mix cocoa into the base, swirl melted chocolate through before chilling, or add a top layer for a buckeye-style finish. Meanwhile, using milk chocolate chips gives a softer, sweeter “candy bar” vibe, while dark chocolate makes the peanut flavor pop.

11. What is buckeye fudge?

Buckeye fudge is a peanut butter fudge base topped with a firm chocolate layer. Once the peanut butter layer is set, pour melted chocolate (often with a little butter or coconut oil for shine) over the top. Then chill again and slice with a warm knife for neat layers.

12. Can I make no bake peanut butter fudge?

Definitely. No-bake peanut butter fudge usually sets by using powdered sugar or a structured base like frosting. Because there’s no cooking stage, it’s faster and less fussy. Still, measuring and mixing thoroughly matters for a clean set.

13. Why is my peanut butter fudge grainy?

Graininess usually comes from sugar crystallization in cooked fudge, or from undissolved granules. To prevent it, avoid stirring once the mixture boils, keep crystals off the sides of the pan, and use a thermometer for accuracy. Conversely, if it’s a no-bake sweetener issue, switching to a powdered-style sweetener often helps.

14. Why is my peanut butter fudge too soft?

First, give it more chill time—many batches firm up as they cool fully. If it’s still soft, the mixture likely needs more structure: add a bit more powdered sugar (or powdered sweetener) next time. For cooked versions, it may not have reached soft-ball temperature, so a thermometer is the quickest fix.

15. Why is my peanut butter fudge crumbly or dry?

This usually means there’s too much dry structure or not enough fat. Add a spoonful of warmed peanut butter (or a little melted butter) and mix again, then press firmly into the pan. Next time, use slightly less powdered sugar or choose the condensed milk or marshmallow method for a creamier set.

16. Why did oil pool on top of my peanut butter fudge?

This happens most often with natural peanut butter that separates easily. Stir the jar extremely well before measuring, then chill and blot any surface oil if needed. Additionally, choosing a method with more stability (butter, condensed milk, or cooked fudge) can reduce pooling.

17. Can I make sugar free peanut butter fudge?

Yes, as long as you use a powdered-style sugar-free sweetener for the smoothest texture. Granular sweeteners can feel gritty in no-bake candy squares. Also, sweetness levels vary by brand, so taste as you go and adjust slowly.

18. Can I make keto peanut butter fudge?

Keto peanut butter fudge typically uses peanut butter with no added sugar, a fat like butter or coconut oil, and a powdered keto sweetener. If it sets very hard, let it sit at room temperature briefly before serving. On the other hand, if it stays too soft, add a little more powdered sweetener next time.

19. How do you make peanut free fudge?

To make peanut-free fudge, swap peanut butter for a safe alternative like sunflower seed butter or soy nut butter, then follow the same no-bake method. However, if you’re baking for allergies, always check labels and watch for cross-contact warnings.

20. How long does peanut butter fudge last and how should I store it?

For the best texture, store peanut butter fudge in an airtight container with parchment between layers. In a cool room, it can last several days; in the fridge, it lasts longer and slices cleaner. Furthermore, freezing works well—wrap tightly and thaw in the fridge so the surface doesn’t sweat.

Posted on 2 Comments

Peanuts for Weight Loss: Best Ways to Eat Groundnuts, Chikki & Peanut Butter

Unshelled peanuts spilling out of a jute bag on rustic wooden background – peanuts for weight loss concept.

Peanuts are one of those everyday foods that almost everyone has in their kitchen — whether it’s a small jar of peanut butter, a handful of roasted groundnuts from the street vendor, or a crunchy piece of peanut chikki during the winter. But when it comes to weight loss, the humble peanut often sparks confusion. Some people swear that peanuts help them feel fuller for longer and curb cravings, while others worry that these little legumes are “too fatty” or “too high in calories” to fit into a healthy plan.

The truth? Both sides have a point. Peanuts are calorie-dense, but they’re also packed with protein, fiber, and healthy fats — all of which can support weight management when eaten mindfully. In fact, learning how to eat peanuts (and in what form) could be the difference between them working for your waistline or working against it. A systematic review published in Nutrients by researchers at St. Michael’s Hospital, Toronto found that nut consumption is not linked with weight gain and may even reduce the risk of obesity over time (Nishi et al., 2021).

In this guide, we’ll walk through the different ways peanuts can be included in a weight loss journey, explore variations like roasted peanuts, masala peanuts, chikki, and peanut butter, and clear up some of the common doubts around whether peanuts help with fat loss or cause weight gain.

So, let’s crack open the shell and dive in.
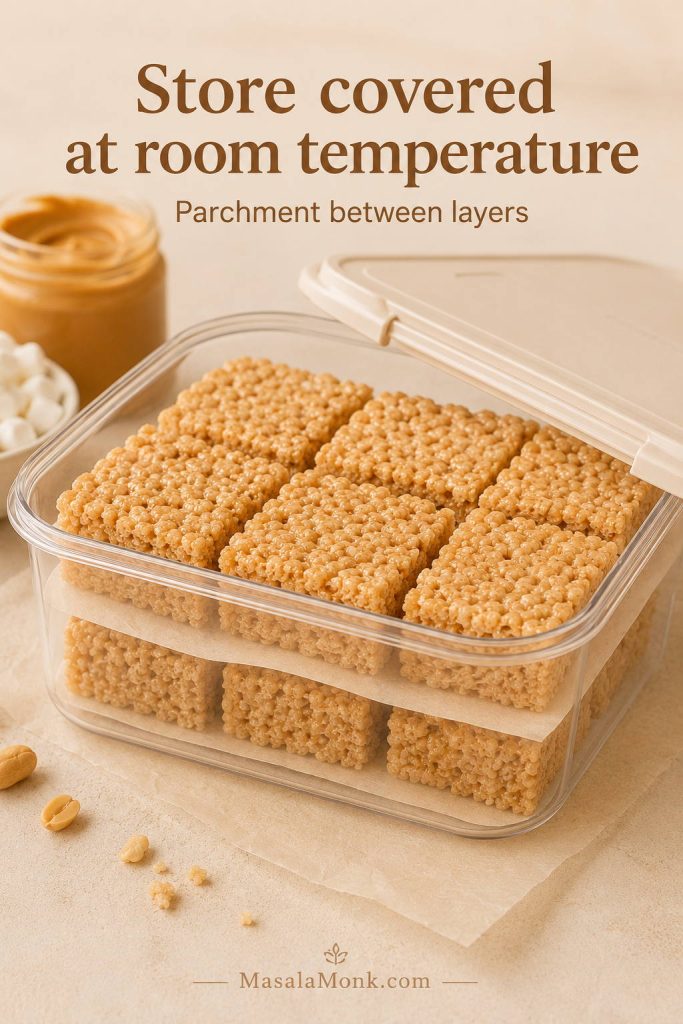
Peanut chikki, roasted peanuts, unshelled groundnuts, and a bowl of peanut butter displayed together on a table – healthy peanut forms for weight loss.
From chikki to roasted groundnuts and peanut butter — peanuts come in many forms, each with its own role in weight loss or weight gain.
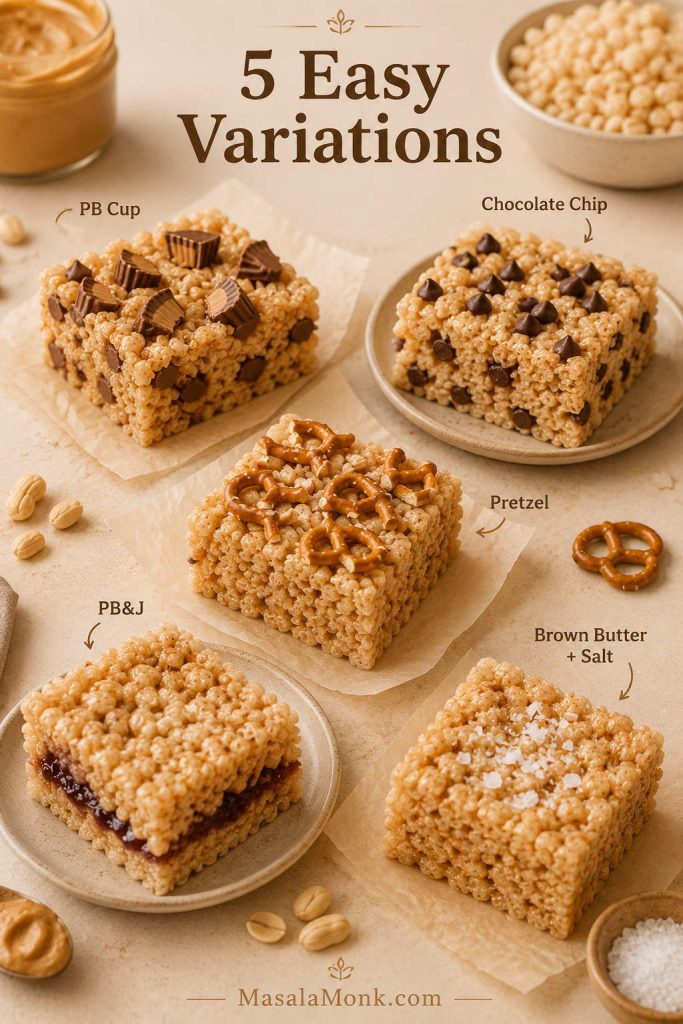
Are Peanuts Good for Weight Loss?

When we think of “diet foods,” peanuts don’t usually make the top of the list. After all, one small handful can contain around 150–170 calories. But calories alone don’t tell the whole story.

The Nutritional Advantage of Peanuts

Peanuts (or groundnuts, as they’re called in many parts of India) are an excellent source of:

  • Protein – about 7 grams in just a handful, making them a great vegetarian protein option.
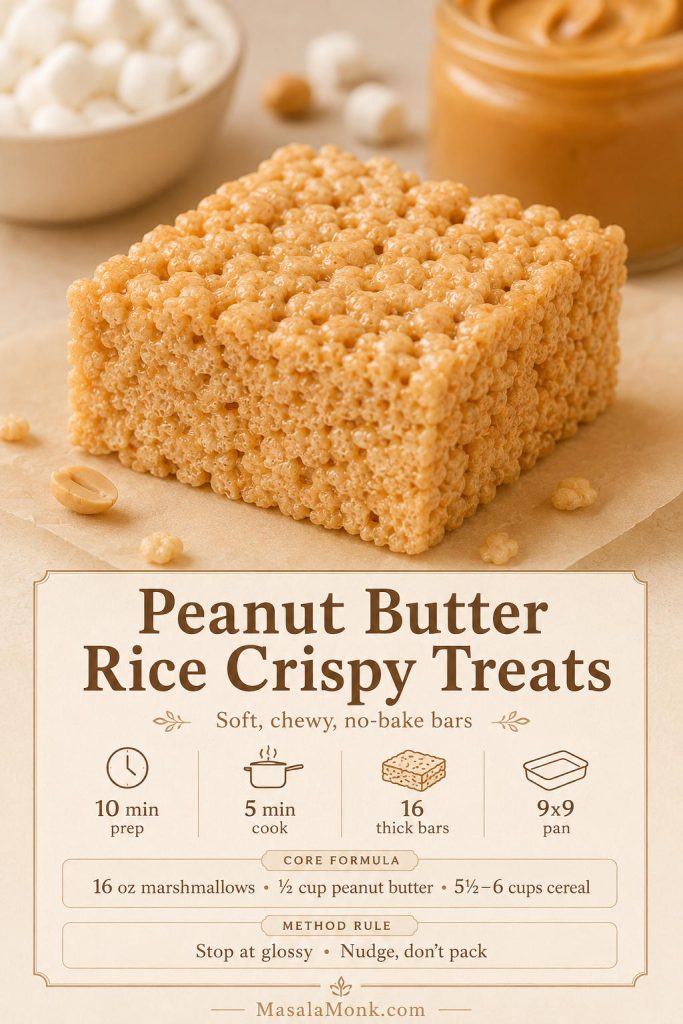
  • Fiber – slows digestion, keeps you full, and reduces the urge to snack mindlessly.
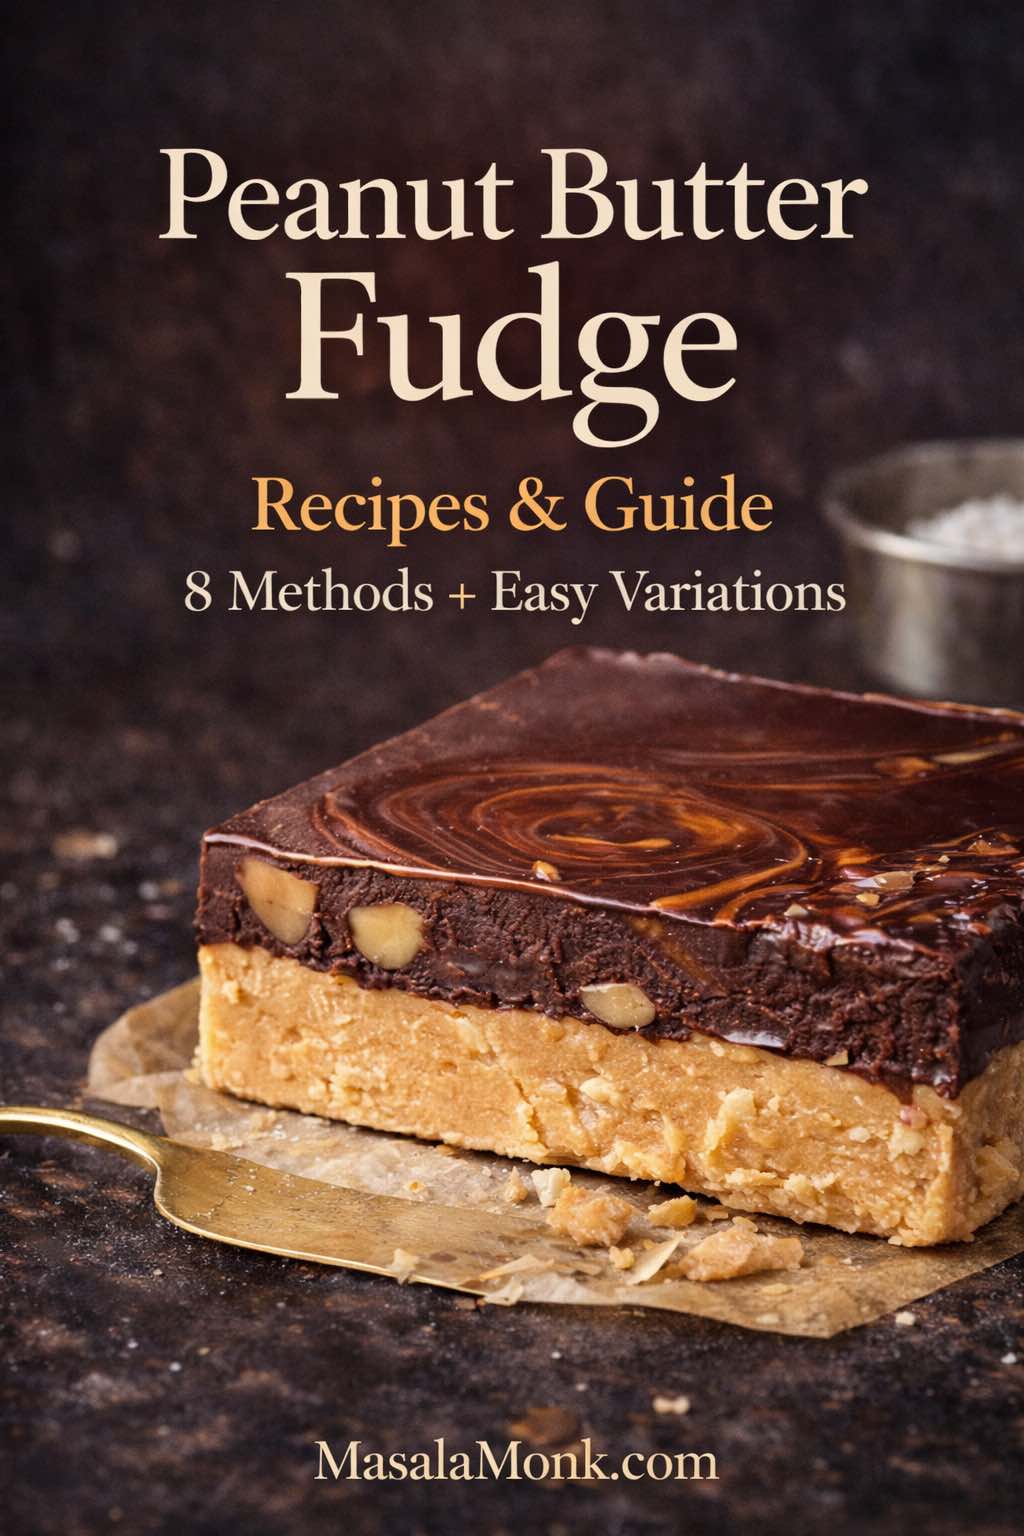
  • Healthy fats – mainly monounsaturated and polyunsaturated fats that support heart health.
  • Micronutrients – including magnesium, vitamin E, and B vitamins, all important for metabolism and energy.

This combination means peanuts aren’t just “empty calories.” They actually work to keep you satisfied, which is one of the most important factors in sticking to a weight loss plan.

A clinical trial conducted by the University of South Australia and Texas Tech University found that participants who ate 35 g of lightly salted dry-roasted peanuts twice a day before meals lost an average of 6.7 kg over six months, while also improving blood pressure and fasting glucose levels (UniSA, 2022).

Satiety: The Secret Weapon in Weight Loss

One of the biggest challenges people face when trying to lose weight is constant hunger. Peanuts help solve this problem. The protein and fat slow down digestion, so you don’t feel like reaching for another snack an hour later.

In fact, studies have shown that people who eat nuts (including peanuts) tend to have better control over their appetite compared to those who avoid them. You can read more about this in our post on nuts for weight loss and satiety.

When you’re not hungry all the time, it’s naturally easier to reduce overall calorie intake without feeling deprived.

The Calorie-Density Debate

Of course, we can’t ignore the fact that peanuts are energy-dense. Too many handfuls can quickly push you into calorie surplus, which leads to weight gain. That’s why portion control is key. A small, mindful serving can keep you full and prevent overeating later, while an oversized portion can undo your progress.

Think of peanuts as a strategic snack rather than an all-you-can-eat option. A fistful (around 28–30 grams, or about 15–20 peanuts) is usually the sweet spot for weight loss.

Whole Peanuts vs. Processed Versions

When it comes to peanuts and weight management, form matters.

  • Unshelled/raw peanuts: Best choice for mindful eating since cracking them slows you down.
  • Roasted peanuts: Great if unsalted and oil-free.
  • Masala or salted peanuts: Tasty but often loaded with sodium and extra oil.
  • Peanut chikki: Delicious but high in sugar, better for quick energy than fat loss.
  • Peanut butter: Healthy if natural and sugar-free, but easy to overeat.

You can also enjoy them in traditional ways, such as a tangy peanut chutney recipe. In short, peanuts can definitely support weight loss, but how you eat them makes all the difference.


How to Eat Peanuts for Weight Loss

If you’ve ever found yourself snacking on peanuts straight out of the jar or polishing off a big cone of roasted groundnuts at the market, you already know how easy it is to go overboard. That’s why when it comes to weight loss, how you eat peanuts is just as important as whether you eat them at all.

The good news? With a little awareness, peanuts can fit beautifully into your plan. They can serve as a quick snack, a protein-rich addition to your meals, or even a healthy replacement for processed munchies — like healthy oat protein bars made with peanut butter that fit perfectly into a weight-loss plan.

Two bowls of peanuts showing portion control: small serving labeled 150 calories for smart snacking, large bowl labeled 600 calories easy to overeat.
Portion size matters: a small handful of peanuts (150 calories) can support weight loss, while an overflowing bowl (600+ calories) may lead to overeating.

Mindful Portion Control

The golden rule is keep it small and intentional. About 28–30 grams (roughly a small handful or 15–20 peanuts) is usually enough to keep hunger away without going overboard on calories.

One simple trick? Buy unshelled peanuts. The act of cracking each shell forces you to slow down, making you less likely to overeat. It turns snacking into a more mindful activity rather than an unconscious hand-to-mouth routine.

Studies show that nuts increase satiety and reduce hunger, helping people naturally lower overall calorie intake. A review published in the American Journal of Medicine by Indiana University researchers confirmed that peanuts and other nuts suppress appetite and increase fullness after eating (Tan & Mattes, 2023).

Best Times to Eat Peanuts for Weight Loss

  • Mid-morning or mid-afternoon snack: Keeps blood sugar steady between meals.
  • Pre-workout: A small serving provides energy without weighing you down.
  • Evening craving buster: Helps prevent late-night junk food binges.

Just avoid eating large amounts right before bed. While peanuts are healthy, they take time to digest and could leave you feeling heavy at night.


Is Roasted Peanuts Good for Weight Loss?

Roasted peanuts (or roasted groundnuts, as they’re often called) are one of the most popular ways to eat them — crunchy, satisfying, and widely available.

The good:

  • Dry-roasted peanuts without added oil or salt are an excellent weight loss snack.
  • They’re high in protein and fiber, so they keep you full.
  • The crunch factor makes them feel indulgent, which helps you stay on track without feeling deprived.
Bowl of roasted unsalted peanuts with text overlay highlighting them as the best choice for weight loss – crunchy, filling, and healthy.
Roasted, unsalted peanuts are the best choice for weight loss — crunchy, filling, and free from hidden oils or excess salt.

The watchouts:

  • Salted roasted peanuts add excess sodium, which can cause water retention and bloating.
  • Oil-roasted peanuts can pack hidden calories that derail your deficit.

👉 If you love roasted peanuts, choose the plain, unsalted version. Pair them with a piece of fruit for a balanced snack that covers both protein and fiber.


Is Masala Peanuts Good for Weight Loss?

We’ve all been tempted by spicy, crunchy masala peanuts sold at local shops or as a bar snack. They’re addictive, no doubt — but are they good for weight loss?

The answer: not really.

Why?

  • Most masala peanuts are deep-fried and coated in a flour batter.
  • They’re loaded with salt and spices, which may make you drink (and eat) more.
  • A small bowl can easily cross 300–400 calories without you realizing it.
Bowl of spicy masala peanuts with text overlay warning about hidden calories, fried oils, and excess salt.
Masala peanuts are tasty but come with hidden calories from added oils and salt. Best enjoyed occasionally, not daily.

That doesn’t mean you can never enjoy them. Think of masala peanuts as an occasional treat rather than an everyday weight loss snack. If you want to make them healthier at home, try air-frying or oven-roasting them with spices and just a touch of oil spray.


Peanut Chikki for Weight Loss

Now let’s talk about peanut chikki — a winter favorite in many Indian households. Made with peanuts and jaggery, it’s often thought of as a healthy sweet. But how does it fit into weight loss?

The good:

  • Peanuts in chikki still provide protein, healthy fats, and crunch.
  • Jaggery, compared to refined sugar, does contain minerals like iron and magnesium.
  • A small piece can satisfy sweet cravings better than store-bought candy or chocolate.
Bowl of peanut chikki with text overlay highlighting it as high in protein and sugar, recommended in moderation for weight loss.
Peanut chikki offers protein and minerals but is also high in sugar — enjoy it as an occasional treat, not an everyday snack.

The challenge:

  • Peanut chikki is calorie-dense. One medium piece can have 150–200 calories.
  • The sugar (jaggery) spikes blood sugar, which may make you hungrier later.

👉 Verdict: Chikki is better than processed sweets, but it’s not a weight loss food. If you include it, keep it to a tiny piece as a dessert, not as a daily snack.


Peanuts and Weight Gain – What You Should Know

Up to this point, we’ve been looking at peanuts through the lens of weight loss. But here’s the interesting part — while peanuts can support fat loss in the right portions, they can also do the exact opposite: help with weight gain. It all comes down to how much you eat, how often, and in what form.

A meta-analysis published in The American Journal of Clinical Nutrition confirmed that nut-enriched diets do not increase body weight, BMI, or waist circumference in controlled settings. However, when consumed in calorie surplus, nuts can support healthy weight gain (Flores-Mateo et al.).

For a broader look at how different nuts compare, check out our guide on the best nuts for weight loss.

The Calorie Surplus Factor

At the heart of weight gain is one simple equation: calories in vs. calories out. Peanuts are calorie-dense — one small handful (30 g) contains around 160–170 calories. Have just three extra handfuls every day, and you’ve added 500 calories to your intake. That’s enough to tip you into a calorie surplus, which leads to gradual weight gain over time.

For someone looking to bulk up or gain healthy weight, peanuts are a blessing. They pack a lot of nutrition in a small serving, making it easier to eat more without feeling stuffed.

Peanuts for Healthy Weight Gain

If weight gain is your goal, here’s how peanuts can help you do it right:

  • Snack frequently: Instead of limiting peanuts to once a day, enjoy them as a mid-morning and evening snack.
  • Add them to meals: Sprinkle roasted groundnuts into poha, salads, or stir-fries for a calorie boost.
  • Pair with calorie-dense foods: Combine peanuts with bananas, jaggery, or oats for a higher-energy meal.
  • Go for peanut butter: A couple of tablespoons on toast or in a smoothie adds 200+ calories easily.
Tall glass of peanut butter smoothie with banana and oats, text overlay promoting peanuts for healthy weight gain.
A creamy peanut butter smoothie blended with banana and oats makes a nutrient-dense option for healthy weight gain.

The Belly Fat Question

A common worry is whether peanuts cause belly fat. Here’s the truth:

  • Peanuts alone don’t target belly fat. They don’t have some magical property that sends calories straight to your midsection.
  • What happens is that eating peanuts (or peanut butter) in excess can push you into calorie surplus. Over time, that extra energy is stored as fat, and for many people, the belly is where it shows first.

So, peanuts are not “bad” for belly fat — it’s simply a matter of how much you eat relative to your needs.

Finding the Balance: Weight Loss vs. Weight Gain

What’s fascinating about peanuts is that they can fit into both goals — loss and gain.

  • For weight loss → Focus on portion control, mindful snacking, and choosing raw/roasted forms.
  • For weight gain → Increase frequency and portion size, add them to meals, and embrace calorie-dense versions like peanut butter or chikki.

It’s not the peanut itself that determines the outcome, but how you use it in your daily routine.


Peanut Butter and Weight Loss

Peanut butter has become a pantry staple in many homes — spread on toast, swirled into oats, or blended into smoothies. But when you’re trying to lose weight, the jar can feel a little intimidating. After all, just two tablespoons pack nearly 200 calories. So, is peanut butter really a friend or foe for weight loss?

The answer: it depends on the type you choose and how you use it.

The Case for Peanut Butter in Weight Loss

  • High in protein: Around 7–8 grams per serving helps curb hunger and maintain muscle mass.
  • Rich in healthy fats: Monounsaturated fats keep you full and support heart health.
  • Versatile and satisfying: A little peanut butter can make simple meals — like whole-grain toast or fruit — taste indulgent, making you less likely to crave junk.

Best Peanut Butter for Weight Loss

Not all peanut butters are created equal. Many commercial jars are loaded with sugar, hydrogenated oils, and salt — ingredients that add empty calories and cancel out the health benefits.

What to look for in a weight-loss-friendly peanut butter:

  • 100% peanuts (or peanuts + a pinch of salt) → the fewer the ingredients, the better.
  • No added sugar or artificial sweeteners.
  • No hydrogenated oils or trans fats.
Two jars of peanut butter compared: natural peanut butter with just peanuts vs processed peanut butter with sugar and oils, labeled for weight loss guidance.
For weight loss, always choose natural peanut butter made only from peanuts. Processed versions often contain added sugar and oils.

Popular Indian brands that often have “natural” or “unsweetened” ranges include Pintola, MyFitness, MuscleBlaze, and Alpino. Always check the label — even “healthy-looking” jars sometimes sneak in sugar or palm oil.

👉 Practical tip: If you’re new to natural peanut butter, stir it well before use. The oil separation is normal and actually a sign that it’s minimally processed.


Peanut Butter for Weight Gain

Here’s where things flip. While weight watchers need to measure peanut butter carefully, those aiming to gain weight can embrace it more freely.

A couple of tablespoons of peanut butter:

  • Add 200+ calories effortlessly.
  • Blend beautifully into high-calorie smoothies (with banana, milk, oats, and honey).
  • Work as a quick spread on chapati or toast for an energy boost.

This is why peanut butter shows up so often in “weight gain diets” — it’s calorie-dense, nutritious, and easy to include daily. If you’re focusing on overall protein goals, you may also find our guide on how to eat 100 grams of protein a day helpful.


Peanut Butter and Belly Fat – Myth or Truth?

One of the most common Google searches around peanut butter is: “Does peanut butter cause belly fat?” Let’s clear this up.

  • Peanut butter by itself doesn’t cause belly fat.
  • Belly fat comes from eating more calories than your body burns — regardless of whether those calories come from peanut butter, rice, or bread.
  • In fact, natural peanut butter may actually support fat loss thanks to its satiety effect, keeping you from overeating later.

The real risk is in portion size. Eating half a jar in one sitting will absolutely push you into calorie surplus — which could show up as belly fat over time. But a measured spoon or two each day, paired with whole foods, can be part of a balanced, weight-loss-friendly diet.

Portion size is the real issue. A systematic review and meta-analysis published in Foods Journal (MDPI) found that nut intake — even up to 100 g/day — was not associated with weight gain when included in calorie-restricted diets and could even improve body composition (Vilela et al., 2024).

In addition, a meta-analysis published in The American Journal of Clinical Nutrition showed that tree nuts and peanuts can significantly improve markers of glycemic control, which ties into better appetite regulation and weight management (Tindall et al., 2019).


Groundnuts (Mungfali) for Weight Loss

In India, the word groundnut or mungfali is far more common than “peanuts.” Whether sold in paper cones on the roadside, mixed into chaat, or enjoyed roasted during winter evenings, groundnuts have long been a comfort snack. But how do they fit into a weight loss plan?

The good news: groundnuts and peanuts are the same thing. The only difference is the name. And just like peanuts, groundnuts can support weight loss when eaten in moderation and in the right form.

Why Groundnuts Are Great for Weight Loss

  • Affordable & accessible: Groundnuts are one of the most budget-friendly sources of protein and healthy fats, making them perfect for everyday diets.
  • Protein-packed: A small handful can keep hunger away for hours, which is crucial when you’re trying to control calories.
  • Fiber-rich: They promote fullness and support digestion.
  • Healthy fat profile: The monounsaturated fats in groundnuts are linked to better heart health and improved satiety.
Street-style paper cone filled with roasted groundnuts (mungfali) on rustic table, labeled as India’s affordable superfood.
Mungfali, or groundnuts, are India’s affordable superfood — packed with protein, fiber, and everyday energy.

Best Ways to Eat Groundnuts for Weight Loss

  1. Boiled groundnuts – A popular snack in South India. Boiling makes them softer and less calorie-dense than fried versions. Add a pinch of salt and turmeric for flavor.
  2. Dry-roasted groundnuts – Simple, crunchy, and filling. Stick to unsalted versions.
  3. Groundnut chutney – Works well as a side, but keep portions small since it often uses oil.
  4. Added to meals – Sprinkle into poha, upma, or salads for extra crunch and protein.

Groundnuts to Avoid During Weight Loss

  • Fried groundnuts: Deep-fried versions (often sold in markets) are heavy in oil and extra calories.
  • Salted groundnuts: Excess sodium can cause bloating and make you eat more.
  • Groundnut-based sweets: Chikki, laddoos, or brittle may be tasty, but the added sugar cancels out the weight loss benefits.

Interestingly, not all calories from nuts are absorbed by the body. A review published in Nutrients (MDPI) by the U.S. Department of Agriculture explained that due to fiber content and incomplete digestion, nuts provide less metabolizable energy than previously assumed — meaning your body doesn’t absorb every calorie listed on the label (Baer et al., 2023).


Final Thoughts

When it comes to weight management, peanuts — or groundnuts, mungfali, peanut butter, and even peanut chikki — are a bit like a double-edged sword. They can be your greatest ally or your sneaky setback, depending on how you use them.

If your goal is weight loss, think of peanuts as a smart snack. A handful of raw or dry-roasted groundnuts can keep hunger at bay, help you avoid processed junk, and provide protein and healthy fats that support your journey. But the key is portion control. Too much of even a good thing can tip you into calorie surplus.

If your goal is weight gain, peanuts become a powerful ally in the opposite way. By increasing your portions and including calorie-dense versions like peanut butter and chikki, you can boost your intake without relying on unhealthy fast foods.

Hands gently holding unshelled peanuts with text overlay highlighting balance and portion control for weight management.
Balance is the secret: a handful of peanuts can help with weight loss, while extra portions can support weight gain.

The beauty of peanuts lies in their versatility. They can be boiled, roasted, spiced, or crushed into butter. They can appear in your breakfast smoothie, your evening snack, or even your winter sweets. Few foods are this adaptable, this affordable, and this universally loved.

So, the next time you crack open a shell or spread peanut butter on toast, remember: peanuts aren’t the enemy. They’re simply a tool. Use them with mindfulness, and they’ll work for you — whether that means shedding kilos, building muscle, or just staying healthy.

In the end, it’s not about labeling foods as “good” or “bad.” It’s about finding the balance that works for you. And in that balance, peanuts — humble, crunchy, and nourishing — can absolutely earn a spot on your plate.


📚 References

  1. Nishi SK, Viguiliouk E, Kendall CWC, et al. (2021). Are fatty nuts a weighty concern? A systematic review and meta-analysis on the effects of nut consumption on adiposity and related disease risk factors. Published in Nutrients, St. Michael’s Hospital, Toronto.
    👉 Read the full review on PubMed Central
  2. University of South Australia & Texas Tech University (2022). Peanuts present a nutty solution for weight loss. Clinical trial showing peanut intake before meals supported significant weight loss and metabolic benefits.
    👉 Read the study release
  3. Tan SY, Mattes RD. (2023). A review of the effects of nuts on appetite, food intake, metabolism, and body weight. Published in the American Journal of Medicine, Indiana University.
    👉 Read on ScienceDirect
  4. Flores-Mateo G, et al. (2013). Nut intake and adiposity: meta-analysis of clinical trials. Published in The American Journal of Clinical Nutrition.
    👉 Read the analysis
  5. Vilela S, et al. (2024). Nuts combined with energy restriction on weight loss, body composition, satiety, and diet quality in adults: A systematic review and meta-analysis. Published in Foods Journal (MDPI).
    👉 Read full text on MDPI
  6. Baer DJ, Gebauer SK, Novotny JA. (2023). Nuts, Energy Balance and Body Weight. Published in Nutrients (MDPI), U.S. Department of Agriculture.
    👉 Read the review
  7. Tindall AM, et al. (2019). Tree nut and peanut consumption and markers of glycemic control in adults: A systematic review and meta-analysis of randomized controlled trials. Published in The American Journal of Clinical Nutrition.
    👉 Read on AJCN

Frequently Asked Questions About Peanuts and Weight Loss

1. Do peanuts really help with weight loss?

Yes, peanuts can support weight loss when eaten in moderation. Thanks to their protein, fiber, and healthy fats, they help you feel fuller for longer and reduce cravings. A clinical trial by the University of South Australia showed that people who ate a small serving of peanuts before meals lost weight more effectively than those who didn’t.


2. How many peanuts should I eat per day for weight loss?

For weight loss, the sweet spot is about 28–30 grams (a small handful or 15–20 peanuts). This portion provides around 150 calories, enough to keep you satisfied without pushing you into a calorie surplus. Eating too many handfuls, however, can quickly add up.


3. Is roasted peanuts good for weight loss?

Dry-roasted, unsalted peanuts are one of the best forms to include in your weight loss diet. They’re crunchy, filling, and free from hidden oils or excess salt. On the other hand, salted or oil-roasted peanuts may cause water retention and add unnecessary calories.


4. Can masala peanuts be eaten during weight loss?

Masala peanuts are tasty but not ideal for weight loss. Most versions are fried and heavily salted, making them calorie-dense and less healthy. If you love the flavor, you can make a homemade roasted masala peanut version using an oven or air fryer with minimal oil.


5. Is peanut chikki good for weight loss?

Peanut chikki is rich in protein and minerals from peanuts and jaggery, but it’s also high in sugar and calories. One medium piece can contain up to 200 calories. It’s fine as an occasional treat, but not something to eat daily if you’re aiming for fat loss.


6. Which peanut butter is best for weight loss?

The best peanut butter for weight loss is natural, unsweetened peanut butter made only from peanuts (and maybe a pinch of salt). Avoid processed versions with added sugar, oils, or stabilizers, as they cancel out the health benefits. Indian brands like Pintola, MyFitness, and MuscleBlaze offer natural options.


7. Does peanut butter cause belly fat?

No, peanut butter alone does not cause belly fat. Excess calories from any food, whether rice, bread, or peanut butter, can lead to fat gain. In fact, studies in The American Journal of Clinical Nutrition show that nut consumption is linked to better appetite control. The key is portion control — stick to 1–2 tablespoons per day.


8. Are groundnuts (mungfali) good for weight loss?

Absolutely! Groundnuts (mungfali) are simply another name for peanuts. They’re affordable, protein-rich, and fiber-packed, making them perfect for weight management. The best forms are boiled or dry-roasted groundnuts. Avoid fried or salted versions to keep your snack weight-loss-friendly.


9. Can peanuts also help with weight gain?

Yes — the beauty of peanuts is that they work for both goals. For weight gain, increase portion size, snack more frequently, and add calorie-dense versions like peanut butter smoothies or peanut chikki. Peanuts are calorie-rich, so they make gaining weight easier without relying on junk food.


10. What is the best time to eat peanuts for weight loss?

The best times are:

  • Mid-morning or mid-afternoon snack to avoid unhealthy munching.
  • Pre-workout for energy and protein.
  • Evening to curb late-night cravings.
    Avoid eating large amounts right before bed since peanuts take time to digest.

Posted on 1 Comment

Peanuts and Weight Loss: Separating Fact from Fiction

Peanuts and Weight Loss: Separating Fact from Fiction

When it comes to weight loss, few foods spark as much debate as peanuts. Are they a friend or foe on the journey to a healthier body? Packed with calories and fats, peanuts often get a bad rap, but recent research suggests a far more nuanced picture — one where peanuts may actually support weight management and overall health.

In this post, we’ll dive deep into the science of peanuts and weight loss, explore exciting new findings from 2025 research, debunk common myths, and offer practical guidance on how to enjoy peanuts as part of a balanced, calorie-conscious diet. Let’s crack the code!


Why Peanuts Have a Reputation in Weight Loss Circles

Peanuts are energy-dense: a single handful (about 28 grams) contains roughly 160–180 calories, mostly from fat. For many, that immediately triggers a red flag — fat and calories are “bad” for weight loss, right?

Well, it’s not that simple.

Peanuts are rich in monounsaturated and polyunsaturated fats — the kind of fats linked to heart health, unlike saturated fats. They’re also a solid source of plant-based protein, fiber, vitamins, and minerals such as magnesium, which play roles in metabolism and satiety.

Despite their caloric density, peanuts have several properties that might help control weight rather than contribute to gain. Let’s unpack how.


How Peanuts Can Help with Weight Loss: The Science

1. Satiety and Reduced Appetite

One of the most compelling reasons peanuts may support weight management is their ability to help you feel full. Their combination of protein, fiber, and healthy fats slows digestion and helps regulate hunger hormones. This means eating peanuts can reduce cravings and lower your total calorie intake across the day.

Studies consistently show that including peanuts or other nuts in snacks or meals helps reduce hunger better than many processed alternatives.

2. Reduced Calorie Absorption

Surprisingly, not all the calories in peanuts are absorbed. Because of the way peanut fat is trapped within the nut’s structure, some fat passes through the digestive system unabsorbed.

Research estimates that about 5–15% fewer calories are absorbed from whole peanuts compared to what’s calculated on nutrition labels. This is an important nuance: while peanuts are calorie-dense on paper, the net calorie impact might be lower.

3. Supporting Metabolic Health

Regular peanut consumption has been linked to improvements in cholesterol levels (especially lowering LDL), blood pressure, and blood sugar control. All of these factors contribute indirectly to healthier body composition and easier weight management.


What’s New in 2025? The Cutting-Edge Telomere Study

Beyond weight control, recent science is shedding light on peanuts’ potential anti-aging benefits at the cellular level.

A Spanish study published in early 2025 (the ARISTOTLE trial) investigated how different forms of peanuts impact telomere length—a biomarker of cellular aging. Telomeres are protective caps on the ends of chromosomes that naturally shorten as we age; preserving their length is linked to longevity and reduced chronic disease risk.

Key findings:

  • Participants consuming 25 grams per day of skin-roasted whole peanuts experienced no telomere shortening over 6 months.
  • In contrast, 22% of those eating peanut butter and 38% of control subjects (no peanuts) showed telomere shortening.
  • This suggests whole, unprocessed peanuts may offer unique cellular benefits that peanut butter doesn’t.

The takeaway? Whole peanuts might be more than a weight-loss aid—they could contribute to healthier aging.


Busting Common Myths About Peanuts and Weight Gain

Myth #1: Peanuts cause weight gain because they’re high in fat.
Fact: Fat isn’t inherently fattening. Peanuts’ fat content, combined with fiber and protein, promotes fullness and a healthy metabolism.

Myth #2: Peanut butter is just as good as whole peanuts for weight loss.
Fact: Peanut butter often lacks the fiber and intact cell structure of whole peanuts, which can reduce satiety and calorie digestion benefits. Many commercial peanut butters also contain added sugar and oils.

Myth #3: Eating peanuts means you’ll eat more calories overall.
Fact: When eaten as part of a balanced diet and replacing less healthy snacks, peanuts tend not to increase overall calorie intake and may improve diet quality.


How to Incorporate Peanuts into a Weight Loss Plan

To enjoy peanuts’ benefits without tipping the calorie scale, follow these tips:

1. Watch Portion Size

Aim for 1–2 handfuls (28–56 grams) daily. This moderate amount offers nutritional benefits without excessive calories.

2. Choose Whole, Skin-On Peanuts

Opt for raw or dry-roasted peanuts with skins intact. Skins add antioxidants and fiber, while whole nuts maximize calorie absorption benefits.

3. Limit Peanut Butter to Natural Versions

If you prefer peanut butter, pick natural options without added sugar or hydrogenated fats, and be mindful of portion size.

4. Use Peanuts as a Snack Substitute

Replace processed snacks or sweets with peanuts to improve satiety and nutrition quality.

5. Balance Your Daily Calories

Integrate peanuts as a substitution rather than an addition to avoid excess energy intake.


Peanuts and Broader Health Benefits

Weight loss is just part of peanuts’ story. Their regular consumption is associated with:

  • Heart health: Lower LDL cholesterol and blood pressure
  • Blood sugar regulation: Stabilizes glucose and insulin responses
  • Brain health: Rich in antioxidants like resveratrol
  • Environmental benefits: Peanuts are more water-efficient and environmentally sustainable compared to many tree nuts

What About Allergies and Safety?

If you have a peanut allergy, these benefits obviously don’t apply and exposure can be dangerous. For everyone else, proper storage is key to avoid aflatoxin contamination, a natural mold toxin sometimes found in peanuts.


Final Thoughts

Peanuts are often misunderstood in the context of weight loss. Far from being a dietary enemy, they can be a powerful ally when enjoyed wisely. Their unique combination of protein, fiber, healthy fats, and now, emerging evidence on cellular aging, paints a compelling picture of peanuts as a nutrient-dense, satiating, and metabolically beneficial snack.

So next time you reach for a handful of peanuts, you’re not just indulging a craving — you’re making a smart choice for your waistline and your health.

FAQs

1. Are peanuts good for weight loss?
Yes. Peanuts promote satiety through their protein, fiber, and healthy fats, helping reduce overall calorie intake. Studies show that moderate peanut consumption fits well within calorie-controlled weight loss diets.

2. Won’t the high fat content in peanuts cause weight gain?
Not necessarily. The fats in peanuts are mostly heart-healthy unsaturated fats. Plus, some of the fat in whole peanuts is not fully absorbed during digestion, which can reduce net calorie intake.

3. Is peanut butter as beneficial as whole peanuts for weight loss?
Peanut butter provides many nutrients but often lacks the fiber and intact cell structure of whole peanuts, reducing some satiety and digestion benefits. Natural peanut butter without added sugars or oils is preferable.

4. How many peanuts should I eat daily to support weight loss?
Aim for 1 to 2 handfuls (28–56 grams) per day. This amount balances nutritional benefits without excessive calories.

5. Can eating peanuts help slow aging?
Emerging research from 2025 suggests that consuming whole skin-on peanuts may help preserve telomere length, a marker linked to slower cellular aging and longevity.

6. Do peanuts affect blood sugar levels?
Yes. Peanuts have a low glycemic index and their protein and fat content help stabilize blood sugar, which supports metabolic health.

7. Are roasted peanuts as healthy as raw peanuts?
Dry-roasted peanuts with skins on retain most of their nutritional benefits, including fiber and antioxidants. Avoid peanuts roasted in unhealthy oils or with excessive salt.

8. Can peanuts replace other snacks for better health?
Absolutely. Swapping processed snacks or sugary treats for peanuts can improve satiety, nutrition quality, and support weight management.

9. Are there any risks with eating peanuts?
Peanut allergies can be severe and life-threatening for some individuals. Also, improper storage can lead to aflatoxin contamination, so buy from reputable sources and store peanuts in a cool, dry place.

10. Do peanuts fit into all types of diets?
Yes. Peanuts are plant-based and fit well in vegetarian, vegan, low-carb, and Mediterranean diets, among others, as long as calorie intake is balanced.