Posted on Leave a comment

Pav Bhaji Masala Recipe: Homemade Powder, Best Brands & Substitutes

Glass jar of reddish-brown homemade pav bhaji masala with a spoon of spice powder, served beside pav bhaji, buttered pav, onion, lemon, and coriander.

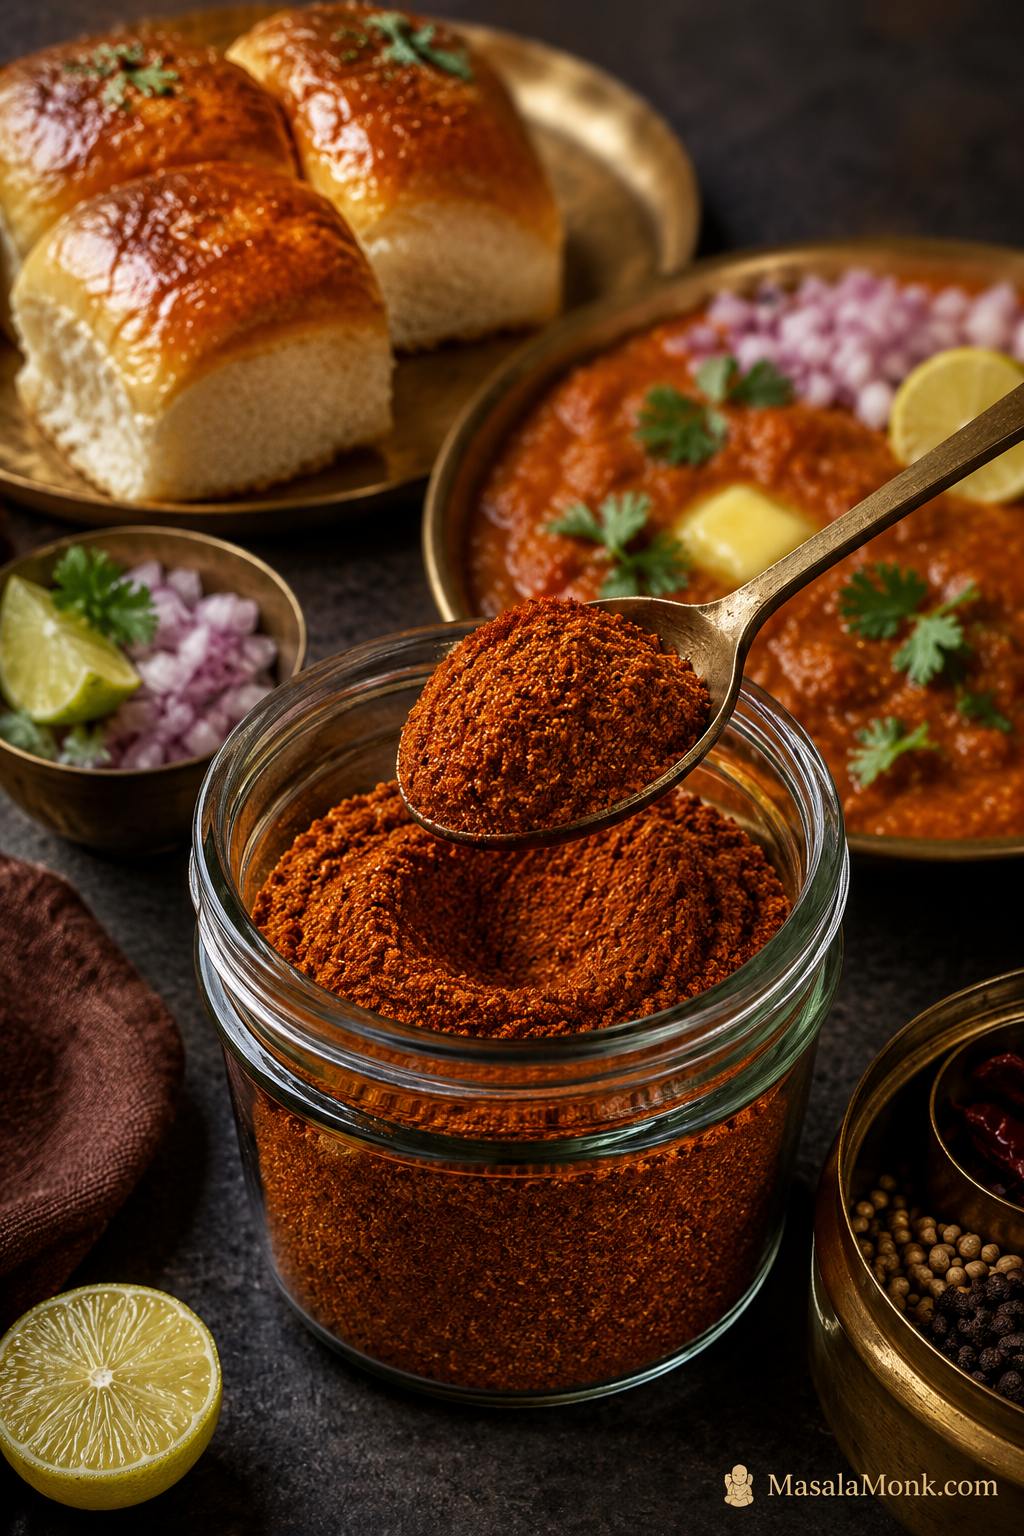
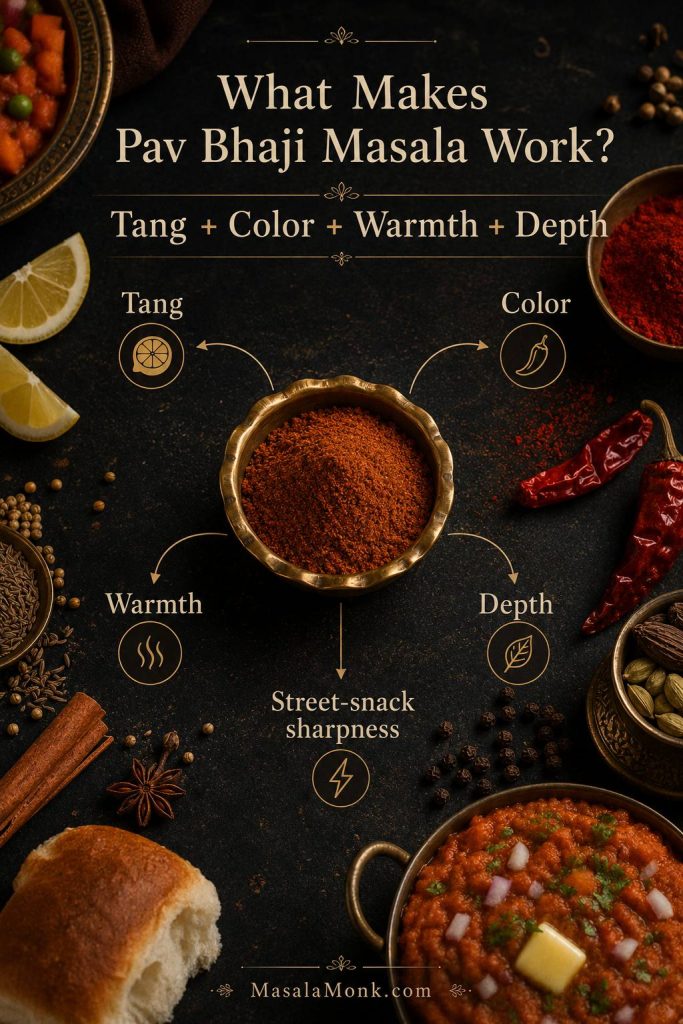
A good pav bhaji masala recipe is often the difference between a pan of mashed vegetables and bhaji that actually tastes like pav bhaji. With the right blend, the dish gets its tang, color, warmth, Mumbai-style aroma, and that buttery, chatpata depth people keep trying to recreate at home.

The confusing part is that this masala is not one fixed thing. One packet may taste too salty. Another may taste flat. A homemade batch can smell wonderful but turn bitter if the spices are roasted too hard. Sometimes the bhaji looks pale, tastes dusty, or never gets that deep snack-shop finish no matter how much powder you add.

So instead of stopping at a spice list, let’s solve the whole problem: how to make the blend fresh, how much to use, which store-bought options are worth trying, what to use in an emergency, and how to get bhaji that tastes warm, tangy, buttery, and rounded instead of flat, dusty, or over-spiced.

The good news is that pav bhaji is forgiving. You do not need the “one true” packet or a perfect spice shelf. You need a blend with warmth and tang, enough butter and tomato to carry it, and the patience to let the bhaji simmer before you decide what is missing.

The goal is that familiar first bite: soft pav, glossy bhaji, butter on top, onion and lemon on the side, and a masala flavor that feels deep without tasting muddy.

Quick Answer: Homemade or Store-Bought Pav Bhaji Masala?

The best choice depends on what you need. If you want the freshest aroma and full control over salt, heat, and tang, make the homemade blend below. If you want convenience, a good packet works well, but every brand has a different strength.

Best choice Use it when
Homemade blend Best for fresh aroma, less hidden salt, and better control over chilli, tang, and warmth.
Everest Pav Bhaji Masala Familiar, easy to find, and useful as a first packet.
Badshah Pav Bhaji Masala Bolder and more Mumbai-style in direction.
MDH Pav Bhaji Masala Classic household masala-box choice.
Organic Tattva or Pure & Sure Useful for kitchens that already prefer organic spice blends.
Homemade pav bhaji masala in a glass jar, neutral packet-style masala, and finished pav bhaji arranged as a decision guide.
Homemade masala gives you control over salt, heat, and tang; meanwhile, a good packet helps when convenience matters and time is short.

For 4 servings of pav bhaji, start with 2–3 teaspoons homemade masala or about 1 tablespoon store-bought masala. Cook it into the tomatoes and butter, simmer with the vegetables, then add more only in small ½-teaspoon steps if the flavor still feels weak.

What Is Pav Bhaji Masala?

Pav bhaji masala is a spice blend made for pav bhaji, the Mumbai street-food dish of mashed vegetables cooked with tomatoes, butter, chillies, and spices, then served with toasted pav. The blend usually includes coriander, cumin, fennel, dried red chillies, black pepper, cinnamon, cloves, black cardamom, bay leaf, amchur, dry ginger, and sometimes stone flower, black salt, mace, nutmeg, turmeric, or other warming spices.

Bowl of pav bhaji masala surrounded by flavor labels for tang, color, warmth, depth, and street-snack sharpness.
Pav bhaji masala works because it is not only spicy; it balances tang, color, warmth, and depth against potatoes, tomatoes, butter, and pav.

Garam Masala vs Pav Bhaji Masala

It is not the same as garam masala. Garam masala can make bhaji warm, but it will not give the same tangy, red-orange, street-snack profile on its own. This blend is sharper, brighter, and built to stand up to potatoes, tomatoes, butter, and bread.

Diagonal comparison of darker garam masala and redder pav bhaji masala with a small pav bhaji serving cue.
Garam masala can warm the pan, but pav bhaji masala adds the chilli color, amchur tang, and snack-style sharpness that bhaji needs.

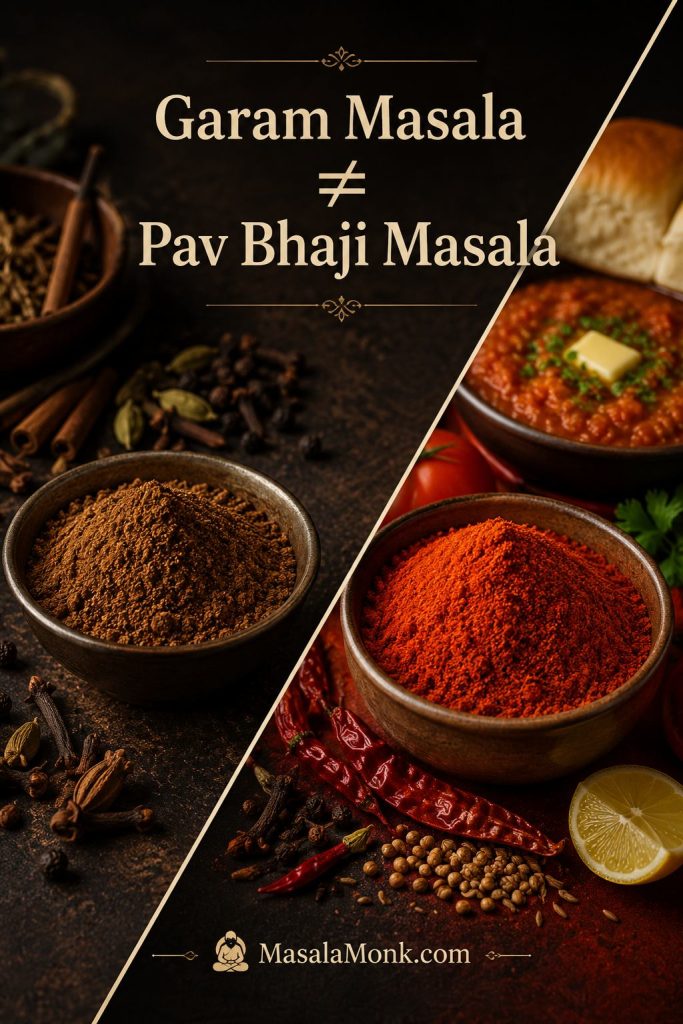
If garam masala is all you have, do not use it alone; jump to the emergency pav bhaji masala substitute for a better balance of color, tang, and warmth.

If you want to understand the broader warm-spice base first, MasalaMonk’s authentic Indian garam masala recipe is a helpful companion. Some spices overlap, but the goal here is tangier, sharper, and more snack-focused.

Simple way to understand it: garam masala adds general warmth. Pav bhaji masala adds the specific bhaji flavor: tang from amchur, color from Kashmiri chilli, depth from whole spices, and chaat-like sharpness from black pepper, black cardamom, and optional stone flower.

Homemade vs Store-Bought Pav Bhaji Masala

Both homemade and store-bought masala can make excellent bhaji. Homemade gives you freshness and control. A ready-made blend gives you speed and consistency. The bigger question is how often you cook pav bhaji and how much control you want over salt, chilli, and tang.

Option Why it works Watch out for
Homemade Fresh aroma, adjustable chilli, no mandatory salt, and better control over tang and heat. Needs whole spices and a grinder. Over-roasted spices can turn bitter.
Store-bought Convenient, consistent, easy for quick cooking, and practical if you make pav bhaji casually. Brand strength varies across salt, heat, color, and tang.

Frequent pav bhaji cooks will get more value from a small homemade batch. For occasional cooking, a good packet is practical. Either way, the flavor depends not just on the spice mix but on whether it is cooked properly into the bhaji.

If you enjoy making spice blends from scratch, MasalaMonk’s authentic sambar masala recipe follows a similar make-ahead logic: roast carefully, cool fully, grind fresh, and store the powder dry.

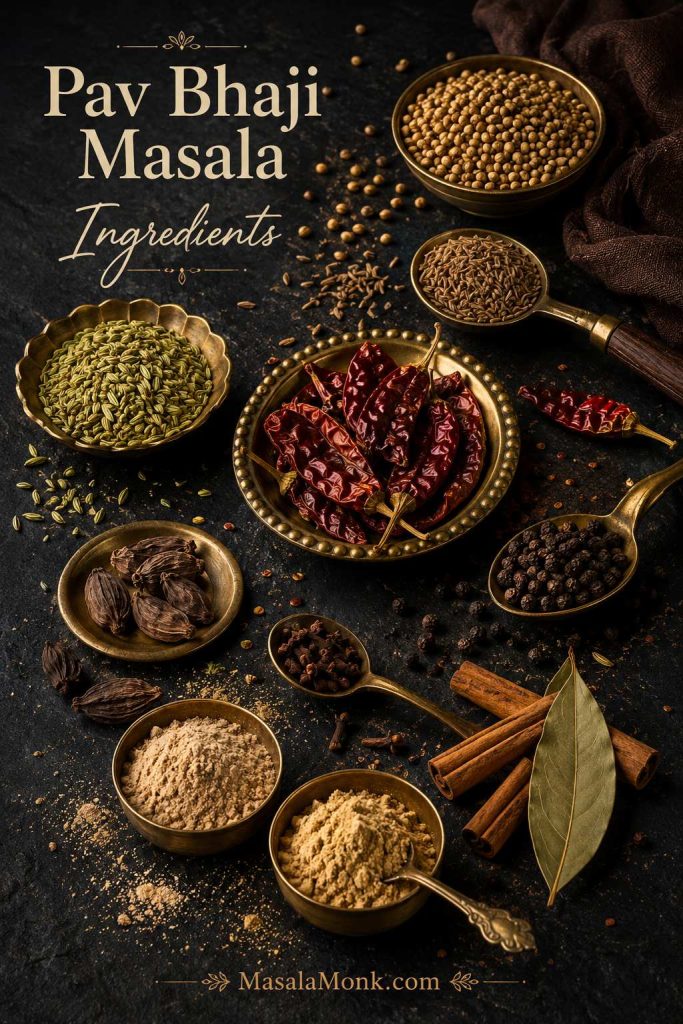
Pav Bhaji Masala Ingredients

A good powder needs body, heat, tang, color, and depth. The ingredient list looks long, but most of the flavor comes from a few core spices. The optional spices are there for a deeper packet-style flavor or a more Mumbai-style finish.

Think of the blend in layers: coriander and cumin build the body, chilli and amchur bring color and tang, and the darker spices add that deep background aroma that makes the bhaji taste rounded instead of plain.

Pav bhaji masala ingredients including coriander seeds, cumin, fennel, Kashmiri chillies, amchur, dry ginger, black cardamom, cloves, cinnamon, and bay leaf.
The ingredient list looks long, yet each spice has a job: coriander for body, cumin for earthiness, Kashmiri chilli for color, and amchur for brightness.

Already have the spices ready? Go straight to the grams and spoon measurements or the step-by-step method.

Core Spices

Ingredient What it does
Coriander seeds Forms the body of the blend with citrusy, warm, slightly sweet flavor.
Cumin seeds Brings earthy tawa-style depth.
Fennel seeds Lifts the powder with a sweet aromatic note so it does not taste too heavy.
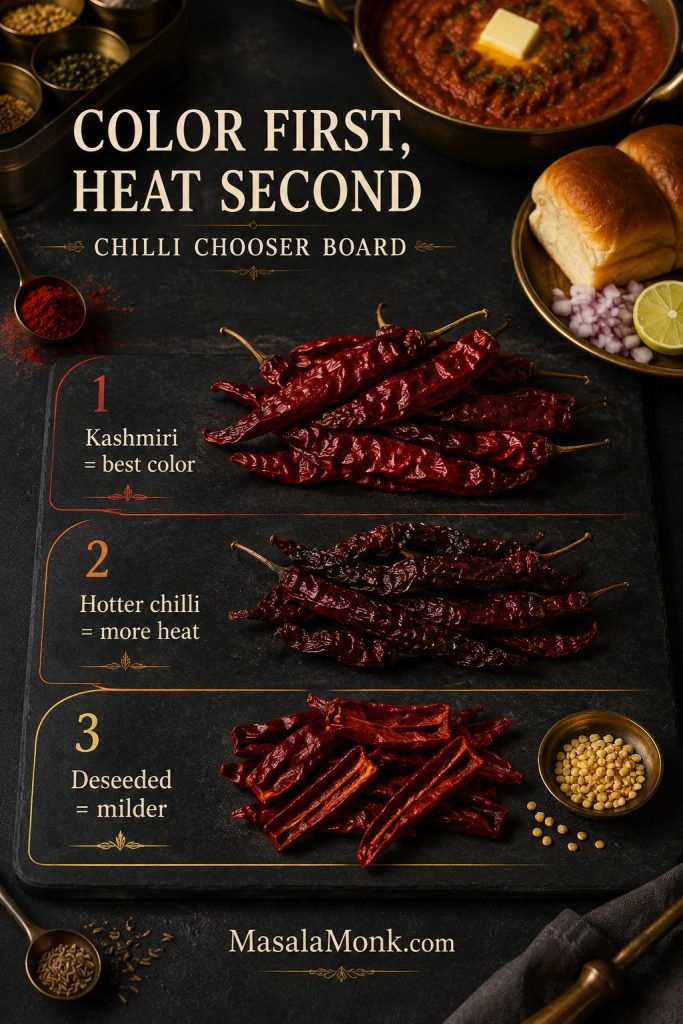
Kashmiri dried red chillies Gives red-orange color and mild heat. Use hotter chillies only if you want a spicier batch.
Black peppercorns Sharpens the heat in a way that works well with butter and potatoes.
Cinnamon and cloves Bring warm, sweet, intense spice notes. Both are strong, so use them carefully.
Black cardamom Creates smoky depth and a more pav bhaji stall-style aroma.
Bay leaf Builds background warmth and savory complexity.
Amchur powder Supplies the tang that separates this masala from garam masala.
Dry ginger powder Finishes the blend with warmth and a subtle dry spice note.
Core pav bhaji masala spices grouped by body, color, tang, and depth on a dark spice-pantry background.
Grouping spices by role makes the blend easier to adjust; instead of adding powder blindly, you can fix the flavor layer that is actually missing.

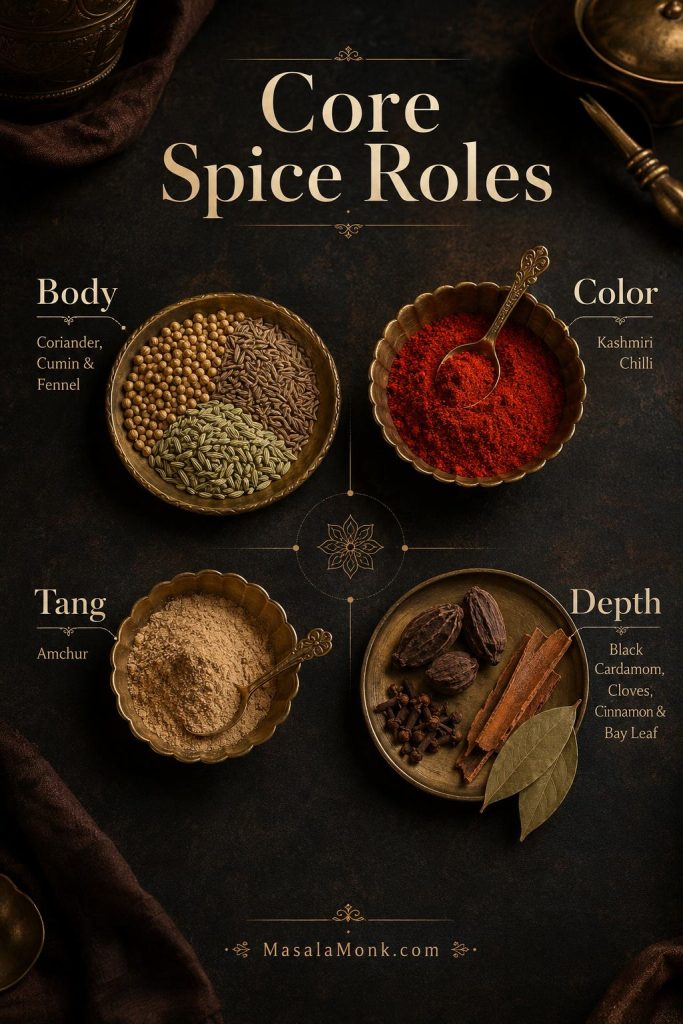
This blend is coriander-forward because pav bhaji needs body before it needs heat. Cumin and fennel keep the base earthy but not heavy, Kashmiri chillies give color without harshness, and amchur is added after roasting so the tang stays clean. The darker spices — black cardamom, cloves, cinnamon, bay leaf, and optional stone flower — should stay in the background. If they dominate, the bhaji tastes more like generic heavy masala than pav bhaji.

Street-Style Spices: Stone Flower, Amchur and Black Cardamom

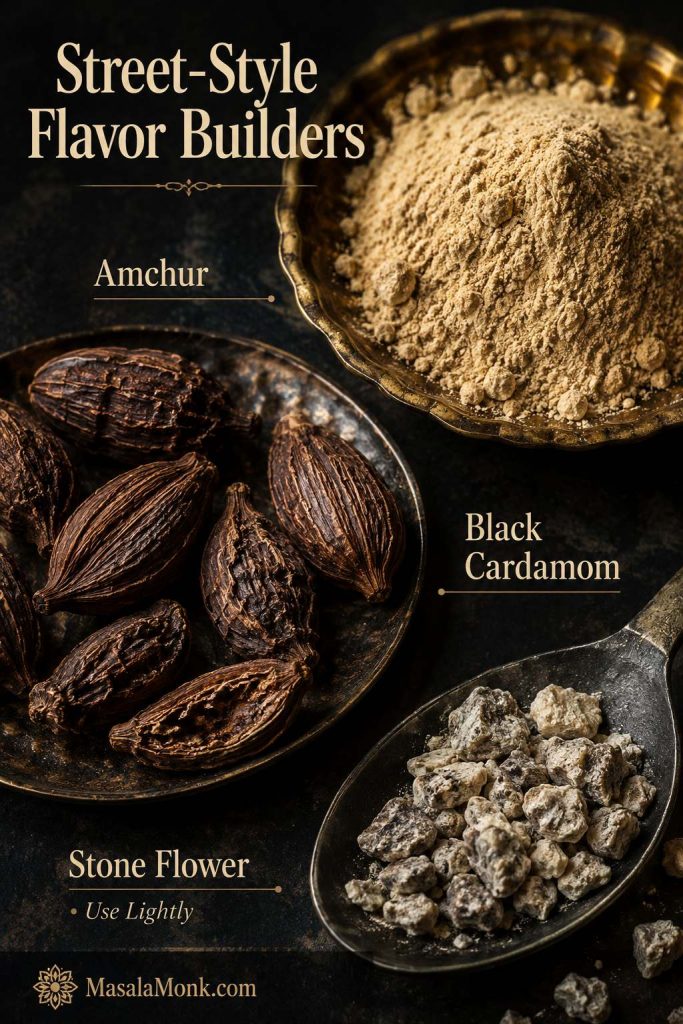
If you want the blend to lean more Mumbai-style, three ingredients matter most: amchur, black cardamom, and a tiny amount of stone flower, also called dagad phool or pathar phool.

Amchur gives tang. Black cardamom adds smoky depth. Stone flower gives a slightly smoky, earthy, restaurant-style note, but it is powerful and not always easy to use. If your stone flower smells dusty, muddy, or stale, skip it.

Close-up of amchur powder, black cardamom pods, and a small pinch of stone flower for street-style pav bhaji masala flavor.
Amchur, black cardamom, and stone flower can move the blend toward a street-style pav bhaji flavor, provided they stay in the background.

Optional Spices You Can Skip

  • Stone flower: good for depth, but optional and easy to overdo.
  • Mace or nutmeg: adds packet-style depth; use only a tiny pinch.
  • Black salt: gives a chaat-like savory note, but can make the blend salty.
  • Turmeric: helps color, but too much can taste earthy.
  • Star anise: adds sweet depth; one small piece is enough.
Important: salt is not mandatory in homemade pav bhaji masala. It is usually better to salt the bhaji separately, especially because store-bought masalas vary widely in salt level.

Do not let the long spice list scare you. Get the coriander-cumin base right, use Kashmiri chilli for color, add amchur for tang, and avoid burning the spices. That will get you much closer than simply adding garam masala to mashed vegetables.

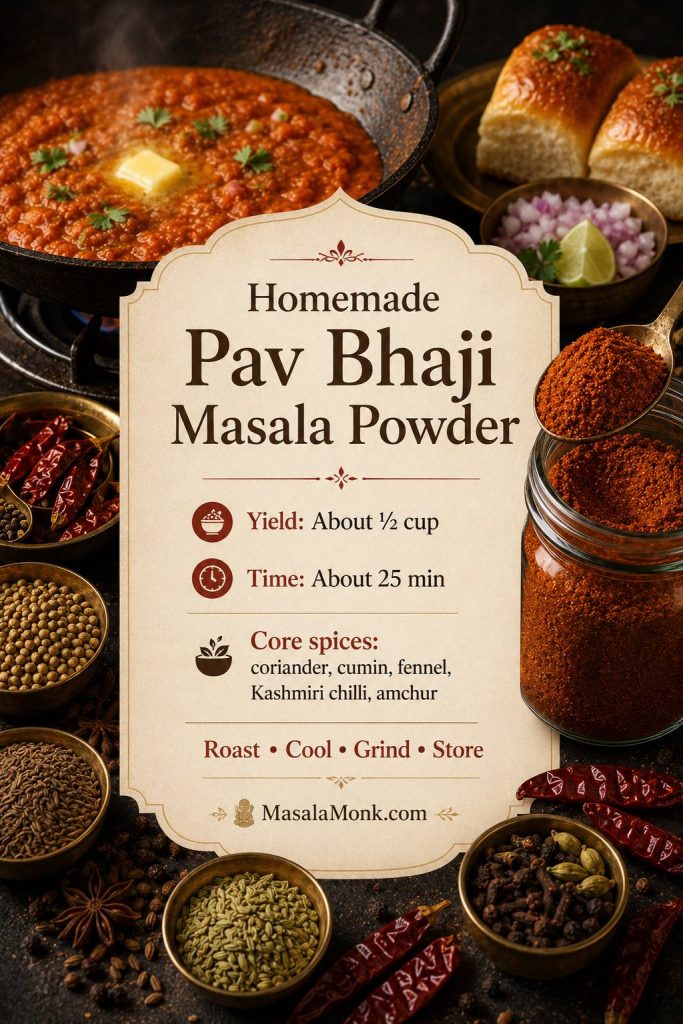
Homemade Pav Bhaji Masala Recipe

This homemade pav bhaji masala recipe makes a practical small batch: enough for several rounds of pav bhaji, but not so much that the jar sits around until the aroma fades. The spoon measures are the working recipe; the gram weights are approximate because whole spices vary in size and freshness.

I prefer making this as a small batch because the aroma is noticeably better in the first few weeks. Bigger batches are convenient, but once the powder starts smelling dull in the jar, the bhaji needs more help from butter, lemon, and fresh coriander.

Freshness matters: if your coriander, cumin, or chillies have been sitting open for a year, the masala will taste dull no matter how carefully you roast it. Use fresh-smelling whole spices for the best result.

Measurements in Grams and Spoons

Measuring spoons, kitchen scale, and pav bhaji masala spices arranged to show spoon measures and approximate gram measurement.
Spoon measures keep this pav bhaji masala recipe easy for everyday cooking; approximate grams help when you want the next homemade batch to taste consistent.
Ingredient Spoon measure Approximate grams
Coriander seeds 4 tbsp 20–24g
Cumin seeds 2 tbsp 12–14g
Fennel seeds 1 tbsp 6g
Dried Kashmiri red chillies 6–8 whole chillies 8–12g, depending on size
Black peppercorns 1½–2 tsp 4–5g
Cinnamon 1 stick, about 2 inches 2–3g
Cloves 8–10 cloves 2g
Black cardamom 2 pods 3–4g
Bay leaf 1–2 leaves 1g
Star anise 1 small piece 1g
Amchur powder 1 tbsp 7–8g
Dry ginger powder ½–1 tsp 1–2g
Turmeric powder, optional ½ tsp 1–2g
Black salt, optional ½ tsp 2–3g
Stone flower / dagad phool, optional Tiny pinch Less than 1g
Mace or nutmeg, optional Tiny pinch Less than 1g

Step-by-Step Method

1. Check and clean the spices

Pick through the whole spices and remove any stones, stems, dust, or stale pieces. Wipe chillies if needed. Avoid washing the spices unless you plan to dry them completely afterward, because moisture can make the powder clump or spoil faster.

2. Choose the chillies based on color and heat

Use Kashmiri dried red chillies if you want good color with mild heat. For a spicier batch, replace 1–2 Kashmiri chillies with a hotter dried chilli. For a family-friendly version, shake out some of the chilli seeds before roasting.

Kashmiri dried red chillies, hotter dried chillies, and deseeded chillies compared for color, heat, and mildness in pav bhaji masala.
Kashmiri chillies are the safest first choice because they build red-orange color without pushing the masala into harsh, overpowering heat.

3. Dry roast the whole spices on low heat

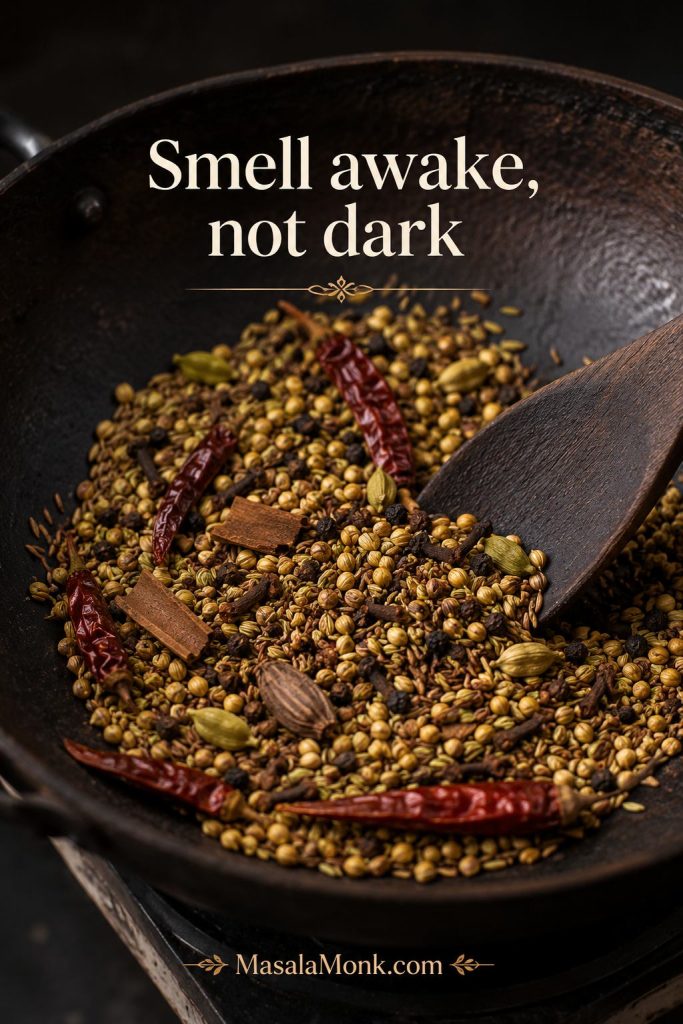
Heat a thick-bottomed pan on low to low-medium heat. Add coriander seeds, cumin seeds, fennel seeds, dried red chillies, black peppercorns, cinnamon, cloves, black cardamom, bay leaf, star anise, and optional stone flower.

Roast gently for 5–7 minutes, stirring often. Stop when the spices smell awake, not when they look dark. The coriander should smell warm, the chillies should look slightly deeper, and the whole pan should smell lively rather than smoky or scorched.

Whole spices dry roasting in a dark pan with coriander, cumin, fennel, dried red chillies, black cardamom, bay leaf, and cloves.
Dry roast the whole spices on low heat until they smell lively; if they darken too much, the finished powder can taste bitter.

If the chillies darken faster than the other spices, remove them from the pan early and keep roasting the coriander, cumin, and larger spices for another minute or two.

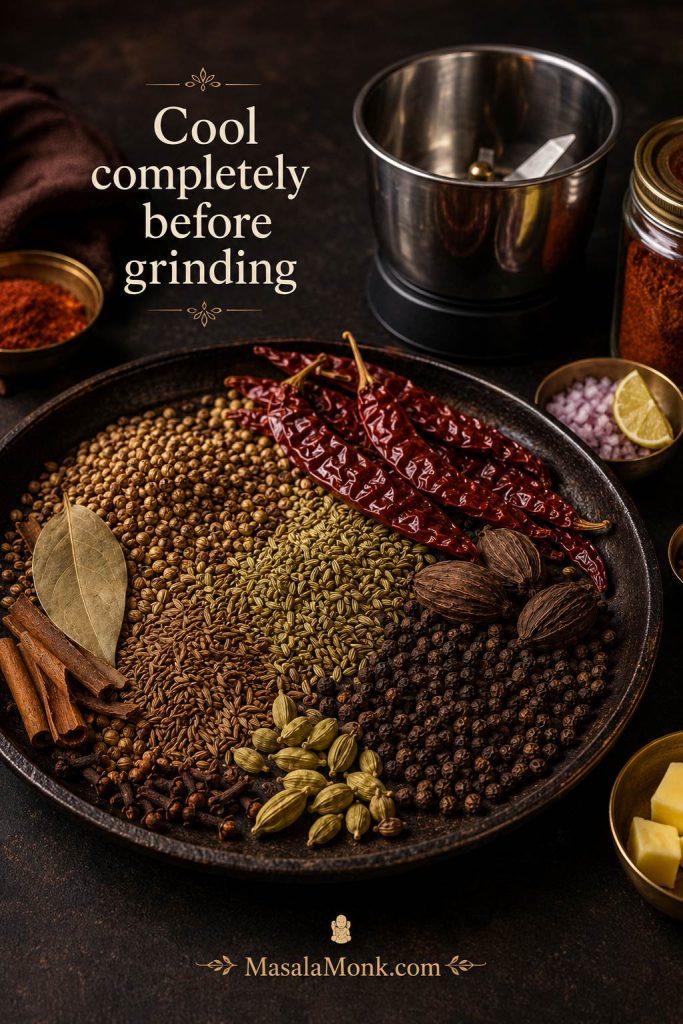
4. Cool completely before grinding

Transfer the roasted spices to a plate and let them cool fully for about 10 minutes. This is not a fussy step. Warm spices can trap steam in the grinder, dull the aroma, and make the powder clumpy.

Roasted pav bhaji masala spices cooling on a dark tray with a mixer grinder jar waiting nearby.
Cooling the roasted spices first prevents trapped steam, dull aroma, and clumps, which is especially important for homemade pav bhaji masala powder.

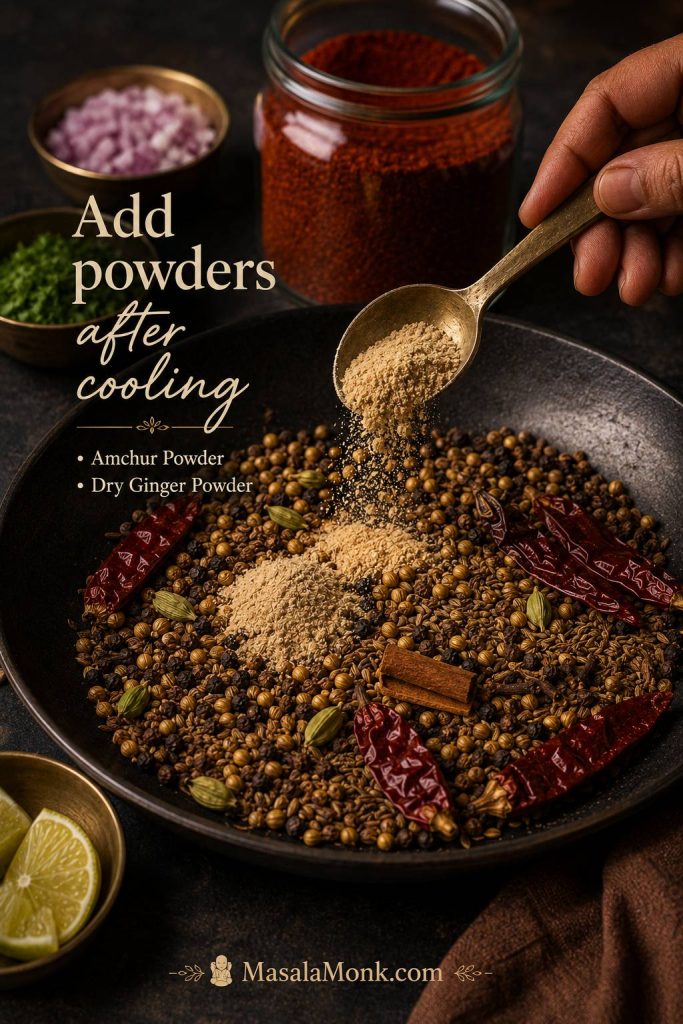
5. Add the powdered spices after cooling

Once the roasted spices are cool, add amchur powder, dry ginger powder, optional turmeric, optional black salt, and optional mace or nutmeg. These powdered spices can scorch quickly, so they are better added after the pan step.

Amchur powder and dry ginger being added to cooled roasted spices before grinding pav bhaji masala.
Add amchur and dry ginger after roasting so the tang stays clean; otherwise, powdered spices can scorch and make the blend taste muddy.

6. Grind in short pulses

Grind the mixture in a dry spice grinder or the dry jar of a mixer grinder. Pulse a few times first, then grind until fine. Avoid running the grinder continuously for too long because heat can dull the aroma.

The finished powder should smell warm, tangy, and rounded. If it smells harsh, burnt, or dusty, the spices were likely stale or roasted too aggressively.
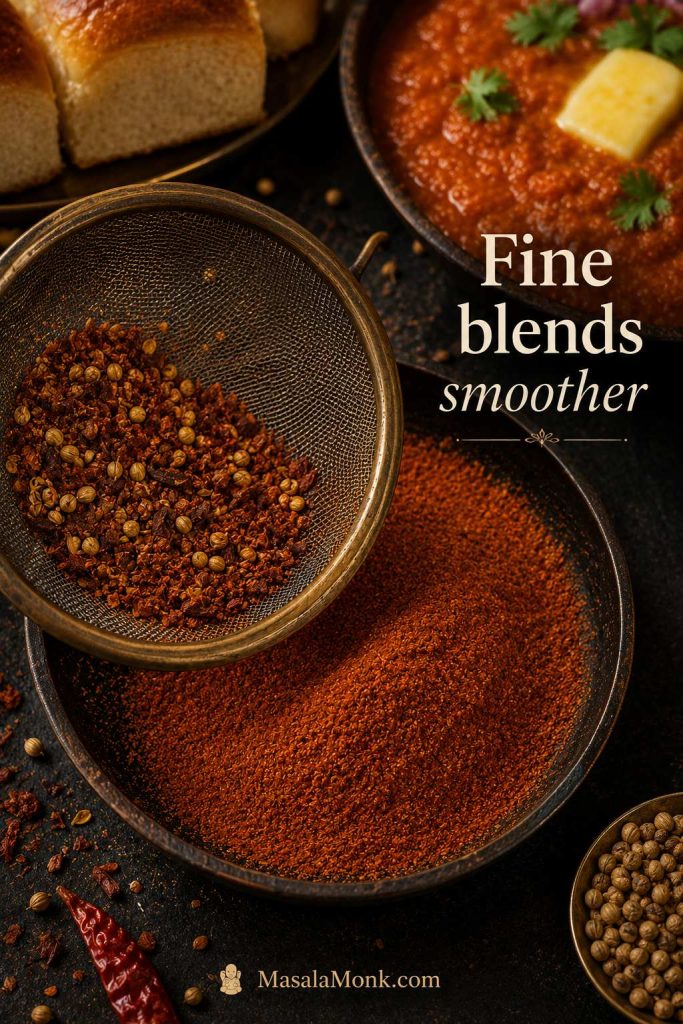
7. Sieve if needed

If the powder is coarse, pass it through a sieve and regrind the larger bits. A slightly coarse texture is still usable, but a finer powder blends more smoothly into bhaji.

Fine reddish-brown pav bhaji masala powder compared with coarse spice bits caught in a sieve.
Fine pav bhaji masala powder blends smoothly into tomatoes, butter, and mashed vegetables, while coarse bits can leave the bhaji tasting uneven.

8. Store in an airtight jar

Transfer the powder to a clean, dry, airtight glass jar. Keep it away from heat, sunlight, steam, and wet spoons.

Recipe Card: Homemade Pav Bhaji Masala Powder

YieldAbout ½ cup / 75–90g
Prep Time10 minutes
Roast + Cool5–7 min roast + 10 min cool
Total TimeAbout 25 minutes

Ingredients

  • 4 tbsp coriander seeds
  • 2 tbsp cumin seeds
  • 1 tbsp fennel seeds
  • 6–8 dried Kashmiri red chillies
  • 1½–2 tsp black peppercorns
  • 1 cinnamon stick, about 2 inches
  • 8–10 cloves
  • 2 black cardamom pods
  • 1–2 bay leaves
  • 1 small star anise
  • 1 tbsp amchur powder
  • ½–1 tsp dry ginger powder
  • ½ tsp turmeric powder, optional
  • ½ tsp black salt, optional
  • Tiny pinch stone flower / dagad phool, optional
  • Tiny pinch mace or nutmeg, optional

Method

  1. Check and clean the spices.
  2. Choose Kashmiri chillies for color and adjust seeds for heat.
  3. Dry roast the whole spices on low to low-medium heat for 5–7 minutes.
  4. Cool the roasted spices completely for about 10 minutes.
  5. Add amchur, dry ginger, and optional powdered spices.
  6. Grind in short pulses until fine and aromatic.
  7. Sieve and regrind coarse bits if needed.
  8. Store in a clean airtight glass jar.

Notes

  • For 4 servings of pav bhaji, start with 2–3 teaspoons of this homemade blend.
  • Use Kashmiri chillies for color and mild heat. Add hotter chillies only if you want a spicier version.
  • If the chillies darken too quickly while roasting, remove them early and continue roasting the sturdier spices.
  • Add amchur, dry ginger, turmeric, black salt, mace, and nutmeg only after the roasted whole spices cool. Powdered spices can scorch quickly in the pan.
  • The final weight can vary because dried chillies, bay leaves, cardamom pods, and grind fineness all change the volume and weight of the powder.
  • Skip black salt if you prefer to adjust salt separately in the bhaji.
  • For a brighter red-orange bhaji, use Kashmiri chilli rather than extra turmeric.
Saveable homemade pav bhaji masala recipe card with yield, timing, core spices, and roast-cool-grind-store method.
A small-batch homemade masala usually stays more aromatic than a large jar kept for months, especially when it is stored dry and airtight.

How Much Pav Bhaji Masala to Use

This is where many pav bhaji recipes become confusing. Homemade powder, Everest-style masala, Badshah-style masala, MDH-style masala, and organic blends do not all have the same strength. One packet may be saltier, another may taste sharper, a third may run hotter, and milder blends may need more quantity to show up in the bhaji.
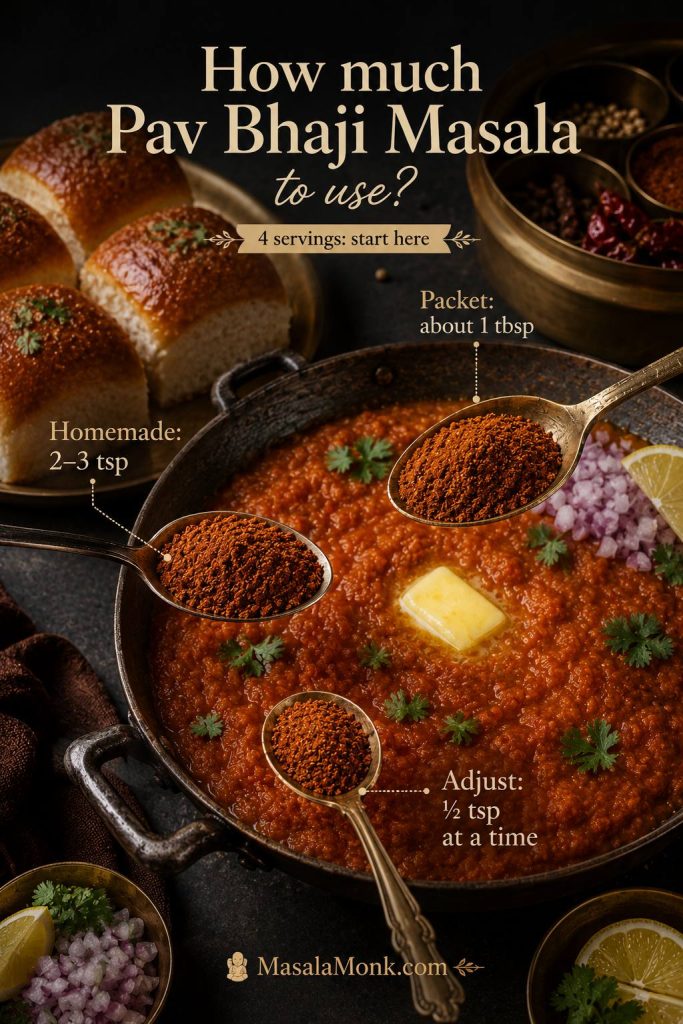
Measurement guide showing homemade pav bhaji masala, packet masala, and half-teaspoon adjustment amounts for four servings.
For 4 servings, treat the amount as a starting point, not a final verdict; pav bhaji masala tastes more balanced after it simmers.
Masala type Starting amount for 4 servings Adjustment note
Fresh homemade blend 2–3 tsp Use ½ tsp more only if the bhaji still tastes flat after simmering.
Store-bought blend 1 tbsp Start lower if the brand is salty, hot, or very strong.
Strong/chatpata brand 2 tsp–1 tbsp A little can dominate quickly, so build the flavor gradually.
Milder brand 1 tbsp The bhaji may need ½–1 tsp more after the vegetables cook down.
Final adjustment ½ tsp at a time Use only after the raw spice taste has cooked out.

If the bhaji tastes almost right but still dull, pause before adding another spoon of powder. Usually the missing piece is butter, salt, lemon, or simmering time. When the pan is already salty, reach for butter, tomato, lemon, coriander, or unsalted homemade powder before adding more packet masala.

If the amount looks right but the bhaji still tastes flat, raw, dusty, or too salty, go to the flavor and texture fixes before adding more powder.

The same measured-spice logic works in simple vegetable dishes too. For example, a dry potato-and-cauliflower dish like MasalaMonk’s easy aloo gobi recipe also depends on letting spices coat the vegetables properly instead of tasting raw on the surface.

How to Bloom Pav Bhaji Masala in the Bhaji

The timing matters. The blend tastes best when it is cooked into the bhaji, not sprinkled over the finished dish like a garnish.

  1. Cook onions, garlic, tomatoes, and capsicum until the tomatoes soften and the pan looks glossy.
  2. Add butter or oil, then add the masala.
  3. Fry for 30–60 seconds on medium-low heat so it blooms without burning.
  4. Add the boiled vegetables and mash everything together.
  5. Simmer for 5–10 minutes before deciding whether the flavor needs anything else.
Pav bhaji masala blooming in butter and softened tomatoes in a dark pan with a spatula stirring the glossy red-orange base.
Bloom the masala before adding vegetables so the tomato, butter, and spice taste like one cooked base instead of separate layers.

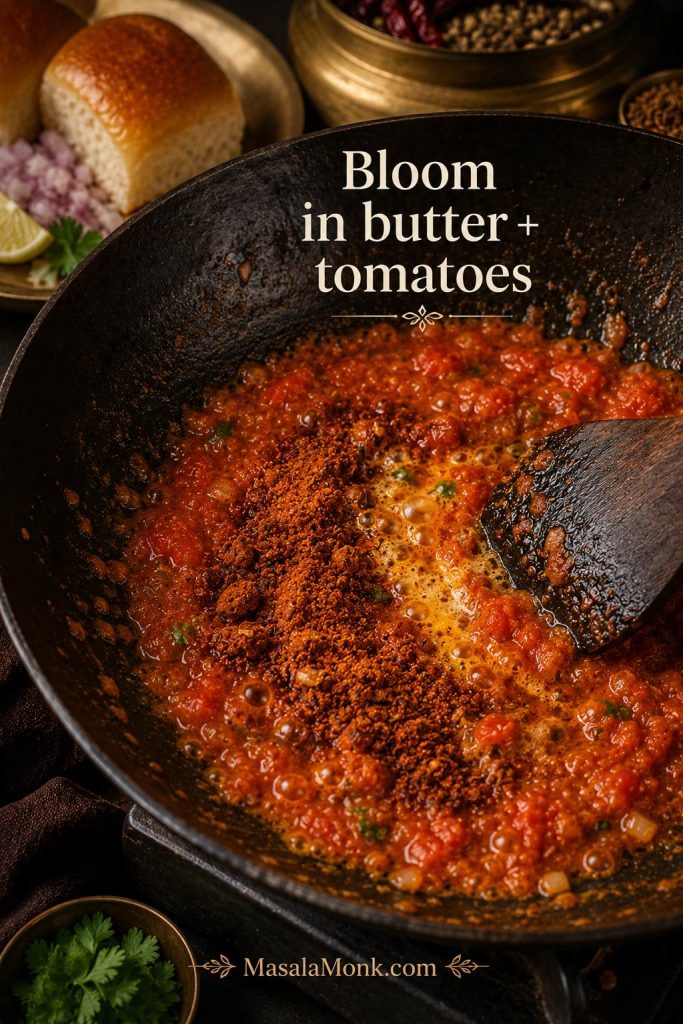
This is the moment the powder turns into bhaji flavor: the tomatoes look glossier, the butter carries the spice, and the raw edge disappears. If the bhaji tastes like raw spice powder, the masala was probably added too late or not cooked long enough with the tomatoes and butter.

When it is right, the pan stops smelling like separate tomato and spice powder and starts smelling like pav bhaji.

What Good Pav Bhaji Masala Should Do in Bhaji

When the masala is working, the bhaji should not taste like separate potatoes, tomatoes, and spice powder. It should taste cohesive: warm from the whole spices, tangy from amchur or lemon, rounded by butter, and bright enough that one buttered pav is never quite enough.

Buttered pav being swiped through glossy red-orange pav bhaji with onion, lemon, coriander, and melted butter.
The pav swipe test tells you if the masala worked: the bhaji should cling to the bread as a glossy, buttery mash with tang and depth.

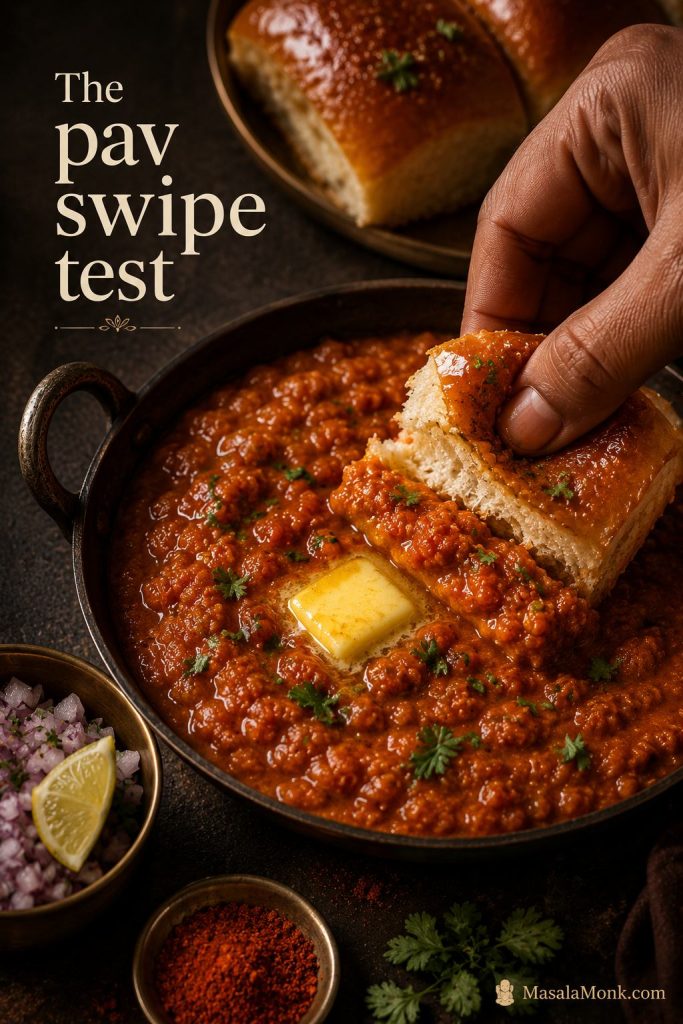
A heavy-tasting bhaji usually needs acid or freshness. Sharp, powdery flavor means the powder needs more time in the pan. When the bhaji tastes rich but sleepy, add lemon, coriander, or a tiny final pinch after the main cooking is done.

The moment it comes together is easy to recognize: the bhaji looks glossy, the masala stops smelling raw, the butter rounds the edges, and the lemon-onion-coriander finish makes the whole pan taste brighter.

How to Store Pav Bhaji Masala

A homemade batch tastes best when it is fresh. Whole spices keep their aroma longer than ground spices, so once you grind the blend, storage matters.

Homemade pav bhaji masala stored in a clean airtight glass jar with a dry spoon on a dark pantry-style surface.
A dry spoon matters as much as the jar; even a little steam can turn homemade pav bhaji masala dull and clumpy.
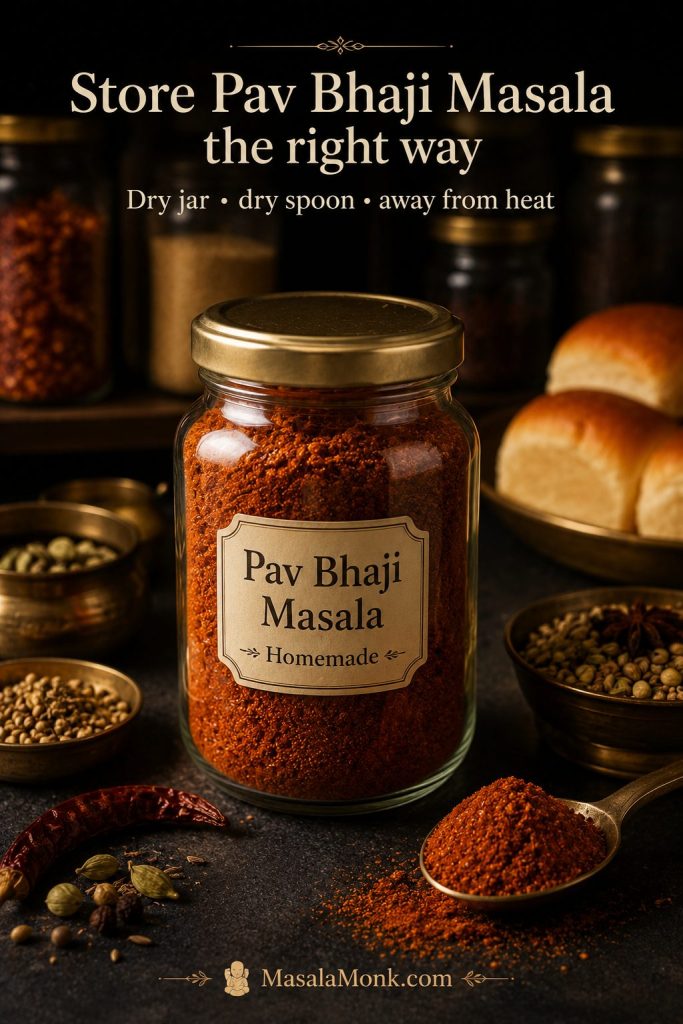
  • Use a clean, dry, airtight glass jar.
  • Keep the jar away from stove heat, sunlight, and steam.
  • Always use a dry spoon.
  • Make smaller batches if you do not cook pav bhaji often.
  • Use within 2–3 months at room temperature for best aroma.
  • Refrigerate up to about 6 months if tightly sealed.
  • If freezing, seal well so the powder does not absorb freezer smells.

A dull-smelling masala will taste dull in the bhaji too. For freezer storage, let the container come closer to room temperature before opening it so condensation does not hit the powder.

If your stored masala has clumped, faded, or started tasting bitter, check the color, bitterness, and storage fixes.

Best Pav Bhaji Masala Brands in India

A packet can still make excellent bhaji when it suits your taste and you cook it properly. The trick is not chasing the loudest masala on the shelf, but choosing one that matches the kind of bhaji you like: mild and familiar, bolder and more Mumbai-style, lower-salt, organic, or simply easy to find.

Pav bhaji pan surrounded by neutral labeled spice bowls and packet silhouettes for Everest, Badshah, MDH, Tata, and organic masala options.
Treat store-bought pav bhaji masala as a flavor choice: familiar, bolder, organic, lower-salt, or simply easier to find.

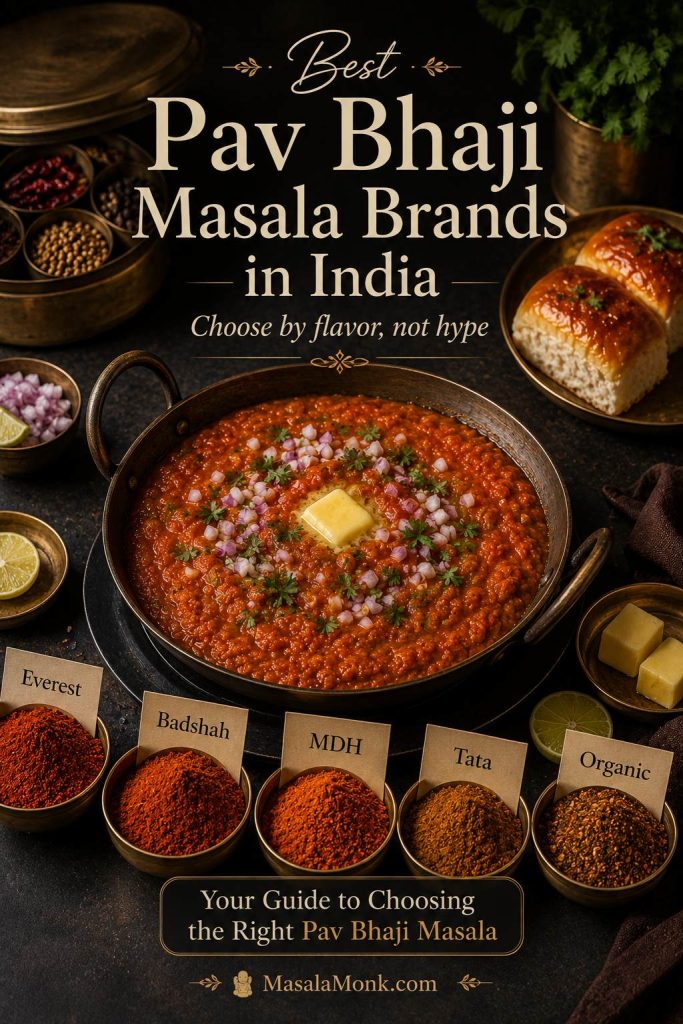
Store-bought pav bhaji masala is useful when you want convenience or do not keep many whole spices at home. Choose by flavor style, not by hype: familiar all-rounder, bolder Mumbai-style, classic household, organic option, or easy backup. This is a practical buying guide, not a blind taste-test ranking, so treat these as starting points.

Affiliate note: As an Amazon Associate, MasalaMonk earns from qualifying purchases. Some links below are affiliate links, which means MasalaMonk may earn a commission at no extra cost to you. The recommendations are limited to spice blends, storage jars, and tools that directly help with homemade pav bhaji masala or the bhaji you make from it.

Everest and Badshah are the strongest starting recommendations: Everest for the most familiar all-rounder direction, Badshah when your bhaji usually tastes too mild. MDH fits the classic pantry lane, while Tata, Catch, MTR, Suhana, Shan, and Zoff are better treated as availability or preference picks. Even the best packet still needs the same basics: cooked tomatoes, enough butter, proper mashing, and a final lift of lemon or coriander.

Whichever packet you buy, choose sealed, clearly labelled masala from a source you trust. Avoid loose ground spice blends if you cannot judge freshness, storage, or handling; FSSAI’s safe ground spices guidance is a useful reminder that ground spices need proper packaging and quality control.

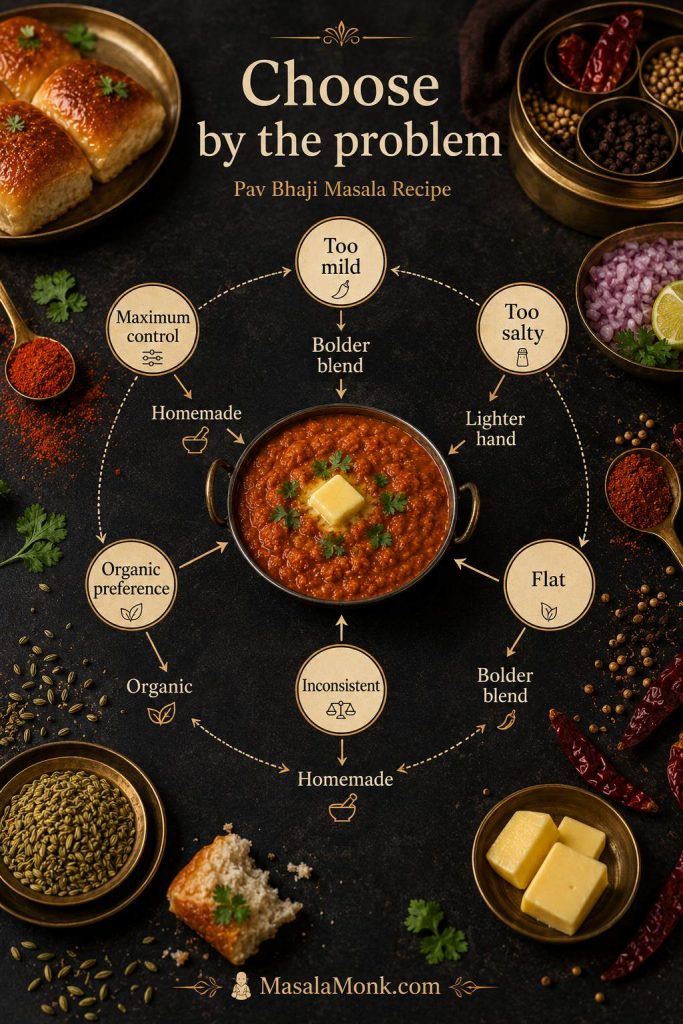
Choose by Flavor Problem

Decision wheel for choosing pav bhaji masala by flavor problem, including too mild, too salty, flat, inconsistent, organic preference, and maximum control.
Choose by the problem first: a salty bhaji needs control, a mild bhaji needs bolder flavor, and an inconsistent bhaji needs reliability.
If your bhaji usually tastes… Choose this direction
Too mild or too home-style Badshah-style bolder blend
Flat but not especially spicy Everest or Badshah direction
Too salty with packets Homemade blend, or use a lighter hand with any packet
Good but inconsistent Everest/MDH/Tata-style familiar packet
Organic matters more than a street-style profile Organic Tattva or Pure & Sure
You want maximum salt and heat control Homemade batch

Quick Brand Picks

Quick pick Brand Best for
Familiar all-rounder Everest Pav Bhaji Masala One easy, recognizable first packet.
Bolder Mumbai-style direction Badshah Pav Bhaji Masala For bhaji that needs a stronger masala push.
Classic household option MDH Pav Bhaji Masala A traditional Indian masala-box brand.
Easy mainstream backup Tata Sampann Pav Bhaji Masala A convenient pantry option for occasional use.
Organic option Organic Tattva / Pure & Sure For kitchens that already prefer organic spices.

Use Everest when you want the safest familiar profile, Badshah when your bhaji usually tastes too mild, MDH when you want a classic pantry option, and Tata or other backups when availability matters more than a specific street-style profile.

Everest vs Badshah Pav Bhaji Masala

Use this comparison as a flavor-direction shortcut, not as a hard ranking. Everest is the safer familiar lane, while Badshah is better when the bhaji needs a stronger snack-shop push.

Everest-style and Badshah-style pav bhaji masala compared with two pans of pav bhaji showing familiar balanced flavor and bolder snack-shop flavor.
Choose Everest when you want a familiar, balanced packet; choose Badshah when your bhaji tastes too mild and needs a bolder Mumbai-style push.

Main Store-Bought Options

Everest is the familiar all-rounder to start with if you want a recognizable, easy-to-find packet. Check Everest Pav Bhaji Masala 100g on Amazon.

Badshah is the better direction if you want a bolder, more snack-shop profile. Check Badshah Pav Bhaji Masala 100g on Amazon.

MDH fits the classic masala-box lane: familiar, straightforward, and easy to keep in the pantry. Check MDH Pav Bhaji Masala 100g on Amazon.

Tata Sampann is an easy mainstream backup for occasional pav bhaji, tawa pulao, or quick masala pav. Check Tata Sampann Pav Bhaji Masala 100g on Amazon.

Other Store-Bought Options

Catch, MTR, Suhana, Shan, and Zoff are useful backup options when they are easier to find, better priced, or already familiar in your pantry. They are not essential to buy if you already have a fresh packet that works for your taste.

Backup options: Catch, MTR, Suhana, Shan, and Zoff.

Organic Pav Bhaji Masala Options

Choose Organic Tattva or Pure & Sure if you already buy organic spices and want the same approach here. They are preference picks, not shortcuts to a stronger or more street-style pav bhaji flavor.

Check Organic Tattva Pav Bhaji Masala 100g on Amazon

Check Pure & Sure Organic Pav Bhaji Masala 100g on Amazon

If you do not want to use a packet today, use the emergency substitute or build the flavor from scratch in the without ready-made masala section.

Pav Bhaji Masala Substitute

If you do not have the blend, you can make an emergency substitute from common spices. It will not taste identical because the original has a specific tangy, smoky, snack-style profile, but it will move your bhaji in the right direction.

Emergency Substitute for 1 Tablespoon Pav Bhaji Masala

  • 1½ tsp coriander powder
  • ¾ tsp cumin powder
  • ½ tsp Kashmiri chilli powder or paprika
  • ¼ tsp garam masala
  • Pinch black pepper
  • Pinch amchur powder, or finish the bhaji with lemon/lime juice
  • Optional tiny pinch fennel powder
  • Optional tiny pinch black salt
Emergency pav bhaji masala substitute with coriander, cumin, Kashmiri chilli, garam masala, black pepper, and amchur or lemon around a spoon of spice mix.
This pav bhaji masala substitute will not taste identical, but coriander, cumin, Kashmiri chilli, black pepper, and amchur can still build warmth, color, and tang.

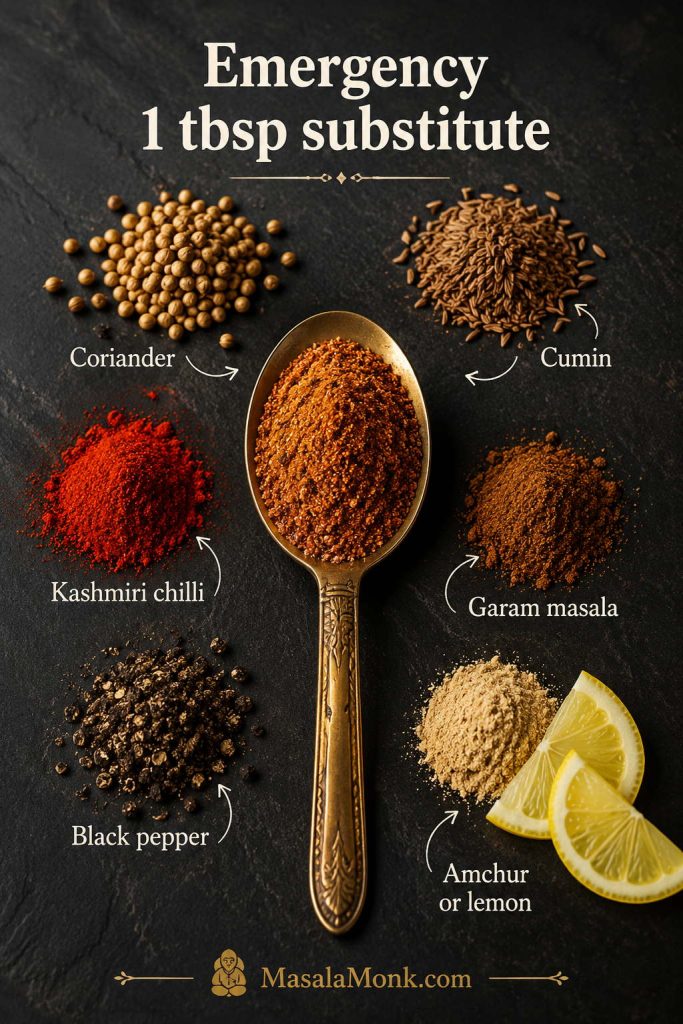
Mix these together and add them while the bhaji is cooking. Fry or simmer the substitute with the tomatoes, butter, and vegetables so it does not taste raw.

If you have chaat masala, use it carefully. It can help with tang, but it can also be salty and sour, so add only a pinch and taste before adding more.

If the bhaji tastes heavy even after the spice balance is fixed, serve it with something fresh on the side. MasalaMonk’s green chutney recipe gives that bright coriander-mint lift that works well with street-style snacks, sandwiches, and pav-based dishes.

Substitute warning: garam masala alone is not a 1:1 replacement. It gives warmth, but it misses the tang, color, and snack-shop edge of pav bhaji masala.

How to Make Pav Bhaji Without Ready-Made Masala

If you want pav bhaji without a packet, use the homemade recipe above or build the flavor directly in the pan. The goal is to create four things: warmth, tang, color, and savory depth.

Tomatoes, butter, coriander, cumin, Kashmiri chilli, garam masala, amchur or lemon, and herbs cooking in a pan without ready-made masala.
No packet does not mean no pav bhaji flavor; tomatoes, butter, Kashmiri chilli, cumin, coriander, and lemon can still build a convincing base.

For a quick bhaji without packaged masala, use coriander powder, cumin powder, Kashmiri chilli powder, a small amount of garam masala, amchur or lemon, black pepper, and enough butter. Cook these into tomatoes and mashed vegetables until the raw spice smell disappears.

The result will be more home-style than packet-masala Mumbai-style, but it can still taste excellent if the vegetables are well mashed and the tomato-butter masala is cooked properly.

How to Fix Pav Bhaji Masala Problems

Most pav bhaji problems are fixable once you identify the real issue: salt, acid, raw spice, weak aroma, poor mashing, or over-roasting. Unless the masala is badly burnt, adjust slowly with simmering, fat, acid, or unsalted vegetable bulk instead of adding more powder blindly.

Flavor and Texture Fixes
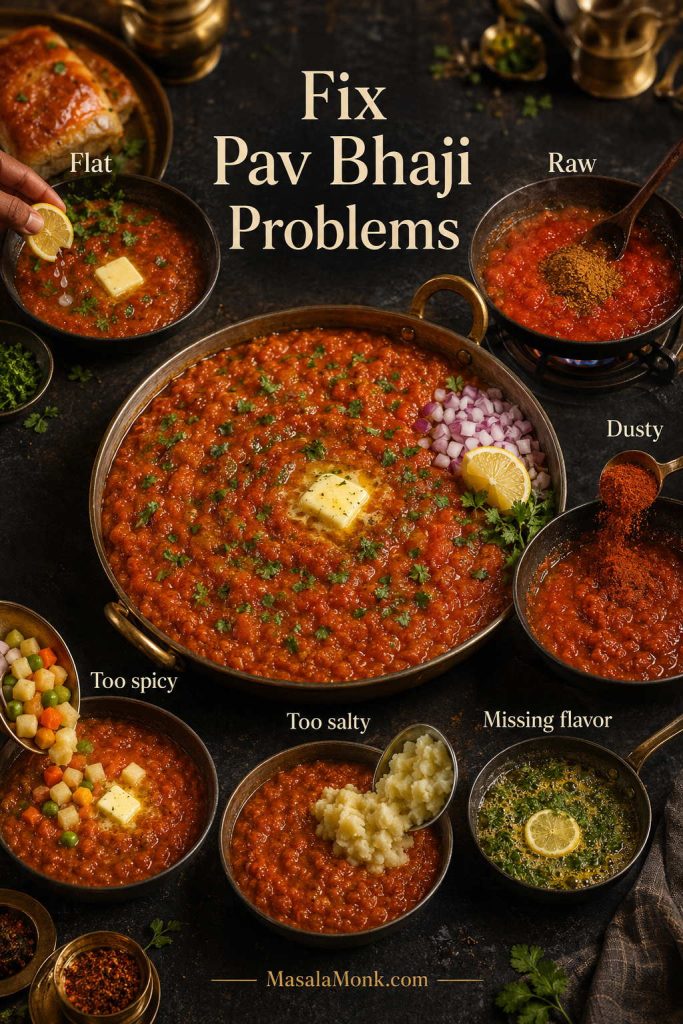
Central pan of glossy pav bhaji surrounded by small fix scenes for flat, raw, dusty, too spicy, too salty, and missing flavor problems.
More powder is not always the fix; flat bhaji needs brightness, raw masala needs cooking, and salty bhaji needs dilution.
Problem Likely reason Fix
Flat flavor Not enough salt, acid, butter, or cooked masala Add a little salt, butter, lemon, or ½ tsp more masala after simmering.
Raw masala taste Added too late or not fried into the tomatoes Cook it with butter/oil and tomatoes for a few minutes.
Dusty or powdery bhaji Too much dry powder added at once, or masala added late Fry the masala in butter and tomatoes, add a splash of water, simmer, then finish with butter and coriander.
Spices show, but pav bhaji flavor is missing Butter, tomato reduction, mashing, or final brightness may be missing Mash more, simmer longer, add butter, and finish with coriander and lemon.
Too spicy Chilli level is too high, or the packet is very strong Soften the heat with mashed potato/vegetables, butter, and a little tomato.
Overly sour Too much amchur, lemon, or tomato Round it out with more potato/vegetables and butter; avoid more tangy masala.
Too salty Packet masala may contain salt, or salt was added twice Dilute with unsalted mashed potato or vegetables. Avoid adding more packet masala.

Color, Bitterness and Storage Fixes
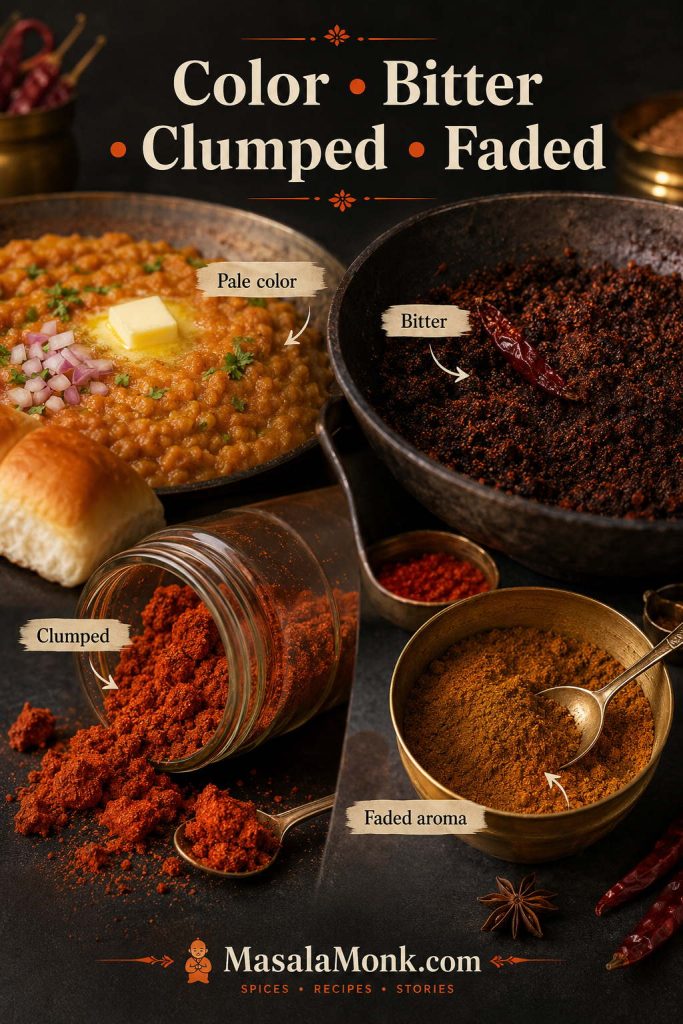
Troubleshooting board showing pale pav bhaji, bitter over-roasted masala, clumped spice powder in a jar, and faded old masala powder.
Pale color usually points to chilli choice, bitterness to over-roasting, clumps to moisture, and faded aroma to old spices or poor storage.
Problem Likely reason Fix
Bitter masala Spices were roasted too hard or burnt Use low heat next time. For the current bhaji, soften with potato, butter, and tomato.
Pale or weak color Kashmiri chilli, tomato, or proper cooking may be missing Boost color with Kashmiri chilli powder, tomato paste, or better chillies. Avoid relying only on food color.
Clumped homemade powder Moisture entered the jar or spices were ground warm Store airtight, use a dry spoon, and cool spices fully before grinding.
Faded aroma Old spices or poor storage Make smaller batches and store away from heat, light, and steam.

Most fixes work better when the masala is cooked into the tomato-butter base first, so revisit how to bloom pav bhaji masala if the flavor still tastes raw or separate.

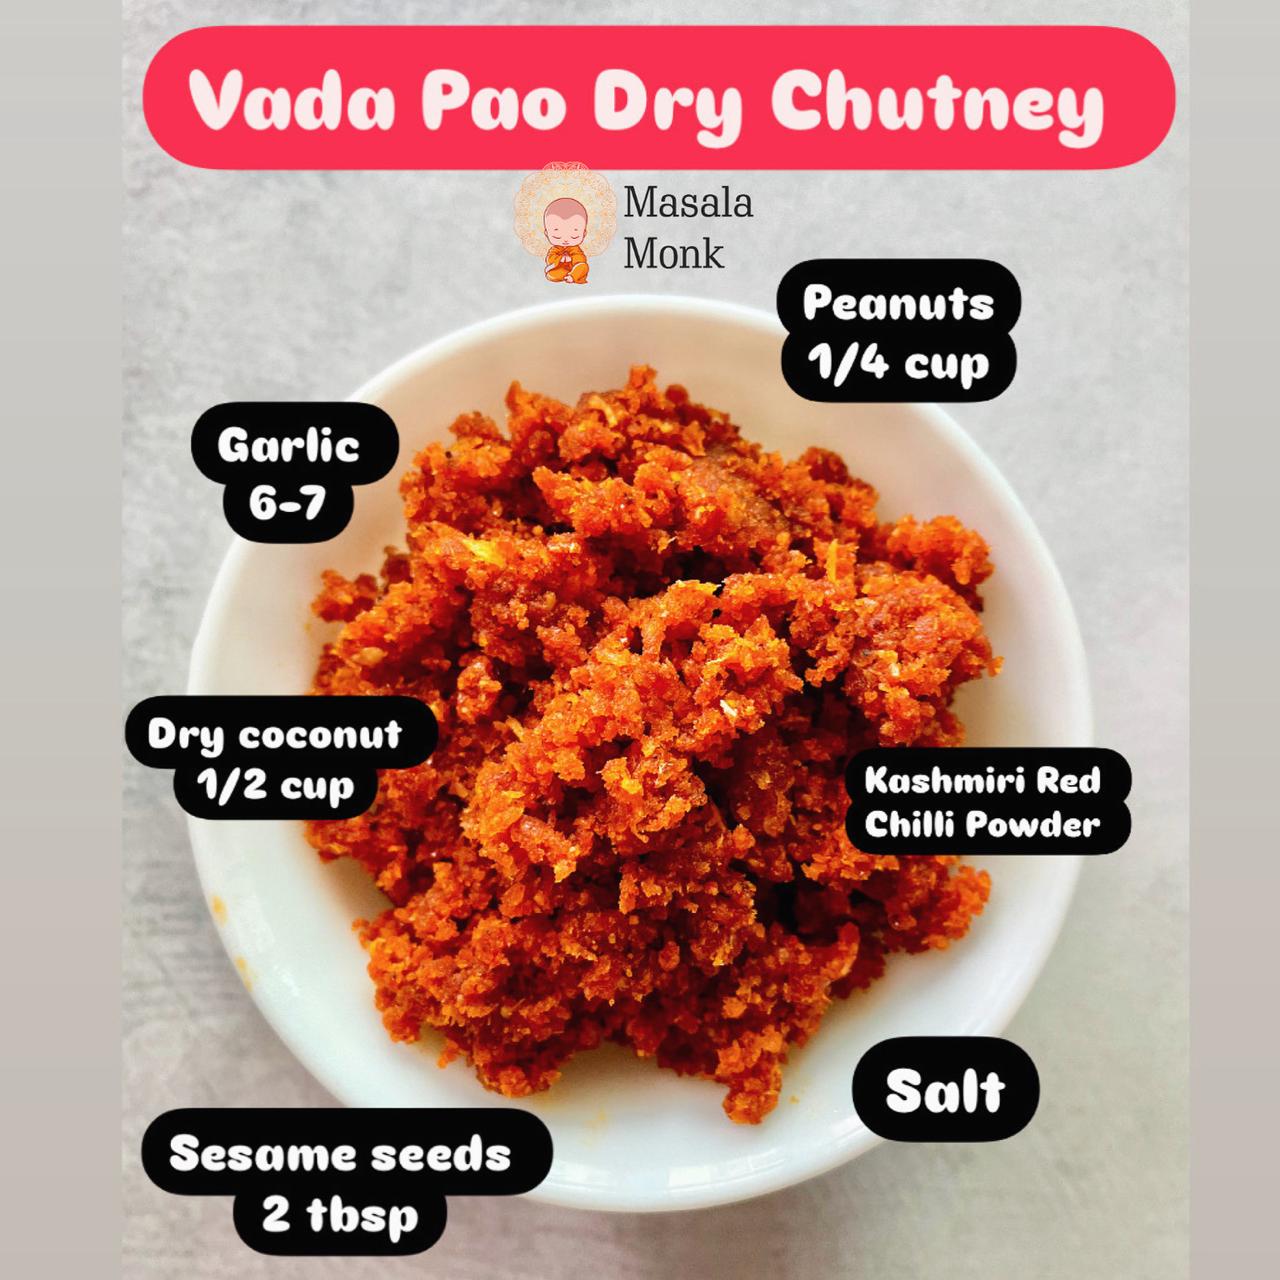
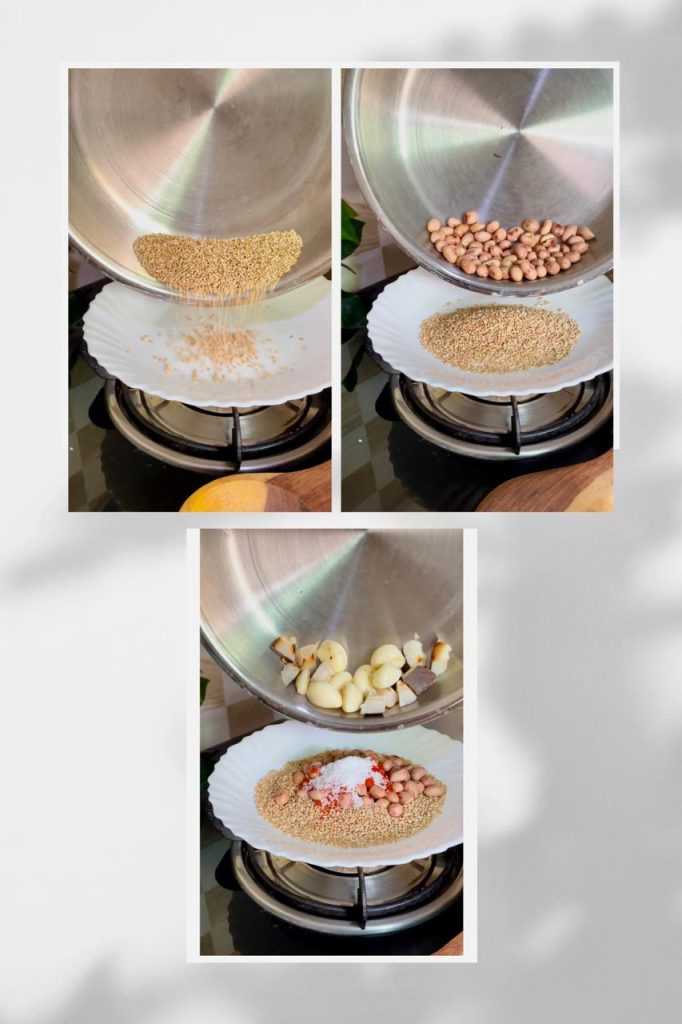
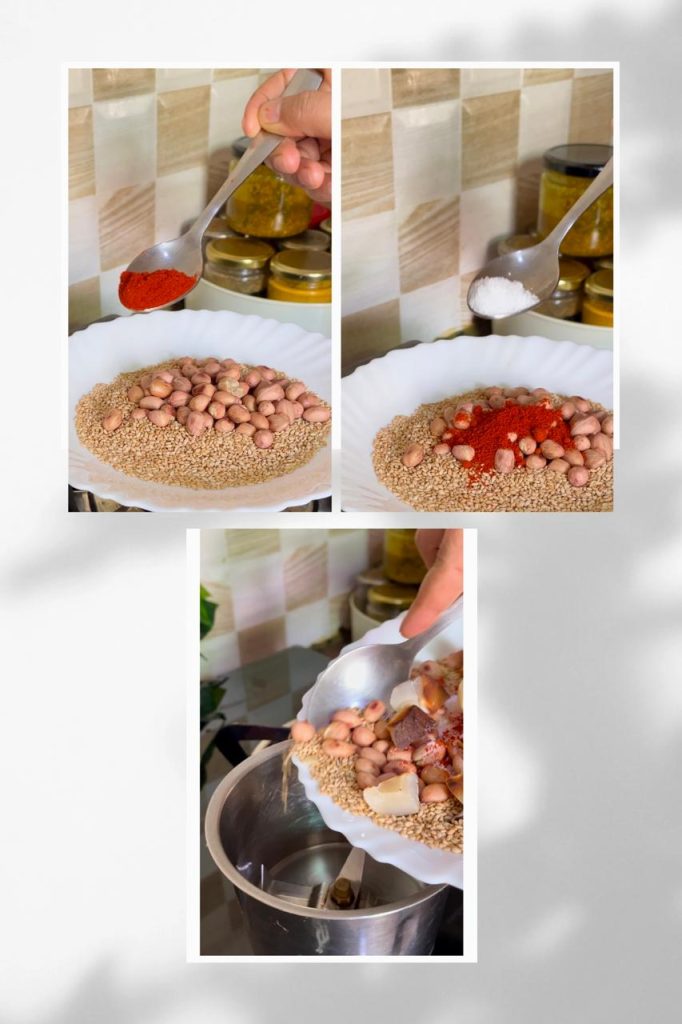
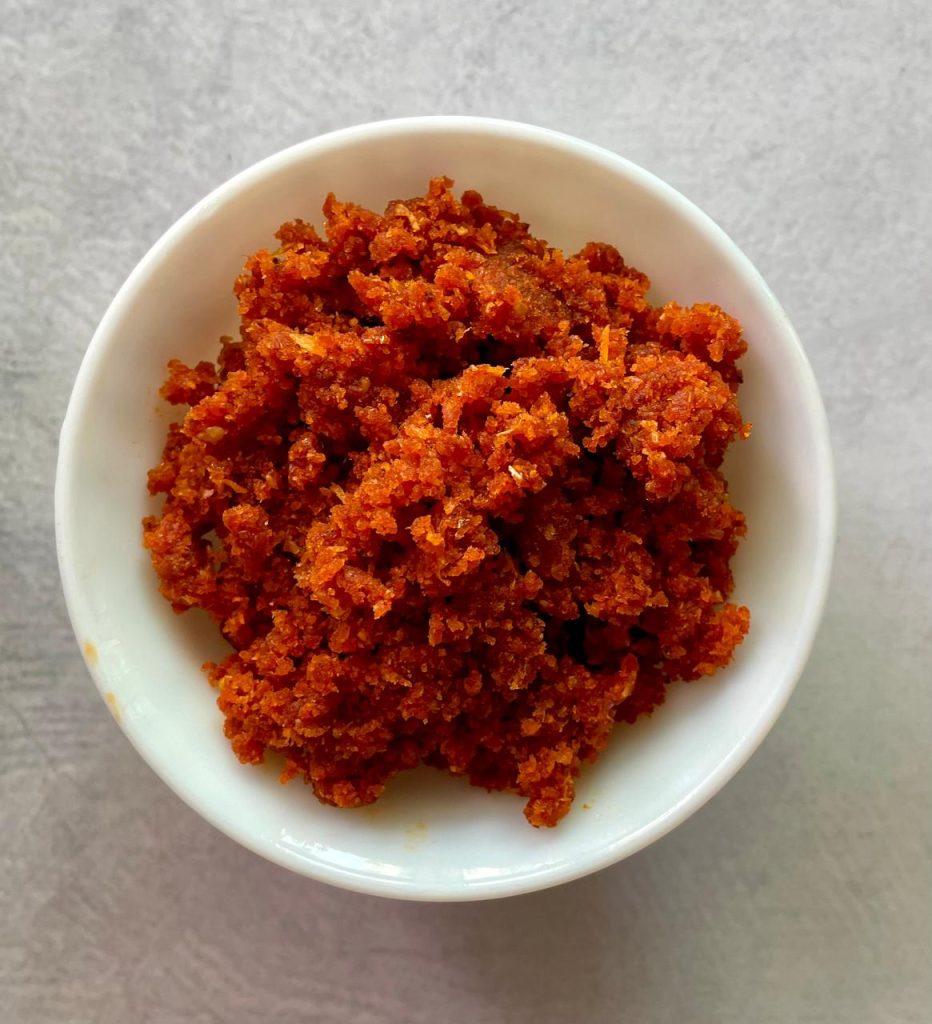
For a different Mumbai-style dry spice hit, MasalaMonk’s vada pav dry chutney recipe is a useful contrast. It is roasted, garlicky, peanut-coconut based, and meant to be sprinkled rather than cooked into a bhaji.

Useful Tools for Homemade Pav Bhaji Masala

Once the blend is chosen, equipment matters only if it changes the result: a finer grind, drier storage, or smoother bhaji. You only need three basics — a dry pan, a grinder, and an airtight jar — but these tools can help if you cook this often.

Dry pan, mixer grinder jar, airtight glass jar, dry spoon, roasted spices, potato masher, pav, and pav bhaji arranged as useful tools for the recipe.
You do not need many tools for homemade pav bhaji masala; a dry pan, grinder, airtight jar, and masher cover the steps that affect flavor most.

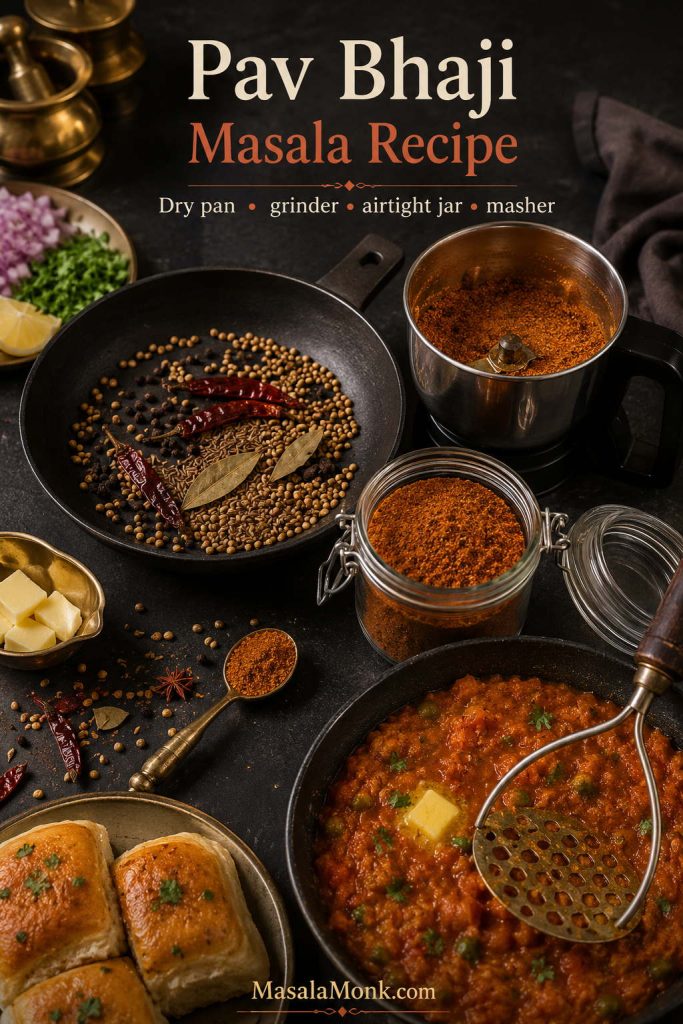
For Making the Masala

Sujata Supermix Mixer Grinder: the main practical grinder pick for turning roasted whole spices into a fine, aromatic powder.

Check Sujata Supermix Mixer Grinder on Amazon

Nestasia Airtight Glass Jars: helpful for storing homemade masala away from steam, heat, and moisture.

Check Nestasia Glass Jars on Amazon

For Making Pav Bhaji with the Masala

Wonderchef Ambrosia Potato Masher: useful when cooking pav bhaji because it helps mash potatoes, peas, tomatoes, capsicum, and cooked vegetables directly in the pan.

Check Wonderchef Ambrosia Potato Masher on Amazon

Optional upgrades: a heavier mixer grinder or cast iron tava can help if you cook Indian snacks often, but they are not necessary for this homemade masala. For this post, the most useful tools are still a reliable grinder, a dry airtight jar, and a masher for the bhaji itself.

That same tawa-and-butter style also shows up in Mumbai sandwiches. If you want another snack built around chutney, vegetables, butter, and heat, MasalaMonk’s authentic grilled Bombay sandwich recipe fits naturally beside this pav bhaji masala guide.

Other Ways to Use Pav Bhaji Masala

This blend is not only for pav bhaji. Once you have a fresh homemade jar or a good store-bought mix, use it in small amounts to add Mumbai street-food flavor to quick dishes.

Dishes made with pav bhaji masala including masala pav, tawa pulao, tawa paneer, potato filling, egg bhurji, and masala toast.
A fresh jar of pav bhaji masala can season more than bhaji, so use small amounts in tawa pulao, masala pav, paneer, potato fillings, eggs, or toast.
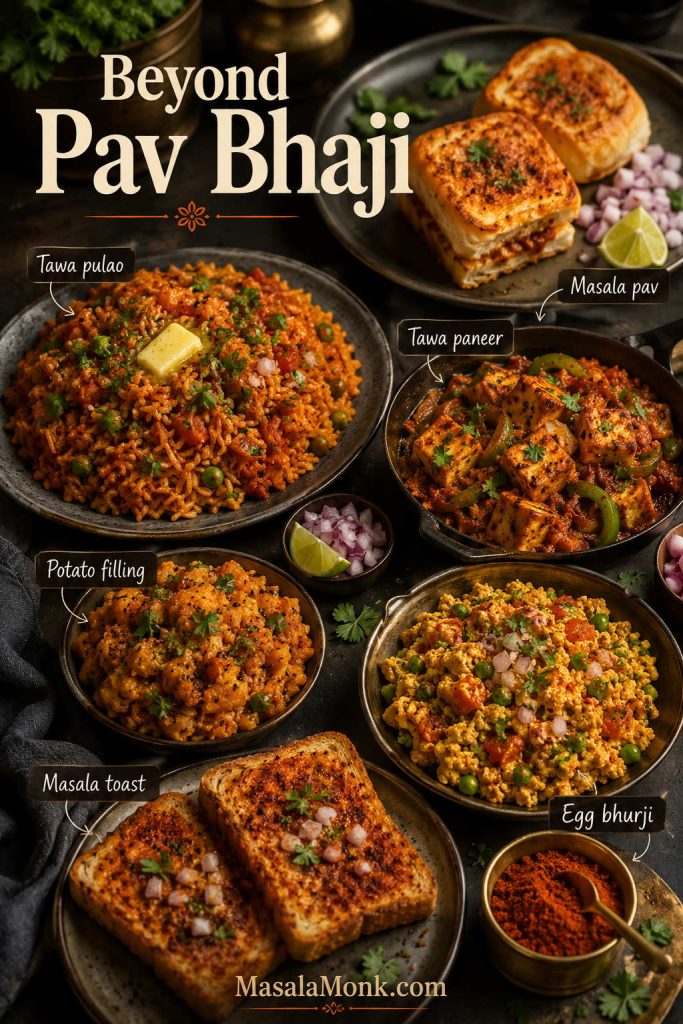
  • Masala pav: cook onions, tomatoes, capsicum, butter, and pav bhaji masala until glossy, then toss pav in the mixture.
  • Tawa pulao: add a small spoon to rice with vegetables, tomato, butter, and coriander.
  • Masala upma: use just a pinch when you want everyday upma to taste fuller and more lunch-like; MasalaMonk’s upma recipes already include a masala-upma direction.
  • Tawa paneer: use a little in a tomato-capsicum masala.
  • Potato filling: add a little to mashed potatoes for sandwiches, rolls, toasties, or snack fillings. For more snack-style potato ideas, see MasalaMonk’s potato appetizers guide.
  • Egg bhurji: use a small pinch for a tawa-style twist.
  • Vegetable stir-fry: add near the end, but cook briefly so it does not taste raw.
  • Masala toast: mix with butter, onions, tomatoes, and capsicum.
  • Quick spiced rice: add a small amount to leftover rice with butter and vegetables.
Use lightly outside pav bhaji: this blend is assertive. Start with ¼–½ teaspoon in small dishes and increase only after tasting.

FAQs

What is pav bhaji masala made of?

It is usually made from coriander seeds, cumin, fennel, dried red chillies, black pepper, cinnamon, cloves, black cardamom, bay leaf, amchur, dry ginger, and sometimes stone flower, black salt, turmeric, mace, or nutmeg.

Which pav bhaji masala brand is best?

Everest is a good familiar first packet, Badshah leans bolder, and MDH fits the classic household masala lane. Choose the rest based on availability, price, heat level, salt level, and whether you prefer organic spices.

Is homemade better than store-bought?

Homemade is better for freshness and control. Store-bought is better for convenience. Both can make good bhaji if used correctly.

How much should I use for 4 servings?

Start with 2–3 teaspoons homemade powder or about 1 tablespoon store-bought masala for 4 servings. Add more only after the bhaji has simmered.

What can I use instead of pav bhaji masala?

Use coriander powder, cumin powder, Kashmiri chilli powder, a little garam masala, black pepper, and amchur or lemon juice. It will not taste identical, but it gives warmth, color, and tang.

Does pav bhaji masala contain salt?

Some store-bought blends may contain salt. Homemade versions do not need to. Taste before adding extra salt, especially when using a packet.

Is it the same as garam masala?

No. Garam masala is warmer and more general-purpose. Pav bhaji masala is tangier, more savory, and built specifically for pav bhaji-style flavor.

Why does my pav bhaji not taste street-style?

The usual reasons are weak masala, undercooked tomatoes, not enough butter, poor mashing, not enough salt or acid, or adding the powder too late. Cook it into the tomatoes and butter, mash well, then finish with butter, coriander, onion, and lemon.

How long does homemade masala last?

For best aroma, use it within 2–3 months at room temperature. It can last longer if refrigerated or frozen tightly, but the flavor is brightest when fresh.

Can I use it in other recipes?

Yes. Use it in masala pav, tawa pulao, tawa paneer, egg bhurji, vegetable stir-fries, potato fillings, sandwiches, and spiced rice. Start small because the blend is strong.

Which spices are optional in homemade pav bhaji masala?

Stone flower, mace, nutmeg, black salt, turmeric, and star anise are optional. The core blend can still work without them.

Should I roast store-bought masala before using it?

No. Do not dry-roast store-bought powder in an empty pan because it can burn quickly. Bloom it briefly in butter or oil with tomatoes instead.

Final Thoughts

The best pav bhaji masala is not the packet with the loudest flavor or the homemade blend with the longest spice list. It is the one that makes the bhaji taste whole: warm, tangy, buttery, bright, and deep enough that the potatoes, tomatoes, vegetables, and spices feel like one glossy pan of pav bhaji.

Once you learn that rhythm, pav bhaji stops feeling like a packet-masala gamble and starts feeling like something you can control from the pan.

That is the real win: bhaji that tastes glossy, tangy, buttery, and whole, not like vegetables trying to hide under spice powder.

Posted on 10 Comments

Green Chutney Recipe (Coriander–Mint / Cilantro Chutney)

Green chutney recipe in a bowl with coriander and mint, shown with a spoonful lifted—coriander–mint (cilantro) chutney with 5 variations.

This green chutney recipe is the kind you start making “just for snacks,” and then—almost without noticing—you’re spreading it on toast, swirling it into yogurt, packing it for lunch, and finding excuses to dip everything into it. It’s fresh coriander (cilantro) and mint blended with green chilli, ginger, roasted cumin, salt, and citrus, so it tastes bright, punchy, and alive. Better still, the same base can become restaurant style green chutney for chaat nights, a thick green chutney for sandwich spreads, or a mellow coconut green chutney that belongs beside dosa and idli.

Depending on where you learned your kitchen language, you might call it coriander mint chutney, cilantro mint chutney, coriander chutney, cilantro chutney, dhania chutney, or dhaniya chutney. The name changes; the craving doesn’t. What matters is that you end up with a jar of green goodness that fixes the whole plate.


The green chutney that fixes everything

Some condiments behave like optional extras. Green chutney isn’t one of them. It’s a small, cold spoonful that can make hot food feel lighter, spicy food feel brighter, and plain food feel like you actually meant it to taste that good.

Think about the foods we naturally reach for it with: samosas, pakoras, kebabs, cutlets, chaat. Those are all rich or fried or boldly spiced, which means they love a contrast—something tangy and herbal to cut through the heaviness. Yet the real power of green chutney shows up outside snack plates. Spread it inside a sandwich and it instantly tastes more “street,” more layered, more addictive. Add it to a bowl of yogurt and it becomes a quick dip that tastes like you planned ahead. Stir a spoon into leftover rice and suddenly you’re not eating leftovers; you’re eating a clever lunch.

In other words, green chutney isn’t just a recipe. It’s a kitchen habit.

Also Read: Pesto Recipe: Classic Basil Pesto Sauce & 10 Variations


Names you’ll hear at home (and what they usually mean)

Before we blend anything, it helps to make peace with the names. The same chutney can wear different labels depending on region, language, and what your family grew up saying.

Cilantro and coriander

If you grew up calling the leafy herb “coriander,” then “coriander chutney” will sound natural. Meanwhile, if you’re used to the word “cilantro,” then “cilantro chutney” will feel like the obvious name. Both can point to the same chutney built on coriander leaves.

Cilantro vs coriander guide showing cilantro (coriander leaves), coriander seeds, and a bowl of green chutney to explain the difference.
If you’re searching for a cilantro chutney recipe, you’re in the right place—cilantro is the same as coriander leaves. Coriander seeds are a different ingredient, so green chutney is made with the leaves (often with mint), not the seeds.

To keep it simple, treat “cilantro” and “coriander leaves” as interchangeable in your kitchen unless you’re specifically talking about coriander seeds.

Dhania and dhaniya

Dhania (and dhaniya) are common Hindi words for coriander. So a dhania chutney recipe or dhaniya chutney recipe is usually pointing you to this same green chutney family—sometimes with mint, sometimes without, but almost always brightened with lemon.

Mint chutney and green chutney

A mint chutney recipe often overlaps with green chutney, but the balance shifts. Mint becomes the main note, coriander supports, and the chutney feels cooler and more mint-forward. You’ll get that variation in this post too, because it’s genuinely useful.

Also Read: Vodka Pasta (Penne alla Vodka) + Spicy Rigatoni, Chicken, and Gigi Recipes


What a good green chutney should taste like

A great green chutney doesn’t taste like “blended leaves.” It tastes like freshness with intention.

First comes tang—lemony brightness that makes your mouth water. Next comes the herb hit, clean and green without tasting raw or grassy. Then the chilli warmth arrives, not as a punch, but as a steady glow. Finally, roasted cumin shows up quietly in the background, giving the chutney that “snack-ready” depth that keeps it from feeling like a salad.

When green chutney is off, the flavor problems are usually predictable:

  • When it tastes flat, it often needs roasted cumin or salt.
  • When it tastes grassy, it usually needs lemon and better seasoning.
  • When it tastes harsh, chilli or ginger may be dominating and needs buffering.
  • When it tastes bitter, the herbs may have heated up during blending or too many thick stems made it into the jar.

The reassuring part is that most batches can be corrected. You don’t have to start over. You just have to nudge the chutney back into balance.

Also Read: Healthy Oat Protein Bars – 5 Easy No Sugar Recipes for Snacks


Before you blend: the small choices that change everything

Choose herbs that smell bright

This sounds almost too obvious, yet it’s the easiest quality check. Coriander should smell citrusy and fresh, not damp. Mint should smell cool, not muddy. If your herbs already smell tired, your chutney will taste tired too—no amount of lemon will fully fix it.

Use tender coriander stems, skip the thick ones

Tender stems carry aroma, so using them makes the chutney taste fuller. Thick, fibrous stems near the base, on the other hand, can blunt the flavor and sometimes add bitterness. So, trim the rough ends, keep the tender parts, and you’ll get the best of both worlds.

Dry your herbs more than you think you need to

Water is the most common reason green chutney becomes thin and bland. Since this chutney is meant to taste concentrated, shake off excess water and pat the herbs dry if you can. Even a quick towel pat changes the final texture.

This step matters even more if you want green chutney for sandwich spreads, because sandwich chutney has to be thick enough to stay put.

Blend in short bursts

Long blending runs heat up herbs. Short bursts keep things cooler, help preserve a brighter green, and give you more control over texture. In practice, this also makes it easier to keep the chutney thick without dumping in water too early.

Also Read: Strawberry Smoothie Recipes (12 Easy Blends + Bowls & Protein Shakes)


Recipe Card: Classic Green Chutney Recipe (Coriander–Mint / Cilantro Chutney)

This is the everyday base—the one you’ll use as a dip, spoon beside meals, or turn into variations. It also naturally covers what most people mean by coriander chutney recipe and cilantro chutney recipe in daily kitchen language.

Yield: about 1 to 1¼ cups
Prep time: 10 minutes
Blend time: 2 to 4 minutes
Best for: snacks, chaat, wraps, everyday meals

Green chutney ingredients flatlay with coriander (cilantro), mint, green chilies, ginger, lemon, roasted cumin powder, and salt.
Everything you need for a classic green chutney recipe—fresh coriander (cilantro), mint, green chilli, ginger, lemon, and roasted cumin—styled here so you can prep fast and blend in minutes.

Ingredients

Coriander (cilantro), 1 large bunch (leaves with tender stems)
Mint leaves, ½ to 1 cup (adjust to taste)
Green chillies, 2 to 4 (adjust to heat)
Ginger, 1 to 1½-inch piece
Roasted cumin powder, ½ to ¾ teaspoon
Salt, to taste (black salt optional)
Lemon or lime juice, 1 to 2 tablespoons
Water, only as needed (start with none)

Green chutney recipe quick steps card showing coriander–mint (cilantro) chutney in 5 steps with a bowl of green chutney and bread.
Short on time? This green chutney recipe (coriander–mint / cilantro chutney) comes together fast—follow these five steps and you’ll have a bright, fresh chutney ready for snacks or sandwiches.

Method

  1. Rinse coriander and mint thoroughly. Then shake off as much water as possible and pat dry if you have time.
  2. Add green chillies and ginger to the blender jar first. Pulse once or twice until roughly broken down.
  3. Add coriander, mint, roasted cumin, and salt. Blend in short bursts, scraping down the jar once or twice.
  4. Add water only in tiny splashes if the blades struggle.
  5. Add lemon juice last. Blend briefly, taste, and adjust slowly until the chutney feels bright and balanced.
Green chutney blend order guide showing the step-by-step sequence: chilli and ginger first, add herbs dry, cumin and salt, lemon last.
For a brighter, smoother green chutney recipe, follow this blend order: start with chilli and ginger, add dry herbs next, season with cumin and salt, then finish with lemon last for the freshest coriander–mint (cilantro) chutney flavor.

The texture of green chutney you’re aiming for

Texture depends on where the chutney is headed. A smooth, spoonable blend is perfect for dipping, especially with fried snacks. If you’re serving it as a side with everyday meals, a slightly coarse grind can taste wonderfully fresh and rustic. Sandwiches are different, though: a thicker spread works better inside bread and won’t turn the layers soggy.

If you enjoy seeing how widely this base is used, the overall structure lines up with classic versions like Veg Recipes of India’s mint coriander chutney and Indian Healthy Recipes’ cilantro chutney. No need to copy either one exactly—think of them as familiar signposts rather than strict rules.

Also Read: Classic Rum Punch + 9 Recipes (Pitcher & Party-Friendly)

Green chutney recipe card with coriander–mint (cilantro chutney) showing ingredients, quick method, prep time, and yield.
Save this classic green chutney recipe card: a bright coriander–mint (cilantro) chutney with a quick 4-step method—use it as a dip now, then explore the five variations in the post for restaurant-style, sandwich spread, coconut, and mint-forward versions.

Getting the texture right (because flavor isn’t the only job)

A lot of green chutney disappointment is really texture disappointment. The flavor might be good, but if the chutney is watery or uneven, it won’t behave the way you want.

Green chutney consistency guide showing three textures: dip consistency, thick sandwich spread, and restaurant-smooth green chutney.
Not sure if your green chutney is “right”? Use this quick guide: keep it spoonable for dipping, thicker for green chutney for sandwich spreads, and extra-smooth for restaurant-style green chutney.

When it’s too thin

Thin chutney happens when too much water enters the blender early, or when the herbs were very wet. Instead of adding more spices to “fix” it, solve the texture first. Later in this post, you’ll see the most reliable thickener for sandwich chutney; for now, remember this: you can always thin chutney later, but thickening watery chutney is harder than starting thick.

When it’s too coarse

Coarse chutney can taste wonderful, especially when served beside home-style meals. Still, if you want that restaurant style green chutney feel, smoothness matters. A smoother blend coats snacks better and tastes more “finished.” Instead of adding lots of water, blend in short bursts and scrape down more often. Usually, patience improves smoothness more than water does.

When it’s foamy or “air-y”

This happens when the blender runs too long, too fast, and pulls in air. The chutney can look lighter and feel less dense. Short bursts help. So does using a smaller jar where the blades catch the herbs properly.

Also Read: 7 Pizza Sauce Recipes | Marinara, White Garlic, Alfredo, Buffalo, BBQ, Vodka & Ranch


Cilantro chutney, coriander chutney, and the green base you already made

With the base green chutney recipe ready, you’re already holding two common variations in your hands. You don’t need separate recipes as much as you need direction.

Coriander–mint ratios for green chutney showing classic 2:1, coriander-forward 4:1, and mint-forward 1:1 with fresh herbs and a bowl of chutney.
Dial in your flavor fast: use a 2:1 coriander–mint ratio for a classic green chutney recipe, go 4:1 for a coriander-forward cilantro chutney, or choose 1:1 when you want a cooler mint chutney vibe.

Cilantro chutney recipe style (coriander-forward Green Dip)

If you want coriander to lead, reduce mint to a small handful or skip it completely. Then keep ginger, chilli, cumin, salt, and lemon as usual. This coriander-forward chutney tastes cleaner and sharper, which makes it excellent in wraps, toasties, and quick lunches.

To make that version taste “complete,” be confident with lemon at the end and keep roasted cumin steady. That combination gives coriander chutney a satisfying finish rather than a raw edge.

Cilantro chutney (no mint) recipe card showing coriander-forward green chutney with ingredients list, quick method, prep time, and yield.
Save this cilantro chutney recipe card for a coriander-forward green chutney without mint—bright, everyday, and easy to blend when you want a simpler chutney that still tastes fresh.

Coriander mint chutney style (mint-friendly & Green)

If you prefer the snack-stall feeling, use more mint. Keep coriander as the backbone, but let mint join more confidently. Blend a bit smoother. Add black salt if you love that chaat tang. This version tends to feel cooler and more “dip-ready,” especially beside fried snacks.

Dhania chutney and dhaniya chutney (both green) at home

If you call it dhania chutney or dhaniya chutney, you’re usually making one of the two styles above—either coriander-forward or coriander-and-mint. The name doesn’t force the method; your taste does.

Also Read: Marinara Sauce Recipe: Classic Homemade Marinara


The “restaurant” taste without overcomplicating your life

Restaurant style green chutney has a particular personality: it’s smoother, brighter, and slightly more intense. It also tastes like it was designed specifically for snacks, which is why it’s so satisfying on a chaat plate.

The simplest way to get that feel is to focus on three things: smoothness, tang, and finish.

Restaurant-style green chutney guide showing 4 simple tweaks—blend smoother, add more lemon, roasted cumin, and optional black salt.
Want restaurant-style green chutney at home? These four quick tweaks—smoother blend, extra lemon, roasted cumin, and a pinch of black salt—deliver that bright chaat-style punch and a deeper finish.

Smoothness comes from blending a little longer than your home version, but doing it in short bursts so the herbs stay cool. Tang comes from pushing lemon slightly further than you normally would. Finish comes from roasted cumin and, if you like it, a pinch of black salt. Used carefully, those two seasonings create the snack-stall memory without overpowering the herbs.

Also Read: Oat Pancakes Recipe (Healthy Oatmeal Pancakes)


Recipe Card: Restaurant Style Green Chutney (Smooth and Chaat-Ready)

This is the version that feels like it belongs beside samosas, pakoras, and chaat. It also matches what many people mean when they say “green chutney restaurant style.”

Yield: about 1 cup
Prep time: 10 minutes
Blend time: 3 to 5 minutes
Best for: chaat, samosas, pakoras, snack platters

Ingredients

Coriander (cilantro), 1 large bunch
Mint leaves, ¾ cup (adjust to taste)
Green chillies, 2 to 4
Ginger, 1-inch piece
Roasted cumin powder, ¾ teaspoon
Salt, to taste
Black salt, a small pinch (optional)
Lemon juice, 1½ to 2 tablespoons (taste as you go)
Water, minimal and added only if needed

Save this restaurant-style green chutney recipe card for a smoother, tangier coriander–mint chutney—perfect as a chaat chutney for samosas, pakoras, and street-style snacks when you want that bright, punchy finish.

Method

  1. Pulse ginger and chillies first.
  2. Add coriander, mint, cumin, salt, and black salt (if using).
  3. Blend smoother than your home version, using short bursts and scraping down.
  4. Add lemon at the end, blend briefly, then taste.
  5. Adjust until the chutney tastes bright and “snack-ready.”

If you enjoy contrasting chutney personalities, it’s fun to pair this with a bold red chutney like MasalaMonk’s Kara Chutney for idli and dosa on the same table. The flavors are entirely different, yet both do the same job: they make the plate exciting.

Also Read: Mayo Recipe: 15+ Homemade Mayonnaise Variations


The sandwich factor (where green chutney becomes a daily habit)

If you’ve ever eaten a proper Bombay sandwich, you already know why green chutney matters. The potatoes and spices create comfort, while the chutney creates contrast. Together, they taste like street food even when you’re eating at home.

Still, green chutney for sandwich needs one special quality: it has to be thick enough to spread without soaking bread. Thin chutney migrates. It makes the bread soggy, the filling slippery, and the flavor uneven. Thick chutney, on the other hand, stays where you put it, so every bite tastes deliberate.

To build that thickness, you mainly need to control water and choose a helpful thickener.

Why roasted chana dal works so well

Roasted chana dal (bhuna chana/dalia) thickens chutney without making it heavy. It also gives the spread a satisfying body that feels very “sandwich shop.” Meanwhile, it keeps the herb flavor intact, which is exactly what you want.

Also Read: Daiquiri Recipe (Classic, Strawberry & Frozen Cocktails)


Recipe Card: Green Chutney for Sandwich (Thick Spread)

This is designed to perform inside bread. It’s spreadable, stable, and concentrated enough to hold its own under fillings.

Yield: about 1 cup
Prep time: 10 minutes
Blend time: 4 to 6 minutes
Best for: Bombay sandwich, toasties, wraps, lunchbox sandwiches

Save this green chutney for sandwich recipe card—thick, spreadable, and made with roasted chana dal so it stays put in a Bombay-style sandwich without turning the bread soggy.

Ingredients

Coriander (cilantro), 1 large bunch
Mint leaves, ½ cup
Green chillies, 2 to 3
Ginger, 1-inch piece
Roasted cumin powder, ½ to ¾ teaspoon
Salt, to taste
Lemon juice, 1 to 1½ tablespoons
Roasted chana dal (bhuna chana/dalia), 1 to 2 tablespoons
Water, only by teaspoons if absolutely needed

Method

  1. Pulse ginger and chillies first.
  2. Add coriander, mint, cumin, and salt. Blend in bursts with almost no water.
  3. Add roasted chana dal and blend again until thick and spreadable.
  4. Add lemon at the end, blend briefly, and taste.
  5. If it becomes too thick, loosen with a teaspoon of water. If it’s still thin, add a little more roasted chana dal.
Sandwich green chutney thickness shown on a spoon and spread on bread, demonstrating a spreadable, not watery green chutney for sandwich.
This is the thickness you want for green chutney for sandwich—spreadable and sturdy, so it stays put on bread instead of soaking in and turning the sandwich soggy.

Where to use it immediately

This is the signature layer in MasalaMonk’s Authentic Grilled Bombay Sandwich Recipe, where green coriander chutney helps create that unmistakable street-style bite. It also works beautifully when you’re using leftovers creatively, like in this Paneer Sabji Sandwich. For mornings, it fits naturally into MasalaMonk’s Sandwich for breakfast ideas, especially when you want a toastie that tastes fresh and bold rather than merely filling.


Coconut green chutney: a softer, breakfast-friendly direction

Sometimes you don’t want sharp. You want calm. Coconut green chutney is that mood: creamy, mellow, and especially good with dosa, idli, or any breakfast plate that needs a comforting dip.

Coconut green chutney in a bowl with lemon and coconut pieces, a breakfast-friendly variation to serve with dosa and idli.
Coconut green chutney is the mellow, breakfast-friendly variation—creamier than classic green chutney, and especially good with dosa and idli when you want a softer, less sharp bite.

The beauty of coconut is that it rounds off harshness and softens chilli heat. Consequently, coconut green chutney feels soothing without becoming bland—especially if you remember to bring brightness back with lemon at the end.


Recipe Card: Coconut Green Chutney (Herb + Coconut)

This version keeps the green freshness, then adds coconut for a creamier finish.

Yield: about 1 to 1¼ cups
Prep time: 10 minutes
Blend time: 4 to 6 minutes
Best for: dosa, idli, savory breakfasts, snack platters

Ingredients

Fresh grated coconut, ½ to ¾ cup (or desiccated coconut soaked briefly)
Coriander (cilantro), 1 bunch
Mint leaves, a small handful (optional)
Green chillies, 1 to 3
Ginger, a small piece
Roasted cumin powder, ¼ to ½ teaspoon
Salt, to taste
Lemon juice, about 1 tablespoon (adjust to taste)
Water, minimal

Save this coconut green chutney recipe card for a mellow, creamy variation of green chutney—perfect with dosa and idli when you want a softer, breakfast-friendly chutney.

Method

  1. Pulse ginger and chillies first.
  2. Add coconut, coriander, cumin, and salt. Blend smooth with very little water.
  3. Add lemon at the end and blend briefly.
  4. Taste and adjust. If it feels too mellow, add a touch more lemon or an extra chilli.

If you want a more traditional coconut chutney profile for South Indian breakfasts, MasalaMonk’s South Indian Coconut Chutney is a great companion. It’s not the same chutney, yet it sits beautifully alongside a sharper green chutney on the same plate.

Also Read: Coconut Water Cocktails: 10 Easy, Refreshing Drinks


Mint chutney recipe: when mint leads the green melody

There are days when mint deserves the spotlight. A mint chutney recipe is cooler, more mint-forward, and often feels especially good with spicy foods because mint softens the heat without dulling flavor.

Mint chutney (pudina chutney) in a bowl with fresh mint and lemon, a cooling green chutney best served with kebabs and pakoras.
Mint chutney (pudina chutney) is the cooling, herb-forward cousin of classic green chutney—perfect when you want a fresher finish with kebabs, pakoras, and spicy snacks.

Although mint chutney and green chutney live in the same family, the balance changes. Mint becomes the main note, coriander supports, and lemon becomes especially important so the chutney feels bright rather than heavy.


Recipe Card: Mint Chutney (Pudina-Forward)

This is a mint-led chutney that still keeps enough coriander to taste rounded.

Yield: about 1 cup
Prep time: 10 minutes
Blend time: 3 to 5 minutes
Best for: kebabs, pakoras, sandwiches, snack platters

Ingredients

Mint leaves, 1 to 1¼ cups
Coriander (cilantro), ½ bunch
Green chillies, 1 to 3
Ginger, ½ to 1-inch piece
Roasted cumin powder, ½ teaspoon
Salt, to taste
Lemon juice, 1 to 1½ tablespoons
Water, minimal

Save this mint chutney (pudina chutney) recipe card for a cooler, herb-forward green chutney—especially good alongside pakoras, kebabs, and spicy snacks when you want a fresh, clean finish.

Method

  1. Pulse ginger and chillies first.
  2. Add mint, coriander, cumin, and salt. Blend in short bursts, scraping down as needed.
  3. Add lemon at the end and blend briefly.
  4. Taste and adjust until it feels bright and complete.

If you like seeing a classic mint-led approach, Veg Recipes of India’s pudina chutney recipe is a helpful reference for how naturally mint can carry a chutney.

Also Read: Double Chocolate Chip Cookies – Easy Recipe with 7 Variations


A spicier cousin to keep in mind

Green chutney is fresh and herby, yet sometimes you want something louder—more chilli, more punch, less silky smoothness. That’s where thecha comes in. It’s not the same chutney, but it scratches the same “one spoon changes the meal” itch in a fierier way. When you’re in that mood, MasalaMonk’s thecha recipe is a great one to explore.


How to use green chutney all week (without forcing it)

The jar empties fastest when you match the chutney style to the meal. Instead of treating it as “a snack condiment,” let it behave like a sauce you reach for whenever food needs contrast.

Ways to use green chutney guide showing green chutney served with samosas and pakoras, Bombay sandwich spread, dosa and idli, and wraps and bowls.
Green chutney isn’t just a dip—use it as a chaat chutney with samosas and pakoras, spread it into a Bombay sandwich, serve it with dosa and idli, or spoon it into wraps and bowls for an instant hit of freshness.

Breakfast: warm + crisp + cold chutney

A savory breakfast becomes instantly more complete when there’s something tangy on the side. For example, MasalaMonk’s Semolina Veggie Pancakes are perfect with a fresh green chutney beside them. The warm, lightly spiced pancake meets the cool, tangy chutney, and suddenly breakfast feels cheerful rather than routine.

Coconut green chutney also fits beautifully on breakfast plates, especially when you’re serving dosa or idli. Meanwhile, a sharper green chutney can sit beside it as contrast, so the plate doesn’t taste one-note.

Lunch: spread it, don’t dip it

For lunchbox sandwiches and wraps, thickness matters. That’s why the sandwich spread version earns its own recipe card. Once you use a thick green chutney for sandwich builds, you’ll notice how much cleaner the sandwich feels—less soggy, more evenly flavored.

If you’re using leftover sabji, chutney acts like a bridge between bread and filling. The Paneer Sabji Sandwich is a perfect example of how chutney makes leftovers taste intentional instead of accidental.

Snacks: the moment for restaurant-style punch

When snacks appear—pakoras, samosas, cutlets—restaurant style green chutney shines. It’s smoother, brighter, and designed to feel “ready” immediately. Even a simple plate of fried potatoes tastes more exciting when the chutney has that chaat-like pop.

Dinner: a small spoon as a fresh counterpoint

For heavier comfort meals, a fresh green chutney side can lift the whole plate. MasalaMonk’s Litti Chokha guide mentions serving it with green chutney, and the pairing makes perfect sense: smoky, hearty flavors love a tangy herbal contrast.

When the plate isn’t “Indian,” the chutney still works

Green chutney behaves like a universal herb sauce. It can sit beside roasted vegetables, grilled paneer, or even as a dip for snacks that aren’t traditionally Indian. MasalaMonk’s Falafel with Indian twists points toward mint-coriander chutney as a dip option, which is a gentle reminder that chutney doesn’t need a passport.

Condiment spreads: pair wet and dry

If you love building a snack spread, pair green chutney with something dry and bold for texture contrast. MasalaMonk’s Vada Pav Dry Chutney recipe is a great counterpart—sprinkleable, garlicky, and intense in a completely different way.

Also Read: Peanut Butter Cookies (Classic Recipe & 3 Variations)


Keeping it vibrant: why green chutney darkens and what helps

Herb chutneys dull over time. That’s normal. When herbs are crushed, they’re exposed to oxygen, and natural enzyme activity can change color. You don’t need to treat this like a crisis; you simply need a few habits that make the chutney stay brighter for longer.

Keep green chutney green guide showing 3 tips: blend in short bursts, add lemon at the end, and store in a small jar to reduce air exposure.
To keep green chutney bright and fresh, blend in short bursts, add lemon at the end, and store it in a smaller jar so there’s less air sitting on top.

To understand the “why” in plain language, IFST’s explainer on enzymic browning is a helpful read. If you enjoy practical kitchen experiments, Serious Eats has a deep dive into why pesto browns and what actually helps. Green chutney isn’t pesto, of course, but the herb-and-oxygen problem behaves similarly.

In daily cooking terms, these habits help the most:

  • Blend in short bursts so the herbs don’t warm up.
  • Add lemon at the end so the bright top notes stay bright.
  • Store in a smaller jar so there’s less headspace.
  • Smooth the top of the chutney so there’s less surface area exposed to air.

Those steps aren’t fussy. They’re simply the small things that keep your chutney looking and tasting fresher.

Also Read: How to Cook Perfect Rice Every Time (Recipe)


Storage and food safety (without turning it into a lecture)

Green chutney is typically uncooked, which means you should treat it like any prepared, ready-to-eat condiment. Keep it refrigerated, use clean spoons, and make batches sized for real life.

If you want an official reference point for general safe handling of prepared foods, the USDA page on leftovers and food safety is worth a quick skim. Even though chutney isn’t exactly “leftovers,” the mindset carries over: fresh prepared foods are best used within a reasonable window, and cleanliness matters.

Freeze green chutney guide showing green chutney cubes in an ice tray with steps to spoon into trays, freeze, and refresh with lemon.
Freeze green chutney in small cubes so you can thaw only what you need—spoon into trays, freeze, then refresh the thawed coriander–mint (cilantro) chutney with a squeeze of lemon.

For longer storage, freezing in small portions works well. The color may dull a bit after thawing, yet the flavor often stays surprisingly strong, especially if you refresh it with a squeeze of lemon before serving.

Also Read: How to Cook Perfect Rice Every Time (Recipe)


When a batch goes sideways (and how to rescue green chutney)

Even experienced cooks get a batch that’s almost right. Fortunately, green chutney is forgiving, so you can correct most problems without frustration.

Fix your green chutney troubleshooting guide with quick fixes for watery, bitter, too spicy, and flat green chutney.
If your green chutney goes off-track, don’t toss it—use these quick fixes for watery chutney, bitterness, too much heat, or a flat taste, and bring it back to a fresh, balanced green chutney recipe.

Too thin

If the chutney is watery, thicken it rather than adding more spices. Roasted chana dal is the most reliable thickener. If you don’t have it, reduce water next time and pat the herbs dry more thoroughly.

Too flat

When it tastes muted, it often needs roasted cumin and salt. Add a pinch of each, blend briefly, then taste again. Usually the chutney isn’t missing “more herbs”; it’s missing grounding.

Too grassy

Grassy chutney typically needs lemon and salt. Add lemon in small squeezes, then taste until the chutney feels “awake.”

Green chutney heat levels guide showing mild, medium, and hot options based on how many green chillies to use.
Adjust your green chutney recipe to your comfort level: use 1 deseeded chilli for mild, 2 chillies for medium heat, or 3–4 chillies for a hotter, punchier coriander–mint (cilantro) chutney.

Too spicy

Instead of diluting with water, blend in more coriander. Water reduces flavor, while more herbs keep it tasting like chutney.

Slightly bitter

Bitterness can happen when herbs heat up during long blending runs, or when thick stems dominate. To soften bitterness in the moment, add lemon and a pinch more salt, then blend in a handful of fresh coriander if you have it. Next time, use short bursts and trim thick stems more carefully.

Also Read: Whole Chicken in Crock Pot Recipe (Slow Cooker “Roast” Chicken with Veggies)


A green chutney ritual worth keeping

After making this green chutney a few times, a simple pattern shows up: the jar empties fastest when the chutney is thick enough to use without thinking. A watery batch, on the other hand, tends to linger—not because the flavor is bad, but because spreading and dipping start feeling messy.

Here’s the easiest rule to live by: begin with less water than you think you’ll need. You can always loosen the chutney later; thickening it after the fact is far more annoying. As a bonus, the flavor stays bolder, sandwiches hold up better, and the chutney feels like a daily staple rather than an occasional side.

That’s why green chutney becomes a habit. It brightens the plate, sharpens each bite, and makes even simple food feel intentional.

When you’re ready to use it right away, MasalaMonk already has plenty of natural landing spots: spread a generous layer in the Authentic Grilled Bombay Sandwich, tuck it into the Paneer Sabji Sandwich, serve it alongside Semolina Veggie Pancakes, or pair it with something bold like Vada Pav Dry Chutney. After that, the jar tends to take care of itself.

Green chutney recipe variations chart showing five types: classic coriander–mint, restaurant-style smooth, thick sandwich spread, coconut green chutney, and mint-forward chutney.
One base green chutney recipe, five directions—keep it classic coriander–mint, blend it extra-smooth for restaurant-style green chutney, thicken it for green chutney for sandwich spreads, mellow it with coconut, or go mint-forward for a cooler finish.

FAQs

1) What is green chutney made of?

Green chutney is usually made by blending coriander (cilantro) with mint, green chillies, ginger, salt, roasted cumin, and lemon or lime juice. Depending on the style, you may also add ingredients like black salt, roasted chana dal for thickness, or coconut for a milder, creamier version.

2) Is cilantro chutney the same as coriander chutney?

Often, yes. In many kitchens, “cilantro” and “coriander leaves” refer to the same herb, so cilantro chutney and coriander chutney commonly point to the same kind of green chutney. That said, some people use “coriander chutney” to mean a coriander-forward version with little or no mint.

3) What is dhania chutney and how is it different from dhaniya chutney?

Dhania chutney and dhaniya chutney are generally the same thing—both names commonly refer to coriander-based green chutney. The difference is usually spelling preference or regional language habits, not a different recipe.

4) How do I make restaurant style green chutney at home?

For restaurant style green chutney, blend the herbs smoother than usual, push the lemon a little further for extra brightness, and season confidently with roasted cumin. Additionally, a small pinch of black salt can give that familiar chaat-style tang, although it’s optional.

5) Why does my green chutney turn dark or brown?

Green chutney can darken because the herbs react with air after blending. To slow it down, blend in short bursts so the chutney doesn’t heat up, store it in a tightly sealed jar, and reduce the empty space at the top. Also, adding lemon at the end can help keep the flavor fresher.

6) How can I keep green chutney green for longer?

To keep green chutney greener, start with cold, dry herbs, blend quickly, and avoid adding too much water. Then, store it in a small jar so there’s less air exposure. In some cases, blanching herbs briefly and cooling them before blending can help, but many cooks prefer keeping it fully raw for the freshest taste.

7) What’s the best green chutney for sandwich spread?

The best green chutney for sandwich is thick and spreadable, not watery. For that reason, use very little water while blending and add roasted chana dal (bhuna chana/dalia) to thicken it. As a result, the chutney stays in place and the bread doesn’t turn soggy.

8) Why is my green chutney watery?

Green chutney becomes watery when herbs aren’t dried well or too much water is added during blending. Instead, blend in bursts and add water only by teaspoons if needed. If it’s already thin, roasted chana dal can thicken it quickly.

9) How do I fix green chutney that is too spicy?

To reduce heat, blend in more coriander (and a little mint, if you use it), rather than adding water. Alternatively, adding a spoon of yogurt can mellow the spice, although it will change the flavor slightly and make the chutney creamier.

10) How do I fix green chutney that tastes bitter?

Bitterness can come from too many thick coriander stems or from over-blending, which warms the herbs. To improve it, add more lemon and a pinch more salt, then blend in extra fresh coriander to rebalance. Next time, use tender stems only and blend in short bursts.

11) How much mint should I add to coriander mint chutney?

Mint quantity depends on how minty you want the chutney and how strong your mint is. Generally, a moderate handful gives a balanced coriander mint chutney, whereas a larger amount creates a more cooling, mint-forward chutney.

12) Can I make coconut green chutney without tempering?

Yes. Coconut green chutney can be made by simply blending coconut with coriander, green chilli, ginger, salt, and lemon. If you want it more traditional, you can add tempering, but it isn’t required for a tasty everyday version.

13) How long does green chutney last in the fridge?

Typically, green chutney is best used within 3 to 4 days when stored in a clean, airtight container in the refrigerator. After that, the flavor and color may degrade, even if it still looks fine.

14) Can I freeze green chutney?

Yes, green chutney can be frozen in small portions. For example, freezing in ice cube trays makes it easy to thaw only what you need. After thawing, the chutney may look slightly duller, so adding a little fresh lemon juice can brighten the flavor.

15) What can I serve with green chutney?

Green chutney pairs well with samosas, pakoras, cutlets, kebabs, chaat, sandwiches, wraps, and savory pancakes. Moreover, it works as a dip for snacks beyond Indian food when you want a fresh, herby sauce with a spicy kick.

Posted on 1 Comment

Spicy and Flavorful Vada Pav Dry Chutney Recipe

If you’re a fan of the classic Mumbai street food, Vada Pav, then you know that the dry chutney is what truly enhance this beloved snack to the next level. This dry chutney, made with roasted peanuts, dry coconut, garlic, and spices, adds a burst of flavor and heat to every bite. It’s the perfect accompaniment to Vada Pav, but it’s so tasty you might find yourself sprinkling it on everything. I make this dry chutney in big lot and keep in the refrigerate for a week and use like idli podi, sometimes in poha or just combine with ajwain paratha (here is the recipe for ajwain paratha) with garma garam chai.

Ingredients:

  1. Peanuts: 1/4 cup
  2. Dry Coconut: 1/2 cup, grated
  3. Garlic: 6-7 cloves
  4. Sesame Seeds: 2 tbsp
  5. Kashmiri Red Chilli Powder: 1-2 tbsp, adjust to taste
  6. Salt: to taste

Method:

Start by dry roasting the peanuts in a pan over medium heat until they turn golden brown and begin to release their aroma. Once roasted, allow them to cool. In the same pan, dry roast the sesame seeds until they start to pop and turn light golden. Set them aside to cool dry roast the grated dry coconut until it turns a light golden brown. Set it aside to cool. Roast the garlic cloves and dry coconut in the same pan until they turn slightly golden.

Once all the ingredients are roasted and cooled, combine them in a blender or food processor. Add the Kashmiri red chili powder and salt to taste. Grind everything together into a coarse powder. Be careful not to over-grind; the chutney should have a slightly coarse texture for the best flavor.

Transfer the ground chutney to an airtight container. It can be stored at room temperature for a few weeks or in the refrigerator for longer shelf life.

How to Use:

This dry chutney is traditionally sprinkled inside the Vada Pav, but it can also be used in a variety of ways:

Sprinkle on Dosas or Idlis: Add a spicy kick to your South Indian breakfast. Explore here perfect batter recipe for Idly and Doda

Serve with Snacks: It pairs wonderfully with bhajis, samosas, or pakoras and parathas

Use as a Topping: Sprinkle over salads, roasted vegetables, or even popcorn for an extra burst of flavor.

This Vada Pav dry chutney is a must-have in any spice lover’s pantry. Its rich, nutty flavor combined with the heat from the red chili powder and the boldness of garlic makes it irresistible.

Try making it at home and bring a taste of Mumbai’s street food culture to your kitchen. If you try this recipe, do give us a shout out. Just click a picture and tag us on @masala.monk or use the hashtag #MasalaMonkRecipe and share on Instagram and Facebook. We would love to hear from you. 🙂Happy cooking!