Posted on Leave a comment

Good Morning Yoga Routine: A Beginner’s Guide

Starting your day with yoga can set a positive tone and energize your body and mind. A morning yoga routine helps to increase flexibility, build strength, and cultivate a sense of calm that lasts throughout the day. In this guide, we’ll walk you through a detailed morning yoga routine that you can easily follow at home. Each pose is designed to wake up your muscles, improve your mood, and enhance your overall well-being.

A free PDF is embedded and available to download, save, or print at the end of this post.

1. Child’s Pose (Balasana)

Begin in a kneeling position, sit back on your heels, and extend your arms forward, resting your forehead on the mat. This pose gently stretches your back and calms the mind.

  • Benefits: Relieves back and neck pain, reduces stress, and calms the brain.
  • How to: Kneel on the mat with your big toes touching and knees apart. Sit back on your heels and stretch your arms forward, lowering your torso between your thighs. Rest your forehead on the mat.

2. Cow Pose (Bitilasana)

Transition to an all-fours position. Inhale, arch your back, and lift your head and tailbone towards the ceiling. This pose warms up your spine and improves posture.

  • Benefits: Stretches the front torso and neck, gently massages the spine.
  • How to: Position yourself on your hands and knees, ensuring your wrists are directly under your shoulders and knees under your hips. Inhale deeply, arch your back, and lift your tailbone and head towards the sky.

3. Cat Pose (Marjaryasana)

Exhale, round your spine, and tuck your chin to your chest, moving into the cat pose. Alternate between cow and cat poses to release tension in the back.

  • Benefits: Stretches the back torso and neck, gently massages the spine.
  • How to: From the cow pose, exhale and round your spine towards the ceiling, tucking your tailbone and drawing your chin to your chest. Repeat the cow-cat sequence several times.

4. Downward Facing Dog (Adho Mukha Svanasana)

From all fours, lift your hips up and back, straightening your legs and forming an inverted V shape. This pose stretches the hamstrings, calves, and shoulders.

  • Benefits: Strengthens arms and legs, stretches the shoulders, hamstrings, calves, and feet.
  • How to: From your hands and knees, lift your hips towards the ceiling, straightening your legs as much as possible without locking your knees. Press your heels towards the floor and your hands into the mat, spreading your fingers wide.

5. Standing Forward Bend (Uttanasana)

Step forward and fold your upper body over your legs, allowing your head to hang down. This pose helps to relieve stress and stretch the hamstrings.

  • Benefits: Stretches the hamstrings, calves, and hips; strengthens the thighs and knees; relieves stress.
  • How to: From the downward facing dog, step your feet forward to meet your hands. Keep your knees slightly bent if needed, and let your upper body hang over your legs.

6. Mountain Pose (Tadasana)

Stand up tall with feet together, grounding through your feet. Reach your arms overhead, lengthening your spine. This pose improves posture and balance.

  • Benefits: Improves posture, strengthens thighs, knees, and ankles, firms abdomen and buttocks.
  • How to: Stand with your feet together, arms at your sides. Distribute your weight evenly across both feet, lift your kneecaps, and engage your thighs. Inhale and reach your arms overhead, lengthening through your spine.

7. Chair Pose (Utkatasana)

From mountain pose, bend your knees and lower your hips as if sitting in an invisible chair. Extend your arms overhead, engaging your core and leg muscles.

  • Benefits: Strengthens the thighs, calves, and spine, stretches the chest and shoulders, stimulates the heart and diaphragm.
  • How to: From mountain pose, bend your knees deeply, trying to keep your thighs as parallel to the floor as possible. Reach your arms overhead, with your biceps next to your ears.

8. Standing Forward Bend (Uttanasana)

Fold forward again from the hips, releasing any tension in your back and legs.

  • Benefits: Stretches the hamstrings, calves, and hips; strengthens the thighs and knees; relieves stress.
  • How to: Bend forward from the hips, allowing your torso to hang over your legs. Keep your knees slightly bent if needed, and hold your elbows with opposite hands for a deeper stretch.

9. Runner’s Lunge (Ardha Mandalasana)

Step one foot back into a deep lunge, aligning your knee over your ankle. This pose stretches the hip flexors and strengthens the legs.

  • Benefits: Stretches the hips, groin, and legs; strengthens the thighs and ankles; improves balance.
  • How to: From a standing position, step one foot back into a deep lunge, keeping your front knee over your ankle. Lower your hips and extend your back leg straight behind you.

10. Revolved Side Angle Pose (Parivrtta Parsvakonasana)

From the runner’s lunge, twist your torso towards the bent knee, extending your opposite arm up and over. This pose improves balance and detoxifies the organs.

  • Benefits: Stretches and strengthens the legs, knees, and ankles; improves digestion and detoxifies the organs.
  • How to: From runner’s lunge, place your opposite elbow on the outside of your bent knee. Twist your torso, extending your top arm overhead, and gaze towards your top hand.

11. Low Plank Pose (Chaturanga Dandasana)

Lower your body into a plank position with elbows bent, keeping your body in a straight line. This pose builds core and arm strength.

  • Benefits: Strengthens the arms, shoulders, and core; improves balance.
  • How to: From a high plank position, lower your body until your elbows are at a 90-degree angle, keeping your body in a straight line from head to heels.

12. Upward Facing Dog (Urdhva Mukha Svanasana)

From the low plank, roll over your toes and lift your chest upwards, keeping your legs straight and thighs off the ground. This pose opens the chest and strengthens the arms.

  • Benefits: Strengthens the spine, arms, and wrists; stretches the chest, shoulders, and abdomen.
  • How to: From low plank, roll over your toes, lift your chest, and straighten your arms. Keep your thighs off the ground and press your shoulders back.

13. Child’s Pose (Balasana)

Return to child’s pose for a moment of rest and relaxation.

  • Benefits: Relieves back and neck pain, reduces stress, and calms the brain.
  • How to: Sit back on your heels and extend your arms forward, resting your forehead on the mat.

14. Hero Pose (Virasana)

Sit back on your heels with knees bent and hands resting on your thighs. This pose promotes relaxation and improves digestion.

  • Benefits: Stretches the thighs, knees, and ankles; improves digestion and relieves gas.
  • How to: Kneel on the mat, with your knees together and feet slightly apart. Sit back between your heels, keeping your back straight and hands on your thighs.

15. Warrior 1 (Virabhadrasana I)

Step one foot forward and bend the knee, keeping the back leg straight. Raise your arms overhead. This pose builds strength and stability.

  • Benefits: Strengthens the legs, ankles, and arms; stretches the chest, shoulders, and groin; improves balance.
  • How to: From a standing position, step one foot back and bend your front knee. Raise your arms overhead and gaze forward.

16. Reverse Warrior (Viparita Virabhadrasana)

From warrior 1, lean back and reach one arm overhead, stretching the side body.

  • Benefits: Stretches the side body, strengthens the legs and arms, improves flexibility.
  • How to: From warrior 1, reach your back hand down your leg and extend your top arm overhead, leaning back slightly.

17. Warrior 2 (Virabhadrasana II)

Turn your back foot slightly and open your hips to the side, extending your arms parallel to the ground. This pose strengthens the legs and improves concentration.

  • Benefits: Strengthens the legs, ankles, and arms; stretches the hips and groin; improves concentration and balance.
  • How to: From warrior 1, open your hips to the side and extend your arms parallel to the ground, gazing over your front hand.

18. Extended Side Angle Pose (Utthita Parsvakonasana)

From warrior 2, lower your front hand to the ground or a block and extend your top arm over your ear. This pose stretches the sides and strengthens the legs.

  • Benefits: Stretches the sides, hips, and hamstrings; strengthens the legs and ankles.
  • How to: From warrior 2, lower your front hand to the ground or a block, and extend your top arm over your ear, creating a long line from your back foot to your fingertips.

19. Triangle Pose (Trikonasana)

Straighten your front leg, extend your front arm to the ground or a block, and reach your top arm towards the ceiling. This pose improves flexibility and balance.

  • Benefits: Stretches the legs, hips, and spine; strengthens the legs and ankles; improves flexibility and balance.
  • How to: From warrior 2, straighten your front leg and reach your front hand to the ground or a block. Extend your top arm towards the ceiling and gaze upwards.

20. Pigeon Pose (Kapotasana)

From downward facing dog, bring one knee forward and extend the opposite leg back, lowering your hips. This pose deeply stretches the hips and relieves lower back pain.

  • Benefits: Stretches the hips, thighs, and groin; relieves lower back pain.
  • How to: From downward facing dog, bring one knee forward and lower your hips, extending your back leg straight behind you. Keep your hips square and fold forward over your front leg.

21. Meditation Pose (Sukhasana)

Sit comfortably with your legs crossed and hands resting on your knees. Close your eyes and focus on your breath, calming your mind and body.

  • Benefits: Calms the mind, reduces stress, improves focus.
  • How to: Sit with your legs crossed and your back straight. Rest your hands on your knees, close your eyes, and take deep breaths.

22. Butterfly Forward Bend (Baddha Konasana)

Bring the soles of your feet together and fold forward over your legs, gently stretching your inner thighs and groin.

  • Benefits: Stretches the inner thighs, groin, and knees; improves flexibility.
  • How to: Sit with your legs bent and the soles of your feet together. Hold your feet with your hands and gently fold forward, keeping your back straight.

23. Seated Pose (Dandasana)

Sit with your legs extended straight in front of you, engaging your core and sitting tall. This pose improves posture and stretches the legs.

  • Benefits: Strengthens the back muscles, improves posture, stretches the legs.
  • How to: Sit with your legs extended straight in front of you. Flex your feet, engage your core, and sit up tall, with your hands resting on the mat beside you.

24. Corpse Pose (Savasana)

Lie down on your back with arms at your sides and legs slightly apart. Close your eyes and relax completely, allowing your body to absorb the benefits of your practice.

  • Benefits: Relaxes the body, reduces stress, promotes overall well-being.
  • How to: Lie on your back with your legs slightly apart and your arms at your sides, palms facing up. Close your eyes and take deep breaths, allowing your body to fully relax.

You can download / save / print this basic FREE PDF with 25 poses to get you started.

Conclusion

Incorporating this morning yoga routine into your daily schedule can bring numerous physical and mental benefits. Whether you’re new to yoga or a seasoned practitioner, these poses are designed to help you start your day with a sense of calm and vitality. Remember to move at your own pace, listen to your body, and enjoy the process.

Tags: Morning Yoga, Yoga Routine, Daily Yoga Practice, Yoga for Beginners, Yoga Poses, Wellness

FAQs:

Q: How long should I hold each pose? A: Aim to hold each pose for 3-5 breaths, adjusting the duration based on your comfort and experience level.

Q: Can I do this routine if I’m new to yoga? A: Yes, this routine includes beginner-friendly poses. Feel free to modify the poses as needed and use props for support.

Q: What are the benefits of a morning yoga routine? A: Morning yoga can improve flexibility, increase energy, reduce stress, and enhance mental clarity throughout the day.

Posted on Leave a comment

Top 10 Collagen Boosting Foods for Glowing Skin

Collagen, the superstar protein in our bodies, is the secret ingredient behind our skin’s elasticity, our hair’s strength, and our joints’ mobility. As we age, our bodies’ collagen production slows down, leading to signs of aging like wrinkles and joint discomfort. But fear not! By incorporating certain foods into your diet, you can give your body’s collagen production a natural boost. Let’s dive into the world of collagen-boosting foods and discover how they can help you maintain youthful skin, luscious hair, and overall health.

🥩🍗 1. Animal-Based Collagen Boosters

Beef Bone Broth

Beef bone broth is a collagen powerhouse. It’s packed with collagen type I, which is vital for skin, hair, and nail health. Sip on some warm beef bone broth or incorporate it into your soups and stews for a collagen kick.

Skin-On Chicken

Chicken, particularly the skin, is a fantastic source of collagen. So, next time you’re roasting or grilling chicken, leave the skin on for that extra collagen boost.

Fatty Fish

Fatty fish like salmon, mackerel, and tuna are not only delicious but also rich in omega-3 fatty acids, which can help maintain skin health and stimulate collagen production.

🌱🥦 2. Plant-Based Collagen Boosters

Spirulina

Spirulina, a type of blue-green algae, is a superfood that can stimulate your body’s collagen production. It’s nutrient-dense and can be easily added to smoothies or salads.

Citrus Fruits

Citrus fruits are bursting with vitamin C, a key player in collagen synthesis. Some of the top citrus fruits include:

  • Oranges 🍊
  • Lemons 🍋
  • Grapefruits 🍈
  • Limes
  • Tangerines
  • Pomelos

Berries

Berries are not only scrumptious but also packed with antioxidants and vitamin C, both of which promote collagen production. Here are some berries to consider:

  • Strawberries 🍓
  • Raspberries
  • Blueberries
  • Blackberries
  • Acai berries
  • Goji berries

Tomatoes

Tomatoes are a treasure trove of lycopene, an antioxidant that protects your skin from damage, and vitamin C, which boosts collagen production.

Green Vegetables

Green vegetables are high in vitamin C and antioxidants, both of which are essential for collagen production. Some green veggies to consider are:

  • Spinach
  • Kale
  • Broccoli 🥦
  • Brussels sprouts
  • Green bell peppers

Nuts and Seeds

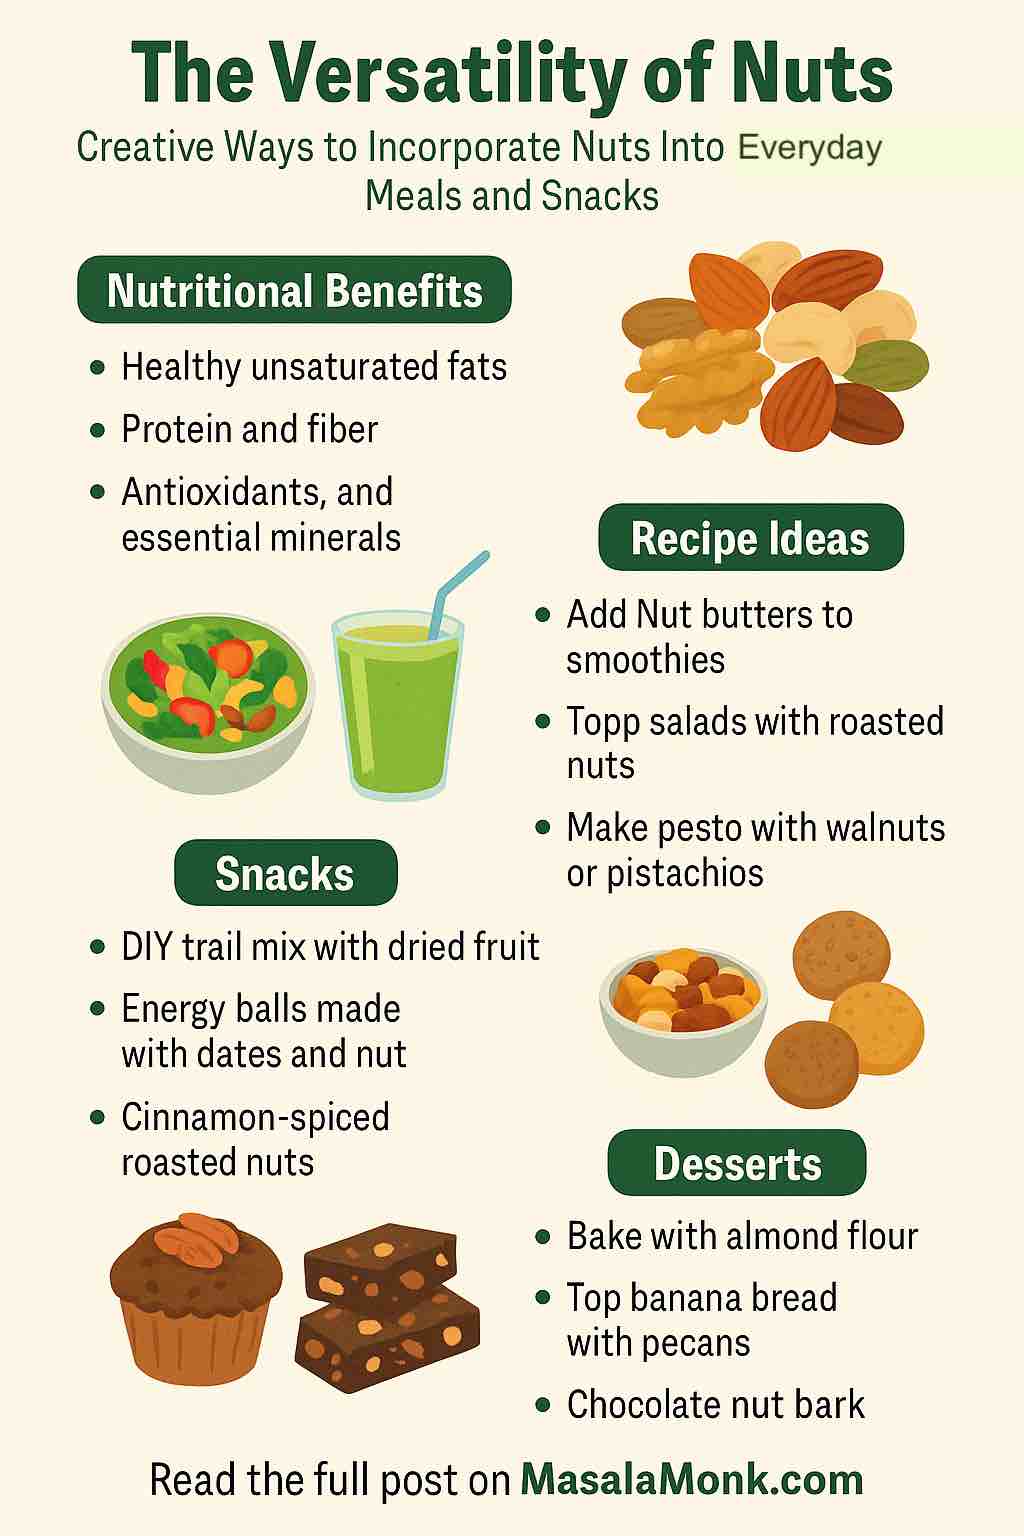
Nuts and seeds are packed with nutrients that can help boost collagen production, including protein, omega-3 fatty acids, and antioxidants. Some to consider are:

  • Almonds
  • Walnuts
  • Chia seeds
  • Flax seeds
  • Pumpkin seeds

Dark Chocolate

Dark chocolate is rich in antioxidants that can protect your skin from damage and boost collagen production. Plus, it’s a delicious treat!

Carrots

Carrots are high in vitamin A, which can stimulate collagen production and slow down its breakdown.

Green Tea

Green tea is packed with antioxidants, which can protect your skin from damage, promote skin health, and boost collagen production.

🍽️🥗 3. Collagen-Boosting Recipes

Citrus Berry Smoothie

Blend together your favorite citrus fruits and berries for a delicious, collagen-boosting smoothie. Add a spoonful of spirulina for an extra boost.

Chicken Salad with Spinach and Almonds

Combine skin-on chicken, spinach, and almonds for a salad that’s packed with collagen-boosting nutrients.

Beef Bone Broth Soup

Simmer beef bones with your favorite vegetables and herbs to make a collagen-rich soup that’s good for your skin and your soul.

🤔 FAQs

Q: What are collagen-boosting foods? A: Collagen-boosting foods are foods that either contain collagen or promote its production in the body. These include bone broth, skin-on chicken, citrus fruits, berries, green vegetables, fatty fish, nuts and seeds, and dark chocolate.

Q: Can eating certain foods boost collagen production? A: Yes, certain foods can boost collagen production. These include foods rich in vitamin C, like citrus fruits and green vegetables, and foods that contain collagen, like bone broth and skin-on chicken.

Q: Are there vegetarian or vegan sources of collagen? A: While there are no plant sources of collagen, certain plant-based foods can help boost collagen production. These include citrus fruits, berries, green vegetables, nuts and seeds, and dark chocolate.

Q: Can collagen-boosting foods improve skin health? A: Yes, collagen-boosting foods can improve skin health by increasing collagen production, which can help maintain skin elasticity and strength, reduce wrinkles, and promote overall skin health.

Q: What are the benefits of collagen for skin and hair? A: Collagen helps maintain skin elasticity and strength, reduce wrinkles, and promote overall skin health. It also plays a crucial role in maintaining healthy hair and nails.


Remember, while these foods can help boost collagen production, it’s also essential to maintain a balanced diet and healthy lifestyle for overall well-being. Enjoy these collagen-boosting foods as part of a varied and balanced diet.

Stay healthy, stay glowing! 🌟

Blog Tags: Collagen, Skin Health, Hair Health, Bone Broth, Citrus Fruits, Berries, Green Vegetables, Fatty Fish, Nuts and Seeds, Dark Chocolate, Healthy Diet, Nutrition, Wellness, Beauty, Anti-Aging, Natural Remedies.

Posted on Leave a comment

Is Ice-Cream Helping You Beat the Summer Heat?

Yes, summers are here, and the scorching heat is unbearable. Our natural instinct is to grab something cold and what better way to beat the heat than an ice-cream. It’s cool, creamy, delicious and triggers dopamine rush. It gives a cooling sensation on the tongue; the flavour and overall sweetness contributes to the positive experience of enjoying this treat. It is hard to pass that feeling of instant pleasure. But before you grab that ice-cream, know the science behind what an ice-cream does to your body heat, so that next time when you require something to cool yourself, you’ll make a better choice.

How our body heat works?

To understand what ice-cream does to our body, we first need to know a bit about how our body controls temperature in different environments. The process of maintaining optimal body temperature by our body is called thermoregulation. Humans are warm blooded which means we can control our body temperature. Our body can constantly produce heat as a byproduct of internal chemical processes which is done by our metabolism. Our metabolism is responsible for correct functioning of our body. From breaking down food to absorbing nutrients to transporting them to different cells and then converting it into energy, metabolism makes it all possible. The heat this process generates is useful when outside temperature is cold but in summers, we need to avoid overheating.

How will Ice-Cream work once it gets digested?

It may seem logical to have something cold like an ice-cream in summers to cool yourself, however, once the components of the ice cream start to break down, the cooling effect is diminished. Its initial cooling effect is rapidly replaced by heat which is generated when the digestion process of ice cream starts. When the body needs to digest calorie rich foods, it produces a lot of heat to digest it which leads to increase in body temperature. Milk, sugar and all the cream added in an ice-cream are rich in calories. This will generate more heat in the body when outside temperature is already high. So, instead of having a cooling effect, it will have the opposite effect. The same goes for high calorie soft drinks- aerated drinks, packed juices. All of this will provide only a momentary respite from the heat but will not cool your body in the truest sense.

What can you actually do to keep your body cool in summers?

While it’s is ok to enjoy an ice-cream once in a while but as the mercury rises opt for a more balanced approach to beat the heat. Some of the best summer coolers are: 

Apart from this, warm beverages surprisingly are a good way to keep yourself cool. Drinking hot beverages cause your body to sweat which allows your body to cool down. Sweating is the most effective natural way for our body to lose heat. 

Eating spicy foods such as ginger, cayenne pepper and red chili peppers can cause you to perspire. When you eat spicy food, you might initially feel hot, but it triggers sweat response causing you to perspire and when the perspiration evaporates, it cools your body temperature. 

Lastly and most importantly, keep yourself hydrated. Drinking enough water is essential to maintain overall well-being and is one of the best ways to keep yourself cool.

Ayurvedic Perspective: 

According to Ayurveda, ice-cream has dampening qualities. It is cold, heavy, too sweet and lacks fire element. Fire or Agni in Ayurveda is referred to as digestive fire- energy that we all need for smooth digestion. Now imagine, pouring something cold and heavy on a blazing fire. Yes, exactly! The fire will diminish. Having too much of cold, sweet and heavy foods creates an imbalance in our body triggering conditions like excess mucus, lethargy, weight gain, allergies, indigestion, bloating and constipation. 

But if you really have a strong urge to grab that ice-cream cup, Ayurveda has some ways in which you can make this food little friendly for your body.

  • Consume your ice-cream around noon time, from 12:00 to 2:00 pm. This is the time when digestive fire is at its strongest. You will have plenty of time throughout the day to digest it. 
  • Go for ice-cream that has a bit of spice like cinnamon, nutmeg, ginger or even cayenne pepper. This gives your body some digestive support. 
  • Cardamom flavoured icecream is considered to be one of best antidotes to icecream. When cardamom is added to dairy products, it aids digestion and helps to reduce excess mucus production caused by dairy. 

Bottomline

Cold treats can be satisfying when the temperature is soaring however, it does have an opposite effect on your body. Instead of cooling your body, it will generate more heat. You can enjoy cold summer treats but remember moderation and maintaining a balance is the key to good health. Fix on better and natural summer coolants and remember to stay hydrated.

I hope this post helped you and next time when you get the craving, do remember this post. It will help you make informed choices. Stay happy and stay healthy! 🙂

Posted on Leave a comment

Know the right way of Consuming Turmeric Milk

We Indians are so well familiar with turmeric spice. Turmeric is so commonly used in India that you will find it in every spice box in a typical Indian household. Rarely you will find an Indian recipe prepared without a dash of turmeric, be it your vegetables or dal preparation. 

Growing up this spice used to be an answer to all our health and skin related issues in our grandmother’s book of wellness. Whenever you fell sick or got injured, your mother or grandmother was quick to force this liquid gold aka Haldi Dhood down your throat. Whether you had chronic cold, cough or stomach related problems, turmeric was antidote to everything. Now, as adults we do realize why our elders did what they did- the science behind their humble wisdom. What was once something our mothers and grandmothers coaxed us into gulping down, has become an international health phenomenon—and all the “golden milk” “turmeric latte” available in every cafe nowadays only reinforce the fact. 

This spice provides innumerable benefits by itself but mix it with milk, and its benefits are doubled. Turmeric mixed with milk is a perfect bedtime drink that helps to reduce inflammation, poor immunity  and disturbed sleep patterns.

Below are all the reasons as to why turmeric milk should be part of your health depository. 

  1. May help fight cancer: Studies indicate that turmeric may offer some protection against cancer.
  2. Strong Bones: Nutrients in turmeric milk contribute to a strong skeleton, reducing your risk of bone diseases, such as osteopenia and osteoporosis.
  3. Reduces inflammation and joint pains: There hero component in turmeric in curcumin. It has strong antioxidants properties which helps to reduce inflammation in the body. Inflammation is a root cause of all the diseases. Having anti-inflammatory foods such as turmeric regularly can greatly reduce that risk. Also, it can help ease joint pains. Hence, it is extremely useful for people suffering from arthritis. 
  4. Helps in Cough and Cold: Consuming a glass of turmeric milk at night is the norm for most growing Indian kids, as this concoction not only provides relief from sniffles and coughs, but also protects against further infections. In fact, turmeric milk has an immediate effect on colds and coughs, as it removes excess phlegm from the body. If you are experiencing a sinus headache, a cup of turmeric milk might provide relief, as it eases mucus flow and promotes sinus drainage.
  5. Skin Benefits: Curcumin in turmeric has anti-bacterial and anti-inflammatory properties which will help in acne and clarifying the complexion. Traditionally, a glass of turmeric milk was given to brides-to-be to add glow to their complexion. For long, turmeric has been a key ingredient in skin care DIY routine for radiant and glowing skin. Turmeric mixed with fresh cream when applied as a mask on face gives an instant glow. 
  6. Induces better sleep: Turmeric milk when combined with saffron was granny’s one of the many remedies to treat insomnia. Dairy foods contain tryptophan, magnesium and zinc, which are essential for serotonin and melatonin production but its bioavailability is limited. When combined with curcumin, it is a game changer. 

Let’s see the correct way of making Turmeric Milk

The main compound in turmeric is curcumin. It makes up about 5% of turmeric. Our liver gets rid of foreign substances by making them water-soluble so that they can be excreted. That is where the role of black pepper comes. Black pepper contains piperine, which naturally helps inhibit drug metabolism. So, when the liver excretes curcumin, piperine can inhibit this process so that curcumin is not excreted. This explains how piperine can help to make curcumin more bioavailable. Research has found that consuming just 20mg of piperine per 2g of turmeric can increase curcumin absorption by up to 2000%. Hence, if you want all the benefits of turmeric milk, do not forget to add black pepper to it.

Recipe: For 1 cup

Ingredients

  1. A2 Cow’s Milk- 1 cup
  2. Turmeric Root: 1/2 inch
  3. Black pepper corns: 2
  4. Cardamom: 1
  5. Saffron: few strands
  6. Jaggery: 1 tsp or as per taste

Instructions

  • In a mortar pestle, add turmeric root, black peppercorns and cardamom. Bruise it a little. 
  • Now in a pan add milk, saffron strands and turmeric mix. Allow the milk to boil. 
  • Then add jaggery powder and allow the milk to simmer for 2 minutes. Switch off the flame. 
  • Cover and let the milk rest for 5 minutes. Sieve and serve warm. 

Notes: 

  1. Cardamom is added because it helps in digestion. It also helps to induce sleep and relieve stress or anxiety. 
  2. Saffron is added to help boost immunity and memory. It also helps to improve sleep quality and protects against flu. 
  3. You can use natural sweetener of your choice. Mishri (rock sugar) or coconut sugar works well too.
  4. Go for A 2 raw cow’s milk instead of pasteurized milk that comes in a packet or a carton. You can boil the raw milk before using it in turmeric milk.
  5. You can add other spices too like ceylon cinnamon or dry ginger powder.

I hope this recipe and information helped you. Do let us know how haldi dhood is prepared at your home. If you have any questions do let us know in the comments. We would love to hear from you. Stay happy and healthy! 🙂

Posted on Leave a comment

A perfect and foolproof Jowar Bajra Roti Recipe

When winter rolls around, or when I’m on a diet, there’s one recipe I always turn to: Jowar Bajra Paratha. This wholesome and nutritious paratha is incredibly satisfying and pairs beautifully with jaggery or any curry sabji. Not only is it a staple during colder months, but it’s also a fantastic option for those looking to incorporate more healthful grains into their diet. So lets see how to make perfect jowar bajra paratha.

Ingredients:

1 cup Jowar Flour

1 Cup Bjara Flour

Water as needed

Ghee for Cooking

Instruction:

In a mixing bowl, combine the jowar flour and bajra flour. Gradually add hot water to the flour mixture. Keep adding water until the mixture comes together to form a soft and pliable dough. Knead the dough for a few minutes until it becomes smooth. The hot water helps in binding the flours.

Divide the dough into equal-sized portions to make roti. Take a portion of the dough and dust some flour to prevent sticking. Roll out the ball into a round roti. Heat a tawa on medium-high heat. Place the rolled paratha on the hot tawa. Cook for a minute  Flip the paratha and cook the other side. Apply ghee on both sides for added flavor and to keep the roti moist.

Once both sides are cooked and crispy, remove the roti from the tawa. Serve hot with jaggery or a curry of your choice.

Enjoy your nutritious and wholesome Jowar Bajra Roti! 🌾🍽

Do try out this simple recipe. I am sure you guys will love it. Let me know what other kind of millet roti you make at home in the comments section. It will be great to know.