Posted on Leave a comment

Spanakopita Recipe: Greek Spinach Pie with Feta, Phyllo & Crispy Layers

A spatula lifting a corner piece of baked spanakopita from a rectangular pan, showing golden phyllo layers and green spinach feta filling.

You know spanakopita is right when the knife crackles through the golden top and the first corner lifts cleanly from the pan. Under those flaky phyllo layers should be warm spinach, salty feta, fresh herbs, and enough structure to slice without the bottom turning wet.

This is a practical home-kitchen spanakopita: store-bought phyllo, a well-drained spinach-feta filling, clear success cues, and a crisp base that does not depend on perfect pastry work. You still get the drama of a flaky Greek spinach pie, but the process stays manageable: dry the greens, mix the filling, layer, bake, rest, and slice.

If phyllo makes you nervous, you are in good company. It tears, dries, and wrinkles, but this pie does not need perfect sheets. The hidden layers can be patchwork, the top can be a little rustic, and the tray will still bake into something golden, flaky, and shareable.

Hands brushing oil over a wrinkled sheet of phyllo pastry inside a rectangular baking pan.
Wrinkled phyllo is still usable phyllo. Once it is lightly brushed and layered, those folds become extra flaky edges instead of a problem to fix.

Fastest reliable path: use frozen spinach, block feta, 14 phyllo sheets, and a 9 x 13 inch pan. Fresh spinach works too, but frozen keeps the filling easier to control for a first tray.

This is the version for the cook who wants spanakopita to feel doable before it feels impressive.

Spanakopita Recipe Snapshot

Recipe typeGreek spinach pie / spinach and feta phyllo pie
Prep time35–45 minutes with frozen spinach; longer with fresh bunch spinach
Cook time45–55 minutes
Total time1 hour 20 minutes to 1 hour 40 minutes, not including phyllo thawing
Advance stepThaw frozen phyllo overnight in the refrigerator
Yield10–12 pieces
Pan size9 x 13 inch / 23 x 33 cm baking dish or pan
Oven temperature350°F / 180°C
Oven rackLower-middle rack
Spinach500 g / 16 oz frozen spinach or 700–900 g / 1½–2 lb fresh spinach
Resting time15–20 minutes, uncovered, before slicing

Jump to the full recipe, or keep reading for the spinach, phyllo, and crisp-bottom tips that make the tray work.

Table of Contents

Before we get into the details, this is the texture you are aiming for: crisp pastry outside, green spinach through the middle, and small feta pieces that stay visible after baking.

A plated slice of Greek spinach pie showing flaky phyllo layers, green spinach filling, and white feta pieces.
A good Greek spinach pie slice should show contrast: crisp pastry outside, herby spinach inside, and small feta pockets throughout. That uneven texture is part of what makes spanakopita feel homemade.

Why This Spanakopita Works

The goal here is not perfect pastry work. It is a tray that lifts cleanly, tastes generous, and gives you flaky layers without asking you to baby every sheet. Frozen spinach takes one variable off your hands, block feta gives better texture, seven bottom phyllo sheets create structure, and the lower-middle rack helps the base bake through before the top gets too dark.

This is the practical spanakopita setup: filling ingredients ready, phyllo still protected, and the pan waiting before assembly begins.

Spanakopita ingredients on a kitchen counter, including phyllo sheets, spinach, feta, herbs, eggs, olive oil, and a rectangular baking pan.
Set up the spanakopita station before opening the phyllo: spinach, feta, herbs, eggs, oil, brush, and pan. Then the delicate sheets spend less time drying on the counter.
  • Frozen spinach makes the filling easier to control. Fresh works too, but frozen is already wilted, so once it is pressed well, the tray becomes more predictable.
  • Block feta gives creamy, salty pockets. It tastes fuller than very dry pre-crumbled feta.
  • Seven bottom sheets support the filling. They help the pie slice cleanly.
  • The lower-middle rack helps the base cook. This is especially useful in glass or ceramic pans.
  • A short rest finishes the texture. The filling settles, the pastry stays flaky, and the pieces cut cleaner.

The tray format is forgiving in a way triangles are not. Torn sheets disappear inside, the filling spreads evenly, and the lower layers have enough time to firm up before slicing.

You still get the flavor of a classic Greek spinach pie, just with store-bought phyllo, a forgiving tray format, and enough structure that the first slice does not collapse.

What Is Spanakopita?

Spanakopita is a Greek spinach pie made with thin phyllo pastry and a savory filling of spinach, feta cheese, herbs, and often eggs.

You may see the pastry spelled as phyllo or filo. They are the same thing: paper-thin pastry sheets that bake into crisp, flaky layers when brushed with olive oil or melted butter.

Greek spinach pies vary by family and region. Some use leeks, some add more herbs, some use homemade phyllo, and some keep the filling very simple. Here, the spirit is classic — greens, feta, herbs, olive oil, and crisp phyllo — while the handling is modern and practical: store-bought pastry, clear texture cues, and a tray format that gives the filling room to settle.

For dinner and clean slices, the tray version is the easiest path; triangles are better when you want appetizers, lunch boxes, or party bites.

A tray of spanakopita in the background with baked spinach and feta phyllo triangles in the foreground.
The same spinach-feta filling can become a full tray or folded spanakopita triangles. Choose the tray for an easier family-style bake, or make triangles when you want appetizer-sized pieces.

Spanakopita is not meant to be creamy like spinach dip. The filling should be savory, herby, and moist enough to taste generous, but firm enough that the phyllo bakes into layers instead of steaming from underneath.

In either shape, the best pieces have contrast: brittle golden corners, soft salty feta tucked into the greens, and a herby filling that smells good before the tray even reaches the oven.

Ingredients and Substitutions

The filling is simple, which is why the details show up in the finished slice. Good feta gives salty pockets, fresh herbs keep the spinach lively, and well-prepared greens let the phyllo stay flaky instead of heavy. If spinach is your main question, jump to the fresh vs frozen spinach guide before mixing.

Spinach and feta are the two ingredients that matter most. Spinach controls texture; feta controls flavor. Loose spinach weakens the pastry, while bland feta makes the whole filling taste flat.

This amount gives a generous but sliceable filling: enough spinach and feta to taste full, but not so much that the lower layers steam. If you add extra greens, keep the final squeezed amount close to the recipe amount.

Spanakopita Ingredient Amounts

IngredientAmountNotes
Frozen chopped spinach500 g / 16 ozThaw fully and press well.
OR fresh spinach700–900 g / 1½–2 lbWilt in batches, cool, chop if needed, then squeeze well.
Feta cheese300 g / about 10½ ozBlock feta gives better flavor and texture than very dry pre-crumbled feta.
Large eggs2Help bind the filling so the pieces slice more cleanly.
Phyllo sheets14 sheetsUse 7 sheets on the bottom and 7 on top.
Olive oil, divided120 ml / ½ cup for brushing, plus 1–2 tablespoons for cookingYou may not use all of it. Sheets should look lightly glossy, not heavy.
Onion or scallions1 small onion or 4–6 scallionsAdds sweetness and depth.
Garlic1–2 cloves, minced, optionalAdds extra savory depth.
Dill, fresh¼ cup choppedClassic fresh herb flavor.
Parsley, fresh¼ cup choppedAdds brightness.
Mint, fresh1–2 tablespoons, optionalAdds a brighter, more aromatic note.
Lemon zest½ teaspoon, optionalAdds brightness if your feta is mild or the filling tastes flat.
Black pepperTo tasteUse generously if your feta is mild.
NutmegPinch, optionalWorks well with spinach and cheese.

Before the eggs go in, taste the filling so you can judge the feta’s saltiness. Some feta needs no added salt at all.

Feta Cheese

Most of the salt and tang comes from the feta, so it matters. Block feta is the better choice if you can get it. Crumble it yourself for a softer, creamier texture. Pre-crumbled feta works, but it can be drier.

A hand crumbling block feta over chopped spinach and herbs for spanakopita filling.
Crumble block feta unevenly instead of mashing it smooth. Those small salty pockets give the filling better flavor and a more satisfying bite.

Use 300 g / about 10½ oz as the default. If your feta is very salty, use a little less and skip extra salt. If your feta is mild, lean on black pepper, herbs, and a little lemon zest before adding more salt.

Olive Oil or Butter?

Olive oil gives the pie a more classic Greek flavor. Melted butter makes the pastry richer and more golden. Both work, and you can also use half olive oil and half melted butter.

Brush lightly. The pastry needs enough fat to crisp, but it should not feel soaked or heavy.

Can You Add Ricotta, Cream Cheese, or Yogurt?

You can add a little ricotta, cream cheese, or Greek yogurt for a creamier filling, but use a light hand. Too much soft cheese makes the mixture wetter and heavier. It should mound softly on a spoon, not spread like dip. If what you really want is a creamy spinach appetizer, MasalaMonk’s spinach dip recipes are a better fit.

Fresh Herbs and Dried Herb Substitutes

Fresh dill and parsley give the filling its best flavor. If using dried dill, start with about 1 teaspoon dried dill for every 1 tablespoon fresh dill. Dried parsley is milder, so fresh parsley is better when possible. Dried mint can be strong, so use only a small pinch.

Leeks, Chard, and Other Greens

Leeks add sweetness and depth. Chard or silverbeet can replace part of the spinach, especially if you like a stronger green flavor. Kale, mushrooms, artichokes, and pine nuts can work too, but treat them as variations. For the cleanest first tray, keep the filling simple: spinach, feta, herbs, onion, and eggs.

Fresh or Frozen Spinach: Which Works Better?

Best spinach for spanakopita: frozen chopped spinach is the most reliable choice for a first tray because it is already wilted and easier to drain evenly. Fresh spinach gives brighter flavor, but it takes more prep and still needs to be cooked, cooled, chopped, and pressed before mixing.

Two bowls showing wilted fresh spinach and thawed frozen spinach side by side, with a kitchen towel nearby.
Fresh spinach gives a brighter taste, while frozen spinach is easier and more predictable. Either way, the winning move is removing moisture before the filling touches the phyllo.
Use thisBest whenWatch out for
Frozen spinachYou want the most reliable first tray.It must be fully thawed and pressed well.
Fresh bunch spinachYou want brighter flavor and a more traditional fresh-greens feel.It takes longer and cooks down heavily.
Baby spinachYou want faster fresh spinach prep.The filling can be softer and milder.
Chard or silverbeetYou want a deeper greens flavor.Stems need chopping finely or removing.

Use about 700 g for tender baby spinach and closer to 900 g for mature bunch spinach with stems. After wilting and squeezing, you want roughly the same packed amount you would get from 500 g / 16 oz thawed frozen spinach.

Fresh spinach always looks like too much at first. Then it wilts down dramatically, which is exactly why the recipe starts with such a large amount.

Spinach Dryness Test

After squeezing, press the spinach with your hand or the back of a spoon. It should hold together in a soft mound, but the bowl should stay dry. If green liquid gathers at the bottom, squeeze again.

Hands squeezing spinach in a kitchen towel over a bowl to remove excess liquid.
First, squeeze out the hidden water. This one step does more for crisp spanakopita than almost any extra seasoning or topping.

For frozen spinach, squeeze it in a clean kitchen towel in small handfuls rather than one large mass; it is easier to remove more liquid that way.

The Dry-Bowl Cue

Here, the greens stop being watery and become a proper filling. Spanakopita can handle moist spinach. It cannot handle dripping spinach.

A compact mound of pressed spinach in a dry bowl with no visible liquid underneath.
After pressing, the spinach should sit in a compact mound with no liquid pooling below it. That dry-bowl cue tells you the filling is ready to mix.

How to Make Spanakopita

Once the spinach is ready and the filling tastes good, assembly is straightforward. The prep work is what makes the tray easy; now it comes together quickly. If the phyllo is the stressful part, the phyllo help section has the calmer fixes.

This method makes one large 9 x 13 inch / 23 x 33 cm Greek spinach pie. It is easier than folding triangles and gives you generous pieces with firm edges, flaky tops, and warm spinach-feta filling.

The tray may look a little untidy before baking. That is normal. Phyllo has a way of looking chaotic in the pan and beautiful after heat does its work.

Step 1: Thaw the Phyllo

Thaw frozen phyllo overnight in the refrigerator, or according to package directions. Before assembling, let the sealed package sit briefly at room temperature so the sheets are easier to unroll. Open the package only when the filling and pan are ready.

Step 2: Prepare the Spinach

For frozen spinach, thaw it completely and press out as much liquid as possible. For fresh spinach, wilt it in batches in a large pan, let it cool, chop it if the leaves are large, and squeeze well. If liquid gathers in the bowl after squeezing, press it again.

Step 3: Cook the Aromatics

Warm 1–2 tablespoons olive oil in a skillet. Add the onion or scallions and cook until softened. Add optional garlic and cook briefly until fragrant. Let the mixture cool slightly.

The onion should smell sweet and mellow, not sharp, before it goes into the spinach.

Softened onion, scallion, and garlic cooking in a skillet with a wooden spoon.
Let the aromatics soften until they smell mellow and sweet. This gives the spinach-feta filling depth without making the Greek spinach pie taste heavy.

Step 4: Mix and Taste the Filling Before Adding Eggs

In a large bowl, combine the squeezed spinach, cooked aromatics, crumbled feta, dill, parsley, black pepper, optional lemon zest, and any optional mint or nutmeg. Taste this mixture before adding salt, because feta can be very salty. Once the seasoning tastes right, mix in the eggs.

A bowl of spanakopita filling before eggs are added, with spinach, feta chunks, herbs, onion, and seasonings.
Before the eggs go in, the filling should look textured rather than creamy. Visible herbs, spinach, and feta pieces mean every slice will have better flavor contrast.

The Filling Texture Test

You should have a generous bowl of filling that looks clumpy and spoonable, with little white pieces of feta still visible in the greens. When you drag a spoon through it, it should not leave watery liquid behind.

A spoon dragged through spinach and feta filling, leaving a visible trail with no liquid pooling in the bowl.
Use the spoon trail as a quick filling test. If water does not rush back into the line, the mixture is clumpy enough to protect the phyllo layers.

By this point, the bowl should already smell like the finished pie: salty feta, green herbs, softened onion, and clean spinach.

Step 5: Heat the Oven and Ready the Pan

Heat the oven to 350°F / 180°C and place a rack in the lower-middle position. Brush a 9 x 13 inch / 23 x 33 cm baking dish or pan with olive oil.

For a fan or convection oven, start around 170°C and check a little early, since the top may brown faster.

Step 6: Layer the Bottom Phyllo

Now comes the part that looks fancier than it is. Open the phyllo and keep the unused sheets covered with a barely damp towel. Place one sheet in the dish and brush lightly with olive oil. Repeat until you have 7 bottom sheets. Torn or wrinkled sheets can go here; save the neatest ones for the top.

A hand lifting a striped towel to reveal stacked phyllo sheets beside a pastry brush and oil.
Cover the phyllo between layers, but keep the towel only barely damp. The goal is flexible sheets, not wet pastry.

Patchwork the Hidden Layers

Use torn or smaller phyllo pieces where they will be hidden. Overlapping the gaps gives the filling support without requiring perfect sheets.

Hands layering torn and overlapping sheets of phyllo in the bottom of a rectangular baking pan.
Torn sheets belong in the bottom layers. Overlap them like patchwork, then keep building; the filling needs coverage and structure, not perfect rectangles.

Step 7: Add the Filling

Spread the spinach-feta filling evenly over the phyllo. Keep it loose and even rather than pressing it down hard. The filling should sit in a generous layer, not a compacted block.

Spinach and feta filling being spread evenly over layered phyllo in a rectangular pan.
Spread the filling evenly, then stop. Pressing it down too hard can make the pie dense instead of giving you a lighter, layered spanakopita.

Step 8: Add the Top Phyllo

Layer 7 more phyllo sheets over the filling, brushing each sheet lightly with olive oil. Tuck or fold the edges into the pan. The sheets should look lightly glossy in spots. They do not need to shine like they are soaked.

A pastry brush spreading a thin sheen of oil over wrinkled phyllo sheets in a baking pan.
Brush just enough oil to leave a light sheen. Too much fat can weigh down the phyllo, while a thin coat helps the layers crisp and separate.

Tuck the Top Edges

Fold the overhanging sheets inward so the top looks tidy and the corners have enough pastry to crisp.

Hands folding and tucking the top phyllo edges into a rectangular pan before baking.
Tuck the top sheets inward for a tidy edge and better corner texture. Those folded bits often bake into the crispiest parts of the tray.

Step 9: Score the Top

Use a sharp knife to score the top layers into squares, rectangles, or diamonds. You do not need to cut all the way through the filling before baking. Scoring now makes the finished pie easier to slice without shattering the top.

A knife scoring the top of an unbaked spanakopita tray into portions before baking.
Score before baking, while the phyllo is still soft enough to guide. Once crisp, those shallow lines help the knife move cleanly instead of crushing the top.

Squares are easiest for weeknights. Diamonds make the same tray look instantly party-ready once the golden top opens along the scored lines.

Step 10: Bake Until Golden-Brown and Crisp

Bake for 45–55 minutes, until the top is golden-brown, the edges are firm, and the filling is hot and set. Start checking at 45 minutes, but trust the pastry more than the clock. If the top browns too quickly, tent it loosely with foil and keep baking. Not sure yet? Compare it with the doneness cues before pulling the tray.

Step 11: Rest, Then Slice

Let the spanakopita rest uncovered for 15–20 minutes before cutting fully through the scored lines. The wait is annoying, but it is what turns a hot, loose filling into clean pieces with flaky tops and edges that hold.

If you only follow the method above, you can make a good tray. The next sections are for the moments that make cooks nervous: a soft base, fussy phyllo, loose filling, make-ahead timing, and slices that need to hold together.

How to Keep the Bottom Crisp

To keep spanakopita from getting soggy: remove excess spinach moisture, avoid loose or creamy filling, use enough bottom phyllo, bake until the pastry is fully golden, and rest the pie uncovered before slicing.

If the bottom turns soft, the pie is usually telling you one of two things: the filling was too wet, or the base needed more heat and time. For specific fixes, use the troubleshooting table.

What Actually Keeps the Bottom Crisp

  1. Moisture first: no liquid pooling in the filling.
  2. Structure second: enough bottom phyllo to support the greens and feta.
  3. Heat third: lower-middle rack so the base bakes before the top over-browns.
  4. Rest last: 15–20 minutes so the filling settles before slicing.

If the filling looks wet, drain off any visible liquid before layering. If the mixture still looks loose, stir in 1–2 tablespoons breadcrumbs, fine semolina, or crushed crackers to absorb extra moisture. This is a rescue trick, not something you should need every time.

Clean First Corner Lift

When the bottom is right, the first corner lifts cleanly instead of slumping, and that is the moment you know the tray worked.

A lifted corner piece of baked spanakopita on a spatula, showing a firm bottom layer, green filling, and golden phyllo top.
The first lifted piece is the real test. If it holds shape on the spatula, the spinach was drained well and the bottom phyllo had enough time to crisp.

If Phyllo Makes You Nervous

The method above is enough for most cooks, but these small phyllo habits make the first tray feel calmer. Most of the fear disappears once you stop trying to keep every sheet perfect.

Thaw phyllo overnight in the refrigerator, then let the sealed package sit at room temperature until pliable. Rushing the thaw can make sheets crack, stick, or turn damp in patches. Once opened, keep unused sheets covered with a barely damp towel.

For this recipe, 14 sheets is the default: 7 on the bottom and 7 on top. Very thin brands can take up to 16 sheets.

Smaller phyllo sheets can be overlapped to make one layer. Larger sheets can climb the sides of the pan and fold inward. The goal is layered coverage, not perfect single-sheet geometry.

If a sheet tears, use it in the bottom or middle layers and overlap the gaps. If a sheet dries out, discard it or tuck it into the middle rather than forcing it across the top.

Think of the inner sheets as patchwork. Nobody will see them, and they still bake beautifully. Once the first few sheets are down, the rest feels much less precious.

Since phyllo brands vary, follow your package first. For a deeper handling reference, Athens Foods has a practical guide to phyllo storage, thawing, and handling.

How to Tell When Spanakopita Is Done

For a 9 x 13 inch / 23 x 33 cm tray, bake at 350°F / 180°C for 45–55 minutes. Your oven and pan matter, but the pastry will tell you when it is ready.

A pale top usually means the lower layers need more time too. A deeply golden top, dry scored lines, and a firm first corner matter more than hitting exactly 50 minutes.

Golden Tray Doneness

Look for a tray that reads crisp before you cut into it: browned edges, dry scoring lines, and a top that no longer looks soft or steamed.

A whole baked tray of spanakopita with a golden phyllo top and dry scored lines.
Check more than color. A finished spanakopita tray should have browned edges, dry scored seams, and a top that looks crisp rather than steamed.
  • Top: deeply golden and crisp, not pale.
  • Edges: flaky, browned, and firm.
  • Scored lines: dry-looking, not wet.
  • Filling: hot and set, not leaking.
  • Bottom: firm enough that a corner lifts with a spatula instead of drooping back into the pan.

When the pie is close, the kitchen starts to smell like toasted pastry, herbs, and warm feta.

A metal pan gives the crispest bottom. Glass or ceramic works too; just give the base a few extra minutes if it still looks soft. If using a metal baking pan, setting it on a preheated sheet pan can help the bottom crisp. If using glass or ceramic, avoid sudden temperature changes, especially if the dish is cold from the refrigerator.

Spanakopita Success Cues

  • Before assembly: the filling smells herby and salty, with no liquid pooling in the bowl.
  • While layering: the phyllo looks lightly glossy, not wet or heavy.
  • Before baking: the top is scored and the edges are tucked into the pan.
  • After baking: the top is deeply golden and the scored lines look dry.
  • After resting: the first corner lifts cleanly instead of collapsing.

Crisp Flaky Phyllo Layers

Close up, the finished pastry should look brittle and layered, with small shards breaking away from the spinach-feta filling beneath.

A close-up of crisp baked phyllo layers with flaky shards and a glimpse of green filling.
This close-up shows the payoff of careful layering: brittle phyllo on top, tender spinach-feta filling below, and flaky shards that break cleanly when cut.

Troubleshooting Spanakopita

Most spanakopita problems are not mysterious. A soggy bottom, leaking filling, or shattered top usually comes from one of three things: too much moisture, not enough baking time, or slicing before the filling has settled.

Correct Filling vs Loose Filling

Before assembly, compare the filling texture instead of guessing. A clumpy mixture protects the pastry; a loose mixture brings too much steam and moisture into the tray.

Two bowls of spanakopita filling, one thick and clumpy and the other looser with visible liquid.
For troubleshooting, compare the two textures before assembly. The thicker filling bakes into cleaner slices, while the loose mixture can soften the pastry and make cutting messier.
ProblemLikely causeFix
Soggy bottomWet filling or underbaked basePress more moisture from the spinach, bake longer, and use a lower rack.
Top browns too fastOven runs hot or tray is too highTent loosely with foil and continue baking.
Bottom is soft but top is doneWeak bottom heatMove lower and bake 10 more minutes with foil over the top.
Phyllo tearsSheets are dry, cold, or handled slowlyKeep covered and use torn sheets inside.
Leaking fillingToo much moisture or overfillingDrain the filling better and keep the layer even.
Bland fillingMild feta or not enough herbsAdd dill, parsley, black pepper, or a little lemon zest.
Too-salty fillingVery salty fetaAdd more spinach or herbs if available; serve with yogurt sauce or a lemony salad.
Dense fillingThe spinach layer was packed down too hardSpread loosely next time; do not compress the spinach layer.
Top shatters badly when slicingNot scored before baking or cut too soonScore before baking, rest 15–20 minutes, then cut through the same lines.
Slices fall apartCut too soon or filling too looseRest 15–20 minutes before slicing fully.
Pastry soft after storageFridge moisture or trapped steamReheat uncovered in the oven or air fryer.

Variations and Shortcuts

The large tray is the main recipe. Once you understand that filling and layering method, these variations become easy to judge.

Spanakopita Triangles

Once the filling is made, triangles are just a folding project. They are great for appetizers, mezze platters, lunch boxes, and party trays. The first triangle is usually the clumsiest. By the third or fourth, your hands understand the fold.

Baked spanakopita triangles on a plate with one broken open to show spinach and feta filling, served with tzatziki.
For appetizer-style spanakopita triangles, use less filling than you think. Snug folds and modest filling help the phyllo seal, brown, and crisp all the way around.

They are especially good with a bowl of Greek tzatziki sauce and crisp bites like homemade falafel.

  • Phyllo strip width: 2½–3 inches / 6–7.5 cm.
  • Layers: 2 phyllo sheets per strip.
  • Filling: ½–1 tablespoon per triangle.
  • Fold: like folding a flag.
  • Oven: 375°F / 190°C.
  • Small appetizer triangles: 15–18 minutes.
  • Medium triangles: 20–25 minutes.

If the filling squeezes out as you fold, use less. A neat triangle needs less filling than you think. The triangles are done when the seams look dry, the corners are golden, and the pastry feels crisp enough to pick up. For dips and sides, jump to the serving ideas.

Puff Pastry Shortcut

Puff pastry makes a delicious shortcut, though the texture is thicker and more buttery than classic phyllo. It is a good option when you want a spinach-feta pie without layering many thin sheets.

Puff pastry should be pliable but still cold; once it warms too much, it gets sticky and bakes less cleanly. Use the same filling, place one puff pastry sheet on the bottom, add the spinach mixture, cover with a second sheet, seal the edges, and cut a few slits in the top so steam can escape.

For a full puff pastry pie, start checking around 35 minutes and expect 40–50 minutes depending on the thickness of the filling and pastry. For small puff pastry parcels, start checking around 20–25 minutes.

Gluten-Free Spanakopita

Use gluten-free phyllo if available, or gluten-free puff pastry as a shortcut. If neither is available, make a crustless spinach-feta bake with the same filling flavors.

Vegan or Dairy-Free Spanakopita

Use olive oil for brushing and replace feta with a salty vegan feta or a firm tofu-cashew mixture. Keep the filling well-seasoned because feta normally provides both salt and tang.

Egg-Free Spanakopita

You can skip the eggs, but the slices will be looser. Keep the spinach very well pressed, avoid wet cheeses, and rest the pie before cutting.

Make It Ahead Without Losing the Crisp Layers

Spanakopita is one of those recipes you can do in pieces. For the best make-ahead texture, assemble it unbaked, refrigerate it for up to 24 hours, then bake until golden and crisp. For longer storage, freeze it unbaked.

  • Make the filling ahead: Prepare up to 1 day ahead and refrigerate. Drain off any liquid before assembling.
  • Assemble unbaked: Refrigerate the covered tray for up to 24 hours, then bake from chilled with a few extra minutes if needed.
  • Freeze unbaked: Score the top while the phyllo is still soft, wrap tightly, and freeze.
  • Bake from frozen: Add 15–25 minutes and cover loosely with foil if the top browns early.
  • Store leftovers: Cool fully, refrigerate for 3–4 days, and reheat uncovered in the oven or air fryer.

If making the filling ahead, check it again before assembling. Spinach can release more liquid in the fridge, so drain or squeeze off any liquid before layering it with phyllo. Use the filling texture comparison if it looks loose.

For a party, serve the pie warm after a 15–20 minute rest, or at room temperature on a mezze table. Let hot spanakopita breathe; trapped steam softens the pastry. Room temperature is fine for serving, but refrigerate leftovers rather than leaving them out for a long time.

This is the kind of dish that solves more than one meal: dinner tonight, brunch tomorrow, party squares on a platter, or a cold leftover piece eaten straight from the fridge.

Reheating Frozen or Leftover Spanakopita

Best way to reheat spanakopita: reheat pieces uncovered in the oven or air fryer. Dry heat helps the phyllo crisp again, while covered reheating traps steam and softens the pastry. The microwave is fast, but it will not bring back the flaky texture.

SituationMethodTime
Frozen spanakopita trianglesAir fryer at 350°F / 177°C8–12 minutes
Frozen spanakopitaOven at 400°F / 200°C17–20 minutes
Leftover homemade sliceOven at 350°F / 175°C8–13 minutes
Leftover homemade sliceAir fryer at 325–350°F / 160–177°C4–7 minutes
MicrowaveFastest, but softens pastryUse only if needed

For frozen or store-bought spanakopita, follow the package instructions first because sizes vary. If using a thermometer, the center should reach 165°F / 74°C. FoodSafety.gov gives the same 165°F / 74°C target for reheated leftovers in its safe minimum internal temperature chart.

These general notes can help with Costco, Trader Joe’s, Aldi, or other frozen spanakopita, but start checking early because every brand and size cooks differently.

What to Serve with Spanakopita

A good tray of spanakopita does not need much ceremony. Cut it warm, let the flaky shards fall where they want, and serve it with something cold and lemony.

It is the kind of food that does not need to be piping hot to be loved; even warm or room temperature, the salty filling and flaky edges still do their job.

For a full Greek-inspired spread, keep the sides cool, bright, and simple so they balance the rich phyllo instead of competing with it.

Spanakopita served on a table with tzatziki, cucumber salad, chickpea salad, olives, lemon wedges, and herbs.
Serve rich spanakopita with cool and bright sides. Tzatziki, cucumber salad, chickpeas, olives, lemon, and herbs balance the salty feta and crisp phyllo without distracting from the pie.

Greek-Inspired Dinner

Serve warm pieces with Greek salad, roasted potatoes, red lentil soup, baked chicken breast, fish, lamb, olives, and lemon wedges.

Vegetarian Mezze Table

Cut smaller pieces and serve with tzatziki, hummus, pita, roasted vegetables, olives, cucumber salad, and homemade falafel.

Brunch or Lunch Boxes

Room-temperature pieces are excellent with cucumber salad, chickpea salad, yogurt sauce, eggs, fresh fruit, or a tomato cucumber salad.

Tabbouleh is also a strong side because the lemon, parsley, mint, and tomato cut through the rich pastry.

Quick lemon-dill yogurt sauce: Mix Greek yogurt with lemon juice, minced garlic, chopped dill, a little olive oil, salt, and black pepper. It is especially good with warm triangles.

Full Spanakopita Recipe

This tray-style spanakopita gives you flaky top layers, a firm base, and a spinach-feta filling that settles into clean pieces after resting.

Recipe name: Spanakopita Recipe: Greek Spinach Pie with Feta and Phyllo

Description: A generous Greek spinach pie recipe with crisp golden phyllo, salty feta, fresh herbs, and a spinach filling that slices cleanly after resting.

Yield: 10–12 pieces

Prep time: 35–45 minutes with frozen spinach, longer with fresh bunch spinach. This does not include overnight phyllo thawing.

Cook time: 45–55 minutes

Total time: 1 hour 20 minutes to 1 hour 40 minutes, plus phyllo thawing

Equipment: 9 x 13 inch / 23 x 33 cm baking dish or pan, large skillet, mixing bowl, colander, clean kitchen towel or cheesecloth, pastry brush, sharp knife, barely damp towel for phyllo.

Before you start: Make sure the spinach is pressed well, the phyllo is fully thawed, and the filling is mixed before you open the phyllo package. Once phyllo is exposed to air, the recipe moves much faster.

Ingredients

  • 500 g / 16 oz frozen chopped spinach, thawed and squeezed well or 700–900 g / 1½–2 lb fresh spinach, wilted, cooled, and squeezed well
  • 300 g / about 10½ oz feta cheese, crumbled
  • 2 large eggs
  • 14 sheets phyllo pastry, thawed
  • Olive oil, divided: 120 ml / ½ cup for brushing, plus 1–2 tablespoons for cooking the onion
  • 1 small onion, finely chopped, or 4–6 scallions, sliced
  • 1–2 garlic cloves, minced, optional
  • ¼ cup chopped fresh dill
  • ¼ cup chopped fresh parsley
  • 1–2 tablespoons chopped fresh mint, optional
  • ½ teaspoon lemon zest, optional
  • Black pepper, to taste
  • Pinch of nutmeg, optional
  • Salt, only if needed after tasting the filling before adding eggs

Instructions

Prepare the Filling

  1. Thaw the phyllo. Thaw frozen phyllo overnight in the refrigerator, or according to package directions. Let the sealed package sit briefly at room temperature before opening. Open the phyllo only when the filling is mixed, the oil is ready, and the pan is brushed.
  2. Prepare the spinach. If using frozen spinach, thaw completely and press out as much liquid as possible. If using fresh spinach, wilt it in batches in a large pan, cool it, chop if needed, and squeeze well. The bowl should not show liquid pooling when pressed.
  3. Cook the aromatics. Heat 1–2 tablespoons olive oil in a skillet. Add onion or scallions and cook until softened. Add optional garlic and cook briefly until fragrant. Let cool slightly.
  4. Mix and taste before adding eggs. In a large bowl, mix spinach, cooked aromatics, feta, dill, parsley, optional mint, optional lemon zest, black pepper, and optional nutmeg. Taste and add salt only if needed. Then mix in the eggs. The filling should hold together without liquid pooling at the bottom of the bowl.

Layer the Spanakopita

  1. Prepare the pan and oven. Heat oven to 350°F / 180°C. Place a rack in the lower-middle position. Brush a 9 x 13 inch / 23 x 33 cm baking dish or pan with olive oil.
  2. Layer the bottom phyllo. Open the phyllo and cover unused sheets with a barely damp towel. Place one sheet in the dish and brush lightly with olive oil. Repeat until you have 7 bottom sheets. Use torn or wrinkled sheets here if needed.
  3. Add the filling. Spread the spinach-feta filling evenly over the phyllo. Keep it loose and even rather than pressing it down hard.
  4. Add the top phyllo. Layer 7 more sheets over the filling, brushing each sheet lightly with olive oil. Tuck or fold the edges into the pan. The sheets should look lightly glossy, not soaked.

Bake, Check, and Rest

  1. Score the top. Use a sharp knife to score the top layers into squares, rectangles, or diamonds. You do not need to cut all the way through the filling yet.
  2. Bake. Bake for 45–55 minutes, until the top is golden-brown, the edges are firm, and the filling is hot and set. If the top browns too quickly, tent loosely with foil and keep baking.
  3. Check for doneness. The top should be golden and crisp, the scored lines should look dry, and a corner should lift without sagging. If the top is brown but the bottom feels soft, cover loosely with foil and bake 5–10 minutes longer.
  4. Rest and slice. Let the spanakopita rest uncovered for 15–20 minutes. Cut fully through the scored lines and serve warm or at room temperature.

Recipe Notes

  • Block feta gives better flavor and texture. Use slightly less if it is very salty, or up to 340 g / 12 oz for a cheesier filling.
  • Lemon zest is optional but useful if your feta is mild or the filling tastes flat. Avoid adding much lemon juice because extra liquid can loosen the filling.
  • If your phyllo sheets are very thin, use up to 16 sheets total.
  • You may not use all the oil. The phyllo should look lightly glossy, not soaked.
  • A metal pan gives the crispest bottom. Glass or ceramic works too, but may need a few extra minutes.
  • For a fan/convection oven, start around 170°C and check a little early because the top can brown faster.
  • If the filling looks wet, drain visible liquid and mix in 1–2 tablespoons breadcrumbs, fine semolina, or crushed crackers.
  • Let hot spanakopita breathe. Steam softens the pastry if it is covered tightly.

Frequently Asked Questions

These are the questions that usually come up the first time you make spanakopita.

Spanakopita Basics

Is spanakopita the same as Greek spinach pie?

Yes. Spanakopita is Greek spinach pie made with phyllo pastry and a filling of spinach, feta, herbs, and often eggs.

Is it phyllo or filo?

Both spellings refer to the same thin pastry sheets. Phyllo is common in the US, while filo is common in the UK and other places.

Ingredients, Spinach, and Phyllo

Fresh spinach or frozen spinach: which is better for spanakopita?

Frozen spinach is easier and more predictable because it is already chopped and wilted. Fresh spinach gives brighter flavor, but it takes more prep and still needs to be pressed well before mixing.

Should fresh spinach be cooked before adding it to spanakopita?

Yes. Fresh spinach should be wilted, cooled, chopped if needed, and pressed well before mixing. Raw spinach releases too much moisture as it bakes and can make the filling loose.

How many phyllo layers should spanakopita have?

Use 14 sheets as a reliable default: 7 on the bottom and 7 on top. If your phyllo is very thin, you can use up to 16 sheets.

Do torn phyllo sheets matter?

No. Use torn sheets in the bottom or middle layers and save the neatest sheets for the top. Once baked, the inner patchwork still turns flaky.

Why did my spanakopita turn soggy?

The most common cause is excess spinach moisture or underbaking. Press the spinach well, keep the filling moundable instead of loose, and bake until the pastry is fully golden-brown.

What cheese can I use besides feta?

Feta gives spanakopita its classic salty tang, so keep it as the main cheese if possible. For a milder filling, replace a small portion with ricotta or cottage cheese, but keep the mixture firm and well-drained so the phyllo does not soften.

Make-Ahead, Freezing, and Reheating

How far ahead can I assemble spanakopita?

You can assemble it unbaked and refrigerate it for up to 24 hours. Check for released liquid before baking and add a few extra minutes if baking from chilled.

Does spanakopita freeze better baked or unbaked?

Unbaked usually gives the best texture because the phyllo crisps for the first time in the oven. Score the top before freezing while the sheets are still soft, wrap tightly, and bake from frozen with extra time. Baked leftovers can also be frozen, but the pastry is more likely to soften after reheating.

What is the best way to reheat spanakopita?

Reheat it uncovered in the oven or air fryer. Dry heat helps the phyllo crisp again. The microwave works for speed, but it softens the pastry.

Diet and Serving Questions

Should spanakopita be served hot or room temperature?

Spanakopita is good warm or at room temperature. Let it rest after baking so the filling settles and the pieces slice more cleanly.

Can spanakopita be made without eggs?

Yes, but the filling will be looser. Keep the spinach especially well pressed, avoid wet cheeses, and rest the pie before cutting.

Puff pastry or phyllo: which is better for spanakopita?

Phyllo is better for classic spanakopita because it bakes into thin, crisp, flaky layers. Puff pastry works as a shortcut, but it gives a thicker, buttery crust and a less traditional texture.

Is classic spanakopita gluten-free?

No. Classic spanakopita uses wheat-based phyllo, so it is not usually gluten-free. For a gluten-free version, use gluten-free phyllo if available, gluten-free puff pastry as a shortcut, or make a pastryless spinach-feta bake inspired by the same flavors.

If you make it, I would love to know which route you took: frozen spinach tray, fresh spinach tray, triangles, or puff pastry shortcut.

The first tray may look a little rustic before it goes into the oven, and that is part of the charm. Once the phyllo turns golden and the spinach-feta filling settles, you get the kind of pie people keep returning to, knife in hand, promising they are cutting “just one more” piece.

Posted on 24 Comments

Greek Tzatziki Sauce Recipe (1 Master Sauce + 10 Easy Variations)

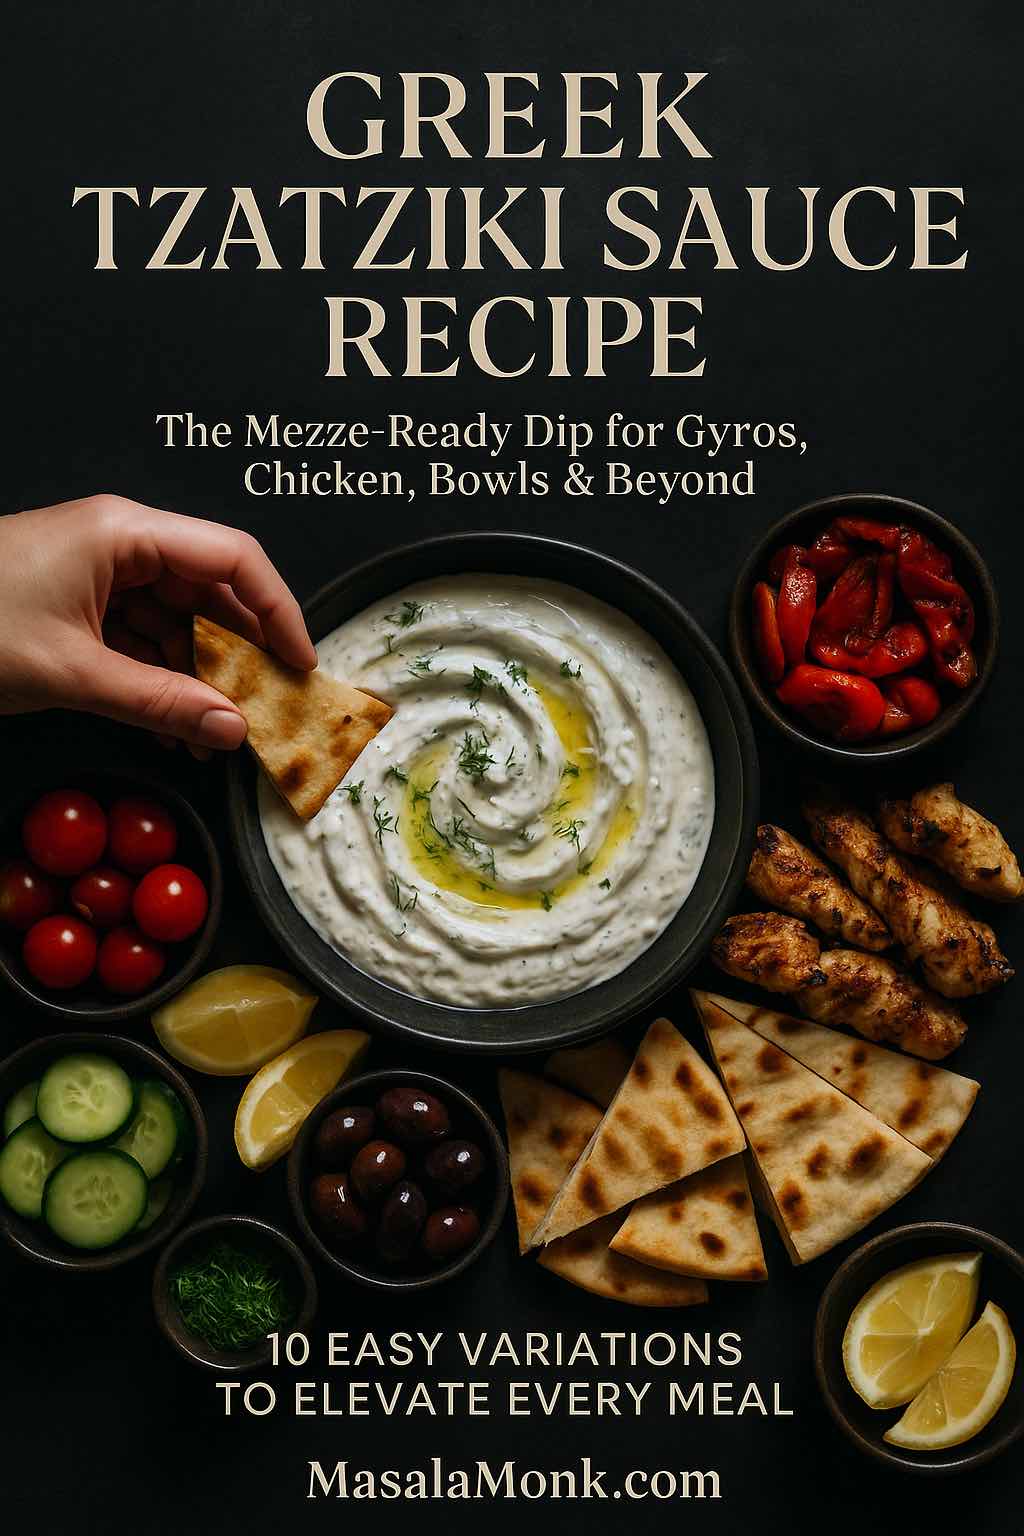
Greek tzatziki sauce recipe served in a black bowl at the center of a mezze platter, with a hand dipping warm pita into the creamy yogurt and cucumber dip surrounded by grilled chicken, olives, tomatoes, cucumber and lemon wedges.

There are recipes you make once, and then there are recipes that quietly move into your weekly rhythm. A good Greek tzatziki sauce recipe almost always falls into the second category. It’s cool and creamy, yet bright and garlicky; simple to stir together, but endlessly useful. One bowl can turn raw vegetables into a snack, plain chicken into dinner, or a random collection of leftovers into a mezze-style feast.

In this long guide, you’ll walk through:

  • What tzatziki actually is (and what makes it “Greek”)
  • A master Greek tzatziki sauce recipe you can rely on
  • Ingredient notes so your sauce tastes restaurant-good, not just “fine”
  • Ten easy variations built off that master bowl
  • Ideas for turning tzatziki into full meals, from mezze boards to brunch
  • Practical notes on storage and making it fit a Mediterranean-style way of eating

All of it is meant to be cooked and eaten, not just admired on a screen.


What Is Tzatziki?

Tzatziki is a chilled yogurt and cucumber sauce that shows up all over Greek and Eastern Mediterranean tables. Read more about it on Wikipedia. At its core, it’s simply:

  • Thick strained yogurt
  • Grated cucumber
  • Garlic
  • Olive oil
  • A little acid (lemon or vinegar)
  • Herbs like dill or mint
  • Salt and pepper

Most traditional versions of a Greek tzatziki sauce recipe follow the same pattern. You grate the cucumber, salt it and squeeze out the water; stir it into thick yogurt with garlic, olive oil and herbs; and let everything chill so the flavors settle and mellow. This basic method pops up again and again in classic Greek and Mediterranean recipes.

Although every family and restaurant has its own tweaks—some go heavy on mint, others prefer all dill, and some include a splash of red wine vinegar instead of lemon—the balance is always the same: refreshing, tangy, garlicky and creamy without being heavy.

At the same time, tzatziki sits naturally inside a broader Mediterranean way of eating. That style emphasizes vegetables, legumes, whole grains, nuts, olive oil and modest amounts of animal protein, with fermented dairy like yogurt appearing in small but regular amounts. Large reviews and long-term studies link this overall pattern with better heart health, improved blood sugar control and even longer life.

So when you stir together a bowl of tzatziki, you’re not just making “a dip for pita.” You’re putting together a flexible, lighter-feeling sauce that pairs effortlessly with vegetables, grains and lean proteins—exactly the kind of food many people are trying to eat more of anyway.

Also Read: How to Make Churros (Authentic + Easy Recipe)


Ingredients for the Master Greek Tzatziki Sauce Recipe

Before you start grating and whisking, it helps to spend a moment on the ingredients themselves. The list is short, so each piece matters.

Greek Yogurt

A true Greek tzatziki sauce recipe needs thick, strained yogurt. That’s where Greek yogurt comes in. Because it’s been strained to remove much of the whey, Greek yogurt is denser and naturally higher in protein than regular yogurt. Nutrition guides repeatedly point out that this straining concentrates protein, calcium and probiotics into each spoonful.

A few practical notes:

  • Choose plain, unsweetened Greek yogurt. Any sweetness will clash with the garlic and cucumber.
  • Full-fat gives the most luxurious texture, but 2% still works beautifully and feels a bit lighter.
  • If you can’t find Greek yogurt, you can strain regular yogurt in a cheesecloth-lined strainer for a couple of hours in the fridge.

If Greek yogurt is already part of your routine—maybe in breakfasts like high protein overnight oats—tzatziki is simply another way to make the same staple pull double duty.

Cucumber

Cucumber brings that signature freshness and bite. You can use:

  • English (seedless) cucumbers, which have thin skins and fewer seeds
  • Or regular cucumbers, peeled if the skin is thick or waxed

What matters more than the variety is how you treat it. Grating releases water, and unless you squeeze that water out, your Greek tzatziki sauce recipe will start thick and end up runny. Salting and squeezing the cucumber is the small step that turns “good enough” tzatziki into the kind you keep going back to.

Garlic

Fresh garlic is non-negotiable. It’s what stops tzatziki from tasting like plain cucumber yogurt. Mince it very finely, or grate it on a microplane so there are no sharp bits. Raw garlic is strong—especially as it sits in the fridge and infuses the yogurt—so starting with a little less than you think you need is usually wise. You can always add more next time.

Olive Oil

Extra-virgin olive oil adds depth, body and that lovely sheen on top of the finished sauce. It also reminds your palate that you’re in Mediterranean territory. A couple of tablespoons are enough; you want richness, not an oil slick.

Lemon Juice or Vinegar

Acid lifts the flavor. Lemon juice is the most common choice, though wine vinegar or even a mild apple cider vinegar can be used. Add it gradually and taste as you go. You’re looking for bright and tangy, not sour.

Herbs: Dill and Mint

Fresh dill is the classic herb in a Greek tzatziki sauce recipe, although many cooks add mint or swap it in completely. Dill reads as savory and grassy; mint adds a cool, almost sweet edge. Either works. You can even use a mix, especially if you’re serving the sauce with grilled lamb, chicken or eggplant.

Salt and Pepper

Salt is what knits all these pieces together. It seasons the yogurt, pulls moisture from the cucumber and softens the sharp edges of the garlic. Freshly ground black pepper isn’t mandatory, but a small pinch adds a gentle warmth.

Also Read: Béchamel Sauce for Lasagna: Classic, Vegan & Ricotta Sauce Recipe


Master Greek Tzatziki Sauce Recipe (Step by Step)

This is the anchor recipe you can make with your eyes closed once you’ve done it a few times. Every variation later on will start from this bowl.

Ingredients (Makes About 1½ Cups)

  • 1 cup full-fat plain Greek yogurt
  • ½ large cucumber (or 1 small), coarsely grated
  • 2–3 cloves garlic, very finely minced or grated
  • 2 tbsp extra virgin olive oil
  • 1–2 tbsp fresh lemon juice, to taste
  • 2 tbsp finely chopped fresh dill (or 1 tbsp dill + 1 tbsp mint)
  • ½ tsp fine sea salt, plus more to taste
  • A pinch of freshly ground black pepper
  • 1–2 tbsp cold water or reserved cucumber juice, if needed
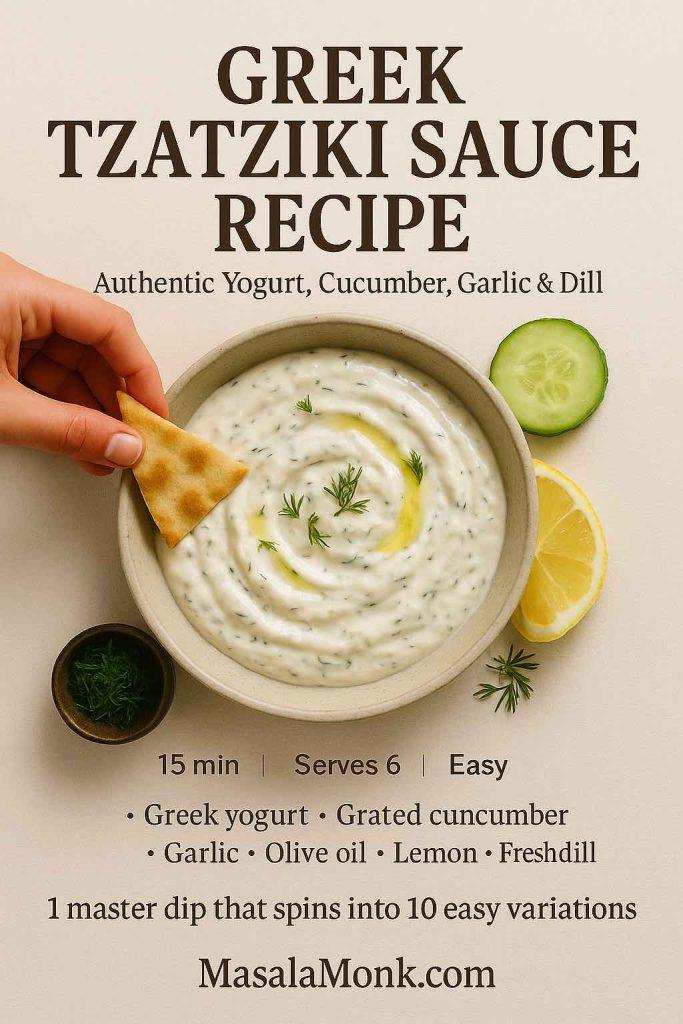
Recipe card showing a bowl of authentic Greek tzatziki sauce made with Greek yogurt, grated cucumber, garlic, olive oil, lemon and dill, with a hand dipping warm pita into the creamy dip on a beige background.
Authentic Greek tzatziki sauce recipe in one glance – thick Greek yogurt, grated cucumber, garlic, lemon, olive oil and fresh dill, ready in 15 minutes and perfect as the master dip for all ten variations.

Step 1: Grate and Salt the Cucumber

Start by grating the cucumber on the large holes of a box grater. If you’re using a thick-skinned or waxed cucumber, peel it first; otherwise, leave the skin on for extra color and nutrients.

Once it’s grated:

  1. Toss the cucumber with a pinch of salt.
  2. Place it in a fine-mesh strainer over a bowl.
  3. Let it sit for 5–10 minutes, then squeeze it firmly with your hands or a clean towel until it feels quite dry.

It’s tempting to rush this step, but taking an extra minute here pays off later. Think of how well-drained spinach makes a better spinach dip; cucumber behaves the same way.
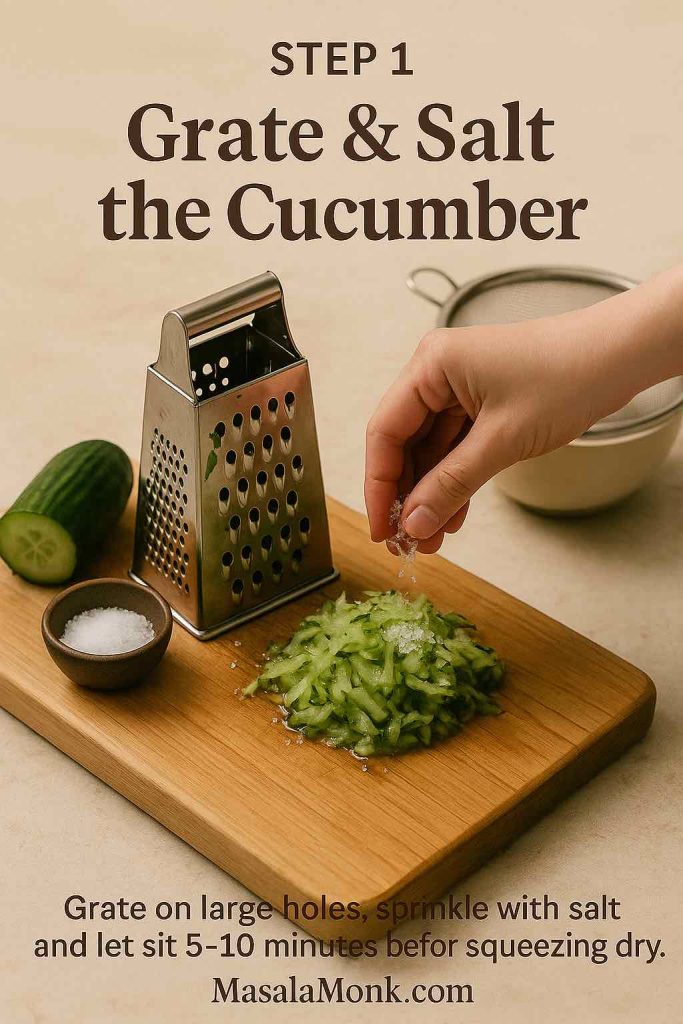
Step 1 of a Greek tzatziki sauce recipe showing a hand grating cucumber on a box grater and sprinkling salt over a pile of grated cucumber on a board with a fine-mesh strainer ready for draining.
Step 1 – Grate and salt the cucumber: use the large holes of a box grater, sprinkle the shreds with salt and let them sit before squeezing out the excess water so your Greek tzatziki sauce stays thick and creamy instead of watery.

Step 2: Build the Yogurt Base

In a medium bowl, whisk together:

  • The Greek yogurt
  • Olive oil
  • 1 tablespoon of lemon juice
  • The ½ teaspoon of salt
  • A pinch of black pepper

Whisk until the mixture is smooth and glossy. The olive oil will loosen the yogurt slightly and give it a silky finish.
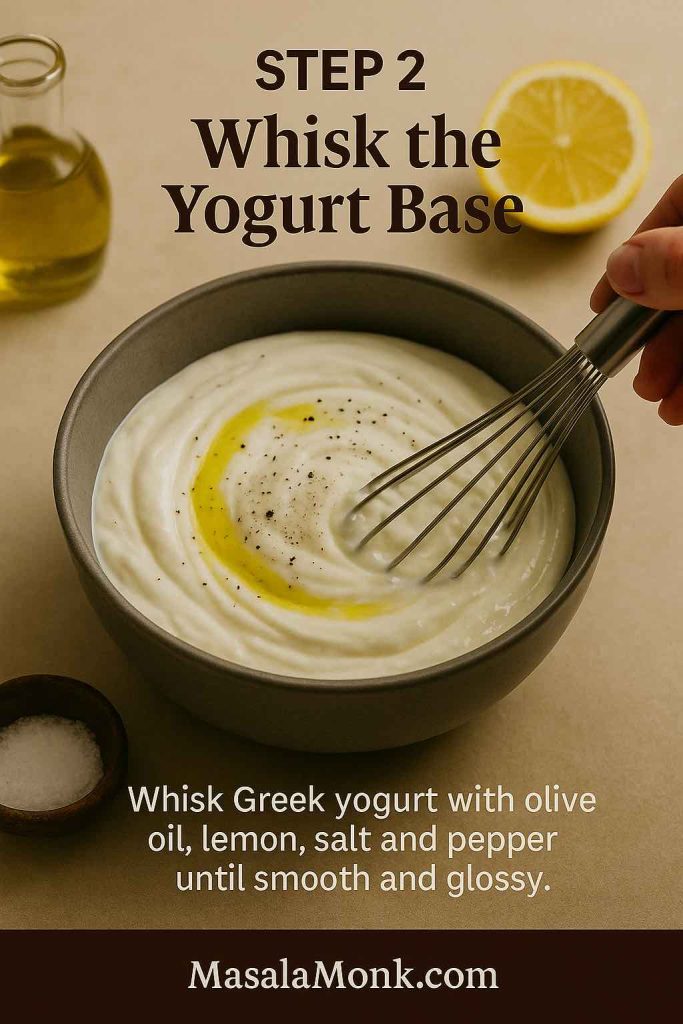
Step 2 of a Greek tzatziki sauce recipe showing a hand whisking Greek yogurt with olive oil, lemon juice, salt and pepper in a gray bowl, with a lemon half, olive oil bottle and salt dish in the background.
Step 2 – Whisk the yogurt base: combine Greek yogurt with olive oil, lemon juice, salt and pepper and whisk until the mixture looks smooth, glossy and ready for cucumber, garlic and fresh herbs.

Step 3: Add Garlic, Cucumber and Herbs

Fold in:

  • The squeezed, grated cucumber
  • Minced or grated garlic
  • Chopped dill (and mint, if using)

Stir gently until everything is evenly distributed. At this point, your Greek tzatziki sauce recipe will already smell garlicky and fresh.

Taste a small spoonful and start adjusting:

  • Add more lemon juice for brightness
  • Sprinkle in a little extra salt if the flavors feel muted
  • Stir in another spoonful of dill if you want it more herb-forward

Raw garlic becomes more pronounced as it sits, so what tastes subtle now may taste just right after chilling.
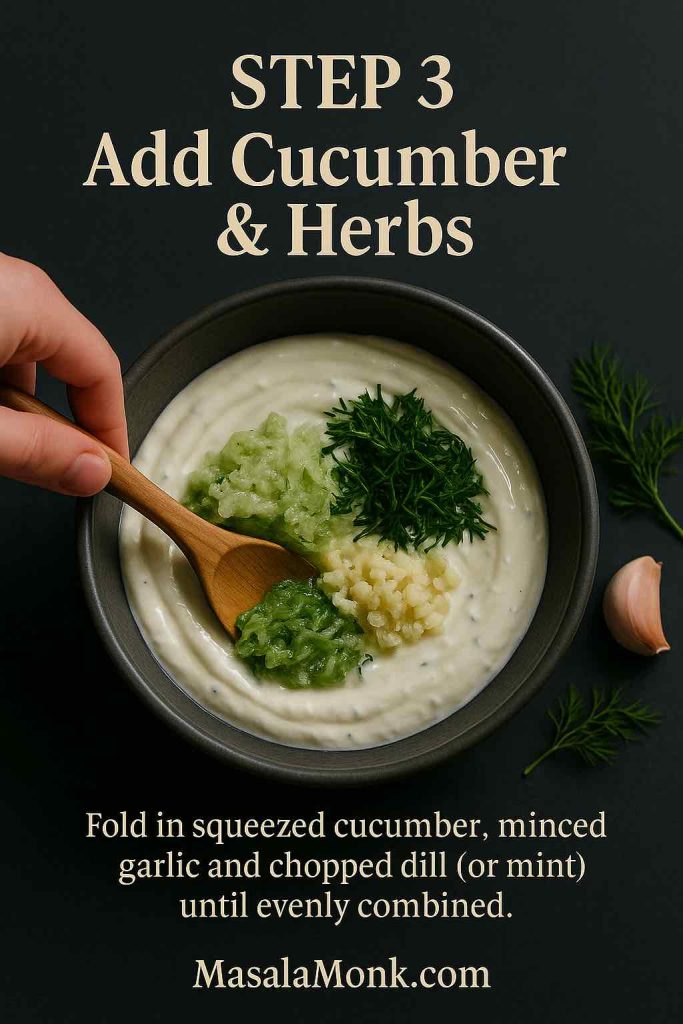
Step 3 of a Greek tzatziki sauce recipe showing a hand using a spatula to fold squeezed grated cucumber, minced garlic and chopped dill into a bowl of smooth Greek yogurt.
Step 3 – Add cucumber and herbs: fold the squeezed grated cucumber, minced garlic and fresh dill (or mint) into the creamy yogurt base until everything is evenly combined and the tzatziki looks speckled with green.

Step 4: Adjust the Thickness

Decide how you plan to use the sauce:

  • For dipping and gyros, keep it thick.
  • For drizzling over salads or bowls, add 1–2 tablespoons of cold water (or a little of the salty cucumber juice you squeezed out earlier) and whisk again until it flows smoothly.

The beauty of this Greek tzatziki sauce recipe is that you can shift the texture without changing the flavor.
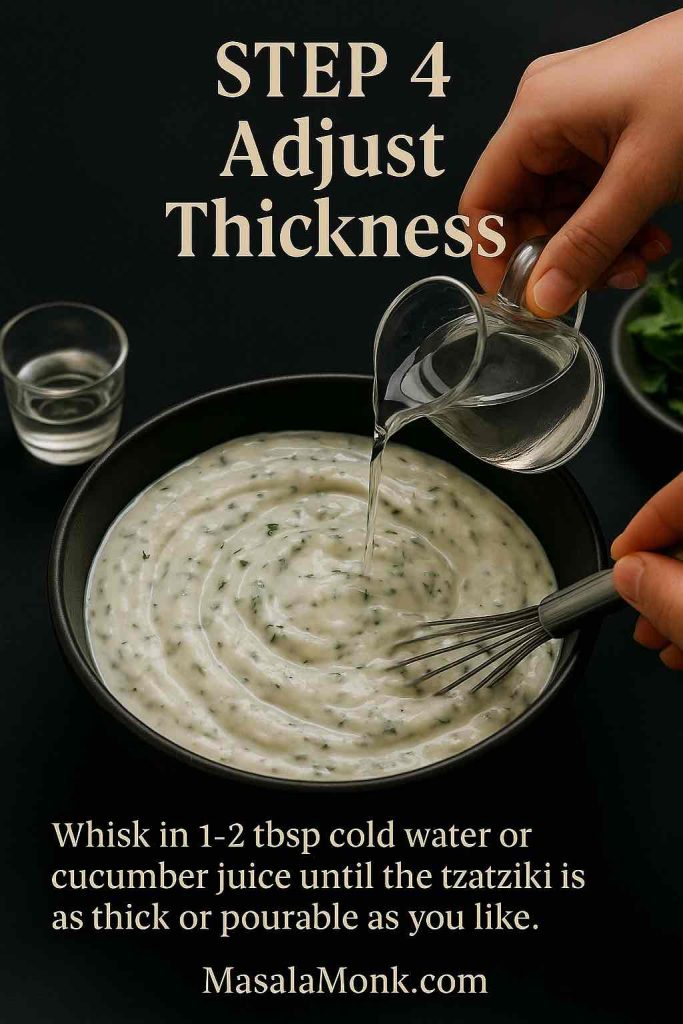
Step 4 of a Greek tzatziki sauce recipe showing a hand pouring a small stream of water or cucumber juice from a jug into a bowl of thick tzatziki while another hand stirs, adjusting the sauce to the desired consistency.
Step 4 – Adjust the thickness: whisk in a spoon or two of cold water or reserved cucumber juice until your Greek tzatziki sauce is as thick for dipping or as pourable for drizzling as you like.

Step 5: Chill

Cover the bowl and refrigerate for at least 30 minutes, and ideally for 1–2 hours. During this time, the garlic softens, the herbs perfume the yogurt and the cucumber flavor moves from individual bits into the whole sauce.

Tzatziki eaten immediately is good; tzatziki that has rested a bit is noticeably better.
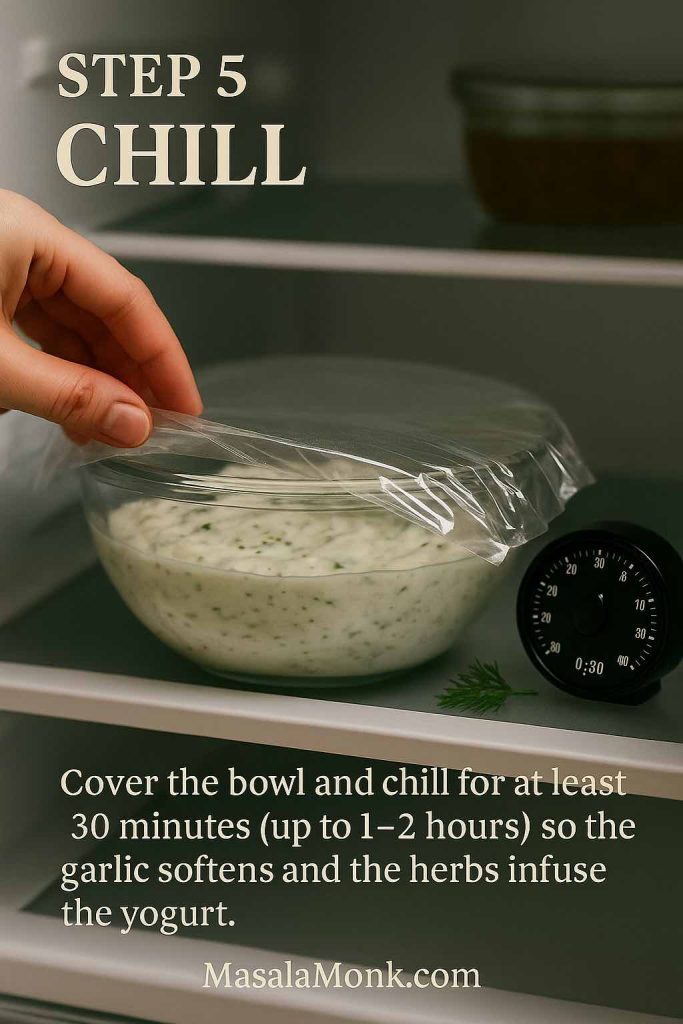
Step 5 of a Greek tzatziki sauce recipe showing a hand covering a glass bowl of tzatziki with plastic wrap on a refrigerator shelf, next to a kitchen timer set to 30 minutes.
Step 5 – Chill: cover the bowl and refrigerate the tzatziki for at least 30 minutes (up to 1–2 hours) so the garlic softens, the herbs perfume the yogurt and the cucumber flavor spreads through the whole sauce.

Step 6: Serve

Just before serving:

  • Spoon the tzatziki into a shallow bowl.
  • Swirl the surface with the back of a spoon.
  • Drizzle a little extra olive oil on top.
  • Scatter a pinch of chopped dill or a few tiny mint leaves over everything.
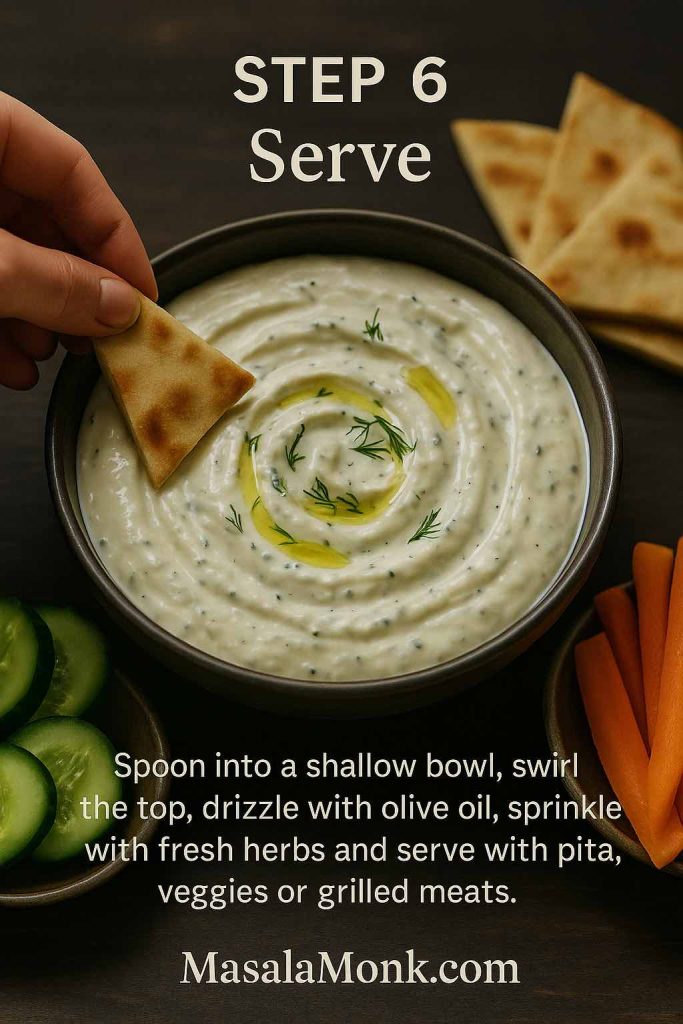
Step 6 of a Greek tzatziki sauce recipe showing a shallow bowl of creamy tzatziki swirled and drizzled with olive oil, garnished with fresh dill, with a hand dipping a pita wedge into the sauce and cucumber slices and carrot sticks arranged around the bowl.
Step 6 – Serve: spoon the chilled tzatziki into a shallow bowl, swirl the top, drizzle with olive oil, scatter fresh dill or mint and bring it to the table with warm pita, crunchy vegetables or grilled meats.

Now it’s ready to set down next to warm pita, grilled meats, roasted vegetables or simply a plate of sliced cucumber and carrots.

Also Read: Tres Leches – Mexican 3 Milk Cake Recipe


Why This Greek Tzatziki Sauce Recipe Fits a Mediterranean Way of Eating

Beyond taste, tzatziki has a few qualities that make it particularly useful if you’re leaning toward more Mediterranean-style meals.

First, Greek yogurt itself is a nutrient-dense ingredient. Because it’s strained, it usually carries more protein and less lactose than regular yogurt, all while keeping a good amount of calcium and live cultures. Many health-focused articles note that this combination supports satiety, bone health and gut health, especially when yogurt is eaten regularly as part of an overall balanced diet.

Second, the rest of the ingredients are simple and whole: cucumber, garlic, olive oil, herbs and lemon. These match up perfectly with the foods emphasized in Mediterranean-style patterns—lots of vegetables, herbs, quality fats and minimal processing. Long-term research has repeatedly associated those patterns with lower risk of heart disease, stroke and type 2 diabetes.

Finally, tzatziki is intense in flavor, so you only need a modest amount to make simple food appealing. A spoonful or two over a plate of grilled vegetables and lentils can be the difference between “virtuous but dull” and “I’d happily eat this again tomorrow.”

If you’re already building meals from other Mediterranean-leaning ideas—such as quinoa-based meal prep bowls or big, colorful salads inspired by a deep dive into daily salad habits—tzatziki slides right into that rhythm.


Ten Greek Tzatziki Sauce Recipes from One Master Bowl

Once you’re comfortable making the master version, small changes create a whole family of variations. You don’t need totally new recipes; you need a handful of smart tweaks.

Below are ten ways to adapt this Greek tzatziki sauce recipe, along with ideas on where each one shines.

1. Everyday Five-Minute Tzatziki

Some nights, the idea of salting, draining and squeezing cucumber is enough to send you toward bottled dressing. For those moments, a streamlined version helps.
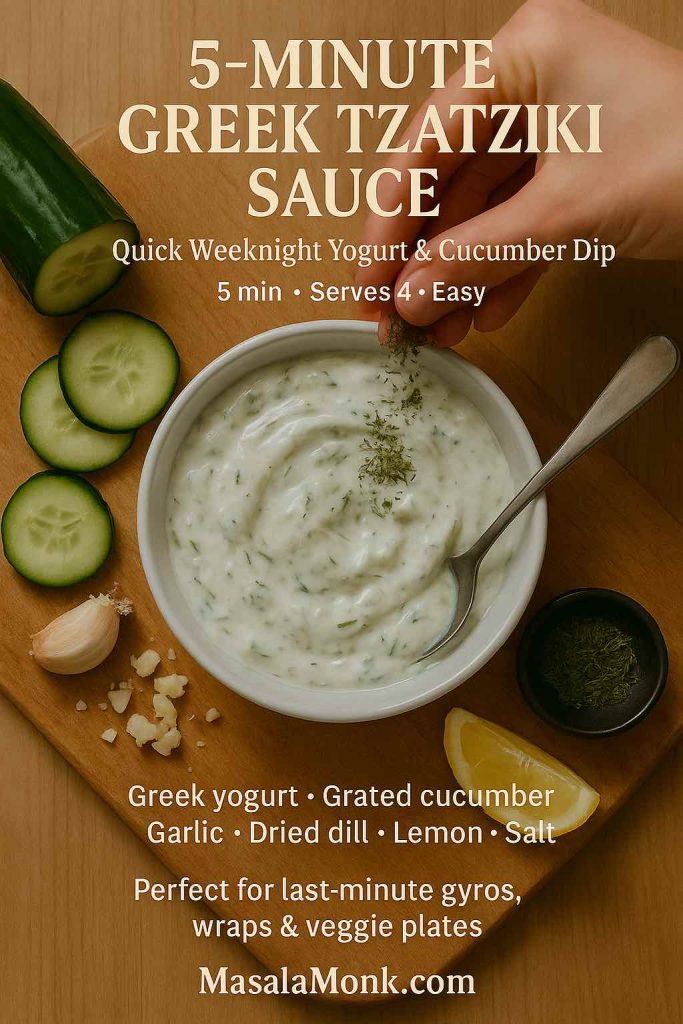
Top-down photo of a bowl of 5-minute Greek tzatziki sauce on a wooden board, with a hand sprinkling dried dill over the creamy yogurt and cucumber dip surrounded by cucumber slices, garlic, lemon and a spoon.
Quick 5-minute Greek tzatziki sauce made with Greek yogurt, grated cucumber, garlic, dried dill and lemon – a weeknight-friendly dip for last-minute gyros, wraps and veggie plates.
  • Grate the cucumber and squeeze it gently in paper towels without salting or resting.
  • Use just 1 clove of garlic plus ½ teaspoon garlic powder for an easier, less intense bite.
  • Swap fresh dill for 1–2 teaspoons dried dill weed if you don’t have fresh herbs on hand.

The flavor won’t be as layered as the full version, and the sauce may loosen a little as it sits, yet it still tastes like a proper Greek tzatziki sauce recipe—cool, garlicky and satisfying. It’s perfect for quick pita sandwiches, simple grilled chicken or as a last-minute dip for vegetable sticks.

Also Read: Simple Bloody Mary Recipe – Classic, Bloody Maria, Virgin & More

2. Recipe of Low-Calorie, High-Protein Tzatziki Greek Sauce

When you want a sauce that feels especially light but still comforting, you can nudge the recipe in that direction without losing its character.
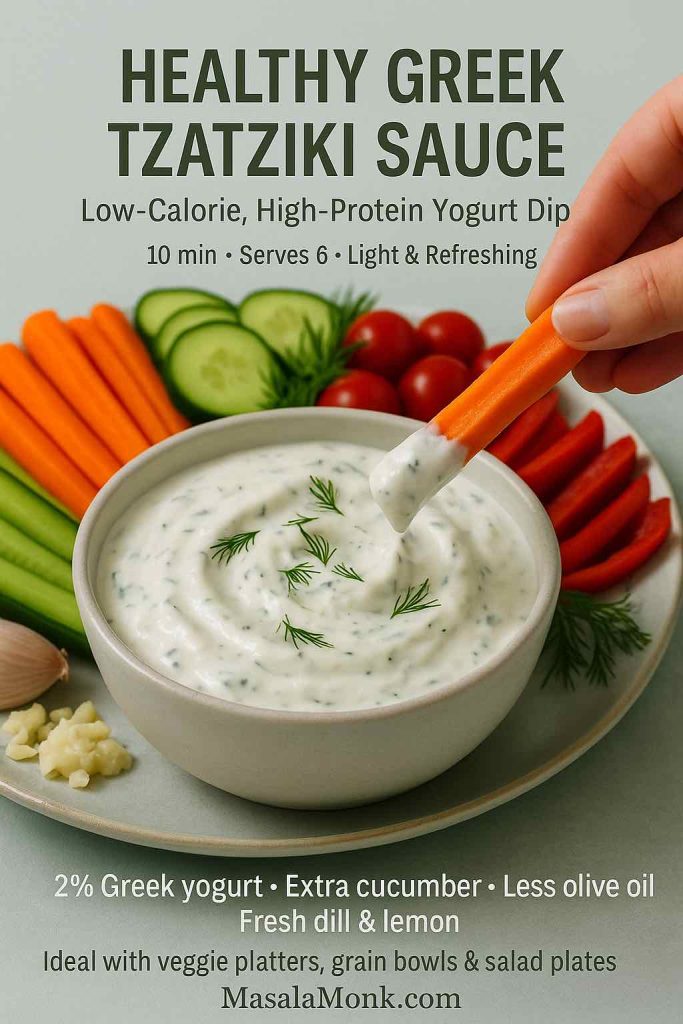
Side view of a bowl of healthy Greek tzatziki sauce made with 2 percent Greek yogurt, extra cucumber and fresh dill, with a hand dipping a carrot stick into the creamy dip, surrounded by cucumber slices, cherry tomatoes and pepper strips on a light plate.
Healthy Greek tzatziki sauce made with 2% Greek yogurt, extra cucumber and less olive oil for a low-calorie, high-protein dip that’s perfect with veggie platters, grain bowls and salad plates.

Try this approach:

  • Use 2% Greek yogurt instead of full-fat.
  • Reduce olive oil to 1 tablespoon.
  • Increase the grated cucumber slightly and add a bit more fresh dill for volume and freshness.

Because Greek yogurt is naturally higher in protein than regular yogurt, this variation still feels substantial. Comparison articles and nutrition breakdowns point out that Greek yogurt often delivers nearly double the protein of traditional yogurt per cup.

This version works beautifully on top of grilled fish, baked chicken, roasted vegetables or as a dressing for grain bowls. It also pairs nicely with lighter mains like a ladle of crock pot lasagna soup or a square of cottage cheese lasagna when you want a mixture of cozy and fresh on the same plate.

3. Dairy-Free / Vegan Recipe for Greek Tzatziki-Style Sauce

For guests who avoid dairy—or for days when you’re simply experimenting with plant-based cooking—you can mimic the feel of tzatziki with a few swaps.
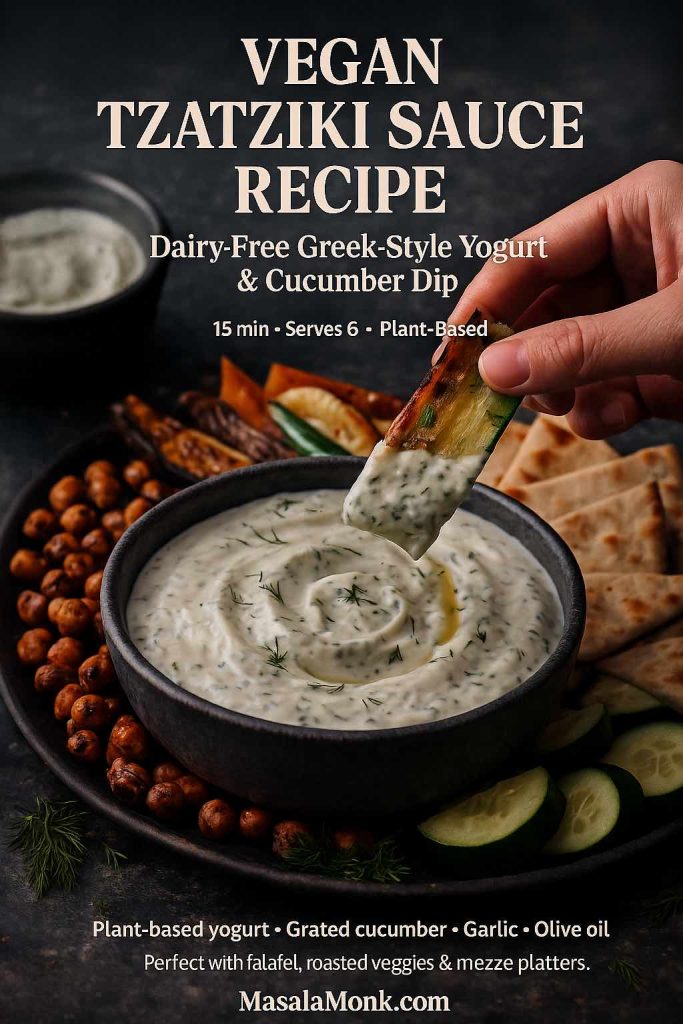
Close-up of a bowl of vegan tzatziki sauce made with plant-based yogurt, grated cucumber, garlic, lemon, dill and olive oil, with a hand dipping a roasted zucchini slice into the creamy dip, surrounded by roasted chickpeas, pita wedges and cucumber on a dark mezze platter.
Vegan tzatziki sauce recipe made with plant-based yogurt, grated cucumber, garlic, lemon and dill – a creamy dairy-free dip that shines on falafel plates, roasted veggie mezze boards and meatless Mediterranean dinners.

Use this pattern:

  • Choose a thick, unsweetened plant-based yogurt made from soy, coconut or almonds.
  • Add 1 extra tablespoon of olive oil to bring back some of the richness you’d get from full-fat dairy.
  • Keep the garlic, lemon and dill generous to ensure a bright, savory flavor.

This dairy-free twist is lovely with roasted vegetables, falafel, lentil patties or Mediterranean-style quinoa bowls similar to those in plant-based meal prep ideas.

You can also thin it down a little and use it as a sauce over roasted chickpeas, baked sweet potato wedges or stuffed peppers.

4. Recipe for Thick Greek Tzatziki Sauce for Gyros

When the sauce needs to stay tucked into bread, it should lean thicker and punchier.
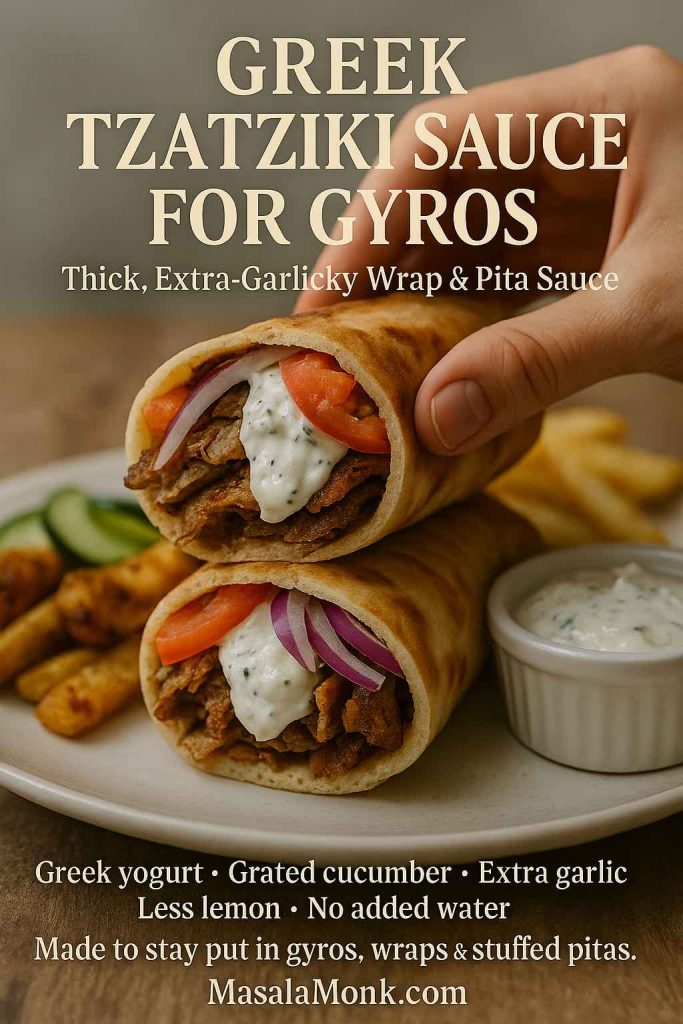
High-resolution photo of a gyro wrap cut in half and stacked, filled with seasoned meat, tomato and red onion, with thick Greek tzatziki sauce visible inside, a hand holding the top half and a small ramekin of extra tzatziki on the side.
Thick, extra-garlicky Greek tzatziki sauce made to stay put inside gyros, wraps and stuffed pitas – rich Greek yogurt, grated cucumber and plenty of garlic with less lemon and no added water for the perfect street-style bite.

Make these adjustments:

  • Squeeze the cucumber extra thoroughly so almost no liquid remains.
  • Skip adding water entirely; let the sauce stay dense.
  • Use the full 3 cloves of garlic and keep lemon to the lower end (around 1 tablespoon) so it doesn’t get runny.

Spread this thick tzatziki down the center of warm pita, add slices of grilled or roasted meat, tuck in tomatoes and onions, then fold everything up. It’s the sauce that ties the sandwich together and keeps it moist, much like the role sauces play in the best chicken sandwich recipes.

You can also use this version as a spread inside flatbread wraps, shawarma-style sandwiches or even on burgers topped with feta and grilled vegetables.

5. Chicken Gyro Bowls with Tzatziki

Instead of wrapping everything in bread, you can turn the same components into a bowl that’s easier to portion and reheat.
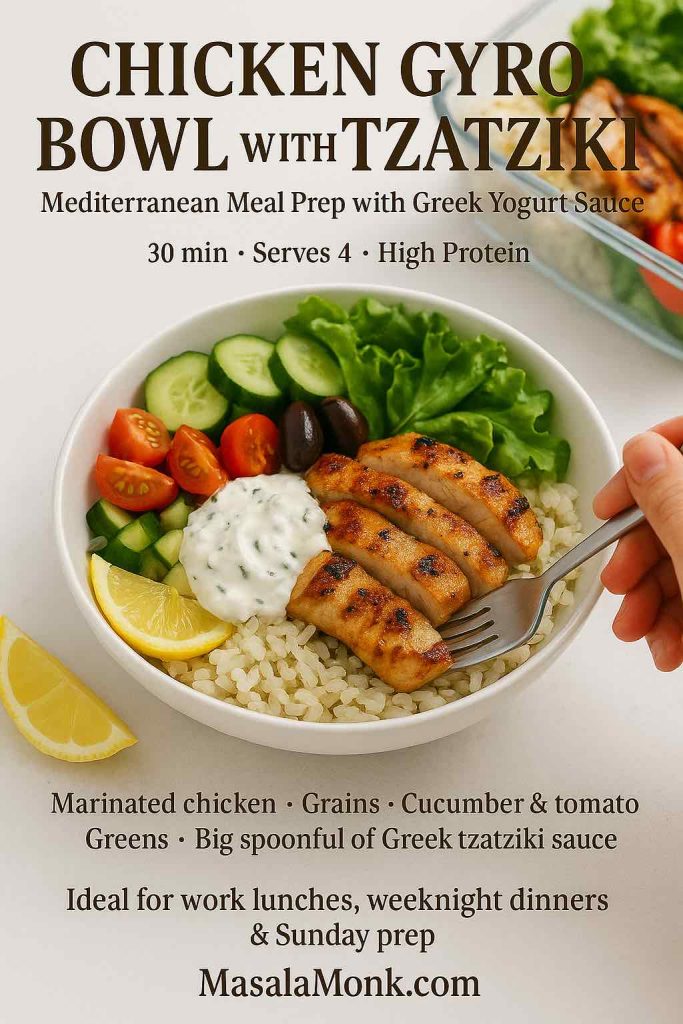
High-resolution photo of a chicken gyro bowl with tzatziki, featuring sliced grilled chicken, rice, cucumber, tomatoes, olives, lettuce and a dollop of Greek yogurt sauce in a white bowl, with a hand holding a fork and a meal prep container in the background.
Chicken gyro bowl with tzatziki – marinated grilled chicken, grains, crunchy cucumber and tomato, olives and greens, all tied together with a big spoonful of Greek yogurt sauce for easy Mediterranean meal prep lunches and weeknight dinners.

Here’s one way to do it:

  1. Marinate chicken thighs or breast strips in olive oil, lemon juice, crushed garlic, dried oregano, salt and pepper.
  2. Grill or roast until the edges are charred and the center is juicy.
  3. Build bowls with a base of rice, quinoa or bulgur, then add chopped cucumber, tomato, red onion, lettuce and olives.
  4. Finish with a generous spoonful of the master Greek tzatziki sauce recipe on top.

Between the yogurt sauce and the chicken, you get a protein-rich meal that still feels fresh. This style of bowl sits in the same category as high protein overnight oats—different time of day, same idea of using yogurt to make food more filling without feeling heavy.

These bowls also pack well for lunch: keep the warm elements and the tzatziki separate, then combine them when you’re ready to eat.

6. Greek Tzatziki Salad Dressing

Sometimes salads need more than a vinaigrette to feel satisfying. That’s where a pourable version of tzatziki comes in.
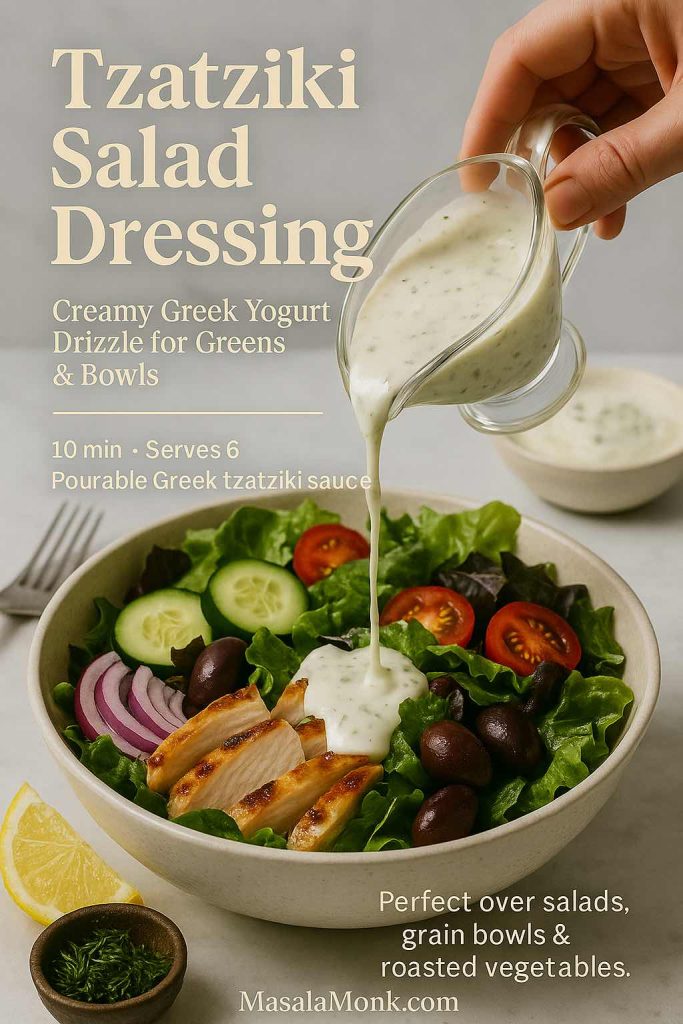
High-resolution photo of tzatziki salad dressing being poured from a glass jug over a colorful Greek salad with lettuce, cucumber, cherry tomatoes, red onion, Kalamata olives and grilled chicken in a beige bowl.
Tzatziki salad dressing – a pourable Greek yogurt version of classic tzatziki that drapes over salads, grain bowls and roasted vegetables with cool, garlicky, herb-fresh flavor.

To turn your sauce into a dressing:

  • Whisk 2–4 tablespoons of cold water into 1 cup of tzatziki until it reaches a smooth, drizzly consistency.
  • Add an extra teaspoon or two of lemon juice.
  • Taste and adjust salt; greens can handle slightly stronger seasoning than raw vegetables served alone.

This dressing is excellent over chopped cucumber–tomato salads, crunchy romaine, simple mixed greens or roasted vegetable platters. It fits neatly with the kind of salads encouraged in a comprehensive look at daily salad habits, where the emphasis is on making vegetables truly enjoyable, not a chore.

You can also drizzle this thinner Greek tzatziki sauce recipe over grain bowls, roasted potatoes or even leftover roasted vegetables to give them new life.

7. Chunky Mezze Tzatziki

When you’re assembling a mezze-style spread for guests, a chunkier, more textural tzatziki feels especially inviting on the table.
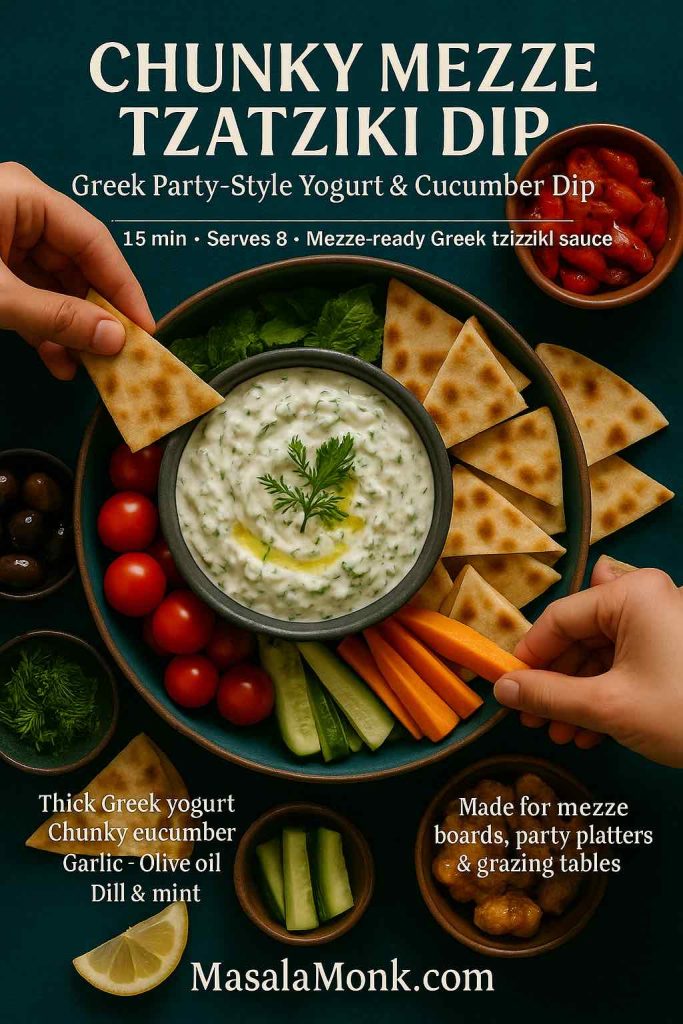
Top-down mezze platter with a large shallow bowl of chunky Greek tzatziki dip in the center, surrounded by pita wedges, olives, cherry tomatoes, grilled peppers, cucumber and carrot sticks, with several hands reaching in to scoop from the dip.
Chunky mezze tzatziki dip – thick Greek yogurt, diced cucumber, garlic, olive oil, dill and mint served in a shallow bowl at the center of a colorful mezze platter, made for parties, grazing tables and easy Greek-style entertaining.

To create that version:

  • Prepare the master recipe as usual, keeping it fairly thick.
  • Dice an extra handful of cucumber into tiny cubes and fold them in after chilling.
  • Increase dill and mint slightly for a more herb-packed bite.
  • Finish the surface with olive oil and a dusting of sumac or smoked paprika.

Serve this bowl alongside warm pita, crunchy vegetables and one or two companion dips inspired by spinach dip recipes.

For extra protein and variety, add air fryer hard-boiled eggs to the board. They’re easy to peel and make a satisfying combination with cool tzatziki and warm bread.

8. Sour-Cream-Enriched Tzatziki (or No-Cucumber Version)

On some days, you might find a tub of sour cream in the fridge and no cucumber in sight. Even then, you can produce something in the spirit of this Greek tzatziki sauce recipe.
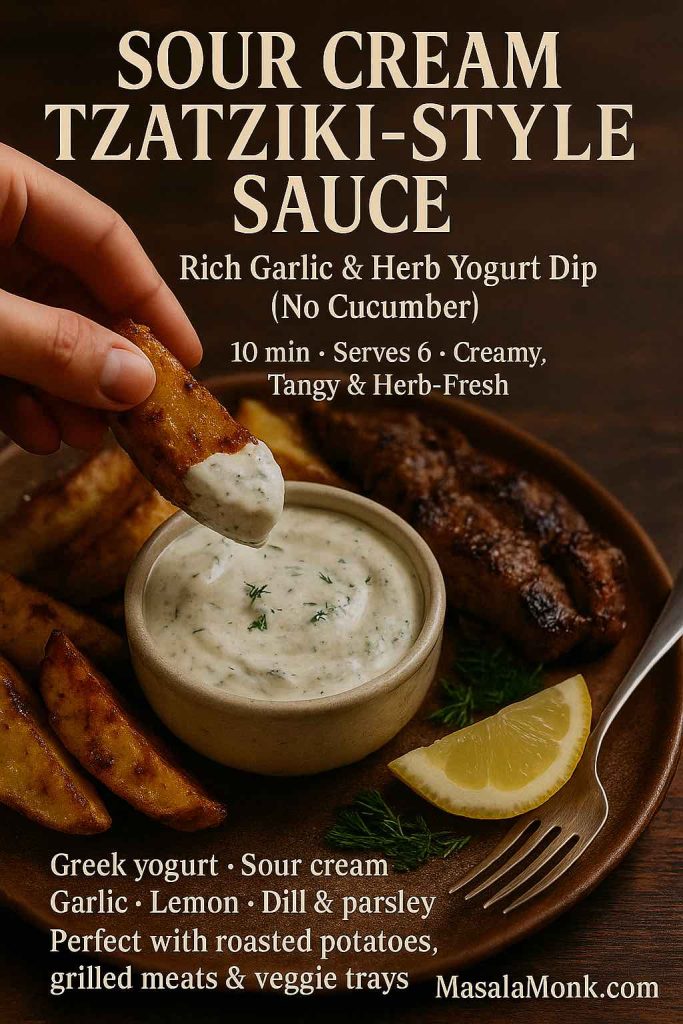
Side-angle photo of a bowl of sour cream tzatziki-style sauce made with Greek yogurt, sour cream, garlic, lemon and herbs, with a hand dipping a crispy roasted potato wedge into the creamy white dip on a rustic wooden table next to roasted potatoes and grilled meat.
Sour cream tzatziki-style sauce – a rich, cucumber-free garlic and herb dip made with Greek yogurt and sour cream, perfect alongside roasted potatoes, grilled meats or hearty veggie trays when you want all the tzatziki flavor in a more indulgent, cozy format.

Try this variation:

  • Use ½ cup Greek yogurt and ½ cup sour cream.
  • Skip the cucumber or replace it with a small handful of finely chopped, seeded tomato for freshness.
  • Keep garlic, lemon and herbs generous so the sauce stays bright instead of heavy.

The result is more like a garlicky herb cream, yet it plays a similar role on the plate. Spoon it over roasted potatoes, grilled steak, baked salmon, steamed vegetables or even next to a cozy dish like green bean casserole when you want something cool and tangy on the side.

9. Salmon with Greek Tzatziki Sauce Recipe

Fish and yogurt might not sound like an obvious pairing at first, but the combination works beautifully—especially with oily fish like salmon.
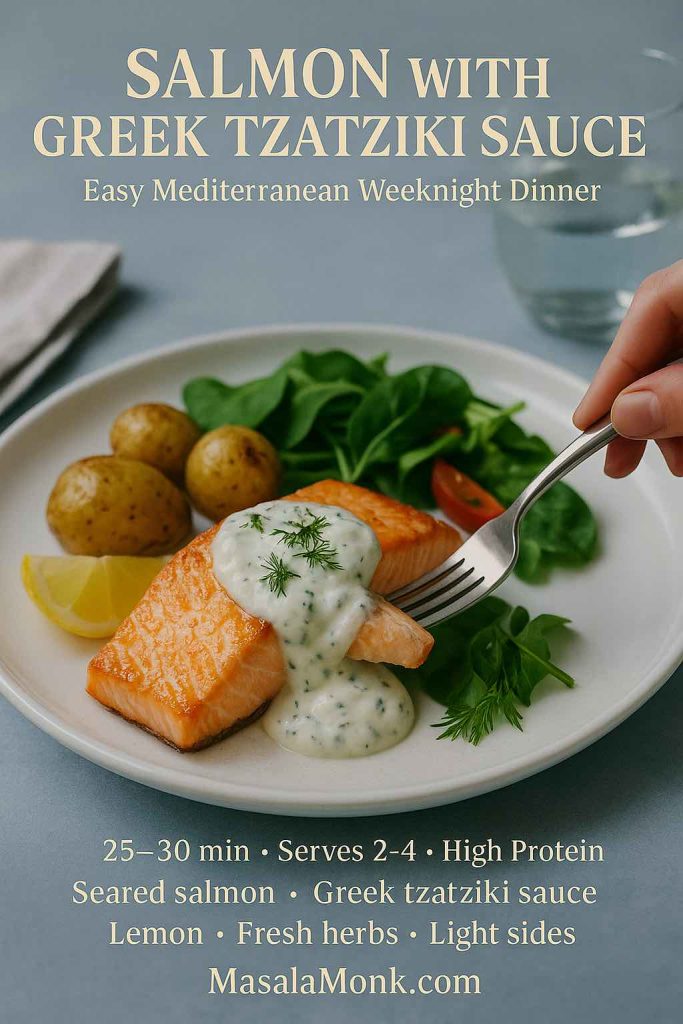
Plated salmon with Greek tzatziki sauce, showing a seared salmon fillet on a light plate with a spoonful of creamy yogurt and cucumber sauce, fresh herbs, lemon wedge and a simple green side, with a hand holding a fork ready to take a bite.
Salmon with Greek tzatziki sauce – a simple Mediterranean weeknight dinner of seared salmon, cool garlicky yogurt and cucumber sauce, lemon and light greens that comes together fast but feels restaurant-level on the plate.

A simple way to bring them together:

  1. Rub salmon fillets with olive oil, salt, pepper and a squeeze of lemon.
  2. Roast or pan-sear until just cooked through and beginning to flake.
  3. Serve with a generous spoonful of chilled tzatziki either on top or alongside.
  4. Add a green salad, roasted vegetables or simple potatoes to round out the plate.

This kind of meal—fish, vegetables, olive oil and a small amount of fermented dairy—mirrors classic Mediterranean patterns that many studies highlight as beneficial for long-term heart health.

You can easily swap in cod, haddock or trout; just adjust cooking times and keep the serving of tzatziki the same.

Also Read: Whiskey Sour Recipe: Classic Cocktail, Best Whiskey & Easy Twists

10. Brunch and Breakfast with Tzatziki

Finally, tzatziki doesn’t need to stay confined to lunch and dinner. It also has a comfortable place in brunch spreads and weekend breakfasts, especially for people who enjoy savory options.
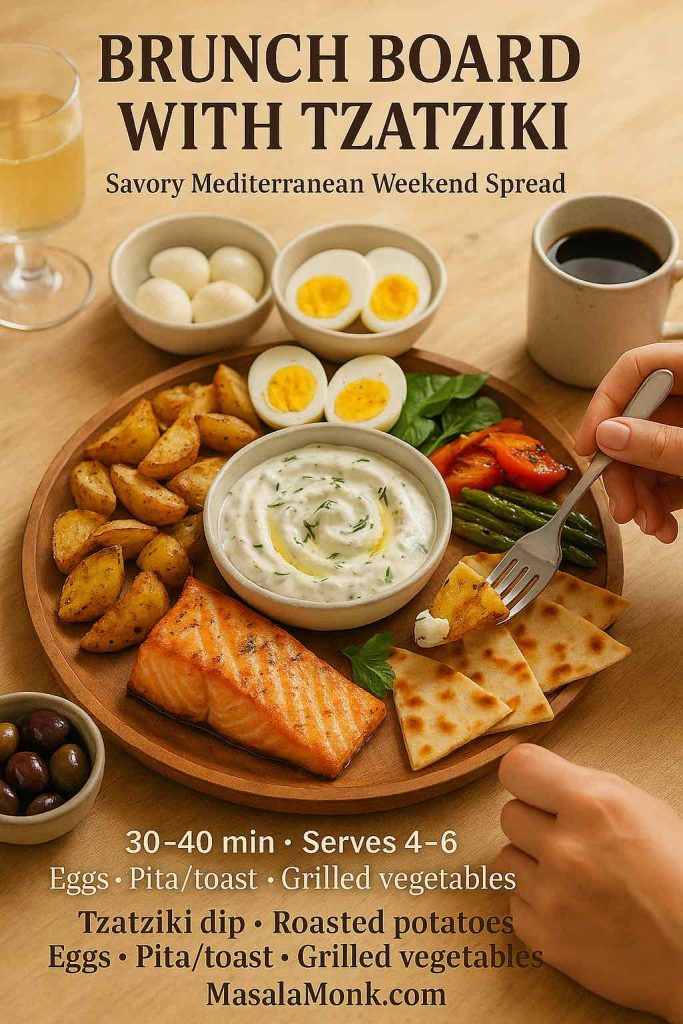
High-resolution photo of a Mediterranean brunch board with a central bowl of Greek tzatziki sauce surrounded by roasted potatoes, soft-boiled eggs, pita wedges, grilled vegetables and fresh greens on a wooden table, with a hand reaching in to take a bite.
Mediterranean brunch board built around Greek tzatziki sauce – roasted potatoes, jammy eggs, pita, grilled vegetables and fresh greens for a savory weekend spread that turns one simple yogurt and cucumber dip into a complete breakfast feast.

Consider a few ideas:

  • Put together a savory brunch board with roasted potatoes, grilled vegetables, olives, slices of cheese, air fryer hard-boiled eggs and a big bowl of tzatziki in the center for dipping.
  • Balance a sweet tray of pancakes or French toast sticks with a plate of warm pita, tomatoes, cucumbers and tzatziki so guests can build both sweet and savory bites.
  • Offer both tzatziki and high protein overnight oats so Greek yogurt shows up in two completely different forms at the same meal.

If you enjoy brunch cocktails, a light, bubbly drink such as a French 75 or one of the twists from a mimosa recipe collection pairs nicely without overwhelming the herbs and garlic.


Building Meals Around Tzatziki

Once there’s a bowl of tzatziki in your fridge, the way you think about meals starts to shift. Instead of beginning with a complicated main dish, you can start with the sauce and assemble around it.

Mezze Nights

One of the easiest ways to use a Greek tzatziki sauce recipe is in a mezze-style spread—essentially a table filled with small plates so everyone can pick and choose. For instance, you might set out:

  • Tzatziki and one or two other dips, perhaps a spinach-based dip inspired by spinach dip recipes
  • Warm pita or flatbreads
  • Sliced cucumbers, carrots, radishes and bell peppers
  • A simple tomato and onion salad
  • Olives, pickled peppers and small cubes of cheese
  • A plate of air fryer hard-boiled eggs or grilled chicken pieces for protein

Everyone can build little bites: a piece of bread with tzatziki and tomato, a slice of egg dipped into the sauce, or raw vegetables dragged through a small puddle of yogurt and herbs. It feels relaxed, social and abundant without requiring hours at the stove.

Comfort Main + Fresh Sauce

On cooler evenings, you might crave something heartier—lasagna, rich soups or baked casseroles. Tzatziki can still play a role there, not as the star, but as the fresh sidekick.

Imagine:

  • A bowl of crock pot lasagna soup with a green salad and a small dish of tzatziki nearby so people can add a spoonful to their bowls if they like.
  • A slice of cottage cheese lasagna alongside a cold, crisp cucumber salad dressed with a thinner Greek tzatziki sauce recipe.
  • A holiday-style plate with green bean casserole, roasted potatoes and grilled chicken, brightened with a spoonful of tzatziki instead of another heavy gravy.

This mix of cozy and fresh keeps comfort food from feeling one-note.

Quick Weeknight Plates

On busy nights, tzatziki can turn very simple components into a complete-feeling meal:

  • Roast a tray of chicken pieces and potatoes with olive oil, salt and herbs. Serve everything with a bowl of tzatziki and a quick side salad.
  • Pan-fry or bake fish fillets, add lemon, then spoon tzatziki on top right at the table.
  • Warm pita or flatbreads, stuff them with leftover roasted vegetables or meat, and slather tzatziki inside as the main sauce.

Because the sauce is already waiting in the fridge, these meals feel fast without reading as “thrown together.”

Also Read: Peanut Butter Cookies (Classic Recipe & 3 Variations)


Storing and Making Ahead Greek Tzatziki Sauce Recipe

A fresh Greek tzatziki sauce recipe keeps nicely in the fridge, though it does change subtly over time.

Here are a few practical points:

  • Container: A clean, lidded glass or plastic container keeps the flavors focused and prevents stray fridge smells from sneaking in.
  • Timeframe: For the best texture and flavor, try to eat tzatziki within 3–4 days. After that, the cucumber can soften a bit too much and the garlic may become a little sharper.
  • Separation: If a bit of liquid pools on top, just stir it back in. If it seems a little thin, folding in a spoonful of fresh Greek yogurt right before serving can restore some body.
  • Serving hygiene: If you’re putting tzatziki out for a gathering, spoon a portion into a smaller bowl instead of letting everyone dip directly into the storage container. That way, any double-dipping or stray crumbs don’t affect the whole batch.

For especially busy weeks, one useful trick is to make the base ahead—yogurt, olive oil, garlic, lemon, salt and herbs—then grate and squeeze the cucumber on the day you want to serve. That gives the yogurt time to develop flavor while keeping the cucumber at its freshest and crispest.

Freezing isn’t recommended; the texture of yogurt and cucumber suffers too much after thawing.

Also Read: Homemade Hot Chocolate with Cocoa Powder Recipe


Tzatziki, the greek sauce recipe in a bigger picture

It’s easy to think of tzatziki as “just a sauce.” Yet looked at another way, a reliable Greek tzatziki sauce recipe is a quiet tool for shaping how you cook and eat:

  • It gives raw vegetables a destination besides plain hummus or ranch.
  • It gives leftover grains, beans or roasted vegetables an easy way to feel new again.
  • It provides a creamy element for meals that still lean on vegetables, legumes, whole grains and fish—exactly the kind of pattern associated with the Mediterranean diet and its long list of possible health benefits.

You don’t have to change everything at once. Simply get comfortable making this sauce, keep a bowl in your fridge when you can, and see where it naturally ends up: next to roasted vegetables, on top of salmon, tucked into sandwiches, or drizzled onto salads. Over time, you may notice that your plates look a little more colorful, a bit more vegetable-forward and—perhaps most importantly—much more fun to eat.

FAQs on Greek Tzatziki Sauce Recipe

1. What is a classic Greek tzatziki sauce recipe made of?

A classic Greek tzatziki sauce recipe usually includes thick Greek yogurt, grated and well-squeezed cucumber, fresh garlic, extra virgin olive oil, lemon juice (or a mild vinegar), salt, black pepper and plenty of fresh dill or a mix of dill and mint. Altogether, these ingredients create a cool, tangy and garlicky cucumber yogurt sauce that works as both a dip and a dressing. For the best texture, the yogurt should be strained and the cucumber should be salted and squeezed so the sauce stays thick and creamy instead of watery.


2. How do I make an easy Greek tzatziki sauce recipe for beginners?

For a simple version, start with plain Greek yogurt in a bowl, then stir in finely grated cucumber (pressed dry in a paper towel), minced garlic, a spoon of olive oil, a squeeze of lemon, salt, pepper and dried or fresh dill. Mix everything until smooth and taste to adjust the lemon and salt. Even though the sauce improves after resting in the fridge, it still tastes delicious right away, which makes this easy tzatziki sauce a great option for busy weeknights or last-minute guests.


3. Which yogurt is best for a Greek tzatziki sauce recipe: Greek or regular?

Generally, Greek yogurt is preferred because it is thicker and richer than regular yogurt, so the tzatziki holds its shape and clings nicely to bread, meat and vegetables. Regular yogurt contains more whey, so it tends to be runnier and can make the sauce feel thin. However, if regular yogurt is all you have, you can strain it through a fine cloth or coffee filter for a couple of hours in the fridge; once it thickens, it behaves much more like Greek yogurt in a tzatziki sauce recipe.


4. Can I make a Greek tzatziki sauce recipe without cucumber?

Yes, you can still prepare a tasty garlic yogurt sauce even if you have no cucumber. In that case, simply leave the cucumber out and increase the herbs, garlic and lemon slightly so the flavor stays bright. Alternatively, very finely chopped, seeded tomatoes or a small amount of grated zucchini can bring a bit of freshness and texture. While it won’t be a textbook tzatziki, this no-cucumber version still works wonderfully as a dip for vegetables, a topping for grilled meats or a spread for wraps.


5. Is a Greek tzatziki sauce recipe healthy?

Most of the time, tzatziki is considered a lighter, nutrient-dense sauce. It is built on strained yogurt, which typically provides protein, calcium and live cultures, along with cucumber, olive oil, garlic, herbs and lemon. Compared with many cream-based or mayonnaise-heavy sauces, a Greek tzatziki sauce recipe usually contains less saturated fat and often more protein per spoonful. Naturally, the overall healthiness still depends on what you eat it with and how large the portions are, but as a way to make vegetables and lean proteins more appealing, tzatziki fits very comfortably into a balanced pattern of eating.


6. How can I make a low-calorie or low-fat Greek tzatziki sauce recipe?

To lighten the sauce, try using 2% or low-fat Greek yogurt instead of full-fat, keep the olive oil to a tablespoon or less, and add extra cucumber and herbs for volume. In addition, you can skip any extra oil drizzled on top when serving. The texture remains creamy because Greek yogurt is naturally thick, while the cucumber and dill keep the flavor refreshing. This kind of healthier tzatziki works especially well with grilled chicken, baked fish, grain bowls and big salads where you want a creamy element that doesn’t overshadow the rest of the meal.


7. Can I make a dairy-free or vegan Greek tzatziki sauce recipe?

Absolutely. For a dairy-free or vegan tzatziki, use a thick, unsweetened plant-based yogurt made from soy, coconut, almond or oat instead of Greek yogurt. Then add grated, squeezed cucumber, garlic, herbs, olive oil, lemon, salt and pepper just as you would in a traditional recipe. Because some non-dairy yogurts can be quite mild, you may want a little extra lemon and garlic to keep the flavor bright. This vegan tzatziki is excellent with falafel, roasted vegetables, grain bowls and wraps, and it fills the same role as a classic Greek tzatziki sauce recipe on the plate.


8. What is the difference between tzatziki and gyro sauce?

In many cases, they are essentially the same thing: a thick Greek tzatziki sauce recipe used as the sauce for gyros. However, gyro sauce is often made a little thicker and more garlicky so it stays inside the pita and stands up to heavily seasoned meat and onions. Sometimes, restaurants use a sour-cream-based garlic sauce or a yogurt-mayo mix and still call it “gyro sauce.” If you specifically want the Greek cucumber yogurt sauce, choose a tzatziki recipe built on Greek yogurt, cucumber, garlic, olive oil, lemon and dill, and then simply keep it extra thick for gyros.


9. Can I use sour cream instead of Greek yogurt in a Greek tzatziki sauce recipe?

You can, although the result will be slightly richer and tangier. Sour cream is thicker than regular yogurt but usually a bit looser than Greek yogurt, so the sauce may turn out softer unless you reduce other liquids. One popular option is to use half Greek yogurt and half sour cream to get the best of both: protein and density from the yogurt, plus silkier texture from the sour cream. This hybrid works nicely for baked potatoes, roasted vegetables and grilled meats, particularly when you want a more indulgent twist on standard tzatziki.


10. How long does homemade Greek tzatziki sauce last in the fridge?

Generally, homemade tzatziki keeps well for about 3 to 4 days in a sealed container in the refrigerator. Over time, the cucumber softens and releases a little extra liquid, and the garlic flavor can intensify. If a bit of liquid collects on top, simply stir it back in; if the sauce becomes too thin for your liking, you can fold in a spoonful of fresh Greek yogurt to thicken it again. Once it smells or tastes off, or if the surface looks discolored, it’s best to discard it and make a fresh batch.


11. Can I freeze a Greek tzatziki sauce recipe?

Freezing isn’t recommended. When yogurt and cucumber thaw, the texture often turns grainy and watery, and the fresh, clean flavor that makes tzatziki so appealing is mostly lost. The cucumber can become mushy, and the yogurt may separate. Instead of freezing, it’s better to make smaller batches more often or prepare the yogurt base ahead of time without cucumber, then stir in freshly grated, squeezed cucumber on the day you plan to serve the sauce.


12. How can I turn a Greek tzatziki sauce recipe into a salad dressing?

Turning tzatziki into a salad dressing is straightforward. Start with the sauce in a bowl, then whisk in cold water, milk or a little extra lemon juice a tablespoon at a time until it reaches a pourable consistency. Taste and add a pinch more salt or herbs if the flavor feels diluted. This thinner version works wonderfully over chopped cucumber-tomato salads, mixed greens, roasted vegetable bowls and even grain-based salads. In this way, one Greek tzatziki sauce recipe can cover both dips and dressings, making it an especially versatile staple to keep in your kitchen.
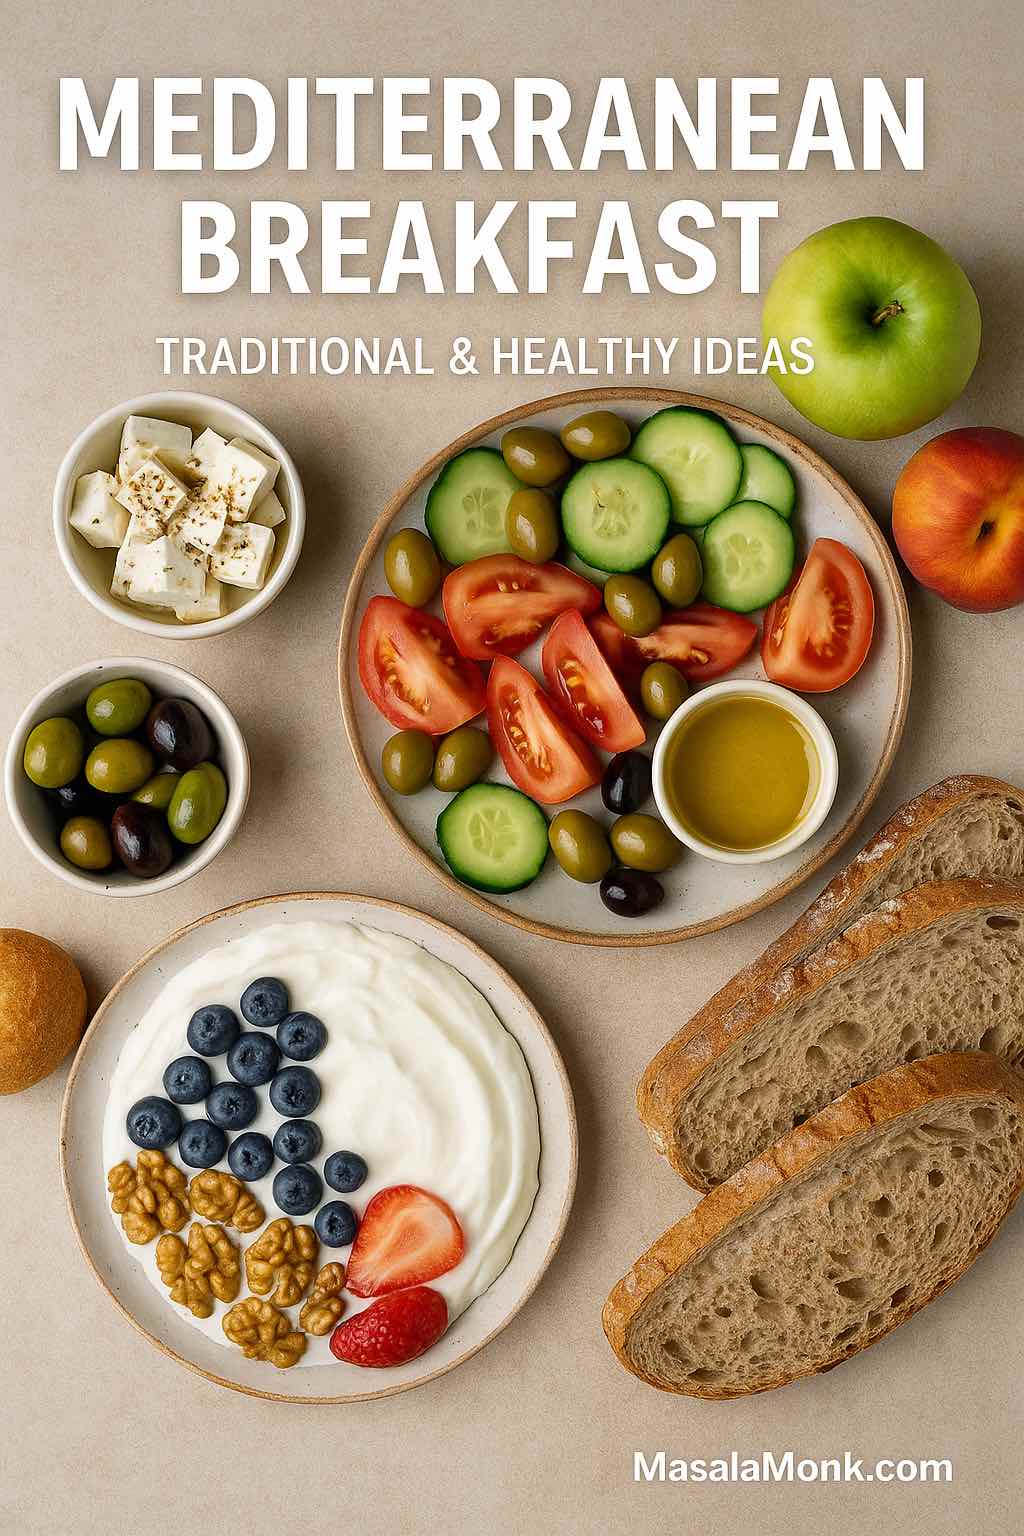
Posted on 6 Comments

Foods to Eat During 16:8 Intermittent Fasting

16/8 intermittent fasting first plate: boiled eggs, leafy greens and broccoli with water—simple foods to eat while fasting 16/8.

When you type foods to eat while fasting 16/8 into a search bar, you’re really asking two practical questions at once: what to drink during the 16-hour fasting window so you stay in a true fast, and what to place on your plate during the eight-hour eating window so you feel satisfied, energized, and consistent. Right from the start, the answer is refreshingly simple: build every plate around protein, high-fiber carbohydrates, and healthy fats, using mostly minimally processed, Mediterranean-leaning foods. That template is easy to shop, effortless to rotate, and—crucially—sustainable. For a quick primer on that food pattern, the American Heart Association’s Mediterranean overview and the practical Oldways Mediterranean Pyramid are both excellent, real-world starting points.


What to Drink While Fasting (and Why It Matters)

During the 16-hour fast, calories count; hydration does too. Consequently, choose plain water, sparkling or mineral water, black coffee, and unsweetened tea—all of which hydrate without adding energy. You can explore our post on Homemade Electrolytes for Fasting to get more ideas on what to drink. If you like simple “how much” rules of thumb, benchmarks from the Academy of Nutrition and Dietetics are helpful, while it is important to stay hydrated, however it’s important to remind you to favor lower-sugar beverages most of the time. For a public-health reminder on swapping out sugary beverages, see CDC: water and healthier drinks.

Of course, context matters. On hot days or after workouts, a pinch of electrolytes can help without breaking your fast—as long as your drink remains unsweetened. If you prefer real-food flavors, try these refreshing Cooling Cucumber Electrolyte Quenchers or explore DIY electrolyte drink ideas and simply omit sweeteners during the fast.

A quick nuance on sweeteners: the WHO’s guideline on non-sugar sweeteners advises against relying on them for weight control. Nevertheless, some people tolerate a small amount in coffee without cravings; others do not. Test gently, observe your appetite, and use minimally.

Also Read: Tea and Intermittent Fasting


The Best First Plate to Break Your Fast (Start Gentle, Then Build)

Once you open your window, your first bites set the tone for the rest of the day. Therefore, begin with a gentle, balanced “first plate” that combines protein + easy-to-digest carbs + a little fat. After 45–90 minutes, follow with your main meal. For instance:

  • A small bowl of lentil or vegetable soup with tofu or paneer and a slice of whole-grain bread.
  • Eggs with sautéed spinach plus a thin chapati or sourdough wedge.
  • Yogurt/curd (or fortified soy yogurt) with berries and a handful of nuts.
  • A smoothie based on milk/curd (or fortified soy) with fruit and a spoon of nut butter.

If you enjoy browsing options, you’ll like this compact collection of gentle, protein-forward fast-breaking ideas you can rotate all week.

Also Read: Coffee and Fasting: All Your Questions Answered


Foods to Eat While Fasting 16/8 (Inside the Window): The Core Building Blocks

Although timing is the hallmark of intermittent fasting, food quality is what shapes energy, fullness, and results. Thus, the most practical foods to eat while fasting 16/8 (meaning during your eating window) fall into three friendly buckets:

  • Protein anchors: eggs; Greek yogurt/curd; cottage cheese/paneer; fish and poultry; tofu and tempeh; dals, chickpeas, kidney beans; edamame; soy milk; nuts and seeds.
  • Smart carbs (fiber-forward): oats, quinoa, brown rice, millets, whole-wheat roti, sweet potatoes, beans and lentils, and plenty of fibrous vegetables—plus fruit like berries, apples, citrus, or bananas.
  • Healthy fats: extra-virgin olive oil, avocado, nuts/seeds; optionally, fatty fish if that suits your diet.

To make that even more concrete, here’s a beginner’s plate rule borrowed from public guidelines: fill half your plate with fruit/veg, and divide the other half between protein and smart carbs—a practical visual reinforced by USDA MyPlate. For specifics, the MyPlate pages for the Vegetable Group and Protein Foods Group offer quick, visual refreshers.

Finally, fruit definitely belongs. Pair it with protein or fat to smooth the glucose curve—think yogurt with berries, apple with peanut butter, banana with paneer or tofu. For ideas that go beyond the usual pairings, try our fruit-during-IF guide.

Also Read: Can We eats Peanuts while Intermittent Fasting?


7-Day Intermittent Fasting Meal Plan (16:8 Window Examples You Can Repeat)

Below is a complete intermittent fasting meal plan for a 12:00–8:00 pm window. Shift earlier (11–7) or later (1–9) as life demands. Each day includes a first plate to break your fast, a main meal, and a compact second plate/snack. You’ll also see vegetarian/vegan swaps and lower-carb variations so the week fits different goals. Use this as a beginner intermittent fasting meal plan, scale portions to your appetite and activity, and repeat favorites.

Portions vary by body size and training load; nevertheless, keep protein, fiber, and minimally processed ingredients at the center.

Day 1 — Mediterranean-Leaning Kickoff (foods to eat while fasting 16/8)

  • 12:00 First plate: Greek yogurt/curd with berries + 1 tbsp mixed nuts.
    Vegan swap: fortified soy yogurt with berries + chia.
  • 1:30 Main meal: Chickpea and vegetable stew in olive oil; side of quinoa; big lemony salad.
    Lower-carb swap: extra veg; smaller quinoa or cauliflower “rice.”
  • 6:30 Second plate/snack: Grilled paneer or tofu with peppers and onions + one orange.

Helpful visual for this style of eating: the Oldways Mediterranean beginner list is clear and friendly.

Day 2 — Indian Comfort, Balanced (foods to eat while fasting 16/8)

  • 12:00 First plate: Two besan chillas with curd and kachumber (or soy yogurt if vegan).
    Recipe inspiration: paneer-stuffed besan chilla (use your favorite version).
  • 2:00 Main meal: Rajma or chole over brown rice or millets; sautéed greens.
    Lower-carb swap: halve rice, double greens and cucumber salad.
  • 7:30 Second plate/snack: Fruit bowl (berries/papaya/banana) + almonds or walnuts.

Day 3 — High-Protein Emphasis (foods to eat while fasting 16/8)

  • 12:00 First plate: Eggs (omelette or boiled) with sautéed spinach + a thin sourdough wedge.
    Vegan swap: chickpea “omelette” (besan) with spinach.
  • 2:00 Main meal: Tandoori chicken or paneer/tofu tikka; roasted vegetables; small portion of brown rice or a roti.
    Lower-carb swap: skip grain, double vegetables; add avocado.
  • 6:45 Second plate/snack: Cottage cheese/paneer or tofu cubes with cherry tomatoes and olives.

Also Read: Best Nuts for Intermittent Fasting: Maximizing Satiety and Nutritional Benefits

Day 4 — Power Bowls (foods to eat while fasting 16/8)

  • 12:00 First plate: Smoothie bowl—milk/curd (or fortified soy), banana/berries, flax or peanut butter; sprinkle seeds.
    Lower-carb tweak: more berries, less banana; tofu on the side.
  • 1:45 Main meal: Lentil-quinoa bowl with roasted cauliflower/carrots; tahini-lemon dressing.
    Vegan/veg by default.
  • 7:00 Second plate/snack: Mixed sprouts chaat with tomato, onion, coriander, lemon, and a dash of chaat masala.
    How-to: sprouted moong overnight—step by step.

Day 5 — Fish or Tofu Friday (foods to eat while fasting 16/8)

  • 12:00 First plate: Miso soup with tofu and greens; small fruit.
  • 2:00 Main meal: Grilled fish with olive oil, herbed potatoes, and a large salad; or tofu steaks if plant-based.
    Lower-carb swap: roasted zucchini/broccoli in place of potatoes.
  • 7:15 Second plate/snack: Greek yogurt/curd parfait with apple and cinnamon; or soy yogurt for vegan.

Day 6 — Comfort Curry, Light Finish (foods to eat while fasting 16/8)

  • 12:00 First plate: Small bowl of moong dal + steamed veggies + lemon.
  • 2:00 Main meal: Coconut-milk vegetable curry (or chicken curry) over brown rice/millets; cucumber-tomato salad.
    Lower-carb swap: less rice, extra salad; add olives or avocado.
  • 6:30 Second plate/snack: Peanut chaat or roasted chana; sliced guava or pear.

Day 7 — Social Sunday, Still Smart (foods to eat while fasting 16/8)

  • 12:00 First plate: Yogurt/curd + low-sugar granola + berries.
    Vegan swap: soy yogurt + homemade nut-seed granola.
  • 2:00 Main meal: Pizza-style whole-grain flatbread with tomato, mushrooms, peppers, olives, mozzarella (or tofu ricotta), olive oil; side salad.
    Lower-carb swap: portobello “pizza” caps or eggplant slices.
  • 7:00 Second plate/snack: Paneer/tofu stir-fry with sesame and greens; or a small hummus plate with crudités.

How to rotate and prep: batch-cook two proteins (dal/chana and tofu/paneer or chicken/fish), one smart carb (quinoa, brown rice, or millets), and a tray of roasted vegetables every 3–4 days. If you need variety within the carb bucket, have a look at Quinoa for Weight Loss: Benefits, Nutrition, and How to Cook Ideas.


Vegetarian, Vegan, and Low-Carb Tracks (Fast Customization, Same Principles)

To craft a vegetarian intermittent fasting meal plan, anchor each eating occasion with paneer/cottage cheese, yogurt/curd, eggs (if you eat them), and legumes (chana, rajma, dal). Layer olive oil, nuts, and seeds for healthy fats. To build a vegan intermittent fasting meal plan, swap dairy for fortified soy yogurt/milk, use tofu or tempeh as daily proteins, and rotate edamame and beans. If you’re curious about tempeh’s texture and flavor, this quick primer on tempeh as a versatile vegan protein will help you get started.

For a low-carb intermittent fasting plan, there’s no need for extremes. Emphasize non-starchy vegetables, lean or plant proteins, olive oil/avocado/nuts, and smaller portions of grains or starchy veg. That plant-forward approach is still compatible with the Mediterranean pattern and, frankly, more livable than strict keto for most people. If you want a broader view of how to begin this style of eating, Cleveland Clinic’s Mediterranean food list and starter plan is grounded and usable.

Also Read: Yogic Meal Plan and Intermittent Fasting – Insights from Sadhguru


What to Eat While Intermittent Fasting for Weight Loss (Tactics That Compound)

Because many readers pursue 16:8 for fat loss, it helps to connect the dots between intermittent fasting and diet quality. To that end, use this checklist inside the window:

  1. Front-load protein at every eating occasion—yogurt/curd, eggs, tofu/tempeh, dal or chana, fish or poultry, plus nuts/seeds.
  2. Fill half your plate with plants—non-starchy vegetables plus fruit. The plate visual from USDA MyPlate keeps this effortless.
  3. Choose slow carbs most of the time: oats, quinoa, brown rice, whole-wheat roti, sweet potato, legumes.
  4. Use fats intentionally: extra-virgin olive oil, avocado, nuts, seeds. Measure pours and handfuls.
  5. Drink during the fast: water, coffee, and tea. For a simple refresher, see the Cleveland Clinic drinks guide.
  6. Break the fast gently: see the first-plate ideas above or browse fast-breaking suggestions.
  7. Batch-cook so your defaults are strong: try high-protein vegetarian meal prep or vegan meal prep ideas to save time during the week.

For a sane, evidence-aware perspective on weight and diet quality (and why extremes backfire), the British Dietetic Association’s plate guidance for weight loss and notes on fad diets are both sensible and easy to skim.


Foods to Avoid (or Save for Occasional Treats)

Even within a flexible intermittent fasting food plan, certain choices make timing harder rather than easier:

  • Sugary beverages and ultra-processed snacks—they spike appetite and can trigger rebound eating.
  • Very high-fat “first meals” right after fasting—greasy, heavy foods often feel rough on the stomach and push you toward grazing later.
  • Mindless nibbling in the window—if your plate lacks protein and fiber, you’ll snack soon after.

By contrast, treating richer items as occasional—and positioning them inside a complete meal with protein and vegetables—preserves the rhythm that makes 16:8 work. For a quick, friendly reminder on lower-sugar beverage choices, visit Nutrition.gov’s hydration and beverage tips.


Troubleshooting Your 16:8 Schedule (Common Hurdles, Easy Fixes)

  • If hunger hits hard mid-morning: sip water or unsweetened tea first; if you still feel low, shift your window earlier (e.g., 11–7) for a week.
  • If you crash after your first plate: increase protein (yogurt + nuts, eggs, tofu) and choose easy digesting carbs (fruit, soup with pulses) before your main meal.
  • If evenings get snacky: make dinner more substantial—double vegetables, keep protein steady, and add a measured spoon of olive oil or a quarter avocado for satisfaction.
  • If weekends derail you: keep timing flexible (e.g., 14:10 on social days) and return to 16:8 on Monday—consistency beats rigidity.
  • If coffee jitters you on an empty stomach: consider delaying coffee by an hour and keep it plain; the nuance around stimulants and stress is covered here: Coffee + cortisol.

Foods to Eat While Fasting 16/8: Shopping Lists You Can Copy

Because shopping clarity makes or breaks adherence, these condensed lists keep decisions simple:

Proteins to rotate: eggs; Greek yogurt/curd; cottage cheese/paneer; tofu/tempeh; chicken/fish; dals, chickpeas, kidney beans; edamame; soy milk; nuts and seeds.
Smart carbs to prefer: oats; quinoa; brown rice; millets; whole-wheat roti; sweet potatoes; legumes; fruit; plus loads of leafy, cruciferous, and colorful vegetables.
Healthy fats to include: extra-virgin olive oil; avocado; almonds, walnuts, pistachios, peanuts; seeds like flax, chia, sesame, and sunflower.

To make legumes especially appealing, remember that pulses are naturally rich in fiber and nutrients—reasons the UN’s Food and Agriculture Organization highlights in their notes on the nutritional benefits of pulses and this broader 2025 celebration of the power of pulses. Consequently, dals, chana, and rajma deserve a regular place on your table.

Also Read: Are Lentils Good for Weight Loss? Benefits, Recipes, and Science Explained


Intermittent Fasting Diet Plan for Beginners (Routine That Fits Real Life)

To live with the 16:8 rhythm comfortably, set up a routine that survives busy weeks:

  • Pick a consistent window most days (e.g., 12–8). Flex for social plans; return to baseline the next day.
  • Prep “fast-breakers” you enjoy: soup portions in the freezer, yogurt/curd cups, chopped fruit, roasted nuts.
  • Keep two fallback plates on standby: eggs + veg + toast; or tofu/paneer tikka + salad + one roti.
  • Hydrate preemptively—first thing in the morning and mid-afternoon—even before you feel thirsty. When you want variety, revisit cooling cucumber electrolytes and DIY hydration recipes for unsweetened options during the fast and low-sugar ideas during the window.
  • Meal prep smartly: for plant-forward weeks, browse high-protein vegetarian meal prep or vegan meal prep ideas; for omnivore weeks, batch-roast chicken/fish and tray-bake vegetables for effortless mix-and-match plates.

If you like evidence windows, it’s worth noting that time-restricted eating research continues to evolve. For a balanced perspective, you can read a randomized trial in the New England Journal of Medicine comparing calorie restriction with/without TRE (summary here), or a more applied brief from the NIH on TRE in metabolic syndrome. Nevertheless, regardless of study headlines, diet quality and routine are the levers you actually control each day.


Special Notes for Women, PCOS, Menopause & Diabetes

Some readers do better with 14:10 or even 12:12 during demanding phases. Women navigating perimenopause, anyone with PCOS, and readers with diabetes (particularly those on glucose-lowering medication) should tailor fasting and meal timing with their clinician. All the same, the meal fundamentals in this guide—protein at each eating occasion, plant-rich plates, slow carbs, and measured healthy fats—remain widely applicable. If you want a gentle on-ramp, glance at vegan meal prep ideas or high-protein vegetarian prep to see how easy it is to keep protein and fiber high without complex rules.


Example Day Revisited: Foods to Eat While Fasting 16/8 (Vegetarian Window)

To connect everything, here’s a compact vegetarian day that mirrors the template:

  • 12:00Yogurt/curd with berries and crushed nuts (or fortified soy yogurt with chia).
  • 3:00Fruit + almonds (apple with almonds, banana with peanut butter, or berries with paneer/tofu cubes).
  • 7:30Paneer tikka or chole with quinoa or whole-wheat roti; mixed salad with olive oil.

Notice how every moment includes protein, plants, and a bit of fat—a simple combination that makes the difference between a plan you can follow and a plan that unravels when life gets busy.

Also Read: The Science of Protein: Maximizing Muscle Growth and Recovery


What to Eat During Intermittent Fasting 16/8: The Weekly Rhythm in One Line

At this point, it should be clear that foods to eat while fasting 16/8 are not about restriction; they’re about focus. Protein first, plants plentiful, fats thoughtful, carbs mostly slow. Rotate different legumes, swap in seasonal vegetables, choose grains you enjoy, and keep fruit in the mix. As a result, you’ll feel fuller on fewer calories, stabilize energy, and make the plan feel less like a “diet” and more like a habit.

And if you ever need a quick nudge, open a friendly visual like the Oldways Mediterranean Pyramid or a basic plate reminder such as USDA MyPlate. They’re simple for a reason: when your defaults are this good, 16:8 becomes far easier to keep—meal after meal, week after week.

Also Read: What is the Mediterranean Diet? Free PDF Meal Plan Inside

FAQs

1) What are the best foods to eat while fasting 16/8 during the eating window?

Build plates around lean or plant proteins (eggs, curd/yogurt, paneer/tofu/tempeh, fish or chicken, dals/beans), high-fiber carbs (oats, quinoa, brown rice, whole-wheat roti, lentils, sweet potato, fruit), and healthy fats (olive oil, avocado, nuts, seeds). This simple mix keeps you full, supports weight loss, and makes foods to eat while fasting 16/8 easy to repeat.

2) What can I eat during intermittent fasting 16/8 as a beginner?

Start with a gentle first meal (yogurt + berries + nuts; eggs + fruit; dal soup + roti) and one main plate (protein + veggies + smart carbs). Add one small snack if needed (paneer/tofu pieces; fruit + almonds). This beginner intermittent fasting meal plan is fuss-free and sustainable.

3) What can I drink while fasting (no calories)?

Stick to water (still or sparkling), black coffee, and unsweetened tea. Zero-calorie electrolytes are fine if truly unsweetened. Save milky coffee, juice, smoothies, and shakes for the eating window.

4) What can you eat during the 8 hours of intermittent fasting?

Prioritize protein at every eating occasion, fill half the plate with vegetables and fruit, and choose slow-digesting carbs. Consequently, your foods to eat while fasting 16/8 list becomes: protein + plants + measured fats.

5) What is the best food to break a fast?

Go gentle: protein + easy carbs + a little fat. Examples: lentil/veg soup with tofu or paneer; eggs with a slice of whole-grain; yogurt/curd with berries and nuts; or a milk/curd + fruit smoothie with nut butter. Then, after 45–90 minutes, eat your main meal.

6) Which foods should I avoid while intermittent fasting?

Limit sugary drinks, ultra-processed snacks, and very greasy “first meals” right after fasting. These can spike hunger and derail your window.

7) Can I eat fruit during intermittent fasting 16/8?

Yes—inside the 8-hour window. Pair fruit with protein or fat (yogurt + berries, apple + peanut butter, banana + paneer/tofu) to improve satiety.

8) Does bone broth break a fast?

Yes. Bone broth contains calories and protein; therefore, it breaks the strict fasting period. Use it inside your eating window.

9) What can you consume during intermittent fasting if you’re hungry?

Hydrate first (water, black coffee, plain tea). If hunger persists daily, shift your window earlier, increase protein at the first meal, and ensure enough fiber and volume from vegetables.

10) Is there a simple intermittent fasting food list I can follow?

Absolutely:

  • Protein: eggs, yogurt/curd, paneer/tofu/tempeh, chicken/fish, dals/beans, edamame, nuts/seeds.
  • Carbs (fiber-forward): oats, quinoa, brown rice, whole-wheat roti, millets, lentils, sweet potato, fruit, veg.
  • Fats: olive oil, avocado, nuts/seeds.

11) What to eat during intermittent fasting 16/8 for weight loss?

Emphasize protein (at every meal), large servings of vegetables, and mostly slow carbs; measure fats. As a result, your calorie deficit becomes easier without strict tracking.

12) What to eat during intermittent fasting 16/8 for vegetarians?

Anchor meals with paneer, curd/yogurt, dals/chana/rajma, tofu/tempeh, eggs (if you eat them), plus whole grains and vegetables. Hence, foods to eat while fasting 16/8 stay protein-rich and plant-forward.

13) What to eat during intermittent fasting 16/8 for vegans?

Rely on tofu/tempeh, edamame/soy milk, legumes (dal, chana, rajma), nuts/seeds, and whole grains. Add plenty of vegetables and fruit for fiber and micronutrients.

14) Can I combine keto with intermittent fasting (keto + 16/8)?

You can, yet it’s optional. A low-carb intermittent fasting plan—with lots of non-starchy veg, olive oil/avocado/nuts, and steady protein—often feels more livable than strict keto while still supporting fat loss.

15) What is a high-protein, low-carb 16/8 day?

First plate: eggs or tofu + sautéed veg.
Main meal: paneer/tofu/chicken/fish + big salad + small portion of quinoa or none.
Snack: yogurt/curd or soy yogurt with nuts.
This structure keeps foods to eat while fasting 16/8 focused on protein and fiber.

16) What to eat during intermittent fasting 16/8 for PCOS?

Prioritize protein at each meal, fiber-rich carbs (legumes, whole grains, vegetables, fruit), and healthy fats; keep sugary drinks minimal. Consider a consistent window and balanced plates to support appetite and energy.

17) What is the best intermittent fasting for menopause or perimenopause?

Many feel better with 14:10 or flexible 16:8. Regardless, protein at every meal, vegetables and fruit at half the plate, and slow carbs with healthy fats often help with steadier energy and satiety.

18) What to eat during intermittent fasting for diabetes?

Coordinate with your clinician. Generally, prioritize protein, vegetables, pulses, and slow carbs while spacing meals in the 8-hour window. Monitor blood glucose closely when adjusting timing.

19) What to eat in the 16/8 window if I work out?

Around training, keep the first plate light but protein-anchored (yogurt + fruit + nuts, or tofu/egg scramble). Post-workout, add slow carbs (quinoa, brown rice, millets, sweet potato) with lean protein and vegetables.

20) What is the best intermittent fasting schedule and meal plan for beginners?

Choose a stable window (12–8 or 11–7). Break the fast gently, eat one main balanced plate, and add one small protein-rich snack if needed. Repeat a few favorite meals so foods to eat while fasting 16/8 become automatic.

21) What can you eat and drink while fasting if you get headaches?

First, hydrate with water or plain tea; consider unsweetened electrolytes. Then, during the eating window, emphasize protein, vegetables, and slow carbs to stabilize energy.

22) Do zero-calorie sweeteners break a fast?

Most are effectively non-caloric, yet they may increase cravings for some. If you use them, keep amounts small during the fasting period and assess your personal response.

23) What’s the best food to break a fast for sensitive stomachs?

Start with soup (dal/veg) or yogurt/curd with fruit and a few nuts; after that, move to your main plate. This gentler sequence helps digestion.

24) Can I follow OMAD instead of 16/8?

You could, but many people find 16/8 easier for performance, digestion, and sustainability. If trying OMAD, ensure the one meal still covers protein, plants, and slow carbs.

25) What’s the difference between 16/8 and 5:2?

16/8 limits when you eat daily; 5:2 limits how much on two days per week. Either can work, though foods to eat while fasting 16/8 typically emphasize daily routine and balanced plates.

26) Does coffee with milk break a fast?

Yes—milk adds calories and breaks a strict fast. Therefore, save lattes/capuccinos for the eating window; keep coffee black while fasting.

27) What should I eat during intermittent fasting 16/8 if I’m frequently hungry?

Increase protein at the first plate, add more vegetables for volume, and choose slow carbs. Additionally, check sleep, stress, and hydration; consistency often fixes mid-window hunger.

28) What is a simple intermittent fasting meal plan free of complicated recipes?

Use a three-part template:

  • First plate: yogurt/curd + fruit + nuts or eggs/tofu + veg.
  • Main plate: protein + big salad/veg + slow carb.
  • Snack (optional): cottage cheese/paneer, soy yogurt, tofu/paneer cubes, or fruit + almonds.

29) What are “16/8 diet power foods” I should stock weekly?

Eggs; Greek yogurt/curd; paneer/tofu/tempeh; dals/chana/rajma; leafy and colorful vegetables; oats/quinoa/brown rice/millets; olive oil/avocado; mixed nuts and seeds; berries/apples/bananas. These are the backbone of foods to eat while fasting 16/8.

30) How do I stay in a calorie deficit while fasting?

Keep protein high, pack plates with vegetables, pick mostly slow carbs, and measure fats. Batch-cook basics and repeat meals you like; the combination quietly maintains a modest deficit without micromanaging.

Posted on 3 Comments

10 Most Popular Mediterranean Breakfasts

Photorealistic portrait of a Mediterranean breakfast spread with bread, olives, cheese, yogurt, fruit, and coffee, styled like a premium magazine cover.

If you’ve ever wondered “What do Mediterraneans really eat for breakfast?” you’re not alone. A Mediterranean breakfast isn’t just food on a plate—it’s a ritual, a slower start to the day, and a celebration of simple, nourishing ingredients. Think ripe fruit, creamy yogurt, a drizzle of golden olive oil, and just enough bread to soak it all up.

The beauty of this style of eating is its balance. Some mornings are as light as a Greek yogurt bowl with honey and nuts, while others are heartier, like shakshuka simmering away in a pan. Whether your goal is to enjoy a traditional spread, follow the Mediterranean diet for better health, or pick up a few quick breakfast ideas for busy mornings, you’ll find inspiration here.

The Mediterranean diet isn’t just delicious—it’s also one of the most studied and recommended eating patterns in the world. Research shows it helps lower the risk of heart disease, diabetes, and even some cancers, while supporting long-term health and longevity (Mayo Clinic; NCBI Review).

For a deeper dive, check out our own Mediterranean diet guide or download a free Mediterranean diet meal plan.

So, let’s begin by exploring what a typical Mediterranean breakfast looks like across the region—because once you see the variety, you’ll realize there’s no one-size-fits-all.


What is a Typical Mediterranean Breakfast?

When people ask about a “typical” or “traditional” Mediterranean breakfast, the truth is—it depends on where you are. The Mediterranean is a patchwork of cultures and flavors, and breakfast looks a little different in each country. What they all share, though, is a love for fresh, seasonal food and the art of keeping things simple.

Here’s a quick tour:

Greek Breakfast

Mornings in Greece are often slow and satisfying. Imagine a bowl of thick Greek yogurt topped with honey, nuts, and figs, or a slice of fresh bread with cheese, olives, and a drizzle of olive oil. Coffee, of course, is always nearby.

Turkish Breakfast (Kahvaltı)

If you love variety, you’ll fall in love with a Turkish breakfast. It’s not just a meal, it’s a spread—plates of tomatoes, cucumbers, olives, cheeses, and bread fill the table. Eggs might be served boiled or as menemen (scrambled with tomatoes and peppers). Black tea in little tulip-shaped glasses ties it all together.

Italian Breakfast

In Italy, breakfast is more about a quick bite than a feast. A strong espresso or cappuccino, maybe paired with fresh fruit, yogurt, or a slice of wholemeal toast drizzled with olive oil. Simple, light, and elegant—just like the Italian lifestyle.

Spanish Breakfast

Spain leans toward hearty simplicity. The classic pan con tomate—toasted bread rubbed with fresh tomato and olive oil—is often topped with cheese or ham. Add a piece of fruit and a cup of coffee, and you’ve got a perfect Mediterranean morning.


In many Eastern Mediterranean countries, mornings begin with a generous spread of cheese, olives, hummus, and beans like ful medames—a tradition highlighted by Oldways.

👉 As you can see, there isn’t one “correct” Mediterranean breakfast. Instead, it’s a celebration of fresh produce, wholesome grains, and healthy fats—delicious proof that eating well can also feel joyful.

Mediterranean Diet Breakfast Ideas for Every Lifestyle

The Mediterranean diet isn’t a strict set of rules—it’s more of a lifestyle. And that’s exactly why breakfast on this diet can be so flexible. Whether you’re looking for something quick and easy, healthy and balanced, or even a little indulgent, there’s always an option that feels doable.

Educational photograph of a typical Mediterranean breakfast plate featuring bread, olive oil, cheese, olives, and fresh fruit, labeled for clarity.
This typical Mediterranean breakfast plate brings together bread, olive oil, cheese, olives, and fruit—simple staples that transition beautifully into a healthy start.

Here are a few ways you can bring the Mediterranean morning to your own kitchen:


Healthy Mediterranean Breakfast Ideas

If you want to start the day feeling energized, focus on whole foods and natural flavors. Some simple but powerful options include:

  • Greek yogurt with berries and chia seeds – creamy, tangy, and full of protein.
  • Whole-grain toast with hummus and veggies – a savory option packed with fiber.
  • Fruit with nuts and a drizzle of olive oil – yes, olive oil on fruit! It adds a silky richness and healthy fats.

These choices are light, refreshing, and perfect if you like to feel fueled but not heavy in the morning.


Easy Mediterranean Diet Breakfast Recipes

Not a morning person? No problem. These quick breakfasts can be ready in minutes—or prepped ahead for grab-and-go ease:

  • Overnight oats with figs and walnuts – soak your oats in almond milk overnight, then top with Mediterranean favorites like figs and nuts.
  • Mediterranean smoothie – blend spinach, Greek yogurt, banana, and flaxseeds for a fast, nutrient-packed drink.
  • Avocado toast with olives and tomato – the ultimate 5-minute breakfast with all the flavors of the Mediterranean coast.

When You Want Something Cozy

Some mornings call for a little extra comfort. On those days, go for:

  • Warm oatmeal with honey and pistachios
  • A slice of rustic bread with olive oil and za’atar
  • A cup of herbal tea or Turkish-style coffee to complete the ritual.

👉 The best part? You can mix and match these ideas all week long. One day might be yogurt and fruit, the next a hearty smoothie, and the next something as simple as bread with olive oil. That’s the beauty of the Mediterranean diet—it’s flexible, joyful, and endlessly adaptable to your lifestyle.

Mediterranean Breakfast Recipes with Eggs

Eggs are a big part of Mediterranean mornings, and for good reason—they’re affordable, versatile, and a fantastic source of protein. In many Mediterranean countries, eggs are combined with fresh vegetables, herbs, and olive oil to create dishes that are both comforting and nourishing.

Here are a few classic recipes you’ll want to try:


Shakshuka

If there’s one Mediterranean egg dish that has gone global, it’s shakshuka. Originating in North Africa and popular across the Middle East, shakshuka features eggs gently poached in a sauce of tomatoes, onions, peppers, and spices. Serve it right out of the skillet with crusty bread to scoop up every last bite—it’s hearty, flavorful, and perfect for brunch or a lazy weekend morning.


Menemen (Turkish Scrambled Eggs)

Menemen is Turkey’s answer to comfort food. It’s made by slowly cooking tomatoes, peppers, and onions until soft, then scrambling in eggs with a drizzle of olive oil. Creamy, slightly sweet, and full of vegetables, it’s a dish that feels indulgent yet light at the same time. Pair it with warm bread and olives for a true Turkish-style breakfast.


Vegetable Omelet with Feta and Herbs

Sometimes, simple is best. A classic Mediterranean omelet often includes fresh vegetables like spinach, zucchini, or peppers, finished with a sprinkle of crumbled feta and fragrant herbs like dill or parsley. It’s quick enough for weekdays but tasty enough to impress guests at brunch.


Looking for more exciting egg options, read our post on 10 Examples of Egg Dishes, with 2 Eggs.

👉 These egg dishes are more than just recipes—they’re traditions, often shared at the table with family or friends. And the beauty of them is how flexible they are: add more veggies if you want a lighter meal, or pair them with whole-grain bread if you need something more filling.

Mediterranean Breakfast Without Eggs

Not everyone is an egg lover—and that’s completely fine. The good news? The Mediterranean diet offers plenty of delicious, satisfying breakfasts without a single egg in sight. These meals are light, nourishing, and just as authentic as their egg-based counterparts.

Here are some of the best ideas:


Greek Yogurt with Nuts and Honey

Creamy, protein-rich Greek yogurt topped with walnuts, almonds, or pistachios and a drizzle of honey is a classic choice. Add fresh fruit like figs, grapes, or berries for natural sweetness. It’s quick, filling, and feels like a little treat.


Oatmeal with Olive Oil and Fruit

Yes, you read that right—olive oil on oatmeal! In the Mediterranean, it’s common to drizzle good extra-virgin olive oil over warm oats, then top with dried figs, dates, or pomegranate seeds. It’s earthy, slightly sweet, and packed with fiber and healthy fats.

Olive oil is more than just a fat—it’s one of the Mediterranean diet’s true superfoods, known for its anti-inflammatory benefits.


Hummus and Veggie Toast

A slice of whole-grain bread spread with creamy hummus and layered with tomatoes, cucumbers, or roasted peppers makes for a savory, egg-free option that keeps you satisfied. Sprinkle a little za’atar or paprika for extra flavor. Here is a simple recipe to help you out: Hummus Veggie Sandwich: A Nutritious and Delicious Delight.


Chia Pudding with Almond Milk

If you’re looking for something you can prep the night before, chia pudding is a perfect fit. Mix chia seeds with almond milk, let it thicken overnight, and top with fruit, nuts, or even a spoonful of tahini in the morning.

Fan of Chia Pudding – explore 10 Creative Chia Pudding Recipes for Every Taste.


For more Egg Free and Vegan variety, here are some more plant-based High Protein breakfast ideas.

👉 As you can see, skipping eggs doesn’t mean missing out. These breakfasts are fresh, wholesome, and incredibly versatile, making them perfect for anyone who prefers plant-based meals or simply wants to switch things up.

Mediterranean Diet Breakfast for Weight Loss

One of the reasons the Mediterranean diet is so popular is because it’s naturally supportive of weight loss. Instead of focusing on restrictions, it encourages balance—lots of fresh vegetables, fruits, whole grains, lean proteins, and of course, heart-healthy fats like olive oil and nuts. The result? Meals that keep you satisfied without feeling heavy.

Infographic showing three Mediterranean breakfast ideas for weight loss: Day 1 yogurt with berries and nuts, Day 2 avocado toast with olives and tomatoes, Day 3 shakshuka with a side of oranges.
Follow this easy 3-day Mediterranean breakfast plan for weight loss—moving from protein-rich yogurt bowls to avocado toast and shakshuka for balance.

When it comes to breakfast, the trick is to combine protein + healthy fats + fiber so you feel full for hours and avoid mid-morning cravings. Here’s a simple 3-day Mediterranean breakfast plan for weight loss you can try:


First Day – Fresh & Protein-Packed

  • Breakfast: Greek yogurt topped with a handful of walnuts, blueberries, and a drizzle of honey.
  • Why it works: High in protein and antioxidants, this bowl balances creaminess with crunch while keeping sugar levels stable.

Second Day – Light & Energizing

  • Breakfast: Whole-grain toast with smashed avocado, sliced tomatoes, olives, and a sprinkle of feta.
  • Why it works: Packed with fiber, healthy fats, and just enough protein to keep you energized until lunch.

Third Day – Hearty & Comforting

  • Breakfast: Shakshuka (eggs poached in tomato and pepper sauce) served with a side of fruit.
  • Why it works: A filling yet nutrient-dense meal that’s rich in protein and perfect for days when you need extra energy.

Why it helps: Mediterranean-style eating is linked to a healthier gut microbiome, which plays an important role in weight regulation. In a controlled non-human primate study, animals fed a Mediterranean diet self-regulated their intake and avoided overeating compared with those on a Western diet (PubMed: Obesity study; Wake Forest News Release). Adding seasonal produce like tomatoes to support weight-loss makes these meals even more effective.

Bonus for brain health: In a large U.S. cohort (92,383 adults), consuming at least 7 g/day of olive oil (about half a tablespoon) was associated with a 28% lower risk of dementia-related death, independent of overall diet quality (JAMA Network Open; NIA Summary).

👉 These breakfasts aren’t about cutting calories to the extreme—they’re about eating smart, flavorful meals that naturally support weight management. By focusing on whole foods and keeping portions balanced, the Mediterranean diet makes weight loss feel less like a “diet” and more like a lifestyle you’ll actually enjoy.

Mediterranean Breakfast Menu & Meal Prep Ideas

One of the best things about the Mediterranean diet is how easy it is to plan ahead. With just a little prep, you can set yourself up for a whole week of nourishing breakfasts—whether you prefer sweet, savory, quick, or sit-down meals.

Here are some Mediterranean breakfast menu ideas and meal prep tips to make your mornings stress-free:


Weekly Mediterranean Breakfast Menu (Sample)

  • Monday – Greek yogurt with figs, almonds, and a drizzle of honey
  • Tuesday – Whole-grain toast with hummus, cucumbers, and olive oil
  • Wednesday – Vegetable omelet with feta and fresh herbs
  • Thursday – Overnight oats with dates, walnuts, and a splash of almond milk
  • FridayPan con tomate (Spanish tomato toast) with a side of fruit
  • Saturday – Shakshuka served with wholemeal bread
  • Sunday – Chia pudding with pomegranate seeds and pistachios

Mediterranean Breakfast Meal Prep Tips

  • Yogurt jars for the week: Portion Greek yogurt into small containers, then just add toppings in the morning.
  • Overnight oats in batches: Prep 3–4 jars at once so you always have a grab-and-go option.
  • Shakshuka base ready to go: Cook the tomato-pepper sauce ahead of time, then reheat and crack in eggs when you’re ready to eat.
  • Pre-chopped veggies: Keep cucumbers, peppers, and tomatoes washed and ready in the fridge for quick toasts or salads.
  • Homemade hummus: Make a batch on Sunday and use it all week for toast, wraps, or veggie dips.

👉 With these ideas, your Mediterranean breakfast isn’t just healthy—it’s also quick, practical, and adaptable. By mixing and matching simple staples like yogurt, bread, eggs, hummus, and fresh produce, you’ll never run out of delicious combinations.

FAQs About Mediterranean Breakfasts

What is a traditional Mediterranean breakfast?

A traditional Mediterranean breakfast often includes simple, fresh foods such as bread with olive oil, cheese, olives, fruit, and yogurt. In some regions, eggs, tomatoes, and herbs are added too. The focus is always on whole, minimally processed ingredients.


What do Mediterraneans eat for breakfast?

It varies by country, but common choices include Greek yogurt with honey and nuts, pan con tomate (Spanish tomato toast), Turkish menemen (eggs with tomatoes and peppers), or just fresh fruit with bread and olive oil.


Can you eat eggs on the Mediterranean diet?

Yes, absolutely. Eggs are a healthy source of protein and are widely used in Mediterranean breakfasts—think omelets with herbs, shakshuka, or simply boiled eggs with olives and bread.


What is a good Mediterranean breakfast for weight loss?

A weight-loss-friendly Mediterranean breakfast combines protein, fiber, and healthy fats. Examples include Greek yogurt with fruit and nuts, avocado toast with vegetables, or oatmeal topped with seeds and olive oil. These keep you full and satisfied without excess calories.


What are examples of Mediterranean breakfasts without eggs?

Great egg-free options include Greek yogurt bowls, hummus and veggie toast, chia pudding with almond milk, or oatmeal with figs and olive oil. They’re just as filling and perfectly aligned with the Mediterranean diet.

Conclusion

A Mediterranean breakfast can be as simple as bread with olive oil or as hearty as shakshuka bubbling away on the stove. What makes it special is the balance of fresh ingredients, healthy fats, and vibrant flavors.

Whether you’re after something traditional, diet-friendly, egg-free, or quick and easy, there’s a Mediterranean breakfast waiting to brighten your morning. So why not bring a little sunshine from the Mediterranean coast to your own kitchen tomorrow? 🌿🍅🥖

If you’d like to dive deeper, the Cleveland Clinic offers an excellent overview of the Mediterranean diet food list and benefits.

Posted on 5 Comments

Foods that Worsen Acid Reflux and Heartburn

Foods That Worsen ACID REFLUX and HEARTBURN

Do you ever feel a burning sensation in your chest after a meal, or wake up at night with acid in your throat? You’re not alone. Acid reflux and heartburn affect millions worldwide, but with a little know-how, you can take control—starting with what’s on your plate.


Why Does Acid Reflux Happen?

Acid reflux occurs when stomach acid flows backward into the esophagus, irritating its lining. The most common culprit? The lower esophageal sphincter (LES)—a muscular “gate” that should keep acid in the stomach, but sometimes relaxes or weakens. What you eat (and when you eat it) plays a major role.


The Usual Suspects: Foods That Commonly Trigger Reflux

Let’s get straight to it. The following foods and beverages have been consistently linked—by recent research and digestive health experts—to increased heartburn and reflux:

1. High-Fat & Fried Foods

  • Examples: Fried chicken, pizza, creamy sauces, cheeseburgers, pastries, chips.
  • Why They’re a Problem: High-fat meals slow down your stomach’s emptying and relax the LES, making it easier for acid to escape upward.
  • Pro Tip: Choose baked or grilled options, and go easy on added oils and dressings.

2. Spicy Foods

  • Examples: Hot sauce, chili peppers, curries, wasabi, salsas.
  • Why They’re a Problem: Spicy ingredients—like capsaicin—can irritate the esophagus and further relax the LES.
  • Pro Tip: If you crave heat, experiment with herbs or milder spices that don’t bother your stomach.

3. Citrus Fruits & Juices

  • Examples: Oranges, lemons, limes, grapefruits, tomato-based sauces, orange juice.
  • Why They’re a Problem: These are highly acidic, directly irritating your esophagus.
  • Pro Tip: Opt for lower-acid fruits like bananas, apples (not green apples), and melons.

4. Chocolate

  • Why It’s a Problem: Contains methylxanthine, which can relax the LES. Even small amounts may trigger reflux for some.
  • Pro Tip: If chocolate is a must, choose a small portion after a meal, not on an empty stomach.

5. Caffeinated Drinks

  • Examples: Coffee, some teas, energy drinks, cola.
  • Why They’re a Problem: Caffeine can lower LES pressure and increase acid production. Even decaf coffee may be problematic for some.
  • Pro Tip: Switch to non-caffeinated herbal teas (like ginger or chamomile) and limit coffee intake.

Do Read: Is Coffee Bad for Acid Reflux? Caffeine and Heartburn and for a take on Decaf, go here: Decaf Coffee and GERD: Is Decaf Coffee Better for Acid Reflux?

6. Alcohol

  • Examples: Wine, beer, cocktails, spirits.
  • Why It’s a Problem: Alcohol relaxes the LES and can directly irritate the digestive lining. Red wine and beer are common offenders.
  • Pro Tip: Limit alcohol, enjoy with food (not on an empty stomach), or choose mocktails.

7. Carbonated Beverages

  • Examples: Soda, sparkling water, beer, kombucha.
  • Why They’re a Problem: Bubbles increase stomach pressure and cause burping, which can push acid upward.
  • Pro Tip: Try flat water or lightly flavored, non-carbonated drinks.

In case you’re looking for some beverage options, please do read What to Drink for Acid Reflux and Heartburn Relief: Soothing Solutions That Work

8. Onion, Garlic, and Mint

  • Why They’re a Problem: These can relax the LES (especially raw onion and garlic) and are high in FODMAPs—a class of carbs known to aggravate symptoms in some people.
  • Pro Tip: Cook these ingredients thoroughly, use in moderation, or substitute with herbs like parsley or basil.

Also Read: Managing Acid Reflux: Foods to Avoid for a Soothing Digestive Experience


What Recent Research Says: Beyond the Obvious

Emerging research (2023–2025) points to some surprising truths and extra triggers:

Ultra-Processed Foods

Hidden acids, fats, and preservatives in fast food, chips, commercial dressings, and processed snacks can worsen reflux—even if they’re not spicy or fried.
Tip: Read labels, cook more at home, and watch for “vinegar,” “citric acid,” and added fats.

Large & Late Meals

Big portions stretch the stomach and increase acid production. Eating close to bedtime is linked to nighttime heartburn.
Tip: Eat smaller, more frequent meals. Aim for dinner at least 2–3 hours before lying down.

Diet Patterns Matter

Low-fiber diets and those high in red/processed meats are associated with more reflux symptoms.
Tip: Favor Mediterranean-style eating—lots of veggies, whole grains, lean proteins, and healthy fats.

Individual Triggers

What sets off reflux for one person may not bother another.
Tip: Keep a simple food and symptom diary for 2–3 weeks to spot your unique patterns.


So, What Can You Eat?

The good news: plenty! Most people tolerate these foods well:

  • Oatmeal, whole-grain bread, brown rice
  • Bananas, melons, apples (peeled), pears
  • Leafy greens, broccoli, asparagus, green beans, zucchini
  • Skinless chicken, fish, lean turkey, eggs (not fried)
  • Ginger (natural anti-inflammatory), fennel, parsley, basil
  • Non-citrus herbal teas (chamomile, licorice root, ginger)
  • Low-fat dairy (if tolerated; yogurt can be soothing)

Do Read: Ginger for Heartburn and Acid Reflux: Natural Relief or Digestive Myth?


Examples of Popular Foods & Their Relation to Acid Reflux

While the classic triggers like fried foods, caffeine, and citrus are well known, many people still have questions about everyday favorites that don’t always appear on “standard” reflux lists. Search data and patient experiences show that foods like mayonnaise, peanut butter, and popcorn often come up in conversations about heartburn and GERD. These items can be confusing because some people tolerate them well while others find they cause immediate discomfort.

To clear up the uncertainty, let’s take a closer look at how these specific foods may affect acid reflux, why reactions vary, and what practical swaps or adjustments can make them easier to enjoy.


Mayonnaise and Acid Reflux: Creamy Condiment or Hidden Trigger?

Many people wonder, “does mayonnaise cause acid reflux or heartburn?” The answer isn’t the same for everyone, but here’s what we know.

Mayonnaise is a high-fat condiment made primarily from oil, egg yolks, and often vinegar or lemon juice. The fat content is the biggest concern: fatty foods slow down digestion and relax the lower esophageal sphincter (LES) — the valve that keeps stomach acid where it belongs. When the LES relaxes, acid can escape upward, causing that familiar burning sensation.

Another factor is added acids like vinegar or lemon juice, which are common in mayo. These can further irritate an already sensitive esophagus. Store-bought mayonnaise may also contain preservatives and stabilizers, which can be problematic for some individuals with reflux.

That said, not everyone with GERD reacts to mayonnaise. Some people tolerate small amounts, especially reduced-fat or avocado-based mayonnaise, which contain less fat and may be easier on digestion.

Pro Tips:

  • If you suspect mayo is a trigger, try switching to low-fat versions or alternatives like hummus or mashed avocado.
  • Keep portion sizes small — a thin spread is less likely to cause trouble than a heaping spoonful.
  • Combine mayo with reflux-friendly foods (like whole-grain bread and lean turkey) rather than fatty meats or fried items.

👉 Key takeaway: Mayonnaise can trigger reflux in some people because of its fat and acidity, but moderation and substitutions can make a big difference.


Peanut Butter and Acid Reflux: Comfort Food or Silent Aggravator?

Another common question is, “is peanut butter bad for acid reflux or GERD?” This one is a little more complicated.

Peanut butter is nutrient-dense, packed with protein, fiber, and healthy fats. On paper, it seems like a good choice. However, the same fat content that makes it filling and nutritious can also be a reflux trigger for certain individuals. High-fat foods take longer to leave the stomach and can relax the LES, creating the perfect storm for acid reflux.

Research and clinical observations suggest that while peanut butter is not universally problematic, about 10% of people with mild reflux and up to 50% of those with severe reflux report it as a trigger. For some, even a small spoonful can lead to chest burning or regurgitation.

The type of peanut butter matters too. Smooth, unsweetened peanut butter is typically better tolerated than chunky or flavored varieties, which may contain added oils, sugar, or salt that worsen reflux. Natural almond or cashew butters, which tend to be lower in additives, may also be gentler options.

Pro Tips:

  • Stick to 1–2 tablespoons at a time, ideally paired with reflux-friendly foods (like apple slices or whole-grain toast).
  • Avoid peanut butter late at night, since lying down soon after a high-fat snack increases reflux risk.
  • If peanut butter consistently triggers you, try switching to almond butter, sunflower seed butter, or even a thin spread of hummus.

👉 Key takeaway: Peanut butter isn’t automatically “bad” for reflux. Many people tolerate it in moderation, but if you notice a connection, consider portion control or exploring alternatives.


Popcorn and Acid Reflux: Snack Attack or Safe Treat?

It’s a question many snack lovers ask: “can popcorn cause acid reflux or heartburn?” The answer depends on how it’s prepared.

Plain, air-popped popcorn is actually a low-fat, whole-grain snack that’s high in fiber and generally reflux-friendly. On its own, it’s unlikely to cause symptoms and can be a good option when you want something crunchy.

The problem comes when we dress it up. Movie-theater popcorn, microwave popcorn, and heavily buttered or seasoned popcorn can be loaded with fat, oils, salt, and artificial flavors — all of which can relax the LES and increase stomach pressure. For many people with GERD, this combination is enough to bring on a flare-up.

Another factor is portion size. Even plain popcorn, eaten in huge quantities, can stretch the stomach and trigger reflux. Moderation is key.

Pro Tips:

  • Choose air-popped popcorn and enjoy it plain or lightly seasoned with reflux-friendly herbs (like parsley or basil).
  • Skip heavy butter, cheese powders, or spicy toppings, which are common triggers.
  • Limit serving size to 2–3 cups at a time to avoid stomach over-distension.
  • Pair popcorn with a glass of still water or herbal tea rather than soda or alcohol.

To explore the topic further, we have more information available in this blog post here: Is Popcorn Safe for Acid Reflux, Heartburn, and GERD?

👉 Key takeaway: Popcorn itself is not inherently acidic or reflux-inducing. Air-popped, plain popcorn is usually safe, but buttery, greasy, or spicy varieties are more likely to cause problems.


Trigger FoodWhy It’s a ProblemGERD-Friendly Alternative
Fried chickenHigh fat, slows digestionGrilled chicken
MayoHigh fat + vinegarLow-fat or avocado mayo
Buttered popcornFat + oilsAir-popped, plain popcorn
Peanut butter (chunky, flavored)Added oils, sugarSmooth, natural peanut butter
Some popular foods that may trigger Acid Reflux & their Alternatives

Real-Life, Practical Tips for Managing Acid Reflux

1. Personalize Your Plate

There’s no universal “no-no” list. Track what you eat and how you feel. Adjust as needed—don’t deprive yourself based on generic lists.

2. Eat Mindfully

Chew slowly, don’t rush meals, and avoid overeating. Sit upright for at least 30–60 minutes after eating.

3. Elevate Your Head

If nighttime reflux is a problem, raise the head of your bed by 6–8 inches, or use a wedge pillow.

4. Rethink Drinks

Limit carbonated and caffeinated beverages, and be careful with cocktails. Hydrate mostly with still water and herbal teas.

5. Move, Don’t Nap

Stay active after meals—light walking helps digestion. Wait at least 2–3 hours after eating before lying down.

6. Seek Professional Advice

Persistent, severe, or new symptoms? See a doctor or gastroenterologist. Dietitians can help create a plan tailored to you.

Do read What Foods Neutralize Stomach Acid Immediately?


Sample One-Day Acid Reflux-Friendly Meal Plan

MealMenu Example
BreakfastOatmeal with banana and a splash of almond milk
SnackApple slices with a tablespoon of almond butter
LunchGrilled chicken with quinoa, roasted green beans
SnackNon-citrus herbal tea, handful of unsalted almonds
DinnerBaked salmon, steamed broccoli, brown rice
EveningMelon cubes (if needed)
One-Day Acid Reflux-Friendly Meal Plan

The Takeaway: Find Your Balance

You don’t need to give up all your favorites forever. Small, sustainable changes—swapping out known triggers, eating smaller meals, and being mindful of timing—can make a big difference. Use the latest science as a guide, but trust your own experience above all.

Also Read: Baking Soda for Heartburn, Acid Reflux, & GERD

Your journey to a happier gut starts with what’s on your fork. Make it count—one meal at a time.


Got a question, a stubborn symptom, or a favorite reflux-friendly recipe? Share your thoughts below! Your story could help someone else find relief.


FAQs

1. What are the most common foods that cause acid reflux?
The most common triggers are high-fat and fried foods, spicy foods, chocolate, caffeine, alcohol, citrus fruits and juices, tomato-based products, carbonated beverages, and mint. These foods can relax the lower esophageal sphincter (LES) or increase stomach acidity, making reflux more likely.

2. Does mayonnaise cause acid reflux or heartburn?
Mayonnaise can trigger reflux in some people because of its high fat content and added acids like vinegar or lemon juice. These factors can relax the LES and irritate the esophagus. Low-fat or avocado-based mayonnaise may be easier to tolerate, but if you notice symptoms after eating mayo, it’s best to limit or substitute it.

3. Is peanut butter bad for GERD?
Not always. Peanut butter is high in healthy fats and protein, which makes it nutritious but also slower to digest. For some people, this can relax the LES and cause reflux. Smooth, unsweetened peanut butter is often tolerated better than chunky or flavored varieties. If peanut butter bothers you, try almond butter, sunflower seed butter, or smaller portions.

4. Can popcorn cause acid reflux?
Plain, air-popped popcorn is usually safe for people with reflux. The problem arises with buttered, oily, or heavily seasoned popcorn, which can increase symptoms. Portion size also matters—eating a very large bowl can stretch the stomach and trigger reflux. For a reflux-friendly option, choose air-popped popcorn with light, non-spicy seasoning.

5. Is coffee always a problem for people with heartburn?
Not always. Some people tolerate coffee (even regular) just fine, while others get symptoms from even decaf. If you notice heartburn after coffee, try limiting intake, switching to herbal teas, or drinking coffee with food instead of on an empty stomach.

6. Are there any “safe” fruits for people with acid reflux?
Yes. Bananas, melons, apples (peeled), and pears are generally well-tolerated by most people with reflux. Avoid citrus fruits like oranges, lemons, and grapefruits, as they are acidic and more likely to cause symptoms.

7. Can drinking milk help with heartburn?
It depends. Low-fat or nonfat milk may soothe symptoms for some, but full-fat dairy can worsen heartburn. Yogurt with live cultures may help, but tolerance varies. Test small amounts to see how your body reacts.

8. How can I prevent nighttime acid reflux?
Eat dinner at least 2–3 hours before lying down, elevate the head of your bed by 6–8 inches, avoid late-night snacks, and sleep on your left side if possible. These strategies reduce acid backing up into the esophagus during sleep.

9. Are spicy foods always off-limits?
Not necessarily. Some people handle moderate spice without symptoms. If you notice burning or discomfort after eating spicy foods, try milder options or reduce the amount until you find your personal threshold.

10. What should I eat when I have a heartburn flare-up?
Choose bland, low-acid, and non-fatty foods like oatmeal, bananas, toast, steamed vegetables, lean proteins (chicken, fish), and non-citrus herbal teas. Avoid known triggers until symptoms calm down.

11. Are there specific diets proven to help acid reflux?
Mediterranean-style and high-fiber diets have been shown to reduce reflux symptoms in research. Plant-based diets are also helpful for many people. Low-fat, low-acid, and whole-food approaches are best.

12. Do carbonated drinks always cause acid reflux?
Not always, but carbonated drinks (soda, sparkling water, beer) can increase stomach pressure and make symptoms worse for many people. Try non-carbonated beverages and see if your symptoms improve.

13. When should I see a doctor about my heartburn?
If you have heartburn more than twice a week, if symptoms persist despite dietary changes, or if you have trouble swallowing, unexplained weight loss, vomiting, or black stools, see a doctor. These may signal more serious conditions that need medical attention.