Posted on Leave a comment

Peanut Butter Rice Crispy Treats

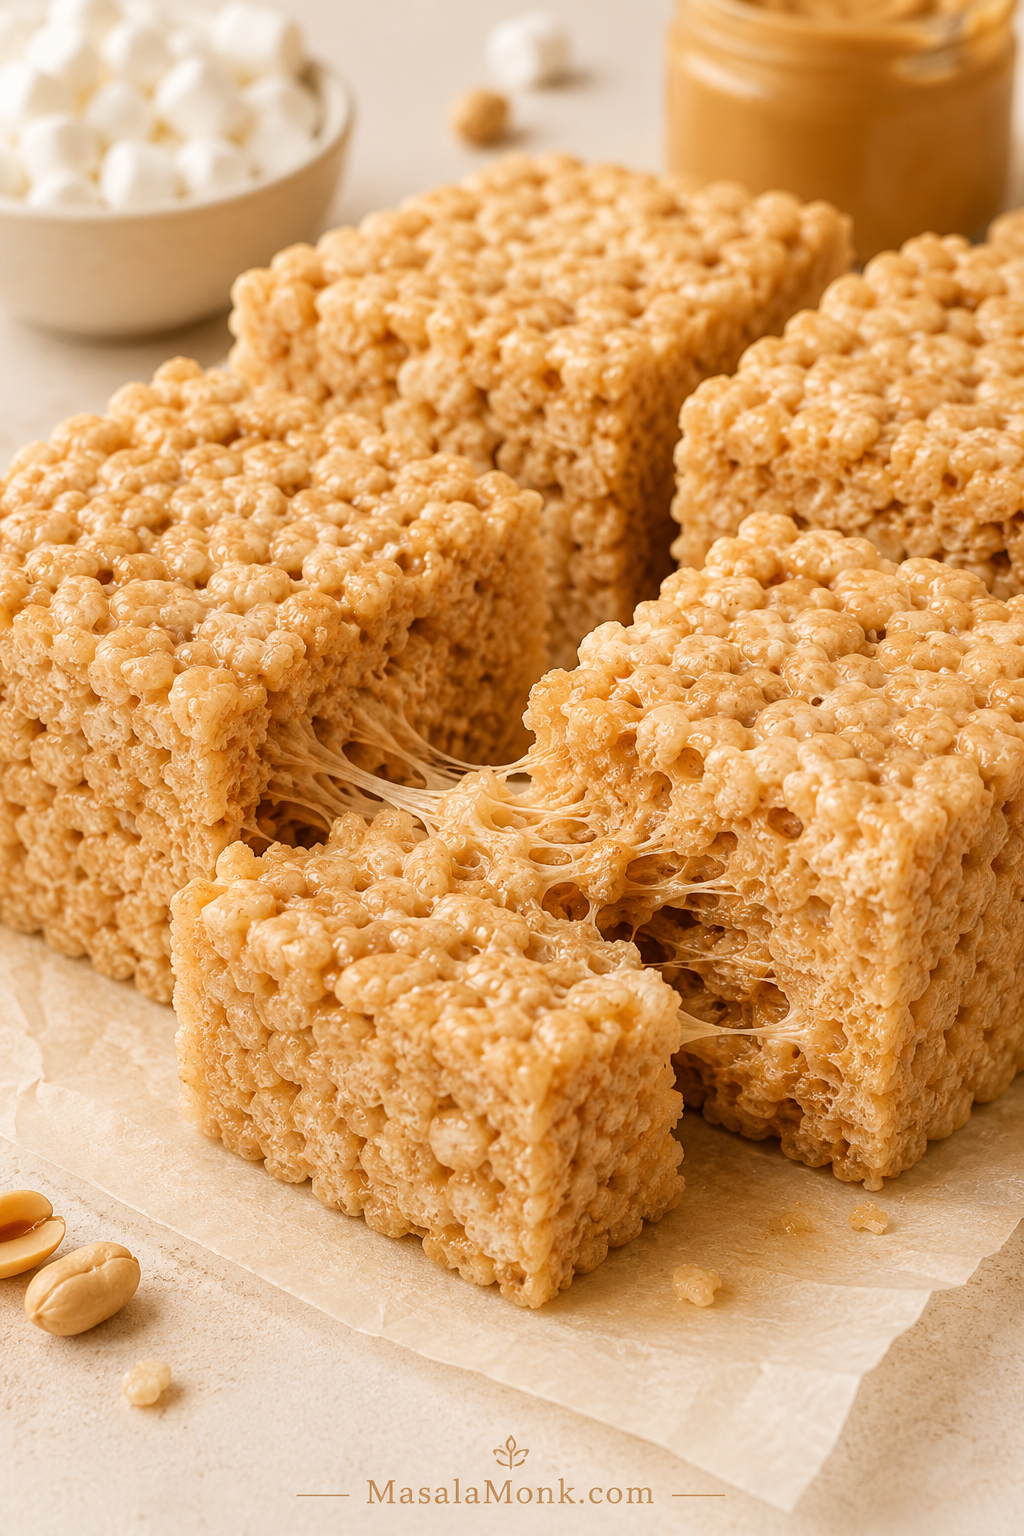
Thick peanut butter rice crispy treats cut into squares, with one piece pulled apart to show marshmallow strands and crisp cereal texture.

These peanut butter rice crispy treats are soft, chewy, salty-sweet no-bake bars with creamy peanut butter melted into the marshmallow mixture and a crisp cereal bite in every square. They taste nostalgic, but the peanut butter makes them richer and more satisfying than the plain version.

The best ones pull apart with soft marshmallow threads, hold their shape when you pick them up, and still have that little crackly bite from the cereal. They should feel homemade and tender, not hard, dry, greasy, or packed down like a brick.
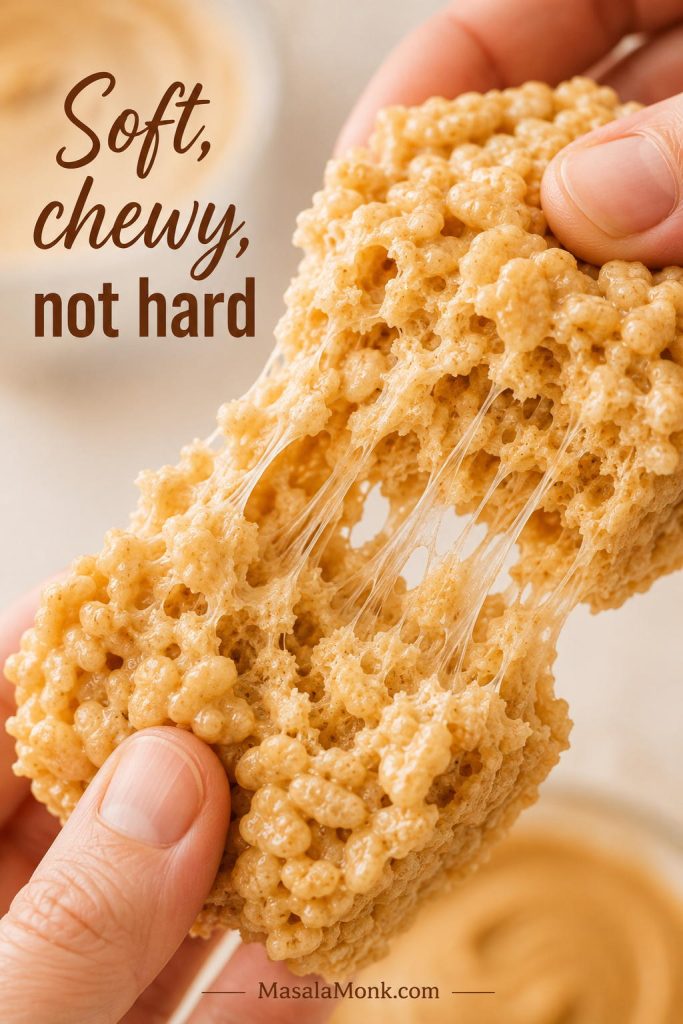
Close-up of a hand pulling apart a soft peanut butter rice crispy treat with marshmallow threads and airy cereal pieces.
If the square bends and pulls instead of snapping, the marshmallows were melted gently and the pan was pressed with a light hand.

This is the kind of pan that disappears in uneven little cuts: one square for a lunchbox, one for the potluck tray, one warm corner piece while the bars are still setting, and then “just one more sliver” later in the afternoon.

You may know these as peanut butter Rice Krispie treats, but Rice Krispies cereal is not the only option. Any fresh crisp rice cereal works as long as the marshmallow mixture stays gentle, glossy, and well balanced.

This version is built around one goal: peanut butter rice crispy treats that stay soft instead of turning stiff. The details are small but important: low heat, fresh marshmallows, the right cereal range, and a light hand when pressing the mixture into the pan.

Quick Answer: How to Make Soft Peanut Butter Rice Crispy Treats

For soft peanut butter rice crispy treats, melt 5 tablespoons butter over low heat, add most of a 16-ounce bag of mini marshmallows, then stir in ½ cup creamy peanut butter, vanilla, and salt. Fold in 5½ to 6 cups crisp rice cereal, press the mixture lightly into a lined 9×9-inch pan, and cool before slicing.
Quick formula board for peanut butter rice crispy treats showing 5 tablespoons butter, 16 ounces marshmallows, 1/2 cup peanut butter, 5 1/2 to 6 cups cereal, vanilla, salt, and a lined 9x9 pan.
This quick formula keeps the base recipe easy to remember, while the cereal range lets you choose a softer or cleaner-cut pan.

For softer, gooier bars, use 5½ cups cereal and fold in reserved mini marshmallows at the end. For cleaner-cut squares, use the full 6 cups cereal and let the pan cool completely. Not sure which texture you want? Use the texture chooser before you start.

The key is gentle heat and light pressing. Stop when the marshmallow mixture is glossy, not bubbling hard, and nudge the cereal mixture into the pan instead of packing it down. That is what keeps the bars soft instead of brick-like.
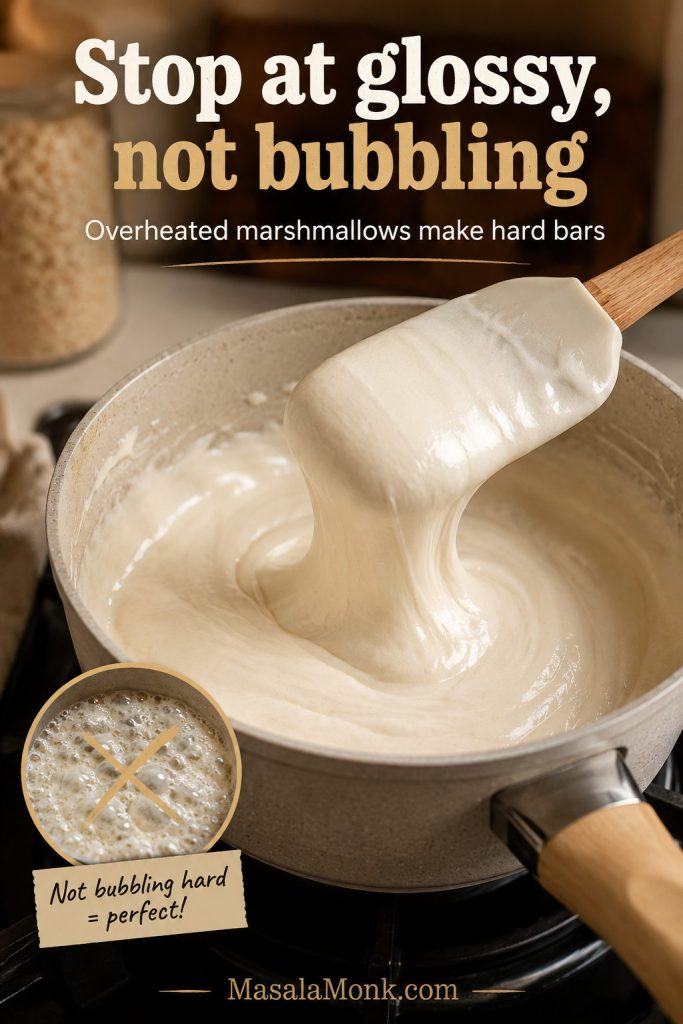
The move that keeps them soft: Melt the marshmallows gently, stop before the mixture bubbles hard, and fold reserved mini marshmallows in at the end. That gives you soft pockets instead of one dense, uniform chew. If your last batch turned stiff, check the troubleshooting guide.
Glossy melted marshmallows in a saucepan being lifted with a spatula before the mixture bubbles hard.
Stop at the glossy stage; once the marshmallows bubble hard, the finished treats are more likely to turn stiff.

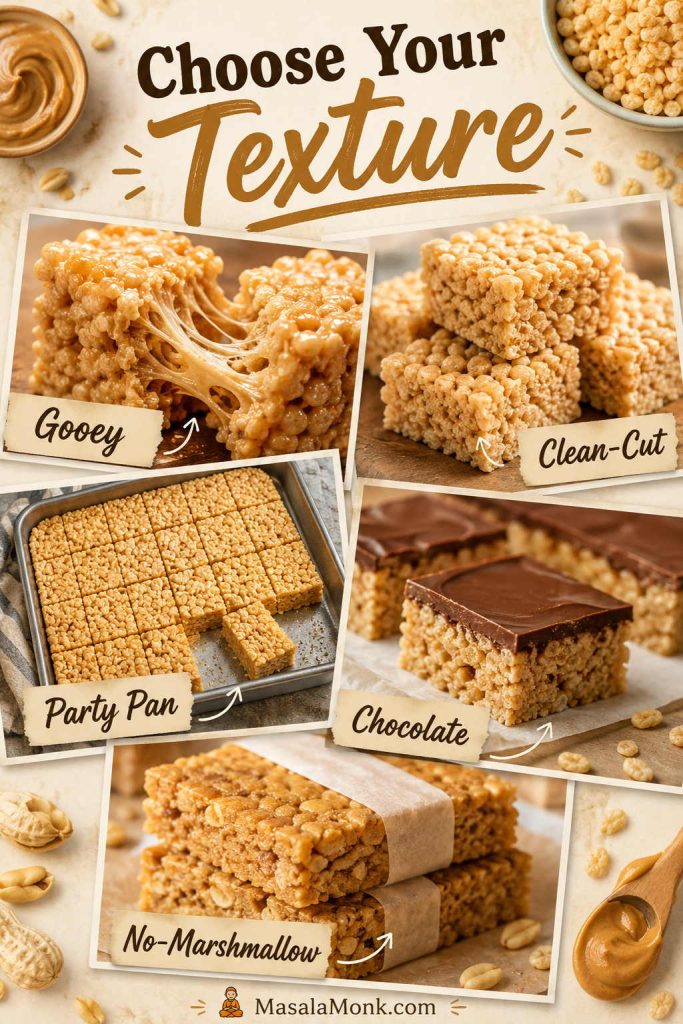
Choose Your Peanut Butter Rice Crispy Treats Texture

Before you start, decide what kind of treat you want from the pan. The same base recipe can turn soft and gooey for home, cleaner-cut for lunchboxes, chocolate-topped for dessert, party-ready in a 9×13 pan, or firmer and snack-bar-like without marshmallows.

What you want Best move Where to go
Softest, gooey bars Use 5½ cups cereal and fold in reserved mini marshmallows See the Ratio
Cleaner lunchbox squares Use 6 cups cereal and cool completely before cutting See the Ratio
Party tray Use the larger 9×13 pan scale instead of stretching the 9×9 batch Choose a Pan
Dessert-bar version Add the soft chocolate-peanut butter topping after the bars cool Add Chocolate
Firmer snack-bar style Use the peanut butter and honey or maple syrup version without marshmallows Skip Marshmallows
Chooser board with gooey, clean-cut, party pan, chocolate-topped, and no-marshmallow peanut butter rice crispy treat options.
Start by choosing the texture you want; then the cereal amount, pan size, and topping become much easier decisions.

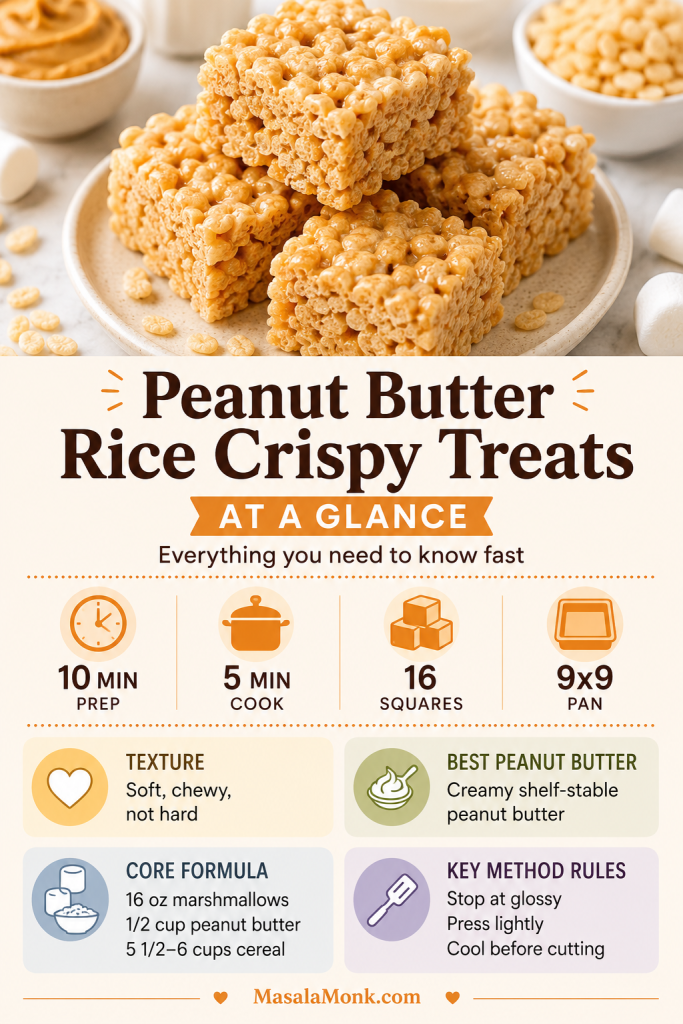
Peanut Butter Rice Crispy Treats at a Glance

Prep time 10 minutes
Cook time 5 minutes
Cooling time 30–45 minutes
Main pan 9×9-inch pan for thick bars
Party pan 9×13-inch pan for thinner squares
Yield 16 thick 9×9 squares, or about 24 thinner 9×13 party pieces
Texture Soft, chewy, lightly gooey, crisp around the cereal
Flavor Sweet-salty, peanut-buttery, marshmallowy
Best for Lunchboxes, bake sales, potlucks, parties, after-school snacks
Best peanut butter Regular creamy peanut butter
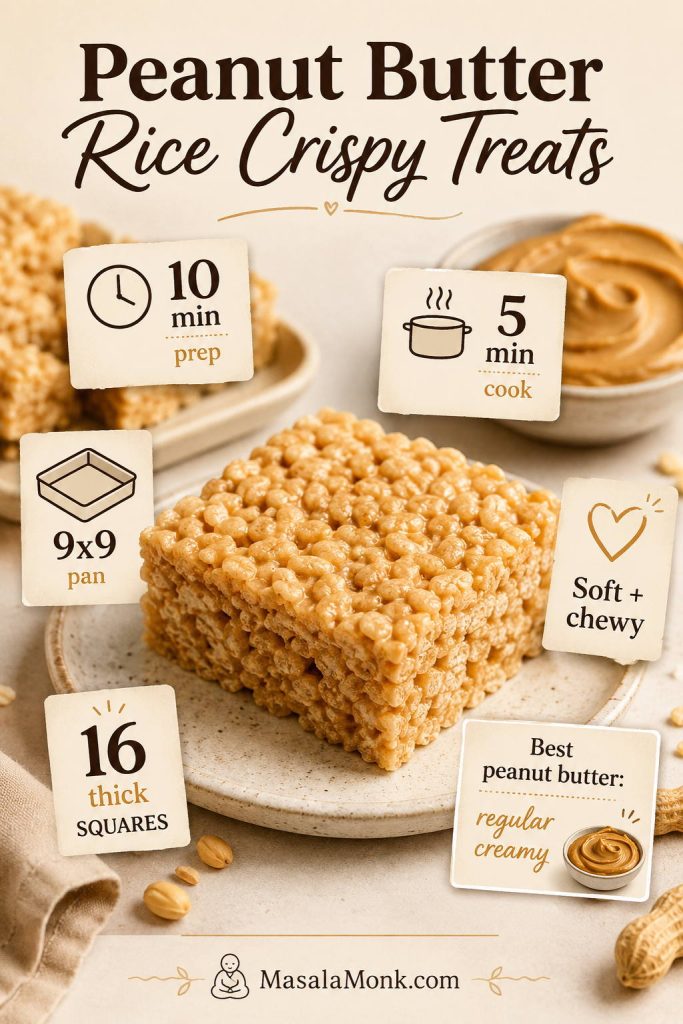
At-a-glance guide for peanut butter rice crispy treats showing prep time, cook time, yield, pan size, texture, core formula, and key method tips.
Use this quick at-a-glance guide to check the basic formula, 9×9 pan size, texture goal, and the key method rules before you start making peanut butter rice crispy treats.

Why These Peanut Butter Rice Crispy Treats Work

Peanut butter changes more than the flavor. It adds richness, saltiness, and body, so the bars taste fuller than plain marshmallow cereal treats. The tradeoff is that peanut butter also adds fat, which means the ratio matters: too much can make the bars greasy or heavy, while too little lets the peanut flavor fade into the marshmallow.

The balance is simple: enough marshmallow for pull, enough peanut butter for flavor, and just enough cereal to hold the bars together without making them stiff. You want a square that lifts cleanly from the pan but still bends a little when you bite it.

The peanut butter also keeps the sweetness from tasting one-note. Instead of plain marshmallow sweetness, you get a salty-sweet bar with deeper roasted peanut flavor, soft marshmallow pockets, and a crisp cereal bite.

The method matters too. Melt gently, stir the peanut butter in off the heat, fold without crushing the cereal, and press the mixture just enough to settle it into the pan. Think nudge, not pack.

Ingredients for Peanut Butter Cereal Bars

The ingredient list is short, so freshness matters. Soft marshmallows melt smoother, regular creamy peanut butter blends more reliably, and crisp cereal gives the bars that little crackle against the chewy marshmallow base.
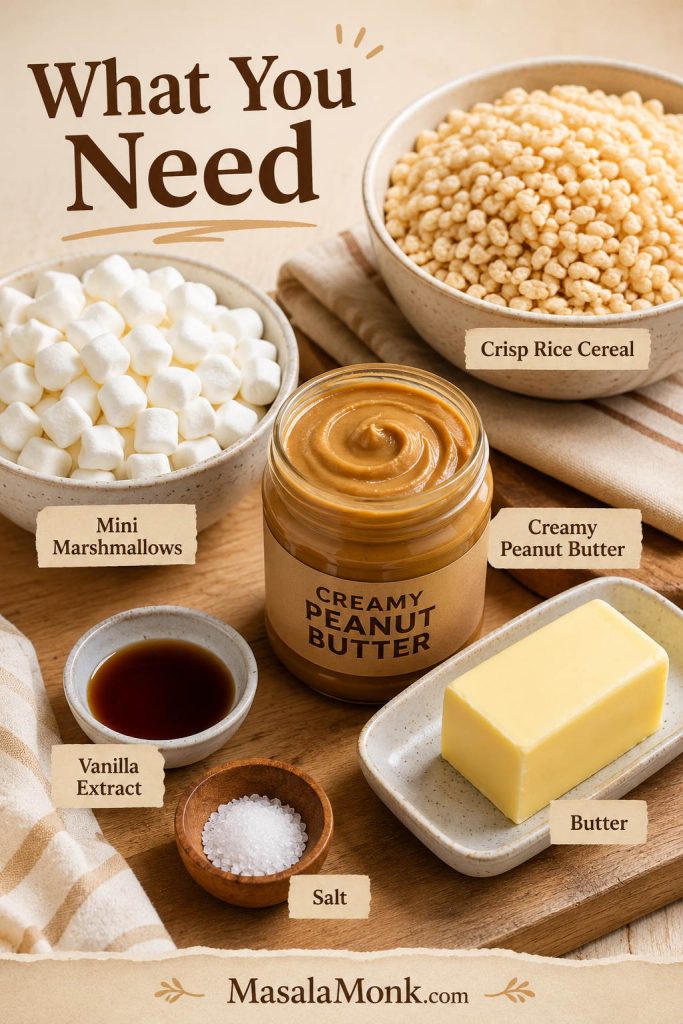
Ingredients for peanut butter rice crispy treats, including marshmallows, peanut butter, cereal, butter, vanilla, and salt.
Because there are so few ingredients, stale cereal or dry marshmallows show up quickly in the final texture.

Crisp rice cereal

Any fresh crisp rice cereal will work here. Rice Krispies cereal is the branded classic, and the official peanut butter treats formula also uses butter, marshmallows, peanut butter, and crisp rice cereal; however, this version is built for thicker 9×9 bars with more softness and troubleshooting. See the official Rice Krispies peanut butter treats baseline.

Freshness matters: if the cereal tastes stale from the box, the finished bars will taste flat too, no matter how good the peanut butter mixture is.

Cereal volume can vary by brand and by how you scoop it, so the recipe gives a small range. Stay at the lower end for a softer pan, or use the upper end when you want neater squares.

Mini marshmallows

Mini marshmallows melt faster and more evenly than large marshmallows. If they feel dry, firm, or stale in the bag, save them for something else. Fresh marshmallows melt smoother and give you softer, stretchier bars.
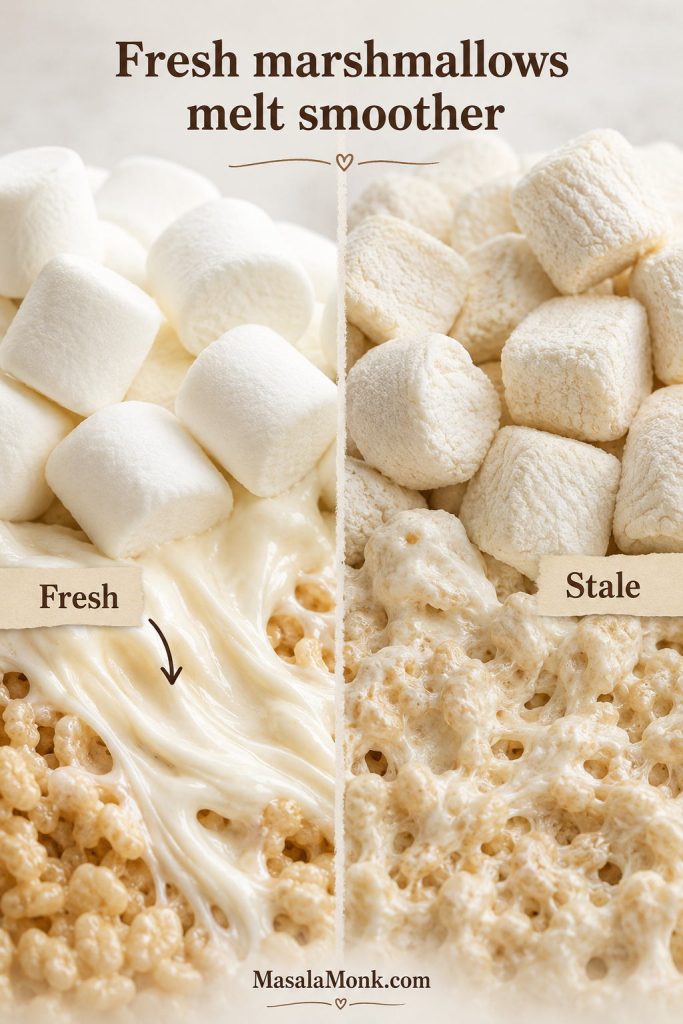
Fresh marshmallows compared with stale marshmallows for making rice crispy treats.
Fresh marshmallows should feel soft and springy in the bag; dry ones melt unevenly and can make the bars tighter.

For the softest texture, reserve 1½ to 2 cups of mini marshmallows from the bag and fold them into the warm cereal mixture at the end. They will stay partly intact and create little marshmallow pockets throughout the bars.

Large marshmallows

Large marshmallows work, but weight is more reliable than counting pieces. This recipe needs 16 ounces / 454 g marshmallows total. Large marshmallows melt more slowly than minis, so keep the heat low and stir patiently instead of increasing the heat.
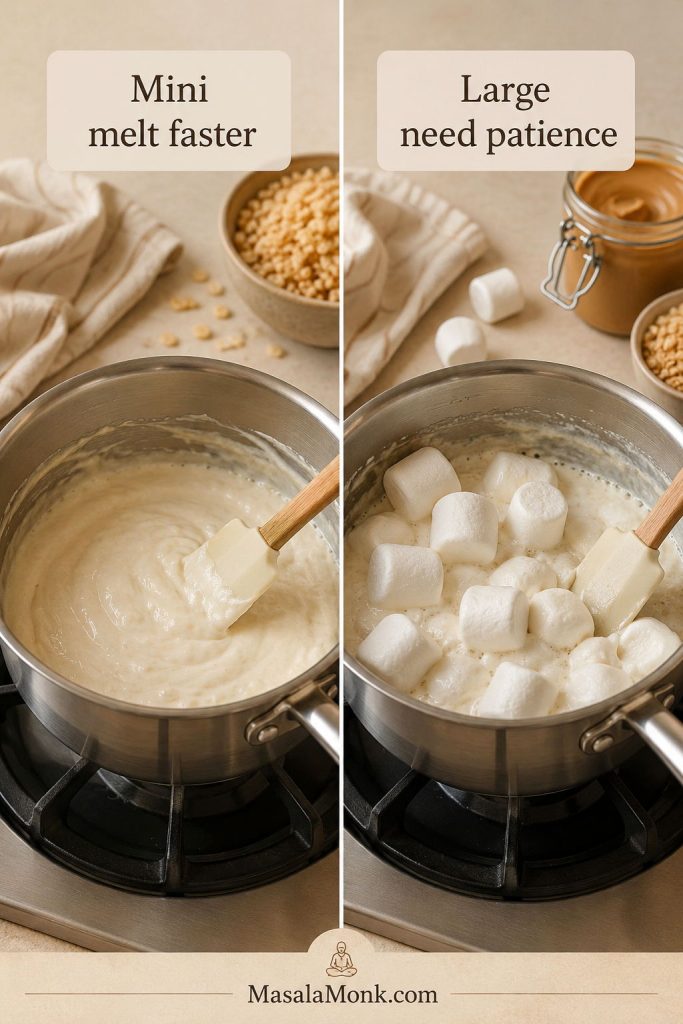
Mini marshmallows melting faster than large marshmallows in a side-by-side saucepan comparison.
Mini marshmallows melt faster and more evenly; however, large marshmallows still work if you keep the heat low and stir patiently.

Creamy peanut butter

Regular creamy peanut butter is the safest choice because it blends smoothly into the melted marshmallows and gives the bars a consistent texture. Natural peanut butter can work, but it is more likely to separate, which can make the bars oily, loose, or crumbly.

Butter, vanilla, and salt

Butter helps the marshmallows melt smoothly and gives the bars a rounder flavor. Salted butter works well because peanut butter loves salt. If you use unsalted butter, add fine salt to the mixture.

Vanilla is optional in the strictest sense, but it makes the bars taste more finished. It softens the marshmallow sweetness and brings the peanut butter flavor forward.

Gluten-free and dairy-free notes

Making these gluten-free mostly comes down to the cereal label. Some crisp rice cereals contain malt flavoring, and malt is often made from barley, so use a certified gluten-free crisp rice cereal if gluten matters in your kitchen. The Celiac Disease Foundation explains why many crispy rice treats are not automatically gluten-free.
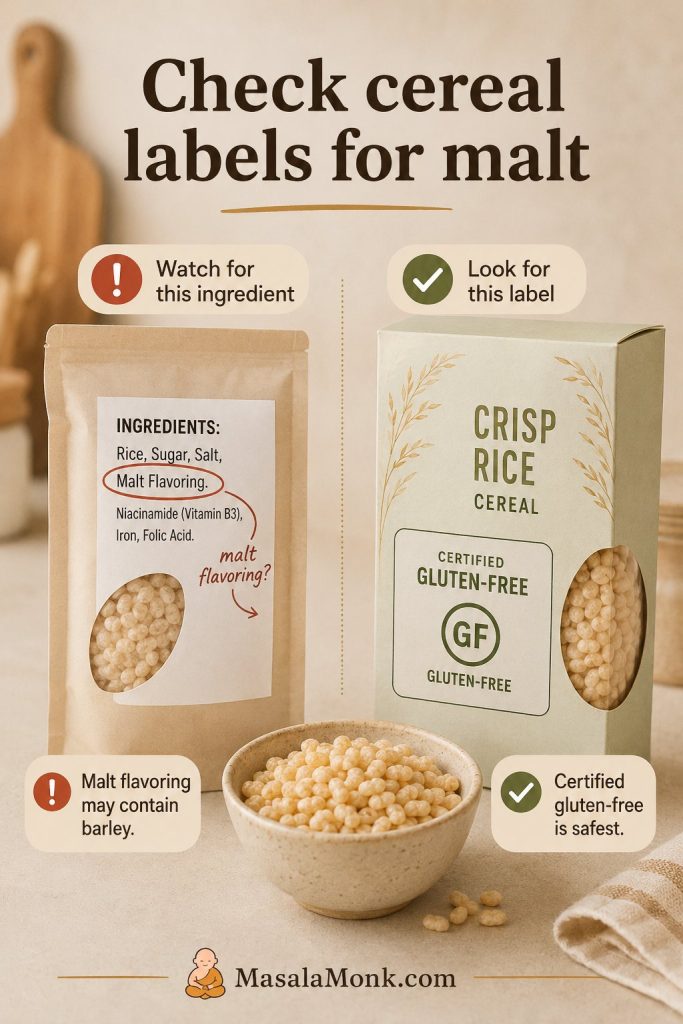
Crisp rice cereal label check showing malt flavoring as a warning and certified gluten-free cereal as the safer choice.
Check the cereal label first for gluten-free rice crispy treats because some crisp rice cereals include malt flavoring from barley.

Dairy-free bars need a dairy-free butter substitute and dairy-free chocolate if you are adding the topping. Vegan bars also need vegan marshmallows, or you can use the no-marshmallow peanut butter and maple syrup version below.

Best Peanut Butter to Use

Peanut butter is doing two jobs here: flavor and structure. A smooth, no-stir creamy peanut butter melts into the marshmallow base instead of fighting it, which is why it gives the most reliable bars.
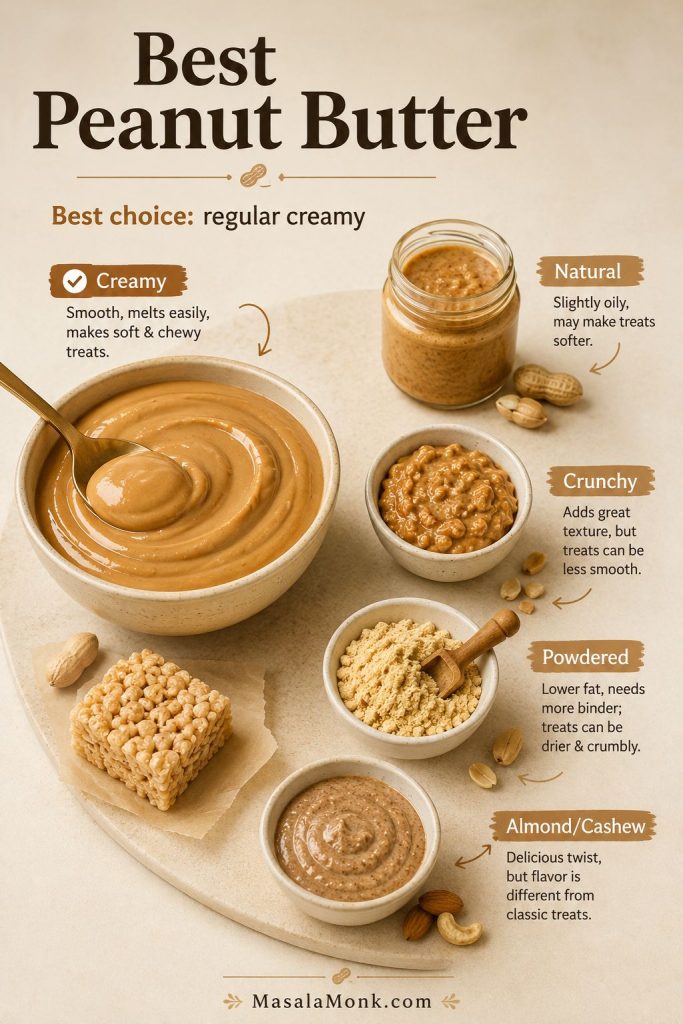
Peanut butter chooser board showing creamy, natural, crunchy, powdered, and almond or cashew butter options.
Choose no-stir creamy peanut butter for the smoothest set; separated natural peanut butter needs extra mixing before it goes in.
Peanut butter type Does it work? What to expect
Regular creamy peanut butter Best choice Melts smoothly into the base and gives the cleanest, softest set
Natural peanut butter Possible, but riskier Can separate and make the bars greasy, loose, or crumbly
Crunchy peanut butter Yes Adds peanut crunch, but the finished bars will not feel as soft and uniform
Powdered peanut butter Not recommended Can make the mixture dry unless the recipe is heavily adjusted
Almond or cashew butter Yes, as a variation Works as a variation, but the flavor and set will be different

If you only have natural peanut butter, stir it extremely well before measuring. If oil is sitting on top of the jar, the bars are more likely to turn greasy. For extra structure, use the full 6 cups of cereal instead of 5½ cups. If your bars already turned oily or loose, jump to the fixes.
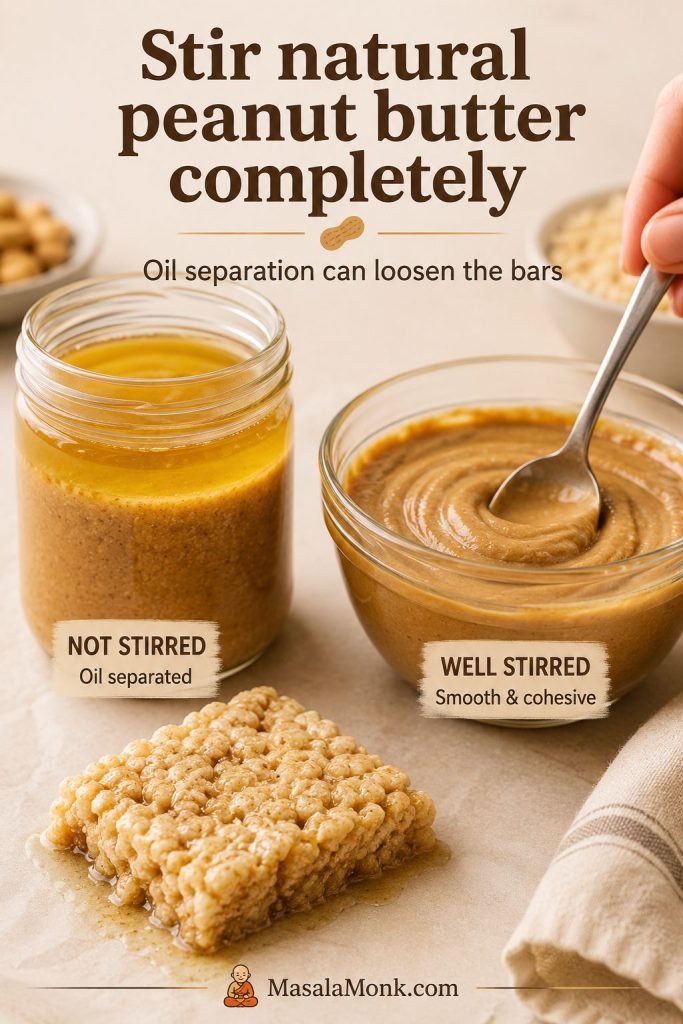
Separated natural peanut butter beside fully stirred peanut butter with a loose cereal bar texture cue.
Natural peanut butter can work, but it needs to be stirred completely smooth so the bars do not turn greasy or crumbly.

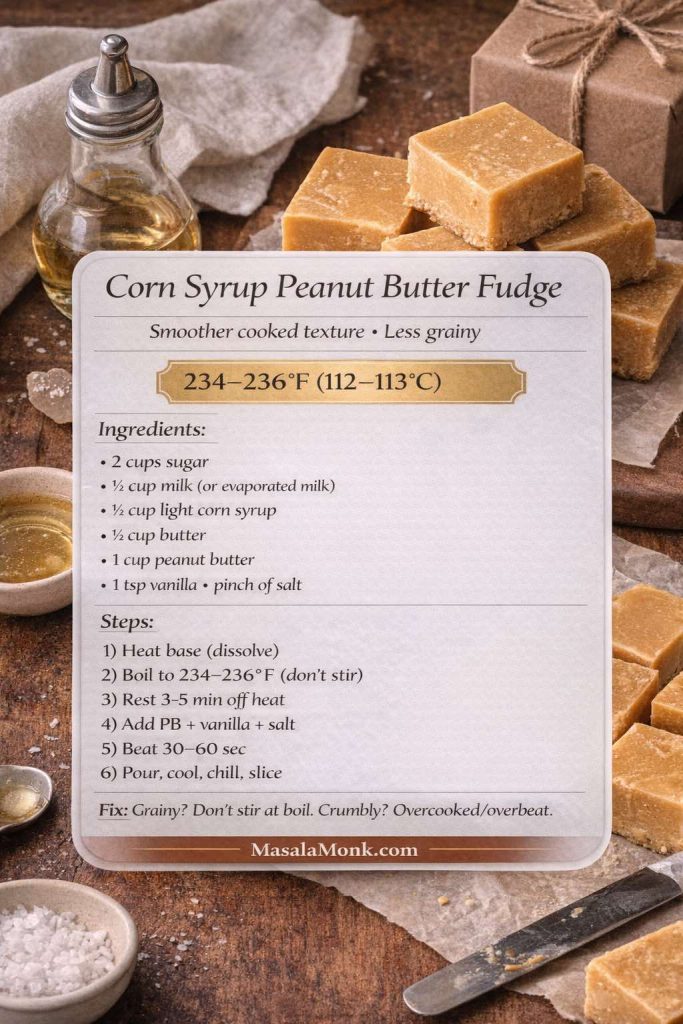
If peanut butter is the flavor you are here for, these peanut butter cookies are the baked, cookie-style route for the same salty-sweet craving.

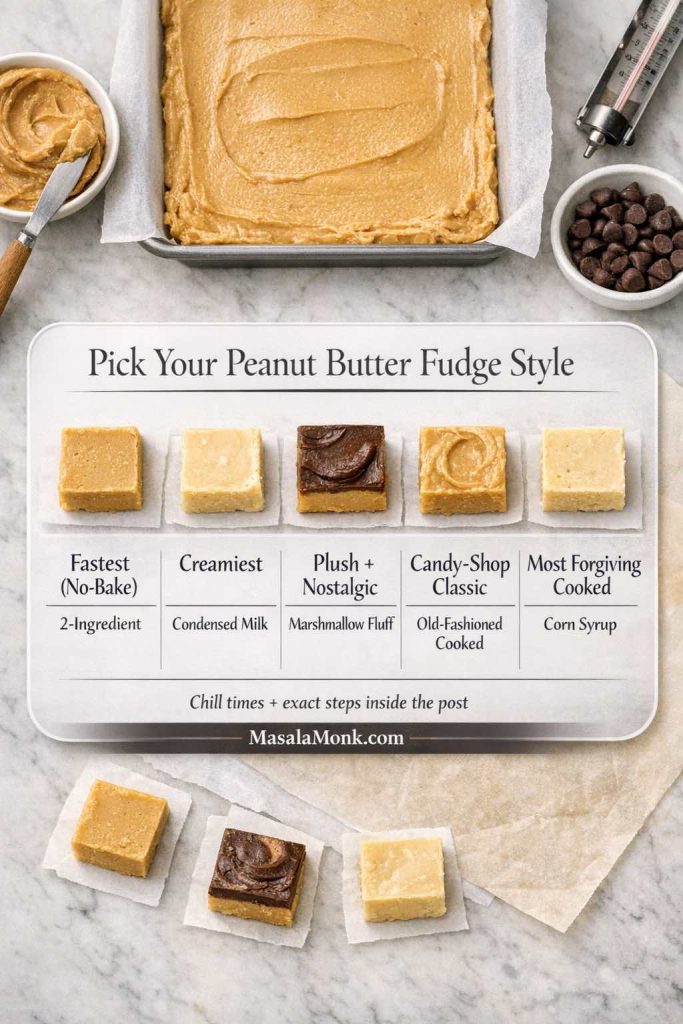
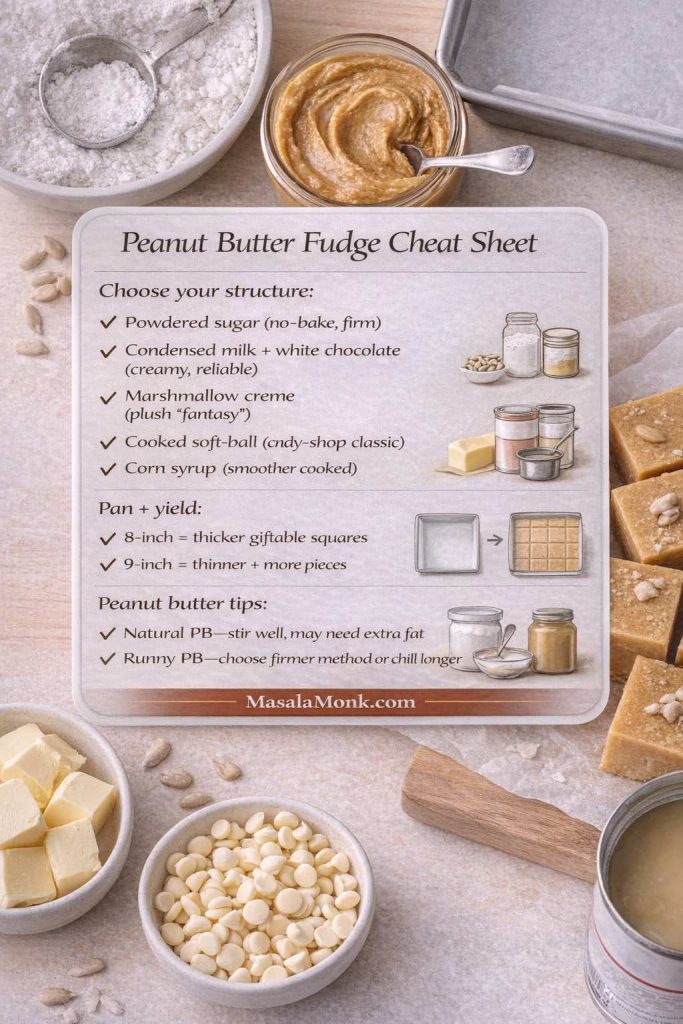
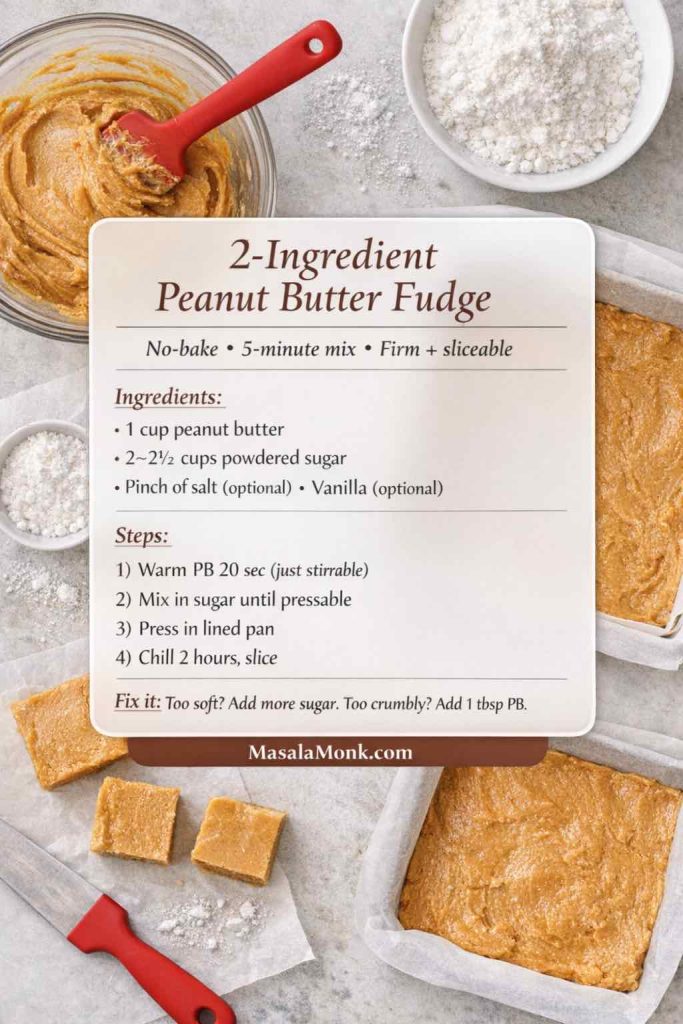
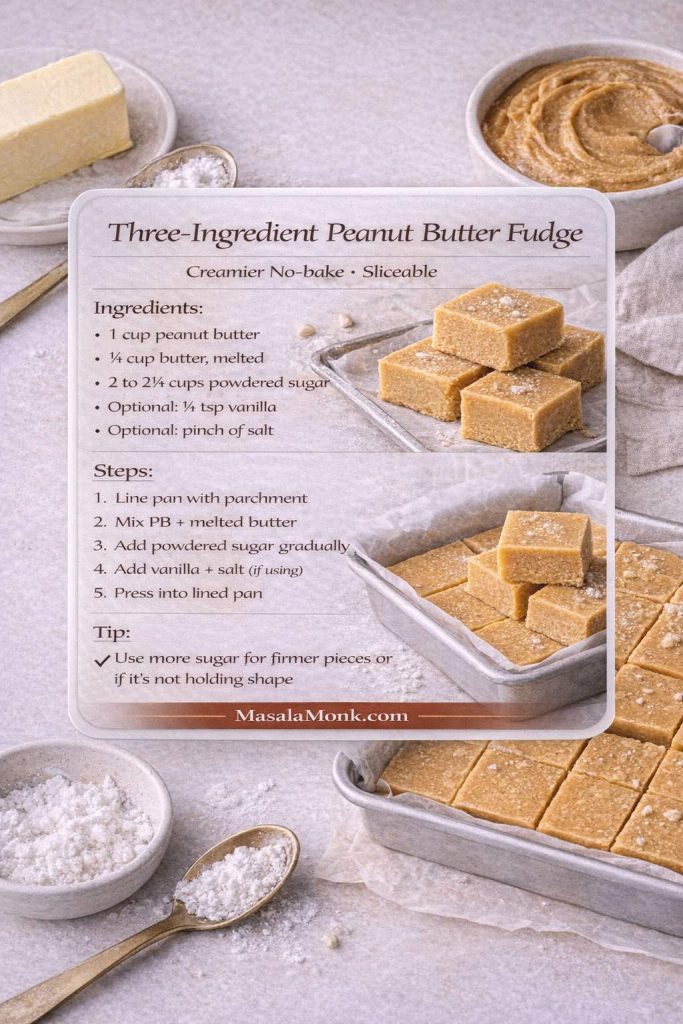
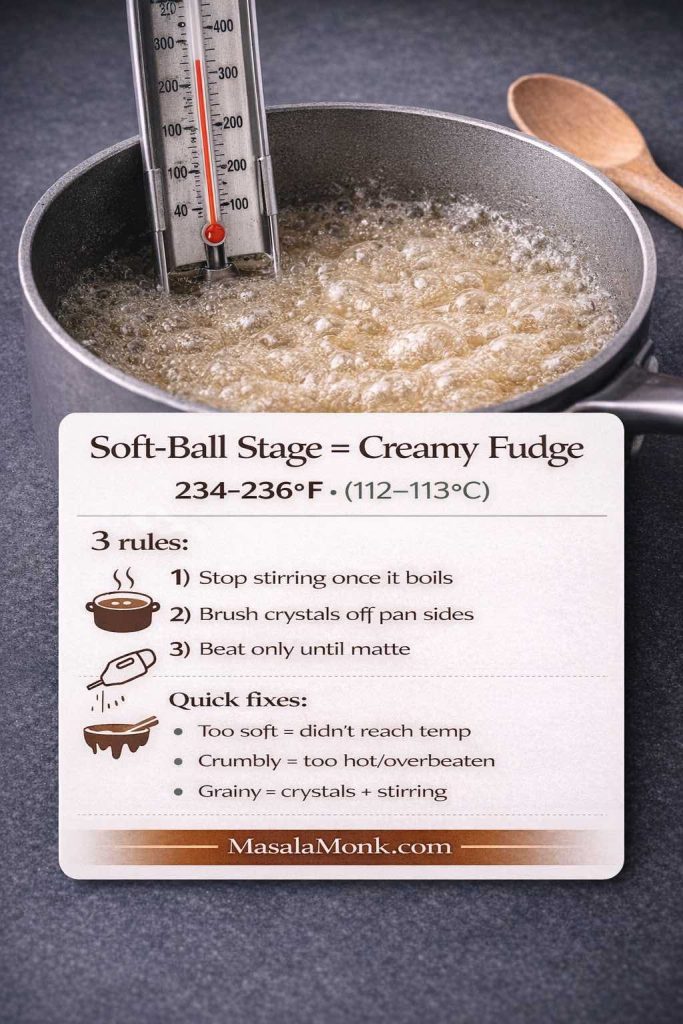
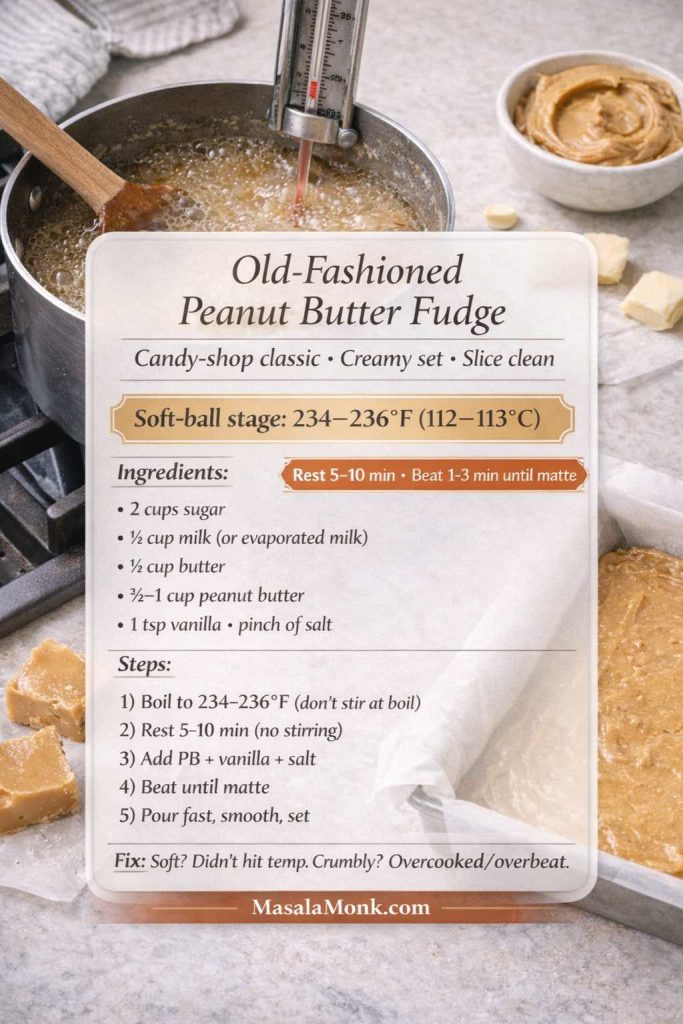
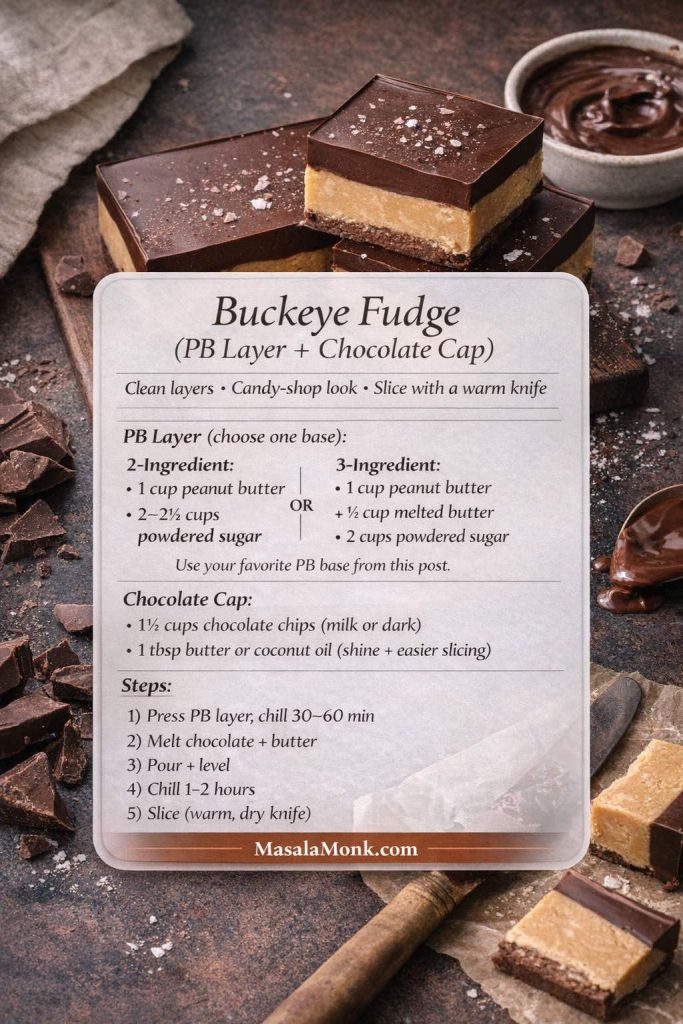
For a denser old-school peanut butter candy texture, this peanut butter fudge guide is the better next stop.

Best Ratio for Soft, Chewy Bars

Most hard, dry cereal bars are not really a cereal-brand problem. They happen when the binder gets stretched too far, the marshmallows get too hot, or the warm mixture gets packed down too firmly.

The goal is not just a sweet square. It is a bar that bends slightly when you bite it, tastes deeply peanut-buttery, and still has enough cereal crackle to keep it from feeling heavy.
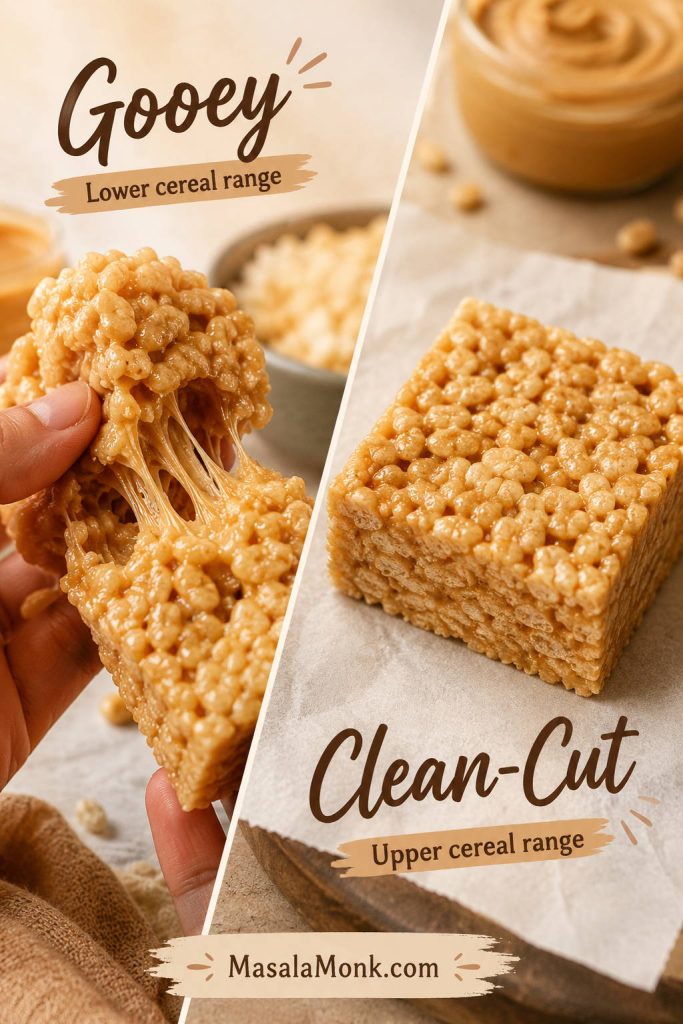
Comparison of a gooey peanut butter rice crispy treat beside a cleaner-cut square on parchment.
A lower cereal amount gives a softer, more marshmallowy bite, while the upper end holds better for lunchboxes and party trays.

This recipe uses a 9×9-inch pan as the main version because it gives thick, soft bars without making them too tall to bite. For thinner party bars, use the 9×13 scale below.

Main 9×9 ratio
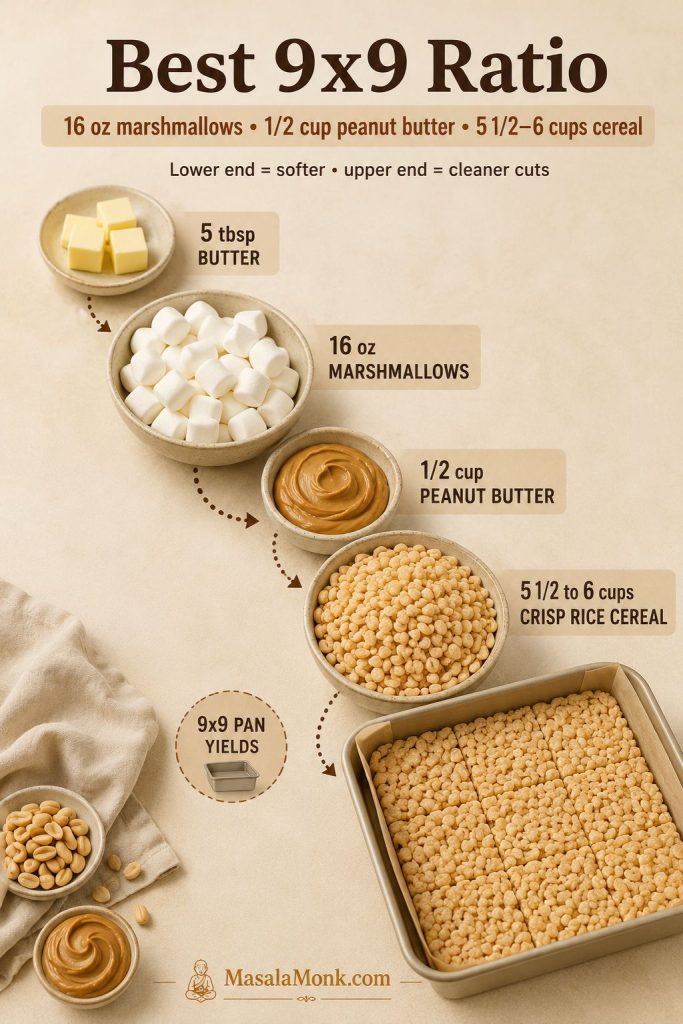
Ratio guide showing marshmallows, peanut butter, cereal, butter, and a 9x9 pan for peanut butter rice crispy treats.
The 9×9 ratio balances marshmallow pull, peanut butter flavor, and enough cereal structure for squares that hold together.
Ingredient US amount Metric amount Why it matters
Salted butter 5 tbsp 70 g Helps marshmallows melt smoothly and adds richness
Mini marshmallows 16 oz bag 454 g Creates the soft, chewy binder
Creamy peanut butter ½ cup 125–130 g Adds peanut flavor without making the bars greasy
Crisp rice cereal 5½–6 cups 155–170 g Use less for gooey bars, more for cleaner cuts
Vanilla extract 1 tsp 5 ml Rounds out the flavor
Fine salt, if using unsalted butter ¼ tsp 1–1.5 g Balances the sweetness
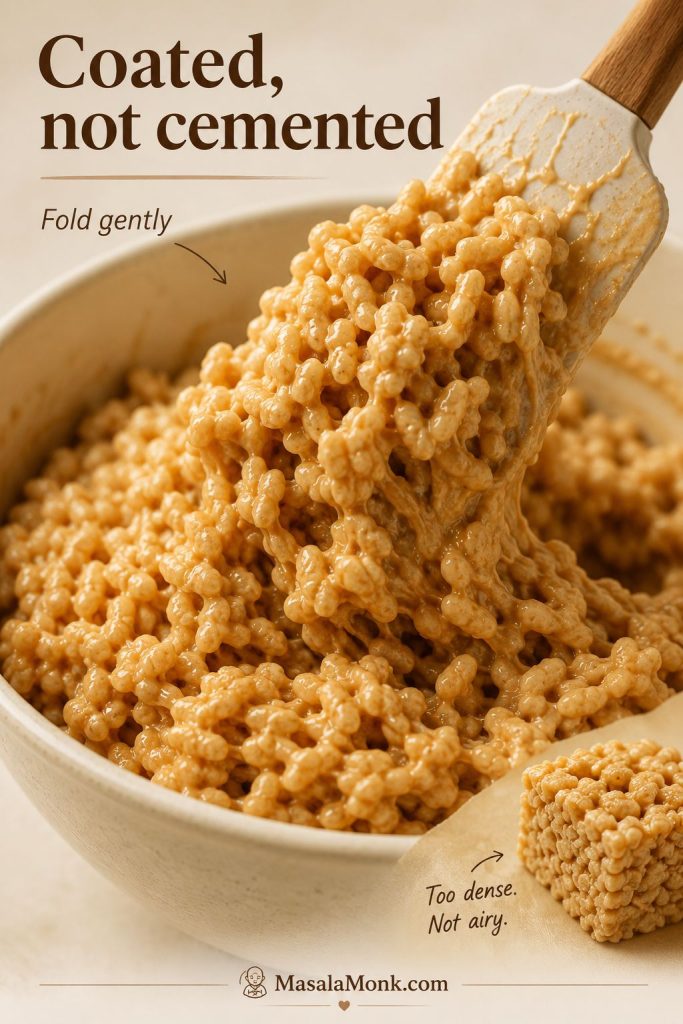
Ratio rule: The cereal should be fully coated but still loose enough to fold. If the mixture looks dry before it reaches the pan, do not fix it by pressing harder; use less cereal next time or melt the marshmallows more gently.
Cereal mixture being folded into marshmallow peanut butter base until coated but still airy.
The cereal should look coated and flexible, not cemented together, before it goes into the pan.

If you only make one version first, make the 9×9 pan with the softer cereal amount. It gives you the most classic pull-apart texture while still cutting cleanly enough for sharing.

Softer, gooier bars

For softer, gooier bars, go with 5½ cups cereal and reserve 1½ to 2 cups of mini marshmallows to fold in at the end. The bars will be a little stickier, but the texture is plush and marshmallowy.

Cleaner-cut squares

For cleaner-cut squares, use the full 6 cups cereal and let the pan cool completely before slicing. This version still tastes chewy, but it holds up better for lunchboxes, parties, and bake sales.

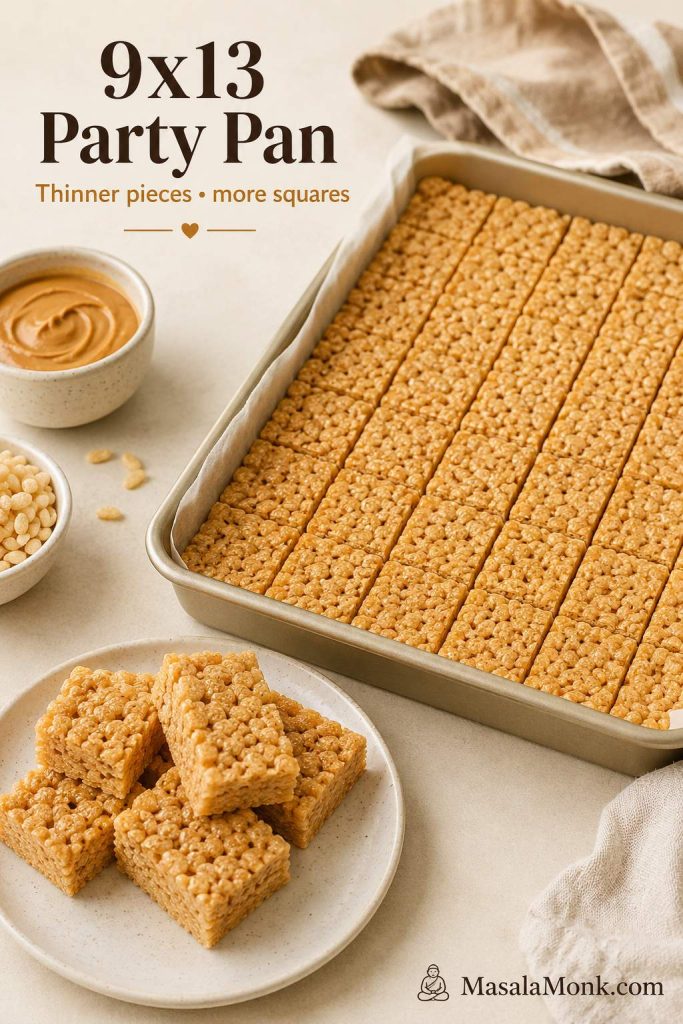
9×13 Party-Pan Scale for Peanut Butter Rice Crispy Treats

For potlucks, bake sales, and larger gatherings, use this 9×13-inch pan scale. It makes about 24 thinner squares, or more if you cut small party pieces. The full printable-style amounts are also included in the recipe card.

Do not simply spread the 9×9 recipe into a 9×13 pan unless you intentionally want very thin bars. The larger pan needs a larger batch.

Ingredient US amount Metric amount
Salted butter ½ cup / 8 tbsp 113 g
Mini marshmallows 20 oz 567 g
Creamy peanut butter 1 cup 250–260 g
Crisp rice cereal 8–8½ cups 225–240 g
Vanilla extract 1½–2 tsp 7.5–10 ml
Fine salt, if using unsalted butter ½ tsp 2–3 g
9x13 pan of peanut butter rice crispy treats cut into thinner party-size squares.
For a crowd, scale the recipe instead of stretching a smaller batch too thin; as a result, the pieces stay balanced and easy to serve.

Equipment You Need

You only need a 9×9-inch pan, parchment paper, a heavy-bottomed pot, and a silicone spatula for the main recipe. A kitchen scale helps with marshmallows and cereal, especially if you are using large marshmallows or a different cereal brand.

For the larger batch, use a 9×13-inch pan. For cleaner cuts, lightly grease your knife before slicing, especially if you added the chocolate topping.

How to Make Peanut Butter Rice Crispy Treats

This is a quick recipe, but it rewards a gentle hand. A few calm minutes over low heat are what keep the bars soft, stretchy, and easy to bite instead of stiff.

Once your ingredients are measured, the process moves quickly. Have the pan ready before you melt the marshmallows so the warm mixture can go straight in while it is still easy to shape.

The mixture will look messy at first, then suddenly turn glossy, stretchy, and smooth. That glossy stage is the signal to stop cooking, stir in the peanut butter, and move quickly before the cereal mixture cools and stiffens.

Before you start: Do not boil the marshmallow mixture, do not add extra cereal just because the mixture looks sticky, and do not press the bars firmly into the pan. Those three habits are the most common reasons crispy rice treats turn hard.

Step 1: Line and grease the pan

Line a 9×9-inch pan with parchment paper, leaving a little overhang so you can lift the bars out later. Then lightly grease the parchment, your spatula, and your hands before the marshmallow mixture starts getting sticky.
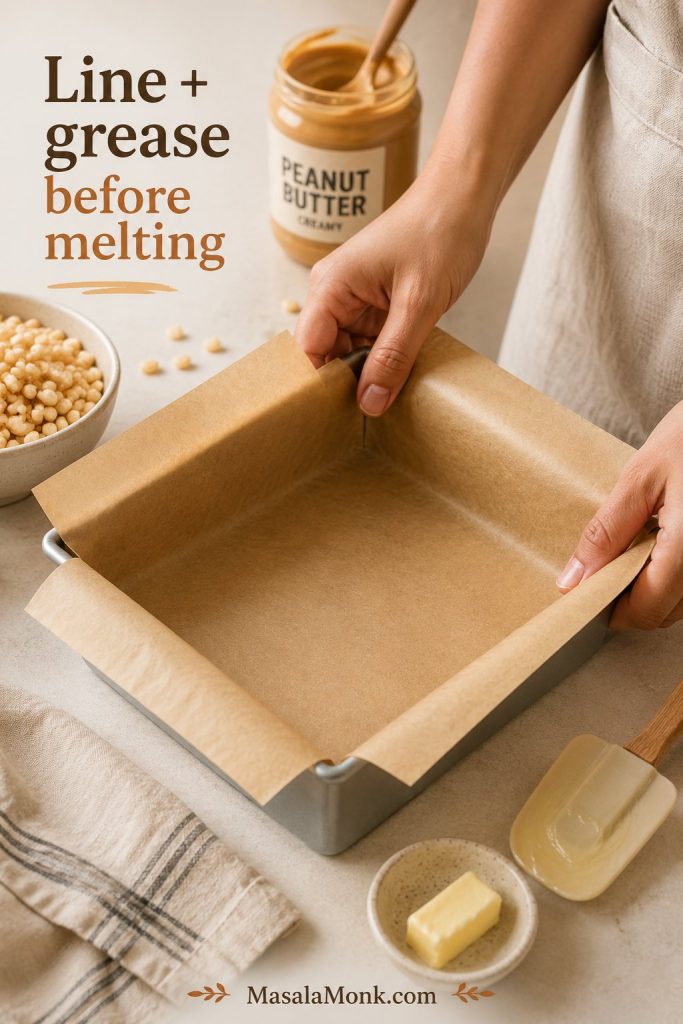
Hands lining a 9x9 pan with parchment paper before making peanut butter rice crispy treats.
Line and grease the pan before melting anything so the warm cereal mixture can go straight in while it is still flexible.

Step 2: Reserve mini marshmallows for soft pockets

Set aside 1½ to 2 cups of mini marshmallows from the 16-ounce bag before the pot goes on the heat. Because they are folded in at the end, they soften without disappearing completely.
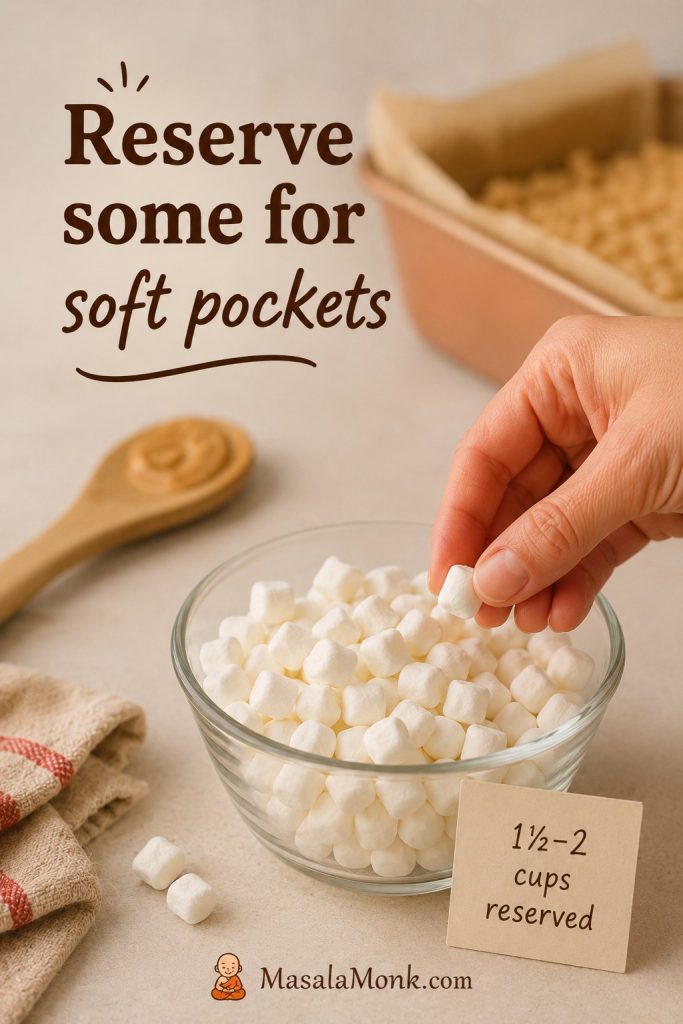
Mini marshmallows reserved in a bowl for folding into peanut butter rice crispy treats at the end.
Reserving some mini marshmallows creates soft pockets throughout the bars, which makes the texture feel more homemade.

Step 3: Melt the base until glossy

Melt the butter in a large heavy-bottomed pot over low to medium-low heat. Add the remaining marshmallows and stir until they are mostly melted, glossy, and stretchy. A few small lumps are fine, but stop before the mixture bubbles hard.

Remove the pot from the burner, then stir in the peanut butter, vanilla, and salt until the base looks creamy and smooth rather than oily or separated.
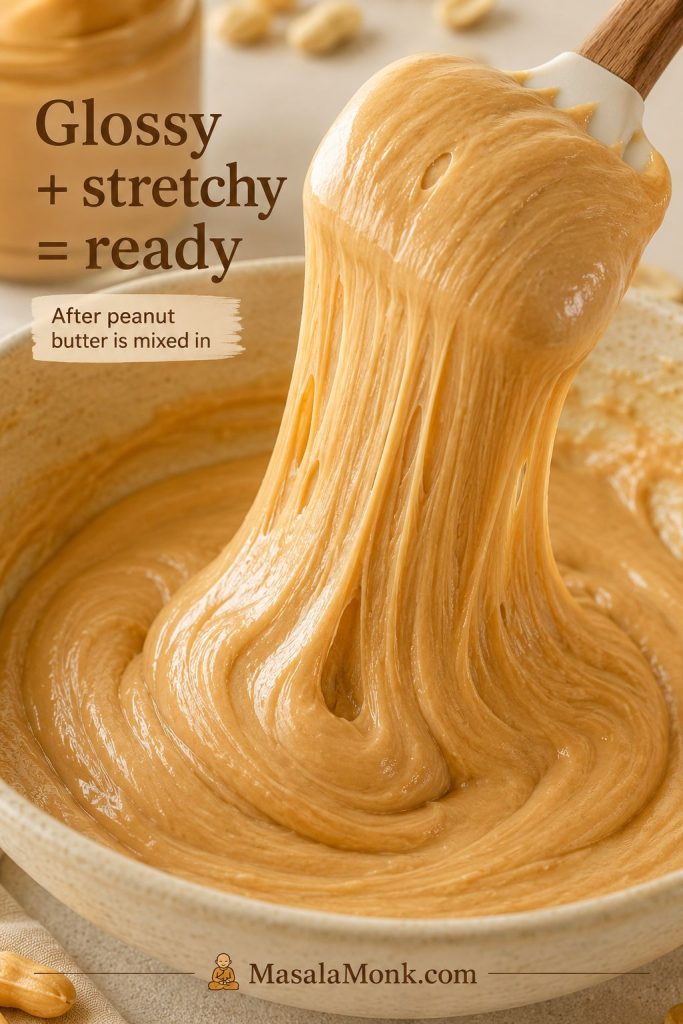
Glossy marshmallow peanut butter base stretching from a spatula before cereal is added.
When the base holds a glossy ribbon on the spatula, it is ready for cereal before it starts cooling and tightening.

Step 4: Add peanut butter off heat

This off-heat moment is important because peanut butter needs gentle residual warmth, not direct heat. Stir it into the marshmallow base after the pot comes off the burner so the mixture stays smooth.
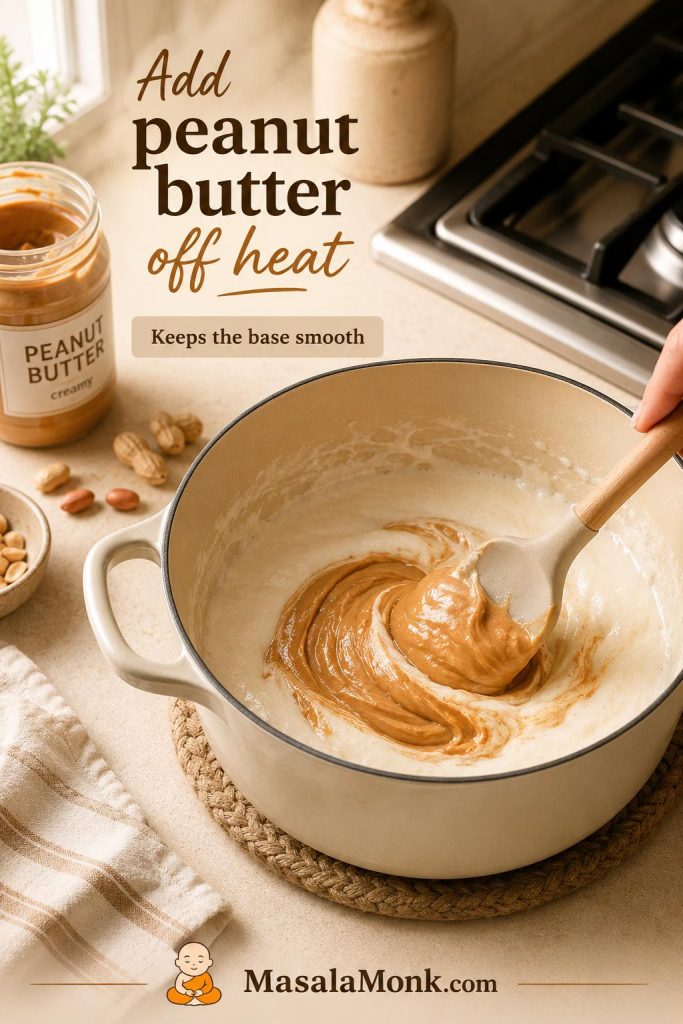
Creamy peanut butter being stirred into melted marshmallows in a pot moved off the heat.
Add the peanut butter off heat so it melts into the marshmallow base instead of separating or turning oily.

Step 5: Fold the cereal gently

Add the crisp rice cereal and fold with a silicone spatula until the pieces are coated but still airy. Stop once you no longer see dry pockets of cereal, then fold in the reserved mini marshmallows while the mixture is still warm.
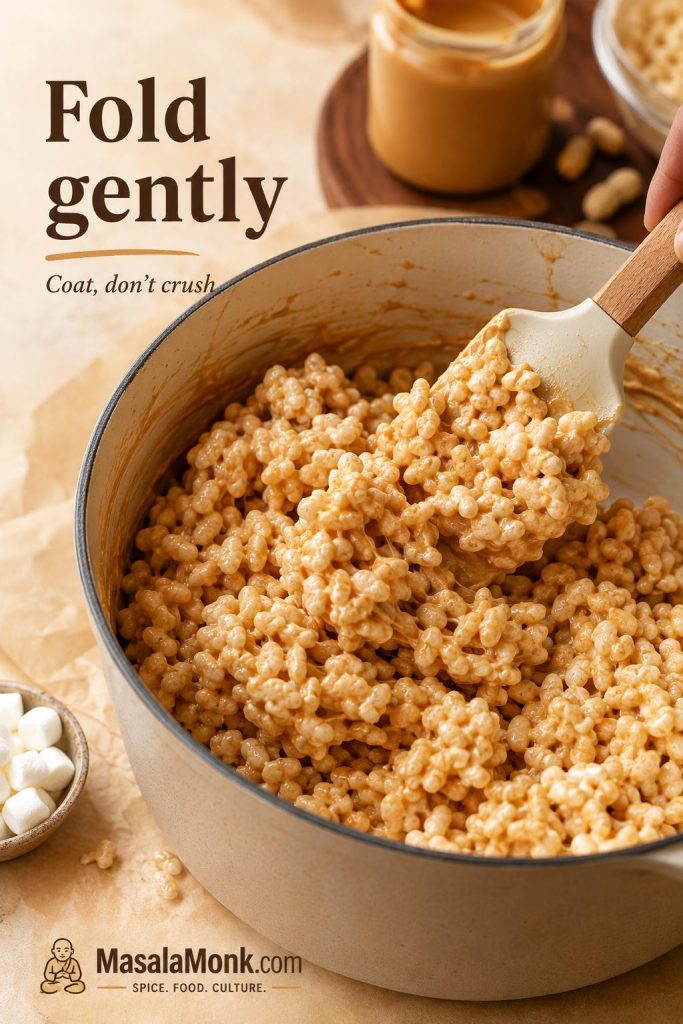
Crisp rice cereal being folded gently into a glossy marshmallow peanut butter base with a spatula.
Fold just until coated because overmixing can crush the cereal and make the bars feel heavy.

Step 6: Press the mixture lightly

Transfer the mixture to the prepared pan and nudge it into the corners with a greased spatula or lightly buttered hands. Shape it while it is still warm, but do not pack it down or flatten the top hard.
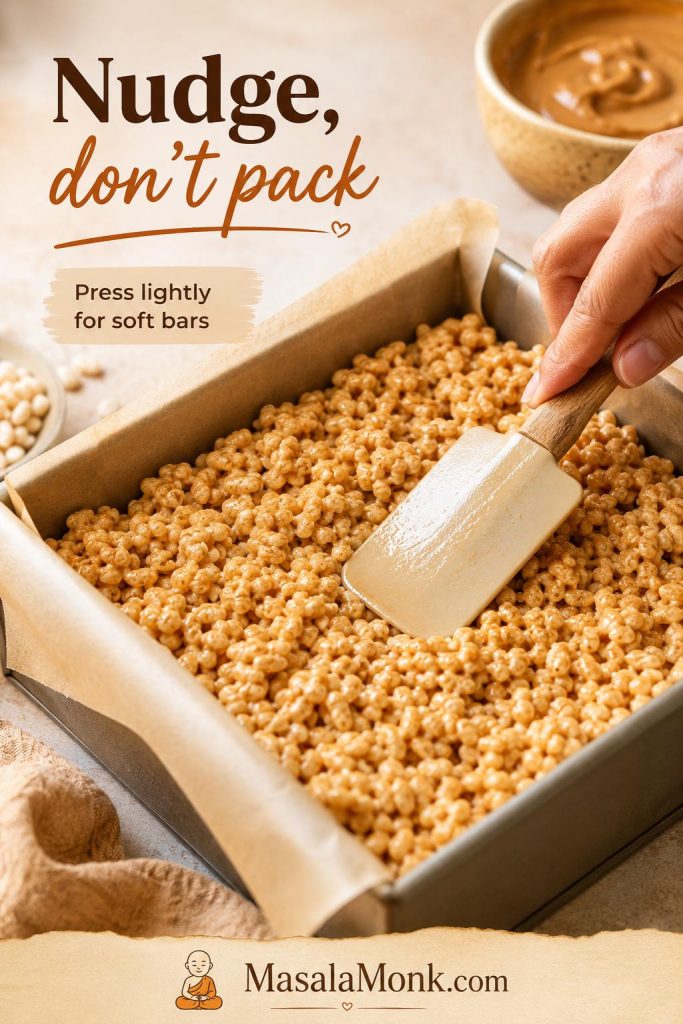
Peanut butter rice crispy treat mixture being pressed lightly into a parchment-lined pan with a spatula.
Use the spatula to guide the mixture into the corners while keeping the top airy instead of flattening it hard.

Step 7: Cool before cutting

Let the bars cool at room temperature for 30–45 minutes, or until the top no longer feels warm and the slab lifts cleanly from the pan. Cooling helps the squares hold their shape without losing tenderness.
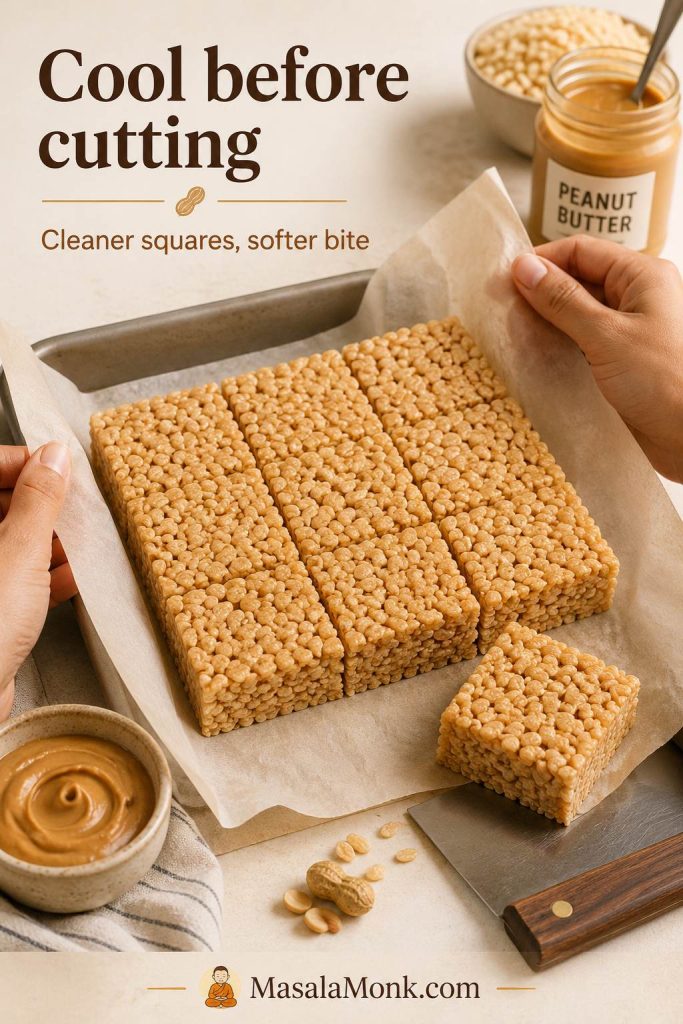
Peanut butter rice crispy treats lifted from a pan with parchment and cut into clean squares.
Let the slab cool until set so the knife cuts clean edges without smearing the still-soft center.
What good looks like: The melted mixture should be glossy, creamy, and stretchy, not oily or bubbling hard. The cereal should be coated but not crushed. When you press the mixture into the pan, it should mound softly and spring back a little. If it feels stiff before it reaches the pan, the marshmallows were probably overheated. If it sticks to your hands or spatula, lightly grease them instead of pressing harder.
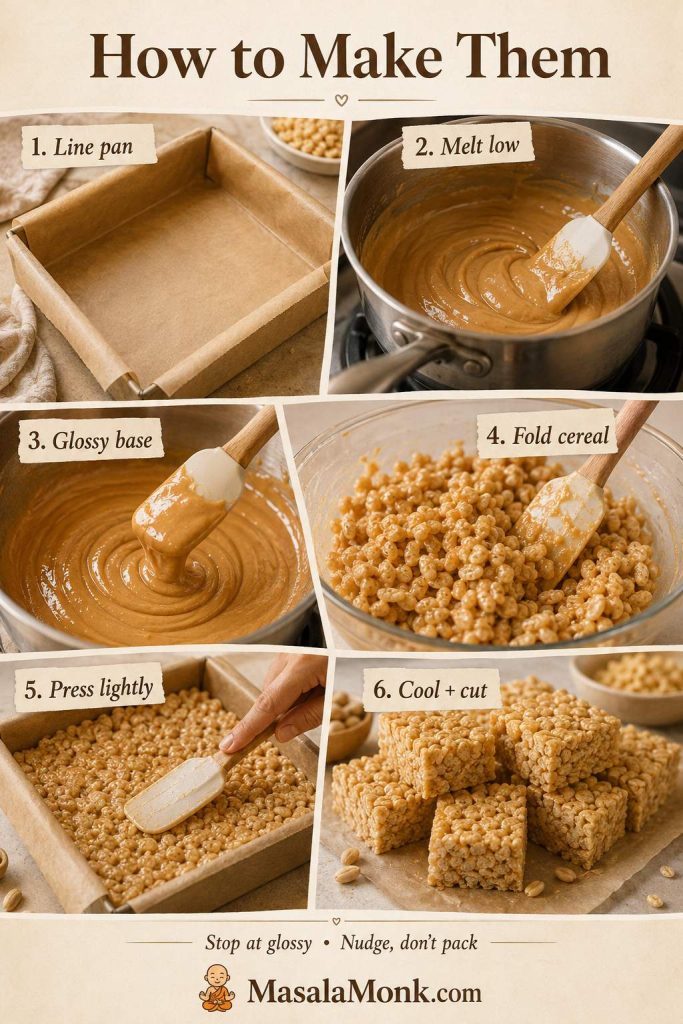
Step-by-step board showing how to line the pan, melt low, make the base, fold cereal, press lightly, and cut.
The method stays easy when you follow the cues in order: melt gently, coat the cereal, press lightly, and cool before slicing.

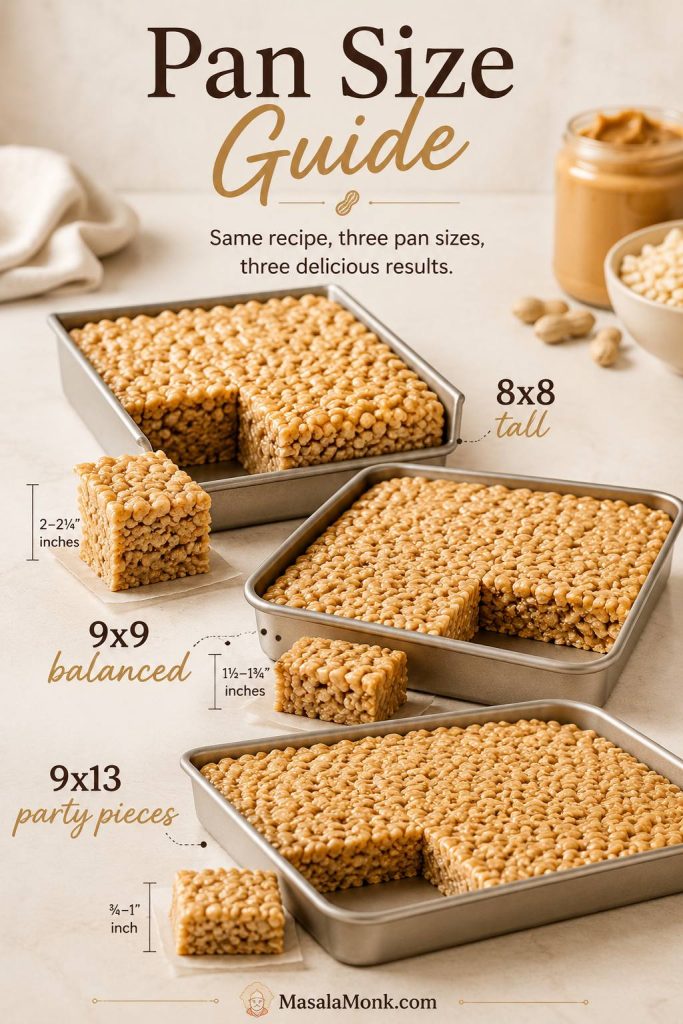
8×8 vs 9×9 vs 9×13 Pan

Pan size changes the whole eating experience. The same mixture can feel tall and gooey in one pan, thinner and firmer in another. Choose the pan based on whether you want thick home-style squares or neat party pieces.

Pan size Best for Result
8×8 inch Very thick dessert bars Tall, gooey, slower to cool, best for small batches
9×9 inch Main recipe Thick but manageable, soft center, clean enough cuts
9×13 inch Parties, lunchboxes, bake sales Thinner bars, more squares, faster cooling
Pan size guide comparing 8x8, 9x9, and 9x13 pans for different rice crispy treat thicknesses.
Pan size changes the eating experience: 8×8 makes taller dessert bars, 9×9 stays balanced, and 9×13 gives thinner party pieces.

If you spread the 9×9 recipe into a 9×13 pan, the bars will be thin, firmer, and less gooey. Use the larger scale if you want a true party pan.

Microwave Method

The microwave is faster, but it needs short bursts and frequent stirring. Marshmallows can go from glossy to stiff quickly, so stop as soon as they are mostly melted.

  1. Use a large microwave-safe bowl with plenty of room for the marshmallows to puff.
  2. Add butter and most of the marshmallows.
  3. Microwave in 30–40 second bursts, stirring after each burst.
  4. Stop when the marshmallows are mostly melted and stir until smooth.
  5. Stir in peanut butter, vanilla, and salt.
  6. Fold in cereal and reserved marshmallows.
  7. Press lightly into a lined pan and cool before slicing.
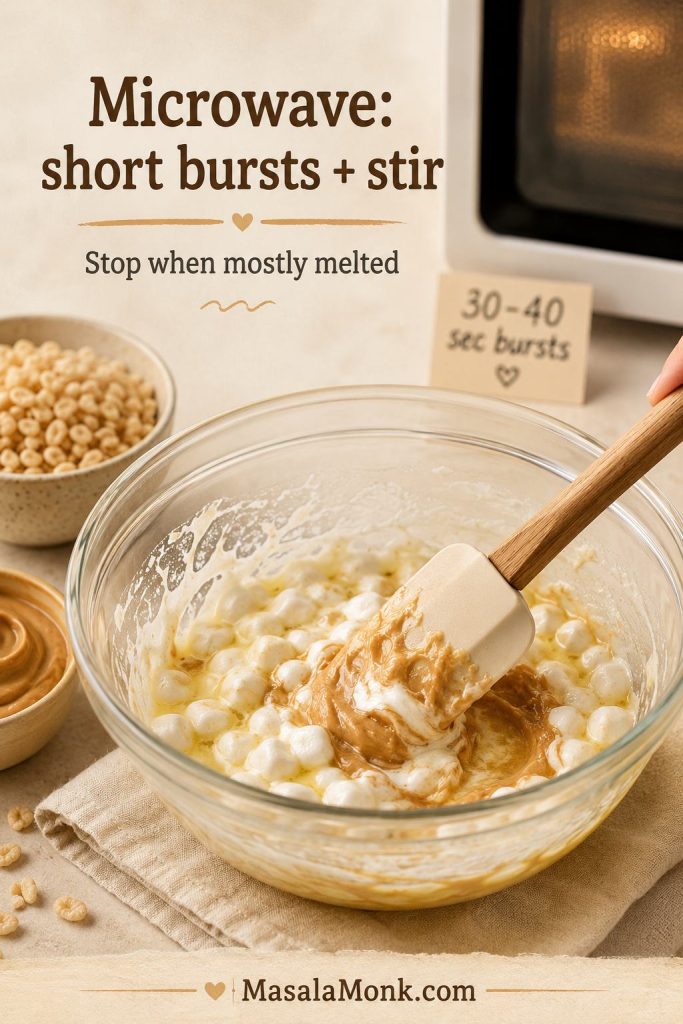
Microwave-safe bowl of marshmallows and butter being stirred for peanut butter rice crispy treats.
For the microwave method, use short bursts and stir often so the marshmallows melt evenly instead of overheating.

If the marshmallow mixture looks dry, stringy, or stiff after microwaving, it was likely overheated. Start again if you can; adding more peanut butter will not fully fix overheated marshmallows.

The stovetop gives you more control. If you are making these bars for the first time, it is the safer choice.

Chocolate Topping

Add the chocolate topping when you want these to feel less like lunchbox squares and more like a peanut butter cup in bar form. The topping sets into a soft chocolate-peanut butter layer while the cereal base stays chewy, crisp, and marshmallowy underneath.
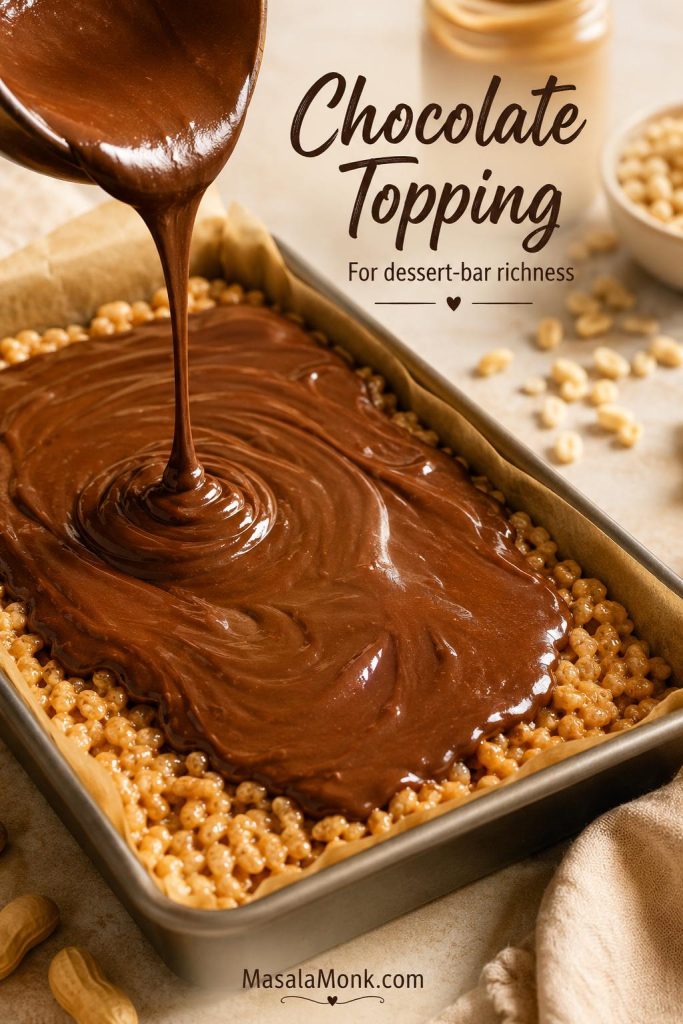
Chocolate peanut butter topping being poured over a pan of peanut butter rice crispy treats.
Add the chocolate topping when you want the bars to move from lunchbox-simple to richer dessert-bar territory.

A drizzle is enough for a lighter snack. However, a full layer turns the pan into something closer to a no-bake chocolate peanut butter bar.
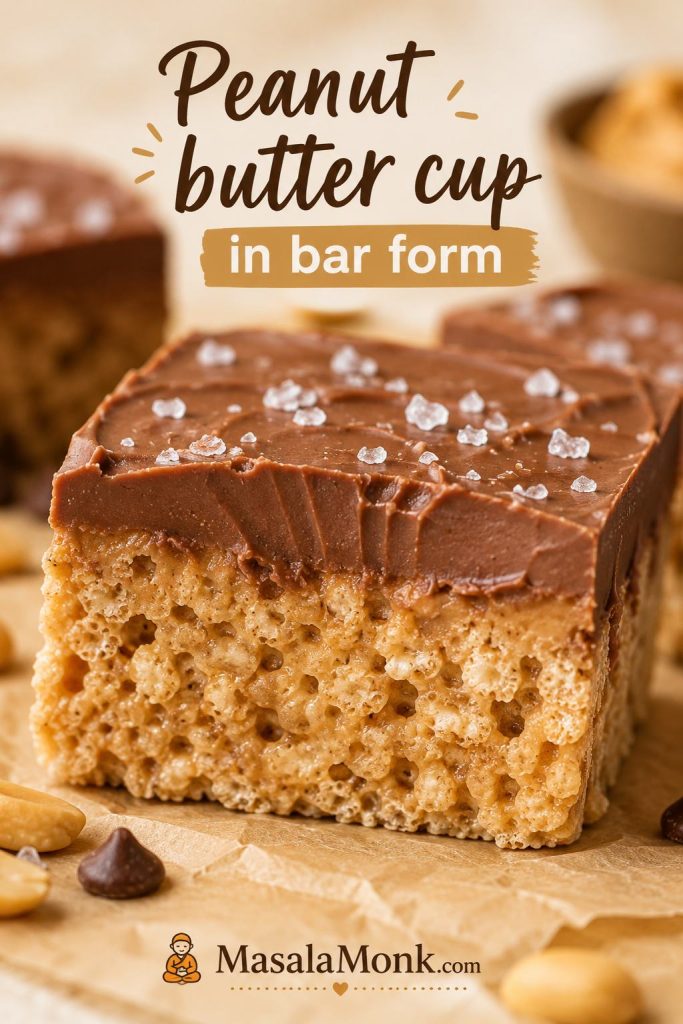
Cross-section of a chocolate-topped peanut butter rice crispy treat with a soft chocolate layer and cereal base.
The chocolate layer should set softly, so every bite feels more like a peanut butter cup than a hard candy shell.

For another rich no-bake chocolate dessert, this avocado chocolate mousse keeps the chocolate flavor deep while staying creamy and spoonable.

Let the bars cool before adding chocolate. If the base is still warm, the topping can sink into the cereal instead of sitting neatly on top. That gives the topping a cleaner surface and helps it set evenly.

Balanced chocolate topping

Ingredient US amount Metric amount
Semi-sweet chocolate chips 1½ cups 255 g
Creamy peanut butter 2 tbsp 30–35 g
Flaky salt Optional Optional

Melt the chocolate chips with the peanut butter until smooth, then spread over the cooled bars. Add flaky salt if you like a sweet-salty finish. Let the chocolate set before slicing.

For a lighter version, use half the chocolate mixture and drizzle it over the top instead of spreading a full layer. For a thicker candy-bar finish, increase the chocolate chips to 2 cups.
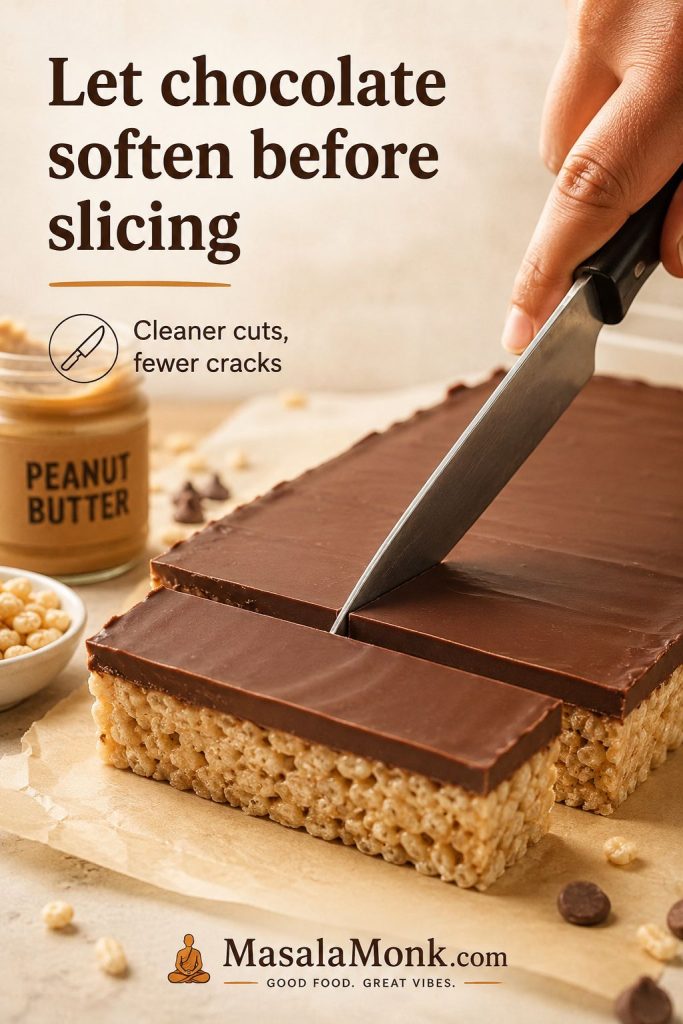
Cutting tip: If the chocolate layer is very cold, it may crack when sliced. Let the pan sit at room temperature for a few minutes, then cut with a sharp knife.
Knife slicing chocolate-topped peanut butter rice crispy treats with a clean cut through the topping.
If the chocolate layer feels too firm, let it sit briefly at room temperature before slicing to prevent cracks.

If you are building a no-bake dessert table, these bars sit naturally beside something creamy and chilled, like this no bake cheesecake recipe.

No-Marshmallow Version

No marshmallows means a different kind of bar. Instead of stretchy, gooey peanut butter rice crispy treats, you get a firmer peanut butter snack bar held together with honey or maple syrup.
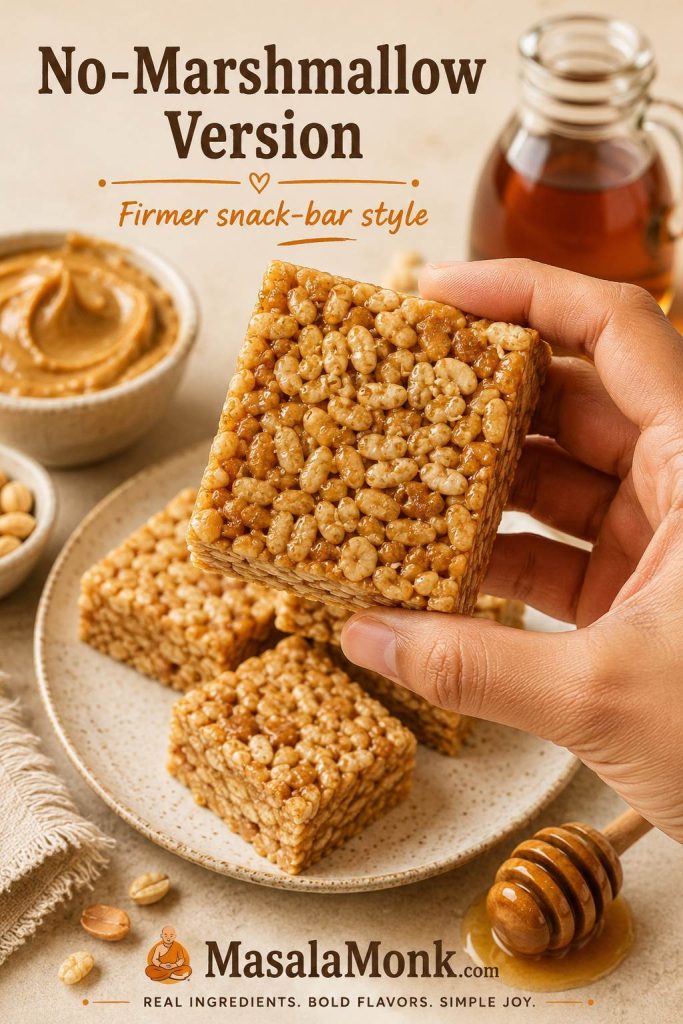
No-marshmallow peanut butter rice crispy bars made with peanut butter and honey or maple syrup.
Without marshmallows, these bars set from a peanut butter-syrup binder and taste more like a firmer snack bar.

Choose the marshmallow version when you want classic pull-apart cereal treats. Choose this version when you want something firmer, less candy-like, easier to chill, and more lunchbox-snack than dessert-bar.
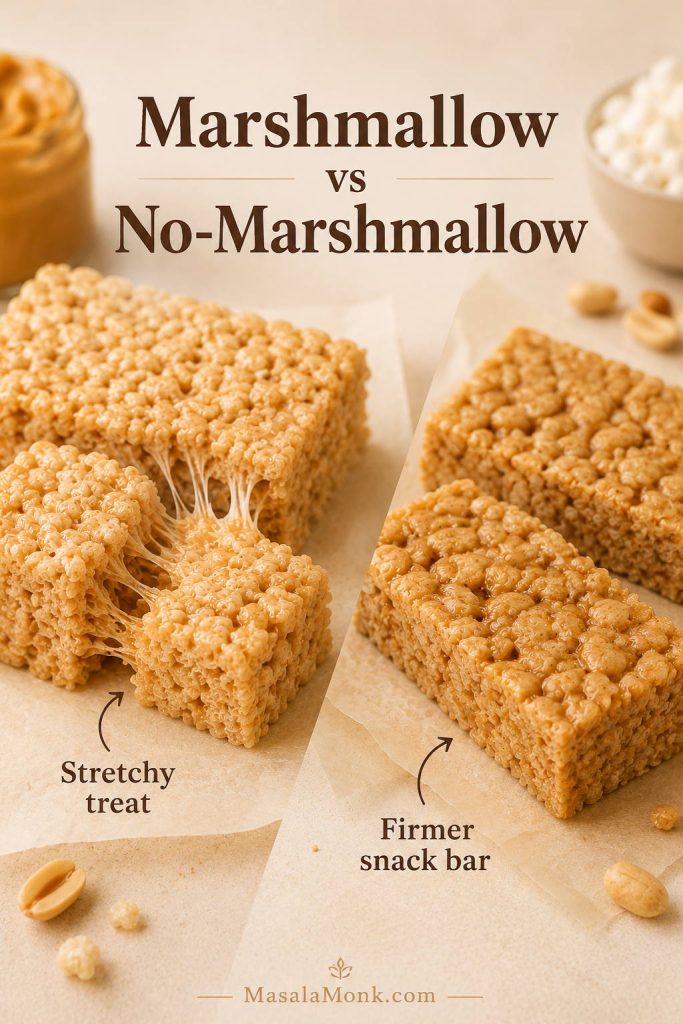
Marshmallow peanut butter rice crispy treat with stretchy pull beside a firmer no-marshmallow snack bar.
The marshmallow version stretches like a classic cereal treat, while the no-marshmallow version sets firmer from peanut butter and syrup.

If that firmer snack-bar direction is what you want, this homemade granola bars recipe goes deeper into no-bake bar binders, texture, and lunchbox-style snacks.

Ingredient US amount Metric amount
Creamy peanut butter ¾ cup 190 g
Honey or maple syrup 6 tbsp 90 ml
Crisp rice cereal 3 cups 80–85 g
Fine salt Pinch Pinch

Warm the peanut butter and honey or maple syrup together just until smooth, then stir in the salt and cereal. Press the mixture firmly into a lined 8×8-inch pan and chill until set. This version needs firmer pressing and colder setting than the main recipe.

Can I Use Marshmallow Fluff?

Marshmallow fluff or marshmallow creme can work, but it behaves differently from regular marshmallows. It makes the bars softer, stickier, and harder to cut cleanly, so do not replace all 16 ounces of marshmallows with fluff unless you are using a fluff-specific recipe.

The safer move is to use fluff as a swirl. Fold ⅓ to ½ cup through the warm cereal mixture before pressing it into the pan, or swirl it over the top with a little melted peanut butter.
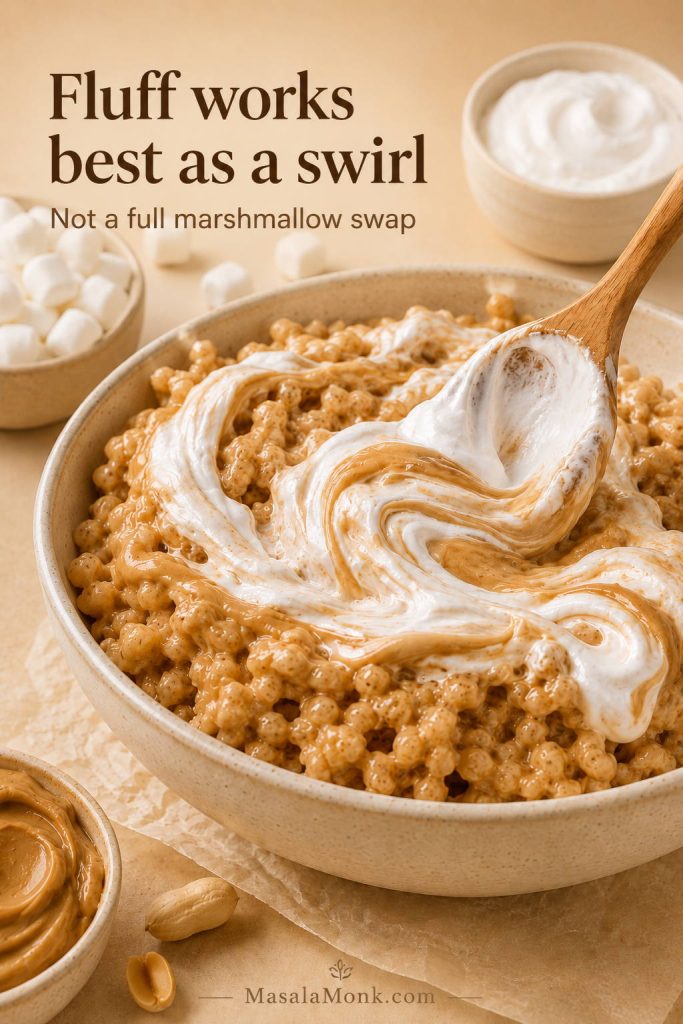
Marshmallow fluff swirled into peanut butter rice crispy treat mixture with a bowl of fluff nearby.
Marshmallow fluff behaves differently from regular marshmallows, so it works best as a swirl rather than a full swap.

If you are adapting a thinner 9×13 cereal-treat formula, a 7-ounce jar of marshmallow creme is often used as a substitute for a 10-ounce bag of marshmallows. Even then, the finished bars will be softer and stickier than bars made with regular marshmallows.

Peanut Butter Rice Crispy Treats vs Scotcheroos

These two bars are related, but the binder is different.

Peanut butter rice crispy treats usually rely on marshmallows, so they are softer, stretchier, and more classic cereal-treat-like. By contrast, Scotcheroos usually use peanut butter with corn syrup and sugar, then get a chocolate-butterscotch topping, so they are denser, sweeter, and more candy-like.

A quick clue: if the bar you remember had a glossy chocolate-butterscotch top and a firmer candy-like bite, you are probably thinking of Scotcheroos. If it was soft, marshmallowy, and stretchy when pulled apart, this is the recipe you want.
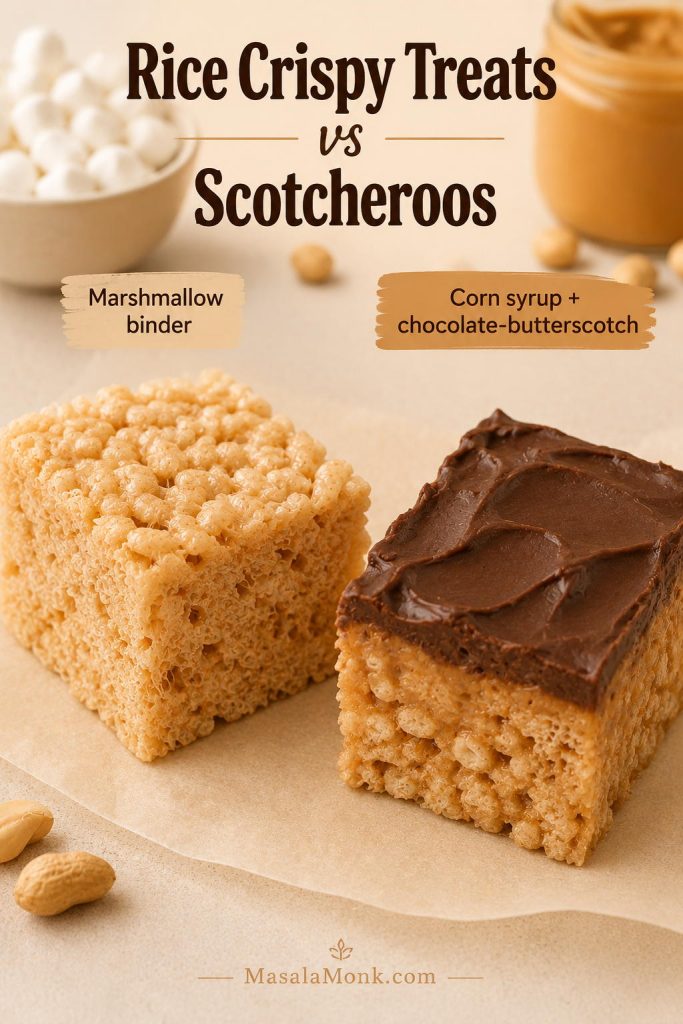
Peanut butter rice crispy treat compared with a chocolate-topped Scotcheroo on parchment.
Peanut butter rice crispy treats are usually softer and marshmallow-based, whereas Scotcheroos are denser and more candy-like.

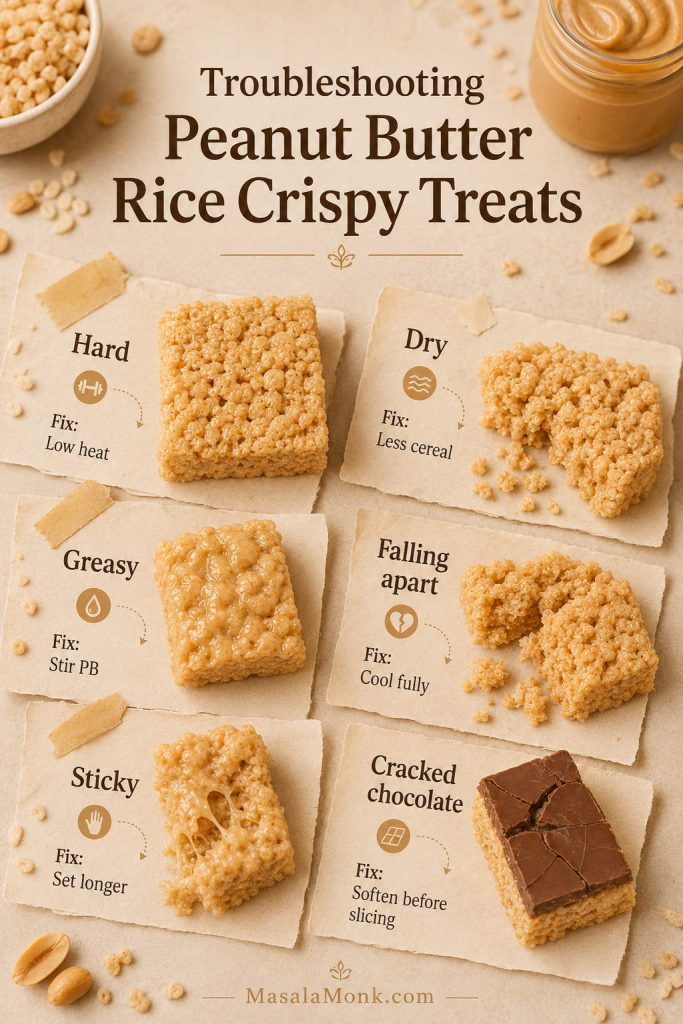
Troubleshooting

Even with a simple recipe, small changes can affect the final texture. If a batch turns hard, dry, greasy, or too sticky, the fix is usually one of four things: heat, ratio, peanut butter type, or how firmly the mixture was pressed into the pan. If your bars turned out well and you just need to keep them fresh, jump to storage.
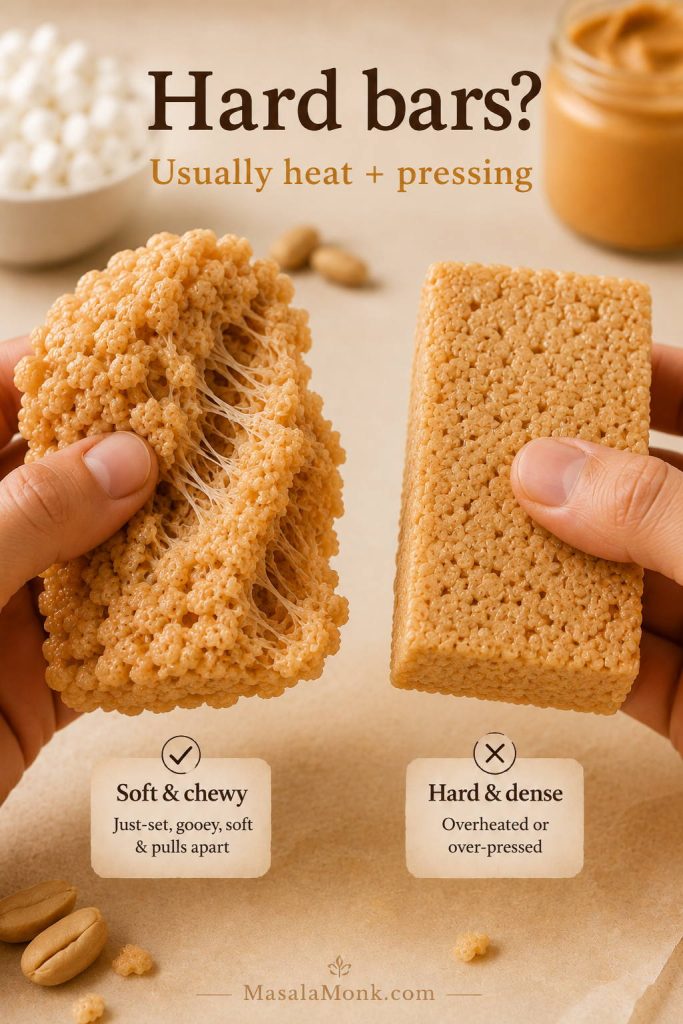
Soft peanut butter rice crispy treat pulling apart beside a compact hard bar with no stretch.
Hard bars usually come from overheated marshmallows, too much pressure, or a ratio that stretches the binder too far.
Problem Likely cause Quick fix next time
Hard bars Overheated marshmallows or packed-down mixture Use low heat, stop at glossy, and press lightly
Dry bars Too much cereal Use less cereal and fold more gently
Greasy bars Separated natural peanut butter Use regular creamy peanut butter
Bars falling apart Not enough binder or cut too early Cool fully before slicing
Sticky bars Too many marshmallows or not cooled Let them set longer
Cracked chocolate Chocolate layer too cold or too thick Let it soften slightly before slicing
Troubleshooting board for peanut butter rice crispy treats with fixes for hard, dry, greasy, sticky, falling apart, and cracked chocolate bars.
Most peanut butter rice crispy treat problems are fixable once you trace them back to heat, cereal amount, peanut butter type, or cooling time.

Why did my bars get hard?

The marshmallow mixture was probably overheated, the marshmallows were stale, too much cereal was added, or the mixture was pressed too firmly into the pan. Next time, use low heat, fresh marshmallows, and a gentler hand. Instead of packing the mixture down, nudge it into the pan just until it reaches the corners.

Why are they dry?

Dry bars usually mean there is too much cereal for the amount of marshmallow mixture. Next time, stay closer to the lower end of the cereal range, or add an extra handful of marshmallows to the melted mixture.

Why are they greasy?

Greasy bars often happen with natural peanut butter that has not been stirred well, or when too much peanut butter or butter is added. Regular creamy peanut butter gives the most reliable result.

Why are they falling apart?

The mixture may not have enough binder, the cereal amount may be too high, or the bars may have been cut before cooling. For the no-marshmallow version, the bars also need chilling time to firm up.

Why are they too sticky?

Sticky bars usually need more cooling time or slightly more cereal. If you folded in extra marshmallows, the bars may also be intentionally gooier. Let them sit longer before slicing.

Why did the chocolate topping crack?

The chocolate may have been too cold or too thick when sliced. Let the bars sit at room temperature for a few minutes before cutting, and use a sharp knife. Adding a little peanut butter to the melted chocolate also keeps the topping softer.

How to Store Them

These bars stay best when they are covered at room temperature: soft enough to bite, but still crisp around the cereal. Open air dries them out faster than time does.

They taste best the day they are made, when the cereal still has its crackle and the marshmallow base is soft. They stay good for about 2 days in an airtight container at room temperature. A third day is usually fine, but the bars will taste less fresh.

If stacking them, place parchment or wax paper between layers so the tops do not stick together. Otherwise, the soft marshmallow surface can cling to the layer above it.
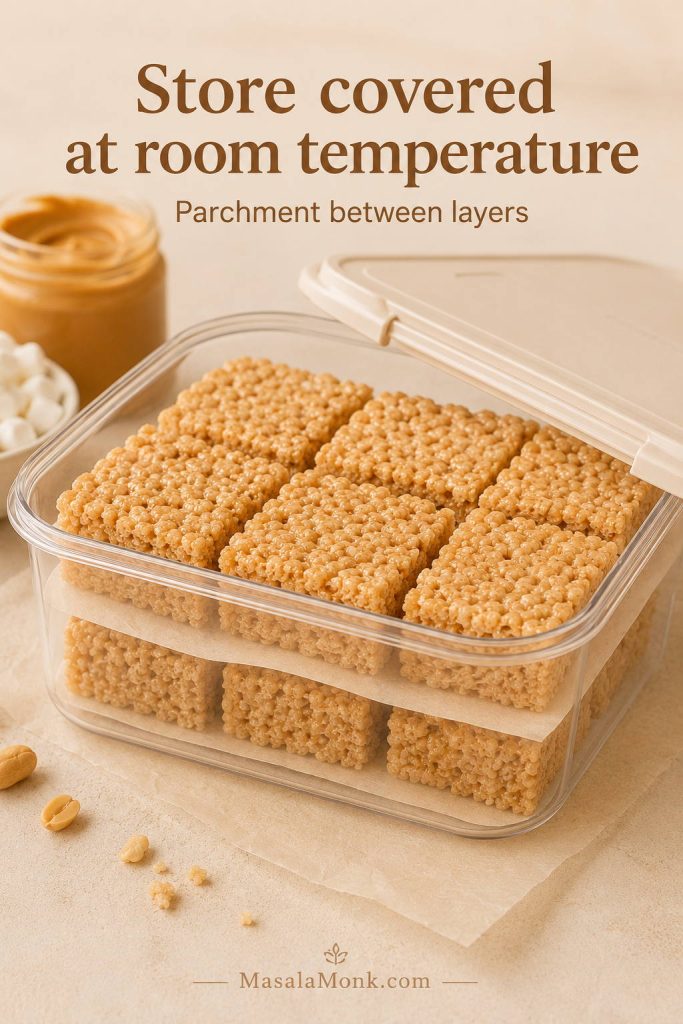
Peanut butter rice crispy treats stored in an airtight container with parchment between the layers.
Store the squares covered at room temperature, with parchment between layers, so they stay easy to lift without drying out.

Avoid refrigerating plain bars because cold air can make them firm and dry. If you add a chocolate topping, you can chill the pan briefly just to set the chocolate, then move the sliced bars back to room temperature storage.

To freeze, place the bars in layers separated by parchment or wax paper inside an airtight freezer-safe container. Freeze for up to 6 weeks. Let them stand at room temperature before serving so the texture softens again. For the full batch formula, return to the recipe card.

Variations

Once the base is soft and reliable, the fun part is choosing what kind of pan you want: lunchbox-simple, candy-bar rich, salty-sweet, extra gooey, or full peanut butter cup.

Keep the base ratio steady, then change the personality of the pan with chocolate, crunch, salt, jam, or a thicker dessert-bar finish.
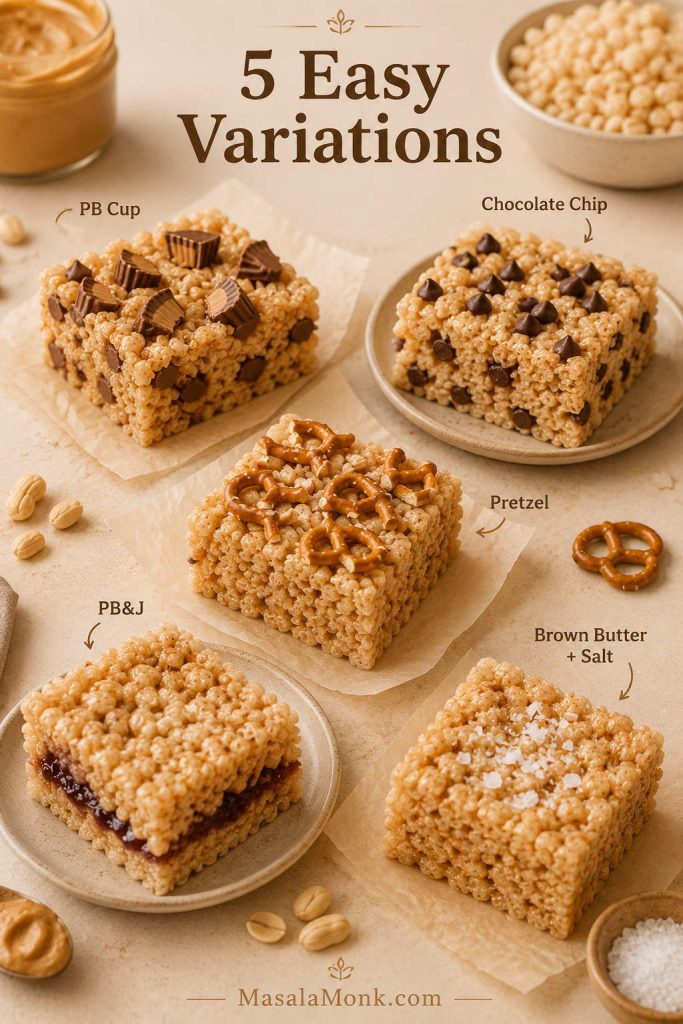
Five peanut butter rice crispy treat variations with peanut butter cups, chocolate chips, pretzels, jam, and flaky salt.
Once the base recipe is reliable, small add-ins like pretzels, jam, chocolate chips, or flaky salt can change the whole pan.

Chocolate and candy variations

  • Peanut butter cup bars: Fold in chopped peanut butter cups after the cereal is coated, or press them on top before the bars cool.
  • Chocolate chip bars: Sprinkle mini chocolate chips over the warm bars and press gently so they stick.
  • Cookie dough-style bars: Add mini chocolate chips and a little extra vanilla for a cookie-dough feel. If you want the actual spoonable version, make this edible cookie dough recipe instead.
  • Salted chocolate bars: Add the chocolate topping and finish with flaky salt.

Crunchy and salty variations

  • Pretzel bars: Replace ½ cup cereal with lightly crushed pretzels for a salty crunch.
  • Roasted peanut bars: Add ½ cup chopped roasted peanuts for extra texture.
  • Flaky salt finish: Sprinkle a little flaky salt over the top before the bars fully set.

Softer or richer variations

  • Brown butter bars: Brown the butter before adding marshmallows for a deeper, toasted flavor.
  • Extra marshmallow pocket bars: Fold in 2 cups reserved mini marshmallows at the end for a gooier bite.
  • Thicker dessert bars: Use an 8×8 pan and let the bars cool fully before slicing.

Lunchbox and snack-bar variations

  • Lunchbox squares: Use the full 6 cups cereal and cut smaller squares after the bars cool completely.
  • PB&J bars: Swirl a few teaspoons of jam over the top before the bars set, or sandwich a thin jam layer between two thinner layers of the peanut butter cereal mixture. Grape or strawberry keeps the classic lunchbox feel.
  • Protein-style bars: Use the no-marshmallow version as the base and add a small amount of protein powder only if the mixture still feels moist enough. For a no-bake protein dessert that is already built around protein powder, this protein cookie dough recipe is a safer next recipe.
  • Vegan-style bars: Use the no-marshmallow peanut butter and maple syrup version with a vegan crisp rice cereal.

Peanut Butter Rice Crispy Treats Recipe

Peanut Butter Rice Crispy Treats

Soft, chewy peanut butter cereal bars with a glossy marshmallow-peanut butter base, crisp rice cereal, and optional soft marshmallow pockets. Use 5½ cups cereal for gooier bars or 6 cups for cleaner-cut squares.

Prep Time 10 minutes
Cook Time 5 minutes
Cooling Time 30–45 minutes
Yield 16 thick 9×9 bars

Ingredients

  • 5 tbsp (70 g) salted butter, plus more for greasing
  • 16 oz (454 g) mini marshmallows, divided
  • ½ cup (125–130 g) regular creamy peanut butter
  • 1 tsp (5 ml) vanilla extract
  • ¼ tsp fine salt, only if using unsalted butter
  • 5½–6 cups (155–170 g) crisp rice cereal

Optional chocolate topping

  • 1½ cups (255 g) semi-sweet chocolate chips
  • 2 tbsp (30–35 g) creamy peanut butter
  • Flaky salt, optional

Instructions

  1. Line a 9×9-inch pan with parchment paper and lightly grease the parchment.
  2. Reserve 1½ to 2 cups of the mini marshmallows from the 16-ounce bag for folding in at the end.
  3. Melt the butter in a large heavy-bottomed pot over low to medium-low heat.
  4. Add the remaining marshmallows and stir until mostly melted, glossy, and stretchy. Stop before the mixture bubbles hard.
  5. Remove the pot from the heat. Stir in the peanut butter, vanilla, and salt until smooth.
  6. Add the crisp rice cereal and fold gently until evenly coated.
  7. Fold in the reserved mini marshmallows while the mixture is still warm.
  8. Transfer to the prepared pan and press lightly into an even layer. Do not compact firmly.
  9. Cool at room temperature for 30–45 minutes, then lift from the pan and cut into bars.
  10. For chocolate topping, melt chocolate chips with peanut butter, spread over cooled bars, sprinkle with flaky salt if using, and let set before slicing.

9×13 party-pan scale

  • Salted butter: ½ cup / 8 tbsp (113 g)
  • Mini marshmallows: 20 oz (567 g)
  • Creamy peanut butter: 1 cup (250–260 g)
  • Crisp rice cereal: 8–8½ cups (225–240 g)
  • Vanilla extract: 1½–2 tsp (7.5–10 ml)
  • Fine salt, if using unsalted butter: ½ tsp

Notes

  • For the softest bars, stay closer to 5½ cups cereal and press very lightly.
  • For cleaner-cut lunchbox or party squares, use 6 cups cereal and cool fully before slicing.
  • Regular creamy peanut butter gives the most reliable texture.
  • Natural peanut butter must be stirred completely smooth before measuring.
  • Measure marshmallows by weight if using large marshmallows or a different brand.
  • Store covered at room temperature so the bars stay soft and the cereal keeps some crackle.
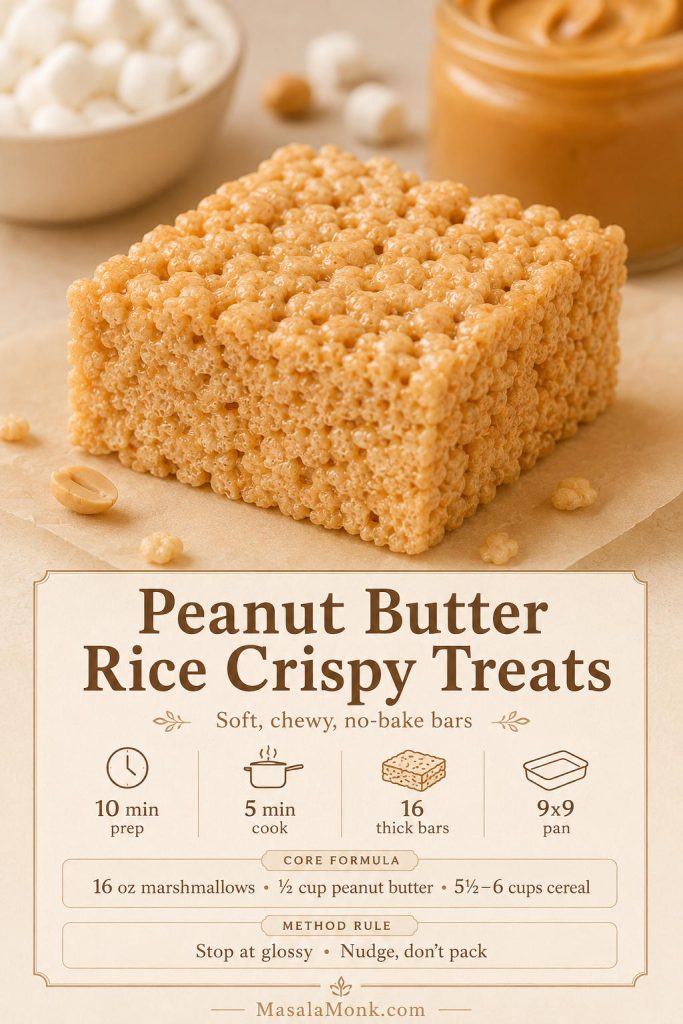
Recipe card for peanut butter rice crispy treats with time, yield, pan size, core formula, and method rules.
Keep this card nearby for the two texture rules that matter most: glossy heat control and a light hand in the pan.

Once you have the low heat, fresh marshmallows, and light pressing down, this becomes the kind of no-bake recipe you can adjust from memory. Make it gooey for home, cleaner-cut for a party tray, or chocolate-topped when you want the pan to disappear faster.

FAQs

Are these the same as peanut butter Rice Krispie treats?

Yes. Rice Krispies is the branded cereal many people associate with classic crispy cereal bars, while crisp rice cereal is the generic ingredient. This recipe works with Rice Krispies cereal or another fresh crisp rice cereal.

What peanut butter works best?

Regular creamy peanut butter works best because it melts smoothly into the marshmallow base and stays stable. Natural peanut butter can work, but it must be stirred very well and may still make the bars softer or greasier.

Why did my treats get hard?

Hard treats usually come from overheated marshmallows, stale marshmallows, too much cereal, or pressing the mixture too firmly into the pan. Keep the heat low and nudge the mixture into the pan instead of packing it down.

How do I make them extra gooey?

Use 5½ cups cereal, keep the heat low, fold in 1½ to 2 cups reserved mini marshmallows at the end, and press the mixture lightly into the pan.

Can I use large marshmallows?

Yes. Use 16 ounces / 454 g marshmallows total, and give them more time to melt. Large marshmallows melt more slowly than minis, so keep the heat low instead of turning up the burner.

What if I do not have marshmallows?

Use the no-marshmallow version with peanut butter and honey or maple syrup. The texture will be firmer and more snack-bar-like, not stretchy and gooey.

Should I use an 8×8, 9×9, or 9×13 pan?

Use an 8×8 pan for very thick bars, a 9×9 pan for the best balance of thickness and easy cutting, or a 9×13 pan for thinner party squares. The main recipe is written for a 9×9 pan.

Do these need to be refrigerated?

No. They stay softer at room temperature in an airtight container. Refrigeration can make the cereal treats firm, so only chill briefly if you need to set a chocolate topping.

How far ahead can I make them?

They taste best the day they are made, but they keep well for about 2 days in an airtight container. For parties, making them the night before is a good compromise between freshness and convenience.

Can I add chocolate on top?

Yes. Spread melted semi-sweet chocolate chips with a little peanut butter over the cooled bars. Finish with flaky salt if you want a stronger sweet-salty balance.

Are these gluten-free?

They can be, but only if every ingredient is gluten-free. The cereal is the main thing to check because some crisp rice cereals contain malt flavoring. If gluten matters, use certified gluten-free crisp rice cereal.

What is the difference between these and Scotcheroos?

These bars usually use marshmallows as the binder, so they are softer and stretchier. Scotcheroos usually use peanut butter with corn syrup and sugar, then get topped with chocolate and butterscotch, so they are denser and more candy-like.
Back to top

Posted on 1 Comment

Applesauce Cake Recipe

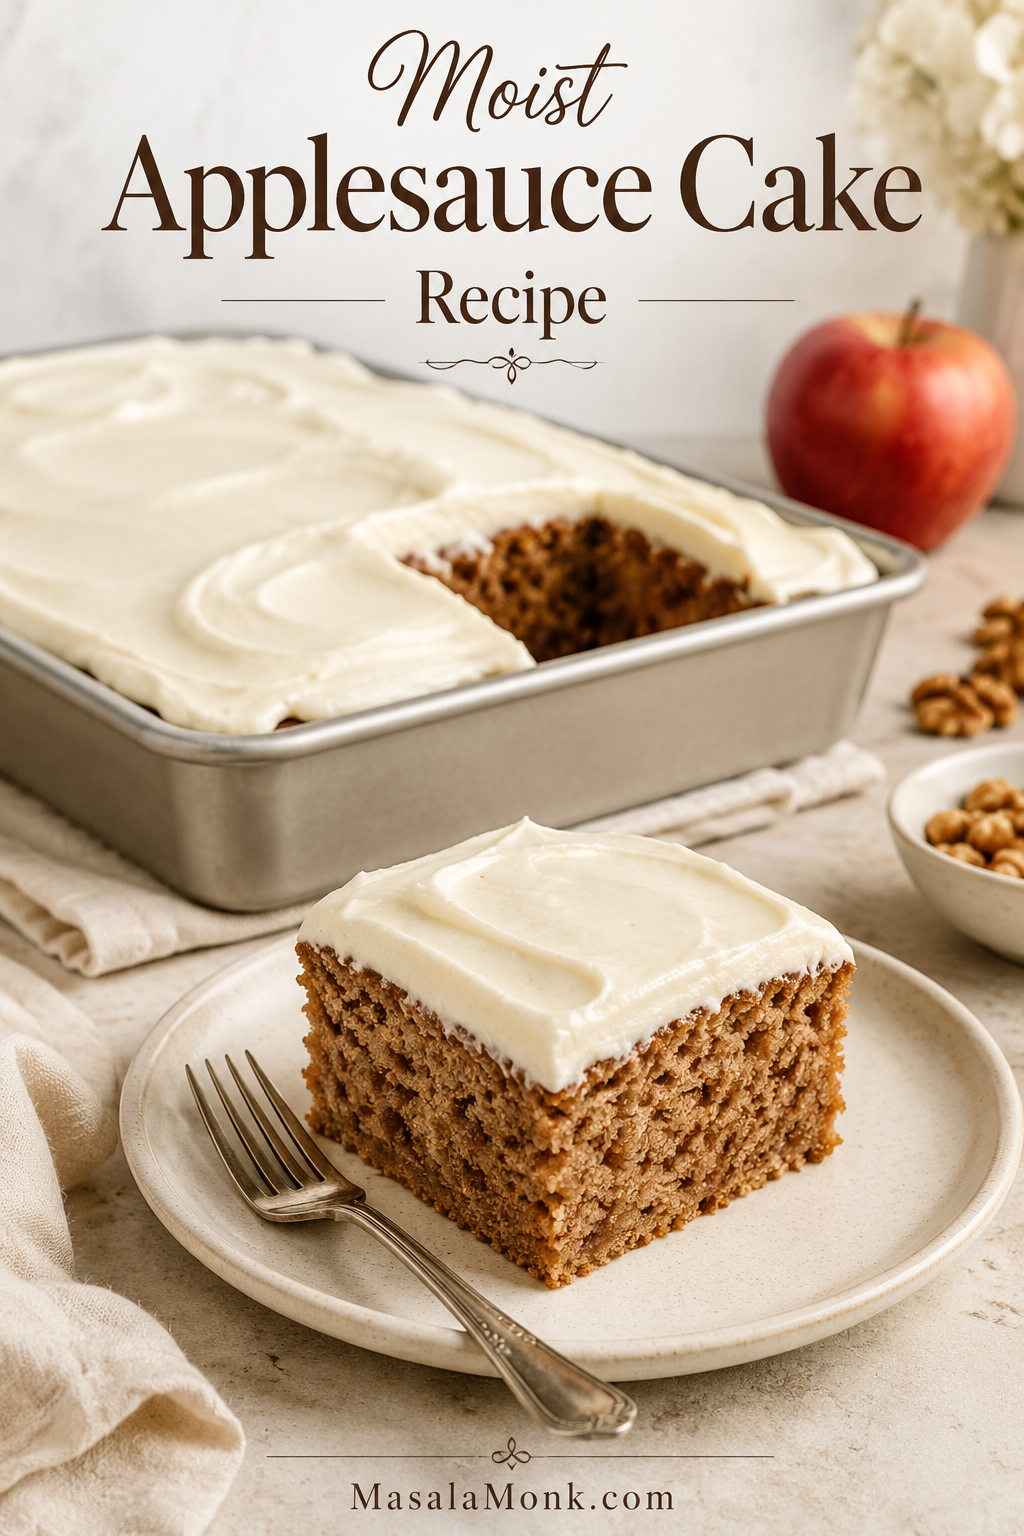
Frosted applesauce cake in a 9x13 metal pan with one square removed and plated in front, showing a soft brown crumb and cream cheese frosting.

Applesauce cake usually starts with one very specific craving: a soft, warmly spiced cake that feels old-fashioned without being dry, heavy, or fussy. This applesauce cake recipe is built around that craving, but also around the problems that can sneak in. Applesauce sounds like it should guarantee moisture, yet the middle can still turn gummy, the edges can dry out, the spices can taste flat, or the frosting can melt because the cake was still warm underneath.

The goal here is to prevent those problems before they happen. This easy applesauce cake bakes in a 9×13 pan with unsweetened applesauce, brown sugar, neutral oil, eggs, vanilla, cinnamon, ginger, nutmeg, and a small pinch of clove or allspice. Applesauce keeps the cake moist, while oil keeps the crumb tender after it cools.

The flavor is apple-spice rather than fresh-apple-chunk cake: cinnamon first, brown sugar underneath, gentle apple in the background, and a tangy cream cheese finish if you frost it. Think of it as an old-fashioned snack cake dressed up just enough for dessert. Dust it with powdered sugar when you want something simple with coffee, or fold in raisins and walnuts when you want the kind of cake that tastes like it came from an older recipe box.

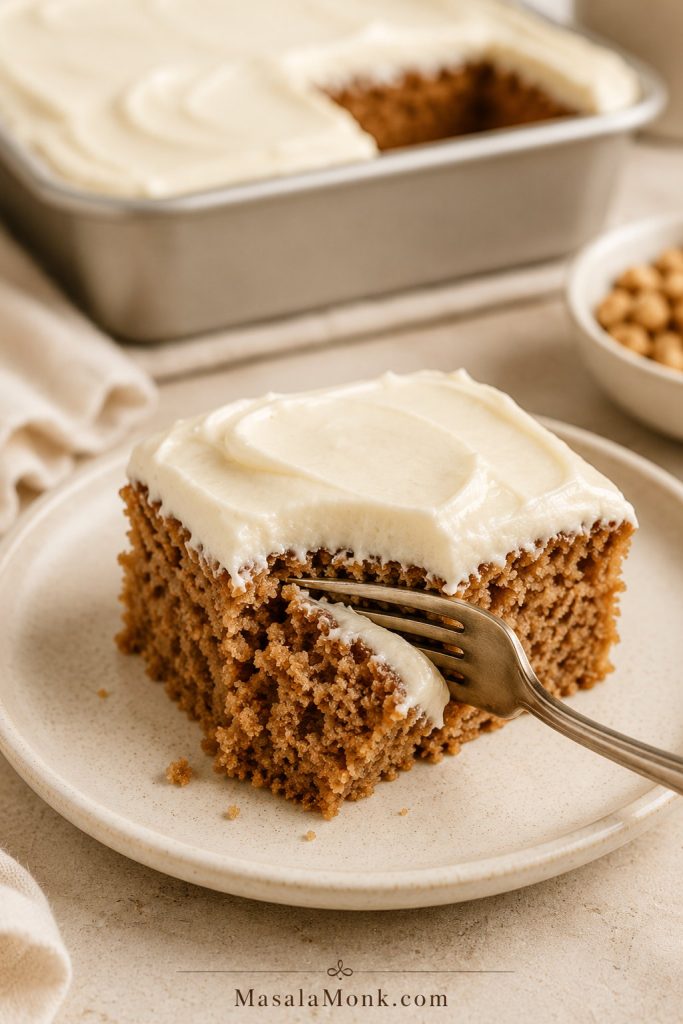
Close-up of a frosted applesauce cake square on a cream plate with a fork pressing into the soft crumb.
A fork should slide into the slice easily, but the cake should still hold its shape. That balance is what separates a tender applesauce cake from one with a gummy middle.

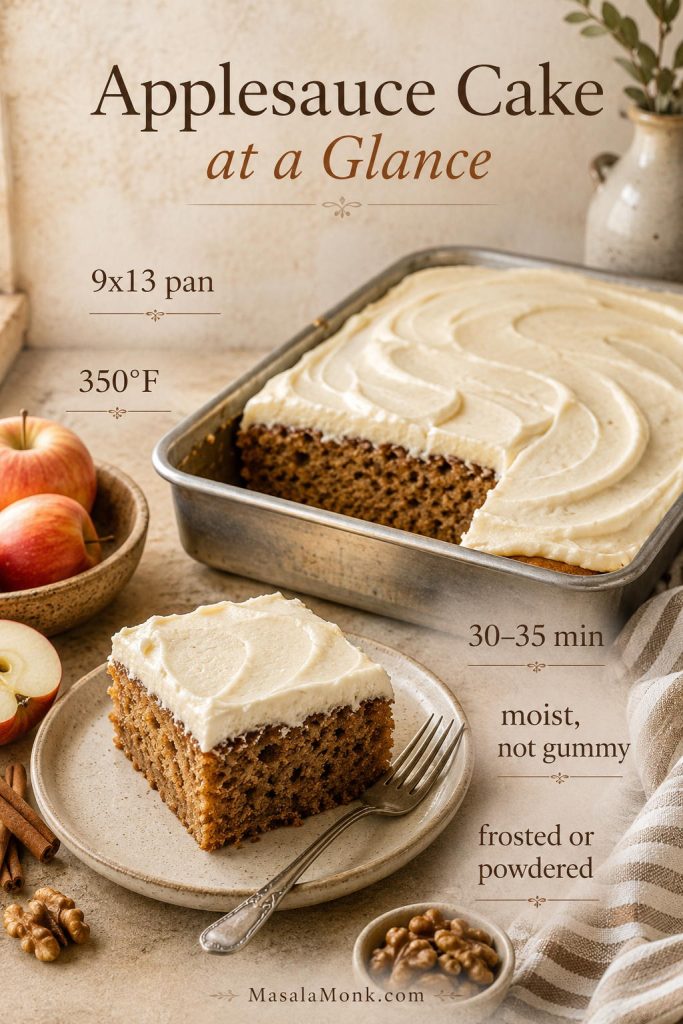
Applesauce Cake at a Glance

Most reliable pan 9×13-inch light metal baking pan.
Oven temperature 350°F / 175°C for metal pans; 325°F / 165°C for glass.
Bake time About 30–35 minutes, depending on pan and oven.
Applesauce texture Unsweetened, smooth, and not watery.
Texture goal Moist and tender, not wet or gummy.
Flavor profile Warm apple-spice cake with gentle apple flavor.
Topping choices Cinnamon cream cheese frosting, powdered sugar, or vanilla glaze.
Yield 15–16 squares.
Storage Refrigerate once frosted with cream cheese.
Make-ahead Bake one day ahead and frost after cooling.
At-a-glance applesauce cake guide showing a frosted cake square with cues for pan size, oven temperature, bake time, texture, and topping options.
Start with the reliable 9×13 setup: 350°F, about 30 to 35 minutes, and a center check that matters more than browned edges.

What This Applesauce Cake Guide Covers

Use this guide for the full cake, frosting choices, pan swaps, shortcut options, storage, and the small baking decisions that keep this cake moist instead of gummy.

Quick Answer: Moist 9×13 Applesauce Cake

For a moist applesauce cake, bake a 9×13-inch pan at 350°F / 175°C for about 30 to 35 minutes. Use unsweetened applesauce, brown sugar, eggs, warm spices, vanilla, and a moderate amount of neutral oil. The cake is done when the center springs back lightly and a toothpick comes out clean or with a few moist crumbs.

The most important texture rule is simple: applesauce adds moisture, but it does not replace fat perfectly. A no-oil version may sound appealing, but it is much more likely to bake up dense, chewy, or gummy. A little oil gives the crumb softness, especially after the cake has cooled and rested.

Most reliable first bake: use unsweetened applesauce, 3/4 cup neutral oil, a light metal 9×13 pan, and let the cake cool completely before frosting. Once you know how the crumb should feel, you can adjust sweetness, frosting, add-ins, or oil level with more confidence.

Need the visual cues before baking? Jump to the Applesauce Cake Texture Checklist before you mix the batter.

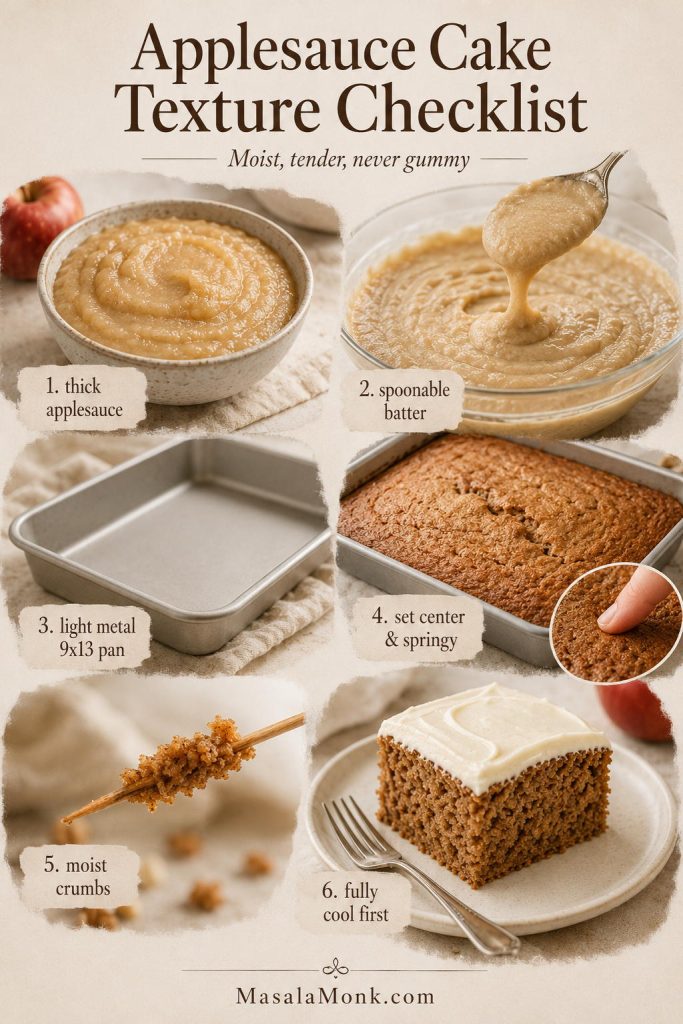
Applesauce Cake Texture Checklist

Applesauce Smooth, thick, and not watery.
Batter Glossy, tan, thick but spoonable.
Pan Light metal 9×13 for the most even first bake.
Center Set and springy, with no jiggle.
Toothpick Clean or a few moist crumbs, not wet batter.
Frosting Only after the cake is fully cool.
Applesauce cake texture checklist showing thick applesauce, spoonable batter, a metal pan, a set cake center, a toothpick test, and a cooled frosted slice.
The best anti-gummy cues happen before and after baking: thick applesauce, spoonable batter, a set center, moist crumbs, and a fully cooled cake before frosting.

Once those cues make sense, go straight to how to make applesauce cake without a gummy center, or use the recipe card if you are ready to bake.

Why This Recipe Works

The texture comes down to balance: enough applesauce for moisture, enough oil for tenderness, and enough structure for clean slices. Applesauce gives the cake its soft, damp crumb and quiet apple flavor, but oil is what keeps that crumb tender after the pan cools. Eggs help it set cleanly, while brown sugar, cinnamon, and the supporting spices make the apple flavor feel fuller.

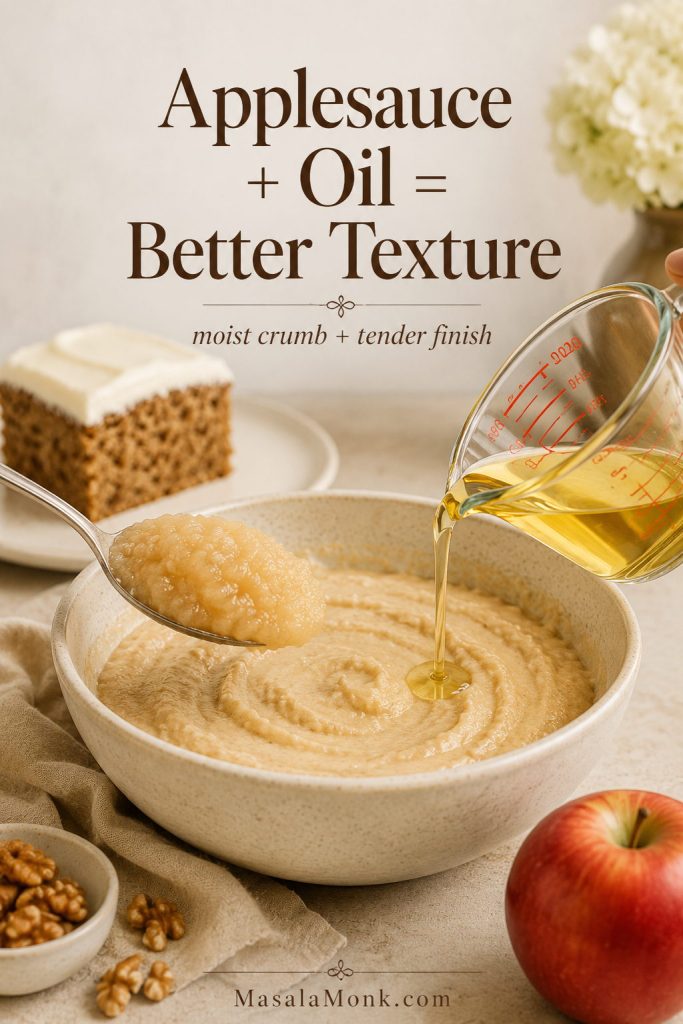
Applesauce and oil being added to cake batter with a finished applesauce cake slice in the background.
Applesauce gives the cake its soft, damp apple-spice crumb; however, the oil protects tenderness once the pan cools, so the slices stay plush instead of rubbery.

A 9×13 pan helps too. It gives the batter enough room to bake evenly, cools faster than a deep Bundt or loaf, and makes the finished cake easy to frost, slice, store, and share. This is the kind of pan cake that works for potlucks, after-school snacks, holiday tables, and casual weekends when you want the house to smell like cinnamon without building a layer cake.

Resting does this cake a favor. Warm spice cakes often taste fuller after a few hours because the cinnamon, applesauce, brown sugar, and vanilla have time to settle into the crumb. That makes this a useful make-ahead dessert, especially if you bake it one day and frost it the next.

There is one place where this recipe stays deliberately practical: it does not remove every bit of fat just because applesauce is in the batter. Applesauce can replace some oil or melted butter in certain bakes, but replacing too much can change the texture. Bon Appétit has a helpful explainer on using applesauce as an oil or butter replacement; the same lesson applies here. Applesauce brings moisture, but fat still matters for tenderness.

What Makes This an Old-Fashioned Applesauce Cake?

Old-fashioned applesauce cake is not just about the ingredient list. It is about the mood of the cake: simple pan, pantry ingredients, warm spice, soft crumb, and a flavor that feels better the next day. It should not need decoration to be good. A square dusted with powdered sugar should still feel complete.

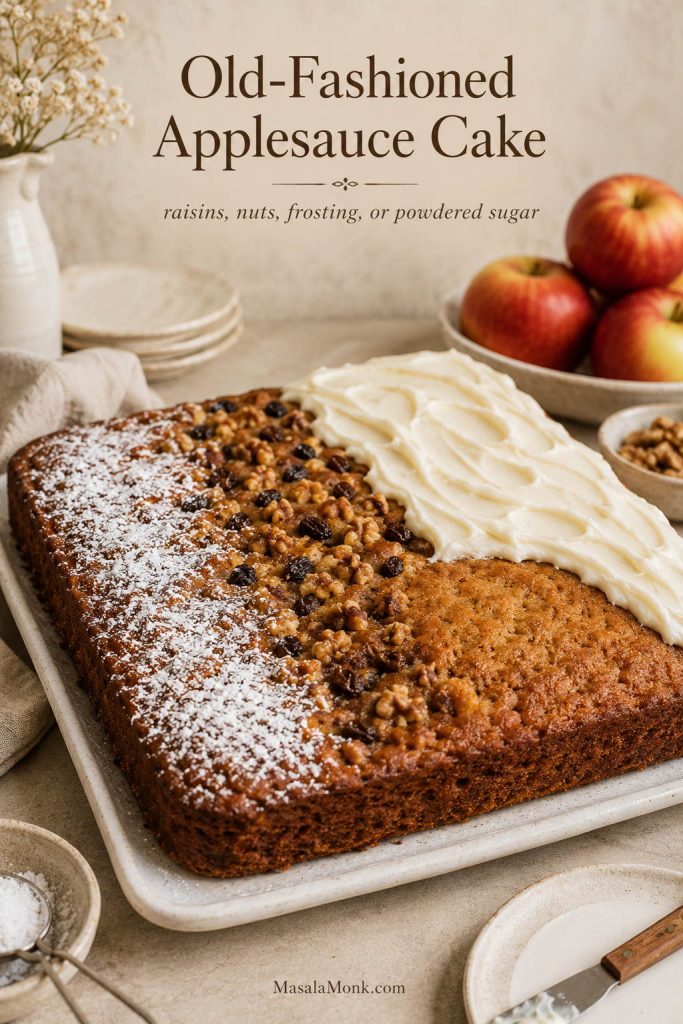
The old-fashioned feeling stays, but the method gets a little more precise. The base cake is soft and spiced, the frosting is optional rather than mandatory, and the add-ins are flexible. In some families, raisins and walnuts are expected. Others want a plain soft square with powdered sugar. For dessert people, cream cheese frosting is what makes the cake feel complete. This recipe can handle all three camps.

Old-fashioned applesauce cake shown with frosted, powdered sugar, raisin-walnut, and plain sections in one pan.
One pan can satisfy several applesauce cake camps: frosted for dessert, powdered for old-fashioned simplicity, plain for snacking, or raisin-walnut for recipe-box flavor.

If you grew up with applesauce cake, you probably already know which camp your family was in: raisins, no raisins, nuts, no nuts, frosting, or just powdered sugar. This is also the kind of cake that behaves well in real kitchens. Cut it into neat squares for guests, or let people shave off uneven little pieces all day. It is exactly the sort of cake that quietly disappears from the pan before anyone admits they had a second slice.

Ingredients That Keep the Cake Moist

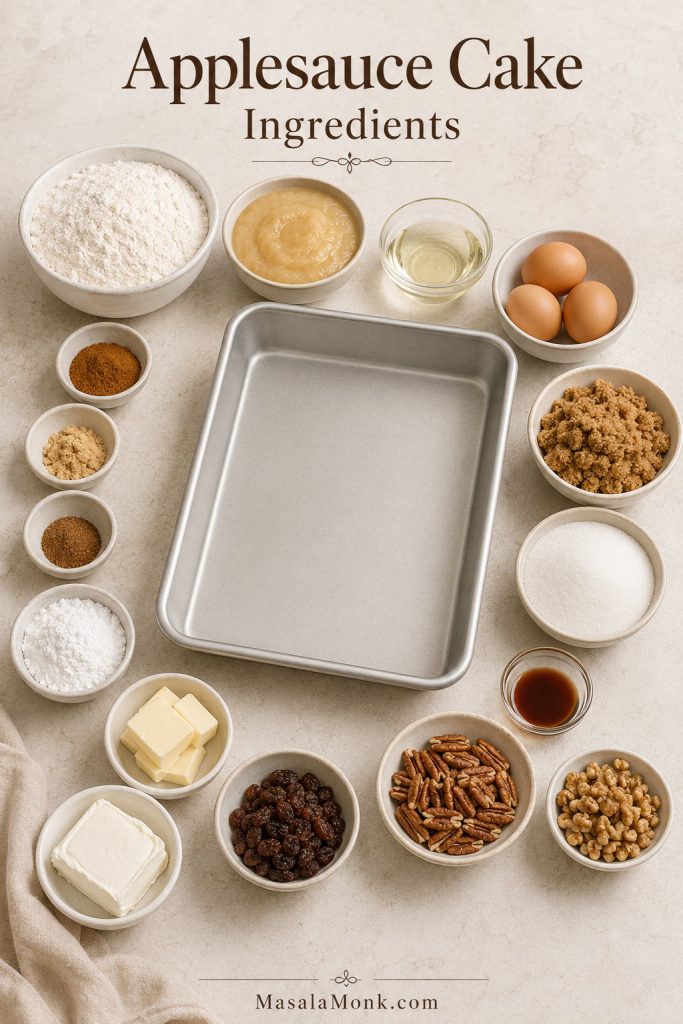
The ingredient list is simple; the texture depends on how you handle a few key choices. Use smooth unsweetened applesauce, measure the flour carefully, keep some oil in the batter, and make sure the spices still smell fresh before you add them. The batter should already smell cozy before it goes into the oven: cinnamon first, then brown sugar, vanilla, and that quiet apple note from the applesauce.

Ingredients for applesauce cake arranged around a 9x13 pan, including applesauce, flour, oil, eggs, sugars, spices, nuts, raisins, cream cheese, butter, and powdered sugar.
A simple pantry cake still depends on balance: watery applesauce slows the center, too much flour dries the crumb, and tired spices make the flavor fall flat.

Best Applesauce to Use

Unsweetened applesauce is the cleanest choice because the batter already has brown sugar and granulated sugar. Sweetened applesauce will work, but the cake can taste more sugary than balanced. Cinnamon applesauce can also work, although it gives you less control over the spice level.

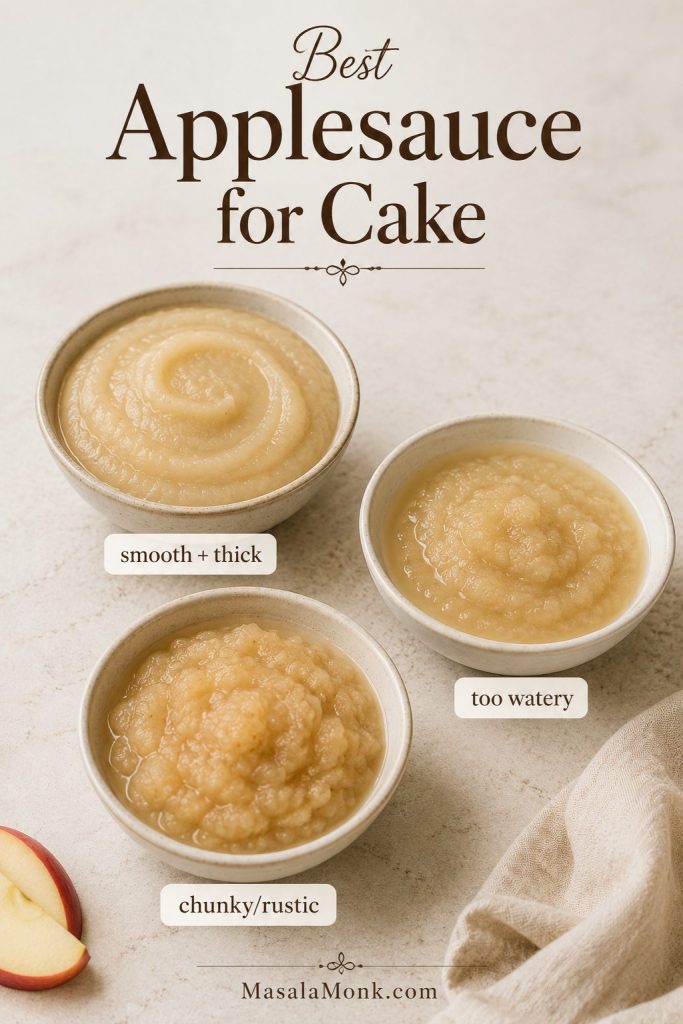
Smooth applesauce gives the most even crumb, which is what you want if this is the kind of cake you plan to frost, slice, and carry to a table without fuss. Chunky applesauce makes the texture more rustic, but large pieces may create damp pockets unless the sauce is thick and the chunks are small. Homemade applesauce is fine as long as it is not watery. If it looks loose, simmer it briefly or drain off extra liquid before measuring.

Three bowls comparing smooth thick applesauce, watery applesauce, and chunky applesauce for baking applesauce cake.
Smooth, thick applesauce gives the most even crumb. However, watery applesauce can loosen the batter and make the center harder to bake through.

If your applesauce looks loose, keep the troubleshooting guide nearby so you know how to avoid a wet or gummy center.

Why This Recipe Uses Applesauce and Oil

Applesauce gives the cake moisture, fruit solids, and mild apple flavor. Oil brings fat, which keeps the crumb soft after baking. Because the batter uses both, the finished squares stay moist without turning rubbery. That balance matters most after cooling, when leaner versions can start to feel dense or chewy.

For a slightly lighter cake, reduce the oil from 3/4 cup to 1/2 cup and add 1/4 cup extra applesauce. The full amount gives the most plush first-bake texture, though. Do not remove all the oil unless you are comfortable with a denser, more snack-cake-style result.

For a lighter version, check the variations section before reducing the oil too aggressively.

Flour, Leavening, and Salt

All-purpose flour gives the cake enough structure to slice cleanly. Spoon and level the flour, or weigh it if you can. Too much flour is one of the easiest ways to lose the soft, snack-cake crumb that makes this recipe work.

This recipe uses both baking powder and baking soda. Baking powder helps lift the batter, while baking soda supports browning and works with the acidity in the applesauce and brown sugar. Salt is not optional here; it keeps the sweetness and spice from tasting flat.

Warm Spices for Old-Fashioned Flavor

Cinnamon does most of the work, but it should not be alone. Ginger adds warmth, nutmeg adds roundness, and a small amount of clove or allspice gives the cake that old-fashioned spice-cake finish. Keep the clove light. Too much can cover the applesauce flavor instead of supporting it.

Before mixing, smell your cinnamon. If it does not make you think of fall before the cake even bakes, it probably will not carry the flavor once it is in the batter. Applesauce is gentle, so the spice blend has to carry the aroma.

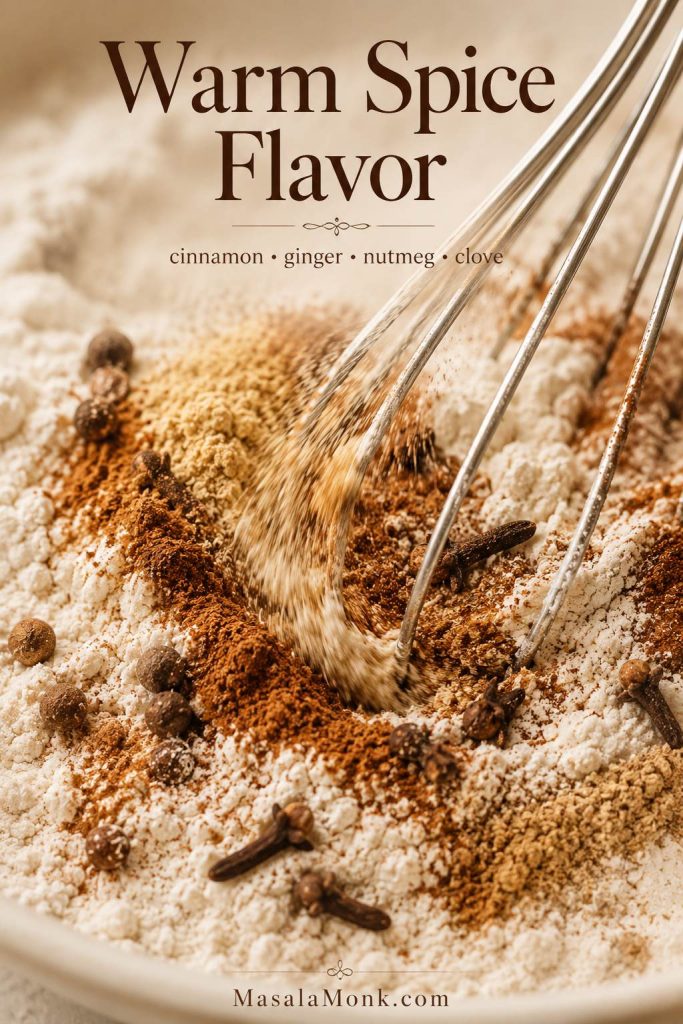
Warm spices including cinnamon, ginger, nutmeg, and clove being whisked into flour for applesauce cake.
Because applesauce has a gentle flavor, the spice blend does much of the aromatic work. Fresh cinnamon, ginger, nutmeg, and clove make the cake taste warmer and fuller.

Optional Raisins, Walnuts, and Pecans

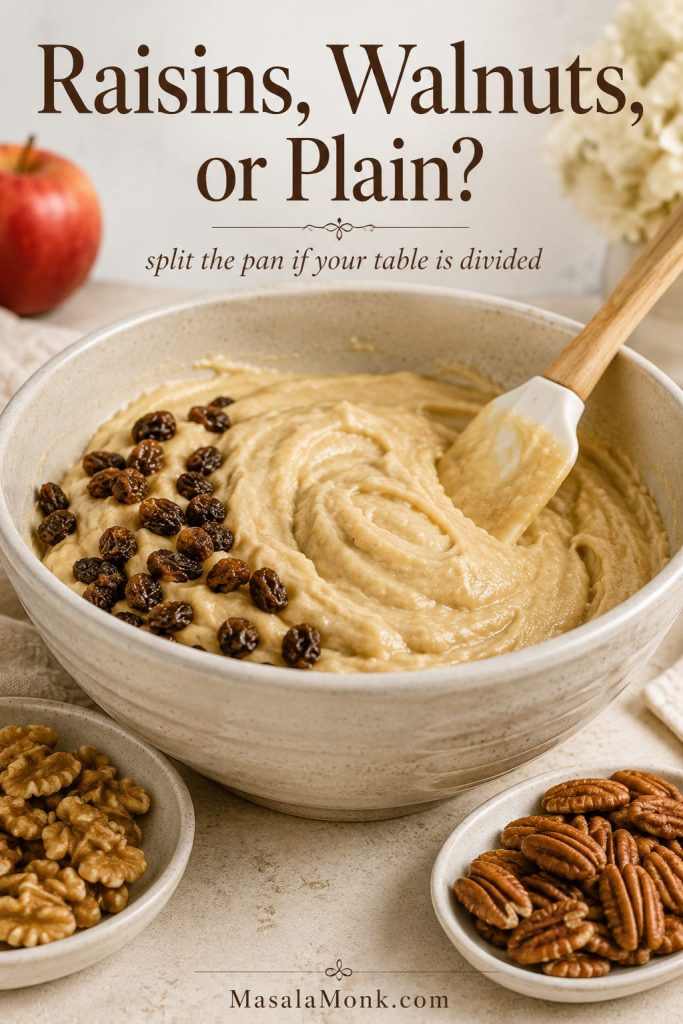
Walnuts make the cake taste classic and slightly earthy. Pecans make it richer and sweeter. Raisins add soft little pockets of fruit, especially if they are soaked in hot water for 10 minutes and drained well before mixing.

To keep add-ins from sinking, toss them with a tablespoon of flour before folding them into the batter. If your table is divided on raisins, leave the batter plain and sprinkle nuts over only half the frosting. Raisins, walnuts, frosting, and powdered sugar all seem to create strong opinions around this cake, which is why a half-and-half pan works so well.

Applesauce cake batter with raisins partly folded in and walnuts and pecans shown nearby as add-in options.
Raisins, walnuts, and pecans are optional, but they change the whole mood of the cake. For divided tables, keep one side plain and add the old-fashioned extras to the other.

How to Make Applesauce Cake Without a Gummy Center

This is a stir-together cake, not a fussy layer cake. You do not need to cream butter, separate eggs, or use a mixer for the batter. The most important steps are preparing the pan, mixing gently, and baking until the center is truly set.

Already comfortable with the steps? Jump to the recipe card. Unsure how the center should look? Use the doneness cues before pulling the pan.

1. Prepare the Pan and Oven

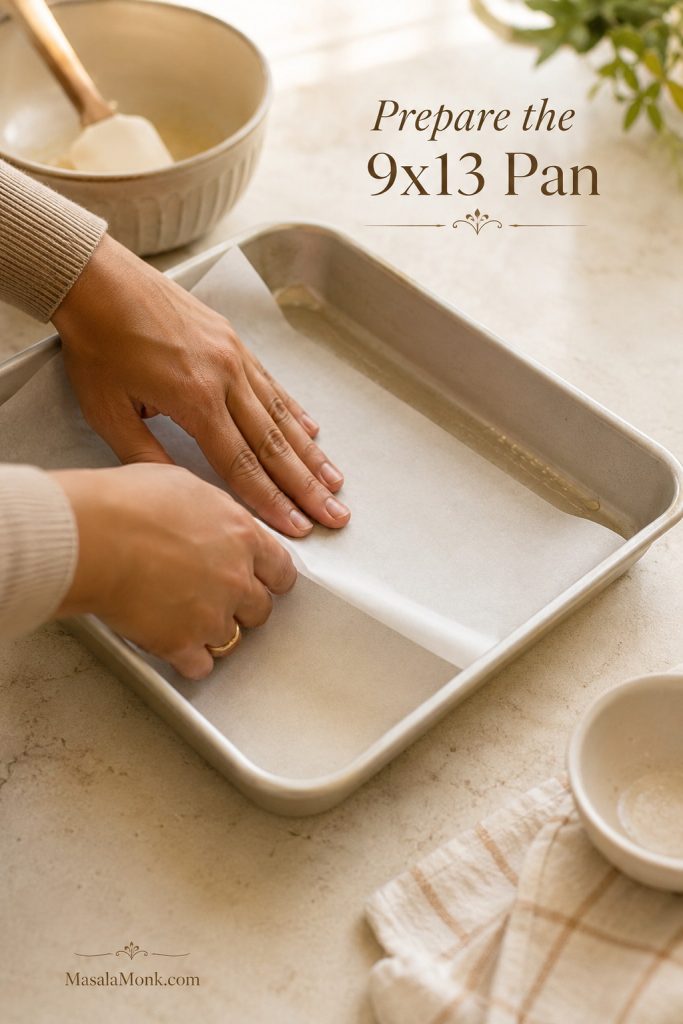
Heat the oven to 350°F / 175°C. Grease a 9×13-inch light metal baking pan, or line it with parchment if you want to lift the cooled cake out for cleaner slices. A light metal pan gives the most reliable, even bake.

Hands smoothing parchment paper into a greased 9x13 metal baking pan before adding applesauce cake batter.
Preparing the pan before mixing saves trouble later. Parchment makes the cooled cake easier to lift, frost, slice, and serve cleanly.

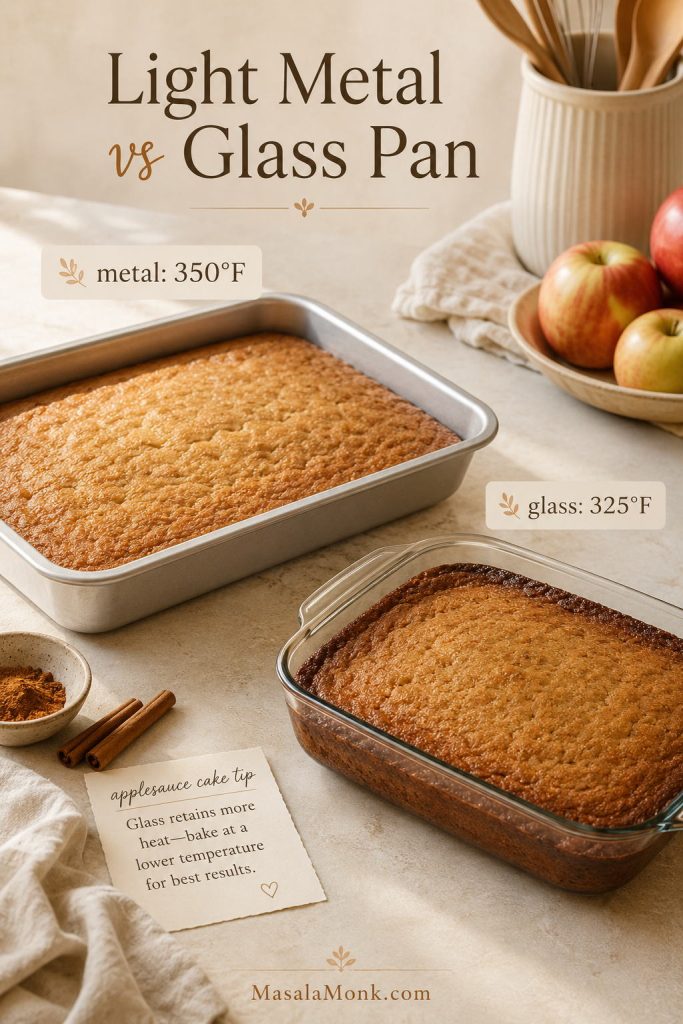
When using a glass pan, reduce the oven temperature to 325°F / 165°C. Glass keeps radiating heat differently than metal, so the edges can race ahead while the center still needs time. The lower temperature gives the middle a better chance to catch up.

Light metal and glass baking pans compared for applesauce cake, with temperature cues for baking in each pan.
Metal and glass do not bake this cake the same way. A light metal 9×13 pan is the easiest first choice, while glass usually needs lower heat.

2. Whisk the Dry Ingredients

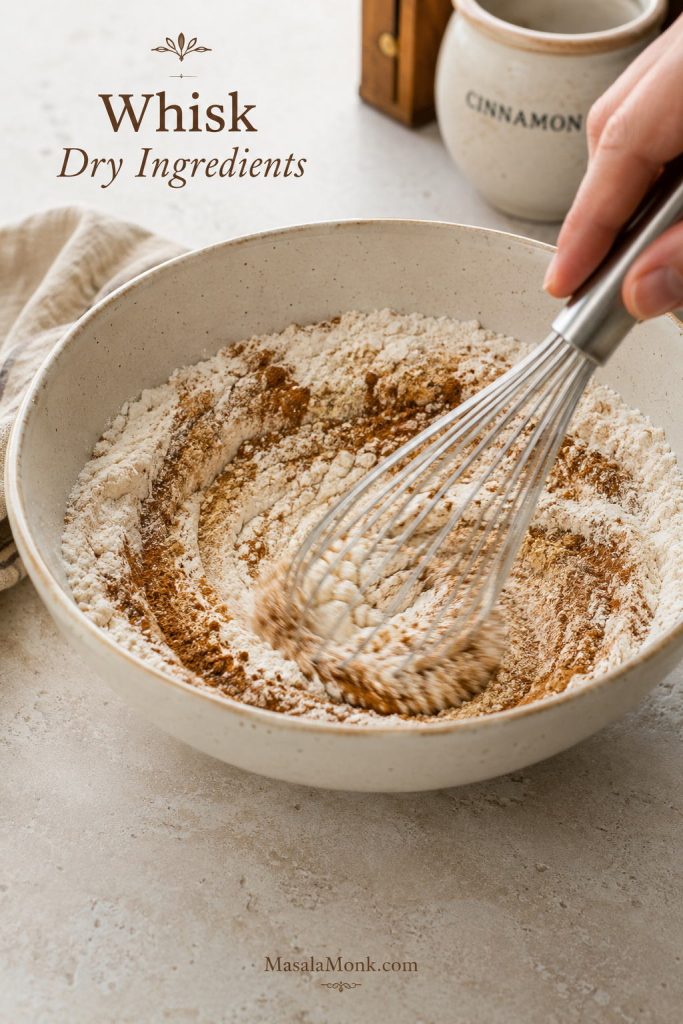
In a medium bowl, whisk the flour, baking powder, baking soda, salt, cinnamon, ginger, nutmeg, and clove or allspice. This spreads the leavening and spices evenly through the flour, so the cake rises well and does not end up with bitter pockets of baking soda or dull patches of spice.

Flour, baking powder, baking soda, salt, and warm spices being whisked together in a bowl for applesauce cake.
A quick whisk before the wet ingredients go in is small insurance; it keeps the rise, salt, and spice evenly spread through every square.

3. Mix the Applesauce, Oil, Eggs, Sugars, and Vanilla

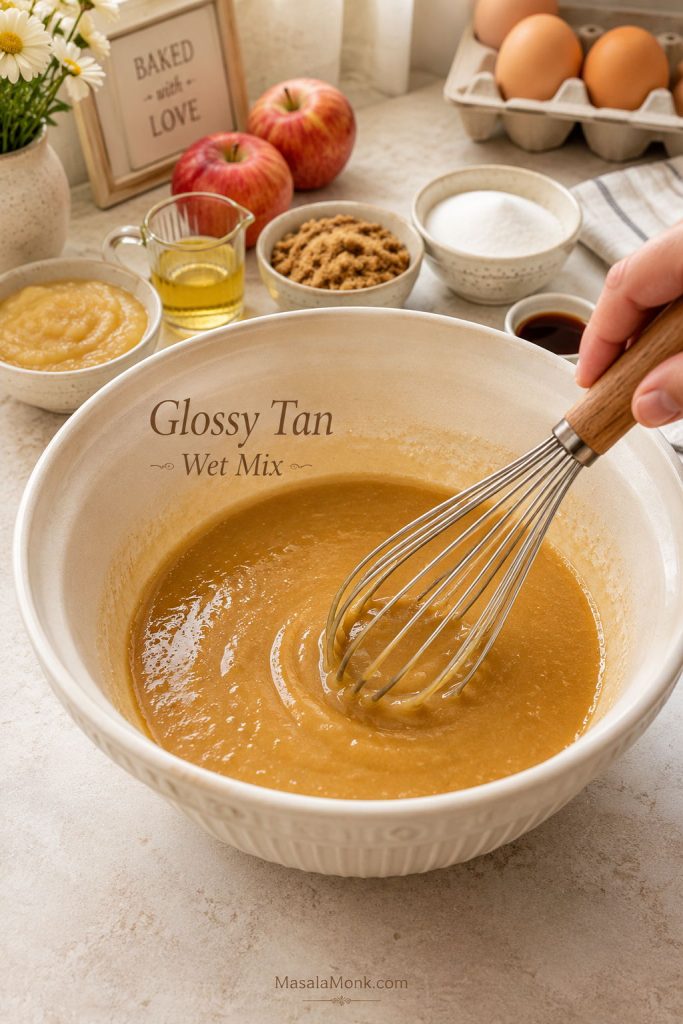
In a larger bowl, whisk the applesauce, oil, eggs, brown sugar, granulated sugar, and vanilla until smooth. The mixture should look loose, glossy, and tan. Break up any lumps of brown sugar now, before the flour goes in.

Applesauce, oil, eggs, brown sugar, granulated sugar, and vanilla whisked into a glossy tan mixture.
Before the flour goes in, the wet mixture should look loose, glossy, and even. At this stage, break up any brown sugar lumps so they do not streak through the batter.

Room-temperature eggs blend more easily, but the cake will still work if you forget. Just whisk the wet ingredients until the eggs are fully incorporated and the mixture looks even. This is the point where the batter starts to smell like the cake you are hoping for: cinnamon, brown sugar, vanilla, and just enough apple to make it feel old-fashioned.

4. Combine Without Overmixing

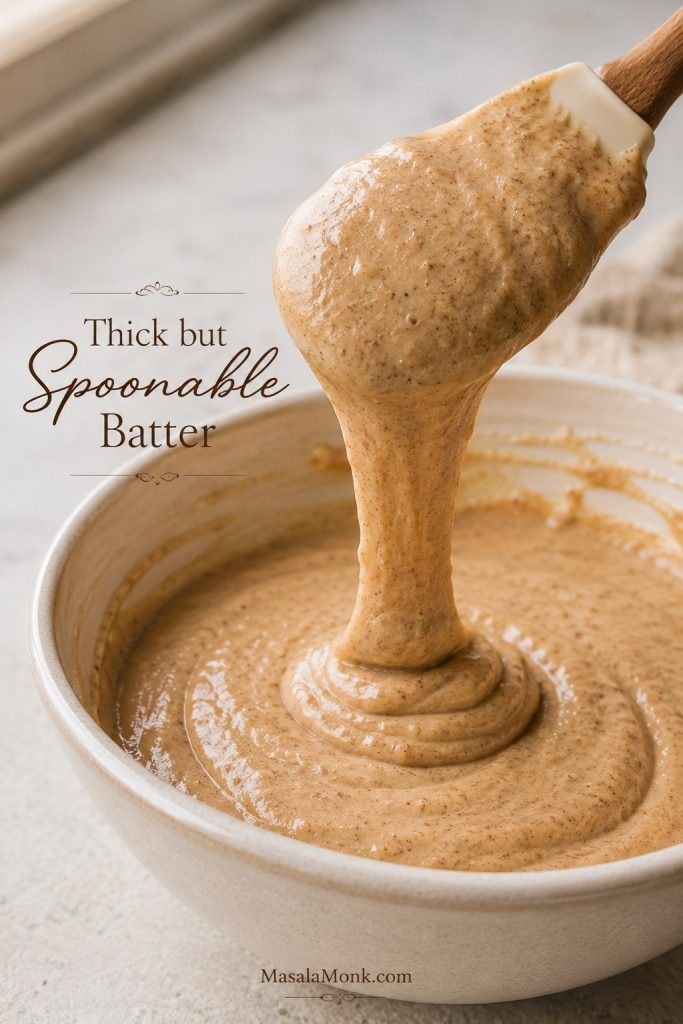
Add the dry ingredients to the wet ingredients and fold just until the flour disappears. The batter should be thick but spoonable, not runny and not stiff like cookie dough. Stop as soon as it comes together. Overmixing develops the flour too much and can make the cake feel tough or gummy.

Thick tan applesauce cake batter lifting from a spatula and falling slowly back into the bowl.
Thick but spoonable batter is the sweet spot. If it pours too loosely, the middle of an applesauce cake can take longer to bake through.

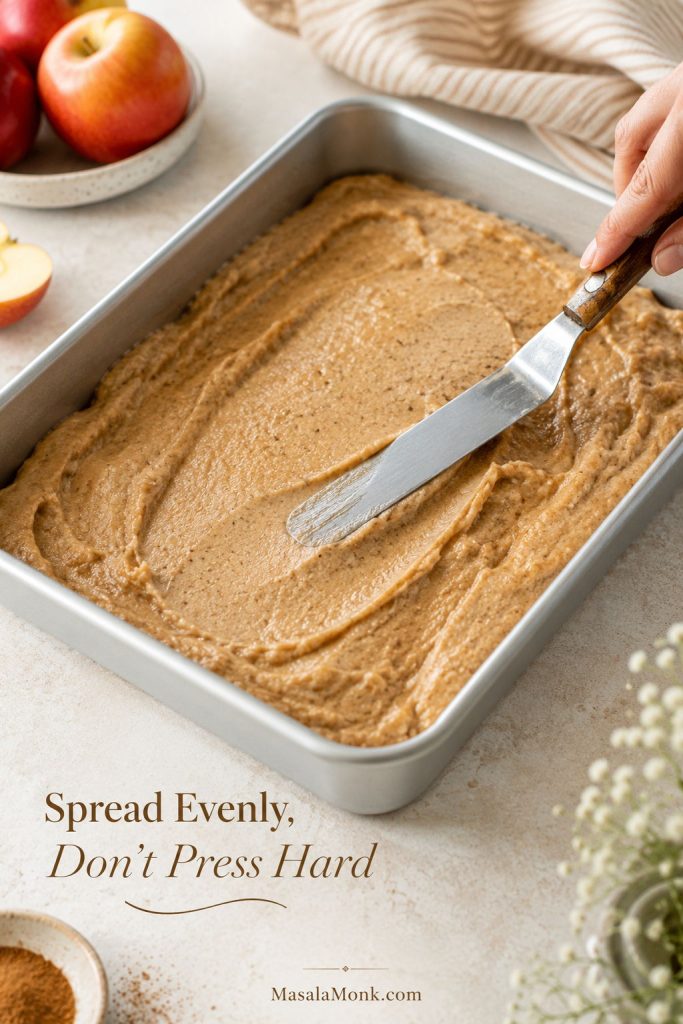
Fold in walnuts, pecans, or raisins at the end if you are using them. Spread the batter evenly into the pan and smooth the top without pressing it down too firmly.

Applesauce cake batter being spread evenly into a 9x13 metal pan with an offset spatula.
Spread the batter evenly, then stop fussing with it. A level surface helps the center and edges bake at a similar pace.

5. Bake Until Moist, Not Gummy

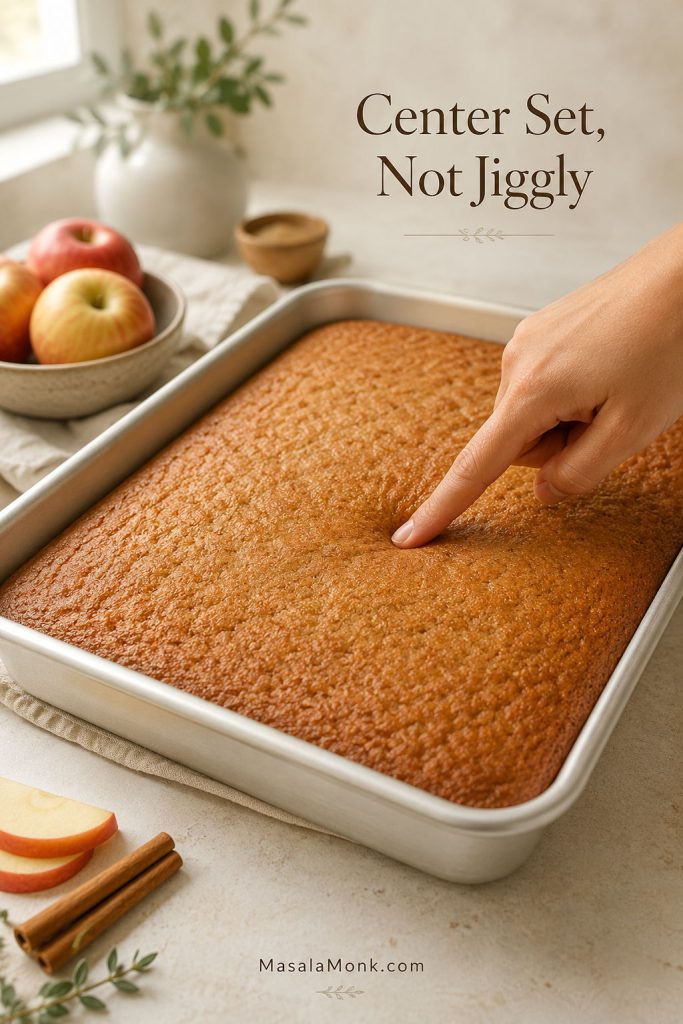
Bake for 30 to 35 minutes, checking near the center around the 30-minute mark. The top should spring back lightly, and a toothpick inserted near the center should come out clean or with a few moist crumbs. Wet batter means the cake needs more time.

The center is the part that lies to you. The edges may look finished while the middle still needs a few more minutes. Since applesauce adds so much moisture, pulling the cake too early is the fastest route to a gummy square in the middle of the pan.

Finger gently pressing the center of a baked applesauce cake in a 9x13 pan to check that it springs back.
The edges often look done first, but the middle decides the cake’s texture. Press gently in the center and look for a light spring-back before pulling the pan.

Before removing the cake from the oven, compare it with the doneness cues so the edges do not trick you into underbaking the center.

6. Cool Completely Before Frosting

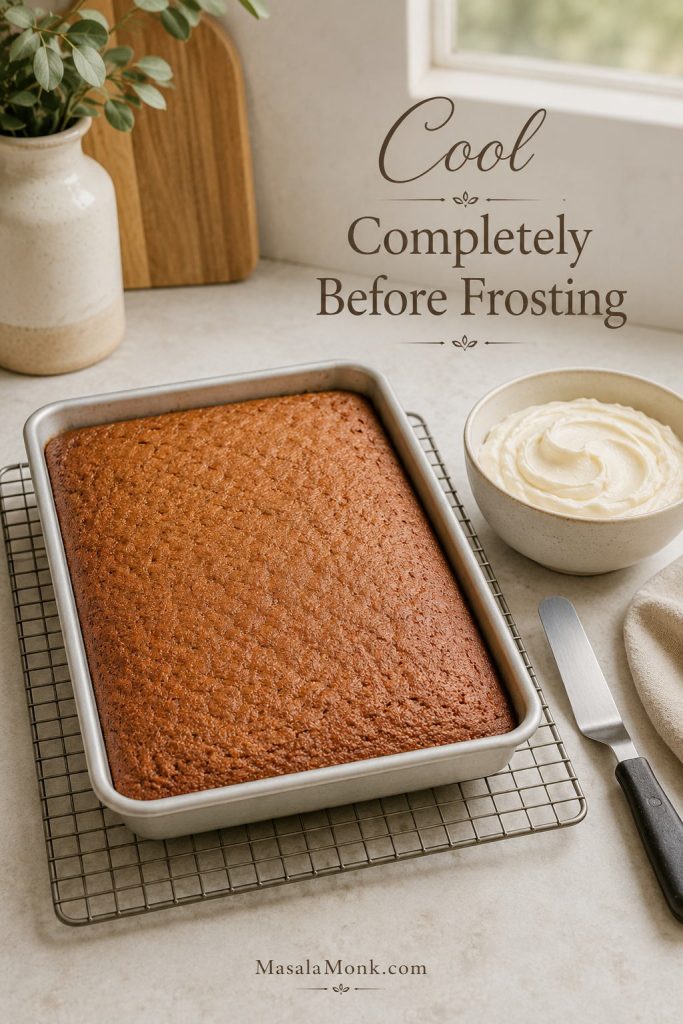
Let the cake cool completely before frosting. Cream cheese frosting melts quickly on a warm cake, and even a slightly warm center can make the frosting slide, soften, or turn greasy. If you are baking ahead, cool the cake, cover it, and frost it the next day.

Unfrosted applesauce cake cooling in a 9x13 metal pan on a wire rack with cream cheese frosting waiting nearby.
Cream cheese frosting behaves best on a fully cooled cake. Even a little trapped warmth can loosen the topping and blur those clean frosted squares.

Can You Make It in One Bowl?

You can make a one-bowl version, but two bowls are more reliable. Whisking the flour, leavening, salt, and spices separately helps the cake rise evenly and keeps the spice flavor consistent. For the easiest cleanup, use one medium bowl for the dry ingredients and one large bowl for everything else.

The visual recipe card below keeps the main bake cues close before the full printable-style details.

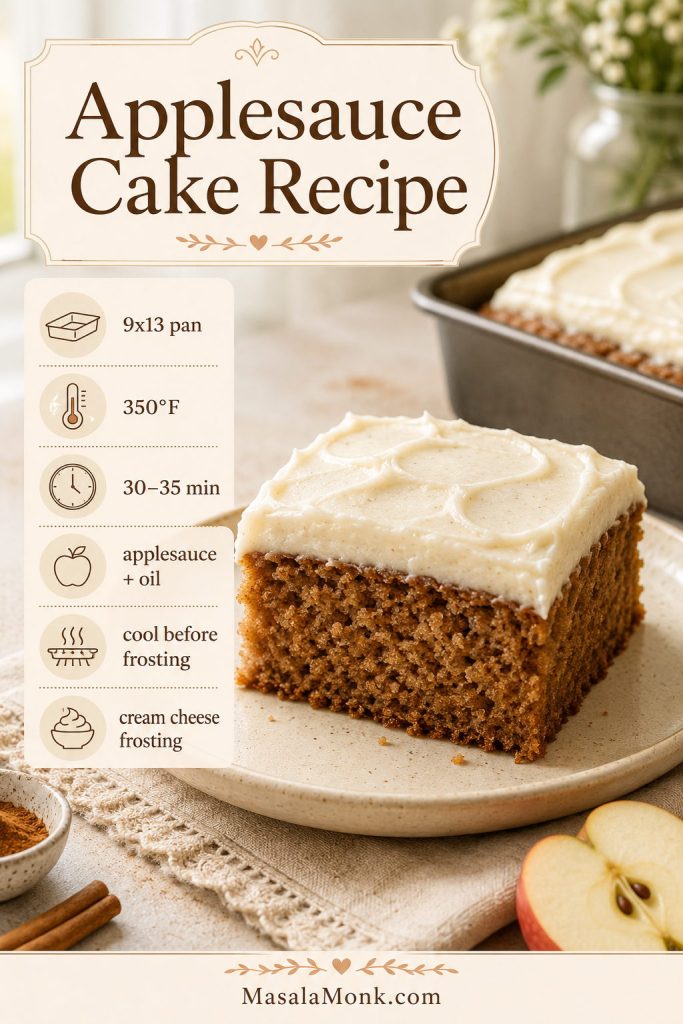
Saveable applesauce cake recipe card with a frosted cake square, 9x13 pan cue, oven temperature, bake time, applesauce and oil cue, and cream cheese frosting note.
This saveable cue card keeps the bake on track: use a 9×13 pan, keep the oven at 350°F, check around 30 minutes, and cool the cake before frosting.

Applesauce Cake Recipe Card

This easy 9×13 applesauce cake recipe has a soft, plush crumb, warm cinnamon-spice flavor, and just enough oil to stay tender after cooling. Frost it with cinnamon cream cheese frosting for a classic dessert finish, or leave it unfrosted for an old-fashioned snack cake.

Prep Time20 minutes
Cook Time30–35 minutes
Cooling Time1–1 1/2 hours
Yield15–16 squares

Equipment

  • 9×13-inch baking pan, preferably light metal
  • Mixing bowls
  • Whisk and silicone spatula
  • Measuring cups/spoons or kitchen scale
  • Toothpick, cake tester, or instant-read thermometer
  • Wire cooling rack
  • Hand mixer or stand mixer for frosting
  • Offset spatula, optional

Ingredients

For the Cake

  • 2 1/2 cups all-purpose flour, spooned and leveled, about 300–315g
  • 2 teaspoons baking powder
  • 1 teaspoon baking soda
  • 3/4 teaspoon fine salt
  • 1 tablespoon ground cinnamon
  • 1/2 teaspoon ground ginger
  • 1/2 teaspoon ground nutmeg
  • 1/4 teaspoon ground cloves or allspice
  • 2 cups smooth unsweetened applesauce, about 490–500g
  • 3/4 cup neutral oil, 180ml
  • 2 large eggs, room temperature if possible
  • 3/4 cup packed light brown sugar, about 150g
  • 1/2 cup granulated sugar, about 100g
  • 2 teaspoons vanilla extract
  • 3/4 cup chopped walnuts or pecans, optional
  • 1/2 cup raisins, optional

For the Cinnamon Cream Cheese Frosting

  • 8 oz brick-style cream cheese, softened, 226g
  • 6 tablespoons unsalted butter, softened, 85g
  • 2 1/2 to 3 cups powdered sugar, 300–360g
  • 1 teaspoon vanilla extract
  • 1/4 to 1/2 teaspoon cinnamon
  • Pinch of salt

Instructions

  1. Heat the oven. Preheat to 350°F / 175°C. Grease a 9×13-inch light metal baking pan or line it with parchment.
  2. Whisk the dry ingredients. In a medium bowl, whisk flour, baking powder, baking soda, salt, cinnamon, ginger, nutmeg, and cloves or allspice.
  3. Mix the wet ingredients. In a large bowl, whisk applesauce, oil, eggs, brown sugar, granulated sugar, and vanilla until smooth.
  4. Combine. Add the dry ingredients to the wet ingredients and fold just until no dry streaks remain. Fold in nuts or raisins if using.
  5. Bake. Spread the batter into the pan. Bake for 30 to 35 minutes, until the center no longer jiggles, springs back lightly, and a toothpick comes out clean or with a few moist crumbs.
  6. Cool. Let the cake cool completely in the pan before frosting.
  7. Make the frosting. Beat cream cheese and butter until smooth. Add powdered sugar, vanilla, cinnamon, and salt. Beat until creamy, using more powdered sugar for a thicker frosting.
  8. Frost and slice. Spread over the cooled cake, slice into squares, and serve.
Glass pan note: If baking in a glass 9×13 pan, reduce the oven to 325°F / 165°C and begin checking around 35 minutes. Glass can brown the edges before the center is fully set.
Using a different pan? Check the pan size and bake-time guide before adjusting the recipe.
Frosting note: Use brick-style cream cheese, not tub-style spread. Tub cream cheese is softer and can make the frosting loose.

How to Tell When the Cake Is Done

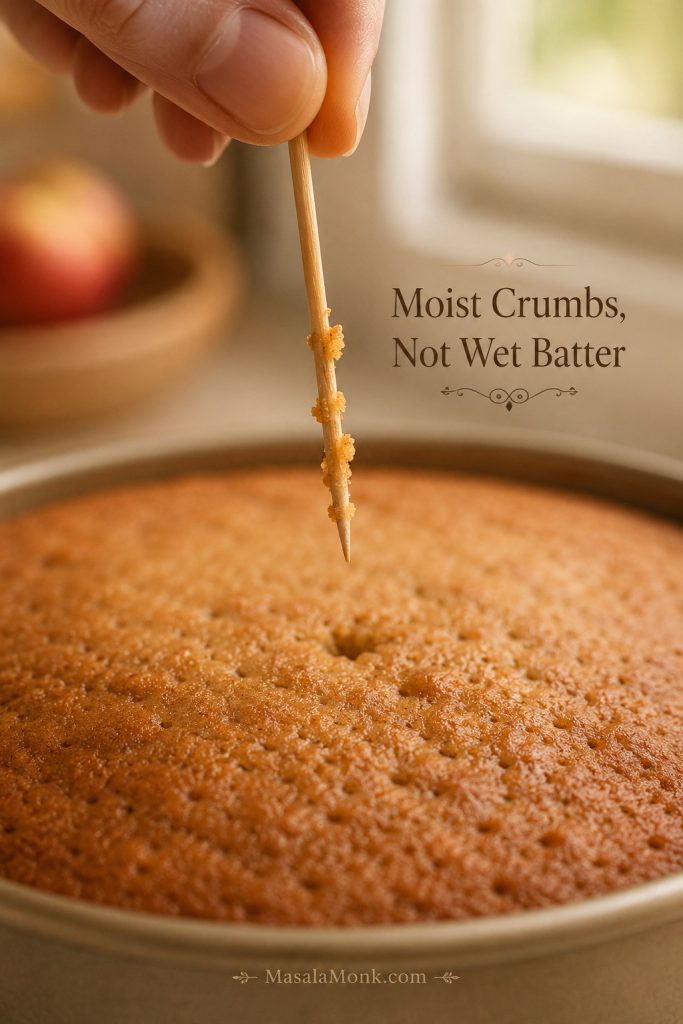
Do not pull the pan from the oven just because the edges look set. The center matters most. Look for three signs together: the top springs back lightly, the middle no longer jiggles, and a toothpick inserted near the center comes out clean or with a few moist crumbs.

Toothpick lifted from the center of applesauce cake with a few moist crumbs attached and no wet batter.
Moist crumbs mean the cake has baked through without drying out. Wet batter on the toothpick, however, means the center still needs more oven time.

A few soft crumbs are fine. Wet batter is not. Since applesauce keeps the batter moist, an underbaked center can seem acceptable while warm but turn dense and gummy as the cake cools. When in doubt, bake another 3 to 5 minutes and check again.

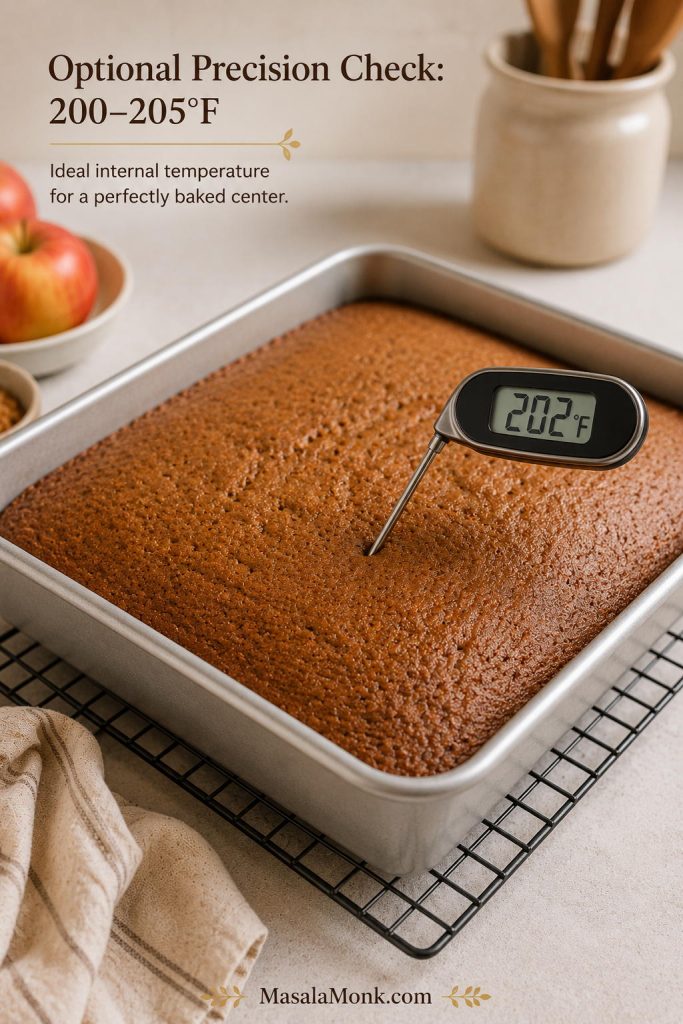
For extra precision, the center should be around 200–205°F / 93–96°C on an instant-read thermometer. You do not need to check this every time, but it helps if your oven runs cool, your pan is glass, or you are adapting the batter to a deeper pan.

Instant-read thermometer inserted into the center of applesauce cake showing a temperature around 202 degrees Fahrenheit.
An internal temperature around 200 to 205°F is a helpful backup check, especially when using glass, a deeper pan, or an oven that runs cool.

Cream Cheese Frosting, Glaze, or Powdered Sugar?

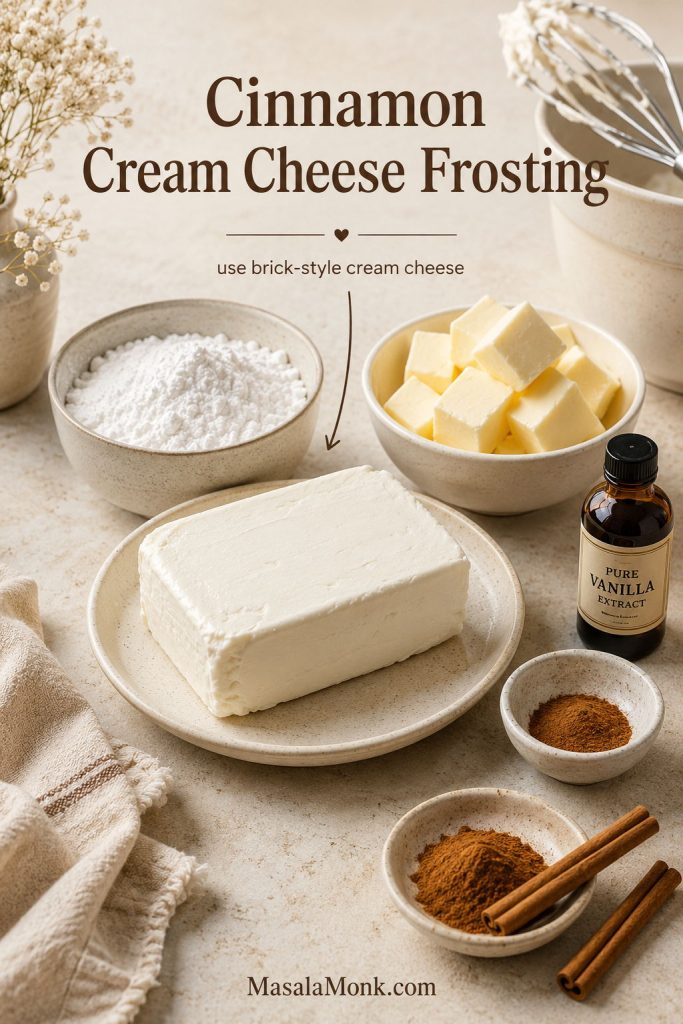
Cream cheese frosting is the classic dessert finish. The tang balances the brown sugar and warm spices, while the cinnamon ties the frosting back into the cake. Make this version when you want a soft square to feel like dessert rather than an everyday snack.

Cream cheese frosting ingredients for applesauce cake, including brick-style cream cheese, butter, powdered sugar, vanilla, and cinnamon.
Brick-style cream cheese gives the frosting more structure than tub-style spread. That small choice helps the topping stay creamy instead of loose or runny.

Powdered sugar makes the cake feel more old-fashioned. A thin vanilla glaze suits Bundt cakes and loaf cakes because it sets neatly and slices cleanly. No frosting at all works when you want the spice and applesauce flavor to stay in front.

The topping is where this cake changes personality, and it is also where families tend to have the strongest opinions. Frosted, it feels like dessert. Unfrosted, it feels like the kind of cake you cut in small squares with coffee, then somehow return to again before dinner. If the cake is for lunchboxes or a room-temperature table, powdered sugar or glaze is easier than cream cheese frosting.

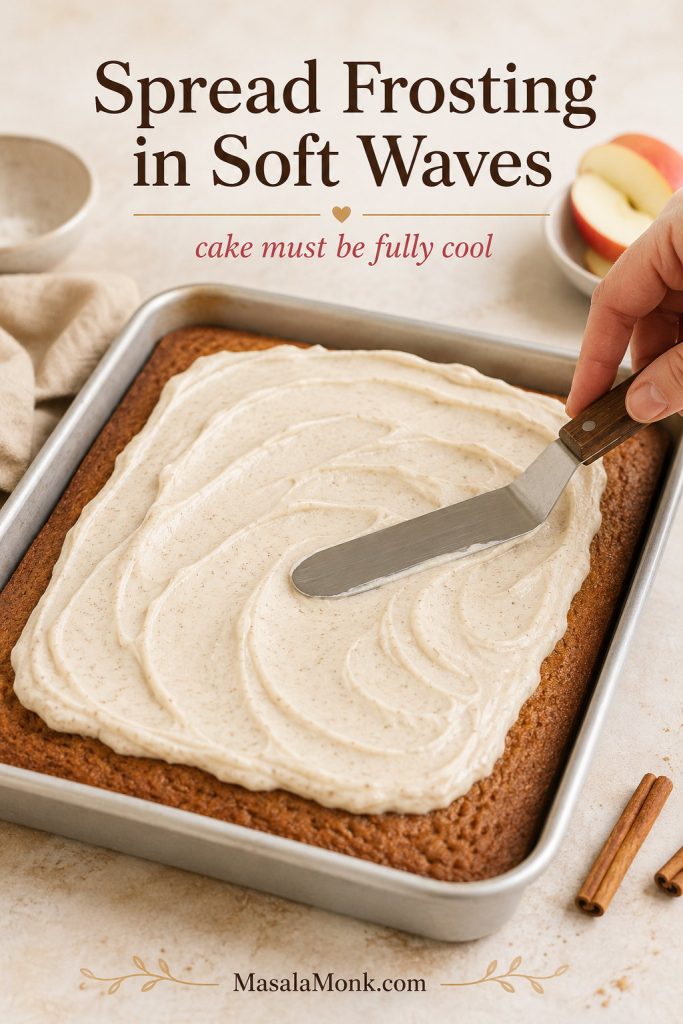
Cream cheese frosting being spread in soft waves over a cooled 9x13 applesauce cake with an offset spatula.
Once the cake is fully cool, spread the frosting in soft waves rather than a thick slab. The topping should feel creamy without overwhelming the spice cake.

Applesauce Cake Topping Options

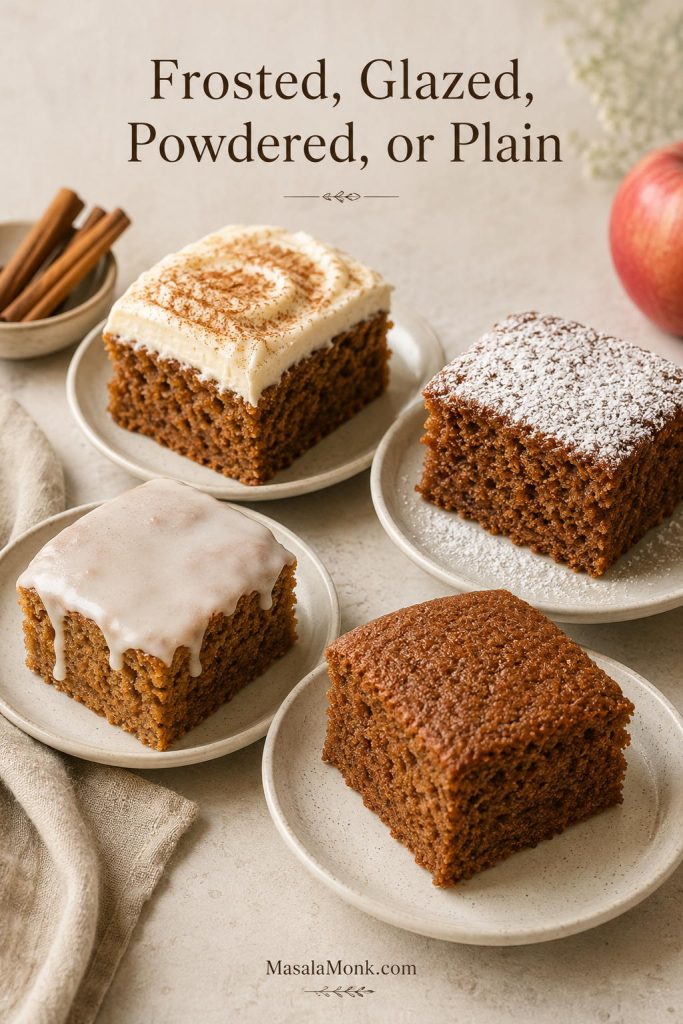
Four applesauce cake squares with different toppings: cream cheese frosting, vanilla glaze, powdered sugar, and plain.
The same applesauce cake can become dessert, coffee cake, lunchbox snack, or an old-fashioned plain square depending on how you finish the top.
Topping Best For Flavor
Cinnamon cream cheese frosting Classic dessert-style cake Tangy, creamy, warmly spiced
Brown butter cream cheese frosting Holiday or potluck version Nutty, rich, deeper
Powdered sugar Old-fashioned snack cake Simple and not too sweet
Vanilla glaze Bundt cake or loaf cake Sweet, neat, easy to slice
No frosting Breakfast, lunchbox, or coffee break More spice-forward

Applesauce Cake Pan Swaps and Bake-Time Changes

Start with the 9×13 Pan

A 9×13 pan is the most reliable first bake because the batter has room to set evenly. Deeper pans need more patience in the center, while wider pans bake faster and can dry out if you wait too long to check them.

Use the table below as a starting point, but let the center make the final call. This cake can look finished at the edges before the middle is ready, especially in glass, Bundt, or loaf pans.

Pan Size and Bake-Time Guide

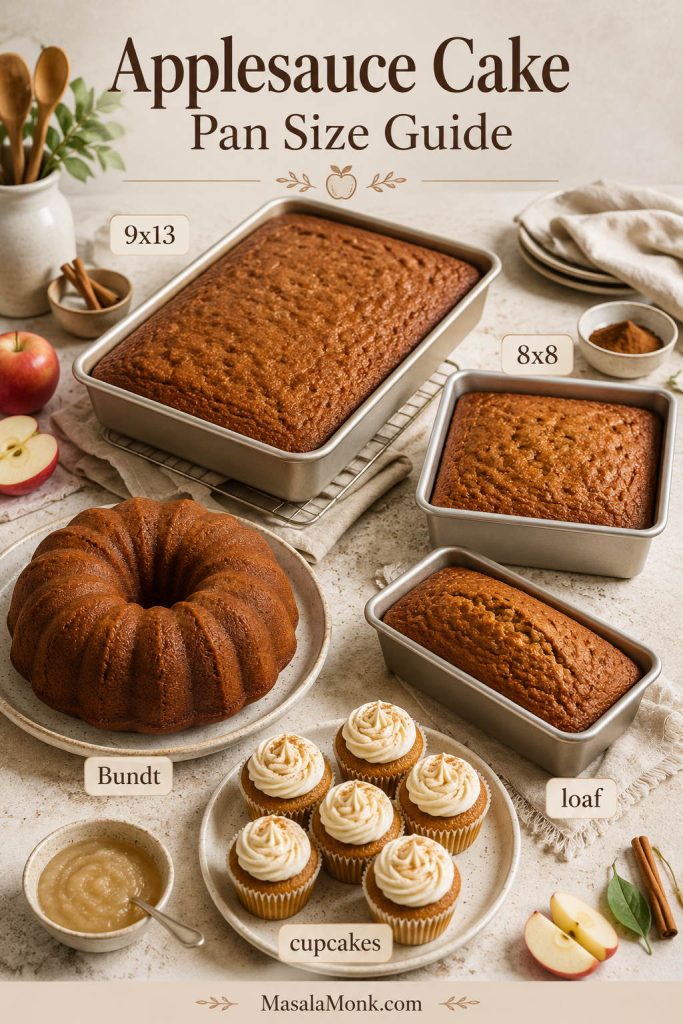
Applesauce cake pan size guide showing a 9x13 pan, 8x8 pan, Bundt cake, loaf pan, and cupcakes.
The 9×13 pan is the easiest starting point, but once the batter moves into Bundt, loaf, cupcake, or smaller pans, depth changes the bake time.
Pan Oven Approximate Bake Time Notes
9×13 metal pan 350°F / 175°C 30–35 minutes Most reliable default for this recipe.
9×13 glass pan 325°F / 165°C 35–42 minutes Lower heat helps protect the edges.
8×8 half batch 350°F / 175°C 30–38 minutes Use half the batter or halve the recipe.
15×10 sheet pan 350°F / 175°C 18–22 minutes Thinner cake; check early.
Bundt pan 350°F / 175°C 45–60 minutes Grease very well and check the deepest part.
Two 8-inch round pans 350°F / 175°C 25–32 minutes Useful for a simple layer cake.
Cupcakes 350°F / 175°C 18–22 minutes Fill liners about two-thirds full.
Two 9×5 loaf pans 350°F / 175°C 50–60 minutes Tent loosely if the tops brown too quickly.

If changing the pan changes the texture, use the problem-solving guide to diagnose whether the cake needed more time, less moisture, or gentler mixing.

Bundt Pan Release Tips

Bundt pans need special care because moist cakes are more likely to stick in the ridges. Grease every detail of the pan carefully, let the cake cool before unmolding, and use a glaze instead of soft frosting. King Arthur Baking has a useful guide to preventing Bundt cakes from sticking if you bake in shaped pans often.

Variations and Easy Changes

Once the base cake is right, it can move in several directions without losing its soft crumb. The first bake teaches you what the texture should feel like; after that, these variations make more sense.

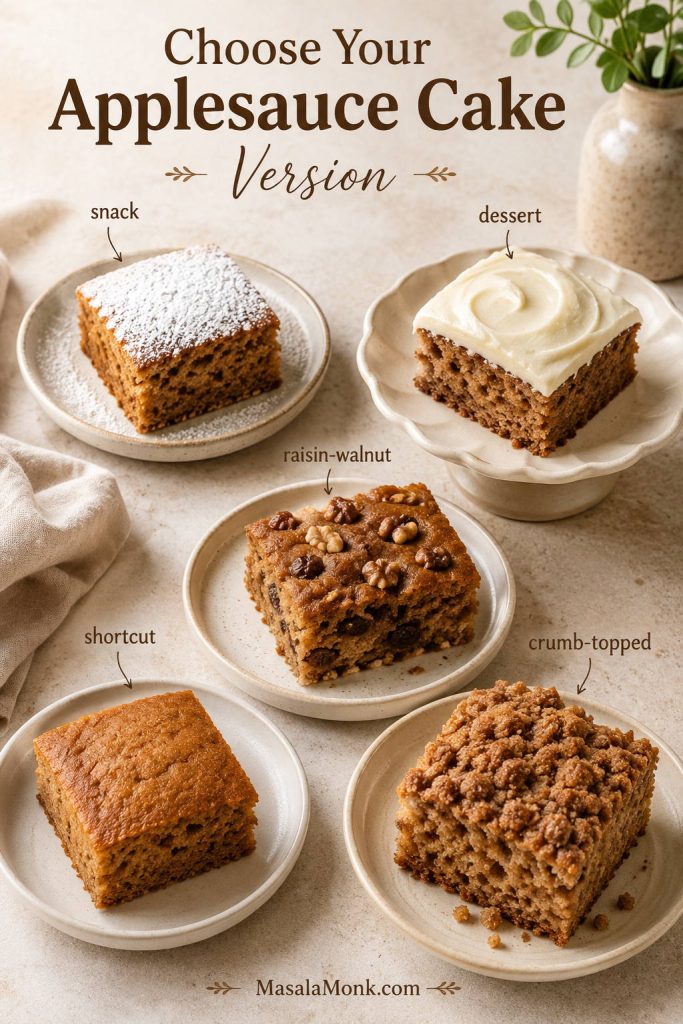
Applesauce cake variation guide showing powdered sugar snack cake, frosted dessert cake, raisin-walnut cake, shortcut cake, and crumb-topped cake.
Choose the version by mood: powdered sugar for snack cake, cream cheese frosting for dessert, raisins and walnuts for old-fashioned flavor, or crumb topping for coffee-cake style.
Version Choose It When What to Change
Less sweet You want a snack cake Skip frosting or use powdered sugar.
More dessert-like You want a potluck or holiday cake Use full oil and cream cheese frosting.
More old-fashioned You like recipe-box flavor Add raisins and walnuts.
Shortcut version You want almost no measuring Use cake mix, applesauce, and eggs.
Brunch-style You want coffee cake energy Use crumb topping and a light glaze.

Old-Fashioned Raisin-Walnut Version

Fold in 1/2 cup raisins and 3/4 cup chopped walnuts or pecans. Skip the frosting and dust the cooled cake with powdered sugar for a more old-fashioned coffee-cake feel, or keep the cream cheese frosting when you want a richer dessert.

This version feels closest to an older recipe-box cake: soft crumb, warm spice, little bites of fruit and nuts, and a flavor that deepens overnight. It is especially good with coffee or black tea.

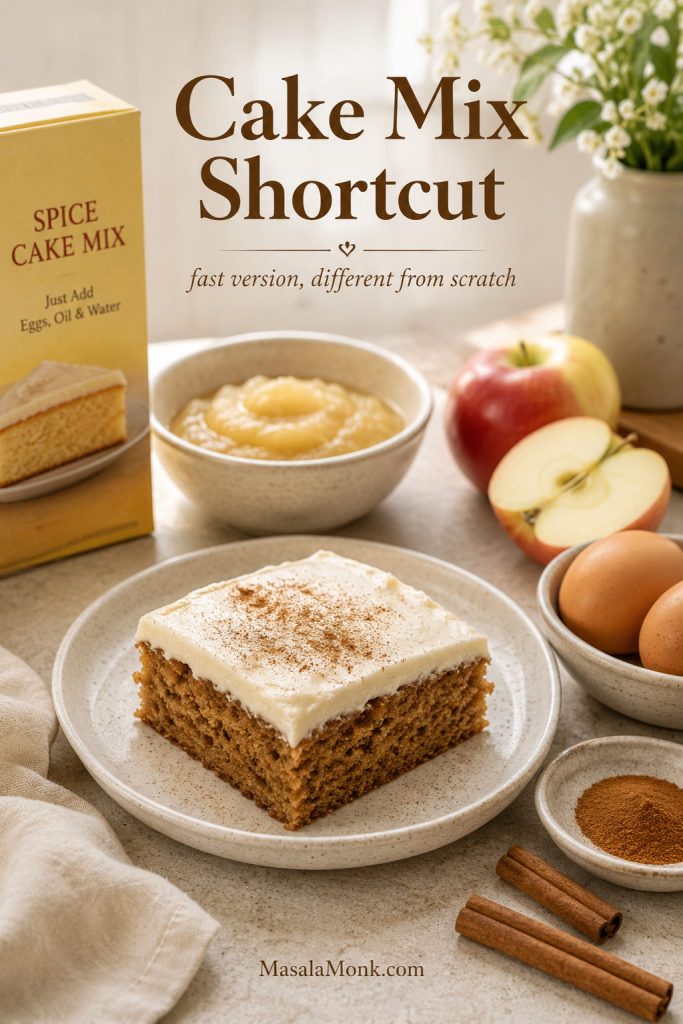
Cake Mix Shortcut

This is not the same cake as the from-scratch version, but it is useful when you want the applesauce-spice idea with almost no measuring. For the simplest shortcut, use a 15.25 oz box of yellow or spice cake mix, 1 1/2 cups applesauce, and 3 large eggs. Bake in a greased 9×13 pan at 350°F until set, usually around 25 to 35 minutes depending on the mix and pan.

Applesauce cake mix shortcut setup with boxed cake mix, applesauce, eggs, cinnamon, and a frosted cake square.
A cake mix shortcut is useful when speed matters, although the texture will be different from the from-scratch applesauce cake.

The three-ingredient version wins on speed. The version with a little oil or melted butter tastes softer, richer, and less lean. For that style, add 2 to 4 tablespoons oil or melted butter and 1 to 2 teaspoons cinnamon.

If shortcut apple desserts are what you reach for most often, the same easy-bake mood also works in an apple cinnamon roll bake with apple pie filling, where refrigerated cinnamon rolls and apple filling turn into a warm 9×13 dessert.

Crumb Cake or Coffee Cake Style

To move this cake toward crumb cake, skip the cream cheese frosting and add a cinnamon brown sugar crumb topping before baking. Use a moderate layer of crumb at first because this batter is already moist. A very heavy topping can slow down the center and make the cake harder to bake evenly.

For a brunch-style version, add chopped nuts or oats to the crumb and finish with a thin vanilla glaze after cooling. Because the crumb topping changes how heat moves through the cake, check the center carefully and expect the bake time to shift slightly.

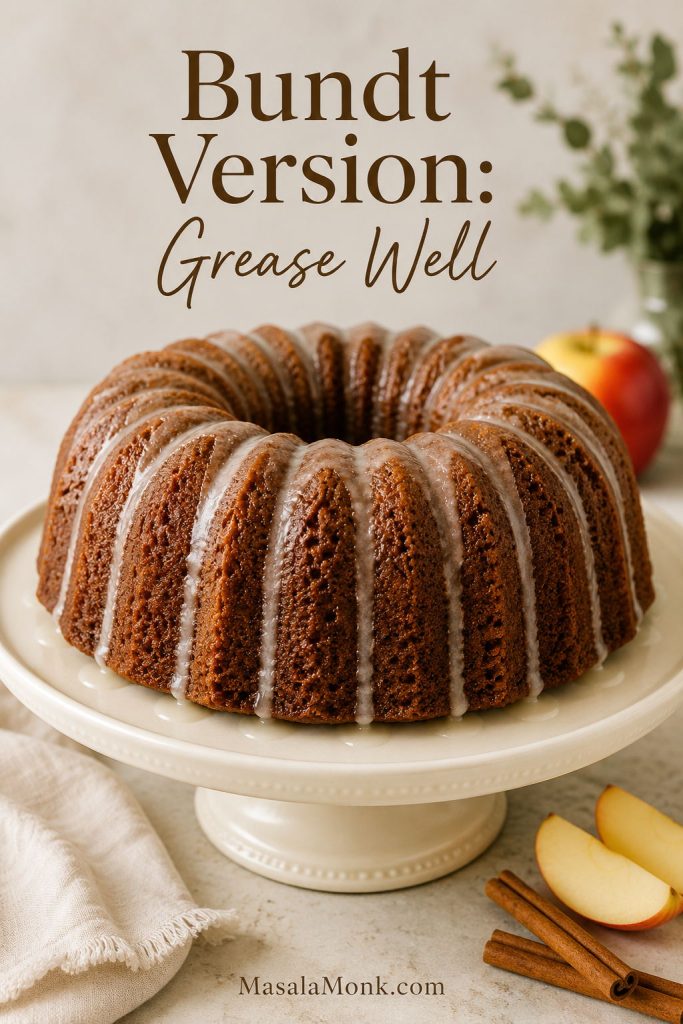
Bundt Cake Version

A Bundt version works well with vanilla glaze, maple glaze, or brown butter glaze. Grease every ridge of the pan, bake longer, and cool the cake before turning it out. The deepest part should be fully set before unmolding.

Applesauce Bundt cake with a thin glaze dripping down the ridges on a cream cake stand.
A Bundt version works best with careful pan greasing and a thin glaze. That way, the ridges stay visible and the cake releases more cleanly.

Gluten-Free or Almond Flour Version

For the closest gluten-free version, use a tested 1:1 gluten-free flour blend in place of the all-purpose flour. The texture may still be a little different, but the structure is more predictable than an almond flour swap.

Do not replace the flour with almond flour 1:1 in this batter. Almond flour needs different liquid, egg, and structure. Because applesauce already adds moisture, a casual almond flour swap can turn the cake oily, fragile, or gummy. For an almond flour version, use a formula written for almond flour from the start.

Vegan or Eggless Version

Eggless applesauce cake is possible, but this batter should not be converted by simply adding more applesauce. Applesauce is already the main moisture ingredient here, so using extra applesauce as an egg replacement can push the cake toward gummy.

For an egg-free version, start with a formula built that way from the beginning. This batter already gets so much moisture from applesauce that simply adding more can make the center heavy instead of soft.

Lighter or Lower-Sugar Version

For a lighter cake, use unsweetened applesauce, reduce the granulated sugar slightly, and serve the cake unfrosted or with a thin glaze. You can also cut the oil to 1/2 cup and add 1/4 cup extra applesauce, but the crumb will be a bit less plush.

Avoid removing all the oil on the first attempt. A little fat keeps the cake softer and prevents the texture from becoming rubbery. If you enjoy using applesauce in breakfast-style baking, it can also work as a moisture helper in recipes like oat pancakes, where softness and natural sweetness matter.

Common Applesauce Cake Problems and Fixes

When this cake disappoints, the problem usually comes from one of a few places: too much moisture, too much flour, not enough bake time, or overmixing. Once you know which one is working against you, the next pan is much easier to fix.

Texture, Bake-Time, and Flavor Problems

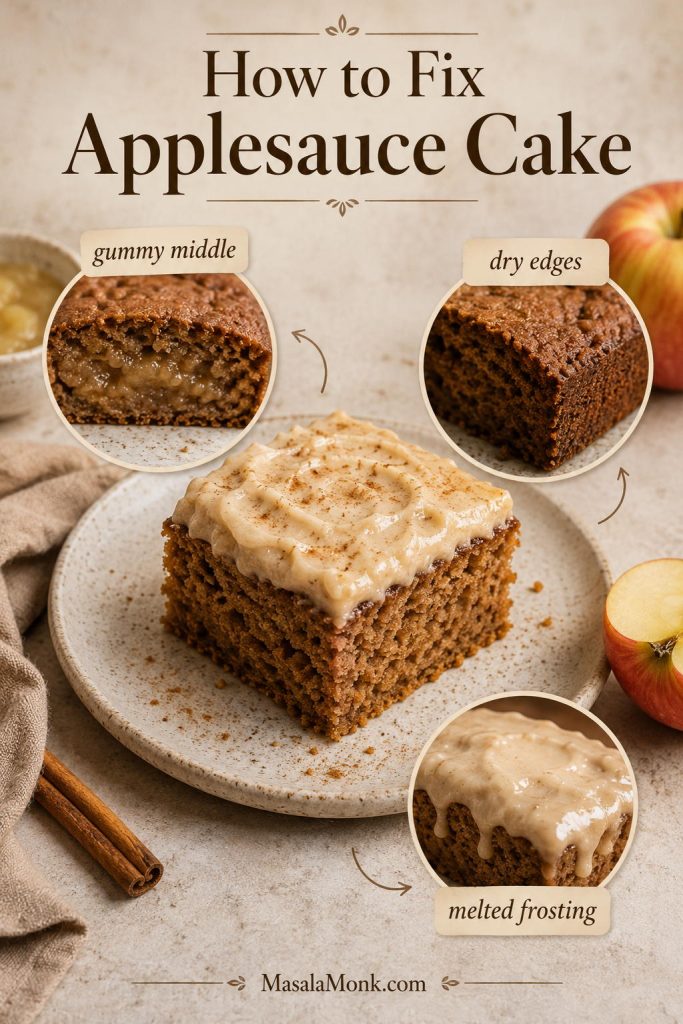
Troubleshooting board for applesauce cake showing gummy middle, dry edges, and melted frosting problems around a central frosted cake square.
A gummy middle, dry edges, or melted frosting usually points to one of four fixes: thicker applesauce, gentler mixing, more bake time, or longer cooling.
Problem Likely Cause Fix
Gummy middle Underbaked cake, watery applesauce, too much applesauce, or overmixed batter Bake until the center is fully set; use thick applesauce; mix only until combined.
Dry cake Too much flour or overbaking Spoon and level flour or use grams; start checking around 30 minutes.
Sank in the center Opened oven early or pulled the pan before the center set Do not open the oven too early; check the center, not just the edges.
Bland flavor Old spices, not enough salt, or too little vanilla Use fresh cinnamon and the full spice blend; do not skip the salt.
Weak apple flavor Applesauce flavor is naturally mild Expect spice-cake flavor with gentle apple in the background, or add a small amount of finely diced apple.

Pan, Add-In, and Frosting Problems

Problem Likely Cause Fix
Frosting melted Cake was still warm Cool completely before frosting.
Edges too dark Dark pan, glass pan, or overbaking Use a light metal pan or reduce heat for glass.
Nuts or raisins sank Add-ins were heavy or batter was loose Toss add-ins with 1 tablespoon flour before folding in.
Baking soda aftertaste Leavening was unevenly mixed or measured heavily Measure carefully and whisk the dry ingredients thoroughly.
Frosting too loose Tub cream cheese, warm butter, or too little powdered sugar Use brick cream cheese, softened butter, and add powdered sugar gradually.

Once you know what went wrong, return to the texture checklist before your next bake.

How to Store, Freeze, and Make Ahead

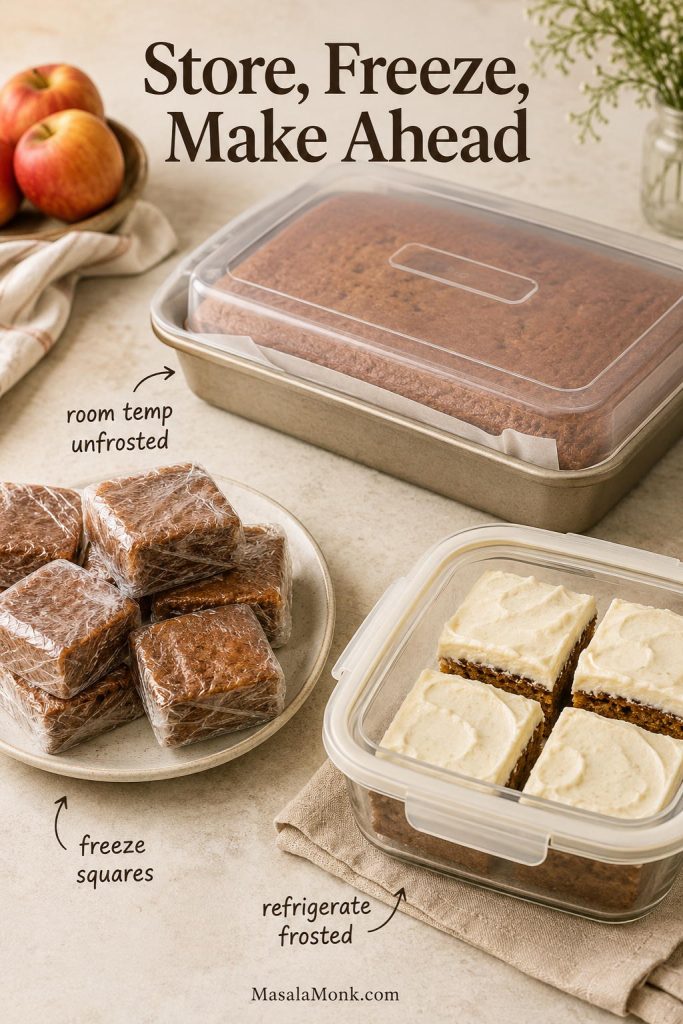
Unfrosted cake can be covered and stored at room temperature for about 2 days if your kitchen is cool. Once it has cream cheese frosting, refrigerate it. Let chilled slices sit at room temperature for 15 to 20 minutes before serving so the frosting softens and the crumb tastes tender again instead of cold and tight.

To freeze, wrap unfrosted squares tightly and freeze for up to 2 to 3 months. Thaw overnight in the refrigerator or at room temperature, then frost after thawing for the freshest texture.

This applesauce cake recipe is also easy to make ahead. Bake the cake one day ahead, cool it completely, cover it, and frost it the next day. The spice flavor often improves after resting because the cinnamon, brown sugar, and applesauce have time to settle into the crumb.

Storage guide showing a covered unfrosted applesauce cake pan, wrapped cake squares for freezing, and frosted slices in a container.
For make-ahead ease, freeze unfrosted squares and refrigerate anything with cream cheese frosting. Then let chilled slices soften before serving.

If you are baking ahead for a gathering, choose the topping from the frosting and topping guide after deciding how long the cake needs to sit out.

What to Serve with Applesauce Cake

This cake does not need much beside it. A square with coffee, black tea, chai, or cold milk is enough for an afternoon snack. If you want the whole table to lean into fall, a mug of healthy pumpkin spice latte keeps the cinnamon-and-spice mood going without adding another heavy dessert.

For dessert, serve it with vanilla ice cream, lightly whipped cream, caramel drizzle, or a few toasted walnuts scattered over the frosting. For brunch, cut it into smaller squares and keep the topping simple. Powdered sugar or a thin glaze works better than a heavy frosting when the cake is sharing the table with eggs, pancakes, fruit, and savory dishes.

For a fall dessert spread, pair this soft spice cake with pumpkin desserts, fruit crisps, or a shortcut pie like apple pie with apple pie filling. The cake brings warm spice and cream cheese frosting, while the pie brings flaky crust and glossy apple filling.

If you are making the apple side of the table from scratch, keep a batch of homemade apple pie filling ready for pies, waffles, pancakes, yogurt, or ice cream. It sits in a fruitier lane than this soft spice cake, so the two do not feel repetitive together.

Applesauce Cake FAQs

What does applesauce do in cake?

Applesauce adds moisture, mild apple flavor, and softness. However, it is not the same as fat. That is why this recipe uses applesauce and oil together for a tender crumb.

Sweetened or unsweetened applesauce?

Unsweetened applesauce is the better choice because it gives you control over the cake’s sweetness. Sweetened applesauce works, but the finished cake may taste sweeter than intended.

Oil or no oil: what happens?

You can reduce the oil, but removing it completely changes the texture. A no-oil version is usually denser and more likely to taste gummy. For the most reliable first bake, keep the oil.

Bundt pan timing

A Bundt pan works, but the bake time will be longer, usually around 45 to 60 minutes. Grease the pan very well, check the deepest part, and cool before turning it out.

Frosted or unfrosted?

Frosting is optional. Cream cheese frosting makes it feel like dessert, while powdered sugar, vanilla glaze, or no topping at all keeps it closer to an old-fashioned snack cake.

Why did the middle turn gummy?

The usual reasons are underbaking, watery applesauce, too much applesauce, not enough fat, or overmixing the batter. Bake until the center is fully set and fold the flour in gently.

Fresh apples: helpful or too wet?

A small amount of finely diced apple is fine, but do not add too much. Fresh apples release moisture as they bake, which can make the center wetter. For the first bake, keep the recipe focused on applesauce, then experiment later.

Homemade applesauce texture

Homemade applesauce works well as long as it is thick enough for baking. If it looks loose, simmer it briefly to thicken or drain off excess liquid before measuring. Smooth, thick applesauce gives the most reliable texture.

Make-ahead timing

This cake is a good make-ahead dessert. Bake it one day ahead, cool it completely, cover it, and frost it the next day. The spice flavor often improves after resting.

Applesauce instead of eggs?

Not in this recipe as a simple swap. Applesauce is already part of the batter, and adding more in place of eggs can make the cake too wet or gummy. Use a tested eggless formula if you need an egg-free version.

Final Thoughts

A good applesauce cake should feel simple, but not careless. The best version is soft in the middle, lightly spiced, easy to slice, and moist without being wet. That comes from treating it like the soft spice cake it is: enough moisture, enough tenderness, fresh spices, and enough patience for the center to set.

Serve it frosted when you want dessert, dust it with powdered sugar when you want something old-fashioned, or fold in raisins and walnuts when you want the cake to taste like it came from an older recipe box. Either way, this is the kind of 9×13 cake that quietly disappears one square at a time — first as dessert, then with coffee, then in those uneven little “just one more” slices everyone pretends do not count.

Back to top

Posted on 7 Comments

Sweetened Condensed Milk Fudge: 10 Easy Recipes

Dark marble food photo of sweetened condensed milk fudge in a parchment-lined tin, cut into squares, with “Base + 10 Variations” text overlay and MasalaMonk.com footer.

Some desserts are worth the effort. Fudge is worth it precisely because it doesn’t demand much effort at all—at least not in the versions you’ll make here. With fudge made from sweetened condensed milk, you get a shortcut that still tastes rich and finished: glossy, sliceable, and the kind of treat that looks at home on a festive platter or tucked into a small gift box.

Better yet, one dependable approach can branch into a whole set of flavors. That’s why this post is built like a guide you’ll actually use: a simple master method, then 10 full recipes that share the same rhythm. As you move through them, you’ll see the same ideas repeating in fresh ways—chocolate and sweetened condensed milk, peanut butter and condensed milk, cocoa powder structure, white chocolate as a firming backbone, and marshmallow crème for that plush “fantasy” bite.

Although the recipes vary, the goal stays the same: a smooth set, clean cuts, and a texture that feels creamy rather than crumbly or gritty. So, before we dive into the flavors, let’s set the stage properly—because a few small choices at the start make every pan easier to nail.


The simple rule that makes condensed milk fudge feel “no-fail”

Fudge is one of those candies where texture is everything. When it’s right, it’s firm but tender, dense yet smooth. When it’s off, it can turn sticky-soft, oddly greasy, or grainy in a way that makes you wish you’d just eaten a spoonful straight from the saucepan and called it a day.

In the condensed milk style, the easiest way to stay on the “right” side of that line is to remember one practical rule:

Sweetened condensed milk needs a strong setting partner.

Most often, that partner is melted chocolate (dark, milk, or white). Sometimes it’s a mix of cocoa powder and sugar for structure. In the marshmallow crème version, the fluff helps the mixture hold together while keeping the bite soft and cohesive. However it shows up, the setting partner is what turns a thick sauce into a sliceable square.

This is also why some “two ingredient” ideas—like condensed milk plus peanut butter—can feel unpredictable in warm kitchens. Peanut butter is rich, yes, but it doesn’t always firm up enough on its own. Once you add white chocolate (or another firming element), the entire batch becomes more stable, and the texture shifts from spoonable to sliceable.

If you’re curious about the classic condensed milk fudge baseline that inspired a lot of these modern shortcuts, you can glance at the traditional-style formula in Eagle Brand’s chocolate fudge recipe. It’s the same general idea you’ll use here—melt, stir, spread, chill—just translated into a full set of variations.

Also Read: Sourdough Recipe: 10 Easy Bread Bakes (Loaves, Rolls & Bagels)


Your setup (and why it matters more than you think)

Tin size (keep it consistent)

Every recipe below is written for a 20 × 20 cm (8 × 8-inch) square tin. You can use a slightly larger pan for thinner pieces, but consistency makes life easier—especially when you’re moving between flavors and you want them to set similarly.

Lining the tin

Line the pan with baking paper so it overhangs on two sides. That overhang becomes your handle later. As a result, you can lift the whole slab out cleanly, then slice it neatly without scraping corners.

Infographic titled “Line Your Pan for Perfect Fudge Squares (Sweetened Condensed Milk Fudge — Lift-Out Method)”. Shows four steps with photos: 1) cut parchment to fit base and sides, 2) press into the pan and leave a two-side overhang, 3) clip corners with small snips for sharp edges, 4) lift out after chilling and slice on a board. Includes specs: pan 20×20 cm, overhang two sides, best cuts with a warm knife. Pro tip says to lightly butter the pan first so parchment stays in place while spreading the fudge. MasalaMonk.com branding appears in the footer.
If you want clean, gift-box fudge squares, don’t skip the parchment overhang. This sweetened condensed milk fudge pan-lining guide shows the lift-out method that prevents stuck corners and broken edges: cut parchment, leave a two-side handle, snip corners for sharp sides, then lift and slice on a board. Save it once and you’ll use it for every condensed milk fudge batch—especially when you’re making multiple flavors for holiday trays.

Heat level

Low heat is your friend. Chocolate scorches quickly when pushed, and white chocolate is especially sensitive. So, even though it’s tempting to rush, keep the flame gentle and stir steadily.

A note on “chips”

You’ll see two roles in these recipes: chopped chocolate is for a smoother, more reliable melt in the base, while chocolate chips are best used as fold-ins when you want real chocolate pockets in each bite. Also, chips can look stubborn in the microwave and then suddenly melt once stirred—that’s why short bursts and frequent stirring matter. If you’d like a dependable microwave reference for the rhythm, King Arthur Baking’s easy microwave fudge demonstrates the stop-and-stir approach that prevents scorching.

Split infographic titled “Chocolate vs Chocolate Chips for Condensed Milk Fudge (Use the right one for the texture you want)”. Left side says “Best for the base: Chopped chocolate (bar/chunks)” with notes that it melts smoother, is best for classic condensed milk chocolate fudge, and gives a glossy uniform set, shown with a photo of melted fudge base with chopped chocolate. Right side says “Best as fold-ins: Chocolate chips” with notes that chips hold shape longer, should be folded in after a 2–3 minute cool-down, and create real chocolate chip pockets, shown with a photo of fudge topped with chips. A rule line reads “Base = chopped chocolate. Pockets = chips.” Pro tip box: “If chips start melting, your base is too hot—wait 2 minutes, then fold.” MasalaMonk.com branding is in the footer.
If you’re making fudge with sweetened condensed milk and chocolate chips, this quick guide prevents the most common mistake. Use chopped chocolate when you want a smooth, glossy base that sets cleanly—then use chocolate chips as fold-ins when you want real chip pockets in every bite. Save this card for any condensed milk fudge recipe so you get the texture you intended (uniform fudge vs chocolate-chip fudge) without scorching or melting your chips into streaks.

Cooling and slicing sweetened condensed milk fudge

Chill until firm—usually 2 to 4 hours—then slice with a warm knife. Warm doesn’t mean blazing hot; rather, run the knife under hot water, wipe it dry, and cut. Repeat as needed. Consequently, you get sharp edges instead of ragged cracks.

Also Read: Peanut Butter Fudge: Recipes & Guide (8 Methods + Easy Variations)

Step-by-step infographic titled “How to Cut Fudge Cleanly (Sweetened Condensed Milk Fudge — Gift-Box Neat Slices)”. Shows four photo steps: (1) chill fudge fully 3–4 hours (overnight cleanest), (2) warm knife with hot water then wipe dry, (3) cut straight down with no sawing, (4) wipe blade between cuts and repeat warm + wipe. Includes a “Too soft?” tip (chill longer and slice cold; next time add 30–50 g chocolate) plus storage guidance: cool room temperature 2–3 days airtight, fridge up to 7 days (best in warm weather), freezer up to 2 months with parchment between layers. MasalaMonk.com branding appears in the footer.
Want gift-box neat slices every time? Save this “warm knife” cutting guide for sweetened condensed milk fudge (and every other fudge, honestly). The difference between ragged edges and clean squares is simple: chill fully, warm the knife, cut straight down, wipe between cuts. It also includes the quick fix for warm kitchens—if fudge feels soft, slice it cold now, and next batch add 30–50 g extra chocolate for a firmer set. Keep this pinned for holiday trays, edible gifts, and Christmas fudge season.

The master method you’ll reuse (stovetop + microwave)

Most of the recipes below follow one of two paths:

  1. Melted chocolate + sweetened condensed milk, then flavor and set
  2. A structured cocoa base (cocoa + sugar + butter + condensed milk), then set

Because the steps repeat, you’ll get faster with every batch. In fact, after you make the first pan, the others feel almost effortless.

Infographic reference card titled “2-Ingredient Condensed Milk Fudge (Foolproof Ratio — Sliceable Every Time)”. Shows the ratio: 1 can sweetened condensed milk (397 g) + 340 g chocolate, with guidance for choosing dark/semi-sweet, milk, or white chocolate. Includes quick method steps (microwave or stove), pan size (20×20 cm), prep time (12 min), chill time (3–5 hrs), yield (~36 squares), a pro tip to add 30–50 g extra chocolate for a firmer set in warm kitchens, and MasalaMonk.com branding in the footer.
Save this 2 ingredient fudge with condensed milk ratio card for the moment you need an instant dessert that actually sets. The “foolproof” formula is simple: 1 can sweetened condensed milk + 340 g chocolate—then you can choose dark for a firmer, balanced bite, milk for a softer candy-bar vibe, or white as the base for flavors like maple and brown sugar. The pro tip is your safety net for warm kitchens: add a little extra chocolate for a clean, sliceable set every time.

Stovetop master method (best for control)

  1. Line the tin and set it aside.
  2. Add your chocolate (or white chocolate) plus sweetened condensed milk to a saucepan.
  3. Place on low heat and stir slowly but consistently until glossy.
  4. Remove from heat, then stir in salt, vanilla, and any flavor additions.
  5. Spread into the tin and smooth the top.
  6. Chill until firm.

Microwave master method (best for speed)

  1. Put chopped chocolate in a large microwave-safe bowl.
  2. Microwave in 20–30 second bursts, stirring very well each time, until the chocolate is mostly melted (a few soft lumps are fine).
  3. Keep stirring until those last lumps disappear and the chocolate turns smooth and shiny.
  4. Add sweetened condensed milk and mix until the mixture becomes thick and glossy.
  5. Warm for 10–15 seconds only if needed, then stir again until fully smooth. Stir in flavor additions, spread, and chill.

One reminder worth repeating: in microwave batches, stirring finishes the melt. Stop when the chocolate is mostly melted, then stir until smooth. That’s how you get a glossy set without scorched edges or greasy separation.

Also Read: 10 Vegan Chocolate Cake Recipes (Easy, Moist, & Dairy-Free)


Microwave sweetened condensed milk fudge (3–5 minute method that won’t scorch)

If you’re looking for microwave fudge with condensed milk, the trick isn’t “longer cooking.” It’s short bursts + aggressive stirring. Chocolate keeps melting from residual heat, so stirring is what finishes the job without scorching the edges or splitting the mixture.

Step-by-step infographic titled “3-Ingredient Microwave Milk Fudge (Sweetened Condensed Milk — 3–5 Minute ‘Stop & Stir’ Method)”. Shows pan size 20×20 cm (8×8), hands-on time 5 minutes, chill time 3–4 hours, yield about 36 squares. Lists ingredients: sweetened condensed milk 397 g (1 can), dark/semi-sweet chocolate 340 g, fine salt 1 g, optional vanilla 5 ml and butter 20–28 g. Includes a “Rhythm” timeline with timers: 30 seconds stir hard, 30 seconds stir hard, 20 seconds stir until smooth (thick + glossy), mix in condensed milk + salt, then 10 seconds only if needed and final stir. Troubleshooting notes: let sit 60 seconds if oily; add 30–50 g extra chocolate next time if too soft. MasalaMonk.com branding appears in the footer.
This 3 ingredient microwave fudge with sweetened condensed milk is the fast method that prevents scorching: short bursts + aggressive stirring. Save this “stop & stir” rhythm card for the days you want easy microwave fudge that sets cleanly—because the chocolate keeps melting from residual heat, and stirring is what makes it glossy (not grainy or oily). Bonus tip built in: if your kitchen runs warm, adding 30–50 g extra chocolate gives you a firmer, sliceable set without changing the flavor.

What you need (for a 20 × 20 cm tin)

  • Sweetened condensed milk: 397 g
  • Dark / semi-sweet chocolate, chopped: 340 g
  • Fine salt: 1 g
  • Optional (smoother bite): 20–28 g unsalted butter
  • Optional (rounds sweetness): 5 ml vanilla extract

Microwave method (the reliable rhythm)

  1. Line the tin with baking paper (overhang on two sides).
  2. Put the chopped chocolate in a large microwave-safe bowl.
  3. Microwave in 20–30 second bursts, stirring very well each time, until the chocolate is mostly melted (it can look lumpy, but should feel soft).
  4. Add the sweetened condensed milk + salt. Stir firmly until the mixture turns thick and glossy.
  5. If it still looks streaky or stubborn, microwave 10–15 seconds, then stir again until fully smooth.
  6. Stir in butter (if using) until melted, then vanilla.
  7. Spread into the tin, smooth the top, and chill until firm.

How long does it take?

  • Total microwave time is usually 60–120 seconds (plus stirring).
  • The more important number is how many times you stir: 4–8 proper stirs beats “one long blast” every time.

Microwave troubleshooting (quick fixes)

  • Grainy or oily look: the chocolate got too hot. Next time use shorter bursts. For now, let it sit 1 minute, then stir steadily; it often re-emulsifies as it cools slightly.
  • Too soft after chilling: you didn’t have enough “setting partner” (chocolate/white chocolate), or your add-ins softened the ratio. Chill longer, then store in the fridge. Next batch: increase chocolate by 30–50 g if your kitchen is warm.
  • Chocolate seized or clumped: Chocolate chips and some chocolates can clump before smoothing out because of stabilizers and uneven heating. Don’t blast it longer—let it sit 30–60 seconds, then stir steadily. Next time, use shorter bursts and a larger bowl for gentler heat.

Also Read: Kahlua Drinks: 10 Easy Cocktail Recipes (Milk, Vodka, Coffee)


Why fudge turns grainy (and how these recipes avoid it)

Graininess in fudge is almost always about sugar crystallization: you get crystals, but they’re too large to feel smooth. The interesting twist is that fudge actually wants crystals—just tiny ones that make the texture creamy rather than sandy. The science explanation in Exploratorium’s “What’s Special About Fudge?” is a surprisingly readable deep dive into that microcrystal sweet spot.

Vertical troubleshooting infographic titled “Sweetened Condensed Milk Fudge Troubleshooting (Grainy • Oily • Too Soft — Fast Fixes)”. It’s laid out as a 3-row table with columns for Problem, Cause, and Fix. Row 1 covers grainy/sandy fudge (overheated chocolate or cocoa/powdered sugar not fully mixed) with fixes: low heat, sift cocoa, stir until glossy, and stop microwaving when mostly melted—stir to finish. Row 2 covers oily/separated fudge (chocolate got too hot, often from long microwave blasts) with fixes: let sit 60 seconds, stir steadily to re-emulsify, and use shorter bursts next time. Row 3 covers fudge too soft after chilling (not enough setting chocolate, warm kitchen, too many mix-ins/liquid add-ins) with fixes: chill longer + refrigerate, next time add 30–50 g chocolate, and keep syrup/extract additions tiny. A callout reads “Golden rule: Stirring finishes the melt — heat is the risk.” Includes three small example photos along the bottom and MasalaMonk.com branding in the footer.
Save this sweetened condensed milk fudge troubleshooting card for the batch that goes sideways. It gives you fast fixes for the three most common problems—grainy fudge, oily/separated fudge, and fudge that’s too soft after chilling—plus the one rule that prevents most fails: stirring finishes the melt; too much heat is the risk. If you’re making holiday trays or gifting, this is the cheat sheet that helps every condensed milk fudge recipe set glossy and slice cleanly.

In condensed milk fudge, you usually sidestep the worst crystallization issues because you’re not boiling sugar syrup to a precise stage. Still, graininess can happen if:

  • the mixture overheats and separates,
  • you stir aggressively after it’s already thickening in a cooked style,
  • or dry ingredients clump and never fully dissolve.

That’s why these recipes emphasize gentle heat, steady stirring, and sifting cocoa where needed. In other words, the “no-fail” feeling isn’t magic—it’s good handling.

Also Read: Hot Chocolate Coffee: 3 Easy Recipes (Cocoa, Mix, or Espresso)


1) Sweetened condensed milk chocolate fudge (classic 3-ingredient style recipe)

This is the one you’ll come back to when you want something simple and dependable. It’s the core condensed milk fudge recipe—smooth, glossy, and sliceable without drama. It also adapts easily: change your chocolate, add nuts, switch the aroma with vanilla, and you still end up with a finished candy.

Ingredients (20 × 20 cm tin)

  • Sweetened condensed milk: 397 g
  • Dark or semi-sweet chocolate, chopped: 340 g
  • Fine salt: 1 g

Optional, but genuinely worth it:

  • Unsalted butter: 28 g
  • Vanilla extract: 5 ml
Recipe card image showing glossy 3-ingredient chocolate fudge made with sweetened condensed milk. Includes pan size (20×20 cm), prep and chill time, ingredient amounts in grams, 5-step stovetop/microwave method, a no-fail tip (“stirring finishes the melt”), and MasalaMonk.com branding in the footer.
This 3-ingredient chocolate fudge with sweetened condensed milk is the baseline “no-fail” recipe for the entire guide: one can of condensed milk + chopped dark/semi-sweet chocolate + a pinch of salt. Use the stovetop or microwave method, then chill until firm for clean slices. The key tip is simple but crucial—stop heating when the chocolate is mostly melted and let stirring finish the melt to avoid oily or grainy fudge. Save this card for quick holiday trays, edible gifts, or anytime you want dependable fudge without candy thermometers.

Method (stovetop)

  1. Line the tin and set it aside.
  2. Combine chocolate, sweetened condensed milk, and salt in a saucepan.
  3. Warm on low heat, stirring until the mixture becomes glossy and uniform.
  4. Remove from heat. Add butter (if using) and stir until fully melted. Then add vanilla.
  5. Spread into the tin, smooth the top, and chill until firm.

Microwave version (fast and clean)

Use the microwave master method above: melt chopped chocolate in short bursts, stirring until it’s mostly melted, then stir until fully smooth. Add sweetened condensed milk and salt and mix until the mixture turns thick and glossy. If it looks streaky, warm it for 10–15 seconds and stir again. Finish with vanilla, spread, and chill.

How it tastes (so you can choose your chocolate)

  • Dark chocolate makes the sweetness feel balanced and grown-up.
  • Milk chocolate makes it softer and sweeter—more “candy bar.”
  • A blend lands in the middle, which is often the safest crowd-pleaser.
Guide-style infographic titled “Best Chocolate for Sweetened Condensed Milk Fudge (Dark vs Milk vs White — How the Set Changes)”. Three columns compare dark/semi-sweet, milk chocolate, and white chocolate with photos of fudge squares. Dark/semi-sweet notes: most balanced sweetness, firmest clean slices, best for classic fudge. Milk chocolate notes: sweeter softer bite, can set softer in warm kitchens, best for candy-bar style. White chocolate notes: sweet creamy base, best for flavors like maple, peanut butter, and brown sugar, needs gentle heat because it scorches faster. A rule line says “Base = chopped chocolate. Pockets = chips.” A tip box says “Warm kitchen or softer chocolate? Add +30–50 g chocolate for a firmer set.” MasalaMonk.com branding appears in the footer.
Save this best chocolate for sweetened condensed milk fudge guide before you swap ingredients. Dark/semi-sweet gives the firmest, cleanest slices with balanced sweetness, milk chocolate makes a softer candy-bar style fudge (especially in warm kitchens), and white chocolate is the best base for flavors like maple fudge, peanut butter fudge, and brown sugar fudge—just melt it gently. If you want a firmer set, the card includes the simplest adjustment: add 30–50 g extra chocolate.

A serving direction that feels intentional

Instead of just stacking squares, treat it like a dessert plate. A thin drizzle of cocoa syrup and a pinch of flaky salt makes each piece feel “finished.” If you want a quick drizzle that’s already designed to stay smooth, try MasalaMonk’s 3-minute homemade chocolate syrup. It pairs beautifully with condensed milk chocolate fudge, especially when the fudge is slightly chilled and the syrup is warm.

Also Read: Cappuccino Recipe: How to Make a Perfect Cappuccino at Home


2) Chocolate chip and sweetened condensed milk fudge (quick set, classic flavor)

Sometimes you want that familiar holiday-tray vibe: a smooth chocolate fudge base with real chocolate chips baked right into the bite. This version delivers exactly that—rich, straightforward, and full of little chocolate pockets—because the chips are folded in at the end, not melted into the base.

Ingredients (20 × 20 cm tin)

Fudge base

  • Sweetened condensed milk: 397 g
  • Dark or semi-sweet chocolate, chopped: 300 g
  • Fine salt: 1 g
  • Vanilla extract: 7.5 ml (1½ tsp)

Fold-in chips (kept as chips)

  • Chocolate chips (semi-sweet or milk): 150 g

Optional (smoother bite)

  • Unsalted butter: 20 g
Recipe card showing chocolate chip fudge made with sweetened condensed milk. The image includes a photo of fudge squares with visible chocolate chips, pan size (20×20 cm), prep time (12 min), chill time (2–4 hrs), yield (~36 squares), ingredient amounts in grams, a 5-step method, a pro tip to rest before folding in chips so they don’t melt, and MasalaMonk.com branding in the footer.
This chocolate chip fudge with sweetened condensed milk is the “holiday tray” version of the classic—smooth chocolate base, plus real chocolate chip pockets in every bite. The key move is simple: rest the warm fudge base for 2–3 minutes before folding in the chips, so they stay as chips instead of melting into streaks. Save this card when you want an easy, sliceable fudge that looks impressive and tastes like a familiar chocolate-chip dessert—without candy thermometers or complicated steps.

Method (stovetop)

  1. Line the tin with baking paper and set it aside.
  2. In a saucepan on low heat, melt the chopped chocolate with sweetened condensed milk and salt, stirring steadily until glossy and completely smooth.
  3. Remove from heat. Stir in butter (if using), then vanilla.
  4. Let the mixture sit 2–3 minutes so it’s still warm but not scorching hot.
  5. Fold in the chocolate chips quickly so they stay intact rather than melting into streaks.
  6. Spread into the tin, smooth the top, and chill until firm.

Method (microwave)

  1. Melt the chopped chocolate in short bursts, stirring between bursts until smooth.
  2. Stir in sweetened condensed milk and salt until thick and glossy (warm briefly only if needed).
  3. Stir in butter (if using) and vanilla.
  4. Rest 2–3 minutes, then fold in chips.
  5. Spread and chill.

Why this stays a separate recipe from the chopped-chocolate classic

Even though the base is similar, the experience is different: instead of one uniform chocolate bite, you get bursts of chocolate from the chips. That “chip pop” is what people expect from chocolate chip fudge, and it’s the reason this version earns its own spot.

A small shift that makes it feel “new”

Add a handful of chopped walnuts or toasted pecans—about 60 g—and fold them in just before spreading. Then, once it’s set, slice and serve with hot coffee or iced coffee. If you’re building a “dessert and drink” pairing moment, the condensed milk angle flows naturally into MasalaMonk’s iced coffee recipes collection, which includes condensed milk-style coffee variations for that café feel.

Also Read: Cold Brew Espresso Martini: How to Make It (Step-by-Step Recipe)


3) Cocoa powder fudge with sweetened condensed milk (deep chocolate, no melted chocolate required)

This one leans into cocoa powder and structure. It’s bold, dark, and intensely chocolatey without relying on a mountain of melted chocolate. The texture is slightly more “fudge-like” in a traditional way—dense and smooth, with a clean slice.

Ingredients

  • Sweetened condensed milk: 397 g
  • Unsalted butter: 60 g
  • Cocoa powder (unsweetened), sifted: 60 g
  • Icing sugar (powdered sugar), sifted: 120 g
  • Fine salt: 1 g
  • Vanilla extract: 5 ml
Recipe card image for cocoa powder fudge made with sweetened condensed milk (no chocolate bars needed). Shows cocoa-dusted fudge squares plus pan size (20×20 cm), prep time (15 min), chill time (2–4 hrs), yield (~30–36 squares), ingredient amounts in grams (condensed milk, butter, cocoa powder, icing sugar, salt, vanilla), a 5-step low-heat method, a pro tip to sift cocoa and sugar for a silky texture, and MasalaMonk.com branding in the footer.
If you’re searching for a condensed milk cocoa powder fudge recipe, this is the reliable pantry version—no chocolate bars required. Sweetened condensed milk + butter builds a smooth base, while sifted cocoa powder and icing sugar give the fudge its structure and deep chocolate flavor. Save this card for those days when you want a bold, sliceable cocoa fudge fast—and remember the one detail that changes everything: sifting keeps the texture silky instead of lumpy.

Method

  1. Line the tin and set it aside.
  2. In a saucepan on low heat, warm condensed milk and butter until the butter melts and the mixture is unified.
  3. Add sifted cocoa and salt. Stir until smooth.
  4. Add sifted icing sugar gradually, stirring until the mixture thickens and becomes glossy.
  5. Remove from heat, stir in vanilla, then press into the tin.
  6. Chill until firm.

What to expect

This version sets quickly and tastes strongly of cocoa. Therefore, it’s a smart choice when you want the chocolate flavor to feel clear rather than candy-sweet.

A satisfying way to serve it

Cut into small squares and plate it with something crisp. Churros are especially good because they bring warmth, crunch, and cinnamon. If you want a full churros guide with sauces and variations, MasalaMonk’s churros recipe gives you plenty of options for turning fudge into a dip or a dessert board centerpiece.

Also Read: Cranberry Moscow Mule Recipe: A Festive Holiday Cocktail With Easy Variations


4) White chocolate fudge with sweetened condensed milk recipe (smooth, creamy, and versatile)

White chocolate condensed milk fudge is the quiet powerhouse of this collection. It’s creamy, sweet, and a perfect base for vanilla, maple, and “holiday tray” flavors. The key is gentle heat. White chocolate scorches faster than dark chocolate, so take your time.

Ingredients

  • Sweetened condensed milk: 397 g
  • White chocolate, chopped: 340 g
  • Fine salt: 1 g
  • Vanilla extract: 5 ml

Optional:

  • Unsalted butter: 20 g
Recipe card image for white chocolate fudge made with sweetened condensed milk. Shows creamy white fudge squares with vanilla flecks, pan size (20×20 cm), prep time (10 min), chill time (2–4 hrs), yield (~36 squares), ingredient amounts in grams (condensed milk, white chocolate, salt, vanilla, optional butter), a 5-step very-low-heat method, a pro tip to keep heat very low to prevent scorching, and MasalaMonk.com branding in the footer.
This white chocolate fudge with sweetened condensed milk is the smooth, sliceable base that powers the “non-dark-chocolate” side of the guide—think vanilla, maple, brown sugar, and butterscotch-style variations. The only rule that matters here is heat control: white chocolate scorches fast, so keep the flame very low and stir until glossy. Save this card when you want a creamy, gift-box-friendly fudge that sets cleanly and cuts into neat squares every time.

Method

  1. Line the tin and set it aside.
  2. Melt white chocolate with condensed milk and salt on very low heat, stirring often.
  3. Remove from heat and stir in butter (if using), then vanilla.
  4. Spread, smooth, chill.

Why this base matters

White chocolate fudge is the bridge between candy and dessert. It also behaves beautifully with add-ins like nuts, dried fruit, or maple. So, even if you make only one “non-chocolate” fudge from this post, make it this one—because it becomes several other recipes with minor shifts.

A gentle, natural pairing link

If you like desserts that lean creamy and layered rather than purely chocolate, you’ll probably love MasalaMonk’s savoiardi chocolate vanilla pudding. It’s a different format, yet it hits the same comfort-dessert note, especially after a meal.

Also Read: Baked Ziti Recipe Collection: 15 Easy Variations


5) Vanilla fudge (sweetened condensed milk) recipe with a clean, classic finish

Vanilla fudge often gets dismissed as “just white chocolate,” but it doesn’t have to taste vague. The difference comes from how you build the flavor: more vanilla, a pinch of salt, and an option for vanilla bean paste if you want that speckled bakery look.

Ingredients

  • Sweetened condensed milk: 397 g
  • White chocolate, chopped: 340 g
  • Fine salt: 1 g
  • Vanilla extract: 10 ml (2 tsp)

Optional:

  • Vanilla bean paste: 5 ml
  • Unsalted butter: 20 g
Recipe card image for vanilla fudge made with sweetened condensed milk. Shows pale vanilla-speckled fudge squares with vanilla beans and a spoon of vanilla paste. The card includes pan size (20×20 cm), prep time (10 min), chill time (2–4 hrs), yield (~36 squares), ingredients in grams (condensed milk, white chocolate, salt, vanilla extract, optional vanilla bean paste and butter), a 5-step very-low-heat method, a pro tip to add vanilla off the heat for stronger flavor, and MasalaMonk.com branding in the footer.
This vanilla fudge recipe using sweetened condensed milk is the “clean finish” version of white chocolate fudge—same easy method, but with the flavor turned up so it tastes unmistakably vanilla, not just sweet. The trick is timing: add vanilla (and vanilla bean paste, if using) off the heat so the aroma stays bold and fresh. Save this card for gift boxes, holiday trays, and quick make-ahead desserts when you want a creamy, sliceable fudge that feels bakery-level without extra work.

Method

  1. Melt white chocolate, condensed milk, and salt on very low heat.
  2. Remove from heat. Stir in vanilla extract (and paste if using).
  3. Spread into the tin. Chill until firm.

Make it feel special without making it complicated

Once set, sprinkle a light dusting of cinnamon or cardamom on top and press gently so it clings. It reads like a deliberate flavor choice rather than “plain.” Even more, it pairs beautifully with fruit-forward desserts, which makes it a nice companion to something like MasalaMonk’s no-bake blueberry cheesecake if you’re building a dessert table with variety.

Also Read: Manhattan Cocktail Recipe (Classic + 6 Variations)


6) Peanut butter fudge using sweetened condensed milk (firm, creamy, and sliceable)

This is where a lot of people get disappointed when they improvise: peanut butter and condensed milk taste wonderful, but the set can be too soft. So, this recipe uses white chocolate as the structure. The result is creamy, stable, and easy to cut—even when your kitchen runs warm.

For a broader peanut butter fudge universe (including old fashioned cooked versions, marshmallow crème methods, and more), MasalaMonk’s peanut butter fudge guide is a great companion read.

Ingredients

  • Sweetened condensed milk: 397 g
  • White chocolate, chopped: 300 g
  • Peanut butter (creamy): 180 g
  • Fine salt: 1 g
  • Vanilla extract: 5 ml

Optional:

  • Roasted peanuts, chopped: 50–60 g
Recipe card image for peanut butter fudge made with sweetened condensed milk. Shows tan peanut butter fudge squares drizzled with dark chocolate and topped with chopped peanuts. The card lists pan size (20×20 cm), prep time (12 min), chill time (3–5 hrs), yield (~36 squares), ingredients in grams (condensed milk, white chocolate, peanut butter, salt, vanilla, optional chopped peanuts), a 5-step method using very low heat, a pro tip explaining white chocolate as the “set partner” to prevent soft fudge, and MasalaMonk.com branding in the footer.
This peanut butter fudge with sweetened condensed milk is the sliceable, reliable version people are actually trying to get when they search “easy peanut butter fudge condensed milk.” The secret is structure: white chocolate acts as the setting partner, so the fudge firms up cleanly instead of staying soft—especially in warm kitchens. Save this card for quick batches, edible gifts, and dessert trays when you want that classic peanut-butter flavor with neat, gift-box cuts every time.

Method

  1. Line the tin and set it aside.
  2. Melt white chocolate with condensed milk on very low heat until smooth.
  3. Remove from heat and stir in peanut butter until glossy.
  4. Add salt and vanilla. Fold in peanuts if using.
  5. Spread into the tin and chill.

What the texture should look like

When you stir in the peanut butter, the mixture should turn silky and cohesive, not greasy or separated. If it looks oily, keep stirring gently until it emulsifies. In most cases, it comes together with patience rather than extra heat.

A dessert-board idea

Peanut butter fudge is fantastic with crisp cookies, bananas, or even spooned onto toast. If you want a no-oven dessert that shares the same “layer and chill” ease, MasalaMonk’s banana pudding sits in the same comfort zone and pairs well on a dessert spread.

Also Read: Green Chutney Recipe (Coriander–Mint / Cilantro Chutney)


7) Chocolate peanut butter fudge recipe (Sweetened condensed milk) — swirl or layers

Chocolate and peanut butter together are always a win, yet you can choose the vibe: swirled for a casual look, layered for that clean “buckeye” feel. Either way, this version is built to set firmly and slice beautifully.

Ingredients (two mixtures)

Peanut butter base

  • Sweetened condensed milk: 220 g
  • White chocolate: 170 g
  • Peanut butter: 150 g
  • Fine salt: 0.5 g
  • Vanilla extract: 2.5 ml

Chocolate layer/swirl

  • Sweetened condensed milk: 177 g
  • Dark or semi-sweet chocolate: 190 g
  • Fine salt: 0.5 g
  • Vanilla extract: 2.5 ml
Recipe card image for chocolate peanut butter fudge made with sweetened condensed milk, showing both swirl and layered versions. The image includes stacked two-layer fudge squares and one marbled swirl piece, pan size (20×20 cm), prep time (18 min), chill time (3–5 hrs), yield (~36 squares), separate ingredient lists with grams for the peanut butter layer and chocolate layer, a 5-step layered method, a short swirl option note, and MasalaMonk.com branding in the footer.
This chocolate peanut butter fudge with sweetened condensed milk is the showstopper version of the guide—choose clean layers for gift-box-perfect slices or a quick swirl for that bakery-style marbled top. The recipe is built to set firmly (thanks to the white-chocolate peanut-butter base) while still tasting rich and balanced. Save this card for holiday trays, edible gifts, or anytime you want a reliable “wow” fudge that cuts neatly and looks impressive with minimal effort.

Method (layered)

  1. Make the peanut butter mixture: melt white chocolate with condensed milk, then stir in peanut butter, salt, and vanilla. Press it into the tin.
  2. Make the chocolate mixture: melt dark chocolate with condensed milk and salt, then stir in vanilla.
  3. Pour the chocolate layer over the peanut butter base.
  4. Chill until firm, then slice with a warm knife.

Method (swirled)

Instead of pouring the chocolate as one layer, drop spoonfuls of chocolate mixture over the peanut butter base and swirl with a knife. Then chill.

Make it feel a bit more “dessert-like”

Serve a square with a spoonful of lightly sweetened cream, or drizzle with cocoa syrup. A warm cocoa drizzle (even a simple cocoa + sugar + hot water syrup) makes the swirl taste more ‘dessert’ than candy—especially when the fudge is chilled.

Also Read: Rob Roy Drink Recipe: Classic Scotch Cocktail (Perfect + Dry + Sweet Variations)


8) Nutella fudge with sweetened condensed milk (rich, glossy, and hazelnut-forward)

Nutella and condensed milk are an intuitive match: creamy, sweet, and deeply comforting. However, the best Nutella condensed milk fudge still benefits from real chocolate for structure and depth. This version keeps the hazelnut flavor clear without becoming overly sweet.

Ingredients

  • Sweetened condensed milk: 397 g
  • Dark or semi-sweet chocolate: 260 g
  • Nutella: 180 g
  • Fine salt: 1 g

Optional:

  • Toasted hazelnuts, chopped: 60 g
Recipe card image for Nutella fudge made with sweetened condensed milk, shown on a teal textured background. The card features stacked glossy Nutella-chocolate fudge squares topped with toasted chopped hazelnuts, plus a jar of Nutella and chocolate pieces in the scene. Text overlay includes pan size (20×20 cm), prep time (12 min), chill time (3–5 hrs), yield (~36 squares), ingredients in grams (condensed milk, dark/semi-sweet chocolate, Nutella, salt, optional hazelnuts), a 5-step low-heat method, a pro tip to stir Nutella in off heat for the smoothest set, and MasalaMonk.com branding in the footer.
This Nutella fudge with sweetened condensed milk is the glossy, hazelnut-forward variation people look for when they want something richer than plain chocolate fudge. The method stays simple—melt chocolate with condensed milk, then stir Nutella in off the heat so it emulsifies smoothly and sets into neat, sliceable squares. Finish with toasted hazelnuts for crunch, and you’ve got a gift-box-ready fudge that feels special without extra effort. Save this card for holiday trays, edible gifts, or anytime you want a quick Nutella dessert that actually slices cleanly.

Method

  1. Line the tin and set it aside.
  2. Melt chocolate with condensed milk and salt on low heat until glossy.
  3. Remove from heat and stir in Nutella until fully emulsified.
  4. Fold in hazelnuts if using, then spread and chill.

A festive pairing suggestion

Nutella fudge sits beautifully next to truffles on a holiday tray. If you want a second bite-sized chocolate treat that doesn’t require baking, MasalaMonk’s Irish rum truffles add variety while staying in the same “rich and celebratory” mood.

Also Read: Sandwich for Breakfast: Breakfast Sandwich Recipe + 10 Variations


9) Maple fudge recipe (sweetened condensed milk) with a warm caramel edge

Maple fudge can be tricky if you rely on maple syrup alone—too much liquid can affect the set. So, this recipe uses white chocolate as the structure and a balanced amount of syrup for flavor, then finishes with maple extract (optional but helpful) for that unmistakable maple aroma.

Ingredients

  • Sweetened condensed milk: 397 g
  • White chocolate: 300 g
  • Maple syrup: 60 g
  • Fine salt: 1 g
  • Maple extract: 2–3 ml (optional, to taste)

Optional:

  • Toasted pecans or walnuts: 60 g
Recipe card image for maple fudge made with sweetened condensed milk. Shows creamy maple fudge squares topped with chopped pecans and a maple syrup drizzle on a warm wooden background, plus a small cup of maple syrup and white chocolate pieces. Text overlay includes pan size (20×20 cm), prep time (12 min), chill time (3–5 hrs), yield (~36 squares), ingredients in grams (condensed milk, white chocolate, maple syrup, salt, optional maple extract and nuts), a 5-step method, a pro tip noting maple syrup adds liquid so white chocolate keeps the set firm, and MasalaMonk.com branding in the footer.
This maple fudge recipe with sweetened condensed milk is the cozy, sliceable version that actually sets cleanly—because maple syrup adds liquid, and white chocolate provides the structure. The result is creamy, warm-maple flavored fudge that looks gift-box ready with a simple pecan topping. Save this card for holidays, dessert trays, or anytime you want maple flavor without candy-thermometer stress—then use the pro tip as your “insurance” for neat squares.

Method

  1. Line the tin and set it aside.
  2. Melt white chocolate with condensed milk on very low heat.
  3. Remove from heat and stir in maple syrup and salt.
  4. Add maple extract gradually if using. Fold in nuts if you like.
  5. Spread into the tin and chill.

Make it feel seasonal without forcing it

Maple fudge pairs beautifully with coffee. If you enjoy desserts that lean into creamy sweetness and milk flavors, it also connects naturally to a three-milks dessert like MasalaMonk’s tres leches cake guide, which uses sweetened condensed milk in a completely different (and equally comforting) way.

Also Read: Paper Plane Cocktail Recipe + Best Amaro Substitutes & Tips


10) Marshmallow fluff fudge (sweetened condensed milk + chocolate) — plush “fantasy” texture

This is the soft, cohesive style that feels especially giftable because it stays tender and creamy. Marshmallow crème (or fluff) adds body and that signature “pull” to the bite. Meanwhile, chocolate provides structure so it still slices cleanly.

Ingredients

  • Sweetened condensed milk: 397 g
  • Dark or semi-sweet chocolate: 300 g
  • Marshmallow fluff/crème: 200 g
  • Unsalted butter: 28 g
  • Fine salt: 1 g
  • Vanilla extract: 5 ml
Recipe card image for marshmallow fluff fudge made with sweetened condensed milk. Shows chocolate fudge squares with visible marshmallow swirls, topped with mini marshmallows and cocoa dust on a grey background. The card lists pan size (20×20 cm), prep time (15 min), chill time (3–5 hrs), yield (~36 squares), ingredients in grams (condensed milk, dark/semi-sweet chocolate, marshmallow fluff/crème, butter, salt, vanilla), a 5-step method, a pro tip to add fluff off heat for a plush texture, and MasalaMonk.com branding in the footer.
If you’re searching for “never fail fudge” with sweetened condensed milk, this is the one to save. Marshmallow fluff + butter gives the fudge that plush, creamy bite people expect from classic holiday-tray fudge, while chocolate keeps the set firm enough for clean squares. The most important step is timing: stir the fluff in off the heat so it stays fluffy and smooth instead of melting away. Keep this card for edible gifts, dessert boards, and quick make-ahead fudge that slices neatly every time.

Method

  1. Line the tin and set it aside.
  2. Melt chocolate with condensed milk and salt on low heat until glossy.
  3. Remove from heat. Stir in butter until melted.
  4. Add marshmallow fluff and stir until fully combined and smooth.
  5. Stir in vanilla, spread into the tin, and chill.

How to make the slices look “clean”

Because this style is softer, it benefits even more from a warm knife. Chill thoroughly, warm the knife, wipe it dry, and cut with confident, straight pressure. If the edges smear, pause and rewarm the blade.

Also Read: Classic Rum Punch + 9 Recipes (Pitcher & Party-Friendly)


Sweetened condensed milk fudge variations (brown sugar, butterscotch, rocky road, peppermint, eggnog)

These are built on the same “strong setting partner” rule, so you don’t need a whole new method each time. Start with the base recipe that matches the flavor, then swap in the add-ins below.

1) Brown sugar sweetened condensed milk fudge (caramel-ish, holiday-tray friendly recipe)

Start with: White chocolate fudge with sweetened condensed milk (Recipe #4)
Add:

  • Brown sugar: 70–90 g
  • Unsalted butter: 30 g (use it here even if you skip it elsewhere)
  • Vanilla: 5 ml
  • Optional: toasted pecans/walnuts 60 g
Recipe card image for brown sugar fudge made with sweetened condensed milk. Shows caramel-colored fudge squares stacked on parchment with chopped nuts on top, plus bowls of brown sugar and butter in the background. Text overlay includes pan size (20×20 cm), prep time (15 min), chill time (3–5 hrs), yield (~36 squares), ingredients in grams (condensed milk, brown sugar, butter, white chocolate, salt, vanilla, optional pecans/walnuts), a 5-step very-low-heat method, a pro tip to dissolve brown sugar first for smooth (not gritty) fudge, and MasalaMonk.com branding in the footer.
This brown sugar condensed milk fudge is the caramel-ish, gift-box favorite—sweetened condensed milk makes it creamy, while white chocolate helps it set firm enough to slice cleanly. The key step is what most recipes skip: dissolve the brown sugar gently in condensed milk + butter first, then add white chocolate off the heat for a smooth, glossy finish (no gritty texture). Save this card for holiday trays, edible gifts, or whenever you want “butterscotch vibes” without candy thermometers.

How:
Warm sweetened condensed milk + butter + brown sugar on very low heat, stirring until the sugar feels fully dissolved and the mixture looks uniform. Remove from heat, add white chocolate, and stir until completely melted and glossy. Add salt and vanilla, fold in nuts if using, then spread and chill.

Why this works: brown sugar brings moisture; the white chocolate keeps the set firm and sliceable.

2) Butterscotch fudge with sweetened condensed milk (easy “gift box” flavor)

Start with: White chocolate fudge (Recipe #4)
Swap/Add:

  • Replace 100–120 g of the white chocolate with butterscotch chips (or butterscotch pieces)
  • Optional salt bump: add an extra pinch (butterscotch loves salt)
Recipe card image for butterscotch fudge made with sweetened condensed milk. Shows golden butterscotch fudge squares topped with butterscotch chips and flaky salt on a light background. Text overlay includes pan size (20×20 cm), prep time (12 min), chill time (3–5 hrs), yield (~36 squares), ingredients in grams (condensed milk, white chocolate, butterscotch chips, salt, vanilla, optional butter), a 5-step very-low-heat method, a pro tip warning that butterscotch chips scorch quickly so keep heat very low, and MasalaMonk.com branding in the footer.
This butterscotch fudge with sweetened condensed milk is the easiest “gift box” flavor—creamy, golden, and nostalgic, yet still firm enough to cut into neat squares. The success trick is temperature: butterscotch chips scorch faster than chocolate, so melt everything on very low heat and stir until glossy. Save this card for holiday trays, edible gifts, or quick make-ahead desserts when you want that classic butterscotch candy vibe without a thermometer.

How:
Melt gently (butterscotch scorches easily). Stir until fully smooth, then chill as usual.
Optional: top with flaky salt or crushed toasted nuts.

3) Rocky road sweetened condensed milk fudge (chocolate + marshmallow + crunch)

Start with: Sweetened condensed milk chocolate fudge (Recipe #1)
Fold in (off heat):

  • Mini marshmallows: 80–100 g
  • Toasted nuts (walnuts/almonds/peanuts): 60–80 g
  • Optional biscuit pieces: 40–50 g
Recipe card image for rocky road fudge made with sweetened condensed milk. Shows chunky chocolate fudge squares on a dark slate background with visible mini marshmallows and toasted nuts, plus extra marshmallows scattered around. Text overlay includes pan size (20×20 cm), prep time (15 min), chill time (3–5 hrs), yield (~36 squares), base ingredients in grams (sweetened condensed milk, dark/semi-sweet chocolate, salt, optional vanilla), fold-ins (mini marshmallows, toasted nuts, optional crushed biscuits/wafer), a 5-step method, a pro tip to cool 2–3 minutes before adding marshmallows so they stay as pockets, and MasalaMonk.com branding in the footer.
This rocky road fudge with sweetened condensed milk is the “texture contrast” superstar—rich chocolate base, chewy marshmallow pockets, and crunchy nuts in every bite. The make-or-break detail is simple: rest the melted fudge base for 2–3 minutes before folding in marshmallows, so they stay as soft pockets instead of melting into the chocolate. Save this card for dessert boards, edible gifts, and Christmas trays when you want a crowd-pleaser that looks chunky, festive, and bakery-style with almost zero effort.

How:
Make the chocolate base. Let it cool 2–3 minutes so it’s thick but not scorching hot, then fold in marshmallows + nuts (+ biscuit). Spread, chill.
Tip: if you fold marshmallows while the base is too hot, they’ll melt into the fudge instead of staying as pockets.

4) Peppermint fudge recipe condensed milk (clean, festive, not toothpaste-y)

Start with: Chocolate fudge (Recipe #1) or White chocolate fudge (Recipe #4)
Add:

  • Peppermint extract: 1–2 ml (start tiny, then adjust)
  • Crushed peppermint candy/candy cane: 25–40 g (sprinkle on top or fold in last)
Recipe card image for peppermint fudge made with sweetened condensed milk, showing two versions side-by-side: white peppermint fudge and chocolate peppermint fudge, both topped with crushed candy cane pieces. The card includes pan size (20×20 cm), prep time (12 min), chill time (3–5 hrs), yield (~36 squares), ingredients for each base in grams (condensed milk, white chocolate or dark chocolate, salt), flavor/topping amounts (peppermint extract 1–2 ml, crushed candy cane 30 g), a 5-step low-heat method, a pro tip to start with 1 ml peppermint extract and adjust, and MasalaMonk.com branding in the footer.
This peppermint fudge recipe with sweetened condensed milk is the easiest way to get that classic Christmas candy vibe—cool, minty, and perfectly sliceable. The card gives you two options (white peppermint or chocolate peppermint) so you can match your tray, then nails the one detail that matters: peppermint extract is powerful, so start tiny and adjust. Save this for holiday trays, edible gifts, and last-minute Christmas desserts when you want festive flavor with a reliable condensed milk fudge set.

How:
Stir extract in off heat. If using crushed candy, either press it on top (cleaner slices) or fold in at the very end (more candy bits inside).

5) Eggnog fudge recipe condensed milk (holiday flavor without extra work)

Start with: Vanilla fudge (Recipe #5)
Add:

  • Nutmeg: ¼ tsp
  • Cinnamon: ⅛ tsp
  • Vanilla: keep as written (don’t reduce)
  • Optional: rum extract 1–2 ml (only if you want that “eggnog” aroma)
Recipe card image for eggnog fudge made with sweetened condensed milk. Shows creamy white chocolate fudge squares dusted with nutmeg on a parchment-lined wooden board, with cinnamon sticks, whole nutmeg, and a glass of eggnog in the background. Text overlay includes pan size (20×20 cm), prep time (12 min), chill time (3–5 hrs), yield (~36 squares), ingredients in grams (sweetened condensed milk, white chocolate, salt, vanilla, nutmeg, cinnamon, optional rum extract), a 5-step method using very low heat, a pro tip to use spices + extract for eggnog flavor without adding extra liquid, and MasalaMonk.com branding in the footer.
This eggnog fudge with sweetened condensed milk is the cozy holiday flavor without the usual set problems—because it gets “eggnog” taste from nutmeg + cinnamon + vanilla (and optional rum extract), not extra liquid. The result is a creamy, sliceable white-chocolate fudge that looks gift-box ready with a simple nutmeg dusting. Save this card for Christmas trays and edible gifts when you want something festive that still behaves like a reliable condensed milk fudge.

How:
Make vanilla fudge as written, then stir spices in off heat. Chill.
Tip: spice blooms better if you stir it into the warm mixture, not after it’s cooling.

Also Read: 7 Pizza Sauce Recipes | Marinara, White Garlic, Alfredo, Buffalo, BBQ, Vodka & Ranch


A few gentle dessert connections (so the fudge isn’t alone on the table)

Even though fudge can be the star, it also plays well with other easy, make-ahead sweets. So, if you’re building a spread—especially for holidays—these pairings keep the table interesting without adding stress:

  • Something fruity and chilled like no-bake blueberry cheesecake complements the richness of chocolate and peanut butter fudge.
  • Something crisp and warm like homemade churros turns fudge into a dipping moment, especially if you soften a spoonful gently.
  • Something creamy and layered like savoiardi chocolate vanilla pudding offers a different texture while staying in the same comfort-dessert family.
  • Something cake-like with the same pantry charm, such as peach condensed milk cake, keeps the condensed milk theme running without repeating the same bite.

Sweetened condensed milk fudge add-ins that keep the set reliable

Once you’ve made one or two batches, it’s tempting to start improvising—and you should. Still, it helps to choose add-ins that don’t fight the texture.

Infographic titled “Condensed Milk Fudge Add-Ins That Set Reliably (Keep It Sliceable — No ‘Too Soft’ Surprises)”. It instructs to fold mix-ins in off heat after the base cools 2–3 minutes and lists safe add-in amounts for a 20×20 cm pan: nuts (pecans/walnuts/hazelnuts) 50–80 g (toasted best), mini marshmallows 40–60 g (add when base is warm, not hot), crushed biscuits/wafers 40–60 g, and chopped dried fruit 40–60 g (pat dry if sticky). It warns to avoid or limit big spoonfuls of syrup/extra liquid and too many mix-ins (over 150 g total). Includes a pro tip: if the kitchen is warm, add 30–50 g extra chocolate for a firmer set, plus MasalaMonk.com branding in the footer.
Save this sweetened condensed milk fudge add-ins cheat sheet before you start “just throwing things in.” These are the mix-ins that keep fudge sliceable—with the exact gram ranges for nuts, mini marshmallows, crushed biscuits, and dried fruit (for a 20×20 cm pan). The biggest win is timing: fold add-ins off heat after a 2–3 minute cool-down so marshmallows stay as pockets and your base doesn’t loosen. If you’re making Christmas trays or gifting, this one card helps every condensed milk fudge variation set cleanly.

Mix-ins that work beautifully with sweetened condensed milk fudge

  • Toasted nuts (pecans, walnuts, hazelnuts): 50–80 g
  • Crushed biscuits or wafer pieces: 40–60 g
  • Mini marshmallows (best in chocolate bases): 40–60 g
  • Dried fruit (chopped): 40–60 g

Fold these in at the end, off the heat, right before spreading.

Flavor additions that lift sweetened condensed milk fudge without changing texture

  • Vanilla, of course (especially in white chocolate bases)
  • A small pinch of cinnamon or cardamom in vanilla fudge
  • Espresso powder (½ to 1 tsp) in chocolate fudge for deeper flavor
  • Orange zest in dark chocolate fudge for a bright edge

When you keep add-ins modest, the fudge still sets cleanly and slices neatly.

Also Read: How to Cook Tortellini (Fresh, Frozen, Dried) + Easy Dinner Ideas


How to build a 10-flavor sweetened condensed milk fudge tray without chaos

Making one batch is easy. Making several batches in a row can still feel easy if you set up the flow.

Guide-style infographic titled “Sweetened Condensed Milk Fudge Tray (10 Flavors) — The Easy Plan” with a photo strip of assorted fudge squares at the top. The card explains how to make multiple batches without muddy flavors and lists a clean-to-strong batch order: 1) Vanilla/Eggnog (white base), 2) Maple/Brown Sugar/Butterscotch (white base variations), 3) Peanut Butter (white base + PB), 4) Chocolate Classic/Chocolate Chip, 5) Rocky Road/Peppermint (strong mix-ins last). A setup checklist recommends lining 2–3 pans (20×20 cm) or reusing with parchment overhang, keeping one “white chocolate” pot and one “dark chocolate” pot, and chilling slabs first before slicing everything with a warm knife. Portion guide notes 1 pan makes about 36 squares and a gift box holds 9–12 pieces (3–4 flavors). Pro tip: make mix-in flavors last to keep everything tasting clean. MasalaMonk.com is branded in the footer.
Planning a Christmas fudge tray with sweetened condensed milk? Save this 10-flavor game plan. It shows the best batch order (clean-to-strong) so your vanilla/maple flavors don’t get “muddy,” plus a simple setup checklist for making multiple pans efficiently. You’ll also get a portion guide for gift boxes (9–12 pieces across 3–4 flavors), so you can build a tray that looks intentional—without turning your kitchen into a full-day project.

Start with the “clean pan” flavors

Begin with vanilla or white chocolate fudge, then move into peanut butter, then finish with dark chocolate. That order keeps flavors distinct and reduces lingering aromas.

Line multiple tins, even if you reuse them

If you only have one tin, line it, chill the slab until firm enough to lift, then transfer it to a board to finish chilling while you line the tin again. You don’t need perfection—just a steady rhythm.

Keep your slicing moment separate

Let everything chill fully first, then slice all slabs at once. This makes your pieces more uniform and reduces the “warm kitchen” effect that can soften edges.


Storage (so your fudge stays the right texture)

Fudge is forgiving, but storage still matters because temperature affects texture.

  • Room temperature (cool climate): keep in an airtight container for 2–3 days.
  • Refrigerator (best in warm kitchens): store in an airtight container up to a week. Let pieces sit for a few minutes before serving so the bite softens slightly.
  • Freezer: wrap the slab (or individual squares) tightly and freeze for up to 2 months. Thaw in the fridge overnight, then bring to cool room temperature before serving.

If you’re making several flavors at once, keep strong aromas (like peppermint or heavy extracts) sealed separately so the flavors stay distinct.

Also Read: How to Cook Bacon in the Oven (Crispy, No-Mess, Crowd-Ready Recipe)


How to make this your “forever” Sweetened Condensed Milk Fudge guide

The best thing about sweetened condensed milk fudge is that it doesn’t ask for a special occasion—yet it still feels like one when you serve it. Once you’ve made a couple of these, you’ll notice something satisfying: you’re no longer “following a recipe,” you’re using a method. That method is what gives you freedom.

On a busy day, you can make condensed milk chocolate fudge and be done. Then on a festive week, you can stack your fridge with vanilla, peanut butter, Nutella, maple, and marshmallow crème slabs, then slice them into tidy squares that look like a gift. On a cozy weekend, you can build a dessert board with churros for dipping, a drizzle of chocolate syrup, and a few different fudge flavors so every bite feels slightly different.

If you’re in the mood to keep the condensed milk theme going beyond fudge, it’s worth pairing this with one creamy chilled dessert like no-bake blueberry cheesecake or a layered comfort dessert like banana pudding. That way, you get contrast in texture and style without adding stress.

Most importantly, don’t feel like you need to “save” these for holidays. Fudge is at its best when it’s part of real life—one square after dinner, a small box shared with someone you like, a sweet bite with coffee on an ordinary afternoon. Make one batch first, then choose the next flavor based on your mood. The guide will still be here when you’re ready to build the full ten. Whenever you want to expand beyond the core ten, use the white chocolate base for brown sugar and butterscotch, and the classic chocolate base for rocky road and peppermint.


Sweetened condensed milk fudge FAQ

1) What is sweetened condensed milk fudge, exactly?

Sweetened condensed milk fudge is a quick fudge method where sweetened condensed milk provides sweetness and creaminess, while chocolate (or other setting ingredients) helps the fudge firm up into sliceable squares. In other words, you get a rich, classic fudge texture without boiling sugar syrup to a specific temperature.

2) Is condensed milk fudge the same as sweetened condensed milk fudge?

Most of the time, yes. When recipes say “condensed milk fudge,” they usually mean sweetened condensed milk fudge. However, evaporated milk is sometimes confused with condensed milk, and it’s not the same product—so check the can before you start. Also, any brand of sweetened condensed milk works, but low-fat versions can set softer than expected.

3) Can I make fudge with condensed milk and chocolate chips?

Absolutely. Fudge with sweetened condensed milk and chocolate chips is one of the easiest versions: melt, stir, spread, and chill. That said, for a cleaner set, use enough chocolate so the mixture firms properly, especially if your kitchen is warm.

4) What’s the best condensed milk fudge recipe for beginners?

A simple sweetened condensed milk chocolate fudge with three ingredients—sweetened condensed milk, chocolate, and salt—is the most beginner-friendly. After that, peanut butter fudge with condensed milk or Nutella fudge with sweetened condensed milk are excellent next steps because they’re still straightforward.

5) Can I make two ingredient fudge with condensed milk?

You can, although “2 ingredient fudge condensed milk” often works best when one ingredient is chocolate (or white chocolate) and the other is sweetened condensed milk. On the other hand, condensed milk and peanut butter alone can turn out softer than expected, so many reliable versions include white chocolate for structure.

6) How do I make three ingredient fudge with condensed milk?

Three ingredient fudge with condensed milk typically uses sweetened condensed milk + chocolate + a pinch of salt (or vanilla). First, melt gently, then stir until glossy, and finally chill until firm. As a result, you get a no-fuss fudge that slices cleanly.

7) Can I make easy microwave fudge with sweetened condensed milk?

Yes—microwave sweetened condensed milk fudge is one of the fastest ways to make it. Still, the method works best with short bursts and frequent stirring so the chocolate melts evenly and doesn’t scorch.

8) Why is my sweetened condensed milk fudge too soft?

Usually it’s because there wasn’t enough setting ingredient (like chocolate or white chocolate), or the ratio shifted due to add-ins. Additionally, warm kitchens can keep fudge softer. To fix it next time, increase the chocolate slightly, chill longer, and store in the fridge if needed.

9) Why did my condensed milk fudge turn grainy?

Graininess typically comes from sugar crystallizing in larger grains or from dry ingredients not dissolving smoothly. Therefore, keep heat low, stir steadily, and sift cocoa or powdered sugar in cocoa-based versions so the mixture stays uniform.

10) Why is my fudge oily or separated?

Most often, the mixture got too hot or was heated too quickly. Instead of increasing heat, melt slowly and stir continuously. Also, when adding peanut butter or Nutella, stir them in off the heat so they emulsify smoothly.

11) Can I use cocoa powder and sweetened condensed milk instead of chocolate?

Yes. Cocoa powder condensed milk fudge is a popular option, yet it usually needs additional structure—commonly butter plus powdered sugar—so it sets properly and doesn’t taste dry. As long as cocoa is sifted and fully mixed, the texture can be smooth and dense.

12) Can I make chocolate fudge with condensed milk and marshmallows?

You can, and it’s a classic style. Marshmallow crème or fluff helps create a plush, creamy bite, which is why “marshmallow fudge recipe condensed milk” and “fluff fudge sweetened condensed milk” are so loved for gift trays.

13) What is “never fail” fudge with sweetened condensed milk?

“Never fail” usually refers to a very forgiving method—often a sweetened condensed milk fudge that uses chocolate plus marshmallow crème (or sometimes butter) to keep the texture creamy and stable. Consequently, it sets reliably and stays tender.

14) Can I make peanut butter fudge using sweetened condensed milk?

Yes, and it’s one of the most requested flavors. However, for a firm set, many peanut butter and condensed milk fudge recipes add white chocolate as the setting backbone. Otherwise, the fudge may stay too soft, especially in warm weather.

15) How do I make chocolate peanut butter fudge with sweetened condensed milk?

Use a chocolate condensed milk fudge mixture and a peanut butter condensed milk fudge mixture, then layer or swirl them before chilling. That way, you get distinct flavors in every bite and a clean slice once it’s firm.

16) Can I make Nutella fudge with sweetened condensed milk?

Yes—Nutella fudge condensed milk style is rich and glossy. Still, it works best with some real chocolate included for structure and depth, so the squares set cleanly and don’t become overly soft.

17) How do I make maple fudge with sweetened condensed milk?

Maple fudge condensed milk versions usually set best with white chocolate. Then, add maple syrup for flavor and, if you want a stronger aroma, a small amount of maple extract. As a result, you get a clear maple taste without a runny texture.

18) What about brown sugar fudge with sweetened condensed milk?

Brown sugar condensed milk fudge has a deeper, caramel-like sweetness. Typically, it works well as a variation of a white chocolate condensed milk fudge base, with brown sugar and butter helping create that butterscotch-style flavor.

19) Can I make white chocolate fudge with condensed milk?

Definitely. White chocolate and sweetened condensed milk fudge is one of the easiest non-dark-chocolate options. Even so, melt it gently—white chocolate can scorch faster—then chill until firm for clean squares.

20) Can I make vanilla fudge with sweetened condensed milk?

Yes. Vanilla condensed milk fudge is often based on white chocolate plus sweetened condensed milk, then boosted with extra vanilla (and a pinch of salt) so it tastes intentionally “vanilla” rather than just sweet.

21) Can I use evaporated milk instead of sweetened condensed milk?

Not in the same way. Evaporated milk fudge is a different method because evaporated milk isn’t sweetened and doesn’t have the same thickness. So, if a recipe calls for sweetened condensed milk, swapping evaporated milk usually won’t set correctly without other changes.

22) Can I make fudge without sweetened condensed milk?

Yes, but it becomes a different style of fudge—often old fashioned fudge made with sugar, milk (or evaporated milk), butter, and careful cooking. Therefore, if your goal is quick condensed milk fudge, it’s better to use the intended ingredient.

23) How long does sweetened condensed milk fudge take to set?

Most batches firm up in 2–4 hours in the refrigerator. Meanwhile, a thicker pan or a softer flavor (like peanut butter-heavy versions) may take longer. If you want the neatest cuts, chilling overnight is ideal.

24) Should I store condensed milk fudge in the fridge or at room temperature?

If your kitchen is cool, room temperature works for a couple of days in an airtight container. Otherwise, refrigeration keeps the texture firm and stable. For longer storage, freezing also works well once pieces are wrapped tightly.

25) Can I freeze sweetened condensed milk fudge?

Yes. Freeze it in layers with parchment between pieces, sealed well to prevent freezer smells. Then thaw in the fridge and let it sit a few minutes before serving so the texture softens slightly.

26) How do I scale a sweetened condensed milk fudge recipe up or down?

Start by scaling based on the sweetened condensed milk amount, then keep the chocolate ratio consistent. For example, doubling the batch usually means using two cans of sweetened condensed milk and roughly double the chocolate, then using a larger tin.

27) What’s the easiest way to cut fudge neatly?

First, chill until fully firm. Next, use a warm knife (run it under hot water, wipe dry). Then slice with steady pressure, wiping the blade between cuts. As a result, edges stay clean and the pieces look gift-box ready.

28) Why does my condensed milk fudge taste too sweet?

Milk chocolate and some white chocolates are very sweet on their own, and sweetened condensed milk adds more sugar. Instead, use darker chocolate, add a pinch more salt, or balance the flavor with nuts. Additionally, vanilla and espresso powder can make the sweetness feel more rounded.

29) Can I make a “creamy fudge recipe with condensed milk” on the stove without overcooking it?

Yes—low heat is the safest route. Stir constantly until the mixture is glossy and smooth, then remove it from heat promptly. Overheating is what most often causes separation or a dull, greasy texture.

30) What’s a good “Christmas fudge recipe condensed milk” approach without extra fuss?

Choose one dark chocolate batch, one white chocolate or vanilla batch, and one peanut butter batch for contrast. Then add simple mix-ins—nuts, crushed biscuits, or a peppermint sprinkle—so the tray feels festive while the method stays easy.

Posted on 8 Comments

Peanut Butter Fudge: Recipes & Guide (8 Methods + Easy Variations)

Peanut butter fudge cover image with a thick buckeye-style layered fudge square and text “Peanut Butter Fudge: Recipes & Guide – 8 Methods + Easy Variations.”

Some desserts feel like a project. This one, thankfully, doesn’t have to. A peanut butter fudge recipe can be a two-minute stir-and-chill treat, a creamy slice that tastes like it came from a candy counter, or an old-fashioned cooked confection with that unmistakable “holiday tray” vibe. Even better, it adapts: you can turn it into chocolate-and-peanut swirls, a buckeye-style slab with a glossy cap, a peanut-free version for allergy-friendly sharing, or a sugar-alternative batch that still scratches the same sweet itch.

Because there are so many ways to make it, the smartest approach is simple: pick the style that matches your mood, then follow the steps. Along the way, you’ll also learn how to troubleshoot grainy texture, fix a too-soft set, and store slices so they stay tender instead of drying out.

Choose your peanut butter fudge style

If you want the shortest path, start with the 2-ingredient version. If you prefer a creamier bite that rarely crumbles, go for the condensed milk method. Meanwhile, marshmallow creme delivers that plush, classic texture that many people associate with “fantasy” style fudge. On the other hand, if you’re craving a true candy-shop finish, the cooked soft-ball stage method is the one.

Quick chooser infographic for peanut butter fudge styles. Shows five options with fudge squares: 2-ingredient no-bake (fastest), condensed milk (creamiest), marshmallow fluff (plush nostalgic), old-fashioned cooked (candy-shop classic), and corn syrup method (most forgiving cooked). Includes MasalaMonk.com branding.
Not sure which peanut butter fudge recipe to make first? Use this quick chooser to match your mood to the right method—2-ingredient no-bake for speed, condensed milk for extra creaminess, marshmallow fluff for classic ‘fantasy’ texture, old-fashioned cooked for candy-shop flavor, or corn syrup for a smoother cooked set.
  • Fastest: 2-ingredient easy peanut butter fudge
  • Creamiest: peanut butter fudge with sweetened condensed milk
  • Plush/nostalgic: marshmallow fluff peanut butter fudge
  • Candy-shop: old fashioned peanut butter fudge (soft-ball stage)
  • Most forgiving cooked: peanut butter fudge with corn syrup
  • Shortcut: frosting and peanut butter fudge
  • Low-sugar: keto peanut butter fudge / sugar free peanut butter fudge
  • Allergy-friendly: peanut free fudge (seed butter swap)

No matter which route you take, great results begin with great peanut butter. If you like controlling the texture from the start—ultra smooth, slightly chunky, or deeply roasted—this guide on how to make peanut butter at home is a useful foundation.


Ingredients and tools that make everything easier

Before jumping into specific methods, it helps to set yourself up for a smooth run. Even when a recipe is “easy,” small choices can make the difference between creamy slices and a crumbly pan.

Pan size and lining

An 8-inch square pan is the sweet spot for thick, giftable squares. For thinner pieces (or if you want more servings), use a 9-inch square pan.

Line the pan with parchment paper, leaving overhang on two sides. That overhang becomes handles, so you can lift the slab out cleanly and slice without gouging the pan.

Peanut butter choice

You can use either stabilized peanut butter (the kind that doesn’t separate much) or natural peanut butter. However, natural versions vary a lot: some are oily and loose; others are stiff and dry.

  • If your peanut butter is very stiff, you’ll often need a touch more fat (butter or coconut oil) to keep the mixture from crumbling.
  • If it’s very runny, you may need a bit more structure (powdered sugar, a little extra chill time, or a firmer method like condensed milk).
Photorealistic ‘Peanut Butter Fudge Cheat Sheet’ infographic. Lists how to choose a peanut butter fudge method: powdered sugar no-bake, condensed milk with white chocolate, marshmallow creme ‘fantasy’ style, cooked soft-ball, and corn syrup for smoother cooked fudge. Includes pan size guidance (8-inch thicker squares, 9-inch thinner more pieces) and peanut butter tips for natural vs runny peanut butter. MasalaMonk.com branding.
Save this peanut butter fudge cheat sheet to pick the right method fast—no-bake powdered sugar for speed, condensed milk + white chocolate for the creamiest reliable set, marshmallow creme for classic ‘fantasy’ texture, soft-ball cooked for candy-shop fudge, or corn syrup for a smoother cooked finish. It also shows the best pan size (8-inch vs 9-inch) and quick peanut butter tips so your batch sets the way you want.

Salt and vanilla in a peanut butter fudge recipe

Salt is the quiet hero here. Even salted peanut butter usually benefits from a pinch more. Vanilla is optional, yet it rounds the flavor and makes the final result taste more “finished.”

Optional tools

  • A sturdy silicone spatula (best for thick mixtures)
  • A heavy saucepan (for heated methods)
  • A candy thermometer (strongly recommended for cooked styles)

Storage and food safety

Fudge lasts well when protected from air. Still, many versions include dairy (butter, milk, condensed milk). For safe handling basics, the USDA’s guidance on leftovers and food safety is a solid reference.

Also Read: 10 Vegan Chocolate Cake Recipes (Easy, Moist, & Dairy-Free)


Method 1: Two ingredient easy peanut butter fudge (fast, firm, classic recipe)

This is the “I need something sweet right now” method. It’s also the simplest way to get that peanut-butter-candy vibe without turning on the stove.

What this style of fudge with peanut butter is like

The texture is firm and sliceable, with a sweetness that hits quickly and then fades into roasted peanut flavor. Because it sets through dry structure rather than cooking, the bite feels a bit like old-fashioned peanut butter candy—dense and satisfying.

Ingredients (8-inch pan)

  • 1 cup peanut butter (creamy works best)
  • 2 to 2½ cups powdered sugar
  • Optional: ½ teaspoon vanilla
  • Optional: pinch of salt
Photorealistic recipe card for 2-ingredient peanut butter fudge (no-bake). Shows ingredients (1 cup peanut butter, 2–2½ cups powdered sugar, optional salt and vanilla) and quick steps to mix, press into a lined pan, chill 2 hours, and slice. Includes tips to fix fudge that’s too soft or crumbly, with MasalaMonk.com branding.
This 2-ingredient peanut butter fudge is the fastest no-bake method: warm the peanut butter just until stirrable, mix in powdered sugar until pressable, then chill and slice. Save this card for those ‘need something sweet now’ moments—and use the quick fix tips if your batch turns out too soft or a little crumbly.

Step-by-step recipe

  1. Line the pan. Set it aside so it’s ready.
  2. Soften the peanut butter. Warm it gently—about 20 seconds in the microwave, or briefly in a small saucepan—just until it stirs easily. Avoid making it hot.
  3. Season it. Stir in vanilla and a pinch of salt if you’re using them.
  4. Add powdered sugar gradually. Start with 2 cups and stir until the mixture thickens into a soft dough.
    Next, add more powdered sugar a few tablespoons at a time until it holds together and feels pressable.
  5. Press into the pan. Use your spatula to compress it firmly. The tighter you press, the cleaner your slices will be.
  6. Chill until firm. Refrigerate at least 2 hours, then lift out and slice.

If it’s not perfect, fix it

  • Crumbly or dry: Warm 1–2 tablespoons of peanut butter and knead it into the mixture. Alternatively, add 1 tablespoon melted butter and mix again.
  • Too soft: Add a bit more powdered sugar and chill longer.

Also Read: Kahlua Drinks: 10 Easy Cocktail Recipes (Milk, Vodka, Coffee)


Method 2: Three ingredient peanut butter fudge (creamier and more forgiving)

This version keeps the no-bake ease, yet feels smoother and richer than the 2-ingredient batch. Because butter adds silkiness and helps binding, the texture often lands in that “creamy peanut butter fudge” zone.

Ingredients (8-inch pan)

  • 1 cup peanut butter
  • ¼ cup butter, melted
  • 2 to 2½ cups powdered sugar
  • Optional: ½ teaspoon vanilla
  • Optional: pinch of salt
Photorealistic recipe card for three ingredient peanut butter fudge (no-bake). Shows ingredients: 1 cup peanut butter, ¼ cup melted butter, 2 to 2½ cups powdered sugar, optional vanilla, and a pinch of salt. Includes steps to line an 8-inch pan, mix peanut butter with melted butter, add powdered sugar gradually, press into the pan, and chill 2–3 hours until sliceable. MasalaMonk.com branding.
This 3-ingredient peanut butter fudge is the creamier, more forgiving upgrade from the 2-ingredient version—melted butter adds silkiness so the texture stays smooth and sliceable. Save this card for a quick no-bake fudge that sets reliably in the fridge and tastes extra peanut-forward with a bigger pinch of salt.

Step-by-step recipe

  1. Prepare your pan. Line it with parchment and set aside.
  2. Melt the butter. Let it cool for a minute so it’s warm, not scalding.
  3. Combine peanut butter and butter. Stir until glossy and unified.
  4. Add vanilla and salt if using.
  5. Stir in powdered sugar gradually. Begin with 2 cups, then adjust. The mixture should be thick but still spreadable.
  6. Press and smooth. Push it firmly into the pan and level the surface.
  7. Chill 2–3 hours until sliceable.

Flavor upgrades for 3 Ingredient peanut butter fudge

A slightly larger pinch of salt makes this taste more peanut-forward. Additionally, a spoonful of finely chopped roasted peanuts gives a satisfying crunch without making slicing difficult.

Also Read: Cranberry Moscow Mule Recipe: A Festive Holiday Cocktail With Easy Variations


Method 3: Four ingredient peanut butter fudge (balanced, “best-ever” flavor)

Four-ingredient versions are popular because that extra ingredient—often vanilla—makes the fudge taste more intentional. Moreover, the method is still just stir, press, chill.

Ingredients (8-inch pan)

  • 1 cup peanut butter
  • ¼ cup butter, melted
  • 2 cups powdered sugar (plus extra only if needed)
  • 1 teaspoon vanilla
  • Pinch of salt (highly recommended)
Photorealistic recipe card for four-ingredient peanut butter fudge (no-bake). Shows fudge squares on a plate with a navy background and an overlay listing ingredients (1 cup peanut butter, ¼ cup melted butter, 2 cups powdered sugar, 1 tsp vanilla, pinch of salt) and steps to mix, add vanilla and salt, stir in powdered sugar until thick, press into a lined pan, and chill 2–3 hours. Includes pro tip to sift powdered sugar for extra-smooth fudge. MasalaMonk.com branding.
Save this four-ingredient peanut butter fudge recipe card for a balanced, ‘best-ever’ no-bake batch that slices clean. The vanilla + salt make it taste more intentional, and the pro tip (sift the powdered sugar) helps keep the texture extra smooth instead of gritty.

Step-by-step

  1. Line the pan and set it nearby.
  2. Stir peanut butter and melted butter until smooth.
  3. Add vanilla and salt. Mix thoroughly.
  4. Add powdered sugar and stir until thick and spreadable.
  5. Press into the pan firmly; smooth the top.
  6. Chill 2–3 hours, then slice.

A simple cocoa twist in 4 Ingredient peanut butter fudge

If you want a quick chocolate-peanut vibe without adding a full layer, stir 1–2 tablespoons cocoa into half the mixture and swirl it through before chilling. For an easy drizzle at serving time, this quick homemade chocolate syrup works beautifully on top of a slice.

Also Read: Iced Coffee: 15 Drink Recipes—Latte, Cold Brew, Frappe & More


Method 4: Peanut Butter Fudge with Sweetened Condensed Milk (extra creamy, very reliable)

This is the candy-counter style: smooth, rich, and easy to slice. To guarantee a firm set, this condensed milk version uses white chocolate chips for structure. Without a setting ingredient, the classic “condensed milk + peanut butter” combo can stay too soft—especially in warmer kitchens.

Ingredients (for an 8-inch pan)

  • 1 can (14 oz / 396g) sweetened condensed milk
  • 2½ cups white chocolate chips
  • 1 cup peanut butter (creamy is easiest)
  • 1 teaspoon vanilla
  • Pinch of salt
Photorealistic recipe card for condensed milk peanut butter fudge with a reliable set. Shows ingredients: 1 can (14 oz/396g) sweetened condensed milk, 2½ cups white chocolate chips, 1 cup peanut butter, vanilla, and salt. Includes steps to melt condensed milk with chips on low heat, stir in peanut butter, pour into a lined pan, and chill 3–4 hours (overnight best). Tip included for fixing fudge that’s too soft. MasalaMonk.com branding.
This condensed milk peanut butter fudge is the ‘candy-counter’ version—extra creamy, smooth, and reliably sliceable thanks to white chocolate chips for structure. Save this card if you want a gift-worthy batch with minimal effort: melt, stir, pour, chill, then cut clean squares.

Step-by-step

  1. Prep the pan: Line an 8-inch square pan with parchment paper, leaving overhang.
  2. Melt gently: In a heavy saucepan over low heat, warm the condensed milk and white chocolate chips, stirring constantly until smooth and glossy (about 3–6 minutes). Keep the heat low to avoid scorching.
  3. Add peanut butter: Stir in the peanut butter until fully unified and silky.
  4. Finish the flavor: Remove from heat and stir in vanilla and salt.
  5. Pour and smooth: Scrape into the pan, level the top, and tap the pan lightly to settle it.
  6. Chill to set: Refrigerate 3–4 hours (overnight is best for super-clean slices). Lift out and slice.

If it’s not perfect, fix it

  • Too soft: Chill longer first. If it still won’t set, re-melt gently and stir in ½ to 1 cup more white chocolate chips, then re-chill.
  • Too firm: Let slices sit at room temperature for 5–10 minutes before serving.

Condensed milk peanut butter fudge without white chocolate (works, but a different texture)

If you’d rather skip the chips, you can still use condensed milk—just add dry structure so it sets sliceable:

  • Warm 1 can condensed milk + 1 cup peanut butter over low heat until glossy.
  • Remove from heat and stir in 2 to 2½ cups powdered sugar until thick and spreadable.
  • Press into the pan and chill 3–4 hours.

This version is more “peanut butter candy” in texture than candy-shop fudge, but it’s still delicious and reliable when you want a no-chip option.

Also Read: Marinara Sauce Recipe: Classic Homemade Marinara


Method 5: Marshmallow Fluff Peanut Butter Fudge (plush, classic, nostalgic)

This is the classic “fantasy-style” approach: you cook the sugar base, then beat in marshmallow creme and peanut butter for that plush, sliceable, old-school texture. It’s much more reliable than simply mixing fluff and peanut butter and hoping it sets.

Ingredients (for an 8-inch pan)

  • 2 cups sugar
  • ½ cup evaporated milk (or whole milk)
  • ½ cup butter
  • 1 jar (7 oz / ~200g) marshmallow creme or marshmallow fluff
  • ¾ to 1 cup peanut butter
  • 1 teaspoon vanilla
  • Pinch of salt
Photorealistic recipe card for marshmallow fluff peanut butter fudge (fantasy-style). Shows a bubbling sugar base in a saucepan with a candy thermometer and lists the soft-ball stage temperature (234–236°F / 112–113°C). Includes ingredients (sugar, evaporated milk, butter, marshmallow creme, peanut butter, vanilla, salt) and steps to boil to temp, add fluff and peanut butter off heat, beat until matte, pour, cool, and chill. MasalaMonk.com branding.
This marshmallow fluff peanut butter fudge is the classic ‘fantasy-style’ version—plush, nostalgic, and sliceable when you hit the soft-ball stage (234–236°F). Save this card if you want that old-school candy-shop texture, plus the quick fixes for batches that turn out too soft or grainy.

Step-by-step

  1. Line your pan with parchment and keep it close by. This mixture sets quickly once it’s beaten.
  2. Start the base: In a heavy saucepan, combine sugar, evaporated milk, and butter. Heat over medium, stirring until everything is dissolved and uniform.
  3. Boil to soft-ball stage: Bring to a steady boil and cook until the mixture reaches 234–236°F (112–113°C). Once it’s boiling, avoid stirring—if needed, gently swirl the pan instead.
  4. Finish off-heat: Remove from heat. Immediately add the marshmallow creme, peanut butter, vanilla, and salt.
  5. Beat until it turns matte: Stir vigorously (with a wooden spoon or a mixer on low) until the mixture thickens, loses some shine, and starts holding soft shape—usually 1–3 minutes.
  6. Pour and smooth fast: Transfer to the pan right away and smooth the top. Let it cool until set, then refrigerate for cleaner slices.

If Marshmallow Fluff Peanut Butter Fudge is not perfect, fix it

  • Grainy: Usually from sugar crystals or too much stirring while boiling. Next time, stop stirring once it boils and brush down the sides of the pan early with a little water.
  • Too soft: It likely didn’t reach soft-ball temperature. You can re-melt the batch gently, bring it back to 234–236°F, then beat again and reset.
  • Too firm/crumbly: It likely cooked a bit too hot or was beaten too long. Next time, stop beating as soon as it thickens and turns slightly matte.

Also Read: Hot Chocolate Coffee: 3 Easy Recipes (Cocoa, Mix, or Espresso)


Method 6: Frosting and peanut butter fudge (icing shortcut that actually works)

This method is almost unfairly easy. Because frosting already contains sugar and fat in a stable ratio, combining it with peanut butter creates a fudge-like base that sets in the fridge.

Ingredients (8-inch pan)

  • 1 cup peanut butter
  • 1 container frosting (about 16 oz / 450g), vanilla preferred
  • Pinch of salt
  • Optional: ½ teaspoon vanilla (if your frosting is bland)
Photorealistic recipe card for frosting and peanut butter fudge (no-bake icing shortcut). Shows ingredients—peanut butter, vanilla frosting (16 oz/450g), pinch of salt, optional vanilla—and quick steps to warm frosting and peanut butter, mix until glossy, press into a lined pan, chill until set, and slice. Includes tip to add extra peanut butter and salt for better flavor. MasalaMonk.com branding.
This frosting and peanut butter fudge is the easiest no-bake shortcut—just warm, mix, press, and chill for smooth, sliceable squares. Save this card for last-minute dessert trays, and use the salt + extra peanut butter tip to make it taste less ‘store-bought.

Step-by-step

  1. Line your pan with parchment.
  2. Warm the frosting briefly. Microwave 10–15 seconds to soften it.
  3. Soften the peanut butter the same way—just enough to stir.
  4. Combine frosting and peanut butter until completely smooth.
    At first, it may resist; keep mixing and it will turn glossy.
  5. Season with salt (and vanilla if using).
  6. Spread into the pan and smooth the top.
  7. Chill 2–3 hours until set.

Make it taste less “store-bought”

Salt is essential here. Also, a little extra peanut butter (2–3 tablespoons) pushes the flavor forward and keeps it from tasting like frosting with peanuts.

Also Read: Strawberry Smoothie Recipes (12 Easy Blends + Bowls & Protein Shakes)


Method 7: Corn Syrup Peanut Butter Fudge (smoother cooked texture, less grainy)

Corn syrup is the quiet helper in cooked fudge. It makes the batch more forgiving by lowering the chances of that gritty, grainy texture that can sneak into candy. If you want old-fashioned flavor with a smoother finish and a little extra insurance, this is the cooked method to start with.

Ingredients (for an 8-inch pan)

  • 2 cups granulated sugar
  • ½ cup milk or evaporated milk
  • ½ cup light corn syrup
  • ¼ cup butter
  • 1 cup peanut butter (creamy is easiest)
  • 1 teaspoon vanilla
  • Pinch of salt
Photorealistic recipe card for corn syrup peanut butter fudge (Karo syrup style). Shows soft-ball stage temperature 234–236°F (112–113°C), ingredients (sugar, milk/evaporated milk, light corn syrup, butter, peanut butter, vanilla, salt) and steps to dissolve, boil without stirring, rest 3–5 minutes, stir in peanut butter, beat briefly, pour, cool, chill, and slice. MasalaMonk.com branding.
This corn syrup peanut butter fudge is the most forgiving cooked method—corn syrup helps reduce sugar crystallization so the texture stays smoother and less grainy. Save this card for the key cues: boil to 234–236°F, don’t stir at the boil, rest briefly off heat, then beat just until it turns slightly matte for clean slices.

Step-by-step

  1. Prep the pan first. Line an 8-inch square pan with parchment paper and leave overhang so you can lift the fudge out later.
  2. Start the base. In a heavy saucepan, combine sugar, milk, corn syrup, and butter. Heat over medium, stirring until the mixture is fully uniform and the sugar looks mostly dissolved.
  3. Boil without stirring. Bring it to a steady boil. Once it’s boiling, stop stirring (stirring encourages crystals). If needed, gently swirl the pan instead.
  4. Cook to soft-ball stage. Continue boiling until the mixture reaches 234–236°F (112–113°C) on a candy thermometer. (This range is where you get creamy fudge—not syrupy-soft and not crumbly.)
  5. Rest briefly. Remove from heat and let the pan sit undisturbed for 3–5 minutes.
  6. Add the peanut butter and flavorings. Stir in peanut butter, vanilla, and salt until completely smooth.
  7. Beat just until it thickens. Keep stirring for about 30–60 seconds, until it looks slightly thicker and loses some shine. Don’t keep going once it starts to resist—overbeating can make it crumbly.
  8. Pour and smooth fast. Scrape into the prepared pan immediately and smooth the top.
  9. Set and slice. Let it cool until firm at room temperature, then refrigerate for cleaner slices.

What makes this Corn Syrup Peanut Butter Fudge different

It’s still real cooked fudge, but the corn syrup helps keep the texture smoother and reduces the “grainy surprise” factor.

If it’s not perfect, fix it

  • Grainy: Next time, stop stirring once it boils, and brush down the sides of the pan early with a little water to remove sugar crystals.
  • Too soft: It likely didn’t reach temperature. You can gently reheat, bring back to 234–236°F, then finish again.
  • Crumbly: Usually cooked a touch too hot or beaten too long. Pull it off closer to 234°F next time and beat less.

Also Read: Sandwich for Breakfast: Breakfast Sandwich Recipe + 10 Variations


Photorealistic fudge-making cheat sheet showing soft-ball stage temperature for creamy fudge: 234–236°F (112–113°C). Background shows a saucepan of bubbling sugar syrup with a candy thermometer reading about 235°F and a wooden spoon nearby. Overlay lists three rules (stop stirring once it boils, brush crystals off pan sides, beat only until matte) and quick fixes for too soft, crumbly, or grainy fudge. MasalaMonk.com branding.
Save this soft-ball stage fudge temperature guide if you’re making old fashioned peanut butter fudge or any cooked fudge. Hitting 234–236°F (112–113°C) is the difference between creamy slices and a batch that’s too soft, crumbly, or grainy—and the quick rules here show exactly when to stop stirring and when to beat.

Method 8: Old-Fashioned Cooked Peanut Butter Fudge (classic soft-ball stage, candy-shop feel)

This is the true old-fashioned version—the one that smells like holidays and tastes like it came from a tiny candy shop. It’s a little more hands-on than the corn syrup method, but the payoff is big: a creamy, structured set and that classic “homemade fudge” character people remember.

Ingredients (for an 8-inch pan)

  • 2 cups granulated sugar
  • ½ cup milk or evaporated milk
  • ¼ cup butter
  • ¾ to 1 cup peanut butter (use 1 cup for bold peanut flavor)
  • 1 teaspoon vanilla
  • Pinch of salt
Photorealistic recipe card for old-fashioned peanut butter fudge. Includes soft-ball stage temperature (234–236°F / 112–113°C), timing cues to rest 5–10 minutes and beat 1–3 minutes until matte, plus ingredients and step-by-step instructions for a creamy candy-shop style set. MasalaMonk.com branding.
This old-fashioned peanut butter fudge is the classic candy-shop method: cook to the soft-ball stage (234–236°F), rest briefly, then beat until matte for that creamy, slice-clean set. Save this card if you want traditional holiday-tray fudge with the key timing cues that prevent grainy or crumbly batches.

Step-by-step

  1. Prep the pan. Line an 8-inch pan with parchment and set it right beside the stove. Timing matters later.
  2. Dissolve the sugar. In a heavy saucepan, combine sugar, milk, and butter. Heat over medium, stirring until the mixture is smooth and the sugar is dissolved.
  3. Boil hands-off. Bring to a steady boil. Once boiling, stop stirring. If you see sugar crystals on the sides early on, brush them down with a little water.
  4. Cook to soft-ball stage. Cook until the mixture reaches 234–236°F (112–113°C).
  5. Cool undisturbed. Remove from heat and let it sit 5–10 minutes without stirring. This short rest helps you land on creamy instead of gritty.
  6. Add peanut butter + finishers. Add peanut butter, vanilla, and salt. Stir until smooth.
  7. Beat until it turns matte. Stir vigorously until it thickens, loses gloss, lightens slightly, and starts holding its shape. This usually takes 1–3 minutes. Stop as soon as it reaches a thick, pourable stage—overbeating can make it crumble.
  8. Pour immediately. Scrape into the pan right away and smooth the top quickly.
  9. Set and slice. Let it set at room temperature, then refrigerate if you want extra clean edges when slicing.

Why this Cooked Peanut Butter Fudge is “classic”

The cooling pause and the beating step create tiny crystals that make fudge taste creamy and slice cleanly. The timing is the whole game.

If it’s not perfect, fix it

  • Too soft: It likely didn’t reach temperature. Reheat gently, bring back to 234–236°F, then finish again.
  • Grainy: Usually caused by stirring while boiling or crystals on the pan sides. Next time: hands off once boiling + brush down sides early.
  • Crumbly: Usually cooked too hot or beaten too long. Pull it off a touch earlier (closer to 234°F) and beat less.

Also Read: Paper Plane Cocktail Recipe + Best Amaro Substitutes & Tips


Chocolate peanut butter fudge and buckeye-style recipes

Chocolate turns a good batch into something that feels gift-worthy. Fortunately, you can add chocolate in several ways, depending on the mood.

If you want help choosing cocoa or chocolate types, MasalaMonk’s explainer on cacao vs chocolate vs dark chocolate is a handy read.

Photorealistic recipe card for buckeye fudge (chocolate peanut butter fudge with layers). Shows a peanut butter fudge base with a glossy chocolate cap and lists ingredients for the PB layer (2-ingredient or 3-ingredient base) plus chocolate topping (chocolate chips and butter/coconut oil). Includes steps to chill the PB layer, pour melted chocolate, chill again, and slice with a warm knife. MasalaMonk.com branding.
Buckeye fudge is the gift-worthy upgrade: a firm peanut butter fudge base topped with a smooth, glossy chocolate layer. Save this card for clean layers every time—chill the PB layer first, pour the melted chocolate cap, then slice with a warm, dry knife for sharp edges.

Variation A: Cocoa in the base (simple chocolate-peanut flavor)

Best for: a unified chocolate peanut fudge taste.

How to do it

  1. Make any base you like (no-bake, condensed milk, or marshmallow).
  2. Stir 2–4 tablespoons cocoa powder into the mixture.
    If it thickens too much, add 1–2 tablespoons warm peanut butter to loosen.
  3. Press, chill, slice.

Variation B: Buckeye fudge (peanut layer + chocolate cap)

Best for: clean layers and candy-shop vibes.

Chocolate cap ingredients

  • 1½ cups chocolate chips (milk or dark)
  • 1 tablespoon butter or coconut oil (for shine and easier slicing)

Step-by-step

  1. Make and set your peanut butter base fully.
  2. Melt chocolate chips with butter until smooth.
  3. Pour over the set layer and tilt the pan to spread evenly.
  4. Chill until firm, then slice with a warm knife.

Variation C: Swirl (marbled look with minimal effort)

Best for: an impressive finish without extra work.

Step-by-step

  1. Prepare your peanut layer, then spread it into the pan.
  2. Melt chocolate separately (or use a thick chocolate syrup).
  3. Spoon chocolate over the top and drag a knife through for swirls.
  4. Chill until set.

For a fast drizzle that looks elegant on a serving plate, this 3-minute chocolate syrup is an easy option.

Also Read: Katsu Curry Rice (Japanese Recipe, with Chicken Cutlet)


Keto peanut butter fudge (low-sugar direction, still rich)

Keto-style batches depend on the sweetener you choose. Because sugar alternatives vary, the texture can shift—sometimes firmer, sometimes softer. Still, a good base formula delivers a sliceable, satisfying result.

For a helpful overview of sweetener types, the American Diabetes Association’s PDF guide to sugar substitutes provides useful context. If you’re deciding on monk fruit specifically, Cleveland Clinic’s overview of monk fruit sweetener is a clear introduction.

Ingredients (8-inch pan)

  • 1 cup peanut butter (no added sugar)
  • ½ cup coconut oil or butter, melted
  • ¾ to 1 cup powdered-style keto sweetener blend
  • ½ teaspoon vanilla
  • Pinch of salt
Photorealistic recipe card for keto peanut butter fudge (low-sugar, no-bake, sliceable). Shows ingredients: peanut butter with no added sugar, melted coconut oil or butter, powdered keto sweetener (monk fruit/erythritol blend), vanilla, and salt. Includes steps to mix until glossy, add sweetener, press into a lined pan, chill 2–3 hours, and slice, plus a tip to rest pieces 5–10 minutes if they set hard. MasalaMonk.com branding.
This keto peanut butter fudge is a simple no-bake, low-sugar method that still tastes rich and slices clean. Save this card if you’re making sugar-free peanut butter fudge with monk fruit/erythritol—use powdered sweetener for the smoothest texture, then chill until firm and let pieces rest briefly before serving if they set extra hard.

Step-by-step recipe

  1. Line your pan with parchment.
  2. Stir peanut butter and melted fat until glossy and smooth.
  3. Add sweetener gradually and mix until thickened.
    Taste as you go; sweetness builds quickly with some blends.
  4. Add vanilla and salt, mixing thoroughly.
  5. Press into the pan firmly and smooth the surface.
  6. Chill 2–3 hours until set.

Texture note for keto peanut butter fudge

If it sets very hard, let slices sit at room temperature for 5–10 minutes. Conversely, if it stays too soft, add a bit more powdered-style sweetener next time.

Also Read: Almond Flour Pancakes (Easy Recipes) Fluffy, High-Protein, Keto & More


Sugar-free peanut butter fudge and candy-style squares

Sugar-free versions often feel closer to “peanut butter candy” than traditional cooked fudge. That’s not a downside—rather, it’s a different texture expectation. The goal is a cohesive, sliceable slab with clean sweetness and strong peanut flavor.

For a grounded take on sweeteners, the NHS overview on whether sweeteners are safe is a practical read. If you prefer a research-focused summary, Harvard’s Nutrition Source page on low-calorie sweeteners adds nuance.

Ingredients (8-inch pan)

  • 1 cup peanut butter
  • ½ cup butter or coconut oil, melted
  • ¾ to 1 cup powdered sugar-free sweetener blend
  • ½ teaspoon vanilla
  • Pinch of salt
Recipe card image for sugar-free peanut butter fudge (no-bake, candy-style squares). Shows stacked peanut butter fudge squares on a plate with ingredients in the background (powdered sugar-free sweetener, melted butter or coconut oil, vanilla, and salt). Text overlay lists ingredients (1 cup peanut butter, ½ cup melted butter or coconut oil, ¾–1 cup powdered sugar-free sweetener, ½ tsp vanilla, pinch of salt) and steps to mix, add sweetener gradually, press into a lined pan, and chill until set. Pro tip: use powdered sweetener (not granular) to avoid grit. MasalaMonk.com footer.
Save this sugar-free peanut butter fudge recipe card for an easy no-bake, candy-style treat that still slices clean. The key to a smooth bite is using a powdered sugar-free sweetener (granular can taste gritty). Mix, press into a lined pan, chill, and you’ve got quick peanut butter fudge squares without the sugar.

Step-by-step

  1. Line the pan with parchment.
  2. Combine peanut butter and melted fat until smooth.
  3. Add sweetener gradually until the mixture becomes thick and pressable.
  4. Stir in vanilla and salt to finish.
  5. Press into the pan firmly.
  6. Chill until set and slice.

Avoiding grit

Powdered-style sweeteners generally work better than granular ones in no-bake candy squares. Additionally, mixing thoroughly helps eliminate pockets of sweetness that can feel sharp.

Also Read: How to Cook Tortellini (Fresh, Frozen, Dried) + Easy Dinner Ideas


Peanut-free fudge (allergy-friendly recipe, still sliceable)

Peanut-free fudge is completely doable when you swap the spread. The method stays the same; the flavor shifts. For substitution ideas, Food Allergy Research & Education has a helpful list of peanut butter alternatives, including sunflower seed butter and soy nut butter.

Ingredients (8-inch pan, no-bake style)

  • 1 cup sunflower seed butter (or another peanut-free alternative)
  • ¼ cup melted butter (or coconut oil)
  • 2 cups powdered sugar (or suitable alternative)
  • ½ teaspoon vanilla
  • Pinch of salt
Photorealistic recipe card for peanut-free fudge made with seed butter. Shows sunflower seed butter (or soy nut butter) fudge squares and lists ingredients (seed butter, melted butter or coconut oil, powdered sugar or powdered sweetener, vanilla, salt) and steps to warm, mix, press into a lined pan, and chill 2–3 hours. Includes safety note to check labels for cross-contact. MasalaMonk.com branding.
This peanut-free fudge uses sunflower seed butter for an allergy-friendly, no-bake treat that still slices clean. Save this card for school events, parties, and potlucks—same easy method, different spread. Always check labels for cross-contact if you’re cooking for peanut allergies.

Step-by-step

  1. Line your pan with parchment.
  2. Warm the seed butter slightly so it stirs smoothly.
  3. Mix in melted butter until glossy.
  4. Add vanilla and salt.
  5. Stir in powdered sugar gradually until thick and spreadable.
  6. Press into the pan and chill until set.

Important reminder

Even when you use peanut-free ingredients, always check labels for cross-contact warnings if you’re cooking for someone with severe allergies.

Also Read: How to Cook Bacon in the Oven (Crispy, No-Mess, Crowd-Ready Recipe)


Troubleshooting: fix texture issues without panic

Even when you follow directions, fudge can surprise you. Fortunately, most problems have straightforward fixes.

Troubleshooting infographic for peanut butter fudge with quick fixes for common problems: grainy texture (sugar crystals), fudge too soft, too firm, oil pooling from natural peanut butter separation, crumbly/dry fudge, and fudge that won’t set. Includes simple solutions like chilling longer, adjusting structure, stirring techniques for cooked fudge, and re-pressing, with MasalaMonk.com branding.
Fudge didn’t turn out the way you wanted? Save this quick troubleshooting guide for peanut butter fudge—fix grainy batches, rescue fudge that’s too soft or too firm, handle oil pooling (common with natural peanut butter), and recover crumbly or won’t-set slabs without starting over.

If it’s grainy

Graininess usually comes from sugar crystallization in cooked batches. To reduce the chance:

  • Avoid stirring while the mixture boils.
  • Use a clean pastry brush and water to wash sugar crystals from the sides early.
  • Consider the corn syrup method if you want extra insurance. King Arthur’s explanation of corn syrup’s role is helpful for understanding why it works.

Your Peanut butter fudge is too soft

  • Chill longer first; many slabs firm up with time.
  • For no-bake versions, add a bit more powdered sugar (or powdered sweetener) next time.
  • For condensed milk versions, slightly increase peanut butter or reduce condensed milk a touch.

If it’s too firm

  • Let it sit at room temperature for several minutes before serving.
  • In future batches, reduce powdered sugar slightly, or add a bit more fat (butter/coconut oil).

And If oil pools on top of your peanut butter fudge

This happens most often with natural peanut butter that separates easily.

  • Stir the peanut butter extremely well before measuring.
  • Chill the slab, then blot any surface oil gently with paper towel.
  • Next time, use the 3-ingredient method or a condensed milk base for a more stable set.

If it crumbles when slicing

Crumbly no-bake fudge usually needs more binding:

  • Add a spoonful of warmed peanut butter and mix again.
  • Alternatively, add a tablespoon of melted butter and re-press.

Also Read: Benefits of Nuts and Seeds – Protein-Packed Superfoods


Slicing, serving, and pairing ideas

Slicing goes best when the slab is cold and firm. Use a long knife, warm it under hot water, wipe dry, and slice in decisive downward cuts. Then, wipe the blade between slices for clean edges.

Step-by-step infographic showing how to slice and store peanut butter fudge for clean squares. Includes tips to chill until firm, warm and dry the knife, cut straight down (no sawing), and wipe the blade between slices. Storage guidance includes using an airtight container, parchment between layers, refrigerating for cleaner slices, and freezing by wrapping tightly and thawing in the fridge. MasalaMonk.com branding.
Want clean, sharp peanut butter fudge squares? Save this slicing + storage guide: chill the slab, warm and dry your knife, cut straight down, and wipe between slices. It also shows the best way to store peanut butter fudge (airtight + parchment layers) and how to freeze it without the surface getting messy when thawed.

For a peanut-butter-themed dessert plate, pairing squares with cookies makes everything feel intentional. MasalaMonk’s peanut butter cookies fit naturally alongside any of these methods. Meanwhile, if you want a lighter contrast, these healthy oat cookies balance rich fudge nicely. Finally, for something bright and fruity on the same spread, MasalaMonk’s mango dessert ideas bring a fresh counterpoint.


A closing thought (and a simple way to pick your winner)

If you’re short on time, start with the 2-ingredient batch. If you’re after creamy reliability, choose the condensed milk method. And if you want plush nostalgia, marshmallow creme is the move. When you want true candy-shop character, go cooked soft-ball stage. After that, chocolate turns any version into a showpiece—especially buckeye-style with a glossy cap.

Once you’ve made two or three styles, you’ll notice something: the “best” one changes depending on the day. Sometimes you want the easiest pan imaginable. Other times you want a softer melt, a deeper cooked flavor, or an allergy-friendly swap so everyone can share. Luckily, all of those are within reach—one method at a time.

Also Read: High Protein Overnight Oats | 5 Recipes (Low Calorie, Vegan, Bulking & More)


FAQs

1. What is the best peanut butter fudge recipe for beginners?

If you’re new to fudge, start with a no-bake peanut butter fudge that uses powdered sugar (the 2-, 3-, or 4-ingredient styles). It’s straightforward, doesn’t require a thermometer, and sets firmly in the fridge. After that, try the condensed milk or cooked soft-ball versions when you want a more candy-shop finish.

2. What are the ingredients in peanut butter fudge?

Peanut butter fudge usually needs peanut butter + a sweetener/structure. Depending on the method, that structure can be powdered sugar, sweetened condensed milk, marshmallow creme, or a cooked sugar base. In addition, many recipes include butter, vanilla, and salt to improve texture and flavor.

3. How do you make two ingredient peanut butter fudge?

Two-ingredient peanut butter fudge is typically peanut butter + powdered sugar. Warm the peanut butter just until stirrable, then mix in powdered sugar until the mixture becomes thick and pressable. Finally, press it into a lined pan and chill until firm.

4. How do you make three ingredient peanut butter fudge?

Three-ingredient versions usually add melted butter to peanut butter and powdered sugar. The butter makes the mixture creamier and easier to spread. Once combined, chill until sliceable.

5. What makes four ingredient peanut butter fudge taste “best ever”?

Four-ingredient peanut butter fudge often includes vanilla (plus peanut butter, butter, and powdered sugar). Vanilla and salt make the flavor taste more complete, while the butter keeps the bite smoother. As a result, it reads more like a finished candy than a quick mix.

6. Can I make peanut butter fudge with sweetened condensed milk?

Yes. For a reliable, creamy set, condensed milk versions usually need an additional “setting” ingredient (commonly white chocolate chips) or extra dry structure (like powdered sugar). Otherwise, condensed milk and peanut butter alone can stay too soft, especially in warmer kitchens.

7. What is marshmallow creme or fluff peanut butter fudge?

Marshmallow creme (or fluff) versions are often called fantasy-style peanut butter fudge. Typically, you cook a sugar base to the soft-ball stage, then beat in marshmallow creme and peanut butter. Consequently, the texture turns plush, cohesive, and sliceable for days.

8. How do you make old fashioned peanut butter fudge?

Old fashioned peanut butter fudge is a cooked method that usually requires reaching the soft-ball stage (about 234–236°F / 112–113°C). After cooking, you cool it briefly, then beat until it thickens and loses some shine before pouring into the pan. That timing is what creates the classic creamy bite.

9. What is corn syrup peanut butter fudge, and why use it?

Corn syrup versions are cooked fudge with an extra helper ingredient. Corn syrup helps reduce crystallization, which can lead to a smoother texture. In other words, it’s a more forgiving route when you want cooked fudge flavor without as much risk of graininess.

10. How do you make chocolate peanut butter fudge?

You can add chocolate in three easy ways: mix cocoa into the base, swirl melted chocolate through before chilling, or add a top layer for a buckeye-style finish. Meanwhile, using milk chocolate chips gives a softer, sweeter “candy bar” vibe, while dark chocolate makes the peanut flavor pop.

11. What is buckeye fudge?

Buckeye fudge is a peanut butter fudge base topped with a firm chocolate layer. Once the peanut butter layer is set, pour melted chocolate (often with a little butter or coconut oil for shine) over the top. Then chill again and slice with a warm knife for neat layers.

12. Can I make no bake peanut butter fudge?

Definitely. No-bake peanut butter fudge usually sets by using powdered sugar or a structured base like frosting. Because there’s no cooking stage, it’s faster and less fussy. Still, measuring and mixing thoroughly matters for a clean set.

13. Why is my peanut butter fudge grainy?

Graininess usually comes from sugar crystallization in cooked fudge, or from undissolved granules. To prevent it, avoid stirring once the mixture boils, keep crystals off the sides of the pan, and use a thermometer for accuracy. Conversely, if it’s a no-bake sweetener issue, switching to a powdered-style sweetener often helps.

14. Why is my peanut butter fudge too soft?

First, give it more chill time—many batches firm up as they cool fully. If it’s still soft, the mixture likely needs more structure: add a bit more powdered sugar (or powdered sweetener) next time. For cooked versions, it may not have reached soft-ball temperature, so a thermometer is the quickest fix.

15. Why is my peanut butter fudge crumbly or dry?

This usually means there’s too much dry structure or not enough fat. Add a spoonful of warmed peanut butter (or a little melted butter) and mix again, then press firmly into the pan. Next time, use slightly less powdered sugar or choose the condensed milk or marshmallow method for a creamier set.

16. Why did oil pool on top of my peanut butter fudge?

This happens most often with natural peanut butter that separates easily. Stir the jar extremely well before measuring, then chill and blot any surface oil if needed. Additionally, choosing a method with more stability (butter, condensed milk, or cooked fudge) can reduce pooling.

17. Can I make sugar free peanut butter fudge?

Yes, as long as you use a powdered-style sugar-free sweetener for the smoothest texture. Granular sweeteners can feel gritty in no-bake candy squares. Also, sweetness levels vary by brand, so taste as you go and adjust slowly.

18. Can I make keto peanut butter fudge?

Keto peanut butter fudge typically uses peanut butter with no added sugar, a fat like butter or coconut oil, and a powdered keto sweetener. If it sets very hard, let it sit at room temperature briefly before serving. On the other hand, if it stays too soft, add a little more powdered sweetener next time.

19. How do you make peanut free fudge?

To make peanut-free fudge, swap peanut butter for a safe alternative like sunflower seed butter or soy nut butter, then follow the same no-bake method. However, if you’re baking for allergies, always check labels and watch for cross-contact warnings.

20. How long does peanut butter fudge last and how should I store it?

For the best texture, store peanut butter fudge in an airtight container with parchment between layers. In a cool room, it can last several days; in the fridge, it lasts longer and slices cleaner. Furthermore, freezing works well—wrap tightly and thaw in the fridge so the surface doesn’t sweat.

Posted on 2 Comments

Best Nuts and Seeds for Weight Loss (Chia, Flax, Almonds & More)

The Role of Nuts & Seeds in Weight Management and Overall Health

If you’re trying to shed pounds naturally, eating the best nuts and seeds for weight loss can give you a real advantage. For years, many people avoided these foods, believing their high fat and calorie content would lead to weight gain. However, modern research tells a different story.

Studies from Harvard and the University of South Australia show that including nuts in a calorie-controlled diet not only supports weight loss but often leads to greater fat loss compared to diets without nuts. Seeds like chia and flax add even more benefits, thanks to their fiber and omega-3 fatty acids, which keep you full and improve metabolism.

In this comprehensive guide, we’ll explore the top nuts and seeds for weight loss, why they work, how to eat them, and the science behind their benefits. By the end, you’ll know exactly how to make these tiny nutritional powerhouses a smart part of your weight-loss journey.


Why Nuts and Seeds Help With Weight Loss

Nuts and seeds are nutrient-dense, combining protein, fiber, and healthy fats. This unique balance explains why they support fat loss instead of hindering it:

Best nuts and seeds for weight loss – almonds, walnuts, pistachios, peanuts, chia seeds, flax, pumpkin, sesame, and sabja – high in protein, fiber, and healthy fats for appetite control and metabolism.
Quick snapshot: Nuts and seeds are rich in protein, fiber, and healthy fats — helping reduce cravings, boost metabolism, and support weight management.
  1. Satiety & Reduced Appetite
    Their high fiber and protein slow digestion and keep you full, reducing cravings for processed snacks.
  2. Incomplete Calorie Absorption
    Research shows that not all calories in nuts are absorbed. For example, the metabolizable energy of walnuts is about 21% lower than what food labels suggest (Health.com).
  3. Improved Metabolism
    Healthy fats (especially omega-3s) support metabolic health, while protein helps preserve lean muscle during fat loss.
  4. Research Evidence
    • A Harvard study tracking 145,000 adults found that eating half a handful of nuts daily reduced obesity risk by 16%.
    • A 2024 systematic review showed nut-enriched diets led to 1.4–7.4 kg more weight loss than nut-free diets.
    • Meta-analyses confirm that nut consumption does not lead to weight gain (PMC).

📊 Nutritional Comparison: Nuts & Seeds (per 100 g)

FoodCaloriesProteinFiberFatKey Nutrients
Chia Seeds48617 g34 g31 gOmega-3s, Calcium, Magnesium
Flax Seeds53418 g27 g42 gLignans, Omega-3s, Fiber
Pumpkin Seeds (Pepitas)55930 g6 g49 gMagnesium, Zinc, Iron
Cumin Seeds37518 g11 g22 gIron, Antioxidants
Sesame Seeds57318 g12 g50 gCalcium, Magnesium, Lignans
Sabja (Basil) Seeds44220 g40 g25 gFiber, Iron, Plant Compounds
Almonds57921 g12.5 g50 gVitamin E, Magnesium
Walnuts65415 g7 g65 gOmega-3s (ALA), Antioxidants
Pistachios56020 g10 g45 gB6, Potassium, Lutein
Peanuts56725 g8.5 g49 gFolate, Niacin, Protein
Brazil Nuts65914 g7.5 g67 gSelenium, Magnesium
Macro Nutrition Comparison of Popular Nuts and Seeds discussed in this blog post.

💡 Insights at a Glance

  • Highest Protein: Pumpkin seeds (30 g/100 g).
  • Highest Fiber: Sabja (40 g/100 g), chia (34 g/100 g).
  • Highest Omega-3s: Flax, chia, walnuts.
  • Lowest Calories (comparatively): Chia and Sabja, though still energy-dense.
  • Nutrient Powerhouses: Brazil nuts (selenium), pumpkin seeds (magnesium & zinc), almonds (vitamin E).

Best Seeds for Weight Loss

Seeds may be tiny, but when it comes to nutrition, they pack an enormous punch. High in fiber, protein, and healthy fats, they help control appetite, stabilize blood sugar, and provide essential micronutrients that support metabolism. Incorporating the best seeds for weight loss into your daily diet is an easy, natural way to enhance fat loss while improving overall health.

Below, we’ll explore the top science-backed seeds that aid weight management — and how to use them.

Best seeds for weight loss – chia, flax, pumpkin, and sabja seeds with benefits like high fiber, omega-3 fatty acids, appetite control, and digestive support.
Top seeds for weight loss: Chia for fiber, flax for omega-3s, pumpkin for curbing cravings, and sabja for cooling digestion and satiety.

🌱 Chia Seeds for Weight Loss

Chia seeds are one of the most popular seeds for weight loss — and for good reason. Just two tablespoons provide nearly 10 grams of fiber, which expands in the stomach and slows digestion, creating a feeling of fullness that reduces overeating.

Chia seeds are also rich in omega-3 fatty acids, protein, calcium, and magnesium, making them a nutrient-dense addition to any diet. Their ability to absorb water (up to 10x their weight) makes them particularly effective in appetite control.

👉 A Harvard Nutrition Guide highlights chia as an easy way to add fiber and omega-3s to meals without significantly raising calorie intake.
How to Eat Chia Seeds

  • Mix 1–2 tablespoons into smoothies or yogurt.
  • Prepare overnight chia pudding with milk or plant-based alternatives.
  • Soak in water for 20 minutes to make chia water, a simple pre-meal appetite suppressant.

💡 Tip: Always soak chia seeds before eating large amounts to prevent digestive discomfort.

For some creative Chia Pudding recipes, do read out post: 10 Creative Chia Pudding Recipes for Every Taste

🌱 Flax Seeds for Weight Loss

Flax seeds (or linseeds) are another fiber powerhouse, providing both soluble and insoluble fiber that promotes satiety and digestive health. They’re also rich in lignans, plant compounds with antioxidant and hormone-balancing effects.

Studies suggest flax may help lower cholesterol and support fat metabolism, making them a great addition to weight-loss diets.

How to Eat Flax Seeds

  • Always consume ground flax seeds (whole seeds may pass through undigested).
  • Add 1–2 tablespoons to oatmeal, pancakes, or baked goods.
  • Blend into protein shakes or smoothies.

💡 Tip: Store ground flax seeds in the fridge to prevent oxidation and preserve nutrients.

Do Read: How to Incorporate Flax Seeds for Weight Loss: Tips, Recipes, and Nutritional Benefits

🌱 Pumpkin Seeds for Weight Loss

Pumpkin seeds, also known as pepitas, are nutrient-dense and packed with protein, magnesium, zinc, and antioxidants. They help regulate blood sugar, support muscle mass, and improve satiety — all important for weight loss.

A gastroenterologist cited in Economic Times recommends pumpkin seeds for their ability to balance blood sugar levels and provide affordable nutrition.

How to Eat Pumpkin Seeds

  • Snack on roasted pumpkin seeds.
  • Add to salads, soups, or stir-fries.
  • Include in homemade trail mix or granola bars.

💡 Tip: Stick to a handful (¼ cup) to keep calories in check.

Also Read: The Benefits of Pumpkin Seeds for Weight Loss and Blood Sugar Control

🌱 Cumin Seeds for Weight Loss

While often used as a spice, cumin seeds have gained attention for potential weight-loss benefits. Some small trials suggest cumin may aid fat reduction and improve cholesterol when included in calorie-controlled diets.

How to Use Cumin Seeds

  • Brew cumin water: soak 1 teaspoon of seeds overnight, strain, and drink in the morning.
  • Add to soups, stews, or roasted vegetables for extra flavor and digestive support.

💡 Tip: Cumin should complement a balanced diet — it’s not a standalone solution for fat loss.

Also Read: Harness the Power of Cumin Seeds for Weight Loss: Unveiling the Potential

🌱 Sesame Seeds for Weight Loss

Sesame seeds are calorie-dense, but they provide calcium, magnesium, and lignans that support metabolic health. They are often consumed in the form of tahini, a sesame paste used in Mediterranean and Middle Eastern cooking.

How to Eat Sesame Seeds

  • Sprinkle toasted sesame seeds on stir-fries, noodles, or salads.
  • Use tahini as a base for salad dressings or dips like hummus.

💡 Tip: A teaspoon or two goes a long way — moderation is key due to calorie density.

Read More: Sesame Seeds for Weight Loss: Exploring the Nutritional Benefits, Cooking Methods, and Incorporation into a Healthy Diet

🌱 Sabja (Basil) Seeds for Weight Loss

Sabja seeds, also called tukmaria or basil seeds, are similar to chia in their ability to swell up in liquid. Rich in fiber and plant compounds, they slow digestion, promote fullness, and support gut health.

They’re a traditional ingredient in Indian summer drinks and desserts, prized for their cooling effect and digestive benefits.

How to Eat Sabja Seeds

  • Soak 1–2 teaspoons in water for 15 minutes before use.
  • Add to lemon water, smoothies, or milk-based drinks like falooda.
💡 Tip: Always soak sabja seeds before consuming — eating them dry can be a choking hazard.


✅ Summary: Seeds for Weight Loss

SeedKey BenefitsHow to EatPortion Size
ChiaHigh fiber, omega-3s, appetite controlPudding, smoothies, chia water1–2 tbsp/day
FlaxFiber, lignans, cholesterol-loweringGround in oats, baking, shakes1–2 tbsp/day
PumpkinProtein, magnesium, blood sugar supportRoasted snack, salads¼ cup/day
CuminMay aid fat metabolismCumin water, spice for meals1 tsp/day
SesameCalcium, lignans, flavor boostTahini, salad topping1–2 tsp/day
Sabja (Basil)Fiber, fullness, gut healthSoaked in water or drinks1–2 tsp/day
Table showing various seeds and how to consume them for weight loss.

🥜 Best Nuts for Weight Loss

Nuts often get a bad reputation because of their calorie and fat content, but science consistently shows the opposite: when eaten in moderation, they can support weight management. Rich in protein, fiber, and healthy fats, nuts keep you full, regulate blood sugar, and may even help your body burn calories more efficiently.

A Harvard study found that people who ate a handful of nuts daily had a 16% lower risk of obesity compared to those who rarely ate them. Another systematic review confirmed that nut consumption does not cause weight gain — and may enhance weight loss in calorie-controlled diets.

Here are the best nuts for weight loss, backed by research.

Best nuts for weight loss – almonds, walnuts, pistachios, peanuts, and Brazil nuts – rich in protein, fiber, omega-3s, and essential minerals to support fat loss and appetite control.
Top nuts for weight loss: Almonds to control hunger, walnuts for omega-3s, pistachios for low-calorie snacking, peanuts for affordable protein, and Brazil nuts for selenium and metabolism support.

🌰 Almonds

Almonds are one of the most effective nuts for weight management. They provide 6 grams of protein, 14 grams of healthy fats, and 3.5 grams of fiber per ounce (23 almonds), which helps curb hunger and stabilize blood sugar.

A study in the International Journal of Obesity found that participants on almond-enriched low-calorie diets lost 62% more weight compared to those on nut-free diets.

How to Eat Almonds for Weight Loss

  • Snack on a small handful (about 23 almonds).
  • Chop and add to oatmeal or yogurt.
  • Use almond butter (natural, no sugar added) on whole-grain toast.

💡 Tip: Almonds are calorie-dense. Stick to 1–2 servings daily.

Read More: Almonds for Weight Loss and Belly Fat Reduction: How to Eat, How Many to Eat, When to eat, and Why to Eat

🌰 Walnuts

Walnuts are unique because they’re rich in alpha-linolenic acid (ALA), a plant-based omega-3 fatty acid that supports brain and metabolic health. They may also help control appetite at a neurological level.

A study published in Diabetes, Obesity and Metabolism found that walnuts activate brain regions that regulate hunger and cravings (Harvard Health).

How to Eat Walnuts for Weight Loss

  • Eat 3–4 walnut halves as a snack.
  • Add to salads, oatmeal, or baked goods.

💡 Tip: Walnuts are rich but calorie-dense — limit to 1 oz per day.

Do Read: Walnuts and Weight Loss: Nurturing Health with Nature’s Powerhouse

🌰 Pistachios

Pistachios are one of the lowest-calorie nuts, with about 160 calories per ounce (49 nuts). They also provide 6 grams of protein and 3 grams of fiber, making them filling despite their small calorie load.

Nutritionists highlight that eating pistachios can help reduce visceral fat (harmful fat around organs), thanks to their healthy fat and antioxidant profile (EatingWell).

How to Eat Pistachios for Weight Loss

  • Snack on pistachios in the shell (slows eating, encourages mindful snacking).
  • Crush and use as a topping for yogurt, salads, or fish dishes.

💡 Tip: Choose unsalted, dry-roasted pistachios to avoid excess sodium.

Also Read: Pistachios and Weight Loss: The Green Powerhouse for a Healthy You

🌰 Peanuts

Although technically legumes, peanuts are nutritionally similar to tree nuts and are one of the most affordable sources of plant-based protein.

A review of randomized controlled trials found that peanut consumption does not lead to weight gain and may improve satiety when included in balanced diets (PMC).

How to Eat Peanuts for Weight Loss

  • Enjoy boiled or roasted peanuts as a snack.
  • Use natural peanut butter (no added sugar or oils) on whole-grain bread.
  • Add peanuts to stir-fries for crunch and protein.

💡 Tip: Avoid flavored or candied peanuts, which often contain added sugars and oils.

Do Read: Peanuts and Weight Loss: Separating Fact from Fiction

🌰 Brazil Nuts

Brazil nuts are among the best dietary sources of selenium, an essential mineral for thyroid health and metabolism. Just one nut provides your daily requirement.

However, too many can cause selenium toxicity, so they should be consumed sparingly.

How to Eat Brazil Nuts for Weight Loss

  • Eat 1–2 nuts per day.
  • Add to homemade nut mixes for variety.

💡 Tip: Think of Brazil nuts as a supplement, not a snack to eat by the handful.

Also Read: Brazil Nut Bliss: 5 Rich and Creamy Dinner Meal Replacement Shakes for a Keto Feast


✅ Summary: Nuts for Weight Loss

NutKey BenefitsHow to EatPortion Size
AlmondsHigh protein, fiber, supports weight loss in studiesSnack, oatmeal, almond butter23 almonds (1 oz)
WalnutsOmega-3 fats, appetite control, brain healthSnack, salads, oatmeal1 oz (7 halves)
PistachiosLowest-calorie nut, reduces visceral fatIn-shell snack, toppings49 pistachios (1 oz)
PeanutsAffordable protein, improves satietyBoiled, roasted, peanut butter1 oz (28 peanuts)
Brazil NutsSelenium for metabolism, thyroid health1–2 dailyVery small serving
Table showing various nuts and how to consume them for weight loss.

🥜 Peanut Butter and Other Nut Butters for Weight Loss

Nut butters can be an excellent addition to a weight-loss diet — but only if you choose the right kind. While some store-bought spreads are loaded with added sugars, hydrogenated oils, and salt, natural nut butters provide a nutrient-dense balance of protein, fiber, and healthy fats that support satiety and energy.

A tablespoon of natural peanut butter offers about 4 grams of protein, 2 grams of fiber, and 8 grams of healthy fats — enough to keep you full and energized without spiking blood sugar. In fact, a Harvard article highlights peanut butter as a smart snack when paired with whole foods like fruit or whole-grain bread.

🥜 Peanut Butter for Weight Loss

Peanut butter is the most popular nut butter, and when consumed in moderation, it can support fat loss by:

  • Reducing cravings due to protein and fat content.
  • Stabilizing blood sugar when paired with complex carbs.
  • Offering a portable, versatile snack option.

👉 Best choice: Natural or organic peanut butter with only peanuts (and maybe salt) in the ingredient list. Avoid “low-fat” versions, as they often add sugar.

Learn now How to make the Best Peanut Butter at Home.

🌰 Almond Butter

Almond butter is slightly higher in vitamin E, magnesium, and monounsaturated fats compared to peanut butter, making it a heart-healthy alternative. It may be especially useful for those who want a lower-carb option while still boosting protein intake.

Do Read: Almond Butter for Diabetes: Creamy, Clean & Blood Sugar Friendly

🌰 Other Nut Butters

  • Cashew Butter: Creamy and mild, though lower in protein compared to peanuts or almonds. Best in moderation.
  • Mixed Nut Butters: Provide a variety of nutrients and flavors, though calories remain high.
  • Hazelnut Butters: Often sold sweetened (e.g., chocolate spreads), which should be avoided for weight loss.

✅ Tips for Using Nut Butters in a Weight-Loss Diet

  • Stick to 1–2 tablespoons per serving (about 90–180 calories).
  • Pair with fiber-rich foods like apple slices, celery sticks, or whole-grain toast.
  • Use as a smoothie base instead of sweetened syrups.
  • Avoid heavily processed or flavored nut butters marketed as “healthy” but packed with sugar.

💡 Key Takeaway: Peanut butter, almond butter, and other natural nut butters can be part of a weight-loss-friendly snack strategy. The key is choosing minimally processed versions and controlling portions.


Best Way to Eat Nuts and Seeds for Weight Loss

Knowing which nuts and seeds support weight loss is only half the battle — the other half is learning how to eat them correctly. Because nuts and seeds are calorie-dense, the secret lies in portion control, timing, and smart pairings.

Infographic showing the best way to eat nuts and seeds for weight loss with serving sizes (nuts, seeds, nut butters), best times to eat (breakfast, snacks, post-workout, evening), and easy ways to add them (chia pudding, smoothies, energy bites, salad toppers, peanut butter with fruit).
The best way to eat nuts and seeds for weight loss: right portions, right timing, and simple swaps that make a big difference. Easy ways to add them – chia pudding, smoothies, energy bites, salad toppers, peanut butter with fruit, etc.

✅ Serving Sizes Matter

  • Nuts: 1 ounce (about a small handful or 23 almonds, 49 pistachios, or 14 walnut halves). This equals roughly 160–180 calories.
  • Seeds: 1–2 tablespoons daily (chia, flax, pumpkin, sesame, or sabja).
  • Nut Butters: 1–2 tablespoons (90–180 calories).

👉 Moderation is essential. Eating too many can lead to calorie surplus, which counteracts weight-loss efforts.

⏰ Best Times to Eat Nuts and Seeds

  • Breakfast: Add chia, flax, or almonds to oats, yogurt, or smoothies for a filling start.
  • Snacks: Replace chips or cookies with pistachios or peanuts for a protein boost.
  • Post-Workout: A smoothie with nut butter and seeds supports muscle repair.
  • Evening: A small serving of walnuts or pumpkin seeds can curb late-night cravings without spiking blood sugar.

🍴 Easy Ways to Add Them to Your Diet

  • Chia Pudding: Soak 2 tbsp chia in milk overnight, top with berries.
  • Almond & Date Energy Bites: Blend almonds, dates, and a sprinkle of flax.
  • Flax Smoothie: Add 1 tbsp ground flax to banana or berry smoothies.
  • Pumpkin Seed Salad Topper: Sprinkle roasted seeds over greens for crunch.
  • Peanut Butter Snack: Pair 1 tbsp natural peanut butter with apple slices or celery.

💡 Key Takeaway: Eating the best nuts and seeds for weight loss doesn’t mean endless handfuls — it means choosing the right portions, adding them to meals strategically, and using them as healthy replacements for processed snacks.


🌟 Other Health Benefits Beyond Weight Loss

While nuts and seeds are excellent for weight control, their benefits extend far beyond fat loss. Packed with essential nutrients, these tiny foods support overall health and disease prevention.

🧠 Rich in Magnesium

Many nuts and seeds — especially almonds, cashews, and pumpkin seeds — are excellent sources of magnesium, a mineral that supports energy production, blood sugar control, and muscle function. Low magnesium intake has been linked to higher risks of obesity and type 2 diabetes (NIH).

Do Read: Magnesium Deficiency? Add These 5 Foods to Your Diet

❤️ Heart and Metabolic Health

The healthy fats in nuts and seeds — particularly monounsaturated and polyunsaturated fats — help reduce LDL (“bad”) cholesterol and improve cardiovascular health. A large review published in the Journal of Nutrition found that regular nut consumption lowered the risk of heart disease by 15–23% (Journal of Nutrition).

💪 Omega-3 Fatty Acids

Walnuts, flax, and chia seeds are rich in plant-based omega-3 fatty acids, which help reduce inflammation, support brain health, and improve metabolic function. The Times of India highlights chia and flax seeds as some of the best vegetarian omega-3 sources.

Also Read: How Omega-3 Fatty Acids Help Fight Chronic Inflammation?

🛡️ Antioxidants and Plant Compounds

Sesame, flax, and chia seeds provide lignans and other antioxidants that fight oxidative stress, supporting hormonal balance and long-term disease prevention. Nuts like pistachios and walnuts also supply polyphenols with anti-inflammatory benefits (Verywell Health).

💡 Key Takeaway: Adding nuts and seeds to your diet not only helps with weight loss but also improves heart health, reduces inflammation, and provides long-lasting energy — making them a cornerstone of a balanced, healthy lifestyle.


🔬 Science-Backed Evidence: What Research Says

The role of nuts and seeds in weight management isn’t just a diet trend — it’s supported by decades of scientific research. Here are some of the strongest studies that back their benefits:

📉 Nuts and Lower Obesity Risk

A large-scale study from Harvard tracked nearly 145,000 adults over four years. Results showed that eating a handful of nuts daily was linked to a 16% lower risk of obesity and less long-term weight gain compared to people who rarely ate nuts.

⚖️ Nut-Inclusive Diets Enhance Weight Loss

A 2024 review published in Nutrition Research Reviews found that adding nuts like almonds, pistachios, and walnuts to calorie-restricted diets resulted in 1.4 to 7.4 kg more weight loss compared to similar diets without nuts (Health.com).

Similarly, a University of South Australia study confirmed across multiple trials that nut-inclusive weight-loss diets are at least as effective — and often more effective — than nut-free approaches.

🔥 Fewer Calories Absorbed Than Labels Suggest

Not all the calories in nuts are absorbed by the body. A study on walnuts found that their metabolizable energy was 21% lower than the standard calorie count listed on nutrition labels (Health.com). This means your body actually digests fewer calories than expected.

✅ No Evidence of Weight Gain from Nuts

Meta-analyses and randomized controlled trials consistently show that nut consumption does not cause weight gain. In fact, when nuts replace processed snacks, they support better weight control (PMC).

💡 Bottom Line: The science is clear — far from being fattening, nuts and seeds are proven allies in weight management, helping reduce obesity risk, enhance fat loss, and improve long-term health.


❓ FAQs About Nuts, Seeds, and Weight Loss


🥜 Are nuts fattening or good for weight loss?

Despite being high in calories, nuts are not fattening when eaten in moderation. Studies show that regular nut consumption does not lead to weight gain and may actually support fat loss thanks to their protein, fiber, and healthy fats (PMC).


🥗 Which nuts are best for weight loss?

Almonds, pistachios, and walnuts are among the best nuts for weight loss. They’re high in protein and fiber, help control appetite, and have been linked to reduced body fat in multiple studies (Harvard Health).


🌱 Which seeds are best for weight loss?

Chia seeds, flax seeds, and pumpkin seeds are top choices. They’re rich in fiber and omega-3s, which slow digestion, promote fullness, and support metabolism (Healthline).


🥄 How many almonds should I eat per day for weight loss?

A small handful — about 23 almonds (1 ounce) — is considered an ideal daily portion. This provides enough protein and fiber to support satiety without adding excess calories.


🥤 How should I eat chia seeds for weight loss?

Soak 1–2 tablespoons of chia seeds in water or milk for 15–20 minutes before eating. Popular options include chia pudding, chia smoothies, or simple chia water taken before meals (Harvard Health).


🍞 Can peanut butter help with weight loss?

Yes — if it’s natural peanut butter with no added sugar or oils, and eaten in moderation. Stick to 1–2 tablespoons paired with fruit or whole-grain toast for a filling snack (Harvard Health).


⚖️ Are seeds better than nuts for weight loss?

Both are beneficial. Seeds (like chia and flax) offer more fiber per serving, while nuts (like almonds and pistachios) are higher in protein. Including a mix of both provides the best balance for weight control and overall health.


🏁 Conclusion

Nuts and seeds are often misunderstood — many people avoid them for fear of gaining weight, but research shows the opposite. When eaten in moderation, the best nuts and seeds for weight loss — from chia and flax seeds to almonds, pistachios, and walnuts — are powerful tools for controlling hunger, boosting metabolism, and improving overall health.

These tiny foods provide the perfect balance of protein, fiber, and healthy fats, which keep you full for longer and help you avoid unhealthy snacking. On top of that, they offer additional benefits like heart protection, blood sugar control, and essential nutrients such as magnesium and omega-3 fatty acids.

The key is portion control and smart usage: a handful of nuts or a few tablespoons of seeds can go a long way. Swap processed snacks for natural options like chia pudding, almond butter on whole-grain toast, or roasted pumpkin seeds, and you’ll feel the difference in your energy, cravings, and weight goals.

👉 Start small today: add a tablespoon of chia to your breakfast or swap chips for a handful of pistachios. Over time, these small, sustainable choices can transform your health — one bite at a time.