For generations, people have called walnuts “brain food.” The nickname sticks partly because a walnut looks like a tiny brain. More importantly, walnuts are rich in nutrients that matter for the nervous system, and researchers have tested their effects on mood, memory, and day-to-day performance. The data doesn’t promise miracles, and we shouldn’t expect a single food to transform cognition. Even so, the evidence points to a simple, practical story: a small daily serving of walnuts is a smart, tasty habit that supports overall brain health, especially when paired with a balanced lifestyle.
In this guide, you’ll find what the best studies actually show, how walnuts might work in the body, who stands to benefit most, and how to build an easy walnut habit without overdoing calories. You’ll also get straightforward tips for storage, safety, and cooking—so the advice is not only sound, but usable.
Also Read: Walnut (Akhrot) Benefits for Men: Heart, Brain, Fertility & Metabolic Health
Walnut Benefits for Brain Health—Myth, Hype, or Science?
The “brain food” idea isn’t just folklore. Walnuts supply a mix of nutrients with plausible roles in brain function:
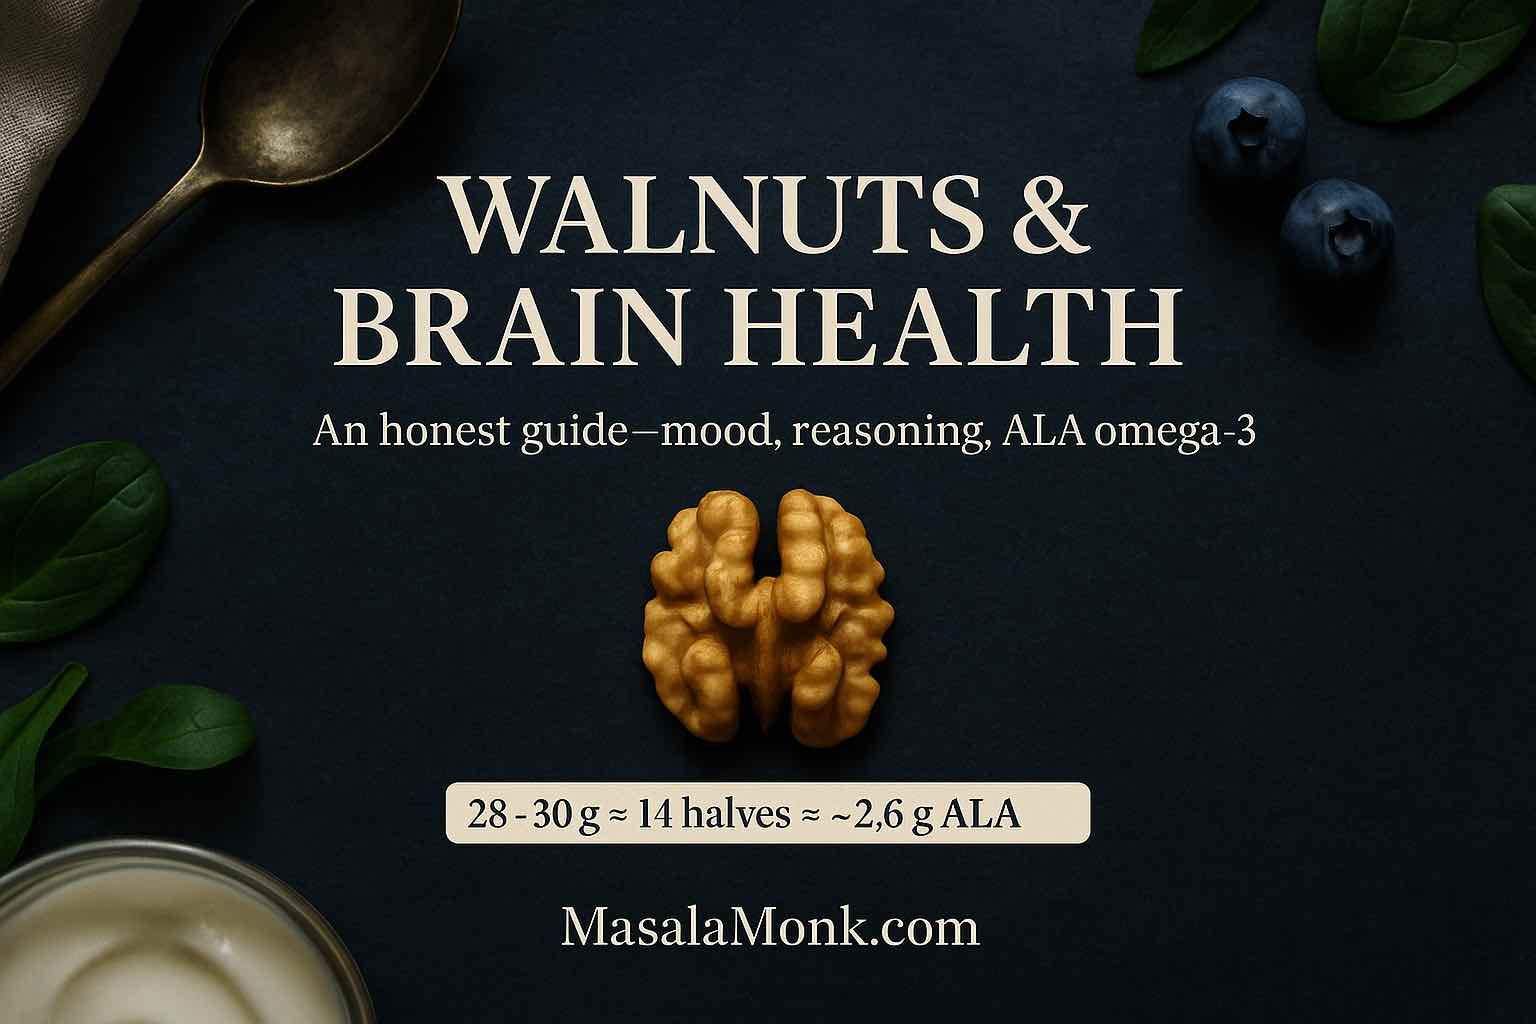
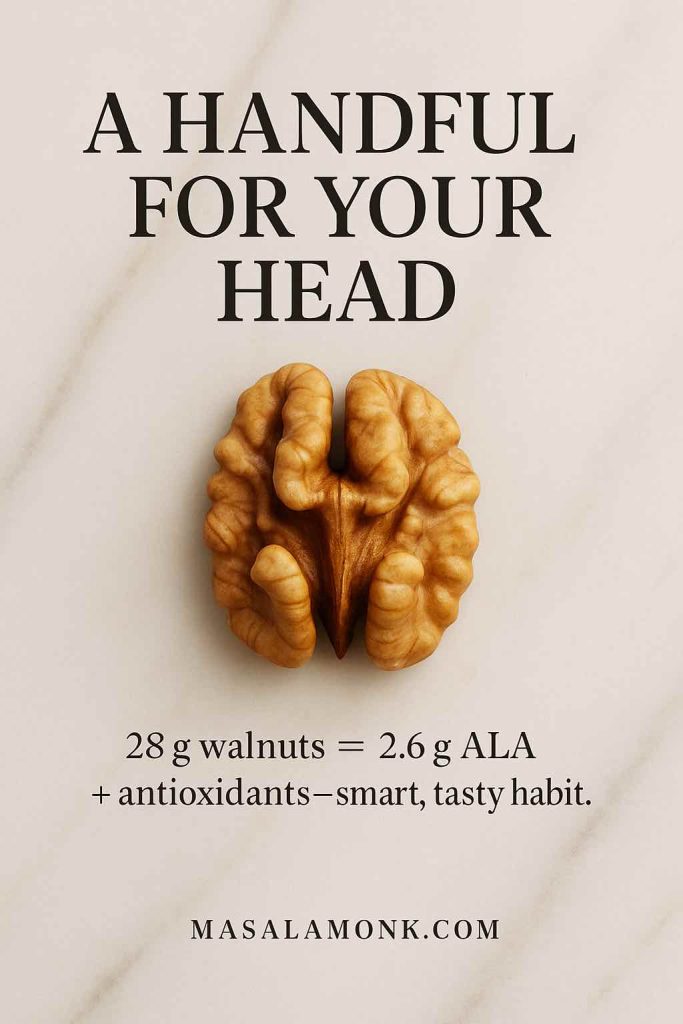
- Alpha-linolenic acid (ALA), a plant-based omega-3 that helps maintain healthy cell membranes and inflammatory balance. A 28 g serving (about 14 halves) contains roughly 2.6 g of ALA, according to USDA-based data via MyFoodData. My Food Data
- Polyphenols and other antioxidants that help counter oxidative stress—a driver of age-related decline.
- Vitamin E and key minerals (magnesium, folate) that support nerve function and overall metabolism.
- Melatonin and related phytochemicals naturally present in walnuts, which may influence sleep/circadian biology.
Together, that’s a nutrient profile you won’t quite find in other nuts. And while not every trial shows across-the-board improvements, several controlled studies and reviews suggest walnuts can nudge specific brain-related outcomes in the right direction.
Also Read: Nourishing the Mind: 7 Foods to Supercharge Your Memory and Brain Health
What Research Really Says About Walnut Benefits for Brain?
Are Walnuts Good for Your Brain? Evidence at a Glance
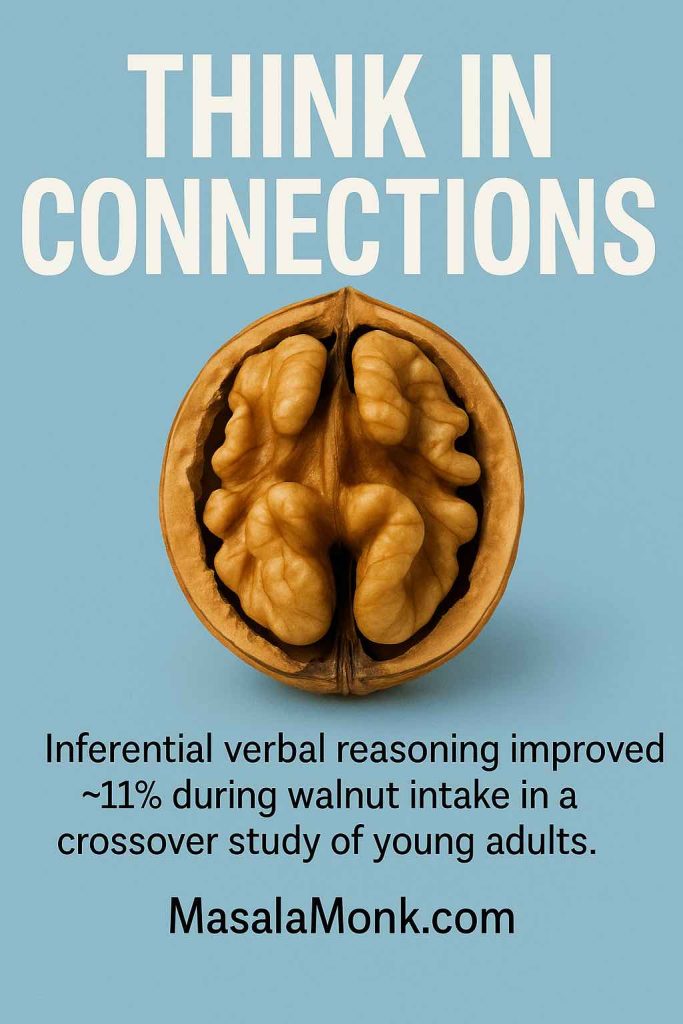
- In healthy young adults, the big picture is no sweeping boost across all cognitive tests. However, one domain—inferential verbal reasoning—has shown a meaningful improvement with regular walnut intake (details just below). PubMed
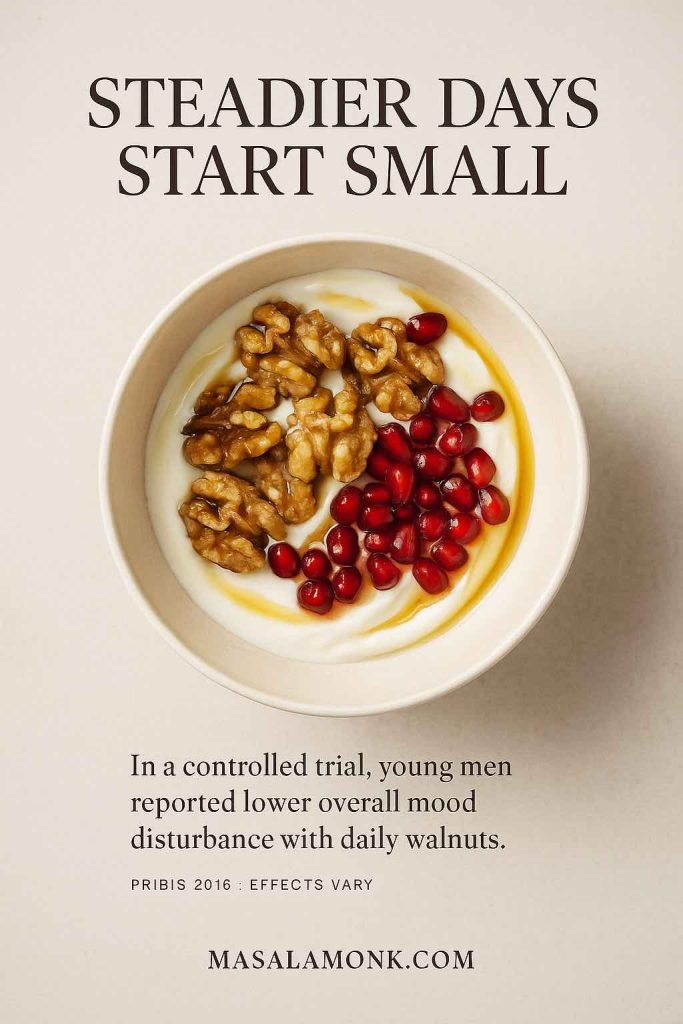
- For mood, a well-designed trial found benefits in young men when walnuts were consumed daily as part of a normal diet. PubMed
- Over the long term in healthy older adults, the best randomized trial to date found no overall change in global cognition, though exploratory analyses hinted at potential benefits in higher-risk subgroups. PubMed
In short: walnuts appear to provide small, realistic support for certain outcomes—mood steadiness in some people, subtle gains in specific cognitive subdomains, and potential protection in at-risk groups—especially as part of an overall healthy pattern.
Also Read: The Gut-Brain Connection: Link Between Anxiety and Gut Health
Walnuts and Mood: A Practical Win for Some
A double-blind, randomized crossover trial in college students found that young men experienced a clear reduction in overall mood disturbance while eating walnuts daily compared with a matched control diet (PubMed). Women in the same study did not show the same effect, which raises interesting questions about sex-specific responses and points to the need for further research. The practical takeaway is simple: if you’re aiming for steadier energy and a calmer baseline, a small daily portion of walnuts is a low-risk experiment worth trying. PubMed
How to try it: Add a handful to breakfast or keep a small container at your desk. Give it two to eight weeks and note how you feel. If it helps, keep going; if not, you’ve still adopted a nutritious snack.
Also Read: High Cortisol in Women: 10 Symptoms, Causes, and How to Reduce It
Walnuts for Memory and Cognitive Performance: Where They Seem to Help
In a crossover study of healthy young adults, walnuts did not overhaul memory or non-verbal reasoning across the board. Even so, inferential verbal reasoning—the kind of thinking you use to connect ideas and draw conclusions—improved by about 11% during the walnut period compared with control (PubMed). Although that’s a single domain in a specific population, it’s a good example of where walnuts can matter: not as a cure-all, but as a small edge in tasks that require flexible thinking. PubMed
Where this is useful: Exam days, presentations, coding sprints—any situation where you need to stay sharp for a long block of time. For best results, combine walnuts with protein, fiber, and hydration.
Also Read: Fueling Focus and Energy: Top Foods for Enhanced Cognitive Performance
Long-Term Walnut Benefits for Brain Health: The Big-Picture View
When researchers look beyond a single day or week, results become more nuanced. In the two-year WAHA trial following healthy elders, a walnut-supplemented diet did not improve global cognition overall. At the same time, brain imaging and post-hoc analyses hinted that walnuts might delay decline in subgroups at higher risk—interesting, but not definitive (PubMed). The right interpretation is neither hype nor dismissal: walnuts likely fit well inside broader dietary patterns that protect the brain, yet they do not transform test scores by themselves. PubMed
A broader review of human studies comes to a similar conclusion: walnuts contain nutrients that align with brain health, and associations are often positive, but the magnitude and consistency of benefits vary across trials and populations (Open-access review, 2021). This is how nutrition usually works—incremental gains that add up when you stack multiple good habits.
Also Read: Can I Eat Walnuts During Pregnancy?
How Might Walnut Benefits for Brain Actually Work?
Healthy Fats that Feed the Nervous System
Walnuts are exceptional among nuts for ALA omega-3 content. Cell membranes in the brain rely on a balanced mix of fatty acids, and ALA helps maintain that balance while participating in anti-inflammatory signaling. Although the body converts ALA to longer-chain omega-3s (EPA/DHA) only modestly, ALA itself supports membrane fluidity and neuron function. Practically, that means walnuts help you hit daily omega-3 targets—especially helpful for those who eat little or no fish.
Antioxidants that Counter Everyday Wear and Tear
Free radicals and oxidative stress can damage neurons and accelerate age-related decline. Walnuts provide polyphenols, vitamin E, and melatonin—a trio that works together to neutralize oxidative stress and may nudge the body’s own antioxidant defenses. Over time, that can translate into better cellular resilience, particularly in tissues rich in delicate polyunsaturated fats like the brain.
Inflammation, Blood Flow, and the Brain–Heart Connection
Chronic, low-grade inflammation and impaired vascular health correlate with cognitive decline. Walnuts have been linked to improved endothelial function in some contexts, and European regulators acknowledge a related claim on vasodilation. That doesn’t prove a direct cognitive effect, but it does strengthen the case for walnuts inside a cardio- and neuro-friendly diet (see EFSA’s opinion on walnuts and endothelium-dependent vasodilation). European Food Safety AuthorityEFSA Journal
The Gut–Brain Pathway
Polyphenols in walnuts interact with the gut microbiome, producing metabolites that influence inflammation and neural signaling. This area is still evolving, yet it offers a plausible route for how a daily walnut habit might gently shape mood and cognition over weeks to months.
If you’re aiming to get the most out of walnut-based omega-3s, this piece explains how soaking walnuts might enhance their nutritional availability, making them easier to digest and potentially more impactful.
Walnut Benefits for Brain Across Life Stages
Walnuts for Brain Development in Children & Teens
Growing brains demand quality fats, minerals, and antioxidants. While there aren’t definitive pediatric trials showing that walnuts alone boost grades, adding them to breakfast or snacks helps meet nutrient needs during intensive learning years. For households with allergies, safety comes first—see the notes below.
Easy wins: Stir crushed walnuts into porridge with banana, blitz a cocoa-banana-walnut smoothie, or tuck a homemade trail mix into lunchboxes (walnuts + roasted chana + a few raisins + dark chocolate shards).
Walnuts for Memory and Mental Clarity in Adults
Workdays stack meetings, deadlines, and context switching. Here’s where steady energy and attention matter. A simple bowl with oats, yogurt, berries, and walnuts delivers slow-release carbs, protein, fiber, and healthy fats—nutrients that support mental performance while keeping you satisfied. On long days, a walnut-inclusive breakfast or snack can help you sustain focus and avoid the mid-afternoon crash.
Practical ideas: Top Greek yogurt with walnuts and cinnamon; toss walnuts into a quinoa-vegetable bowl for lunch; carry a small container of lightly roasted walnuts to sidestep ultra-processed snacks.
Walnuts for Brain Health in Seniors
As we age, protecting vascular health, reducing inflammation, and maintaining nutrient sufficiency all matter. Even though the large WAHA trial didn’t show universal gains from walnuts alone, it sits comfortably within a larger pattern: Mediterranean-style eating—rich in plants, fish (if eaten), whole grains, and nuts—associates with slower decline. In that context, walnuts become a convenient way to hit omega-3 and antioxidant targets.
Practical ideas: Add walnuts to dal or sabzi for a soft crunch; blend into chutneys; combine with leafy greens and olive oil for a Mediterranean-style salad.
Walnuts Brain Food: Smart Ways to Work Them into Your Day
Breakfast (busy-morning friendly)
- Oats + Walnut Crunch: Rolled oats simmered with milk or a plant alternative, finished with crushed walnuts, dates, and apple.
- Creamy Smoothie: Banana, cocoa, yogurt, a spoon of soaked walnuts, and a splash of coffee if you like.
- Savory Start: Eggs with spinach and cherry tomatoes; finish with toasted walnuts and a pinch of feta.
Midday & Snacks (focus without the crash)
- Walnut Chutney Sandwich: Whole-grain bread with mint-walnut chutney, cucumber, and paneer.
- Desk Bowl: Greek yogurt topped with walnuts, pomegranate arils, and a drizzle of honey.
- Trail Mix That Works: Walnuts, roasted chana, a few raisins, dark chocolate shards.

Dinner & Entertaining (family-friendly)
- Walnut-Paneer Tikka: Skewer paneer and peppers; brush with yogurt-spice marinade and finish with a walnut crumble.
- Pesto Upgrade: Swap pine nuts for walnuts in basil pesto and toss with whole-wheat pasta or zucchini noodles.
- Stir-Fry Crunch: Add walnuts at the end of a veggie stir-fry for texture and healthy fats.
Also Read: Walnut Wonderland: 5 Wholesome Keto Meal Replacement Shakes Packed with Walnut Goodness
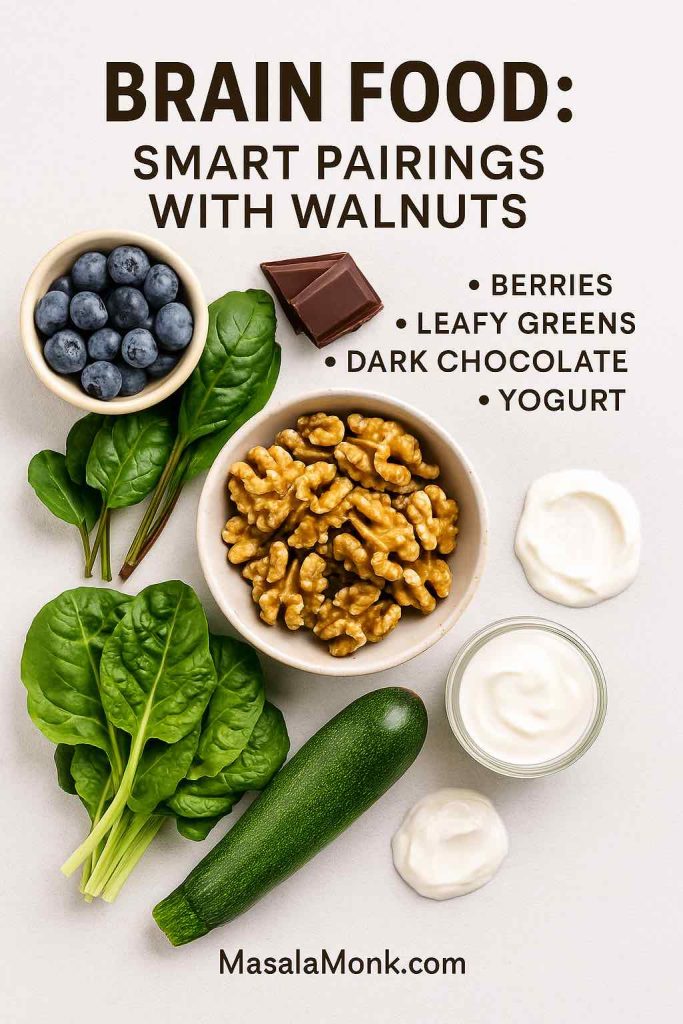
Walnut for Brain Development: Pairings that Make a Difference
Synergy matters. Combine walnuts with:
- Berries (anthocyanins) for antioxidant teamwork.
- Leafy greens (folate, magnesium) for nerve support.
- Dark chocolate (flavanols) for blood-flow benefits.
- Fermented foods (yogurt, kefir, dosa batter) to support the gut–brain axis.
These pairings build meals that are satisfying, nutrient-dense, and naturally supportive of cognitive function.
How Much Walnuts to Eat for Possible Brain Benefits?
A practical daily target is about 28–30 g—roughly one small handful (≈14 halves). That serving supplies ~2.6 g of ALA plus fiber and antioxidants (USDA-based: MyFoodData). If you’re replacing less healthy snacks, keep total calories steady by trimming sweets or refined snacks elsewhere. If you’re very active, plant-forward, or trying to improve diet quality, going a little higher on training days is reasonable. My Food Data
Dial it in:
- Start with one handful daily for two to eight weeks and see how you feel.
- Mix walnuts with almonds or pistachios for variety, while keeping walnuts as the anchor for their omega-3 content.
- If weight management is a priority, replace, don’t simply add—use walnuts instead of lower-quality snacks.
Also Read: Unleashing the Power of Soaked Walnuts: Discover the Nutritional Benefits
Safety, Allergies, and Storage: Read This Before You Stock Up
Allergies and Sensitivities
Tree-nut allergies can be serious. If you or a family member has a known tree-nut allergy—or you’re introducing nuts to a child—speak with a qualified clinician first. Cross-contamination with other nuts or peanuts is common in processing environments; always check labels and follow medical guidance. For an expert public overview, see the AAAAI’s page on tree-nut allergy (AAAAI).
Watch-outs can include itching, hives, swelling, wheezing, or stomach upset soon after eating. Any severe reaction requires immediate medical attention.
Medication Considerations
Walnuts don’t typically interact with common medicines. Still, if you’re on a restricted diet or anticoagulants, discuss big diet changes with your healthcare provider—especially if you plan to increase overall vitamin E intake.
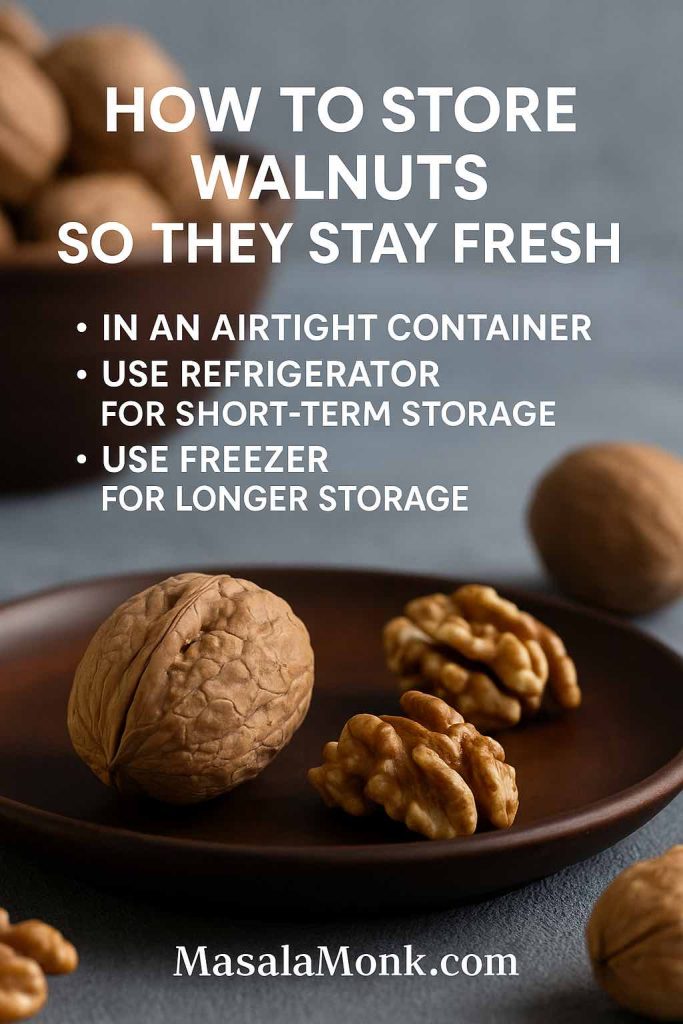
How to Store Walnuts So They Stay Fresh
Walnuts are rich in delicate unsaturated fats that can turn rancid if stored poorly. Keep shelled or in-shell walnuts in an airtight container; use the refrigerator if you’ll finish them within a few weeks, or the freezer for longer storage. Simple, evidence-based guidance is available from UC Davis Postharvest (UC Davis). UC Postharvest Center
If your walnuts smell paint-like or taste bitter, they’re past their prime—don’t use them.
The Deeper Science: How Walnut Benefits for Brain Could Accrue Over Time
From ALA to Signaling Molecules
ALA integrates into cell membranes and supports fluidity, which influences how receptors and ion channels behave. Although conversion of ALA to longer-chain omega-3s (EPA/DHA) is limited, the body also uses ALA directly in anti-inflammatory pathways. In parallel, omega-3s help with neurotransmission and synaptic plasticity—processes central to learning and memory.
Oxidative Stress, Polyphenols, and Neurons
Neurons are metabolic overachievers; they generate more reactive oxygen species than many other cells. Walnut polyphenols, vitamin E, and melatonin help scavenge those oxidants and may up-regulate the body’s own antioxidant enzymes. Over time, that can limit cumulative wear—especially in tissues rich in polyunsaturated fats like the brain.
Vascular Function and the Brain–Heart Link
The brain depends on precise blood flow. Walnuts have been tied to improved endothelial function—the ability of blood vessels to relax properly. Better endothelial function supports steadier delivery of oxygen and glucose to neurons, particularly under stress. The EFSA recognizes a health claim related to walnut intake and endothelium-dependent vasodilation, which adds regulatory context (see EFSA’s published opinion). European Food Safety AuthorityEFSA Journal
Microbiome Metabolites and the Gut–Brain Axis
Walnut polyphenols can be transformed by gut bacteria into metabolites with systemic effects. While this area is still evolving, it offers a plausible route for how a daily walnut habit could gently shape mood and cognition over weeks to months.
Buying, Preparing, and Cooking: A Mini-Guide
- Raw vs. Roasted: Lightly roast at home (low oven, 8–10 minutes) to enhance flavor without burning sensitive fats.
- Soaking: Soak to soften for smoothies or chutneys; drain and refrigerate, using within 1–2 days.
- Quality checks: Prefer sealed packaging. If buying from bulk bins, choose high-turnover shops and store promptly at home.
- Flavor pairings: Walnuts love cinnamon, cocoa, berries, dates, citrus zest, leafy greens, beetroot, mushrooms, and tangy cheeses.
Quick Start: A One-Week Walnut Plan
Day 1–2: Add one handful to breakfast. Note appetite, focus, and energy by mid-morning.
Day 3–4: Swap an afternoon packaged snack for a yogurt-and-walnut bowl. Track mood and cravings toward evening.
Day 5–6: Cook one dinner that uses walnuts for texture (pesto, stir-fry, sabzi). Notice satiety and sleep quality.
Day 7: Reflect on what worked. Keep the breakfast habit if mornings felt clearer; keep the snack if afternoons felt steadier.
Are Walnuts Good for Your Brain? An Honest Bottom Line
Yes—with context. When you scan the full landscape of studies, walnuts emerge as a useful, nutrient-dense food that can support brain-adjacent outcomes like mood steadiness in some people and subtle improvements in specific cognitive tasks. Large, long-term trials in older adults haven’t confirmed broad gains on global cognitive batteries from walnuts alone; however, that’s not a let-down so much as a reminder that nutrition is cumulative. Walnuts fit beautifully inside a wider strategy that includes a plant-forward, Mediterranean-style diet, regular movement, good sleep, and stress management.
If you’re after a simple, realistic step that nudges brain health in the right direction, a daily handful of walnuts is about as easy—and as delicious—as it gets.
Key research
- Mood: randomized crossover in young adults (men benefited) — Pribis 2016, PubMed. PubMed
- Cognition in young adults: domain-specific improvement in inferential verbal reasoning — Pribis 2012, PubMed. PubMed
- Long-term elders: 2-year WAHA trial found no overall effect on global cognition — Sala-Vila 2020, PubMed. PubMed
- ALA amount per 28 g serving — MyFoodData (USDA-based). My Food Data
- Regulatory context on vasodilation — EFSA opinion on walnuts & endothelium-dependent vasodilation. EFSA Journal
FAQs for Walnut benefits for brain.
1) Are walnuts really “brain food”?
Yes—though without the hype. Walnuts deliver ALA omega-3s, polyphenols, vitamin E, and minerals that support brain-adjacent functions. In short, walnut benefits for brain health are real but modest, working best alongside an overall healthy lifestyle.
2) What’s the simplest daily amount for brain support?
Aim for about 28–30 g (≈14 halves). This serving provides roughly ~2.6 g ALA, plus antioxidants. Moreover, if you’re watching calories, replace a lower-quality snack rather than simply adding walnuts.
3) Do walnuts improve mood?
They can—especially for some people. In a randomized crossover study, young men reported lower overall mood disturbance during a walnut phase. Nevertheless, responses vary, so try a small daily portion for 2–8 weeks and notice how you feel.
4) Do walnuts boost memory or reasoning?
Not across every test, but there’s a signal. For example, inferential verbal reasoning improved in young adults during a walnut period. Consequently, walnut benefits for brain performance tend to be domain-specific rather than sweeping.
5) How long until I notice anything?
Be patient. Because nutrition works cumulatively, give your walnut habit 2–8 weeks before judging mood or focus changes. Meanwhile, support the effort with sleep, movement, hydration, and balanced meals.
6) Are soaked or roasted walnuts better for brain benefits?
Either can fit. Light roasting enhances flavor; soaking softens texture and may aid comfort for some. However, the core nutrients tied to walnut benefits for brain—ALA and polyphenols—remain in both when you avoid high heat or lengthy storage after soaking.
7) What should I pair walnuts with for extra payoff?
Go for berries, leafy greens, fermented dairy (yogurt/kefir), and a little dark chocolate. These pairings add anthocyanins, folate/magnesium, helpful microbes, and flavanols—therefore reinforcing blood-flow, gut–brain, and antioxidant pathways.
8) Can I eat walnuts if I already take fish oil (EPA/DHA)?
Absolutely. ALA from walnuts complements fish-derived omega-3s. Moreover, for people who rarely eat fish, walnuts are a practical way to raise total omega-3 intake and still enjoy broader walnut benefits for brain health.
Also Read: Best Fish Oil Supplements on Amazon India
9) Are walnuts safe during pregnancy?
Generally, yes for those without nut allergies. They add fiber, healthy fats, and micronutrients. That said, always follow your clinician’s guidance and standard prenatal dietary advice.
10) What about kids and teens—do walnuts help with studying?
They can help meet nutrient needs during growth and heavy learning periods. While grades won’t jump overnight, a walnut-inclusive breakfast or snack supports steady energy and, consequently, better attention habits.
11) How should I store walnuts so the healthy fats stay fresh?
Because their fats are delicate, keep walnuts airtight; refrigerate for weeks and freeze for months. If they smell paint-like or taste bitter, they’re rancid—therefore discard them and restock.
12) Are other nuts just as good for the brain?
Many nuts are great, yet walnuts are unique for their high ALA content. Consequently, when your focus is walnut benefits for brain health, keeping walnuts as the “anchor” nut (and mixing others for variety) is a sensible strategy.
13) What’s one easy recipe that fits the science and the schedule?
Try a walnut pesto (swap pine nuts for walnuts) or a yogurt bowl with walnuts, berries, and honey. Both combine healthy fats, protein, and polyphenols—therefore practical, tasty ways to make the habit stick.
14) Bottom line—should I start?
Yes—if you enjoy them. A daily handful of walnuts is an easy, delicious step that can support mood steadiness and certain thinking tasks while nourishing long-term health. Nevertheless, remember: food is a team sport, and walnuts shine brightest as part of a balanced routine.