Transform Your Health with the Time-Honored Art of Acupressure
In today’s fast-paced world, the ancient practice of Qigong acupressure emerges as a sanctuary of wellness and simplicity. Drawing insights from the video “PRESS THESE 3 POINTS DAILY for A Healthy Life” by Qigong Meditation, this extensive guide unveils the secrets of three critical acupressure points, promising a pathway to enhanced health and vitality. Here, we delve deeper into each point, exploring their significance and methods in the broader context of Qigong’s holistic healing philosophy.
Understanding Acupressure in the Realm of Qigong
Acupressure, a cornerstone of traditional Chinese medicine, is akin to acupuncture but without the use of needles. It involves the stimulation of specific points on the body to regulate the flow of Qi. In Qigong, acupressure is more than a mere technique; it’s an integral part of a comprehensive approach to health that balances the physical, mental, and spiritual aspects of our being.
The Interplay of Qi and Health
Qi Dynamics: The practice of acupressure in Qigong is grounded in the belief that a balanced and free-flowing Qi is essential for optimal health.
Meridian Connectivity: Acupressure points are located along meridians or channels through which Qi flows, connecting various organs and systems in the body.
Delving into the Three Acupressure Points
Center of the Palm (PC8):
Location & Identification: Located in the middle of the palm, easily found by aligning with the middle finger.
Benefits: This point is pivotal in strengthening internal organs and enhancing overall vitality.
Technique & Application: Use the thumb of the opposite hand to apply gentle yet firm pressure. Coordinate with deep breathing, pressing on the inhale and releasing on the exhale.
Connection Between Thumb and Index Finger (LI4):
Location & Identification: Situated in the muscle between the thumb and index finger.
Benefits: Known for its effectiveness in alleviating headaches, toothaches, and stress.
Technique & Application: Apply pressure in a rhythmic manner, syncing with your breathing. This point can be sensitive, so adjust the pressure accordingly.
Inner Wrist Point (PC6):
Location & Identification: Found three finger-widths from the wrist crease on the inner arm.
Benefits: Aids in relieving digestive issues, nausea, and gas buildup in the body.
Technique & Application: Gently press with the thumb, maintaining a steady breath, for about a minute. This point can also be soothing when feeling anxious or restless.
Integrating Acupressure into Your Daily Regimen
Timing & Consistency: These points can be stimulated at any time, ideally in a calm setting. Regular practice, even if for a few minutes a day, can yield significant benefits.
Complementary Practices: Combine acupressure with other Qigong exercises, meditation, or Tai Chi to enhance the overall impact.
The Far-Reaching Benefits of Acupressure
Immediate Effects: Experience quick relief from everyday ailments, promoting a sense of well-being.
Long-Term Advantages: Consistent practice can fortify the immune system, improve organ function, and foster emotional balance.
The Broader Spectrum of Qigong Practices
Understanding these acupressure techniques opens the door to the vast and rich world of Qigong. Each practice in Qigong, whether it be movement, breathwork, or meditation, is interconnected, working synergistically to enhance life energy.
Learning from Qigong Masters
Follow the expert guidance of Thich Man Tue in the Qigong Basic Acupressure Daily video. His instructions provide clarity and depth, making the practice accessible to all.
Embarking on a Journey of Self-Healing
As you incorporate these acupressure techniques into your daily life, observe the subtle yet profound changes in your health and well-being. We invite you to share your experiences and join the conversation on holistic healing through Qigong.
10 FAQs for Qigong Acupressure Practice
Q: What is Qigong acupressure and how does it work?
A: Qigong acupressure involves applying pressure to specific points on the body to stimulate Qi flow. It works by unblocking energy pathways, enhancing overall health and vitality.
Q: Can Qigong acupressure be self-administered?
A: Yes, one of the advantages of Qigong acupressure is that it can be easily practiced on oneself, making it a convenient and accessible self-care technique.
Q: How long should I press each acupressure point?
A: Generally, pressing each point for about 60 seconds is recommended. However, this can be adjusted based on personal comfort and response.
Q: Is Qigong acupressure safe for everyone?
A: Qigong acupressure is generally safe, but individuals with specific health conditions or pregnant women should consult with a healthcare professional before practicing.
Q: How often should I practice Qigong acupressure?
A: Daily practice is ideal for the best results, but even occasional practice can be beneficial.
Q: Do I need any special tools for Qigong acupressure?
A: No special tools are required. Your fingers or thumbs are sufficient for applying pressure to the acupressure points.
Q: Can Qigong acupressure help with stress?
A: Absolutely. Qigong acupressure can be very effective in reducing stress and promoting relaxation.
Q: Will Qigong acupressure show immediate results?
A: Some effects, like relaxation or mild pain relief, can be immediate, while others, like improved organ function, may take longer to manifest.
Q: Can Qigong acupressure aid in treating chronic illnesses?
A: While not a cure, Qigong acupressure can complement other treatments in managing symptoms of chronic illnesses.
Q: Should I do Qigong acupressure before or after other exercises?
A: It can be done either before to prepare the body or after exercises like Qigong or Tai Chi to enhance and consolidate the benefits.
Blog Tags for the Post
qigong acupressure, traditional chinese medicine, qi flow, self-care techniques, energy pathways, stress reduction, holistic health, daily wellness practice, pain relief, relaxation techniques, energy balance, natural healing, pressure points, mind-body connection, therapeutic touch, wellness routine
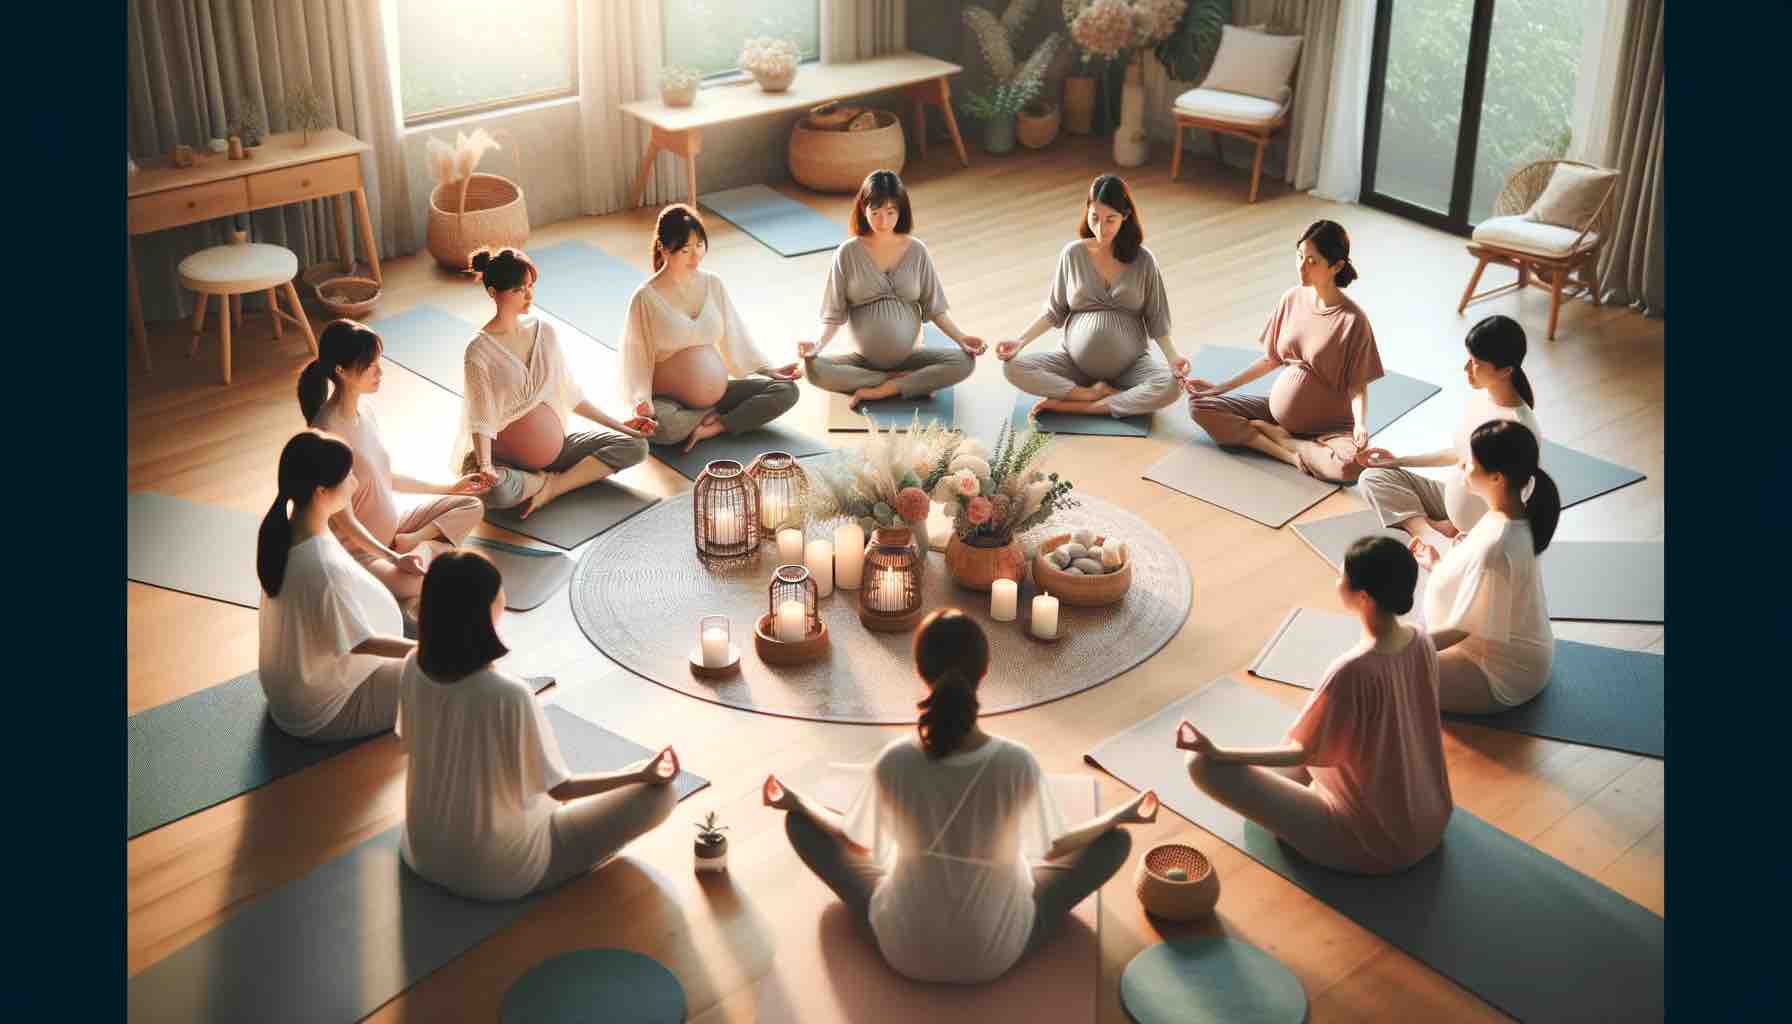
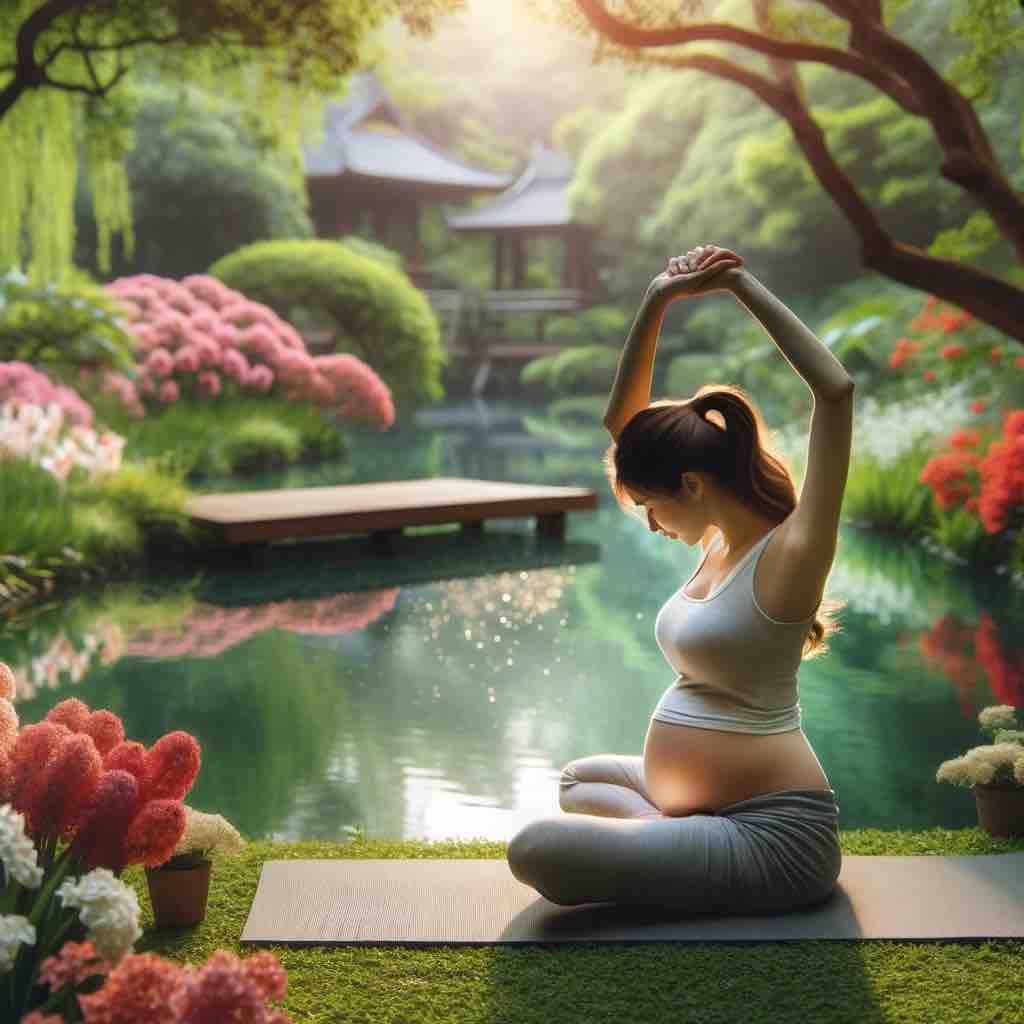
Introduction: Welcome to our guide on yoga for the third trimester of pregnancy. This special time in your life brings unique physical and emotional changes, and yoga can be a wonderful way to navigate these with grace and strength. In this post, we’ll explore a series of yoga poses and exercises specifically designed for the third trimester, focusing on safety, comfort, and the well-being of both you and your baby.
Disclaimer: Please consult with your healthcare provider before beginning any new exercise routine, especially during pregnancy. The information provided here is for educational purposes and should not replace professional medical advice.
Yoga Poses for the Third Trimester:
1. Warm-Up Poses:
Deep Breathing Techniques: Start your practice with a few minutes of deep breathing. Sit comfortably, close your eyes, and focus on taking slow, deep breaths. This helps to calm the mind and prepare your body for the yoga session.
Gentle Neck Stretches: Ease into your practice with gentle neck rolls. Drop your chin to your chest and slowly rotate your head in a circular motion, first clockwise, then counterclockwise. This helps to release tension in the neck and shoulders.
2. Standing Poses:
Uttanasana (Standing Forward Bend): Stand with feet hip-width apart, exhale, and gently bend forward from the hips, not the waist. Keep your knees slightly bent. This pose stretches the back and legs and can be modified by placing your hands on yoga blocks.
Virabhadrasana II (Warrior II Pose): Step your feet wide apart, raise your arms parallel to the floor, and turn your right foot out 90 degrees. Bend your right knee, keeping it over your ankle. Hold the pose, then switch sides. This strengthens the legs and opens the hips.
Trikonasana (Triangle Pose): From a wide-legged stance, extend your arms, and tilt at the hip to reach one hand toward your ankle, with the other arm reaching upwards. This pose improves balance and stretches the body.
3. Floor Poses:
Balasana (Child’s Pose): Kneel on the floor, touch your big toes together, and sit on your heels. Separate your knees as wide as your belly, and lay your torso down between your thighs. This pose is a great way to relax and relieve lower back pain.
Malasana (Garland Pose): Squat with your feet as close together as possible. Keep your heels on the floor if you can, or support them on a folded mat. This pose strengthens the pelvic floor and aids in digestion.
Marjaryasana-Bitilasana (Cat-Cow Stretch): Get on your hands and knees in a tabletop position. As you inhale, arch your back and look up (Cow Pose), and as you exhale, round your spine and drop your head (Cat Pose). This flow increases spinal flexibility.
4. Hip Openers and Pelvic Floor Strengthening:
Baddha Konasana (Butterfly Pose): Sit with your feet together, knees bent out to the sides. Hold your feet and gently flap your knees up and down, like the wings of a butterfly. This pose is excellent for hip flexibility.
Modified Matsyendrasana (Lord of the Fishes Pose): Sit with one leg extended, the other bent with the foot flat on the floor. Twist your torso towards the bent knee. This gentle twist is great for back relief.
Chakki Chalanasana (Mill Churning Pose): Sit with your legs spread wide, interlace your fingers, and extend your arms. Make large, circular movements with your arms and upper body, as if churning a mill. This exercise is beneficial for the pelvic floor and back.
5. Relaxation and Restorative Poses:
Viparita Karani (Legs-Up-The-Wall Pose): Lie on your back and rest your legs vertically against a wall. This restorative pose is excellent for relaxation and reducing swelling in the legs.
Supta Baddha Konasana (Reclining Bound Angle Pose): Lie on your back, bend your knees, and bring the soles of your feet together. Let your knees fall open to each side. Place pillows under your knees for support. This pose is deeply relaxing and opens up the hips.
6. Pranayama (Breathing Exercises):
Practice gentle breathing exercises like Ujjayi breath. Focus on deep, calming breaths to prepare your body and mind for labor.
7. Cool Down:
End your practice with Savasana (Corpse Pose), lying on your back with pillows under your head and knees for support. Focus on complete relaxation of the mind and body.
Safety Tips and Modifications:
Always listen to your body and avoid any poses that cause discomfort.
Use props
like yoga blocks, bolsters, and blankets for support and comfort.
Modify poses as needed to accommodate your growing belly and changing balance.
The Importance of Mind-Body Connection:
Yoga during pregnancy isn’t just about physical well-being; it’s also about preparing mentally and emotionally for childbirth.
Use this time on the mat to connect with your baby and embrace the changes in your body.
Focus on breathing and relaxation techniques that can be helpful during labor.
Conclusion: Practicing yoga during the third trimester can be a beautiful way to nurture your body and mind as you prepare for the arrival of your baby. These poses and exercises are designed to support you during this special time, offering relief,
strength, and tranquility. Remember, each pregnancy is unique, so honor your body’s needs and limitations. Incorporating these gentle yoga practices into your routine can help ensure a healthier, more comfortable pregnancy journey.
Call to Action: We’d love to hear about your experiences with yoga during pregnancy. Feel free to share your stories or ask questions in the comments section below. If you found this post helpful, consider subscribing or following us for more content on pregnancy wellness and yoga. Your journey is an inspiration to us all, and we’re here to support you every step of the way.
10 FAQs for the Yoga in the Third Trimester Blog Post:
Is it safe to start yoga in the third trimester if I haven’t practiced before?
Yes, it’s generally safe to start gentle yoga in the third trimester, but always consult with your healthcare provider first. Focus on basic poses and listen to your body.
Can yoga help with pregnancy-related back pain?
Absolutely. Poses like Marjaryasana-Bitilasana (Cat-Cow Stretch) and Balasana (Child’s Pose) can alleviate back pain by stretching and strengthening the back muscles.
How often should I practice yoga during the third trimester?
This depends on your comfort and energy levels. Many find that a short, daily practice or 2-3 times a week is beneficial.
Are there any poses I should avoid during the third trimester?
Avoid poses that put pressure on your abdomen, deep twists, and intense backbends. Also, be cautious with balance poses as your center of gravity shifts.
Can yoga help in preparing for childbirth?
Yes, yoga can help physically by strengthening the pelvic floor and mentally through breathing and relaxation techniques, which are useful during labor.
Is it normal to feel more tired after yoga during the third trimester?
It’s normal to feel a bit more fatigued due to the physical changes your body is undergoing. Listen to your body and rest as needed.
Can I do inversions during the third trimester?
Inversions are generally not recommended during the third trimester. Instead, focus on gentle, grounding poses.
How can I modify poses as my belly grows?
Use props like yoga blocks and bolsters for support. Widen your stance in standing poses and avoid lying flat on your back.
What are the best poses for relieving swollen ankles?
Viparita Karani (Legs-Up-The-Wall Pose) is excellent for reducing swelling in the ankles and legs.
How long after birth should I wait before resuming yoga?
This varies depending on your delivery and recovery. Generally, wait until you have clearance from your healthcare provider, often at the 6-week postpartum check-up.
Blog Tags: Pregnancy Yoga, Third Trimester Exercises, Prenatal Wellness, Gentle Yoga, Yoga for Expectant Mothers, Pregnancy Health, Relaxation Techniques, Pelvic Floor Strengthening, Back Pain Relief, Labor Preparation
Welcome to the world of pregnancy, a time of wonder, transformation, and, yes, a fair share of discomforts. As your body nurtures and grows a new life, it undergoes profound changes that can bring about aches, pains, and stress. But fear not, for there is a gentle, yet powerful ally in your journey – stretching.
Inspired by Haley Barry’s insightful “Pregnancy Stretching Routine” video, this blog post is more than just a guide; it’s your companion in finding relief and preparing your body for the miraculous process of childbirth. Whether you’re experiencing the first flutters of movement in your second trimester or counting down the days in your third, these stretches are designed to adapt to every stage of your pregnancy journey.
In this post, we’ll explore a series of soothing, safe, and effective stretches. Each one is carefully chosen to alleviate common pregnancy symptoms – from the restless legs that keep you awake at night to the lower back pain that greets you each morning. These stretches are not just about physical relief; they’re about creating moments of peace and connection with your growing baby.
So, grab your yoga mat, find a comfortable spot, and let’s embark on a journey of comfort and flexibility together. Remember, every stretch, every breath, is a step towards a healthier, happier pregnancy.
Why Stretching is Essential During Pregnancy
As you embark on this incredible journey of motherhood, your body becomes a nurturing haven for your growing baby. But with this beautiful transformation come challenges that can affect your comfort and well-being. This is where the power of stretching comes into play, offering a myriad of benefits for both you and your little one.
1. Alleviating Physical Discomfort: Pregnancy can often bring about a range of physical discomforts. As your belly grows, the extra weight can lead to lower back pain, sciatica, and general stiffness. Stretching gently works these areas, easing tension and pain. It helps in maintaining flexibility, which is crucial as your body adapts to its new shape.
2. Enhancing Circulation: Good circulation is vital during pregnancy. It ensures that essential nutrients and oxygen are efficiently delivered to your baby. Stretching aids in boosting blood flow, reducing the risk of swelling and varicose veins, common concerns for many pregnant women.
3. Preparing for Childbirth: One of the most profound benefits of stretching during pregnancy is its role in preparing your body for labor and delivery. Stretching the pelvic floor, hips, and lower back can enhance your flexibility and endurance, which can be beneficial during childbirth.
4. Stress Relief and Mental Well-being: Pregnancy can be a rollercoaster of emotions. Stretching isn’t just about physical relief; it’s also a form of self-care for your mental health. The calming nature of stretching exercises can reduce stress and anxiety, promoting a sense of tranquility and well-being.
5. Better Sleep: Many women struggle with sleep disturbances during pregnancy. Stretching before bed can relax your muscles and mind, leading to improved sleep quality. It’s a natural way to combat insomnia and ensure you and your baby are well-rested.
6. Bonding with Your Baby: As you stretch, you create a peaceful moment to connect with your unborn child. This quiet time can be used to focus on your baby, fostering an early bond that is both emotional and physical.
In the following sections, we’ll guide you through specific stretches, each tailored to address these aspects of prenatal health. Remember, while stretching is beneficial, it’s important to listen to your body and avoid overexertion. Always consult with your healthcare provider before starting any new exercise routine during pregnancy.
Embarking on a stretching routine during pregnancy isn’t just about flexibility; it’s about creating a harmonious balance between your mind, body, and the little life growing inside you. Let’s dive into a series of stretches, inspired by Haley Barry’s video, that are specifically designed to cater to the unique needs of your changing body.
1. Neck and Shoulder Stretches:
How to Perform: Sit in a comfortable position. Gently tilt your head from side to side, then forward and backward, feeling the stretch in your neck muscles. Follow this with shoulder rolls, moving them in circular motions to release tension.
Benefits: These stretches are vital for relieving the strain on your neck and shoulders, often caused by the increasing weight and changing posture during pregnancy.
2. Upper Back Stretch:
How to Perform: Interlace your fingers and stretch your arms forward, rounding your upper back. Gently sway from side to side, allowing the movement to release any tightness in your upper back.
Benefits: This stretch helps alleviate the common upper back pain associated with pregnancy, promoting better posture and spinal health.
3. Chest Opener:
How to Perform: Interlace your fingers behind your back. Gently lift your arms, opening up your chest. You can add a slight sway to enhance the stretch.
Benefits: As your body prepares for breastfeeding, this stretch opens up the chest and shoulders, counteracting the forward hunch and easing tension.
4. Seated Leg and Calf Stretches:
How to Perform: Sit with your legs extended. Flex and point your toes, feeling the stretch in your calves and shins. You can also gently lean forward to deepen the stretch along your hamstrings.
Benefits: These stretches are crucial for reducing leg cramps and swelling, common in later stages of pregnancy.
5. Gentle Spinal Twists:
How to Perform: Sitting cross-legged, place one hand on your opposite knee and gently twist your torso. Keep the twist mild and focused on the upper back.
Benefits: This gentle twist aids in relieving lower back pain and keeps the spine flexible, which is essential as your body adjusts to carrying your baby.
6. Butterfly Pose:
How to Perform: Sit with the soles of your feet together and knees dropped to the sides. Gently lean forward, keeping your back straight, to feel a stretch in your inner thighs and hips.
Benefits: This pose is excellent for opening up the hips and preparing your body for labor, especially in the third trimester.
7. Cat-Cow Stretch:
How to Perform: On all fours, alternate between arching your back (cat pose) and lifting your head and tailbone (cow pose).
Benefits: This stretch enhances spinal flexibility and can relieve tension in the lower back.
8. Child’s Pose:
How to Perform: Kneel and sit back on your heels, then lean forward with your arms stretched out. Keep your knees wide to accommodate your belly.
Benefits: Child’s pose is a restorative stretch that calms the mind and relieves stress, while gently stretching the back.
Safety First: While these stretches are generally safe, it’s crucial to remember that every pregnancy is unique. Listen to your body, and if any stretch feels uncomfortable, modify it or skip it altogether. Ensure you’re in a stable and comfortable position to prevent any strain or injury.
Maximizing the Benefits: Tips and Considerations for Your Pregnancy Stretching Routine
To ensure you get the most out of your pregnancy stretching routine, it’s essential to approach it with mindfulness and care. Here are some tips and considerations to enhance your stretching experience and ensure safety:
1. Creating the Right Environment:
Comfort is Key: Choose a quiet, comfortable space for your stretching routine. A calm environment helps in reducing stress and focusing on your body.
Use Supportive Props: Consider using yoga mats, cushions, or pillows for added comfort, especially when lying down or sitting on the floor.
2. Timing Your Stretches:
Consistency Matters: Try to incorporate stretching into your daily routine. Even a few minutes each day can make a significant difference.
Best Times to Stretch: Morning stretches can help alleviate stiffness from sleep, while evening stretches promote relaxation and better sleep.
3. Listening to Your Body:
Understand Your Limits: Pregnancy is not the time to push your body’s limits. If a stretch causes pain or discomfort, stop immediately.
Adapt as You Progress: As your pregnancy advances, your body changes. Modify stretches to accommodate your growing belly and shifting center of gravity.
4. Breathing Techniques:
Focus on Your Breath: Deep, controlled breathing enhances relaxation and oxygenates your muscles. Inhale deeply through your nose and exhale slowly through your mouth during each stretch.
Mind-Body Connection: Use this time to connect with your baby. Each breath can be a moment of bonding and mindfulness.
5. Incorporating Variety:
Mix It Up: Include a variety of stretches to target different muscle groups. This approach ensures a well-rounded routine that addresses multiple areas of discomfort.
Gentle Movement: Along with static stretches, consider gentle prenatal yoga flows or walking to keep your body active and engaged.
6. Post-Stretch Care:
Hydration: Drink plenty of water before and after your stretching routine to stay hydrated.
Nutrition: Eating a balanced diet supports muscle health and overall well-being during pregnancy.
Rest: Allow time for relaxation after stretching. This could be a few minutes of lying down or sitting quietly, allowing your body to absorb the benefits of the routine.
7. Seeking Professional Guidance:
Consult Healthcare Providers: Always talk to your healthcare provider before starting any new exercise routine, especially if you have any pregnancy-related complications or concerns.
Consider Prenatal Classes: If possible, attend prenatal yoga or stretching classes. These are often tailored to the needs of pregnant women and led by professionals who can provide guidance and modifications.
This section aims to provide practical advice on how to effectively and safely incorporate stretching into a pregnancy routine. It covers various aspects, from creating a conducive environment and understanding the best times to stretch, to the importance of listening to one’s body and incorporating breathing techniques. The focus is on making stretching a holistic, enjoyable, and beneficial part of the pregnancy journey, emphasizing the importance of professional guidance and post-stretch care. The goal is to empower expectant mothers with the knowledge and tools they need to practice stretching safely and effectively during their pregnancy.
Enhancing Your Stretching Experience: Advanced Tips and Mindful Practices
To elevate your pregnancy stretching routine beyond the basics, incorporating advanced tips and mindful practices can significantly enhance the experience. This section delves into ways to deepen your stretching routine, making it a more holistic and enriching part of your pregnancy journey.
1. Integrating Mindfulness and Meditation:
Mindful Stretching: Engage in each stretch with full awareness. Focus on the sensations in your body and the rhythm of your breath. This practice turns your stretching routine into a meditative experience.
Visualization Techniques: While stretching, visualize a peaceful and positive birthing experience. Imagine your body opening and relaxing, preparing for the arrival of your baby.
2. Tailoring Stretches to Your Trimester:
First Trimester Focus: During the early stages, focus on stretches that build strength and stability, as your body isn’t yet significantly altered.
Second Trimester Adjustments: As your belly grows, modify stretches to accommodate your changing body. Emphasize hip openers and lower back stretches.
Third Trimester Emphasis: In the later stages, prioritize gentle stretches that prepare your body for labor. Focus on pelvic floor relaxation and maintaining comfort.
3. Combining Stretching with Prenatal Exercise:
Balanced Routine: Combine your stretching routine with other prenatal exercises like walking, swimming, or prenatal yoga. This combination ensures a well-rounded approach to prenatal fitness.
Post-Exercise Stretching: Use stretching as a cool-down after other exercises. It helps in muscle recovery and reduces the risk of cramps or strains.
4. Partner Involvement:
Stretching with a Partner: Involve your partner in your stretching routine. They can help with support for certain stretches and provide a bonding experience for both of you.
Communication and Support: Use this time to communicate with your partner about your pregnancy journey, sharing feelings and expectations.
5. Creating a Stretching Ritual:
Routine Setting: Establish a regular time and place for your stretching routine. This consistency creates a ritual that you can look forward to each day.
Ambiance Enhancement: Use soft lighting, comfortable clothing, and perhaps gentle music to create a relaxing ambiance for your stretching session.
6. Post-Stretch Relaxation Techniques:
Relaxation Postures: After stretching, spend a few minutes in relaxation postures like Savasana (lying on your side after the first trimester) or seated meditation.
Breathing Exercises: Incorporate breathing exercises like diaphragmatic breathing or Ujjayi breath to deepen relaxation and reduce stress.
7. Keeping a Stretching Journal:
Track Your Progress: Keep a journal to note down your stretching routine, how you felt during and after the stretches, and any modifications you made.
Reflect on Your Journey: Use the journal as a tool to reflect on your pregnancy journey, noting any changes in your body and how the stretches are helping you.
8. Seeking Continuous Learning:
Educational Resources: Read books, watch videos, or attend workshops about prenatal stretching and yoga. Continuous learning helps you understand your body better and make informed choices about your routine.
Feedback and Adaptation: Be open to feedback from your body and instructors. Adapt your routine as needed to align with your body’s changing needs.
This section is designed to provide expectant mothers with advanced tips and practices to deepen their stretching routine. It emphasizes the importance of mindfulness, adapting stretches to different trimesters, and integrating stretching with overall prenatal wellness. The goal is to offer a comprehensive guide that not only focuses on physical stretching but also incorporates mental and emotional well-being, making the routine a more enriching and fulfilling part of the pregnancy experience.
Conclusion: Embracing the Journey with Grace and Strength
As we wrap up our comprehensive guide to pregnancy stretching, it’s important to reflect on the journey you’re undertaking. Pregnancy is a unique and transformative experience, and taking care of your body during this time is crucial. Stretching is more than just a series of physical movements; it’s a practice that nurtures both your body and soul, preparing you for the journey of motherhood.
1. Celebrating Your Body’s Capabilities:
Appreciate the Changes: Your body is doing something extraordinary. Embrace the changes with love and respect, understanding that each stretch brings you closer to meeting your baby.
Empowerment Through Movement: Each stretch is a testament to your strength and adaptability. Celebrate these moments as milestones in your pregnancy journey.
2. The Role of Stretching in Maternal Health:
Long-Term Benefits: The benefits of stretching extend beyond pregnancy. They lay a foundation for a quicker postpartum recovery and long-term physical well-being.
Holistic Health Approach: Incorporating stretching into your routine is a step towards a holistic approach to health, balancing physical care with mental and emotional well-being.
3. Preparing for Labor and Beyond:
Labor Readiness: Regular stretching can play a significant role in preparing your body for labor, making the process smoother and potentially more manageable.
Postpartum Recovery: The strength and flexibility gained from a consistent stretching routine can aid in a more comfortable and quicker recovery after childbirth.
4. Fostering a Deep Connection with Your Baby:
Bonding Time: Use your stretching time to bond with your unborn child. Talk to your baby, share your hopes and dreams, and enjoy the quiet moments of connection.
Mindful Presence: Being present during your stretching routine allows you to tune into your baby’s movements and responses, fostering a deep, intuitive bond.
5. Embracing a Community of Support:
Sharing Experiences: Connect with other expectant mothers, whether it’s through prenatal classes, online forums, or social groups. Sharing experiences and tips can be incredibly supportive.
Seeking Support: Don’t hesitate to reach out for support from family, friends, or healthcare professionals. Pregnancy is a journey best traveled with a supportive community.
6. Looking Forward with Positivity:
Embracing the Future: As you near the end of your pregnancy, look forward to the future with positivity and confidence. The strength and calmness you’ve cultivated through stretching will be invaluable assets in motherhood.
Continuing the Practice: Consider continuing your stretching routine postpartum. It can be an excellent way to regain strength, reduce stress, and maintain a healthy lifestyle.
Final Thoughts: Remember, every pregnancy is unique, and what works for one person may not work for another. Trust your instincts, listen to your body, and adjust your routine as needed. The stretches you’ve learned here are not just exercises; they’re stepping stones on your path to motherhood. Embrace this journey with grace and strength, and know that you are doing something incredible.
10 FAQs and Answers for the Post:
Q: Can I start prenatal stretching at any stage of my pregnancy? A: Yes, you can start prenatal stretching at any stage, but always consult with your healthcare provider first, especially if you have any complications.
Q: Are there any stretches I should avoid during pregnancy? A: Avoid deep backbends, intense abdominal twists, and any poses that put pressure on your belly. Modify stretches to accommodate your comfort as your pregnancy progresses.
Q: How long should I stretch each day? A: Even 10-15 minutes of stretching daily can be beneficial. Listen to your body and don’t overdo it.
Q: Is it normal to feel sore after stretching during pregnancy? A: Mild soreness can be normal, but if you experience pain or discomfort, you may need to modify your routine. Always stretch gently and avoid pushing yourself too hard.
Q: Can prenatal stretching help with labor and delivery? A: Yes, prenatal stretching can help prepare your muscles for childbirth, potentially making labor smoother and aiding in recovery.
Q: Should I do prenatal stretching if I’ve never done yoga or stretching before? A: Yes, prenatal stretching is suitable for beginners. Start with basic stretches and focus on gentle movements.
Q: Can stretching help with pregnancy-related back pain? A: Absolutely. Stretching can alleviate back pain by strengthening and relaxing your muscles and improving posture.
Q: Is it safe to do prenatal stretching without a yoga mat? A: While a yoga mat is recommended for comfort and stability, you can do stretching on any comfortable, non-slip surface.
Q: How can I make sure I am doing the stretches correctly? A: It’s a good idea to attend a prenatal yoga class or watch instructional videos to ensure correct form. Always listen to your body and make modifications as needed.
Q: Can prenatal stretching help with sleep issues during pregnancy? A: Yes, stretching can promote relaxation and reduce stress, aiding in better sleep quality during pregnancy.
Blog Tags for the Post: Prenatal Stretching, Pregnancy Wellness, Maternal Fitness, Gentle Yoga, Pregnancy Health, Relaxation Techniques, Labor Preparation, Mindful Movement, Pregnancy Exercises, Maternal Well-being
Welcome to a transformative journey where two hearts beat in unison, where life blooms within, and every breath weaves a bond stronger than words. As you embark on this magical path of motherhood, it’s essential to nurture not just the life growing inside you but also yourself. This is where prenatal yoga – an ancient practice tailored for the modern mother-to-be – becomes your companion, guiding you gently through the waves of pregnancy.
Pregnancy is a time of profound change, an odyssey filled with joy, anticipation, and a spectrum of emotions. Amidst this beautiful chaos, your body and mind seek harmony and balance. Prenatal yoga offers just that – a sanctuary of tranquility and strength. It is a practice deeply rooted in ancient wisdom, now adapted to embrace the unique needs of expectant mothers. Through this blog post, we journey together into the world of prenatal yoga, exploring its myriad benefits, gentle poses, calming breaths, and soulful meditations.
But, let’s pause for a moment to acknowledge the importance of safety and awareness. Every pregnancy is unique, and so is every body. It’s crucial to remember that this guide, enriched with AI-driven research and reflecting the latest insights of 2024, is a compass, not a map. The true guide lies within you – your body, your intuition. We emphasize consulting with your healthcare provider before embarking on any new exercise regimen, especially one as specialized as prenatal yoga. They can provide personalized advice, ensuring the safety and health of both you and your baby.
As we unravel the layers of prenatal yoga, you’ll find each section of this guide meticulously crafted. We delve into weekly yoga plans for each trimester, each week bringing its own set of poses and practices, thoughtfully chosen to align with your body’s changing needs. From the gentle stretches that ease the discomforts of early pregnancy to the strengthening asanas preparing you for childbirth, every pose is a step towards a healthier, happier you and baby.
Our journey doesn’t stop at yoga poses. We explore the serene world of breathing techniques and relaxation methods. These practices are not just exercises; they are moments of connection with your baby, creating an unspoken bond that starts in the womb and lasts a lifetime. The rhythmic breathing, the mindful meditation, every inhale and exhale is a whisper of love, a lullaby for the soul.
And because the essence of prenatal yoga transcends the physical, we also focus on nutrition. A balanced diet, rich in essential nutrients, is a cornerstone of a healthy pregnancy. Our guide offers nutritional advice that complements your yoga practice, ensuring both you and your baby thrive.
As we embark on this journey together, remember, this blog is more than just a guide. It’s a space for sharing, learning, and growing. We invite you to share your experiences, insights, and the beautiful stories that unfold along your path. Let’s build a community of strong, empowered, and radiant mothers-to-be.
So, take a deep breath, embrace your inner strength, and let’s begin this beautiful journey of prenatal yoga, one pose, one breath, one heartbeat at a time.
First Month Yoga Plan: Nurturing Your New Journey
The first month of pregnancy is a time of wonder and adjustment. This yoga plan is thoughtfully designed to gently introduce you to practices suitable for the early stages of pregnancy, focusing on comfort, stability, and a deep connection with your changing body and growing baby.
Week 1: Discovering Stability and Peace
Yoga Poses:
Tadasana (Mountain Pose): Stand with feet hip-width apart, grounding through the soles. Lift through the crown of the head, feeling your spine elongate. This foundational pose fosters a sense of grounding and stability.
Vajrasana (Thunderbolt Pose) with Ujjayi Breathing: Sit on your heels, spine straight. Practice Ujjayi by inhaling deeply through the nose, slightly constricting the back of the throat, and exhaling smoothly. This combination enhances focus and aids digestion.
Sukhasana (Easy Pose) for Meditation: Sit cross-legged, hands on knees, palms up. Close your eyes and focus on your breath, inviting mental clarity and calm.
Breathing Technique: Deep Belly Breathing – Sit comfortably, one hand on your chest, the other on your belly. Inhale deeply through the nose, expanding the belly, and exhale slowly. This technique promotes relaxation and adapts to physical changes.
Relaxation: Guided Visualization – Visualize a tranquil scene, such as a gentle stream or a quiet forest. Let this visualization foster a sense of peace and connection with your baby.
Nutrition Tip: Hydrate frequently and include folic acid-rich foods like leafy greens, citrus fruits, and fortified cereals in your diet.
Safety and Adaptation: Listen to your body. If a pose causes discomfort, modify or avoid it. Remember, gentle movement is key.
Week 2: Cultivating Flexibility and Comfort
Yoga Poses:
Marjariasana (Cat Pose): On all fours, arch your back up, drawing in the abdomen (Cat), and then dip your spine down, lifting your head and tailbone (Cow). This flow gently massages the spine and relieves back tension.
Balasana (Child’s Pose): From hands and knees, sit back on your heels, forehead to the mat, arms extended. It’s a comforting pose that releases hip and back tension.
Baddha Konasana (Bound Angle Pose): Seated, bring the soles of your feet together, knees dropped to the sides. This pose opens up the hips and improves circulation.
Breathing Technique: Ujjayi Pranayama – Continue this soothing breath to enhance relaxation and oxygen flow.
Relaxation: Progressive Muscle Relaxation – Starting from your toes, tense each muscle group as you inhale, and relax it as you exhale. Progress up to your head, releasing tension.
Nutrition Tip: Focus on small, fiber-rich meals to aid digestion and manage nausea.
Weekly Focus: Embrace gentle stretches and movements to alleviate early pregnancy discomforts.
Week 3: Building Strength and Stability
Yoga Poses:
Virabhadrasana I (Warrior I): Step one foot back, bend the front knee, and raise your arms. This pose strengthens the legs and improves focus.
Parsvottanasana (Pyramid Pose): From a standing position, step one foot back, hips square, and fold over the front leg. This pose balances and strengthens the spine.
Modified Uttanasana (Standing Forward Bend): Stand with feet hip-width, gently fold from the hips, letting your head hang. This stretches the hamstrings and calms the mind.
Breathing Technique: Nadi Shodhana – Alternate nostril breathing for energy balance and stress relief.
Relaxation: Yoga Nidra – Practice deep relaxation, lying down, guided by a soothing voice, to achieve mental peace and physical relaxation.
Nutrition Tip: Include calcium-rich foods like dairy, leafy greens, and almonds for bone health.
Safety Tip: Be mindful of balance. Use a chair or wall for support if needed.
Week 4: Embracing Emotional Balance and Well-being
Yoga Poses:
Setu Bandhasana (Bridge Pose, modified): Lie on your back, feet flat, knees bent. Lift your hips, keeping the neck and spine neutral. This gentle backbend calms the brain and strengthens the back.
Viparita Karani (Legs-Up-the-Wall Pose): Sit close to a wall, then lie back and extend your legs up the wall. This inversion variant is relaxing and helps reduce swelling in the legs.
Breathing Technique: Bhramri Pranayama (Bee Breath) – Humming breath that soothes the nerves and reduces stress.
Relaxation: Meditation – Focus on the bond with your baby, sending love and positive energy.
Nutrition Tip: Consume iron-rich foods like spinach, legumes, and red meat to combat fatigue and boost energy.
Weekly Focus: Prioritize emotional well-being. Adapt to the changes and embrace them with positivity.
This first month’s yoga plan is a nurturing blend of physical postures, breathing techniques, and relaxation practices, all woven together with nutritional advice to support you on this incredible journey. Remember, each step on this path is unique to you – honor your body, cherish your experience, and embrace the profound journey of motherhood.
Second Month Yoga Plan (Days 29-56): Cultivating Strength and Balance
As you gracefully step into the second month of pregnancy, your yoga practice evolves to meet your body’s changing needs. This month focuses on cultivating strength, enhancing balance, and maintaining emotional harmony. We carefully select practices that offer support and nourishment as your journey continues.
Week 5: Deepening Flexibility and Core Strength
Yoga Poses:
Trikonasana (Triangle Pose): Stand wide-legged, turn one foot out and extend your arms. Reach to the side, lowering your hand to your shin, and extend the other arm upward. This pose stretches the sides and strengthens the legs.
Uttanasana (Standing Forward Bend, with modifications): From standing, exhale and fold forward, bending the knees slightly. Let your head hang, releasing tension in the neck.
Ardha Chandrasana (Half Moon Pose, with support): Use a wall or chair for support as you balance on one leg, lifting the other leg parallel to the floor, and opening your hips and chest to the side.
Breathing Technique: Continue with Nadi Shodhana to balance and calm the mind.
Relaxation: Deep relaxation techniques such as gentle music or sound therapy to unwind and destress.
Nutrition Tip: Focus on foods rich in Omega-3 fatty acids like walnuts, flaxseeds, and fish (if non-vegetarian) for fetal brain development.
Safety and Adaptation: Use props for balance and support in standing poses. Be mindful of your body’s signals and adapt as necessary.
Week 6: Embracing Pelvic Strength and Emotional Fluidity
Yoga Poses:
Modified Navasana (Boat Pose): Seated, lean back slightly and lift your feet, keeping the knees bent. Extend your arms forward. This pose strengthens the core and improves balance.
Pelvic Tilts: Lying on your back with knees bent, gently rock your pelvis up and down. This simple movement eases back pain and keeps the pelvic region agile.
Malasana (Garland Pose, with support): Squat with feet apart, hands in prayer position. Use a block under your seat for support. This pose opens the hips and strengthens the pelvic floor.
Breathing Technique: Practice Anulom Vilom (Alternate Nostril Breathing) to harmonize the body’s energy channels.
Relaxation: Loving-kindness meditation focusing on sending love and positivity to the baby and oneself.
Nutrition Tip: Protein-rich foods like lean meats, tofu, and legumes are crucial for muscle strength and fetal growth.
Weekly Focus: Pay attention to pelvic health, crucial for childbirth preparation.
Week 7: Nurturing Vitality and Mindfulness
Yoga Poses:
Uttana Shishosana (Extended Puppy Pose): A cross between Child’s Pose and Downward Facing Dog, it stretches the spine and releases tension in the shoulders.
Supta Baddha Konasana (Reclining Bound Angle Pose): Lying on your back, bring the soles of your feet together and let your knees fall to the sides. This pose is deeply relaxing and opens up the pelvic area.
Breathing Technique: Sama Vritti (Equal Breathing) – Inhale and exhale for an equal count, encouraging balance and calm.
Relaxation: Body scan relaxation, moving attention gradually through each part of the body to release tension.
Nutrition Tip: Vitamin C-rich foods like oranges, bell peppers, and strawberries to support the immune system.
Weekly Focus: Practice mindfulness and staying present, connecting deeply with your body and baby.
Week 8: Transitioning Gracefully into the Second Trimester
Yoga Poses:
Anjaneyasana (Low Lunge, with modifications): Step one foot forward into a lunge, lowering your back knee to the mat. Raise your arms for a gentle stretch.
Vrksasana (Tree Pose, with support): Stand on one leg, place the other foot on your inner thigh or calf (avoid the knee), and balance. Use a wall for support if needed.
Breathing Technique: Continue with diaphragmatic breathing to maintain a calm and centered state.
Relaxation: Visualize a positive and healthy second trimester, embracing the changes with grace and confidence.
Nutrition Tip: Maintain a balanced diet focusing on diverse nutrients. Stay hydrated, especially important as your body undergoes further changes.
Weekly Focus: Reflect on the first trimester’s journey and prepare mentally and physically for the upcoming changes in the second trimester.
This second month’s plan is a blend of physical postures, mindful breathing, and relaxation techniques, coupled with nutritional insights, to support you during this pivotal phase of pregnancy. Remember, the key is to listen to your body, embrace the changes, and enjoy this beautiful journey of transformation.
Third Month Yoga Plan (Days 57-84): Deepening Connection and Preparing for Change
Entering the third month of your pregnancy, your yoga practice deepens to align with the significant changes your body and mind are undergoing. This phase of prenatal yoga is designed to enhance your connection with the growing baby, further prepare your body for the upcoming changes, and continue nurturing your emotional and physical well-being.
Week 9: Fostering Flexibility and Mind-Body Harmony
Yoga Poses:
Parsvakonasana (Side Angle Pose, modified): Begin in a wide stance, turn one foot out, bend the knee, and extend your arm over your head, creating a line from your extended foot to your fingertips. This pose stretches the sides of the body and strengthens the legs.
Prasarita Padottanasana (Wide-Legged Forward Bend): With feet wide apart and parallel, fold forward from the hips, bringing your hands to the floor or a block for support. It stretches the back and legs and calms the mind.
Sitting Side Stretch: Sitting with legs crossed, stretch one arm over your head towards the opposite side, feeling a deep side stretch. Alternate sides.
Breathing Technique: Bhastrika Pranayama (Bellows Breath, gentle version) – Helps invigorate and energize the body.
Relaxation: Sound therapy or gentle chanting to unwind and calm the mind and body.
Nutrition Tip: Focus on hydrating foods and those rich in antioxidants for overall health and vitality.
Safety and Adaptation: Use props for extra support and balance in standing poses. Adapt the intensity as your body continues to change.
Week 10: Emotional Wellness and Inner Strength
Yoga Poses:
Sukhasana (Easy Pose) for Meditation and Gentle Twisting: Enhances spinal flexibility and aids digestion while fostering emotional balance.
Butterfly Pose (Modified Baddha Konasana): Sit with soles of feet together, knees apart. Gently flap your knees like butterfly wings for a gentle hip opener.
Cat-Cow Stretch (Marjariasana-Bitilasana): On all fours, alternate between arching your back and lifting your head and chest. Promotes spinal flexibility and relieves back tension.
Breathing Technique: Sheetali Pranayama (Cooling Breath) – Soothes and cools the body and mind.
Relaxation: Loving-kindness meditation focusing on nurturing positive emotions towards yourself and your baby.
Nutrition Tip: Include Vitamin B6-rich foods like bananas, avocados, and whole grains to help with mood regulation.
Weekly Focus: Embrace emotional balance and inner strength. Use this time for reflection and deeper connection with your baby.
Week 11: Stability, Grounding, and Gentle Movement
Yoga Poses:
Tadasana Variations and Gentle Seated Stretches: Focusing on grounding and stability while maintaining flexibility.
Supported Squat (Malasana with props): Helps open the hips and strengthen the lower body, preparing for childbirth.
Legs-Up-the-Wall Pose (Viparita Karani): Provides relaxation and relief for tired legs and feet.
Relaxation: Gratitude journaling or reflection to cultivate a positive mindset and emotional well-being.
Nutrition Tip: Focus on magnesium-rich foods like nuts, seeds, and leafy greens for muscle relaxation and overall well-being.
Weekly Focus: Embrace changes and maintain stability and grounding through gentle movements and mindful practices.
Week 12: Preparing for the Second Trimester
Yoga Poses:
Modified Warrior II (Veerabhadrasana II): Strengthening the legs and opening the hips, while improving balance.
Gentle Hip Openers: Such as Pigeon Pose (modified) or seated hip stretches, to maintain flexibility and ease discomfort.
Child’s Pose (Balasana): A restful pose that provides gentle stretching and relaxation.
Breathing Technique: Continue with Ujjayi Pranayama to maintain a calm and centered state.
Relaxation: Visualization techniques, imagining a healthy and positive second trimester.
Nutrition Tip: Balanced diet focusing on nutrient diversity to support the growing needs of both mother and baby. Stay hydrated.
Weekly Focus: Reflect on the journey of the first trimester, mentally and physically preparing for the changes in the second trimester.
This third month’s yoga plan is crafted to deepen your bond with your baby and prepare you for the upcoming journey. Remember, each practice is a step towards nurturing yourself and the life within you. Listen to your body, embrace each moment, and enjoy this beautiful journey of motherhood.
Concluding Remarks: Embracing the Journey with Grace and Gratitude
As we draw the curtain on our detailed exploration of prenatal yoga for the first trimester, it’s time to reflect on the journey we’ve embarked upon together. Over the past twelve weeks, you’ve embraced changes, nurtured your body and mind, and fostered a deep connection with the life growing within you. This journey, though uniquely yours, is part of the beautiful tapestry of motherhood shared by women across the world.
Reflecting on the First Trimester Yoga Journey
Personal Growth: You’ve taken the first steps in a transformative journey, not just as a soon-to-be mother, but as a woman embracing a new phase of life with strength, patience, and love.
Physical and Emotional Well-being: Through the gentle stretches, strengthening poses, and calming breaths, you’ve cared for your body and soothed your mind, preparing yourself for the journey ahead with resilience and grace.
Looking Ahead: Transitioning into the Second Trimester
As you transition into the next phase of your pregnancy, carry with you the practices and lessons learned. The second trimester will bring its own joys and challenges, and your yoga practice will continue to evolve to meet your changing needs.
Remember, the journey of pregnancy is as much about the present moment as it is about preparation. Cherish each day and the unique experiences it brings.
Continuing Your Practice
Adaptability: As your body continues to change, so too will your yoga practice. Listen to your body, and don’t hesitate to modify poses or introduce new ones that cater to your evolving needs.
Consistency: Regular practice is key. Whether it’s a few minutes of meditation or a full yoga session, make time for yourself and your baby. This consistency will not only benefit your physical health but also deepen the emotional bond with your baby.
Building a Community
Sharing and Learning: Pregnancy is a journey best shared. Connect with other expectant mothers, share your experiences, and learn from each other. This sense of community can be incredibly supportive.
Expert Guidance: Continue to seek advice and guidance from prenatal yoga instructors and healthcare professionals. Their expertise is invaluable in ensuring a safe and beneficial practice.
Final Thoughts
As we conclude, remember that this guide, bolstered by AI-assisted research and reflecting the latest insights of 2024, is just the beginning of a beautiful and ongoing journey. Your intuition, coupled with professional advice, is the ultimate guide.
Prenatal yoga is more than a set of exercises; it is a celebration of life, a ritual of self-care, and a testament to the strength and beauty of motherhood. Embrace this journey with an open heart, a mindful presence, and a spirit of gratitude. Here’s to you and your baby – to your health, happiness, and the incredible journey that lies ahead.
Namaste.
This conclusion wraps up the first-trimester yoga plan, offering reflections, insights, and encouragement for the continued journey of prenatal yoga. It emphasizes the importance of personal growth, community, and the ever-evolving nature of this beautiful practice.
10 FAQs for Prenatal Yoga in the First Trimester
Is it safe to start yoga in the first trimester of pregnancy?
Yes, it’s generally safe to start yoga during the first trimester, but always consult your healthcare provider first. Begin with gentle poses and avoid intense stretches or abdominal pressure.
What are the primary benefits of prenatal yoga in the first trimester?
Prenatal yoga helps improve flexibility, reduce stress and anxiety, enhance sleep quality, and foster an emotional connection with your baby. It also prepares your body for the changes during pregnancy.
How often should I practice prenatal yoga?
Aim for a moderate routine, such as 2-3 times a week. However, listen to your body and adjust the frequency as needed.
Can prenatal yoga help with morning sickness?
While it may not cure morning sickness, certain poses and breathing exercises can help manage its intensity and provide relaxation during bouts of nausea.
Are there any poses I should avoid during the first trimester?
Yes, avoid intense backbends, deep twists, and inversions. Focus on gentle, open poses and maintain a comfortable range of motion.
What should I do if I feel discomfort during a pose?
If a pose causes discomfort, gently come out of it and try a modified version or a different pose that feels more comfortable. Always prioritize your comfort and safety.
How can prenatal yoga affect my baby?
Prenatal yoga can promote better oxygen and blood flow, which is beneficial for the baby. The relaxation and stress-reduction aspects also contribute to a healthier prenatal environment.
Can I do prenatal yoga if I’ve never done yoga before?
Absolutely. Prenatal yoga is suitable for beginners. Start with basic poses and gradually progress as you become more comfortable.
What equipment do I need for prenatal yoga?
A yoga mat, comfortable clothing, and possibly props like yoga blocks, bolsters, or a chair for support and balance.
Should I eat before doing prenatal yoga?
It’s best to practice on a light stomach or have a small, easy-to-digest snack about 30 minutes before your session to maintain energy levels without discomfort.
In recent years, the world of yoga has seen a surge in popularity, with various forms emerging to cater to different needs. Among these, chair yoga stands out as a unique and accessible variant, making the ancient practice available to virtually everyone. Whether you’re a senior, someone with mobility issues, or just someone looking for a quick stretch during office hours, chair yoga has something to offer.
What is Chair Yoga?
Defining Chair Yoga
At its core, chair yoga is exactly what it sounds like: yoga performed while seated on a chair. But don’t let its simplicity fool you. This form of yoga retains all the essence and benefits of traditional yoga, adapted for those who might find standard poses challenging.
Origin and Evolution Chair yoga has its roots in making yoga inclusive. Recognizing that not everyone can easily get down on a yoga mat, instructors sought ways to bring the practice to those who remain seated. Over time, it has evolved to cater not just to seniors or those with disabilities but also to office workers, travelers, and anyone looking to sneak in a quick session in a confined space.
Adaptability is Key
One of the hallmarks of chair yoga is its adaptability. Whether you’re in an office chair, on your couch, or even in a park with a bench, chair yoga can be your companion. The poses are modified to be performed while seated, ensuring that you can enjoy the benefits of yoga without the need for a mat or ample space.
The Benefits of Chair Yoga
Engaging in chair yoga isn’t just about convenience; it’s a potent practice with a plethora of benefits.
Physical Benefits
Flexibility: Regular practice can help increase flexibility in the joints and muscles.
Strength: Even seated poses can help in building muscle tone and strength.
Posture: Chair yoga encourages awareness of the spine, leading to improved posture.
Mental and Emotional Benefits
Stress Reduction: Like all yoga forms, chair yoga promotes relaxation, helping reduce stress and anxiety.
Improved Focus: The meditative aspect of yoga can lead to better concentration and clarity.
Sense of Well-being: Engaging in regular practice can boost mood and overall mental well-being.
For many, chair yoga isn’t just an alternative; it’s a preferred method. Whether it’s the ease, the inclusivity, or the unique challenges it offers, chair yoga has carved a niche for itself in the vast world of yoga.
The Structured Approach: 28-Day Challenges and More
Embarking on a chair yoga journey can be even more rewarding when there’s a structured approach to follow. Challenges offer a guided path, ensuring consistent practice and gradual progression.
The 28-Day Chair Yoga Challenge for Seniors
This challenge, led by Carol, is a comprehensive 28-day journey that requires nothing more than a chair. The series is beginner-friendly but also offers depth for those familiar with chair yoga. With a strong emphasis on community, participants are encouraged to practice together, fostering a sense of unity and shared purpose. Watch the introduction video here.
Chair Yoga 30-Day Challenge by Wellness By Degrees
Another structured approach, this challenge spans 30 days, focusing on improving calm, energy, flexibility, and balance. Each day brings a new lesson, a new pose, and a new opportunity to connect with oneself. Find out more about this challenge here.
Top Chair Yoga Videos to Get You Started
For those not ready to commit to a full challenge but eager to explore chair yoga, here are some top video recommendations:
Yoga For Neck, Shoulders, Upper Back | 10-Minute Yoga Quickie by Yoga With Adriene: A short session focusing on the upper body, perfect for a quick break. Watch it here.
Chair Yoga for Weight Loss | Reduce Belly Fat, Stretch and Feel Your Best by Pagoda Yoga: A 15-minute session that targets weight loss while promoting overall well-being. View the video here.
How to Make the Most of Your Chair Yoga Practice
Setting Up Your Space
Choose the Right Chair: Opt for a stable chair without arms or wheels. Placing it on a carpet or yoga mat can add stability.
Gather Optional Equipment: While not mandatory, having a yoga block or strap can enhance your practice. Household alternatives like books or scarves can also work.
Consistency is Key
Like all forms of exercise, consistency in chair yoga yields the best results. Whether you’re taking on a challenge or practicing independently, aim to incorporate it into your daily routine.
Adapting to Your Needs
Remember, chair yoga is all about adaptability. Listen to your body, modify poses as needed, and ensure your practice is comfortable and enjoyable.
Free Chair Yoga Guides for download in PDF
In the vast realm of yoga, resources are aplenty. However, finding comprehensive and user-friendly guides, especially for niche practices like chair yoga, can sometimes be a challenge. To aid your chair yoga journey, we’ve curated two invaluable resources that not only provide insights into this unique practice but also offer detailed illustrations and poses to guide you. The best part? They’re available for free download!
Making Yoga Accessible for Everyone This PDF guide, titled “12 Chair Yoga Poses for Older Individuals”, is a gem for those looking to delve into chair yoga. It provides beautifully illustrated poses, ensuring clarity in execution. Whether you’re a senior or just someone looking to explore chair yoga’s nuances, this guide offers a structured approach to getting started.
Chair Yoga by Yoga Circle Studio The Chair Yoga guide by Yoga Circle Studio is another fantastic resource in PDF. It delves deep into the practice, offering a blend of theory and practical poses. The guide is designed to be both informative and actionable, making it a perfect companion for those eager to incorporate chair yoga into their daily routines.
Suggestion for Readers: Both these guides are available for free download. We recommend saving them on your device or even printing them out. Having a tangible guide can be incredibly handy, especially when you’re practicing away from the digital screen. It allows for a more immersive experience, letting you focus solely on your practice.
FAQ Section
1. What is chair yoga? Chair yoga is a form of yoga practice adapted to be performed while seated on a chair. It incorporates traditional yoga poses and techniques, modified to be accessible for those who might find standard poses challenging. This makes it suitable for seniors, people with mobility issues, office workers, or anyone looking for a gentle yet effective yoga practice.
2. How does chair yoga differ from traditional yoga? While chair yoga retains the essence and benefits of traditional yoga, the primary difference lies in its adaptability. Instead of using a yoga mat and performing poses on the floor, chair yoga utilizes a chair as the primary prop, allowing participants to remain seated or use the chair for support in standing poses.
3. Who can benefit from chair yoga? Almost anyone can benefit from chair yoga. It’s especially beneficial for seniors, individuals with mobility challenges, office workers looking for a quick stretch, or those recovering from injuries. However, even seasoned yogis can enjoy and benefit from the unique challenges and perspectives chair yoga offers.
4. Do I need any special equipment for chair yoga? The primary equipment you need is a stable chair, preferably without arms or wheels. Occasionally, some practices might incorporate yoga blocks or straps, but these are not mandatory. Common household items like books can replace blocks, and scarves or belts can replace straps.
5. How often should I practice chair yoga? The frequency of your practice depends on your personal goals and availability. However, like all forms of exercise, consistency yields the best results. Whether it’s a daily 10-minute session or a longer practice a few times a week, the key is regularity.
6. Can chair yoga help with weight loss? While chair yoga is primarily a low-impact form of exercise focusing on flexibility and relaxation, it can contribute to weight loss when combined with a balanced diet and other forms of physical activity. Certain chair yoga routines target muscle toning and calorie burning, making them a beneficial addition to a weight loss regimen.
7. Are there online resources or challenges for chair yoga? Absolutely! There are numerous online resources, including video tutorials, challenges, and courses. For instance, the “28-Day Chair Yoga Challenge” by Bottoms Down and “Chair Yoga 30 Day Challenge” by Wellness By Degrees are structured programs available on YouTube to guide beginners and enthusiasts alike.
Conclusion
Chair yoga is more than just a subset of yoga; it’s a testament to the practice’s versatility and inclusivity. Whether you’re a seasoned yogi or someone looking to start, chair yoga offers a unique and rewarding experience. With the resources and challenges highlighted in this post, you’re well-equipped to begin or deepen your chair yoga journey. Embrace the practice, enjoy the journey, and discover the myriad benefits chair yoga has to offer.
Blog Tags: chair yoga, yoga for seniors, adaptive yoga, seated yoga, yoga challenges, office yoga, yoga for mobility issues, yoga benefits, yoga tutorials, yoga for beginners, wellness, fitness, relaxation techniques, stress relief, muscle toning, weight loss yoga, online yoga resources, yoga practices, yoga modifications.