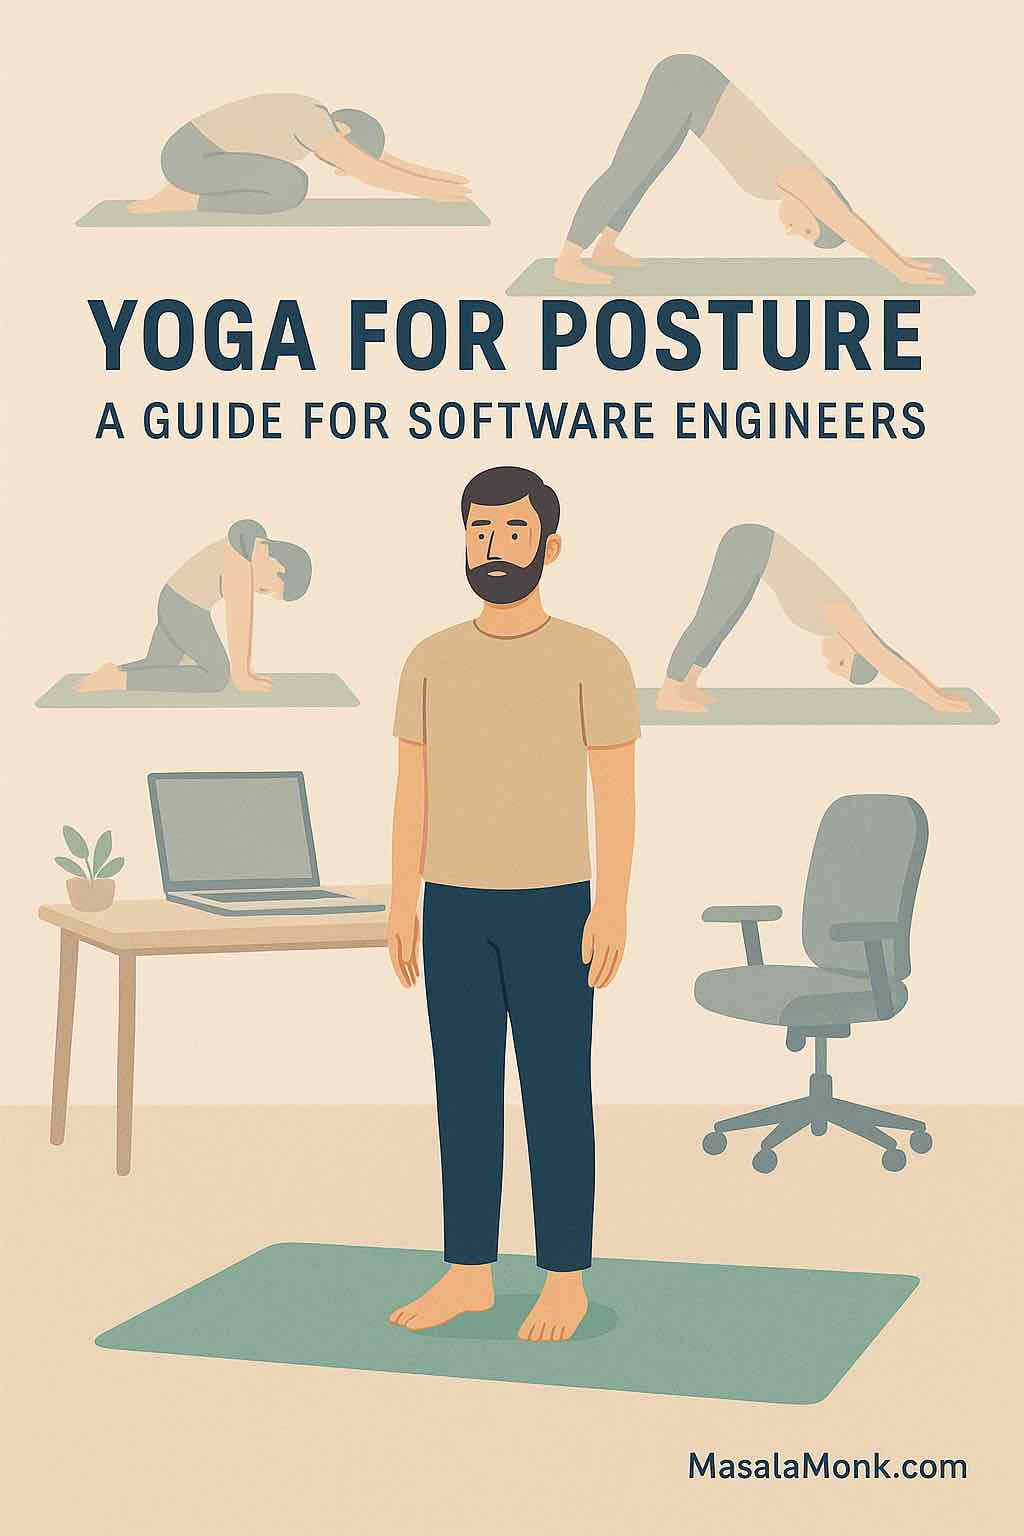
“Your posture is a reflection of your coding habits.”
— Anonymous (probably a developer with back pain)
As a software engineer, you live in the digital world — but your body still operates in the physical one. Endless hours of coding, debugging, and zoom calls quietly erode your posture over time.
The result?
- Forward head posture
- Rounded shoulders
- Tight hips
- Lower back stiffness
- Fatigue and brain fog
This is not just an aesthetic problem — poor posture affects your breathing, mood, focus, and long-term health.
The good news? You can fix much of this damage with yoga for posture — a science-backed, accessible, and holistic solution.
In this article, we’ll cover:
- Why posture deteriorates for software engineers
- How yoga specifically addresses bad posture
- A detailed yoga routine tailored for developers
- Practical tips for integrating yoga into your workday
Why Do Software Engineers Develop Poor Posture?
The typical workday of a developer looks like this:
- 8+ hours sitting in front of a screen
- Shoulders rounded forward, neck protruding
- Hips in constant flexion
- Little variation in movement
- High cognitive load, low physical activity
📊 Studies show that desk-bound professionals sit an average of 9.3 hours a day — that’s more than we sleep.
Over time, these positions create muscle imbalances:
- Overactive: hip flexors, chest (pectoralis major/minor), upper trapezius
- Underactive: glutes, core stabilizers, mid/lower trapezius, deep neck flexors
This leads to:
- Kyphosis (rounded upper back)
- Forward head posture (aka “tech neck”)
- Anterior pelvic tilt (excessive arching of lower back)
And eventually:
- Chronic pain
- Reduced lung capacity
- Decreased energy
- Poor focus
How Yoga Helps Fix Bad Posture
✅ Builds Postural Awareness
Yoga encourages you to notice body alignment throughout your practice, which naturally carries into daily life.
✅ Restores Spinal Alignment
Yoga poses realign the natural curves of your spine (cervical, thoracic, lumbar).
✅ Balances Muscles
Yoga simultaneously strengthens weak muscles and releases tight ones.
✅ Improves Mobility
Joints regain their full range of motion — especially shoulders, hips, and spine.
✅ Activates Core Stability
Many yoga poses engage deep core muscles critical for long-term posture support.
✅ Reduces Stress & Fatigue
By improving posture, yoga enhances breathing efficiency and reduces mental fatigue.
🔬 Scientific Note:
Multiple studies (eg: Harvard Health, NIH) confirm yoga’s efficacy in improving postural stability, spinal alignment, and musculoskeletal balance.
The Developer’s Yoga Routine for Better Posture
Here’s a fully actionable yoga routine specifically for software engineers dealing with bad posture.
1️⃣ Mountain Pose (Tadasana)

Purpose:
Establishes baseline posture awareness and activates postural muscles.
How to Perform:
- Stand tall, feet hip-width or together.
- Distribute weight evenly between both feet.
- Slightly tuck the chin, as if a string is pulling the crown of your head upward.
- Gently engage your core and glutes.
- Draw your shoulders back and down.
- Hold for 30–60 seconds while breathing naturally.
Developer Posture Fix:
- Resets posture awareness.
- Trains your body for upright, aligned sitting during coding sessions.
2️⃣ Cat-Cow Stretch (Marjaryasana-Bitilasana)
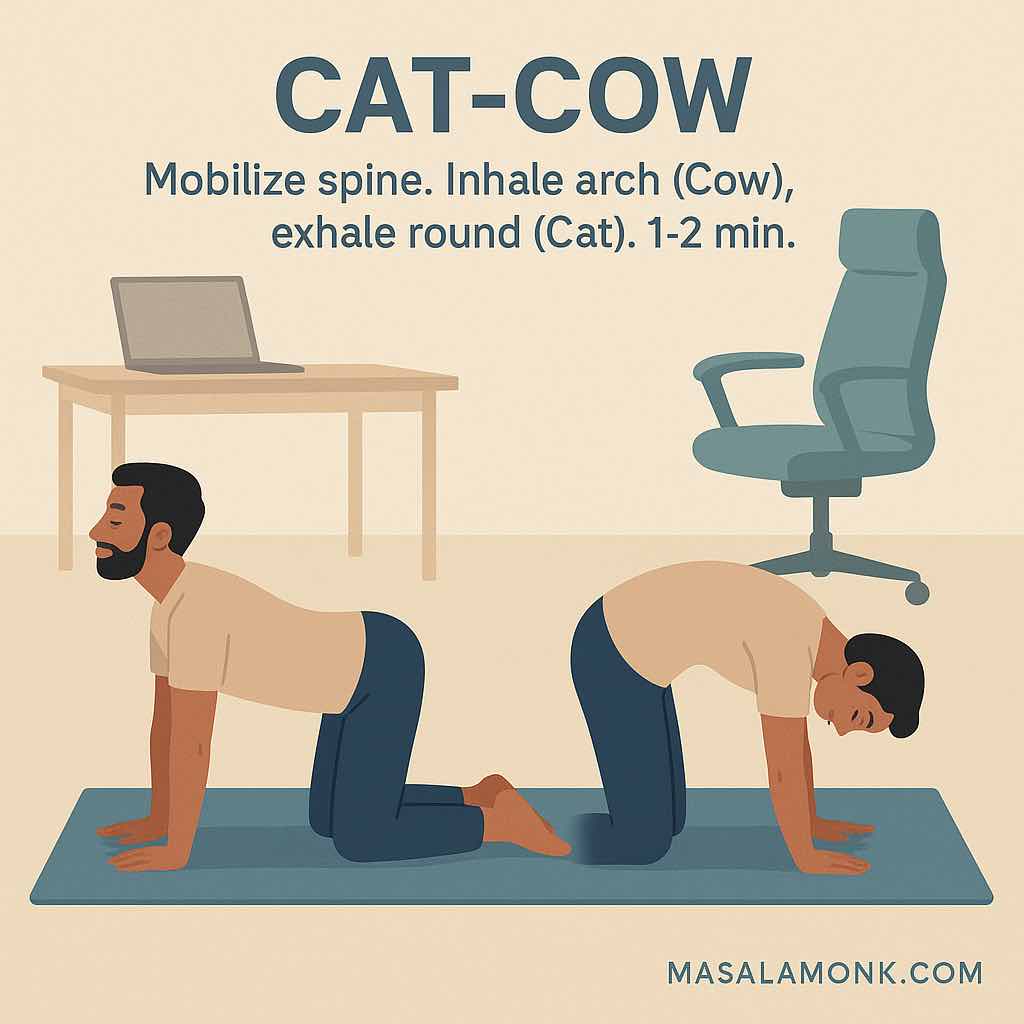
Purpose:
Mobilizes the spine, lubricates joints, and relieves stiffness from sitting.
How to Perform:
- Start on hands and knees (wrists under shoulders, knees under hips).
- Cow Pose (Inhale):
- Drop belly towards mat.
- Lift chest forward and up.
- Raise tailbone.
- Cat Pose (Exhale):
- Round back upward.
- Tuck chin toward chest.
- Pull belly in.
- Repeat the cycle for 1–2 minutes, moving slowly with breath.
Developer Posture Fix:
- Rehydrates spinal discs compressed by long sitting.
- Increases flexibility and segmental mobility.
3️⃣ Chest Opener with Strap (or Towel)
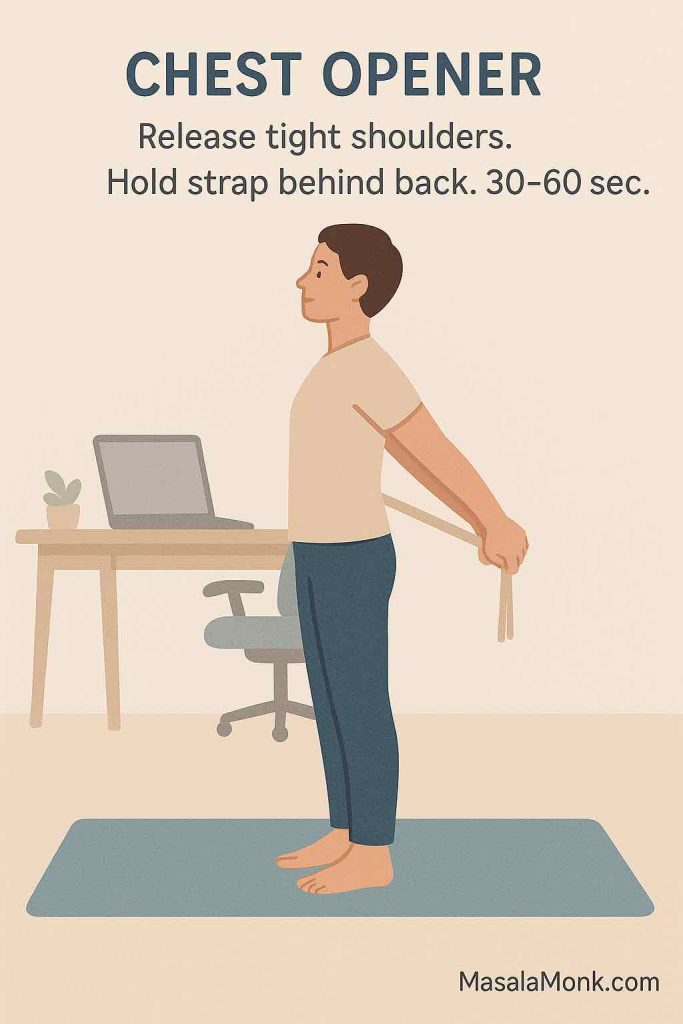
Purpose:
Opens tight chest muscles caused by hunching over screens.
How to Perform:
- Stand or kneel upright.
- Hold a strap or towel behind your back, arms extended.
- Gently pull the strap to open chest and draw shoulders backward.
- Keep your core lightly engaged to avoid overarching the lower back.
- Hold the stretch for 30–60 seconds.
Developer Posture Fix:
- Reverses rounded shoulders (“hunchback coder posture”).
- Encourages healthy shoulder blade positioning.
4️⃣ Downward Facing Dog (Adho Mukha Svanasana)
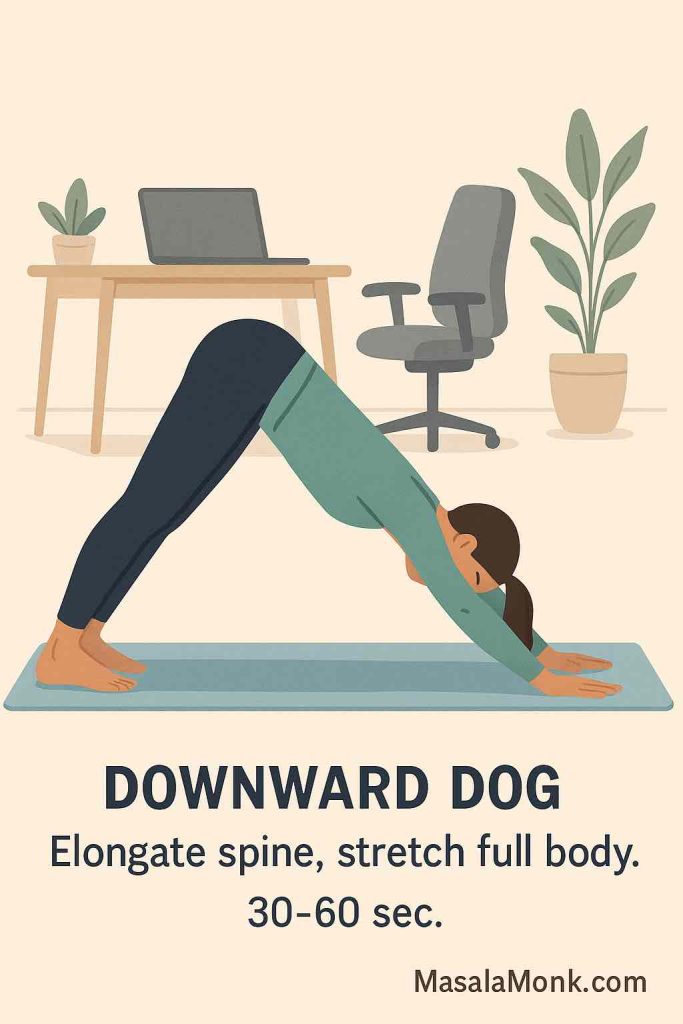
Purpose:
Full-body spinal elongation, stretches hamstrings, calves, back, and shoulders.
How to Perform:
- Start on hands and knees, then lift hips toward ceiling.
- Form an inverted “V” shape.
- Spread fingers wide; press palms and heels downward.
- Keep spine long, knees slightly bent if needed.
- Hold for 30–60 seconds, breathing deeply.
Developer Posture Fix:
- Decompresses spinal column.
- Counteracts compression from sitting and improves posterior chain flexibility.
5️⃣ Low Lunge (Anjaneyasana)
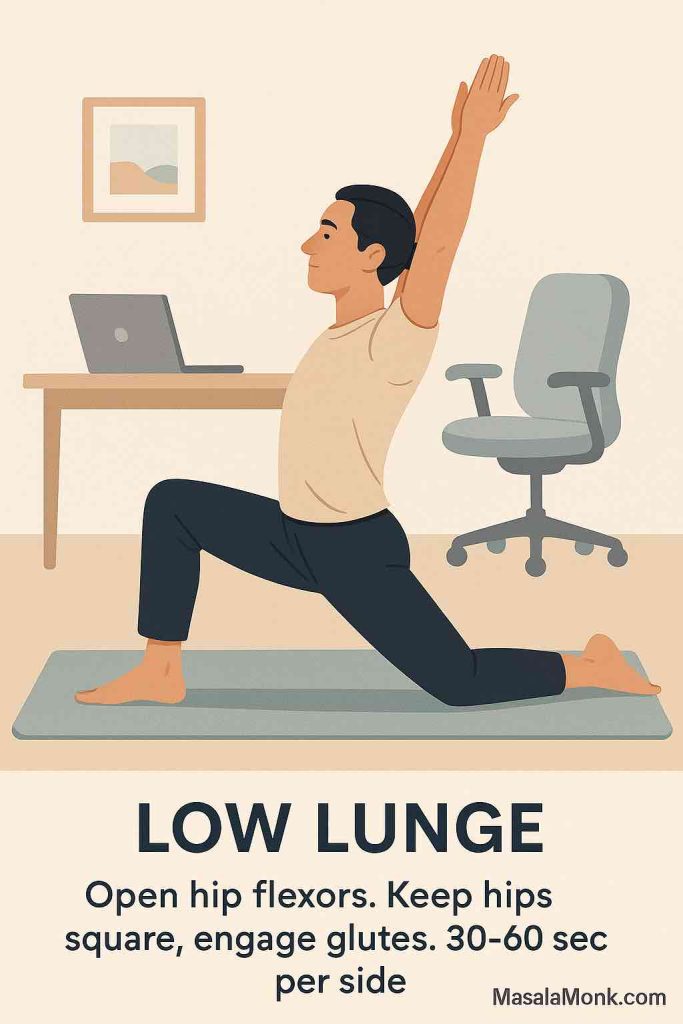
Purpose:
Opens tight hip flexors from prolonged sitting.
How to Perform:
- From standing, step right foot forward into lunge.
- Lower left knee to ground.
- Keep pelvis square; engage glutes.
- Raise arms overhead or keep hands on front thigh.
- Hold for 30–60 seconds, switch sides.
Developer Posture Fix:
- Releases hip flexor tension (psoas muscle).
- Corrects anterior pelvic tilt (tilted lower back posture).
6️⃣ Cobra Pose (Bhujangasana)
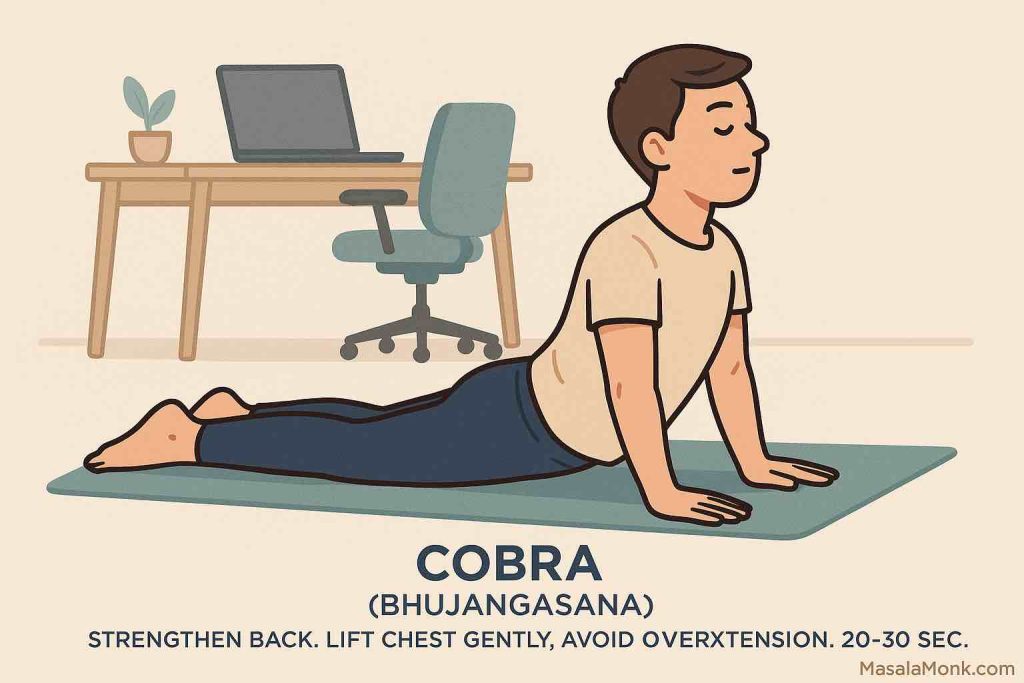
Purpose:
Strengthens back extensors, counteracts forward head posture.
How to Perform:
- Lie face-down, legs extended.
- Place hands under shoulders.
- Gently press into hands to lift chest.
- Keep elbows slightly bent, shoulders down, and neck neutral.
- Hold for 20–30 seconds.
Developer Posture Fix:
- Retrains back muscles weakened by slouching.
- Opens chest, draws head back over spine.
7️⃣ Child’s Pose (Balasana)
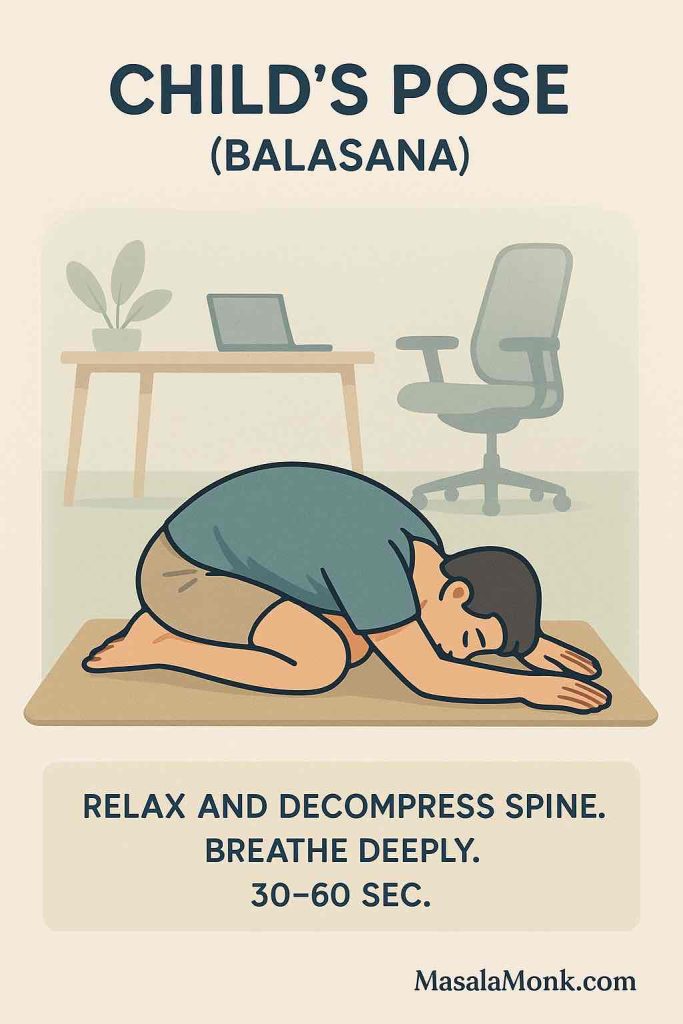
Purpose:
Relaxes nervous system, gently lengthens spine.
How to Perform:
- Kneel on mat, sit hips back towards heels.
- Extend arms forward or place beside body.
- Rest forehead on mat (or support with cushion if needed).
- Breathe deeply for 30–60 seconds.
Developer Posture Fix:
- Passive spinal decompression.
- Allows entire body to release postural tension.
🔄 Bonus: Diaphragmatic Breathing
Purpose:
Activates deep core stability and improves breathing mechanics compromised by poor posture.
How to Perform:
- Sit or lie comfortably.
- Place one hand on chest, one on abdomen.
- Inhale deeply into the belly, letting it expand.
- Exhale slowly while keeping shoulders relaxed.
- Practice for 2–3 minutes daily.
Developer Posture Fix:
- Trains your core to support neutral spine.
- Improves oxygenation and reduces coding fatigue.
Integrating Yoga Into Your Coding Life
Small, frequent doses of yoga can yield better results than occasional hour-long sessions.
| Time of Day | Yoga Focus | Duration |
|---|---|---|
| Morning | Cat-Cow, Cobra, Breathing | 5-10 min |
| Mid-day | Chest Opener, Low Lunge | 5-10 min |
| After Work | Downward Dog, Child’s Pose | 10-15 min |
| Weekly | Full Yoga Sequence | 30-45 min |
📝 Tip: Use micro-breaks between coding sprints to do 1-2 poses.
Long-Term Benefits for Software Engineers
✅ Less back, neck, and shoulder pain
✅ Improved focus and energy
✅ Better mood and reduced anxiety
✅ Healthier joints and mobility
✅ Increased coding stamina
“A straight spine is a healthy nervous system.”
📝 Download & Print: Developer Posture Yoga Checklist
“The best posture corrector is your own awareness.”
To help you stay consistent, we’ve created a one-page printable checklist you can keep at your desk.
- ✅ Simple, daily yoga poses for better posture
- ✅ Quick reference for busy coding days
- ✅ Designed specifically for software engineers
👉 [Download your free Developer Yoga Posture Checklist (PDF)]
📌 Tip: Print it, stick it near your monitor, or keep a copy on your desk for quick posture resets throughout your workday.
Credits: Designed by MasalaMonk.com for all fellow developers fighting bad posture.
Conclusion
Yoga for posture isn’t a luxury — it’s a long-term investment in your career longevity, cognitive clarity, and physical well-being.
You don’t need to become a yogi or give up hours of your day. With just 10-15 minutes of targeted practice, you can:
- Reverse years of bad posture habits
- Prevent chronic pain
- Improve your overall coding performance
💡 Start small. Stay consistent. Your spine (and future self) will thank you.
📌 10 FAQs
1️⃣ Why is posture important for software engineers?
Answer:
Software engineers often spend long hours sitting at desks, leading to slouching, rounded shoulders, and forward head posture. Poor posture contributes to back pain, neck stiffness, and fatigue. Good posture helps maintain spinal alignment, improves breathing, reduces pain, and enhances focus.
2️⃣ How can yoga improve my posture?
Answer:
Yoga strengthens postural muscles, increases flexibility, and builds body awareness. Poses target common problem areas like tight hips, weak core, and rounded shoulders, helping realign the spine and create lasting posture improvements.
3️⃣ Do I need prior yoga experience to follow this routine?
Answer:
No prior experience is necessary. The poses in this routine are beginner-friendly and can be modified based on your comfort level. Focus on form and breathing rather than intensity.
4️⃣ How often should I practice these yoga poses?
Answer:
Aim for at least 3-4 times per week. Consistency is key. Even short 10-15 minute sessions can bring noticeable improvements over time.
5️⃣ Can I do these poses during work breaks?
Answer:
Absolutely! Many of these poses can be done right beside your desk or during short breaks. This helps relieve muscle tension, refresh the mind, and prevent stiffness during long coding sessions.
6️⃣ Do I need any special equipment?
Answer:
You only need a yoga mat for comfort. A yoga strap or towel can help with certain stretches like the Chest Opener. Comfortable clothing and a calm space are helpful too.
7️⃣ What if I feel discomfort during a pose?
Answer:
Never push into pain. Modify the pose or ease out if you feel discomfort. It’s normal to feel gentle stretching, but sharp pain or strain should be avoided. Consult a healthcare professional if unsure.
8️⃣ Will yoga alone fix my posture?
Answer:
Yoga is a powerful tool but works best combined with ergonomic workspace setup, mindful sitting habits, and regular movement. An integrated approach delivers lasting posture correction.
9️⃣ How long before I see results?
Answer:
With consistent practice, many people notice improved posture, flexibility, and reduced discomfort within 4-6 weeks. Subtle benefits often appear even sooner, like better body awareness and less stiffness.
🔟 Can these poses help with back and neck pain?
Answer:
Yes — these poses target spinal mobility, core engagement, and muscle balance, which can relieve tension in the back, neck, and shoulders. However, for chronic or severe pain, consult a medical professional.