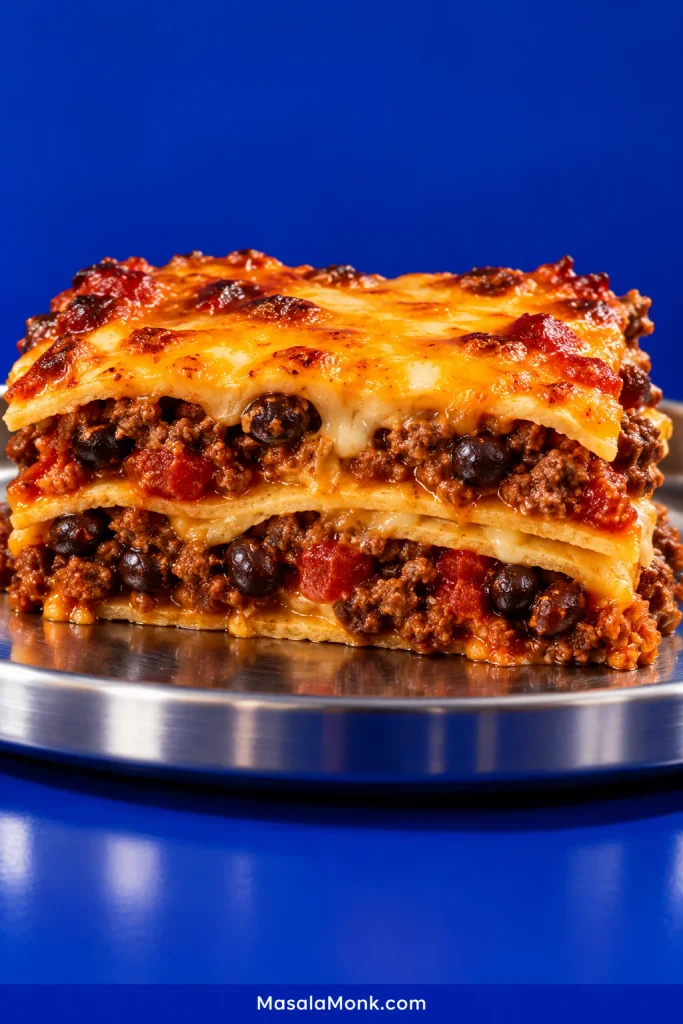
A good taco casserole should still eat like tacos. You should get seasoned beef, tortilla, melted cheese and salsa in the same forkful without everything disappearing into one soft filling.
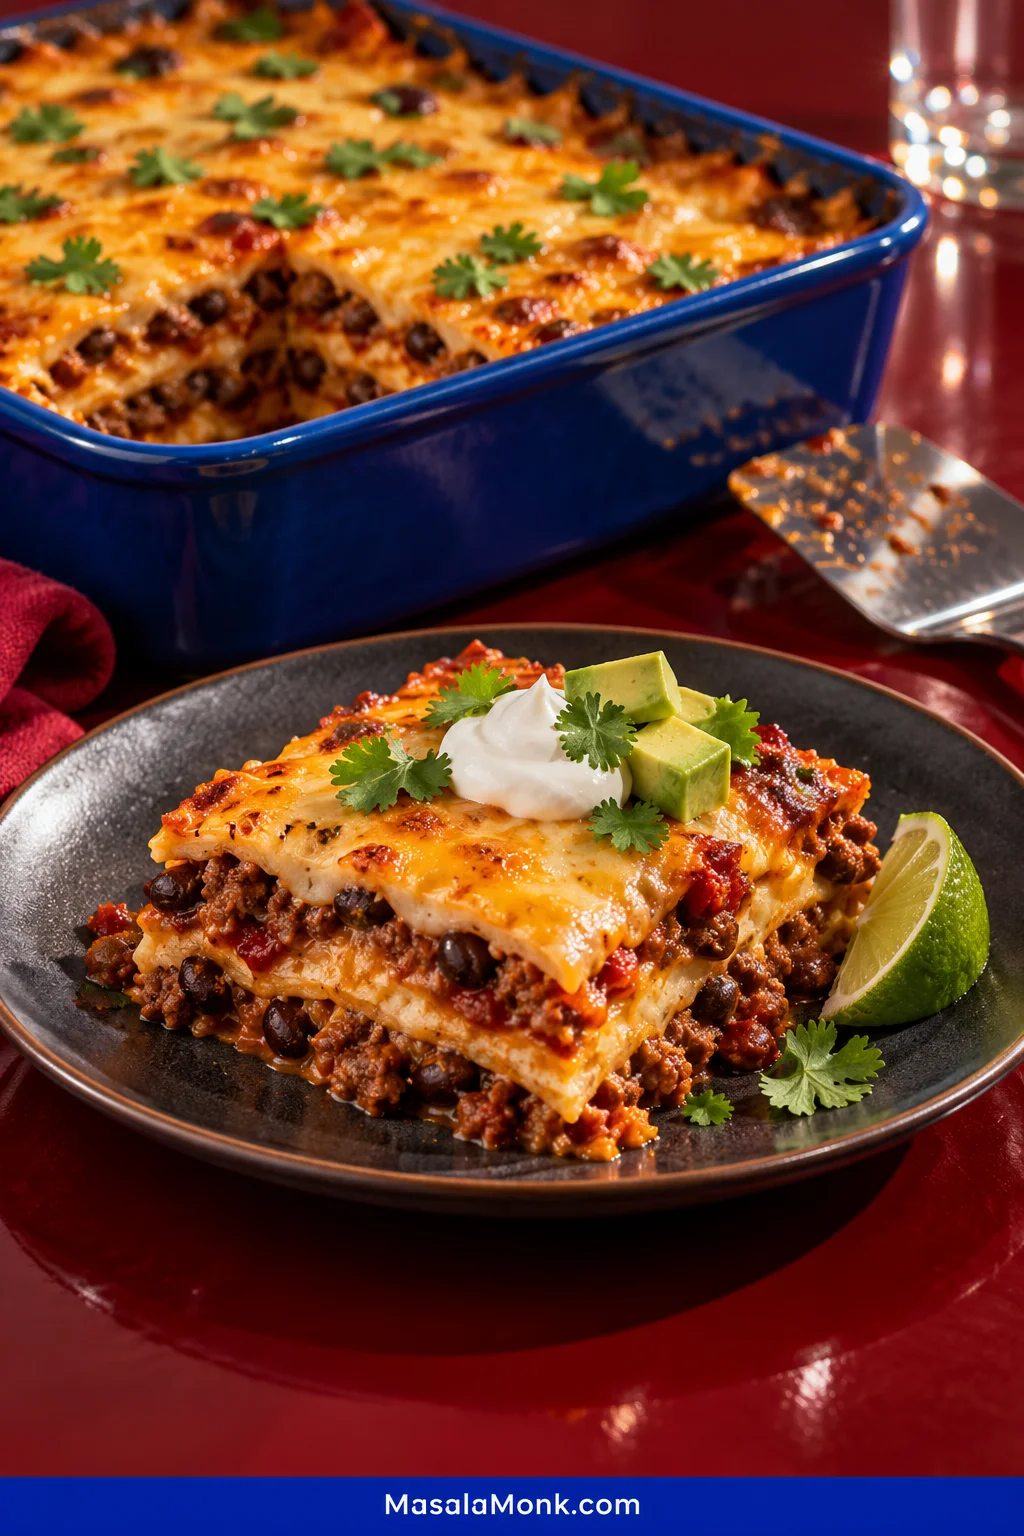
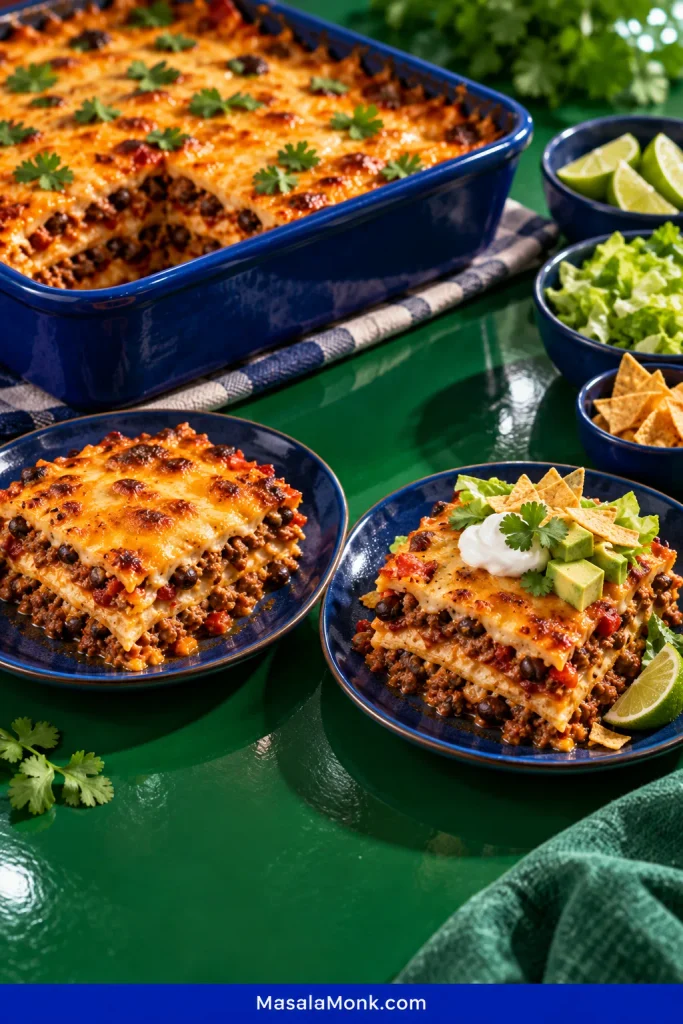
This is the layered tortilla version: ground beef and black beans stacked with tortillas and cheese in a 9×13-inch dish. Aim for fully melted cheese and visible layers; exposed tortilla edges may toast lightly.
Most of the judgment happens before the casserole reaches the oven. The beef and beans should be juicy and easy to spoon, but not swimming in salsa. Get the skillet right and the rest of the pan is forgiving.
Brown and season the beef, add black beans and thick salsa, and cook until the mixture is thick enough to scoop rather than pour. Build three layers of tortillas, beef-and-bean filling and cheese, then bake uncovered at 350°F / 175°C until the edges bubble and the cheese is fully melted.
Taco Casserole Recipe
Three layers of tortillas with seasoned beef, black beans and melted cheese, baked until bubbling around the edges.
PrepAbout 10–15 minutes
StovetopAbout 12–15 minutes
BakeAbout 20 minutes
Rest5–10 minutes
TotalAbout 50–60 minutes
Yield8 pieces; about 6–8 servings
Pan: 9×13 in / 23×33 cm, roughly 3 qt / 2.8 L.
Ingredients
1 lb / 16 oz / 454 g ground beef, preferably around 85/15 or 90/10
1 medium yellow or white onion, finely diced, about 1 cup / 130–150 g
2 tbsp + 1 tsp / about 19 g MasalaMonk homemade taco seasoning, plus more to taste, or store-bought taco seasoning intended for 1 lb / 454 g beef
16 oz / 454 g thick jarred salsa, mild, medium or hot
1 can black beans, 14–15 oz / 400–425 g before draining, drained and rinsed well
6 large flour tortillas, about 10 inches / 25 cm across
8 oz / 225 g shredded cheese, roughly 2 cups; cheddar, Monterey Jack, Colby Jack or a Mexican-style blend all work
For Serving
Sour cream or plain Greek yogurt
Diced tomato or fresh pico de gallo
Shredded lettuce
Avocado or guacamole
Chopped cilantro or sliced green onion
Lime wedges
Crushed tortilla chips, Fritos or Doritos, if you want extra crunch
Using our homemade taco seasoning? The Taco Seasoning for 1 lb Ground Beef recipe makes about 3 tbsp / 24 g. Start with 2 tbsp + 1 tsp here and keep the remainder nearby. Salsa and cheese bring their own salt, so taste before adding more.
Using a packet? Use the seasoning amount intended for 1 lb of beef, but don’t automatically add the water called for on the packet. The salsa provides the liquid here.
Method
1. Heat the Oven
Heat the oven to 350°F / 175°C. Lightly grease a 9×13-inch / 23×33-cm baking dish.
2. Brown the Beef
Heat a large skillet over medium-high heat. Add the beef and leave some of it against the hot pan long enough to pick up color before you start breaking it apart.
Cook until browned, leaving small crumbles. Add the onion and continue cooking until it softens and the beef reaches 160°F / 71°C.
Drain most of the rendered fat if a noticeable pool collects in the skillet. A light coating on the meat is fine.
3. Add the Seasoning, Salsa and Beans
Stir in the taco seasoning. Give it about 30 seconds in the hot beef and onion, just until the spices smell warmer and more fragrant.
Add the salsa and black beans. Lower the heat to medium and cook for about 4–6 minutes, stirring occasionally.
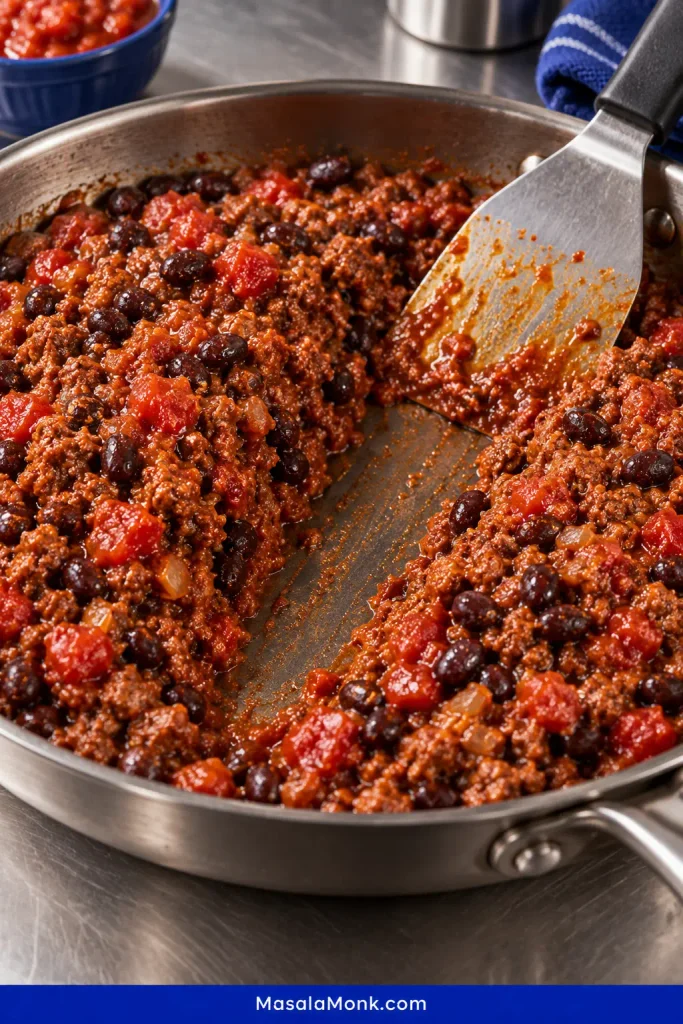
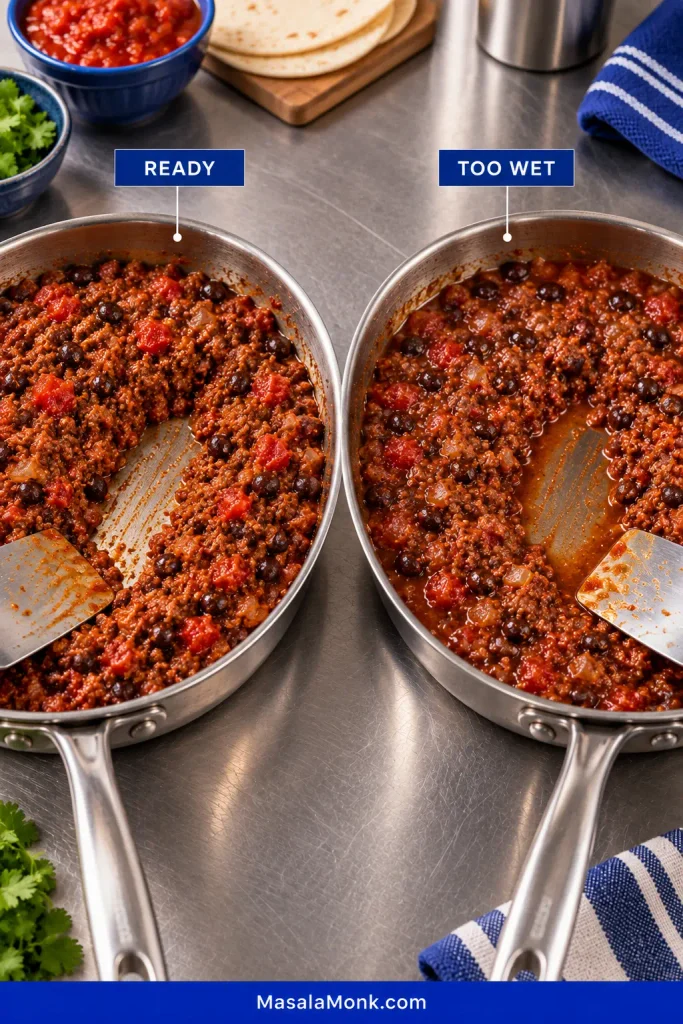
The beef and beans are ready when they slump from the spoon but do not run from it. Pull a spatula through the center of the skillet. The path should remain visible briefly before the mixture settles back.
Salsa can vary surprisingly much from jar to jar. That’s why this brief spatula channel is more useful than the clock: the filling is ready when loose liquid no longer rushes back in.
The meat should look glossy. Dry and crumbly means you’ve gone too far.
Taste before moving on. Add some of the reserved seasoning only if the beef needs it.
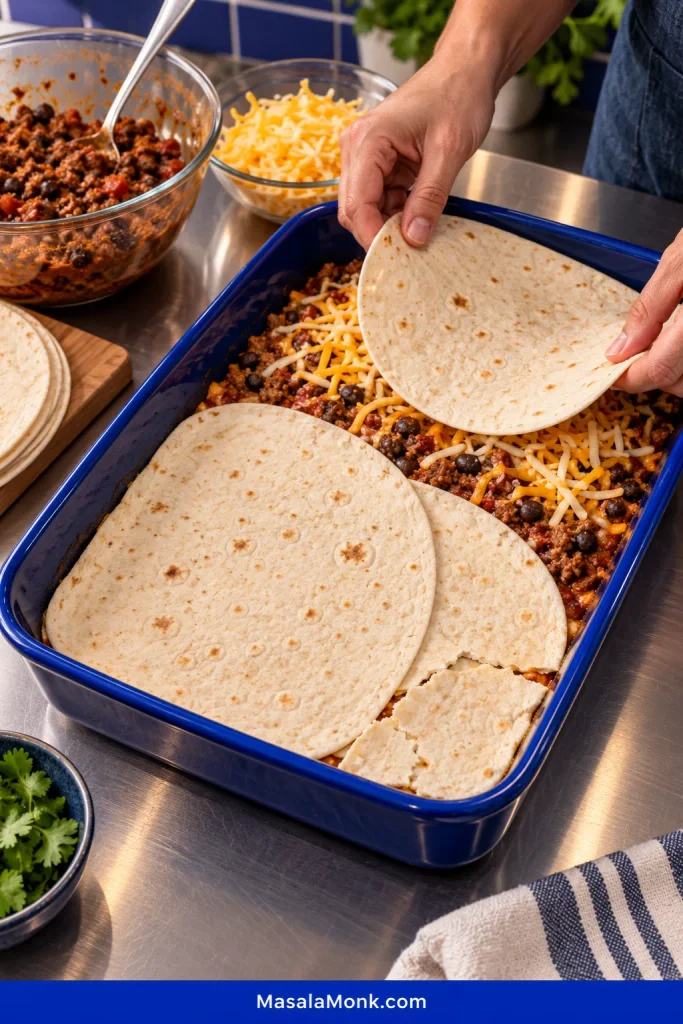
Lay 2 tortillas across the bottom of the dish, overlapping them through the middle. Let the rounded edges curve slightly up the sides. Don’t fuss over perfect coverage. If a large corner is bare, tear off a piece of tortilla, patch it and carry on.
Spread one-third of the beef and beans over the tortillas and add one-third of the cheese.
Add 2 more tortillas, another third of the meat and another third of the cheese.
Finish with the last 2 tortillas, the remaining beef and beans and the rest of the cheese.
The rough overlap disappears once the filling and cheese go on. What matters is avoiding large uncovered areas, not cutting tortillas into perfect rectangles.
Eyeballing the skillet into thirds before you start saves the final layer from getting whatever happens to be left.
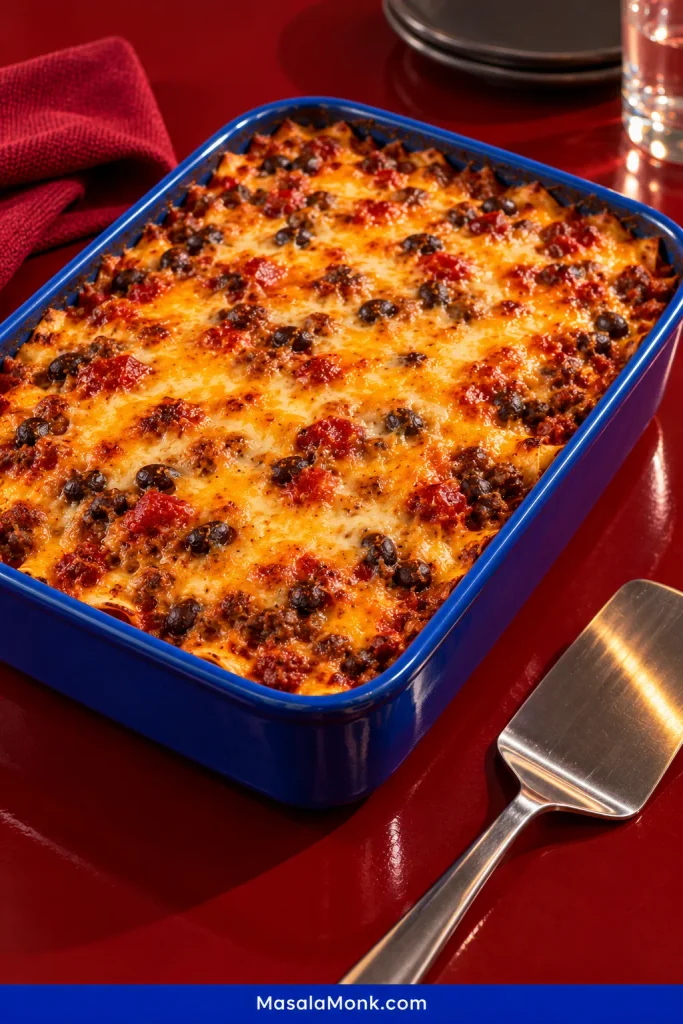
Bake uncovered for about 20 minutes, until several edges are bubbling and the cheese has melted completely. A few browned patches on top are a bonus; exposed tortilla edges may toast slightly.
6. Rest Before Cutting
Let the pan stand for 5–10 minutes. Five minutes works when everyone is ready to eat; closer to ten gives the cheese and meat more time to settle for cleaner pieces.
Cut into 8 squares and add the fresh toppings at the table.
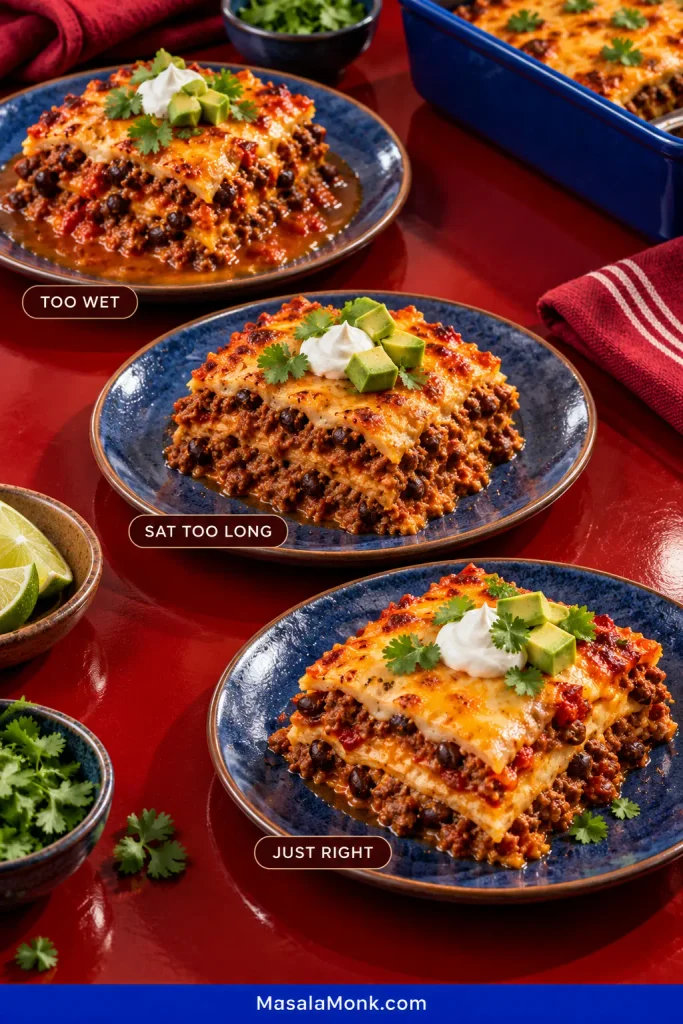
Visible tortilla layers are the proof that the filling stayed juicy without soaking the casserole.
Use thick salsa, drain the beans and any juicy add-ins well, and let loose liquid cook away before you start layering. Soft tortillas are part of the dish. A puddle around the first slice isn’t.
What matters is the liquid around the filling, not how glossy the beef looks. Extra salsa left in the skillet can soak the tortillas and collect around the first slice later.
Fresh pico usually needs more attention than a thick jarred salsa. Drain it well and simmer the beef longer, or keep the pico fresh and spoon it over the finished casserole instead.
The same principle applies to canned tomatoes, corn or vegetables that release water: deal with the excess before the mixture leaves the skillet.
Think saucy beef, not beef sitting in sauce. If liquid runs into a puddle when you tilt the skillet, give it another minute or two.
Corn vs Flour Tortillas
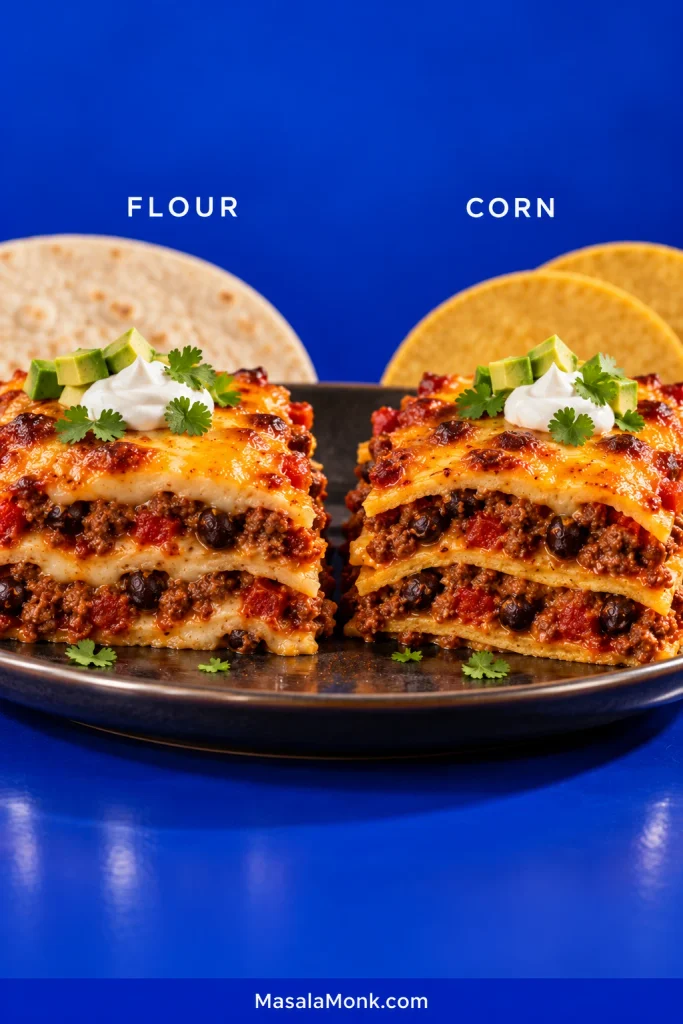
Flour tortillas give softer, more flexible layers; corn tortillas bring stronger corn flavor and usually remain more distinct between the beef and cheese.
Choose flour when you want the softest layers and the easiest fit in a 9×13 pan. Choose corn when stronger corn flavor and more noticeable tortilla layers matter more.
Corn tortillas may stay more noticeable between the layers, but they will not rescue an overly wet filling. The choice is mainly about tortilla texture and corn flavor.
Six large flour tortillas cover the pan easily. Corn tortillas are smaller, so you’ll need roughly 10–12, and warming them first helps them overlap without splitting.
Tortilla
What to expect
Large flour tortillas
A softer forkful and easy pan coverage
Small corn tortillas
More corn flavor and layers that stay more noticeable in each bite
Briefly griddled corn tortillas
A bit more resistance to the sauce, with an extra cooking step
A quick pass across a dry or lightly oiled skillet can give corn tortillas more structure. Stop while they’re pliable enough to overlap.
If you’re making them yourself, our Corn Tortilla Recipe covers masa hydration, pressing and how to keep cooked tortillas flexible.
Already Have Taco Meat? Start Here
Made taco meat yesterday? Use the amount cooked from about one pound of raw ground beef and skip the browning step.
A cup measurement isn’t especially reliable. Cooked ground beef changes volume depending on fat percentage, crumble size and how much sauce is already mixed through it.
Warm the meat with the beans, then add salsa gradually. You may not need the full jar if the leftovers are already saucy. Taste before adding more seasoning.
If those leftovers are headed back into individual tortillas instead, our Ground Beef Tacos Recipe is built for that job.
Taco Casserole Substitutions
You don’t need a different formula for every swap. The changes worth thinking about are the ones that affect moisture, salt or how quickly the meat dries out.
Change
What changes
Ground turkey or chicken
Both work, though lean poultry dries faster. Ground poultry should reach 165°F / 74°C.
Pinto beans
Use them just as you would black beans: drained and rinsed.
Up to 1 cup corn
Drain canned corn well, or thaw and dry frozen corn first.
Canned tomatoes or Rotel
Drain first, then cook until the extra liquid has reduced.
Refried beans aren’t a straight replacement for whole black beans; they make the layers much denser. For this version, I’d keep them on the side. Our Refried Beans from a Can recipe works well there.
Adjusting the Heat
A casserole can be plenty spicy and still taste flat. Before adding more chile, check whether it needs salt or acidity. Lime can do more for a dull bite than another spoonful of hot sauce.
For more heat, use hotter salsa, jalapeño, pepper Jack or hot sauce. Keeping some at the table makes dinner easier when people want different levels of spice. A spoonful of roasted salsa verde gives an individual serving a sharper, greener finish.
Pan Size, Half Batches and Double Batches
Full batch: 9×13-inch pan. Half batch: 8×8-inch pan. Double batch: two 9×13-inch pans.
For a half batch, keep the oven at 350°F and start checking around 15 minutes; a deeper or heavier dish may need closer to 20. For a double batch, two separate pans keep roughly the same layer depth and heat more predictably than one very deep casserole.
Make Taco Casserole Ahead
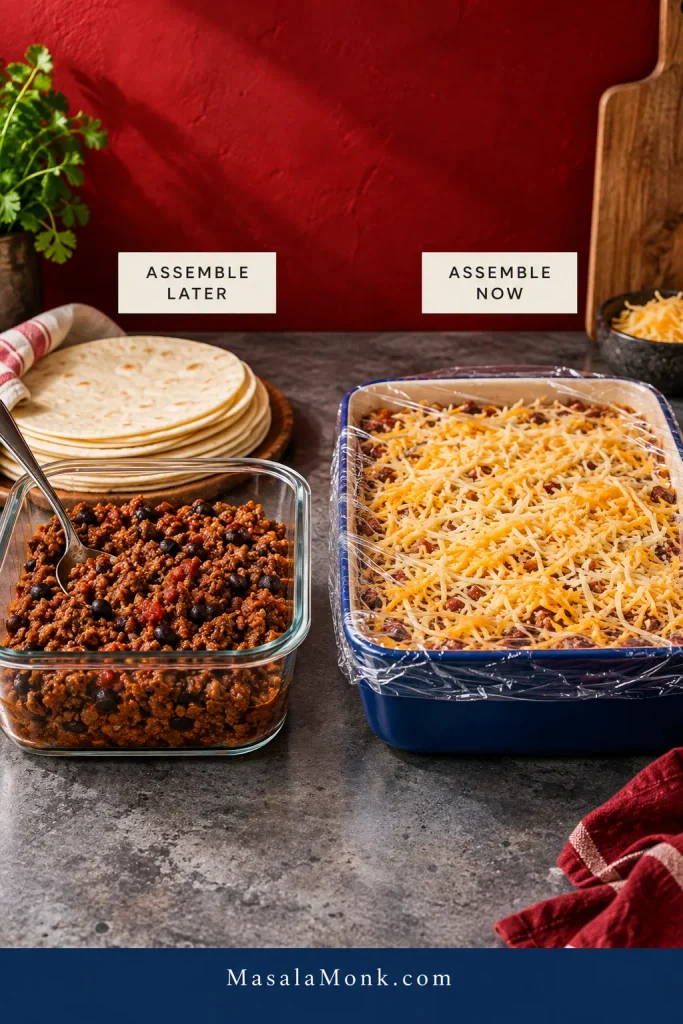
You can make taco casserole ahead, but there is a texture tradeoff. For firmer tortilla layers, cook the beef and beans up to 2 days ahead, cool them promptly and assemble the pan closer to baking.
The whole casserole can also be assembled up to 1 day ahead. It bakes well, but the tortillas will be softer after spending a night against the salsa.
An assembled-ahead pan trades some layer definition for convenience. Keeping the cooked filling separate preserves firmer tortillas without changing the recipe itself.
A refrigerator-cold casserole will take longer than a freshly assembled one. Bake at 350°F / 175°C until it is bubbling and hot through and the center reaches 165°F / 74°C.
Follow the bakeware manufacturer’s guidance before moving refrigerator-cold glass or ceramic into a hot oven.
Taco Casserole Toppings and Serving Ideas
The casserole itself is hot, rich and soft. Cool sour cream, sharp lime, avocado and a few crunchy chips change the whole bite once they meet the melted cheese and seasoned beef.
Use sliced avocado if that’s enough. For a fuller lime-onion-cilantro topping, add a spoonful of fresh guacamole.
Keep chips out of the oven if you want them crunchy. Twenty minutes under hot cheese and steam changes the deal.
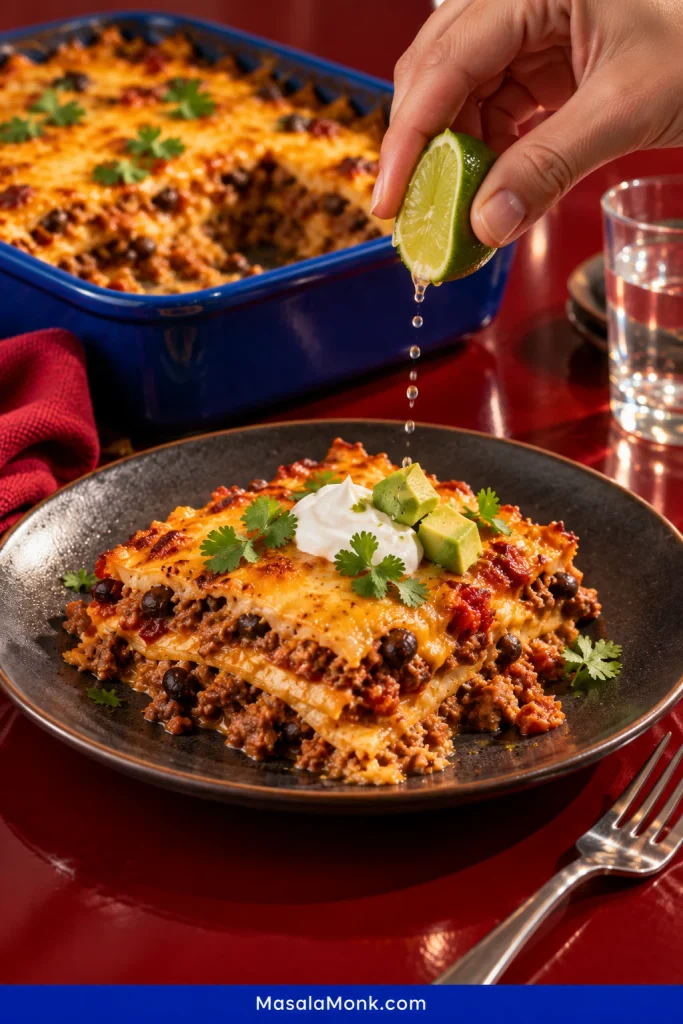
A squeeze of lime is especially useful on a hot first bite: the acidity cuts through the beef and melted cheese without making the casserole itself any heavier.
For the rest of the meal, contrast works better than piling on more richness. A crisp slaw, simple green salad, corn, or rice with plenty of lime all make more sense here than another heavy baked side.
Taco Casserole Troubleshooting
Most problems show up clearly once the first piece comes out. Use what the slice is doing to work backward to the cause.
Give the casserole its resting time before judging the first piece. After that, excess liquid, blurred tortilla layers or a clean, cohesive slice become useful clues rather than normal just-out-of-the-oven messiness.
Common Taco Casserole Problems and Fixes
What happened
Likely cause
What to do
Liquid gathers around the slice
The skillet mixture went into the dish too wet
Reduce it longer next time and use a thicker salsa.
Layers blur together but there isn’t a puddle
The assembled casserole sat too long before baking, so the tortillas absorbed more salsa
Assemble closer to baking when firmer tortilla layers matter.
First slice falls apart
It was cut while very hot
Give the pan 5–10 minutes before cutting. Expect the first piece to be the messiest one.
Casserole feels dry
The skillet reduced too far or the pan baked too long
Stop while the meat is glossy and pull the dish once the edges bubble and the cheese melts.
Beef feels pasty
It was broken very finely or simmered too long in salsa
Leave some small crumbles when browning and shorten the final simmer.
Casserole tastes too salty
Seasoning, salsa and cheese all contributed salt
Taste the skillet before adding more seasoning.
Hot enough but still bland
It may need salt or acidity rather than more chile
Check the salt and add lime at the table.
Chips turned soft
They baked in the steam
Add them after the casserole comes out.
Storage, Freezing and Reheating
How Long Does Taco Casserole Keep?
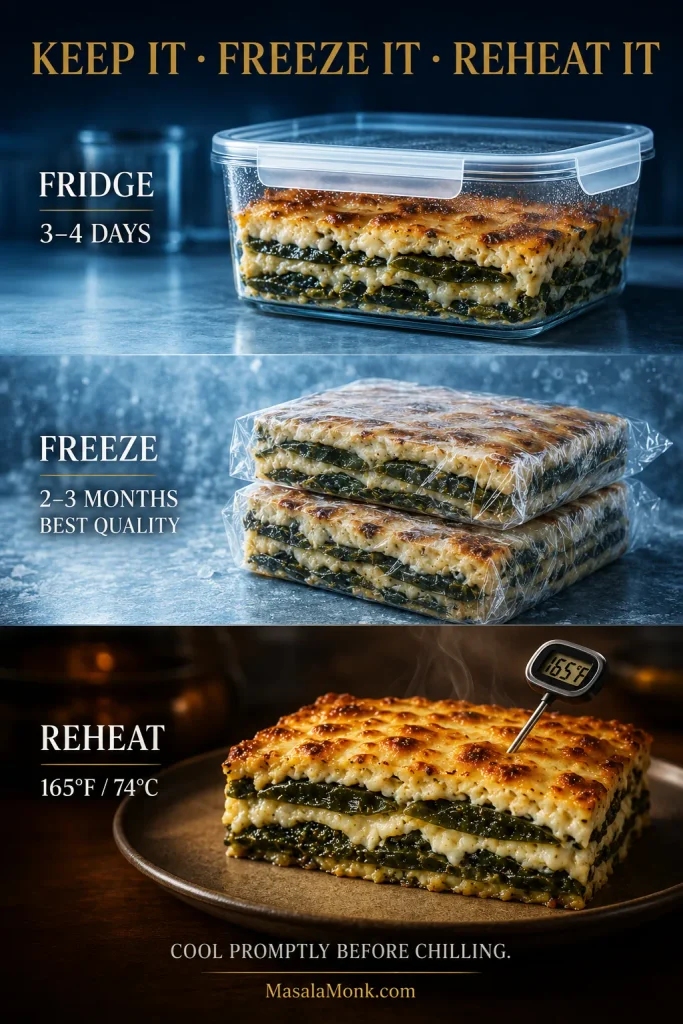
Refrigerate leftovers promptly and use them within 3–4 days. The tortillas will soften further overnight; that comes with storing a layered casserole.
Can You Freeze Taco Casserole?
Yes. For the best tortilla texture, cool individual portions, pack them airtight and use them within about 2–3 months. If texture matters more than convenience, freeze the cooked beef-and-bean mixture separately and assemble with fresh tortillas later.
How to Reheat Taco Casserole
Microwave: loosely cover an individual portion and reheat until the center reaches 165°F / 74°C.
Oven: cover several portions and reheat at 325–350°F / 165–175°C until the center reaches 165°F / 74°C. Uncover for the last few minutes if you want the cheese on top to dry slightly and melt again.
Add fresh toppings—lettuce, avocado, sour cream and chips—after reheating, not before.
Taco casserole is forgiving once what’s in the skillet is under control. The tortillas don’t have to line up perfectly, and the first square out of the dish may never look quite as tidy as the second.
Cut a generous piece while the cheese is soft, squeeze over a little lime and finish it at the table.
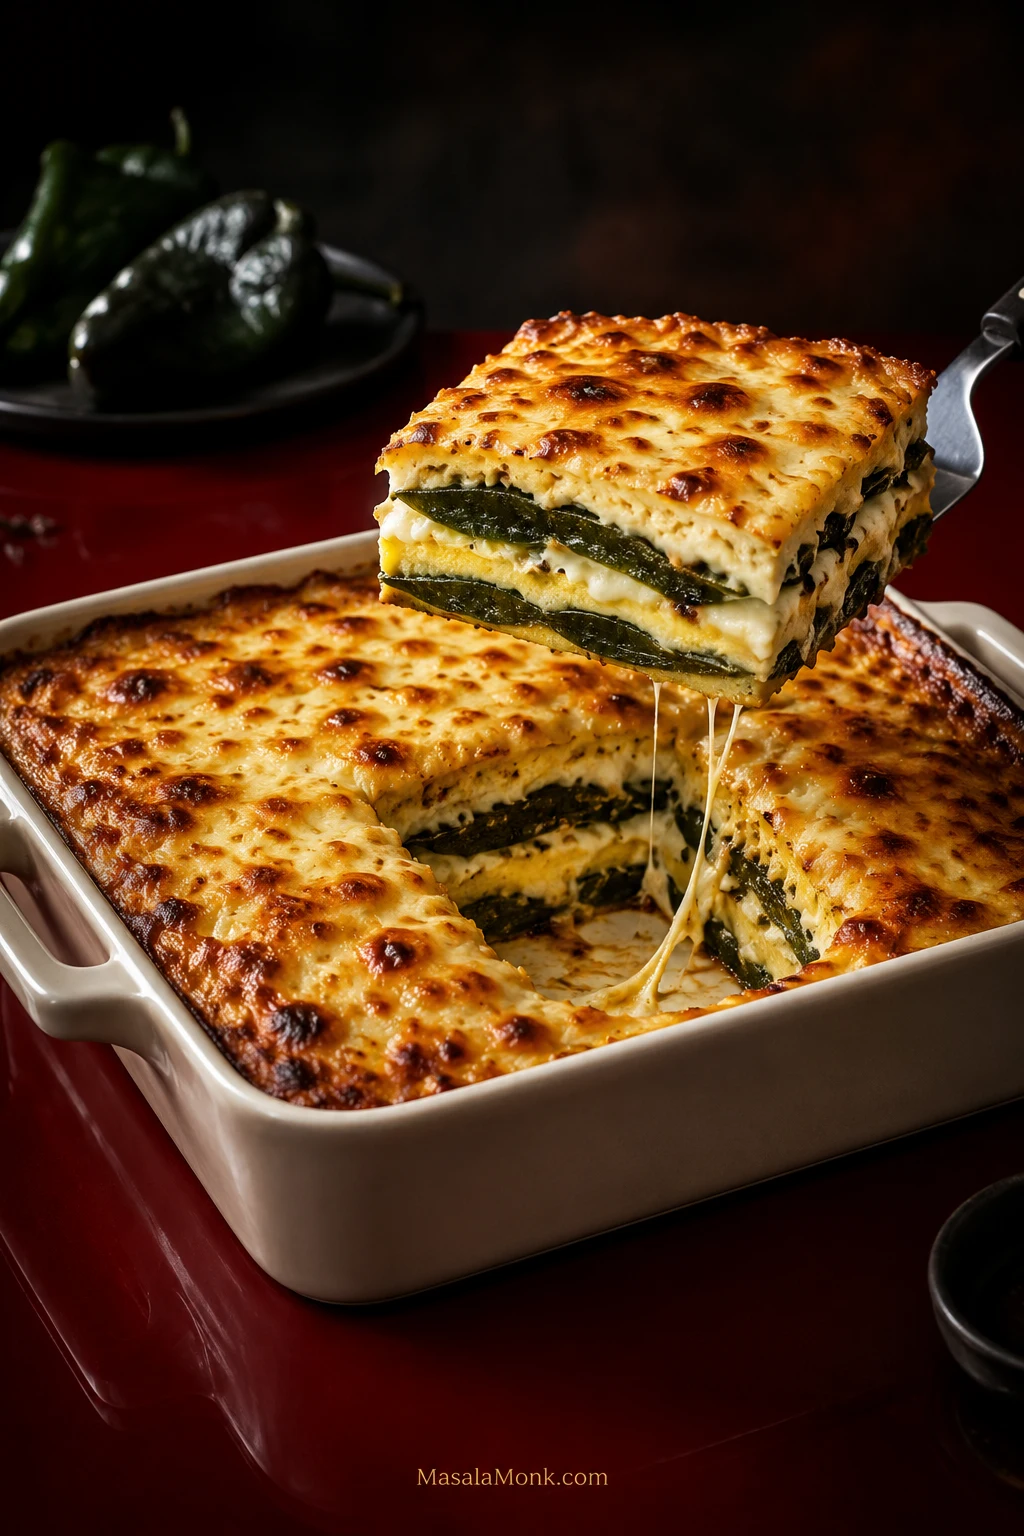
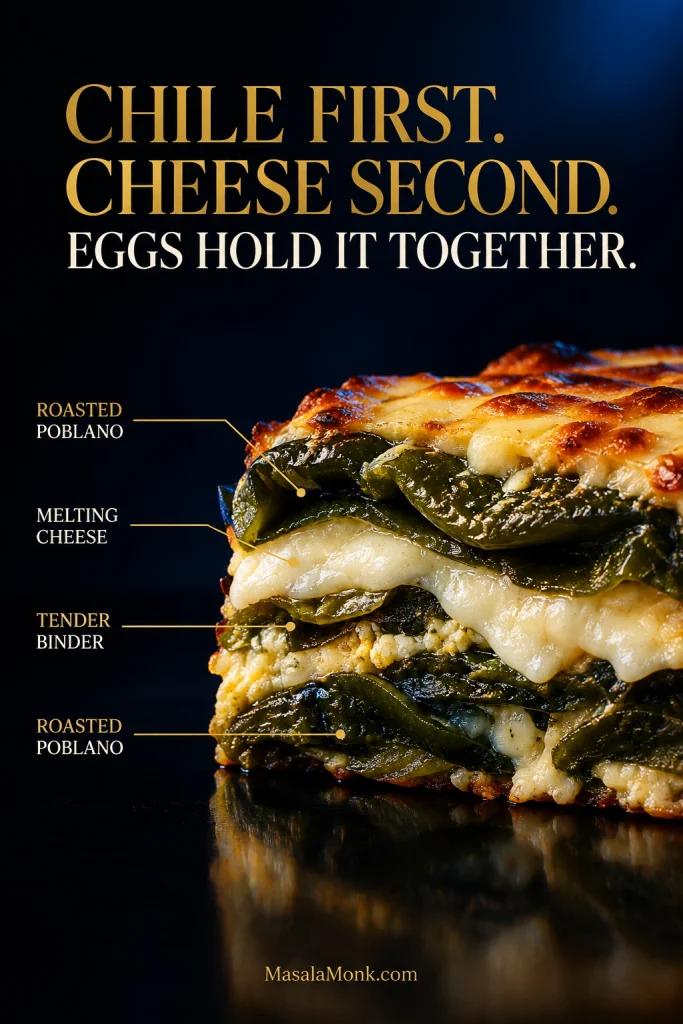
Cut into a good chile relleno casserole and you should still know where the poblanos are. Broad layers of roasted green chile run through the slice, molten cheese sits between them, and the egg around everything is tender and lightly puffed rather than taking over the plate.
Traditional chiles rellenos ask you to roast, peel, stuff, batter and fry individual peppers without letting them split or spill their cheese. This casserole is much less demanding. A poblano tears while you peel it? Piece it together in the dish and keep going. No toothpicks, no coating peppers one by one, and no pot of frying oil.
The payoff is a forkful with soft roasted poblano, stretchy Oaxaca or Monterey Jack and just enough tender egg around the edges to hold everything together.
Chile first. Cheese second. Eggs hold it together.
Roast 6–8 medium-large poblanos / about 700–900 g (1½–2 lb), open them flat and use enough for two nearly complete chile layers. Layer with 400 g / 14 oz Oaxaca or Monterey Jack, or a mixture of the two.
Whisk 6 large eggs + 60 ml / ¼ cup milk + 40 g / about ⅓ cup flour + ½ teaspoon baking powder until completely blended with a light layer of foam across the surface. Pour over the chile and cheese and bake in a 9-inch / 23 cm square dish at 350°F / 175°C conventional / 160°C fan.
Start checking at 35 minutes. Many casseroles in this pan finish around 35–45 minutes. The center should be set rather than wet or sloshy and should reach 160°F / 71°C if checked with a thermometer. Rest for 10 minutes before slicing.
Poblano should read as the structure of the slice; cheese fills the seams, while the egg binder nearly disappears between them.
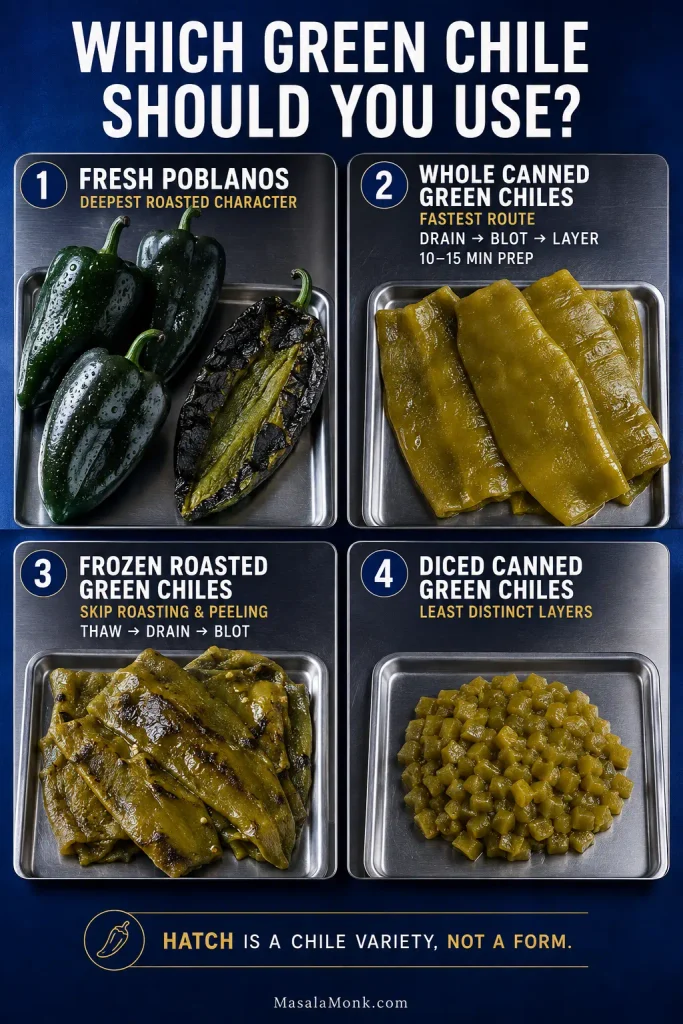
Choose Your Chile: Fresh, Canned or Frozen
Fresh poblanos give you the strongest roasted-pepper character. Whole canned green chiles turn the dish into a genuine shortcut. Frozen roasted green chiles save the roasting and peeling.
Easy does not mean instant when you start with fresh poblanos. They still need time to blister, steam and peel. The easy part is skipping the fiddly stuffing, battering and frying.
Canned chiles have their own good reason to exist. This is the route for a night when roasting peppers is the difference between making the casserole and not making it.
How Each Green Chile Changes the Casserole
Whole chiles preserve recognizable layers; diced chiles disappear into the binder much more easily.
Chile
Best for
What to expect
Fresh poblanos
Roasted-pepper depth
Firm, distinct chile layers; requires roasting, steaming and peeling.
Whole canned green chiles
The fastest route
Softer and milder, with broad pieces that still layer well.
Frozen roasted green chiles
Skipping the roasting and peeling
Already roasted and convenient; thaw completely before using.
Diced canned green chiles
Using what you already have
The least layered choice. Small pieces mingle more readily with the egg.
Hatch chile can be used fresh, frozen roasted or canned; there is a fuller Hatch variation below. Whatever form you use, opened whole chiles should give you enough flesh to cover the baking dish twice with only small gaps.
Using canned or thawed frozen chiles? Drain them thoroughly and blot away surface moisture before layering.
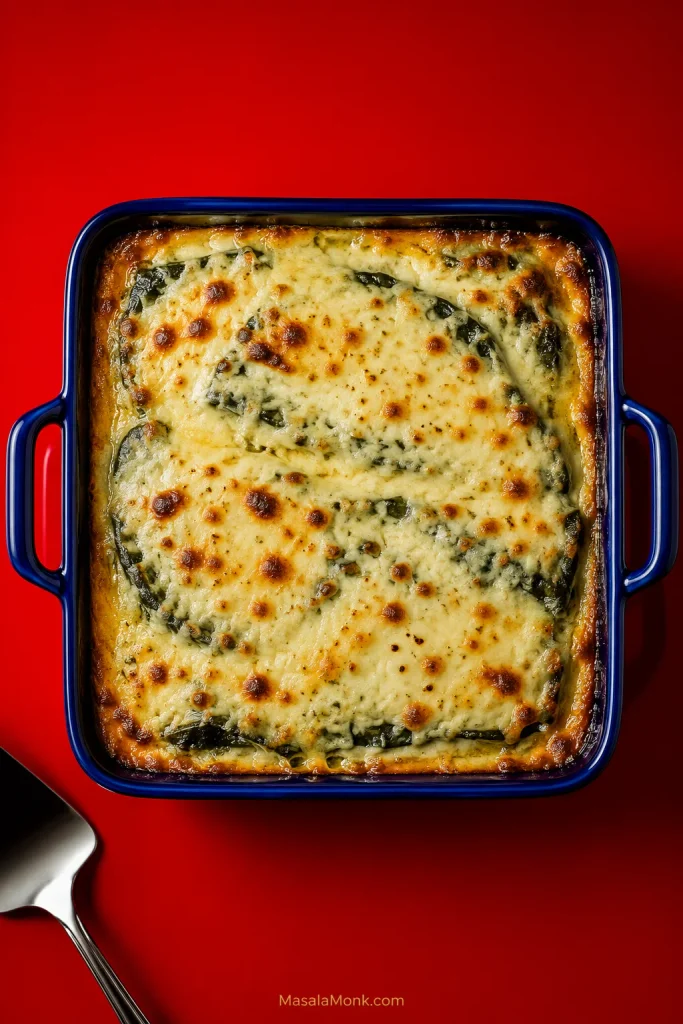
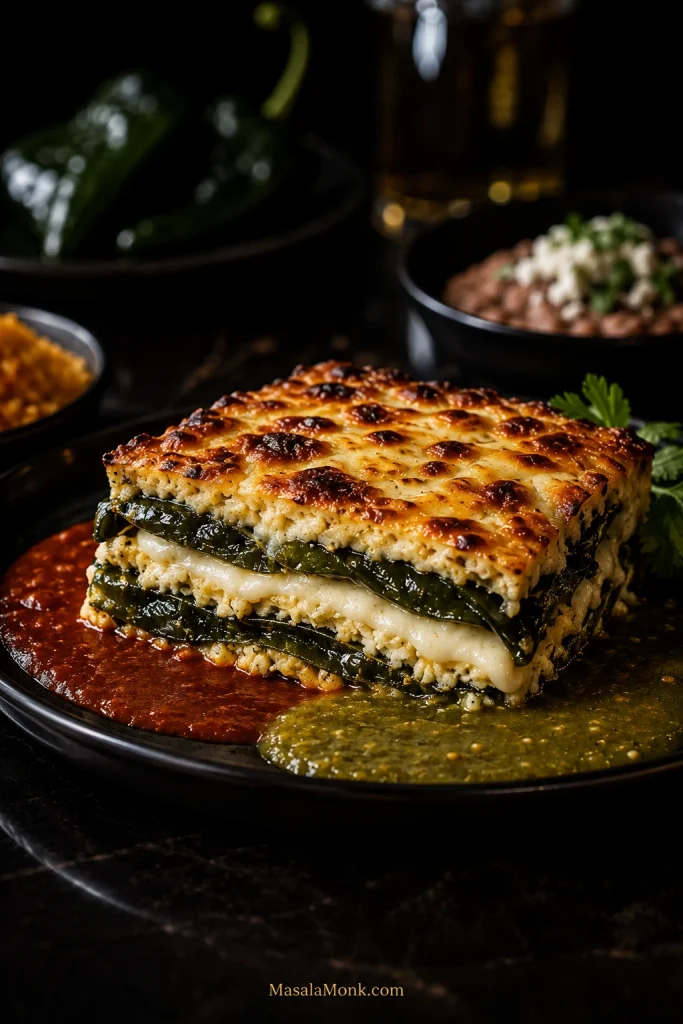
Look for a deeply golden, blistered cheese top with dark roasted poblano edges peeking through around the pan.
Make It Now: Chile Relleno Casserole
Recipe at a Glance
Yield 6 generous or 8 smaller servings
Prep About 30–40 minutes
Bake About 35–45 minutes
Rest 10 minutes
Oven: 350°F / 175°C conventional / 160°C fan Pan: 9-inch / 23 cm square baking dish Total from raw poblanos: about 1 hour 15 minutes to 1 hour 35 minutes Canned-chile shortcut: about 10–15 minutes prep and roughly 55–70 minutes total including the rest
Ingredients
6–8 medium-large poblano peppers, about 700–900 g / 1½–2 lb
For the canned shortcut, use instead: 3–4 (7-ounce / about 200 g) cans whole green chiles, drained very well, or enough for two substantial layers
400 g / 14 oz Oaxaca or Monterey Jack cheese, or a mixture of the two, shredded and divided
6 large eggs
60 ml / ¼ cup whole milk
40 g / about ⅓ cup all-purpose flour
½ teaspoon baking powder
¾ teaspoon fine salt. Use closer to ½ teaspoon when both the canned chiles and cheese are particularly salty.
¼ teaspoon freshly ground black pepper
½ teaspoon garlic powder, optional
Butter or neutral oil, for the baking dish
For serving, optional: red chile or tomato sauce, salsa verde, avocado, crema or sour cream, cilantro and warm homemade corn tortillas.
Useful equipment: tongs, a rimmed sheet pan, a covered bowl for steaming, a 9-inch square baking dish and a whisk. An instant-read thermometer is handy but optional.
Making the canned-chile version? Drain the whole chiles very well and blot them dry. Skip Steps 1 and 2 and begin with Step 3: Layer the chile and cheese.
How to Make It
1. Char the poblanos
Set the broiler to high and arrange an oven rack about 5–6 inches / 13–15 cm from the heat. Line a rimmed sheet pan with foil and arrange the poblanos on it.
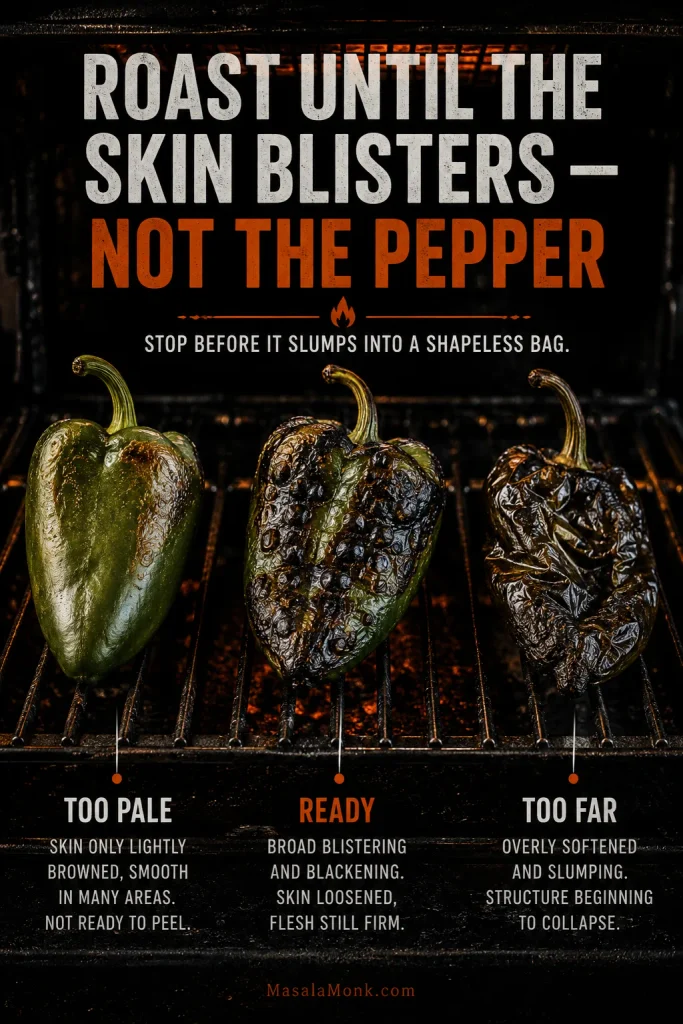
Broil, turning as needed, until the skins are well blistered and blackened in patches. Depending on pepper size and your broiler, this usually takes 8–15 minutes.
The skin should look loose and charred while the flesh underneath still has enough body to pick up with tongs. By now the kitchen should smell roasted and a little smoky. Stop before the peppers slump into shapeless bags.
No broiler? Char the poblanos directly over a gas flame or on a hot grill, turning with tongs until the skins blister well. A very hot oven works too; it usually takes longer and gives less concentrated charring.
Use char coverage, not the clock: broad blistering with a pepper that still holds its shape is the target.
2. Steam, peel and dry
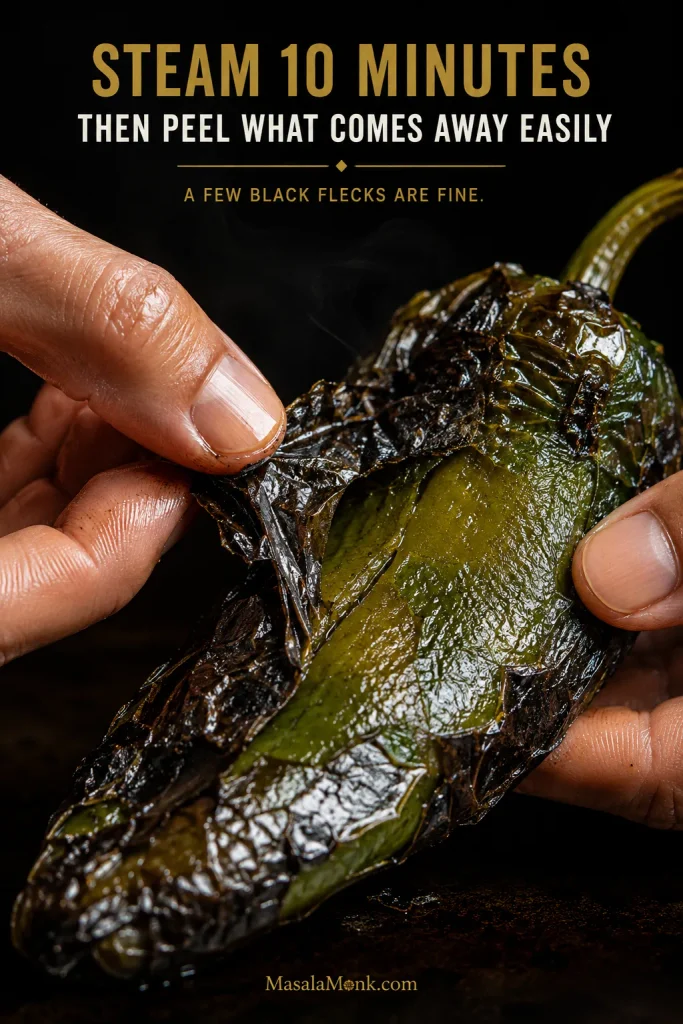
Move the hot peppers into a bowl and cover tightly with a plate, lid or foil. Leave them for about 10 minutes.
Peel away the loosened skin, then open each poblano lengthwise. Remove the stems, seeds and thick pale ribs.
A few stubborn black flecks are fine. Your fingers will probably get messy; that’s still easier than scraping so hard that half the pepper comes away with the skin. Lay the opened poblanos on paper towels and blot both sides well.
Anyone sensitive to chile oils may prefer kitchen gloves here, especially when cleaning a large batch. Either way, avoid touching your eyes until your hands are washed.
Don’t sacrifice pepper flesh for perfectly bare skin; a few charred flecks are harmless.
Lower the oven to 350°F / 175°C conventional / 160°C fan. Lightly grease the baking dish.
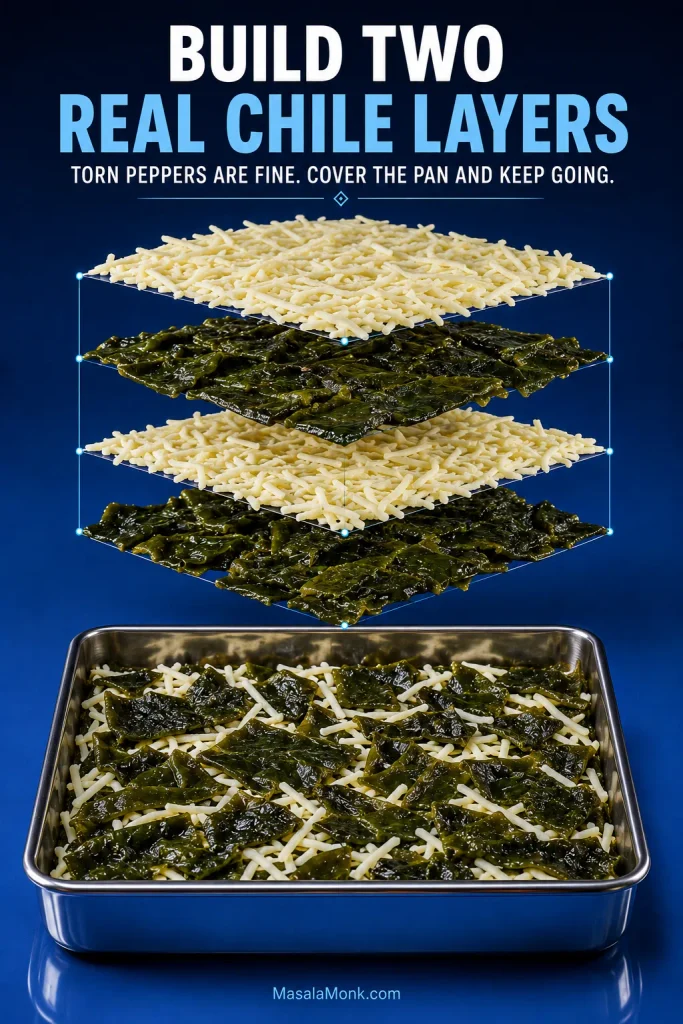
Cover the bottom with half of the opened chiles, overlapping torn pieces where needed. Scatter over about one-third of the cheese. Add the remaining chile layer, then another third of the cheese. Save the final third for the top.
It does not need to look tidy. The peppers can overlap and the cheese can fall where it falls; once everything melts and puffs in the oven, those rough edges disappear into the slice.
Aim for broad coverage rather than neat symmetry; overlaps and torn poblano pieces disappear into the finished casserole.
4. Mix the eggs last
With the casserole layered and the oven ready, whisk the flour, baking powder, salt, pepper and optional garlic powder together in a large bowl. Whisk in the milk until smooth, then add the eggs.
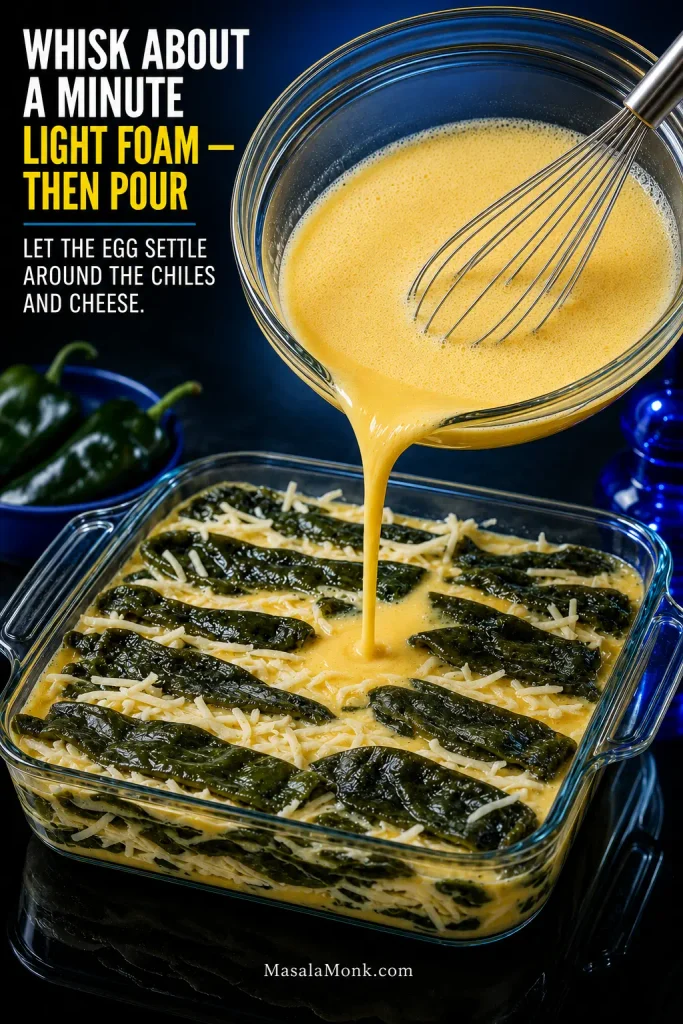
Whisk vigorously for about a minute, until everything is completely blended and a light layer of foam sits across much of the surface. There is no need to separate the eggs.
5. Pour, top and bake
Pour the egg mixture slowly over the chile and cheese, moving around the baking dish so it reaches the gaps. Give the dish a gentle jiggle, scatter over the remaining cheese and put it straight into the oven.
Fine bubbles are enough; pour slowly so the egg mixture slips into the gaps instead of forming a thick layer on top.
Start checking at 35 minutes. Many casseroles in this pan finish around 35–45 minutes. A refrigerator-cold casserole, juicier peppers or a heavy ceramic dish can push the bake a little longer.
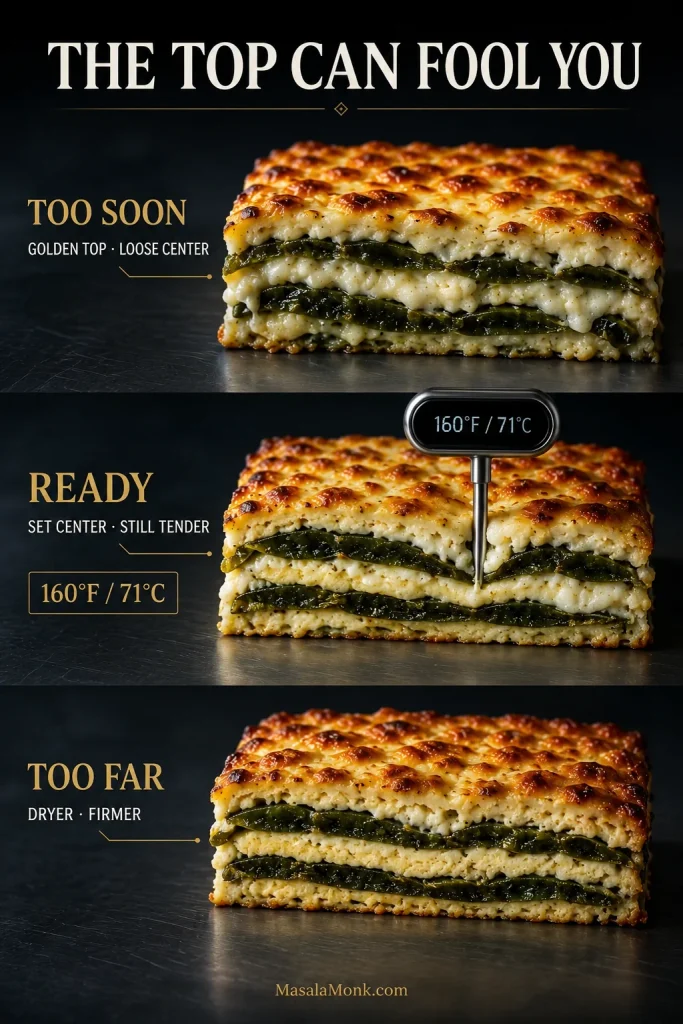
Look past the melted cheese on top. The edges should be puffed and lightly golden. The middle should be set, with no obvious liquid sloshing when the dish moves gently. An instant-read thermometer should register 160°F / 71°C near the center.
A browned top with a loose middle simply needs more time. Cover loosely with foil if the color is already where you want it.
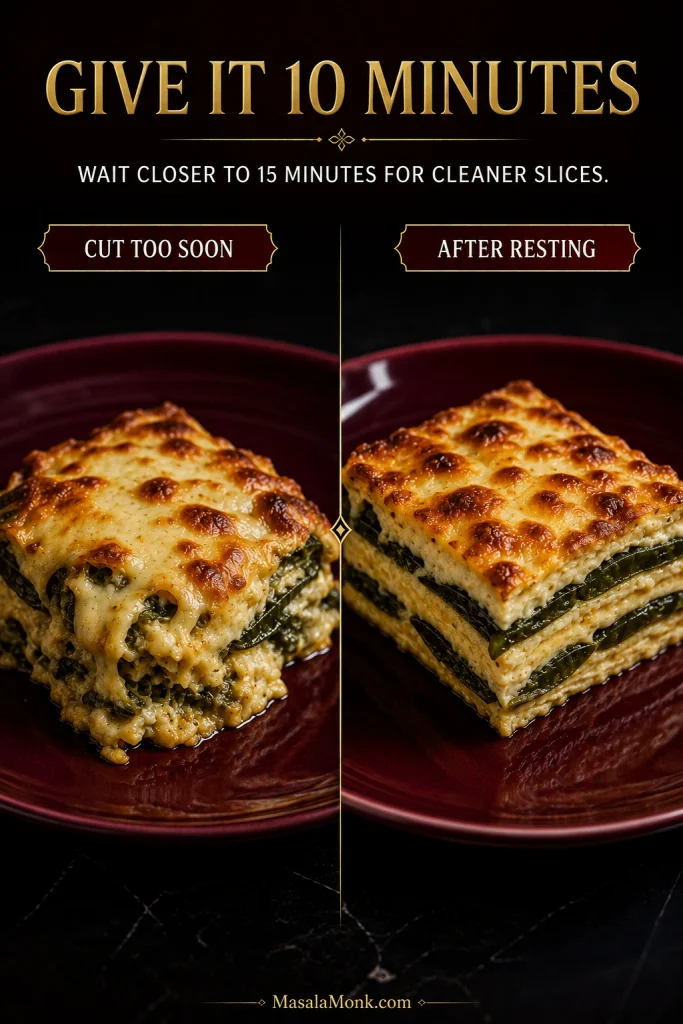
Leave the casserole alone for 10 minutes. Ten minutes feels annoyingly long when the cheese is bubbling, but cutting immediately is how a good casserole turns into a soft heap on the plate.
Wait closer to 15 minutes when neat slices matter more than maximum cheese stretch.
Resting can organize an already-set casserole, but it cannot rescue a liquid center. Ten minutes keeps more cheese stretch; 15 gives cleaner cuts.
Changing the Pan or Scaling the Recipe
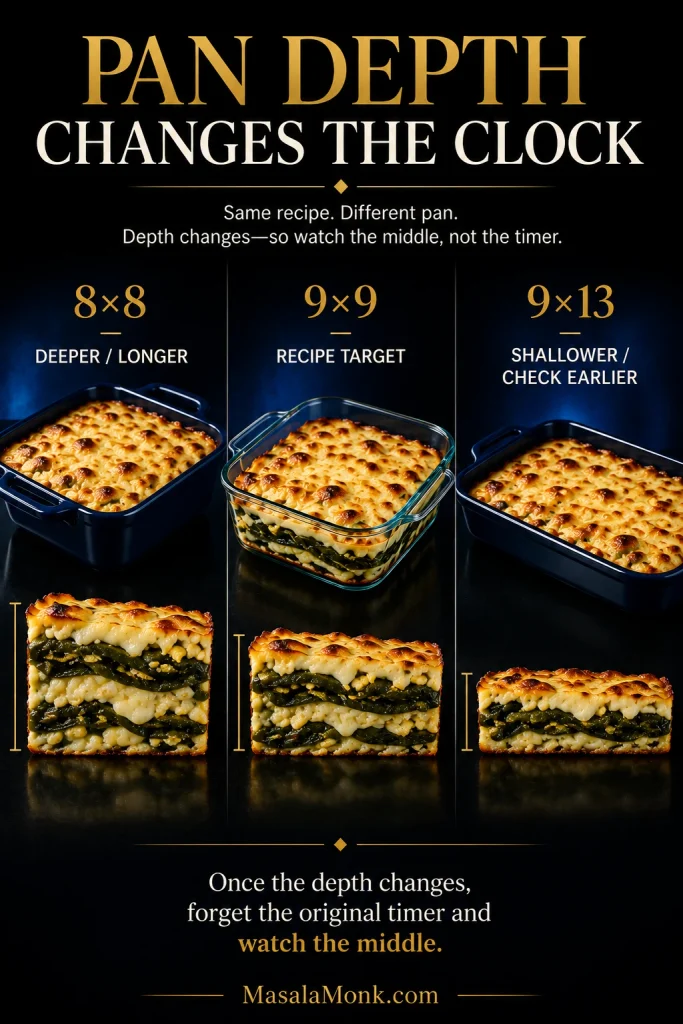
The recipe is built around a 9-inch / 23 cm square dish. A deeper casserole takes longer to set in the middle; a shallower one gets there faster.
Depth changes bake time: deeper casseroles need longer; shallower ones should be checked earlier.
Change
What to expect
8-inch / 20 cm square
A deeper casserole. Expect the middle to need longer even after the top looks ready.
9×13-inch / 23×33 cm
One batch will be shallower, so begin checking earlier and expect thinner layers.
Half batch
Use a smaller dish instead of spreading the mixture thinly across the standard pan.
Double batch
Two 9-inch square dishes are easier to judge than one very deep casserole. A full double batch in one 9×13 can brown well before the middle sets.
Once the depth changes, forget the original timer and watch the middle.
Choosing the Poblanos and Cheese
How Much Chile, and How Hot?
How much chile? Use the recipe count as a shopping guide, then let the baking dish make the final decision. Once the roasted peppers are opened flat, you want enough to cover the pan twice. Six big poblanos can easily give you more usable chile than eight small ones. Large bare patches in the second layer are a better reason to roast another pepper than any particular number.
How hot? Poblanos are generally much milder than jalapeños, though individual peppers vary. Most of the heat is concentrated around the pale inner ribs, so trim those away if you want a gentler casserole. Taste a little roasted chile when heat matters to your table; salsa or a few drops of pepper sauce can make one serving hotter without changing the whole pan.
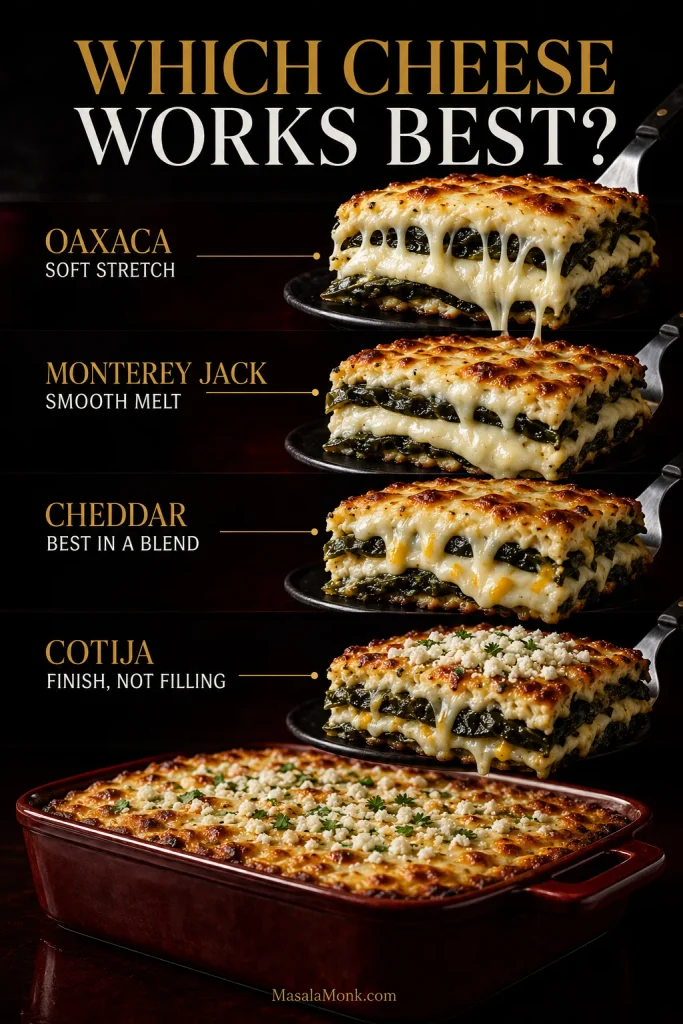
Which Cheese Melts Best?
Oaxaca and Monterey Jack are the two choices that matter most here. Oaxaca gives you a soft, stretchy melt; Monterey Jack melts smoothly into creamy pockets and is easy to find. Asadero works well too. Use Pepper Jack when you deliberately want more heat.
Cheddar is best used in a blend rather than as the only cheese; too much shifts the flavor away from the mild melting-cheese profile. Cotija belongs on top after baking, not in place of the molten layer inside.
Block cheese generally melts more smoothly than pre-shredded cheese. Pre-shredded will still work, so use whichever makes sense for the night you’re cooking.
For both creamy melt and stretch, combine Monterey Jack with Oaxaca; use Cheddar or Cotija as accents.
What the Egg Mixture Is Doing
The eggs settle into the spaces around the chile and cheese and hold the slice together. A little milk keeps them tender, flour helps the mixture set around the layers, and baking powder gives it some lift. The finished egg layer should fill the gaps rather than forming a thick, separate layer over the chiles.
Whisking whole eggs until lightly foamy is the easier route used in the recipe. Separating the eggs and whipping the whites can produce a lighter, more soufflé-like layer, though the method becomes more delicate. It is an option, not something this version needs.
Why Won’t My Roasted Poblanos Peel Cleanly?
Easy peeling starts during roasting. Skin that has only softened or lightly browned will still cling after steaming. Look for broad blistered, blackened areas while the flesh underneath still holds together, then cover the peppers while they are hot so the trapped steam can do its work.
New Mexico State University recommends the same basic sequence for green chile: blister the skin first, then place the hot chiles in a covered heat-safe container to help loosen it. Their green-chile handling guide has more detail.
A few patches may still refuse to cooperate. Leave them. Scraping aggressively just to get a perfectly bare pepper can remove more flesh than skin, and a few tiny charred flecks disappear into the finished casserole anyway.
How to Know When It’s Done
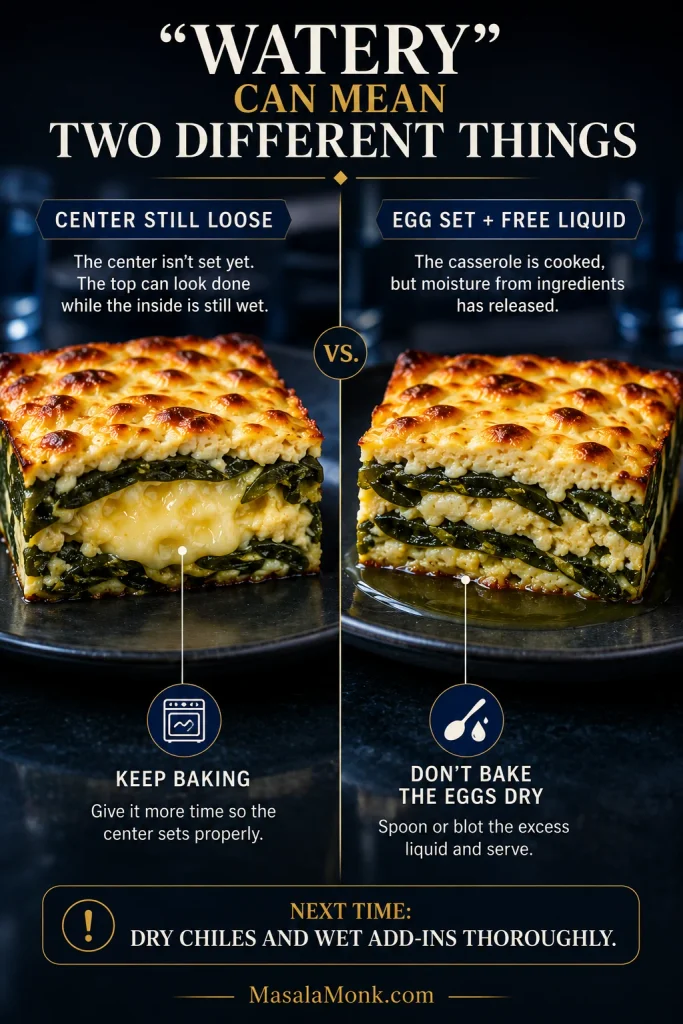
The top can fool you. If the cheese is already browned and the middle still ripples or sloshes when the pan moves gently, tent the dish with foil and keep baking. For certainty, the center should reach 160°F / 71°C, consistent with USDA guidance for egg dishes.
The center, not the browned top, decides doneness: stop when it no longer sloshes and reaches 160°F / 71°C.
After the rest, a good slice should lift cleanly without feeling stiff. The poblano should cut softly under the fork, the cheese should still pull a little from the middle, and there should be no puddle gathering at the cut edge. Spoon a little salsa around it and there is not much else it needs.
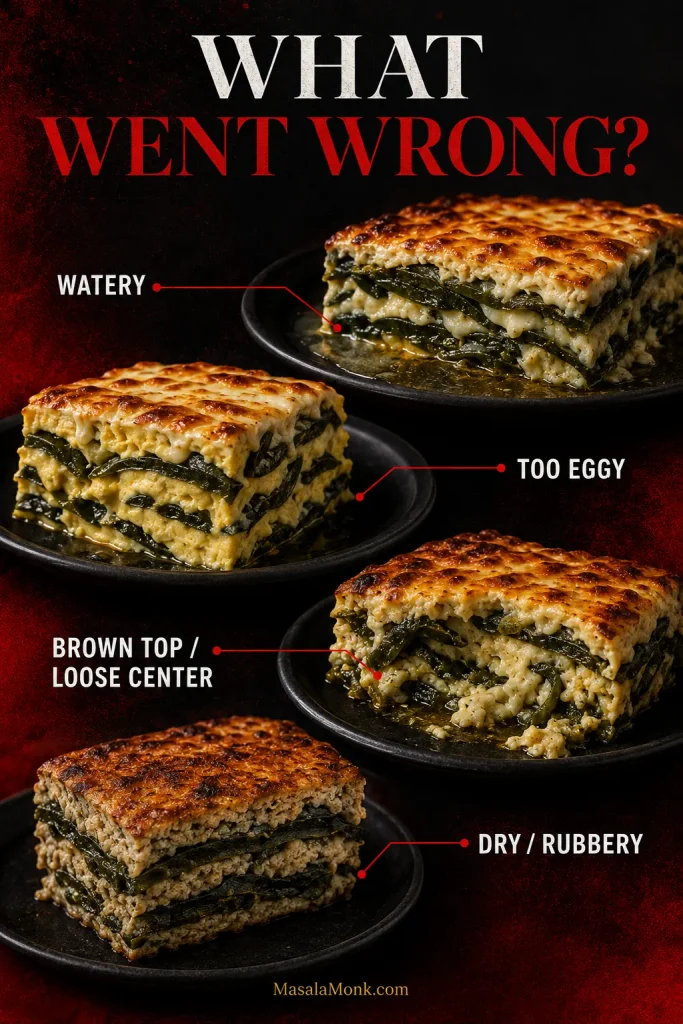
Troubleshoot in order: is the center set, is moisture inside or around the slice, and is the egg tender or firm? Those clues separate the main failure modes.
Watery Casserole: Loose Center or Released Moisture?
A wet casserole, a dry one and an egg-heavy one are different problems. Look at what is actually happening before changing the recipe.
A loose wet center needs more heat; clear liquid around a slice that already holds together points to moisture released by chiles or add-ins.
Other Common Casserole Problems
Problem
Likely cause
What to do
It tastes mostly like eggs
Too little chile or cheese, extra milk or finely diced chile disappearing into the egg
Now: a chile-forward salsa can bring some balance. Next time: build two generous pepper layers and don’t increase the dairy.
Brown top, loose middle
A deep pan, cold ingredients, a larger batch or extra moisture
Now: tent loosely with foil and continue baking. Next time: use the specified pan depth or adjust the bake for the new one.
Dense egg layer
Little aeration, weak or old baking powder, or too many heavy or wet additions
Now: once cooked through it is still perfectly usable; it simply will not be as light. Next time: use fresh baking powder, whisk until lightly foamy and bake shortly after mixing.
Poblanos won’t peel
The skins did not blister enough or the peppers cooled without steaming
Cover them while still hot and remove whatever skin releases easily. Do not scrape the flesh to pieces.
Greasy casserole
Fatty meat, excess cheese or rendered fat left in an addition
Now: blot obvious surface fat. Next time: drain meat before layering and keep additions modest.
Dry or rubbery
The eggs baked too long or leftovers were overheated
Now: serve with sauce or salsa. Next time: pull the casserole when the middle has just set.
Flavor seems flat
It may need salt or acidity rather than more dry spice
Taste with lime, salsa or a little additional salt before changing the base seasoning.
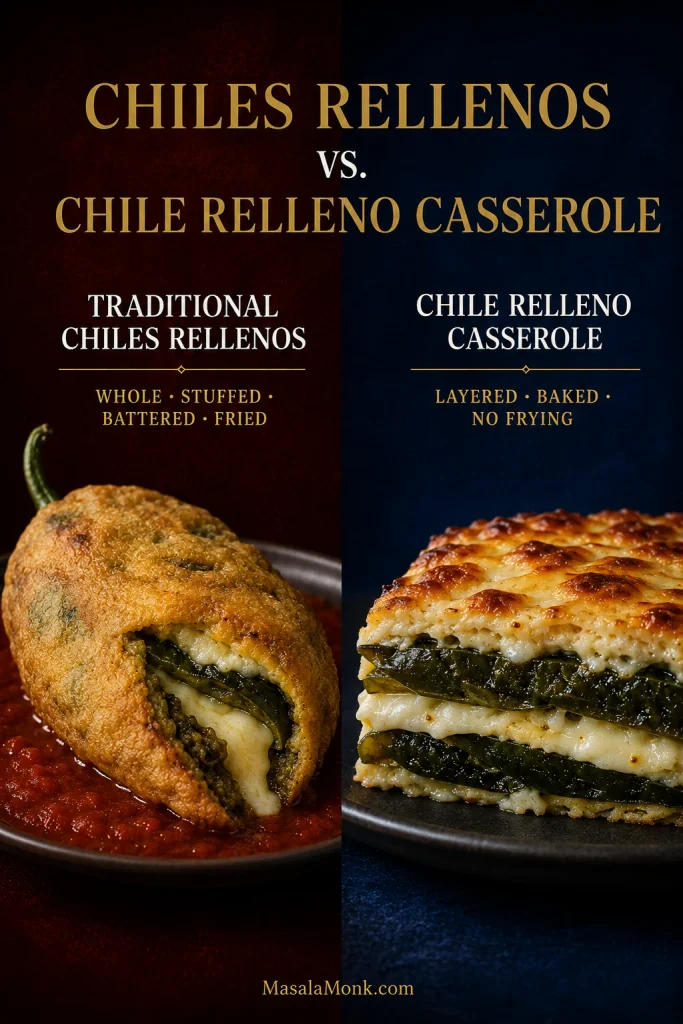
Is Chile Relleno Casserole the Same as Chiles Rellenos?
No. Traditional chiles rellenos generally begin with whole roasted chiles that are peeled, stuffed and commonly coated in an airy egg batter before frying. Depending on the style, they may then be served with a tomato-based sauce or another accompaniment.
A casserole rearranges the same broad idea—roasted chile, melting cheese and egg—for a baking dish. You lose the crisp fried exterior. In return, you stop worrying about keeping every pepper whole or getting batter to cling in hot oil. Torn roasted poblanos simply disappear into the layers.
Traditional rellenos keep the pepper whole and battered; the casserole opens roasted poblanos into broad baked layers.
Variations
The base casserole is vegetarian as written. Meat is entirely optional. If you do add anything, keep cooked additions to about 1½ cups or less. Much more makes the standard pan deeper, wetter and slower to set.
Hatch green chile
Fresh roasted, thawed and well-drained frozen roasted, or whole canned Hatch green chiles can replace the poblanos. Blot thawed or canned chile before layering, and taste it first: Hatch heat varies considerably from batch to batch. Cool avocado, crema or fresh salsa on the side is plenty when the chiles run hot.
Adding meat or vegetables
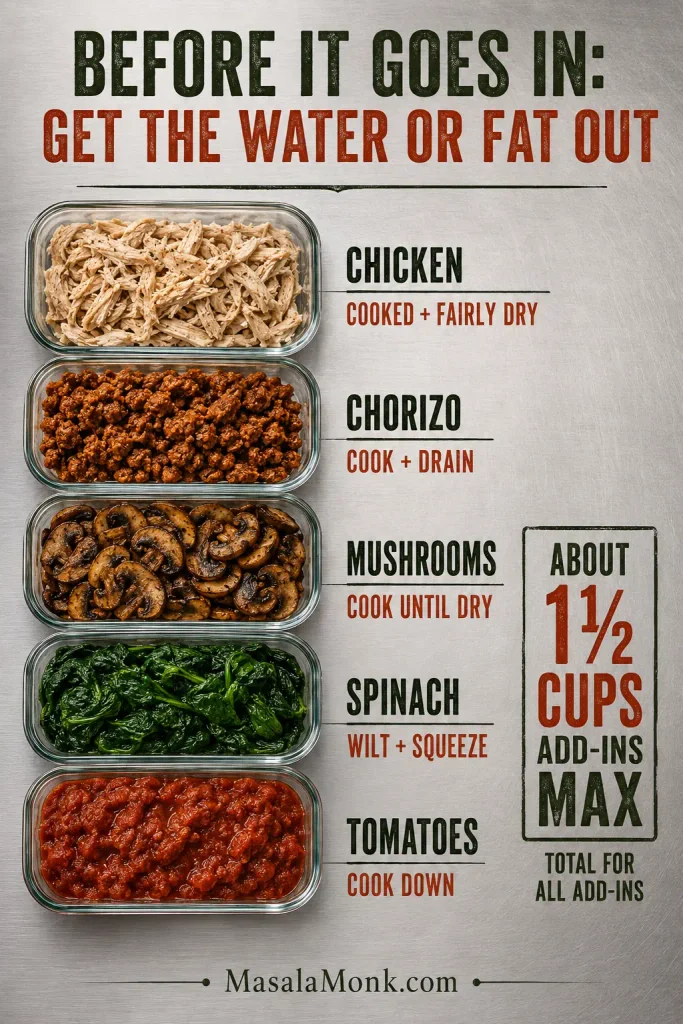
Chicken: about 1½ cups / 7 oz / 200 g cooked shredded chicken is plenty. Keep it fairly dry rather than adding meat dripping with broth or sauce.
Ground beef or chorizo: start with about 8 oz / 225 g, cook it fully and drain excess fat before layering. A full pound is too much for the standard pan if you want the original baking time to remain useful.
Tomatoes, spinach and mushrooms: deal with their water first. Cook tomatoes and mushrooms until obvious moisture has cooked away. Wilt spinach, cool it and squeeze it dry. Choose one or two additions rather than packing the dish with everything at once.
If an add-in leaves water or grease in the skillet, remove that excess before it reaches the casserole; keep total cooked add-ins near 1½ cups.
Replace the wheat flour with a gluten-free all-purpose blend intended for 1:1 baking. Different blends can give slightly different textures, but no other part of the method needs to change.
Sauce and Serving
Sauce works better on the plate than poured heavily through the casserole. You get cleaner slices, clearer poblano flavor and control over how saucy each serving becomes.
For a warm red option, spoon a little homemade red enchilada sauce onto the plate before setting the slice on top. For a brighter finish, roasted salsa verde brings tomatillo acidity and green-chile freshness.
Ranchero sauce, salsa roja, pico de gallo and a favorite hot sauce are easy alternatives.
What to serve with it
A scoop of creamy refried beans turns a slice into an easy dinner. Add Mexican-style or cilantro-lime rice when you want something more substantial.
Avocado or fresh guacamole is especially good beside a hot, sauced slice. A cabbage slaw or simple green salad brings the crispness the soft casserole itself does not have.
Black or pinto beans, pico de gallo and warm corn or flour tortillas fit easily on the table too. At brunch, add breakfast potatoes and fruit; at dinner, beans, rice and something fresh or acidic are usually enough.
Keep red chile sauce and salsa verde outside the bake, then spoon either around each slice for richness or bright acidity.
To get ahead: roast, peel, seed and dry the poblanos 1–2 days ahead. Cool and refrigerate the roasted peppers within 2 hours, then keep them covered in the refrigerator. You can also shred the cheese and arrange the chile-and-cheese layers in the baking dish the night before. Whisk and pour the egg mixture shortly before baking.
A refrigerator-cold casserole may need a little longer in the oven. Let the middle, rather than the original timer, decide when it is ready.
Store, Freeze and Reheat
For leftovers: cool the casserole promptly, cover and refrigerate for 3–4 days.
To freeze: cool the casserole promptly and refrigerate until chilled. Then cut it into portions, wrap well and freeze for about 2–3 months for best quality. Thaw overnight in the refrigerator. The egg layer may release a little moisture after freezing, so expect a softer slice than when freshly baked.
To reheat: microwave individual slices in short intervals, or cover several portions loosely and warm them in a 325–350°F / 165–175°C oven. Reheat leftovers to 165°F / 74°C; once they’re hot, more time only makes the egg firmer.
Chill before portioning so slices hold together cleanly; reheat only until the center is hot to avoid firming the egg further.
A leftover slice is also most of the filling for a breakfast burrito already done: chop it, warm it and roll it into a tortilla with salsa, avocado or beans.
FAQ
Can I use Anaheim peppers instead of poblanos?
Yes. Roast, steam, peel, seed and dry them the same way. Anaheims are often narrower, so judge the amount by how much roasted chile flesh you need to cover the pan rather than by pepper count.
Can I make chile relleno casserole without eggs?
Not by simply leaving the eggs out. They are the binder in this version, so an egg-free casserole needs a different binding system and different ratios.
Traditional chiles rellenos still have that crisp, just-fried coating a casserole cannot reproduce. Make them when that’s the experience you’re after.
But when what you really want is roasted poblano, molten cheese and that soft chile-filled middle—without stuffing and frying six individual peppers—this is the version to make. Give it those ten quiet minutes after the oven, then cut the first slice.
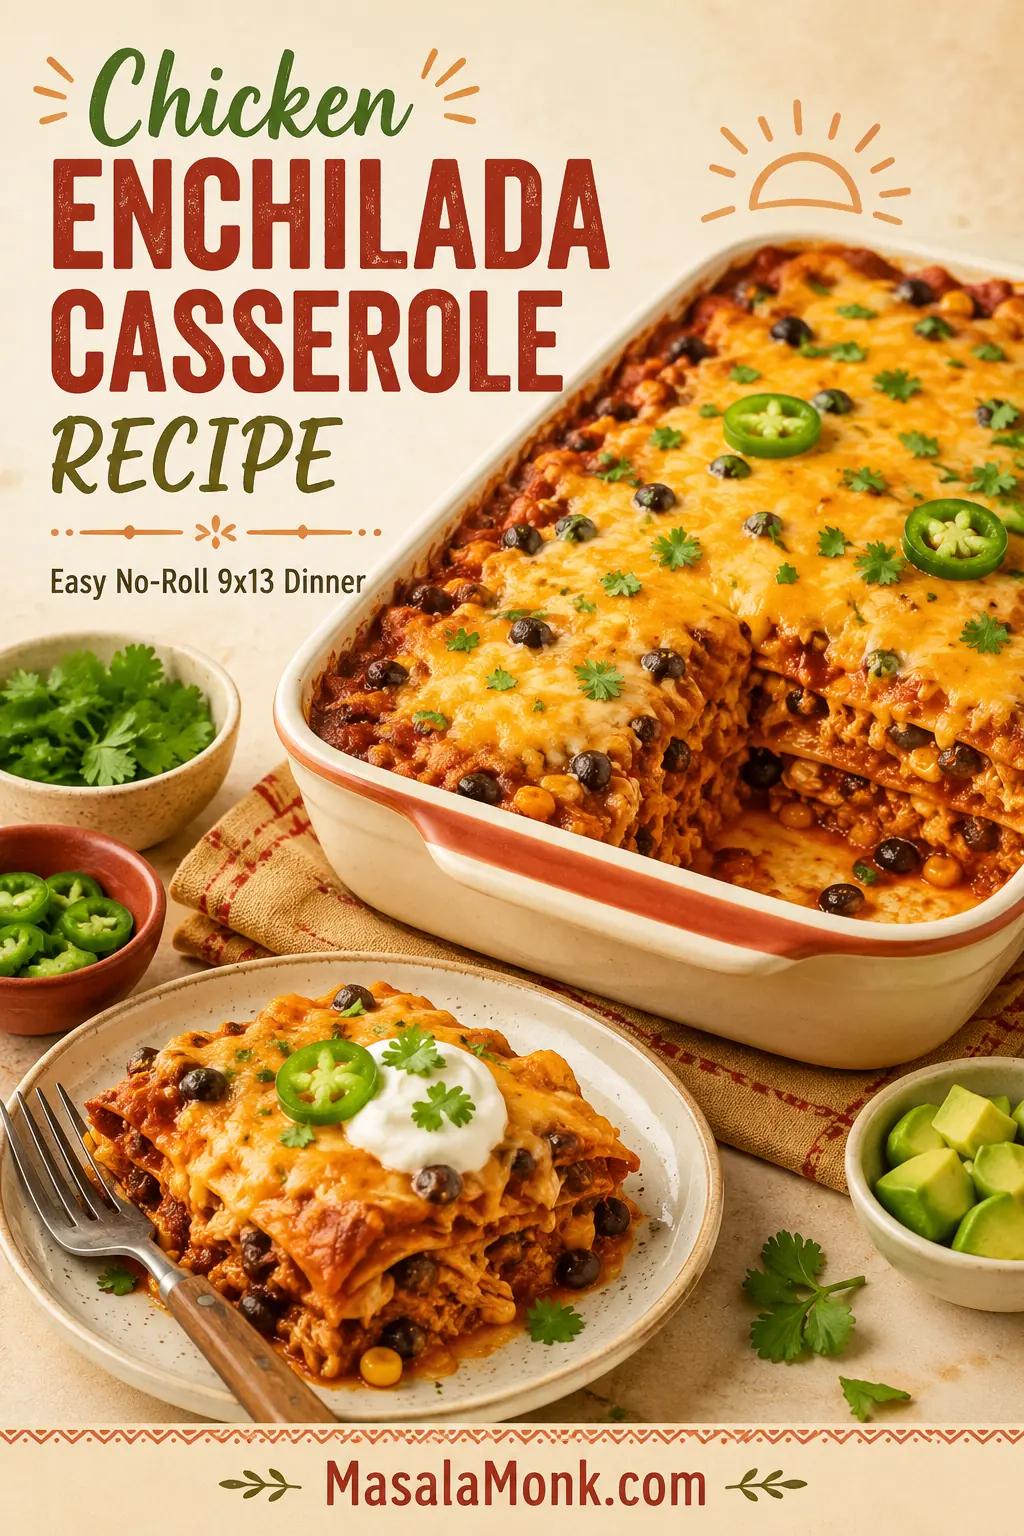
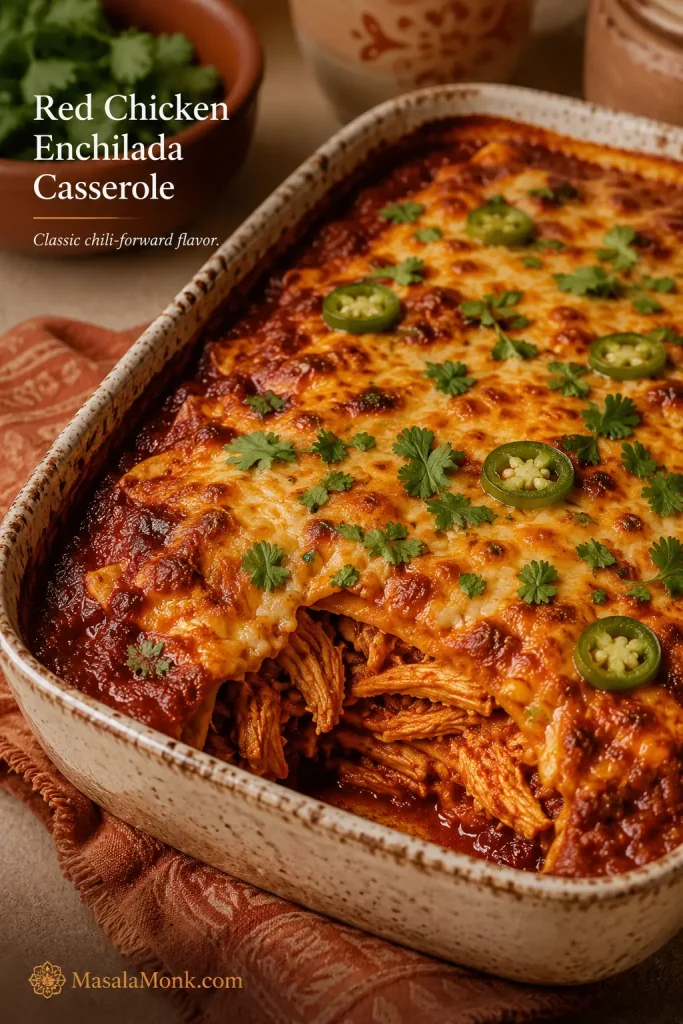
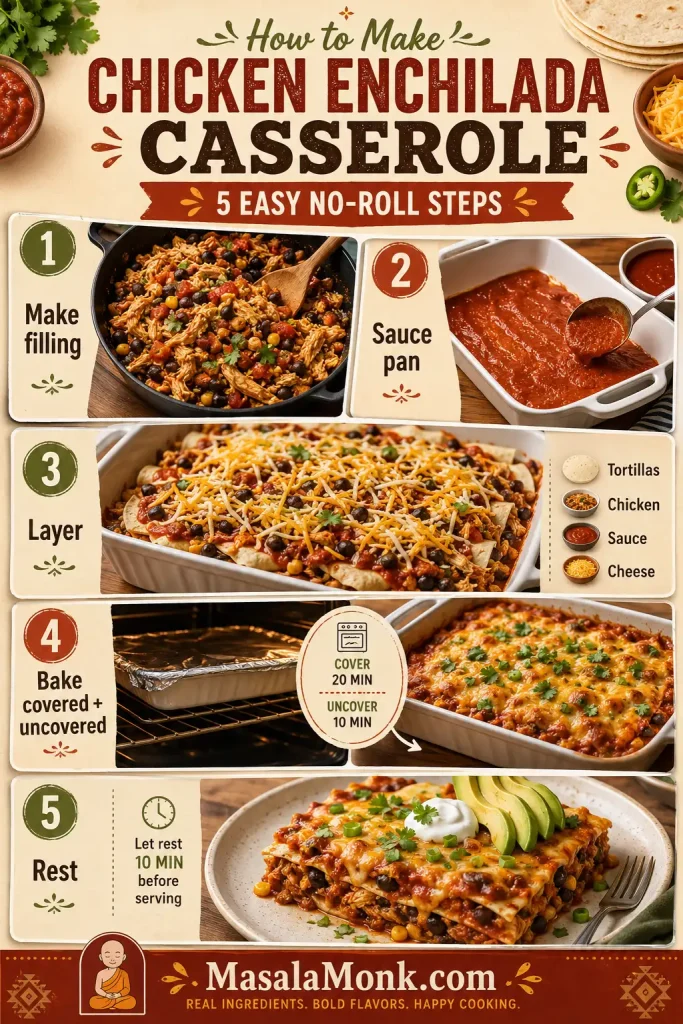
This chicken enchilada casserole recipe is for the night you want enchiladas, but not the whole enchilada project. No warming every tortilla one by one. No filling, rolling, tearing, and trying to fit everything neatly in the pan while dinner waits. You get the same saucy, cheesy comfort by layering tortillas, shredded chicken, enchilada sauce, and cheese in a 9×13 dish and baking it until bubbling.
It comes out bubbling at the edges, soft through the middle, and melted on top — the kind of dinner that feels generous without asking you to roll a dozen enchiladas first. The goal is simple: saucy layers, weeknight shortcuts, and clean-enough slices without a loose, watery pan.
This no-roll casserole is weeknight-friendly, rotisserie-chicken friendly, and flexible enough for red sauce, green sauce, beans, corn, or a creamy white variation.
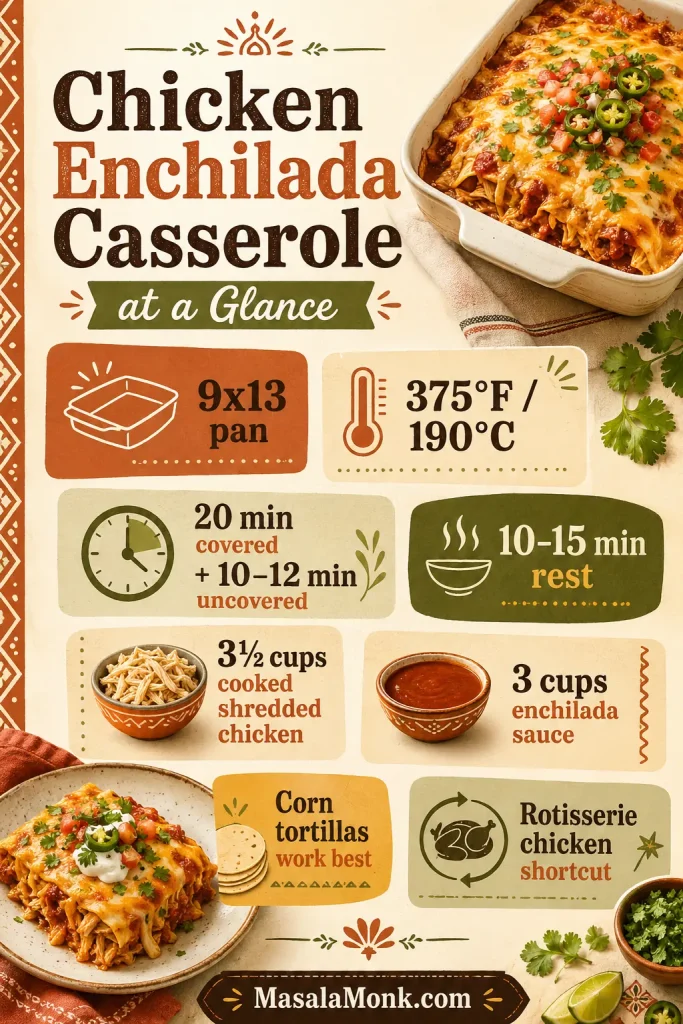
Quick Answer: Chicken Enchilada Casserole
Chicken enchilada casserole is a no-roll version of chicken enchiladas made by layering tortillas, cooked shredded chicken, enchilada sauce, and cheese in a baking dish. Instead of filling and rolling each tortilla, you build the casserole in a 9×13 pan and bake it until the sauce bubbles and the cheese melts.
For the most dependable texture, use corn tortillas, about 3 cups of enchilada sauce, 3½ cups of cooked shredded chicken, and 3 cups of shredded cheese. Bake the casserole covered first so the center heats through, then uncover it so the top can bubble and some moisture can escape. Let it rest before slicing so the layers settle instead of sliding apart.
Use this as the quick decision guide before you start cooking.
Pan9×13-inch / 23×33 cm
Oven375°F / 190°C
Bake20 min covered + 10–12 min uncovered
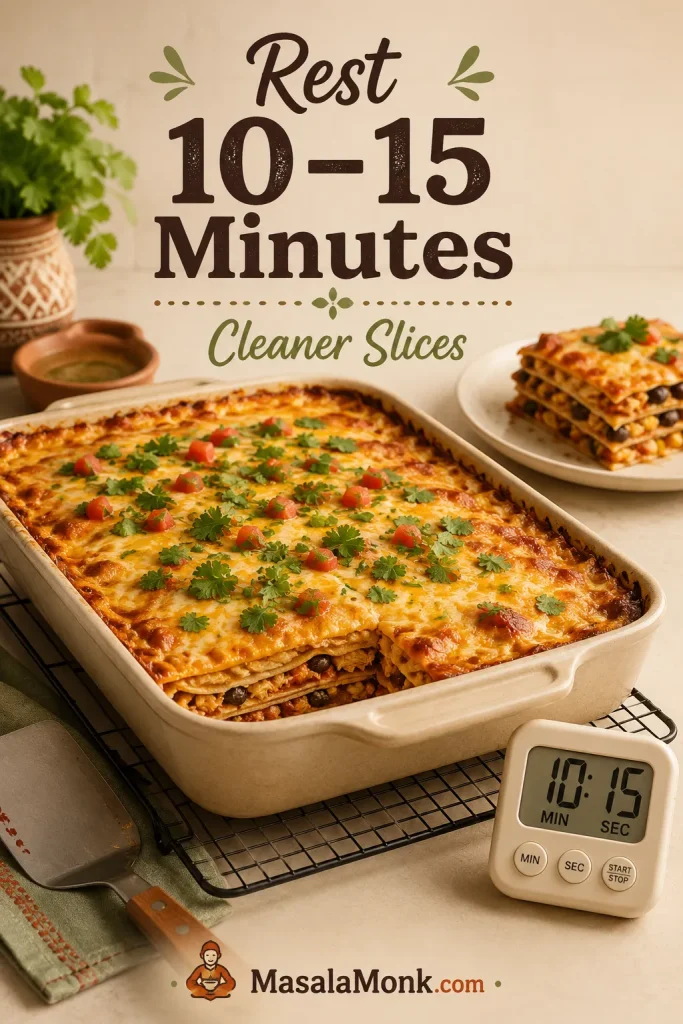
Rest10–15 minutes before slicing
Chicken3½ cups cooked shredded chicken
Sauce3 cups red or green enchilada sauce
Most forgiving tortillaCorn tortillas for better structure
ShortcutRotisserie chicken works beautifully
Before you start, use the basic formula to check the pan size, sauce amount, bake time, and tortilla choice.
Already know you are making it? Jump straight to the recipe card. Still deciding between corn and flour tortillas, red and green sauce, or make-ahead timing? The guide below answers those questions before you start layering.
Why This No-Roll Chicken Enchilada Casserole Works
Regular enchiladas are delicious, but they can feel like a lot on a weeknight. Tortillas tear. Filling falls out. The pan gets crowded. This oven method keeps the comfort and skips the fussy part.
The trick is that the casserole does not try to be fancy. It keeps the parts people crave — tortillas, sauce, chicken, and cheese — and makes them easier to build in layers.
This is the kind of casserole that works for rotisserie-chicken nights, casual family dinners, meal-prep Sundays, and evenings when you want something cozy but do not want to stand at the counter rolling tortillas.
No rolling: The tortillas are layered, so there is less handling and less tearing.
Good use for cooked chicken: Rotisserie chicken, leftover roasted chicken, poached chicken, or shredded chicken breasts all work.
Classic red or tangy green: Red enchilada sauce gives deeper flavor; green sauce makes a brighter chicken casserole.
9×13 family-dinner size: It serves about 8 and reheats well.
Built-in texture control: Corn tortillas, measured sauce, an uncovered finish, and a short rest help prevent sogginess.
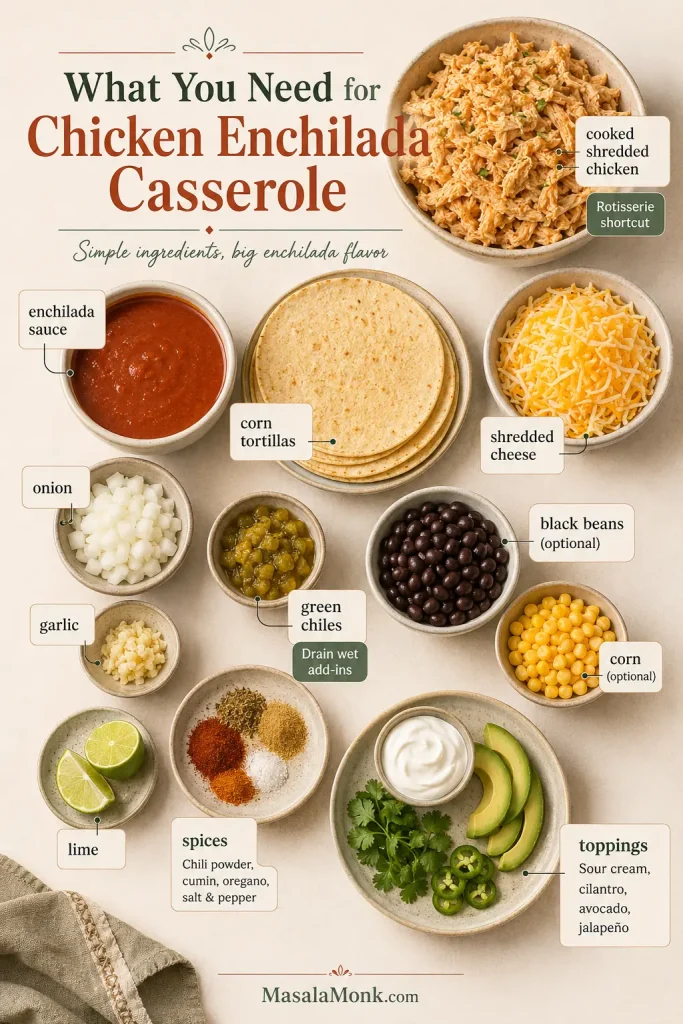
What You Need for Chicken Enchilada Casserole
The ingredient list is simple, but the choices matter. Cooked chicken makes the recipe fast, corn tortillas give the casserole better structure, and the sauce needs enough flavor to carry the whole dish.
The ingredient list stays simple, but draining wet add-ins and using flavorful sauce make a big difference in the final texture.
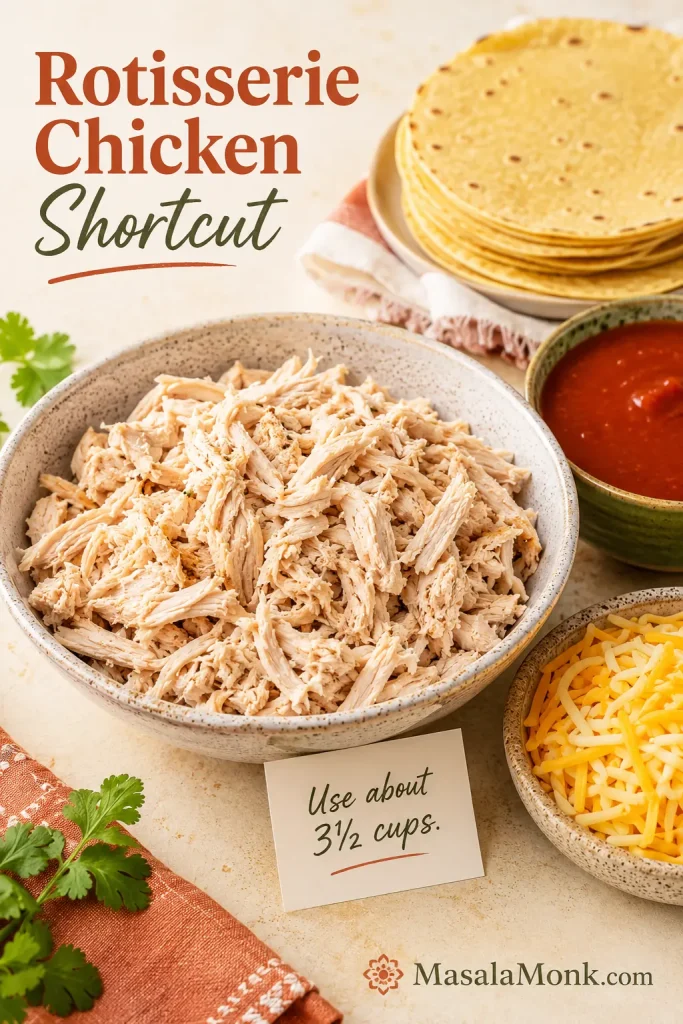
You need 3½ cups cooked shredded chicken, or about 525 g. One average rotisserie chicken usually gives about 3 to 4 cups shredded meat, depending on size, so it is a practical shortcut.
Shredded chicken blends into the layers better than large chunks. If you prefer more bite, you can use small diced cooked chicken, but avoid large pieces because they make the casserole harder to slice neatly. If you are starting with raw chicken breasts, MasalaMonk’s baked chicken breast recipe is a useful prep method before shredding.
Rotisserie chicken is the fastest shortcut here; however, shredding it finely helps the filling spread evenly between the tortilla layers.
Enchilada Sauce
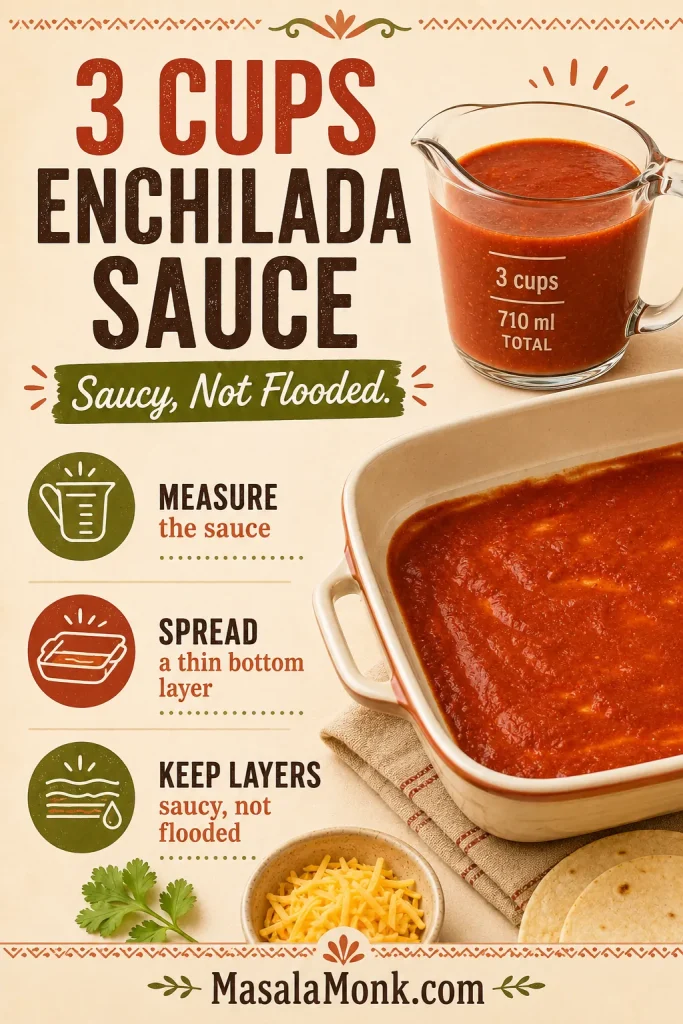
Use 3 cups / 710 ml enchilada sauce total. Red enchilada sauce gives the casserole a classic chili-forward flavor. Green enchilada sauce tastes brighter, tangier, and especially good with chicken.
Store-bought sauce is fine for a weeknight dinner. Homemade sauce works too. For a fresher green variation, salsa verde is excellent; MasalaMonk’s salsa verde recipe is a natural fit if you want a brighter tomatillo-style direction.
Measuring the enchilada sauce keeps the casserole moist without flooding the layers, so the finished pan is saucy instead of watery.
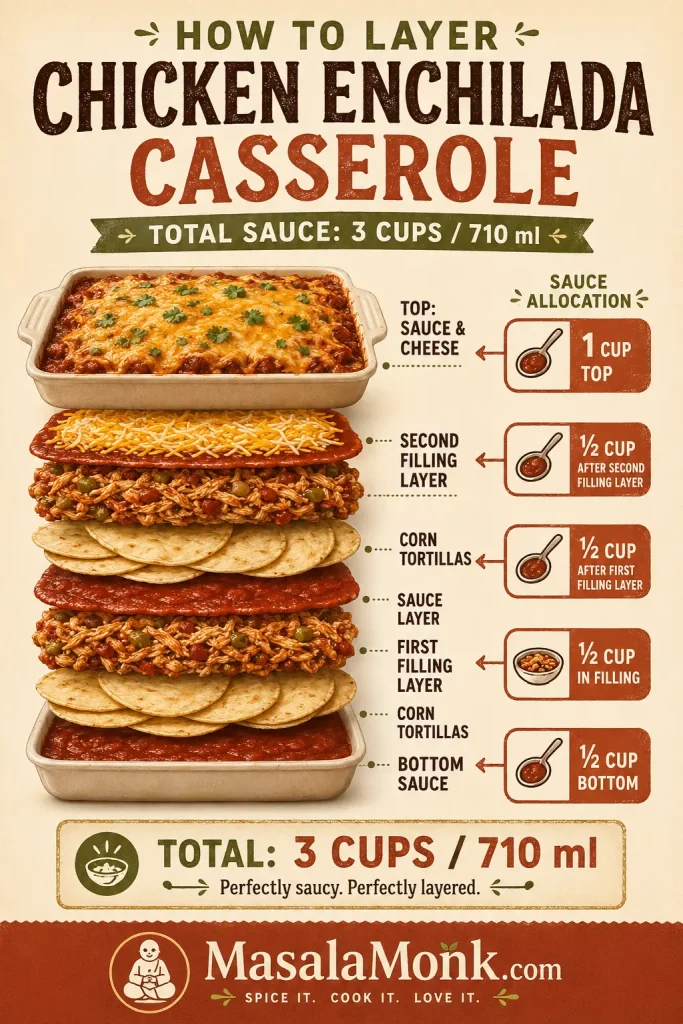
If you are worried about using too much sauce, the layering guide shows exactly where the 3 cups go.
Corn Tortillas
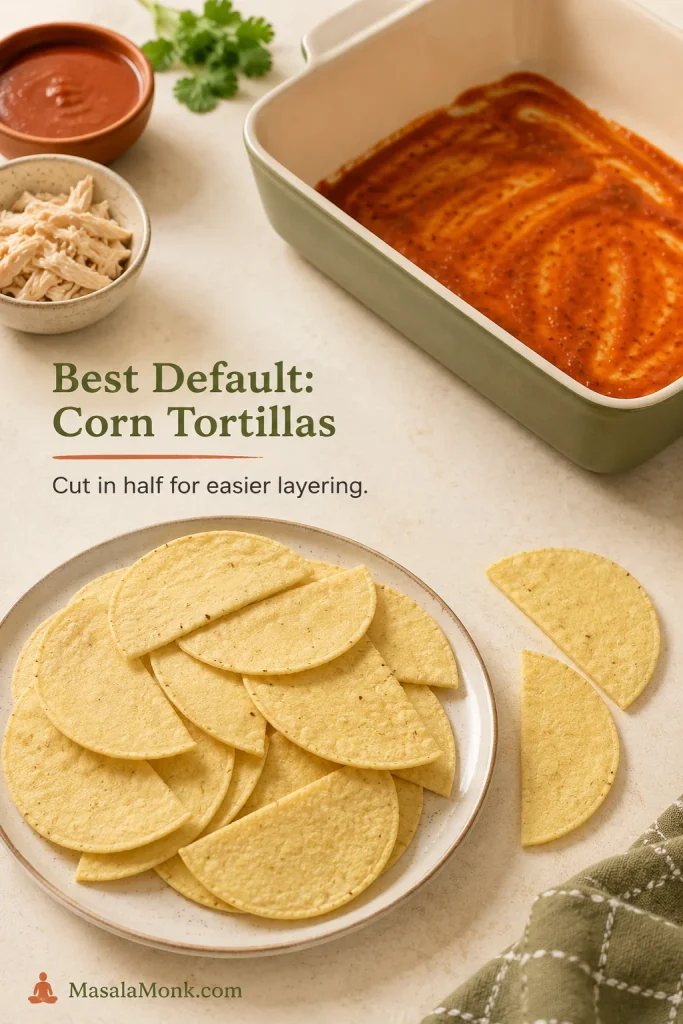
Use 12 small 6-inch corn tortillas, about 300–330 g total. Cut them in half so they fit the baking dish more evenly. Corn tortillas give the most classic enchilada flavor and hold their structure better under sauce.
Corn tortillas are the best default because they bring classic enchilada flavor and hold their shape better under sauce.
Cheese
Use 3 cups / 12 oz / 340 g shredded cheese. Monterey Jack melts the smoothest, cheddar-Jack brings a little more flavor, and a Mexican-style cheese blend is convenient. Freshly shredded cheese usually melts better, but pre-shredded cheese is fine for a practical casserole.
Add-Ins and Heat Level
A small can of diced green chiles adds easy enchilada flavor without making the dish aggressively spicy. Black beans and corn are optional, but they make the casserole heartier and more colorful.
Drain beans, corn, and chiles well. Extra liquid is one of the fastest ways to turn an enchilada casserole watery. If you use both beans and corn and the skillet looks very full, save a little filling for tacos, bowls, or nachos instead of forcing every last spoonful into the baking dish.
As written, this casserole is usually mild to medium, depending on the enchilada sauce you use. For more heat, add jalapeño, a hotter sauce, or hot sauce at the table. For a family-friendly pan, keep the bake mild and let people add heat to their own plates.
Toppings
Add toppings after baking. Sour cream, chopped cilantro, avocado, sliced jalapeños, diced red onion, pico de gallo, salsa verde, and lime wedges all work well. Fresh toppings are especially helpful because the casserole itself is rich and saucy. If you want a creamy avocado topping, MasalaMonk’s easy guacamole recipe fits naturally here.
Pan, Oven Temperature, and Bake Time
The most forgiving pan for this recipe is a 9×13-inch baking dish, about 23×33 cm. That size gives you enough room for three balanced layers without making the center too thick.
Detail
Use This
Why It Matters
Pan size
9×13-inch / 23×33 cm
Creates even layers and reliable baking.
Oven temperature
375°F / 190°C
Hot enough to bubble the sauce and melt the cheese without drying the casserole.
Covered bake
20 minutes
Lets the center heat through before the top browns.
Uncovered bake
10–12 minutes
Lets the cheese bubble and excess moisture escape.
Rest time
10–15 minutes
Lets the layers settle so the casserole slices better.
If you prefer baking at 350°F / 175°C, bake covered for 25–30 minutes, then uncover and bake for another 10–15 minutes. The lower temperature works; it simply needs a little more time.
How to Tell When It Is Done
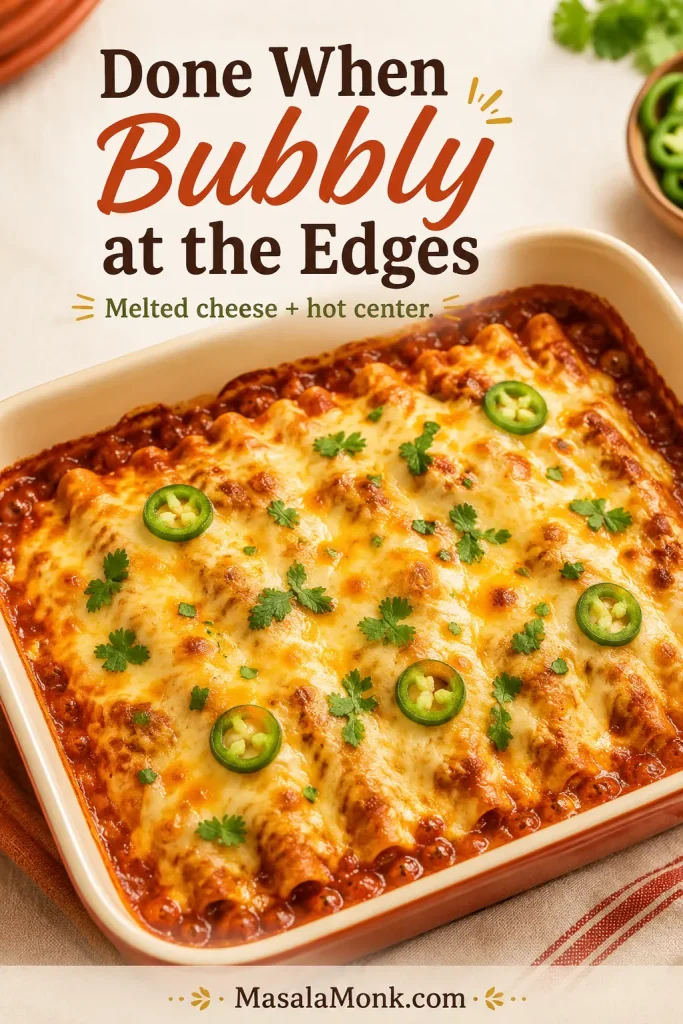
The casserole is done when the sauce is bubbling around the edges, the cheese is fully melted, the center is hot, and the tortillas have softened. At that point, it should smell like warm chili, toasted corn, and melted cheese. If the top still looks wet or loose, give it a few more uncovered minutes. If the cheese is browning too fast, loosely tent the dish with foil.
Bubbling edges and melted cheese are the clearest signs that the center is hot and the casserole is ready to rest.
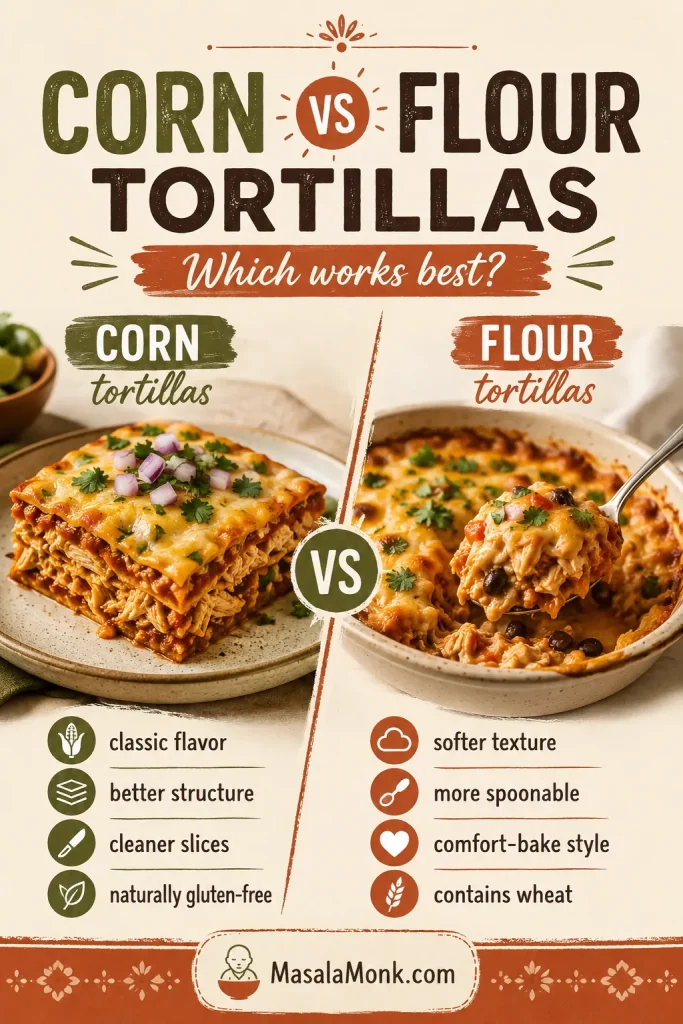
Corn vs Flour Tortillas for Chicken Enchilada Casserole
The tortilla choice changes the casserole. It affects flavor, structure, softness, and whether the final dish slices cleanly or collapses into a saucy scoop.
Corn tortillas give cleaner pieces, while flour tortillas create a softer comfort-bake texture; therefore, the best choice depends on how sliceable you want the casserole.
Why Corn Tortillas Work Best
Corn tortillas are the most forgiving choice for a classic chicken enchilada casserole because they taste more like enchiladas and hold up better under sauce. They soften as the casserole bakes, but they usually do not become as gummy as flour tortillas.
Corn tortillas also make the dish easier to keep gluten-free, as long as the enchilada sauce and other packaged ingredients are certified gluten-free.
When Flour Tortillas Are Okay
Flour tortillas work if you want a softer, more comfort-food-style casserole. They are common in creamy white chicken enchilada casserole versions, where the goal is soft and rich rather than sliceable and structured.
If flour tortillas are what you have, the casserole will still taste good. It will simply be more tender and spoonable, so think comfort bake rather than neat enchilada squares. Because flour tortillas absorb sauce differently, the soggy-fix section is worth reading before you assemble.
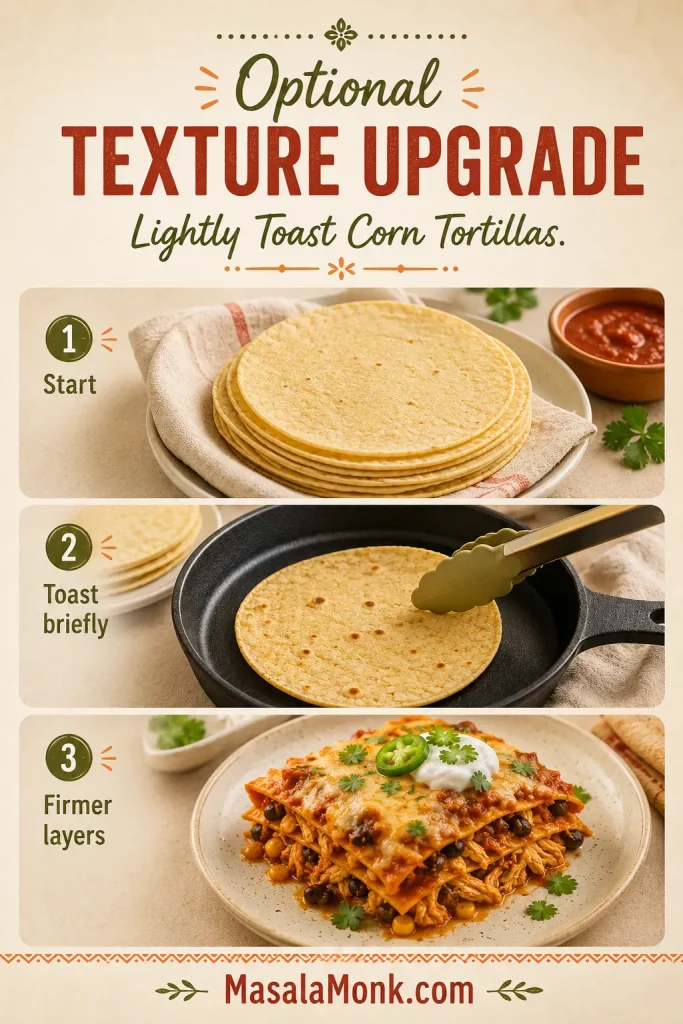
Should You Toast or Fry the Tortillas First?
You do not have to fry tortillas for this no-roll casserole. However, if you want firmer layers, you can lightly toast corn tortillas in a dry skillet or warm them quickly with a small amount of oil before layering.
This extra step is optional, but useful if your enchilada sauce is thin, if you plan to make the casserole ahead, or if you want neater pieces.
Toasting corn tortillas is optional, but it is useful when you want firmer layers or plan to assemble the casserole ahead.
This step matters most when you are making the casserole ahead; the make-ahead and freezer notes explain how the tortilla texture changes as it sits.
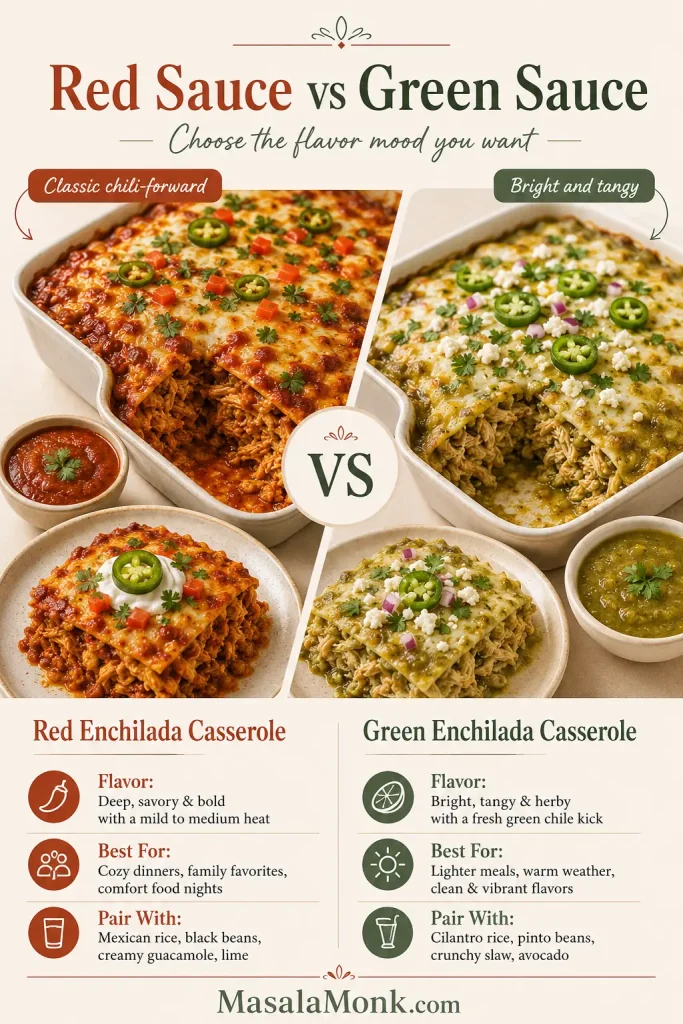
Red Sauce vs Green Sauce
This recipe works with either red or green enchilada sauce. The right choice depends on the flavor mood you want: red is deeper, cozier, and more classic, while green is brighter, tangier, and especially lively with chicken.
Red enchilada sauce gives a deeper, cozier flavor, while green sauce makes the chicken casserole brighter and tangier.
Sauce
Flavor
Best For
Red enchilada sauce
Deeper, chili-forward, classic
Traditional chicken enchilada casserole
Green enchilada sauce
Brighter, tangier, slightly sharper
Green chicken enchilada casserole
Salsa verde
Fresh, tomatillo-forward, lively
A fresher green variation with cilantro and lime
Creamy green sauce
Rich, tangy, soft
White or creamy chicken enchilada casserole
Use red enchilada sauce for a classic, cozy pan or green enchilada sauce for a brighter chicken casserole. If using salsa verde, taste it first because some jars are saltier or more acidic than others. For extra heat at the table, a few drops from MasalaMonk’s pepper sauce guide can add sharp chili flavor without changing the whole casserole.
Red enchilada sauce gives the layers a deeper chili flavor, especially when it is measured instead of poured freely.
Choose your version: Go red sauce + corn tortillas for classic enchilada flavor, green sauce or salsa verde + Monterey Jack for a brighter chicken casserole, sour cream or white sauce for a creamier comfort-food bake, and rotisserie chicken + jarred sauce for the fastest dinner.
How to Make Chicken Enchilada Casserole
Once the filling is mixed, the rest is simple layering: build the pan, bake it covered, finish it uncovered, and give it a short pause before serving. This does not need to look perfect in the dish. Even coverage matters more than pretty rows, and the oven will pull everything together.
Once the filling is mixed, the rest is relaxed layering: sauce the pan, build the stack, bake, and let it settle.
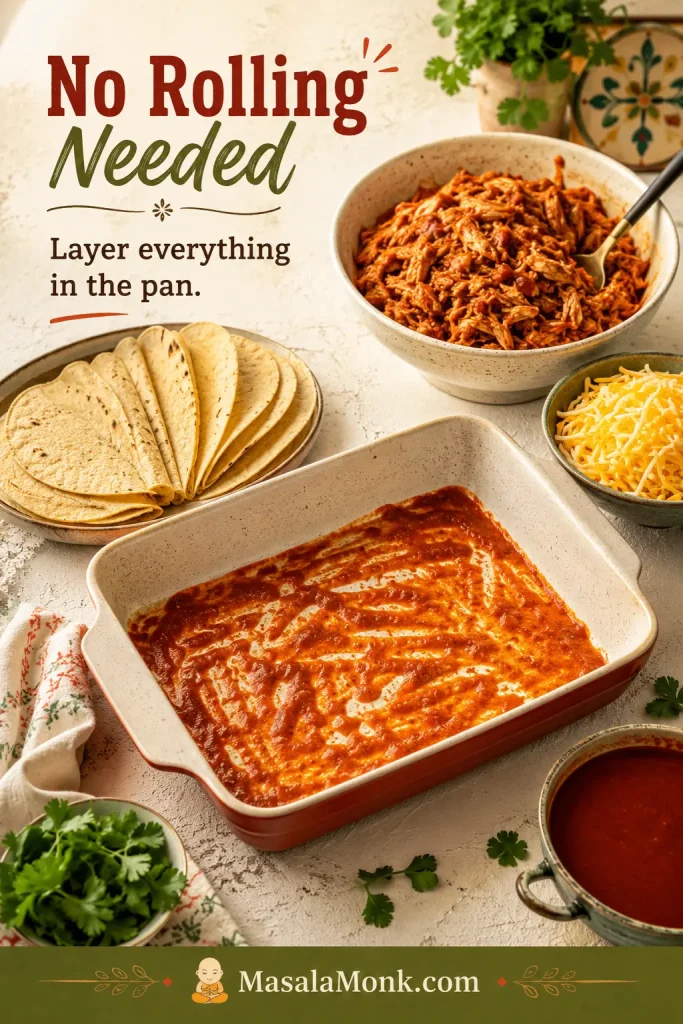
No-Roll Assembly Setup
Before you start building layers, set the sauced pan, tortilla halves, chicken filling, cheese, and remaining sauce within reach. That keeps the assembly relaxed and prevents overthinking each layer.
Instead of filling and rolling each tortilla, keep the assembly relaxed: layer the ingredients directly in the dish and let the oven pull them together.
1. Make the Chicken Filling
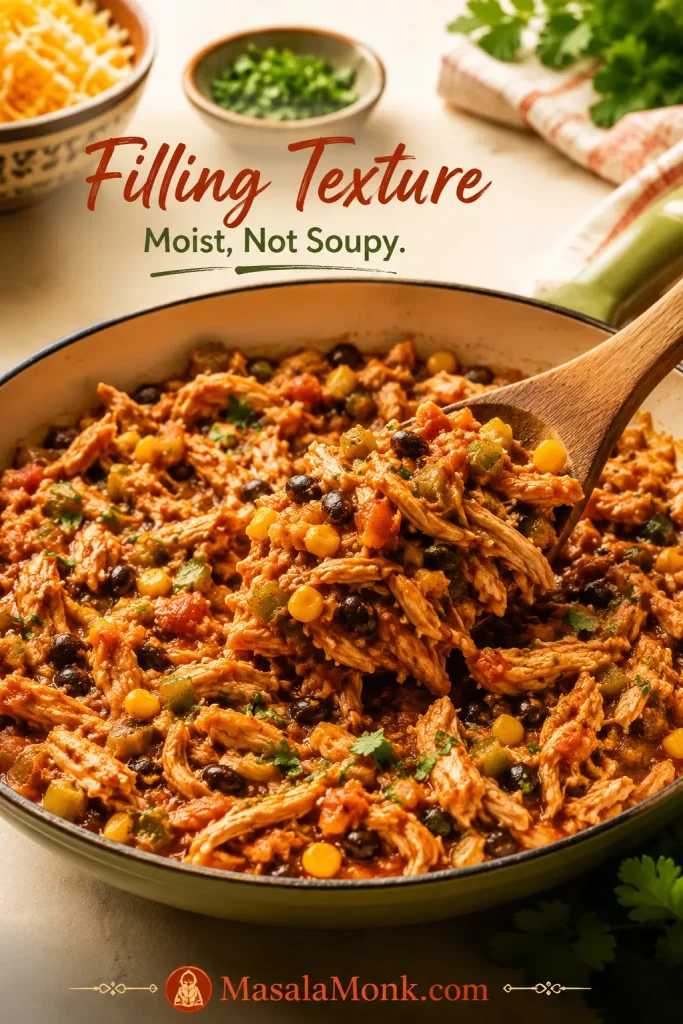
Warm oil in a skillet, then cook the onion until softened. Add garlic, cumin, chili powder, paprika, oregano, salt, and diced green chiles. Stir in the shredded chicken, optional black beans, optional corn, a little enchilada sauce, and lime juice.
The filling should be moist and flavorful, but not soupy. If it looks watery, cook it for another minute or two so extra liquid can evaporate.
The filling should taste seasoned and saucy on its own, but it should not be so wet that it loosens the whole baking dish.
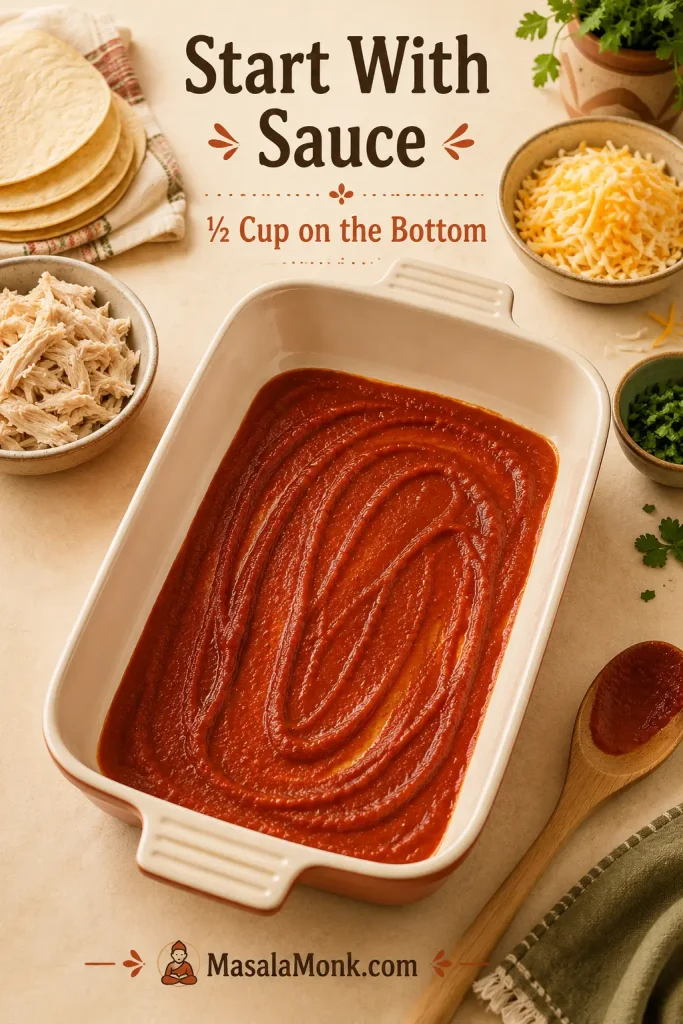
2. Sauce the Bottom of the Pan
Spread ½ cup / 120 ml enchilada sauce across the bottom of the baking dish. This prevents the first tortilla layer from drying out and gives the casserole a saucy base.
Starting with a thin sauce layer protects the first tortillas from drying out without adding too much liquid to the bottom of the pan.
3. Layer the Tortillas, Chicken, Sauce, and Cheese
Add a layer of tortilla halves, overlapping slightly. Spread one-third of the chicken filling over the tortillas, spoon on some sauce, and sprinkle with cheese. Repeat until you have three layers.
4. Bake Covered, Then Uncovered
Cover the dish with foil and bake for 20 minutes. Remove the foil and bake for another 10–12 minutes, until the sauce bubbles around the edges and the cheese is melted on top.
5. Rest Before Slicing
Let the casserole rest for 10–15 minutes before cutting. This is what turns the bubbling pan into something sliceable. If you scoop it immediately, it will taste good, but it will not hold together as well.
A short rest gives the cheese and sauce time to settle, so the casserole serves in cleaner, more stable pieces.
How to Layer Chicken Enchilada Casserole So It Holds Together
The casserole needs enough sauce to soften the tortillas, but not so much that every layer swims. This part is where many cooks worry about making the pan messy, but it does not need to look perfect.
Use the Sauce as Your Layering Guide
The goal is saucy, not flooded. If your enchilada sauce is very thin, hold back a few tablespoons and add more only if the top looks dry before baking.
Sauce Use
Amount
Where It Goes
Chicken filling
½ cup / 120 ml
Stir into the seasoned chicken mixture.
Bottom of pan
½ cup / 120 ml
Spread before the first tortilla layer.
After first filling layer
½ cup / 120 ml
Spoon lightly over the chicken before cheese.
After second filling layer
½ cup / 120 ml
Add just enough to moisten, not flood.
Top layer
1 cup / 240 ml
Spread over the final tortilla layer before the last cheese.
Total
3 cups / 710 ml
Enough sauce for soft layers without a watery casserole.
The measured sauce allocation keeps every layer moist without letting the bottom of the pan turn loose or watery.
If the pan looks too wet at any point, check the soggy casserole fixes before adding more sauce.
Build the Layers Without Overthinking It
After the sauce is measured, the layers are simple: spread a thin sauce layer on the bottom, add tortilla halves, scatter one-third of the filling, spoon on the measured sauce, and add about 1 cup / 113 g cheese. Repeat until the pan is full, finishing with sauce and cheese on top.
Overlap tortilla halves slightly so there are no large gaps.
Spread the chicken filling evenly, but do not pack it down hard.
Keep the middle layers saucy, not flooded.
Finish with enough sauce and cheese on top to keep the casserole moist as it bakes.
If your tortillas are small, use enough pieces to cover each layer. If they are larger, trim or tear them to fit. The goal is even coverage, not a perfect pattern.
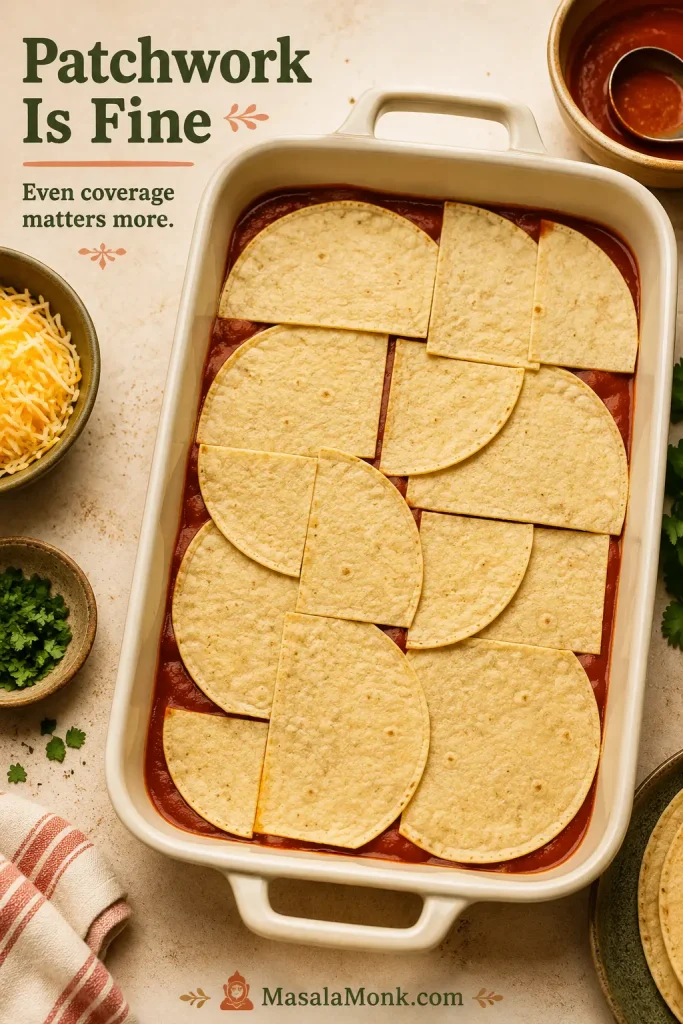
Patchwork Tortilla Layers Are Fine
Do not worry if the tortilla pieces look a little patchwork in the pan. Once the sauce and cheese melt into the layers, neat coverage matters more than a perfect arrangement. The pan may look imperfect before baking, but the finished casserole settles into soft, saucy layers.
The tortilla layer does not need to look perfect; even coverage matters more than neat rows once the sauce and cheese melt.
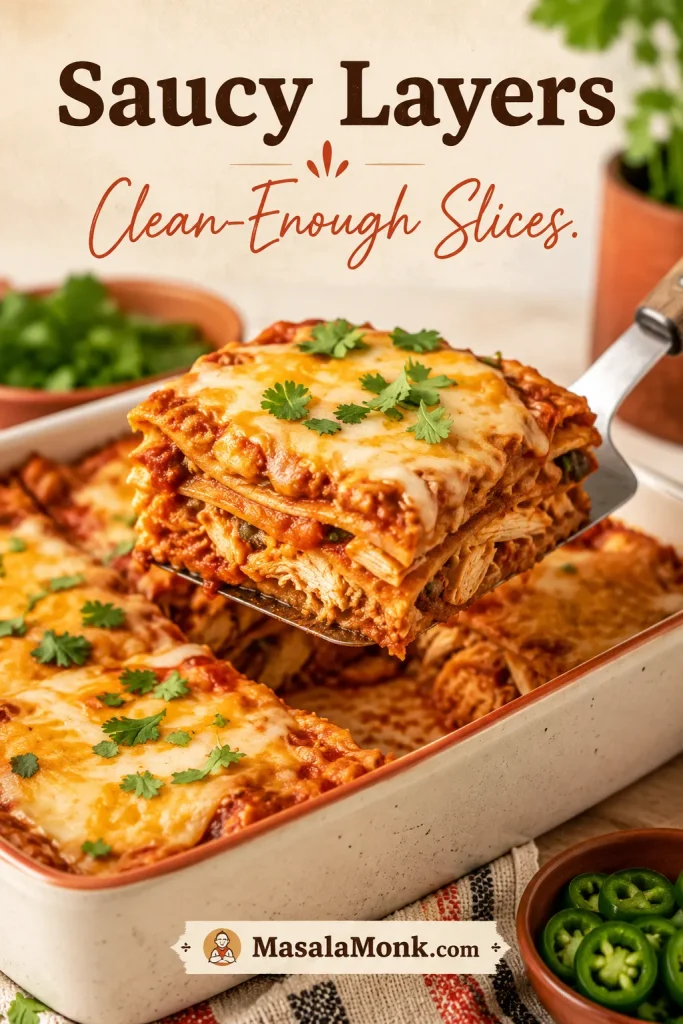
What Clean-Enough Slices Look Like
The best version is still generous and saucy, not dry or stiff. A slice should lift cleanly enough to serve while still showing soft tortilla, chicken, cheese, and sauce layers.
The goal is not a dry, perfect square; instead, aim for saucy layers that hold together enough to serve.
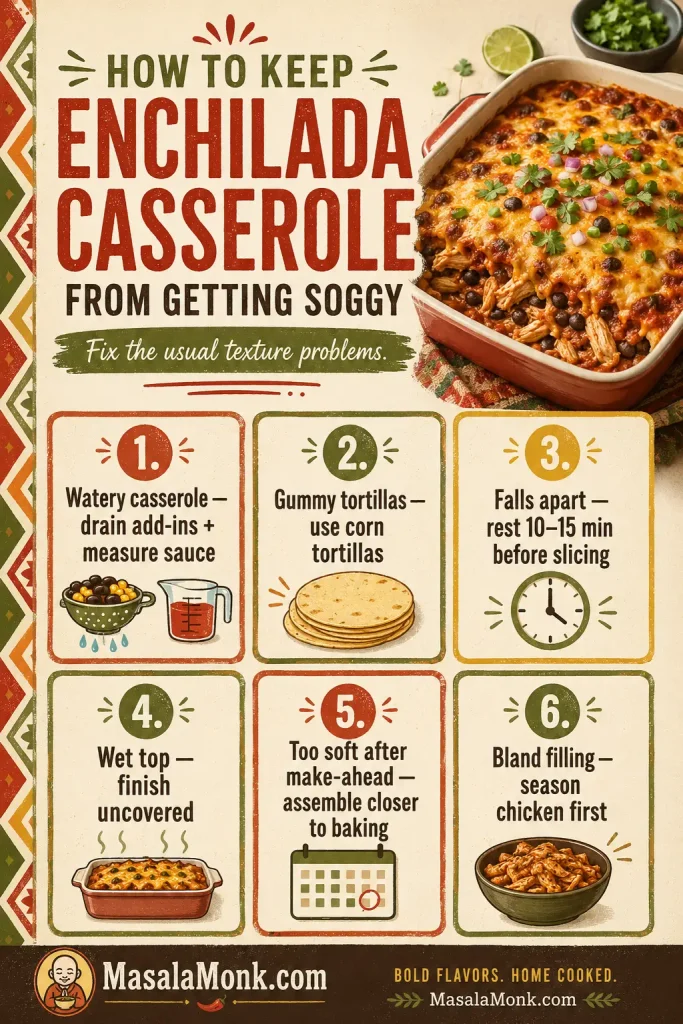
How to Keep Enchilada Casserole From Getting Soggy
Sogginess is the main thing that can ruin chicken enchilada casserole. Fortunately, most soggy casseroles are not ruined by one big mistake. Usually, it is a few small things adding up: wet add-ins, too much sauce, soft tortillas, and serving the casserole before it has had a chance to settle.
Too much liquid from sauce, beans, corn, or chiles
Drain add-ins well and use about 3 cups sauce total.
Gummy tortillas
Flour tortillas or too much sauce
Use corn tortillas, or reduce sauce slightly if using flour.
Casserole falls apart
Cut too soon after baking
Rest 10–15 minutes before slicing.
Wet top
Baked covered the whole time
Uncover for the final 10–12 minutes.
Too soft after make-ahead
Tortillas absorbed sauce while refrigerated
Use corn tortillas and avoid assembling too far ahead if you want firmer layers.
Bland filling
Chicken was not seasoned before layering
Season the filling with spices, chiles, sauce, and lime before assembling.
If the pan usually turns soft or watery, start with moisture control: drain add-ins, measure sauce, and give the bake time to settle.
Most fixes come down to controlling moisture before the pan goes into the oven. If the first scoop looks softer than you expected, give the pan another few minutes before serving the rest. Enchilada casserole firms up as it cools, especially when the cheese and sauce have time to settle.
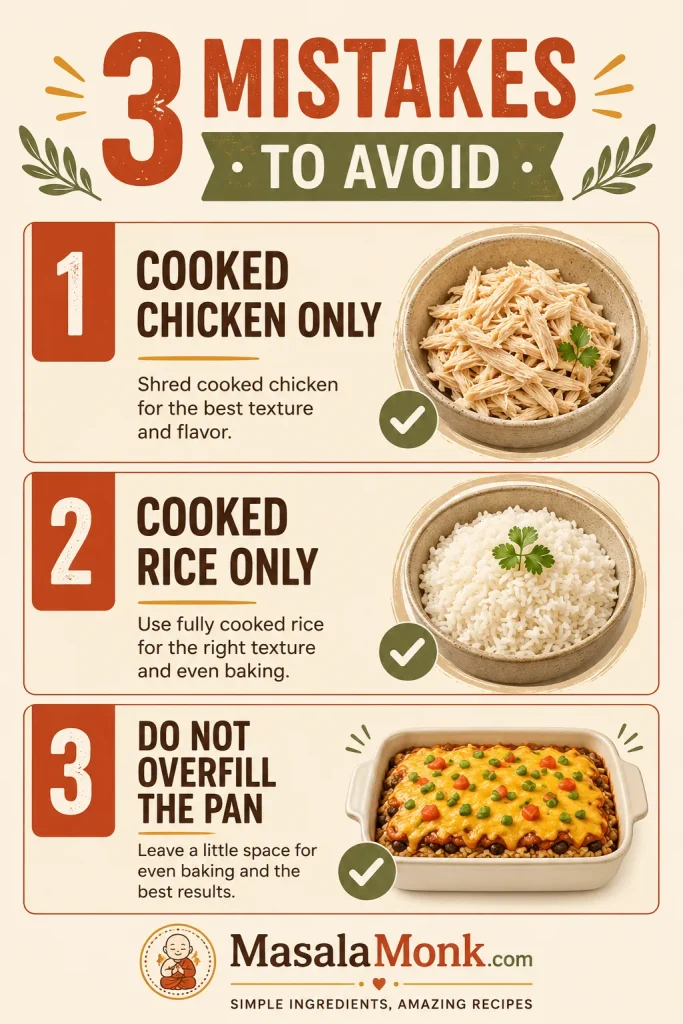
Mistakes to Avoid
Keep these three guardrails in mind: use cooked chicken, not raw chicken; use cooked rice only if you add rice; and do not pack the baking dish so full that the layers cannot settle.
These three guardrails keep the recipe safe, evenly baked, and easier to serve without changing the basic method.
Raw chicken changes the recipe. This casserole is built around cooked shredded chicken, so raw chicken would change the bake time, moisture level, and food-safety timing.
Raw rice needs its own recipe. It needs more liquid and a longer bake, so use cooked rice only if you want a rice variation.
An overfilled pan gets messy fast. If the filling is more than your dish can comfortably hold, save the extra for tacos, bowls, or nachos.
Chicken Enchilada Casserole Variations
These are adaptation notes for the main casserole, not all separate full recipes. Red or green sauce swaps stay closest to the original 9×13 bake. Rice, slow cooker, keto, and tortilla-free versions change the texture or timing more, so use those as direction rather than simple one-for-one swaps. If you plan to make a variation ahead, check the make-ahead notes because creamy, rice, and slow cooker versions soften differently.
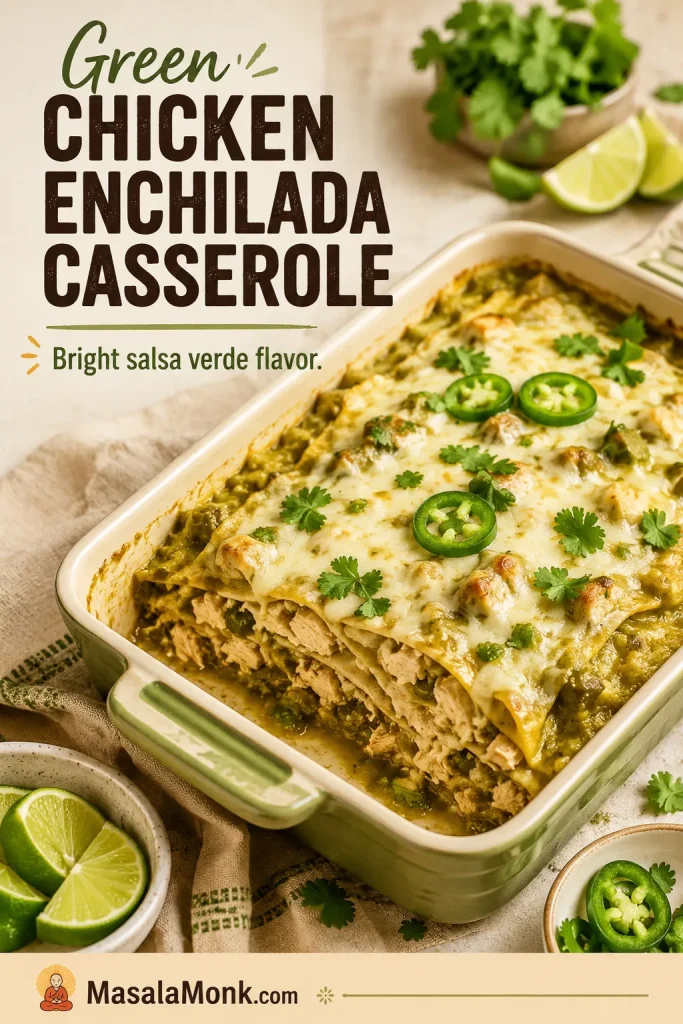
Green Chicken Enchilada Casserole
Green sauce gives the casserole a brighter, tangier feel, especially with chicken. Use green enchilada sauce or salsa verde, add diced green chiles to the filling, choose Monterey Jack or cheddar-Jack, and finish with cilantro and lime.
Green enchilada sauce or salsa verde gives the casserole a fresher finish, especially with Monterey Jack, cilantro, and lime.
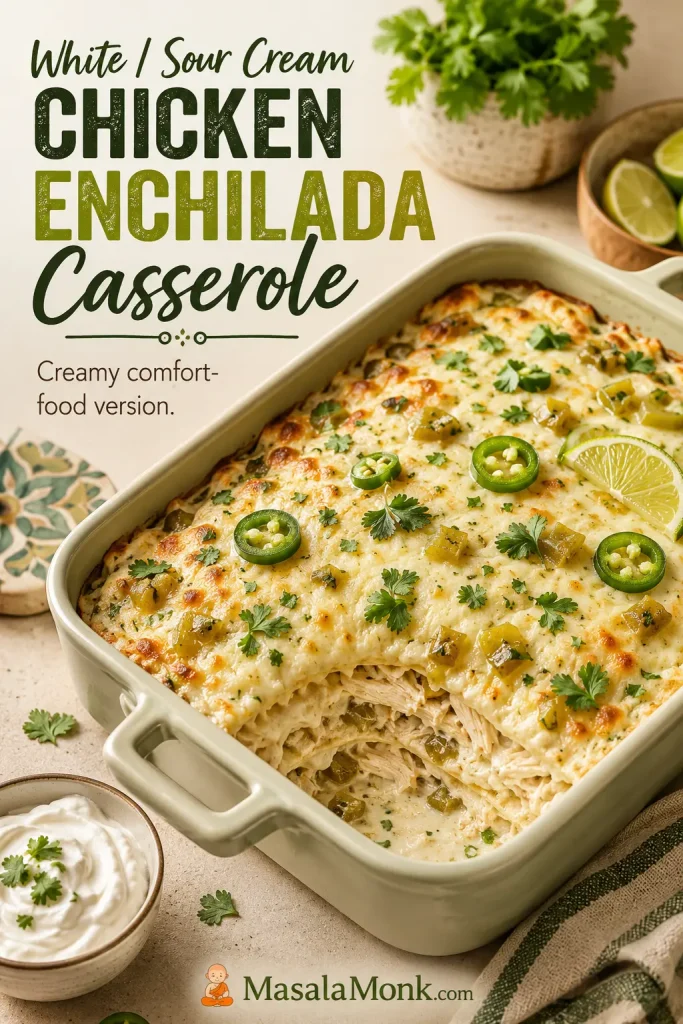
White, Sour Cream, or Creamy Chicken Enchilada Casserole
For a creamier comfort-food pan, use a sour cream, cream cheese, or simple white sauce direction with green chiles and Monterey Jack. Flour tortillas are common in white enchilada casseroles because they make the texture softer, but corn tortillas still hold better if you want neater pieces.
A white or sour cream version leans creamier and softer, so think comfort bake rather than sharply sliced layers.
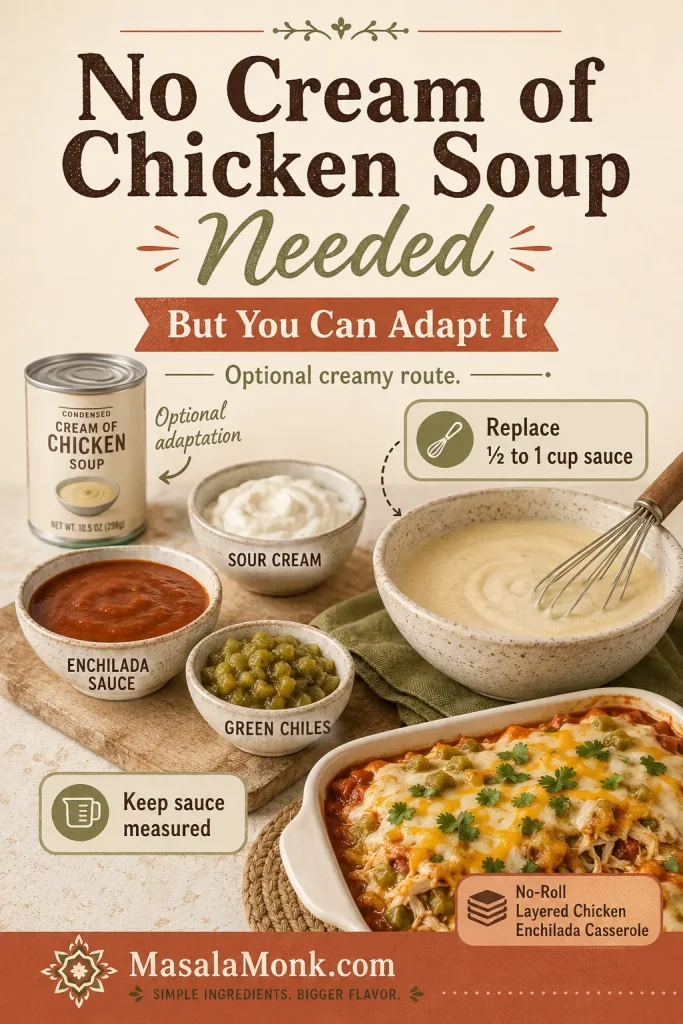
No Cream of Chicken Soup Needed — But Here’s How to Adapt It
This recipe does not need cream of chicken soup because enchilada sauce already gives the pan moisture and flavor. However, if the casserole you grew up with was creamier, softer, and made with condensed soup, you can still take this recipe in that direction.
Replace ½ to 1 cup of the enchilada sauce with a sour cream and cream-of-chicken mixture, then keep the remaining sauce measured. Condensed soup plus sour cream makes the casserole richer and softer, so this route works best when you want an old-school creamy bake rather than the cleanest layered pieces.
The main recipe does not need condensed soup, but this adaptation shows how to take it toward an old-school creamy casserole without losing control of the sauce.
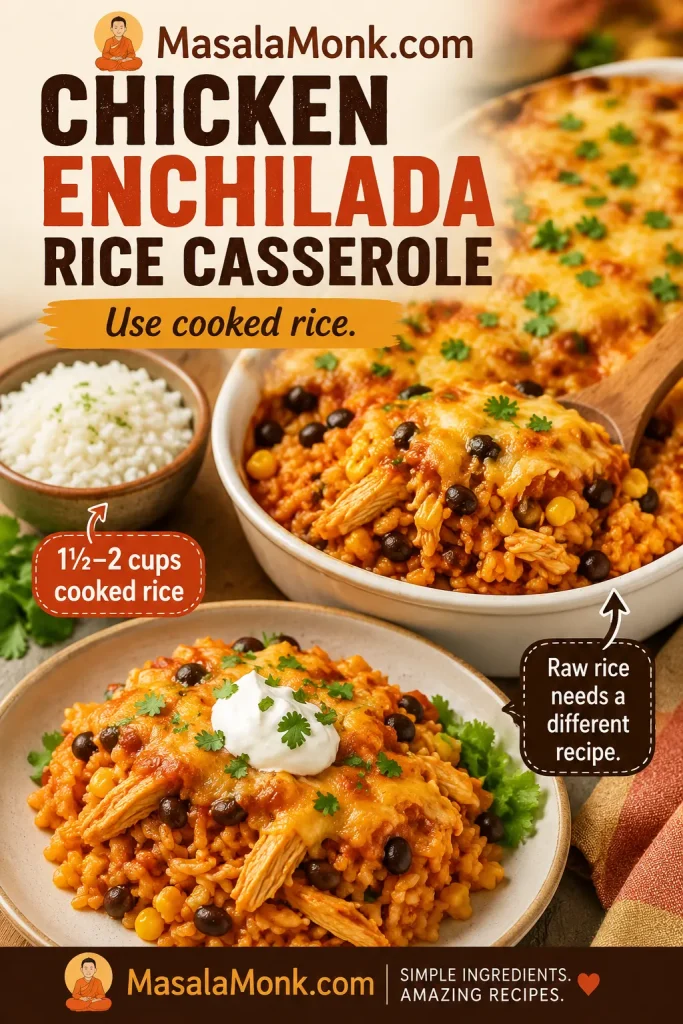
Chicken Enchilada Rice Casserole
Cooked rice can make the casserole heartier. Stir in 1½ to 2 cups cooked rice with the chicken filling and reduce the tortillas slightly if the pan feels too full. Do not use raw rice here; it needs a different liquid ratio and longer bake time.
Cooked rice makes the casserole heartier; however, raw rice needs a different liquid ratio and should not be added to this version.
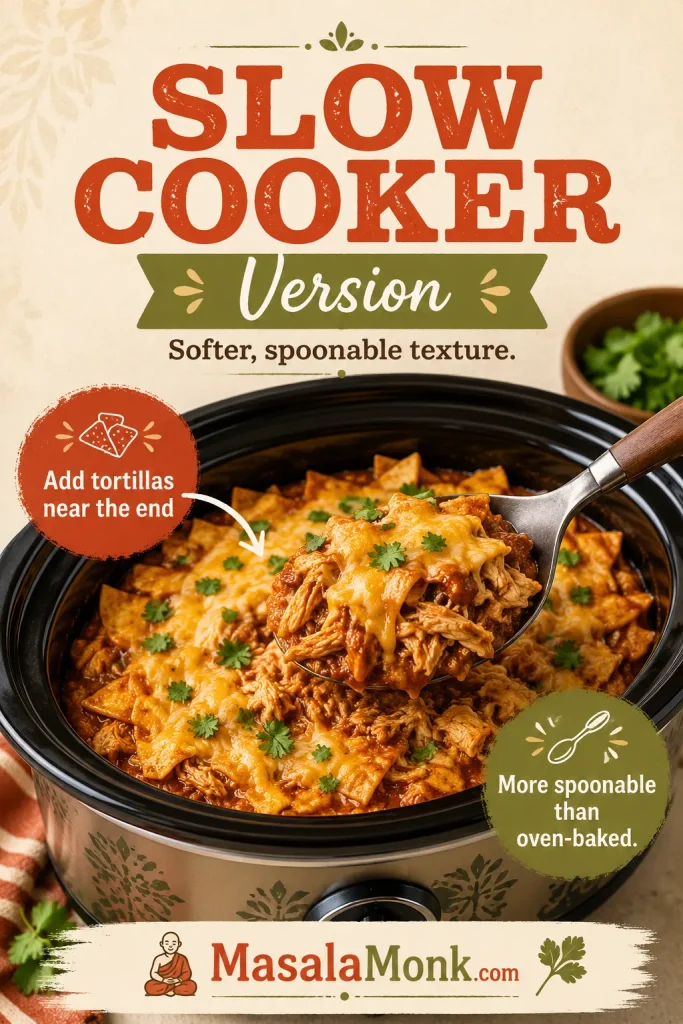
Slow Cooker Chicken Enchilada Casserole
The slow cooker version is convenient, but it will be more spoonable than the oven-baked casserole. Cook chicken with enchilada sauce first, shred it, then stir in tortilla strips and cheese near the end so the tortillas do not become mushy. For more shredded-chicken dinner ideas, MasalaMonk’s crock pot chicken breast recipes are useful.
The slow cooker version is convenient and spoonable, but adding the tortillas near the end helps keep them from turning mushy.
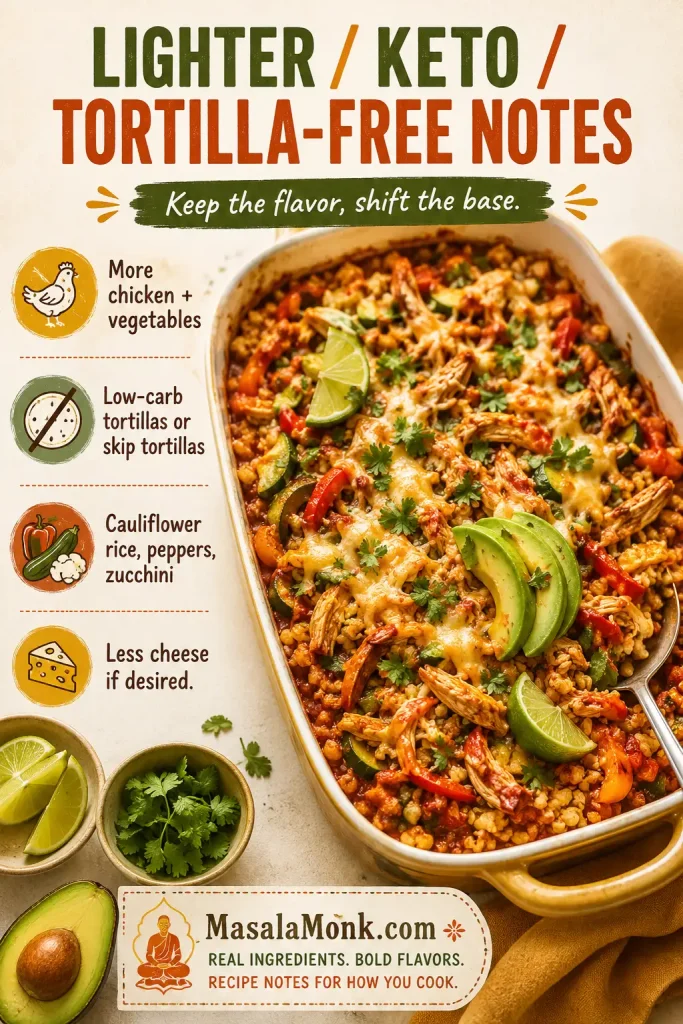
Healthy, Keto, or Tortilla-Free Notes
A lighter pan can use more chicken, black beans, extra vegetables, slightly less cheese, and corn tortillas. For a low-carb version, use low-carb tortillas or skip the tortillas and make a saucy chicken enchilada bake with peppers, cauliflower rice, or zucchini. MasalaMonk’s sheet pan chicken fajitas recipe is a good lighter companion if you want a quick Tex-Mex-style chicken dinner with more peppers and less cheese.
For a lighter or lower-carb direction, keep the enchilada flavor and shift the base toward chicken, vegetables, and low-carb swaps.
Make Ahead, Freezer, and Reheating Tips
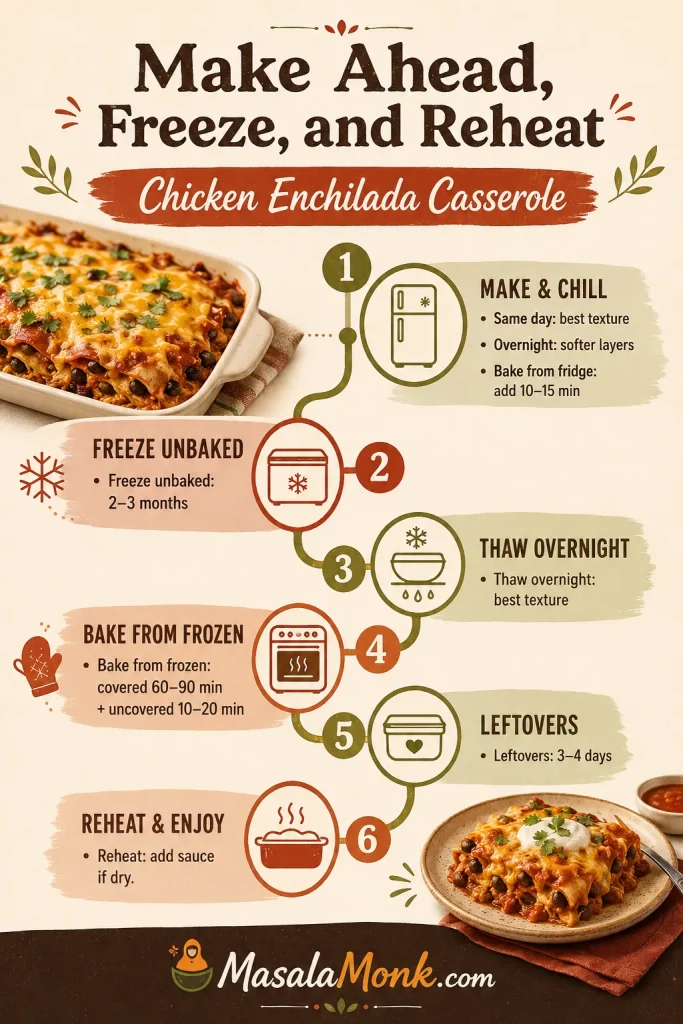
Chicken enchilada casserole is a good make-ahead dinner, but tortilla texture changes the longer the casserole sits with sauce. If you want the neatest layers, assemble it the same day you plan to bake it. If convenience matters more, assemble it ahead and expect a more tender texture.
To keep the make-ahead texture firmer, use the corn tortilla guidance and avoid over-saucing the layers.
When serving company, bake it fresh if you can. On a busy weeknight, assembling it ahead is still worth it. The make-ahead version is not about perfect slices; it is about having dinner mostly handled before the evening gets busy.
Need
What to Do
Texture Note
Make ahead same day
Assemble, cover, and refrigerate until ready to bake.
Very good texture.
Make ahead overnight
Refrigerate up to 24 hours.
Tortillas soften more, especially flour tortillas.
Bake from fridge
Add 10–15 minutes to the covered bake time.
Keep covered until hot in the center.
Freeze unbaked
Wrap tightly and freeze for 2–3 months.
Corn tortillas freeze better than flour.
Bake after thawing
Thaw overnight in the fridge, then bake covered and finish uncovered.
Best freezer texture.
Bake from frozen
Bake at 350°F / 175°C covered for 60–90 minutes, then uncovered for 10–20 minutes.
Time depends on pan depth and how solidly frozen it is.
Store leftovers
Refrigerate in an airtight container for 3–4 days.
Good for lunches.
Reheat
Warm covered at 350°F / 175°C or microwave individual portions.
Add a spoonful of sauce if it seems dry.
Make-ahead prep is practical, although the layers soften slightly; careful chilling, wrapping, and reheating keep the pan worth serving.
Freeze Unbaked Chicken Enchilada Casserole
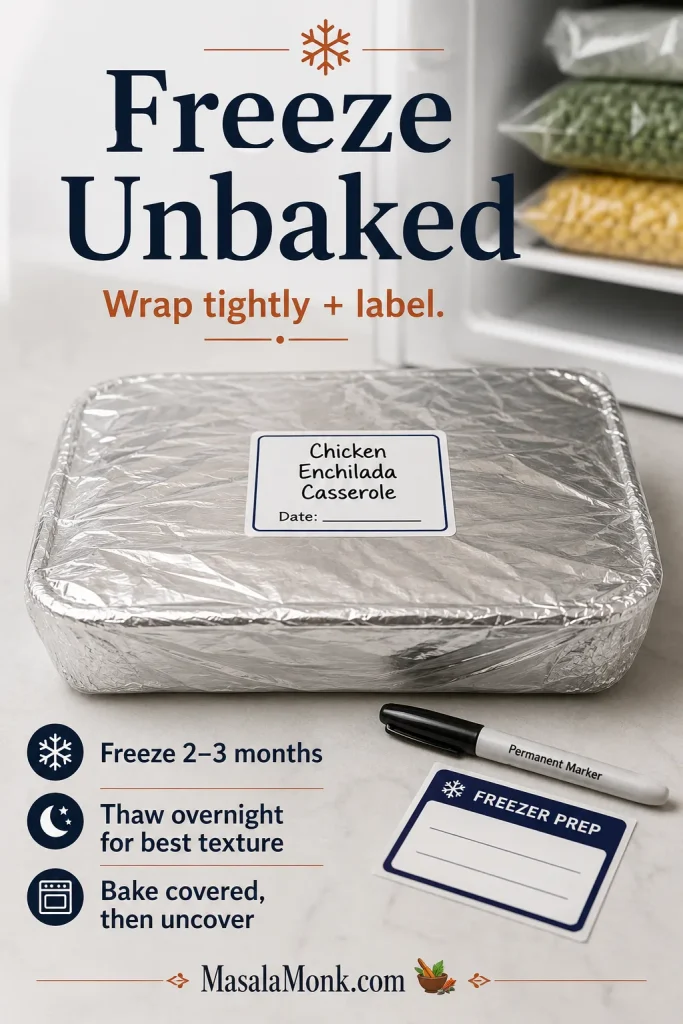
Freezing the unbaked pan is useful when you want dinner ready for a future busy night. Wrap the dish tightly, label it clearly, and thaw overnight for the best texture before baking.
Wrapping and labeling the unbaked casserole protects it in the freezer, while thawing overnight gives the best baked texture later.
For general leftover safety, the USDA’s food-safety guidance is a helpful reference for cooked dishes and refrigerated leftovers: USDA leftovers and food safety. For poultry safety specifically, the USDA’s safe minimum internal temperature chart is useful if you are cooking chicken before shredding it.
What to Serve With Chicken Enchilada Casserole
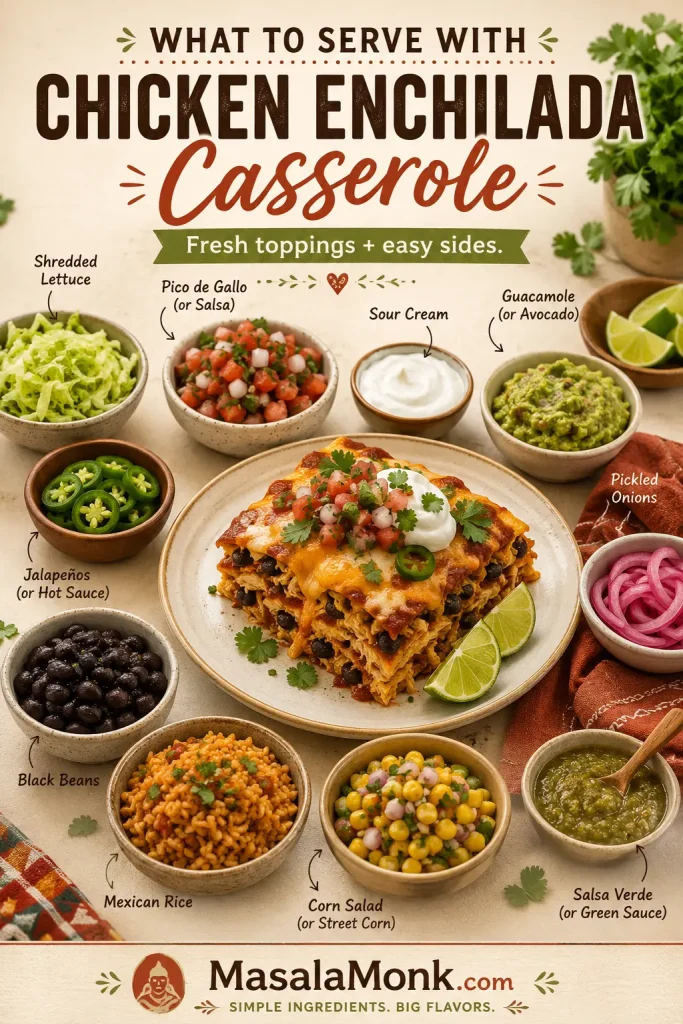
This casserole is filling on its own, but the right sides make it feel like a complete dinner. Since the casserole is saucy and cheesy, fresh, crunchy, or bright sides work especially well. Think of toppings as balance: lime, cilantro, and pico de gallo add brightness; sour cream, avocado, and guacamole add creaminess; jalapeños and pepper sauce add heat; lettuce, onion, or slaw add crunch.
Mexican rice or cilantro lime rice
Black beans or refried beans
Guacamole or sliced avocado
Pico de gallo or MasalaMonk’s mango salsa recipe for a sweet-bright topping
Salsa verde
Shredded lettuce with lime
Corn salad
Pickled onions
Jalapeños
Lime wedges
If serving this for guests, put toppings in small bowls and let everyone finish their own plate. It turns a hot, cheesy casserole into an easy toppings-bar dinner, and the cool, fresh extras make every serving feel a little brighter.
Bright toppings, crunchy sides, beans, rice, and salsa make the saucy baked pan feel fresh enough for a full dinner.
Chicken Enchilada Casserole Recipe
This easy chicken enchilada casserole is a no-roll 9×13 dinner with soft tortilla layers, saucy shredded chicken, and melted cheese on top. Use red sauce for a classic chili-forward bake or green sauce for a brighter, tangier chicken casserole.
Prep Time20 minutes
Cook Time30–32 minutes
Rest Time10–15 minutes
Servings8
Equipment
9×13-inch / 23×33 cm baking dish
Large skillet
Mixing spoon or spatula
Foil
Knife and cutting board
Measuring cups and spoons
Ingredients
1 tablespoon neutral oil / 15 ml
1 small onion, diced / about 120 g
2–3 garlic cloves, minced
1 teaspoon ground cumin
1 teaspoon chili powder
½ teaspoon smoked paprika or regular paprika
½ teaspoon dried oregano
½ teaspoon kosher salt, plus more to taste
1 can diced green chiles / 4 oz / 113 g, drained if watery
3½ cups cooked shredded chicken / about 525 g
1 can black beans, drained and rinsed / 15 oz / 425 g, optional
1 cup corn / about 150–165 g, optional
3 cups enchilada sauce, red or green / 710 ml, divided
1 tablespoon lime juice / 15 ml
12 small corn tortillas, 6-inch, halved / about 300–330 g total
3 cups shredded Monterey Jack, cheddar-Jack, or Mexican blend cheese / 12 oz / 340 g
Optional Toppings
Sour cream
Chopped cilantro
Avocado or guacamole
Sliced jalapeños
Diced red onion
Lime wedges
Pico de gallo or salsa verde
Instructions
Heat the oven. Preheat the oven to 375°F / 190°C. Lightly grease a 9×13-inch / 23×33 cm baking dish.
Make the filling. Heat the oil in a large skillet over medium heat. Add the onion and cook for 3–4 minutes, until softened.
Add the seasoning. Stir in the garlic, cumin, chili powder, paprika, oregano, salt, and diced green chiles. Cook for about 30 seconds, just until fragrant.
Add chicken and extras. Stir in the shredded chicken, black beans if using, corn if using, ½ cup / 120 ml enchilada sauce, and lime juice. Cook for 1–2 minutes, just until everything is combined and lightly saucy. Taste and adjust salt if needed.
Start the layers. Spread ½ cup / 120 ml enchilada sauce across the bottom of the baking dish. Add a layer of tortilla halves, overlapping slightly.
Add filling and cheese. Spread one-third of the chicken filling over the tortillas. Spoon over about ½ cup / 120 ml sauce, then sprinkle with about 1 cup / 113 g cheese.
Repeat. Add another tortilla layer, another third of the filling, another ½ cup / 120 ml sauce, and another cup of cheese. Add the final tortilla layer, the remaining filling, the remaining sauce, and the last cheese.
Bake covered. Cover the dish with foil and bake for 20 minutes. If the dish is very full, tent the foil slightly so it does not stick to the cheese.
Finish uncovered. Remove the foil and bake for another 10–12 minutes, until the casserole is bubbling around the edges and the cheese is melted.
Rest before serving. Let the casserole rest for 10–15 minutes before slicing. Add toppings just before serving.
Recipe Notes
Baking at 350°F / 175°C: Bake covered for 25–30 minutes, then uncovered for 10–15 minutes.
Green chicken enchilada casserole: Use green enchilada sauce or salsa verde, Monterey Jack cheese, and extra cilantro/lime to finish.
Creamier casserole: Stir ½ cup / 120 g sour cream into the filling after it cools slightly, or use it as a topping.
Neater slices: Use corn tortillas and let the casserole rest before cutting.
Softer casserole: Flour tortillas can be used, but they may become more tender or gummy.
FAQs
Do I have to roll the tortillas?
No. That is the beauty of the casserole. The tortillas are layered in the pan instead of filled and rolled, so you get enchilada flavor without the assembly line.
How much chicken do I need?
Use about 3½ cups cooked shredded chicken. One average rotisserie chicken usually gives about 3 to 4 cups shredded meat, depending on size.
Are corn or flour tortillas better?
Corn tortillas give more classic enchilada flavor and better structure. Flour tortillas work, but they create a softer, more spoonable casserole and can turn gummy if the dish is too saucy.
Is red or green enchilada sauce better for this casserole?
Both work. Red sauce gives a deeper, more classic flavor, while green enchilada sauce tastes brighter and tangier with chicken, Monterey Jack, cilantro, and lime.
How do I keep chicken enchilada casserole from getting soggy?
Use corn tortillas, drain wet add-ins, measure the sauce, bake uncovered at the end, and give the casserole time to settle before serving. If you want firmer layers, lightly toast the tortillas before assembling.
How far ahead can I assemble it?
You can assemble it up to 24 hours ahead and refrigerate it covered. When baking from the fridge, add 10–15 minutes to the covered bake time so the center heats through.
What is the best way to freeze it?
Freeze it unbaked or baked, tightly wrapped, for 2–3 months. For the best texture, thaw it overnight in the refrigerator before baking or reheating. Corn tortillas usually freeze better than flour tortillas.
Is the slow cooker version as good as the oven version?
The slow cooker version is convenient, but it will be softer than the oven method. Cook the chicken with enchilada sauce first, shred it, then add tortilla strips and cheese near the end so the tortillas do not become too mushy.
Should rice go in this casserole or on the side?
Cooked rice can go in the casserole if you want it heartier. Stir in 1½ to 2 cups cooked rice with the chicken filling. Raw rice needs different liquid ratios and a longer bake time, so it is better handled as its own chicken enchilada rice casserole.
How long does chicken enchilada casserole last in the fridge?
Leftover chicken enchilada casserole keeps well in the refrigerator for 3–4 days in an airtight container. Reheat individual portions in the microwave or warm larger portions covered in a 350°F / 175°C oven.
Once you know the sauce amount, tortilla choice, and the value of a short pause before serving, this becomes the kind of forgiving dinner you can make without overthinking it. Keep it classic with red sauce, brighten it with green sauce, or set out sour cream, lime, avocado, salsa, and jalapeños so the whole pan feels easy, generous, and personal.