
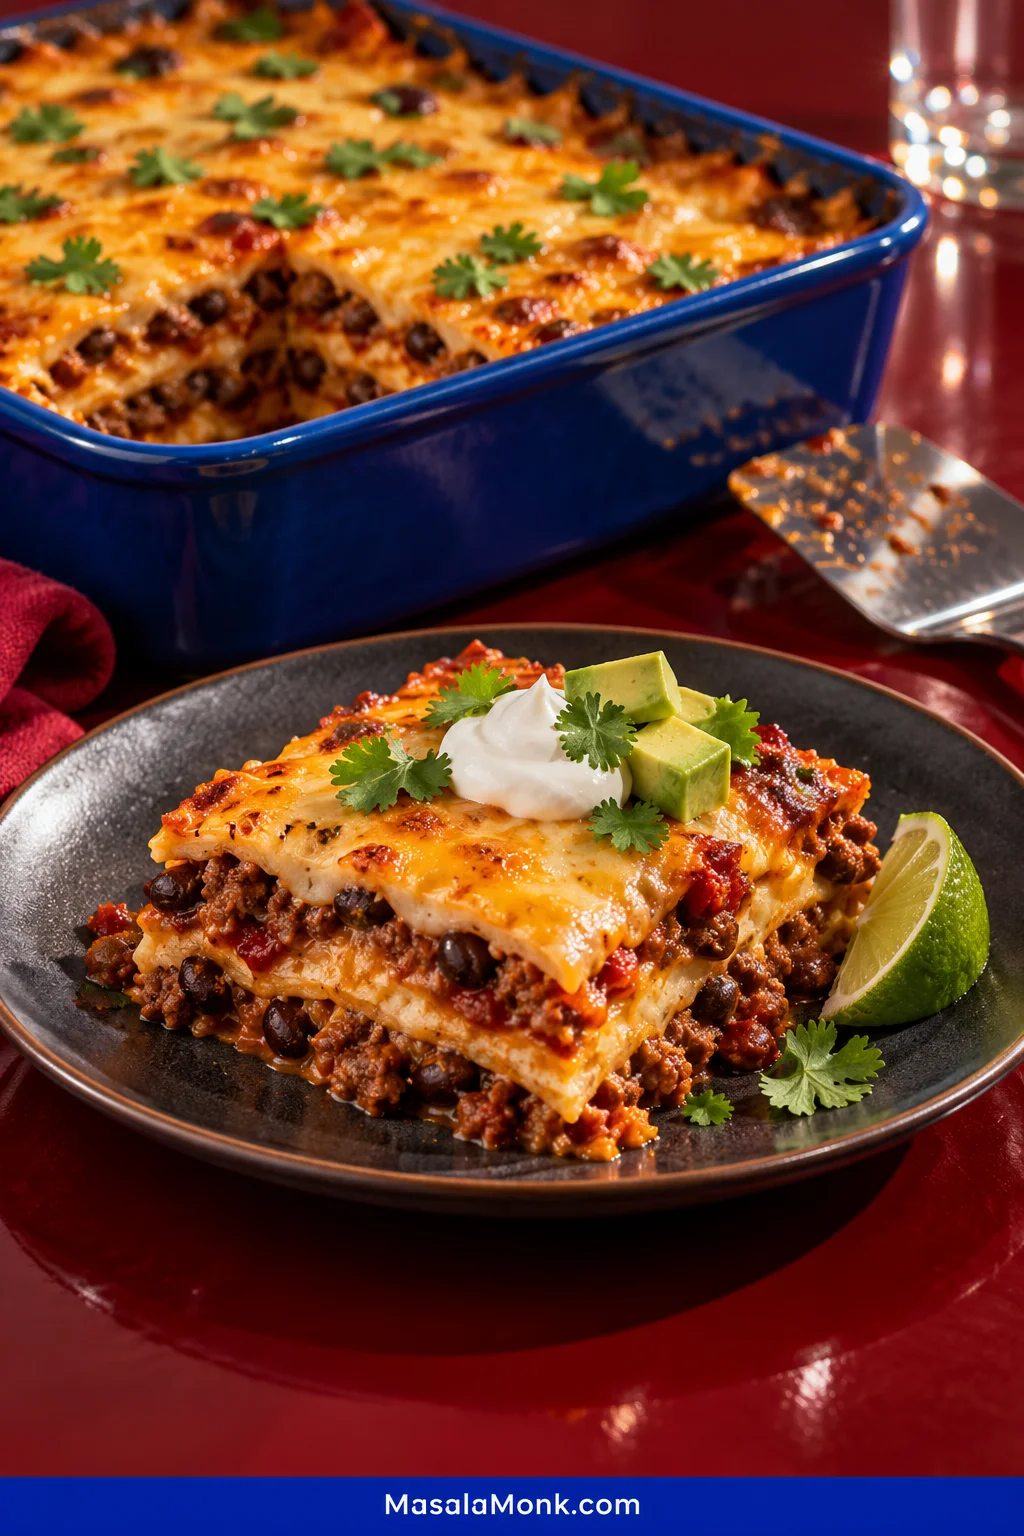
A good taco casserole should still eat like tacos. You should get seasoned beef, tortilla, melted cheese and salsa in the same forkful without everything disappearing into one soft filling.
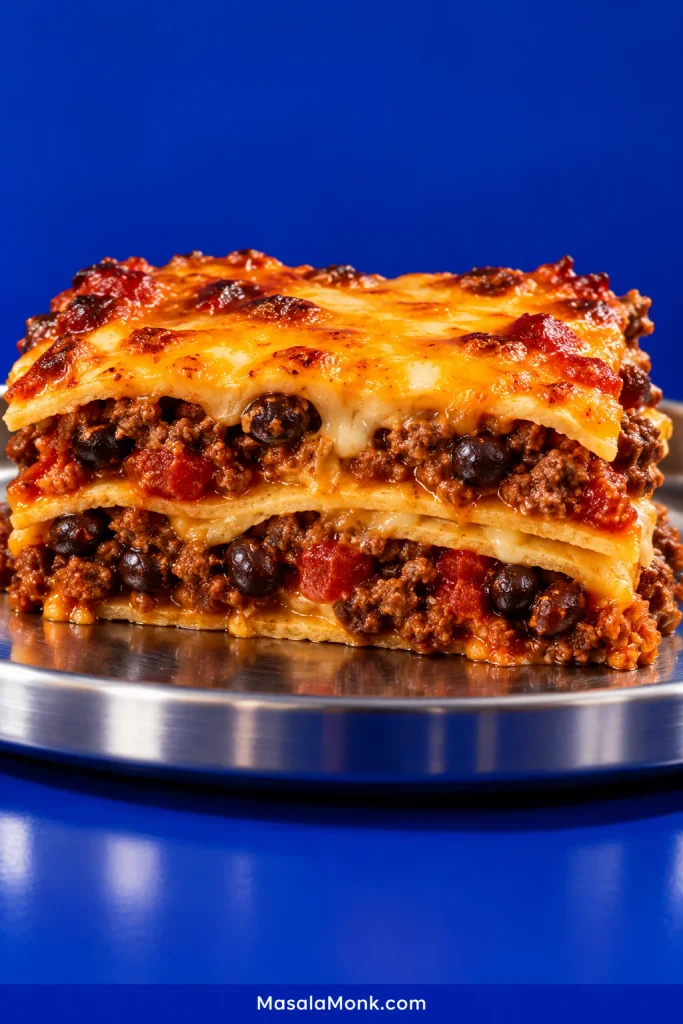
This is the layered tortilla version: ground beef and black beans stacked with tortillas and cheese in a 9×13-inch dish. Aim for fully melted cheese and visible layers; exposed tortilla edges may toast lightly.
Most of the judgment happens before the casserole reaches the oven. The beef and beans should be juicy and easy to spoon, but not swimming in salsa. Get the skillet right and the rest of the pan is forgiving.
Taco Casserole at a Glance
Brown and season the beef, add black beans and thick salsa, and cook until the mixture is thick enough to scoop rather than pour. Build three layers of tortillas, beef-and-bean filling and cheese, then bake uncovered at 350°F / 175°C until the edges bubble and the cheese is fully melted.
Taco Casserole Recipe
Three layers of tortillas with seasoned beef, black beans and melted cheese, baked until bubbling around the edges.
Pan: 9×13 in / 23×33 cm, roughly 3 qt / 2.8 L.
Ingredients
- 1 lb / 16 oz / 454 g ground beef, preferably around 85/15 or 90/10
- 1 medium yellow or white onion, finely diced, about 1 cup / 130–150 g
- 2 tbsp + 1 tsp / about 19 g MasalaMonk homemade taco seasoning, plus more to taste, or store-bought taco seasoning intended for 1 lb / 454 g beef
- 16 oz / 454 g thick jarred salsa, mild, medium or hot
- 1 can black beans, 14–15 oz / 400–425 g before draining, drained and rinsed well
- 6 large flour tortillas, about 10 inches / 25 cm across
- 8 oz / 225 g shredded cheese, roughly 2 cups; cheddar, Monterey Jack, Colby Jack or a Mexican-style blend all work
For Serving
- Sour cream or plain Greek yogurt
- Diced tomato or fresh pico de gallo
- Shredded lettuce
- Avocado or guacamole
- Chopped cilantro or sliced green onion
- Lime wedges
- Crushed tortilla chips, Fritos or Doritos, if you want extra crunch
Using our homemade taco seasoning? The Taco Seasoning for 1 lb Ground Beef recipe makes about 3 tbsp / 24 g. Start with 2 tbsp + 1 tsp here and keep the remainder nearby. Salsa and cheese bring their own salt, so taste before adding more.
Using a packet? Use the seasoning amount intended for 1 lb of beef, but don’t automatically add the water called for on the packet. The salsa provides the liquid here.
Method
1. Heat the Oven
Heat the oven to 350°F / 175°C. Lightly grease a 9×13-inch / 23×33-cm baking dish.
2. Brown the Beef
Heat a large skillet over medium-high heat. Add the beef and leave some of it against the hot pan long enough to pick up color before you start breaking it apart.
Cook until browned, leaving small crumbles. Add the onion and continue cooking until it softens and the beef reaches 160°F / 71°C.
Drain most of the rendered fat if a noticeable pool collects in the skillet. A light coating on the meat is fine.
3. Add the Seasoning, Salsa and Beans
Stir in the taco seasoning. Give it about 30 seconds in the hot beef and onion, just until the spices smell warmer and more fragrant.
Add the salsa and black beans. Lower the heat to medium and cook for about 4–6 minutes, stirring occasionally.
The beef and beans are ready when they slump from the spoon but do not run from it. Pull a spatula through the center of the skillet. The path should remain visible briefly before the mixture settles back.
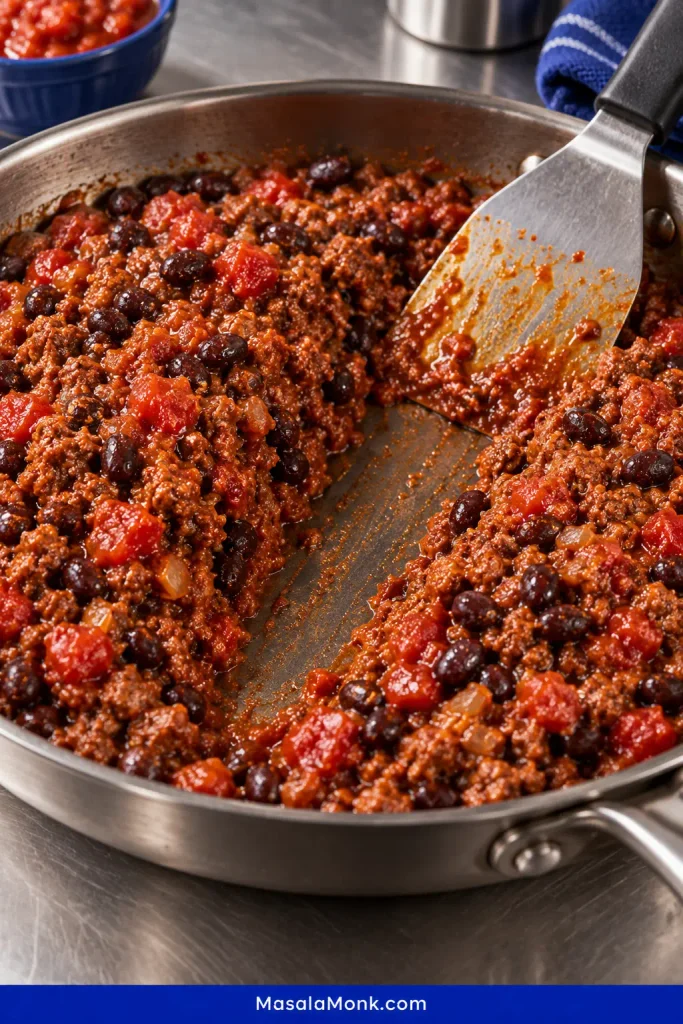
The meat should look glossy. Dry and crumbly means you’ve gone too far.
Taste before moving on. Add some of the reserved seasoning only if the beef needs it.
Still seeing loose liquid? See how to keep taco casserole from getting watery.
4. Layer the Casserole
Lay 2 tortillas across the bottom of the dish, overlapping them through the middle. Let the rounded edges curve slightly up the sides. Don’t fuss over perfect coverage. If a large corner is bare, tear off a piece of tortilla, patch it and carry on.
- Spread one-third of the beef and beans over the tortillas and add one-third of the cheese.
- Add 2 more tortillas, another third of the meat and another third of the cheese.
- Finish with the last 2 tortillas, the remaining beef and beans and the rest of the cheese.
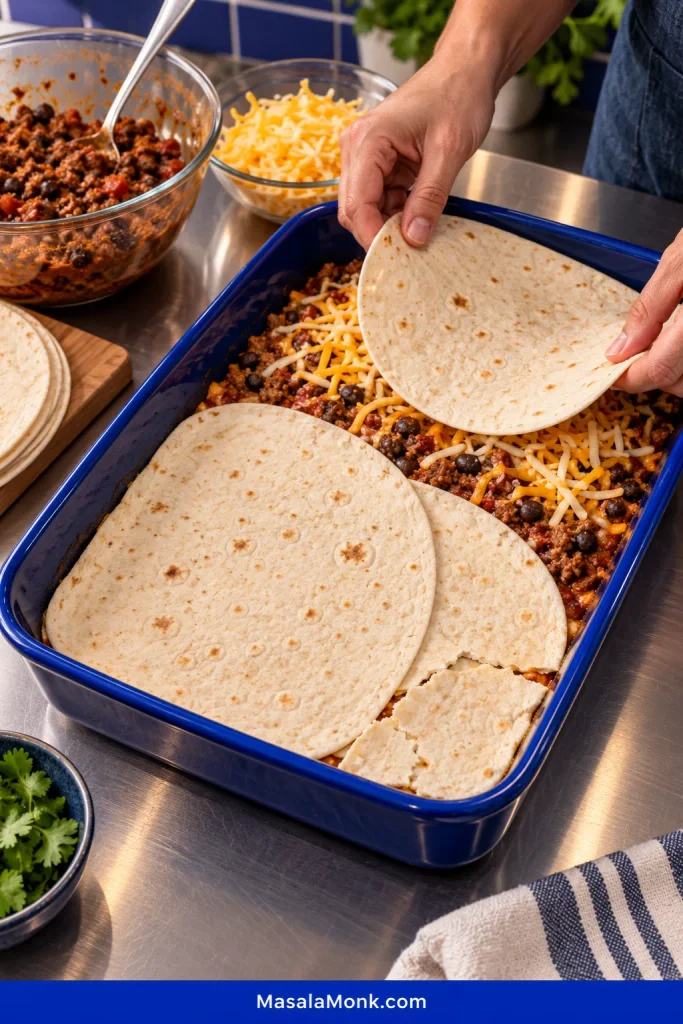
Eyeballing the skillet into thirds before you start saves the final layer from getting whatever happens to be left.
Using corn tortillas instead? See what changes with corn vs flour tortillas.
5. Bake
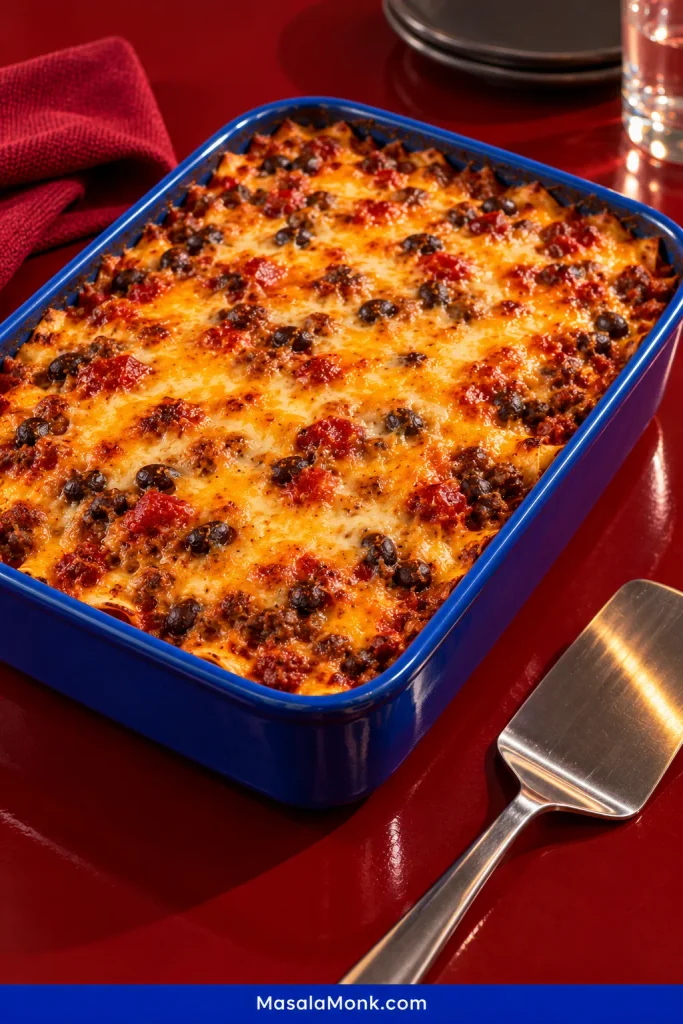
Bake uncovered for about 20 minutes, until several edges are bubbling and the cheese has melted completely. A few browned patches on top are a bonus; exposed tortilla edges may toast slightly.
6. Rest Before Cutting
Let the pan stand for 5–10 minutes. Five minutes works when everyone is ready to eat; closer to ten gives the cheese and meat more time to settle for cleaner pieces.
Cut into 8 squares and add the fresh toppings at the table.
If dinner is all you needed, you can stop here.
How to Keep Taco Casserole from Getting Watery
Use thick salsa, drain the beans and any juicy add-ins well, and let loose liquid cook away before you start layering. Soft tortillas are part of the dish. A puddle around the first slice isn’t.
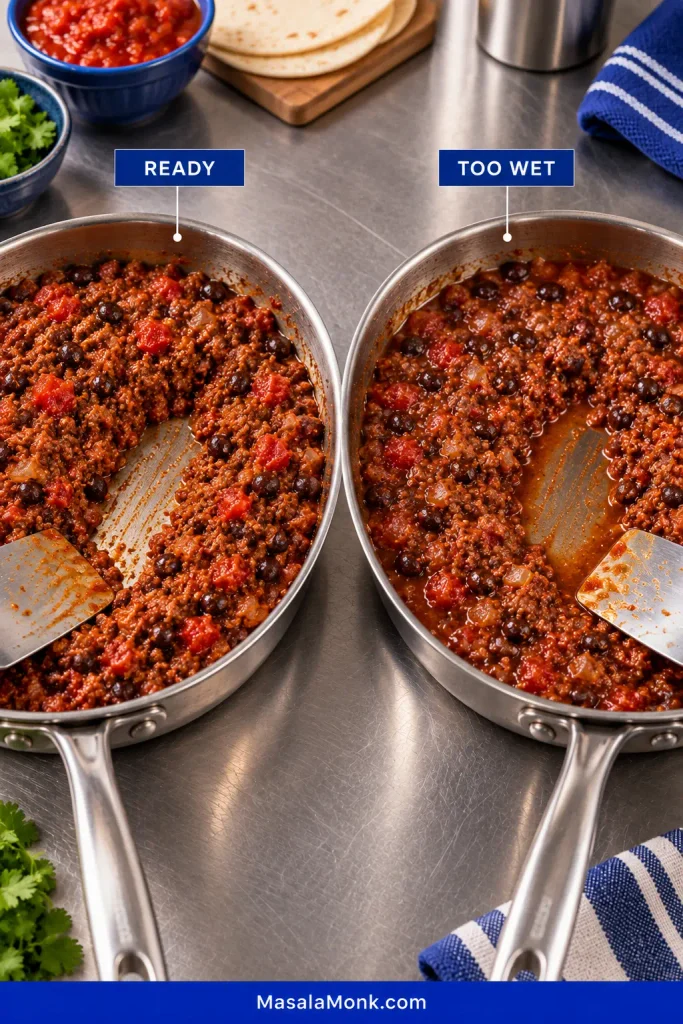
Fresh pico usually needs more attention than a thick jarred salsa. Drain it well and simmer the beef longer, or keep the pico fresh and spoon it over the finished casserole instead.
The same principle applies to canned tomatoes, corn or vegetables that release water: deal with the excess before the mixture leaves the skillet.
Think saucy beef, not beef sitting in sauce. If liquid runs into a puddle when you tilt the skillet, give it another minute or two.
Corn vs Flour Tortillas
Flour tortillas give softer, more flexible layers; corn tortillas bring stronger corn flavor and usually remain more distinct between the beef and cheese.
Choose flour when you want the softest layers and the easiest fit in a 9×13 pan. Choose corn when stronger corn flavor and more noticeable tortilla layers matter more.
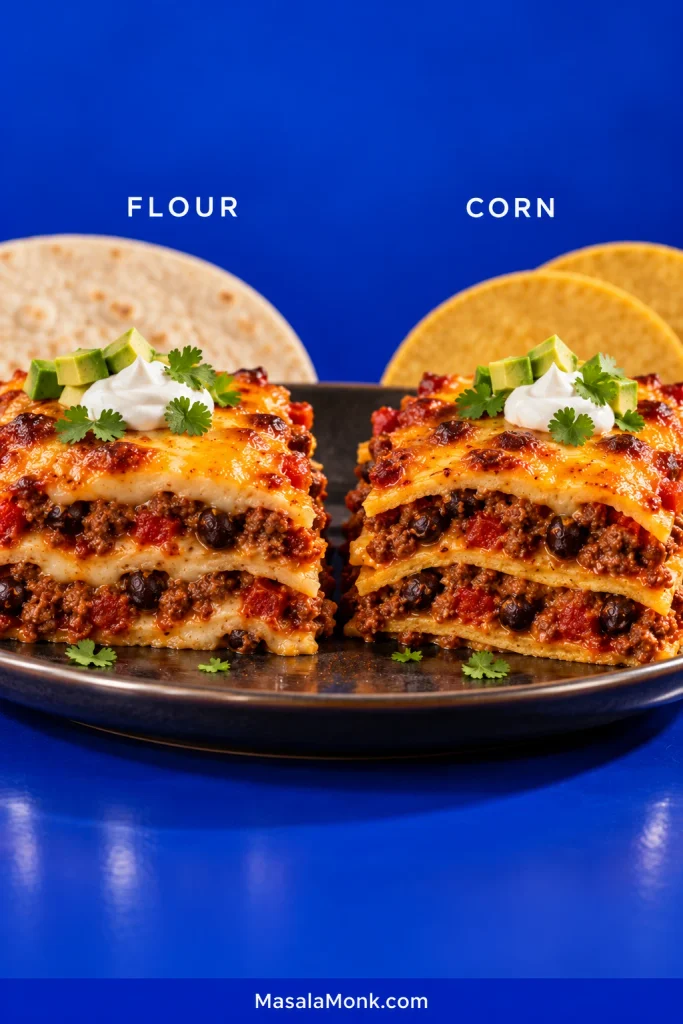
Six large flour tortillas cover the pan easily. Corn tortillas are smaller, so you’ll need roughly 10–12, and warming them first helps them overlap without splitting.
| Tortilla | What to expect |
|---|---|
| Large flour tortillas | A softer forkful and easy pan coverage |
| Small corn tortillas | More corn flavor and layers that stay more noticeable in each bite |
| Briefly griddled corn tortillas | A bit more resistance to the sauce, with an extra cooking step |
A quick pass across a dry or lightly oiled skillet can give corn tortillas more structure. Stop while they’re pliable enough to overlap.
If you’re making them yourself, our Corn Tortilla Recipe covers masa hydration, pressing and how to keep cooked tortillas flexible.
Already Have Taco Meat? Start Here
Made taco meat yesterday? Use the amount cooked from about one pound of raw ground beef and skip the browning step.
A cup measurement isn’t especially reliable. Cooked ground beef changes volume depending on fat percentage, crumble size and how much sauce is already mixed through it.
Warm the meat with the beans, then add salsa gradually. You may not need the full jar if the leftovers are already saucy. Taste before adding more seasoning.
If those leftovers are headed back into individual tortillas instead, our Ground Beef Tacos Recipe is built for that job.
Taco Casserole Substitutions
You don’t need a different formula for every swap. The changes worth thinking about are the ones that affect moisture, salt or how quickly the meat dries out.
| Change | What changes |
|---|---|
| Ground turkey or chicken | Both work, though lean poultry dries faster. Ground poultry should reach 165°F / 74°C. |
| Pinto beans | Use them just as you would black beans: drained and rinsed. |
| Up to 1 cup corn | Drain canned corn well, or thaw and dry frozen corn first. |
| Canned tomatoes or Rotel | Drain first, then cook until the extra liquid has reduced. |
Refried beans aren’t a straight replacement for whole black beans; they make the layers much denser. For this version, I’d keep them on the side. Our Refried Beans from a Can recipe works well there.
Adjusting the Heat
A casserole can be plenty spicy and still taste flat. Before adding more chile, check whether it needs salt or acidity. Lime can do more for a dull bite than another spoonful of hot sauce.
For more heat, use hotter salsa, jalapeño, pepper Jack or hot sauce. Keeping some at the table makes dinner easier when people want different levels of spice. A spoonful of roasted salsa verde gives an individual serving a sharper, greener finish.
Pan Size, Half Batches and Double Batches
Full batch: 9×13-inch pan. Half batch: 8×8-inch pan. Double batch: two 9×13-inch pans.
For a half batch, keep the oven at 350°F and start checking around 15 minutes; a deeper or heavier dish may need closer to 20. For a double batch, two separate pans keep roughly the same layer depth and heat more predictably than one very deep casserole.
Make Taco Casserole Ahead
You can make taco casserole ahead, but there is a texture tradeoff. For firmer tortilla layers, cook the beef and beans up to 2 days ahead, cool them promptly and assemble the pan closer to baking.
The whole casserole can also be assembled up to 1 day ahead. It bakes well, but the tortillas will be softer after spending a night against the salsa.
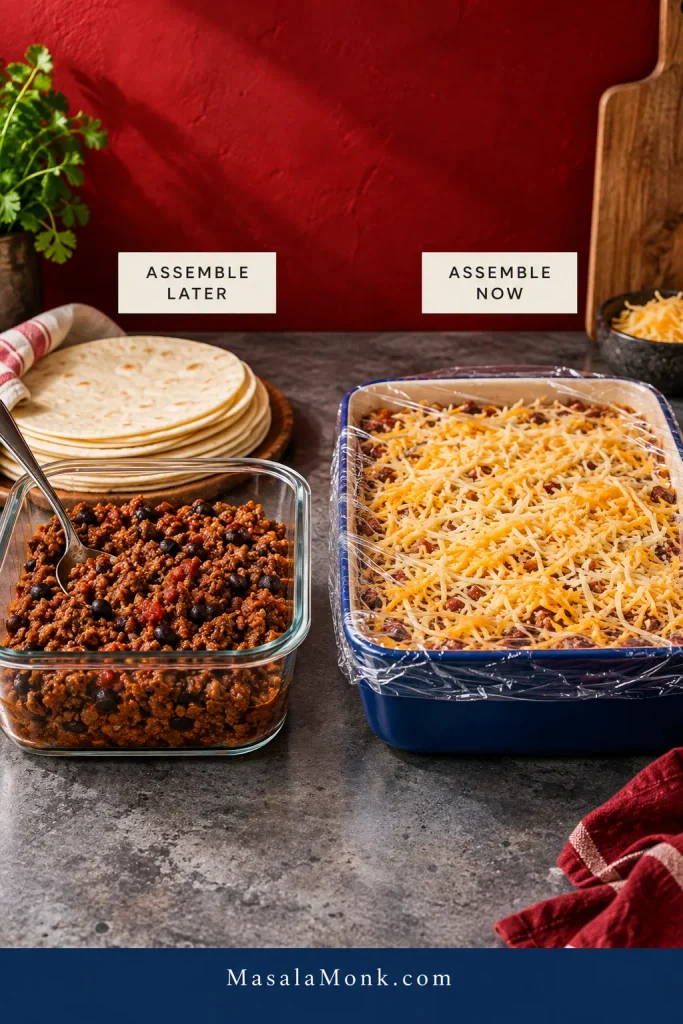
A refrigerator-cold casserole will take longer than a freshly assembled one. Bake at 350°F / 175°C until it is bubbling and hot through and the center reaches 165°F / 74°C.
Follow the bakeware manufacturer’s guidance before moving refrigerator-cold glass or ceramic into a hot oven.
Taco Casserole Toppings and Serving Ideas
The casserole itself is hot, rich and soft. Cool sour cream, sharp lime, avocado and a few crunchy chips change the whole bite once they meet the melted cheese and seasoned beef.
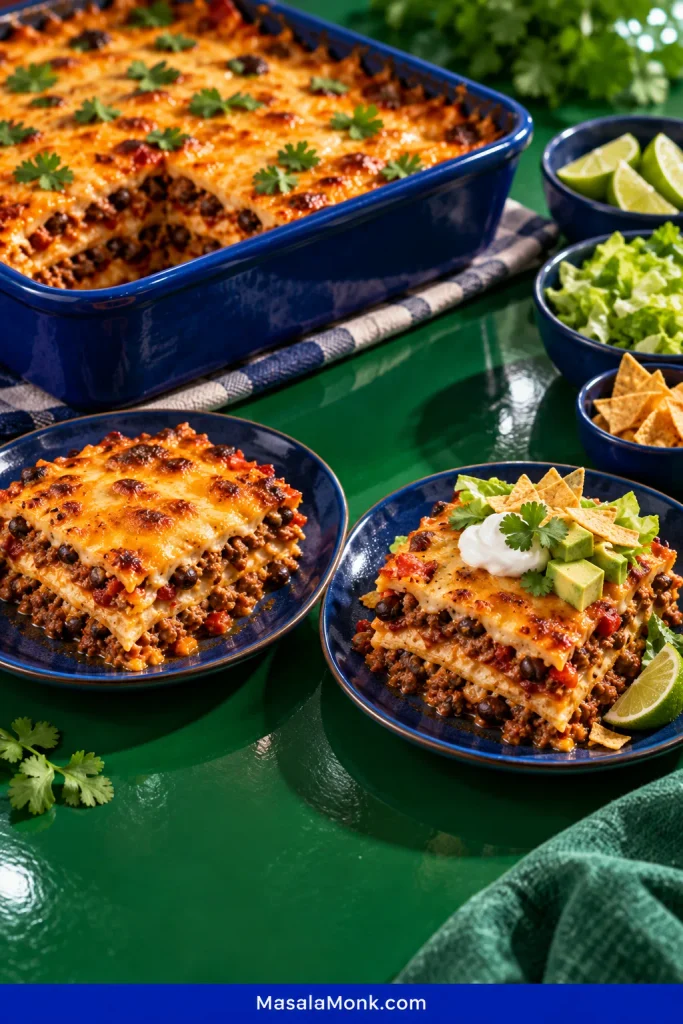
Use sliced avocado if that’s enough. For a fuller lime-onion-cilantro topping, add a spoonful of fresh guacamole.
Keep chips out of the oven if you want them crunchy. Twenty minutes under hot cheese and steam changes the deal.
A squeeze of lime is especially useful on a hot first bite: the acidity cuts through the beef and melted cheese without making the casserole itself any heavier.
For the rest of the meal, contrast works better than piling on more richness. A crisp slaw, simple green salad, corn, or rice with plenty of lime all make more sense here than another heavy baked side.
Taco Casserole Troubleshooting
Most problems show up clearly once the first piece comes out. Use what the slice is doing to work backward to the cause.
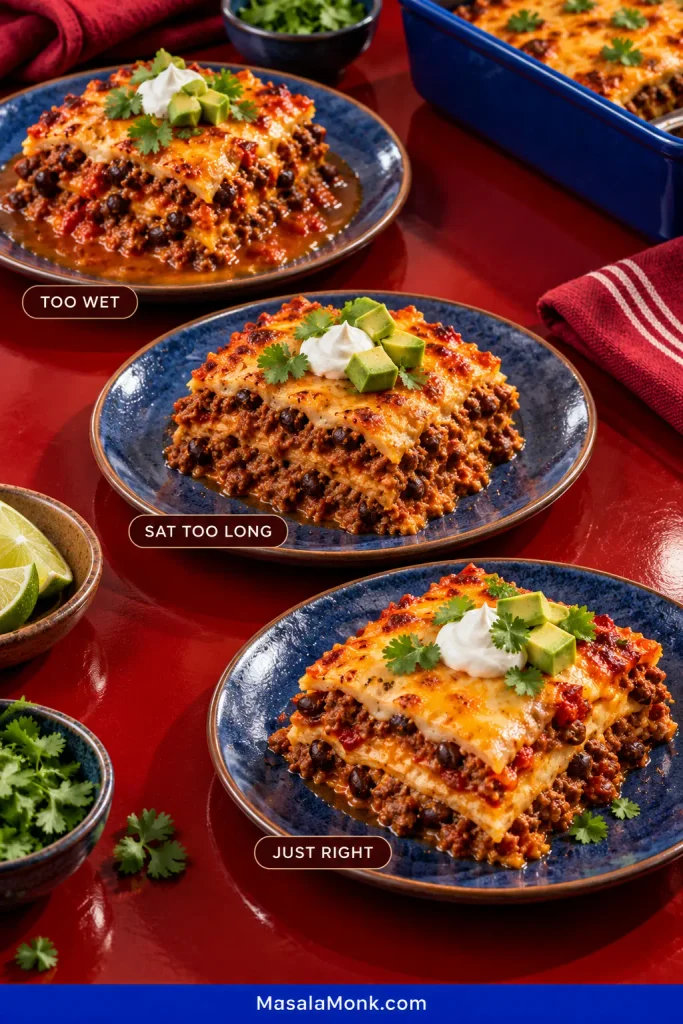
Common Taco Casserole Problems and Fixes
| What happened | Likely cause | What to do |
|---|---|---|
| Liquid gathers around the slice | The skillet mixture went into the dish too wet | Reduce it longer next time and use a thicker salsa. |
| Layers blur together but there isn’t a puddle | The assembled casserole sat too long before baking, so the tortillas absorbed more salsa | Assemble closer to baking when firmer tortilla layers matter. |
| First slice falls apart | It was cut while very hot | Give the pan 5–10 minutes before cutting. Expect the first piece to be the messiest one. |
| Casserole feels dry | The skillet reduced too far or the pan baked too long | Stop while the meat is glossy and pull the dish once the edges bubble and the cheese melts. |
| Beef feels pasty | It was broken very finely or simmered too long in salsa | Leave some small crumbles when browning and shorten the final simmer. |
| Casserole tastes too salty | Seasoning, salsa and cheese all contributed salt | Taste the skillet before adding more seasoning. |
| Hot enough but still bland | It may need salt or acidity rather than more chile | Check the salt and add lime at the table. |
| Chips turned soft | They baked in the steam | Add them after the casserole comes out. |
Storage, Freezing and Reheating
How Long Does Taco Casserole Keep?
Refrigerate leftovers promptly and use them within 3–4 days. The tortillas will soften further overnight; that comes with storing a layered casserole.
Can You Freeze Taco Casserole?
Yes. For the best tortilla texture, cool individual portions, pack them airtight and use them within about 2–3 months. If texture matters more than convenience, freeze the cooked beef-and-bean mixture separately and assemble with fresh tortillas later.
How to Reheat Taco Casserole
Microwave: loosely cover an individual portion and reheat until the center reaches 165°F / 74°C.
Oven: cover several portions and reheat at 325–350°F / 165–175°C until the center reaches 165°F / 74°C. Uncover for the last few minutes if you want the cheese on top to dry slightly and melt again.
Add fresh toppings—lettuce, avocado, sour cream and chips—after reheating, not before.
Taco casserole is forgiving once what’s in the skillet is under control. The tortillas don’t have to line up perfectly, and the first square out of the dish may never look quite as tidy as the second.
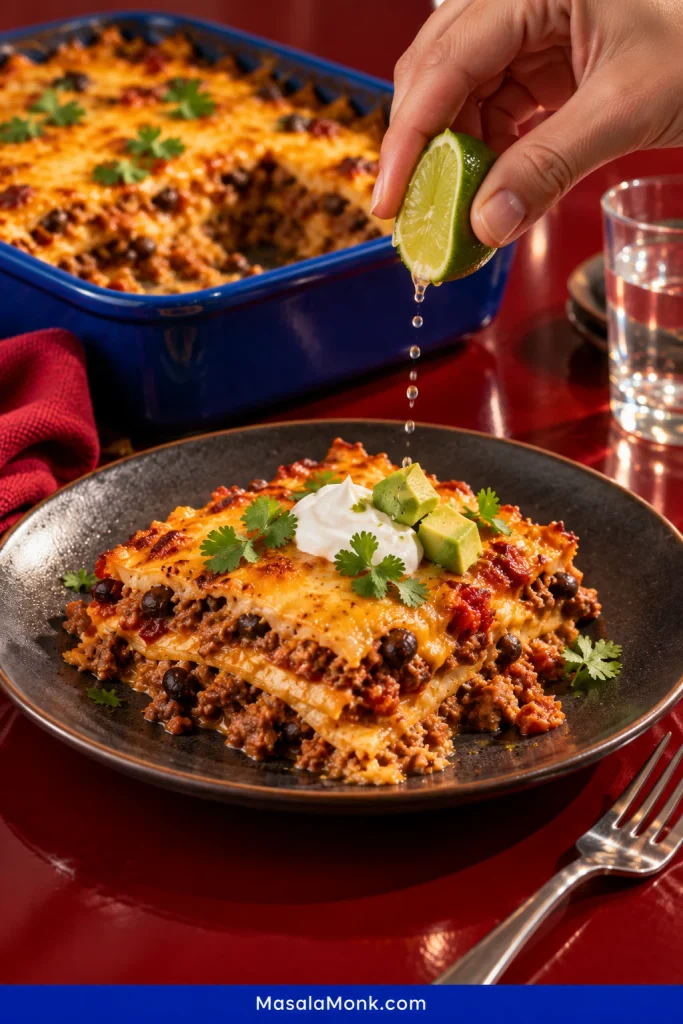
Cut a generous piece while the cheese is soft, squeeze over a little lime and finish it at the table.
Back to Recipe · Guide Contents · Moisture Guide · Back to Top








