Posted on Leave a comment

Korean Beef Bowl Recipe: 20-Minute Ground Beef Rice Bowls

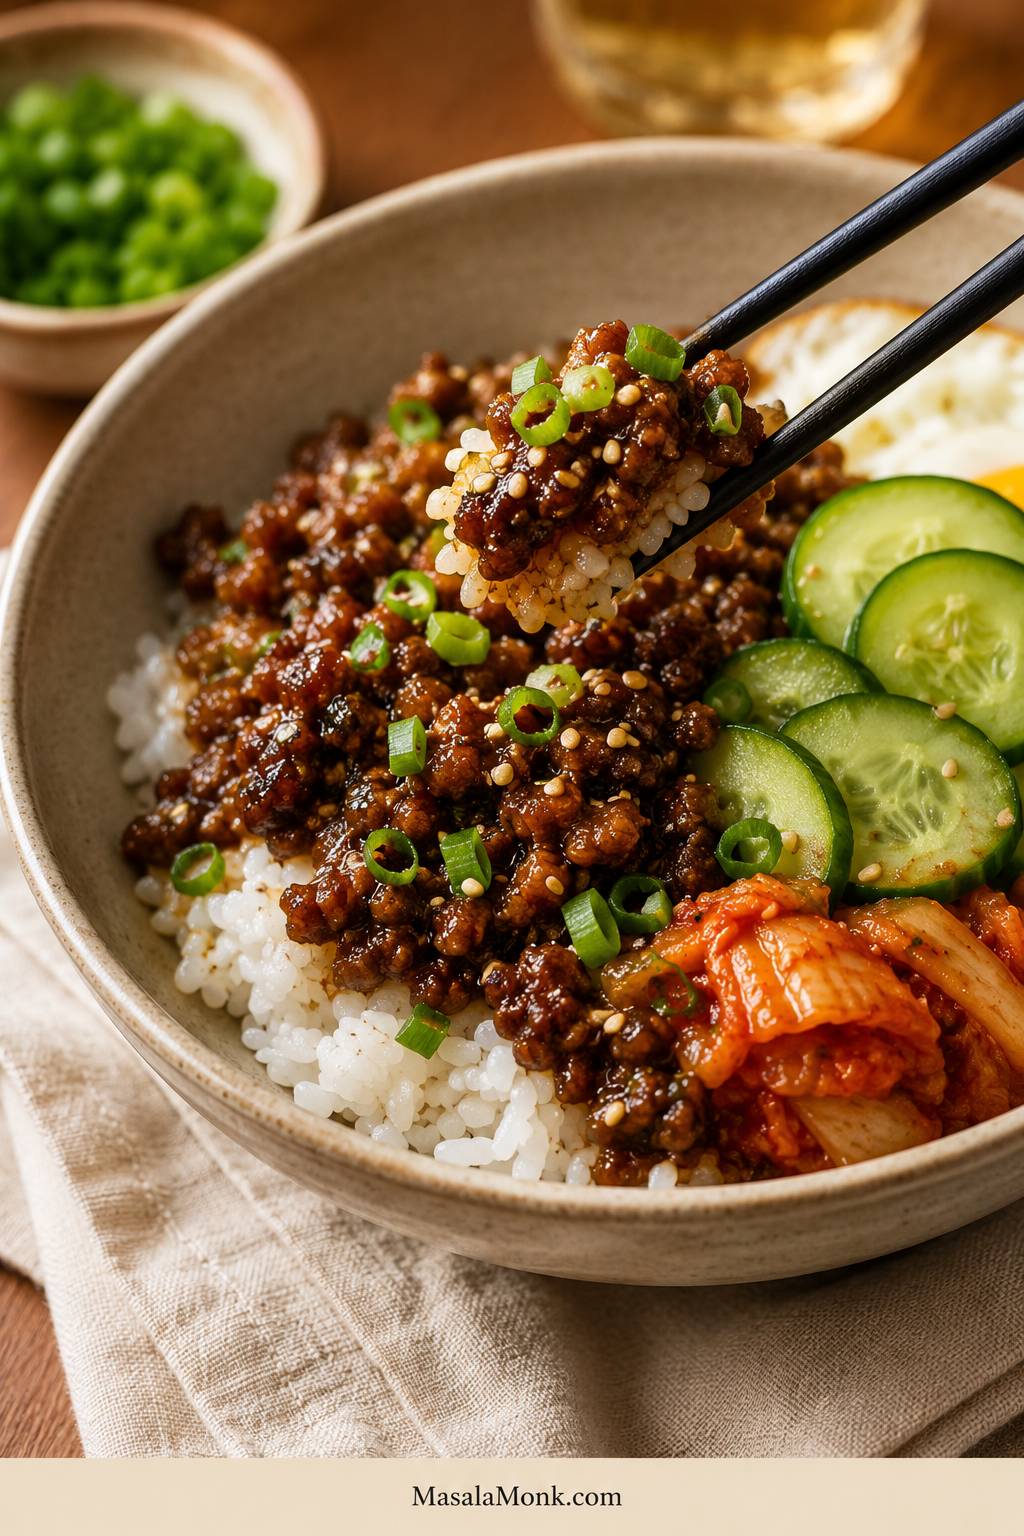
Ceramic bowl of white rice topped with glossy ground beef, sliced cucumber, scallions, sesame seeds, kimchi, and chopsticks lifting a bite.

This Korean beef bowl recipe is for the nights when you have ground beef in the fridge, rice ready or almost ready, and no patience for a complicated dinner. In about 20 minutes, the beef turns saucy, garlicky, a little sweet, and deeply savory, with browned edges and a pan sauce that clings to every crumble.

With rice, beef, and one fresh topping, this is already dinner. Everything else — kimchi, carrot, sesame seeds, a fried egg, or a creamy gochujang drizzle — just makes it feel more complete.

You do not need a perfect topping spread. One crunchy or bright thing is enough to make the bowl work.

The idea is simple: one sauce ratio, three flavor paths, and a bowl you can build around whatever you have. Keep it mild, add gochujang for heat, or make it rounder and more bulgogi-style with grated apple or pear.

Small effort, big dinner: saucy beef, warm rice, one fresh crunch, and a sauce you can keep mild or make spicy. This is a 20-minute recipe when cooked rice is ready. If you are starting rice from scratch, this guide to cooking perfect rice helps with stovetop, rice cooker, and Instant Pot timing.

Make This Tonight

If you want the fastest path to dinner, start here. This gives you the full sweet-savory Korean-inspired beef bowl feeling with the fewest moving parts.

Beef1 lb / 450–500 g ground beef or beef mince
Sauce¼ cup soy, 2–3 tbsp sweetener, 1 tbsp vinegar, 2 tsp sesame oil, garlic, ginger
Rice3–4 cups cooked rice, warm before the beef is done
Best toppingsCucumber, scallions, sesame seeds, fried egg if you have time

Bowl formula: warm base + saucy beef + one fresh crunch + one finish. That can be as simple as rice, beef, cucumber, and sesame seeds.

The key move is to brown the beef first, then add the sauce. If the sauce goes in too early, the beef simmers and tastes flatter. Brown it first, and the sauce clings to deeper, better-tasting crumbles.
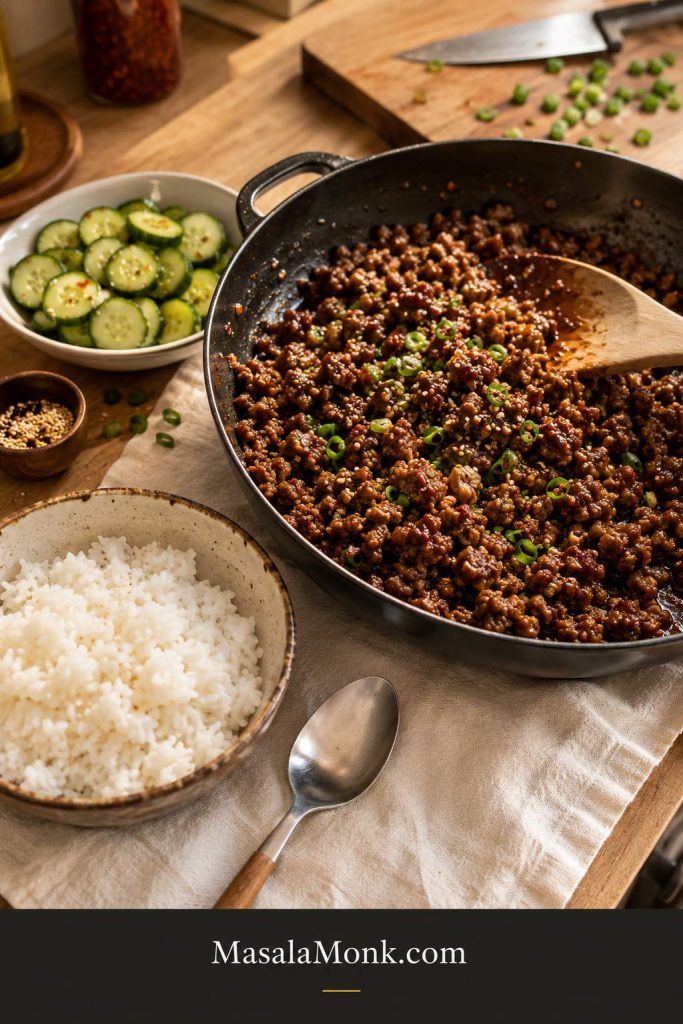
Dark skillet of saucy ground beef beside white rice, sliced cucumber, scallions, and sesame seeds on a warm kitchen counter.
For a 20-minute dinner, keep rice and cucumber ready while the beef simmers; once the sauce thickens, the skillet can go straight into bowls.

What You’ll Need

You do not need much to make this taste good. The beef brings richness, the sauce brings that salty-sweet garlic-soy flavor, and the toppings keep everything fresh enough to go back for another bite.
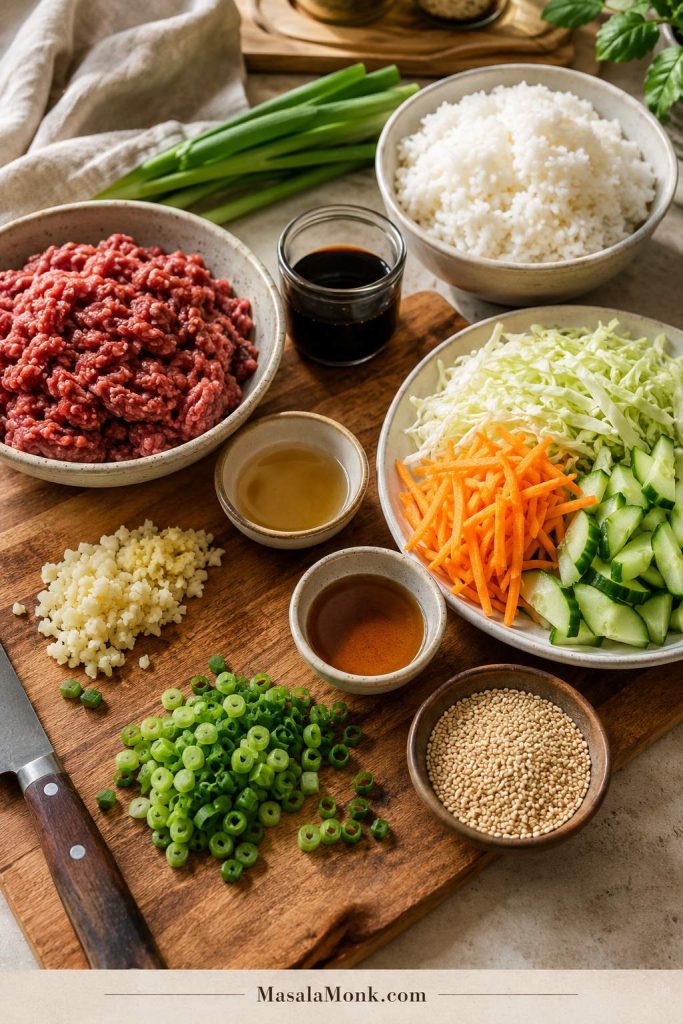
Ground beef, cooked rice, soy sauce, sesame oil, garlic, ginger, scallions, cucumber, carrot, cabbage, and sesame seeds arranged for cooking.
The ingredient list stays weeknight-friendly: ground beef for speed, rice for comfort, sauce for flavor, and fresh toppings for balance.

Ground Beef or Beef Mince

Use 1 lb / 450–500 g ground beef or beef mince for 4 bowls. The method is the same either way, so use the pack size and wording common where you live.

If you only remember one thing, use 90/10. It browns nicely, stays juicy, and does not leave the bowl greasy. 85/15 tastes richer but often needs draining, while 93/7 is leaner and needs a little more care so it does not dry out.

Beef type Best for Cooking note
85/15 Juicier bowls, better browning, richer flavor. Drain excess fat if the pan looks greasy before adding sauce.
90/10 Best all-purpose choice. Enough flavor, but not too greasy.
93/7 Leaner meal prep bowls. Add a little oil if needed and avoid overcooking.

Aromatics

Fresh garlic and ginger make the pan smell like dinner almost immediately. Use 3–4 garlic cloves and about 1 teaspoon grated ginger. Scallion whites or a little grated onion can also go into the pan for extra depth.

Rice and Toppings

Warm cooked rice is the easiest base. For toppings, use cucumber, carrot, cabbage, scallions, sesame seeds, kimchi, or egg. Even a simple bowl with rice, beef, scallions, and sesame seeds can still feel complete.

US and Metric Measurements

Measurements are forgiving here. The sauce does not need laboratory precision, but these amounts give you a reliable starting point before you adjust sweetness, heat, or salt at the end.

Ingredient US measure Metric measure
Ground beef / beef mince 1 lb 450–500 g
Low-sodium soy sauce ¼ cup 60 ml
Brown sugar 2–3 tbsp about 25–38 g
Honey, if using instead 2–3 tbsp about 42–63 g
Rice vinegar 1 tbsp 15 ml
Toasted sesame oil 2 tsp 10 ml
Gochujang, optional 1–2 tbsp 18–36 g
Cooked rice 3–4 cups about 500–750 g, depending on rice type
Grated apple or pear, optional 2–3 tbsp 30–45 g
Grated onion, optional 1–2 tbsp 15–30 g

Korean Beef Bowl Sauce

The sauce is what makes the beef taste deeper than a 20-minute dinner usually does. It works because every bite has balance: salty soy, sweetness from brown sugar or honey, acidity from rice vinegar or kimchi, fat from beef and sesame oil, heat if you add gochujang, and crunch from cucumber or cabbage.

That is why the bowl tastes complete even when the topping list is short.
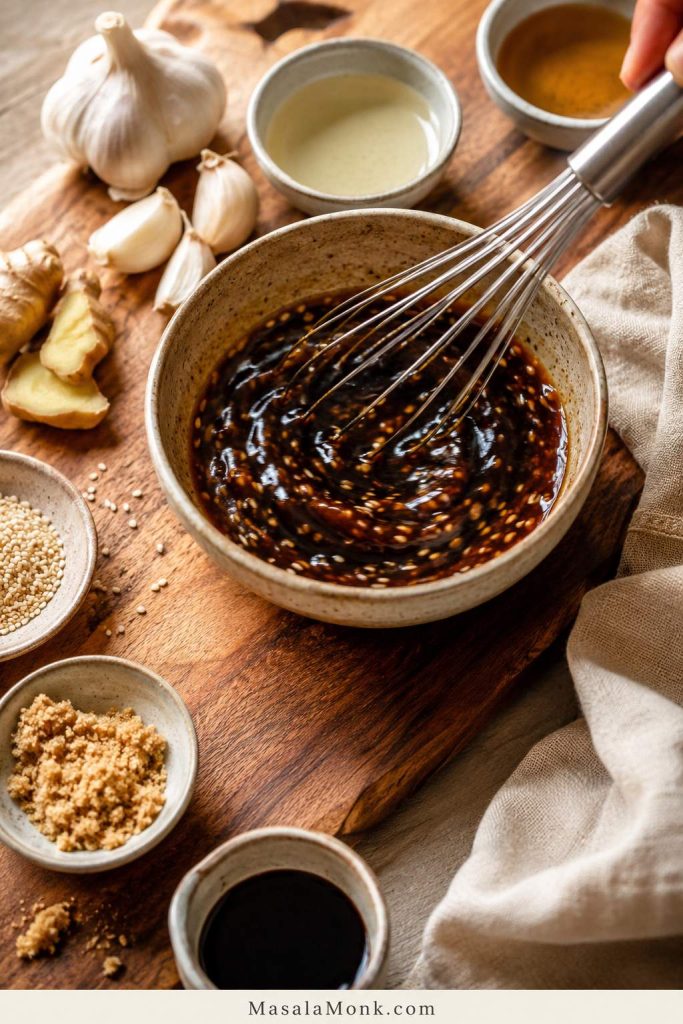
Small ceramic bowl of dark soy-garlic-sesame sauce being whisked, with garlic, ginger, brown sugar, sesame seeds, and sauce ingredients nearby.
The base sauce sets the flavor before heat: soy sauce, sweetener, rice vinegar, sesame oil, garlic, and ginger create the salty-sweet backbone.

Save This Sauce Ratio

For 1 lb / 450–500 g beef, remember this base formula:

  • ¼ cup / 60 ml low-sodium soy sauce for salt and savoriness
  • 2–3 tablespoons brown sugar or honey for sweetness and gloss
  • 1 tablespoon rice vinegar for balance
  • 2 teaspoons toasted sesame oil for aroma
  • Garlic + ginger for the flavor base
  • Optional: 1–2 tablespoons gochujang for heat, or grated apple/pear for bulgogi-style sweetness

Make It Mild, Medium, Spicy, or Bulgogi-Style

  • Mild: skip the gochujang and use the soy-garlic-sesame sauce as written.
  • Medium: add 1 tablespoon gochujang for color, depth, and gentle heat.
  • Spicy: add 2 tablespoons gochujang, then balance the bowl with cucumber, cabbage, rice, or egg.
  • Bulgogi-style: add 2–3 tablespoons grated apple or pear and 1–2 tablespoons grated onion.

Not sure which one to make? Start with the mild version. For the best all-around bowl, add 1 tablespoon gochujang and 2 tablespoons grated apple or pear; it stays balanced, slightly spicy, and deeper without becoming difficult.
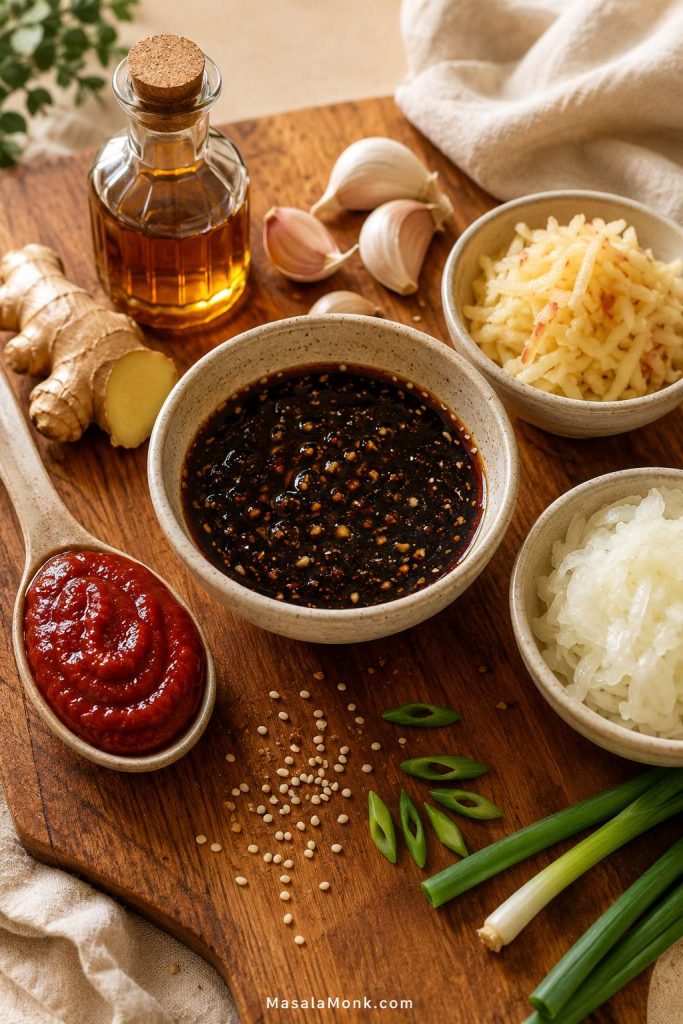
Central bowl of dark soy-garlic sauce with red gochujang on a spoon, grated apple or pear, grated onion, garlic, ginger, sesame oil, and scallions nearby.
From that same sauce base, gochujang adds heat, while grated apple or pear and onion create a sweeter, rounder bulgogi-style beef bowl.
Sesame oil note: toasted sesame oil tastes strongest when it is not cooked hard for too long. Whisk it into the sauce for ease, or save half to drizzle in at the end if you want a stronger sesame aroma.

Quick Sauce Adjustments

  • Less sweet: use 2 tablespoons brown sugar or honey instead of 3.
  • More saucy: add 1–2 tablespoons water while simmering.
  • Spicier: add more gochujang, gochugaru, chili flakes, or sriracha-style sauce.
  • Brighter: finish with a small splash of rice vinegar.
  • More sesame-rich: finish with sesame seeds or a tiny drizzle of toasted sesame oil.

Ingredient Swaps

Dinner can still happen even if you are missing one ingredient. The flavor will change slightly, but these swaps keep the bowl moving in the same sweet-savory direction.

If you do not have… Use instead
Rice vinegar Apple cider vinegar, white vinegar, or a squeeze of lime juice.
Gochujang Chili flakes, gochugaru, sriracha-style sauce, or simply skip it.
Fresh ginger ¼–½ teaspoon ground ginger, or leave it out if needed.
Brown sugar Honey, maple syrup, white sugar, or coconut sugar.
Soy sauce Tamari for gluten-free, or coconut aminos for a milder option.
Sesame oil Skip it if needed, then finish with sesame seeds for some nuttiness.
Apple or pear Leave it out, or use a little grated onion for body.

Back to top ↑

Simple Equipment

No special equipment is needed, but a wide skillet makes a real difference. A crowded pan traps moisture, which makes the beef steam instead of brown. You only need a wide skillet, a small bowl for the sauce, and a spatula or wooden spoon.

Before you start: have cooked rice and toppings ready. The beef cooks quickly, and the bowl tastes best when the hot, saucy beef goes straight over warm rice.

How to Make the Bowls

Once the sauce is mixed, the skillet part moves fast: brown the beef, simmer until the sauce coats the crumbles, then build the bowls while everything is still hot.

Step 1: Make the Sauce

In a small bowl, whisk together soy sauce, brown sugar or honey, rice vinegar, garlic, ginger, and optional gochujang. Whisk in the sesame oil too, or save half to drizzle in at the end for a stronger sesame aroma. For the bulgogi-style version, add grated apple or pear, grated onion, and optional mirin.

Whisk until the sugar dissolves and the gochujang, if using, is fully mixed in.

Step 2: Brown the Beef

Heat a wide skillet over medium-high heat. Add the beef. If it is very lean, add 1 tablespoon neutral oil first.

Press the beef into an even layer and let it cook undisturbed for 1–2 minutes before breaking it apart. That short pause helps the bottom brown instead of turning gray and watery.
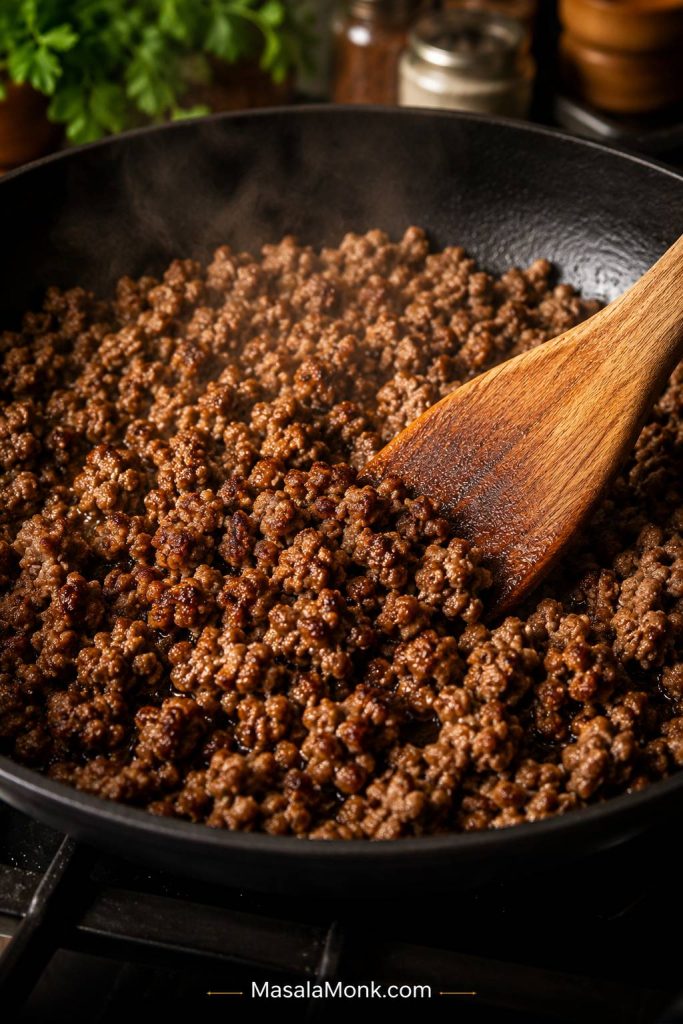
Browned ground beef crumbles cooking in a dark skillet with a wooden spatula and steam rising.
Before the sauce goes in, brown the ground beef well; those caramelized edges keep the finished bowl from tasting flat.

Step 3: Break It Into Crumbles

Use a wooden spoon or spatula to break the beef into small crumbles. Cook until browned and fully cooked. If the pan looks watery before the sauce goes in, drain it; sauce clings to browned beef, not liquid.

Food safety note: ground beef should be cooked to 160°F / 71°C. A thermometer is the most reliable check; color alone can be misleading. If you do not have one, cook until the beef is steaming hot throughout and fully cooked through.

Step 4: Add the Sauce

Pour the sauce into the skillet and stir well. When the garlic and ginger hit the hot beef, it should smell savory and warm almost immediately. If anything smells sharp or scorched, lower the heat before the sauce reduces too far.
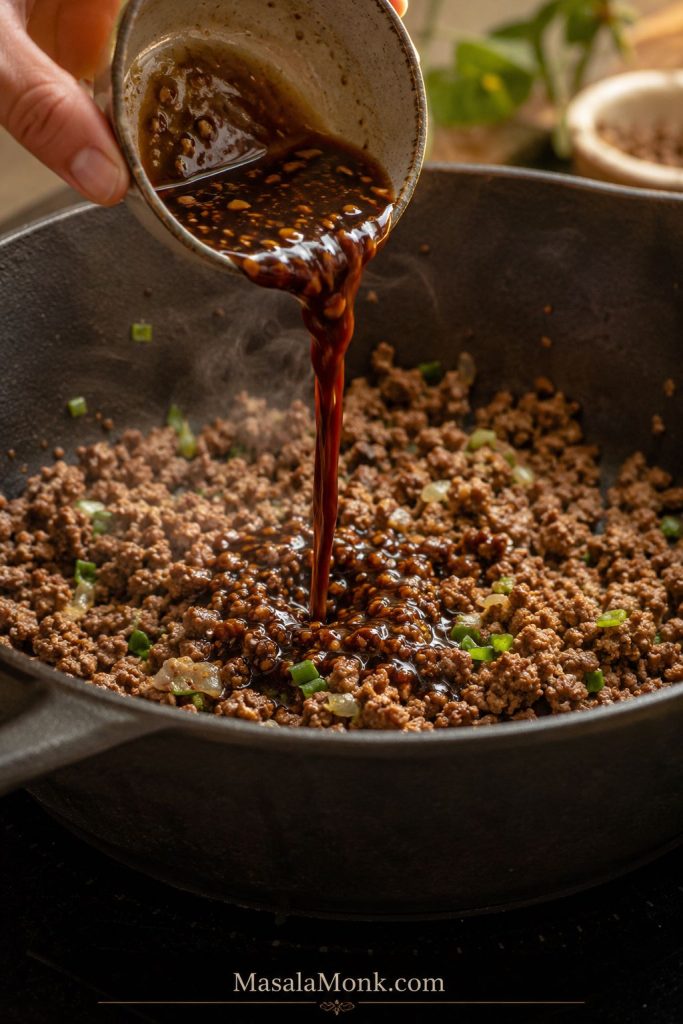
Hand pouring dark soy-garlic sauce from a small bowl into browned ground beef in a skillet.
After browning, let the sauce bubble briefly so the soy-garlic flavor coats the beef instead of staying loose in the pan.

What Glossy Korean Ground Beef Should Look Like

Let the sauce bubble gently for 2–4 minutes, until it looks glossy, reduced, and clings to the beef instead of running across the pan. It should coat the crumbles, not pool like soup.
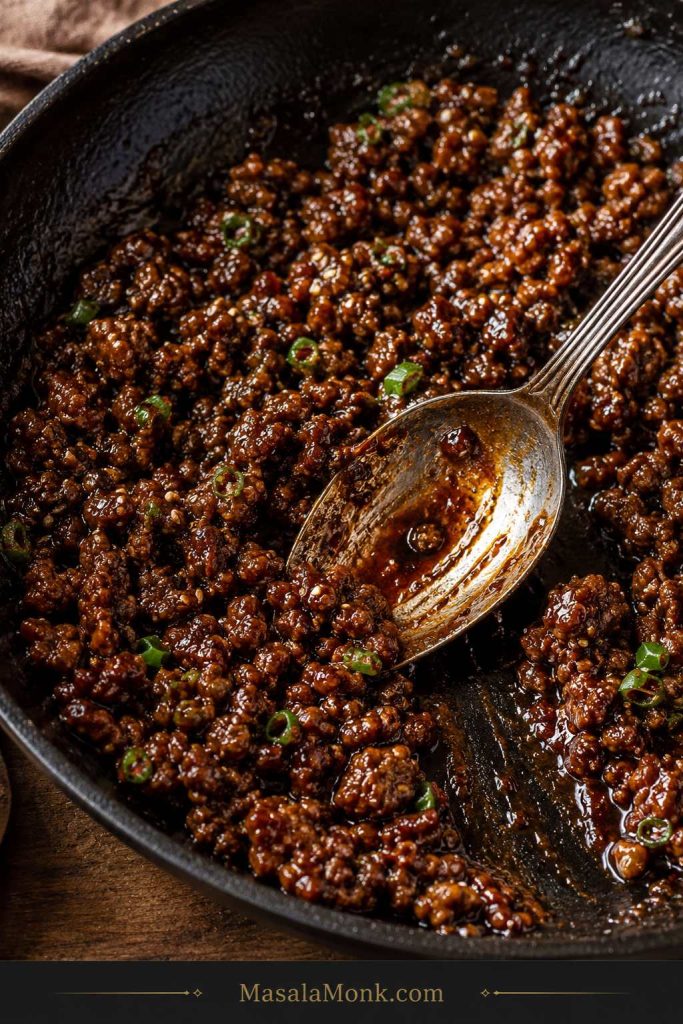
Saucy Korean-style ground beef in a dark skillet with a spoon dragged through the thickened sauce.
Once the sauce clings to the crumbles, the beef is ready; that texture helps it season the rice without making the bowl watery.

Taste the beef before you build the bowls. Too salty? Add more rice or cucumber. Flat? Splash in rice vinegar. Want more heat? Stir in a little gochujang at the end.

Step 5: Build the Bowls

Divide warm rice between bowls. Spoon the saucy beef over the rice. Add cucumber, carrot, cabbage or lettuce, scallions, sesame seeds, kimchi, and egg if using.
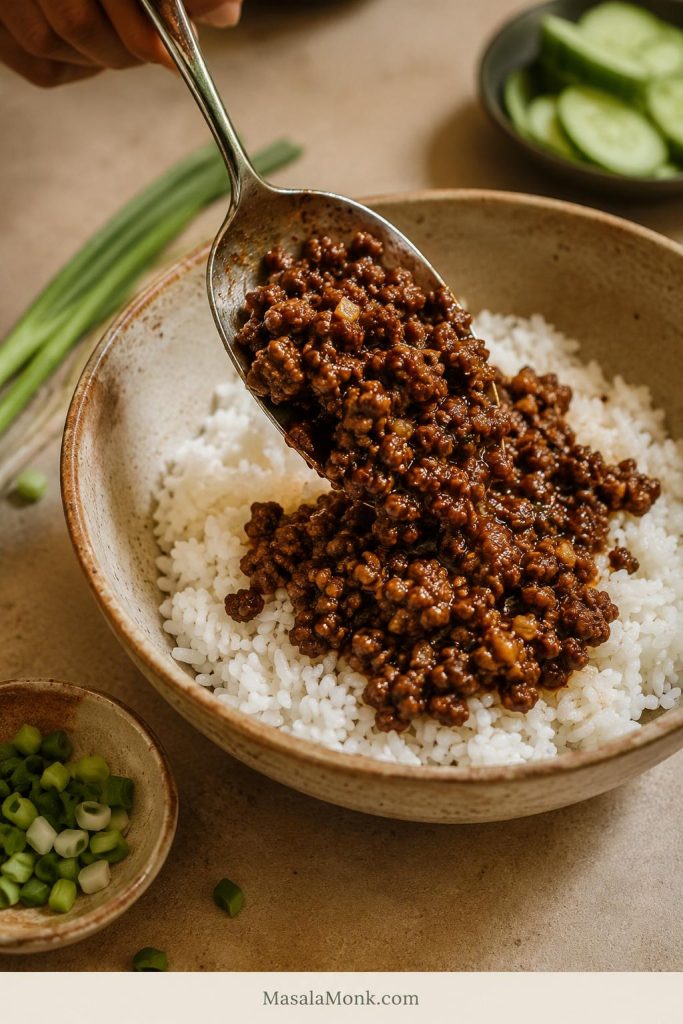
Spoon adding saucy ground beef over white rice in a ceramic bowl, with cucumber slices and chopped scallions nearby.
Next, spoon the beef over hot rice, then keep the bowl simple with one fresh crunch and one finish instead of overloading the toppings.

Step 6: Finish and Serve

Finish with extra sesame seeds, sliced scallions, a drizzle of sesame oil, or a spoonful of gochujang sauce. For a creamy drizzle, mix 2 tablespoons mayo with 1–2 teaspoons gochujang and a few drops of rice vinegar. Add a tiny splash of water only if you want it thinner. For a homemade version, this mayo guide includes a gochujang mayo variation.

Serve while the beef is hot, the rice is warm, and the vegetables are still crisp.

Korean Beef Bowl Recipe

Easy ground beef or beef mince rice bowls with sticky soy-garlic beef, warm rice, crunchy toppings, optional gochujang heat, and a bulgogi-style apple or pear upgrade.

Prep Time5 minutes
Cook Time15 minutes
Total Time20 minutes
Servings4 bowls

Total time assumes cooked rice is ready and toppings are simple. Add about 5 minutes for several toppings, fried eggs, or the bulgogi-style upgrade.

Equipment

  • 12-inch skillet or large nonstick skillet
  • Small mixing bowl
  • Whisk or fork
  • Spatula or wooden spoon
  • Rice cooker or pot, if cooking rice fresh
  • Optional microplane or box grater

Ingredients

For the Beef and Bowls

  • 1 lb / 450–500 g ground beef or beef mince, preferably 90/10
  • 3–4 cups cooked rice, warm and ready before the beef starts cooking
  • 1 tablespoon neutral oil, only if using very lean beef
  • 2–3 scallions, sliced, whites and greens separated if possible
  • 1 small cucumber, sliced
  • 1 medium carrot, shredded or julienned
  • 1 cup shredded cabbage or lettuce
  • 1–2 teaspoons sesame seeds
  • Kimchi, optional
  • 4 fried eggs or soft-boiled eggs, optional

For the Sauce

  • ¼ cup / 60 ml low-sodium soy sauce
  • 2–3 tablespoons brown sugar or honey
  • 1 tablespoon rice vinegar
  • 2 teaspoons toasted sesame oil
  • 3–4 garlic cloves, minced
  • 1 teaspoon fresh ginger, grated
  • 1–2 tablespoons gochujang, optional
  • 1–2 tablespoons water, if needed

Optional Bulgogi-Style Upgrade

  • 2–3 tablespoons grated apple or Asian pear
  • 1–2 tablespoons grated onion
  • 1 tablespoon mirin or rice wine, optional

Instructions

  1. Have the rice ready. This recipe moves quickly once the beef starts cooking, so use warm cooked rice, leftover rice, microwave rice, or rice already prepared in a cooker.
  2. Make the sauce. In a small bowl, whisk together soy sauce, brown sugar or honey, rice vinegar, garlic, ginger, and optional gochujang. Whisk in the sesame oil too, or save half to drizzle in at the end for a stronger sesame aroma. If using the bulgogi-style upgrade, whisk in grated apple or pear, grated onion, and mirin.
  3. Brown the beef. Heat a large skillet over medium-high heat. Add the beef. Press it into an even layer and let it brown for 1–2 minutes before breaking it apart.
  4. Cook through. Break the beef into small crumbles and cook until browned, steaming hot, and cooked through. Drain excess liquid if the pan looks watery.
  5. Add the sauce. Pour the sauce over the beef and stir well. Simmer for 2–4 minutes, until it looks glossy, reduces slightly, and coats the crumbles. Add a splash of water if it becomes too thick.
  6. Build the bowls. Divide warm rice between bowls. Spoon the saucy beef over the rice.
  7. Add toppings. Top with cucumber, carrot, cabbage or lettuce, scallions, sesame seeds, kimchi, and egg if using.
  8. Serve. Finish with extra sesame seeds, a drizzle of sesame oil, extra gochujang sauce, or a little gochujang mayo if you want a creamy finish.

Recipe Notes

  • Cook ground beef to 160°F / 71°C for food safety.
  • Use low-sodium soy sauce because the sauce reduces in the skillet.
  • Total time assumes cooked rice is ready and toppings are simple.
  • If you only have beef, sauce, rice, scallions, and sesame seeds, the bowl still works.
  • Mild bowl: skip the gochujang or serve it on the side.
  • Medium heat: use 1 tablespoon gochujang.
  • Spicier version: use 2 tablespoons gochujang.
  • Bulgogi-style flavor: add grated apple or pear and grated onion.
  • Store beef, rice, and fresh toppings separately for the best meal prep texture.

What Makes This a Korean-Inspired Beef Bowl?

Think of this as a weeknight shortcut built from the flavors people love in Korean BBQ-style beef: soy, garlic, ginger, sesame, sweetness, and optional gochujang. Ground beef or beef mince makes it fast. Rice makes it filling. Cucumber, cabbage, kimchi, scallions, or egg make it feel like a complete bowl instead of just beef over rice.

Korean Beef Bowl vs Bulgogi vs Bibimbap

This bowl borrows the sweet-savory garlic-soy comfort people love in bulgogi-style beef, but it keeps the method simple. Here is the quick difference, so expectations are clear.

Dish What it usually means How this recipe relates
Korean beef bowl A beef and rice bowl with Korean-inspired sauce and toppings. This recipe fits that style directly.
Bulgogi Traditional Korean marinated beef, usually thinly sliced and cooked quickly. This version uses ground beef, so it is faster but not traditional bulgogi.
Bulgogi bowl A rice bowl built around bulgogi or bulgogi-style beef. Add apple or pear and onion to the sauce for a closer bulgogi-style flavor.
Bibimbap Korean mixed rice bowl with vegetables, gochujang, egg, and often beef. Add egg and vegetables for a similar feel, while keeping this recipe simpler.

For traditional bulgogi, use thinly sliced beef and marinate it before cooking. The Smithsonian Center for Folklife and Cultural Heritage describes bulgogi as thinly sliced beef marinated with soy sauce, sugar or honey, sesame oil, garlic, onion, and often Asian pear. That is why the apple-or-pear upgrade works so well in this shortcut version. Read more about bulgogi.

For tonight, ground beef gives you the shortcut: the same garlic-soy-sesame comfort, but in a pan that can be done while the rice is still steaming.

Back to top ↑

How to Brown Ground Beef Without Steaming It

If your beef turns gray or watery, the pan is usually crowded or stirred too soon. Use this checklist before adding sauce so the finished bowl tastes browned, not boiled.

  • Use a wide pan. A crowded skillet traps moisture.
  • Start with medium-high heat. The beef should sizzle when it hits the pan.
  • Do not stir immediately. Let the beef sit for 1–2 minutes so it can form browned edges.
  • Drain excess liquid. Sauce sticks better to browned beef than to watery beef.
  • Add sauce after browning. If sauce goes in too early, the beef simmers before it browns.

Best Rice to Use

Warm white rice gives this bowl its soft, comforting base, especially when the beef is glossy and salty-sweet. Jasmine rice, short-grain rice, or medium-grain rice all work well because they catch the sauce and let the beef stay the main event.
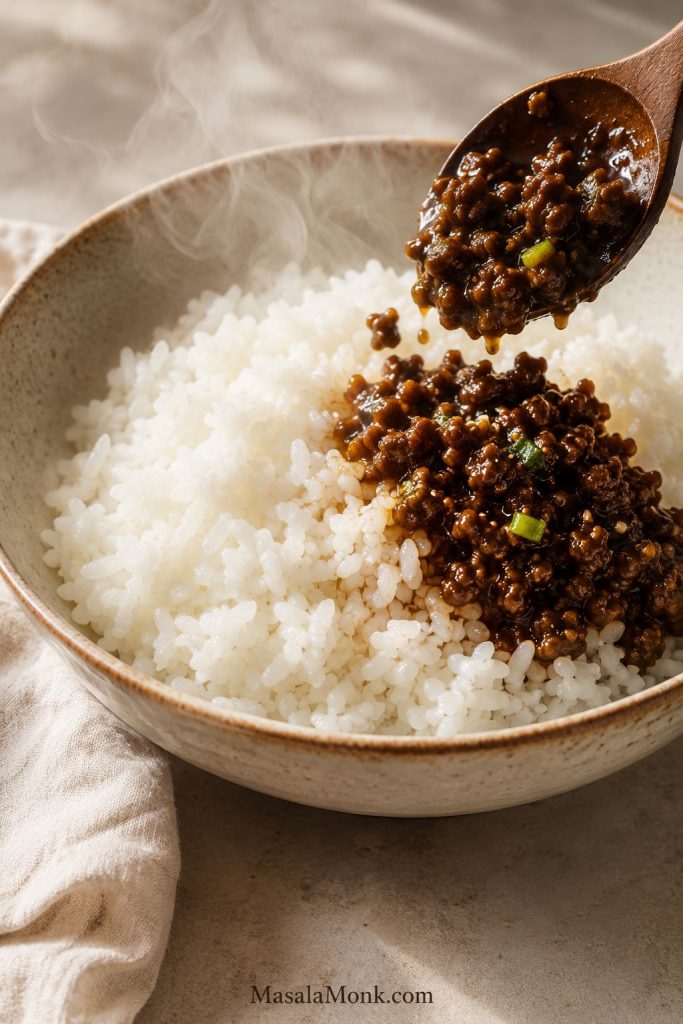
Close-up of fluffy white rice in a ceramic bowl with a small amount of saucy ground beef being added to one side.
Warm rice works as the soft base because it catches the sauce; even a small spoonful of beef can season the grains.
Base Best for
White rice Classic, soft, comforting bowl base.
Jasmine rice Fragrant weeknight rice bowls.
Short-grain rice Stickier bowl texture.
Brown rice Meal prep and nuttier flavor.
Cauliflower rice Low-carb bowls.
Noodles Turning the beef into a noodle bowl.
Lettuce cups A lighter, hand-held version.

If using leftover rice, cool it quickly, refrigerate it in a covered container, and reheat it until steaming hot.

Best Toppings, Sides, and Finishes

The toppings are not decoration here; they are what make a fast bowl feel fresh instead of tired. A little cold crunch, a little acid, and maybe an egg can make ground beef and rice feel like dinner you planned.
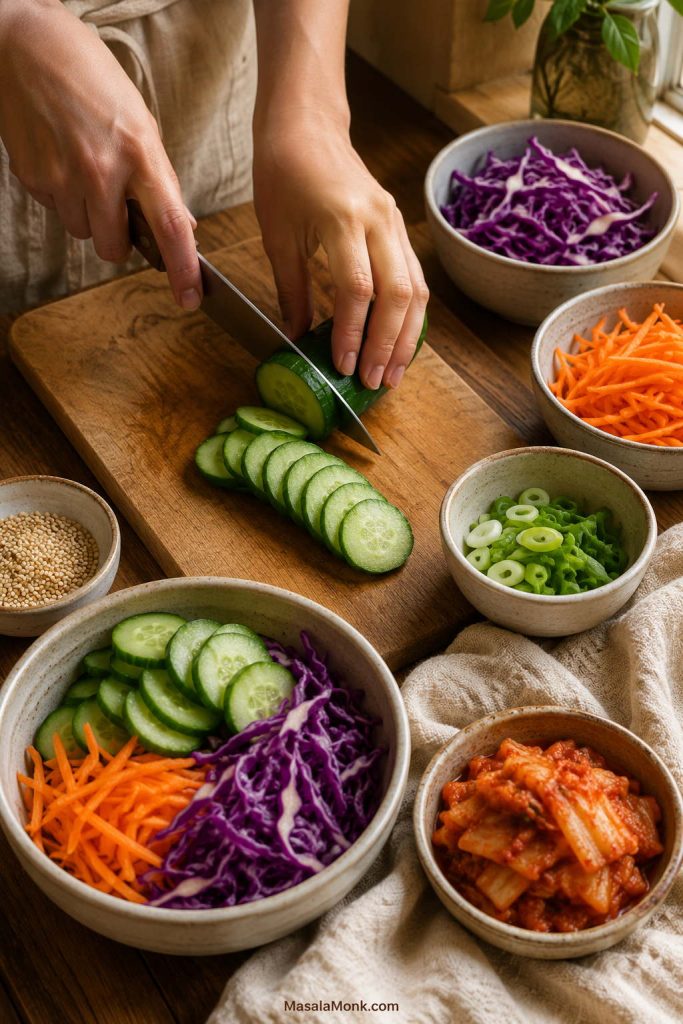
Hands slicing cucumber on a wooden board with shredded cabbage, carrot, scallions, sesame seeds, and kimchi nearby.
Meanwhile, fresh toppings do the work the beef cannot: cucumber cools, kimchi sharpens, cabbage crunches, and scallions wake up each bite.

If you only have rice, beef, scallions, and sesame seeds, you still have a good bowl. Add cucumber, kimchi, cabbage, or pickled onions when you want freshness. Add egg, avocado, noodles, or extra rice when you want it heartier.

Type Options Why it helps
Fresh and crunchy Cucumber, carrot, cabbage, lettuce, scallions Balances the rich beef and keeps the bowl from feeling heavy.
Acidic or fermented Kimchi, quick cucumber topping, pickled onions Adds brightness and cuts through the sweet-savory sauce.
Rich Fried egg, soft-boiled egg, avocado, gochujang mayo Makes the bowl more filling and satisfying.
Simple sides Cucumber salad, cabbage slaw, steamed broccoli, mushrooms, spinach Adds freshness or vegetables without changing the beef.
Flavor finish Sesame seeds, sesame oil, gochugaru, chili flakes Adds aroma, heat, and texture at the end.

The same bowl logic works beyond beef: warm base, protein, sauce, crunch, and a fresh finish. Once that structure is clear, you can turn the beef into rice bowls, lettuce cups, noodle bowls, or meal prep boxes without starting over.

Add an Egg

A fried egg makes the bowl richer and gives it a bibimbap-style feel. The yolk mixes into the rice and beef like a quick sauce. For meal prep, soft-boiled or jammy eggs are easier to make ahead; this air fryer hard-boiled eggs guide is useful if you want soft, jammy, or fully set eggs without boiling water.
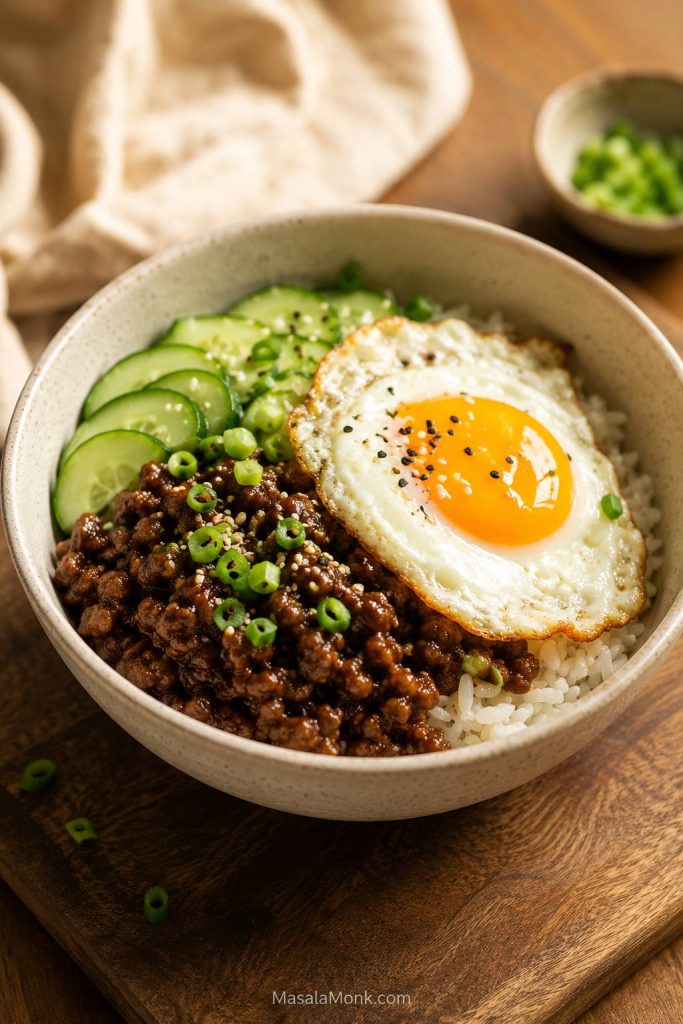
Korean beef rice bowl topped with a fried egg, ground beef, sliced cucumber, scallions, sesame seeds, and white rice.
Add a fried egg when you want the bowl to feel richer; the yolk softens the rice and gives the beef a bibimbap-style finish.

Quick Cucumber Topping

For a fast cucumber topping, mix thinly sliced cucumber with rice vinegar, a pinch of sugar or honey, a pinch of salt, sesame seeds, and optional chili flakes. Let it sit while the beef cooks.
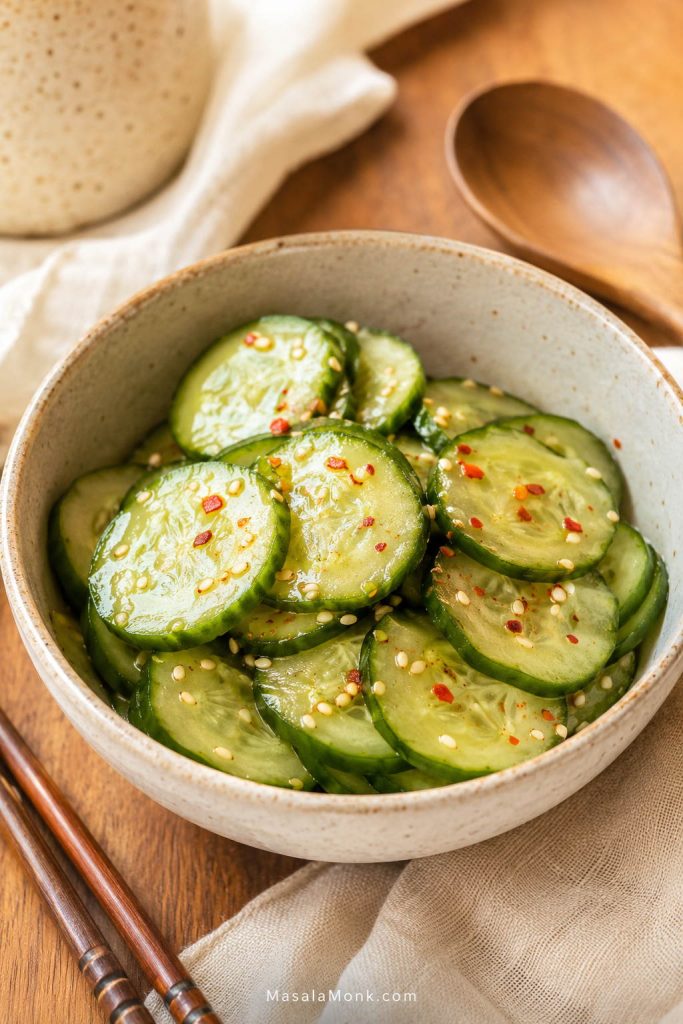
Ceramic bowl of sliced cucumber tossed with sesame seeds, chili flakes, and a glossy vinegar-style dressing.
A quick cucumber sesame topping is the easiest way to add crunch and acid when the beef sauce is sweet, salty, and rich.

It is not a full cucumber salad, but it gives the bowl a fresh, tangy contrast in just a few minutes. For a colder, crunchier side, this cucumber salad recipe works especially well with sweet-savory beef bowls.

Easy Bowl Builds

Use these when you want a quick decision instead of a long topping list. The beef is the same; the bowl changes depending on what you need that night.

Pantry Korean Beef Bowl

Use this build when you need dinner with the fewest toppings: rice, saucy beef, scallions, sesame seeds, and optional chili flakes.
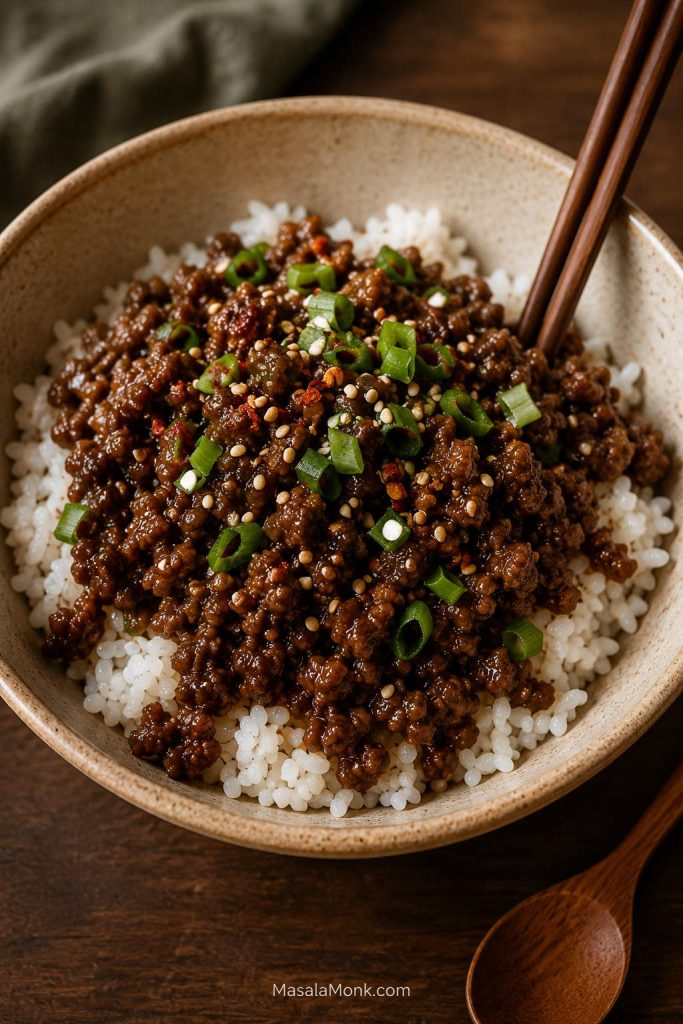
Simple ceramic bowl of white rice topped with ground beef, chopped scallions, sesame seeds, and chili flakes.
The pantry bowl proves the formula works with almost nothing extra: rice, beef, scallions, sesame, and chili flakes are enough for dinner.

Fresh Korean Beef Bowl

Choose this version when the beef tastes rich and you want more crunch: rice, beef, cucumber, carrot or cabbage, kimchi, and scallions.
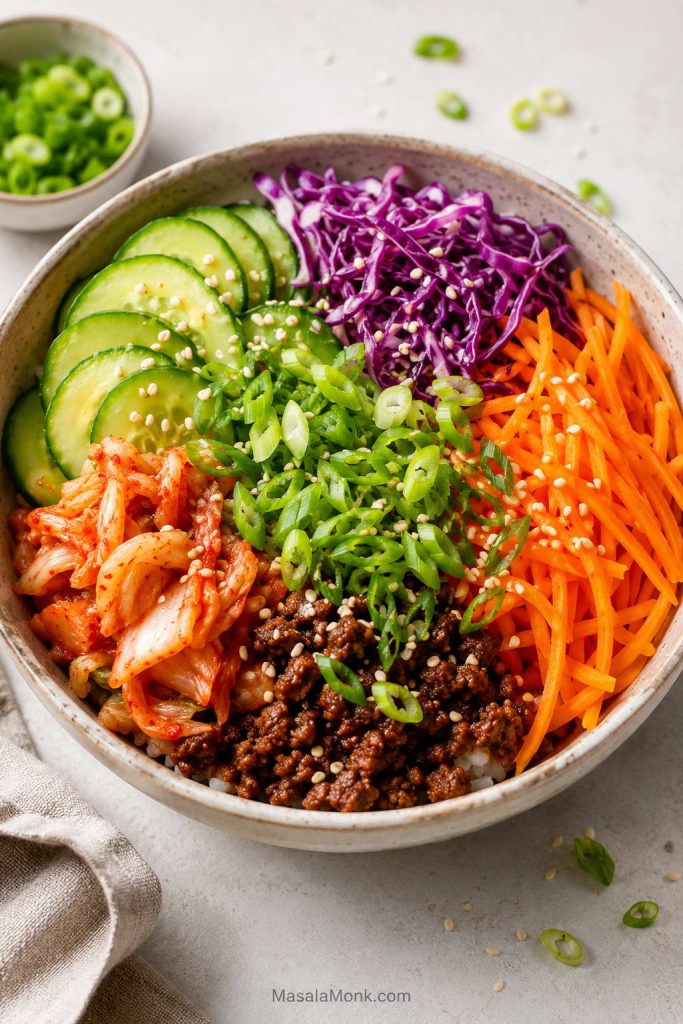
Bright rice bowl with ground beef, sliced cucumber, shredded carrot, purple cabbage, kimchi, scallions, and sesame seeds.
In the fresh bowl build, let cucumber, carrot, cabbage, kimchi, scallions, and sesame take up more space so the saucy beef feels lighter.

Loaded Gochujang Beef Bowl

Make this one when you want heat and fullness: gochujang beef, rice, fried egg, kimchi, cucumber, sesame, scallions, and a light creamy drizzle.
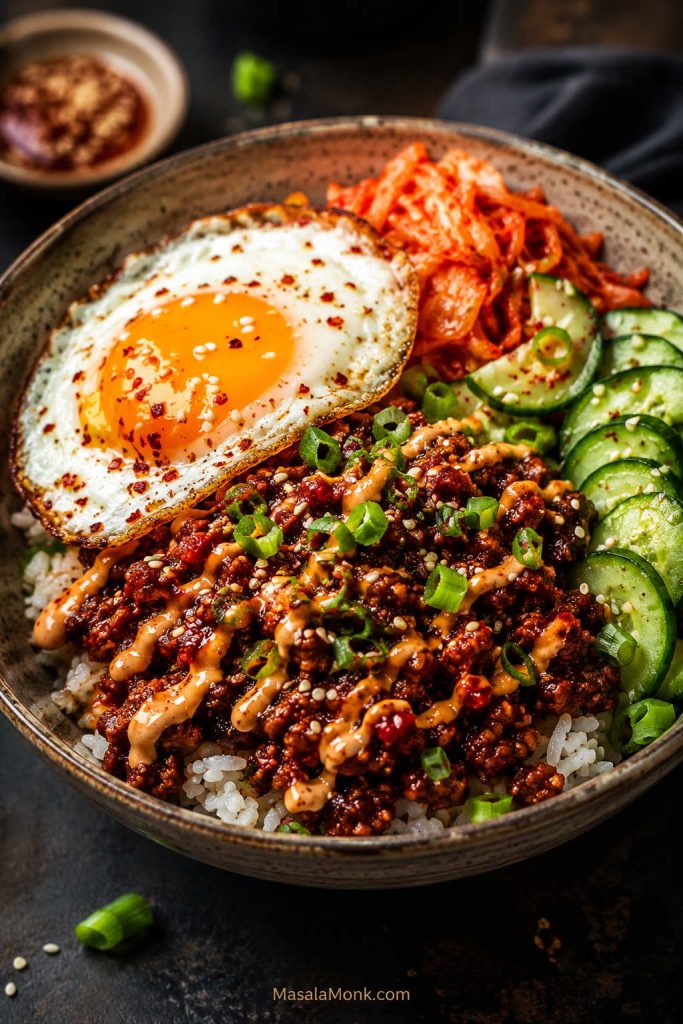
Loaded gochujang beef rice bowl with fried egg, kimchi, cucumber slices, scallions, sesame seeds, creamy drizzle, and white rice.
The loaded version uses gochujang beef, kimchi, cucumber, egg, sesame, scallions, and a light drizzle for a spicier bowl.
Choose your night: In a rush? Use rice, beef, scallions, and sesame. Need freshness? Add cucumber, cabbage, or kimchi. Need more protein? Add egg or extra beef. Need lower carb? Use cabbage, lettuce cups, cucumber, or cauliflower rice.

Other Ways to Use the Beef

Once you have the beef, it can go a lot of places: lettuce wraps, tacos, noodle bowls, fried rice, salad bowls, and meal prep boxes.

Low-Carb Korean Beef Bowl

For a lower-carb version, use cauliflower rice, shredded cabbage, lettuce cups, cucumber, or sautéed greens instead of rice. Keep the same sauce and add enough fresh crunch so the bowl still feels full and satisfying.
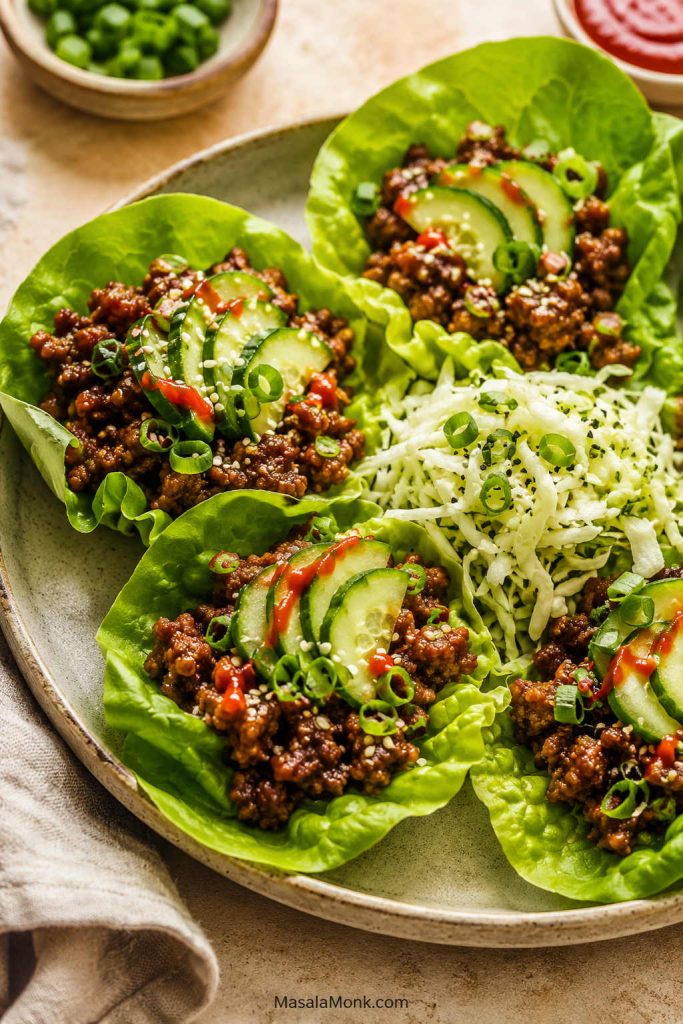
Lettuce cups filled with saucy ground beef, cucumber slices, scallions, sesame seeds, shredded cabbage, and a small red sauce drizzle.
Instead of rice, use lettuce cups or cabbage to keep the same saucy Korean beef flavor with more crunch and fewer carbs.

You can also use ground pork, turkey, or chicken with the same sauce. Pork tastes richer, while turkey and chicken are leaner and may need a little oil. Brown them well, cook them through, then let the sauce reduce until it coats the meat.

For a gluten-free bowl, use tamari or gluten-free soy sauce. Check your gochujang label too, because some brands contain wheat.

Back to top ↑

Meal Prep, Storage, and Reheating

These bowls work well for meal prep, but the best texture comes from storing the hot and fresh parts separately. The beef and rice can reheat together; the cold toppings should stay cold.

The only thing that really suffers in the fridge is the crunch, so keep cucumber, cabbage, kimchi, scallions, and creamy drizzles in separate containers. Add them after reheating so the bowl still tastes fresh.
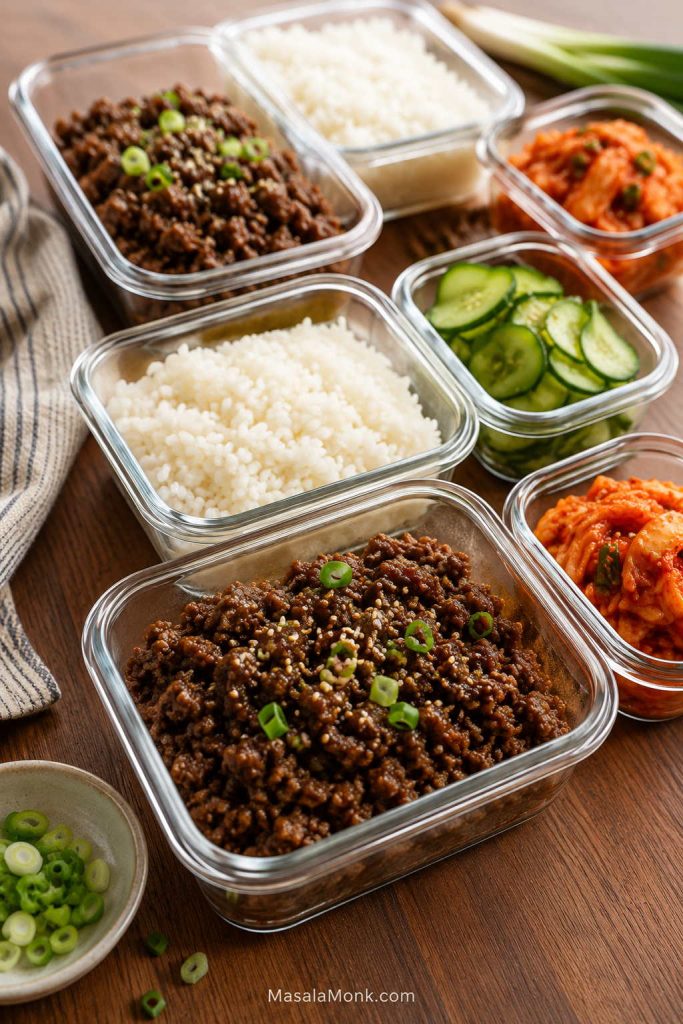
Glass meal prep containers with ground beef, white rice, sliced cucumber, kimchi, scallions, and sesame on a wooden table.
Meal prep works best when beef and rice stay separate from cucumber and kimchi, so reheated bowls still finish crisp.

Best Meal Prep Order

  1. Cook or reheat the rice.
  2. Cook the beef and sauce.
  3. Slice cucumber, carrots, cabbage, and scallions.
  4. Store beef and rice separately from fresh toppings if possible.
  5. Add egg, kimchi, cucumber, and drizzles just before serving.
Part How to store Best note
Cooked beef 3–4 days in an airtight container in the fridge. Reheat with a splash of water to loosen the sauce.
Rice Store separately from fresh toppings. Cool quickly, refrigerate covered, and reheat until steaming hot.
Cucumber and lettuce Keep cold and separate. Add after reheating so they stay crisp.
Egg Cook fresh if fried; soft-boiled eggs can be made ahead. Best added just before serving.
Freezer Freeze cooked beef for 2–3 months. Freeze beef only, not assembled bowls.

Troubleshooting: If Something Feels Off

Most problems come from pan size, beef fat, sauce balance, or simmering time. The good news is that this bowl is easy to fix before it reaches the table.

Problem Why it happened How to fix it
Beef tastes greasy The meat was fatty or the pan had too much rendered fat. Drain excess fat before adding sauce. Use 85/15, 90/10, or leaner beef next time.
Beef is dry The beef was very lean or overcooked. Add a splash of water while reheating, or use 85/15 or 90/10 beef.
Beef steamed instead of browned The pan was crowded or stirred too often. Use a wider skillet, medium-high heat, and let the beef sit before breaking it up.
Sauce is too salty Regular soy sauce was used or the sauce reduced too much. Add more rice, vegetables, water, or a little honey. Use low-sodium soy next time.
Sauce is too sweet Too much sugar or honey. Add rice vinegar, gochujang, or a small splash of soy sauce.
Sauce is watery Too much liquid in the pan. Simmer uncovered until reduced. Drain beef better next time.
Sauce is too thick It reduced too long or gochujang made it dense. Add 1–2 tablespoons water and stir.
Too spicy Too much gochujang or chili. Add more rice, cucumber, honey, or a creamy drizzle.
Bowl tastes flat It needs acid, freshness, or heat. Add cucumber, kimchi, scallions, rice vinegar, or chili flakes.

Nutrition Estimate

Nutrition will change depending on beef fat percentage, rice amount, egg, mayo drizzle, and toppings. As a rough estimate, one bowl made with 90/10 beef, about ¾ cup cooked white rice, sauce, cucumber, scallions, and sesame seeds is around 480–560 calories with about 26–32 g protein.

  • Higher protein: use a generous beef portion or add an egg.
  • Lower calorie: use leaner beef, less rice, more cucumber or cabbage, and skip mayo drizzle.
  • Lower carb: use cauliflower rice, shredded cabbage, lettuce cups, or cucumber as the base.
  • More filling: add egg, avocado, extra vegetables, or brown rice.

Frequently Asked Questions

Can I make Korean beef bowls with ground beef?

Yes. Ground beef is one of the easiest ways to make this bowl fast because it browns quickly and soaks up the soy-garlic-sesame sauce.

Can I use beef mince instead of ground beef?

Yes. Beef mince works just like ground beef here. Use 450–500 g and brown it well before adding the sauce.

Is Korean beef bowl the same as bulgogi?

Not exactly. Traditional bulgogi usually uses thinly sliced marinated beef. This recipe uses ground beef or beef mince with a bulgogi-style sauce, so it is faster and easier for weeknights.

Is this the same as bibimbap?

No. Bibimbap is a Korean mixed rice bowl with vegetables, gochujang, egg, and often beef. This bowl is simpler and centered around saucy ground beef over rice, though egg and vegetables can give it a similar feel.

What sauce goes in a Korean beef bowl?

A simple sauce usually includes soy sauce, brown sugar or honey, garlic, ginger, sesame oil, and rice vinegar. Add gochujang for heat or grated apple and onion for a deeper bulgogi-style sauce.

Do I need gochujang?

No. The bowl still tastes complete with just the mild soy-garlic-sesame sauce. Gochujang adds heat, color, and deeper flavor, but it is not required. For a family-friendly pan, skip it and let people add gochujang or chili at the table.

What can I use instead of gochujang?

Use chili flakes, gochugaru, sriracha-style sauce, or another chili paste you like. The flavor will not be exactly the same, but it will still add heat.

What rice is best for Korean beef rice bowls?

White rice is the easiest, jasmine rice is fragrant, short-grain rice feels stickier, and brown rice works well for meal prep. For a lower-carb bowl, use cauliflower rice, cabbage, or lettuce cups.

What vegetables go with it?

Fresh cucumber, cabbage, carrot, lettuce, and scallions are best when you want crunch. Broccoli, mushrooms, spinach, zucchini, bell pepper, and snap peas work well if you want cooked vegetables. Add tender greens at the end so they do not overcook.

Can I add an egg?

Yes. A fried egg is best when serving right away; soft-boiled or jammy eggs are easier for meal prep. Add the egg after reheating so it stays tender.

How do I make it more like bulgogi?

Add grated apple or Asian pear, grated onion, and optional mirin to the sauce. This gives the ground beef a sweeter, rounder, more bulgogi-style flavor.

Can I make this gluten-free?

Yes. Use tamari or gluten-free soy sauce. Check your gochujang label too, because some brands contain wheat.

Can I make this low-carb?

Yes. Serve the beef over cauliflower rice, shredded cabbage, lettuce, or cucumber instead of rice. Keep the same sauce and add plenty of crunchy toppings.

Can I meal prep it?

Yes. The beef reheats well, so it is a good meal-prep protein. Store beef and rice separately from cucumber, cabbage, scallions, kimchi, egg, and creamy drizzles. Reheat the beef and rice first, then add the cold toppings.

How long does the cooked beef last in the fridge?

Cooked beef keeps for 3–4 days in an airtight container in the fridge.

Can I freeze the beef?

Yes. Freeze the cooked beef for up to 2–3 months. Freeze the beef by itself, not the assembled bowls. Thaw overnight in the fridge and reheat with a splash of water to loosen the sauce.

Final Thoughts

Once you know the sauce ratio, this stops being one recipe and becomes a dinner you can rebuild all week: rice bowl tonight, lettuce wraps tomorrow, noodles for lunch, or meal prep boxes with cucumber and egg.

Try it mild first, then make the next pan yours: more gochujang, more cucumber, extra sesame, a creamy drizzle, or a fried egg on top. Once you make it once, it stops being a recipe you follow and becomes a bowl you know how to build.
Back to top ↑

Posted on 5 Comments

Quinoa vs Rice: Nutrition, Glycemic Index, and When to Choose Each

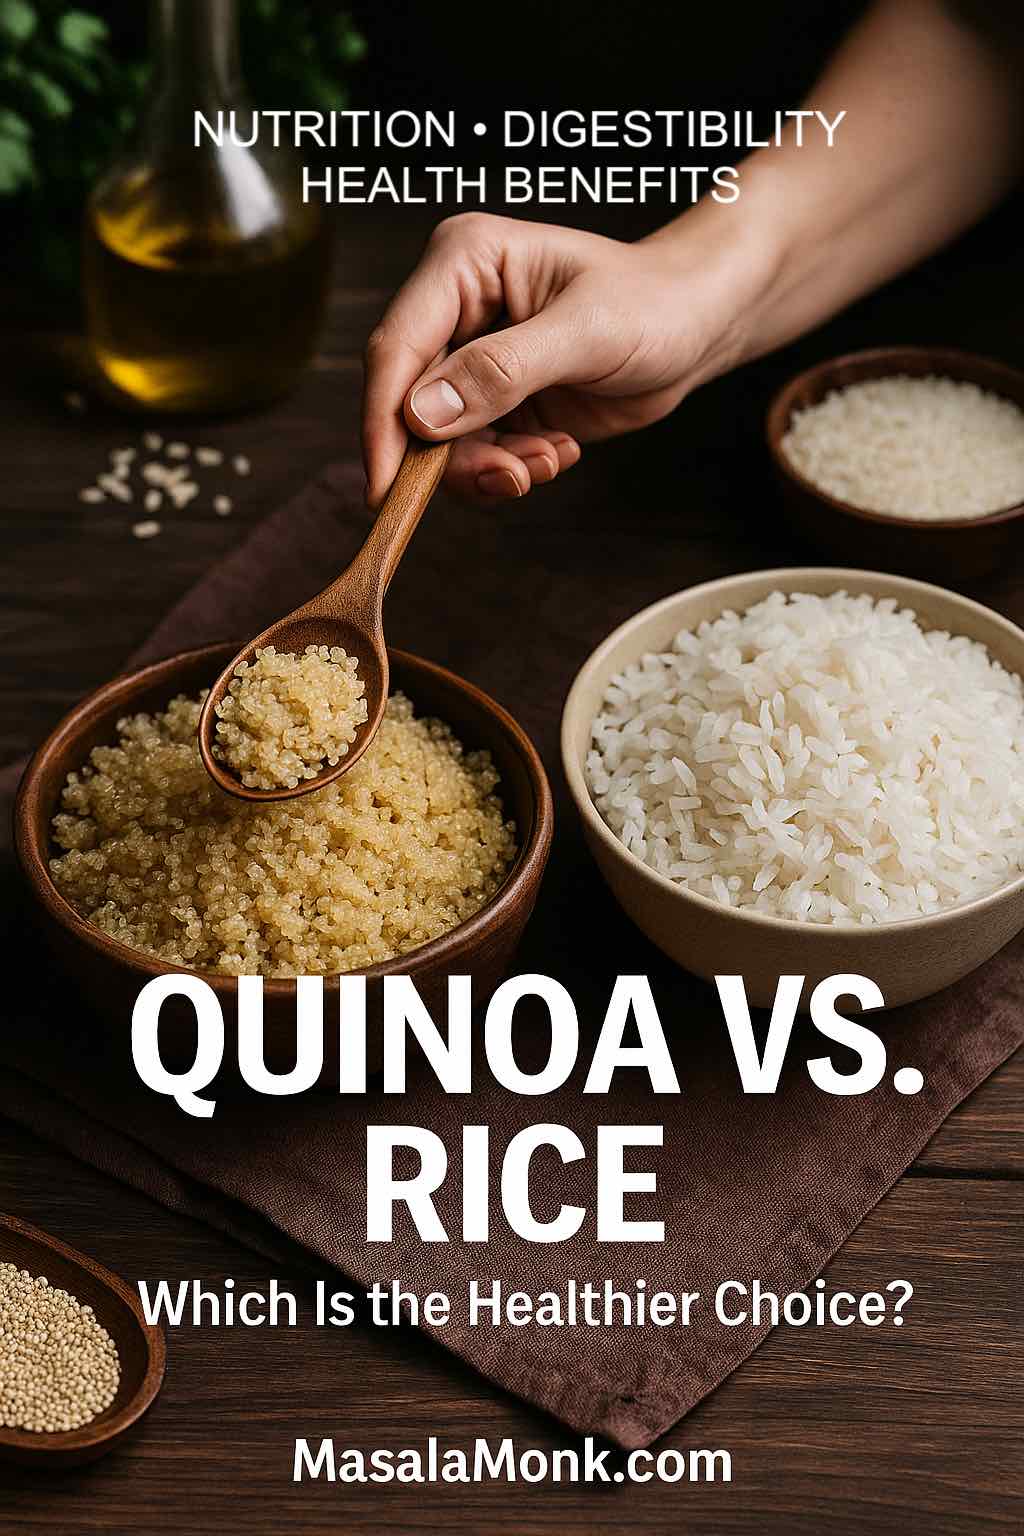
Hand scooping cooked quinoa beside a bowl of white rice; magazine-style cover comparing calories, carbs and glycemic index to choose the healthier base

We reach for rice or quinoa because both are comforting. They carry flavor, welcome vegetables and both of them make a plate feel complete. Yet, when you compare them closely, they behave differently in your body and in your kitchen. This guide unpacks quinoa vs rice with practical numbers, plain language, and easy cooking moves you can use tonight.

Although both are starches, they do not play the same role. Quinoa brings more protein and more fiber. Rice, especially white rice, brings a softer texture and a neutral base. As a result, each shines in different meals. In the sections below, you will see where quinoa wins. You will also see where rice still fits beautifully. Most importantly, you will learn how to choose the right base for your goals and your taste.

Before we dive in, remember one key fact. Quinoa is a seed. It cooks like a grain, but botanically it is not a cereal. This small detail explains some of its unique traits. It also explains why its protein and fiber numbers stand out.

Also Read: Glycemic Index (GI) VS Glycemic Load (GL)


Quinoa vs Rice: the short, honest take

Let’s set the stage with a clear summary. Then we will build details under it.

  • Quinoa offers more protein and fiber per cooked cup. Therefore, it usually keeps you full longer.
  • White rice is slightly lower in calories per cup. It tastes neutral. It lets sauces and curries take center stage.
  • For steadier energy, quinoa, brown rice, and basmati are generally better picks than standard white or jasmine.

If you want more context on varieties, skim our explainer on basmati rice and glycemic index. For a simple primer on blood sugar and carbs, read Harvard’s guide to carbohydrates and blood sugar. Both links will help you turn this article into action.


Quinoa vs Rice: nutrition, per cooked cup

Numbers make decisions easier. Let’s compare typical cooked portions you see in bowls and plates.

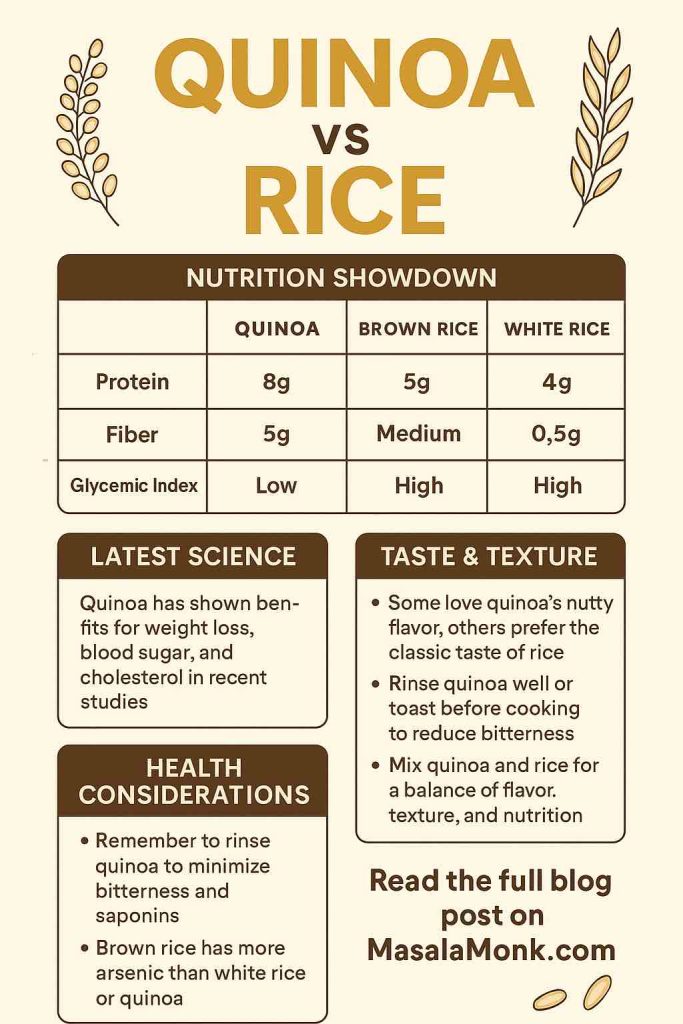
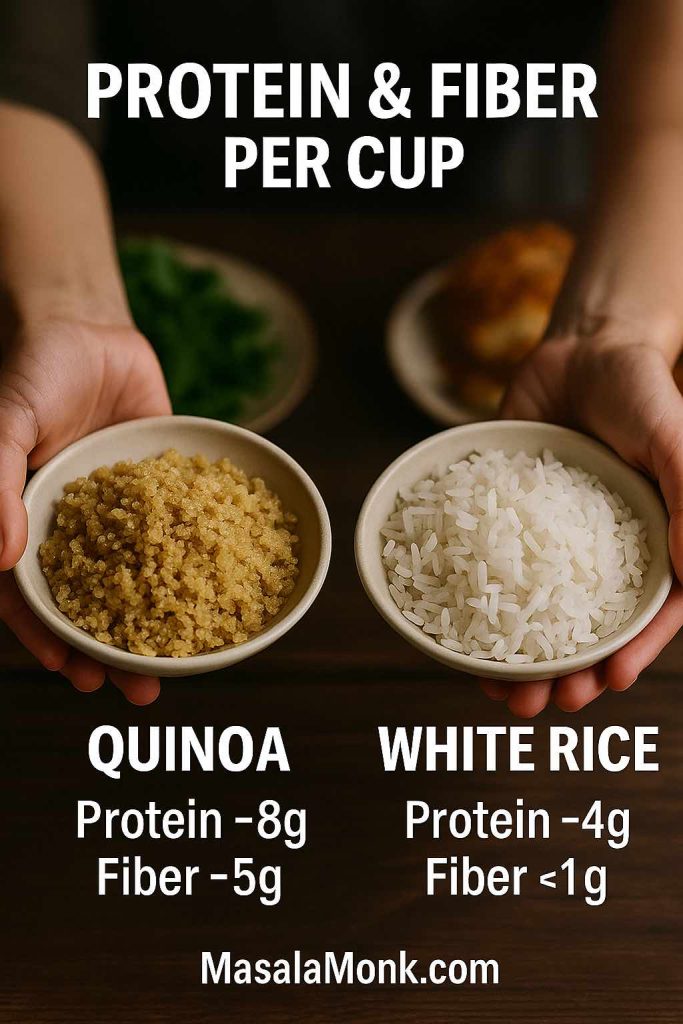
Two hands holding bowls of cooked quinoa vs white rice with text showing protein and fiber per cup.
Why quinoa keeps you fuller: more protein and fiber per cup compared with standard white rice.

Which has fewer calories per cup? White rice does, by a modest margin.
Which supports fullness better? Quinoa does, because of protein and fiber.
Is quinoa lower carb than rice? Per cup, quinoa has slightly fewer carbs than many white rices. The gap is small. The bigger win is quinoa’s fiber and protein.

Prefer metric? No problem. Per 100 g cooked, quinoa averages about 4.4 g protein and ~2.8 g fiber. White rice averages roughly 2.7 g protein and ~0.4–0.6 g fiber. Consequently, quinoa sticks a bit longer and often delivers better satiety. Rice, meanwhile, usually needs support from protein and vegetables to keep hunger steady and digests faster unless you add partners like beans, tofu, eggs, fish, or chicken.

Now step back. Nutrition is not only macros. Micronutrients matter. So do amino acids. Quinoa offers a broader amino acid profile and helpful minerals. Rice offers consistency, digestibility, and a clean flavor stage. Therefore, let your meal goal guide your choice. Are you building a lean, filling bowl for lunch? Quinoa might serve you well. Are you plating a rich curry that needs a soft base? White or basmati rice may be perfect.

Also Read: Glycemic Index and Secrets of Weight Loss


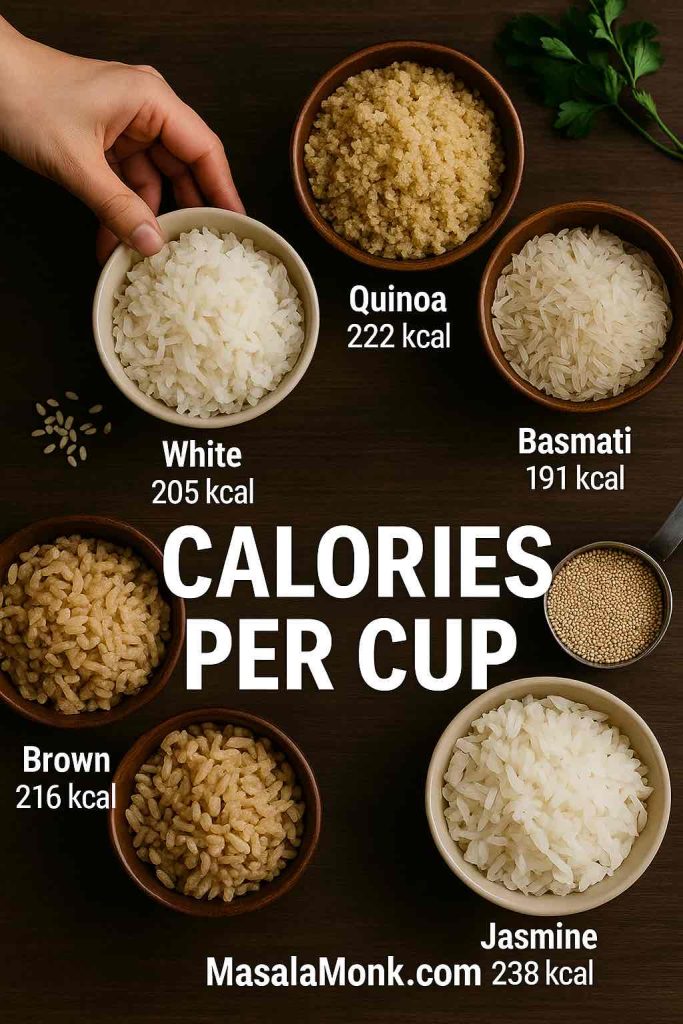
Overhead bowls of quinoa, white, brown, basmati and jasmine rice labeled with calories per cooked cup for quinoa vs rice types.
Quick glance: typical calories per cooked cup across quinoa and common rice varieties—use it to portion bowls fast.

Quinoa vs Rice: per cup and per 100 g at a glance

Per cup (cooked)

1 cup cookedCaloriesCarbsProteinFiber
Quinoa (~185 g)~222~39 g~8 g~5 g
White rice (~158 g)~205~45 g~4 g<1 g
Brown rice (~195 g)~216~45 g~5 g~3.5 g
Comparing Quinoa VS Rice Macros, based on Per Cup Serving.

Source the quinoa and white rice figures from USDA/MyFoodData for quinoa and USDA/MyFoodData for white rice. Values vary by brand and moisture, but the pattern remains stable.

Tip: Use the cup table for quick menu planning. Use the gram table below for macro tracking.

Per 100 g (cooked)

Food (100 g)CaloriesCarbsProteinFiber
Quinoa~120~21.3 g~4.4 g~2.8 g
White rice~130~28.3 g~2.7 g~0.4–0.6 g
Brown rice~123~25.6 g~2.7–2.9 g~1.6–1.8 g
Basmati (white)~121–130~25–28 g~2.7–3.0 g~0.4–0.8 g
Jasmine (white)~129–135~28–30 g~2.7–3.0 g~0.4–0.8 g
Comparing Quinoa VS Rice Macros, based on Per 100 gm Serving.

These tables helps in calories vs carbs vs protein comparison. They also support quick menu planning. If you build bowls by volume, the per-cup table helps. If you track macros by weight, the 100 g snapshot helps more. You can now place the base that matches your day.


Glycemic index in quinoa vs rice (and why it matters)

The glycemic index (GI) estimates how fast a carb-rich food raises blood sugar. As a rule of thumb, ≤55 is low, 56–69 is medium, and ≥70 is high. For clear definitions and practical examples, read Harvard’s overview on carbohydrates and blood sugar. If you want to look up specific foods or brands, use the University of Sydney GI database.

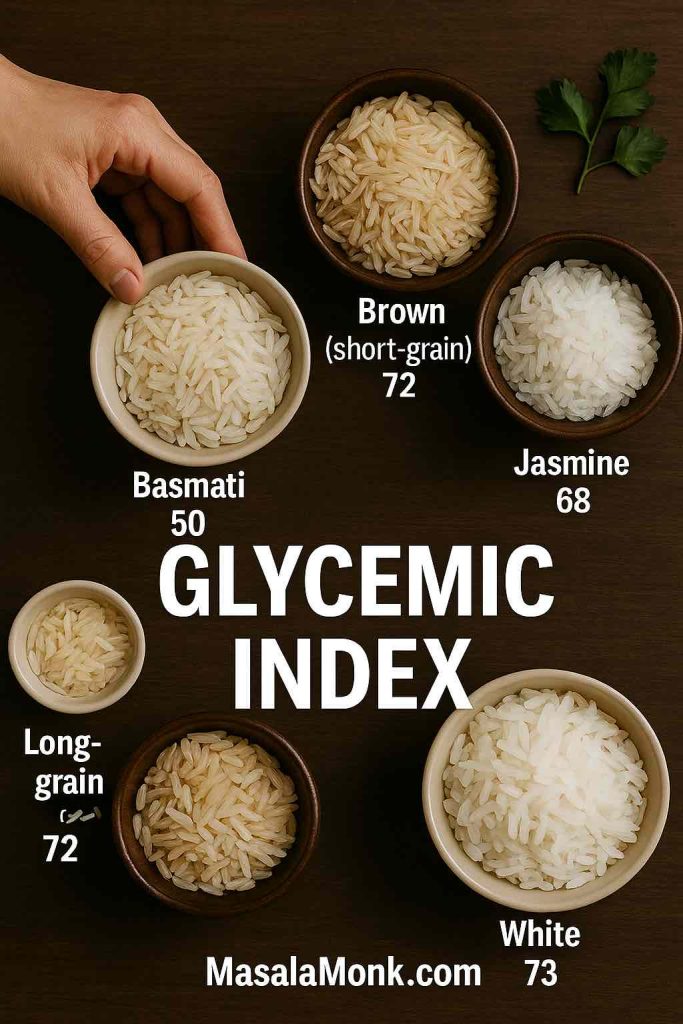
Five bowls of rice varieties labeled with approximate glycemic index values including basmati, jasmine, brown and white.
Variety matters: basmati tends to test lower on GI than many white rices, while jasmine often trends higher.

Here is the part that matters for your day.

  • Quinoa is generally low-GI, often reported around the low 50s. Its fiber and protein contribute to that steadier curve. That is why quinoa bowls often feel satisfying for longer.
  • Rice spans a wide range. Brown rice averages around the low-to-medium boundary. Standard white rice sits medium on average. Basmati often lands lower among white rices. Jasmine tends to land higher.

Here it is important to keep on mind cooking changes starch, GI can shift with methods. Cooling cooked rice and then reheating increases resistant starch. That change can soften the post-meal rise for some people. Pairings matter too. When you add protein, fiber, and healthy fats, digestion slows. Therefore, you can keep rice in rotation and still aim for steady energy.

Summarizing GI in quinoa vs rice

  • What is the GI of quinoa vs rice? Quinoa is generally low-GI (often ~53). Rice varies widely by type.
  • Which rice types run lower GI? Brown rice often averages ~55. Basmati is frequently lower among white rices.
  • Which rice types run higher GI? Jasmine tends to be higher. Many standard white rices fall in the medium range.

Is quinoa healthier than rice for blood sugar? Often yes, because quinoa starts low-GI and brings fiber and protein. However, brown rice and basmati can also be smart picks. Therefore, choose variety first, then use cooking methods that encourage steadier curves.

If you want practical levers, walk through our guide to reducing the glycemic impact of rice. You will see how cook → cool → reheat, slightly firmer texture, and protein-fiber pairings smooth the ride. For a neutral, health-organization perspective on using GI wisely, review Diabetes UK’s GI overview.


GI by rice variety (white, brown, basmati, jasmine)

Variety matters. So do cultivar and cooking. Here is a quick comparison you can trust.

  • White rice (general): medium GI on average. Soft and easy to over-serve.
  • Brown rice: low-to-medium GI. More fiber than standard white. Chewier bite and nutty notes.
  • Basmati (white): often lower GI among white rices. Higher amylose helps keep grains separate.
  • Jasmine (white): often higher GI. Plush texture and a perfumed aroma.

For a broader context on GI and health outcomes, skim Harvard’s overview of rice. For brand or product specifics, check entries in the University of Sydney GI database.


How cooking and pairing change GI (so rice stays in your life)

Small technique shifts change how grains behave.

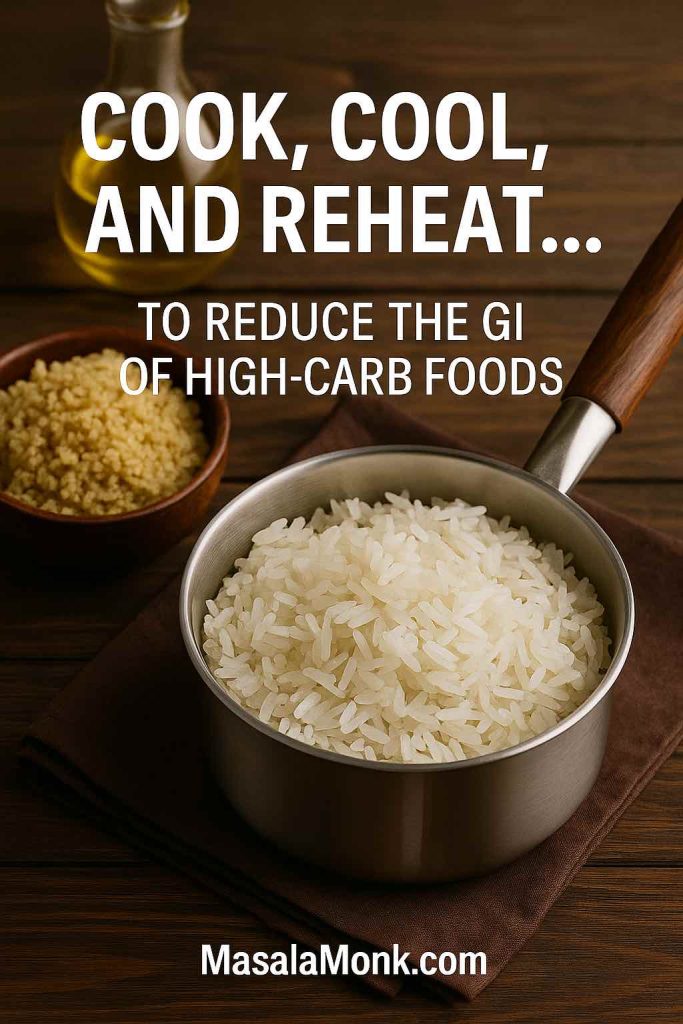
Pot of cooked white rice and bowl of quinoa with text explaining the cook–cool–reheat method to lower GI.
Batch smart: chill cooked grains and reheat—resistant starch goes up, and meals feel steadier.
  1. Cook → cool → reheat. Cooling cooked rice forms resistant starch. That starch resists digestion and can blunt the spike.
  2. Keep grains slightly firm. Very soft grains digest faster. Slightly firmer grains slow things down.
  3. Pair smartly. Add protein, fiber, and healthy fats. Beans, tofu, eggs, fish, chicken, vegetables, nuts, and seeds all help.
  4. Mind portions. A modest scoop leaves room for vegetables and protein. You get the texture you love without losing balance.

For a clear walkthrough, open our practical guide on reducing rice’s GI. The methods are simple, repeatable, and budget-friendly.


Quinoa vs Rice for different goals

This section folds several “which is better” questions directly into the guidance. That way, you decide by goal, not by hype.

Quinoa vs Rice for fullness and everyday nutrition

Which is healthier, rice or quinoa, for satiety? Quinoa usually wins. If satiety is your priority, start with quinoa. It delivers more protein and more fiber per cup. Those two levers slow digestion. They also help curb snack cravings later. For the full panel, compare USDA/MyFoodData for quinoa with USDA/MyFoodData for white rice. For a friendly overview, read Harvard Nutrition Source on quinoa.

Even so, rice can still support fullness when you structure the plate. First, add bulk with non-starchy vegetables. Next, add protein. Then finish with a little fat for flavor and texture. Together, those pieces change how the whole meal feels.

What about brown rice vs quinoa? That contest is closer. Brown rice is a whole grain with moderate fiber and low-to-medium GI. However, quinoa still edges it on protein and often on fiber per cup. If you love the chew of brown rice, you can still get great meals. Just add beans or tofu to push protein higher.

Quinoa vs Rice for steady energy and blood sugar

If you want stable post-meal energy, lean on low- or medium-GI bases. Quinoa is a reliable choice. Brown rice and basmati are strong options too. Moreover, dial in technique. Use the cook-cool-reheat sequence. Keep grains a touch firm. Pair with protein, vegetables, and healthy fats. For a clean, balanced view from a health organization, read Diabetes UK on the GI.

Does quinoa have a lower GI than jasmine rice? Usually yes. Jasmine often trends higher. If you love jasmine for aroma, balance the plate. Add vegetables and protein. Keep the serving controlled.

Quinoa vs Rice for weight management

Is quinoa better than rice for weight loss? Sometimes. Weight management is about patterns, not single foods. Still, the base matters. White rice is slightly lower in calories per cup than quinoa. That small edge can help when you want a lighter base. However, quinoa’s higher protein and fiber can improve fullness. Consequently, the “better” choice depends on the rest of the plate.

Here are two simple frameworks:

  • Quinoa-forward bowl: quinoa base + beans or tofu + mixed vegetables + yogurt-tahini dressing + lemon.
  • Light rice bowl: modest scoop of white or basmati rice + vegetable-heavy stir-fry + lean chicken or shrimp + crunchy side salad.

Is quinoa more filling than rice? Often yes. The protein and fiber explain that feeling. But remember preference and texture. If rice helps you enjoy more vegetables and lean protein, that also supports the goal. If you want more structure, explore our guide on choosing the best rice for weight loss. It shows how to set portions and choose cooking methods that support a calorie plan.

Quinoa vs Rice for bodybuilding and training days

Training changes needs. Sometimes you want faster carb delivery. Other times you want meals that stick. Therefore, match the base to the session.

  • Around training: white or basmati rice digests a bit faster. That can help when you need quick refueling. Pair with lean protein and a small amount of fat.
  • Away from training: quinoa brings more protein and fiber. That helps fullness as you spread meals through the day. Add legumes, eggs, tofu, or fish for extra protein.

As always, test and notice. Your body will tell you which base supports your work.

Also Read: Quinoa for Weight Loss: Benefits, Nutrition, and How to Cook Ideas


Quinoa vs Rice by variety (white, brown, basmati, jasmine)

As the risk of repeating ourselves, however for sake of more clarity on topic, let’s now fold some comparisons directly into short, practical sub-sections. Each one answers “which is better” in the specific context.

Quinoa vs White Rice

White rice is plush and neutral. It absorbs sauces and lets other flavors lead. On average, it is medium GI and low in fiber. Therefore, watch portions. Pair it with vegetables and protein. In contrast, quinoa is typically lower GI and higher in protein and fiber. It brings a nutty note and a slight pop to each bite.

For facts while you cook, keep USDA/MyFoodData for white rice open in a tab. For quinoa context, browse Harvard Nutrition Source on quinoa. If you want a broad view of rice varieties, read Harvard Nutrition Source on rice.

When to choose which: use white rice when the dish is rich and saucy. Use quinoa when you want the base to contribute protein and fiber. Or mix them half-and-half for a balanced compromise.

Quinoa vs Brown Rice

Here the gap narrows. Brown rice is a whole grain. It keeps the bran and germ. As a result, it carries more fiber and micronutrients than standard white rice. Its GI usually sits in the low-to-medium band. If you enjoy the chewier bite and nutty flavor, it can anchor meals beautifully. Quinoa still edges brown rice on protein and fiber per cup. That edge can aid fullness when calories are tight.

For averages and a sensible overview, see Harvard’s rice page. For a narrative comparison of brown and white rice, skim Harvard Health’s head-to-head explainer.

When to choose which: pick brown rice when you want the rice experience with extra texture and a friendlier GI. Pick quinoa when you want more protein, more fiber, and quicker cooking.

Quinoa vs Basmati Rice

Among white rices, basmati is a standout. It often lands lower on the GI spectrum than many standard white rices. Higher amylose helps keep grains separate. The aroma is a bonus. If you want a white rice experience with a gentler curve, basmati is a smart choice. For deeper detail and cooking notes, open our basmati GI analysis. If you want brand-specific values, search the University of Sydney GI database.

When to choose which: pick basmati when you want long, separate, fragrant grains. Pick quinoa when you want more protein and fiber in the base. Or serve basmati with lentils or chickpeas to boost protein and fiber.

Also Read: ‘Quinoa’ Instead of ‘Chicken’: 5 High Protein Plant-Based Meal Prep Ideas

Quinoa vs Jasmine Rice

Jasmine rice is aromatic and soft. It is lovely with Thai curries and dishes that want a perfumed base. However, jasmine tends to sit higher on the GI than basmati and many brown rices. Therefore, if blood sugar steadiness is a priority, choose jasmine less often. For variety differences and a clear overview, read Harvard’s rice page.

When to choose which: pick jasmine for aroma and softness. Pick quinoa when you want steadier energy and extra protein.


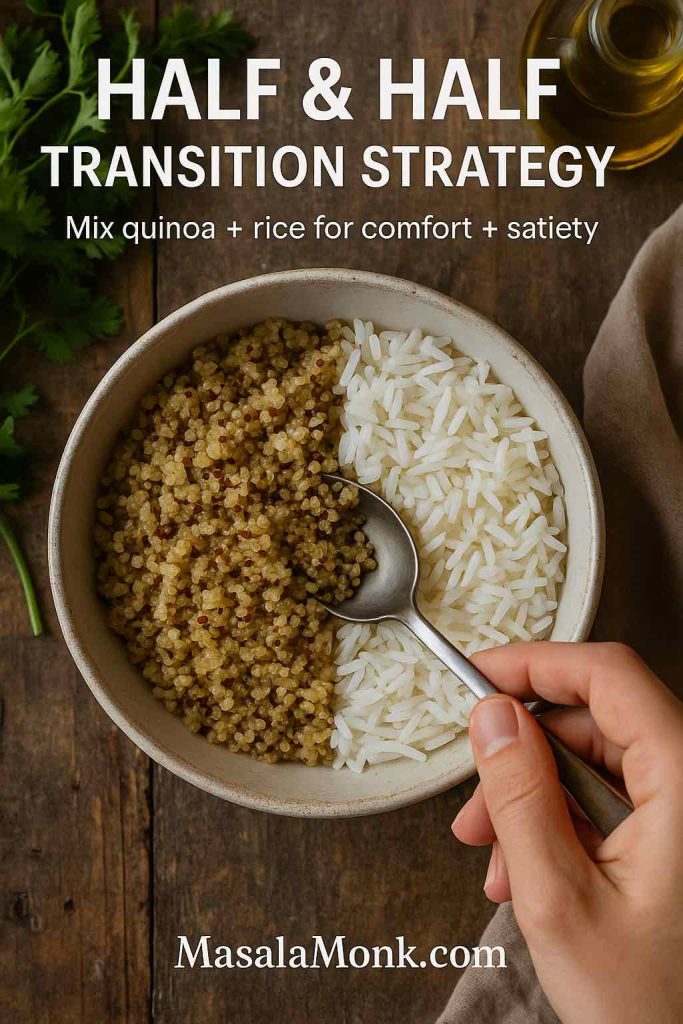
Top-down view of a bowl split 50–50 with cooked quinoa and white rice, showing an easy transition strategy.
Start with a 50–50 base—quinoa for protein and fiber, rice for comfort—then shift to 60–40 as your taste adapts.

Other rice styles in brief (so you can branch out)

There are so many rice varieties, it’s hard to cover them all, however some of the more popular ones and which keep trending every now and then are covered below in comparison with Quinoa.

Wild rice vs quinoa

Wild rice is a grass seed, much like quinoa is a seed. It brings a chewy bite and an earthy, nutty flavor. It has more protein than many standard white rices. Choose wild rice when you want texture and a whole-grain feel. Choose quinoa when you want more protein per cup and a faster cook.

Red and black rice vs quinoa

Red and black rices keep their bran. They bring color, antioxidants, and a bit more fiber than standard white rice. They usually land in the medium-GI range. Choose them when you want a classic rice experience with extra character. Choose quinoa when you want more protein and a typically lower GI.

Parboiled rice vs quinoa

Parboiled rice is steamed in the husk before milling. That process helps retain some nutrients. It also tends to keep grains separate and can yield a lower GI than standard white rice. Use parboiled rice when you want distinct grains for pilaf. Use quinoa when you want higher protein and fiber in the base.

Cauliflower rice and shirataki rice vs quinoa

Cauliflower and shirataki “rice” are low-calorie substitutes, not grains. They drastically reduce carbs and calories. However, they change texture and flavor. Use them for low-carb meals or as volume extenders. Use quinoa or rice when you want true grain structure and lasting fullness.

Also Read: Healthy Oat Protein Bars – 5 Easy No Sugar Recipes for Snacks


Taste, texture, and kitchen behavior (so your swaps stick)

Food should satisfy. Numbers help, but flavor keeps habits alive. Therefore, pay attention to texture and taste.

Quinoa tastes nutty with a gentle chew. Rinse it well to remove saponins. For extra depth, toast the dry grains for a minute or two. Then add water. A 1:2 quinoa-to-water ratio works for many cooks. Simmer until you see tiny germ rings and the pot looks just dry. Cover and rest for five minutes. Finally, fluff and season. A drizzle of olive oil and a squeeze of lemon go a long way.

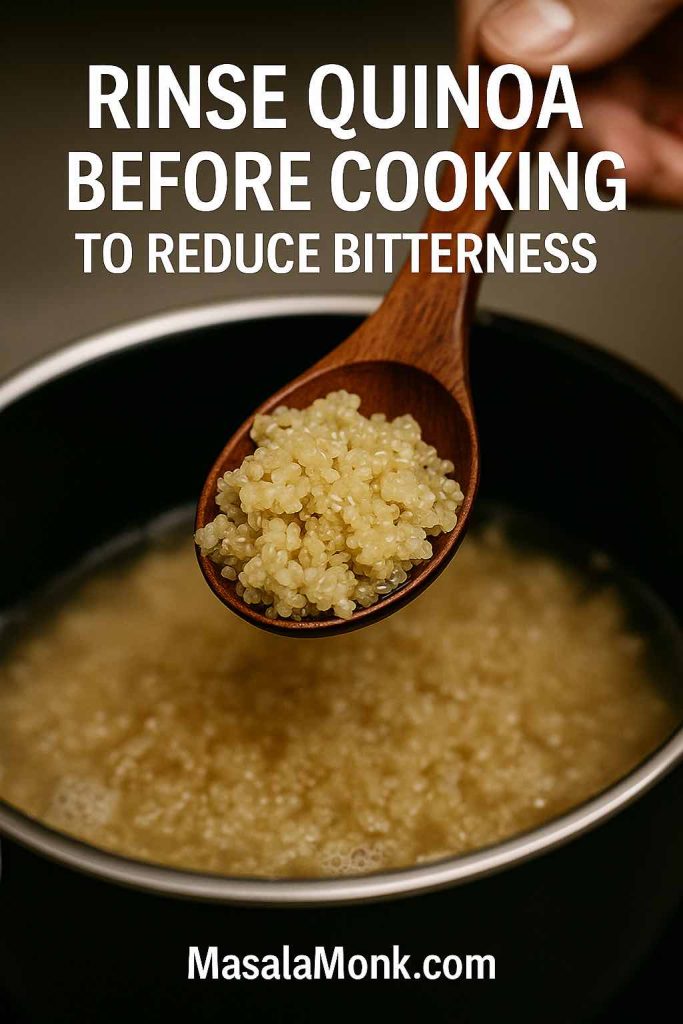
Spoon lifting cooked quinoa above a pot with tip to rinse before cooking to reduce bitterness.
Pro tip: rinsing removes saponins so quinoa tastes cleaner and pairs better with delicate sauces.

White rice is soft and neutral. It lets sauces sing and stews shine. Brown rice is chewier and slightly nutty. Basmati cooks fragrant and separate, which makes it ideal for pilafs. Jasmine is plush and perfumed, perfect for Thai and Southeast Asian flavors.

If you are not ready for a full swap, start gently. Mix half quinoa and half rice. The bowl will feel familiar yet more filling. Over time, you can push the ratio toward your goals without losing comfort.

Does quinoa taste like rice? Not exactly. It is nuttier and slightly chewy. However, with the right dressing or sauce, most eaters enjoy the swap quickly.


Real-world plates you can build tonight

Real life asks for simple moves, you do not need new recipes to start. You only need patterns that repeat well, here are patterns that work.

Protein-forward quinoa bowl
Base: quinoa. Add roasted chickpeas or grilled tofu. Pile on vegetables. Finish with a yogurt-tahini drizzle and lemon. Because quinoa brings protein and fiber, the bowl satisfies. For more ideas, see quinoa meal-prep ideas.

Light, saucy rice bowl
Base: a modest scoop of white or basmati rice. Top with a vegetable-heavy stir-fry. Add lean chicken or shrimp. Add a crunchy side salad. The plate stays light yet complete.

Basmati pilaf with legumes
Toast basmati with spices. Simmer until long and separate. Fold in cooked lentils and herbs. Serve with a bright cucumber salad. The dish tastes rich but lands gently.

Half-and-half “transition” bowl
Mix equal parts cooked quinoa and cooked brown rice. Add roasted vegetables, a protein, and a nutty dressing. You get rice comfort and quinoa’s staying power.

Cold grain salad for busy weeks
Toss cooked and cooled quinoa with chopped greens, beans, cucumbers, tomatoes, olives, and a lemon vinaigrette. Store for lunches. Because quinoa holds texture, the salad keeps well. For higher-protein patterns, explore high-protein quinoa strategies.


Quinoa vs Rice: cooking smarter for better curves

You can improve rice’s glycemic profile without abandoning it, which means you can keep rice and still aim for steady energy. Use these simple levers.

  • Cook → cool → reheat. Resistant starch goes up. The glycemic hit can soften.
  • Pair with protein, fiber, and healthy fats. Beans, eggs, tofu, fish, chicken, leafy greens, nuts, and seeds slow digestion.
  • Keep texture slightly firm. Very soft grains digest faster.
  • Scale portions down. A smaller scoop plus more vegetables often feels better.
  • Prefer lower-GI choices. Basmati and brown rice are friendlier than standard white or jasmine.

For step-by-step help, read reducing the glycemic impact of rice. For a neutral, health-org perspective on using GI well, see Diabetes UK’s GI overview.


Pantry, storage, and prep notes that make the habit easy

Logistics shape success. Set up your kitchen so good choices happen on autopilot.

  • Store uncooked grains in airtight jars away from heat and light.
  • Cool cooked grains quickly, then refrigerate within two hours.
  • Use cooked grains within three to four days, or freeze flat for later.
  • Reheat with a splash of water and cover to restore moisture.
  • Batch once; eat many times. Cook big on one night. Portion into containers. Rotate through bowl formulas all week.
  • Season simply. Try lemon zest, garlic, toasted cumin, turmeric, parsley, cilantro, sesame, or a spoon of pesto. Little touches amplify flavor.

When you cook a pot, cook a little extra. Future-you will thank present-you.


Pulling it together: how to choose with confidence

You now have the facts and the levers. Let’s convert them into confident choices.

  • Choose quinoa when you want more protein and fiber, generally lower GI, and a base that can stand on its own in bowls and salads. For numbers and context, revisit USDA quinoa and Harvard’s quinoa guide.
  • Choose brown or basmati rice when you want a classic rice experience with a gentler glycemic impact than standard white. For a balanced overview of varieties, see Harvard’s rice page.
  • Choose white rice when you need a lighter-calorie, neutral base that keeps the spotlight on the main dish. Then round out the plate with vegetables and protein so the meal satisfies and digests steadily. For exact cup-for-cup figures, compare white rice per cup with quinoa per cup.

If blood sugar steadiness is a priority, focus on technique. Cook, cool, and reheat. Keep grains slightly firm. Pair with protein and vegetables. Favor lower-GI varieties. For simple steps, use our guide to reducing rice’s GI. For a neutral, health-org stance on GI, read Diabetes UK’s overview.

Finally, keep cooking joyful. Food is fuel, but it is also comfort. Try one new method this week. Swap in a half-and-half mix. Add a bright pickle or a crunchy salad. Notice how the plate feels. Then iterate. With a little curiosity, quinoa vs rice stops being an argument. It becomes a flexible toolkit you can use with ease.

FAQs

1) What is the glycemic index of quinoa vs rice?

Generally, quinoa sits in the low-GI range, while rice varies widely by type. Consequently, brown and basmati rice tend to be friendlier than standard white or jasmine. Even so, cooking, cooling, and reheating can shift the numbers a bit.

2) Which is healthier overall: quinoa or rice?

It depends on your goal. Typically, quinoa wins on protein, fiber, and a steadier blood-sugar response. However, white rice is slightly lower in calories per cup and works well as a neutral base when portions and pairings are smart.

3) Is quinoa better than rice for weight loss?

Often, yes—because quinoa’s extra protein and fiber can improve fullness. Nevertheless, a modest serving of rice with plenty of vegetables and lean protein can also fit well.

4) Brown rice vs quinoa: which should I choose?

Both are solid. Brown rice offers a whole-grain experience with chew and moderate fiber. Meanwhile, quinoa usually brings more protein and fiber per cup. Therefore, choose by texture preference and how long you want the meal to keep you satisfied.

5) Basmati rice vs quinoa: which has the advantage?

Each brings different strengths. Basmati often lands lower on the GI spectrum among white rices and has a fragrant, separate grain. Conversely, quinoa adds more protein and fiber. As a result, you might even combine them.

6) Jasmine rice vs quinoa: which supports steadier energy?

Typically quinoa. Jasmine rice is delicious and plush, yet it often trends higher on the GI scale. Thus, if you choose jasmine, balance the plate with vegetables, protein, and mindful portions.

7) Does quinoa have fewer carbs than rice?

Per cooked cup, quinoa usually has slightly fewer carbs than many white rices. Still, the difference is small. Instead, quinoa’s bigger edge is its protein and fiber.

8) Quinoa vs white rice: which has fewer calories?

White rice, by a modest margin. Even so, quinoa often feels more filling thanks to its higher protein and fiber content.

9) Protein in quinoa vs rice: how do they compare?

Quinoa commonly provides about twice the protein per cup compared with white rice. Consequently, it can help when you want more protein from the base itself.

10) Fiber in quinoa vs brown rice: who wins?

Quinoa usually edges out brown rice on fiber per cup. Nevertheless, both beat standard white rice. Therefore, either can help you build more satisfying bowls.

11) What is the difference between quinoa and rice?

Botanically, quinoa is a seed that cooks like a grain, while rice is a cereal grain. Hence, quinoa tends to carry more protein and fiber, whereas rice delivers a softer, more neutral canvas.

12) Is quinoa better than rice for diabetics?

Often yes, due to lower GI and higher fiber. That said, brown rice and basmati can also be sensible choices. Furthermore, pairings, portions, and cooking methods matter just as much.

13) Which is better for bodybuilding or training days: quinoa or rice?

It depends on timing. Around workouts, white or basmati rice can digest a bit faster. Conversely, away from training, quinoa’s extra protein and fiber can help with satiety across the day.

14) Quinoa vs rice for weight loss: what portion strategies work?

First, keep the base modest. Next, pack in vegetables. Then, add lean protein and a little fat for flavor. Consequently, both quinoa bowls and rice bowls can fit your plan.

15) Wild, red, or black rice vs quinoa: how do these compare?

These colorful rices retain more of the grain and usually bring extra texture and character. Even so, quinoa still tends to offer more protein per cup. Thus, choose based on flavor and the role you want the base to play.

16) Parboiled rice vs quinoa: which should I use?

Parboiled rice often cooks into separate grains and can be gentler than some standard white rices. Nevertheless, quinoa remains stronger on protein and fiber. Therefore, pick parboiled for pilafs and quinoa for protein-forward bowls.

17) Cauliflower rice or shirataki rice vs quinoa: which is “lighter”?

Those substitutes are extremely low in calories and carbs. However, they change texture and flavor dramatically. Meanwhile, quinoa behaves like a true grain and offers staying power. Hence, use the alternatives for very low-carb plates and quinoa for fuller meals.

18) Does quinoa taste like rice?

Not exactly. Quinoa is nutty with a slight chew; rice is softer and more neutral. That said, with dressings, sauces, and herbs, the swap feels natural surprisingly quickly.

19) Can I mix quinoa and rice in one dish?

Absolutely. In fact, a half-and-half mix is an easy transition strategy. As a result, you get rice’s familiarity and quinoa’s extra protein and fiber in the same bowl.

20) Is quinoa more expensive than rice?

In many markets, yes, because quinoa is less widely grown and processed differently. Even so, mixing quinoa with rice or using quinoa for specific meals can manage cost while preserving benefits.

21) Quinoa vs rice calories per 100 g vs per cup: which view should I use?

Use the per 100 g view for precise macro tracking. Alternatively, use the per cup view for quick home cooking decisions. Either way, keep consistency in your method.

22) Which is healthier: brown rice or quinoa?

Often quinoa, thanks to protein and fiber. Nonetheless, brown rice remains a strong whole-grain option. Therefore, rotate both and pick based on texture, budget, and the rest of the plate.

23) Is quinoa or rice better for beginners who want steadier energy?

Start with quinoa or basmati, since both usually support a smoother glucose response than many standard white rices. Additionally, keep portions steady and add protein.

24) Why do cooking methods change the GI of rice?

Because heat, cooling, and reheating alter starch structure. Specifically, cooling increases resistant starch, which resists digestion. Consequently, the post-meal rise can be gentler.

25) How do I choose between quinoa and rice on busy weeks?

Plan for versatility. Batch-cook one pot of quinoa and one of rice. Then, alternate: quinoa bowls on high-satiety days; rice bowls when you want a lighter base or faster digestion.