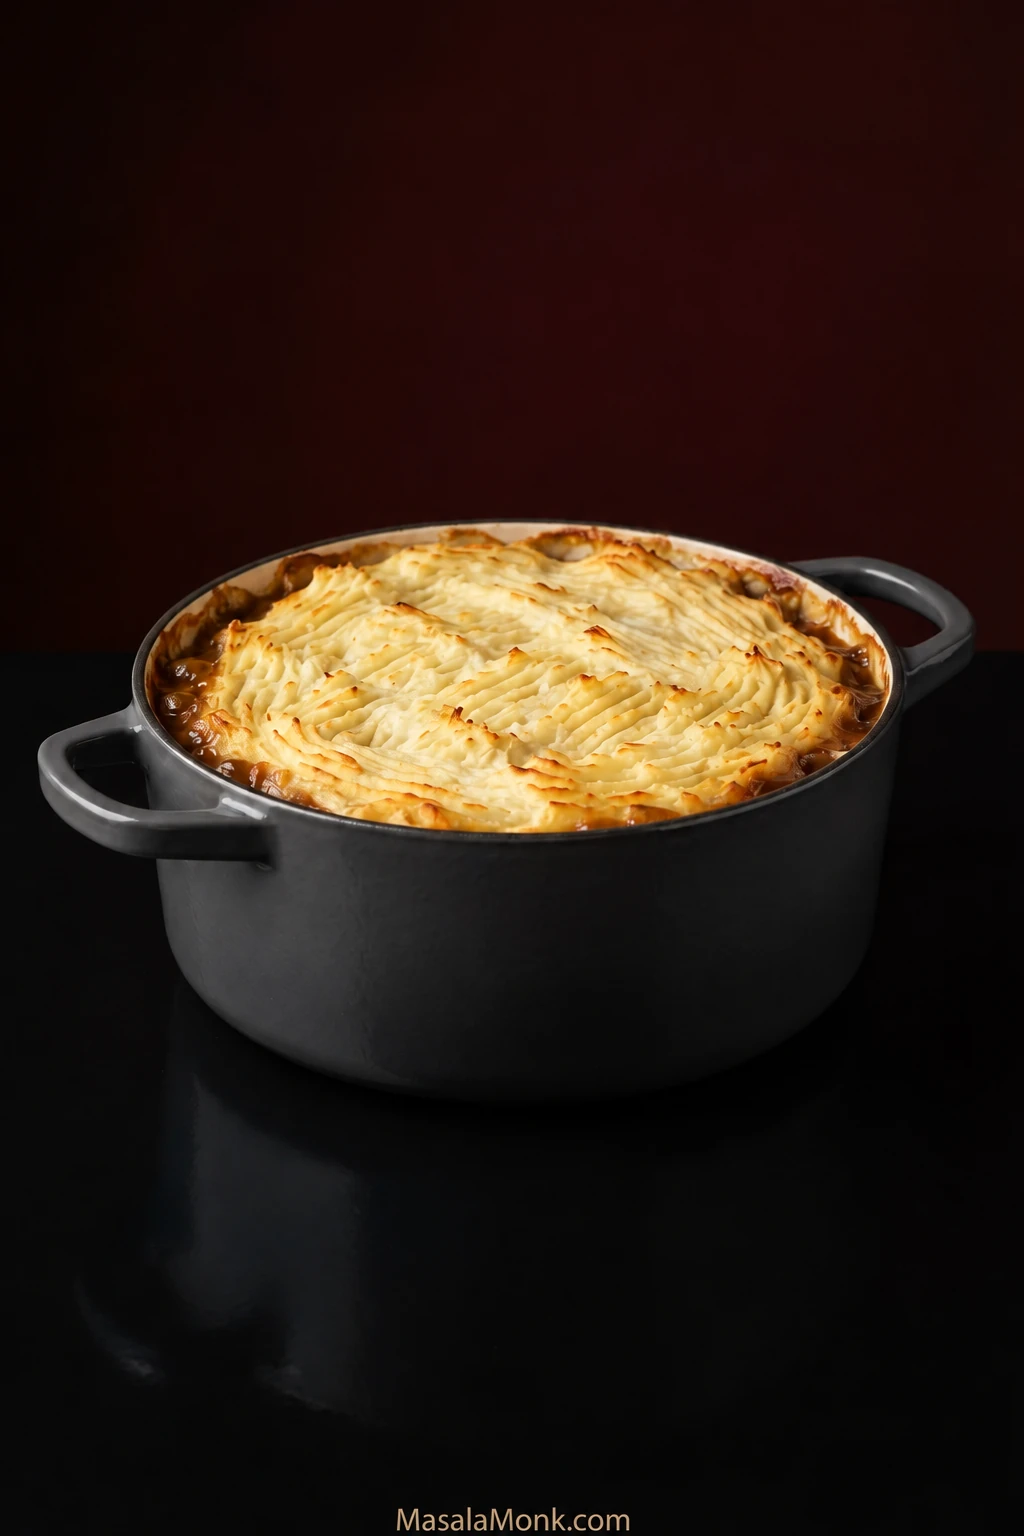
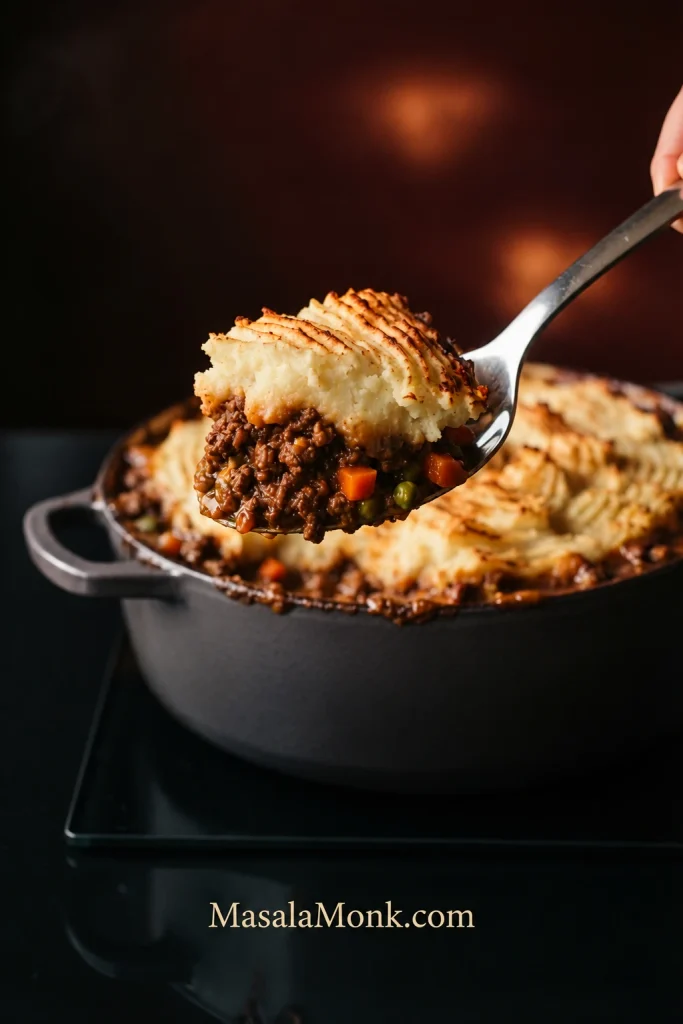
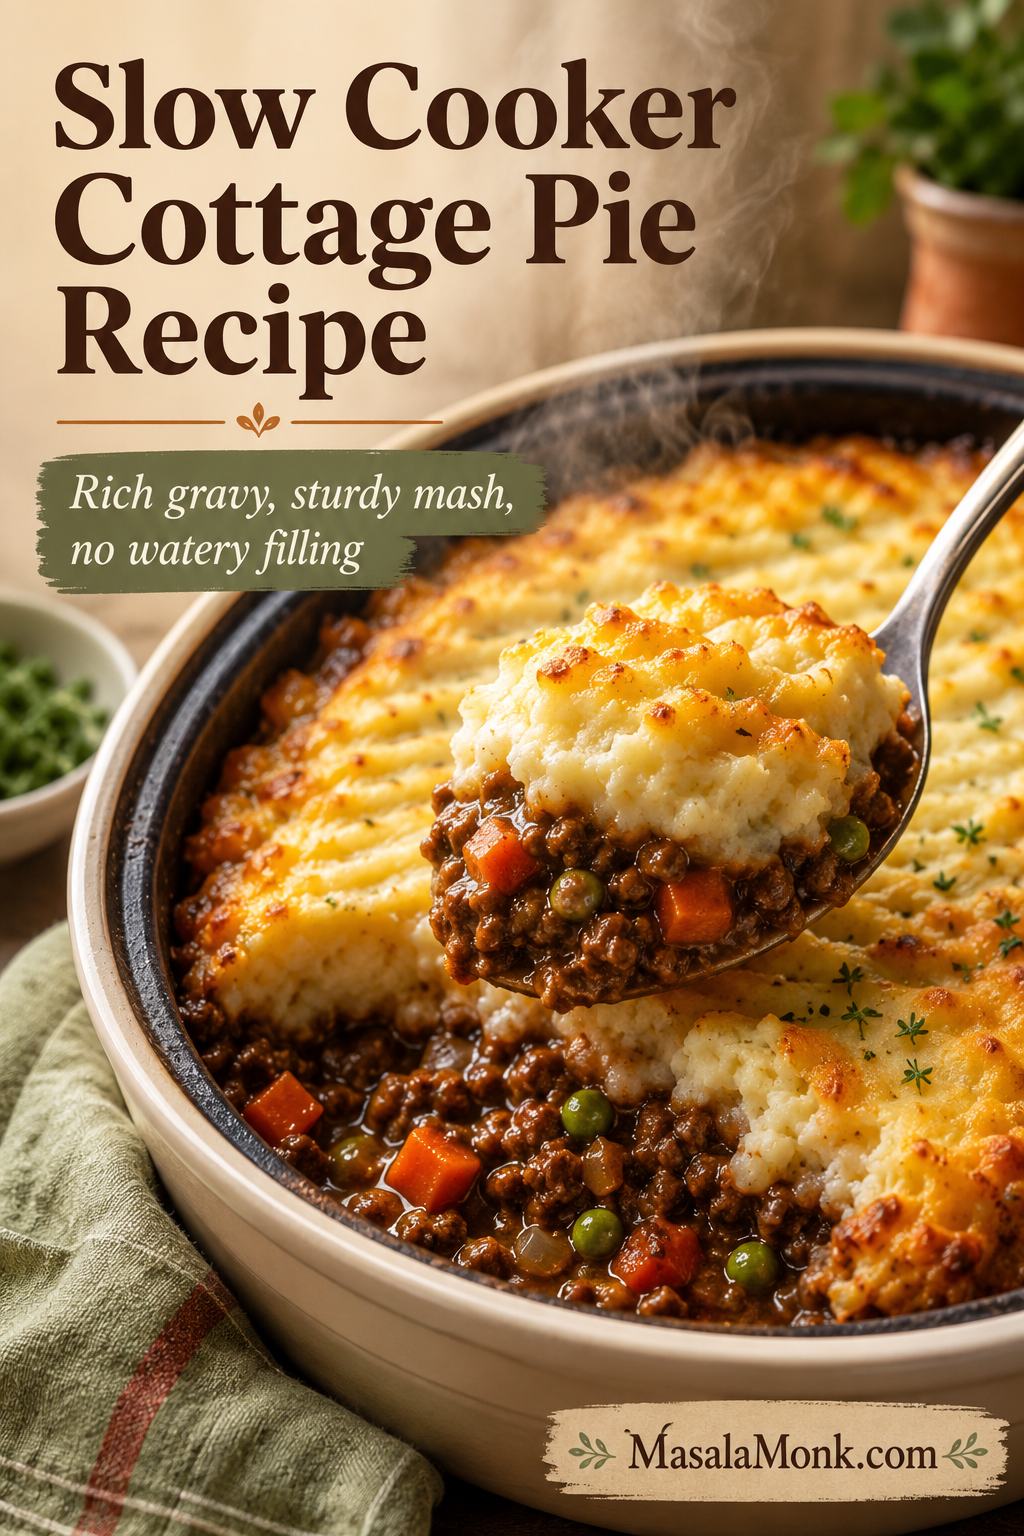
Break through the browned potato ridges and you get crisp little edges first, then soft mash and a layer of beef, carrots and peas underneath in gravy thick enough to come up with the spoon.
This cottage pie recipe uses familiar ingredients and one simple rule: finish the beef filling in the skillet, then top it with mash soft enough to spread without sinking.
Cottage pie traditionally uses beef; shepherd’s pie uses lamb. If lamb is what you want, make our Shepherd’s Pie Recipe.
Cottage Pie Recipe
Ground beef and vegetables simmer in a thick beef gravy, then get covered with mashed potatoes and baked until gravy bubbles around the edges and the potato ridges brown.
Serves 6
Prep About 25 minutes
Cook About 60–70 minutes
Rest 5–10 minutes
Total About 1 hour 30–45 minutes
Oven 400°F / 200°C / 180°C fan
Equipment
12-inch / 30 cm skillet, sauté pan or wide Dutch oven
Large saucepan
Colander
Potato masher or ricer
2½- to 3-quart / about 2.4- to 2.8-liter baking dish
Wooden spoon or sturdy spatula
Rimmed sheet pan, useful if the baking dish is close to full
Ingredients
For the beef filling
1¼ lb / 567 g ground beef, preferably around 85/15
1 medium onion, finely diced, about 5 oz / 150 g
2 medium carrots, finely diced, about 5 oz / 150 g
2 celery ribs, finely diced, about 3½ oz / 100 g
3 garlic cloves, minced
2 tbsp / about 30 g tomato paste
2 tbsp / about 16 g all-purpose flour
1½ tbsp / about 22 ml Worcestershire sauce
1½ cups / 360 ml low-sodium beef broth
1 tsp dried thyme
1 bay leaf
¾ cup / about 100 g frozen peas
½ tsp fine salt to start, plus more to taste
½ tsp freshly ground black pepper, plus more to taste
1 to 2 tsp neutral oil, only if the pan or very lean beef needs it
Optional red wine: Replace ½ cup / 120 ml of the beef broth with ½ cup / 120 ml dry red wine.
For the mashed potato topping
2 lb / 907 g Yukon Gold potatoes, peeled and cut into similar-size chunks; russets also work
4 tbsp / 56 g unsalted butter
⅓ cup / 80 ml warm whole milk, plus up to 2 tbsp / 30 ml more only if needed
½ tsp fine salt to start, plus salt for the cooking water and more to taste
¼ tsp freshly ground black pepper, or to taste
2 oz / 55 g sharp cheddar, grated, optional
How to Make Cottage Pie
Build the beef base
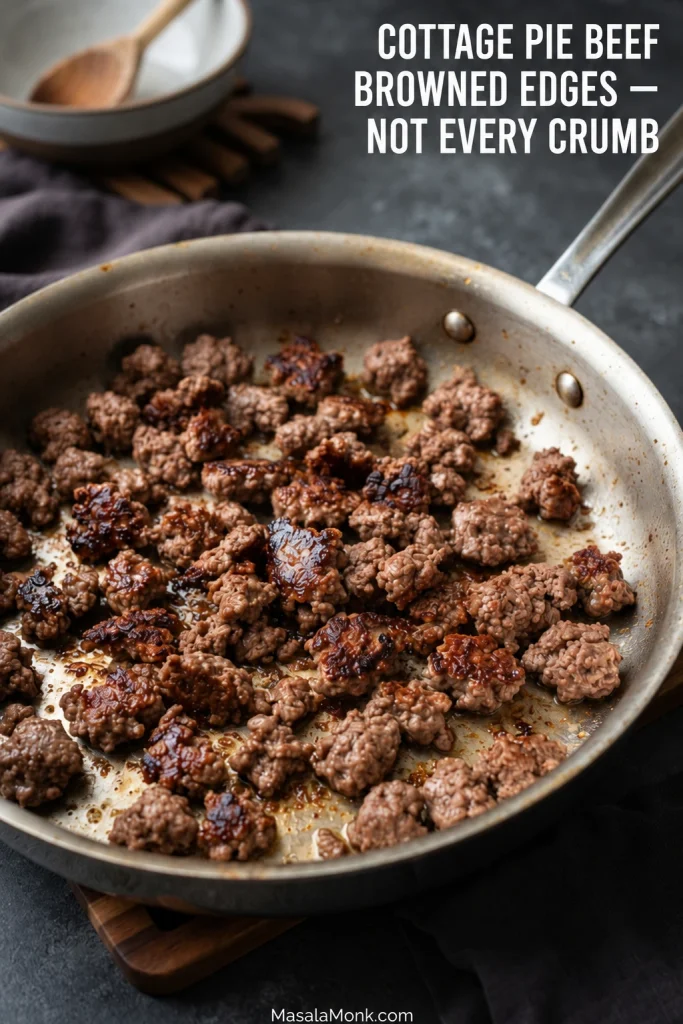
Brown the beef. Heat a wide skillet or sauté pan over medium-high heat. Add a little oil only if the pan is dry or the beef is very lean. Spread in the ground beef and leave it alone briefly before breaking it apart. Cook for about 6 to 8 minutes, turning and breaking it up as needed, until the beef is browned and some pieces have developed dark brown edges. Don’t chase perfect browning on every crumb. If a large pool of fat collects, spoon off the excess but leave a light coating in the pan. Transfer the beef to a bowl or plate.
Cook the vegetables. Reduce the heat to medium. Add the onion, carrots and celery. Cook for about 6 to 8 minutes, stirring now and then, until the onion is soft and the vegetables have started to color. Add the garlic and cook for about 30 seconds.
Build the gravy. Stir in the tomato paste and cook for 1 minute. Add the flour and stir for another minute. Using wine? Pour it in now, scrape up the browned bits and let it bubble for 2 to 3 minutes. Gradually stir in the broth, followed by the Worcestershire sauce, thyme, bay leaf, ½ teaspoon salt and ½ teaspoon black pepper. Return the beef and any juices to the pan.
Finish the filling and mash
Simmer the filling while the potatoes cook. Bring the beef mixture to a gentle simmer and cook uncovered for 15 to 20 minutes, stirring occasionally. Meanwhile, cover the potatoes with cold water by about 1 inch / 2.5 cm and salt the water well. Bring to a boil, lower to a steady simmer and cook until a knife slides easily through the largest pieces, usually 12 to 18 minutes. While the filling and potatoes cook, heat the oven to 400°F / 200°C / 180°C fan.
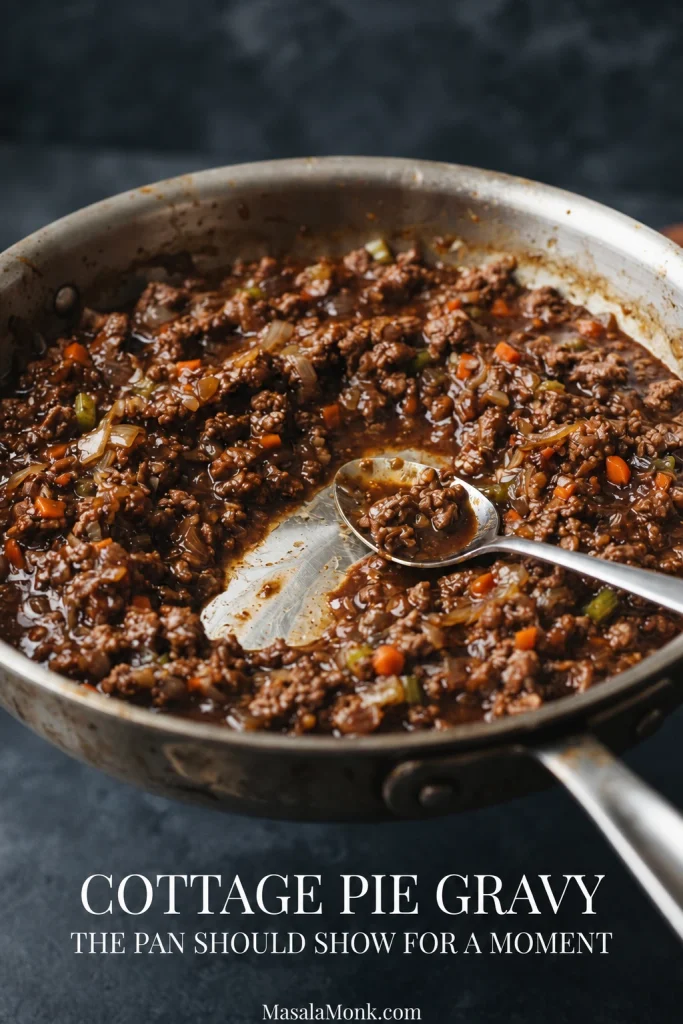
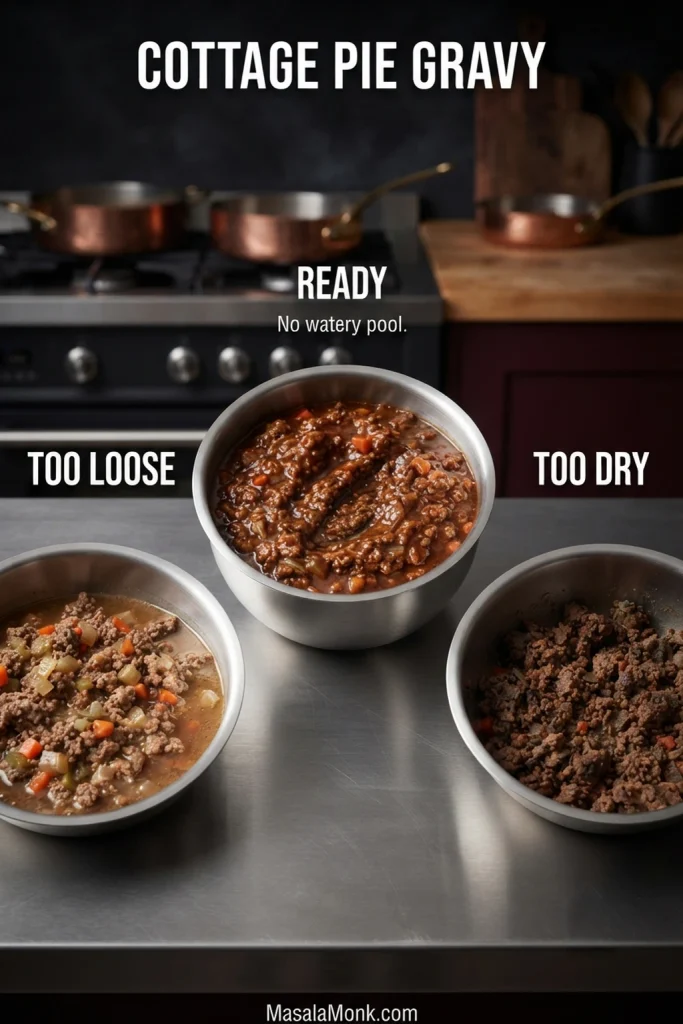
Finish the filling. It is ready when the beef and vegetables are coated in gravy and there is no thin pool underneath. Drag a spoon across the bottom of the skillet. You should see the pan for a moment before the gravy slowly moves back. If it still looks soupy in the skillet, it will still be soupy under the potatoes. Stir in the frozen peas for the final 1 to 2 minutes, remove the bay leaf, then taste and adjust the seasoning. Spread the filling in the baking dish and let it sit while you finish the potatoes. If the consistency is hard to judge, see the gravy consistency guide.
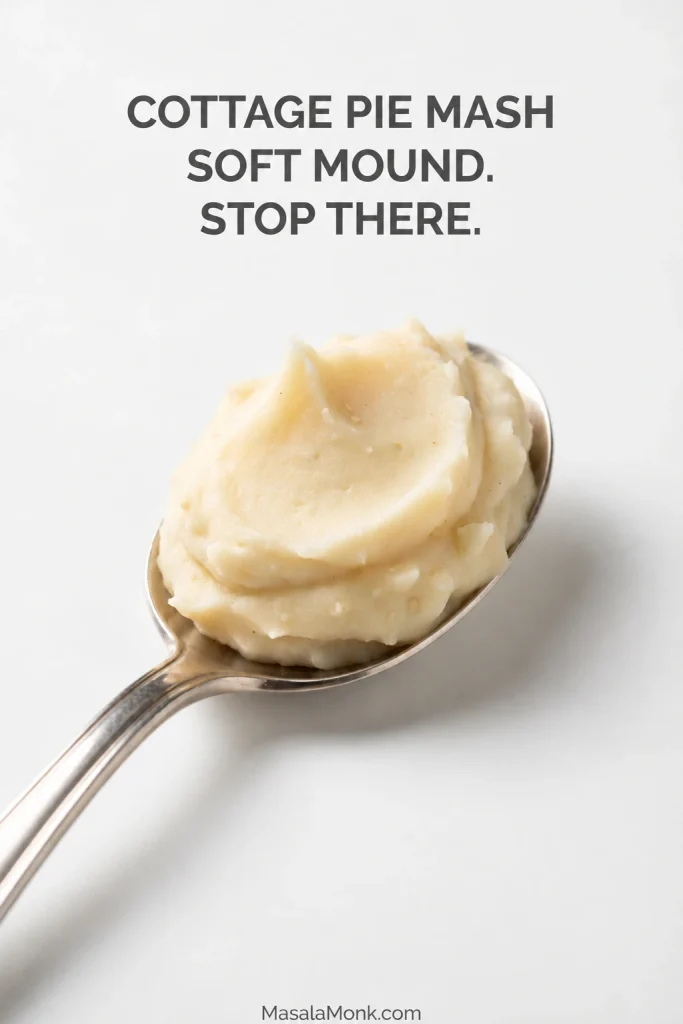
Steam-dry and mash the potatoes. Drain the potatoes thoroughly, then put them back in the warm saucepan over low heat for 1 to 2 minutes. Gently shake the pan until the surfaces look dry. Take them off the heat and mash. Add the butter, ½ teaspoon salt and black pepper, followed by ⅓ cup / 80 ml warm milk. If needed, add more milk only 1 tablespoon at a time. Lift a spoonful: the mash should sit in a soft mound. Stop there.
Season, assemble and bake
Taste both layers together. Try the beef on its own, then take another bite with some potato. If the combination tastes flat, stir a little more salt or pepper through the filling before you add the topping.
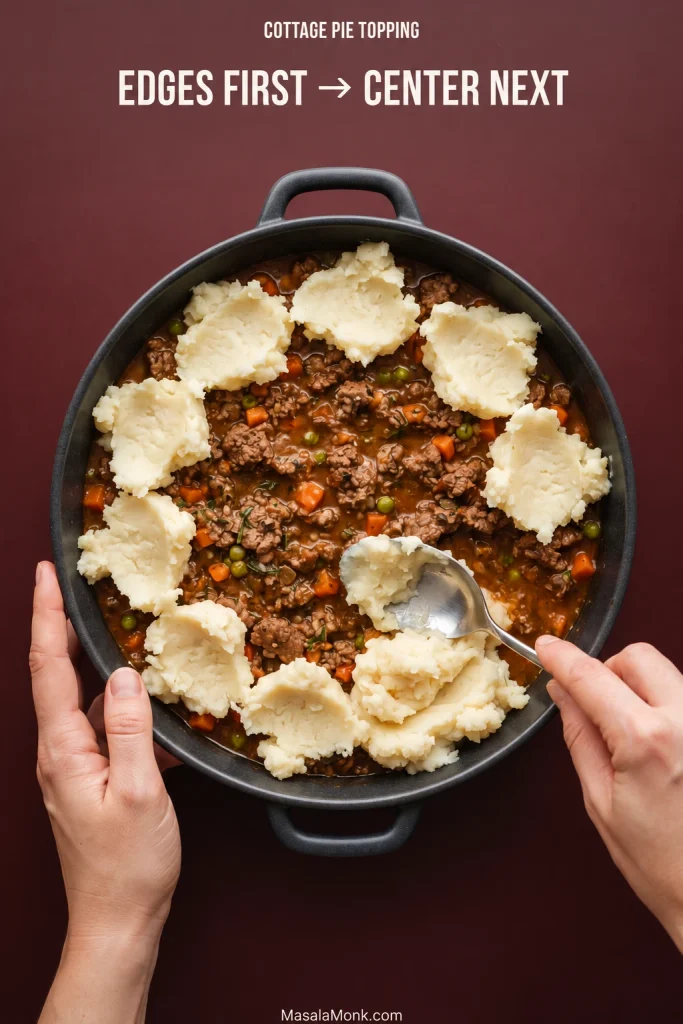
Top the pie. Spoon small mounds of warm mash around the edge first, then fill the center. Gently join them without pressing down hard, take the mash right to the sides and rake the top with a fork. Add the cheddar, if using, and leave about ½ inch / 1–1.5 cm of headspace. If the filling keeps pushing through, see the edge-first topping technique.
Bake. Put the dish on a rimmed sheet pan if it is close to full. Bake for about 20 to 30 minutes, until gravy is bubbling around the perimeter and the potato tips are browned. If the middle is hot but the top still looks pale, and your baking dish is broiler/grill-safe, broil/grill for 1 to 3 minutes, watching closely.
Give it a few minutes before serving. Rest the cottage pie for 5 to 10 minutes. A little slumping is normal—this is a soft, spoonable casserole. The short rest simply keeps the first serving from disappearing into a puddle.
Scaling the recipe: A half batch can go into a smaller casserole. For a double batch, use two dishes instead of one very deep one. Two shallower pies heat through more evenly and give you more browned potato on top.
Research note: This recipe was developed from established cottage-pie methods and common troubleshooting patterns; it has not been independently kitchen-tested by MasalaMonk.
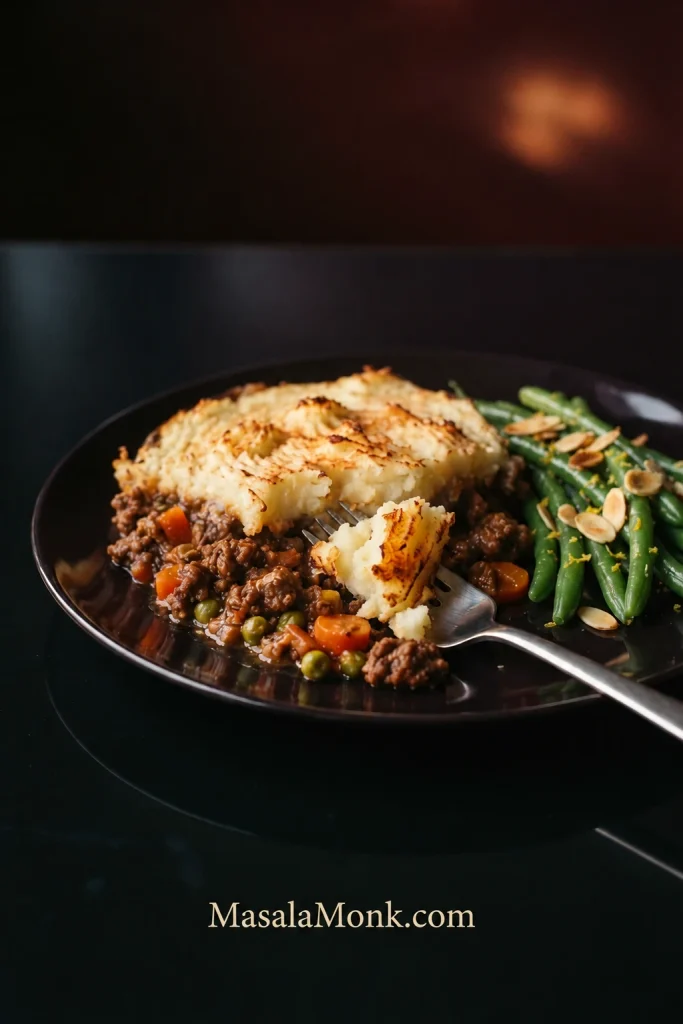
What the first scoop should look like
Cottage pie is a soft casserole, not a freestanding slice. A slight slump is normal; a puddle of thin gravy is not.
Once you lift the first serving, check the space it leaves behind. The filling should stay glossy and cohesive instead of releasing thin gravy into the cavity, while the spoonful should still show distinct potato and beef layers.
Cottage Pie Tips, Troubleshooting & Make-Ahead
How to Build Cottage Pie Gravy
Good browning and enough reduction do most of the work here. The filling should already have the consistency you want before the mash goes on.
Brown the beef first
Ground beef gives off moisture when it hits the pan. Crowd it and stir constantly and the meat stays gray. Give parts of it a little uninterrupted contact with the skillet and you’ll get browned edges that make the finished gravy taste fuller.
Not every piece needs a crust. Once you have a good scattering of brown, move on.
With ground beef, color matters more than uniformity. Mahogany patches mean useful browning; black, brittle edges mean you have gone too far. Once some pieces have real contact color, move on rather than chasing uniform browning.
Build the rest in the same pan
Onion, carrots and celery soften in the browned bits left by the beef. Garlic goes in later so it does not scorch. Give the tomato paste a minute against the heat, then add the flour and liquid.
Keep the tomato paste restrained; it should add body and a little sweetness without making the filling tomato-heavy. Worcestershire rounds out the beef flavor, while low-sodium broth leaves room to adjust the salt after the liquid has reduced. Wine is optional; if you use it, let it bubble down briefly before adding the broth.
Reduce the gravy before assembly
The open skillet is where you fix the consistency. Once the mash goes on, the oven is mainly heating the filling and browning the top; it will not evaporate a loose gravy as efficiently as the uncovered pan.
Drag a spoon through the cottage pie filling and watch the track. At the ready stage, the pan should stay visible briefly before the glossy gravy eases back around the beef. If thin liquid immediately rushes into the gap, keep reducing.
Three gravy states to watch
The filling does not need to become dry before assembly. Look for the middle state: gravy that stays with the beef and vegetables without leaving a thin pool underneath.
Before judging cottage pie gravy from the surface, stir right across the bottom of the pan. The ready stage should still look glossy after that full stir, without thin broth separating around the beef or dry meat beginning to catch.
What you see
What to do
Thin gravy runs ahead of the beef
Keep simmering uncovered. There is still too much free liquid to go under the potatoes.
Glossy gravy stays with the beef and vegetables
Move on. The filling should look juicy and coated, with no watery pool underneath.
The beef looks dry or starts catching
Add a small splash of low-sodium broth. You want the filling moist, not crumbly.
Getting the Cottage Pie Potato Topping Right
2 lb / 907 g potatoes gives this amount of beef a generous topping without burying the filling.
Yukon Gold or russet?
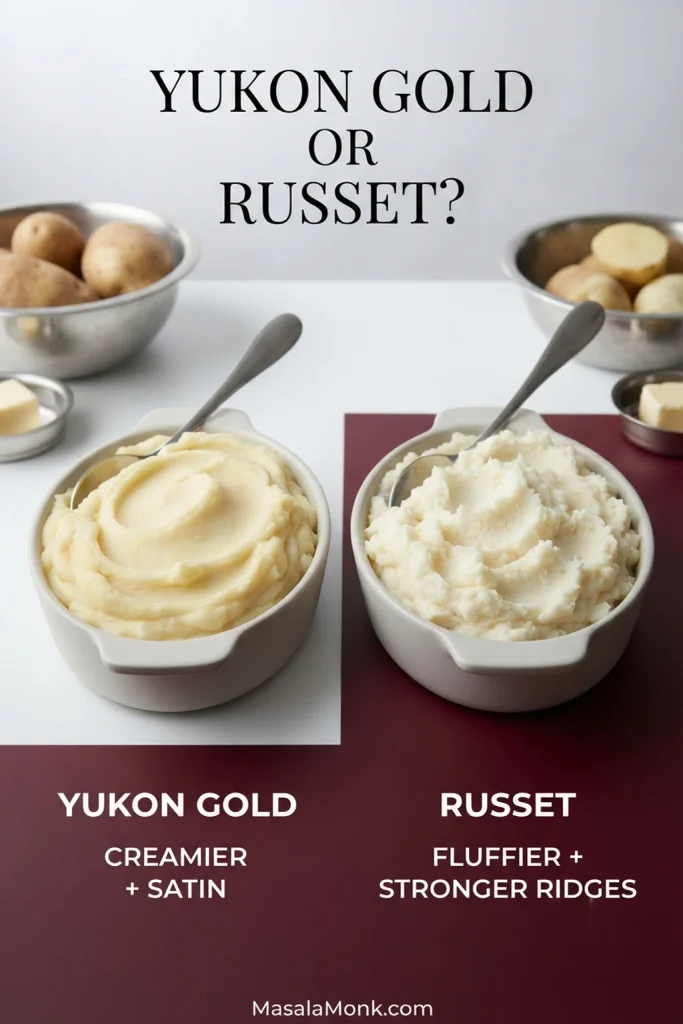
Yukon Gold potatoes make a creamier topping; russets are fluffier and a little drier, with especially good rough edges for browning. Either works.
Yukon Gold and russet potatoes do not need to look identical on top. Expect Yukon Gold mash to stay smoother, while russet mash is naturally craggier. If you want more browned edges on the creamier Yukon topping, rake slightly deeper fork ridges before baking.
What matters more is getting rid of excess water. Drain the potatoes well and give them another minute or two in the warm saucepan. Still shiny? Give them another minute before the butter goes in.
For a deeper look at potato varieties, steam-drying, dairy and avoiding gluey mash, our Mashed Potatoes Recipe covers those details in full.
The mash needs some backbone
Side-dish mash can be very soft. Here it has to sit over hot gravy, so add the milk gradually rather than chasing a loose, pourable texture.
The potatoes should stay soft enough to spread but firm enough to hold where you put them. A few lumps are less troublesome than mash that has been beaten until gluey or thinned until it sinks.
If the mound shows dry cracks, loosen the mash cautiously; if the edges already sag off the spoon, stop adding milk. The useful middle ground is a rounded mound that holds its shape but still spreads easily.
Warm mash, calmer filling
Cold mash is a pain to spread. Bubbling filling is just as awkward. Let the beef sit for a few minutes and work with the potatoes while they are still warm.
Start with small spoonfuls around the outside and work inward. Once the filling is covered, joining the mash is easy. Drag a fork lightly over the top and leave the ridges rough. Those high spots brown first while the mash underneath stays soft.
Once the edge is ringed with small spoonfuls, bridge them gently with the back of the spoon. If gravy starts surfacing, lift and sweep the mash across the filling rather than pressing harder; that is gentler on the settled filling underneath.
Troubleshooting a Watery Filling, Sinking Mash & More
The filling may have been too hot, the mash too loose, or both. Let the filling settle briefly and add milk to the potatoes cautiously.
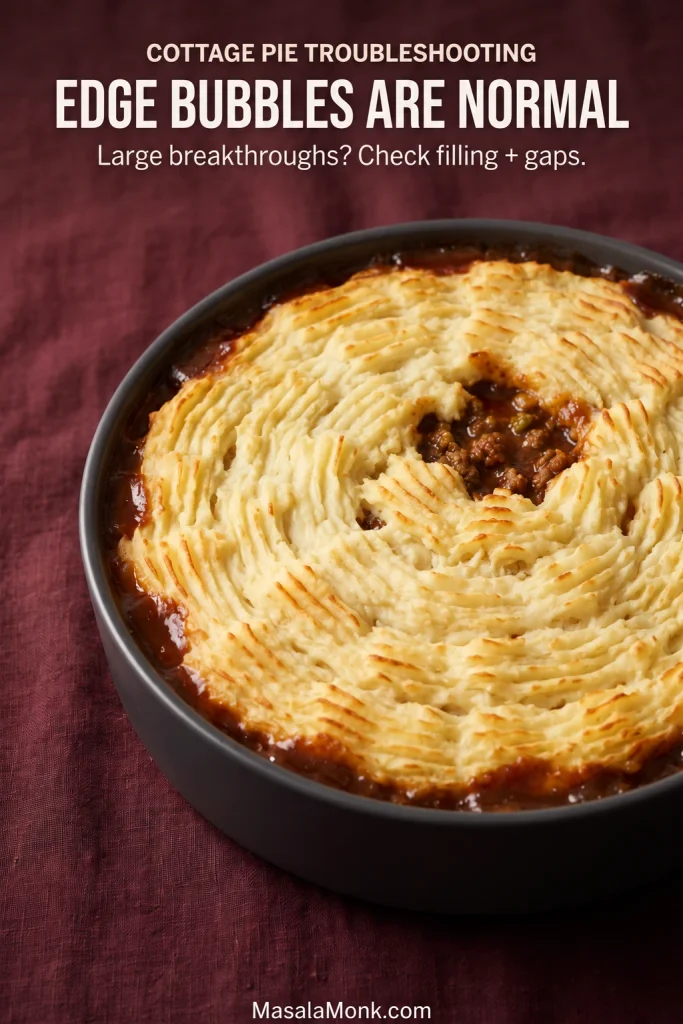
Gravy breaks through the potato in several places
A little bubbling at the edges is exactly what you want. If gravy erupts through large gaps, check that the filling was not too loose and take the mash right to the sides.
The finished pie tastes bland
Taste the beef with a little potato before assembly. That second bite often needs more seasoning than the beef did on its own.
The filling feels greasy
Too much rendered fat stayed in the pan. Spoon off a large excess after browning, leaving only a light coating for the vegetables.
The first scoop falls apart
A little slumping is normal. A puddle points back to loose gravy or too little resting time.
Edge bubbles vs gravy breakthroughs
Use the pattern as the clue: a little activity at the perimeter can be normal, while repeated breaks through the potato point back to filling consistency or gaps in the topping.
One isolated breakthrough can simply mark a local gap in the mashed potato topping. By contrast, gravy pushing through in several places makes the filling itself more suspect, especially if it was still loose before assembly.
Cottage Pie or Shepherd’s Pie?
Cottage pie is the beef version; shepherd’s pie is traditionally made with lamb. Recipes written in the UK may call the beef minced beef or beef mince; in a U.S. ingredient list, that’s simply ground beef.
Easy Shortcuts That Still Work
Frozen mirepoix: Use about 12 to 14 oz / 340 to 400 g in place of the fresh onion, carrots and celery. Cook until the water it releases has evaporated before adding the garlic.
Leftover or prepared mash: About 4 cups will cover this amount of filling. Warm it gently before spreading and keep it fairly firm.
Skip the baking dish: A deep 12-inch oven-safe skillet can go straight into the oven if there is still about ½ inch / 1–1.5 cm of room above the potatoes.
For a more hands-off route altogether, our Slow Cooker Cottage Pie Recipe handles the liquid differently because a covered slow cooker holds onto much more moisture than an open skillet.
Make Ahead, Freeze & Reheat
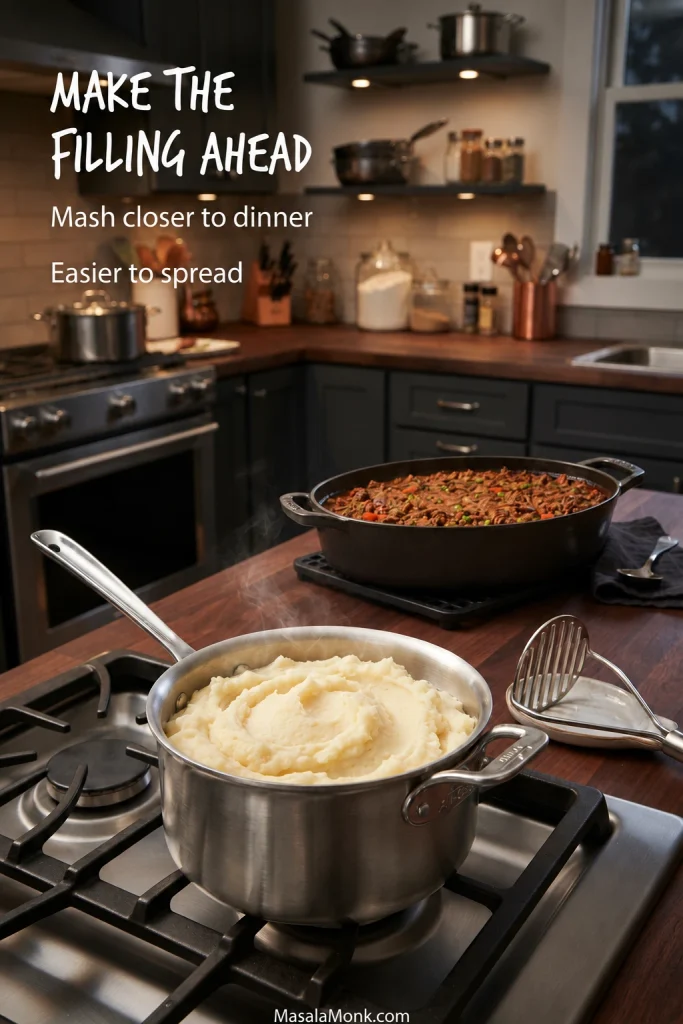
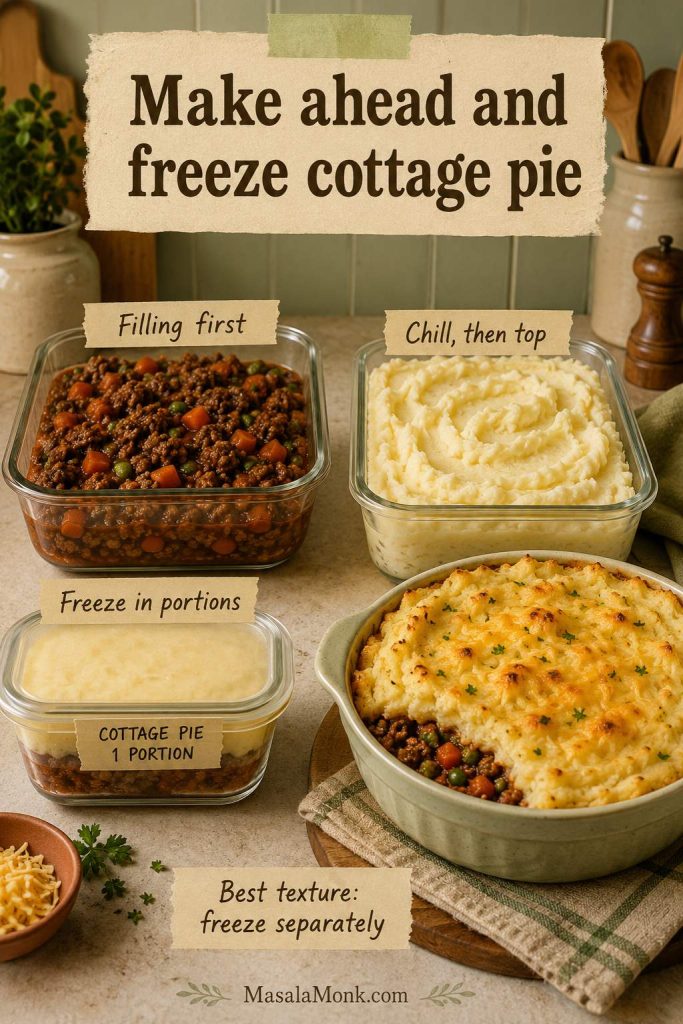
If dinner needs to be mostly sorted before you want to serve it, make the beef filling first. It keeps well overnight, and making the mash closer to dinner gives you the easiest topping to spread.
Make It a Day Ahead
Cook the beef filling, cool it promptly, then cover and refrigerate it. The next day, take it out while the potatoes cook, make the mash, assemble the pie and bake.
You can also assemble the whole pie in advance. Cool the filling first, spread freshly made warm mash over the top while it is still easy to work with, then cover and refrigerate the assembled pie promptly.
For make-ahead cottage pie, let the beef filling cool until it is settled rather than steaming, then work with warm mash. That temperature contrast makes the topping easier to place cleanly and reduces the chance of churning the two layers together.
Baking a chilled cottage pie
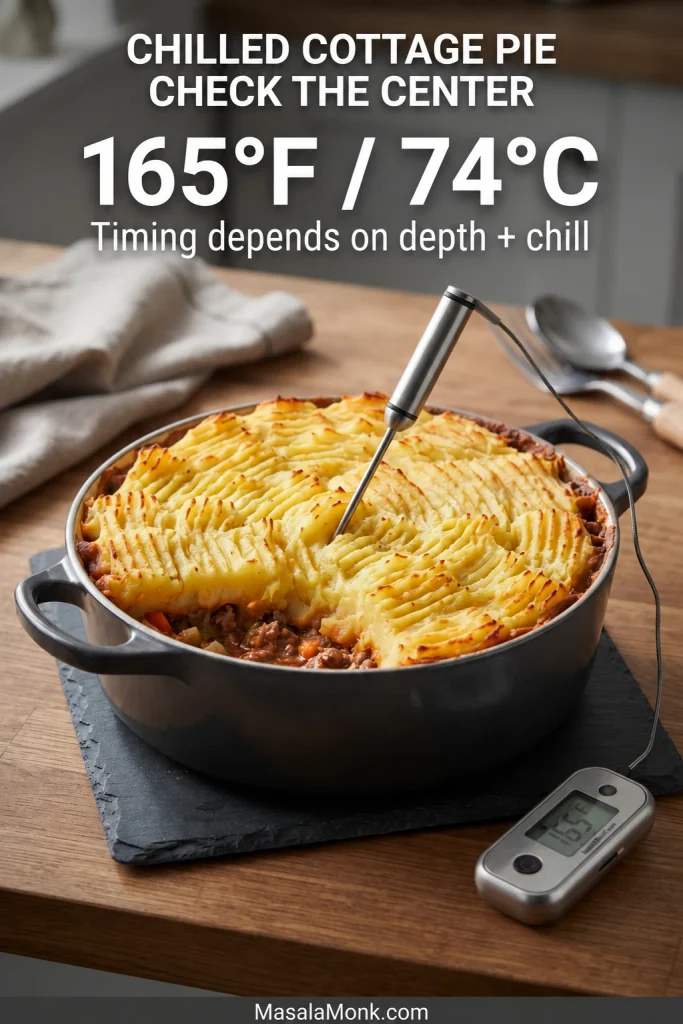
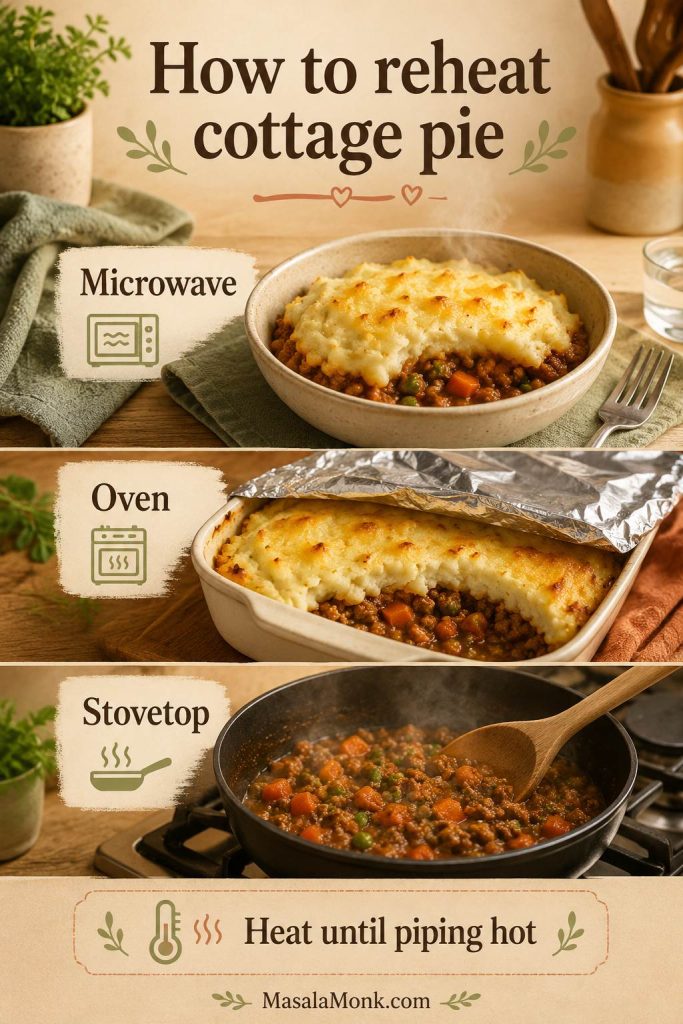
At 400°F / 200°C / 180°C fan, start checking a thoroughly chilled pie around 35 minutes; a deep one may need closer to 45 to 50 minutes. Bake until the center is hot throughout and reaches 165°F / 74°C. If the potatoes darken before the middle is ready, cover the top loosely with foil and uncover it near the end.
If you’re baking the pie in glass or ceramic, check the manufacturer’s guidance before moving a chilled dish into a hot oven.
When checking a chilled cottage pie, push the probe through the mash into the center of the filling and keep the tip away from the dish. The edges heat first, so a side reading can look ready while the middle is still catching up.
Freezing for later
For a whole frozen pie, cool the beef filling first, then add the mash while it is still soft enough to spread easily. Chill the assembled pie completely, wrap it well and freeze. Thaw overnight in the refrigerator before baking so the middle heats evenly, then use the chilled cottage pie guidance above for the bake.
For the best texture, try to use it within about 3 months. If you prefer freshly made mashed potatoes, freeze the beef filling on its own and make the topping on the day.
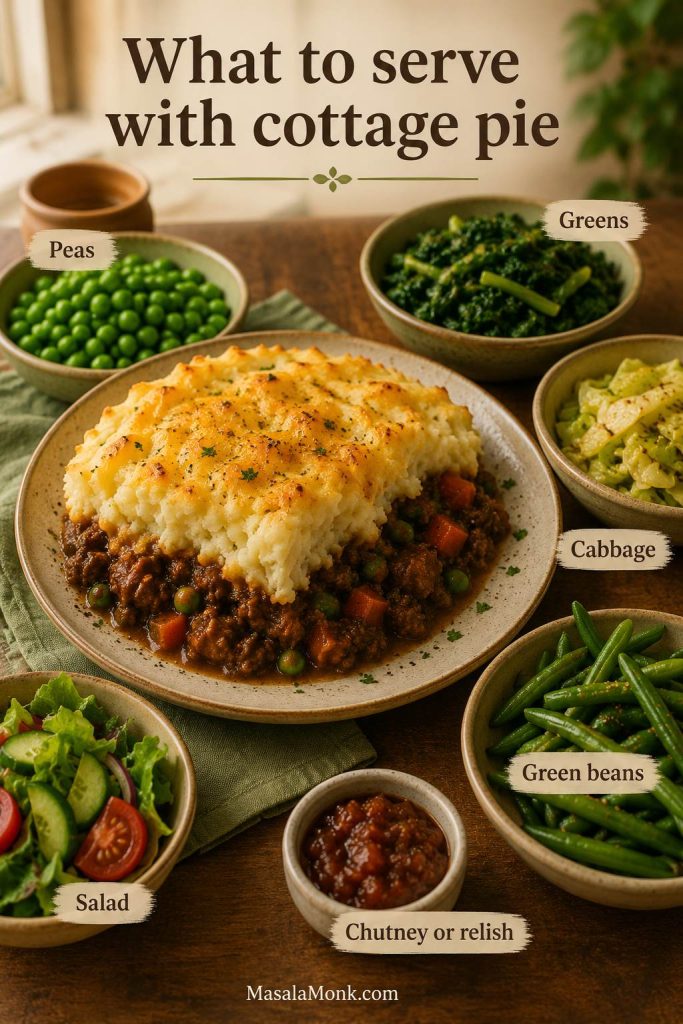
Cottage pie already brings beef, potatoes, gravy and vegetables to the plate. Keep the side simple and give the meal something green, crisp or a little sharp.
Green beans with butter, lemon or plenty of black pepper
Steamed or roasted broccoli
Buttered cabbage or simply cooked greens
A crisp salad with a sharp vinaigrette
Pickled or braised red cabbage for something sweet-sharp
Our Green Beans Almondine adds lemon and toasted almonds for brightness and crunch beside the soft mash and beef gravy.
Because cottage pie already gives you rich beef gravy and soft mash, use the side dish for contrast. Lemon on green beans, red cabbage or a sharp vinaigrette can brighten the plate without forcing extra acidity into the pie itself.
Serve the cottage pie while the forked ridges are still crisp at the tips. Push the serving spoon right to the bottom so every plate gets crisp-edged potato, soft mash, plenty of gravy and browned beef underneath.
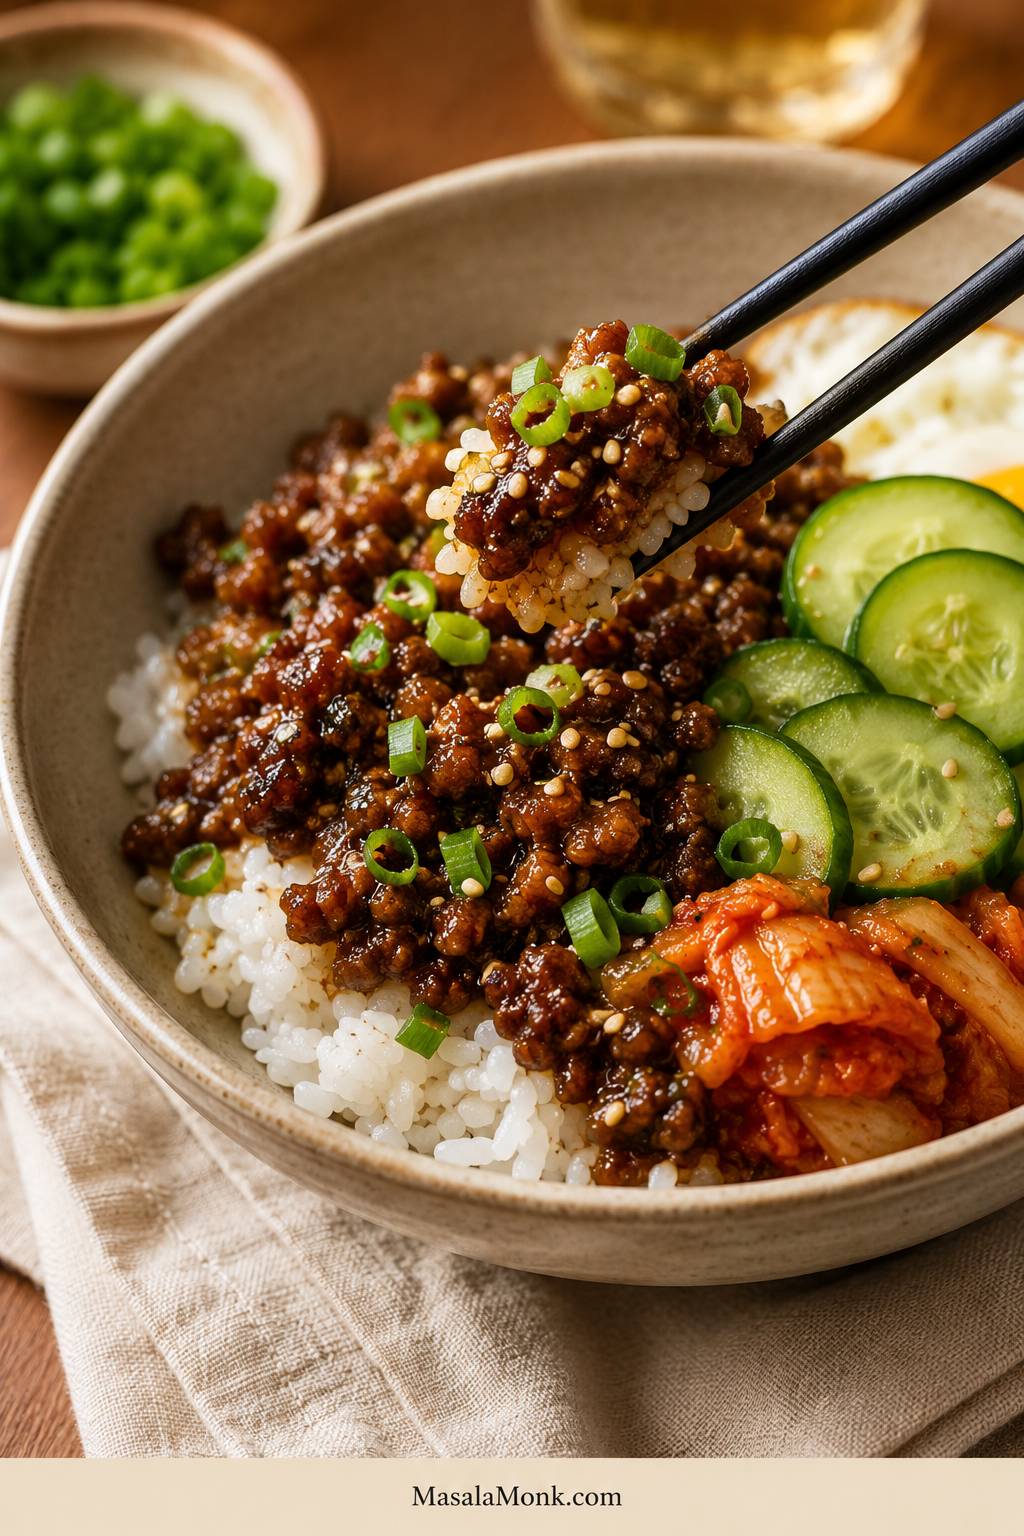
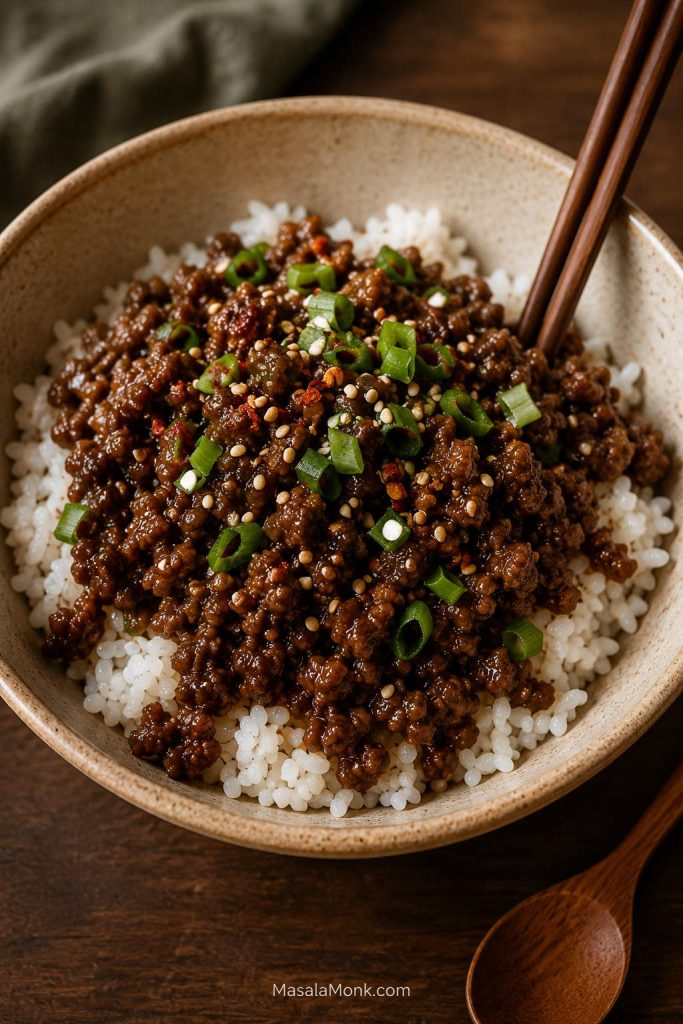
This Korean beef bowl recipe is for the nights when you have ground beef in the fridge, rice ready or almost ready, and no patience for a complicated dinner. In about 20 minutes, the beef turns saucy, garlicky, a little sweet, and deeply savory, with browned edges and a pan sauce that clings to every crumble.
With rice, beef, and one fresh topping, this is already dinner. Everything else — kimchi, carrot, sesame seeds, a fried egg, or a creamy gochujang drizzle — just makes it feel more complete.
You do not need a perfect topping spread. One crunchy or bright thing is enough to make the bowl work.
The idea is simple: one sauce ratio, three flavor paths, and a bowl you can build around whatever you have. Keep it mild, add gochujang for heat, or make it rounder and more bulgogi-style with grated apple or pear.
Small effort, big dinner: saucy beef, warm rice, one fresh crunch, and a sauce you can keep mild or make spicy. This is a 20-minute recipe when cooked rice is ready. If you are starting rice from scratch, this guide to cooking perfect rice helps with stovetop, rice cooker, and Instant Pot timing.
If you want the fastest path to dinner, start here. This gives you the full sweet-savory Korean-inspired beef bowl feeling with the fewest moving parts.
Rice3–4 cups cooked rice, warm before the beef is done
Best toppingsCucumber, scallions, sesame seeds, fried egg if you have time
Bowl formula: warm base + saucy beef + one fresh crunch + one finish. That can be as simple as rice, beef, cucumber, and sesame seeds.
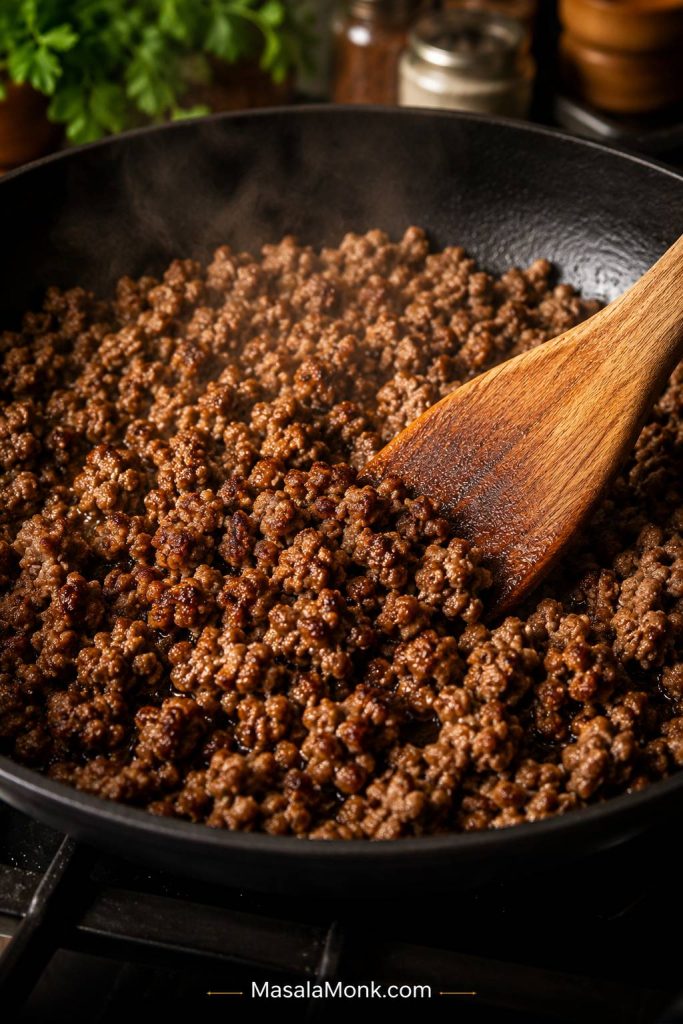
The key move is to brown the beef first, then add the sauce. If the sauce goes in too early, the beef simmers and tastes flatter. Brown it first, and the sauce clings to deeper, better-tasting crumbles.
For a 20-minute dinner, keep rice and cucumber ready while the beef simmers; once the sauce thickens, the skillet can go straight into bowls.
What You’ll Need
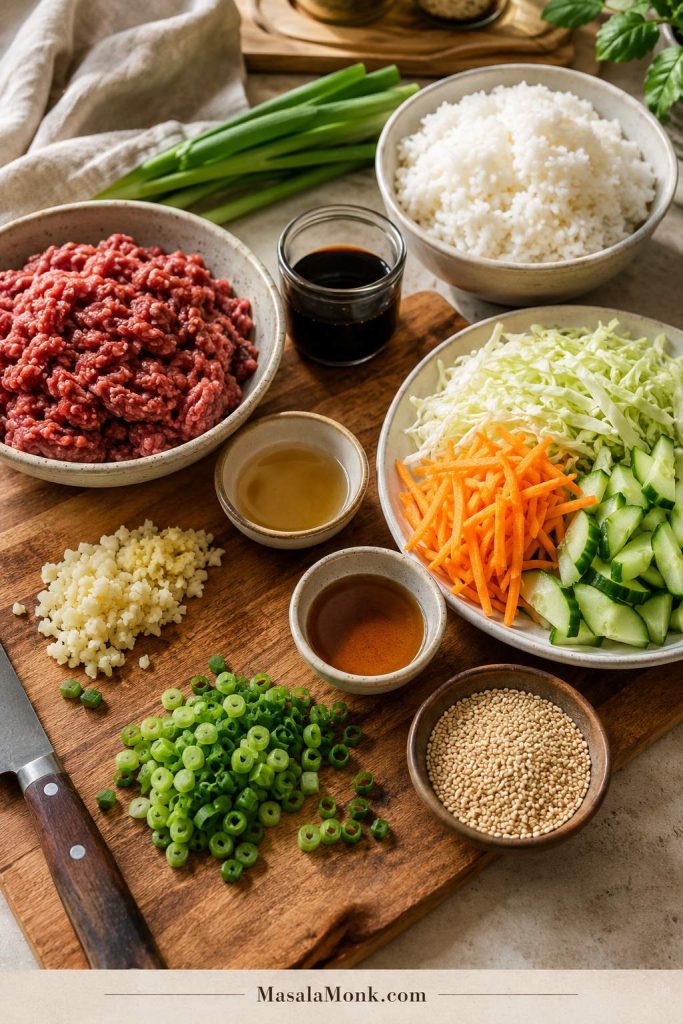
You do not need much to make this taste good. The beef brings richness, the sauce brings that salty-sweet garlic-soy flavor, and the toppings keep everything fresh enough to go back for another bite.
The ingredient list stays weeknight-friendly: ground beef for speed, rice for comfort, sauce for flavor, and fresh toppings for balance.
Ground Beef or Beef Mince
Use 1 lb / 450–500 g ground beef or beef mince for 4 bowls. The method is the same either way, so use the pack size and wording common where you live.
If you only remember one thing, use 90/10. It browns nicely, stays juicy, and does not leave the bowl greasy. 85/15 tastes richer but often needs draining, while 93/7 is leaner and needs a little more care so it does not dry out.
Beef type
Best for
Cooking note
85/15
Juicier bowls, better browning, richer flavor.
Drain excess fat if the pan looks greasy before adding sauce.
90/10
Best all-purpose choice.
Enough flavor, but not too greasy.
93/7
Leaner meal prep bowls.
Add a little oil if needed and avoid overcooking.
Aromatics
Fresh garlic and ginger make the pan smell like dinner almost immediately. Use 3–4 garlic cloves and about 1 teaspoon grated ginger. Scallion whites or a little grated onion can also go into the pan for extra depth.
Rice and Toppings
Warm cooked rice is the easiest base. For toppings, use cucumber, carrot, cabbage, scallions, sesame seeds, kimchi, or egg. Even a simple bowl with rice, beef, scallions, and sesame seeds can still feel complete.
US and Metric Measurements
Measurements are forgiving here. The sauce does not need laboratory precision, but these amounts give you a reliable starting point before you adjust sweetness, heat, or salt at the end.
Ingredient
US measure
Metric measure
Ground beef / beef mince
1 lb
450–500 g
Low-sodium soy sauce
¼ cup
60 ml
Brown sugar
2–3 tbsp
about 25–38 g
Honey, if using instead
2–3 tbsp
about 42–63 g
Rice vinegar
1 tbsp
15 ml
Toasted sesame oil
2 tsp
10 ml
Gochujang, optional
1–2 tbsp
18–36 g
Cooked rice
3–4 cups
about 500–750 g, depending on rice type
Grated apple or pear, optional
2–3 tbsp
30–45 g
Grated onion, optional
1–2 tbsp
15–30 g
Korean Beef Bowl Sauce
The sauce is what makes the beef taste deeper than a 20-minute dinner usually does. It works because every bite has balance: salty soy, sweetness from brown sugar or honey, acidity from rice vinegar or kimchi, fat from beef and sesame oil, heat if you add gochujang, and crunch from cucumber or cabbage.
That is why the bowl tastes complete even when the topping list is short.
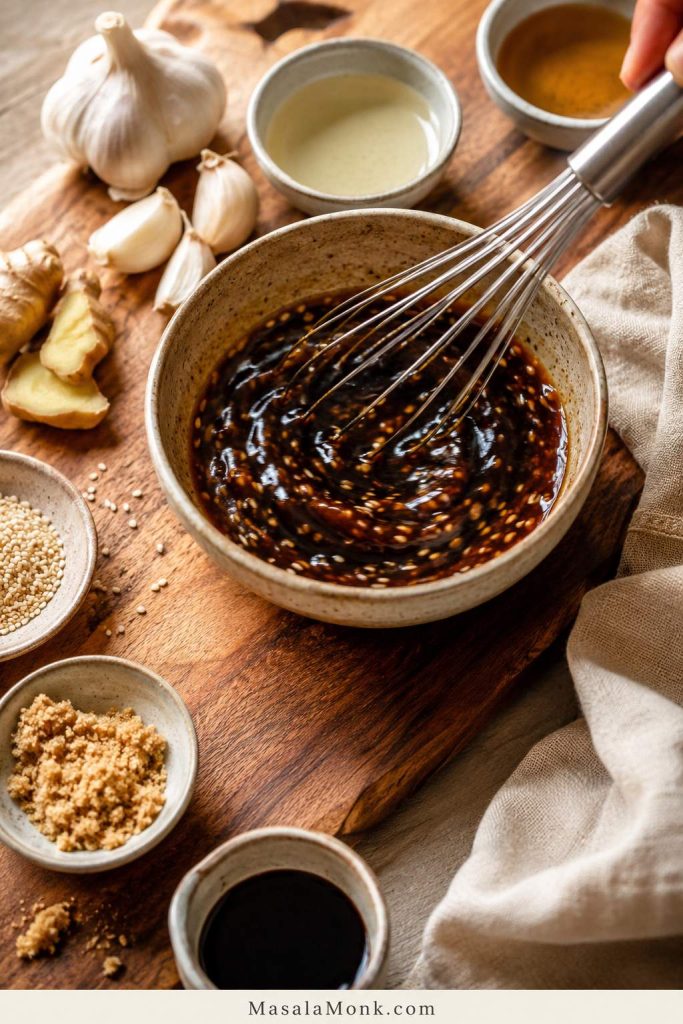
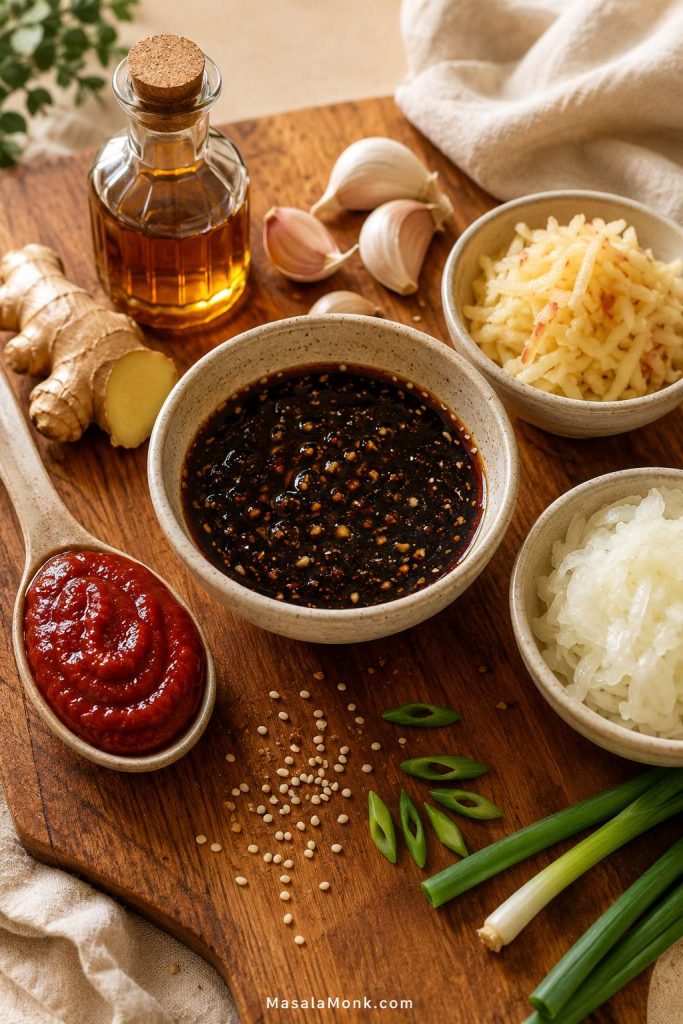
The base sauce sets the flavor before heat: soy sauce, sweetener, rice vinegar, sesame oil, garlic, and ginger create the salty-sweet backbone.
Save This Sauce Ratio
For 1 lb / 450–500 g beef, remember this base formula:
¼ cup / 60 ml low-sodium soy sauce for salt and savoriness
2–3 tablespoons brown sugar or honey for sweetness and gloss
1 tablespoon rice vinegar for balance
2 teaspoons toasted sesame oil for aroma
Garlic + ginger for the flavor base
Optional: 1–2 tablespoons gochujang for heat, or grated apple/pear for bulgogi-style sweetness
Make It Mild, Medium, Spicy, or Bulgogi-Style
Mild: skip the gochujang and use the soy-garlic-sesame sauce as written.
Medium: add 1 tablespoon gochujang for color, depth, and gentle heat.
Spicy: add 2 tablespoons gochujang, then balance the bowl with cucumber, cabbage, rice, or egg.
Bulgogi-style: add 2–3 tablespoons grated apple or pear and 1–2 tablespoons grated onion.
Not sure which one to make? Start with the mild version. For the best all-around bowl, add 1 tablespoon gochujang and 2 tablespoons grated apple or pear; it stays balanced, slightly spicy, and deeper without becoming difficult.
From that same sauce base, gochujang adds heat, while grated apple or pear and onion create a sweeter, rounder bulgogi-style beef bowl.
Sesame oil note: toasted sesame oil tastes strongest when it is not cooked hard for too long. Whisk it into the sauce for ease, or save half to drizzle in at the end if you want a stronger sesame aroma.
Quick Sauce Adjustments
Less sweet: use 2 tablespoons brown sugar or honey instead of 3.
More saucy: add 1–2 tablespoons water while simmering.
Spicier: add more gochujang, gochugaru, chili flakes, or sriracha-style sauce.
Brighter: finish with a small splash of rice vinegar.
More sesame-rich: finish with sesame seeds or a tiny drizzle of toasted sesame oil.
Ingredient Swaps
Dinner can still happen even if you are missing one ingredient. The flavor will change slightly, but these swaps keep the bowl moving in the same sweet-savory direction.
If you do not have…
Use instead
Rice vinegar
Apple cider vinegar, white vinegar, or a squeeze of lime juice.
Gochujang
Chili flakes, gochugaru, sriracha-style sauce, or simply skip it.
Fresh ginger
¼–½ teaspoon ground ginger, or leave it out if needed.
Brown sugar
Honey, maple syrup, white sugar, or coconut sugar.
Soy sauce
Tamari for gluten-free, or coconut aminos for a milder option.
Sesame oil
Skip it if needed, then finish with sesame seeds for some nuttiness.
Apple or pear
Leave it out, or use a little grated onion for body.
No special equipment is needed, but a wide skillet makes a real difference. A crowded pan traps moisture, which makes the beef steam instead of brown. You only need a wide skillet, a small bowl for the sauce, and a spatula or wooden spoon.
Before you start: have cooked rice and toppings ready. The beef cooks quickly, and the bowl tastes best when the hot, saucy beef goes straight over warm rice.
How to Make the Bowls
Once the sauce is mixed, the skillet part moves fast: brown the beef, simmer until the sauce coats the crumbles, then build the bowls while everything is still hot.
Step 1: Make the Sauce
In a small bowl, whisk together soy sauce, brown sugar or honey, rice vinegar, garlic, ginger, and optional gochujang. Whisk in the sesame oil too, or save half to drizzle in at the end for a stronger sesame aroma. For the bulgogi-style version, add grated apple or pear, grated onion, and optional mirin.
Whisk until the sugar dissolves and the gochujang, if using, is fully mixed in.
Step 2: Brown the Beef
Heat a wide skillet over medium-high heat. Add the beef. If it is very lean, add 1 tablespoon neutral oil first.
Press the beef into an even layer and let it cook undisturbed for 1–2 minutes before breaking it apart. That short pause helps the bottom brown instead of turning gray and watery.
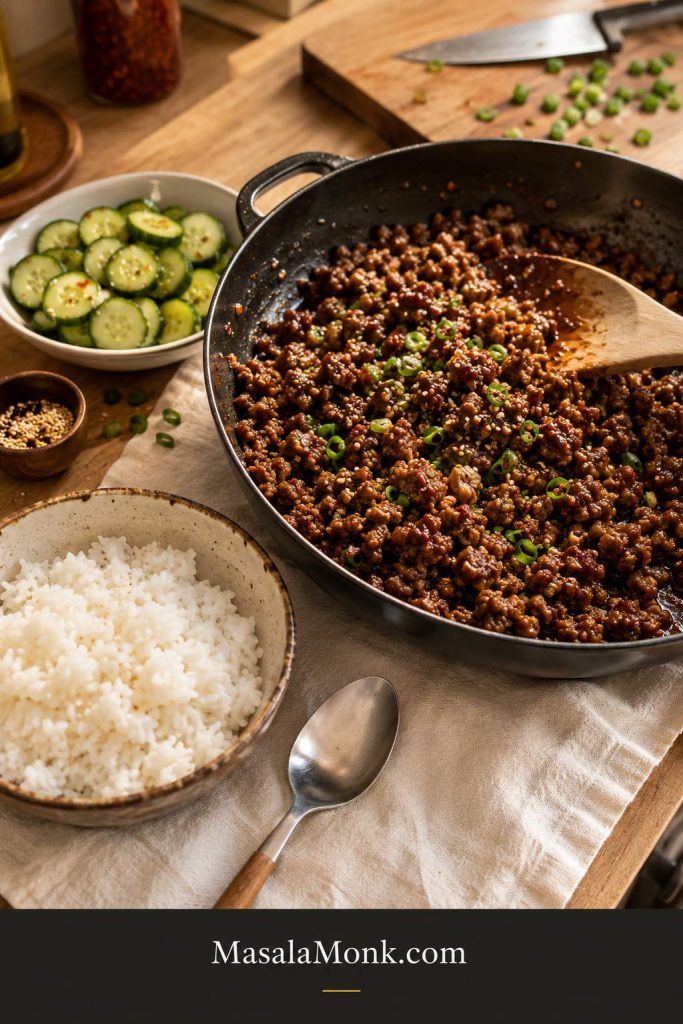
Before the sauce goes in, brown the ground beef well; those caramelized edges keep the finished bowl from tasting flat.
Step 3: Break It Into Crumbles
Use a wooden spoon or spatula to break the beef into small crumbles. Cook until browned and fully cooked. If the pan looks watery before the sauce goes in, drain it; sauce clings to browned beef, not liquid.
Food safety note: ground beef should be cooked to 160°F / 71°C. A thermometer is the most reliable check; color alone can be misleading. If you do not have one, cook until the beef is steaming hot throughout and fully cooked through.
Step 4: Add the Sauce
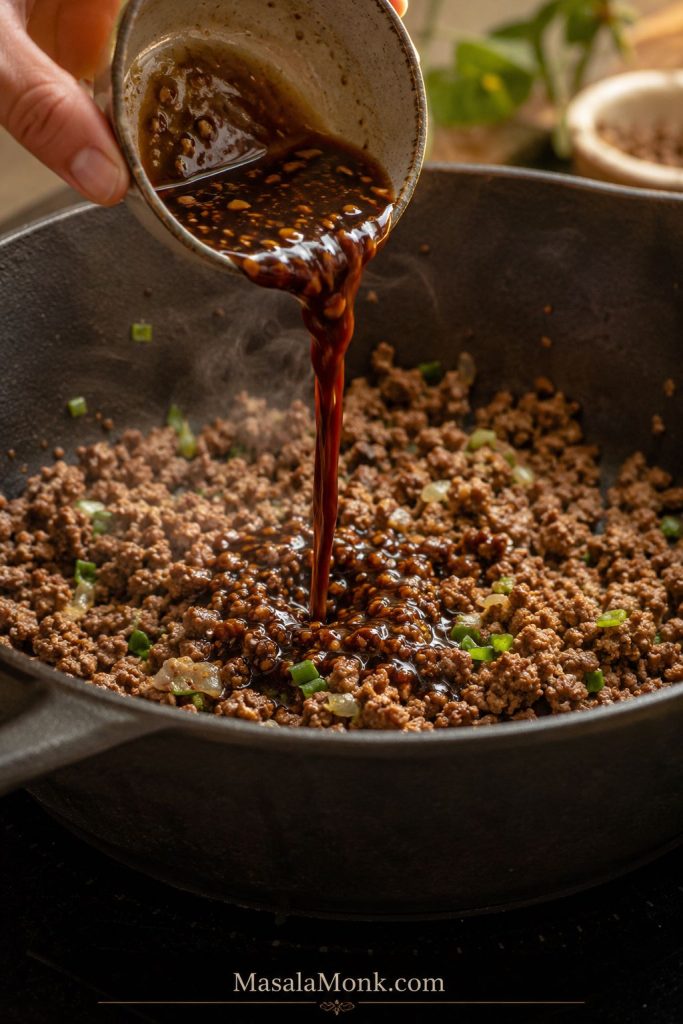
Pour the sauce into the skillet and stir well. When the garlic and ginger hit the hot beef, it should smell savory and warm almost immediately. If anything smells sharp or scorched, lower the heat before the sauce reduces too far.
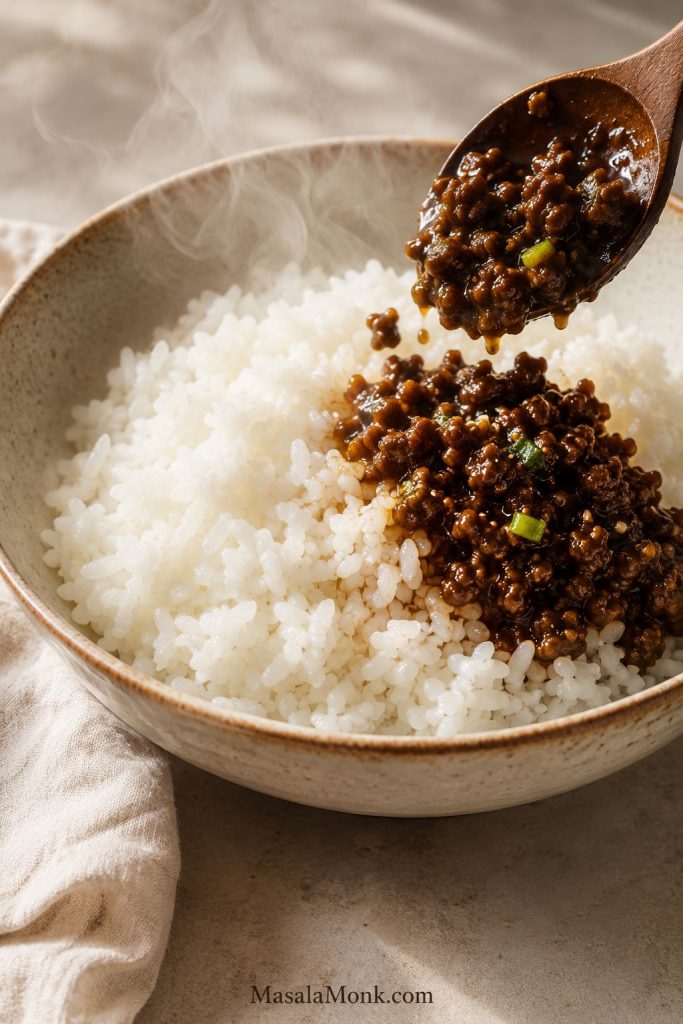
After browning, let the sauce bubble briefly so the soy-garlic flavor coats the beef instead of staying loose in the pan.
What Glossy Korean Ground Beef Should Look Like
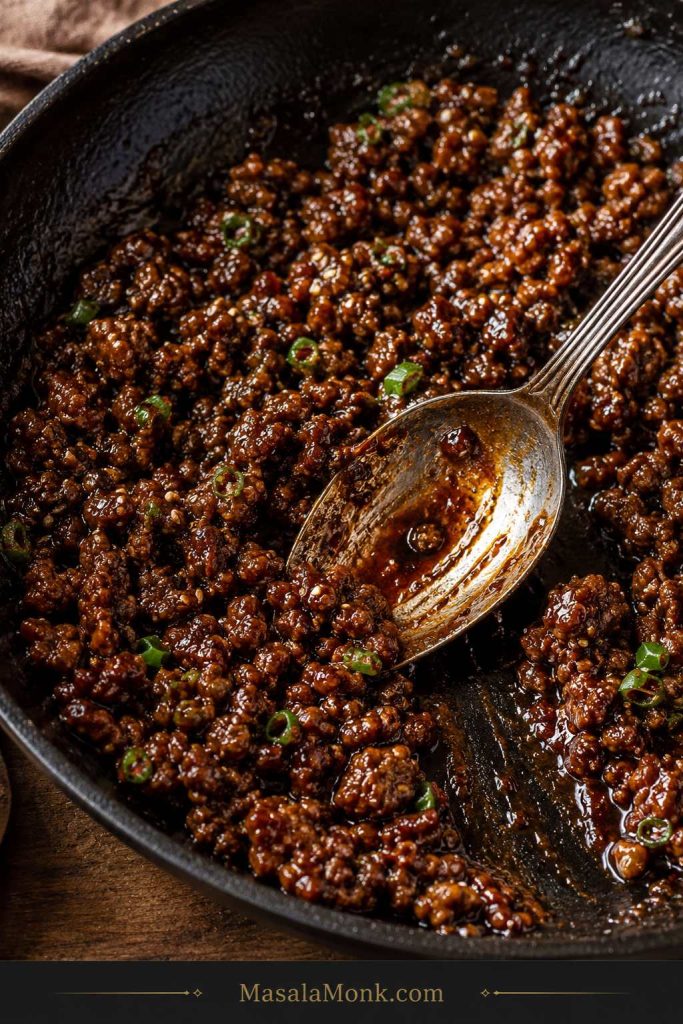
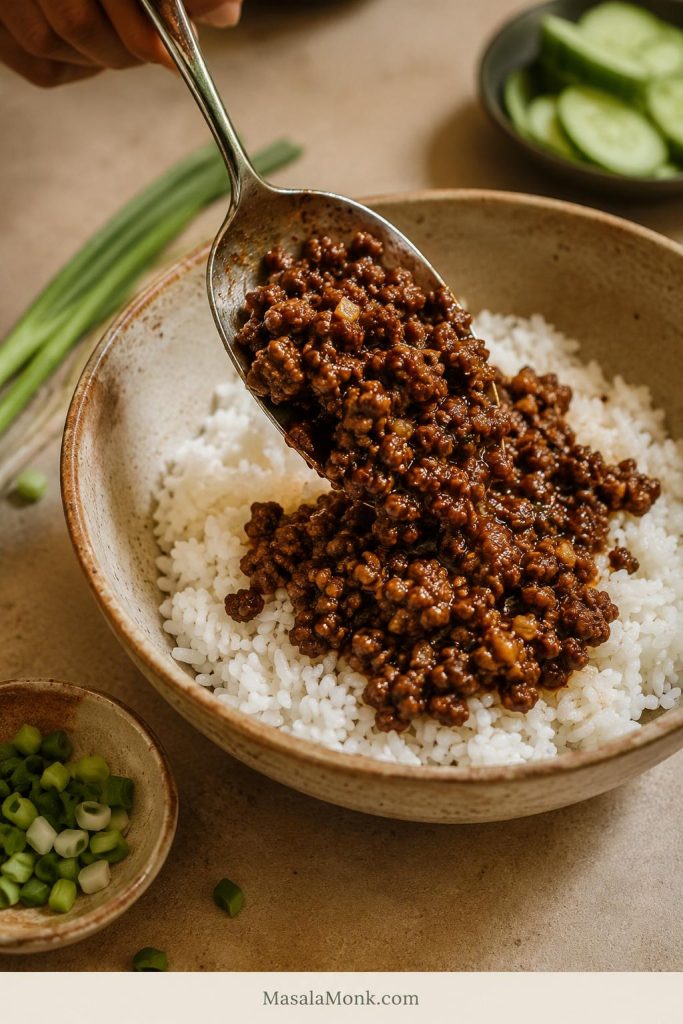
Let the sauce bubble gently for 2–4 minutes, until it looks glossy, reduced, and clings to the beef instead of running across the pan. It should coat the crumbles, not pool like soup.
Once the sauce clings to the crumbles, the beef is ready; that texture helps it season the rice without making the bowl watery.
Taste the beef before you build the bowls. Too salty? Add more rice or cucumber. Flat? Splash in rice vinegar. Want more heat? Stir in a little gochujang at the end.
Step 5: Build the Bowls
Divide warm rice between bowls. Spoon the saucy beef over the rice. Add cucumber, carrot, cabbage or lettuce, scallions, sesame seeds, kimchi, and egg if using.
Next, spoon the beef over hot rice, then keep the bowl simple with one fresh crunch and one finish instead of overloading the toppings.
Step 6: Finish and Serve
Finish with extra sesame seeds, sliced scallions, a drizzle of sesame oil, or a spoonful of gochujang sauce. For a creamy drizzle, mix 2 tablespoons mayo with 1–2 teaspoons gochujang and a few drops of rice vinegar. Add a tiny splash of water only if you want it thinner. For a homemade version, this mayo guide includes a gochujang mayo variation.
Serve while the beef is hot, the rice is warm, and the vegetables are still crisp.
Korean Beef Bowl Recipe
Easy ground beef or beef mince rice bowls with sticky soy-garlic beef, warm rice, crunchy toppings, optional gochujang heat, and a bulgogi-style apple or pear upgrade.
Prep Time5 minutes
Cook Time15 minutes
Total Time20 minutes
Servings4 bowls
Total time assumes cooked rice is ready and toppings are simple. Add about 5 minutes for several toppings, fried eggs, or the bulgogi-style upgrade.
Equipment
12-inch skillet or large nonstick skillet
Small mixing bowl
Whisk or fork
Spatula or wooden spoon
Rice cooker or pot, if cooking rice fresh
Optional microplane or box grater
Ingredients
For the Beef and Bowls
1 lb / 450–500 g ground beef or beef mince, preferably 90/10
3–4 cups cooked rice, warm and ready before the beef starts cooking
1 tablespoon neutral oil, only if using very lean beef
2–3 scallions, sliced, whites and greens separated if possible
1 small cucumber, sliced
1 medium carrot, shredded or julienned
1 cup shredded cabbage or lettuce
1–2 teaspoons sesame seeds
Kimchi, optional
4 fried eggs or soft-boiled eggs, optional
For the Sauce
¼ cup / 60 ml low-sodium soy sauce
2–3 tablespoons brown sugar or honey
1 tablespoon rice vinegar
2 teaspoons toasted sesame oil
3–4 garlic cloves, minced
1 teaspoon fresh ginger, grated
1–2 tablespoons gochujang, optional
1–2 tablespoons water, if needed
Optional Bulgogi-Style Upgrade
2–3 tablespoons grated apple or Asian pear
1–2 tablespoons grated onion
1 tablespoon mirin or rice wine, optional
Instructions
Have the rice ready. This recipe moves quickly once the beef starts cooking, so use warm cooked rice, leftover rice, microwave rice, or rice already prepared in a cooker.
Make the sauce. In a small bowl, whisk together soy sauce, brown sugar or honey, rice vinegar, garlic, ginger, and optional gochujang. Whisk in the sesame oil too, or save half to drizzle in at the end for a stronger sesame aroma. If using the bulgogi-style upgrade, whisk in grated apple or pear, grated onion, and mirin.
Brown the beef. Heat a large skillet over medium-high heat. Add the beef. Press it into an even layer and let it brown for 1–2 minutes before breaking it apart.
Cook through. Break the beef into small crumbles and cook until browned, steaming hot, and cooked through. Drain excess liquid if the pan looks watery.
Add the sauce. Pour the sauce over the beef and stir well. Simmer for 2–4 minutes, until it looks glossy, reduces slightly, and coats the crumbles. Add a splash of water if it becomes too thick.
Build the bowls. Divide warm rice between bowls. Spoon the saucy beef over the rice.
Add toppings. Top with cucumber, carrot, cabbage or lettuce, scallions, sesame seeds, kimchi, and egg if using.
Serve. Finish with extra sesame seeds, a drizzle of sesame oil, extra gochujang sauce, or a little gochujang mayo if you want a creamy finish.
Recipe Notes
Cook ground beef to 160°F / 71°C for food safety.
Use low-sodium soy sauce because the sauce reduces in the skillet.
Total time assumes cooked rice is ready and toppings are simple.
If you only have beef, sauce, rice, scallions, and sesame seeds, the bowl still works.
Mild bowl: skip the gochujang or serve it on the side.
Medium heat: use 1 tablespoon gochujang.
Spicier version: use 2 tablespoons gochujang.
Bulgogi-style flavor: add grated apple or pear and grated onion.
Store beef, rice, and fresh toppings separately for the best meal prep texture.
What Makes This a Korean-Inspired Beef Bowl?
Think of this as a weeknight shortcut built from the flavors people love in Korean BBQ-style beef: soy, garlic, ginger, sesame, sweetness, and optional gochujang. Ground beef or beef mince makes it fast. Rice makes it filling. Cucumber, cabbage, kimchi, scallions, or egg make it feel like a complete bowl instead of just beef over rice.
Korean Beef Bowl vs Bulgogi vs Bibimbap
This bowl borrows the sweet-savory garlic-soy comfort people love in bulgogi-style beef, but it keeps the method simple. Here is the quick difference, so expectations are clear.
Dish
What it usually means
How this recipe relates
Korean beef bowl
A beef and rice bowl with Korean-inspired sauce and toppings.
This recipe fits that style directly.
Bulgogi
Traditional Korean marinated beef, usually thinly sliced and cooked quickly.
This version uses ground beef, so it is faster but not traditional bulgogi.
Bulgogi bowl
A rice bowl built around bulgogi or bulgogi-style beef.
Add apple or pear and onion to the sauce for a closer bulgogi-style flavor.
Bibimbap
Korean mixed rice bowl with vegetables, gochujang, egg, and often beef.
Add egg and vegetables for a similar feel, while keeping this recipe simpler.
For traditional bulgogi, use thinly sliced beef and marinate it before cooking. The Smithsonian Center for Folklife and Cultural Heritage describes bulgogi as thinly sliced beef marinated with soy sauce, sugar or honey, sesame oil, garlic, onion, and often Asian pear. That is why the apple-or-pear upgrade works so well in this shortcut version. Read more about bulgogi.
For tonight, ground beef gives you the shortcut: the same garlic-soy-sesame comfort, but in a pan that can be done while the rice is still steaming.
If your beef turns gray or watery, the pan is usually crowded or stirred too soon. Use this checklist before adding sauce so the finished bowl tastes browned, not boiled.
Use a wide pan. A crowded skillet traps moisture.
Start with medium-high heat. The beef should sizzle when it hits the pan.
Do not stir immediately. Let the beef sit for 1–2 minutes so it can form browned edges.
Drain excess liquid. Sauce sticks better to browned beef than to watery beef.
Add sauce after browning. If sauce goes in too early, the beef simmers before it browns.
Best Rice to Use
Warm white rice gives this bowl its soft, comforting base, especially when the beef is glossy and salty-sweet. Jasmine rice, short-grain rice, or medium-grain rice all work well because they catch the sauce and let the beef stay the main event.
Warm rice works as the soft base because it catches the sauce; even a small spoonful of beef can season the grains.
Base
Best for
White rice
Classic, soft, comforting bowl base.
Jasmine rice
Fragrant weeknight rice bowls.
Short-grain rice
Stickier bowl texture.
Brown rice
Meal prep and nuttier flavor.
Cauliflower rice
Low-carb bowls.
Noodles
Turning the beef into a noodle bowl.
Lettuce cups
A lighter, hand-held version.
If using leftover rice, cool it quickly, refrigerate it in a covered container, and reheat it until steaming hot.
Best Toppings, Sides, and Finishes
The toppings are not decoration here; they are what make a fast bowl feel fresh instead of tired. A little cold crunch, a little acid, and maybe an egg can make ground beef and rice feel like dinner you planned.
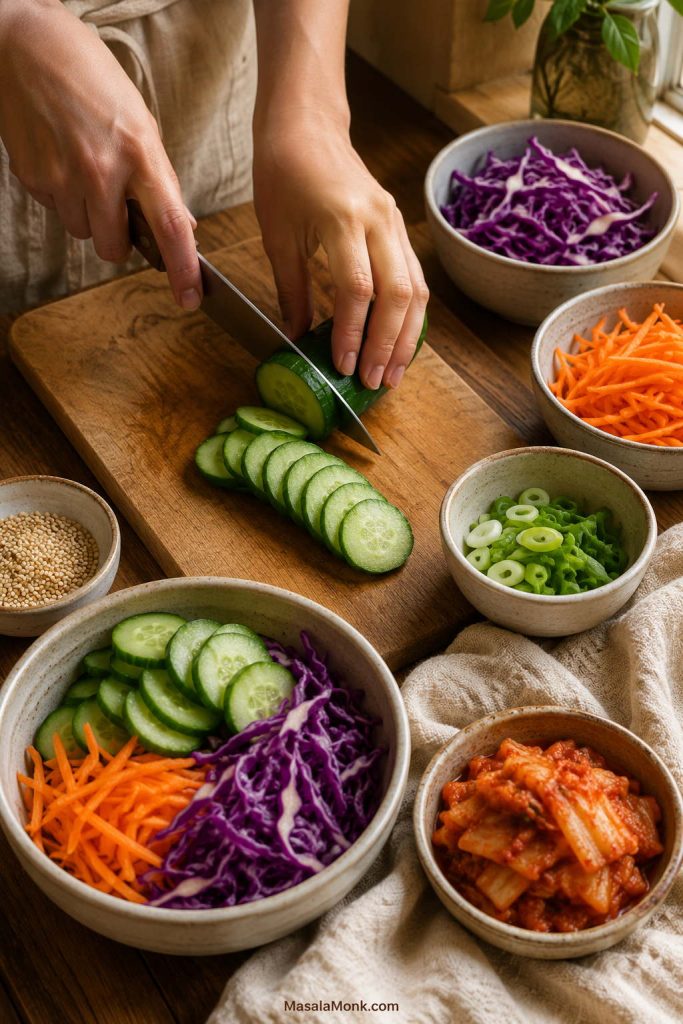
Meanwhile, fresh toppings do the work the beef cannot: cucumber cools, kimchi sharpens, cabbage crunches, and scallions wake up each bite.
If you only have rice, beef, scallions, and sesame seeds, you still have a good bowl. Add cucumber, kimchi, cabbage, or pickled onions when you want freshness. Add egg, avocado, noodles, or extra rice when you want it heartier.
Type
Options
Why it helps
Fresh and crunchy
Cucumber, carrot, cabbage, lettuce, scallions
Balances the rich beef and keeps the bowl from feeling heavy.
Acidic or fermented
Kimchi, quick cucumber topping, pickled onions
Adds brightness and cuts through the sweet-savory sauce.
Rich
Fried egg, soft-boiled egg, avocado, gochujang mayo
Adds freshness or vegetables without changing the beef.
Flavor finish
Sesame seeds, sesame oil, gochugaru, chili flakes
Adds aroma, heat, and texture at the end.
The same bowl logic works beyond beef: warm base, protein, sauce, crunch, and a fresh finish. Once that structure is clear, you can turn the beef into rice bowls, lettuce cups, noodle bowls, or meal prep boxes without starting over.
Add an Egg
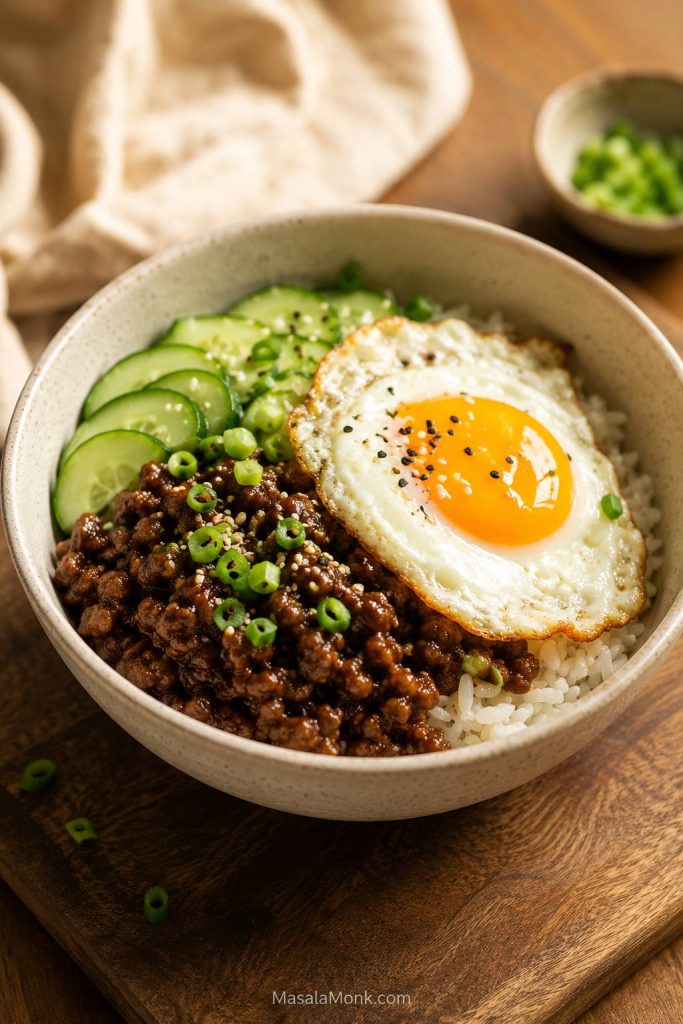
A fried egg makes the bowl richer and gives it a bibimbap-style feel. The yolk mixes into the rice and beef like a quick sauce. For meal prep, soft-boiled or jammy eggs are easier to make ahead; this air fryer hard-boiled eggs guide is useful if you want soft, jammy, or fully set eggs without boiling water.
Add a fried egg when you want the bowl to feel richer; the yolk softens the rice and gives the beef a bibimbap-style finish.
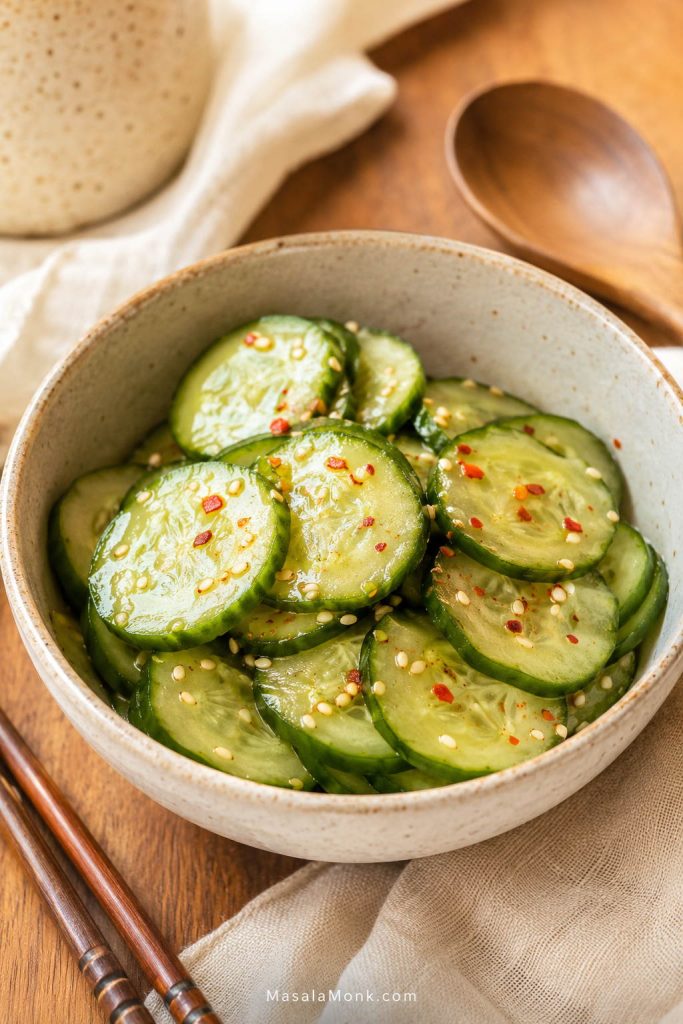
Quick Cucumber Topping
For a fast cucumber topping, mix thinly sliced cucumber with rice vinegar, a pinch of sugar or honey, a pinch of salt, sesame seeds, and optional chili flakes. Let it sit while the beef cooks.
A quick cucumber sesame topping is the easiest way to add crunch and acid when the beef sauce is sweet, salty, and rich.
It is not a full cucumber salad, but it gives the bowl a fresh, tangy contrast in just a few minutes. For a colder, crunchier side, this cucumber salad recipe works especially well with sweet-savory beef bowls.
Easy Bowl Builds
Use these when you want a quick decision instead of a long topping list. The beef is the same; the bowl changes depending on what you need that night.
Pantry Korean Beef Bowl
Use this build when you need dinner with the fewest toppings: rice, saucy beef, scallions, sesame seeds, and optional chili flakes.
The pantry bowl proves the formula works with almost nothing extra: rice, beef, scallions, sesame, and chili flakes are enough for dinner.
Fresh Korean Beef Bowl
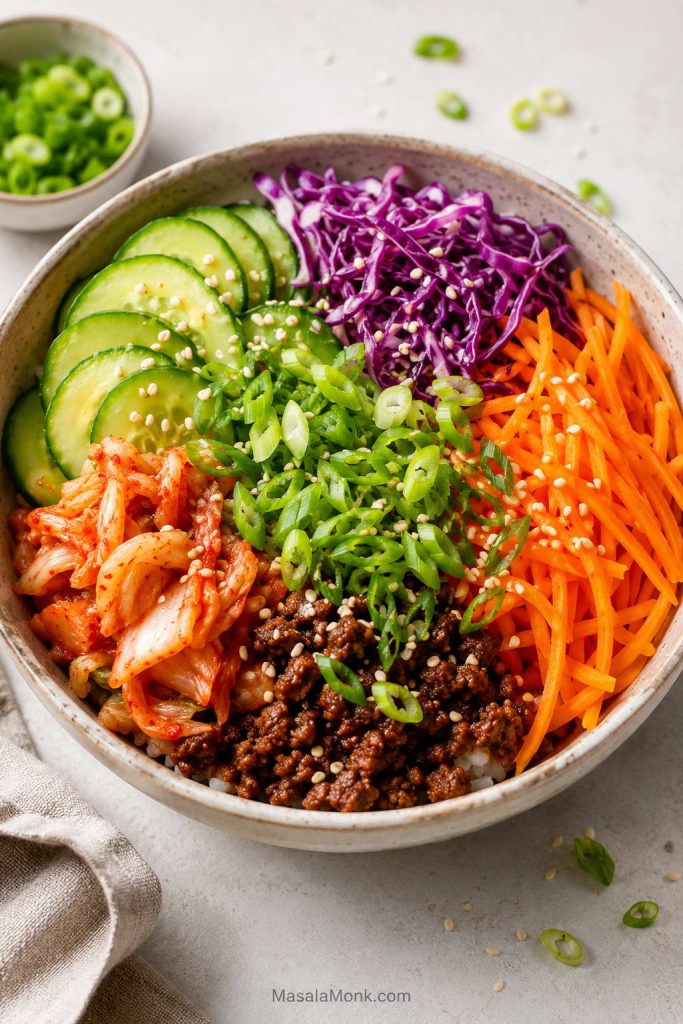
Choose this version when the beef tastes rich and you want more crunch: rice, beef, cucumber, carrot or cabbage, kimchi, and scallions.
In the fresh bowl build, let cucumber, carrot, cabbage, kimchi, scallions, and sesame take up more space so the saucy beef feels lighter.
Loaded Gochujang Beef Bowl
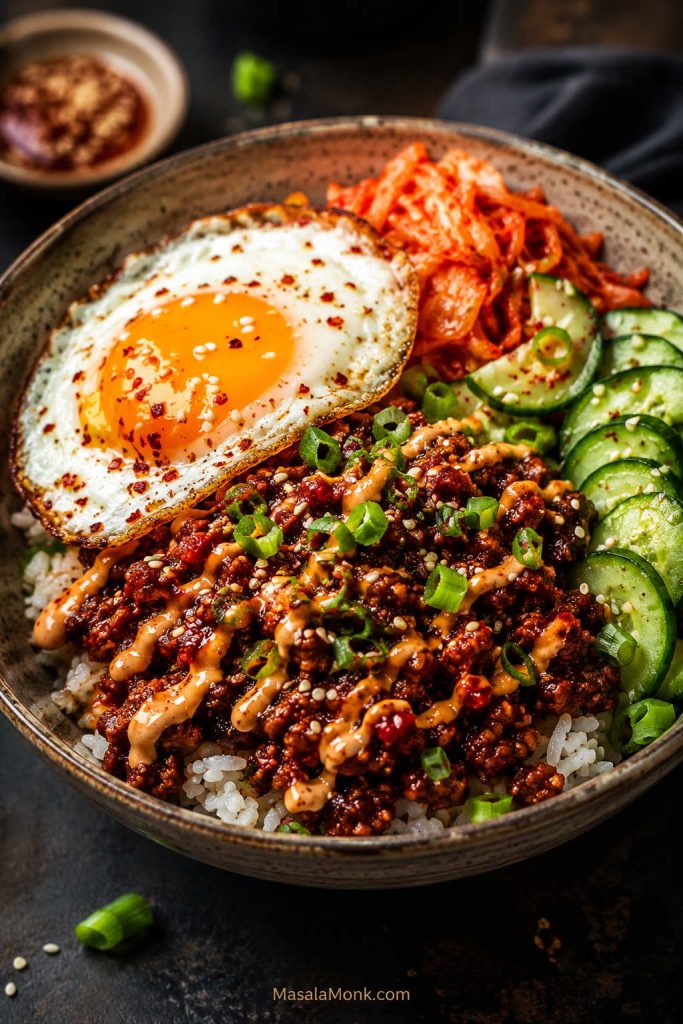
Make this one when you want heat and fullness: gochujang beef, rice, fried egg, kimchi, cucumber, sesame, scallions, and a light creamy drizzle.
The loaded version uses gochujang beef, kimchi, cucumber, egg, sesame, scallions, and a light drizzle for a spicier bowl.
Choose your night: In a rush? Use rice, beef, scallions, and sesame. Need freshness? Add cucumber, cabbage, or kimchi. Need more protein? Add egg or extra beef. Need lower carb? Use cabbage, lettuce cups, cucumber, or cauliflower rice.
Other Ways to Use the Beef
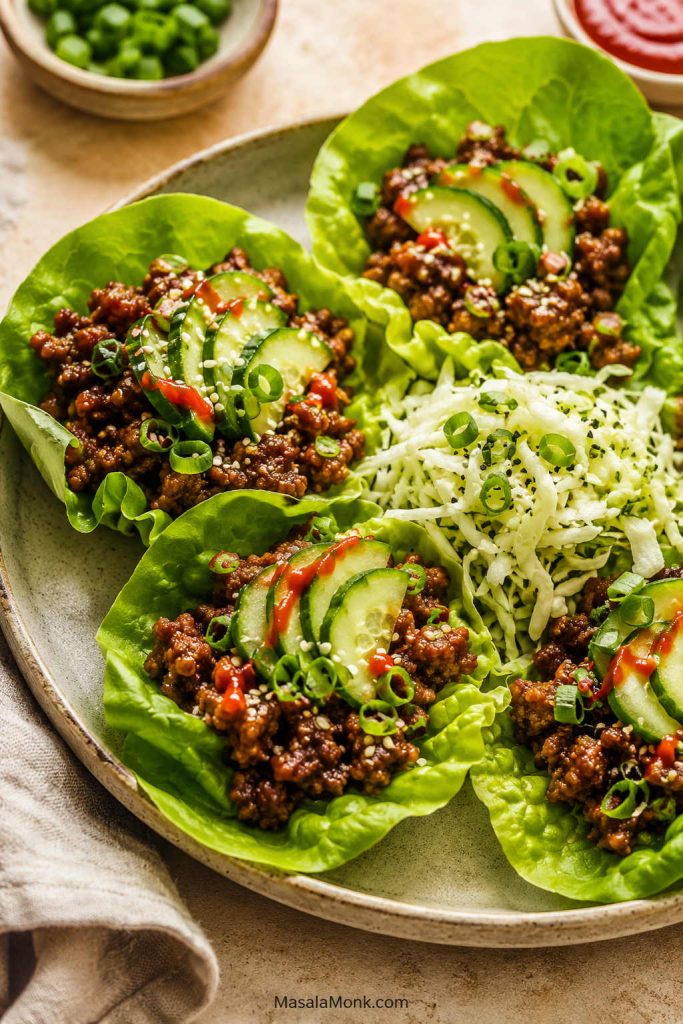
Once you have the beef, it can go a lot of places: lettuce wraps, tacos, noodle bowls, fried rice, salad bowls, and meal prep boxes.
Low-Carb Korean Beef Bowl
For a lower-carb version, use cauliflower rice, shredded cabbage, lettuce cups, cucumber, or sautéed greens instead of rice. Keep the same sauce and add enough fresh crunch so the bowl still feels full and satisfying.
Instead of rice, use lettuce cups or cabbage to keep the same saucy Korean beef flavor with more crunch and fewer carbs.
You can also use ground pork, turkey, or chicken with the same sauce. Pork tastes richer, while turkey and chicken are leaner and may need a little oil. Brown them well, cook them through, then let the sauce reduce until it coats the meat.
For a gluten-free bowl, use tamari or gluten-free soy sauce. Check your gochujang label too, because some brands contain wheat.
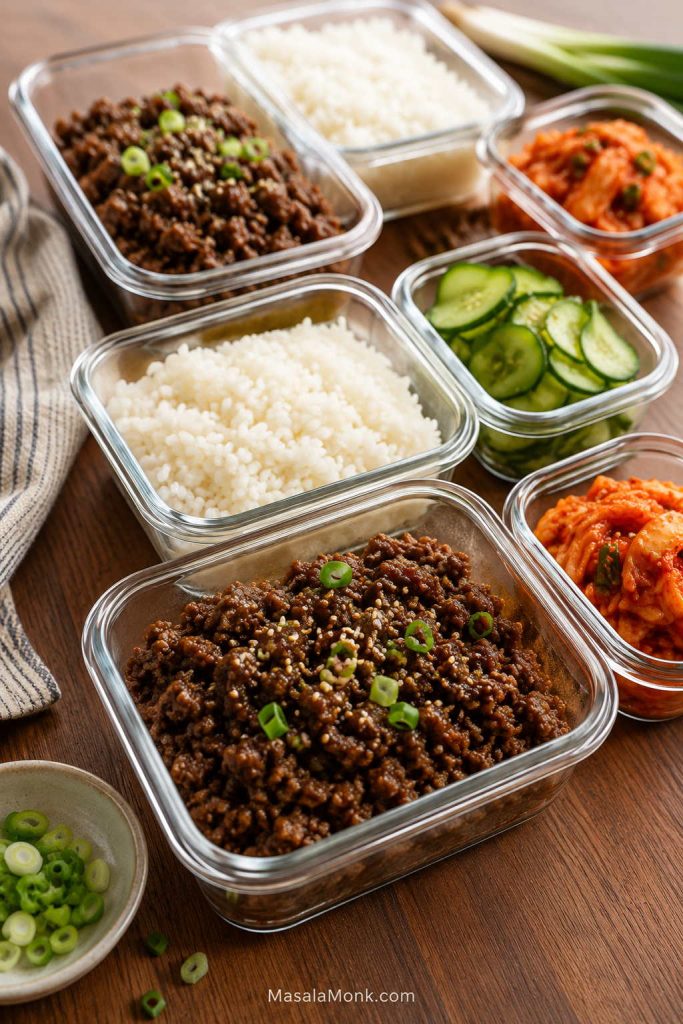
These bowls work well for meal prep, but the best texture comes from storing the hot and fresh parts separately. The beef and rice can reheat together; the cold toppings should stay cold.
The only thing that really suffers in the fridge is the crunch, so keep cucumber, cabbage, kimchi, scallions, and creamy drizzles in separate containers. Add them after reheating so the bowl still tastes fresh.
Meal prep works best when beef and rice stay separate from cucumber and kimchi, so reheated bowls still finish crisp.
Best Meal Prep Order
Cook or reheat the rice.
Cook the beef and sauce.
Slice cucumber, carrots, cabbage, and scallions.
Store beef and rice separately from fresh toppings if possible.
Add egg, kimchi, cucumber, and drizzles just before serving.
Part
How to store
Best note
Cooked beef
3–4 days in an airtight container in the fridge.
Reheat with a splash of water to loosen the sauce.
Rice
Store separately from fresh toppings.
Cool quickly, refrigerate covered, and reheat until steaming hot.
Cucumber and lettuce
Keep cold and separate.
Add after reheating so they stay crisp.
Egg
Cook fresh if fried; soft-boiled eggs can be made ahead.
Best added just before serving.
Freezer
Freeze cooked beef for 2–3 months.
Freeze beef only, not assembled bowls.
Troubleshooting: If Something Feels Off
Most problems come from pan size, beef fat, sauce balance, or simmering time. The good news is that this bowl is easy to fix before it reaches the table.
Problem
Why it happened
How to fix it
Beef tastes greasy
The meat was fatty or the pan had too much rendered fat.
Drain excess fat before adding sauce. Use 85/15, 90/10, or leaner beef next time.
Beef is dry
The beef was very lean or overcooked.
Add a splash of water while reheating, or use 85/15 or 90/10 beef.
Beef steamed instead of browned
The pan was crowded or stirred too often.
Use a wider skillet, medium-high heat, and let the beef sit before breaking it up.
Sauce is too salty
Regular soy sauce was used or the sauce reduced too much.
Add more rice, vegetables, water, or a little honey. Use low-sodium soy next time.
Sauce is too sweet
Too much sugar or honey.
Add rice vinegar, gochujang, or a small splash of soy sauce.
Sauce is watery
Too much liquid in the pan.
Simmer uncovered until reduced. Drain beef better next time.
Sauce is too thick
It reduced too long or gochujang made it dense.
Add 1–2 tablespoons water and stir.
Too spicy
Too much gochujang or chili.
Add more rice, cucumber, honey, or a creamy drizzle.
Bowl tastes flat
It needs acid, freshness, or heat.
Add cucumber, kimchi, scallions, rice vinegar, or chili flakes.
Nutrition Estimate
Nutrition will change depending on beef fat percentage, rice amount, egg, mayo drizzle, and toppings. As a rough estimate, one bowl made with 90/10 beef, about ¾ cup cooked white rice, sauce, cucumber, scallions, and sesame seeds is around 480–560 calories with about 26–32 g protein.
Higher protein: use a generous beef portion or add an egg.
Lower calorie: use leaner beef, less rice, more cucumber or cabbage, and skip mayo drizzle.
Lower carb: use cauliflower rice, shredded cabbage, lettuce cups, or cucumber as the base.
More filling: add egg, avocado, extra vegetables, or brown rice.
Frequently Asked Questions
Can I make Korean beef bowls with ground beef?
Yes. Ground beef is one of the easiest ways to make this bowl fast because it browns quickly and soaks up the soy-garlic-sesame sauce.
Can I use beef mince instead of ground beef?
Yes. Beef mince works just like ground beef here. Use 450–500 g and brown it well before adding the sauce.
Is Korean beef bowl the same as bulgogi?
Not exactly. Traditional bulgogi usually uses thinly sliced marinated beef. This recipe uses ground beef or beef mince with a bulgogi-style sauce, so it is faster and easier for weeknights.
Is this the same as bibimbap?
No. Bibimbap is a Korean mixed rice bowl with vegetables, gochujang, egg, and often beef. This bowl is simpler and centered around saucy ground beef over rice, though egg and vegetables can give it a similar feel.
What sauce goes in a Korean beef bowl?
A simple sauce usually includes soy sauce, brown sugar or honey, garlic, ginger, sesame oil, and rice vinegar. Add gochujang for heat or grated apple and onion for a deeper bulgogi-style sauce.
Do I need gochujang?
No. The bowl still tastes complete with just the mild soy-garlic-sesame sauce. Gochujang adds heat, color, and deeper flavor, but it is not required. For a family-friendly pan, skip it and let people add gochujang or chili at the table.
What can I use instead of gochujang?
Use chili flakes, gochugaru, sriracha-style sauce, or another chili paste you like. The flavor will not be exactly the same, but it will still add heat.
What rice is best for Korean beef rice bowls?
White rice is the easiest, jasmine rice is fragrant, short-grain rice feels stickier, and brown rice works well for meal prep. For a lower-carb bowl, use cauliflower rice, cabbage, or lettuce cups.
What vegetables go with it?
Fresh cucumber, cabbage, carrot, lettuce, and scallions are best when you want crunch. Broccoli, mushrooms, spinach, zucchini, bell pepper, and snap peas work well if you want cooked vegetables. Add tender greens at the end so they do not overcook.
Can I add an egg?
Yes. A fried egg is best when serving right away; soft-boiled or jammy eggs are easier for meal prep. Add the egg after reheating so it stays tender.
How do I make it more like bulgogi?
Add grated apple or Asian pear, grated onion, and optional mirin to the sauce. This gives the ground beef a sweeter, rounder, more bulgogi-style flavor.
Can I make this gluten-free?
Yes. Use tamari or gluten-free soy sauce. Check your gochujang label too, because some brands contain wheat.
Can I make this low-carb?
Yes. Serve the beef over cauliflower rice, shredded cabbage, lettuce, or cucumber instead of rice. Keep the same sauce and add plenty of crunchy toppings.
Can I meal prep it?
Yes. The beef reheats well, so it is a good meal-prep protein. Store beef and rice separately from cucumber, cabbage, scallions, kimchi, egg, and creamy drizzles. Reheat the beef and rice first, then add the cold toppings.
How long does the cooked beef last in the fridge?
Cooked beef keeps for 3–4 days in an airtight container in the fridge.
Can I freeze the beef?
Yes. Freeze the cooked beef for up to 2–3 months. Freeze the beef by itself, not the assembled bowls. Thaw overnight in the fridge and reheat with a splash of water to loosen the sauce.
Final Thoughts
Once you know the sauce ratio, this stops being one recipe and becomes a dinner you can rebuild all week: rice bowl tonight, lettuce wraps tomorrow, noodles for lunch, or meal prep boxes with cucumber and egg.
Try it mild first, then make the next pan yours: more gochujang, more cucumber, extra sesame, a creamy drizzle, or a fried egg on top. Once you make it once, it stops being a recipe you follow and becomes a bowl you know how to build.
A slow cooker cottage pie should feel like the perfect low-effort comfort dinner: rich beef mince, sweet vegetables, savoury gravy, creamy mashed potatoes, and a meal that waits for you. But this is also one of those recipes where the slow cooker can quietly work against you.
The filling can turn watery because the lid traps steam. The mash can sink if the gravy is too loose. The top can stay pale because a slow cooker heats gently but does not brown like an oven. And if you skip browning the mince, the flavour and texture need a little extra help.
The method is still simple: cook the beef until the gravy is rich, add mash once the filling looks ready, then choose a soft slow-cooker top or a golden finish. The filling uses less liquid than an oven version, tightens before the mash goes on, and gets its peas near the end.
What you get is savoury beef gravy, buttery fork-ridged mash, sweet carrots and peas, and a cottage pie that still serves in generous spoonfuls. Keep it soft-topped and easy, or finish it under the grill, broiler, or in the oven for golden cheddar edges.
It is the kind of dinner that feels calm by the time you serve it: beef gravy underneath, soft potato on top, and no last-minute pan juggling. This is the slow cooker version built to stay rich and comforting instead of turning into beef stew under mashed potatoes.
In the UK, cottage pie usually means beef mince under mashed potato, while shepherd’s pie traditionally uses lamb. In US search terms, the same beef version is often called crockpot shepherd’s pie.
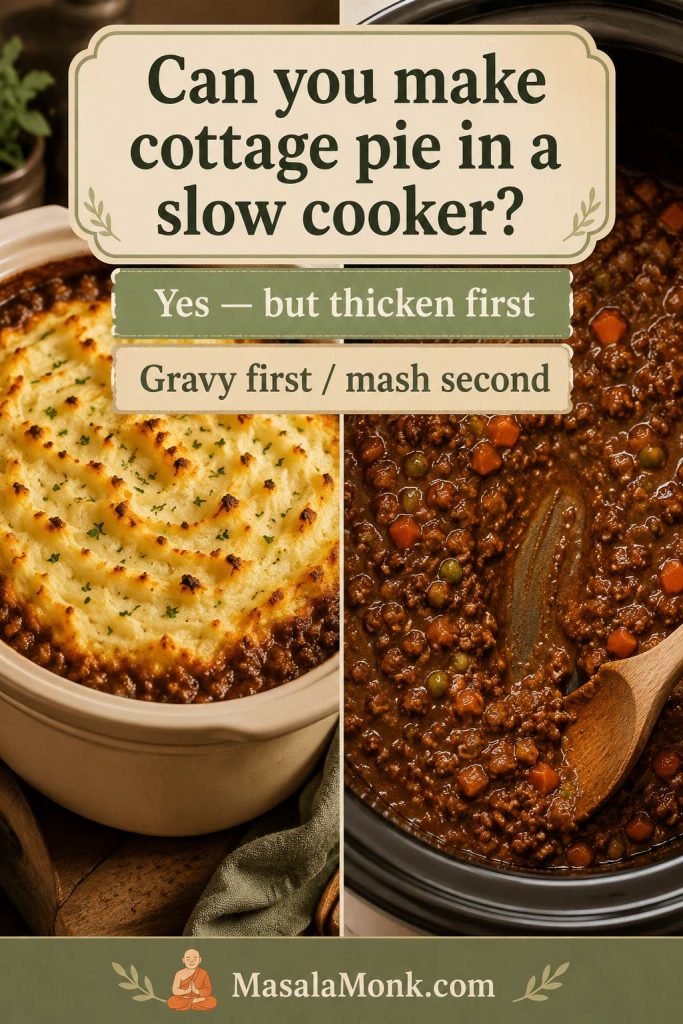
Yes, you can make cottage pie in a slow cooker, but the filling needs to be thicker and more settled than a normal oven version before you add the mashed potato. A slow cooker traps moisture, so a cottage pie recipe that works beautifully in the oven can become loose and soupy if the same amount of stock or tomatoes is used under a slow-cooker lid.
The most reliable method is to cook the beef filling first, make sure the gravy is saucy but not loose, then add mashed potatoes only when the filling is ready for the topping. To get a browned top, finish the pie under the grill or broiler, or transfer the filling to an oven dish and bake it briefly.
In US search terms, this same method also works as a crockpot shepherd’s pie with ground beef; in UK terms, beef under mash is cottage pie.
Think of the recipe in this order: gravy first, mash second, golden top if you want it. That simple rule prevents most slow-cooker cottage pie problems.
Yes, cottage pie works in a slow cooker; however, the beef layer needs to look saucy, not loose, before the mash goes on.
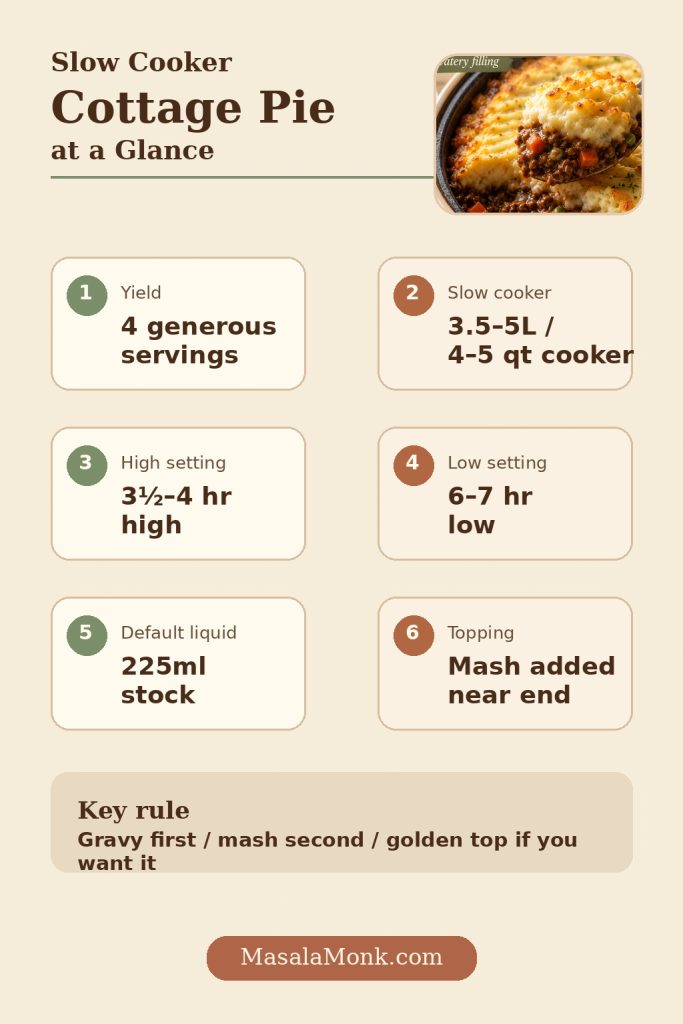
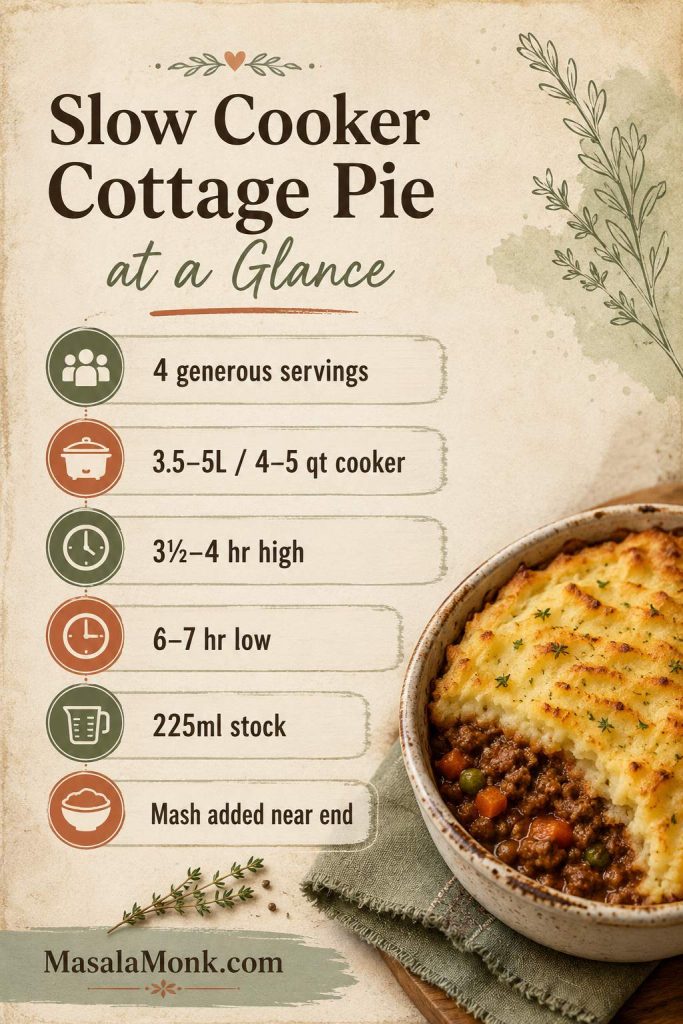
Slow Cooker Cottage Pie at a Glance
Yield 4 generous servings, or 5–6 moderate portions with sides
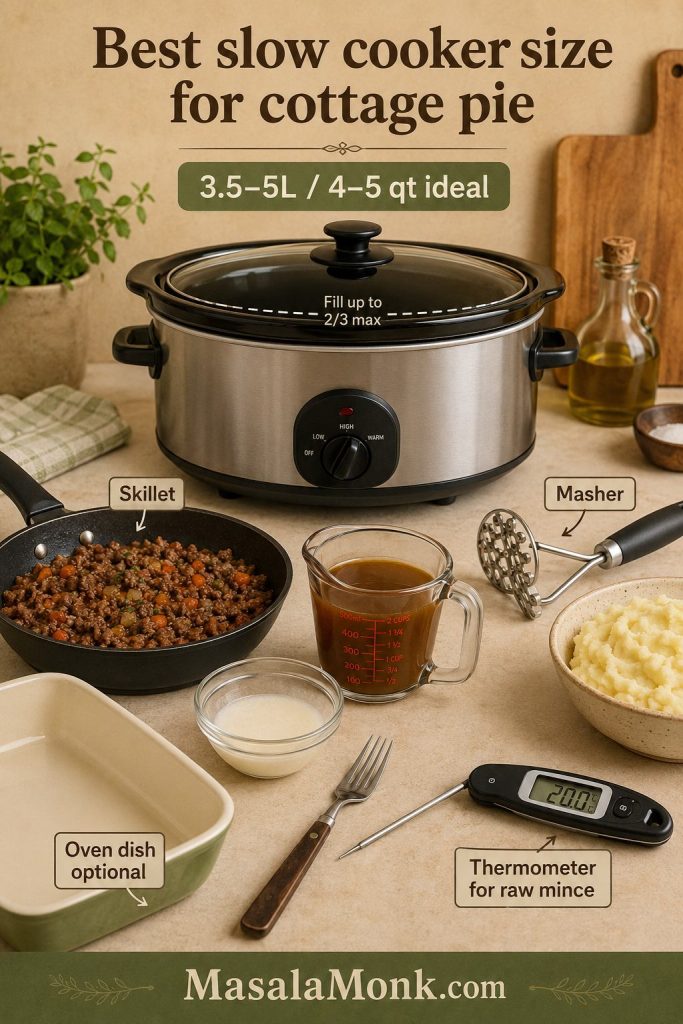
Slow cooker size 3.5–5L / 4–5 quart oval cooker
Filling cook time 3½–4 hours high or 6–7 hours low
Total time About 4½–5½ hours on high About 7–8½ hours on low
Main ingredient: 500g lean beef mince / about 1 lb 2 oz ground beef.
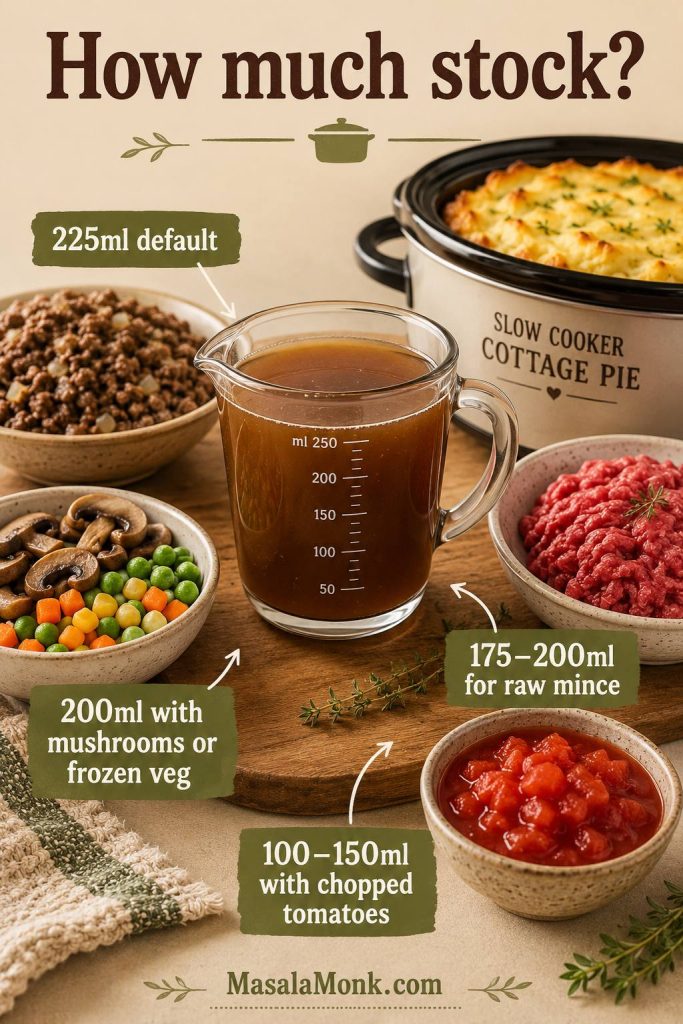
Default liquid: 225ml / scant 1 cup beef stock. Use about 200ml for mushrooms, frozen vegetables, or no-browning; use 100–150ml if adding chopped tomatoes.
Timing note: an oven or broiler finish is quicker; heating the mash through in the slow cooker takes longer.
Texture cue: the filling should be saucy but not loose, so the potato topping can rest neatly above the gravy.
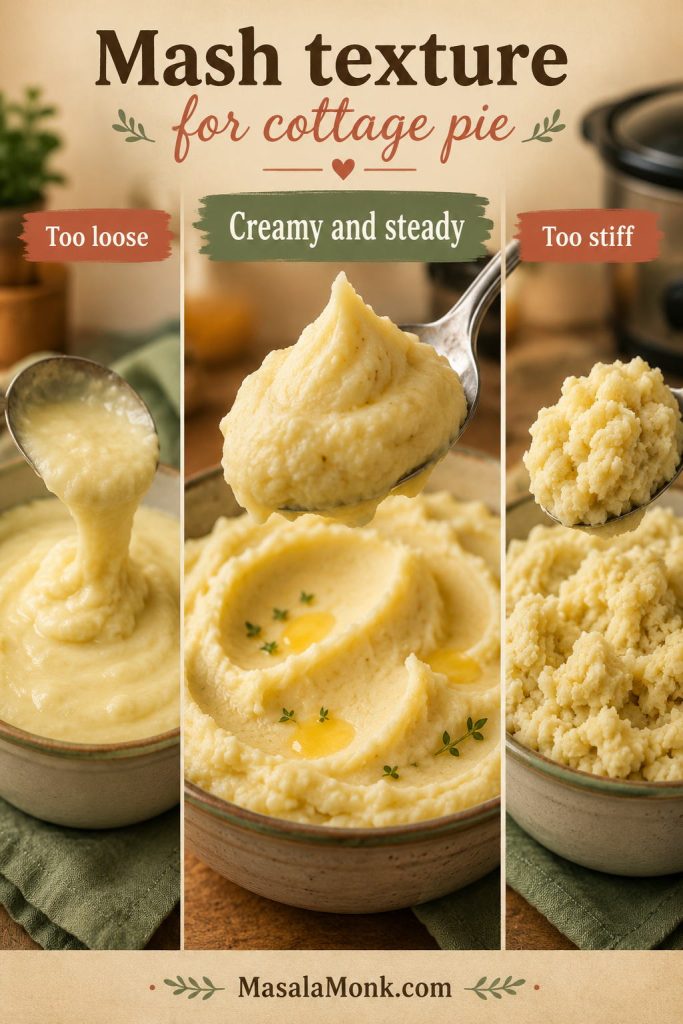
Mash cue: the mashed potato should be creamy, steady, and easy to spread.
Flavour move: brown the mince first when you can, then drain excess fat before slow cooking.
These are the numbers that keep the recipe calm: modest stock, the right cooker size, and mash added near the end.
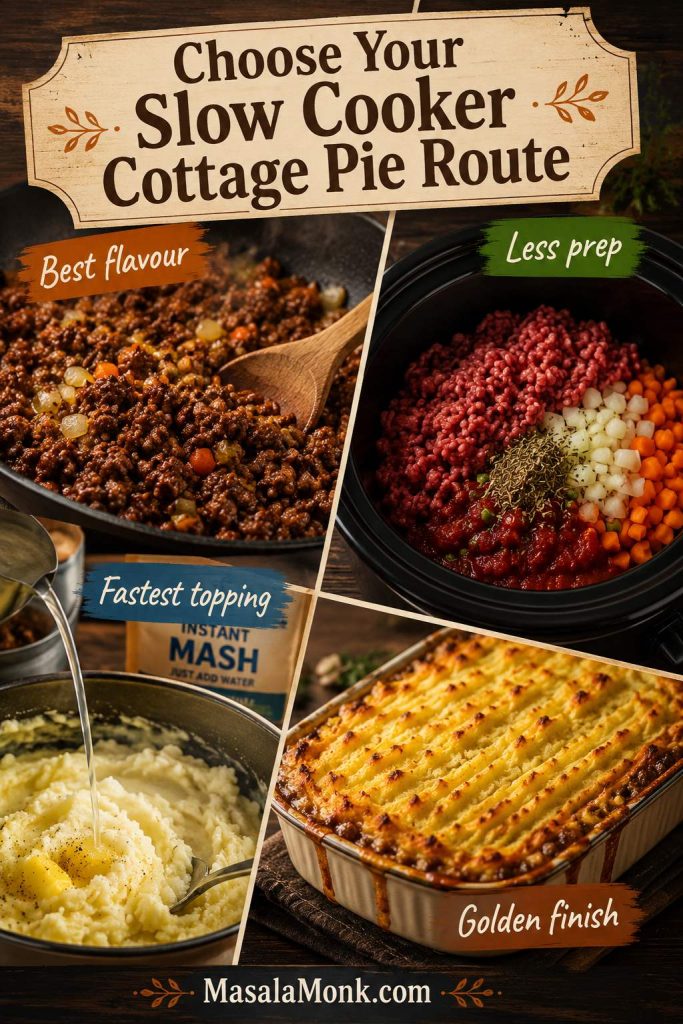
Choose Your Slow Cooker Cottage Pie Route
Use the browned-mince method for the best flavour, or choose one of the shortcuts below. Every version comes back to the same calm idea: make the filling glossy, not soupy, then add the topping.
Route
Use this if
How to adjust
Best flavour
You can brown the mince
Use the main method, drain fat, and thicken with flour from the start.
Raw-mince shortcut
You need less prep
Use fresh, fully thawed lean mince, less stock, no flour at the start, and thicken near the end.
Instant-mash shortcut
You want the easiest topping
Make instant mash thicker than packet directions and add it only after the filling settles.
Golden-top version
You want classic cottage pie texture
Slow cook the filling, then finish safely under the grill, broiler, or in an oven dish.
Choose the route that matches your night: browned mince for flavour, raw mince for ease, instant mash for speed, or a golden finish.
For the easiest weeknight version, use the raw-mince shortcut with frozen mixed vegetables and prepared or instant mash, then tighten the filling before topping. Shortcut routes count too: the goal is a savoury filling, a topping that stays put, and dinner that feels sorted.
Brown the mince when you have the energy, and choose the golden finish when you want that classic baked top. If this is your first time making it, note your slow cooker size and stock amount; those two details make the next batch easier to adjust. The full recipe card sits below the topping choices, and the Jump to Recipe button takes you there directly.
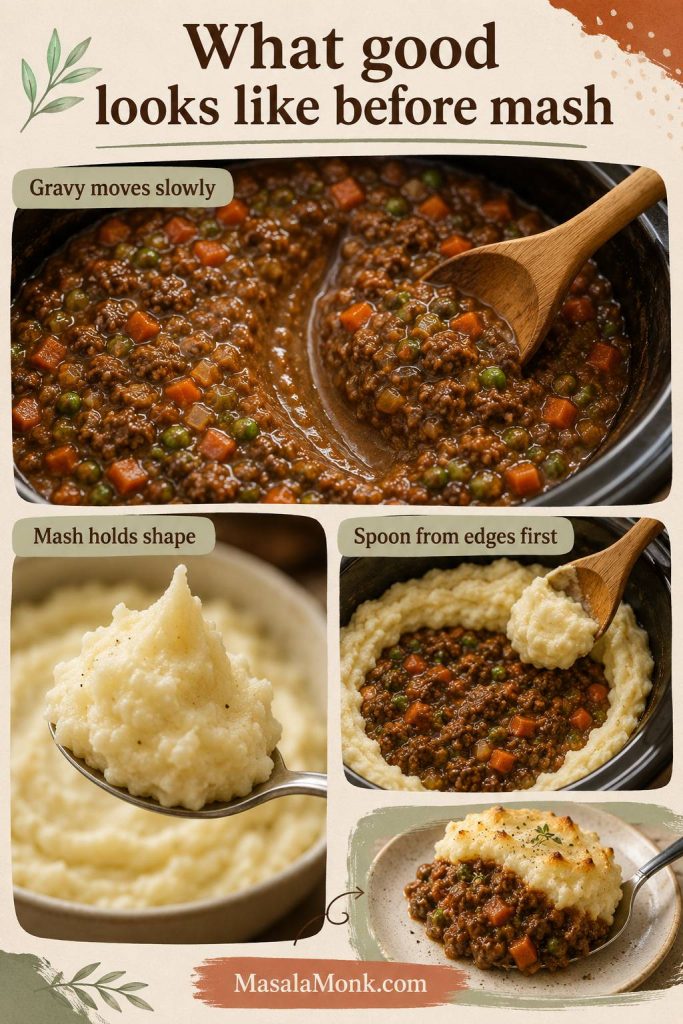
What Good Looks Like Before You Add the Mash
Here is what good looks like before the mash goes on, so you do not have to guess.
1. The gravy should move slowly
Drag a spoon through the beef filling. The gravy should leave a visible path for a second before slowly closing. If it floods back instantly, the filling needs more reduction or thickening.
2. The mash should hold its shape
Scoop the mash with a spoon. It should hold soft peaks and feel spreadable, not loose or pourable. Wet mash is one of the main reasons toppings sink.
3. Add the topping gently
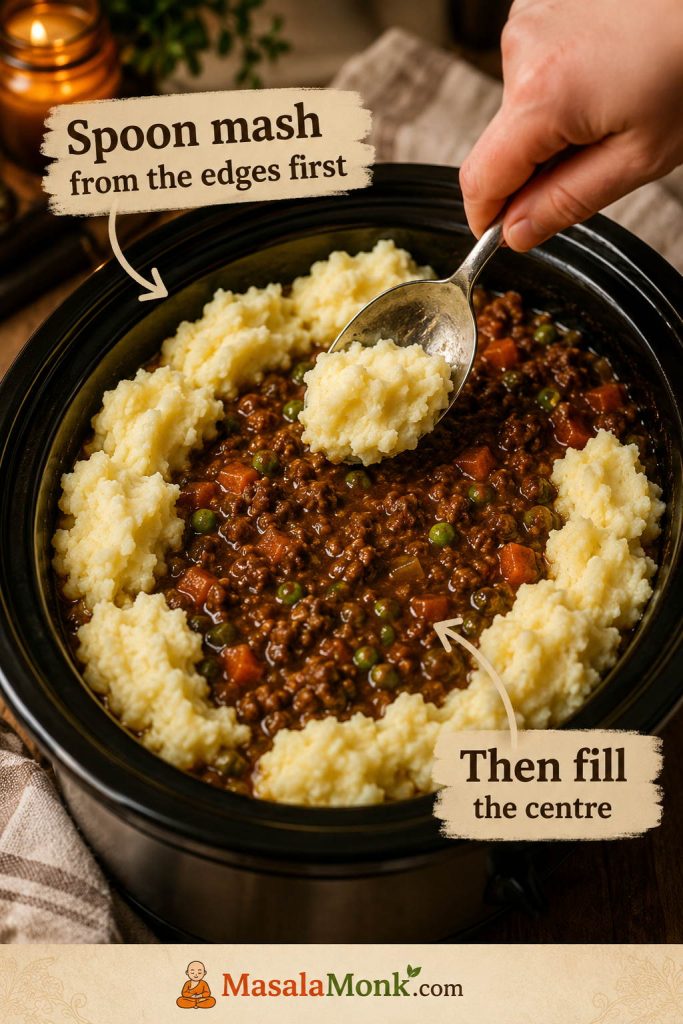
Add mash in small spoonfuls around the edges first, then fill the centre and spread gently. Dropping all the mash into the middle can push it through the filling.
What you’re looking for
A beef layer that holds together in deep spoonfuls, creamy mash that stays in place, and gentle topping. That is what keeps the finished pie from collapsing into stew.
Before topping, look for slow-moving gravy and mash with soft peaks; those two cues prevent most sinking problems.
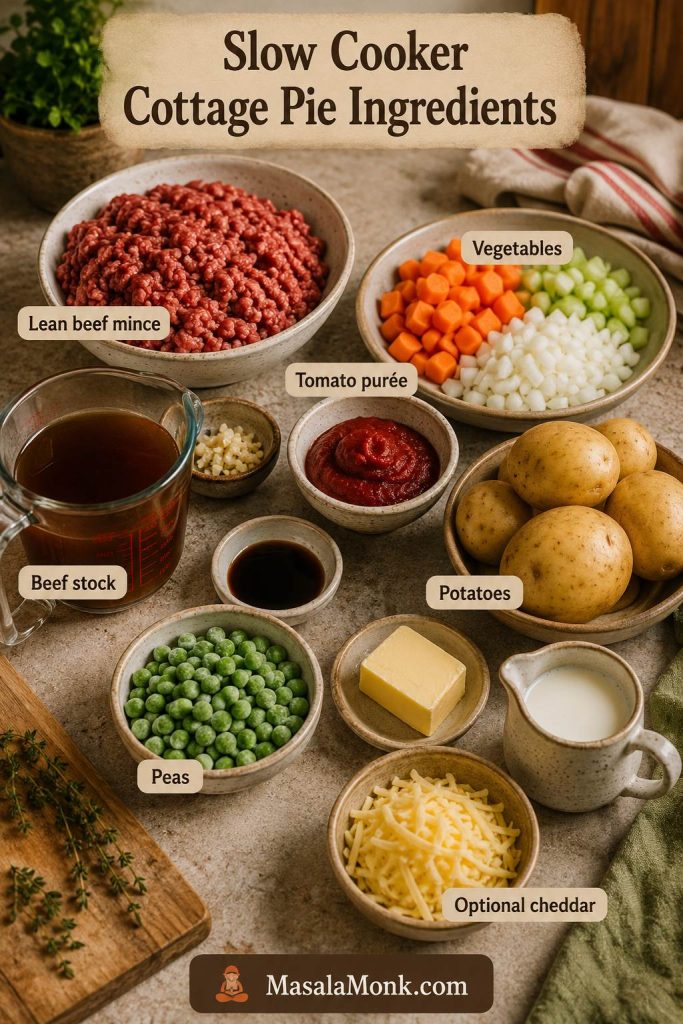
Now that you know what the filling and mash should feel like, the ingredient choices make more sense: less loose liquid, a stronger gravy base, and mash that sits neatly on top. These are everyday cottage pie ingredients; the difference is not fancy shopping, but how the liquid and potatoes are handled.
The default version uses tomato purée or tomato paste rather than a full tin of chopped tomatoes, because the slow cooker does not reduce liquid like an oven or pan.
In slow cooker cottage pie, ordinary ingredients work best when the stock stays modest and the mash is not too loose.
Beef filling ingredients
Ingredient
Amount
Notes
Neutral oil or olive oil
1 tsp, optional
Use only if cooking very lean mince in a dry pan.
Lean beef mince / ground beef
500g / about 1 lb 2 oz
Use 5–10% fat if possible. It gives flavour without making the slow cooker greasy.
Onion, finely diced
1 large
Adds sweetness and helps build the gravy base.
Carrots, finely diced
2 medium
Classic cottage pie sweetness and colour.
Celery, finely diced
1–2 sticks / stalks
Builds a deeper savoury base.
Garlic
2–3 cloves
Adds depth without taking over.
Tomato purée / tomato paste
2 tbsp
Gives depth, colour, and savoury concentration without adding much water.
Plain flour / all-purpose flour
2 tbsp
Default thickener for the browned-mince method.
Beef stock
225ml / scant 1 cup
Use about 200ml for mushrooms, frozen mixed vegetables, or no-browning. If adding chopped tomatoes, reduce the stock to 100–150ml.
Worcestershire sauce
1 tbsp
Gives savoury, tangy depth.
Dried thyme or rosemary
1 tsp
Use either, or a small mix of both.
Frozen peas
100–150g / ¾–1 cup
Add near the end so they stay brighter.
Salt and black pepper
To taste
Start light if your stock is salty; adjust before adding the mash.
How Much Stock to Use in Slow Cooker Cottage Pie
Stock is the easiest place to control the finished texture. Start modest, then adjust for watery add-ins such as mushrooms, frozen vegetables, raw mince, or chopped tomatoes.
Because slow cookers trap moisture, adjusting the stock is one of the easiest ways to prevent watery cottage pie filling.
If you are using mushrooms, frozen vegetables, or chopped tomatoes, the watery filling section explains how to adjust the liquid before topping.
Optional flavour boosters and add-ins
Mushrooms: add 100–150g finely chopped mushrooms with the vegetables for a deeper, meatier filling. Use slightly less stock because mushrooms release moisture.
Red wine: replace 50–100ml of the stock with red wine. Let it bubble briefly in the pan before slow cooking.
Brown sauce or mustard: add 1 teaspoon to 1 tablespoon for a sharper UK-style savoury note.
Chopped tomatoes: use 200g / about 7 oz chopped tomatoes if you want a tomato-rich filling, and reduce the stock to 100–150ml. Expect to thicken near the end if needed.
Frozen mixed vegetables: use them in place of peas and carrots if needed, but add them late or reduce the stock because they release water.
Optional thickener
When the filling looks loose near the end, mix 1 tablespoon cornflour / cornstarch with 1 tablespoon cold water, stir it into the filling, and cook on high until the gravy tightens. For a quick UK-style option, you can use 1–2 teaspoons beef gravy granules instead, but taste before adding more because they add salt quickly.
Mashed potato topping ingredients
Ingredient
Amount
Notes
Floury potatoes
800–900g / 1 lb 12 oz–2 lb
Maris Piper, King Edward, Russet, or Yukon Gold work well.
Butter
30–45g / 2–3 tbsp
Adds flavour and helps the mash spread.
Milk
60ml / ¼ cup, plus 1 tbsp at a time only if needed
Start small. The mash should be creamy but not loose.
Cheddar, optional
75–100g / ¾–1 cup grated
Use in the mash or on top for a cheesy finish.
Leftover, prepared, or instant mash
About 4 cups / enough to cover
Warm slightly if chilled, and keep it thicker than usual so it sits on the filling.
Salt
To taste
Season the mash separately from the filling.
For a deeper guide to creamy potatoes that stay fluffy instead of gluey, use our garlic mashed potatoes recipe; the same steam-dry step helps this topping sit neatly on the filling.
Texture cue: the mash should hold soft peaks on a spoon. If it slides, pours, or feels like loose purée, it is too wet for this recipe. Steam-dry fresh potatoes and add milk gradually.
Slow Cooker Size and Equipment
A 3.5–5L / 4–5 quart oval slow cooker is ideal for this recipe. It keeps the beef layer deep enough while leaving enough surface area to spread the topping. A round slow cooker works too, but an oval insert makes the finished pie easier to serve.
An oval cooker gives the beef layer useful depth while leaving enough room to spread the potato evenly.
Large skillet or frying pan: for browning the mince and cooking the vegetables.
3.5–5L / 4–5 quart slow cooker: best for the 500g beef version.
Large saucepan: for boiling potatoes.
Potato masher or ricer: for smooth mash that is steady enough to spread.
Small bowl: for mixing cornflour/cornstarch slurry if needed.
Oven dish: useful if you want a golden top and your slow-cooker insert is not oven-safe.
Instant-read thermometer: helpful for the raw-mince method.
Important insert safety note: only put a slow-cooker insert under the grill, broiler, or into the oven if the manufacturer says that exact insert is safe for that use. If there is any doubt, transfer the filling to an oven dish before topping and browning.
For the safest browning choices, check the finish options before putting any insert under direct heat.
The recipe is forgiving as long as the filling is not too loose and the topping is not too wet. Use less liquid than an oven cottage pie, adjust watery add-ins, and choose whether you want a soft slow-cooker top or a golden oven, grill, or broiler finish.
How to Make Slow Cooker Cottage Pie
The method looks detailed, but the cooking itself is simple: brown the beef if you can, let the slow cooker build the gravy, then top when the filling is ready. By the end, the carrots should be sweet, the gravy should smell deeply savoury, and the mash should sit proudly on top instead of sliding into the filling.
This is the kind of cottage pie that does not need perfect slices to feel right; it just needs a thick savoury base, warm potato, and enough gravy to make the greens on the side worth eating.
1. Brown the beef mince
Heat a large skillet or frying pan over medium-high heat. If you are using very lean mince or a dry pan, add 1 teaspoon oil first. Add the beef mince and break it into small crumbles with a wooden spoon. Let it brown properly instead of simply turning grey. A little colour on the beef gives the finished filling a deeper savoury flavour.
If the mince releases a lot of fat, spoon or drain off the excess before you continue. Slow cookers do not evaporate fat away, so this small step keeps the filling rich rather than greasy.
2. Add the vegetables
Add the onion, carrot, celery, garlic, and mushrooms if using. Cook for 4–5 minutes, stirring often, until the onion starts to soften and smell sweet. The vegetables do not need to be fully tender yet because they will finish in the slow cooker.
3. Build the gravy base
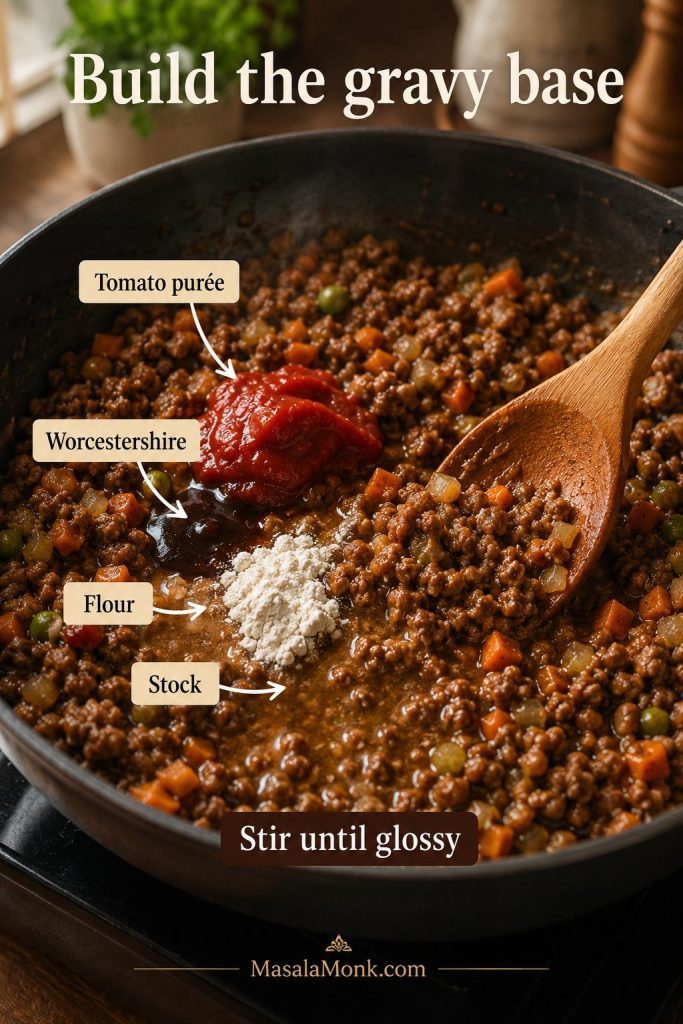
Stir in the tomato purée, Worcestershire sauce, thyme or rosemary, salt, and black pepper. Sprinkle over the flour and stir for 1 minute so it coats the mince and vegetables. This cooks off the raw flour taste and gives the gravy a smoother texture later.
Add the stock gradually, scraping the bottom of the pan as you stir. The mixture should become glossy and lightly saucy, not thin and soupy. If using wine, add it before the stock and let it bubble briefly.
This is where cooked mince becomes cottage pie filling: tomato purée, Worcestershire, flour, and stock create the gravy base.
4. Slow cook the filling
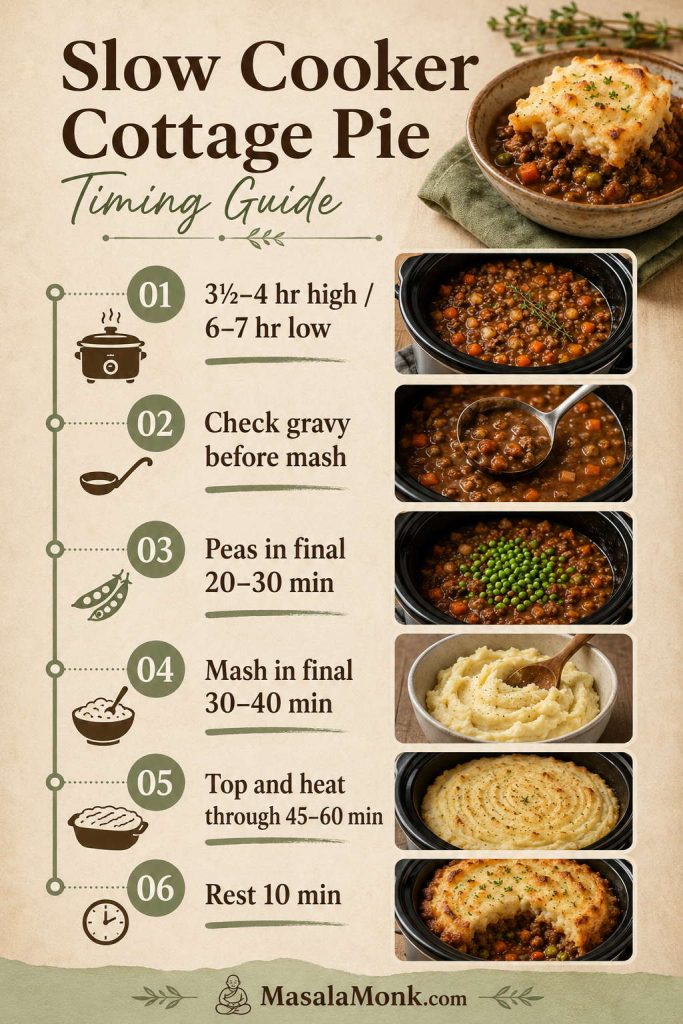
Transfer the beef mixture to the slow cooker. Cover and cook on high for 3½–4 hours or on low for 6–7 hours, until the vegetables are tender and the filling tastes rounded and savoury.
Start looking from 3 hours on high or 5½ hours on low if your slow cooker runs hot, has a wide insert, or the filling is sitting in a shallow layer. Try not to lift the lid too often early on, because each lift releases heat and can stretch the cooking time.
5. Look at the Gravy Before Adding Mash
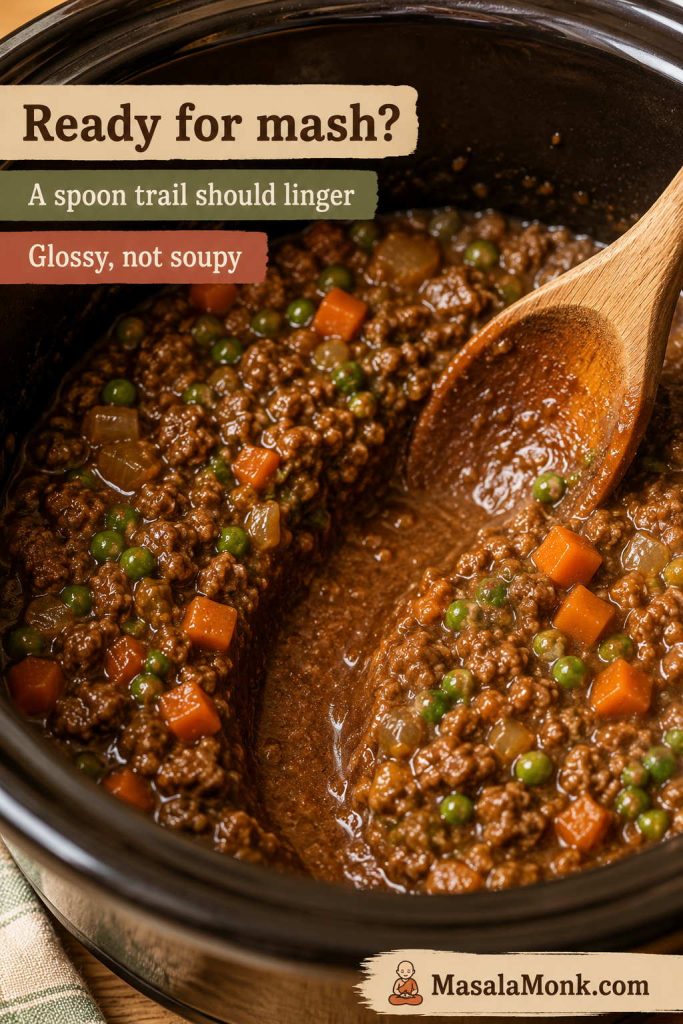
Pause here before you add the mash; this one look makes the biggest difference. Stir the filling and drag a spoon through the centre. If the gravy leaves a visible trail for a second before slowly closing, the filling is ready for mash. The first spoonful should hold together but still look saucy.
When it is right, the filling should smell deeply savoury and look glossy rather than soupy, with carrots soft enough to melt into the gravy but still visible in each spoonful.
Once a spoon trail lingers, the filling is ready for mash; if it floods back like soup, thicken it first.
When the gravy floods back immediately, pause and give it a little help before topping. Mix 1 tablespoon cornflour or cornstarch with 1 tablespoon cold water, stir it into the filling, and cook on high for 20–30 minutes. If your slow cooker holds heat well, you can cook uncovered. If it cools quickly, leave the lid slightly ajar, or thicken a few ladles of liquid in a small pan and stir it back into the slow cooker.
This is also the best time to taste the filling. Add salt, pepper, Worcestershire sauce, or a little more tomato paste if it needs more depth. Once the mash goes on, adjusting the filling becomes harder.
Should You Add the Mash at the Start?
It is better to add the mash near the end, after the beef filling has cooked and settled. If mash goes on too early, condensation can soften it, bubbling gravy can break through it, and you lose the chance to fix a loose filling before topping.
6. Add the peas late
Stir in the frozen peas during the final 20–30 minutes of filling time. They will heat through quickly, stay brighter, and release less water into the gravy than they would if added at the beginning.
7. Make creamy mash that holds its shape
You can make the mash during the final 30–40 minutes of the filling time, then keep it warm and loosely covered until the filling is ready to top.
Boil the potatoes in salted water until tender. Drain well, then return them to the hot pan for 1–2 minutes so extra steam escapes. Mash with butter, then add 60ml / ¼ cup milk. Add more milk 1 tablespoon at a time only if the mash is too stiff to spread.
The best mash for cottage pie is creamy and steady, because loose mash sinks while stiff mash drags through the filling.
If using cheddar, stir some into the mash or save it for the top. Warm mash spreads more easily than cold leftover mash, so if you are using leftovers, warm them slightly before topping the filling.
8. Spoon the mash gently over the filling
Add the mash in small spoonfuls around the edges of the slow cooker first, then fill the centre. Spread gently with a fork or spatula. Avoid dropping all the mash into the middle at once because that weight can push through the filling.
Start spooning mash around the edges, then fill the centre; the border helps the potato spread without diving into the gravy.
If the topping starts to sink, pause and use the mash-sinking fixes before spreading the rest.
Use a fork to make ridges on top. Those ridges catch heat and brown better if you finish the pie under the grill, broiler, or in the oven.
9. Finish and rest
For the easiest finish, cover and cook on high for 45–60 minutes until the mash is hot. For a golden top, either use a safe grill/broiler finish or transfer the filling to an oven dish and bake until browned.
The slow-cooker-only version is softer and homier; the oven-finished version gives you those golden ridges and bubbling edges that make cottage pie feel more like a proper baked dinner.
Let the cottage pie rest for 10 minutes before serving. Resting lets the gravy settle and the mash firm slightly, so the first spoonful comes out with creamy potato on top and glossy beef gravy underneath.
Slow Cooker Timing Table
Use this timing table as a guide for when to look at the filling, add peas, warm the mash, and decide how you want to finish the top.
Stage
High setting
Low setting
Notes
Beef filling
3½–4 hours
6–7 hours
Start looking earlier if your slow cooker runs hot or has a wide insert.
Thickening adjustment
20–30 minutes on high
Switch to high
Use slurry only if the filling looks loose.
Peas
Final 20–30 minutes
Final 20–30 minutes
Add late for better colour and texture.
Mash topping in slow cooker
45–60 minutes
Not ideal
Use high to heat the mash through.
Oven-dish finish
200°C / 400°F for 20–25 minutes
Same
Most classic finish if your insert is not oven-safe.
Grill / broiler finish
5–10 minutes
Same
Only use a safe insert or separate oven dish.
Keep the flow calm: cook the filling first, add peas late, make the mash near the end, then rest before serving.
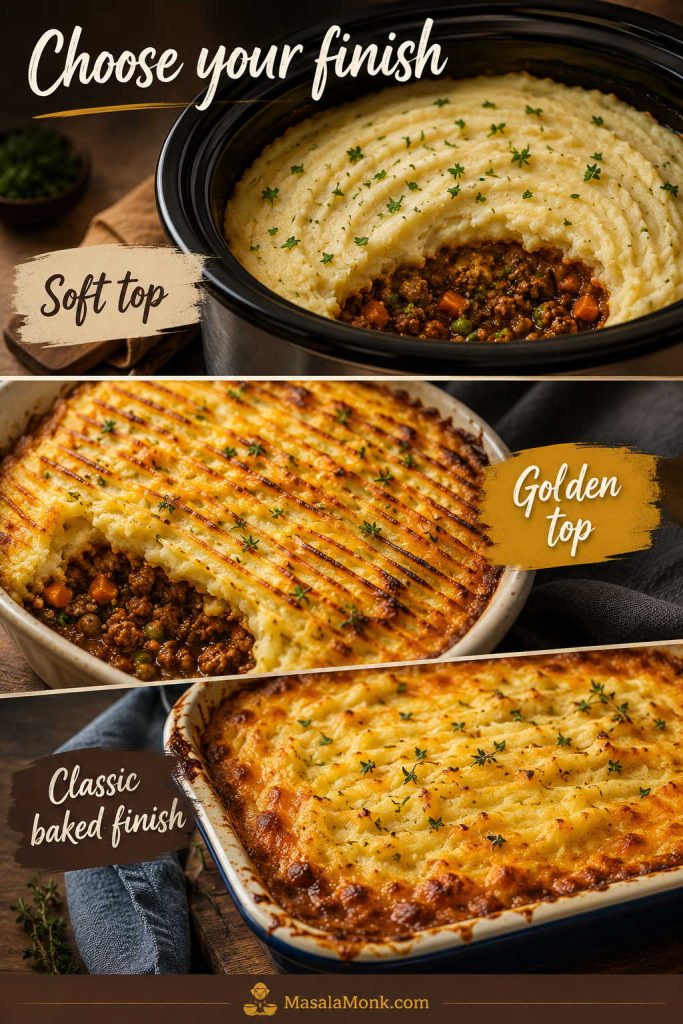
Choosing the Finish: Soft, Golden, or Classic
The slow cooker is excellent at making the filling tender and savoury. The finish depends on what you want from the topping: easiest, golden, or most classic.
What to expect: a slow cooker will heat the mash, but it will not give you a crisp browned crust. For a soft family-style cottage pie, keep it in the slow cooker. For a classic golden top, use the oven, grill, or broiler.
Finish option
Good for
Result
Keep in mind
Slow cooker only
Lowest effort family dinner
Hot, soft mash topping with rich filling underneath
No crisp or golden top
Grill / broiler
Golden top without baking the whole dish
Browned fork ridges, melted cheese, better colour
Insert must be safe for direct heat
Oven dish
Neatest classic cottage pie finish
Bubbling filling, golden mash, easier serving
Uses one extra dish
The slow cooker gives a soft top, while a grill, broiler, or oven finish adds golden ridges and bubbling edges.
Most classic: slow cook the filling, transfer it to an oven dish, top with mash, and bake at 200°C / 400°F for 20–25 minutes. This gives bubbling gravy at the edges, golden fork ridges, and a potato topping that feels baked rather than steamed.
No-extra-dish option: grill or broil the topping in the slow-cooker insert only if the manufacturer says the insert is safe for direct heat.
Easiest option: keep everything in the slow cooker and cook on high until the mash is hot. The top will be soft, not golden, but the dinner will still be comforting and complete.
Once the gravy looks glossy and the mash is hot, the rest is just the kind of comfort you want: soft if you keep it in the slow cooker, golden if you finish it under heat.
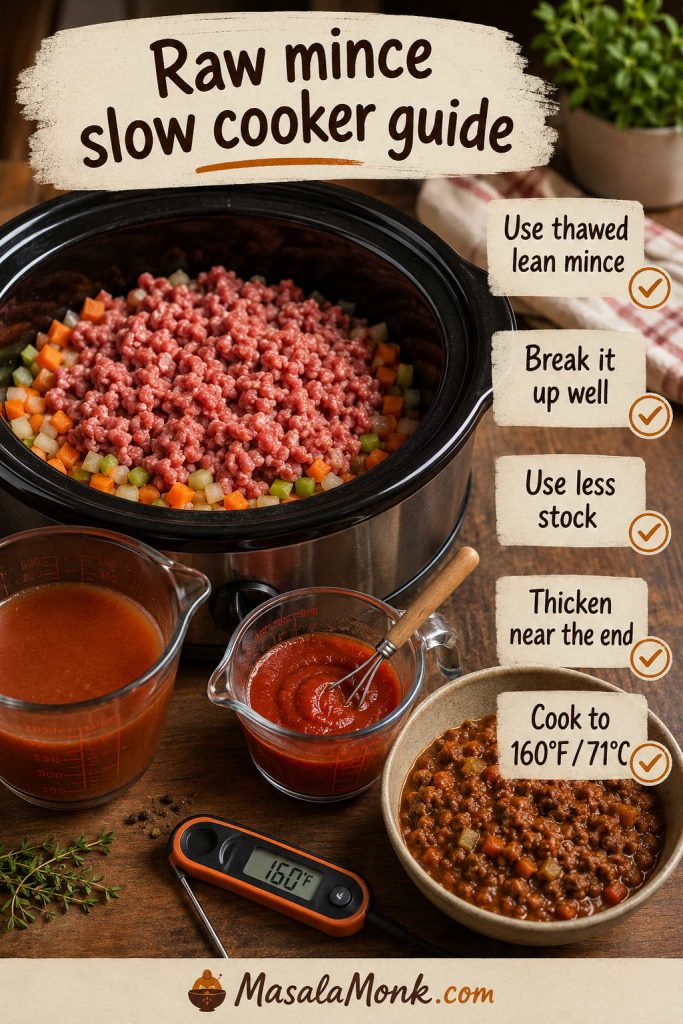
Can You Put Raw Mince in Slow Cooker Cottage Pie?
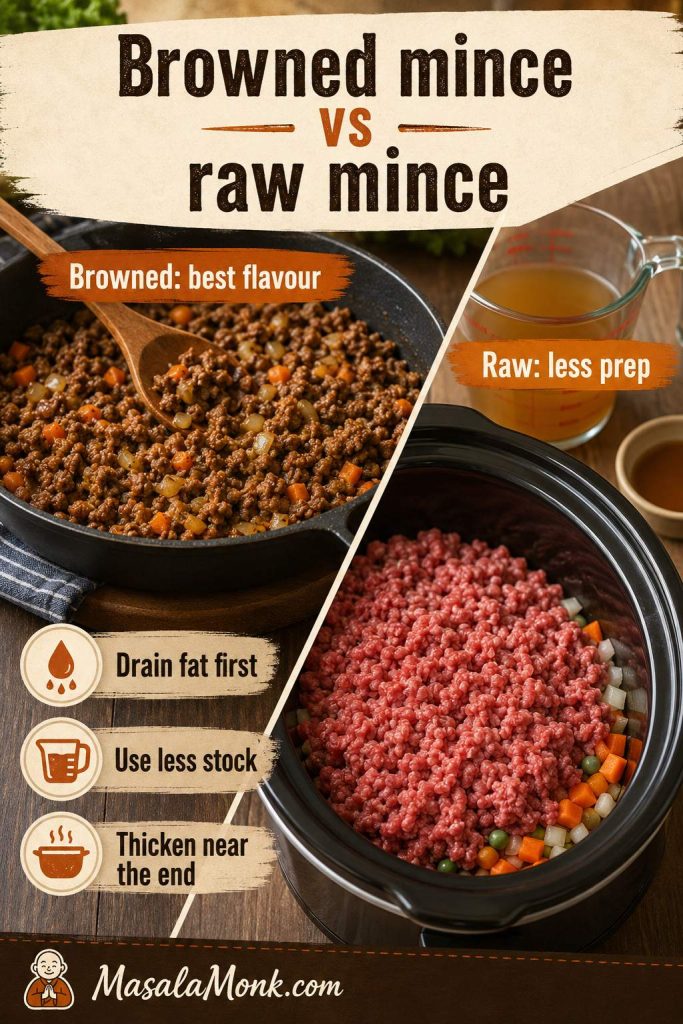
Yes, you can put raw mince in slow cooker cottage pie, but browned mince gives better flavour, better texture, and lets you drain fat first. If you need the shortcut, use fresh, fully thawed lean mince, reduce the stock, break it up well, and thicken near the end.
Some nights, simply getting dinner into the slow cooker is enough. This shortcut is not the richest version, but it can still give you a useful, comforting cottage pie if you handle the liquid carefully.
Browned Mince vs Raw Mince
Both routes can work, but they need different handling. Browning builds deeper flavour and lets you drain fat first; meanwhile, raw mince needs less stock, careful stirring, and a final texture check.
Browned mince gives deeper flavour; meanwhile, the raw-mince shortcut needs less stock and a final thickening step.
Is This a Dump-and-Go Cottage Pie?
It can be close to dump-and-go, but not completely hands-off. Use raw thawed lean mince, frozen mixed vegetables, less stock, and prepared mash if you want the easiest version. Just give the filling one look near the end so you can thicken it before the mash goes on.
Raw-mince / no-browning method
Use fresh, fully thawed lean mince. Avoid starting with frozen raw mince.
Crumble the mince into the slow cooker instead of leaving it in a block.
Add the onion, carrot, celery, and garlic.
Whisk the tomato purée, Worcestershire sauce, herbs, and 175–200ml stock together, then pour it over the mince and vegetables.
Skip the flour at the beginning because it can clump with raw mince and cold liquid.
Cook on high for 1 hour, then stir well to break up clumps if you are nearby. Either continue on high until the total cooking time reaches 3½–4 hours, or switch to low and cook for another 5–6 hours, until the beef is cooked through and the vegetables are tender.
Spoon off excess fat or liquid if needed.
Thicken near the end with 1–2 tablespoons cornflour/cornstarch mixed with equal cold water.
Add peas, check seasoning, then top with mash that is spreadable but not loose.
Raw mince is the shortcut route, but it still needs thawed lean beef, less stock, good stirring, and final thickening.
For peace of mind with the raw-mince option, use an instant-read thermometer if you have one. Ground beef should reach 160°F / 71°C, and for slow-cooker safety the USDA recommends thawing meat before it goes into a slow cooker: USDA slow cooker food safety guidance.
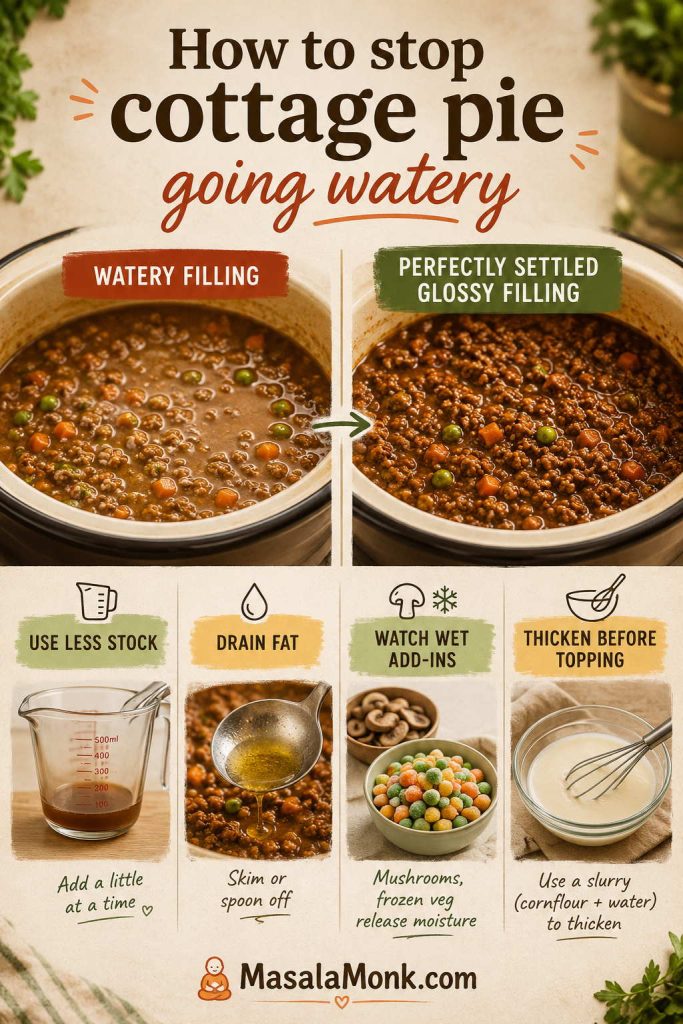
How to Stop Slow Cooker Cottage Pie Going Watery
Watery filling usually comes from too much stock, undrained fat, watery vegetables, or adding mash before the gravy has tightened.
Watery cottage pie usually comes from too much stock, undrained fat, or wet add-ins, so fix the filling before topping.
Use less stock than an oven recipe
For 500g beef mince, 225ml stock is the default for the browned method. Use about 200ml if you add mushrooms, frozen mixed vegetables, or raw mince. If adding 200g / about 7 oz chopped tomatoes, reduce the stock to 100–150ml. Use up to 250ml only if the mince is browned and drained and the filling genuinely looks dry.
Watch mushrooms, frozen veg, and chopped tomatoes
Mushrooms, frozen mixed vegetables, chopped tomatoes, and extra onions all bring moisture. They work well, but they need a lower stock amount or a little extra thickening near the end.
Drain the browned mince
Fat and liquid do not disappear in the slow cooker. Drain the mince if it releases a lot of fat, and spoon off any greasy layer before adding the mash.
Thicken before topping
If the filling is loose, thicken it first and use the spoon trail from earlier before adding the mash. Cornflour/cornstarch gives the cleanest fix; gravy granules are useful when you want a quick UK-style thickening shortcut.
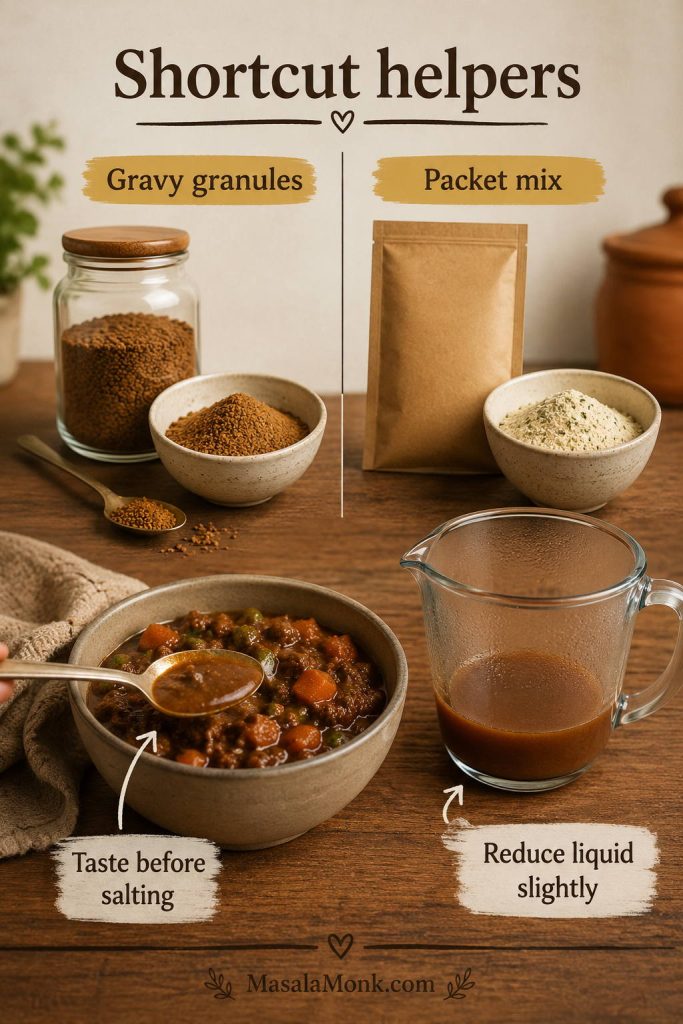
Gravy Granules and Cottage Pie Packet Mix
Shortcut helpers can be useful, especially in UK-style cottage pie, but they still need careful liquid control and tasting before extra salt goes in.
Gravy granules and packet mix can help on busy nights; however, reduce the liquid slightly and taste before salting.
Can You Use Gravy Granules to Thicken It?
Yes. Gravy granules are useful when you want a quick UK-style thickening shortcut, not just when something has gone wrong. Start with 1–2 teaspoons, let the filling settle for a few minutes, then taste before adding more because they add salt quickly.
Can You Use a Cottage Pie Packet Mix?
Yes. Use the packet as the flavour base, but reduce the liquid slightly because the slow cooker will not evaporate it the way an oven or pan does. Taste before adding extra salt, and make sure the filling is settled enough for topping.
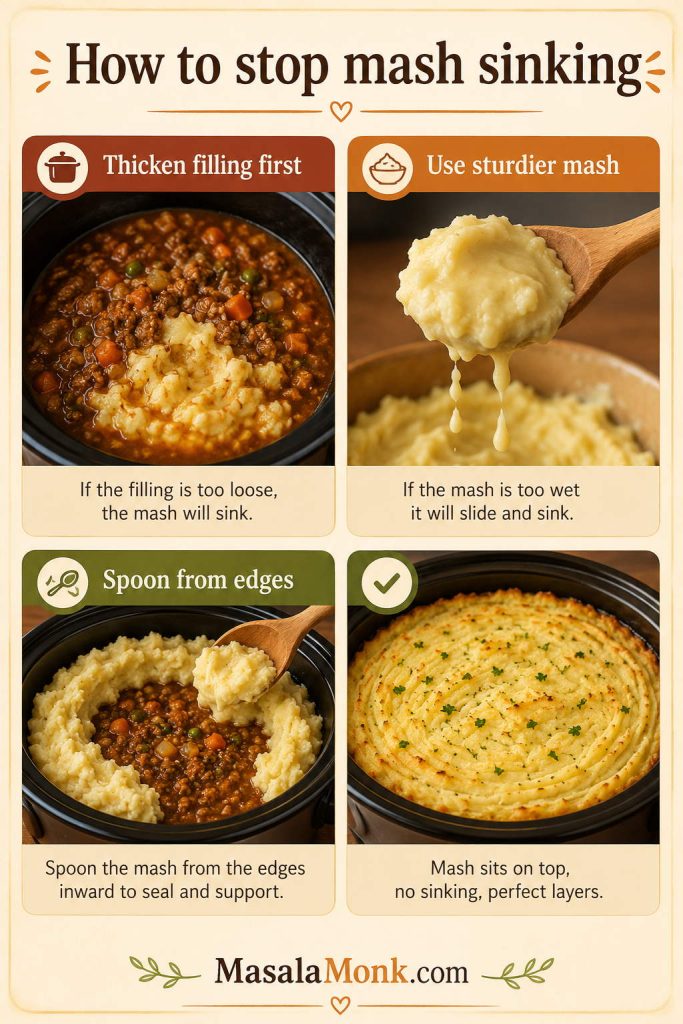
How to Stop the Mash Sinking
Mashed potato sinks when the filling is too loose, the mash is too wet, or the topping is added too heavily in one place. The fix is simple: thicken the filling first, use mash that holds its shape, and spoon from the edges inward.
If the mash sinks, the recipe is not ruined; next time, thicken the filling, use sturdier mash, and spoon from the edges inward.
Let fierce bubbling settle. If the filling is bubbling aggressively, turn the slow cooker off for 10 minutes before topping.
Use sturdy mash. Steam-dry the potatoes and add milk slowly.
Start at the edges. The rim gives the potato a firmer starting point than the centre.
Spoon, then spread. Dot small mounds of mash across the surface before smoothing.
If the mash already sank: serve it as a rustic cottage pie bowl. It will not look neat, but the flavour is still there. Next time, thicken the filling first and spoon the topping from the edges inward.
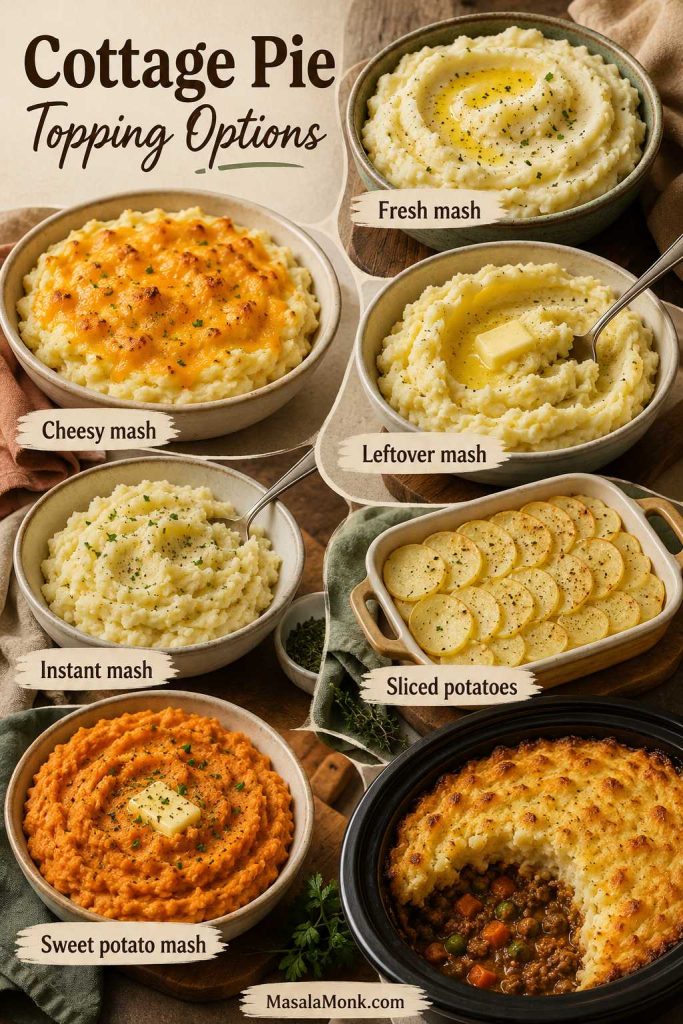
Topping Options: Mash, Cheese, Sliced Potatoes, and Shortcuts
The topping can be classic, cheesy, leftover, instant, or sliced. Choose the one that matches the amount of effort you want and the finish you like best.
Topping
Best for
Keep in mind
Fresh mash
Best texture
Steam-dry potatoes and add milk slowly.
Leftover mash
Convenience
Warm before spreading so it does not pull at the filling.
Instant mash
Fastest shortcut
Make it thicker than packet directions.
Cheesy mash
Golden finish
Can get salty if the filling is already well seasoned.
Sliced potatoes
Different texture
Needs oven, grill, or broiler finish.
Sweet potato mash
Lighter, sweeter topping
Holds more moisture, so use less milk.
Once the beef layer is glossy and spoonable, the topping becomes flexible: classic mash, cheese, leftovers, instant mash, sliced potatoes, or sweet potato.
Classic mashed potato
Classic mash is the most reliable all-purpose topping. Use floury potatoes, butter, a little milk, and salt. The texture should be spreadable without sinking, but not so stiff that it tears up the filling underneath.
Cheesy mash
Cheddar gives this cottage pie a more finished, oven-baked feel. Stir some into the mash or scatter it on top before grilling or broiling. Cheese also helps the fork ridges brown.
Leftover mash
Leftover mash is one of the easiest shortcuts. Warm it slightly before spreading so it is not fridge-cold and stiff. If it has dried out, beat in a small knob of butter or a splash of milk, but keep the texture thick enough to sit on the filling.
If you have more leftover mash than you need for topping, turn it into crisp snacks with our croquettes recipe.
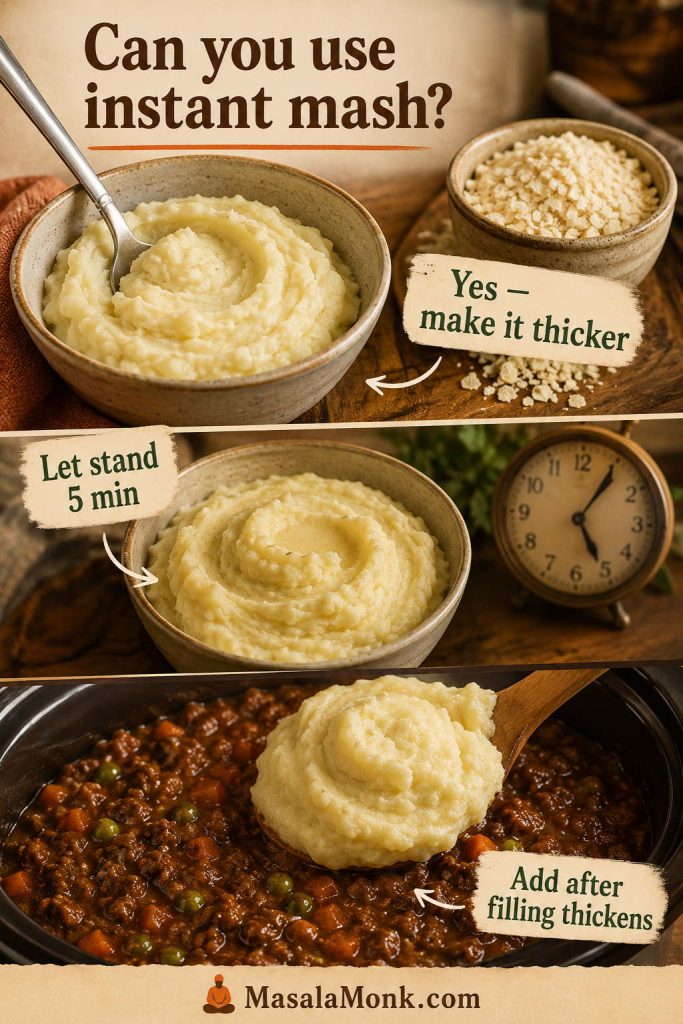
Can You Use Instant Mash for Slow Cooker Cottage Pie?
Yes, instant mash works for a shortcut version, but make it thicker than the packet directions suggest. Let it stand for 5 minutes before topping, and add a little grated cheese if it needs more structure. It is exactly the kind of shortcut that makes sense on a weeknight, especially when the beef filling is already rich and well seasoned.
Instant mash works as a cottage pie shortcut when it is thicker than usual and rested before it goes on.
Sliced potato topping
You can make slow cooker cottage pie with sliced potatoes, but it works best with an oven or grill finish. Slice the potatoes thinly, parboil if needed, layer them over a beef filling that holds together, brush with butter or oil, and finish until tender and golden. A slow cooker alone will soften sliced potatoes but will not make them crisp.
Sweet potato mash
Sweet potato mash gives the pie a sweeter, lighter feel. Because sweet potatoes hold more moisture than white potatoes, steam them well after cooking and use less milk. This works especially well for a lighter variation.
You should be able to scoop through soft potato into glossy beef gravy in a spoonful that lands on the plate as dinner, not soup. Use the recipe card below as the practical cook-through version.
Slow Cooker Cottage Pie Recipe Card
Description: A rich slow cooker cottage pie with savoury beef gravy, creamy mashed potatoes that sit neatly on top, optional cheddar, and an oven or grill finish for a golden top.
Before you top it: gravy first, mash second. The beef filling should briefly hold a spoon trail before the potato goes on. If it looks loose, thicken it first.
Filling cook time 3½–4 hours high or 6–7 hours low
Total time About 4½–5½ hours on high About 7–8½ hours on low
Yield 4 generous servings
Timing note: an oven or broiler finish is quicker; heating the mash through in the slow cooker takes longer.
Equipment: 3.5–5L / 4–5 quart slow cooker, large skillet or frying pan, saucepan, potato masher or ricer, small bowl for slurry, and an oven dish if browning the top outside the slow cooker.
Ingredients
Beef filling
1 tsp neutral oil or olive oil, optional, for very lean mince
500g lean beef mince / ground beef, about 1 lb 2 oz
1 large onion, finely diced
2 medium carrots, finely diced
1–2 celery sticks, finely diced
2–3 garlic cloves, minced
2 tbsp tomato purée / tomato paste
1 tbsp Worcestershire sauce
2 tbsp plain flour / all-purpose flour
225ml beef stock / scant 1 cup
Stock adjustment: use about 200ml with mushrooms or frozen veg, 175–200ml for no-browning, or 100–150ml with chopped tomatoes
1 tsp dried thyme or rosemary
100–150g frozen peas / ¾–1 cup
Salt and black pepper, to taste, starting light if your stock is salty
Optional flavour boosters and add-ins
100–150g mushrooms, finely chopped
50–100ml red wine, replacing part of the stock
1 tsp mustard or 1 tbsp brown sauce
200g / about 7 oz chopped tomatoes, with stock reduced to 100–150ml
Optional thickener
1 tbsp cornflour/cornstarch mixed with 1 tbsp cold water, only if the filling is loose near the end
For a UK-style shortcut, use 1–2 tsp beef gravy granules near the end, wait a few minutes, then taste before adding more because they add salt quickly.
Mash topping
800–900g floury potatoes, peeled and cut into chunks
30–45g butter / 2–3 tbsp
60ml milk / ¼ cup, plus 1 tbsp at a time only if needed
75–100g grated cheddar, optional
Or about 4 cups leftover, prepared, or instant mash, kept thicker than usual
Salt, to taste
Instructions
Cook the Beef Filling
Brown the mince. Heat a large skillet over medium-high heat. Add 1 tsp oil if using very lean mince. Add the beef mince and cook until browned, breaking it into small crumbles. Drain excess fat.
Add vegetables. Stir in onion, carrot, celery, garlic, and mushrooms if using. Cook for 4–5 minutes until beginning to soften.
Build the gravy. Add tomato purée, Worcestershire sauce, herbs, salt, and pepper. Sprinkle over the flour and stir for 1 minute.
Add stock. Pour in the beef stock gradually, scraping the pan and stirring until the mixture looks glossy. If using wine, add it before the stock and let it bubble briefly.
Slow cook. Transfer to the slow cooker. Cover and cook on high for 3½–4 hours or low for 6–7 hours. Check earlier if your slow cooker runs hot.
Check thickness. Stir the filling. Drag a spoon through it; the gravy should leave a brief path. If loose, stir in 1 tbsp cornflour/cornstarch mixed with 1 tbsp cold water and cook on high for 20–30 minutes.
Add peas. Stir in frozen peas during the final 20–30 minutes of filling time. Taste and adjust seasoning.
Make the Mash and Finish
Make mash. During the final 30–40 minutes of filling time, boil potatoes in salted water until tender. Drain, steam-dry for 1–2 minutes, then mash with butter and 60ml / ¼ cup milk. Add more milk 1 tablespoon at a time only if needed. Stir in some cheddar if using.
Top the filling. Spoon mash over the beef filling in small mounds, starting around the edges. Spread gently and rough up the surface with a fork. Add cheddar on top if desired.
Finish. For the easiest soft topping, cover and cook on high for 45–60 minutes. For a golden top, transfer to an oven dish and bake at 200°C / 400°F for 20–25 minutes, or grill/broil for 5–10 minutes only if your insert is safe for direct heat.
Rest and serve. Let the cottage pie rest for 10 minutes before serving.
Recipe Notes
Best flavour: brown the mince when you can. It gives deeper flavour and lets you drain excess fat.
Raw-mince shortcut: skip the flour at the start, use fresh, fully thawed lean mince, reduce stock to 175–200ml, break the mince up well, whisk tomato purée into the stock before adding, and thicken near the end.
Chopped tomatoes: if using 200g / about 7 oz chopped tomatoes, reduce the stock to 100–150ml and check the filling before topping.
Shortcut mash: warm leftover or prepared mash slightly before spreading; make instant mash thicker than the packet directions.
Thickening options: cornflour/cornstarch slurry gives the cleanest fix; gravy granules also work but add salt quickly.
Slow-cooker insert warning: only grill/broil or oven-finish in the insert if the manufacturer says it is safe.
For a quick saveable reference, the image below keeps the core slow-cooker cottage pie numbers together without replacing the fuller method above.
Save the core slow cooker cottage pie numbers: 500g beef mince, 225ml stock, mash near the end, and 10 minutes of resting.
Why This Slow Cooker Cottage Pie Works
Less liquid: 225ml stock gives enough gravy for 500g beef mince without drowning the topping.
Tomato purée instead of a full tin of tomatoes: you get savoury depth without adding too much water.
Browning when possible: it builds flavour and lets you drain fat before slow cooking.
Flour first, slurry later: flour thickens the browned method from the start; cornflour/cornstarch rescues a loose filling near the end.
Late peas: they stay brighter and do not release water into the filling too early.
Steam-dried mash: extra steam leaves the potatoes, so the topping stays creamy but sturdy.
That same low-liquid thinking is useful in other slow-cooker dinners too; our slow cooker sausage casserole recipe uses the same idea to keep the sauce glossy instead of thin.
Fixes for Watery Filling, Sinking Mash, and Pale Topping
A loose filling is not a ruined dinner. Most slow-cooker cottage pie problems can be fixed with a little thickening, a short rest, or a gentler topping method.
Problem
Fix now
Fix next time
Filling is watery
Add 1 tbsp cornflour/cornstarch mixed with 1 tbsp cold water. Gravy granules also work as a shortcut. Cook on high until thickened.
Use less stock, drain browned mince, and reduce liquid for watery add-ins.
Mash sank into the filling
Serve as a rustic beef-and-potato bowl.
Thicken the filling first, then spoon the topping from the edges inward.
Filling tastes bland
Add salt, pepper, Worcestershire sauce, or a little more tomato paste.
Brown the mince harder and use stronger beef stock.
Filling is greasy
Spoon fat from the surface before topping.
Use lean mince and drain fat after browning.
Topping is pale
Finish under the grill/broiler or transfer to an oven dish.
Plan a golden finish from the beginning and use fork ridges on the mash.
Mash is gluey
Fold in a little butter and avoid overmixing.
Use floury potatoes and mash by hand instead of overworking in a processor.
Mash is too loose
Stir in grated cheese or extra cooked potato if available.
Steam-dry potatoes and add milk gradually.
Slow cooker is too full
Remove some filling before topping.
Keep the slow cooker around half to two-thirds full for best cooking and topping space.
Variations and Scaling
These variations still follow the same core idea: keep the filling glossy, not soupy. When you add ingredients that release water or dilute flavour, adjust the stock and seasoning.
Budget version
To stretch the beef, add 100–150g cooked lentils or drained white beans, 100g finely chopped mushrooms, or 1 extra grated carrot. Reduce the stock by 25–50ml if adding mushrooms or frozen vegetables, and taste for extra Worcestershire sauce or tomato paste because stretch ingredients can soften the savoury flavour.
For a family-style version, dice or grate the vegetables small so they melt into the gravy rather than staying as large chunks.
Lighter version
Use 5% lean beef mince, 30g butter instead of 45g, skip extra cheese, and replace up to one-third of the potato with sweet potato if you like a sweeter topping. Add extra carrots, celery, or mushrooms, but keep the stock modest so the filling still feels hearty.
Crockpot shepherd’s pie with ground beef
For US-style crockpot shepherd’s pie, follow the same method with ground beef. You can also use frozen mixed vegetables and prepared mashed potatoes for a shortcut version, but make sure the beef layer holds together before adding the topping.
Lamb shepherd’s pie version
If using lamb mince, follow the same method but drain the fat carefully because lamb can be richer than beef. With lamb, the dish is traditionally called shepherd’s pie rather than cottage pie.
Guinness or red wine cottage pie
Replace part of the stock with Guinness or red wine for a deeper gravy. Use a modest amount and let it bubble briefly with the browned mince before slow cooking so the flavour becomes rounded rather than sharp.
Vegetarian or lentil cottage pie
For a vegetarian version, treat this as inspiration rather than a direct swap. Lentils and mushrooms need different liquid, so they deserve their own slow-cooker recipe.
Making a larger batch
If you want to make a larger crockpot cottage pie with 1kg / about 2 lb ground beef, use a 6–8 quart slow cooker and scale carefully. When scaling up, double the beef and vegetables, but be gentler with the liquid. You can always add more stock later; taking it back out is harder.
Ingredient
Standard recipe
Larger version
Beef mince / ground beef
500g / about 1 lb 2 oz
1kg / about 2 lb
Slow cooker size
3.5–5L / 4–5 quart
6–8 quart
Stock
225ml / scant 1 cup
Start with 350ml / about 1½ cups, then add more only if needed
Flour
2 tbsp
3–4 tbsp
Potatoes
800–900g
1.5–1.8kg
Filling cook time
3½–4 hours high or 6–7 hours low
Check from 4 hours high or 7 hours low
If you add chopped tomatoes or a lot of mushrooms to a larger batch, reduce the stock further and check the filling before topping. For larger batches, the oven-dish finish is often easier than trying to brown a very full slow-cooker insert.
What to Serve with Slow Cooker Cottage Pie
This is already rich and filling, so the best sides are simple and fresh. For a classic plate, serve it with peas, steamed greens, cabbage, green beans, or roasted carrots. For a lighter plate, add a crisp salad with a sharp vinaigrette.
Because cottage pie is rich and creamy, simple greens, peas, salad, or sharp chutney make the plate brighter and more balanced.
Pickled onions, chutney, or a spoonful of sharp relish also work well because they cut through the creamy mash and beef gravy. If the filling is a little looser and you are serving it more like a rustic cottage pie bowl, crusty bread is useful for catching the gravy.
It should feel generous rather than polished: creamy potato, glossy beef gravy, and enough structure to scoop without needing perfect slices.
Make Ahead, Storage, Freezing, and Reheating
Make Ahead and Freeze Slow Cooker Cottage Pie
The neatest make-ahead order is to prepare the beef filling first, chill it until it sets slightly, then top and finish later. Chilled filling is easier to cover neatly with mashed potato.
For the best make-ahead cottage pie texture, chill the filling first and freeze portions separately when possible.
Make the beef filling.
Cool and refrigerate it in a covered container.
Make the mash fresh, or use leftover mash.
Reheat the filling until hot.
Top with mash and finish in the slow cooker, oven, or under the grill/broiler.
Can you assemble the whole pie ahead?
Yes, you can assemble the whole pie ahead if the filling is cold and settled. Cover and refrigerate, then reheat until piping hot before serving. A fully assembled chilled pie reheats best in the oven or microwave; the slow cooker is better for keeping already-hot food warm than for reheating from fridge-cold.
Avoid putting a fridge-cold ceramic slow-cooker insert straight into a hot oven. Transfer the pie to an oven dish if you want an oven finish.
Fridge storage
Cool leftovers promptly, then store in an airtight container in the fridge for 3–4 days. Keep the pie covered so the mash does not dry out.
Freezing
For best texture, freeze the beef filling and mashed potato separately. You can freeze assembled cottage pie, but the potato topping may soften slightly after thawing. Freeze in meal-size portions so reheating is easier.
For another freezer-friendly slow-cooker dinner with clear cooker-size guidance, see our slow cooker pulled pork recipe.
How to Reheat Slow Cooker Cottage Pie
Reheat leftovers quickly in the microwave, oven, or on the hob until piping hot. Avoid using a slow cooker as the main method for reheating cold leftovers because it takes too long to move chilled food through the safe temperature range.
Reheat cottage pie until piping hot, using the microwave for speed, the oven for the topping, or the stovetop for loose filling.
For reheating, the USDA safe temperature chart lists leftovers and casseroles at 165°F / 74°C: USDA safe temperature chart.
FAQs
Can I put raw mince in slow cooker cottage pie?
Yes, but treat it as the shortcut version, not the best-flavour version. Use fresh, fully thawed lean mince, reduce the stock, break the mince up well, and thicken the filling near the end. Browned mince still gives better flavour and lets you drain fat first.
Is slow cooker cottage pie dump-and-go?
It can be close, especially if you use raw thawed mince, frozen mixed vegetables, and prepared mash. However, the filling still needs one look near the end so you can thicken it before topping.
Should I add mash at the beginning or near the end?
Add the mash near the end. It gives you a chance to let the filling settle first, so the potatoes stay defined instead of softening into the gravy.
Why did my slow cooker cottage pie go watery?
The usual causes are too much stock, undrained mince fat, watery vegetables, or not enough thickening. The fix is usually simple: use less liquid than an oven cottage pie, then tighten the gravy before the mash goes on.
How do I stop mash sinking into cottage pie?
Use a beef filling that is saucy but not runny, mash that holds its shape, and a gentle topping method. Spoon the potatoes from the edges inward instead of dropping everything into the centre.
Can I use instant mash?
Yes. It is not the fanciest topping, but it is a useful weeknight shortcut if you make it thicker than the packet directions suggest. Let it stand for 5 minutes, then add it only after the filling has thickened.
Can I use gravy granules to thicken the filling?
Yes — they are a handy UK-style shortcut when the filling looks loose, but start small because gravy granules season as well as thicken. Use 1–2 teaspoons near the end, wait a few minutes, then taste before adding more.
Can I use a cottage pie packet mix?
Yes, but reduce the liquid slightly because the slow cooker will not evaporate it like an oven or hob. Taste before adding extra salt, and make sure the filling is settled and glossy before topping.
Can I make it with frozen mixed vegetables?
Yes, frozen mixed vegetables are fine, especially for a shortcut version, but they release water as they heat. Add them late or reduce the stock slightly so the filling holds together.
Can I make it ahead?
Yes. The easiest make-ahead path is filling first, then mash and finish later. If the pie is fully assembled and chilled, reheat it in the oven or microwave until piping hot rather than relying on the slow cooker from cold.
Can I freeze slow cooker cottage pie?
Yes. For the neatest texture, freeze the beef filling and mash separately. Assembled cottage pie also freezes, but the potato topping may soften a little after thawing.
How do I get a golden top?
Use a short grill, broiler, or oven finish after the filling is already hot. Fork ridges, a little butter, and optional cheddar help the top brown quickly, so you get colour without drying out the gravy underneath.
Once you understand the two big ideas — keep the filling glossy, not soupy, and keep the mash sturdy — slow cooker cottage pie becomes a forgiving dinner. Make it soft and simple in the slow cooker, or give it those golden fork ridges under the grill. Either way, it should land on the table as proper comfort.
Tried this with raw mince, instant mash, gravy granules, leftover mash, sliced potatoes, packet mix, or a grill finish? Leave a comment with your slow cooker size, liquid amount, and what you changed — it helps other readers choose the right version.