Posted on Leave a comment

Korean Beef Bowl Recipe: 20-Minute Ground Beef Rice Bowls

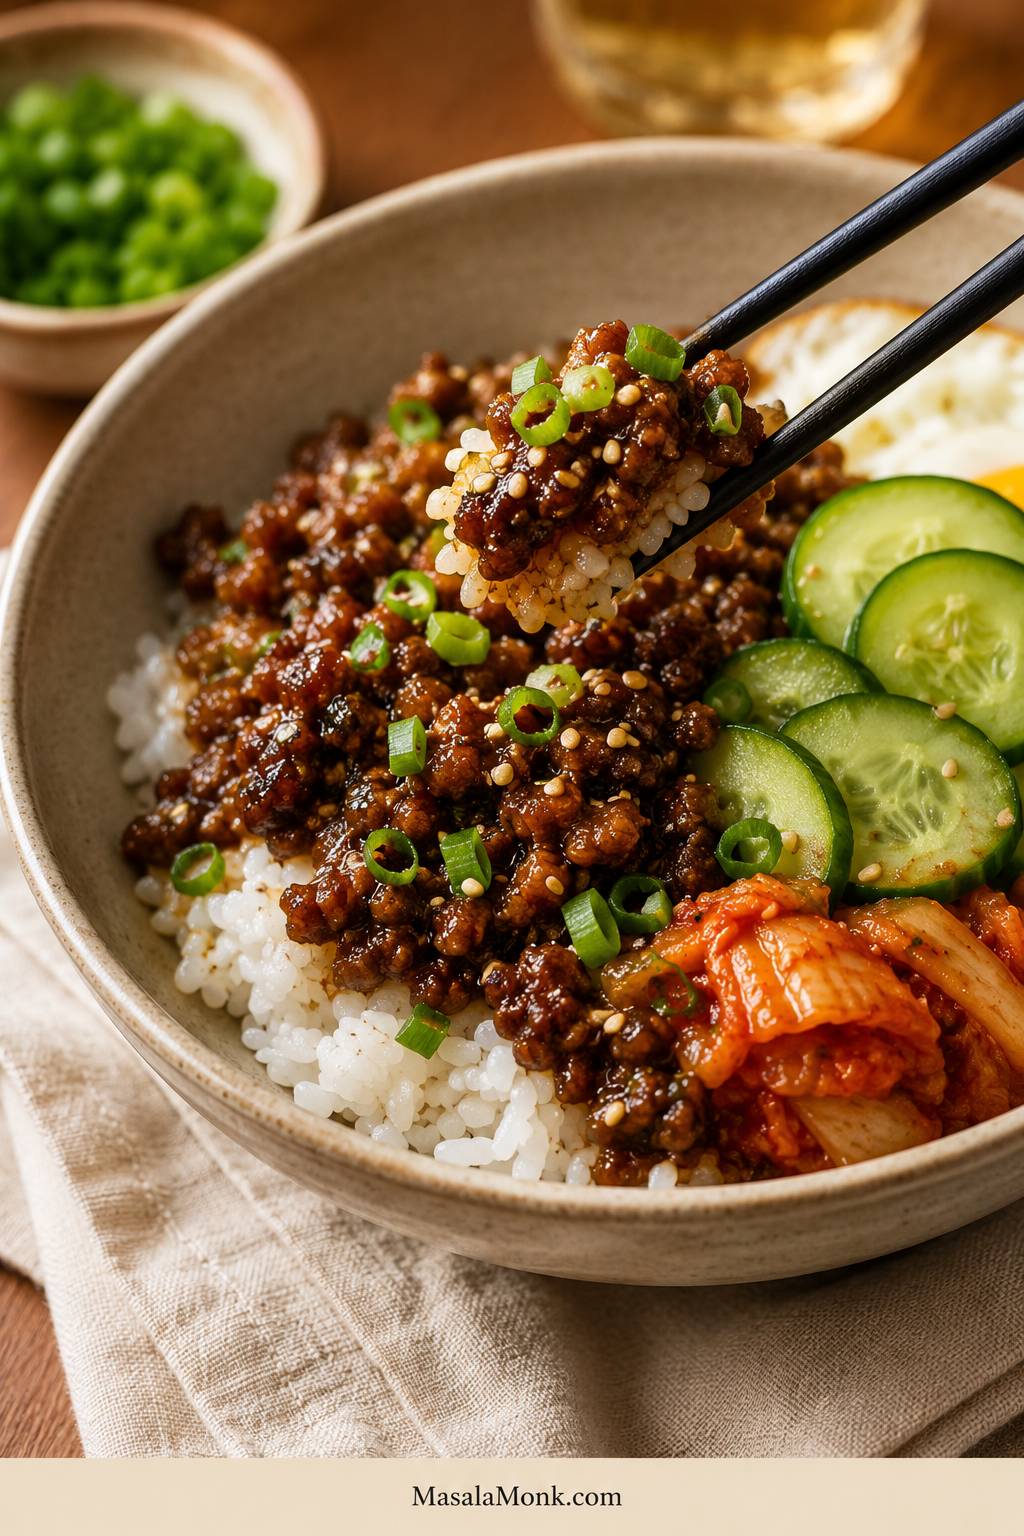
Ceramic bowl of white rice topped with glossy ground beef, sliced cucumber, scallions, sesame seeds, kimchi, and chopsticks lifting a bite.

This Korean beef bowl recipe is for the nights when you have ground beef in the fridge, rice ready or almost ready, and no patience for a complicated dinner. In about 20 minutes, the beef turns saucy, garlicky, a little sweet, and deeply savory, with browned edges and a pan sauce that clings to every crumble.

With rice, beef, and one fresh topping, this is already dinner. Everything else — kimchi, carrot, sesame seeds, a fried egg, or a creamy gochujang drizzle — just makes it feel more complete.

You do not need a perfect topping spread. One crunchy or bright thing is enough to make the bowl work.

The idea is simple: one sauce ratio, three flavor paths, and a bowl you can build around whatever you have. Keep it mild, add gochujang for heat, or make it rounder and more bulgogi-style with grated apple or pear.

Small effort, big dinner: saucy beef, warm rice, one fresh crunch, and a sauce you can keep mild or make spicy. This is a 20-minute recipe when cooked rice is ready. If you are starting rice from scratch, this guide to cooking perfect rice helps with stovetop, rice cooker, and Instant Pot timing.

Make This Tonight

If you want the fastest path to dinner, start here. This gives you the full sweet-savory Korean-inspired beef bowl feeling with the fewest moving parts.

Beef1 lb / 450–500 g ground beef or beef mince
Sauce¼ cup soy, 2–3 tbsp sweetener, 1 tbsp vinegar, 2 tsp sesame oil, garlic, ginger
Rice3–4 cups cooked rice, warm before the beef is done
Best toppingsCucumber, scallions, sesame seeds, fried egg if you have time

Bowl formula: warm base + saucy beef + one fresh crunch + one finish. That can be as simple as rice, beef, cucumber, and sesame seeds.

The key move is to brown the beef first, then add the sauce. If the sauce goes in too early, the beef simmers and tastes flatter. Brown it first, and the sauce clings to deeper, better-tasting crumbles.
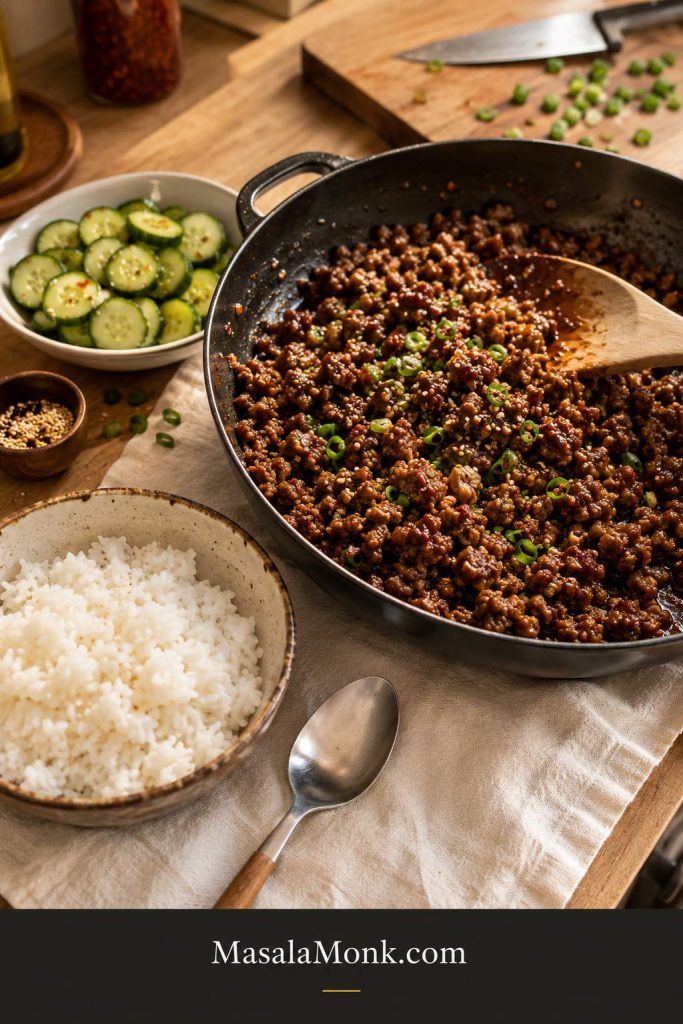
Dark skillet of saucy ground beef beside white rice, sliced cucumber, scallions, and sesame seeds on a warm kitchen counter.
For a 20-minute dinner, keep rice and cucumber ready while the beef simmers; once the sauce thickens, the skillet can go straight into bowls.

What You’ll Need

You do not need much to make this taste good. The beef brings richness, the sauce brings that salty-sweet garlic-soy flavor, and the toppings keep everything fresh enough to go back for another bite.
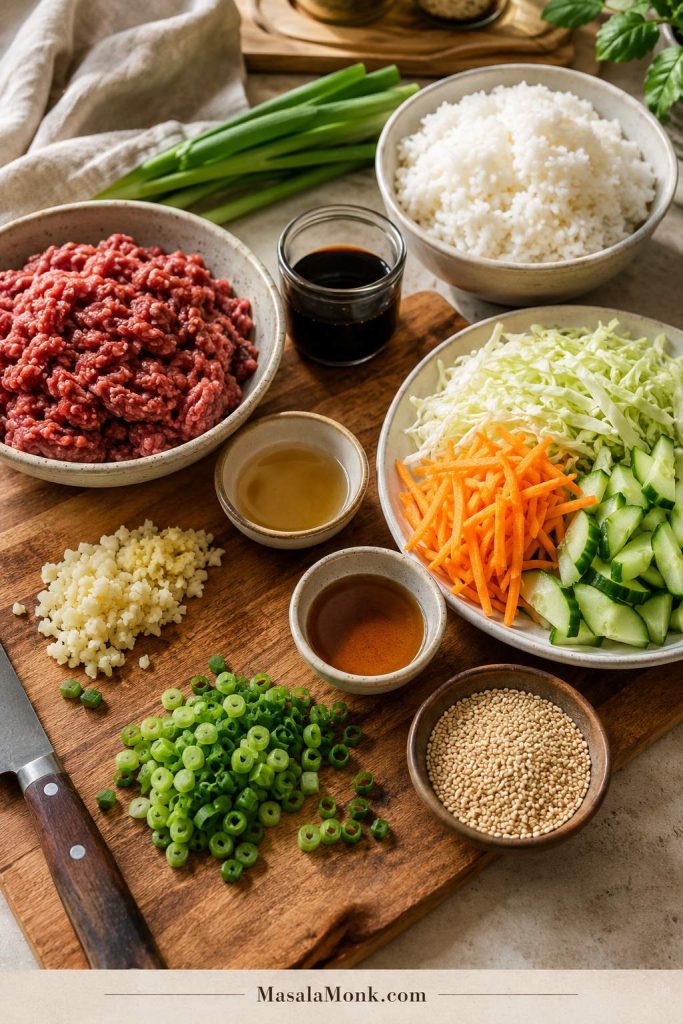
Ground beef, cooked rice, soy sauce, sesame oil, garlic, ginger, scallions, cucumber, carrot, cabbage, and sesame seeds arranged for cooking.
The ingredient list stays weeknight-friendly: ground beef for speed, rice for comfort, sauce for flavor, and fresh toppings for balance.

Ground Beef or Beef Mince

Use 1 lb / 450–500 g ground beef or beef mince for 4 bowls. The method is the same either way, so use the pack size and wording common where you live.

If you only remember one thing, use 90/10. It browns nicely, stays juicy, and does not leave the bowl greasy. 85/15 tastes richer but often needs draining, while 93/7 is leaner and needs a little more care so it does not dry out.

Beef type Best for Cooking note
85/15 Juicier bowls, better browning, richer flavor. Drain excess fat if the pan looks greasy before adding sauce.
90/10 Best all-purpose choice. Enough flavor, but not too greasy.
93/7 Leaner meal prep bowls. Add a little oil if needed and avoid overcooking.

Aromatics

Fresh garlic and ginger make the pan smell like dinner almost immediately. Use 3–4 garlic cloves and about 1 teaspoon grated ginger. Scallion whites or a little grated onion can also go into the pan for extra depth.

Rice and Toppings

Warm cooked rice is the easiest base. For toppings, use cucumber, carrot, cabbage, scallions, sesame seeds, kimchi, or egg. Even a simple bowl with rice, beef, scallions, and sesame seeds can still feel complete.

US and Metric Measurements

Measurements are forgiving here. The sauce does not need laboratory precision, but these amounts give you a reliable starting point before you adjust sweetness, heat, or salt at the end.

Ingredient US measure Metric measure
Ground beef / beef mince 1 lb 450–500 g
Low-sodium soy sauce ¼ cup 60 ml
Brown sugar 2–3 tbsp about 25–38 g
Honey, if using instead 2–3 tbsp about 42–63 g
Rice vinegar 1 tbsp 15 ml
Toasted sesame oil 2 tsp 10 ml
Gochujang, optional 1–2 tbsp 18–36 g
Cooked rice 3–4 cups about 500–750 g, depending on rice type
Grated apple or pear, optional 2–3 tbsp 30–45 g
Grated onion, optional 1–2 tbsp 15–30 g

Korean Beef Bowl Sauce

The sauce is what makes the beef taste deeper than a 20-minute dinner usually does. It works because every bite has balance: salty soy, sweetness from brown sugar or honey, acidity from rice vinegar or kimchi, fat from beef and sesame oil, heat if you add gochujang, and crunch from cucumber or cabbage.

That is why the bowl tastes complete even when the topping list is short.
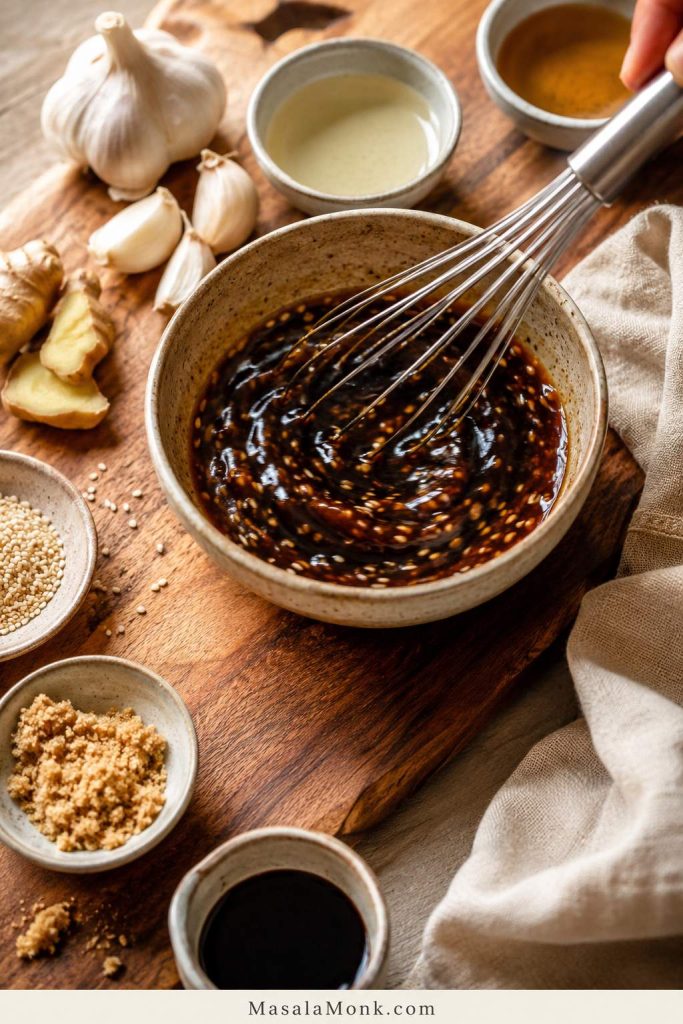
Small ceramic bowl of dark soy-garlic-sesame sauce being whisked, with garlic, ginger, brown sugar, sesame seeds, and sauce ingredients nearby.
The base sauce sets the flavor before heat: soy sauce, sweetener, rice vinegar, sesame oil, garlic, and ginger create the salty-sweet backbone.

Save This Sauce Ratio

For 1 lb / 450–500 g beef, remember this base formula:

  • ¼ cup / 60 ml low-sodium soy sauce for salt and savoriness
  • 2–3 tablespoons brown sugar or honey for sweetness and gloss
  • 1 tablespoon rice vinegar for balance
  • 2 teaspoons toasted sesame oil for aroma
  • Garlic + ginger for the flavor base
  • Optional: 1–2 tablespoons gochujang for heat, or grated apple/pear for bulgogi-style sweetness

Make It Mild, Medium, Spicy, or Bulgogi-Style

  • Mild: skip the gochujang and use the soy-garlic-sesame sauce as written.
  • Medium: add 1 tablespoon gochujang for color, depth, and gentle heat.
  • Spicy: add 2 tablespoons gochujang, then balance the bowl with cucumber, cabbage, rice, or egg.
  • Bulgogi-style: add 2–3 tablespoons grated apple or pear and 1–2 tablespoons grated onion.

Not sure which one to make? Start with the mild version. For the best all-around bowl, add 1 tablespoon gochujang and 2 tablespoons grated apple or pear; it stays balanced, slightly spicy, and deeper without becoming difficult.
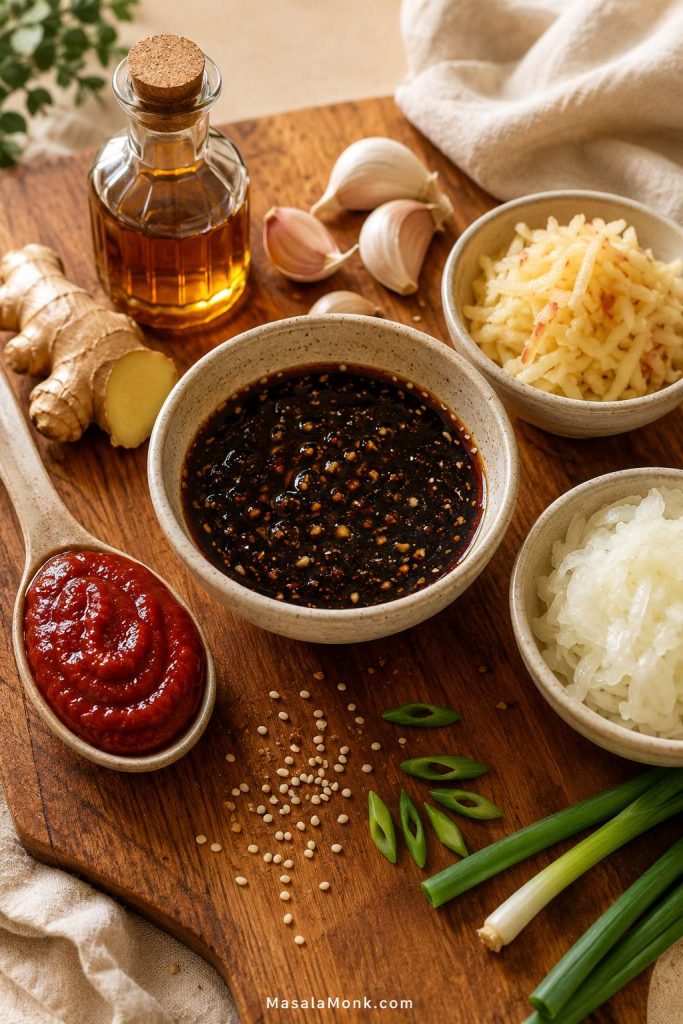
Central bowl of dark soy-garlic sauce with red gochujang on a spoon, grated apple or pear, grated onion, garlic, ginger, sesame oil, and scallions nearby.
From that same sauce base, gochujang adds heat, while grated apple or pear and onion create a sweeter, rounder bulgogi-style beef bowl.
Sesame oil note: toasted sesame oil tastes strongest when it is not cooked hard for too long. Whisk it into the sauce for ease, or save half to drizzle in at the end if you want a stronger sesame aroma.

Quick Sauce Adjustments

  • Less sweet: use 2 tablespoons brown sugar or honey instead of 3.
  • More saucy: add 1–2 tablespoons water while simmering.
  • Spicier: add more gochujang, gochugaru, chili flakes, or sriracha-style sauce.
  • Brighter: finish with a small splash of rice vinegar.
  • More sesame-rich: finish with sesame seeds or a tiny drizzle of toasted sesame oil.

Ingredient Swaps

Dinner can still happen even if you are missing one ingredient. The flavor will change slightly, but these swaps keep the bowl moving in the same sweet-savory direction.

If you do not have… Use instead
Rice vinegar Apple cider vinegar, white vinegar, or a squeeze of lime juice.
Gochujang Chili flakes, gochugaru, sriracha-style sauce, or simply skip it.
Fresh ginger ¼–½ teaspoon ground ginger, or leave it out if needed.
Brown sugar Honey, maple syrup, white sugar, or coconut sugar.
Soy sauce Tamari for gluten-free, or coconut aminos for a milder option.
Sesame oil Skip it if needed, then finish with sesame seeds for some nuttiness.
Apple or pear Leave it out, or use a little grated onion for body.

Back to top ↑

Simple Equipment

No special equipment is needed, but a wide skillet makes a real difference. A crowded pan traps moisture, which makes the beef steam instead of brown. You only need a wide skillet, a small bowl for the sauce, and a spatula or wooden spoon.

Before you start: have cooked rice and toppings ready. The beef cooks quickly, and the bowl tastes best when the hot, saucy beef goes straight over warm rice.

How to Make the Bowls

Once the sauce is mixed, the skillet part moves fast: brown the beef, simmer until the sauce coats the crumbles, then build the bowls while everything is still hot.

Step 1: Make the Sauce

In a small bowl, whisk together soy sauce, brown sugar or honey, rice vinegar, garlic, ginger, and optional gochujang. Whisk in the sesame oil too, or save half to drizzle in at the end for a stronger sesame aroma. For the bulgogi-style version, add grated apple or pear, grated onion, and optional mirin.

Whisk until the sugar dissolves and the gochujang, if using, is fully mixed in.

Step 2: Brown the Beef

Heat a wide skillet over medium-high heat. Add the beef. If it is very lean, add 1 tablespoon neutral oil first.

Press the beef into an even layer and let it cook undisturbed for 1–2 minutes before breaking it apart. That short pause helps the bottom brown instead of turning gray and watery.
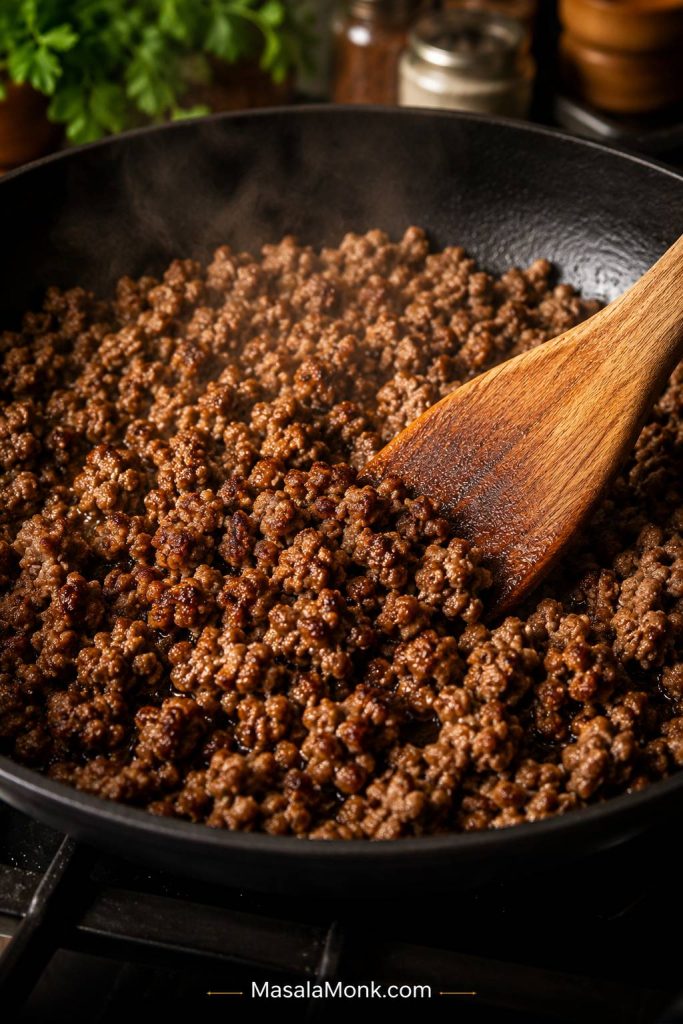
Browned ground beef crumbles cooking in a dark skillet with a wooden spatula and steam rising.
Before the sauce goes in, brown the ground beef well; those caramelized edges keep the finished bowl from tasting flat.

Step 3: Break It Into Crumbles

Use a wooden spoon or spatula to break the beef into small crumbles. Cook until browned and fully cooked. If the pan looks watery before the sauce goes in, drain it; sauce clings to browned beef, not liquid.

Food safety note: ground beef should be cooked to 160°F / 71°C. A thermometer is the most reliable check; color alone can be misleading. If you do not have one, cook until the beef is steaming hot throughout and fully cooked through.

Step 4: Add the Sauce

Pour the sauce into the skillet and stir well. When the garlic and ginger hit the hot beef, it should smell savory and warm almost immediately. If anything smells sharp or scorched, lower the heat before the sauce reduces too far.
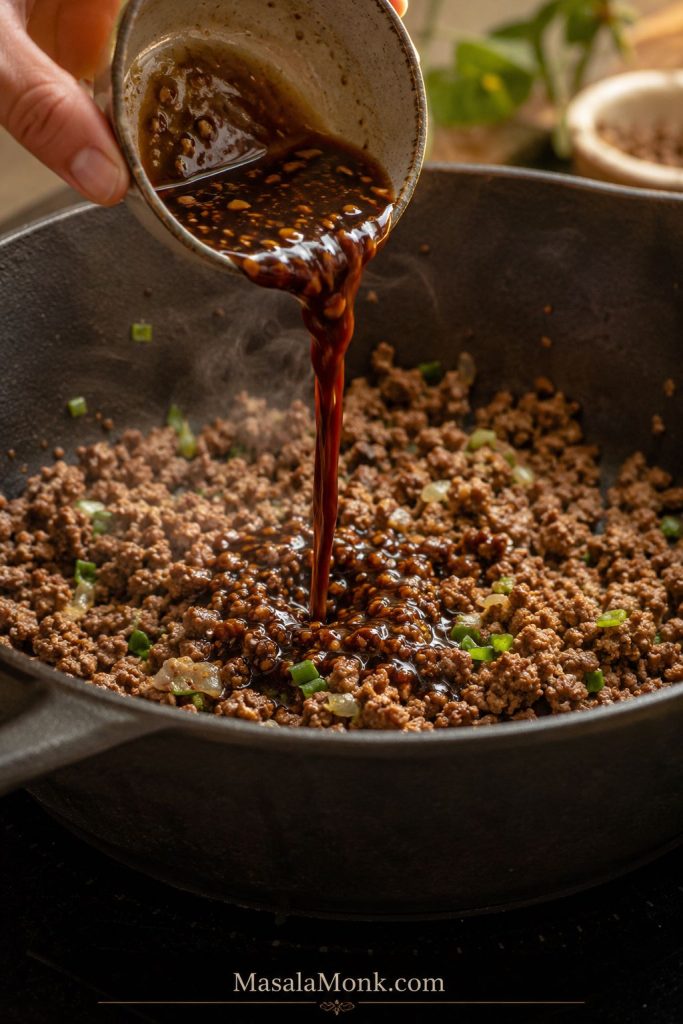
Hand pouring dark soy-garlic sauce from a small bowl into browned ground beef in a skillet.
After browning, let the sauce bubble briefly so the soy-garlic flavor coats the beef instead of staying loose in the pan.

What Glossy Korean Ground Beef Should Look Like

Let the sauce bubble gently for 2–4 minutes, until it looks glossy, reduced, and clings to the beef instead of running across the pan. It should coat the crumbles, not pool like soup.
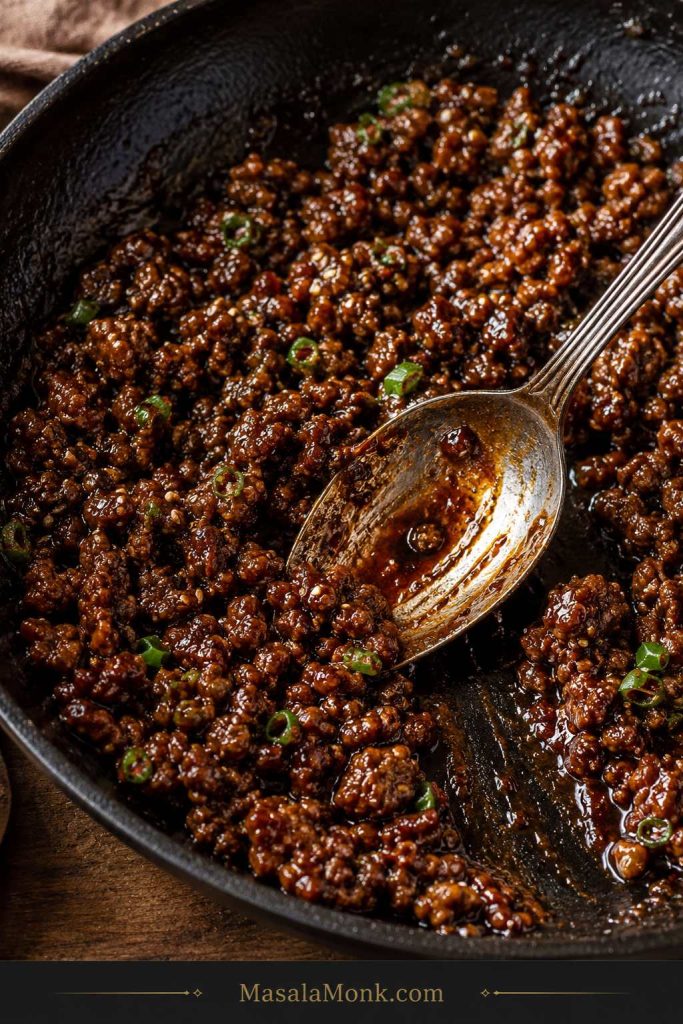
Saucy Korean-style ground beef in a dark skillet with a spoon dragged through the thickened sauce.
Once the sauce clings to the crumbles, the beef is ready; that texture helps it season the rice without making the bowl watery.

Taste the beef before you build the bowls. Too salty? Add more rice or cucumber. Flat? Splash in rice vinegar. Want more heat? Stir in a little gochujang at the end.

Step 5: Build the Bowls

Divide warm rice between bowls. Spoon the saucy beef over the rice. Add cucumber, carrot, cabbage or lettuce, scallions, sesame seeds, kimchi, and egg if using.
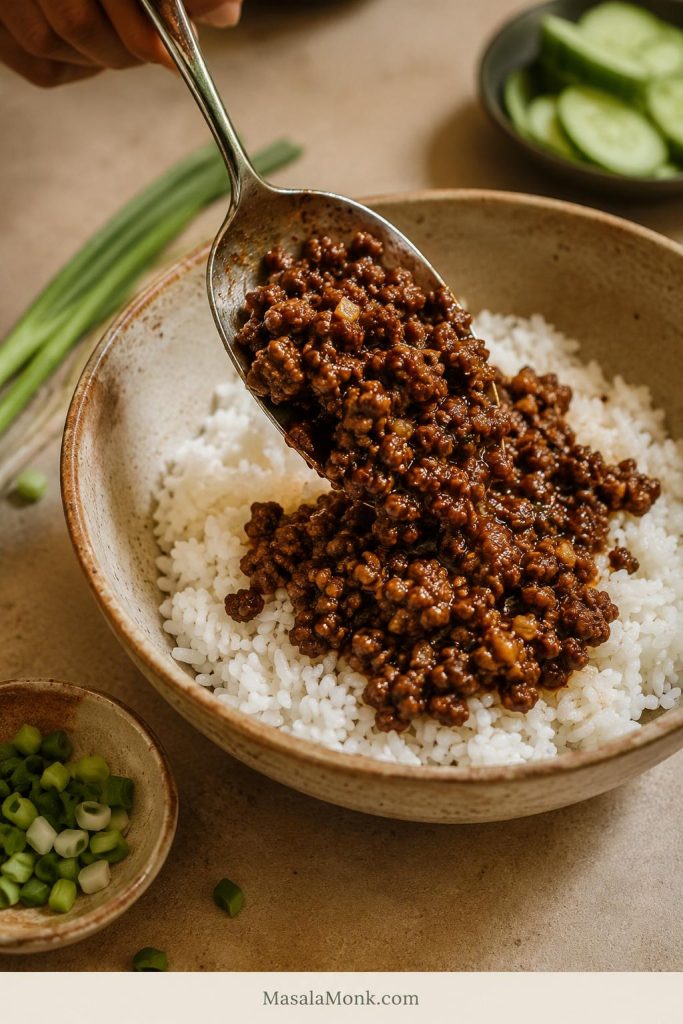
Spoon adding saucy ground beef over white rice in a ceramic bowl, with cucumber slices and chopped scallions nearby.
Next, spoon the beef over hot rice, then keep the bowl simple with one fresh crunch and one finish instead of overloading the toppings.

Step 6: Finish and Serve

Finish with extra sesame seeds, sliced scallions, a drizzle of sesame oil, or a spoonful of gochujang sauce. For a creamy drizzle, mix 2 tablespoons mayo with 1–2 teaspoons gochujang and a few drops of rice vinegar. Add a tiny splash of water only if you want it thinner. For a homemade version, this mayo guide includes a gochujang mayo variation.

Serve while the beef is hot, the rice is warm, and the vegetables are still crisp.

Korean Beef Bowl Recipe

Easy ground beef or beef mince rice bowls with sticky soy-garlic beef, warm rice, crunchy toppings, optional gochujang heat, and a bulgogi-style apple or pear upgrade.

Prep Time5 minutes
Cook Time15 minutes
Total Time20 minutes
Servings4 bowls

Total time assumes cooked rice is ready and toppings are simple. Add about 5 minutes for several toppings, fried eggs, or the bulgogi-style upgrade.

Equipment

  • 12-inch skillet or large nonstick skillet
  • Small mixing bowl
  • Whisk or fork
  • Spatula or wooden spoon
  • Rice cooker or pot, if cooking rice fresh
  • Optional microplane or box grater

Ingredients

For the Beef and Bowls

  • 1 lb / 450–500 g ground beef or beef mince, preferably 90/10
  • 3–4 cups cooked rice, warm and ready before the beef starts cooking
  • 1 tablespoon neutral oil, only if using very lean beef
  • 2–3 scallions, sliced, whites and greens separated if possible
  • 1 small cucumber, sliced
  • 1 medium carrot, shredded or julienned
  • 1 cup shredded cabbage or lettuce
  • 1–2 teaspoons sesame seeds
  • Kimchi, optional
  • 4 fried eggs or soft-boiled eggs, optional

For the Sauce

  • ¼ cup / 60 ml low-sodium soy sauce
  • 2–3 tablespoons brown sugar or honey
  • 1 tablespoon rice vinegar
  • 2 teaspoons toasted sesame oil
  • 3–4 garlic cloves, minced
  • 1 teaspoon fresh ginger, grated
  • 1–2 tablespoons gochujang, optional
  • 1–2 tablespoons water, if needed

Optional Bulgogi-Style Upgrade

  • 2–3 tablespoons grated apple or Asian pear
  • 1–2 tablespoons grated onion
  • 1 tablespoon mirin or rice wine, optional

Instructions

  1. Have the rice ready. This recipe moves quickly once the beef starts cooking, so use warm cooked rice, leftover rice, microwave rice, or rice already prepared in a cooker.
  2. Make the sauce. In a small bowl, whisk together soy sauce, brown sugar or honey, rice vinegar, garlic, ginger, and optional gochujang. Whisk in the sesame oil too, or save half to drizzle in at the end for a stronger sesame aroma. If using the bulgogi-style upgrade, whisk in grated apple or pear, grated onion, and mirin.
  3. Brown the beef. Heat a large skillet over medium-high heat. Add the beef. Press it into an even layer and let it brown for 1–2 minutes before breaking it apart.
  4. Cook through. Break the beef into small crumbles and cook until browned, steaming hot, and cooked through. Drain excess liquid if the pan looks watery.
  5. Add the sauce. Pour the sauce over the beef and stir well. Simmer for 2–4 minutes, until it looks glossy, reduces slightly, and coats the crumbles. Add a splash of water if it becomes too thick.
  6. Build the bowls. Divide warm rice between bowls. Spoon the saucy beef over the rice.
  7. Add toppings. Top with cucumber, carrot, cabbage or lettuce, scallions, sesame seeds, kimchi, and egg if using.
  8. Serve. Finish with extra sesame seeds, a drizzle of sesame oil, extra gochujang sauce, or a little gochujang mayo if you want a creamy finish.

Recipe Notes

  • Cook ground beef to 160°F / 71°C for food safety.
  • Use low-sodium soy sauce because the sauce reduces in the skillet.
  • Total time assumes cooked rice is ready and toppings are simple.
  • If you only have beef, sauce, rice, scallions, and sesame seeds, the bowl still works.
  • Mild bowl: skip the gochujang or serve it on the side.
  • Medium heat: use 1 tablespoon gochujang.
  • Spicier version: use 2 tablespoons gochujang.
  • Bulgogi-style flavor: add grated apple or pear and grated onion.
  • Store beef, rice, and fresh toppings separately for the best meal prep texture.

What Makes This a Korean-Inspired Beef Bowl?

Think of this as a weeknight shortcut built from the flavors people love in Korean BBQ-style beef: soy, garlic, ginger, sesame, sweetness, and optional gochujang. Ground beef or beef mince makes it fast. Rice makes it filling. Cucumber, cabbage, kimchi, scallions, or egg make it feel like a complete bowl instead of just beef over rice.

Korean Beef Bowl vs Bulgogi vs Bibimbap

This bowl borrows the sweet-savory garlic-soy comfort people love in bulgogi-style beef, but it keeps the method simple. Here is the quick difference, so expectations are clear.

Dish What it usually means How this recipe relates
Korean beef bowl A beef and rice bowl with Korean-inspired sauce and toppings. This recipe fits that style directly.
Bulgogi Traditional Korean marinated beef, usually thinly sliced and cooked quickly. This version uses ground beef, so it is faster but not traditional bulgogi.
Bulgogi bowl A rice bowl built around bulgogi or bulgogi-style beef. Add apple or pear and onion to the sauce for a closer bulgogi-style flavor.
Bibimbap Korean mixed rice bowl with vegetables, gochujang, egg, and often beef. Add egg and vegetables for a similar feel, while keeping this recipe simpler.

For traditional bulgogi, use thinly sliced beef and marinate it before cooking. The Smithsonian Center for Folklife and Cultural Heritage describes bulgogi as thinly sliced beef marinated with soy sauce, sugar or honey, sesame oil, garlic, onion, and often Asian pear. That is why the apple-or-pear upgrade works so well in this shortcut version. Read more about bulgogi.

For tonight, ground beef gives you the shortcut: the same garlic-soy-sesame comfort, but in a pan that can be done while the rice is still steaming.

Back to top ↑

How to Brown Ground Beef Without Steaming It

If your beef turns gray or watery, the pan is usually crowded or stirred too soon. Use this checklist before adding sauce so the finished bowl tastes browned, not boiled.

  • Use a wide pan. A crowded skillet traps moisture.
  • Start with medium-high heat. The beef should sizzle when it hits the pan.
  • Do not stir immediately. Let the beef sit for 1–2 minutes so it can form browned edges.
  • Drain excess liquid. Sauce sticks better to browned beef than to watery beef.
  • Add sauce after browning. If sauce goes in too early, the beef simmers before it browns.

Best Rice to Use

Warm white rice gives this bowl its soft, comforting base, especially when the beef is glossy and salty-sweet. Jasmine rice, short-grain rice, or medium-grain rice all work well because they catch the sauce and let the beef stay the main event.
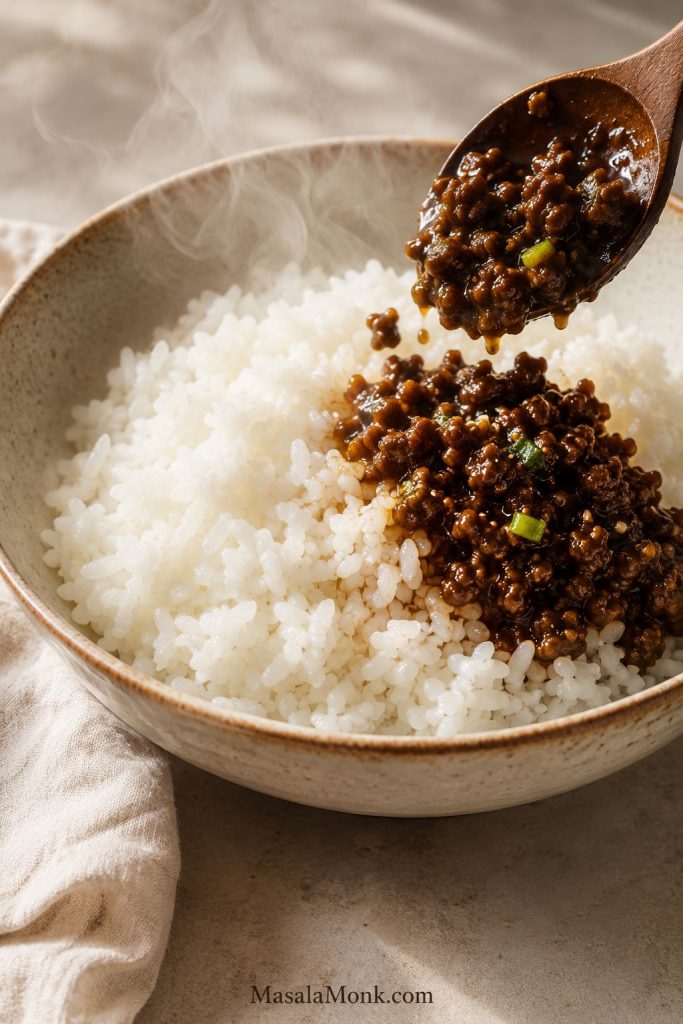
Close-up of fluffy white rice in a ceramic bowl with a small amount of saucy ground beef being added to one side.
Warm rice works as the soft base because it catches the sauce; even a small spoonful of beef can season the grains.
Base Best for
White rice Classic, soft, comforting bowl base.
Jasmine rice Fragrant weeknight rice bowls.
Short-grain rice Stickier bowl texture.
Brown rice Meal prep and nuttier flavor.
Cauliflower rice Low-carb bowls.
Noodles Turning the beef into a noodle bowl.
Lettuce cups A lighter, hand-held version.

If using leftover rice, cool it quickly, refrigerate it in a covered container, and reheat it until steaming hot.

Best Toppings, Sides, and Finishes

The toppings are not decoration here; they are what make a fast bowl feel fresh instead of tired. A little cold crunch, a little acid, and maybe an egg can make ground beef and rice feel like dinner you planned.
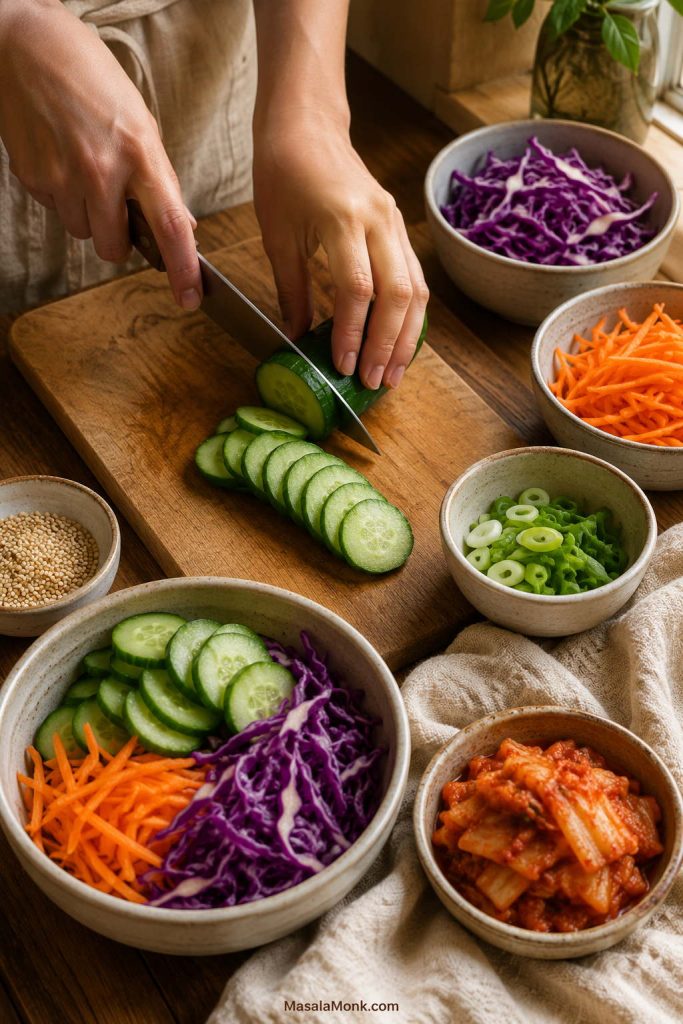
Hands slicing cucumber on a wooden board with shredded cabbage, carrot, scallions, sesame seeds, and kimchi nearby.
Meanwhile, fresh toppings do the work the beef cannot: cucumber cools, kimchi sharpens, cabbage crunches, and scallions wake up each bite.

If you only have rice, beef, scallions, and sesame seeds, you still have a good bowl. Add cucumber, kimchi, cabbage, or pickled onions when you want freshness. Add egg, avocado, noodles, or extra rice when you want it heartier.

Type Options Why it helps
Fresh and crunchy Cucumber, carrot, cabbage, lettuce, scallions Balances the rich beef and keeps the bowl from feeling heavy.
Acidic or fermented Kimchi, quick cucumber topping, pickled onions Adds brightness and cuts through the sweet-savory sauce.
Rich Fried egg, soft-boiled egg, avocado, gochujang mayo Makes the bowl more filling and satisfying.
Simple sides Cucumber salad, cabbage slaw, steamed broccoli, mushrooms, spinach Adds freshness or vegetables without changing the beef.
Flavor finish Sesame seeds, sesame oil, gochugaru, chili flakes Adds aroma, heat, and texture at the end.

The same bowl logic works beyond beef: warm base, protein, sauce, crunch, and a fresh finish. Once that structure is clear, you can turn the beef into rice bowls, lettuce cups, noodle bowls, or meal prep boxes without starting over.

Add an Egg

A fried egg makes the bowl richer and gives it a bibimbap-style feel. The yolk mixes into the rice and beef like a quick sauce. For meal prep, soft-boiled or jammy eggs are easier to make ahead; this air fryer hard-boiled eggs guide is useful if you want soft, jammy, or fully set eggs without boiling water.
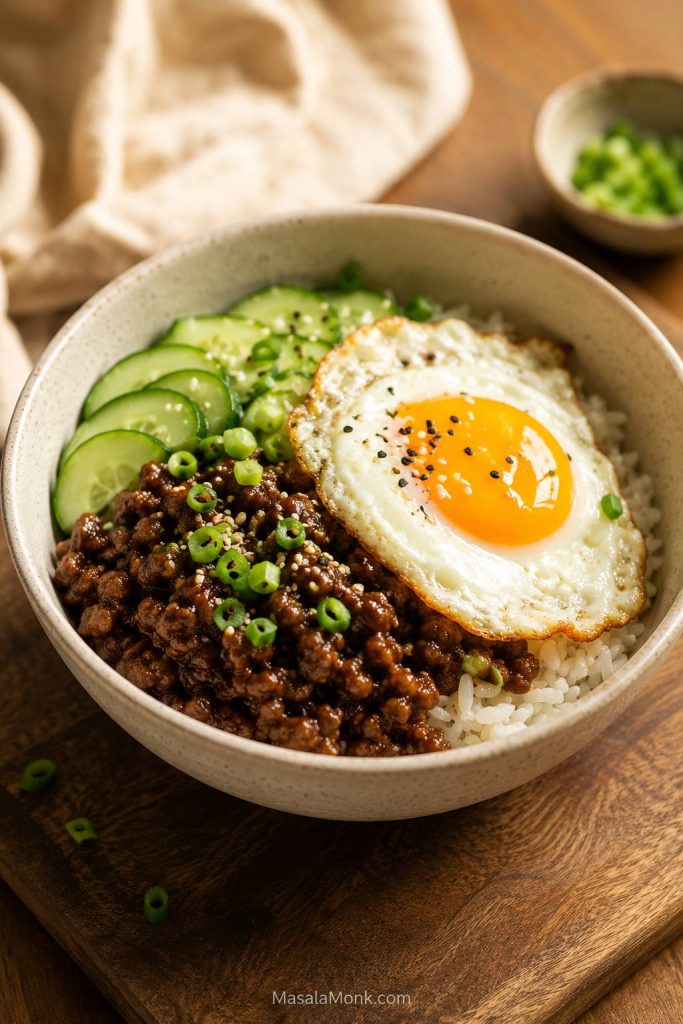
Korean beef rice bowl topped with a fried egg, ground beef, sliced cucumber, scallions, sesame seeds, and white rice.
Add a fried egg when you want the bowl to feel richer; the yolk softens the rice and gives the beef a bibimbap-style finish.

Quick Cucumber Topping

For a fast cucumber topping, mix thinly sliced cucumber with rice vinegar, a pinch of sugar or honey, a pinch of salt, sesame seeds, and optional chili flakes. Let it sit while the beef cooks.
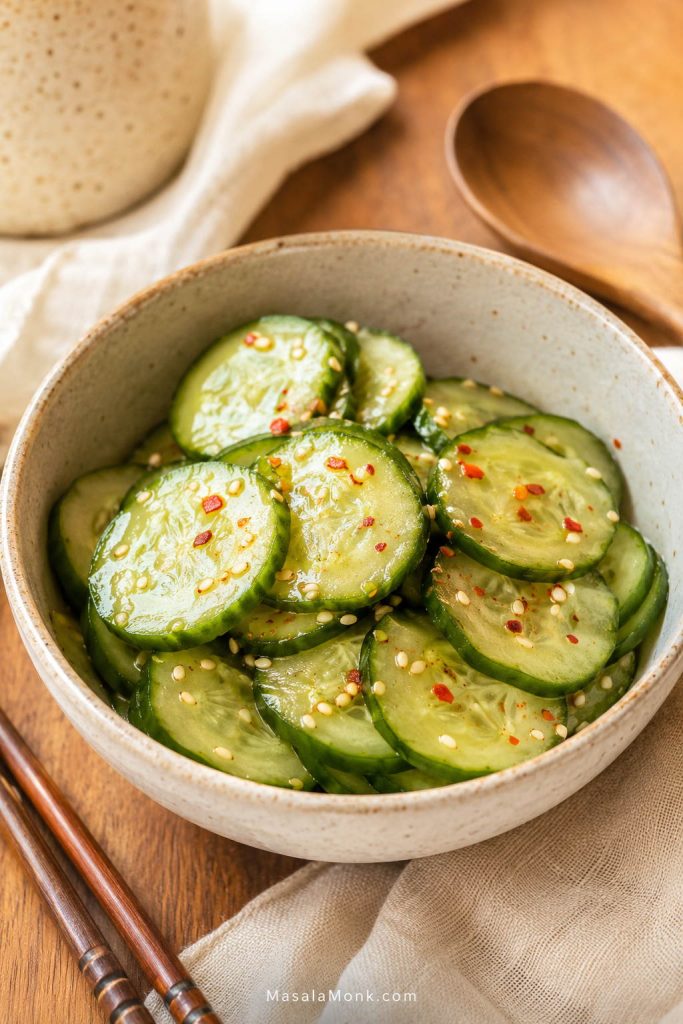
Ceramic bowl of sliced cucumber tossed with sesame seeds, chili flakes, and a glossy vinegar-style dressing.
A quick cucumber sesame topping is the easiest way to add crunch and acid when the beef sauce is sweet, salty, and rich.

It is not a full cucumber salad, but it gives the bowl a fresh, tangy contrast in just a few minutes. For a colder, crunchier side, this cucumber salad recipe works especially well with sweet-savory beef bowls.

Easy Bowl Builds

Use these when you want a quick decision instead of a long topping list. The beef is the same; the bowl changes depending on what you need that night.

Pantry Korean Beef Bowl

Use this build when you need dinner with the fewest toppings: rice, saucy beef, scallions, sesame seeds, and optional chili flakes.
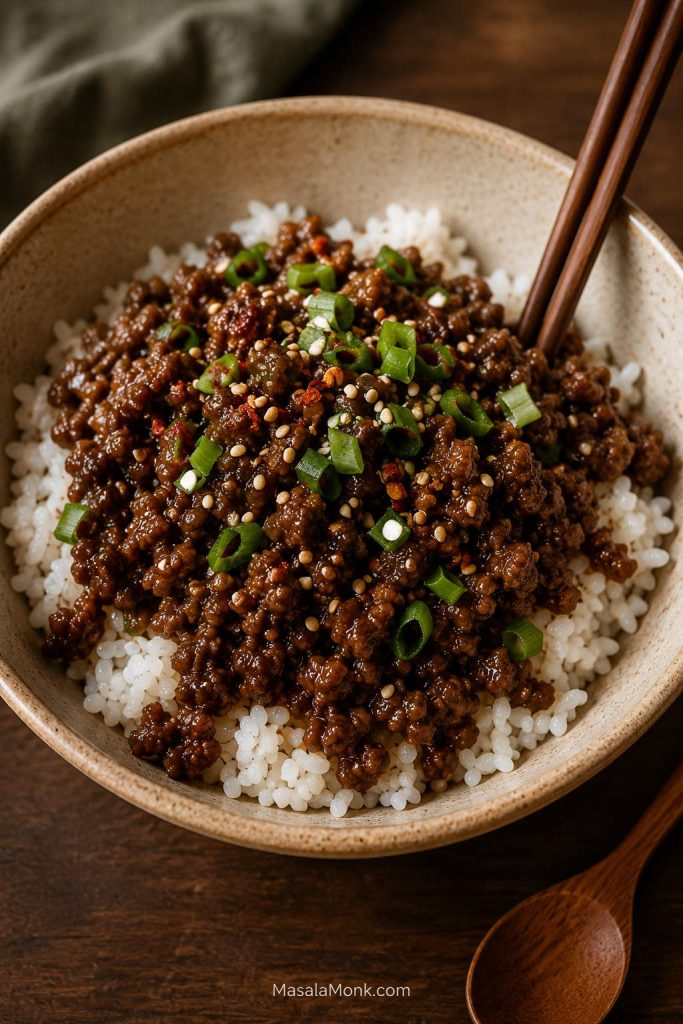
Simple ceramic bowl of white rice topped with ground beef, chopped scallions, sesame seeds, and chili flakes.
The pantry bowl proves the formula works with almost nothing extra: rice, beef, scallions, sesame, and chili flakes are enough for dinner.

Fresh Korean Beef Bowl

Choose this version when the beef tastes rich and you want more crunch: rice, beef, cucumber, carrot or cabbage, kimchi, and scallions.
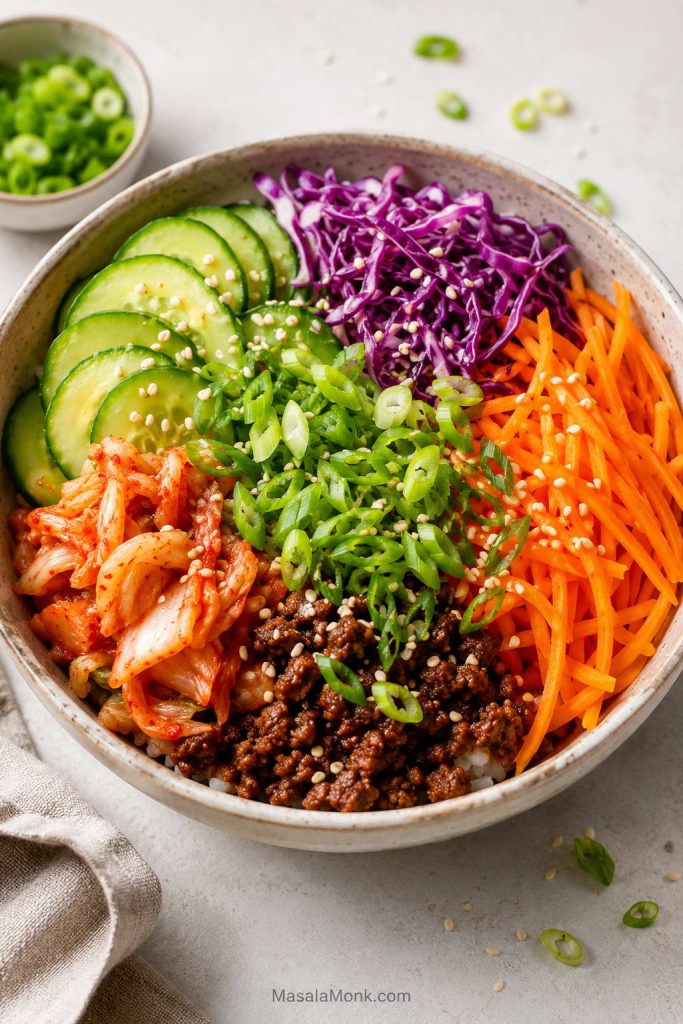
Bright rice bowl with ground beef, sliced cucumber, shredded carrot, purple cabbage, kimchi, scallions, and sesame seeds.
In the fresh bowl build, let cucumber, carrot, cabbage, kimchi, scallions, and sesame take up more space so the saucy beef feels lighter.

Loaded Gochujang Beef Bowl

Make this one when you want heat and fullness: gochujang beef, rice, fried egg, kimchi, cucumber, sesame, scallions, and a light creamy drizzle.
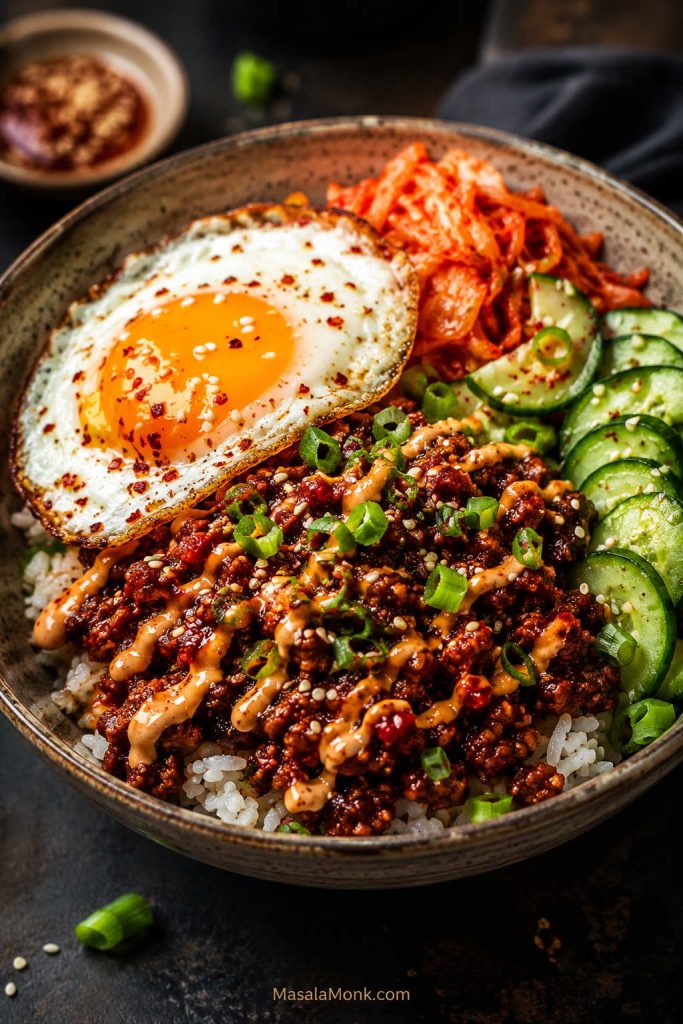
Loaded gochujang beef rice bowl with fried egg, kimchi, cucumber slices, scallions, sesame seeds, creamy drizzle, and white rice.
The loaded version uses gochujang beef, kimchi, cucumber, egg, sesame, scallions, and a light drizzle for a spicier bowl.
Choose your night: In a rush? Use rice, beef, scallions, and sesame. Need freshness? Add cucumber, cabbage, or kimchi. Need more protein? Add egg or extra beef. Need lower carb? Use cabbage, lettuce cups, cucumber, or cauliflower rice.

Other Ways to Use the Beef

Once you have the beef, it can go a lot of places: lettuce wraps, tacos, noodle bowls, fried rice, salad bowls, and meal prep boxes.

Low-Carb Korean Beef Bowl

For a lower-carb version, use cauliflower rice, shredded cabbage, lettuce cups, cucumber, or sautéed greens instead of rice. Keep the same sauce and add enough fresh crunch so the bowl still feels full and satisfying.
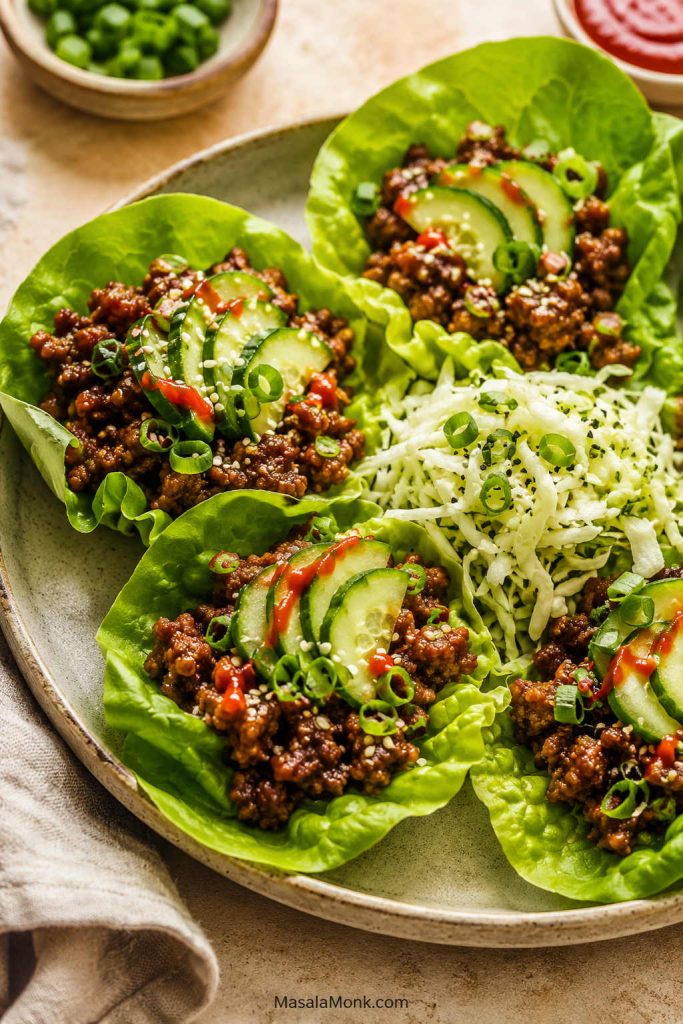
Lettuce cups filled with saucy ground beef, cucumber slices, scallions, sesame seeds, shredded cabbage, and a small red sauce drizzle.
Instead of rice, use lettuce cups or cabbage to keep the same saucy Korean beef flavor with more crunch and fewer carbs.

You can also use ground pork, turkey, or chicken with the same sauce. Pork tastes richer, while turkey and chicken are leaner and may need a little oil. Brown them well, cook them through, then let the sauce reduce until it coats the meat.

For a gluten-free bowl, use tamari or gluten-free soy sauce. Check your gochujang label too, because some brands contain wheat.

Back to top ↑

Meal Prep, Storage, and Reheating

These bowls work well for meal prep, but the best texture comes from storing the hot and fresh parts separately. The beef and rice can reheat together; the cold toppings should stay cold.

The only thing that really suffers in the fridge is the crunch, so keep cucumber, cabbage, kimchi, scallions, and creamy drizzles in separate containers. Add them after reheating so the bowl still tastes fresh.
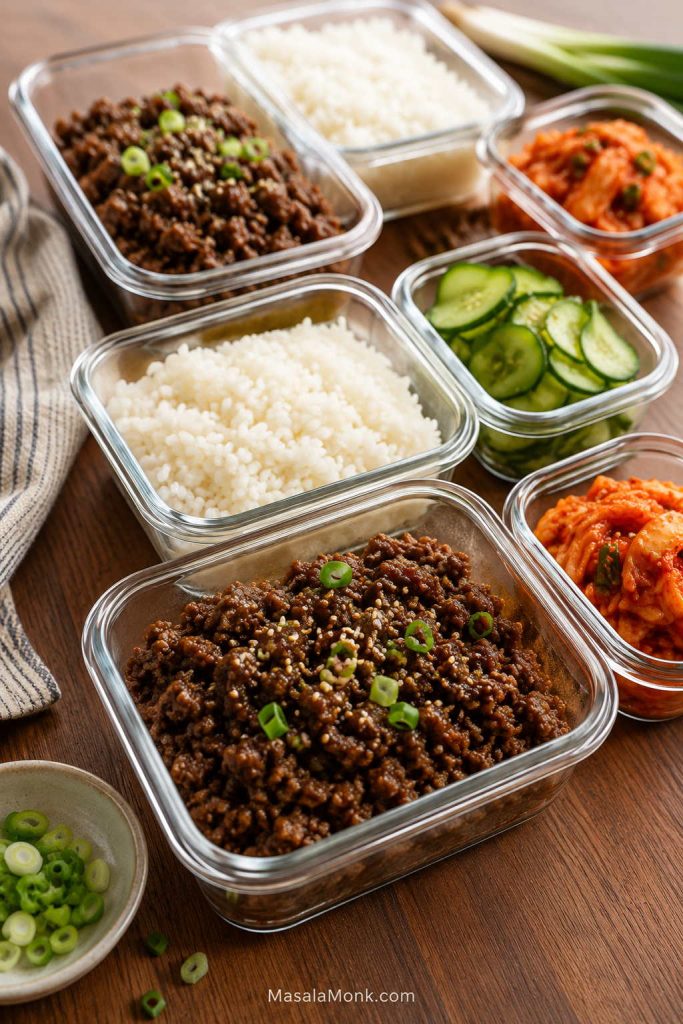
Glass meal prep containers with ground beef, white rice, sliced cucumber, kimchi, scallions, and sesame on a wooden table.
Meal prep works best when beef and rice stay separate from cucumber and kimchi, so reheated bowls still finish crisp.

Best Meal Prep Order

  1. Cook or reheat the rice.
  2. Cook the beef and sauce.
  3. Slice cucumber, carrots, cabbage, and scallions.
  4. Store beef and rice separately from fresh toppings if possible.
  5. Add egg, kimchi, cucumber, and drizzles just before serving.
Part How to store Best note
Cooked beef 3–4 days in an airtight container in the fridge. Reheat with a splash of water to loosen the sauce.
Rice Store separately from fresh toppings. Cool quickly, refrigerate covered, and reheat until steaming hot.
Cucumber and lettuce Keep cold and separate. Add after reheating so they stay crisp.
Egg Cook fresh if fried; soft-boiled eggs can be made ahead. Best added just before serving.
Freezer Freeze cooked beef for 2–3 months. Freeze beef only, not assembled bowls.

Troubleshooting: If Something Feels Off

Most problems come from pan size, beef fat, sauce balance, or simmering time. The good news is that this bowl is easy to fix before it reaches the table.

Problem Why it happened How to fix it
Beef tastes greasy The meat was fatty or the pan had too much rendered fat. Drain excess fat before adding sauce. Use 85/15, 90/10, or leaner beef next time.
Beef is dry The beef was very lean or overcooked. Add a splash of water while reheating, or use 85/15 or 90/10 beef.
Beef steamed instead of browned The pan was crowded or stirred too often. Use a wider skillet, medium-high heat, and let the beef sit before breaking it up.
Sauce is too salty Regular soy sauce was used or the sauce reduced too much. Add more rice, vegetables, water, or a little honey. Use low-sodium soy next time.
Sauce is too sweet Too much sugar or honey. Add rice vinegar, gochujang, or a small splash of soy sauce.
Sauce is watery Too much liquid in the pan. Simmer uncovered until reduced. Drain beef better next time.
Sauce is too thick It reduced too long or gochujang made it dense. Add 1–2 tablespoons water and stir.
Too spicy Too much gochujang or chili. Add more rice, cucumber, honey, or a creamy drizzle.
Bowl tastes flat It needs acid, freshness, or heat. Add cucumber, kimchi, scallions, rice vinegar, or chili flakes.

Nutrition Estimate

Nutrition will change depending on beef fat percentage, rice amount, egg, mayo drizzle, and toppings. As a rough estimate, one bowl made with 90/10 beef, about ¾ cup cooked white rice, sauce, cucumber, scallions, and sesame seeds is around 480–560 calories with about 26–32 g protein.

  • Higher protein: use a generous beef portion or add an egg.
  • Lower calorie: use leaner beef, less rice, more cucumber or cabbage, and skip mayo drizzle.
  • Lower carb: use cauliflower rice, shredded cabbage, lettuce cups, or cucumber as the base.
  • More filling: add egg, avocado, extra vegetables, or brown rice.

Frequently Asked Questions

Can I make Korean beef bowls with ground beef?

Yes. Ground beef is one of the easiest ways to make this bowl fast because it browns quickly and soaks up the soy-garlic-sesame sauce.

Can I use beef mince instead of ground beef?

Yes. Beef mince works just like ground beef here. Use 450–500 g and brown it well before adding the sauce.

Is Korean beef bowl the same as bulgogi?

Not exactly. Traditional bulgogi usually uses thinly sliced marinated beef. This recipe uses ground beef or beef mince with a bulgogi-style sauce, so it is faster and easier for weeknights.

Is this the same as bibimbap?

No. Bibimbap is a Korean mixed rice bowl with vegetables, gochujang, egg, and often beef. This bowl is simpler and centered around saucy ground beef over rice, though egg and vegetables can give it a similar feel.

What sauce goes in a Korean beef bowl?

A simple sauce usually includes soy sauce, brown sugar or honey, garlic, ginger, sesame oil, and rice vinegar. Add gochujang for heat or grated apple and onion for a deeper bulgogi-style sauce.

Do I need gochujang?

No. The bowl still tastes complete with just the mild soy-garlic-sesame sauce. Gochujang adds heat, color, and deeper flavor, but it is not required. For a family-friendly pan, skip it and let people add gochujang or chili at the table.

What can I use instead of gochujang?

Use chili flakes, gochugaru, sriracha-style sauce, or another chili paste you like. The flavor will not be exactly the same, but it will still add heat.

What rice is best for Korean beef rice bowls?

White rice is the easiest, jasmine rice is fragrant, short-grain rice feels stickier, and brown rice works well for meal prep. For a lower-carb bowl, use cauliflower rice, cabbage, or lettuce cups.

What vegetables go with it?

Fresh cucumber, cabbage, carrot, lettuce, and scallions are best when you want crunch. Broccoli, mushrooms, spinach, zucchini, bell pepper, and snap peas work well if you want cooked vegetables. Add tender greens at the end so they do not overcook.

Can I add an egg?

Yes. A fried egg is best when serving right away; soft-boiled or jammy eggs are easier for meal prep. Add the egg after reheating so it stays tender.

How do I make it more like bulgogi?

Add grated apple or Asian pear, grated onion, and optional mirin to the sauce. This gives the ground beef a sweeter, rounder, more bulgogi-style flavor.

Can I make this gluten-free?

Yes. Use tamari or gluten-free soy sauce. Check your gochujang label too, because some brands contain wheat.

Can I make this low-carb?

Yes. Serve the beef over cauliflower rice, shredded cabbage, lettuce, or cucumber instead of rice. Keep the same sauce and add plenty of crunchy toppings.

Can I meal prep it?

Yes. The beef reheats well, so it is a good meal-prep protein. Store beef and rice separately from cucumber, cabbage, scallions, kimchi, egg, and creamy drizzles. Reheat the beef and rice first, then add the cold toppings.

How long does the cooked beef last in the fridge?

Cooked beef keeps for 3–4 days in an airtight container in the fridge.

Can I freeze the beef?

Yes. Freeze the cooked beef for up to 2–3 months. Freeze the beef by itself, not the assembled bowls. Thaw overnight in the fridge and reheat with a splash of water to loosen the sauce.

Final Thoughts

Once you know the sauce ratio, this stops being one recipe and becomes a dinner you can rebuild all week: rice bowl tonight, lettuce wraps tomorrow, noodles for lunch, or meal prep boxes with cucumber and egg.

Try it mild first, then make the next pan yours: more gochujang, more cucumber, extra sesame, a creamy drizzle, or a fried egg on top. Once you make it once, it stops being a recipe you follow and becomes a bowl you know how to build.
Back to top ↑

Posted on 24 Comments

How to Cook Perfect Rice Every Time (Recipe)

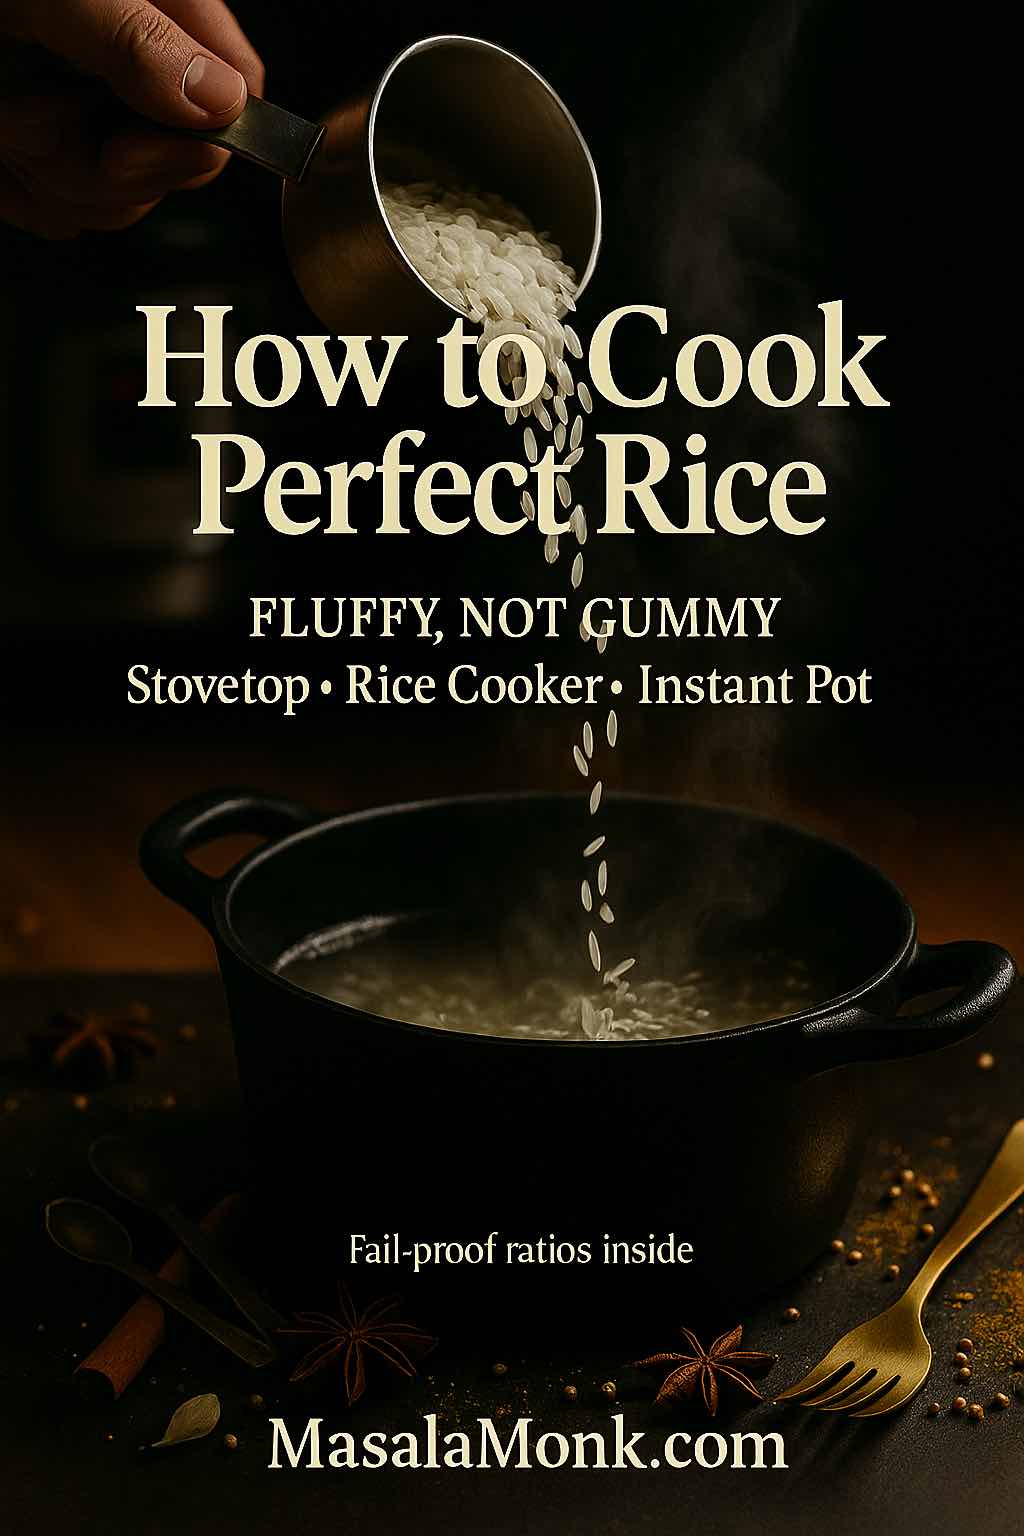
How to cook perfect rice — uncooked white rice pours from a measuring cup into a steaming black pot, with warm spices around; fluffy, not gummy.

Rice ought to be effortless. Nevertheless, a little too much water or a quick peek under the lid can turn a pot of promise into clumpy frustration. This guide shows how to cook perfect rice across methods and varieties—with crystal-clear steps, practical ratios, and why the small moves matter. You’ll learn a base stovetop technique, then branch into basmati, jasmine, sushi, and brown rice; after that, we’ll cover rice cookers and Instant Pots, storing and reheating safely, and turning leftovers into fast, satisfying meals. Along the way, you’ll find carefully chosen links for follow-up reading and technique deep dives woven naturally into the text.

The Baseline: How to Cook Perfect Rice on the Stovetop

If you only remember one method, make it this one. It delivers fluffy, separate grains without gimmicks, and it adapts to most long-grain white rices.

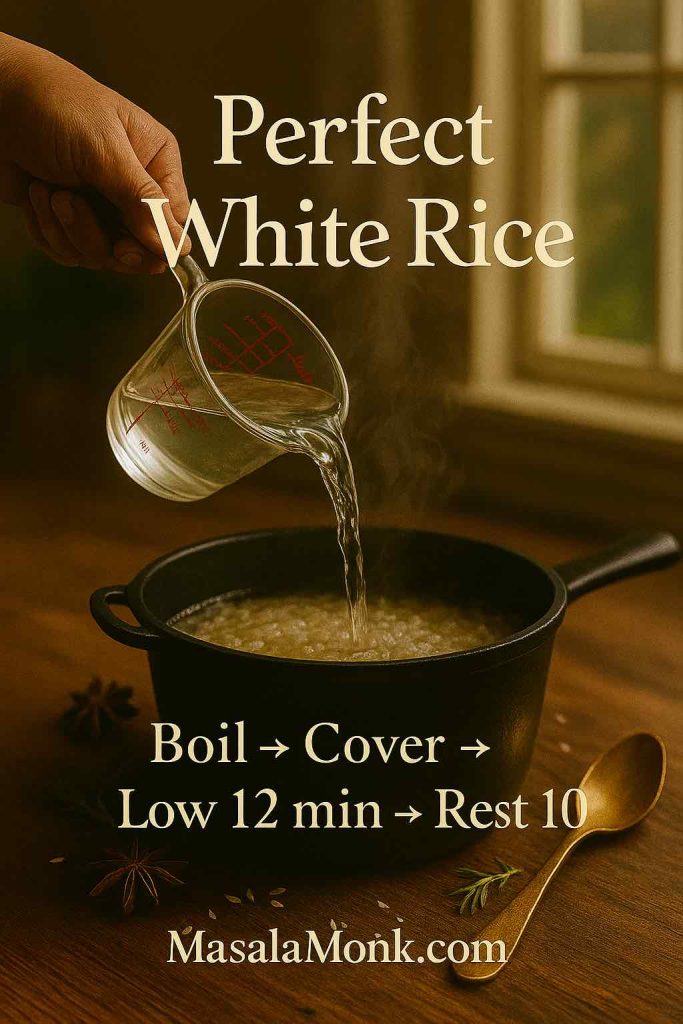
Daylight kitchen: water pours from a glass measuring cup into a pot of rinsed white rice; stovetop method—boil, cover, low 12 minutes, rest 10.
Perfect White Rice (Stovetop): Rinse well, bring to a boil, cover and cook on low for 12 minutes, then rest 10 before fluffing—reliable, fluffy results every time.

You’ll need: 1 cup long-grain white rice, 1½ cups water, a pinch of salt, a heavy pot with a tight lid, and a fork.

  1. Rinse thoroughly. Place the rice in a fine-mesh strainer and rinse under cold water, swishing with your hand until the water runs mostly clear. This removes excess surface starch so grains don’t glue together later.
  2. Measure precisely. For long-grain white rice on the stovetop, use 1½ cups water per 1 cup rice. Add a pinch of salt if you like.
  3. Boil, then cover. Bring the water to a rolling boil, stir in the rice once to break up any clumps, clamp on the lid, and immediately reduce the heat to low.
  4. Simmer gently for 12 minutes. No peeking. Lifting the lid dumps steam and derails even cooking.
  5. Rest for 10 minutes, still covered. The residual heat finishes the centers without overcooking the outer layers.
  6. Fluff and vent. Off the heat, uncover and fluff with a fork. If you want extra-dry, restaurant-style grains, briefly vent another 2–3 minutes.

As an optional flourish, place a clean kitchen towel between the pot and the lid during the rest; it absorbs condensation and prevents drip-back, yielding lighter, drier rice. For a quick visual explanation of this trick, see the concise breakdown of the towel-under-lid rest.

Why this works

Rinsing reduces sticky surface starch; an immediate drop to low heat stabilizes simmering; the undisturbed rest lets steam equalize moisture from the outside in. Moreover, the ratios here are calibrated for typical long-grain white rice; once you navigate specialty varieties, you’ll tweak the numbers a bit, but the underlying logic stays consistent.

Also Read: Homemade Hot Chocolate with Cocoa Powder Recipe

At-a-Glance Cheatsheet for Cooking Perfect Rice

Standard Water Ratios (by volume) for Making Rice by various Methods

Rice typeRinse?Soak?Stovetop water : riceRice cookerInstant Pot (HP)Microwave rice cooker
Long-grain whiteYesNo1.5 : 11.1–1.2 : 1 (or to line)1 : 1, 3–4 min + 10 min NR1.5 : 1, 10–12 min, 5 min rest
JasmineYes10 min (optional)1.25–1.33 : 1~1.1–1.2 : 11 : 1, 3 min + 10 min NR1.5 : 1, 10–12 min
BasmatiRinse very well20–30 min1.5 : 11.2 : 11 : 1, 6 min + 10 min NR1.5 : 1, 12–14 min
Short-grain / SushiRinse until clear20–30 min1.1–1.2 : 1~1.1 : 11 : 1, 5 min + 10 min NR1.25–1.33 : 1, 10–12 min
Brown (long-grain)Rinse20 min (optional)2–2.25 : 11.4–1.5 : 11.25–1.33 : 1, 22–25 min + 10 min NR2 : 1, 20–22 min
Cheat Sheet for How to Cook different types of Rice at Home using various methods & devices.

NR = Natural Release (don’t vent; let pressure drop for the stated time).

Also Read: Peanut Butter Cookies (Classic Recipe & 3 Variations)

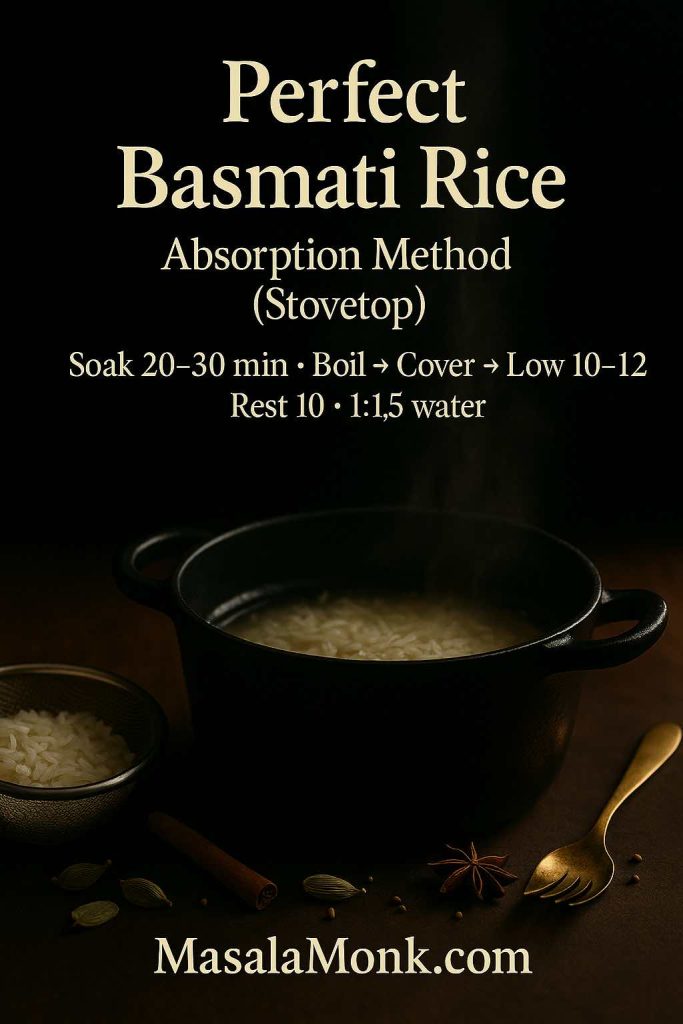
How to Cook Perfect Rice for Basmati

Basmati rewards gentle handling and a short soak. Its hallmark is long, elegant grains that stay separate, so our moves aim to protect structure rather than chase stickiness.

Black enamel pot with steam and soaked basmati; soak 20–30 min, boil → cover → low 10–12, rest 10; 1:1.5 water.
Perfect Basmati Rice: Rinse well, soak 20–30, drain thoroughly, boil → cover → low 10–12, rest 10. Ratio 1 cup : 1½ cups water.
  1. Rinse very well until the water is almost clear—this usually takes 2–3 changes.
  2. Soak 20–30 minutes. Hydrating the core ensures the grains elongate without bursting. Drain thoroughly.
  3. Use 1½ cups water per cup of rice on the stovetop. Bring to a boil, cover, reduce to low, and simmer 10–12 minutes.
  4. Rest 10 minutes covered, then fluff. For even airier grains, spread the rice on a tray for 2–3 minutes to vent.

Beyond texture, many cooks pick basmati for its gentler impact on blood sugar compared with some other white rices. If that angle matters to you, explore a compact primer on basmati rice GI and nutrition and a broader look at GI vs GL across rice types. Because context helps, you might also skim a practical guide to reducing the glycemic impact of rice using cook-cool-reheat strategies you can fold into weekly meal prep.

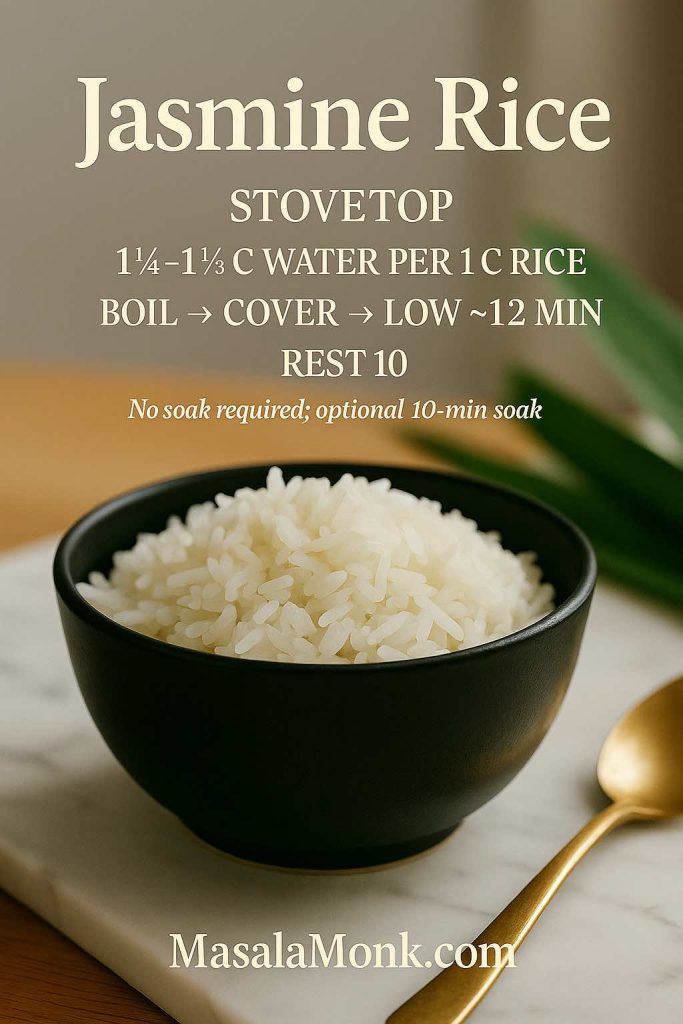
How to Cook Perfect Jasmine Rice

Jasmine sits between fluffy and plush. It wants slightly less water than standard long-grain; too much and it edges toward soft and clingy.

Black enamel pot with steaming jasmine rice; no soak needed; 1¼–1⅓ water; boil, cover, low ~12, rest 10.
Jasmine Rice (Stovetop): Slightly less water than standard long-grain keeps jasmine plush—not soggy.
  • Rinse until the water mostly clears; an optional 10-minute soak can soften the core.
  • Measure 1¼–1⅓ cups water per cup of rice, depending on how dry or tender you prefer it.
  • Cook like the baseline: boil → cover → low simmer ~12 minutes10-minute rest.

For a ratio-first discussion that aligns with testing across brands, skim this practical stovetop jasmine/white rice method. It mirrors the idea that jasmine benefits from slightly less water than old “2:1” rules of thumb.

Also Read: Green Tea Shot with Jameson | Recipe & 10 Variations

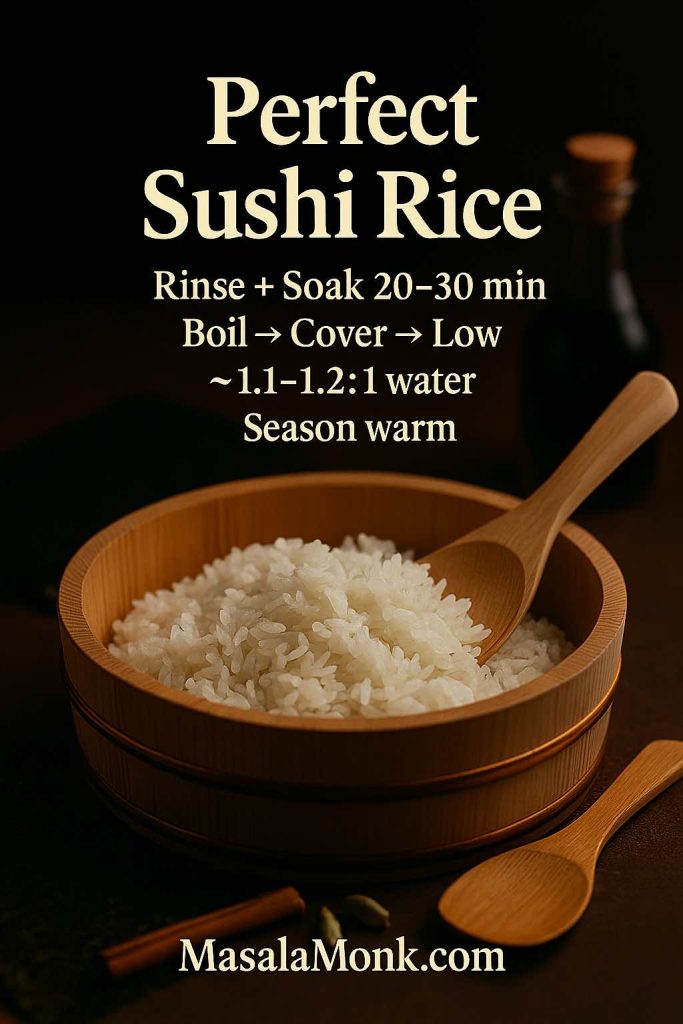
How to Cook Perfect Rice for Sushi (Short-Grain)

Sushi rice is meant to cling. Nevertheless, the goal is glossy and supple—not mushy—so gentle handling and proper seasoning matter.

Hangiri filled with glossy sushi rice; rinse and soak 20–30 minutes, boil then cover and cook on low with ~1.1–1.2:1 water; rest 10 minutes and season warm.
Perfect Sushi Rice: Rinse, soak 20–30 min, cook with ~1.1–1.2 : 1 water, rest 10, then season while warm for shine and gentle cling.
  1. Rinse until the water is nearly clear to remove powdery starch.
  2. Soak 20–30 minutes; drain. This gives the short grains an even, tender finish.
  3. Use ~1.1–1.2 : 1 water to rice on the stovetop or your cooker’s dedicated “sushi” line.
  4. Cook, rest 10 minutes, then season while warm with sushi vinegar (rice vinegar plus sugar and salt).
  5. Fold, don’t mash. Fan as you cut and turn the rice to keep grains intact and shiny.

For well-illustrated steps and classic proportions, follow a reliable reference like Just One Cookbook’s sushi rice method. And because short-grain techniques differ from long-grain instincts, returning to photos mid-process can be surprisingly helpful.

Also Read: Béchamel Sauce for Lasagna: Classic, Vegan & Ricotta Sauce Recipe

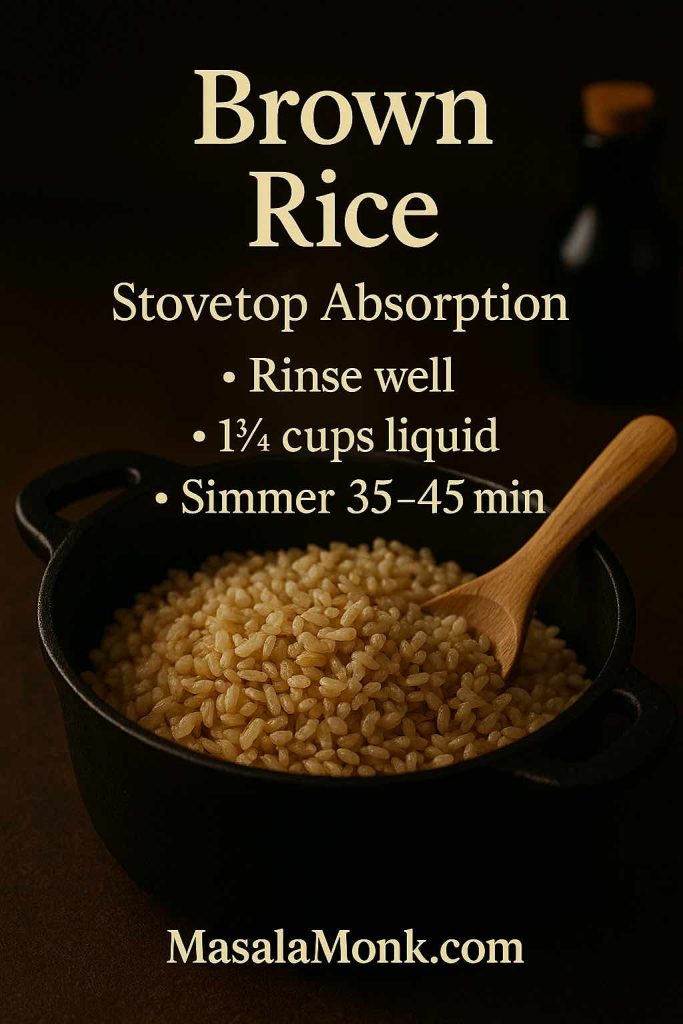
How to Cook Perfect Brown Rice (Tender Without the Chalk)

Brown rice asks for more water and time because the bran and germ slow hydration. Still, done right, it’s deeply satisfying—nutty, chewy, and never chalky.

Cast-iron pot of cooked brown rice; stovetop absorption method—rinse, 2–2¼ cups water per cup rice, boil then cover and low simmer 35–45 minutes, rest 10.
Brown Rice (Stovetop): Rinse well, use 2–2¼ : 1 water, boil → cover → low simmer 35–45, then rest 10 for nutty, tender grains.
  • Stovetop: Use 2–2¼ : 1 water to rice. Bring to a boil, cover, and simmer 35–45 minutes until the water is absorbed; rest 10 minutes before fluffing.
  • Instant Pot: Measure 1.25–1.33 : 1 water to rice. Cook 22–25 minutes on high pressure, then let it naturally release for 10 minutes before venting.

If nutrition is part of your decision tree, it’s worth reading the FDA’s consumer resources on arsenic in rice and rice products and the agency’s technical risk assessment overview. Among practical takeaways, an excess-water method (boil in plenty of water, then drain) can reduce inorganic arsenic—a trade-off to consider if that aligns with your health priorities. Meanwhile, if you’re comparing grains for weekly menus, this side-by-side look at quinoa vs rice is a handy complement.

Also Read: Crock Pot Lasagna Soup (Easy Base + Cozy Slow-Cooker Recipes)

Rice Cookers Demystified

A good rice cooker is like cruise control: set it and focus on something else. Still, understanding its logic helps you get the most out of it.

  • Trust the lines. Most cookers calibrate for specific varieties; fill to the marked lines instead of relying on generic kitchen ratios. If you want brand-specific guidance, browse Zojirushi’s concise white rice instructions or the broader manuals page.
  • Rinse and drain well. Excess water clinging to the grains can skew the cooker’s assumptions.
  • Let it rest. When the switch flips to “warm,” give the rice 10 minutes before opening; this small pause improves texture noticeably.
  • Fluff and vent briefly. Loosen the rice, then leave the lid ajar for a minute or two for drier, separate grains—especially useful when the next stop is a stir-fry.

Even in the cooker, basmati appreciates a 20–30-minute soak and jasmine benefits from slightly less water than standard long-grain. Sushi rice, on the other hand, thrives when you follow your model’s dedicated short-grain settings.

Also Read: Cottage Cheese Lasagna Recipe | Chicken, Spinach, & Ricotta

Instant Pot and Pressure Cooker Shortcuts

Pressure cookers shine when you want predictability. Because they operate in a sealed environment, small ratio changes matter; nevertheless, the results are consistent once dialed in.

  • White rice (long-grain or jasmine): 1:1 water to rice, 3–4 minutes on high pressure, 10-minute natural release.
  • Basmati: 1:1, 6 minutes on high, 10-minute natural release.
  • Short-grain for sushi: 1:1, 5 minutes on high, 10-minute natural release.
  • Brown: 1.25–1.33:1, 22–25 minutes on high, 10-minute natural release.

For model-specific variations, it’s wise to refer to the manufacturer’s documentation; start at the Instant Pot manuals hub and, if you want a baseline reference recipe, browse an official white rice example by Instant Pot. Because factors like altitude and personal texture preference play a role, adjust subsequent batches a tablespoon or two of water at a time rather than reinventing ratios from scratch.

Also Read: How to Make Churros (Authentic + Easy Recipe)

Texture Control: From Feather-Light to Just-Sticky-Enough

Understanding what affects texture allows you to steer the outcome. Consider these levers:

  • Rinse level. More rinsing = more separation. Minimal rinsing = more cling. Consequently, long-grain white benefits from thorough rinsing; sushi demands cleaning but then recruits seasoning to achieve stickiness.
  • Soaking. Basmati and sushi gain even doneness from soaking; jasmine may soften slightly with a short soak but doesn’t require it.
  • Agitation. Stir only once after adding rice to boiling water; further agitation releases starch, which binds grains.
  • Lid discipline. Steam is your friend; lifting the lid mid-cook vents heat, lengthens cooking, and risks uneven texture.
  • Rest time. A 10-minute rest evens moisture and turns “good” rice into “great” rice. Additionally, a towel-under-lid rest (during the off-heat phase) curbs condensation and keeps the top layer from turning soggy—see the towel trick for a quick demo.

Also Read: How to Cook Bacon in the Oven (Crispy, No-Mess, Crowd-Ready Recipe)

Scaling Up Without Guesswork

Perhaps you’re cooking for a crowd. Fortunately, the math scales cleanly as long as your pot is wide enough and the heat stays gentle.

  • 1 cup rice → 1½ cups water (stovetop long-grain white)
  • 3 cups rice → 4½ cups water
  • 4 cups rice → 6 cups water

For jasmine, aim for 1¼–1⅓ : 1; for basmati, 1½ : 1 with a soak; for brown, 2–2¼ : 1 on the stove or 1.25–1.33 : 1 under pressure. Rather than leap to big changes when scaling, adjust by 2–3 tablespoons of water per cup of rice after your first larger batch to match your stove, pot, and preference.

Also Read: French Toast Sticks (Air Fryer + Oven Recipe) — Crispy Outside, Custardy Inside

Storing, Cooling, and Reheating Safely

Rice is easy to make ahead, but it deserves the same diligence you’d give to chicken or soup. Cool it quickly, refrigerate promptly, and reheat thoroughly.

  • Cool fast. Spread hot rice on a sheet pan to release steam; once warmth dissipates, pack into shallow containers.
  • Refrigerate within 1–2 hours. The quicker you chill, the safer your leftovers.
  • Reheat to 165°F/74°C. In the microwave, sprinkle a tablespoon of water over each cup of rice, cover, and heat until piping hot; on the stovetop, add a spoonful of water and steam briefly. For authoritative guidance, bookmark the USDA’s page on leftovers and safe reheating.

If you’re exploring broader nutrition or contaminant questions around rice varieties and cooking methods, take a moment with the FDA’s resources on arsenic in rice and products. They’re balanced, practical, and help you decide when to use absorption versus excess-water techniques.

Also Read: 10 Best Chicken Sandwich Recipes (BBQ, Parm, Buffalo & More)

How to Cook Perfect Rice on Busy Weeknights

Life happens. Even so, you can still put excellent rice on the table without hovering over a pot.

  • Use the Instant Pot for white rice when you’re juggling multiple dishes. Measure 1:1, set 3 minutes on high, and walk away; dinner’s starch will be ready right as you need it.
  • Batch-cook basmati on Sunday. Soak, cook, fluff, cool quickly, and refrigerate. Basmati reheats beautifully and still eats light.
  • Lean on a rice cooker for hands-off consistency. Follow the model’s lines, then give it a 10-minute warm rest before fluffing. If you’re new to your machine, the brand’s manuals page is a shortcut to specifics.

Meanwhile, finishers make weeknight rice feel special: a pat of butter or ghee, a thread of olive oil, or a splash of toasted sesame oil right before serving. Even a few slices of ginger bloomed in oil at the start can transform a plain bowl.

Also Read: 10 Best Espresso Martini Recipe Variations (Bar-Tested)

Flavor Boosters and Simple Add-Ins

Before adding water, briefly warm 1 teaspoon oil or ghee in the pot and bloom aromatics—sliced garlic, crushed cardamom, or a bay leaf. During the rest, fold in chopped herbs (cilantro, scallions, or dill) or a handful of frozen peas for color. As you explore, keep a few ideas in your back pocket:

  • For an almost effortless rice bowl, toss hot grains with a splash of balsamic and olive oil, then crown with roasted vegetables. It’s a fast route to a satisfying dinner when time is scarce.
  • When a craving for dessert strikes, pivot to a silky Thai-style treat using coconut milk and ripe fruit—this approachable walkthrough on mango + coconut milk turns pantry items into a crowd-pleaser: creamy mango-coconut how-to. If you want a festival-worthy finish with sticky rice, try the kitchen’s fully detailed authentic mango sticky rice recipe.

Also Read: Macaroni & Cheese Recipe: Creamy Stovetop, Baked & Southern

Leftovers You’ll Look Forward To

Great rice rarely goes to waste, but planning for leftovers turns tomorrow’s meal into an easy win.

Same-Day Fried Rice (When You Just Cooked the Rice)

When fried rice is on tonight’s menu, lower the water for your white rice by 2 tablespoons per cup, then spread the cooked rice on a tray and chill it for 15–20 minutes. This brief drying step helps the grains sear rather than steam in the pan. For a crisp, minimal baseline, use a straightforward, wok-friendly technique like this classic egg fried rice walkthrough. If you prefer a vegetable-forward version loaded with texture, Kenji’s method-first approach shows how to balance heat, oil, and moisture for vivid results: easy vegetable fried rice.

Also Read: Vegan French Toast: 6 Easy Recipes (Pan, Air Fryer, GF & High-Protein)

Day-Old Transformations

Day-old rice is ideal for fried rice, obviously, yet it also shines in croquettes and stuffed vegetables. For a snack that feels special, use those leftovers to make crisp, melty arancini; the step-by-step guide to shaping, breading, and frying is here: turn leftover rice into arancini. Serve with a quick marinara or a garlicky yogurt dip and you’ve got a win either way.

How to Cook Perfect Rice for Meals that Fit Your Goals

If you’re mindful of post-meal energy or simply tracking macros, small technique choices can help. Cooling and reheating can modestly increase resistant starch, while your choice of variety matters too. For a practical, non-dogmatic overview that connects kitchen moves to outcomes, start with this field guide to reducing the glycemic impact of rice. For a zoomed-out look across varieties and contexts, the side-by-side on GI vs GL for common rices is useful; pair it with the FDA resources on arsenic in foods if you’re choosing methods with both texture and safety in mind.

Also Read: Homemade Electrolytes for Fasting: 7 Precise Recipes

Frequently Used Ratios and Timings, Explained in Plain Language

Because recipes scatter numbers everywhere, let’s unify the essentials so you can adjust confidently.

  • Long-grain white (stovetop): 1.5 : 1 water → 12-minute simmer, 10-minute rest. This yields about 3 cups cooked per cup raw.
  • Jasmine (stovetop): 1¼–1⅓ : 1 water → 12 minutes, 10-minute rest; tenderness sits between fluffy and plush. A thorough overview appears in this tested stovetop ratio piece.
  • Basmati (stovetop): 1.5 : 1 water after a 20–30-minute soak10–12 minutes, 10-minute rest; texture is light and separate. For health context, see the basmati GI briefing.
  • Sushi/short-grain: ~1.1–1.2 : 1 water after a 20–30-minute soakcook + 10-minute rest, then season gently; technique photos here: sushi rice guide.
  • Brown (Instant Pot): 1.25–1.33 : 1 water → 22–25 minutes high pressure, 10-minute natural release; for stovetop, plan 2–2¼ : 1 water and 35–45 minutes simmer time.
  • Rice cooker: Follow the unit’s water lines for your variety; it’s the design assumption. If you’re curious how manufacturers expect you to use those markings, peek at Zojirushi’s white rice instructions and their manuals page.

Also Read: Pumpkin Spice, Your Way: Master Blend, Variations & Real-World Recipes

Troubleshooting: Fix It Today, Improve It Tomorrow

Even experienced cooks occasionally miss by a little. Here’s how to correct in the moment and calibrate for next time.

  • Too wet or soft? You likely used too much water or lifted the lid. Spread the rice on a tray and let it vent for a few minutes; next time, reduce the water by 2–3 tablespoons per cup and resist peeking.
  • Undercooked in the center? Sprinkle over 2–4 tablespoons of hot water, cover, and cook on the lowest heat for 3–5 minutes; extend the rest before fluffing.
  • Starchy clumps? Rinse more thoroughly and avoid stirring after the initial boil. If you want extra separation, adopt the towel-under-lid rest technique—again, the quick explainer for that move is here: how the towel rest helps.
  • Scorched base? The heat was too high or the pot too thin. Use a heavier pan, lower the flame, and keep ratios consistent.
  • Basmati breaking? The soak ran too long or you stirred during the simmer. Keep the pre-cook soak to 20–30 minutes, then handle gently.

Because kitchens vary—burners, pots, even the mineral content of your water—log your favorite ratio the first time you nail it. From then on, you’re just repeating success.

Also Read: Homemade & DIY Coffee Creamer: 16 Flavor Recipes (French Vanilla, Pumpkin Spice & More)

How to Cook Perfect Rice, Then Make It Sing

Mastering the basics is liberating. Once you can produce perfect rice without thinking, it becomes a canvas for flavor.

  • Ghee and cumin (jeera rice). Warm a spoon of ghee, bloom cumin seeds until fragrant, then add cooked rice to coat.
  • Ginger-garlic steam. Start the pot with a few slices of ginger and a crushed clove of garlic before adding water; the aroma perfumes the whole batch.
  • Pandan or bay leaf. Add either to the pot and retrieve before fluffing for a subtle, sophisticated note.
  • Coconut finish. Fold a splash of coconut milk into hot rice for a plush side that loves grilled fish and veggies.
  • Curd rice twist. For cooling comfort, stir yogurt, mustard seeds, and a little tempering into leftover rice; if you want a vivid variation, the beet-brightened take is here: curd rice with beetroot.

Meanwhile, when you want a sweet ending, keep it simple: ripe mango, creamy coconut milk, and warm rice are an unbeatable trio; the pantry-friendly method is spelled out in this mango + coconut milk guide, and for a celebration-level classic, make the authentic mango sticky rice.

Also Read: Classic vs. Authentic Alfredo: 5 Essential Recipes

Putting It All Together

At this point, how to cook perfect rice should feel far less mysterious. Start with the baseline stovetop method—rinse, 1.5 : 1 water, 12-minute simmer, 10-minute rest—and you’ll win most nights. For basmati, soak briefly and keep the water at 1.5 : 1. If its jasmine, dial water down to 1¼–1⅓ : 1. For sushi, rinse thoroughly, soak, and season gently after cooking. And when cooking brown, commit to more time or use pressure for convenience. When using machines, trust rice cooker lines and lean on manufacturer documents like Zojirushi’s manuals or the Instant Pot manuals hub. For nuanced texture, adopt the towel-under-lid rest demonstrated in the towel trick explainer.

Finally, keep your leftovers safe and delicious: cool quickly, refrigerate promptly, and reheat to 165°F/74°C, following the USDA’s guidance on leftovers and safe reheating. Then have some fun—turn a bowl into egg fried rice with this reliable wok-side walkthrough, go veg-heavy with Kenji’s stir-fry method, or roll day-old grains into golden arancini.

When a staple tastes this good and works this reliably, dinner stops being a question mark. It becomes a rhythm: measure, simmer, rest, fluff—and enjoy.

Also Read: Lemon Drop Martini Recipe (Classic, 3-Ingredient, & More)

FAQs

1) How to cook perfect rice on the stove without it getting mushy?

Rinse until the water runs mostly clear, then use a precise water-to-rice ratio (typically 1.5:1 for long-grain white). Bring to a boil, cover, reduce to low, simmer about 12 minutes, and let it rest covered for 10 minutes before fluffing. Consequently, grains stay separate and tender.

2) What is the best water-to-rice ratio for white rice?

Generally, long-grain white rice thrives at about 1.5 cups water per 1 cup rice on the stovetop. For slightly drier rice, reduce the water by 2–3 tablespoons per cup; for softer results, add the same amount. Thus, you can fine-tune texture to taste.

3) How long does it take to cook rice?

For white or jasmine rice on the stove, expect roughly 12 minutes of gentle simmering plus a 10-minute rest. Brown rice usually needs 35–45 minutes on the stove. Meanwhile, pressure cooking shortens the timeline considerably.

4) How to cook perfect rice in a rice cooker?

Rinse, drain well, and fill water to your cooker’s variety line (or use the same ratios you’d use on the stove). Start the cycle, then allow a 10-minute warm rest before you open. Afterwards, fluff and briefly vent for drier, separate grains.

5) How to cook perfect rice in an Instant Pot or pressure cooker?

Use a 1:1 ratio for most white rices (3–4 minutes high pressure, 10 minutes natural release). For basmati, still 1:1 but about 6 minutes high; for brown, 1.25–1.33:1 and 22–25 minutes high. Importantly, let pressure drop naturally before venting for the best texture.

6) How much water for jasmine rice?

Jasmine prefers slightly less water than standard long-grain: about 1¼–1⅓ cups water per cup of rice on the stovetop. Moreover, an optional 10-minute soak softens the core without making it soggy.

7) How to make basmati rice fluffy and long?

Rinse thoroughly, soak 20–30 minutes, drain well, then cook at roughly 1.5:1 water to rice. Keep heat low and the lid tight; rest 10 minutes. Consequently, grains elongate beautifully without breaking.

8) Do I need to soak rice?

Not always. Basmati and sushi benefit from soaking (20–30 minutes) for even doneness. Conversely, most long-grain white and jasmine work fine without soaking, though a brief soak can soften edges slightly.

9) How to cook perfect rice for sushi (short-grain)?

Rinse until nearly clear, soak 20–30 minutes, drain, then use about 1.1–1.2:1 water. Cook gently, rest 10 minutes, and season warm rice with a vinegar mixture while folding—never mashing. Hence, you get glossy, clinging grains.

10) How to keep rice from sticking together?

Rinse thoroughly to remove surface starch, avoid stirring once it returns to a simmer, and let it rest before fluffing. Additionally, use a heavy pot and steady low heat so the bottom doesn’t scorch and glue the batch.

11) How to make fluffy rice every time?

Measure accurately, keep the simmer gentle, and give that 10-minute covered rest. Likewise, a quick post-cook vent (lid off 2–3 minutes) drives off excess steam for lighter, more separate grains.

12) How much water for 1 cup, 3 cups, or 4 cups of rice?

For long-grain white on the stove, start at 1.5:1. That’s 1.5 cups water for 1 cup rice; 4.5 cups water for 3 cups rice; 6 cups water for 4 cups rice. Notably, different varieties may require small adjustments.

13) How to cook perfect brown rice that isn’t chalky?

Use 2–2¼ cups water per cup on the stove (35–45 minutes simmering), or 1.25–1.33:1 in a pressure cooker (22–25 minutes high). Afterward, rest 10 minutes before fluffing to let moisture even out.

14) Can I make rice in the microwave?

Yes. In a microwave-safe bowl or microwave rice cooker, use about 1.5:1 for white rice. Cook on high 10–12 minutes for 1 cup (your microwave may vary), rest 5 minutes covered, then fluff. Remarkably convenient for small batches.

15) How to cook perfect rice for fried rice the same day?

Cook white rice with 2 tablespoons less water per cup, spread it on a tray, and chill 15–20 minutes to dry. Thereafter, stir-fry over high heat with minimal moisture so the grains sear rather than steam.

16) Why is my rice gummy or clumpy?

Usually, either insufficient rinsing, too much water, or stirring after boiling. Reduce water slightly, rinse more, and avoid agitation during the simmer. Ultimately, a calm pot yields cleaner texture.

17) Why is the bottom of my rice pot scorched?

Heat was too high, the pot too thin, or water too low. Next time, use a heavier pot, lower the flame, and follow proven ratios. Furthermore, never lift the lid during the cook, which can trigger uneven heating.

18) How to reheat rice so it tastes fresh?

Add a spoonful of water, cover, and steam until piping hot (microwave or stovetop). Break up clumps gently with a fork halfway through. Consequently, grains regain moisture without turning soggy.

19) How to boil rice vs. steam/absorption—what’s the difference?

Boiling in excess water and draining offers forgiving doneness but slightly less aroma retention; absorption (our standard method) locks flavor in the pot and produces fluffier texture. Nevertheless, both work—choose based on preference and variety.

20) How to cook perfect rice if my tap water is hard or soft?

Hard water can firm grains; soft water can push them toward mushy. Therefore, if your batches are consistently too firm, add a tablespoon or two of extra water per cup; if too soft, subtract the same amount.

21) How to make plain rice taste great without heavy sauces?

Bloom a teaspoon of ghee or oil with aromatics (garlic, ginger, cumin, bay, or pandan) before adding rice and water. Then, finish with butter or toasted sesame oil and a pinch of salt. Instantly more character, minimal effort.

22) Is “balsamic rice” the same as basmati rice?

Often it’s a typo or mishearing of “basmati.” However, if you literally want balsamic-glazed rice, toss hot cooked white rice with a little balsamic and olive oil, then season. Simple, bright, and surprisingly good.

23) How to cook perfect rice when doubling or tripling a recipe?

Scale water linearly (keep the same ratio) and use a wider pot so steam circulates evenly. Keep the simmer gentle and extend the rest by a couple of minutes. Consequently, larger batches finish evenly without soggy centers.

24) Should I salt the water for rice?

Yes—seasoning the water yields rice that tastes good on its own. Start with about ½ teaspoon fine salt per cup of raw rice. Alternatively, swap some water for light broth if you prefer layered flavor.

25) How to store cooked rice safely?

Cool quickly in shallow containers, refrigerate promptly, and eat within a few days. Reheat until steaming hot. As a result, you keep texture appealing while maintaining good food safety habits.

26) How to cook perfect rice when I want it extra dry?

After the 10-minute rest, fluff and leave the lid off for 2–3 minutes to vent steam. Alternatively, reduce water by 1–2 tablespoons per cup of rice next time. Subtle tweaks deliver a distinctly lighter bite.

27) What’s the difference between jasmine and basmati in cooking?

Jasmine leans softer and uses a touch less water; basmati prefers a soak and keeps a firmer, longer grain with a standard 1.5:1 ratio. Consequently, match your technique to the variety for best results.

28) How much rice per person should I cook?

As a side, plan ¼–⅓ cup raw rice per person (about ¾–1 cup cooked). For rice-centric meals or big appetites, move toward ½ cup raw per person. Naturally, leftovers are easy to repurpose.

29) How to cook perfect rice with oil or butter—before or after?

Either works. A teaspoon of fat before cooking blooms aromatics and improves mouthfeel; a small knob after cooking adds gloss and flavor. Nevertheless, keep amounts modest so grains don’t turn heavy.

30) Can I skip rinsing?

You can, but expect more stickiness, especially with long-grain white. For fluffy, non-sticky results, rinsing pays off. Even so, for sushi, you’ll still rinse—then you’ll deliberately add seasoning to achieve cling by design.