

A good bowl of homemade chicken soup has a golden, savory broth that tastes unmistakably of chicken, tender pieces of meat, and carrots and celery soft enough for the spoon without disappearing into it. It works as dinner with a piece of bread, but it is just as welcome in a smaller bowl when someone does not feel like eating much.
This is the simple brothy kind: no noodles, rice, cream or condensed soup in the base recipe. Bone-in chicken builds the broth in the same pot, and the vegetables go in later so they keep some texture. You do not need to make stock the day before.
If noodles are what you came for, the Chicken Noodle Soup Recipe has a separate method for the broth and noodle timing.
Before You Add More Water
For 40–48 oz / 1,130–1,360 g bone-in chicken thighs, start with 64 fl oz / 1,900 ml water. Add a little more only if needed to bring the liquid most of the way up the chicken.
An empty-looking stockpot is not a problem. Diluted broth is.

Chicken Soup Recipe
The chicken cooks first, the vegetables get a shorter simmer, and the meat returns only long enough to heat through. That order helps the chicken stay tender while the carrots and celery retain some character of their own.
| Yield | 6 generous or 8 smaller bowls |
|---|---|
| Prep | 15–20 minutes |
| Cook | About 60–70 minutes |
| Total | About 75–90 minutes |
| Pot | 6–7 qt / 5.7–6.6 L Dutch oven or stockpot |
| Starting Water | 64 fl oz / 1,900 ml |
| Chicken Safety | 165°F / 74°C minimum; thighs may need additional gentle cooking for tenderness |
Useful equipment: a 6–7 qt / 5.7–6.6 L Dutch oven or stockpot, an instant-read thermometer, a fine-mesh strainer, a large heatproof bowl, and tongs or a slotted spoon.
Ingredients
- 40–48 oz / 1,130–1,360 g bone-in chicken thighs; remove the skin if attached for a cleaner, less fatty broth
- 64 fl oz / 1,900 ml cool water, plus up to 8 fl oz / 240 ml more if needed
- 1 large yellow onion, peeled and divided; half left in large pieces, half diced
- 4 garlic cloves, lightly crushed
- 2 bay leaves
- 1 tsp whole black peppercorns
- 4–6 parsley stems, plus 2–3 tbsp chopped parsley leaves for finishing
- 3 medium carrots, sliced about ¼ inch / 6 mm thick
- 3 celery ribs, sliced about ¼ inch / 6 mm thick
- 2 tsp fine sea salt, divided, plus more to taste
- Freshly ground black pepper, to taste
- Fresh lemon juice, optional; start with 1 tsp / 5 ml
Method
Start the Broth
- Start the broth. Put the chicken thighs in the pot. Add the large pieces of onion, garlic, bay leaves, peppercorns, parsley stems and 1 tsp salt. Pour in 64 fl oz / 1,900 ml cool water. Add a little more, if needed, to bring the liquid most of the way up the chicken. The pieces do not have to be completely submerged.
- Bring it gently toward a simmer. Heat over medium to medium-high until steam rises and small bubbles begin appearing regularly. Pale foam may collect at the surface; skim it if you want a cleaner-looking broth. Lower the heat before the pot reaches a rolling boil.

Cook the Chicken and Strain the Broth
- Simmer the chicken partially uncovered. Leave the lid slightly ajar. Begin checking the thickest thighs after about 30 minutes of gentle simmering. Measure the thickest part without touching the bone. Chicken must reach at least 165°F / 74°C. If a thigh is safely cooked but the meat still grips the bone firmly, give it a few more minutes until it loosens easily.
- Remove the chicken, strain the broth and check its flavor. Transfer the thighs to a plate. Strain the liquid through a fine-mesh strainer into a large heatproof bowl, discard the spent aromatics, then return the broth to the pot. Skim a heavy layer of surface fat if needed. If the flavor seems muted, add a small pinch of salt and stir. If the broth still tastes watery rather than merely under-seasoned, simmer it uncovered for 5–10 minutes, then check it again.

Cook the Vegetables and Prepare the Chicken
- Add the vegetables. Put the diced remaining onion, carrots and celery into the broth. There is no sauté step here; the vegetables cook directly in the finished broth and absorb its flavor as they soften. Simmer for about 10–15 minutes, until a knife passes through a carrot slice with light resistance.
- Cut the chicken for the spoon. Remove and discard the bones. Check the meat for any small bone fragments, then pull or cut it into roughly ¾–1 inch / 2–2.5 cm pieces. There is no need to shred it into fine strands.

Return the Chicken and Finish
- Return the chicken. Add it back to the pot for about 3–5 minutes, just long enough to become hot again.
- Finish the soup. Taste before adding the remaining 1 tsp salt; the broth may already have reduced enough. Add salt gradually only as needed, then finish with black pepper and chopped parsley. If it tastes savory but a little flat, try 1 tsp / 5 ml lemon juice. Add more only if the soup needs it. Ladle into bowls with enough broth to surround the chicken and vegetables.

Recipe Notes
- Do not rinse raw chicken. Washing poultry can splash bacteria around the sink and nearby surfaces. Cooking it properly is what makes it safe.
- Skin-on thighs: Leave the skin on for a richer broth, or remove it first if you want less fat to skim later. Since this version aims for a cleaner, lighter broth, starting skinless makes the final skimming easier and keeps the liquid from becoming unnecessarily greasy.
- Salt: Different salts vary by crystal size. The listed fine-sea-salt amount is a starting point; finish the pot by taste.
- No strainer? Lift out the onion, garlic, bay leaves, parsley stems and peppercorns with a slotted spoon. The broth may look more rustic, which is fine.
- Timing: These times are estimates. Large thighs, a slow-heating pot or extra reduction can add time; temperature and tenderness determine when the chicken is ready.
About this recipe: This is a research-developed MasalaMonk recipe, not a claim of in-house test-kitchen validation. Chicken size, cookware and stovetop heat vary, so use the temperature and texture cues along with the approximate times.
Most chicken soup problems come down to a few decisions: whether the broth needs salt or reduction, whether the chicken needs more time, and when the vegetables should go in.
Chicken Soup Guide
Build the Broth
- Recipe Card
- Match the Chicken to the Liquid
- How Much Water Is Enough?
- Taste Before the Vegetables Go In
- 165°F Means Safe; Tender May Take Longer
Fix the Pot
Adapt and Store
Match the Chicken to the Liquid
Raw bone-in chicken can build broth from water as it cooks. Boneless meat and already-cooked chicken contribute less to the liquid, so those versions are more dependable when they begin with prepared broth or stock.
| Starting Chicken | Start With | Why |
|---|---|---|
| Bone-in thighs | Water | The meat, bones and connective tissue flavor the liquid as they cook. |
| Whole chicken | Water | A whole bird brings plenty of bone and connective tissue for broth. |
| Boneless thighs | Broth or stock | The meat stays juicy but contributes less body without the bones. |
| Chicken breast | Broth or stock | Lean breast provides meat but relatively little broth-building power. |
| Rotisserie or leftover chicken | Broth or stock | The meat is already cooked, so the liquid needs to carry the soup. |
| Chicken carcass | Prepared broth for a quick boost; water for a longer simmer | The bones can enrich prepared broth or help form a longer-cooked stock. |
Swapping bone-in thighs for boneless breast without changing the liquid can leave the soup surprisingly thin. The meat changed, but so did the source of the broth’s flavor and body. If you are starting with rotisserie or leftover chicken, see the quick adaptation method.
Broth or Stock?
Either works for shortcut versions. Stock often has more gelatin and body; broth can be lighter. Choose low-sodium or unsalted stock when possible so the liquid can reduce without becoming too salty.
When using a carton, taste it before adding the recipe’s full salt amount. Some store-bought broths are already seasoned, and concentrated stock can become more intense as it simmers. Start gently, then adjust the finished pot rather than trying to predict how much salt the liquid will need after reduction.
Onion and garlic provide the base flavor. Bay, peppercorns and parsley stems add background fragrance. The fresh vegetables are saved for later so they remain part of the meal, while parsley gives the finished soup a fresher edge. Lemon is optional: use it if the soup tastes rich but a little flat.
How Much Water Is Enough?
A wide stockpot can make a sensible amount of liquid look strangely low, while a narrower Dutch oven may cover the same chicken easily.
Watch the chicken, not the empty metal above it.
This is why water does not scale perfectly. A doubled batch may not need twice the water, and a half batch may need more than half. Pot width and how tightly the chicken fits change the level.
When to Add More Water
If the liquid sits well below most of the chicken, add water in small amounts until it reaches the intended level. Do not keep topping up the pot just because a few pieces are exposed. The liquid only needs to reach most of the way up the chicken, and you can reduce the broth later if it needs more concentration.
For a larger batch, arrange the chicken before deciding on the final water level. Wider pots also lose liquid faster during simmering, while deeper, narrower pots generally evaporate less.
If you add too much, reduce the broth uncovered later. It is easier to leave unnecessary water out in the first place.
A covered slow cooker loses much less liquid to evaporation than a stovetop pot. Do not transfer these water quantities directly to it; the Slow Cooker Chicken Noodle Soup uses a method suited to that different cooking environment.
Taste the Broth Before the Vegetables Go In
The chicken is out and the long-simmered aromatics are gone. Take a spoonful now. The liquid should smell clearly of chicken and taste savory even before the carrots and celery arrive.
If it tastes good, move on. If it seems muted, check the salt; if it is seasoned but watery, reduce it briefly. For the full order of fixes, jump to the bland chicken soup troubleshooting steps.

165°F Means Safe; Tender May Take Longer
For reference, a gentle simmer may sit around 185–200°F / 85–93°C. You do not need to monitor the broth with a second thermometer; steady small bubbles and gentle movement are usually enough.
A hard boil can tear at the chicken and scatter proteins and fat through the liquid. The soup may look cloudier and feel greasier without gaining much flavor.
Check the Thickest Part
Measure the thickest part of a thigh without touching the bone. Poultry must reach at least 165°F / 74°C for safety.

Check Tenderness Separately
Thigh meat can remain juicy above that minimum and often becomes easier to pull from the bone with a little additional gentle cooking. If the meat still holds tightly to the bone, give it another few minutes at a quiet simmer. Once it loosens easily, take it out and let the vegetables have the pot.

Back to Recipe · Fix a Bland Broth
Why the Vegetables Go In Later
Add the vegetables only after the chicken has built the broth’s flavor; this helps them become tender without turning mushy. Carrot slices, celery and the remaining onion usually need around 10–15 minutes at this size. Stop while the pieces still hold their shape.
Keep the Cuts Consistent
Try to keep the carrot and celery pieces close to the listed ¼-inch / 6 mm thickness. Even cuts soften at roughly the same pace, so you are less likely to end up with crunchy carrot beside celery that has already gone limp. If your carrots are particularly wide, halve the rounds to make easy spoonfuls.
They will keep cooking briefly in the hot soup after the burner goes off, so there is no need to push them to complete softness in the pot. Once the chicken and vegetables are back together, taste the soup as a whole before deciding whether it needs anything else.
Your Chicken Soup Is Bland. Don’t Add Everything at Once.
If a pot tastes disappointing, it is tempting to reach for salt, bouillon, lemon and half the spice cupboard at once. Try one correction, then decide what is still missing.
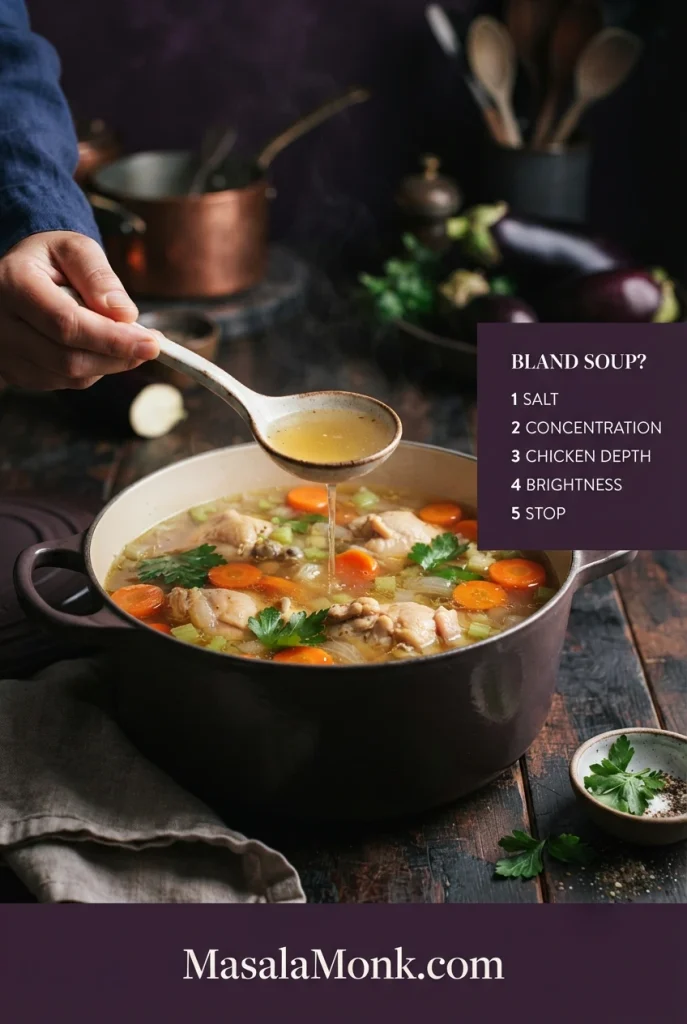
1. Salt
Taste the soup hot. If it is clearly under-seasoned, add a pinch of salt, stir well and see whether the chicken flavor comes forward. Go gradually; you can always add more.
2. Concentration
If the seasoning is right but the soup still feels watery, simmer it uncovered briefly. Reduction strengthens the flavors already in the pot. Check it before making another change.
3. Chicken Flavor
If the broth is seasoned and concentrated but still lighter than you want, add concentrated chicken base in ½-teaspoon increments. Stir until dissolved before deciding whether it needs more. The base recipe does not require it; this is an option for a pot that still needs more chicken flavor.
4. Brightness
A rich broth can still taste a little flat. Add 1 tsp / 5 ml lemon juice. It should lift the flavor without making the soup distinctly lemony.
5. Stop When It Tastes Good
If the next spoonful tastes right, put the lemon, bouillon and spice jars away.
If the Soup Becomes Too Salty
Stop reducing it, because evaporation will concentrate the salt further. Instead, add a little unsalted water or low-sodium broth, then taste again. If you have extra unsalted cooked chicken or vegetables, those can also increase the batch without adding more salt. Avoid trying to hide excess salt with a large squeeze of lemon; acidity changes the flavor but does not remove the salt.
Cloudy, greasy or gelled instead? · Using different chicken?
Cloudy, Greasy, Gelled—or Actually Wrong?
Homemade chicken broth can look a little strange, especially after chilling. A pale layer on top and a golden jelly underneath, for example, are two different things—and both can be normal.
Cloudy Broth
A broth can lose its crystal-clear appearance when proteins and tiny droplets of fat become suspended in the liquid. That affects how it looks, but cloudiness by itself does not tell you whether the soup is good or bad.

| What You Notice | Likely Cause | What to Do |
|---|---|---|
| Cloudy broth | Proteins or fat dispersed through the liquid | If it tastes clean, eat it. Use a gentler simmer next time if clarity matters. |
| Thin shimmer of fat | Normal rendered chicken fat | Leave it unless the soup feels oily. |
| Heavy oil slick | Too much surface fat | Skim some off. |
| Firm pale layer after chilling | Solidified chicken fat | Lift off as much as you prefer. |
| Golden broth that jiggles when cold | Gelatin from bones and connective tissue | Keep it. It melts again when heated. |
| Broth does not gel | Lower gelatin concentration | If it tastes good, leave it alone. |
| Stringy or dry chicken | Chicken overcooked | Remove it sooner next time and return only to reheat. |
| Mushy vegetables | Vegetables went in too early or cooked too long | Add them later and stop when tender. |
| Bitter broth | Strong scraps, herbs or aromatics over-extracted | Dilute if mild. Severe bitterness may not be worth chasing. |
| Rotten, sulfurous or clearly spoiled smell | Possible quality or safety problem | If the chicken or soup seems spoiled or unsafe, discard it. |
Fat and Gelatin After Chilling
Chilling makes the difference easier to see. Rendered chicken fat firms into a pale layer at the surface, while gelatin-rich broth underneath may wobble like soft jelly. They are not the same thing.

Cloudy does not mean ruined. Good chicken soup does not have to look like consommé.
Use the Chicken You Have
Bone-in thighs do the meat and broth jobs at the same time. Other chicken works too; the liquid and timing just need to change with it.
Rotisserie or Leftover Cooked Chicken
Start with low-sodium chicken broth or stock. Cook the onion, carrots and celery until tender, then add chopped or shredded cooked chicken for the last few minutes. It only needs to heat through.
Rotisserie chicken can be well salted and may carry a strong roasted seasoning, so taste the broth before adding extra salt. Remove skin and bones first, then cut the meat into bite-size pieces; if you want to save the carcass, use the separate carcass method below rather than simmering the cooked meat for the whole cooking time.

Rotisserie Carcass
Strip off the usable meat first. For a quick boost, simmer the carcass in prepared broth, then strain before adding the vegetables. Starting with water instead means a much longer simmer and is closer to making stock.
About vegetable scraps: use clean ingredients whose flavor you actually want in the broth. A stockpot is not a compost bin. Too many cabbage-family scraps, old herbs or tired vegetables can turn broth muddy or bitter.
Chicken breast: Start with broth or stock and remove the breast once it reaches 165°F / 74°C. Return the chopped meat near the end so it does not spend the whole vegetable-cooking period in the pot.
Boneless thighs: These stay juicy and are easy to cut, but contribute less body to the broth without the bones. Start them in broth or stock.
Canned chicken: Drain it and add it near the end like other cooked chicken. Use unsalted or low-sodium broth because the meat may already bring plenty of salt.
Whole Chicken
A whole bird is a traditional route to a larger batch and fuller broth. Add only enough water to mostly cover it rather than scaling the thigh recipe mechanically. If the bird is cut into pieces, the breast can come out while the legs and wings continue cooking.
Change the Flavor
The base recipe is intentionally simple, so small changes can move the soup in noticeably different directions. Pick one flavor idea rather than adding every aromatic at once; that keeps the broth tasting like chicken soup instead of a crowded spice mixture.

For more aroma: Add a few thin slices of fresh ginger with the broth aromatics and use a little extra garlic. For a warmer, earthier flavor, add a restrained amount of turmeric as well. Strain the ginger out before the vegetables go in.
Choosing herbs: Parsley stays classic, dill is fresher and more distinctive, and thyme works quietly in the background. Use rosemary sparingly; too much can become woody or bitter in a long-simmered broth.
Want a smoky, chile-rich soup instead? Tomato, dried chiles, lime and crisp tortilla strips take the bowl in a different direction. The Chicken Tortilla Soup Recipe builds that flavor from the start.
When lemon should lead: Here, lemon is a finishing adjustment. Avgolemono Soup takes it in a different direction with an egg-lemon finish.
Lower-sodium version: Starting with water gives you control from the beginning. Skip chicken base, season gradually, and use pepper, parsley and a little lemon for contrast.
Chicken Soup When You Are Sick
Chicken soup is not a cure for a cold or another illness. Warm broth provides fluid, while tender chicken and soft vegetables can be easier to manage when appetite is low. A hot bowl can be comforting, too.
If you are making it for somebody else, keep the pot fairly mild and let them add extra pepper or lemon at the table. The ginger-garlic version is a good choice when a little more aroma sounds appealing.
For a soup where fresh ginger is central from the beginning, Chicken Tinola combines bone-in chicken, ginger, garlic and a clear savory broth.
Storing Chicken Soup
This brothy version freezes well because there are no noodles or rice sitting in the liquid. The first job is cooling a large pot promptly, rather than waiting for it to become completely cold on the counter.
Cool, Store and Reheat
Divide leftovers among smaller, shallow containers so heat escapes faster. Refrigerate perishable food within two hours under normal conditions, and sooner in very hot weather. USDA food-safety guidance covers safe handling and cold-storage recommendations.
In the Fridge
Use refrigerated chicken soup within 3–4 days. Freeze portions you will not reach within that window.
In the Freezer
For best quality, use frozen soup within about 2–3 months. Food kept continuously frozen at 0°F / −18°C remains safe indefinitely, but flavor and texture gradually decline. Leave room for expansion in the container and label it before it disappears into the back of the freezer.
Thawing Frozen Soup
For the easiest planning, move a portion to the refrigerator the day before you need it. If you reheat soup directly from frozen, warm it gently in a saucepan and stir as it loosens so the edges do not overheat while the center remains frozen. Do not thaw a container on the counter at room temperature.
Reheating
Reheat leftovers thoroughly to 165°F / 74°C. When practical, warm only what you plan to eat rather than repeatedly heating and cooling the full batch.

Back to Recipe · Go to FAQ · Back to Top
Chicken Soup FAQ
Do I Need to Brown the Chicken First?
No. Browning gives the chicken roasted flavor and darkens the broth slightly. Starting directly in water keeps this version lighter and simpler.
Can I Make This Soup Ahead?
Yes. Cool and refrigerate it promptly, then reheat thoroughly when needed. The vegetables may soften more as they sit. For the freshest texture, make the broth and chicken ahead, refrigerate them safely, then cook the fresh vegetables when you are ready to finish the soup.
Can I Make Chicken Soup in an Instant Pot?
Yes, but pressure cooking changes both timing and liquid behavior. This stovetop method lets you judge the broth before the vegetables go in, so a pressure-cooker version needs its own liquid amount and cooking method.
Can I Add Rice or Orzo?
Yes. Both absorb broth as they cook and continue doing so in leftovers. If you want to preserve a clear, brothy soup for storage, cook the starch separately and add it to individual bowls.
If the broth tastes good before the carrots and celery go in, the hard part is already done.








