
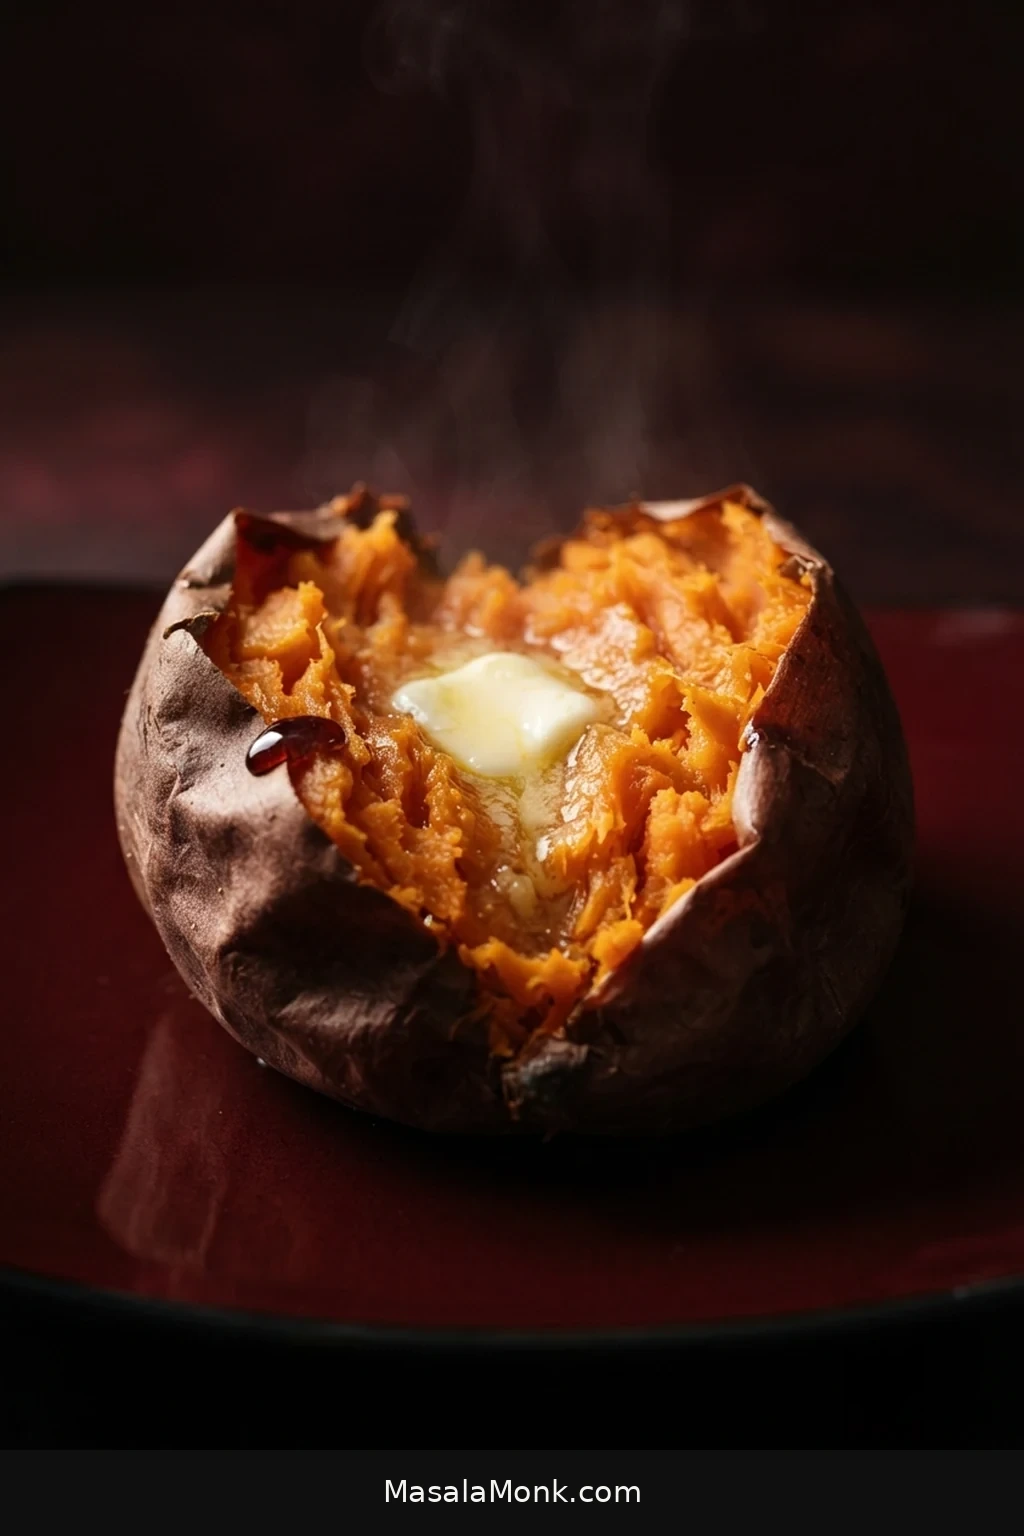
A good baked sweet potato should open easily when you split it. Expect soft orange flesh, a light, easily fluffed middle, loosened skin and sometimes a little dark, sticky syrup around the edges.
Getting there is mostly about knowing when to stop baking, rather than finding one magic number of minutes.
This baked sweet potato recipe uses orange-fleshed roots around 8–10 oz (225–285 g) each. Bake them whole and unwrapped at 425°F (220°C). Many finish in 45–60 minutes. A thick, round potato may need longer than a slender one of the same weight.
Use the timer to decide when to check; let the potato tell you when it is done. A thin knife should glide through the thickest part without meeting a firm or chalky center.
Choose Your Result
Classic whole baked sweet potato: Bake it unwrapped at 425°F (220°C) for a soft, easily fluffed center and a drier, roasted skin. This is the main method below.
More deeply browned flesh: Halve the potato lengthwise and bake it cut-side down so the exposed flesh makes direct contact with the hot pan.
Soft, steamier skin: Wrap the potato in foil before baking.

Ready to make the classic whole-baked version? Jump to the recipe card.
Baked Sweet Potato Recipe
Prep Time: 5 minutes · Cook Time: about 45–60 minutes for the reference size · Total Time: about 50–65 minutes · Yield: 4 baked sweet potatoes / 4 side-dish servings
Oven: 425°F (220°C) conventional · Reference size: 8–10 oz (225–285 g) each · Start checking: around 45 minutes
Ingredients
- 4 medium orange-fleshed sweet potatoes, ideally 8–10 oz (225–285 g) each
- 4 teaspoons (20 ml) olive or avocado oil, optional, for the skin
- Kosher salt, optional, for the skin
- Butter and black pepper, optional, for serving
Equipment: A rimmed baking sheet, parchment, fork, oven mitt and thin paring knife are enough. A kitchen scale helps compare potatoes accurately.
How to Bake the Sweet Potatoes

- Heat the oven. Set the middle rack and preheat to 425°F (220°C) on regular Bake. If Roast uses a fan, use the convection adjustment below. Line a rimmed pan with parchment.
- Scrub, dry and pierce. Wash and dry each potato thoroughly. Make several shallow fork pricks around the surface; avoid deep punctures that split the skin.
- Oil the skin if you want to. Bare potatoes bake well, too. For a seasoned exterior, rub each root with about 1 teaspoon (5 ml) oil and a pinch of salt. Leave it unwrapped.
- Bake until the center is tender. Arrange the potatoes with space between them. For 8–10 oz roots, start checking around 45 minutes. Many finish in 45–60 minutes, but thick potatoes may need longer. A thin knife should pass through the thickest part with virtually no resistance. Remove each potato as it becomes tender.
- Split and fluff while hot. Split the top, push the ends toward one another, and fluff with a fork. The flesh should separate into soft tufts, not firm chunks. Add butter or toppings.

Using fan/convection? Start near 400°F (205°C). Because ovens vary, judge by tenderness rather than assuming conventional-oven timing will match.
Baked Sweet Potato Guide
Get the Bake Right
- Recipe Card
- How to Tell When It Is Done
- Why Some Sweet Potatoes Take Longer
- What Temperature Should You Use?
- Whole or Halved
Understand the Result
Troubleshoot, Choose and Store
How to Tell When It Is Done
Look at the skin, then check the center. The knife test is the most useful final check; the other clues help you judge when the potato is getting close.
Look: The Skin Has Loosened
The skin usually looks less taut than it did raw. It may wrinkle, puff slightly or pull away from the flesh in places. A bead of amber or dark syrup may appear around a fork hole or crack, but it is not required for doneness.
Confirm: A Knife Glides Through the Center
Push a thin paring knife or skewer into the thickest point. It should slide through with almost no resistance. A firm or chalky-feeling middle means the potato needs more time; return it to the oven and check again after 5–10 minutes.

Optional: Give It a Gentle Squeeze
Through an oven mitt, the widest part should give gently instead of feeling hard. Use a light touch—a very soft potato can split under pressure. When in doubt, trust the knife test.
No syrup? No problem. Plenty of fully cooked sweet potatoes never leak any. Judge the middle, not the presence of sticky drips.
Why Some Sweet Potatoes Take Longer
Two 10-ounce sweet potatoes can still finish at different times. A long, slender one has less distance for heat to travel to its center than a short, round potato of the same weight.
Weight helps you choose when to start checking. Thickness explains why one potato may need longer than another.

Timing note: The ranges below draw on published cooking guidance rather than in-house testing. Treat them as starting points; the shape of the root and the way your oven heats it still matter.
| Potato Size | When to Start Checking at 425°F (220°C) |
|---|---|
| Small: under 8 oz (under about 225 g) | Check before 45 minutes; very small roots may finish considerably earlier |
| Medium: 8–10 oz (225–285 g) | Start around 45 minutes |
| Large: over 10 oz to about 14 oz (285–400 g) | Start around 50–55 minutes |
| Extra-large: over 14 oz (over about 400 g) | Expect an hour or longer; check the center carefully |
These are checking points, not deadlines. A potato at the upper end of a size range may need more time, particularly when it is thick through the middle.
For a batch, sort roots by their widest point and group similar shapes together. Remove each one as it becomes tender, even if the rest of the tray needs longer.
What Temperature Should You Bake a Sweet Potato At?
We use 425°F (220°C) because the center has time to soften while the skin dries and escaped sugars can brown. A lower setting works too, especially when another dish needs the oven.
| Conventional Oven | Approximate Time for an 8–10 oz Whole Potato |
|---|---|
| 350°F / 175°C | About 60–75 minutes |
| 375°F / 190°C | About 50–65 minutes |
| 400°F / 205°C | About 45–65 minutes |
| 425°F / 220°C | About 45–60 minutes; begin checking around 45 minutes |
Published recipes use different potato sizes and methods, so these ranges overlap. Treat them as estimates, not exact schedules. Higher heat usually browns the outside sooner; however, a large potato at 425°F can still take longer than a smaller one at a lower setting.
Dinner needs the oven at 375°F or 400°F? Leave it there and give the potatoes more time. You do not need to reorganize the entire meal around one vegetable.

For another dish at the same 425°F temperature, our Baked Chicken Breast can share the oven. The chicken will generally finish sooner, so check each food on its own schedule.
Some cooks prefer lower-temperature baking because the slower heating changes how sweetness develops inside the root. It takes longer, though, and isn’t necessary for the method here.
Whole or Halved?
Whole potatoes keep the familiar baked-potato shape, with loosened skin around a soft center. Halving one changes the texture as well as the timing because the exposed flesh can brown against the hot pan.
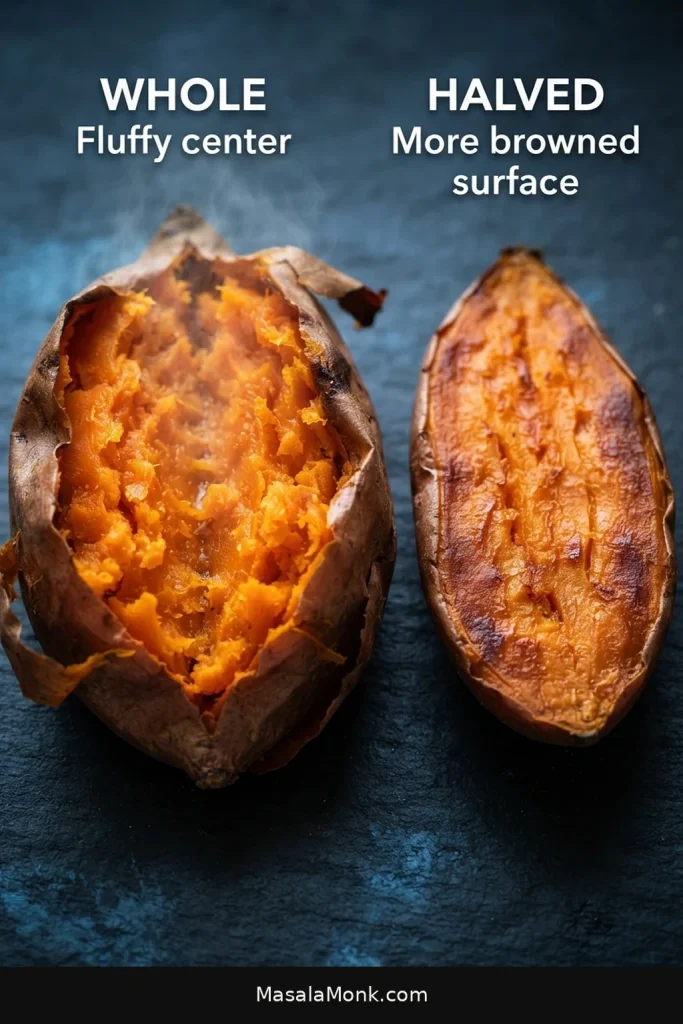
Halve It for More Browning
Cut the potato lengthwise, brush the cut face lightly with oil, and place it cut-side down. Direct contact with the metal sheet gives the strongest browning; parchment makes cleanup easier but reduces direct contact.
At 400–425°F (205–220°C), begin checking medium halves around 30 minutes. They’re ready when the cut face is well browned and a knife passes through the center easily. Thick halves and potatoes baked at 400°F may need longer.

Raw sweet potatoes are dense. Use a sharp chef’s knife on a stable cutting board; trim the thinnest possible slice from one side if the potato rolls before you cut it lengthwise.
For browned bite-size pieces instead, use our Roasted Sweet Potatoes method. Smaller pieces need their own spacing and timing.
Foil, Oil and Skin Texture
A bare potato needs no extra oil and develops a drier skin. A thin coating of oil and salt adds a more seasoned, roasted finish; about 1 teaspoon (5 ml) per medium potato is plenty.
Want softer skin? Wrap the potato in foil. Trapped moisture makes it steamier and less dry than a potato baked unwrapped.
Foil under the potato is different from wrapping it. A lined baking sheet catches sugary drips without enclosing the root. Parchment is especially handy once those juices become sticky.

Curious about the skin, fiber or portion size? Our Sweet Potato Nutrition Facts guide covers those details.
What That Dark Sticky Syrup Means
A little dark liquid leaking from a sweet potato can look much worse than it is.
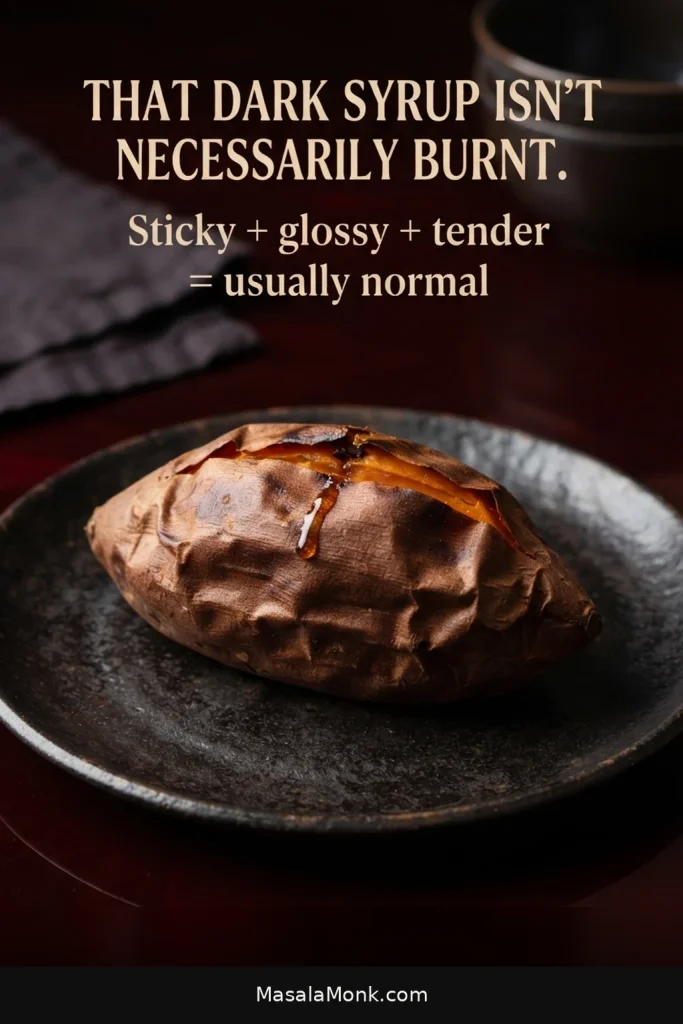
As the flesh softens, sugary juice can escape through a fork hole, crack or weak spot in the skin. Spread thinly across a hot baking sheet, that small amount becomes concentrated and dark, sometimes turning almost black while the potato itself remains perfectly fine.
Look beyond color. Tender flesh, a sweet roasted smell and a few sticky spots are normal. Heavy smoke, an acrid smell or widespread dry char points to scorching. For doneness, return to the knife test and center-tenderness checks rather than judging the syrup alone.
Why Is My Sweet Potato Still Hard?
Most of the time, the answer is uncomplicated: it needs longer.

Still Firm at 45–50 Minutes?
Still firm? Give it another 5–10 minutes and check again. A thicker potato may simply need longer.
Dark Outside, Firm Inside?
A thick center can remain firm while the exterior keeps browning. Once the skin is dark enough, reduce the oven to roughly 375–400°F (190–205°C) and let the center finish more gently. An oven thermometer can help identify an oven that repeatedly runs hotter than its display suggests.
Dinner Is Ready but the Center Is Not
A potato that is browned outside but firm inside can be rescued in the microwave. Heat it in short bursts until the center softens, then return it briefly to the hot oven if the skin needs drying again.
Still Hard After a Very Long Bake?
Pay attention to where the firmness remains. An underbaked potato is generally firm through the center; a root with a possible storage defect may be cooked around the edges while one central area stays stubbornly hard. If that pattern persists, compare it with the signs of a potato-quality problem below.
Much less commonly, the problem can start before the potato reaches your kitchen. Sweet potatoes are sensitive to prolonged cold storage, and chilling injury can leave a hard center after cooking. NC State Extension’s postharvest guidance describes this rare hard-core defect.
When the surrounding flesh is already thoroughly cooked, another 20 minutes may only dry and darken the parts that are done. In that case, stop extending the bake blindly and assess the potato’s texture and condition.
When the Potato Itself Is the Problem
Not every disappointing sweet potato started with a mistake in the oven.

Dry or Stringy Flesh
Some varieties naturally bake firmer or mealier than orange-fleshed sweet potatoes. Age and storage matter too. When the potato is already cooked through, extra oven time may only make it drier.
Pithy or Hollow Areas
Cottony patches, small voids or pithy flesh can reflect storage or other problems with the potato itself. Mold, decay or an off smell are reasons to discard it. More oven time will not repair a root that has already deteriorated.
How to tell the difference: a uniformly firm center usually needs more cooking. A potato that is tender almost everywhere except for one oddly hard or damaged area may have a problem with the root itself.
Which Sweet Potatoes Work Best?
This method is written for moist, orange-fleshed sweet potatoes—the familiar type sold in many U.S. supermarkets. Other varieties can be excellent baked, but the flesh may not become as soft or creamy.

Orange-Fleshed Sweet Potatoes
Labels may say Garnet, Jewel, Beauregard, Covington or simply “sweet potato.” Look for firm roots without soft spots.
Japanese, Korean, White and Purple Varieties
These labels cover a range of cultivars and textures. Some roots bake to a firmer, starchier or chestnut-like center; others are moister and softer. A cooked potato that is pleasantly tender but doesn’t resemble the creamy orange flesh described here may simply be a different variety.
What About “Yams”?
In U.S. supermarkets, orange-fleshed sweet potatoes are often sold as “yams.” A familiar tapered root with orange flesh will generally work here. True botanical yams are different roots with different cooking characteristics.
For the glossy brown-sugar holiday dish with pecans or marshmallows, see our Candied Yams recipe.
What to Put on a Baked Sweet Potato
Once the center is soft and sweet, a few contrasting flavors are usually enough.

Savory
- Butter, flaky salt and black pepper — simple and hard to beat.
- Greek yogurt and chives — cool and tangy against the sweet flesh.
- Feta, herbs and lemon — salty and bright without becoming heavy.
- Broccoli and cheddar sauce — richer and more substantial. Our Cheese Sauce works well over vegetables and potatoes.
Sweet or Sweet-Salty
- Butter, cinnamon and a little brown sugar — taste the potato first; a sweet one may need very little extra sugar.
- Maple syrup, butter and flaky salt — a small drizzle adds sweetness without drowning the flesh.
- Tahini, a little maple and salt — creamy and nutty, with a sweet-salty finish.
For a mashed holiday bake with pecans, marshmallows or both, see our Sweet Potato Casserole.
Ready to cook another batch? Return to the recipe card.
Bake Ahead, Store and Reheat
Baked sweet potatoes reheat well, so making a few at once can save time on another day.
Storing Raw and Cooked Sweet Potatoes
Raw sweet potatoes: Keep them in a cool, dark, dry and reasonably ventilated place. Avoid refrigerating them raw because prolonged cold storage can damage their texture and cooking quality.
Cooked sweet potatoes: Refrigerate leftovers within 2 hours in a covered container and use within 3–4 days. USDA FSIS recommends the same general storage window for most cooked leftovers. See USDA FSIS leftover guidance.
Reheating Without Drying Out the Center

Microwave when speed matters. For one refrigerated potato, start with about 1–2 minutes, then continue in short bursts. Turn it partway through, cover it with a microwave-safe cover that allows steam to escape, and let it stand briefly. Check the center in more than one spot; larger potatoes and lower-powered microwaves need longer.
Use the oven when you want a drier skin. Place the potato in a 350°F (175°C) oven and warm it until heated through. A whole refrigerated potato may need around 15–20 minutes or longer, depending on its size and starting temperature.
Use the air fryer when you want to refresh the skin without heating the full oven. Air fryers vary, so start with moderate heat and check early. The outside can refresh before the center is hot, particularly with a thick potato.
For cooked leftovers, USDA FSIS recommends reheating to 165°F (74°C). This is a leftover food-safety target, not a doneness temperature for the original bake. USDA’s reheating guidance also recommends covering and rotating food in the microwave to help it heat evenly.
A Few Last Questions
Can I bake regular potatoes and sweet potatoes at the same time?
Yes, provided the oven temperature suits both. They may finish at different times, so check each one separately rather than assuming both are ready together.
Why isn’t my baked sweet potato very sweet?
Sweetness varies with variety, maturity, storage and cooking method. Baking develops and concentrates sweetness, but it cannot make every root taste identical. Orange-fleshed varieties are a good starting point for the soft, sweet result described here.
The number of minutes is the least useful thing to memorize. Start checking at the right time, then trust the potato: once a knife slides through the center cleanly, split it while it’s hot.
After you’ve baked a few this way, you’ll probably stop watching the timer so closely. And that dark syrup on the parchment? Usually, it’s just part of what a sweet potato does as it softens and its natural sugars concentrate.








