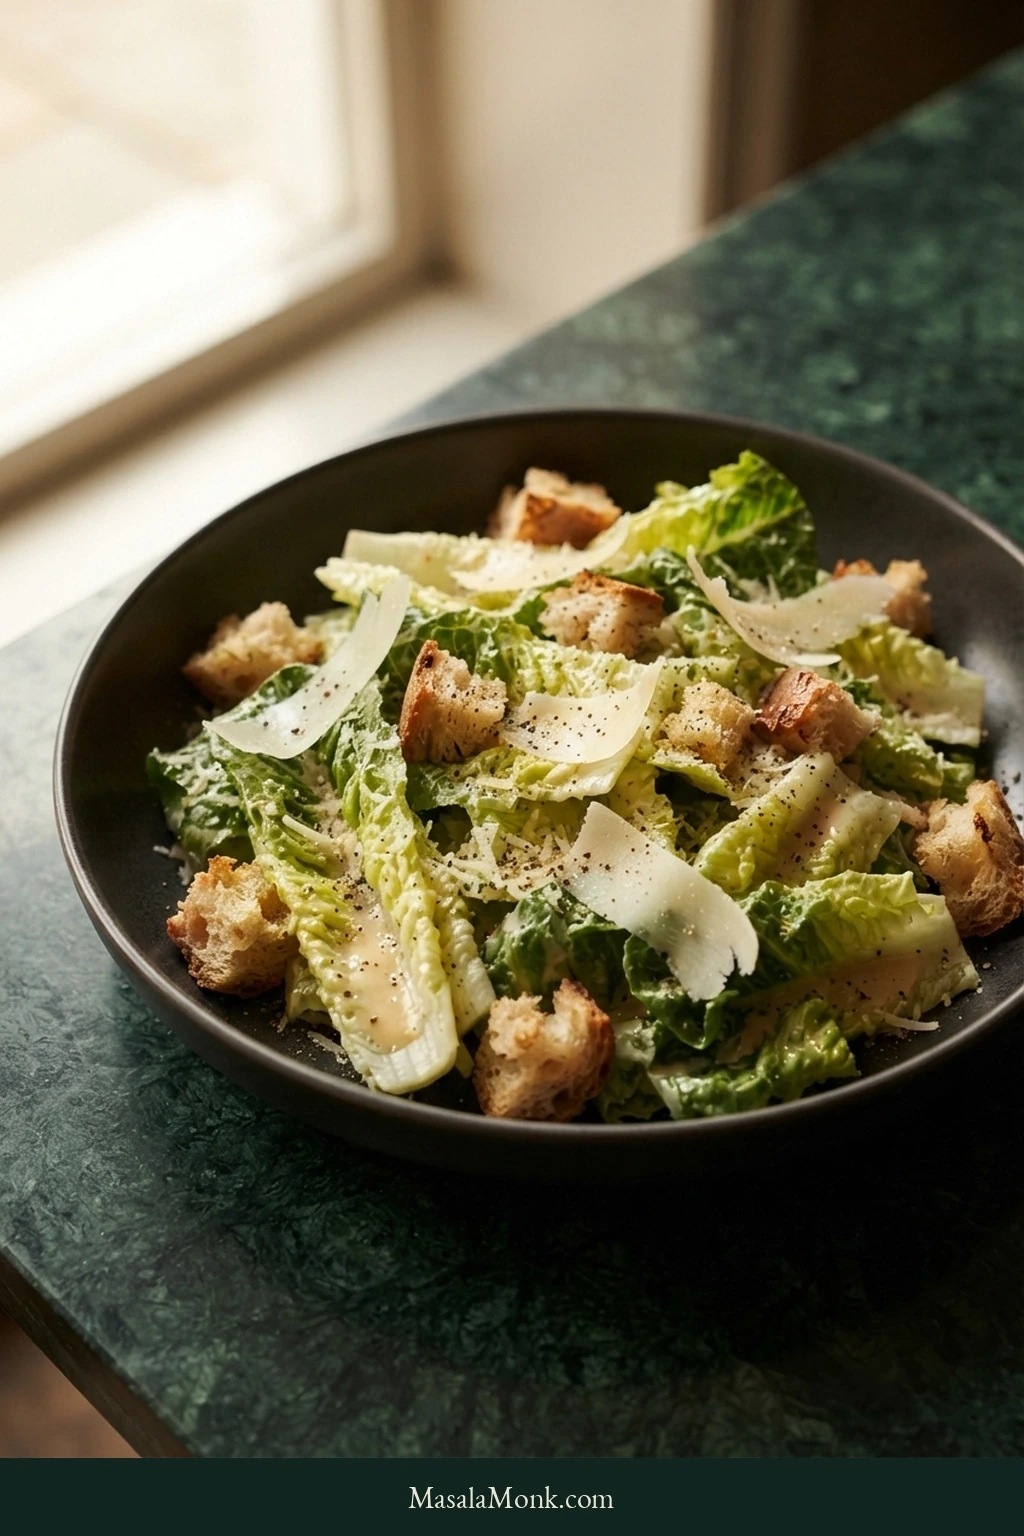
A great Caesar salad gives you cold, snappy romaine, a thin creamy layer of dressing, crunchy croutons, salty Parmesan, black pepper and enough lemon to make you want the next bite. Anchovy deepens everything without becoming the first thing you taste.
Caesar looks simple enough that a disappointing one is especially annoying. The lettuce turns watery. The croutons could break a tooth. Or everything tastes vaguely creamy because another spoonful of dressing went into a bowl that already had enough.
None of those problems needs a complicated fix. You just need to know what to look for.
The Caesar Test
Check
What You Want
Romaine
Cold, firm and dry
Croutons
Golden, crunchy and easy to bite
Dressing
Bright and savory on romaine
Toss
Green, lightly glossy leaves; no puddle underneath
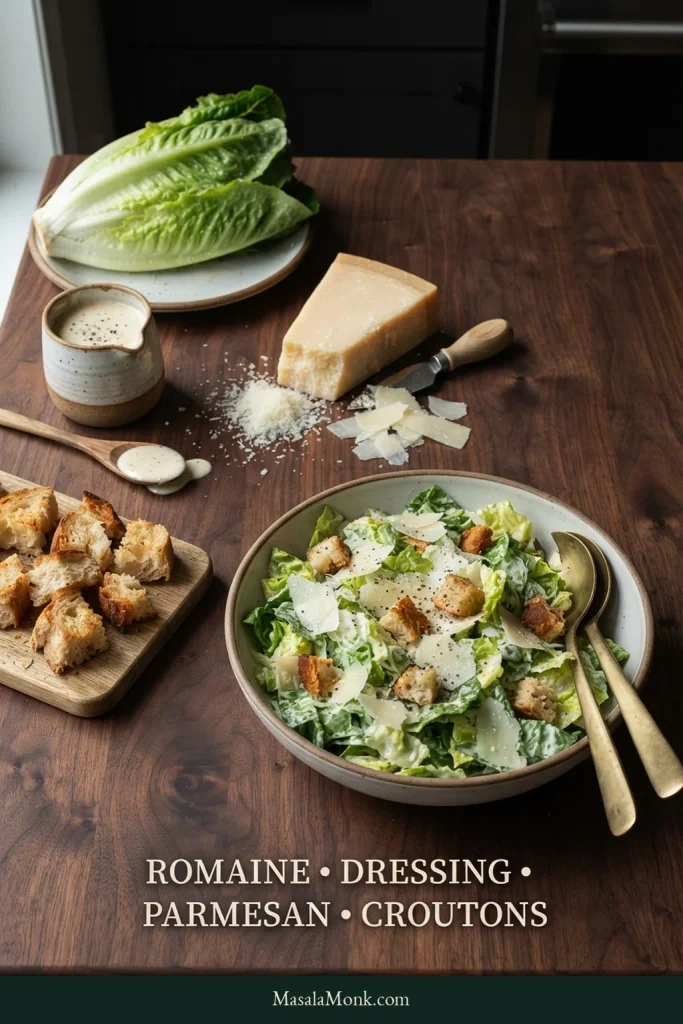
A modern Caesar salad is made with romaine lettuce, Caesar dressing, Parmesan, croutons and black pepper. Lemon, garlic, anchovy and Worcestershire are carried in the dressing, so the bowl does not need a crowd of toppings to taste complete.
Chicken, bacon, avocado and other additions can make good salads, but none is required for Caesar to taste like Caesar.
Romaine brings cold crunch, dressing carries acidity and savoriness, Parmesan adds salty nuttiness, and croutons bring toasted contrast. A good Caesar keeps those roles distinct rather than letting one element dominate every bite.
Caesar Salad Recipe
The dressing below follows the mayonnaise-based formula from our Caesar Dressing Recipe. This batch intentionally makes more than this salad usually needs, so keep the extra chilled rather than pouring it into an already dressed bowl.
Prep: 20 minutes Cook: 10–15 minutes Total: about 35 minutes Serves: 4 as a generous side, or about 6 as a smaller side
Useful equipment: a salad spinner and a very large mixing bowl.
For the Salad
16–18 oz / 450–510 g trimmed romaine hearts, about 8–10 loosely packed cups
½ cup / 4 fl oz / 120 ml Caesar dressing to start, with more available if needed
1 oz / 28 g Parmesan, very finely grated
½–¾ oz / 14–21 g Parmesan, shaved for finishing
Freshly ground black pepper
Lemon wedges, optional
For the Croutons
4 oz / 115 g sturdy rustic bread, such as sourdough, country bread or baguette
2 tbsp / 1 fl oz / 30 ml olive oil
½ tsp finely grated garlic
Small pinch of fine salt
Freshly ground black pepper
For the Caesar Dressing
¾ cup / 6 fl oz / 180 ml full-fat mayonnaise
1 tsp / 5 ml anchovy paste, or 2 small brown oil-packed anchovy fillets, mashed smooth
1 small garlic clove, finely grated
2 tbsp / 1 fl oz / 30 ml fresh lemon juice, divided: 1½ tbsp / about 22 ml to start, the rest to finish
1 tsp / 5 ml Dijon mustard
¼ tsp freshly ground black pepper, plus more if needed
1 tsp / 5 ml Worcestershire sauce
1 oz / 28 g Parmesan, very finely grated
Fine salt, only if needed at the end
1 tsp / 5 ml cold water to start, plus more 1 tsp / 5 ml at a time as needed
Dressing yield: about 1⅛ cups / 9 fl oz / 270 ml, depending on thinning.
Instructions
Prep the Romaine and Croutons
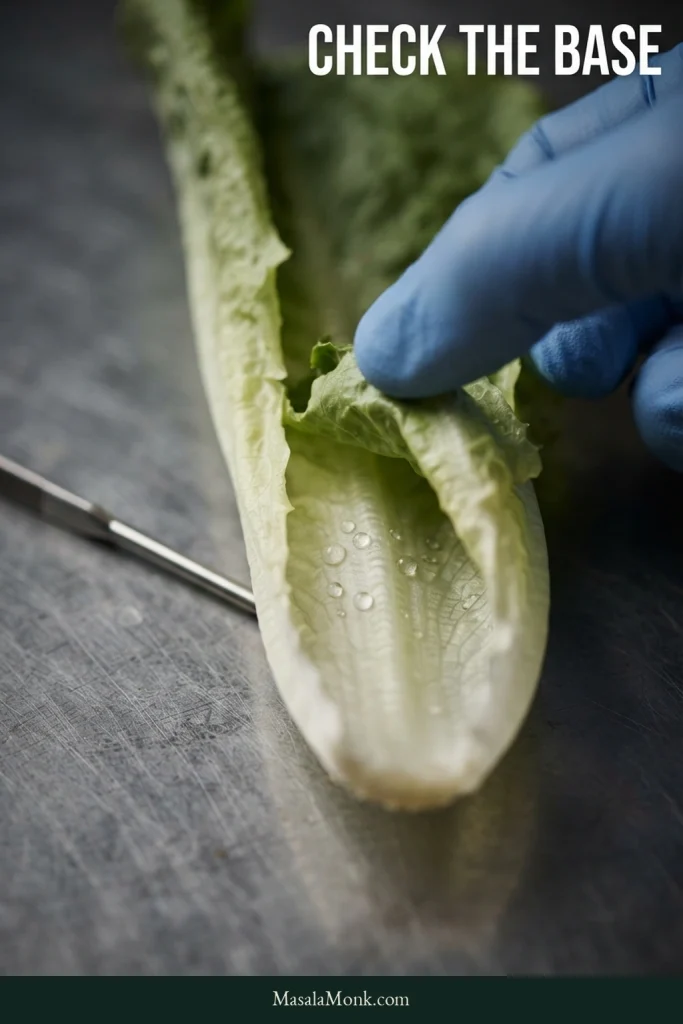
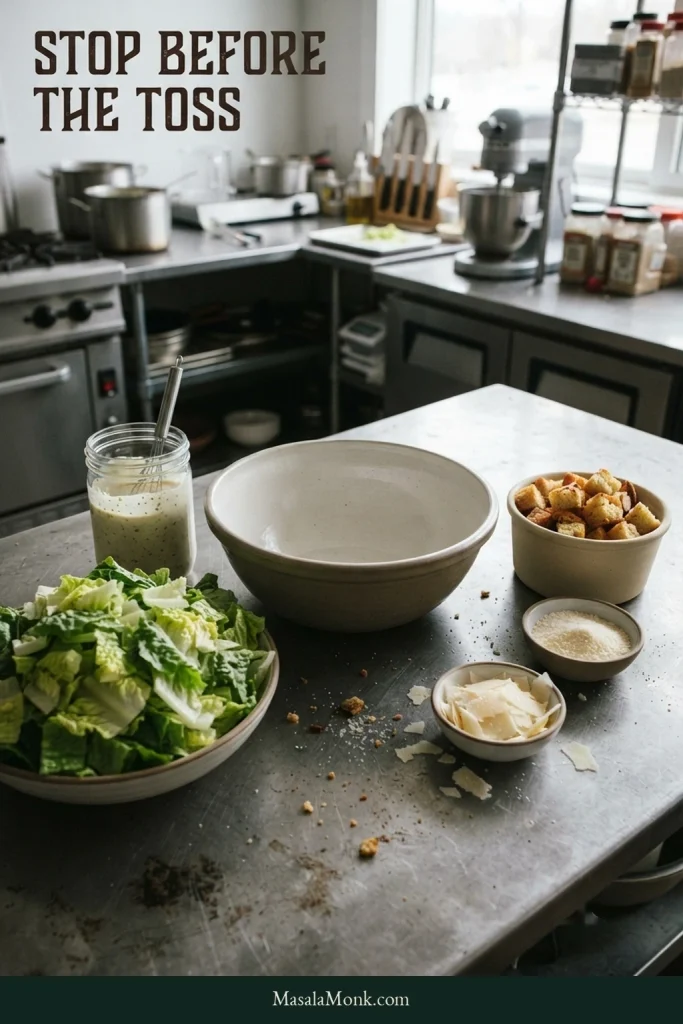
Wash, dry and chill the romaine. Separate and wash the leaves, then spin them thoroughly. Check the pale ribs and cupped bases even if the broad parts look dry; the last drops like to hide there. Blot anything the spinner missed. Tear or cut into roughly 1½–2 inch / 4–5 cm pieces and refrigerate while you make the rest.
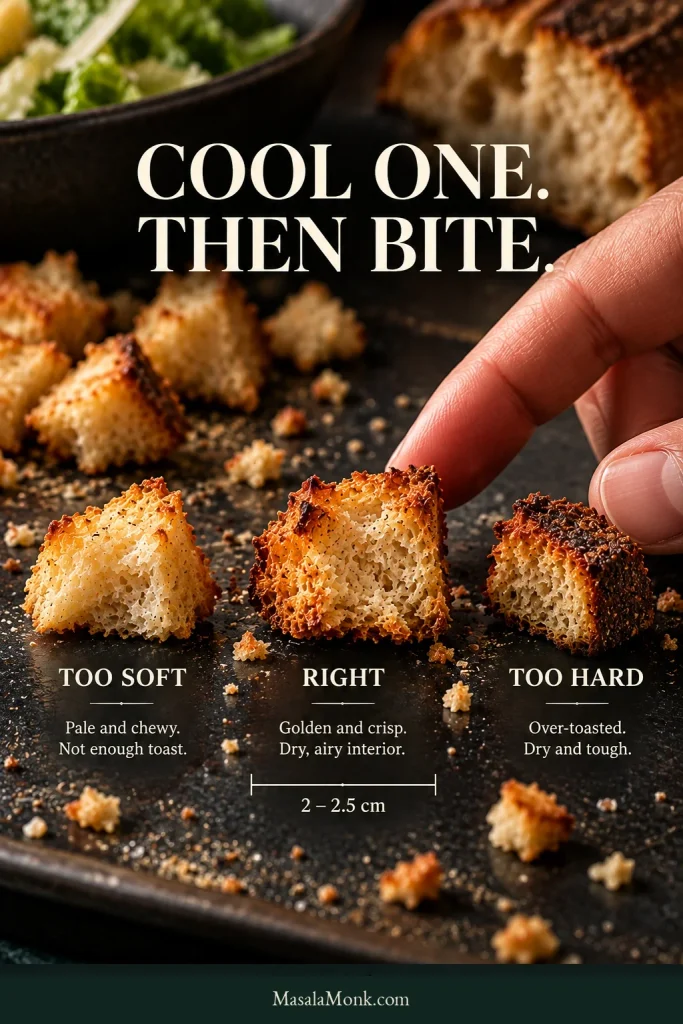
Heat the oven to 375°F / 190°C. Tear the bread into irregular ¾–1 inch / 2–2.5 cm pieces. Perfect cubes are unnecessary. Toss with the olive oil, garlic, a small pinch of salt and black pepper, then spread in one layer.
Bake the croutons for 10–15 minutes. Toss once if needed and continue until they look golden and nearly crisp. Remove the tray from the oven and leave it out while one crouton cools for 3–5 minutes. Bite it. If it crunches easily without feeling rock-hard, let the tray cool completely. A test piece that remains genuinely soft after cooling needs another 2–3 minutes in the oven before you check again.
Mix and Balance the Dressing
Mix the dressing. Whisk the mayonnaise, anchovy, garlic, Dijon, Worcestershire, black pepper and 1½ tbsp / about 22 ml lemon juice until smooth. Then whisk in the 1 oz / 28 g Parmesan for the dressing.
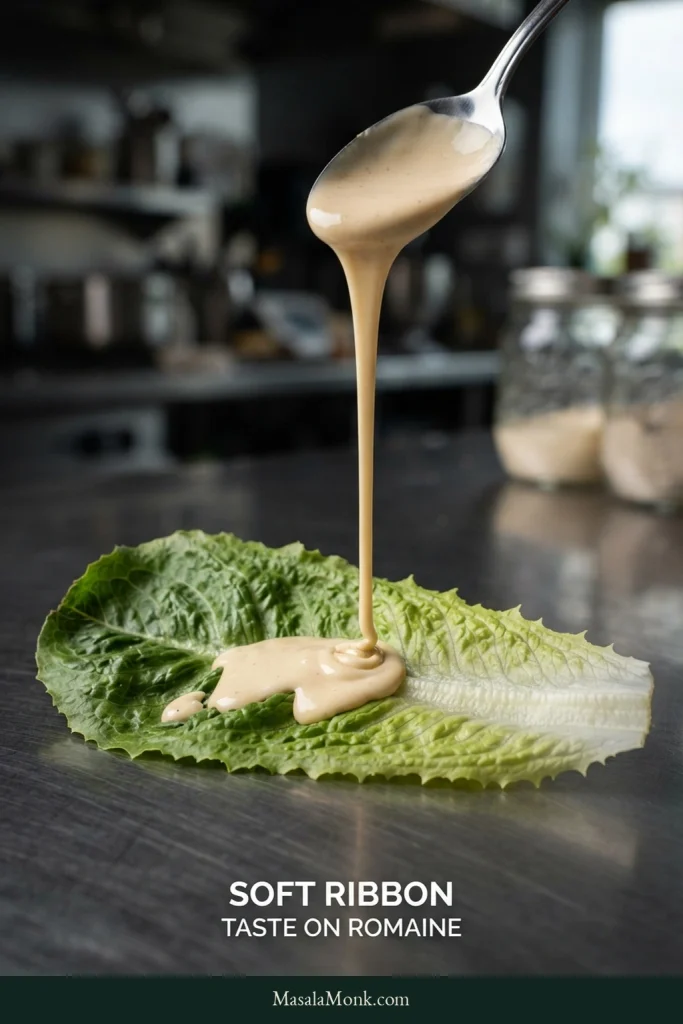
Get the consistency right. Whisk in 1 tsp / 5 ml cold water. Lift the whisk or spoon. The dressing should fall in a soft ribbon, roughly the flow of heavy cream. If it still drops in a heavy mound, add more water 1 tsp / 5 ml at a time.
Taste it on romaine. Dress one dry piece. Look for bright lemon, Parmesan, garlic and pepper, with anchovy adding savory depth rather than obvious fishiness. Use the reserved lemon or more pepper if needed. Taste again before reaching for salt.
Use cold water to correct thickness and save the remaining lemon for flavor. Water changes the flow without simultaneously increasing acidity, so you can judge texture before deciding whether the dressing needs more brightness.
Toss and Finish
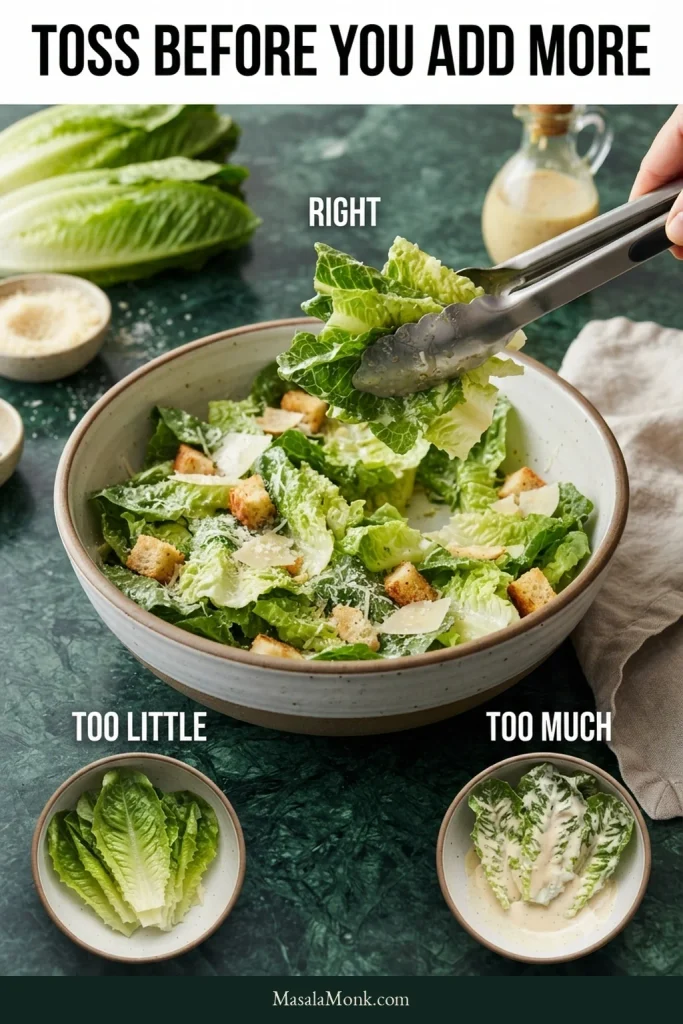
Start the toss. Put the cold romaine in your largest bowl and add ½ cup / 120 ml dressing. It may look stingy against that much lettuce. Toss before you trust your eyes. Reach underneath and lift the leaves through the dressing, add the 1 oz / 28 g finely grated Parmesan for the salad, then toss again.
Now look. The leaves should still be green under a thin creamy sheen. Taste a full forkful. If some leaves are still barely dressed, add another 1 tbsp / 15 ml dressing, toss and check again.
Finish and serve. Fold in the completely cooled croutons. Add ½–¾ oz / 14–21 g shaved Parmesan and plenty of freshly ground black pepper. Serve straight away, with lemon wedges if you like.
Recipe Notes
Measure romaine after trimming. Weight is more reliable than a fixed number of heads.
Keep extra dressing separate. Once the leaves are lightly dressed, stop. Refrigerate the rest.
Salt last. Anchovy, Worcestershire, Parmesan and the croutons have already brought salt to the bowl.
How we developed this recipe: This version brings together established Caesar techniques, published recipes and recurring problems reported by home cooks. MasalaMonk has not independently kitchen-tested this exact formula.
Romaine: Dry, Cold & Snappy
Romaine hearts give Caesar its backbone: firm pale ribs, tender inner leaves and enough surface for dressing to cling to. Choose hearts that feel firm and crisp, with fresh-looking cut ends and no slimy edges.
Wet lettuce is the fastest way to weaken a good Caesar. Water left around the ribs thins the dressing during the toss and eventually finds its way into the croutons.
A spinner gets you most of the way there, but check a few ribs afterward. If the broad part of the leaf looks dry, check the base anyway. That’s where the last drops hide.
If dressing slides off the lettuce while liquid gathers underneath, don’t immediately add more. Hidden water can make a well-measured bowl look under-dressed when the real problem is dilution.
Still finding droplets? Spin again or blot them. This is one place worth being fussy.
Then chill the lettuce. Dryness helps the dressing stay put; cold gives romaine that refreshing snap. A chilled serving bowl is a nice extra if you have room for one, but good lettuce matters far more than cold crockery.
Croutons: Crunchy, Not Hard
Use bread with some structure—sourdough, country bread or baguette all work. Slightly stale bread is useful here. Torn pieces give you craggy edges that toast beautifully and catch little streaks of dressing later.
Size matters more than neatness. Pieces around ¾–1 inch / 2–2.5 cm can develop a toasted exterior without drying into pebbles.
The other trap is judging them hot. Steam can make a freshly baked crouton seem softer than it will be once cooled. That is why the test piece rests outside the oven before you decide whether the tray needs another few minutes.
Color is only part of crouton doneness. After cooling, the center should be dry and airy while the outside stays crisp enough to crunch without becoming dense or brittle.
Crunch, yes. Jaw workout, no. A good Caesar crouton should break easily enough to eat with the lettuce instead of fighting it.
Parmesan Has Two Jobs
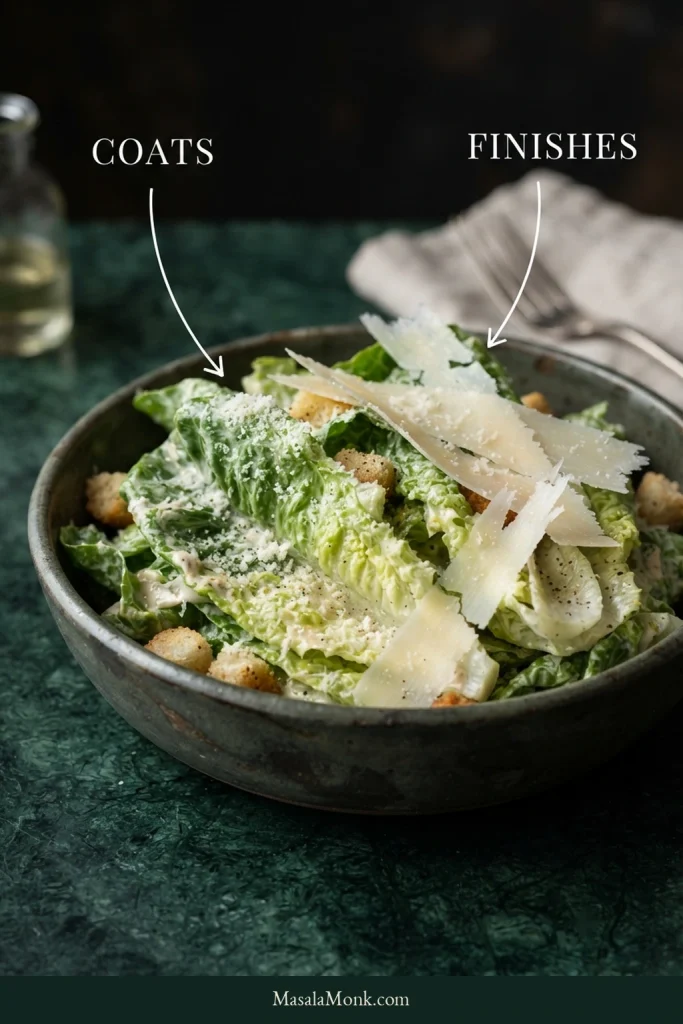
Finely grated Parmesan almost disappears into the tossed salad. That’s useful: it puts a little salt and nuttiness across the romaine instead of concentrating all the cheese in a few bites.
The larger shavings do the opposite. They stay distinct, so now and then you get a more pronounced bite of Parmesan without making the entire bowl heavy.
Sequence matters here: finely grated Parmesan goes in during the toss so it can travel through the leaves, while larger shavings stay for the finish and remain distinct on the fork.
The Toss Is the Recipe
Most of the work is already done by the time the cold romaine reaches the mixing bowl, so don’t lose its snap in the final minute. Half a cup of dressing can look almost comically small against a mountain of romaine, and the temptation is to pour in more before tossing. Wait.
Give the salad a thorough toss and let the finely grated Parmesan work through the leaves before deciding it needs anything else.
How to Know When to Stop
Now look. Pick up a piece of romaine. It should shine without sagging, with green still visible beneath the dressing. The bottom of the bowl should be almost clean.
Then taste a full forkful. If the leaves are already nicely dressed but the flavor feels timid, don’t keep adding volume just to chase flavor. Add a little lemon or black pepper to a spoonful of dressing, taste it on romaine, then toss that through. Add salt only if the finished forkful still needs it. If some leaves are still bare, that’s different: add another 1 tbsp / 15 ml.
Use the center state as the stopping cue: dressing should reach the folds and edges without turning the romaine pale or leaving a puddle underneath.
Don’t overthink the last few tablespoons. Once the lettuce is dry and the dressing tastes good on it, the bowl usually tells you when to stop.
A good forkful should crack through a cold romaine rib, pick up creamy dressing and nutty Parmesan, then finish with the toasted crunch of a crouton.
Caesar Salad Troubleshooting
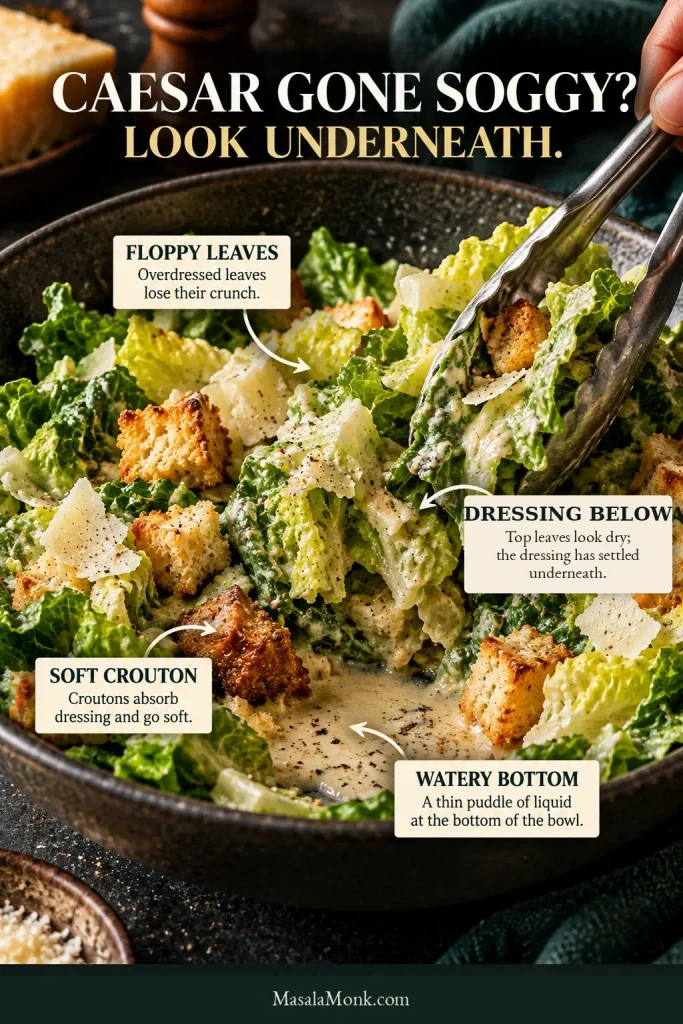
If your Caesar is already soggy, where the moisture shows up can tell you what went wrong.
Where the moisture appears is the clue. A puddle below, bare-looking leaves, floppy romaine and softened croutons point to different problems.
There Is Watery Liquid Under the Salad
Check the romaine first. Water caught around the ribs thins the dressing during the toss. If the lettuce started dry, the dressing itself may have been loosened too far.
The Leaves Look Bare but Dressing Is Underneath
This usually points to wet lettuce, overly thin dressing or a toss that never brought the lower leaves through the bowl. Toss again from the bottom before adding another drop.
The Leaves Are Dressed but Already Floppy
The salad probably got too much dressing or waited too long after tossing. You cannot put the original snap back into softened romaine. Serve it now; next time, leave the toss until closer to the table.
The Romaine Is Fine but the Croutons Are Soft
They may have gone into the bowl warm, needed a little more baking or simply spent too long touching dressing. Cool them completely and make them one of the last things into the bowl.
If the flavor of an already-dressed salad is simply too concentrated, the cleanest dilution is more undressed romaine—not water.
Problem
What to Do
Bland after tossing
If the leaves already have enough dressing, adjust a little dressing rather than adding more just to chase flavor. Lemon or black pepper are the first things to check.
Too fishy
Anchovy is dominating. Rebalance the remaining dressing before using any more.
Too salty
Hold back extra Parmesan and salty croutons. Rebalance any remaining dressing before adding more.
Too garlicky
Raw garlic is dominating. Repair the remaining dressing before using more; adding water directly to the finished salad will not solve it.
Heavy or flat
Add a little lemon to the dressing, taste it on romaine, then toss that through the salad.
Croutons too hard
There is little to rescue once bread is overdried. Use larger torn pieces next time and judge them after cooling.
If the dressing itself needs rescuing—because the anchovy or garlic is too strong, the texture is wrong, or the flavor has slipped out of balance—our Caesar dressing guide has the more detailed fixes.
When the bowl is right, none of the parts has to fight for attention. The romaine stays cold and snappy, the dressing follows the leaves instead of collecting underneath, and the croutons still crunch when the salad reaches the table.
Wash, dry and chill the romaine. Make the dressing and refrigerate it. Cool the croutons completely and keep them airtight at room temperature. Grate and shave the Parmesan, cover it and refrigerate it.
The useful make-ahead decision is where to stop. Once dressing touches romaine and croutons, the texture clock starts, so portion anything meant for later before the first toss.
When it is time to eat, dress the leaves, add the fine Parmesan and finish with the croutons and shavings. That last-minute toss is what keeps the romaine snappy and the croutons crunchy.
Packing lunch? Keep the dressing and croutons separate and assemble the salad when you are ready to eat.
What About Leftover Dressed Caesar?
Refrigerate it promptly, but expect softer lettuce and croutons later. If you already know half the bowl is for tomorrow, don’t dress that half tonight.
Caesar works especially well beside a hot main because cold romaine, lemon and toasted croutons bring their own kind of contrast.
For pizza night, make the salad while the pizza bakes but wait to toss it until the pizza comes out. A Focaccia Pizza can rest for a few minutes before slicing. The Caesar can’t.
For a lighter soup-and-salad dinner, serve it with Chicken Noodle Soup. Warm broth and tender noodles play nicely against cold romaine and crunchy croutons.
Original Caesar Salad vs. Modern Caesar Salad
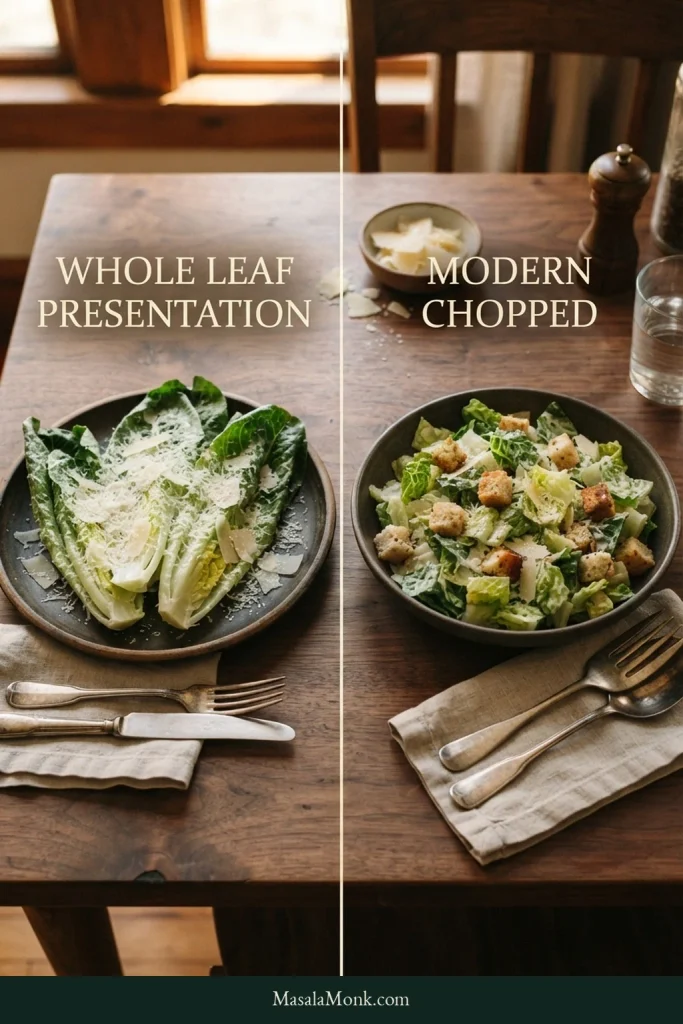
The whole romaine leaves you still see in tableside Caesars are not just restaurant theater. They’re a link to the salad’s early presentation in Tijuana, Mexico, where Caesar Cardini is associated with its creation in 1924. The Los Angeles Times’ account of Caesar’s in Tijuana traces that connection and the restaurant’s continuing tableside tradition.
Exact early formulas are less tidy than the origin story. A Cardini-attributed version documented by UCHealth uses whole romaine, egg yolk, lime, Worcestershire, olive oil, Parmesan and toasted baguette without separate anchovy fillets. Modern Caesar commonly uses explicit anchovy, while surviving accounts of earlier versions vary.
The recipe here is a modern classic Caesar: chopped romaine, anchovy in the dressing, Dijon, Parmesan and bite-size croutons. It keeps the familiar flavor while making the salad straightforward to toss and eat at home.
Whole Romaine Leaves or Chopped?
Whole tender inner leaves make a striking tableside salad and echo the older presentation. At home, 1½–2 inch / 4–5 cm pieces are easier to toss evenly, which is why this recipe uses the chopped style.
Whole leaves preserve the tableside character of an original-style Caesar. Chopped romaine gives up some ceremony but makes it easier to build a forkful with lettuce, Parmesan and crouton together.
Anchovies, Eggs & Fish-Free Options
Anchovy shouldn’t shout. If you have avoided it because you don’t want a fishy salad, quantity makes the difference. In a balanced Caesar, anchovy reads as deep savoriness before it reads as fish.
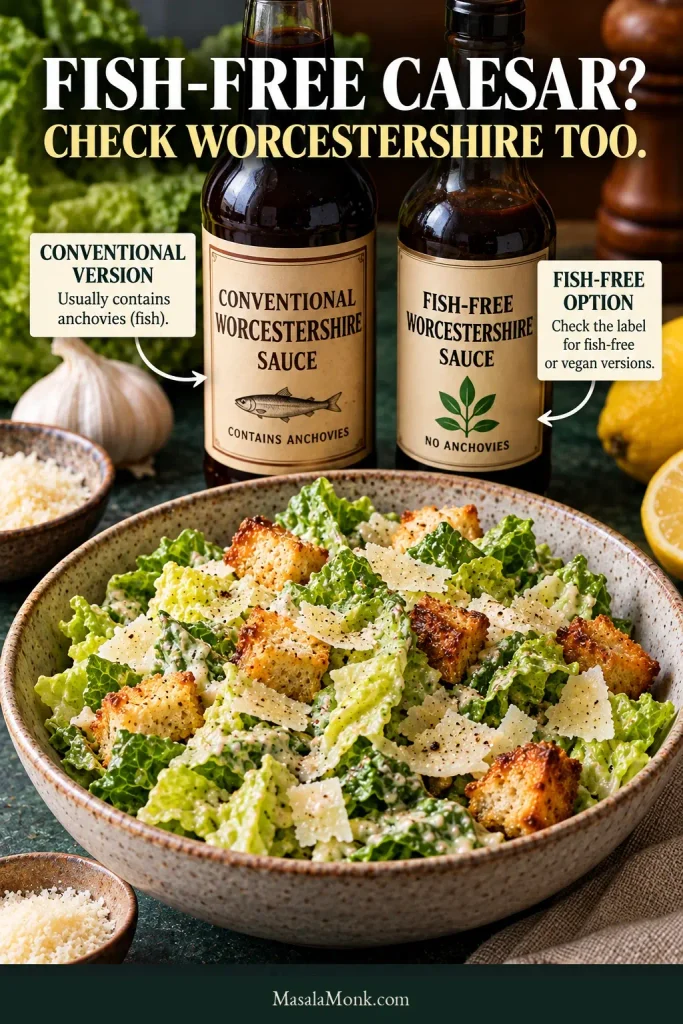
For a fish-free Caesar, omit the anchovy and use a fish-free Worcestershire sauce. Leaving out the fillets or paste alone may not be enough because conventional Worcestershire commonly contains anchovy.
The main recipe uses prepared mayonnaise, so you do not have to handle an uncooked yolk yourself. It still contains egg; use egg-free mayonnaise if needed.
If you avoid animal rennet, check the cheese too and choose a suitable vegetarian Parmesan-style hard cheese. The dressing guide gives the quantities needed to keep fish-free and egg-free versions balanced.
Omitting visible anchovy is not always enough. Conventional Worcestershire can contain anchovy too, so check the bottle before calling the dressing fish-free.
Frequently Asked Questions
How much Caesar dressing do I need per person?
As a starting point, this recipe uses about 2 tbsp / 30 ml dressing per generous side serving. Toss before adding more. Dry lettuce, thicker dressing and a thorough toss can all change how much the bowl actually needs. For the visual stopping cues, see The Toss Is the Recipe.
Can I use bottled Caesar dressing?
Yes. Dry and chill the romaine, start with a modest amount and toss thoroughly before adding more. If the bottled dressing sits in heavy blobs, loosen the portion you plan to use with a little cold water first. The technique still matters when the dressing comes from a bottle.
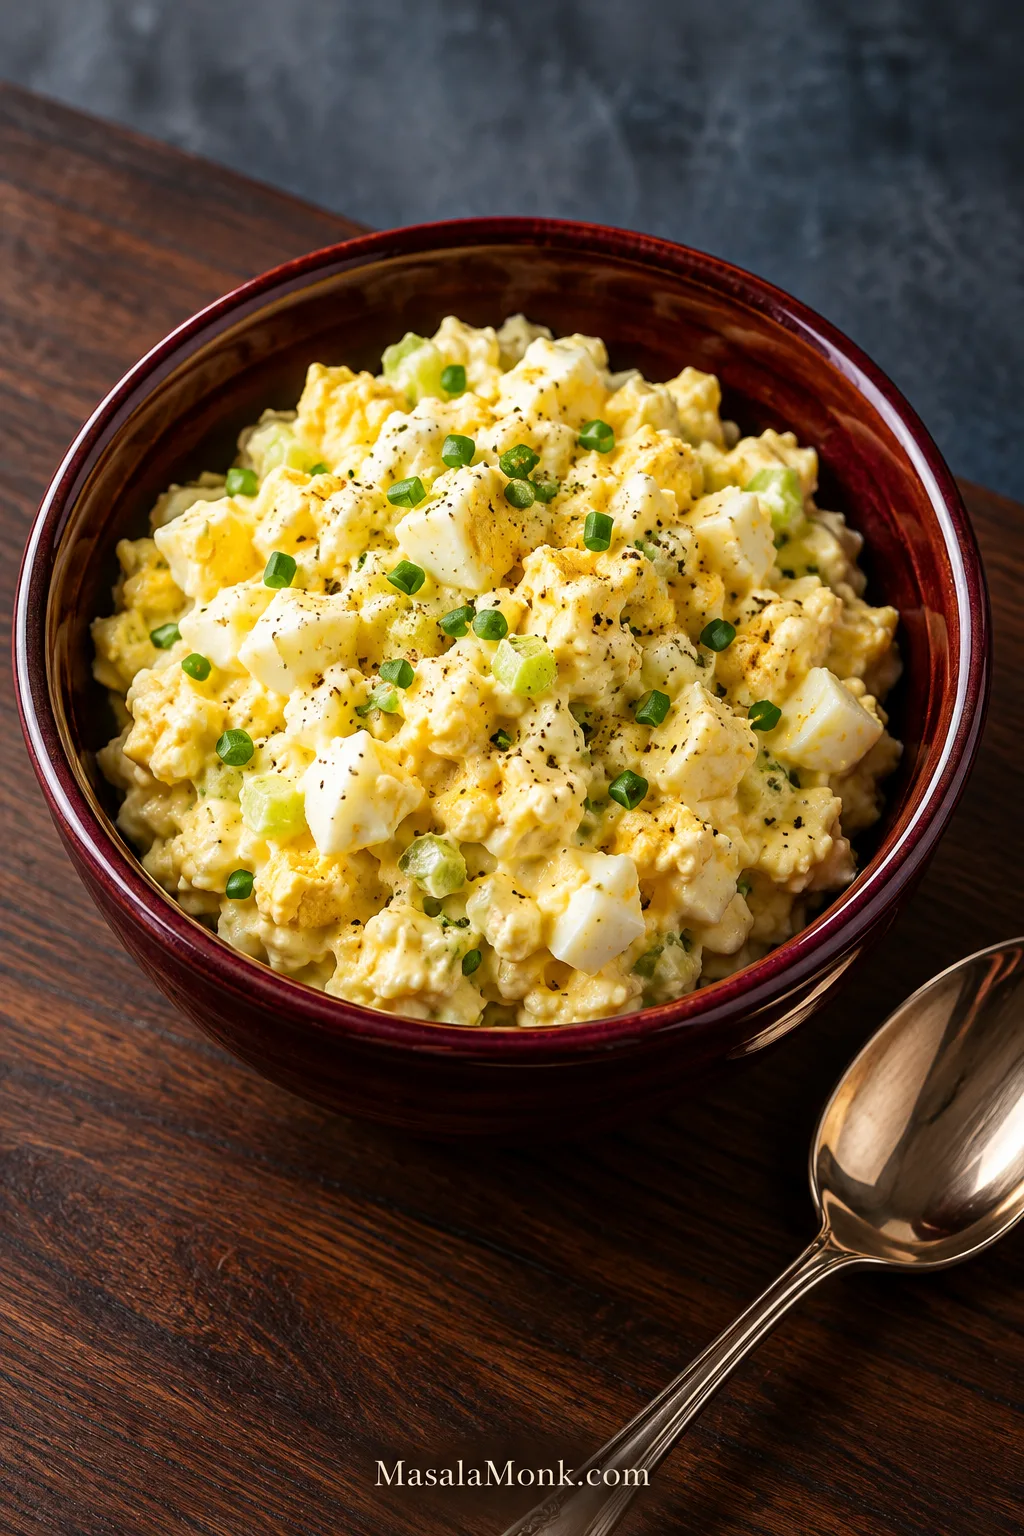
A good egg salad sandwich is one of those lunches that doesn’t need much: tender eggs, a creamy dressing, a little crunch and bread you actually want to eat. The filling should stay cool and soft inside the sandwich, with enough tang to keep it lively and enough texture that you can still tell you’re eating eggs.
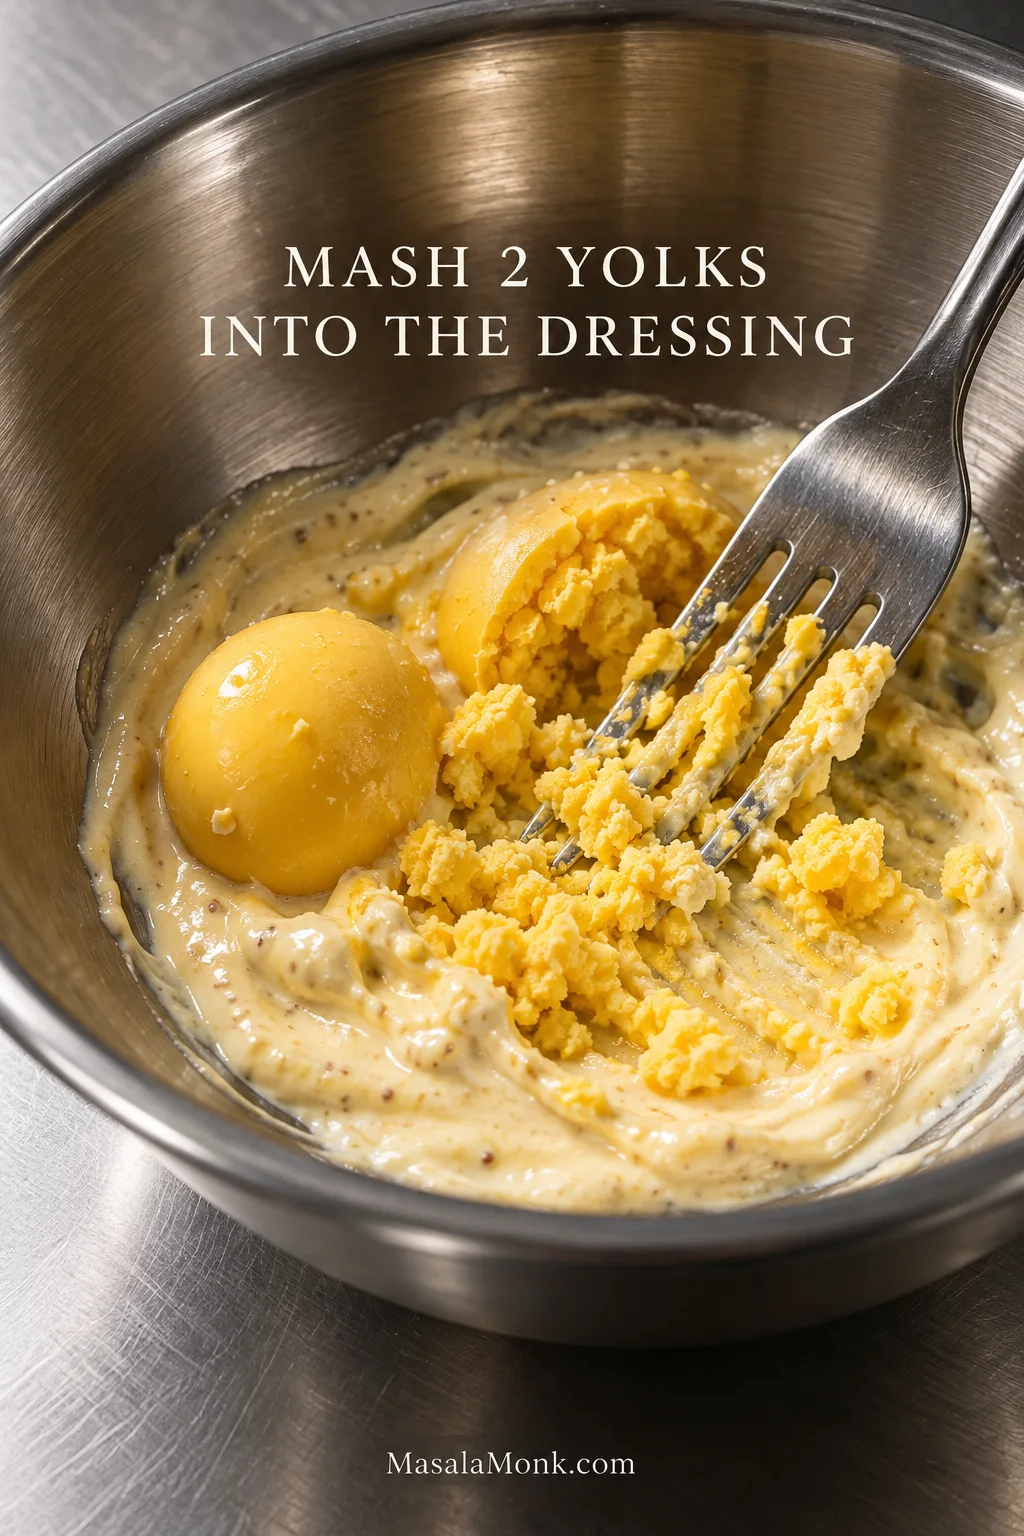
This easy egg salad recipe gets its creaminess from more than mayonnaise. Two cooked yolks are mashed into the dressing first, then the remaining eggs are chopped and folded in. The dressing gets richer and thicker while the whites stay in distinct, tender pieces.
Keep it classic, add dill pickle or relish, leave out the celery or mustard, or scale the batch to whatever number of hard-boiled eggs happen to be in the fridge. If the eggs are already cooked and chilled, lunch is about 10 minutes away.
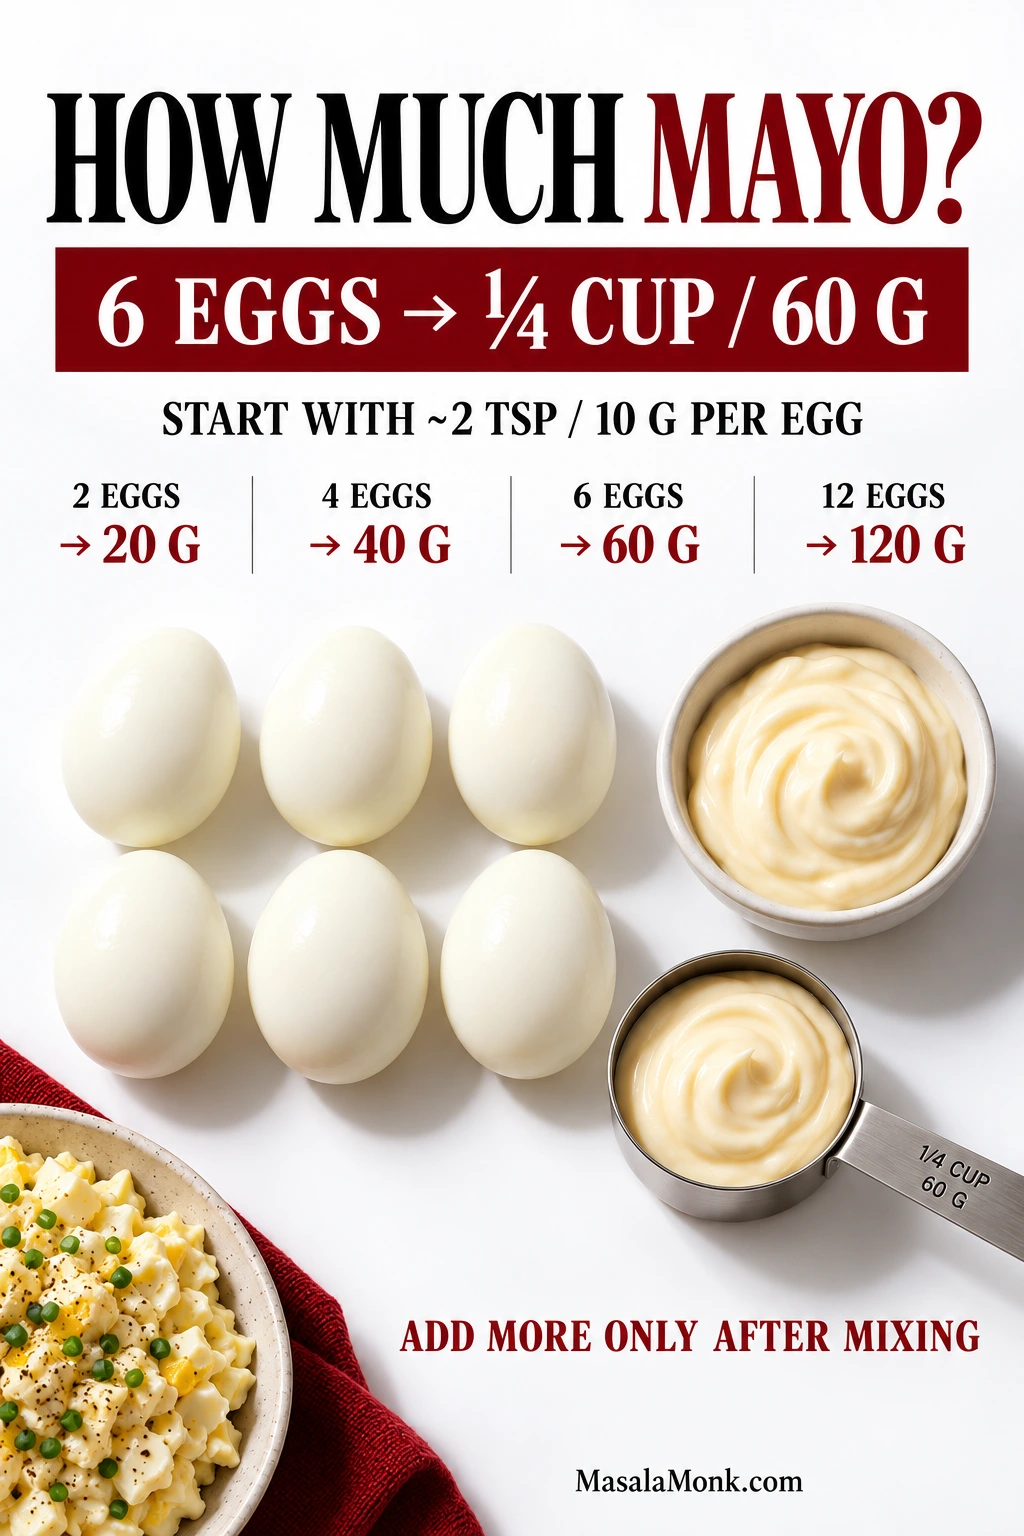
With 6 large eggs, begin with ¼ cup (60 ml / about 60 g) mayonnaise. Mash two yolks into the dressing, then fold in the chopped eggs. Leave the extra spoonful of mayo alone until everything else is mixed.
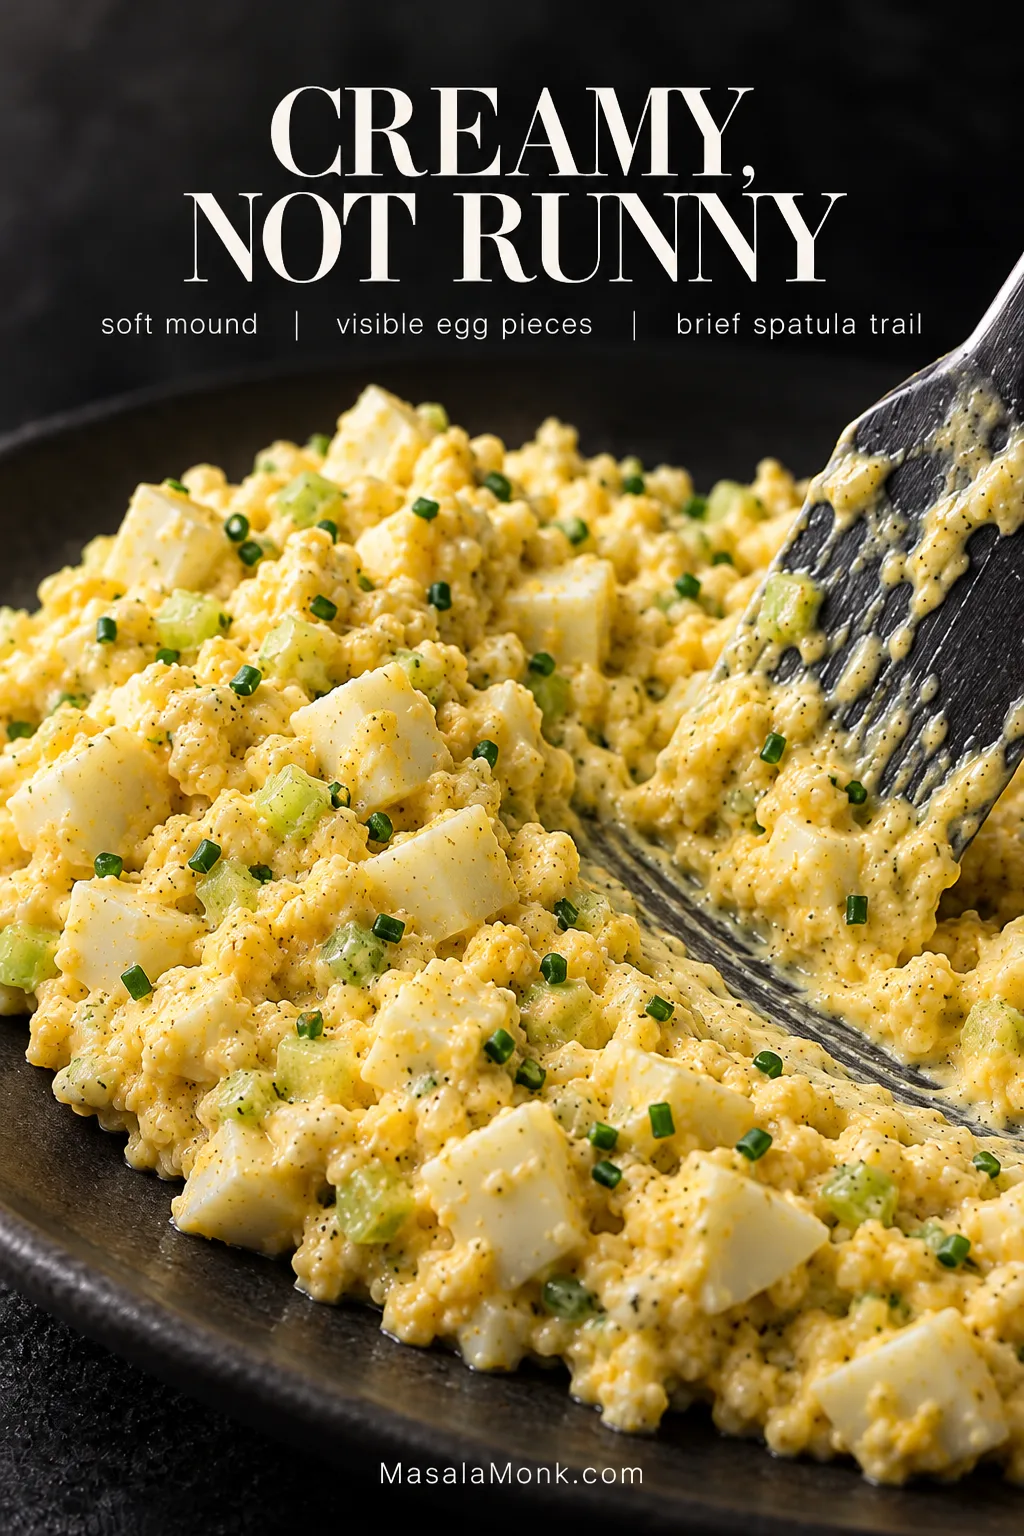
What success looks like: the salad should sit in a soft mound on a spoon. Pieces of egg white should still be obvious, yet the filling should spread easily. Drag a spatula through the mixture and you should see the path for a moment before the salad slowly settles back.
Once the dressing already connects the egg pieces, another spoonful can blur their definition instead of improving the salad. Check the texture after mixing before adding more.
Already have hard-boiled eggs? Use 6 large cooked, completely chilled eggs and go straight to the dressing. You can eat the salad immediately; a short chill simply makes the filling a little firmer for sandwiches.
Easy, Creamy Egg Salad Recipe
Classic egg salad with tender chopped eggs, a creamy dressing made richer with mashed yolks, and just enough fresh crunch for a satisfying sandwich.
Keep the egg pieces larger than the celery and chives. That way, the vegetables add little bursts of crunch and freshness without taking over the soft, tender texture of the eggs.
Prep 10–15 minutes
Cook 11 minutes
Cool About 10 minutes
Optional Chill 20–30 minutes
Yield About 3–4 sandwiches
Total time: about 35–45 minutes from starting the water to finished egg salad, including heating, cooking, cooling, peeling and mixing. Add another 20–30 minutes if you want the salad chilled before serving. With cooked, chilled eggs ready to go, mixing takes about 10 minutes.
Equipment
Medium saucepan
Bowl for ice water
Cutting board and knife
Medium mixing bowl
Fork and spatula or large spoon
Ingredients
6 large eggs
¼ cup mayonnaise — 60 ml / about 60 g
2 teaspoons Dijon mustard — 10 ml
1 teaspoon fresh lemon juice — 5 ml
3 tablespoons very finely diced celery — about 20 g
1 tablespoon finely chopped fresh chives or scallion greens — about 3 g
¼ teaspoon fine salt, plus more to taste
¼ teaspoon freshly ground black pepper, plus more to taste
Up to 1 tablespoon additional mayonnaise — 15 ml / about 15 g, only if needed
Optional additions
1–2 tablespoons finely chopped, well-drained dill pickle or relish
1–2 teaspoons finely chopped fresh dill
For a lighter dressing: replace 2 tablespoons of the mayonnaise with 2 tablespoons thick full-fat Greek yogurt
For sandwiches, optional
6–8 slices bread, as needed
Lettuce
A very thin layer of butter or mayonnaise on the bread if packing ahead
Method
Cook and Cool the Eggs
Bring the water to a boil. Fill a medium saucepan with enough water to cover the eggs by at least 1 inch (2.5 cm), then bring it to a full boil.
Cook the eggs for 11 minutes. Lower the refrigerator-cold eggs gently into the boiling water. Start the timer as soon as the last egg goes in. Adjust the heat so the water keeps a controlled boil without knocking the eggs around.
Cool and peel. Transfer the eggs straight into ice water and leave them for about 10 minutes, or until cold all the way through. Peel.
Make the Yolk Dressing
Make the yolk dressing. Halve two eggs and remove their yolks. Mash those yolks with the mayonnaise, Dijon, lemon juice, salt and black pepper until mostly smooth. If replacing some or all of the mayonnaise with thick, full-fat Greek yogurt, mix it in here.
The dressing should be mostly smooth before the chopped whites return to the bowl. A few tiny yolk flecks are fine; dry crumbles are not. Getting the base cohesive now means less handling later.
Mash the yolks thoroughly before the chopped whites go in. Doing the heavier mixing now means you can handle the finished salad gently later.
Fold and Finish the Egg Salad
Chop the eggs. Cut the four whole eggs plus the two reserved whites into roughly ½-inch (about 1 cm) pieces.
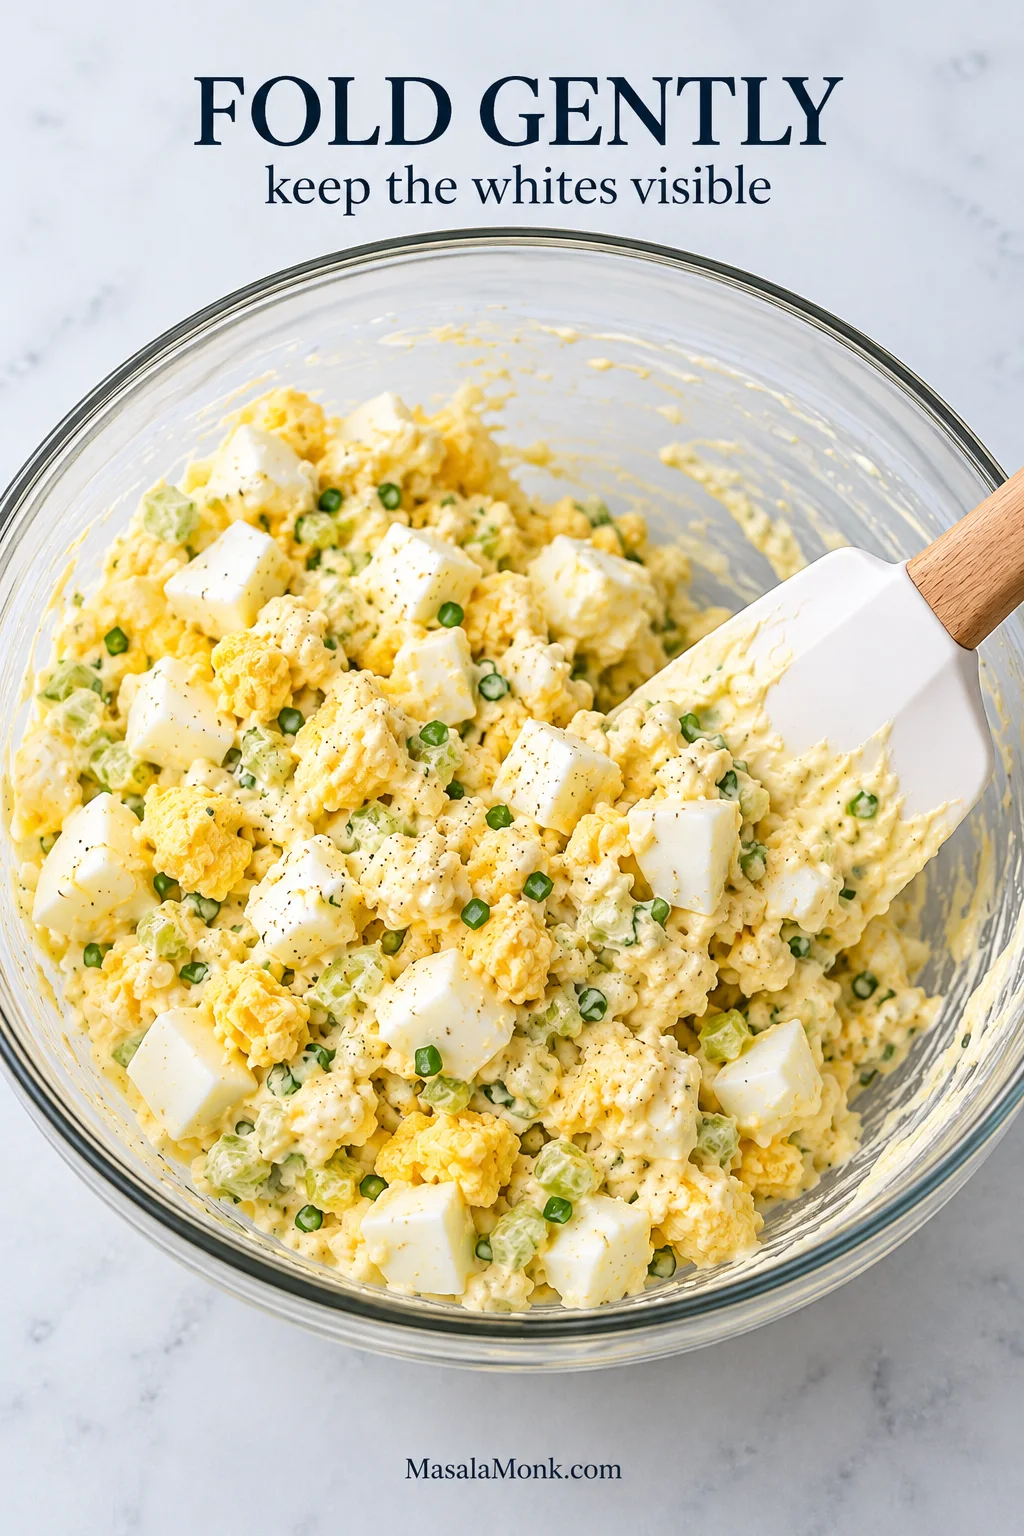
Fold the salad together. Add the chopped eggs, celery and chives or scallion. If using the optional chopped pickle, relish or dill, add it now. Fold gently just until everything is coated, stopping while the pieces of white are still easy to see.
At this stage, the mixture should still look irregular rather than uniformly mashed. Large pieces of white should remain visible while the dressing clings around them; that is the cue to stop folding.
A flexible spatula lifts the eggs from the bottom of the bowl rather than cutting through the whites with repeated stirring.
Check the consistency. Spoon up some salad. It should hold a soft mound rather than slump into a glossy puddle. If the salad is firmer than you want, add the optional mayonnaise 1 teaspoon at a time.
Serve or chill. With thoroughly chilled eggs, you can serve the salad immediately. For a firmer sandwich filling, cover and refrigerate for 20–30 minutes. Taste while cold and adjust with another pinch of salt, black pepper or a few drops of lemon if needed.
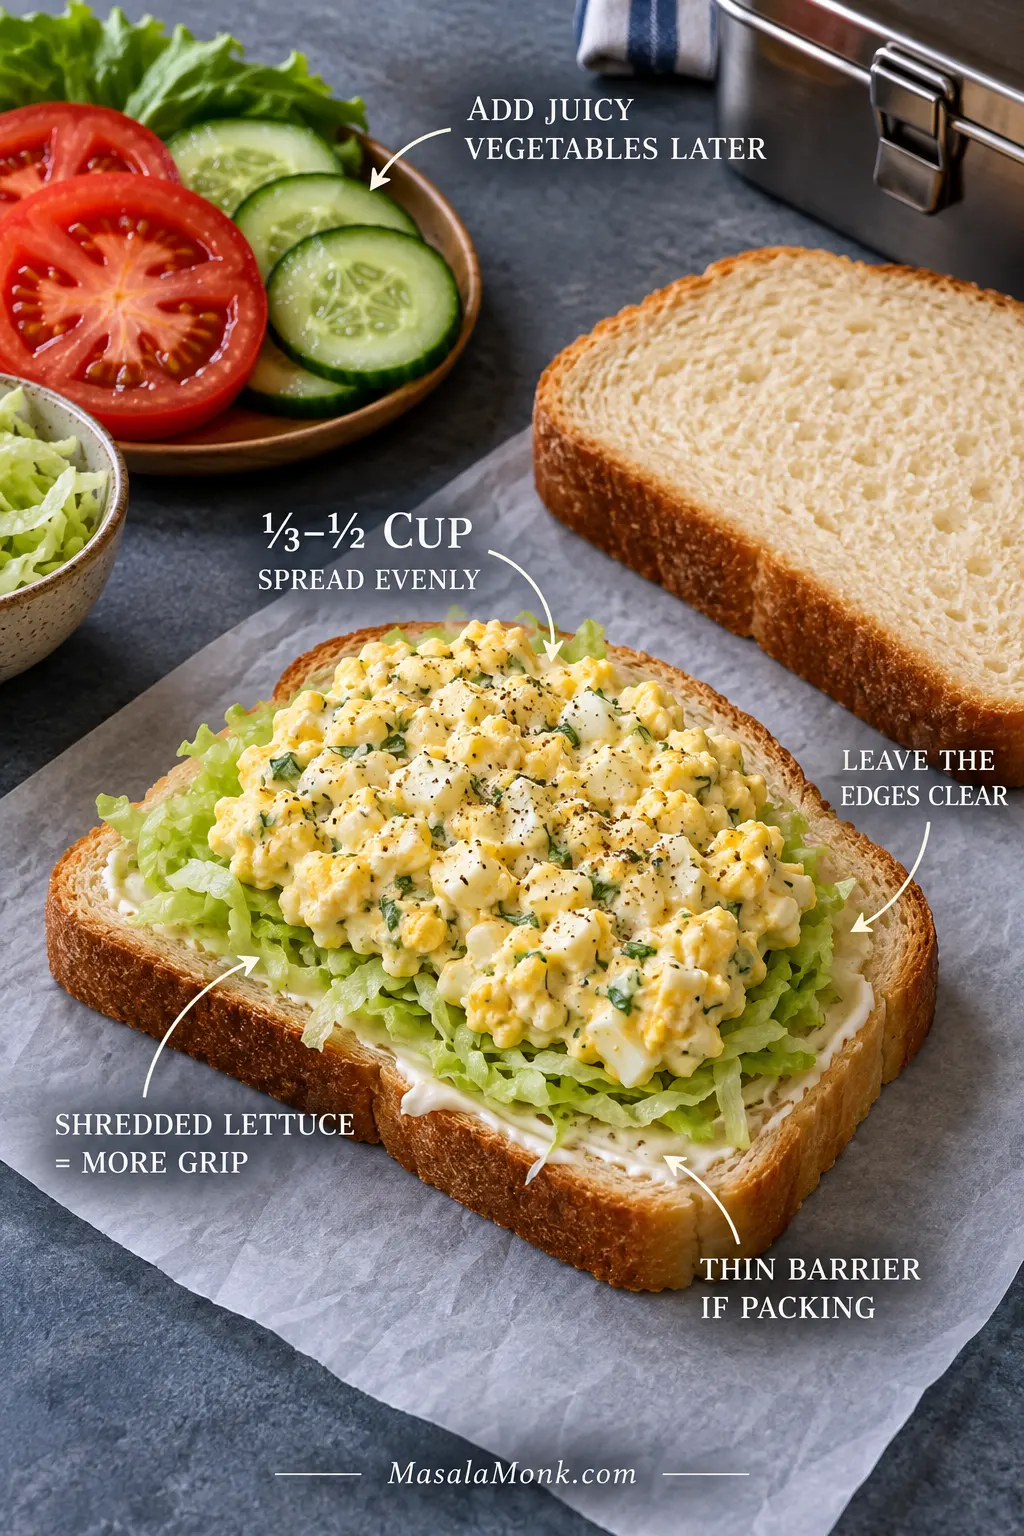
For sandwiches: roughly ⅓–½ cup filling is usually plenty for a regular sandwich, depending on the bread and how generously you like it filled.
For 6 large eggs, start with ¼ cup (60 ml / about 60 g) mayonnaise. The two mashed yolks thicken the dressing further, so there is no reason to add more until the whole salad is mixed.
Recipes can swing from a few spoonfuls of mayo to half a cup or more for the same number of eggs. Once there is too much, though, the first thing you notice is the dressing rather than the egg.
Judge the salad, not the measuring spoon. If it holds its shape and still spreads easily, you’re done. A firmer batch may need another teaspoon of mayo; add it only after everything else is mixed.
At the right balance, the dressing settles into the spaces between the chopped whites instead of covering every piece in a thick coat. You get creaminess in every bite without losing the tender texture of the eggs.
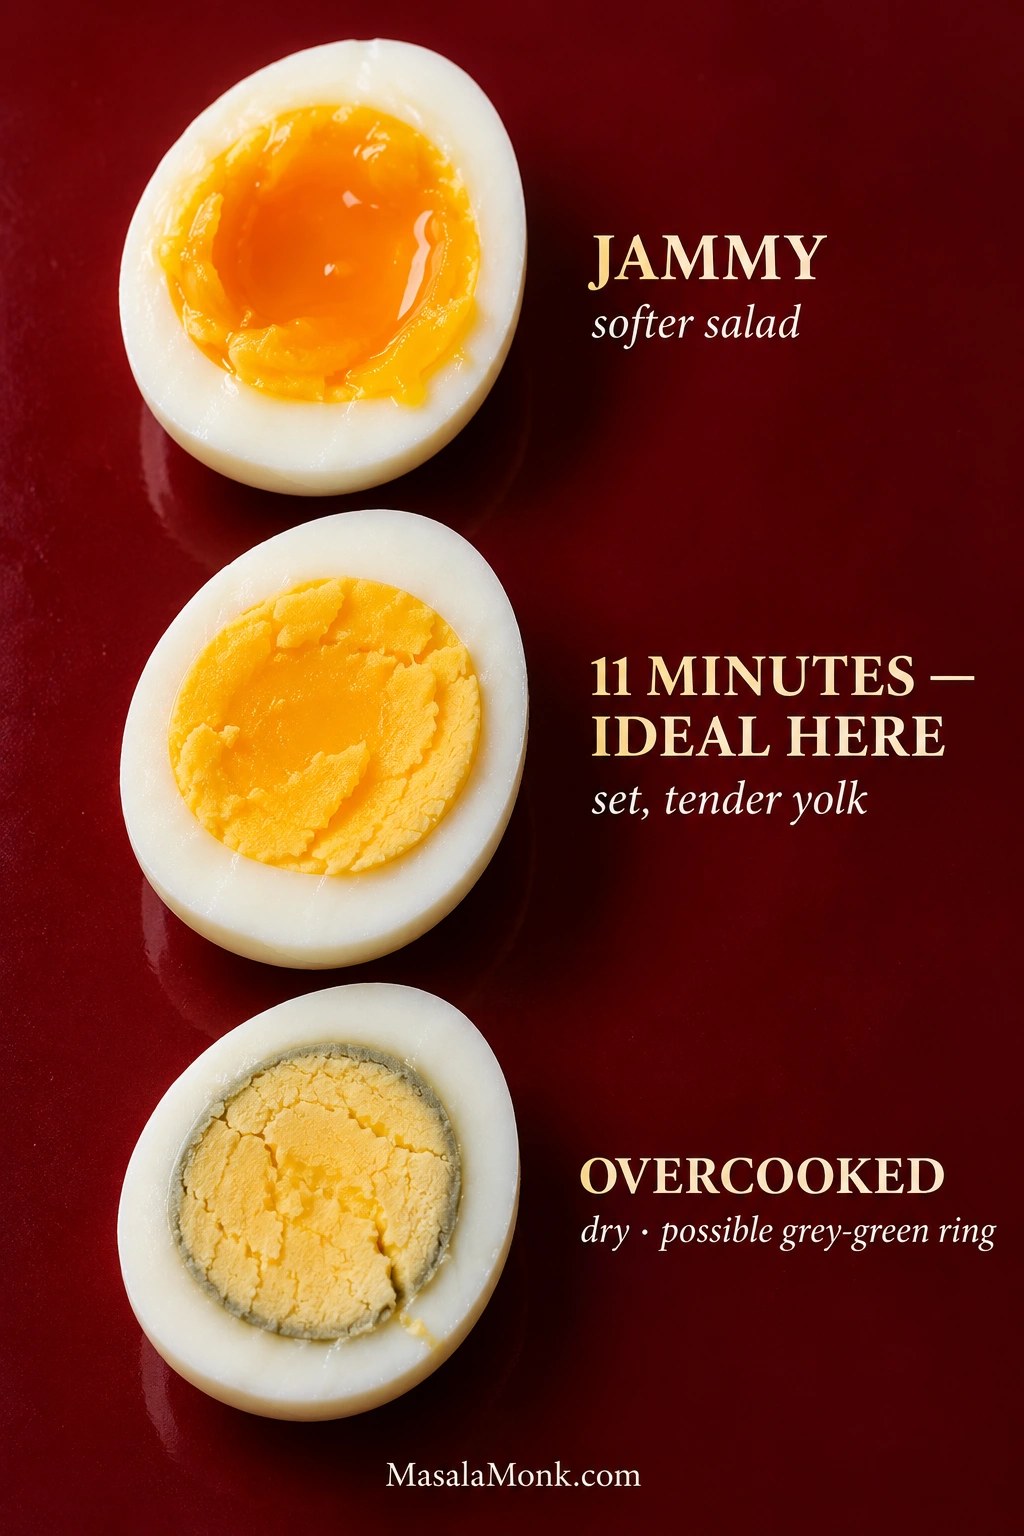
For this style of egg salad, the yolks should be fully set but still tender and yellow. Very soft or jammy yolks make a softer, richer salad; here we’re after the firmer classic texture that holds up especially well in a sandwich.
For large refrigerator-cold eggs, the target here is about 11 minutes in boiling water followed by immediate ice-water cooling. The full step-by-step method is in the recipe card above.
Eleven minutes produces yolks that mash smoothly into the dressing while leaving the whites firm enough to cut into clean pieces. Jammy yolks smear more readily; overcooked ones can become chalky.
Peeling doesn’t need to be pretty. Start near the wider end if you can get beneath the membrane there, but don’t fight for a perfectly smooth egg. Any little torn patches disappear under the knife. This is egg salad, not deviled eggs.
Gray-green yolk? The egg probably cooked a little too long or cooled too slowly. That discoloration is harmless; accurate timing and rapid cooling help prevent it next time.
Steaming is another good route, generally around 12–13 minutes for refrigerator-cold large eggs followed by immediate cooling. An air fryer works too; our air fryer hard-boiled eggs guide has timings for firm yolks.
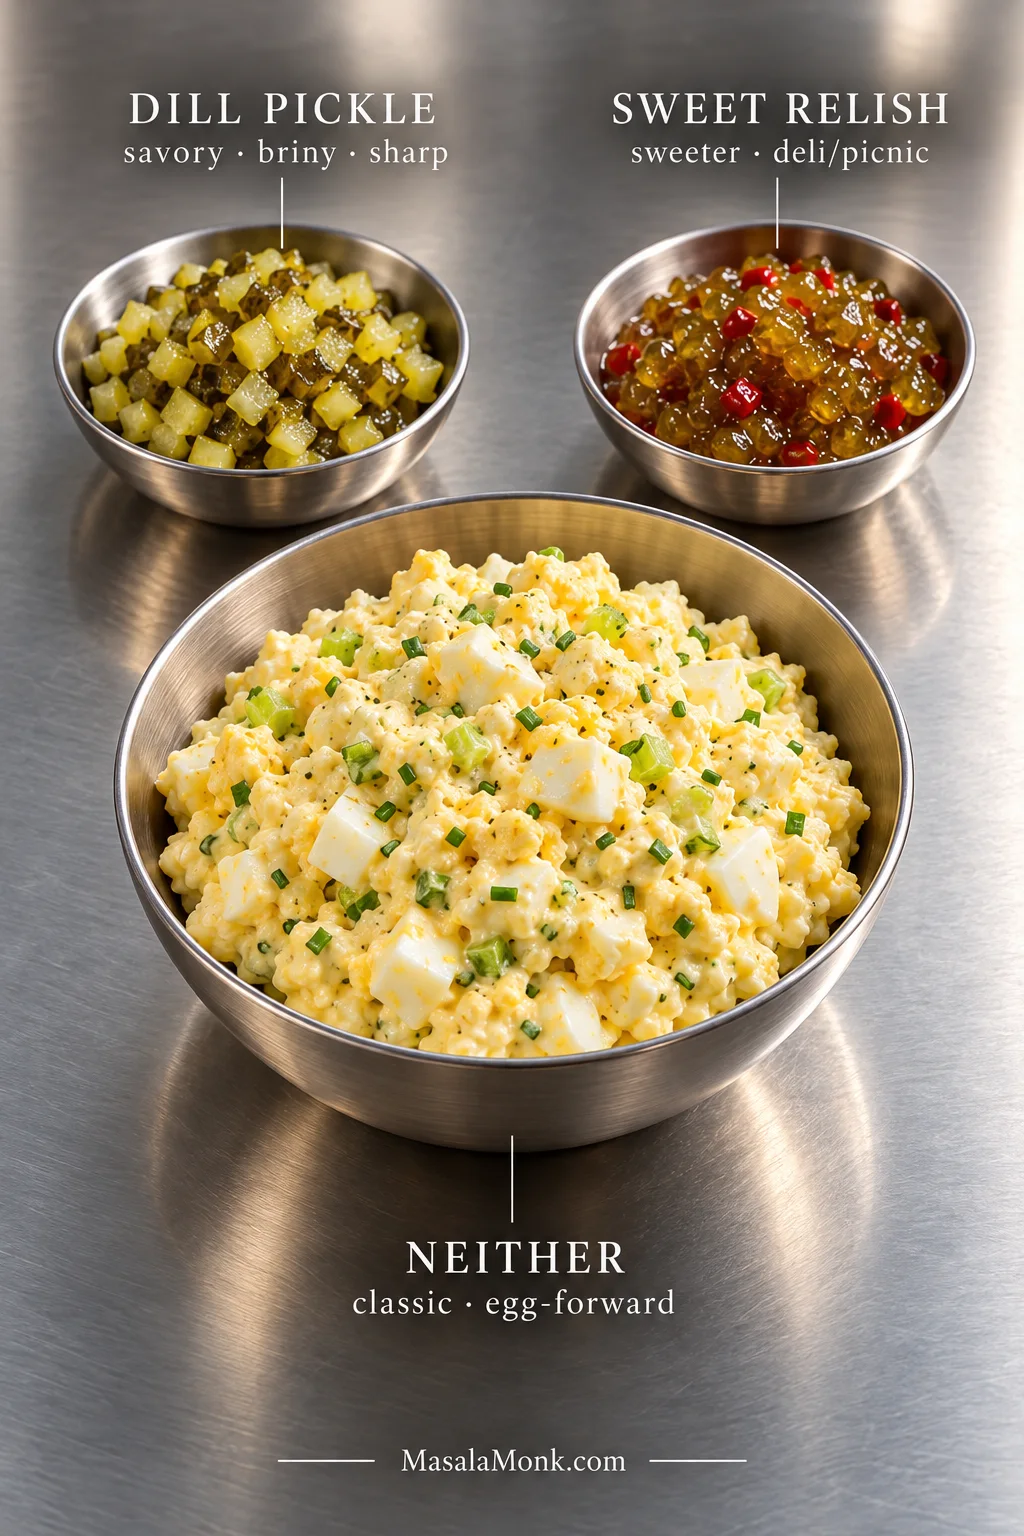
Pickle, Relish or Neither?
Plenty of good egg salads never see a pickle jar. Still, a little pickle or relish can be excellent when you want more contrast against the rich eggs and mayo.
Dill pickle or dill relish keeps the flavor savory, briny and sharp. Sweet relish moves the salad toward that sweeter, old-fashioned picnic or deli style. Tiny pieces are enough—you want an occasional salty or sweet hit, not pickle in every bite.
Drain spoonable relish well and blot chopped pickles before folding them in. That keeps their briny or sweet flavor in the salad without bringing extra liquid along with it.
For six eggs, 1–2 tablespoons is plenty. Chop pickles finely and drain or blot them well. The flavor belongs in the salad; the extra liquid doesn’t.
Pickle brine counts as liquid. A teaspoon can brighten the dressing nicely, but once brine goes in, taste before adding the full amount of lemon.
If you want another accent, try fresh dill, paprika, hot sauce, capers or horseradish—but pick one direction rather than piling several competing flavors into the same salad. Our egg seasoning guide has more ideas when you want them.
What You Can Leave Out or Swap
Don’t like celery? Leave it out. No mustard is fine too. Egg salad doesn’t stop working because one of the usual additions isn’t your thing.
A salad without celery is softer; one without mustard is milder. Neither is a broken recipe.
Start with ¼ cup thick, full-fat Greek yogurt in place of the ¼ cup mayonnaise. Expect a tangier, less rich salad; adjust the texture after mixing.
Mustard
Leave it out.
Celery
Nothing has to replace it. Finely chopped pickle or scallion adds crunch if you miss it.
Scale the Batch
Got four eggs instead of six? There’s no need to make another trip to the store. For any batch size, start with about 2 teaspoons (10 g) mayonnaise per egg. The table below gives a few useful reference points.
Start with about 10 g of mayonnaise per egg. Three eggs need roughly 30 g; five need about 50 g. Then let the finished texture—not the arithmetic—decide whether you need more.
Eggs
Starting mayo
Dijon to start
2
1 tbsp + 1 tsp / ~20 g
About ½ tsp
4
2 tbsp + 2 tsp / ~40 g
About 1¼ tsp
6
¼ cup / ~60 g
2 tsp
12
½ cup / ~120 g
1 tbsp + 1 tsp
For the yolk dressing, mash 1 yolk for a 2–4 egg batch, 2 yolks for 6 eggs, and about 4 yolks for 12 eggs.
Mustard and lemon don’t need laboratory precision. Scale the mayonnaise carefully; adjust the seasoning once the smaller or larger batch is mixed.
Boiling a full dozen but only using half here? The extras are perfect for a batch of classic deviled eggs.
For a sandwich that stays together, use cold, moundable egg salad and roughly ⅓–½ cup per sandwich. Spread it evenly, and add a moisture barrier if lunch has to travel.
Soft bread benefits from a thin butter or mayonnaise barrier when the sandwich has to sit before lunch. Keep the filling cold, spread it level, and add juicy vegetables closer to serving time.
The filling can be perfect in the mixing bowl and still end up down your fingers once it meets bread. Loose salad squeezes out. Too much filling makes every bite awkward. Soft bread eventually gives in to moisture.
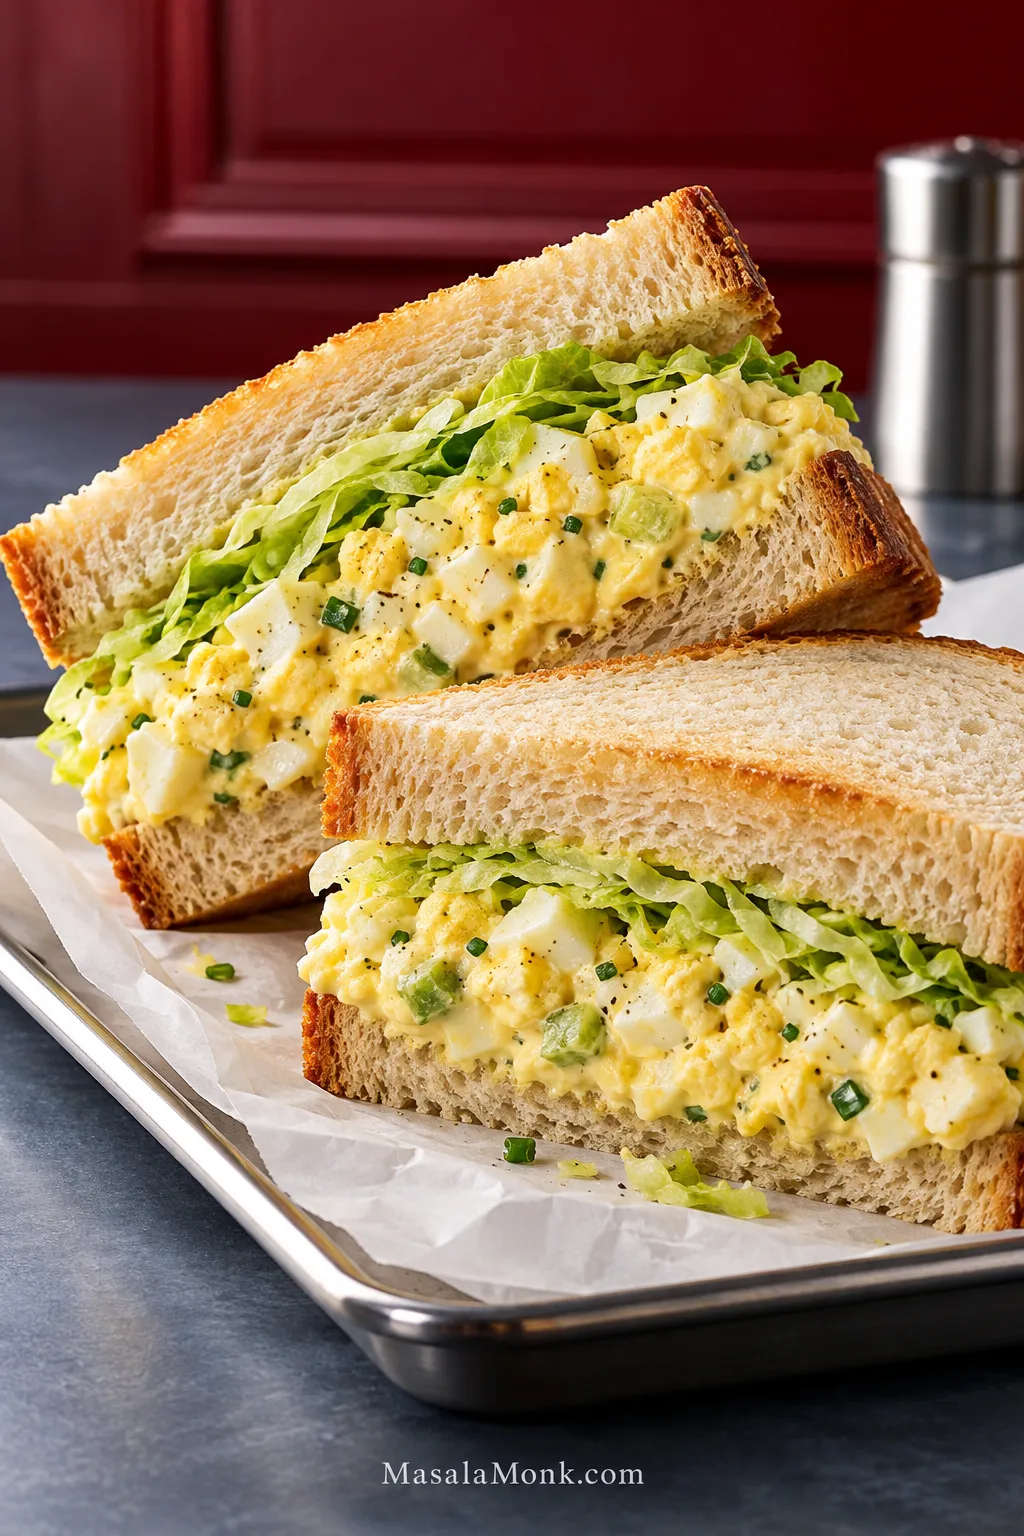
Spread the filling into an even layer and leave a little space around the edges. There’s no advantage to building a mountain in the middle. If you’re adding lettuce, finely shredded leaves add some grip; one broad leaf sometimes acts more like a slide.
Soft white, Pullman or whole-wheat bread gives you a tender sandwich when lunch is being eaten soon. Toasted rye or sourdough adds more structure and holds up better when the sandwich needs to travel.
4 Easy Egg Salad Sandwich Ideas
Classic lunchbox: soft white or whole-wheat bread, egg salad, crisp lettuce and plenty of black pepper.
Deli-style: lightly toasted rye or sourdough, dill-pickle egg salad and finely shredded lettuce.
Tea sandwiches: chop or grate the eggs finer, spread a thinner layer over lightly buttered soft white bread, trim the crusts and cut into fingers or triangles.
Croissant lunch: a modest layer of egg salad, butter lettuce and extra chives inside a split croissant.
Match the filling to the bread: use a thin layer for tea sandwiches, a moderate amount in a croissant, and a generous but sturdy spread on toasted deli bread.
A toasted homemade bagel is another sturdy option, especially with chives, black pepper or dill pickle in the filling.
No bread at all is fine too. A scoop of cold egg salad works with crisp crackers, tucked into lettuce cups or spooned over greens.
How to Keep an Egg Salad Sandwich from Getting Soggy
For a packed sandwich, a very thin coating of butter or mayonnaise on the inside of the bread slows moisture from soaking in. Lettuce helps as well. Save juicy tomato or cucumber for closer to serving time—after several hours inside a packed sandwich, both can make the bread noticeably wetter.
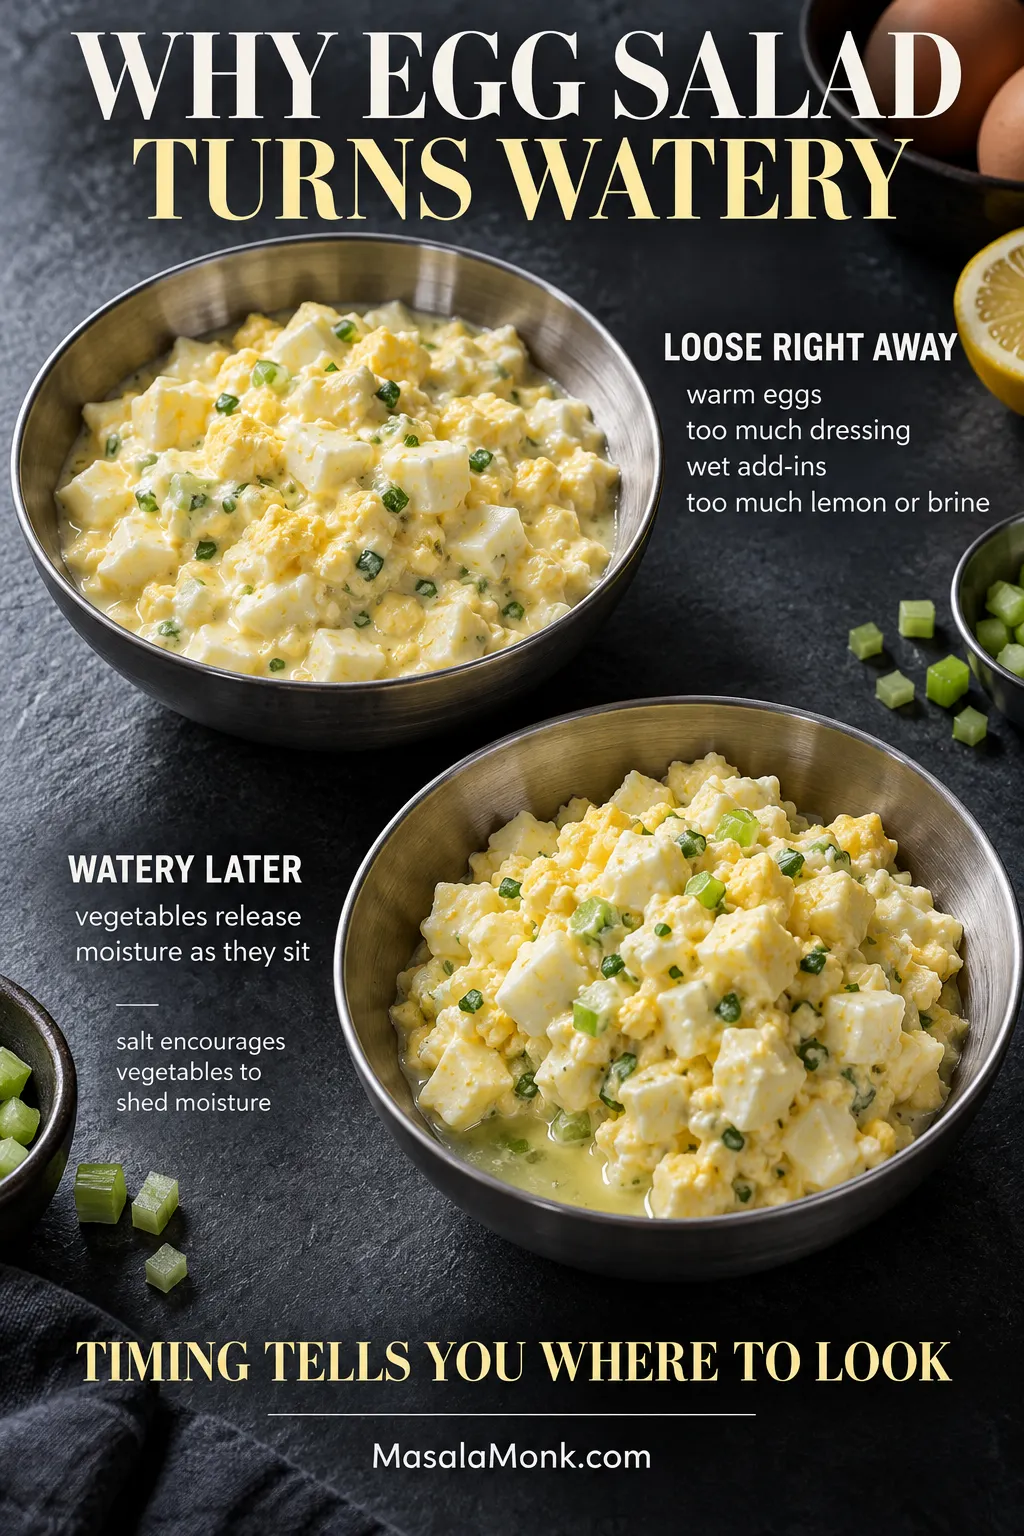
Why Egg Salad Turns Watery
Egg salad that is loose or glossy immediately usually has warm eggs, too much dressing, or wet add-ins. Too much lemon or pickle brine can thin it too. Liquid pooling later is different: that is usually moisture released by celery, onion, pickles or other vegetables as the salad sits.
The timing tells you where to look first. A salad that is loose immediately has a different problem from a batch that starts out fine and develops a shiny pool at the bottom after a night in the fridge.
Look at the liquid as well as when it appears. A glossy, slumping mixture suggests excess dressing or warm ingredients; a thin, clear pool around the bowl edge is a stronger clue that vegetables released moisture as the salad sat.
Salt encourages chopped vegetables to shed moisture as they sit. That’s why the salad can look just right at first and wetter the next day.
Match the Fix to When the Water Appears
What you see
Likely cause and fix
Loose or glossy immediately
If the eggs were still warm, chill the salad first. If it remains too loose, fold in a little additional chopped cooked egg. Next time, cool the eggs fully, measure the mayo before adding more, and drain wet add-ins well.
Liquid pooled after sitting
Celery, onion, pickles or other vegetables have probably released moisture as the salad rested. Spoon or blot away obvious pooled liquid, then stir gently. Dry wet add-ins well next time and save very juicy vegetables for serving.
Cucumber is refreshing with egg salad, just not mixed into a batch that needs to hold overnight. For that same cool crunch without extra water, serve a crisp cucumber salad alongside.
A Few Common Fixes
Too dry? Stir it first; chilled egg salad sometimes tightens as it rests. Still dry? Add mayo a teaspoon at a time.
Bland? Check the salt. Dijon, lemon or pickle brine can bring back some brightness once the seasoning is right.
Tastes mostly of mayo? Fold in more chopped cooked egg if you have it. Otherwise, start with less mayonnaise next time and add more only after mixing.
Too sour or sharp? A small spoonful of mayo softens mild sharpness. If you’ve added far too much lemon or brine, there isn’t a neat one-spoon fix.
Turned pasty? The eggs were probably chopped too finely or mixed too long. It is hard to undo completely; next time, stop while the whites are still easy to pick out.
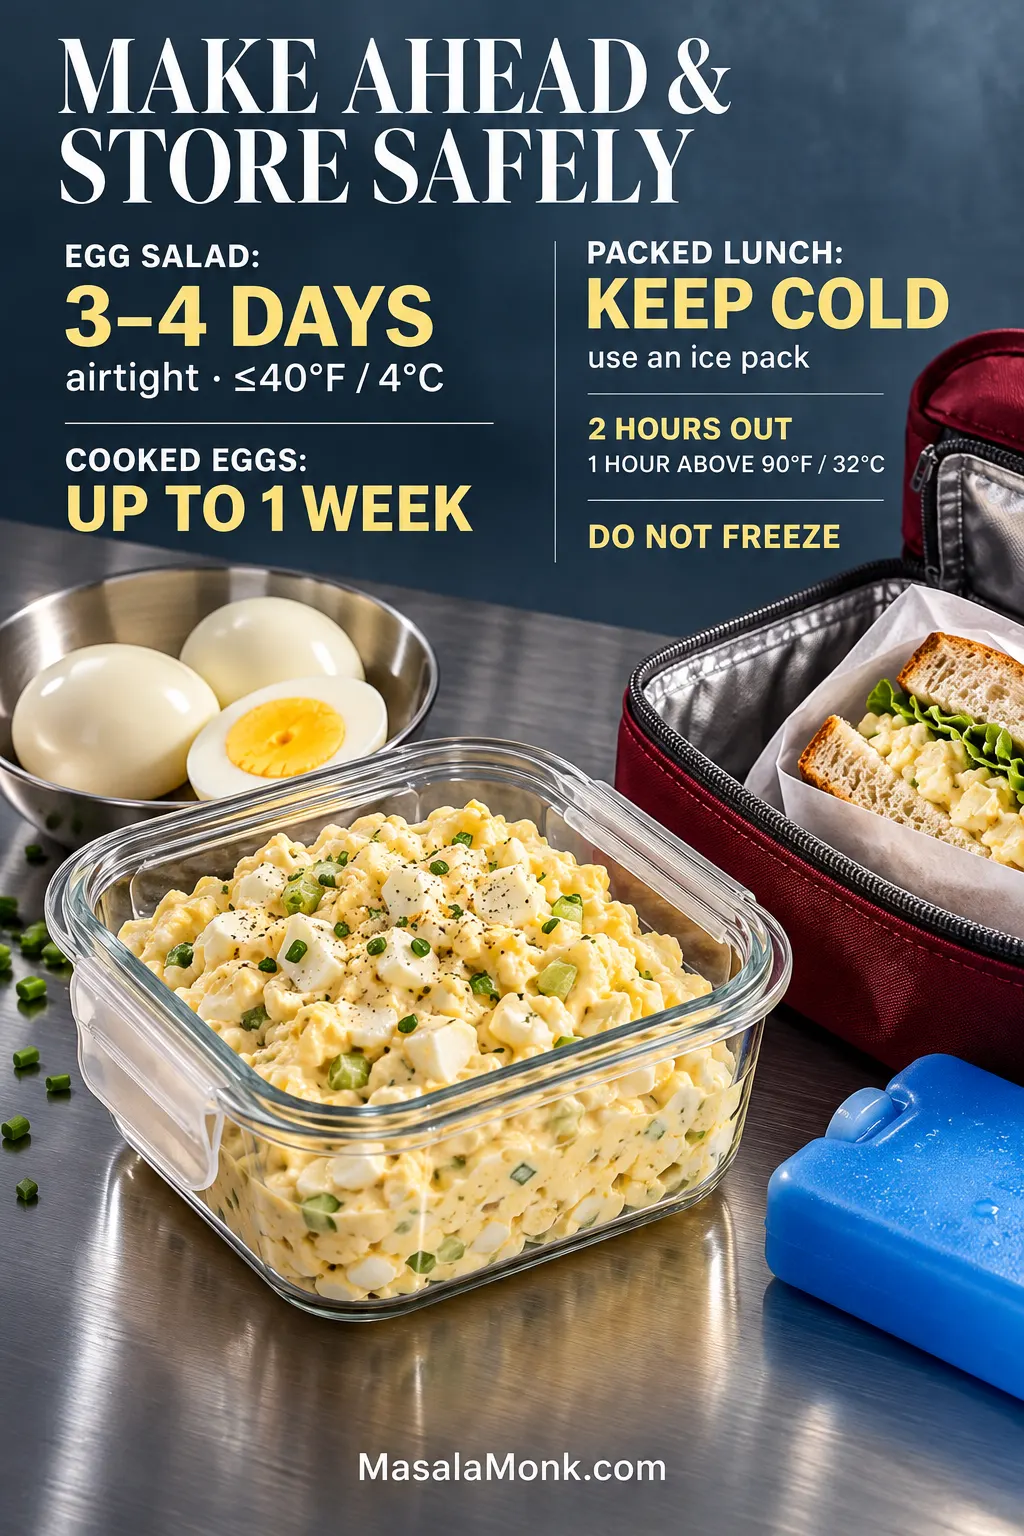
Finished egg salad keeps for 3–4 days in an airtight container in the refrigerator at 40°F (4°C) or colder. It doesn’t freeze well; the whites become rubbery and the creamy dressing loses its smooth texture after thawing.The FoodSafety.gov cold-storage chart gives the official storage window.
Egg salad is excellent the day it is made and works well a day ahead too. To prep farther in advance, cook the eggs first and leave the mixing until later. Properly refrigerated hard-cooked eggs can be kept for up to 1 week. Once they are mixed into egg salad, use the earlier limit: 3–4 days for the finished salad, or sooner if the cooked eggs were already several days old. FDA egg-safety guidance has the full handling advice.
Packed sandwiches need to stay cold too. Use an insulated lunch bag with an ice pack or frozen gel pack. Cooked eggs and egg dishes should not sit unrefrigerated for more than 2 hours, or more than 1 hour above 90°F (32°C).
Date the container when you mix the salad and use it within 3–4 days, or sooner if the cooked eggs were already several days old. Keep a packed sandwich cold with an ice pack.
For a picnic, serve the egg salad with potato salad, crisp vegetables and something salty on the side.
Once the salad is cold and seasoned, there isn’t much left to fuss with. Spoon it onto good bread, add something crisp if you want it, and lunch is done.
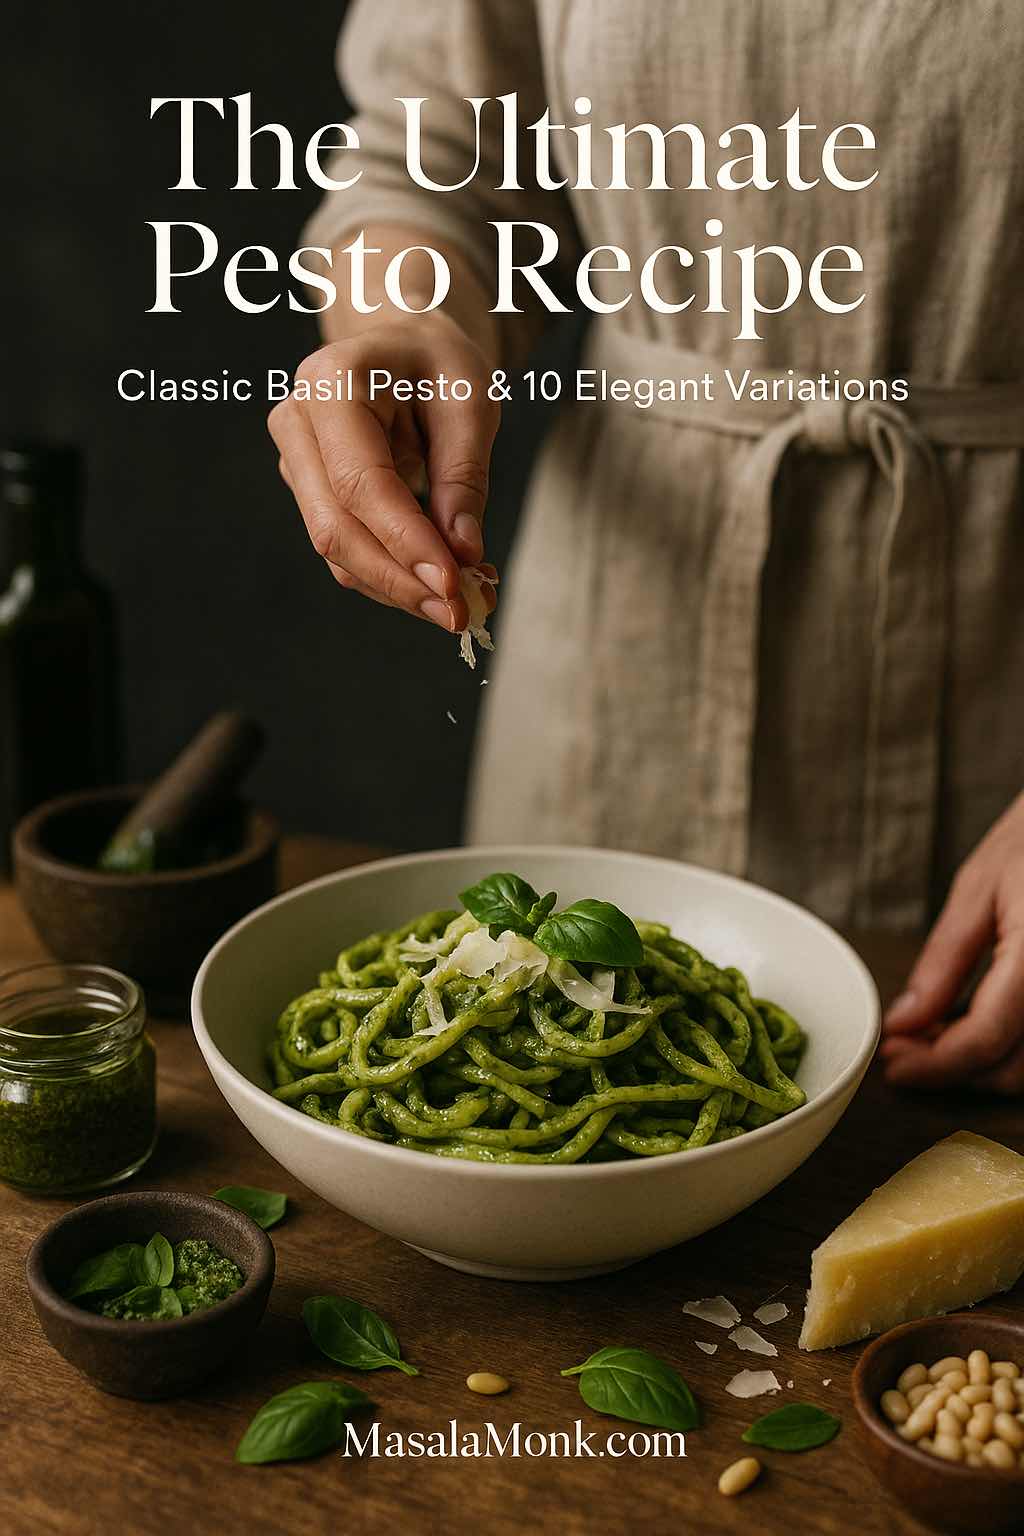
There are days when dinner looks like plain boiled pasta, some grilled chicken, maybe a tired bag of salad leaves. And then there are days when a spoonful of emerald-green pesto sauce hits the plate and suddenly everything looks intentional. Pesto is one of those sauces that seems fancy when it comes from a jar, but becomes shockingly simple once you learn how to make it yourself. A handful of basil, a little garlic, a nut or two, good olive oil, a salty cheese – that’s all it takes for a classic pesto recipe.
From learning basic – How to make Pesto, you can move in countless directions: vegan pesto, nut free pesto, red pesto with sun dried tomato, pistachio pesto, smooth creamy pesto sauce for pasta, pesto butter for steaks, pesto salad dressing, pesto dip for snacks and pesto mayo for sandwiches. This guide starts with a solid basil pesto sauce you can rely on every time. After that, we’ll move into ten useful variations, then finish with practical ways to use them in everyday cooking: pesto pasta, pesto pizza, pesto pasta salad, chicken pesto pasta, pesto salmon, pesto sandwich ideas and more.
What pesto actually is
At its core, pesto is a raw Italian sauce. The name comes from the Italian verb pestare, “to pound” or “to crush,” because the original method uses a mortar and pestle. A traditional pesto is made with:
Basil or another soft leafy herb
A nut, usually pine nuts
A hard, salty cheese
Garlic
Olive oil
Salt, and sometimes a touch of acidity
The most iconic version, pesto alla Genovese, comes from Liguria in northern Italy. Classic recipes from that region use only fresh basil, garlic, pine nuts, Parmigiano Reggiano, Pecorino, olive oil and salt.
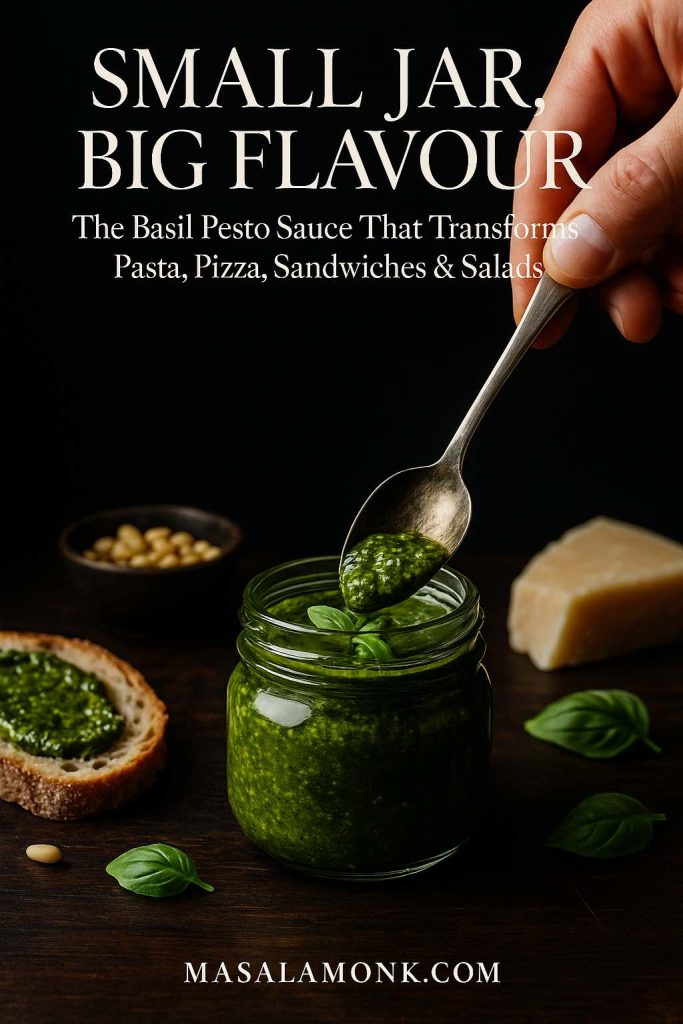
A single jar of basil pesto sauce can turn simple bread, pasta or vegetables into something worth lingering over.
Modern cooks bend the rules a bit. Walnuts often replace pine nuts. Some recipes use almonds or pistachios. Others lean on kale or rocket instead of all basil. In some kitchens, cheese is omitted completely in favour of nutritional yeast, turning it into a vegan pesto sauce. Even so, the structure stays the same: a rich, thick, uncooked herb sauce that can be thinned to make pesto pasta sauce or used thick as a pesto spread.
Because it’s based on olive oil, nuts, basil and cheese, pesto also sits in that rare category of condiments that feel indulgent but can still support a fairly balanced way of eating. Nutrition writers often point out that it’s rich, yes, but mostly in unsaturated fats and antioxidants.
So if you’ve only met pesto in the form of a slightly dull jar that lives at the back of the fridge, it’s worth meeting it again, properly fresh.
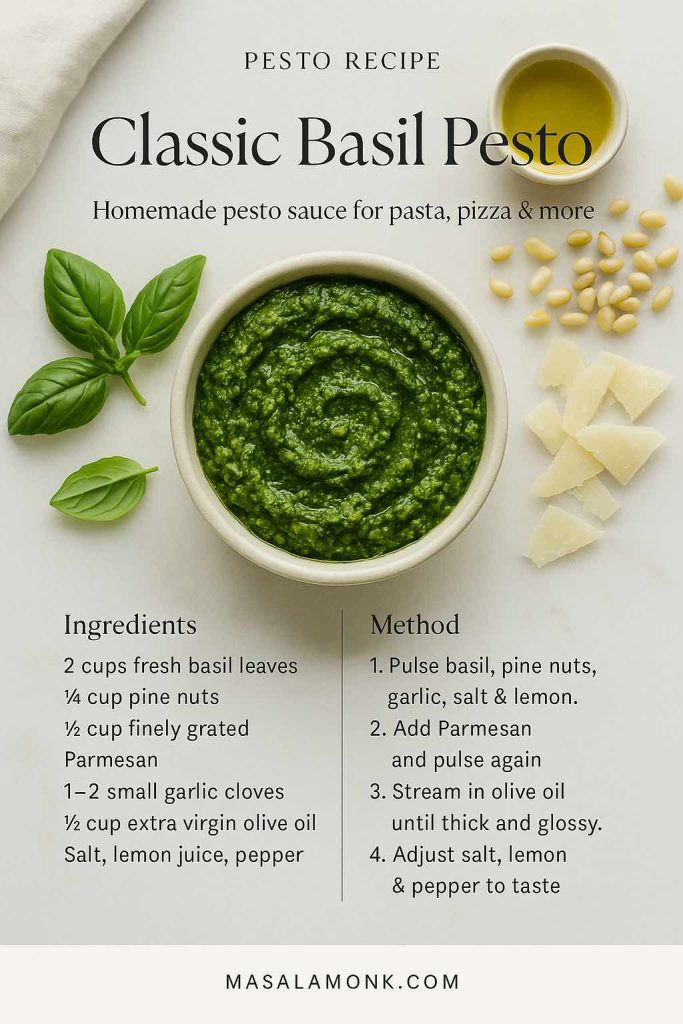
This is your baseline pesto recipe. Every variation later either starts from here or uses the same ratio logic.
Ingredients (about 1 cup)
2 packed cups fresh basil leaves
¼ cup pine nuts (walnuts or almonds also work)
½ cup finely grated Parmesan, or a mix of Parmesan and Pecorino
1–2 small garlic cloves, smashed
½ cup extra virgin olive oil, plus more to cover for storage
½–1 tablespoon lemon juice (optional but brightening)
½ teaspoon fine salt, or to taste
A pinch of black pepper
You can swap quantities slightly to taste – more cheese for a saltier pesto, more nuts for a richer pesto, more olive oil for a looser pesto sauce – but this is a reliable starting point.
Classic Basil Pesto – a quick reference card you can save or pin. Keep this homemade pesto sauce ratio handy for pasta, pizza, salads and more.
How to make basil pesto (processor method)
Although the traditionalists might side-eye the blender, most home cooks will use one. Used gently, it still makes excellent pesto.
Build the flavour base Tip the basil leaves, pine nuts, garlic, salt and lemon juice into a food processor. Pulse in short bursts until everything is finely chopped. You want a moist, finely minced mixture, not a purée yet.
Fold in the cheese Add the grated Parmesan. Pulse again a few times to mix it through.
Stream in the olive oil With the processor on low, slowly pour in the olive oil. Watch the texture: once it turns into a thick, glossy paste that loosens slightly as the blade moves, you’re there. Scrape down the sides once or twice.
Taste and balance Now check what you’ve got. Too heavy? Add a little more lemon. Too sharp? Round it out with a spoonful more olive oil or a sprinkle of cheese. Lacking intensity? A tiny pinch of extra salt usually wakes everything up.
That’s it: a classic homemade pesto sauce that works in basil pesto pasta, spooned onto grilled vegetables, folded into grain bowls, spread under cheese on toast, or served as a pesto dip with raw vegetables and crackers.
Mortar and pestle option for Pesto Recipe
If you ever feel like going fully traditional, making pesto in a mortar and pestle is worth experiencing at least once. Many Italian cooks swear the flavour and colour are better, because crushing releases oils without the same heat and aeration you get from fast blades. Recent tests from cooking writers also suggest the mortar method gives a silkier, more stable emulsion that clings beautifully to pasta.
The order matters:
Pound garlic and salt to a smooth paste.
Add basil in handfuls, crushing and twisting until it collapses into a thick green paste.
Add the nuts and smash until they mostly disappear into the basil.
Work in the grated cheese.
Finally, drizzle in olive oil and stir until you have a cohesive sauce.
The flavour will be softer, less grassy, and the colour often stays more vivid.
How to store pesto safely
Homemade pesto is raw and includes fresh basil, garlic and oil, so storage isn’t something to wing.
Guidance from the National Center for Home Food Preservation is very clear: pesto should be made fresh, kept in the refrigerator for no more than three days, and frozen for any longer storage.
A practical approach at home:
Spoon pesto into a clean jar.
Smooth the top and pour a thin layer of olive oil over the surface.
Close and refrigerate for up to 2–3 days.
For longer, portion into ice cube trays or small containers and freeze.
Food preservation experts repeatedly stress that pesto should not be canned; there are no safe, tested canning times for an oil-rich, low-acid mixture like this, and freezing is the recommended method instead.
With the base recipe and storage sorted, the fun part begins.
Instead of thinking of each variation as a completely new pesto recipe, it helps to treat the classic version as a template:
Greens or herbs
Nuts or seeds
Cheese or a savoury substitute
Garlic or a more gentle flavour base
Olive oil
Salt, with optional lemon or vinegar
Every variation below changes one or more of those slots: sometimes to accommodate dairy-free, nut-free or low FODMAP needs, and sometimes simply to chase a different flavour.
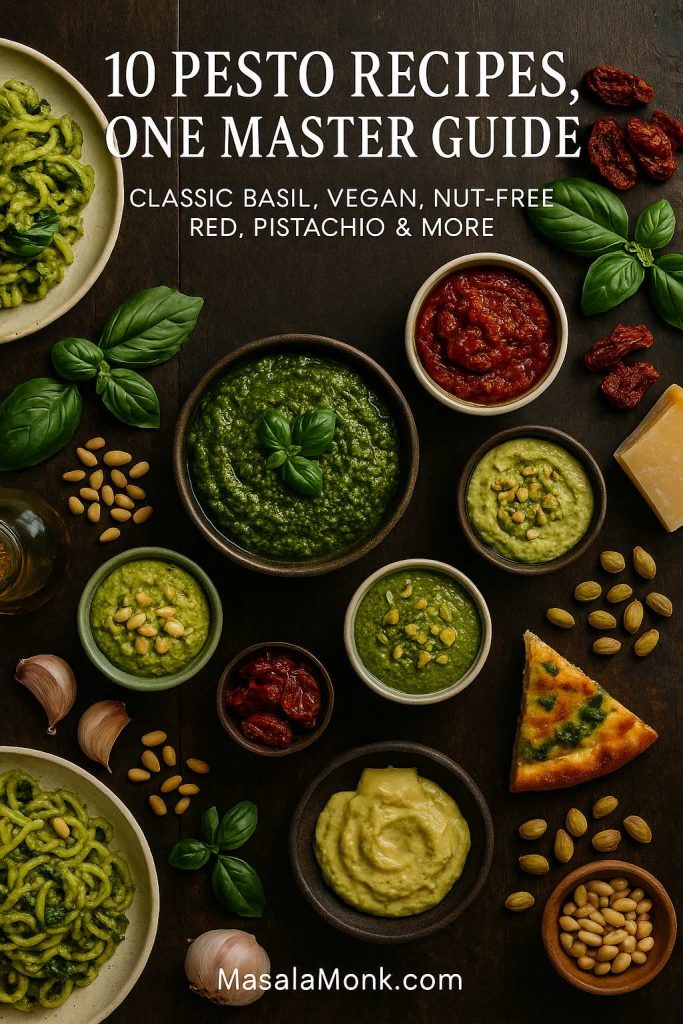
Classic basil, red, vegan, nut-free, pistachio and more – this board of pesto variations shows how one master recipe branches into ten different sauces.
When you take cheese out of pesto, you have to put savouriness back somehow. Luckily, that’s exactly what nutritional yeast is good at.
A very simple vegan pesto looks like this:
2 cups basil (or basil plus a little parsley)
¼ cup nuts or seeds – cashews, walnuts, pine nuts or pumpkin seeds
3–4 tablespoons nutritional yeast, instead of Parmesan
1–2 cloves garlic
Olive oil, lemon juice, salt and pepper
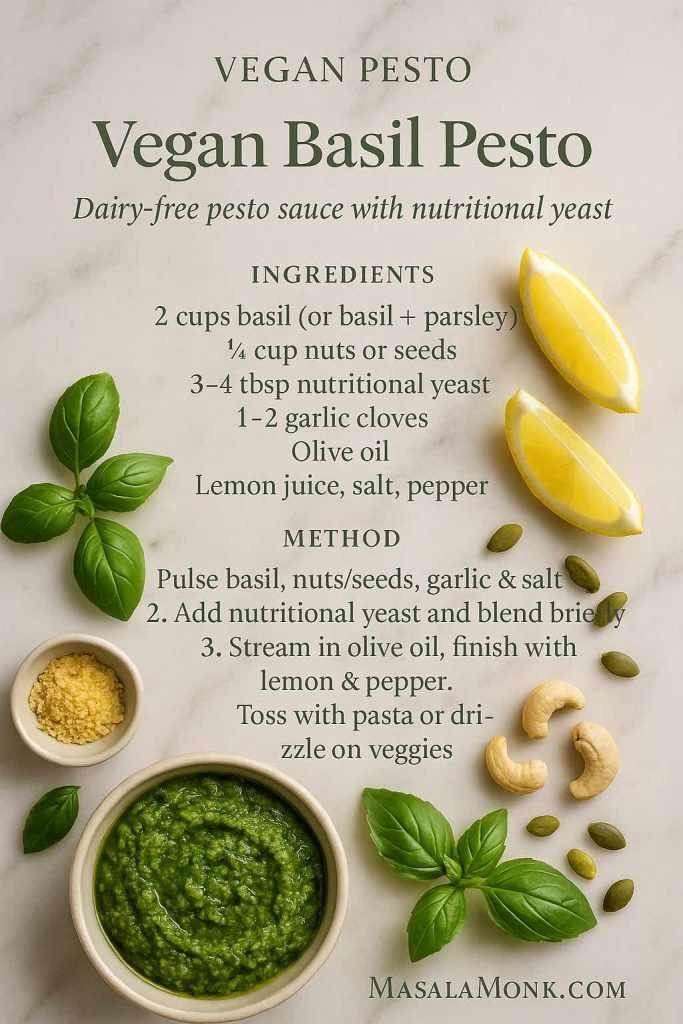
Vegan Basil Pesto – a dairy-free pesto sauce made with nutritional yeast instead of cheese. Save this quick-reference card for easy vegan pesto pasta, salads and roasted veggies.
The method is identical to the classic pesto recipe. The taste is a little different – more nutty, slightly cheesy from the nutritional yeast – but it does everything you’d want a basil pesto sauce to do: coat pasta, dress salads, work as a pesto dip, even stand in as a pesto spread on toast.
If you prefer a tested version with exact measurements, you can also look at MasalaMonk’s own fresh basil vegan pesto, which uses basil, cashews, pumpkin seeds and lemon to create a rich dairy-free sauce.
This style works beautifully with vegan pesto pasta, as a base for vegan pesto pizza, or even stirred into a pot of vegetable soup just before serving.
For nut allergies, the simplest fix is to keep basil and olive oil the same and replace pine nuts with seeds. Sunflower seeds, pumpkin seeds and hemp hearts all blend well and give a creamy pesto without nuts.
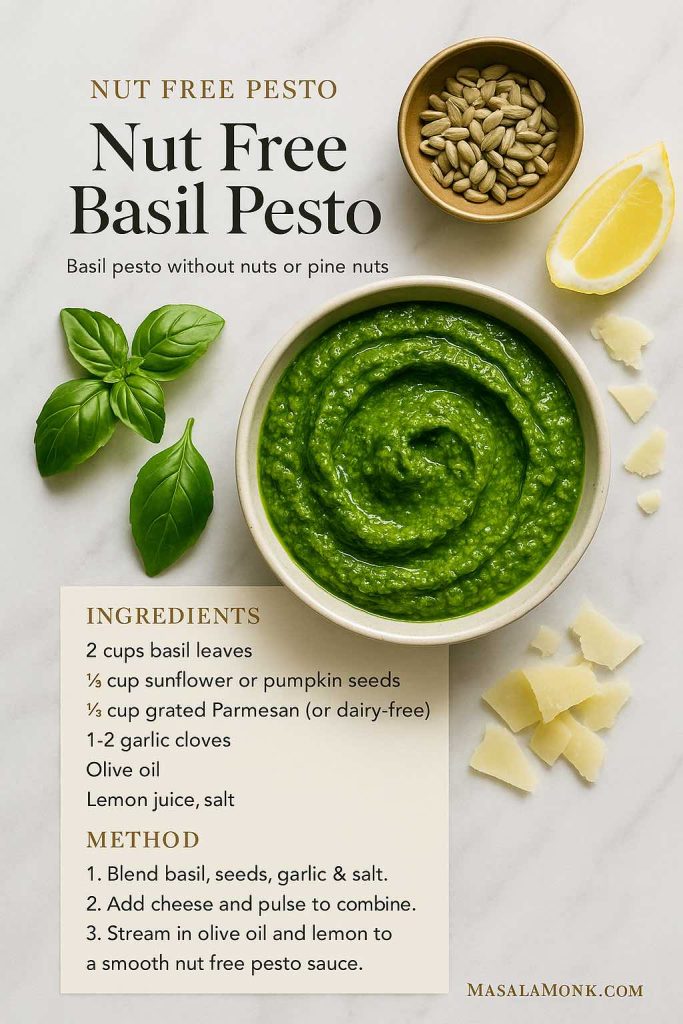
Nut Free Basil Pesto – a basil pesto recipe made with sunflower or pumpkin seeds instead of nuts or pine nuts. Pin this card for a quick, allergy-friendly pesto sauce you can use with pasta, salads and sandwiches.
A nut free pesto base might be:
2 cups basil
¼ cup sunflower or pumpkin seeds
½ cup grated Parmesan (or a dairy-free alternative if needed)
1–2 garlic cloves
Olive oil, lemon, salt
You can also skip seeds completely and rely on basil, cheese and olive oil for body. That gives you a smooth, slightly lighter pesto sauce that works in pesto pasta and pesto noodles while staying safe in nut-free homes and lunchboxes.
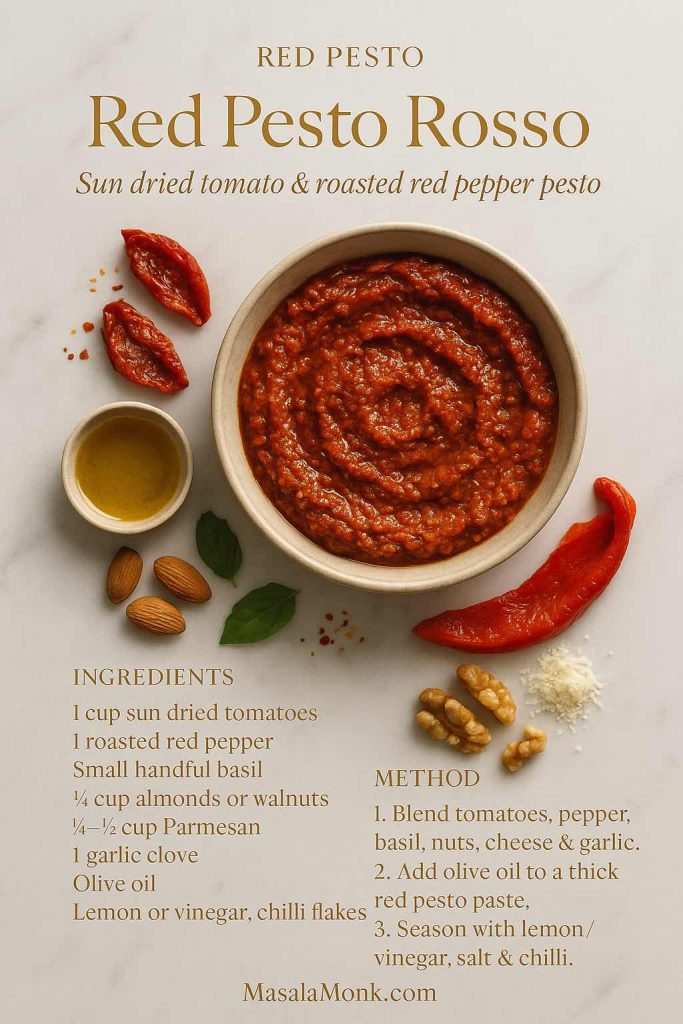
3. Red Pesto Recipe (Sun Dried Tomato Pesto Rosso)
Red pesto – sometimes called pesto rosso – swaps out most of the basil for tomatoes and peppers. It’s richer, deeper and a little sweeter, and it loves grilled meats, toasted breads and hearty pasta shapes.
Red Pesto Rosso – a bold pesto made with sun dried tomatoes and roasted red pepper. Save this card for quick red pesto pasta, crostini, grilled chicken or roasted vegetable bowls.
A flexible red pesto pattern:
1 cup drained sun dried tomato halves (oil-packed or rehydrated)
1 roasted red pepper (jarred or homemade)
Small handful fresh basil leaves
¼ cup toasted almonds or walnuts
¼–⅓ cup grated Parmesan
1 garlic clove
Olive oil as needed
A spoon of red wine vinegar or lemon juice
Optional pinch of dried chilli flakes
Blend everything except the oil first, then add oil until it turns into a thick, glossy paste. Use this red pesto with penne for a punchy red pesto pasta, toss it through warm potatoes, spread it inside a pesto grilled cheese, or spoon it over roast chicken.
To make a slightly sharper version, you can lean more on roasted red pepper, a little chilli pesto style heat, and less on tomatoes. Either way, this lives firmly in the “fast weeknight pasta” category.
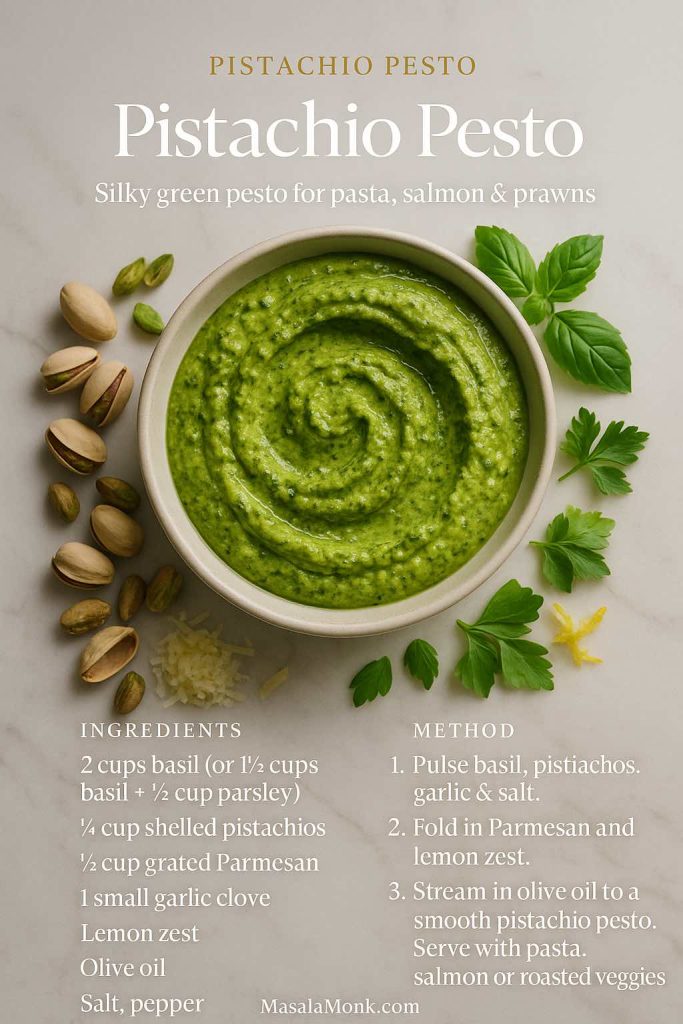
4. Pistachio Pesto Recipe (How to Make Pistachio Pesto)
Pistachio pesto feels fancy, but it’s just a simple swap: pistachios instead of pine nuts. However, the effect is dramatic. The sauce becomes silkier and a touch sweeter, pairing beautifully with seafood, chicken and grilled vegetables.
Pistachio Pesto – a silky, slightly sweet pesto that’s perfect with pasta, salmon or prawns. Save this recipe card so you always have the pistachio-to-basil ratio handy for an instant gourmet pesto sauce.
A good starting ratio:
2 cups basil (or 1½ cups basil + ½ cup flat-leaf parsley)
¼ cup pistachios, shelled
½ cup grated Parmesan
1 small garlic clove
Finely grated lemon zest
Olive oil, salt and pepper
This pistachio pesto is wonderful tossed with spaghetti, folded into a pistachio pesto pasta salad, spooned over pesto salmon, or drizzled onto roasted cauliflower and carrots.
For an even greener effect, you can blend in a few spinach leaves or rocket with the basil. It’s not necessary, but it does make a bowl of pasta look restaurant-ready.
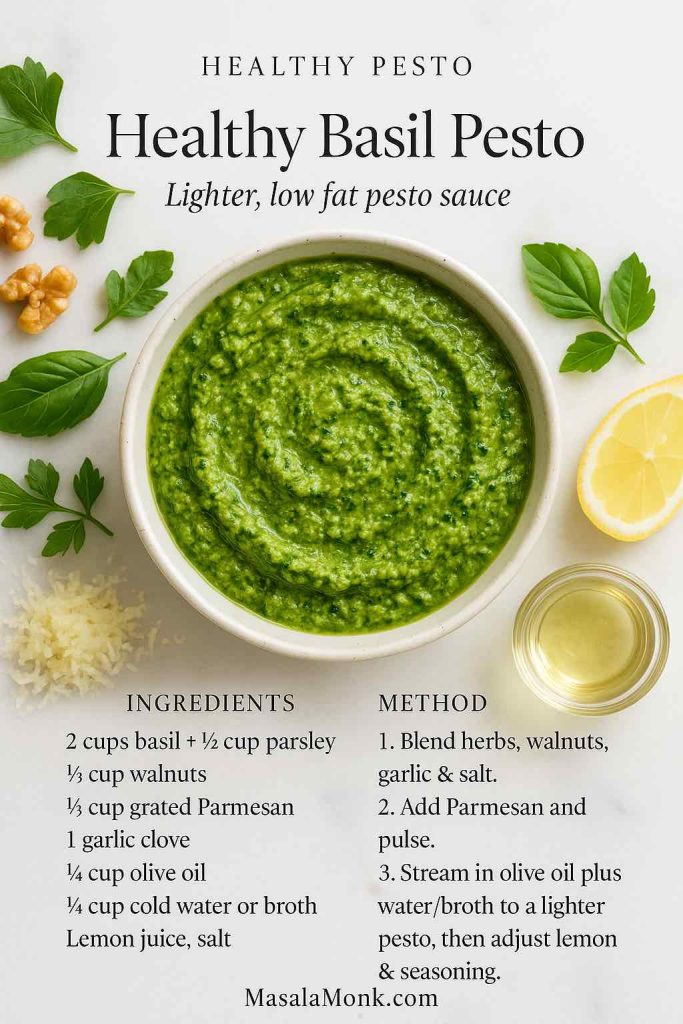
Pesto isn’t a low-calorie sauce; most of its calories come from olive oil, nuts and cheese. That said, those calories aren’t empty. Several nutrition write-ups describe pesto as energy-dense but also rich in unsaturated fats and antioxidants from olive oil and basil, and suggest it can absolutely fit into a balanced diet in reasonable portions.
Healthy Basil Pesto – a lighter, low fat pesto sauce made with extra herbs, walnuts and a mix of olive oil plus water or broth. Save this card for days when you want pesto flavour with a gentler calorie hit for your pasta, salads and grain bowls.
If you’d like a lighter pesto for everyday use, there are a few gentle tweaks:
Replace part of the olive oil with cold water or vegetable broth.
Use slightly less cheese and bump up the basil and parsley instead.
Add a spoonful of yogurt or soft ricotta to create a creamy pesto sauce that feels rich but uses less oil.
Season with a lighter hand if you’re watching sodium.
One simple “healthy pesto” approach is:
2 cups basil + ½ cup parsley
¼ cup walnuts
⅓ cup grated Parmesan
1 garlic clove
¼ cup olive oil + ¼ cup cold water
Lemon juice and salt to taste
This still coats pasta nicely, yet feels less heavy. You can also thin it further into a pesto salad dressing for grain bowls built from whole wheat pasta, brown rice or quinoa. As you experiment with those bases, it’s handy to keep guides like Quinoa vs Rice: Nutrition, Glycemic Index, and When to Choose Each nearby if you like number-driven decisions.
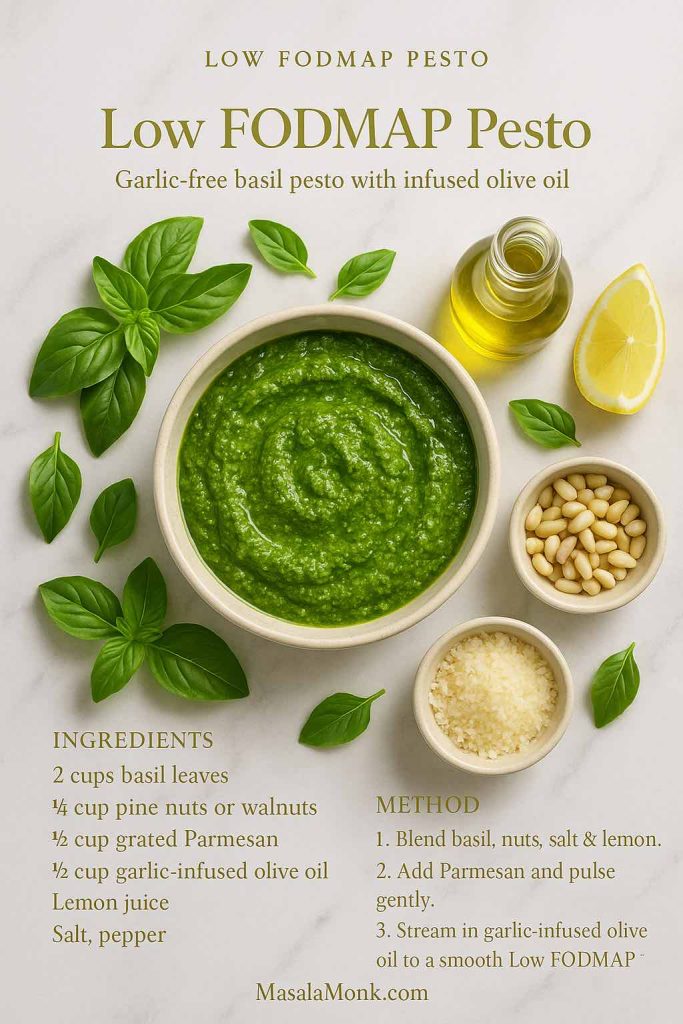
6. How to make Pesto – Low-FODMAP and no-garlic
For anyone with a sensitive gut, raw garlic can be a problem. Yet most of the character in classic pesto comes from garlic and basil together, so the trick is to soften the impact without losing all of the aroma.
Low FODMAP Pesto – a garlic-free basil pesto made with garlic-infused olive oil so you keep the flavour without the FODMAP load. Save this card if you need a gentler pesto option for sensitive stomachs, pasta, salads or grain bowls.
Two easy strategies:
Skip garlic entirely and balance the flavour with more lemon zest, basil and cheese.
Use garlic-infused olive oil in place of both garlic and some of the plain oil.
A low-FODMAP-friendly pesto might look like this:
2 cups basil
¼ cup pine nuts or walnuts
½ cup Parmesan
½ cup garlic-infused olive oil
Lemon juice, salt and pepper
You can make the same kind of adjustments to red pesto, pistachio pesto and kale pesto. The result won’t be identical to the garlicky classic, but it still gives you herby, savoury richness for pesto pasta, pesto macaroni salad, pesto and chicken, pesto and salmon or even a simple pesto dip for roasted vegetables.
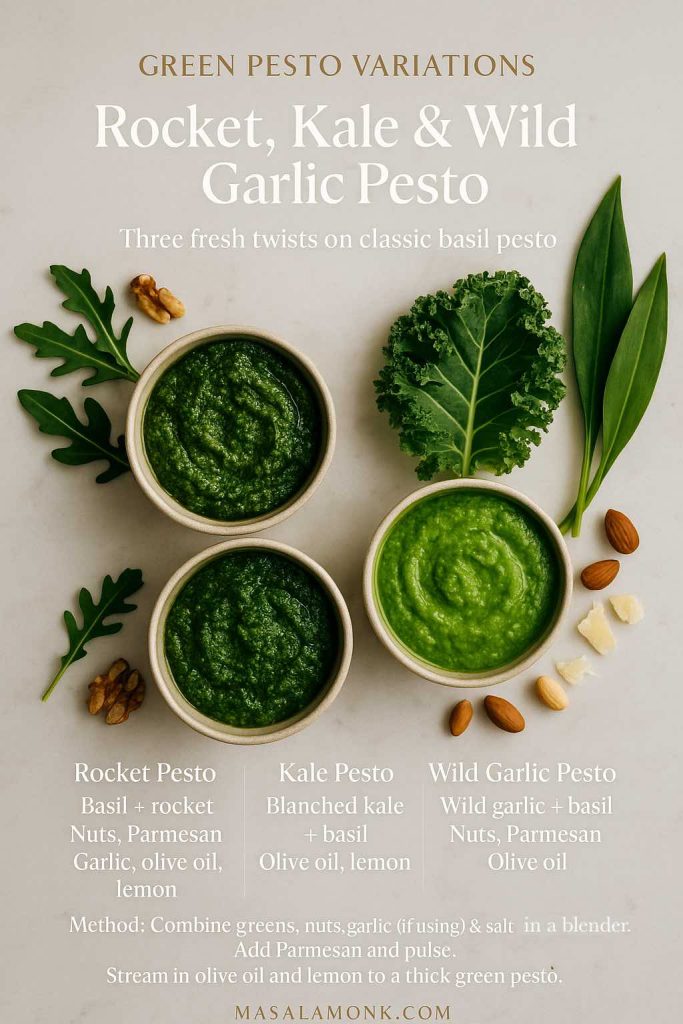
7. Green pesto recipe variations: rocket, kale and wild garlic
Sometimes you simply don’t have enough basil. Other days you have a bag of kale that needs using, or a bunch of rocket that’s about to wilt. Pesto is kind to those situations.
Rocket, Kale & Wild Garlic Pesto – three fresh twists on classic basil pesto. Use this card as a quick guide to swap in rocket, blanched kale or wild garlic when you’re short on basil but still want a big, herby pesto flavour for pasta, pizza or veggies.
Rocket pesto (arugula pesto)
Rocket has a peppery bite that cuts nicely through pasta cream sauces and rich cheeses.
1 cup basil + 1 cup rocket
¼ cup walnuts or almonds
½ cup Parmesan
Garlic, olive oil, lemon and salt
This rocket pesto works well in pasta and on pizza, and it’s especially good with grilled courgettes or roasted beetroot.
Kale pesto
As we know, Kale is sturdier than basil, so blanching it briefly helps tame bitterness and gives a smoother texture.
Blanch 2 cups kale leaves in boiling water for 30–40 seconds, then shock in ice water and squeeze dry.
Blend with 1 cup basil, ¼ cup nuts, ½ cup cheese, garlic, olive oil and lemon.
Pesto made from Kale is great in everything from warm pasta to cold pesto pasta salad and even as a pesto spread on sandwiches.
Wild garlic and garlic scape pesto
In spring, wild garlic and garlic scapes give you a short window to make some very special pesto. This is where herb-only pestos really shine: wild garlic leaves or scapes, olive oil, nuts and a little cheese turn into an intensely aromatic sauce that can make even boiled potatoes taste like something from a restaurant.
Because these greens are powerful, they often work best when combined with a little basil, spinach or parsley.
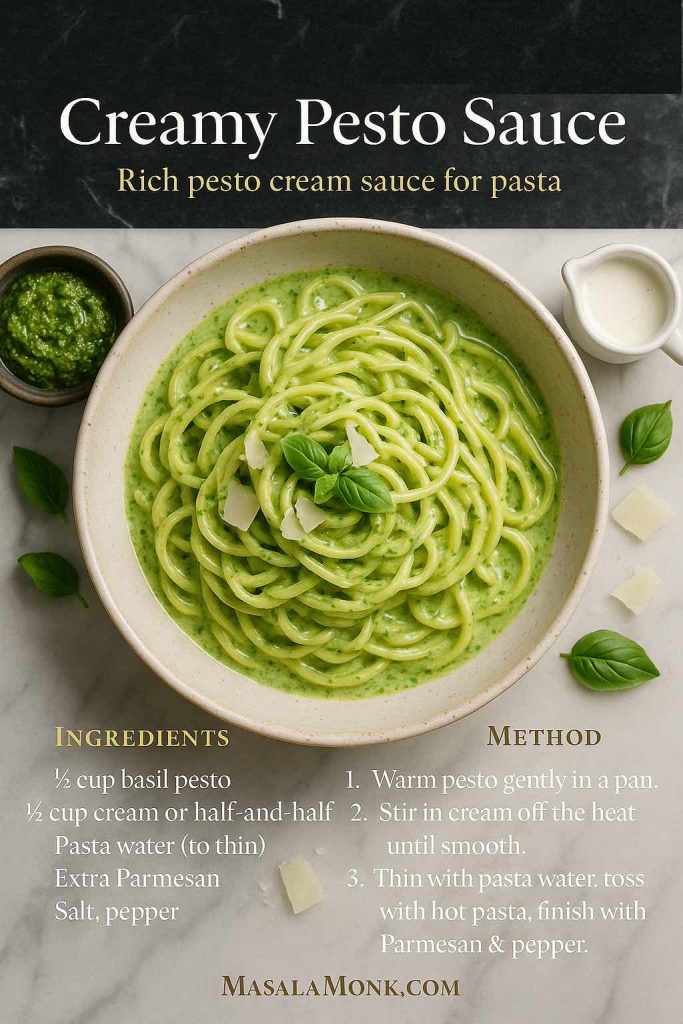
On some evenings, what you really want is a large bowl of creamy pesto pasta. Not a thin coating, not a light drizzle – a proper comfort-bowl, almost like an Alfredo, but green.
Creamy Pesto Sauce – a rich pesto cream sauce for nights when you want full comfort. Save this card to remember the simple ratio of pesto to cream, then toss it with hot pasta, add Parmesan and you’ve got an instant green Alfredo-style bowl.
There are a few different ways to get there:
Stir a splash of cream into warm pesto and toss quickly with hot pasta off the heat.
Whisk pesto with ricotta, mascarpone or Greek yogurt to make a thicker, tangier sauce.
Fold pesto into a simple white sauce or béchamel for baked dishes.
For an easy creamy pesto pasta sauce:
Warm ½ cup of basil pesto gently in a pan.
Add ½ cup of cream or half-and-half and whisk until smooth.
Thin with a little pasta water if needed.
Toss with cooked pasta, then finish with extra Parmesan and black pepper.
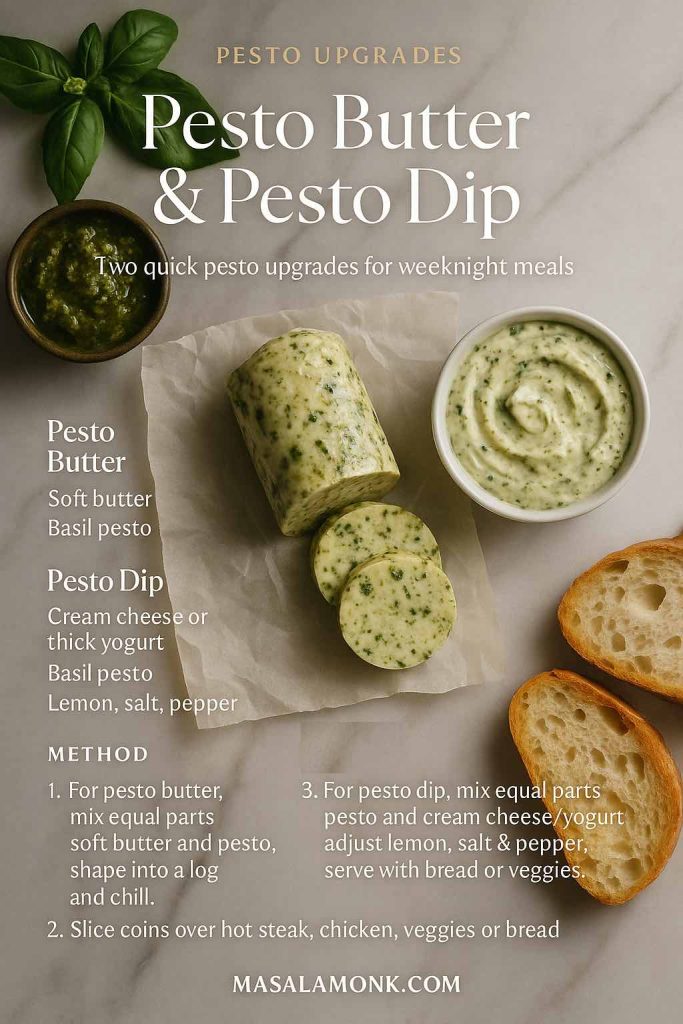
Pesto isn’t only a sauce. Once you realise it can behave like a compound butter or flavoured cream cheese, the number of quick upgrades you can pull off on a weeknight multiplies.
Pesto Butter & Pesto Dip – two fast upgrades that turn a jar of pesto into something special. Save this card so you can slice pesto butter over hot steak, chicken or veggies, and whip up a creamy pesto dip for bread, crackers or snack boards in minutes.
Pesto butter
Mix equal parts soft butter and pesto.
Shape into a log in baking paper and chill.
Slice coins of pesto butter onto grilled steak, roast chicken, steamed vegetables, jacket potatoes or warm focaccia.
The heat melts the butter, spreading basil, garlic and Parmesan over everything without any extra effort.
Pesto dip
Mix equal parts pesto and cream cheese, labneh or thick yogurt.
Adjust with lemon and pepper to taste.
This pesto dip works as a snack with vegetable sticks and crackers, or as an easy spread inside chicken pesto sandwiches, pesto grilled cheese or even a simple pesto breakfast sandwich.
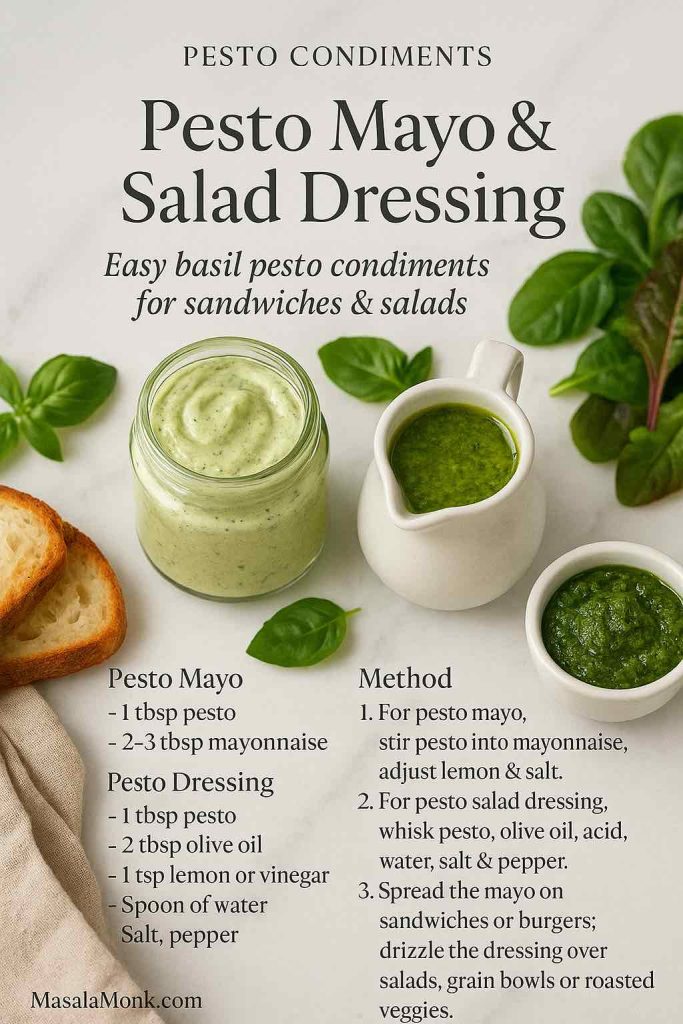
Finally, the condiments. A spoonful of pesto can transform plain mayonnaise into something special, and turns basic vinaigrettes into basil pesto salad dressing that feels like it came from a café.
Pesto Mayo & Salad Dressing – easy basil pesto condiments that turn simple sandwiches and salads into café-style plates. Save this card to remember the basic pesto-to-mayo and pesto-to-oil ratios for quick spreads and dressings.
That’s it. Use it as a spread on pesto sandwich combinations with mozzarella and tomato, or smear it over toasted bread before layering roasted vegetables or grilled chicken. It’s also excellent as a dip for potato wedges and crisp fries.
Pesto salad dressing
Whisk together:
1 tablespoon pesto
2 tablespoons olive oil
1 teaspoon vinegar or lemon juice
A spoon of water, to thin
A pinch of salt and pepper
Shake everything in a jar until smooth. This dressing slips easily over green salads, cold pesto pasta salad, tomato and mozzarella plates, grain bowls, even leftover roasted vegetables.
In lists of “better-for-you condiments”, pesto often shows up alongside salsa and hummus, because it packs a lot of flavour into a small spoon and uses ingredients like olive oil, basil and nuts that contribute useful fats and micronutrients.
Once you have a jar of pesto – classic, vegan, nut-free, red, pistachio or any other – the simplest way to make it earn its keep is to use it across multiple meals. It’s not just for pesto pasta.
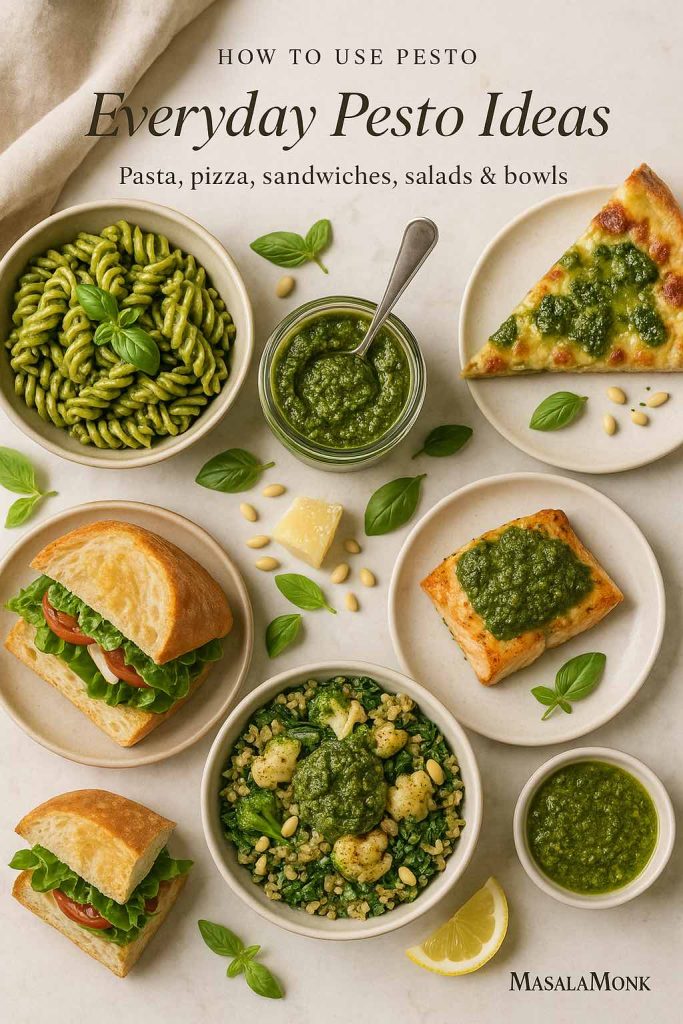
Everyday Pesto Ideas – a jar of basil pesto can turn into pesto pasta, pesto pizza, sandwiches, salmon and grain bowls in minutes. Use this visual guide to spark quick weeknight pesto meals.
Pesto pasta and pesto noodles
A basic pesto pasta follows the same pattern almost every time:
Cook pasta in well-salted water until al dente.
Scoop out a cup of the cooking water.
Drain the pasta, return it to the pot (off the heat).
Add a generous spoonful of pesto and a splash of cooking water.
Toss until each strand or shell is coated in a glossy pesto pasta sauce.
That works with spaghetti, fusilli, penne, shells and even zucchini noodles or chickpea pasta. For creamy pesto pasta, finish with a little cream, ricotta or cashew cream.
You can also take pesto pasta in different directions. For example, MasalaMonk’s Pesto Pasta: Adding 5 Delightful Indian Twists to the Italian Classic plays with coriander pesto pasta, mint pesto pasta, curry leaf pesto pasta, spinach pesto pasta and even tomato-sesame pesto, showing how flexible the basic idea is.
Pesto pasta salad
Cold pesto pasta salad is just as easy:
Cook short pasta (fusilli, farfalle, macaroni) until just tender.
Rinse briefly under cold water to stop cooking, then drain very well.
Toss with pesto, a drizzle of olive oil or yogurt, chopped vegetables and optional protein like chickpeas or cubed chicken.
Chill until serving.
You can lean creamy, with a little mayo or yogurt, or keep it sharp and light, close to a pesto dressing. Either way, it works alongside barbecues, picnics and big bowls of other sides like the potato salad variations MasalaMonk already explores.
Pesto pizza
Pesto pizza is the sort of idea that sounds like a restaurant trick but becomes a home staple once you try it.
Spread a thin layer of basil pesto over your pizza base instead of tomato sauce.
Scatter mozzarella, cherry tomatoes, olives, maybe some sliced red onion.
Add cooked chicken if you’re heading towards a chicken pesto pizza.
Bake until the cheese is bubbling and golden.
You can do the same on naan, pita breads, thin flatbreads or even thick toast for a fast pesto pizza toastie.
Enjoy Homemade Pesto – from pasta and pizza to sandwiches and grain bowls, a jar of basil pesto can turn an everyday family meal into something you look forward to sharing around the table.
Pesto sandwiches, breakfast and snacks
Pesto behaves extremely well as a spread. It cuts through richness and gives instant character.
Some ideas:
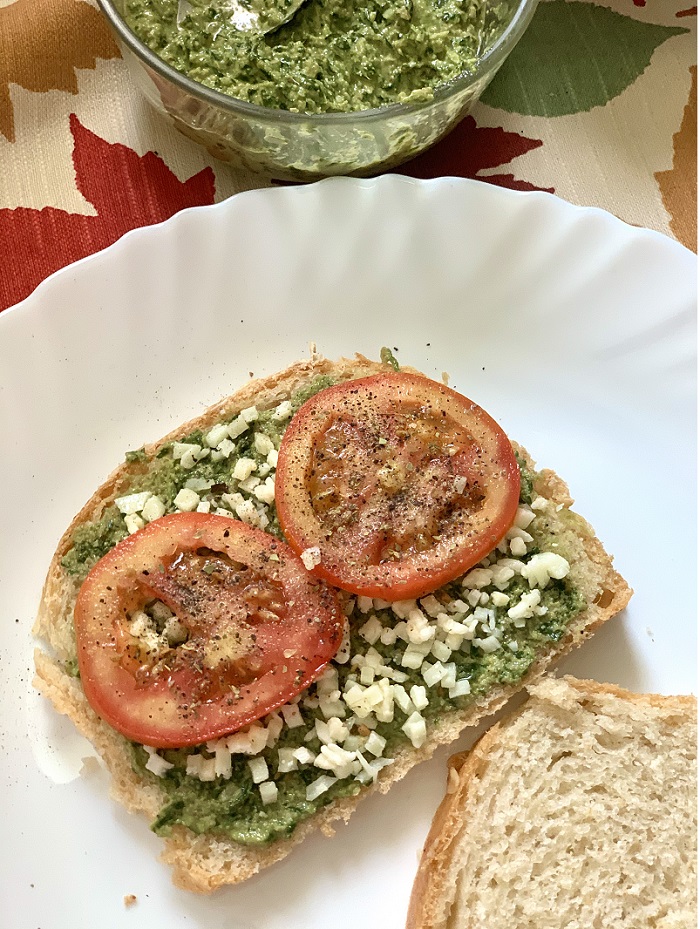
Spread pesto or pesto mayo onto toasted sourdough, add mozzarella, tomato and a little salt for a simple mozzarella pesto sandwich.
Stir pesto into scrambled eggs and tuck them into a soft roll for an egg pesto sandwich or a pesto breakfast sandwich.
Layer leftover roast vegetables, pesto and cheese into a grilled sandwich or panini and toast until crisp.
Even a spoon of pesto on a piece of warm bread next to a bowl of soup can make a simple lunch feel finished.
Pesto and protein: chicken, salmon, tuna and shrimp
Pesto also loves protein.
Toss hot pasta with chicken strips and basil pesto for a quick chicken pesto pasta.
Spoon pistachio pesto or classic basil pesto over baked salmon fillets just after they come out of the oven.
Fold pesto into tuna with a little yogurt or mayo for an upgraded tuna salad to stuff into sandwiches, wraps or baked potatoes.
Stir pesto into hot spaghetti with garlic prawns or shrimp for a spaghetti pesto shrimp bowl.
On days when you’re already cooking something creamy like Alfredo, pesto can even step in for a swirl of colour and flavour, or sit alongside recipes like Chicken Alfredo Pasta, 5 Ways as a “green cousin” that shares similar comfort but a very different flavour profile.
Pesto with grains, beans and vegetables
Pasta doesn’t get all the fun. Pesto is just as happy with grains and beans:
Toss cooked quinoa, farro or brown rice with a spoonful of pesto and roasted vegetables for an easy lunch bowl.
Stir pesto into warm white beans and serve on toast.
Mix pesto with a little extra olive oil and lemon juice and drizzle over roasted potatoes, grilled courgettes or steamed green beans.
If you enjoy building high-fibre, gut-friendly plates, those kinds of bowls also sit nicely next to pieces like Top 10 Foods for Gut Health or your quinoa comparison posts – pesto adds flavour while the base and vegetables carry most of the nutrition work.
Bringing it all together
At this point, “pesto” should feel less like a single sauce and more like a family:
A classic basil pesto recipe made from basil, pine nuts, garlic, cheese and olive oil.
A set of practical variations: vegan and dairy-free pesto, nut free pesto, red pesto, pistachio pesto, lighter healthier pesto, low-FODMAP pesto without garlic, kale and rocket pesto, creamy pesto sauce, pesto butter, pesto dip, pesto mayo and basil pesto salad dressing.
A long list of easy uses: pesto pasta and pesto noodles, pesto pasta salad, pesto pizza, pesto sandwiches, pesto chicken and pesto salmon, pesto potato salad and pesto grain bowls.
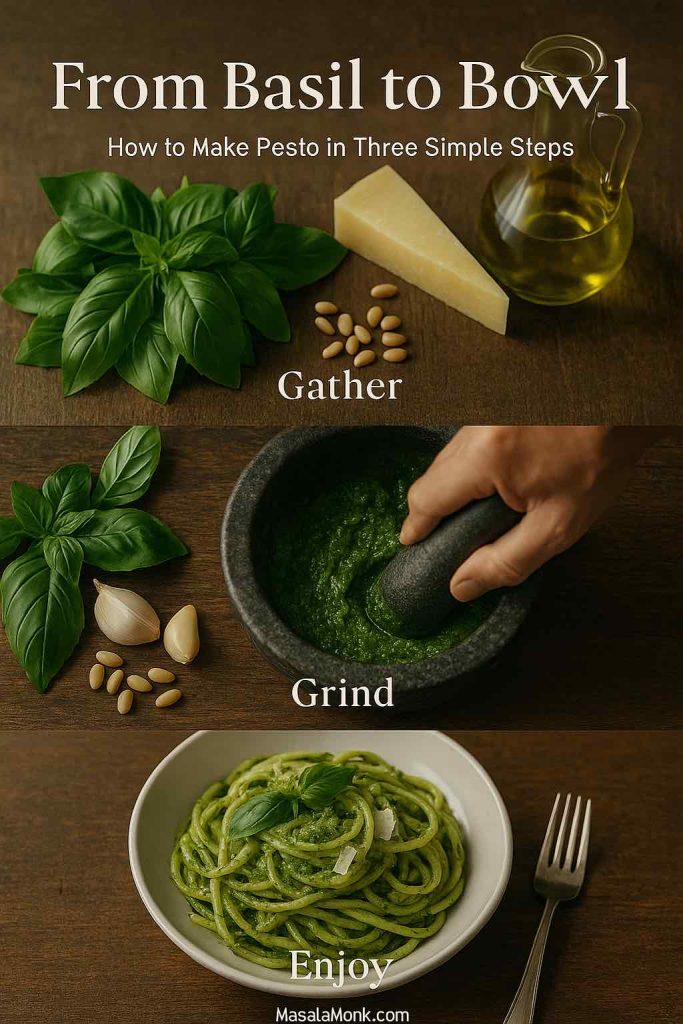
From basil and pine nuts to a finished bowl of pesto pasta, this three-step collage shows how quickly a classic pesto recipe comes together: gather, grind and enjoy.
Once you treat the base pesto recipe as a template rather than a fixed law, it becomes much easier to work with what you have. Basil low today? Stretch it with spinach. Out of pine nuts? Use walnuts. Cooking for vegans? Swap cheese for nutritional yeast and use a recipe like the vegan basil pesto on MasalaMonk. Keeping an eye on calories? Thin the olive oil with water or broth and lean harder on herbs.
In the end, a jar of pesto – whether classic green, sun dried tomato red pesto, pistachio pesto or a dairy-free basil pesto – is simply a way to put a lot of flavour into a small spoon. Once you know how to make pesto sauce yourself, you can keep that spoon working, from pesto pizza on Friday nights to chicken pesto pasta on Mondays, and everything in between.
FAQs
1. What is pesto made of?
Most classic pesto recipes use fresh basil, pine nuts, Parmesan or Pecorino, garlic, extra virgin olive oil, salt and sometimes a little lemon juice. Together they create a thick, uncooked green sauce with a strong basil flavour.
2. What is the basic pesto recipe ratio?
A simple starting point is 2 cups basil, ¼ cup nuts, ½ cup cheese, 1–2 cloves garlic and about ½ cup olive oil. Then you can adjust salt, lemon and pepper to taste.
3. How do I make pesto sauce for pasta?
Blend your basil pesto fairly thick, then cook pasta and save some cooking water. Toss the hot pasta with pesto off the heat, adding splashes of the starchy water until it becomes a smooth pesto pasta sauce that coats every piece.
4. Can I make pesto without pine nuts?
Yes, you can swap pine nuts for walnuts, almonds, cashews or pistachios. Each nut changes the flavour slightly, but the pesto sauce still works exactly the same.
5. How do I make nut free pesto?
For nut free pesto, use sunflower seeds, pumpkin seeds or hemp hearts instead of nuts, or skip them entirely. Just rely more on basil, cheese and olive oil to give body to the pesto recipe.
6. How can I make dairy free or vegan pesto?
To make vegan pesto, remove the cheese and stir in nutritional yeast for a savoury kick. You keep basil, nuts, garlic and olive oil, so the sauce still feels like classic basil pesto.
7. What is red pesto?
Red pesto, or pesto rosso, usually combines sun dried tomatoes, roasted red pepper, a little basil, nuts, cheese, garlic and olive oil. It tastes richer and sweeter than green pesto and is great with red pesto pasta, toast and grilled meats.
8. What is pistachio pesto best for?
Pistachio pesto is creamier and slightly sweeter than regular pesto, so it pairs beautifully with pasta, prawns, salmon and roasted vegetables. It also makes a lovely spread for crostini.
9. Is pesto healthy?
Pesto is high in calories but mainly from olive oil and nuts, which contain mostly unsaturated fats. When you use modest amounts over vegetables, whole grains and lean proteins, it can fit into a healthy eating pattern.
10. How do I make light or low fat pesto?
You can make a lighter pesto by reducing the oil, using a bit more basil and parsley, and slightly cutting down the cheese and nuts. Adding a spoon of water, broth or yogurt thins the sauce without adding too much extra fat.
11. How long does homemade pesto last in the fridge?
Homemade pesto is best used within 3 days in the refrigerator. Cover the surface with a thin layer of olive oil to slow browning and always keep it chilled.
12. Can I freeze pesto?
Yes, pesto freezes very well. Spoon it into ice cube trays or small containers, freeze solid, then store the cubes in a bag and drop them straight into hot pasta or soup later.
13. Why did my pesto turn dark or brown?
Pesto darkens when basil oxidises after contact with air or heat. To limit this, blend briefly, avoid very hot blades and cover the finished pesto with olive oil before storing.
14. Why does my pesto taste bitter?
Bitterness usually comes from overworked basil, too much raw garlic or a very sharp olive oil. Next time, pulse gently, use smaller cloves and taste the oil before adding; a squeeze of lemon and a bit more cheese can also soften bitterness.
15. Can I make pesto without garlic?
Yes, you can skip garlic completely or use garlic-infused olive oil. In that case, add a bit more basil, lemon zest and cheese so the pesto sauce still tastes full and balanced.
16. What greens can I use instead of basil?
Rocket (arugula), kale, spinach, coriander, parsley and wild garlic all work well in pesto recipes. Often a mix of basil plus one of these greens gives the best flavour and colour.
17. What pasta shapes work best with pesto?
Short shapes with ridges or curves, like fusilli, rotini, farfalle and shells, grab pesto pasta sauce very nicely. Long strands such as spaghetti and linguine also work well if you loosen the pesto a bit more.
18. How do I use pesto beyond pasta?
Pesto is great on pizza instead of tomato sauce, in pesto sandwiches, stirred into soups, spread under cheese on toast, mixed into potato salad, brushed onto roasted vegetables and spooned over chicken, tuna or salmon.
19. How do I make creamy pesto sauce?
To make creamy pesto sauce, warm a few spoonfuls of pesto and gently stir in cream, ricotta or Greek yogurt off the heat. Then thin with a little pasta water until it coats the back of a spoon.
20. Can I use jarred pesto in these recipes?
You can use jarred pesto anywhere you would use homemade pesto, although the flavour is usually milder. Often it helps to add a little extra fresh basil, lemon juice or grated cheese to brighten a store-bought pesto sauce.
One of my favorite things about summer is the bounty of fresh herbs that are in my kitchen garden. There’s something so satisfying about plucking fresh herbs that you grew with so much love.
Pesto is not only delicious but super healthy too. It is a great source of Vitamin K, Vitamin E & Vitamin C. It is highly rich in antioxidants that helps fight free radicals. In fact, it helps to reduce your blood sugar, cholesterol, blood pressure, and cancer risk. Also, high in unsaturated fat, it is great for your heart health and for your kids healthy weight gain.
What is a pesto and how you can use it?
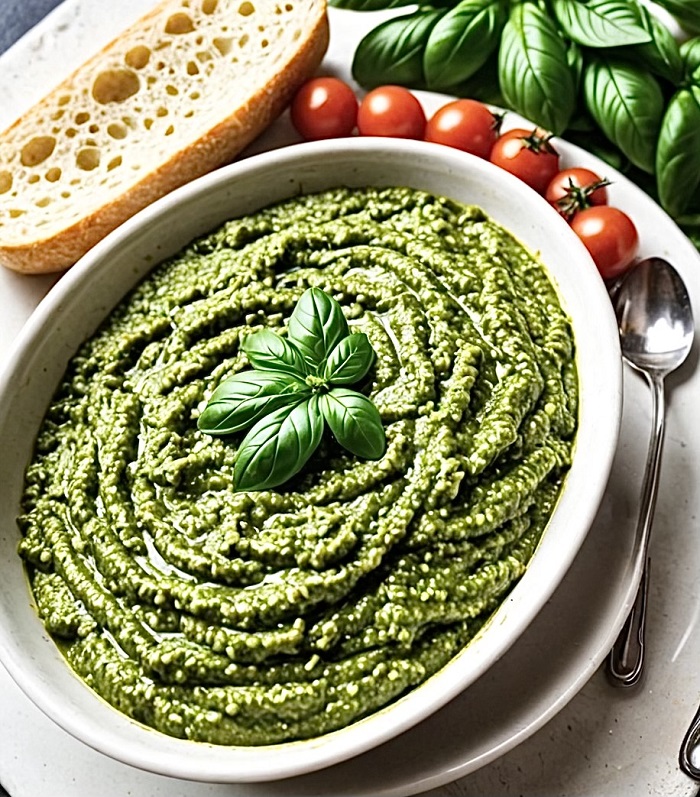
Traditional pesto is a blend of fresh sweet basil, garlic, pine nuts, extra-virgin olive oil and Parmesan cheese. While pesto may seem fancy and gourmet, but homemade pesto is very easy to make. It will literally take you 5 minutes. Just a few blitz in the food processor and it’s done. The flavor of sweet basil is between sweet and savory, with hints of mint, star anise, and pepper.
Pesto can be used to make grilled sandwiches, as a pizza sauce, spaghetti, salad dressing, eggs, grilled vegetables. Now you get the idea, so you can get creative and use it to create different things.
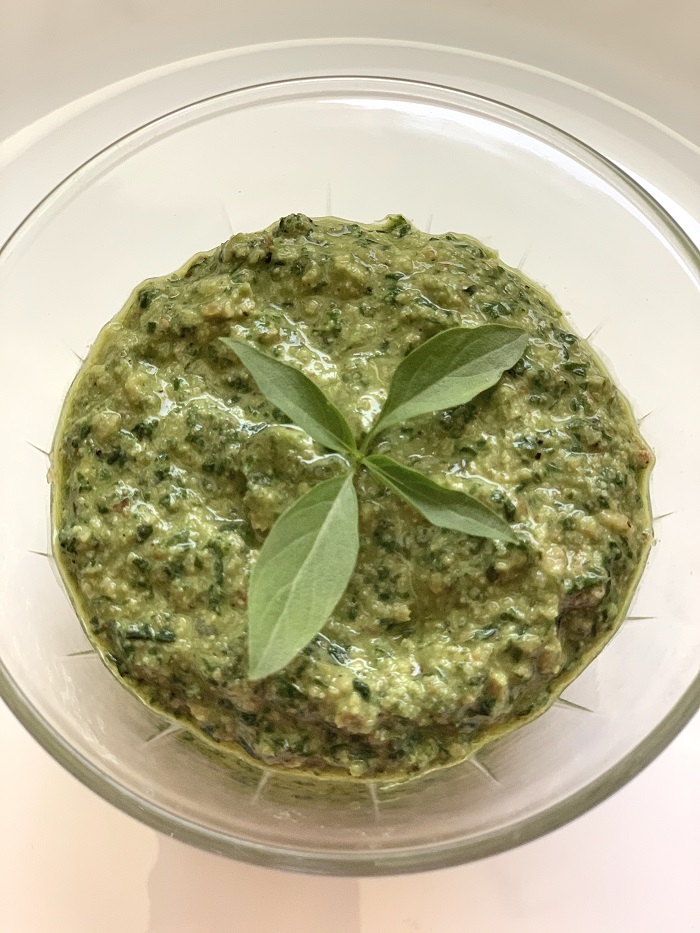
Once you’ve made the classic basil pesto recipe, try changing it up! In this recipe, I swapped the pine nuts with cashews and pumpkin seeds.
Recipe: makes 1 cup of Pesto
Ingredients:
2 cups tightly packed Sweet Basil
1/4th cup Cashews
1/4th cup Pumpkin seeds
1/4th cup Olive Oil
2 cloves garlic
Salt & Pepper to taste
1 tsp Lemon juice (taste and adjust)
Method:
In a food processor combine, cashews, pumpkin seeds, salt & pepper.
Add lemon juice, basil leaves & garlic. Give it a nice blitz.
Now with the food processor running, keep adding olive oil little by little till everything comes together. Do not add water. Pesto is suppose to be a coarse paste and not a smooth one.
Pesto recipe variations
If you want to make it nut free, you can add hemp seeds or sunflower seeds or a combination of both. It gives a nice nutty flavour without the use of nuts.
Add Parmesan cheese if you want to make it rich & cheesy. Be mindful of salt if adding parmesan.
You can use different herbs. You can try pesto with mint leaves, coriander leaves or fresh carrot leaves. You can also try combination of basil with mint leaves or basil with coriander leaves.
You can also add roasted red bell pepper and sun-dried tomatoes for that extra punch.
When it comes to weight loss, finding delicious and satisfying foods that are low in calories and high in nutrients is key. Watermelon, with its high water content and refreshing taste, is often hailed as a beneficial fruit for those on a weight loss journey. In this extensive blog post, we’ll dive deeper into the reasons why watermelon can be a helpful addition to your weight loss plan, its impressive nutritional profile, various ways to enjoy it, and some practical tips for incorporating it into a balanced diet. Let’s explore the juicy benefits of watermelon for weight loss and discover why it deserves a prominent place in your healthy eating routine! 🍉🌿
🌿 Hydration and Low Calorie Content Watermelon’s high water content makes it a fantastic choice for weight loss. Staying hydrated is crucial for overall health and maintaining a balanced metabolism. With over 90% water, watermelon can help keep you hydrated throughout the day, promoting optimal bodily functions and supporting weight loss efforts. Additionally, watermelon’s low-calorie content is a bonus. With approximately 46 calories per cup of diced watermelon, it can be enjoyed guilt-free while providing a refreshing and satisfying experience.
🍉 Nutritional Profile Beyond its hydration and low-calorie benefits, watermelon packs a nutritional punch. Here are some key nutrients found in watermelon:
Vitamin C: Watermelon is an excellent source of vitamin C, a powerful antioxidant that supports immune function, collagen production, and wound healing. Vitamin C also aids in the absorption of iron from plant-based foods, which is essential for energy production and overall health.
Vitamin A: Watermelon contains beta-carotene, a precursor to vitamin A, which is crucial for maintaining healthy skin, vision, and a strong immune system. Vitamin A also plays a role in promoting healthy cell growth and development.
Lycopene: Watermelon is rich in lycopene, a potent antioxidant responsible for its vibrant red color. Lycopene has been associated with numerous health benefits, including reducing the risk of certain types of cancer, supporting heart health, and protecting against oxidative stress.
Citrulline: Watermelon is one of the few fruits that naturally contains citrulline, an amino acid that has been linked to various health benefits. Citrulline is converted into arginine, another amino acid that plays a role in blood vessel dilation, promoting healthy circulation and cardiovascular health.
🌿 Incorporating Watermelon into a Weight Loss Diet Here are some practical tips for incorporating watermelon into your weight loss plan:
Enjoy it as a Refreshing Snack: When cravings strike, reach for a bowl of chilled watermelon cubes. Its natural sweetness and high water content will satisfy your sweet tooth while keeping you hydrated.
Incorporate it into Salads: Add watermelon cubes to your favorite salad for a burst of refreshing flavor. Pair it with leafy greens, cucumber slices, feta cheese, and a light vinaigrette for a satisfying and nutritious meal.
Create Flavorful Smoothies: Blend watermelon with other fruits, such as berries or pineapple, and a source of protein like Greek yogurt or a plant-based protein powder for a nourishing and filling smoothie.
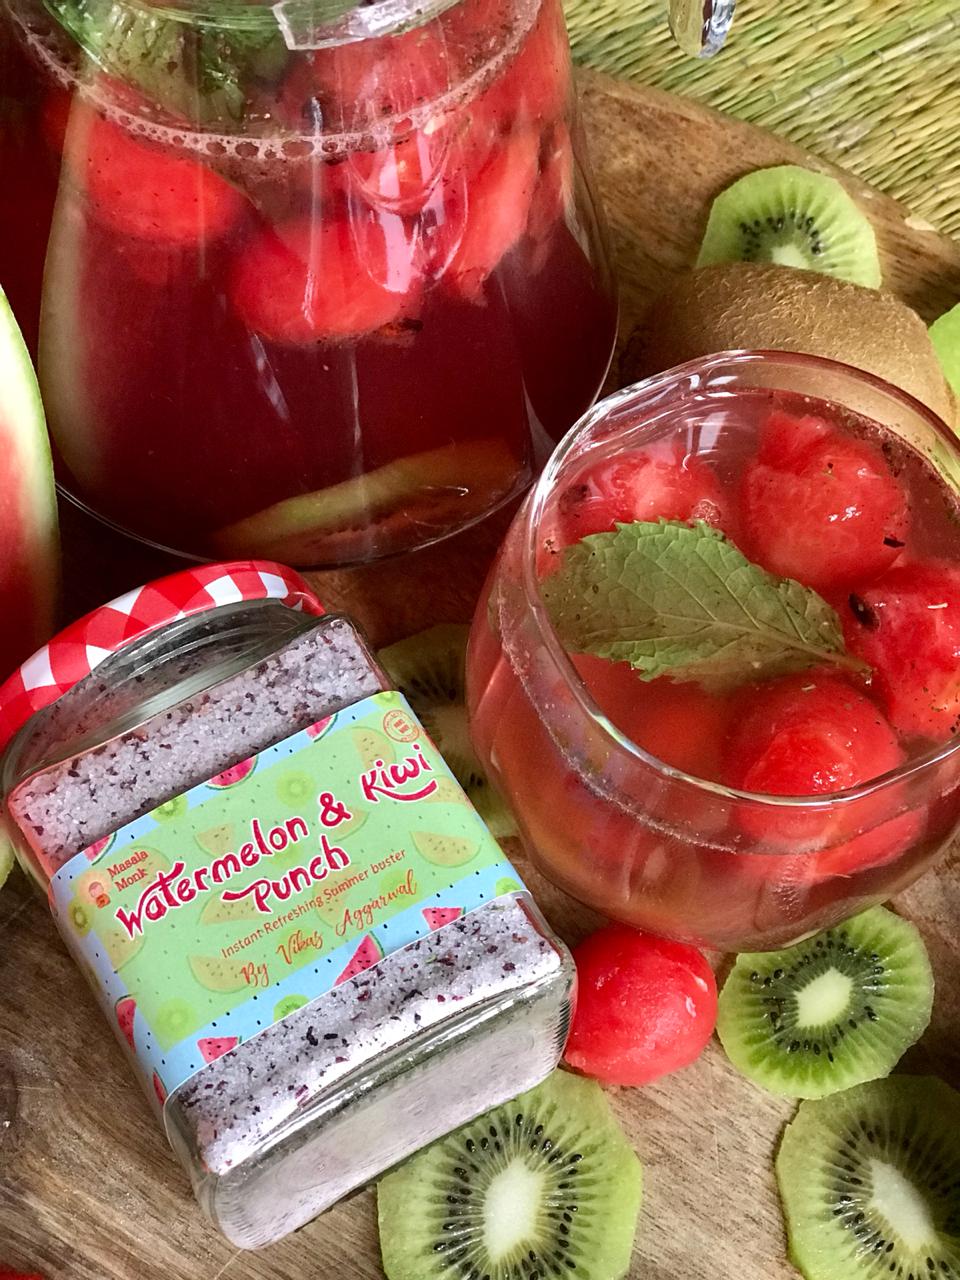
Make Fruit-Infused Water: Enhance the taste of your water by infusing it with watermelon slices and other fruits like cucumber or mint. This simple and refreshing beverage will keep you hydrated throughout the day.
Experiment with Grilled Watermelon: Surprise your taste buds by grilling watermelon slices for a unique and savory twist. The heat caramelizes the natural sugars, intensifying the flavor and providing a delightful contrast to savory dishes.
Pair it with Protein: While watermelon is primarily a source of carbohydrates, combining it with a source of protein can create a balanced snack or meal. Pair watermelon with a handful of nuts, a slice of lean chicken or turkey, or a dollop of Greek yogurt for a satisfying and balanced combination.
🍉🌿 While watermelon alone won’t magically melt away excess pounds, its hydrating properties, low-calorie content, and valuable nutrients make it a favorable choice for weight loss. Remember to pair it with a balanced diet that includes a variety of nutrient-dense foods and engage in regular physical activity for optimal results. So, embrace the juicy goodness of watermelon and enjoy it as part of a wholesome and weight-conscious lifestyle!