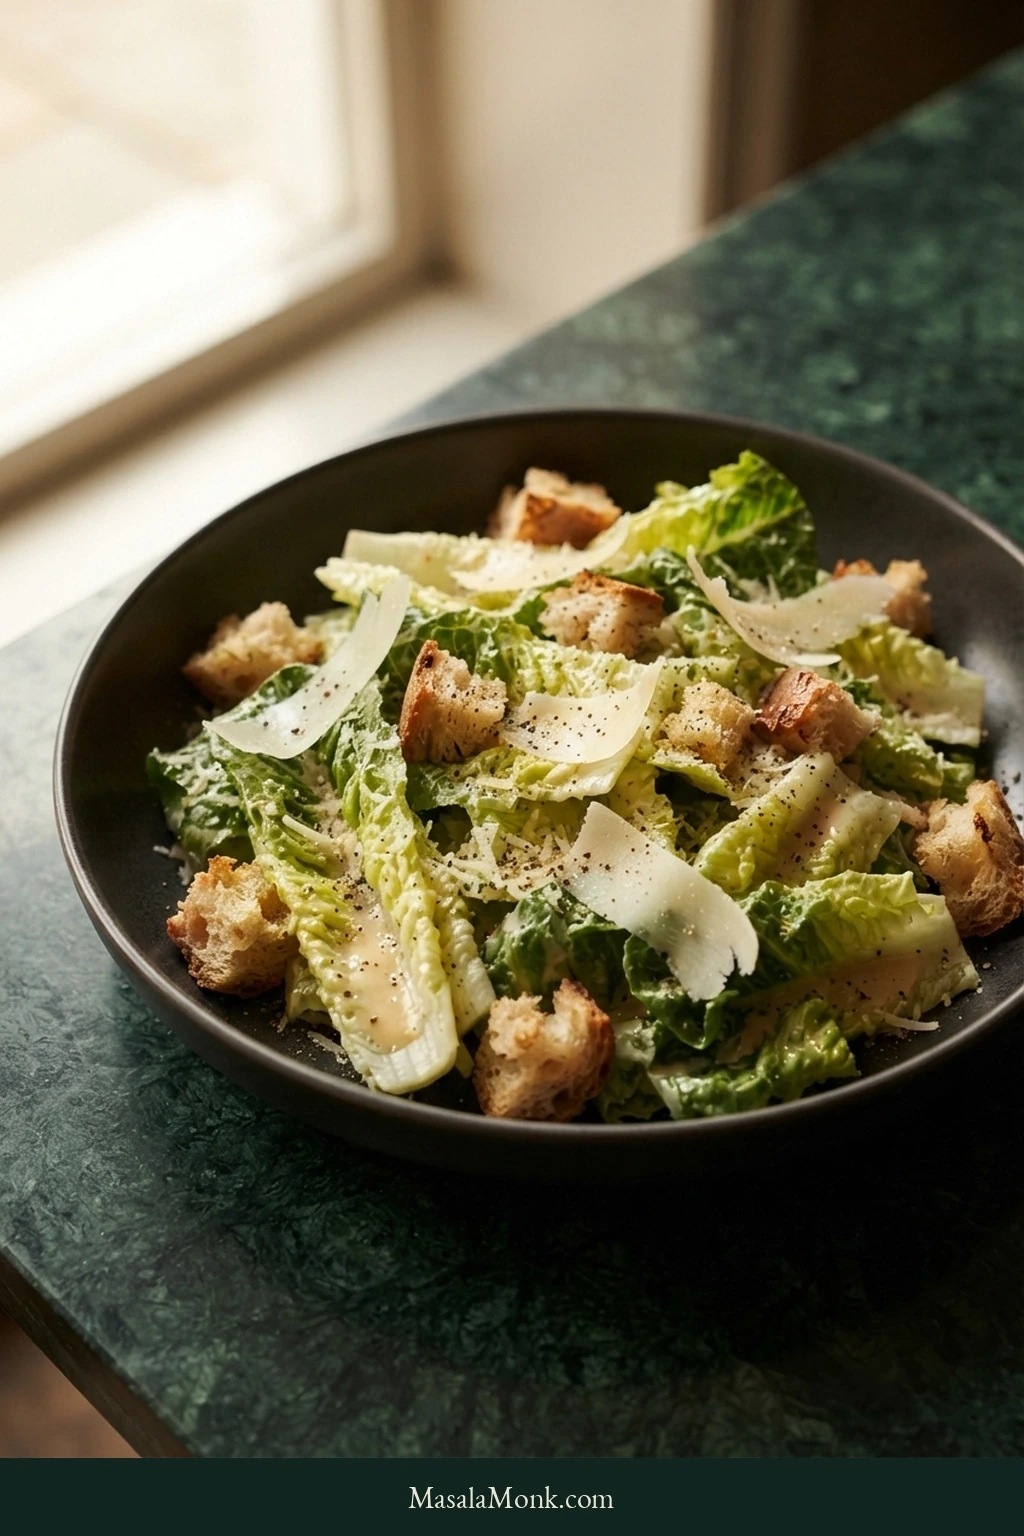
A great Caesar salad gives you cold, snappy romaine, a thin creamy layer of dressing, crunchy croutons, salty Parmesan, black pepper and enough lemon to make you want the next bite. Anchovy deepens everything without becoming the first thing you taste.
Caesar looks simple enough that a disappointing one is especially annoying. The lettuce turns watery. The croutons could break a tooth. Or everything tastes vaguely creamy because another spoonful of dressing went into a bowl that already had enough.
None of those problems needs a complicated fix. You just need to know what to look for.
The Caesar Test
Check
What You Want
Romaine
Cold, firm and dry
Croutons
Golden, crunchy and easy to bite
Dressing
Bright and savory on romaine
Toss
Green, lightly glossy leaves; no puddle underneath
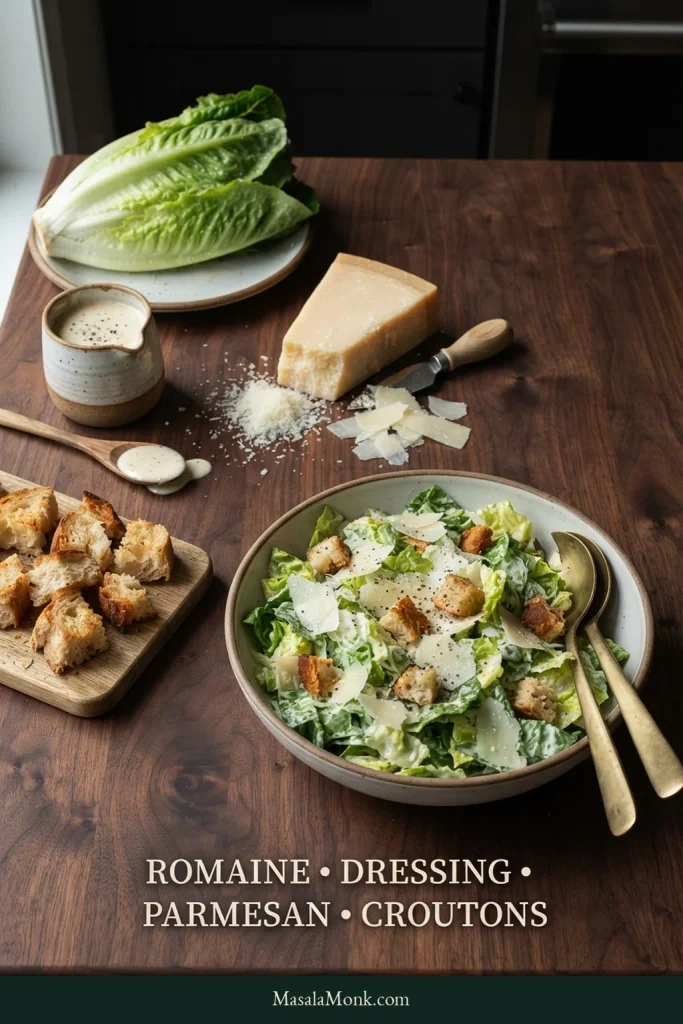
A modern Caesar salad is made with romaine lettuce, Caesar dressing, Parmesan, croutons and black pepper. Lemon, garlic, anchovy and Worcestershire are carried in the dressing, so the bowl does not need a crowd of toppings to taste complete.
Chicken, bacon, avocado and other additions can make good salads, but none is required for Caesar to taste like Caesar.
Romaine brings cold crunch, dressing carries acidity and savoriness, Parmesan adds salty nuttiness, and croutons bring toasted contrast. A good Caesar keeps those roles distinct rather than letting one element dominate every bite.
Caesar Salad Recipe
The dressing below follows the mayonnaise-based formula from our Caesar Dressing Recipe. This batch intentionally makes more than this salad usually needs, so keep the extra chilled rather than pouring it into an already dressed bowl.
Prep: 20 minutes Cook: 10–15 minutes Total: about 35 minutes Serves: 4 as a generous side, or about 6 as a smaller side
Useful equipment: a salad spinner and a very large mixing bowl.
For the Salad
16–18 oz / 450–510 g trimmed romaine hearts, about 8–10 loosely packed cups
½ cup / 4 fl oz / 120 ml Caesar dressing to start, with more available if needed
1 oz / 28 g Parmesan, very finely grated
½–¾ oz / 14–21 g Parmesan, shaved for finishing
Freshly ground black pepper
Lemon wedges, optional
For the Croutons
4 oz / 115 g sturdy rustic bread, such as sourdough, country bread or baguette
2 tbsp / 1 fl oz / 30 ml olive oil
½ tsp finely grated garlic
Small pinch of fine salt
Freshly ground black pepper
For the Caesar Dressing
¾ cup / 6 fl oz / 180 ml full-fat mayonnaise
1 tsp / 5 ml anchovy paste, or 2 small brown oil-packed anchovy fillets, mashed smooth
1 small garlic clove, finely grated
2 tbsp / 1 fl oz / 30 ml fresh lemon juice, divided: 1½ tbsp / about 22 ml to start, the rest to finish
1 tsp / 5 ml Dijon mustard
¼ tsp freshly ground black pepper, plus more if needed
1 tsp / 5 ml Worcestershire sauce
1 oz / 28 g Parmesan, very finely grated
Fine salt, only if needed at the end
1 tsp / 5 ml cold water to start, plus more 1 tsp / 5 ml at a time as needed
Dressing yield: about 1⅛ cups / 9 fl oz / 270 ml, depending on thinning.
Instructions
Prep the Romaine and Croutons
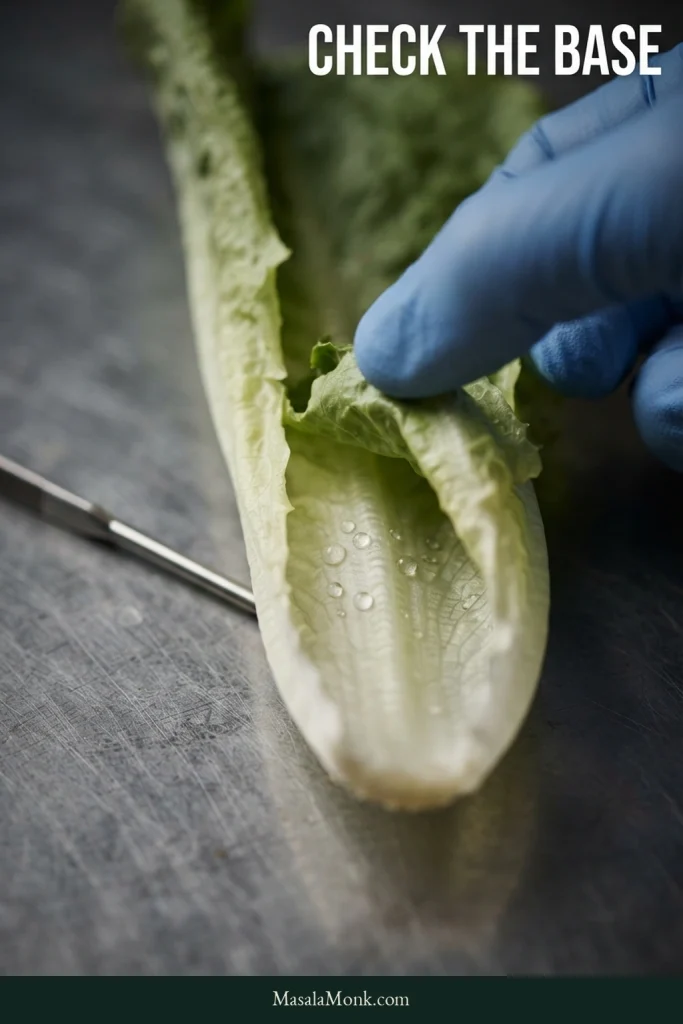
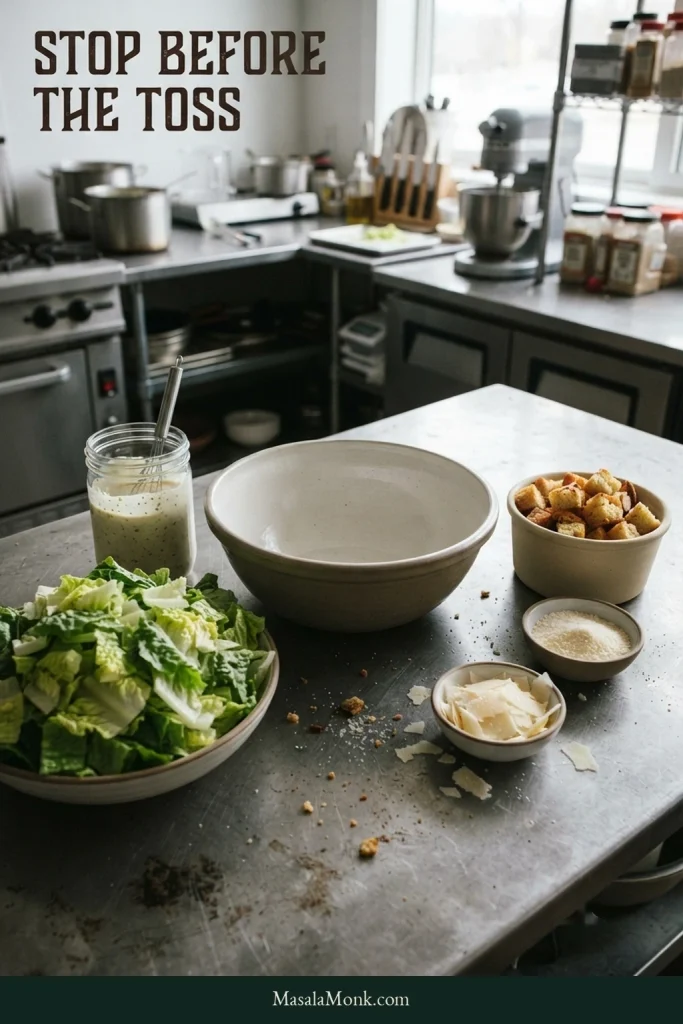
Wash, dry and chill the romaine. Separate and wash the leaves, then spin them thoroughly. Check the pale ribs and cupped bases even if the broad parts look dry; the last drops like to hide there. Blot anything the spinner missed. Tear or cut into roughly 1½–2 inch / 4–5 cm pieces and refrigerate while you make the rest.
Heat the oven to 375°F / 190°C. Tear the bread into irregular ¾–1 inch / 2–2.5 cm pieces. Perfect cubes are unnecessary. Toss with the olive oil, garlic, a small pinch of salt and black pepper, then spread in one layer.
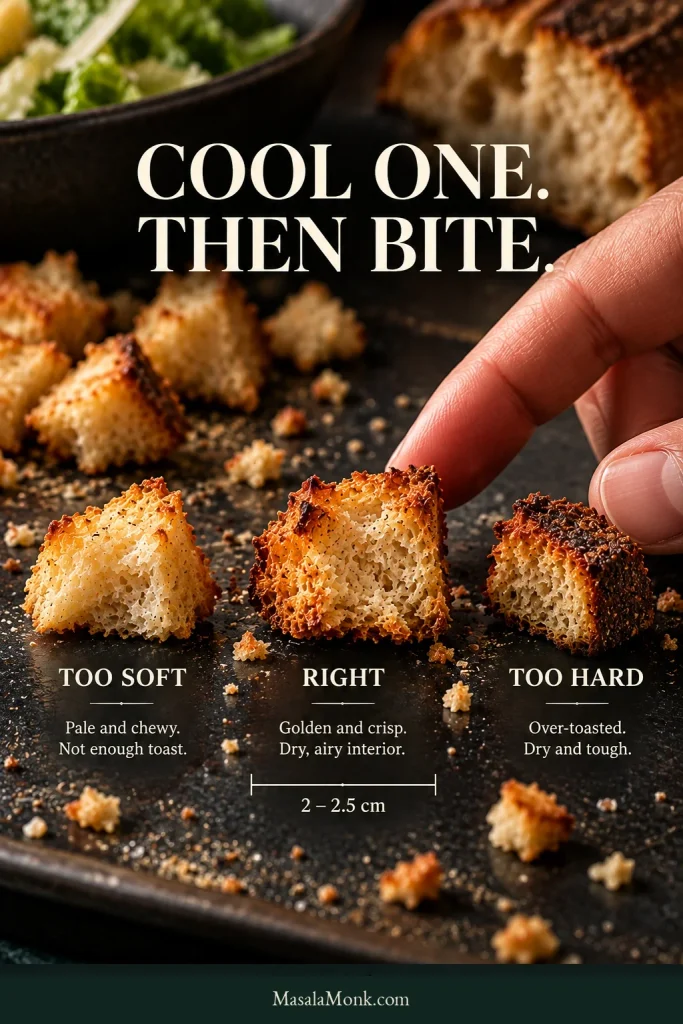
Bake the croutons for 10–15 minutes. Toss once if needed and continue until they look golden and nearly crisp. Remove the tray from the oven and leave it out while one crouton cools for 3–5 minutes. Bite it. If it crunches easily without feeling rock-hard, let the tray cool completely. A test piece that remains genuinely soft after cooling needs another 2–3 minutes in the oven before you check again.
Mix and Balance the Dressing
Mix the dressing. Whisk the mayonnaise, anchovy, garlic, Dijon, Worcestershire, black pepper and 1½ tbsp / about 22 ml lemon juice until smooth. Then whisk in the 1 oz / 28 g Parmesan for the dressing.
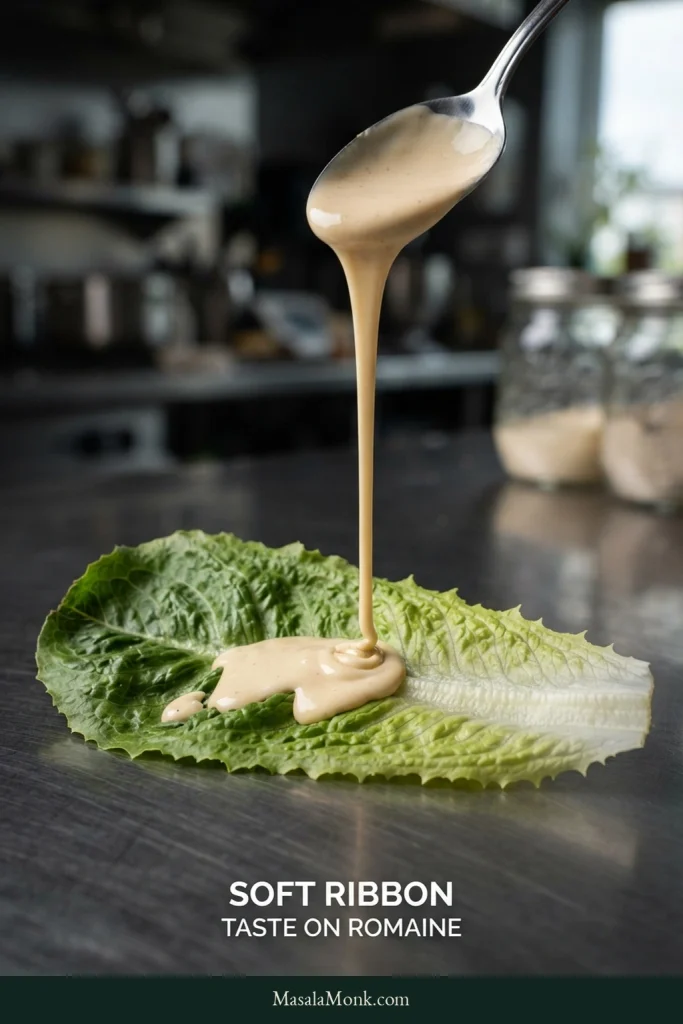
Get the consistency right. Whisk in 1 tsp / 5 ml cold water. Lift the whisk or spoon. The dressing should fall in a soft ribbon, roughly the flow of heavy cream. If it still drops in a heavy mound, add more water 1 tsp / 5 ml at a time.
Taste it on romaine. Dress one dry piece. Look for bright lemon, Parmesan, garlic and pepper, with anchovy adding savory depth rather than obvious fishiness. Use the reserved lemon or more pepper if needed. Taste again before reaching for salt.
Use cold water to correct thickness and save the remaining lemon for flavor. Water changes the flow without simultaneously increasing acidity, so you can judge texture before deciding whether the dressing needs more brightness.
Toss and Finish
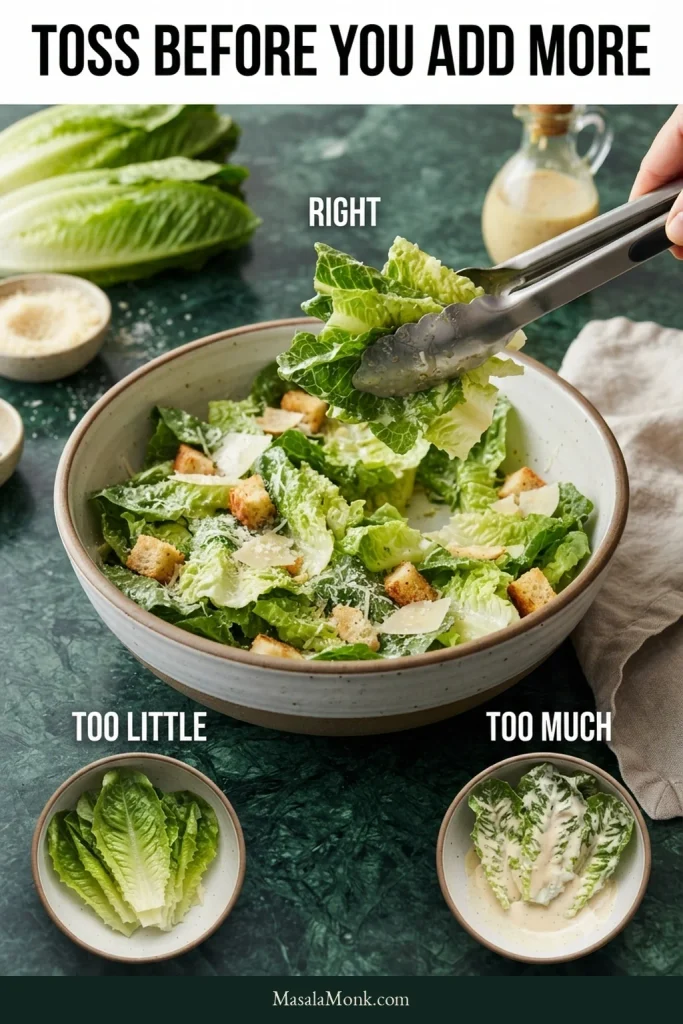
Start the toss. Put the cold romaine in your largest bowl and add ½ cup / 120 ml dressing. It may look stingy against that much lettuce. Toss before you trust your eyes. Reach underneath and lift the leaves through the dressing, add the 1 oz / 28 g finely grated Parmesan for the salad, then toss again.
Now look. The leaves should still be green under a thin creamy sheen. Taste a full forkful. If some leaves are still barely dressed, add another 1 tbsp / 15 ml dressing, toss and check again.
Finish and serve. Fold in the completely cooled croutons. Add ½–¾ oz / 14–21 g shaved Parmesan and plenty of freshly ground black pepper. Serve straight away, with lemon wedges if you like.
Recipe Notes
Measure romaine after trimming. Weight is more reliable than a fixed number of heads.
Keep extra dressing separate. Once the leaves are lightly dressed, stop. Refrigerate the rest.
Salt last. Anchovy, Worcestershire, Parmesan and the croutons have already brought salt to the bowl.
How we developed this recipe: This version brings together established Caesar techniques, published recipes and recurring problems reported by home cooks. MasalaMonk has not independently kitchen-tested this exact formula.
Romaine: Dry, Cold & Snappy
Romaine hearts give Caesar its backbone: firm pale ribs, tender inner leaves and enough surface for dressing to cling to. Choose hearts that feel firm and crisp, with fresh-looking cut ends and no slimy edges.
Wet lettuce is the fastest way to weaken a good Caesar. Water left around the ribs thins the dressing during the toss and eventually finds its way into the croutons.
A spinner gets you most of the way there, but check a few ribs afterward. If the broad part of the leaf looks dry, check the base anyway. That’s where the last drops hide.
If dressing slides off the lettuce while liquid gathers underneath, don’t immediately add more. Hidden water can make a well-measured bowl look under-dressed when the real problem is dilution.
Still finding droplets? Spin again or blot them. This is one place worth being fussy.
Then chill the lettuce. Dryness helps the dressing stay put; cold gives romaine that refreshing snap. A chilled serving bowl is a nice extra if you have room for one, but good lettuce matters far more than cold crockery.
Croutons: Crunchy, Not Hard
Use bread with some structure—sourdough, country bread or baguette all work. Slightly stale bread is useful here. Torn pieces give you craggy edges that toast beautifully and catch little streaks of dressing later.
Size matters more than neatness. Pieces around ¾–1 inch / 2–2.5 cm can develop a toasted exterior without drying into pebbles.
The other trap is judging them hot. Steam can make a freshly baked crouton seem softer than it will be once cooled. That is why the test piece rests outside the oven before you decide whether the tray needs another few minutes.
Color is only part of crouton doneness. After cooling, the center should be dry and airy while the outside stays crisp enough to crunch without becoming dense or brittle.
Crunch, yes. Jaw workout, no. A good Caesar crouton should break easily enough to eat with the lettuce instead of fighting it.
Parmesan Has Two Jobs
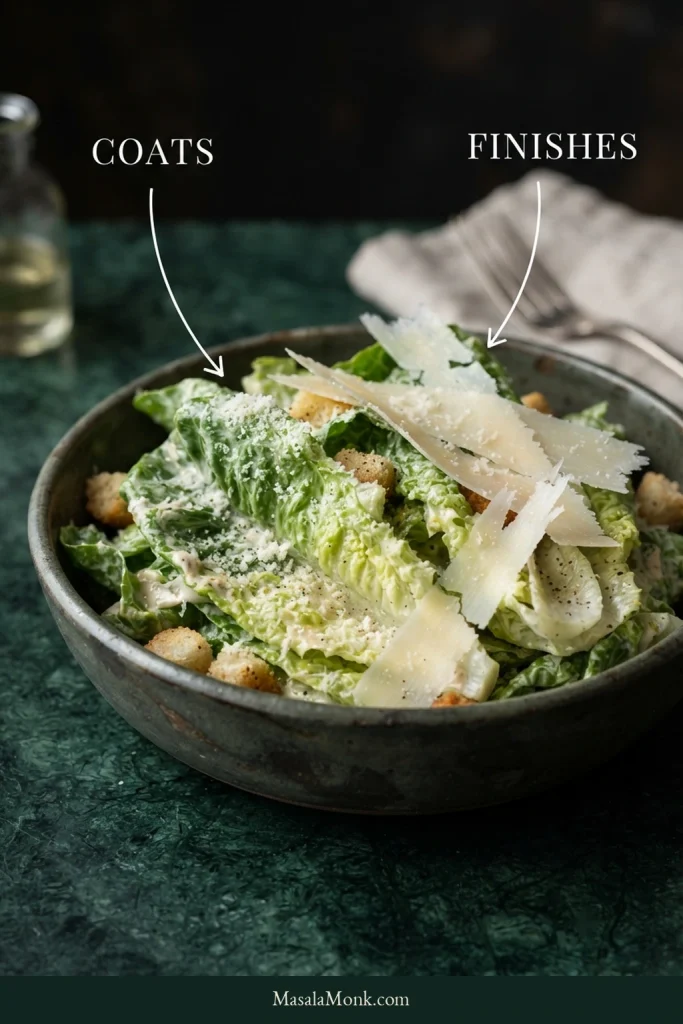
Finely grated Parmesan almost disappears into the tossed salad. That’s useful: it puts a little salt and nuttiness across the romaine instead of concentrating all the cheese in a few bites.
The larger shavings do the opposite. They stay distinct, so now and then you get a more pronounced bite of Parmesan without making the entire bowl heavy.
Sequence matters here: finely grated Parmesan goes in during the toss so it can travel through the leaves, while larger shavings stay for the finish and remain distinct on the fork.
The Toss Is the Recipe
Most of the work is already done by the time the cold romaine reaches the mixing bowl, so don’t lose its snap in the final minute. Half a cup of dressing can look almost comically small against a mountain of romaine, and the temptation is to pour in more before tossing. Wait.
Give the salad a thorough toss and let the finely grated Parmesan work through the leaves before deciding it needs anything else.
How to Know When to Stop
Now look. Pick up a piece of romaine. It should shine without sagging, with green still visible beneath the dressing. The bottom of the bowl should be almost clean.
Then taste a full forkful. If the leaves are already nicely dressed but the flavor feels timid, don’t keep adding volume just to chase flavor. Add a little lemon or black pepper to a spoonful of dressing, taste it on romaine, then toss that through. Add salt only if the finished forkful still needs it. If some leaves are still bare, that’s different: add another 1 tbsp / 15 ml.
Use the center state as the stopping cue: dressing should reach the folds and edges without turning the romaine pale or leaving a puddle underneath.
Don’t overthink the last few tablespoons. Once the lettuce is dry and the dressing tastes good on it, the bowl usually tells you when to stop.
A good forkful should crack through a cold romaine rib, pick up creamy dressing and nutty Parmesan, then finish with the toasted crunch of a crouton.
Caesar Salad Troubleshooting
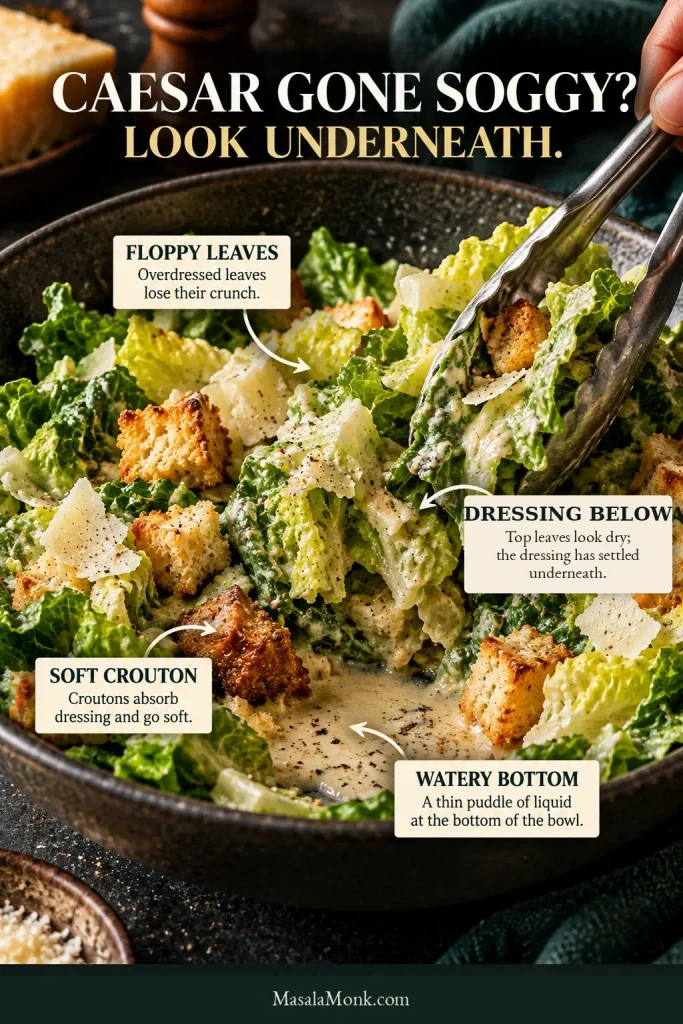
If your Caesar is already soggy, where the moisture shows up can tell you what went wrong.
Where the moisture appears is the clue. A puddle below, bare-looking leaves, floppy romaine and softened croutons point to different problems.
There Is Watery Liquid Under the Salad
Check the romaine first. Water caught around the ribs thins the dressing during the toss. If the lettuce started dry, the dressing itself may have been loosened too far.
The Leaves Look Bare but Dressing Is Underneath
This usually points to wet lettuce, overly thin dressing or a toss that never brought the lower leaves through the bowl. Toss again from the bottom before adding another drop.
The Leaves Are Dressed but Already Floppy
The salad probably got too much dressing or waited too long after tossing. You cannot put the original snap back into softened romaine. Serve it now; next time, leave the toss until closer to the table.
The Romaine Is Fine but the Croutons Are Soft
They may have gone into the bowl warm, needed a little more baking or simply spent too long touching dressing. Cool them completely and make them one of the last things into the bowl.
If the flavor of an already-dressed salad is simply too concentrated, the cleanest dilution is more undressed romaine—not water.
Problem
What to Do
Bland after tossing
If the leaves already have enough dressing, adjust a little dressing rather than adding more just to chase flavor. Lemon or black pepper are the first things to check.
Too fishy
Anchovy is dominating. Rebalance the remaining dressing before using any more.
Too salty
Hold back extra Parmesan and salty croutons. Rebalance any remaining dressing before adding more.
Too garlicky
Raw garlic is dominating. Repair the remaining dressing before using more; adding water directly to the finished salad will not solve it.
Heavy or flat
Add a little lemon to the dressing, taste it on romaine, then toss that through the salad.
Croutons too hard
There is little to rescue once bread is overdried. Use larger torn pieces next time and judge them after cooling.
If the dressing itself needs rescuing—because the anchovy or garlic is too strong, the texture is wrong, or the flavor has slipped out of balance—our Caesar dressing guide has the more detailed fixes.
When the bowl is right, none of the parts has to fight for attention. The romaine stays cold and snappy, the dressing follows the leaves instead of collecting underneath, and the croutons still crunch when the salad reaches the table.
Wash, dry and chill the romaine. Make the dressing and refrigerate it. Cool the croutons completely and keep them airtight at room temperature. Grate and shave the Parmesan, cover it and refrigerate it.
The useful make-ahead decision is where to stop. Once dressing touches romaine and croutons, the texture clock starts, so portion anything meant for later before the first toss.
When it is time to eat, dress the leaves, add the fine Parmesan and finish with the croutons and shavings. That last-minute toss is what keeps the romaine snappy and the croutons crunchy.
Packing lunch? Keep the dressing and croutons separate and assemble the salad when you are ready to eat.
What About Leftover Dressed Caesar?
Refrigerate it promptly, but expect softer lettuce and croutons later. If you already know half the bowl is for tomorrow, don’t dress that half tonight.
Caesar works especially well beside a hot main because cold romaine, lemon and toasted croutons bring their own kind of contrast.
For pizza night, make the salad while the pizza bakes but wait to toss it until the pizza comes out. A Focaccia Pizza can rest for a few minutes before slicing. The Caesar can’t.
For a lighter soup-and-salad dinner, serve it with Chicken Noodle Soup. Warm broth and tender noodles play nicely against cold romaine and crunchy croutons.
Original Caesar Salad vs. Modern Caesar Salad
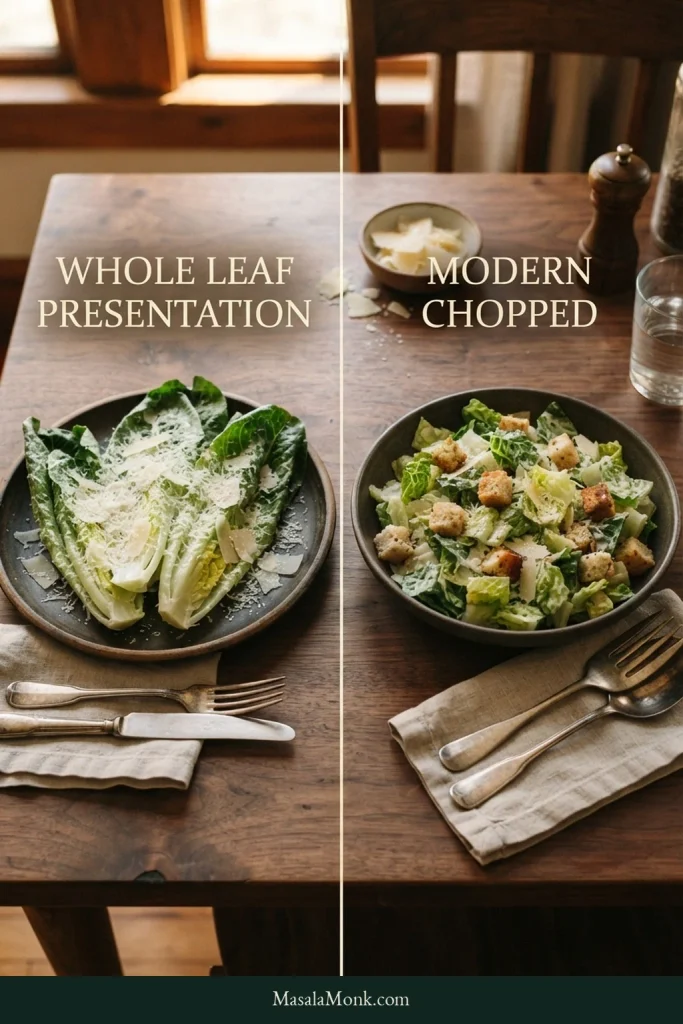
The whole romaine leaves you still see in tableside Caesars are not just restaurant theater. They’re a link to the salad’s early presentation in Tijuana, Mexico, where Caesar Cardini is associated with its creation in 1924. The Los Angeles Times’ account of Caesar’s in Tijuana traces that connection and the restaurant’s continuing tableside tradition.
Exact early formulas are less tidy than the origin story. A Cardini-attributed version documented by UCHealth uses whole romaine, egg yolk, lime, Worcestershire, olive oil, Parmesan and toasted baguette without separate anchovy fillets. Modern Caesar commonly uses explicit anchovy, while surviving accounts of earlier versions vary.
The recipe here is a modern classic Caesar: chopped romaine, anchovy in the dressing, Dijon, Parmesan and bite-size croutons. It keeps the familiar flavor while making the salad straightforward to toss and eat at home.
Whole Romaine Leaves or Chopped?
Whole tender inner leaves make a striking tableside salad and echo the older presentation. At home, 1½–2 inch / 4–5 cm pieces are easier to toss evenly, which is why this recipe uses the chopped style.
Whole leaves preserve the tableside character of an original-style Caesar. Chopped romaine gives up some ceremony but makes it easier to build a forkful with lettuce, Parmesan and crouton together.
Anchovies, Eggs & Fish-Free Options
Anchovy shouldn’t shout. If you have avoided it because you don’t want a fishy salad, quantity makes the difference. In a balanced Caesar, anchovy reads as deep savoriness before it reads as fish.
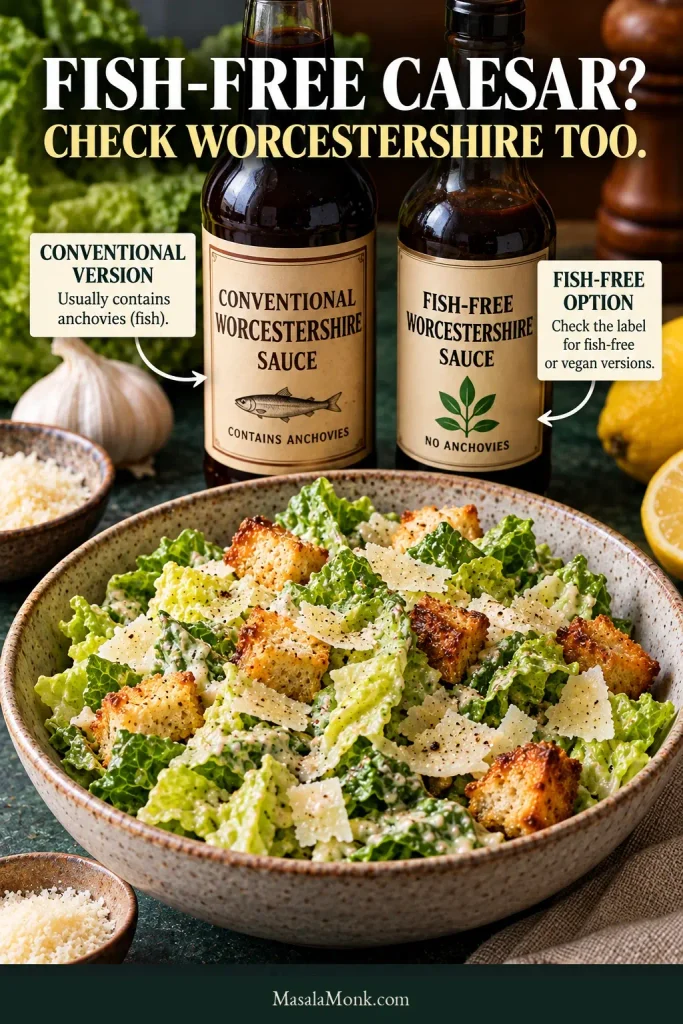
For a fish-free Caesar, omit the anchovy and use a fish-free Worcestershire sauce. Leaving out the fillets or paste alone may not be enough because conventional Worcestershire commonly contains anchovy.
The main recipe uses prepared mayonnaise, so you do not have to handle an uncooked yolk yourself. It still contains egg; use egg-free mayonnaise if needed.
If you avoid animal rennet, check the cheese too and choose a suitable vegetarian Parmesan-style hard cheese. The dressing guide gives the quantities needed to keep fish-free and egg-free versions balanced.
Omitting visible anchovy is not always enough. Conventional Worcestershire can contain anchovy too, so check the bottle before calling the dressing fish-free.
Frequently Asked Questions
How much Caesar dressing do I need per person?
As a starting point, this recipe uses about 2 tbsp / 30 ml dressing per generous side serving. Toss before adding more. Dry lettuce, thicker dressing and a thorough toss can all change how much the bowl actually needs. For the visual stopping cues, see The Toss Is the Recipe.
Can I use bottled Caesar dressing?
Yes. Dry and chill the romaine, start with a modest amount and toss thoroughly before adding more. If the bottled dressing sits in heavy blobs, loosen the portion you plan to use with a little cold water first. The technique still matters when the dressing comes from a bottle.
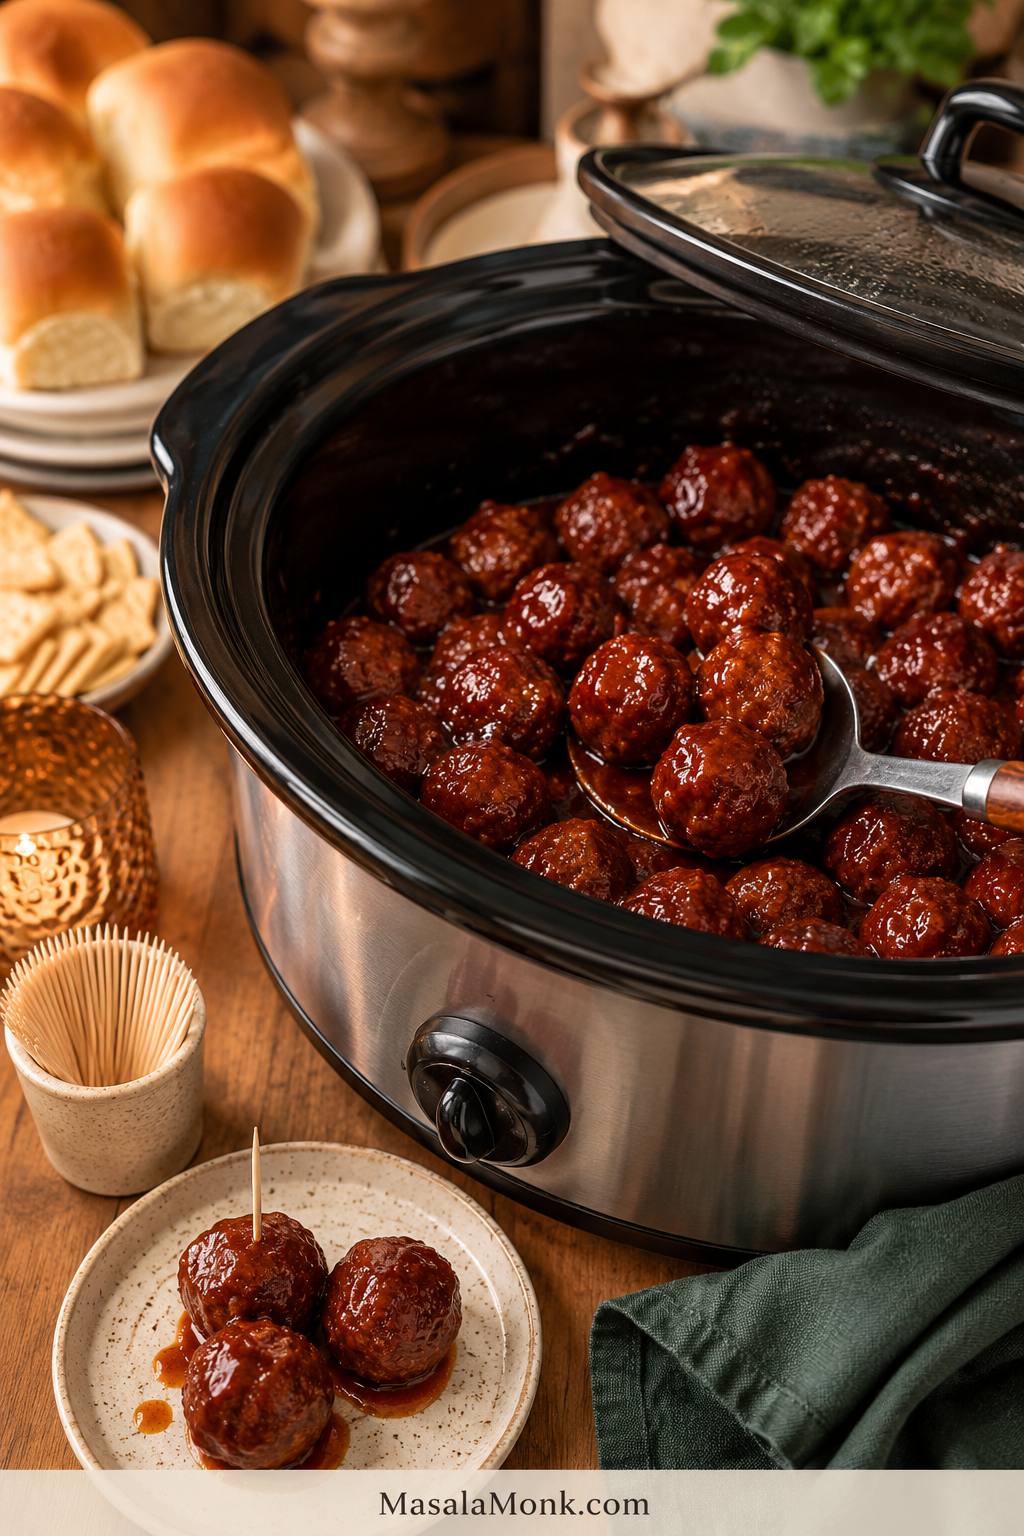
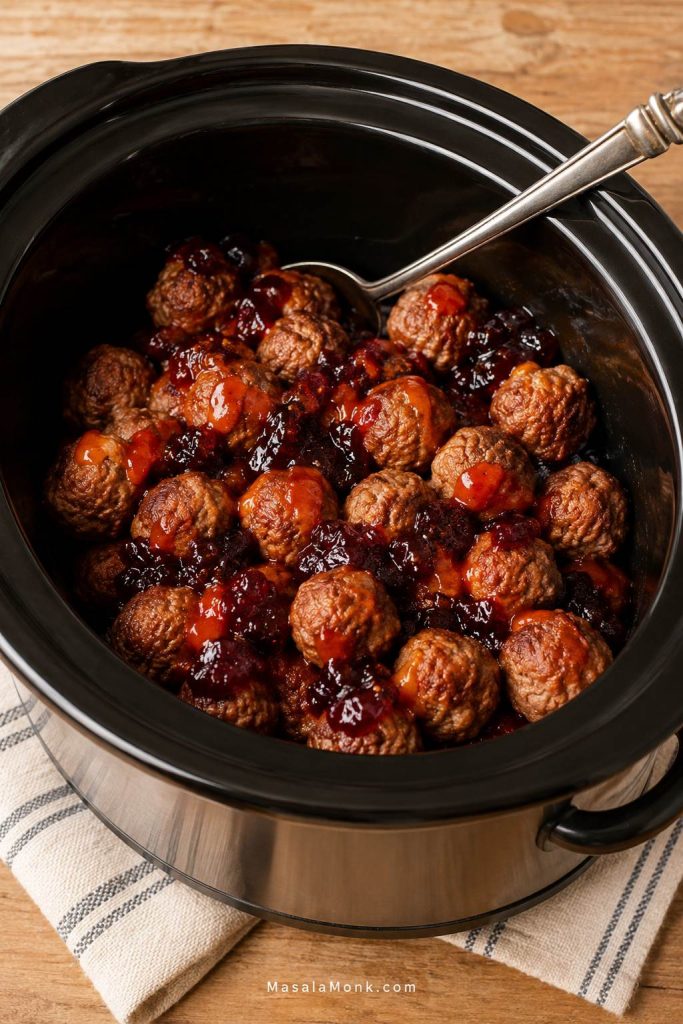
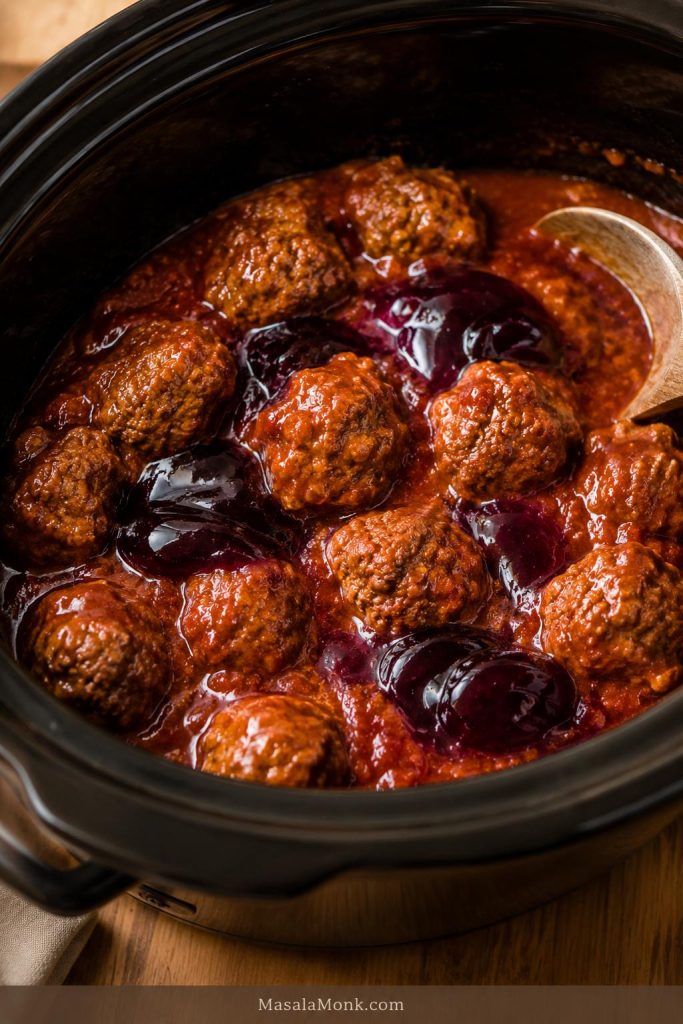
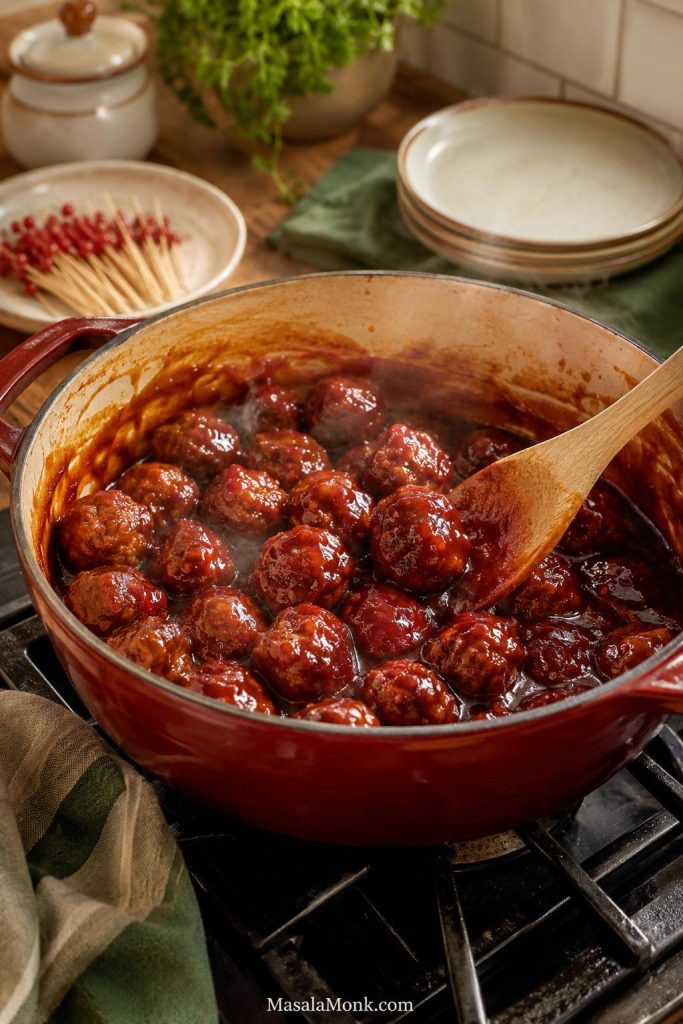
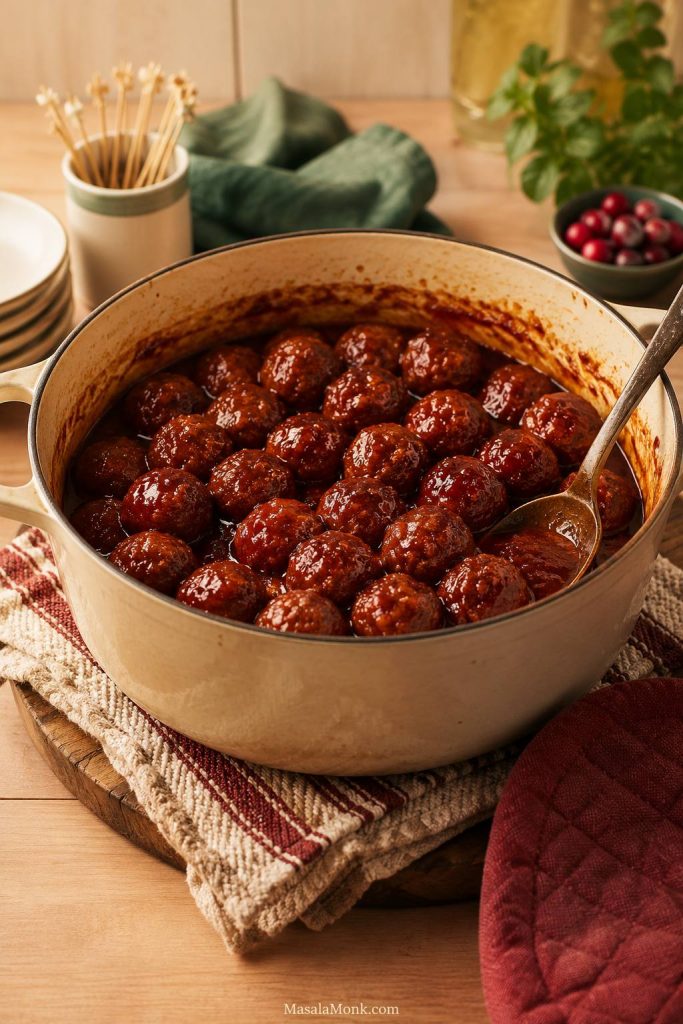
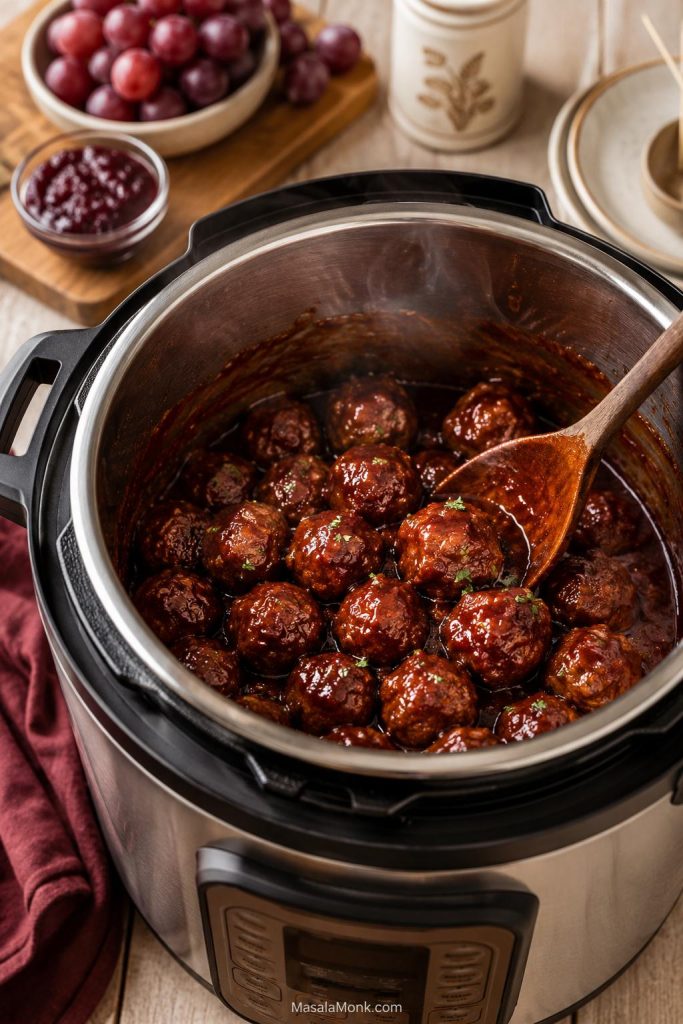
Grape jelly meatballs are the kind of party food that makes people suspicious for about five seconds, then sends them back for another toothpick. The ingredient list sounds strange until the sauce starts bubbling: sweet grape jelly, tangy chili sauce, and tender meatballs turning glossy in the slow cooker while you finish the rest of the table.
Keep the classic version simple: fully cooked meatballs, grape jelly, and bottled chili sauce in the crockpot. As the batch warms, the jelly melts into the sauce, the chili sauce balances the sweetness, and the slow cooker holds everything until people are ready to serve themselves.
It is old-school, low-stress, and very good at doing what party food should do: stay warm, taste familiar, and disappear quietly while people keep talking. Once the lid goes on, you get a hot appetizer that can take care of itself while you finish the rest of the food.
Quick Answer: The 3 Ingredients for Grape Jelly Meatballs
To make grape jelly meatballs, combine 2 lb / 900 g fully cooked frozen meatballs, 10–12 oz / 280–340 g grape jelly, and 12 oz / 340 g bottled chili sauce, the tomato-based kind usually found near ketchup, in a slow cooker. Cook on HIGH for 2–3 hours or LOW for 4–5 hours, stirring once or twice, until the sauce has melted together, the coating clings, and the meatballs are heated through.
Ingredient
Amount
Role
Fully cooked frozen homestyle meatballs
32 oz / 2 lb / 900 g
Easy party base, usually about 48–50 small meatballs.
Grape jelly
10–12 oz / 280–340 g
Sweetness, shine, and sticky body.
American-style bottled chili sauce
12 oz / 340 g
Tangy tomato balance.
What the three ingredients do
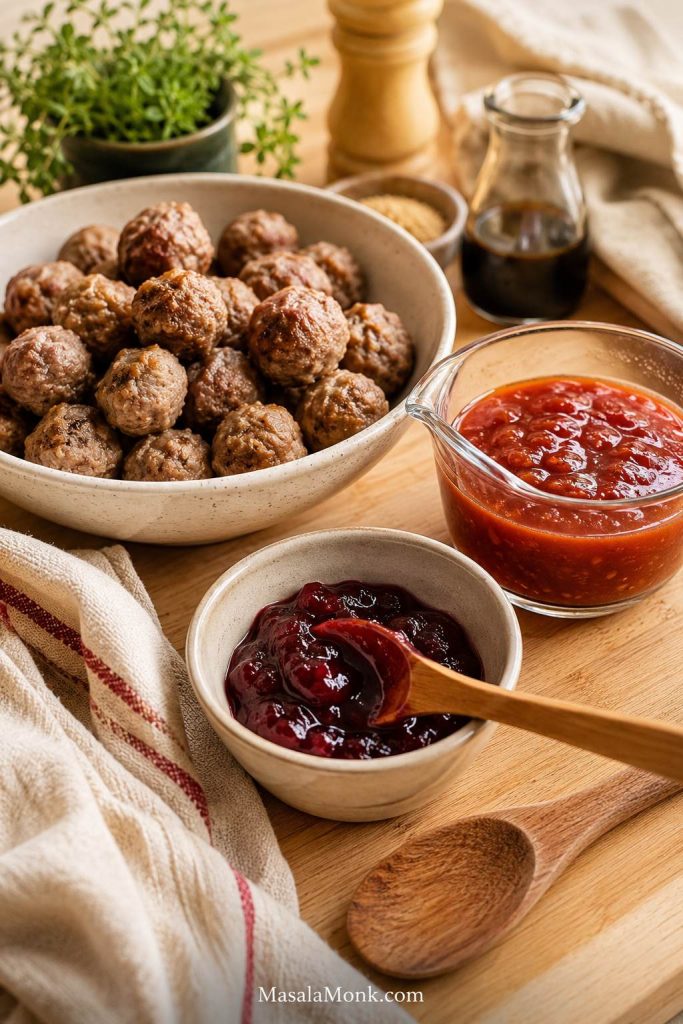
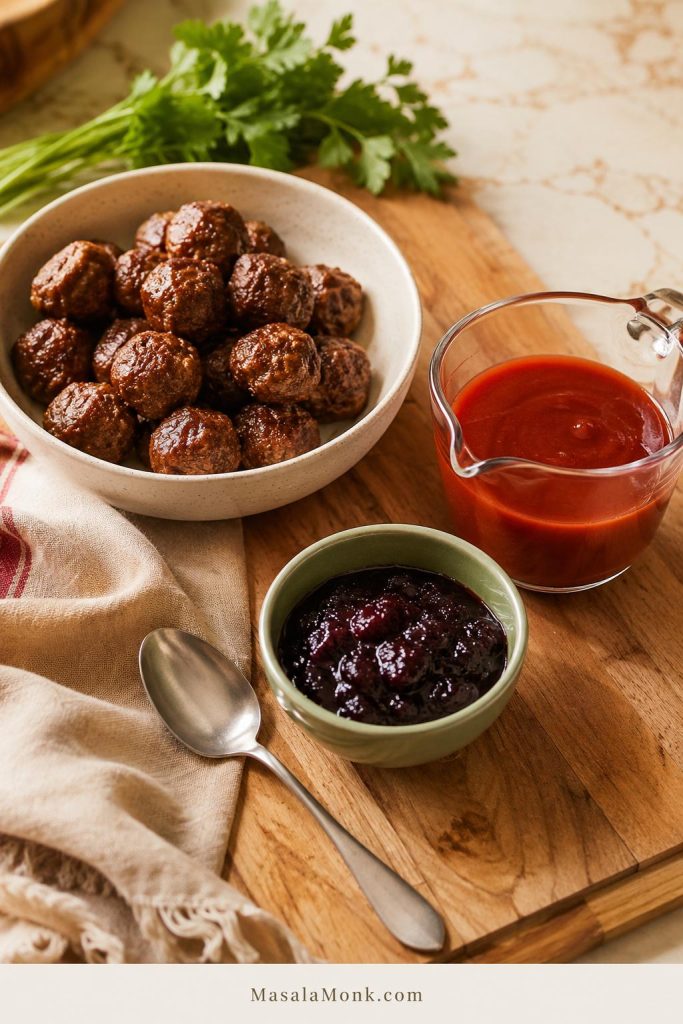
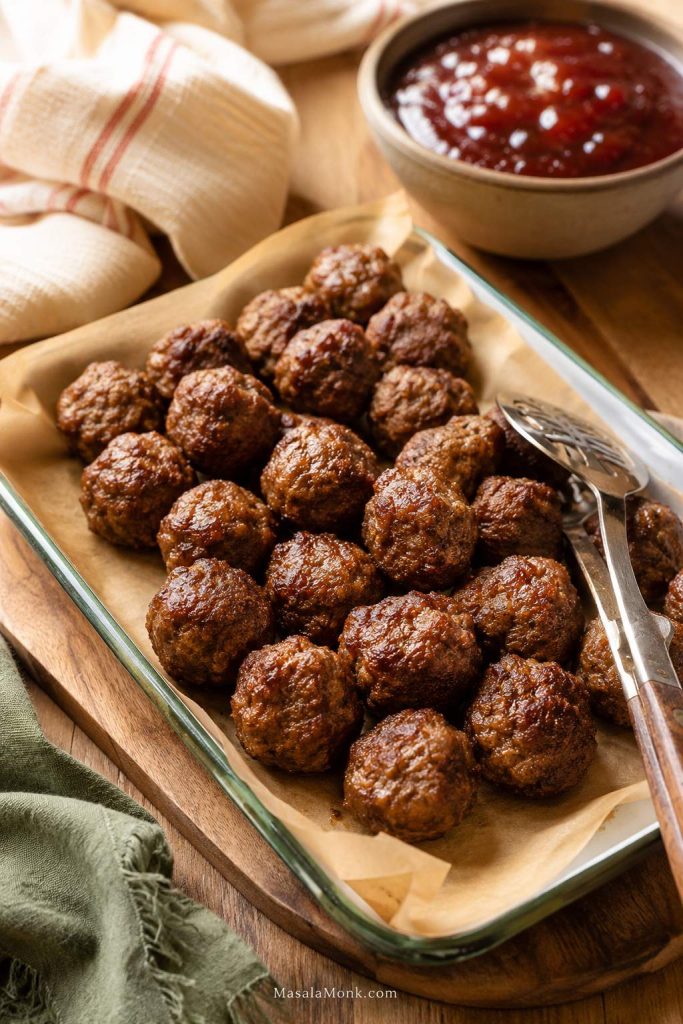
This is the moment where the recipe looks stranger than it tastes. Seeing the ingredients together makes the grape jelly less confusing before the sauce melts.
The base is simple: cooked meatballs, grape jelly, and bottled chili sauce. Once warm, Worcestershire, pepper, vinegar, or mustard can fine-tune the flavor.
Increase the grape jelly to 18–20 oz / 510–565 g for a sweeter, stickier potluck glaze. Go with BBQ sauce for a smoky version. For the mildest pantry batch, ketchup works too, especially with a splash of Worcestershire sauce or vinegar.
At a glance: 5 minutes prep, 2–3 hours on HIGH or 4–5 hours on LOW, 12–16 appetizer servings, best with fully cooked frozen homestyle meatballs.
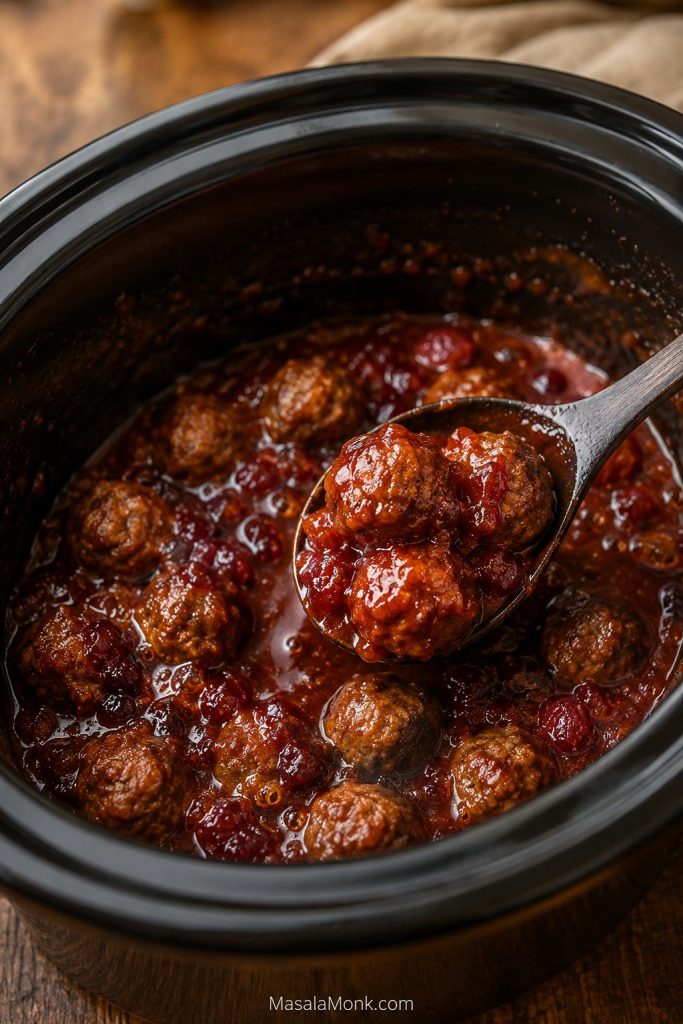
A quick reassurance: The mixture may look lumpy, separated, or too thin before it heats. That is normal. The jelly melts slowly, the chili sauce turns it savory, and the final sauce should taste balanced rather than candy-sweet. Taste only after everything has warmed together.
Choose Your Sauce Version
You can keep the meatballs exactly the same and change only the sauce to fit the crowd. Start with the classic chili sauce version if this is your first time. Choose BBQ sauce for game day. Use ketchup when you want the mildest, most pantry-friendly version.
Situation
Best version
What to use
First time making these
Classic chili sauce version
2 lb meatballs + 10–12 oz grape jelly + 12 oz chili sauce
Sweet potluck glaze
Extra grape jelly version
2 lb meatballs + 18–20 oz grape jelly + 12 oz chili sauce
Game day or BBQ crowd
BBQ version
2 lb meatballs + 1 cup grape jelly + 1 1/2 to 2 cups BBQ sauce
Pantry-only version
Ketchup version
2 lb meatballs + 3/4 to 1 cup grape jelly + 1 1/2 cups ketchup
Less sweet / more balanced
Classic ratio + sharpener
Add vinegar, Dijon, Worcestershire, black pepper, or hot sauce after tasting
Sauce comparison: chili sauce, BBQ, or ketchup
The meatballs stay the same; the sauce decides whether the batch tastes classic, smoky, or mild.
Choose the sauce by the crowd: chili sauce for classic tang, BBQ sauce for smoky game-day flavor, and ketchup for a milder family batch.
Best default: First time making these? Use 2 lb fully cooked homestyle meatballs, 10–12 oz grape jelly, and 12 oz bottled chili sauce. It is the safest balance for most parties: sweet enough to feel classic, tangy enough to avoid tasting like candy.
BBQ sauce gives the friendliest game-day flavor. BBQ sauces vary a lot, so if yours is already sweet and thick, start with less grape jelly and add more only after tasting. Ketchup is not a failure version; it is simply softer, sweeter, and milder. Add vinegar or Worcestershire if you want it closer to the tang of chili sauce.
The chili sauce version tastes most classic, but BBQ sauce is the one many families grew up with. This is exactly the kind of recipe where the “right” version depends on whose slow cooker you remember.
The Best Ratio for Grape Jelly Meatballs
The best all-purpose ratio is 2 lb / 900 g fully cooked meatballs, 10–12 oz / 280–340 g grape jelly, and 12 oz / 340 g bottled chili sauce. It gives you enough sauce to coat the meatballs without turning the slow cooker into a bowl of syrup.
You will see two common versions: a balanced version with 10–12 oz grape jelly and a sweeter potluck version with an 18–20 oz jar. Neither is wrong. Use the smaller amount when you want savory-sweet balance; use the larger jar when you want the sticky retro party glaze.
Save this ratio: 2 lb meatballs + 12 oz chili sauce + 10–12 oz grape jelly for balance.
The Visual Ratio: Balanced First, Sweeter Later
Start balanced first. You can always make the glaze sweeter, but pulling back too much jelly is harder once the whole jar is in the pot.
Start with 2 lb meatballs, 10–12 oz grape jelly, and 12 oz chili sauce; add more jelly only if you want a sweeter potluck glaze.
Recipe Card: Grape Jelly Meatballs
Grape Jelly Meatballs Recipe
Glossy, sweet-tangy grape jelly meatballs made in the slow cooker with fully cooked meatballs, grape jelly, and bottled chili sauce. Easy to keep warm for parties, potlucks, holidays, and game day, with notes for BBQ sauce, ketchup, stovetop, oven, and Instant Pot versions.
Prep Time 5 minutes
Cook Time 2–3 hours HIGH or 4–5 hours LOW
Total Time About 2 hr 5 min to 5 hr 5 min
Yield 12–16 appetizer servings
Ingredients
32 oz / 2 lb / 900 g fully cooked frozen homestyle meatballs
10–12 oz / 280–340 g grape jelly
12 oz / 340 g American-style bottled chili sauce
Add 1 teaspoon Worcestershire sauce, optional
Use 1/2 teaspoon garlic powder, optional
Finish with 1/4 to 1/2 teaspoon black pepper, optional
Instructions
Add grape jelly and chili sauce to a 4–5 quart slow cooker.
Stir lightly. The jelly does not need to be fully melted yet.
Add the fully cooked meatballs and turn them through the mixture.
Cover and cook on HIGH for 2–3 hours or LOW for 4–5 hours.
Stir once or twice while the meatballs heat.
When the sauce has melted together and the meatballs are hot, switch to WARM and serve.
Notes
For a sweeter party glaze, increase grape jelly to 18–20 oz / 510–565 g.
BBQ version: combine 1 1/2 to 2 cups BBQ sauce with 1 cup grape jelly.
Ketchup version: combine 1 1/2 cups ketchup with 3/4 to 1 cup grape jelly.
Use American-style bottled chili sauce, not chili garlic sauce, Thai sweet chili sauce, or sriracha as a direct replacement.
If using homemade meatballs, cook them fully before adding them to the sauce.
The sauce is ready when there are no streaks of jelly left and the coating clings to the meatballs.
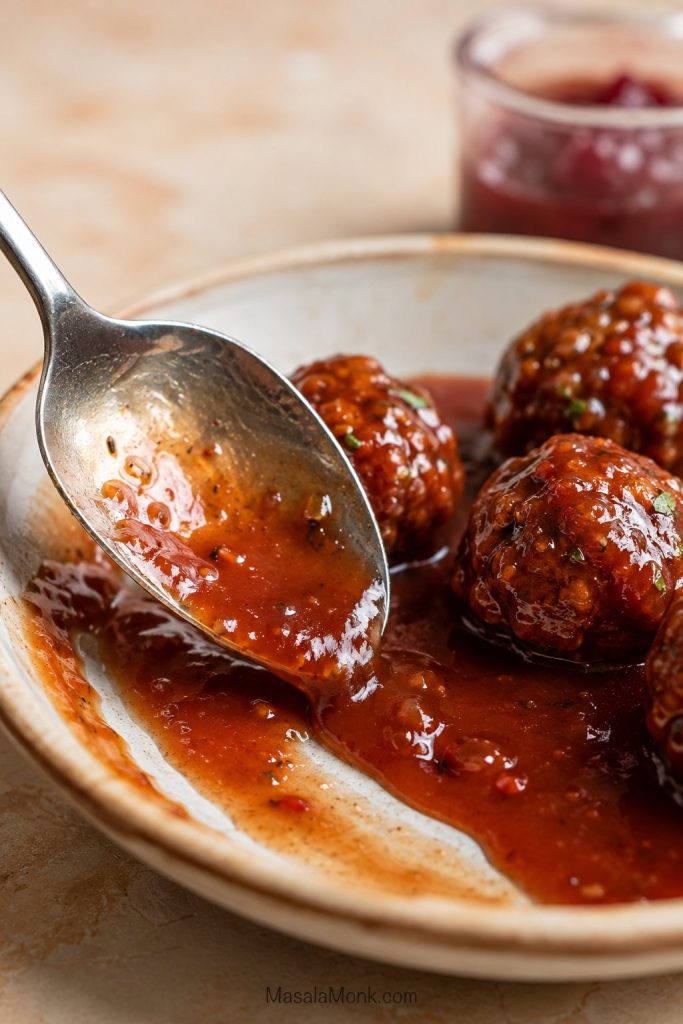
What the Finished Sauce Should Look Like
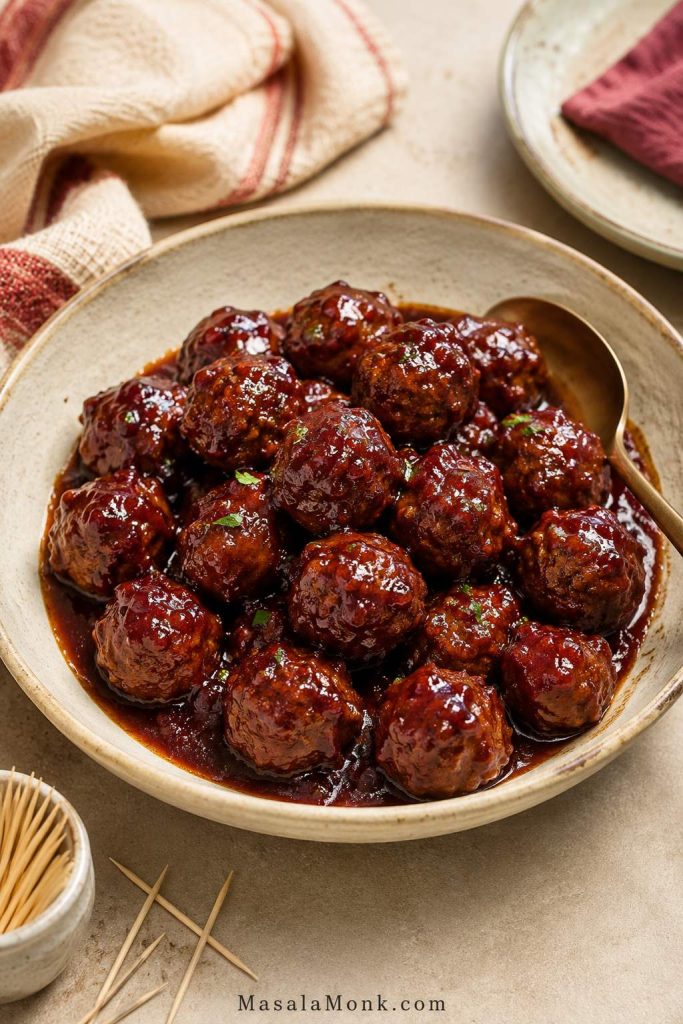
After the recipe card, use this as the visual target: saucy, spoonable, and glossy without being watery.
The finished sauce should lightly pool without turning soupy, so the meatballs are easy to spoon or hold warm in a crockpot.
That is the whole basic recipe. From here, use only what you need: scale the batch for a party, choose the sauce version your crowd will like best, make it without a crockpot, or fix the sauce if it tastes too sweet, too thin, or too sharp.
A 32 oz / 2 lb / 900 g bag of fully cooked frozen homestyle meatballs is the easiest choice. Most bags this size contain around 48–50 small meatballs, though the exact count depends on the brand.
For the most classic flavor, choose plain homestyle cocktail meatballs rather than strongly seasoned Italian meatballs. Beef, pork, turkey, chicken, or mixed meatballs can all work, but the sauce tastes most familiar with mild beef or beef-pork style meatballs.
If your bag is closer to 26–28 oz instead of 32 oz, you can still use the recipe. Hold back a few spoonfuls of sauce at first, then add more if the meatballs need extra coating. If your meatballs are larger than cocktail-size, give them more time to heat through.
For crowds, it is worth checking the meatball label for breadcrumbs, egg, dairy, soy, or gluten, since frozen meatballs vary by brand.
Grape jelly
Grape jelly gives the sauce sweetness, shine, and thickness. Concord grape jelly has the most familiar flavor, but any regular grape jelly works.
The grape jelly is the part that makes people pause, but it is also the part that makes the sauce work. It melts into sweetness and body, not a grape-flavored coating.
For a balanced sauce, use 10–12 oz / 280–340 g. For a sweeter, extra-saucy version, use 18–20 oz / 510–565 g.
If your jar is 10 oz, use the whole thing for a balanced batch. If your jar is 18–20 oz, start with about half to two-thirds of the jar, then add more after tasting if you want the sweeter potluck glaze.
Bottled chili sauce
Choose American-style bottled chili sauce, the tomato-based sauce usually sold near ketchup. The bottle may say “chili sauce,” but the flavor should be tangy and mildly spiced, not fiery hot.
Important chili sauce note: For this recipe, chili sauce means American-style bottled chili sauce, usually found near ketchup. Heinz chili sauce is a common reference point, but store brands are fine as long as the sauce is smooth, tomatoey, tangy, and mildly spiced. It is not the same as Asian chili garlic sauce, Thai sweet chili sauce, or sriracha.
If you cannot find it, BBQ sauce or ketchup can still make a good batch. The flavor changes, but the method stays simple.
Optional flavor boosters
The basic 3-ingredient version works on its own. Use these only if the warm sauce tastes like it needs a little more depth, sharpness, or heat:
Add 1 teaspoon Worcestershire sauce for savory depth
Use 1/2 teaspoon garlic powder for a rounder flavor
Sprinkle in 1/4 to 1/2 teaspoon black pepper for mild heat
Stir in 1 teaspoon Dijon mustard if the sauce is too sweet
Brighten with 1 teaspoon vinegar or lemon juice if it needs brightness
Hot sauce or sriracha if you want more heat
How to Make Grape Jelly Meatballs in the Crockpot
A 4–5 quart slow cooker works well for a standard 2 lb batch. For a double batch, use a 6 quart slow cooker so the meatballs heat evenly and you still have room to stir.
Before cooking: why the sauce looks uneven
Do not worry if the slow cooker looks patchy at the start. Heat is what turns the separate sauce pockets into one coating.
This uneven start is normal. Heat turns the separate jelly and chili sauce into a smooth coating.
Add the grape jelly and chili sauce to the slow cooker.
Stir roughly. The jelly does not need to be fully smooth yet.
Add the fully cooked meatballs.
Turn them through the mixture until coated.
Cover and cook on HIGH for 2–3 hours or LOW for 4–5 hours.
Stir once or twice during cooking.
When the meatballs are hot and there are no streaks of jelly left, switch the slow cooker to WARM for serving.
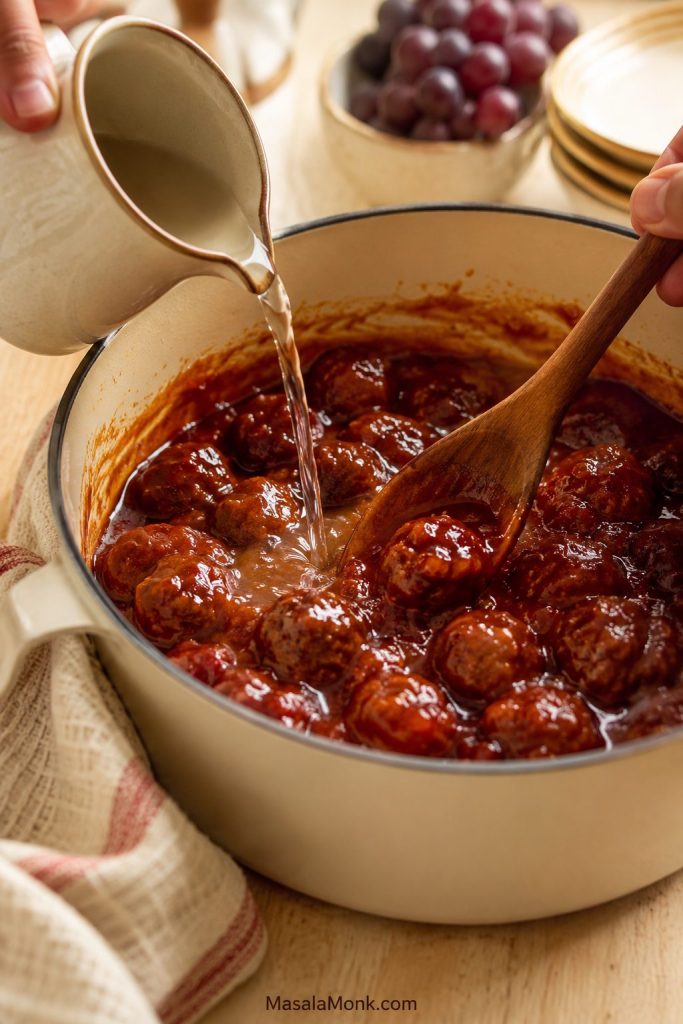
Texture cue: The sauce is ready when it coats the spoon and clings to the meatballs instead of sitting in separate streaks of jelly and chili sauce. If the edges of the slow cooker start getting sticky, stir and add a splash of water or broth.
If the mixture looks thin halfway through, do not panic. It thickens as the jelly melts, the meatballs warm through, and the edges of the slow cooker begin to bubble.
Halfway through: wait before adjusting
This is the stage where people often adjust too early. Wait until the jelly melts before adding more sweetness, tang, or thickener.
At the halfway point, look for partial coating rather than perfect gloss; the sauce smooths out as the jelly melts.
Once the meatballs are hot, avoid leaving them on HIGH for too long. The sauce can reduce around the edges, become overly sticky, and make the meatballs taste drier. WARM is the better setting for serving.
How to know the meatballs are done
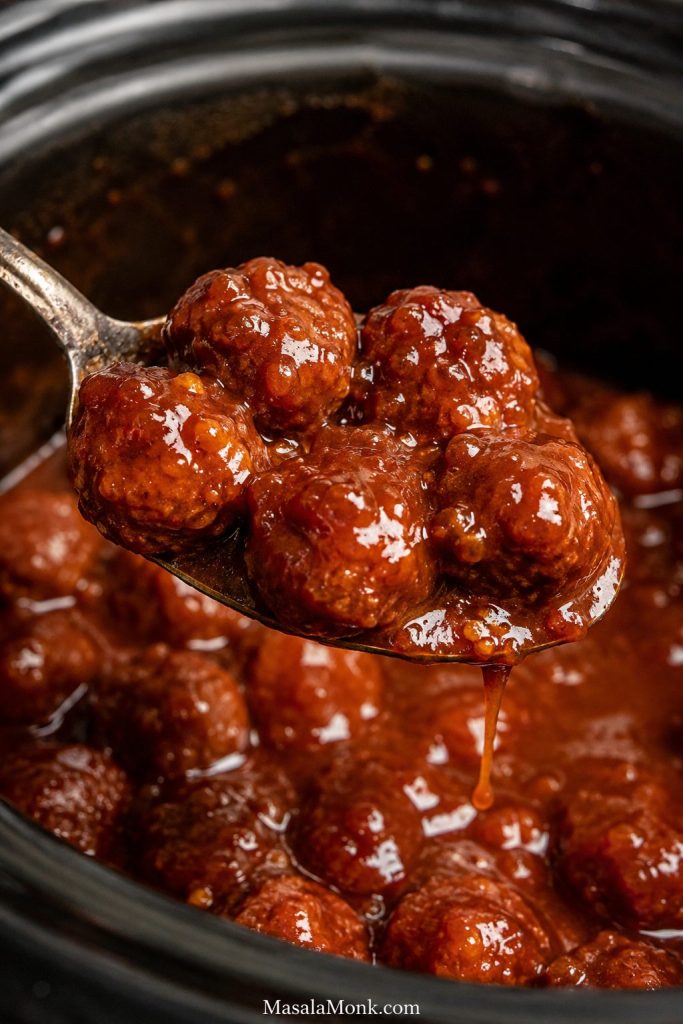
The meatballs are ready when the sauce has fully melted, the coating looks unified, and the meatballs are heated through. Around the edges of the slow cooker, the mixture may bubble gently and thicken slightly.
Look for an even coating on the spoon; that means the sauce has come together and the meatballs are heated through.
If you use homemade meatballs, cook them through before adding them to the sauce. Some homemade slow-cooker meatball recipes cook raw meatballs in sauce, but this party version is easier to control when the meatballs are cooked first. You get better texture, simpler timing, and less guesswork.
Why This Ratio Works
This version starts with 10–12 oz grape jelly instead of a full 18–20 oz jar, so the sauce still tastes like a savory appetizer instead of a candy glaze. It is also easier to adjust: if the sauce needs more sweetness, you can add it, but if it starts too sweet, you have fewer ways to pull it back.
What Balanced Sauce Should Look Like
This is the sauce check: it should move easily from the spoon while still holding onto the meatballs.
A good sauce should flow but still cling. Starting with moderate jelly gives you more control than dumping in a full jar.
The method stays honest to what this recipe is supposed to be: one slow cooker, fully cooked meatballs, and no extra pan unless you want to thicken the sauce faster. The result is glossy, sweet-tangy, and easy to hold warm without turning the edges into syrup.
When These Meatballs Work Best
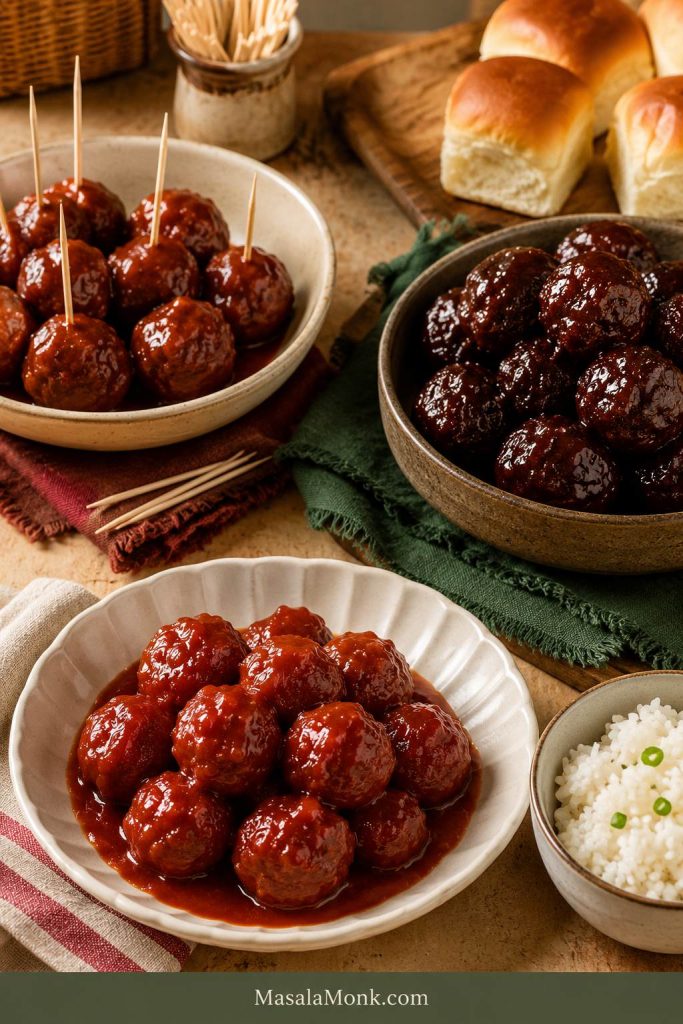
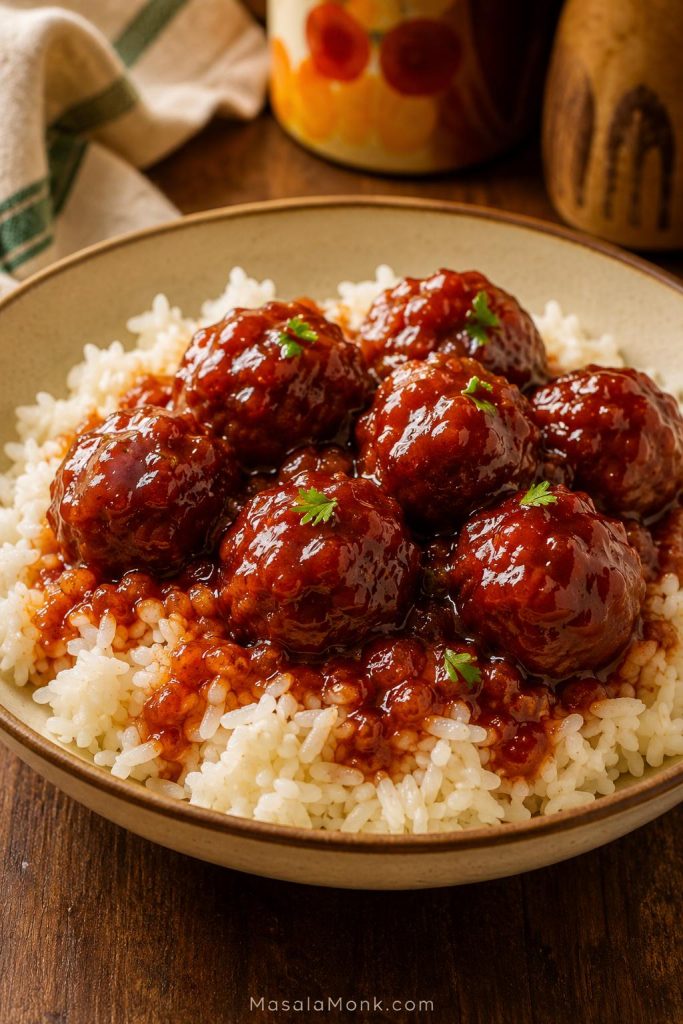
These meatballs work three ways: as cocktail meatballs with toothpicks, as a slow cooker appetizer for game day, or as a saucy dinner over rice or mashed potatoes. They are built for fully cooked meatballs, a warm sauce, and a slow cooker that can hold everything on a buffet table.
They are small, warm, saucy, and easy to take without committing to a full plate. That is why they disappear slowly at first, then suddenly all at once.
Once the meatballs are heated through, the crockpot keeps them warm while people serve themselves. If you like this kind of hands-off party food, this slow cooker pulled pork recipe works for the same reason: the slow cooker handles the timing, and the sauce does the heavy lifting.
The recipe works because the sauce pulls in two directions at once: grape jelly gives sweetness and shine, while chili sauce, BBQ sauce, or ketchup keeps it from tasting one-note. A little vinegar, mustard, Worcestershire, or hot sauce can fine-tune the flavor once everything is warm.
Why the Jelly and Chili Sauce Work
The jelly melts into a glossy glaze
At first, the grape jelly may sit in thick spoonfuls beside the chili sauce. That is normal. Give it heat and time, and it melts into a spoon-coating sauce instead of tasting like meatballs in jam. The mixture may look separated for the first 20–30 minutes, so do not judge it too early.
Those dark jelly pockets melt into the chili sauce, building shine and sweetness without leaving a jammy coating.
Chili sauce keeps the sweetness in check
Grape jelly alone would be too sweet. Bottled chili sauce brings tomato, vinegar, mild spice, and enough tang to make the sauce taste savory. If it smells sharp at first, wait until everything warms through before adjusting.
Fully cooked meatballs make it party-proof
Frozen fully cooked meatballs are already shaped, cooked, and ready to heat. You do not need to thaw, sear, or fuss with anything if the package says they can be heated from frozen.
The crockpot holds everything without babysitting
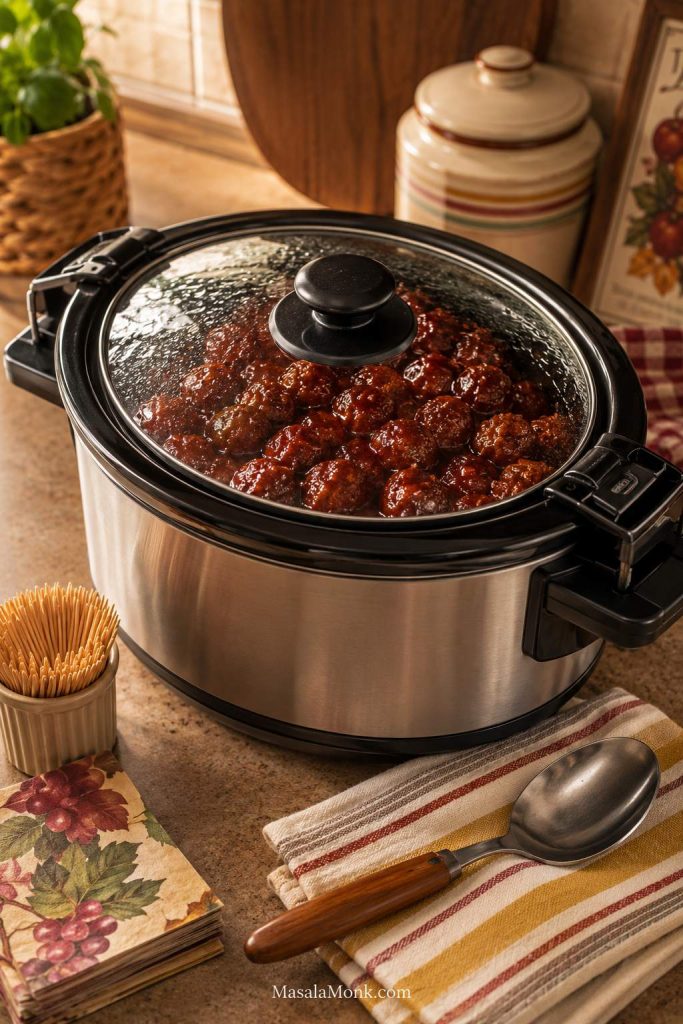
The slow cooker warms the meatballs gently, melts the jelly into the sauce, and holds everything ready until people start serving themselves. Once the batch is hot, switch to WARM so the coating stays saucy instead of reducing too far around the edges.
Crockpot Time Chart
Slow cookers do vary, so use the times below as a guide and the visual cues as your final check. You are looking for hot meatballs, melted sauce, and a coating that clings instead of pooling at the bottom.
Batch size
Slow cooker size
HIGH
LOW
1 lb / 450 g meatballs
2–3 quart
1.5–2 hours
3–4 hours
2 lb / 900 g meatballs
4–5 quart
2–3 hours
4–5 hours
4 lb / 1.8 kg meatballs
6 quart
3–4 hours
5–6 hours
Stir occasionally, but avoid lifting the lid too often. Once the meatballs are fully hot, switch to WARM for serving.
Serving safety note: The slow cooker is great for keeping hot food warm, but it should not be used to reheat cold leftovers straight from the fridge. USDA slow cooker food safety guidance recommends reheating leftovers first on the stovetop, in the oven, or in the microwave, then moving them to the slow cooker for serving.
Before You Start: Sauce Mistakes to Avoid
Use the right chili sauce. Bottled tomato-based chili sauce is not the same as chili garlic sauce, Thai sweet chili sauce, or sriracha.
Let the jelly melt before judging the flavor. The sauce tastes different once the jelly has fully melted into the chili sauce.
Switch from HIGH to WARM once the meatballs are hot. This keeps the edges from over-thickening.
Mix cornstarch with cold water first. Adding dry cornstarch directly to hot sauce can make it clump.
Cook homemade meatballs before saucing. This version is for heating and coating fully cooked meatballs, not cooking raw meat from scratch.
Chili Sauce vs BBQ Sauce vs Ketchup
If you already picked a version above, use this section to fine-tune it. Chili sauce keeps things classic and balanced, BBQ sauce brings smoke, and ketchup needs a little sharpening when you want a pantry-only batch.
Chili sauce tastes like a tangier, bolder ketchup-style sauce. Ketchup makes the meatballs softer and sweeter, while chili sauce gives the classic version more tomato tang and mild spice.
Version
Meatballs
Sauce
Flavor
Classic chili sauce
2 lb / 900 g
10–12 oz grape jelly + 12 oz chili sauce
Tangy, classic, balanced
Sweeter party glaze
2 lb / 900 g
18–20 oz grape jelly + 12 oz chili sauce
Stickier, sweeter, extra saucy
BBQ version
2 lb / 900 g
1 cup grape jelly + 1 1/2 to 2 cups BBQ sauce
Smoky and sweet
Ketchup version
2 lb / 900 g
3/4 to 1 cup grape jelly + 1 1/2 cups ketchup
Mild and sweet-tangy
If using ketchup, add Worcestershire sauce, vinegar, mustard, black pepper, or chili powder if the sauce tastes flat. If using BBQ sauce, start with the lower amount of jelly and add more only if you want a sweeter coating.
No Crockpot? Make Them on the Stovetop, in the Oven, or in the Instant Pot
The crockpot is still the easiest choice when guests are coming, but you are not stuck if it is already full. The same grape jelly mixture works on the stovetop, in the oven, and in the Instant Pot with a few small adjustments.
Stovetop method
Add grape jelly and chili sauce to a Dutch oven, deep skillet, or large saucepan.
Warm over medium-low heat until the jelly melts into the chili sauce.
Add the meatballs and stir to coat.
Cover and simmer for 15–20 minutes, stirring occasionally.
If the meatballs are large or still very frozen, allow 25–30 minutes.
Use the stovetop when you need them faster or when the sauce needs a few extra minutes to tighten into a thicker coating.
On the stovetop, gentle simmering melts the jelly and tightens the sauce faster than a slow cooker.
Oven method
Heat the oven to 350°F / 175°C.
Add meatballs, grape jelly, and chili sauce to a covered baking dish or Dutch oven.
Stir to coat.
Cover and bake for 45–60 minutes.
Stir halfway through.
Uncover for the last 10 minutes if the coating looks too thin.
Reach for the oven when the slow cooker is already busy or when a wide baking dish is easier than stirring a crowded crockpot.
A covered baking dish keeps the meatballs saucy when the slow cooker is already busy.
Instant Pot method
The Instant Pot works, but it is not the best method for the glossiest sauce or for holding meatballs during a party. Use it when speed matters, then transfer the meatballs to a slow cooker on WARM or to a serving dish.
Add the meatballs, grape jelly, chili sauce, and 1/2 to 3/4 cup water to the Instant Pot.
Pressure cook for 5–10 minutes, depending on meatball size.
Quick release carefully.
Use the sauté function to simmer uncovered until the mixture thickens and coats the spoon.
Do not skip the sauté step if you want a sticky coating. The mixture will look thinner at first because of the added water.
After pressure cooking, use sauté to reduce the sauce from loose to spoon-coating.
Can You Use Homemade Meatballs?
You do not need homemade meatballs for this recipe to work. Frozen fully cooked meatballs are the point when you need an easy party appetizer. Homemade meatballs are simply an upgrade if you have the time.
Cooked meatballs before sauce
Homemade meatballs are an upgrade, but they should be cooked first so the sauce is only heating and coating them, not cooking raw meat.
Cook homemade meatballs first, then sauce them; the texture stays firmer and timing is easier.
For a simple homemade batch, use:
Ground beef or beef-pork mix, 2 lb / 900 g
Breadcrumbs or panko, 1 cup
Milk, 1/2 cup
Eggs, 2
Finely chopped onion, 1/2 cup
Garlic powder, 1 teaspoon
Salt, 1 teaspoon
Black pepper, 1/2 teaspoon
Mix gently, shape into 1-inch meatballs, then bake or brown them before adding them to the sauce. Ground beef or pork meatballs should be cooked through to 160°F / 71°C. Poultry meatballs should reach 165°F / 74°C.
Best practical choice: Use frozen fully cooked meatballs for parties. Choose homemade meatballs when you want better texture and have time to cook them before saucing.
How Much to Make for a Party
A 2 lb bag usually gives about 48–50 small meatballs. If you are serving several appetizers, people will take fewer. If these are the main hot snack, plan for more.
Use case
Amount to plan
Light appetizer with other snacks
3–4 meatballs per person
Heavier appetizer
5–6 meatballs per person
Dinner over rice, noodles, or potatoes
6–8 meatballs per person
2 lb / 900 g bag
About 12–16 appetizer servings
4 lb / 1.8 kg double batch
About 24–32 appetizer servings
What a Double Batch Looks Like
Use this as the capacity check: the slow cooker can look full, but it still needs room for stirring.
A double batch needs room to stir. Crowding slows heating and makes the sauce harder to manage.
If you are not sure how much your crowd will eat, make the double batch. These are exactly the kind of appetizers people keep taking one at a time until the slow cooker is suddenly empty.
Sauce Scaling Chart
Use this chart when your bag size is smaller, larger, or when you want a sweeter party-style batch. The standard batch is saucy enough for a party bowl, but not so heavy that the meatballs swim in sauce.
Batch
Meatballs
Grape jelly
Chili sauce
Small bag
26–28 oz / 740–800 g
8–10 oz / 225–280 g
10–12 oz / 280–340 g
Half batch
1 lb / 450 g
5–6 oz / 140–170 g
6 oz / 170 g
Standard balanced batch
2 lb / 900 g
10–12 oz / 280–340 g
12 oz / 340 g
Sweeter party batch
2 lb / 900 g
18–20 oz / 510–565 g
12 oz / 340 g
Double balanced batch
4 lb / 1.8 kg
20–24 oz / 560–680 g
24 oz / 680 g
Double sweeter batch
4 lb / 1.8 kg
36–40 oz / about 1–1.1 kg, or roughly two 18–20 oz jars
24 oz / 680 g
Simple Party Timeline
If you are serving these for a party, start the slow cooker about 3 hours before guests arrive if cooking on HIGH, or 5 hours before if cooking on LOW. That gives the meatballs time to heat through and gives you a little buffer before serving.
When
What to do
Night before
Mix the grape jelly and chili sauce, or cook the full batch and refrigerate it after cooling.
Before serving a refrigerated batch
Reheat on the stovetop, in the oven, or in the microwave until hot, then move to the slow cooker on WARM.
3–5 hours before serving a fresh batch
Cook the meatballs in the slow cooker, depending on HIGH or LOW timing.
When guests arrive
Switch to WARM, stir, and set out toothpicks plus a spoon for extra sauce.
During serving
Stir occasionally and loosen the sauce with a splash of water or broth if the edges thicken.
Taking Them to a Potluck
If you are taking grape jelly meatballs to another house, the easiest option is to cook or reheat them before you leave, keep the slow cooker covered during the trip, then plug it in as soon as you arrive and keep the meatballs on WARM.
How to Hold Them Warm at a Potluck
The covered slow cooker shines as a holding tool. For best texture and safety, bring the meatballs hot before you rely on WARM.
Bring the meatballs hot, then use the covered slow cooker to hold them warm once you arrive.
For a longer trip, transport the meatballs chilled in a sealed container, reheat them until hot when you arrive, then move them to the slow cooker for serving. Do not rely on a cold slow cooker full of refrigerated meatballs to reheat the batch quickly.
How to Fix Grape Jelly Meatball Sauce
If your first taste makes you think, “this is too sweet,” do not start over. Wait until the jelly has melted, then adjust the hot sauce in the direction it needs to go.
The good news is that this sauce is forgiving. Once it is warm, small adjustments make a big difference.
Problem
Fix
Too sweet
Add more chili sauce, Dijon, vinegar, lemon juice, Worcestershire sauce, black pepper, or hot sauce.
Too tangy
Add more grape jelly or a spoonful of BBQ sauce.
Too thin
Simmer uncovered or add a cornstarch slurry.
Too thick
Add water, broth, pineapple juice, or a little BBQ sauce.
Flat flavor
Add Worcestershire sauce, Dijon, black pepper, vinegar, hot sauce, or a pinch of salt.
Coating not clinging
Cook longer, stir well, or reduce slightly.
Too spicy
Add more grape jelly or BBQ sauce.
Meatballs drying out
Add a splash of water and keep them on WARM, not HIGH.
If the sauce gets too thick
Sauce that drags instead of spoons needs loosening before serving, especially after sitting on WARM or thickening around the slow cooker edges.
If the sauce thickens around the edges, loosen it with a small splash of water or broth so the glaze stays spoonable.
If the sauce drags instead of pours, loosen it before serving. These meatballs should feel glossy and easy to spoon, not sticky enough to fight with.
How to thicken the sauce
For light thickening, mix 1 teaspoon cornstarch with 1 teaspoon cold water. For a thicker glaze, mix 2 teaspoons cornstarch with 2 teaspoons cold water.
Stir the slurry into the hot mixture and cook until it turns shiny and coats the spoon. In a slow cooker, add the slurry near the end and cook on HIGH for another 15–20 minutes. For faster thickening, transfer the sauce to a saucepan and simmer for a few minutes.
How to make the sauce less sweet
Add something tangy, savory, or spicy. A splash of vinegar, a little Dijon mustard, extra chili sauce, Worcestershire sauce, black pepper, lemon juice, or hot sauce can pull the sauce back into balance.
Start small, stir, taste, and adjust again. It is much easier to add more sharpness than to fix a sauce that has gone too sour.
Substitutions: Grape Jelly, Chili Sauce, and Meatballs
Grape jelly substitutes
Grape jelly is classic, but other fruit preserves can work with the same sweet-savory idea. The mixture may look less smooth if you use jam or preserves with fruit pieces.
Substitute
Flavor result
Cranberry sauce
Tangier, holiday-style, and good with chili sauce.
Apricot preserves
Lighter, fruity, and good with BBQ sauce.
Orange marmalade
Citrus-sweet with a slight bitter edge.
Raspberry preserves
Sweeter berry flavor.
Hot pepper jelly
Spicy-sweet and stronger in flavor.
Strawberry jelly
Works, but tastes sweeter and less classic.
Grape jam
Similar flavor, but thicker and less smooth than jelly.
For a holiday-style version, cranberry sauce is the most natural swap. If you already like sweet-tart cranberry sauce with savory food, that same flavor direction works beautifully with cocktail meatballs. This cranberry sauce with orange juice has the kind of bright, tangy-sweet profile that pairs well with warm appetizers.
Chili sauce substitutes
Go with BBQ sauce when you want a smoky, game-day flavor. Use ketchup when you want the mildest pantry version, then add Worcestershire sauce, vinegar, Dijon, black pepper, or chili powder if it tastes flat.
Meatball substitutes
Turkey, chicken, beef, pork, beef-pork, and plant-based meatballs can all work as long as they are fully cooked before going into the sauce. Choose mild meatballs if you want the classic party flavor.
Can you use low-sugar or sugar-free grape jelly?
Yes, but the sauce may be thinner, less shiny, or slightly sharper depending on the sweetener. Taste after the jelly melts before adding vinegar, mustard, or hot sauce. If the coating looks thin, use the cornstarch slurry method to help it cling to the meatballs.
Can You Use Little Smokies Instead of Meatballs?
Little Smokies can go straight into this sauce too. Use 2–3 lb cocktail sausages with the same grape jelly and chili sauce mixture, then cook until hot and well coated.
How the Little Smokies Version Looks
Use this version when you want the same sauce but a snappier cocktail-sausage bite instead of soft meatballs.
Little Smokies turn the same glaze into a saltier, snappier cocktail-sausage appetizer.
What to Serve with Grape Jelly Meatballs
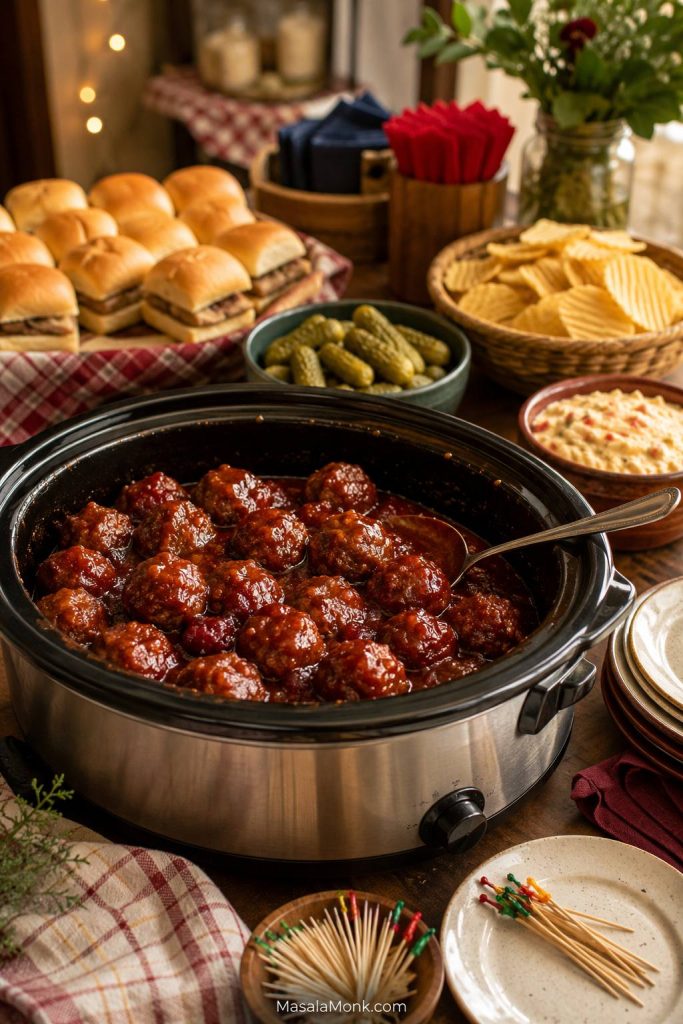
For parties, let these be the warm, saucy anchor on the table. Surround them with something crunchy, something creamy, and something easy to grab.
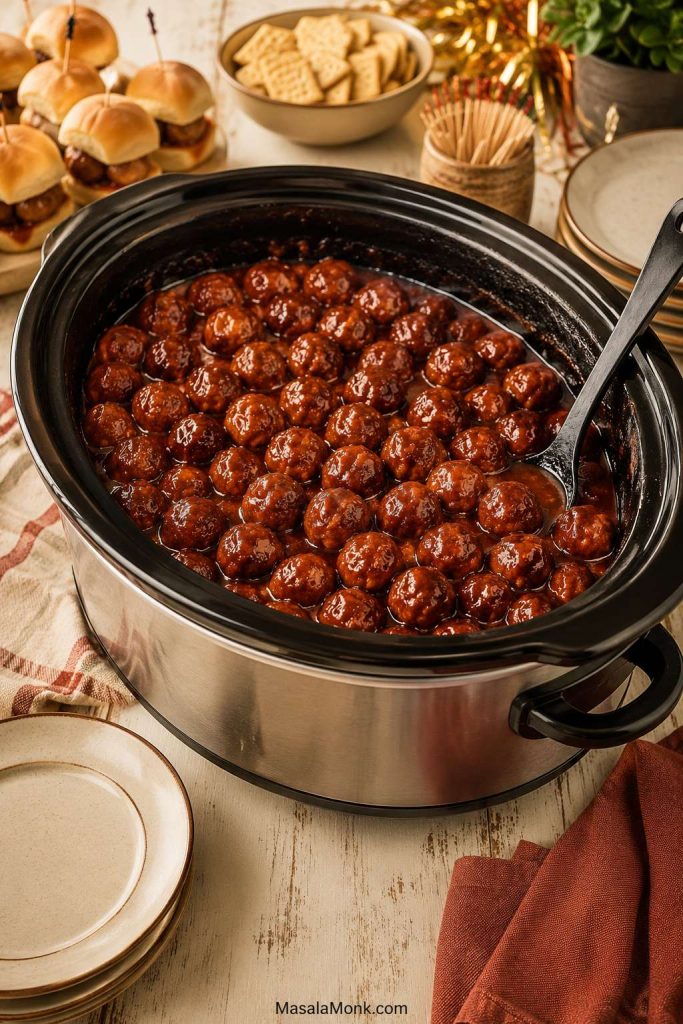
For a slow-cooker setup, set out toothpicks plus a small spoon or ladle. Toothpicks are easy for grabbing meatballs, but a spoon helps people get enough sauce.
What to Serve With Party Meatballs
A good party spread gives the warm meatballs contrast: something soft, something crunchy, something tangy, and something creamy.
Balance the warm saucy meatballs with soft buns, crunchy chips, tangy pickles, and a creamy dip.
Because the sauce is bold and a little sweet, it pairs best with something simple and starchy. Rice, potatoes, and noodles all work because they soak it up without competing with it.
Can You Make Grape Jelly Meatballs Ahead?
Yes. You can make grape jelly meatballs ahead for parties, holidays, and game day. Cook the meatballs in the sauce, let them cool, then store them in an airtight container in the fridge.
Before serving, reheat them on the stovetop, in the oven, or in the microwave until hot. Once reheated, move them to the slow cooker on WARM. If the sauce has thickened in the fridge, stir in a splash of water, broth, or BBQ sauce until it loosens again.
Do not ask the slow cooker to bring cold leftovers up to temperature. Reheat first, then use the slow cooker to hold them warm for serving.
You can also mix the grape jelly and chili sauce ahead of time and keep the sauce refrigerated. When ready to cook, add the sauce and meatballs to the slow cooker and continue with the recipe.
For a cold make-ahead appetizer beside the hot meatballs, this cheese ball recipe works well because it can chill while the slow cooker handles the warm food.
Storage, Freezing, and Reheating
Leftovers keep well because the sauce thickens around the meatballs as it chills. Store them in an airtight container in the fridge for 3–4 days.
To freeze, cool the meatballs completely, then freeze them with the sauce in a freezer-safe container for up to 2–3 months. Thaw overnight in the fridge before reheating.
Reheat on the stovetop, in the microwave, or in the oven until hot. The sauce thickens when cold, so do not panic if leftovers look stiff from the fridge. Add a splash of water if needed, then move the meatballs to a slow cooker on WARM if you want to serve them at a party.
FAQs
What are grape jelly meatballs made of?
Classic grape jelly meatballs use fully cooked meatballs, grape jelly, and bottled chili sauce. The jelly gives sweetness and shine, while the chili sauce keeps the sauce tangy instead of candy-sweet.
Why do people put grape jelly in meatballs?
Grape jelly melts into the sauce and acts like the sweet part of a sweet-and-sour glaze. Once it mixes with chili sauce, it tastes more savory-sweet than fruity.
Do grape jelly meatballs taste like grape jelly?
Not exactly. The jelly adds sweetness, shine, and body, but the chili sauce turns the flavor sweet, tangy, and savory instead of jammy.
What kind of chili sauce do you use?
Use American-style bottled chili sauce, usually found near ketchup. It is tomato-based, tangy, and mildly spiced. Do not use chili garlic sauce, Thai sweet chili sauce, or sriracha as a direct replacement.
What is the difference between chili sauce and ketchup in this recipe?
Chili sauce tastes like a tangier, bolder ketchup-style sauce. Ketchup makes the meatballs softer and sweeter, while chili sauce gives the classic version more tomato tang and mild spice.
Can BBQ sauce replace chili sauce?
Yes. Use 1 1/2 to 2 cups BBQ sauce and 1 cup grape jelly for 2 lb / 900 g meatballs. The flavor will be smokier and sweeter.
Does ketchup work instead of chili sauce?
Yes. Use 1 1/2 cups ketchup and 3/4 to 1 cup grape jelly for 2 lb / 900 g meatballs. Add Worcestershire sauce, vinegar, mustard, or chili powder if it tastes too sweet or flat.
Is grape jam okay instead of grape jelly?
Yes. Grape jam has a similar flavor, but it may be thicker and less smooth because it contains more fruit pulp. Add a splash of water if needed.
What can I use instead of grape jelly?
Cranberry sauce, apricot preserves, orange marmalade, raspberry preserves, hot pepper jelly, strawberry jelly, or grape jam can work. Jam and preserves may make the sauce less smooth than jelly.
Do I thaw frozen meatballs first?
Most fully cooked frozen meatballs can go straight into the slow cooker, but check the package instructions. If a brand recommends thawing first, follow the package.
Do Italian meatballs work?
Yes, but homestyle meatballs taste more like the classic party version. Italian meatballs can work, though the herbs and cheese may make the sauce taste more dinner-style.
Should raw meatballs go into this recipe?
This recipe assumes the meatballs are already cooked. Cook raw or homemade meatballs first, then add them to the sauce for heating and coating.
What size slow cooker do I need?
A 4–5 quart slow cooker works well for 2 lb / 900 g meatballs. Use a 6 quart slow cooker for a double batch.
How long do grape jelly meatballs cook in the crockpot?
For a standard 2 lb / 900 g batch, cook on HIGH for 2–3 hours or LOW for 4–5 hours, until the meatballs are hot and the sauce has melted together.
How do I double grape jelly meatballs?
Yes. Use 4 lb / 1.8 kg fully cooked meatballs, 20–24 oz / 560–680 g grape jelly, and 24 oz / 680 g chili sauce. Use a 6 quart slow cooker and stir once or twice.
How do I keep them warm for a party?
Once the meatballs are fully hot, switch the slow cooker to WARM and stir occasionally. If the sauce thickens around the edges, add a splash of water or broth.
How long can grape jelly meatballs stay on WARM?
Once fully hot, they can sit on WARM as long as the slow cooker keeps them hot, ideally at 140°F / 60°C or above. For best texture, serve within 2–4 hours.
How do I make them without a crockpot?
Yes. Simmer them on the stovetop for 15–20 minutes, or bake covered at 350°F / 175°C for 45–60 minutes. You can also use an Instant Pot with added water, then reduce the sauce after pressure cooking.
How do I thicken grape jelly meatball sauce?
Mix 1 teaspoon cornstarch with 1 teaspoon cold water, then stir it into the hot sauce. For a thicker glaze, use 2 teaspoons cornstarch with 2 teaspoons cold water.
How do I make grape jelly meatballs less sweet?
Add chili sauce, vinegar, lemon juice, Dijon mustard, Worcestershire sauce, hot sauce, black pepper, or chili flakes. Add a little at a time and taste before adding more.
Does low-sugar or sugar-free grape jelly work?
Yes, but the sauce may be thinner, less shiny, or slightly sharper. Taste after the jelly melts, then thicken with a cornstarch slurry if needed.
Do homemade meatballs work?
Yes. Cook homemade meatballs first, then add them to the grape jelly sauce. Frozen fully cooked meatballs are easier for parties, but homemade meatballs give you more control over texture.
Can Little Smokies replace the meatballs?
Yes. Use 2–3 lb Little Smokies or cocktail sausages with the same sauce, then cook until hot and coated. They will taste saltier and snappier than meatballs.
What do you serve with grape jelly meatballs?
For parties, serve them with toothpicks, slider buns, chips and dip, pickles, raw vegetables, or a cheese board. For dinner, spoon them over rice, mashed potatoes, egg noodles, or macaroni and cheese.
Can you freeze grape jelly meatballs?
Yes. Cool them completely, then freeze with the sauce in a freezer-safe container for up to 2–3 months. Thaw overnight in the fridge and reheat until hot.
Final Thoughts
The easiest ratio to remember is simple: 2 lb meatballs, 10–12 oz grape jelly, and 12 oz bottled chili sauce. Let the jelly melt fully, then taste before adjusting.
Once you know that base, the rest is easy: more jelly for sweetness, BBQ sauce for smoke, vinegar or mustard for tang, and a splash of water if the sauce gets too thick. It is not a fancy appetizer, and that is exactly why it works: people know what to do with it, the slow cooker keeps it ready, and the bowl usually empties before anyone admits how simple it was.
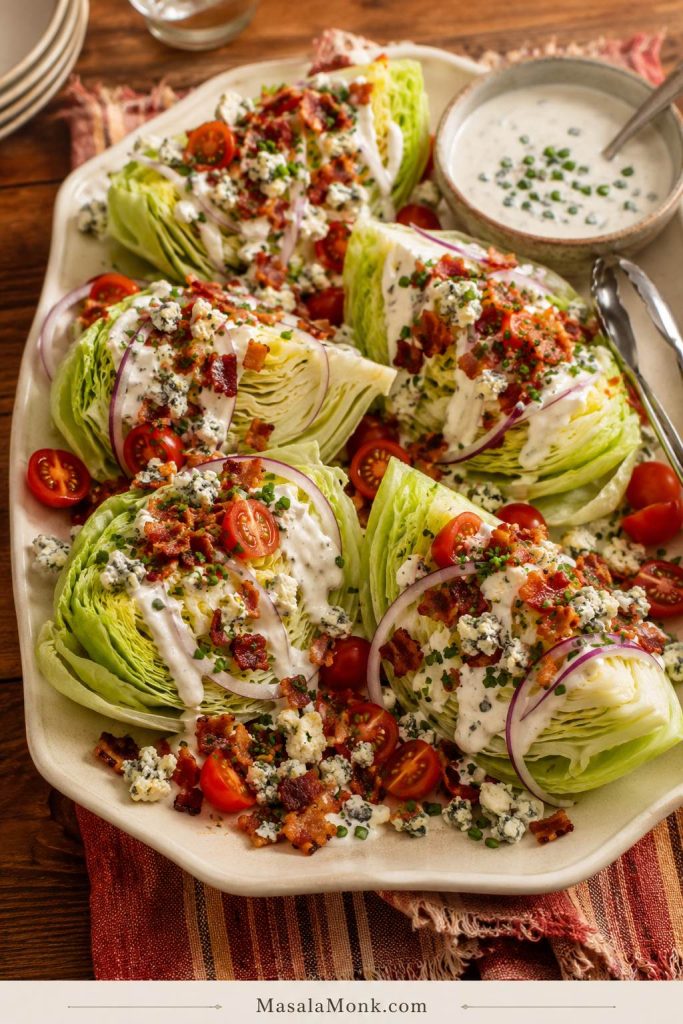
A wedge salad is funny because it looks almost too simple: a quarter of iceberg lettuce, a spoonful of dressing, and a few toppings. Then you cut into it and remember why steakhouses never let it disappear.
The lettuce snaps cold under the knife, the dressing settles into the layers, the bacon hits salty and crisp, and suddenly the plainest lettuce in the fridge feels like the best side on the table.
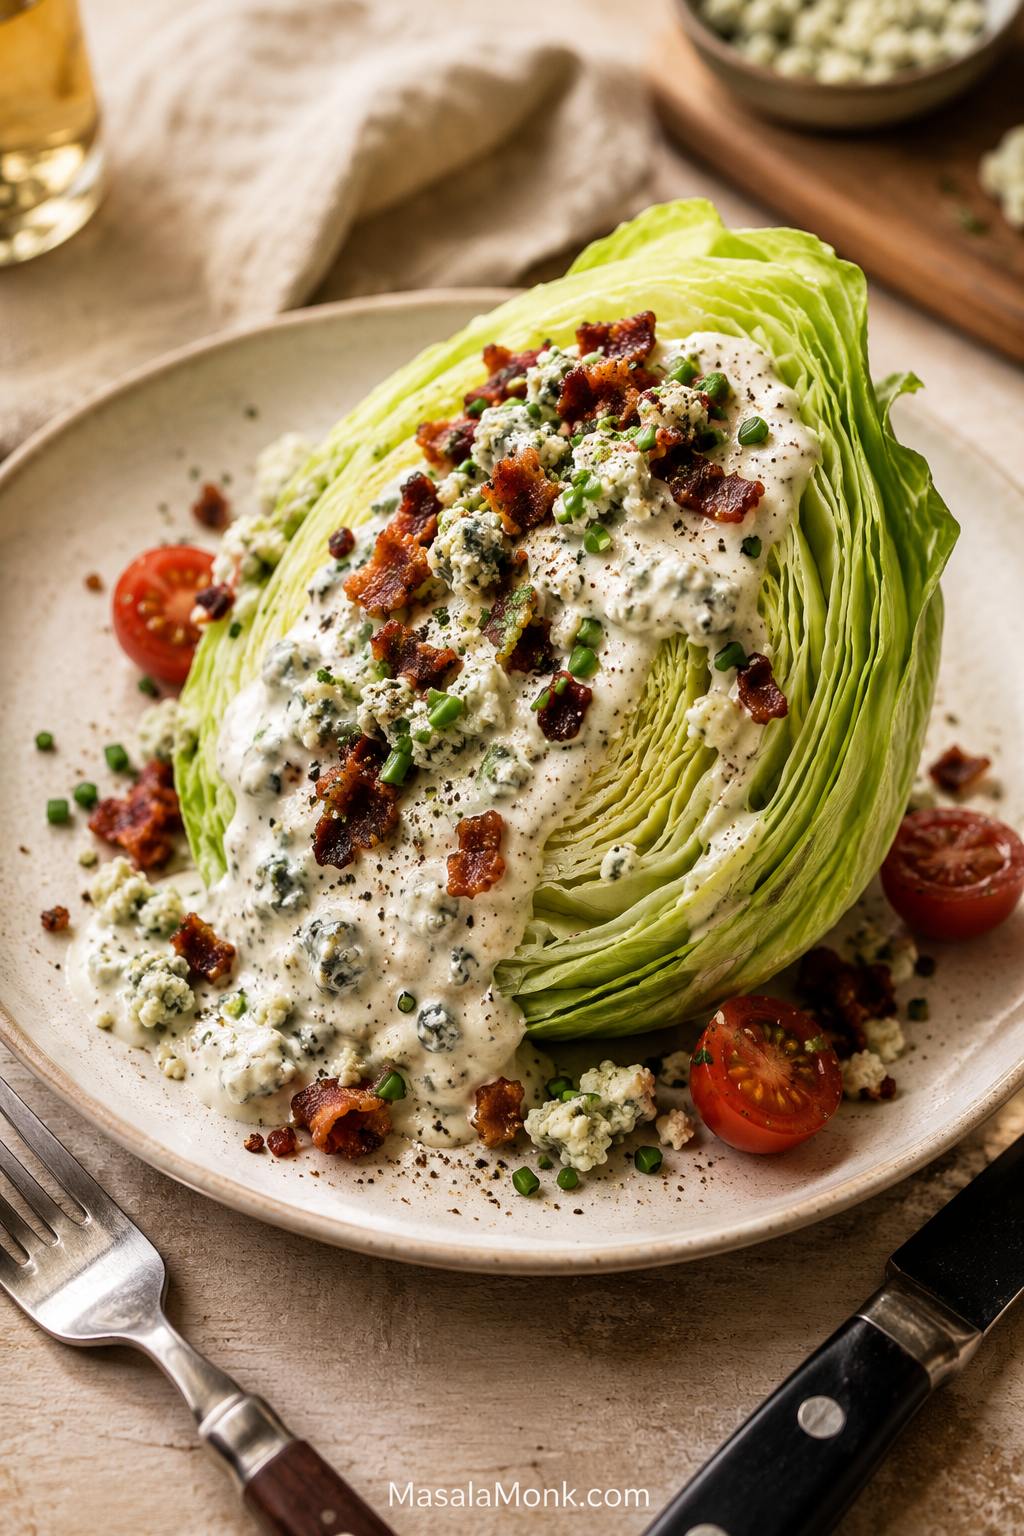
A wedge salad is not a tossed salad. It is a cold, knife-and-fork salad where the details matter: dry lettuce, thick dressing, crisp bacon, and toppings small enough to stay put. The trick is not doing more; it is doing those simple things properly.
What Makes a Good Wedge Salad?
Most disappointing wedge salads fail for the same reason: wet lettuce, thin dressing, warm bacon, and toppings that slide off. This version fixes those small things first, so the salad stays crunchy, creamy, and easy to eat.
This is the kind of recipe to keep in your back pocket for nights when you want a salad that feels special without making the meal harder. Start with the blue cheese wedge salad, then use the ranch, Outback-style, chopped, grilled, keto, vegetarian, no-bacon, and no-blue-cheese options whenever you want a slightly different version.
It also looks more impressive than the work it takes, which is exactly why it is such a good starter for guests, burger nights, steak dinners, and summer meals from the grill.
Make it now: Cut 1 cold iceberg head into 4 wedges. Make or choose a thick blue cheese or ranch dressing, then top each wedge with crisp cooled bacon, small tomatoes, fine onion or chives, blue cheese crumbles, and black pepper. Keep a little core attached, dry the lettuce well, and dress just before serving. Serves: 4 large wedges. Total time: about 30–40 minutes.
What matters most: Dry lettuce, spoonable dressing, cooled bacon, and toppings chopped small enough to stay on the wedge. That is the difference between a crisp steakhouse-style salad and a plate that slides apart.
If you are building a fresh salad spread, this sits nicely next to a crisp cucumber salad or a colorful beet salad.
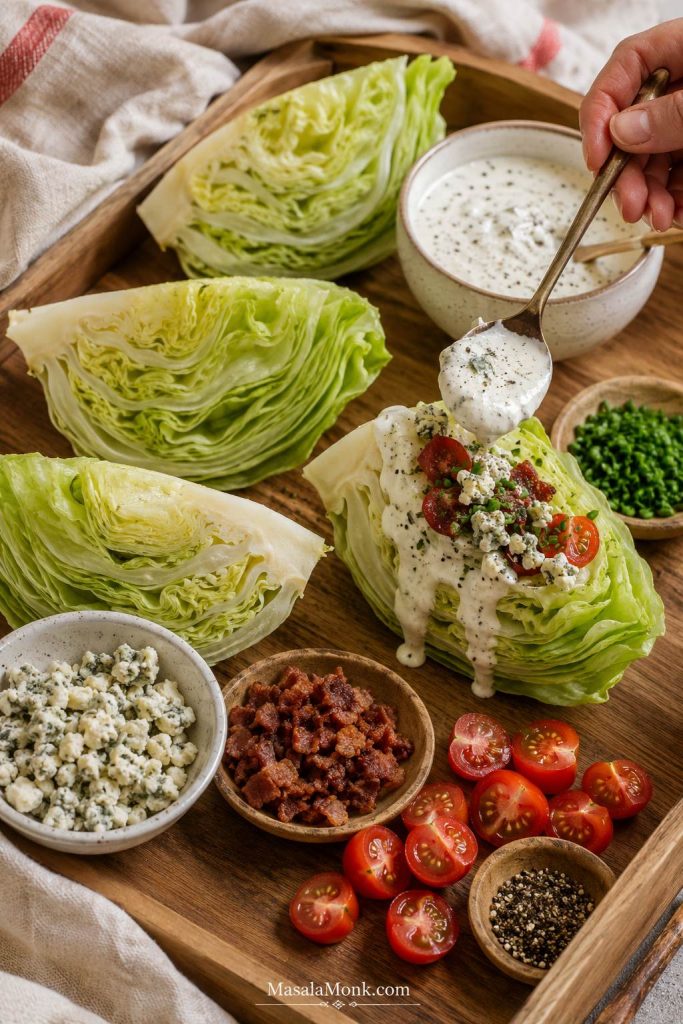
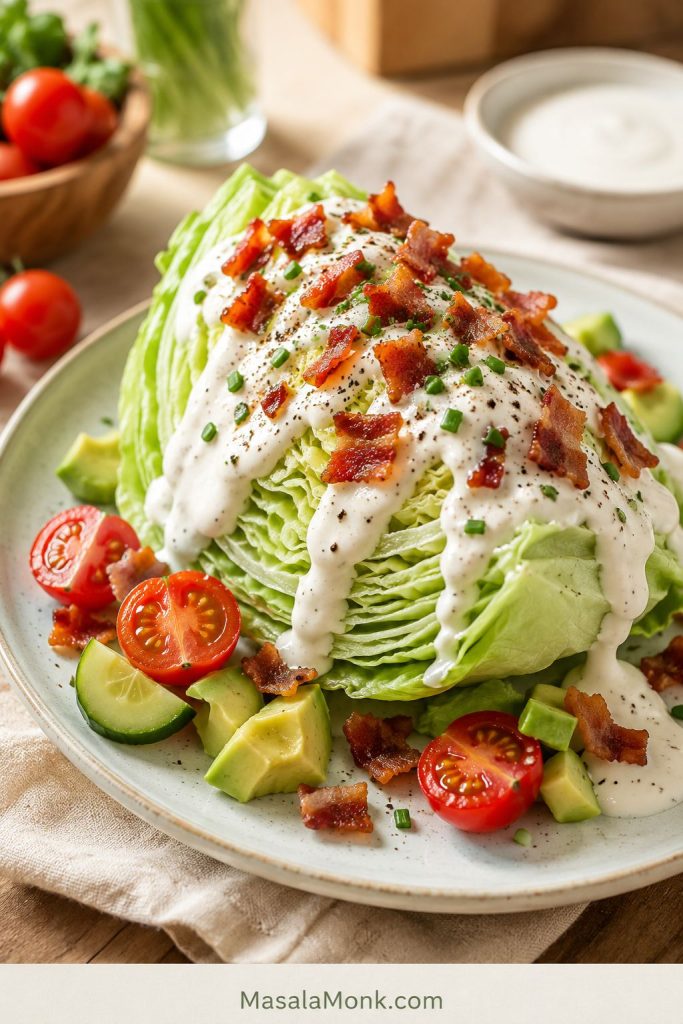
A wedge salad is a cold quarter of iceberg lettuce topped with creamy dressing, crisp bacon, tomatoes, onion or chives, blue cheese crumbles, and black pepper. It is usually served as a knife-and-fork salad, which is part of its old-school charm.
Blue cheese dressing is traditional, while ranch is the easiest milder swap. Iceberg works because it stays crunchy and sturdy under creamy dressing and toppings.
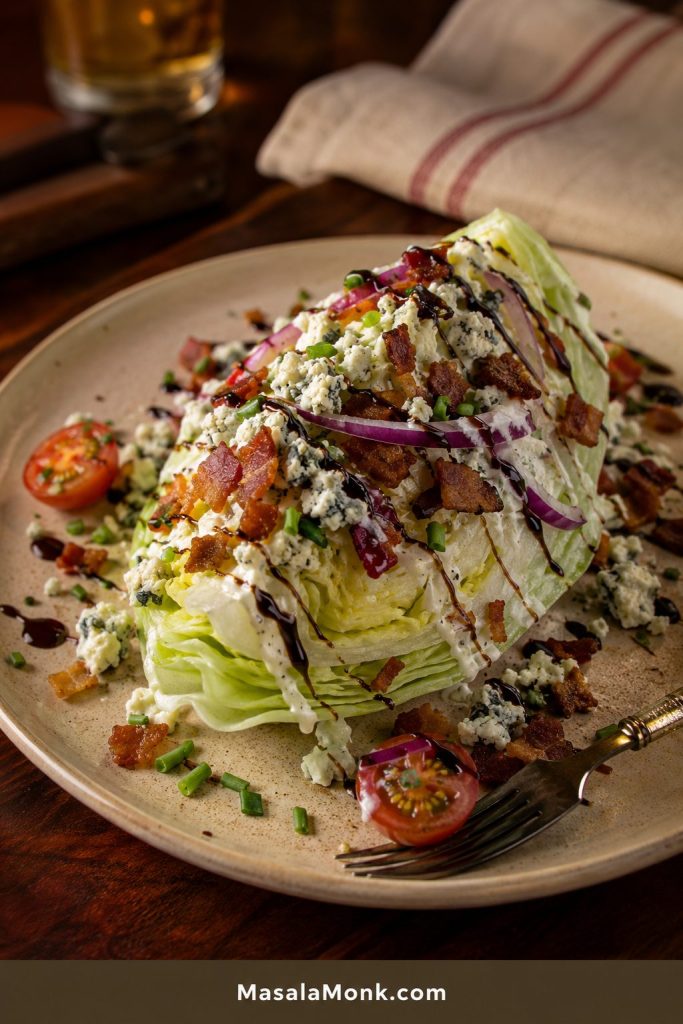
Start here: Choose the blue cheese version for steakhouse flavor, ranch for a milder family version, and balsamic glaze when you want that sweet-tangy Outback-style finish.
Why This Recipe Works
The salad works because the textures stay in balance: crisp iceberg, creamy dressing, salty bacon, juicy tomatoes, and a sharp little finish from onion and blue cheese.
That is why a good wedge salad never feels like a sad side salad. It is fresh enough to reset the plate and rich enough to belong beside burgers, steak, grilled chicken, or a baked potato.
Iceberg brings the snap. Its tight layers hold the wedge shape and stand up to a rich dressing.
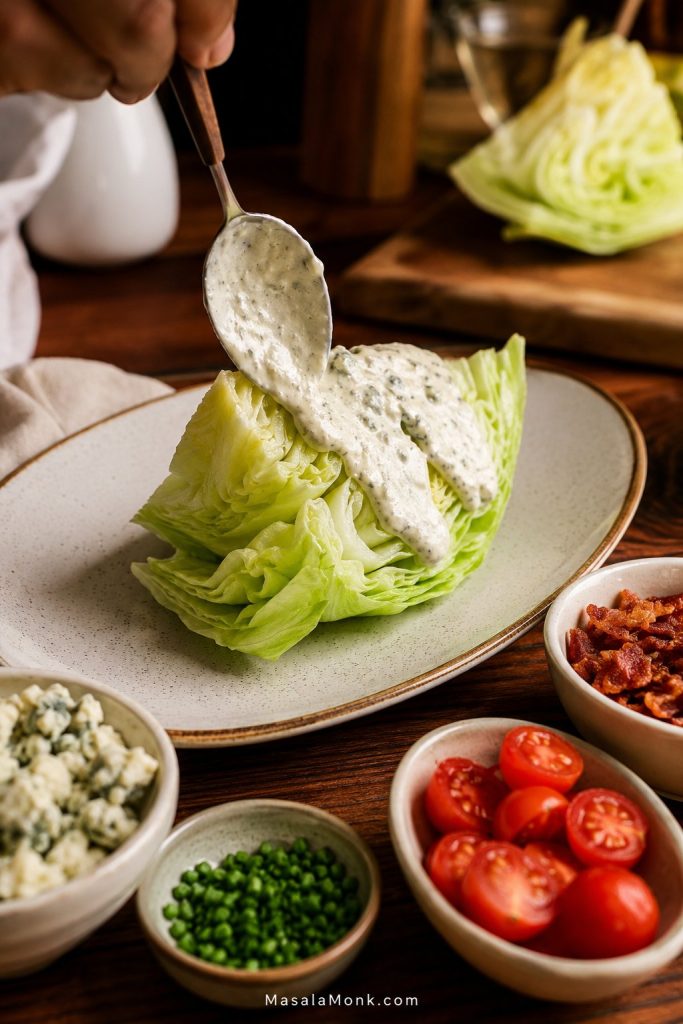
The dressing grips the layers. It should fall from a spoon in thick ribbons, not pour like milk.
Crisp bacon gives salty crunch. Soft bacon disappears, but crisp bits make every bite better.
The toppings are small on purpose. Think confetti, not chunks.
Everything comes together at the end. Last-minute assembly keeps the wedge fresh instead of soggy.
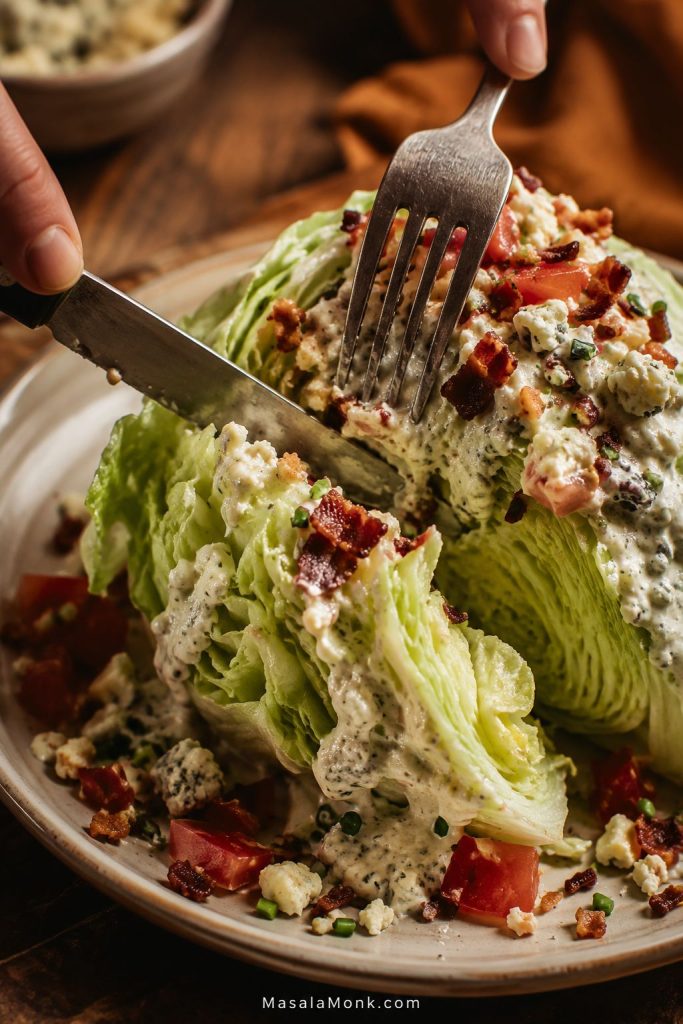
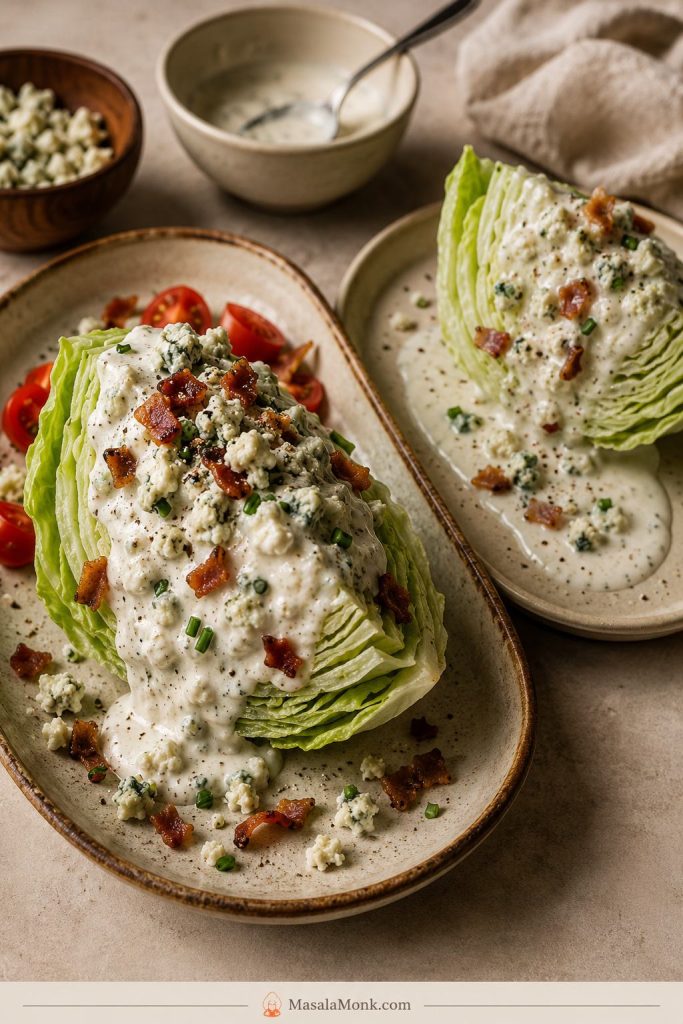
Cut straight down through the iceberg layers so each bite gets cold lettuce, creamy dressing, bacon, tomato, and blue cheese together.
What Makes It Taste Like the One You’d Order Out?
A great wedge salad is cold, neat, generous, and balanced. The lettuce is chilled, the dressing is thick enough to coat, the bacon is crisp but not hot, and the toppings stay where they belong.
Use cold plates if you can. They help the iceberg stay crisp longer.
Dress the cut sides, not just the top. A little dressing in the layers makes better bites.
Add toppings after the dressing. The dressing helps hold bacon, tomatoes, onion, and crumbles in place.
Finish with black pepper. It cuts through the creamy dressing and sharpens the whole salad.
Wedge Salad Ingredients
The ingredient list is short, so each part has to earn its place.
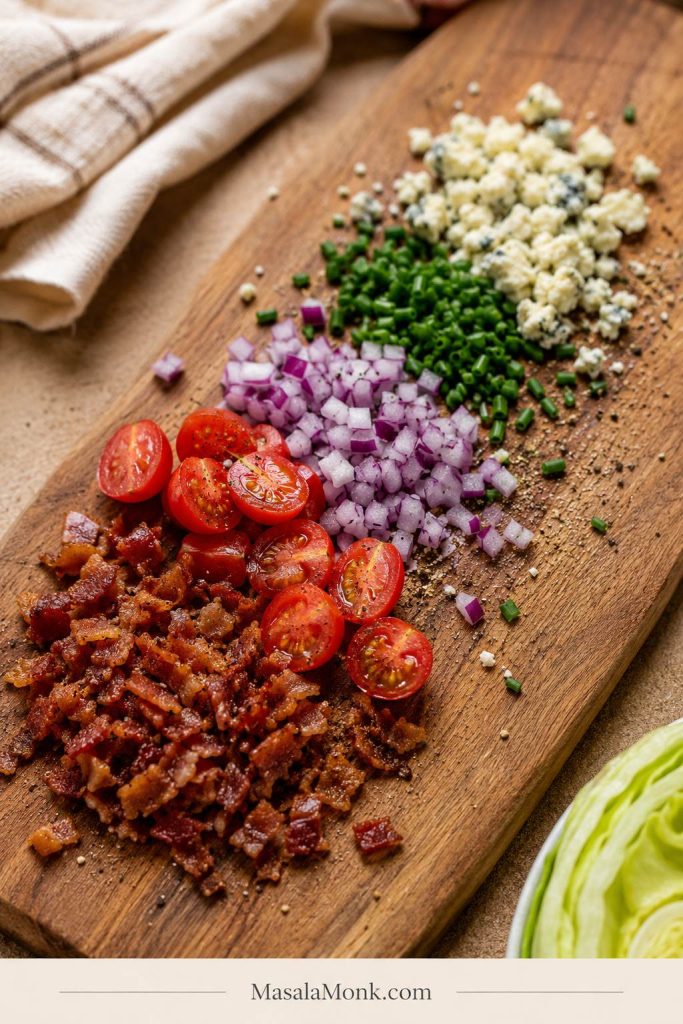
Prep the wedge salad ingredients like a small station: dry iceberg wedges, thick dressing, crisp bacon, tomatoes, chives, blue cheese crumbles, and pepper. Then assembly stays fast and clean.
Iceberg Lettuce
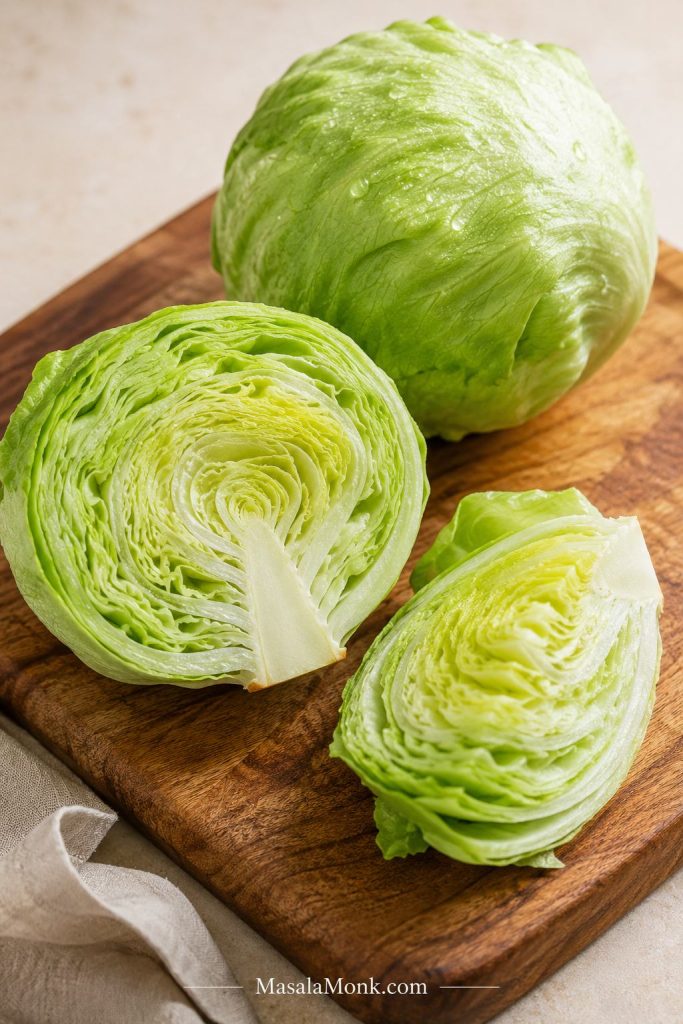
Iceberg is the heart of the recipe. It is crisp, mild, refreshing, and sturdy enough to cut into wedges. One medium head gives you 4 large wedges or 6 smaller starter wedges.
Look for a head that feels heavy for its size, with tight leaves and no slimy or brown patches.
Bacon
Thick-cut bacon gives the strongest salty crunch. Cook it until crisp, drain it well, and chop it small so the bits catch in the dressing instead of sliding off the plate.
You can also cook the bacon in the oven. Arrange it on a lined sheet pan and bake at 400°F / 200°C until crisp, usually 15–20 minutes depending on thickness.
Let the bacon cool before adding it. Warm bacon fat can soften the lettuce and loosen the dressing.
Tomatoes
Cherry or grape tomatoes are the easiest win here: sweet, tidy, easy to halve, and less likely to flood the plate than large chopped tomatoes.
If they are very juicy, sprinkle them lightly with salt and let them drain for 5–10 minutes before adding them to the salad. This keeps the finished plate fresher and cleaner.
Red Onion, Chives, or Scallions
Red onion gives a sharp bite, but it can be strong. Dice it finely, or soak it briefly in cold water for a milder flavor.
Chives are the gentlest option. Scallions are fresh and easy, with a little more bite than chives but less intensity than red onion.
Blue Cheese Dressing
Blue cheese, sometimes written as bleu cheese on steakhouse menus, is the classic flavor for a wedge. For the best version, the dressing should sit on the lettuce, not run away from it.
Blue Cheese Crumbles
Extra crumbles make the salad feel richer and more old-school. Use a creamy, tangy blue cheese if you like a smoother bite, or a sharper blue cheese if you want more punch. Either way, use it lightly so the flavor stays balanced.
Shopping note: If you are making the dressing and adding extra crumbles on top, buy about 3–4 oz / 85–115 g blue cheese total.
Black Pepper
Freshly cracked black pepper cuts through the creamy dressing and gives the finished salad a little bite.
Optional Toppings
Balsamic glaze, avocado, hard-boiled egg, cucumber, crispy breadcrumbs, fried shallots, grilled chicken, steak strips, shrimp, croutons, roasted chickpeas, and toasted nuts all work well.
Easy topping rule: Choose one creamy element, one salty or crunchy element, one juicy element, and one sharp or fresh element. That is usually enough.
The Best Lettuce to Use
Iceberg is the classic choice because it has tight layers, clean crunch, and enough structure to hold dressing and toppings. Softer greens can taste good, but they collapse faster.
Iceberg lettuce works best because it stays cold, crisp, and structured. Softer greens collapse faster under creamy dressing and toppings.
Iceberg lettuce: the most reliable choice because it is crisp, sturdy, and tightly layered.
Romaine hearts: good for grilled wedge salads or Caesar-style wedges.
Little gem lettuce: useful for mini wedges or appetizer-style servings.
Butter lettuce or green leaf lettuce: better for tossed salads than wedge salads because they are softer.
For the main version, iceberg is still the one to buy. Romaine can work if you want a grilled or Caesar-style variation, but iceberg gives the true chilled crunch.
How to Wash and Cut Iceberg Lettuce for Wedge Salad
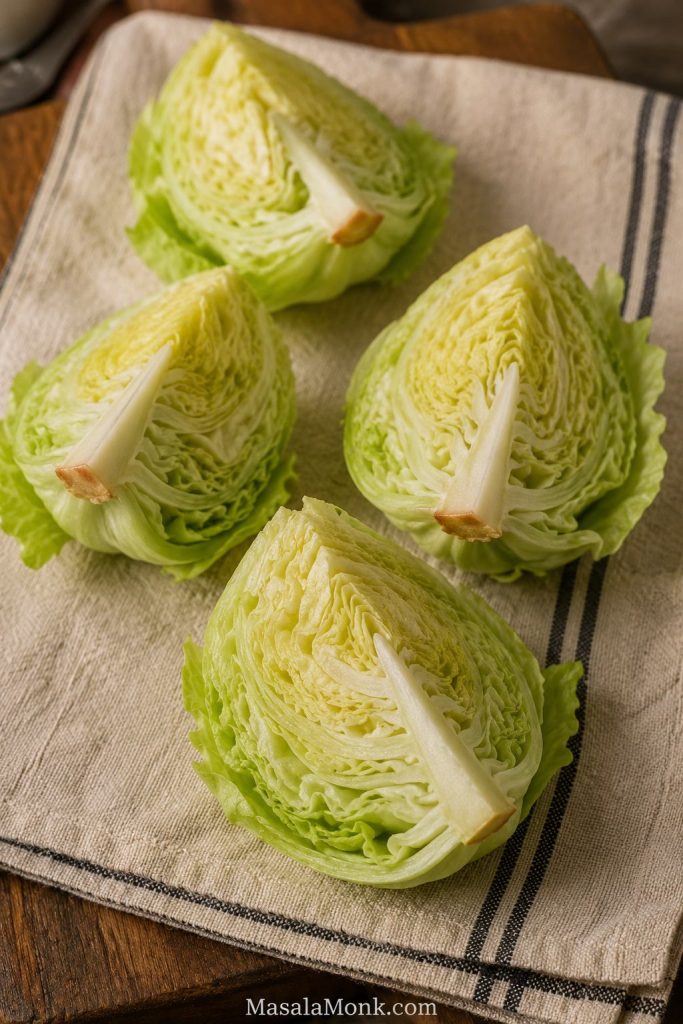
The wedge holds together because you cut through the core, not around it. Remove the core too early and the leaves can fall apart before they ever reach the plate.
When cutting iceberg lettuce, slice through the core first. That small anchor keeps each wedge from opening up before it reaches the plate.
Remove damaged or wilted outer leaves.
Rinse the outside of the iceberg head under cold water.
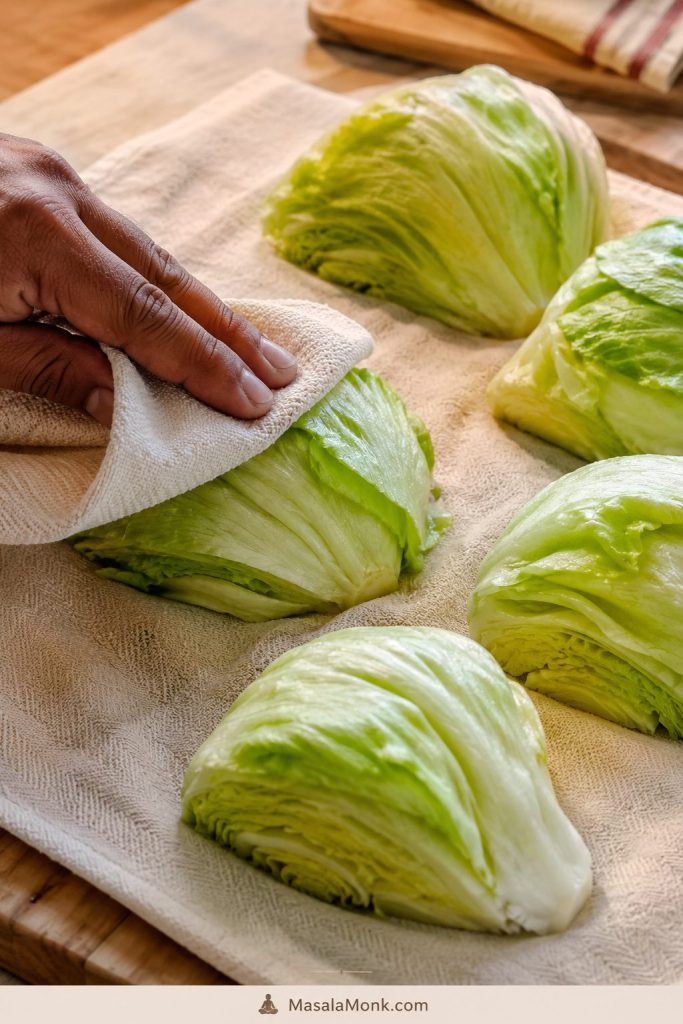
Pat the outside dry with a clean towel.
Trim only the brown end of the stem if needed.
Place the lettuce on a cutting board with the core facing down.
Cut the head in half through the core.
Cut each half through the core again to make 4 wedges.
Keep a small part of the core attached so each wedge holds together.
Gently rinse between the layers only if needed.
Drain the wedges cut-side down.
Pat very dry with paper towels or a clean kitchen towel.
Chill until you are ready to assemble.
Important: Keep a little core attached while cutting the wedges. Once each wedge is on the plate, you can trim away the hard inner piece if needed.
Core Attached Cue
Use this visual check after cutting: each iceberg wedge should still have enough core to hold the layers together, but not so much that the hard center dominates the bite.
Leave a little core attached until serving. It keeps the iceberg wedge neat while you dry the lettuce, move it, and add dressing.
If the lettuce already looks clean inside, avoid forcing water deep between every layer. Rinse what needs rinsing, dry it well, and keep the wedges cold.
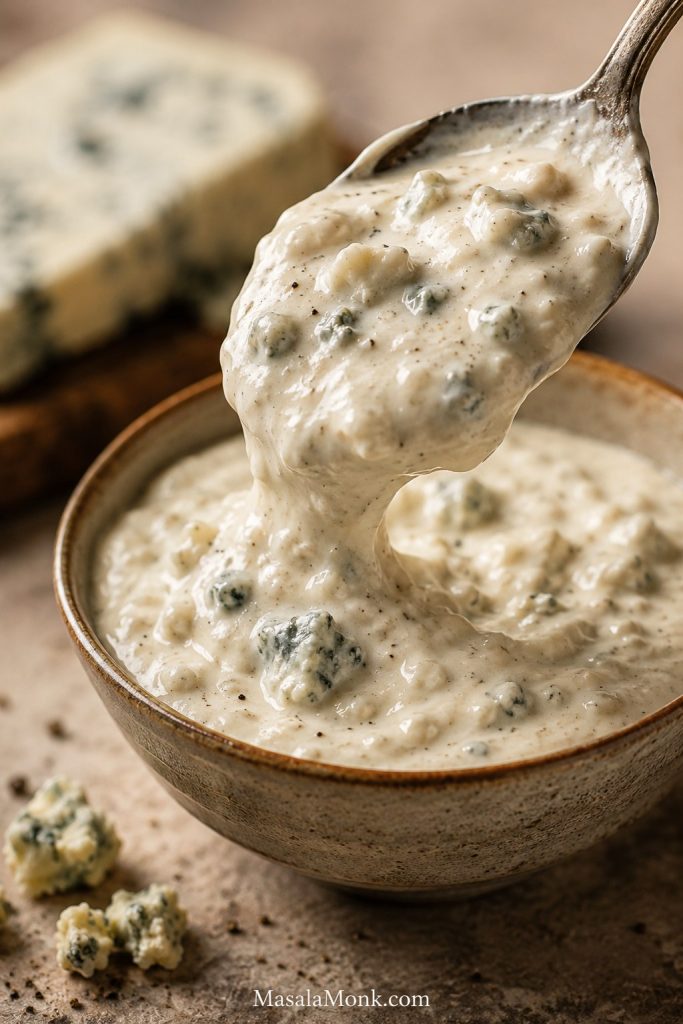
Blue cheese dressing gives this version its creamy, tangy steakhouse flavor. Texture matters as much as taste here.
Think creamy dressing, not pourable dressing. It should fall from a spoon in thick ribbons. Add milk or buttermilk one tablespoon at a time, because it is much easier to thin a thick dressing than rescue a watery one.
For blue cheese wedge salad, texture matters as much as flavor. Thick, spoonable dressing coats the lettuce instead of running off.
Blue Cheese Dressing Ingredients
Ingredient
US Measure
Metric
Sour cream
½ cup
120 g
Mayonnaise
¼ cup
55 g
Buttermilk or milk
2–3 tbsp
30–45 ml
Lemon juice or red wine vinegar
1½–2 tsp
7–10 ml
Worcestershire sauce
½ tsp
2–3 ml
Garlic powder
¼ tsp
About 1 g
Freshly cracked black pepper
¼–½ tsp
1–2 g
Blue cheese, crumbled
2 oz
56 g
Salt
To taste, optional
To taste
How to Make the Dressing
Whisk together the sour cream, mayonnaise, buttermilk or milk, lemon juice or vinegar, Worcestershire sauce, garlic powder, and black pepper. Stir in the crumbled blue cheese.
For a smoother dressing, mash some of the cheese into the mixture with the back of a spoon. For a chunkier version, fold the crumbles in gently at the end.
Chill the dressing for 20–30 minutes before serving. If it becomes too thick in the fridge, loosen it with a small splash of buttermilk or milk.
To soften a sharp dressing, add a spoonful more sour cream. For a flat dressing, add a little more lemon juice or black pepper. Taste before adding salt, because blue cheese varies a lot; add only a small pinch if needed.
This makes about 1 to 1¼ cups dressing. Start with ¾ cup for the salad and serve extra on the side if needed.
If you use store-bought dressing, choose a thick one, preferably refrigerated. To make it taste fresher, stir in black pepper, a squeeze of lemon, and a spoonful of blue cheese crumbles. Thin bottled dressing is better served on the side; a wedge needs dressing with some body.
No buttermilk? Use regular milk with a small squeeze of lemon juice, or use milk alone and adjust the tang with lemon juice or vinegar.
No blue cheese? Use ranch, creamy garlic dressing, buttermilk herb dressing, green goddess, or Caesar dressing instead.
How to Make Wedge Salad
Once the lettuce, dressing, bacon, and toppings are ready, assembly takes only a few minutes.
1. Make the Dressing
Whisk together the blue cheese dressing ingredients and chill the dressing for 20–30 minutes. This gives it better flavor and a colder, creamier texture.
2. Cook the Bacon
Cook the bacon in a skillet over medium heat until crisp, about 8–10 minutes. Transfer it to paper towels to drain, then chop or crumble it. Let it cool before it touches the lettuce.
3. Prepare the Toppings
Halve the tomatoes, finely dice the onion, chop the chives, and crumble the blue cheese. If the tomatoes are juicy, salt and drain them for a few minutes.
4. Wash, Dry, and Cut the Lettuce
Cut the iceberg through the core into wedges. Rinse only as needed, drain well, pat dry, and keep the wedges chilled until serving.
5. Plate the Wedges
Place one cold wedge on each plate. Trim the hard core if needed, but keep the wedge intact.
6. Add Dressing and Toppings
Spoon the dressing over each wedge. Add bacon, tomatoes, red onion or chives, blue cheese crumbles, and black pepper.
Add dressing first, then toppings. The creamy layer catches bacon, tomatoes, onion, chives, and blue cheese crumbles before they slide away.
7. Serve Immediately
Serve as soon as it is dressed, before the lettuce starts to soften.
How to Plate It So It Looks Good
Place each wedge with one cut side facing up. Spoon dressing over the top and into the layers, then add toppings while the dressing is still sitting on the lettuce. Finish with pepper and chives.
Recipe Card: Wedge Salad Recipe
Wedge Salad with Iceberg Lettuce, Bacon & Blue Cheese Dressing
A crisp steakhouse-style wedge salad with cold iceberg lettuce, thick blue cheese dressing, smoky bacon, juicy tomatoes, chives, and extra crumbles — simple enough for weeknights, polished enough for steak night.
Servings: 4 large side salads
Active Prep Time: About 20 minutes
Cook Time: 8–10 minutes
Chill Time: 20–30 minutes, while you prep
Total Time: About 30–40 minutes
Course: Salad, Side Dish, Starter
Cuisine: American, Steakhouse-style
Serve It: Cold and freshly assembled
Equipment
Chef’s knife
Cutting board
Mixing bowl
Whisk
Skillet or sheet pan for bacon
Paper towels or clean kitchen towel
Serving plates
Optional: small saucepan for balsamic glaze
Ingredients for the Salad
Ingredient
US Measure
Metric
Iceberg lettuce
1 medium head
About 500–700 g
Thick-cut bacon
4–6 strips
About 115–170 g raw
Cherry or grape tomatoes, halved
1–1½ cups
150–225 g
Red onion, finely diced
¼ cup
35–40 g
Chives or scallions, chopped
2 tbsp
About 6 g
Blue cheese crumbles
1–2 oz
28–56 g
Blue cheese dressing, recipe below
¾–1 cup
180–240 ml
Freshly cracked black pepper
To taste
To taste
Ingredients for the Blue Cheese Dressing
Ingredient
US Measure
Metric
Sour cream
½ cup
120 g
Mayonnaise
¼ cup
55 g
Buttermilk or milk
2–3 tbsp
30–45 ml
Lemon juice or red wine vinegar
1½–2 tsp
7–10 ml
Worcestershire sauce
½ tsp
2–3 ml
Garlic powder
¼ tsp
About 1 g
Freshly cracked black pepper
¼–½ tsp
1–2 g
Blue cheese, crumbled
2 oz
56 g
Salt
To taste, optional
To taste
Instructions
Make the dressing. In a bowl, whisk together sour cream, mayonnaise, buttermilk or milk, lemon juice or vinegar, Worcestershire sauce, garlic powder, and black pepper. Stir in the crumbled blue cheese.
Chill the dressing. Refrigerate for 20–30 minutes. If it becomes too thick, loosen it with a small splash of buttermilk or milk. Taste before adding salt.
Cook the bacon. Cook bacon in a skillet over medium heat until crisp, about 8–10 minutes, or bake at 400°F / 200°C until crisp, about 15–20 minutes. Drain, crumble, and let it cool.
Prep the toppings. Halve the tomatoes, finely dice the onion, chop the chives, and crumble extra blue cheese. If the tomatoes are very juicy, salt and drain them for 5–10 minutes.
Prepare the lettuce. Remove damaged outer leaves from the iceberg. Rinse, dry, and cut through the core into 4 wedges. Keep a little core attached so each wedge holds together.
Plate the wedges. Place one cold lettuce wedge on each plate. Trim the hard core if needed.
Add dressing. Spoon blue cheese dressing over each wedge and into the layers.
Add toppings. Sprinkle with bacon, tomatoes, onion or chives, blue cheese crumbles, and black pepper.
Serve immediately. Serve while the lettuce is still cold and crisp.
Recipe Notes
Use thick ranch instead of blue cheese dressing for a milder version.
Add a light drizzle of balsamic glaze for the Outback-style finish.
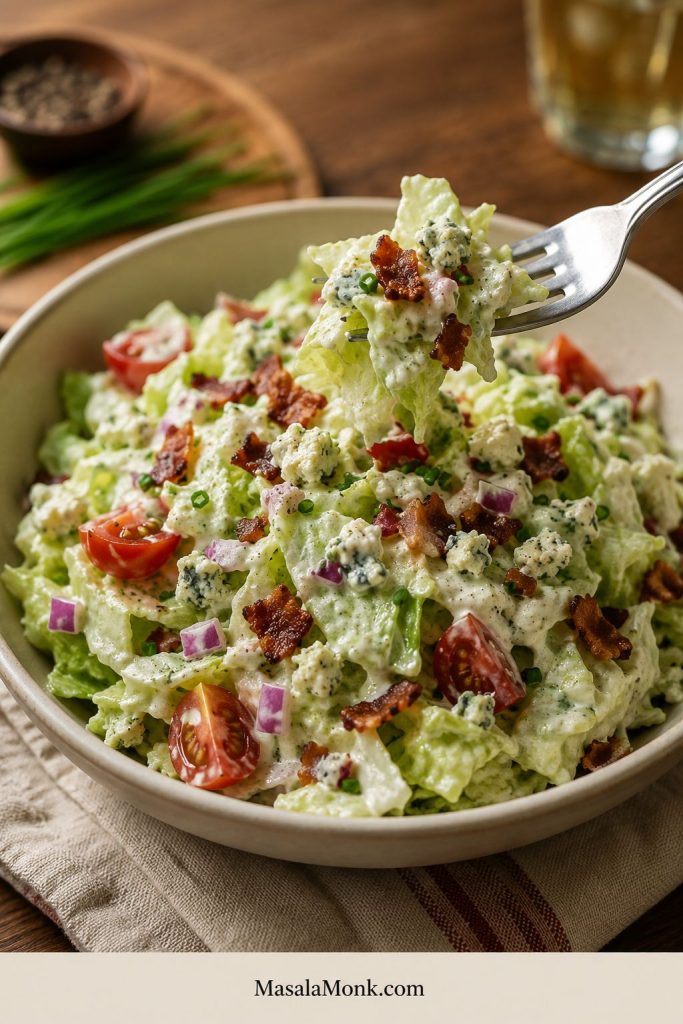
Chop the iceberg for bowls, potlucks, or easier eating.
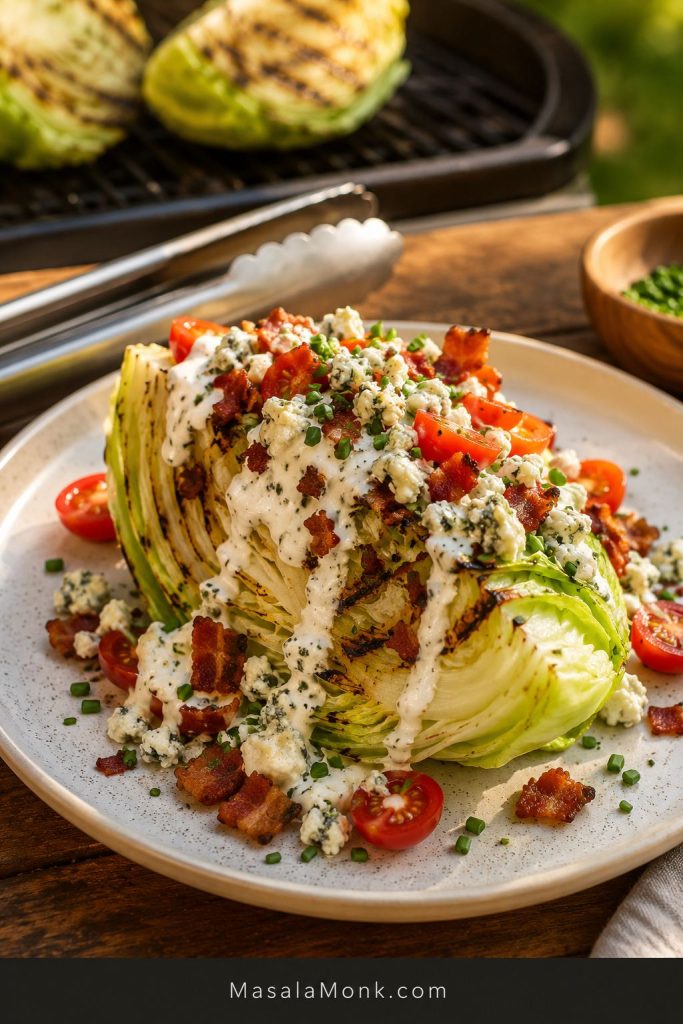
Briefly grill the wedges for a smoky summer side.
For keto, skip sweet glaze or use only a tiny drizzle.
For vegetarian, replace bacon with crispy chickpeas, fried onions, smoked almonds, or toasted breadcrumbs.
How to Keep the Salad from Getting Watery
The fastest way to make a wedge salad disappointing is to let water sneak in. Wet lettuce, juicy tomatoes, and thin dressing all work against that cold crunch.
Dry iceberg is the quiet trick behind a better wedge salad. Water between the layers thins the dressing and makes the plate messy.
Problem
Likely Cause
Fix
Dressing slides off
Lettuce is wet
Pat the wedges dry and chill them before serving.
Salad tastes watery
Tomatoes are too juicy
Salt and drain tomatoes for 5–10 minutes.
Wedge falls apart
Core was removed too early
Cut through the core and trim only after plating if needed.
Toppings roll off
Pieces are too large
Chop bacon, onion, and tomatoes smaller.
Bacon softens
Salad was assembled too early or bacon was added warm
Cool the bacon and add it right before serving.
Dressing pools on the plate
Dressing is too thin
Use less milk or buttermilk, or stir in more sour cream.
Thick vs Thin Dressing Test
Use this cue before serving: thick dressing should sit on the iceberg wedge, while thin dressing will run down the layers and collect on the plate.
Use this dressing test: thick dressing sits on the wedge, while thin dressing runs down the sides. Add milk or buttermilk slowly.
Get those details right and the salad stays crisp instead of sliding apart on the plate.
Simple rule: Make the components ahead, but do not dress the lettuce until you are ready to serve.
Toppings That Actually Stay Put
This is where the wedge becomes fun. Keep it old-school with bacon and blue cheese, make it fresher with cucumber and avocado, or turn it into lunch with chicken, shrimp, egg, or crispy chickpeas.
Choose one direction first: steakhouse, fresh, crunchy, meal-worthy, lighter, or spicy. That keeps the salad balanced instead of overloaded.
For wedge salad toppings, smaller is better. Bacon bits, halved tomatoes, diced onion, chives, and crumbles cling better than large pieces.
Style
Topping Ideas
Classic
Bacon, tomatoes, red onion, chives, blue cheese crumbles
Steakhouse
Balsamic glaze, cracked pepper, fried shallots, extra blue cheese
Greek yogurt dressing, turkey bacon, extra tomatoes, cucumber
Spicy
Jalapeños, spicy ranch, chili crisp, hot honey drizzle
The goal is not to pile on everything. The goal is to make each bite feel complete: creamy, crunchy, juicy, salty, and fresh.
If you want the salad to eat more like lunch, chickpeas are an easy add-in. For that direction, this chickpea salad recipe is a useful companion.
Wedge Salad Variations
The main version is the one to learn first. After that, the variations are just swaps: change the dressing, add glaze, chop the lettuce, grill the cut sides, or build everything on a platter.
Not sure which version to make? Make blue cheese for the classic steakhouse flavor, ranch for a milder family version, chopped for easier eating, grilled for smoky edges, and Outback-style when you want a sweet-tangy balsamic finish.
Ranch Wedge Salad
Ranch is the easiest alternative if you do not like blue cheese. Start with a thicker ranch base and loosen it slowly; thin ranch slips off before you get a good bite.
Ranch wedge salad is the easy no-blue-cheese version. Use thick ranch, then add bacon, tomatoes, cucumber, chives, avocado, and pepper.
Quick Ranch Ingredient
US Measure
Metric
Sour cream
½ cup
120 g
Mayonnaise
¼ cup
55 g
Buttermilk
¼ cup, plus more as needed
60 ml, plus more as needed
Lemon juice
2 tsp
10 ml
Garlic powder
1 tsp
3 g
Dried dill
1–1½ tsp
1–2 g
Chives
2 tbsp
About 6 g
Salt
½ tsp
3 g
Black pepper
To taste
To taste
Whisk everything together and chill before using. Add more buttermilk one tablespoon at a time until the ranch is spoonable. For a fresh ranch version, top the iceberg with bacon, tomatoes, chives, cucumber, black pepper, and optional avocado.
Outback-Style Blue Cheese Wedge Salad with Balsamic Glaze
This is not the official restaurant recipe. It is a home-style version built around the same steakhouse idea: iceberg lettuce, blue cheese dressing, bacon, tomatoes, red onion, crumbles, and a light balsamic glaze drizzle.
An Outback-style wedge salad gets its steakhouse finish from balsamic glaze. Keep the drizzle thin so it brightens the blue cheese dressing without taking over.
Balsamic Glaze Ingredient
US Measure
Metric
Balsamic vinegar
½ cup
120 ml
Brown sugar or honey
2 tbsp
25 g brown sugar or 30 ml honey
Salt
Pinch
Pinch
Simmer the balsamic vinegar, sugar or honey, and salt over medium-low heat for 5–8 minutes, until it lightly coats the back of a spoon. Let it cool for a few minutes, then drizzle lightly over the finished salad.
This makes more glaze than you need for 4 wedges. Drizzle it last in thin lines, not a heavy pour. Balsamic glaze is a drizzle, not a sauce; too much makes the salad sweet, sticky, and heavy.
Chopped Wedge Salad
A chopped version uses the same ingredients but cuts the iceberg into bite-size pieces. It is easier to eat, easier to pack into bowls, and often the better choice if a full wedge feels awkward.
A chopped wedge salad keeps the steakhouse flavor but makes it easier to eat. It works well for lunches, potlucks, meal prep, and casual bowls.
Chop the lettuce into large pieces, then add bacon, tomatoes, red onion, chives, blue cheese crumbles, and dressing. Toss lightly or drizzle the dressing over the top. Add hard-boiled egg, grilled chicken, avocado, cucumber, or crispy breadcrumbs if you want it to feel more like a meal.
Grilled Wedge Salad
A grilled version gives the lettuce a smoky edge. Romaine hearts are easiest to grill, but iceberg can work if you keep the core attached and dry the wedges well.
Cut the lettuce into wedges through the core.
Dry the cut sides very well.
Brush the cut sides lightly with oil.
Place the wedges cut-side down on the grill.
Grill just until the edges pick up color.
Serve immediately with blue cheese dressing, ranch, or spicy ranch.
Grill only the cut sides. Leave the rounded outside mostly untouched so the wedge keeps some cool crunch. If your grill is very hot, start with 30–45 seconds per cut side. If it is medium-hot, 1–2 minutes may be enough. The wedges should pick up color at the edges, not wilt all the way through. Grill them last, after the rest of the meal is ready.
Briefly char the cut sides for grilled wedge salad, then stop. You want smoky edges, not cooked lettuce.
Loaded Wedge Salad for a Crowd
For parties, cut the iceberg into 6 smaller wedges and arrange them on a chilled platter. Put dressing in a bowl and toppings in small piles or bowls so guests can build their own plates without the lettuce wilting.
Serving wedge salad for a crowd is easier with smaller wedges on a platter. Keep dressing and toppings nearby so the lettuce stays fresh.
Good loaded toppings include bacon, cherry tomatoes, red onion, chives, blue cheese crumbles, hard-boiled egg, avocado, cucumber, crispy breadcrumbs, fried onions, grilled chicken, steak strips, shrimp, ranch, blue cheese dressing, and balsamic glaze.
Lighter, Keto, Vegetarian, and No-Blue-Cheese Options
The blue cheese version is rich, but it is easy to adjust without losing the point of the salad: cold crunch, dressing that grips the layers, and toppings with texture.
Lighter Wedge Salad
For a lighter-feeling wedge salad, use a Greek yogurt-based dressing, reduce the bacon, and add more fresh toppings like tomatoes, cucumber, radish, herbs, or grilled chicken. Keep the dressing creamy enough that the salad still feels satisfying.
The main version can be keto-friendly with iceberg lettuce, full-fat blue cheese dressing, bacon, blue cheese, and low-carb toppings. Skip sweet balsamic glaze or use only a tiny drizzle.
Check bottled dressing labels if you are strict keto, and keep tomatoes, onions, and any balsamic glaze modest.
For a fuller low-carb meal, serve it with bunless burgers or burger bowls from these keto burger ideas.
Vegetarian Wedge Salad
Skip the bacon and add crunch with crispy chickpeas, smoked almonds, toasted walnuts, fried onions, roasted corn, or crispy breadcrumbs. Avocado adds richness if you are also skipping blue cheese.
For a strict vegetarian version, use vegetarian Worcestershire or skip it, and choose a vegetarian-friendly blue cheese if needed.
Wedge Salad Without Blue Cheese
Go with ranch, creamy garlic dressing, green goddess, buttermilk herb dressing, Caesar dressing, or a vinaigrette. Ranch is the closest creamy substitute.
Wedge Salad Without Bacon
Replace bacon with crispy chickpeas, croutons, toasted breadcrumbs, fried shallots, toasted nuts, roasted seeds, or smoked almonds for crunch.
Dairy-Free Wedge Salad
Choose a dairy-free ranch or a vinaigrette-style dressing. Skip the blue cheese crumbles and add avocado, crispy chickpeas, or nuts for richness.
What to Serve with Wedge Salad
This is the salad to make when dinner is already rich and hot, but you still want something cold, crisp, and a little showy on the plate.
It is especially good beside a burger, steak, baked potato, roast chicken, or anything smoky from the grill.
Lighter plates: baked chicken, roasted vegetables, soups, or simple pasta dinners.
For lunch, a cold wedge also works well beside sandwiches, especially when you want something fresher than chips.
Make-Ahead and Storage Tips
The finished salad is best assembled right before serving, but the parts can be prepared ahead.
Component
Make Ahead?
Notes
Blue cheese dressing
Yes, 2–3 days
Keep refrigerated and stir before using.
Ranch dressing
Yes, 2–3 days
Keep cold and thin slightly if needed before serving.
Bacon
Yes, 1–2 days
Store chilled and re-crisp briefly if needed.
Lettuce wedges
Same day ideal
Wash, dry, wrap, and chill.
Tomatoes and onion
Same day ideal
Store separately so they do not water down the lettuce.
Fully assembled salad
No
Dress right before serving.
A simple prep schedule works best: make the dressing and cook the bacon earlier in the day, wash and dry the wedges about an hour before serving, then assemble the plates just before serving.
Once dressed, the lettuce wilts, the bacon softens, and the dressing becomes watery.
This make-ahead style works well when the main dish is already taking care of itself, like a slow cooker pork loin.
Most wedge salad problems come from water, weak texture, or assembling too early. Use this as a final checklist.
Wet lettuce: dressing slides off instead of sitting on the wedge.
Core removed too early: the wedge falls apart.
Thin dressing: it pools on the plate.
Warm bacon: it softens the lettuce and loosens the dressing.
Large toppings: they roll off instead of sticking to the wedge.
Early assembly: the salad turns watery before serving.
Too much balsamic glaze: the plate becomes sweet and sticky.
How to Eat a Wedge Salad
This is a knife-and-fork salad, so do not fight it. Cut down through the wedge so each bite has lettuce, dressing, bacon, tomato, onion, and blue cheese.
If the large wedge feels awkward, make the chopped version instead. It has the same flavor but is easier to eat from a bowl.
FAQs
These quick answers cover dressing swaps, cutting iceberg, make-ahead timing, toppings, and ways to keep the salad crisp.
What is a wedge salad?
It is a cold quarter of iceberg lettuce topped with creamy dressing, bacon, tomatoes, onion or chives, blue cheese, and black pepper. It is usually served as a knife-and-fork side salad or starter.
Why is it called a wedge salad?
It is called a wedge salad because the lettuce is served as a wedge, usually a quarter of a head of iceberg, instead of being chopped or tossed.
How many wedge salads does one head of iceberg make?
One medium head of iceberg makes 4 large wedges or 6 smaller starter wedges.
What lettuce is best for wedge salad?
Iceberg is the classic choice because it is crisp, sturdy, and tightly layered. It holds its shape under dressing better than softer greens.
Why is iceberg lettuce used?
Iceberg has a mild flavor, high crunch, and compact structure, which is why it holds up so well as a wedge.
How do you cut iceberg lettuce for wedge salad?
Remove damaged outer leaves, rinse and dry the head, then cut it in half through the core. Cut each half through the core again to make 4 wedges.
Why does my wedge salad fall apart?
It usually falls apart because the core was removed too early or the lettuce was cut across the head. Cut through the core, keep a small piece attached, and trim the hard part only after plating.
Do you wash iceberg lettuce before making this salad?
Yes. Rinse the head or wedges under cold water, drain well, and pat very dry. Wet lettuce makes the dressing slide off.
What dressing goes on wedge salad?
Blue cheese dressing is traditional. Ranch is the easiest milder swap. Creamy garlic, buttermilk herb, green goddess, Caesar, or vinaigrette can also work.
Can I use store-bought blue cheese dressing?
Yes. Choose a thick dressing, preferably refrigerated. To improve it, stir in extra black pepper, lemon juice, and a spoonful of blue cheese crumbles.
What can I use instead of buttermilk?
Use regular milk with a small squeeze of lemon juice, or use milk alone and adjust the tang with lemon juice or vinegar.
Is wedge salad better with blue cheese or ranch?
Blue cheese gives the traditional steakhouse flavor: tangy, rich, and sharp. Ranch is milder and easier for a crowd. Serve both if you are not sure.
Can I make it with ranch?
Yes. Ranch works well if you want a milder dressing. Choose a thick ranch so it stays on the lettuce.
What toppings go on wedge salad?
Classic toppings include bacon, tomatoes, red onion, chives, blue cheese crumbles, and black pepper. Avocado, egg, cucumber, fried onions, crispy breadcrumbs, chicken, steak, shrimp, and balsamic glaze also work.
Can I cook the bacon in the oven?
Yes. Bake bacon on a lined sheet pan at 400°F / 200°C until crisp, usually 15–20 minutes depending on thickness.
What is in an Outback-style wedge salad?
An Outback-style version usually includes iceberg lettuce, blue cheese dressing, bacon, grape or cherry tomatoes, red onion, blue cheese crumbles, and balsamic glaze.
Is this an Outback copycat wedge salad?
No. It is not an official restaurant recipe, but the Outback-style variation uses the same general idea: iceberg, blue cheese dressing, bacon, tomatoes, red onion, crumbles, and a light balsamic glaze drizzle.
Can I make it without blue cheese?
Yes. Use ranch, creamy garlic dressing, buttermilk herb dressing, green goddess, Caesar, or vinaigrette. Skip the crumbles or add avocado for richness.
Can I make it without bacon?
Yes. Use crispy chickpeas, toasted breadcrumbs, fried shallots, smoked almonds, croutons, roasted seeds, or toasted nuts for crunch.
Is wedge salad keto?
It can be keto-friendly with iceberg lettuce, full-fat blue cheese dressing, bacon, blue cheese, and low-carb toppings. Check bottled dressing labels and keep tomatoes, onions, and balsamic glaze modest if you are strict keto.
Is wedge salad healthy?
It can be lighter or richer depending on the dressing and toppings. For a fresher version, use less bacon, choose a lighter dressing, and add cucumber, tomatoes, herbs, or grilled chicken.
Can I make it ahead of time?
You can make the dressing, cook the bacon, and prep toppings ahead. Wash, dry, and chill the lettuce the same day, then assemble just before serving.
How long does wedge salad last after dressing?
It is best served immediately. Once dressed, the lettuce softens, the bacon loses crunch, and the plate can become watery.
How do I keep it from getting watery?
Dry the lettuce well, use thick dressing, drain juicy tomatoes, and dress the wedges right before serving.
How do you eat a wedge salad?
Use a knife and fork. Cut the wedge into bite-size pieces on the plate so each bite gets lettuce, dressing, bacon, tomatoes, onion, and cheese.
What do you serve with it?
Serve it with steak, burgers, grilled chicken, roast chicken, barbecue meals, baked potatoes, pasta, sandwiches, soups, or grilled shrimp.
Once the lettuce is cold and dry, the dressing has body, and the toppings are crisp and small, wedge salad becomes what steakhouses know it can be: simple, dramatic, refreshing, and far more satisfying than a quarter of iceberg has any right to be.
There’s something wonderfully comforting about a big bowl of potato salad. It fits in almost anywhere: summer barbecues, winter potlucks, Eid spreads, Christmas dinners, brunch tables, even quiet weekday lunches with leftovers. Some days you crave a classic creamy potato salad recipe with egg and mayo; on others, a tangy German potato salad, a rich Russian salad (Olivier salad), a colourful beet and potato salad, or a lighter Greek yogurt or vegan potato salad with a fresh, herby vinaigrette feels just right.
Because there are so many versions, it makes sense to begin with one reliable, easy potato salad recipe and treat that as your base. From there, you can branch out into the styles you love—warm potato salad with bacon, dill potato salad, Japanese potato salad, cold sweet potato salad, chicken potato salad, vegan potato salad, even the occasional Amish-style or Filipino potato salad. As you’ll see in this guide, once you understand the basic potato salad ingredients and procedure, you can turn that simple foundation into countless potato salad recipes without much extra effort.
Why Potato Salad Is More Than “Just a Side”
Before we make the first bowl, it’s worth answering a simple question: is potato salad just comfort food, or can it actually fit into a balanced way of eating?
Potatoes: What’s Really Inside
A medium potato (about 5.3 oz) brings around 110 calories, almost no fat, and useful amounts of vitamin C, potassium and vitamin B6. Resources like PotatoGoodness’ nutrition breakdown, describe potatoes as nutrient-dense complex carbohydrates, not empty calories.
Potatoes bring around 110 calories per medium tuber plus vitamin C, potassium and B6—and when cooled for potato salad, some of their starch turns into gut-friendly resistant starch.
Furthermore, when you cool cooked potatoes – which is exactly what happens in a cold potato salad – some starch turns into resistant starch. Many nutrition writers and dietitians point out that resistant starch digests more slowly and may support better blood sugar and gut health than freshly mashed, steaming potatoes.
If you like digging into the details, MasalaMonk’s article “The Potato Debate: White vs Sweet” compares white potatoes and sweet potatoes in terms of glycemic index, calories and context on how to use both wisely.
Why Dressing and Portion Size Matter
Of course, the dressing can change everything. A heavy potato salad mayonnaise dressing with bacon, cheese and extra sugar is not the same as a simple potato salad with yogurt and herbs. Nevertheless, both still start from the same base ingredient.
Because of that, you can easily slide along a spectrum:
From creamy and rich to lighter yogurt and fully vegan with beans and vegetables, your choice of dressing decides whether a potato salad feels indulgent or everyday-healthy.
From classic southern potato salad with eggs, mustard, mayo and relish
To a healthy potato salad with olive oil, lemon, herbs and lots of vegetables
To a vegan potato salad recipe built with eggless mayo and beans
Thought the focus on this post is on potato salad recipe, but behind that phrase you actually have a whole library of possibilities.
Now that you know potatoes themselves are not the villain, you can choose the right type and the best supporting cast.
Starchy potatoes give soft, mashy salad, waxy potatoes hold their shape in neat cubes, and all-purpose potatoes sit in between—pick your potato type to match the texture you want before you start your next potato salad recipe.
Best Potatoes for Potato Salad
Different potato salad recipes favour different potatoes:
Starchy potatoes (like russets)
Great for softer, slightly mashed potato salad
Good in old-fashioned potato salad recipe versions
Waxy potatoes (like red or new potatoes)
Hold their shape in chunky potato salad
Ideal for German potato salad, red potato salad recipe and warm potato salad
All-purpose potatoes
Sit in the middle
Excellent for an easy potato salad recipe or basic potato salad recipe with egg and mayo
You can use potatoes with skins for a rustic potato salad with skins, or peel them for a smoother traditional potato salad recipe. For pretty bowls, people often love new potato salad or red skin potato salad, because the small potatoes look good simply halved with dressing.
Other Potato Salad Building Blocks
Besides potatoes, most versions share a few key building blocks that you can mix and match to create anything from a simple potato salad to the best potato salad recipe with bacon and dill.
With a creamy base, a splash of acid, plenty of crunchy vegetables and fresh herbs and spice, you can turn any simple potato salad into dill, bacon-and-egg or beet and potato salad in minutes.
Creamy base
Mayonnaise
Sour cream or hung curd
Greek yogurt
Any combination of these
Acid and tang
Vinegar (white, apple cider or wine vinegar)
Pickle brine or gherkin juice
Lemon juice
Yellow, Dijon or wholegrain mustard
Crunch and colour
Celery
Onions (red, white or spring onions)
Cucumbers
Bell peppers
Green beans
Corn
Peas
Carrots
Herbs and spices
Dill
Parsley
Chives
Coriander (cilantro)
Paprika or smoked paprika
Cayenne or chilli flakes
Cajun seasoning
Garlic or garlic powder
Once these simple elements live in your kitchen, it becomes very easy to move from a basic, simple potato salad to richer ideas like a creamy dill potato salad, a bacon and egg potato salad, or even a colourful beet and potato salad with hardly any extra effort.
Core Potato Salad Procedure (The Backbone of Almost Every Version)
Almost every potato salad recipe, from classic American to German salad potato dishes, follows the same simple flow. Once you memorise this, you’ll never feel lost.
Step 1: Prep and Boil the Potatoes
First, scrub or peel the potatoes. Cut them into even chunks. For small potato salad, keep them smaller; for chunky potato salad, keep them slightly larger.
Start potato chunks in cold salted water so they heat through at the same rate—this keeps them tender inside without turning the outside to mush in your potato salad.
Place the potatoes in cold, salted water. Then bring the pot to a gentle boil. Simmer until the potatoes are just tender when pierced with a knife. Try not to let them fall apart, otherwise you’ll land in mashed potato salad territory.
Step 2: Drain and Season While Warm
Next, drain the potatoes well and leave them in the colander to steam dry. While they’re warm, you can sprinkle them with a spoonful of vinegar or pickle brine. That trick – also used in recipes like Serious Eats’ classic potato salad – lets the potatoes absorb flavour all the way to the centre.
Drizzle vinegar or pickle brine over potatoes while they’re still warm and steaming—this helps the flavour soak into the centre of each piece instead of sitting only on the surface.
Step 3: Make the Dressing
Meanwhile, mix your dressing in a large bowl:
Start with mayonnaise or a mix of mayo and sour cream.
Add mustard, vinegar or lemon juice and seasonings.
Stir in chopped onion, celery and pickles.
The best potato salad dressing starts creamy, then gets sharpened with mustard and vinegar and finished with crunchy onions, celery and pickles for texture.
This is the moment where a Hellmann’s potato salad recipe, a Best Foods potato salad recipe or a German potato salad recipe warm start to part ways. The brand of mayo matters less than the balance between creaminess, tang and salt.
Step 4: Fold Everything Together
After that, tip the warm potatoes into the bowl with the dressing. Fold gently until every piece is coated. If you’re making potato salad with egg, fold in chopped hard-boiled eggs at the end so they don’t break down too much.
Use a gentle folding motion rather than rough stirring so your potato salad keeps those satisfying chunky pieces of potato instead of collapsing into mashed potatoes in dressing.
Because this step is gentle, it also works when you add bacon, chopped chicken, canned tuna, green beans, beetroot or even canned potatoes for potato salad.
Step 5: Chill or Serve Warm
Finally, decide whether you want a warm potato salad or a chilled one.
For German potato salad and some mustard potato salad styles, serve the dish slightly warm.
For classic potato salad, Russian salad, Amish potato salad, Hawaiian potato salad or Filipino potato salad, chill the bowl for a few hours so the flavours marry.
Serve German and mustard-based potato salads slightly warm, but let creamy classic potato salad chill on ice or in the fridge so the flavour deepens and the dressing sets.
Once you understand this structure, you can handle almost any potato salad ingredients and procedure list you see online.
Let’s anchor everything with one classic creamy potato salad recipe. You can make it exactly as written or use it as your “mother recipe” for dozens of variations.
Ingredients (Serves 6–8)
1 kg potatoes, peeled or scrubbed
3 large eggs (omit for potato salad recipe no egg)
½ cup mayonnaise
¼ cup sour cream or thick yogurt
1–2 tablespoons mustard (yellow or Dijon)
2–3 tablespoons chopped dill pickles or relish
2–3 tablespoons finely chopped red onion or spring onion
2 tablespoons finely chopped celery
1–2 tablespoons vinegar or lemon juice
½ teaspoon sugar (optional)
Salt and black pepper to taste
A handful of chopped dill or parsley
If you prefer an eggless creamy base, you can swap the mayo for an egg-free option. For instance, MasalaMonk sells several eggless mayonnaises, and these work well in a vegan potato salad or a potato salad vegetarian version.
This classic potato salad base shows you the core ingredients and timings so you can quickly build any version—southern, mustard, dill, bacon or vegan—without relearning the method each time.
Method
Cut the potatoes into even chunks and place them in a pot of cold, salted water.
Bring to a gentle boil and cook until just tender. Drain and let them steam dry in the colander for a few minutes.
At the same time, hard-boil the eggs. Cool them in cold water, peel and chop into pieces. For an easy way to prep eggs, you can also use the air fryer method from MasalaMonk’s air fryer hard-boiled eggs guide.
In a large mixing bowl, whisk together mayonnaise, sour cream or yogurt, mustard, vinegar or lemon, sugar, salt and pepper. Stir in onion, celery and pickles.
Add the warm potatoes to the bowl and fold gently so they’re coated in dressing.
Fold in the chopped eggs and herbs. Taste and adjust seasoning.
Chill the potato salad for at least an hour before serving.
This simple base already gives you a good potato salad recipe. However, with tiny adjustments you can pivot towards classic southern potato salad, mustard potato salad, dill red potato salad, creamy potato salad with bacon, and several more.
Classic Twists: Old-Fashioned, Southern, Mustard and Dill
Once you’ve tried the master bowl a couple of times, you can turn the dial in different directions without starting over.
Old-Fashioned Potato Salad Recipe with Egg
An old-fashioned potato salad feels soft, comforting and a bit nostalgic.
Turn your classic base into an old-fashioned “grandma style” potato salad by switching to softer russet or Yukon Gold potatoes, adding more eggs, stirring in sweet pickle relish and sugar, and finishing with a paprika dusting.
To get that feel:
Use potatoes that break down a little, such as russets or Yukon Gold.
Increase the eggs to four or five.
Use sweet pickle relish and a spoon of sugar.
Sprinkle paprika on top.
The result is close to many “grandma’s potato salad” styles. It also scales well as potato salad for a crowd at weddings, church suppers and long family lunches.
Southern Potato Salad and Mustard Potato Salad
Southern potato salad often leans into mustard and sweetness.
Turn your classic potato salad into a Southern mustard version by loading up the yellow mustard, adding a touch of sugar and keeping celery, relish and eggs for crunch—perfect next to BBQ, fried chicken and cornbread.
To take your master recipe there:
Use a generous spoon of yellow mustard.
Add a teaspoon or two of sugar.
Keep relish, celery and egg.
Because of the sweetness and mustard, this kind of potato salad recipe sits beautifully next to fried chicken, ribs, collard greens and cornbread. If you like Hidden Valley–style flavours, you can even echo that profile and make a Hidden Valley ranch potato salad recipe by adding ranch seasoning and herbs.
Dill Potato Salad and Dill Pickle Potato Salad
If you love dill, the easiest way to celebrate it is inside potato salad.
To turn your classic potato salad into a dill lover’s dream, pile in fresh dill, swap regular pickles for dill pickles or gherkins and use pickle brine for extra tang.
Simply:
Add plenty of chopped fresh dill to your dressing.
Use dill pickles or gherkins instead of regular pickles.
Splash in some pickle brine for extra tang.
In that way you land on a classic dill potato salad. If you push the pickles even more, you end up with a dill pickle potato salad that’s sharply tangy and very moreish.
Protein-Packed Potato Salad: Egg, Bacon, Tuna and Chicken
Sometimes you want potato salad to carry the whole meal. In that case, protein turns the bowl into something hearty and satisfying.
Potato and Egg Salad / Egg and Potato Salad Recipe
You already have a potato and egg salad if you keep the three boiled eggs in the master recipe. Yet you can go further.
Turn your base into an egg-forward, deviled-egg style potato salad by using more boiled eggs, mashing some yolks with mayo and mustard, and finishing with smoked paprika and chives.
For an egg-forward version:
Increase eggs to five or six.
Mash a couple of yolks with mustard and mayo.
Sprinkle the top with smoked paprika and chives.
This starts to feel like a deviled egg potato salad. If you’d like more inspiration, MasalaMonk’s deviled egg recipe post shows deviled egg fillings that also work nicely as potato salad flavour ideas.
For a rich, smoky potato salad, crisp your bacon hard, fold some into the bowl and keep extra on top—then add garlic, onion powder and herbs to turn it into a full-on bacon ranch potato salad.
To make a bacon and potato salad:
Cook bacon until crisp, then crumble.
Fold some pieces into the salad and use the rest as a garnish.
For bacon egg potato salad or bacon and egg potato salad, combine bacon with chopped eggs. The trio of potato, egg and bacon gives you a rich, almost brunch-level bowl.
If you enjoy ranch flavours, stir in herbs, garlic and onion powder to create a bacon ranch potato salad. You can also echo the flavours from MasalaMonk’s one-pot chicken bacon ranch pasta and bring those same notes into a cold salad version.
Tuna Potato Salad and Potato Salad Tuna
Tuna potato salad is a smart way to use pantry staples.
For a pantry-friendly potato salad that works as a full lunch, drain canned tuna really well, fold it gently into already-dressed potatoes and finish with either a creamy or lemony olive oil dressing.
To make it:
Drain canned tuna very well.
Flake it gently and fold it into the dressed potatoes.
You can keep the dressing creamy or switch to a lemony olive oil one. Either way, you get a complete potato salad tuna bowl that works well for lunches.
Chicken Potato Salad and Chicken and Potato Salad Recipe
Chicken potato salad turns leftovers into something new.
Turn leftover roast or grilled chicken into a full meal by folding it into your potato salad, lightening the dressing with yogurt and adding peas or green beans, then serving it with salad and bread.
For a simple chicken and potato salad:
Add shredded roast chicken or grilled chicken pieces.
Keep the dressing a little lighter by using more yogurt.
Toss in peas or green beans for colour.
This style pairs well with green salad, fresh bread and cold drinks, creating a full meal from one big mixing bowl.
Even though creamy salad is comforting, there are days when you want something that sits more lightly. Fortunately, potato salad adapts well.
Potato Salad Recipe Without Mayo
A potato salad recipe without mayo usually uses a vinaigrette.
For a lighter, picnic-safe potato salad, skip the mayo and toss warm potatoes with an olive oil, mustard and vinegar or lemon dressing so they soak up tangy flavour all the way through.
You can whisk together:
Olive oil
Vinegar or lemon juice
Mustard
A little garlic
Salt, pepper and herbs
Then you toss warm potatoes in this dressing. This style echoes many German salad potato recipes and Austrian kartoffelsalat. For a reference point, look at Serious Eats’ Erdäpfelsalat recipe, which uses onions, vinegar and mustard in a light sauce.
Because there is no mayo, this salad feels tangy and bright. It also works well for picnics where you want to reduce the risk of a heavy mayo-based dish sitting out too long.
Greek Yogurt Potato Salad and Potato Salad with Sour Cream
If you still want creaminess, but with a fresher feeling, Greek yogurt potato salad and potato salad with sour cream are ideal.
For a lighter but still creamy potato salad, swap half the mayo for Greek yogurt or sour cream, then brighten it with lemon, garlic and plenty of fresh dill or other herbs.
For a simple version:
Replace half the mayo with Greek yogurt or sour cream.
Add lemon, garlic and herbs.
This is similar to the approach The Kitchn suggests in their classic potato salad tutorial and their later testing of different dressing bases with yogurt and sour cream. The combination keeps things creamy and tangy, yet a bit lighter than pure mayo.
You can also lean into Greek flavours by starting with the Greek tzatziki sauce recipe from MasalaMonk and turning it into a potato salad dressing. That instantly gives you a Greek potato salad or Greek salad potato salad vibe: potatoes, cucumber, garlic, yogurt and dill.
Vegan Potato Salad and Vegetarian Potato Salad
For a vegan potato salad recipe, you simply ensure that:
The dressing uses vegan mayo or an eggless mayonnaise.
You skip bacon, eggs and cheese.
You add plant proteins such as chickpeas, lentils or tofu.
Build a vegan but still hearty potato salad by skipping bacon, eggs and cheese, using vegan mayo or a mustard vinaigrette and loading the bowl with chickpeas, lentils and colourful vegetables.
A bowl of potatoes, green beans, chickpeas and a mustard vinaigrette becomes a sturdy vegan potato salad that feels complete. To round out a fully plant-based spread, you can pair it with MasalaMonk’s Vegan Som Tam raw papaya salad and their lentil salad recipes for weight loss.
A vegetarian potato salad, on the other hand, might still include eggs and dairy while avoiding meat. Classic potato salad with egg, a potato salad with sour cream, or even a cream cheese potato salad all fit comfortably into that category.
As soon as you look beyond your own kitchen, you realise that “potato salad” changes character completely from one region to another. However, the basic boiled potato remains the star.
Russian Salad (Olivier Salad)
Russian salad, also known as Olivier salad, is a beloved party dish in many countries. It usually includes:
Diced potatoes
Carrots and peas
Pickles
Often chicken, ham or sausage
A generous amount of mayonnaise
For a deeper dive into its origins and variations, you can read the Olivier salad article on Wikipedia, which traces the dish back to a 19th-century restaurant in Moscow.
Russian salad, or Olivier, turns tiny cubes of potato, carrot, peas and pickles in rich mayo into a colourful party potato salad that’s perfect for buffets and festive spreads.
To make a simple Russian salad at home:
Dice potatoes, carrots and pickles into small cubes.
Cook potatoes and carrots until tender.
Mix with peas, pickles and a rich mayo dressing.
Chill thoroughly before serving.
Because it is rich and colourful, Russian salad works beautifully on festive tables and buffets.
German Potato Salad and Austrian Kartoffelsalat
German potato salad and Austrian potato salad (kartoffelsalat) tend to skip mayo and instead use a warm dressing.
German and Austrian potato salad skip the mayo and keep things warm: sliced potatoes tossed with bacon, onions, vinegar, mustard and a little stock, perfect next to schnitzel or sausages.
Typically they feature:
Warm sliced potatoes
Bacon and bacon fat
Onions
Vinegar and mustard
Herbs like parsley and chives
For a lighter Austrian-style example, see Serious Eats’ Erdäpfelsalat, which uses onions, vinegar and mustard in a light sauce. This kind of salad is excellent alongside schnitzel, sausages and grilled meats.
Japanese Potato Salad
Japanese potato salad is creamier and softer than many Western versions. It often feels like a cross between mashed potatoes and chunky salad.
Japanese potato salad is softer and creamier than most Western versions: partly mashed potatoes plus thin cucumber and carrot slices, a little ham or egg and Japanese mayo with rice vinegar make it perfect for bento boxes and fried chicken nights.
A typical bowl includes:
Potatoes, boiled and partly mashed
Very thin slices of cucumber and carrot
Sometimes ham, corn or egg
Japanese mayo and a little rice vinegar
Because part of the potato is mashed, the dressing clings to every bite. This style makes a great side for katsu curry, karaage or bento boxes.
Greek and Mediterranean Potato Salad
Greek potato salad and broader Mediterranean potato salad recipes focus on olive oil, lemon and herbs rather than heavy mayo.
This Greek and Mediterranean potato salad skips heavy mayo in favour of olive oil, lemon, garlic, fresh vegetables and feta, turning simple potatoes into a bright, light main for hot days.
You might:
Toss potatoes with olive oil, lemon juice, garlic and oregano.
Add cucumbers, olives, tomatoes and red onion.
Crumble feta cheese on top.
This style becomes even fresher if you use a yogurt-based tzatziki dressing, like the one in MasalaMonk’s Greek tzatziki master recipe. In that case, you end up with a potato salad with yogurt dressing that works as a light main dish on hot days.
Hawaiian, Filipino and South African Potato Salad
Elsewhere, potato salad leans into sweetness or special local ingredients.
Hawaiian, Filipino and South African-inspired potato salads lean sweet and creamy—think macaroni and grated carrot, condensed milk with apples and raisins, or a sweet-tangy dressing for braais, all perfect for holiday spreads and party tables.
Hawaiian potato salad often mixes macaroni and potatoes with mayo and grated carrot.
Filipino potato salad or pinoy potato salad typically includes condensed milk, apples or fruit cocktail, raisins, eggs and mayo.
Potato salad South Africa sometimes appears as a condensed milk potato salad or a creamy potato salad served at braais.
Even though the flavours feel very different from German salad or Japanese potato salad, the base technique remains the same: boil potatoes, mix dressing, combine and chill.
Once you’ve mastered the base, adding more vegetables turns potato salad into a full meal in a bowl.
Beet and Potato Salad / Beetroot Potato Salad
Beet and potato salad looks stunning because beetroot tints everything pink.
This pretty-in-pink beet and beetroot potato salad uses cooked beet cubes, potatoes, dill, onion and walnuts in a light dressing, making it a striking side for holiday and brunch spreads.
You can make it by:
Roasting or boiling beetroot until tender, then dicing it.
Mixing beets with potatoes and a light dressing.
Adding dill, onion and perhaps walnuts for crunch.
This gives you beet and potato salad, beet potato salad or beetroot and potato salad, depending on how much beet you use. It looks especially good on festive and holiday tables.
Sweet Potato Salad and Mixed Potato Salad
Sweet potato salad recipes highlight natural sweetness and go well with tangy dressings or spices.
This sweet and mixed potato salad roasts sweet (and optional regular) potatoes, then tosses them with black beans or chickpeas, lime, chilli and coriander for a naturally sweet, zesty side that works warm or at room temperature.
For example, you might:
Roast sweet potato chunks with olive oil.
Toss them with black beans, chickpeas or lentils.
Dress them in lime, chilli and coriander.
You can also combine regular potatoes and sweet potatoes in one bowl. That yields a potato and sweet potato salad or even a potato marble salad when you mix different colours.
If you want to understand sweet potato nutrition more deeply, MasalaMonk’s sweet potato nutrition breakdown explains calories, carbohydrates and macros for both 100 g portions and whole potatoes.
Green Bean Potato Salad, Corn Potato Salad and Cauliflower Potato Salad
Beyond beets and sweet potatoes, other vegetables also work beautifully.
When you want more vegetables in the bowl, turn your base into a veg-forward potato salad with green beans, sweet corn and cauliflower twists.
Green bean potato salad: Blanch green beans until crisp-tender, cool them and toss with potatoes and a vinaigrette.
Corn and potato salad: Mix boiled or roasted potatoes with sweet corn kernels, herbs and perhaps a lime-chilli dressing.
Cauliflower potato salad: Replace some potatoes with steamed or roasted cauliflower florets to lower the carb load while keeping the general feel.
If you feel like a hot dish instead, MasalaMonk’s easy aloo gobi recipe shows how potatoes and cauliflower pair up in a spiced, comforting way rather than as a cold salad.
Small Batch, Big Batch and Store-Bought Shortcuts
Real life doesn’t always match recipe yields. Sometimes you just need potato salad for 2. Other times you need a huge tub.
Potato Salad for 2 and Small Potato Salad Bowls
For potato salad for two people, you can:
Use about 250–300 g potatoes.
Scale the dressing to two or three tablespoons.
Use one egg instead of three.
Consequently, you get a small potato salad that fits into one bowl. You can also treat it as a potato salad bowl meal by topping it with extra vegetables, seeds or a fried egg.
Use this quick guide to scale potato salad: a small cosy bowl for two with 250–300 g potatoes and a little dressing, or a big party bowl where you plan ½–1 cup per person and keep tasting as you scale up.
Potato Salad for a Crowd
For potato salad for a crowd, simply multiply the master recipe.
A rough guide:
As a side dish, plan ½–1 cup per person.
For a main dish, allow more, especially if there’s plenty of protein mixed in.
The potato salad ingredients and procedure stay exactly the same. However, you will need a larger pot and mixing bowl, and you should taste as you go to balance the seasoning.
Canned Potatoes and Instant Shortcuts
When time is tight, you may look at canned potatoes for potato salad or canned German potato salad.
You can still make a decent bowl if you:
Rinse and drain the canned potatoes thoroughly.
Cut them into bite-sized pieces if necessary.
Handle them gently when folding in the dressing.
It won’t match the texture of freshly boiled potatoes, but it can rescue last-minute meals.
On busy days, you can still get a decent bowl by rinsing and dressing canned potatoes properly or by brightening plain store-bought potato salad with fresh herbs, mustard and pickles.
Store-Bought Potato Salad
Finally, there are days when you just buy potato salad.
Supermarkets and delis often sell:
Classic creamy potato salad
Deviled egg potato salad
German potato salad
Dill potato salad
Loaded or bacon ranch potato salad
Big-box stores might offer potato salad bulk tubs (similar to what you see when people say “potato salad at Sam’s Club” or “Costco potato salad”). Local chains sometimes have their own styles, like “Kroger potato salad”, “Safeway potato salad”, “Vons potato salad” or “Sainsbury’s potato salad”.
These options are convenient. However, if you find yourself constantly searching for “best potato salad near me”, “Russian salad near me” or “German potato salad near me” and feeling disappointed, it may be time to trust your own cooking. With a simple potato salad recipe in hand, you’ll often do better at home.
Potato salad is delicious, yet it can turn dangerous if left out too long. The good news is that you only need a few simple rules.
How Long Can Potato Salad Sit Out?
Food safety experts repeat one guideline: potato salad should not sit at room temperature for more than two hours. If the temperature is above 32°C / 90°F, limit it to one hour.
Articles like Allrecipes’ guide on potato salad safety and Food & Wine’s explanation emphasise that the real risk is not just the mayonnaise. Instead, cooked potatoes, eggs and cut vegetables form a perfect environment for bacteria in the “danger zone” between 4°C and 60°C.
Therefore:
Keep potato salad in the fridge until just before serving.
Nest the serving bowl in a larger bowl filled with ice at outdoor events.
Refrigerate leftovers promptly.
How Long Does Potato Salad Last in the Fridge?
Refrigerated potato salad generally stays safe for about three to five days. When you store it:
Use shallow, covered containers so it chills quickly.
Keep it at a consistent fridge temperature.
Stir gently and taste before serving leftovers.
Guides like Allrecipes’ and Southern Living’s discussions of how long potato salad can sit out and keep in the fridge explain this window clearly. In short, if you’re not sure about a container that’s been lurking for a week, it’s better to throw it away.
Can You Make Potato Salad Ahead?
Yes, you can. In fact, many people feel a classic potato salad recipe tastes better the next day.
To make it ahead:
Boil and dress the potatoes as usual.
Chill the salad overnight.
Add fresh herbs and any crispy toppings (like bacon) just before serving.
If you want to prep even further ahead, you can boil potatoes and store them plain in the fridge for one or two days, then dress them on the day of serving. That approach helps maintain a good texture.
Potato salad is rarely alone on the table. It almost always sits next to something grilled, baked or roasted.
At a BBQ or picnic, let potato salad sit in the middle of the table alongside grilled chicken and sausages, crispy potato bites, a fresh green salad with fruity dressing and a couple of dips so everyone can build a complete plate.
Picnic, Cookout and BBQ Ideas
For a picnic or barbecue, potato salad fits perfectly next to grilled meats and vegetables.
For extra freshness, you can also drizzle green salads with something like MasalaMonk’s sweet and spicy mango salad dressing, which balances nicely against creamy potato salad.
For brunches and holidays, pair potato salad with deviled eggs, a fresh green salad, roasted vegetables and simple desserts like fruit and brownies so the whole spread feels generous but balanced.
Brunch and Holiday Menus
Potato salad also feels comfortable on brunch tables.
For instance, you might serve:
A potato and egg salad or deviled egg potato salad
A platter of deviled eggs (inspired by MasalaMonk’s deviled egg ideas through Classic Deviled Eggs post)
A green salad and some roasted vegetables
Brunch drinks or mocktails for a relaxed weekend
During holidays, Russian salad or Olivier salad, beetroot potato salad, German salad and condensed milk potato salad styles often appear next to roasts, pies, stuffed vegetables and desserts.
Easy Desserts That Pair Well
Because potato salad can be rich, dessert doesn’t need to be complicated.
Light fruit-based desserts and cookies both balance a heavier bacon ranch potato salad or German potato salad recipe warm from the stove.
Bringing It All Together
By now, you’ve walked through a whole world of potato salad. You started with a master potato salad recipe and then wandered through:
Old-fashioned potato salad recipe with egg
Classic southern potato salad and mustard potato salad
Dill potato salad and dill pickle potato salad
Bacon and egg potato salad, bacon ranch potato salad and tuna potato salad
Chicken potato salad and chicken and potato salad recipe ideas
Vegan potato salad, potato salad recipe without mayo and potato salad with yogurt dressing
International styles like Russian salad, German potato salad, Japanese potato salad, Greek potato salad, Hawaiian and Filipino potato salad
Colourful versions such as beetroot potato salad, beet and potato salad, sweet potato salad, potato and sweet potato salad, green bean potato salad and cauliflower potato salad
Practical notes on potato salad for 2, potato salad for a crowd, canned potatoes and store-bought shortcuts
Safety and storage tips so your potato salad stays delicious and safe
Not only that, you’ve also seen how quickly you can shift from a creamy potato salad recipe with egg and mayo to a lighter, Mediterranean-style salad, or even to a fully vegan potato salad recipe with lentils and beans.
Potato salad really does work for every table—from cosy dinners with friends to big family feasts—whether you serve it classic, beetroot-pink, German-style or piled high with eggs and herbs.
Conclusion
In the end, the best potato salad recipe is simply the one you actually enjoy making and eating. Once you’ve cooked this dish a few times, played with different potatoes, swapped in Greek yogurt or sour cream, tried dill and mustard, added bacon or chickpeas and maybe experimented with beetroot and sweet potatoes, you’ll inevitably find your own favourite version.
That version will be the one friends ask you to bring “every time”, the one that disappears first from the table, and the one that quietly proves that a humble potato salad recipe can be as interesting and satisfying as any main course.
A classic potato salad recipe usually starts with boiled potatoes, hard-boiled eggs, mayonnaise, mustard, vinegar or lemon juice, and a few crunchy vegetables like celery and onion. After cooking the potatoes until just tender, you drain them well and gently fold them into a creamy potato salad dressing while they’re still warm, then chill everything so the flavours meld. This simple potato salad is the base you can turn into countless variations later.
2. How can I make an easy potato salad recipe with few ingredients?
For an easy potato salad recipe, you only really need potatoes, mayo, a little mustard, salt, pepper and one crunchy element such as onion or cucumber. Just boil the potatoes, cool them slightly, then stir in the dressing and your chosen vegetable. This kind of quick potato salad is perfect when you want a basic potato salad recipe on the table fast without a long ingredient list.
3. What goes into a traditional potato salad recipe with egg and mayo?
In a traditional potato salad recipe with egg and mayo, the potatoes are combined with chopped hard-boiled eggs, mayonnaise, mustard, vinegar, celery, onion and sometimes sweet pickle relish. Typically, this kind of creamy potato salad is seasoned with salt, pepper and a sprinkle of paprika on top. The result is a classic potato salad recipe that tastes like the one many people remember from family gatherings.
4. How do I make a potato salad recipe no egg?
If you prefer a potato salad recipe no egg, you can simply leave the eggs out and increase the crunch and herbs instead. For example, you might add extra celery, cucumber, dill or parsley to keep the texture interesting. In this way, the potato salad still feels satisfying and familiar, just without the egg component.
5. How do I make a potato salad recipe without mayo?
To create a potato salad recipe without mayo, you can swap the creamy base for a vinaigrette. Mix olive oil, vinegar or lemon juice, mustard, garlic, salt and pepper, then toss the warm potatoes in this dressing. That gives you a lighter, tangier potato salad recipe without mayo that works well as a side for grilled meats, fish or tofu.
6. What is the difference between potato salad, Russian salad and Olivier salad?
Potato salad usually focuses on potatoes, eggs and a simple dressing, while Russian salad and Olivier salad add more small diced vegetables like carrots, peas and pickles, plus extra richness. Often, Olivier salad also includes chicken, ham or sausage along with a generous amount of mayonnaise. As a result, Russian salad feels like a dressed-up potato salad recipe with more colour, texture and party vibes.
7. How is German potato salad different from classic creamy potato salad?
German potato salad is usually served warm or at room temperature and relies on a vinaigrette made with vinegar, mustard, onions and sometimes bacon, instead of a heavy mayonnaise base. Classic creamy potato salad, on the other hand, is chilled and built around mayo, sour cream or yogurt. Consequently, German potato salad tastes sharper and lighter, while traditional American potato salad tastes richer and softer.
8. How can I make a healthy potato salad or lighter version?
To turn a regular potato salad recipe into a healthy potato salad, you can reduce the mayonnaise and bring in Greek yogurt, sour cream or a simple olive-oil dressing. Then, add plenty of vegetables such as cucumbers, green beans, peas, corn, bell peppers or herbs. Suddenly, your potato salad becomes a balanced bowl with more fibre, less fat and a brighter flavour.
9. How do I make vegan potato salad?
For a vegan potato salad, you need to replace any animal products with plant-based options. Instead of eggs and regular mayonnaise, use egg-free mayo or an olive-oil vinaigrette, and skip bacon or dairy. Additionally, you can add chickpeas, lentils, beans, nuts or seeds so the vegan potato salad recipe feels filling enough to stand on its own.
10. What are some good flavour variations like dill potato salad or bacon potato salad?
Once you master a basic potato salad recipe, you can customise the bowl in many directions. For dill potato salad, fold in fresh dill and dill pickles; for dill pickle potato salad, add extra pickle brine and chopped gherkins. If you want potato salad with bacon, simply stir in crisp bacon pieces and a little extra mustard. Likewise, you can create red potato salad, sweet potato salad, or crunchy potato salad by switching the potato type and adding more vegetables or toppings.
11. How much potato salad do I need for 2 people or for a crowd?
If you’re planning potato salad for 2 people, about 250–300 g of potatoes plus dressing is usually enough as a side. By contrast, potato salad for a crowd often needs ½ to 1 cup per person, depending on what else you’re serving and whether the salad is a side dish or the main part of the meal. Scaling up or down is straightforward once you know roughly how many potatoes you cook per person.
12. How long does potato salad last in the fridge, and can it sit out?
Generally, homemade potato salad lasts about three to five days in the fridge when stored in a covered container. Nevertheless, it should not stay at room temperature for more than two hours, or one hour in very hot weather, because bacteria can grow quickly. Therefore, always chill potato salad promptly after serving and avoid leaving it on the table for the entire party.
13. How do I fix potato salad if it’s too dry, too runny or bland?
If your potato salad seems too dry, gently stir in more dressing or a spoonful of mayo, yogurt or olive oil until it loosens. Conversely, when a potato salad turns out too runny, you can add extra potatoes or chopped vegetables, then chill it so it firms up. If it tastes bland, simply adjust the salt, acid (vinegar or lemon), mustard and herbs until the flavours pop.
14. What can I serve with potato salad to make a complete meal?
Potato salad pairs well with grilled chicken, sausages, kebabs, burgers, roasted vegetables, baked fish and even hearty bean dishes. Moreover, you can serve it alongside green salads, coleslaw, corn on the cob or simple tomato salads to round out the plate. With those extras, a classic potato salad recipe, a German potato salad or a vegan potato salad can easily anchor a full, satisfying meal.