Posted on Leave a comment

Margherita Pizza Recipe: Easy Homemade Pizza With Tomato, Mozzarella and Basil

Homemade Margherita pizza with one slice gently lifted on a server, showing a slight bend, browned crust, tomato, mozzarella and fresh basil.

A good Margherita pizza bends when you lift a slice, but it does not collapse. The underside has enough color to support the toppings, the rim remains tender, and the basil still smells fresh when the pizza reaches the table.

That balance comes from restraint. Margherita pizza uses tomato, mozzarella, fresh basil and olive oil, applied lightly enough that the crust remains part of every bite.

The disappointing homemade version often looks ready from above but tells a different story underneath: a pale base, a damp center and mozzarella that has released more water than the oven could remove.

You do not need a pizza oven to avoid that result. A heavy metal baking sheet, enough preheating and a lighter hand with the toppings can take a regular home oven surprisingly far. The rule is simple: control the moisture above and build the heat below.

Quick answer

Margherita Pizza at a Glance

Make the same-day dough, divide it in two and stretch each ball to about 12 inches / 30 cm.

Top lightly with thick crushed tomato and mozzarella blotted until no loose water remains on the surface. The raw pizza should look less covered than a standard cheese pizza.

Bake on a thoroughly preheated inverted metal sheet at the hottest safe oven setting, ideally 475–500°F / 245–260°C. Lift one edge and check underneath after 9 minutes.

Per pizza: about 255 g dough · 75 g prepared tomato topping · 75 g fresh mozzarella

Make it now

Easy Homemade Margherita Pizza

Using bread flour, canned plum tomatoes, fresh mozzarella and an inverted baking sheet? Follow the main route below. The later sections help when the dough pulls back, the cheese runs wet or the oven needs a different approach.

This amount makes a tender, moderately substantial home-oven crust. Stretch closer to 11 inches / 28 cm for a fuller rim or to the full 12 inches / 30 cm for a thinner center.

Makes: Two 12-inch / 30 cm pizzas · Serves: 3–4
Active time: About 35 minutes · Rise and rest: About 2¼–3¼ hours
Preheat: About 40–55 minutes, overlapping the final rest
Bake: 10–13 minutes per pizza, plus surface recovery
Total: About 3–4 hours

Equipment

  • Digital kitchen scale, strongly recommended
  • Large mixing bowl
  • Dough scraper or flexible spatula
  • Two covered containers or one lightly oiled tray
  • Heavy uncoated metal baking sheet rated for your oven temperature
  • Pizza peel, thin wooden board or another flat baking sheet for transfer
  • Parchment paper, optional and only when rated for the oven temperature

For the pizza dough

  • 300 g bread flour or strong all-purpose flour, about 2½ cups when spooned and leveled
  • 195 g water, 195 ml or about ¾ cup plus 1 tablespoon
  • 6 g fine sea salt, about 1 teaspoon
  • ½ teaspoon instant yeast, about 1.5 g
  • 1 teaspoon extra-virgin olive oil, about 5 g
  • Additional flour or fine semolina for dusting, used sparingly

Yeast alternatives: use the same ½ teaspoon / about 1.5 g active dry yeast and allow more rise time when needed. Dissolving it first is optional unless the package directs otherwise. For fresh yeast, use about 4–5 g.

For the no-cook tomato topping

  • 150 g crushed canned whole plum tomatoes, about ⅔ cup, using only enough packing juice to make a thick, spreadable topping
  • 1–1½ g fine sea salt, about ¼ teaspoon, adjusted to the tomatoes and cheese
  • 1 teaspoon extra-virgin olive oil

Begin with less salt when the tomatoes or mozzarella are already salty. For a more seasoned home-style topping, add a little finely grated garlic; omit it for the cleaner tomato flavor used in the main recipe.

For topping two pizzas

  • 150 g fresh cow’s-milk mozzarella, about 5¼ oz, weighed after draining
  • 10–12 fresh basil leaves
  • 2 teaspoons extra-virgin olive oil, for finishing

Instructions

Make the dough and prepare the toppings

  1. Mix and rest. Combine the water and yeast in a large bowl. Add the flour and mix until no dry patches remain. Cover and rest for 15 minutes.
  2. Add the salt and oil. Work in the salt and olive oil, then knead for 6–8 minutes until the dough is smoother, elastic and slightly tacky.
  3. Let the dough rise. Shape it into a ball, cover and leave until 60–80% larger, lighter and visibly aerated. This commonly takes 1¼–2 hours.
  4. Divide, ball and preheat. Divide the dough into two equal pieces of about 255 g and shape them into smooth balls. Cover and rest for 45–60 minutes. Immediately place a heavy baking sheet upside down in the lower third of the oven and heat to its highest safe setting, ideally 475–500°F / 245–260°C. Once the oven reaches temperature, continue heating the sheet for another 15–20 minutes.
  5. Prepare the toppings. Near the end of the dough rest, crush and season the tomatoes. Tear the mozzarella into small pieces, place them between absorbent towels and blot thoroughly.

Shape, top and bake

  1. Shape the first pizza. Press from the center outward while leaving a ¾-inch / 2 cm rim untouched. Lift and rotate the dough until it reaches about 12 inches / 30 cm. If it keeps springing back, stop fighting it. Cover and rest for another 10 minutes.
  2. Choose the transfer method. For a peel or board, dust lightly, place the dough on it and test that it slides. For parchment, shape and top the pizza directly on a trimmed sheet of temperature-rated paper; transfer the paper with the pizza.
  3. Top lightly. Spread 75 g prepared tomato topping, about ⅓ cup, across the dough. Add 75 g drained mozzarella, about 2⅔ oz, keeping the center lightly topped.
  4. Transfer and bake. When using a peel or board, give it one final gentle shake and transfer the pizza immediately if it moves as one piece. Check underneath after 9 minutes, rotate if one side colors faster and continue until the base is browned.
  5. Finish, recover and repeat. Remove the pizza when the underside is browned, the rim has expanded and the center is set. Add half the basil—about 5–6 leaves—and 1 teaspoon olive oil. Rest for 1–2 minutes before slicing. Let the oven return to temperature, then give the baking sheet another 3–5 minutes to recover before repeating with the remaining dough and toppings.

Adjust for a different oven

For an oven that stops at 450°F / 230°C: continue heating the inverted sheet for 20–25 minutes after the oven reaches temperature. Use 60 g / about 2 oz low-moisture mozzarella from the beginning, or use 75 g / about 2⅔ oz well-drained fresh mozzarella and add it during the final 3–4 minutes. Check the underside after 11 minutes.

Fan or convection oven: start checking one or two minutes earlier because moving air can color the top faster. See the oven-specific notes below for the full adjustment.

Parchment: check the manufacturer’s maximum-temperature rating and trim exposed corners. Remove the parchment before using the broiler.

The home-oven balance: keep the dough and topping load consistent, then let underside color tell you what the oven needs.

Home-oven Margherita pizza formula graphic showing measured dough, prepared tomato and mozzarella portions with baking temperature and timing guidance.
Keeping the topping load this light gives the center a better chance to set before the base overbrowns.

Choose Your Oven Setup

The inverted baking sheet is the best starting point for a regular oven. It is inexpensive, easy to load and capable of producing a properly browned base when given enough time to heat.

Heavy metal baking sheet positioned upside down on a lower rack inside a domestic oven, with its flat underside facing upward.
The flat back of an inverted sheet removes the raised rim, giving the peel a cleaner, shallower path into the oven.
SetupBest useMain trade-off
Inverted heavy baking sheetBest default for a regular ovenAccessible and reliable, though slower than steel
Pizza steelFast and deep bottom browningCan burn loose flour or an overly thin center
Pizza stoneGentler bottom heat than steelNeeds a long preheat and slower recovery
Inverted sheet at 450°F / 230°COvens with a lower maximum temperatureNeeds a longer bake and drier or later-added cheese
Comparison guide showing an inverted baking sheet, pizza steel and pizza stone as different surfaces for baking pizza in a home oven.
Steel browns fastest, stone more gently, and an inverted sheet is the accessible default; let underside color guide later adjustments.

On a smaller screen, scroll sideways to see the full table.

What Is Margherita Pizza?

Margherita tells you what is on the pizza: tomato, mozzarella, basil and olive oil. Neapolitan describes more of the dough, shaping and intensely hot baking tradition. A Margherita can be Neapolitan, but a home-oven pizza baked for several minutes is not identical to one cooked in roughly a minute.

Side-by-side comparison of a moderately browned home-oven Margherita pizza and a more inflated, deeply spotted Neapolitan-style pizza.
A successful home-oven Margherita can have a moderate rim and restrained spotting; it does not need wood-fired Neapolitan char.

The traditional Neapolitan pizza standards use hand-shaped dough, tomato, fior di latte or buffalo mozzarella, basil and extra-virgin olive oil in an oven far hotter than most domestic models. This recipe keeps that topping identity while adapting the dough and baking method to a regular oven.

Margherita pizza is famously associated with Queen Margherita of Savoy and an 1889 visit to Naples, although similar tomato-and-mozzarella pizzas existed earlier.

Why This Method Works in a Home Oven

A pizza oven removes moisture quickly. A regular oven gives the tomato and cheese more time to release it, so the toppings must remain lighter and the baking surface must begin fully heated.

The home-oven rule: the longer the pizza needs to bake, the less loose moisture it can carry. Dry the mozzarella, use a thin tomato layer and preheat the baking surface fully.

Pizza cross-section graphic showing restrained tomato and mozzarella above the dough and heat rising from a thoroughly preheated baking surface below.
Pale underneath usually means more bottom heat; a wet center over a browned base points instead to excess topping moisture.

The dough carries enough water to remain tender without becoming needlessly difficult to shape. Measured toppings leave room for the center to bake through. There is no prize for using the whole ball of cheese.

Choosing Margherita Pizza Ingredients

Use bread flour for the easiest home-oven dough

Bread flour stretches reliably and browns well during a longer home bake. Strong all-purpose flour also works; hold back one teaspoon of water if yours is particularly soft.

“00” is an Italian flour classification, not a guarantee that every bag will behave the same way in a home oven. Choose one formulated for the temperature and fermentation schedule you plan to use.

Choose canned whole plum tomatoes

Canned whole plum tomatoes are the dependable year-round choice. They should smell bright when the can opens and crush into pulpy tomato rather than disappearing into watery juice.

San Marzano tomatoes are excellent when available, but they are not compulsory. A flavorful ordinary plum tomato with good body is more useful than an expensive can carrying too much liquid. A prepared sauce also works when time is limited; compare the options in this pizza sauce guide.

Match the mozzarella to the speed of the bake

Choose well-drained fresh mozzarella for a fast, hot bake and low-moisture whole-milk mozzarella when the pizza needs longer in the oven.

Fresh cow’s-milk mozzarella, often sold as fior di latte, gives the pizza its milky flavor and separate creamy pools. Buffalo mozzarella is richer and usually wetter.

The practical rule is simple: the longer the bake, the more useful a drier cheese becomes. Coarsely grate low-moisture mozzarella or tear thin slices into small pieces so it scatters across the tomato instead of forming a heavy blanket.

Mozzarella comparison guide showing drained fresh mozzarella, low-moisture mozzarella and an option for a slower, lower-temperature home oven.
Choose mozzarella by moisture as much as by style: wetter cheese suits faster bakes, while slower ovens benefit from drier cheese.

Finish with basil and olive oil

Add most or all the basil after baking. The residual heat softens the leaves just enough while preserving the fragrance that makes Margherita pizza feel fresh rather than heavy.

Fresh green basil leaves being scattered by hand over a just-baked Margherita pizza with tomato and melted mozzarella.
Add most basil after baking so the leaves soften in the residual heat without losing their fresh, herbal aroma.

For a softer cooked-basil note, tuck two or three leaves beneath the mozzarella before baking. A light dusting of Parmesan or Pecorino is optional, but the main pizza needs only mozzarella.

Ready to cook? Return to the main recipe ↑

Mix, Ferment and Stretch the Dough

Mix and knead without drying it out

The dough will look ragged immediately after mixing. Leave it alone for 15 minutes and the flour will absorb more water, turning the same rough mass into something noticeably easier to knead.

Before-and-after comparison of the same pizza dough, showing a rough shaggy mixture becoming smoother after a 15-minute covered rest.
Wait the full 15 minutes before correcting rough dough with extra flour or water; the rest often smooths it on its own.

After kneading, it should feel elastic and less rough without becoming dry. Slight tackiness is useful. Too much added flour makes the dough easier to handle for a few minutes and the finished crust less tender.

Close-up of a fingertip lifting from soft pizza dough with slight tack but no wet dough coating the finger.
Slightly tacky dough pulls gently at the skin and releases; wet dough smears or leaves paste on your fingers.

Let it rise, divide and relax

The dough is ready for dividing when it has expanded by 60–80%, softened and developed small bubbles beneath the surface. It should feel lighter than it did after kneading.

Pizza dough shown before and after rising in matching straight-sided containers, with the risen dough visibly larger and aerated.
Mark the starting height in a straight-sided container so a 60–80% rise is easy to judge instead of guess.

Adjust for the room: use mildly warm water in a cool kitchen below 70°F / 21°C, room-temperature water in a comfortable kitchen around 70–79°F / 21–26°C and cool tap water in a warm kitchen at 80°F / 27°C or above. In a warm room, check the dough after about an hour.

Dividing and balling tightens the dough again. After its final 45–60-minute rest, a ball that resisted your hands begins to widen beneath gentle fingertip pressure. That change matters more than the clock.

Two fingertips gently pressing a rested pizza dough ball and leaving shallow indentations in its soft surface.
A relaxed dough yields broadly under your fingertips instead of pushing back in one tight spot.

Fix sticky, dry or slow dough

  • Too sticky: pause for five minutes and handle it with lightly damp or oiled hands.
  • Too dry: wet your fingertips and knead in one teaspoon of water at a time.
  • Slow to rise: move the covered bowl somewhere comfortably warm and allow more time.
  • Rising too quickly: divide and ball it early, then refrigerate briefly if dinner is delayed.
  • Dry surface: cover the dough properly. A skin resists stretching and can tear.
Three-part pizza dough troubleshooting guide showing sticky dough, dry dough being moistened and covered dough resting somewhere warm.
Sticky, dry or slow dough usually needs a small correction; large flour, water or heat changes can create a second problem.

For a naturally fermented base, use this sourdough pizza dough and return here for the tomato, mozzarella and basil quantities.

How to Prevent a Watery Margherita Pizza

Water rarely comes from one dramatic mistake. It is usually the combined effect of loose tomato, wet mozzarella, heavy topping and a base that did not begin hot enough.

Tomato and mozzarella should remain juicy. The aim is not to dry the life out of them, only to remove the loose water that would collect in the center before the crust has time to brown.

Make a thick no-cook tomato sauce

Crush the tomatoes by hand or pulse them only briefly. Drag a spoon through the mixture. The trail should remain visible for a moment instead of filling immediately with juice.

Two bowls of crushed tomato compared side by side, with thicker tomato holding a spoon trail and watery tomato flowing back together.
A spoon trail that holds briefly signals tomato thick enough to spread lightly without flowing toward the center.

Drain excess packing liquid rather than cooking the tomatoes merely to thicken them. The no-cook topping keeps a brighter, fresher tomato flavor after baking. Sugar is rarely needed when the tomatoes are balanced.

For a cooked, garlicky red sauce, use this homemade marinara sauce and keep its pizza layer thin.

Drain fresh mozzarella after tearing it

A whole mozzarella ball can feel dry outside while holding substantial water inside. Tear or slice it first, spread the pieces between clean towels and blot firmly.

The cheese should remain moist and milky without loose water shining on the surface. Properly drained mozzarella melts into creamy pools instead of leaving a wet blanket across the tomato.

Four-step sequence showing fresh mozzarella torn into pieces, drained on towels, blotted and ready to use without visible pooled water.
Blot until free water is gone, then stop; the cheese should stay soft and milky rather than feel dried out.

Particularly wet cheese may need 20–30 minutes between absorbent towels. During a bake longer than about 12 minutes, add fresh mozzarella for the final 3–4 minutes or use low-moisture mozzarella from the beginning.

How to Shape, Top and Transfer the Pizza

Once the tomato and mozzarella are ready, the challenge shifts from moisture to movement: shaping the dough and getting it onto the hot surface without losing the rim.

Stretch without crushing the rim

Press from the center outward while leaving a ¾-inch / 2 cm border untouched. Rotate the dough as you work, then lift it over the backs of your hands and allow gravity to widen the center.

Hands pressing pizza dough outward from the center while leaving a raised outer border marked as ¾ inch or 2 cm untouched.
Leave the outer ¾ inch / 2 cm untouched so trapped gas remains available to expand into the rim.

Stop before the middle becomes fragile. If the dough keeps pulling back, cover it and wait another 10–15 minutes. An oval is not a failed pizza. An even center and intact rim matter more than a perfect circle.

Side-by-side comparison showing tight pizza dough shrinking inward and rested dough remaining wider after stretching.
If the dough keeps shrinking back, cover it and rest briefly; forcing it usually makes shaping harder.

Use a peel, board or parchment

For a peel or board, dust lightly and shake the shaped dough before topping. It should move as one piece. Work a dough scraper beneath any stuck patch, add a pinch of flour or semolina and test the slide again.

For parchment, shape and top the pizza directly on a trimmed sheet rated for your oven temperature, then transfer the paper with the pizza. Remove it before using the broiler.

Pizza transfer guide comparing shaped dough on a lightly dusted wooden peel with dough prepared on trimmed parchment paper.
Choose peel or parchment before topping so you are not changing transfer methods under the weight of tomato and cheese.

A heavy layer of loose flour burns quickly on a steel, stone or hot sheet and can leave the underside bitter.

Keep the toppings light

Spread the tomato thinly enough that a little dough remains faintly visible. Scatter the mozzarella instead of creating a continuous blanket, and give the center the lightest topping.

Two raw pizzas compared overhead, one lightly topped with separated mozzarella pieces and one crowded with excess tomato and cheese.
Visible gaps between mozzarella keep the center lightly loaded, giving the crust a better chance to set before moisture collects.

If using a peel or board, give it one final gentle shake after topping. If the pizza moves as one piece, transfer it immediately.

Raw Margherita pizza being transferred from a wooden peel onto the flat back of a hot inverted baking sheet in a domestic oven.
A single sticking spot only needs a local fix; loosen that patch instead of adding extra flour across the peel.

How to Bake Margherita Pizza in Your Oven

The cheese may look ready before the base is. Treat the times below as your first check rather than a guaranteed finish, then lift an edge and trust what you see underneath.

Baking setupAdditional heating after oven reaches temperatureFirst checkCommon finish range
Steel at 500–550°F / 260–288°C25–30 minutes5 minutes6–8 minutes
Stone at 500°F / 260°C or hotter30–45 minutes, or manufacturer guidance7 minutes8–10 minutes
Inverted sheet at 475–500°F / 245–260°C15–20 minutes9 minutes10–13 minutes
Inverted sheet at 450°F / 230°C20–25 minutes11 minutes12–16 minutes
Margherita pizza timing guide comparing pizza steel, pizza stone and inverted baking sheet methods with temperatures and first-check times.
Treat the first-check time as the moment to look underneath, not a command to pull the pizza from the oven.

On a smaller screen, scroll sideways to compare the baking setups.

Surface thickness and oven cycling affect both preheat and recovery. Follow the manufacturer’s guidance when a steel or stone requires longer.

Inverted sheet, stone or steel

The inverted sheet removes the raised rim that would otherwise block the transfer. Use a heavy plain metal sheet rated for your oven temperature.

A steel transfers heat fastest, giving the base deeper color while the center remains flexible. A stone heats more gently and recovers more slowly. Start with the surface in the lower third for stronger bottom heat; move it upward only when the underside consistently finishes before the rim.

When the base is ready but the rim remains pale, move the pizza—not the heavy baking surface—to an upper rack or broiler-safe tray. Remove any parchment, broil briefly and watch continuously.

Lower-temperature and fan ovens

At 450°F / 230°C, keep the sheet near the lower element and use low-moisture mozzarella or add fresh mozzarella near the end. Check the base around 11 minutes.

In a fan or convection oven, use the hottest setting allowed by the oven and baking surface. Moving air can color and dry the top faster, so check one or two minutes earlier.

How to Tell When the Pizza Is Done

  • Rim: expanded, set and browned in spots.
  • Underside: golden to deep brown with darker speckles rather than blond and soft.
  • Tomato: concentrated and glossy without a visible pool of liquid.
  • Mozzarella: melted into separate creamy pools.
  • Center: flexible but structurally set, with no gummy line beneath the tomato.
Finished Margherita pizza with callouts identifying a browned rim, glossy tomato, melted mozzarella and a gently flexible center.
Judge the rim, tomato, mozzarella and center together; melted cheese alone does not mean the base is ready.

Lift one edge and look underneath. A properly heated surface should have turned the base from pale and floury to browned and firm enough to support the center.

Close-up of a pizza underside lifted on a metal server, showing broad golden-brown color with scattered darker speckles.
Broad, even browning matters more than a few dramatic dark spots; a pale center can hide beneath impressive blisters.

Use what that pizza shows you before launching the second. A pale base needs a longer surface recovery; a wet center needs less moisture or later-added cheese.

Pizza not matching these cues? Jump to troubleshooting →

Margherita Pizza With Fresh Tomatoes

Fresh tomatoes should replace most or all of the canned tomato rather than sit over a complete sauce layer. Sauce, juicy tomato slices and fresh mozzarella together can overwhelm a slower home bake.

Choose ripe plum, Roma or another meaty tomato. Slice it about ⅛ inch / 3 mm thick, remove loose seed gel from very juicy fruit, lightly salt the slices and leave them on absorbent towels for 10–15 minutes. Blot both sides before weighing and topping.

Four-stage fresh tomato preparation guide showing plum tomatoes, thin slices, loose seed gel being removed and salted slices draining on towels.
Weigh fresh tomatoes after draining and blotting, because equally sized tomatoes can shed very different amounts of water.

For one 12-inch pizza: use about 140 g / 5 oz prepared fresh tomato, weighed after removing loose seed gel and blotting; 65 g / about 2¼ oz well-drained mozzarella; 5–6 basil leaves; and 1 teaspoon olive oil. The tomato weight is higher because these are drained slices of flesh rather than a thin layer of crushed sauce.

Place halved cherry tomatoes cut-side up so more of their liquid can evaporate. Extra ripe tomatoes can become this tomato sauce from fresh tomatoes.

Margherita Pizza Troubleshooting

The first pizza is not a verdict. It is the clearest information your oven can give you. The color underneath, moisture in the center and feel of the crust usually reveal what needs to change.

ProblemSave this pizzaChange the next one
Wet centerMove individual slices to a dry skillet over medium-low heat and check underneath every 30 secondsUse drier cheese, less tomato or a longer sheet preheat
Pale undersideIf the top can take more baking, leave the pizza on the hot surface a little longer; for finished slices, use the dry-skillet methodPreheat longer and let the surface recover fully
Bottom browning too fastIf the base is already dark but the rim needs color, move the pizza—not the hot baking surface—to an upper rack or broiler-safe tray for a brief finishReduce surface heat or shorten the initial bake
Dough springs backCover and wait 10–20 minutesAllow the full final dough-ball rest
Center tearsPinch the tear closed, or patch it with a small piece taken from an overly thick edgeStop stretching sooner and watch the center thickness
Pizza sticks to the peelWork a dough scraper beneath the stuck patch, add a pinch of flour or semolina and test the slide againPrepare toppings first and test the dough before topping
Toppings slide when slicedRest the pizza for another minute before cutting againReduce moisture and keep the center lightly topped
Four-part Margherita pizza troubleshooting guide showing a wet center, pale underside, overly dark bottom and pizza dough stuck to a peel.
A wet center with a pale base needs more bottom heat; a wet center over a dark base needs less topping moisture.

On a smaller screen, scroll sideways to compare the immediate rescue with the next-pizza correction.

Try again: return to the main recipe ↑

Shortcuts and Dough Options

The main pizza needs none of these adjustments. Use them when you need a faster dough, a smaller batch or a thinner crust.

Make one pizza: Halve the dough ingredients and use the per-pizza topping quantities already listed. Alternatively, make the full batch and freeze the second dough ball after the first rise and balling. Thaw overnight in the refrigerator, then leave it covered until relaxed enough to stretch.

Store-bought dough: Leave refrigerated dough covered until it feels soft and stretches without repeatedly springing back. Depending on the room and dough, this commonly takes 45–90 minutes.

Fast no-yeast dough: When there is no time for fermentation, this Greek yogurt pizza dough provides a faster homemade base.

Thin crust: Use about 220 g / 7¾ oz dough for one 12-inch pizza. Stretch the center more thinly, reduce the prepared tomato topping to 60 g / about ¼ cup and the fresh mozzarella to 60–65 g / about 2–2¼ oz, then check the underside earlier.

Make Ahead, Store and Reheat

Prepare the components ahead

  • Tomato topping: refrigerate in a covered container for up to three days. Stir and drain any separated liquid before using it.
  • Mozzarella: tear, drain and blot it several hours ahead. Refrigerate it in a covered container lined with a clean absorbent towel.
  • Frozen dough: freeze individual balls after the first rise for up to three months. Thaw overnight in the refrigerator, then leave covered until relaxed enough to stretch.
  • Assembled raw pizza: shape and top it only after the oven and baking surface are ready.

When the open tomatoes and remaining basil outlast pizza night, use them in a pot of tomato basil soup.

Store and reheat leftovers

Cool leftover slices before covering and refrigerate them in an airtight container for up to three days.

For the best reheating result, place a slice in a dry skillet over medium-low heat and cover for 2–4 minutes. Uncover briefly at the end. The base should crisp again while the mozzarella softens without becoming rubbery.

When the cheese needs help softening, add a few drops of water beside the slice—not on it—and cover again. An oven or air fryer also works at 375–400°F / 190–200°C; check after three minutes in an air fryer and five minutes in an oven.

Three-stage guide showing a leftover Margherita pizza slice reheated in a dry skillet, first uncovered, then covered and finally uncovered again.
Cover to warm the cheese and center, then uncover to vent steam and restore the skillet-crisped base.

Frequently Asked Questions

What is the difference between Margherita pizza and cheese pizza?

A typical cheese pizza often uses cooked sauce and a continuous layer of grated mozzarella. Margherita pizza keeps the tomato and cheese lighter, then finishes with fresh basil and olive oil.

What is the best mozzarella for Margherita pizza?

Well-drained fresh cow’s-milk mozzarella gives the classic creamy pools; low-moisture mozzarella is more forgiving in a slower oven. See how to match mozzarella to your bake.

Can I make Margherita pizza without a stone?

Yes. A thoroughly preheated heavy baking sheet turned upside down works well in a regular oven. See Choose Your Oven Setup for the sheet, stone and steel trade-offs.

Can I bake both pizzas at once?

Baking them one at a time gives each pizza the strongest bottom heat and most even result. Bake both together only when the oven has two thoroughly preheated surfaces and enough space for air to circulate; rotate or swap their positions if they color unevenly.

Is Margherita pizza vegetarian?

The pizza contains no meat, but some mozzarella and hard cheeses use animal-derived rennet. Check the label when you need strictly vegetarian cheese.

The First Slice Is Where the Restraint Makes Sense

Your pizza may be oval, and the launch may feel more hurried than graceful. Once the base is browned and the center holds, neither matters much.

Add the basil, wait a minute, then cut a slice. It should bend without dropping its tomato and cheese. The first slice tells the truth.

Partially eaten homemade Margherita pizza on a dining table with a slice on a plate, a hand, water glass, linen and pizza cutter.
The browned crust, half-empty plate and crumbs are the payoff: the method worked well enough to disappear into dinner.

Back to the beginning ↑

Posted on Leave a comment

Fresh Tomato Soup Recipe With Fresh Tomatoes: Easy Homemade Tomato Basil Soup

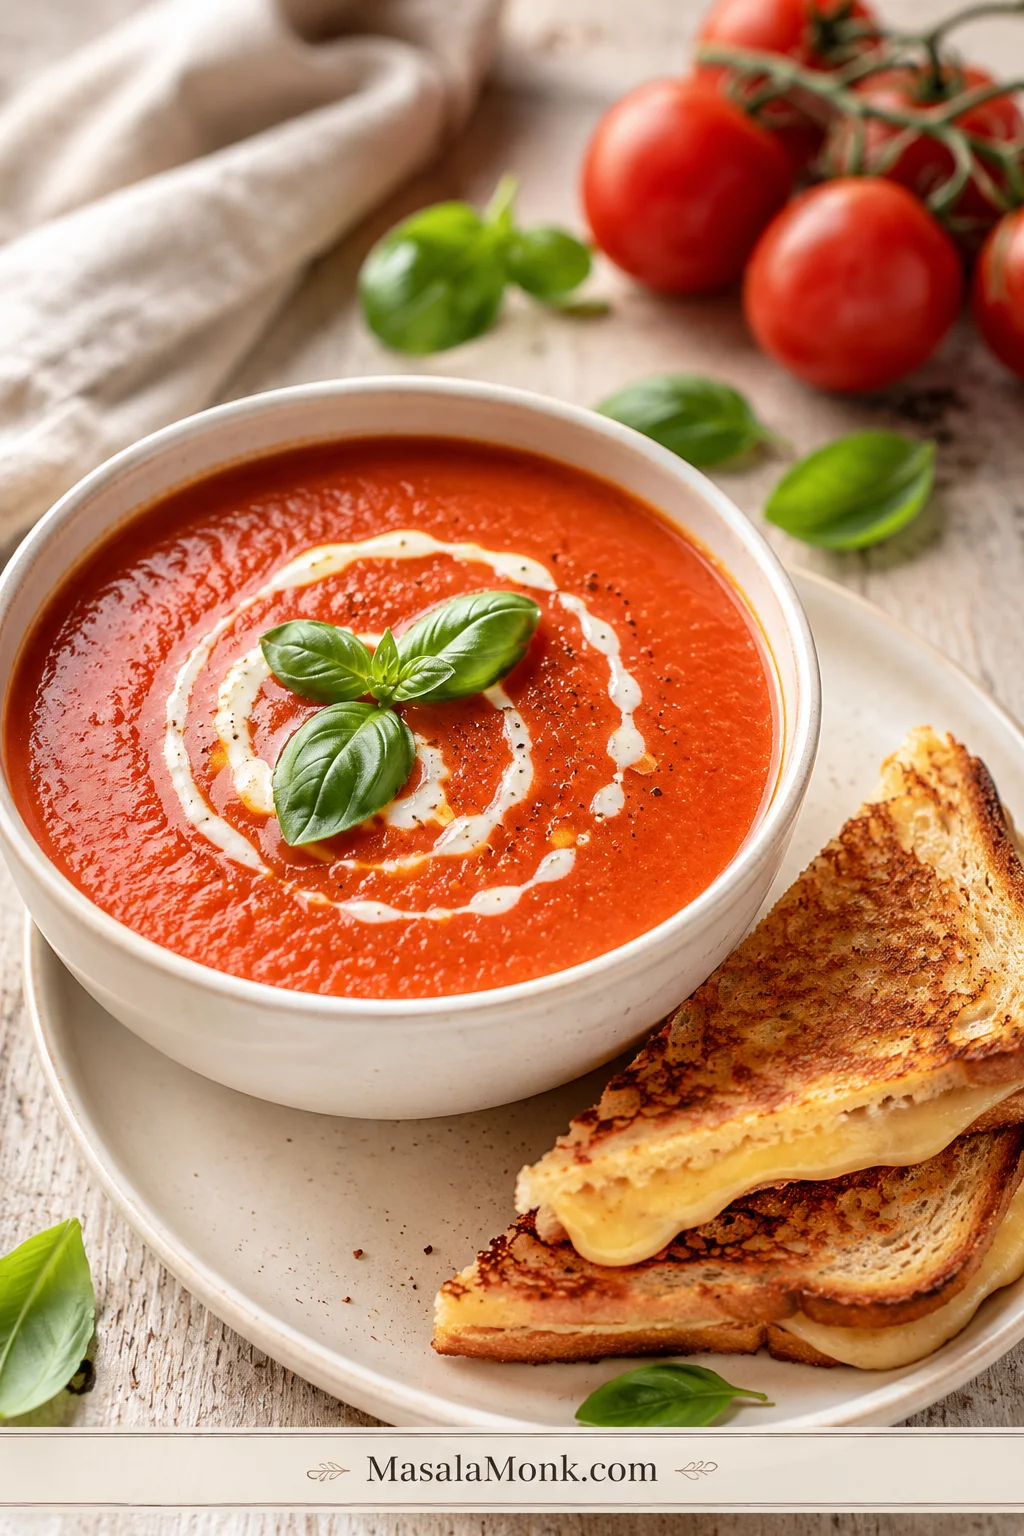
A bowl of smooth fresh tomato soup topped with basil and a cream swirl, with grilled cheese on the side.

Fresh tomato soup should taste bright, smooth, rich, and comforting — not watery, sour, thin, or like hot tomato juice. The goal is simple: take ripe fresh tomatoes, cook them down until they smell sweet and saucy, then blend them into the kind of cozy bowl you actually want to dip grilled cheese into.

This is the soup for the awkward tomato bowl: a few Roma tomatoes, a few garden tomatoes, one soft vine tomato, and cherry tomatoes that need to be used today. It works because you do not force those tomatoes into a fixed amount of liquid. You cook them down first, then loosen the soup after blending.

That makes this recipe useful even when your tomatoes are not identical — Roma, cherry, vine, garden, watery, soft, or mixed. The method keeps the soup from turning thin because the tomatoes get a chance to concentrate before the final broth goes in.

From there, the base recipe is simple; the extra sections are only there to help you adjust the tomatoes you have. Start with the stovetop method for speed, roast the tomatoes for deeper flavor, keep the bowl light, make it creamy, or turn it into tomato basil soup with fresh basil at the end.

Mixed Roma, vine, cherry, or garden tomatoes can still make smooth homemade tomato soup when the pot is reduced first and loosened later.
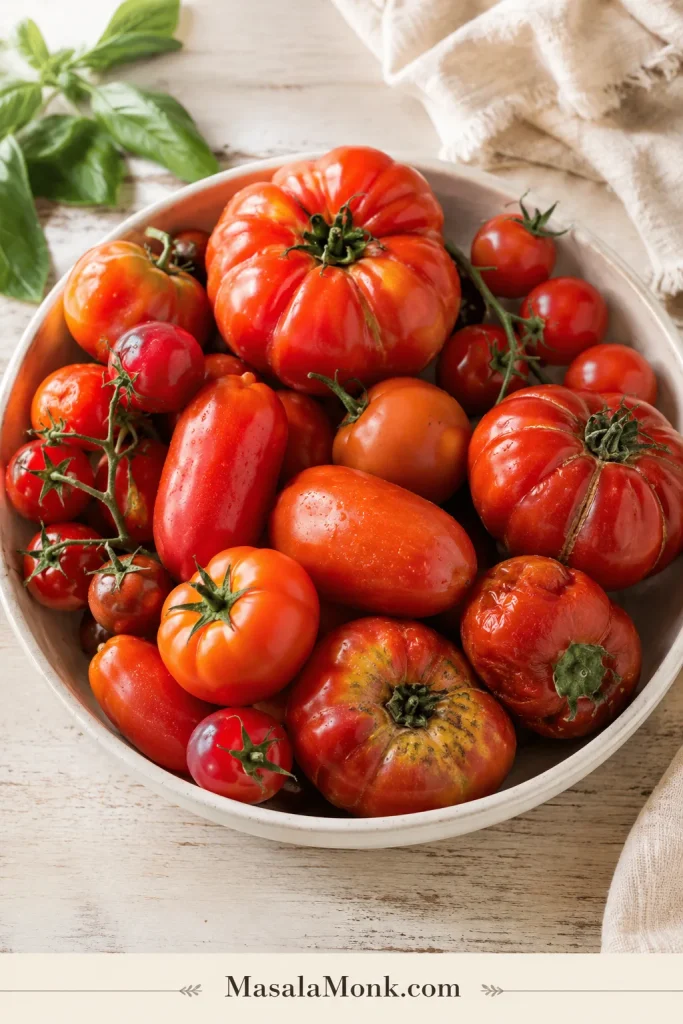
A bowl filled with mixed fresh tomatoes, including Roma, cherry, vine, and garden tomatoes.
Even mixed, soft, or uneven tomatoes can make excellent homemade tomato soup when they are cooked down first and loosened only after blending.

Cooking now? Start with the recipe card. Still deciding how to handle your tomatoes? Use the soup ratio, success cues, tomato guide, roasted method, or troubleshooting section before you begin.

Quick Answer: How to Make Tomato Soup With Fresh Tomatoes

To make tomato soup with fresh tomatoes, soften onion in olive oil or butter, add garlic and tomato paste, then add chopped ripe tomatoes, salt, pepper, and herbs. Simmer uncovered until the tomatoes collapse into their own juices and the flavor concentrates. Add broth gradually, blend until smooth, stir in fresh basil near the end, and finish with cream only if you want a richer bowl.

You are not rushing fresh tomatoes into soup; you are letting them collapse, sweeten, and turn saucy before you decide how much broth they need.

The most important rule is this: do not add all the broth too early. Your tomatoes may release more juice than mine, so hold some liquid back until after blending. That one habit keeps the soup full and spoonable instead of thin.

Next step: Need exact amounts? Jump to the recipe card. Still adjusting your tomatoes? Use the soup ratio first.

The Fresh Tomato Soup Ratio

For a balanced fresh tomato soup, use about 3 lb / 1.35 kg fresh tomatoes to 1 1/2 to 2 cups / 360 to 480 ml broth. Start with the lower amount, blend, then add more only if the soup needs loosening.

Before adding extra broth, use the ratio below as a starting point, especially when your fresh tomatoes are very juicy or unusually meaty.
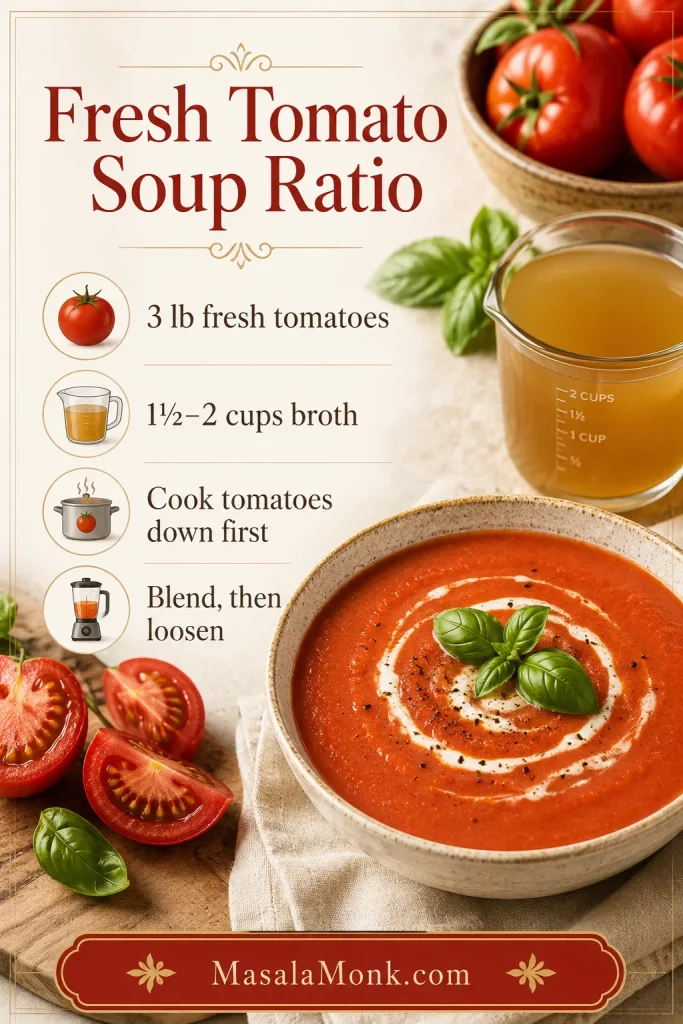
A guide card showing the ratio for fresh tomato soup with 3 pounds of tomatoes and 1 1/2 to 2 cups of broth.
Start with this fresh tomato soup ratio, then adjust after blending because different tomatoes release very different amounts of juice.

Thicker soup

Use Roma or plum tomatoes, begin with 1 1/2 cups broth, and simmer uncovered before blending.

Lighter soup

Add the full 2 cups broth after blending, especially if the tomatoes are meaty and the soup feels too thick.

Watery tomatoes

Roast first or simmer longer. Let the tomato juices reduce before you loosen the soup.

Creamy soup

Keep the base slightly thick, then finish with cream or a no-cream thickener after blending.

If you remember only one thing: fresh tomatoes decide the broth, not the other way around.

The main method rule is simple: reduce the tomatoes first, then loosen the soup only after blending.
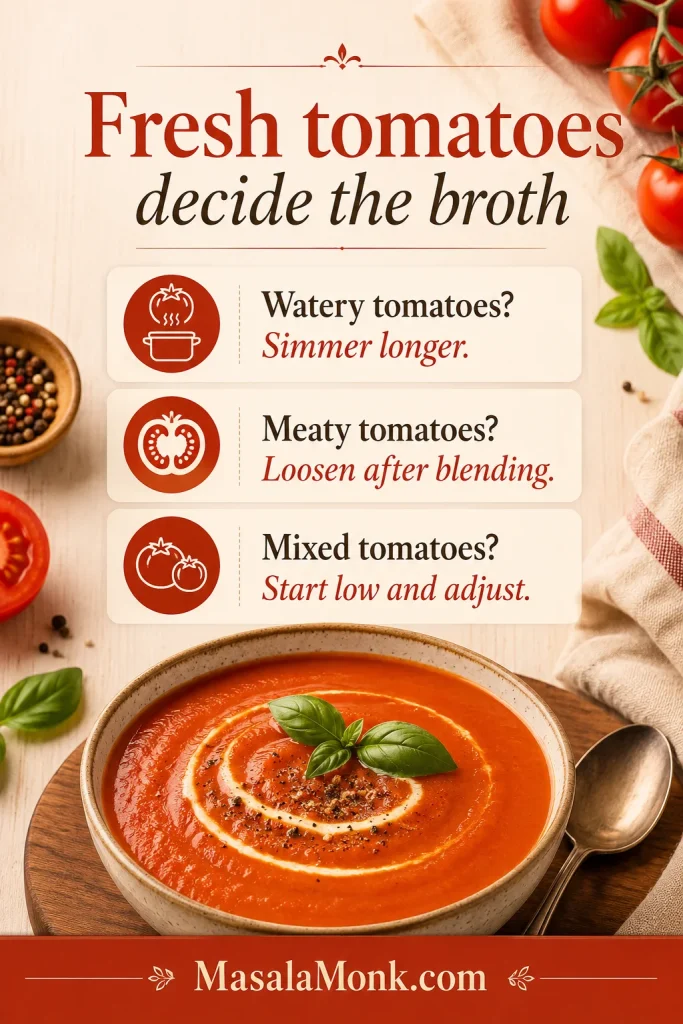
A guide card explaining that fresh tomatoes decide how much broth tomato soup needs.
Instead of forcing a fixed broth amount, let the tomatoes lead; juicy tomatoes need more reduction, while meatier tomatoes may need loosening later.

Still deciding? Compare the best tomatoes for soup, use the roasted method for watery tomatoes, or go straight to troubleshooting.

Recipe Card

Easy Homemade Tomato Soup With Fresh Tomatoes

A smooth, easy homemade tomato soup made with ripe fresh tomatoes, onion, garlic, tomato paste, basil, and optional cream. Use the stovetop method for speed or the roasted method for deeper flavor.

Prep Time
10 minutes
Cook Time
30 to 35 minutes
Total Time
40 to 45 minutes
Servings
6 bowls
Yield
About 7 cups
Tomatoes
About 8 to 10 medium tomatoes
Texture
Smooth, strain optional
Diet
Vegetarian if using vegetable broth; vegan option

Ingredients

  • 3 lb / 1.35 kg ripe fresh tomatoes, roughly chopped
  • 2 tablespoons olive oil, or 2 tablespoons / 28g butter
  • 1 medium onion, chopped, about 150g
  • 4 to 6 garlic cloves, minced
  • 2 tablespoons / about 30g tomato paste
  • 1 small carrot, chopped, or 1/2 red bell pepper, chopped, optional
  • 1 teaspoon fine salt, plus more to taste
  • 1/2 teaspoon black pepper
  • 1/2 teaspoon dried oregano or dried thyme
  • 1 1/2 to 2 cups / 360 to 480 ml vegetable broth or chicken broth
  • 1/2 cup loosely packed fresh basil leaves
  • 1/4 cup / 60 ml heavy cream, optional
  • 1 to 2 teaspoons sugar, honey, or maple syrup, only if the tomatoes taste too sharp; use sugar or maple syrup for vegan soup
  • Extra basil, cream, parmesan, croutons, olive oil, or black pepper, for serving

Equipment

  • Large pot or Dutch oven
  • Sharp knife and cutting board
  • Immersion blender, regular blender, or high-speed blender
  • Fine-mesh strainer, optional, for extra-smooth soup
  • Rimmed baking sheet, only if using the roasted method

Instructions

Cook Down the Tomatoes

  1. Soften the onion. Warm the olive oil or butter in a large pot or Dutch oven over medium heat. Cook the onion for 5 to 6 minutes, until soft, translucent, and lightly golden.
  2. Build the tomato base. Stir in the garlic for about 30 seconds. Spoon in the tomato paste and cook for 1 minute, stirring often, until it darkens slightly and smells rich.
  3. Tip in the tomatoes. Add the chopped tomatoes, carrot or red bell pepper if using, salt, pepper, and oregano or thyme. Stir well.
  4. Cook them down. Simmer uncovered for 20 to 25 minutes, stirring occasionally, until the tomatoes collapse and the mixture looks saucy. Splash in a little broth only if the pot starts to dry out.
  5. Pour in the first broth. Stir in 1 1/2 cups / 360 ml broth and simmer for about 5 minutes. Hold back the remaining broth until after blending.

Blend, Finish, and Serve

  1. Puree until smooth. Turn off the heat. Blend with an immersion blender until smooth, or blend carefully in batches in a regular blender. Vent the blender lid so steam can escape.
  2. Drop in the basil. Add the fresh basil and blend briefly again. For a fresher speckled finish, chop the basil and stir it in after blending instead.
  3. Finish the texture. Loosen with more broth if the soup is too thick. Simmer uncovered for a few minutes if it is too thin.
  4. Make it creamy, if desired. Stir in the cream over low heat. If the soup is very hot, mix a spoonful of soup into the cream first, then add it back to the pot. Do not boil hard after adding cream. Taste and adjust salt, pepper, and acidity.
  5. Serve. Ladle into bowls and finish with basil, black pepper, cream, parmesan, croutons, or olive oil.

Recipe Notes

  • Roma and plum tomatoes make the thickest soup. Garden tomatoes give great flavor but may need more simmering.
  • The broth range is flexible on purpose because Roma tomatoes, vine tomatoes, cherry tomatoes, and mixed garden-style tomatoes release different amounts of juice.
  • Before blending, the tomatoes should look collapsed and saucy, not like chopped tomatoes floating in liquid.
  • No peeling is required for everyday soup. Blend well, then strain only if you want an ultra-smooth finish.
  • If your broth is salty, start with 3/4 teaspoon salt and adjust after blending.
  • The listed cook time is for the stovetop method. Roasted method timing is about 55 to 65 minutes total.
  • For a vegan version, use olive oil, vegetable broth, and skip the cream or replace it with cashew cream, coconut milk, white beans, potato, or carrot.

This ingredient view shows why the short list still works: each item builds sweetness, depth, brightness, or body.
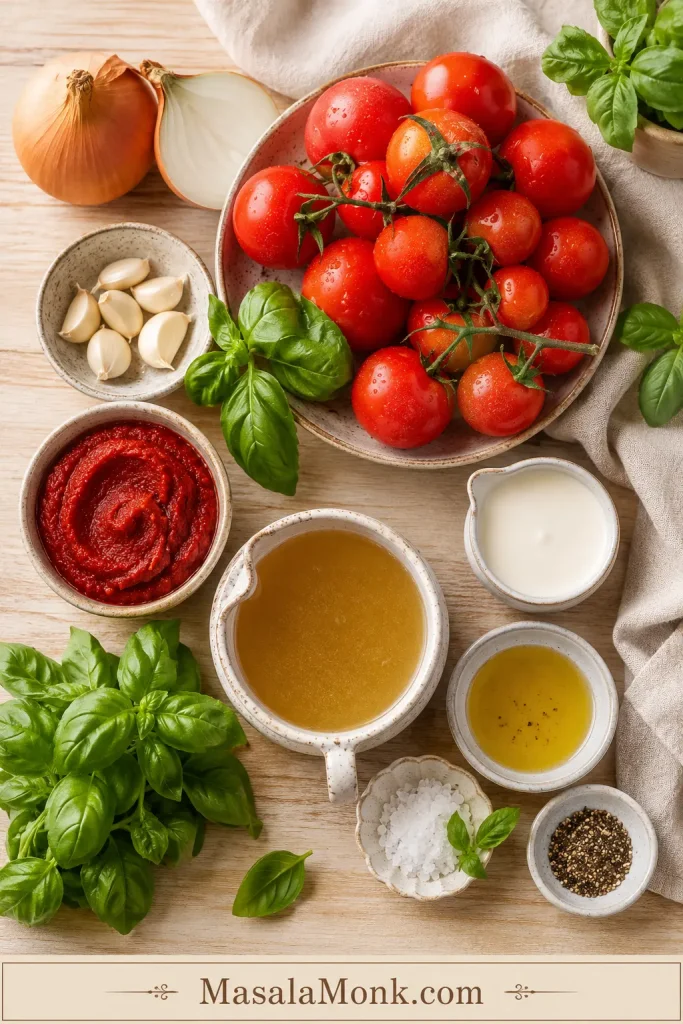
Fresh tomato soup ingredients arranged overhead, including tomatoes, onion, garlic, basil, tomato paste, broth, cream, oil, salt, and pepper.
Each ingredient has a clear job: onion builds sweetness, tomato paste adds depth, basil brightens the finish, and broth controls the final texture.

Success Cues

Use these cues more than the clock. Fresh tomatoes vary, but the signs of a good pot stay the same.

Tomatoes before blending

The tomatoes should look collapsed and saucy, not like chopped tomatoes floating in broth.

Puree before more broth

The puree should be smooth first. Loosen the soup only after you know how thick the blended base is.

Before serving

The soup should coat a spoon lightly, pour easily, and taste bright first, then soft and savory.

At the finish

Add basil late, keep cream gentle, and adjust salt after the soup is fully blended.

Look for this cue before blending: the tomatoes should be collapsed and saucy, not floating in loose liquid.
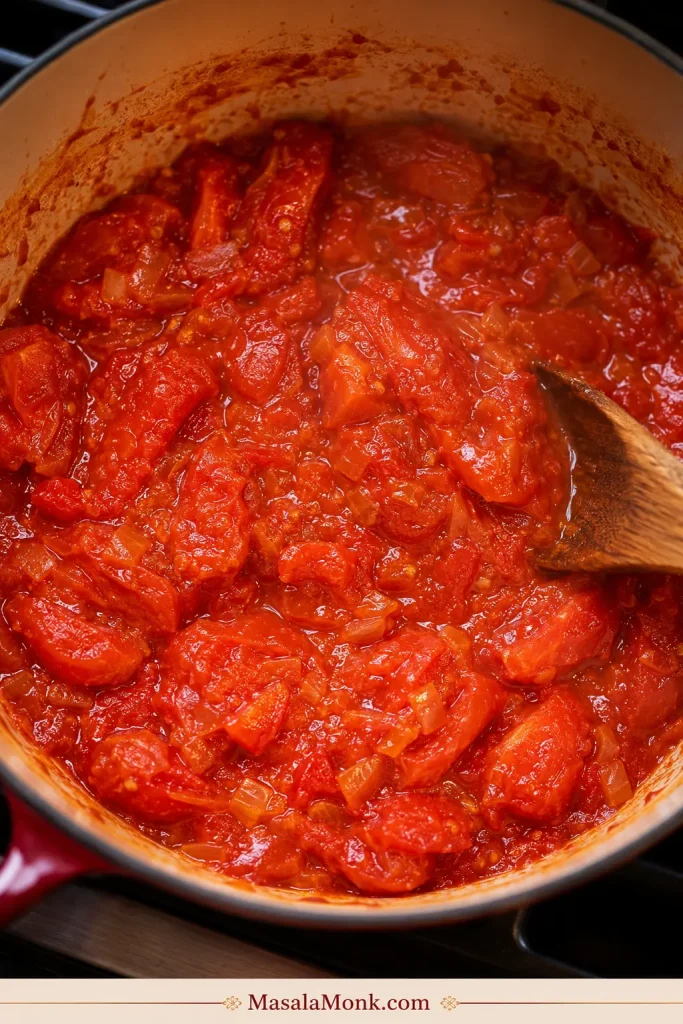
Fresh tomatoes cooked down in a pot until soft, thick, and saucy before blending.
Before blending, the tomatoes should look collapsed and saucy rather than loose and chunky; this cue is one of the best ways to avoid watery tomato soup.

Table of Contents

Need a tomato, texture, roasting, storage, or rescue answer? Jump to the section you need.

Fresh Tomato Soup vs Canned Tomato Soup

Fresh tomatoes do not behave like canned tomatoes, and that is exactly why this soup needs a gentler, more flexible method. Canned tomatoes are already cooked, concentrated, and fairly consistent. Fresh tomatoes are brighter and more seasonal, but they also bring their own water, sweetness, acidity, skin, and seeds.

That is why this recipe builds flavor before the pot gets too loose. The same reduction logic matters in this tomato sauce from fresh tomatoes, where the final texture depends on cooking off extra water before adjusting the finished dish.

For a thicker, pasta-ready version of tomato depth, this classic marinara sauce recipe stays in the sauce lane. This soup stays softer, smoother, and more spoonable.

Why This Fresh Tomato Soup Works

Fresh tomatoes give you that bright, just-cut flavor, but they also bring a lot of water with them. The soup gets its body before the blender comes out, while the tomatoes are still bubbling down into something sweeter and fuller.

By the time the blender comes out, the pot should already smell like tomato sauce becoming soup.

  • Onion softens the sharp edge of the tomatoes and adds natural sweetness.
  • Garlic gives the pot savory warmth without overpowering the fresh tomato flavor.
  • Tomato paste boosts color and depth, especially when the tomatoes are juicy or mild.
  • Uncovered simmering concentrates the base before the final texture is adjusted.
  • Fresh basil goes in late so the soup tastes fragrant, not dull.
  • Cream is optional, so the final bowl can be light, creamy, vegan, or dairy-free.

The Best Tomatoes for a Smooth, Flavorful Soup

Start with the tomatoes you have, then decide how much help they need. A soft tomato that smells sweet can still make a beautiful soup, even if it is past its salad-perfect moment.

Use the tomato guide below to decide whether your batch needs more simmering, more sweetness, or a roasted start.
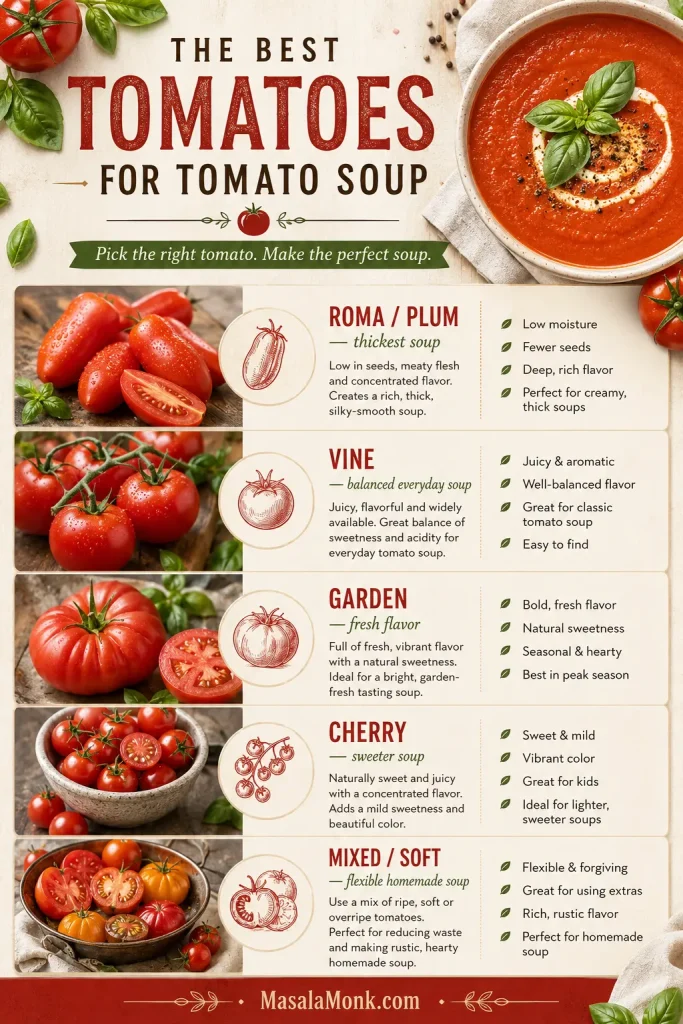
A visual guide showing Roma, vine, garden, cherry, and mixed tomatoes for tomato soup.
Roma tomatoes give body, cherry tomatoes add sweetness, and mixed garden tomatoes bring complexity, so the best tomato choice depends on the flavor and texture you want.
Tomato Type Best Use What to Know
Roma or plum tomatoes Thicker fresh tomato soup Meaty, less watery, and excellent for a smooth soup base.
Vine tomatoes Everyday tomato soup Good balance of sweetness, juice, and acidity.
Garden tomatoes Fresh summer flavor Great when ripe, but may need longer cooking if very juicy.
Cherry tomatoes Sweet roasted tomato soup Sweet and juicy. Roast them or hold back more broth at first.
Overripe tomatoes Rich homemade soup Excellent if soft and fragrant, but avoid spoiled tomatoes.
Watery tomatoes Roasted or reduced soup Roast first or simmer uncovered to concentrate them.
Underripe tomatoes Not ideal They can make the soup sharp, pale, and bland.

The tomato does not have to be perfect. It just needs to taste ripe enough that you would still want another bite — sweet, juicy, and a little fragrant when you cut into it. If you are mixing tomato types, use that to your advantage: Roma tomatoes can thicken juicy garden tomatoes, while cherry tomatoes can add sweetness to sharper ones.

Tomatoes chosen? Review the soup ratio, then move to the stovetop method.

Ingredients That Make the Soup Taste Full

The ingredient list is short, so each ingredient has to pull its weight. The right balance keeps the soup from tasting watery, flat, or too acidic.

Fresh Tomatoes

Choose ripe tomatoes that feel heavy and smell sweet. Roma, plum, vine, garden, and cherry tomatoes all work, but they behave differently. Juicy tomatoes need more time. Meaty tomatoes make a thicker base more easily.

Onion and Garlic

Onion rounds out the acidity and gives the soup a softer base. Garlic adds that warm, savory smell that makes the pot feel fuller before you even blend it. Cook the onion first, then add the garlic briefly so it stays fragrant instead of bitter.

Tomato Paste

Tomato paste is the backup plan for tomatoes that are juicy, pale, or mild. Cook it for a minute before adding the tomatoes so it darkens slightly and makes the soup taste deeper.

Broth

Vegetable broth keeps the soup light and vegetarian. Chicken broth makes it a little more savory and old-fashioned, especially if you are serving it with grilled cheese. Add it in stages so the tomatoes can show you how much they need.

Fresh Basil

Fresh basil wakes up the bowl at the end. Add it late so the flavor stays green and fragrant. When basil is the flavor you want to push harder, this classic basil pesto guide gives you another way to use the same herb as a swirl, toast spread, or pasta sauce.

Dried basil can work, but it should go in earlier with the dried herbs. Fresh basil is more delicate, so save it for the finish.

Cream, Optional

Heavy cream softens the acidity and makes the soup richer, but it is not required. You can keep the bowl bright and light, or use no-cream options like carrot, potato, cashews, white beans, bread, or coconut milk.

Peeling, Seeding, and the Smooth-Soup Shortcut

You do not need to peel or seed tomatoes for everyday homemade tomato soup. Once the tomatoes are cooked until soft and blended well, most skins disappear into the bowl.

For a very smooth, restaurant-style bowl, blend fully, strain once, and finish with a small splash of cream over low heat. Straining removes seeds, tiny bits of skin, and any grainy texture without making you peel every tomato first.

A silky bowl does not require peeling every tomato; blend first, then strain only if the texture needs it.
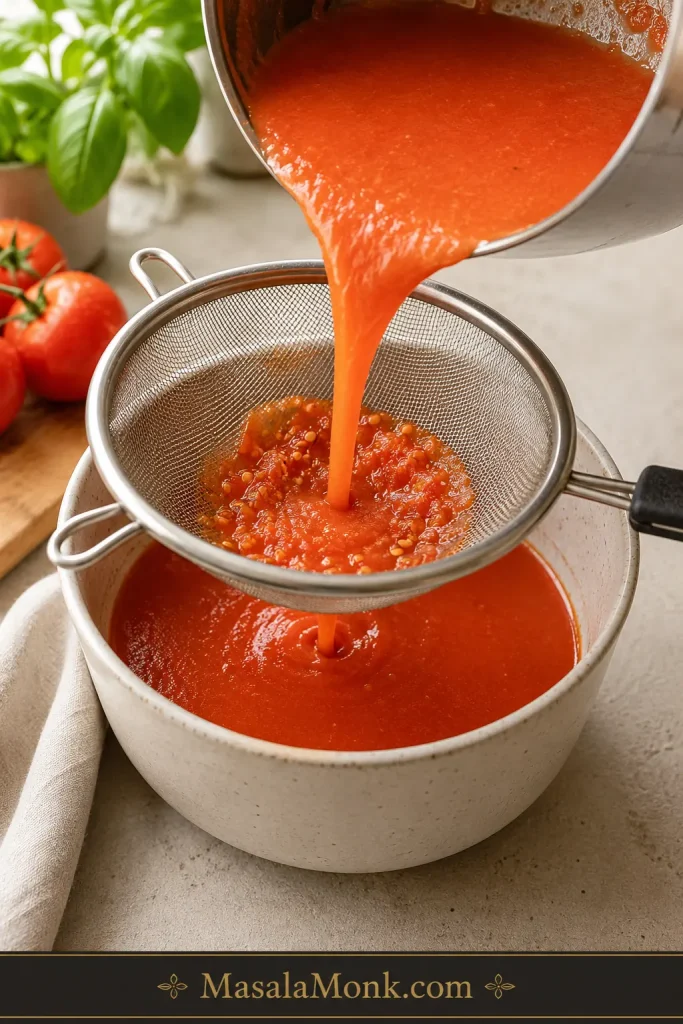
Tomato soup being poured through a fine-mesh strainer, with seeds and skin bits left behind.
For silky tomato soup without peeling every tomato, blend first and strain afterward to catch seeds and tiny skin pieces.

Prefer rustic tomato soup? Blend only half the pot and leave the rest slightly chunky.

Choose the final texture here: leave some body for rustic soup or strain once for a smoother restaurant-style finish.
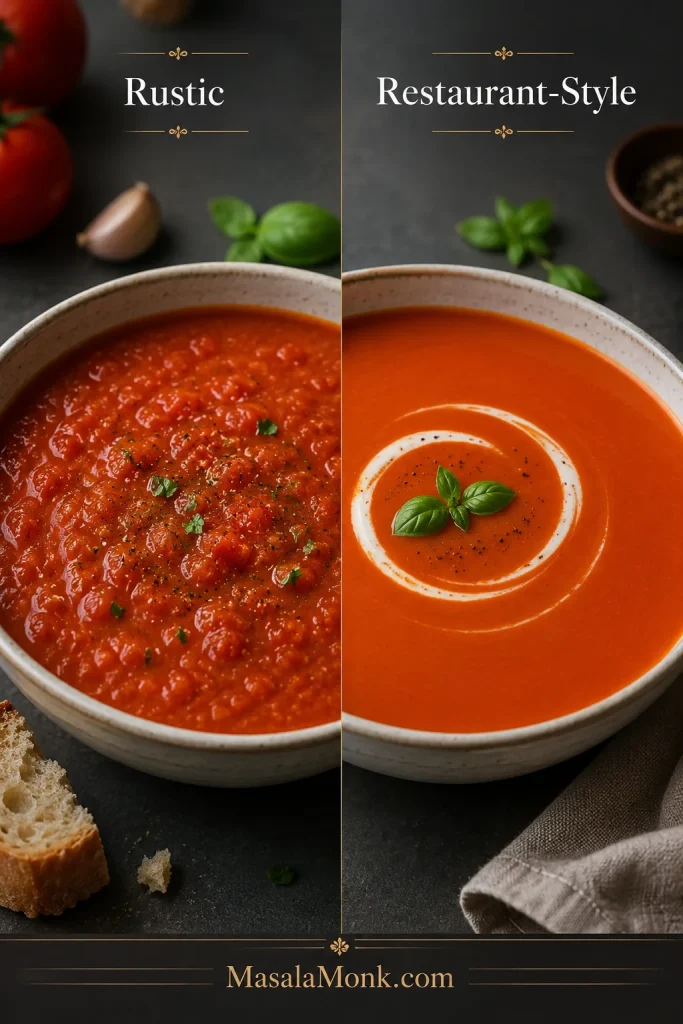
Two bowls comparing rustic tomato soup and smooth restaurant-style tomato soup.
For a rustic bowl, leave some texture behind; however, for a restaurant-style finish, blend thoroughly and strain once.

Once you know whether you want rustic or silky soup, the stovetop method is straightforward.

Texture chosen? Continue to how to make fresh tomato soup, or keep the visual cues nearby while you cook.

How to Make Fresh Tomato Soup

The stovetop method is the easiest place to start. It is fast, flexible, and lets you taste as you go.

1. Soften the Onion Until Sweet

Warm olive oil or butter in a large pot. Cook the onion until soft and lightly golden. Do not rush this part; it creates sweetness before the tomatoes go in.

At this stage, the onion should smell sweet and look translucent before the acidity of the tomatoes enters the pot.
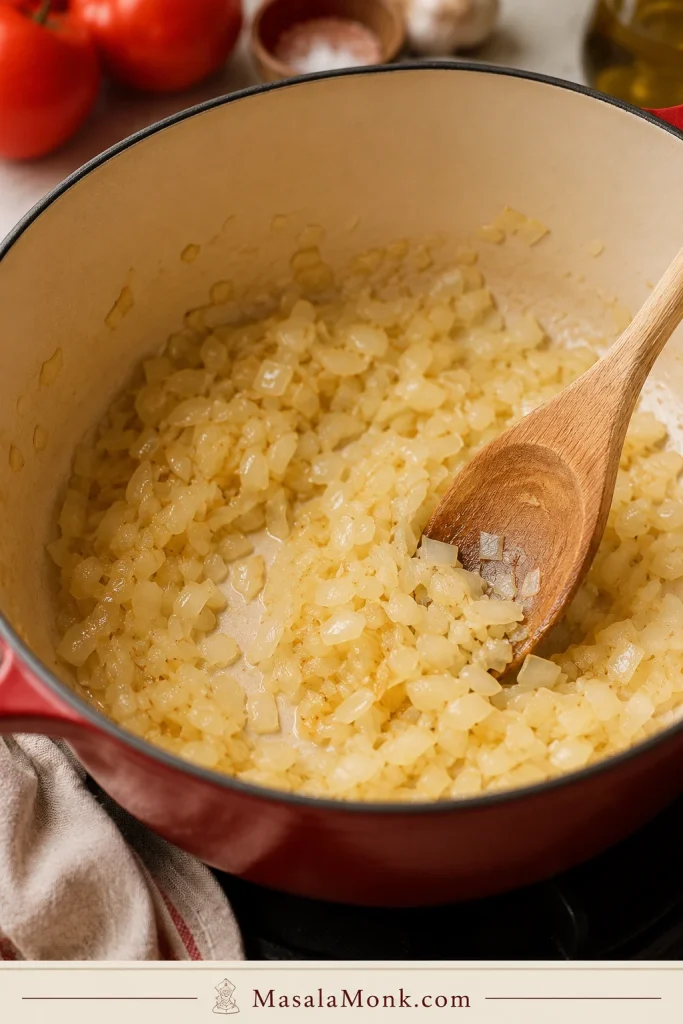
Chopped onion softening in a Dutch oven with a wooden spoon.
Soften the onion until it smells sweet and turns translucent; this early step helps balance acidity before the fresh tomatoes go in.

2. Add Garlic and Tomato Paste

Let the garlic sizzle for about 30 seconds, then stir in the tomato paste. The paste should darken slightly and smell rich, almost like the tomato flavor is already getting deeper.

Cooking tomato paste briefly with the aromatics gives the soup deeper color and a fuller tomato base.
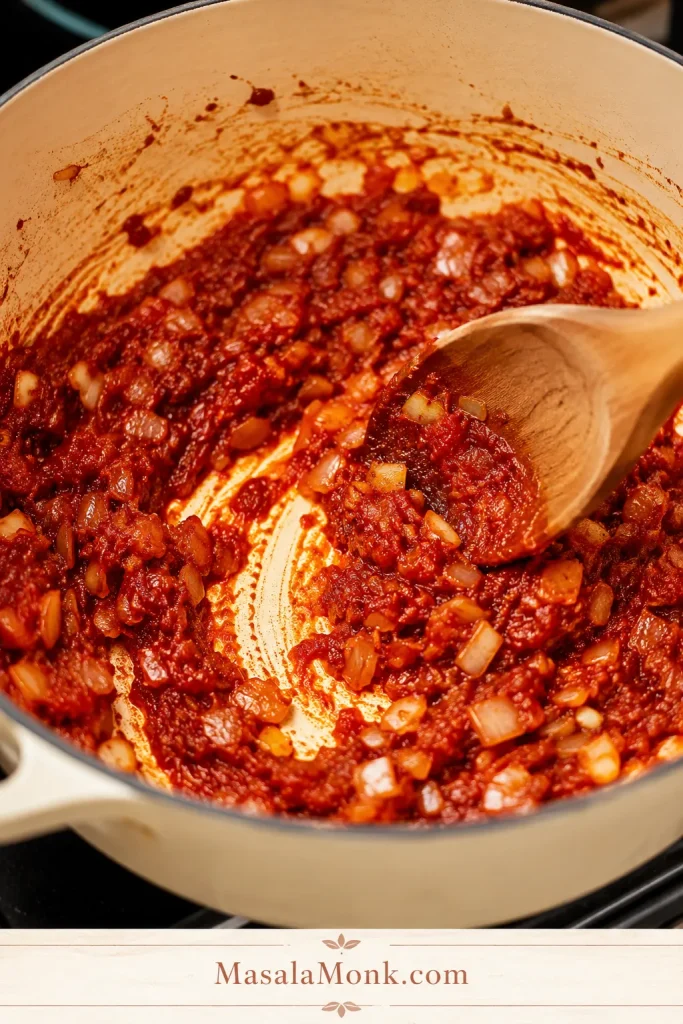
Tomato paste cooking with onion and garlic in a pot.
Briefly cooking tomato paste with onion and garlic deepens the base, so the finished soup tastes fuller even when the tomatoes are mild or extra juicy.

3. Collapse the Tomatoes

Tip in the chopped tomatoes, seasoning, and carrot or bell pepper if using. Simmer uncovered until the tomatoes collapse into their juices and the pot looks saucy.

Once the fresh tomatoes hit the pot, give them time to soften and concentrate before you decide how much broth they need.
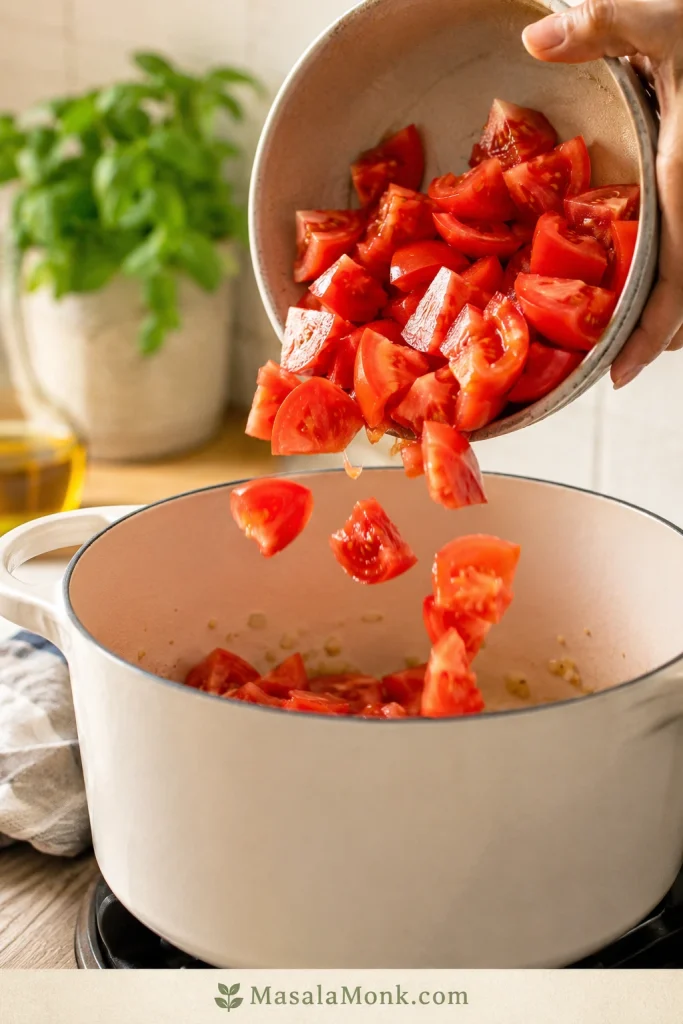
Chopped fresh tomatoes being tipped from a bowl into a pot.
Add the fresh tomatoes before most of the broth so they can soften, concentrate, and build flavor before you decide how loose the soup should be.

4. Blend and Adjust

Pour in part of the broth, puree until smooth, then finish the texture. A good bowl should pour like cream but still taste like tomatoes first.

Add broth gradually after the tomato base has cooked down so the soup stays easier to control.
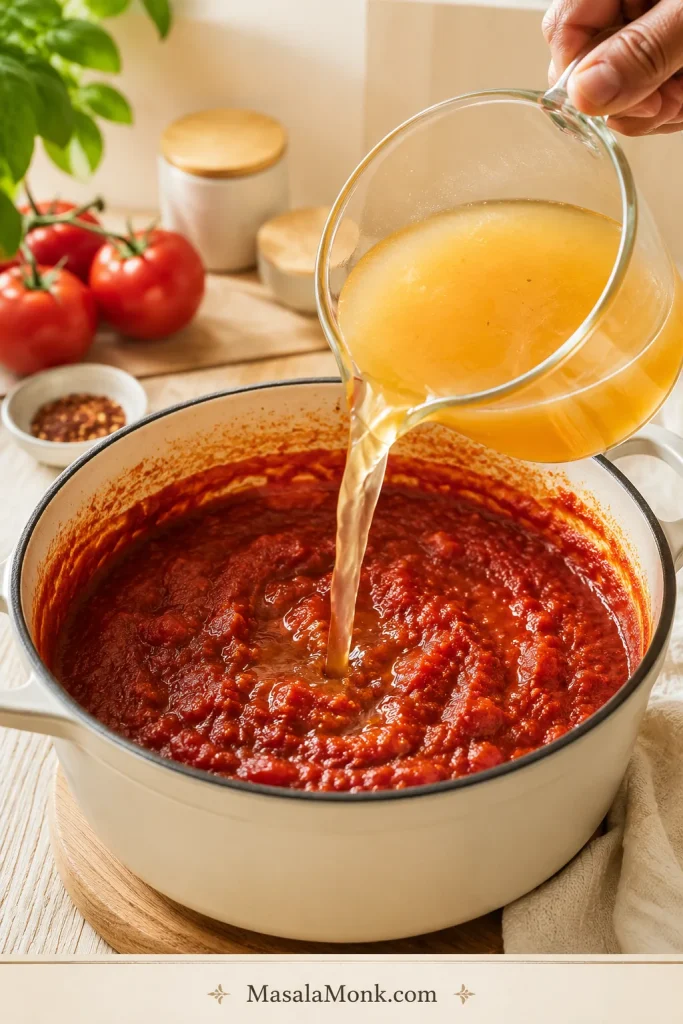
Broth being poured into a pot of concentrated cooked tomato mixture.
Once the tomatoes have cooked down, add broth gradually rather than all at once; that keeps fresh tomato soup full-bodied and easier to control.

After you get used to blending first and loosening after, you can use the same habit in other smooth soups too, like this butternut squash soup.

Safety cue: Hot soup expands in a blender. Work in batches, vent the lid, and cover the top with a towel so steam can escape.

When the soup is hot, work carefully and judge the thickness before adding more liquid or cream.
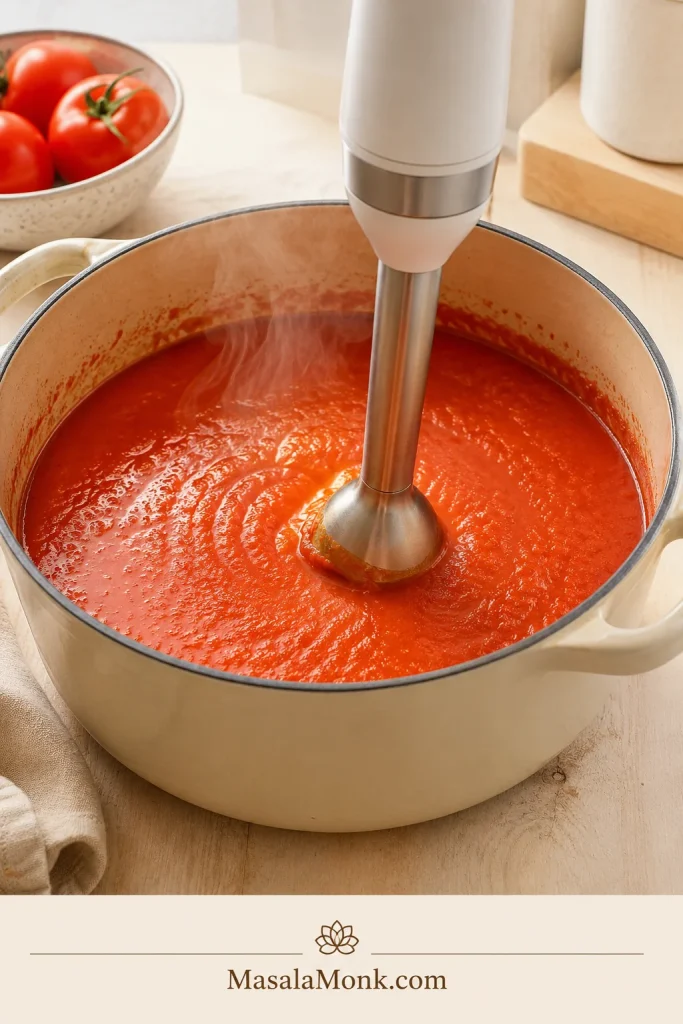
An immersion blender blending tomato soup inside a large pot.
Blend directly in the pot until smooth, then check the thickness before adding anything else because fresh tomato soup often loosens more than expected.

Cooking from the card? Return to the recipe card, or keep going for texture cues and variations.

What to Look For While the Soup Cooks

Tomatoes do not all behave the same, so use the timing as a guide and the texture as the final signal. The pot should smell sweeter before it looks smooth.

Stage What You Should See Why It Matters
Onion cooked Soft, translucent, and lightly golden This adds sweetness before the tomatoes go in.
Tomato paste cooked Darker red and fragrant This deepens the tomato flavor and color.
Tomatoes simmered Collapsed, saucy, and no longer floating in liquid This is where the soup starts getting body.
After blending Smooth, spoon-coating, and pourable You are aiming for soft body, not a thick paste.
Final soup Bright red-orange, balanced, and not grainy At this point, taste once more, then serve.

Aim for the texture shown here: smooth, spoon-coating tomato soup that still pours easily.
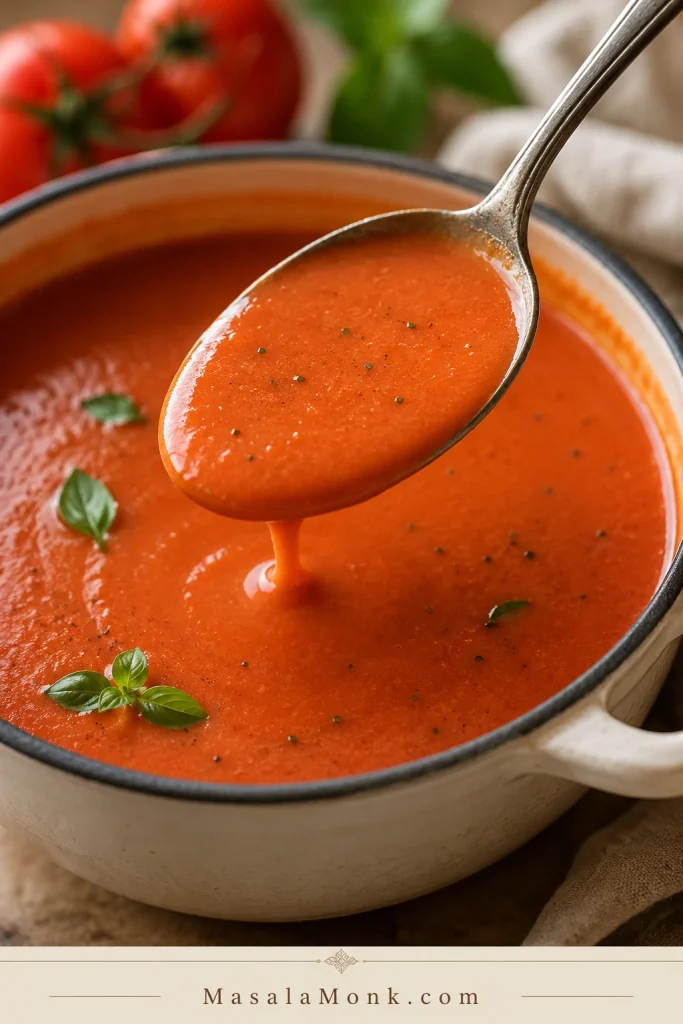
Smooth tomato soup lightly coating a spoon above the pot.
The right texture should coat a spoon lightly while still pouring easily, giving the soup a creamy feel without making it heavy.

Roasted Fresh Tomato Soup Method for Deeper Flavor

When to Roast Fresh Tomatoes

Roasting is the method to choose when your tomatoes taste good but not amazing yet. The oven pulls out sweetness, softens acidity, and gives the soup a deeper red, slightly jammy flavor before it ever reaches the blender.

It is especially useful when your tomatoes are watery, very juicy, mild, or garden-grown.

The roasted method takes longer than the stovetop version, but most of that time is hands-off. Plan on about 55 to 65 minutes total if you roast first.

Roasting helps watery or mild tomatoes taste sweeter and more concentrated before they become soup.
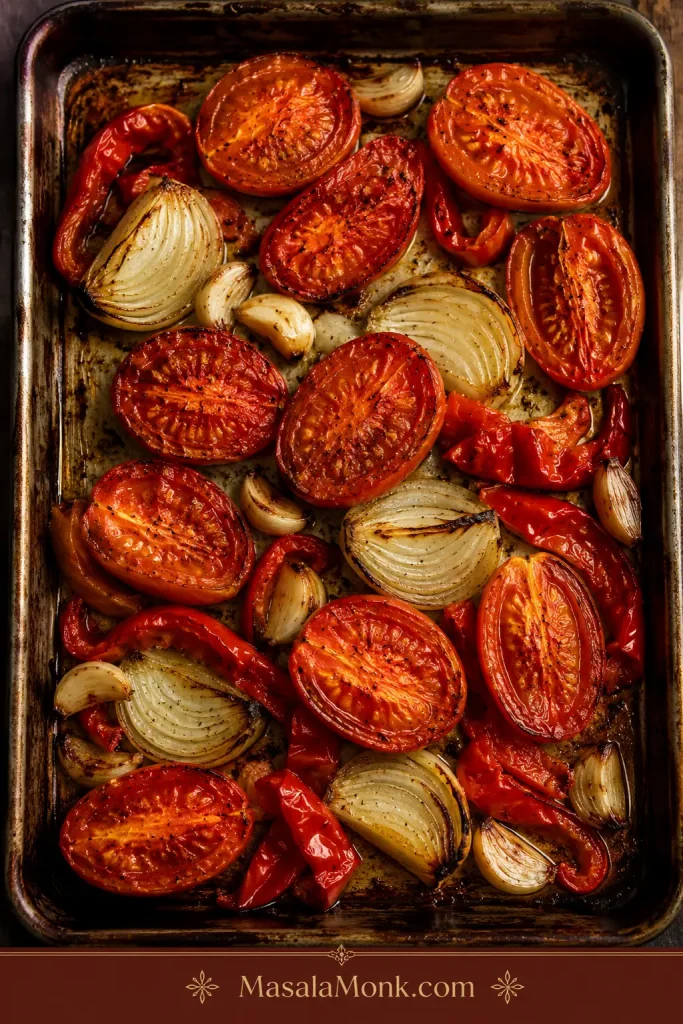
Roasted tomatoes, onions, garlic, and red pepper on a sheet pan.
Roasted fresh tomatoes create a deeper, sweeter soup because the oven concentrates their flavor before they reach the pot.

Roasting Setup

Use the same 3 lb / 1.35 kg fresh tomatoes. For roasting, use olive oil on the baking sheet. If you prefer butter, stir it into the pot after roasting instead. Cut medium tomatoes into halves or quarters. Leave the garlic cloves whole for roasting instead of mincing them, then squeeze the softened garlic out of the skins before blending.

How to Finish the Roasted Soup

  1. Heat the oven to 425°F / 220°C.
  2. Spread the tomatoes, onion, whole garlic cloves, and optional red bell pepper on a rimmed baking sheet.
  3. Toss with olive oil, salt, and pepper.
  4. Roast for 35 to 45 minutes, until the tomatoes are soft, jammy, and lightly browned at the edges.
  5. Transfer the roasted vegetables to a pot. Stir the tomato paste into the roasted juices and cook for 30 to 60 seconds.
  6. Pour in only 1 cup / 240 ml broth at first, then blend.
  7. Loosen gradually with more broth until the soup reaches your preferred thickness.
  8. Simmer for 5 to 10 minutes, blend until smooth, then add basil and blend briefly again. Finish with cream only if you want a richer roasted tomato basil soup.

The roasted tray should smell sweet and garlicky before it ever reaches the pot. If the baking sheet has a lot of tomato liquid, add those juices gradually instead of dumping everything in at once.

When transferring roasted tomatoes, add the tray juices thoughtfully so the roasted flavor stays strong without thinning the pot.
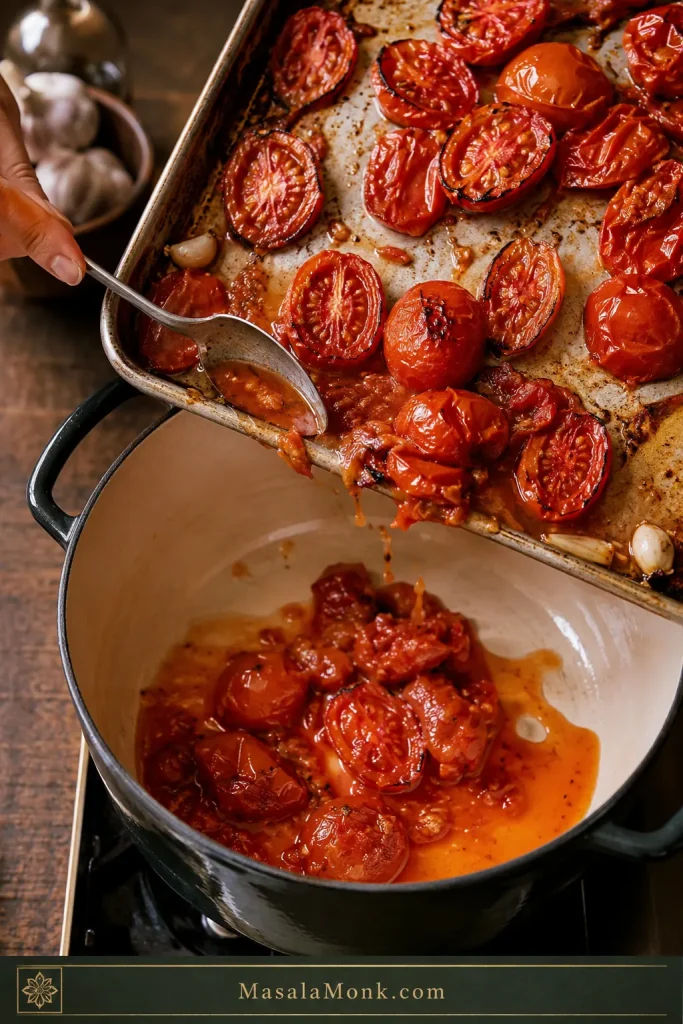
Roasted tomatoes and juices being transferred from a sheet pan into a pot.
Scrape the roasted tomatoes and tray juices into the pot, but add the liquid thoughtfully so the soup keeps its roasted flavor without thinning too much.

After roasting: Keep the bowl bright, make it creamy or dairy-free, turn it into tomato basil soup, or choose what to serve with it.

Creamy, No-Cream, and Vegan Options

Choose the Creaminess Level

Creaminess is not just about adding cream. It is about deciding how soft, rich, and mellow you want the final bowl to feel. Some bowls want the classic silkiness of dairy; others only need a carrot, a potato, or a handful of cashews to feel round.

Creamy Options and No-Cream Thickeners

Option How Much to Use Best For
Heavy cream 1/4 cup / 60 ml for light creaminess; 1/2 cup / 120 ml for richer soup Classic creamy tomato soup.
Half-and-half 1/4 to 1/2 cup / 60 to 120 ml Lighter everyday creamy soup.
Butter 1 tablespoon blended in at the end Silky texture without much cream.
Cashews 1/4 to 1/3 cup soaked cashews Dairy-free creamy body.
White beans 1/2 cup cooked white beans Thicker soup with more body.
Potato 1 small peeled potato, simmered with the tomatoes Thick, mild, no-cream soup.
Carrot 1 small carrot, cooked with the tomatoes Sweetness, body, and acidity balance.
Bread 1 small slice crusty bread, blended in Rustic creamy texture without cream.
Coconut milk 2 to 4 tablespoons Vegan creamy tomato soup.

Creaminess can come from dairy or from body-building ingredients like cashews, beans, potato, carrot, or bread.
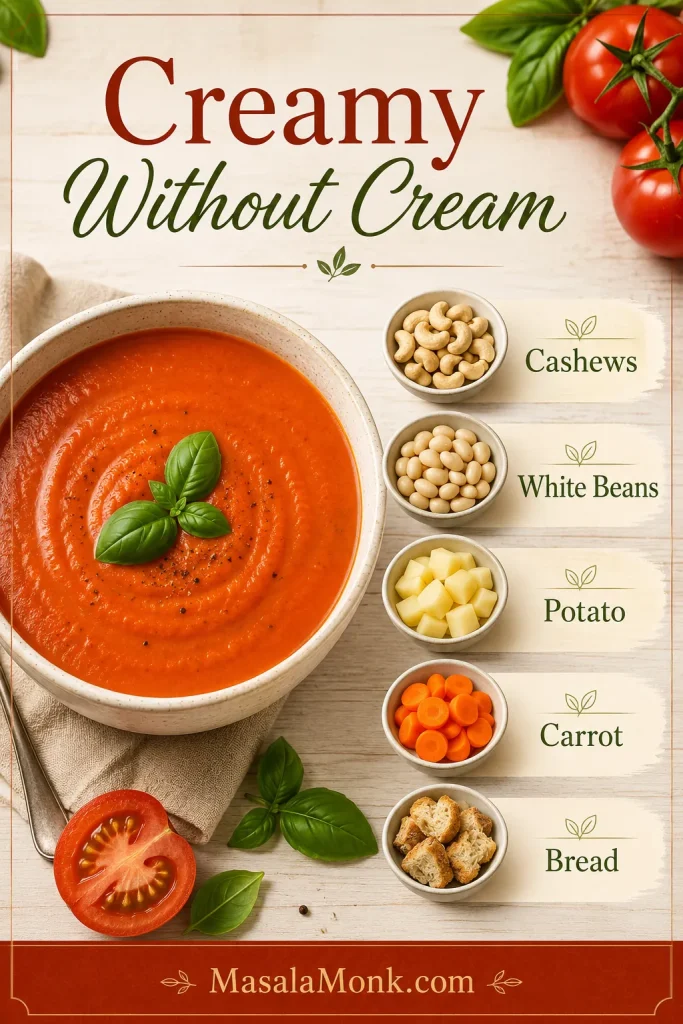
A guide showing cashews, white beans, potato, carrot, and bread as no-cream thickener options for tomato soup.
For creamy tomato soup without cream, use cashews, beans, potato, carrot, or bread to add body while keeping the tomato flavor clear.

The best creamy version still tastes like fresh tomatoes first. Cream, butter, cashews, beans, potato, or bread should round the edges, not hide them.

The goal is a soup that feels softer on the spoon, not one that forgets it started with fresh tomatoes.

Add Dairy Gently

With dairy, add it after blending and keep the heat low. If the soup is very hot, stir a spoonful of soup into the cream first, then add it back to the pot.

Cream belongs at the end, over low heat, where it softens the tomato flavor without splitting or muting the soup.
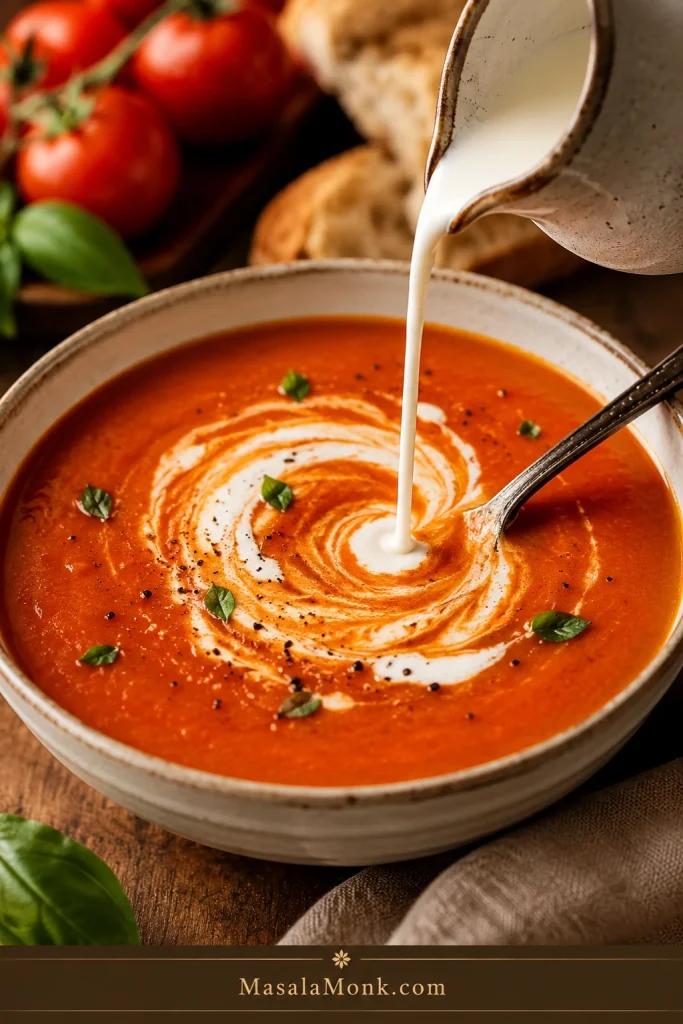
Cream being swirled into a bowl of tomato soup.
Add cream gently at the end and keep the heat low; creamy tomato soup should taste softer and rounder, not muted or split.

Vegan Tomato Soup Adjustments

For vegan tomato soup, use olive oil instead of butter and vegetable broth instead of chicken broth. Skip the cream, or blend in cashews, white beans, potato, carrot, or coconut milk for body. If the soup tastes sharp, use carrot, roasted red pepper, or a tiny amount of maple syrup instead of honey.

Tomato Basil Soup Variation

To make this a fresh tomato basil soup, increase the basil to about 3/4 cup loosely packed fresh basil leaves. Add the basil near the end, then blend briefly. For a brighter finish, save a little chopped basil for the bowls.

Fresh basil should go in late so tomato basil soup keeps its green aroma and bright finish.
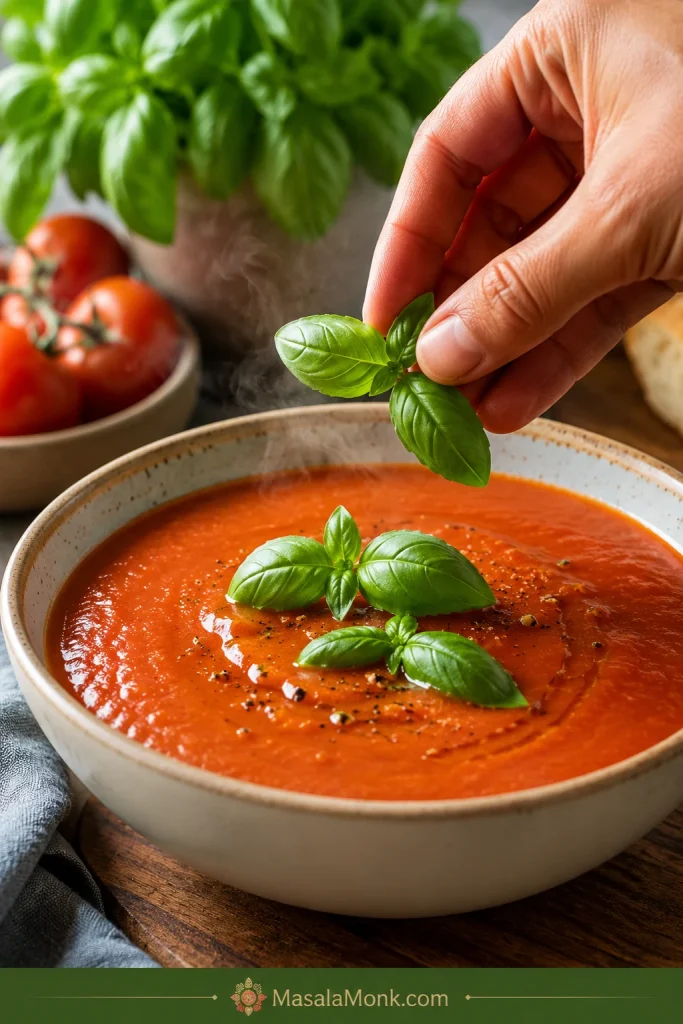
Fresh basil leaves being added to warm tomato soup.
Add basil at the end so tomato basil soup keeps its fresh green aroma; otherwise, long cooking can flatten both the color and flavor.

The basil should smell fresh the moment it hits the warm soup. If it cooks too long, that bright green lift disappears.

No fresh basil? Use 1/2 to 1 teaspoon dried basil and add it with the oregano or thyme. The flavor will be less fresh, but the soup will still be good. If basil is what you love most, save this pesto pasta recipe for another night — same fresh-herb comfort, completely different dinner.

Old-Fashioned Fresh Tomato Soup Variation

For an old-fashioned tomato soup texture, use butter instead of olive oil and add a light roux. After the onion softens, stir in 1 to 2 tablespoons flour and cook for 1 minute before adding the tomatoes and broth. Finish with a splash of milk or cream and a tiny pinch of sugar if the tomatoes are sharp.

This version is thicker, softer, and more diner-style, especially good with grilled cheese, buttered toast, or homemade croutons. It is for eating fresh, refrigerating, or freezing — not for canning.

This variation leans softer and creamier, with the kind of diner-style texture that suits toast or grilled cheese.
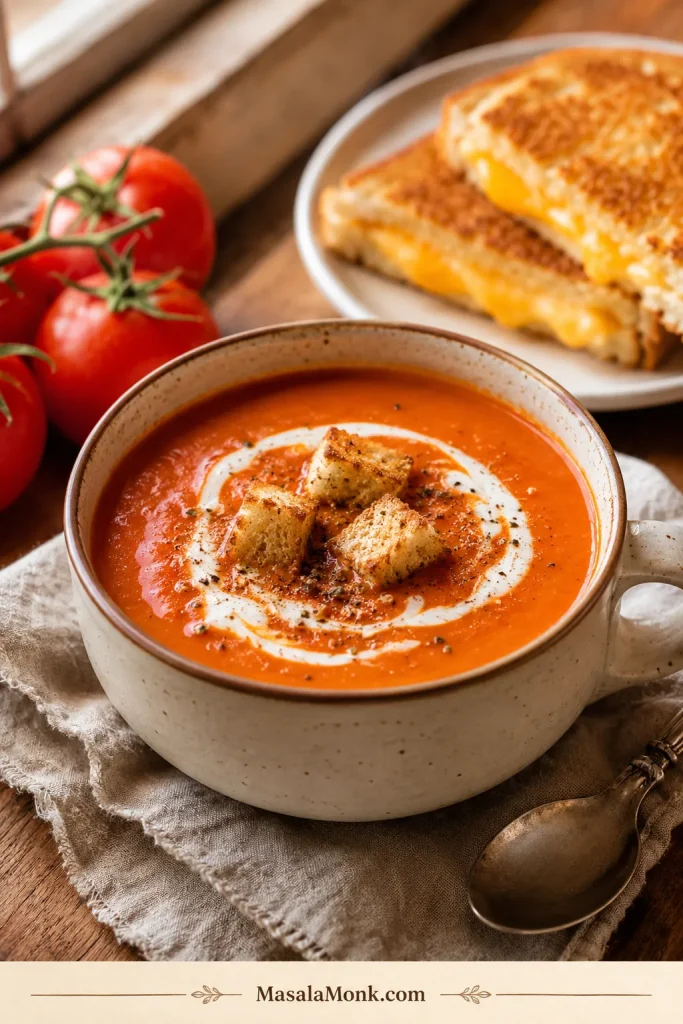
A bowl of old-fashioned creamy tomato soup topped with croutons and black pepper, with grilled cheese in the background.
For an old-fashioned tomato soup feel, go a little creamier and softer in flavor, then serve it with croutons, toast, or grilled cheese for classic comfort.

Once the base method is clear, you can adapt it to the appliance you actually want to use.

Adapt the Method for Instant Pot, Slow Cooker, or Blender

You do not need a separate recipe for every appliance. The same rule still matters: cook the tomatoes into something flavorful before you loosen the soup.

Method How to Adapt It
Instant Pot Sauté onion and garlic, deglaze well, then add tomatoes. Keep tomato paste off the bottom to reduce burn risk. Use 1 cup / 240 ml broth for pressure cooking, pressure cook 15 minutes, release naturally 5 to 10 minutes, then blend and loosen.
Slow cooker For best flavor, sauté onion, garlic, and tomato paste first. For the easiest version, add everything directly. Use only part of the broth. Cook on high for 3 to 4 hours or low for 5 to 8 hours, then blend and add basil and cream at the end.
High-speed blender Use it for the smoothest texture, especially if you do not want to peel tomatoes. When blending hot soup, work in batches, vent the lid, and cover the top with a towel.

These versions are there for convenience, but the best flavor still comes from the same small cues: softened onion, cooked tomato paste, tomatoes that smell sweeter, and final liquid added with care.

When you want the slow-cooker route but a much heartier dinner, this crock pot lasagna soup is the richer tomato-and-pasta version.

Before troubleshooting, check the mistakes most likely to make fresh tomato soup thin, dull, or unsafe to store.
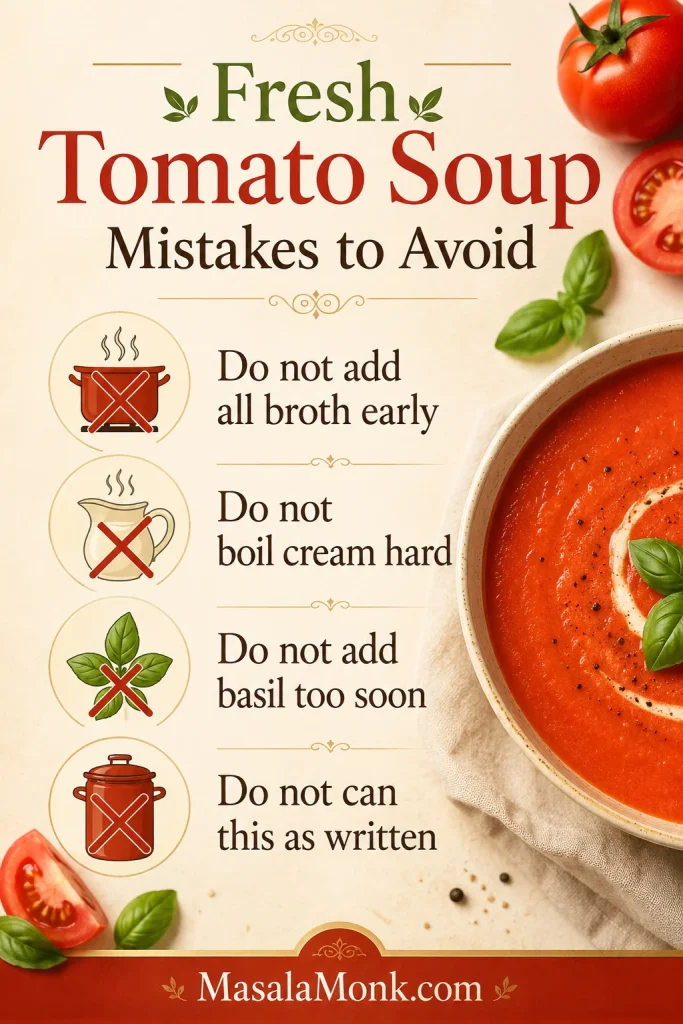
A guide card listing common fresh tomato soup mistakes, including adding broth too early, boiling cream, adding basil too soon, and canning the soup as written.
These fresh tomato soup mistakes are easy to avoid: hold back broth, keep dairy gentle, add basil late, and do not can this recipe as written.

How to Fix Watery, Sour, or Bland Tomato Soup

Start With the Simple Fixes

Do not panic if the first taste is sharp, thin, or a little bland. Fresh tomatoes vary a lot, and most soup problems are easy to fix before the bowls hit the table. Salt wakes the flavor up, cream softens acidity, tomato paste deepens the base, and a few more minutes of simmering can rescue a thin pot.

Use this comparison to see the difference between loose tomato soup and the thicker spoon-coating texture you want.
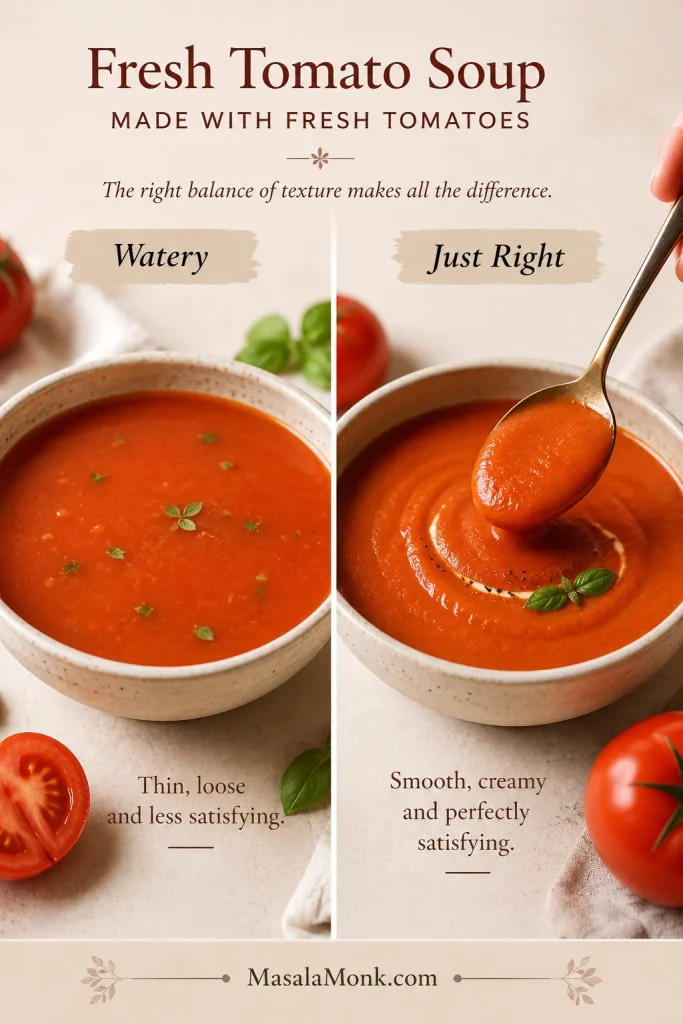
A side-by-side comparison showing watery tomato soup and thicker tomato soup labeled just right.
If the soup looks watery, keep cooking or add body before serving; the goal is smooth tomato soup that feels spoon-coating, not loose and flat.

Common Tomato Soup Problems

Problem Why It Happens How to Fix It
Watery soup Tomatoes were very juicy or too much broth was added. Simmer uncovered, add tomato paste, roast tomatoes next time, or blend in potato, white beans, cashews, or a small piece of bread.
Sour soup Tomatoes were acidic or underripe. Add carrot, roasted red pepper, cream, butter, or a tiny amount of sugar or maple syrup.
Bland soup Not enough salt, tomato depth, or aromatics. Add salt gradually, more black pepper, tomato paste, basil, or roasted garlic.
Bitter soup Garlic burned, basil overcooked, or tomatoes were underripe. Avoid burnt garlic, add basil late, and balance with cream or carrot.
Thin soup Too much liquid or not enough body. Simmer longer, add potato, white beans, cashews, bread, or cream.
Too thick Soup reduced too much. Add broth or water slowly until the texture loosens.
Seedy soup Tomato seeds remained after blending. Strain the soup through a fine-mesh strainer.
Skins in soup Tomato skins did not fully blend. Blend longer, use a high-speed blender, or strain.
Pale soup Tomatoes were not deeply red or tomato paste was skipped. Use ripe red tomatoes and add tomato paste.
Grainy soup Soup was not blended enough or solids were fibrous. Blend longer and strain for a smoother finish.

After the troubleshooting table, this card gives quick fixes for watery, sour, bland, or grainy soup.
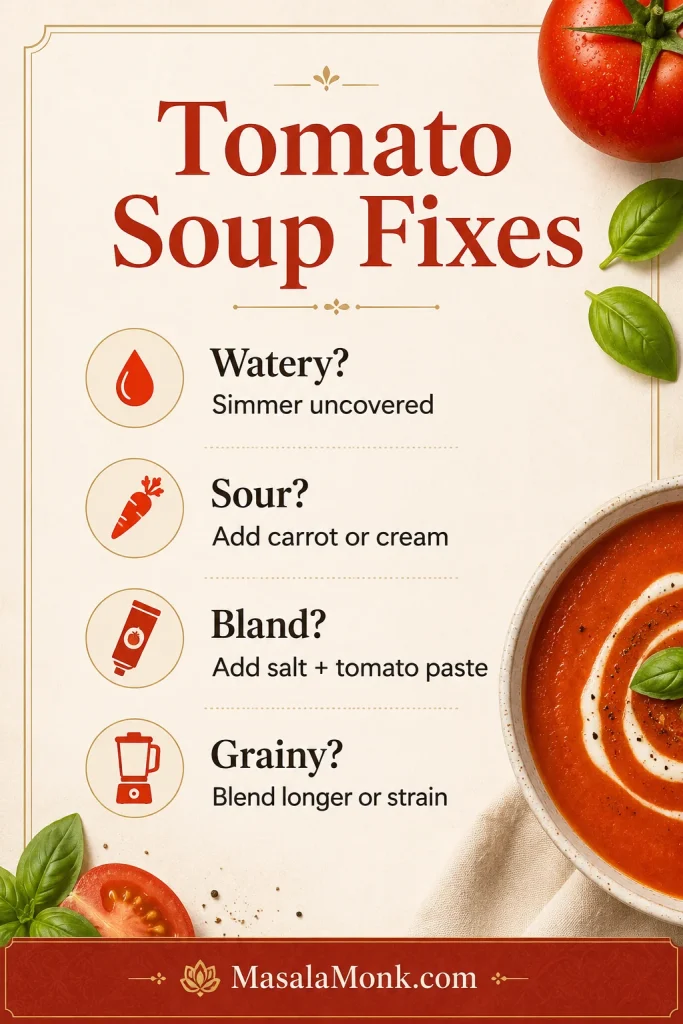
A guide card showing fixes for watery, sour, bland, and grainy tomato soup.
Most tomato soup problems can be fixed before serving: simmer watery soup, soften sour edges, deepen bland flavor, and blend or strain rough texture.

What Not to Overdo

Do not fix everything with sugar. A tiny amount can help sharp tomatoes, but better soup usually comes from ripe tomatoes, enough salt, tomato paste, proper simmering, and a little fat or cream when needed.

For a chunkier tomato-broth soup where beans naturally add body, this minestrone soup is a good next bowl to make.

Soup fixed? Return to the recipe card, choose what to serve with tomato soup, or check storage and freezing.

What to Serve With Tomato Soup

Tomato soup is built for crisp, toasted, cheesy, or herby sides. The best bowl has that red-orange glow, a little basil on top, and something crisp on the side for dipping.

A bowl of tomato soup becomes a fuller meal when you add something crisp, cheesy, herby, or fresh on the side.
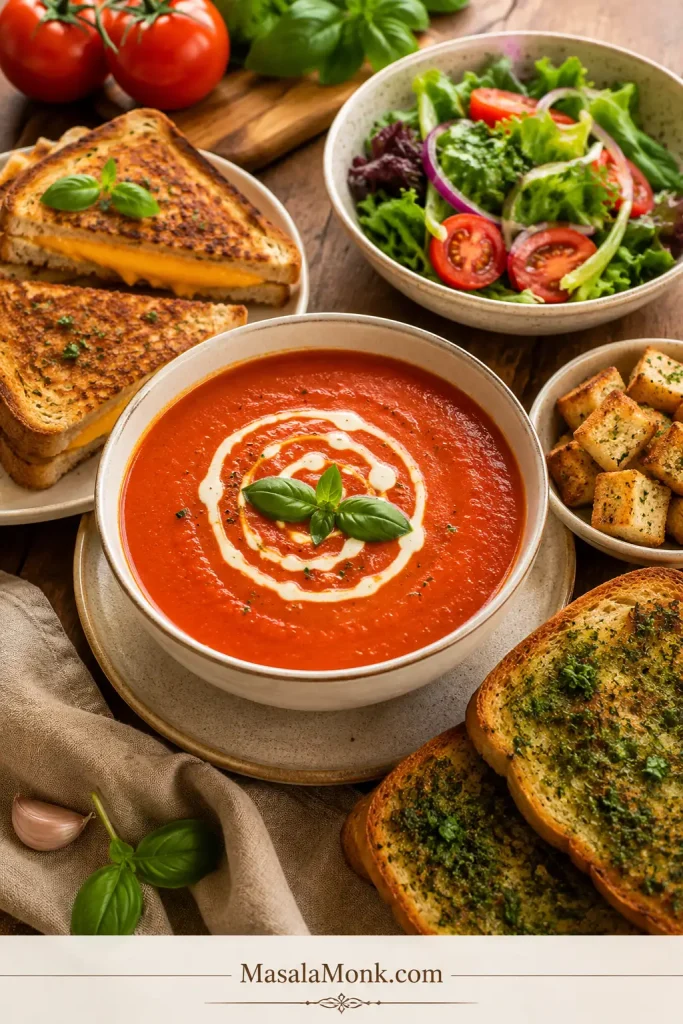
Tomato soup served with grilled cheese, toast, croutons, and a fresh salad on a table.
Tomato soup becomes a fuller meal with crisp, cheesy, or herby sides, so grilled cheese, garlic toast, croutons, and a fresh salad all work especially well.
  • Grilled cheese sandwich
  • Garlic bread
  • Cheese toast
  • Croutons
  • Toasted sourdough
  • Basil pesto toast
  • Cucumber salad for a crisp, cool side
  • Parmesan and black pepper
  • Chili flakes or chili oil
  • A swirl of cream or olive oil

For the classic version, make grilled cheese and dip the crisp edges into the soup. The first dip should leave a little orange-red trail on the bread. To keep the bowl lighter, serve it with salad, toasted bread, and extra basil. For a more filling lunch that still stays fresh, pair it with this chickpea salad instead of making the soup heavier.

The grilled cheese dip is also a texture test: the soup should cling lightly instead of running off like water.
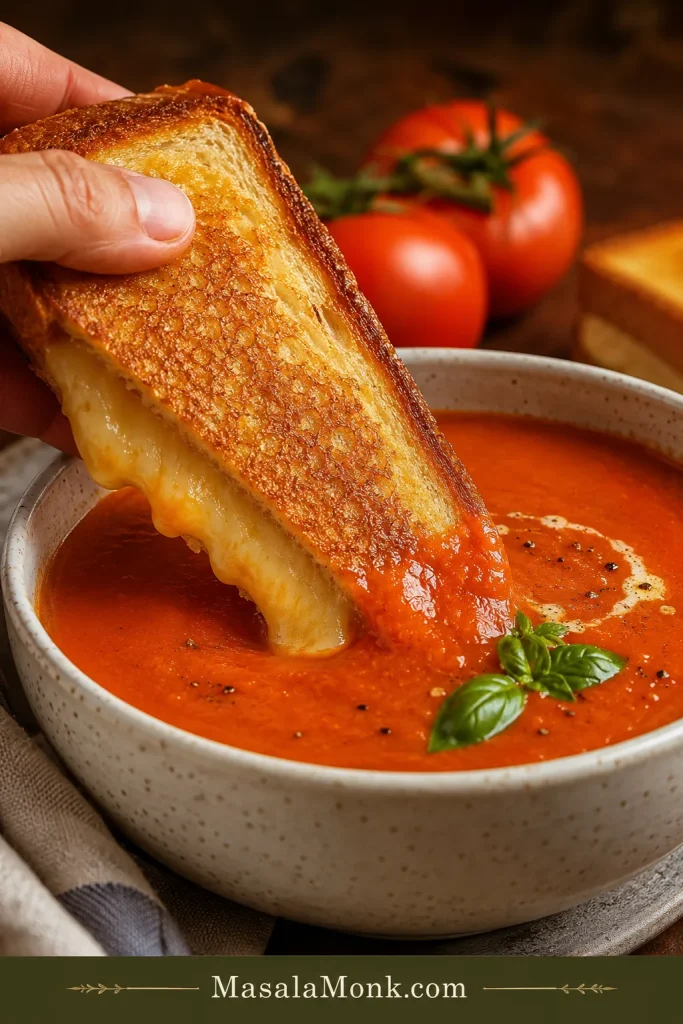
A grilled cheese sandwich being dipped into a bowl of tomato soup.
A good tomato soup should cling lightly to grilled cheese and leave a warm orange-red trail, which is another sign that the texture is right.

Storage, Freezing, and Reheating

  • Refrigerate: Store cooled soup in an airtight container for up to 4 days.
  • Freeze: Freeze for up to 3 months for best quality. For best texture, freeze before adding cream.
  • Reheat: Warm gently on the stovetop over medium-low heat, stirring often.
  • Adjust after reheating: Add a splash of broth or water if the soup thickens in the fridge or freezer.
  • Add cream later: If freezing, stir in cream after reheating rather than before freezing.

Freeze the soup in portions for quick lunches. Leave a little space at the top of the container because soup expands as it freezes.

Portion the soup before adding cream, then adjust the texture gently when reheating.
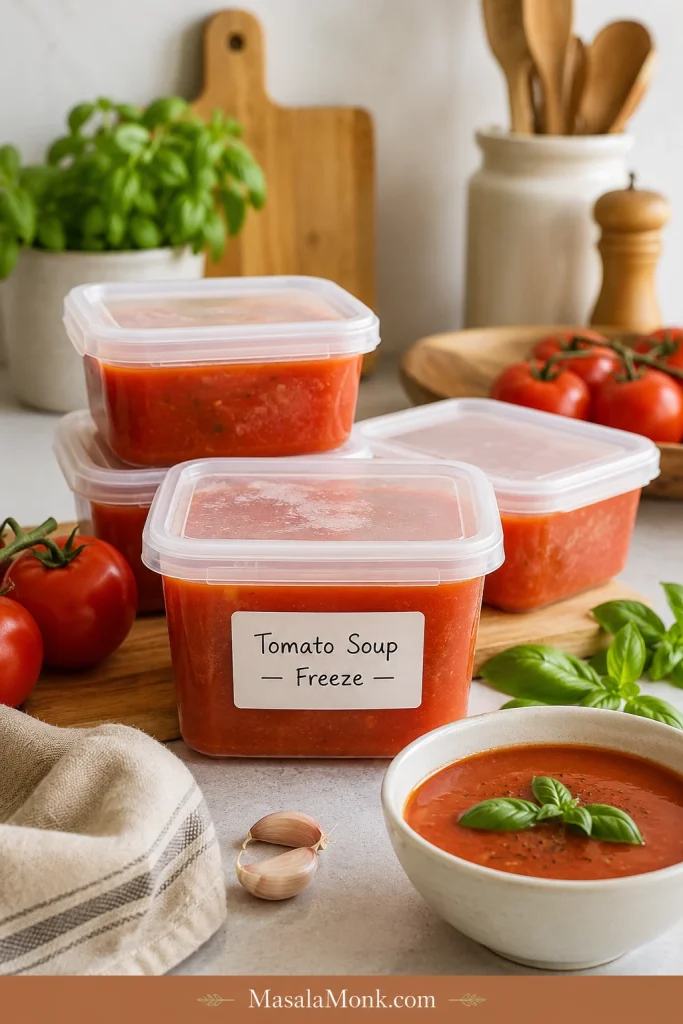
Fresh tomato soup stored in freezer-safe containers labeled for freezing, with a bowl of soup nearby.
Freeze fresh tomato soup before adding cream for the best reheated texture; later, warm it gently and loosen it with a splash of broth if needed.

For general leftover timing, FoodSafety.gov’s cold food storage chart lists soups and stews at 3 to 4 days in the refrigerator and 2 to 3 months in the freezer, which is why this recipe keeps the storage guidance conservative.

Cooking again later? Return to the recipe card, or jump back to the top of the post.

Canning Safety Note

This fresh tomato soup recipe is written for eating fresh, refrigerating, or freezing. It is not a tested shelf-stable canning recipe.

Keep the storage advice clear: fresh eating, refrigeration, and freezing are fine, but this is not a canning recipe.
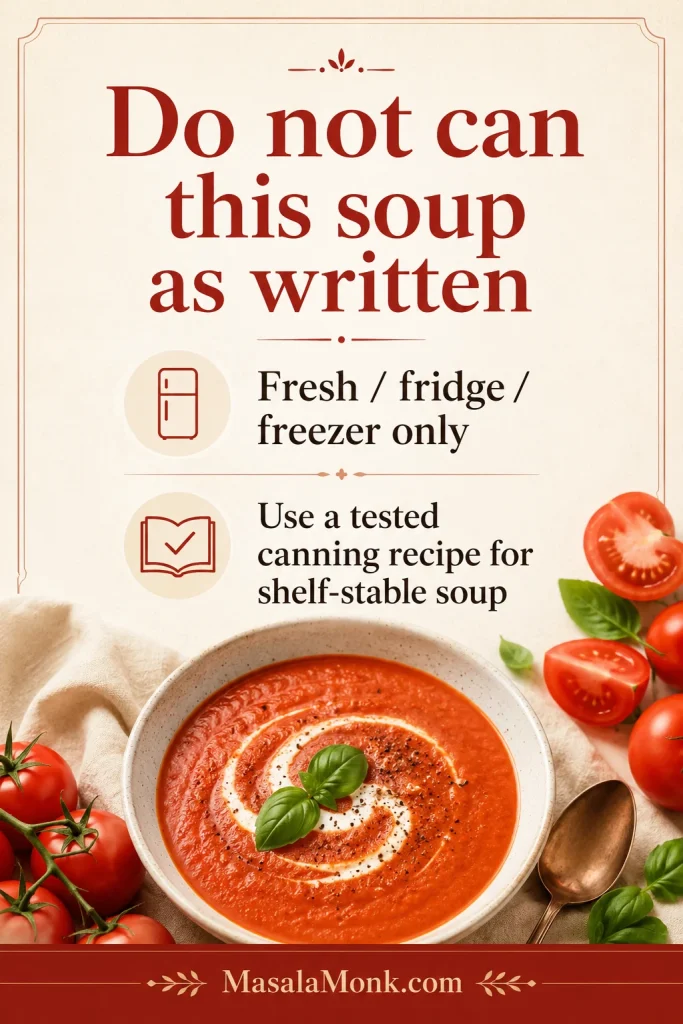
A safety card stating not to can this soup as written and to use a tested canning recipe for shelf-stable soup.
This recipe is meant for fresh eating, refrigeration, or freezing, while shelf-stable tomato soup should come from a properly tested canning recipe.

Do not can this soup as written, especially if you add cream, milk, flour, cashews, bread, potato, white beans, pasta, rice, or other thickeners. Those ingredients can change density and heat penetration in home-canned soup. If you want pantry-stable tomato soup, follow a tested pressure-canning recipe from start to finish rather than adapting this one. The National Center for Home Food Preservation is a good place to start.

Fresh Tomato Soup FAQs

Do I need to peel tomatoes for tomato soup?

No. You do not need to peel tomatoes for everyday tomato soup. Blend well, then strain the soup if you want a very smooth finish.

How many fresh tomatoes do I need?

For about 6 bowls of soup, use 3 lb / 1.35 kg fresh tomatoes. This is usually around 8 to 10 medium tomatoes, depending on their size.

Can I use cherry, garden, or mixed tomatoes?

Yes. Cherry tomatoes add sweetness, garden tomatoes add fresh flavor, and mixed tomatoes work well together. If the mix is very juicy, cook it longer before adding more broth.

Why did my soup turn watery?

Tomato soup turns watery when the tomatoes are very juicy, the soup is not simmered long enough, or too much broth is added early. Simmer uncovered, add tomato paste, or roast the tomatoes next time for a thicker bowl.

How do you make fresh tomato soup less acidic?

Use ripe tomatoes, add carrot or roasted red bell pepper, and finish with cream, butter, or a small pinch of sugar if needed. Roasting the tomatoes also helps soften sharp acidity.

What if I do not have tomato paste?

You can still make the soup, but it may taste lighter and look paler. Cook the tomatoes longer, use the roasted method if possible, and add a little extra salt or a small knob of butter at the end for depth.

Should I add cream to fresh tomato soup?

Add cream if you want the soup softer, richer, and closer to classic creamy tomato soup. Skip it if you want the fresh tomato flavor to stay brighter. For no-cream body, use carrot, potato, cashews, white beans, bread, or extra simmering.

How do I make tomato basil soup with fresh tomatoes?

Make the base recipe, then add fresh basil near the end and blend briefly. For stronger basil flavor, use extra basil and garnish each bowl with chopped basil or basil oil.

Can this be made without onion or garlic?

Yes. Use carrot, celery, roasted red bell pepper, bay leaf, basil, black pepper, and olive oil or butter for flavor. For an Indian-style no onion no garlic version, an optional tiny pinch of hing can add savory depth.

How long does homemade tomato soup last?

Homemade tomato soup lasts up to 4 days in the refrigerator when stored in an airtight container.

Can I freeze fresh tomato soup?

Yes. Fresh tomato soup freezes well for up to 3 months for best quality. For the smoothest texture, freeze it before adding cream and stir in cream after reheating.

Can I can this tomato soup?

No. This is not a tested shelf-stable canning recipe. It is written for eating fresh, refrigerating, or freezing. Use a tested pressure-canning recipe if you want pantry-stable soup.

Final Thought

The best fresh tomato soup tastes like you caught the tomatoes at the right moment — ripe, sweet, a little messy, and worth turning into something warm. Cook them down until the pot smells saucy, blend until smooth, then let the tomatoes tell you how much broth they need. The final bowl should taste bright enough for summer, soft enough for comfort, and ready for grilled cheese.
Posted on 17 Comments

Pesto Recipe: Classic Basil Pesto Sauce & 10 Variations

Hand sprinkling Parmesan over a bowl of basil pesto pasta on a wooden table with fresh basil, pine nuts and pesto sauce.

There are days when dinner looks like plain boiled pasta, some grilled chicken, maybe a tired bag of salad leaves. And then there are days when a spoonful of emerald-green pesto sauce hits the plate and suddenly everything looks intentional. Pesto is one of those sauces that seems fancy when it comes from a jar, but becomes shockingly simple once you learn how to make it yourself. A handful of basil, a little garlic, a nut or two, good olive oil, a salty cheese – that’s all it takes for a classic pesto recipe.

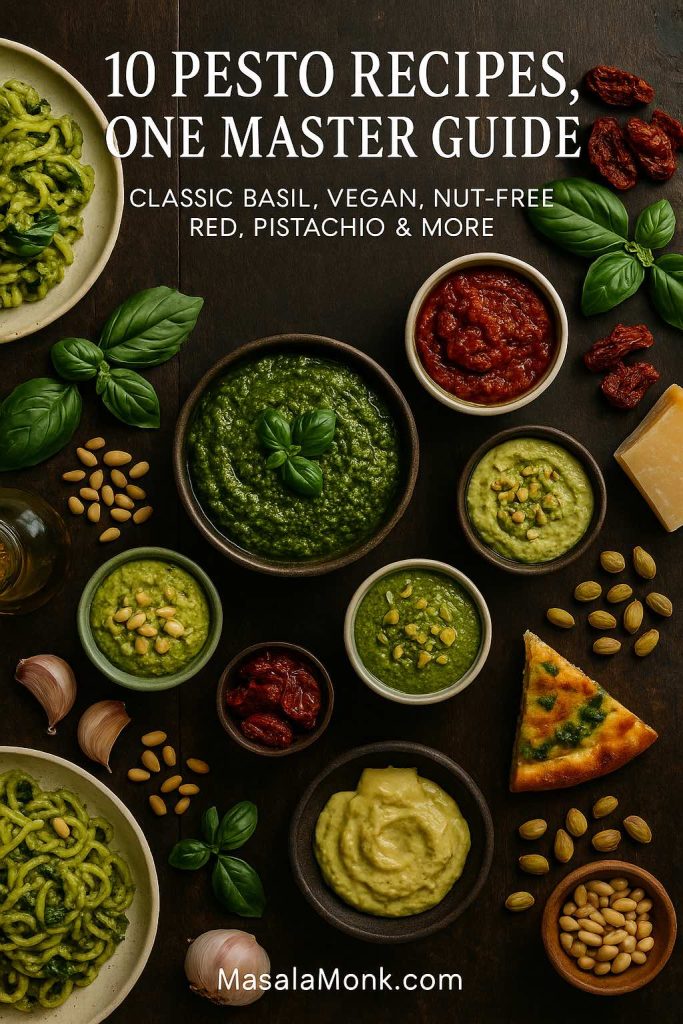
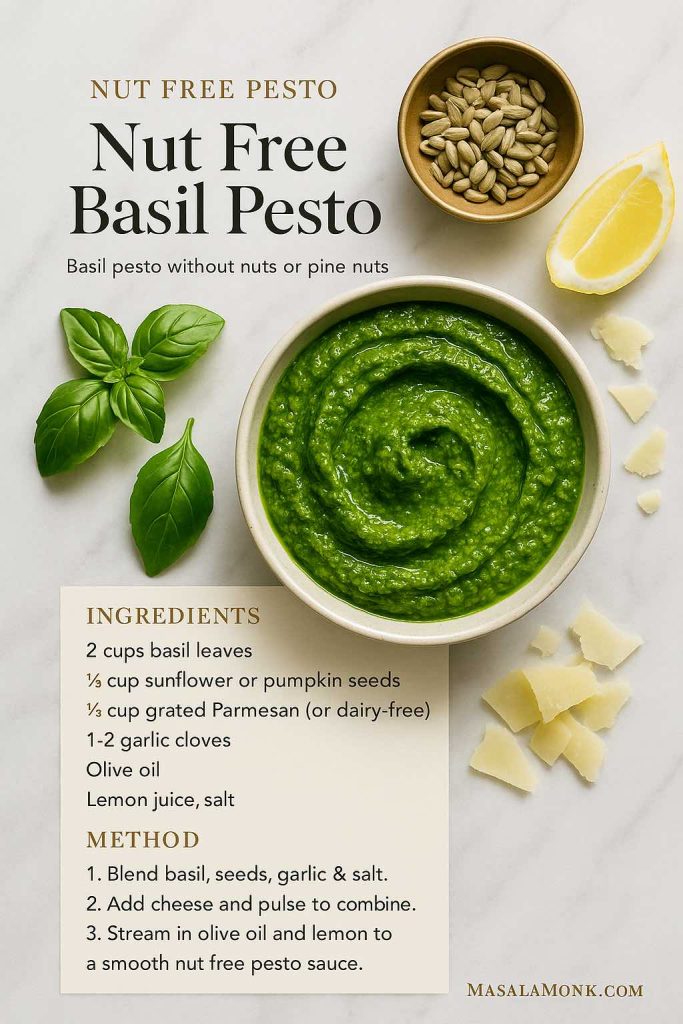
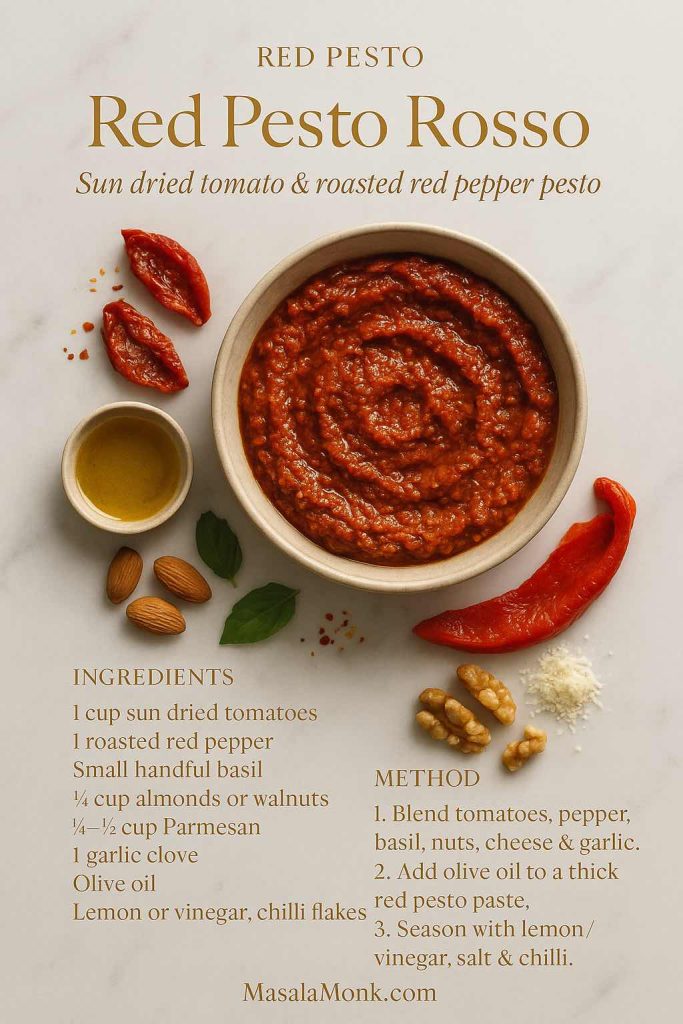
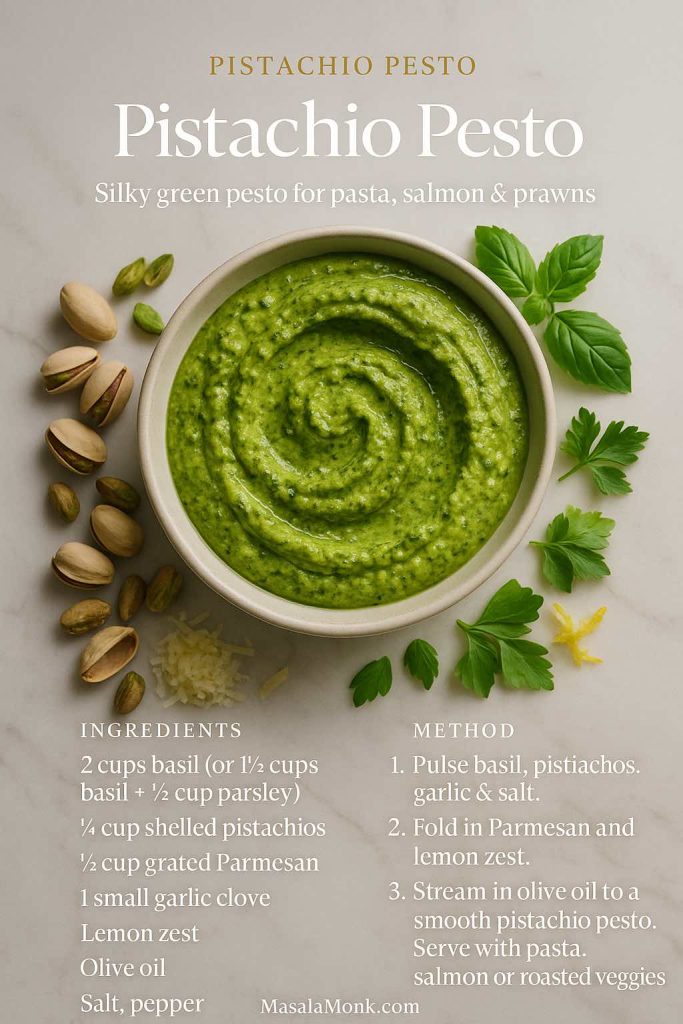
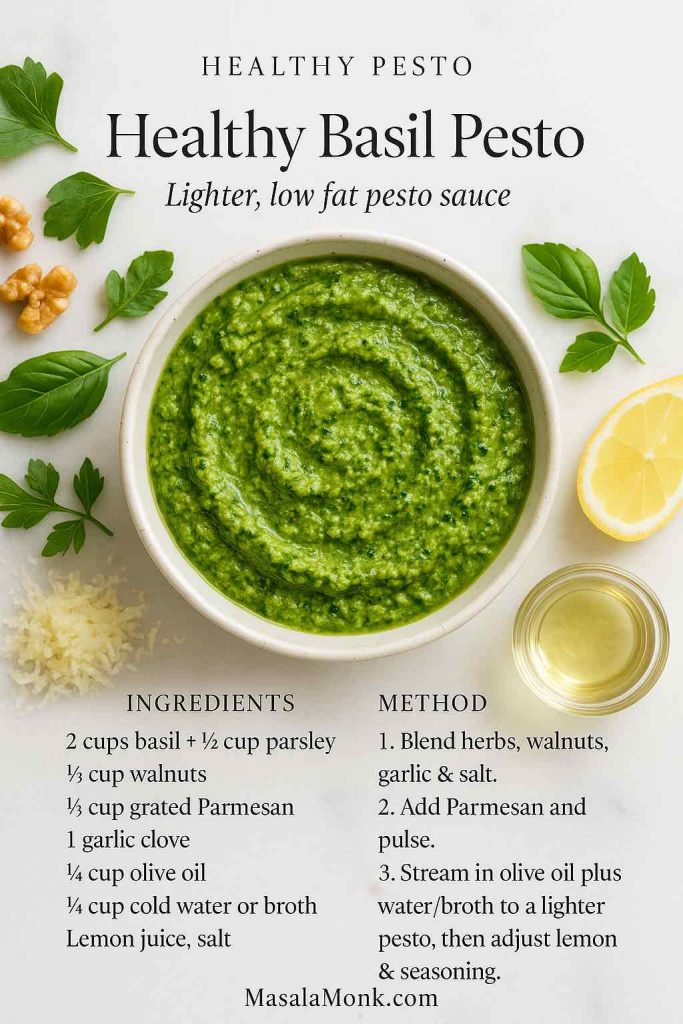
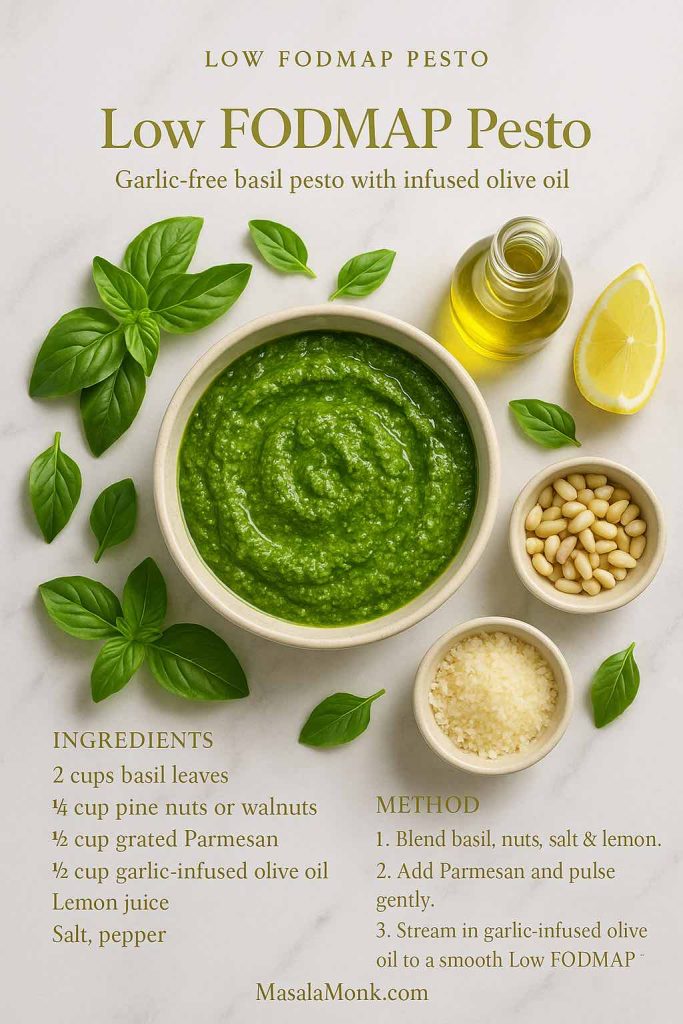
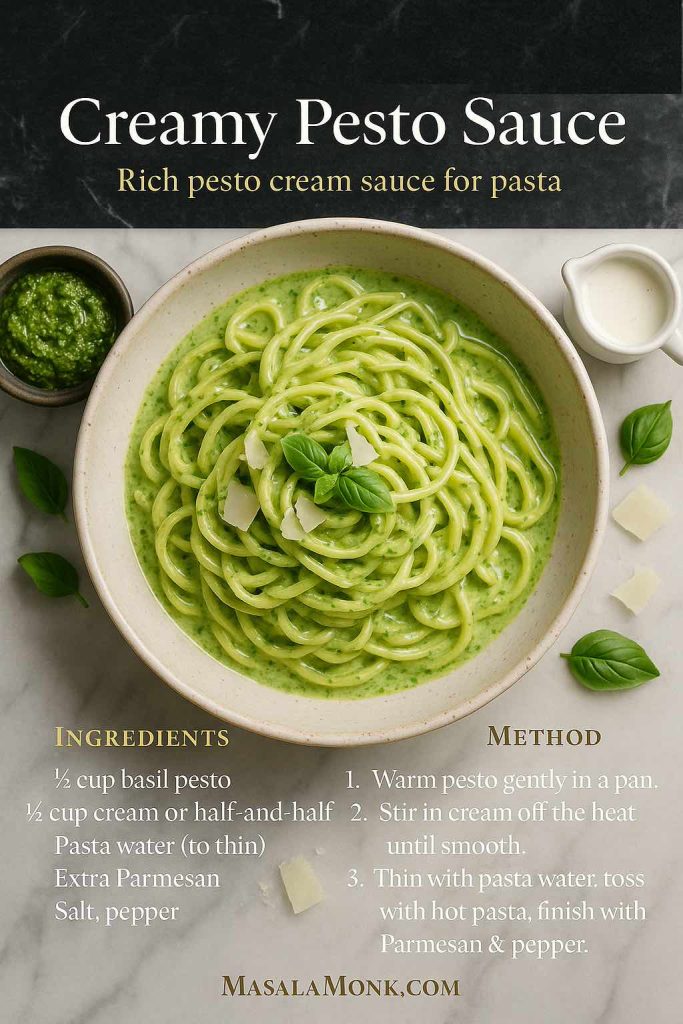
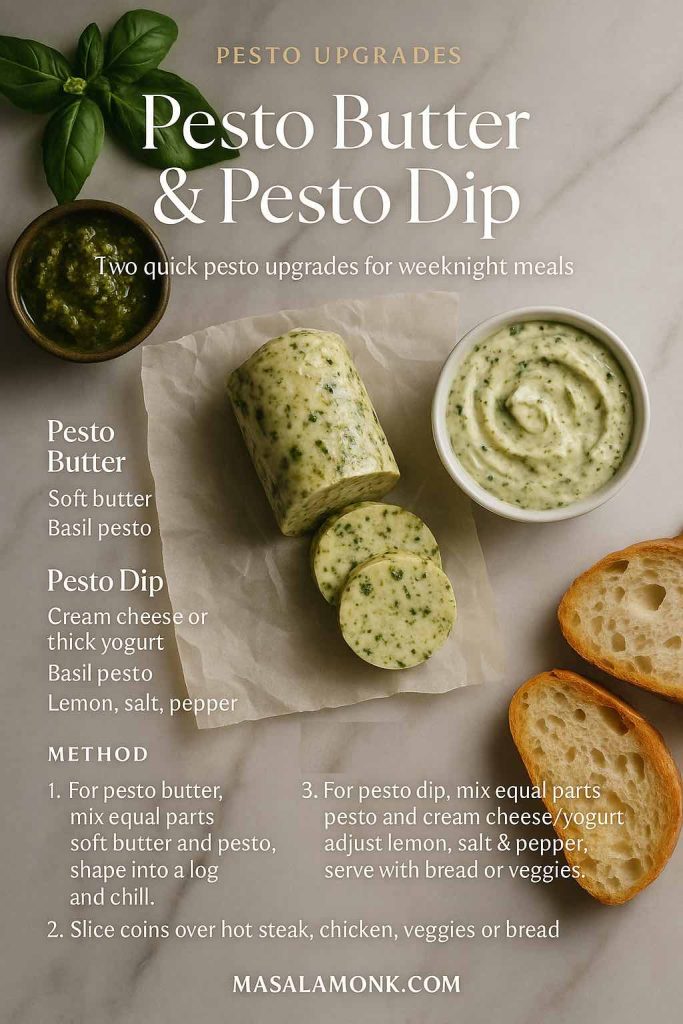
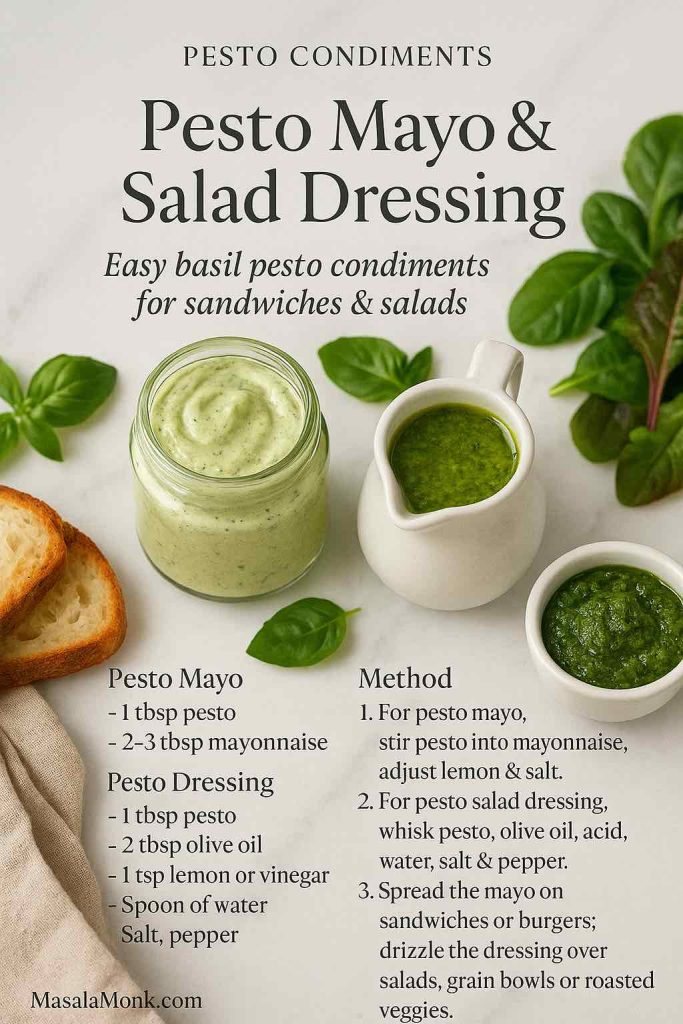
From learning basic – How to make Pesto, you can move in countless directions: vegan pesto, nut free pesto, red pesto with sun dried tomato, pistachio pesto, smooth creamy pesto sauce for pasta, pesto butter for steaks, pesto salad dressing, pesto dip for snacks and pesto mayo for sandwiches. This guide starts with a solid basil pesto sauce you can rely on every time. After that, we’ll move into ten useful variations, then finish with practical ways to use them in everyday cooking: pesto pasta, pesto pizza, pesto pasta salad, chicken pesto pasta, pesto salmon, pesto sandwich ideas and more.


What pesto actually is

At its core, pesto is a raw Italian sauce. The name comes from the Italian verb pestare, “to pound” or “to crush,” because the original method uses a mortar and pestle. A traditional pesto is made with:

  • Basil or another soft leafy herb
  • A nut, usually pine nuts
  • A hard, salty cheese
  • Garlic
  • Olive oil
  • Salt, and sometimes a touch of acidity

The most iconic version, pesto alla Genovese, comes from Liguria in northern Italy. Classic recipes from that region use only fresh basil, garlic, pine nuts, Parmigiano Reggiano, Pecorino, olive oil and salt.

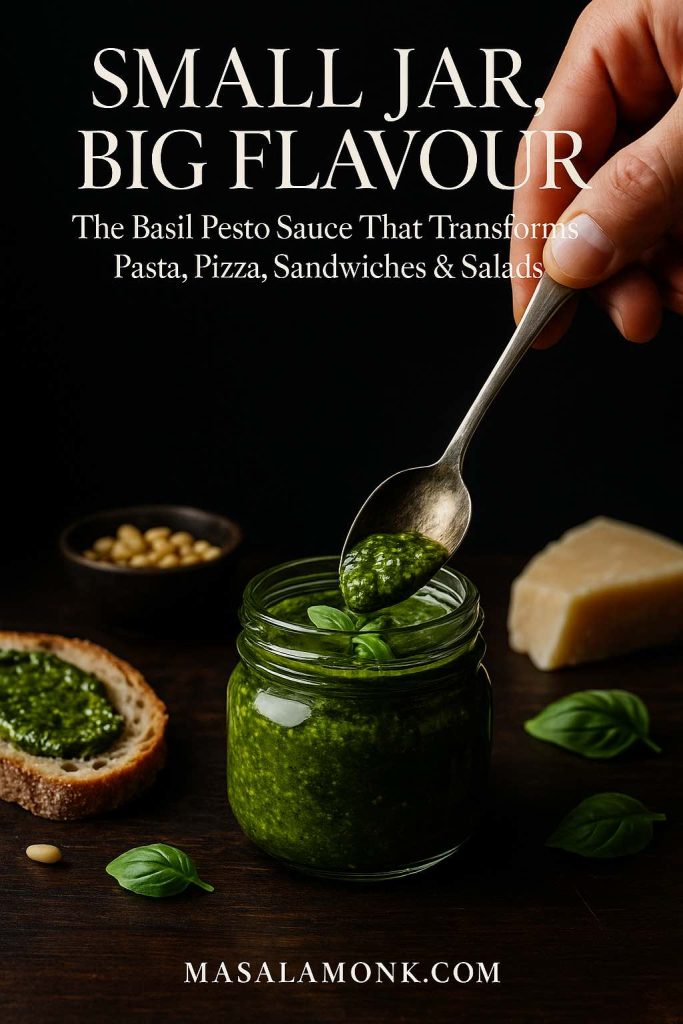
Spoon dipping into a small glass jar of basil pesto sauce with bread, cheese and basil on a dark wooden table.
A single jar of basil pesto sauce can turn simple bread, pasta or vegetables into something worth lingering over.

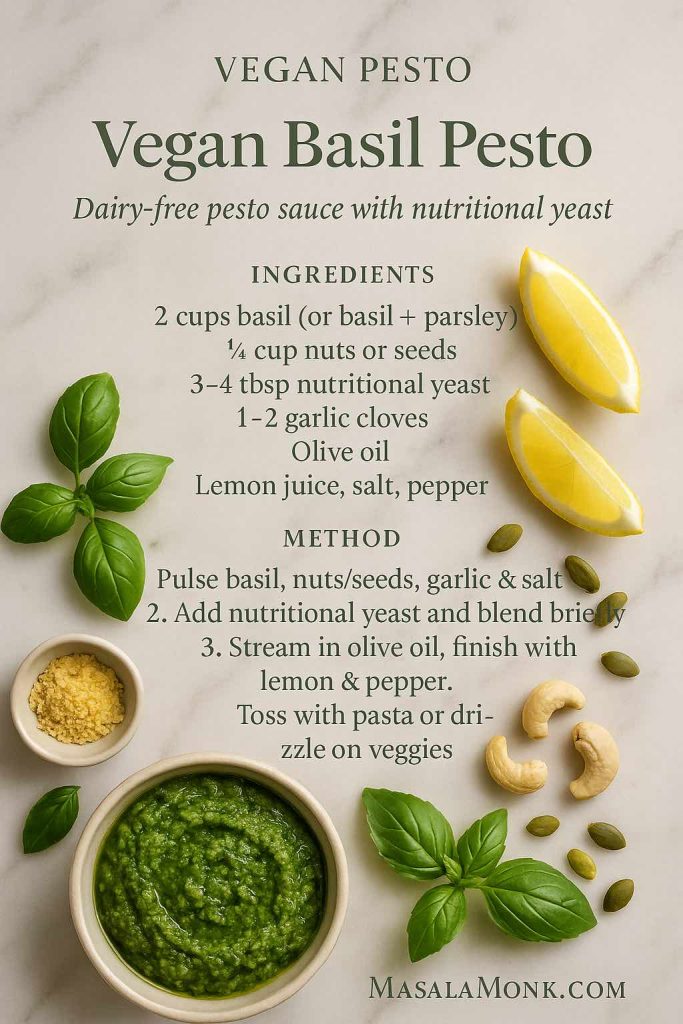
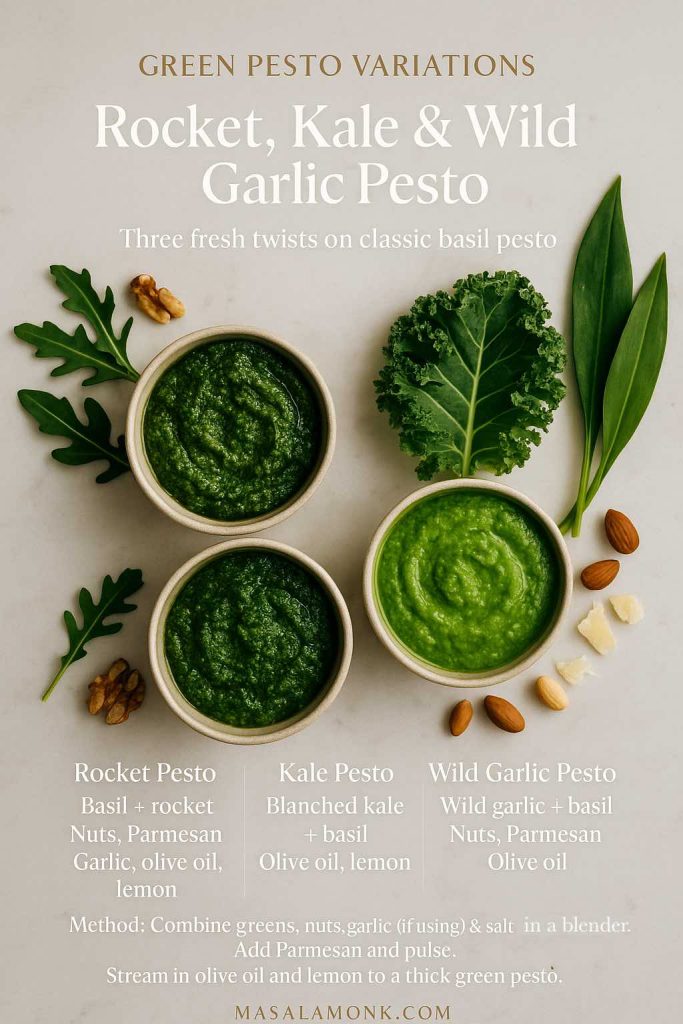
Modern cooks bend the rules a bit. Walnuts often replace pine nuts. Some recipes use almonds or pistachios. Others lean on kale or rocket instead of all basil. In some kitchens, cheese is omitted completely in favour of nutritional yeast, turning it into a vegan pesto sauce. Even so, the structure stays the same: a rich, thick, uncooked herb sauce that can be thinned to make pesto pasta sauce or used thick as a pesto spread.

Because it’s based on olive oil, nuts, basil and cheese, pesto also sits in that rare category of condiments that feel indulgent but can still support a fairly balanced way of eating. Nutrition writers often point out that it’s rich, yes, but mostly in unsaturated fats and antioxidants.

So if you’ve only met pesto in the form of a slightly dull jar that lives at the back of the fridge, it’s worth meeting it again, properly fresh.

Also Read: Healthy Tuna Salad – 10 Easy Recipes (Avocado, Mediterranean, No Mayo & More)


Classic Basil Pesto Recipe (Base Pesto Sauce)

This is your baseline pesto recipe. Every variation later either starts from here or uses the same ratio logic.

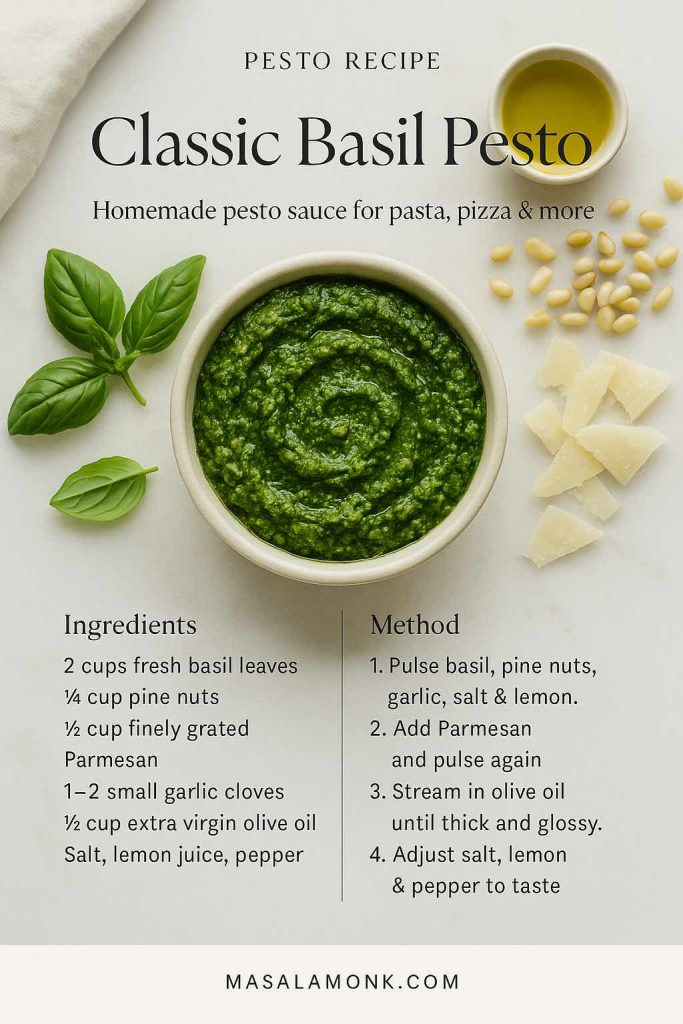
Ingredients (about 1 cup)

  • 2 packed cups fresh basil leaves
  • ¼ cup pine nuts (walnuts or almonds also work)
  • ½ cup finely grated Parmesan, or a mix of Parmesan and Pecorino
  • 1–2 small garlic cloves, smashed
  • ½ cup extra virgin olive oil, plus more to cover for storage
  • ½–1 tablespoon lemon juice (optional but brightening)
  • ½ teaspoon fine salt, or to taste
  • A pinch of black pepper

You can swap quantities slightly to taste – more cheese for a saltier pesto, more nuts for a richer pesto, more olive oil for a looser pesto sauce – but this is a reliable starting point.

Classic Basil Pesto recipe card showing ingredients and method on a luxe marble background with a bowl of green pesto – MasalaMonk.
Classic Basil Pesto – a quick reference card you can save or pin. Keep this homemade pesto sauce ratio handy for pasta, pizza, salads and more.

How to make basil pesto (processor method)

Although the traditionalists might side-eye the blender, most home cooks will use one. Used gently, it still makes excellent pesto.

  1. Build the flavour base
    Tip the basil leaves, pine nuts, garlic, salt and lemon juice into a food processor. Pulse in short bursts until everything is finely chopped. You want a moist, finely minced mixture, not a purée yet.
  2. Fold in the cheese
    Add the grated Parmesan. Pulse again a few times to mix it through.
  3. Stream in the olive oil
    With the processor on low, slowly pour in the olive oil. Watch the texture: once it turns into a thick, glossy paste that loosens slightly as the blade moves, you’re there. Scrape down the sides once or twice.
  4. Taste and balance
    Now check what you’ve got. Too heavy? Add a little more lemon. Too sharp? Round it out with a spoonful more olive oil or a sprinkle of cheese. Lacking intensity? A tiny pinch of extra salt usually wakes everything up.

That’s it: a classic homemade pesto sauce that works in basil pesto pasta, spooned onto grilled vegetables, folded into grain bowls, spread under cheese on toast, or served as a pesto dip with raw vegetables and crackers.

Mortar and pestle option for Pesto Recipe

If you ever feel like going fully traditional, making pesto in a mortar and pestle is worth experiencing at least once. Many Italian cooks swear the flavour and colour are better, because crushing releases oils without the same heat and aeration you get from fast blades. Recent tests from cooking writers also suggest the mortar method gives a silkier, more stable emulsion that clings beautifully to pasta.

The order matters:

  1. Pound garlic and salt to a smooth paste.
  2. Add basil in handfuls, crushing and twisting until it collapses into a thick green paste.
  3. Add the nuts and smash until they mostly disappear into the basil.
  4. Work in the grated cheese.
  5. Finally, drizzle in olive oil and stir until you have a cohesive sauce.

The flavour will be softer, less grassy, and the colour often stays more vivid.

How to store pesto safely

Homemade pesto is raw and includes fresh basil, garlic and oil, so storage isn’t something to wing.

Guidance from the National Center for Home Food Preservation is very clear: pesto should be made fresh, kept in the refrigerator for no more than three days, and frozen for any longer storage.

A practical approach at home:

  • Spoon pesto into a clean jar.
  • Smooth the top and pour a thin layer of olive oil over the surface.
  • Close and refrigerate for up to 2–3 days.
  • For longer, portion into ice cube trays or small containers and freeze.

Food preservation experts repeatedly stress that pesto should not be canned; there are no safe, tested canning times for an oil-rich, low-acid mixture like this, and freezing is the recommended method instead.

With the base recipe and storage sorted, the fun part begins.

Also Read: Double Chocolate Chip Cookies – Easy Recipe with 7 Variations


Ten useful pesto variations & their recipe

Instead of thinking of each variation as a completely new pesto recipe, it helps to treat the classic version as a template:

  • Greens or herbs
  • Nuts or seeds
  • Cheese or a savoury substitute
  • Garlic or a more gentle flavour base
  • Olive oil
  • Salt, with optional lemon or vinegar

Every variation below changes one or more of those slots: sometimes to accommodate dairy-free, nut-free or low FODMAP needs, and sometimes simply to chase a different flavour.

Top view of classic basil pesto surrounded by bowls of red pesto, vegan pesto, nut-free pesto and pistachio pesto with pasta and pizza.
Classic basil, red, vegan, nut-free, pistachio and more – this board of pesto variations shows how one master recipe branches into ten different sauces.

1. Vegan Pesto Recipe (Dairy Free Basil Pesto Sauce)

When you take cheese out of pesto, you have to put savouriness back somehow. Luckily, that’s exactly what nutritional yeast is good at.

A very simple vegan pesto looks like this:

  • 2 cups basil (or basil plus a little parsley)
  • ¼ cup nuts or seeds – cashews, walnuts, pine nuts or pumpkin seeds
  • 3–4 tablespoons nutritional yeast, instead of Parmesan
  • 1–2 cloves garlic
  • Olive oil, lemon juice, salt and pepper
Vegan Basil Pesto recipe card with dairy-free pesto ingredients and method on a marble background, showing basil, lemon, cashews and nutritional yeast – MasalaMonk.
Vegan Basil Pesto – a dairy-free pesto sauce made with nutritional yeast instead of cheese. Save this quick-reference card for easy vegan pesto pasta, salads and roasted veggies.

The method is identical to the classic pesto recipe. The taste is a little different – more nutty, slightly cheesy from the nutritional yeast – but it does everything you’d want a basil pesto sauce to do: coat pasta, dress salads, work as a pesto dip, even stand in as a pesto spread on toast.

If you prefer a tested version with exact measurements, you can also look at MasalaMonk’s own fresh basil vegan pesto, which uses basil, cashews, pumpkin seeds and lemon to create a rich dairy-free sauce.

This style works beautifully with vegan pesto pasta, as a base for vegan pesto pizza, or even stirred into a pot of vegetable soup just before serving.

Also Read: Vegan French Toast: 6 Easy Recipes (Pan, Air Fryer, GF & High-Protein)

2. Nut free pesto recipe (no nuts, no pine nuts)

For nut allergies, the simplest fix is to keep basil and olive oil the same and replace pine nuts with seeds. Sunflower seeds, pumpkin seeds and hemp hearts all blend well and give a creamy pesto without nuts.

Nut Free Basil Pesto recipe card on marble with a bowl of green pesto, basil leaves, sunflower seeds, lemon wedge and printed ingredients and method – MasalaMonk.
Nut Free Basil Pesto – a basil pesto recipe made with sunflower or pumpkin seeds instead of nuts or pine nuts. Pin this card for a quick, allergy-friendly pesto sauce you can use with pasta, salads and sandwiches.

A nut free pesto base might be:

  • 2 cups basil
  • ¼ cup sunflower or pumpkin seeds
  • ½ cup grated Parmesan (or a dairy-free alternative if needed)
  • 1–2 garlic cloves
  • Olive oil, lemon, salt

You can also skip seeds completely and rely on basil, cheese and olive oil for body. That gives you a smooth, slightly lighter pesto sauce that works in pesto pasta and pesto noodles while staying safe in nut-free homes and lunchboxes.

Also Read: French 75 Cocktail Recipe: 7 Easy Variations

3. Red Pesto Recipe (Sun Dried Tomato Pesto Rosso)

Red pesto – sometimes called pesto rosso – swaps out most of the basil for tomatoes and peppers. It’s richer, deeper and a little sweeter, and it loves grilled meats, toasted breads and hearty pasta shapes.

Red Pesto Rosso recipe card on marble showing a bowl of sun dried tomato and roasted red pepper pesto with almonds, walnuts, Parmesan and printed ingredients and method – MasalaMonk.
Red Pesto Rosso – a bold pesto made with sun dried tomatoes and roasted red pepper. Save this card for quick red pesto pasta, crostini, grilled chicken or roasted vegetable bowls.

A flexible red pesto pattern:

  • 1 cup drained sun dried tomato halves (oil-packed or rehydrated)
  • 1 roasted red pepper (jarred or homemade)
  • Small handful fresh basil leaves
  • ¼ cup toasted almonds or walnuts
  • ¼–⅓ cup grated Parmesan
  • 1 garlic clove
  • Olive oil as needed
  • A spoon of red wine vinegar or lemon juice
  • Optional pinch of dried chilli flakes

Blend everything except the oil first, then add oil until it turns into a thick, glossy paste. Use this red pesto with penne for a punchy red pesto pasta, toss it through warm potatoes, spread it inside a pesto grilled cheese, or spoon it over roast chicken.

To make a slightly sharper version, you can lean more on roasted red pepper, a little chilli pesto style heat, and less on tomatoes. Either way, this lives firmly in the “fast weeknight pasta” category.

Also Read: Whole Chicken in Crock Pot Recipe (Slow Cooker “Roast” Chicken with Veggies)

4. Pistachio Pesto Recipe (How to Make Pistachio Pesto)

Pistachio pesto feels fancy, but it’s just a simple swap: pistachios instead of pine nuts. However, the effect is dramatic. The sauce becomes silkier and a touch sweeter, pairing beautifully with seafood, chicken and grilled vegetables.

Pistachio Pesto recipe card on white marble with a bowl of silky green pesto, scattered pistachios, basil, parsley, lemon zest and printed ingredients and method – MasalaMonk.
Pistachio Pesto – a silky, slightly sweet pesto that’s perfect with pasta, salmon or prawns. Save this recipe card so you always have the pistachio-to-basil ratio handy for an instant gourmet pesto sauce.

A good starting ratio:

  • 2 cups basil (or 1½ cups basil + ½ cup flat-leaf parsley)
  • ¼ cup pistachios, shelled
  • ½ cup grated Parmesan
  • 1 small garlic clove
  • Finely grated lemon zest
  • Olive oil, salt and pepper

This pistachio pesto is wonderful tossed with spaghetti, folded into a pistachio pesto pasta salad, spooned over pesto salmon, or drizzled onto roasted cauliflower and carrots.

For an even greener effect, you can blend in a few spinach leaves or rocket with the basil. It’s not necessary, but it does make a bowl of pasta look restaurant-ready.

Also Read: 10 Spinach Dip Recipes: Cold, Baked, Artichoke & More

5. Healthy / Lighter Pesto Recipe (low fat, lower calorie, lower sodium)

Pesto isn’t a low-calorie sauce; most of its calories come from olive oil, nuts and cheese. That said, those calories aren’t empty. Several nutrition write-ups describe pesto as energy-dense but also rich in unsaturated fats and antioxidants from olive oil and basil, and suggest it can absolutely fit into a balanced diet in reasonable portions.

Healthy Basil Pesto recipe card on white marble with a bowl of bright green low fat pesto, basil and parsley leaves, walnuts, Parmesan, lemon wedge and printed ingredients and method – MasalaMonk.
Healthy Basil Pesto – a lighter, low fat pesto sauce made with extra herbs, walnuts and a mix of olive oil plus water or broth. Save this card for days when you want pesto flavour with a gentler calorie hit for your pasta, salads and grain bowls.

If you’d like a lighter pesto for everyday use, there are a few gentle tweaks:

  • Replace part of the olive oil with cold water or vegetable broth.
  • Use slightly less cheese and bump up the basil and parsley instead.
  • Add a spoonful of yogurt or soft ricotta to create a creamy pesto sauce that feels rich but uses less oil.
  • Season with a lighter hand if you’re watching sodium.

One simple “healthy pesto” approach is:

  • 2 cups basil + ½ cup parsley
  • ¼ cup walnuts
  • ⅓ cup grated Parmesan
  • 1 garlic clove
  • ¼ cup olive oil + ¼ cup cold water
  • Lemon juice and salt to taste

This still coats pasta nicely, yet feels less heavy. You can also thin it further into a pesto salad dressing for grain bowls built from whole wheat pasta, brown rice or quinoa. As you experiment with those bases, it’s handy to keep guides like Quinoa vs Rice: Nutrition, Glycemic Index, and When to Choose Each nearby if you like number-driven decisions.

6. How to make Pesto – Low-FODMAP and no-garlic

For anyone with a sensitive gut, raw garlic can be a problem. Yet most of the character in classic pesto comes from garlic and basil together, so the trick is to soften the impact without losing all of the aroma.

Low FODMAP Pesto recipe card on white marble with a bowl of garlic-free basil pesto, fresh basil leaves, pine nuts, garlic-infused olive oil, Parmesan, lemon wedge and printed ingredients and method – MasalaMonk.
Low FODMAP Pesto – a garlic-free basil pesto made with garlic-infused olive oil so you keep the flavour without the FODMAP load. Save this card if you need a gentler pesto option for sensitive stomachs, pasta, salads or grain bowls.

Two easy strategies:

  • Skip garlic entirely and balance the flavour with more lemon zest, basil and cheese.
  • Use garlic-infused olive oil in place of both garlic and some of the plain oil.

A low-FODMAP-friendly pesto might look like this:

  • 2 cups basil
  • ¼ cup pine nuts or walnuts
  • ½ cup Parmesan
  • ½ cup garlic-infused olive oil
  • Lemon juice, salt and pepper

You can make the same kind of adjustments to red pesto, pistachio pesto and kale pesto. The result won’t be identical to the garlicky classic, but it still gives you herby, savoury richness for pesto pasta, pesto macaroni salad, pesto and chicken, pesto and salmon or even a simple pesto dip for roasted vegetables.

Also Read: Easy Lemon Pepper Chicken Wings (Air Fryer, Oven & Fried Recipe)

7. Green pesto recipe variations: rocket, kale and wild garlic

Sometimes you simply don’t have enough basil. Other days you have a bag of kale that needs using, or a bunch of rocket that’s about to wilt. Pesto is kind to those situations.

Recipe card for Rocket, Kale and Wild Garlic pesto variations on white marble, showing three bowls of green pesto with rocket leaves, kale, wild garlic, nuts, Parmesan and simple ingredient lists and method – MasalaMonk.
Rocket, Kale & Wild Garlic Pesto – three fresh twists on classic basil pesto. Use this card as a quick guide to swap in rocket, blanched kale or wild garlic when you’re short on basil but still want a big, herby pesto flavour for pasta, pizza or veggies.

Rocket pesto (arugula pesto)

Rocket has a peppery bite that cuts nicely through pasta cream sauces and rich cheeses.

  • 1 cup basil + 1 cup rocket
  • ¼ cup walnuts or almonds
  • ½ cup Parmesan
  • Garlic, olive oil, lemon and salt

This rocket pesto works well in pasta and on pizza, and it’s especially good with grilled courgettes or roasted beetroot.

Kale pesto

As we know, Kale is sturdier than basil, so blanching it briefly helps tame bitterness and gives a smoother texture.

  • Blanch 2 cups kale leaves in boiling water for 30–40 seconds, then shock in ice water and squeeze dry.
  • Blend with 1 cup basil, ¼ cup nuts, ½ cup cheese, garlic, olive oil and lemon.

Pesto made from Kale is great in everything from warm pasta to cold pesto pasta salad and even as a pesto spread on sandwiches.

Wild garlic and garlic scape pesto

In spring, wild garlic and garlic scapes give you a short window to make some very special pesto. This is where herb-only pestos really shine: wild garlic leaves or scapes, olive oil, nuts and a little cheese turn into an intensely aromatic sauce that can make even boiled potatoes taste like something from a restaurant.

Because these greens are powerful, they often work best when combined with a little basil, spinach or parsley.

Also Read: Katsu Curry Rice (Japanese Recipe, with Chicken Cutlet)

8. Creamy pesto sauce recipe

On some evenings, what you really want is a large bowl of creamy pesto pasta. Not a thin coating, not a light drizzle – a proper comfort-bowl, almost like an Alfredo, but green.

Creamy Pesto Sauce recipe card with a bowl of pasta coated in rich green pesto cream sauce, fresh basil, Parmesan shavings, small bowls of pesto and cream, plus printed ingredients and method – MasalaMonk.
Creamy Pesto Sauce – a rich pesto cream sauce for nights when you want full comfort. Save this card to remember the simple ratio of pesto to cream, then toss it with hot pasta, add Parmesan and you’ve got an instant green Alfredo-style bowl.

There are a few different ways to get there:

  • Stir a splash of cream into warm pesto and toss quickly with hot pasta off the heat.
  • Whisk pesto with ricotta, mascarpone or Greek yogurt to make a thicker, tangier sauce.
  • Fold pesto into a simple white sauce or béchamel for baked dishes.

For an easy creamy pesto pasta sauce:

  • Warm ½ cup of basil pesto gently in a pan.
  • Add ½ cup of cream or half-and-half and whisk until smooth.
  • Thin with a little pasta water if needed.
  • Toss with cooked pasta, then finish with extra Parmesan and black pepper.

If you enjoy playing with cream-based sauces generally, it’s fun to line this up alongside guides like Classic vs. Authentic Alfredo: 5 Essential Recipes and Chicken Alfredo Pasta, 5 Ways and use similar techniques to control thickness, gloss and richness.

9. Recipe for Pesto butter and pesto dip

Pesto isn’t only a sauce. Once you realise it can behave like a compound butter or flavoured cream cheese, the number of quick upgrades you can pull off on a weeknight multiplies.

Pesto Butter and Pesto Dip recipe card on marble with a log of sliced pesto butter on parchment, a bowl of creamy pesto dip, fresh basil, crusty bread and printed ingredients and method – MasalaMonk.
Pesto Butter & Pesto Dip – two fast upgrades that turn a jar of pesto into something special. Save this card so you can slice pesto butter over hot steak, chicken or veggies, and whip up a creamy pesto dip for bread, crackers or snack boards in minutes.

Pesto butter

  • Mix equal parts soft butter and pesto.
  • Shape into a log in baking paper and chill.
  • Slice coins of pesto butter onto grilled steak, roast chicken, steamed vegetables, jacket potatoes or warm focaccia.

The heat melts the butter, spreading basil, garlic and Parmesan over everything without any extra effort.

Pesto dip

  • Mix equal parts pesto and cream cheese, labneh or thick yogurt.
  • Adjust with lemon and pepper to taste.

This pesto dip works as a snack with vegetable sticks and crackers, or as an easy spread inside chicken pesto sandwiches, pesto grilled cheese or even a simple pesto breakfast sandwich.

Also Read: Cheesy Chicken Broccoli Rice – 4 Ways Recipe (One Pot, Casserole, Crockpot & Instant Pot)

10. Pesto mayo and pesto salad dressing recipe

Finally, the condiments. A spoonful of pesto can transform plain mayonnaise into something special, and turns basic vinaigrettes into basil pesto salad dressing that feels like it came from a café.

Pesto Mayo and Salad Dressing recipe card on white marble with a jar of creamy pesto mayo, a small jug of pesto salad dressing, fresh basil, toast, salad greens and printed ingredients and method – MasalaMonk.
Pesto Mayo & Salad Dressing – easy basil pesto condiments that turn simple sandwiches and salads into café-style plates. Save this card to remember the basic pesto-to-mayo and pesto-to-oil ratios for quick spreads and dressings.

Pesto mayo and pesto aioli

  • Stir 1 tablespoon pesto into 2–3 tablespoons mayonnaise (or vegan mayo).
  • Taste and adjust salt and lemon.

That’s it. Use it as a spread on pesto sandwich combinations with mozzarella and tomato, or smear it over toasted bread before layering roasted vegetables or grilled chicken. It’s also excellent as a dip for potato wedges and crisp fries.

Pesto salad dressing

  • Whisk together:
    • 1 tablespoon pesto
    • 2 tablespoons olive oil
    • 1 teaspoon vinegar or lemon juice
    • A spoon of water, to thin
    • A pinch of salt and pepper

Shake everything in a jar until smooth. This dressing slips easily over green salads, cold pesto pasta salad, tomato and mozzarella plates, grain bowls, even leftover roasted vegetables.

In lists of “better-for-you condiments”, pesto often shows up alongside salsa and hummus, because it packs a lot of flavour into a small spoon and uses ingredients like olive oil, basil and nuts that contribute useful fats and micronutrients.

Also Read: Crispy Homemade French Fries From Fresh Potatoes (Recipe Plus Variations)


How to use pesto in everyday cooking

Once you have a jar of pesto – classic, vegan, nut-free, red, pistachio or any other – the simplest way to make it earn its keep is to use it across multiple meals. It’s not just for pesto pasta.

Everyday pesto ideas photo showing a jar of basil pesto surrounded by pesto pasta, pesto pizza slice, pesto sandwich, pesto grain bowl and salmon with pesto on a white marble surface – MasalaMonk.
Everyday Pesto Ideas – a jar of basil pesto can turn into pesto pasta, pesto pizza, sandwiches, salmon and grain bowls in minutes. Use this visual guide to spark quick weeknight pesto meals.

Pesto pasta and pesto noodles

A basic pesto pasta follows the same pattern almost every time:

  1. Cook pasta in well-salted water until al dente.
  2. Scoop out a cup of the cooking water.
  3. Drain the pasta, return it to the pot (off the heat).
  4. Add a generous spoonful of pesto and a splash of cooking water.
  5. Toss until each strand or shell is coated in a glossy pesto pasta sauce.

That works with spaghetti, fusilli, penne, shells and even zucchini noodles or chickpea pasta. For creamy pesto pasta, finish with a little cream, ricotta or cashew cream.

You can also take pesto pasta in different directions. For example, MasalaMonk’s Pesto Pasta: Adding 5 Delightful Indian Twists to the Italian Classic plays with coriander pesto pasta, mint pesto pasta, curry leaf pesto pasta, spinach pesto pasta and even tomato-sesame pesto, showing how flexible the basic idea is.

Pesto pasta salad

Cold pesto pasta salad is just as easy:

  • Cook short pasta (fusilli, farfalle, macaroni) until just tender.
  • Rinse briefly under cold water to stop cooking, then drain very well.
  • Toss with pesto, a drizzle of olive oil or yogurt, chopped vegetables and optional protein like chickpeas or cubed chicken.
  • Chill until serving.

You can lean creamy, with a little mayo or yogurt, or keep it sharp and light, close to a pesto dressing. Either way, it works alongside barbecues, picnics and big bowls of other sides like the potato salad variations MasalaMonk already explores.

Pesto pizza

Pesto pizza is the sort of idea that sounds like a restaurant trick but becomes a home staple once you try it.

  • Spread a thin layer of basil pesto over your pizza base instead of tomato sauce.
  • Scatter mozzarella, cherry tomatoes, olives, maybe some sliced red onion.
  • Add cooked chicken if you’re heading towards a chicken pesto pizza.
  • Bake until the cheese is bubbling and golden.

You can do the same on naan, pita breads, thin flatbreads or even thick toast for a fast pesto pizza toastie.

Family gathered around a wooden table sharing homemade pesto dishes including pesto pasta, pesto pizza, pesto sandwiches and a grain salad, with a jar of basil pesto in the centre – MasalaMonk.
Enjoy Homemade Pesto – from pasta and pizza to sandwiches and grain bowls, a jar of basil pesto can turn an everyday family meal into something you look forward to sharing around the table.

Pesto sandwiches, breakfast and snacks

Pesto behaves extremely well as a spread. It cuts through richness and gives instant character.

Some ideas:

  • Spread pesto or pesto mayo onto toasted sourdough, add mozzarella, tomato and a little salt for a simple mozzarella pesto sandwich.
  • Stir pesto into scrambled eggs and tuck them into a soft roll for an egg pesto sandwich or a pesto breakfast sandwich.
  • Layer leftover roast vegetables, pesto and cheese into a grilled sandwich or panini and toast until crisp.

Even a spoon of pesto on a piece of warm bread next to a bowl of soup can make a simple lunch feel finished.

Pesto and protein: chicken, salmon, tuna and shrimp

Pesto also loves protein.

  • Toss hot pasta with chicken strips and basil pesto for a quick chicken pesto pasta.
  • Spoon pistachio pesto or classic basil pesto over baked salmon fillets just after they come out of the oven.
  • Fold pesto into tuna with a little yogurt or mayo for an upgraded tuna salad to stuff into sandwiches, wraps or baked potatoes.
  • Stir pesto into hot spaghetti with garlic prawns or shrimp for a spaghetti pesto shrimp bowl.

On days when you’re already cooking something creamy like Alfredo, pesto can even step in for a swirl of colour and flavour, or sit alongside recipes like Chicken Alfredo Pasta, 5 Ways as a “green cousin” that shares similar comfort but a very different flavour profile.

Pesto with grains, beans and vegetables

Pasta doesn’t get all the fun. Pesto is just as happy with grains and beans:

  • Toss cooked quinoa, farro or brown rice with a spoonful of pesto and roasted vegetables for an easy lunch bowl.
  • Stir pesto into warm white beans and serve on toast.
  • Mix pesto with a little extra olive oil and lemon juice and drizzle over roasted potatoes, grilled courgettes or steamed green beans.

If you enjoy building high-fibre, gut-friendly plates, those kinds of bowls also sit nicely next to pieces like Top 10 Foods for Gut Health or your quinoa comparison posts – pesto adds flavour while the base and vegetables carry most of the nutrition work.


Bringing it all together

At this point, “pesto” should feel less like a single sauce and more like a family:

  • A classic basil pesto recipe made from basil, pine nuts, garlic, cheese and olive oil.
  • A set of practical variations: vegan and dairy-free pesto, nut free pesto, red pesto, pistachio pesto, lighter healthier pesto, low-FODMAP pesto without garlic, kale and rocket pesto, creamy pesto sauce, pesto butter, pesto dip, pesto mayo and basil pesto salad dressing.
  • A long list of easy uses: pesto pasta and pesto noodles, pesto pasta salad, pesto pizza, pesto sandwiches, pesto chicken and pesto salmon, pesto potato salad and pesto grain bowls.
Vertical collage showing basil, pine nuts and Parmesan, then pesto being ground in a mortar, and finally a plate of pesto pasta with the words Gather, Grind and Enjoy.
From basil and pine nuts to a finished bowl of pesto pasta, this three-step collage shows how quickly a classic pesto recipe comes together: gather, grind and enjoy.

Once you treat the base pesto recipe as a template rather than a fixed law, it becomes much easier to work with what you have. Basil low today? Stretch it with spinach. Out of pine nuts? Use walnuts. Cooking for vegans? Swap cheese for nutritional yeast and use a recipe like the vegan basil pesto on MasalaMonk. Keeping an eye on calories? Thin the olive oil with water or broth and lean harder on herbs.

In the end, a jar of pesto – whether classic green, sun dried tomato red pesto, pistachio pesto or a dairy-free basil pesto – is simply a way to put a lot of flavour into a small spoon. Once you know how to make pesto sauce yourself, you can keep that spoon working, from pesto pizza on Friday nights to chicken pesto pasta on Mondays, and everything in between.

FAQs

1. What is pesto made of?

Most classic pesto recipes use fresh basil, pine nuts, Parmesan or Pecorino, garlic, extra virgin olive oil, salt and sometimes a little lemon juice. Together they create a thick, uncooked green sauce with a strong basil flavour.


2. What is the basic pesto recipe ratio?

A simple starting point is 2 cups basil, ¼ cup nuts, ½ cup cheese, 1–2 cloves garlic and about ½ cup olive oil. Then you can adjust salt, lemon and pepper to taste.


3. How do I make pesto sauce for pasta?

Blend your basil pesto fairly thick, then cook pasta and save some cooking water. Toss the hot pasta with pesto off the heat, adding splashes of the starchy water until it becomes a smooth pesto pasta sauce that coats every piece.


4. Can I make pesto without pine nuts?

Yes, you can swap pine nuts for walnuts, almonds, cashews or pistachios. Each nut changes the flavour slightly, but the pesto sauce still works exactly the same.


5. How do I make nut free pesto?

For nut free pesto, use sunflower seeds, pumpkin seeds or hemp hearts instead of nuts, or skip them entirely. Just rely more on basil, cheese and olive oil to give body to the pesto recipe.


6. How can I make dairy free or vegan pesto?

To make vegan pesto, remove the cheese and stir in nutritional yeast for a savoury kick. You keep basil, nuts, garlic and olive oil, so the sauce still feels like classic basil pesto.


7. What is red pesto?

Red pesto, or pesto rosso, usually combines sun dried tomatoes, roasted red pepper, a little basil, nuts, cheese, garlic and olive oil. It tastes richer and sweeter than green pesto and is great with red pesto pasta, toast and grilled meats.


8. What is pistachio pesto best for?

Pistachio pesto is creamier and slightly sweeter than regular pesto, so it pairs beautifully with pasta, prawns, salmon and roasted vegetables. It also makes a lovely spread for crostini.


9. Is pesto healthy?

Pesto is high in calories but mainly from olive oil and nuts, which contain mostly unsaturated fats. When you use modest amounts over vegetables, whole grains and lean proteins, it can fit into a healthy eating pattern.


10. How do I make light or low fat pesto?

You can make a lighter pesto by reducing the oil, using a bit more basil and parsley, and slightly cutting down the cheese and nuts. Adding a spoon of water, broth or yogurt thins the sauce without adding too much extra fat.


11. How long does homemade pesto last in the fridge?

Homemade pesto is best used within 3 days in the refrigerator. Cover the surface with a thin layer of olive oil to slow browning and always keep it chilled.


12. Can I freeze pesto?

Yes, pesto freezes very well. Spoon it into ice cube trays or small containers, freeze solid, then store the cubes in a bag and drop them straight into hot pasta or soup later.


13. Why did my pesto turn dark or brown?

Pesto darkens when basil oxidises after contact with air or heat. To limit this, blend briefly, avoid very hot blades and cover the finished pesto with olive oil before storing.


14. Why does my pesto taste bitter?

Bitterness usually comes from overworked basil, too much raw garlic or a very sharp olive oil. Next time, pulse gently, use smaller cloves and taste the oil before adding; a squeeze of lemon and a bit more cheese can also soften bitterness.


15. Can I make pesto without garlic?

Yes, you can skip garlic completely or use garlic-infused olive oil. In that case, add a bit more basil, lemon zest and cheese so the pesto sauce still tastes full and balanced.


16. What greens can I use instead of basil?

Rocket (arugula), kale, spinach, coriander, parsley and wild garlic all work well in pesto recipes. Often a mix of basil plus one of these greens gives the best flavour and colour.


17. What pasta shapes work best with pesto?

Short shapes with ridges or curves, like fusilli, rotini, farfalle and shells, grab pesto pasta sauce very nicely. Long strands such as spaghetti and linguine also work well if you loosen the pesto a bit more.


18. How do I use pesto beyond pasta?

Pesto is great on pizza instead of tomato sauce, in pesto sandwiches, stirred into soups, spread under cheese on toast, mixed into potato salad, brushed onto roasted vegetables and spooned over chicken, tuna or salmon.


19. How do I make creamy pesto sauce?

To make creamy pesto sauce, warm a few spoonfuls of pesto and gently stir in cream, ricotta or Greek yogurt off the heat. Then thin with a little pasta water until it coats the back of a spoon.


20. Can I use jarred pesto in these recipes?

You can use jarred pesto anywhere you would use homemade pesto, although the flavour is usually milder. Often it helps to add a little extra fresh basil, lemon juice or grated cheese to brighten a store-bought pesto sauce.