Posted on Leave a comment

Fresh Tomato Soup Recipe With Fresh Tomatoes: Easy Homemade Tomato Basil Soup

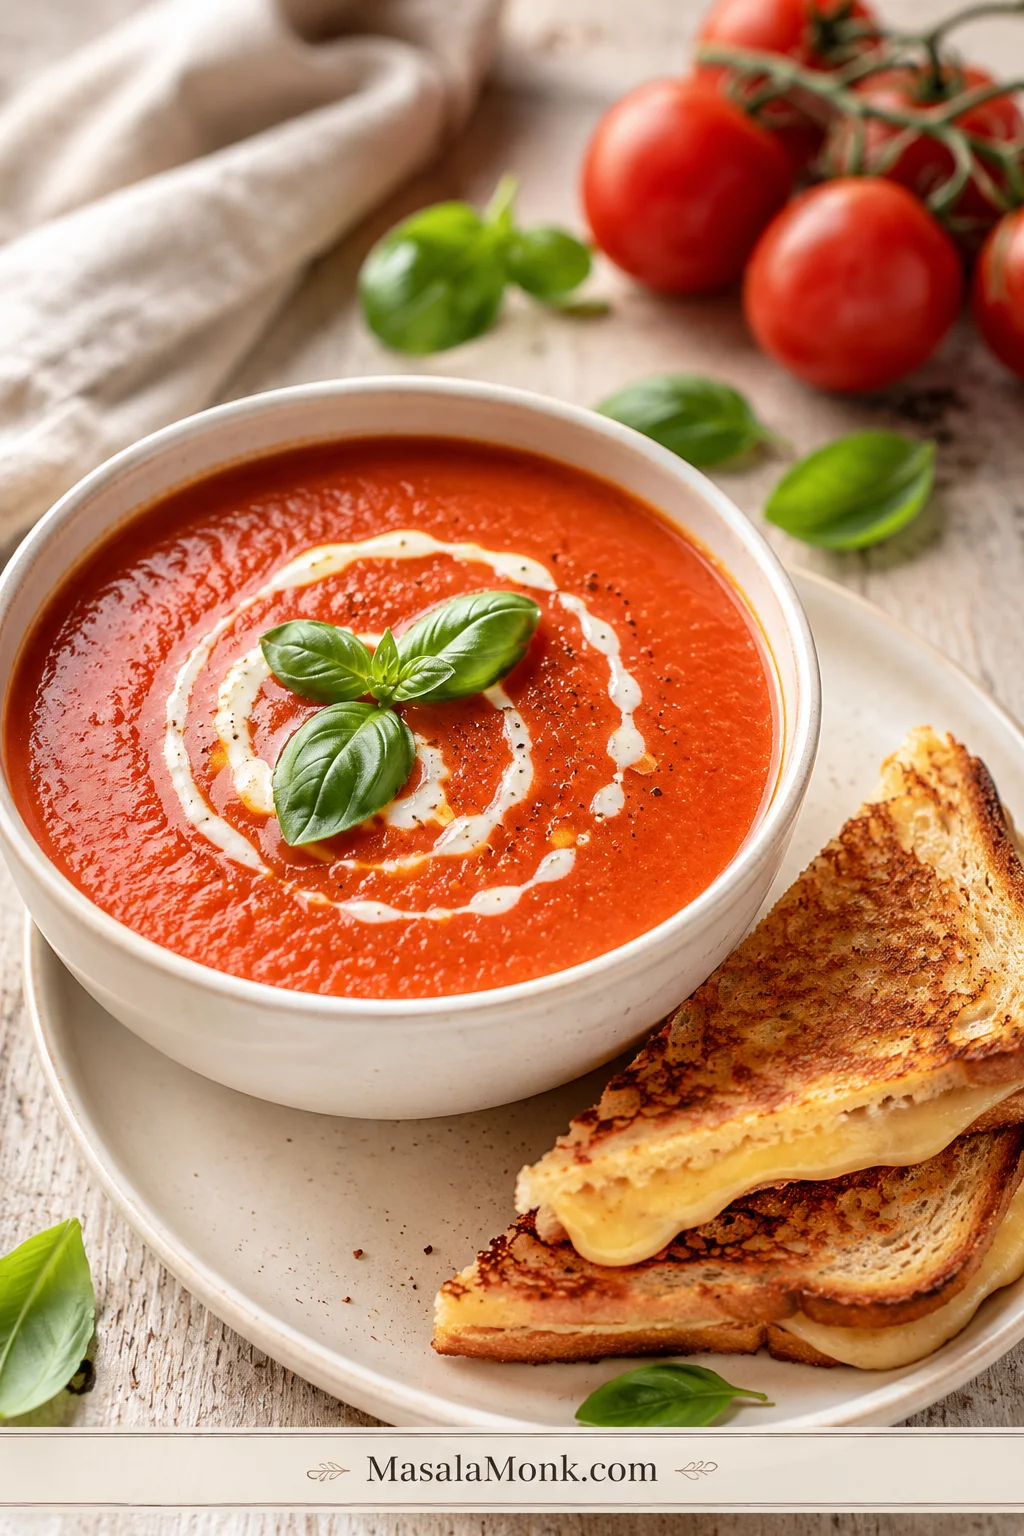
A bowl of smooth fresh tomato soup topped with basil and a cream swirl, with grilled cheese on the side.

Fresh tomato soup should taste bright, smooth, rich, and comforting — not watery, sour, thin, or like hot tomato juice. The goal is simple: take ripe fresh tomatoes, cook them down until they smell sweet and saucy, then blend them into the kind of cozy bowl you actually want to dip grilled cheese into.

This is the soup for the awkward tomato bowl: a few Roma tomatoes, a few garden tomatoes, one soft vine tomato, and cherry tomatoes that need to be used today. It works because you do not force those tomatoes into a fixed amount of liquid. You cook them down first, then loosen the soup after blending.

That makes this recipe useful even when your tomatoes are not identical — Roma, cherry, vine, garden, watery, soft, or mixed. The method keeps the soup from turning thin because the tomatoes get a chance to concentrate before the final broth goes in.

From there, the base recipe is simple; the extra sections are only there to help you adjust the tomatoes you have. Start with the stovetop method for speed, roast the tomatoes for deeper flavor, keep the bowl light, make it creamy, or turn it into tomato basil soup with fresh basil at the end.

Mixed Roma, vine, cherry, or garden tomatoes can still make smooth homemade tomato soup when the pot is reduced first and loosened later.
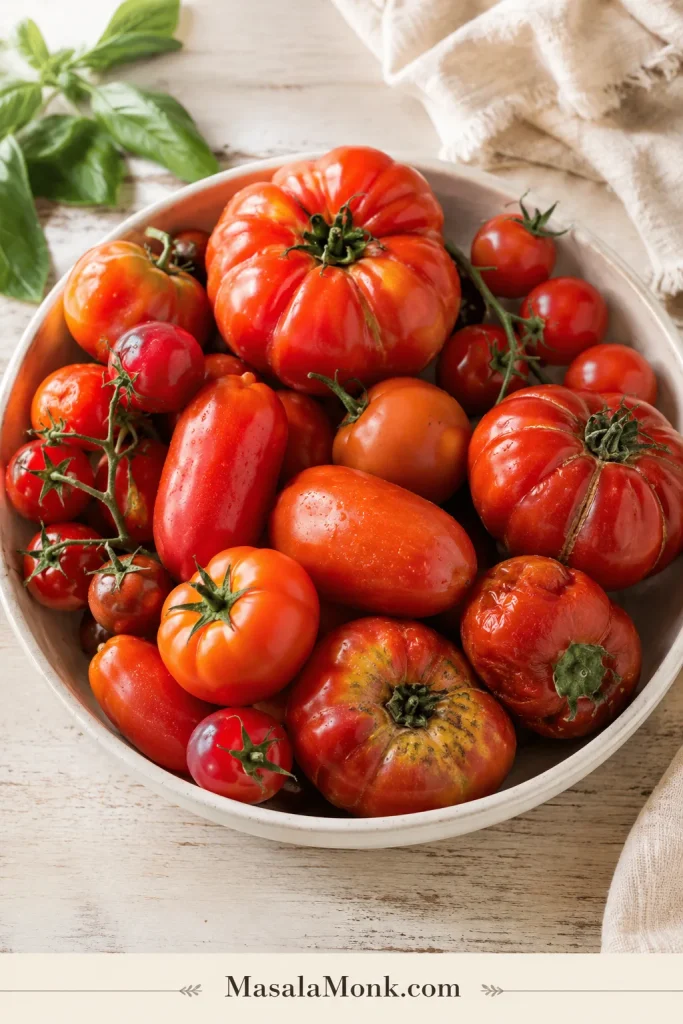
A bowl filled with mixed fresh tomatoes, including Roma, cherry, vine, and garden tomatoes.
Even mixed, soft, or uneven tomatoes can make excellent homemade tomato soup when they are cooked down first and loosened only after blending.

Cooking now? Start with the recipe card. Still deciding how to handle your tomatoes? Use the soup ratio, success cues, tomato guide, roasted method, or troubleshooting section before you begin.

Quick Answer: How to Make Tomato Soup With Fresh Tomatoes

To make tomato soup with fresh tomatoes, soften onion in olive oil or butter, add garlic and tomato paste, then add chopped ripe tomatoes, salt, pepper, and herbs. Simmer uncovered until the tomatoes collapse into their own juices and the flavor concentrates. Add broth gradually, blend until smooth, stir in fresh basil near the end, and finish with cream only if you want a richer bowl.

You are not rushing fresh tomatoes into soup; you are letting them collapse, sweeten, and turn saucy before you decide how much broth they need.

The most important rule is this: do not add all the broth too early. Your tomatoes may release more juice than mine, so hold some liquid back until after blending. That one habit keeps the soup full and spoonable instead of thin.

Next step: Need exact amounts? Jump to the recipe card. Still adjusting your tomatoes? Use the soup ratio first.

The Fresh Tomato Soup Ratio

For a balanced fresh tomato soup, use about 3 lb / 1.35 kg fresh tomatoes to 1 1/2 to 2 cups / 360 to 480 ml broth. Start with the lower amount, blend, then add more only if the soup needs loosening.

Before adding extra broth, use the ratio below as a starting point, especially when your fresh tomatoes are very juicy or unusually meaty.
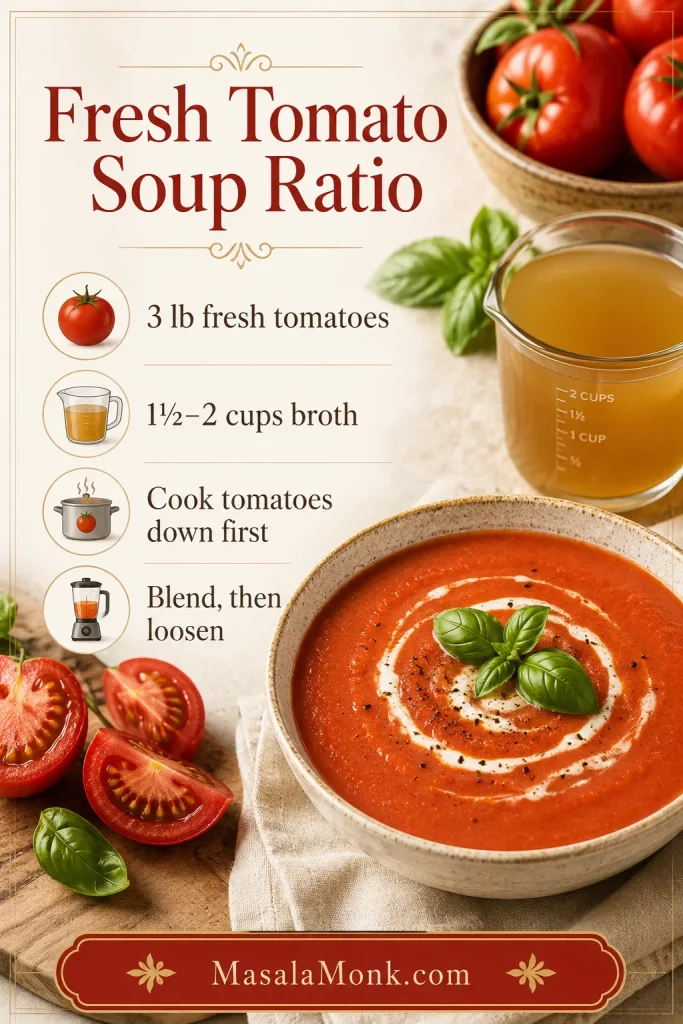
A guide card showing the ratio for fresh tomato soup with 3 pounds of tomatoes and 1 1/2 to 2 cups of broth.
Start with this fresh tomato soup ratio, then adjust after blending because different tomatoes release very different amounts of juice.

Thicker soup

Use Roma or plum tomatoes, begin with 1 1/2 cups broth, and simmer uncovered before blending.

Lighter soup

Add the full 2 cups broth after blending, especially if the tomatoes are meaty and the soup feels too thick.

Watery tomatoes

Roast first or simmer longer. Let the tomato juices reduce before you loosen the soup.

Creamy soup

Keep the base slightly thick, then finish with cream or a no-cream thickener after blending.

If you remember only one thing: fresh tomatoes decide the broth, not the other way around.

The main method rule is simple: reduce the tomatoes first, then loosen the soup only after blending.
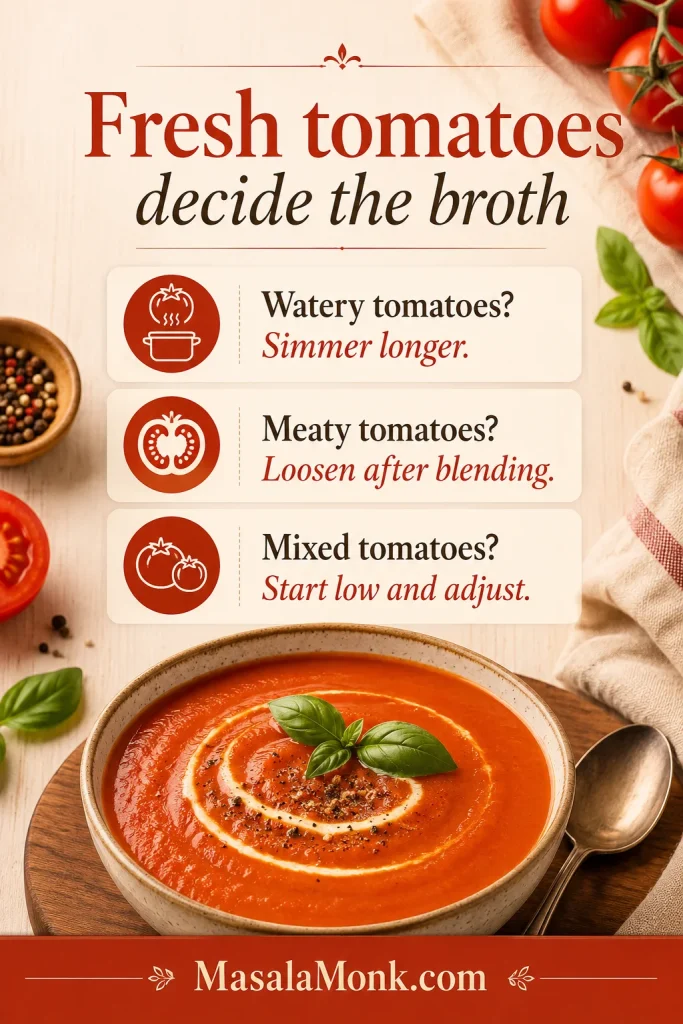
A guide card explaining that fresh tomatoes decide how much broth tomato soup needs.
Instead of forcing a fixed broth amount, let the tomatoes lead; juicy tomatoes need more reduction, while meatier tomatoes may need loosening later.

Still deciding? Compare the best tomatoes for soup, use the roasted method for watery tomatoes, or go straight to troubleshooting.

Recipe Card

Easy Homemade Tomato Soup With Fresh Tomatoes

A smooth, easy homemade tomato soup made with ripe fresh tomatoes, onion, garlic, tomato paste, basil, and optional cream. Use the stovetop method for speed or the roasted method for deeper flavor.

Prep Time
10 minutes
Cook Time
30 to 35 minutes
Total Time
40 to 45 minutes
Servings
6 bowls
Yield
About 7 cups
Tomatoes
About 8 to 10 medium tomatoes
Texture
Smooth, strain optional
Diet
Vegetarian if using vegetable broth; vegan option

Ingredients

  • 3 lb / 1.35 kg ripe fresh tomatoes, roughly chopped
  • 2 tablespoons olive oil, or 2 tablespoons / 28g butter
  • 1 medium onion, chopped, about 150g
  • 4 to 6 garlic cloves, minced
  • 2 tablespoons / about 30g tomato paste
  • 1 small carrot, chopped, or 1/2 red bell pepper, chopped, optional
  • 1 teaspoon fine salt, plus more to taste
  • 1/2 teaspoon black pepper
  • 1/2 teaspoon dried oregano or dried thyme
  • 1 1/2 to 2 cups / 360 to 480 ml vegetable broth or chicken broth
  • 1/2 cup loosely packed fresh basil leaves
  • 1/4 cup / 60 ml heavy cream, optional
  • 1 to 2 teaspoons sugar, honey, or maple syrup, only if the tomatoes taste too sharp; use sugar or maple syrup for vegan soup
  • Extra basil, cream, parmesan, croutons, olive oil, or black pepper, for serving

Equipment

  • Large pot or Dutch oven
  • Sharp knife and cutting board
  • Immersion blender, regular blender, or high-speed blender
  • Fine-mesh strainer, optional, for extra-smooth soup
  • Rimmed baking sheet, only if using the roasted method

Instructions

Cook Down the Tomatoes

  1. Soften the onion. Warm the olive oil or butter in a large pot or Dutch oven over medium heat. Cook the onion for 5 to 6 minutes, until soft, translucent, and lightly golden.
  2. Build the tomato base. Stir in the garlic for about 30 seconds. Spoon in the tomato paste and cook for 1 minute, stirring often, until it darkens slightly and smells rich.
  3. Tip in the tomatoes. Add the chopped tomatoes, carrot or red bell pepper if using, salt, pepper, and oregano or thyme. Stir well.
  4. Cook them down. Simmer uncovered for 20 to 25 minutes, stirring occasionally, until the tomatoes collapse and the mixture looks saucy. Splash in a little broth only if the pot starts to dry out.
  5. Pour in the first broth. Stir in 1 1/2 cups / 360 ml broth and simmer for about 5 minutes. Hold back the remaining broth until after blending.

Blend, Finish, and Serve

  1. Puree until smooth. Turn off the heat. Blend with an immersion blender until smooth, or blend carefully in batches in a regular blender. Vent the blender lid so steam can escape.
  2. Drop in the basil. Add the fresh basil and blend briefly again. For a fresher speckled finish, chop the basil and stir it in after blending instead.
  3. Finish the texture. Loosen with more broth if the soup is too thick. Simmer uncovered for a few minutes if it is too thin.
  4. Make it creamy, if desired. Stir in the cream over low heat. If the soup is very hot, mix a spoonful of soup into the cream first, then add it back to the pot. Do not boil hard after adding cream. Taste and adjust salt, pepper, and acidity.
  5. Serve. Ladle into bowls and finish with basil, black pepper, cream, parmesan, croutons, or olive oil.

Recipe Notes

  • Roma and plum tomatoes make the thickest soup. Garden tomatoes give great flavor but may need more simmering.
  • The broth range is flexible on purpose because Roma tomatoes, vine tomatoes, cherry tomatoes, and mixed garden-style tomatoes release different amounts of juice.
  • Before blending, the tomatoes should look collapsed and saucy, not like chopped tomatoes floating in liquid.
  • No peeling is required for everyday soup. Blend well, then strain only if you want an ultra-smooth finish.
  • If your broth is salty, start with 3/4 teaspoon salt and adjust after blending.
  • The listed cook time is for the stovetop method. Roasted method timing is about 55 to 65 minutes total.
  • For a vegan version, use olive oil, vegetable broth, and skip the cream or replace it with cashew cream, coconut milk, white beans, potato, or carrot.

This ingredient view shows why the short list still works: each item builds sweetness, depth, brightness, or body.
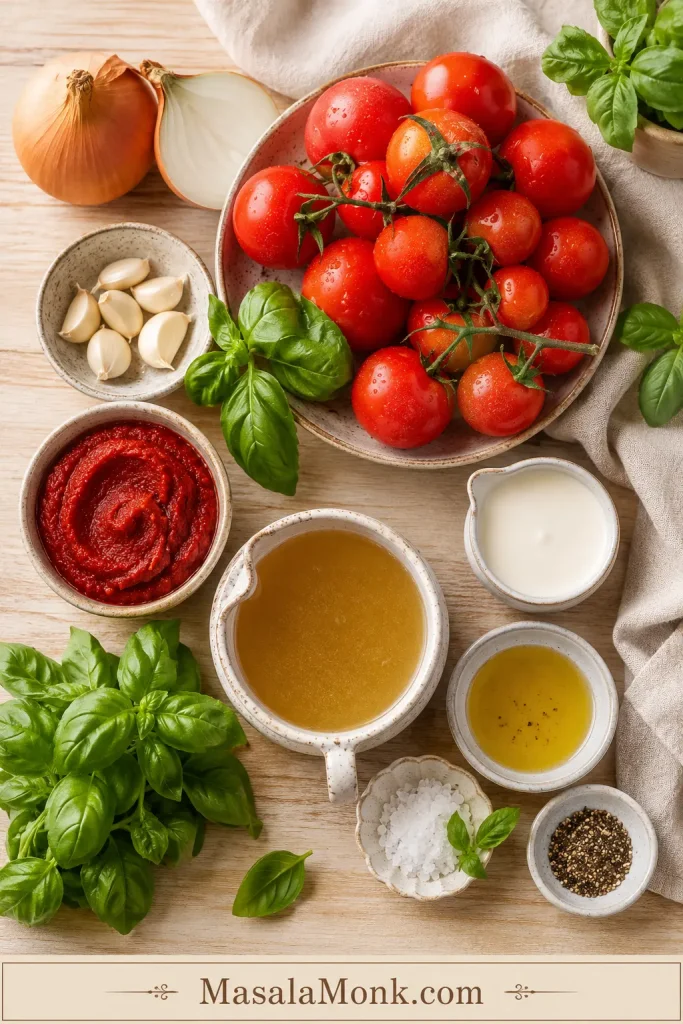
Fresh tomato soup ingredients arranged overhead, including tomatoes, onion, garlic, basil, tomato paste, broth, cream, oil, salt, and pepper.
Each ingredient has a clear job: onion builds sweetness, tomato paste adds depth, basil brightens the finish, and broth controls the final texture.

Success Cues

Use these cues more than the clock. Fresh tomatoes vary, but the signs of a good pot stay the same.

Tomatoes before blending

The tomatoes should look collapsed and saucy, not like chopped tomatoes floating in broth.

Puree before more broth

The puree should be smooth first. Loosen the soup only after you know how thick the blended base is.

Before serving

The soup should coat a spoon lightly, pour easily, and taste bright first, then soft and savory.

At the finish

Add basil late, keep cream gentle, and adjust salt after the soup is fully blended.

Look for this cue before blending: the tomatoes should be collapsed and saucy, not floating in loose liquid.
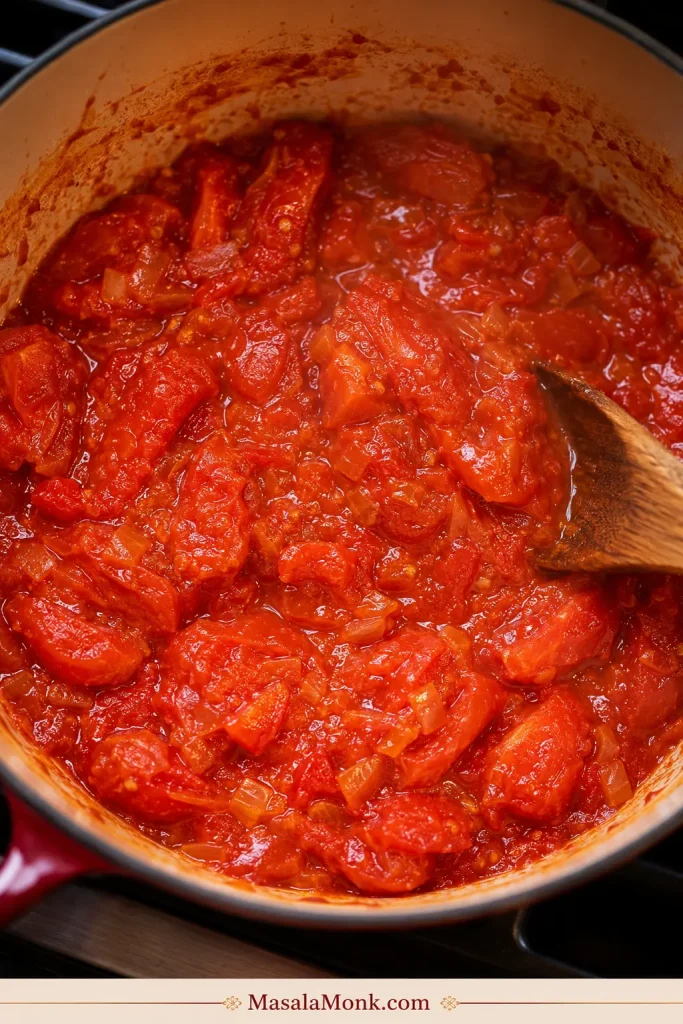
Fresh tomatoes cooked down in a pot until soft, thick, and saucy before blending.
Before blending, the tomatoes should look collapsed and saucy rather than loose and chunky; this cue is one of the best ways to avoid watery tomato soup.

Table of Contents

Need a tomato, texture, roasting, storage, or rescue answer? Jump to the section you need.

Fresh Tomato Soup vs Canned Tomato Soup

Fresh tomatoes do not behave like canned tomatoes, and that is exactly why this soup needs a gentler, more flexible method. Canned tomatoes are already cooked, concentrated, and fairly consistent. Fresh tomatoes are brighter and more seasonal, but they also bring their own water, sweetness, acidity, skin, and seeds.

That is why this recipe builds flavor before the pot gets too loose. The same reduction logic matters in this tomato sauce from fresh tomatoes, where the final texture depends on cooking off extra water before adjusting the finished dish.

For a thicker, pasta-ready version of tomato depth, this classic marinara sauce recipe stays in the sauce lane. This soup stays softer, smoother, and more spoonable.

Why This Fresh Tomato Soup Works

Fresh tomatoes give you that bright, just-cut flavor, but they also bring a lot of water with them. The soup gets its body before the blender comes out, while the tomatoes are still bubbling down into something sweeter and fuller.

By the time the blender comes out, the pot should already smell like tomato sauce becoming soup.

  • Onion softens the sharp edge of the tomatoes and adds natural sweetness.
  • Garlic gives the pot savory warmth without overpowering the fresh tomato flavor.
  • Tomato paste boosts color and depth, especially when the tomatoes are juicy or mild.
  • Uncovered simmering concentrates the base before the final texture is adjusted.
  • Fresh basil goes in late so the soup tastes fragrant, not dull.
  • Cream is optional, so the final bowl can be light, creamy, vegan, or dairy-free.

The Best Tomatoes for a Smooth, Flavorful Soup

Start with the tomatoes you have, then decide how much help they need. A soft tomato that smells sweet can still make a beautiful soup, even if it is past its salad-perfect moment.

Use the tomato guide below to decide whether your batch needs more simmering, more sweetness, or a roasted start.
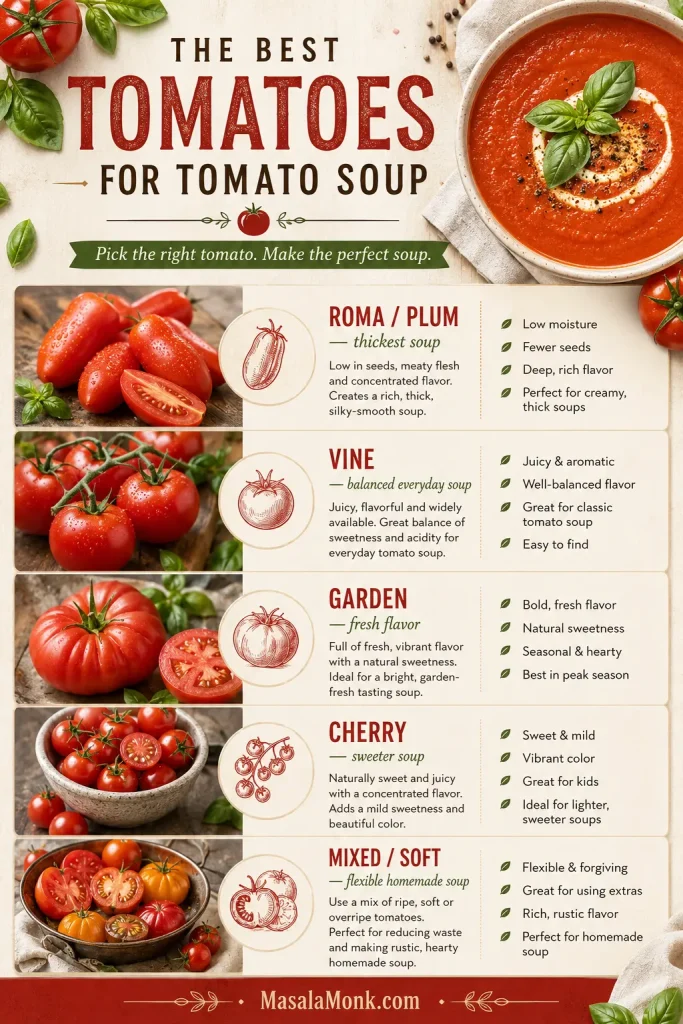
A visual guide showing Roma, vine, garden, cherry, and mixed tomatoes for tomato soup.
Roma tomatoes give body, cherry tomatoes add sweetness, and mixed garden tomatoes bring complexity, so the best tomato choice depends on the flavor and texture you want.
Tomato Type Best Use What to Know
Roma or plum tomatoes Thicker fresh tomato soup Meaty, less watery, and excellent for a smooth soup base.
Vine tomatoes Everyday tomato soup Good balance of sweetness, juice, and acidity.
Garden tomatoes Fresh summer flavor Great when ripe, but may need longer cooking if very juicy.
Cherry tomatoes Sweet roasted tomato soup Sweet and juicy. Roast them or hold back more broth at first.
Overripe tomatoes Rich homemade soup Excellent if soft and fragrant, but avoid spoiled tomatoes.
Watery tomatoes Roasted or reduced soup Roast first or simmer uncovered to concentrate them.
Underripe tomatoes Not ideal They can make the soup sharp, pale, and bland.

The tomato does not have to be perfect. It just needs to taste ripe enough that you would still want another bite — sweet, juicy, and a little fragrant when you cut into it. If you are mixing tomato types, use that to your advantage: Roma tomatoes can thicken juicy garden tomatoes, while cherry tomatoes can add sweetness to sharper ones.

Tomatoes chosen? Review the soup ratio, then move to the stovetop method.

Ingredients That Make the Soup Taste Full

The ingredient list is short, so each ingredient has to pull its weight. The right balance keeps the soup from tasting watery, flat, or too acidic.

Fresh Tomatoes

Choose ripe tomatoes that feel heavy and smell sweet. Roma, plum, vine, garden, and cherry tomatoes all work, but they behave differently. Juicy tomatoes need more time. Meaty tomatoes make a thicker base more easily.

Onion and Garlic

Onion rounds out the acidity and gives the soup a softer base. Garlic adds that warm, savory smell that makes the pot feel fuller before you even blend it. Cook the onion first, then add the garlic briefly so it stays fragrant instead of bitter.

Tomato Paste

Tomato paste is the backup plan for tomatoes that are juicy, pale, or mild. Cook it for a minute before adding the tomatoes so it darkens slightly and makes the soup taste deeper.

Broth

Vegetable broth keeps the soup light and vegetarian. Chicken broth makes it a little more savory and old-fashioned, especially if you are serving it with grilled cheese. Add it in stages so the tomatoes can show you how much they need.

Fresh Basil

Fresh basil wakes up the bowl at the end. Add it late so the flavor stays green and fragrant. When basil is the flavor you want to push harder, this classic basil pesto guide gives you another way to use the same herb as a swirl, toast spread, or pasta sauce.

Dried basil can work, but it should go in earlier with the dried herbs. Fresh basil is more delicate, so save it for the finish.

Cream, Optional

Heavy cream softens the acidity and makes the soup richer, but it is not required. You can keep the bowl bright and light, or use no-cream options like carrot, potato, cashews, white beans, bread, or coconut milk.

Peeling, Seeding, and the Smooth-Soup Shortcut

You do not need to peel or seed tomatoes for everyday homemade tomato soup. Once the tomatoes are cooked until soft and blended well, most skins disappear into the bowl.

For a very smooth, restaurant-style bowl, blend fully, strain once, and finish with a small splash of cream over low heat. Straining removes seeds, tiny bits of skin, and any grainy texture without making you peel every tomato first.

A silky bowl does not require peeling every tomato; blend first, then strain only if the texture needs it.
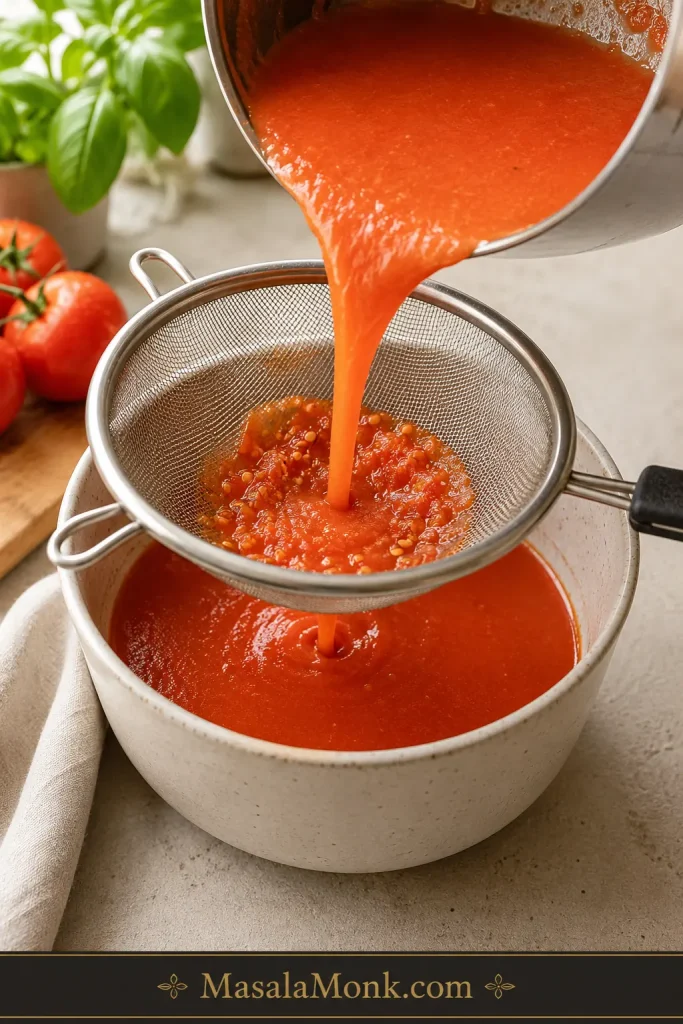
Tomato soup being poured through a fine-mesh strainer, with seeds and skin bits left behind.
For silky tomato soup without peeling every tomato, blend first and strain afterward to catch seeds and tiny skin pieces.

Prefer rustic tomato soup? Blend only half the pot and leave the rest slightly chunky.

Choose the final texture here: leave some body for rustic soup or strain once for a smoother restaurant-style finish.
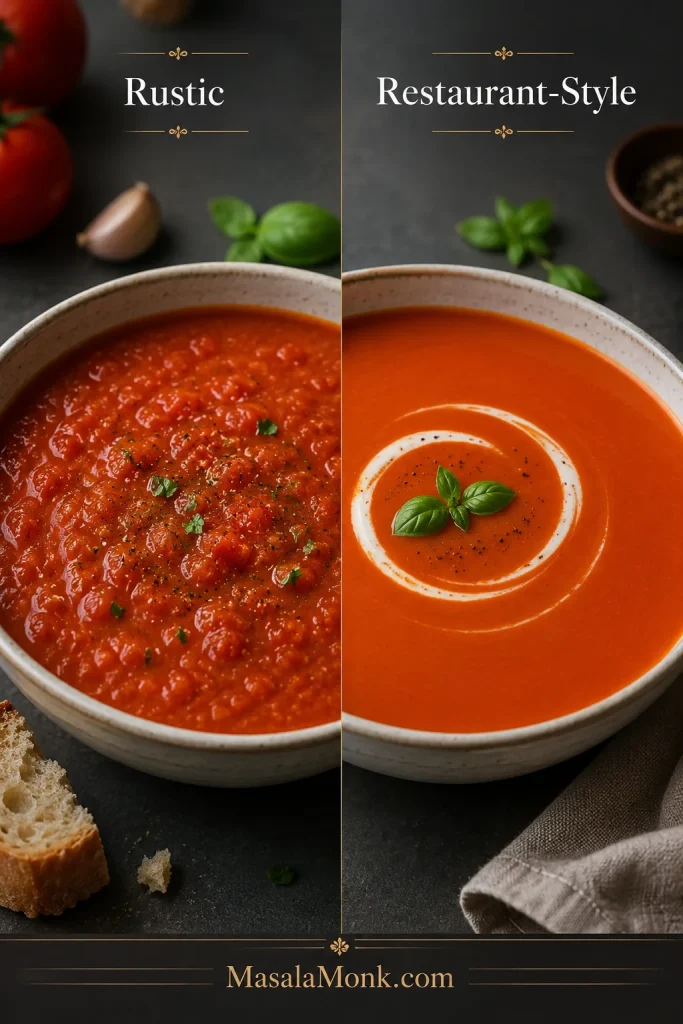
Two bowls comparing rustic tomato soup and smooth restaurant-style tomato soup.
For a rustic bowl, leave some texture behind; however, for a restaurant-style finish, blend thoroughly and strain once.

Once you know whether you want rustic or silky soup, the stovetop method is straightforward.

Texture chosen? Continue to how to make fresh tomato soup, or keep the visual cues nearby while you cook.

How to Make Fresh Tomato Soup

The stovetop method is the easiest place to start. It is fast, flexible, and lets you taste as you go.

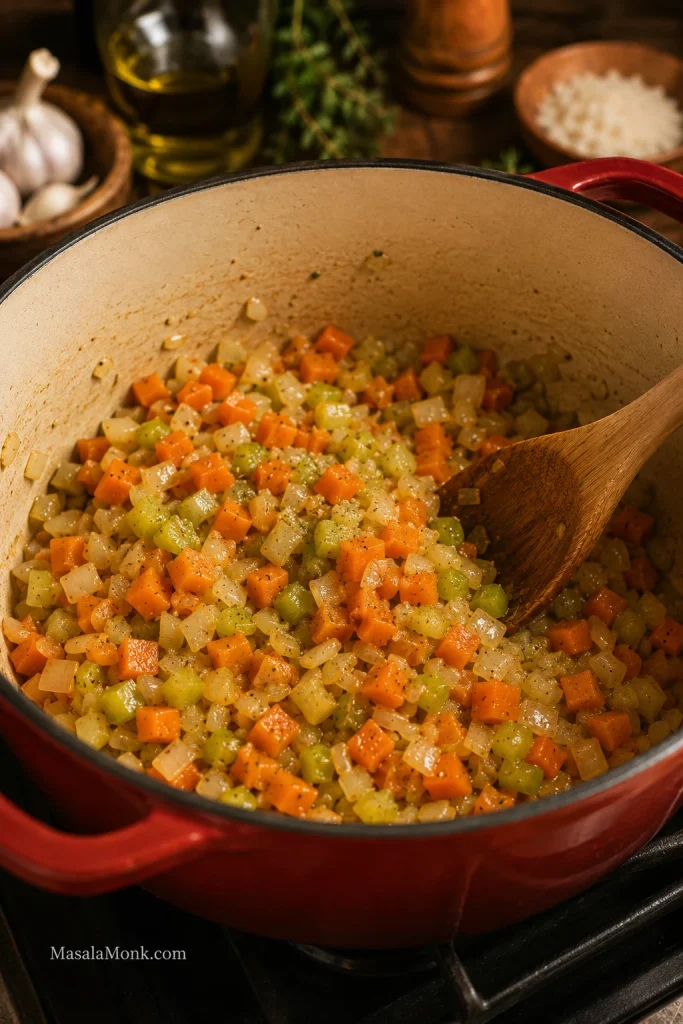
1. Soften the Onion Until Sweet

Warm olive oil or butter in a large pot. Cook the onion until soft and lightly golden. Do not rush this part; it creates sweetness before the tomatoes go in.

At this stage, the onion should smell sweet and look translucent before the acidity of the tomatoes enters the pot.
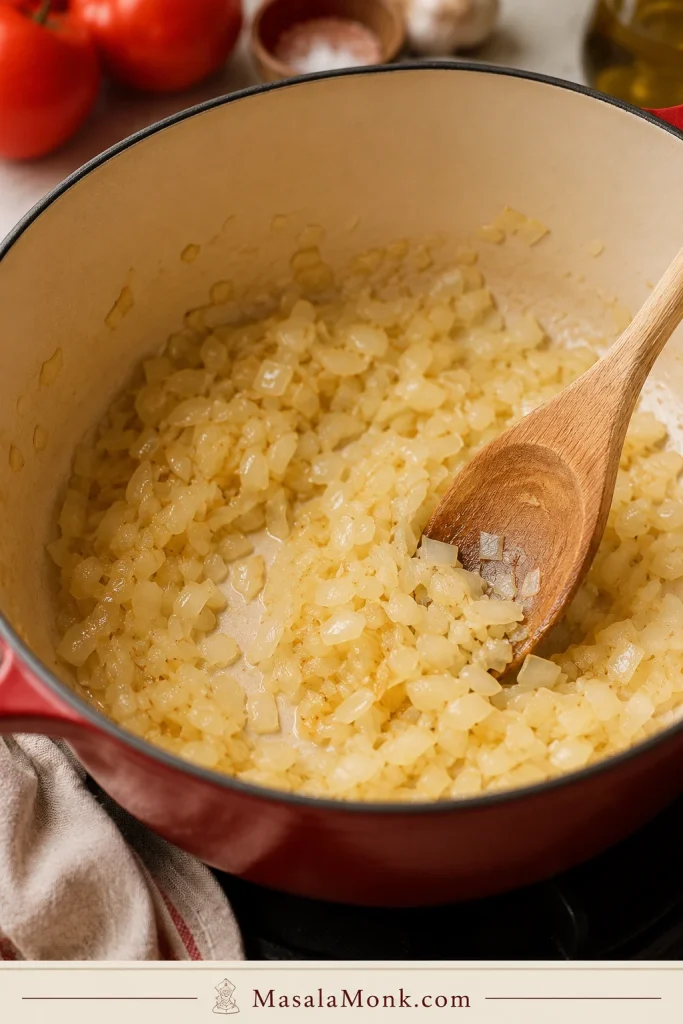
Chopped onion softening in a Dutch oven with a wooden spoon.
Soften the onion until it smells sweet and turns translucent; this early step helps balance acidity before the fresh tomatoes go in.

2. Add Garlic and Tomato Paste

Let the garlic sizzle for about 30 seconds, then stir in the tomato paste. The paste should darken slightly and smell rich, almost like the tomato flavor is already getting deeper.

Cooking tomato paste briefly with the aromatics gives the soup deeper color and a fuller tomato base.
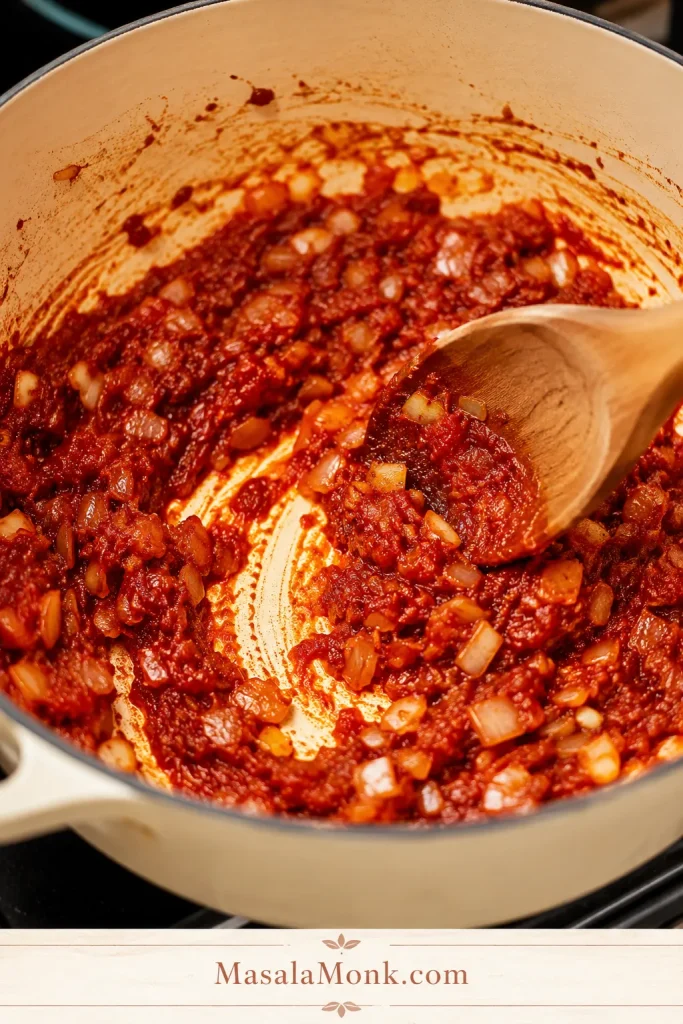
Tomato paste cooking with onion and garlic in a pot.
Briefly cooking tomato paste with onion and garlic deepens the base, so the finished soup tastes fuller even when the tomatoes are mild or extra juicy.

3. Collapse the Tomatoes

Tip in the chopped tomatoes, seasoning, and carrot or bell pepper if using. Simmer uncovered until the tomatoes collapse into their juices and the pot looks saucy.

Once the fresh tomatoes hit the pot, give them time to soften and concentrate before you decide how much broth they need.
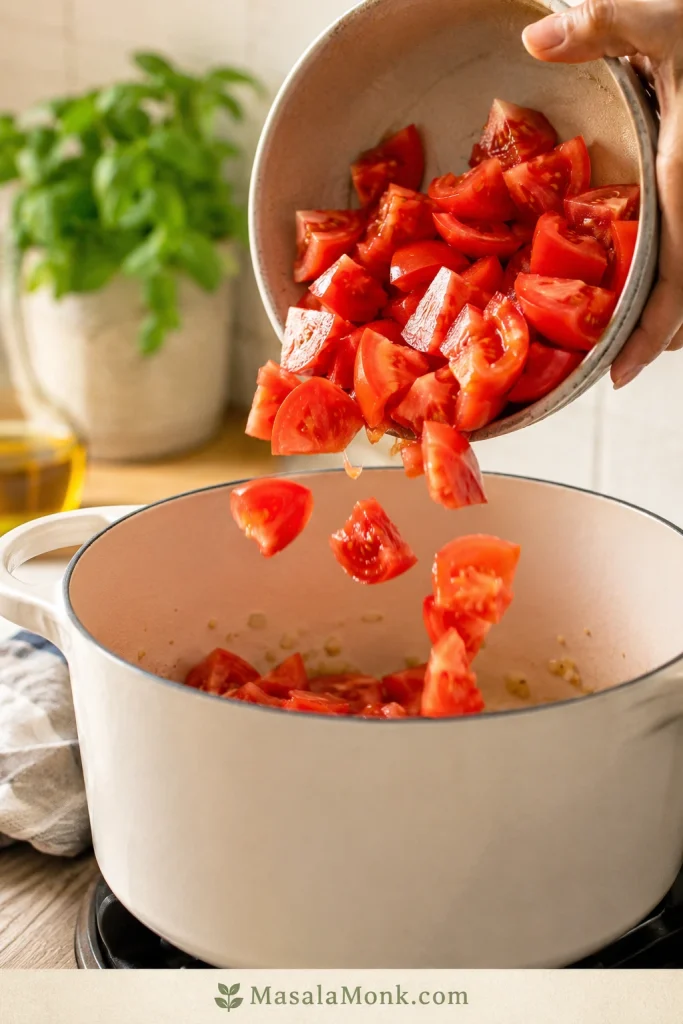
Chopped fresh tomatoes being tipped from a bowl into a pot.
Add the fresh tomatoes before most of the broth so they can soften, concentrate, and build flavor before you decide how loose the soup should be.

4. Blend and Adjust

Pour in part of the broth, puree until smooth, then finish the texture. A good bowl should pour like cream but still taste like tomatoes first.

Add broth gradually after the tomato base has cooked down so the soup stays easier to control.
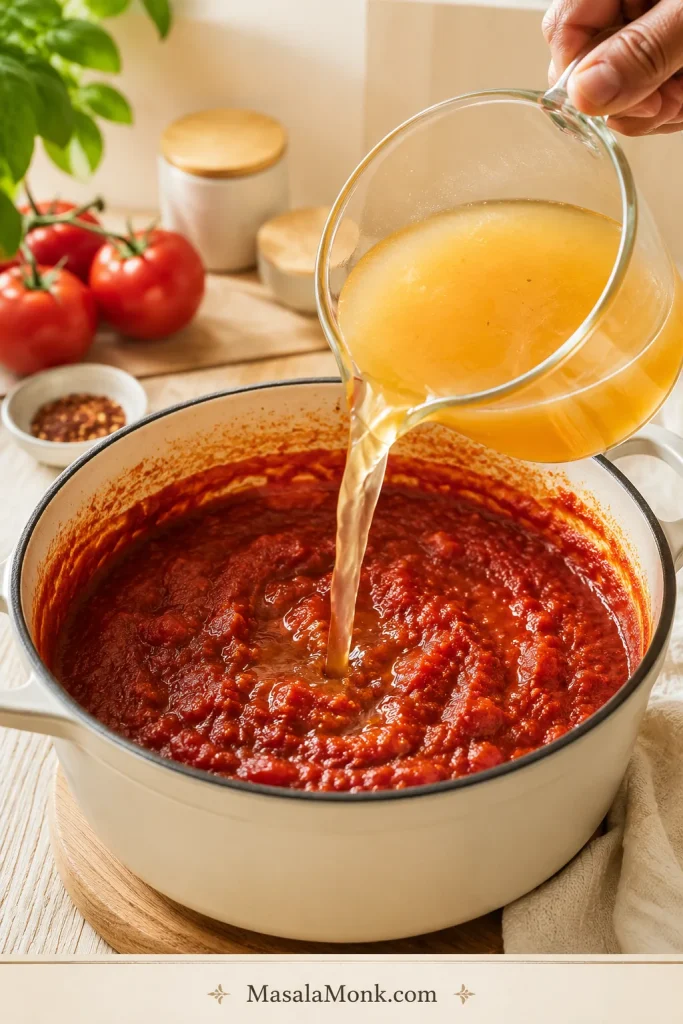
Broth being poured into a pot of concentrated cooked tomato mixture.
Once the tomatoes have cooked down, add broth gradually rather than all at once; that keeps fresh tomato soup full-bodied and easier to control.

After you get used to blending first and loosening after, you can use the same habit in other smooth soups too, like this butternut squash soup.

Safety cue: Hot soup expands in a blender. Work in batches, vent the lid, and cover the top with a towel so steam can escape.

When the soup is hot, work carefully and judge the thickness before adding more liquid or cream.
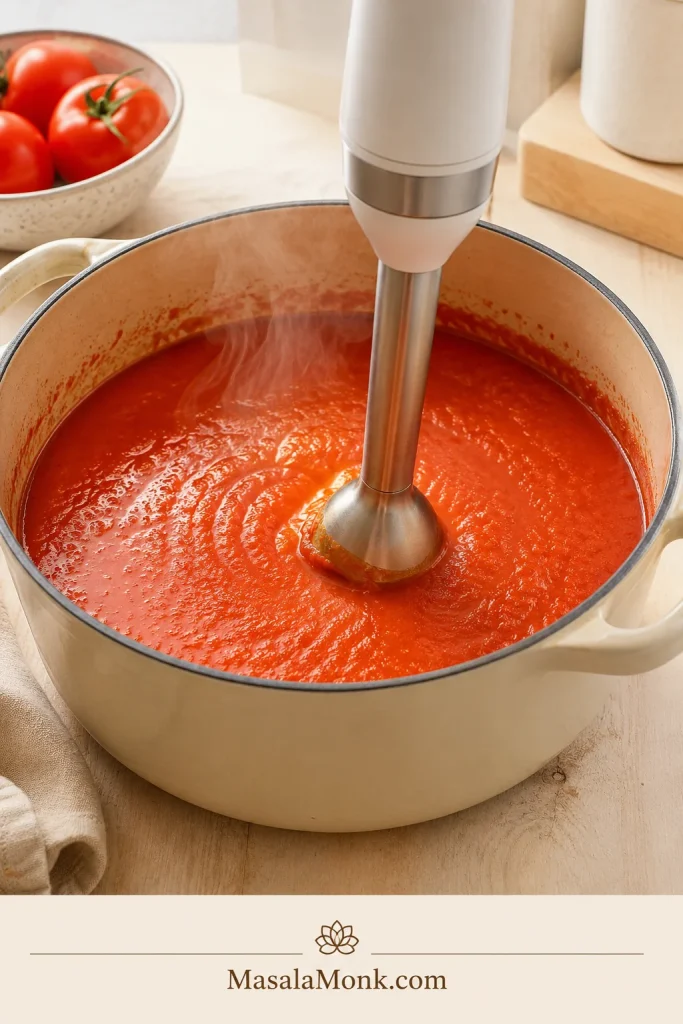
An immersion blender blending tomato soup inside a large pot.
Blend directly in the pot until smooth, then check the thickness before adding anything else because fresh tomato soup often loosens more than expected.

Cooking from the card? Return to the recipe card, or keep going for texture cues and variations.

What to Look For While the Soup Cooks

Tomatoes do not all behave the same, so use the timing as a guide and the texture as the final signal. The pot should smell sweeter before it looks smooth.

Stage What You Should See Why It Matters
Onion cooked Soft, translucent, and lightly golden This adds sweetness before the tomatoes go in.
Tomato paste cooked Darker red and fragrant This deepens the tomato flavor and color.
Tomatoes simmered Collapsed, saucy, and no longer floating in liquid This is where the soup starts getting body.
After blending Smooth, spoon-coating, and pourable You are aiming for soft body, not a thick paste.
Final soup Bright red-orange, balanced, and not grainy At this point, taste once more, then serve.

Aim for the texture shown here: smooth, spoon-coating tomato soup that still pours easily.
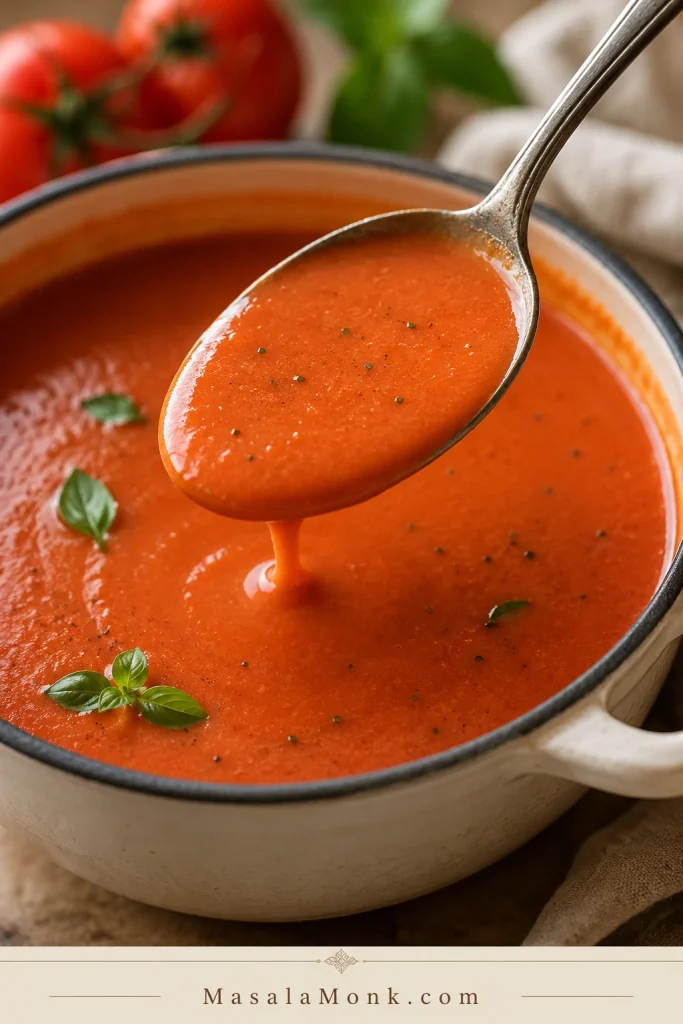
Smooth tomato soup lightly coating a spoon above the pot.
The right texture should coat a spoon lightly while still pouring easily, giving the soup a creamy feel without making it heavy.

Roasted Fresh Tomato Soup Method for Deeper Flavor

When to Roast Fresh Tomatoes

Roasting is the method to choose when your tomatoes taste good but not amazing yet. The oven pulls out sweetness, softens acidity, and gives the soup a deeper red, slightly jammy flavor before it ever reaches the blender.

It is especially useful when your tomatoes are watery, very juicy, mild, or garden-grown.

The roasted method takes longer than the stovetop version, but most of that time is hands-off. Plan on about 55 to 65 minutes total if you roast first.

Roasting helps watery or mild tomatoes taste sweeter and more concentrated before they become soup.
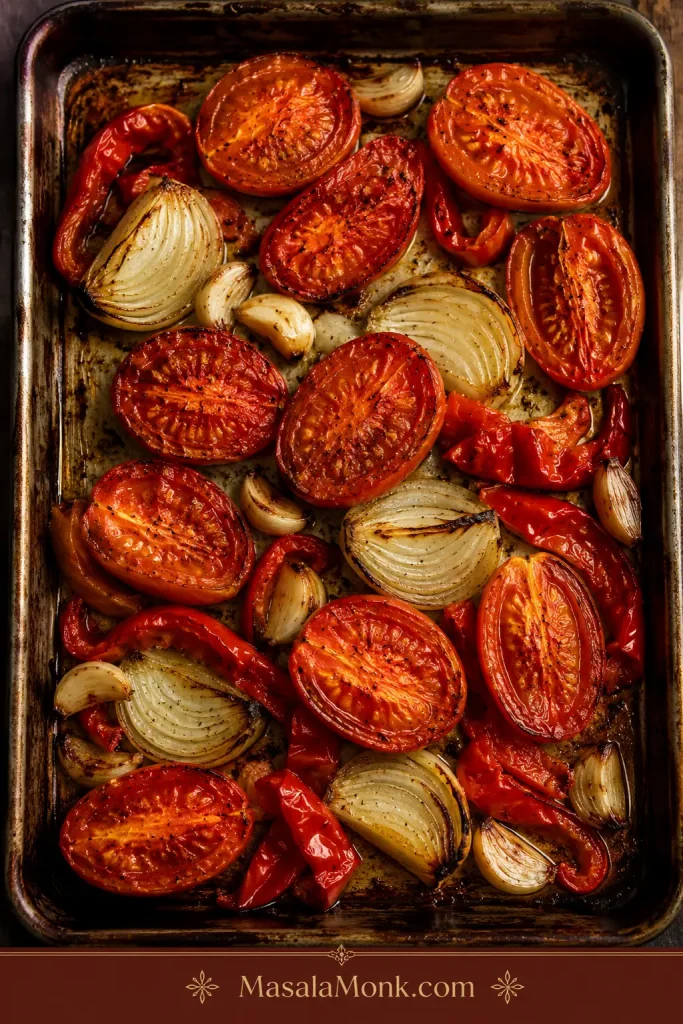
Roasted tomatoes, onions, garlic, and red pepper on a sheet pan.
Roasted fresh tomatoes create a deeper, sweeter soup because the oven concentrates their flavor before they reach the pot.

Roasting Setup

Use the same 3 lb / 1.35 kg fresh tomatoes. For roasting, use olive oil on the baking sheet. If you prefer butter, stir it into the pot after roasting instead. Cut medium tomatoes into halves or quarters. Leave the garlic cloves whole for roasting instead of mincing them, then squeeze the softened garlic out of the skins before blending.

How to Finish the Roasted Soup

  1. Heat the oven to 425°F / 220°C.
  2. Spread the tomatoes, onion, whole garlic cloves, and optional red bell pepper on a rimmed baking sheet.
  3. Toss with olive oil, salt, and pepper.
  4. Roast for 35 to 45 minutes, until the tomatoes are soft, jammy, and lightly browned at the edges.
  5. Transfer the roasted vegetables to a pot. Stir the tomato paste into the roasted juices and cook for 30 to 60 seconds.
  6. Pour in only 1 cup / 240 ml broth at first, then blend.
  7. Loosen gradually with more broth until the soup reaches your preferred thickness.
  8. Simmer for 5 to 10 minutes, blend until smooth, then add basil and blend briefly again. Finish with cream only if you want a richer roasted tomato basil soup.

The roasted tray should smell sweet and garlicky before it ever reaches the pot. If the baking sheet has a lot of tomato liquid, add those juices gradually instead of dumping everything in at once.

When transferring roasted tomatoes, add the tray juices thoughtfully so the roasted flavor stays strong without thinning the pot.
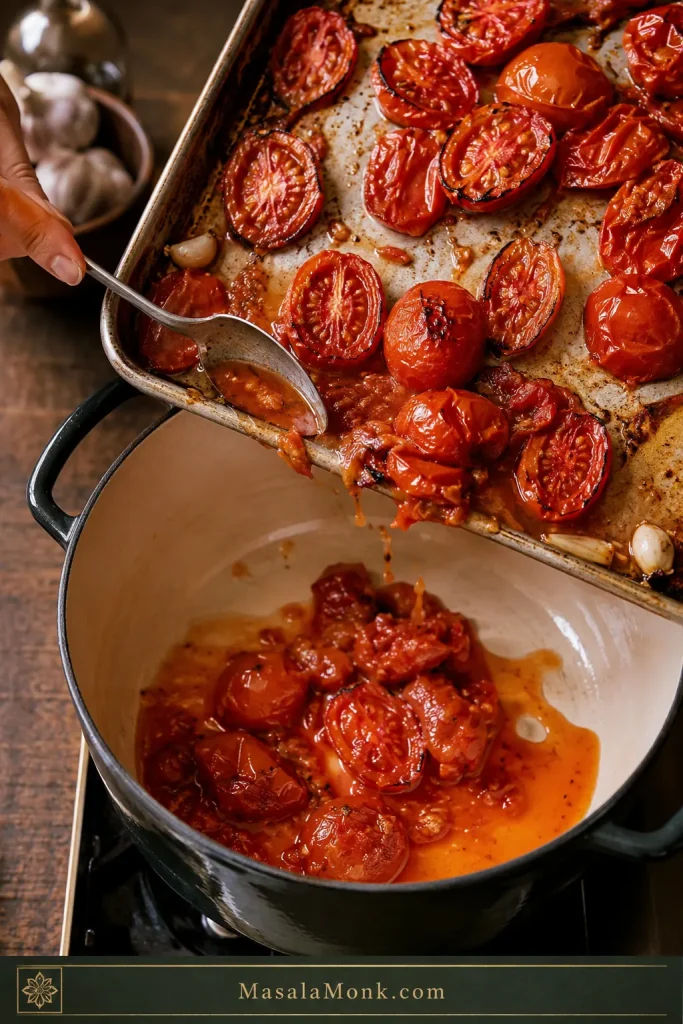
Roasted tomatoes and juices being transferred from a sheet pan into a pot.
Scrape the roasted tomatoes and tray juices into the pot, but add the liquid thoughtfully so the soup keeps its roasted flavor without thinning too much.

After roasting: Keep the bowl bright, make it creamy or dairy-free, turn it into tomato basil soup, or choose what to serve with it.

Creamy, No-Cream, and Vegan Options

Choose the Creaminess Level

Creaminess is not just about adding cream. It is about deciding how soft, rich, and mellow you want the final bowl to feel. Some bowls want the classic silkiness of dairy; others only need a carrot, a potato, or a handful of cashews to feel round.

Creamy Options and No-Cream Thickeners

Option How Much to Use Best For
Heavy cream 1/4 cup / 60 ml for light creaminess; 1/2 cup / 120 ml for richer soup Classic creamy tomato soup.
Half-and-half 1/4 to 1/2 cup / 60 to 120 ml Lighter everyday creamy soup.
Butter 1 tablespoon blended in at the end Silky texture without much cream.
Cashews 1/4 to 1/3 cup soaked cashews Dairy-free creamy body.
White beans 1/2 cup cooked white beans Thicker soup with more body.
Potato 1 small peeled potato, simmered with the tomatoes Thick, mild, no-cream soup.
Carrot 1 small carrot, cooked with the tomatoes Sweetness, body, and acidity balance.
Bread 1 small slice crusty bread, blended in Rustic creamy texture without cream.
Coconut milk 2 to 4 tablespoons Vegan creamy tomato soup.

Creaminess can come from dairy or from body-building ingredients like cashews, beans, potato, carrot, or bread.
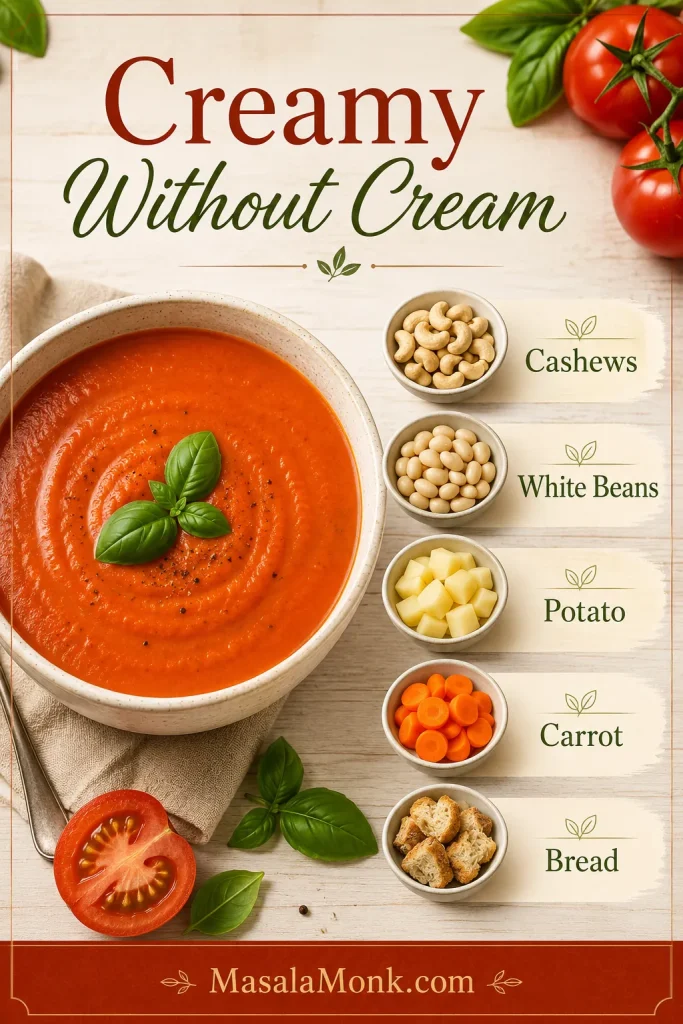
A guide showing cashews, white beans, potato, carrot, and bread as no-cream thickener options for tomato soup.
For creamy tomato soup without cream, use cashews, beans, potato, carrot, or bread to add body while keeping the tomato flavor clear.

The best creamy version still tastes like fresh tomatoes first. Cream, butter, cashews, beans, potato, or bread should round the edges, not hide them.

The goal is a soup that feels softer on the spoon, not one that forgets it started with fresh tomatoes.

Add Dairy Gently

With dairy, add it after blending and keep the heat low. If the soup is very hot, stir a spoonful of soup into the cream first, then add it back to the pot.

Cream belongs at the end, over low heat, where it softens the tomato flavor without splitting or muting the soup.
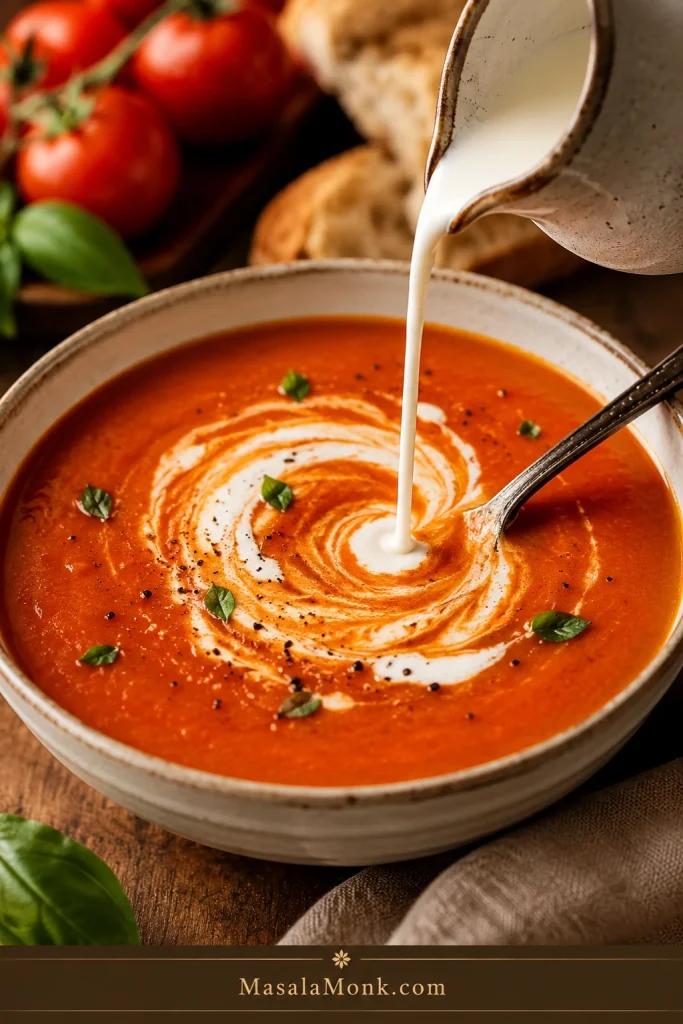
Cream being swirled into a bowl of tomato soup.
Add cream gently at the end and keep the heat low; creamy tomato soup should taste softer and rounder, not muted or split.

Vegan Tomato Soup Adjustments

For vegan tomato soup, use olive oil instead of butter and vegetable broth instead of chicken broth. Skip the cream, or blend in cashews, white beans, potato, carrot, or coconut milk for body. If the soup tastes sharp, use carrot, roasted red pepper, or a tiny amount of maple syrup instead of honey.

Tomato Basil Soup Variation

To make this a fresh tomato basil soup, increase the basil to about 3/4 cup loosely packed fresh basil leaves. Add the basil near the end, then blend briefly. For a brighter finish, save a little chopped basil for the bowls.

Fresh basil should go in late so tomato basil soup keeps its green aroma and bright finish.
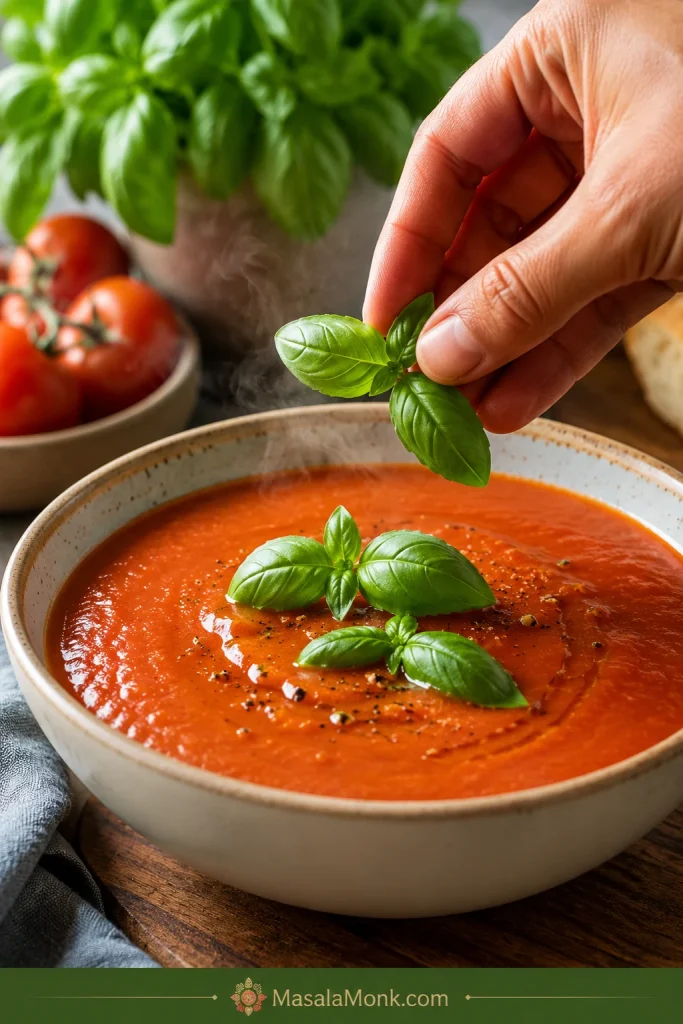
Fresh basil leaves being added to warm tomato soup.
Add basil at the end so tomato basil soup keeps its fresh green aroma; otherwise, long cooking can flatten both the color and flavor.

The basil should smell fresh the moment it hits the warm soup. If it cooks too long, that bright green lift disappears.

No fresh basil? Use 1/2 to 1 teaspoon dried basil and add it with the oregano or thyme. The flavor will be less fresh, but the soup will still be good. If basil is what you love most, save this pesto pasta recipe for another night — same fresh-herb comfort, completely different dinner.

Old-Fashioned Fresh Tomato Soup Variation

For an old-fashioned tomato soup texture, use butter instead of olive oil and add a light roux. After the onion softens, stir in 1 to 2 tablespoons flour and cook for 1 minute before adding the tomatoes and broth. Finish with a splash of milk or cream and a tiny pinch of sugar if the tomatoes are sharp.

This version is thicker, softer, and more diner-style, especially good with grilled cheese, buttered toast, or homemade croutons. It is for eating fresh, refrigerating, or freezing — not for canning.

This variation leans softer and creamier, with the kind of diner-style texture that suits toast or grilled cheese.
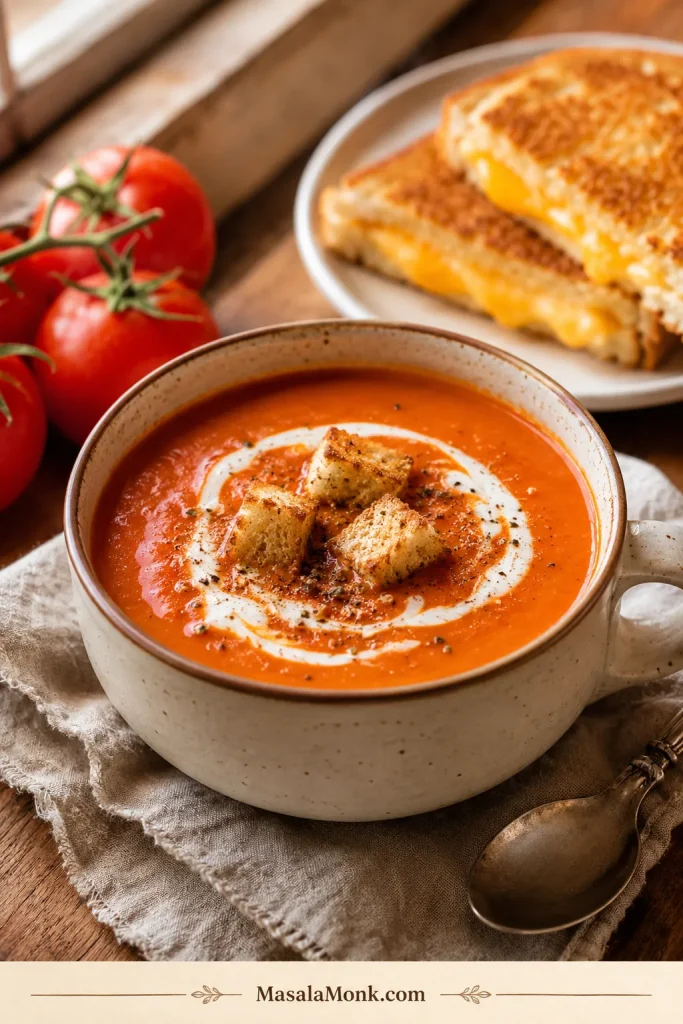
A bowl of old-fashioned creamy tomato soup topped with croutons and black pepper, with grilled cheese in the background.
For an old-fashioned tomato soup feel, go a little creamier and softer in flavor, then serve it with croutons, toast, or grilled cheese for classic comfort.

Once the base method is clear, you can adapt it to the appliance you actually want to use.

Adapt the Method for Instant Pot, Slow Cooker, or Blender

You do not need a separate recipe for every appliance. The same rule still matters: cook the tomatoes into something flavorful before you loosen the soup.

Method How to Adapt It
Instant Pot Sauté onion and garlic, deglaze well, then add tomatoes. Keep tomato paste off the bottom to reduce burn risk. Use 1 cup / 240 ml broth for pressure cooking, pressure cook 15 minutes, release naturally 5 to 10 minutes, then blend and loosen.
Slow cooker For best flavor, sauté onion, garlic, and tomato paste first. For the easiest version, add everything directly. Use only part of the broth. Cook on high for 3 to 4 hours or low for 5 to 8 hours, then blend and add basil and cream at the end.
High-speed blender Use it for the smoothest texture, especially if you do not want to peel tomatoes. When blending hot soup, work in batches, vent the lid, and cover the top with a towel.

These versions are there for convenience, but the best flavor still comes from the same small cues: softened onion, cooked tomato paste, tomatoes that smell sweeter, and final liquid added with care.

When you want the slow-cooker route but a much heartier dinner, this crock pot lasagna soup is the richer tomato-and-pasta version.

Before troubleshooting, check the mistakes most likely to make fresh tomato soup thin, dull, or unsafe to store.
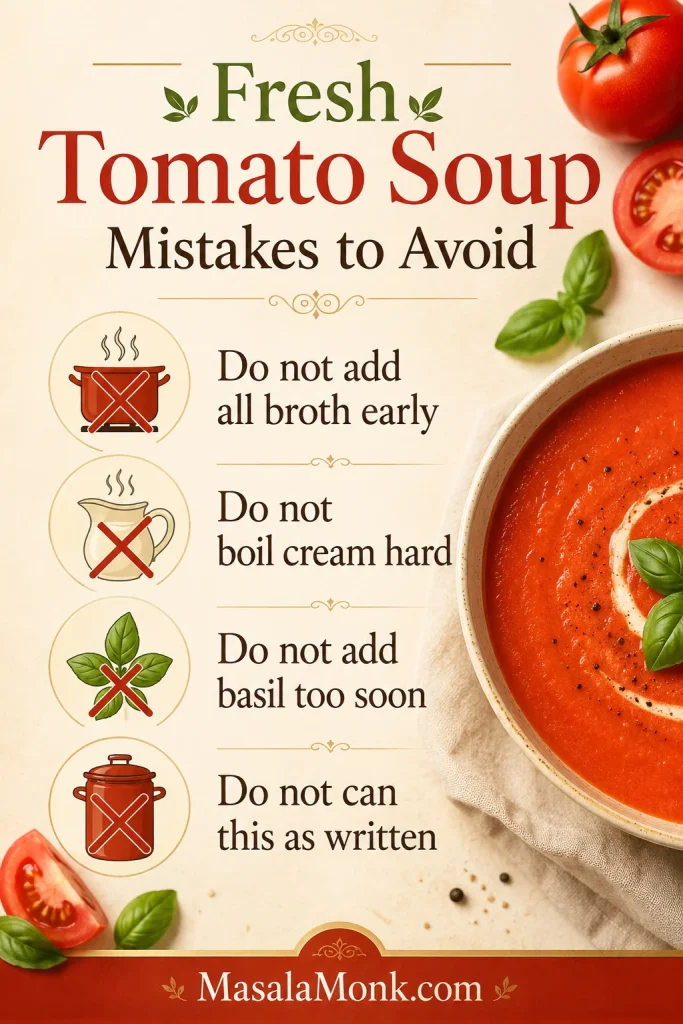
A guide card listing common fresh tomato soup mistakes, including adding broth too early, boiling cream, adding basil too soon, and canning the soup as written.
These fresh tomato soup mistakes are easy to avoid: hold back broth, keep dairy gentle, add basil late, and do not can this recipe as written.

How to Fix Watery, Sour, or Bland Tomato Soup

Start With the Simple Fixes

Do not panic if the first taste is sharp, thin, or a little bland. Fresh tomatoes vary a lot, and most soup problems are easy to fix before the bowls hit the table. Salt wakes the flavor up, cream softens acidity, tomato paste deepens the base, and a few more minutes of simmering can rescue a thin pot.

Use this comparison to see the difference between loose tomato soup and the thicker spoon-coating texture you want.
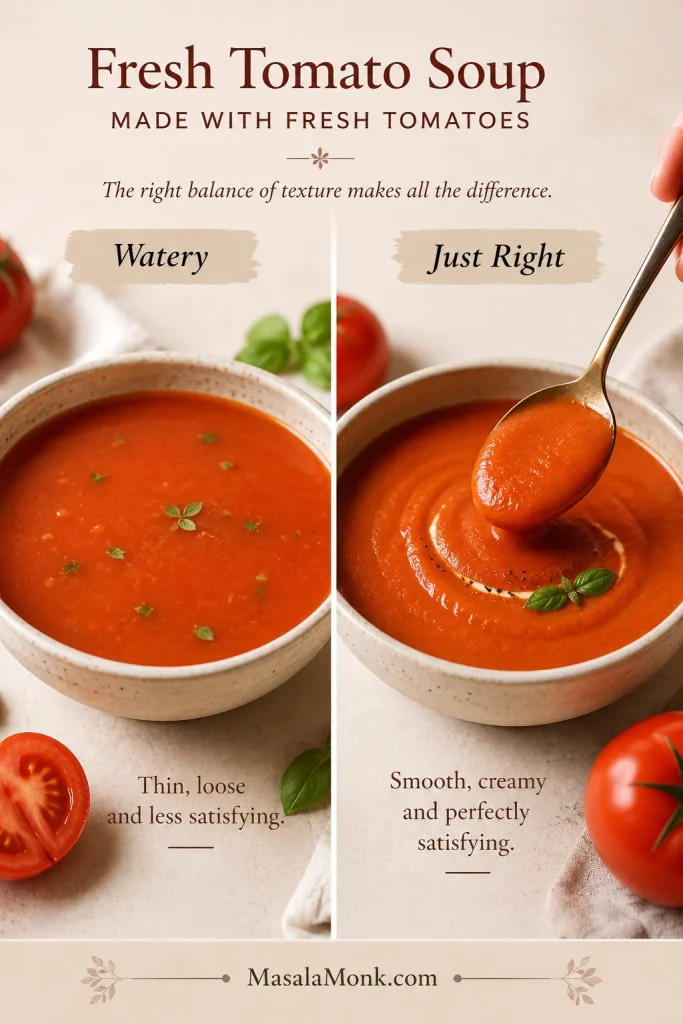
A side-by-side comparison showing watery tomato soup and thicker tomato soup labeled just right.
If the soup looks watery, keep cooking or add body before serving; the goal is smooth tomato soup that feels spoon-coating, not loose and flat.

Common Tomato Soup Problems

Problem Why It Happens How to Fix It
Watery soup Tomatoes were very juicy or too much broth was added. Simmer uncovered, add tomato paste, roast tomatoes next time, or blend in potato, white beans, cashews, or a small piece of bread.
Sour soup Tomatoes were acidic or underripe. Add carrot, roasted red pepper, cream, butter, or a tiny amount of sugar or maple syrup.
Bland soup Not enough salt, tomato depth, or aromatics. Add salt gradually, more black pepper, tomato paste, basil, or roasted garlic.
Bitter soup Garlic burned, basil overcooked, or tomatoes were underripe. Avoid burnt garlic, add basil late, and balance with cream or carrot.
Thin soup Too much liquid or not enough body. Simmer longer, add potato, white beans, cashews, bread, or cream.
Too thick Soup reduced too much. Add broth or water slowly until the texture loosens.
Seedy soup Tomato seeds remained after blending. Strain the soup through a fine-mesh strainer.
Skins in soup Tomato skins did not fully blend. Blend longer, use a high-speed blender, or strain.
Pale soup Tomatoes were not deeply red or tomato paste was skipped. Use ripe red tomatoes and add tomato paste.
Grainy soup Soup was not blended enough or solids were fibrous. Blend longer and strain for a smoother finish.

After the troubleshooting table, this card gives quick fixes for watery, sour, bland, or grainy soup.
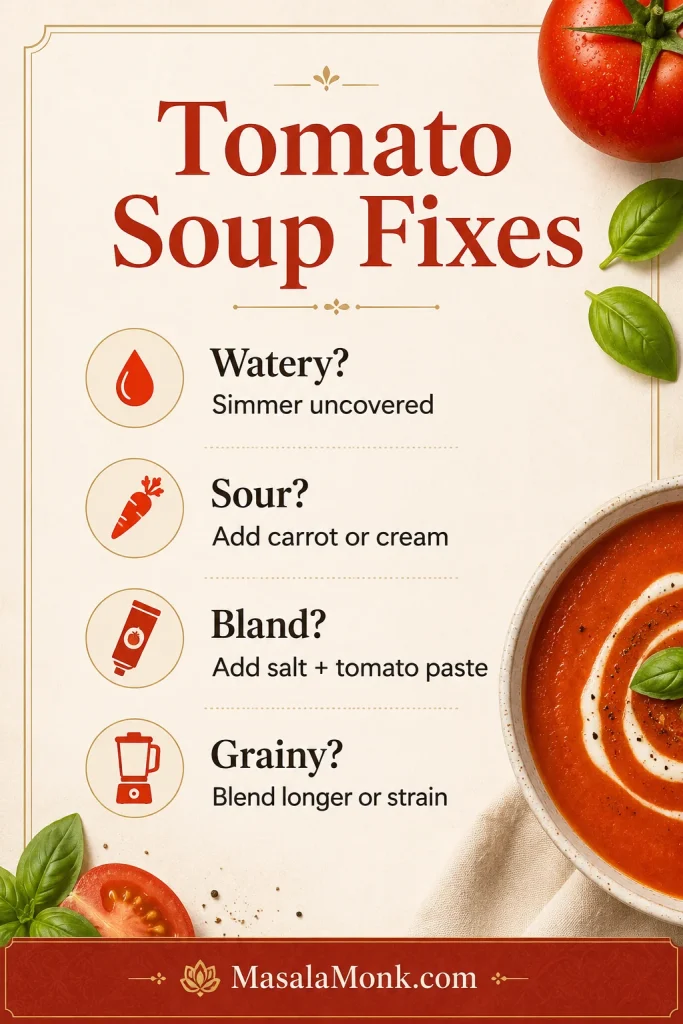
A guide card showing fixes for watery, sour, bland, and grainy tomato soup.
Most tomato soup problems can be fixed before serving: simmer watery soup, soften sour edges, deepen bland flavor, and blend or strain rough texture.

What Not to Overdo

Do not fix everything with sugar. A tiny amount can help sharp tomatoes, but better soup usually comes from ripe tomatoes, enough salt, tomato paste, proper simmering, and a little fat or cream when needed.

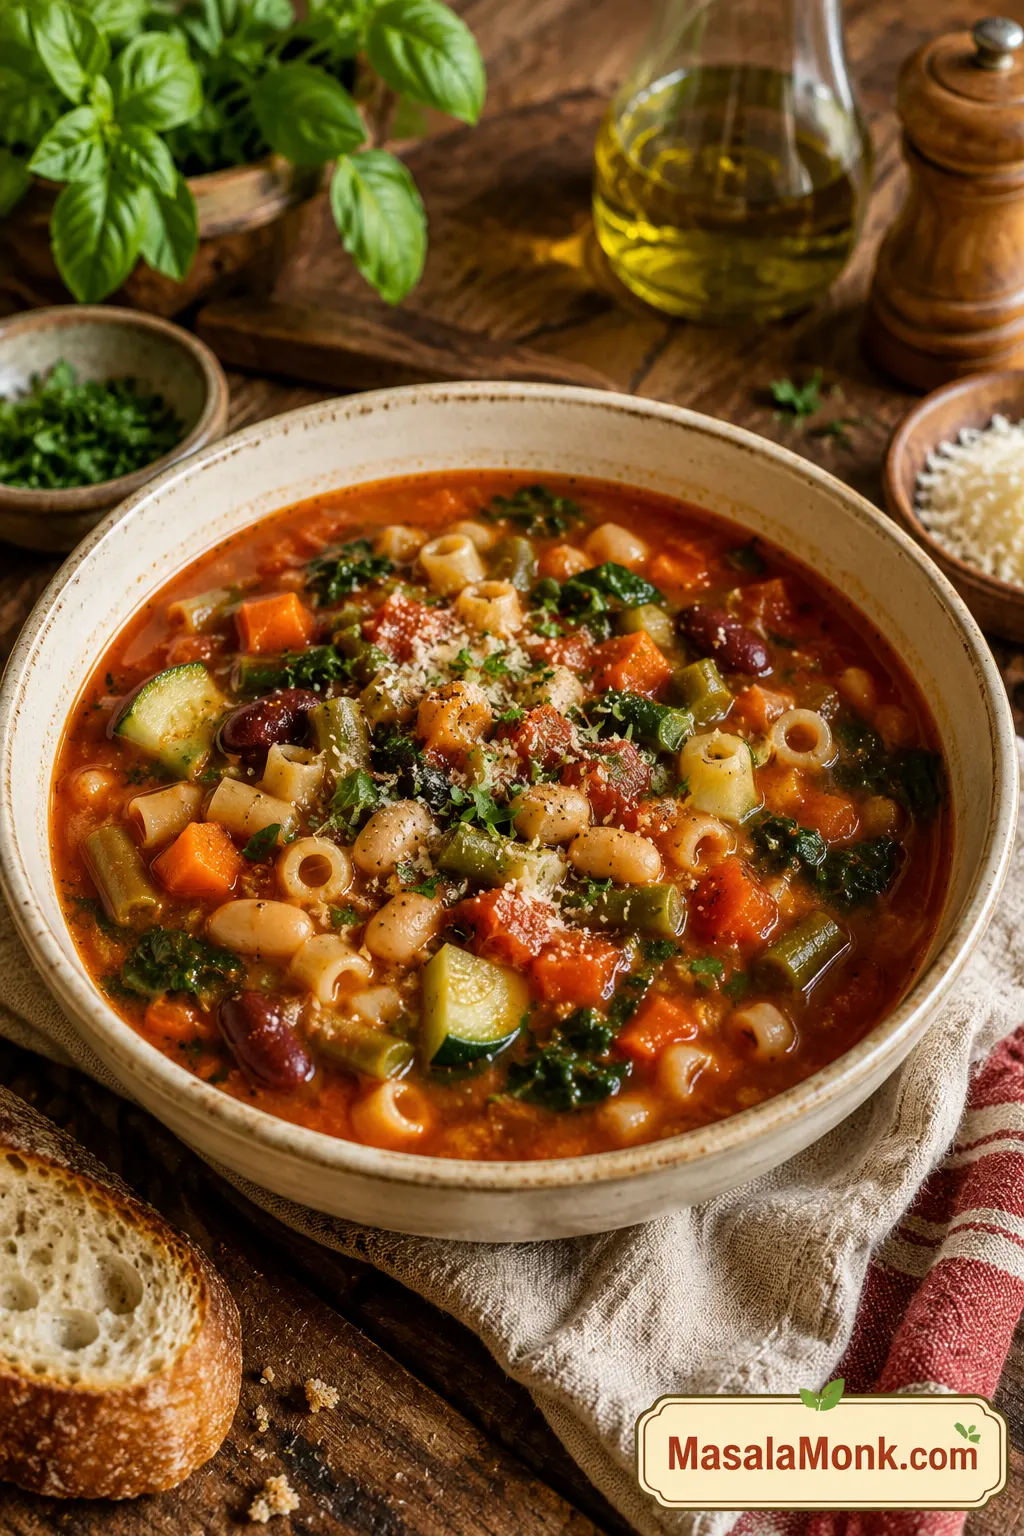
For a chunkier tomato-broth soup where beans naturally add body, this minestrone soup is a good next bowl to make.

Soup fixed? Return to the recipe card, choose what to serve with tomato soup, or check storage and freezing.

What to Serve With Tomato Soup

Tomato soup is built for crisp, toasted, cheesy, or herby sides. The best bowl has that red-orange glow, a little basil on top, and something crisp on the side for dipping.

A bowl of tomato soup becomes a fuller meal when you add something crisp, cheesy, herby, or fresh on the side.
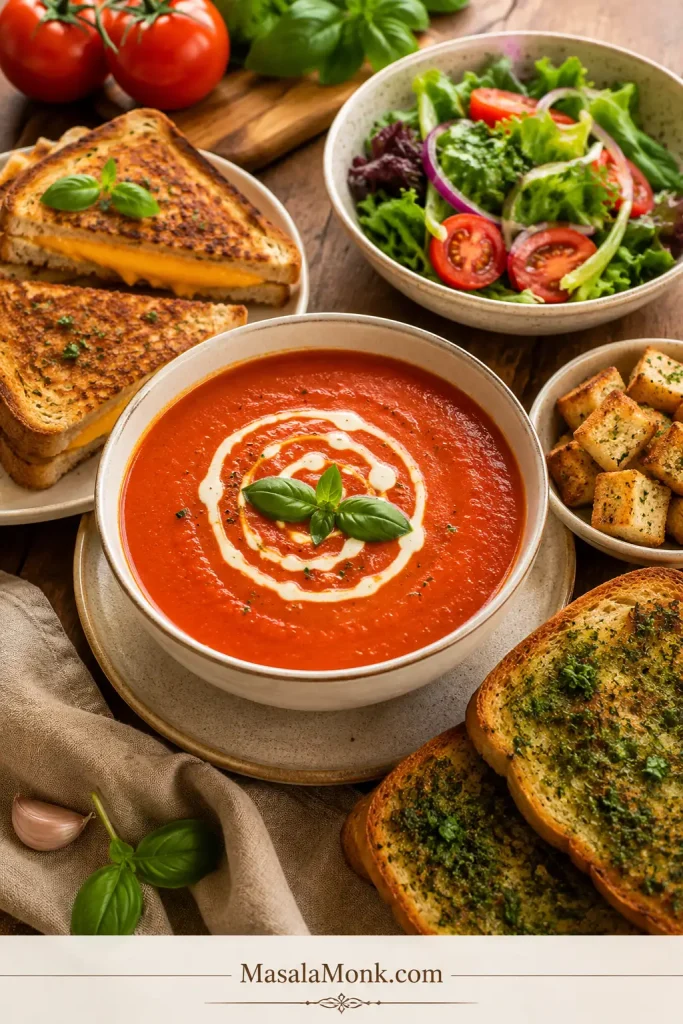
Tomato soup served with grilled cheese, toast, croutons, and a fresh salad on a table.
Tomato soup becomes a fuller meal with crisp, cheesy, or herby sides, so grilled cheese, garlic toast, croutons, and a fresh salad all work especially well.
  • Grilled cheese sandwich
  • Garlic bread
  • Cheese toast
  • Croutons
  • Toasted sourdough
  • Basil pesto toast
  • Cucumber salad for a crisp, cool side
  • Parmesan and black pepper
  • Chili flakes or chili oil
  • A swirl of cream or olive oil

For the classic version, make grilled cheese and dip the crisp edges into the soup. The first dip should leave a little orange-red trail on the bread. To keep the bowl lighter, serve it with salad, toasted bread, and extra basil. For a more filling lunch that still stays fresh, pair it with this chickpea salad instead of making the soup heavier.

The grilled cheese dip is also a texture test: the soup should cling lightly instead of running off like water.

A grilled cheese sandwich being dipped into a bowl of tomato soup.
A good tomato soup should cling lightly to grilled cheese and leave a warm orange-red trail, which is another sign that the texture is right.

Storage, Freezing, and Reheating

  • Refrigerate: Store cooled soup in an airtight container for up to 4 days.
  • Freeze: Freeze for up to 3 months for best quality. For best texture, freeze before adding cream.
  • Reheat: Warm gently on the stovetop over medium-low heat, stirring often.
  • Adjust after reheating: Add a splash of broth or water if the soup thickens in the fridge or freezer.
  • Add cream later: If freezing, stir in cream after reheating rather than before freezing.

Freeze the soup in portions for quick lunches. Leave a little space at the top of the container because soup expands as it freezes.

Portion the soup before adding cream, then adjust the texture gently when reheating.
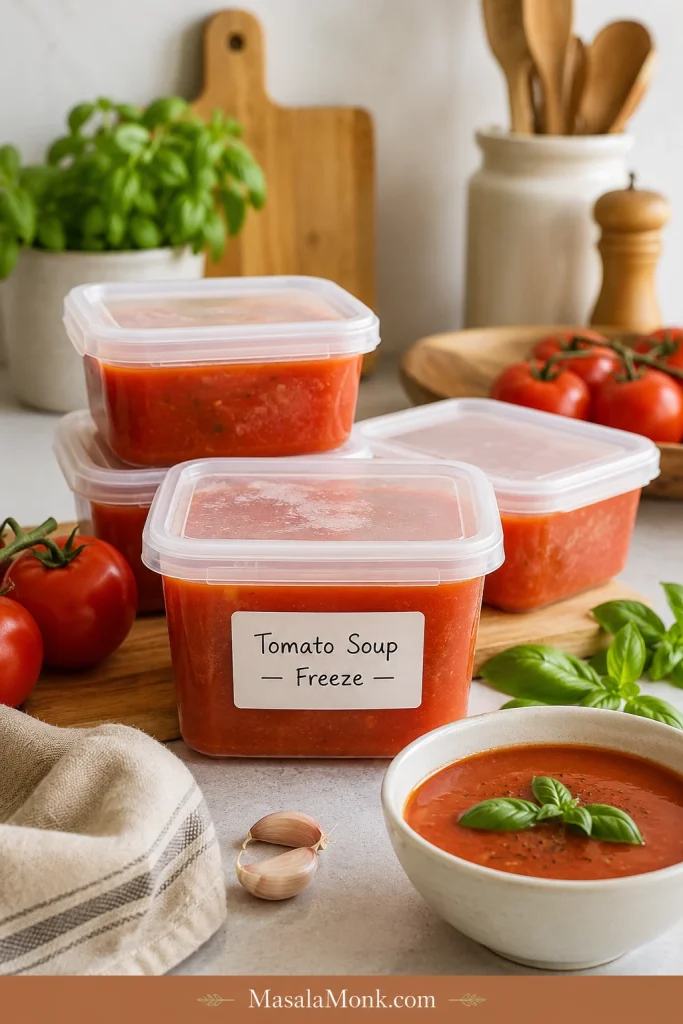
Fresh tomato soup stored in freezer-safe containers labeled for freezing, with a bowl of soup nearby.
Freeze fresh tomato soup before adding cream for the best reheated texture; later, warm it gently and loosen it with a splash of broth if needed.

For general leftover timing, FoodSafety.gov’s cold food storage chart lists soups and stews at 3 to 4 days in the refrigerator and 2 to 3 months in the freezer, which is why this recipe keeps the storage guidance conservative.

Cooking again later? Return to the recipe card, or jump back to the top of the post.

Canning Safety Note

This fresh tomato soup recipe is written for eating fresh, refrigerating, or freezing. It is not a tested shelf-stable canning recipe.

Keep the storage advice clear: fresh eating, refrigeration, and freezing are fine, but this is not a canning recipe.
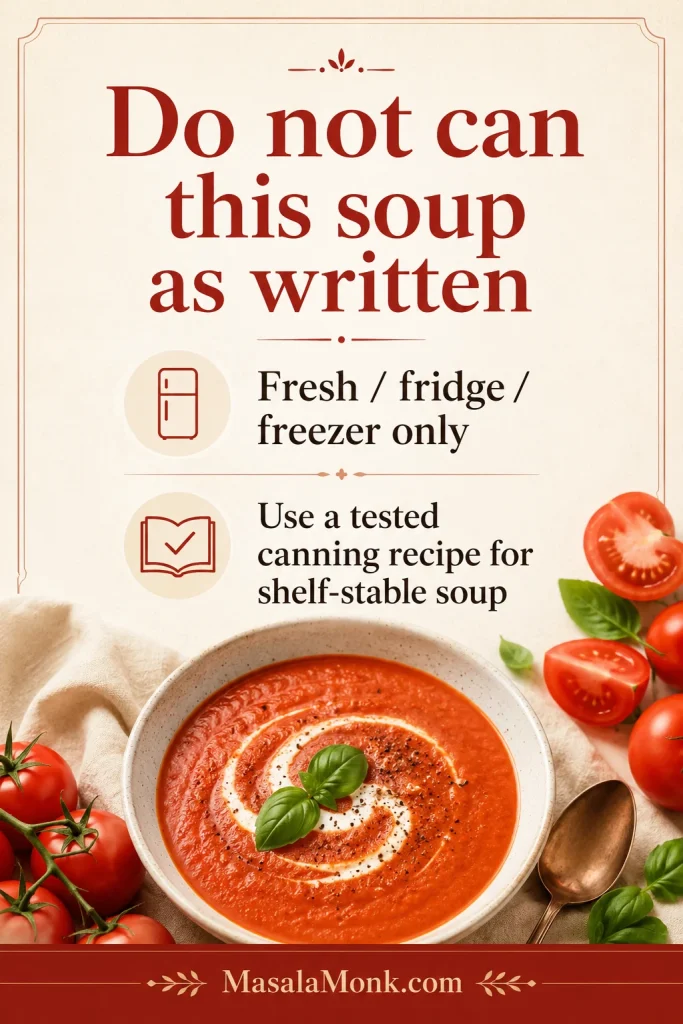
A safety card stating not to can this soup as written and to use a tested canning recipe for shelf-stable soup.
This recipe is meant for fresh eating, refrigeration, or freezing, while shelf-stable tomato soup should come from a properly tested canning recipe.

Do not can this soup as written, especially if you add cream, milk, flour, cashews, bread, potato, white beans, pasta, rice, or other thickeners. Those ingredients can change density and heat penetration in home-canned soup. If you want pantry-stable tomato soup, follow a tested pressure-canning recipe from start to finish rather than adapting this one. The National Center for Home Food Preservation is a good place to start.

Fresh Tomato Soup FAQs

Do I need to peel tomatoes for tomato soup?

No. You do not need to peel tomatoes for everyday tomato soup. Blend well, then strain the soup if you want a very smooth finish.

How many fresh tomatoes do I need?

For about 6 bowls of soup, use 3 lb / 1.35 kg fresh tomatoes. This is usually around 8 to 10 medium tomatoes, depending on their size.

Can I use cherry, garden, or mixed tomatoes?

Yes. Cherry tomatoes add sweetness, garden tomatoes add fresh flavor, and mixed tomatoes work well together. If the mix is very juicy, cook it longer before adding more broth.

Why did my soup turn watery?

Tomato soup turns watery when the tomatoes are very juicy, the soup is not simmered long enough, or too much broth is added early. Simmer uncovered, add tomato paste, or roast the tomatoes next time for a thicker bowl.

How do you make fresh tomato soup less acidic?

Use ripe tomatoes, add carrot or roasted red bell pepper, and finish with cream, butter, or a small pinch of sugar if needed. Roasting the tomatoes also helps soften sharp acidity.

What if I do not have tomato paste?

You can still make the soup, but it may taste lighter and look paler. Cook the tomatoes longer, use the roasted method if possible, and add a little extra salt or a small knob of butter at the end for depth.

Should I add cream to fresh tomato soup?

Add cream if you want the soup softer, richer, and closer to classic creamy tomato soup. Skip it if you want the fresh tomato flavor to stay brighter. For no-cream body, use carrot, potato, cashews, white beans, bread, or extra simmering.

How do I make tomato basil soup with fresh tomatoes?

Make the base recipe, then add fresh basil near the end and blend briefly. For stronger basil flavor, use extra basil and garnish each bowl with chopped basil or basil oil.

Can this be made without onion or garlic?

Yes. Use carrot, celery, roasted red bell pepper, bay leaf, basil, black pepper, and olive oil or butter for flavor. For an Indian-style no onion no garlic version, an optional tiny pinch of hing can add savory depth.

How long does homemade tomato soup last?

Homemade tomato soup lasts up to 4 days in the refrigerator when stored in an airtight container.

Can I freeze fresh tomato soup?

Yes. Fresh tomato soup freezes well for up to 3 months for best quality. For the smoothest texture, freeze it before adding cream and stir in cream after reheating.

Can I can this tomato soup?

No. This is not a tested shelf-stable canning recipe. It is written for eating fresh, refrigerating, or freezing. Use a tested pressure-canning recipe if you want pantry-stable soup.

Final Thought

The best fresh tomato soup tastes like you caught the tomatoes at the right moment — ripe, sweet, a little messy, and worth turning into something warm. Cook them down until the pot smells saucy, blend until smooth, then let the tomatoes tell you how much broth they need. The final bowl should taste bright enough for summer, soft enough for comfort, and ready for grilled cheese.
Posted on Leave a comment

Butternut Squash Soup Recipe

Creamy butternut squash soup in a matte ceramic bowl with pumpkin seeds, chili oil, herbs, black pepper, a cream swirl, and toast on the side.

This is the butternut squash soup for the nights when you want something creamy and comforting, but still balanced rather than heavy — sweet from the squash, savory from onion and garlic, and bright enough at the end that the bowl never tastes flat.

Butternut squash soup can easily go watery, bland, baby-food sweet, or too heavy if the liquid, salt, and finish are not handled carefully. This version avoids that with one simple idea: cook the squash until tender, blend first, thin later, then brighten the pot at the end.

You can roast the squash for deeper caramelized flavor, or make the whole soup on the stovetop when you want something faster. It also works with fresh squash, pre-cut cubes, frozen squash, canned puree, or leftover roasted squash — and you can finish it with cream, coconut milk, olive oil, butter, or no cream at all.

Here is the goal: a smooth, cozy bowl that does not turn watery, bland, or too sweet. At the finish, the soup should coat a spoon, taste savory before it tastes sweet, and end with just enough brightness to make you want the next bite. It is the kind of bowl that makes a piece of toast feel like dinner, especially when the top has something crunchy, creamy, or a little spicy.

Jump to Recipe · Quick Answer · Make It Now · Less-Broth-First Method · Roasted vs Stovetop · Cream, Coconut Milk, or No Cream · Fix Bland or Thin Soup

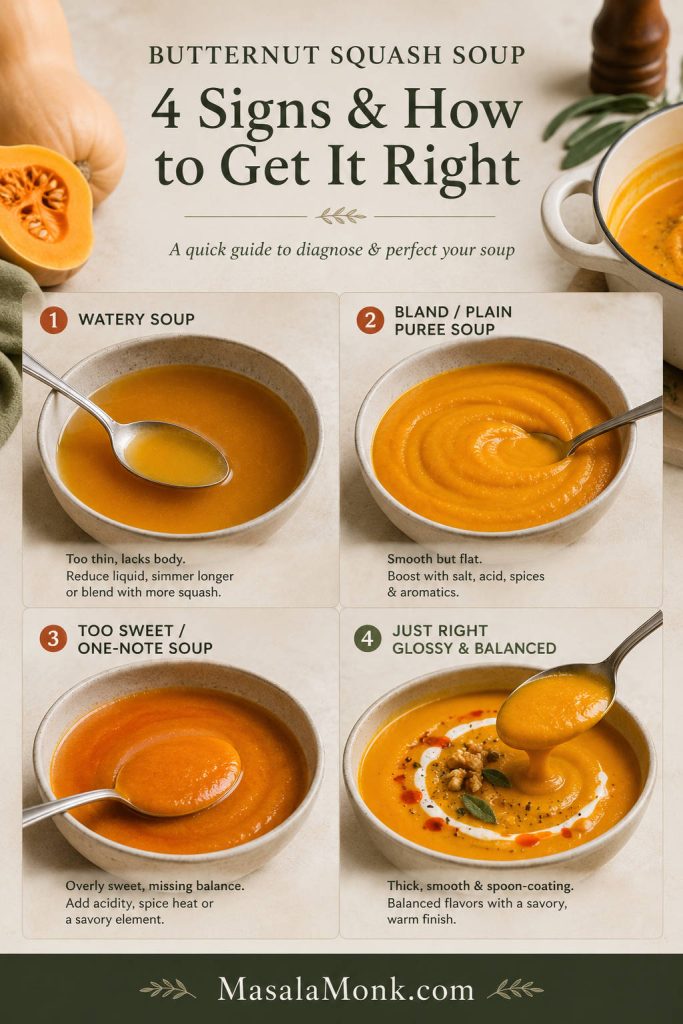
Use this quick visual check before you adjust the pot: watery, bland, and overly sweet butternut squash soup each need a different fix.

Four-panel comparison showing watery butternut squash soup, bland puree-style soup, overly sweet soup, and a thick glossy finished soup.
Before fixing the pot, identify the real problem: thin soup needs body, flat soup needs seasoning, and overly sweet soup needs acid, heat, or savoriness.

Quick Answer: How to Make Butternut Squash Soup

To make butternut squash soup, cook butternut squash until very tender, then blend it with sautéed onion, garlic, carrot, broth, herbs, and seasoning until smooth. Roast the squash at 425°F / 220°C when you want the deepest flavor. When speed matters, simmer peeled squash cubes directly in the pot with broth until soft.

If peeling raw squash feels annoying, roast the halves first and scoop the soft flesh out later. That gives you deeper flavor and skips the hardest part of squash prep.

The most important technique is to use less liquid at first. Start with 3 cups / 720 ml broth, blend the soup, then loosen it only once the texture is clear. That keeps the bowl creamy instead of watery, whether you finish it with cream, coconut milk, olive oil, butter, or no cream at all.

Before serving, taste once and wake the pot with lemon juice, lime juice, or apple cider vinegar. A small acidic finish keeps the squash from tasting dessert-sweet.

Need exact amounts? Go straight to the recipe card. Still choosing a method? Compare roasted vs stovetop, or check the fresh, frozen, pre-cut, and canned squash guide.

Make It Now: The Best Default Version

Do not overthink the versions yet. When in doubt, make the MasalaMonk default: roasted squash, a simple onion-carrot-garlic base, herbs, 3 cups / 720 ml broth, and the creamy finish that fits your bowl — cream, coconut milk, butter, or olive oil.

For the safest, most flavorful bowl tonight, roast one large butternut squash, sauté the onion, carrot, garlic, and herbs in a soup pot, add the roasted squash and broth, then blend until silky. Finish with either ½ cup / 120 ml cream, 1 cup / 240 ml coconut milk, or 1–2 tablespoons butter or olive oil.

Before serving, taste the soup and add a small splash of lemon juice, lime juice, or apple cider vinegar. That simple order keeps the soup thick, smooth, and balanced instead of watery, grainy, or too sweet.

NeedBest Choice
Best flavorRoast the squash first
Fastest methodUse the stovetop method with peeled cubes
No raw peelingRoast squash halves, then scoop the flesh
Dairy-free creamy soupUse full-fat coconut milk
No-cream soupBlend well and finish with olive oil, butter, lemon, or lime
Thicker soupStart with less broth and adjust the body at the end

Butternut Squash Soup Recipe Card

Creamy Butternut Squash Soup

This creamy butternut squash soup is smooth, comforting, and easy to adjust. Roast the squash for deeper flavor, or make it fully on the stovetop for a faster weeknight soup. Finish it with cream, coconut milk, butter, olive oil, or a simple splash of lemon or lime for a lighter version.

Prep Time15 minutes
Cook Time45 minutes roasted / 30 minutes stovetop
Total TimeAbout 1 hour roasted / 45 minutes stovetop
Servings6
YieldAbout 8 cups / 1.9 L soup
Main MethodRoasted or stovetop
Diet NotesVegetarian; gluten-free if using gluten-free stock; vegan and dairy-free options included

Timing note: the roasted total assumes you prep and sauté the aromatics while the squash finishes roasting.

Ingredients

  • 1 large butternut squash, about 3 lb / 1.3–1.4 kg whole, or about 8 cups / 1.1–1.2 kg peeled cubes
  • 2 tablespoons / 30 ml olive oil, plus a little more if roasting cubes
  • 1 large yellow onion, about 200 g, chopped
  • Carrot: 1 large, about 150 g, chopped
  • 3–4 garlic cloves, minced
  • 1 teaspoon grated fresh ginger, optional
  • 3 cups / 720 ml vegetable broth to start, plus up to 1 cup / 240 ml more as needed
  • 1 teaspoon fine salt, plus more to taste
  • ½ teaspoon black pepper
  • ½ teaspoon smoked paprika or ⅛ teaspoon ground nutmeg
  • 1 teaspoon dried thyme, sage, or rosemary, or 1 tablespoon chopped fresh herbs
  • Finish with 1–2 teaspoons lemon juice, lime juice, or apple cider vinegar

Choose One Creamy Finish

  • Classic creamy soup: ½ cup / 120 ml heavy cream
  • Dairy-free creamy soup: 1 cup / 240 ml full-fat coconut milk
  • Creamy soup without cream: 1–2 tablespoons butter or olive oil
  • Lighter soup: skip the creamy finish and use lemon, lime, herbs, and black pepper to brighten the bowl

Equipment

  • Large baking sheet, if roasting
  • Parchment paper, optional
  • Sharp chef’s knife
  • Vegetable peeler, if making the stovetop cube version
  • Large spoon for removing seeds
  • Dutch oven or heavy-bottomed soup pot
  • Immersion blender or countertop blender
  • Ladle
  • Measuring cups and spoons
  • Kitchen scale, optional but helpful

Roasted Method

  1. Heat the oven to 425°F / 220°C.
  2. Cut the butternut squash in half lengthwise and scoop out the seeds. For faster roasting, peel and cube the squash instead.
  3. Rub the squash with 1 tablespoon olive oil and a pinch of salt. If roasting cubes, use enough oil to lightly coat them.
  4. Roast cut-side down on a baking sheet for 40–50 minutes, or until the flesh is very tender and the edges smell sweet and nutty. If using cubes, roast for 35–40 minutes, tossing once, until lightly caramelized.
  5. Heat the remaining 1 tablespoon olive oil in a Dutch oven or soup pot over medium heat.
  6. Add the onion and carrot. Cook for 6–8 minutes, stirring occasionally, until softened.
  7. Add garlic, ginger if using, herbs, smoked paprika or nutmeg, black pepper, and salt. Cook for 30–60 seconds, just until fragrant.
  8. Scoop the roasted squash flesh into the pot. Add 3 cups / 720 ml broth.
  9. Simmer for 5–10 minutes so the flavors come together.
  10. Blend until completely smooth using an immersion blender or countertop blender.
  11. Thin the soup in small splashes until it reaches your preferred texture.
  12. Stir in your chosen creamy finish, if using.
  13. Finish with lemon juice, lime juice, or apple cider vinegar. Taste and adjust salt, pepper, and acidity before serving.

Stovetop Method

  1. Peel, seed, and cube the butternut squash.
  2. Heat 2 tablespoons olive oil in a Dutch oven or soup pot over medium heat.
  3. Add onion and carrot. Cook for 6–8 minutes, until softened.
  4. Add garlic, ginger if using, herbs, smoked paprika or nutmeg, salt, and pepper. Cook for 30–60 seconds.
  5. Add the squash cubes and 3 cups / 720 ml broth.
  6. Bring to a boil, then reduce to a simmer.
  7. Cover and cook for 20–30 minutes, or until the squash is very soft.
  8. Blend until smooth.
  9. Loosen the soup only if it needs more liquid.
  10. Stir in your chosen creamy finish, if using.
  11. Finish with lemon juice, lime juice, or apple cider vinegar, then adjust seasoning.

Important texture note: start with 3 cups / 720 ml broth, not the full amount. Squash size and water content can vary. It is much easier to thin the soup after blending than to fix a watery pot later.

Vegan note: use vegetable broth, olive oil, and coconut milk or cashew cream instead of butter or heavy cream.

Now tune the bowl: texture method · creamy finish · toppings · troubleshooting.

What’s Inside

The recipe above gives you the main bowl. From there, the guide below helps you tune it to your kitchen — the squash you have, the method you prefer, the finish you want, and the fixes that save the pot if something tastes off.

Start Here

Choose Your Version

Serve, Store, Fix

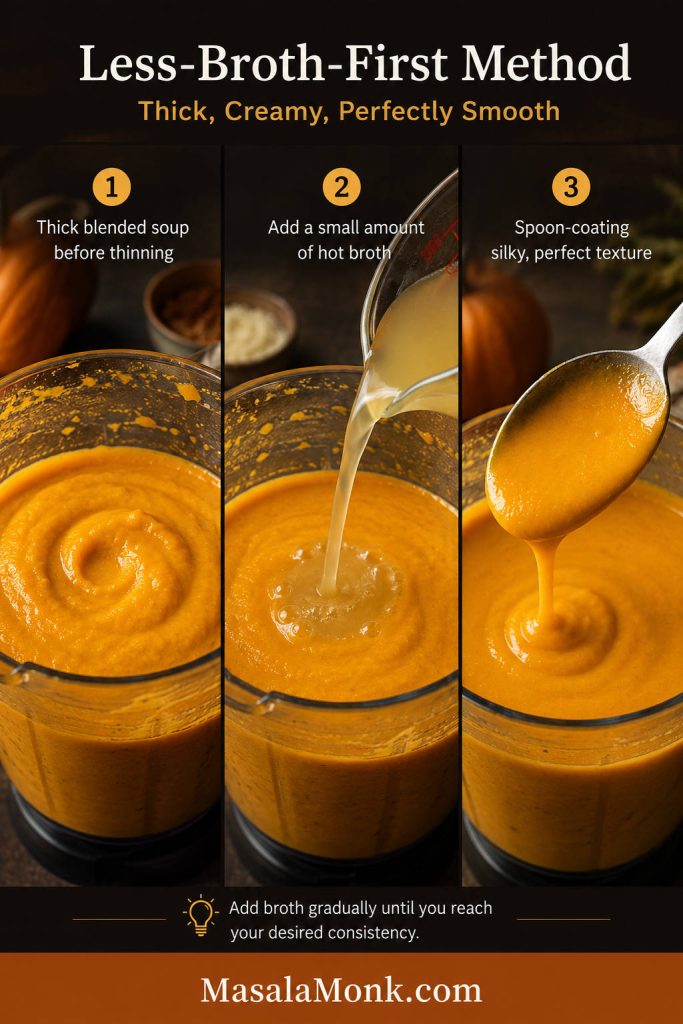
The Less-Broth-First Method

This recipe uses the Less-Broth-First Method: start with 3 cups / 720 ml broth, blend the cooked squash until smooth, then thin only after you know the soup’s real texture.

That one method is what makes the recipe flexible. If your squash is huge, watery, frozen, canned, or already roasted, the soup still works because the final thickness is adjusted after blending, not guessed before cooking.

The finished soup should feel velvety on the spoon, not loose like broth and not stiff like puree. Once the texture is right, salt, richness, herbs, and a little acid make the flavor complete.

Three-panel guide showing thick blended butternut squash soup, a small amount of broth being added, and a spoonful of smooth soup with spoon-coating texture.
Because squash varies in moisture, blend the soup thick first; then loosen it gradually so it stays creamy instead of turning watery.

Why This Butternut Squash Soup Works

This soup tastes complete when the squash’s sweetness has something savory, rich, and bright around it. Onion, garlic, carrot, herbs, spice, salt, fat, and acidity all help the bowl taste full instead of flat.

Roasting brings out deeper, caramelized flavor. The stovetop method is faster and still gives you a smooth, comforting result, especially when the onion, garlic, carrot, and spices are cooked properly before the broth goes in.

When the cut side comes out deeply golden and the kitchen smells sweet and nutty, you know the soup already has a head start. Those roasted edges are where the bowl gets its deeper, almost nutty sweetness.

Seasoning the aromatics before the broth goes in keeps the soup from tasting diluted later. Carrot helps the soup taste rounder and look brighter, while ginger, herbs, black pepper, smoked paprika, or nutmeg add warmth. Lemon juice, lime juice, or apple cider vinegar keeps the final spoonful lively.

Ingredient Notes: What Each One Does

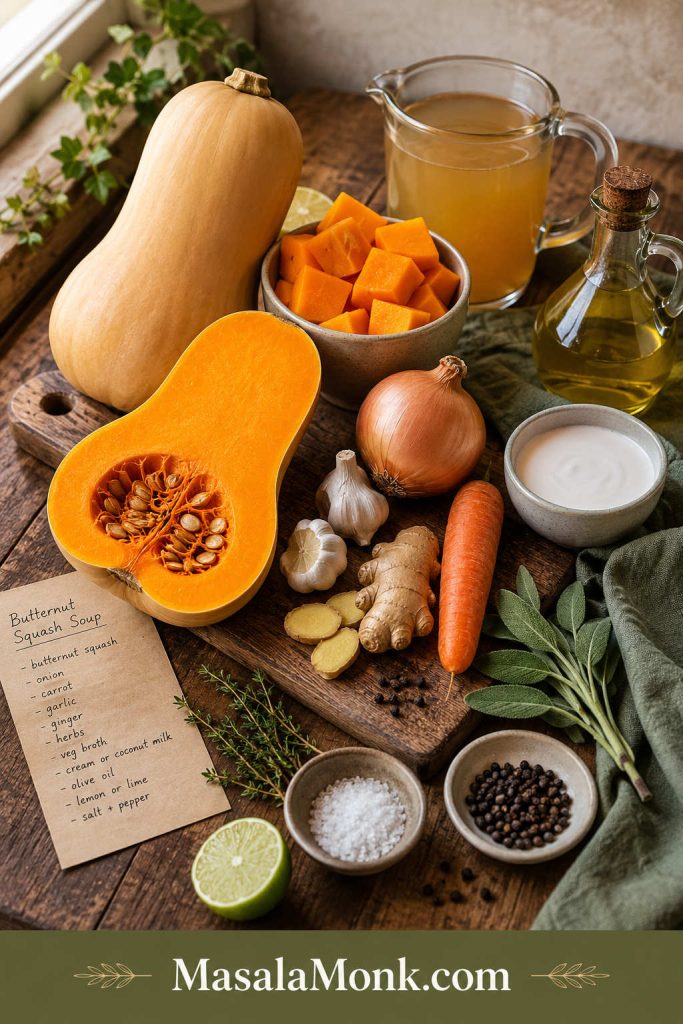
None of the ingredients are here just for show. Squash brings body and sweetness. Onion, garlic, and carrot make the soup savory. Herbs, ginger, and spices add warmth. Broth controls thickness. Your creamy finish decides how rich the final bowl feels.

Ingredients for butternut squash soup arranged on a wooden board, including squash, onion, carrot, garlic, ginger, herbs, broth, cream, olive oil, lime, salt, and pepper.
Notice the balance before cooking: squash brings body, aromatics build depth, broth controls texture, and citrus wakes up the final flavor.

Butternut Squash

Butternut squash is naturally sweet, creamy when blended, and perfect for soup. One large squash, about 3 lb / 1.3–1.4 kg, is usually enough for 6 servings.

Whole fresh squash, peeled cubes, frozen squash, canned puree, and leftover roasted squash can all work. The method changes slightly depending on what you have, but the same rule stays true: cook it until very tender before blending.

Onion, Garlic, and Carrot

Onion and garlic give the soup its savory base. Carrot is part of the default version because it rounds out the flavor and deepens the color. You can skip it if you do not have one, but the bowl may taste slightly less full.

Ginger, Herbs, and Spices

Fresh ginger adds warmth and keeps the soup from tasting heavy. Sage, thyme, rosemary, nutmeg, smoked paprika, curry powder, garam masala, and black pepper all work well here.

Classic version: use sage, thyme, rosemary, or nutmeg. For a warmer spiced bowl, add ginger with a little curry powder or garam masala and finish with lime.

Broth

Vegetable broth keeps the recipe vegetarian and works well with the natural sweetness of the squash. Chicken broth can also be used if you are not keeping the soup vegetarian.

Think of broth as an adjustment, not the whole base. The soup should coat a spoon, not pour like thin broth. Add more only after blending if the texture needs it.

Cream, Coconut Milk, Butter, or Olive Oil

You do not need heavy cream to make this soup creamy. Creaminess comes from fully cooked squash, controlled broth, and thorough blending first. The blender should turn the squash glossy before any cream goes in.

Cream, coconut milk, butter, or olive oil can add richness, but they should not be doing all the work. Coconut milk is the easiest dairy-free finish. For more ways to use it in cooking, see this guide to coconut milk benefits and uses.

Lemon, Lime, or Apple Cider Vinegar

This is the small step that makes the soup taste finished. Use lemon juice for a clean finish, lime juice for a spiced or coconut version, and apple cider vinegar for a warmer fall-style bowl.

Fresh, Frozen, Pre-Cut, or Canned Squash

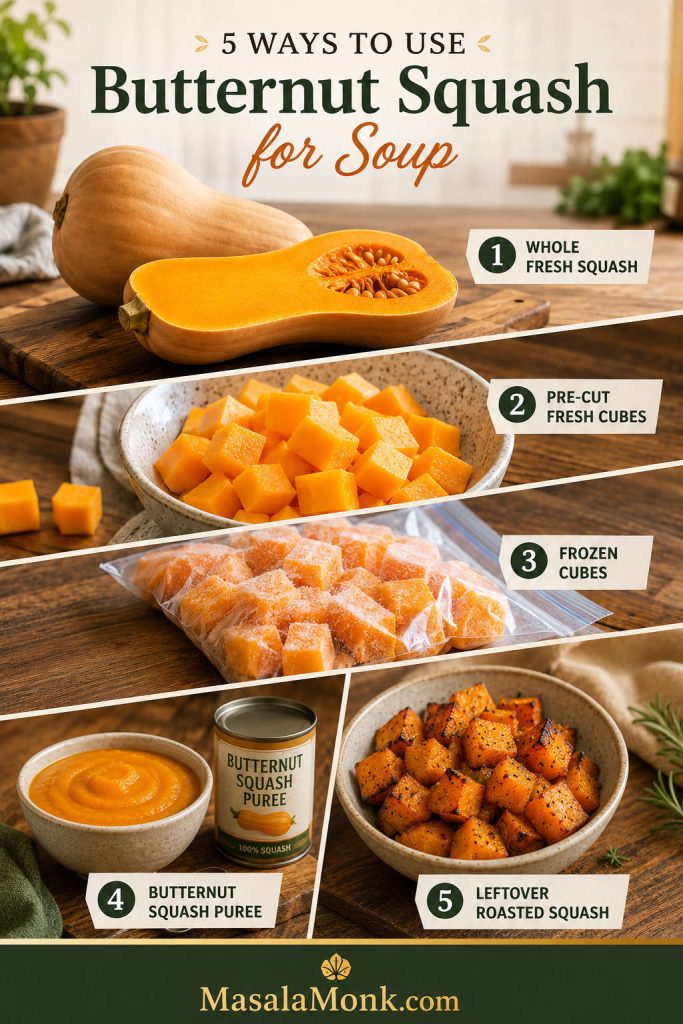
Fresh, frozen, pre-cut, canned, and leftover roasted squash can all make a good soup. The handling changes, but the method stays forgiving: cook the squash until fully soft, blend, then adjust the texture and flavor.

Guide showing whole fresh butternut squash, pre-cut squash cubes, frozen squash cubes, butternut squash puree, and leftover roasted squash.
Whether you use fresh, frozen, pre-cut, canned puree, or leftover roasted squash, adjust the liquid after blending because moisture levels change.

Choose the Squash You Have

What You HaveAmount for This RecipeWhat to Adjust
Whole fresh butternut squash1 large squash, about 3 lb / 1.3–1.4 kgBest flavor. Roast halves or cubes, or peel and simmer on the stovetop.
Pre-cut fresh squashAbout 8 cups / 1.1–1.2 kg cubesGreat shortcut. Roast for flavor or simmer for speed. Check that the cubes are firm and fresh.
Frozen butternut squash cubesAbout 8 cups / 1.1–1.2 kg cubesAdd directly to the pot. Frozen cubes may release extra water, so start with less broth.
Canned or packaged squash pureeAbout 4 cups / 900–950 g pureeSauté onion, garlic, and spices first. Then whisk in the puree and broth slowly.
Frozen squash pureeAbout 4 cups / 900–950 g pureeWarm gently, then blend with cooked aromatics and hot broth.
Leftover roasted squashAbout 4 cups mashed or scooped fleshFastest option. Blend with sautéed onion, garlic, and hot broth.

Frozen squash may look watery at first. Let it simmer until very soft, blend well, then adjust the body after blending.

Canned or packaged puree can taste flatter than roasted squash, so give the onion, garlic, and spices time to bloom before adding it. A small splash of lemon juice or apple cider vinegar at the end helps wake up the flavor.

Leftover roasted squash makes this almost instant. Since the squash is already cooked, focus on building a good onion-garlic base, then blend with hot broth and finish with salt, fat, and acidity.

Once you know your squash type, compare roasted vs stovetop or move into how to make the soup.

Roasted vs Stovetop Butternut Squash Soup

Both methods work. Pick based on the night you are having: the oven when you want deeper flavor, the stovetop when you want dinner faster.

Side-by-side comparison of roasted butternut squash soup and stovetop butternut squash soup served in two bowls.
For deeper caramelized flavor, choose roasted squash; for a faster butternut squash soup with a softer taste, use the stovetop method.
MethodBest ForFlavorTime
Roasted squashBest overall flavorSweet, caramelized, deepLonger
StovetopFast weeknight soupSmooth, clean, lighterFaster
Pre-cut or frozen squashConvenienceGood if seasoned wellFastest
Leftover roasted squashQuickest rich soupDeep and already cookedVery fast

Use the roasted method when you want the best flavor. Roasting concentrates the squash and adds caramelized edges, which makes the final soup taste richer.

The stovetop method is better when you want a faster, simpler dinner. It will still be smooth and cozy, but it may need a little more seasoning, spice, or acidity at the end.

Pre-cut or frozen squash is for the nights when convenience matters. The bowl can still be very good, especially if you build flavor with onion, garlic, ginger, herbs, and enough salt.

Chosen your route? Go to how to make butternut squash soup, or return to the recipe card.

How to Make Butternut Squash Soup

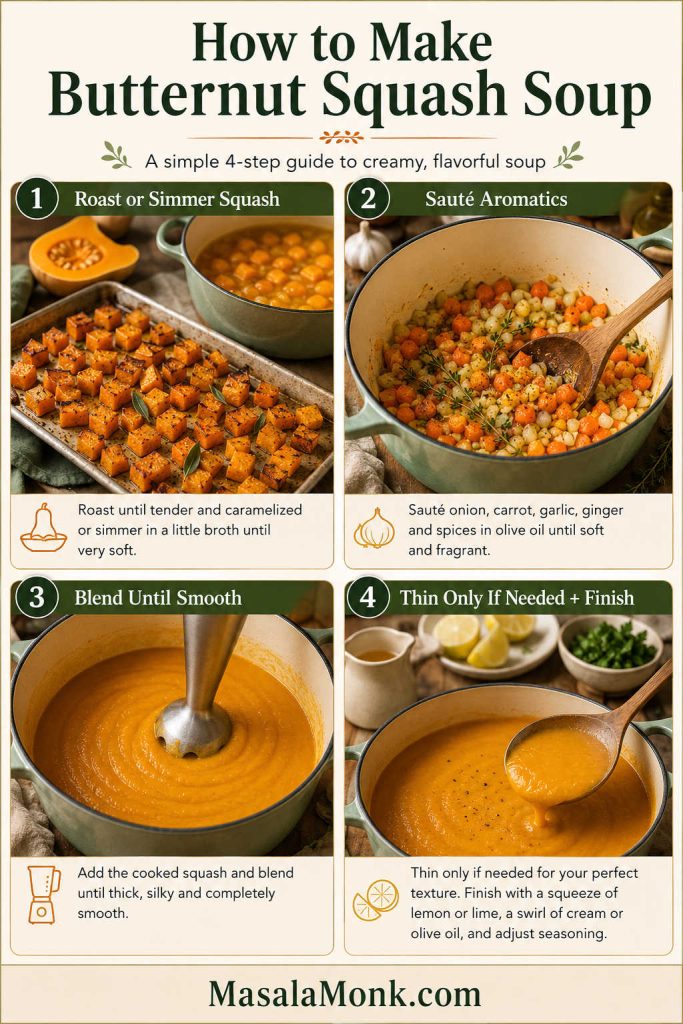
Use this quick method guide as the visual map for the full process: cook the squash, build the savory base, blend until smooth, then thin only if needed.

Four-step guide showing roasted or simmered squash, sautéed aromatics, blended smooth soup, and finished soup thinned only if needed.
First cook the squash, then build the flavor base, blend until silky, and adjust thickness only once you can see the final texture.

1. Prepare the Squash

For roasted soup, cut the squash in half lengthwise and scoop out the seeds. Roast it cut-side down, then scoop out the soft flesh later. This route avoids peeling raw squash.

Roasted butternut squash halves on parchment paper with soft orange flesh being scooped from the skin using a spoon.
Instead of peeling raw squash, roast the halves first; once tender, the flesh scoops out cleanly and blends into a smoother soup.

With the stovetop method, peel the squash, remove the seeds, and cut it into cubes. Smaller pieces cook faster. Pre-cut or frozen cubes can go straight into the pot with only small broth adjustments.

2. Roast or Simmer Until Very Tender

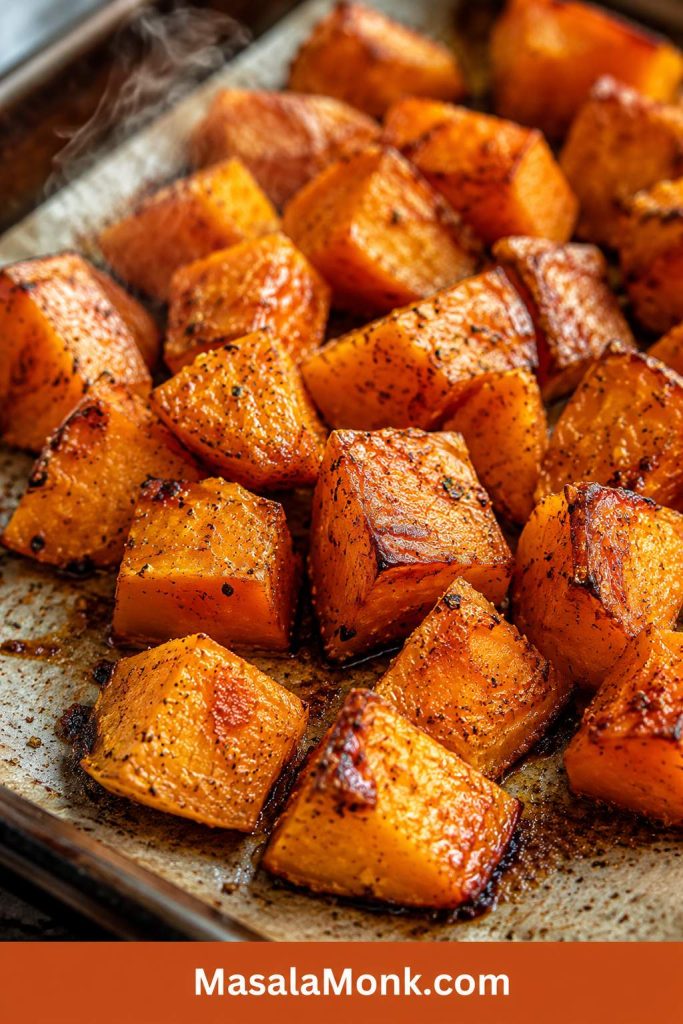
In the roasted method, cook the squash at 425°F / 220°C until the flesh is soft and the edges have some color. This usually takes 40–50 minutes for halves or 35–40 minutes for cubes.

Close-up of roasted butternut squash cubes with browned edges, caramelized spots, black pepper, and steam on a baking sheet.
After roasting, look for browned edges and caramelized spots; that color is what gives roasted butternut squash soup deeper, rounder flavor.

On the stovetop, simmer the cubes with broth for 20–30 minutes, until they are soft enough to mash with a spoon. Do not rush this step. Undercooked squash can make the soup taste grainy instead of silky.

3. Build the Flavor Base

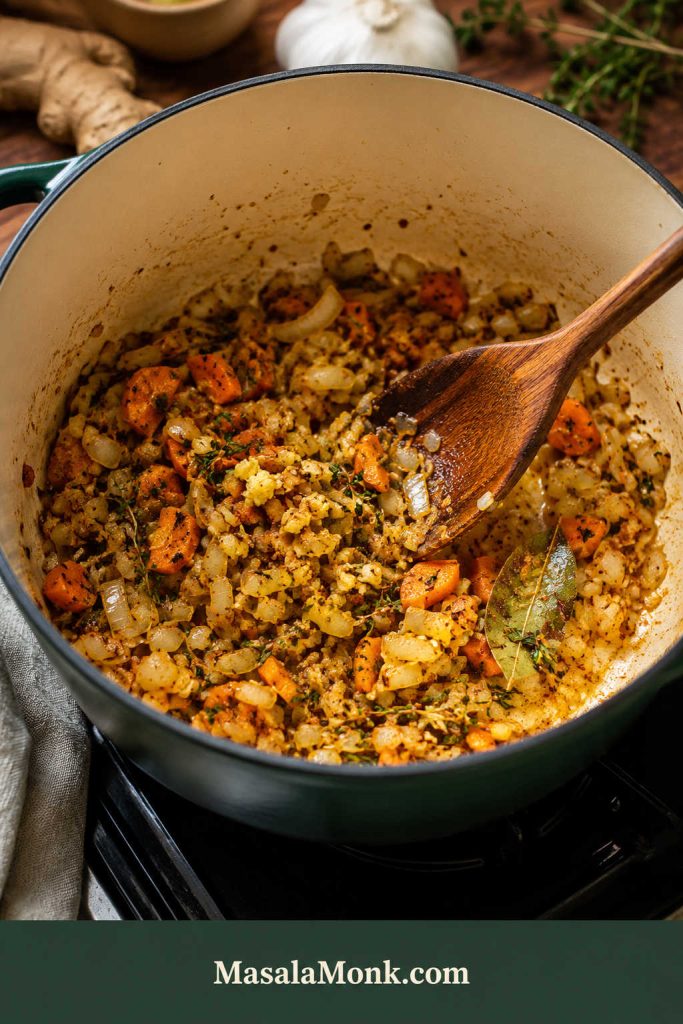
Cook onion and carrot in olive oil until softened. Add garlic, ginger, herbs, and spices only after the onion has softened. Garlic and ground spices can burn if they cook too long over dry heat.

This base is what keeps the soup from tasting like plain squash puree.

Onion, carrot, garlic, ginger, herbs, spices, and bay leaf sautéing in a green Dutch oven with a wooden spoon.
Meanwhile, soften the onion, carrot, garlic, ginger, and herbs before adding broth so the soup starts savory instead of turning flat later.

4. Add Broth Carefully

Add 3 cups / 720 ml broth first. After blending, add more only if the soup is too thick. If too much liquid goes in early, simmer uncovered or blend in more cooked squash, sweet potato, carrots, lentils, or beans.

5. Blend Until Smooth

An immersion blender lets you blend directly in the pot. A countertop blender usually gives the silkiest finish, especially after roasting.

If using a countertop blender, blend in batches and do not fill the jar too high. Hot soup expands when blended. Start on low speed and protect your hand with a towel if steam can escape from the lid.

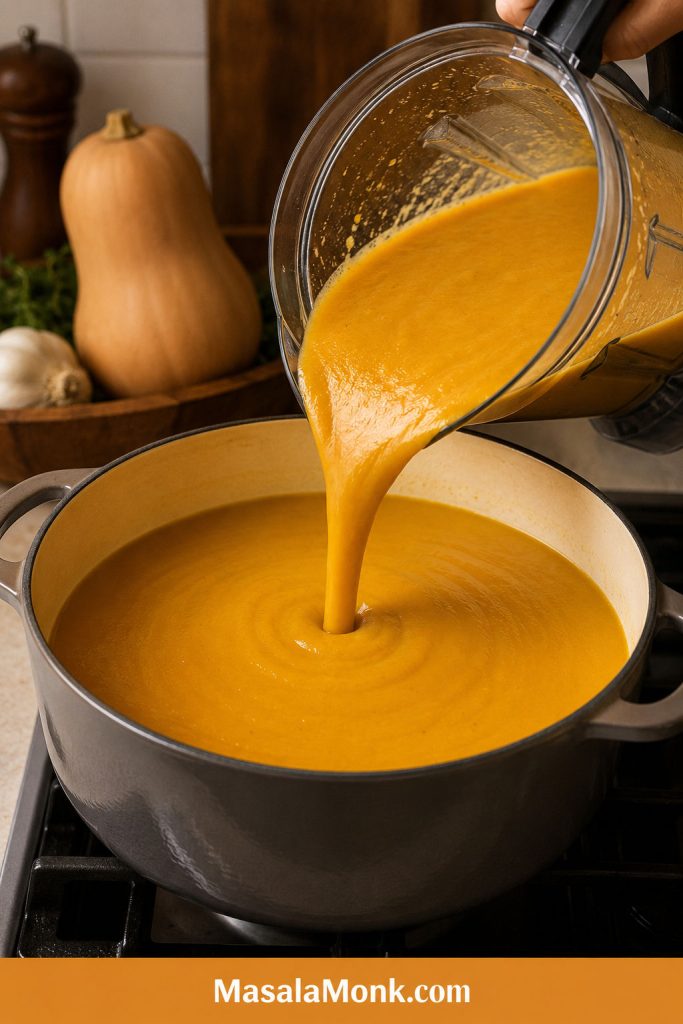
Blend longer than you think you need to. That extra time helps the squash turn glossy and silky instead of pulpy.

Smooth orange butternut squash soup being poured from a blender into a Dutch oven on the stove.
Once blended, the soup should pour in a smooth ribbon with a glossy surface; that is the cue that it is silky, not grainy.

6. Finish and Balance

After blending, choose your finish: heavy cream for classic richness, coconut milk for dairy-free creaminess, butter or olive oil for no-cream richness, or lemon/lime for brightness.

A good batch tastes mellow first, then bright at the end. If it feels sleepy, add salt before adding more spice, then finish with a small splash of lemon, lime, or vinegar.

Instant Pot, Slow Cooker, and Blender Notes

For after-work soup, use the stovetop or Instant Pot method. When you have a little more time, roast the squash and let the oven do the flavor work.

MethodHow to Do ItBest Tip
Instant PotSauté onion, carrot, garlic, ginger, and spices. Add peeled squash cubes and 3 cups / 720 ml broth. Pressure cook on high for 10 minutes, let it naturally release for 5 minutes, then quick release, blend, and finish.Add cream or coconut milk after pressure cooking.
Slow cookerFor best flavor, sauté the onion, carrot, garlic, and spices first. Add them to the slow cooker with peeled squash cubes, broth, herbs, salt, and pepper. Cook on high for 3–4 hours or low for 6–8 hours, until very soft. Blend and finish.Use less broth at first; slow-cooked vegetables release liquid.
High-speed blenderRoast or simmer the squash first, then blend with hot broth and cooked aromatics. Use a heated soup cycle only if your blender is designed for it.Hot soup expands, so blend carefully and never overfill.
Immersion blenderBlend directly in the pot after the squash is fully cooked.Easy and safe, but may not be as silky as a countertop blender.

A countertop blender gives the smoothest result. An immersion blender is less fussy and easier to clean, so use whichever one makes the soup more likely to happen tonight.

If the slow cooker is your favorite route for cozy soups, this slow cooker broccoli cheese soup follows the same gentle-finish idea for keeping creamy soups smooth.

How to Make Butternut Squash Soup Creamy

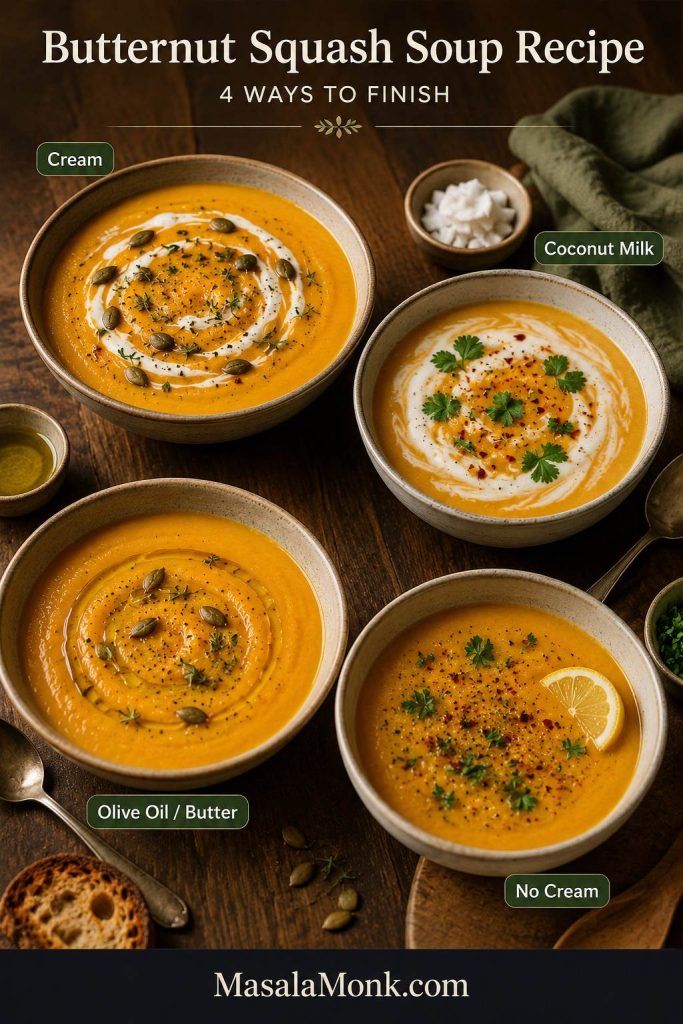
Creaminess does not have to mean heavy cream. It comes from fully tender squash, careful broth, and enough blending. Once the base is smooth, you can make the bowl rich, dairy-free, light, or extra silky with one finishing choice.

Four bowls of butternut squash soup showing cream, coconut milk, olive oil or butter, and no-cream finishing options.
With a smooth base, choose your finish: cream adds richness, coconut milk softens it, olive oil adds gloss, and no cream keeps it lighter.
Creamy OptionBest ForHow to Use It
Heavy creamClassic creamy soupStir in ½ cup / 120 ml after blending. Do not boil hard.
Coconut milkDairy-free or vegan soupAdd 1 cup / 240 ml after blending. Great with ginger, curry, chili, and lime.
ButterCreamy without creamBlend in 1–2 tablespoons at the end.
Olive oilLighter no-cream versionDrizzle in after blending or blend in 1 tablespoon.
Cashew creamVegan richnessBlend soaked cashews with water, then stir in.
Sweet potato or potatoThicker bodyReplace part of the squash or add a small amount while simmering.
No creamLightest versionBlend very well and finish with lemon/lime and a little olive oil.

A coconut milk version works best with full-fat coconut milk. Light coconut milk is fine, but the soup will be thinner and less silky.

For a vegan bowl, use vegetable broth, olive oil, coconut milk or cashew cream, and plant-based toppings like pumpkin seeds, roasted chickpeas, herbs, or chili oil.

Add cream, coconut milk, or cashew cream near the end, after blending. This keeps the texture smoother and prevents dairy from boiling too hard.

After choosing your finish, try a flavor variation or use troubleshooting if the soup tastes flat, thin, or too sweet.

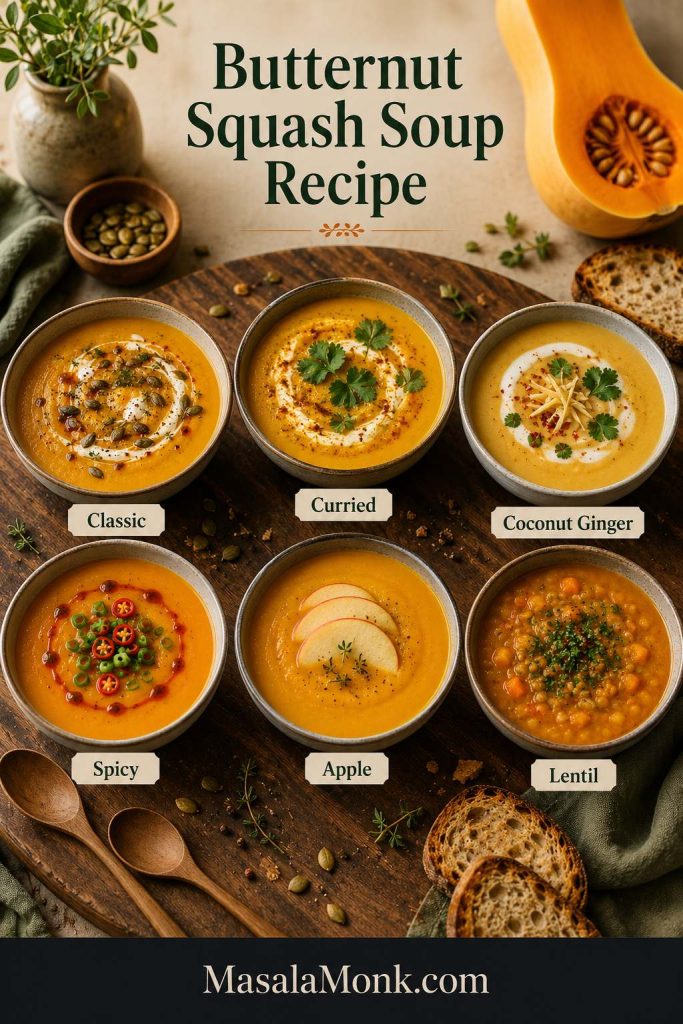
Butternut Squash Soup Variations

Think of the variations as small turns, not separate recipes. The soup stays familiar; only the mood changes.

Six small bowls of butternut squash soup variations labeled classic, curried, coconut ginger, spicy, apple, and lentil.
Start with the same base, then shift the mood: curry adds warmth, ginger adds brightness, lentils add body, and apple brings autumn sweetness.
VersionWhat to Add
Classic butternut squash soupSage, thyme, rosemary, black pepper, and a little nutmeg
Curried butternut squash soupCurry powder or garam masala, ginger, coconut milk, and lime
Spicy butternut squash soupChili flakes, chili oil, chipotle, or black pepper
Coconut ginger soupCoconut milk, fresh ginger, lime, and cilantro
Apple autumn soup1 peeled apple, cinnamon, nutmeg, and a small drizzle of maple syrup
Sweet potato butternut soupReplace 2 cups of squash with sweet potato cubes
Carrot butternut soupAdd 2–3 carrots and ½ cup extra broth if the soup gets too thick
Lentil butternut soupAdd ½ cup red lentils and 1–1½ cups extra broth for a thicker, meal-style soup
Roasted garlic soupRoast garlic with the squash and blend it in
No-cream light soupSkip cream and finish with lemon, herbs, and olive oil

For a warm spiced version, add ginger, a little curry powder or garam masala, coconut milk, black pepper, and lime juice. It gives the soup depth without making it heavy.

Lentils are the easiest way to turn this into a heartier vegetarian meal. This guide to vegan lentil soup recipes has more ideas for using lentils in cozy, filling bowls.

For the apple-autumn version, a small pinch of homemade pumpkin pie spice can bring cinnamon, ginger, nutmeg, allspice, and clove notes without needing several jars on the counter.

When the flavor lane is set, finish the bowl with toppings or turn it into dinner with serving ideas.

Best Toppings for Butternut Squash Soup

Once the soup is blended and balanced, toppings are where the bowl stops feeling like plain puree and starts feeling like dinner. A silky soup needs something that crunches, swirls, snaps, or wakes it up — seeds, herbs, chili oil, cream, yogurt, roasted chickpeas, or crisp toast.

Bowl of butternut squash soup surrounded by pumpkin seeds, chili oil, herbs, croutons, roasted chickpeas, apple slices, nuts, black pepper, and toast.
Because creamy soup is soft by nature, toppings should add contrast: crunch, heat, herbs, pepper, toast, or something bright.
What the Soup NeedsGood Toppings
CrunchToasted pumpkin seeds, croutons, roasted chickpeas, toasted almonds, walnuts, or pecans
Creamy contrastCream swirl, coconut milk, yogurt, sour cream, or cashew cream
HeatChili oil, chili crisp, red pepper flakes, black pepper, sambal, or hot sauce
FreshnessCilantro, parsley, chives, scallions, basil, or dill
Sweet-salty contrastDiced apple, crispy bacon, blue cheese, feta, or dried cranberries
Meal upgradeRoasted chickpeas, cooked lentils, beans, grilled cheese cubes, or toasted bread

Think of toppings as balance. Sweeter batches need heat, salt, herbs, or acidity. For a fuller meal, add chickpeas, lentils, beans, seeds, or toast.

Easy Topping Combos

StyleUse This Combo
ClassicCream swirl + black pepper + toasted pumpkin seeds
VeganCoconut milk + chili oil + cilantro + roasted chickpeas
Fall dinnerToasted pecans + diced apple + thyme
SpicedLime + chili oil + toasted seeds + cilantro
Protein boostLentils or roasted chickpeas + yogurt or coconut milk
Simple lunchCroutons + olive oil + black pepper + parsley

A swirl of cream softens the edges, pumpkin seeds snap against the silky soup, and chili oil or lime keeps the sweetness awake.

To make the bowl feel more like lunch, serve it with a scoop of chickpea salad on the side. Chickpeas add protein and texture without making the meal feel heavy.

What to Serve With Butternut Squash Soup

This soup can be a starter, lunch, or light dinner. To make it more filling, serve it with something crisp, toasted, or protein-rich.

Butternut squash soup served with garlic toast, cucumber salad, chickpea salad, and rustic bread on a cozy table.
Turn butternut squash soup into dinner by pairing the bowl with crisp toast, garlic bread, chickpea salad, or cucumber salad.
  • Crusty bread
  • Garlic bread
  • Grilled cheese
  • Cheese toast
  • Simple green salad
  • Roasted chickpeas
  • Lentil salad
  • Quinoa bowl
  • Baked potato
  • Sandwiches
  • Roasted vegetables

Bread turns this into the kind of meal people linger over. A warm slice of homemade garlic bread loaf works especially well because it adds crunch, butteriness, and something sturdy to dip.

Cucumber salad keeps the meal from feeling too soft or sweet. The vinegar, dill, and onion cut through the squash’s natural sweetness.

If you love cozy soup dinners, try this French onion soup next. For tonight, keep this butternut squash soup as the main bowl with toast, salad, and crunchy toppings.

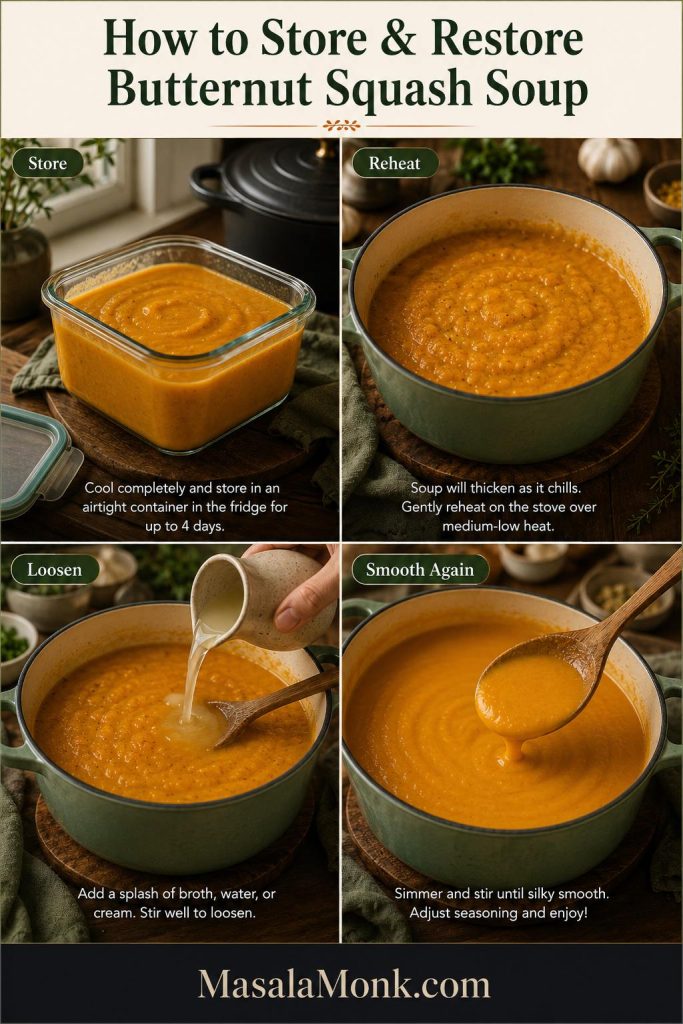
Storage, Freezing, and Reheating

This soup is excellent for meal prep because it stores and reheats well. It may look thicker the next day, but that is normal; a splash of broth, water, cream, or coconut milk brings it back.

Four-panel guide showing butternut squash soup in a storage container, thick reheated soup, liquid being stirred in, and smooth soup on a spoon.
As the soup chills, it thickens. Reheat gently and stir in a small splash of broth, water, cream, or coconut milk until smooth again.
Storage MethodGuidance
FridgeStore in an airtight container for up to 4 days.
FreezerFreeze for up to 3 months for best texture and flavor.
Reheating on stoveWarm gently over medium-low heat, stirring often.
Reheating in microwaveHeat in short intervals, stirring between each one.
If too thick after chillingAdd broth, water, cream, or coconut milk a little at a time.
If separated after freezingWhisk well or blend briefly after reheating.

For general food safety, the USDA leftover safety guidance recommends using refrigerated leftovers within 3–4 days.

Cream-based soup can sometimes separate slightly after freezing. It is still fine to eat, but the texture may need whisking or blending.

Coconut milk versions usually freeze well, though they may also need stirring after reheating.

For the smoothest freezer results, freeze the soup before adding cream, then add cream or coconut milk after reheating.

Need to rescue leftovers or a tricky batch? Jump to fixes for thick, thin, bland, grainy, or separated soup.

Avoid These Common Mistakes

Most problems are easy to avoid if you control the liquid, cook the squash fully, and balance the flavor at the end.

  • Do not add all the broth at once. Start with 3 cups / 720 ml and thin after blending.
  • Do not blend undercooked squash. The squash should be soft enough to mash easily with a spoon.
  • Do not skip salt and acid. Butternut squash is sweet, so it needs seasoning and brightness.
  • Do not boil hard after adding cream. Add cream or coconut milk near the end and heat gently.
  • Do not rely only on sweetness. Use onion, garlic, herbs, ginger, spice, or acidity for balance.
  • Do not judge the texture before blending. The soup often looks chunky or loose before it turns smooth.

Troubleshooting Butternut Squash Soup

If the pot is already made and something feels off, do not start over. A bland or thin soup is not a failure — it usually just needs salt, acid, time, or a little more body.

Why is my butternut squash soup bland?

Most bland soup needs salt first, then acid. Add salt gradually, then wake it up with lemon juice, lime juice, or apple cider vinegar. Still flat? Add black pepper, smoked paprika, curry powder, ginger, or a small amount of butter or olive oil.

Why does my soup taste like plain puree?

If the soup tastes like plain puree or too sweet and one-note, it usually needs contrast. Add salt first, then try lemon, lime, vinegar, black pepper, chili oil, toasted seeds, herbs, roasted chickpeas, or crisp toast on top.

Why is my soup too sweet?

Butternut squash is naturally sweet. Balance it with lemon juice, lime juice, vinegar, black pepper, chili flakes, curry powder, or a little extra broth. Savory toppings like roasted chickpeas, pumpkin seeds, yogurt, or herbs also help.

How do I fix soup that is too thick?

Add hot broth ¼ cup / 60 ml at a time, blending or stirring after each addition, until the soup reaches the texture you want.

How do I fix soup that is too thin?

Simmer it uncovered until some liquid evaporates. You can also blend in more roasted squash, cooked sweet potato, cooked carrots, red lentils, or beans.

Why is my soup grainy?

The squash may not have cooked long enough, or the soup may need more blending. Simmer until the squash is very soft, then blend thoroughly. A countertop blender usually gives the smoothest texture.

Why did my soup separate after freezing?

Cream and coconut milk can separate slightly after freezing and reheating. Warm the soup gently and whisk well. If needed, blend it briefly to bring the texture back together.

How do I make the soup richer without cream?

Blend in 1–2 tablespoons butter, a drizzle of olive oil, coconut milk, cashew cream, or a small amount of cooked sweet potato. Roasting the squash first also gives the soup deeper flavor without needing extra cream.

Is Butternut Squash Soup Healthy?

It can be a nourishing, vegetable-heavy soup, but the final nutrition depends on broth, cream, toppings, and serving size. The base is naturally smooth, so you do not need a lot of cream to make it satisfying.

A lighter version still feels satisfying because the squash does the creamy work before any cream goes in. For the lightest bowl, use broth, olive oil, lemon, herbs, and crunchy seeds.

A more filling vegetarian version can use lentils, beans, chickpeas, Greek yogurt, or pumpkin seeds. Richer cream-or-butter versions work best in smaller bowls.

If you are not keeping it vegetarian, grilled chicken or turkey also works. For lower sodium, use low-sodium broth and adjust salt at the end.

To check ingredient-level nutrition details, search for raw or cooked butternut squash in USDA FoodData Central.

For a low-carb or keto-style approach, butternut squash needs more care because it is naturally starchy. This guide to butternut squash on keto explains that angle in more detail.

Frequently Asked Questions

Do you need to peel butternut squash for soup?

If you are roasting the squash in halves, you do not need to peel it first. Roast it until soft, then scoop the flesh out of the skin. If you are making the stovetop version with cubes, peel it before cooking.

Is roasted butternut squash soup better than stovetop?

Roasting usually gives deeper flavor because the squash caramelizes in the oven. The stovetop version is faster and easier, but it may need a little extra seasoning, spice, or acidity to taste as rich.

What makes butternut squash soup creamy?

Butternut squash itself becomes creamy when cooked until soft and blended well. Cream, coconut milk, butter, olive oil, cashew cream, sweet potato, or potato can make it richer, but good blending and broth control matter most.

How do you make butternut squash soup without cream?

Skip the cream and blend the soup very well. Use less broth at first, then thin only as needed. Finish with olive oil, butter if not vegan, coconut milk, cashew cream, or a splash of lemon or lime juice for balance.

Does coconut milk work in butternut squash soup?

Yes — especially with ginger, curry powder, chili, lime, and cilantro. Full-fat coconut milk gives the creamiest texture.

When should you add cream or coconut milk?

Add cream or coconut milk after the squash is cooked and the soup is blended. Warm it gently after adding. Avoid boiling hard once cream has been added because the texture can become less smooth.

Why does my butternut squash soup taste bland?

Most bland soup needs salt first, then acid. Add salt gradually, then brighten it with lemon juice, lime juice, or apple cider vinegar. For more flavor, add ginger, black pepper, smoked paprika, curry powder, sage, thyme, or chili oil.

How do you thicken butternut squash soup?

Simmer it uncovered, or blend in more cooked squash, sweet potato, carrots, lentils, beans, or potato. For best results, avoid adding too much broth before blending.

What spices go well with butternut squash soup?

Sage, thyme, rosemary, nutmeg, black pepper, smoked paprika, ginger, curry powder, cinnamon, chili flakes, and garam masala all work well here.

Can frozen butternut squash be used for soup?

Yes — use about 8 cups / 1.1–1.2 kg frozen cubes for this recipe. Add them directly to the pot and simmer until very soft. Start with less broth because frozen squash can release extra water.

How much butternut squash puree equals one squash for soup?

For this recipe, use about 4 cups / 900–950 g puree in place of one large 3 lb / 1.3–1.4 kg squash. Sauté the onion, garlic, carrot, and spices first, then whisk in the puree and broth slowly.

Can you make butternut squash soup in an Instant Pot or slow cooker?

Yes. For Instant Pot soup, sauté the aromatics, add squash and broth, pressure cook on high for 10 minutes, naturally release for 5 minutes, then blend and finish. Slow cooker soup takes 3–4 hours on high or 6–8 hours on low, until the squash is very soft. Add cream or coconut milk after cooking.

How long does butternut squash soup last?

It lasts up to 4 days in the fridge when stored in an airtight container. You can also freeze it for up to 3 months. For the best texture, freeze the soup before adding cream, then add cream or coconut milk after reheating.

Back to Recipe Card · Back to Top

Final Tips for the Best Butternut Squash Soup

Use roasted squash when you have time and the stovetop method when dinner needs to happen faster. Start with less broth, blend until the soup turns glossy, then loosen it only if needed.

Before serving, taste once. If the bowl feels flat, add salt first, then a small splash of lemon, lime, or vinegar. Too thick? Loosen it gently. Too sweet? Give it herbs, heat, crunch, or acidity.

That is the bowl you want: creamy without being dull, sweet without being sugary, warm without being heavy, and easy enough to make again next week — especially with toast, seeds, or a little chili oil on top.

Posted on Leave a comment

Minestrone Soup Recipe

Bowl of minestrone soup with tomato broth, white beans, kidney beans, small pasta, carrots, zucchini, greens, herbs, and bread on the side.

A good minestrone soup should look generous before you even take the first spoonful: tender vegetables, creamy beans, small pasta, herbs, and a tomato broth that tastes rich instead of watery. The first spoonful should catch a little of everything — a soft bean, a piece of pasta, sweet carrot, zucchini, greens, and enough tomato broth to pull it all together.

This pot works because it protects the three things that matter most in minestrone: rich tomato broth, vegetables with texture, and pasta that does not turn the leftovers into mush. Even a half-used zucchini, a tired carrot, two cans of beans, and the last handful of pasta can become a proper dinner.

Homemade minestrone also gives you something canned soup rarely does: better texture. The vegetables do not have to be overcooked, the pasta can stay tender, and you control the salt, broth, and finish.

Cooking now? Jump to the recipe card. The notes below help keep the broth rich, the vegetables tender, and the leftovers useful.

What a Good Minestrone Spoonful Should Show

Before you start, notice the target balance: beans, vegetables, pasta, greens, and tomato broth should all show up in the same spoonful.

Spoon lifting minestrone soup with small pasta, white bean, kidney bean, carrot, zucchini, greens, and tomato broth dripping back into the bowl.
This spoonful shows the balance you want: beans for body, vegetables for freshness, small pasta for comfort, and tomato broth tying everything together.

Recipe at a Glance

Prep time20 minutes
Cook time45 minutes
Total time1 hour 5 minutes
Faster versionAbout 40 to 45 minutes with smaller diced vegetables, the full 6 cups broth, and a shorter 15 to 20 minute base simmer
Servings6 generous bowls
YieldAbout 11 to 13 cups soup
MethodStovetop
Best pot5 to 6 quart / 5 to 6 liter Dutch oven or heavy soup pot
Best forWeeknight dinner, meal prep, and freezer-friendly soup base
DietMeatless when made with vegetable broth; vegan option

The Minestrone Rule of 5: soften the aromatics, build the tomato base, add beans for body, keep the pasta small, and save tender greens for the end. Vegetables can change; the rhythm is what keeps the pot balanced.

Why this works: tomato paste gives the soup depth, beans make it feel full, late-added vegetables keep their shape, and pasta goes in only when the broth already tastes good. That is what keeps the soup hearty without letting it turn heavy or dull.

The Minestrone Rule of 5

This visual is the memory hook for the whole recipe: keep the rhythm steady, even when the vegetables change.

Rustic board showing minestrone ingredients arranged as aromatics, tomato base, beans, small pasta, and leafy greens.
Use the Minestrone Rule of 5 when you want the recipe to feel flexible: aromatics, tomato base, beans, small pasta, and greens are the core building blocks.

Easy minestrone ratio: for 6 bowls, use about 5 to 6 cups broth, 2 cans beans, 4 to 5 cups chopped vegetables, and 3/4 cup small pasta.

Short on time? Dice the vegetables smaller, use the full 6 cups broth, and simmer the soup base for 15 to 20 minutes before adding pasta and greens. The full cook gives deeper flavor, but the faster version still makes a good weeknight bowl.


Minestrone Soup Recipe Card

Description: A hearty minestrone soup with vegetables, beans, small pasta, and a rich tomato broth. It is meatless when made with vegetable broth, cozy without cream, and easy to adjust for leftovers or a thicker dinner-style bowl.

Prep: 20 minutes | Cook: 45 minutes | Total: 1 hour 5 minutes | Serves: 6 generous bowls | Yield: about 11 to 13 cups

Equipment: 5 to 6 quart / 5 to 6 liter Dutch oven or heavy soup pot, knife, cutting board, can opener, colander, wooden spoon, and ladle.

Ingredients

Base

  • 2 tablespoons olive oil, plus more for finishing, about 30 ml
  • 1 medium yellow onion, diced, about 150 to 180 g
  • 2 medium carrots, diced, about 130 to 160 g
  • 2 celery ribs, diced, about 90 to 120 g
  • 4 garlic cloves, minced
  • 3 tablespoons tomato paste, about 45 g

Broth and Seasoning

  • 1 can crushed or diced tomatoes, 28 oz / 794 g
  • 5 to 6 cups vegetable broth, 1.2 to 1.4 liters
  • 1 bay leaf
  • 1 1/2 teaspoons Italian seasoning
  • 1/2 teaspoon dried oregano, optional
  • 1/4 teaspoon red pepper flakes, optional
  • 1 teaspoon kosher salt or 3/4 teaspoon fine salt, plus more to taste; start with less if your broth is salted
  • 1/2 teaspoon black pepper, plus more to taste
  • 1 parmesan rind, optional; skip for vegan minestrone

Beans, Vegetables, and Pasta

  • 1 can cannellini beans or white beans, 15 oz / 425 g, drained and rinsed
  • 1 can kidney beans, 15 oz / 425 g, drained and rinsed
  • 1 cup chopped green beans, about 100 to 125 g
  • 1 medium zucchini, diced, about 180 to 220 g
  • 3/4 cup small pasta such as ditalini, small shells, elbows, or macaroni, about 75 to 90 g
  • 2 cups packed spinach or chopped kale, about 60 to 80 g

Finish

  • 1 to 2 teaspoons lemon juice or red wine vinegar, 5 to 10 ml
  • 1/4 cup chopped parsley or basil, about 10 to 15 g
  • Extra olive oil, for finishing
  • Grated parmesan, optional, for serving

Instructions

  1. Heat olive oil in a 5 to 6 quart / 5 to 6 liter Dutch oven or heavy soup pot over medium heat.
  2. Add onion, carrot, celery, and salt. Cook for 7 to 10 minutes, stirring often, until softened and fragrant.
  3. Add garlic and tomato paste. Cook for 1 to 2 minutes, stirring often, until the tomato paste darkens slightly.
  4. Add crushed or diced tomatoes, vegetable broth, bay leaf, Italian seasoning, oregano if using, red pepper flakes if using, black pepper, and parmesan rind if using. Stir well and scrape the bottom of the pot.
  5. Add the cannellini beans and kidney beans. Bring to a boil, then reduce to a gentle simmer.
  6. Simmer partly covered for 20 to 25 minutes, until the broth tastes developed. Add firm vegetables such as cabbage, potato, or squash during this simmer if using them.
  7. Add green beans, zucchini, and pasta. Cook for 8 to 10 minutes, or until the pasta is just tender.
  8. Stir in spinach or kale and cook for 1 to 3 minutes, just until wilted.
  9. Remove the bay leaf and parmesan rind. Stir in lemon juice or red wine vinegar, parsley or basil, and a drizzle of olive oil.
  10. Taste and adjust salt, pepper, and acidity. Let the soup rest for 5 minutes before serving.
  11. Serve hot with parmesan, extra herbs, crusty bread, garlic bread, or a simple salad.

Recipe Notes

  • Brothier soup: use 3/4 cup pasta and the full 6 cups broth.
  • Thicker soup: use 1 cup pasta or mash 1/2 cup beans into the broth.
  • Firmer zucchini: add zucchini during the final 5 minutes instead of with the pasta.
  • Better leftovers: cook pasta separately and add it to bowls.
  • Vegan version: use vegetable broth and skip parmesan rind and parmesan cheese.
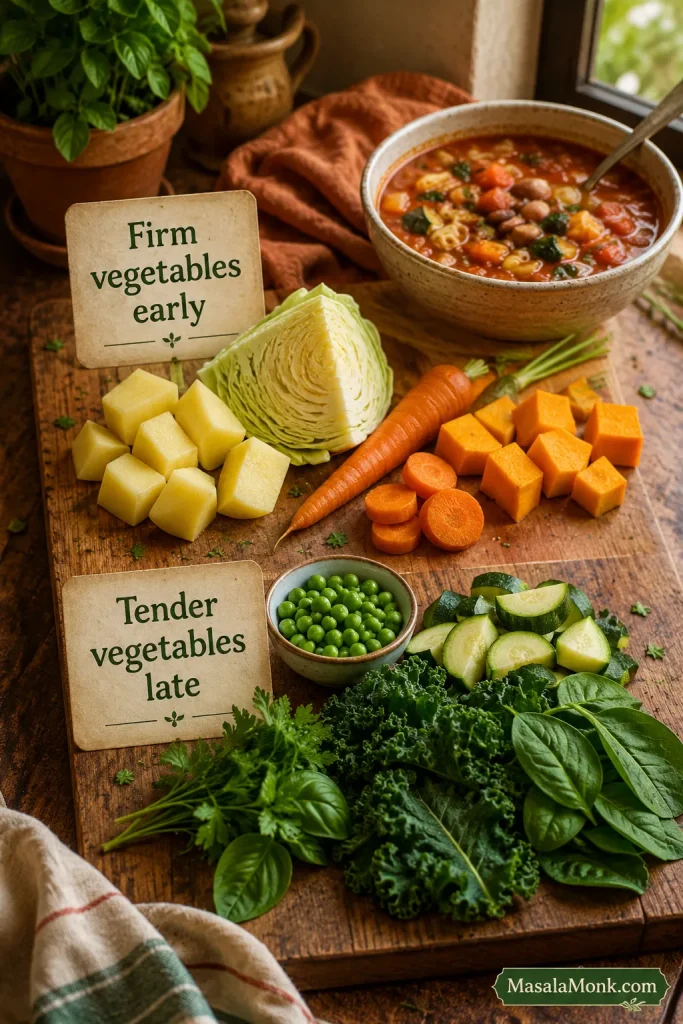
  • Meal prep: toss separately cooked pasta with a tiny drizzle of olive oil after draining so it does not clump.
  • Gluten-free version: use gluten-free pasta or rice, preferably cooked separately.
  • Rice version: cooked rice is easiest. Add it near the end or directly to bowls because rice absorbs broth quickly.
  • Extra richness: simmer with a parmesan rind or finish with olive oil and herbs.

The recipe works on its own, but the notes below help you adjust the beans, pasta, vegetables, storage, and appliance methods without losing the minestrone feel. If leftovers matter, the storage and freezing notes are especially useful.

Before the deeper notes, this quick visual ratio gives you a flexible way to adjust the pot without losing the minestrone balance.

Easy Minestrone Ratio

Use this ratio when you want to adjust the recipe without losing the soup’s balance.

Broth, beans, chopped vegetables, and small pasta arranged on a rustic counter as an easy minestrone ratio guide.
Instead of measuring every vegetable perfectly, follow the ratio: broth keeps it loose, beans make it filling, vegetables add bulk, and pasta should stay modest.

What Is Minestrone Soup?

Minestrone is an Italian vegetable soup made with vegetables, beans, tomatoes, broth, herbs, olive oil, and usually pasta or rice. Classic minestrone is not about one fixed vegetable list; it is about building a generous, seasonal soup with enough beans and starch to feel like a meal.

That is why one pot might have zucchini and green beans while another has cabbage, kale, potato, or squash. A good bowl should be crowded, not dry: enough vegetables and beans to make it feel like dinner, but enough tomato broth to keep it unmistakably soup.

Why You’ll Like This Recipe

  • The broth tastes built, not diluted. Tomato paste, sautéed aromatics, herbs, beans, and olive oil give it a rounded tomato flavor.
  • The vegetables keep their texture. Firm vegetables simmer first, while zucchini and greens go in later.
  • The pasta will not hijack the leftovers. Cook it in the soup when serving right away, or separately when you want better storage.
  • It starts meatless. Use vegetable broth, and the whole pot stays hearty without meat.
  • It gives you room to use what you have. Small shells, elbows, ditalini, zucchini, green beans, cabbage, kale, spinach, white beans, kidney beans, or chickpeas can all work.
  • It can be lighter or heartier. Use more greens and less pasta for a lighter bowl, or extra beans and a little more pasta for a thicker dinner-style soup.

Minestrone feels hearty without cream because beans, vegetables, pasta, and olive oil do the work. If you like cozy tomato-and-pasta dinners, this sits near the same comfort zone as baked ziti, but it is lighter, brothier, and packed with vegetables.

Minestrone Soup Ingredients

These ingredients follow the same Rule of 5: aromatics, tomato broth, beans, small pasta or rice, and tender greens at the end. Do not worry if you are missing one vegetable. Minestrone is forgiving as long as the base stays balanced.

If you are missing one vegetable or bean, check the easy minestrone swaps before changing the broth or pasta ratio.

Ingredients for minestrone soup on a counter, including tomatoes, broth, beans, pasta, carrots, celery, onion, garlic, zucchini, green beans, greens, herbs, olive oil, and parmesan rind.
Each minestrone ingredient has a role: aromatics create sweetness, tomatoes shape the broth, beans add substance, pasta brings comfort, and greens freshen the finish.

If you remember one thing: taste the broth before adding pasta. When it tastes thin or flat at that point, fix the broth first; pasta will not rescue a weak soup.

Build the Aromatic Base

Onion, carrot, celery, garlic, and olive oil create the base. Cook the onion, carrot, and celery until the sharp onion smell softens and the pot starts smelling sweet. The onion should look translucent and the carrot edges should soften. This is the first moment the soup starts smelling like dinner instead of chopped vegetables.

Onion, carrot, and celery sautéing in olive oil inside a Dutch oven with a wooden spoon.
First, cook the onion, carrot, and celery until they soften and smell sweet. This step gives homemade minestrone a deeper base before the tomatoes arrive.

Cook the Tomato Paste Before Broth


Tomato paste and a large can of crushed or diced tomatoes give the broth its color and flavor. Cook the tomato paste until it darkens slightly; it should leave orange-red streaks on the bottom of the pot, not black bits. Crushed tomatoes make a fuller, smoother broth, while diced tomatoes give a chunkier texture.

Tomato paste cooked with onion, carrot, and celery in a pot, with a wooden spoon dragging through the red paste.

Next, let the tomato paste cook briefly with the aromatics. It deepens the soup base and helps the broth taste rich instead of thin.

Broth


Vegetable broth keeps the soup meatless and easy to make vegan. Chicken broth also works if you are not keeping the soup vegetarian. Low-sodium broth gives you more control because canned beans, tomatoes, pasta, and cheese can all add salt.

Beans


White beans and kidney beans are a strong everyday combination. The white beans soften into the tomato broth and make the soup feel fuller, almost as if it simmered longer than it did. Kidney beans add color, bite, and the familiar minestrone look. Rinse canned beans before adding them so the broth stays clean and balanced.

Pasta or Rice


Small pasta is what keeps minestrone easy to eat by the spoonful. Ditalini is classic, but small shells, elbows, macaroni, or orzo all work. Use 3/4 cup for a brothier soup and up to 1 cup for a thicker bowl. Cooked rice also works when you want a pasta-free version. If you are cooking for leftovers, see how to keep minestrone pasta from getting mushy before adding pasta directly to the pot.

Vegetables


Zucchini, green beans, spinach, kale, cabbage, potato, peas, squash, carrots, and celery can all work. Dense vegetables such as potato, squash, cabbage, and carrots need more time. Zucchini, peas, spinach, and tender greens should go in later so they keep some color and shape.

Minestrone is not a test of whether you bought the exact vegetables; it is a way to turn the vegetables you have into a balanced soup.

Herbs and Finishers


Italian seasoning, oregano, basil, thyme, bay leaf, black pepper, parsley, and fresh basil all fit well. A parmesan rind is optional for extra depth, but use vegetarian-style parmesan if that matters to you, or skip cheese completely for a vegan version.

A small splash of lemon juice or red wine vinegar wakes up the whole pot at the end, especially after the beans and pasta have softened the broth. A spoonful of pesto can make the finish taste brighter; these basil pesto variations are useful if you like that herby direction.

How to Make Minestrone Soup

The steps follow the same rhythm as the Rule of 5: sauté, deepen, simmer, add quick-cooking ingredients late, finish fresh.

1. Sauté the Onion, Carrot, and Celery


Heat olive oil in a large Dutch oven or heavy soup pot over medium heat. Add onion, carrot, celery, and salt. Cook for 7 to 10 minutes, stirring often, until the vegetables soften and the onion turns translucent. The pot should smell sweet and savory before you move on.

2. Add Garlic and Tomato Paste


Stir in the garlic and tomato paste. Cook for 1 to 2 minutes, stirring often. The tomato paste should darken slightly and smell richer, but it should not scorch. A watery minestrone usually means the base was rushed, so give this step its minute.

3. Build the Broth


Add crushed or diced tomatoes, broth, Italian seasoning, bay leaf, black pepper, and parmesan rind if using. Scrape the bottom of the pot so all the tomato paste and aromatics dissolve into the broth.

Minestrone soup base in a Dutch oven with tomato broth, beans, carrots, celery, and firm vegetables before pasta and greens are added.

Let the tomato broth, beans, and firm vegetables simmer before adding pasta. As a result, the base tastes rounded instead of rushed.

4. Add Beans and Simmer Gently


Add the rinsed beans and any firm vegetables such as cabbage, potato, or squash. Bring the soup to a boil, then reduce it to a gentle simmer. You want small bubbles, not a rolling boil. Cook partly covered for 20 to 25 minutes, until the broth tastes fuller and the vegetables are tender.

Taste the broth before adding pasta. If it tastes thin or flat now, give it more simmering time, adjust the salt, or brighten it with a little lemon juice or vinegar. The broth should already taste good before the pasta goes in; if it still tastes weak, use the troubleshooting section before adding pasta.

Minestrone soup gently simmering in a Dutch oven with tomato broth, beans, carrots, celery, pasta, and vegetables.

Keep minestrone at a gentle simmer, not a hard boil. Small bubbles build flavor while helping the vegetables stay tender and intact.

5. Add Quick-Cooking Vegetables and Pasta


Add green beans, zucchini, and small pasta near the end. Cook for 8 to 10 minutes, or until the pasta is just tender. Stop while it still has a little structure, because it will keep softening in the hot broth.

Small pasta being poured into a pot of minestrone soup with spinach added near the end of cooking.

Add pasta and greens near the end. This keeps the soup brighter, protects the greens, and helps prevent pasta from swelling in the pot.

6. Finish with Greens, Herbs, and Brightness


Stir in spinach or kale for the final 1 to 3 minutes. The greens only need to wilt; they do not need to cook down into the broth. Remove the bay leaf and parmesan rind. Finish with parsley or basil, a drizzle of olive oil, and lemon juice or red wine vinegar. Rest the soup for 5 minutes before serving so the broth settles and the flavors come together.

Finished pot of homemade minestrone soup with tomato broth, beans, pasta, carrots, zucchini, green beans, greens, herbs, and olive oil.

When the pot is ready, it should look colorful and ladle easily. If it feels crowded, loosen it with a splash of broth before serving.

Easy Minestrone Swaps

Once the base makes sense, the soup becomes forgiving. You do not need the exact same vegetables every time; you just need the right balance of broth, beans, pasta or rice, and timing.

Use What You Have

Use this section when the pot needs to adapt to the vegetables, beans, and pasta you already have.

Rustic board with minestrone swaps including zucchini, carrot, cabbage, kale, potato, white beans, green beans, herbs, and small pasta.

Minestrone is made for flexible cooking. Therefore, zucchini, cabbage, kale, potato, beans, herbs, and small pasta can all work when you add them at the right time.

If you do not have Use this instead
Cannellini beans Navy beans, great northern beans, white beans, or chickpeas
Kidney beans More white beans, borlotti beans, chickpeas, or lentils
Zucchini Cabbage, green beans, peas, spinach, kale, or squash
Ditalini Small shells, elbows, macaroni, or orzo
Vegetable broth Water with extra tomato paste, herbs, olive oil, and careful seasoning
Fresh greens Frozen spinach, frozen kale, or chopped cabbage added earlier
Parmesan rind Skip it, or finish with olive oil, herbs, and a little lemon juice or vinegar

This is also where minestrone becomes personal. One cook adds cabbage, another adds potato, another uses chickpeas, and another keeps it brothy. The base stays the same, but the pot can still feel like yours. For more timing help, see the firm-early, tender-late vegetable guide.

What the Soup Should Look and Taste Like

You are looking for a soup that is chunky but still brothy. The tomato broth should taste rounded rather than sharp or thin. Vegetables should be tender without collapsing, beans should stay creamy but mostly intact, and the pasta should be just tender, not swollen.

Finished Bowl Texture Check

Use the finished bowl as a quick check before serving: the soup should look full, but it should still move like soup.

Close-up bowl of finished minestrone soup with tomato broth, white beans, kidney beans, pasta, carrots, zucchini, greens, and herbs.

Use the finished bowl as a texture check. The vegetables and beans should stand out clearly, while the tomato broth still fills the gaps around them.

Chunky but Still Soup

If the pot looks crowded but still has enough broth to move around the vegetables, you are in the right place. You should be able to drag the spoon through the bowl and see vegetables and beans settle back into the tomato broth, not sit in a dry pile. The final olive oil, herbs, and lemon juice or vinegar should make the bowl taste brighter, not sour.

Close bowl of chunky but brothy minestrone soup with visible tomato broth, beans, pasta, carrots, zucchini, greens, and herbs.

Aim for chunky but not dry. The spoon should catch vegetables and beans, while the broth still makes the bowl feel like soup.

Best Beans, Pasta, and Vegetables for Minestrone

Beans, pasta, and vegetables are where minestrone becomes dinner. The choices do not need to be fancy; they just need to make sense together in the spoon.

Best Beans and Pasta for Minestrone

Start with spoon-friendly beans and small pasta shapes, then choose vegetables that match the season and cooking time.

Bowls and spoons of cannellini beans, kidney beans, ditalini pasta, small shells, elbows, and orzo for minestrone soup.

Choose beans and pasta that fit easily on a spoon. Cannellini beans, kidney beans, ditalini, elbows, or small shells keep minestrone hearty without making it clumsy.

Best Beans


  • Cannellini or white beans: creamy, mild, and classic.

  • Kidney beans: firmer, colorful, and familiar in restaurant-style minestrone.

  • Borlotti beans: rustic and soft with a fuller bean flavor.

  • Chickpeas: nutty and firmer, good when you want more bite.

  • Lentils: useful for a thicker, higher-protein variation.

Best Pasta


  • Ditalini: classic and spoon-friendly.

  • Small shells: good for catching tomato broth.

  • Elbows or macaroni: easy pantry choice.

  • Orzo: soft and pleasant, but it thickens leftovers quickly.

  • Rice: useful if you do not want pasta. Cooked rice is easiest.

Once the beans and pasta are chosen, the vegetables are mostly about timing: firm ones early, tender ones late. That is what keeps the bowl generous without making it taste tired.

Firm Vegetables Early, Tender Vegetables Late


A good minestrone should never feel trapped by one vegetable list. Keep the tomato broth, aromatics, beans, herbs, and small pasta structure, then choose vegetables that fit the pot.

  • Summer: zucchini, green beans, fresh tomatoes, basil, spinach.

  • Winter: cabbage, kale, potato, squash, carrots, celery.

  • Spring: peas, asparagus, spinach, leeks, fresh herbs.

  • Pantry version: canned tomatoes, canned beans, frozen vegetables, cabbage, carrots, small pasta.

Add dense vegetables like potato, squash, cabbage, and carrots earlier. Add zucchini, peas, spinach, and tender greens near the end. Try not to overload the pot; minestrone should be hearty, but it should still have enough broth to feel like soup.

Rustic vegetable timing board showing firm vegetables like potato, cabbage, carrot, and squash beside tender vegetables like zucchini, peas, spinach, kale, and herbs.

Vegetable timing matters more than a perfect shopping list. Add firm vegetables early, then save tender greens, zucchini, peas, and herbs for the final minutes.

How to Fix Minestrone Soup Problems

If your minestrone tastes bland, watery, too thick, too acidic, or overcooked, it can usually be fixed. Most problems come down to seasoning, simmering, pasta timing, vegetable timing, or broth balance.

Fix Bland Minestrone Soup

Before rebuilding the whole pot, taste for salt, acid, herbs, pepper, and olive oil; those small finishes often fix a flat bowl.

Bowl of minestrone soup beside salt, lemon wedge, red wine vinegar, olive oil, parsley or basil, and black pepper.

Bland minestrone often needs a finish, not a rebuild. Salt, lemon or vinegar, herbs, black pepper, and olive oil can wake up the whole pot.

Problem Fix
Soup tastes flat Add salt first, then a small splash of lemon juice or red wine vinegar.
Broth is too thin Simmer uncovered for a few minutes or mash 1/2 cup of beans into the broth.
Soup is too thick Add broth or water until it becomes spoonable again.
Pasta is too soft Add more broth, fresh herbs, and a little acidity. Next time, cook pasta separately.
Vegetables are overcooked Freshen the bowl with herbs, olive oil, and extra broth. Next time, add zucchini and greens later.
Soup tastes too acidic Add a drizzle of olive oil or a tiny pinch of sugar to round the tomato flavor.
Soup is too salty Add unsalted broth, water, extra beans, or more vegetables.

Most of the time, the fix is smaller than you think. A little salt, a little acid, a splash of broth, or a few mashed beans can bring the pot back.

Fix Watery Minestrone Soup

When the broth looks thin, mashed white beans are the quickest natural thickener because they add body without changing the soup into cream sauce.

Two bowls of minestrone comparing thin watery broth with richer tomato broth, with mashed white beans shown as the thickening fix.

If the broth tastes watery, mash a few white beans into the soup and simmer briefly. This thickens minestrone naturally without cream or flour.

How to Make Minestrone Richer

  • Cook the onion, carrot, and celery until they soften and smell sweet.

  • Cook the tomato paste before adding broth.

  • Use crushed tomatoes for a fuller broth.

  • Add a parmesan rind if you are using cheese.
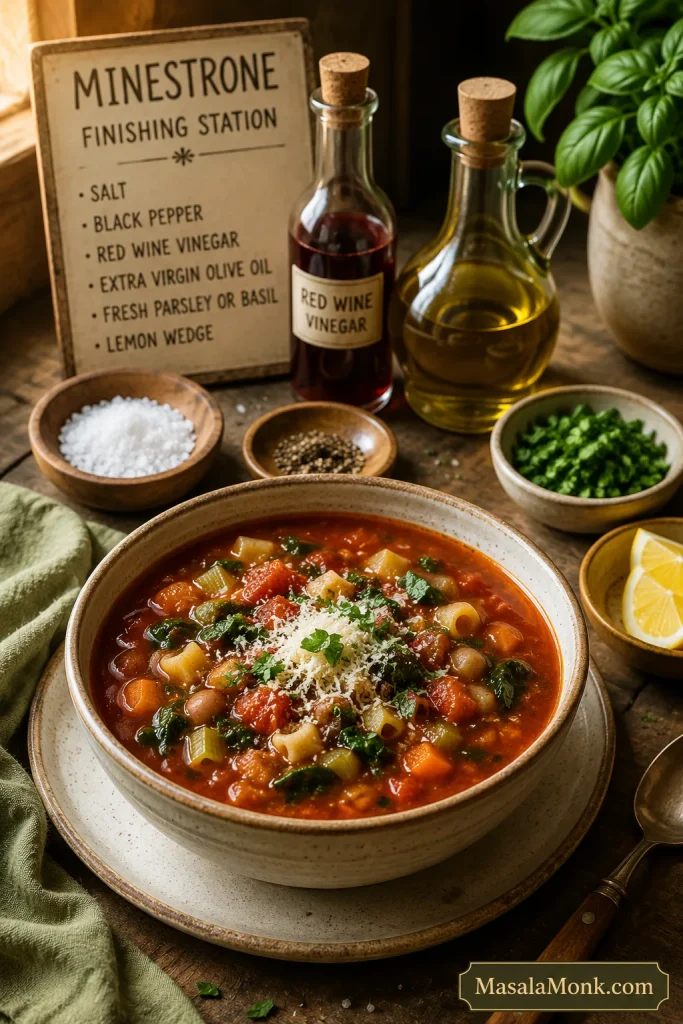
  • Mash some of the beans into the soup for natural body.

  • Simmer partly uncovered when the soup looks too thin.

  • Finish with olive oil, herbs, and a small splash of lemon juice or vinegar.

How to Keep Pasta from Getting Mushy


Minestrone pasta gets mushy when it sits in hot broth for too long or stays in the soup through storage. The safest method depends on how you plan to serve it.

  • Serving immediately: add dry pasta during the final 8 to 10 minutes.

  • Meal prep: cook pasta separately and add it to each bowl.

  • Freezing: freeze the soup without pasta and add fresh pasta later.

  • Thick leftovers: reheat with extra broth or water.

Glass containers showing minestrone soup base stored separately from cooked small pasta, with pasta being added to a serving bowl.

For better leftovers, store the soup base and pasta separately. Then add pasta to each serving so the next bowl stays fresh instead of soggy.

Slow Cooker and Instant Pot Minestrone

Slow Cooker vs Instant Pot Minestrone

For both appliance methods, the texture rule is the same: cook the base first and keep pasta and greens late. The pasta texture notes are especially useful for meal prep.

Slow cooker and Instant Pot filled with minestrone soup, with small bowls of pasta and greens nearby for adding near the end.

Whether you use a slow cooker or Instant Pot, cook the soup base first. Meanwhile, keep pasta and greens for the end so the texture stays better.

Slow Cooker Minestrone

Slow cooker minestrone is best for a hands-off soup base. Cook the broth, beans, aromatics, and firm vegetables first, then add zucchini, pasta, and greens near the end so they do not overcook.

  1. Add onion, carrot, celery, garlic, tomato paste, tomatoes, broth, herbs, bay leaf, beans, and firm vegetables to the slow cooker.

  2. Cook on low for 6 to 8 hours or high for 3 to 4 hours.

  3. Add zucchini and green beans during the final 30 minutes.

  4. Add pasta only during the final 20 to 30 minutes, or cook pasta separately.

  5. Stir in spinach or kale at the end, then finish with herbs, olive oil, and lemon juice or vinegar.

Instant Pot Minestrone


Instant Pot minestrone is best for a fast soup base. Pressure cook the broth, beans, and firm vegetables, then add cooked pasta and greens at the end so the pasta does not turn soft under pressure.

  1. Use sauté mode to cook onion, carrot, celery, and olive oil for 4 to 5 minutes.

  2. Add garlic and tomato paste. Cook for 1 minute.

  3. Add tomatoes, broth, herbs, bay leaf, beans, and firm vegetables.

  4. Pressure cook on high for 4 to 5 minutes.

  5. Let pressure release naturally for 5 to 10 minutes, then quick release carefully.

  6. Stir in greens and cooked pasta, then finish with herbs, olive oil, and lemon juice or vinegar.

Olive Garden-Style Minestrone Soup

If you like Olive Garden’s lighter tomato-broth style, use these adjustments while keeping the main recipe homemade. Olive Garden describes its minestrone as vegetables, beans, and pasta in a light tomato broth, so this is a home version in that familiar direction, not the official recipe. You can see Olive Garden’s menu description for the style reference.

Light tomato-broth minestrone soup in a cream bowl with kidney beans, white beans, pasta, carrots, zucchini, green beans, celery, spinach, and herbs.

For Olive Garden-style minestrone at home, keep the broth lighter, the beans whole, the vegetables small, and the pasta modest.

  • Use diced tomatoes instead of crushed for a lighter restaurant-style texture.

  • Do not mash the beans into the broth.

  • Keep the pasta modest so the soup stays brothy.

  • Use kidney beans, white beans, zucchini, green beans, carrots, celery, and spinach.

  • Finish with herbs and acidity so the bowl tastes bright, not heavy.

Minestrone Soup Variations

After the base tastes good, you can take the soup in a few different directions without losing the minestrone feel. Keep the tomato base, beans, vegetable timing, and small pasta structure in place, then adjust the bowl you want. For gluten-free, rice-based, or pasta-free versions, the storage section is useful if you plan to cook the starch separately.

Three bowls of minestrone variations showing a vegan version, a gluten-free or rice version, and a thicker bean-rich version on a rustic table.

Once the tomato-bean base tastes good, you can take minestrone in several directions: vegan, gluten-free, rice-based, or thicker and extra hearty.

  • Vegan minestrone: use vegetable broth and skip parmesan rind, parmesan cheese, meat, and egg pasta. Finish with olive oil, herbs, nutritional yeast, or vegan pesto.

  • Gluten-free minestrone: use gluten-free pasta or rice. Cook gluten-free pasta separately for the best texture. Do not use barley or farro.

  • Minestrone without pasta: skip the pasta and add extra beans, cabbage, zucchini, potato, kale, spinach, or cooked rice.

  • Thick and hearty minestrone: use crushed tomatoes, 1 cup pasta, extra white beans, and a small potato. Mash some beans into the broth.

  • Brothy minestrone: use 3/4 cup pasta, unmashed beans, and an extra cup of broth for a lighter, restaurant-style bowl.

  • Low-sodium minestrone: start with low-sodium broth, rinse canned beans well, and choose no-salt-added tomatoes if available. Use garlic, herbs, lemon juice, vinegar, and olive oil to build flavor.

  • Add meat: brown Italian sausage or ground beef before adding the aromatics, or stir in shredded cooked chicken near the end.

Think of these as directions, not separate recipes. The same pot can become lighter, heartier, vegan, gluten-free, or meatier without losing its minestrone backbone.

What to Serve with Minestrone Soup

Minestrone can stand alone as dinner, especially with beans and pasta, but a simple side makes the meal feel complete.

  • A lighter meal: serve minestrone with a crisp salad, roasted vegetables, or something bright like beet salad.

  • For a heartier dinner: add garlic bread, focaccia, grilled cheese, parmesan toast, or pesto toast.

Bowl of minestrone soup served with garlic bread, a green salad with tomatoes, herbs, and a spoon on a wooden table.

Minestrone can stand alone, but the sides change the meal. Garlic bread makes it heartier, while a fresh salad keeps dinner lighter.

The best side is something that balances the tomato broth without making the meal feel heavy.

Make-Ahead, Storage, Freezing, and Reheating

Make-Ahead Plan


Yes, you can make minestrone ahead of time. For the best texture, make the soup base without pasta, refrigerate it, and add freshly cooked pasta when serving.

  • Chop the onion, carrot, celery, zucchini, and green beans up to 1 day ahead.

  • Drain and rinse the beans ahead of time.

  • Make the soup base without pasta up to 3 days ahead.

  • Add greens when reheating so they stay brighter.

  • Cook pasta fresh, or store cooked pasta separately with a tiny drizzle of olive oil.

Store and Freeze Minestrone with Pasta Separately

This storage setup keeps the soup base useful and protects the pasta from swelling before the next serving.

Glass containers of minestrone soup base and a separate bowl of cooked small pasta for storing and freezing.

For freezing, leave pasta out of the soup base. This way, the broth, beans, and vegetables reheat well, and fresh pasta can be added later.

Fridge

Store minestrone soup in an airtight container in the fridge for 3 to 4 days, which matches the USDA’s general guidance for refrigerated leftovers. The next-day soup is often thicker and more flavorful. Loosen it with broth before reheating.

Freezer


Minestrone freezes best without pasta. Freeze the soup base for up to 3 months, then add freshly cooked pasta when reheating. If you freeze it with pasta, the flavor will still be good, but the pasta will become softer.

Reheating


Reheat gently on the stovetop over low to medium-low heat. Add broth or water to loosen the soup. After reheating, freshen the bowl with olive oil, herbs, lemon juice, vinegar, or parmesan. For the fastest fix when leftovers get thick, see the troubleshooting table.

Serve Minestrone Family-Style

Family-style Dutch oven of minestrone soup on a wooden table with a ladle, bowls of soup, bread, herbs, cheese, and a hand serving soup.

Serve minestrone family-style when you want the meal to feel relaxed and generous, with herbs, cheese, bread, or extra broth added at the table.

Once you have the rhythm down, minestrone becomes one of those soups you can make again and again without overthinking it. Keep the tomato broth, beans, small pasta, and vegetable timing in place, then let the pot change with the season.

The best minestrone is not the one with the longest ingredient list; it is the one where the broth, beans, vegetables, and pasta all still feel like they belong in the same spoonful.

Minestrone changes from kitchen to kitchen. If your pot had cabbage, potato, chickpeas, kale, extra zucchini, or a pasta shape that worked beautifully, tell us. Those small choices are often what help the next person make a better pot from what they already have.


Frequently Asked Questions

What is minestrone soup made of?


Minestrone soup is an Italian vegetable soup made with vegetables, beans, tomatoes, broth, herbs, olive oil, and usually pasta or rice. Common vegetables include onion, carrot, celery, zucchini, green beans, cabbage, spinach, kale, potato, and peas.

Is minestrone soup vegetarian?


Minestrone soup is vegetarian when it is made with vegetable broth and no meat. If you add parmesan, choose vegetarian-style parmesan if that matters to you.

Is minestrone soup vegan?


Minestrone soup is vegan when it is made with vegetable broth and no parmesan, parmesan rind, meat, or egg pasta. For a vegan finish, use olive oil, herbs, nutritional yeast, or vegan pesto.

What is the best pasta for minestrone?


Ditalini is one of the best pasta shapes for minestrone because it is small and spoon-friendly. Small shells, elbows, macaroni, and orzo also work.

What beans are best for minestrone?


Cannellini beans, white beans, and kidney beans are the best everyday beans for minestrone. Borlotti beans, navy beans, chickpeas, and lentils also work.

Why does my minestrone taste bland?


Bland minestrone usually needs salt, acidity, or more simmering time. Cook the aromatics well, cook the tomato paste until it darkens slightly, taste the broth before adding pasta, then finish with lemon juice or vinegar if the tomato flavor tastes flat.

How do you make minestrone less watery?


To make minestrone less watery, simmer it uncovered, mash some beans into the broth, use crushed tomatoes, or add a parmesan rind if you are using cheese. A watery soup often means the aromatics or tomato paste needed more time at the beginning.
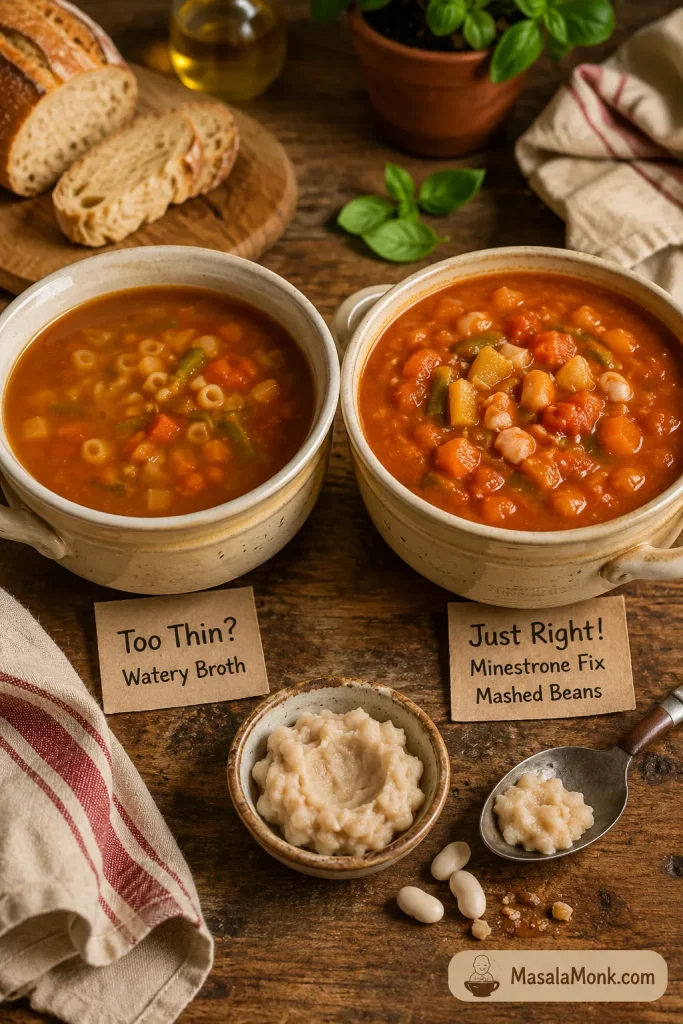
How do you keep pasta from getting mushy in minestrone?


To keep pasta from getting mushy in minestrone, add it only near the end and stop when it is just tender. For leftovers, meal prep, or freezing, cook pasta separately and add it to each bowl.

Can you make minestrone soup ahead of time?


Yes, minestrone is a good make-ahead soup, especially if you make the soup base without pasta. Refrigerate the base for 3 to 4 days, then add freshly cooked pasta when serving.

Can you freeze minestrone soup?


Yes, minestrone soup freezes well, but it freezes best without pasta. Freeze the soup base for up to 3 months, then add freshly cooked pasta when serving.

What is the difference between minestrone and vegetable soup?


Minestrone is usually heartier than plain vegetable soup because it often includes beans, pasta or rice, tomatoes, Italian herbs, and olive oil. Vegetable soup can be any broth-based soup made with vegetables.

What is the difference between minestrone and pasta e fagioli?


Minestrone is a vegetable-heavy soup that often includes beans plus pasta or rice. Pasta e fagioli means pasta and beans, so it is more focused on those two ingredients and is often thicker and more bean-forward.
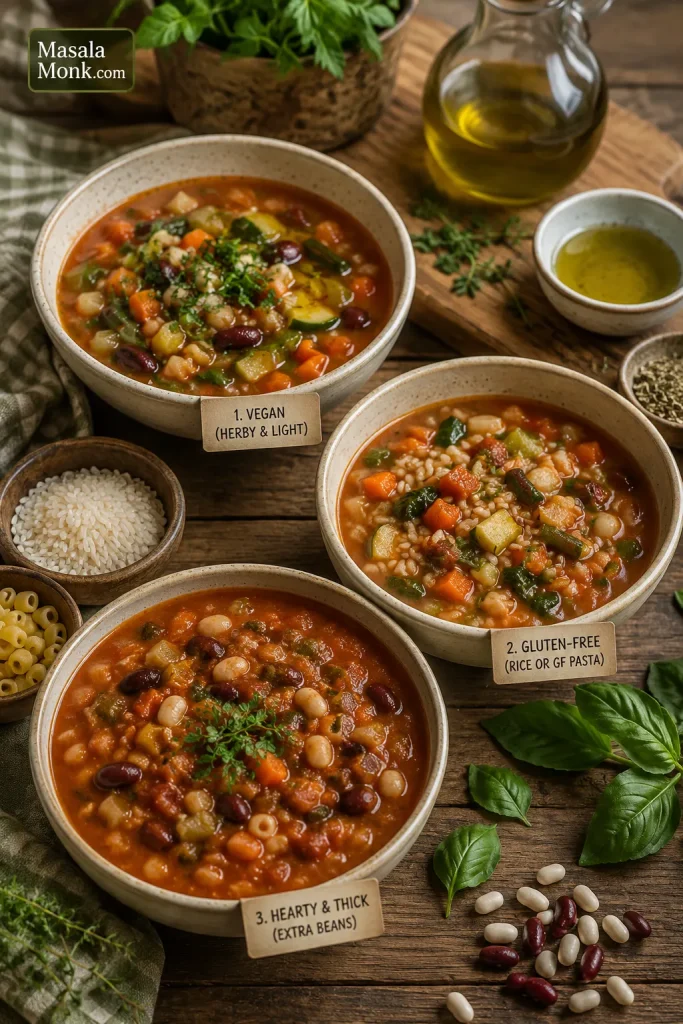
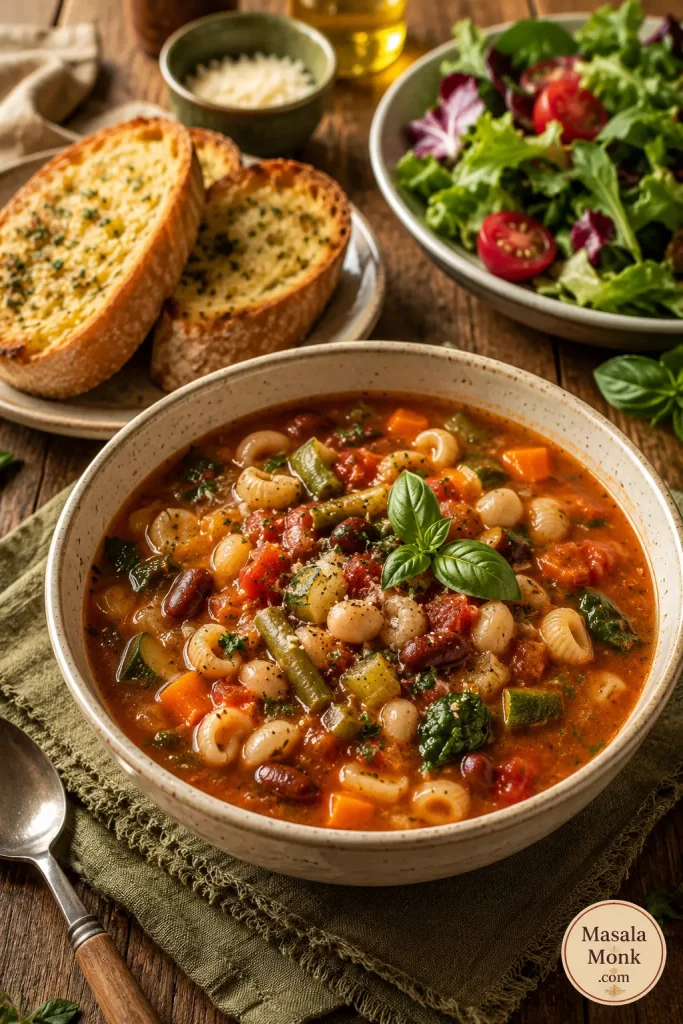
Can I make minestrone without pasta?


Yes, you can make minestrone without pasta. Add extra beans, cabbage, zucchini, potato, kale, spinach, or cooked rice instead.

Can I use frozen vegetables in minestrone?


Yes, frozen peas, green beans, spinach, kale, and mixed vegetables can work well in minestrone. Add quick-cooking frozen vegetables near the end unless they are dense vegetables. If frozen spinach releases too much water, squeeze it before adding.

Can I make minestrone with canned vegetables?


Yes, canned vegetables can work in minestrone when you need a pantry version. Drain them well and add them near the end because they are already cooked and can become too soft if simmered for a long time.