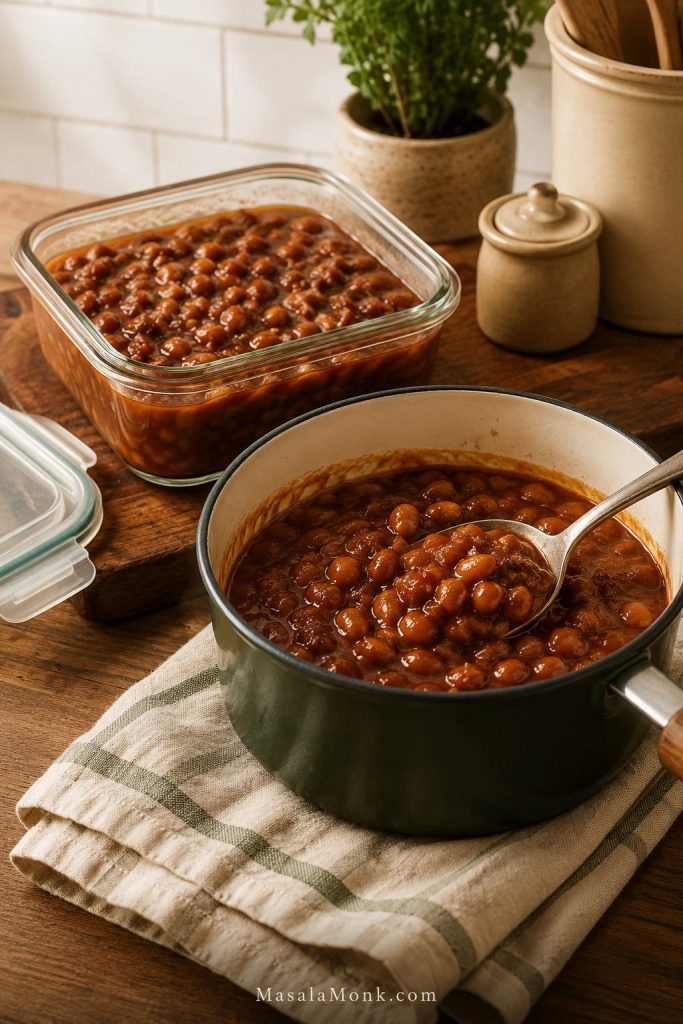
Posted on Leave a comment

Minestrone Soup Recipe

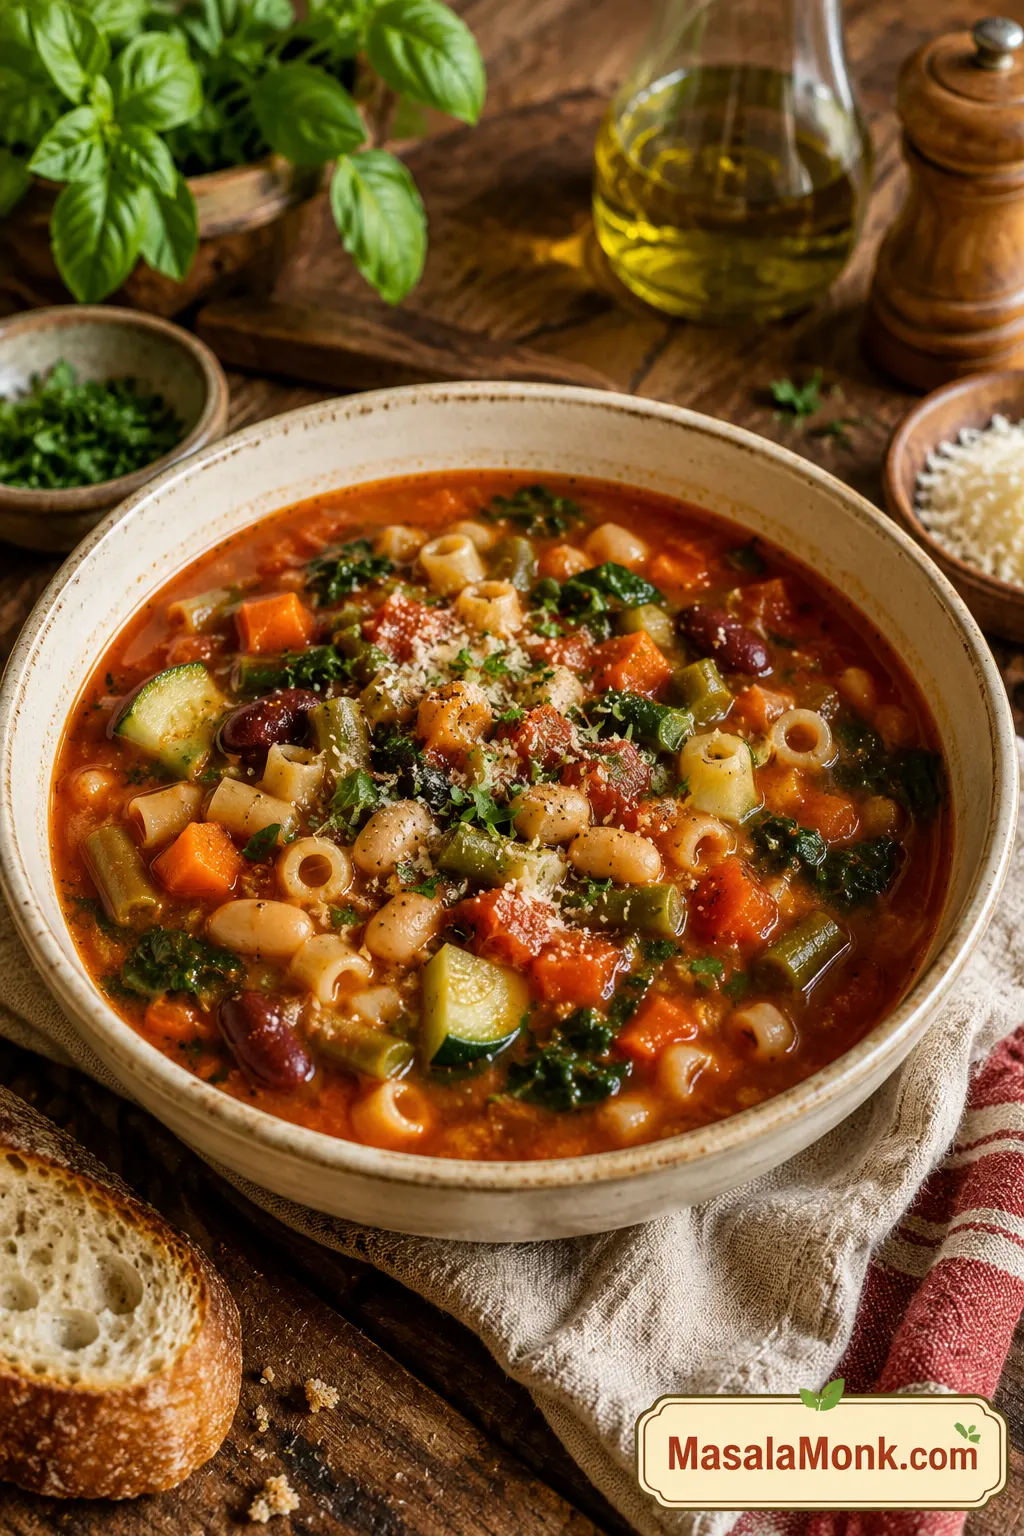
Bowl of minestrone soup with tomato broth, white beans, kidney beans, small pasta, carrots, zucchini, greens, herbs, and bread on the side.

A good minestrone soup should look generous before you even take the first spoonful: tender vegetables, creamy beans, small pasta, herbs, and a tomato broth that tastes rich instead of watery. The first spoonful should catch a little of everything — a soft bean, a piece of pasta, sweet carrot, zucchini, greens, and enough tomato broth to pull it all together.

This pot works because it protects the three things that matter most in minestrone: rich tomato broth, vegetables with texture, and pasta that does not turn the leftovers into mush. Even a half-used zucchini, a tired carrot, two cans of beans, and the last handful of pasta can become a proper dinner.

Homemade minestrone also gives you something canned soup rarely does: better texture. The vegetables do not have to be overcooked, the pasta can stay tender, and you control the salt, broth, and finish.

Cooking now? Jump to the recipe card. The notes below help keep the broth rich, the vegetables tender, and the leftovers useful.

What a Good Minestrone Spoonful Should Show

Before you start, notice the target balance: beans, vegetables, pasta, greens, and tomato broth should all show up in the same spoonful.
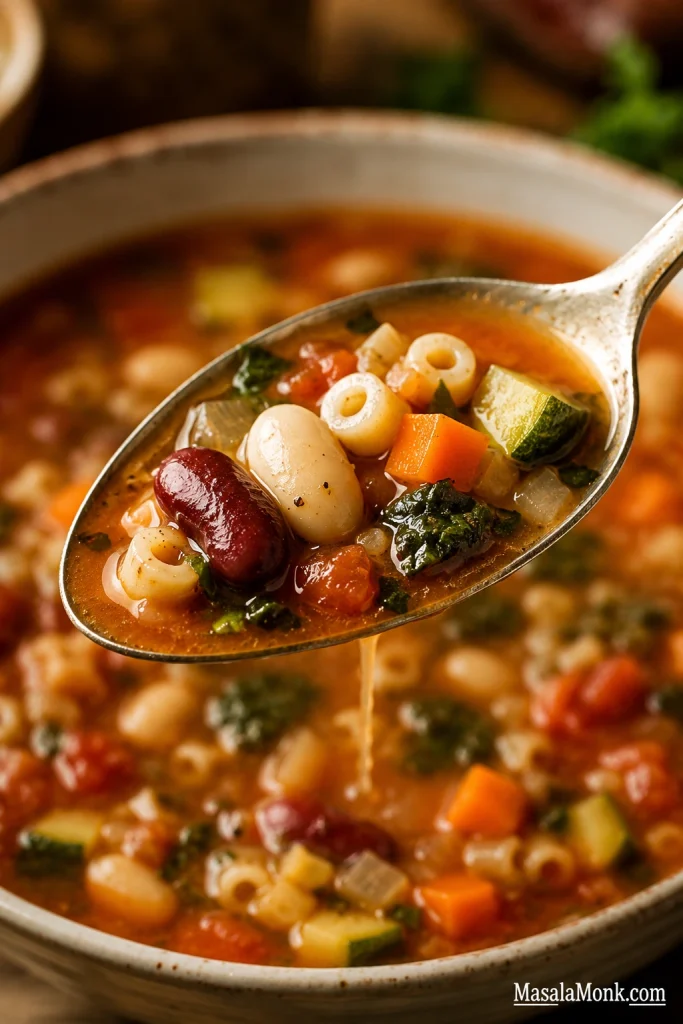
Spoon lifting minestrone soup with small pasta, white bean, kidney bean, carrot, zucchini, greens, and tomato broth dripping back into the bowl.
This spoonful shows the balance you want: beans for body, vegetables for freshness, small pasta for comfort, and tomato broth tying everything together.

Recipe at a Glance

Prep time20 minutes
Cook time45 minutes
Total time1 hour 5 minutes
Faster versionAbout 40 to 45 minutes with smaller diced vegetables, the full 6 cups broth, and a shorter 15 to 20 minute base simmer
Servings6 generous bowls
YieldAbout 11 to 13 cups soup
MethodStovetop
Best pot5 to 6 quart / 5 to 6 liter Dutch oven or heavy soup pot
Best forWeeknight dinner, meal prep, and freezer-friendly soup base
DietMeatless when made with vegetable broth; vegan option

The Minestrone Rule of 5: soften the aromatics, build the tomato base, add beans for body, keep the pasta small, and save tender greens for the end. Vegetables can change; the rhythm is what keeps the pot balanced.

Why this works: tomato paste gives the soup depth, beans make it feel full, late-added vegetables keep their shape, and pasta goes in only when the broth already tastes good. That is what keeps the soup hearty without letting it turn heavy or dull.

The Minestrone Rule of 5

This visual is the memory hook for the whole recipe: keep the rhythm steady, even when the vegetables change.
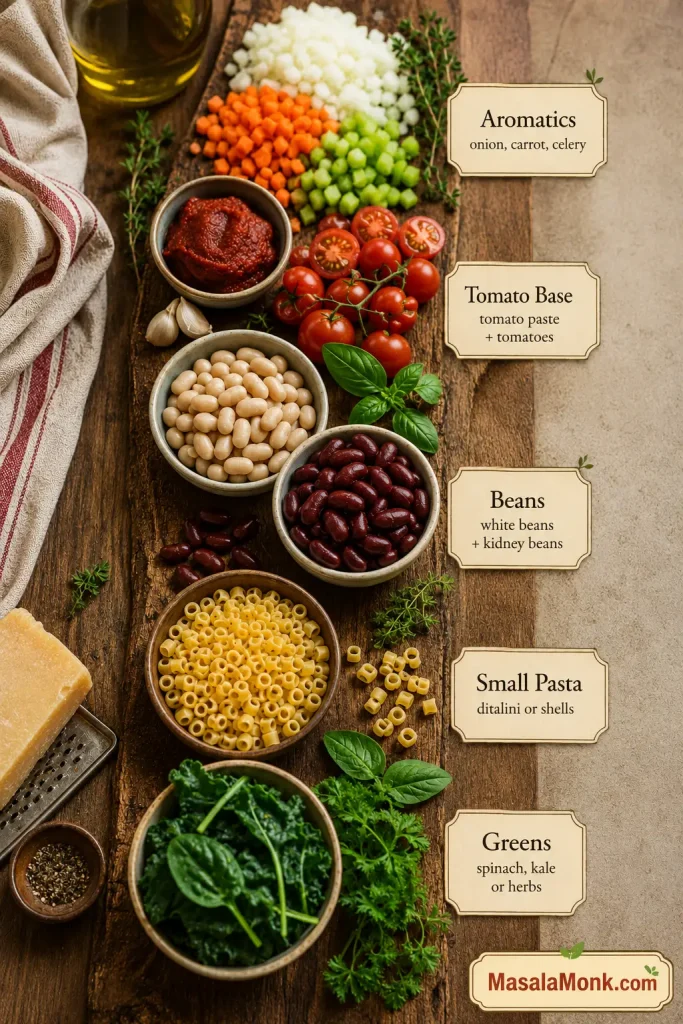
Rustic board showing minestrone ingredients arranged as aromatics, tomato base, beans, small pasta, and leafy greens.
Use the Minestrone Rule of 5 when you want the recipe to feel flexible: aromatics, tomato base, beans, small pasta, and greens are the core building blocks.

Easy minestrone ratio: for 6 bowls, use about 5 to 6 cups broth, 2 cans beans, 4 to 5 cups chopped vegetables, and 3/4 cup small pasta.

Short on time? Dice the vegetables smaller, use the full 6 cups broth, and simmer the soup base for 15 to 20 minutes before adding pasta and greens. The full cook gives deeper flavor, but the faster version still makes a good weeknight bowl.


Minestrone Soup Recipe Card

Description: A hearty minestrone soup with vegetables, beans, small pasta, and a rich tomato broth. It is meatless when made with vegetable broth, cozy without cream, and easy to adjust for leftovers or a thicker dinner-style bowl.

Prep: 20 minutes | Cook: 45 minutes | Total: 1 hour 5 minutes | Serves: 6 generous bowls | Yield: about 11 to 13 cups

Equipment: 5 to 6 quart / 5 to 6 liter Dutch oven or heavy soup pot, knife, cutting board, can opener, colander, wooden spoon, and ladle.

Ingredients

Base

  • 2 tablespoons olive oil, plus more for finishing, about 30 ml
  • 1 medium yellow onion, diced, about 150 to 180 g
  • 2 medium carrots, diced, about 130 to 160 g
  • 2 celery ribs, diced, about 90 to 120 g
  • 4 garlic cloves, minced
  • 3 tablespoons tomato paste, about 45 g

Broth and Seasoning

  • 1 can crushed or diced tomatoes, 28 oz / 794 g
  • 5 to 6 cups vegetable broth, 1.2 to 1.4 liters
  • 1 bay leaf
  • 1 1/2 teaspoons Italian seasoning
  • 1/2 teaspoon dried oregano, optional
  • 1/4 teaspoon red pepper flakes, optional
  • 1 teaspoon kosher salt or 3/4 teaspoon fine salt, plus more to taste; start with less if your broth is salted
  • 1/2 teaspoon black pepper, plus more to taste
  • 1 parmesan rind, optional; skip for vegan minestrone

Beans, Vegetables, and Pasta

  • 1 can cannellini beans or white beans, 15 oz / 425 g, drained and rinsed
  • 1 can kidney beans, 15 oz / 425 g, drained and rinsed
  • 1 cup chopped green beans, about 100 to 125 g
  • 1 medium zucchini, diced, about 180 to 220 g
  • 3/4 cup small pasta such as ditalini, small shells, elbows, or macaroni, about 75 to 90 g
  • 2 cups packed spinach or chopped kale, about 60 to 80 g

Finish

  • 1 to 2 teaspoons lemon juice or red wine vinegar, 5 to 10 ml
  • 1/4 cup chopped parsley or basil, about 10 to 15 g
  • Extra olive oil, for finishing
  • Grated parmesan, optional, for serving

Instructions

  1. Heat olive oil in a 5 to 6 quart / 5 to 6 liter Dutch oven or heavy soup pot over medium heat.
  2. Add onion, carrot, celery, and salt. Cook for 7 to 10 minutes, stirring often, until softened and fragrant.
  3. Add garlic and tomato paste. Cook for 1 to 2 minutes, stirring often, until the tomato paste darkens slightly.
  4. Add crushed or diced tomatoes, vegetable broth, bay leaf, Italian seasoning, oregano if using, red pepper flakes if using, black pepper, and parmesan rind if using. Stir well and scrape the bottom of the pot.
  5. Add the cannellini beans and kidney beans. Bring to a boil, then reduce to a gentle simmer.
  6. Simmer partly covered for 20 to 25 minutes, until the broth tastes developed. Add firm vegetables such as cabbage, potato, or squash during this simmer if using them.
  7. Add green beans, zucchini, and pasta. Cook for 8 to 10 minutes, or until the pasta is just tender.
  8. Stir in spinach or kale and cook for 1 to 3 minutes, just until wilted.
  9. Remove the bay leaf and parmesan rind. Stir in lemon juice or red wine vinegar, parsley or basil, and a drizzle of olive oil.
  10. Taste and adjust salt, pepper, and acidity. Let the soup rest for 5 minutes before serving.
  11. Serve hot with parmesan, extra herbs, crusty bread, garlic bread, or a simple salad.

Recipe Notes

  • Brothier soup: use 3/4 cup pasta and the full 6 cups broth.
  • Thicker soup: use 1 cup pasta or mash 1/2 cup beans into the broth.
  • Firmer zucchini: add zucchini during the final 5 minutes instead of with the pasta.
  • Better leftovers: cook pasta separately and add it to bowls.
  • Vegan version: use vegetable broth and skip parmesan rind and parmesan cheese.
  • Meal prep: toss separately cooked pasta with a tiny drizzle of olive oil after draining so it does not clump.
  • Gluten-free version: use gluten-free pasta or rice, preferably cooked separately.
  • Rice version: cooked rice is easiest. Add it near the end or directly to bowls because rice absorbs broth quickly.
  • Extra richness: simmer with a parmesan rind or finish with olive oil and herbs.

The recipe works on its own, but the notes below help you adjust the beans, pasta, vegetables, storage, and appliance methods without losing the minestrone feel. If leftovers matter, the storage and freezing notes are especially useful.

Before the deeper notes, this quick visual ratio gives you a flexible way to adjust the pot without losing the minestrone balance.

Easy Minestrone Ratio

Use this ratio when you want to adjust the recipe without losing the soup’s balance.
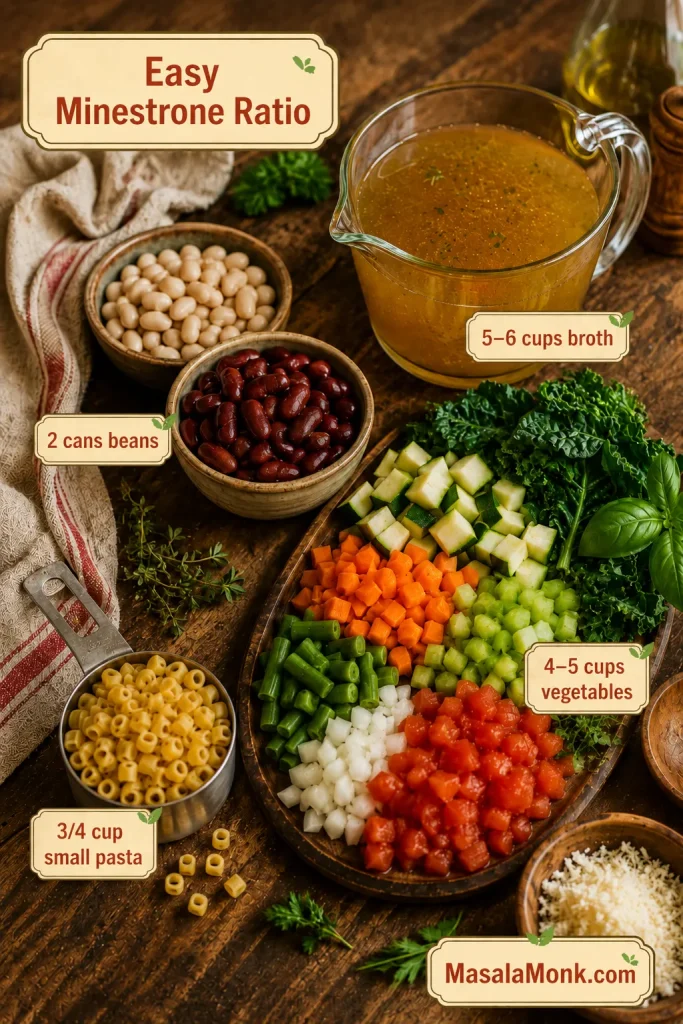
Broth, beans, chopped vegetables, and small pasta arranged on a rustic counter as an easy minestrone ratio guide.
Instead of measuring every vegetable perfectly, follow the ratio: broth keeps it loose, beans make it filling, vegetables add bulk, and pasta should stay modest.

What Is Minestrone Soup?

Minestrone is an Italian vegetable soup made with vegetables, beans, tomatoes, broth, herbs, olive oil, and usually pasta or rice. Classic minestrone is not about one fixed vegetable list; it is about building a generous, seasonal soup with enough beans and starch to feel like a meal.

That is why one pot might have zucchini and green beans while another has cabbage, kale, potato, or squash. A good bowl should be crowded, not dry: enough vegetables and beans to make it feel like dinner, but enough tomato broth to keep it unmistakably soup.

Why You’ll Like This Recipe

  • The broth tastes built, not diluted. Tomato paste, sautéed aromatics, herbs, beans, and olive oil give it a rounded tomato flavor.
  • The vegetables keep their texture. Firm vegetables simmer first, while zucchini and greens go in later.
  • The pasta will not hijack the leftovers. Cook it in the soup when serving right away, or separately when you want better storage.
  • It starts meatless. Use vegetable broth, and the whole pot stays hearty without meat.
  • It gives you room to use what you have. Small shells, elbows, ditalini, zucchini, green beans, cabbage, kale, spinach, white beans, kidney beans, or chickpeas can all work.
  • It can be lighter or heartier. Use more greens and less pasta for a lighter bowl, or extra beans and a little more pasta for a thicker dinner-style soup.

Minestrone feels hearty without cream because beans, vegetables, pasta, and olive oil do the work. If you like cozy tomato-and-pasta dinners, this sits near the same comfort zone as baked ziti, but it is lighter, brothier, and packed with vegetables.

Minestrone Soup Ingredients

These ingredients follow the same Rule of 5: aromatics, tomato broth, beans, small pasta or rice, and tender greens at the end. Do not worry if you are missing one vegetable. Minestrone is forgiving as long as the base stays balanced.

If you are missing one vegetable or bean, check the easy minestrone swaps before changing the broth or pasta ratio.
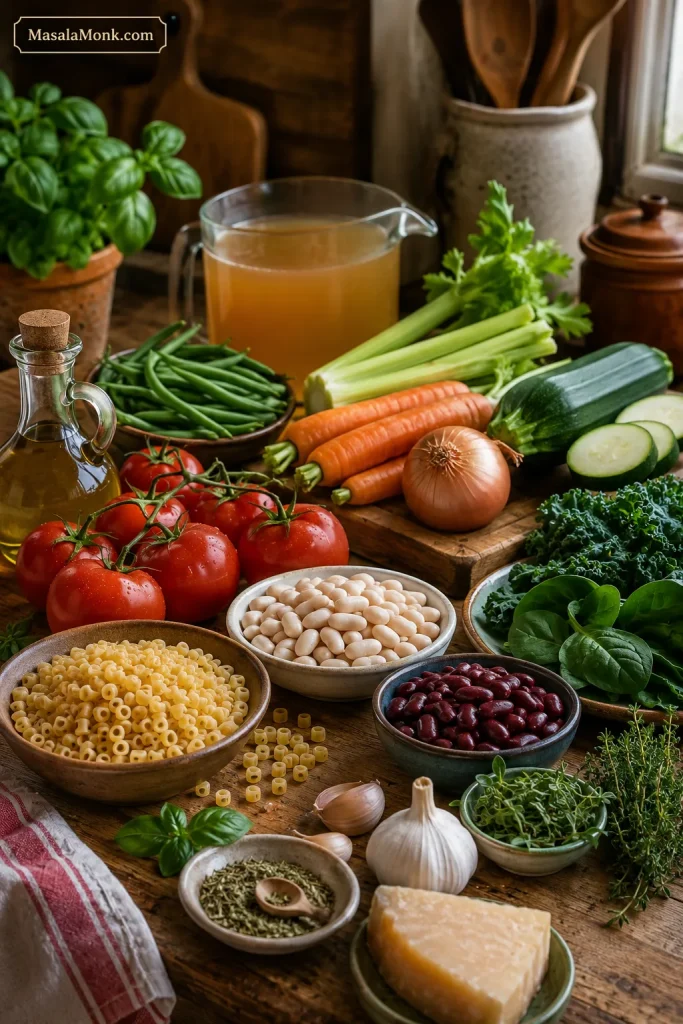
Ingredients for minestrone soup on a counter, including tomatoes, broth, beans, pasta, carrots, celery, onion, garlic, zucchini, green beans, greens, herbs, olive oil, and parmesan rind.
Each minestrone ingredient has a role: aromatics create sweetness, tomatoes shape the broth, beans add substance, pasta brings comfort, and greens freshen the finish.

If you remember one thing: taste the broth before adding pasta. When it tastes thin or flat at that point, fix the broth first; pasta will not rescue a weak soup.

Build the Aromatic Base

Onion, carrot, celery, garlic, and olive oil create the base. Cook the onion, carrot, and celery until the sharp onion smell softens and the pot starts smelling sweet. The onion should look translucent and the carrot edges should soften. This is the first moment the soup starts smelling like dinner instead of chopped vegetables.
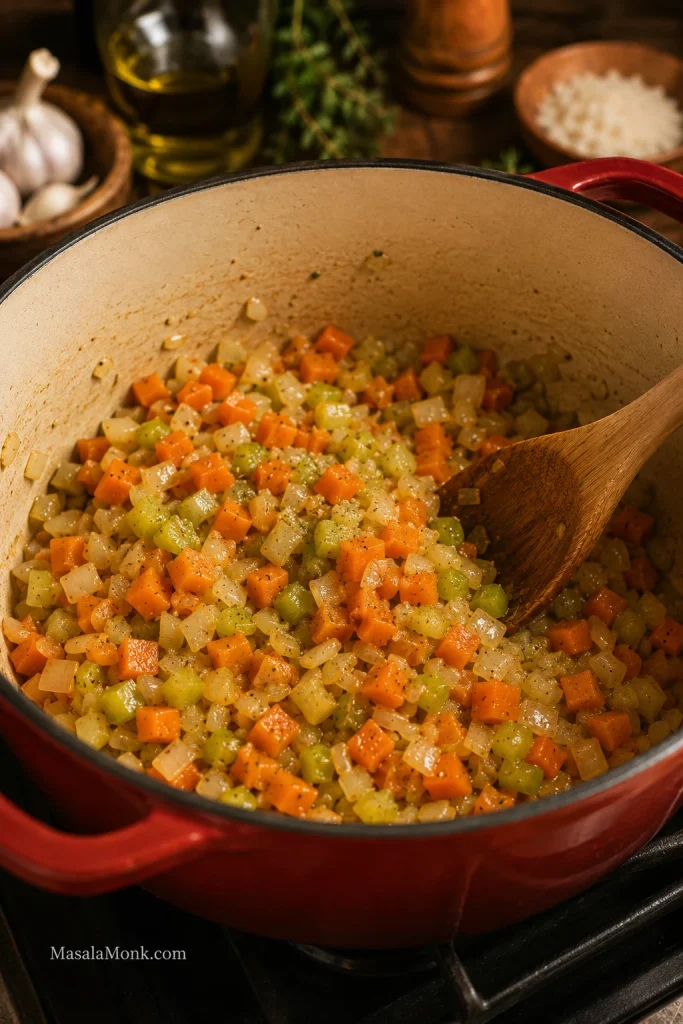
Onion, carrot, and celery sautéing in olive oil inside a Dutch oven with a wooden spoon.
First, cook the onion, carrot, and celery until they soften and smell sweet. This step gives homemade minestrone a deeper base before the tomatoes arrive.

Cook the Tomato Paste Before Broth


Tomato paste and a large can of crushed or diced tomatoes give the broth its color and flavor. Cook the tomato paste until it darkens slightly; it should leave orange-red streaks on the bottom of the pot, not black bits. Crushed tomatoes make a fuller, smoother broth, while diced tomatoes give a chunkier texture.
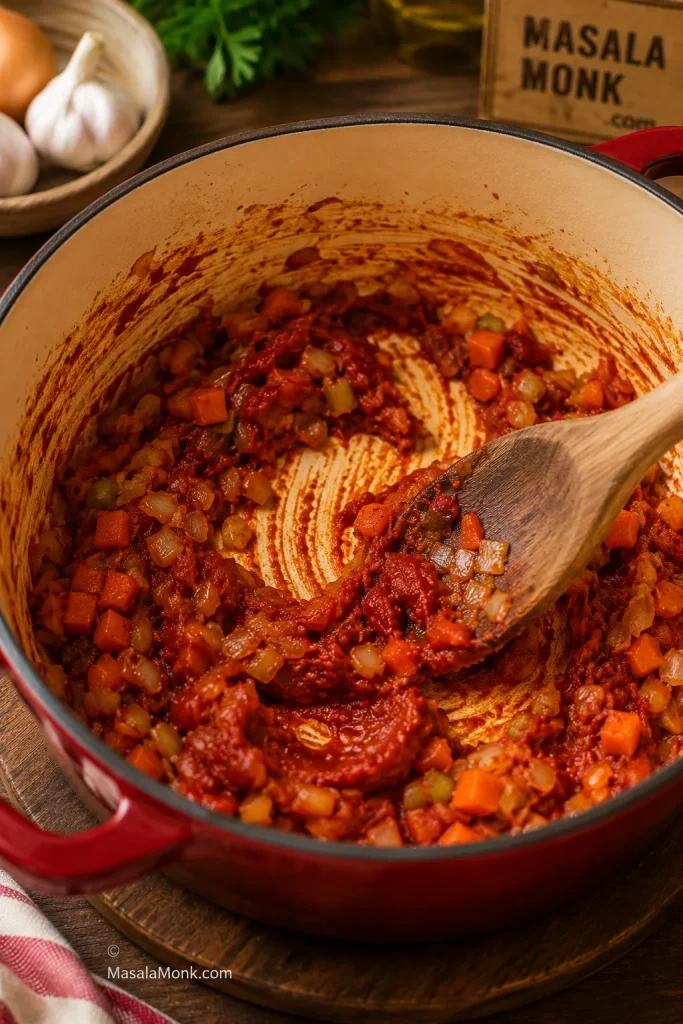
Tomato paste cooked with onion, carrot, and celery in a pot, with a wooden spoon dragging through the red paste.

Next, let the tomato paste cook briefly with the aromatics. It deepens the soup base and helps the broth taste rich instead of thin.

Broth


Vegetable broth keeps the soup meatless and easy to make vegan. Chicken broth also works if you are not keeping the soup vegetarian. Low-sodium broth gives you more control because canned beans, tomatoes, pasta, and cheese can all add salt.

Beans


White beans and kidney beans are a strong everyday combination. The white beans soften into the tomato broth and make the soup feel fuller, almost as if it simmered longer than it did. Kidney beans add color, bite, and the familiar minestrone look. Rinse canned beans before adding them so the broth stays clean and balanced.

Pasta or Rice


Small pasta is what keeps minestrone easy to eat by the spoonful. Ditalini is classic, but small shells, elbows, macaroni, or orzo all work. Use 3/4 cup for a brothier soup and up to 1 cup for a thicker bowl. Cooked rice also works when you want a pasta-free version. If you are cooking for leftovers, see how to keep minestrone pasta from getting mushy before adding pasta directly to the pot.

Vegetables


Zucchini, green beans, spinach, kale, cabbage, potato, peas, squash, carrots, and celery can all work. Dense vegetables such as potato, squash, cabbage, and carrots need more time. Zucchini, peas, spinach, and tender greens should go in later so they keep some color and shape.

Minestrone is not a test of whether you bought the exact vegetables; it is a way to turn the vegetables you have into a balanced soup.

Herbs and Finishers


Italian seasoning, oregano, basil, thyme, bay leaf, black pepper, parsley, and fresh basil all fit well. A parmesan rind is optional for extra depth, but use vegetarian-style parmesan if that matters to you, or skip cheese completely for a vegan version.

A small splash of lemon juice or red wine vinegar wakes up the whole pot at the end, especially after the beans and pasta have softened the broth. A spoonful of pesto can make the finish taste brighter; these basil pesto variations are useful if you like that herby direction.

How to Make Minestrone Soup

The steps follow the same rhythm as the Rule of 5: sauté, deepen, simmer, add quick-cooking ingredients late, finish fresh.

1. Sauté the Onion, Carrot, and Celery


Heat olive oil in a large Dutch oven or heavy soup pot over medium heat. Add onion, carrot, celery, and salt. Cook for 7 to 10 minutes, stirring often, until the vegetables soften and the onion turns translucent. The pot should smell sweet and savory before you move on.

2. Add Garlic and Tomato Paste


Stir in the garlic and tomato paste. Cook for 1 to 2 minutes, stirring often. The tomato paste should darken slightly and smell richer, but it should not scorch. A watery minestrone usually means the base was rushed, so give this step its minute.

3. Build the Broth


Add crushed or diced tomatoes, broth, Italian seasoning, bay leaf, black pepper, and parmesan rind if using. Scrape the bottom of the pot so all the tomato paste and aromatics dissolve into the broth.
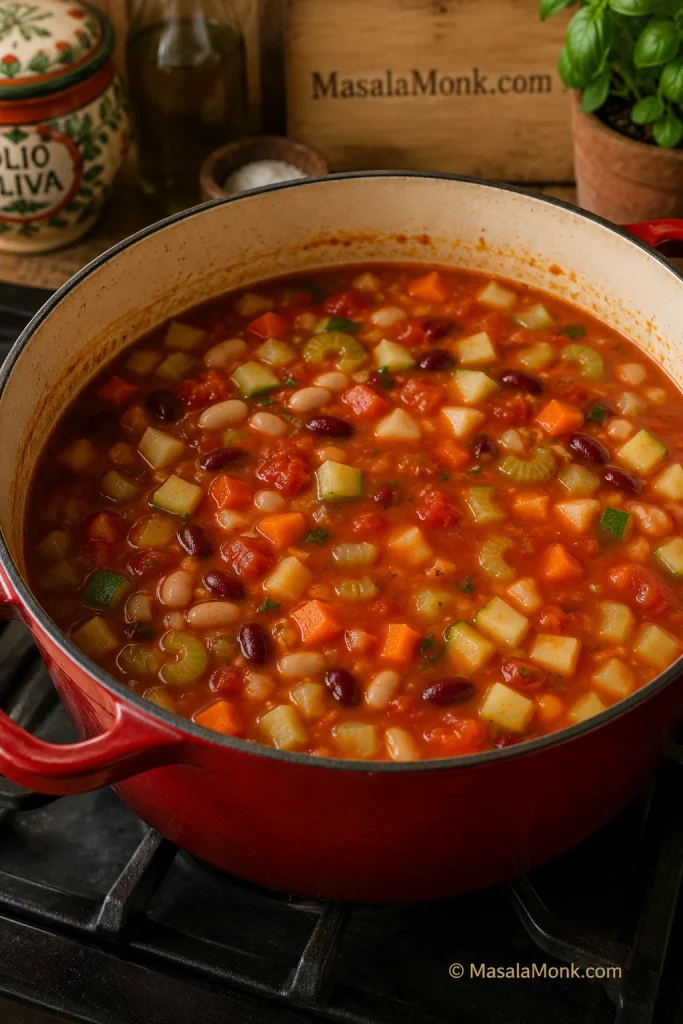
Minestrone soup base in a Dutch oven with tomato broth, beans, carrots, celery, and firm vegetables before pasta and greens are added.

Let the tomato broth, beans, and firm vegetables simmer before adding pasta. As a result, the base tastes rounded instead of rushed.

4. Add Beans and Simmer Gently


Add the rinsed beans and any firm vegetables such as cabbage, potato, or squash. Bring the soup to a boil, then reduce it to a gentle simmer. You want small bubbles, not a rolling boil. Cook partly covered for 20 to 25 minutes, until the broth tastes fuller and the vegetables are tender.

Taste the broth before adding pasta. If it tastes thin or flat now, give it more simmering time, adjust the salt, or brighten it with a little lemon juice or vinegar. The broth should already taste good before the pasta goes in; if it still tastes weak, use the troubleshooting section before adding pasta.
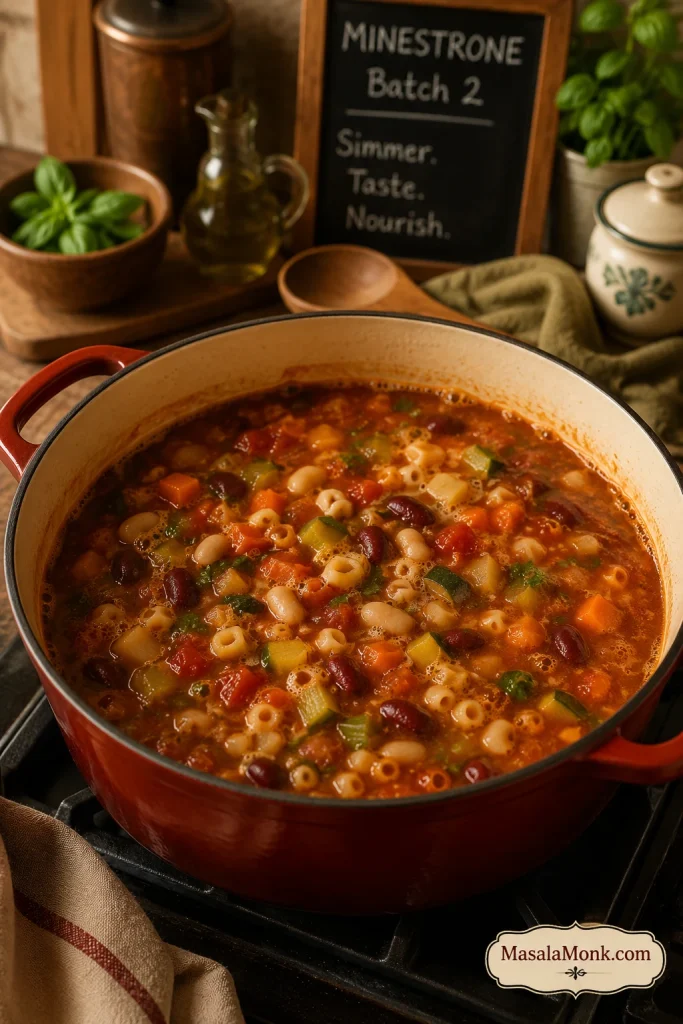
Minestrone soup gently simmering in a Dutch oven with tomato broth, beans, carrots, celery, pasta, and vegetables.

Keep minestrone at a gentle simmer, not a hard boil. Small bubbles build flavor while helping the vegetables stay tender and intact.

5. Add Quick-Cooking Vegetables and Pasta


Add green beans, zucchini, and small pasta near the end. Cook for 8 to 10 minutes, or until the pasta is just tender. Stop while it still has a little structure, because it will keep softening in the hot broth.
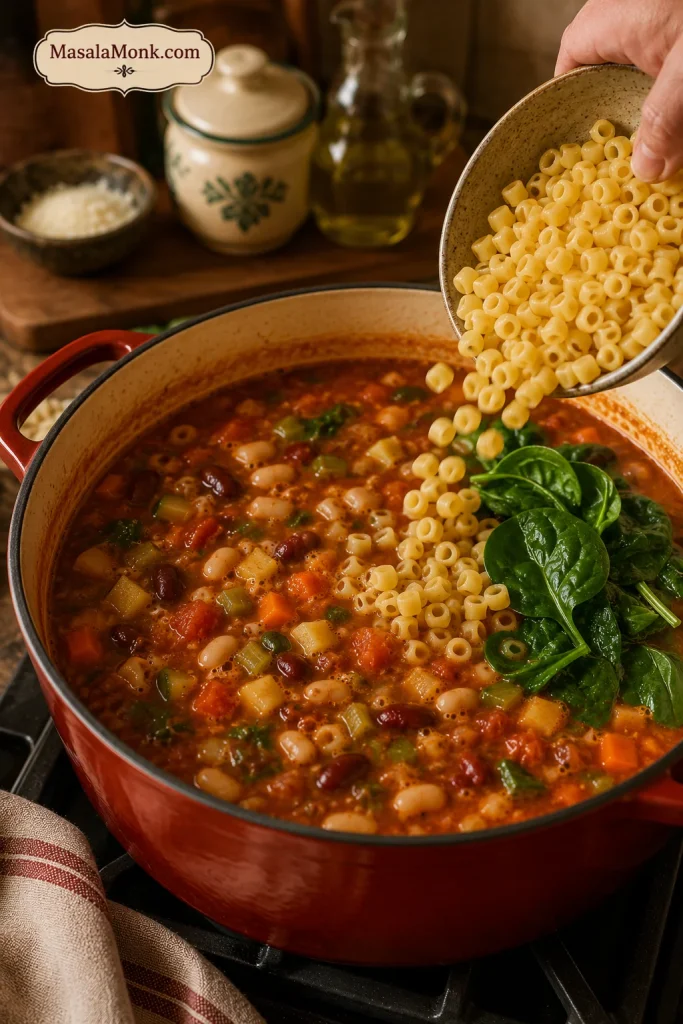
Small pasta being poured into a pot of minestrone soup with spinach added near the end of cooking.

Add pasta and greens near the end. This keeps the soup brighter, protects the greens, and helps prevent pasta from swelling in the pot.

6. Finish with Greens, Herbs, and Brightness


Stir in spinach or kale for the final 1 to 3 minutes. The greens only need to wilt; they do not need to cook down into the broth. Remove the bay leaf and parmesan rind. Finish with parsley or basil, a drizzle of olive oil, and lemon juice or red wine vinegar. Rest the soup for 5 minutes before serving so the broth settles and the flavors come together.
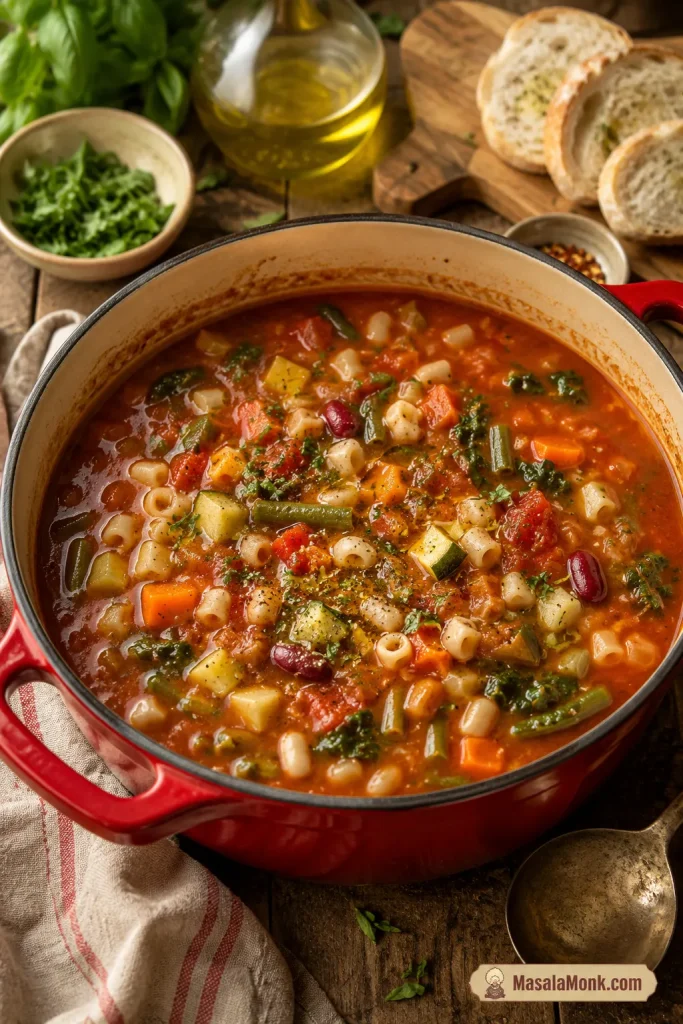
Finished pot of homemade minestrone soup with tomato broth, beans, pasta, carrots, zucchini, green beans, greens, herbs, and olive oil.

When the pot is ready, it should look colorful and ladle easily. If it feels crowded, loosen it with a splash of broth before serving.

Easy Minestrone Swaps

Once the base makes sense, the soup becomes forgiving. You do not need the exact same vegetables every time; you just need the right balance of broth, beans, pasta or rice, and timing.

Use What You Have

Use this section when the pot needs to adapt to the vegetables, beans, and pasta you already have.
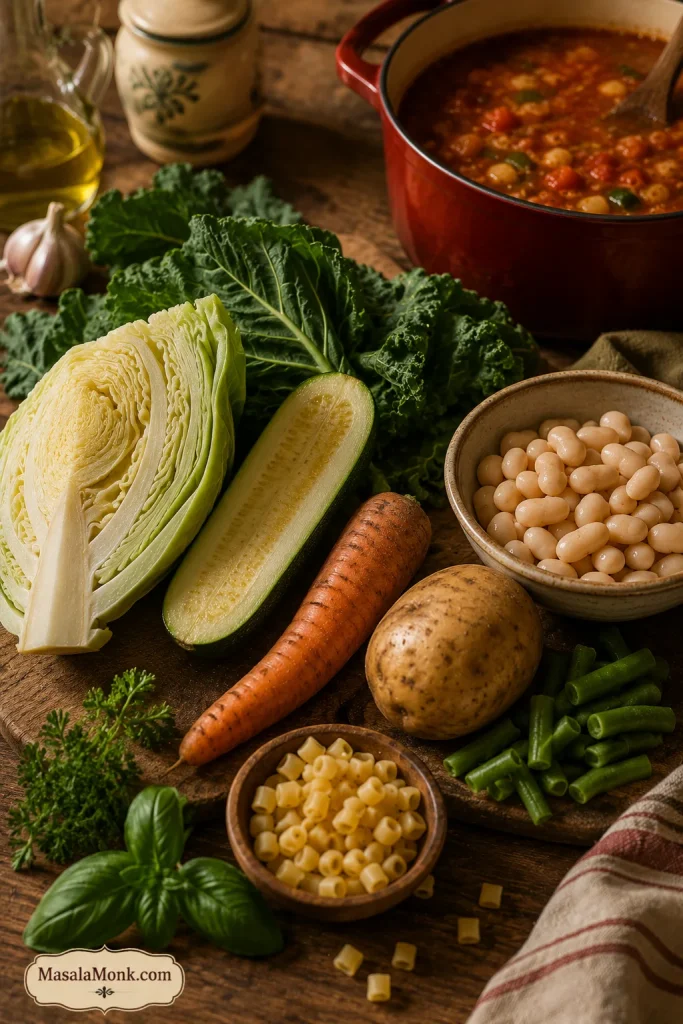
Rustic board with minestrone swaps including zucchini, carrot, cabbage, kale, potato, white beans, green beans, herbs, and small pasta.

Minestrone is made for flexible cooking. Therefore, zucchini, cabbage, kale, potato, beans, herbs, and small pasta can all work when you add them at the right time.

If you do not have Use this instead
Cannellini beans Navy beans, great northern beans, white beans, or chickpeas
Kidney beans More white beans, borlotti beans, chickpeas, or lentils
Zucchini Cabbage, green beans, peas, spinach, kale, or squash
Ditalini Small shells, elbows, macaroni, or orzo
Vegetable broth Water with extra tomato paste, herbs, olive oil, and careful seasoning
Fresh greens Frozen spinach, frozen kale, or chopped cabbage added earlier
Parmesan rind Skip it, or finish with olive oil, herbs, and a little lemon juice or vinegar

This is also where minestrone becomes personal. One cook adds cabbage, another adds potato, another uses chickpeas, and another keeps it brothy. The base stays the same, but the pot can still feel like yours. For more timing help, see the firm-early, tender-late vegetable guide.

What the Soup Should Look and Taste Like

You are looking for a soup that is chunky but still brothy. The tomato broth should taste rounded rather than sharp or thin. Vegetables should be tender without collapsing, beans should stay creamy but mostly intact, and the pasta should be just tender, not swollen.

Finished Bowl Texture Check

Use the finished bowl as a quick check before serving: the soup should look full, but it should still move like soup.
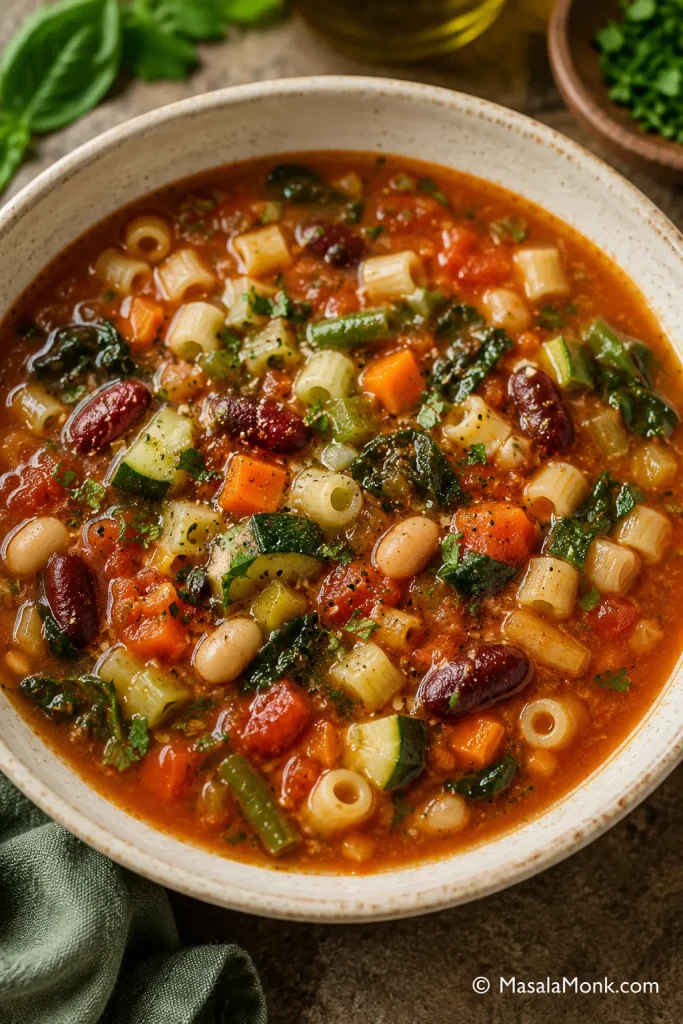
Close-up bowl of finished minestrone soup with tomato broth, white beans, kidney beans, pasta, carrots, zucchini, greens, and herbs.

Use the finished bowl as a texture check. The vegetables and beans should stand out clearly, while the tomato broth still fills the gaps around them.

Chunky but Still Soup

If the pot looks crowded but still has enough broth to move around the vegetables, you are in the right place. You should be able to drag the spoon through the bowl and see vegetables and beans settle back into the tomato broth, not sit in a dry pile. The final olive oil, herbs, and lemon juice or vinegar should make the bowl taste brighter, not sour.
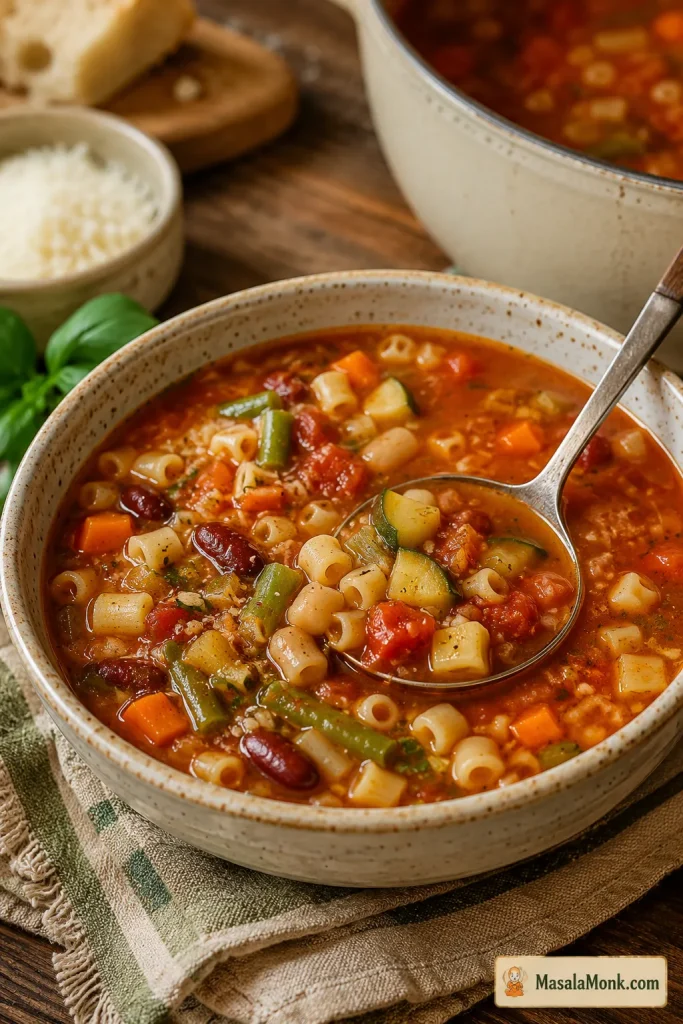
Close bowl of chunky but brothy minestrone soup with visible tomato broth, beans, pasta, carrots, zucchini, greens, and herbs.

Aim for chunky but not dry. The spoon should catch vegetables and beans, while the broth still makes the bowl feel like soup.

Best Beans, Pasta, and Vegetables for Minestrone

Beans, pasta, and vegetables are where minestrone becomes dinner. The choices do not need to be fancy; they just need to make sense together in the spoon.

Best Beans and Pasta for Minestrone

Start with spoon-friendly beans and small pasta shapes, then choose vegetables that match the season and cooking time.
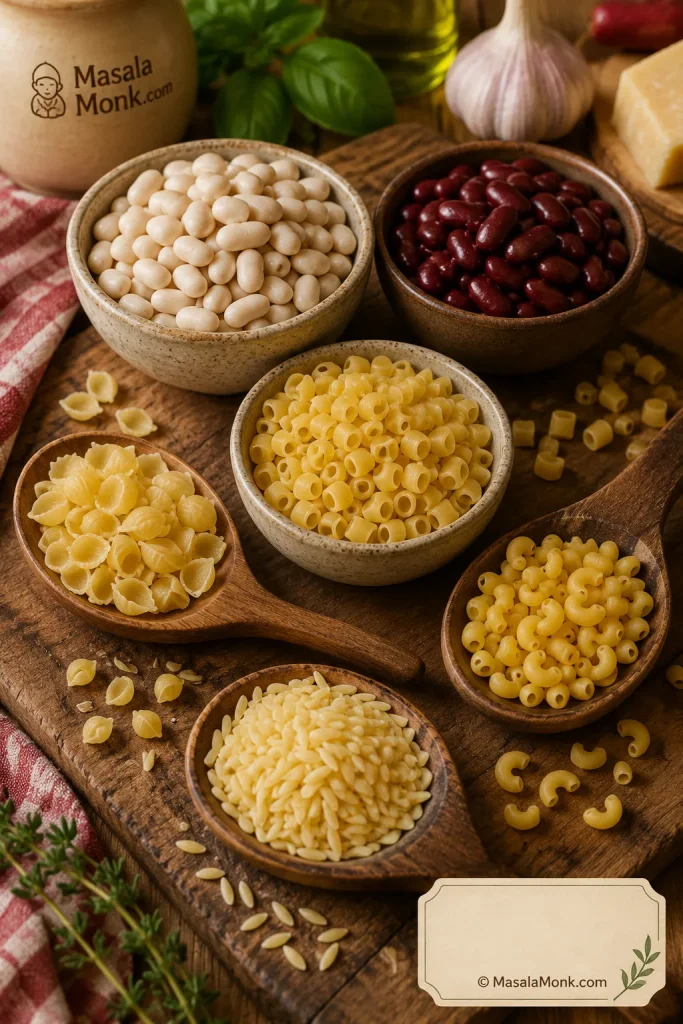
Bowls and spoons of cannellini beans, kidney beans, ditalini pasta, small shells, elbows, and orzo for minestrone soup.

Choose beans and pasta that fit easily on a spoon. Cannellini beans, kidney beans, ditalini, elbows, or small shells keep minestrone hearty without making it clumsy.

Best Beans


  • Cannellini or white beans: creamy, mild, and classic.

  • Kidney beans: firmer, colorful, and familiar in restaurant-style minestrone.

  • Borlotti beans: rustic and soft with a fuller bean flavor.

  • Chickpeas: nutty and firmer, good when you want more bite.

  • Lentils: useful for a thicker, higher-protein variation.

Best Pasta


  • Ditalini: classic and spoon-friendly.

  • Small shells: good for catching tomato broth.

  • Elbows or macaroni: easy pantry choice.

  • Orzo: soft and pleasant, but it thickens leftovers quickly.

  • Rice: useful if you do not want pasta. Cooked rice is easiest.

Once the beans and pasta are chosen, the vegetables are mostly about timing: firm ones early, tender ones late. That is what keeps the bowl generous without making it taste tired.

Firm Vegetables Early, Tender Vegetables Late


A good minestrone should never feel trapped by one vegetable list. Keep the tomato broth, aromatics, beans, herbs, and small pasta structure, then choose vegetables that fit the pot.

  • Summer: zucchini, green beans, fresh tomatoes, basil, spinach.

  • Winter: cabbage, kale, potato, squash, carrots, celery.

  • Spring: peas, asparagus, spinach, leeks, fresh herbs.

  • Pantry version: canned tomatoes, canned beans, frozen vegetables, cabbage, carrots, small pasta.

Add dense vegetables like potato, squash, cabbage, and carrots earlier. Add zucchini, peas, spinach, and tender greens near the end. Try not to overload the pot; minestrone should be hearty, but it should still have enough broth to feel like soup.
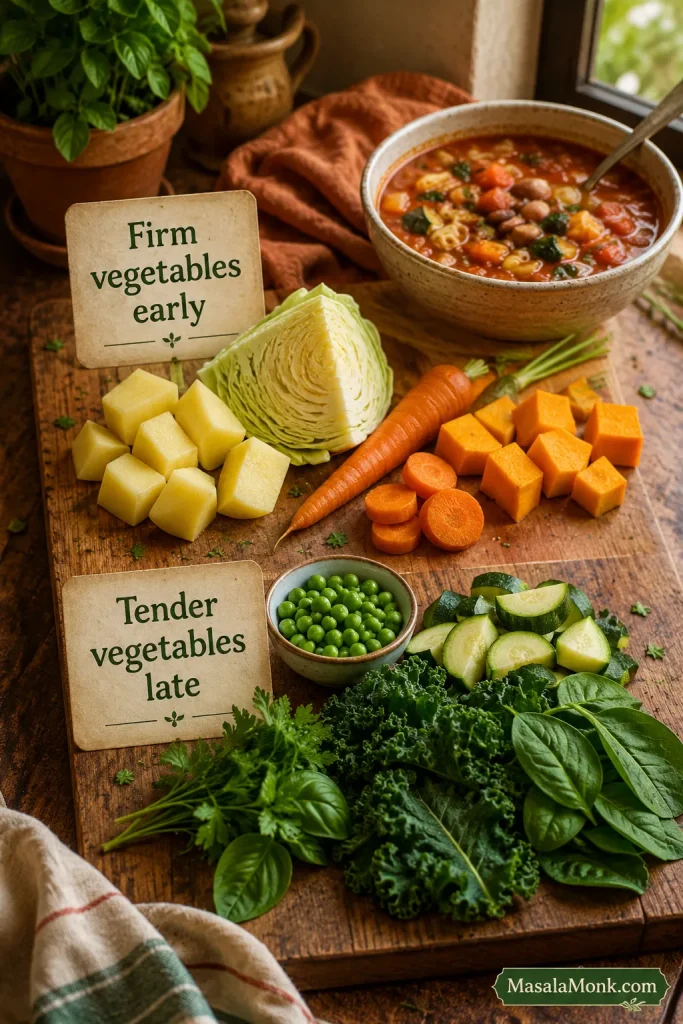
Rustic vegetable timing board showing firm vegetables like potato, cabbage, carrot, and squash beside tender vegetables like zucchini, peas, spinach, kale, and herbs.

Vegetable timing matters more than a perfect shopping list. Add firm vegetables early, then save tender greens, zucchini, peas, and herbs for the final minutes.

How to Fix Minestrone Soup Problems

If your minestrone tastes bland, watery, too thick, too acidic, or overcooked, it can usually be fixed. Most problems come down to seasoning, simmering, pasta timing, vegetable timing, or broth balance.

Fix Bland Minestrone Soup

Before rebuilding the whole pot, taste for salt, acid, herbs, pepper, and olive oil; those small finishes often fix a flat bowl.
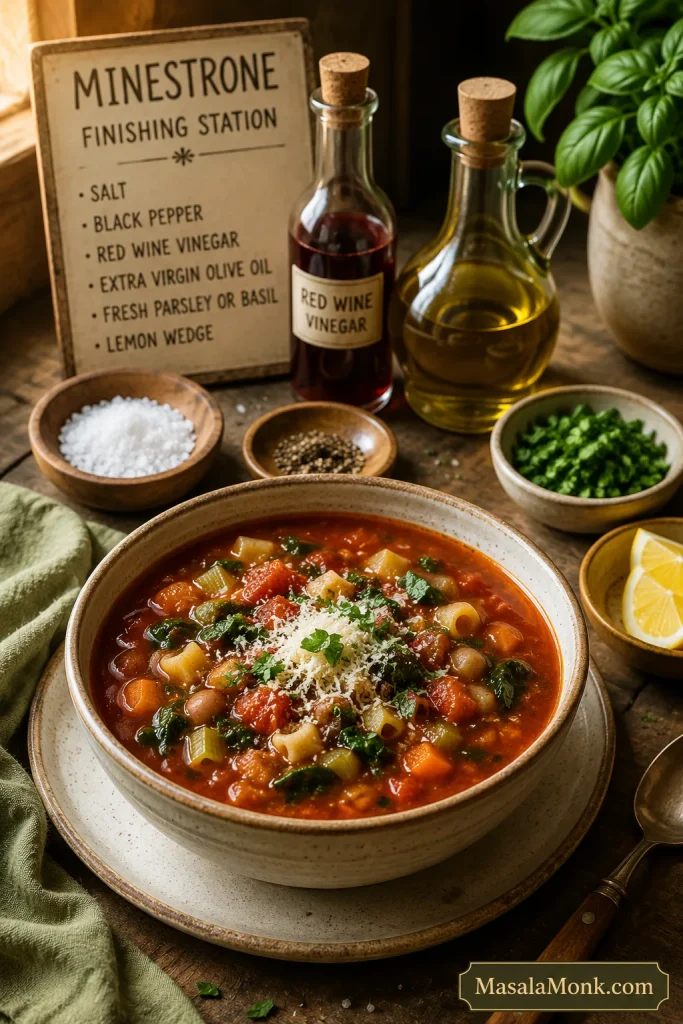
Bowl of minestrone soup beside salt, lemon wedge, red wine vinegar, olive oil, parsley or basil, and black pepper.

Bland minestrone often needs a finish, not a rebuild. Salt, lemon or vinegar, herbs, black pepper, and olive oil can wake up the whole pot.

Problem Fix
Soup tastes flat Add salt first, then a small splash of lemon juice or red wine vinegar.
Broth is too thin Simmer uncovered for a few minutes or mash 1/2 cup of beans into the broth.
Soup is too thick Add broth or water until it becomes spoonable again.
Pasta is too soft Add more broth, fresh herbs, and a little acidity. Next time, cook pasta separately.
Vegetables are overcooked Freshen the bowl with herbs, olive oil, and extra broth. Next time, add zucchini and greens later.
Soup tastes too acidic Add a drizzle of olive oil or a tiny pinch of sugar to round the tomato flavor.
Soup is too salty Add unsalted broth, water, extra beans, or more vegetables.

Most of the time, the fix is smaller than you think. A little salt, a little acid, a splash of broth, or a few mashed beans can bring the pot back.

Fix Watery Minestrone Soup

When the broth looks thin, mashed white beans are the quickest natural thickener because they add body without changing the soup into cream sauce.
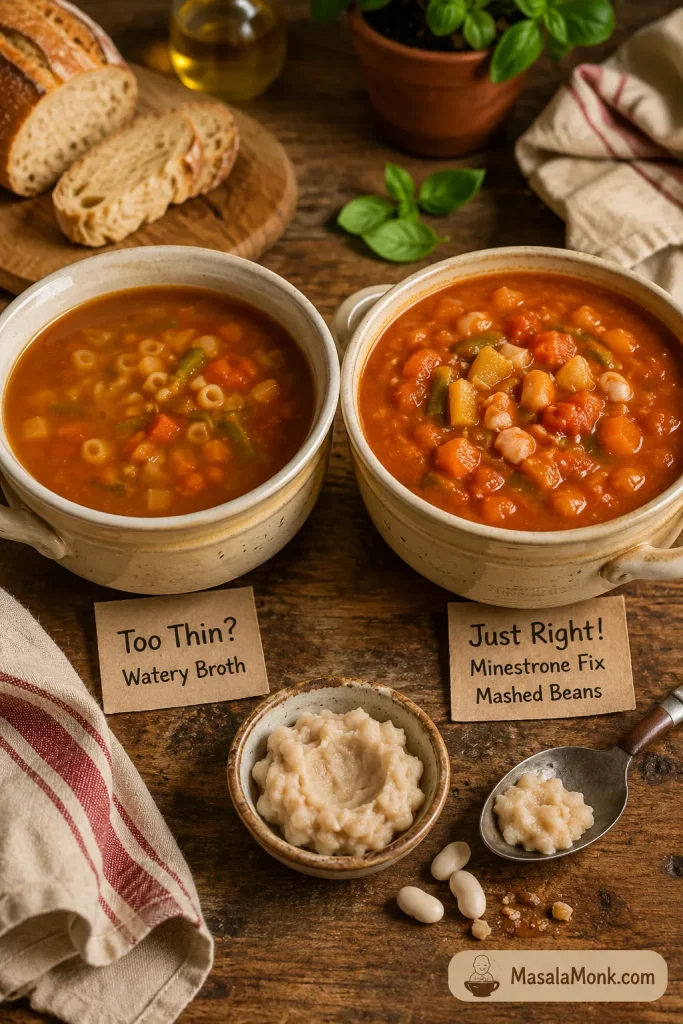
Two bowls of minestrone comparing thin watery broth with richer tomato broth, with mashed white beans shown as the thickening fix.

If the broth tastes watery, mash a few white beans into the soup and simmer briefly. This thickens minestrone naturally without cream or flour.

How to Make Minestrone Richer

  • Cook the onion, carrot, and celery until they soften and smell sweet.

  • Cook the tomato paste before adding broth.

  • Use crushed tomatoes for a fuller broth.

  • Add a parmesan rind if you are using cheese.

  • Mash some of the beans into the soup for natural body.

  • Simmer partly uncovered when the soup looks too thin.

  • Finish with olive oil, herbs, and a small splash of lemon juice or vinegar.

How to Keep Pasta from Getting Mushy


Minestrone pasta gets mushy when it sits in hot broth for too long or stays in the soup through storage. The safest method depends on how you plan to serve it.

  • Serving immediately: add dry pasta during the final 8 to 10 minutes.

  • Meal prep: cook pasta separately and add it to each bowl.

  • Freezing: freeze the soup without pasta and add fresh pasta later.

  • Thick leftovers: reheat with extra broth or water.
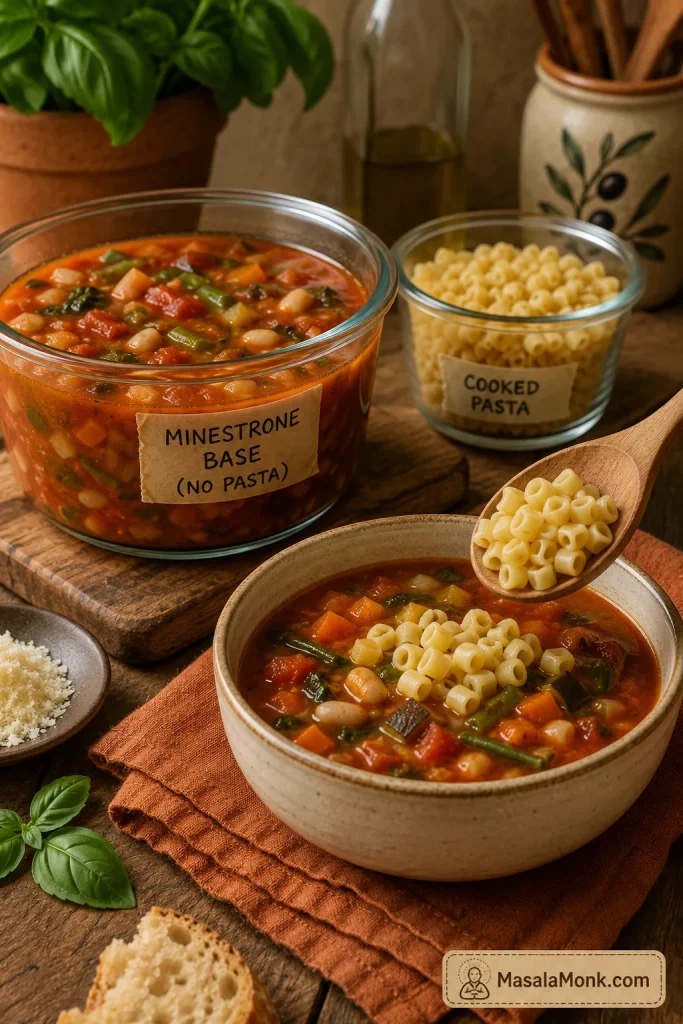
Glass containers showing minestrone soup base stored separately from cooked small pasta, with pasta being added to a serving bowl.

For better leftovers, store the soup base and pasta separately. Then add pasta to each serving so the next bowl stays fresh instead of soggy.

Slow Cooker and Instant Pot Minestrone

Slow Cooker vs Instant Pot Minestrone

For both appliance methods, the texture rule is the same: cook the base first and keep pasta and greens late. The pasta texture notes are especially useful for meal prep.
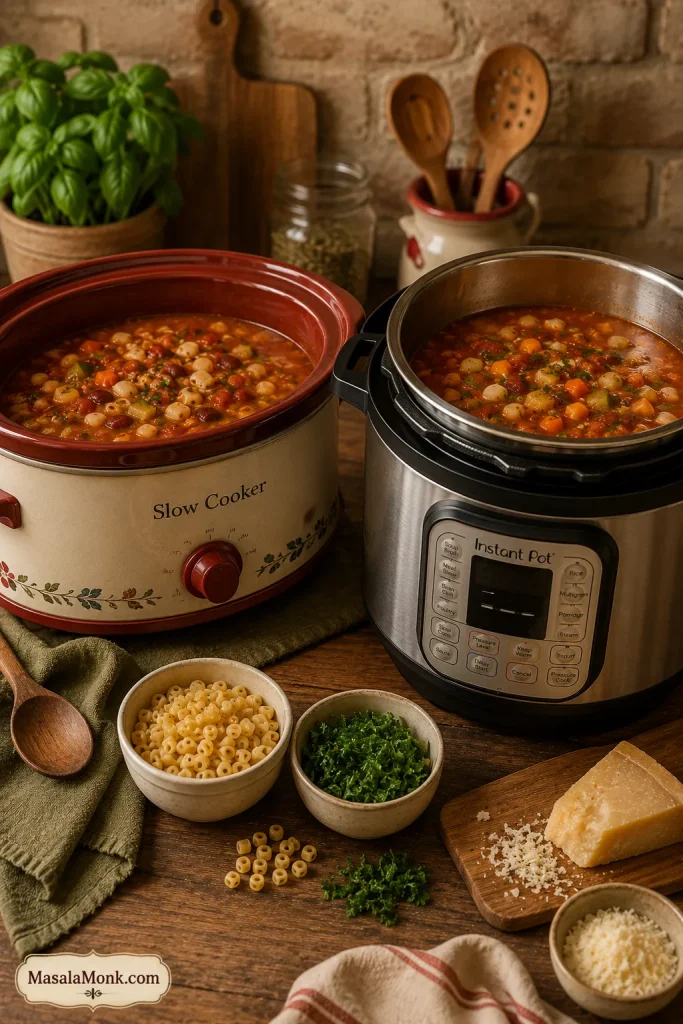
Slow cooker and Instant Pot filled with minestrone soup, with small bowls of pasta and greens nearby for adding near the end.

Whether you use a slow cooker or Instant Pot, cook the soup base first. Meanwhile, keep pasta and greens for the end so the texture stays better.

Slow Cooker Minestrone

Slow cooker minestrone is best for a hands-off soup base. Cook the broth, beans, aromatics, and firm vegetables first, then add zucchini, pasta, and greens near the end so they do not overcook.

  1. Add onion, carrot, celery, garlic, tomato paste, tomatoes, broth, herbs, bay leaf, beans, and firm vegetables to the slow cooker.

  2. Cook on low for 6 to 8 hours or high for 3 to 4 hours.

  3. Add zucchini and green beans during the final 30 minutes.

  4. Add pasta only during the final 20 to 30 minutes, or cook pasta separately.

  5. Stir in spinach or kale at the end, then finish with herbs, olive oil, and lemon juice or vinegar.

Instant Pot Minestrone


Instant Pot minestrone is best for a fast soup base. Pressure cook the broth, beans, and firm vegetables, then add cooked pasta and greens at the end so the pasta does not turn soft under pressure.

  1. Use sauté mode to cook onion, carrot, celery, and olive oil for 4 to 5 minutes.

  2. Add garlic and tomato paste. Cook for 1 minute.

  3. Add tomatoes, broth, herbs, bay leaf, beans, and firm vegetables.

  4. Pressure cook on high for 4 to 5 minutes.

  5. Let pressure release naturally for 5 to 10 minutes, then quick release carefully.

  6. Stir in greens and cooked pasta, then finish with herbs, olive oil, and lemon juice or vinegar.

Olive Garden-Style Minestrone Soup

If you like Olive Garden’s lighter tomato-broth style, use these adjustments while keeping the main recipe homemade. Olive Garden describes its minestrone as vegetables, beans, and pasta in a light tomato broth, so this is a home version in that familiar direction, not the official recipe. You can see Olive Garden’s menu description for the style reference.
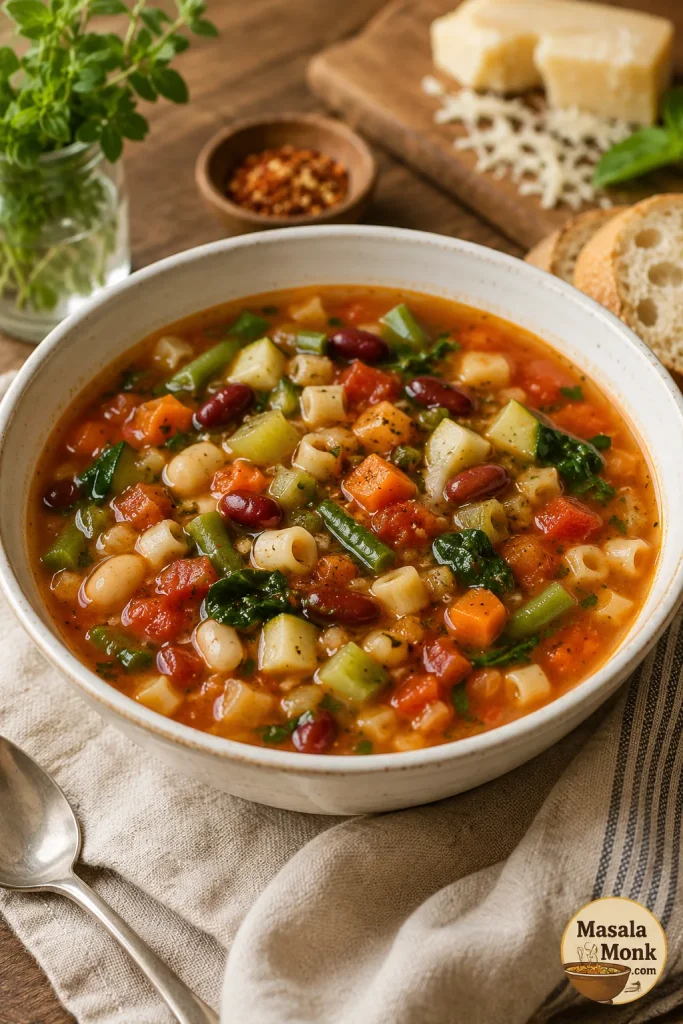
Light tomato-broth minestrone soup in a cream bowl with kidney beans, white beans, pasta, carrots, zucchini, green beans, celery, spinach, and herbs.

For Olive Garden-style minestrone at home, keep the broth lighter, the beans whole, the vegetables small, and the pasta modest.

  • Use diced tomatoes instead of crushed for a lighter restaurant-style texture.

  • Do not mash the beans into the broth.

  • Keep the pasta modest so the soup stays brothy.

  • Use kidney beans, white beans, zucchini, green beans, carrots, celery, and spinach.

  • Finish with herbs and acidity so the bowl tastes bright, not heavy.

Minestrone Soup Variations

After the base tastes good, you can take the soup in a few different directions without losing the minestrone feel. Keep the tomato base, beans, vegetable timing, and small pasta structure in place, then adjust the bowl you want. For gluten-free, rice-based, or pasta-free versions, the storage section is useful if you plan to cook the starch separately.
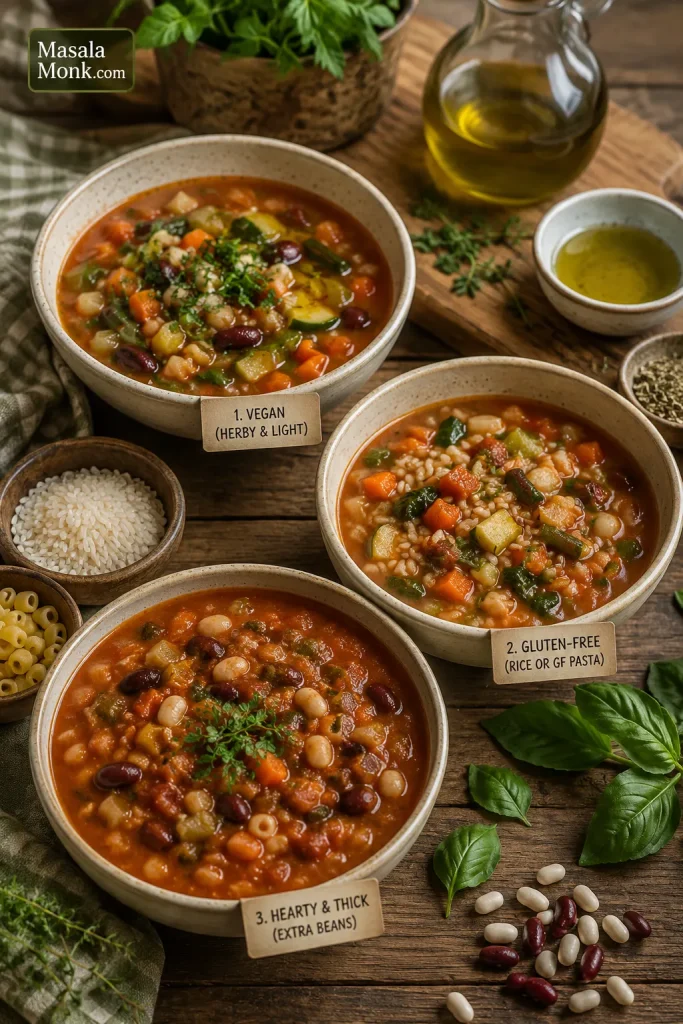
Three bowls of minestrone variations showing a vegan version, a gluten-free or rice version, and a thicker bean-rich version on a rustic table.

Once the tomato-bean base tastes good, you can take minestrone in several directions: vegan, gluten-free, rice-based, or thicker and extra hearty.

  • Vegan minestrone: use vegetable broth and skip parmesan rind, parmesan cheese, meat, and egg pasta. Finish with olive oil, herbs, nutritional yeast, or vegan pesto.

  • Gluten-free minestrone: use gluten-free pasta or rice. Cook gluten-free pasta separately for the best texture. Do not use barley or farro.

  • Minestrone without pasta: skip the pasta and add extra beans, cabbage, zucchini, potato, kale, spinach, or cooked rice.

  • Thick and hearty minestrone: use crushed tomatoes, 1 cup pasta, extra white beans, and a small potato. Mash some beans into the broth.

  • Brothy minestrone: use 3/4 cup pasta, unmashed beans, and an extra cup of broth for a lighter, restaurant-style bowl.

  • Low-sodium minestrone: start with low-sodium broth, rinse canned beans well, and choose no-salt-added tomatoes if available. Use garlic, herbs, lemon juice, vinegar, and olive oil to build flavor.

  • Add meat: brown Italian sausage or ground beef before adding the aromatics, or stir in shredded cooked chicken near the end.

Think of these as directions, not separate recipes. The same pot can become lighter, heartier, vegan, gluten-free, or meatier without losing its minestrone backbone.

What to Serve with Minestrone Soup

Minestrone can stand alone as dinner, especially with beans and pasta, but a simple side makes the meal feel complete.

  • A lighter meal: serve minestrone with a crisp salad, roasted vegetables, or something bright like beet salad.

  • For a heartier dinner: add garlic bread, focaccia, grilled cheese, parmesan toast, or pesto toast.
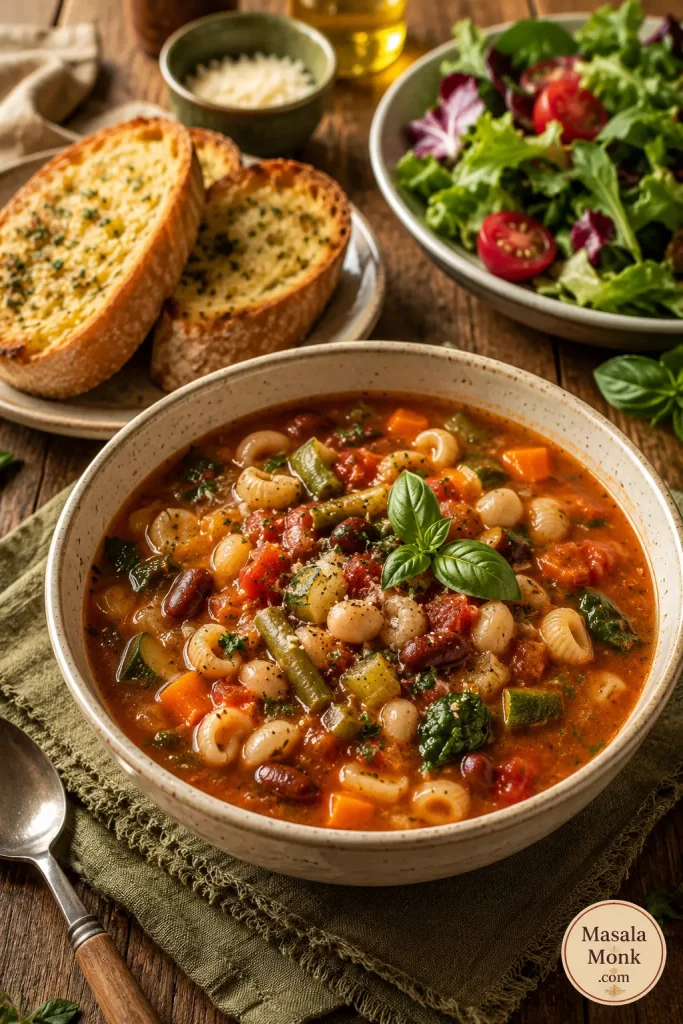
Bowl of minestrone soup served with garlic bread, a green salad with tomatoes, herbs, and a spoon on a wooden table.

Minestrone can stand alone, but the sides change the meal. Garlic bread makes it heartier, while a fresh salad keeps dinner lighter.

The best side is something that balances the tomato broth without making the meal feel heavy.

Make-Ahead, Storage, Freezing, and Reheating

Make-Ahead Plan


Yes, you can make minestrone ahead of time. For the best texture, make the soup base without pasta, refrigerate it, and add freshly cooked pasta when serving.

  • Chop the onion, carrot, celery, zucchini, and green beans up to 1 day ahead.

  • Drain and rinse the beans ahead of time.

  • Make the soup base without pasta up to 3 days ahead.

  • Add greens when reheating so they stay brighter.

  • Cook pasta fresh, or store cooked pasta separately with a tiny drizzle of olive oil.

Store and Freeze Minestrone with Pasta Separately

This storage setup keeps the soup base useful and protects the pasta from swelling before the next serving.
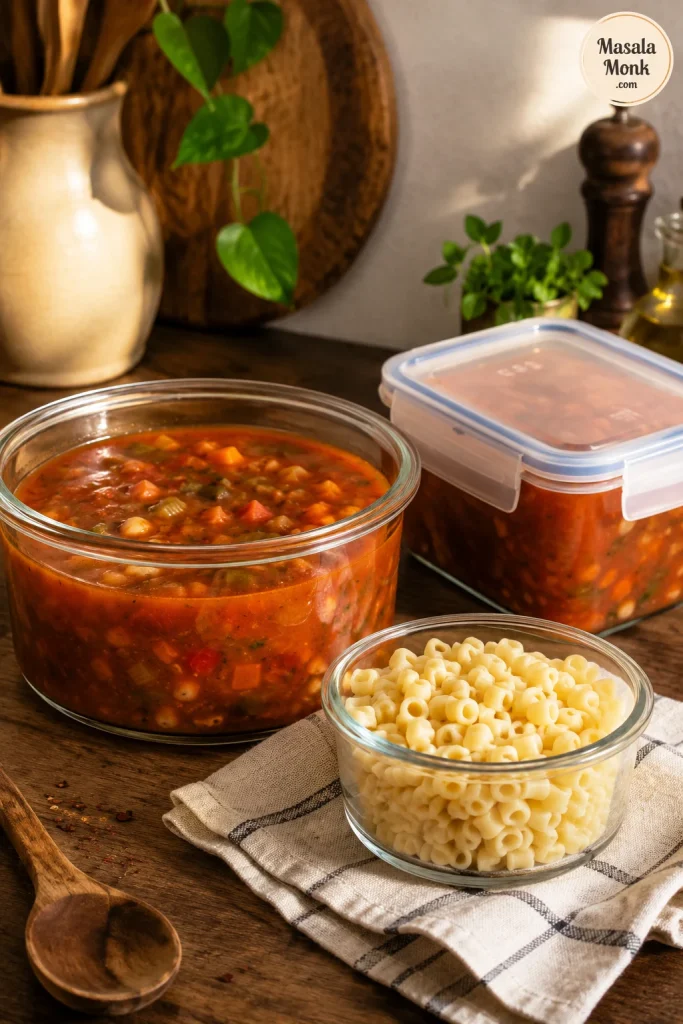
Glass containers of minestrone soup base and a separate bowl of cooked small pasta for storing and freezing.

For freezing, leave pasta out of the soup base. This way, the broth, beans, and vegetables reheat well, and fresh pasta can be added later.

Fridge

Store minestrone soup in an airtight container in the fridge for 3 to 4 days, which matches the USDA’s general guidance for refrigerated leftovers. The next-day soup is often thicker and more flavorful. Loosen it with broth before reheating.

Freezer


Minestrone freezes best without pasta. Freeze the soup base for up to 3 months, then add freshly cooked pasta when reheating. If you freeze it with pasta, the flavor will still be good, but the pasta will become softer.

Reheating


Reheat gently on the stovetop over low to medium-low heat. Add broth or water to loosen the soup. After reheating, freshen the bowl with olive oil, herbs, lemon juice, vinegar, or parmesan. For the fastest fix when leftovers get thick, see the troubleshooting table.

Serve Minestrone Family-Style
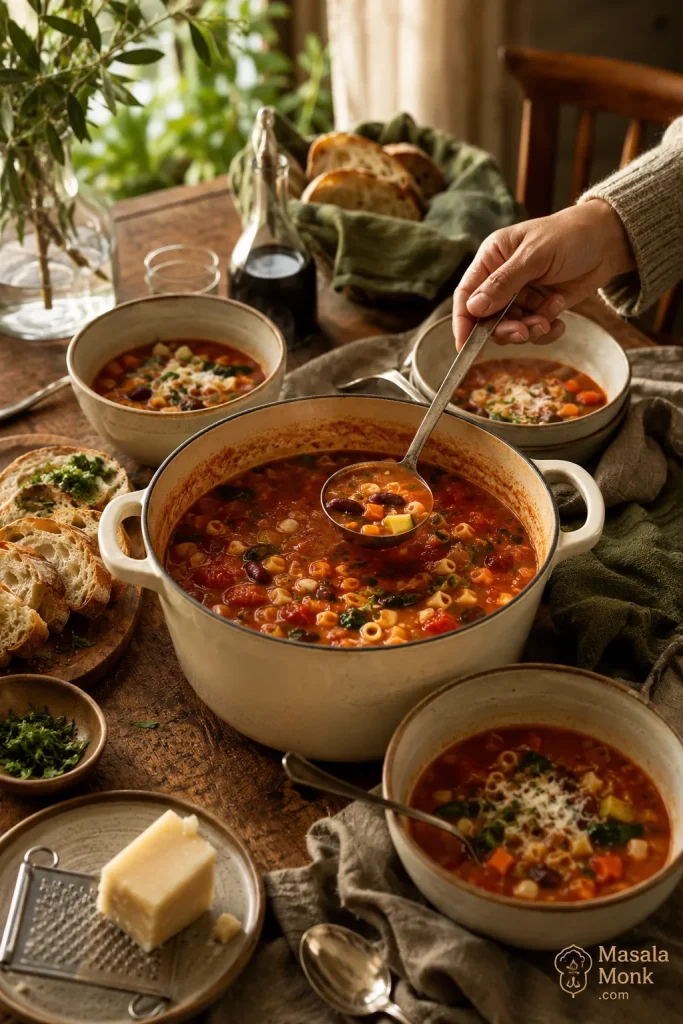
Family-style Dutch oven of minestrone soup on a wooden table with a ladle, bowls of soup, bread, herbs, cheese, and a hand serving soup.

Serve minestrone family-style when you want the meal to feel relaxed and generous, with herbs, cheese, bread, or extra broth added at the table.

Once you have the rhythm down, minestrone becomes one of those soups you can make again and again without overthinking it. Keep the tomato broth, beans, small pasta, and vegetable timing in place, then let the pot change with the season.

The best minestrone is not the one with the longest ingredient list; it is the one where the broth, beans, vegetables, and pasta all still feel like they belong in the same spoonful.

Minestrone changes from kitchen to kitchen. If your pot had cabbage, potato, chickpeas, kale, extra zucchini, or a pasta shape that worked beautifully, tell us. Those small choices are often what help the next person make a better pot from what they already have.


Frequently Asked Questions

What is minestrone soup made of?


Minestrone soup is an Italian vegetable soup made with vegetables, beans, tomatoes, broth, herbs, olive oil, and usually pasta or rice. Common vegetables include onion, carrot, celery, zucchini, green beans, cabbage, spinach, kale, potato, and peas.

Is minestrone soup vegetarian?


Minestrone soup is vegetarian when it is made with vegetable broth and no meat. If you add parmesan, choose vegetarian-style parmesan if that matters to you.

Is minestrone soup vegan?


Minestrone soup is vegan when it is made with vegetable broth and no parmesan, parmesan rind, meat, or egg pasta. For a vegan finish, use olive oil, herbs, nutritional yeast, or vegan pesto.

What is the best pasta for minestrone?


Ditalini is one of the best pasta shapes for minestrone because it is small and spoon-friendly. Small shells, elbows, macaroni, and orzo also work.

What beans are best for minestrone?


Cannellini beans, white beans, and kidney beans are the best everyday beans for minestrone. Borlotti beans, navy beans, chickpeas, and lentils also work.

Why does my minestrone taste bland?


Bland minestrone usually needs salt, acidity, or more simmering time. Cook the aromatics well, cook the tomato paste until it darkens slightly, taste the broth before adding pasta, then finish with lemon juice or vinegar if the tomato flavor tastes flat.

How do you make minestrone less watery?


To make minestrone less watery, simmer it uncovered, mash some beans into the broth, use crushed tomatoes, or add a parmesan rind if you are using cheese. A watery soup often means the aromatics or tomato paste needed more time at the beginning.

How do you keep pasta from getting mushy in minestrone?


To keep pasta from getting mushy in minestrone, add it only near the end and stop when it is just tender. For leftovers, meal prep, or freezing, cook pasta separately and add it to each bowl.

Can you make minestrone soup ahead of time?


Yes, minestrone is a good make-ahead soup, especially if you make the soup base without pasta. Refrigerate the base for 3 to 4 days, then add freshly cooked pasta when serving.

Can you freeze minestrone soup?


Yes, minestrone soup freezes well, but it freezes best without pasta. Freeze the soup base for up to 3 months, then add freshly cooked pasta when serving.

What is the difference between minestrone and vegetable soup?


Minestrone is usually heartier than plain vegetable soup because it often includes beans, pasta or rice, tomatoes, Italian herbs, and olive oil. Vegetable soup can be any broth-based soup made with vegetables.

What is the difference between minestrone and pasta e fagioli?


Minestrone is a vegetable-heavy soup that often includes beans plus pasta or rice. Pasta e fagioli means pasta and beans, so it is more focused on those two ingredients and is often thicker and more bean-forward.

Can I make minestrone without pasta?


Yes, you can make minestrone without pasta. Add extra beans, cabbage, zucchini, potato, kale, spinach, or cooked rice instead.

Can I use frozen vegetables in minestrone?


Yes, frozen peas, green beans, spinach, kale, and mixed vegetables can work well in minestrone. Add quick-cooking frozen vegetables near the end unless they are dense vegetables. If frozen spinach releases too much water, squeeze it before adding.

Can I make minestrone with canned vegetables?


Yes, canned vegetables can work in minestrone when you need a pantry version. Drain them well and add them near the end because they are already cooked and can become too soft if simmered for a long time.
Posted on Leave a comment

Baked Beans Recipe With Canned Beans, Canned Baked Beans, or Dried Beans

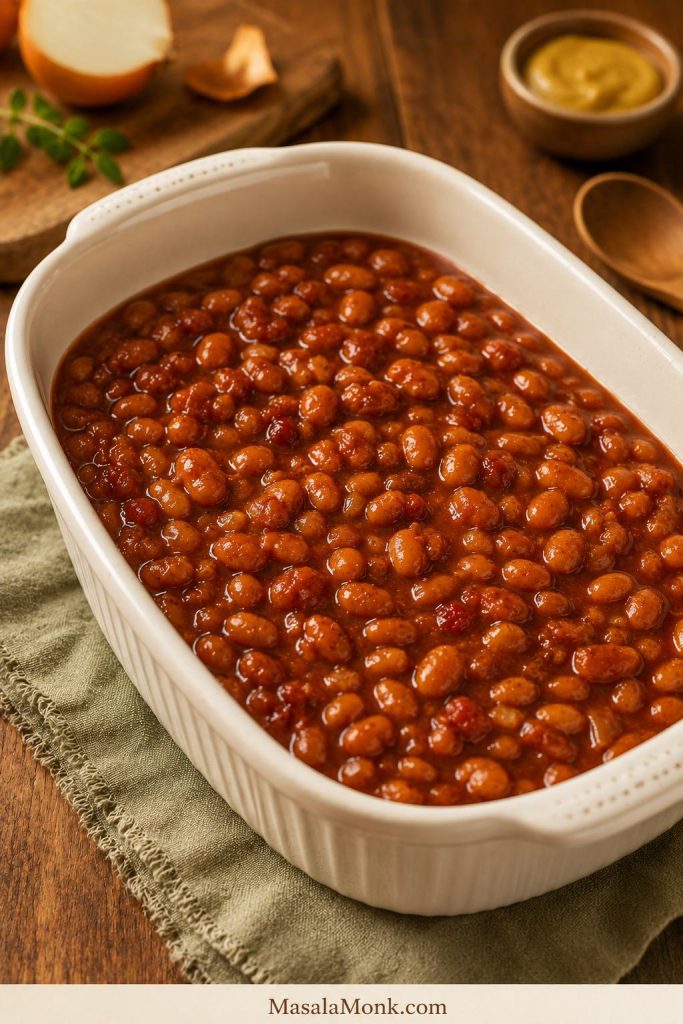
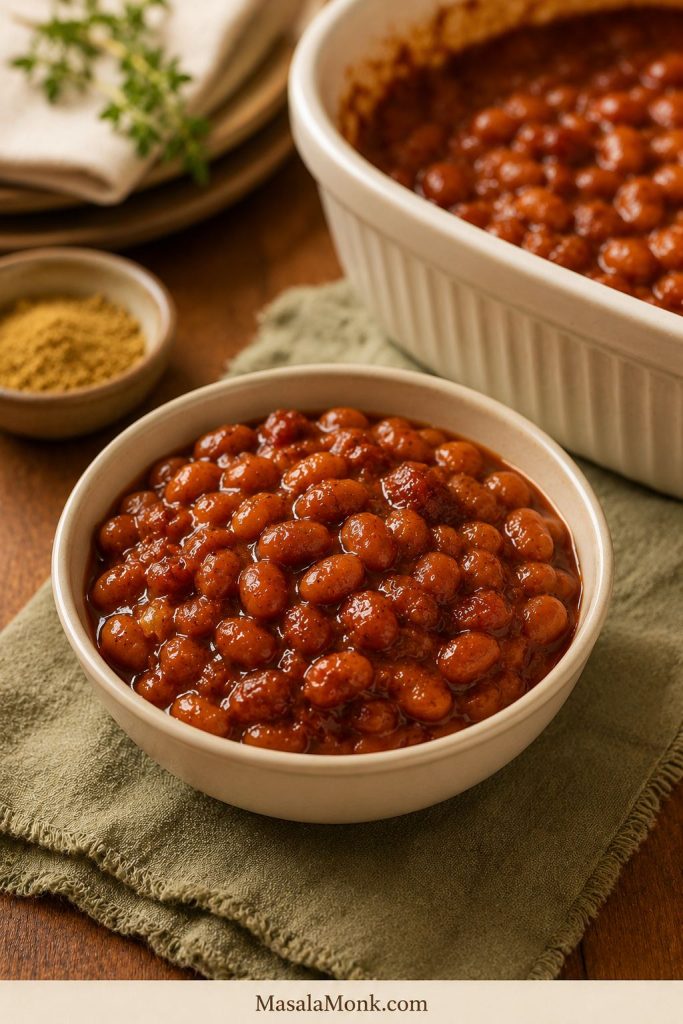
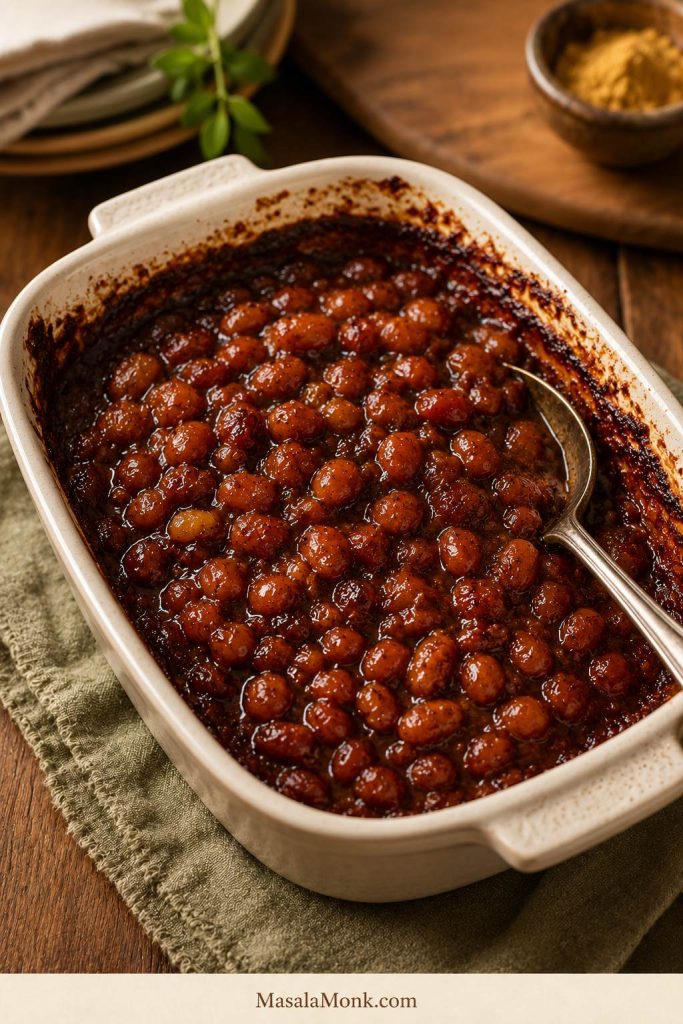
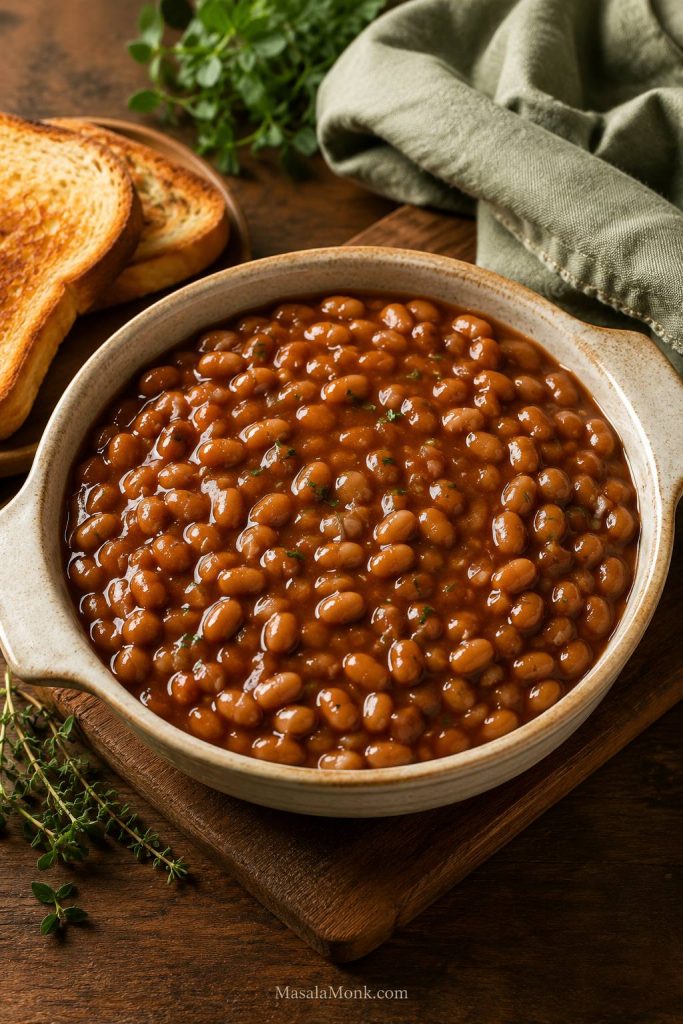
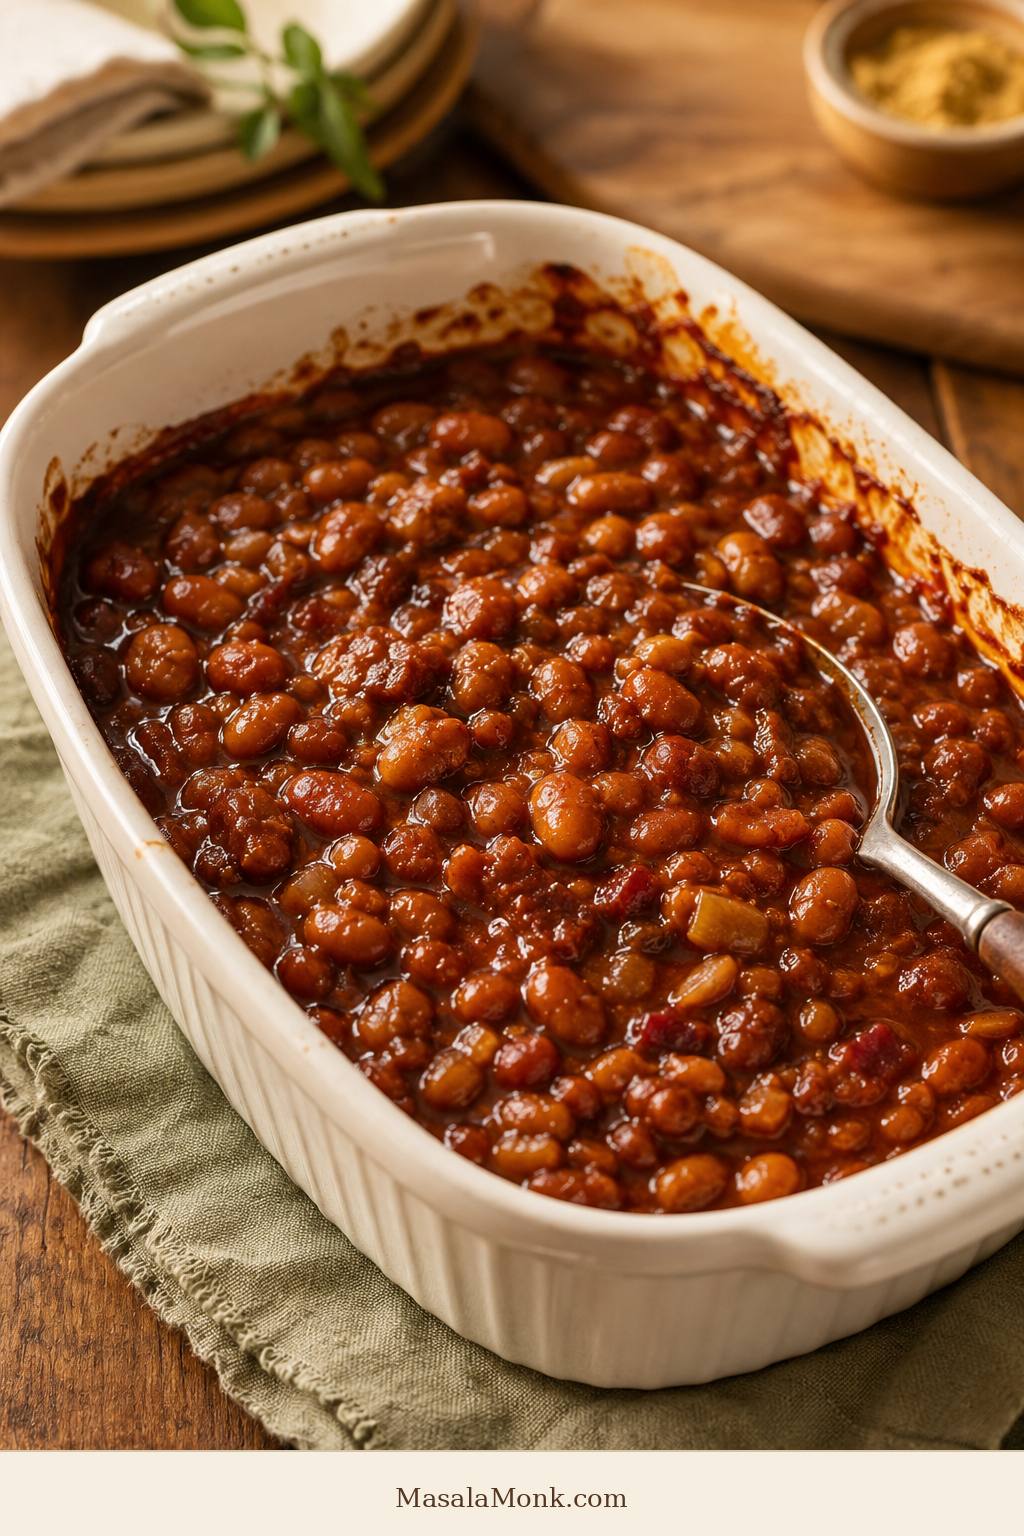
Homemade baked beans in a white ceramic dish with browned edges.

Good baked beans should taste like they took their time, even when you start with cans. The sauce should cling to the spoon, the edges should bubble and darken, and the flavor should land somewhere between sweet, tangy, deeply savory, and just smoky enough to feel slow-cooked.

This baked beans recipe is made for the way people actually cook: with whatever beans are already in the pantry. Plain canned beans, canned baked beans, and dried navy beans can all lead to a thick, balanced, homemade-tasting pan — with bacon, without pork, vegetarian, vegan, lower-sugar, and lower-sodium adjustments built in.

That means fewer store trips, less guessing with sweet canned beans, and dried beans that turn tender before they ever meet the sauce. Brown sugar and molasses bring familiar sweetness, mustard and vinegar add lift, onion and garlic make the beans taste cooked, and the oven gives you those glossy edges people keep sneaking from the pan.

This is the kind of side dish that quietly disappears from the corner of the pan while everyone is still “just tasting.”

For beans as a full dinner instead of a side dish, this bean stew recipe turns canned or cooked beans into a thick, hearty one-pot meal.

Quick Answer: How to Make Baked Beans

For easy homemade baked beans, start with plain canned white beans, navy beans, Great Northern beans, or cannellini beans. Drain and rinse the beans, then simmer them briefly in a sauce made with sautéed onion, ketchup or tomato sauce, a little barbecue sauce, brown sugar or molasses, mustard, apple cider vinegar, smoked paprika, and optional bacon.

Bake uncovered at 350°F / 175°C for 55 to 70 minutes, until the edges bubble, the sauce darkens, and it coats the beans instead of pooling around them. Rest the beans for 10 to 15 minutes before serving so the sauce can settle into the pan.

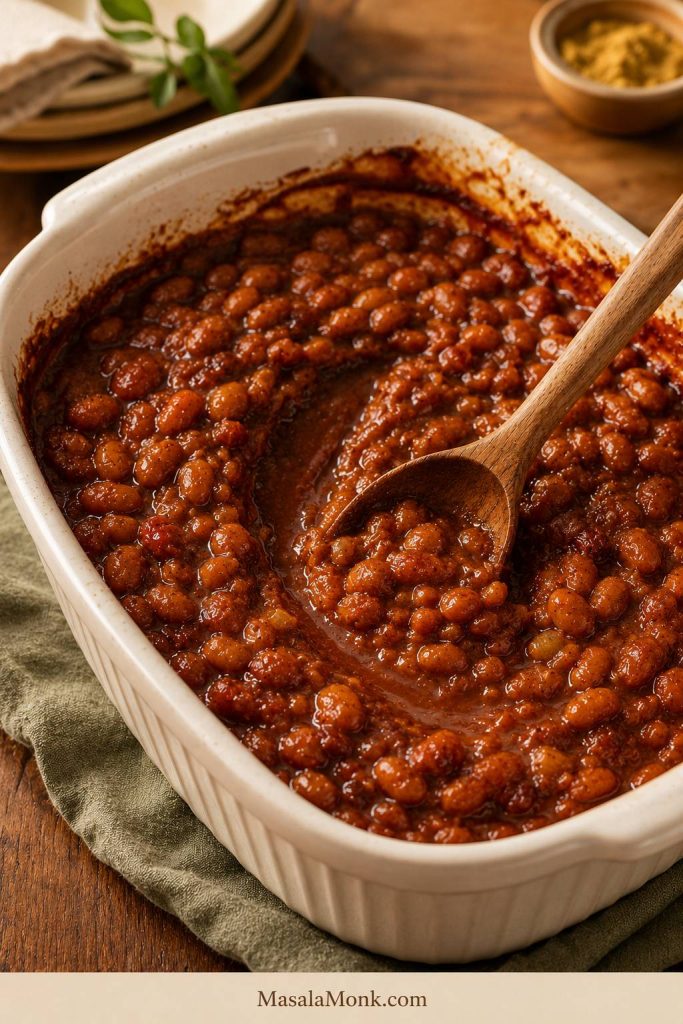
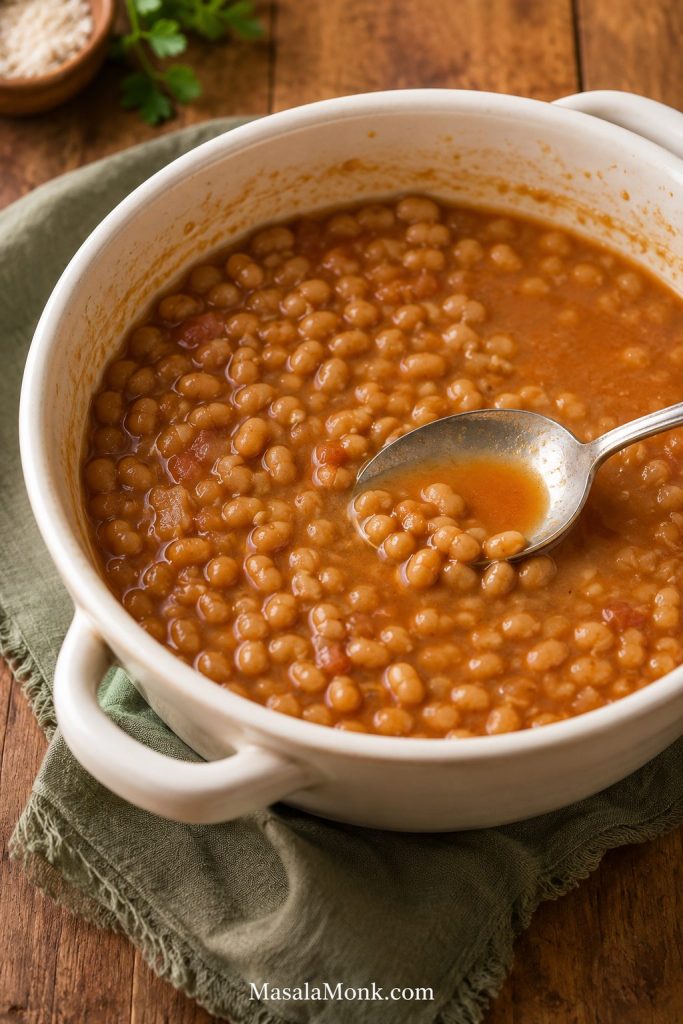
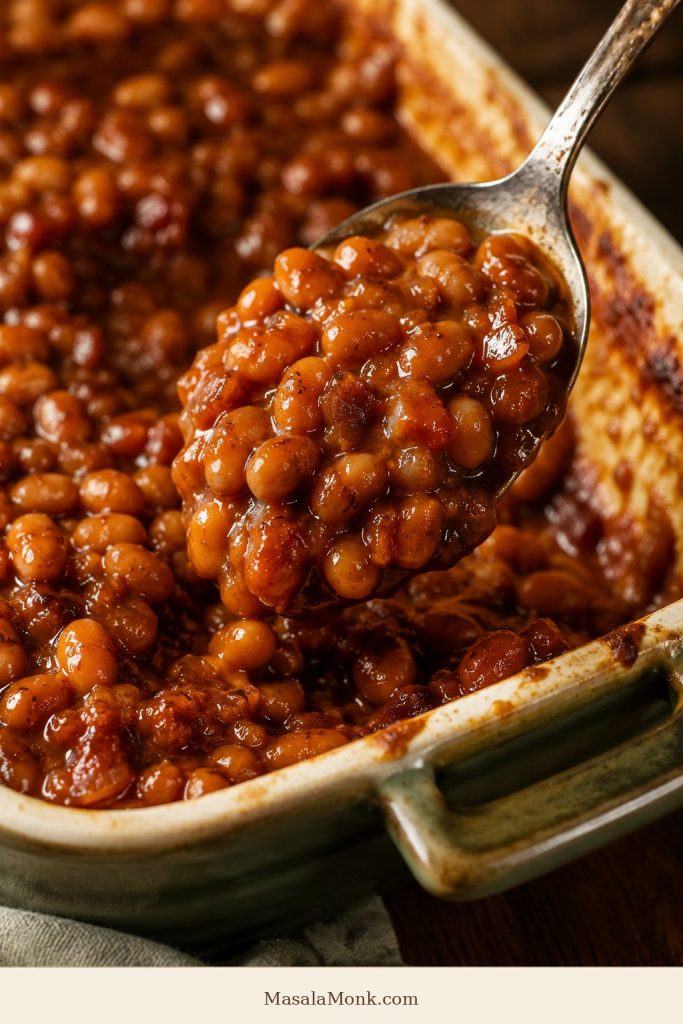
Spoon lifting thick baked beans from a ceramic baking dish.
Use the spoon test before serving. When the beans hold together in a full scoop, the sauce has reduced enough to rest.
Shortcut note: Starting with canned baked beans? Treat sweetness as an adjustment, not the starting point. Most cans already bring sugar, salt, and sauce; your job is to add onion, tang, cooked flavor, and a better baked texture.

This is an American-style baked beans recipe: thicker, darker, sweeter, and more barbecue-friendly than British-style tomato baked beans. For full amounts, jump to the recipe card, or keep reading for bean choices, pan size, texture cues, and fixes for watery, bland, too-sweet, or too-thick baked beans.

Baked Beans at a Glance

Most reliable beans: Plain canned navy beans, Great Northern beans, cannellini beans, or small white beans

Classic from-scratch beans: Dried navy beans

Quickest shortcut: Canned baked beans, adjusted with onion, mustard, vinegar, cooked flavor, and less sugar

Oven temperature: 350°F / 175°C

Cook time: 55 to 70 minutes for the main canned-bean version

Rest time: 10 to 15 minutes

Dish: 9×13-inch / 23×33 cm baking dish or Dutch oven

Texture cue: Bubbling edges, glossy top, and sauce that slowly settles when spooned

Serving cue: Serve after a short rest, when the sauce has stopped running and starts clinging to the beans

Why This Recipe Works

This recipe works because it does not force you into one starting point. A pantry can of white beans, a can of baked beans, and a bag of dried navy beans can all become a good pan — they just need slightly different handling.

The sauce is layered instead of just sweet. Onion and garlic create a savory base. Ketchup or tomato sauce gives body. Brown sugar and molasses bring that familiar baked-bean flavor. Mustard and vinegar keep the sauce bright. Smoked paprika adds a warm barbecue-style note, especially when there is no bacon in the pan.

Uncovered baking does the slow work. It concentrates the sauce, deepens the flavor, and gives the edges that slightly caramelized finish that makes the beans taste like they have been sitting near the grill for hours.

The baked beans balance test: Before baking, the sauce should taste a little stronger than the finished beans: sweet, tangy, savory, and loose enough to reduce in the oven. If it tastes flat, add mustard, vinegar, or a savory note before adding more sugar.

Canned Beans, Canned Baked Beans, or Dried Beans?

The best starting point is not the same for everyone. A weeknight pan, a potluck shortcut, and a from-scratch weekend batch all need slightly different handling.

Choose your starting point

  • Choose plain canned beans when you want the easiest homemade-tasting version.
  • Reach for canned baked beans when you need a fast potluck or cookout shortcut.
  • Start with dried navy beans when you want the most old-fashioned texture and do not mind extra time.
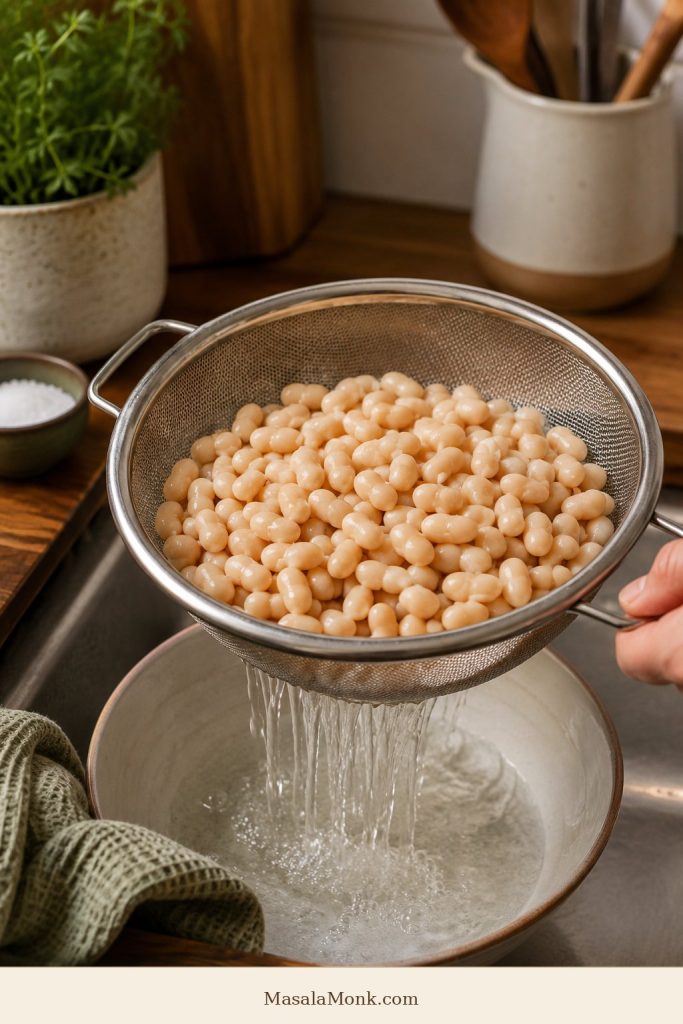
White beans draining in a colander over a bowl.
Plain canned white beans give you control. After draining and rinsing, you can build a cleaner baked beans sauce from scratch.
Starting Point When to Use It What to Know
Plain canned white beans Easy homemade flavor Fast, flexible, and less sweet than canned baked beans. This is the most reliable starting point for this recipe.
Canned baked beans Fast shortcut Already sweet and seasoned. Do not rinse them; adjust the sauce instead.
Dried navy beans From-scratch version Cook until fully tender before adding tomato, vinegar, molasses, or sugar.
Pork and beans Classic cookout shortcut Good with bacon, barbecue sauce, mustard, brown sugar, and a longer uncovered bake.
Cannellini or Great Northern beans Easy substitute Larger and creamier than navy beans, but reliable in a homemade sauce.
Pinto beans BBQ-style variation Earthier and heartier. Good for barbecue-style beans, potlucks, and mixed-bean versions.
Plain canned beans means cooked beans packed in liquid, usually not sweet. Canned baked beans means beans already packed in a seasoned tomato-style sauce. Treat them differently.

For this recipe, plain canned white beans are the easiest starting point. The beans are already tender, but the flavor is still yours to build — sweetness, tang, salt, depth, and final texture all stay in your hands.

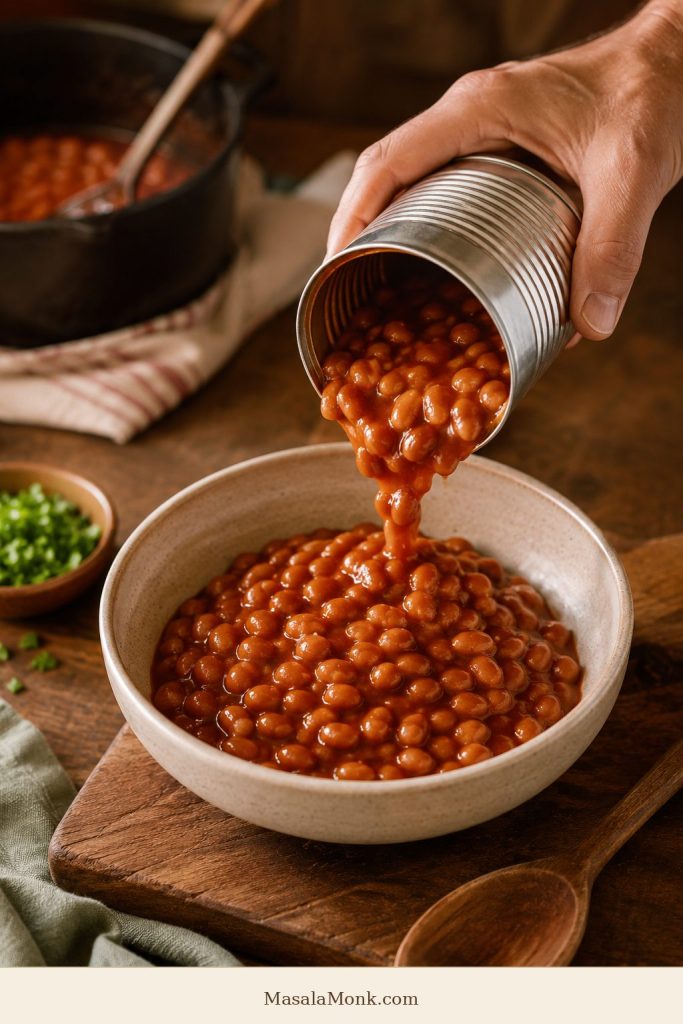
Canned baked beans poured from an unlabeled can into a bowl.
Canned baked beans are already sweet and sauced. Upgrade them with onion, acid, smoke, and oven time instead of more sugar.

Which Beans Work Best for Baked Beans?

The classic bean for baked beans is the navy bean, also called a haricot bean in some places. It is small, creamy, and holds its shape well in a thick sauce.

The good news is that baked beans are forgiving. The exact bean matters less than tenderness, sauce balance, and enough oven time.

  • Navy beans / haricot beans: the classic baked bean choice.
  • Great Northern beans: slightly larger, creamy, and easy to use.
  • Cannellini beans: larger and softer, but very convenient.
  • Pinto beans: good for barbecue-style baked beans.
  • Mixed beans: better for potluck or barbecue-style versions than classic baked beans.

For the cleanest homemade flavor, use plain canned navy beans or Great Northern beans. For the most traditional from-scratch version, use dried navy beans. All you have is cannellini or small white beans? Use them. As long as the beans are tender and the sauce is balanced, the pan will still work.

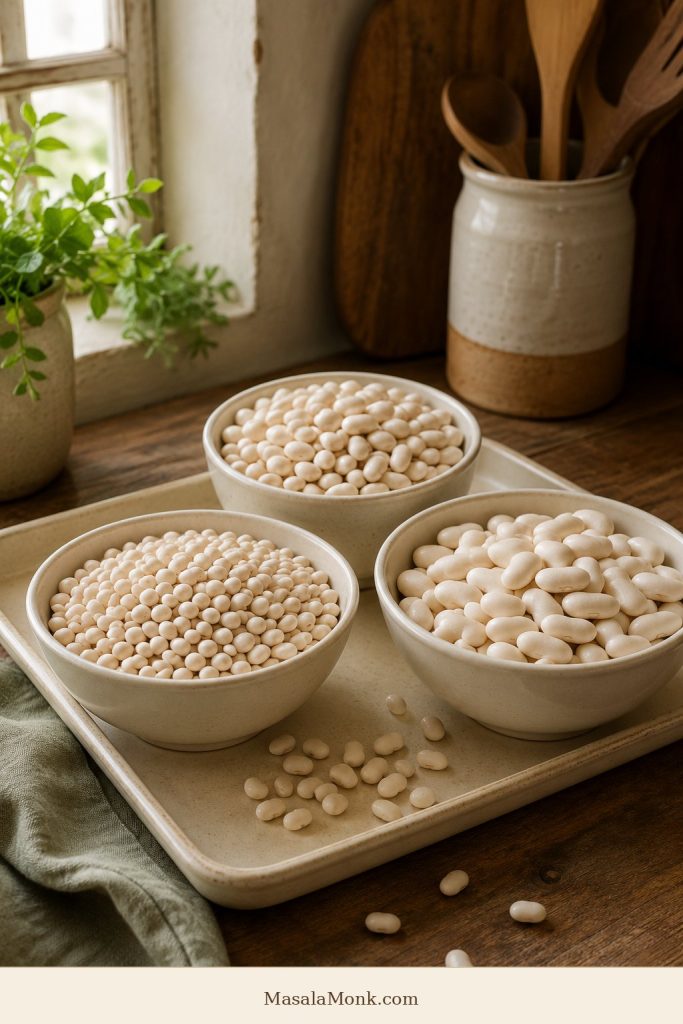
Three bowls showing different white beans for baked beans.
Navy beans are traditional, but Great Northern and cannellini beans also work. Choose white beans that soften well and hold sauce.

For a more complete rice-and-beans meal, this red beans and rice recipe is a better fit than a sweet-savory baked bean side.

Which Pan or Pot Works Best?

The dish changes how quickly the sauce settles around the beans. Wide baking dishes give more surface area, so the sauce tightens faster. Deeper casseroles keep the beans saucier, while a Dutch oven lets you sauté, simmer, and bake in the same pot.

  • 9×13-inch / 23×33 cm baking dish: the most reliable choice for a glossy, spoonable sauce because it gives the beans more surface area.
  • Dutch oven: best for one-pot cooking from stovetop to oven.
  • 2–3 quart casserole dish: works well, but keeps the beans saucier and may need more time.
  • Slow cooker: useful for keeping baked beans warm, but it will not give the same caramelized edges.
  • Thin metal pan: not ideal for long baking because sugary sauce can scorch at the edges or bottom.

Choose the 9×13 dish for a spoonable, glossy sauce. A Dutch oven is better for one-pot convenience. For parties, bake the beans first, then keep them warm in a slow cooker. Need a full slow-cooker beans-and-sausage dinner? Use this slow cooker sausage casserole recipe.

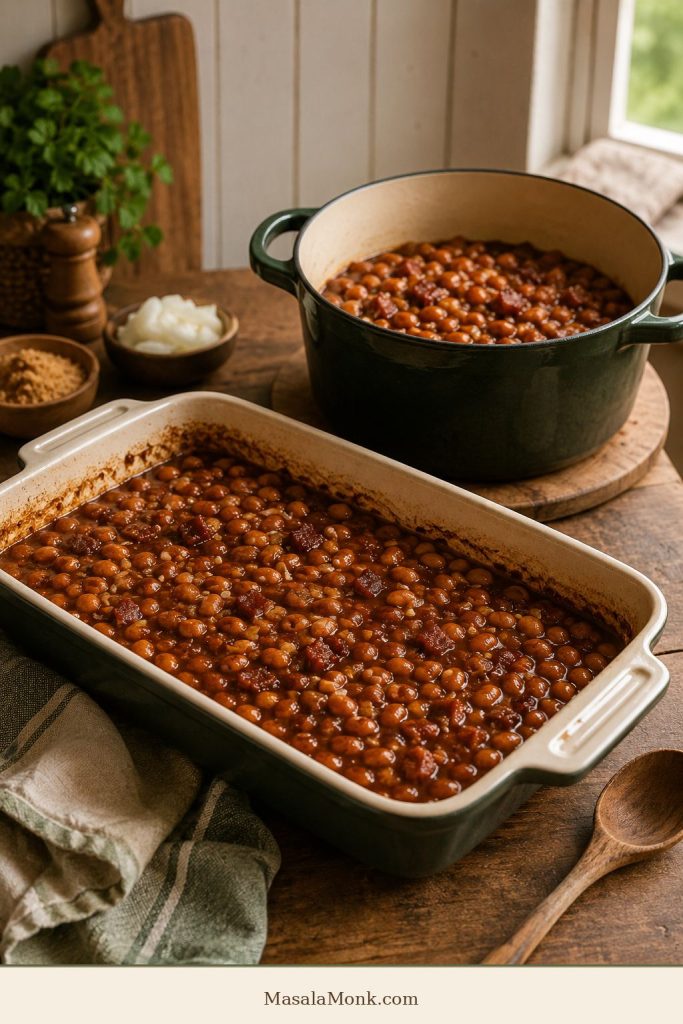
Wide baking dish and Dutch oven shown as baked beans pan options.
The pan changes the result. A wide dish reduces sauce faster, while a deeper Dutch oven keeps baked beans softer and saucier.

Ingredients You’ll Need

This recipe makes one 9×13-inch pan, about 8 to 10 servings.

Beans

Use 3 cans of plain white beans, 15 oz / 425 g each, drained and rinsed. Navy beans, Great Northern beans, cannellini beans, or small white beans all work.

If your cans are 400 g / 14 oz, use 3 cans for the same sauce ratio. Use 4 cans only for a larger batch, and increase the sauce by about one-quarter so the beans do not turn out under-sauced.

Onion and Garlic

Onion gives the sauce its savory base. Garlic adds depth. This is where the canned-bean flavor starts becoming cooked, not just mixed.

Ketchup, Tomato Sauce, or Tomato Paste

Ketchup gives sweetness, tang, and body. Tomato sauce gives a less sweet base. Tomato paste is optional, but useful when you want the sauce to cling better with less added sugar.

Barbecue Sauce

A little barbecue sauce adds cookout flavor and roundness. Use it as a background note, not the whole personality of the dish.

Brown Sugar and Molasses

Brown sugar gives quick sweetness. Molasses gives deeper, darker baked-bean flavor. Together, they create the old-fashioned sweetness people expect from baked beans. Use both for a classic sweet-savory sauce, or reduce the brown sugar for a less sweet pan.

Mustard and Vinegar

Mustard and vinegar keep the sauce balanced. They should not make the beans sour. They should make the sweetness taste brighter and less heavy. This is the difference between beans that taste flat and beans people keep spooning back onto the plate.

Smoked Paprika

Smoked paprika gives a warm, savory edge, especially useful when you are making baked beans without bacon or pork.

Worcestershire, Soy Sauce, or Tamari

A small amount adds rounded flavor. Standard Worcestershire sauce often contains anchovies, so use vegetarian Worcestershire, soy sauce, or tamari for vegetarian or vegan baked beans. A little goes a long way, especially once the sauce reduces.

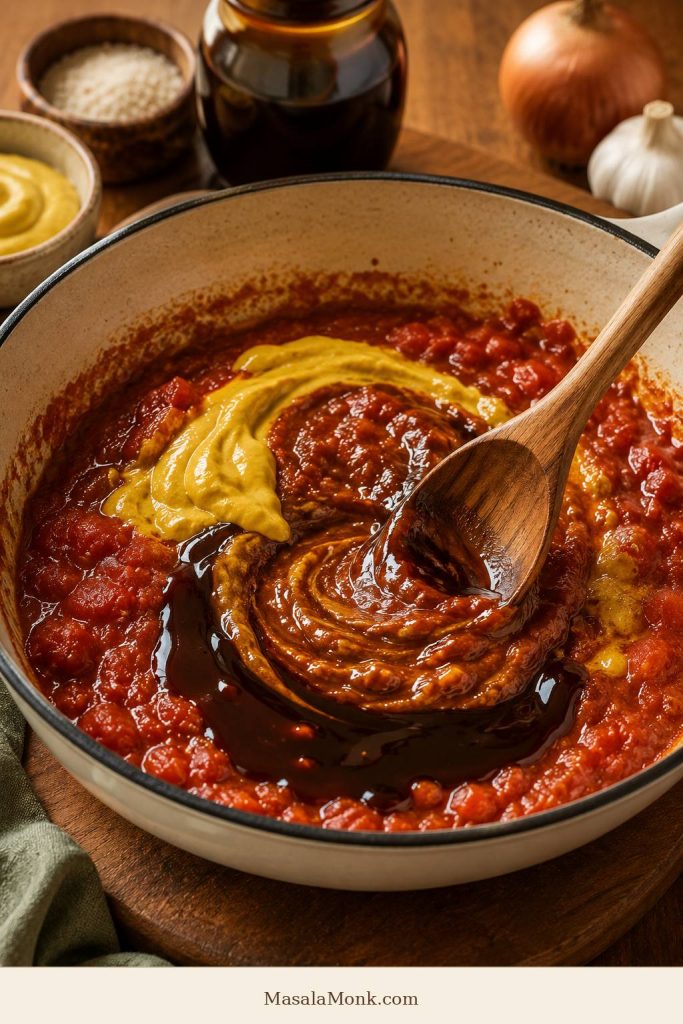
Tomato, mustard, and molasses stirred into baked beans sauce.
Build the sauce in layers: tomato for body, mustard for brightness, molasses for depth, and spice for a slow-cooked finish.

Bacon, Optional

Bacon adds salt, fat, and a savory edge. It is good, but not required. For no-pork baked beans, use olive oil or butter and build flavor with smoked paprika, mustard, vinegar, and a little vegetarian Worcestershire, soy sauce, or tamari.

Important: Starting with canned baked beans instead of plain canned beans? Taste before adding brown sugar or molasses.

What the Sauce Should Look Like

Baked beans are simple, but the texture matters. Too loose, and they taste like beans floating in sauce. Too dry, and they feel heavy. Aim for a sauce that coats the beans, bubbles at the edges, and firms up slightly as it rests.

A loose-looking pan halfway through baking is normal. The beans need room to bake into the sauce, and the final stretch plus the rest time are where the sauce turns spoonable.

Texture cues by stage

Stage What You Should See What It Means
Before baking The beans look saucy and slightly loose. The oven will reduce the sauce, so do not start with a dry mixture.
Halfway through baking The edges bubble first and the top starts to darken slightly. Stir once if the edges are reducing much faster than the center.
At the end The surface looks glossy and the sauce no longer pools like liquid. The beans are nearly ready. The sauce will cling better after resting.
After resting A spoon leaves a slow trail through the beans. This is the best serving texture.

If the sauce looks too thick before baking, add a splash of water, stock, or bean cooking liquid. If it looks watery near the end, keep baking uncovered and let the pan sit before judging the final texture. A little looseness at the end is fine; beans that look perfect the second they leave the oven can become too thick after resting.

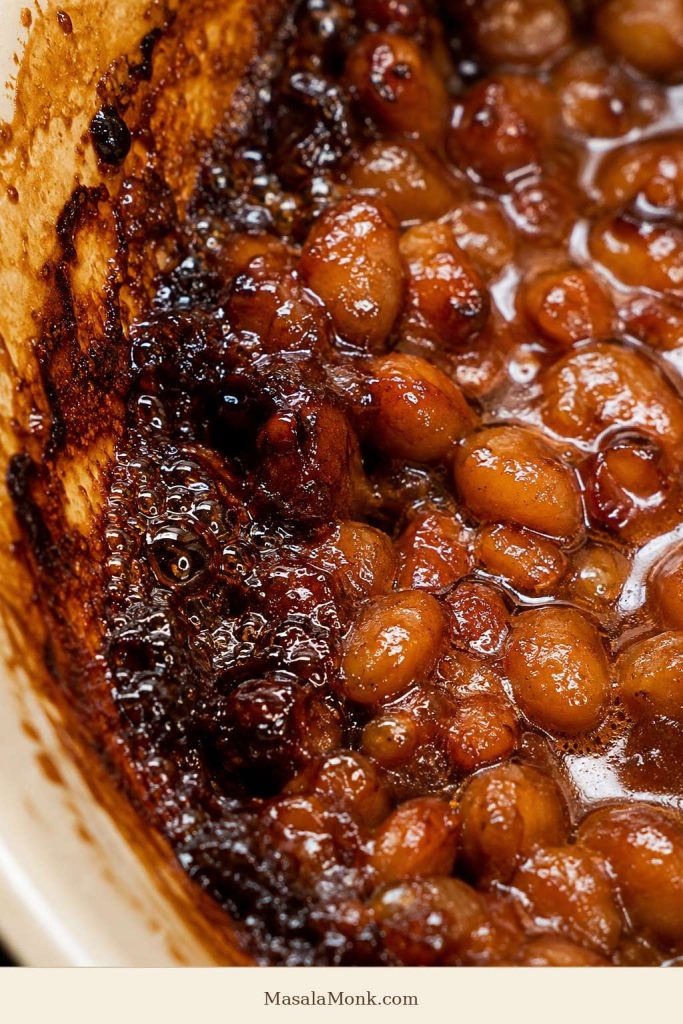
Close-up of baked beans bubbling along the edge of a dish.
Bubbling edges mean the sauce is concentrating. As the sides darken slightly, the baked beans move from saucy to properly baked.

How to Make Baked Beans With Canned Beans

Once the beans and pan are sorted, the method is simple: build flavor in a skillet, let the oven do the slow work, then give the pan a short rest before serving.

1. Heat the Oven

Preheat the oven to 350°F / 175°C. Use a 9×13-inch / 23×33 cm baking dish for more surface area, or a Dutch oven to sauté and bake in the same pot.

2. Cook the Bacon, If Using

If using bacon, cook 4 to 6 slices in a skillet until partly crisp. Remove the bacon, chop it, and keep about 1 to 2 tablespoons of the drippings in the pan. If skipping bacon, heat 2 tablespoons of olive oil, butter, or another cooking fat instead.

3. Sauté the Onion and Garlic

Add 1 finely chopped medium onion and cook for 5 to 7 minutes, until soft and lightly golden. Add 2 minced garlic cloves and cook for another 30 seconds.

This step is small, but it changes the whole dish. It makes the beans taste cooked instead of simply mixed.

Chopped onion sautéing in a skillet with a wooden spoon.
Start with onion when you want homemade flavor. This quick sauté gives canned or plain beans a savory base before the sauce goes in.

4. Build the Sauce

Stir in ketchup or tomato sauce, barbecue sauce, brown sugar, molasses, mustard, vinegar, smoked paprika, and black pepper. Tomato paste makes the sauce thicker and less sweet. Worcestershire, soy sauce, or tamari gives the pan more body when the flavor tastes flat.

Loosen the sauce with ¼ to ⅓ cup / 60 to 80 ml water, stock, or bean cooking liquid if it looks too tight before baking. Let it bubble for 2 to 3 minutes so everything comes together. Hold back extra salt until after the beans have baked and the sauce has concentrated.

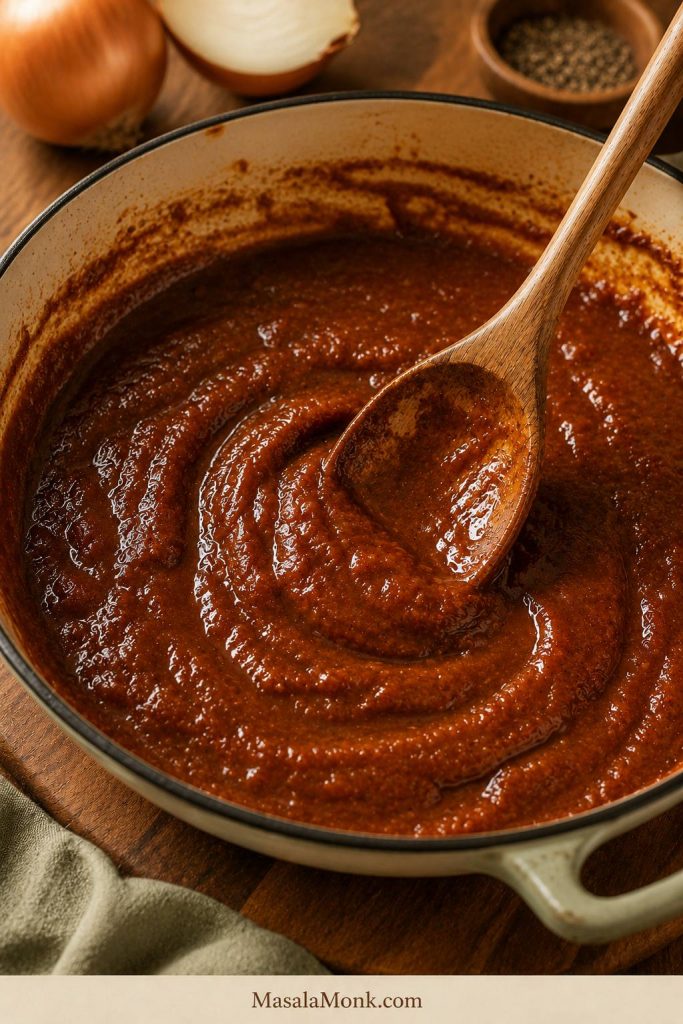
Reddish-brown baked beans sauce coating a spoon in a skillet.
Before adding beans, check the sauce on the spoon. It should taste bold now because the beans will soften the flavor later.

5. Add the Beans

Stir in the drained and rinsed beans gently so they are coated in the sauce. Taste the sauce before baking. It should be sweet, tangy, savory, and slightly stronger than you want the finished dish to be, because the beans will mellow it.

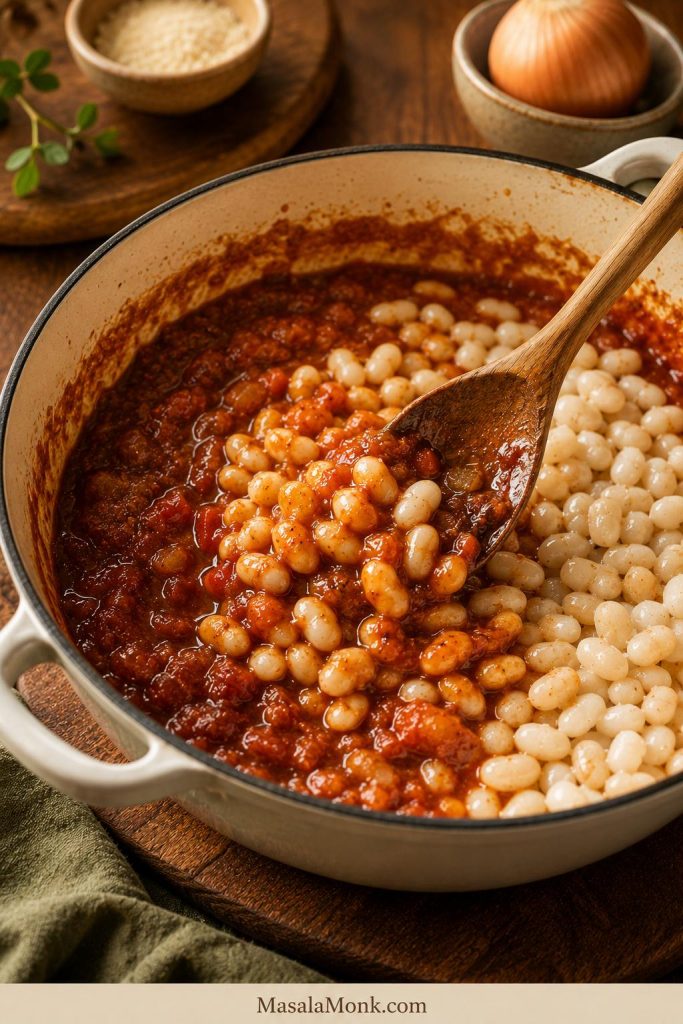
White beans folded into reddish-brown sauce with a wooden spoon.
Fold gently at this stage. The beans should stay mostly whole while the sauce coats them and prepares to reduce in the oven.

6. Bake Uncovered

Transfer the beans to the baking dish. Scatter the chopped bacon over the top if using. Bake uncovered for 55 to 70 minutes, until the edges are bubbling and the sauce has tightened around the beans. Stir once around the halfway point if the edges are getting much darker than the center.

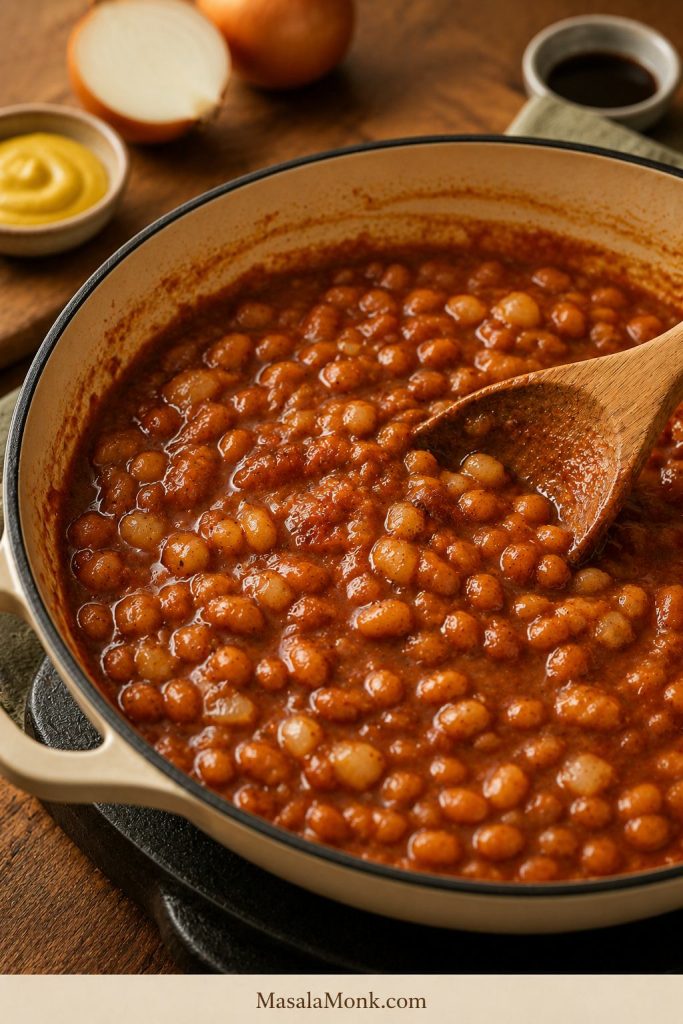
Saucy baked beans in a cream baking dish before baking.
Before baking, the mixture should look looser than the final dish. That extra sauce protects the beans while the oven reduces it.

The pan should still look saucy when it goes into the oven. Uncovered heat will reduce the liquid, darken the edges, and turn the mixture into proper baked beans.

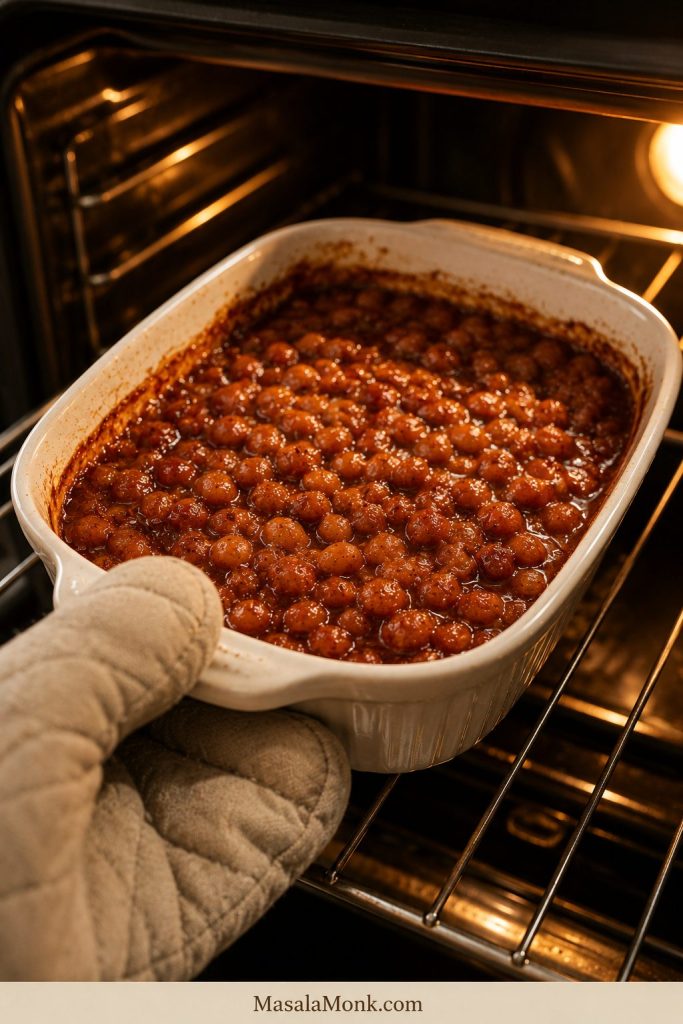
Baking dish of baked beans being placed on an oven rack.
Uncovered oven time is where the recipe changes. The sauce thickens, the edges darken, and the flavors settle into the beans.

The edges usually tell you first. They bubble, darken, and start to look sticky before the center fully catches up.

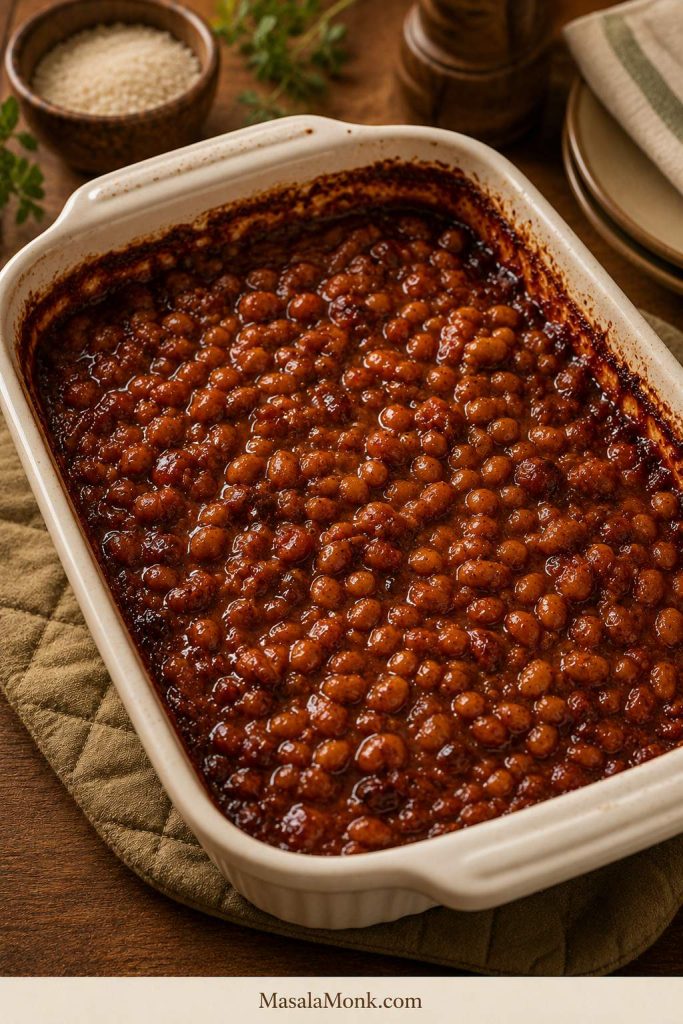
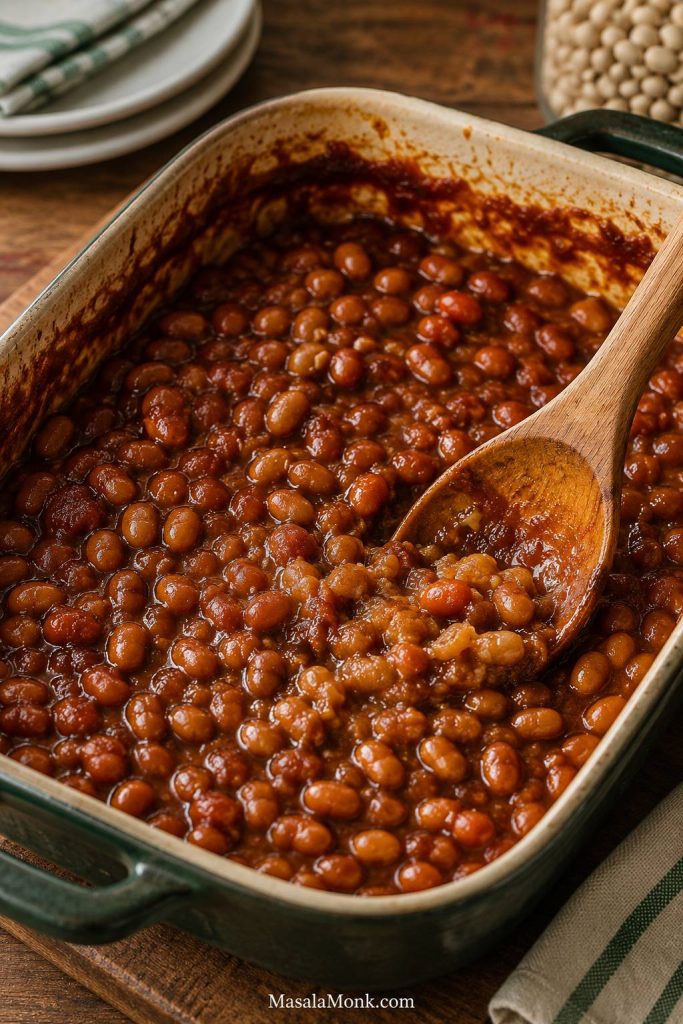
Finished baked beans bubbling in a cream baking dish.
When the pan is bubbling and the edges look darker, stop before it dries out. Resting will finish thickening the sauce.

If the beans still look a little saucy at 45 minutes, that is normal. The final stretch of baking and the short rest after the oven usually bring the sauce together.

7. Rest and Adjust

Let the baked beans rest for 10 to 15 minutes before serving. This is when the sauce stops looking separate and starts tasting settled. Taste after resting, then adjust with a little more vinegar, mustard, black pepper, or salt if needed.

Spoon dragged through rested baked beans, leaving a visible trail.
After resting, drag a spoon through the pan. A slow trail means the baked beans are thick enough for serving.
Doneness cue: The beans are ready when the edges are bubbling, the top looks glossy, and the sauce slowly settles back when you drag a spoon through it.

Recipe Card: Easy Homemade Baked Beans

Tender white beans baked in a sweet-savory tomato-molasses sauce with onion, mustard, vinegar, smoked paprika, and optional bacon. Start with the main canned-bean version below, then use the notes for canned baked beans, dried navy beans, vegetarian, vegan, low-sugar, low-sodium, and no-pork adjustments.

Prep Time
15 minutes
Cook Time
55 to 70 minutes
Rest Time
10 to 15 minutes
Total Time
About 1 hour 30 minutes
Servings
8 to 10

Times are for the canned-bean version. The dried-bean version needs soaking and simmering time before baking.

Equipment

  • 9×13-inch / 23×33 cm baking dish or Dutch oven
  • Large skillet
  • Spoon or spatula
  • Foil, optional

Ingredients

Beans and Base

  • 3 cans plain white beans, 15 oz / 425 g each, drained and rinsed, or 3 cans white beans, 400 g / 14 oz each, drained and rinsed
  • 2 tablespoons olive oil, butter, or bacon drippings
  • 1 medium onion, finely chopped
  • 2 garlic cloves, minced, or ½ teaspoon garlic powder

Sauce

  • ½ cup / 120 ml ketchup or tomato sauce
  • ¼ cup / 60 ml barbecue sauce
  • ¼ cup / 50 g brown sugar
  • 2 tablespoons molasses or maple syrup
  • 2 tablespoons yellow mustard or Dijon mustard
  • 1 tablespoon apple cider vinegar, plus more to taste
  • 1 teaspoon smoked paprika
  • ½ teaspoon black pepper
  • ¼ to ⅓ cup / 60 to 80 ml water, stock, or bean cooking liquid, as needed

Optional Flavor Boosters

  • 1 tablespoon tomato paste, for a thicker sauce
  • 1 teaspoon Worcestershire sauce, soy sauce, or tamari
  • ⅛ teaspoon liquid smoke, optional; use up to ¼ teaspoon only for a stronger smoky flavor
  • Salt, added carefully at the end, to taste

Optional Bacon

  • 4 to 6 slices bacon

Instructions

  1. Preheat the oven to 350°F / 175°C.
  2. If using bacon, cook it in a skillet until partly crisp. Remove, chop, and set aside. Keep 1 to 2 tablespoons of the drippings in the pan. If skipping bacon, heat olive oil or butter instead.
  3. Add the onion and cook for 5 to 7 minutes, until soft and lightly golden. Add the garlic and cook for 30 seconds.
  4. Stir in the ketchup or tomato sauce, barbecue sauce, brown sugar, molasses, mustard, vinegar, smoked paprika, and black pepper. Add tomato paste, Worcestershire, soy sauce, tamari, or liquid smoke if using. Add a splash of water, stock, or bean cooking liquid if the sauce looks too tight. Do not add extra salt yet unless you are sure your beans and sauces are unsalted.
  5. Stir in the drained beans gently until coated.
  6. Transfer to a 9×13-inch / 23×33 cm baking dish or keep in a Dutch oven. Scatter bacon over the top if using.
  7. Bake uncovered for 55 to 70 minutes, until bubbling at the edges and glossy. Stir once if the edges are getting darker faster than the center.
  8. Rest for 10 to 15 minutes before serving. Taste and adjust with a little more vinegar, mustard, black pepper, or salt if needed.

Notes

Bean starting points

  • Balance test: Before baking, the sauce should taste sweet, tangy, savory, and slightly stronger than the finished beans.
  • Canned baked beans: Use 2 large cans, about 28 oz / 794 g each. Do not rinse them. Start with no extra sugar; add onion, mustard, vinegar, smoked paprika, and a little barbecue sauce.
  • Dried beans: For a batch close to the main recipe, use 12 oz / 340 g dried navy beans. Soak overnight, simmer until creamy, then sauce and bake. With 1 lb / 454 g dried beans, increase the sauce by about one-third.

Adjustments

  • Vegetarian baked beans: Skip bacon and use olive oil or butter. Add smoked paprika, mustard, vinegar, and vegetarian Worcestershire or soy sauce for rounded flavor.
  • Vegan baked beans: Use olive oil, maple syrup or molasses, smoked paprika, tomato sauce, mustard, vinegar, and tamari or soy sauce. Check that your barbecue sauce is vegan.
  • Low-sugar baked beans: Reduce brown sugar by half, use tomato sauce instead of ketchup, and balance the sauce with mustard, vinegar, tomato paste, and smoked paprika.
  • Low-sodium baked beans: Rinsed plain beans are easier to control than canned baked beans. Use low-sodium tomato sauce and salt only at the end.
  • Salt control: Bacon, canned baked beans, Worcestershire, soy sauce, tamari, and salted beans can all add salt, so taste before adding more.
  • Thicker baked beans: Bake uncovered longer, use a wider dish, or mash a few spoonfuls of beans and stir them back in.
  • Storage: Refrigerate for 3 to 4 days or freeze for up to 3 months.
Bowl of homemade baked beans served beside the baking dish.
A good serving bowl should show tender beans coated in sauce, without a watery pool at the bottom.

Back to top ↑

How to Make Baked Beans From Dried Navy Beans

For a from-scratch batch close to the main canned-bean recipe, use 12 oz / 340 g dried navy beans. A full 1 lb / 454 g bag makes a larger batch, so increase the sauce by about one-third.

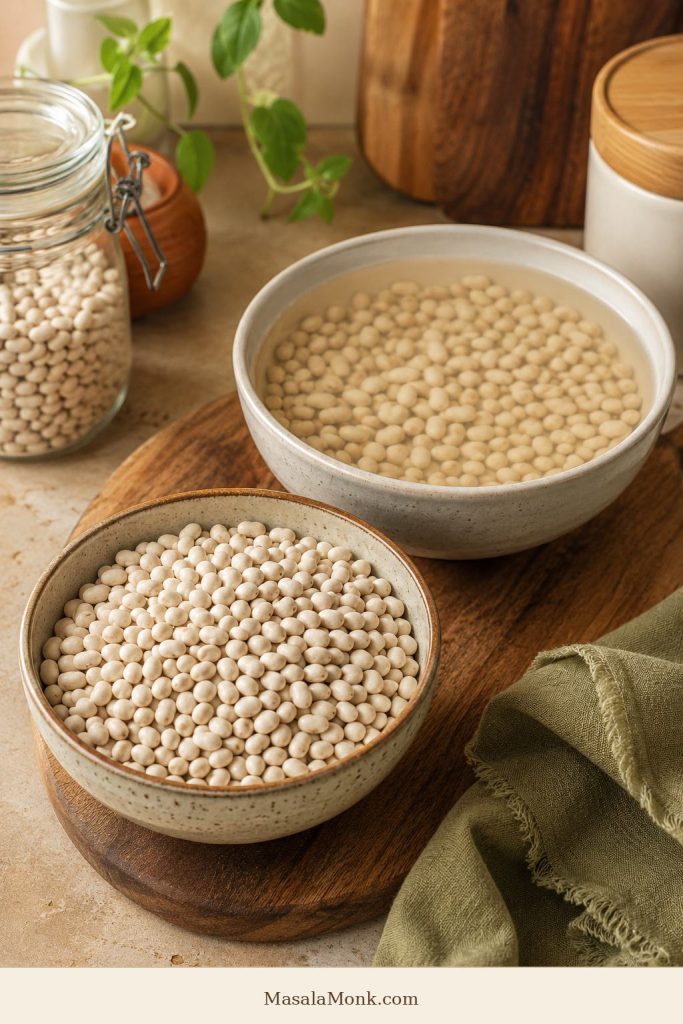
Dried navy beans and soaked beans in bowls on a wooden table.
Dried navy beans need to turn tender first. Then the molasses, mustard, tomato, and vinegar can season them without keeping them firm.

Think of dried beans as a two-step job: first make them tender in water, then make them flavorful in sauce.

Rinse the beans, then soak them in plenty of water for 8 to 12 hours. Drain and rinse again. Put the beans in a pot with fresh water and simmer until tender, usually 45 to 90 minutes, depending on the age of the beans.

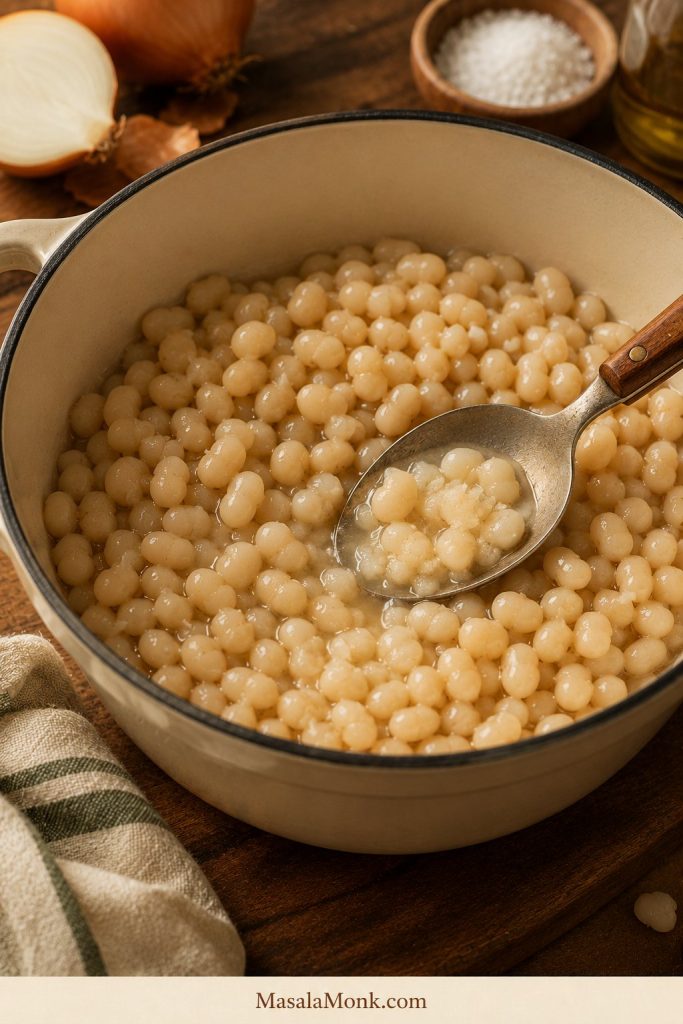
The beans should be creamy inside before they go into the sauce. Do not stop when they are merely “not crunchy.” Once tomato, vinegar, molasses, or sugar are added, firm beans can take much longer to soften.

Cooked navy beans before sauce with a spoon pressing into them.
Test dried beans before adding sweet or acidic sauce. Otherwise, the flavor may be right while the beans stay too firm.

Save some of the bean cooking liquid before draining. Once the beans are tender, continue with the sauce and baking method above. Bake at 325°F / 163°C for a deeper, slower version, or 350°F / 175°C for the standard version. Add reserved bean liquid if the beans get too thick before the sauce is done.

Important dried-bean rule: Tenderness comes before sauce. Cook dried beans until creamy and tender before adding tomato, vinegar, molasses, or sugar.

Can You Quick-Soak the Beans?

Yes. Cover rinsed beans with plenty of water, bring them to a boil, boil for 2 minutes, then turn off the heat. Cover and let them rest for 1 hour. Drain, rinse, and simmer in fresh water until tender before adding the sauce.

Can You Skip Soaking the Beans?

You can, but the simmering time will be longer and less predictable. Rinse the beans, cover them with plenty of water, and simmer until fully tender before adding them to the sauce.

If beans stay firm after a long simmer, they may be old. Keep simmering them in fresh water before adding sauce; do not try to force them tender in a sweet-acidic sauce.

How Much Cooked Bean Do You Get From Dried Beans?

One pound / 454 g dried navy beans usually gives roughly 6 to 7 cups cooked beans, depending on the beans and cooking time. That is more than the main canned-bean batch, so increase the sauce if using the full pound.

For a deeper dry-bean preparation guide, North Dakota State University Extension has a useful all-about-beans guide.

How to Make Canned Baked Beans Taste Homemade

Canned baked beans can taste like a real baked side dish, not just something warmed from a tin. The fastest route is simple: keep the can as the base, add onion and tang, hold back on sweetness, then bake uncovered until the sauce tastes cooked instead of canned.

Use 2 large cans of baked beans, about 28 oz / 794 g each. Do not rinse them; the sauce is part of the shortcut. Sauté a small chopped onion in oil, butter, or bacon drippings, then add mustard, apple cider vinegar, smoked paprika, a little barbecue sauce, and bacon if using. Add extra sugar only after tasting.

Canned baked beans stirred in a skillet with onion and seasoning.
To make canned baked beans taste homemade, warm them with onion, mustard, vinegar, and smoky seasoning before baking.

Bake uncovered at 350°F / 175°C for 45 to 60 minutes, until bubbling and glossy. If the beans still look loose, give them more uncovered time. A top that darkens too quickly just needs one stir and a loose cover.

Upgraded canned baked beans baked in a small casserole dish.
After baking, the shortcut should look darker, thicker, and more cooked-in. That is the difference between opened and upgraded.
Canned baked beans usually need onion, tang, and enough cooked flavor to stop tasting straight from the can — not more sweetness first.

Quick Fixes for Canned Baked Beans

Problem What to Add or Do
Too sweet Add mustard, vinegar, tomato paste, smoked paprika, or more unsweetened beans.
Watery sauce Bake uncovered, use a wider dish, simmer first, or mash a few beans.
Bland flavor Add sautéed onion, garlic, mustard, smoked paprika, Worcestershire, soy sauce, or tamari.
Too salty Add unsalted beans, tomato sauce, or a splash of water. Avoid adding more BBQ sauce or bacon.
Thin sauce Bake longer uncovered, use tomato paste, or mash a small portion of beans.
Canned taste Sauté onion first, add acid and rounded flavor, then bake uncovered until the sauce darkens and clings to the beans.

A slow cooker is useful for keeping canned baked beans warm, but it will leave them softer and saucier than the oven. Bake first for the best flavor, then hold warm for serving.

Baked Beans Time and Temperature Guide

The oven temperature changes the finish. A hotter oven reduces the sauce quickly. A lower oven gives a deeper, slower flavor. For most home cooks, 350°F / 175°C is the most reliable default because it tightens the sauce without drying the beans too fast.

Method Temperature Time Use It For What to Watch
Quick canned baked beans 400°F / 204°C 30–35 minutes Fast weeknight side Reduces quickly, so watch for dry edges.
Standard baked beans 350°F / 175°C 55–70 minutes Most reliable method Good balance of reduction and control.
Low-and-slow baked beans 325°F / 163°C 1½–2 hours Deeper cookout flavor Add liquid if the sauce gets too tight before flavor develops.
Dried bean baked beans 325–350°F / 163–175°C 1½–3 hours after beans are cooked From-scratch version Beans must be fully tender before saucing.
Slow cooker baked beans Low 3–5 hours for canned base Potlucks and keeping warm Convenient, but less caramelized and often saucier.

If you are building a holiday or potluck oven schedule, baked beans also sit well beside a 350°F side like green bean casserole. For a sweeter holiday table, they can share the make-ahead plan with sweet potato casserole.

Should Baked Beans Be Covered or Uncovered?

Bake baked beans uncovered when you want the sauce to reduce, tighten, and darken around the edges. This is the most reliable method for this version.

Cover the dish when the beans are drying out before they are hot and tender, or when the edges are darkening too quickly. For very saucy beans, bake covered for the first 30 minutes, then uncover and continue baking until the sauce has lost its watery edge.

Easy rule: Watery beans need uncovered baking. Dry edges need a stir and a loose cover.
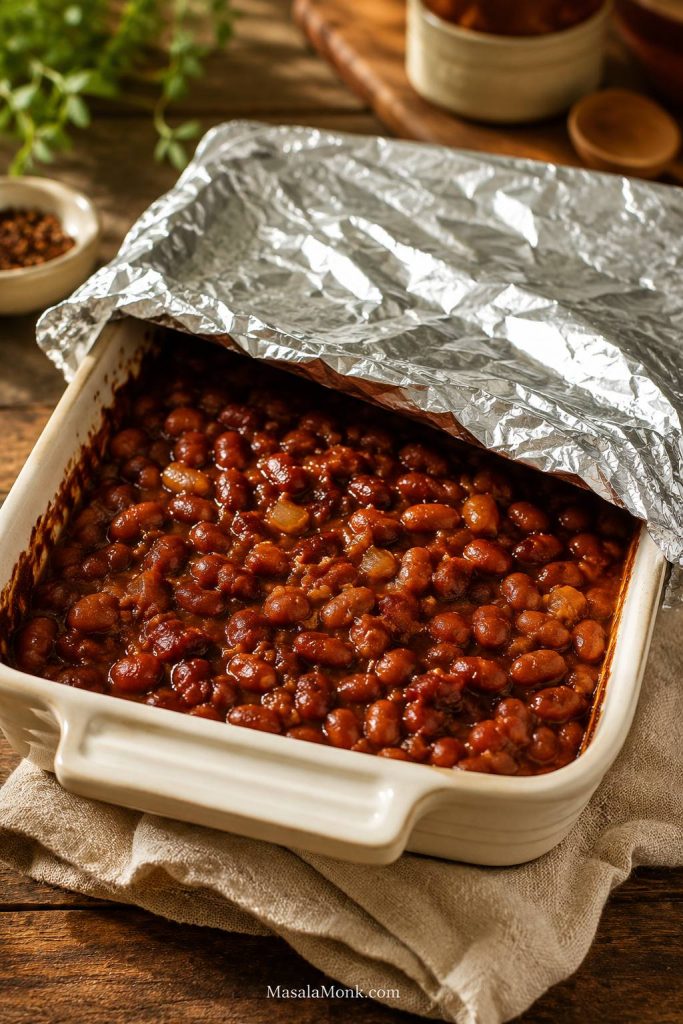
Baked beans loosely covered with foil lifted at one corner.
Use foil only when the edges darken too fast. Keep it loose so steam can escape and the sauce can still finish.

Easy Baked Beans Variations

Once the basic pan is working, these small changes let you take it toward BBQ, Boston-style, vegetarian, vegan, low-sugar, or no-pork baked beans without starting over.

Southern BBQ Baked Beans

This is the cookout version: a little bolder, a little smokier, and ready for a plate with ribs, hot dogs, grilled chicken, cornbread, or air fryer burgers. Lean more into barbecue sauce, smoked paprika, bacon, and brown sugar, but stop before the beans taste like bottled sauce.

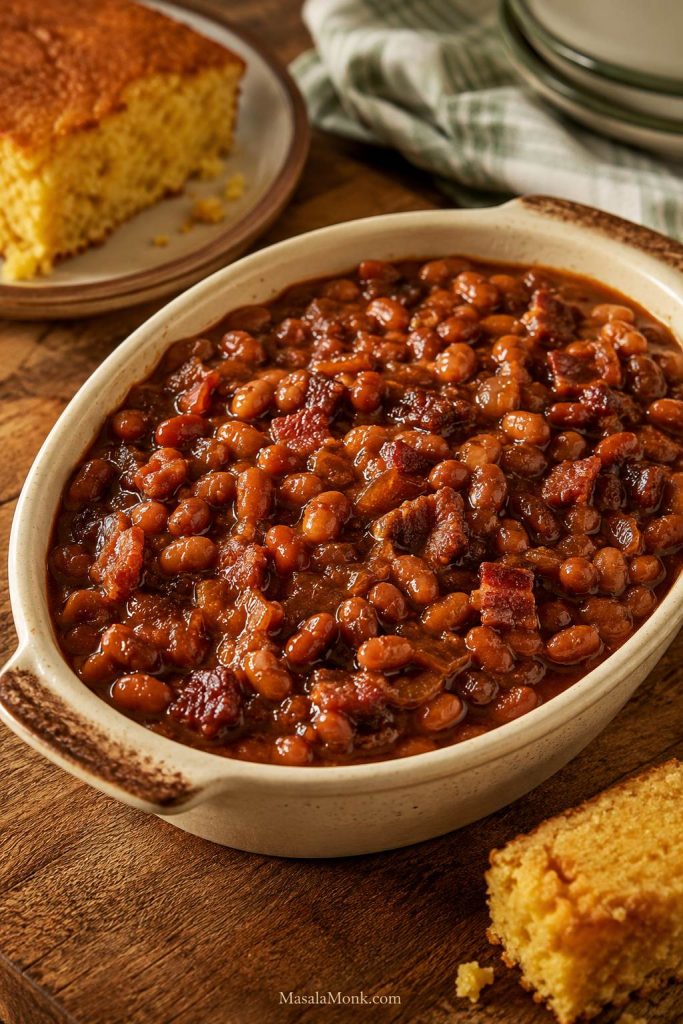
Southern-style baked beans with bacon served beside cornbread.
Southern BBQ baked beans should feel smoky and bold. Bacon, darker sauce, and cornbread push them toward cookout territory.

Boston-Style Baked Beans

Boston-style baked beans are darker, slower, and more molasses-forward. Lean on navy beans, molasses, mustard, onion, and bacon or salt pork, then bake lower and slower for a more traditional pan.

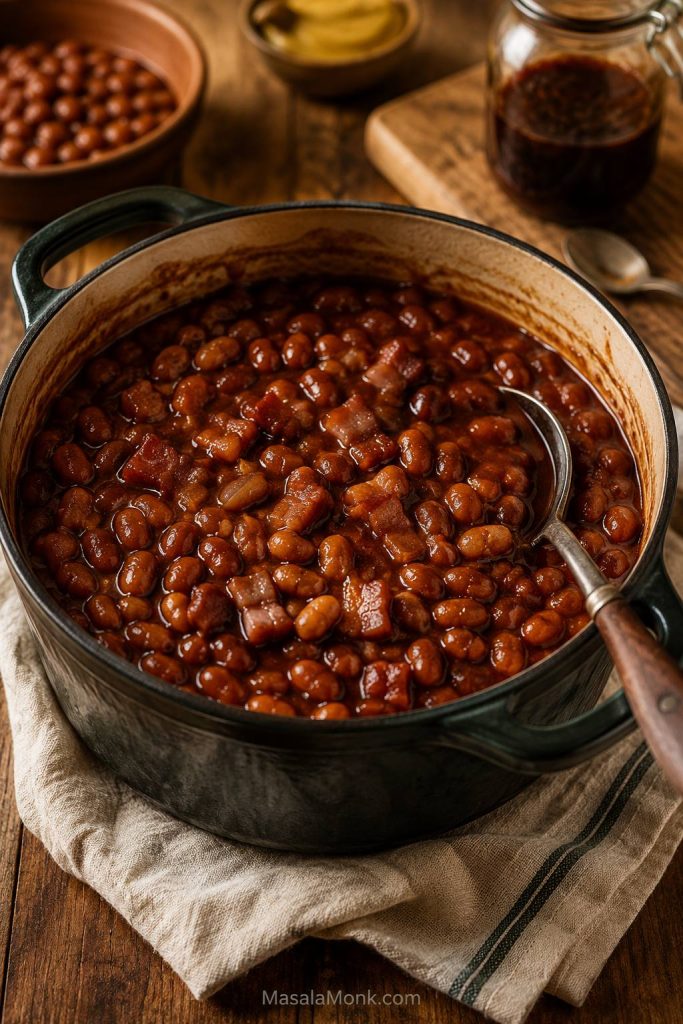
Boston-style baked beans in a dark Dutch oven with molasses sauce.
Boston-style baked beans lean deeper and more molasses-forward. Navy beans and a slower bake give this version its old-fashioned feel.

Vegetarian Baked Beans

Vegetarian baked beans still need the same rounded, cookout-style flavor. Skip the bacon, but replace what it usually brings: richness from olive oil or butter, smoke from paprika, brightness from mustard and vinegar, and a salt-and-umami note from vegetarian Worcestershire, soy sauce, or tamari.

Vegan Baked Beans

Vegan baked beans can still taste full and glossy. Use olive oil instead of butter or bacon fat, maple syrup or molasses for sweetness, tomato sauce or ketchup for body, and tamari or soy sauce for a deeper finish. Standard Worcestershire sauce often contains anchovies, so use vegetarian Worcestershire, soy sauce, or tamari instead. Check that your barbecue sauce is vegan too.

Vegan baked beans in a cream dish with toast nearby.
Vegan baked beans still need savory depth. Onion, smoked paprika, mustard, vinegar, and tamari can replace the bacon backbone.

For a lighter plant-based plate, pair these beans with a fresh chickpea salad or add homemade falafel for a more filling spread.

Low-Sugar Baked Beans

Low-sugar baked beans should still taste glossy, tangy, and cookout-worthy — just not candy-sweet. The easiest route is plain canned beans plus tomato sauce, mustard, vinegar, onion, smoked paprika, and just enough molasses for depth.

Start with tomato sauce instead of ketchup, cut the brown sugar in half, and taste before adding more sweetness. Some barbecue sauces are as sweet as ketchup, so choose a less sweet sauce or lean on tomato paste and warm spice instead.

Low-Sodium Baked Beans

Plain canned beans give you the most control because you can rinse them, choose your tomato base, and add salt only after the sauce has reduced. Choose low-sodium or no-salt-added canned beans when possible, rinse well, use low-sodium tomato sauce, and go easy on barbecue sauce, Worcestershire, soy sauce, bacon, and added salt.

For flavor without more salt, lean on onion, garlic, mustard, vinegar, smoked paprika, tomato paste, and a small amount of molasses.

No-Pork Baked Beans

No-pork baked beans need a little help replacing the smoky, salty backbone bacon usually gives. Caramelized onion, smoked paprika, mustard, vinegar, and a small splash of soy sauce, tamari, or vegetarian Worcestershire do the job well. Liquid smoke can help too, but start with only ⅛ teaspoon.

For a no-pork protein plate, serve the beans with baked chicken breast and a crisp salad instead of bacon-heavy sides.

Spicy Baked Beans

To make the pan spicy, build heat slowly so it supports the sweet-smoky sauce instead of taking over. Chipotle powder, cayenne, hot sauce, jalapeño, chilli flakes, or diced green chillies all work.

American vs British Baked Beans

American-style baked beans and British-style baked beans are related, but they do not taste the same. This recipe leans American-style: thicker, sweeter, darker, and more suited to BBQ plates and potlucks. British-style baked beans are usually softer, more tomato-forward, and often served on toast or baked potatoes.

  • American baked beans: thicker, sweeter, often smoky, with molasses, brown sugar, mustard, BBQ sauce, and optional bacon.
  • British-style baked beans: softer, more tomato-forward, less smoky, and usually served on toast, baked potatoes, or breakfast plates.

For a British-style version, skip the barbecue sauce, reduce the sugar, use tomato sauce or passata, and keep the sauce looser and more tomato-forward.

Common Baked Beans Mistakes to Avoid

  • Adding full sugar to canned baked beans: Taste first. They may already be sweet enough.
  • Skipping the onion step: Sautéed onion is one of the easiest ways to make canned beans taste homemade.
  • Covering the dish the whole time: Covered beans stay saucier. Uncovered baking reduces the sauce.
  • Adding acidic sauce before dried beans are tender: Tomato, vinegar, molasses, and sugar can slow softening.
  • Using a dish that is too deep: A deep dish reduces slowly. Use a wider dish if you want the sauce to tighten faster.
  • Skipping the rest time: Baked beans become more spoonable after 10 to 15 minutes out of the oven.
  • Salting too early: Bacon, canned beans, BBQ sauce, Worcestershire, soy sauce, and canned baked beans can all add salt.

How to Fix Baked Beans

Even if the pan does not look perfect when it comes out of the oven, baked beans are forgiving. Most problems are easy to fix with time, heat, or one balancing ingredient.

Watery baked beans in a deep cream casserole with loose sauce.
Thin sauce around the spoon means the baked beans need more uncovered time. Let the liquid reduce before serving.
Problem Fix
Watery baked beans Bake uncovered longer, use a wider dish, simmer the sauce first, or mash some beans.
Too sweet Add vinegar, mustard, tomato paste, smoked paprika, or more unsweetened beans.
Salty sauce Add unsalted beans, tomato sauce, or a splash of water; serve with rice or potatoes.
Overly thick beans Add water, stock, tomato sauce, or bean cooking liquid.
Bland flavor Add salt carefully, mustard, vinegar, smoked paprika, onion, garlic, Worcestershire, soy sauce, or tamari.
Hard dried beans Dried beans were not cooked enough before adding sauce. Simmer them until creamy before baking.
Dry baked beans Add liquid, cover loosely, and reduce the bake time next time.
Burned edges Lower the oven temperature, stir once, or use a heavier dish.

If your beans taste flat, they probably need tang, salt, or a deeper savory note — not more sugar. For thin beans, keep baking uncovered or mash a few beans before serving.

Thickened baked beans with reduced sauce and a spoon in the pan.
To thicken baked beans, remove moisture or add body. Bake uncovered longer, use a wider pan, or mash a few beans in.

What to Serve With Baked Beans

Baked beans can be a side dish, a potluck pan, or part of a simple comfort meal. They sit naturally beside smoky grilled foods like slow cooker pulled pork, but they can also turn toast, rice, potatoes, or eggs into something more filling.

Think of baked beans as the warm, saucy anchor on the plate. For the best plate, pair them with one smoky or grilled main, one crisp side, and one plain starch so the meal has contrast.

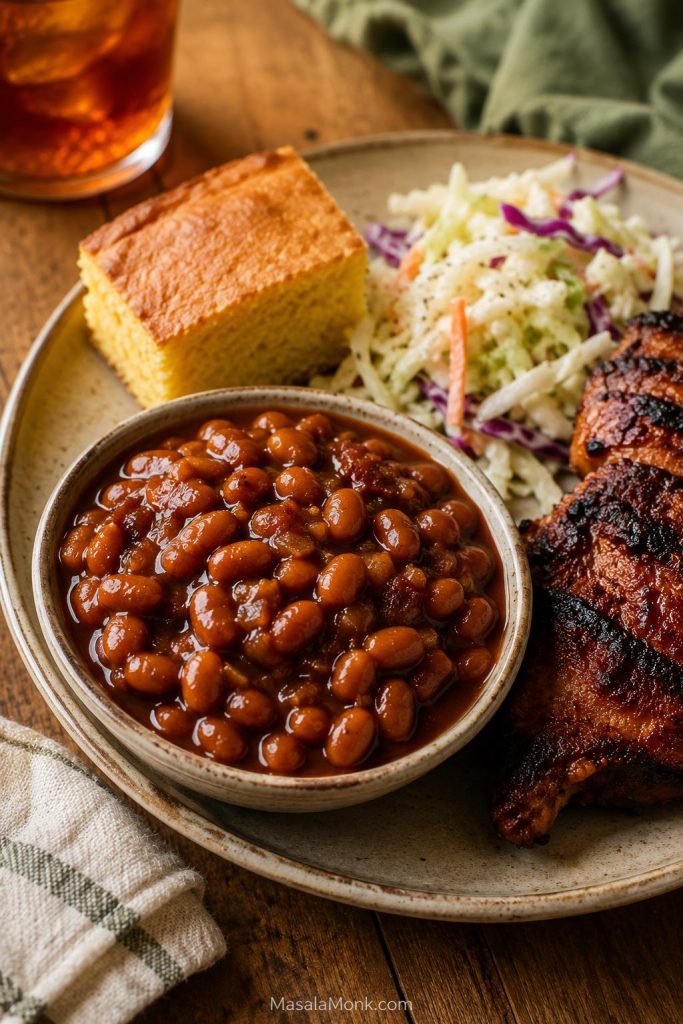
Baked beans served with slaw, cornbread, and grilled meat.
Build the plate with contrast: smoky grilled food, crisp slaw, and cornbread or bread to balance the sweet-savory beans.

For a BBQ or Cookout Plate

Build the plate around contrast: smoky meat, cool salad, crisp slaw, and these warm beans.

  • Burgers
  • Hot dogs
  • Ribs
  • Sausages
  • Grilled chicken
  • Corn on the cob
  • Potato salad
  • Coleslaw
  • Cornbread

A smoky sliced-meat plate works just as well as sandwiches, so these beans pair nicely with smoked pork loin. Creamy potato salad or crisp coleslaw adds the cold, fresh contrast needed against the sweet-savory sauce.

Easy Comfort Meal

Choose a plain starch when you want the beans to feel more like dinner. Toast, rice, potatoes, and eggs all catch the sauce well without competing with it.

  • Toast
  • Rice
  • Baked potatoes
  • Eggs
  • Roasted vegetables
  • Buttered bread

For a cozier plate, add toast, eggs, or a scoop of garlic mashed potatoes beside the beans.

Vegetarian Plate

Vegetarian plates work best when the beans are paired with something fresh, roasted, or crisp. That keeps the meal from feeling too soft.

  • Baked potatoes
  • Rice bowls
  • Grilled mushrooms
  • Roasted sweet potatoes
  • Simple green salad
  • Toast with herbs or chilli flakes

Leftover Ideas

Spoon leftover baked beans over toast, rice, baked potatoes, or roasted sweet potatoes. Serve them with eggs, fold them into wraps, use them as a quick side with sausages, or warm them until the sauce loosens again for a second-day lunch.

Make Ahead, Storage, Freezing, and Reheating

Baked beans are one of the rare sides that can become better after a night in the fridge. The sauce has time to settle into the beans, and reheating usually makes the pan taste even more rounded.

  • Make ahead: Cook 1 to 2 days ahead and refrigerate.
  • Fridge: Store leftovers in an airtight container for 3 to 4 days.
  • Freezer: Freeze for up to 3 months.
  • Reheating: Warm gently on the stovetop or cover and bake at 325°F / 163°C until hot.
  • If too thick after chilling: Add a splash of water, stock, or tomato sauce.
  • For parties: Bake first, then keep warm in a slow cooker on the warm setting while serving.
Baked beans in a glass container and saucepan for reheating.
Baked beans often improve overnight. When reheating, loosen the sauce with water, stock, or tomato sauce only as needed.
Baked beans thicken in the fridge and after freezing. Warm them first, then loosen with a little water, stock, or tomato sauce if needed. If serving for a party, refrigerate leftovers within 2 hours; this follows the standard FoodSafety.gov 2-hour rule.

Frequently Asked Questions

If you are adjusting the recipe for different beans, sweetness levels, or make-ahead timing, these quick answers should help.

What beans are used for baked beans?

Navy beans are the classic choice for baked beans, but Great Northern beans, cannellini beans, small white beans, and pinto beans also work. Plain canned white beans are the easiest option when you want homemade baked beans without a long cooking time.

Can I make baked beans with canned beans?

Yes. Plain canned beans are the easiest shortcut because the beans are already tender, but the sauce is still yours to control. Drain and rinse them, then bake them in the homemade sauce until it coats the beans instead of pooling around them.

Can I use canned baked beans for this recipe?

Yes. Treat canned baked beans as a shortcut base, not a blank canvas. They already bring sauce, sweetness, and salt, so add onion, mustard, vinegar, smoked paprika, and only a little extra sugar after tasting.

Do I drain canned beans for baked beans?

Drain and rinse plain canned beans. Do not rinse canned baked beans because their sauce is part of the shortcut. Extra liquid can be handled in the oven by baking uncovered.

How do you make canned baked beans taste homemade?

Sauté onion first, add mustard and vinegar for balance, use smoked paprika or a tiny amount of liquid smoke for depth, and bake uncovered until the sauce tastes cooked instead of canned.

Can I make baked beans from dried beans?

Yes. Use dried navy beans, soak them overnight or quick-soak them, then simmer until creamy and tender before adding the sauce. Think of dried beans in two steps: make them tender in water first, then make them flavorful in sauce.

Why are my baked beans watery?

They usually need more uncovered baking time. Baked beans often look loose before they come together; the last stretch in the oven and the 10-minute rest are where the sauce turns spoonable.

How do I thicken baked beans?

Bake them uncovered for longer, use a wider dish, simmer the sauce before baking, or mash a few spoonfuls of beans and stir them back in. Resting the beans also helps the sauce cling better.

Should baked beans be covered while baking?

For thicker baked beans, bake them uncovered. Cover them only when they are drying out too quickly or when the edges are darkening before the center is hot.

How do I make baked beans less sweet?

Use less brown sugar, reduce or skip extra molasses, and balance the sauce with mustard, vinegar, tomato paste, smoked paprika, and unsweetened beans. Beans that are already too sweet usually need acidity and rounded flavor, not more sugar.

Can I make baked beans without pork or bacon?

Yes. Bacon adds smoke, salt, fat, and umami, but you can replace those with smoked paprika, sautéed onion, mustard, vinegar, and a little vegetarian Worcestershire, soy sauce, or tamari.

Can baked beans be vegetarian or vegan?

Yes. Skip the bacon and use olive oil. For vegetarian or vegan depth, use smoked paprika, mustard, vinegar, caramelized onion, and soy sauce, tamari, or vegetarian Worcestershire sauce. Standard Worcestershire often contains anchovies, so check the label or use a vegetarian alternative.

Can I make baked beans in a slow cooker?

Yes. Cook canned-bean baked beans on low for about 3 to 5 hours. The slow cooker is useful for potlucks and keeping beans warm, but the sauce will not caramelize the same way it does in the oven. For the best texture, bake first and keep warm in the slow cooker.

Are baked beans better the next day?

Often, yes. The sauce settles and the flavor deepens after a night in the fridge. Reheat gently and add a splash of water, stock, or tomato sauce if the beans are too thick.

Can baked beans be made ahead?

Yes. Baked beans are one of those sides that often tastes better the next day. Make them 1 to 2 days ahead, refrigerate, then reheat gently before serving.

Can you freeze baked beans?

Yes. Cool them completely, freeze in airtight containers for up to 3 months, thaw overnight in the fridge, and reheat gently. Add a splash of water or tomato sauce if they are too thick after thawing.

What can I add to baked beans for more flavor?

Use the balance test first. If the beans taste flat, add tang, salt, or rounded flavor before adding more sugar. Sautéed onion, mustard, vinegar, smoked paprika, Worcestershire sauce, soy sauce, tomato paste, chipotle, or a tiny amount of liquid smoke can all help.

What is the difference between American and British baked beans?

American baked beans are usually thicker, sweeter, smokier, and often flavored with molasses, brown sugar, mustard, bacon, or barbecue sauce. British-style baked beans are usually more tomato-forward, softer, less smoky, and often served on toast or baked potatoes.

Final Thoughts

The best baked beans are not just sweet beans in sauce. They need enough sweetness to feel familiar, enough tang to stay balanced, enough depth to feel slow-cooked, and enough oven time for the sauce to settle into the beans.

Whether you started with pantry cans, a shortcut can of baked beans, or dried navy beans, the goal is the same: tender beans, a balanced sauce, and a pan with glossy edges that people keep returning to before the meal is even over.

Back to top ↑