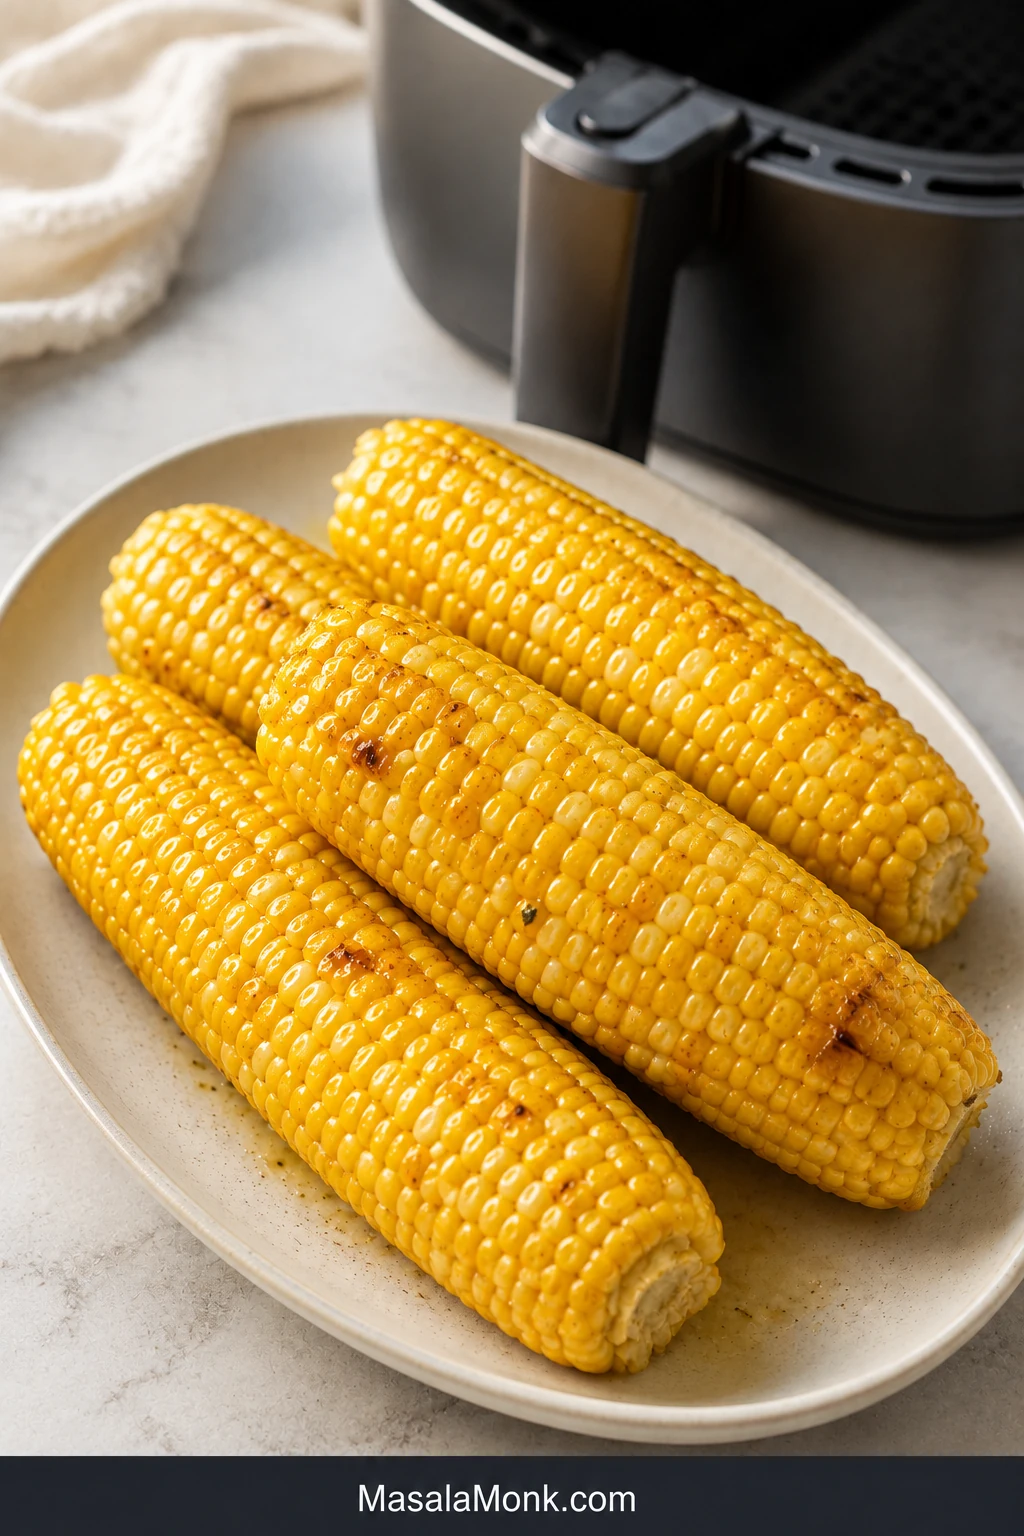
Air fryer corn on the cob should be one of the easiest sides you make all summer. You can skip the pot of boiling water, leave the grill unlit and cook only the number of ears dinner actually needs.
The confusing part is the timer. One recipe says six minutes, another says twelve, and a third keeps the corn cooking for nearly twenty. Thick ears may still feel firm after a fast recipe, while slim ears can turn wrinkled if you wait too long for dramatic black spots.
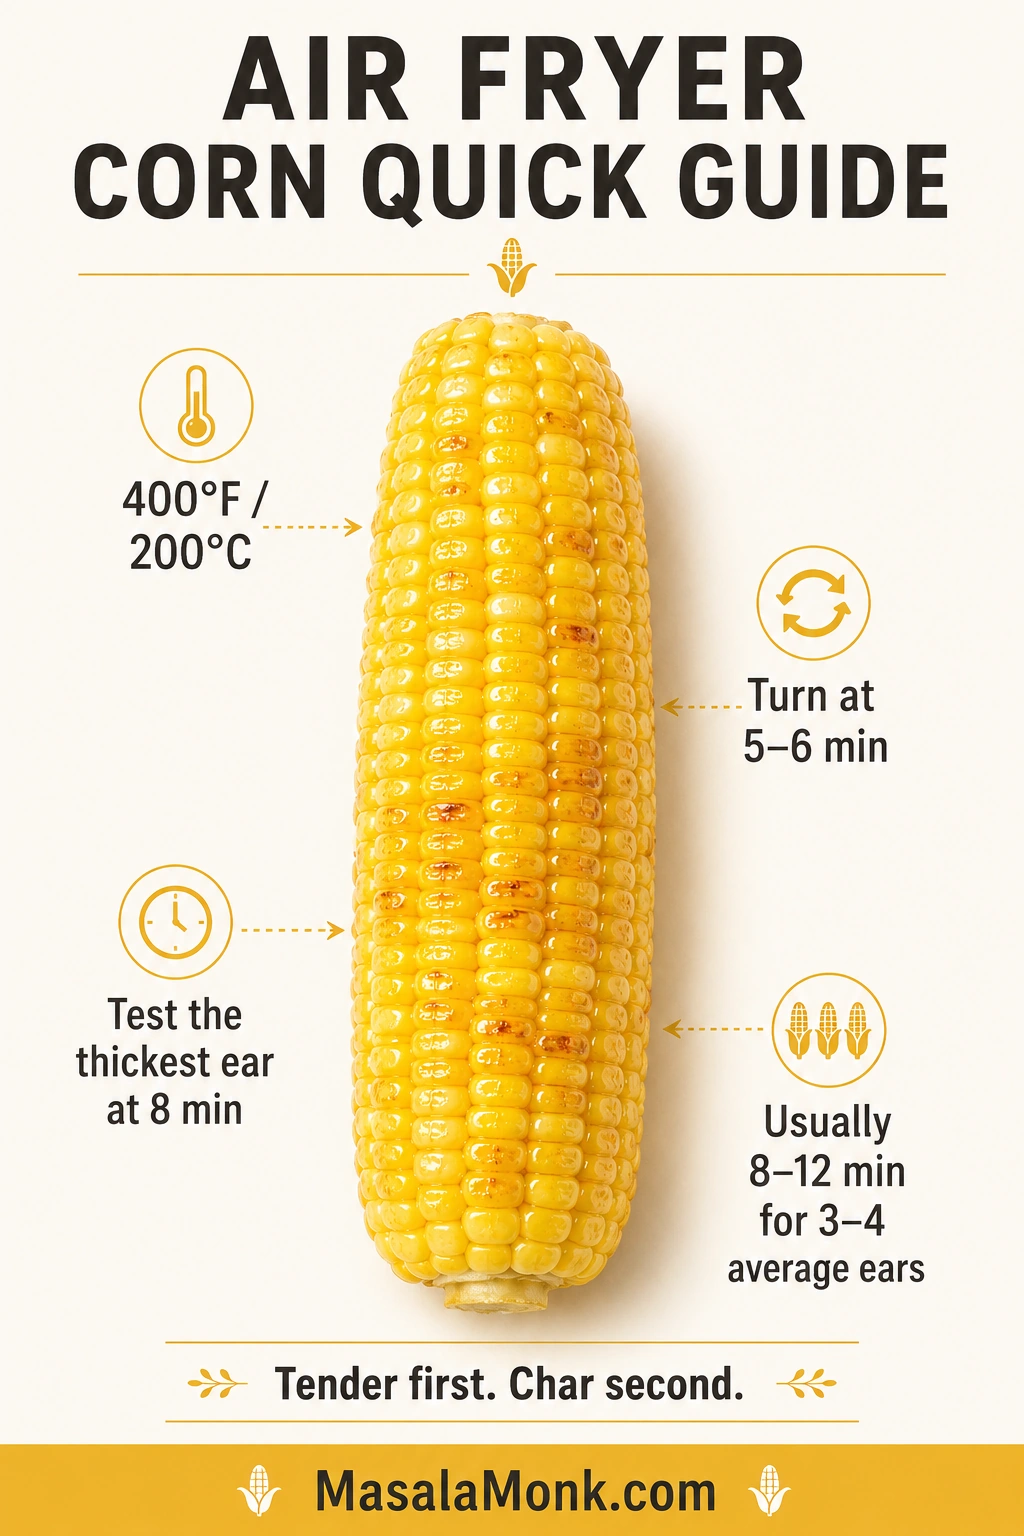
Air fry three or four average-thickness ears at 400°F / 200°C for 8–12 minutes, turning once. Test the thickest ear at eight minutes; one or two slim ears may be ready around 6–7 minutes.
The MasalaMonk rule: tenderness decides when the corn is cooked; extra time decides how deeply browned and charred it becomes.
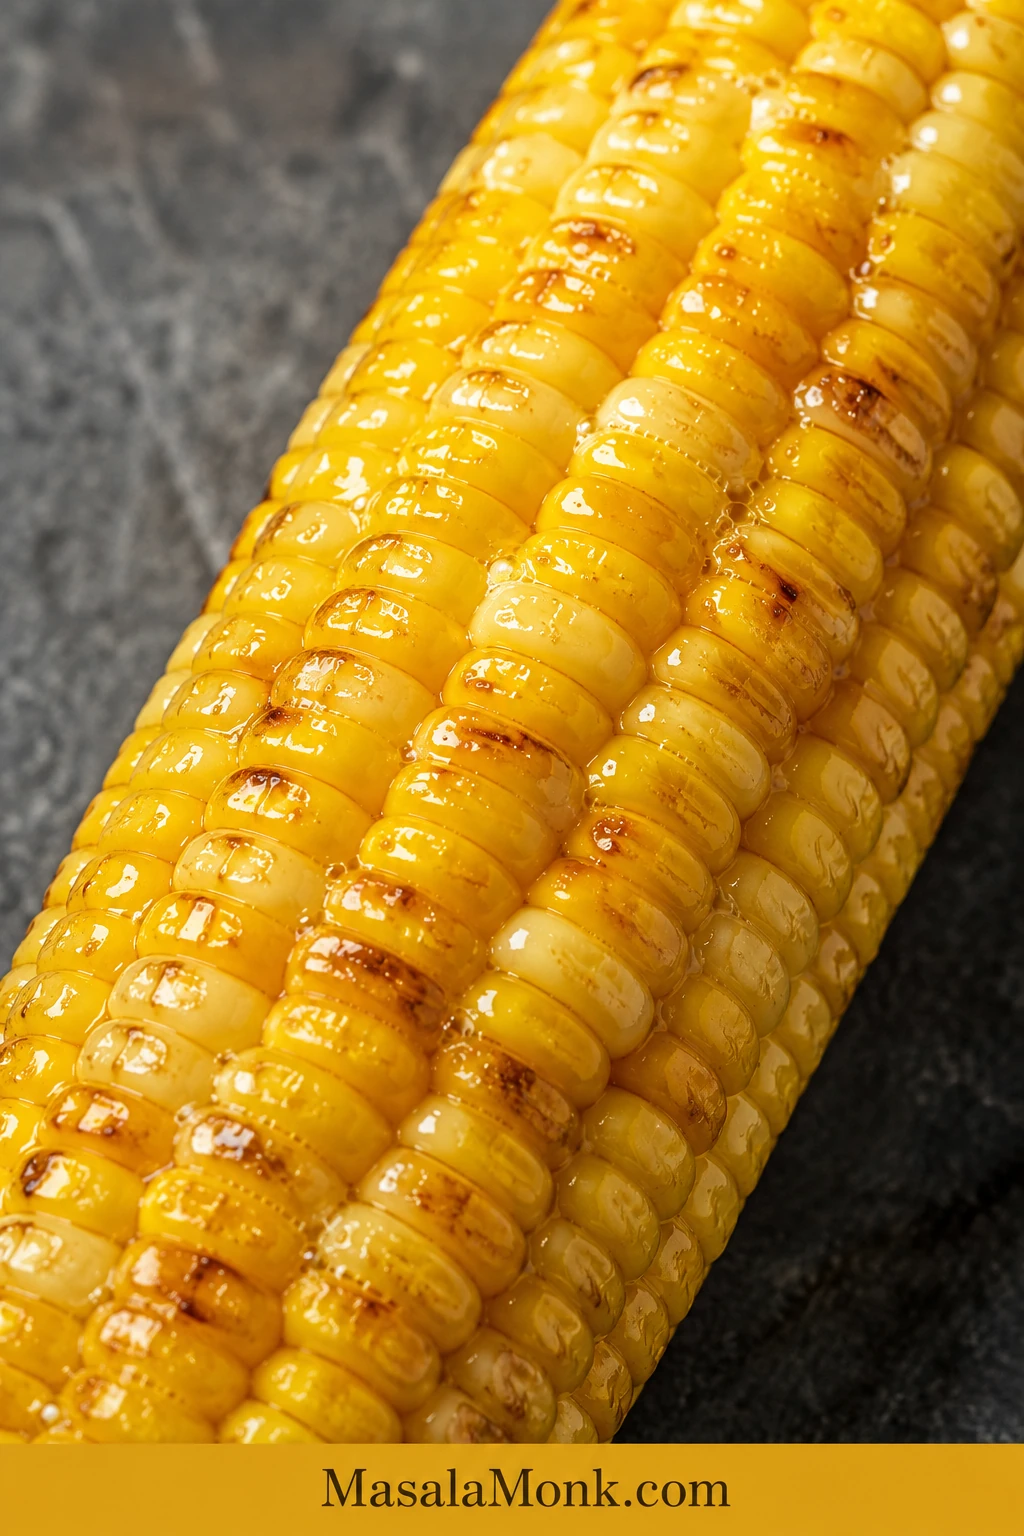
Once a pierced kernel gives with gentle resistance and beads with juice, the ear can leave the basket. Add colour afterward, one minute at a time, for up to 3 extra minutes. Brush on the butter at the end so it melts between the hot rows instead of scorching beside the heating element.
Inspect the broad centre rows rather than the tapered tip, since the smaller end can colour and dry sooner.
Air Fryer Corn on the Cob Recipe
Fresh sweet corn with juicy kernels and lightly blistered edges. Check the thickest ear early and remove each one as soon as it becomes tender.
PrepAbout 5 minutes
Cook8–12 minutes
TotalAbout 13–17 minutes
Yield4 side servings
Temperature400°F / 200°C
First Check8 minutes
Want deeper roasted colour? Allow another 1–3 minutes after the kernels are tender.
Ingredients
For the Corn
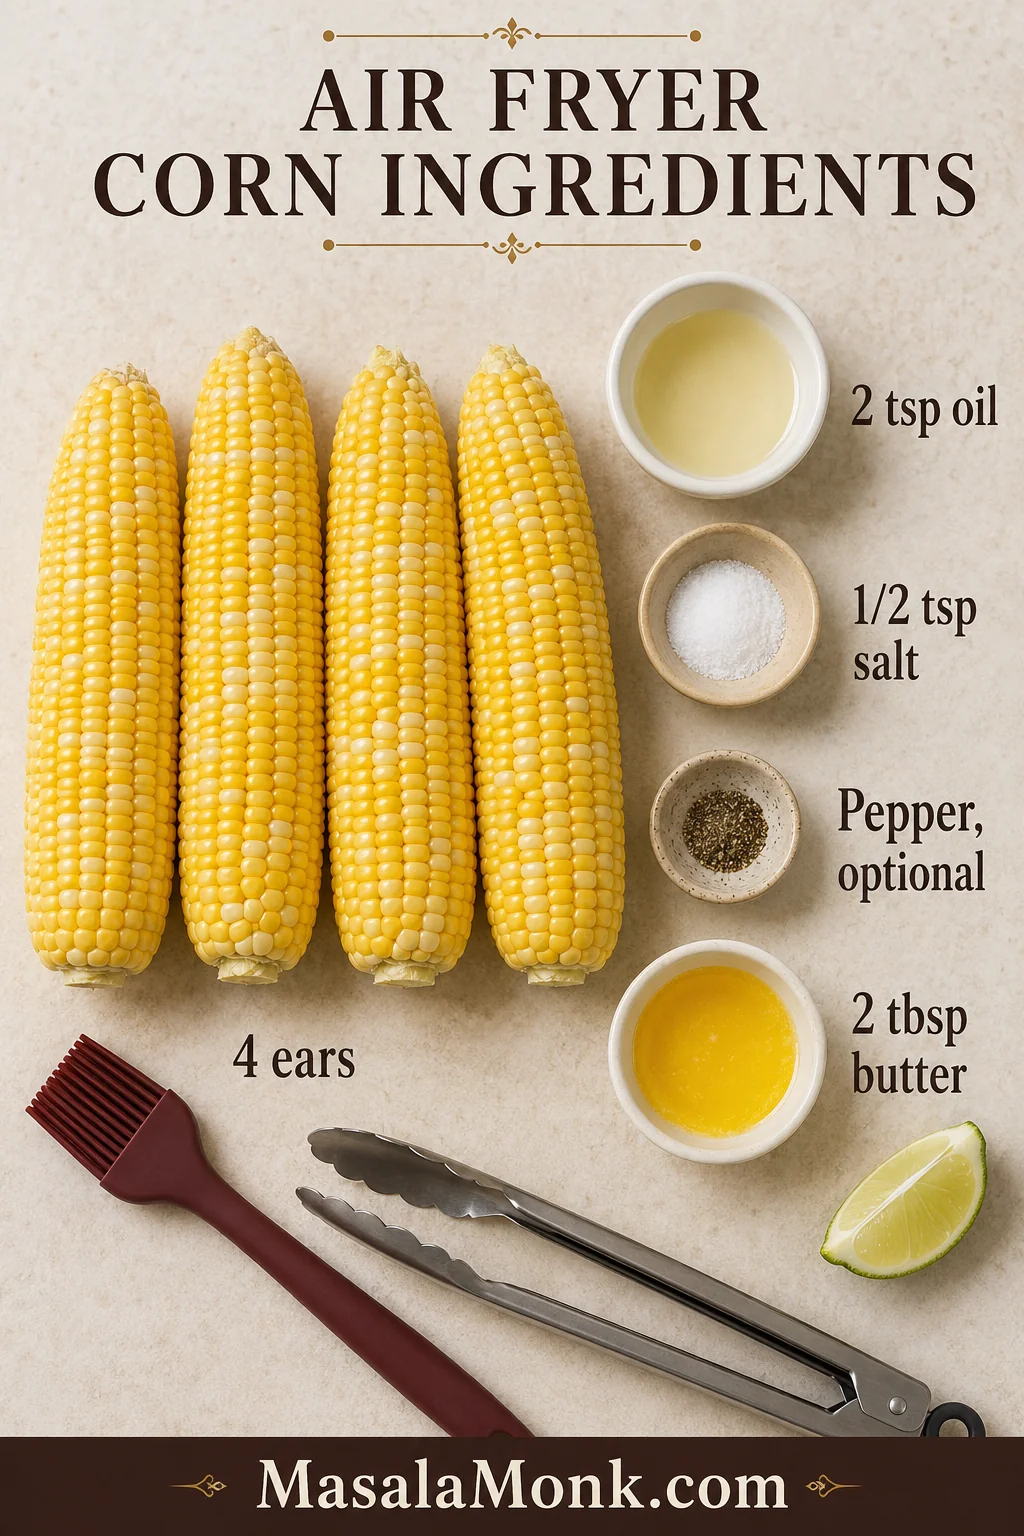
4 average-thickness ears of fresh sweet corn
2 teaspoons neutral oil or olive oil
½ teaspoon fine salt, about 3 g
¼ teaspoon black pepper, optional
For Serving
2 tablespoons unsalted butter, melted, 28 g / 1 oz
Lemon or lime wedges, optional
Additional salt and pepper, only after tasting
Properly oiled corn should have a faint sheen, not visible droplets; excess fat can pool between the rows instead of improving browning.
Equipment
Basket-style air fryer large enough to hold the corn in one layer
Tongs
Small bowl
Pastry or silicone brush
Knife and cutting board when the ears need trimming or halving
Method
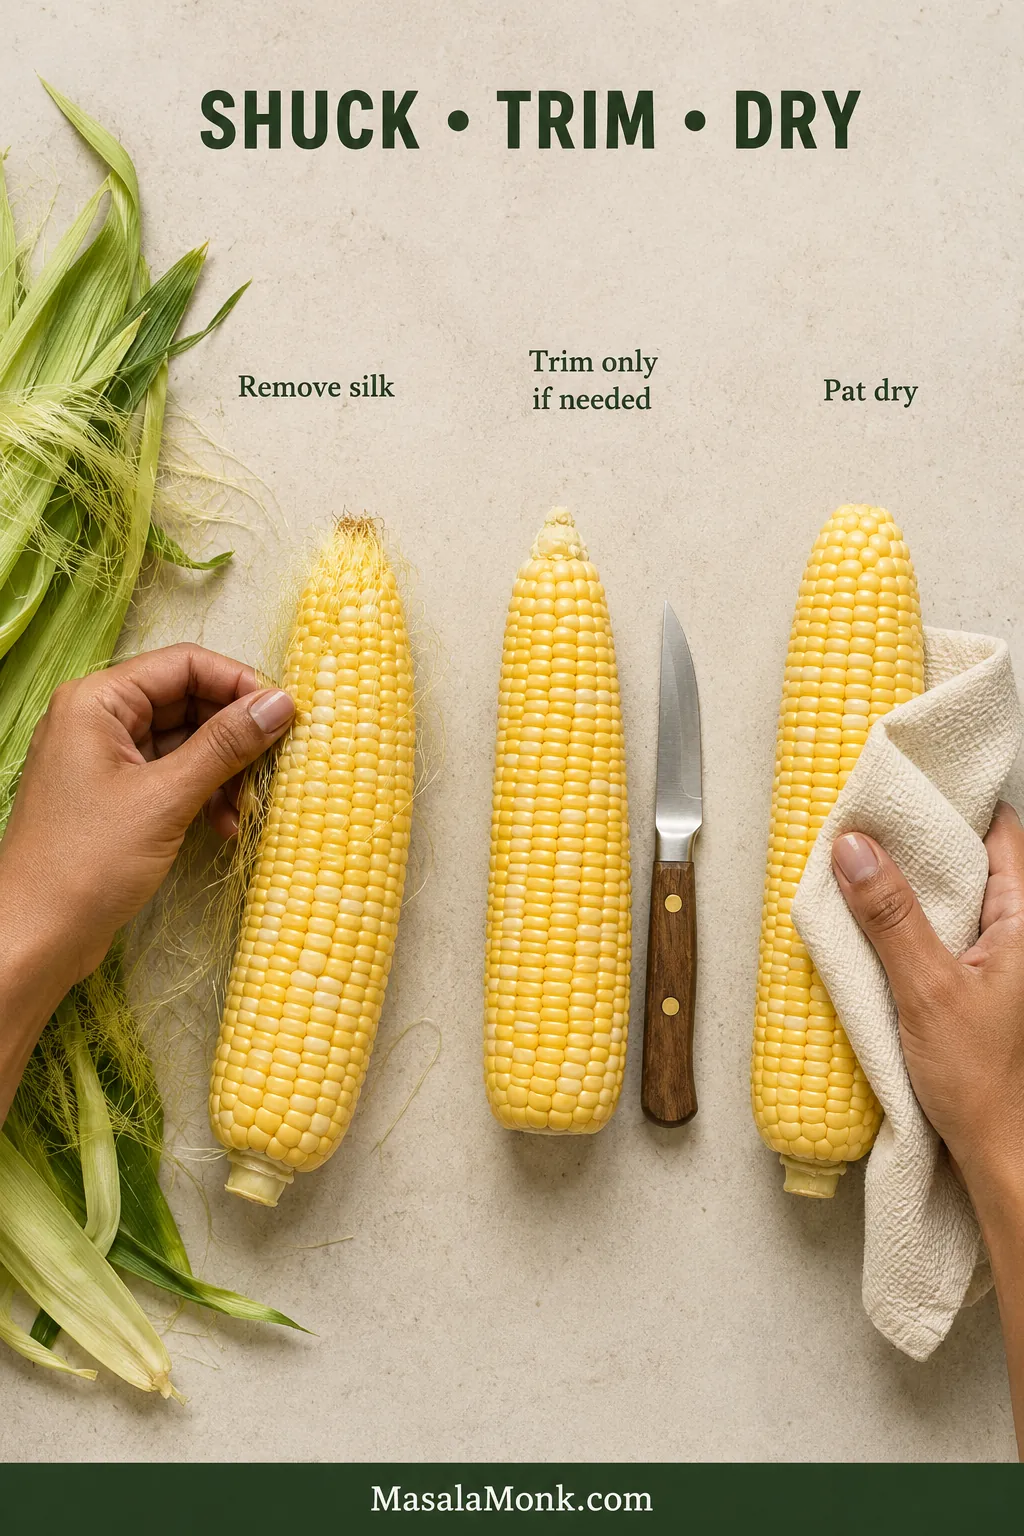
Prepare the corn. Remove the husks and silk. Trim the narrow tip or halve the ears only when needed to fit. Pat the kernels dry.
Preheat if recommended for your model. Heat the air fryer to 400°F / 200°C for up to 3 minutes. Prepare the ears while the basket heats.
Season lightly. Brush the ears with oil until they look lightly glossy rather than wet. Add the salt and optional pepper.
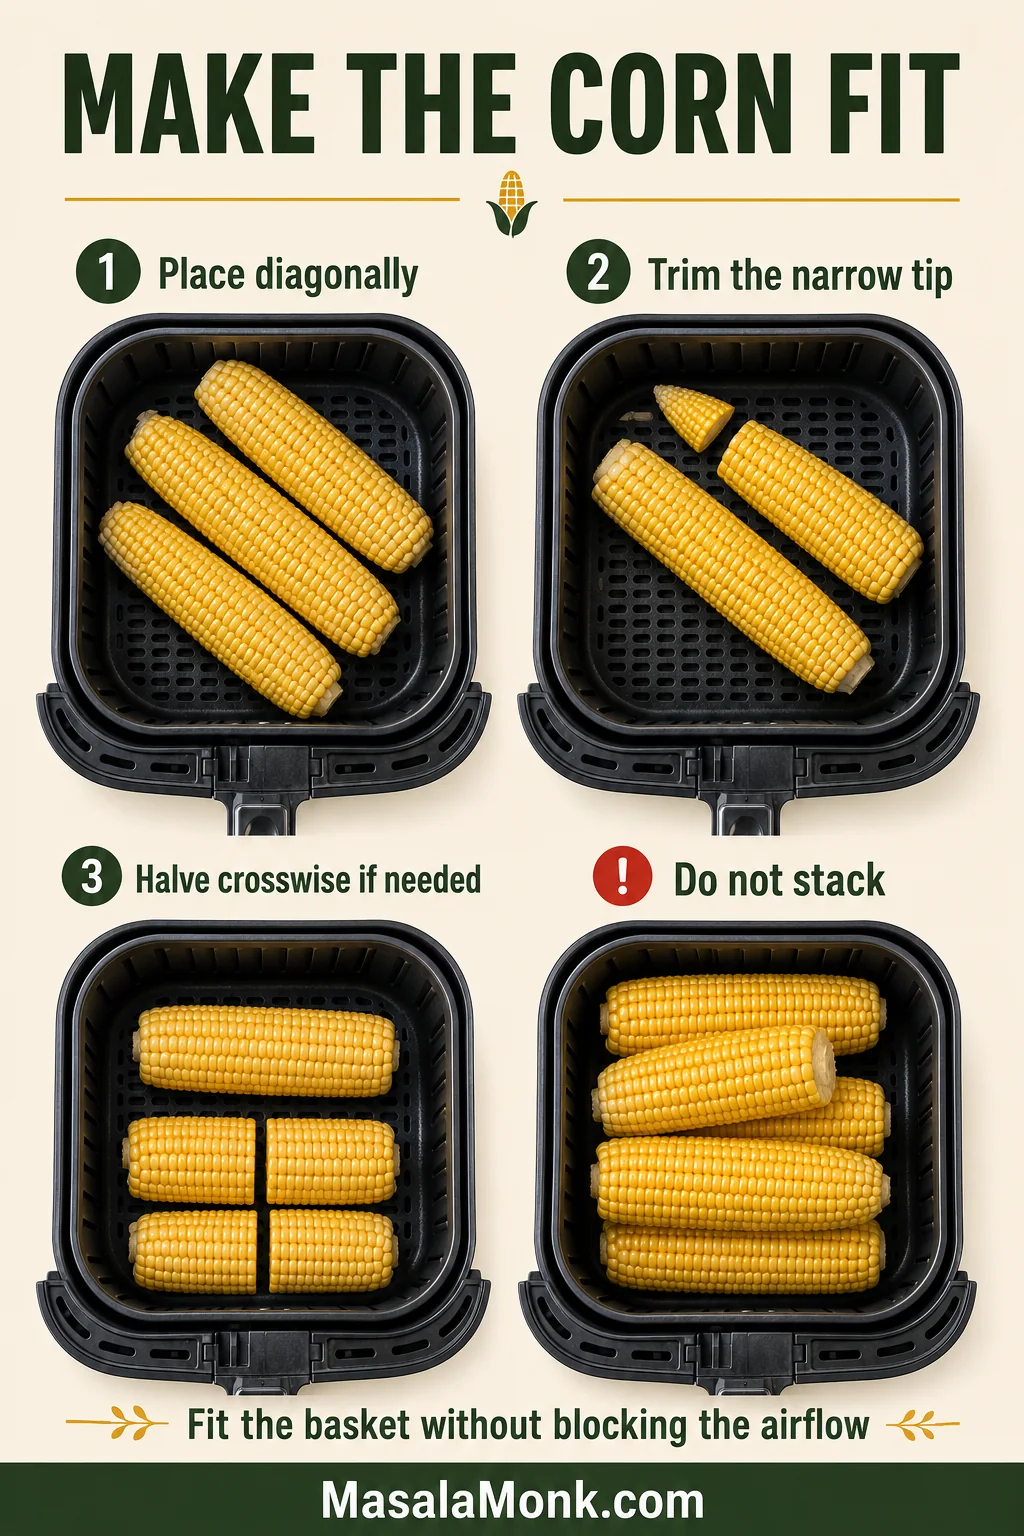
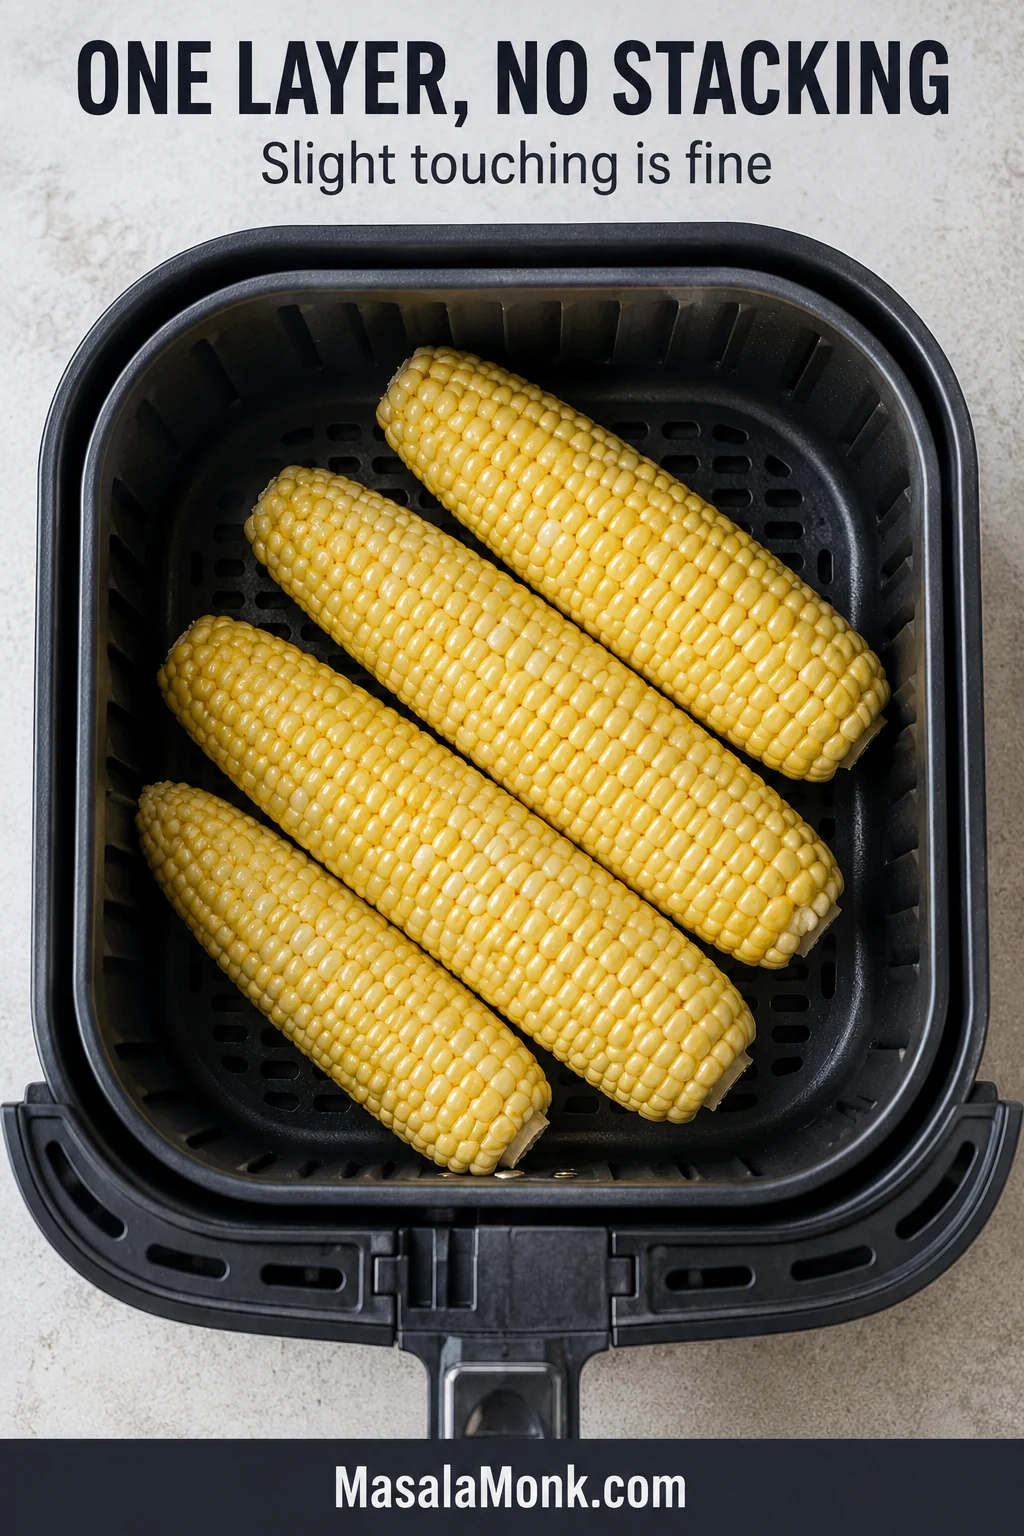
Arrange the basket. Place the corn in one layer. A little touching is fine, but do not stack the ears or force them close to the upper element.
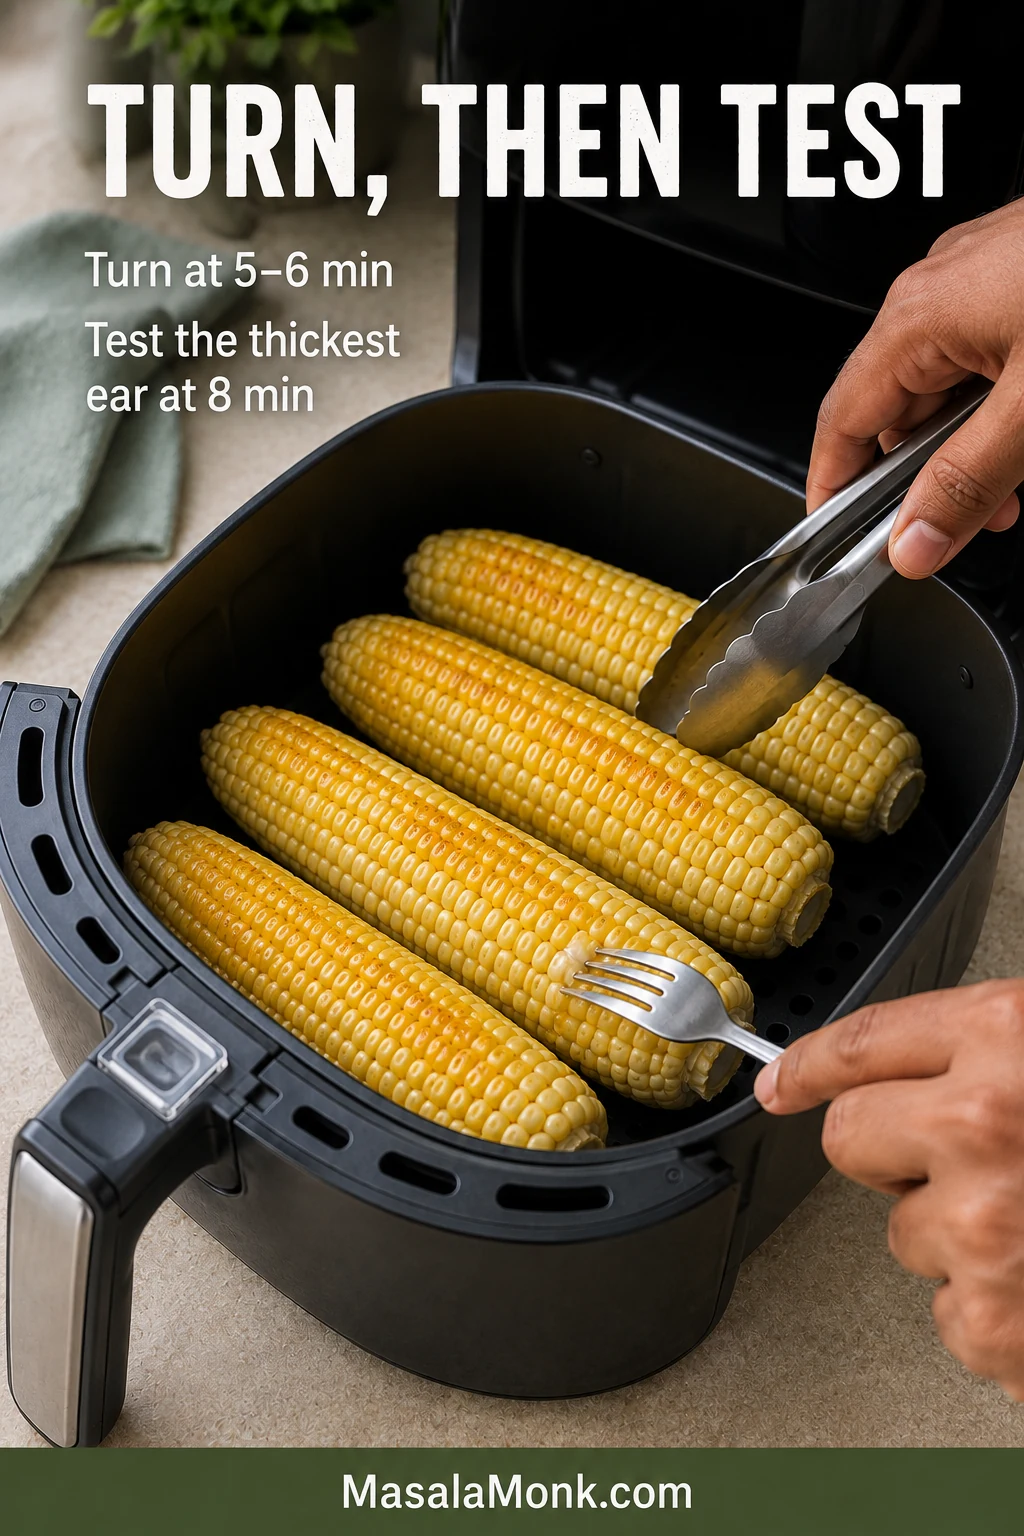
Air fry. Cook at 400°F / 200°C and turn or roll the ears after 5–6 minutes.
Test the thickest ear. At 8 minutes, pierce a kernel near the middle. Continue until the kernel looks full, releases a little juice and offers only gentle resistance.
Choose the colour. Once tender, cook for another minute at a time when you want darker roasted patches. Stop after 3 additional minutes.
Serve hot. Brush with melted butter, taste and add more seasoning only as needed.
Recipe notes:
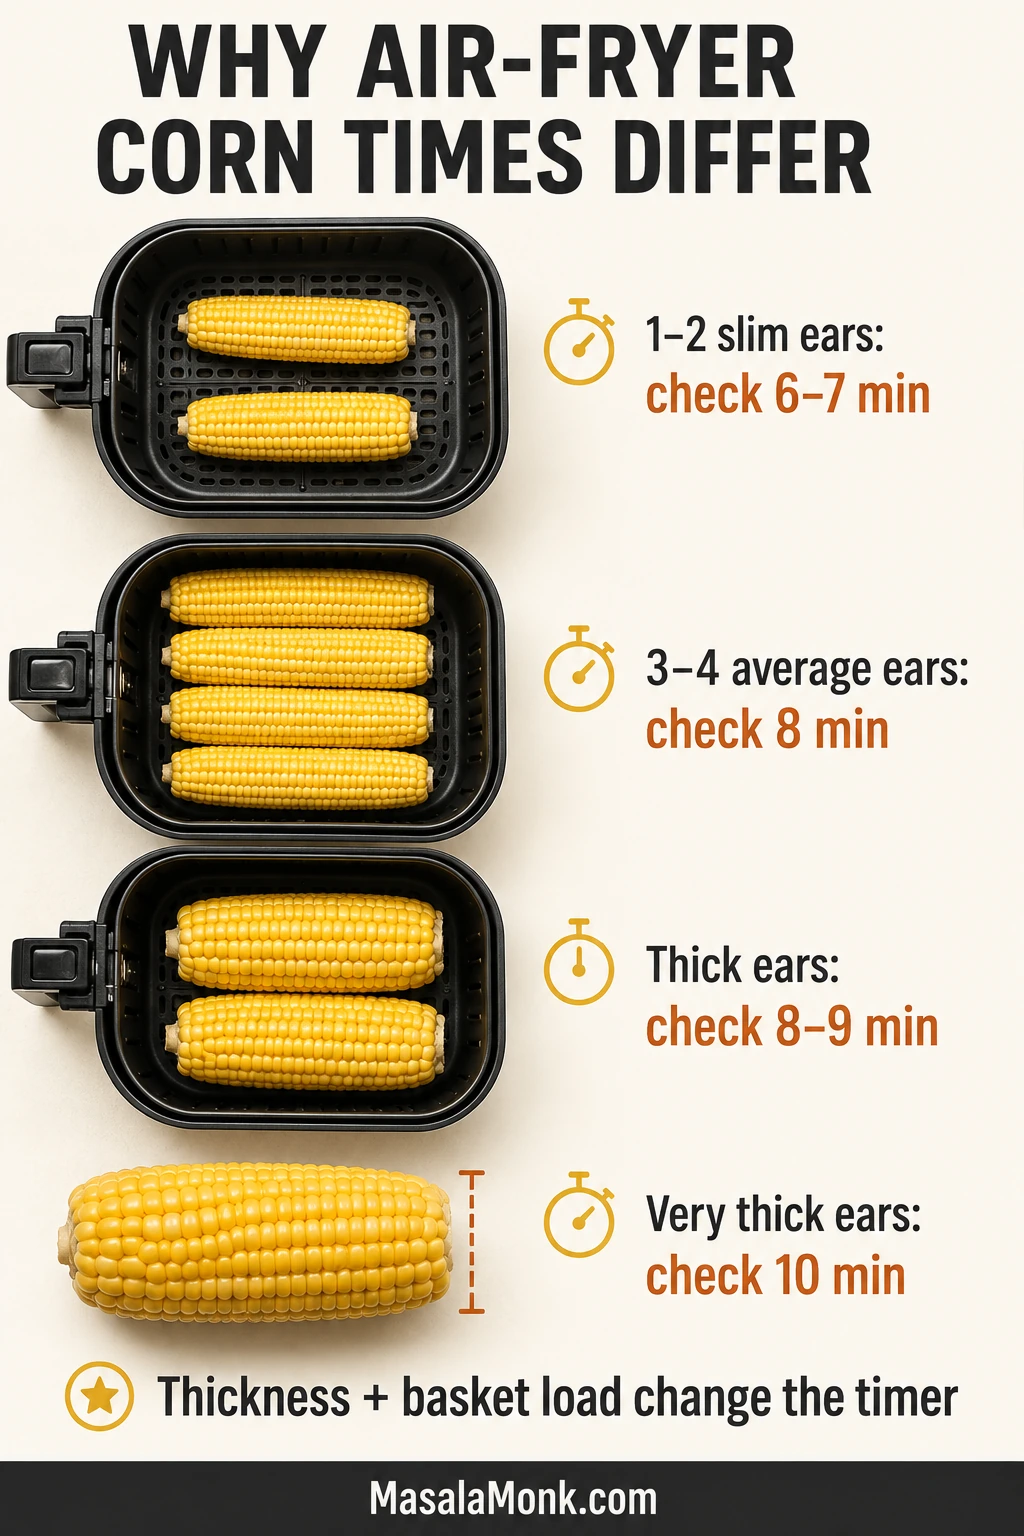
Cooking only 1–2 slim ears? Start checking at 6–7 minutes.
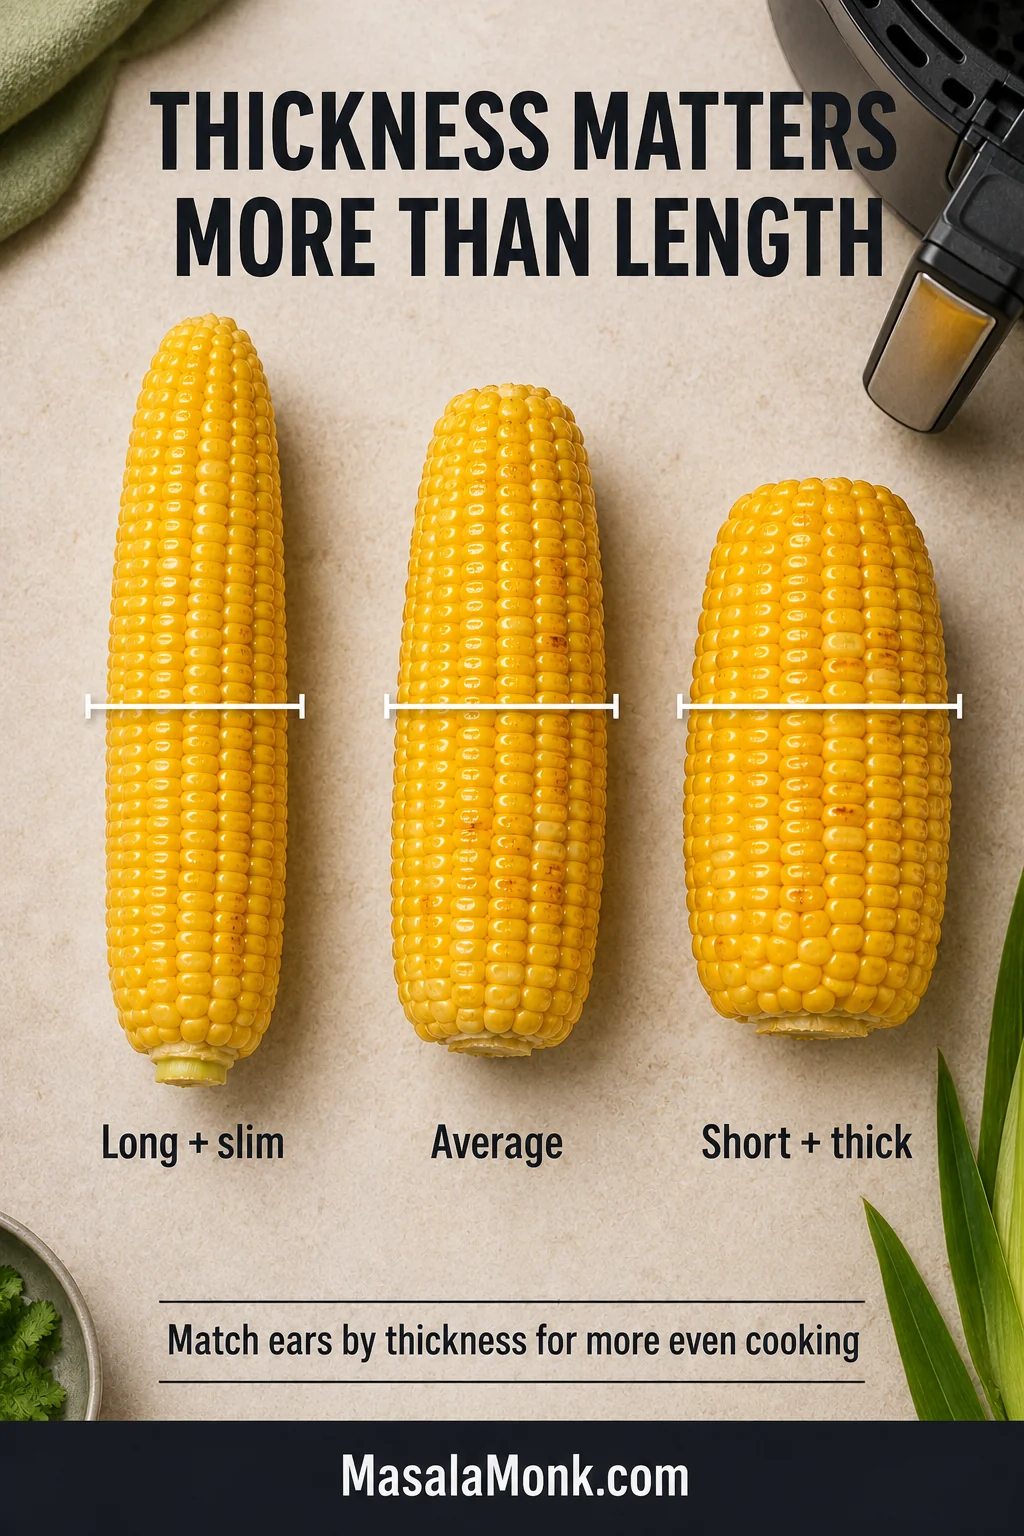
Matching ear thickness is more useful than matching length.
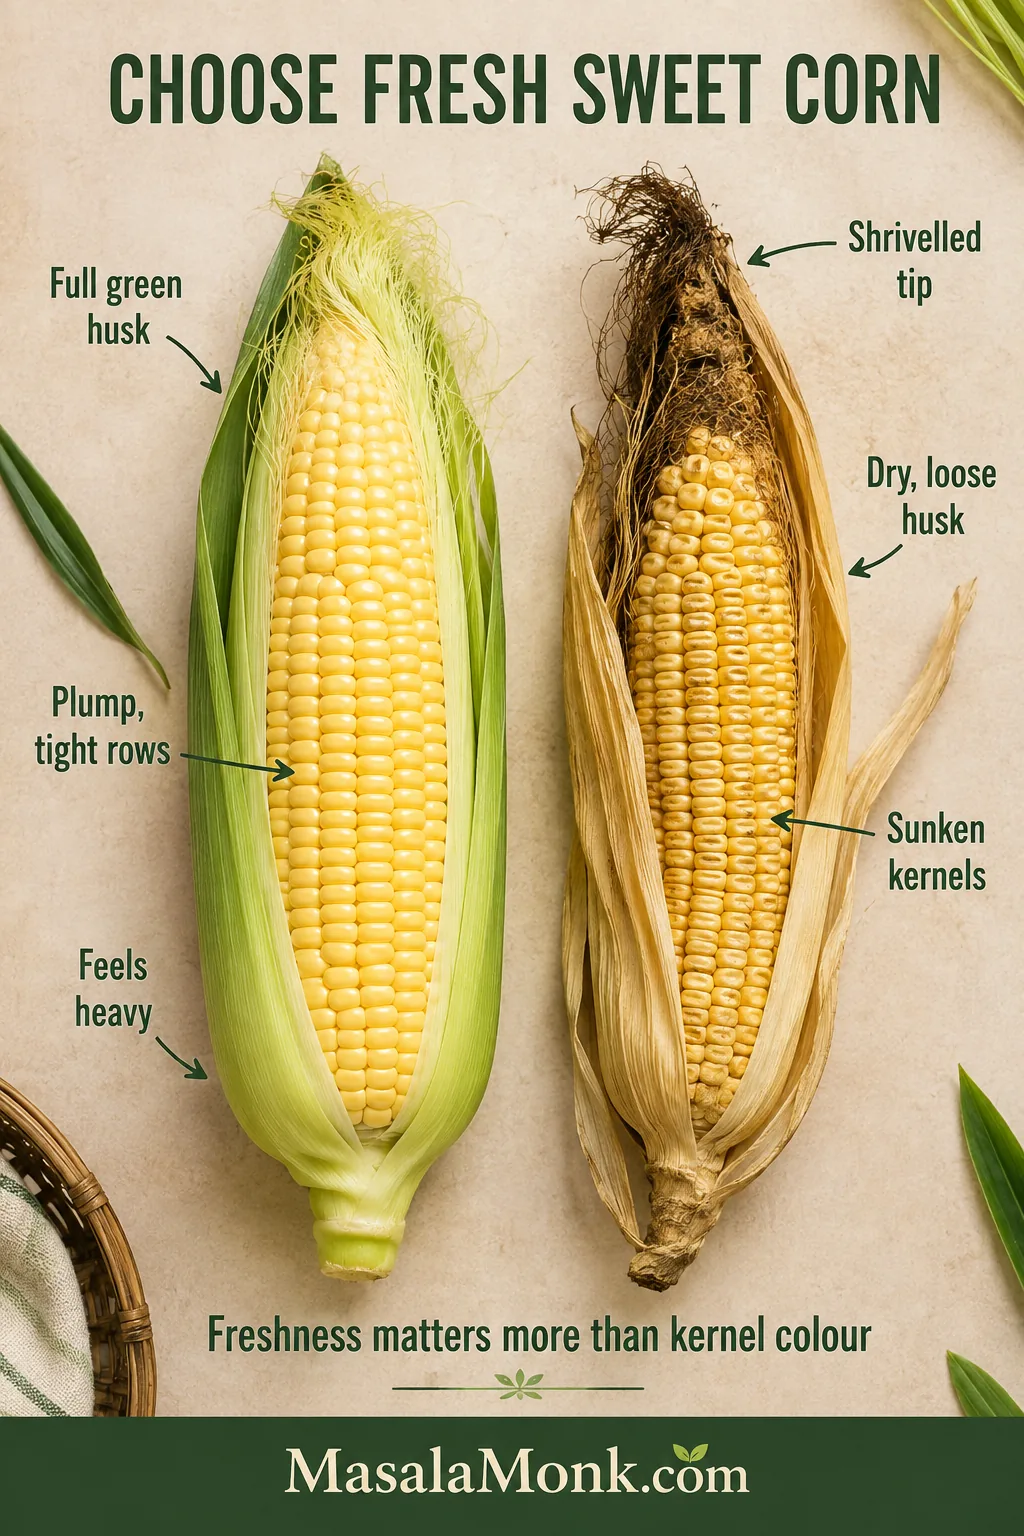
Yellow, white and bicolour sweet corn all work. Freshness matters more than kernel colour.
Kosher salt crystals vary by brand, so begin lightly and adjust after adding butter.
For three or four average ears, air fry at 400°F / 200°C for 8–12 minutes. Turn at 5–6 minutes and test the thickest ear at 8.
Air fryers vary, so treat those times as checking points rather than guaranteed finishing times. Ear thickness and basket load explain most of the variation; if you are unsure what “tender” should look and feel like, use the visual doneness cues.
The listed minute starts the check; the thickest ear’s texture determines when the cook ends.
How to use this table: Start with the listed first-check time, test the thickest ear and continue only until its kernels are tender.
Air fryer corn cooking times by ear thickness and basket load
Your basket
First check
Typical range at 400°F / 200°C
1–2 slim ears
6–7 minutes
7–10 minutes
3–4 average-thickness ears
8 minutes
8–12 minutes; a closely fitted basket often lands near 10–12
1–2 noticeably thick ears
8–9 minutes
10–12 minutes
Very thick ears
10 minutes
12–15 minutes
How to Tell When the Corn Is Done
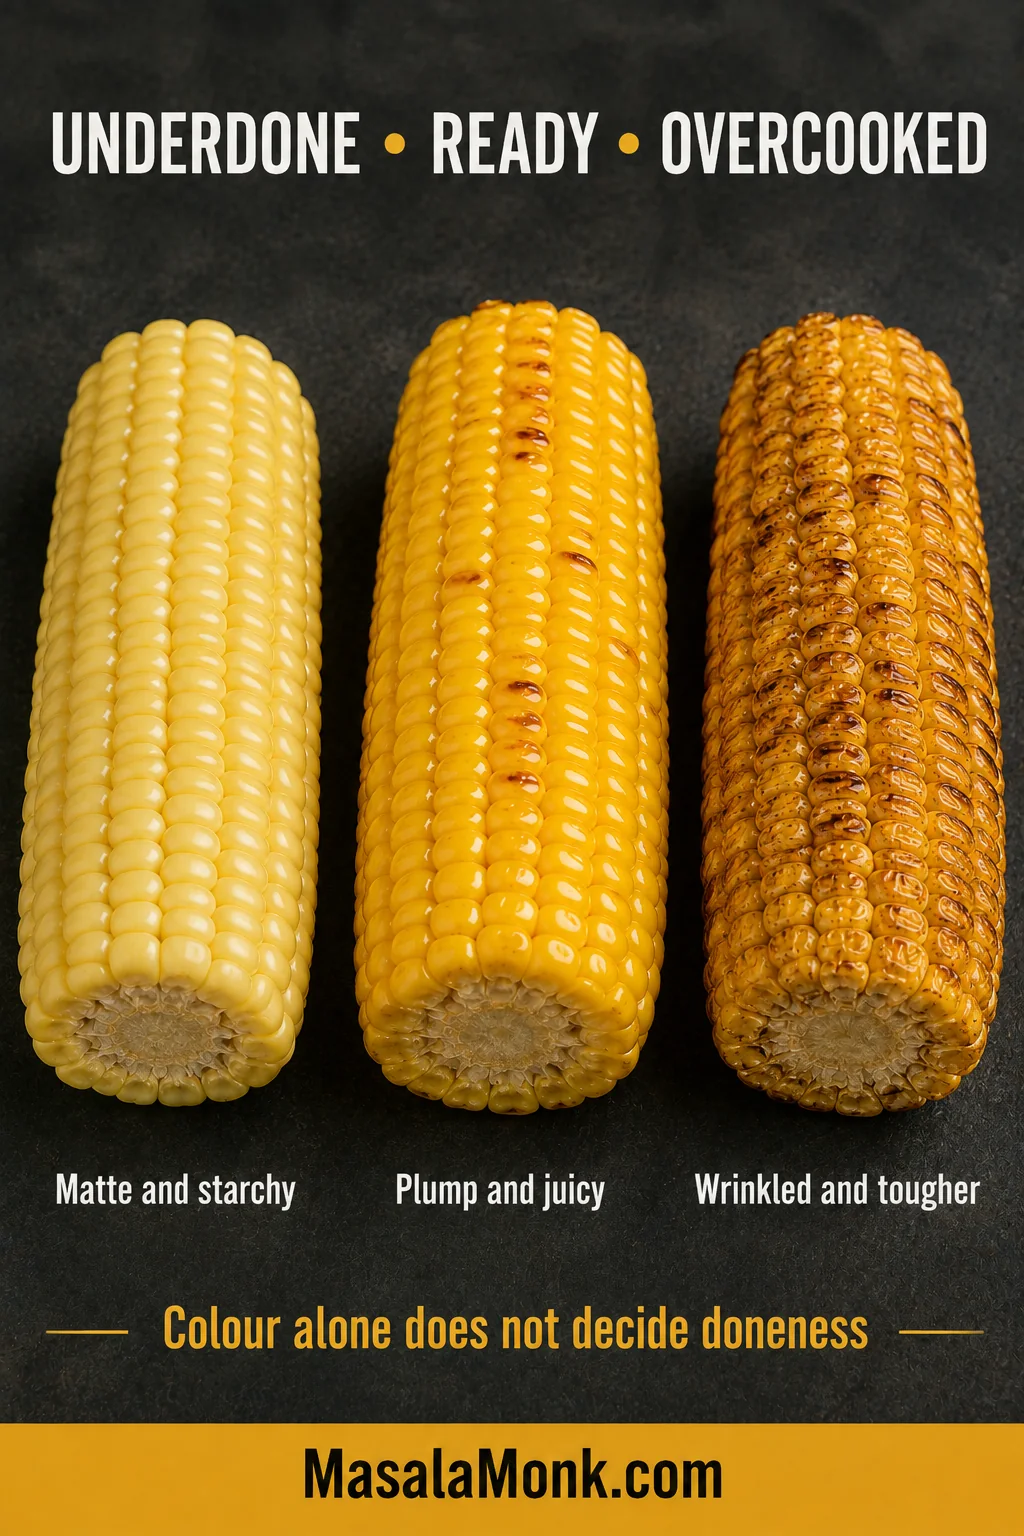
Otherwise-good corn often stays in the basket too long because someone is waiting for every row to turn dark. Colour can deepen after the centre is already cooked.
Underdone
The kernels look matte, resist a fork and taste dense or starchy.
Ready to Serve
The rows look full and glossy. A pierced kernel gives easily and beads with juice.
Overcooked
The kernels begin to wrinkle or lose their plump shape, and the skins become noticeably tougher.
If one person wants deeper char, remove the other tender ears and leave theirs in a little longer. Dinner does not improve by making every cob wait for the darkest one.
Because wrinkling cannot be reversed, pull a ready ear early instead of waiting for every cob to develop matching colour.
For more roasted colour without drier kernels, wait until the centre is tender, then continue uncovered. Turn frequently near the end and stop as soon as the blistered patches are as dark as you want.
Roll each ear onto a less-coloured side rather than simply nudging it; meanwhile, remove any thinner ear that becomes tender early.
Choosing, Preparing and Arranging the Corn
Start with ears that feel full and heavy, with close-fitting green husks and no badly dried or mushy tip. Older corn can taste starchier and remain less juicy even when the timing is right.
When the husk cannot be opened, feel through it for firmly packed rows without soft gaps, missing kernels or a hollow tip.
Next, match the ears by thickness rather than length. Similar diameters are more likely to become tender together, while a tapered tip can make a substantial ear look slimmer than it really is.
A shorter thick ear can take longer than a long slim one, so compare the widest middle sections rather than overall size.
Sweet summer corn already brings most of the flavour; the air fryer’s job is to deepen the edges without taking the juice from the centre.
Remove the husks and stubborn silk, trim only what prevents the ear from fitting and pat the exposed kernels dry. Surface water must evaporate before browning can begin.
A barely damp towel can help lift fine strands of silk; pat the kernels dry afterward so surface moisture does not delay browning.
Oil: A thin coating helps seasoning cling and encourages more even colour. Two teaspoons across four ears is enough. Oil-free corn still cooks.
Butter: Save it for the moment the ears leave the basket. It melts into the hot rows without risking burnt milk solids near the upper element.
Make the Ears Fit Without Crowding
Halving creates extra exposed ends for browning and can make a closely fitted basket easier to arrange.
Trim the narrow tip first. The tapered end may be all that prevents an ear from fitting.
Halve the ear when needed. A crosswise cut improves fit and may create more open airflow.
Keep the corn in one layer. Slight touching and diagonal placement are fine; stacking is not.
Leave room below the element. Do not force an oversized ear close to the upper heater.
Remove loose silk and husk. Lightweight dry pieces can move in the fan.
Save cheese, honey, sugar and fresh garlic for after cooking. They can scorch before the centre softens; instead, add them through one of the finishing options once the ears are tender.
Should You Use a Paper or Silicone Liner?
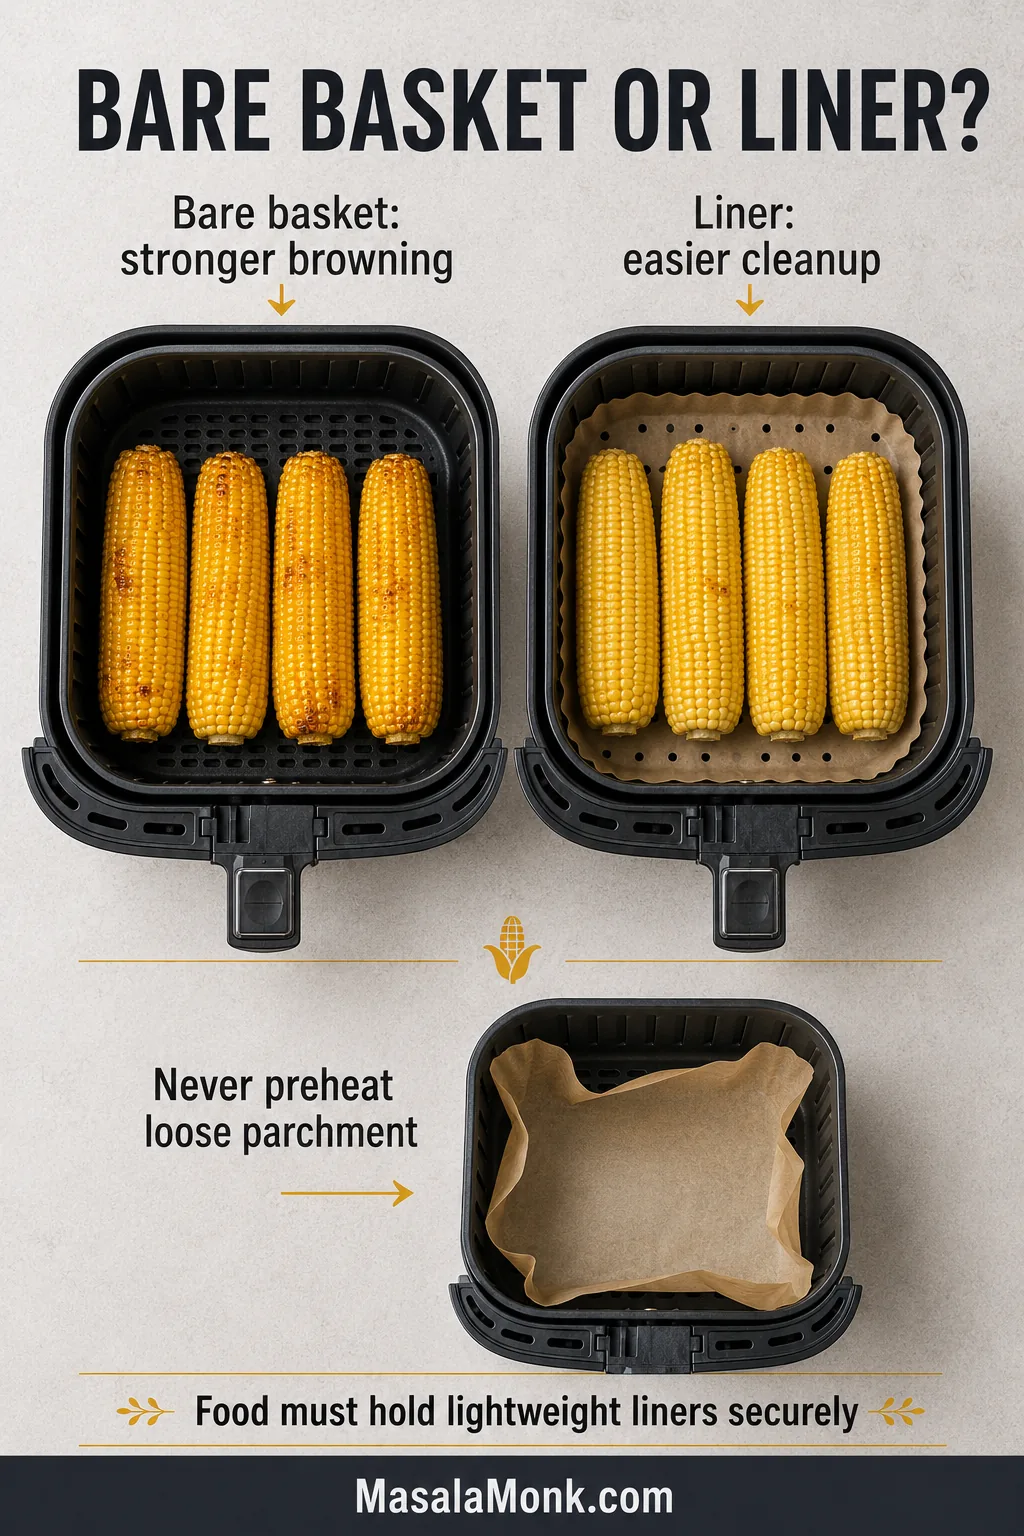
Liners make cleanup easier. Direct basket contact gives the exposed kernels better airflow and stronger browning, so the lower side may stay paler when a liner is used.
Use the bare air-fryer basket when underside colour matters most; choose a fitted liner when easier cleanup is the greater priority.
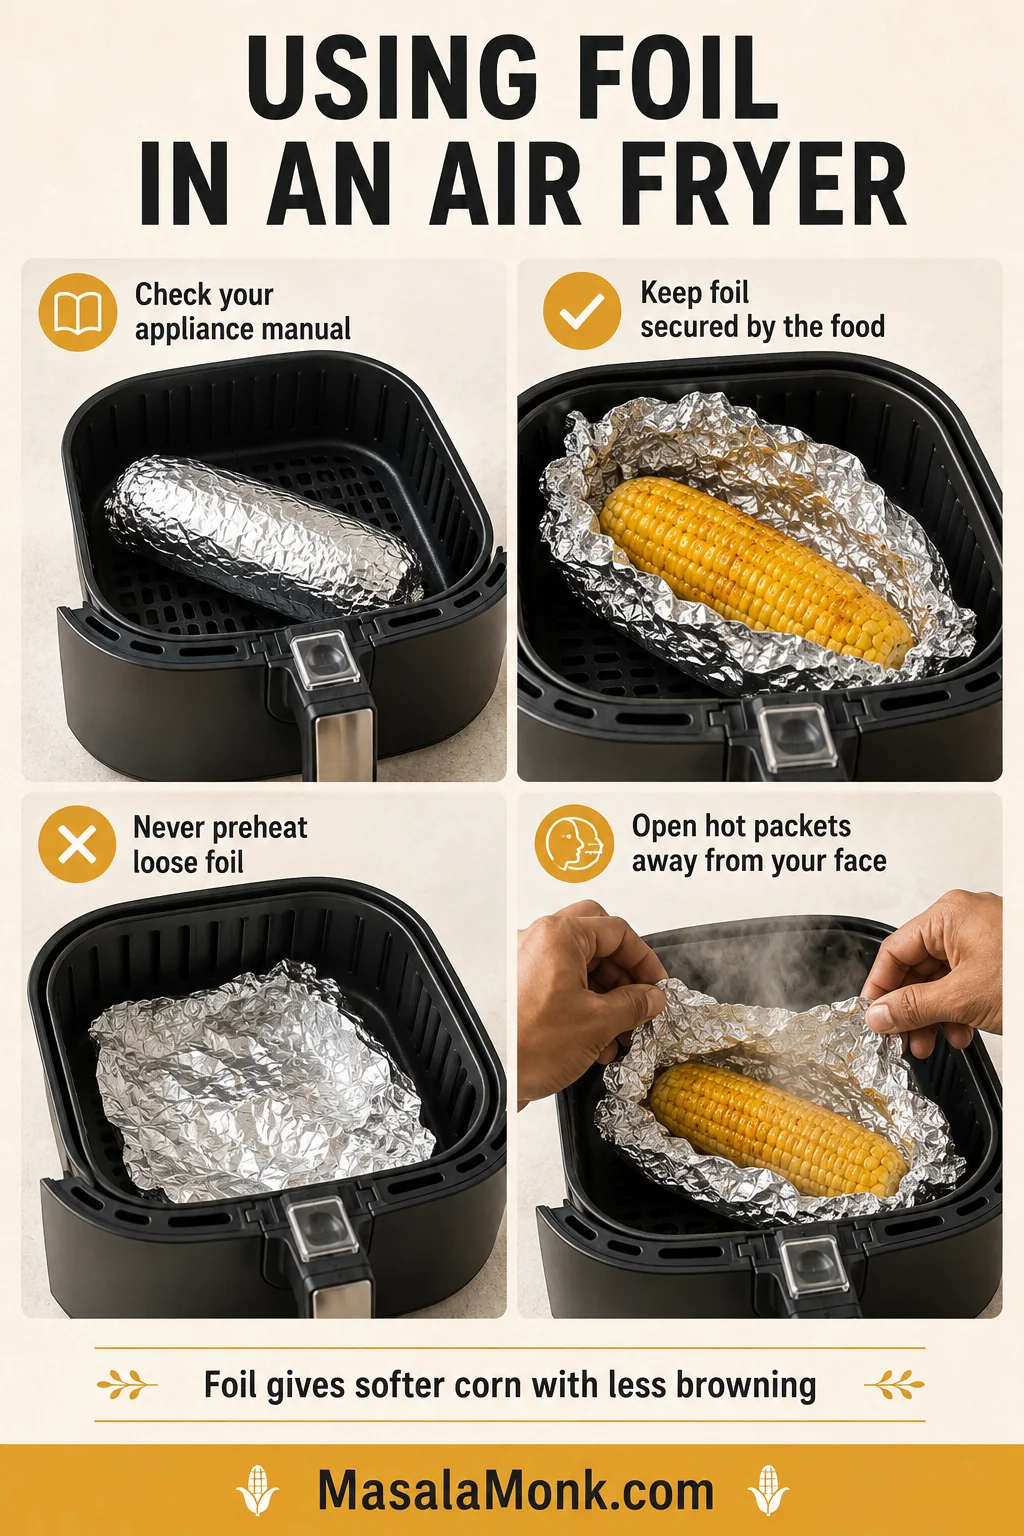
Never preheat loose parchment without food securing it. A lightweight sheet can lift toward the heating element. The guide to common air fryer mistakes goes further into crowding, wet food, blocked airflow and basket smoke.
Adjusting for Thick Ears and Different Air Fryers
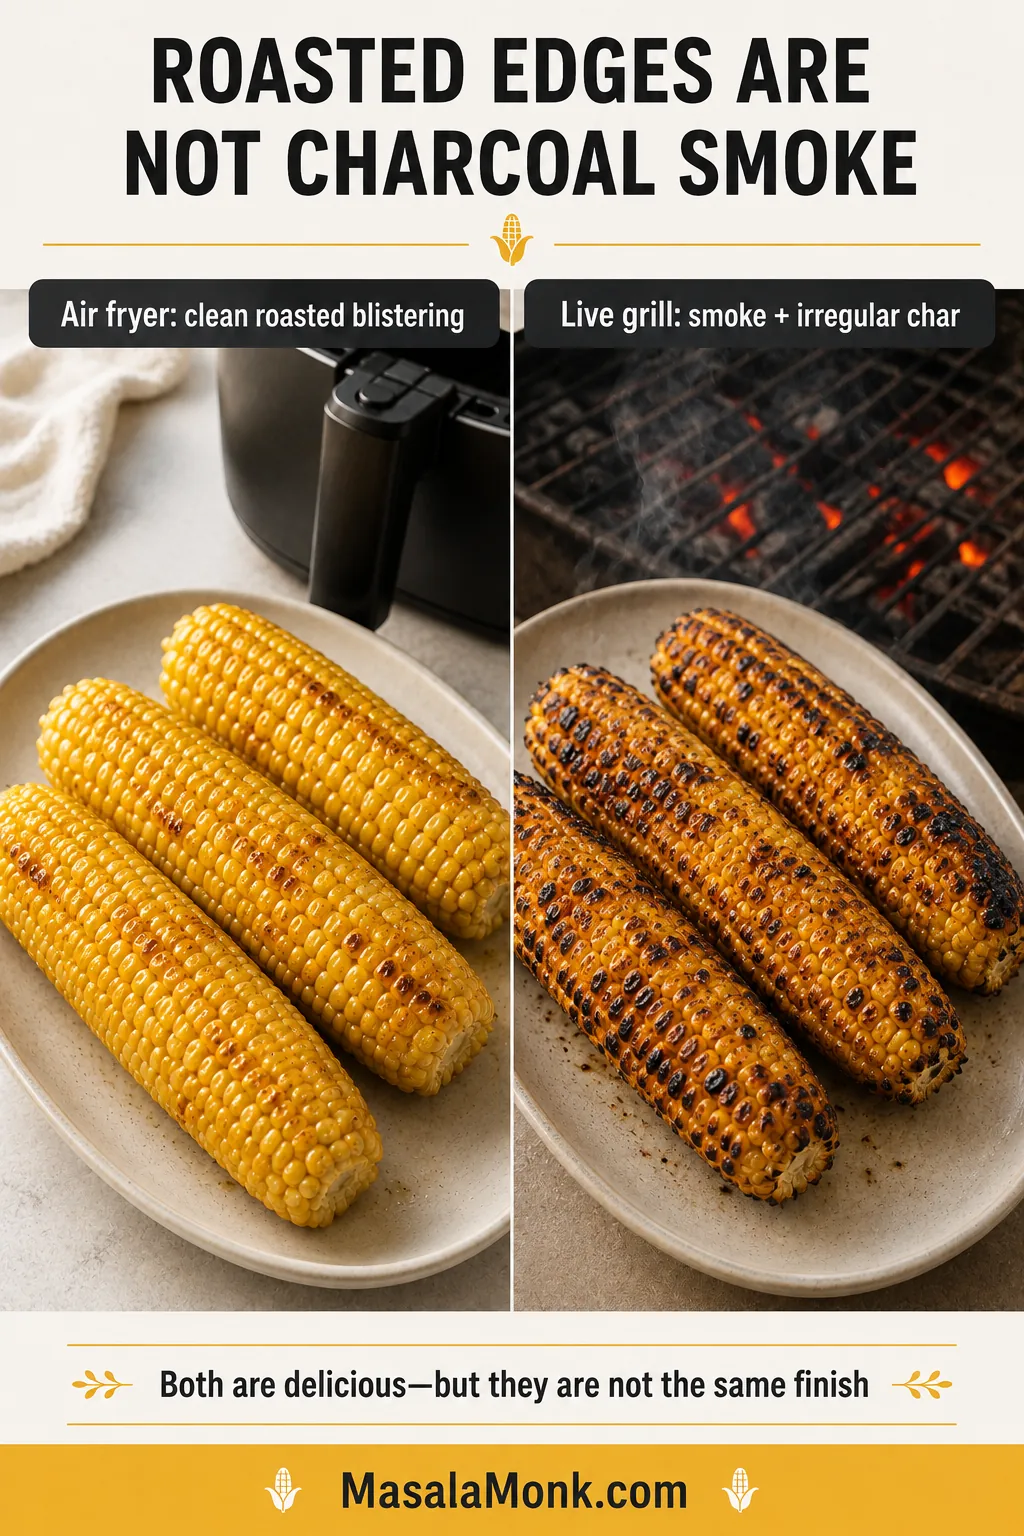
Moving heat gives the exposed rows roasted, blistered patches as the centre warms. It creates more browning than a microwave, but it will not reproduce the smoke of corn cooked over charcoal or a live grill.
Choose the air fryer for controlled tenderness and convenient roasting; choose live fire when genuine smoke is central to the flavour.
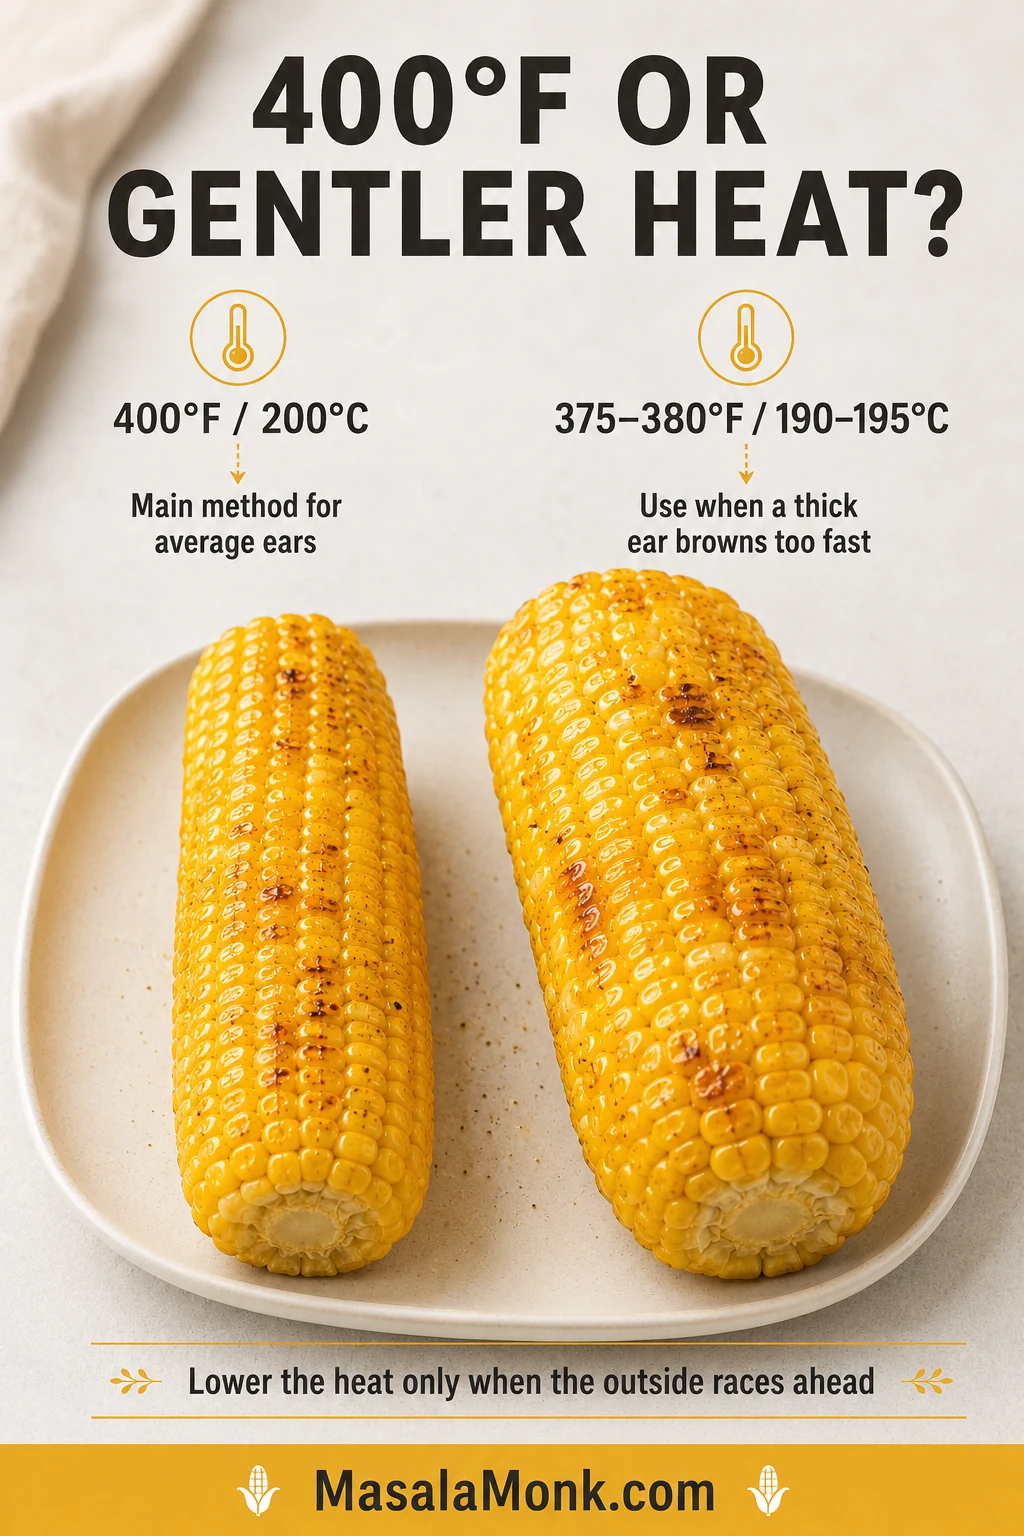
Use 400°F / 200°C for the main method. Lower the heat only when the outside is colouring faster than the centre is softening.
400°F / 200°C — Main Method
Best for average fresh ears and stronger roasted patches. Check early.
375–380°F / 190–195°C — Gentler Adjustment
Use for very thick ears or a compact fryer that darkens the outside before the centre becomes tender.
Treat gentler air-fryer temperature as a correction for premature browning, not the default starting point for every batch.
How Different Air Fryer Styles Change the Timing
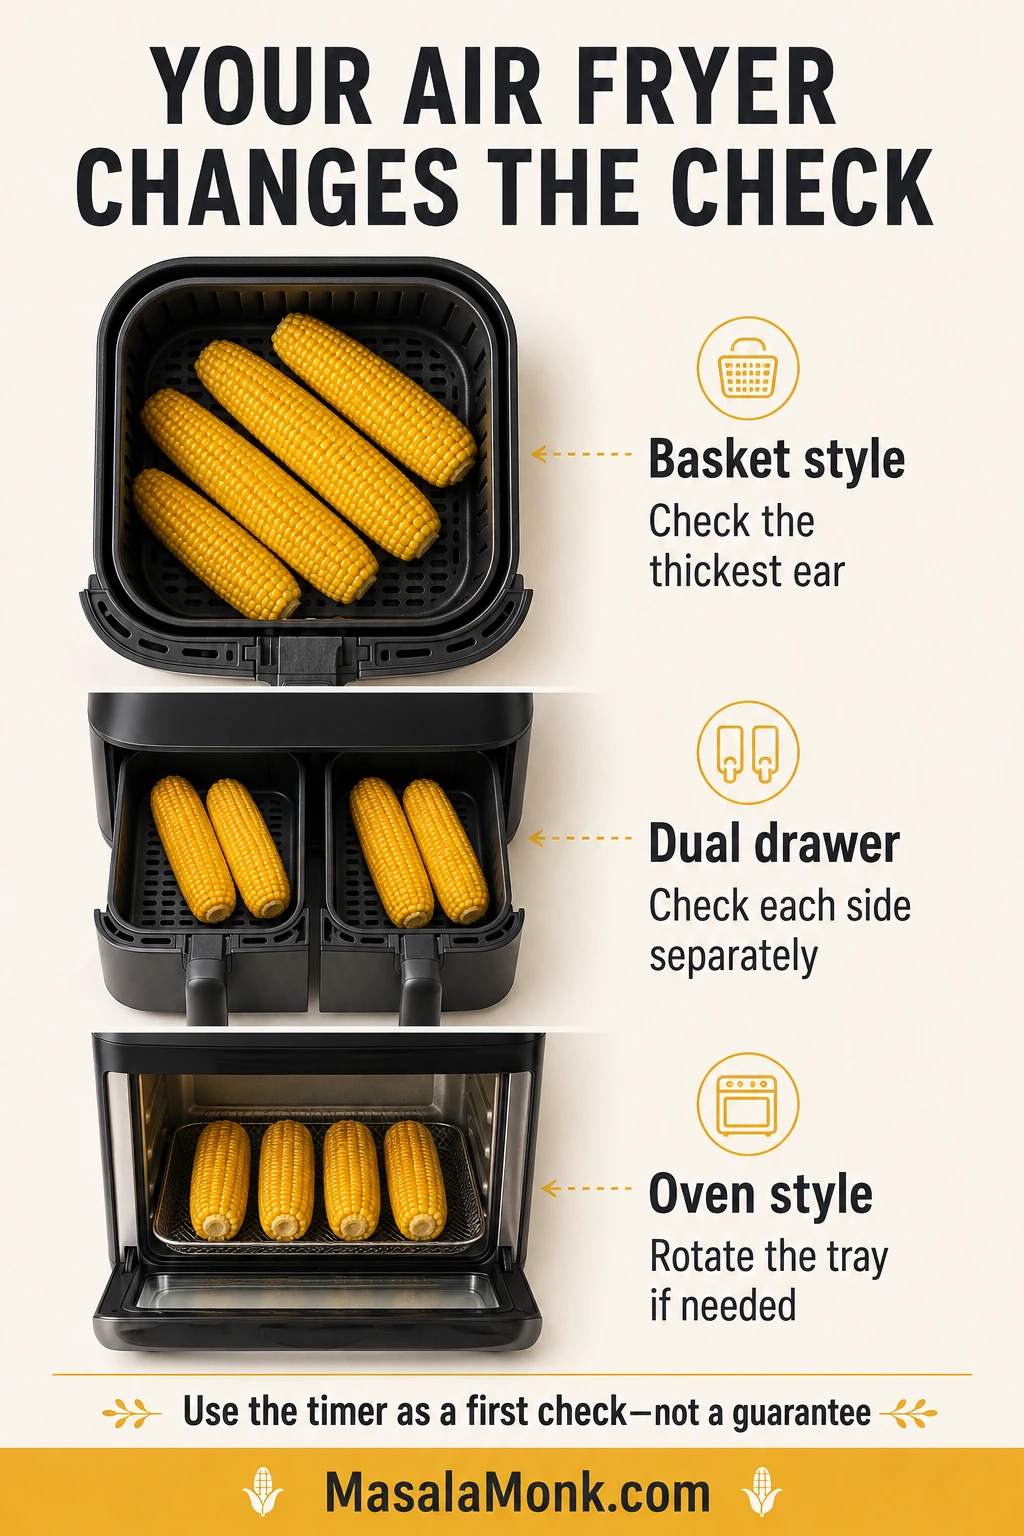
Timings may shift between basket, dual-drawer and oven-style models; however, the same kernel texture cues still determine doneness.
Thick ears: allow more time for heat to reach the centre.
A full basket: expect the later end of the timing range.
A compact fryer: check sooner because the corn may sit closer to the element.
Dual drawers: inspect both sides separately; they may not finish together.
Oven-style fryer: allow a little longer and rotate the tray if one side colours faster.
A broil, max-crisp or extra-high setting is much more aggressive than Air Fry. Use it only as a brief finishing boost when the appliance manual permits it.
Once you find the timing that suits your machine, note the number and approximate thickness of the ears. That result will be more useful next time than trying to match somebody else’s exact minute.
Fresh, Frozen or Foil-Wrapped Corn
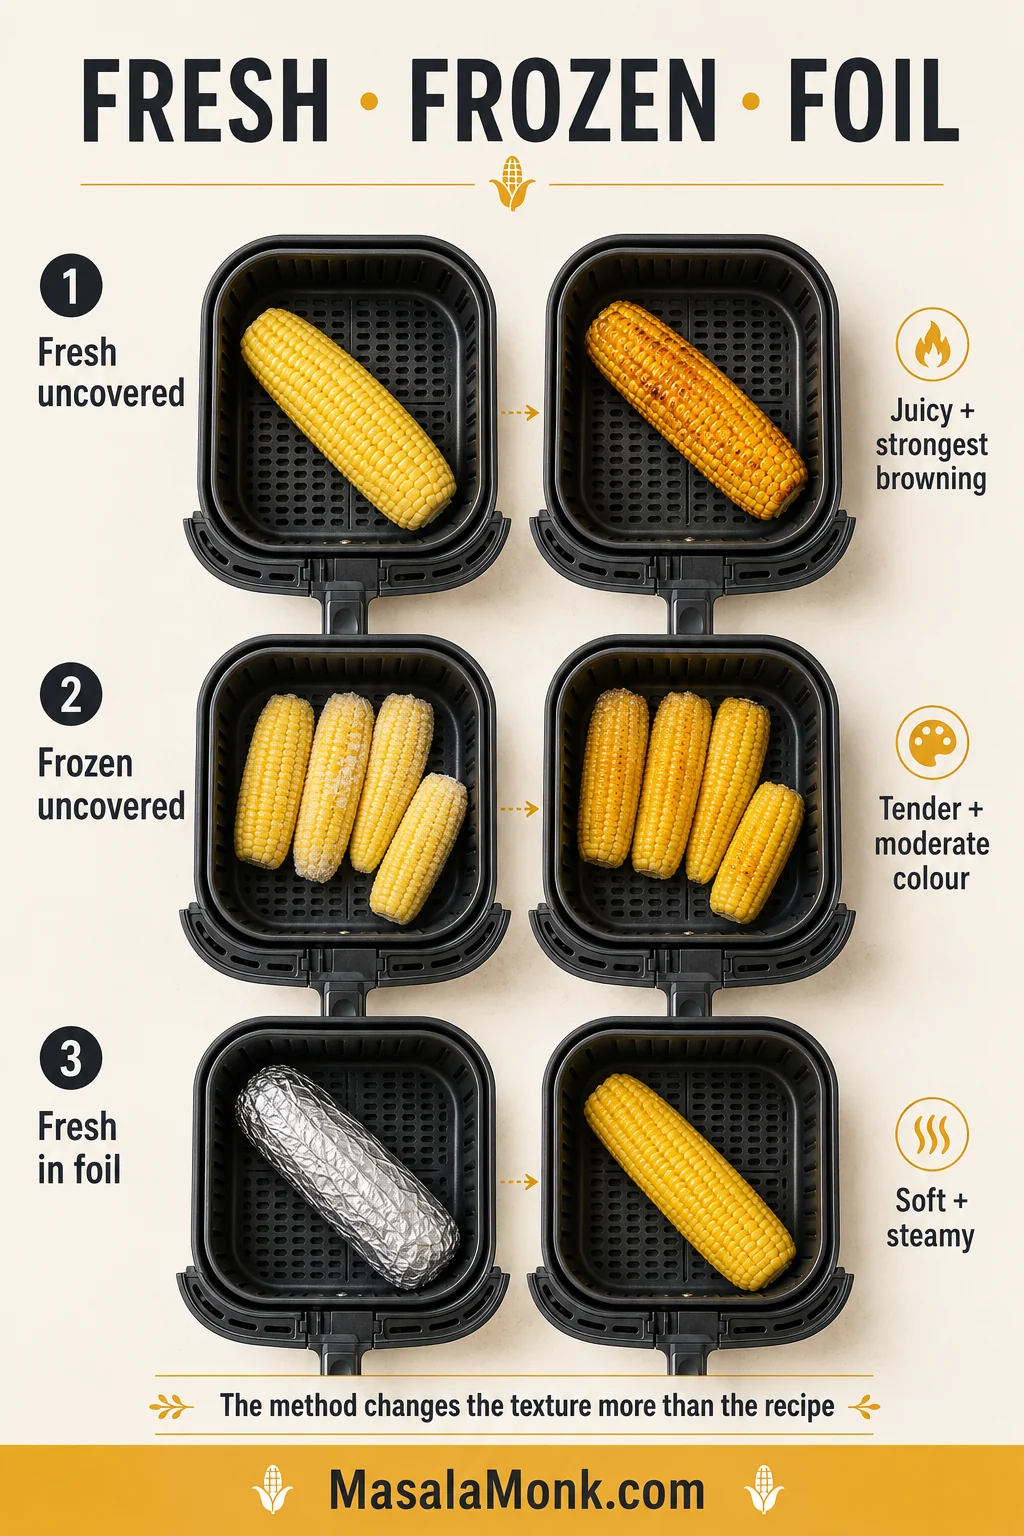
Fresh uncovered corn gives the strongest browning. Frozen corn needs time to shed its icy coating, while foil shifts the result toward soft, buttery and steamy.
Foil is primarily a texture decision—not a speed shortcut—because trapped steam softens the kernels while limiting roasted colour.
Air fryer cooking times and textures for fresh uncovered corn, fresh foil-wrapped corn and frozen uncovered corn
Corn
Method
First check
Usual time
Texture
Fresh
Uncovered
8 minutes
8–12 minutes
Juicy with the strongest browning
Fresh
Foil-wrapped
11 minutes
11–15 minutes
Soft and steamy with little colour
Frozen
Uncovered
12 minutes
12–15 minutes for half-cobs or average ears
Tender with moderate colour
How to Air Fry Frozen Corn on the Cob
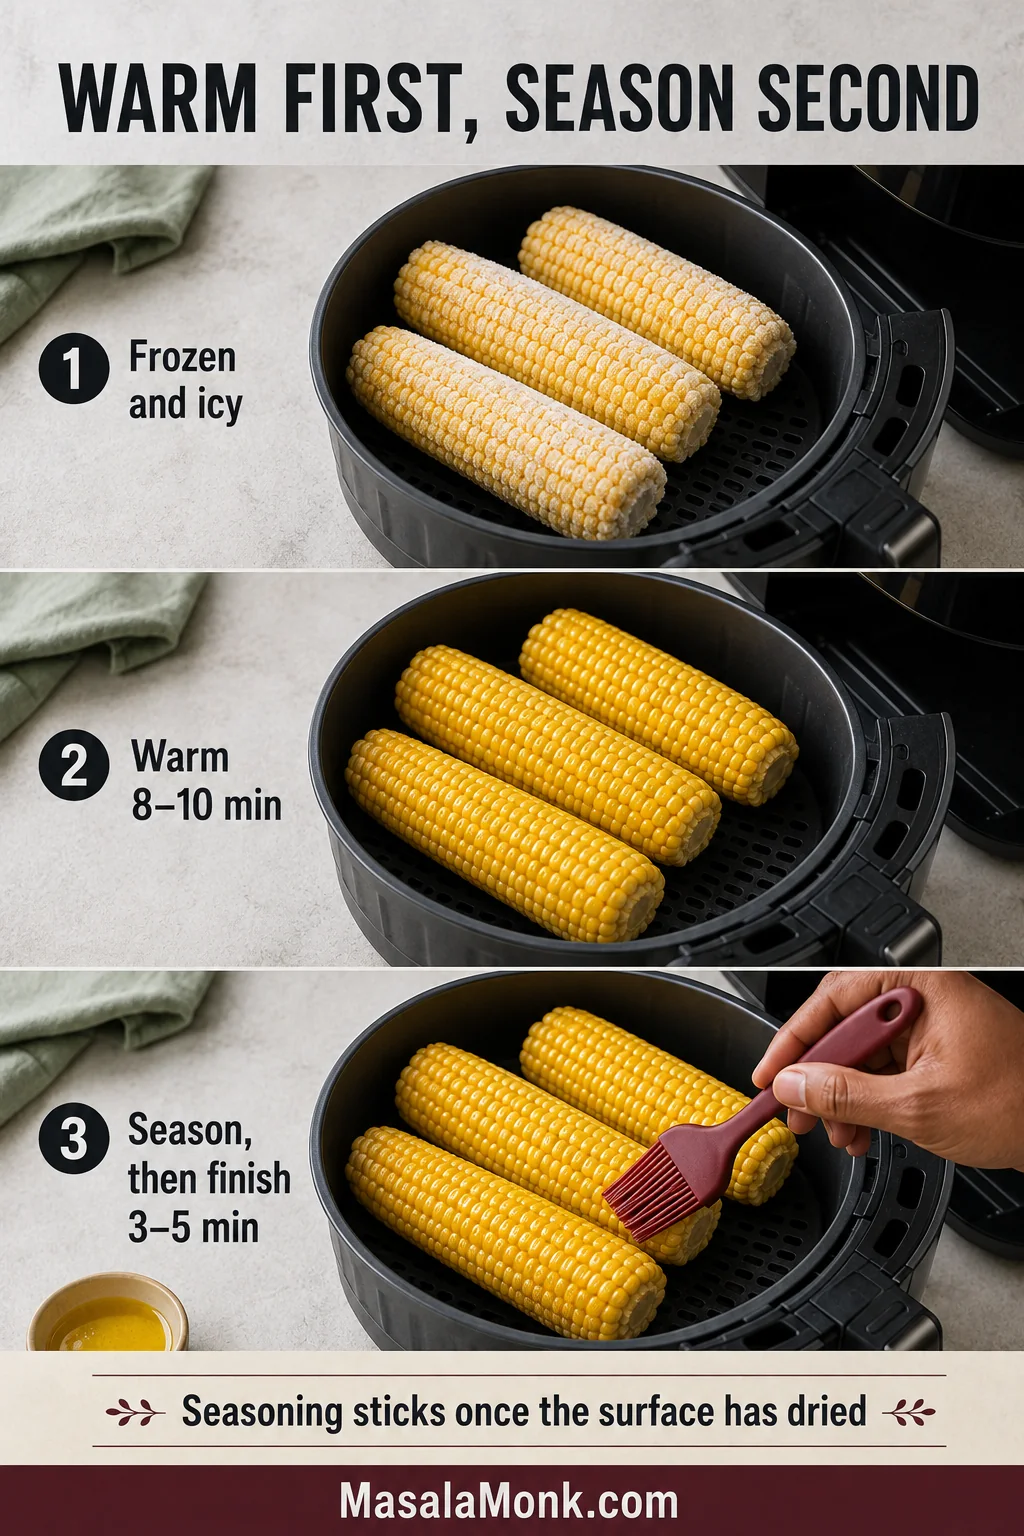
Frozen corn releases water as the ice melts. Butter and dry seasoning can slide away during that early stage, and the extra moisture slows browning.
After the warming stage, blot away any collected meltwater before seasoning; otherwise, the new coating may still slide from the corn.
Arrange frozen half-cobs or average ears in one layer.
Air fry at 400°F / 200°C.
Turn once the outside has thawed and begun to dry.
Test a kernel at 12 minutes.
Continue until tender, usually 12–15 minutes. Large whole frozen ears may need longer.
Add butter and seasoning once the corn is hot and no longer icy.
For better seasoning adhesion: warm the frozen corn for 8–10 minutes first. Once the icy surface has dried, brush with butter or oil, season and finish at 400°F / 200°C for another 3–5 minutes, or until tender. Then choose a buttery, spicy or tangy finish.
Thawed corn cooks faster than fully frozen corn. Start near the early end of the fresh-corn range and check frequently.
How to Air Fry Corn in Foil
Foil traps steam and butter around each ear, giving you softer kernels with much less roasted colour. Some manufacturers permit foil when food holds it securely; others advise against it.
Philips, for example, warns that foil or baking paper can restrict airflow or lift toward the heating element. Check the Philips Airfryer foil and paper guidance, then follow the manual for your own model.
Even when foil is permitted, keep basket vents exposed so hot air can circulate instead of turning the appliance into a sealed steamer.
Spread ½ tablespoon / 7 g butter over each fresh ear and season lightly. This butter replaces the 2 tablespoons used for serving in the main recipe.
Wrap each ear securely without covering the entire basket base.
Air fry at 400°F / 200°C, turning once.
Test the corn at 11 minutes and expect 11–15 minutes.
Open the packet away from your face because hot steam will escape.
For more colour, remove the foil and cook uncovered for another 1–3 minutes.
Add lemon or lime after cooking for the brightest flavour.
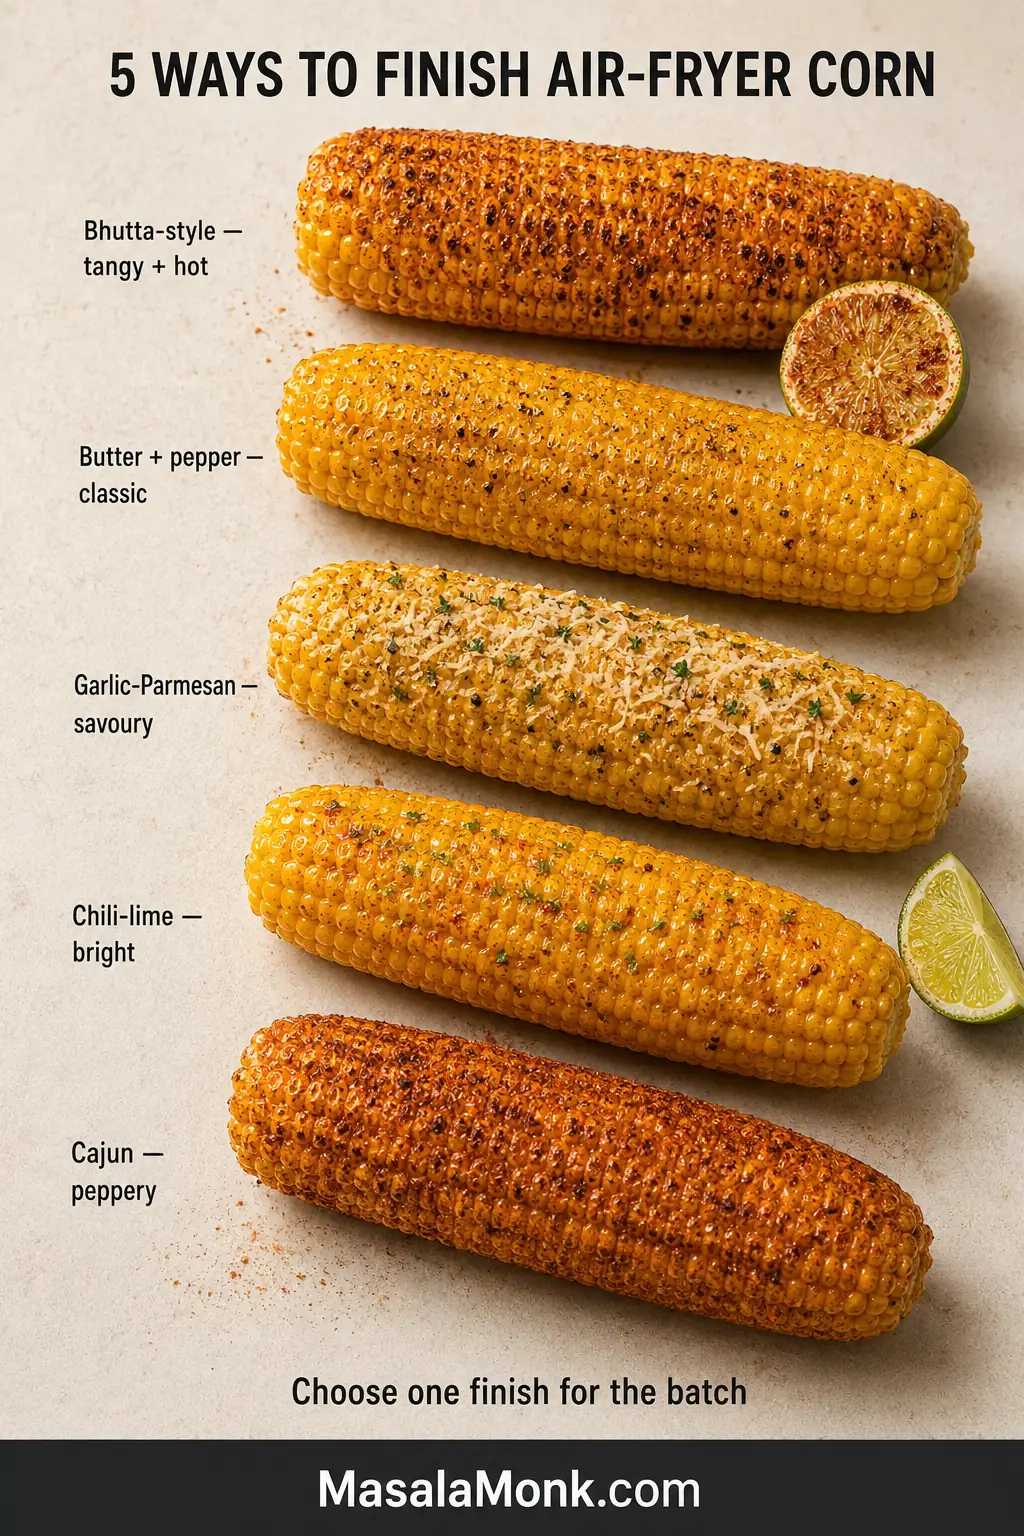
Five Easy Ways to Season the Corn
Keep it buttery and simple when everyone wants something familiar, use chili-lime beside a rich main dish, choose Cajun seasoning for a peppery edge, or reach for lime and chaat masala when the plate needs something sharp and bright.
Before choosing a finish: each variation below seasons four ears and replaces the 2 tablespoons of serving butter in the main recipe. Bhutta-style corn uses no butter unless you choose to add it. When using Parmesan, Cajun seasoning or chaat masala, reduce or omit the salt added before cooking and adjust after tasting.
Bhutta-Style Lime and Chaat Masala
Use: 1 lime, 1 teaspoon chaat masala and ¼ teaspoon red chili powder. Butter is optional.
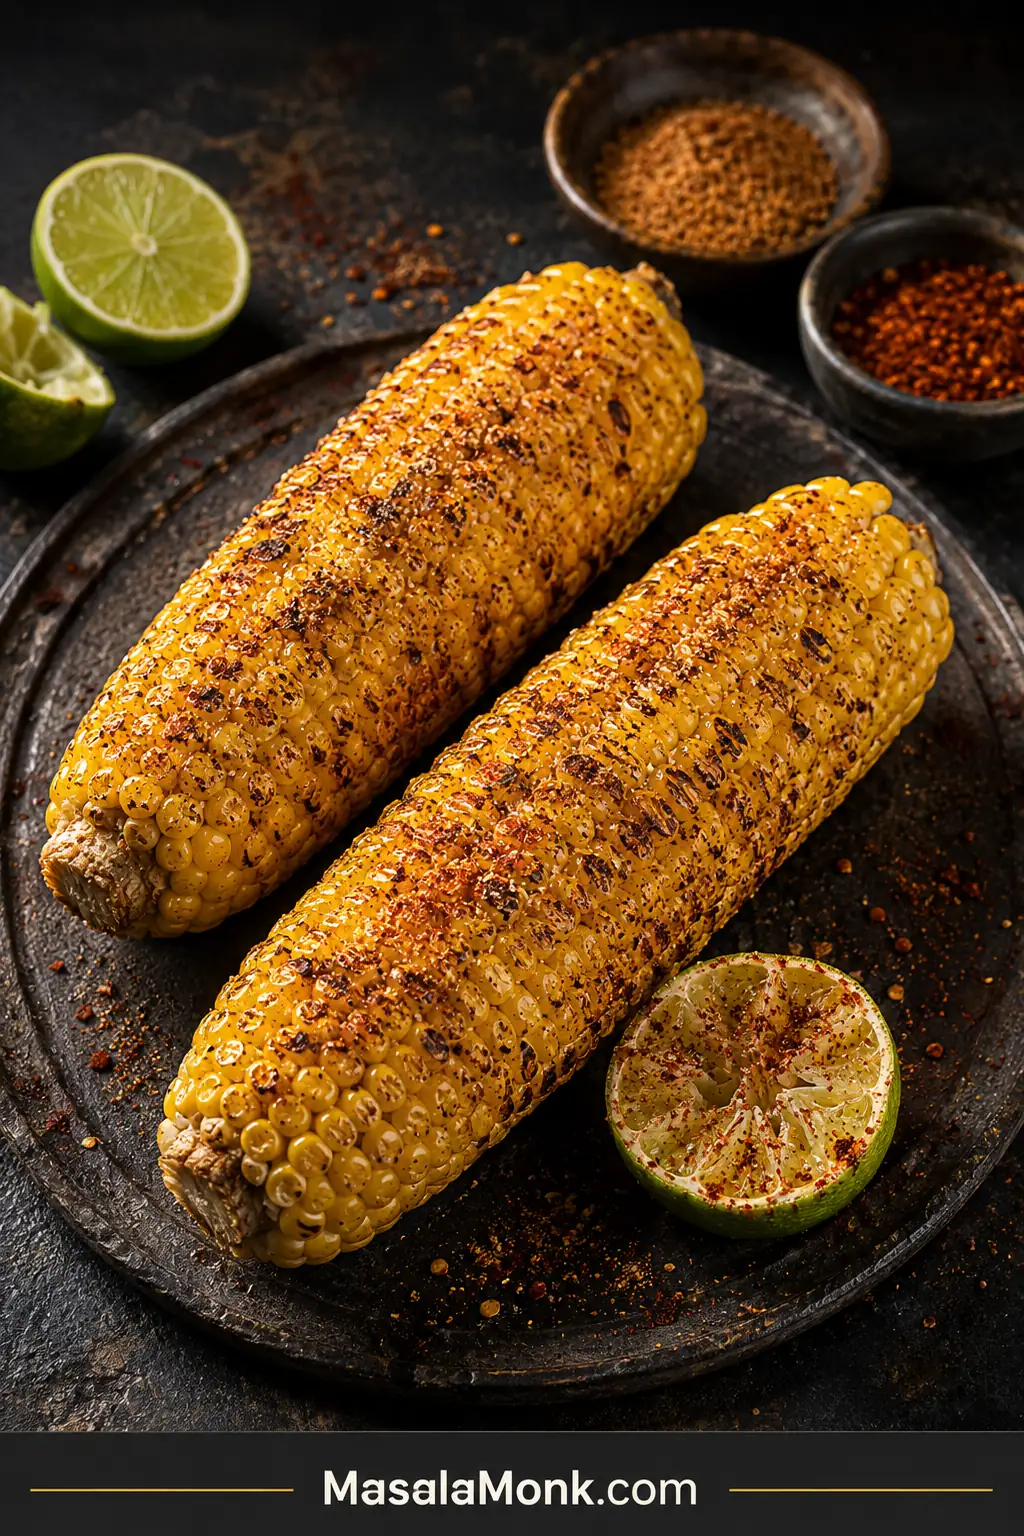
This is the brightest finish in the set—tangy, salty and hot rather than rich and buttery. Place the spices on the cut side of the lime, then rub it over the hot corn. The juice carries the seasoning between the rows.
Apply the lime-and-spice rub after cooking so the citrus stays bright and the damp masala does not scorch against the hot basket.
Classic Butter and Pepper
Use: 2 tablespoons / 28 g melted butter, black pepper and salt to taste.
Brush the butter over the hot corn, add pepper and taste before adding more salt. Simple, sweet and buttery.
Garlic-Parmesan
Use: 2 tablespoons / 28 g melted butter, ½ teaspoon garlic powder, ¼ cup finely grated Parmesan and 1 tablespoon chopped parsley.
Mix the garlic into the butter, brush it over the corn, then add the Parmesan and parsley for a savoury, nutty finish.
Chili-Lime
Use: 2 tablespoons / 28 g melted butter, ½ teaspoon mild chili powder, plus the zest and juice of 1 lime.
Brush with chili butter, then add the lime zest and juice for a bright finish that cuts through richer main dishes.
Cajun Corn
Use: 2 tablespoons / 28 g melted butter and 1–1½ teaspoons Cajun seasoning.
Brush with butter, sprinkle lightly and taste before adding separate salt. The result is warm, peppery and lightly smoky.
What Went Wrong—and How to Fix It
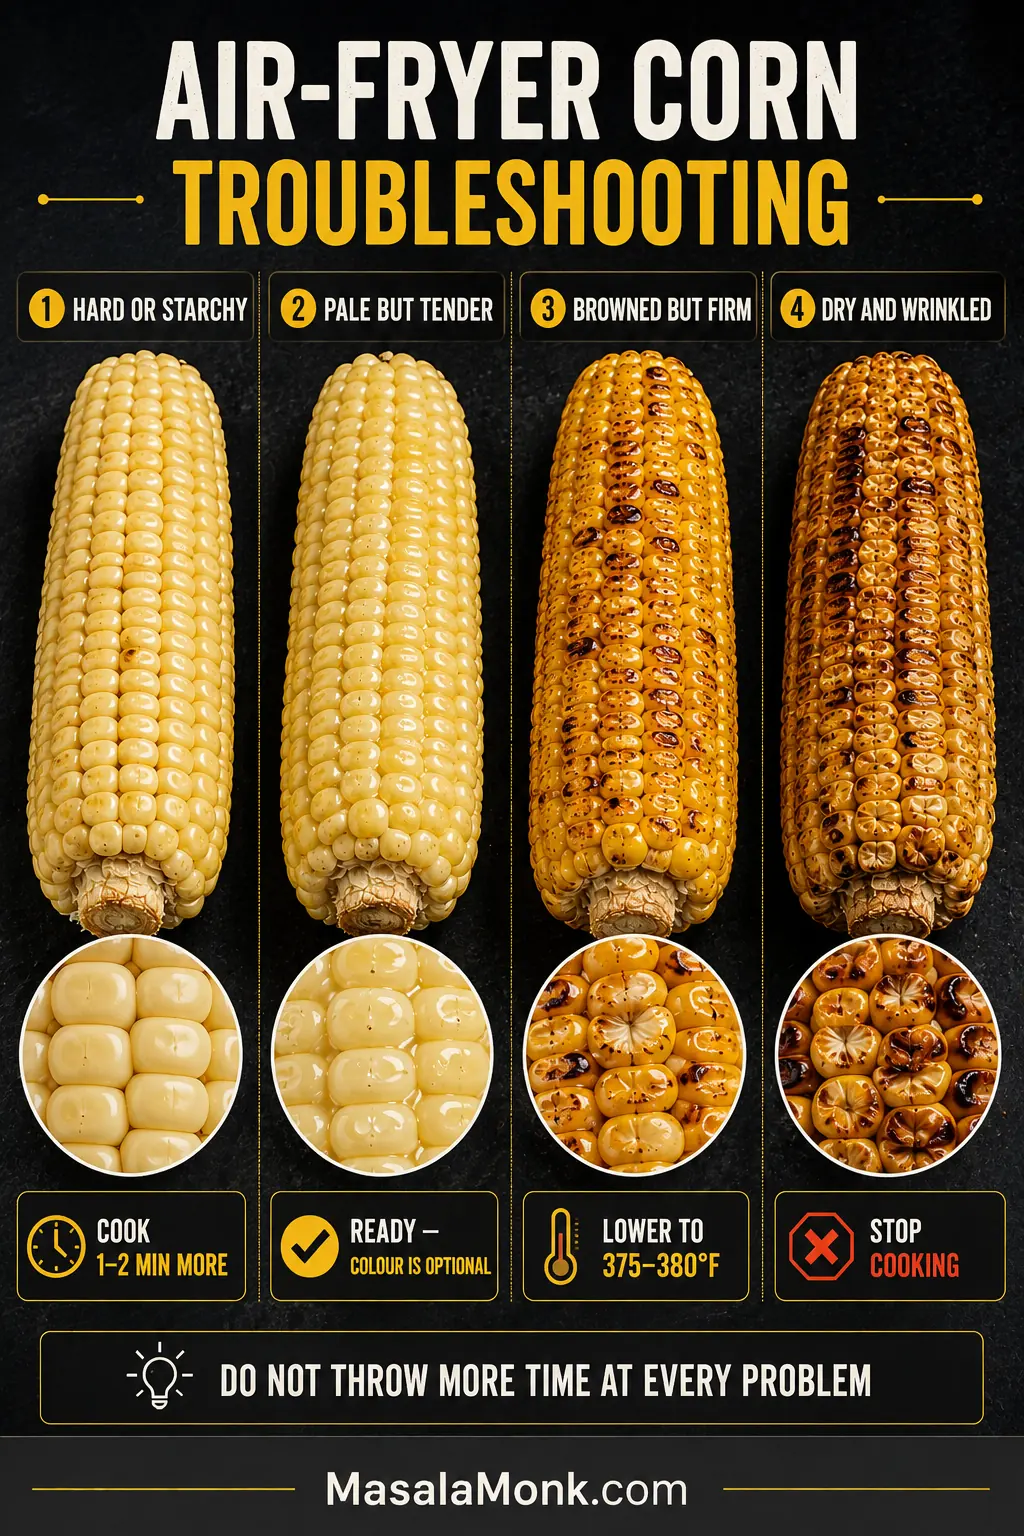
Plump kernels that still feel hard or dense usually need more cooking. Pale but tender corn is ready—add colour only if you want it. Browned but firm corn needs gentler heat. If tender corn still tastes starchy, the ear may simply be older rather than undercooked.
Do not throw more time at every problem. Many batches can still be improved while dinner comes together.
Use the first correction only when the centre is still hard or dense; tender corn that tastes starchy is more likely an age issue than a timing issue.
Texture and Doneness Problems
Air fryer corn troubleshooting for undercooked, pale, browned, dry and starchy kernels
What you see
Why it happened
What to do now
Kernels look plump but remain hard or starchy
Thick ears, a full basket or too little cooking time
Continue in 1–2-minute intervals and test the thickest ear again.
Corn is pale but tender
Wet kernels, foil, a liner or limited airflow
Serve it as it is, or uncover and create more space for another minute when you want deeper colour.
Corn is pale and firm
It needs more cooking and better surface drying
Continue uncovered and roll the ears once more.
The browned side is dark but the centre is firm
The outside heated faster than the middle
Lower the temperature to 375–380°F / 190–195°C and continue in short intervals.
Kernels are dry or wrinkled
Too much time, slim ears or older corn
Remove immediately. Butter adds richness but cannot replace lost moisture.
Kernels look full but still taste starchy
The corn may have been older or less sweet before cooking
Serve with butter and a bright seasoning; more cooking is unlikely to restore sweetness.
Uneven Browning, Seasoning and Smoke Problems
Air fryer corn troubleshooting for uneven cooking, burnt toppings, frozen seasoning and basket smoke
What you see
Why it happened
What to do now
One side is burning
The ear is close to the element or was turned too late
Roll the ear, lower the heat if needed and check more frequently.
Different ears are cooking at different speeds
The batch contains mixed thicknesses
Remove tender ears and leave the thicker ones to continue.
Butter, garlic, cheese or sugar is burning
Delicate ingredients were added too early
Remove badly burnt bits and add a fresh topping after cooking.
Seasoning slides off frozen corn
The icy outside is melting
Warm the corn first, then season it once the ears are hot and the surface has dried.
The basket is smoking
Fat, sugary seasoning or old residue is reaching the base
Stop the air fryer if smoke is heavy or persistent. Let it cool, remove burnt residue or excess fat, and clean the basket before continuing.
Make Ahead, Storage and Reheating
Air fryer corn is best as soon as it leaves the basket, while the kernels are hot and the blistered patches still taste roasted.
Reheat only the portion being served, then refresh it with butter, lime or seasoning rather than repeatedly drying the entire stored batch.
Prepare ahead: shuck the corn earlier in the day and refrigerate it tightly covered so the exposed kernels do not dry out.
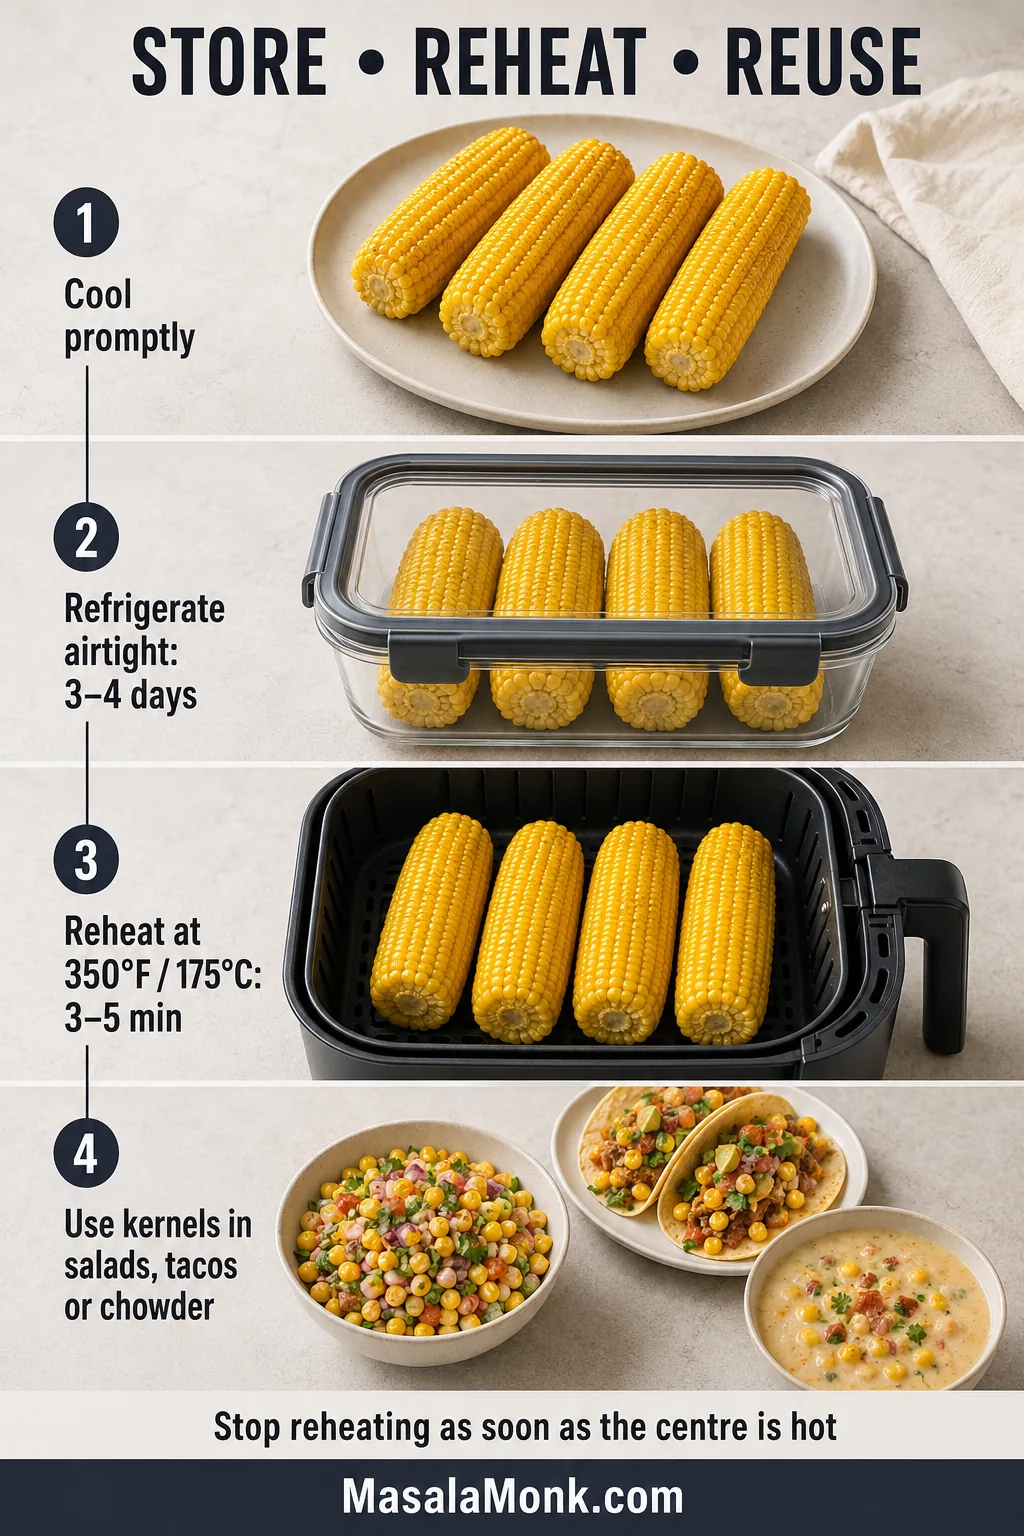
Refrigerate: cool cooked corn promptly and store it in an airtight container for up to 3–4 days.
Reheat: air fry at 350°F / 175°C for 3–5 minutes, checking early.
Serve again: add a little fresh butter after reheating rather than warming the corn in a pool of butter.
Stop as soon as the centre is hot; extended reheating tightens the kernel skins. For broader refrigerator and freezer guidance, see the FoodSafety.gov cold-storage chart.
Have several ears left? Slice off the kernels for salsa, salads, tacos or grain bowls, or turn a larger amount into creamy vegetarian corn chowder.
What to Serve With Air Fryer Corn
For a cookout or summer dinner, make a bowl of crisp homemade coleslaw first and refrigerate it while the meal comes together. Air fry the corn last so the slaw stays cold and crunchy while the ears reach the table hot.
Chili-lime corn works especially well with honey garlic salmon because the lime cuts through the sweet glaze.
For a vegetarian plate, pair bhutta-style corn with a sturdy black bean burger. Lime and chaat masala brighten the burger’s earthy filling.
When one finish will cover the whole batch, use the chart below to match the corn to the meal. For mixed preferences, season individual ears separately after cooking.
Use this chart when all four ears will share one finish; for mixed preferences, season individual ears separately after cooking.
Frequently Asked Questions
Why Do Air-Fryer Corn Recipes Give Such Different Cooking Times?
Ear thickness, basket load, preheating, appliance shape and the desired amount of browning all affect the final time. Treat a published time as a first-check point, then stop when the thickest ear is tender and juicy.
For a single-screen recap, use this guide after identifying the approximate thickness and basket load. It condenses the checkpoints, while tenderness still decides the finish.
A brief early basket check costs less than several unattended extra minutes, especially when slim and thick ears cook together.
Do You Need to Soak Corn Before Air Frying?
No. Soaking adds moisture to the exposed kernels and delays browning. Remove the husks and silk, dry the ears and cook them directly.
Do You Need to Boil or Microwave Corn First?
No. Fresh average ears cook completely in the air fryer. If very thick ears brown before the centre softens, lower the temperature to 375–380°F / 190–195°C and continue in short intervals.
Should You Salt Corn Before or After Air Frying?
A light seasoning before cooking gives the kernels a base layer of flavour. Reduce or omit it when the finish contains Parmesan, Cajun seasoning or chaat masala, then adjust after tasting.
Can You Cook More Than Four Ears?
Cook only as many ears as fit in one layer. For a larger batch, work in rounds and check the second batch slightly earlier because the air fryer is already fully hot.
This basket shows the practical limit: the ears may touch at narrow points, but the fuller middle sections still need open space for moving air.
The narrow ends may touch, but leave breathing room around the fuller middle sections where the ears occupy the most basket space.
Can You Air Fry Corn Without Oil?
Yes. Place dry, shucked ears directly in the basket and follow the fresh-corn timing. The kernels soften normally, though the exposed rows may brown less evenly and dry seasoning will not cling as readily.
Can You Air Fry Corn in the Husk?
Some appliances permit husk-on corn, but loose silk and dry husk can move toward the heating element. Because timing and appliance guidance vary, fully shucked corn is the more predictable choice for this recipe.
Once the rest of the meal is ready, bring the corn out last and let each person add butter, lime or spice at the table. The point is not matching every ear; it is serving each one while the kernels are still hot and juicy.
Serve the ears as soon as they are tender; finishing choices can happen at the table.
Tender First, Char Second
For three or four average fresh ears, begin at 400°F / 200°C and test the thickest ear at eight minutes. Turn once, stop when the kernels are juicy and tender, and add only a short final burst when you want darker roasted patches.
Bring the corn to the table while the butter is still disappearing between the rows. Some ears may be only lightly browned while others are more deeply blistered; tenderness is the part that matters.
How long did your corn need? Share the time below—and add your air-fryer model if you know it.
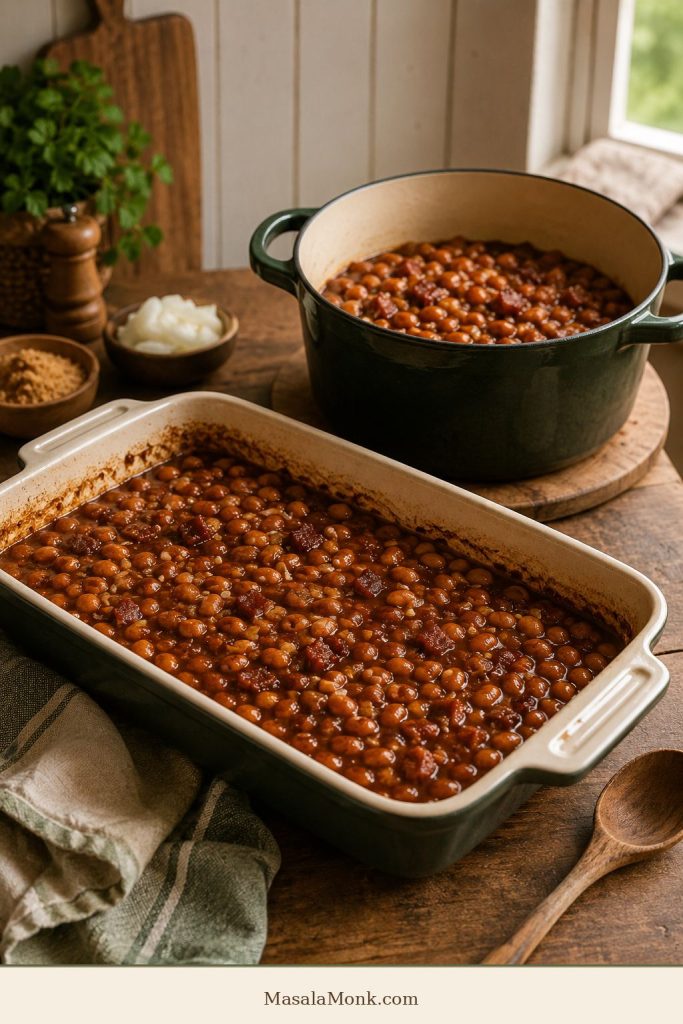
Good baked beans should taste like they took their time, even when you start with cans. The sauce should cling to the spoon, the edges should bubble and darken, and the flavor should land somewhere between sweet, tangy, deeply savory, and just smoky enough to feel slow-cooked.
This baked beans recipe is made for the way people actually cook: with whatever beans are already in the pantry. Plain canned beans, canned baked beans, and dried navy beans can all lead to a thick, balanced, homemade-tasting pan — with bacon, without pork, vegetarian, vegan, lower-sugar, and lower-sodium adjustments built in.
That means fewer store trips, less guessing with sweet canned beans, and dried beans that turn tender before they ever meet the sauce. Brown sugar and molasses bring familiar sweetness, mustard and vinegar add lift, onion and garlic make the beans taste cooked, and the oven gives you those glossy edges people keep sneaking from the pan.
This is the kind of side dish that quietly disappears from the corner of the pan while everyone is still “just tasting.”
For beans as a full dinner instead of a side dish, this bean stew recipe turns canned or cooked beans into a thick, hearty one-pot meal.
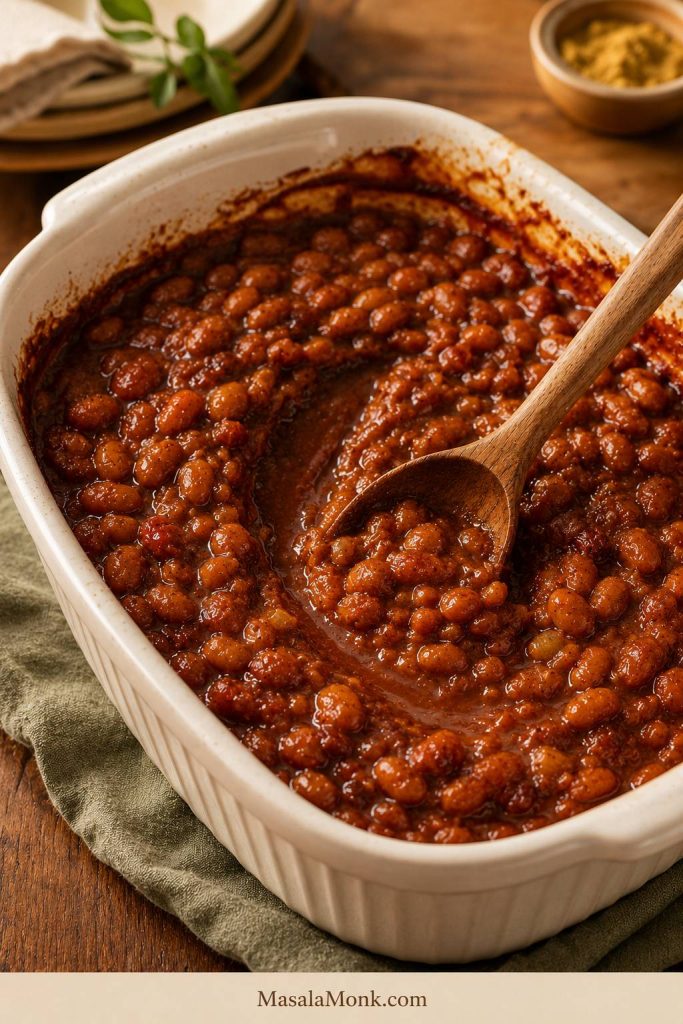
For easy homemade baked beans, start with plain canned white beans, navy beans, Great Northern beans, or cannellini beans. Drain and rinse the beans, then simmer them briefly in a sauce made with sautéed onion, ketchup or tomato sauce, a little barbecue sauce, brown sugar or molasses, mustard, apple cider vinegar, smoked paprika, and optional bacon.
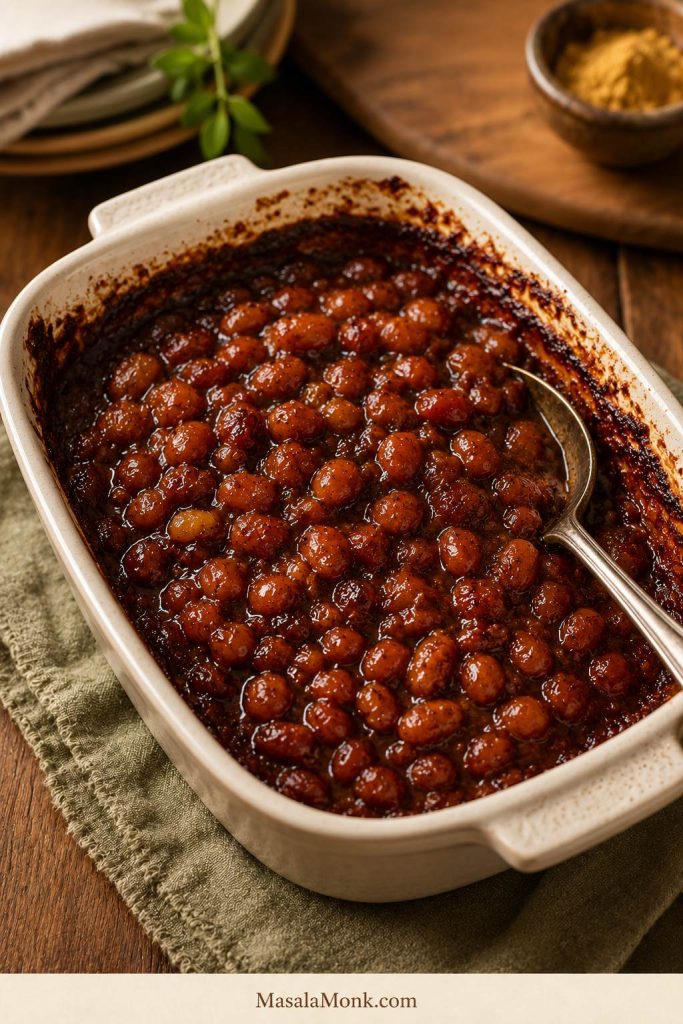
Bake uncovered at 350°F / 175°C for 55 to 70 minutes, until the edges bubble, the sauce darkens, and it coats the beans instead of pooling around them. Rest the beans for 10 to 15 minutes before serving so the sauce can settle into the pan.
Use the spoon test before serving. When the beans hold together in a full scoop, the sauce has reduced enough to rest.
Shortcut note: Starting with canned baked beans? Treat sweetness as an adjustment, not the starting point. Most cans already bring sugar, salt, and sauce; your job is to add onion, tang, cooked flavor, and a better baked texture.
Most reliable beans: Plain canned navy beans, Great Northern beans, cannellini beans, or small white beans
Classic from-scratch beans: Dried navy beans
Quickest shortcut: Canned baked beans, adjusted with onion, mustard, vinegar, cooked flavor, and less sugar
Oven temperature: 350°F / 175°C
Cook time: 55 to 70 minutes for the main canned-bean version
Rest time: 10 to 15 minutes
Dish: 9×13-inch / 23×33 cm baking dish or Dutch oven
Texture cue: Bubbling edges, glossy top, and sauce that slowly settles when spooned
Serving cue: Serve after a short rest, when the sauce has stopped running and starts clinging to the beans
Why This Recipe Works
This recipe works because it does not force you into one starting point. A pantry can of white beans, a can of baked beans, and a bag of dried navy beans can all become a good pan — they just need slightly different handling.
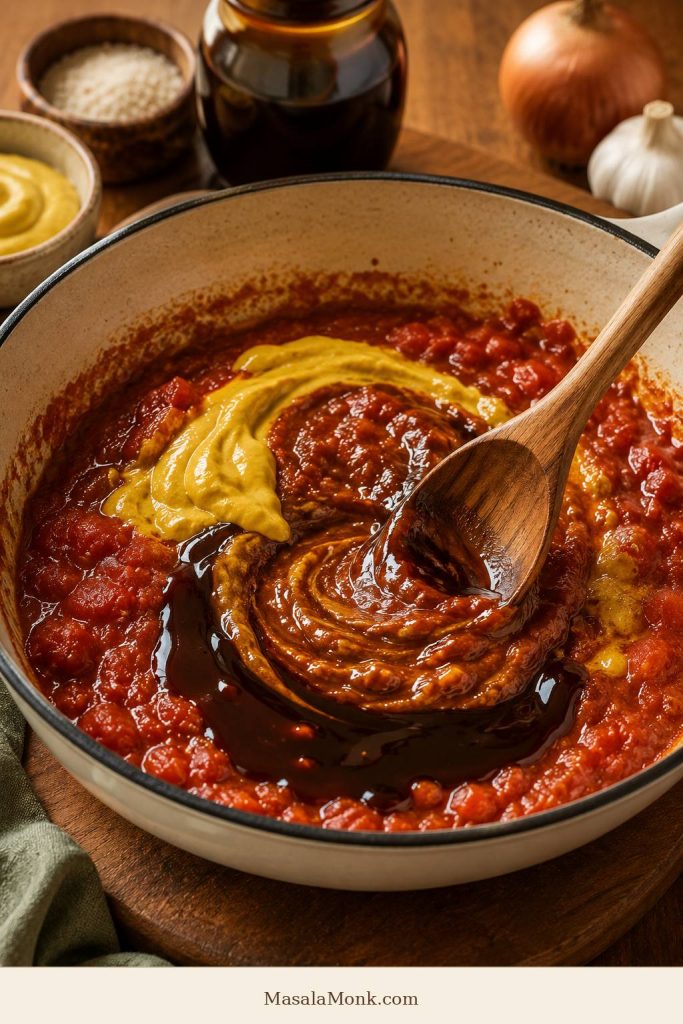
The sauce is layered instead of just sweet. Onion and garlic create a savory base. Ketchup or tomato sauce gives body. Brown sugar and molasses bring that familiar baked-bean flavor. Mustard and vinegar keep the sauce bright. Smoked paprika adds a warm barbecue-style note, especially when there is no bacon in the pan.
Uncovered baking does the slow work. It concentrates the sauce, deepens the flavor, and gives the edges that slightly caramelized finish that makes the beans taste like they have been sitting near the grill for hours.
The baked beans balance test: Before baking, the sauce should taste a little stronger than the finished beans: sweet, tangy, savory, and loose enough to reduce in the oven. If it tastes flat, add mustard, vinegar, or a savory note before adding more sugar.
Canned Beans, Canned Baked Beans, or Dried Beans?
The best starting point is not the same for everyone. A weeknight pan, a potluck shortcut, and a from-scratch weekend batch all need slightly different handling.
Choose your starting point
Choose plain canned beans when you want the easiest homemade-tasting version.
Reach for canned baked beans when you need a fast potluck or cookout shortcut.
Start with dried navy beans when you want the most old-fashioned texture and do not mind extra time.
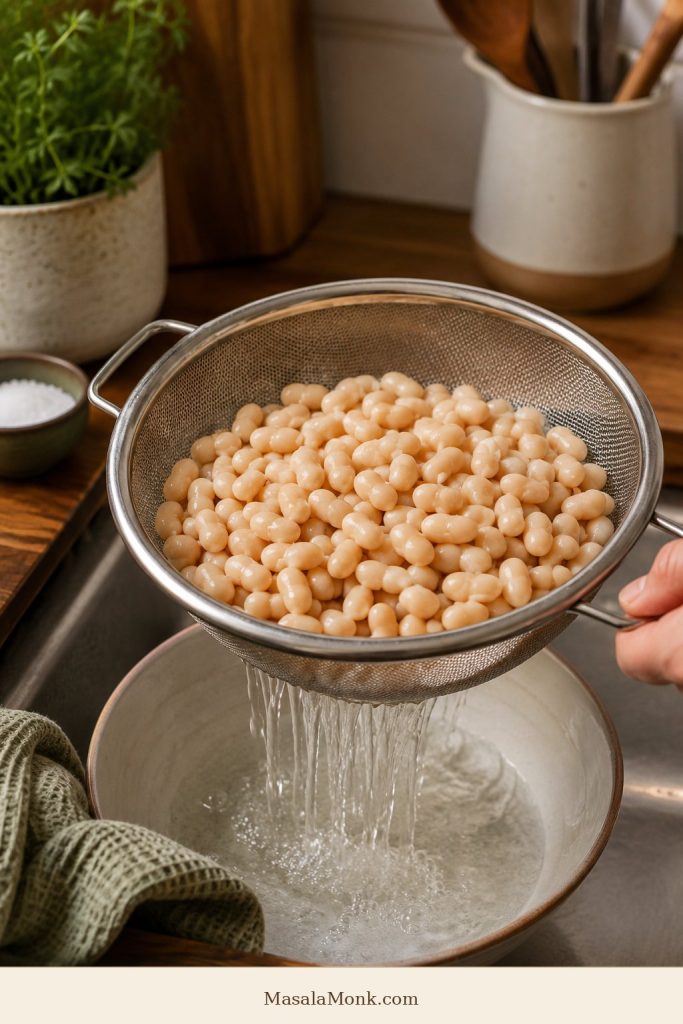
Plain canned white beans give you control. After draining and rinsing, you can build a cleaner baked beans sauce from scratch.
Starting Point
When to Use It
What to Know
Plain canned white beans
Easy homemade flavor
Fast, flexible, and less sweet than canned baked beans. This is the most reliable starting point for this recipe.
Canned baked beans
Fast shortcut
Already sweet and seasoned. Do not rinse them; adjust the sauce instead.
Dried navy beans
From-scratch version
Cook until fully tender before adding tomato, vinegar, molasses, or sugar.
Pork and beans
Classic cookout shortcut
Good with bacon, barbecue sauce, mustard, brown sugar, and a longer uncovered bake.
Cannellini or Great Northern beans
Easy substitute
Larger and creamier than navy beans, but reliable in a homemade sauce.
Pinto beans
BBQ-style variation
Earthier and heartier. Good for barbecue-style beans, potlucks, and mixed-bean versions.
Plain canned beans means cooked beans packed in liquid, usually not sweet. Canned baked beans means beans already packed in a seasoned tomato-style sauce. Treat them differently.
For this recipe, plain canned white beans are the easiest starting point. The beans are already tender, but the flavor is still yours to build — sweetness, tang, salt, depth, and final texture all stay in your hands.
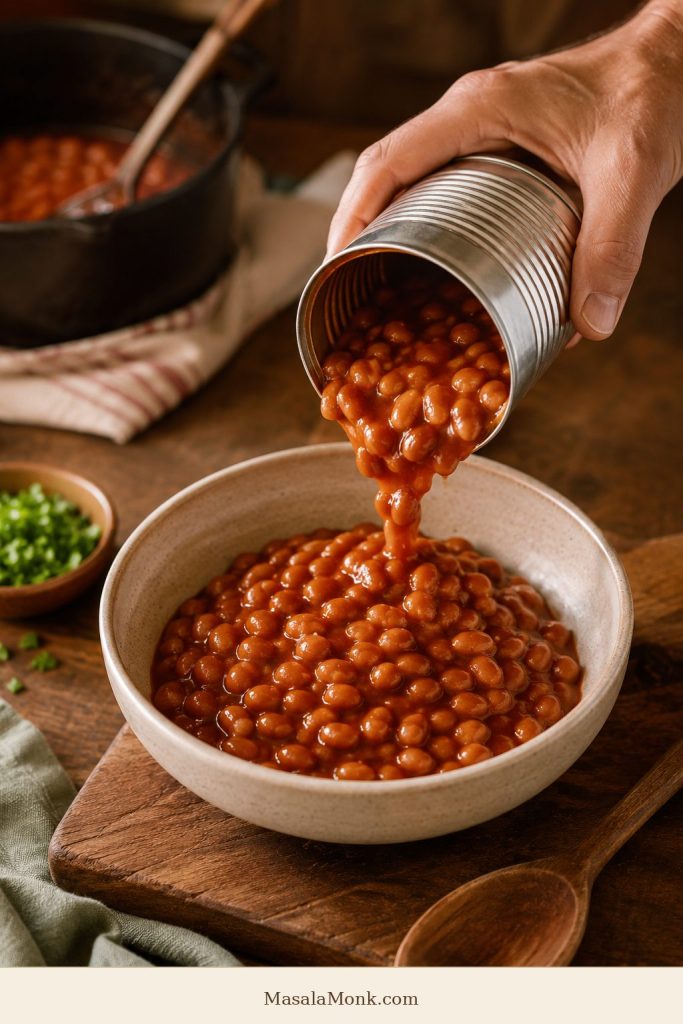
Canned baked beans are already sweet and sauced. Upgrade them with onion, acid, smoke, and oven time instead of more sugar.
Which Beans Work Best for Baked Beans?
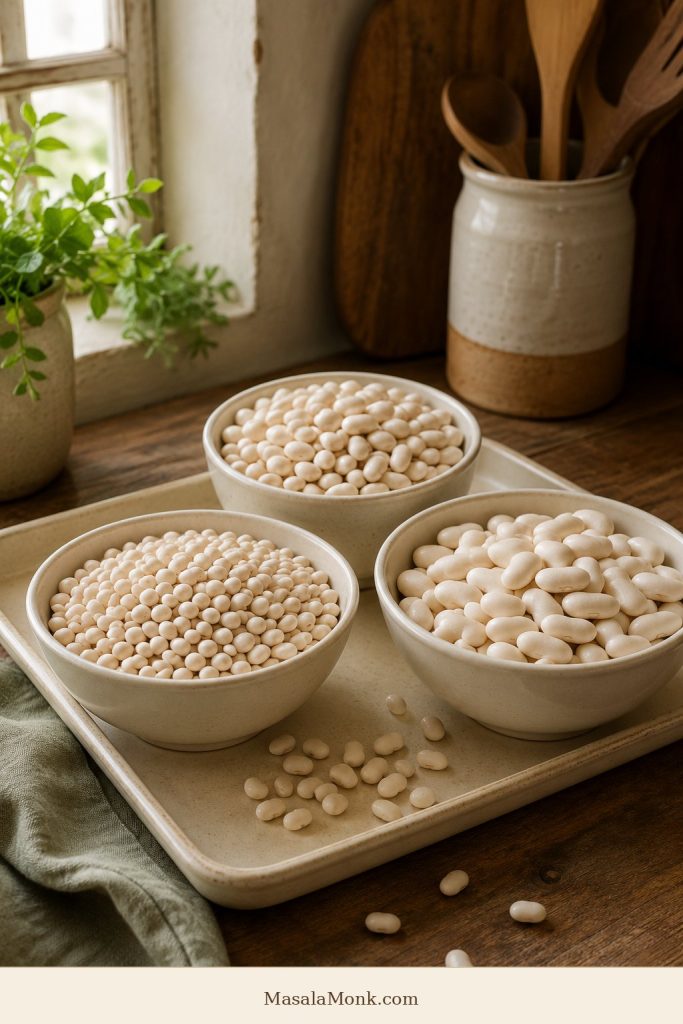
The classic bean for baked beans is the navy bean, also called a haricot bean in some places. It is small, creamy, and holds its shape well in a thick sauce.
The good news is that baked beans are forgiving. The exact bean matters less than tenderness, sauce balance, and enough oven time.
Navy beans / haricot beans: the classic baked bean choice.
Great Northern beans: slightly larger, creamy, and easy to use.
Cannellini beans: larger and softer, but very convenient.
Pinto beans: good for barbecue-style baked beans.
Mixed beans: better for potluck or barbecue-style versions than classic baked beans.
For the cleanest homemade flavor, use plain canned navy beans or Great Northern beans. For the most traditional from-scratch version, use dried navy beans. All you have is cannellini or small white beans? Use them. As long as the beans are tender and the sauce is balanced, the pan will still work.
Navy beans are traditional, but Great Northern and cannellini beans also work. Choose white beans that soften well and hold sauce.
For a more complete rice-and-beans meal, this red beans and rice recipe is a better fit than a sweet-savory baked bean side.
Which Pan or Pot Works Best?
The dish changes how quickly the sauce settles around the beans. Wide baking dishes give more surface area, so the sauce tightens faster. Deeper casseroles keep the beans saucier, while a Dutch oven lets you sauté, simmer, and bake in the same pot.
9×13-inch / 23×33 cm baking dish: the most reliable choice for a glossy, spoonable sauce because it gives the beans more surface area.
Dutch oven: best for one-pot cooking from stovetop to oven.
2–3 quart casserole dish: works well, but keeps the beans saucier and may need more time.
Slow cooker: useful for keeping baked beans warm, but it will not give the same caramelized edges.
Thin metal pan: not ideal for long baking because sugary sauce can scorch at the edges or bottom.
Choose the 9×13 dish for a spoonable, glossy sauce. A Dutch oven is better for one-pot convenience. For parties, bake the beans first, then keep them warm in a slow cooker. Need a full slow-cooker beans-and-sausage dinner? Use this slow cooker sausage casserole recipe.
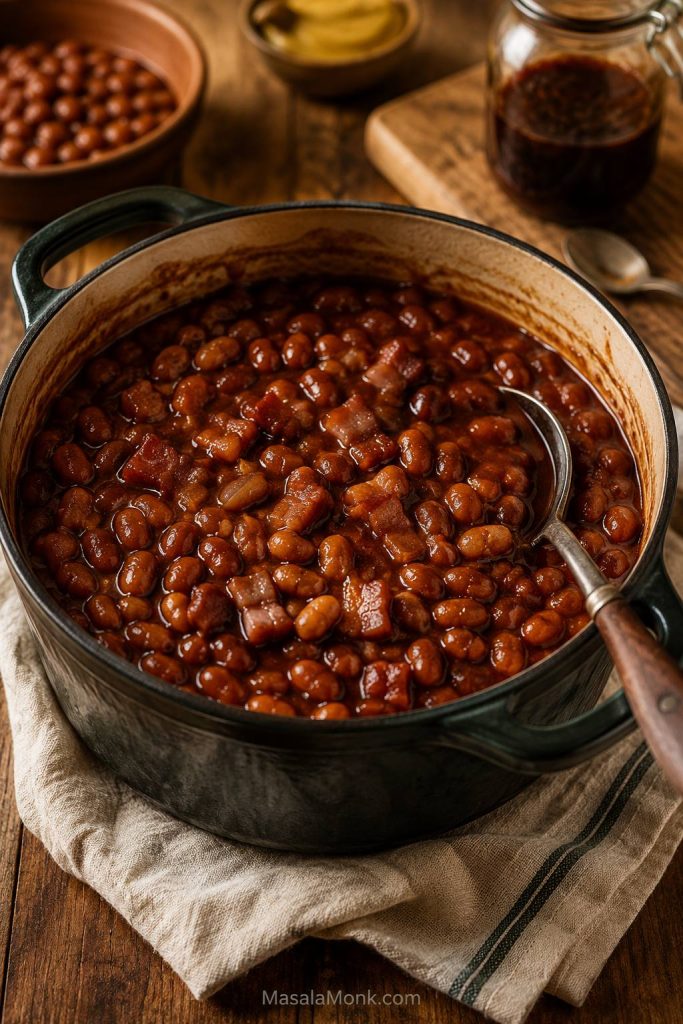
The pan changes the result. A wide dish reduces sauce faster, while a deeper Dutch oven keeps baked beans softer and saucier.
Ingredients You’ll Need
This recipe makes one 9×13-inch pan, about 8 to 10 servings.
Beans
Use 3 cans of plain white beans, 15 oz / 425 g each, drained and rinsed. Navy beans, Great Northern beans, cannellini beans, or small white beans all work.
If your cans are 400 g / 14 oz, use 3 cans for the same sauce ratio. Use 4 cans only for a larger batch, and increase the sauce by about one-quarter so the beans do not turn out under-sauced.
Onion and Garlic
Onion gives the sauce its savory base. Garlic adds depth. This is where the canned-bean flavor starts becoming cooked, not just mixed.
Ketchup, Tomato Sauce, or Tomato Paste
Ketchup gives sweetness, tang, and body. Tomato sauce gives a less sweet base. Tomato paste is optional, but useful when you want the sauce to cling better with less added sugar.
Barbecue Sauce
A little barbecue sauce adds cookout flavor and roundness. Use it as a background note, not the whole personality of the dish.
Brown Sugar and Molasses
Brown sugar gives quick sweetness. Molasses gives deeper, darker baked-bean flavor. Together, they create the old-fashioned sweetness people expect from baked beans. Use both for a classic sweet-savory sauce, or reduce the brown sugar for a less sweet pan.
Mustard and Vinegar
Mustard and vinegar keep the sauce balanced. They should not make the beans sour. They should make the sweetness taste brighter and less heavy. This is the difference between beans that taste flat and beans people keep spooning back onto the plate.
Smoked Paprika
Smoked paprika gives a warm, savory edge, especially useful when you are making baked beans without bacon or pork.
Worcestershire, Soy Sauce, or Tamari
A small amount adds rounded flavor. Standard Worcestershire sauce often contains anchovies, so use vegetarian Worcestershire, soy sauce, or tamari for vegetarian or vegan baked beans. A little goes a long way, especially once the sauce reduces.
Build the sauce in layers: tomato for body, mustard for brightness, molasses for depth, and spice for a slow-cooked finish.
Bacon, Optional
Bacon adds salt, fat, and a savory edge. It is good, but not required. For no-pork baked beans, use olive oil or butter and build flavor with smoked paprika, mustard, vinegar, and a little vegetarian Worcestershire, soy sauce, or tamari.
Important: Starting with canned baked beans instead of plain canned beans? Taste before adding brown sugar or molasses.
What the Sauce Should Look Like
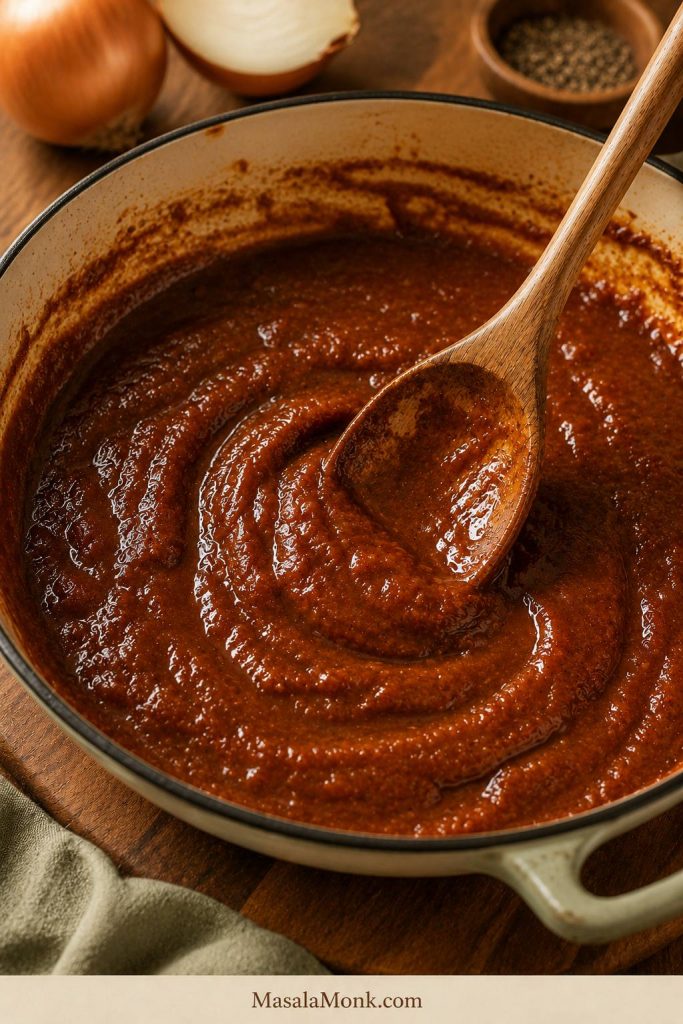
Baked beans are simple, but the texture matters. Too loose, and they taste like beans floating in sauce. Too dry, and they feel heavy. Aim for a sauce that coats the beans, bubbles at the edges, and firms up slightly as it rests.
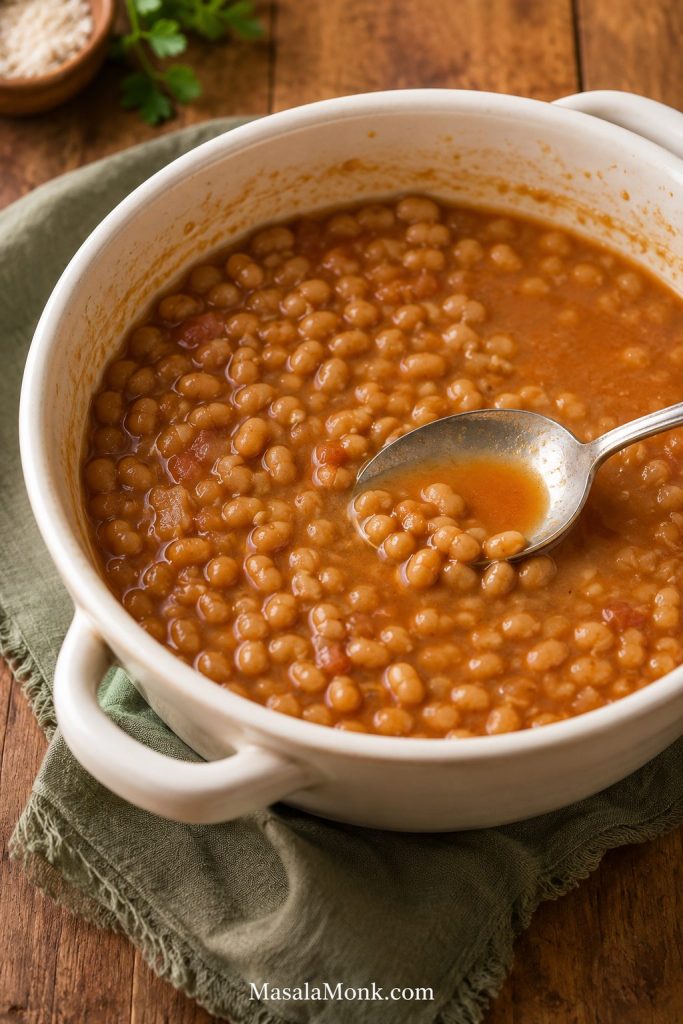
A loose-looking pan halfway through baking is normal. The beans need room to bake into the sauce, and the final stretch plus the rest time are where the sauce turns spoonable.
Texture cues by stage
Stage
What You Should See
What It Means
Before baking
The beans look saucy and slightly loose.
The oven will reduce the sauce, so do not start with a dry mixture.
Halfway through baking
The edges bubble first and the top starts to darken slightly.
Stir once if the edges are reducing much faster than the center.
At the end
The surface looks glossy and the sauce no longer pools like liquid.
The beans are nearly ready. The sauce will cling better after resting.
After resting
A spoon leaves a slow trail through the beans.
This is the best serving texture.
If the sauce looks too thick before baking, add a splash of water, stock, or bean cooking liquid. If it looks watery near the end, keep baking uncovered and let the pan sit before judging the final texture. A little looseness at the end is fine; beans that look perfect the second they leave the oven can become too thick after resting.
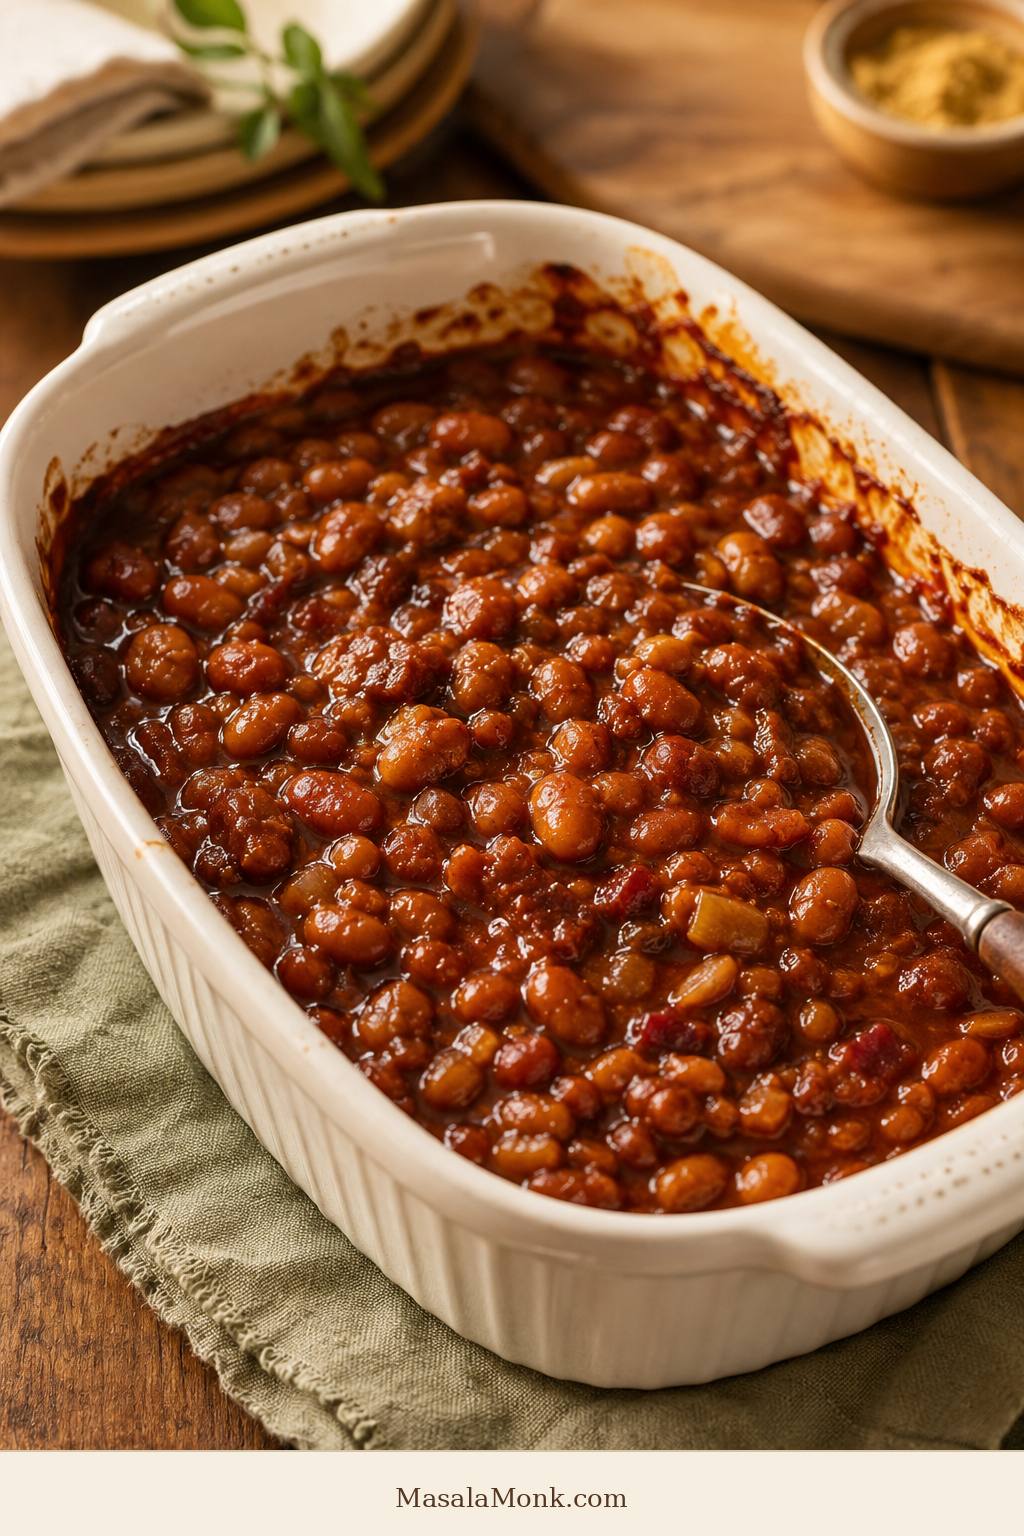
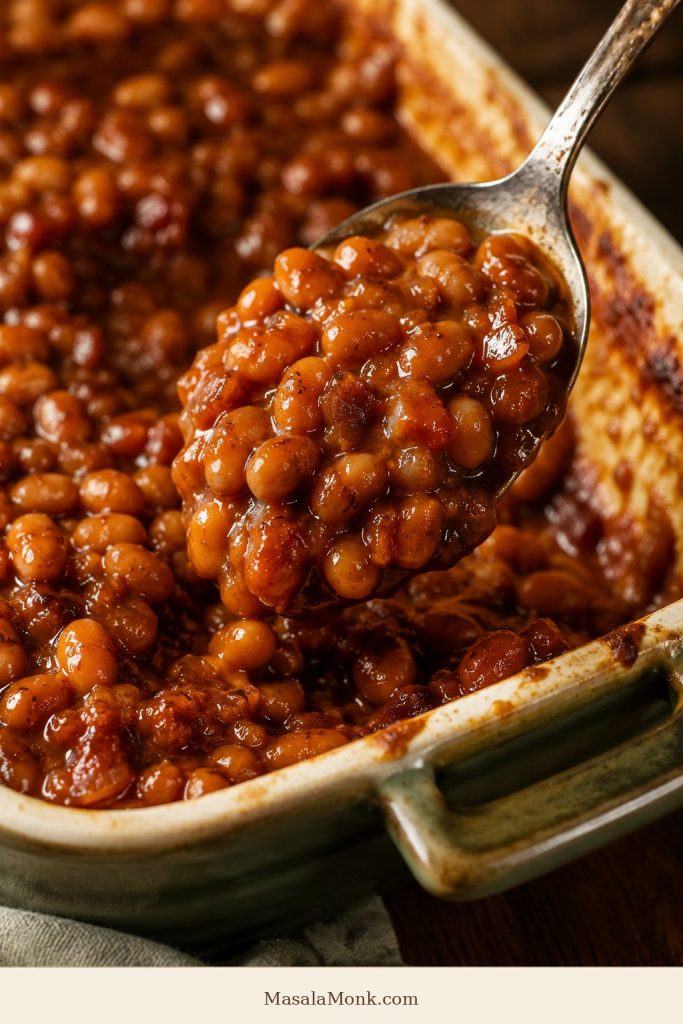
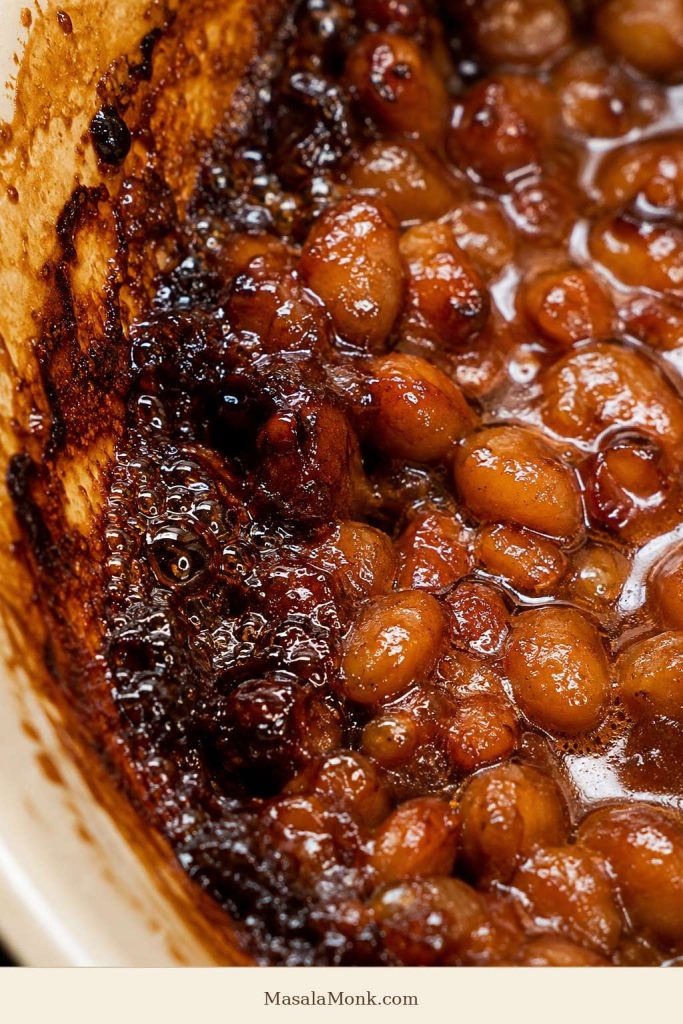
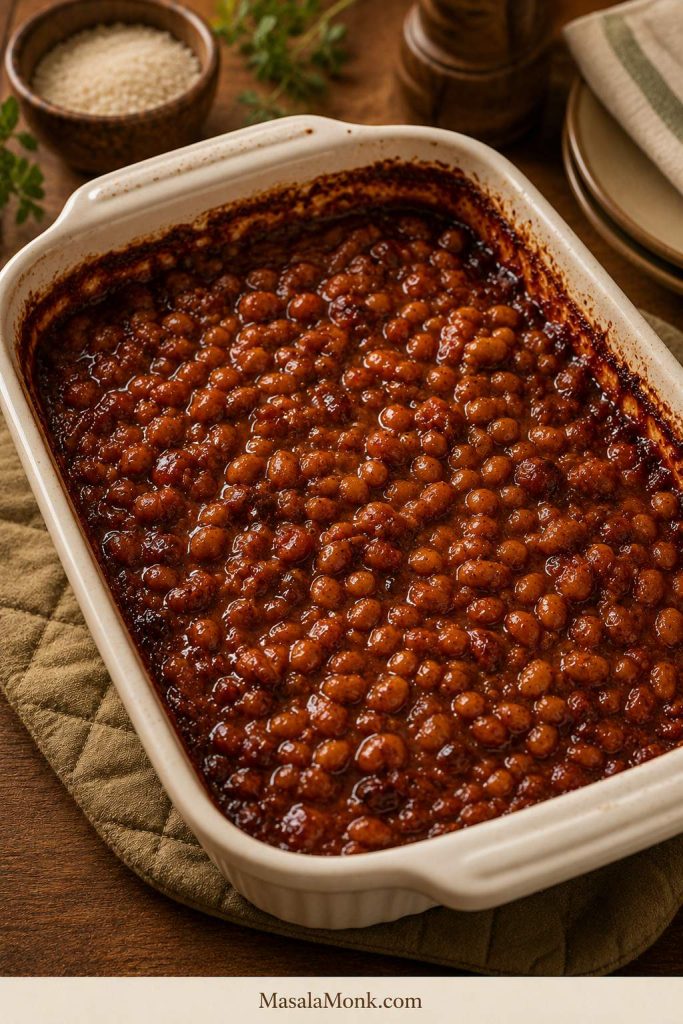
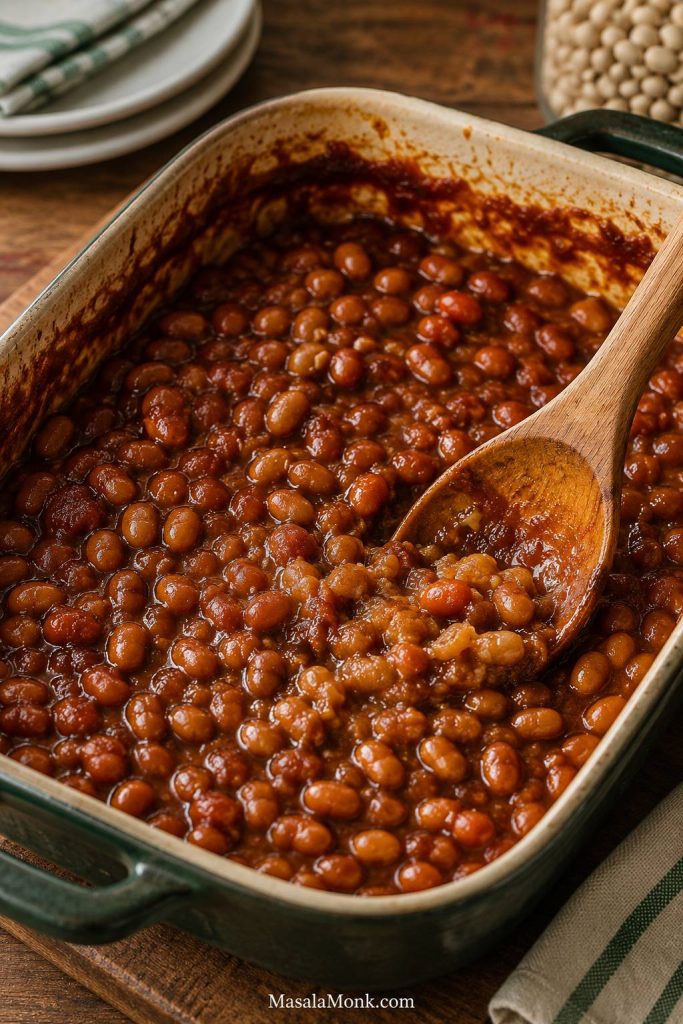
Bubbling edges mean the sauce is concentrating. As the sides darken slightly, the baked beans move from saucy to properly baked.
How to Make Baked Beans With Canned Beans
Once the beans and pan are sorted, the method is simple: build flavor in a skillet, let the oven do the slow work, then give the pan a short rest before serving.
1. Heat the Oven
Preheat the oven to 350°F / 175°C. Use a 9×13-inch / 23×33 cm baking dish for more surface area, or a Dutch oven to sauté and bake in the same pot.
2. Cook the Bacon, If Using
If using bacon, cook 4 to 6 slices in a skillet until partly crisp. Remove the bacon, chop it, and keep about 1 to 2 tablespoons of the drippings in the pan. If skipping bacon, heat 2 tablespoons of olive oil, butter, or another cooking fat instead.
3. Sauté the Onion and Garlic
Add 1 finely chopped medium onion and cook for 5 to 7 minutes, until soft and lightly golden. Add 2 minced garlic cloves and cook for another 30 seconds.
This step is small, but it changes the whole dish. It makes the beans taste cooked instead of simply mixed.
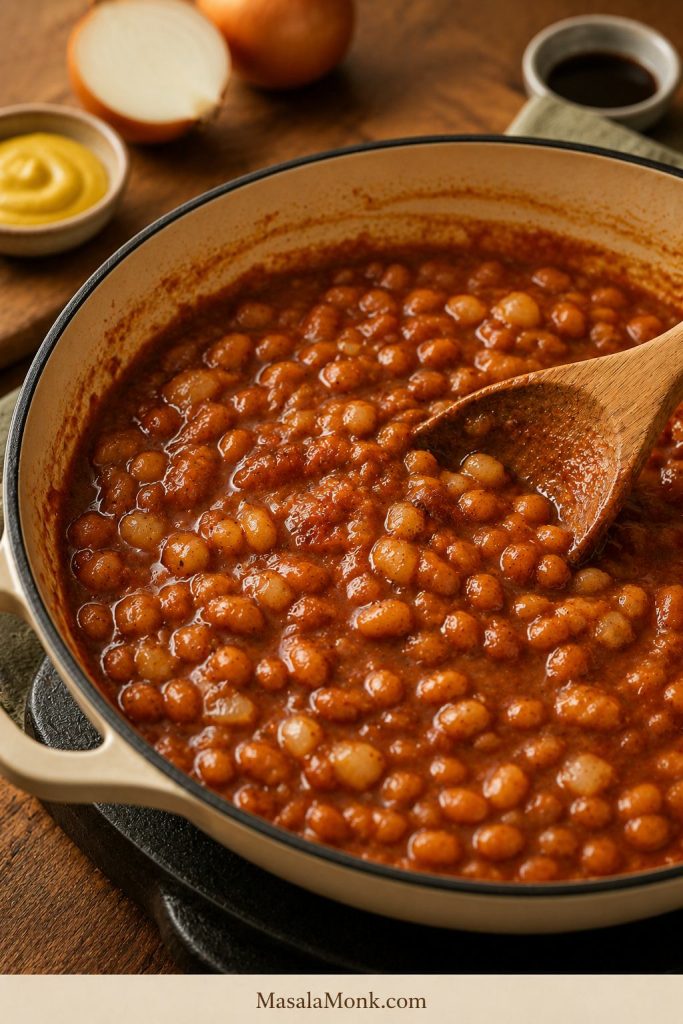
Start with onion when you want homemade flavor. This quick sauté gives canned or plain beans a savory base before the sauce goes in.
4. Build the Sauce
Stir in ketchup or tomato sauce, barbecue sauce, brown sugar, molasses, mustard, vinegar, smoked paprika, and black pepper. Tomato paste makes the sauce thicker and less sweet. Worcestershire, soy sauce, or tamari gives the pan more body when the flavor tastes flat.
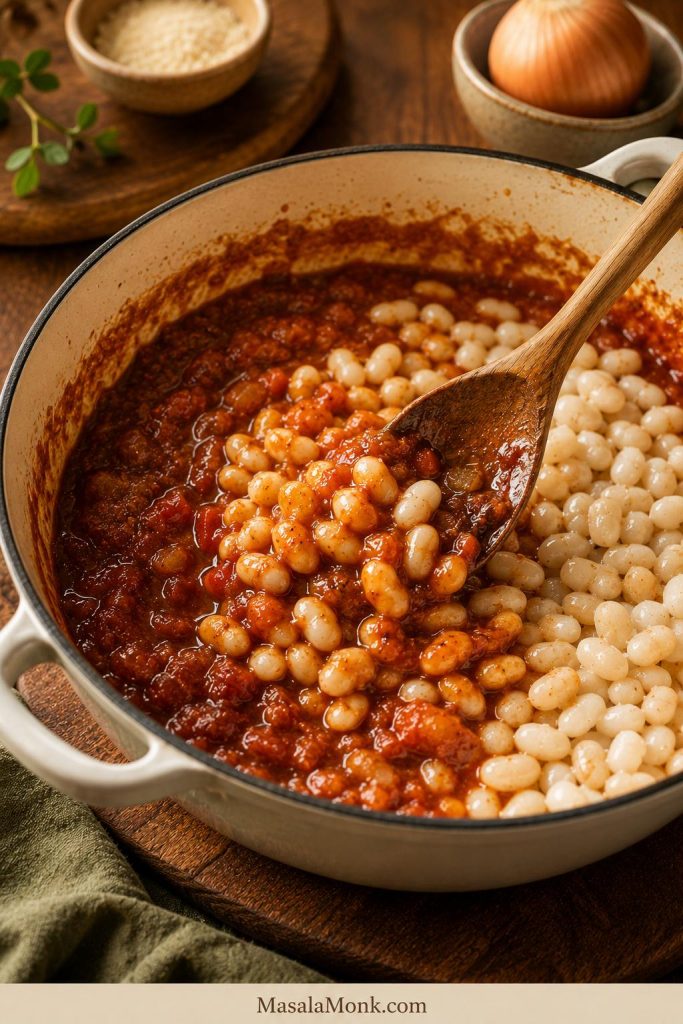
Loosen the sauce with ¼ to ⅓ cup / 60 to 80 ml water, stock, or bean cooking liquid if it looks too tight before baking. Let it bubble for 2 to 3 minutes so everything comes together. Hold back extra salt until after the beans have baked and the sauce has concentrated.
Before adding beans, check the sauce on the spoon. It should taste bold now because the beans will soften the flavor later.
5. Add the Beans
Stir in the drained and rinsed beans gently so they are coated in the sauce. Taste the sauce before baking. It should be sweet, tangy, savory, and slightly stronger than you want the finished dish to be, because the beans will mellow it.
Fold gently at this stage. The beans should stay mostly whole while the sauce coats them and prepares to reduce in the oven.
6. Bake Uncovered
Transfer the beans to the baking dish. Scatter the chopped bacon over the top if using. Bake uncovered for 55 to 70 minutes, until the edges are bubbling and the sauce has tightened around the beans. Stir once around the halfway point if the edges are getting much darker than the center.
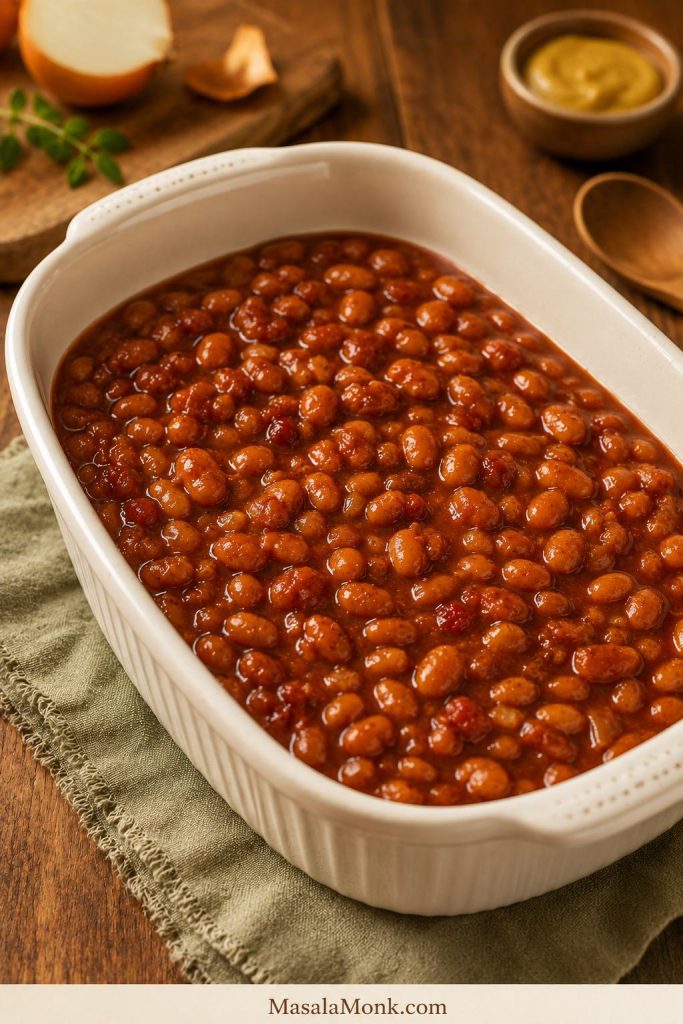
Before baking, the mixture should look looser than the final dish. That extra sauce protects the beans while the oven reduces it.
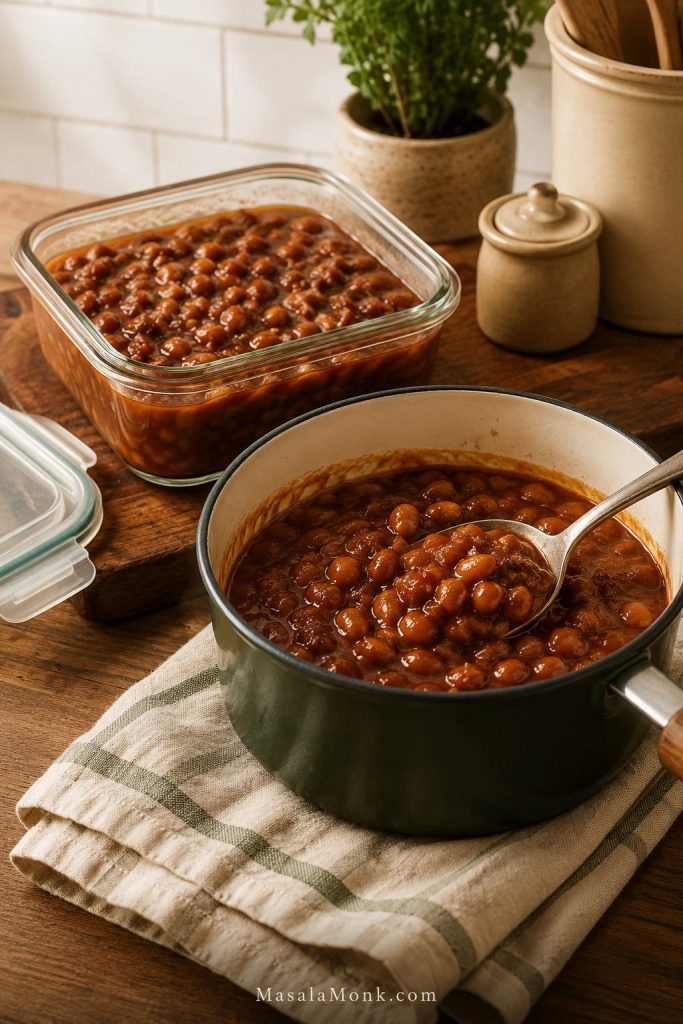
The pan should still look saucy when it goes into the oven. Uncovered heat will reduce the liquid, darken the edges, and turn the mixture into proper baked beans.
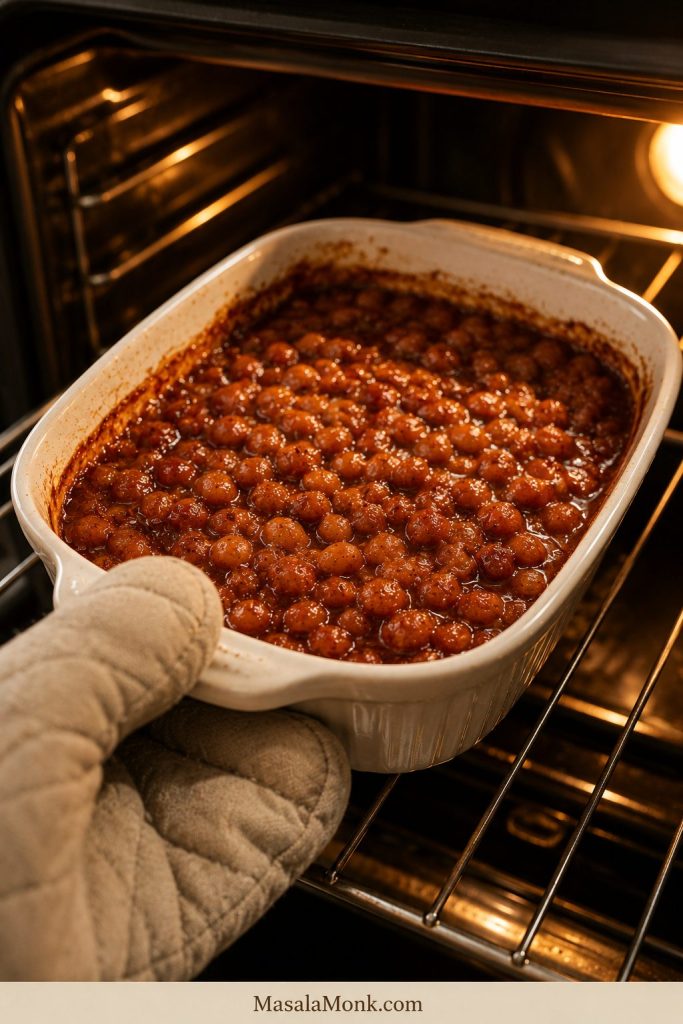
Uncovered oven time is where the recipe changes. The sauce thickens, the edges darken, and the flavors settle into the beans.
The edges usually tell you first. They bubble, darken, and start to look sticky before the center fully catches up.
When the pan is bubbling and the edges look darker, stop before it dries out. Resting will finish thickening the sauce.
If the beans still look a little saucy at 45 minutes, that is normal. The final stretch of baking and the short rest after the oven usually bring the sauce together.
7. Rest and Adjust
Let the baked beans rest for 10 to 15 minutes before serving. This is when the sauce stops looking separate and starts tasting settled. Taste after resting, then adjust with a little more vinegar, mustard, black pepper, or salt if needed.
After resting, drag a spoon through the pan. A slow trail means the baked beans are thick enough for serving.
Doneness cue: The beans are ready when the edges are bubbling, the top looks glossy, and the sauce slowly settles back when you drag a spoon through it.
Recipe Card: Easy Homemade Baked Beans
Tender white beans baked in a sweet-savory tomato-molasses sauce with onion, mustard, vinegar, smoked paprika, and optional bacon. Start with the main canned-bean version below, then use the notes for canned baked beans, dried navy beans, vegetarian, vegan, low-sugar, low-sodium, and no-pork adjustments.
Prep Time 15 minutes
Cook Time 55 to 70 minutes
Rest Time 10 to 15 minutes
Total Time About 1 hour 30 minutes
Servings 8 to 10
Times are for the canned-bean version. The dried-bean version needs soaking and simmering time before baking.
Equipment
9×13-inch / 23×33 cm baking dish or Dutch oven
Large skillet
Spoon or spatula
Foil, optional
Ingredients
Beans and Base
3 cans plain white beans, 15 oz / 425 g each, drained and rinsed, or 3 cans white beans, 400 g / 14 oz each, drained and rinsed
2 tablespoons olive oil, butter, or bacon drippings
1 medium onion, finely chopped
2 garlic cloves, minced, or ½ teaspoon garlic powder
Sauce
½ cup / 120 ml ketchup or tomato sauce
¼ cup / 60 ml barbecue sauce
¼ cup / 50 g brown sugar
2 tablespoons molasses or maple syrup
2 tablespoons yellow mustard or Dijon mustard
1 tablespoon apple cider vinegar, plus more to taste
1 teaspoon smoked paprika
½ teaspoon black pepper
¼ to ⅓ cup / 60 to 80 ml water, stock, or bean cooking liquid, as needed
Optional Flavor Boosters
1 tablespoon tomato paste, for a thicker sauce
1 teaspoon Worcestershire sauce, soy sauce, or tamari
⅛ teaspoon liquid smoke, optional; use up to ¼ teaspoon only for a stronger smoky flavor
Salt, added carefully at the end, to taste
Optional Bacon
4 to 6 slices bacon
Instructions
Preheat the oven to 350°F / 175°C.
If using bacon, cook it in a skillet until partly crisp. Remove, chop, and set aside. Keep 1 to 2 tablespoons of the drippings in the pan. If skipping bacon, heat olive oil or butter instead.
Add the onion and cook for 5 to 7 minutes, until soft and lightly golden. Add the garlic and cook for 30 seconds.
Stir in the ketchup or tomato sauce, barbecue sauce, brown sugar, molasses, mustard, vinegar, smoked paprika, and black pepper. Add tomato paste, Worcestershire, soy sauce, tamari, or liquid smoke if using. Add a splash of water, stock, or bean cooking liquid if the sauce looks too tight. Do not add extra salt yet unless you are sure your beans and sauces are unsalted.
Stir in the drained beans gently until coated.
Transfer to a 9×13-inch / 23×33 cm baking dish or keep in a Dutch oven. Scatter bacon over the top if using.
Bake uncovered for 55 to 70 minutes, until bubbling at the edges and glossy. Stir once if the edges are getting darker faster than the center.
Rest for 10 to 15 minutes before serving. Taste and adjust with a little more vinegar, mustard, black pepper, or salt if needed.
Notes
Bean starting points
Balance test: Before baking, the sauce should taste sweet, tangy, savory, and slightly stronger than the finished beans.
Canned baked beans: Use 2 large cans, about 28 oz / 794 g each. Do not rinse them. Start with no extra sugar; add onion, mustard, vinegar, smoked paprika, and a little barbecue sauce.
Dried beans: For a batch close to the main recipe, use 12 oz / 340 g dried navy beans. Soak overnight, simmer until creamy, then sauce and bake. With 1 lb / 454 g dried beans, increase the sauce by about one-third.
Adjustments
Vegetarian baked beans: Skip bacon and use olive oil or butter. Add smoked paprika, mustard, vinegar, and vegetarian Worcestershire or soy sauce for rounded flavor.
Vegan baked beans: Use olive oil, maple syrup or molasses, smoked paprika, tomato sauce, mustard, vinegar, and tamari or soy sauce. Check that your barbecue sauce is vegan.
Low-sugar baked beans: Reduce brown sugar by half, use tomato sauce instead of ketchup, and balance the sauce with mustard, vinegar, tomato paste, and smoked paprika.
Low-sodium baked beans: Rinsed plain beans are easier to control than canned baked beans. Use low-sodium tomato sauce and salt only at the end.
Salt control: Bacon, canned baked beans, Worcestershire, soy sauce, tamari, and salted beans can all add salt, so taste before adding more.
Thicker baked beans: Bake uncovered longer, use a wider dish, or mash a few spoonfuls of beans and stir them back in.
Storage: Refrigerate for 3 to 4 days or freeze for up to 3 months.
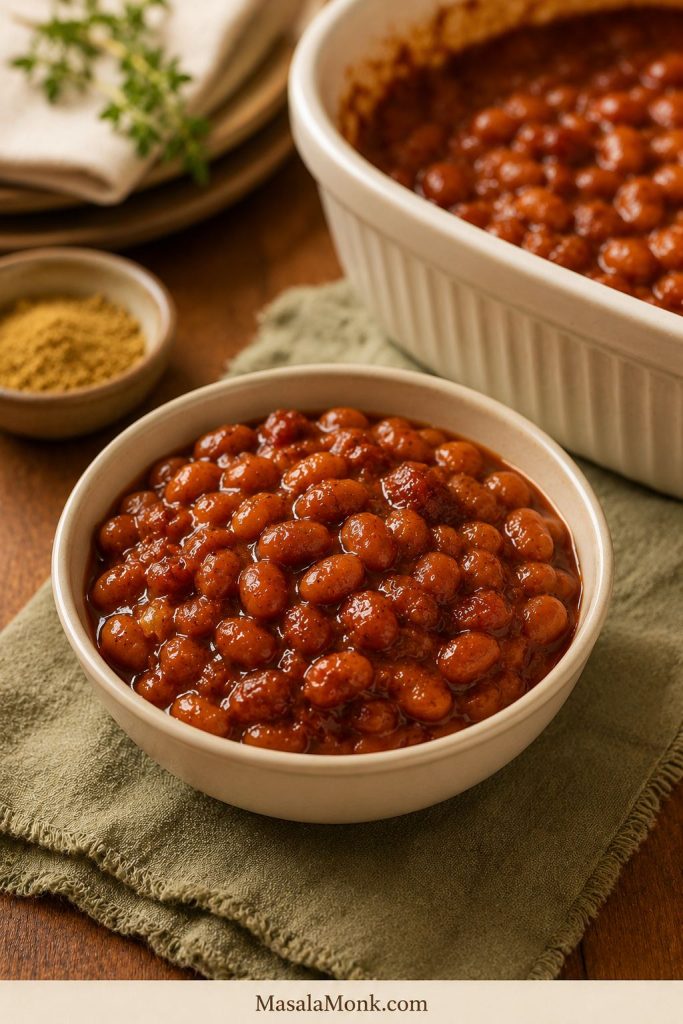
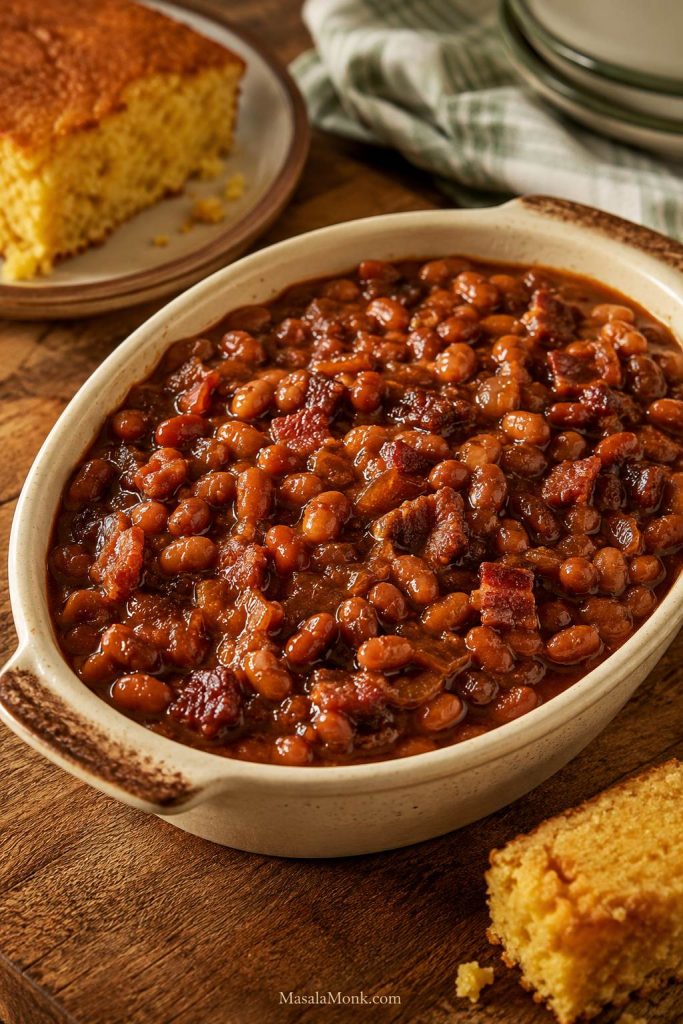
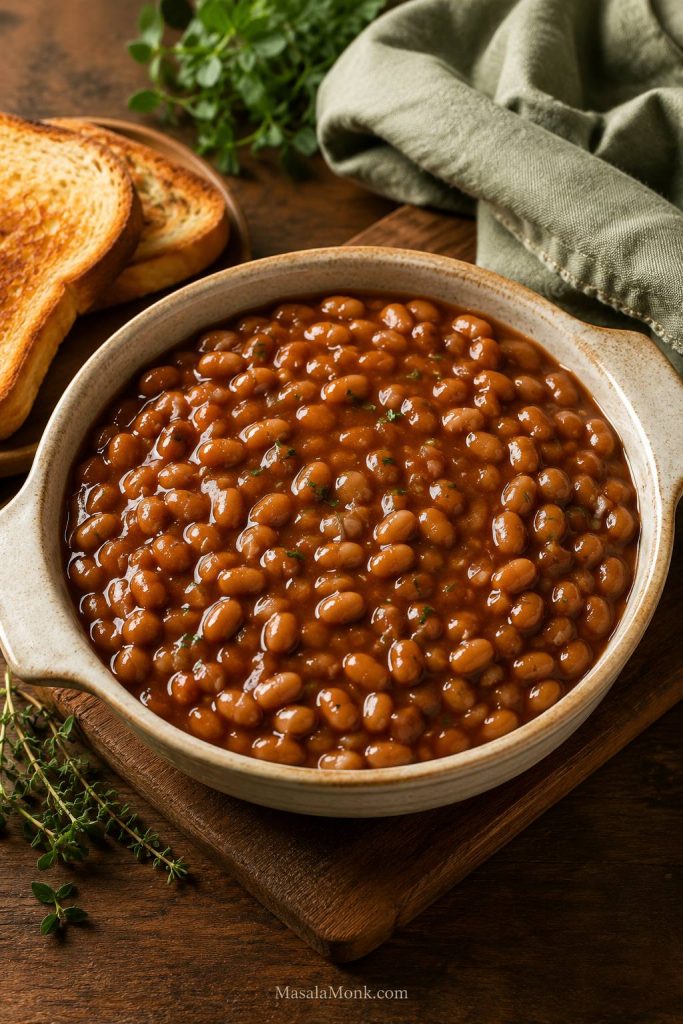
A good serving bowl should show tender beans coated in sauce, without a watery pool at the bottom.
For a from-scratch batch close to the main canned-bean recipe, use 12 oz / 340 g dried navy beans. A full 1 lb / 454 g bag makes a larger batch, so increase the sauce by about one-third.
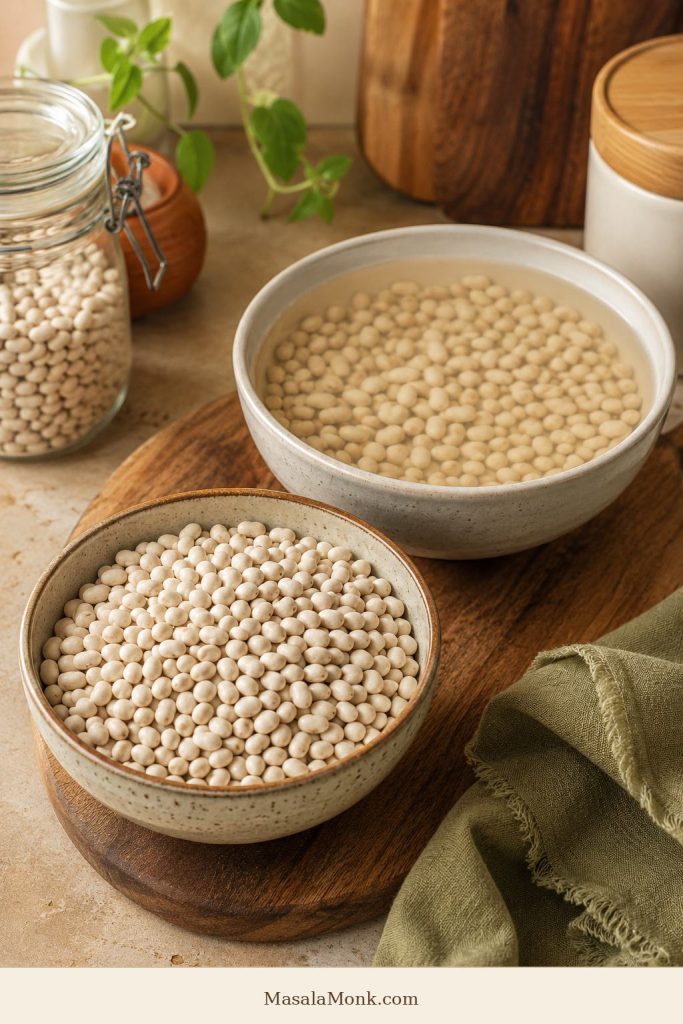
Dried navy beans need to turn tender first. Then the molasses, mustard, tomato, and vinegar can season them without keeping them firm.
Think of dried beans as a two-step job: first make them tender in water, then make them flavorful in sauce.
Rinse the beans, then soak them in plenty of water for 8 to 12 hours. Drain and rinse again. Put the beans in a pot with fresh water and simmer until tender, usually 45 to 90 minutes, depending on the age of the beans.
The beans should be creamy inside before they go into the sauce. Do not stop when they are merely “not crunchy.” Once tomato, vinegar, molasses, or sugar are added, firm beans can take much longer to soften.
Test dried beans before adding sweet or acidic sauce. Otherwise, the flavor may be right while the beans stay too firm.
Save some of the bean cooking liquid before draining. Once the beans are tender, continue with the sauce and baking method above. Bake at 325°F / 163°C for a deeper, slower version, or 350°F / 175°C for the standard version. Add reserved bean liquid if the beans get too thick before the sauce is done.
Important dried-bean rule: Tenderness comes before sauce. Cook dried beans until creamy and tender before adding tomato, vinegar, molasses, or sugar.
Can You Quick-Soak the Beans?
Yes. Cover rinsed beans with plenty of water, bring them to a boil, boil for 2 minutes, then turn off the heat. Cover and let them rest for 1 hour. Drain, rinse, and simmer in fresh water until tender before adding the sauce.
Can You Skip Soaking the Beans?
You can, but the simmering time will be longer and less predictable. Rinse the beans, cover them with plenty of water, and simmer until fully tender before adding them to the sauce.
If beans stay firm after a long simmer, they may be old. Keep simmering them in fresh water before adding sauce; do not try to force them tender in a sweet-acidic sauce.
How Much Cooked Bean Do You Get From Dried Beans?
One pound / 454 g dried navy beans usually gives roughly 6 to 7 cups cooked beans, depending on the beans and cooking time. That is more than the main canned-bean batch, so increase the sauce if using the full pound.
For a deeper dry-bean preparation guide, North Dakota State University Extension has a useful all-about-beans guide.
How to Make Canned Baked Beans Taste Homemade
Canned baked beans can taste like a real baked side dish, not just something warmed from a tin. The fastest route is simple: keep the can as the base, add onion and tang, hold back on sweetness, then bake uncovered until the sauce tastes cooked instead of canned.
Use 2 large cans of baked beans, about 28 oz / 794 g each. Do not rinse them; the sauce is part of the shortcut. Sauté a small chopped onion in oil, butter, or bacon drippings, then add mustard, apple cider vinegar, smoked paprika, a little barbecue sauce, and bacon if using. Add extra sugar only after tasting.
To make canned baked beans taste homemade, warm them with onion, mustard, vinegar, and smoky seasoning before baking.
Bake uncovered at 350°F / 175°C for 45 to 60 minutes, until bubbling and glossy. If the beans still look loose, give them more uncovered time. A top that darkens too quickly just needs one stir and a loose cover.
After baking, the shortcut should look darker, thicker, and more cooked-in. That is the difference between opened and upgraded.
Canned baked beans usually need onion, tang, and enough cooked flavor to stop tasting straight from the can — not more sweetness first.
Quick Fixes for Canned Baked Beans
Problem
What to Add or Do
Too sweet
Add mustard, vinegar, tomato paste, smoked paprika, or more unsweetened beans.
Watery sauce
Bake uncovered, use a wider dish, simmer first, or mash a few beans.
Add unsalted beans, tomato sauce, or a splash of water. Avoid adding more BBQ sauce or bacon.
Thin sauce
Bake longer uncovered, use tomato paste, or mash a small portion of beans.
Canned taste
Sauté onion first, add acid and rounded flavor, then bake uncovered until the sauce darkens and clings to the beans.
A slow cooker is useful for keeping canned baked beans warm, but it will leave them softer and saucier than the oven. Bake first for the best flavor, then hold warm for serving.
Baked Beans Time and Temperature Guide
The oven temperature changes the finish. A hotter oven reduces the sauce quickly. A lower oven gives a deeper, slower flavor. For most home cooks, 350°F / 175°C is the most reliable default because it tightens the sauce without drying the beans too fast.
Method
Temperature
Time
Use It For
What to Watch
Quick canned baked beans
400°F / 204°C
30–35 minutes
Fast weeknight side
Reduces quickly, so watch for dry edges.
Standard baked beans
350°F / 175°C
55–70 minutes
Most reliable method
Good balance of reduction and control.
Low-and-slow baked beans
325°F / 163°C
1½–2 hours
Deeper cookout flavor
Add liquid if the sauce gets too tight before flavor develops.
Dried bean baked beans
325–350°F / 163–175°C
1½–3 hours after beans are cooked
From-scratch version
Beans must be fully tender before saucing.
Slow cooker baked beans
Low
3–5 hours for canned base
Potlucks and keeping warm
Convenient, but less caramelized and often saucier.
If you are building a holiday or potluck oven schedule, baked beans also sit well beside a 350°F side like green bean casserole. For a sweeter holiday table, they can share the make-ahead plan with sweet potato casserole.
Should Baked Beans Be Covered or Uncovered?
Bake baked beans uncovered when you want the sauce to reduce, tighten, and darken around the edges. This is the most reliable method for this version.
Cover the dish when the beans are drying out before they are hot and tender, or when the edges are darkening too quickly. For very saucy beans, bake covered for the first 30 minutes, then uncover and continue baking until the sauce has lost its watery edge.
Easy rule: Watery beans need uncovered baking. Dry edges need a stir and a loose cover.
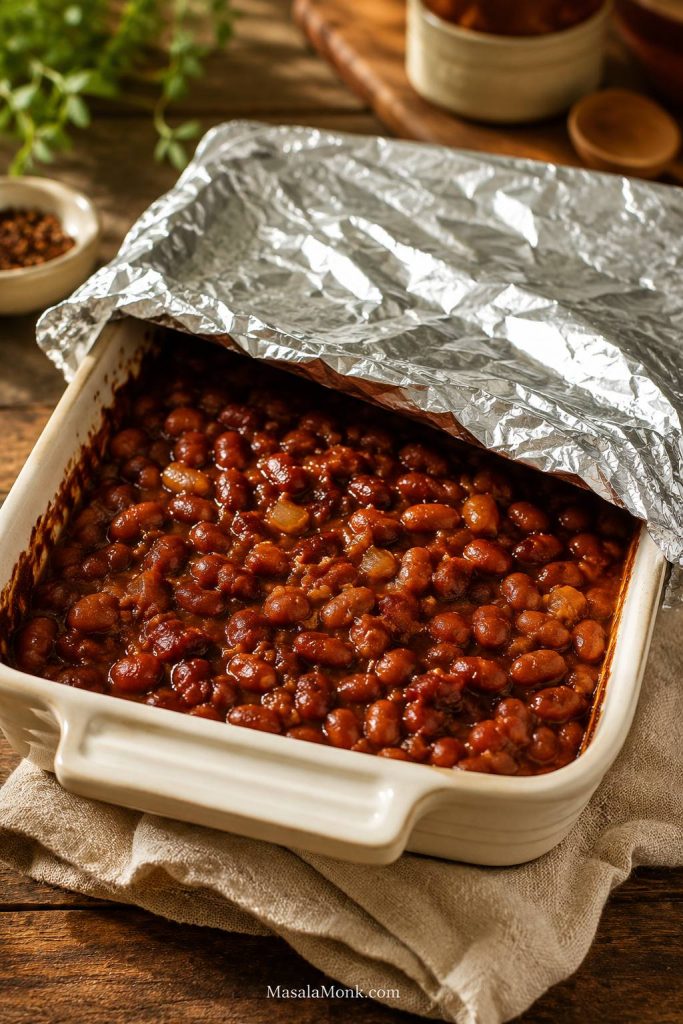
Use foil only when the edges darken too fast. Keep it loose so steam can escape and the sauce can still finish.
Easy Baked Beans Variations
Once the basic pan is working, these small changes let you take it toward BBQ, Boston-style, vegetarian, vegan, low-sugar, or no-pork baked beans without starting over.
Southern BBQ Baked Beans
This is the cookout version: a little bolder, a little smokier, and ready for a plate with ribs, hot dogs, grilled chicken, cornbread, or air fryer burgers. Lean more into barbecue sauce, smoked paprika, bacon, and brown sugar, but stop before the beans taste like bottled sauce.
Southern BBQ baked beans should feel smoky and bold. Bacon, darker sauce, and cornbread push them toward cookout territory.
Boston-Style Baked Beans
Boston-style baked beans are darker, slower, and more molasses-forward. Lean on navy beans, molasses, mustard, onion, and bacon or salt pork, then bake lower and slower for a more traditional pan.
Boston-style baked beans lean deeper and more molasses-forward. Navy beans and a slower bake give this version its old-fashioned feel.
Vegetarian Baked Beans
Vegetarian baked beans still need the same rounded, cookout-style flavor. Skip the bacon, but replace what it usually brings: richness from olive oil or butter, smoke from paprika, brightness from mustard and vinegar, and a salt-and-umami note from vegetarian Worcestershire, soy sauce, or tamari.
Vegan Baked Beans
Vegan baked beans can still taste full and glossy. Use olive oil instead of butter or bacon fat, maple syrup or molasses for sweetness, tomato sauce or ketchup for body, and tamari or soy sauce for a deeper finish. Standard Worcestershire sauce often contains anchovies, so use vegetarian Worcestershire, soy sauce, or tamari instead. Check that your barbecue sauce is vegan too.
Vegan baked beans still need savory depth. Onion, smoked paprika, mustard, vinegar, and tamari can replace the bacon backbone.
For a lighter plant-based plate, pair these beans with a fresh chickpea salad or add homemade falafel for a more filling spread.
Low-Sugar Baked Beans
Low-sugar baked beans should still taste glossy, tangy, and cookout-worthy — just not candy-sweet. The easiest route is plain canned beans plus tomato sauce, mustard, vinegar, onion, smoked paprika, and just enough molasses for depth.
Start with tomato sauce instead of ketchup, cut the brown sugar in half, and taste before adding more sweetness. Some barbecue sauces are as sweet as ketchup, so choose a less sweet sauce or lean on tomato paste and warm spice instead.
Low-Sodium Baked Beans
Plain canned beans give you the most control because you can rinse them, choose your tomato base, and add salt only after the sauce has reduced. Choose low-sodium or no-salt-added canned beans when possible, rinse well, use low-sodium tomato sauce, and go easy on barbecue sauce, Worcestershire, soy sauce, bacon, and added salt.
For flavor without more salt, lean on onion, garlic, mustard, vinegar, smoked paprika, tomato paste, and a small amount of molasses.
No-Pork Baked Beans
No-pork baked beans need a little help replacing the smoky, salty backbone bacon usually gives. Caramelized onion, smoked paprika, mustard, vinegar, and a small splash of soy sauce, tamari, or vegetarian Worcestershire do the job well. Liquid smoke can help too, but start with only ⅛ teaspoon.
For a no-pork protein plate, serve the beans with baked chicken breast and a crisp salad instead of bacon-heavy sides.
Spicy Baked Beans
To make the pan spicy, build heat slowly so it supports the sweet-smoky sauce instead of taking over. Chipotle powder, cayenne, hot sauce, jalapeño, chilli flakes, or diced green chillies all work.
American vs British Baked Beans
American-style baked beans and British-style baked beans are related, but they do not taste the same. This recipe leans American-style: thicker, sweeter, darker, and more suited to BBQ plates and potlucks. British-style baked beans are usually softer, more tomato-forward, and often served on toast or baked potatoes.
American baked beans: thicker, sweeter, often smoky, with molasses, brown sugar, mustard, BBQ sauce, and optional bacon.
British-style baked beans: softer, more tomato-forward, less smoky, and usually served on toast, baked potatoes, or breakfast plates.
For a British-style version, skip the barbecue sauce, reduce the sugar, use tomato sauce or passata, and keep the sauce looser and more tomato-forward.
Common Baked Beans Mistakes to Avoid
Adding full sugar to canned baked beans: Taste first. They may already be sweet enough.
Skipping the onion step: Sautéed onion is one of the easiest ways to make canned beans taste homemade.
Covering the dish the whole time: Covered beans stay saucier. Uncovered baking reduces the sauce.
Adding acidic sauce before dried beans are tender: Tomato, vinegar, molasses, and sugar can slow softening.
Using a dish that is too deep: A deep dish reduces slowly. Use a wider dish if you want the sauce to tighten faster.
Skipping the rest time: Baked beans become more spoonable after 10 to 15 minutes out of the oven.
Salting too early: Bacon, canned beans, BBQ sauce, Worcestershire, soy sauce, and canned baked beans can all add salt.
How to Fix Baked Beans
Even if the pan does not look perfect when it comes out of the oven, baked beans are forgiving. Most problems are easy to fix with time, heat, or one balancing ingredient.
Thin sauce around the spoon means the baked beans need more uncovered time. Let the liquid reduce before serving.
Problem
Fix
Watery baked beans
Bake uncovered longer, use a wider dish, simmer the sauce first, or mash some beans.
Too sweet
Add vinegar, mustard, tomato paste, smoked paprika, or more unsweetened beans.
Salty sauce
Add unsalted beans, tomato sauce, or a splash of water; serve with rice or potatoes.
Overly thick beans
Add water, stock, tomato sauce, or bean cooking liquid.
Bland flavor
Add salt carefully, mustard, vinegar, smoked paprika, onion, garlic, Worcestershire, soy sauce, or tamari.
Hard dried beans
Dried beans were not cooked enough before adding sauce. Simmer them until creamy before baking.
Dry baked beans
Add liquid, cover loosely, and reduce the bake time next time.
Burned edges
Lower the oven temperature, stir once, or use a heavier dish.
If your beans taste flat, they probably need tang, salt, or a deeper savory note — not more sugar. For thin beans, keep baking uncovered or mash a few beans before serving.
To thicken baked beans, remove moisture or add body. Bake uncovered longer, use a wider pan, or mash a few beans in.
What to Serve With Baked Beans
Baked beans can be a side dish, a potluck pan, or part of a simple comfort meal. They sit naturally beside smoky grilled foods like slow cooker pulled pork, but they can also turn toast, rice, potatoes, or eggs into something more filling.
Think of baked beans as the warm, saucy anchor on the plate. For the best plate, pair them with one smoky or grilled main, one crisp side, and one plain starch so the meal has contrast.
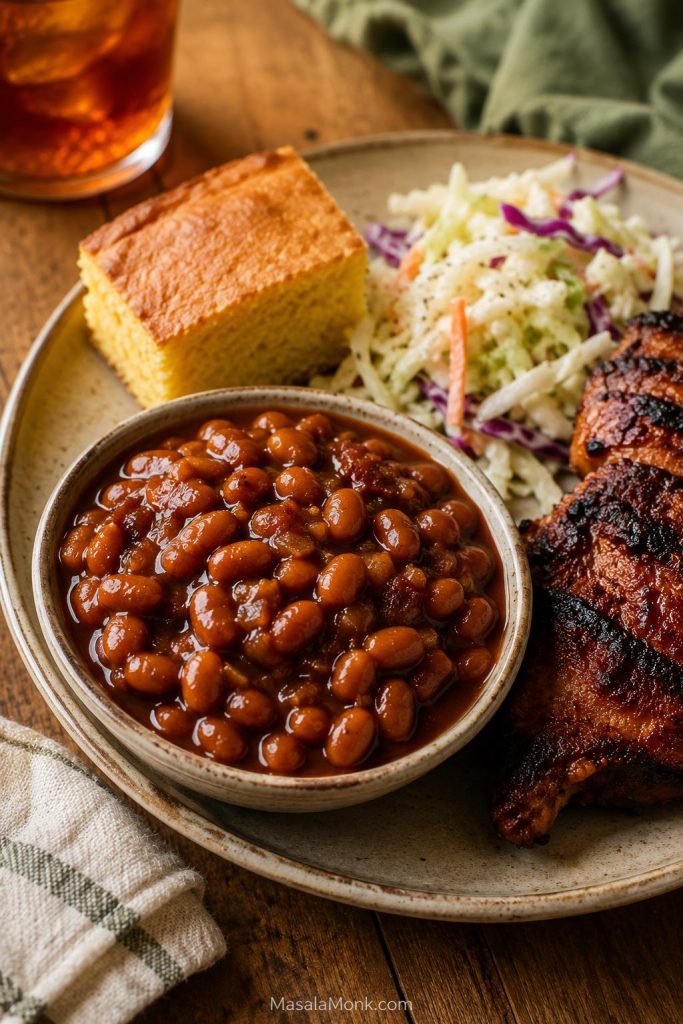
Build the plate with contrast: smoky grilled food, crisp slaw, and cornbread or bread to balance the sweet-savory beans.
For a BBQ or Cookout Plate
Build the plate around contrast: smoky meat, cool salad, crisp slaw, and these warm beans.
Burgers
Hot dogs
Ribs
Sausages
Grilled chicken
Corn on the cob
Potato salad
Coleslaw
Cornbread
A smoky sliced-meat plate works just as well as sandwiches, so these beans pair nicely with smoked pork loin. Creamy potato salad or crisp coleslaw adds the cold, fresh contrast needed against the sweet-savory sauce.
Easy Comfort Meal
Choose a plain starch when you want the beans to feel more like dinner. Toast, rice, potatoes, and eggs all catch the sauce well without competing with it.
Toast
Rice
Baked potatoes
Eggs
Roasted vegetables
Buttered bread
For a cozier plate, add toast, eggs, or a scoop of garlic mashed potatoes beside the beans.
Vegetarian Plate
Vegetarian plates work best when the beans are paired with something fresh, roasted, or crisp. That keeps the meal from feeling too soft.
Baked potatoes
Rice bowls
Grilled mushrooms
Roasted sweet potatoes
Simple green salad
Toast with herbs or chilli flakes
Leftover Ideas
Spoon leftover baked beans over toast, rice, baked potatoes, or roasted sweet potatoes. Serve them with eggs, fold them into wraps, use them as a quick side with sausages, or warm them until the sauce loosens again for a second-day lunch.
Make Ahead, Storage, Freezing, and Reheating
Baked beans are one of the rare sides that can become better after a night in the fridge. The sauce has time to settle into the beans, and reheating usually makes the pan taste even more rounded.
Make ahead: Cook 1 to 2 days ahead and refrigerate.
Fridge: Store leftovers in an airtight container for 3 to 4 days.
Freezer: Freeze for up to 3 months.
Reheating: Warm gently on the stovetop or cover and bake at 325°F / 163°C until hot.
If too thick after chilling: Add a splash of water, stock, or tomato sauce.
For parties: Bake first, then keep warm in a slow cooker on the warm setting while serving.
Baked beans often improve overnight. When reheating, loosen the sauce with water, stock, or tomato sauce only as needed.
Baked beans thicken in the fridge and after freezing. Warm them first, then loosen with a little water, stock, or tomato sauce if needed. If serving for a party, refrigerate leftovers within 2 hours; this follows the standard FoodSafety.gov 2-hour rule.
Frequently Asked Questions
If you are adjusting the recipe for different beans, sweetness levels, or make-ahead timing, these quick answers should help.
What beans are used for baked beans?
Navy beans are the classic choice for baked beans, but Great Northern beans, cannellini beans, small white beans, and pinto beans also work. Plain canned white beans are the easiest option when you want homemade baked beans without a long cooking time.
Can I make baked beans with canned beans?
Yes. Plain canned beans are the easiest shortcut because the beans are already tender, but the sauce is still yours to control. Drain and rinse them, then bake them in the homemade sauce until it coats the beans instead of pooling around them.
Can I use canned baked beans for this recipe?
Yes. Treat canned baked beans as a shortcut base, not a blank canvas. They already bring sauce, sweetness, and salt, so add onion, mustard, vinegar, smoked paprika, and only a little extra sugar after tasting.
Do I drain canned beans for baked beans?
Drain and rinse plain canned beans. Do not rinse canned baked beans because their sauce is part of the shortcut. Extra liquid can be handled in the oven by baking uncovered.
How do you make canned baked beans taste homemade?
Sauté onion first, add mustard and vinegar for balance, use smoked paprika or a tiny amount of liquid smoke for depth, and bake uncovered until the sauce tastes cooked instead of canned.
Can I make baked beans from dried beans?
Yes. Use dried navy beans, soak them overnight or quick-soak them, then simmer until creamy and tender before adding the sauce. Think of dried beans in two steps: make them tender in water first, then make them flavorful in sauce.
Why are my baked beans watery?
They usually need more uncovered baking time. Baked beans often look loose before they come together; the last stretch in the oven and the 10-minute rest are where the sauce turns spoonable.
How do I thicken baked beans?
Bake them uncovered for longer, use a wider dish, simmer the sauce before baking, or mash a few spoonfuls of beans and stir them back in. Resting the beans also helps the sauce cling better.
Should baked beans be covered while baking?
For thicker baked beans, bake them uncovered. Cover them only when they are drying out too quickly or when the edges are darkening before the center is hot.
How do I make baked beans less sweet?
Use less brown sugar, reduce or skip extra molasses, and balance the sauce with mustard, vinegar, tomato paste, smoked paprika, and unsweetened beans. Beans that are already too sweet usually need acidity and rounded flavor, not more sugar.
Can I make baked beans without pork or bacon?
Yes. Bacon adds smoke, salt, fat, and umami, but you can replace those with smoked paprika, sautéed onion, mustard, vinegar, and a little vegetarian Worcestershire, soy sauce, or tamari.
Can baked beans be vegetarian or vegan?
Yes. Skip the bacon and use olive oil. For vegetarian or vegan depth, use smoked paprika, mustard, vinegar, caramelized onion, and soy sauce, tamari, or vegetarian Worcestershire sauce. Standard Worcestershire often contains anchovies, so check the label or use a vegetarian alternative.
Can I make baked beans in a slow cooker?
Yes. Cook canned-bean baked beans on low for about 3 to 5 hours. The slow cooker is useful for potlucks and keeping beans warm, but the sauce will not caramelize the same way it does in the oven. For the best texture, bake first and keep warm in the slow cooker.
Are baked beans better the next day?
Often, yes. The sauce settles and the flavor deepens after a night in the fridge. Reheat gently and add a splash of water, stock, or tomato sauce if the beans are too thick.
Can baked beans be made ahead?
Yes. Baked beans are one of those sides that often tastes better the next day. Make them 1 to 2 days ahead, refrigerate, then reheat gently before serving.
Can you freeze baked beans?
Yes. Cool them completely, freeze in airtight containers for up to 3 months, thaw overnight in the fridge, and reheat gently. Add a splash of water or tomato sauce if they are too thick after thawing.
What can I add to baked beans for more flavor?
Use the balance test first. If the beans taste flat, add tang, salt, or rounded flavor before adding more sugar. Sautéed onion, mustard, vinegar, smoked paprika, Worcestershire sauce, soy sauce, tomato paste, chipotle, or a tiny amount of liquid smoke can all help.
What is the difference between American and British baked beans?
American baked beans are usually thicker, sweeter, smokier, and often flavored with molasses, brown sugar, mustard, bacon, or barbecue sauce. British-style baked beans are usually more tomato-forward, softer, less smoky, and often served on toast or baked potatoes.
Final Thoughts
The best baked beans are not just sweet beans in sauce. They need enough sweetness to feel familiar, enough tang to stay balanced, enough depth to feel slow-cooked, and enough oven time for the sauce to settle into the beans.
Whether you started with pantry cans, a shortcut can of baked beans, or dried navy beans, the goal is the same: tender beans, a balanced sauce, and a pan with glossy edges that people keep returning to before the meal is even over.