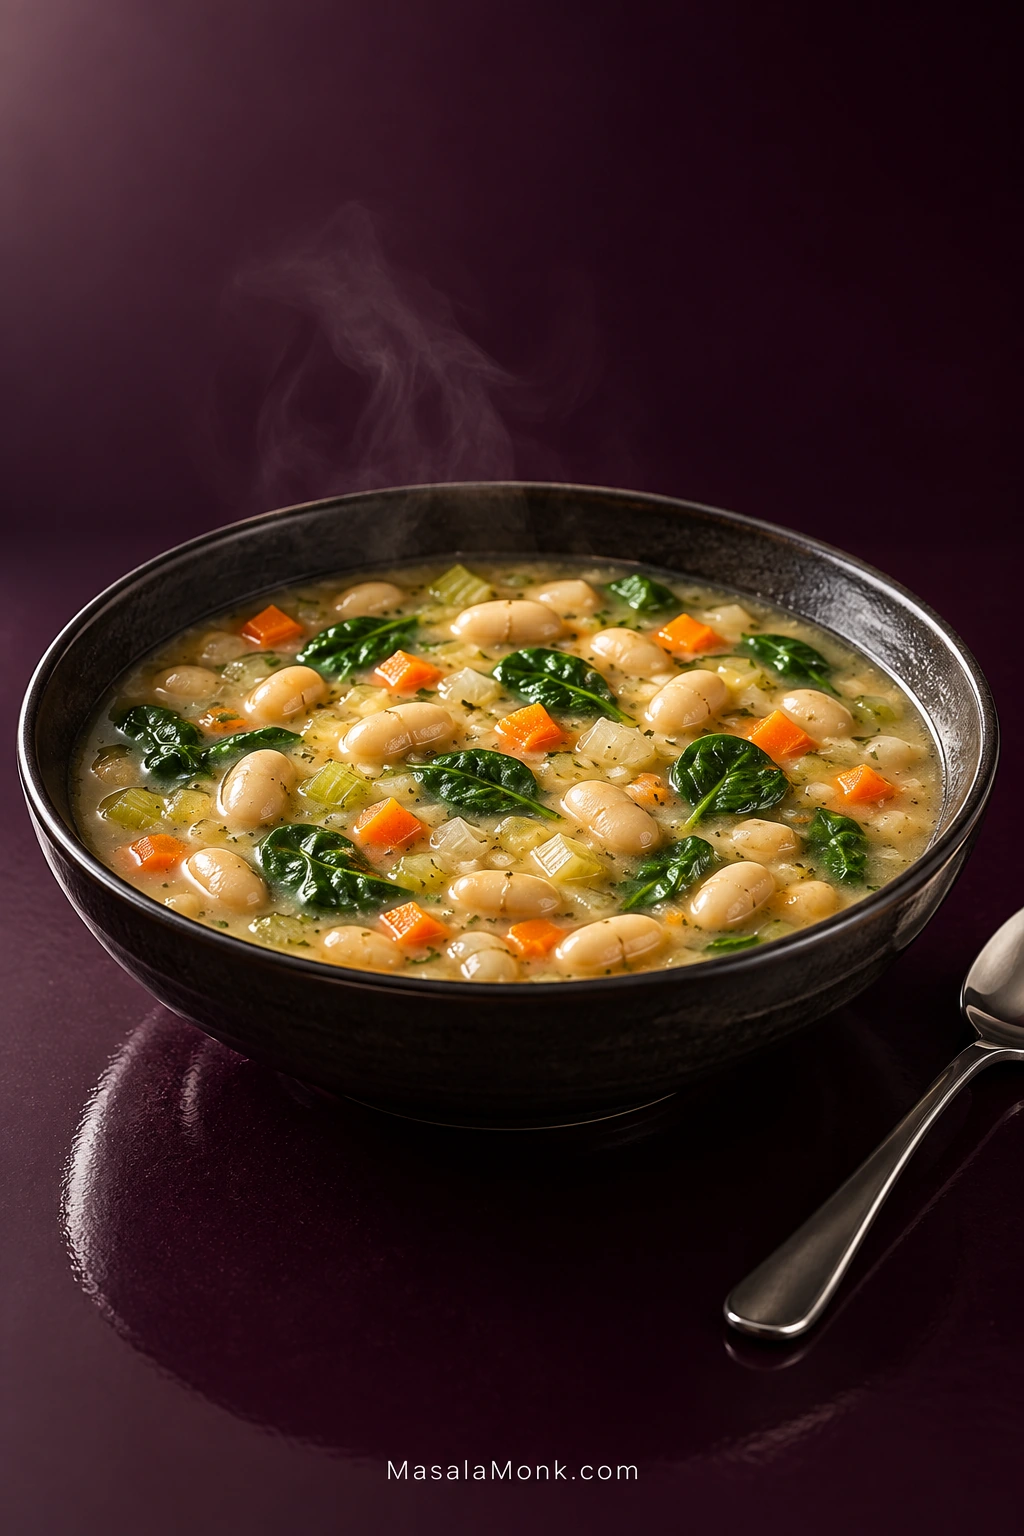
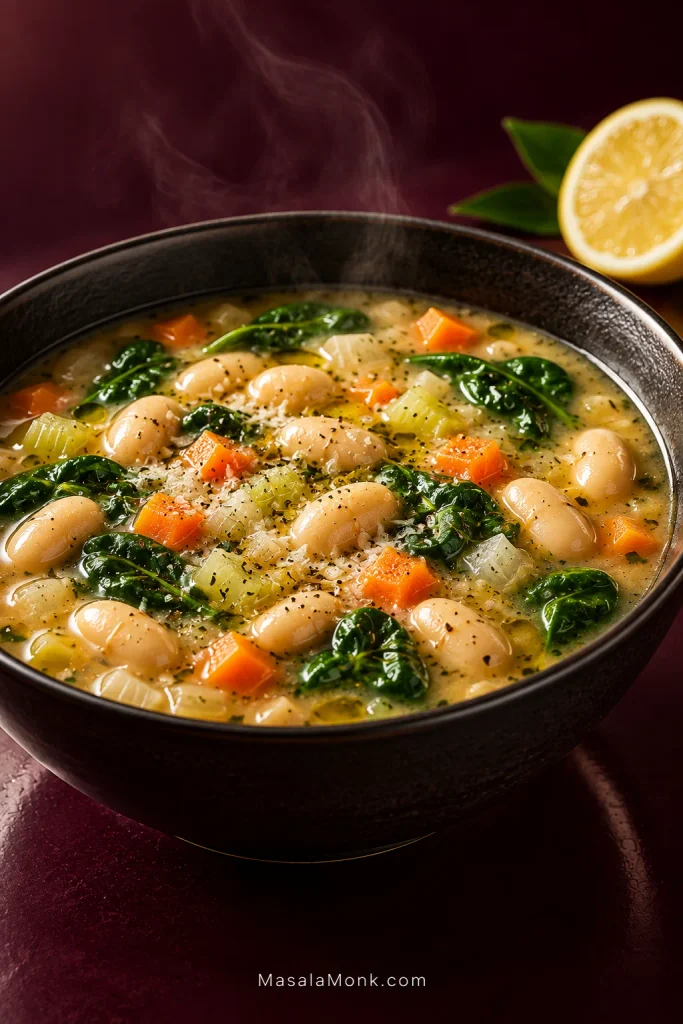
A few cans of white beans, an onion, a carrot and some broth do not look like much of a dinner. Half an hour later, they can be a pot of creamy broth full of whole cannellini beans, tender vegetables and wilted spinach, with enough garlic, herbs and lemon to keep every spoonful lively.
The broth gets its body from the beans themselves, not from flour or heavy cream. One can is blended until smooth and the other two stay whole, so the bowl still feels hearty rather than puréed.
Cannellini beans, tender vegetables and spinach in a bean-thickened broth with garlic, rosemary, thyme and fresh lemon.
Pot 5–6 qt / 4.7–5.7 L
Prep 10 min
Cook 20 min
Total 30 min
Yield 4 generous / 6 lighter servings
Equipment
5- to 6-quart / 4.7- to 5.7-liter Dutch oven or soup pot
Countertop blender or immersion blender with a tall blending jug; see notes for a no-blender option
Ingredients
2 tablespoons / 30 ml olive oil
1 medium yellow onion, about 170 g peeled, diced
2 medium carrots, about 150 g trimmed, diced
2 celery ribs, about 100 g trimmed, diced
4 garlic cloves / about 14 g, finely chopped or minced
1 teaspoon dried thyme
½ teaspoon dried rosemary, lightly crushed between your fingers
¼ teaspoon red pepper flakes, or less for a very mild soup
3 × 15 oz / 425 g cans cannellini beans, drained and rinsed
4 cups / 950 ml low-sodium vegetable or chicken broth, plus more if needed
3 packed cups / about 90–100 g baby spinach
1½ tablespoons / about 22 ml fresh lemon juice, plus another 1–2 teaspoons if needed
¼ teaspoon fine sea salt to start, plus more to taste
¼ teaspoon freshly ground black pepper, plus more to taste
For serving, if you like: grated Parmesan, chopped parsley, extra-virgin olive oil, black pepper, red pepper flakes and crusty bread.
Method
Build the Base
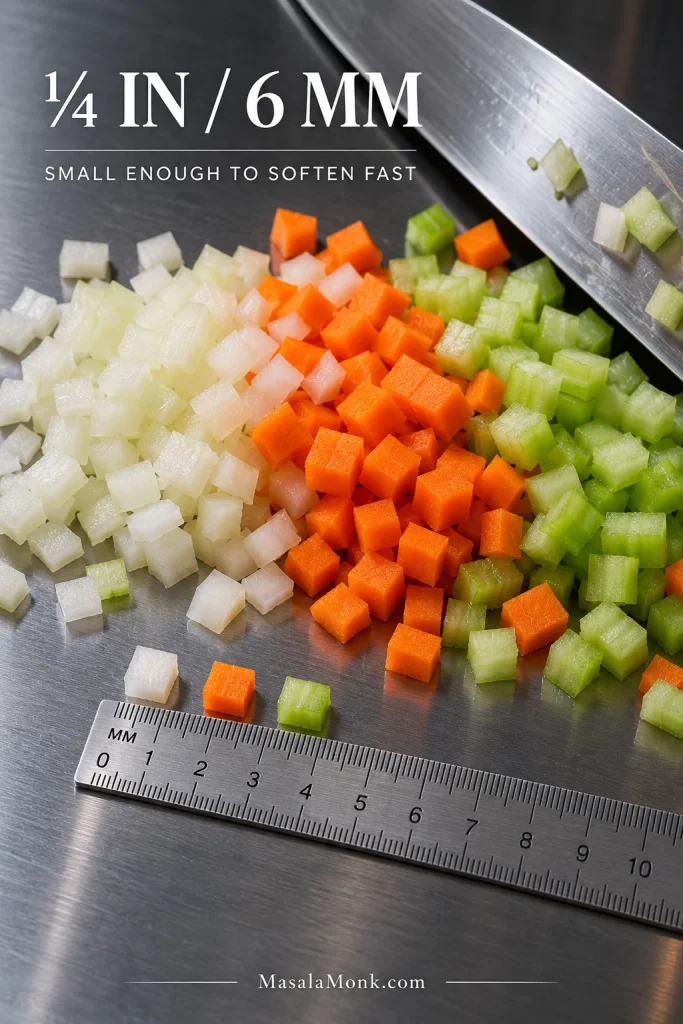
Start the vegetables. Heat the olive oil over medium heat. Add the onion, carrots, celery and the measured ¼ teaspoon salt. Keep the vegetables around ¼ inch / 6 mm so they soften within the short cook. Cook for about 6–7 minutes, stirring occasionally, until the onion is translucent and the vegetables are beginning to soften.
Uniformity matters more than perfect knife work. Keep the onion, carrot and celery close to ¼ inch / 6 mm so one oversized piece does not stay firm after the rest has softened.
Blend one can of beans while the vegetables cook. Put one drained and rinsed can of cannellini beans in a countertop blender or tall blending jug with 1 cup / 240 ml of the unheated broth. Blend until smooth and glossy, with no obvious pieces of bean skin.
Watch the texture in the blender: the bean mixture should be smooth enough to pour, not thick enough to sit like paste. That fluid base is what later gives the broth body.
Add the aromatics. Stir in the garlic, thyme, rosemary and red pepper flakes. Cook for 30–60 seconds, until the garlic loses its raw edge and the herbs smell noticeably stronger. Do not let the garlic brown.
Simmer and Finish
Add the beans and broth. Stir in the two remaining cans of whole beans, the bean purée and the remaining 3 cups / about 710 ml broth. Bring the pot just to a boil, then lower the heat to a gentle simmer. Cook uncovered for about 8–10 minutes, until the vegetables are tender and the broth has lightly thickened.
The surface should stay mostly calm with small bubbles rising through it. When the whole pot churns, very tender canned beans are more likely to split and lose their skins.
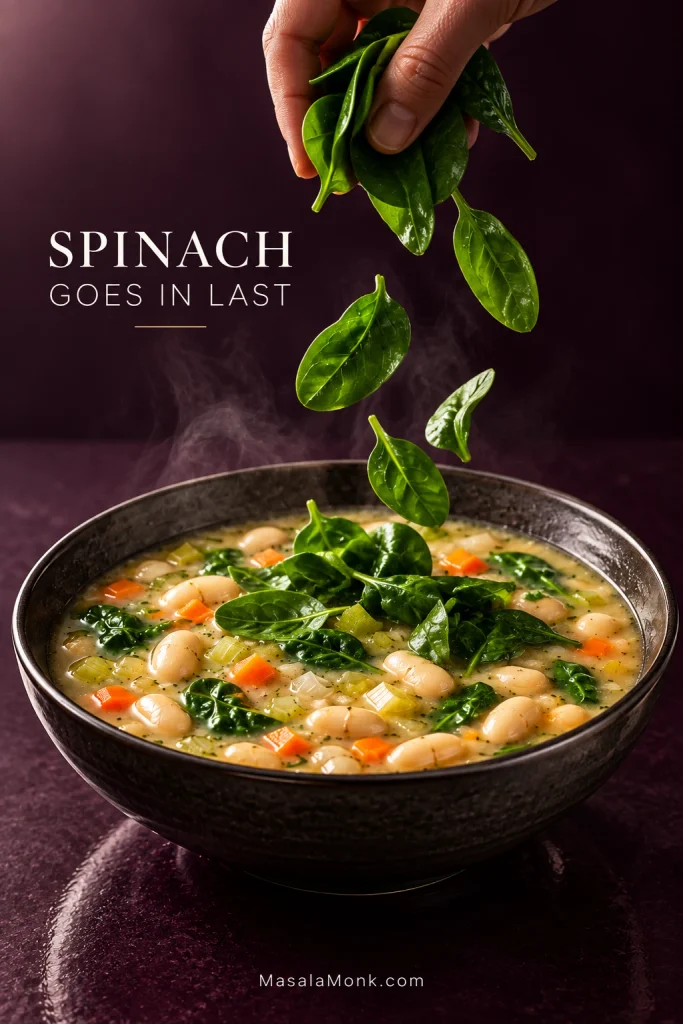
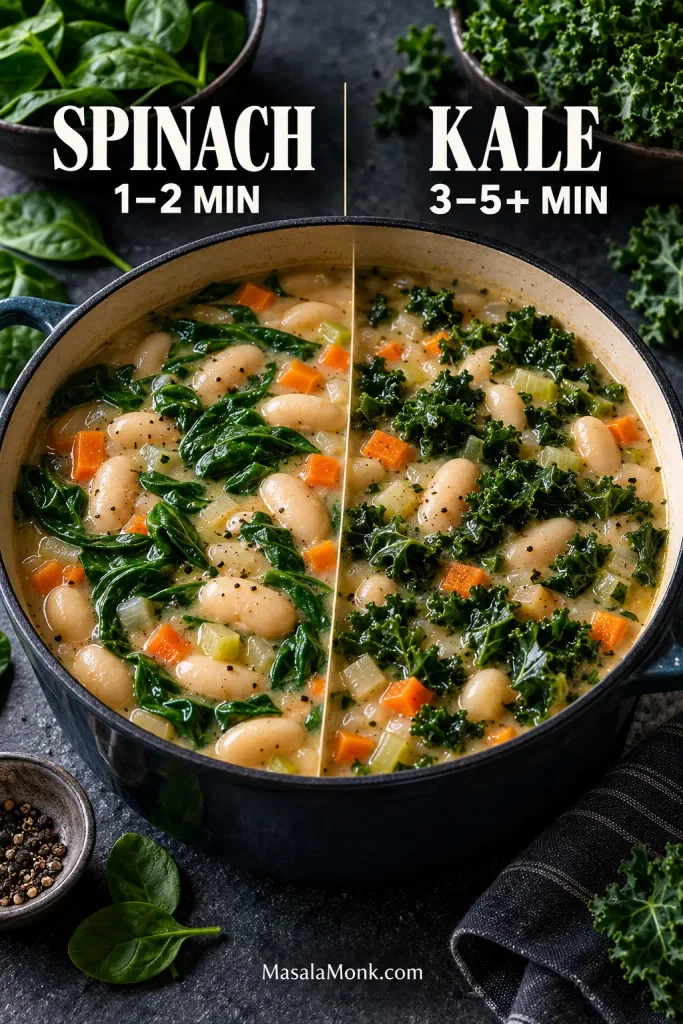
Wilt the spinach. Add the spinach. It will look like a lot at first, then collapse quickly. Cook for 1–2 minutes, until wilted but still green.
Once the leaves lose their volume, there is little benefit in cooking them much longer. Extra time mostly dulls their color and softens their texture.
Finish off the heat. Stir in 1½ tablespoons / about 22 ml lemon juice and the black pepper. Taste before adding more salt. Already salty enough but still dull? Add another teaspoon of lemon first. Loosen with a little extra broth if needed.
A balanced spoonful carries broth, beans, vegetables and greens together. If the solids sink away from watery broth—or barely move through something gravy-thick—the texture still needs adjusting.
Recipe Notes
No blender: Mash one drained can very thoroughly, then loosen it with a little broth before adding it to the pot.
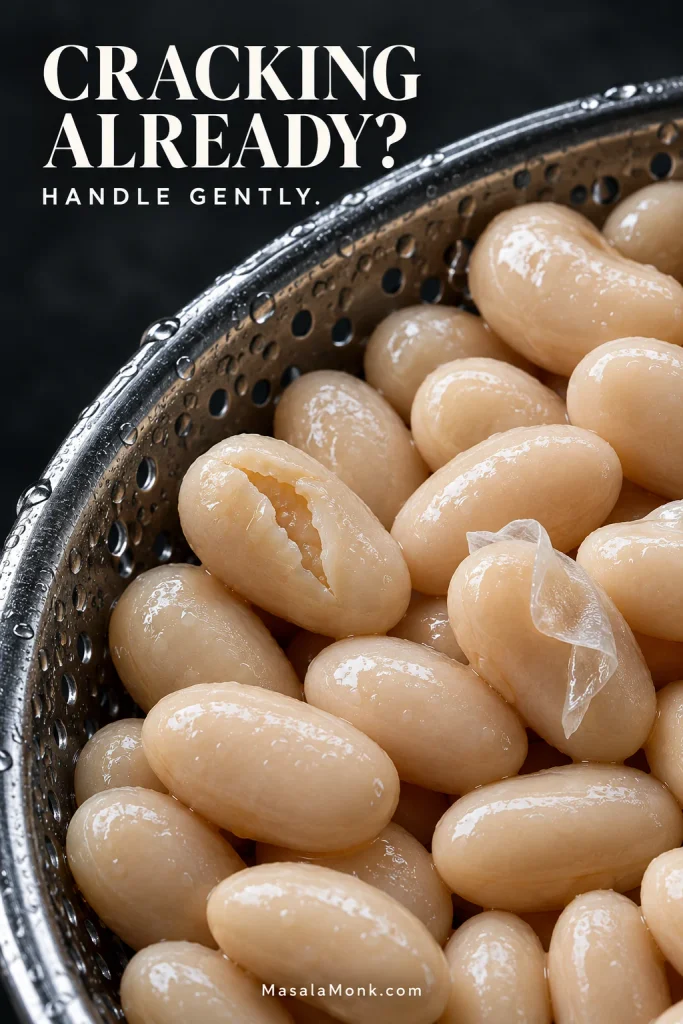
Very soft canned beans: Beans already cracking or shedding skins in the colander need a shorter simmer and gentler stirring from here.
Vegan: Use vegetable broth and leave off the Parmesan. A drizzle of extra-virgin olive oil at serving adds richness.
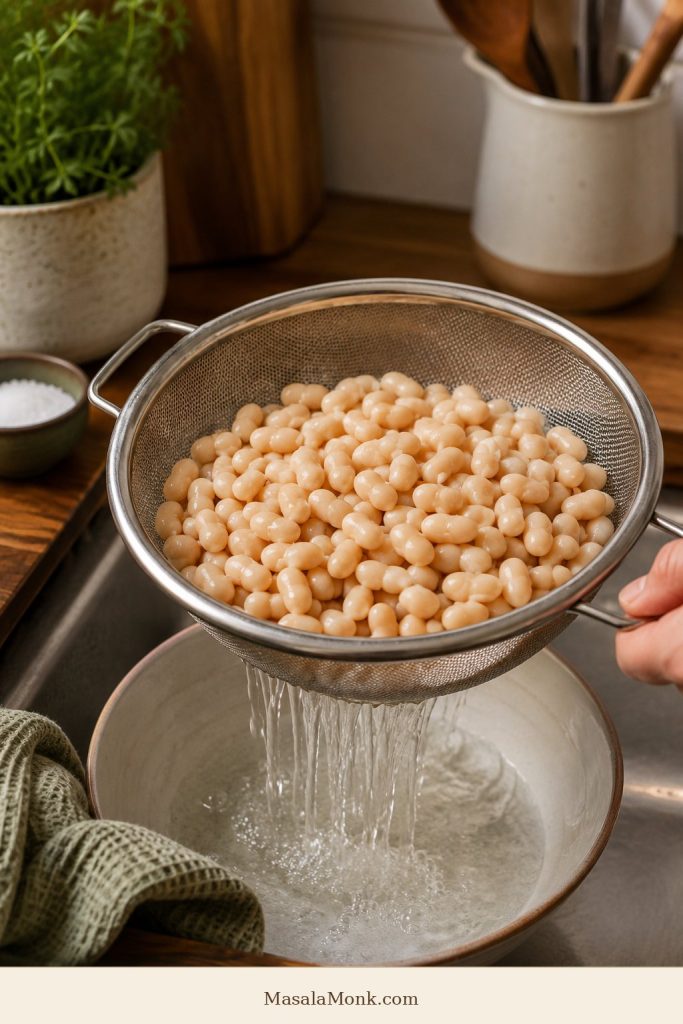
The colander can tell you a lot before cooking starts. Beans that are already cracking or slipping out of their skins need gentler stirring than a firmer batch.
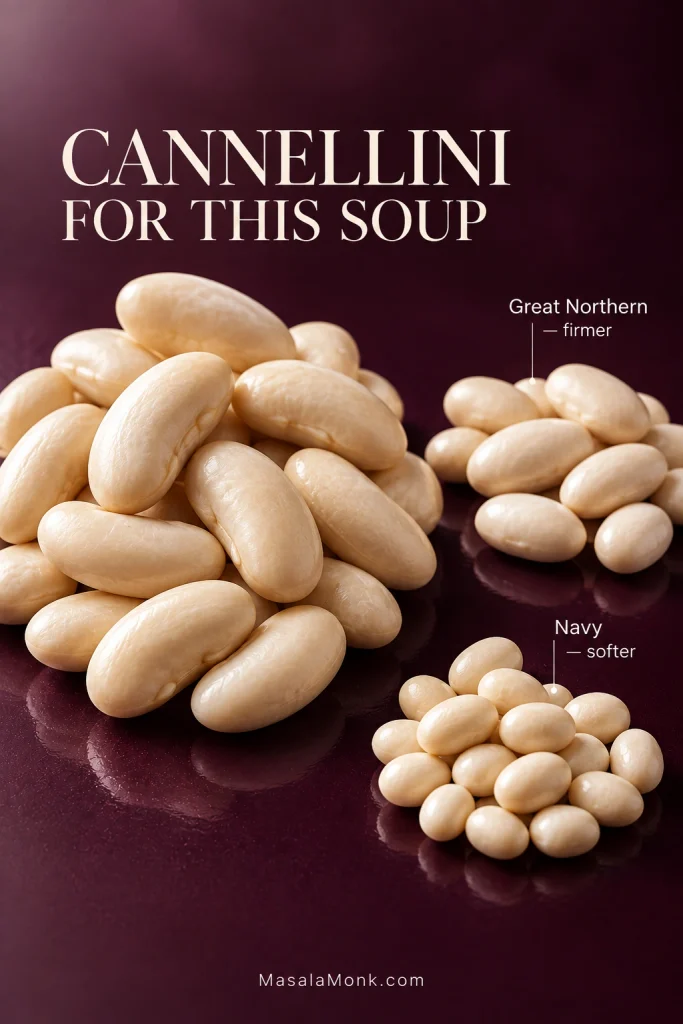
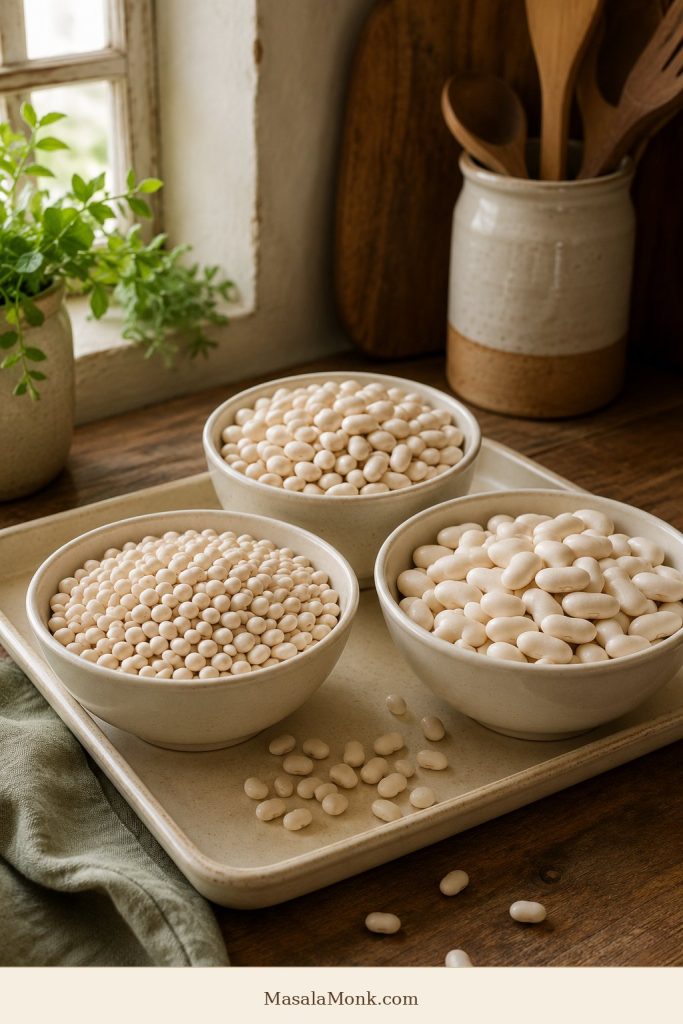
Cannellini: large and creamy, with enough structure to stay mostly whole. They give this soup a fuller broth without disappearing into it.
Great Northern: smaller, slightly firmer and very mild. Use them as a direct swap.
Navy: smaller and softer. They tend to break down sooner, so the finished soup may feel thicker.
Size changes what you notice in the bowl. Cannellini stay prominent, Great Northern beans sit in the middle, while smaller navy beans disappear into the broth more easily as they soften.
Should You Drain and Rinse Canned Beans?
For this recipe, yes. Canned bean liquid contains starch and can be useful, but its saltiness, thickness and flavor vary quite a bit by brand.
Rinsing gives you more control and can wash away a noticeable canned or metallic taste from some packing liquids. The blended beans already provide the starch we need here.
Using Dried White Beans? Cook Them First
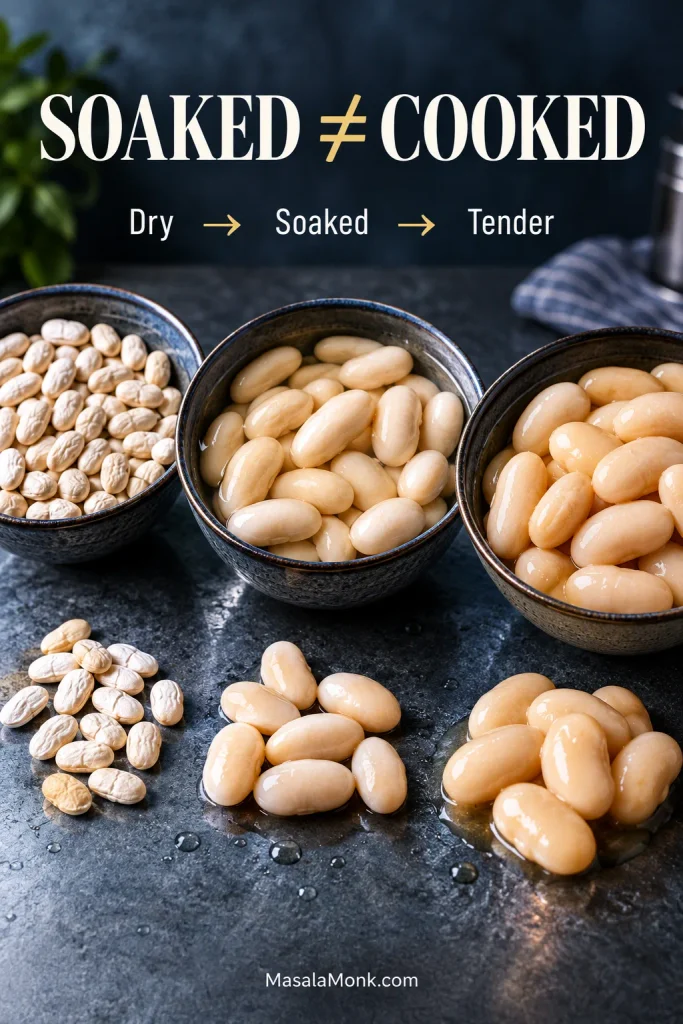
Cook them all the way before using them in this recipe. Soaking hydrates cannellini, Great Northern or navy beans, but it does not make them tender enough to go straight into this quick soup.
Once cooked, use enough beans to replace the three drained cans called for in the recipe. Because dried-bean yield varies with the bean and cooking method, match the finished cooked amount rather than relying on an untested dry-bean conversion.
Plump does not mean tender. Dried white beans can look ready after soaking while still being far from the soft texture needed for soup.
Creamy Without Cream
Creamy describes the broth; the whole soup should not be smooth. You still want whole beans and pieces of carrot, celery and spinach in every bowl.
With three cans of beans and 4 cups / 950 ml broth, the soup stays substantial without becoming dense. One can builds the broth while the other two keep the bowl full of whole beans.
Separating the beans by job gives you more control later. The blended portion can build body while the whole beans preserve texture, so thickening the broth does not mean sacrificing every intact bean.
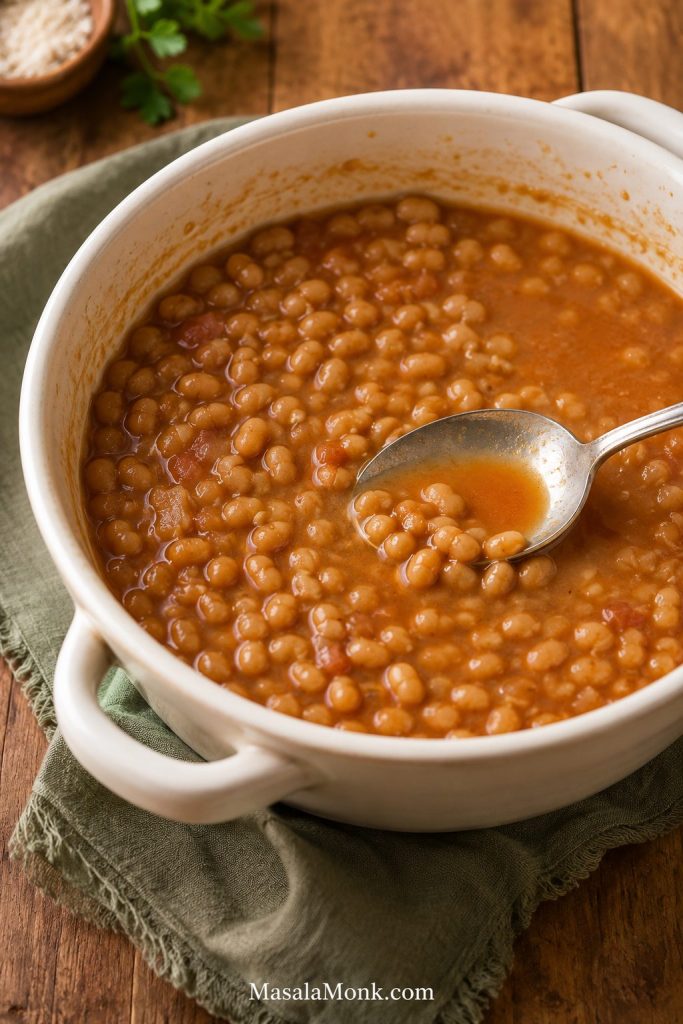
Drag a spoon through a ladleful. The broth should cling lightly to the beans and vegetables, then flow straight back into the gap. Bean brands vary, so use that result instead of chasing one exact look.
Pay attention to how the trail closes. A gap that stays open suggests the soup is too dense; one that vanishes immediately points to a looser broth.
Too brothy: mash or blend another ½–1 cup of beans.
Still too thin: simmer uncovered for another 2–4 minutes.
Too thick: add broth in ¼-cup / 60 ml increments.
Stop a little earlier than you think. The beans keep thickening the broth as it sits.
Spinach is the quicker option and stays fairly quiet in the finished bowl. Add 3 packed cups / about 90–100 g only after the beans have simmered and the broth is where you want it.
Kale has more chew and a stronger flavor. Use roughly 2½–3 loosely packed cups / 70–90 g stemmed, chopped kale. Tender leaves may be ready in 3–5 minutes; mature kale often needs longer.
The choice changes the eating experience as much as the timing. Spinach almost melts into the broth, while kale stays more noticeable and gives each spoonful extra chew.
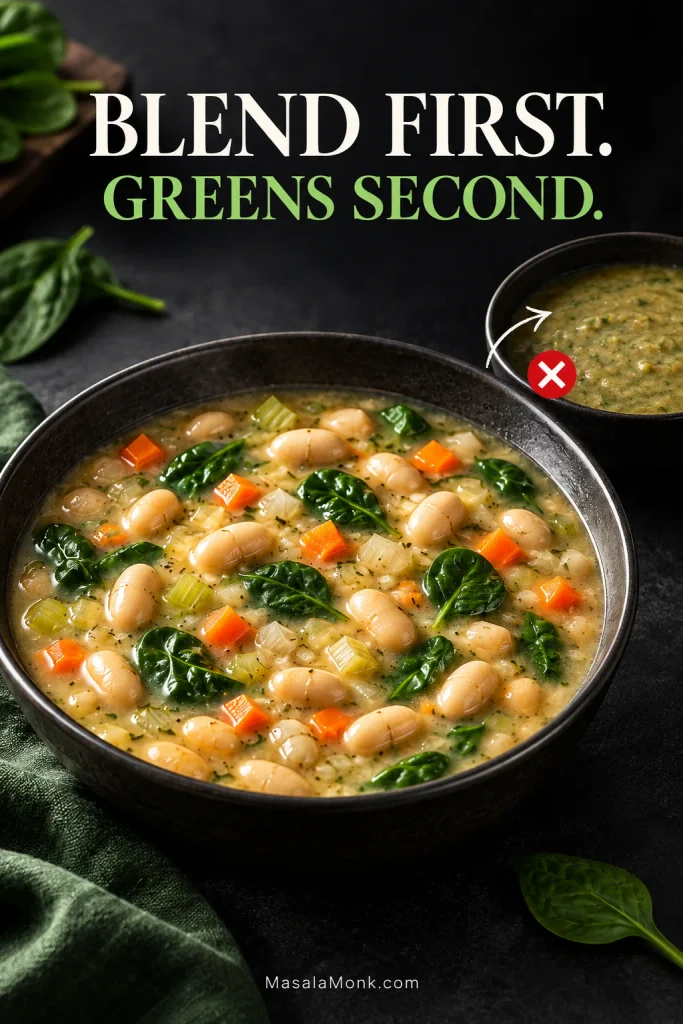
Blend first, greens second. Once the leaves are in, leave the blender alone. Otherwise the pale broth turns muddy and the greens disappear into the purée.
Once leafy greens are blended into the base, their clean color and leaf definition are gone for good. Finish the blending while the pot is still just beans and broth.
Frozen spinach works too; thaw it and squeeze out excess water first. For a brothier bowl with beans, vegetables, greens and small pasta, the minestrone soup recipe goes in that direction.
Salty does not necessarily mean flavorful. Taste once before reaching for anything. Is it actually under-salted, or simply dull? Those are different problems.
Salt and acidity do different jobs. If the white bean soup already tastes seasoned, fresh lemon can sharpen the beans, vegetables and herbs without pushing the salt level higher.
What it tastes like
Try this next
Clearly under-salted
Add a small pinch of salt, stir, then taste again.
Salty enough but flat
Add another teaspoon of lemon juice.
Bright but still one-dimensional
Try black pepper, red pepper flakes, parsley or Parmesan at the table.
Slightly too sweet
Add lemon first, then reassess pepper and salt.
Actually too salty
Dilute with unsalted broth or water, then taste again.
Low-sodium broth leaves more room for those final changes because canned beans and packaged broth both vary.
When the Texture Is Off
Problem
Likely cause
Fix now
Pasty
Too much purée or too much evaporation
Add broth ¼ cup / 60 ml at a time.
Crunchy carrots
Pieces were too large or the initial sauté was rushed
Keep simmering before adding greens. Next time keep the dice near ¼ inch / 6 mm.
Beans falling apart
The pot boiled too hard or the beans were very soft to begin with
Lower the heat and stir gently.
Lots of loose skins
Soft beans, vigorous cooking or the bean brand itself
Keep the simmer mild. Repeated loose skins are also a good reason to try another brand.
Mushy spinach
It went in too early
Next time add it only for the final 1–2 minutes.
Why It Gets Thicker Overnight
The beans keep absorbing liquid as they sit, so tomorrow’s bowl will usually be thicker than tonight’s. Expect to add a splash of broth or water when reheating.
Make the final consistency judgment after the leftovers are hot. Chilled bean soup can look deceptively dense, and adding too much liquid too early may leave the reheated bowl thinner than you wanted.
Freezer: Freeze cooled portions in suitable containers, leaving a little room for expansion. For best quality, use within about 2–3 months. The spinach will be softer after thawing.
Reheating: Warm gently, adding broth or water in ¼-cup / 60 ml increments until the broth pours easily again. Reheat leftovers to 165°F / 74°C.
Taste again before serving. Added liquid can soften the seasoning, and some of the fresh lemon character fades in storage. Another small squeeze may be all the bowl needs.
Once the broth is balanced, the soup needs very little at the table. Parmesan adds salt, olive oil adds richness and black pepper adds warmth, so finish the bowl according to what it still needs.
What to Serve With It
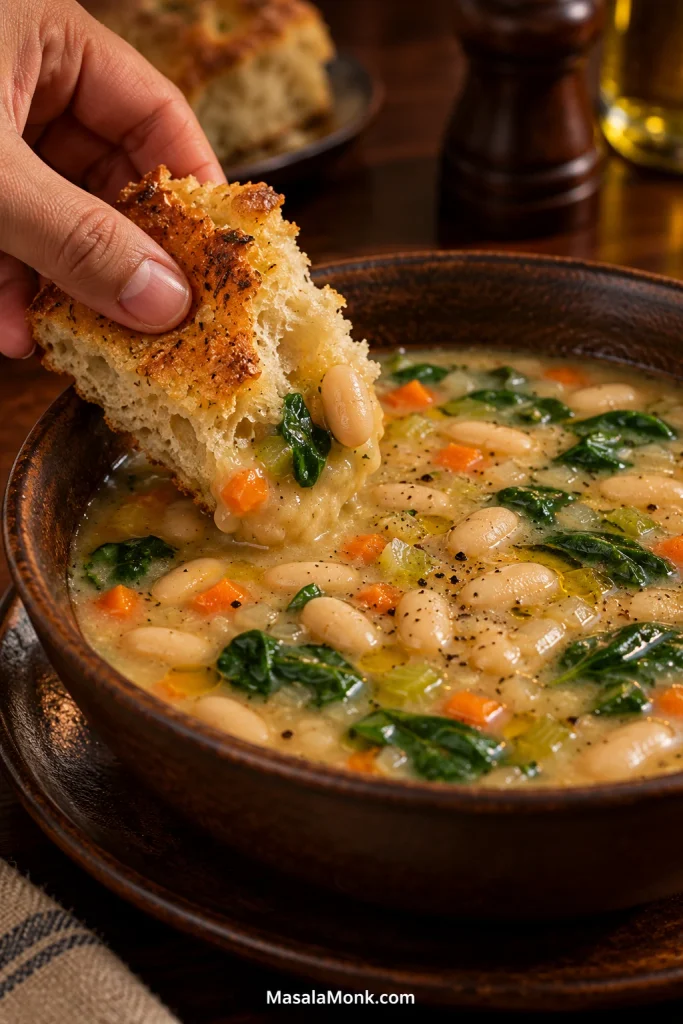
This is filling enough to be dinner on its own, though bread is hard to argue with. Homemade focaccia gives you a soft middle and crisp olive-oil edges; a homemade garlic bread loaf is the more garlicky option. Either one is good for dragging through the last of the broth.
An airy focaccia crumb traps broth and small pieces of beans and vegetables especially well. Dip as you eat rather than leaving it submerged, and the bread keeps more of its structure.
A simple green salad works too. Parmesan, parsley, black pepper or a drizzle of extra-virgin olive oil are all good at the table. When the pot is right, though, it does not need much: tender vegetables, whole beans, broth that clings lightly, and just enough lemon to pull you into another spoonful. Add bread and dinner is done.
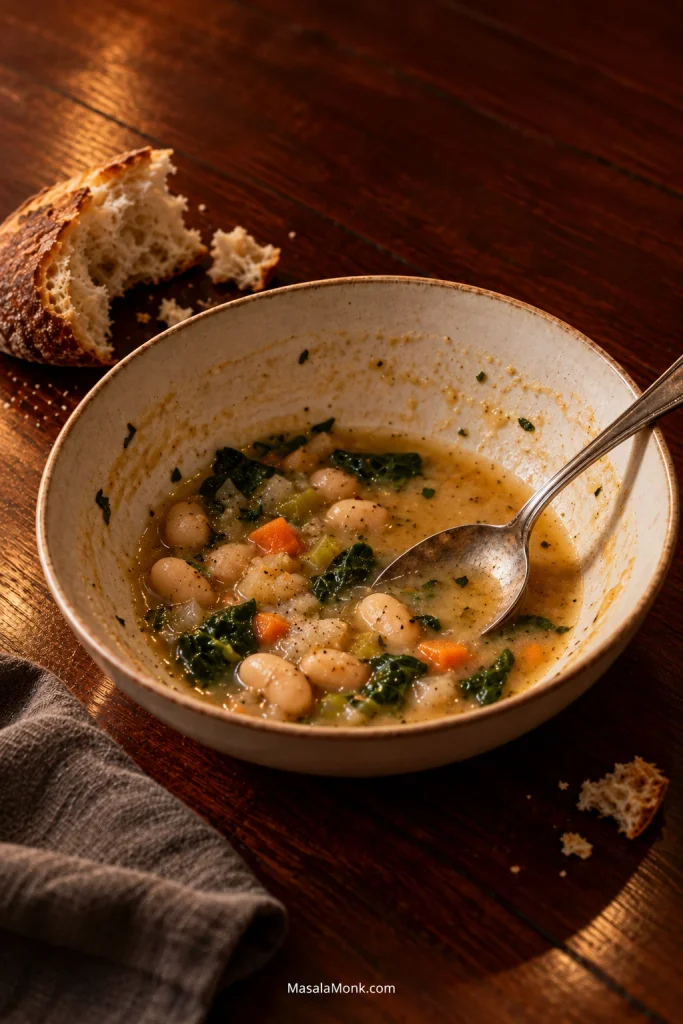
A little broth, a few beans and torn bread left at the end of dinner—sometimes that says more about the soup than another perfectly styled bowl ever could.
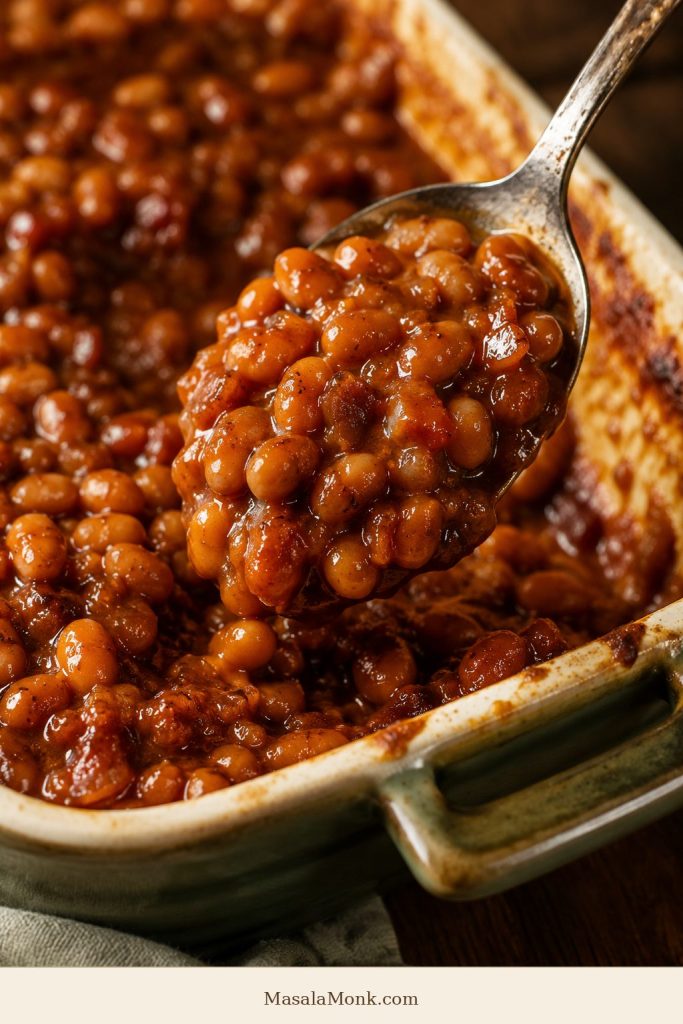
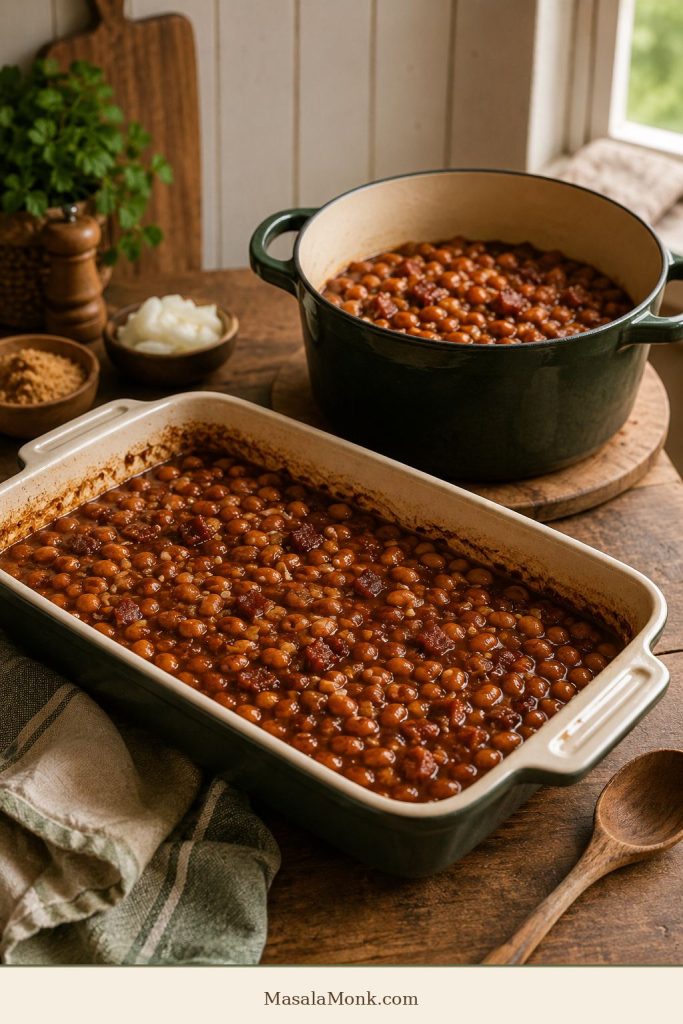
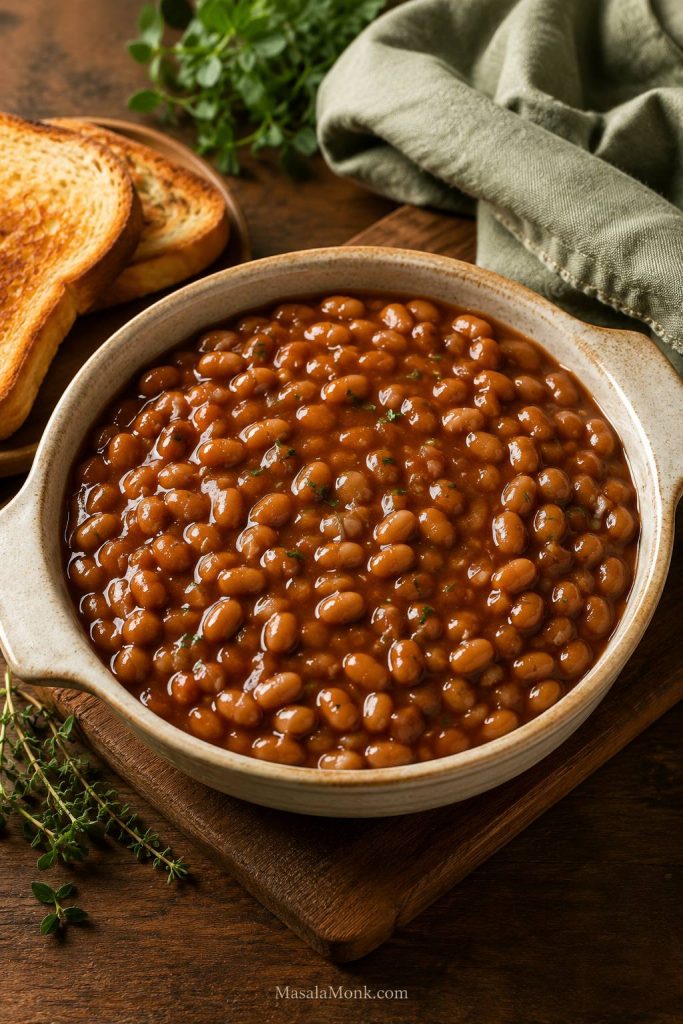
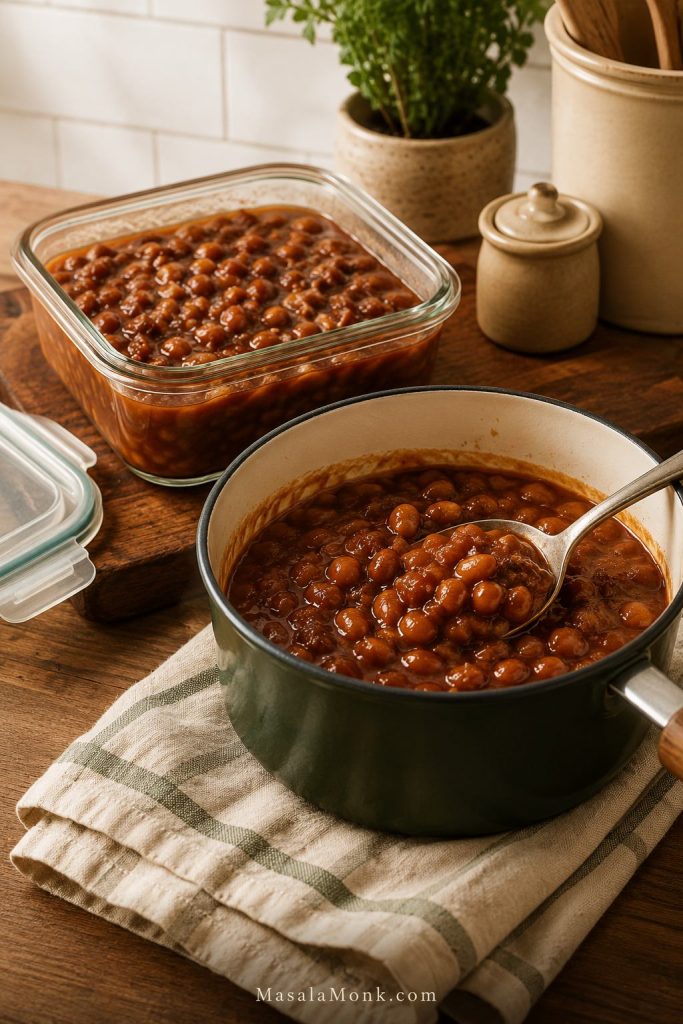
Good baked beans should taste like they took their time, even when you start with cans. The sauce should cling to the spoon, the edges should bubble and darken, and the flavor should land somewhere between sweet, tangy, deeply savory, and just smoky enough to feel slow-cooked.
This baked beans recipe is made for the way people actually cook: with whatever beans are already in the pantry. Plain canned beans, canned baked beans, and dried navy beans can all lead to a thick, balanced, homemade-tasting pan — with bacon, without pork, vegetarian, vegan, lower-sugar, and lower-sodium adjustments built in.
That means fewer store trips, less guessing with sweet canned beans, and dried beans that turn tender before they ever meet the sauce. Brown sugar and molasses bring familiar sweetness, mustard and vinegar add lift, onion and garlic make the beans taste cooked, and the oven gives you those glossy edges people keep sneaking from the pan.
This is the kind of side dish that quietly disappears from the corner of the pan while everyone is still “just tasting.”
For beans as a full dinner instead of a side dish, this bean stew recipe turns canned or cooked beans into a thick, hearty one-pot meal.
For easy homemade baked beans, start with plain canned white beans, navy beans, Great Northern beans, or cannellini beans. Drain and rinse the beans, then simmer them briefly in a sauce made with sautéed onion, ketchup or tomato sauce, a little barbecue sauce, brown sugar or molasses, mustard, apple cider vinegar, smoked paprika, and optional bacon.
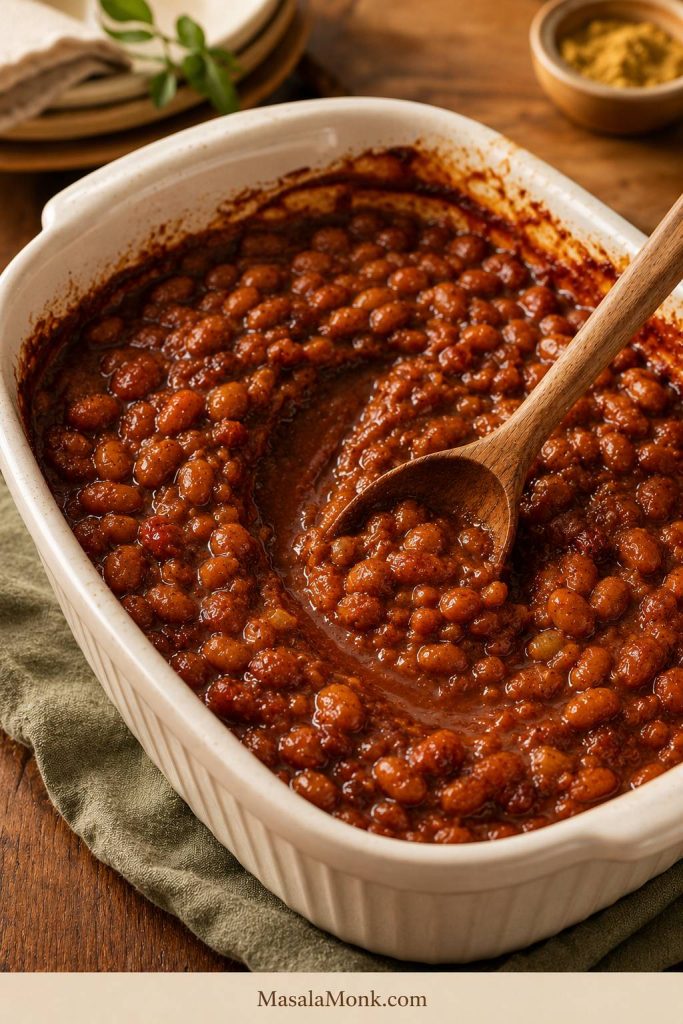
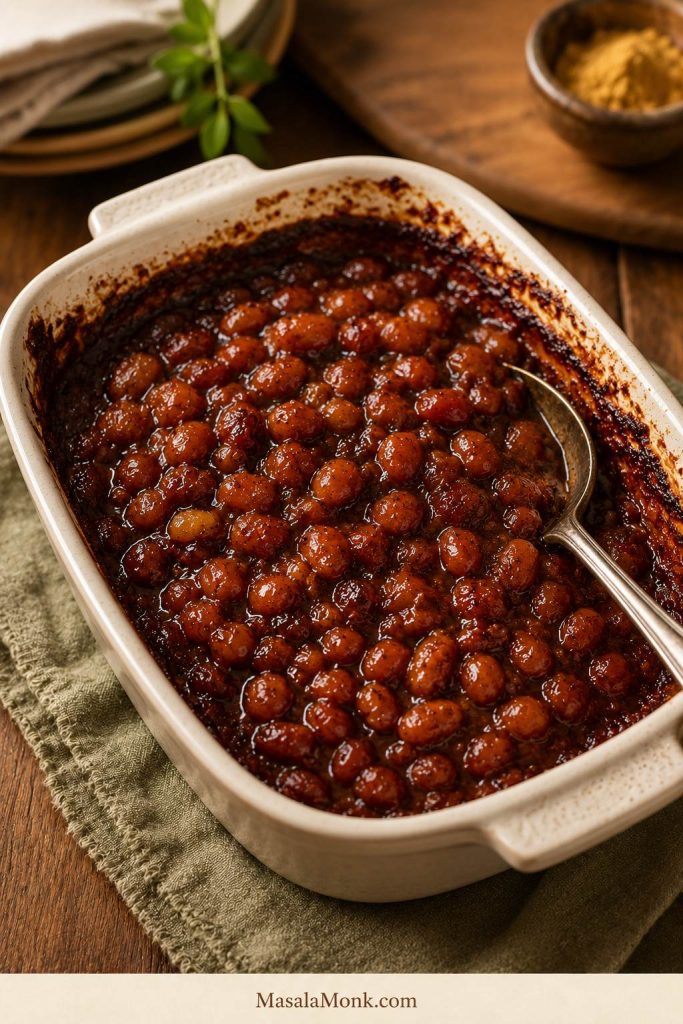
Bake uncovered at 350°F / 175°C for 55 to 70 minutes, until the edges bubble, the sauce darkens, and it coats the beans instead of pooling around them. Rest the beans for 10 to 15 minutes before serving so the sauce can settle into the pan.
Use the spoon test before serving. When the beans hold together in a full scoop, the sauce has reduced enough to rest.
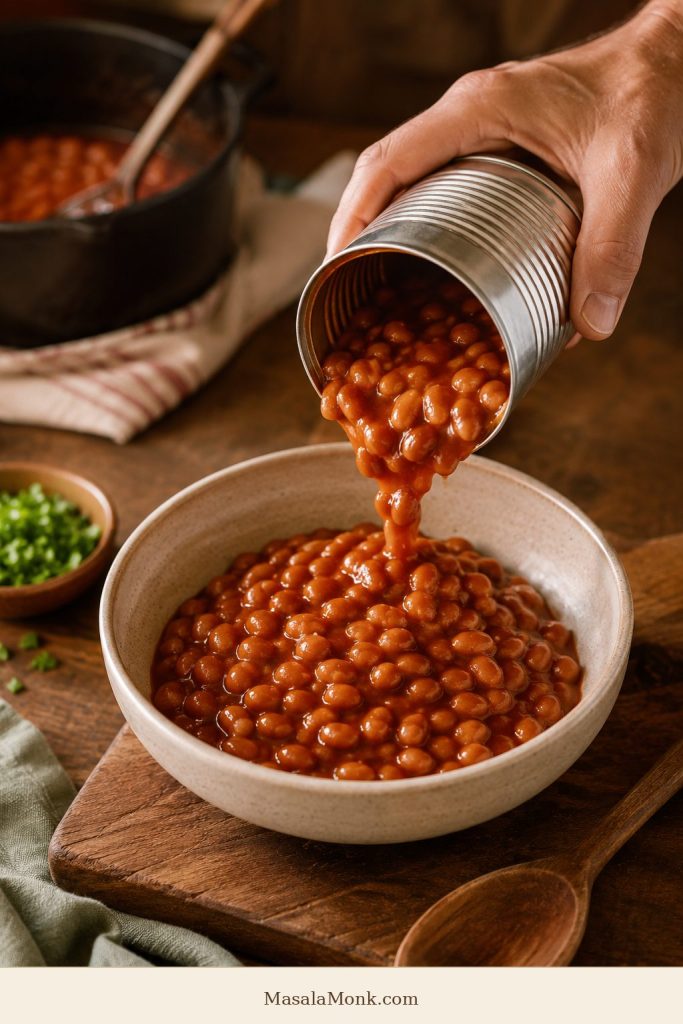
Shortcut note: Starting with canned baked beans? Treat sweetness as an adjustment, not the starting point. Most cans already bring sugar, salt, and sauce; your job is to add onion, tang, cooked flavor, and a better baked texture.
Most reliable beans: Plain canned navy beans, Great Northern beans, cannellini beans, or small white beans
Classic from-scratch beans: Dried navy beans
Quickest shortcut: Canned baked beans, adjusted with onion, mustard, vinegar, cooked flavor, and less sugar
Oven temperature: 350°F / 175°C
Cook time: 55 to 70 minutes for the main canned-bean version
Rest time: 10 to 15 minutes
Dish: 9×13-inch / 23×33 cm baking dish or Dutch oven
Texture cue: Bubbling edges, glossy top, and sauce that slowly settles when spooned
Serving cue: Serve after a short rest, when the sauce has stopped running and starts clinging to the beans
Why This Recipe Works
This recipe works because it does not force you into one starting point. A pantry can of white beans, a can of baked beans, and a bag of dried navy beans can all become a good pan — they just need slightly different handling.
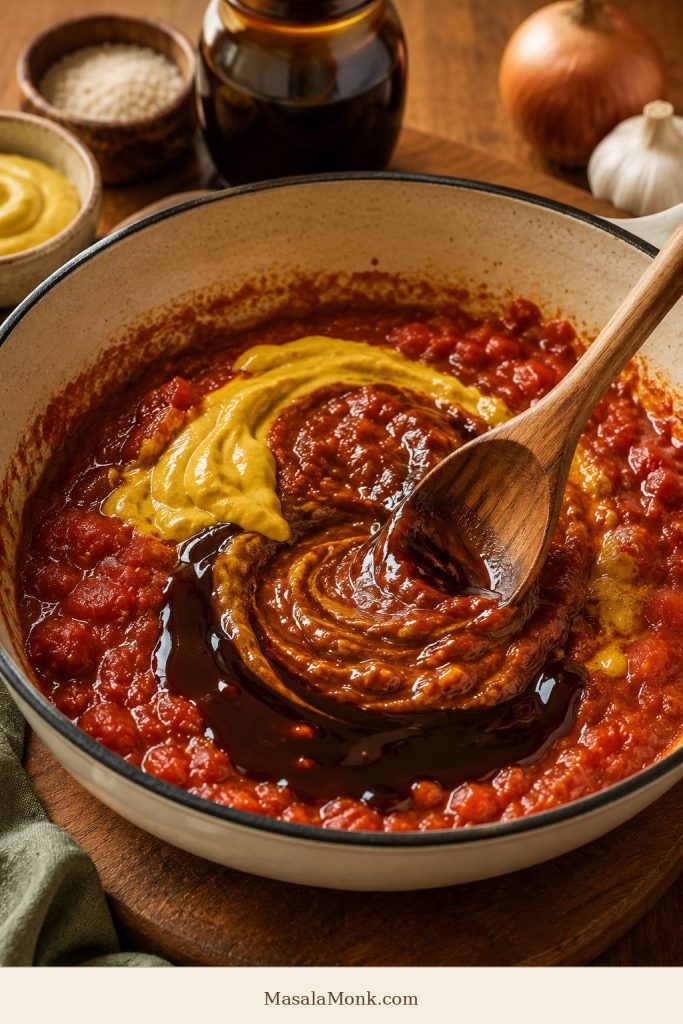
The sauce is layered instead of just sweet. Onion and garlic create a savory base. Ketchup or tomato sauce gives body. Brown sugar and molasses bring that familiar baked-bean flavor. Mustard and vinegar keep the sauce bright. Smoked paprika adds a warm barbecue-style note, especially when there is no bacon in the pan.
Uncovered baking does the slow work. It concentrates the sauce, deepens the flavor, and gives the edges that slightly caramelized finish that makes the beans taste like they have been sitting near the grill for hours.
The baked beans balance test: Before baking, the sauce should taste a little stronger than the finished beans: sweet, tangy, savory, and loose enough to reduce in the oven. If it tastes flat, add mustard, vinegar, or a savory note before adding more sugar.
Canned Beans, Canned Baked Beans, or Dried Beans?
The best starting point is not the same for everyone. A weeknight pan, a potluck shortcut, and a from-scratch weekend batch all need slightly different handling.
Choose your starting point
Choose plain canned beans when you want the easiest homemade-tasting version.
Reach for canned baked beans when you need a fast potluck or cookout shortcut.
Start with dried navy beans when you want the most old-fashioned texture and do not mind extra time.
Plain canned white beans give you control. After draining and rinsing, you can build a cleaner baked beans sauce from scratch.
Starting Point
When to Use It
What to Know
Plain canned white beans
Easy homemade flavor
Fast, flexible, and less sweet than canned baked beans. This is the most reliable starting point for this recipe.
Canned baked beans
Fast shortcut
Already sweet and seasoned. Do not rinse them; adjust the sauce instead.
Dried navy beans
From-scratch version
Cook until fully tender before adding tomato, vinegar, molasses, or sugar.
Pork and beans
Classic cookout shortcut
Good with bacon, barbecue sauce, mustard, brown sugar, and a longer uncovered bake.
Cannellini or Great Northern beans
Easy substitute
Larger and creamier than navy beans, but reliable in a homemade sauce.
Pinto beans
BBQ-style variation
Earthier and heartier. Good for barbecue-style beans, potlucks, and mixed-bean versions.
Plain canned beans means cooked beans packed in liquid, usually not sweet. Canned baked beans means beans already packed in a seasoned tomato-style sauce. Treat them differently.
For this recipe, plain canned white beans are the easiest starting point. The beans are already tender, but the flavor is still yours to build — sweetness, tang, salt, depth, and final texture all stay in your hands.
Canned baked beans are already sweet and sauced. Upgrade them with onion, acid, smoke, and oven time instead of more sugar.
Which Beans Work Best for Baked Beans?
The classic bean for baked beans is the navy bean, also called a haricot bean in some places. It is small, creamy, and holds its shape well in a thick sauce.
The good news is that baked beans are forgiving. The exact bean matters less than tenderness, sauce balance, and enough oven time.
Navy beans / haricot beans: the classic baked bean choice.
Great Northern beans: slightly larger, creamy, and easy to use.
Cannellini beans: larger and softer, but very convenient.
Pinto beans: good for barbecue-style baked beans.
Mixed beans: better for potluck or barbecue-style versions than classic baked beans.
For the cleanest homemade flavor, use plain canned navy beans or Great Northern beans. For the most traditional from-scratch version, use dried navy beans. All you have is cannellini or small white beans? Use them. As long as the beans are tender and the sauce is balanced, the pan will still work.
Navy beans are traditional, but Great Northern and cannellini beans also work. Choose white beans that soften well and hold sauce.
For a more complete rice-and-beans meal, this red beans and rice recipe is a better fit than a sweet-savory baked bean side.
Which Pan or Pot Works Best?
The dish changes how quickly the sauce settles around the beans. Wide baking dishes give more surface area, so the sauce tightens faster. Deeper casseroles keep the beans saucier, while a Dutch oven lets you sauté, simmer, and bake in the same pot.
9×13-inch / 23×33 cm baking dish: the most reliable choice for a glossy, spoonable sauce because it gives the beans more surface area.
Dutch oven: best for one-pot cooking from stovetop to oven.
2–3 quart casserole dish: works well, but keeps the beans saucier and may need more time.
Slow cooker: useful for keeping baked beans warm, but it will not give the same caramelized edges.
Thin metal pan: not ideal for long baking because sugary sauce can scorch at the edges or bottom.
Choose the 9×13 dish for a spoonable, glossy sauce. A Dutch oven is better for one-pot convenience. For parties, bake the beans first, then keep them warm in a slow cooker. Need a full slow-cooker beans-and-sausage dinner? Use this slow cooker sausage casserole recipe.
The pan changes the result. A wide dish reduces sauce faster, while a deeper Dutch oven keeps baked beans softer and saucier.
Ingredients You’ll Need
This recipe makes one 9×13-inch pan, about 8 to 10 servings.
Beans
Use 3 cans of plain white beans, 15 oz / 425 g each, drained and rinsed. Navy beans, Great Northern beans, cannellini beans, or small white beans all work.
If your cans are 400 g / 14 oz, use 3 cans for the same sauce ratio. Use 4 cans only for a larger batch, and increase the sauce by about one-quarter so the beans do not turn out under-sauced.
Onion and Garlic
Onion gives the sauce its savory base. Garlic adds depth. This is where the canned-bean flavor starts becoming cooked, not just mixed.
Ketchup, Tomato Sauce, or Tomato Paste
Ketchup gives sweetness, tang, and body. Tomato sauce gives a less sweet base. Tomato paste is optional, but useful when you want the sauce to cling better with less added sugar.
Barbecue Sauce
A little barbecue sauce adds cookout flavor and roundness. Use it as a background note, not the whole personality of the dish.
Brown Sugar and Molasses
Brown sugar gives quick sweetness. Molasses gives deeper, darker baked-bean flavor. Together, they create the old-fashioned sweetness people expect from baked beans. Use both for a classic sweet-savory sauce, or reduce the brown sugar for a less sweet pan.
Mustard and Vinegar
Mustard and vinegar keep the sauce balanced. They should not make the beans sour. They should make the sweetness taste brighter and less heavy. This is the difference between beans that taste flat and beans people keep spooning back onto the plate.
Smoked Paprika
Smoked paprika gives a warm, savory edge, especially useful when you are making baked beans without bacon or pork.
Worcestershire, Soy Sauce, or Tamari
A small amount adds rounded flavor. Standard Worcestershire sauce often contains anchovies, so use vegetarian Worcestershire, soy sauce, or tamari for vegetarian or vegan baked beans. A little goes a long way, especially once the sauce reduces.
Build the sauce in layers: tomato for body, mustard for brightness, molasses for depth, and spice for a slow-cooked finish.
Bacon, Optional
Bacon adds salt, fat, and a savory edge. It is good, but not required. For no-pork baked beans, use olive oil or butter and build flavor with smoked paprika, mustard, vinegar, and a little vegetarian Worcestershire, soy sauce, or tamari.
Important: Starting with canned baked beans instead of plain canned beans? Taste before adding brown sugar or molasses.
What the Sauce Should Look Like
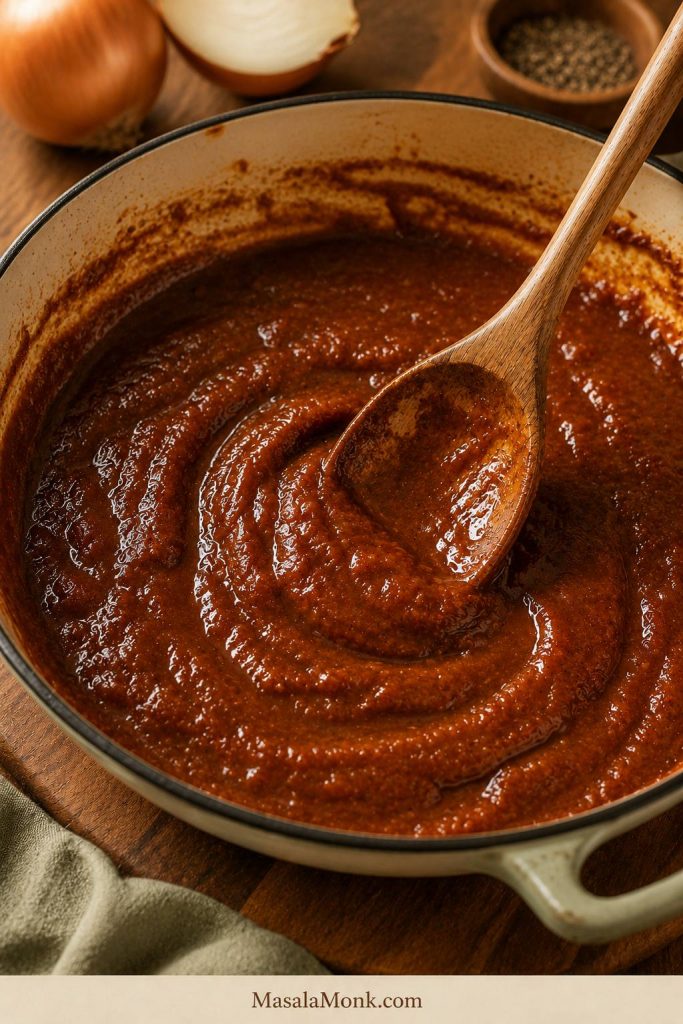
Baked beans are simple, but the texture matters. Too loose, and they taste like beans floating in sauce. Too dry, and they feel heavy. Aim for a sauce that coats the beans, bubbles at the edges, and firms up slightly as it rests.
A loose-looking pan halfway through baking is normal. The beans need room to bake into the sauce, and the final stretch plus the rest time are where the sauce turns spoonable.
Texture cues by stage
Stage
What You Should See
What It Means
Before baking
The beans look saucy and slightly loose.
The oven will reduce the sauce, so do not start with a dry mixture.
Halfway through baking
The edges bubble first and the top starts to darken slightly.
Stir once if the edges are reducing much faster than the center.
At the end
The surface looks glossy and the sauce no longer pools like liquid.
The beans are nearly ready. The sauce will cling better after resting.
After resting
A spoon leaves a slow trail through the beans.
This is the best serving texture.
If the sauce looks too thick before baking, add a splash of water, stock, or bean cooking liquid. If it looks watery near the end, keep baking uncovered and let the pan sit before judging the final texture. A little looseness at the end is fine; beans that look perfect the second they leave the oven can become too thick after resting.
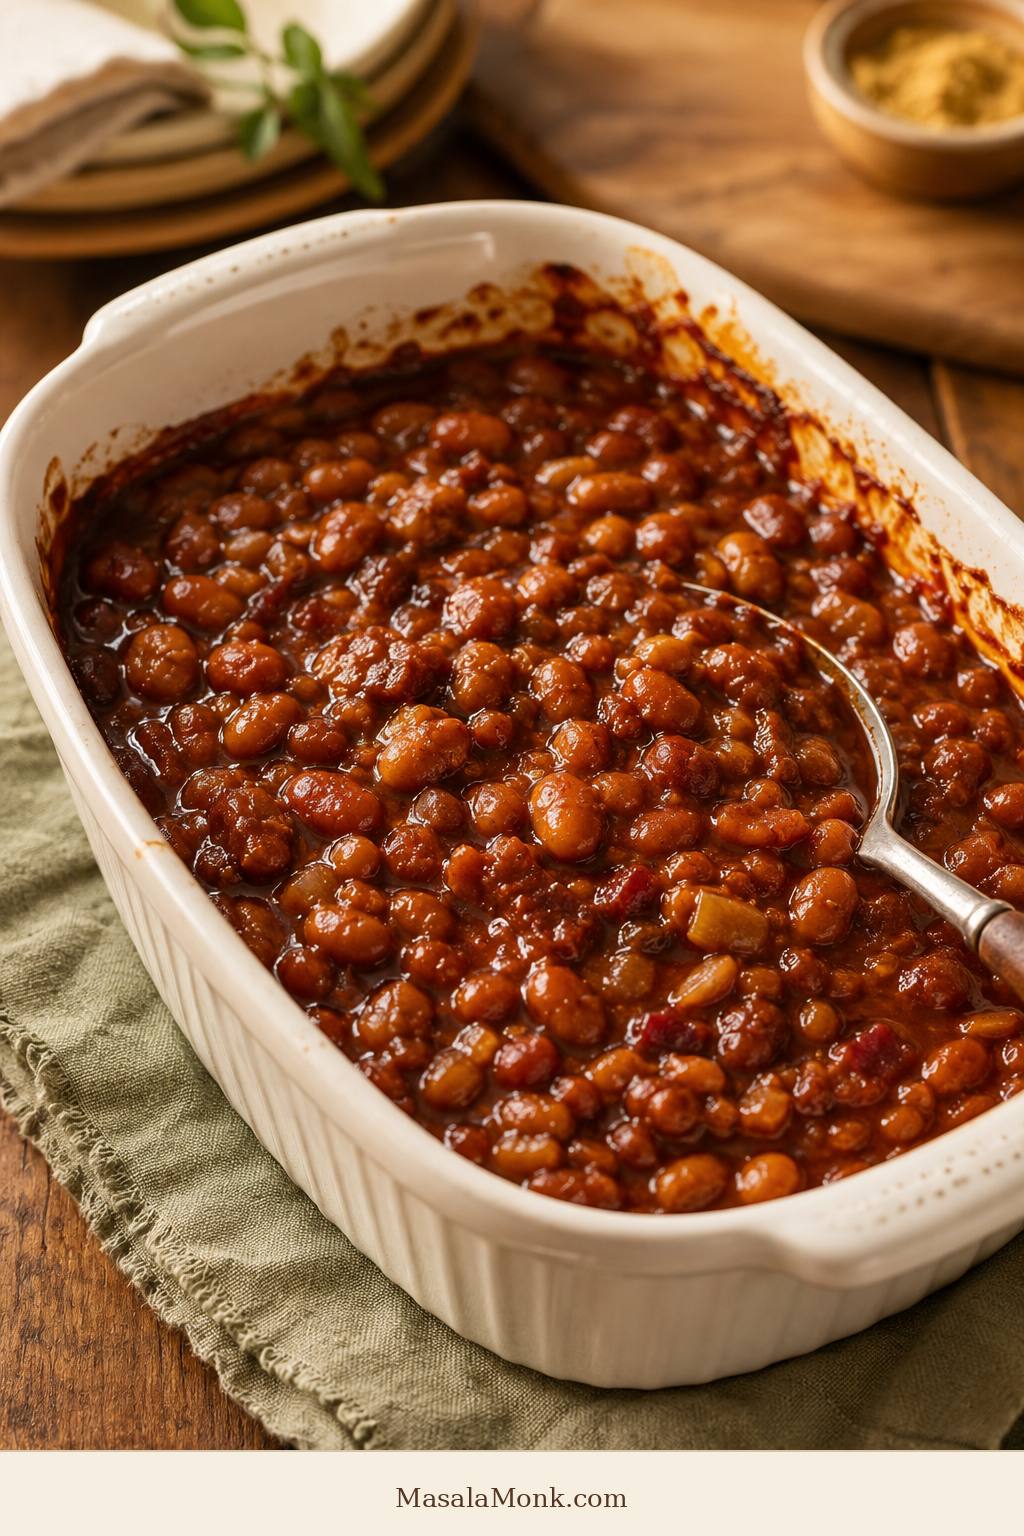
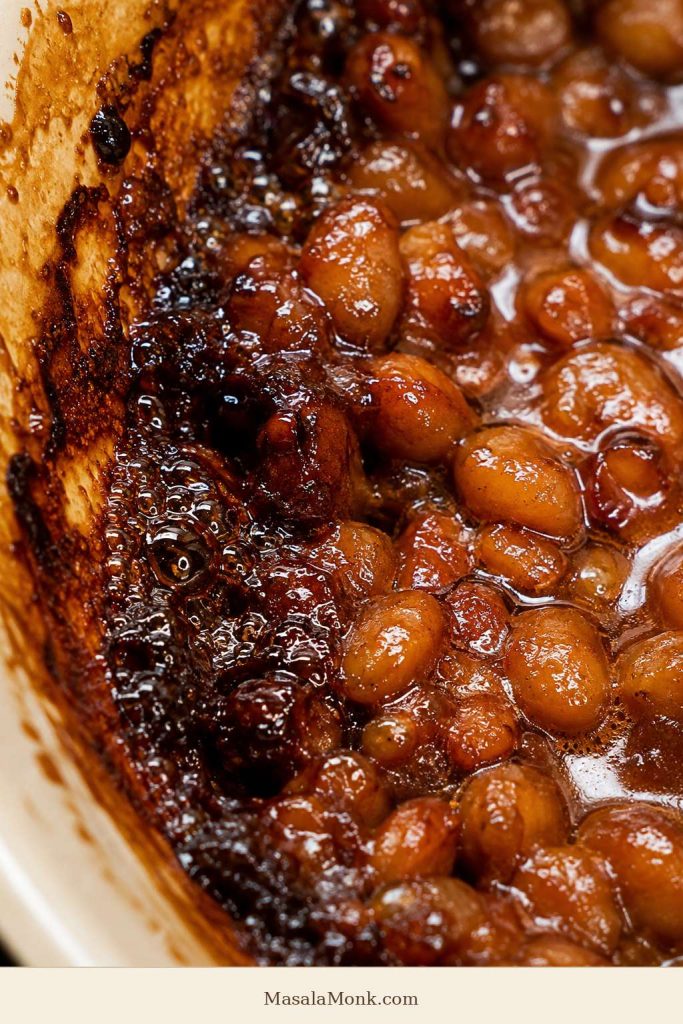
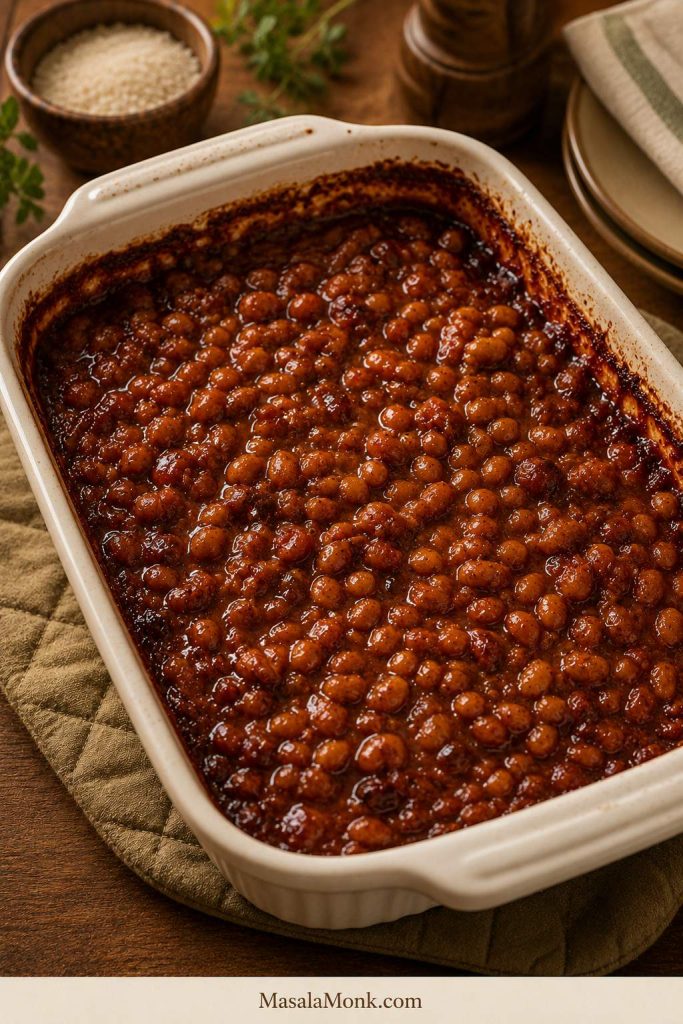
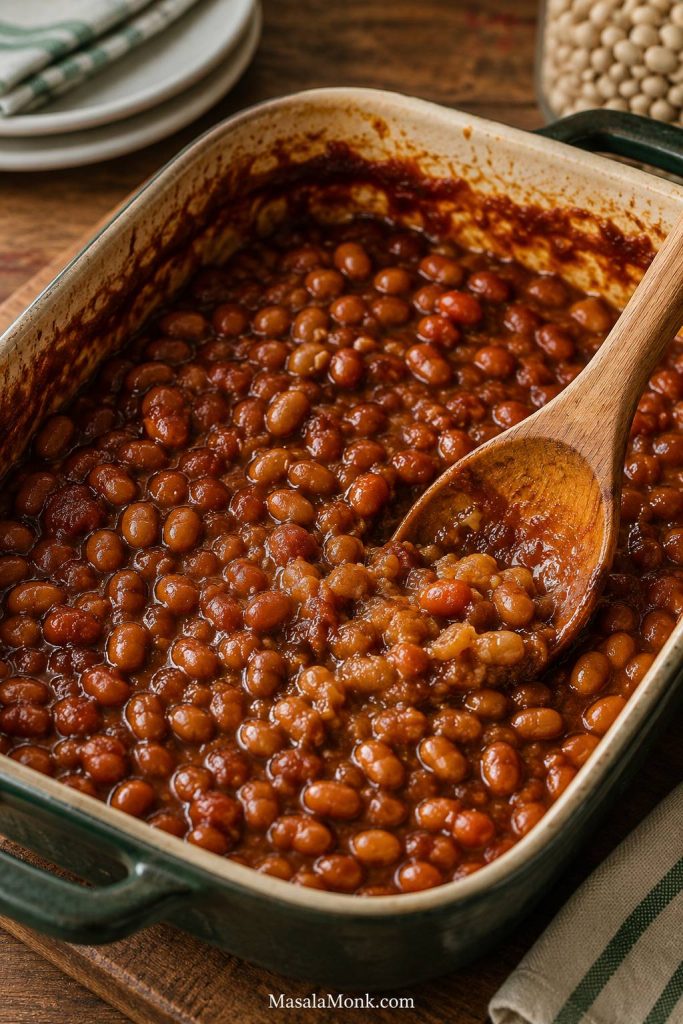
Bubbling edges mean the sauce is concentrating. As the sides darken slightly, the baked beans move from saucy to properly baked.
How to Make Baked Beans With Canned Beans
Once the beans and pan are sorted, the method is simple: build flavor in a skillet, let the oven do the slow work, then give the pan a short rest before serving.
1. Heat the Oven
Preheat the oven to 350°F / 175°C. Use a 9×13-inch / 23×33 cm baking dish for more surface area, or a Dutch oven to sauté and bake in the same pot.
2. Cook the Bacon, If Using
If using bacon, cook 4 to 6 slices in a skillet until partly crisp. Remove the bacon, chop it, and keep about 1 to 2 tablespoons of the drippings in the pan. If skipping bacon, heat 2 tablespoons of olive oil, butter, or another cooking fat instead.
3. Sauté the Onion and Garlic
Add 1 finely chopped medium onion and cook for 5 to 7 minutes, until soft and lightly golden. Add 2 minced garlic cloves and cook for another 30 seconds.
This step is small, but it changes the whole dish. It makes the beans taste cooked instead of simply mixed.
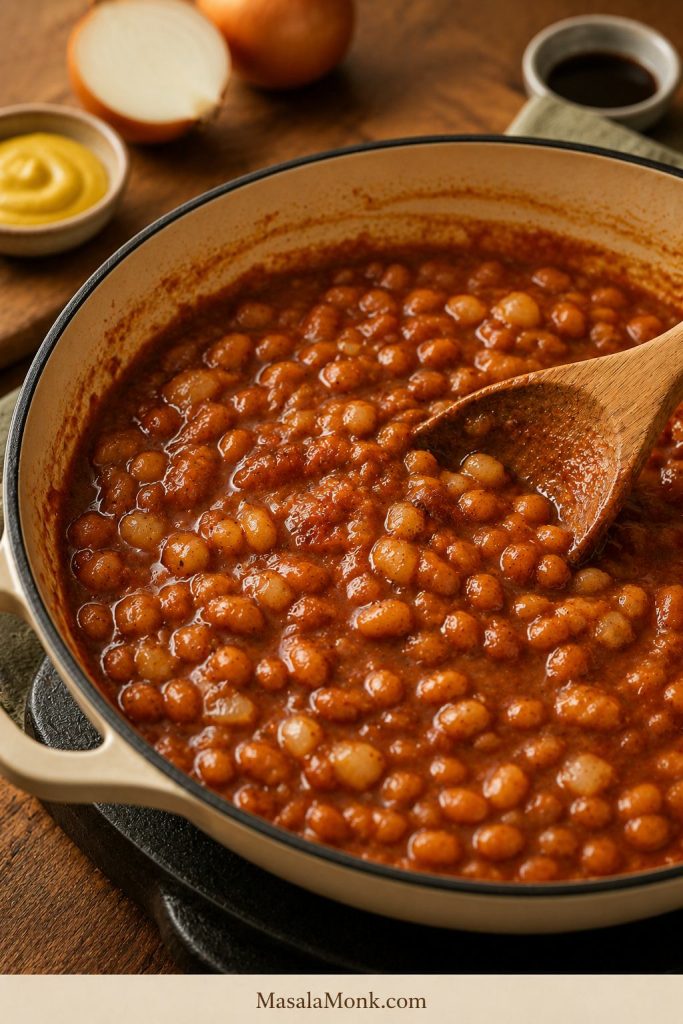
Start with onion when you want homemade flavor. This quick sauté gives canned or plain beans a savory base before the sauce goes in.
4. Build the Sauce
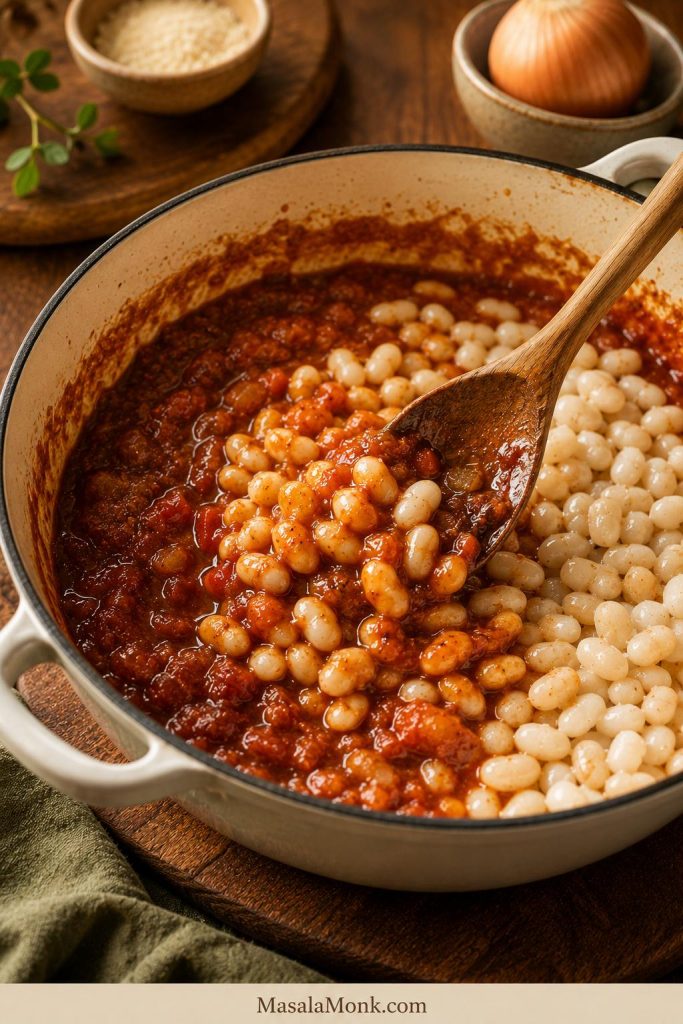
Stir in ketchup or tomato sauce, barbecue sauce, brown sugar, molasses, mustard, vinegar, smoked paprika, and black pepper. Tomato paste makes the sauce thicker and less sweet. Worcestershire, soy sauce, or tamari gives the pan more body when the flavor tastes flat.
Loosen the sauce with ¼ to ⅓ cup / 60 to 80 ml water, stock, or bean cooking liquid if it looks too tight before baking. Let it bubble for 2 to 3 minutes so everything comes together. Hold back extra salt until after the beans have baked and the sauce has concentrated.
Before adding beans, check the sauce on the spoon. It should taste bold now because the beans will soften the flavor later.
5. Add the Beans
Stir in the drained and rinsed beans gently so they are coated in the sauce. Taste the sauce before baking. It should be sweet, tangy, savory, and slightly stronger than you want the finished dish to be, because the beans will mellow it.
Fold gently at this stage. The beans should stay mostly whole while the sauce coats them and prepares to reduce in the oven.
6. Bake Uncovered
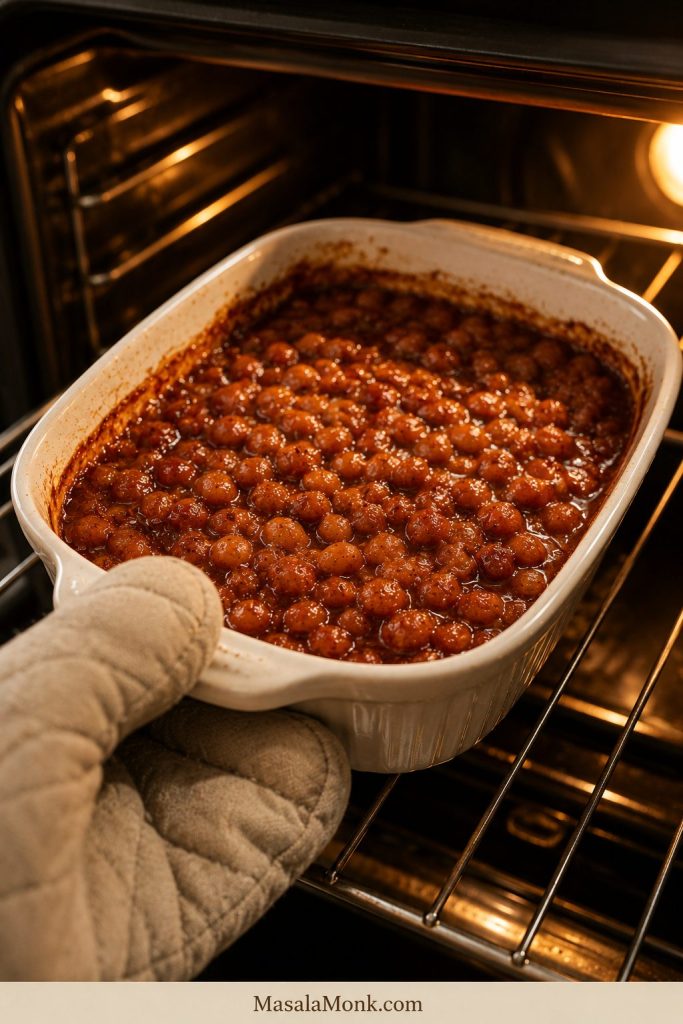
Transfer the beans to the baking dish. Scatter the chopped bacon over the top if using. Bake uncovered for 55 to 70 minutes, until the edges are bubbling and the sauce has tightened around the beans. Stir once around the halfway point if the edges are getting much darker than the center.
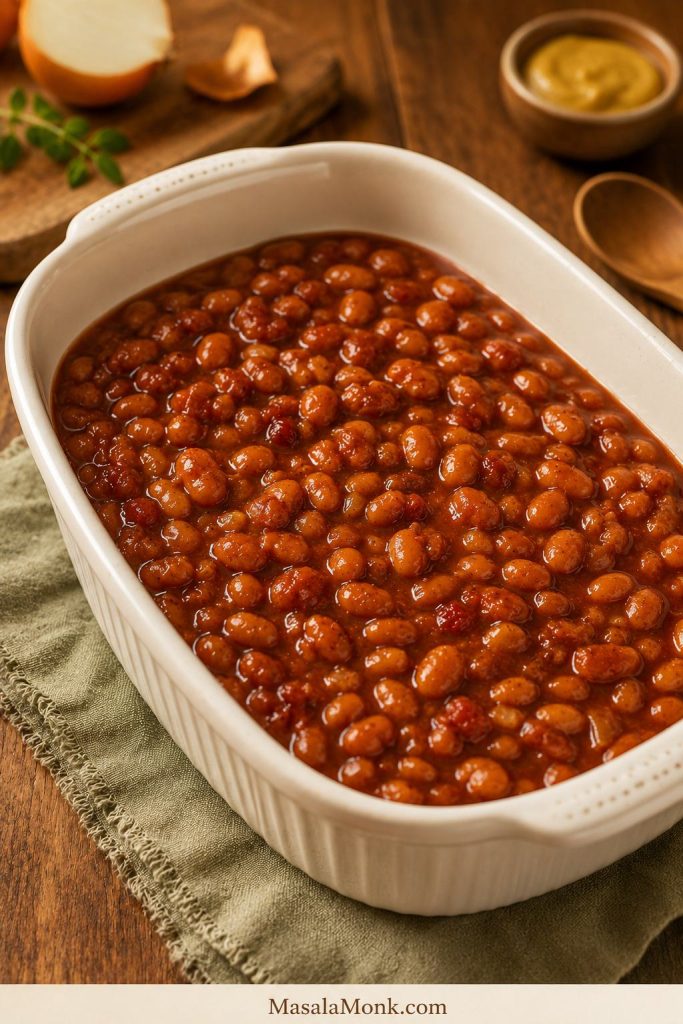
Before baking, the mixture should look looser than the final dish. That extra sauce protects the beans while the oven reduces it.
The pan should still look saucy when it goes into the oven. Uncovered heat will reduce the liquid, darken the edges, and turn the mixture into proper baked beans.
Uncovered oven time is where the recipe changes. The sauce thickens, the edges darken, and the flavors settle into the beans.
The edges usually tell you first. They bubble, darken, and start to look sticky before the center fully catches up.
When the pan is bubbling and the edges look darker, stop before it dries out. Resting will finish thickening the sauce.
If the beans still look a little saucy at 45 minutes, that is normal. The final stretch of baking and the short rest after the oven usually bring the sauce together.
7. Rest and Adjust
Let the baked beans rest for 10 to 15 minutes before serving. This is when the sauce stops looking separate and starts tasting settled. Taste after resting, then adjust with a little more vinegar, mustard, black pepper, or salt if needed.
After resting, drag a spoon through the pan. A slow trail means the baked beans are thick enough for serving.
Doneness cue: The beans are ready when the edges are bubbling, the top looks glossy, and the sauce slowly settles back when you drag a spoon through it.
Recipe Card: Easy Homemade Baked Beans
Tender white beans baked in a sweet-savory tomato-molasses sauce with onion, mustard, vinegar, smoked paprika, and optional bacon. Start with the main canned-bean version below, then use the notes for canned baked beans, dried navy beans, vegetarian, vegan, low-sugar, low-sodium, and no-pork adjustments.
Prep Time 15 minutes
Cook Time 55 to 70 minutes
Rest Time 10 to 15 minutes
Total Time About 1 hour 30 minutes
Servings 8 to 10
Times are for the canned-bean version. The dried-bean version needs soaking and simmering time before baking.
Equipment
9×13-inch / 23×33 cm baking dish or Dutch oven
Large skillet
Spoon or spatula
Foil, optional
Ingredients
Beans and Base
3 cans plain white beans, 15 oz / 425 g each, drained and rinsed, or 3 cans white beans, 400 g / 14 oz each, drained and rinsed
2 tablespoons olive oil, butter, or bacon drippings
1 medium onion, finely chopped
2 garlic cloves, minced, or ½ teaspoon garlic powder
Sauce
½ cup / 120 ml ketchup or tomato sauce
¼ cup / 60 ml barbecue sauce
¼ cup / 50 g brown sugar
2 tablespoons molasses or maple syrup
2 tablespoons yellow mustard or Dijon mustard
1 tablespoon apple cider vinegar, plus more to taste
1 teaspoon smoked paprika
½ teaspoon black pepper
¼ to ⅓ cup / 60 to 80 ml water, stock, or bean cooking liquid, as needed
Optional Flavor Boosters
1 tablespoon tomato paste, for a thicker sauce
1 teaspoon Worcestershire sauce, soy sauce, or tamari
⅛ teaspoon liquid smoke, optional; use up to ¼ teaspoon only for a stronger smoky flavor
Salt, added carefully at the end, to taste
Optional Bacon
4 to 6 slices bacon
Instructions
Preheat the oven to 350°F / 175°C.
If using bacon, cook it in a skillet until partly crisp. Remove, chop, and set aside. Keep 1 to 2 tablespoons of the drippings in the pan. If skipping bacon, heat olive oil or butter instead.
Add the onion and cook for 5 to 7 minutes, until soft and lightly golden. Add the garlic and cook for 30 seconds.
Stir in the ketchup or tomato sauce, barbecue sauce, brown sugar, molasses, mustard, vinegar, smoked paprika, and black pepper. Add tomato paste, Worcestershire, soy sauce, tamari, or liquid smoke if using. Add a splash of water, stock, or bean cooking liquid if the sauce looks too tight. Do not add extra salt yet unless you are sure your beans and sauces are unsalted.
Stir in the drained beans gently until coated.
Transfer to a 9×13-inch / 23×33 cm baking dish or keep in a Dutch oven. Scatter bacon over the top if using.
Bake uncovered for 55 to 70 minutes, until bubbling at the edges and glossy. Stir once if the edges are getting darker faster than the center.
Rest for 10 to 15 minutes before serving. Taste and adjust with a little more vinegar, mustard, black pepper, or salt if needed.
Notes
Bean starting points
Balance test: Before baking, the sauce should taste sweet, tangy, savory, and slightly stronger than the finished beans.
Canned baked beans: Use 2 large cans, about 28 oz / 794 g each. Do not rinse them. Start with no extra sugar; add onion, mustard, vinegar, smoked paprika, and a little barbecue sauce.
Dried beans: For a batch close to the main recipe, use 12 oz / 340 g dried navy beans. Soak overnight, simmer until creamy, then sauce and bake. With 1 lb / 454 g dried beans, increase the sauce by about one-third.
Adjustments
Vegetarian baked beans: Skip bacon and use olive oil or butter. Add smoked paprika, mustard, vinegar, and vegetarian Worcestershire or soy sauce for rounded flavor.
Vegan baked beans: Use olive oil, maple syrup or molasses, smoked paprika, tomato sauce, mustard, vinegar, and tamari or soy sauce. Check that your barbecue sauce is vegan.
Low-sugar baked beans: Reduce brown sugar by half, use tomato sauce instead of ketchup, and balance the sauce with mustard, vinegar, tomato paste, and smoked paprika.
Low-sodium baked beans: Rinsed plain beans are easier to control than canned baked beans. Use low-sodium tomato sauce and salt only at the end.
Salt control: Bacon, canned baked beans, Worcestershire, soy sauce, tamari, and salted beans can all add salt, so taste before adding more.
Thicker baked beans: Bake uncovered longer, use a wider dish, or mash a few spoonfuls of beans and stir them back in.
Storage: Refrigerate for 3 to 4 days or freeze for up to 3 months.
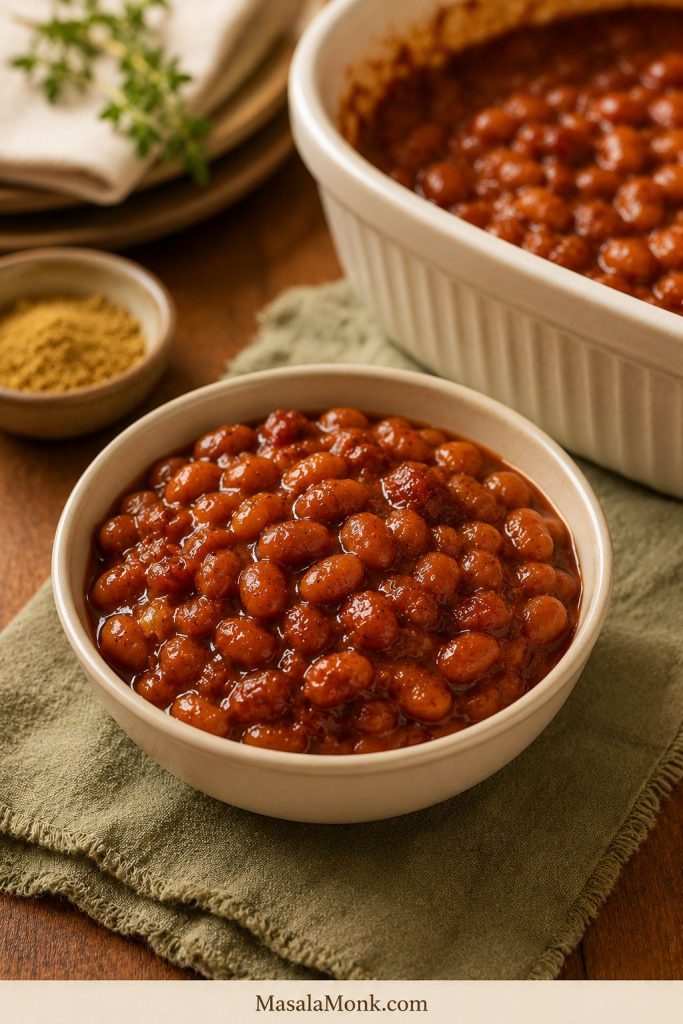
A good serving bowl should show tender beans coated in sauce, without a watery pool at the bottom.
For a from-scratch batch close to the main canned-bean recipe, use 12 oz / 340 g dried navy beans. A full 1 lb / 454 g bag makes a larger batch, so increase the sauce by about one-third.
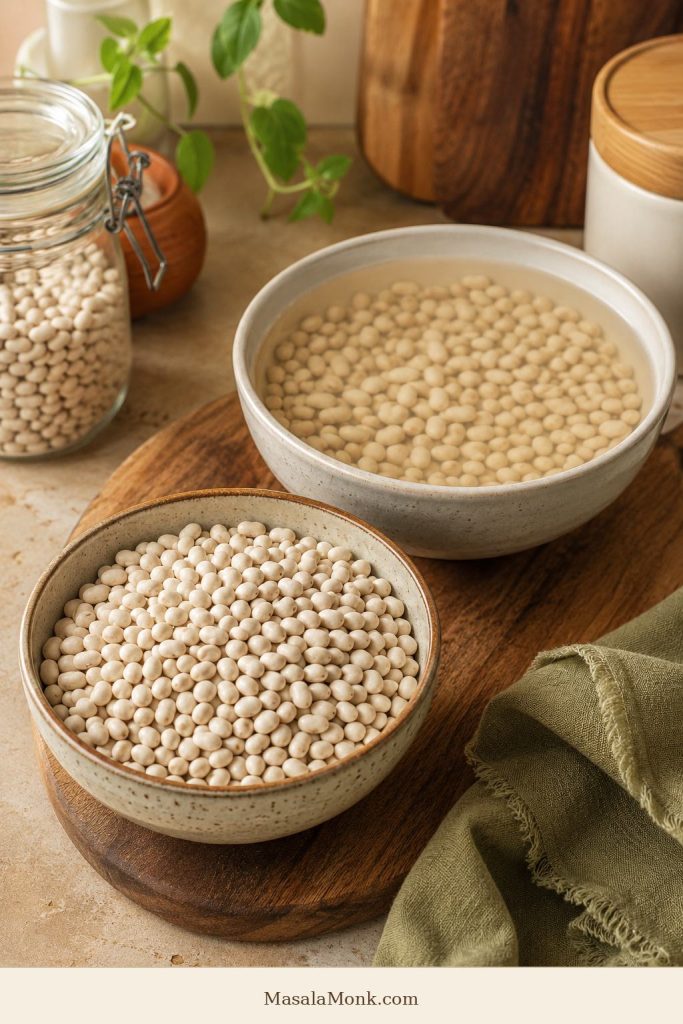
Dried navy beans need to turn tender first. Then the molasses, mustard, tomato, and vinegar can season them without keeping them firm.
Think of dried beans as a two-step job: first make them tender in water, then make them flavorful in sauce.
Rinse the beans, then soak them in plenty of water for 8 to 12 hours. Drain and rinse again. Put the beans in a pot with fresh water and simmer until tender, usually 45 to 90 minutes, depending on the age of the beans.
The beans should be creamy inside before they go into the sauce. Do not stop when they are merely “not crunchy.” Once tomato, vinegar, molasses, or sugar are added, firm beans can take much longer to soften.
Test dried beans before adding sweet or acidic sauce. Otherwise, the flavor may be right while the beans stay too firm.
Save some of the bean cooking liquid before draining. Once the beans are tender, continue with the sauce and baking method above. Bake at 325°F / 163°C for a deeper, slower version, or 350°F / 175°C for the standard version. Add reserved bean liquid if the beans get too thick before the sauce is done.
Important dried-bean rule: Tenderness comes before sauce. Cook dried beans until creamy and tender before adding tomato, vinegar, molasses, or sugar.
Can You Quick-Soak the Beans?
Yes. Cover rinsed beans with plenty of water, bring them to a boil, boil for 2 minutes, then turn off the heat. Cover and let them rest for 1 hour. Drain, rinse, and simmer in fresh water until tender before adding the sauce.
Can You Skip Soaking the Beans?
You can, but the simmering time will be longer and less predictable. Rinse the beans, cover them with plenty of water, and simmer until fully tender before adding them to the sauce.
If beans stay firm after a long simmer, they may be old. Keep simmering them in fresh water before adding sauce; do not try to force them tender in a sweet-acidic sauce.
How Much Cooked Bean Do You Get From Dried Beans?
One pound / 454 g dried navy beans usually gives roughly 6 to 7 cups cooked beans, depending on the beans and cooking time. That is more than the main canned-bean batch, so increase the sauce if using the full pound.
For a deeper dry-bean preparation guide, North Dakota State University Extension has a useful all-about-beans guide.
How to Make Canned Baked Beans Taste Homemade
Canned baked beans can taste like a real baked side dish, not just something warmed from a tin. The fastest route is simple: keep the can as the base, add onion and tang, hold back on sweetness, then bake uncovered until the sauce tastes cooked instead of canned.
Use 2 large cans of baked beans, about 28 oz / 794 g each. Do not rinse them; the sauce is part of the shortcut. Sauté a small chopped onion in oil, butter, or bacon drippings, then add mustard, apple cider vinegar, smoked paprika, a little barbecue sauce, and bacon if using. Add extra sugar only after tasting.
To make canned baked beans taste homemade, warm them with onion, mustard, vinegar, and smoky seasoning before baking.
Bake uncovered at 350°F / 175°C for 45 to 60 minutes, until bubbling and glossy. If the beans still look loose, give them more uncovered time. A top that darkens too quickly just needs one stir and a loose cover.
After baking, the shortcut should look darker, thicker, and more cooked-in. That is the difference between opened and upgraded.
Canned baked beans usually need onion, tang, and enough cooked flavor to stop tasting straight from the can — not more sweetness first.
Quick Fixes for Canned Baked Beans
Problem
What to Add or Do
Too sweet
Add mustard, vinegar, tomato paste, smoked paprika, or more unsweetened beans.
Watery sauce
Bake uncovered, use a wider dish, simmer first, or mash a few beans.
Add unsalted beans, tomato sauce, or a splash of water. Avoid adding more BBQ sauce or bacon.
Thin sauce
Bake longer uncovered, use tomato paste, or mash a small portion of beans.
Canned taste
Sauté onion first, add acid and rounded flavor, then bake uncovered until the sauce darkens and clings to the beans.
A slow cooker is useful for keeping canned baked beans warm, but it will leave them softer and saucier than the oven. Bake first for the best flavor, then hold warm for serving.
Baked Beans Time and Temperature Guide
The oven temperature changes the finish. A hotter oven reduces the sauce quickly. A lower oven gives a deeper, slower flavor. For most home cooks, 350°F / 175°C is the most reliable default because it tightens the sauce without drying the beans too fast.
Method
Temperature
Time
Use It For
What to Watch
Quick canned baked beans
400°F / 204°C
30–35 minutes
Fast weeknight side
Reduces quickly, so watch for dry edges.
Standard baked beans
350°F / 175°C
55–70 minutes
Most reliable method
Good balance of reduction and control.
Low-and-slow baked beans
325°F / 163°C
1½–2 hours
Deeper cookout flavor
Add liquid if the sauce gets too tight before flavor develops.
Dried bean baked beans
325–350°F / 163–175°C
1½–3 hours after beans are cooked
From-scratch version
Beans must be fully tender before saucing.
Slow cooker baked beans
Low
3–5 hours for canned base
Potlucks and keeping warm
Convenient, but less caramelized and often saucier.
If you are building a holiday or potluck oven schedule, baked beans also sit well beside a 350°F side like green bean casserole. For a sweeter holiday table, they can share the make-ahead plan with sweet potato casserole.
Should Baked Beans Be Covered or Uncovered?
Bake baked beans uncovered when you want the sauce to reduce, tighten, and darken around the edges. This is the most reliable method for this version.
Cover the dish when the beans are drying out before they are hot and tender, or when the edges are darkening too quickly. For very saucy beans, bake covered for the first 30 minutes, then uncover and continue baking until the sauce has lost its watery edge.
Easy rule: Watery beans need uncovered baking. Dry edges need a stir and a loose cover.
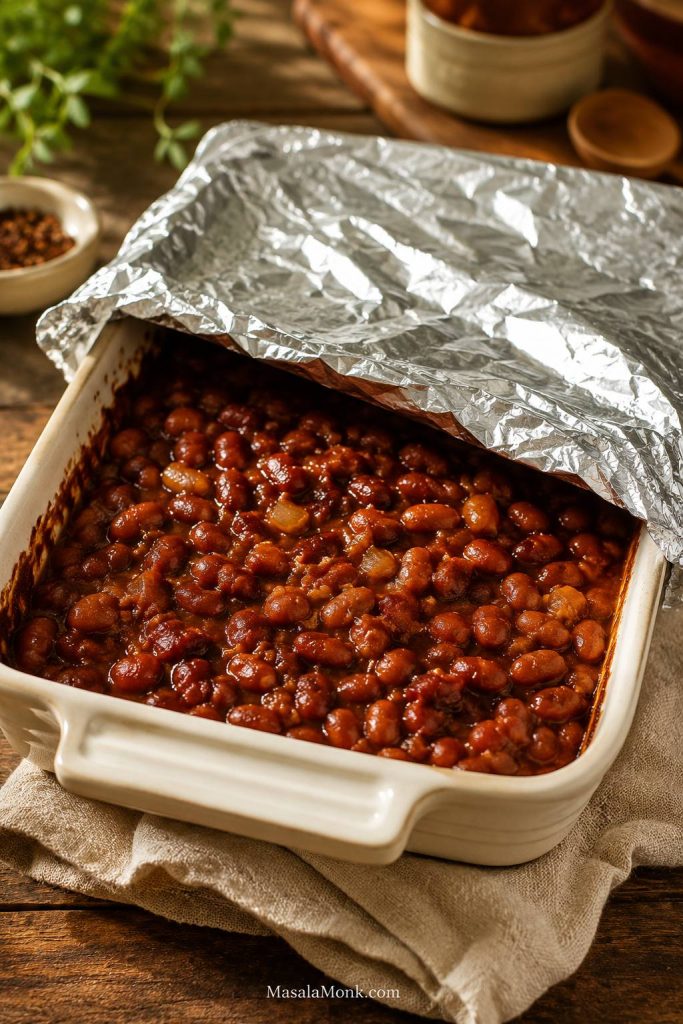
Use foil only when the edges darken too fast. Keep it loose so steam can escape and the sauce can still finish.
Easy Baked Beans Variations
Once the basic pan is working, these small changes let you take it toward BBQ, Boston-style, vegetarian, vegan, low-sugar, or no-pork baked beans without starting over.
Southern BBQ Baked Beans
This is the cookout version: a little bolder, a little smokier, and ready for a plate with ribs, hot dogs, grilled chicken, cornbread, or air fryer burgers. Lean more into barbecue sauce, smoked paprika, bacon, and brown sugar, but stop before the beans taste like bottled sauce.
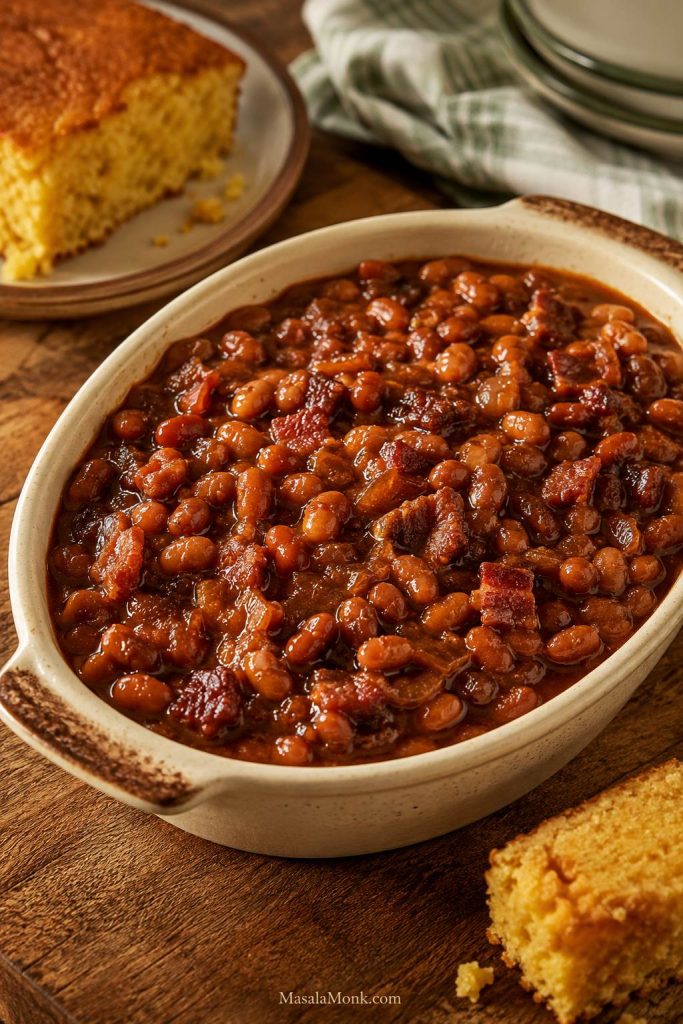
Southern BBQ baked beans should feel smoky and bold. Bacon, darker sauce, and cornbread push them toward cookout territory.
Boston-Style Baked Beans
Boston-style baked beans are darker, slower, and more molasses-forward. Lean on navy beans, molasses, mustard, onion, and bacon or salt pork, then bake lower and slower for a more traditional pan.
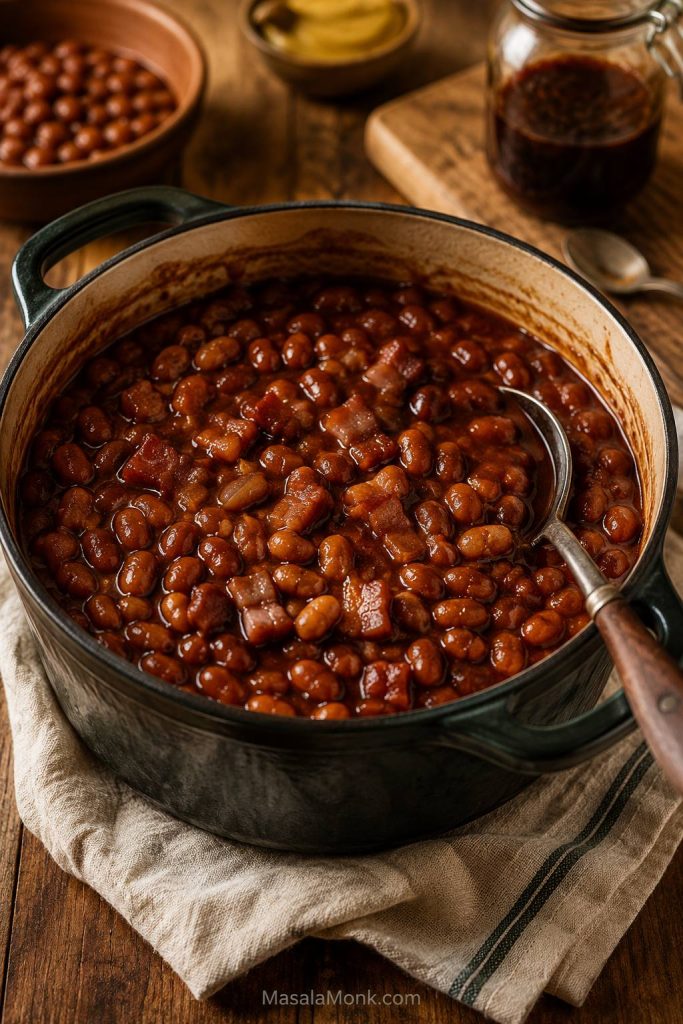
Boston-style baked beans lean deeper and more molasses-forward. Navy beans and a slower bake give this version its old-fashioned feel.
Vegetarian Baked Beans
Vegetarian baked beans still need the same rounded, cookout-style flavor. Skip the bacon, but replace what it usually brings: richness from olive oil or butter, smoke from paprika, brightness from mustard and vinegar, and a salt-and-umami note from vegetarian Worcestershire, soy sauce, or tamari.
Vegan Baked Beans
Vegan baked beans can still taste full and glossy. Use olive oil instead of butter or bacon fat, maple syrup or molasses for sweetness, tomato sauce or ketchup for body, and tamari or soy sauce for a deeper finish. Standard Worcestershire sauce often contains anchovies, so use vegetarian Worcestershire, soy sauce, or tamari instead. Check that your barbecue sauce is vegan too.
Vegan baked beans still need savory depth. Onion, smoked paprika, mustard, vinegar, and tamari can replace the bacon backbone.
For a lighter plant-based plate, pair these beans with a fresh chickpea salad or add homemade falafel for a more filling spread.
Low-Sugar Baked Beans
Low-sugar baked beans should still taste glossy, tangy, and cookout-worthy — just not candy-sweet. The easiest route is plain canned beans plus tomato sauce, mustard, vinegar, onion, smoked paprika, and just enough molasses for depth.
Start with tomato sauce instead of ketchup, cut the brown sugar in half, and taste before adding more sweetness. Some barbecue sauces are as sweet as ketchup, so choose a less sweet sauce or lean on tomato paste and warm spice instead.
Low-Sodium Baked Beans
Plain canned beans give you the most control because you can rinse them, choose your tomato base, and add salt only after the sauce has reduced. Choose low-sodium or no-salt-added canned beans when possible, rinse well, use low-sodium tomato sauce, and go easy on barbecue sauce, Worcestershire, soy sauce, bacon, and added salt.
For flavor without more salt, lean on onion, garlic, mustard, vinegar, smoked paprika, tomato paste, and a small amount of molasses.
No-Pork Baked Beans
No-pork baked beans need a little help replacing the smoky, salty backbone bacon usually gives. Caramelized onion, smoked paprika, mustard, vinegar, and a small splash of soy sauce, tamari, or vegetarian Worcestershire do the job well. Liquid smoke can help too, but start with only ⅛ teaspoon.
For a no-pork protein plate, serve the beans with baked chicken breast and a crisp salad instead of bacon-heavy sides.
Spicy Baked Beans
To make the pan spicy, build heat slowly so it supports the sweet-smoky sauce instead of taking over. Chipotle powder, cayenne, hot sauce, jalapeño, chilli flakes, or diced green chillies all work.
American vs British Baked Beans
American-style baked beans and British-style baked beans are related, but they do not taste the same. This recipe leans American-style: thicker, sweeter, darker, and more suited to BBQ plates and potlucks. British-style baked beans are usually softer, more tomato-forward, and often served on toast or baked potatoes.
American baked beans: thicker, sweeter, often smoky, with molasses, brown sugar, mustard, BBQ sauce, and optional bacon.
British-style baked beans: softer, more tomato-forward, less smoky, and usually served on toast, baked potatoes, or breakfast plates.
For a British-style version, skip the barbecue sauce, reduce the sugar, use tomato sauce or passata, and keep the sauce looser and more tomato-forward.
Common Baked Beans Mistakes to Avoid
Adding full sugar to canned baked beans: Taste first. They may already be sweet enough.
Skipping the onion step: Sautéed onion is one of the easiest ways to make canned beans taste homemade.
Covering the dish the whole time: Covered beans stay saucier. Uncovered baking reduces the sauce.
Adding acidic sauce before dried beans are tender: Tomato, vinegar, molasses, and sugar can slow softening.
Using a dish that is too deep: A deep dish reduces slowly. Use a wider dish if you want the sauce to tighten faster.
Skipping the rest time: Baked beans become more spoonable after 10 to 15 minutes out of the oven.
Salting too early: Bacon, canned beans, BBQ sauce, Worcestershire, soy sauce, and canned baked beans can all add salt.
How to Fix Baked Beans
Even if the pan does not look perfect when it comes out of the oven, baked beans are forgiving. Most problems are easy to fix with time, heat, or one balancing ingredient.
Thin sauce around the spoon means the baked beans need more uncovered time. Let the liquid reduce before serving.
Problem
Fix
Watery baked beans
Bake uncovered longer, use a wider dish, simmer the sauce first, or mash some beans.
Too sweet
Add vinegar, mustard, tomato paste, smoked paprika, or more unsweetened beans.
Salty sauce
Add unsalted beans, tomato sauce, or a splash of water; serve with rice or potatoes.
Overly thick beans
Add water, stock, tomato sauce, or bean cooking liquid.
Bland flavor
Add salt carefully, mustard, vinegar, smoked paprika, onion, garlic, Worcestershire, soy sauce, or tamari.
Hard dried beans
Dried beans were not cooked enough before adding sauce. Simmer them until creamy before baking.
Dry baked beans
Add liquid, cover loosely, and reduce the bake time next time.
Burned edges
Lower the oven temperature, stir once, or use a heavier dish.
If your beans taste flat, they probably need tang, salt, or a deeper savory note — not more sugar. For thin beans, keep baking uncovered or mash a few beans before serving.
To thicken baked beans, remove moisture or add body. Bake uncovered longer, use a wider pan, or mash a few beans in.
What to Serve With Baked Beans
Baked beans can be a side dish, a potluck pan, or part of a simple comfort meal. They sit naturally beside smoky grilled foods like slow cooker pulled pork, but they can also turn toast, rice, potatoes, or eggs into something more filling.
Think of baked beans as the warm, saucy anchor on the plate. For the best plate, pair them with one smoky or grilled main, one crisp side, and one plain starch so the meal has contrast.
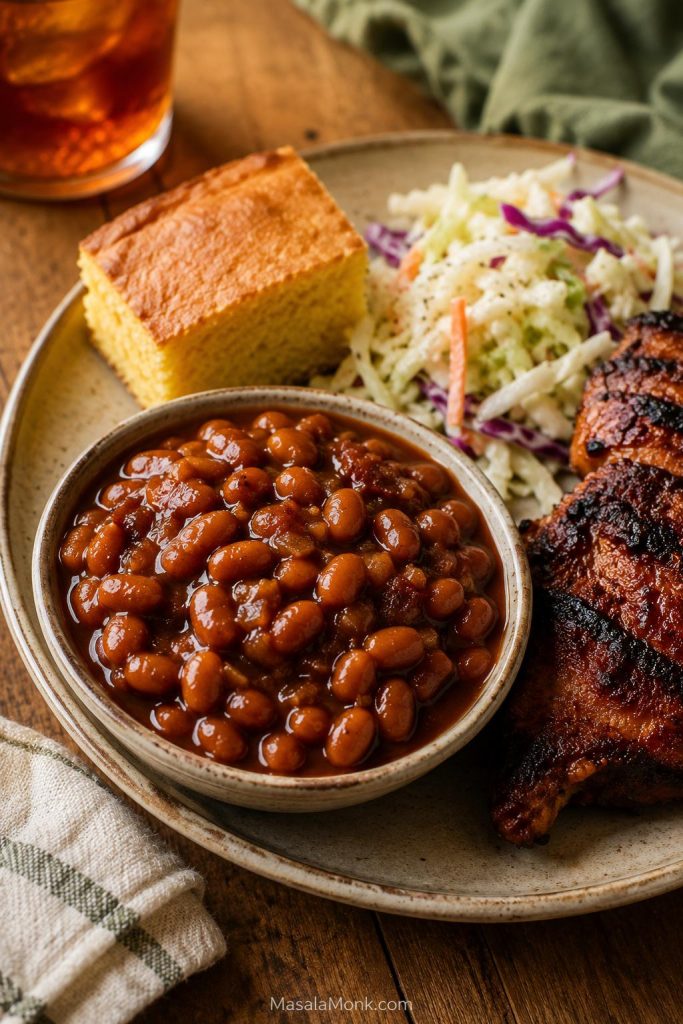
Build the plate with contrast: smoky grilled food, crisp slaw, and cornbread or bread to balance the sweet-savory beans.
For a BBQ or Cookout Plate
Build the plate around contrast: smoky meat, cool salad, crisp slaw, and these warm beans.
Burgers
Hot dogs
Ribs
Sausages
Grilled chicken
Corn on the cob
Potato salad
Coleslaw
Cornbread
A smoky sliced-meat plate works just as well as sandwiches, so these beans pair nicely with smoked pork loin. Creamy potato salad or crisp coleslaw adds the cold, fresh contrast needed against the sweet-savory sauce.
Easy Comfort Meal
Choose a plain starch when you want the beans to feel more like dinner. Toast, rice, potatoes, and eggs all catch the sauce well without competing with it.
Toast
Rice
Baked potatoes
Eggs
Roasted vegetables
Buttered bread
For a cozier plate, add toast, eggs, or a scoop of garlic mashed potatoes beside the beans.
Vegetarian Plate
Vegetarian plates work best when the beans are paired with something fresh, roasted, or crisp. That keeps the meal from feeling too soft.
Baked potatoes
Rice bowls
Grilled mushrooms
Roasted sweet potatoes
Simple green salad
Toast with herbs or chilli flakes
Leftover Ideas
Spoon leftover baked beans over toast, rice, baked potatoes, or roasted sweet potatoes. Serve them with eggs, fold them into wraps, use them as a quick side with sausages, or warm them until the sauce loosens again for a second-day lunch.
Make Ahead, Storage, Freezing, and Reheating
Baked beans are one of the rare sides that can become better after a night in the fridge. The sauce has time to settle into the beans, and reheating usually makes the pan taste even more rounded.
Make ahead: Cook 1 to 2 days ahead and refrigerate.
Fridge: Store leftovers in an airtight container for 3 to 4 days.
Freezer: Freeze for up to 3 months.
Reheating: Warm gently on the stovetop or cover and bake at 325°F / 163°C until hot.
If too thick after chilling: Add a splash of water, stock, or tomato sauce.
For parties: Bake first, then keep warm in a slow cooker on the warm setting while serving.
Baked beans often improve overnight. When reheating, loosen the sauce with water, stock, or tomato sauce only as needed.
Baked beans thicken in the fridge and after freezing. Warm them first, then loosen with a little water, stock, or tomato sauce if needed. If serving for a party, refrigerate leftovers within 2 hours; this follows the standard FoodSafety.gov 2-hour rule.
Frequently Asked Questions
If you are adjusting the recipe for different beans, sweetness levels, or make-ahead timing, these quick answers should help.
What beans are used for baked beans?
Navy beans are the classic choice for baked beans, but Great Northern beans, cannellini beans, small white beans, and pinto beans also work. Plain canned white beans are the easiest option when you want homemade baked beans without a long cooking time.
Can I make baked beans with canned beans?
Yes. Plain canned beans are the easiest shortcut because the beans are already tender, but the sauce is still yours to control. Drain and rinse them, then bake them in the homemade sauce until it coats the beans instead of pooling around them.
Can I use canned baked beans for this recipe?
Yes. Treat canned baked beans as a shortcut base, not a blank canvas. They already bring sauce, sweetness, and salt, so add onion, mustard, vinegar, smoked paprika, and only a little extra sugar after tasting.
Do I drain canned beans for baked beans?
Drain and rinse plain canned beans. Do not rinse canned baked beans because their sauce is part of the shortcut. Extra liquid can be handled in the oven by baking uncovered.
How do you make canned baked beans taste homemade?
Sauté onion first, add mustard and vinegar for balance, use smoked paprika or a tiny amount of liquid smoke for depth, and bake uncovered until the sauce tastes cooked instead of canned.
Can I make baked beans from dried beans?
Yes. Use dried navy beans, soak them overnight or quick-soak them, then simmer until creamy and tender before adding the sauce. Think of dried beans in two steps: make them tender in water first, then make them flavorful in sauce.
Why are my baked beans watery?
They usually need more uncovered baking time. Baked beans often look loose before they come together; the last stretch in the oven and the 10-minute rest are where the sauce turns spoonable.
How do I thicken baked beans?
Bake them uncovered for longer, use a wider dish, simmer the sauce before baking, or mash a few spoonfuls of beans and stir them back in. Resting the beans also helps the sauce cling better.
Should baked beans be covered while baking?
For thicker baked beans, bake them uncovered. Cover them only when they are drying out too quickly or when the edges are darkening before the center is hot.
How do I make baked beans less sweet?
Use less brown sugar, reduce or skip extra molasses, and balance the sauce with mustard, vinegar, tomato paste, smoked paprika, and unsweetened beans. Beans that are already too sweet usually need acidity and rounded flavor, not more sugar.
Can I make baked beans without pork or bacon?
Yes. Bacon adds smoke, salt, fat, and umami, but you can replace those with smoked paprika, sautéed onion, mustard, vinegar, and a little vegetarian Worcestershire, soy sauce, or tamari.
Can baked beans be vegetarian or vegan?
Yes. Skip the bacon and use olive oil. For vegetarian or vegan depth, use smoked paprika, mustard, vinegar, caramelized onion, and soy sauce, tamari, or vegetarian Worcestershire sauce. Standard Worcestershire often contains anchovies, so check the label or use a vegetarian alternative.
Can I make baked beans in a slow cooker?
Yes. Cook canned-bean baked beans on low for about 3 to 5 hours. The slow cooker is useful for potlucks and keeping beans warm, but the sauce will not caramelize the same way it does in the oven. For the best texture, bake first and keep warm in the slow cooker.
Are baked beans better the next day?
Often, yes. The sauce settles and the flavor deepens after a night in the fridge. Reheat gently and add a splash of water, stock, or tomato sauce if the beans are too thick.
Can baked beans be made ahead?
Yes. Baked beans are one of those sides that often tastes better the next day. Make them 1 to 2 days ahead, refrigerate, then reheat gently before serving.
Can you freeze baked beans?
Yes. Cool them completely, freeze in airtight containers for up to 3 months, thaw overnight in the fridge, and reheat gently. Add a splash of water or tomato sauce if they are too thick after thawing.
What can I add to baked beans for more flavor?
Use the balance test first. If the beans taste flat, add tang, salt, or rounded flavor before adding more sugar. Sautéed onion, mustard, vinegar, smoked paprika, Worcestershire sauce, soy sauce, tomato paste, chipotle, or a tiny amount of liquid smoke can all help.
What is the difference between American and British baked beans?
American baked beans are usually thicker, sweeter, smokier, and often flavored with molasses, brown sugar, mustard, bacon, or barbecue sauce. British-style baked beans are usually more tomato-forward, softer, less smoky, and often served on toast or baked potatoes.
Final Thoughts
The best baked beans are not just sweet beans in sauce. They need enough sweetness to feel familiar, enough tang to stay balanced, enough depth to feel slow-cooked, and enough oven time for the sauce to settle into the beans.
Whether you started with pantry cans, a shortcut can of baked beans, or dried navy beans, the goal is the same: tender beans, a balanced sauce, and a pan with glossy edges that people keep returning to before the meal is even over.