Posted on Leave a comment

Spanakopita Recipe: Greek Spinach Pie with Feta, Phyllo & Crispy Layers

A spatula lifting a corner piece of baked spanakopita from a rectangular pan, showing golden phyllo layers and green spinach feta filling.

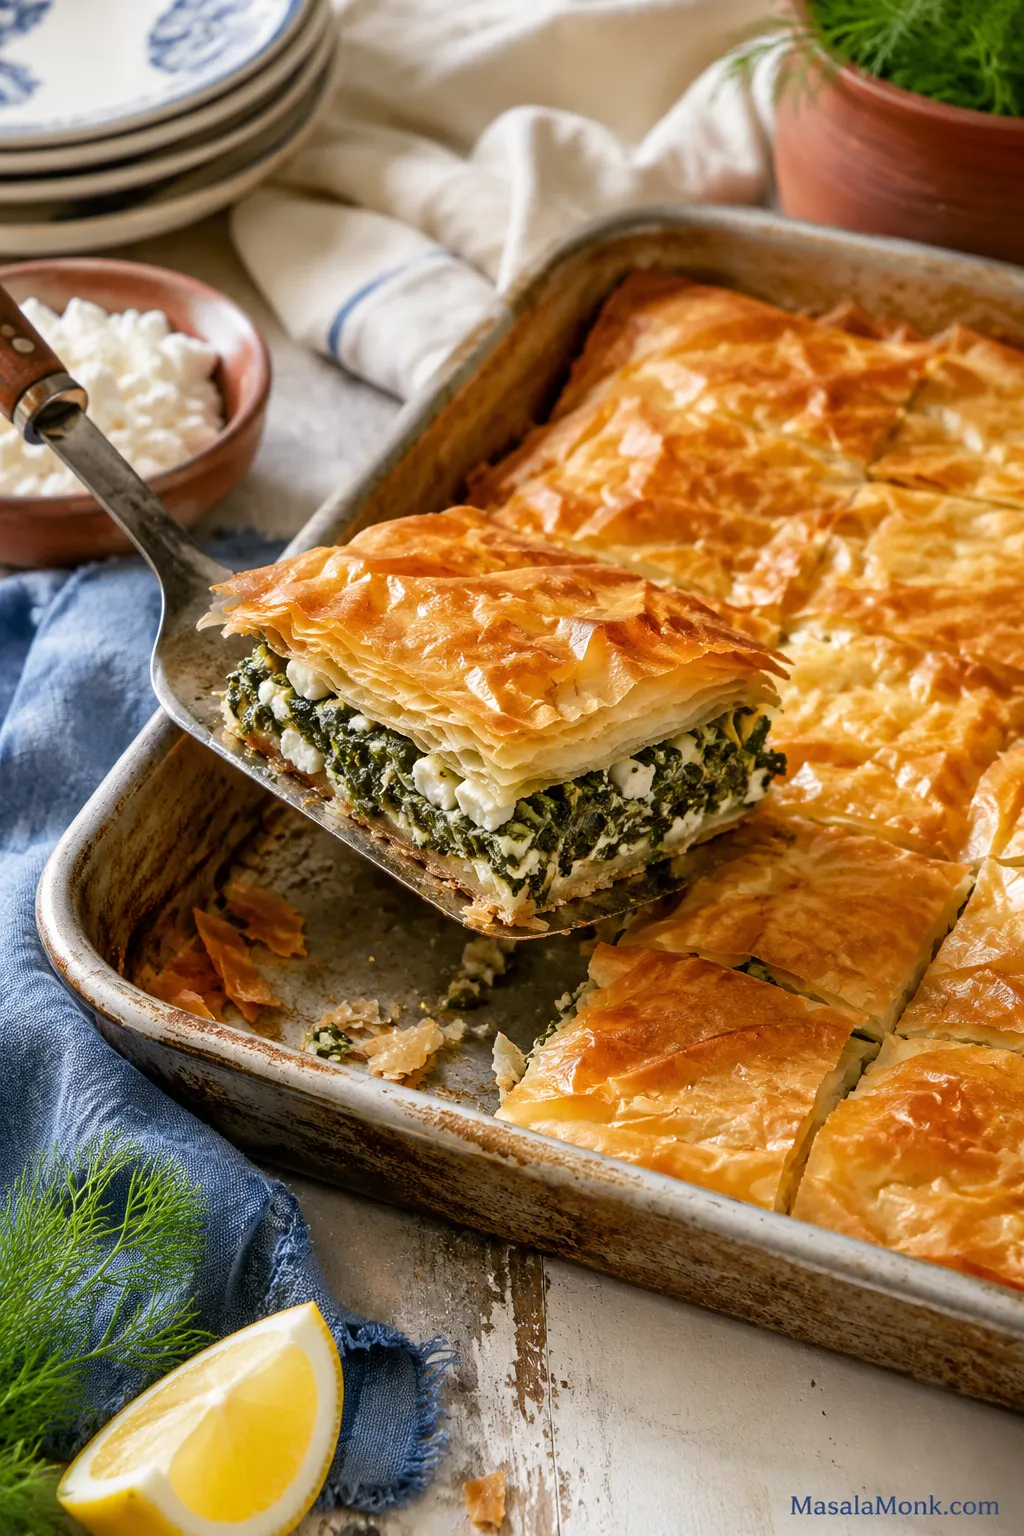
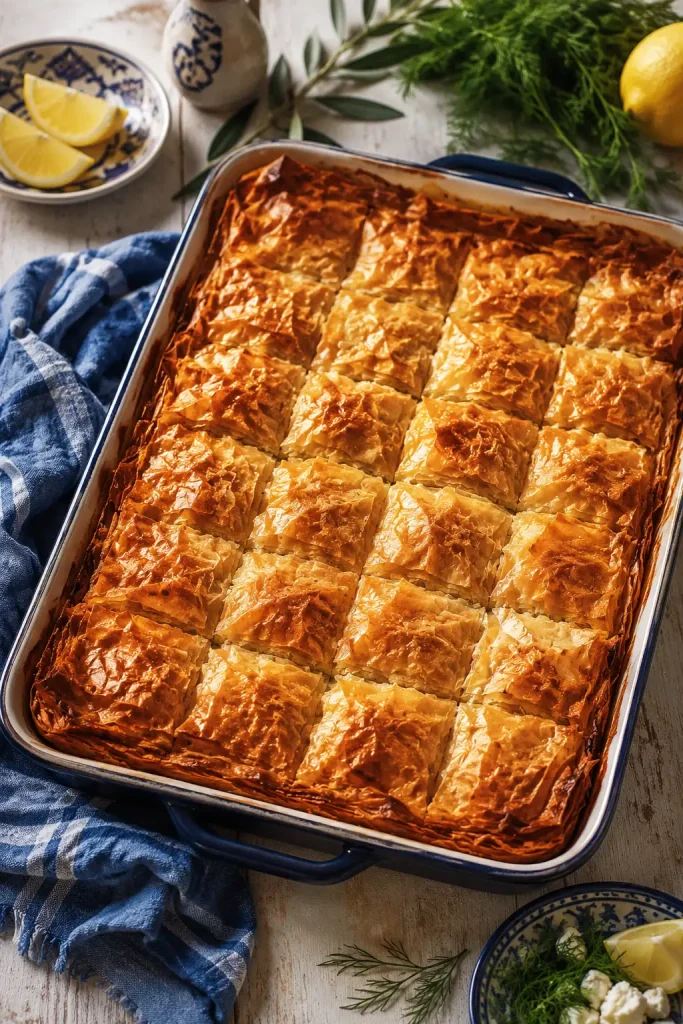
You know spanakopita is right when the knife crackles through the golden top and the first corner lifts cleanly from the pan. Under those flaky phyllo layers should be warm spinach, salty feta, fresh herbs, and enough structure to slice without the bottom turning wet.

This is a practical home-kitchen spanakopita: store-bought phyllo, a well-drained spinach-feta filling, clear success cues, and a crisp base that does not depend on perfect pastry work. You still get the drama of a flaky Greek spinach pie, but the process stays manageable: dry the greens, mix the filling, layer, bake, rest, and slice.

If phyllo makes you nervous, you are in good company. It tears, dries, and wrinkles, but this pie does not need perfect sheets. The hidden layers can be patchwork, the top can be a little rustic, and the tray will still bake into something golden, flaky, and shareable.

Hands brushing oil over a wrinkled sheet of phyllo pastry inside a rectangular baking pan.
Wrinkled phyllo is still usable phyllo. Once it is lightly brushed and layered, those folds become extra flaky edges instead of a problem to fix.

Fastest reliable path: use frozen spinach, block feta, 14 phyllo sheets, and a 9 x 13 inch pan. Fresh spinach works too, but frozen keeps the filling easier to control for a first tray.

This is the version for the cook who wants spanakopita to feel doable before it feels impressive.

Spanakopita Recipe Snapshot

Recipe typeGreek spinach pie / spinach and feta phyllo pie
Prep time35–45 minutes with frozen spinach; longer with fresh bunch spinach
Cook time45–55 minutes
Total time1 hour 20 minutes to 1 hour 40 minutes, not including phyllo thawing
Advance stepThaw frozen phyllo overnight in the refrigerator
Yield10–12 pieces
Pan size9 x 13 inch / 23 x 33 cm baking dish or pan
Oven temperature350°F / 180°C
Oven rackLower-middle rack
Spinach500 g / 16 oz frozen spinach or 700–900 g / 1½–2 lb fresh spinach
Resting time15–20 minutes, uncovered, before slicing

Jump to the full recipe, or keep reading for the spinach, phyllo, and crisp-bottom tips that make the tray work.

Table of Contents

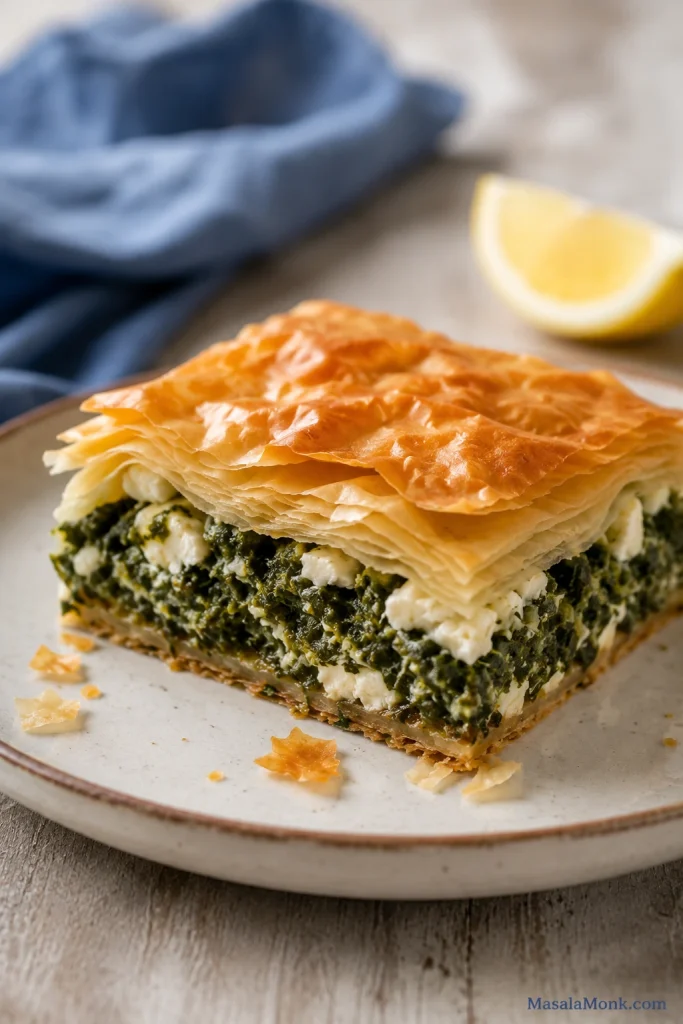
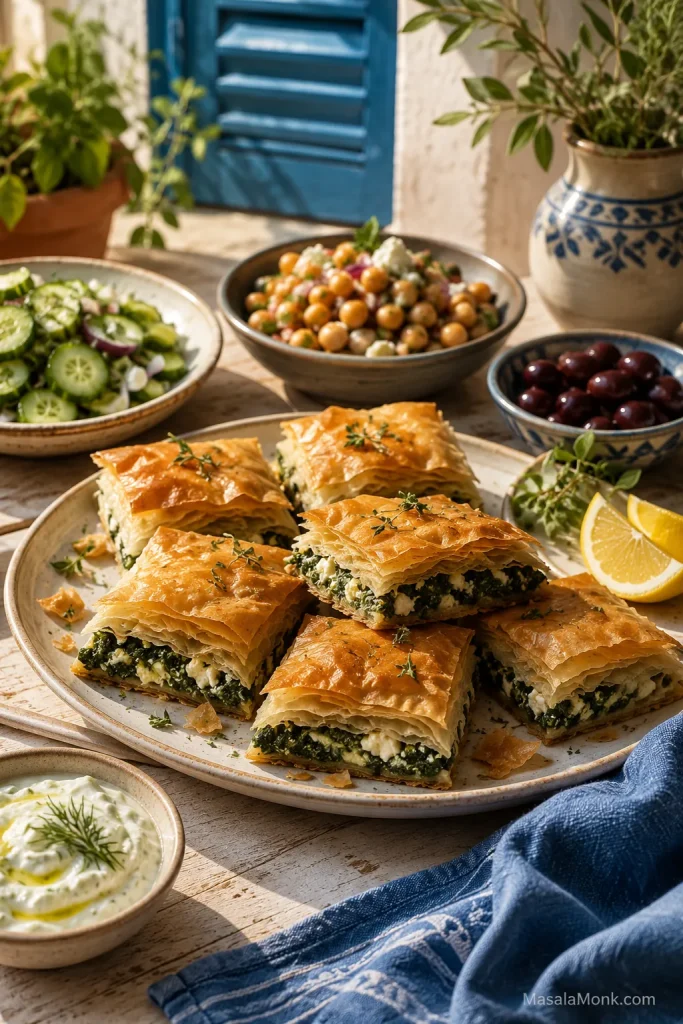
Before we get into the details, this is the texture you are aiming for: crisp pastry outside, green spinach through the middle, and small feta pieces that stay visible after baking.

A plated slice of Greek spinach pie showing flaky phyllo layers, green spinach filling, and white feta pieces.
A good Greek spinach pie slice should show contrast: crisp pastry outside, herby spinach inside, and small feta pockets throughout. That uneven texture is part of what makes spanakopita feel homemade.

Why This Spanakopita Works

The goal here is not perfect pastry work. It is a tray that lifts cleanly, tastes generous, and gives you flaky layers without asking you to baby every sheet. Frozen spinach takes one variable off your hands, block feta gives better texture, seven bottom phyllo sheets create structure, and the lower-middle rack helps the base bake through before the top gets too dark.

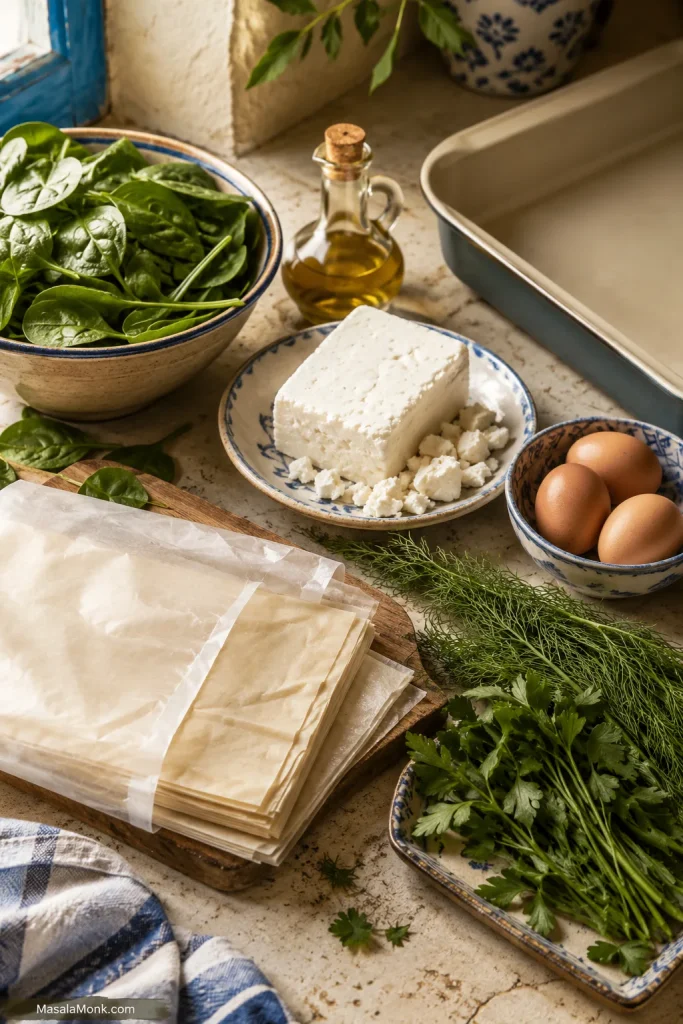
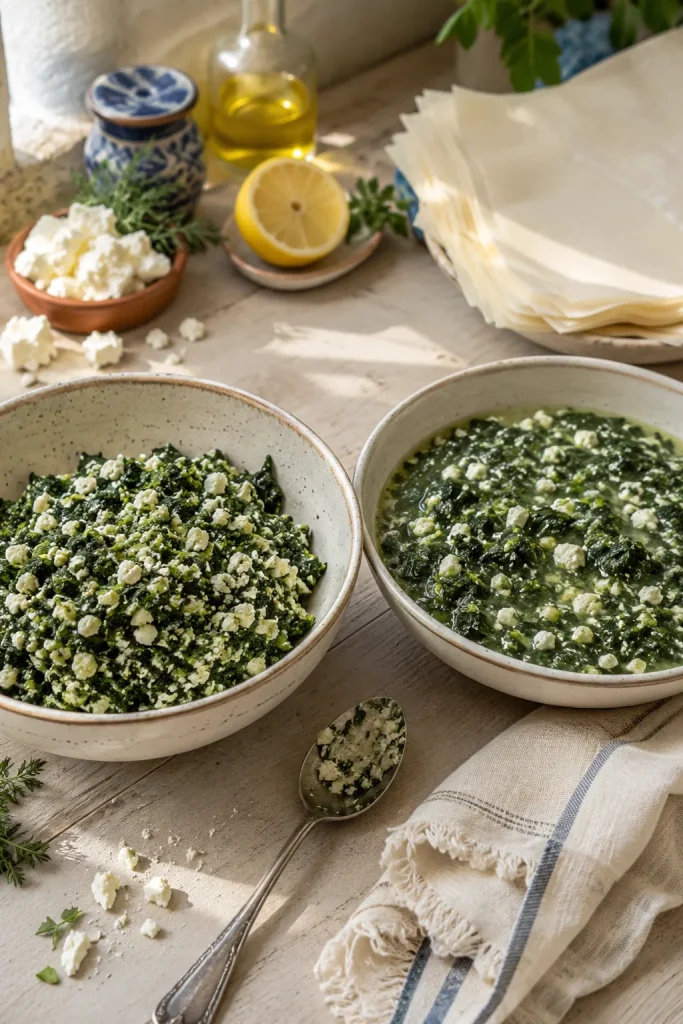
This is the practical spanakopita setup: filling ingredients ready, phyllo still protected, and the pan waiting before assembly begins.

Spanakopita ingredients on a kitchen counter, including phyllo sheets, spinach, feta, herbs, eggs, olive oil, and a rectangular baking pan.
Set up the spanakopita station before opening the phyllo: spinach, feta, herbs, eggs, oil, brush, and pan. Then the delicate sheets spend less time drying on the counter.
  • Frozen spinach makes the filling easier to control. Fresh works too, but frozen is already wilted, so once it is pressed well, the tray becomes more predictable.
  • Block feta gives creamy, salty pockets. It tastes fuller than very dry pre-crumbled feta.
  • Seven bottom sheets support the filling. They help the pie slice cleanly.
  • The lower-middle rack helps the base cook. This is especially useful in glass or ceramic pans.
  • A short rest finishes the texture. The filling settles, the pastry stays flaky, and the pieces cut cleaner.

The tray format is forgiving in a way triangles are not. Torn sheets disappear inside, the filling spreads evenly, and the lower layers have enough time to firm up before slicing.

You still get the flavor of a classic Greek spinach pie, just with store-bought phyllo, a forgiving tray format, and enough structure that the first slice does not collapse.

What Is Spanakopita?

Spanakopita is a Greek spinach pie made with thin phyllo pastry and a savory filling of spinach, feta cheese, herbs, and often eggs.

You may see the pastry spelled as phyllo or filo. They are the same thing: paper-thin pastry sheets that bake into crisp, flaky layers when brushed with olive oil or melted butter.

Greek spinach pies vary by family and region. Some use leeks, some add more herbs, some use homemade phyllo, and some keep the filling very simple. Here, the spirit is classic — greens, feta, herbs, olive oil, and crisp phyllo — while the handling is modern and practical: store-bought pastry, clear texture cues, and a tray format that gives the filling room to settle.

For dinner and clean slices, the tray version is the easiest path; triangles are better when you want appetizers, lunch boxes, or party bites.

A tray of spanakopita in the background with baked spinach and feta phyllo triangles in the foreground.
The same spinach-feta filling can become a full tray or folded spanakopita triangles. Choose the tray for an easier family-style bake, or make triangles when you want appetizer-sized pieces.

Spanakopita is not meant to be creamy like spinach dip. The filling should be savory, herby, and moist enough to taste generous, but firm enough that the phyllo bakes into layers instead of steaming from underneath.

In either shape, the best pieces have contrast: brittle golden corners, soft salty feta tucked into the greens, and a herby filling that smells good before the tray even reaches the oven.

Ingredients and Substitutions

The filling is simple, which is why the details show up in the finished slice. Good feta gives salty pockets, fresh herbs keep the spinach lively, and well-prepared greens let the phyllo stay flaky instead of heavy. If spinach is your main question, jump to the fresh vs frozen spinach guide before mixing.

Spinach and feta are the two ingredients that matter most. Spinach controls texture; feta controls flavor. Loose spinach weakens the pastry, while bland feta makes the whole filling taste flat.

This amount gives a generous but sliceable filling: enough spinach and feta to taste full, but not so much that the lower layers steam. If you add extra greens, keep the final squeezed amount close to the recipe amount.

Spanakopita Ingredient Amounts

IngredientAmountNotes
Frozen chopped spinach500 g / 16 ozThaw fully and press well.
OR fresh spinach700–900 g / 1½–2 lbWilt in batches, cool, chop if needed, then squeeze well.
Feta cheese300 g / about 10½ ozBlock feta gives better flavor and texture than very dry pre-crumbled feta.
Large eggs2Help bind the filling so the pieces slice more cleanly.
Phyllo sheets14 sheetsUse 7 sheets on the bottom and 7 on top.
Olive oil, divided120 ml / ½ cup for brushing, plus 1–2 tablespoons for cookingYou may not use all of it. Sheets should look lightly glossy, not heavy.
Onion or scallions1 small onion or 4–6 scallionsAdds sweetness and depth.
Garlic1–2 cloves, minced, optionalAdds extra savory depth.
Dill, fresh¼ cup choppedClassic fresh herb flavor.
Parsley, fresh¼ cup choppedAdds brightness.
Mint, fresh1–2 tablespoons, optionalAdds a brighter, more aromatic note.
Lemon zest½ teaspoon, optionalAdds brightness if your feta is mild or the filling tastes flat.
Black pepperTo tasteUse generously if your feta is mild.
NutmegPinch, optionalWorks well with spinach and cheese.

Before the eggs go in, taste the filling so you can judge the feta’s saltiness. Some feta needs no added salt at all.

Feta Cheese

Most of the salt and tang comes from the feta, so it matters. Block feta is the better choice if you can get it. Crumble it yourself for a softer, creamier texture. Pre-crumbled feta works, but it can be drier.

A hand crumbling block feta over chopped spinach and herbs for spanakopita filling.
Crumble block feta unevenly instead of mashing it smooth. Those small salty pockets give the filling better flavor and a more satisfying bite.

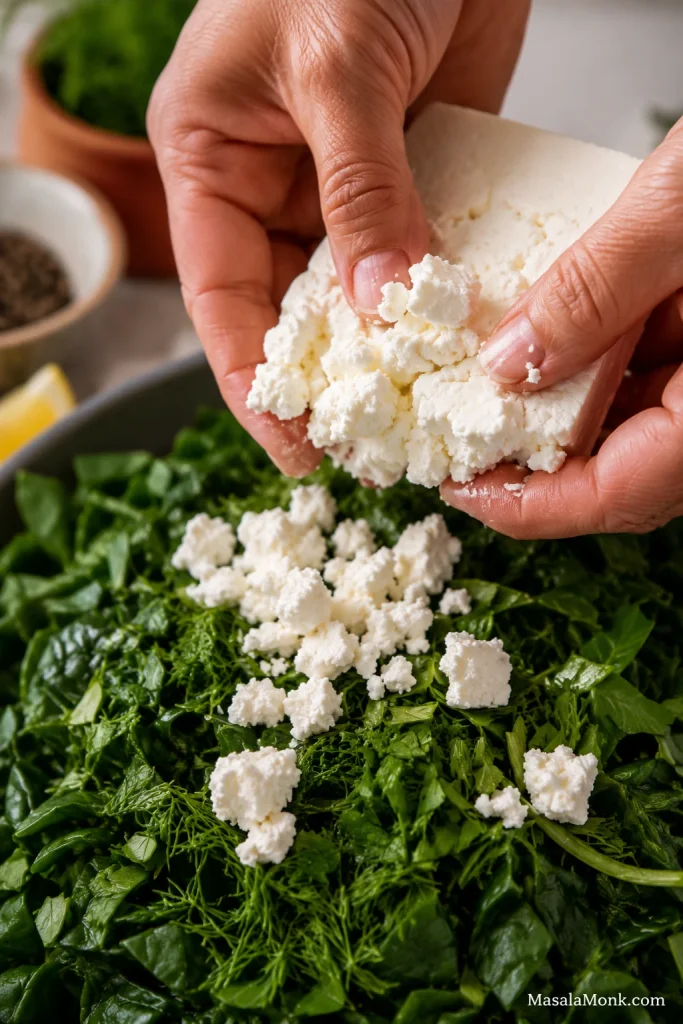
Use 300 g / about 10½ oz as the default. If your feta is very salty, use a little less and skip extra salt. If your feta is mild, lean on black pepper, herbs, and a little lemon zest before adding more salt.

Olive Oil or Butter?

Olive oil gives the pie a more classic Greek flavor. Melted butter makes the pastry richer and more golden. Both work, and you can also use half olive oil and half melted butter.

Brush lightly. The pastry needs enough fat to crisp, but it should not feel soaked or heavy.

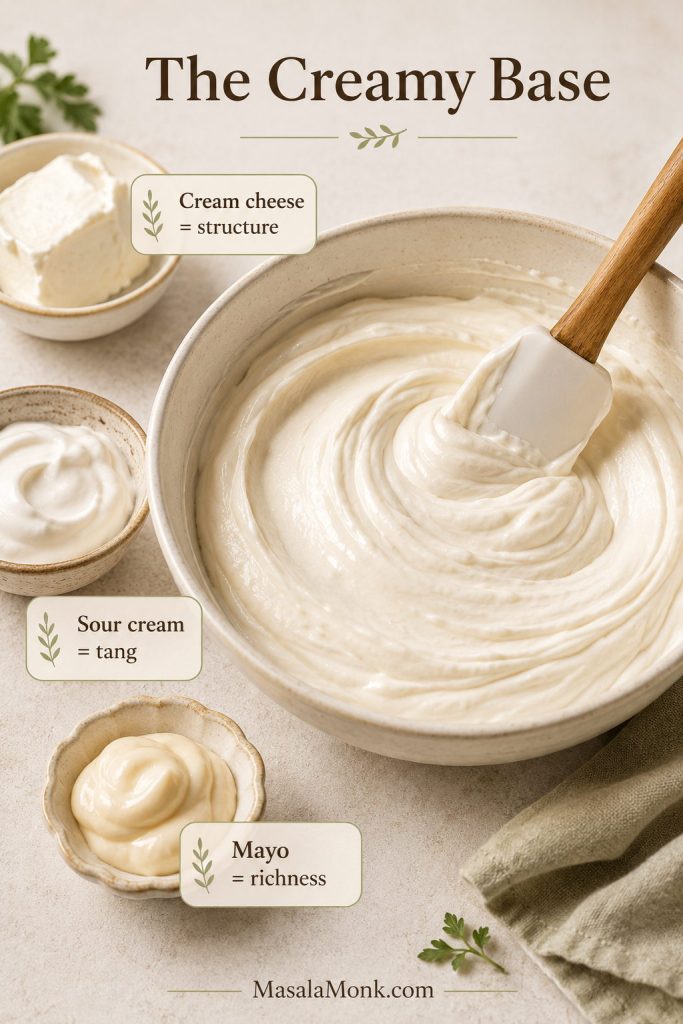
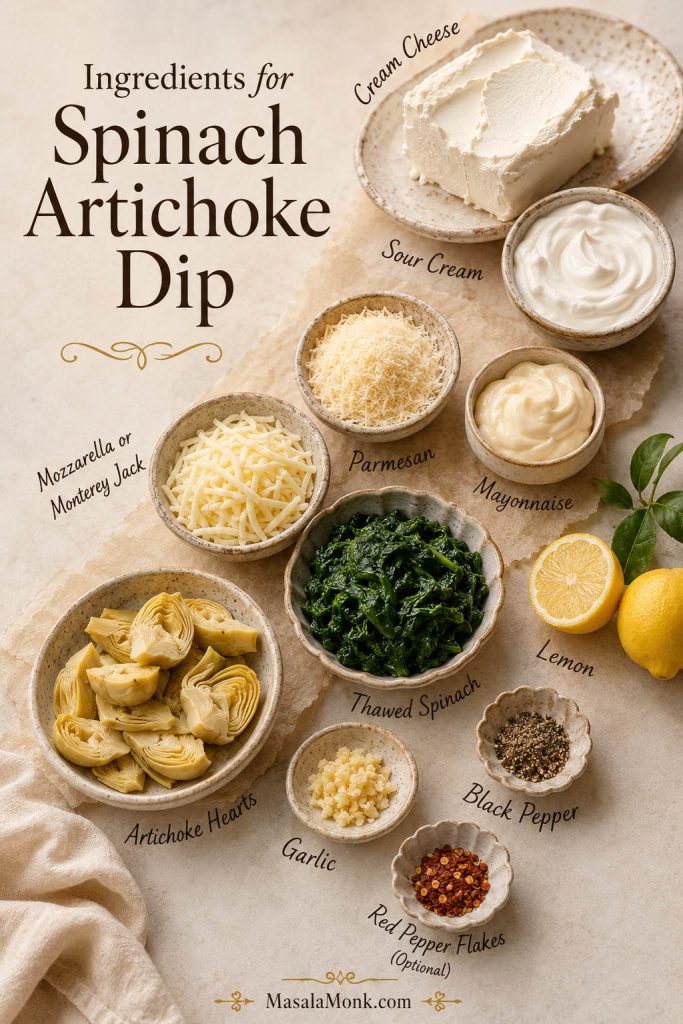
Can You Add Ricotta, Cream Cheese, or Yogurt?

You can add a little ricotta, cream cheese, or Greek yogurt for a creamier filling, but use a light hand. Too much soft cheese makes the mixture wetter and heavier. It should mound softly on a spoon, not spread like dip. If what you really want is a creamy spinach appetizer, MasalaMonk’s spinach dip recipes are a better fit.

Fresh Herbs and Dried Herb Substitutes

Fresh dill and parsley give the filling its best flavor. If using dried dill, start with about 1 teaspoon dried dill for every 1 tablespoon fresh dill. Dried parsley is milder, so fresh parsley is better when possible. Dried mint can be strong, so use only a small pinch.

Leeks, Chard, and Other Greens

Leeks add sweetness and depth. Chard or silverbeet can replace part of the spinach, especially if you like a stronger green flavor. Kale, mushrooms, artichokes, and pine nuts can work too, but treat them as variations. For the cleanest first tray, keep the filling simple: spinach, feta, herbs, onion, and eggs.

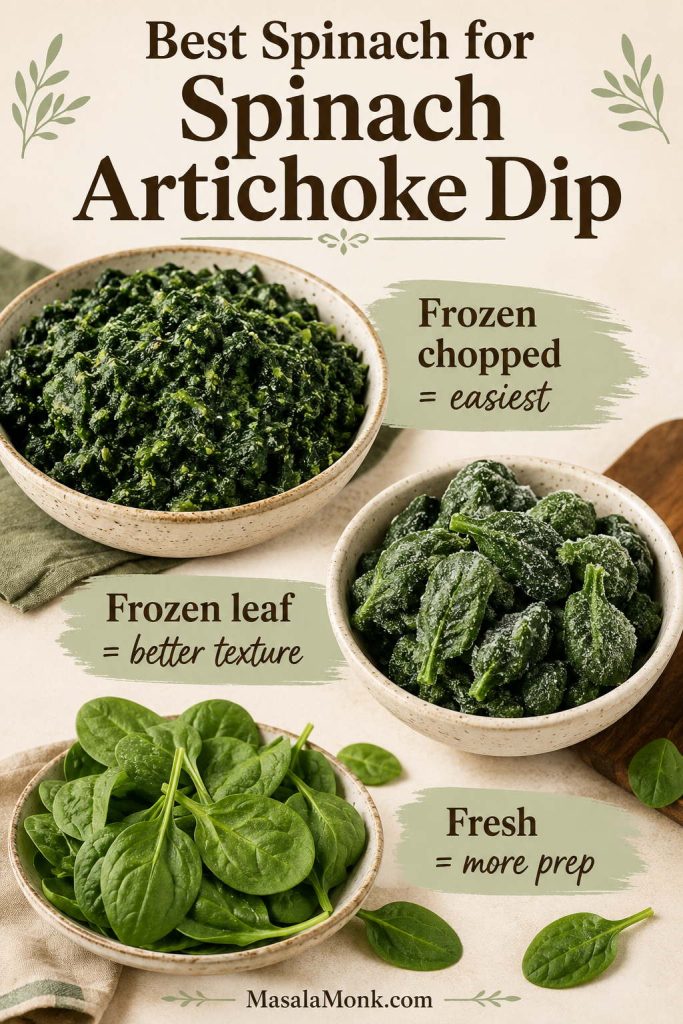
Fresh or Frozen Spinach: Which Works Better?

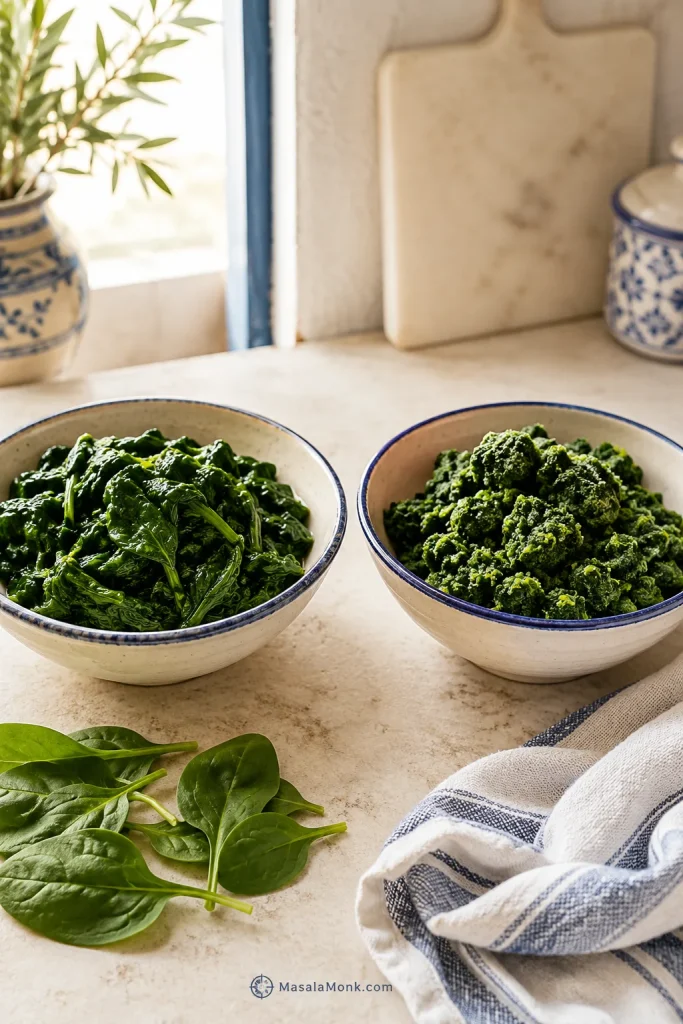
Best spinach for spanakopita: frozen chopped spinach is the most reliable choice for a first tray because it is already wilted and easier to drain evenly. Fresh spinach gives brighter flavor, but it takes more prep and still needs to be cooked, cooled, chopped, and pressed before mixing.

Two bowls showing wilted fresh spinach and thawed frozen spinach side by side, with a kitchen towel nearby.
Fresh spinach gives a brighter taste, while frozen spinach is easier and more predictable. Either way, the winning move is removing moisture before the filling touches the phyllo.
Use thisBest whenWatch out for
Frozen spinachYou want the most reliable first tray.It must be fully thawed and pressed well.
Fresh bunch spinachYou want brighter flavor and a more traditional fresh-greens feel.It takes longer and cooks down heavily.
Baby spinachYou want faster fresh spinach prep.The filling can be softer and milder.
Chard or silverbeetYou want a deeper greens flavor.Stems need chopping finely or removing.

Use about 700 g for tender baby spinach and closer to 900 g for mature bunch spinach with stems. After wilting and squeezing, you want roughly the same packed amount you would get from 500 g / 16 oz thawed frozen spinach.

Fresh spinach always looks like too much at first. Then it wilts down dramatically, which is exactly why the recipe starts with such a large amount.

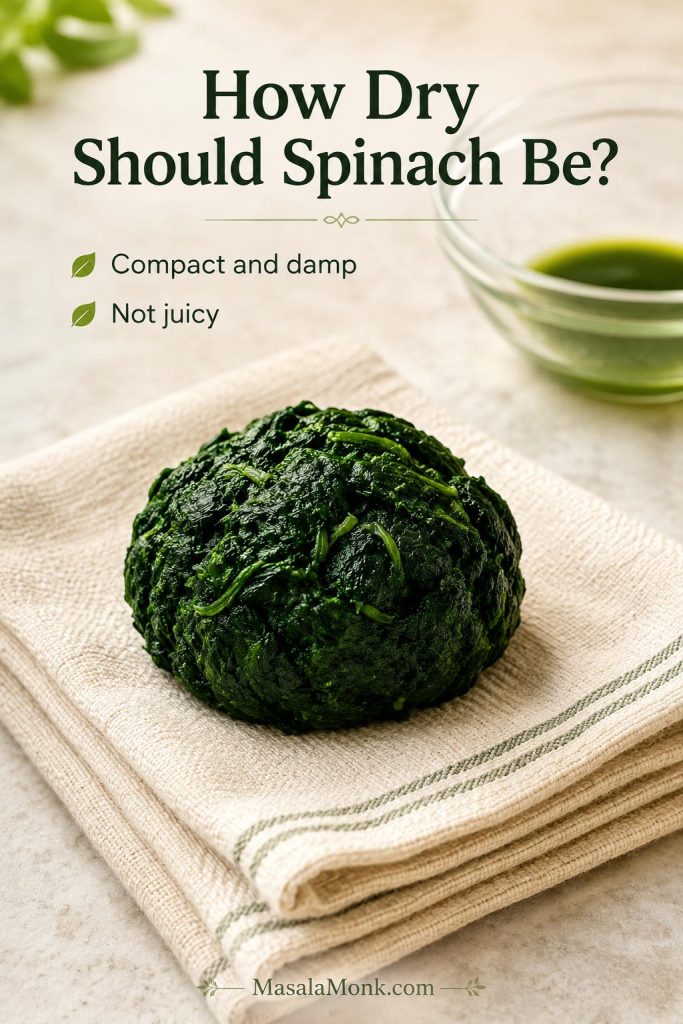
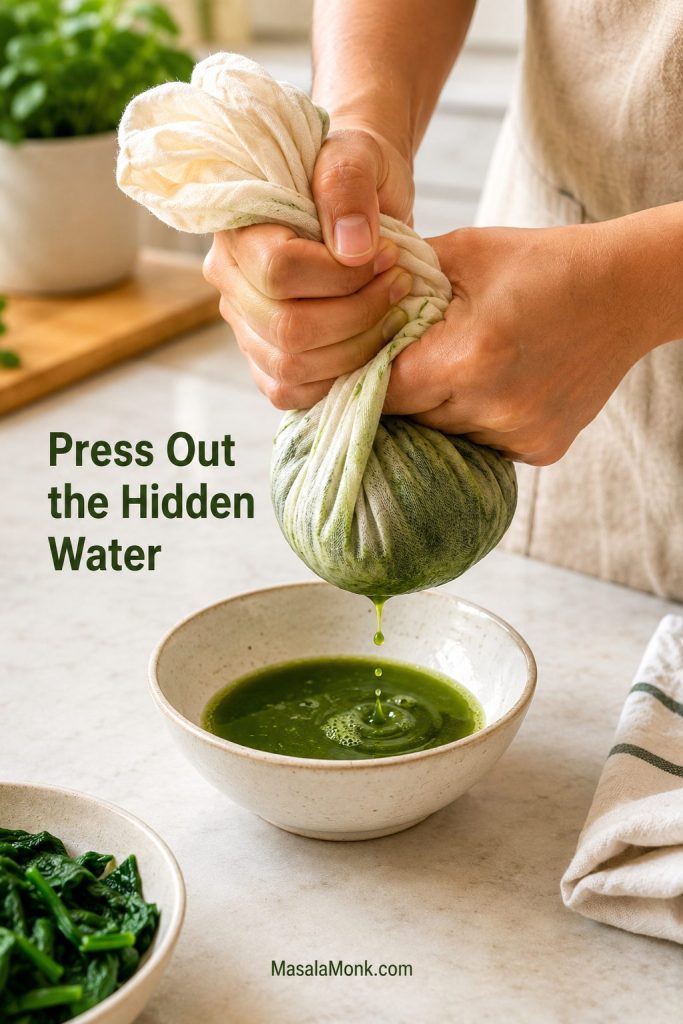
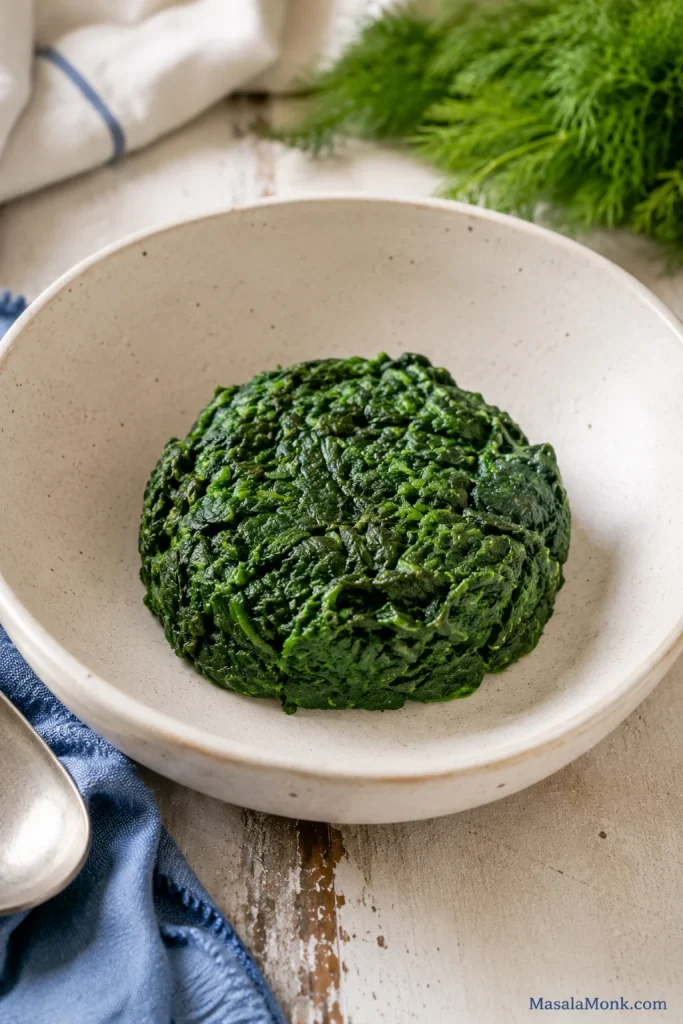
Spinach Dryness Test

After squeezing, press the spinach with your hand or the back of a spoon. It should hold together in a soft mound, but the bowl should stay dry. If green liquid gathers at the bottom, squeeze again.

Hands squeezing spinach in a kitchen towel over a bowl to remove excess liquid.
First, squeeze out the hidden water. This one step does more for crisp spanakopita than almost any extra seasoning or topping.

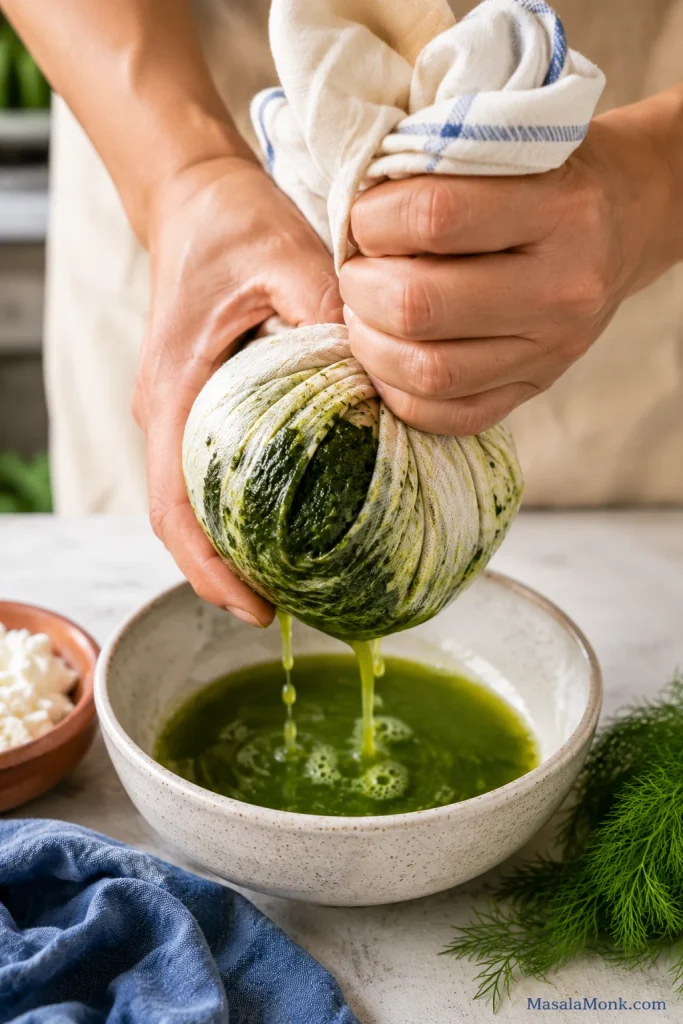
For frozen spinach, squeeze it in a clean kitchen towel in small handfuls rather than one large mass; it is easier to remove more liquid that way.

The Dry-Bowl Cue

Here, the greens stop being watery and become a proper filling. Spanakopita can handle moist spinach. It cannot handle dripping spinach.

A compact mound of pressed spinach in a dry bowl with no visible liquid underneath.
After pressing, the spinach should sit in a compact mound with no liquid pooling below it. That dry-bowl cue tells you the filling is ready to mix.

How to Make Spanakopita

Once the spinach is ready and the filling tastes good, assembly is straightforward. The prep work is what makes the tray easy; now it comes together quickly. If the phyllo is the stressful part, the phyllo help section has the calmer fixes.

This method makes one large 9 x 13 inch / 23 x 33 cm Greek spinach pie. It is easier than folding triangles and gives you generous pieces with firm edges, flaky tops, and warm spinach-feta filling.

The tray may look a little untidy before baking. That is normal. Phyllo has a way of looking chaotic in the pan and beautiful after heat does its work.

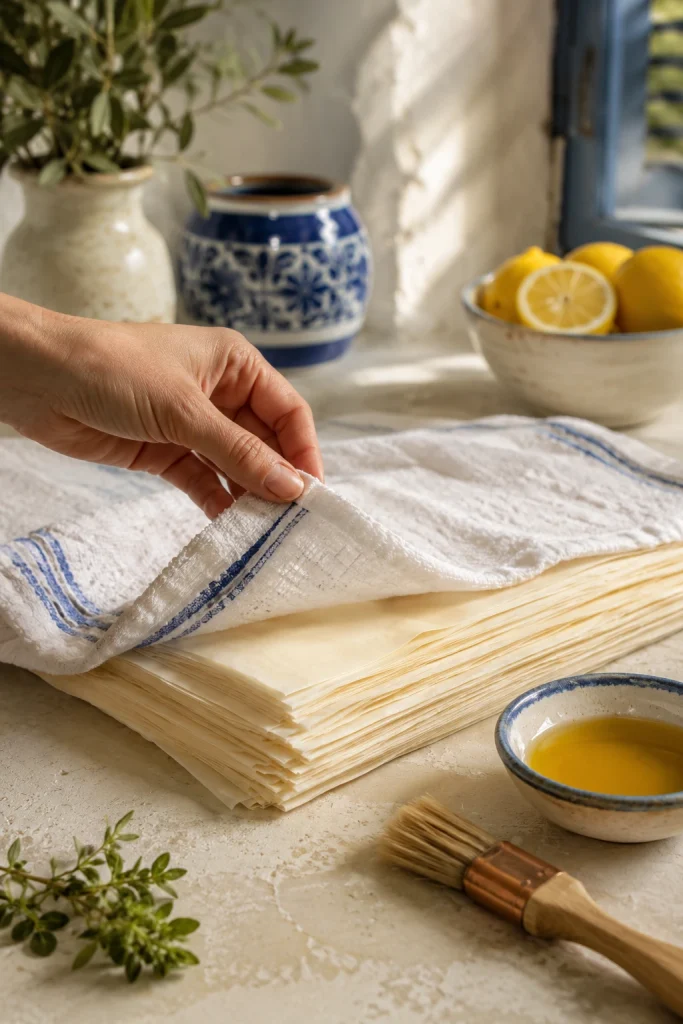
Step 1: Thaw the Phyllo

Thaw frozen phyllo overnight in the refrigerator, or according to package directions. Before assembling, let the sealed package sit briefly at room temperature so the sheets are easier to unroll. Open the package only when the filling and pan are ready.

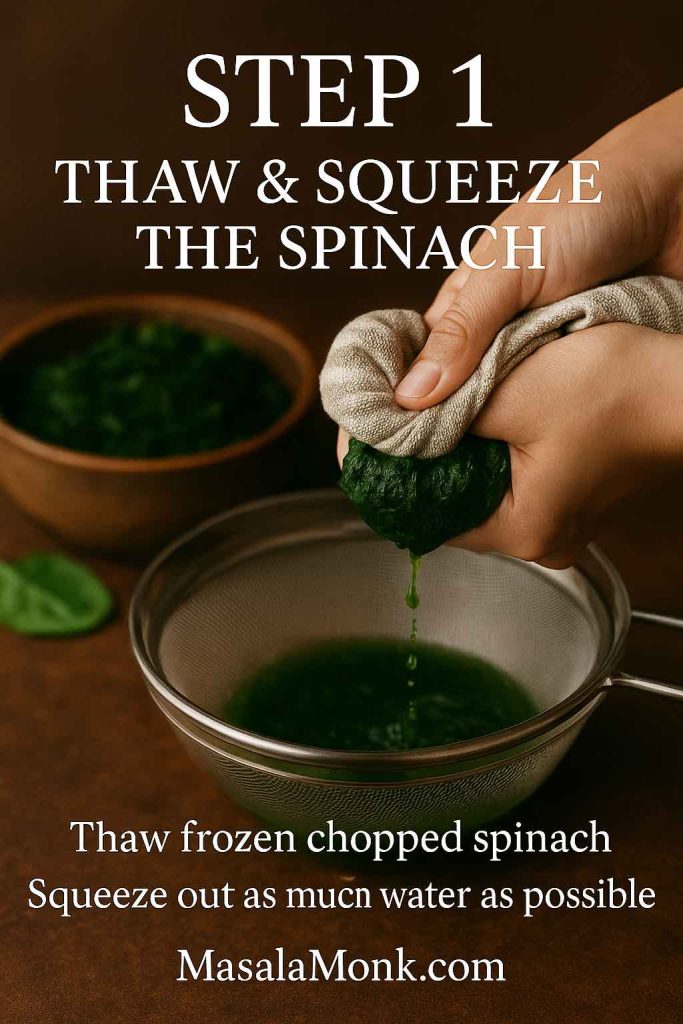
Step 2: Prepare the Spinach

For frozen spinach, thaw it completely and press out as much liquid as possible. For fresh spinach, wilt it in batches in a large pan, let it cool, chop it if the leaves are large, and squeeze well. If liquid gathers in the bowl after squeezing, press it again.

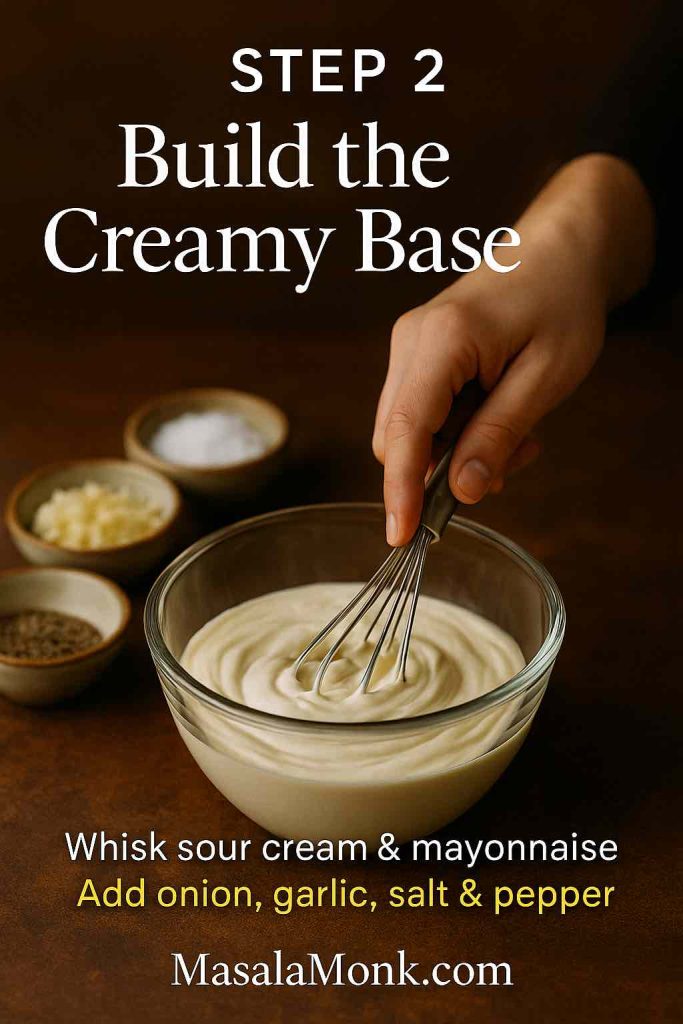
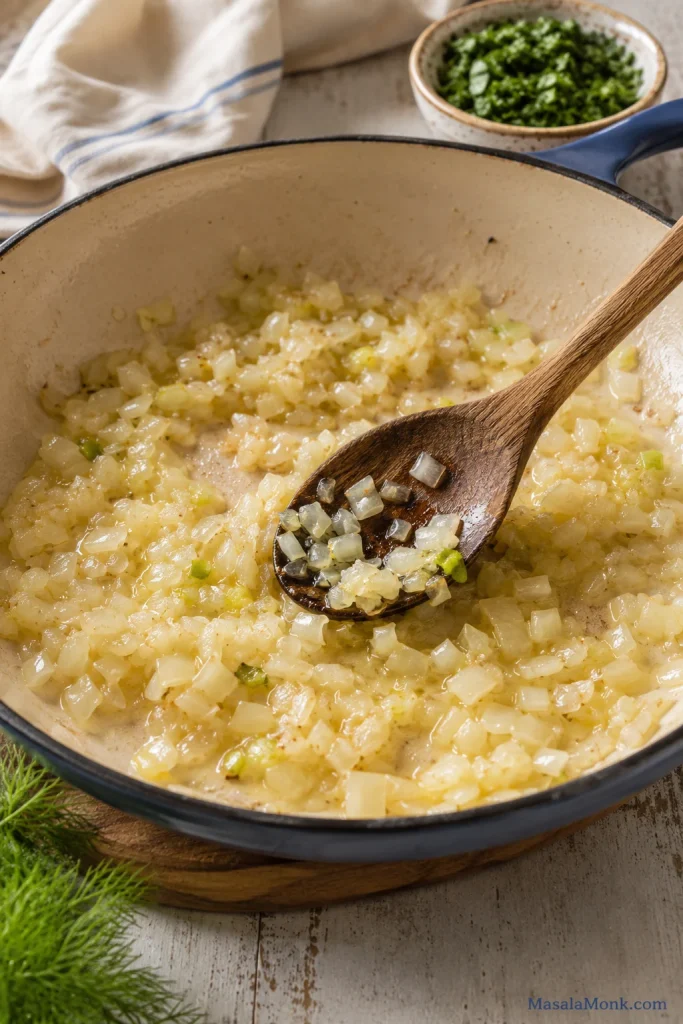
Step 3: Cook the Aromatics

Warm 1–2 tablespoons olive oil in a skillet. Add the onion or scallions and cook until softened. Add optional garlic and cook briefly until fragrant. Let the mixture cool slightly.

The onion should smell sweet and mellow, not sharp, before it goes into the spinach.

Softened onion, scallion, and garlic cooking in a skillet with a wooden spoon.
Let the aromatics soften until they smell mellow and sweet. This gives the spinach-feta filling depth without making the Greek spinach pie taste heavy.

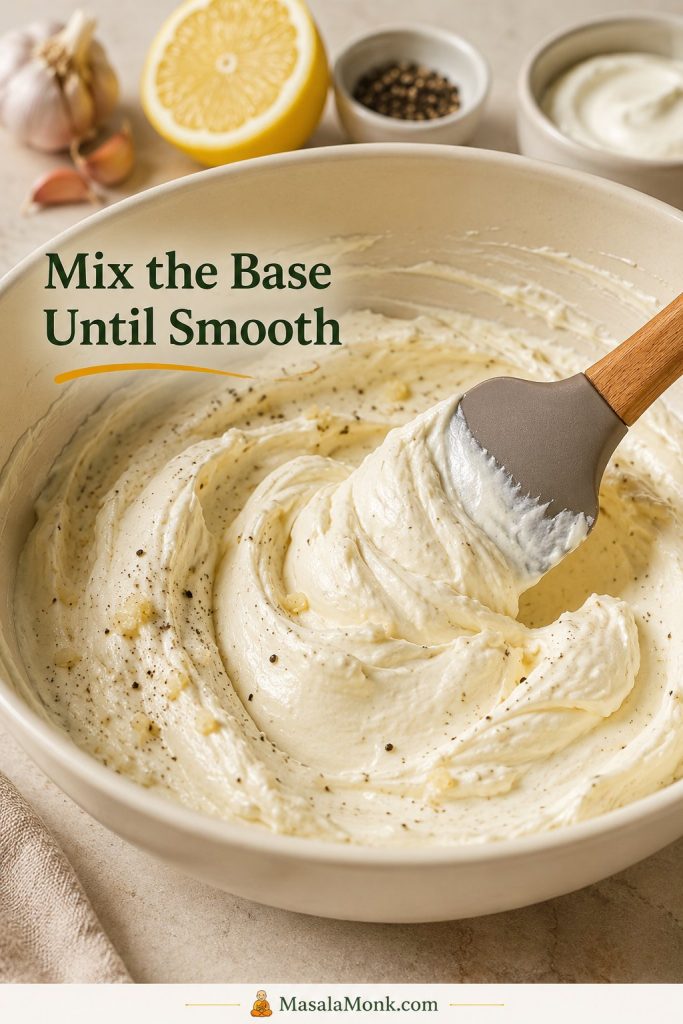
Step 4: Mix and Taste the Filling Before Adding Eggs

In a large bowl, combine the squeezed spinach, cooked aromatics, crumbled feta, dill, parsley, black pepper, optional lemon zest, and any optional mint or nutmeg. Taste this mixture before adding salt, because feta can be very salty. Once the seasoning tastes right, mix in the eggs.

A bowl of spanakopita filling before eggs are added, with spinach, feta chunks, herbs, onion, and seasonings.
Before the eggs go in, the filling should look textured rather than creamy. Visible herbs, spinach, and feta pieces mean every slice will have better flavor contrast.

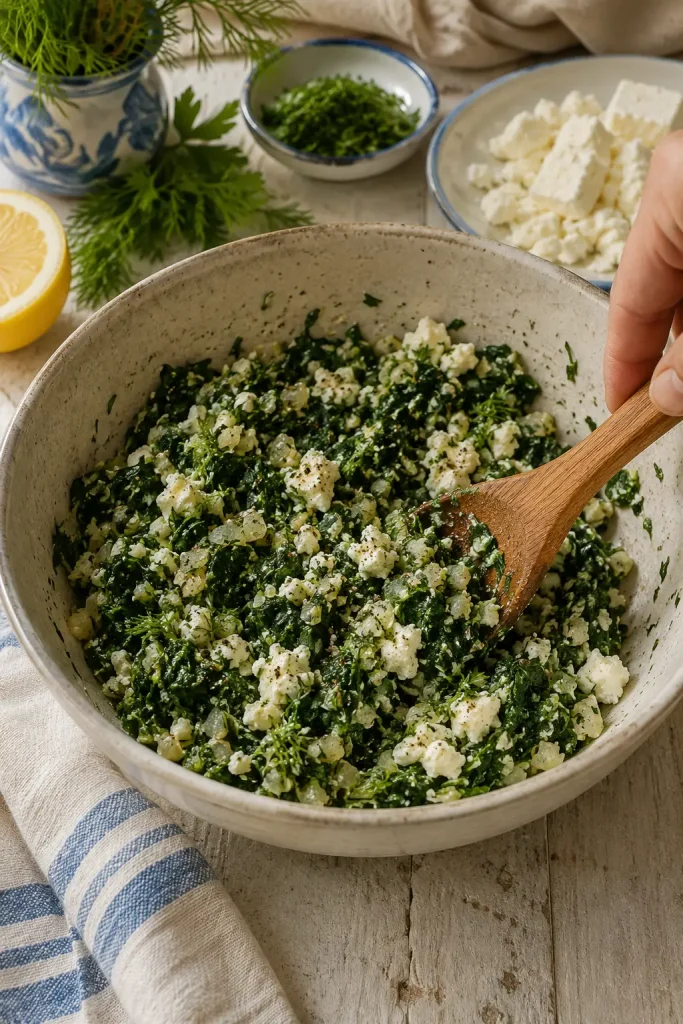
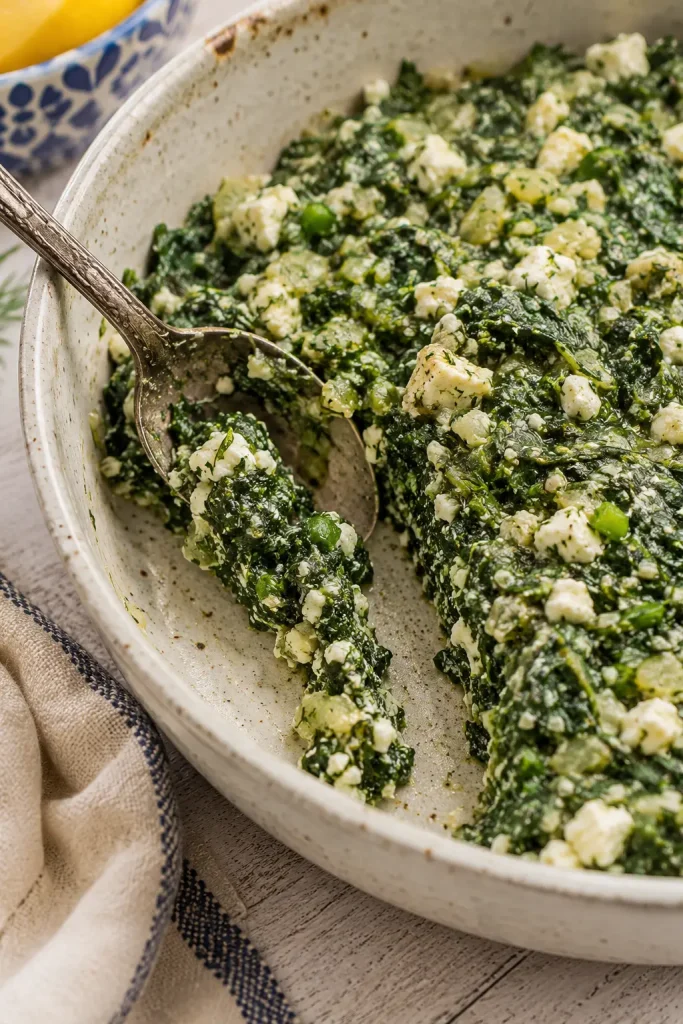
The Filling Texture Test

You should have a generous bowl of filling that looks clumpy and spoonable, with little white pieces of feta still visible in the greens. When you drag a spoon through it, it should not leave watery liquid behind.

A spoon dragged through spinach and feta filling, leaving a visible trail with no liquid pooling in the bowl.
Use the spoon trail as a quick filling test. If water does not rush back into the line, the mixture is clumpy enough to protect the phyllo layers.

By this point, the bowl should already smell like the finished pie: salty feta, green herbs, softened onion, and clean spinach.

Step 5: Heat the Oven and Ready the Pan

Heat the oven to 350°F / 180°C and place a rack in the lower-middle position. Brush a 9 x 13 inch / 23 x 33 cm baking dish or pan with olive oil.

For a fan or convection oven, start around 170°C and check a little early, since the top may brown faster.

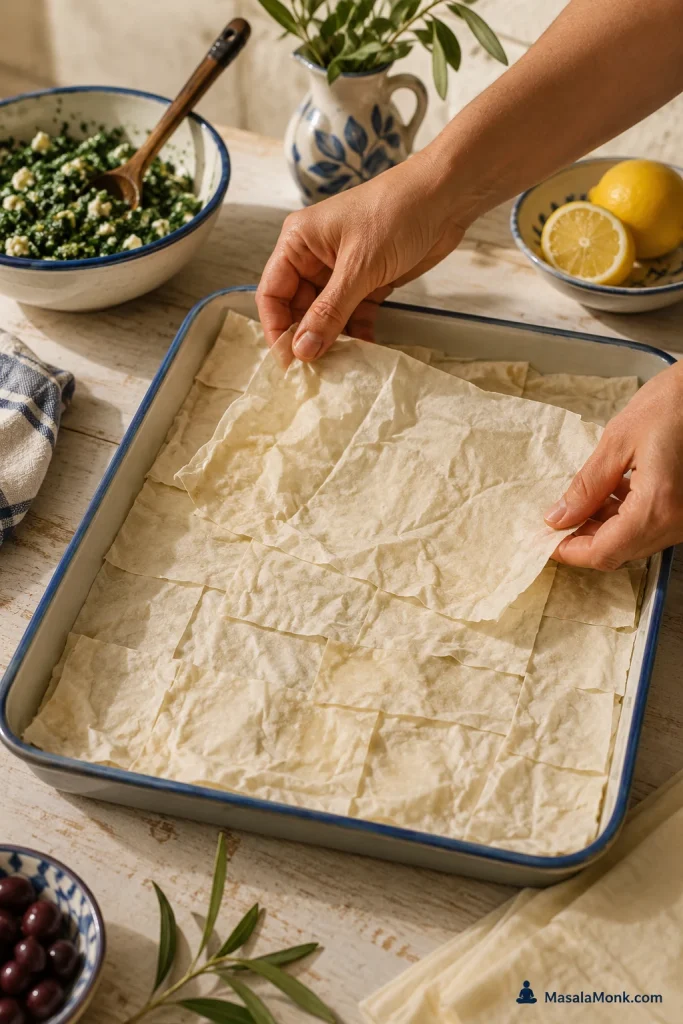
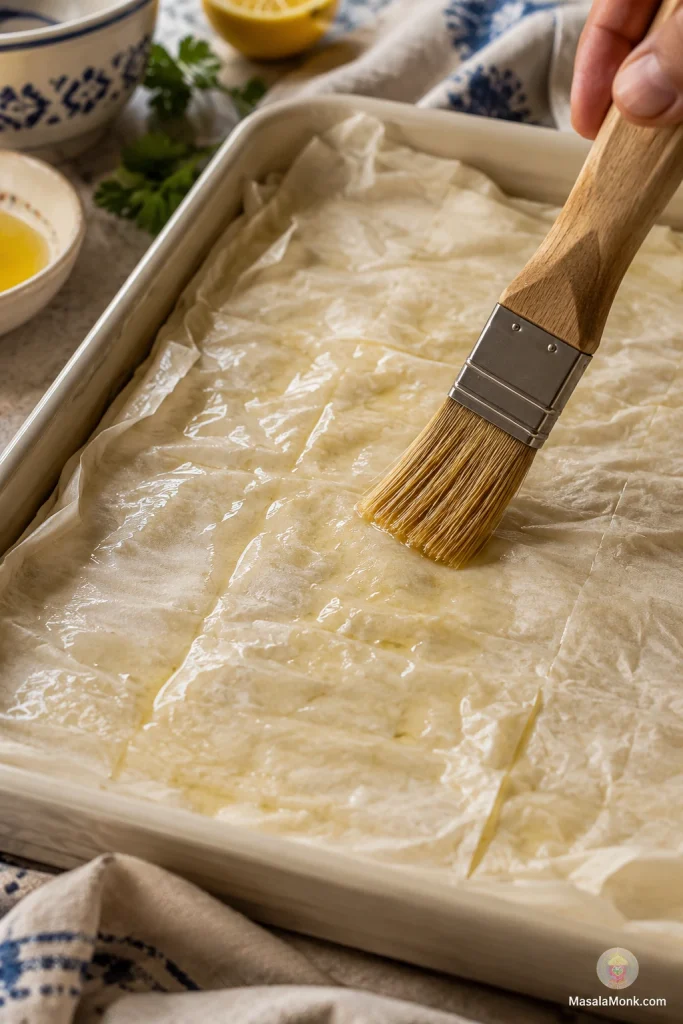
Step 6: Layer the Bottom Phyllo

Now comes the part that looks fancier than it is. Open the phyllo and keep the unused sheets covered with a barely damp towel. Place one sheet in the dish and brush lightly with olive oil. Repeat until you have 7 bottom sheets. Torn or wrinkled sheets can go here; save the neatest ones for the top.

A hand lifting a striped towel to reveal stacked phyllo sheets beside a pastry brush and oil.
Cover the phyllo between layers, but keep the towel only barely damp. The goal is flexible sheets, not wet pastry.

Patchwork the Hidden Layers

Use torn or smaller phyllo pieces where they will be hidden. Overlapping the gaps gives the filling support without requiring perfect sheets.

Hands layering torn and overlapping sheets of phyllo in the bottom of a rectangular baking pan.
Torn sheets belong in the bottom layers. Overlap them like patchwork, then keep building; the filling needs coverage and structure, not perfect rectangles.

Step 7: Add the Filling

Spread the spinach-feta filling evenly over the phyllo. Keep it loose and even rather than pressing it down hard. The filling should sit in a generous layer, not a compacted block.

Spinach and feta filling being spread evenly over layered phyllo in a rectangular pan.
Spread the filling evenly, then stop. Pressing it down too hard can make the pie dense instead of giving you a lighter, layered spanakopita.

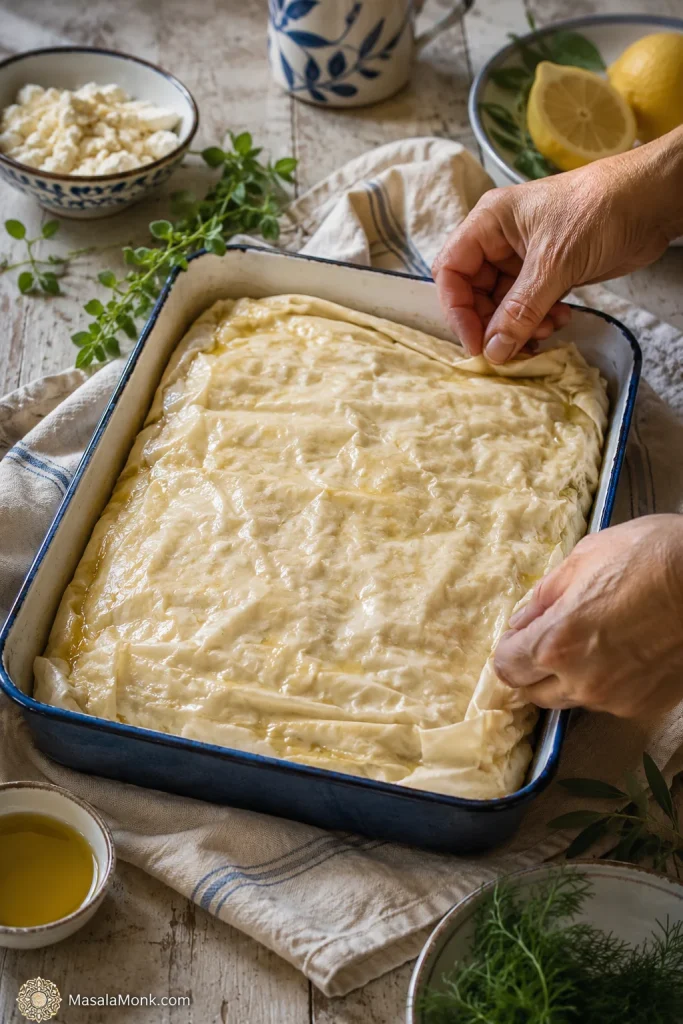
Step 8: Add the Top Phyllo

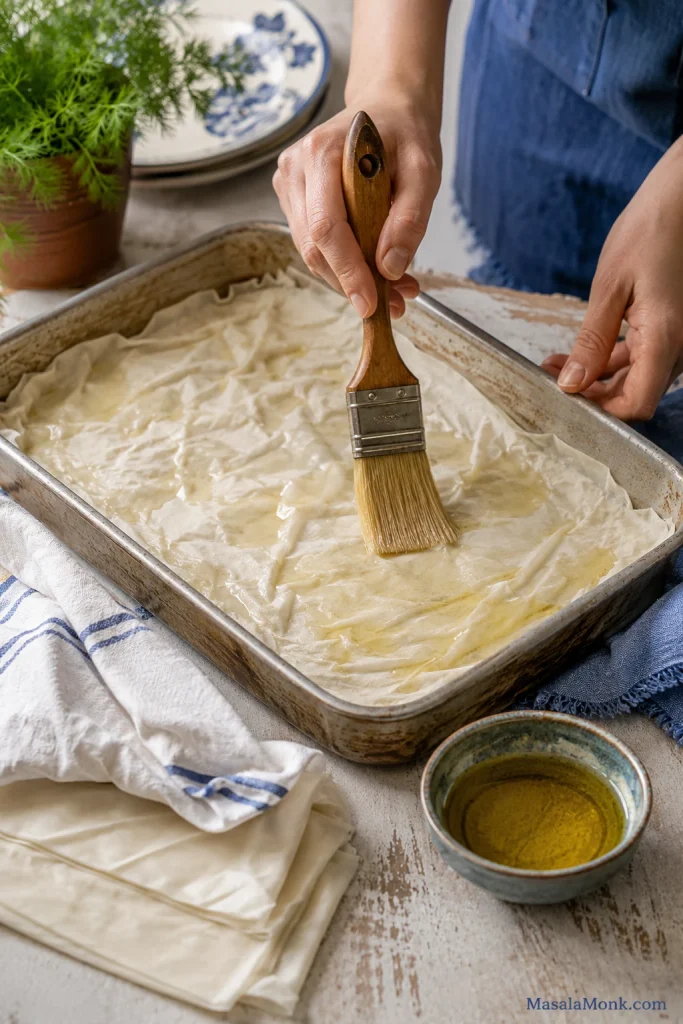
Layer 7 more phyllo sheets over the filling, brushing each sheet lightly with olive oil. Tuck or fold the edges into the pan. The sheets should look lightly glossy in spots. They do not need to shine like they are soaked.

A pastry brush spreading a thin sheen of oil over wrinkled phyllo sheets in a baking pan.
Brush just enough oil to leave a light sheen. Too much fat can weigh down the phyllo, while a thin coat helps the layers crisp and separate.

Tuck the Top Edges

Fold the overhanging sheets inward so the top looks tidy and the corners have enough pastry to crisp.

Hands folding and tucking the top phyllo edges into a rectangular pan before baking.
Tuck the top sheets inward for a tidy edge and better corner texture. Those folded bits often bake into the crispiest parts of the tray.

Step 9: Score the Top

Use a sharp knife to score the top layers into squares, rectangles, or diamonds. You do not need to cut all the way through the filling before baking. Scoring now makes the finished pie easier to slice without shattering the top.

A knife scoring the top of an unbaked spanakopita tray into portions before baking.
Score before baking, while the phyllo is still soft enough to guide. Once crisp, those shallow lines help the knife move cleanly instead of crushing the top.

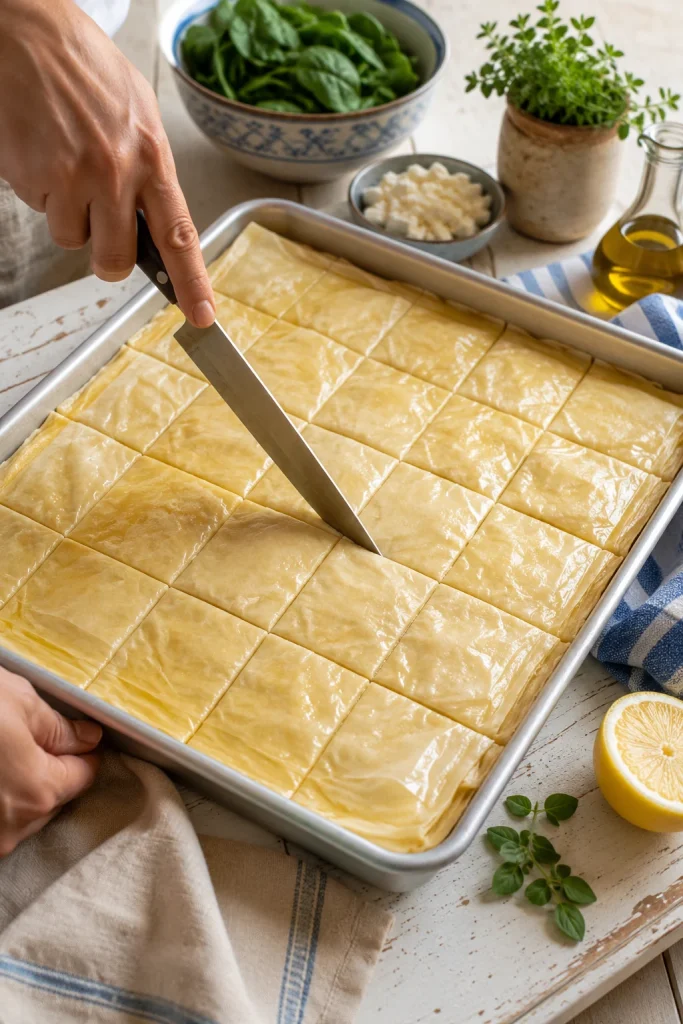
Squares are easiest for weeknights. Diamonds make the same tray look instantly party-ready once the golden top opens along the scored lines.

Step 10: Bake Until Golden-Brown and Crisp

Bake for 45–55 minutes, until the top is golden-brown, the edges are firm, and the filling is hot and set. Start checking at 45 minutes, but trust the pastry more than the clock. If the top browns too quickly, tent it loosely with foil and keep baking. Not sure yet? Compare it with the doneness cues before pulling the tray.

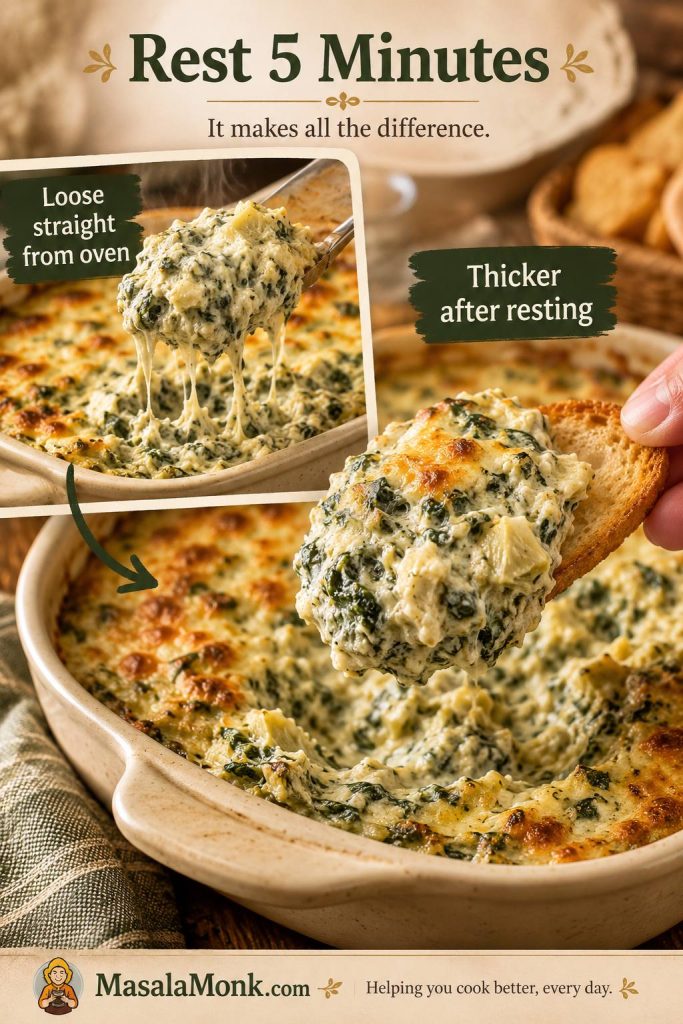
Step 11: Rest, Then Slice

Let the spanakopita rest uncovered for 15–20 minutes before cutting fully through the scored lines. The wait is annoying, but it is what turns a hot, loose filling into clean pieces with flaky tops and edges that hold.

If you only follow the method above, you can make a good tray. The next sections are for the moments that make cooks nervous: a soft base, fussy phyllo, loose filling, make-ahead timing, and slices that need to hold together.

How to Keep the Bottom Crisp

To keep spanakopita from getting soggy: remove excess spinach moisture, avoid loose or creamy filling, use enough bottom phyllo, bake until the pastry is fully golden, and rest the pie uncovered before slicing.

If the bottom turns soft, the pie is usually telling you one of two things: the filling was too wet, or the base needed more heat and time. For specific fixes, use the troubleshooting table.

What Actually Keeps the Bottom Crisp

  1. Moisture first: no liquid pooling in the filling.
  2. Structure second: enough bottom phyllo to support the greens and feta.
  3. Heat third: lower-middle rack so the base bakes before the top over-browns.
  4. Rest last: 15–20 minutes so the filling settles before slicing.

If the filling looks wet, drain off any visible liquid before layering. If the mixture still looks loose, stir in 1–2 tablespoons breadcrumbs, fine semolina, or crushed crackers to absorb extra moisture. This is a rescue trick, not something you should need every time.

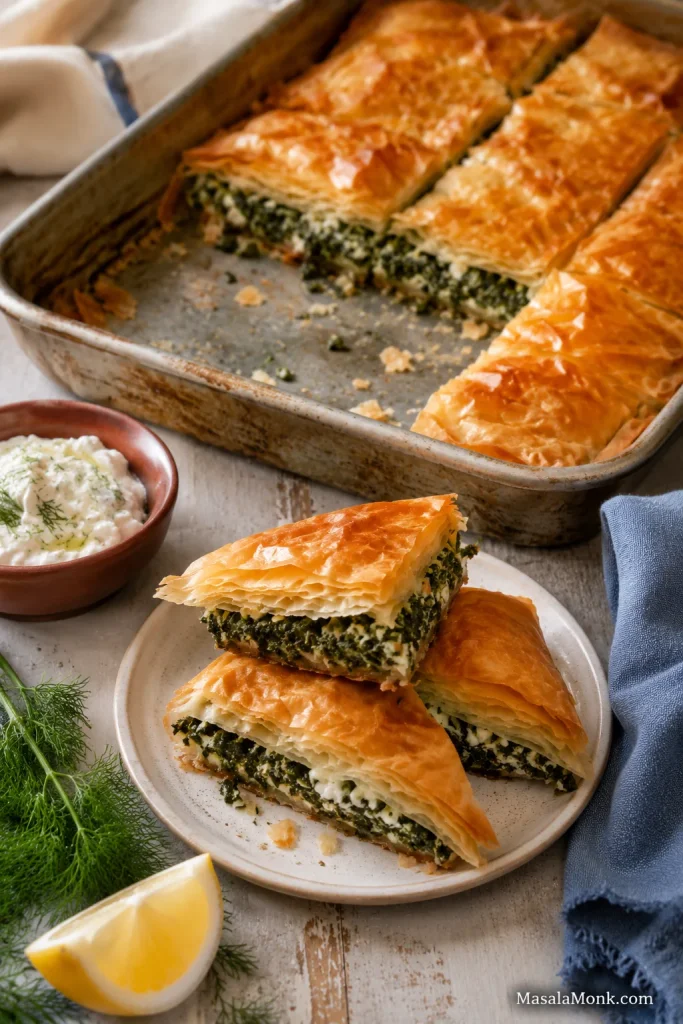
Clean First Corner Lift

When the bottom is right, the first corner lifts cleanly instead of slumping, and that is the moment you know the tray worked.

A lifted corner piece of baked spanakopita on a spatula, showing a firm bottom layer, green filling, and golden phyllo top.
The first lifted piece is the real test. If it holds shape on the spatula, the spinach was drained well and the bottom phyllo had enough time to crisp.

If Phyllo Makes You Nervous

The method above is enough for most cooks, but these small phyllo habits make the first tray feel calmer. Most of the fear disappears once you stop trying to keep every sheet perfect.

Thaw phyllo overnight in the refrigerator, then let the sealed package sit at room temperature until pliable. Rushing the thaw can make sheets crack, stick, or turn damp in patches. Once opened, keep unused sheets covered with a barely damp towel.

For this recipe, 14 sheets is the default: 7 on the bottom and 7 on top. Very thin brands can take up to 16 sheets.

Smaller phyllo sheets can be overlapped to make one layer. Larger sheets can climb the sides of the pan and fold inward. The goal is layered coverage, not perfect single-sheet geometry.

If a sheet tears, use it in the bottom or middle layers and overlap the gaps. If a sheet dries out, discard it or tuck it into the middle rather than forcing it across the top.

Think of the inner sheets as patchwork. Nobody will see them, and they still bake beautifully. Once the first few sheets are down, the rest feels much less precious.

Since phyllo brands vary, follow your package first. For a deeper handling reference, Athens Foods has a practical guide to phyllo storage, thawing, and handling.

How to Tell When Spanakopita Is Done

For a 9 x 13 inch / 23 x 33 cm tray, bake at 350°F / 180°C for 45–55 minutes. Your oven and pan matter, but the pastry will tell you when it is ready.

A pale top usually means the lower layers need more time too. A deeply golden top, dry scored lines, and a firm first corner matter more than hitting exactly 50 minutes.

Golden Tray Doneness

Look for a tray that reads crisp before you cut into it: browned edges, dry scoring lines, and a top that no longer looks soft or steamed.

A whole baked tray of spanakopita with a golden phyllo top and dry scored lines.
Check more than color. A finished spanakopita tray should have browned edges, dry scored seams, and a top that looks crisp rather than steamed.
  • Top: deeply golden and crisp, not pale.
  • Edges: flaky, browned, and firm.
  • Scored lines: dry-looking, not wet.
  • Filling: hot and set, not leaking.
  • Bottom: firm enough that a corner lifts with a spatula instead of drooping back into the pan.

When the pie is close, the kitchen starts to smell like toasted pastry, herbs, and warm feta.

A metal pan gives the crispest bottom. Glass or ceramic works too; just give the base a few extra minutes if it still looks soft. If using a metal baking pan, setting it on a preheated sheet pan can help the bottom crisp. If using glass or ceramic, avoid sudden temperature changes, especially if the dish is cold from the refrigerator.

Spanakopita Success Cues

  • Before assembly: the filling smells herby and salty, with no liquid pooling in the bowl.
  • While layering: the phyllo looks lightly glossy, not wet or heavy.
  • Before baking: the top is scored and the edges are tucked into the pan.
  • After baking: the top is deeply golden and the scored lines look dry.
  • After resting: the first corner lifts cleanly instead of collapsing.

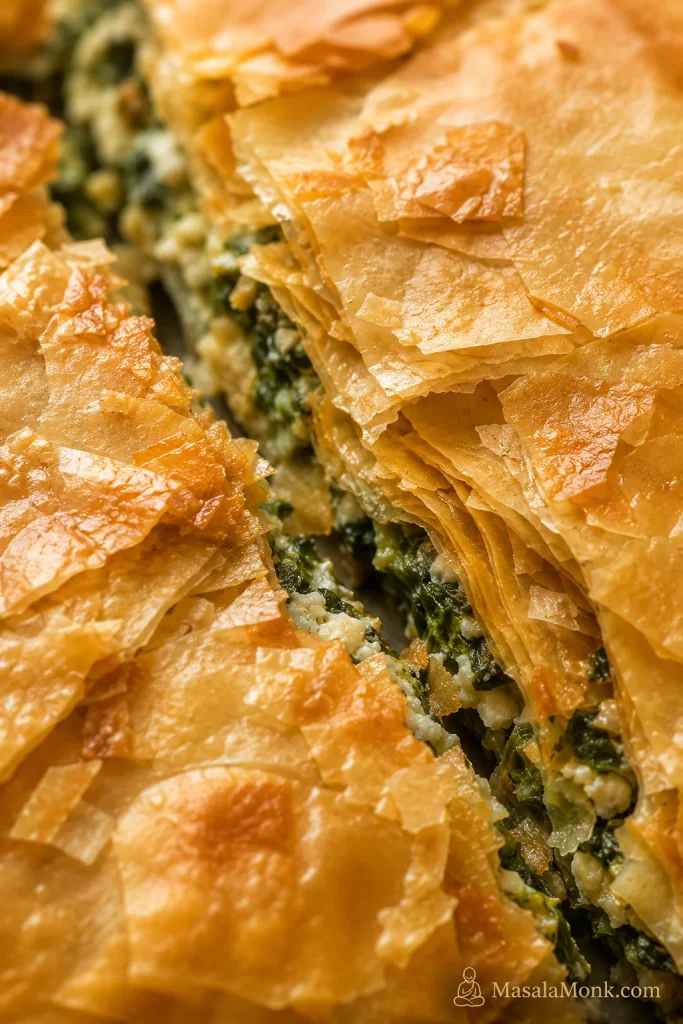
Crisp Flaky Phyllo Layers

Close up, the finished pastry should look brittle and layered, with small shards breaking away from the spinach-feta filling beneath.

A close-up of crisp baked phyllo layers with flaky shards and a glimpse of green filling.
This close-up shows the payoff of careful layering: brittle phyllo on top, tender spinach-feta filling below, and flaky shards that break cleanly when cut.

Troubleshooting Spanakopita

Most spanakopita problems are not mysterious. A soggy bottom, leaking filling, or shattered top usually comes from one of three things: too much moisture, not enough baking time, or slicing before the filling has settled.

Correct Filling vs Loose Filling

Before assembly, compare the filling texture instead of guessing. A clumpy mixture protects the pastry; a loose mixture brings too much steam and moisture into the tray.

Two bowls of spanakopita filling, one thick and clumpy and the other looser with visible liquid.
For troubleshooting, compare the two textures before assembly. The thicker filling bakes into cleaner slices, while the loose mixture can soften the pastry and make cutting messier.
ProblemLikely causeFix
Soggy bottomWet filling or underbaked basePress more moisture from the spinach, bake longer, and use a lower rack.
Top browns too fastOven runs hot or tray is too highTent loosely with foil and continue baking.
Bottom is soft but top is doneWeak bottom heatMove lower and bake 10 more minutes with foil over the top.
Phyllo tearsSheets are dry, cold, or handled slowlyKeep covered and use torn sheets inside.
Leaking fillingToo much moisture or overfillingDrain the filling better and keep the layer even.
Bland fillingMild feta or not enough herbsAdd dill, parsley, black pepper, or a little lemon zest.
Too-salty fillingVery salty fetaAdd more spinach or herbs if available; serve with yogurt sauce or a lemony salad.
Dense fillingThe spinach layer was packed down too hardSpread loosely next time; do not compress the spinach layer.
Top shatters badly when slicingNot scored before baking or cut too soonScore before baking, rest 15–20 minutes, then cut through the same lines.
Slices fall apartCut too soon or filling too looseRest 15–20 minutes before slicing fully.
Pastry soft after storageFridge moisture or trapped steamReheat uncovered in the oven or air fryer.

Variations and Shortcuts

The large tray is the main recipe. Once you understand that filling and layering method, these variations become easy to judge.

Spanakopita Triangles

Once the filling is made, triangles are just a folding project. They are great for appetizers, mezze platters, lunch boxes, and party trays. The first triangle is usually the clumsiest. By the third or fourth, your hands understand the fold.

Baked spanakopita triangles on a plate with one broken open to show spinach and feta filling, served with tzatziki.
For appetizer-style spanakopita triangles, use less filling than you think. Snug folds and modest filling help the phyllo seal, brown, and crisp all the way around.

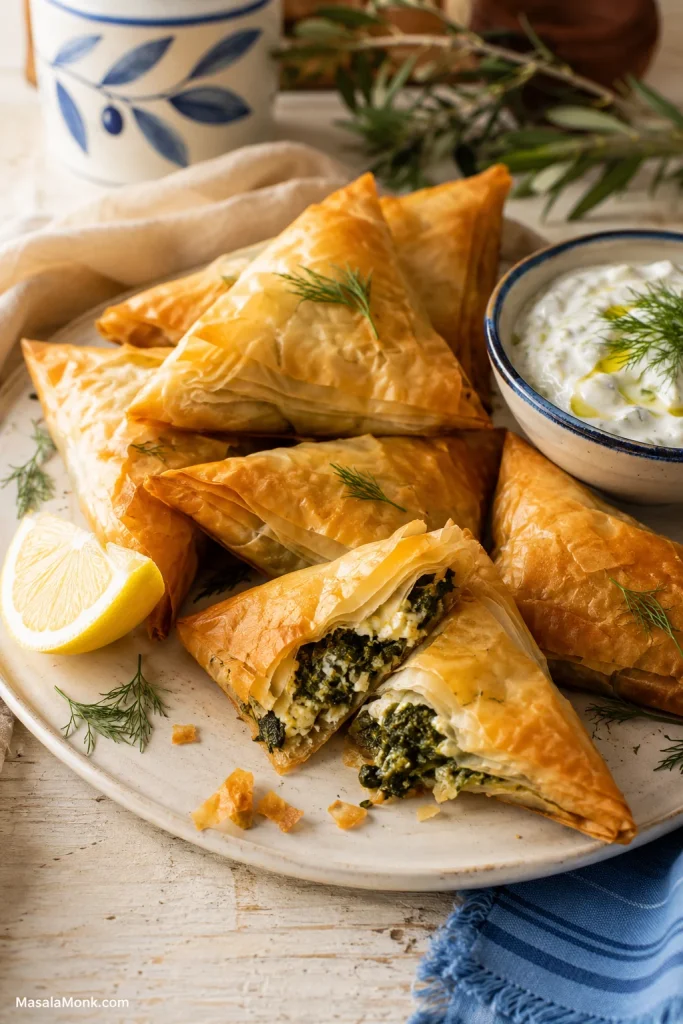
They are especially good with a bowl of Greek tzatziki sauce and crisp bites like homemade falafel.

  • Phyllo strip width: 2½–3 inches / 6–7.5 cm.
  • Layers: 2 phyllo sheets per strip.
  • Filling: ½–1 tablespoon per triangle.
  • Fold: like folding a flag.
  • Oven: 375°F / 190°C.
  • Small appetizer triangles: 15–18 minutes.
  • Medium triangles: 20–25 minutes.

If the filling squeezes out as you fold, use less. A neat triangle needs less filling than you think. The triangles are done when the seams look dry, the corners are golden, and the pastry feels crisp enough to pick up. For dips and sides, jump to the serving ideas.

Puff Pastry Shortcut

Puff pastry makes a delicious shortcut, though the texture is thicker and more buttery than classic phyllo. It is a good option when you want a spinach-feta pie without layering many thin sheets.

Puff pastry should be pliable but still cold; once it warms too much, it gets sticky and bakes less cleanly. Use the same filling, place one puff pastry sheet on the bottom, add the spinach mixture, cover with a second sheet, seal the edges, and cut a few slits in the top so steam can escape.

For a full puff pastry pie, start checking around 35 minutes and expect 40–50 minutes depending on the thickness of the filling and pastry. For small puff pastry parcels, start checking around 20–25 minutes.

Gluten-Free Spanakopita

Use gluten-free phyllo if available, or gluten-free puff pastry as a shortcut. If neither is available, make a crustless spinach-feta bake with the same filling flavors.

Vegan or Dairy-Free Spanakopita

Use olive oil for brushing and replace feta with a salty vegan feta or a firm tofu-cashew mixture. Keep the filling well-seasoned because feta normally provides both salt and tang.

Egg-Free Spanakopita

You can skip the eggs, but the slices will be looser. Keep the spinach very well pressed, avoid wet cheeses, and rest the pie before cutting.

Make It Ahead Without Losing the Crisp Layers

Spanakopita is one of those recipes you can do in pieces. For the best make-ahead texture, assemble it unbaked, refrigerate it for up to 24 hours, then bake until golden and crisp. For longer storage, freeze it unbaked.

  • Make the filling ahead: Prepare up to 1 day ahead and refrigerate. Drain off any liquid before assembling.
  • Assemble unbaked: Refrigerate the covered tray for up to 24 hours, then bake from chilled with a few extra minutes if needed.
  • Freeze unbaked: Score the top while the phyllo is still soft, wrap tightly, and freeze.
  • Bake from frozen: Add 15–25 minutes and cover loosely with foil if the top browns early.
  • Store leftovers: Cool fully, refrigerate for 3–4 days, and reheat uncovered in the oven or air fryer.

If making the filling ahead, check it again before assembling. Spinach can release more liquid in the fridge, so drain or squeeze off any liquid before layering it with phyllo. Use the filling texture comparison if it looks loose.

For a party, serve the pie warm after a 15–20 minute rest, or at room temperature on a mezze table. Let hot spanakopita breathe; trapped steam softens the pastry. Room temperature is fine for serving, but refrigerate leftovers rather than leaving them out for a long time.

This is the kind of dish that solves more than one meal: dinner tonight, brunch tomorrow, party squares on a platter, or a cold leftover piece eaten straight from the fridge.

Reheating Frozen or Leftover Spanakopita

Best way to reheat spanakopita: reheat pieces uncovered in the oven or air fryer. Dry heat helps the phyllo crisp again, while covered reheating traps steam and softens the pastry. The microwave is fast, but it will not bring back the flaky texture.

SituationMethodTime
Frozen spanakopita trianglesAir fryer at 350°F / 177°C8–12 minutes
Frozen spanakopitaOven at 400°F / 200°C17–20 minutes
Leftover homemade sliceOven at 350°F / 175°C8–13 minutes
Leftover homemade sliceAir fryer at 325–350°F / 160–177°C4–7 minutes
MicrowaveFastest, but softens pastryUse only if needed

For frozen or store-bought spanakopita, follow the package instructions first because sizes vary. If using a thermometer, the center should reach 165°F / 74°C. FoodSafety.gov gives the same 165°F / 74°C target for reheated leftovers in its safe minimum internal temperature chart.

These general notes can help with Costco, Trader Joe’s, Aldi, or other frozen spanakopita, but start checking early because every brand and size cooks differently.

What to Serve with Spanakopita

A good tray of spanakopita does not need much ceremony. Cut it warm, let the flaky shards fall where they want, and serve it with something cold and lemony.

It is the kind of food that does not need to be piping hot to be loved; even warm or room temperature, the salty filling and flaky edges still do their job.

For a full Greek-inspired spread, keep the sides cool, bright, and simple so they balance the rich phyllo instead of competing with it.

Spanakopita served on a table with tzatziki, cucumber salad, chickpea salad, olives, lemon wedges, and herbs.
Serve rich spanakopita with cool and bright sides. Tzatziki, cucumber salad, chickpeas, olives, lemon, and herbs balance the salty feta and crisp phyllo without distracting from the pie.

Greek-Inspired Dinner

Serve warm pieces with Greek salad, roasted potatoes, red lentil soup, baked chicken breast, fish, lamb, olives, and lemon wedges.

Vegetarian Mezze Table

Cut smaller pieces and serve with tzatziki, hummus, pita, roasted vegetables, olives, cucumber salad, and homemade falafel.

Brunch or Lunch Boxes

Room-temperature pieces are excellent with cucumber salad, chickpea salad, yogurt sauce, eggs, fresh fruit, or a tomato cucumber salad.

Tabbouleh is also a strong side because the lemon, parsley, mint, and tomato cut through the rich pastry.

Quick lemon-dill yogurt sauce: Mix Greek yogurt with lemon juice, minced garlic, chopped dill, a little olive oil, salt, and black pepper. It is especially good with warm triangles.

Full Spanakopita Recipe

This tray-style spanakopita gives you flaky top layers, a firm base, and a spinach-feta filling that settles into clean pieces after resting.

Recipe name: Spanakopita Recipe: Greek Spinach Pie with Feta and Phyllo

Description: A generous Greek spinach pie recipe with crisp golden phyllo, salty feta, fresh herbs, and a spinach filling that slices cleanly after resting.

Yield: 10–12 pieces

Prep time: 35–45 minutes with frozen spinach, longer with fresh bunch spinach. This does not include overnight phyllo thawing.

Cook time: 45–55 minutes

Total time: 1 hour 20 minutes to 1 hour 40 minutes, plus phyllo thawing

Equipment: 9 x 13 inch / 23 x 33 cm baking dish or pan, large skillet, mixing bowl, colander, clean kitchen towel or cheesecloth, pastry brush, sharp knife, barely damp towel for phyllo.

Before you start: Make sure the spinach is pressed well, the phyllo is fully thawed, and the filling is mixed before you open the phyllo package. Once phyllo is exposed to air, the recipe moves much faster.

Ingredients

  • 500 g / 16 oz frozen chopped spinach, thawed and squeezed well or 700–900 g / 1½–2 lb fresh spinach, wilted, cooled, and squeezed well
  • 300 g / about 10½ oz feta cheese, crumbled
  • 2 large eggs
  • 14 sheets phyllo pastry, thawed
  • Olive oil, divided: 120 ml / ½ cup for brushing, plus 1–2 tablespoons for cooking the onion
  • 1 small onion, finely chopped, or 4–6 scallions, sliced
  • 1–2 garlic cloves, minced, optional
  • ¼ cup chopped fresh dill
  • ¼ cup chopped fresh parsley
  • 1–2 tablespoons chopped fresh mint, optional
  • ½ teaspoon lemon zest, optional
  • Black pepper, to taste
  • Pinch of nutmeg, optional
  • Salt, only if needed after tasting the filling before adding eggs

Instructions

Prepare the Filling

  1. Thaw the phyllo. Thaw frozen phyllo overnight in the refrigerator, or according to package directions. Let the sealed package sit briefly at room temperature before opening. Open the phyllo only when the filling is mixed, the oil is ready, and the pan is brushed.
  2. Prepare the spinach. If using frozen spinach, thaw completely and press out as much liquid as possible. If using fresh spinach, wilt it in batches in a large pan, cool it, chop if needed, and squeeze well. The bowl should not show liquid pooling when pressed.
  3. Cook the aromatics. Heat 1–2 tablespoons olive oil in a skillet. Add onion or scallions and cook until softened. Add optional garlic and cook briefly until fragrant. Let cool slightly.
  4. Mix and taste before adding eggs. In a large bowl, mix spinach, cooked aromatics, feta, dill, parsley, optional mint, optional lemon zest, black pepper, and optional nutmeg. Taste and add salt only if needed. Then mix in the eggs. The filling should hold together without liquid pooling at the bottom of the bowl.

Layer the Spanakopita

  1. Prepare the pan and oven. Heat oven to 350°F / 180°C. Place a rack in the lower-middle position. Brush a 9 x 13 inch / 23 x 33 cm baking dish or pan with olive oil.
  2. Layer the bottom phyllo. Open the phyllo and cover unused sheets with a barely damp towel. Place one sheet in the dish and brush lightly with olive oil. Repeat until you have 7 bottom sheets. Use torn or wrinkled sheets here if needed.
  3. Add the filling. Spread the spinach-feta filling evenly over the phyllo. Keep it loose and even rather than pressing it down hard.
  4. Add the top phyllo. Layer 7 more sheets over the filling, brushing each sheet lightly with olive oil. Tuck or fold the edges into the pan. The sheets should look lightly glossy, not soaked.

Bake, Check, and Rest

  1. Score the top. Use a sharp knife to score the top layers into squares, rectangles, or diamonds. You do not need to cut all the way through the filling yet.
  2. Bake. Bake for 45–55 minutes, until the top is golden-brown, the edges are firm, and the filling is hot and set. If the top browns too quickly, tent loosely with foil and keep baking.
  3. Check for doneness. The top should be golden and crisp, the scored lines should look dry, and a corner should lift without sagging. If the top is brown but the bottom feels soft, cover loosely with foil and bake 5–10 minutes longer.
  4. Rest and slice. Let the spanakopita rest uncovered for 15–20 minutes. Cut fully through the scored lines and serve warm or at room temperature.

Recipe Notes

  • Block feta gives better flavor and texture. Use slightly less if it is very salty, or up to 340 g / 12 oz for a cheesier filling.
  • Lemon zest is optional but useful if your feta is mild or the filling tastes flat. Avoid adding much lemon juice because extra liquid can loosen the filling.
  • If your phyllo sheets are very thin, use up to 16 sheets total.
  • You may not use all the oil. The phyllo should look lightly glossy, not soaked.
  • A metal pan gives the crispest bottom. Glass or ceramic works too, but may need a few extra minutes.
  • For a fan/convection oven, start around 170°C and check a little early because the top can brown faster.
  • If the filling looks wet, drain visible liquid and mix in 1–2 tablespoons breadcrumbs, fine semolina, or crushed crackers.
  • Let hot spanakopita breathe. Steam softens the pastry if it is covered tightly.

Frequently Asked Questions

These are the questions that usually come up the first time you make spanakopita.

Spanakopita Basics

Is spanakopita the same as Greek spinach pie?

Yes. Spanakopita is Greek spinach pie made with phyllo pastry and a filling of spinach, feta, herbs, and often eggs.

Is it phyllo or filo?

Both spellings refer to the same thin pastry sheets. Phyllo is common in the US, while filo is common in the UK and other places.

Ingredients, Spinach, and Phyllo

Fresh spinach or frozen spinach: which is better for spanakopita?

Frozen spinach is easier and more predictable because it is already chopped and wilted. Fresh spinach gives brighter flavor, but it takes more prep and still needs to be pressed well before mixing.

Should fresh spinach be cooked before adding it to spanakopita?

Yes. Fresh spinach should be wilted, cooled, chopped if needed, and pressed well before mixing. Raw spinach releases too much moisture as it bakes and can make the filling loose.

How many phyllo layers should spanakopita have?

Use 14 sheets as a reliable default: 7 on the bottom and 7 on top. If your phyllo is very thin, you can use up to 16 sheets.

Do torn phyllo sheets matter?

No. Use torn sheets in the bottom or middle layers and save the neatest sheets for the top. Once baked, the inner patchwork still turns flaky.

Why did my spanakopita turn soggy?

The most common cause is excess spinach moisture or underbaking. Press the spinach well, keep the filling moundable instead of loose, and bake until the pastry is fully golden-brown.

What cheese can I use besides feta?

Feta gives spanakopita its classic salty tang, so keep it as the main cheese if possible. For a milder filling, replace a small portion with ricotta or cottage cheese, but keep the mixture firm and well-drained so the phyllo does not soften.

Make-Ahead, Freezing, and Reheating

How far ahead can I assemble spanakopita?

You can assemble it unbaked and refrigerate it for up to 24 hours. Check for released liquid before baking and add a few extra minutes if baking from chilled.

Does spanakopita freeze better baked or unbaked?

Unbaked usually gives the best texture because the phyllo crisps for the first time in the oven. Score the top before freezing while the sheets are still soft, wrap tightly, and bake from frozen with extra time. Baked leftovers can also be frozen, but the pastry is more likely to soften after reheating.

What is the best way to reheat spanakopita?

Reheat it uncovered in the oven or air fryer. Dry heat helps the phyllo crisp again. The microwave works for speed, but it softens the pastry.

Diet and Serving Questions

Should spanakopita be served hot or room temperature?

Spanakopita is good warm or at room temperature. Let it rest after baking so the filling settles and the pieces slice more cleanly.

Can spanakopita be made without eggs?

Yes, but the filling will be looser. Keep the spinach especially well pressed, avoid wet cheeses, and rest the pie before cutting.

Puff pastry or phyllo: which is better for spanakopita?

Phyllo is better for classic spanakopita because it bakes into thin, crisp, flaky layers. Puff pastry works as a shortcut, but it gives a thicker, buttery crust and a less traditional texture.

Is classic spanakopita gluten-free?

No. Classic spanakopita uses wheat-based phyllo, so it is not usually gluten-free. For a gluten-free version, use gluten-free phyllo if available, gluten-free puff pastry as a shortcut, or make a pastryless spinach-feta bake inspired by the same flavors.

If you make it, I would love to know which route you took: frozen spinach tray, fresh spinach tray, triangles, or puff pastry shortcut.

The first tray may look a little rustic before it goes into the oven, and that is part of the charm. Once the phyllo turns golden and the spinach-feta filling settles, you get the kind of pie people keep returning to, knife in hand, promising they are cutting “just one more” piece.

Posted on Leave a comment

Spinach Artichoke Dip Recipe

Baked spinach artichoke dip in a cream ceramic dish with a tortilla chip lifting a thick scoop of cheese, spinach, and artichokes.

A good spinach artichoke dip recipe has a very specific kind of magic: the edges are bubbling, the top is lightly golden, and the first scoop pulls up creamy cheese, tender spinach, and little bites of artichoke without leaving a watery puddle behind. It is the kind of hot, cheesy appetizer people hover around at a party, pretending they are only taking one more chip.

The challenge is getting all that richness to behave. Spinach and artichokes bring moisture, the cheese needs gentle heat, and the creamy base needs enough structure to stay smooth. This version keeps the classic party-dip comfort, but it uses spinach pressed free of hidden water, well-drained artichokes, a stable cream cheese base, and a controlled bake so the dip stays plush, spoonable, and full of flavor.

What you get is a warm baked spinach artichoke dip that is rich but balanced, sturdy enough for chips, and easy enough to make ahead for game day, holidays, potlucks, movie nights, or any table where a bubbling dish of dip disappears faster than expected.

This guide focuses on the details that usually make or break the bowl: how dry the spinach should be, which artichokes work best, which cheeses melt smoothly, when to stop baking, and how to keep the dip warm without turning it oily.

Spinach Artichoke Dip Texture Goal

Before the recipe details, look for the first success cue: a thick scoop with visible vegetables and no watery puddle.

Close-up of hot spinach artichoke dip being scooped from a baked dish with creamy cheese, spinach, artichokes, and a golden edge.
This close-up shows the texture you are aiming for: soft-set, rich, and full of visible vegetables, but still thick enough to hold together.

Spinach Artichoke Dip Guide

Use this guide to make a classic hot spinach artichoke dip, choose the right ingredients, adjust the pan and bake time, and keep the texture smooth, rich, and chip-friendly.

Quick Answer: Best Ratio, Bake Time, and Texture Cue

For this spinach artichoke dip recipe, use 8 oz cream cheese, ½ cup sour cream, ⅓ cup mayonnaise, 10 oz frozen spinach, one 14 oz can artichoke hearts, Parmesan, and mozzarella or Monterey Jack. Bake it at 375°F / 190°C for 22–28 minutes in a 1½- to 2-quart baking dish or an 8×8-inch dish, until the edges bubble and the top is lightly golden.

After baking, rest the dip for 5 minutes before serving. That short pause matters because the cheese and cream base settle into a thicker, chip-friendly texture instead of running the moment a chip hits the dish.

Detail Use This
Oven temperature 375°F / 190°C
Bake time 22–28 minutes
Dish 1½- to 2-quart glass or ceramic dish, or 8×8-inch dish
Servings 8–10 appetizer servings
Spinach 10 oz / 280 g frozen spinach, thawed and squeezed very dry
Artichokes 14 oz / 390–400 g canned artichoke hearts, drained and patted dry
Texture cue Bubbling edges, creamy center, lightly golden top
Rest time 5 minutes before serving

Spinach Artichoke Dip Ratio at a Glance

Keep these core numbers in mind before you mix: dairy base, vegetables, oven temperature, bake time, and rest cue.

Quick answer board for spinach artichoke dip showing 375°F, 22 to 28 minutes, cream cheese, spinach, artichokes, and rest time.
Use the ratio as your starting point, but judge the finish by the dish: bubbling edges, a hot center, and a short rest create the best texture.
Three rules: press the vegetables free of hidden water, bake until the edges bubble, then rest the dip for 5 minutes. The finished dip should look smooth in the center and scoop without leaking liquid into the dish.

Three Rules for a Dip That Holds Together

These three habits are the safety net. Once they make sense, the full step-by-step method shows exactly when to mix, fold, bake, and rest the dip.

Three-rule guide showing spinach being pressed dry, bubbling dip edges, and a rested scoop on a chip.
This is the easiest way to remember the recipe: dry the vegetables well, stop baking once the edges bubble, and give the dip a few minutes to settle.

Why This Spinach Artichoke Dip Works

The creamy texture comes down to balance. Spinach and artichokes bring moisture, the dairy brings richness, and the cheese gives the dip body. When those parts work together, you get a warm, scoopable appetizer instead of a dip that turns loose, oily, or heavy.

That is why this spinach artichoke dip recipe uses a cream cheese base, a moderate oven temperature, and vegetables that are dried before they meet the cheese.

The Creamy Base Has Structure

Cream cheese gives the dip structure and helps hold the base together. Sour cream adds tang, so the richness does not feel flat. A smaller amount of mayonnaise gives the classic party-dip flavor without making the whole dish taste oily or heavy.

That smaller mayo amount is intentional. You still get the familiar richness, but the dip stays closer to a soft, velvety baked appetizer than a heavy mayo-based spread.

How the Base Holds Together

The base is not just richness; it is the part that holds the vegetables and cheese together.

Cream cheese, sour cream, and mayonnaise being mixed into a smooth base with callouts for structure, tang, and richness.
The base works because every dairy ingredient has a job: cream cheese holds the dip together, sour cream brightens it, and mayo adds classic party-dip richness.

The Vegetables Are Dried First

Frozen spinach is reliable because you can thaw it and press out a surprising amount of hidden water before it ever touches the baking dish. Artichoke hearts need the same attention: drain them well, pat them dry, and chop them into bite-size pieces so every scoop has a little artichoke without making the dip wet.

That is the difference between a dip that looks good for five minutes and one that still scoops cleanly after people have been grazing for a while.

The Cheese Melts Gently

Parmesan gives salty, savory depth, while mozzarella or Monterey Jack gives the soft melt. A moderate 375°F / 190°C bake is hot enough to warm the center and brown the top, but not so harsh that the dairy breaks before the dip is ready.

Why this version stays creamy: cream cheese gives the base structure, a smaller amount of mayo keeps it rich without tasting heavy, a full 10 oz package of spinach gives real flavor, and a moderate 375°F bake lets the cheese melt gently.

The main idea is simple: remove water before the dip goes into the oven, then bake just until the cheese melts and the edges bubble. That one-two combination keeps the dip smooth, rich, and chip-friendly.

Ingredients for Creamy Spinach Artichoke Dip

The ingredients are familiar, but the details matter. Use softened cream cheese, fully drained spinach, dry artichokes, and a cheese combination that melts well instead of turning grainy.

Ingredients Before You Mix

Before mixing, it helps to have the base, vegetables, cheese, and seasonings ready at the same time.

Ingredient guide with cream cheese, sour cream, mayonnaise, cheeses, spinach, artichokes, garlic, lemon, pepper, and red pepper flakes.
The ingredient list is simple, but the balance matters; once the dairy, cheese, spinach, and artichokes are in the right ratio, the dip tastes generous without feeling heavy.

Cream Cheese

Use one 8 oz / 226 g block of full-fat cream cheese, softened to room temperature. Block cream cheese gives the dip the best structure. If it is too cold, it will be harder to mix and may leave small lumps in the base.

Sour Cream and Mayonnaise

Sour cream gives the dip a gentle tang and a looser, spoonable texture. A smaller amount of mayonnaise adds richness and helps the dip feel classic without taking over. If you dislike mayo, you can use more sour cream or Greek yogurt instead; just know that the flavor will be tangier and slightly less rich.

Parmesan and Mozzarella or Monterey Jack

Parmesan gives the dip savory, salty flavor. Mozzarella gives the classic stretchy melt. Monterey Jack is a little creamier and smoother if you want a softer restaurant-style texture. You can use all mozzarella, all Monterey Jack, or a mix of the two.

Choose mozzarella if you want more stretch, or Monterey Jack if you want a softer, smoother scoop. For the most balanced version, use one of those for melt and Parmesan for flavor.

Freshly shredded cheese melts a little smoother, but bagged mozzarella or Monterey Jack still works here because the cream cheese base helps keep the dip soft.

Spinach

Frozen spinach is the easiest route here because the big shrinking-down step has already happened; your main job is getting rid of the hidden water. Thaw it completely, then squeeze it until it feels like a compact damp ball instead of wet leaves. If you use fresh spinach, cook it down first, cool it, chop it, and squeeze out the extra liquid.

Artichoke Hearts

Canned artichoke hearts in water or brine are the easiest default. Drain them well, pat them dry, and chop them into bite-size pieces. Marinated artichokes work too, but they add more oil, salt, and tang, so drain them very thoroughly and taste before adding extra salt.

Quartered artichoke hearts are easiest because they are already close to scoopable size. Whole hearts work too, but chop them smaller so they do not release big pockets of liquid into the dip.

If the jar smells boldly herby or vinegary, assume that flavor will show up in the finished dip.

Garlic, Lemon, Pepper, and Optional Heat

Garlic gives the dip its savory backbone. Lemon zest or a little lemon juice cuts through the richness without making the dip taste lemony. Black pepper adds warmth, and a pinch of red pepper flakes or a few dashes of hot sauce can wake up the whole dish.

Fresh vs Frozen Spinach for Spinach Artichoke Dip

Fresh spinach and frozen spinach both work, but they do not behave the same way. Frozen spinach is easier for most home cooks because it has already been cooked down. Once thawed, you can squeeze out the water and add it straight to the creamy base.

Fresh spinach has a cleaner flavor, but it takes more prep. Once it cooks down, the leaves still need to be cooled and squeezed; otherwise, the dip can turn loose instead of thick and scoopable.

Best Spinach Choice for the Dip

The best spinach is the one you can prep and dry thoroughly, even if frozen spinach is the easiest route.

Comparison of frozen chopped spinach, frozen leaf spinach, and fresh spinach for making spinach artichoke dip.
Frozen spinach saves prep time because it is already cooked down, but it still needs one important step: press out the water before it reaches the cheese base.
Spinach Type Amount How to Use It
Frozen chopped spinach 10 oz / 280 g Thaw completely and squeeze very dry.
Frozen cut-leaf spinach 10 oz / 280 g Use if available for a slightly better leafy texture. Thaw and squeeze dry.
Fresh baby spinach About 1 lb / 450 g Cook down first, cool, chop, and squeeze dry.
Frozen creamed spinach Shortcut only Changes the dairy, salt, and texture. Reduce other creamy ingredients if using it.
Most important rule: the success of this dip depends less on fresh vs frozen spinach and more on how dry the spinach is before it goes into the bowl.

After squeezing, the spinach should feel compact and damp, not juicy. If you press it and liquid still runs out, keep going. Once the spinach is ready, it should break apart easily when you stir it into the base instead of leaving green liquid behind in the bowl.

How Dry the Spinach Should Look

The table explains the options; this cue shows the texture you want before the spinach enters the cheese base. If your dip has turned loose before, the troubleshooting section explains how to fix watery dip and prevent it next time.

Compact squeezed spinach clump on a kitchen towel showing how dry spinach should be before adding it to dip.
This is the spinach texture to aim for: compact and damp, not juicy. If liquid still runs out when you press it, keep going.

Canned vs Marinated Artichokes

For classic spinach artichoke dip, canned artichoke hearts are the easiest choice. They are tender, mild, and easy to chop. The only catch is moisture. Drain them well, press away excess liquid with paper towels or a clean kitchen towel, and chop them into pieces small enough to scoop.

Marinated artichokes can taste great, but they bring oil, herbs, salt, and tang. Drain them extra well before they go into the creamy base, especially if you do not want the dip to taste sharp or oily.

Best Artichokes to Use

Before choosing a can or jar, remember that artichokes change both flavor and moisture.

Comparison of canned, brined, marinated, and frozen artichokes for spinach artichoke dip.
Artichokes affect both moisture and flavor. For the cleanest baked dip, choose mild canned or brined hearts and dry them well before mixing.
Artichoke Type Use It? What to Know
Canned in water Yes The easiest default. Drain well, pat dry, and chop.
Jarred in brine Yes Drain well. Rinse if they taste very salty.
Marinated in oil Yes, with care More flavor, more oil. Drain very thoroughly.
Frozen artichokes Yes, if available Thaw, drain, pat dry, then chop.
Fresh artichokes Not ideal here Too much prep for a creamy baked dip.

How to Prep Artichokes for Dip

Once you choose the artichokes, the prep is simple but important: drain, dry, and chop them small enough for clean scoops.

Artichoke hearts being drained, patted dry, and chopped into bite-size pieces on a cutting board.
Smaller, drier artichoke pieces mix more evenly into the cheese base, so every scoop gets flavor without hidden wet pockets.

Best Cheese for Spinach Artichoke Dip

The best cheese for spinach artichoke dip is usually a mix of one cheese for melt and one cheese for flavor. Mozzarella or Monterey Jack gives the creamy pull. Parmesan gives the savory bite.

The goal is not just stretch. You want a dip that feels melty and generous, but still has enough savory edge from Parmesan to keep each bite from tasting like plain cream.

A dramatic cheese pull is fun, but the better party dip is the one that stays smooth enough for the next person’s chip.

Best Cheese Blend for Spinach Artichoke Dip

Cheese choice helps, but bake control matters too; the bake-time guide shows when to stop before the dairy overheats.

Cheese guide showing mozzarella, Monterey Jack, and Parmesan for spinach artichoke dip.
The best cheese blend does two things at once: mozzarella or Monterey Jack gives melt, while Parmesan adds the savory bite that keeps the dip from tasting flat.

Classic Cheese Combination

Use mozzarella and Parmesan for the familiar creamy, cheesy party dip. Mozzarella melts softly, and Parmesan keeps the flavor from tasting flat.

Creamiest Cheese Combination

Use Monterey Jack and Parmesan if you want a smoother, less stretchy dip. Monterey Jack melts beautifully and works especially well if you are serving the dip from a slow cooker or keeping it warm for a party.

Sharper Restaurant-Style Option

Use white cheddar with Parmesan for a sharper flavor. Keep the amount moderate, because too much aged cheese can make the dip salty or slightly grainy.

Cheese to Use Carefully

Gruyère, Swiss, and aged cheddar can add great flavor, but they are best in smaller amounts. For the smoothest dip, do not make aged cheese the entire cheese base.

Freshly Shredded vs Bagged Cheese

This is a practical choice, not a dealbreaker. Fresh shreds melt smoother, but the cream cheese base keeps good bagged cheese workable.

Freshly shredded cheese and bagged shredded cheese compared for use in spinach artichoke dip.
Freshly shredded cheese melts a little smoother, but bagged mozzarella or Monterey Jack still works because the cream cheese base helps keep the dip soft.

How to Make Spinach Artichoke Dip

This is an easy spinach artichoke dip, but the order matters: dry the vegetables first, mix the base until smooth, fold gently, and bake just until the edges bubble.

Method at a Glance

Here is the whole workflow before the step-by-step details.

Step-by-step guide showing vegetable prep, base mixing, cheese folding, baking, and resting for spinach artichoke dip.
The method is simple, but the order matters: dry the vegetables first, smooth the base, fold gently, and bake only until the dip is hot and bubbling.

Step 1: Prep the Spinach and Artichokes

Thaw the frozen spinach completely. Wrap it in a clean kitchen towel, cheesecloth, or several layers of paper towel, then squeeze until no more liquid runs out. Drain the artichokes, pat them dry, and chop them into bite-size pieces.

How to Press Out Hidden Water

This is where the dip is won or lost: twist firmly, then keep pressing until the spinach stops giving off liquid.

Hands twisting thawed spinach in a clean kitchen towel over a bowl to remove green liquid.
Pressing out the hidden water is the most important prep step because wet spinach is one of the fastest ways to make the dip loose.

Step 2: Mix the Creamy Base

In a large bowl, mix softened cream cheese, sour cream, mayonnaise, garlic, lemon zest or juice, black pepper, and optional red pepper flakes or hot sauce. The base should look mostly smooth before you add the vegetables.

Mix the Base Before Adding Vegetables

A smooth base makes the vegetables easier to fold in evenly, especially when the cream cheese is fully softened.

Cream cheese, sour cream, mayonnaise, garlic, lemon, and pepper being mixed into a smooth base in a bowl.
Mix the base before adding spinach and artichokes; otherwise, cold cream cheese can leave lumps and make the vegetables harder to fold in evenly.

Step 3: Fold in Cheese, Spinach, and Artichokes

Fold in most of the Parmesan and mozzarella or Monterey Jack, saving some for the top. Add the squeezed spinach and chopped artichokes, then stir until evenly combined. Do not mash everything into a paste; little artichoke pieces are part of the charm.

Step 4: Taste and Adjust

Taste the mixture before baking and add salt only if needed, since Parmesan and artichokes can already be salty. This is also the moment to add a little more lemon, pepper, or hot sauce if the base tastes flat.

Step 5: Bake Until Bubbly

Spread the mixture into a greased 1½- to 2-quart glass or ceramic baking dish, or an 8×8-inch dish. Top with the reserved cheese. Bake at 375°F / 190°C for 22–28 minutes, until the edges bubble and the top is lightly golden.

Step 6: Rest Before Serving

Let the dip rest for 5 minutes before serving. It will still be hot, but the base will settle into a thicker, smoother scoop.

Spinach Artichoke Dip Recipe Card

This spinach artichoke dip recipe makes a hot baked dip with a velvety cheese base, tender spinach, bite-size artichokes, and enough structure to hold on sturdy chips, crackers, crostini, pita, or vegetables.

Prep Time15 minutes
Bake Time22–28 minutes
Rest Time5 minutes
Total TimeAbout 45 minutes
Servings8–10
YieldAbout 5 cups
Oven375°F / 190°C
Dish1½- to 2-quart or 8×8-inch

Ingredients

  • 8 oz / 226 g cream cheese, softened
  • ½ cup / 120 g sour cream
  • ⅓ cup / 75–80 g mayonnaise
  • ¾ cup / 65–75 g grated Parmesan, divided
  • 1½ cups / 150–170 g shredded mozzarella or Monterey Jack, divided
  • 10 oz / 280 g frozen spinach, thawed and squeezed very dry
  • 1 can / 14 oz / about 390–400 g artichoke hearts, drained, patted dry, and chopped
  • 2–3 garlic cloves, minced
  • 1 tsp lemon zest or 1 tbsp lemon juice
  • ¼ tsp black pepper
  • ¼ tsp red pepper flakes or a few dashes of hot sauce, optional
  • Salt, only after tasting
  • Tortilla chips, pita chips, crostini, crackers, or vegetables, for serving

Instructions

  1. Heat the oven to 375°F / 190°C. Lightly grease a 1½- to 2-quart glass or ceramic baking dish, or an 8×8-inch baking dish.
  2. Thaw the spinach completely, then squeeze it very dry in a clean kitchen towel, cheesecloth, or several layers of paper towel.
  3. Drain the artichoke hearts, pat them dry, and chop them into bite-size pieces.
  4. In a large mixing bowl, stir together the softened cream cheese, sour cream, mayonnaise, garlic, lemon zest or juice, black pepper, and optional red pepper flakes or hot sauce until mostly smooth.
  5. Fold in ½ cup Parmesan and 1 cup mozzarella or Monterey Jack. Save the remaining cheese for topping.
  6. Fold in the squeezed spinach and chopped artichokes until evenly distributed.
  7. Taste the mixture before baking and add salt only if needed, since Parmesan and artichokes can already be salty.
  8. Spread the mixture into the prepared baking dish. Top with the remaining Parmesan and mozzarella or Monterey Jack.
  9. Bake for 22–28 minutes, until the dip bubbles at the edges and the top is lightly golden.
  10. For a more browned top, broil for 1–2 minutes at the end, watching closely.
  11. Rest for 5 minutes before serving warm with sturdy chips, crackers, crostini, pita, or vegetables.

Notes

  • Do not rush the spinach step. A few extra squeezes are the difference between a dip that holds together and one that leaks at the bottom.
  • If baking from the fridge, add 10–15 minutes depending on the depth of the dish.
  • If using fresh spinach, cook down about 1 lb / 450 g fresh spinach, cool it, chop it, and squeeze it dry before adding.
  • If the dip seems too thick after baking, stir in a spoonful of warm milk, sour cream, or softened cream cheese.
  • If the dip seems watery, the spinach or artichokes likely needed more draining. Bake uncovered a little longer and use the troubleshooting table below for next time.
  • For the smoothest texture, serve the dip warm after a 5-minute rest, not straight from the oven while it is still bubbling aggressively.

What the Finished Dip Should Look Like

When the dip is ready, the edges should be bubbling, the top should be lightly golden, and the center should look soft rather than dry. After a 5-minute rest, a chip or spoon should pull up a thick, creamy scoop with visible spinach and artichoke pieces.

Serve it while the top is still just-baked and lightly golden, but not so hot that the cheese runs. That is the sweet spot where the dip holds on a chip, the artichokes still taste bright, and the garlic-cheese aroma does half the work for you.

If the dip tastes a little flat after baking, add a tiny squeeze of lemon or a few dashes of hot sauce on top before serving. Warm dairy and cheese can mute seasoning slightly, so a small bright finish can make the whole dish taste more awake.

Why the 5-Minute Rest Matters

The finished dip should not be served at its most molten moment; a brief rest gives the first scoop a better chance to hold together.

Comparison of spinach artichoke dip straight from the oven and after resting for five minutes, with a thicker rested scoop.
Resting gives the cheese base time to settle, so the first chip pulls up a thick scoop instead of dragging loose dip back into the dish.

Bake Time by Pan Size

The right bake time for this spinach artichoke dip recipe depends on the depth of the dish. A shallow dish heats faster and browns sooner. A deeper dish takes longer for the center to become hot and creamy.

Time gets you close, but the visual cue matters more. If your oven runs hot or your dish is shallow, start checking early: the edges should bubble before the top gets deeply browned.

Best Pan Size for Baking

Choose the dish before you rely on the timer. Wider dishes brown faster, while deeper ones need more time in the center.

Pan size guide showing different baking dishes, including a 1½ to 2 quart dish, 8x8-inch dish, shallow pie dish, and 9x9-inch dish.
Pan depth changes bake time. A shallow dish browns faster, while a deeper dish needs more time for the center to become hot.
Dish or Setup Bake Time at 375°F / 190°C Texture Cue
1½- to 2-quart baking dish 22–28 minutes Bubbling edges, creamy center
8×8-inch dish 22–25 minutes Hot through, lightly golden top
Shallow pie dish 18–22 minutes Watch the top; it browns faster
9×9-inch dish 20–25 minutes Good for a slightly thinner layer
From the fridge Add 10–15 minutes Center should be hot, not just edges
Broiled top 1–2 minutes only Watch constantly so the cheese does not overheat

Doneness Cues Before You Pull the Dish

Pair the bake-time table with what you see in the dish: bubbling and lightly golden, not deeply browned.

Doneness guide showing spinach artichoke dip that is too loose, just right, and too browned.
Use time as a guide, then trust what you see: the dip should bubble at the edges and look lightly golden before it goes too far.

350°F vs 375°F vs 400°F

350°F is gentler and works well for deeper dishes, but the dip may take longer. 375°F is the best default because it heats the center and browns the top without rushing the dairy. A 400°F oven works for a faster bake in a shallow dish, but watch it closely so the top does not brown before the center is fully hot.

Make Ahead Spinach Artichoke Dip

This spinach artichoke dip recipe is a great make-ahead appetizer because you can assemble it 1–2 days ahead, refrigerate it tightly covered, and bake it when you are ready to serve.

Make-Ahead Setup

The easiest party timing is simple: assemble ahead, keep it chilled, then bake close to serving time. If you are assembling in glass or ceramic, check the cold dish safety note before baking.

Make-ahead guide showing assembled spinach artichoke dip stored before being transferred to a baking dish.
For the smoothest make-ahead dip, handle the moisture first; once the spinach and artichokes are dry, the rest of the prep becomes easy.

How Far Ahead Can You Assemble It?

For the best texture, assemble the dip 1 day ahead. Two days is still fine, but the spinach and artichokes need to be very well drained so the dip does not loosen as it sits.

This is the kind of appetizer you want ready before people drift into the kitchen asking what smells good. Assemble it ahead, then bake it when the table is almost ready.

How to Bake It From the Fridge

If the dip is cold from the fridge, add 10–15 minutes to the bake time. The top may look ready before the center is hot, so check the middle before serving.

Cold Dish Safety Note

A cold glass or ceramic baking dish should not go straight from the refrigerator into a fully hot oven. Let the dish sit at room temperature briefly, place it on a room-temperature baking sheet, or transfer the dip to a room-temperature baking dish before baking. This helps protect the dish from thermal shock.

Cold Dish Safety Before Baking

This fridge-to-oven step protects the dish: let cold glass or ceramic warm slightly, or move the dip into a room-temperature baker.

Cold dish safety guide showing a refrigerated glass or ceramic dish, a baking sheet, and a transfer step before baking.
If the dip was refrigerated in glass or ceramic, avoid shocking the dish with sudden heat; instead, let it warm slightly or transfer the dip before baking.
Best party prep: mix the dip in an airtight container, refrigerate it, then transfer it to the baking dish before baking. That gives you more flexibility and avoids putting an ice-cold glass dish into a hot oven.

Storage and Reheating

Store leftover spinach artichoke dip in an airtight container in the refrigerator for 3–4 days. Refrigerate leftovers within 2 hours of serving, especially because this is a dairy-heavy dip.

Party safety tip: if the dip has been sitting out for more than 2 hours, especially in a warm room, do not keep returning it to the fridge and reheating it. For longer parties, keep a smaller amount out and refill with a clean spoon, or keep the dip warm in a slow cooker once it is fully heated.

To reheat a larger portion, cover loosely and warm in a 325–350°F oven until hot. For a small portion, microwave in short bursts, stirring between each burst. If the dip has thickened in the fridge, stir in a spoonful of milk, sour cream, or cream cheese to bring back the creamy texture.

How to Store and Reheat Leftovers

Leftovers need gentle heat, not aggressive reheating. If you need to store the dip longer than a few days, the freezing section explains the texture tradeoff.

Storage and reheating guide showing leftover spinach artichoke dip in a container, oven reheating, and dairy being stirred in to loosen the dip.
Leftover dip thickens as it chills, so reheat it gently and stir in a little dairy if it needs help becoming smooth again.

For general leftover safety, USDA FSIS recommends reheating leftovers to 165°F / 74°C; their leftovers and food safety guide is a useful reference for reheating and storing cooked foods.

Can You Freeze Spinach Artichoke Dip?

You can freeze spinach artichoke dip, but it is not the best make-ahead method if you want the creamiest texture. Dairy-based dips can loosen, separate, or turn slightly grainy after freezing and thawing.

If you need to freeze it, freeze the dip unbaked in a freezer-safe container or disposable foil pan. Thaw overnight in the refrigerator when possible, stir well, top with a little fresh cheese, and bake gently until hot.

Freezing Spinach Artichoke Dip

Freezing is possible, but the best result comes from thawing, stirring, and baking gently.

Freezing guide showing spinach artichoke dip in a freezer-safe container, thawed dip being stirred, and a small baked dish.
You can freeze this dip, but refrigeration gives the best texture. When freezing is necessary, thaw it, stir it well, and bake gently.
Method Works? What to Know
Refrigerate unbaked Yes Use within 1–2 days for the creamiest result.
Freeze unbaked Possible Texture may loosen after thawing.
Freeze baked leftovers Not ideal Dairy can separate when reheated.
Bake from frozen Possible in a foil pan Takes longer and may be less creamy.
Thaw, stir, then bake Best freezer route Restores the texture better than baking straight from frozen.

Slow Cooker Spinach Artichoke Dip Option

To make slow cooker spinach artichoke dip, mix the recipe as written and spread it into a lightly greased 3-quart slow cooker. Cook on low for 1½–2 hours or on high for about 1 hour, stirring once or twice, until the dip is hot and creamy.

Once it is hot, switch the slow cooker to warm for serving. Stir occasionally so the edges do not overheat. If the dip thickens as it sits, loosen it with a splash of warm milk or a spoonful of sour cream.

Just know that the slow cooker is best for holding the dip warm and soft; it will not give you the same browned top as the oven.

Slow Cooker Serving Option

For long parties, the slow cooker solves the holding problem even though it will not brown the top. For timing, pair it with the make-ahead plan.

Spinach artichoke dip in a cream slow cooker with tortilla chips, crostini, carrots, celery, and cucumber nearby.
Use the slow cooker when you care more about easy serving than a golden top; it keeps the dip warm, soft, and ready for grazing.
Slow cooker tip: do not leave dairy-heavy dip on high for too long. Once it is melted and hot, warm is the safer party setting.

If you want a second hot dip for the same party table, MasalaMonk’s buffalo chicken dip recipe gives you a spicier baked, crockpot, and game-day option.

No Mayo, Healthy, and Greek Yogurt Variations

The classic version uses a little mayonnaise because it adds richness and gives the dip that familiar party-appetizer flavor. You can still make it without mayo, with Greek yogurt, or in a lighter style if you keep enough cream cheese to hold the dip together.

For a broader look at cold spinach dip, baked spinach dip, bread-bowl versions, and lighter yogurt-based ideas, MasalaMonk’s spinach dip recipes guide is a useful companion.

Ways to Adapt the Dip

Once the base recipe is balanced, these swaps are much easier to control because the moisture and cheese structure stay steady.

Variations guide showing classic, no mayo, Greek yogurt, lighter, spicy, and extra cheesy spinach artichoke dip.
Once the base recipe is balanced, you can change the style without losing the texture: go no-mayo, Greek yogurt, lighter, spicy, or extra cheesy.

Spinach Artichoke Dip Without Mayo

Replace the ⅓ cup mayonnaise with ⅓ cup sour cream. This is the easiest no-mayo version because the flavor stays creamy and familiar. For a tangier no-mayo dip, use ⅓ cup full-fat Greek yogurt instead.

No-mayo ratio: 8 oz cream cheese + ⅔ cup sour cream, or ½ cup sour cream + ⅓ cup full-fat Greek yogurt, with no mayo. Keep the cheese, spinach, and artichokes the same.

Healthy Spinach Artichoke Dip

For a lighter spinach artichoke dip, replace the mayo with Greek yogurt, use part-skim mozzarella, and keep the full amount of spinach and artichokes. Do not remove all the cream cheese unless you want a much lighter, tangier dip with less classic party-dip texture.

Lighter ratio: 8 oz cream cheese + ½ cup sour cream + ⅓ cup full-fat Greek yogurt + part-skim mozzarella. This keeps the dip smooth and scoopable while reducing the mayo-heavy richness.

Greek Yogurt Spinach Artichoke Dip

Greek yogurt adds tang and protein, but it can separate if overheated. Use full-fat Greek yogurt if possible, keep the cream cheese in the base, and avoid baking the dip too aggressively. Greek yogurt works best as a mayo replacement, not as the only creamy ingredient.

Spicy Spinach Artichoke Dip

Add minced jalapeño, red pepper flakes, cayenne, or hot sauce. Start small. The goal is warmth and lift, not a dip that hides the artichoke flavor.

Extra Cheesy Restaurant-Style Dip

Add an extra ½ cup mozzarella, Monterey Jack, or white cheddar. If you add more cheese, keep the spinach and artichokes very dry so the dip stays creamy instead of greasy.

How to Fix Watery, Greasy, Grainy, or Bland Spinach Artichoke Dip

A great spinach artichoke dip recipe should stay smooth and scoopable from the first chip to the last. If the dip turns watery, greasy, grainy, or bland, do not change the whole recipe first. Most problems are fixable once you know where they started: excess water, aggressive heat, or seasoning that needs more contrast.

Quick Fix Guide

Before changing the recipe, diagnose the problem first. The table below gives the full cause-and-fix details.

Troubleshooting guide showing watery, greasy, grainy, too thick, too thin, bland, too salty, and broken chip problems for spinach artichoke dip.
Most dip problems come from moisture, heat, or seasoning, so diagnosing the issue first makes the fix much easier.
Problem Likely Cause Fix
Watery dip Spinach or artichokes were too wet Squeeze spinach harder, pat artichokes dry, and bake uncovered a little longer.
Greasy top Dairy or cheese overheated Use moderate heat, avoid a long broil, and remove the dip once the edges bubble.
Grainy texture Cheese overheated or too much aged cheese Use mozzarella or Monterey Jack for melt, Parmesan for flavor, and avoid overbaking.
Too thick Too much cheese or overbaking Stir in warm milk, sour cream, or a spoonful of softened cream cheese.
Too thin Too much liquid in the vegetables or base Bake uncovered a little longer and add a small handful of cheese if needed.
Bland Not enough acid, garlic, pepper, or savory cheese Add lemon zest or juice, black pepper, garlic, Parmesan, or a few dashes of hot sauce.
Too salty Brined artichokes, salty cheese, or too much added salt Rinse brined artichokes next time and salt only after tasting the mixed dip.
Chips keep breaking Dip is too thick or dippers are too thin Use pita chips, crostini, sturdy tortilla chips, crackers, or vegetables.
Dish cracked Cold glass or ceramic dish went straight into a hot oven Let the dish warm slightly, transfer the dip, or use a room-temperature baking dish.

What to Serve With Spinach Artichoke Dip

Spinach artichoke dip is thick, warm, and cheese-rich, so sturdy dippers are best. Thin chips can snap if the dip is very cheesy, especially right out of the oven.

Because the dip is rich, the best spread has contrast: something salty, something crisp, something fresh, and something sturdy enough to scoop through the warm cheese without snapping.

What to Serve With It

Build contrast around the rich dip: sturdy, crisp, fresh, and easy to scoop. If this is the main hot appetizer, check the party quantity guide before deciding whether to make a full or double batch.

Serving board with baked spinach artichoke dip, tortilla chips, pita chips, crostini, crackers, carrots, celery, bell peppers, cucumber, and snap peas.
The best dippers bring contrast: sturdy chips and crostini handle the thick dip, while fresh vegetables keep the appetizer board from feeling too heavy.

How Much Spinach Artichoke Dip to Make for a Party

One full batch makes about 5 cups, which is enough for 8–10 appetizer servings. If this is the main hot appetizer on the table, make more than you think you need.

Crowd Size Amount to Make What to Know
4–6 people Half batch Good for a small snack spread.
8–10 people 1 full batch The standard party size for this recipe.
12–16 people 1½ batches Useful when there are several appetizers.
18–20 people Double batch Best for game day, holidays, or buffet-style serving.

Party Quantity Visual Guide

If this is the main hot appetizer, check this quantity guide before deciding whether a full batch is enough.

Party quantity guide showing different dish sizes for half batch, full batch, one and a half batches, and double batch spinach artichoke dip.
If this is the main hot appetizer, make a little more than you think; it is the dish people keep returning to while they graze.

For a party where people will graze for a while, a double batch is safer than it sounds. Hot spinach artichoke dip has a way of becoming the dish everyone “just checks on” every time they pass the table.

For a full appetizer table, balance the rich dip with something crisp, something fresh, and something hot from the oven or air fryer. That keeps the spread from feeling too heavy.

Crunchy Dippers

Tortilla chips, pita chips, pretzel crisps, bagel chips, sturdy crackers, and thick potato chips all work well. Sturdy dippers matter because nobody wants the chip to snap halfway through the first scoop.

Bread and Crostini

Serve the dip with toasted baguette slices, sourdough crostini, focaccia strips, garlic bread, naan chips, or a bread bowl for a party-style presentation. For a warmer bread option, slice a homemade garlic bread loaf into thick pieces and serve it beside the dip instead of plain crostini.

Fresh Vegetable Dippers

Carrot sticks, celery, bell pepper strips, cucumber rounds, broccoli, cauliflower, and snap peas add freshness and crunch next to the rich dip. A low-carb spread still works beautifully here: serve crunchy vegetables or choose sturdier ideas from MasalaMonk’s keto chips guide.

Party Board Ideas

For game day, pair the dip with air fryer chicken wings or baked jalapeño poppers so the table has something crispy, spicy, and hot next to the creamy dip.

On a grazing table, this dip can be the warm centerpiece. Build the rest of the board with MasalaMonk’s charcuterie board 3-3-3-3 rule.

Leftover Spinach Artichoke Dip Ideas

Although leftovers are rare, spinach artichoke dip has a second life built in. It is already creamy, garlicky, cheesy, and full of vegetables, so it can become a shortcut sauce, filling, or spread for another meal.

  • Spinach artichoke pizza: spread a thin layer over pizza dough, flatbread, or naan, then add mozzarella and bake until the edges are crisp.
  • Stuffed chicken breast: tuck a spoonful inside chicken breasts before baking.
  • Grilled cheese: spread a thin layer inside the sandwich with extra mozzarella.
  • Quesadillas: use it with chicken, turkey, or extra vegetables.
  • Pasta sauce: loosen with milk or pasta water and toss with short pasta for a fast creamy dinner.
  • Baked potatoes: spoon warm dip over baked potatoes or sweet potatoes.
  • Omelets or scrambled eggs: use a small spoonful as a creamy filling.
  • Stuffed mushrooms: fill mushroom caps and bake until hot.
  • Turkey or chicken sandwich spread: use a thin chilled layer instead of mayo.

Ways to Use Leftover Dip

Leftovers are more useful when you treat the dip like a filling or sauce, not just something to reheat.

Leftover spinach artichoke dip ideas including pizza, stuffed chicken, grilled cheese, quesadilla, pasta, baked potato, eggs, and mushrooms.
Leftover spinach artichoke dip already works like a creamy filling or shortcut sauce, so it can turn into pizza, pasta, sandwiches, stuffed chicken, or baked potatoes the next day.

If you turn leftover dip into flatbread or pizza and want a tomato layer underneath, MasalaMonk’s pizza sauce recipes can help you keep the base creamy, garlicky, or more tomato-forward.

Once you understand the moisture, heat, and seasoning balance, spinach artichoke dip becomes one of those reliable appetizers you can make almost on autopilot. Keep the spinach dry, bake gently, serve it warm, and let the dippers do the rest.

FAQs About Spinach Artichoke Dip

Is spinach artichoke dip better with fresh or frozen spinach?

Frozen spinach is the safer choice for most home cooks because the hard part — wilting it down — is already done. The only job left is to thaw it fully and press out the hidden water. Fresh spinach works too, but it needs to be cooked, cooled, chopped, and squeezed before you add it to the dip.

Why did my spinach artichoke dip turn watery?

The spinach or artichokes probably carried too much water into the creamy base. The fix starts before baking: thaw frozen spinach completely, squeeze it until it feels compact, drain the artichokes well, and pat them dry before mixing.

What temperature should spinach artichoke dip be baked at?

375°F / 190°C is the best default temperature. It is hot enough to melt and brown the dip, but gentle enough to protect the creamy dairy base. A 350°F oven is gentler and slower, while 400°F browns faster but needs closer watching.

Should spinach artichoke dip be served hot or warm?

It is best served warm. Straight from the oven, the dip can be too hot and loose; after a 5-minute rest, it becomes thicker, smoother, and easier to scoop.

How long does spinach artichoke dip last in the fridge?

Leftover spinach artichoke dip keeps for 3–4 days in an airtight container in the refrigerator. Reheat only what you need, because repeated warming and chilling can make the dairy base less smooth.

What is the best cheese for spinach artichoke dip?

Mozzarella or Monterey Jack is best for melt, while Parmesan is best for savory flavor. Choose mozzarella if you want more stretch; choose Monterey Jack if you want a softer scoop. Either way, Parmesan keeps the dip from tasting flat.

Is mayo necessary in spinach artichoke dip?

No. Mayo adds richness, but the dip still works with sour cream or full-fat Greek yogurt in its place. Greek yogurt makes the dip tangier and can separate if overheated, so it works best with cream cheese rather than as the only base.

How do you keep spinach artichoke dip warm for a party?

The easiest way is to use a slow cooker on the warm setting after the dip is fully heated. Stir occasionally and loosen with a splash of warm milk or a spoonful of sour cream if it thickens too much.

What chips are best for spinach artichoke dip?

Use dippers with backbone: pita chips, crostini, sturdy tortilla chips, pretzel crisps, crackers, or crisp vegetables. Thin chips are fine for salsa, but they snap too easily in a thick cheese dip.

Back to top

Posted on 17 Comments

10 Spinach Dip Recipes: Cold, Baked, Artichoke & More

Woman dipping bread into a creamy spinach dip recipe surrounded by colorful veggie sticks, bread cubes, and small bowls of dip on a wooden table.

Some recipes feel trendy for a season and then vanish. A really good spinach dip recipe is the opposite. It shows up at potlucks, game nights, Diwali parties, Christmas dinners, and casual Friday evenings, and somehow the bowl is always scraped clean.

This long, cozy guide gathers several kinds of spinach dip recipes into one place: classic cold party dip, ranch-style, vegetable soup mix in a bread bowl, two versions of spinach artichoke dip (cold and baked), a lighter yogurt-based dip, a cheesy queso-style dip, plus a few ultra-simple three- and five-ingredient options. Along the way, you’ll find ideas for what to serve with them, how to handle fresh versus frozen spinach, and a little bit of context about spinach itself.

If you’d like to nerd out on the health side later, you can always read more about spinach nutrition and weight loss benefits on MasalaMonk or check the nutrient breakdown on Healthline’s spinach nutrition page. For now, though, let’s get straight into creamy bowls and warm bread.


Why spinach makes such a good dip base

Before diving into the first spinach dip recipe, it helps to quickly appreciate why spinach works so well in dips.

Spinach has a fairly mild, earthy flavor that doesn’t overpower other ingredients, yet it adds a lovely deep green color and just enough personality. Because it shrinks dramatically when cooked or thawed, a small amount of raw spinach turns into a concentrated, almost buttery pile of greens that blends beautifully into sour cream, yogurt, mayonnaise, and cheese.

Nutritionally, spinach is one of those leafy greens that keeps turning up in research. It’s naturally low in calories yet high in vitamins A, C, K, several B vitamins including folate, and minerals such as iron and potassium. If you want to dig into the numbers, the USDA’s FoodData Central database lists exact values for fresh and cooked spinach. Spinach also contains plant compounds like carotenoids and nitrates, which are frequently associated with heart and eye health in studies cited by major nutrition sources.

Of course, the creamy parts of a spinach dip recipe still make this more of a treat than a salad. However, it’s a treat with at least some leafy-green goodness baked in, which is a nice bonus.

Also Read: How to Cook Bacon in the Oven (Crispy, No-Mess, Crowd-Ready Recipe)


Fresh, frozen, or canned spinach: choosing the right one

A question that comes up surprisingly often is whether fresh, frozen, or canned spinach is “best” for a spinach dip recipe. The honest answer is that all three can work, as long as you handle them properly.

Frozen spinach

Frozen chopped spinach is usually the easiest option for dips. It’s already blanched and chopped, so the main task is thawing and squeezing.

  • Thaw overnight in the fridge or quickly in the microwave.
  • Squeeze out as much water as possible.
  • For most recipes here, one 10 oz / 280 g packet of frozen spinach is perfect.

Because it’s blanched soon after harvest, frozen spinach keeps much of its nutritional value. If you like numbers, both Healthline and similar sources note that cooked or frozen spinach often contains more concentrated amounts of certain vitamins and minerals per serving than raw spinach, simply because the volume shrinks.

Fresh spinach

Fresh spinach is fantastic when you already have a big bag in the fridge.

  • Rinse and dry the leaves.
  • Wilt them in a pan with a splash of water or a tiny amount of oil.
  • Once cool, squeeze out the liquid and chop.

You’ll need more fresh spinach by weight than frozen, because it shrinks significantly. Roughly 300–350 g of raw leaves will give you a similar amount of cooked spinach to one frozen packet.

Canned spinach

Canned spinach is less common, yet it can absolutely stand in when that’s what you have.

  • Pour it into a sieve and rinse briefly.
  • Press firmly with the back of a spoon or your hands to remove excess liquid.
  • Measure out about 1½ cups of firmly packed, drained spinach for one batch of dip.

As long as you treat any of these options like a sponge that needs wringing out, your spinach dip recipe will be thick and creamy instead of runny.

Also Read: How to Make Churros (Authentic + Easy Recipe)


Classic cold spinach dip recipe (your party-style base)

This is the backbone of everything that follows. Once you can make this classic cold spinach dip recipe with your eyes closed, you can riff on it endlessly.

Ingredients (about 3 cups)

  • 1 packet (10 oz / 280 g) frozen chopped spinach, thawed
  • 1 cup (240 ml) sour cream
  • 1 cup (240 ml) mayonnaise
  • ½ cup (about 50 g) finely grated hard cheese (parmesan or similar, optional but delicious)
  • 2–3 tablespoons finely minced onion or 2 teaspoons dried minced onion
  • 1–2 cloves garlic, finely minced or ½ teaspoon garlic powder
  • ½–1 teaspoon salt, to taste
  • ¼–½ teaspoon black pepper
  • Optional mix-ins
    • ½ cup finely chopped water chestnuts for crunch
    • ¼–½ cup sliced green onions
    • ¼ cup finely diced bell pepper or pimentos
Classic spinach dip in a ceramic bowl with a hand dipping crusty bread, surrounded by carrot and cucumber sticks on a wooden board, with mini recipe text overlay.
Classic cold spinach dip recipe – a creamy party favorite made with frozen spinach, sour cream and mayo, served with crusty bread and fresh veggie sticks.

Step-by-step Recipe – How to make a Spinach Dip

1. Thaw and squeeze the spinach

Start by thawing the frozen chopped spinach. You can do this overnight in the fridge, in a bowl of cold water, or quickly in the microwave. Once thawed, gather the spinach in your hands or in a clean kitchen towel and squeeze firmly over the sink. Quite a lot of liquid will come out; keep going until it feels as dry as you can manage.

This part might seem fussy, yet it makes all the difference between a thick, scoopable spinach dip recipe and a watery one.

Step 1 of classic spinach dip recipe showing hands squeezing thawed chopped spinach in a towel over a sieve, with green liquid dripping into a bowl.
Step 1 – Thaw and squeeze the spinach: thaw frozen chopped spinach, then squeeze out as much water as possible so your spinach dip stays thick and creamy.

2. Build the creamy base

In a medium mixing bowl, whisk together the sour cream and mayonnaise until smooth. Add the onion, garlic, salt, and pepper. Give it another good stir so the seasonings are nicely dispersed.

If you’re one of those people who likes a mild onion flavor, start with the lower end of the onion amount and adjust later. It will intensify as the dip rests.

Step 2 of classic spinach dip recipe showing a hand whisking sour cream and mayonnaise in a glass bowl with small bowls of onion, garlic, salt and pepper on a wooden surface.
Step 2 – Build the creamy base: whisk sour cream and mayonnaise together, then add onion, garlic, salt and pepper to create the smooth foundation for your spinach dip.

3. Fold in the spinach

Next, add the squeezed spinach to the bowl. Use a spoon or spatula to fold it into the creamy base, breaking up any clumps so the greens are evenly moved through the mixture. At this stage you can also sprinkle in parmesan (or another hard cheese) if you’re using it, along with optional water chestnuts, green onions, or bell peppers.

Step 3 of classic spinach dip recipe showing a hand using a spatula to fold a mound of squeezed spinach into a creamy dip base in a glass bowl, with grated cheese and green onions in small bowls nearby.
Step 3 – Fold in the spinach: stir the squeezed spinach into the creamy base until evenly green, then add parmesan and any crunchy mix-ins like water chestnuts or green onions.

4. Chill to develop flavor

Cover the bowl and refrigerate for at least 1–2 hours. If you can, prepare this spinach dip recipe the day before and let it rest overnight. The onion softens, the garlic mellows, and the spinach flavor infuses into the creamy base in a way that simply doesn’t happen if you eat it right away.

Step 4 of classic spinach dip recipe showing a hand pressing plastic wrap over a bowl of creamy spinach dip on a wooden surface before refrigerating.
Step 4 – Chill the dip: cover the bowl and refrigerate, letting the spinach dip rest for 1–2 hours or overnight so the flavors deepen and the texture thickens.

5. Taste and serve

Just before serving, give the dip a stir, then taste it. Adjust the salt and pepper if needed. If it feels a little too thick, you can loosen it with a tablespoon or two of milk, cream, or yogurt.

Step 5 of classic spinach dip recipe showing a hand dipping toasted bread into a bowl of creamy spinach dip, surrounded by carrot sticks, celery sticks, spinach leaves and bread cubes.
Step 5 – Taste and serve: give the spinach dip a final stir, adjust the salt and pepper, then serve it with bread, crackers and fresh veggies for dipping.

Spoon into a serving bowl and surround it with sliced bread, vegetables, or any dippers you like. Later in this post we’ll get into detailed serving ideas; for now, you’ve just made a classic cold spinach dip recipe that can stand on its own at any gathering.

If this made you fall in love with the creamy-spinach combo, you might also enjoy the Indian-inspired spinach raita (palak raita), which takes similar flavors in a lighter, yogurt-based direction.


Ranch spinach dip recipe variation

Once you’ve mastered the base, the next easy twist is a ranch spinach dip recipe. Ranch seasoning brings herbs, garlic, onion, and a slight tang, turning the classic dip into something just a little more familiar and “snacky”.

What you’ll need

  • 1 batch classic cold spinach dip base
  • 1 packet ranch-style seasoning mix (about 1 oz)
    or 3–4 tablespoons thick ranch dressing
  • A splash or two of milk or yogurt if the dip ends up too thick
Top-down view of a bowl of ranch spinach dip with a hand holding a spoon, surrounded by spinach leaves, crackers, and ranch seasoning on a teal background with mini recipe text overlay.
Ranch spinach dip recipe – a herby, tangy twist on classic spinach dip made with sour cream, mayo, ranch seasoning, and plenty of spinach, perfect with crisp crackers or veggies.

How to make ranch spinach dip

To keep things simple, start by mixing the ranch with the creamy ingredients before adding spinach:

  1. In a clean bowl, whisk together the sour cream and mayonnaise from the base recipe with the ranch seasoning mix until it’s completely blended.
  2. Add the squeezed, chopped spinach and fold it through.
  3. Taste before adding extra salt; most ranch mixes bring plenty of salt on their own.
  4. Chill the ranch spinach dip recipe for at least an hour, then adjust the seasoning once more if needed.

This version is excellent with crunchy vegetable sticks, but it really shines next to potatoes. For a full party-snack spread, you can pair it with some of these easy potato appetizers, which range from crispy bites to cheesy loaded options.


Vegetable soup mix spinach dip recipe in a bread bowl

For many people, the most nostalgic spinach dip recipe involves a packet of vegetable soup mix and a big round loaf of bread. It’s the kind of thing that appears on buffet tables surrounded by chunks of bread and vanishes within an hour.

Ingredients

  • 1 batch classic spinach dip recipe base, without onion and garlic added yet
  • 1 packet dry vegetable soup and dip mix
  • ½ cup finely chopped water chestnuts
  • ½ cup chopped green onions or sautéed leeks
  • 1 large round loaf of bread (sourdough, rye, or pumpernickel all work)
Bread bowl filled with creamy spinach dip made with vegetable soup mix, surrounded by carrot and celery sticks and torn bread pieces, with mini recipe text overlay.
Bread bowl spinach dip – a crowd-pleasing veggie soup mix spinach dip recipe served in a hollowed loaf with crunchy vegetables and rustic bread for dipping.

Method

1. Stir the soup mix into the base

Whisk together sour cream and mayonnaise in a large bowl. Sprinkle in the dry vegetable soup mix and stir well. Let this sit for 5–10 minutes so the dehydrated vegetables can soften slightly.

2. Add spinach and mix-ins

Fold in the drained, chopped spinach. Stir through the water chestnuts for crunch and the green onions or leeks for a sweet onion note.

3. Chill thoroughly

Because the soup mix needs a little time to hydrate, this version benefits from at least 2 hours in the fridge, and overnight is even better.

4. Turn it into a bread bowl

While the dip chills, prepare your bread:

  1. Slice off the top of the loaf like a lid.
  2. Hollow out the center with your hands, leaving a good 2–3 cm wall so the dip bowl is sturdy.
  3. Cut the removed bread into rough bite-sized cubes.

Just before serving, spoon the dip into the hollowed loaf and arrange the bread cubes around it on a platter. Add some fresh vegetables for color and extra crunch.

If you’d like an even more indulgent bread pairing another time, consider baking a homemade garlic bread loaf and cutting it into chunks for dipping. On days when you want something heartier but still relatively wholesome, slices of quick and healthy oatmeal bread also make a great base for spinach dip.

To turn the whole setup into a full grazing platter, you can borrow some ideas from the guide on assembling charcuterie boards using the 3-3-3-3 rule, then tuck this bread-bowl dip right into the center.


Spinach artichoke dip recipes: cold and baked

Whenever people talk about restaurant-style spinach dip, they’re usually imagining spinach artichoke dip. The artichokes add a tangy, tender bite that cuts through the richness. It’s worth having both a cold version and a baked one in your personal spinach dip recipe collection.

Cold spinach artichoke dip

This version is brilliant when you need something make-ahead that can sit on a buffet.

Ingredients

  • 1 batch classic cold spinach dip recipe
  • 1 cup chopped marinated artichoke hearts, drained
  • ½ cup shredded mozzarella or mild cheese blend (optional)
  • 2–3 tablespoons lemon juice
Cold spinach artichoke dip in a light ceramic bowl with a hand holding a crostini scoop, surrounded by lemon wedges, spinach leaves, artichoke hearts, and toasted baguette slices on a pale stone surface, with mini recipe text overlay.
Cold spinach artichoke dip – a make-ahead spinach dip recipe with sour cream, mayo, cheese, lemon and plenty of artichoke hearts, perfect for serving with crisp crostini or vegetables.

Directions

  1. Prepare the classic spinach dip base and let it chill for at least an hour.
  2. Stir in the chopped artichoke hearts and shredded cheese, if using.
  3. Add lemon juice a tablespoon at a time, tasting as you go, until it feels bright but not sour.
  4. Chill for another hour so the flavors mingle.

Serve with crackers, toasted bread slices, or vegetable sticks. The artichokes make this spinach dip recipe feel more complex, even though the method stays very simple.

Baked spinach artichoke dip (hot and bubbly)

For a cozier option, especially in cooler months, a baked spinach artichoke dip recipe gives you that golden top and stretchy cheese pull.

Ingredients

  • 1 block (8 oz / 225 g) cream cheese, softened
  • ½ cup sour cream
  • ½ cup mayonnaise
  • 1 cup shredded mozzarella
  • ½ cup grated parmesan or similar hard cheese
  • 1½ cups cooked, chopped spinach (frozen and thawed, or sautéed fresh)
  • 1 cup chopped artichoke hearts
  • 2 cloves garlic, minced
  • Salt and pepper, to taste
Baked spinach artichoke dip in a cast-iron skillet with a hand lifting a cheesy scoop on toasted bread, the golden bubbling top surrounded by extra crostini, with mini recipe text overlay.
Baked spinach artichoke dip – a hot, cheesy spinach dip recipe made with cream cheese, sour cream, spinach and artichokes, baked until golden and bubbling and served straight from the skillet with crisp toasted bread.

Instructions

  1. Preheat your oven to 180°C / 350°F. Lightly grease a small baking dish.
  2. Beat the cream cheese in a mixing bowl until smooth. Add the sour cream and mayonnaise and blend again.
  3. Stir in mozzarella, parmesan, garlic, spinach, and artichokes. Season with a small pinch of salt and pepper; the cheeses are salty, so it’s easy to overdo it.
  4. Spread the mixture into the baking dish in an even layer.
  5. Bake for 20–25 minutes, until hot and bubbling at the edges.
  6. For a browned top, switch to the broiler for 2–3 minutes at the end, watching carefully to avoid burning.

Place the hot dish on a board surrounded by baguette slices, breadsticks, and roasted vegetables. If you’re planning a fuller meal, this cheesy, comforting bowl sits nicely beside cozier dishes like cottage cheese lasagna with spinach or green bean casserole recipe ideas for holiday or Sunday dinners.


Lighter spinach and yogurt spinach dip recipe

Sometimes you want the flavor of a spinach dip recipe without quite so much heaviness. A yogurt-forward version keeps everything creamy but brings in more protein and a pleasant tang.

Ingredients

  • 1 cup thick Greek yogurt or hung curd
  • ½ cup light mayonnaise or additional yogurt
  • 1 packet (10 oz) frozen chopped spinach, thawed and squeezed dry
  • 2 cloves garlic, minced
  • 2–3 tablespoons lemon juice
  • 2–3 tablespoons chopped fresh herbs (dill, parsley, coriander – choose your favorite)
  • Salt and pepper, to taste
Spinach and yogurt dip in a white bowl with a hand dipping a carrot stick, surrounded by fresh veggie sticks, lemon wedges, herbs and small bowls of Greek yogurt, with mini recipe text overlay.
Spinach & yogurt dip – a lighter, protein-rich spinach dip recipe made with Greek yogurt, spinach, garlic, lemon and fresh herbs, served with crunchy vegetable sticks.

Directions

  1. In a bowl, whisk together the yogurt and mayonnaise until smooth.
  2. Add garlic, lemon juice, salt, and pepper, and whisk again.
  3. Fold in the spinach and chopped herbs.
  4. Chill for at least 1 hour so the garlic and herbs soften and flavor the yogurt.
  5. Taste, then adjust salt, pepper, and lemon juice.

This lighter spinach dip recipe pairs wonderfully with fresh vegetables and seeded crackers. Because yogurt plays the starring role, it feels especially at home next to Indian-leaning dishes. If you enjoy this style, you might also like the creamy spinach raita mentioned earlier or the hung curd spinach cheese sandwich, which uses strained yogurt in a protein-rich filling.

For a completely different spin, check out the idea of lentil-and-green dips like the lentil and spinach hummus. It’s another clever way to bring spinach into snack time, this time with extra fiber and plant protein from pulses.


Simple 3-ingredient and 5-ingredient spinach dip recipes

On some days, there’s time to shop and prep; on others, you want a spinach dip recipe that works almost like a magic trick. That’s where minimalist versions come in handy.

3-ingredient spinach dip

For a basic three-ingredient bowl:

  • 1 cup sour cream or thick Greek yogurt
  • 1 cup mayonnaise or softened cream cheese
  • 1 packet (10 oz) frozen chopped spinach, thawed and squeezed dry
Top-down view of a 3-ingredient spinach dip in a bowl surrounded by small bowls of sour cream, mayonnaise or cream cheese, and spinach on a light surface, with mini recipe text overlay.
3-ingredient spinach dip – a fast and simple spinach dip recipe made with sour cream, mayo or cream cheese, and spinach, just mix until creamy and chill before serving.

Stir everything together, season lightly with salt and pepper, and chill. If you’d like more flavor without technically adding a “fourth ingredient”, you can use a seasoned cream cheese or a flavored mayonnaise to sneak in herbs and spices.

5-ingredient baked spinach artichoke dip

Another shortcut version keeps the ingredient list short but still gives you an impressive baked dish:

  • 1 block (8 oz) cream cheese
  • 1 cup shredded cheese (mozzarella or a blend)
  • ½ cup sour cream or yogurt
  • 1 cup chopped spinach
  • 1 cup chopped artichoke hearts
5-ingredient spinach artichoke dip baked in a white dish with a spoon, surrounded by small bowls of cream cheese, shredded cheese, sour cream, spinach and artichokes, with mini recipe text overlay.
5-ingredient spinach artichoke dip – a quick baked spinach dip recipe using just cream cheese, shredded cheese, sour cream, spinach and artichokes, baked at 180°C / 350°F until hot and melty.

Beat the cream cheese until smooth, then stir in sour cream, cheese, spinach, and artichokes. Spread into a small baking dish and bake at 180°C / 350°F for 20 minutes or so, until everything is hot and melty.

These versions are especially useful when you already have something like baked jalapeño poppers or cheese balls with Indian-inspired flavors in the oven and just want one more dish without adding much work.


Warm cheesy spinach queso dip

If you’re hosting game night or movie night, a spinach dip recipe with a queso twist always gets attention. It’s stretchy, melty, and perfect with crunchy sides.

Ingredients

  • 250 g processed melting cheese or cheese loaf, cubed
  • ½ cup milk or cream
  • 1 cup cooked, chopped spinach
  • Optional:
    • ½ cup diced tomatoes with green chilies, drained
    • 1 jalapeño, finely chopped
    • ½ teaspoon onion powder or garlic powder
Spinach queso dip in a cast-iron skillet with a tortilla chip lifting a stretchy cheesy scoop, surrounded by tortilla chips, salsa, jalapeños and shredded cheese, with mini recipe text overlay.
Spinach queso dip – a warm, cheesy spinach dip recipe made by melting cheese with milk, stirring in spinach and chilies, and serving hot with crunchy tortilla chips and hearty dippers.

Method

  1. Add the cheese cubes and milk to a small saucepan or deep skillet.
  2. Warm over low heat, stirring often, until the cheese melts into a smooth sauce.
  3. Stir in spinach and any optional add-ins.
  4. Keep over very low heat, just enough to keep the queso fluid, not boiling.

Serve this warm spinach dip recipe in a heat-safe bowl. Although tortilla chips are a classic pairing, it’s also fun with toasted bread fingers, roasted potato wedges, and even vegetable sticks for contrast.

Also Read: Air Fryer Chicken Wings (Super Crispy, No Baking Powder)


What to serve with your favorite spinach dip recipe

Once you’ve chosen which spinach dip recipe to make, the next question is what to put around the bowl. The possibilities are genuinely endless, but a few categories cover most occasions.

Breads and crackers

Bread and spinach dip are such a natural pairing that it’s easy to build a whole platter around them.

  • Cubes of crusty bread or baguette
  • Slices of homemade garlic bread loaf for extra flavor
  • Toasted slices of oatmeal bread when you want something a little heartier
  • Pita chips, breadsticks, or crispbread
  • Seeded crackers for crunch

If you enjoy assembling boards, you can place the dip as the centerpiece of a small grazing board. Surround it with breads, crackers, nuts, and fruit, taking cues from the charcuterie tips in the 3-3-3-3 rule guide.

Vegetables

Creamy dips always benefit from fresh, crisp vegetables as dippers. They add color, crunch, and a lighter option for guests who don’t want too much bread.

Try:

  • Carrot and cucumber sticks
  • Bell pepper strips
  • Cherry tomatoes
  • Blanched broccoli or cauliflower florets
  • Snap peas or green beans

Spinach is already part of the leafy-greens family that many nutrition experts say we should eat more of; adding assorted vegetables around the bowl brings you even closer to that goal. If you ever want to zoom out and read more about the role of vegetables and fruits in healthy eating patterns, Harvard’s Nutrition Source has an accessible overview.

Other appetizers for a full spread

For a larger gathering, it’s nice to add a few more bite-sized dishes so your spinach dip recipe shares the table with other flavors and textures.

Some options that work beautifully alongside dip include:

Together with one or two spinach dips, these give you an appetizer table that feels far more elaborate than the actual work involved.


Drinks that pair well with spinach dips

Because most spinach dip recipes are rich and creamy, they pair best with drinks that either cut through that richness or wrap around it in a cozy way.

For a sparkling, citrusy option, a French 75 cocktail is a classic choice. The combination of gin, lemon, a touch of sugar, and sparkling wine feels bright and celebratory, and the bubbles help refresh the palate between bites of dip.

If you prefer something on the slightly bitter side, you might like the balance of a Negroni with variations, while fans of shaken sour cocktails can explore the classic whiskey sour recipe with its sharp lemon edge. On evenings when you’d rather keep things non-alcoholic or cozy, mugs of homemade hot chocolate with cocoa powder feel surprisingly right next to hot spinach artichoke dip and roasted potatoes.

If you’re in the mood to experiment further, a roundup of creative gin cocktail recipes or playful ideas like the green tea shot with Jameson can help you match your drinks to the energy of the evening.


Storing spinach dips safely

Finally, because most versions of a spinach dip recipe are built on sour cream, yogurt, mayonnaise, and cheese, it’s worth paying attention to storage.

A few simple guidelines go a long way:

  • Keep spinach dips refrigerated in a covered container.
  • Try to eat them within 3–4 days for the best quality and safety.
  • During gatherings, avoid letting the dip sit out at room temperature for more than 2 hours. If the weather is very hot, aim for 1 hour. After that point, it’s safer to discard leftovers that have been sitting out.

If you’d like specific, broader advice beyond dips, the general recommendations on FoodSafety.gov are a useful reference for how long different chilled foods can safely stay out and how long they should be stored in the fridge.

For long parties, a good strategy is to serve half the dip at a time and keep the rest chilled. When the bowl runs low, swap in fresh, cold dip rather than topping up what’s been sitting out for hours.

Also Read: 6 Wellness Shot Recipes to Boost Your Immune System

Overhead view of four leftover spinach dip ideas including creamy spinach pasta, a skillet of baked dip, stuffed mushrooms and a stuffed baked potato, with text suggesting ways to use leftover spinach dip.
Leftover spinach dip ideas – turn extra dip into creamy pasta sauce, a cheesy pizza or toast topping, or use it to stuff mushrooms, baked potatoes and sandwiches so every last spoonful gets enjoyed.

Bringing it all together

By now, you’ve walked through a whole mini-universe of spinach dip recipes: the classic cold party version, ranch and vegetable soup mix twists, spinach artichoke variations (both cold and baked), lighter yogurt-based dips, shortcut three- and five-ingredient bowls, and a cheesy queso option for game day. You’ve also seen how to adapt fresh, frozen, or canned spinach, how to build a simple but impressive appetizer table around your dip, and how to think about drinks and storage.

You don’t have to make all of them at once. Instead, treat this as your personal spinach dip recipe toolbox. Pick one for a quiet evening with toasted bread and a movie, another for a big holiday meal with green bean casserole and lasagna, and keep the quickest versions in mind for those nights when someone messages, “We’re stopping by in 20 minutes,” and you still want to put something homemade on the table.

Also Read: What to Eat with Hummus for Weight Loss 🏋️‍♀️

FAQs

1. Can I make a spinach dip recipe ahead of time?

Yes, a spinach dip recipe actually tastes better when made ahead. Firstly, mixing everything together and letting it sit in the fridge for a few hours allows the onion, garlic, herbs, and spinach to fully flavor the creamy base. Secondly, the texture improves as the dip thickens slightly while it chills. Ideally, make your spinach dip 8–24 hours in advance, then give it a good stir and a quick taste before serving. If it feels too thick after chilling, you can gently loosen it with a tablespoon or two of milk, cream, or yogurt. In short, “make ahead” is not just okay; it is one of the secrets to a truly delicious spinach dip recipe.


2. Should I use fresh, frozen, or canned spinach for spinach dip?

All three can work in a spinach dip recipe; they simply need slightly different handling. Frozen chopped spinach is the most convenient option because it is already blanched and finely cut. After thawing, you only have to squeeze out as much water as possible. Fresh spinach is lovely when you already have it at home; just wilt it in a pan, cool it down, squeeze well, and chop. Canned spinach is the least common, yet it is still usable if you drain it thoroughly and press out the extra liquid. Overall, the most important step—no matter which kind you choose—is removing excess moisture, so the spinach dip stays thick and creamy instead of watery.


3. How do I stop my spinach dip recipe from being watery?

Excess water in the spinach is almost always the culprit. Therefore, the first step is to squeeze the spinach very well, whether it is frozen, fresh, or canned. Additionally, avoid adding watery ingredients like tomatoes or cucumbers directly into the dip; serve them on the side as dippers instead. If you accidentally end up with a loose spinach dip, you can stir in a bit of extra cream cheese, sour cream, or grated hard cheese to help thicken it. Another simple trick is to chill the dip for a longer time, since it tends to firm up as it rests in the refrigerator. Ultimately, good draining plus proper chilling are the best defenses against a runny spinach dip recipe.


4. What is the best base for a cold spinach dip recipe—sour cream, mayo, or cream cheese?

Each base creates a slightly different personality for your spinach dip recipe. Sour cream gives a tangy, smooth texture and classic “party dip” flavor. Mayonnaise adds richness and a glossy mouthfeel, making the dip feel more luxurious. Cream cheese, on the other hand, produces a thicker, spreadable consistency that is excellent for bread and crackers. Very often, the tastiest dips use a combination of these: for example, half sour cream and half mayonnaise, or sour cream with a portion of cream cheese for extra body. As a general guideline, use more sour cream and yogurt if you want a lighter dip, and more mayonnaise or cream cheese if you prefer something richer and denser.


5. Can I make a healthier spinach dip recipe with yogurt?

Absolutely, you can create a lighter spinach dip recipe by replacing part or even all of the sour cream and mayonnaise with thick yogurt or hung curd. To begin, choose a full-bodied yogurt like Greek yogurt so the dip does not become too runny. Then mix it with a smaller amount of mayonnaise or olive oil for smoothness and flavor. Moreover, you can lean on garlic, lemon juice, herbs, and black pepper to make the dip exciting without needing loads of fat. Over time, you can adjust the ratio in favor of yogurt as your taste buds get used to a tangier, fresher flavor. This kind of spinach and yogurt dip works wonderfully with raw vegetables and whole-grain crackers, and it still feels indulgent even though it is a bit kinder to your daily calories.


6. How can I turn a basic spinach dip recipe into a spinach artichoke dip?

Transforming a classic spinach dip recipe into a spinach artichoke dip is surprisingly straightforward. Simply fold in chopped artichoke hearts—marinated or canned both work—after you have mixed the base. As a starting point, add about one cup of chopped artichokes to a standard batch of dip. Additionally, consider including shredded mozzarella and a little extra parmesan if you are aiming for that familiar restaurant-style flavor. If you want a cold dip, you can serve it immediately after chilling. Conversely, for a baked spin on the same idea, spread the mixture into an oven-safe dish, sprinkle more cheese on top, and bake until it is hot and bubbling. In either case, the artichokes add a lovely tang and texture that makes the spinach dip feel even more special.


7. What is the difference between a cold spinach dip recipe and a baked one?

A cold spinach dip recipe is usually based on sour cream, mayonnaise, and sometimes yogurt, and it relies on chilling time to thicken and develop flavor. It stays soft and scoopable straight from the refrigerator and is perfect for bread, chips, and raw vegetables. A baked spinach dip, in contrast, features more cheese—especially mozzarella, parmesan, and cream cheese—and is heated in the oven until hot and gooey. As a result, it has a stretchy, melty texture and a lightly browned top. Because of that, baked versions feel cozier and more suited to winter dinners, holiday parties, and game nights. Cold dips, meanwhile, are especially refreshing for warm-weather gatherings but also hold their own at any buffet table.


8. Can I make a spinach dip recipe without mayonnaise?

Yes, you can absolutely create a spinach dip recipe without mayonnaise. One straightforward option is to replace mayonnaise entirely with sour cream, Greek yogurt, or a blend of both. Cream cheese also works well as a base; it produces a thick, spreadable dip when combined with sour cream or yogurt. Furthermore, seasonings like garlic, onion, lemon juice, pepper, and herbs will provide plenty of flavor so you do not miss the mayonnaise at all. If you want even more richness without mayo, you can add a small splash of olive oil or a bit of grated cheese to round out the taste. In the end, the structure of the dip comes from something creamy plus the spinach, while the flavor comes mainly from aromatics and spices, so you have lots of freedom.


9. How can I make a gluten-free spinach dip recipe?

A spinach dip recipe is often naturally close to gluten-free, but there are a few details to check. Firstly, the core ingredients—spinach, sour cream, yogurt, mayonnaise, cream cheese, and most cheeses—do not contain gluten. The potential issues usually come from packets of soup mix, seasoning blends, and certain processed cheeses. Therefore, you need to read the labels on any mixes or flavored ingredients to ensure they are certified gluten-free. Instead of using packaged vegetable or onion soup mix, you can season your dip with plain dried herbs, garlic powder, onion powder, smoked paprika, and salt. As for serving, choose gluten-free dippers such as rice crackers, corn chips labeled gluten-free, sliced vegetables, or gluten-free bread. Once you take these simple steps, your spinach dip recipe can be enjoyed safely by guests who avoid gluten.


10. Can a spinach dip recipe be made vegan or dairy-free?

Yes, with a few strategic swaps you can create a dairy-free or even fully vegan spinach dip recipe. To begin, replace sour cream and yogurt with plant-based alternatives made from coconut, soy, or almonds. Next, swap out cream cheese and other cheeses for vegan cream cheese or shredded plant-based cheese. In addition, use a vegan mayonnaise made from vegetable oils instead of eggs. As you adjust these ingredients, you might need to rely more heavily on garlic, lemon juice, nutritional yeast, and herbs to build up a satisfying savory flavor. For a thicker texture, you can blend in a small amount of soaked cashews or silken tofu. When everything is combined and chilled, you will have a creamy, scoopable spinach dip that fits into a dairy-free or vegan lifestyle while still feeling indulgent.


11. How long does a homemade spinach dip recipe last in the fridge?

As a general guideline, a homemade spinach dip recipe keeps well in the refrigerator for about three to four days. The ingredients—especially sour cream, yogurt, mayonnaise, and cheeses—are all perishable, so they need to be stored in a covered container at a consistently cold temperature. Try not to leave the dip out at room temperature for more than two hours during parties; if it has been sitting out for longer than that, it is safer to discard the remainder. One practical approach is to serve part of the dip in a bowl and keep the rest chilled, refilling as needed. In this way, the majority of your spinach dip remains at a safe temperature while guests are enjoying the portion on the table.


12. Can I freeze leftover spinach dip?

Freezing a spinach dip recipe is possible, although the results depend on the ingredients. Dips that are mostly cream cheese and shredded cheese tend to freeze and thaw better, because they have less water. On the other hand, dips with a high proportion of sour cream or yogurt can sometimes become grainy or separated after freezing. If you choose to freeze spinach dip, place it in an airtight container, leaving a little room for expansion. When you want to use it again, thaw it slowly in the refrigerator, then stir it thoroughly. If the texture feels slightly broken, you can try whisking in a spoonful of fresh cream cheese or yogurt to smooth it out. Even so, for the very best texture and flavor, it is usually preferable to enjoy a spinach dip recipe freshly made or only chilled in the fridge.


13. What can I do with leftover spinach dip besides serving it with bread or crackers?

Leftover spinach dip is surprisingly versatile, so you do not have to keep eating it in exactly the same way. Firstly, you can transform it into a pasta sauce by thinning it with a little milk or pasta cooking water, then tossing it with hot pasta and extra parmesan. Secondly, you can spread it over pizza dough as a “white” sauce base for a spinach dip pizza topped with mozzarella and vegetables. Additionally, it works well as a filling in stuffed mushrooms or as a layer inside baked sandwiches and wraps. You can even spoon a thicker spinach dip recipe into baked potatoes or use it as a topping for grilled chicken or fish. With just a bit of imagination, the leftovers become an ingredient rather than a problem.


14. How can I add more flavor to a basic spinach dip recipe?

If your basic spinach dip recipe tastes a little flat, you have lots of options for boosting flavor. Garlic and onion are the first and most obvious helpers; you can use them fresh, sautéed, or in powdered form. Beyond that, herbs like dill, parsley, coriander, basil, and chives add freshness. Spices such as smoked paprika, cayenne, black pepper, and mustard powder introduce warmth and complexity. A squeeze of lemon juice or a splash of vinegar brightens everything, especially in richer dips. Grated parmesan or another sharp cheese can also deepen the savory notes. Finally, a pinch of salt added after chilling can tighten the flavors, since cold food often needs slightly more seasoning than warm dishes. Bit by bit, these small additions turn a simple spinach dip recipe into something truly memorable.

Posted on 2 Comments

Spinach Nutrition and Weight Loss Benefits

Fresh spinach on a chopping board with lemon and salt, overlaid with facts highlighting its nutrition and weight loss benefits — only 23 calories per 100g, rich in vitamin K, iron, and folate.

If there’s one leafy green that deserves its reputation as a true superfood, it’s spinach. For centuries, it has been celebrated in kitchens and traditional medicine across the world — from Mediterranean salads to Indian palak paneer – this humble green delivers powerful spinach nutrition and weight loss benefits backed by modern science.. And while Popeye may have exaggerated its instant muscle-building powers, modern science confirms what generations before us instinctively knew: spinach is incredibly good for you.

What makes it even more exciting is how well spinach nutrition and weight loss benefits go hand in hand. This humble green is nutrient-dense yet astonishingly low in calories, making it the kind of food you can eat generously without derailing your health goals.

In this feature, we’ll explore spinach’s nutrition profile, its role in supporting weight management, and the many delicious ways you can weave it into your everyday meals.


Spinach Nutrition Facts (100g, 1 Cup, Raw vs Cooked)

The numbers tell a story that nutritionists love: spinach gives you a lot for very little.

  • 100 grams of raw spinach: ~23 calories, ~2.9g protein, ~2.2–2.9g fiber, ~92–94% water. (My Food Data)
  • 1 cup raw spinach (30g): ~7 calories, with hefty doses of vitamin K, vitamin A, folate, and manganese. (University of Rochester Medical Center)
  • 1 cup cooked spinach (180g): ~41 calories; as water cooks off, minerals concentrate, especially calcium and iron. (My Food Data)

Spinach is particularly famous for its vitamin K content — one serving can overshoot your daily requirement many times over, with cooked spinach providing ~987% DV per cup. (My Food Data) It also provides vitamin C for immunity, beta-carotene (vitamin A) for eye health, folate for cell repair, and iron for energy production. (My Food Data) In short: it’s a tiny calorie “investment” with a massive nutritional return.

Micronutrient Highlights

  • Magnesium: Supports energy production and muscle health.
  • Potassium: Helps regulate blood pressure and fluid balance.
  • Manganese: Important for metabolism and bone development.
  • B vitamins (B6, riboflavin): Contribute to brain function and energy metabolism.

These micronutrients often get overlooked but are critical for overall health — and spinach delivers them in abundance. (My Food Data)

Suggested Reading: Magnesium Deficiency? The 5 Best Foods (and Drinks) to Boost Your Levels


Spinach vs Other Greens

How does spinach compare to its leafy rivals?

  • Spinach vs Lettuce: Spinach offers significantly more vitamins A, C, K, and iron, while lettuce is mostly water and fiber.
  • Spinach vs Kale: Kale has more vitamin C, but spinach wins on iron and folate. Know more about Kale in Kale – Nutrition, Benefits, and 5 Practical Ways for Weight Loss.
  • Spinach vs Cabbage: Cabbage provides more vitamin C, but spinach is more nutrient-dense calorie for calorie.

It is essentially the “all-rounder” — not the highest in every nutrient, but consistently strong across the board. (My Food Data)


Spinach Nutrition and Weight Loss Benefits Explained

Spinach isn’t a magic bullet, but it’s about as close as real food gets. For anyone focused on maintaining or losing weight, the spinach nutrition and weight loss benefits are especially compelling.

Here’s why spinach is such a powerful ally:

  1. Volume with Few Calories
    You can eat a whole bowl of spinach and still barely crack 50 calories. This means you fill your stomach without overloading your plate. (University of Rochester Medical Center)
  2. Fiber and Water for Satiety
    The combination of dietary fiber and high water content slows down digestion and prolongs feelings of fullness, naturally reducing overeating. (My Food Data)
  3. Thylakoids and Appetite Regulation
    Spinach contains plant compounds called thylakoids,early human studies using spinach thylakoid extract report delayed fat digestion, increased GLP-1, and lower hedonic hunger/cravings in the short term. (PMC, PubMed). Some research shows that people who consume spinach extracts feel less hungry and have fewer cravings for sugary foods.
  4. Nutrient Density Without Deprivation
    Many diets fail because they leave people feeling deprived. Spinach, however, packs vitamins, minerals, and antioxidants into every bite, meaning you get more nutrition for fewer calories. (My Food Data)

Suggested Read: Hearty and Nourishing: 5 Vegan Lentil Soup Recipes for Weight Loss


Real-Life Weight Loss Scenarios

  • Swap a 300-calorie side of fries with a spinach salad topped with grilled chicken and vinaigrette — you’ll cut calories in half while doubling your nutrient intake.
  • Add a handful of spinach to a smoothie instead of an extra scoop of protein powder — you’ll still feel full, but with added fiber, folate, and iron.
  • Replace refined tortillas with spinach wraps or lettuce cups — lowering carbs and calories without giving up the “wrap” experience.
  • Or just enjoy this healthy hung curd spinach cheese sandwich as a protein-packed, low-calorie snack.

These swaps might seem small, but done consistently, they embody how spinach nutrition and weight loss benefits compound over time.


Is Spinach Good for Weight Loss? Benefits Explained

In a word: absolutely.

Spinach shines in the weight loss conversation because it satisfies two of the biggest hurdles dieters face: staying full and staying nourished. A food that is both low in calories and rich in vitamins is rare — but spinach checks both boxes effortlessly.

When you load your plate with spinach, you’re essentially eating bulk without the calorie burden. At just 23 calories per 100 grams, you can enjoy heaping portions without worrying about undoing your day’s effort. Add to that a meaningful amount of fiber, water, iron, folate, vitamin A, and vitamin K – and you’ve got a vegetable that actively works to slow digestion and stabilize hunger. (My Food Data)

But satiety is only half the story. Spinach delivers iron for energy, folate for cell repair, vitamin A for skin and vision, and vitamin K for bone health. These aren’t “bonus” nutrients — they’re the very things your body craves to function well. Diets often fail because people feel deprived; spinach flips that script by offering abundance without excess.

So yes — spinach is good for weight loss. Or rather, the spinach nutrition and weight loss benefits make it more than good: they make it a weight management essential.

Also Read: Spinach Chicken Curry| Palak Chicken| Murg Saagwala Recipe


How to Eat Spinach for Weight Loss (5 Practical Tips Expanded)

Spinach’s versatility is what transforms it from “just another vegetable” into a diet ally. Here are five proven ways to weave it into your meals — each expanded with practical examples so you can start today.

1. Smoothies That Don’t Taste “Green”

Spinach blends seamlessly into fruit-based smoothies. Try:

  • 1 cup baby spinach
  • ½ banana
  • ½ cup frozen mango
  • 1 scoop protein powder
  • 1 cup almond milk

The fruit masks the greens, but you still get fiber, vitamins, and minerals. For extra satiety, add chia seeds or oats or gt inspiration from one our fragrant cardamom-spinach power drinks for a refreshing twist.

2. Simple Soups and Stews

Add spinach to the pot during the final 2–3 minutes of cooking. It wilts instantly and boosts the nutrient profile without changing the flavor dramatically. A bowl of lentil soup with spinach delivers protein, fiber, and iron in one warming meal.

3. Protein-Packed Salads

Spinach leaves are sturdier than lettuce and pair well with lean proteins. A classic combo:

  • 2 cups fresh spinach
  • 2 boiled eggs or 100g grilled chicken
  • ½ avocado
  • A sprinkle of seeds (pumpkin or sunflower)
  • Lemon-olive oil dressing

The vitamin C from lemon juice also enhances non-heme iron absorption from spinach — a win-win. (My Food Data)

4. Eggs and Stir-Fries

A handful of spinach in scrambled eggs adds volume, fiber, and nutrients with almost no extra calories. In stir-fries, spinach is a last-minute addition that bulks up the dish while soaking up savory sauces.

5. Spinach Drinks and Juices

Cold-pressed spinach juice has become trendy, but smoothies are more balanced since they retain fiber. For a refreshing green drink: blend spinach with cucumber, apple, and ginger. Need more inspiration? Fuel your mornings with these matcha-spinach energizing drinks which are hydrating, low-calorie, and loaded with antioxidants.


A 7-Day Spinach Weight Loss Meal Idea

Here’s how a week of small swaps can highlight the spinach nutrition and weight loss benefits without boredom:

DayBreakfastLunchDinnerSnack
MonSpinach & egg omeletSpinach salad with chickpeasGrilled salmon + sautéed spinachSpinach + mango smoothie
TueSpinach smoothie bowlTurkey & spinach wrapLentil soup with spinachSpinach hummus + carrots
WedGreek yogurt with spinach powderPalak paneer (light version)Brown rice + stir-fried spinach & tofuSpinach + apple juice
ThuOats with spinach powderSpinach quinoa bowlChicken curry with spinach sabjiSpinach + pineapple smoothie
FriScrambled eggs with spinachSpinach chickpea saladPasta tossed with spinach & veggiesFrozen spinach added to soup
SatSpinach + banana smoothieSpinach tortilla wrap with beansGrilled shrimp + spinach sautéSpinach + cucumber juice
SunSpinach feta omeletPalak dal with riceSpanakopita (in moderation)Spinach dip (yogurt-based)

This isn’t a “spinach-only” plan — it’s about weaving spinach into meals in creative, enjoyable ways.


Spinach Benefits Beyond Weight Loss: Nutrition and Health

While spinach is a friend to anyone managing weight, its influence goes much further. Eating spinach consistently supports nearly every system in the body.

  • Bone Health
    Vitamin K and calcium in spinach are essential for bone density. In fact, one cup of cooked spinach provides over 30% of your daily calcium needs. (My Food Data)
  • Heart Health
    Spinach is naturally high in nitrates; a 7-day randomized crossover trial in healthy adults found nitrate-rich spinach soup reduced arterial stiffness and lowered blood pressure versus a low-nitrate control. (PMC, PubMed)
  • Eye Protection
    Spinach provides lutein and zeaxanthin, pigments linked with reduced progression of age-related macular degeneration in human studies/reviews. (PMC)
  • Brain and Mood
    Folate, magnesium, and vitamin B6 in spinach support neurotransmitter function, which may help regulate mood and reduce risk of cognitive decline. (My Food Data)
  • Anti-Inflammatory Power
    Spinach is packed with antioxidants, including flavonoids and carotenoids, which combat inflammation — a root cause of many chronic diseases. (My Food Data)

In short, the spinach nutrition and weight loss benefits are just one slice of the story. This vegetable is more than a diet trick — it’s a long-term health investment.


Baby Spinach and Red Spinach

When you walk into a grocery store, you’ll often see two standouts: baby spinach and, occasionally, red spinach. While they share the same leafy family, each brings something unique to the table.

Baby spinach is simply spinach harvested earlier, when the leaves are smaller, more tender, and milder in taste. Nutritionally, it’s almost identical to mature spinach — rich in vitamin K, vitamin A, folate, and iron — but its delicate leaves make it especially popular in salads and smoothies. For those new to greens, baby spinach is often the easiest entry point.

Red spinach, less common in Western supermarkets but widely used in parts of Asia, has a striking crimson hue thanks to betalains, the same antioxidant pigments found in beets. These compounds may support heart health and reduce oxidative stress. Red spinach also tends to have a slightly earthier, more robust flavor, making it excellent in stir-fries and sautés.

Both varieties reinforce the case that spinach isn’t just one thing — it’s a versatile family of greens with overlapping but distinctive health perks.


Spinach Powder and Supplements

For those who want the benefits of spinach without the daily washing and chopping, spinach powder has become a popular option. Made by drying and pulverizing fresh spinach, it’s often marketed as a nutrient-dense addition to smoothies, soups, and even baked goods.

Here’s what you should know:

  • Nutrient retention: Spinach powder preserves many of the vitamins and minerals found in fresh spinach, especially vitamin K, iron, and plant antioxidants.
  • Convenience: It’s lightweight, shelf-stable, and easy to scoop into drinks or recipes.
  • Cautions: It won’t provide the same water content or fiber as fresh spinach, so it’s best viewed as a supplement, not a replacement.

If you’re traveling, on a tight schedule, or looking to boost smoothies without bulk, spinach powder can be a handy addition. But nothing beats a crisp bunch of fresh spinach on your plate.


Calories in Spinach: Portion and Nutrition Guide

Spinach’s nutrition can sound abstract until you see it broken down into practical portions. Here’s a simple guide to common serving sizes:

PortionCaloriesProteinFiberVitamin KVitamin AIron
1 cup raw (30g)70.9g0.7g181% DV56% DV5% DV
100g raw232.9g2.9g604% DV188% DV15% DV
1 cup cooked (180g)415.4g4.3g987% DV377% DV36% DV
200g raw (about 6 cups)465.8g5.8g1,200% DV376% DV30% DV

(Sources: University of Rochester Medical Center, for raw Spinach My Food Data, for cooked Spinach My Food Data)

This chart answers queries like “calories in spinach,” “100g spinach nutrition,” “1 cup spinach nutrition facts,” and makes it easy for readers to visualize exactly what they’re getting on their plate.


Spinach Nutrition: Vitamins and Nutrients It’s High In

Spinach isn’t just a “green” — it’s a nutrient pharmacy. Here’s a closer look at the vitamins and minerals that dominate its profile:

  • Vitamin K: Spinach is one of the richest natural sources. Just one cup raw covers nearly 200% of your daily needs, critical for bone strength and healthy blood clotting.
  • Vitamin A (as beta-carotene): Essential for vision and skin health. Spinach provides more than half your daily intake in a single cup.
  • Vitamin C: Supports your immune system, collagen production, and helps your body absorb iron.
  • Folate: Important for cell growth and repair, particularly during pregnancy — and spinach is a star in these folate-focused chicken and spinach snacks, which make nutrition easy even on busy days.
  • Iron: While plant-based iron isn’t as easily absorbed as animal sources, spinach still contributes meaningfully, especially when paired with vitamin-C-rich foods. In fact, it ranks among the top iron-rich vegetables for boosting hemoglobin.
  • Magnesium & Potassium: Support energy production, muscle health, and blood pressure regulation.

So, when someone asks “What is spinach high in?” or “Spinach vitamins?”, the answer is: a lot — with a special emphasis on K, A, C, folate, and iron. (My Food Data)

Also Read: Symptoms of Vitamin B12 Deficiency


Palak Nutrition and Indian Spinach Dishes

In India, spinach goes by a more familiar name: palak. This term covers the same leafy green, but the cultural context changes how it’s enjoyed.

  • Palak nutrition: Nutritionally identical to spinach — low in calories, high in vitamins K, A, C, and folate.
  • Palak paneer: A classic dish combining spinach puree with cottage cheese (paneer). A typical serving delivers protein from paneer plus spinach’s iron and folate. One bowl (250g) averages around 320–350 calories depending on preparation.
  • Palak sabji: A simpler stir-fried or sautéed version, often under 150 calories per bowl, making it a weight-loss-friendly staple.

For readers searching “palak nutrition” or “palak for weight loss,” this section bridges the gap between global spinach facts and the local way people eat it daily.


Spinach in Everyday Dishes: Dips, Frozen, and More

Beyond wraps and salads, spinach pops up in comfort foods and pantry staples that many people Google before indulging:

  • Spinach artichoke dip: A creamy favorite, but calorie-heavy — restaurant versions often top 250–300 calories per ½ cup, with significant fat from cheese and mayonnaise. Homemade versions with Greek yogurt can be a lighter spin.
  • Frozen spinach: Nutritionally comparable to fresh, and in some cases even higher in vitamin C due to flash-freezing. (PubMed). A budget-friendly, year-round option that makes it easier to add spinach to soups and curries.
  • Canned spinach: Convenient but less vibrant in taste and texture. It retains minerals but loses some vitamin C in the canning process.

Frozen spinach: about 26 calories per 100g; Canned spinach: about 19 calories per 100g, though sodium may be higher due to preservation.


Can You Eat Spinach Every Day?

It’s one of the most common questions, and the answer is: yes, for most people. Eating spinach daily provides a steady supply of essential nutrients, especially vitamin K, iron, and folate.

The only caveat is oxalates, natural compounds in spinach that can bind to calcium and contribute to kidney stones in susceptible individual. For most healthy people, daily spinach provides a steady supply of vitamin K, folate, and iron. If you’re prone to kidney stones, just be oxalate-smart: moderate very large raw portions, rotate in cooked spinach (cooking lowers oxalates), hydrate well, and pair with calcium-rich foods like Cheese, Paneer or Yogurt. (Mayo Clinic)

So yes — you can absolutely eat spinach every day. The trick is variety in preparation: raw salads, sautéed sides, blended smoothies, and hearty curries all keep your spinach habit sustainable and enjoyable.


Spinach Juice, Smoothies, and Raw Spinach Nutrition

Should you eat spinach raw or cooked? The answer is: both.

  • Raw spinach keeps vitamin C intact and works beautifully in salads and smoothies.
  • Cooked spinach reduces oxalate levels (which can block calcium absorption), making minerals like calcium and iron more available.

Balance is best: raw for freshness, cooked for minerals. Alternate between salads, sautéed sides, and blended smoothies, and you’ll cover all bases.


Spinach in Popular Foods (Wraps, Spanakopita, Starbucks Feta Wrap)

Spinach also sneaks into some of our favorite comfort foods — sometimes with a healthy twist, other times less so.

  • Starbucks Spinach, Feta & Egg White Wrap: Officially listed at ~290 calories per wrap (notable protein and fiber) — a balanced grab-and-go option compared to many fast-food breakfasts. (Starbucks)
  • Spanakopita: A delicious Greek pastry filled with spinach and feta. While nutritious, the buttery phyllo adds extra calories — enjoy as a treat, not a daily staple.
  • Spinach tortillas/wraps: Marketed as “healthy,” but often made with refined flour and just a sprinkle of spinach. Always check the label for whole grains and actual spinach content.

By being label-savvy, you can enjoy spinach in many forms without derailing your nutrition goals.


Final Thoughts

Spinach is one of those rare foods that ticks every box: nourishing, low in calories, endlessly versatile, and backed by decades of nutritional science. From bone health to heart protection, from satiety to long-term weight management, the spinach nutrition and weight loss benefits make it a true kitchen essential.

Whether you’re aiming to slim down or simply to feel stronger and healthier, spinach is an easy, affordable step in the right direction. Next time you’re at the market, skip past the fad foods and reach for a bunch of spinach — your future self will thank you.

FAQs on Spinach Nutrition and Weight Loss Benefits

1) Is spinach good for weight loss?

Absolutely. Thanks to low calories, high water, and fiber, spinach helps you feel full without piling on energy. Moreover, when you focus on spinach nutrition and weight loss benefits, you get vitamins and minerals that make lighter eating feel satisfying—not deprived.

2) How do I eat spinach for weight loss?

Start simple: add a handful to smoothies, toss it into soups at the end, build salads with protein (eggs, chicken, chickpeas), and fold it into omelets or stir-fries. Additionally, pairing spinach with lemon or other vitamin-C foods boosts iron absorption—another quiet win for overall spinach nutrition and weight loss benefits.

3) Does spinach burn fat?

Spinach doesn’t “melt” fat directly; however, it supports a calorie deficit by enhancing fullness. Early research on spinach thylakoids suggests they may help curb cravings—so, indirectly, spinach nutrition and weight loss benefits make sticking to your plan easier.

4) What are the top spinach nutrition facts (per 100g and per cup)?

Per 100g, spinach has roughly 23 kcal, ~3g protein, ~2–3g fiber, and is ~92% water. Meanwhile, a cup of raw leaves (~30g) has about 7 kcal—tiny calories for big micronutrients like vitamin K, vitamin A, folate, and iron. That’s the “more for less” magic behind spinach nutrition and weight loss benefits.

5) What vitamins is spinach high in?

Spinach is rich in vitamin K, vitamin A (beta-carotene), vitamin C, and folate; it also offers iron, magnesium, and potassium. And because these come packaged with water and fiber, the spinach nutrition and weight loss benefits extend beyond vitamins to real-world satiety.

6) Is raw spinach better than cooked?

Both have advantages. Raw spinach preserves delicate vitamin C, while cooked spinach lowers oxalates and concentrates minerals like calcium and iron. Therefore, alternating raw and cooked gives you the best of both worlds—and maximizes spinach nutrition and weight loss benefits.

7) What are the benefits of eating raw spinach?

Raw spinach is crisp, hydrating, and bright with vitamin C and folate—great for salads and smoothies. Plus, it’s effortless to add daily. However, for mineral availability, rotate in cooked options too; that balance keeps spinach nutrition and weight loss benefits steady.

8) Is baby spinach healthier than regular spinach?

Nutritionally, they’re very similar. Baby spinach is just younger—tender, mild, and perfect for raw dishes—while mature leaves stand up beautifully to cooking. Consequently, choose based on texture and recipe; either way, you’ll capture spinach nutrition and weight loss benefits.

9) What are the benefits of red spinach?

Red spinach (common in parts of Asia) brings betalain antioxidants along with the familiar spinach vitamins. Moreover, its slightly earthier flavor shines in sautés and stir-fries, adding variety while preserving core spinach nutrition and weight loss benefits.

10) What are the calories in spinach (1 cup vs 100g)?

A cup of raw spinach (~30g) has ~7 kcal; 100g has ~23 kcal. Meanwhile, a cup of cooked spinach (~180g) is ~41 kcal because water cooks off and nutrients concentrate. Low energy, high nutrients—that’s the heart of spinach nutrition and weight loss benefits.

11) Is spinach high in fiber?

Yes. While fiber amounts are modest per serving, spinach’s high water + fiber combo really helps with fullness. Additionally, layering spinach with beans, seeds, or whole grains multiplies the effect—practical synergy for spinach nutrition and weight loss benefits.

12) What are the benefits of spinach powder?

Spinach powder is convenient and shelf-stable; you can stir it into smoothies or soups for a micronutrient bump. However, it lacks fresh spinach’s full water and fiber, so use it as a supplement, not a replacement, to keep spinach nutrition and weight loss benefits intact.

13) Is spinach good to eat every day?

For most people, yes. Daily spinach offers reliable vitamin K, folate, and iron. Nevertheless, if you’re prone to kidney stones, moderate raw portions and include cooked spinach (lower oxalates). This balanced approach sustains spinach nutrition and weight loss benefits long-term.

14) What is “palak nutrition,” and is palak good for weight loss?

“Palak” is simply spinach in India—the nutrition is the same. Palak paneer, palak sabji, and dal palak are delicious ways to eat it. And because palak is low-calorie yet nutrient-dense, it aligns beautifully with spinach nutrition and weight loss benefits in everyday Indian meals.

15) How many calories are in a Starbucks spinach feta egg white wrap—and is it a smart choice?

It’s roughly ~290 calories with notable protein and some fiber, so it’s a more balanced on-the-go option than many fast-food breakfasts. Still, check local nutrition info and, if you like, pair it with fruit or a side salad to lean into spinach nutrition and weight loss benefits without overdoing extras.

🌿 Research & Sources on Spinach Nutrition and Weight Loss Benefits

If you’d like to dive deeper into the numbers and science behind spinach nutrition and its role in weight loss, here are the most reliable resources we’ve drawn on. They’re easy to explore, trustworthy, and align perfectly with the spinach nutrition and weight loss benefits covered in this article.

1. Spinach Nutrition Facts

For exact calories, protein, fiber, vitamins, and minerals in both raw and cooked spinach, MyFoodData provides clear breakdowns:

2. Thylakoids and Appetite Control

Research on spinach’s natural compounds called thylakoids shows they may help reduce cravings and increase satiety — one reason spinach is such a powerful ally for weight management.

3. Spinach Nitrates and Heart Health

Studies show spinach’s naturally high nitrates can help improve blood flow and lower blood pressure.

4. Lutein & Zeaxanthin for Eye Protection

These antioxidants in spinach are strongly linked to protecting against age-related macular degeneration.

5. Oxalates and Kidney Stones

For most people spinach is safe daily, but for those prone to kidney stones, here’s Mayo Clinic’s guidance on oxalates:

6. Fresh vs. Frozen Spinach

Frozen spinach is not a downgrade — in fact, flash-freezing often helps retain key nutrients like vitamin C.

7. Everyday Spinach Choices

Even quick-service meals like Starbucks’ spinach wrap can give you a balanced on-the-go option.


Takeaway: These sources show that the spinach nutrition and weight loss benefits are not hype but supported by credible data and real science. Whether you’re tracking calories, exploring antioxidants, or just trying to eat healthier, spinach earns its place on your plate.

Posted on 4 Comments

5 Iron-Boosting Vegan Snacks for Pregnancy: Lentil and Spinach Combinations

IRON-BOOSTING VEGAN SNACKS FOR PREGNANCY LENTIL AND SPINACH COMBINATIONS

Pregnancy is a beautiful journey—but let’s be honest, it can also leave you feeling exhausted, especially if your iron levels take a dip. Iron is the mineral that keeps your blood oxygenated and your energy steady, and during pregnancy your body needs almost 50% more of it—jumping from 18 mg/day to a whopping 27 mg/day.

If you’re following a plant-based lifestyle, you might already know that your iron comes in the “non-heme” form, which isn’t absorbed quite as efficiently as the “heme” iron from animal products. But don’t worry—research in 2025 has shown that with smart food pairings, preparation methods, and a little creativity in the kitchen, plant-based diets can fully support a healthy pregnancy.

And here’s where two humble heroes—lentils and spinach—come into play.


Why Iron Matters So Much During Pregnancy

During pregnancy, your blood volume increases by about 50%, which means your body is working double-time to carry oxygen to both you and your growing baby. That requires more hemoglobin—and hemoglobin is built from iron.

Daily iron needs:

  • Before pregnancy: ~18 mg/day
  • During pregnancy: ~27 mg/day

Low iron can lead to anemia, which may cause fatigue, dizziness, shortness of breath, and even affect your baby’s growth. Research from 2025 confirms that well-planned plant-based diets can meet these increased needs—especially when you pay attention to iron absorption.


Why Lentils + Spinach Are a Perfect Pair

  • Lentils: ~6–7 mg of iron per cooked cup, plus high folate content for fetal brain and spine development, fiber for digestion, and plant protein.
  • Spinach: ~6.4 mg of iron per cooked cup, along with vitamins A, K, and a touch of vitamin C.
  • Vitamin C synergy: Combining these with vitamin C-rich foods (bell peppers, lemon juice, tomatoes) can dramatically improve iron absorption.

💡 Pro tip: Cooking in a cast-iron pan can naturally increase the iron content of your meals—a method validated by recent UC Davis nutrition research.


The Science of Absorption (Made Simple)

Iron from plants (non-heme iron) isn’t absorbed as efficiently as iron from meat (heme iron). But there are easy ways to change that:

Do

  • Pair with vitamin C sources to boost absorption.
  • Soak, sprout, or ferment lentils to reduce phytates (iron blockers).
  • Cook in cast-iron cookware.

Don’t

  • Drink tea or coffee with iron-rich meals (tannins can block absorption by up to 60%).
  • Rely solely on spinach without pairing with other absorption-friendly foods.

5 Delicious Lentil + Spinach Snacks for Pregnancy

Pregnancy snacks don’t have to be bland or repetitive. With lentils and spinach as the foundation, you can create snacks that are not only rich in iron, folate, and fiber, but also bursting with flavor and texture. Here’s a detailed look at five tried-and-true recipes, with extra tips for enhancing absorption, making them in bulk, and adding variety.


1. Spinach & Lentil Patties

Why they work:
These patties deliver iron, protein, and folate in a compact, freezer-friendly form. They’re satisfying enough for a midday hunger pang and versatile enough to double as a burger patty for dinner.

Spinach & Lentil Patties
“Iron-rich and freezer-friendly, these Spinach & Lentil Patties are the ultimate pregnancy snack—packed with folate, plant protein, and flavor. Pair with vitamin C-rich salsa to boost iron absorption and keep your energy levels steady all day.”

Ingredients:

  • 1 cup cooked brown or green lentils (soaked overnight for better digestion)
  • 2 cups fresh spinach leaves, finely chopped
  • ½ cup breadcrumbs or oat flour
  • 1 small onion, finely diced
  • 2 cloves garlic, minced
  • 1 tsp ground cumin
  • Juice of ½ lemon (vitamin C boost)
  • Salt & pepper to taste
  • 2 tbsp olive oil for pan-searing

Method:

  1. Prep the lentils: Boil soaked lentils until tender but not mushy. Drain well to prevent soggy patties.
  2. Cook the spinach: Sauté with onion and garlic until just wilted.
  3. Mix: Combine lentils, spinach mixture, breadcrumbs, spices, and lemon juice. Mash lightly, leaving some lentil texture.
  4. Shape: Form into small patties.
  5. Cook: Pan-sear in a cast-iron skillet until golden on each side.

💡 Related: Boosting Folate in Pregnancy: Top 5 Lentil and Bean Dishes

Pregnancy Tip: Pair with fresh tomato salsa or bell pepper chutney to increase non-heme iron absorption.

Make-Ahead: Freeze uncooked patties between parchment sheets. Cook straight from frozen, adding 2–3 extra minutes per side.


2. Lentil & Spinach Hummus

Why they work:
A smooth, creamy dip that sneaks in greens without compromising flavor. Perfect for an afternoon snack that also helps you meet your protein quota.

Lentil & Spinach Hummus
“Creamy, colorful, and nutrient-dense—this Lentil & Spinach Hummus is a pregnancy-friendly twist on a classic dip. With red lentils, leafy greens, and vitamin C from lemon juice, it’s an easy way to fuel up on iron and protein between meals.”

Ingredients:

  • 1 cup red lentils, boiled until soft
  • 1 cup spinach, blanched for 30 seconds
  • 2 tbsp tahini (calcium + healthy fats)
  • 2 tbsp lemon juice (vitamin C)
  • 1 garlic clove, roasted or raw
  • 1 tbsp olive oil
  • Salt & cumin to taste

Method:

  1. Cook lentils: Boil until soft, drain well.
  2. Blanch spinach: Drop into boiling water for 30 seconds, then shock in ice water to keep it green.
  3. Blend: Add lentils, spinach, tahini, lemon juice, garlic, olive oil, salt, and cumin to a food processor. Blend until creamy.

Serving Tip: Serve with carrot sticks, cucumber rounds, or bell pepper strips.

💡 Related: 5 Sugarless Snacks Rich in Iron for Pregnant Nights

Pregnancy Tip: Red lentils cook quickly and are easy to digest—ideal for pregnancy when digestion can slow down.

Flavor Variations: Add roasted red peppers or sun-dried tomatoes for a smoky twist.


3. Mini Spinach-Lentil Soup Shots

Why they work:
These are perfect when you want something warm and nourishing without committing to a full bowl. Great as a mid-morning boost or evening wind-down.

Mini Spinach-Lentil Soup Shots
“Warm, soothing, and bursting with nutrition—these Mini Spinach-Lentil Soup Shots are perfect for pregnancy snacking. Packed with plant-based iron, folate, and a touch of turmeric, they’re the ultimate comfort boost in a cup.”

Ingredients:

  • ½ cup red or yellow lentils
  • 2 cups vegetable broth (low sodium)
  • 1 cup chopped spinach
  • 1 medium tomato, diced (vitamin C)
  • ½ onion, chopped
  • 1 garlic clove, minced
  • ½ tsp turmeric
  • Salt & pepper to taste
  • Lemon wedges to serve

Method:

  1. Cook lentils: Simmer in vegetable broth with onion, garlic, tomato, and turmeric until soft.
  2. Add spinach: Stir in chopped spinach just before blending.
  3. Blend: Puree until silky smooth.
  4. Serve: Pour into small mugs or shot glasses, garnish with lemon.

💡 Related: 5 Folate-Focused Recipes for a Nourishing Pregnancy

Pregnancy Tip: Turmeric adds anti-inflammatory benefits, but keep portions moderate (¼–½ tsp) during pregnancy.

Make-Ahead: Freeze in small glass jars; thaw overnight for a ready-to-go warm snack.


4. Lentil & Spinach Falafel Wraps

Why they work:
These wraps are a complete mini-meal in one — protein-packed falafels made with lentils and spinach, wrapped with crisp vegetables and a creamy dressing. Perfect for a quick lunch or a portable pregnancy-friendly snack.

Lentil & Spinach Falafel Wraps
“Wholesome and portable, these Lentil & Spinach Falafel Wraps deliver plant-based iron, fiber, and healthy fats in every bite. Ideal for busy pregnancy days when you need a nourishing, on-the-go meal that’s as tasty as it is energizing.”

Ingredients:

  • 1 cup green lentils, cooked and drained
  • 1½ cups spinach, finely chopped
  • ¼ cup chickpea flour (binds and boosts protein)
  • 2 cloves garlic, minced
  • 1 tsp cumin powder
  • ½ tsp coriander powder
  • Salt & pepper to taste
  • 4 whole wheat pitas or wraps
  • Salad fillings: lettuce, tomato slices, cucumber sticks
  • Tahini or yogurt dressing
  • Lemon wedges

Method:

  1. Mix: In a food processor, blend lentils, spinach, garlic, chickpea flour, and spices into a coarse mixture.
  2. Shape: Form into small patties or balls.
  3. Cook: Bake at 200°C (390°F) for 20 minutes or pan-fry with minimal oil until golden.
  4. Assemble: Place falafels in pitas with salad fillings and drizzle generously with tahini or yogurt dressing. Squeeze lemon juice over before serving.

💡 Related: 10 Exotic Superfoods for a Healthy Pregnancy

Pregnancy Tip: Add sliced avocado for healthy fats and extra creaminess.

Batch Tip: Prepare falafel mixture in advance and refrigerate for up to 2 days, or freeze shaped falafels to cook later.


5. Spinach-Lentil Energy Wraps

Why they work:
Fresh, crunchy, and portable—these wraps require minimal prep and can be customized for different cravings.

Spinach-Lentil Energy Wraps
“Fresh, crunchy, and loaded with pregnancy-safe nutrients—these Spinach-Lentil Energy Wraps combine iron-rich lentils, crisp veggies, and creamy avocado for a satisfying, blood-sugar-friendly snack anytime.”

Ingredients:

  • Large spinach leaves or whole-grain tortillas
  • 1 cup cooked brown lentils
  • ½ cup shredded carrots
  • ½ cup thinly sliced bell peppers (vitamin C)
  • ¼ avocado, sliced (healthy fats)
  • 2 tbsp tahini-lemon dressing

Method:

  1. Prep filling: Mix lentils with carrots, bell peppers, and avocado.
  2. Assemble: Lay spinach leaves or tortillas flat, fill with lentil mixture.
  3. Dress: Drizzle with tahini-lemon dressing.
  4. Wrap & secure: Roll tightly and secure with a toothpick if needed.

💡 Related: 5 Omega-3 Rich Vegan Snack Ideas for Pregnant Women

Pregnancy Tip: These wraps are rich in fiber and healthy fats, helping to maintain steady blood sugar levels.

Make-Ahead: Pack in parchment for a quick grab-and-go snack; store in the fridge for up to 24 hours.


🥗 Final Pro Tips for All 5 Recipes

  • Enhance absorption: Always pair with a vitamin C source.
  • Diversify your greens: Swap spinach with kale or amaranth leaves for variety.
  • Play with spices: Pregnancy-safe spices like cumin, coriander, and fennel add flavor and aid digestion.
  • Mind your portions: Multiple smaller snacks can be easier on digestion than one large portion during pregnancy.

Pregnancy Nutrition Tip

Even with the best snack lineup, iron deficiency can still sneak up during pregnancy. Pay attention to symptoms like unusual fatigue, dizziness, or shortness of breath—and don’t skip your prenatal checkups. If your doctor recommends a supplement, it’s not a failure—it’s just an extra tool in your pregnancy wellness kit.


Final Thoughts

Pregnancy nutrition can feel overwhelming, but it doesn’t have to be complicated. By combining the humble lentil with vibrant spinach—and pairing them with vitamin C—you can create snacks that are as delicious as they are nourishing.

Think of these recipes as a starting point. Once you get the hang of the flavor combos, you’ll find endless variations. And by linking your snacks to other nutrient-packed recipes—like Folate-Focused Recipes or Omega-3 Rich Vegan Snack Ideas—you can build a pregnancy-friendly menu that keeps you energized and your baby thriving.

So go ahead—grab those lentils and spinach. Your body (and your baby) will thank you.

FAQs – Lentil & Spinach Pregnancy Snacks

1. Why are lentils and spinach recommended during pregnancy?

Lentils and spinach are both rich in iron, folate, and fiber—three nutrients vital for pregnancy. Iron supports healthy blood oxygen levels, folate aids fetal brain and spinal development, and fiber helps prevent constipation, which is common during pregnancy.


2. How much iron do I need daily while pregnant?

Most pregnant women need about 27 mg of iron per day, compared to 18 mg before pregnancy. Since plant-based iron (non-heme iron) is absorbed less efficiently, it’s important to pair it with vitamin C-rich foods like bell peppers, tomatoes, or lemon juice.


3. Can I meet my iron needs on a plant-based diet during pregnancy?

Yes. Research in 2025 confirms that with smart food pairings, soaking or sprouting legumes, and cooking methods like using cast-iron pans, plant-based diets can fully support healthy pregnancy iron levels.


4. Why should I pair lentils and spinach with vitamin C?

Vitamin C helps convert plant-based iron into a form your body can absorb more easily. Adding lemon juice, fresh tomatoes, or bell peppers to your lentil and spinach dishes can significantly boost iron uptake.


5. Can I freeze these snacks for later?

Absolutely. Most of these recipes—especially patties, cutlets, and falafel—can be frozen uncooked between parchment sheets or cooked and cooled before freezing. This makes healthy snacking quick and convenient.


6. Are these recipes safe for gestational diabetes?

Yes, with some adjustments. These snacks are high in fiber and protein, which help stabilize blood sugar. If needed, reduce or avoid added refined carbs (like breadcrumbs) and use oat or chickpea flour instead.


7. Can I substitute spinach with other greens?

Yes. Kale, Swiss chard, and amaranth leaves are excellent alternatives, offering similar nutrient profiles and slightly different flavors. Just adjust cooking times, as tougher greens may need a bit longer to soften.


8. Do lentils need to be soaked before cooking?

Soaking lentils isn’t strictly necessary, but it can reduce cooking time and help lower phytates—natural compounds that can reduce iron absorption. For better digestion during pregnancy, soaking is recommended.


9. Can I make these snacks gluten-free?

Yes. Replace breadcrumbs with oat flour, chickpea flour, or ground flaxseeds. All five recipes can be adapted to be 100% gluten-free without losing flavor or texture.


10. Are there any foods I should avoid pairing with these snacks?

Avoid consuming tea, coffee, or high-calcium dairy products at the same time as iron-rich meals, as tannins and calcium can block iron absorption. Instead, enjoy those beverages between meals.