
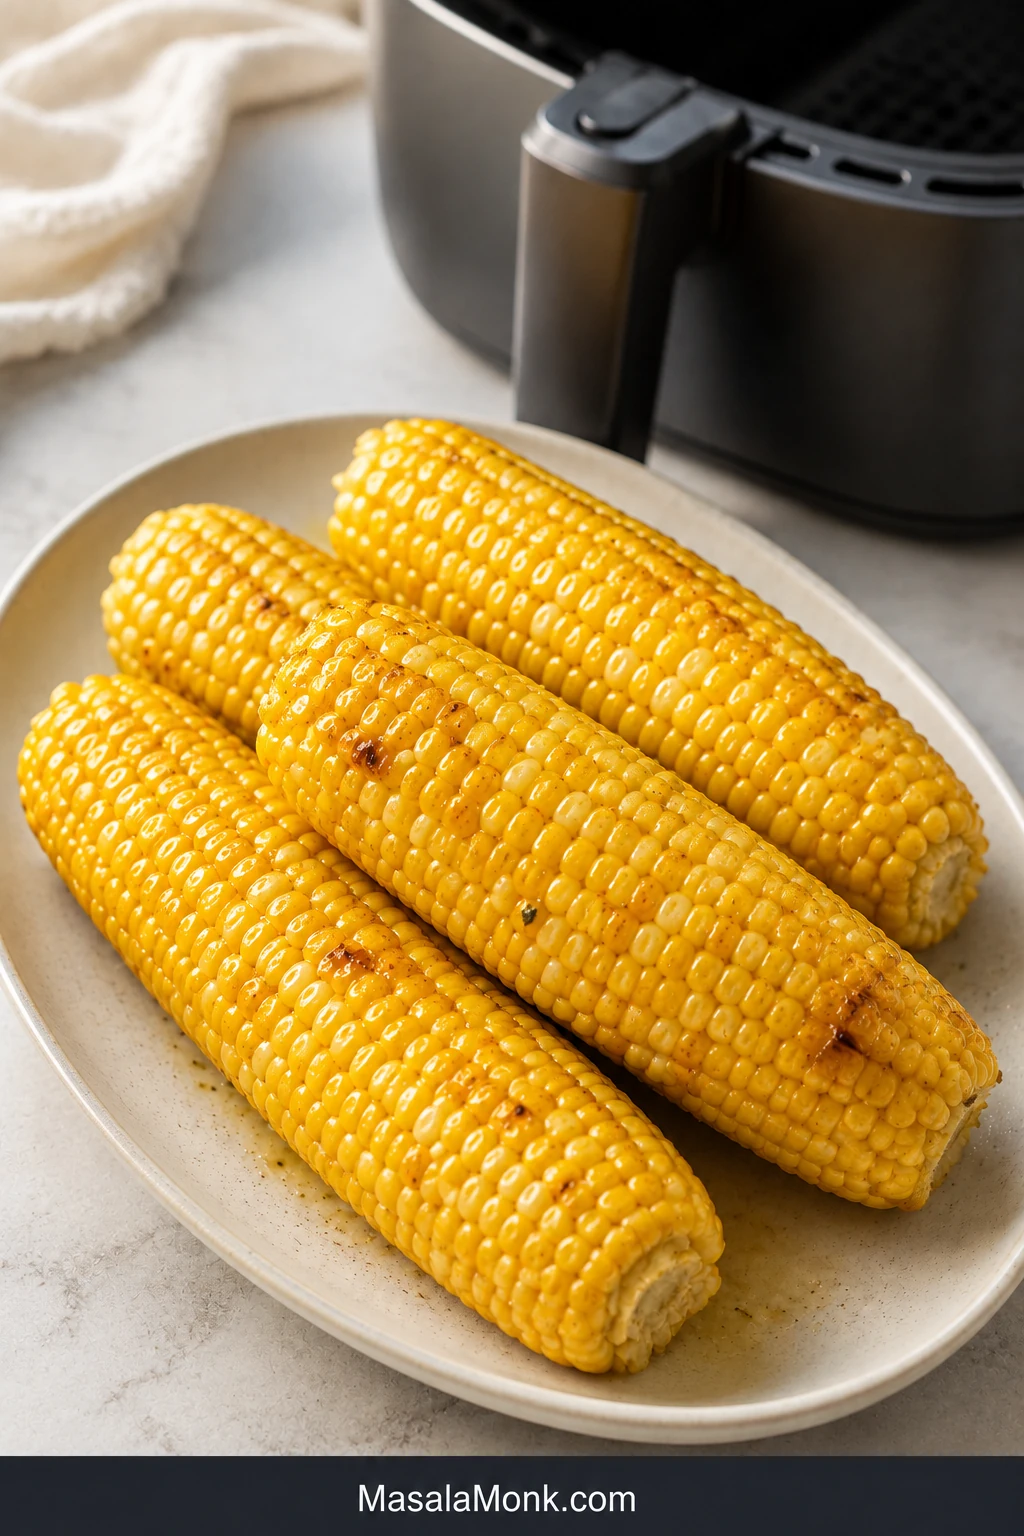
Air fryer corn on the cob should be one of the easiest sides you make all summer. You can skip the pot of boiling water, leave the grill unlit and cook only the number of ears dinner actually needs.
The confusing part is the timer. One recipe says six minutes, another says twelve, and a third keeps the corn cooking for nearly twenty. Thick ears may still feel firm after a fast recipe, while slim ears can turn wrinkled if you wait too long for dramatic black spots.
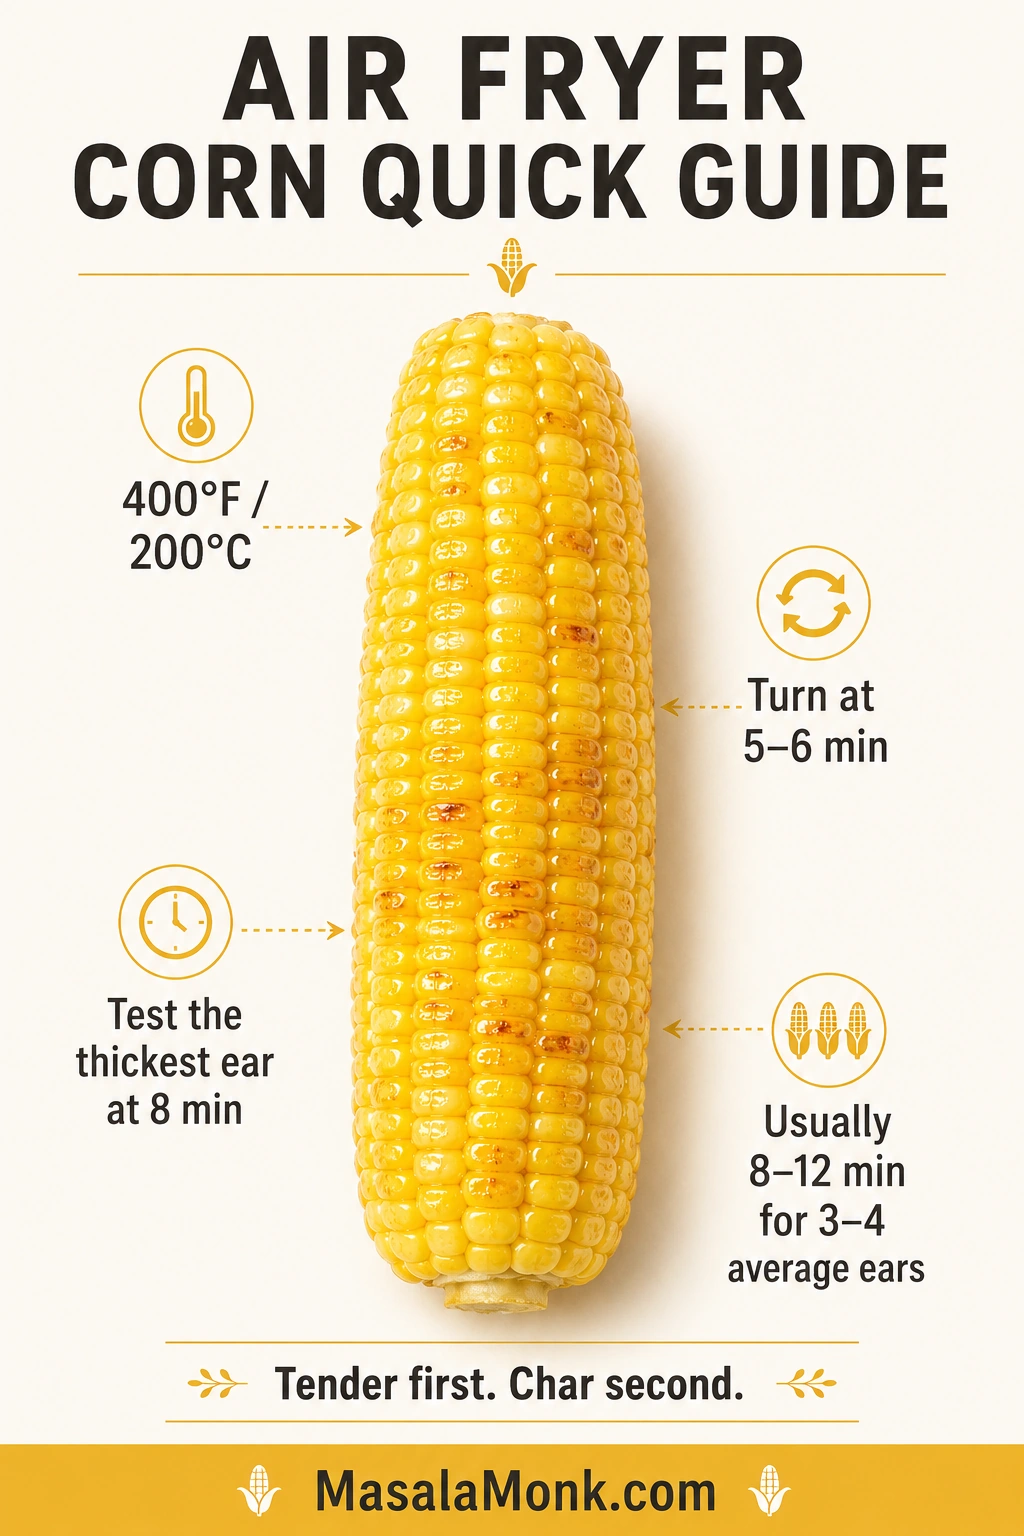
Air fry three or four average-thickness ears at 400°F / 200°C for 8–12 minutes, turning once. Test the thickest ear at eight minutes; one or two slim ears may be ready around 6–7 minutes.
The MasalaMonk rule: tenderness decides when the corn is cooked; extra time decides how deeply browned and charred it becomes.
Once a pierced kernel gives with gentle resistance and beads with juice, the ear can leave the basket. Add colour afterward, one minute at a time, for up to 3 extra minutes. Brush on the butter at the end so it melts between the hot rows instead of scorching beside the heating element.
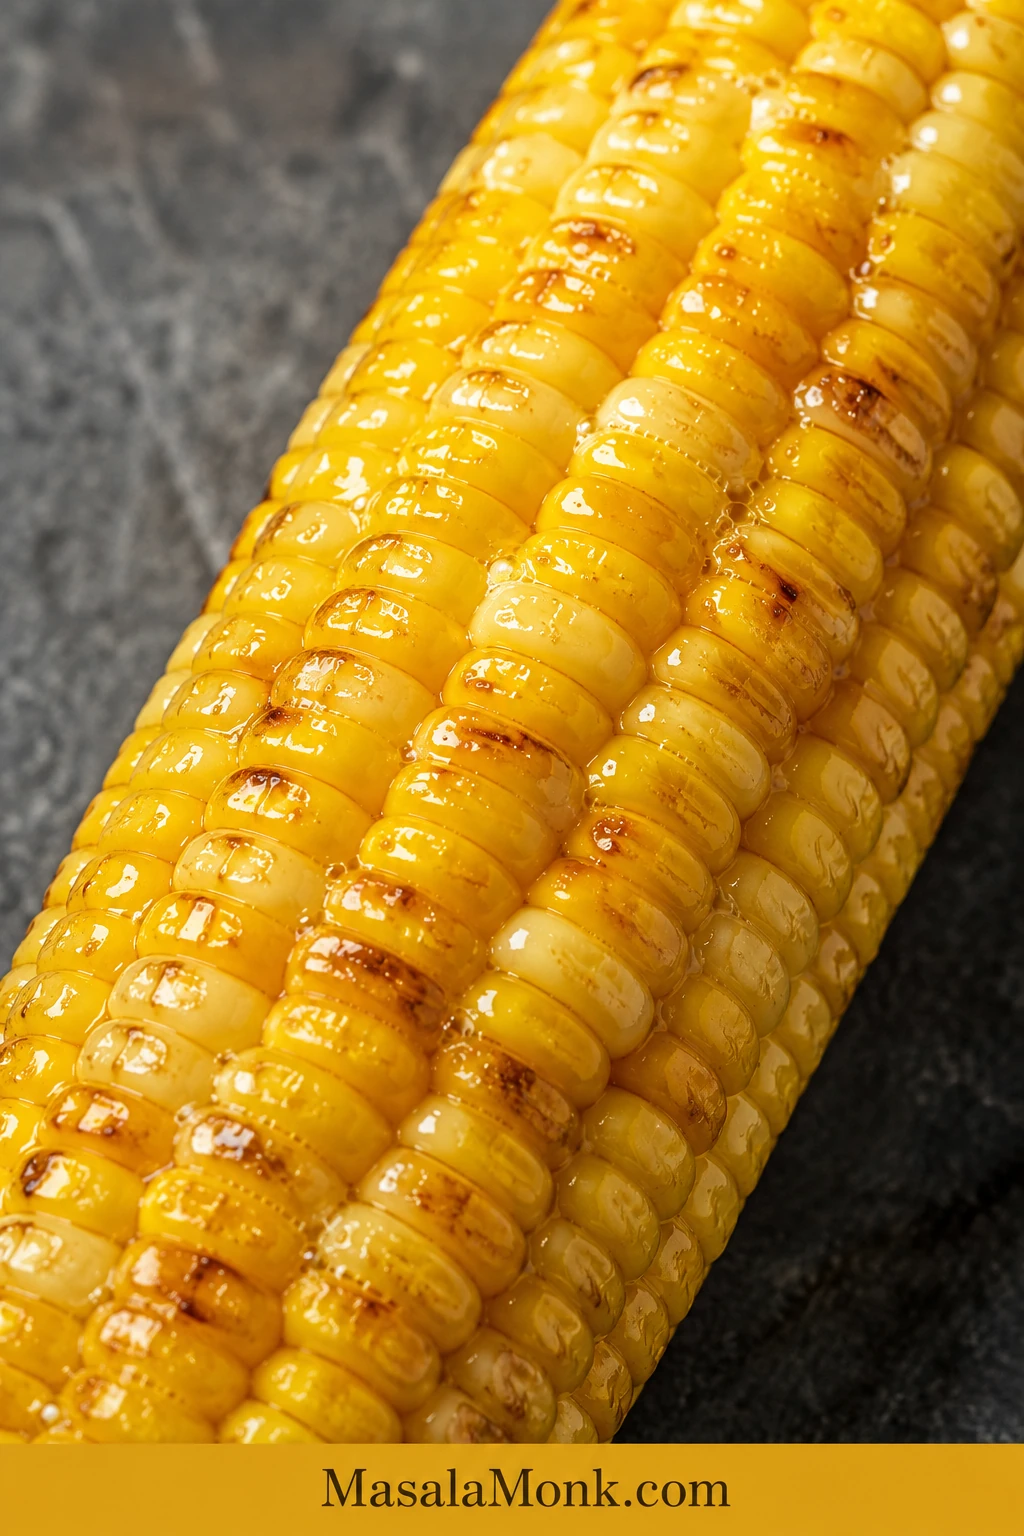
Air Fryer Corn on the Cob Recipe
Fresh sweet corn with juicy kernels and lightly blistered edges. Check the thickest ear early and remove each one as soon as it becomes tender.
Want deeper roasted colour? Allow another 1–3 minutes after the kernels are tender.
Ingredients
For the Corn
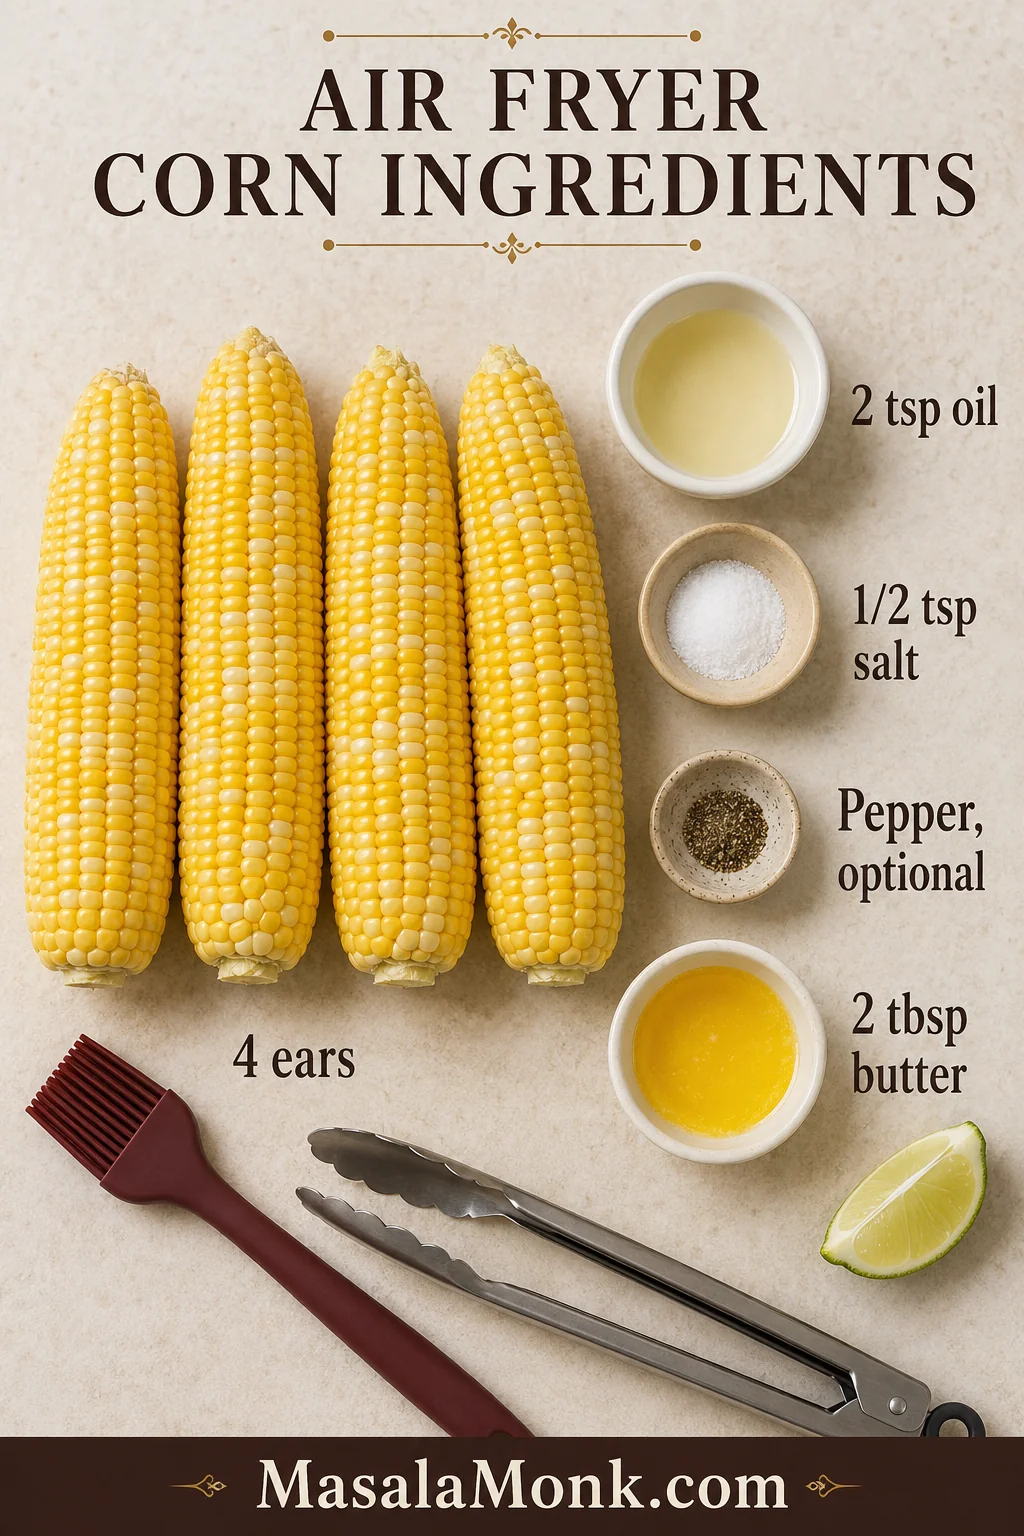
- 4 average-thickness ears of fresh sweet corn
- 2 teaspoons neutral oil or olive oil
- ½ teaspoon fine salt, about 3 g
- ¼ teaspoon black pepper, optional
For Serving
- 2 tablespoons unsalted butter, melted, 28 g / 1 oz
- Lemon or lime wedges, optional
- Additional salt and pepper, only after tasting
Equipment
- Basket-style air fryer large enough to hold the corn in one layer
- Tongs
- Small bowl
- Pastry or silicone brush
- Knife and cutting board when the ears need trimming or halving
Method
- Prepare the corn. Remove the husks and silk. Trim the narrow tip or halve the ears only when needed to fit. Pat the kernels dry.
- Preheat if recommended for your model. Heat the air fryer to 400°F / 200°C for up to 3 minutes. Prepare the ears while the basket heats.
- Season lightly. Brush the ears with oil until they look lightly glossy rather than wet. Add the salt and optional pepper.
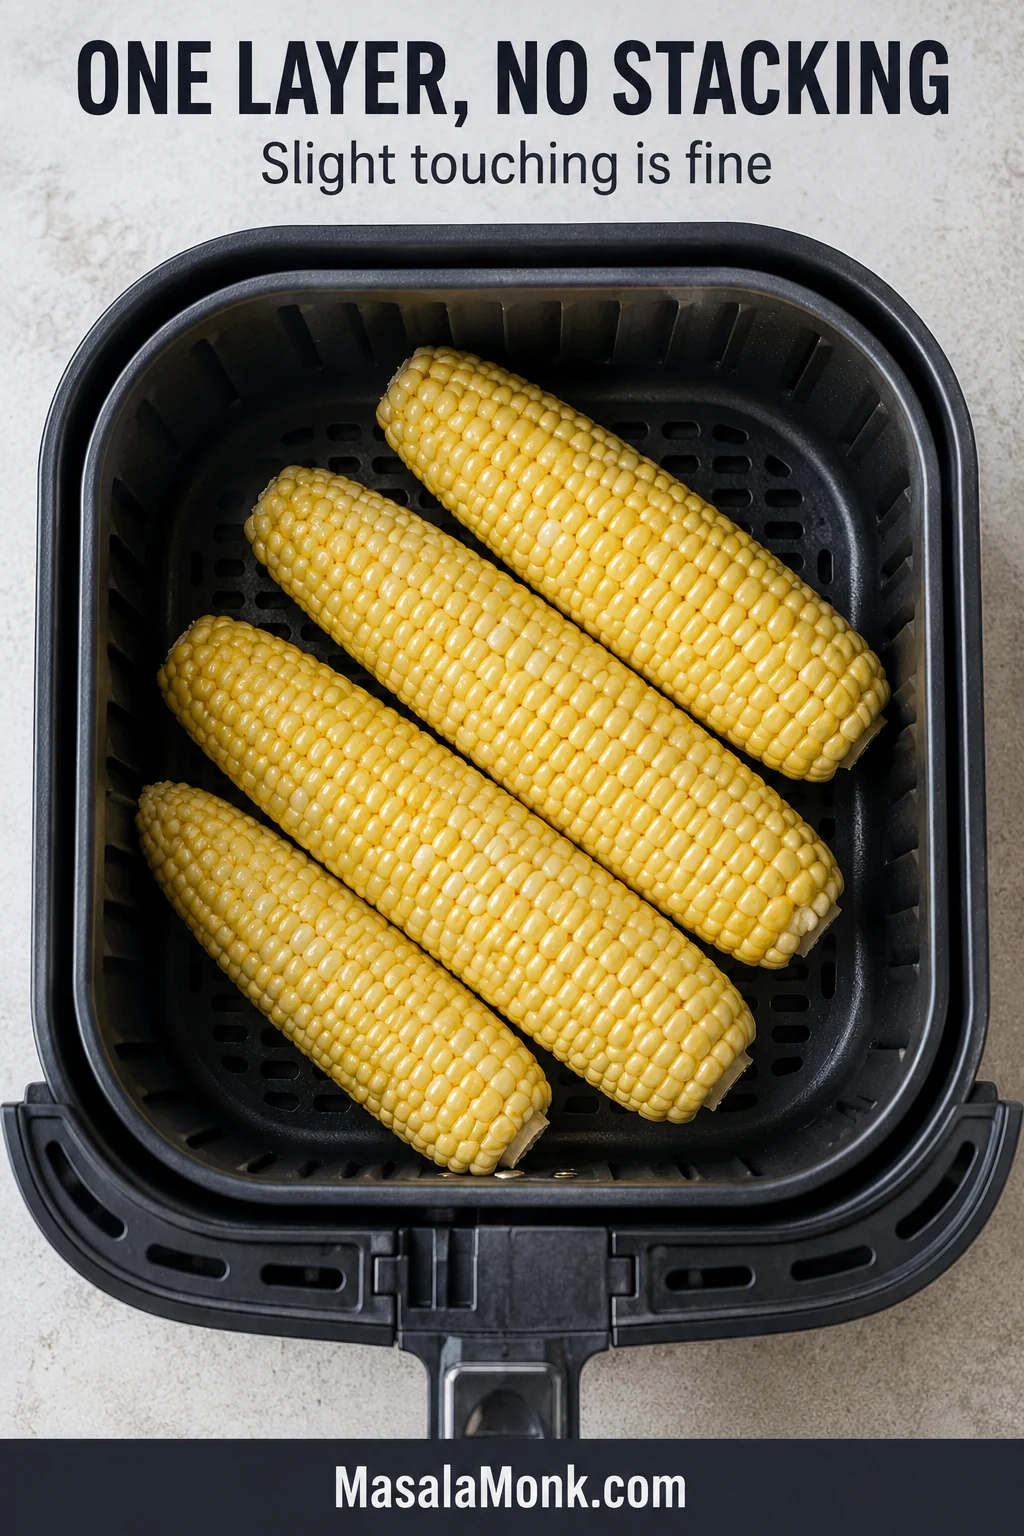
- Arrange the basket. Place the corn in one layer. A little touching is fine, but do not stack the ears or force them close to the upper element.
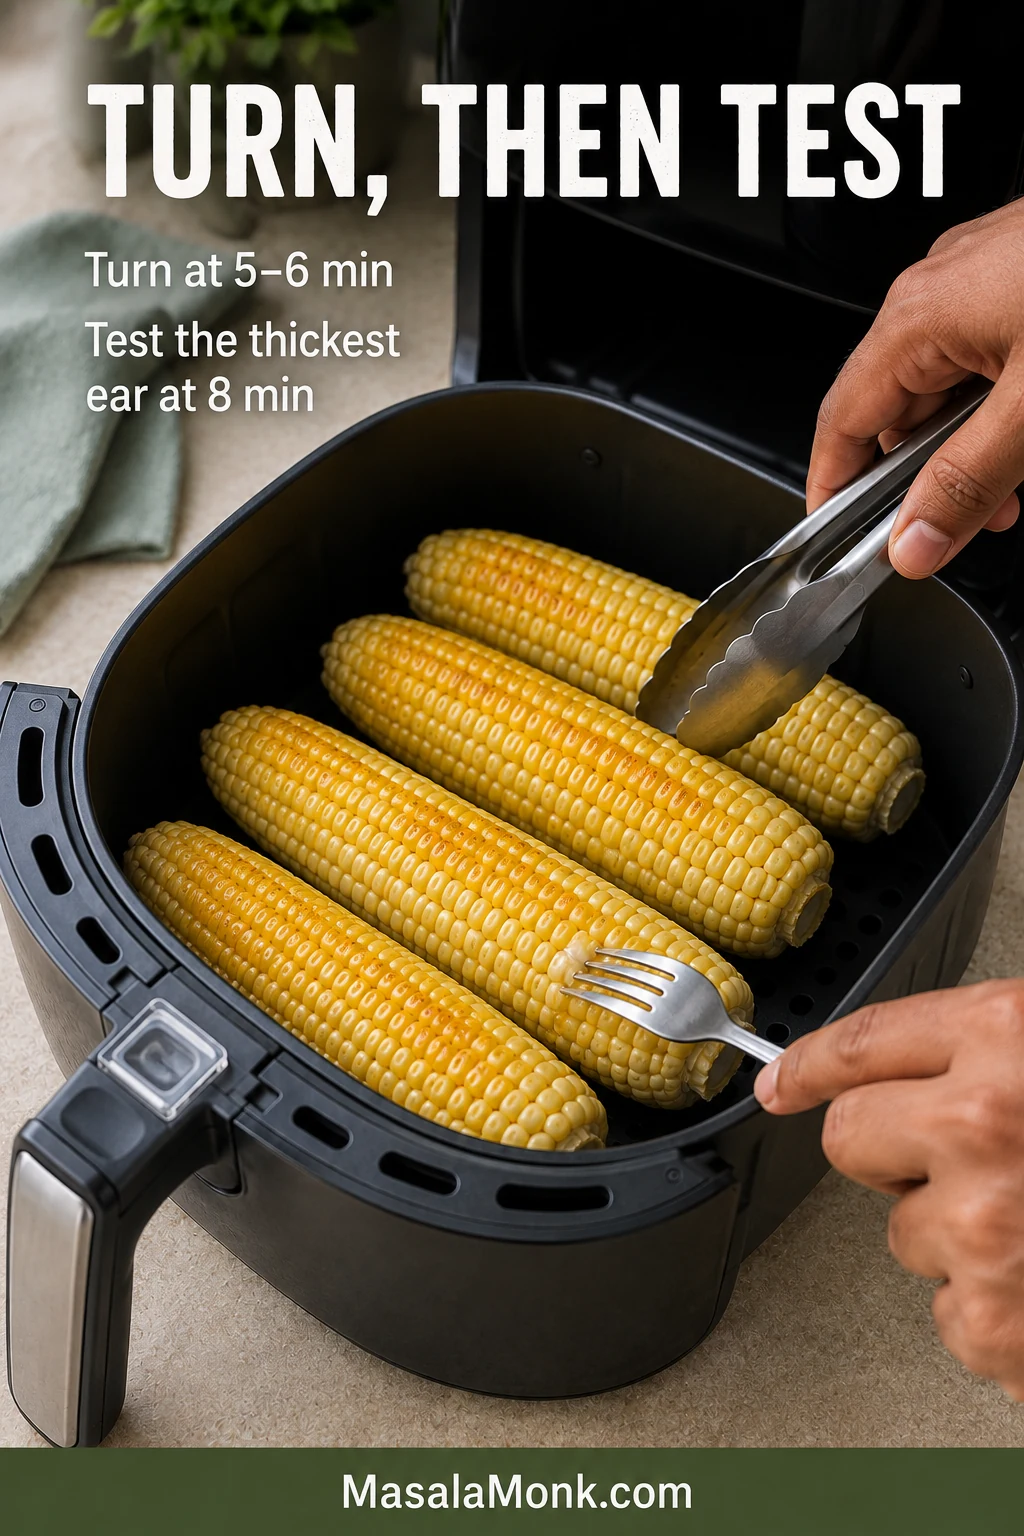
- Air fry. Cook at 400°F / 200°C and turn or roll the ears after 5–6 minutes.
- Test the thickest ear. At 8 minutes, pierce a kernel near the middle. Continue until the kernel looks full, releases a little juice and offers only gentle resistance.
- Choose the colour. Once tender, cook for another minute at a time when you want darker roasted patches. Stop after 3 additional minutes.
- Serve hot. Brush with melted butter, taste and add more seasoning only as needed.
Recipe notes:
- Cooking only 1–2 slim ears? Start checking at 6–7 minutes.
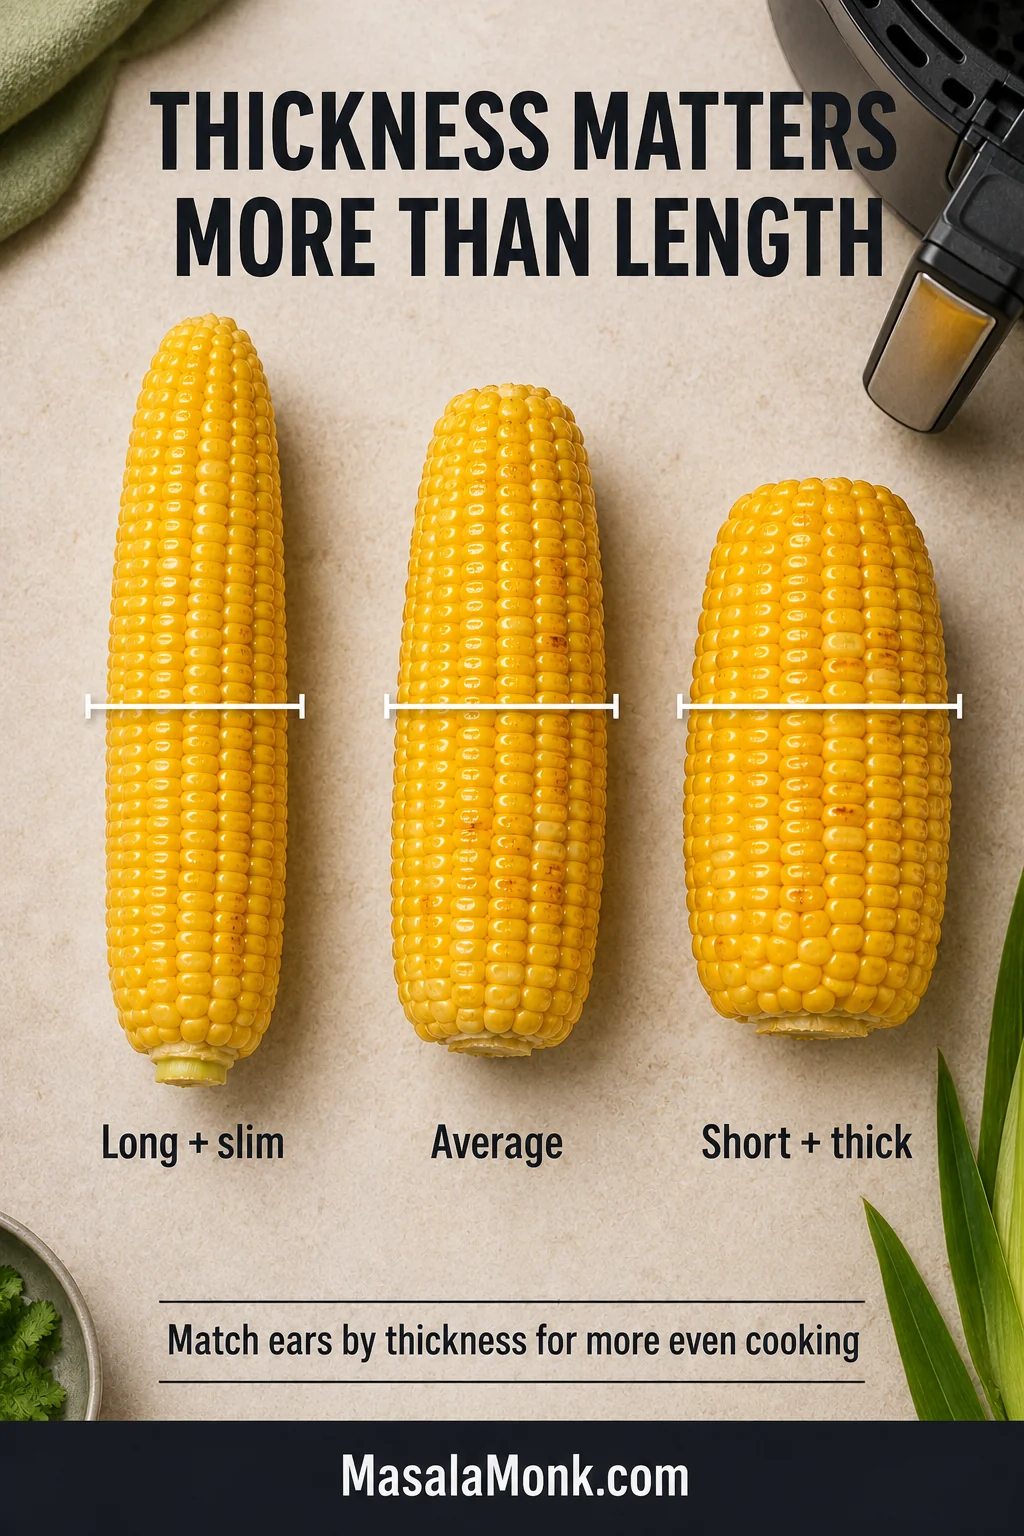
- Matching ear thickness is more useful than matching length.
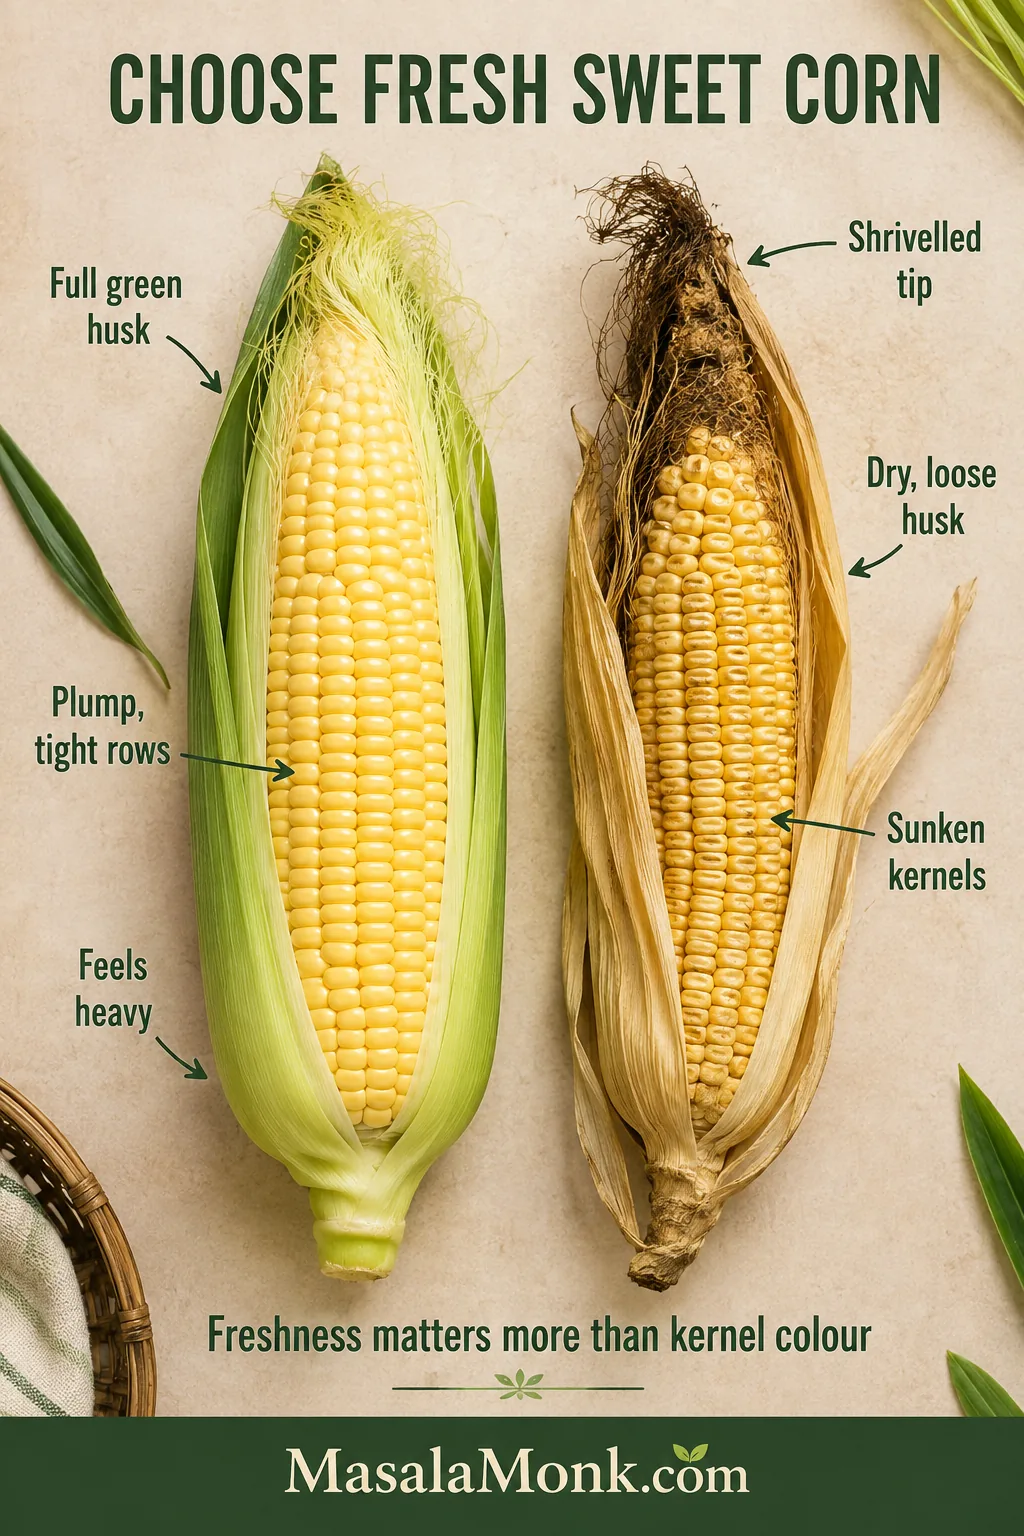
- Yellow, white and bicolour sweet corn all work. Freshness matters more than kernel colour.
- Kosher salt crystals vary by brand, so begin lightly and adjust after adding butter.
Choose a timing range · Check the doneness cues · Fix a problem
How Long to Air Fry Corn on the Cob
For three or four average ears, air fry at 400°F / 200°C for 8–12 minutes. Turn at 5–6 minutes and test the thickest ear at 8.
Air fryers vary, so treat those times as checking points rather than guaranteed finishing times. Ear thickness and basket load explain most of the variation; if you are unsure what “tender” should look and feel like, use the visual doneness cues.
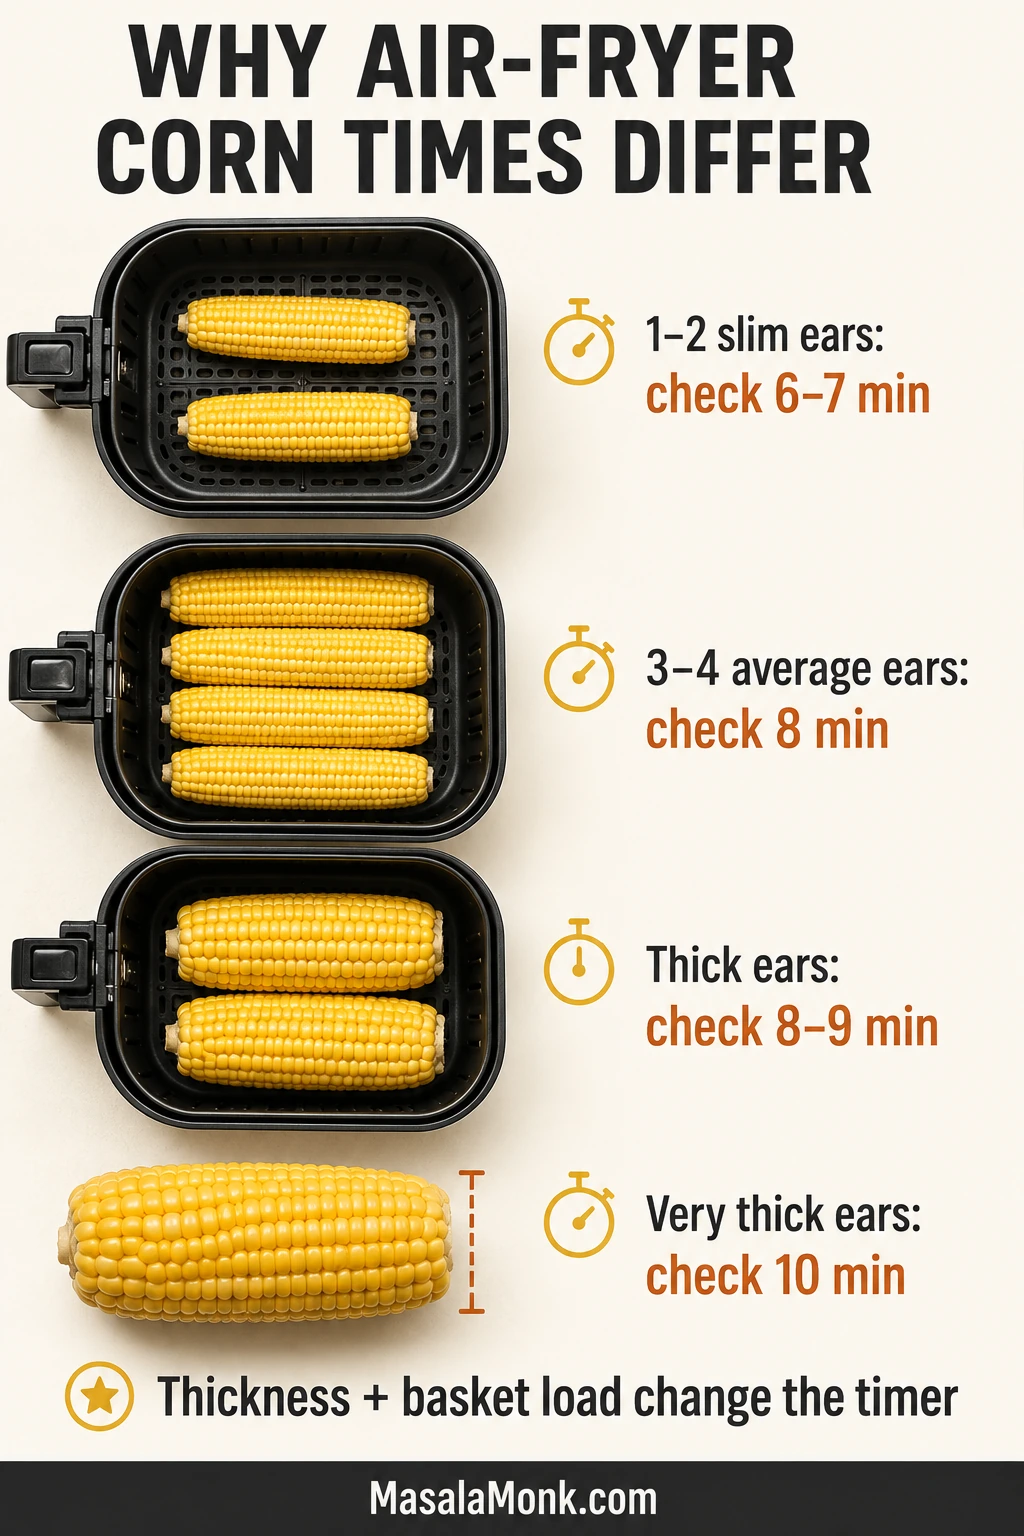
How to use this table: Start with the listed first-check time, test the thickest ear and continue only until its kernels are tender.
| Your basket | First check | Typical range at 400°F / 200°C |
|---|---|---|
| 1–2 slim ears | 6–7 minutes | 7–10 minutes |
| 3–4 average-thickness ears | 8 minutes | 8–12 minutes; a closely fitted basket often lands near 10–12 |
| 1–2 noticeably thick ears | 8–9 minutes | 10–12 minutes |
| Very thick ears | 10 minutes | 12–15 minutes |
How to Tell When the Corn Is Done
Otherwise-good corn often stays in the basket too long because someone is waiting for every row to turn dark. Colour can deepen after the centre is already cooked.
If one person wants deeper char, remove the other tender ears and leave theirs in a little longer. Dinner does not improve by making every cob wait for the darkest one.
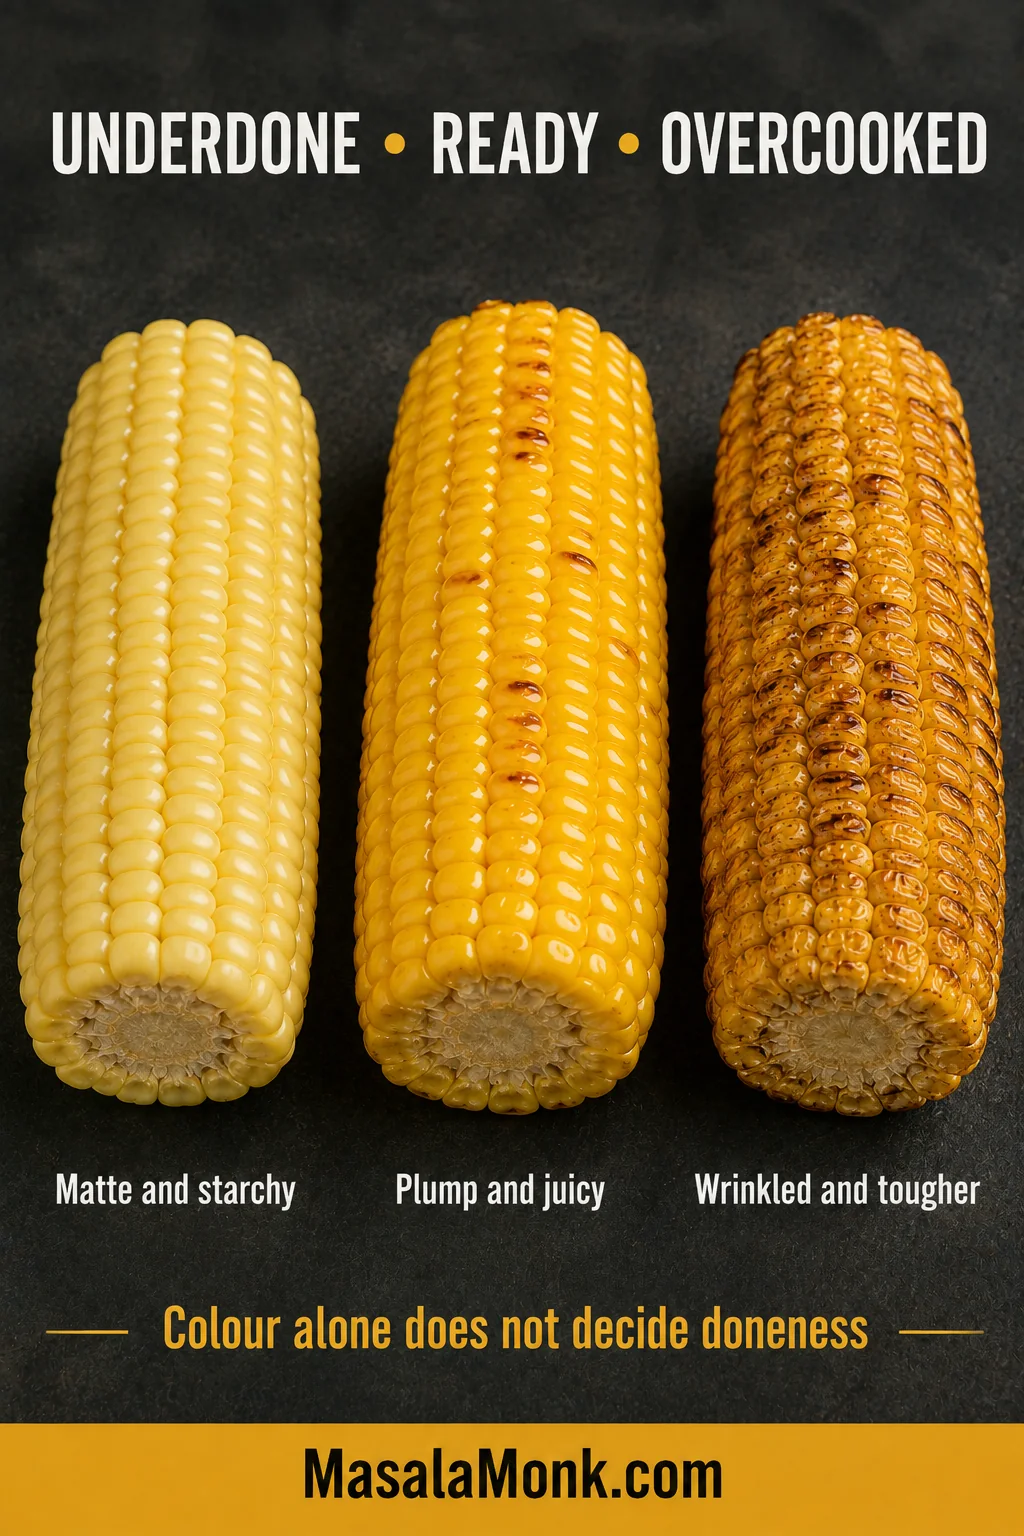
For more roasted colour without drier kernels, wait until the centre is tender, then continue uncovered. Turn frequently near the end and stop as soon as the blistered patches are as dark as you want.
Choosing, Preparing and Arranging the Corn
Start with ears that feel full and heavy, with close-fitting green husks and no badly dried or mushy tip. Older corn can taste starchier and remain less juicy even when the timing is right.
Next, match the ears by thickness rather than length. Similar diameters are more likely to become tender together, while a tapered tip can make a substantial ear look slimmer than it really is.
Sweet summer corn already brings most of the flavour; the air fryer’s job is to deepen the edges without taking the juice from the centre.
Remove the husks and stubborn silk, trim only what prevents the ear from fitting and pat the exposed kernels dry. Surface water must evaporate before browning can begin.
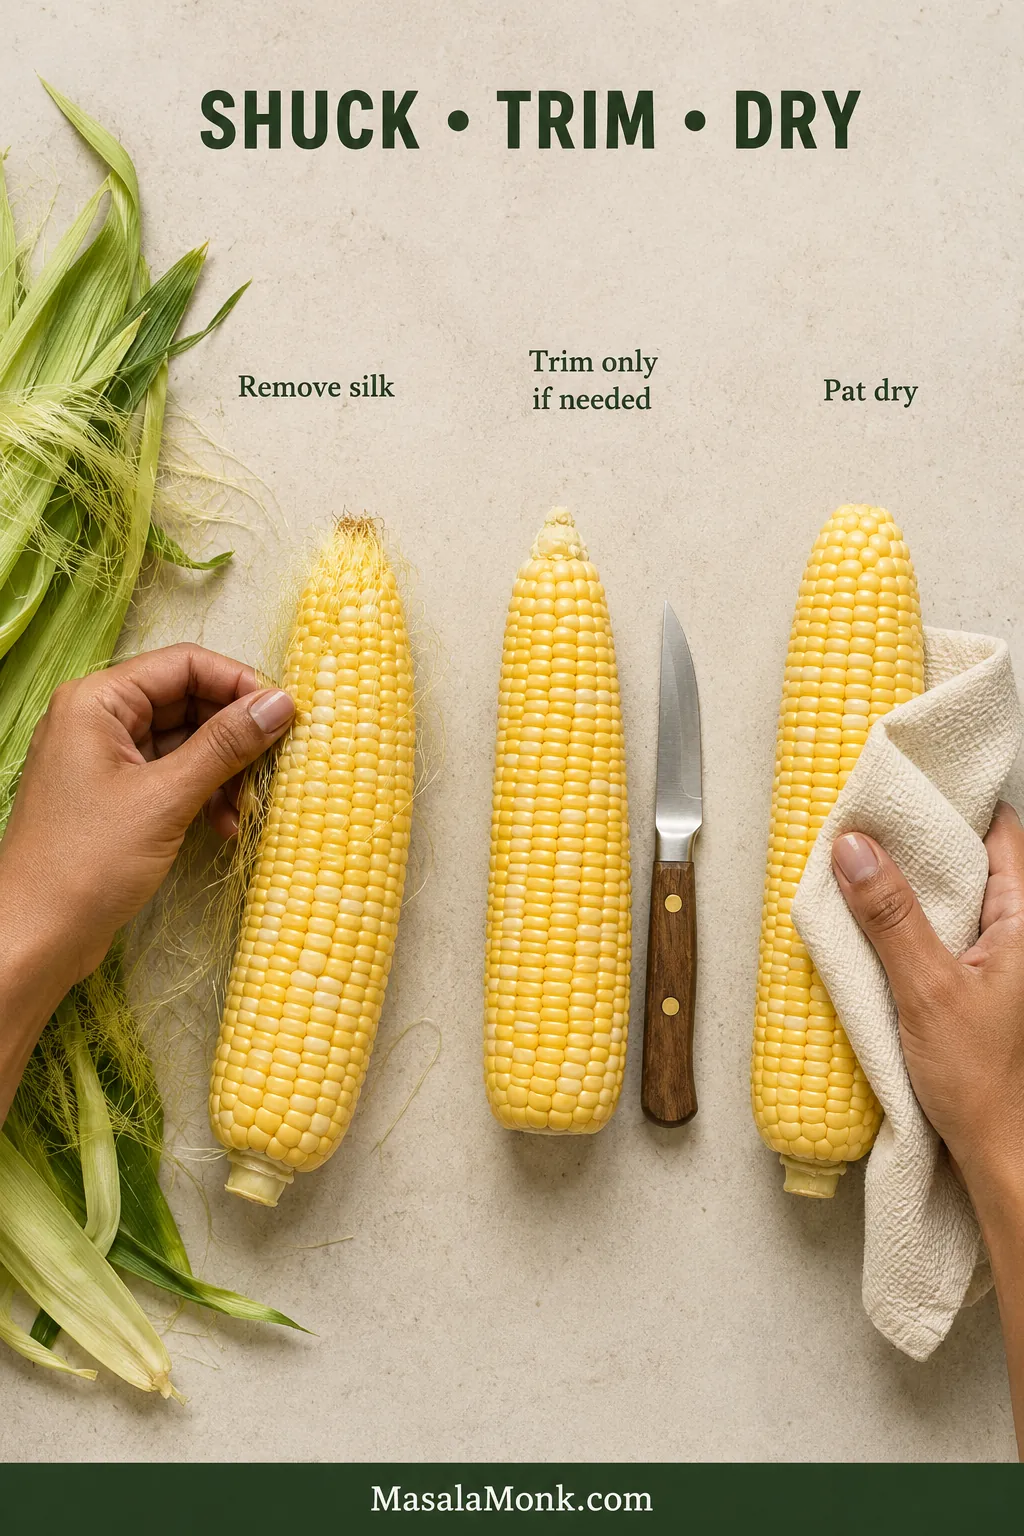
Oil: A thin coating helps seasoning cling and encourages more even colour. Two teaspoons across four ears is enough. Oil-free corn still cooks.
Butter: Save it for the moment the ears leave the basket. It melts into the hot rows without risking burnt milk solids near the upper element.
Make the Ears Fit Without Crowding
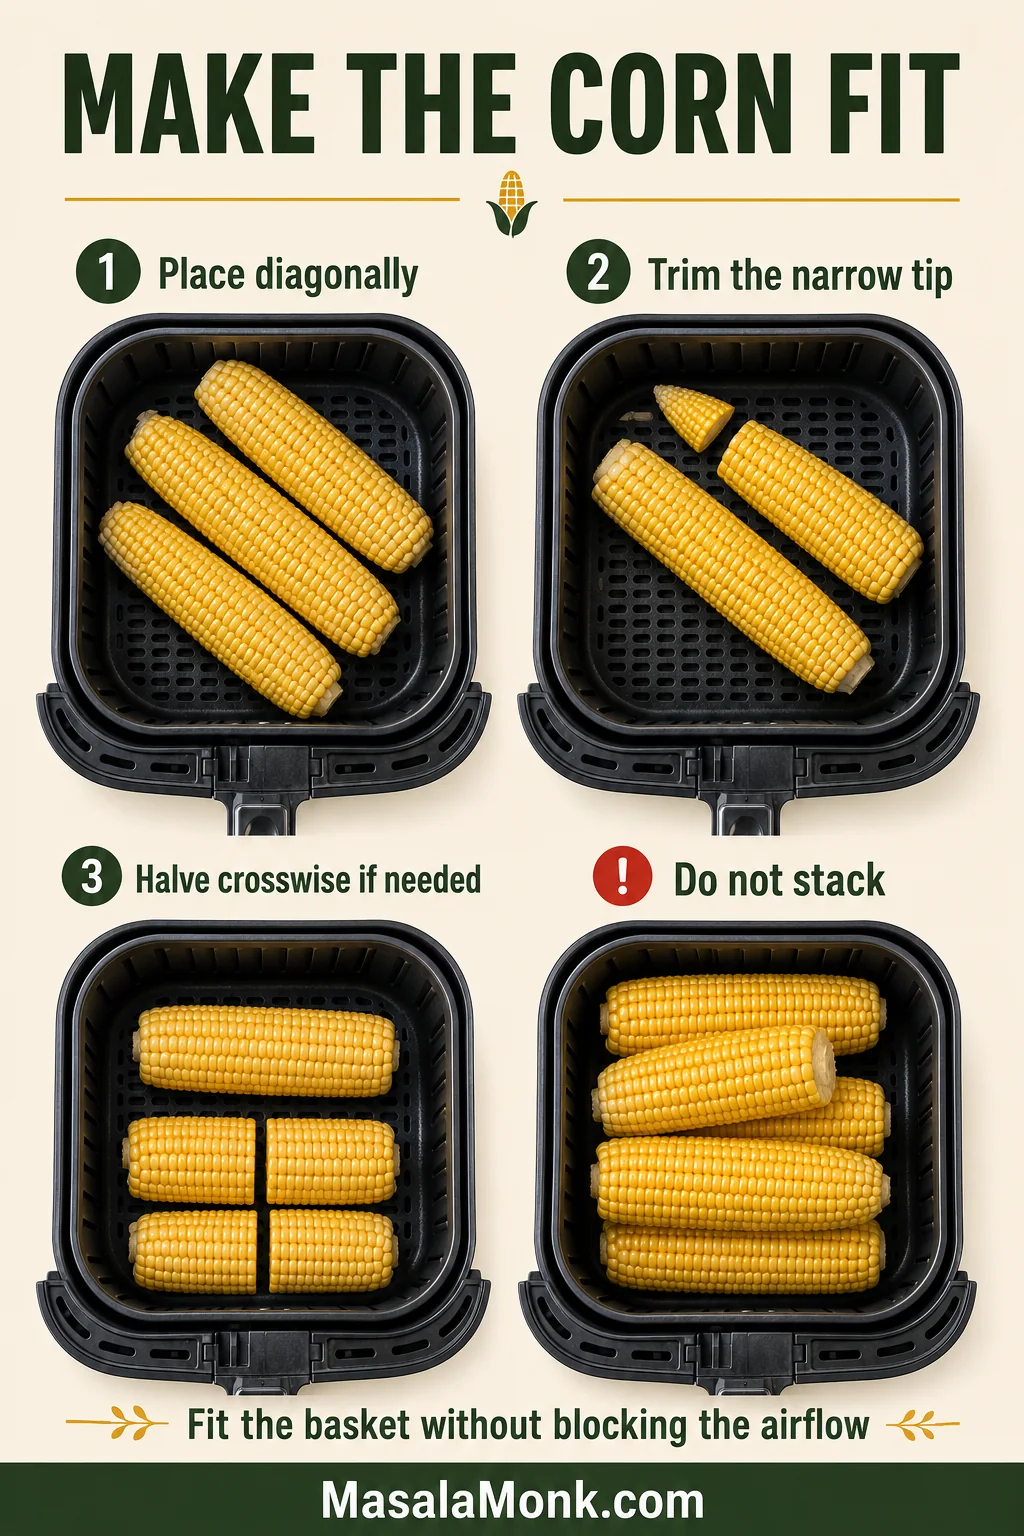
- Trim the narrow tip first. The tapered end may be all that prevents an ear from fitting.
- Halve the ear when needed. A crosswise cut improves fit and may create more open airflow.
- Keep the corn in one layer. Slight touching and diagonal placement are fine; stacking is not.
- Leave room below the element. Do not force an oversized ear close to the upper heater.
- Remove loose silk and husk. Lightweight dry pieces can move in the fan.
Save cheese, honey, sugar and fresh garlic for after cooking. They can scorch before the centre softens; instead, add them through one of the finishing options once the ears are tender.
Should You Use a Paper or Silicone Liner?
Liners make cleanup easier. Direct basket contact gives the exposed kernels better airflow and stronger browning, so the lower side may stay paler when a liner is used.
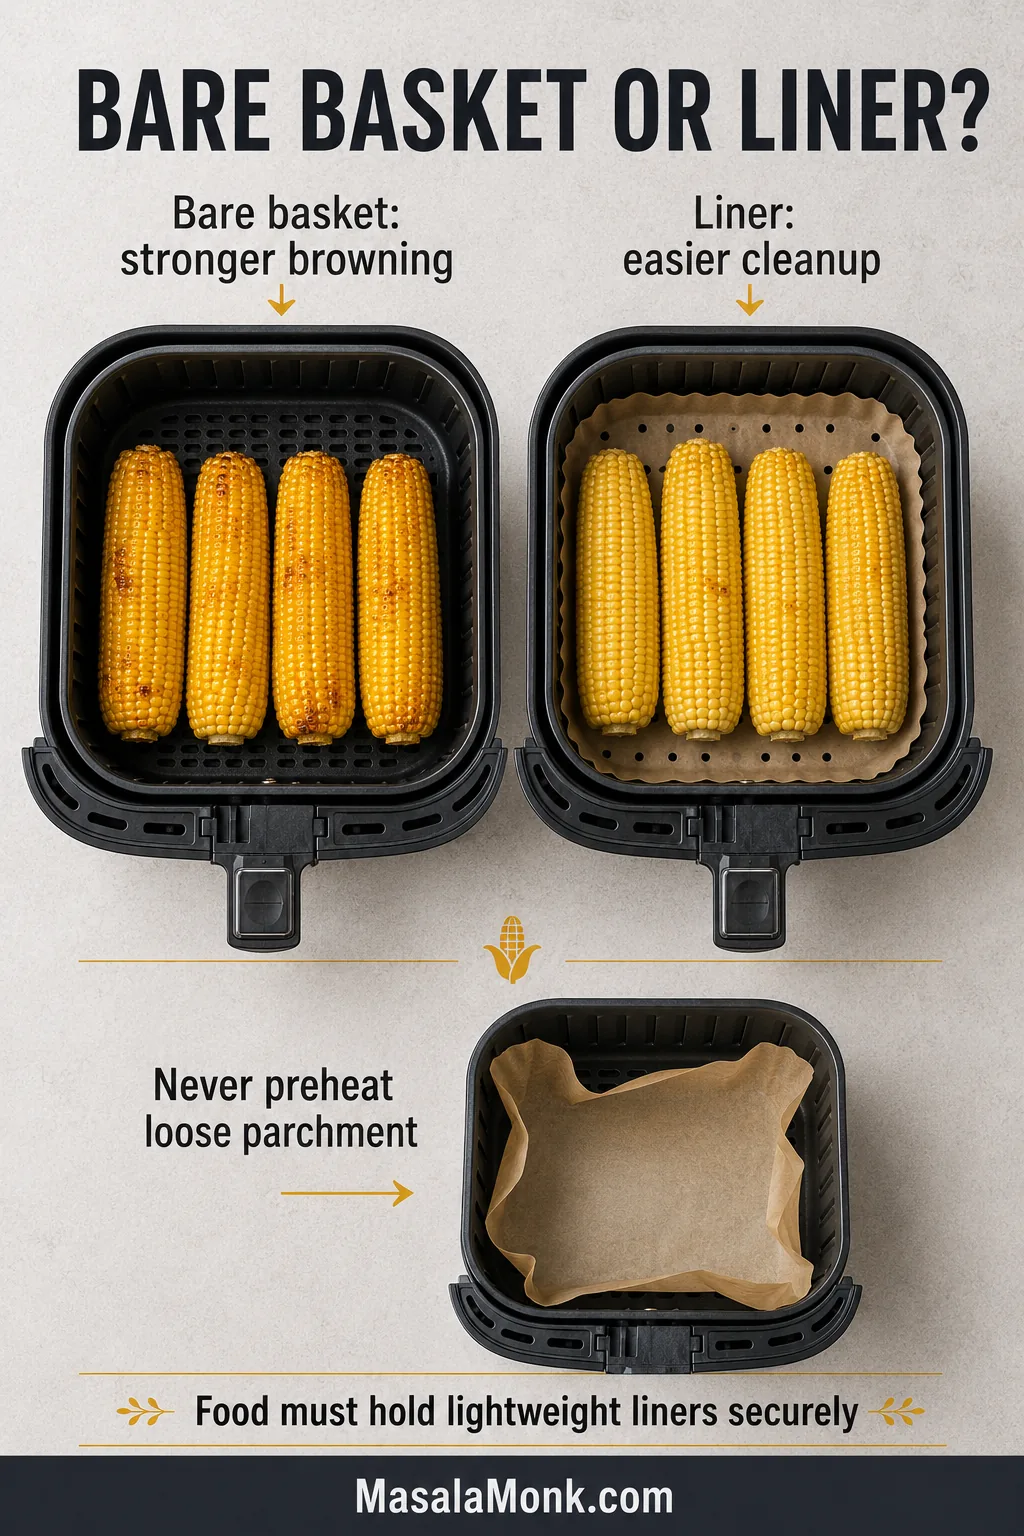
Never preheat loose parchment without food securing it. A lightweight sheet can lift toward the heating element. The guide to common air fryer mistakes goes further into crowding, wet food, blocked airflow and basket smoke.
Adjusting for Thick Ears and Different Air Fryers
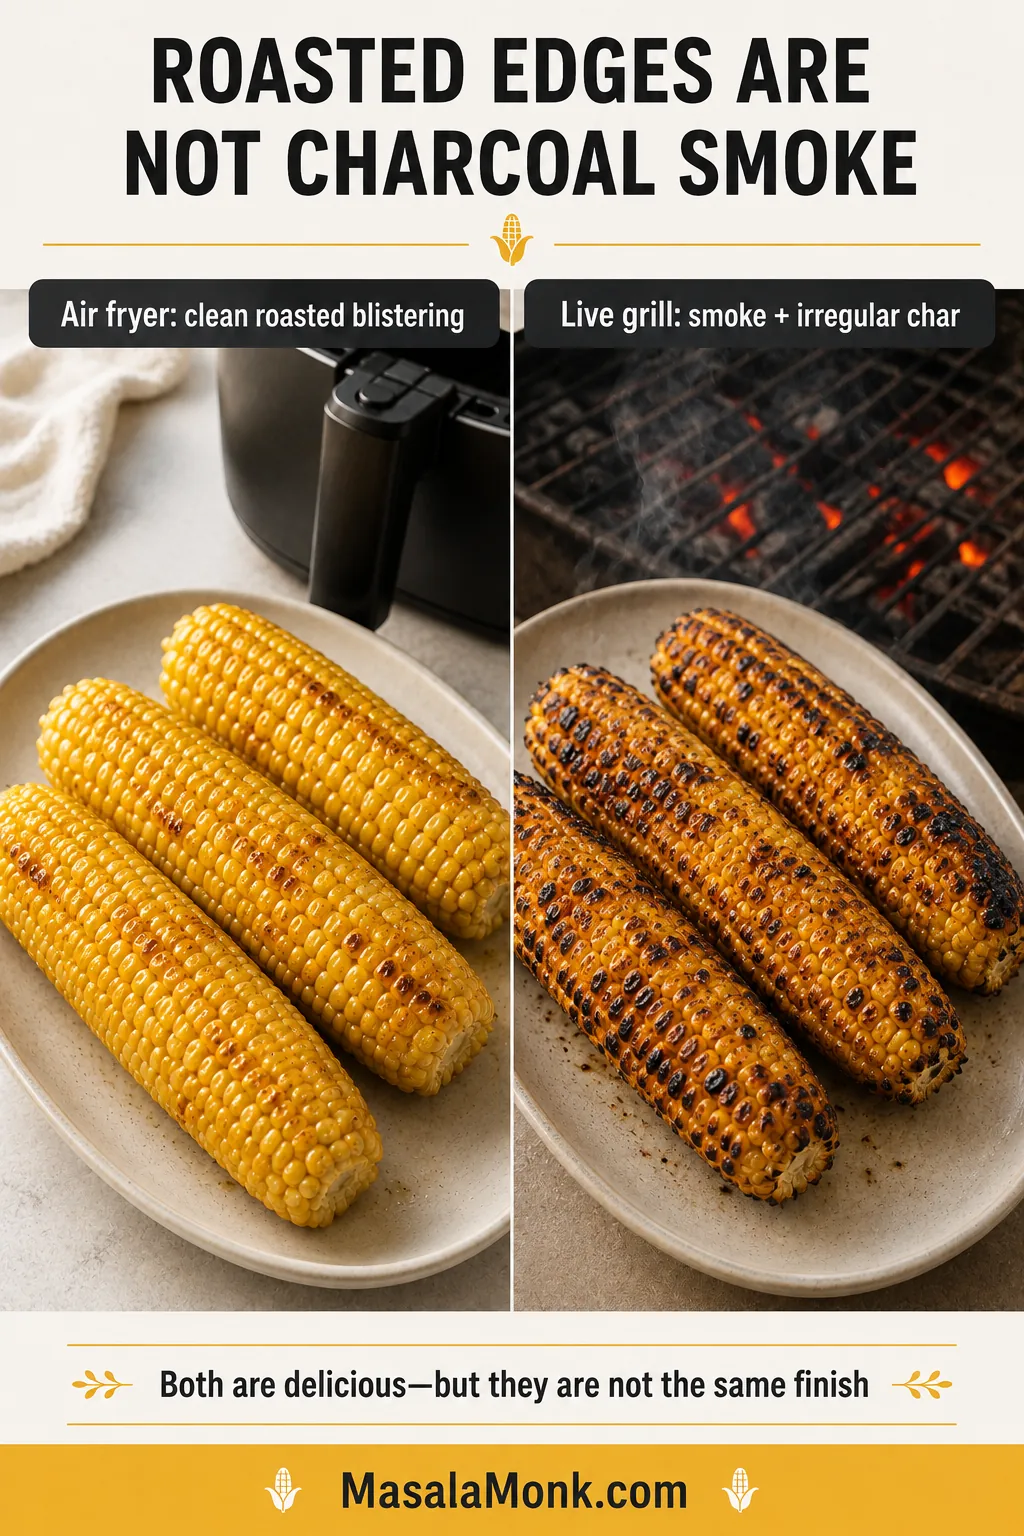
Moving heat gives the exposed rows roasted, blistered patches as the centre warms. It creates more browning than a microwave, but it will not reproduce the smoke of corn cooked over charcoal or a live grill.
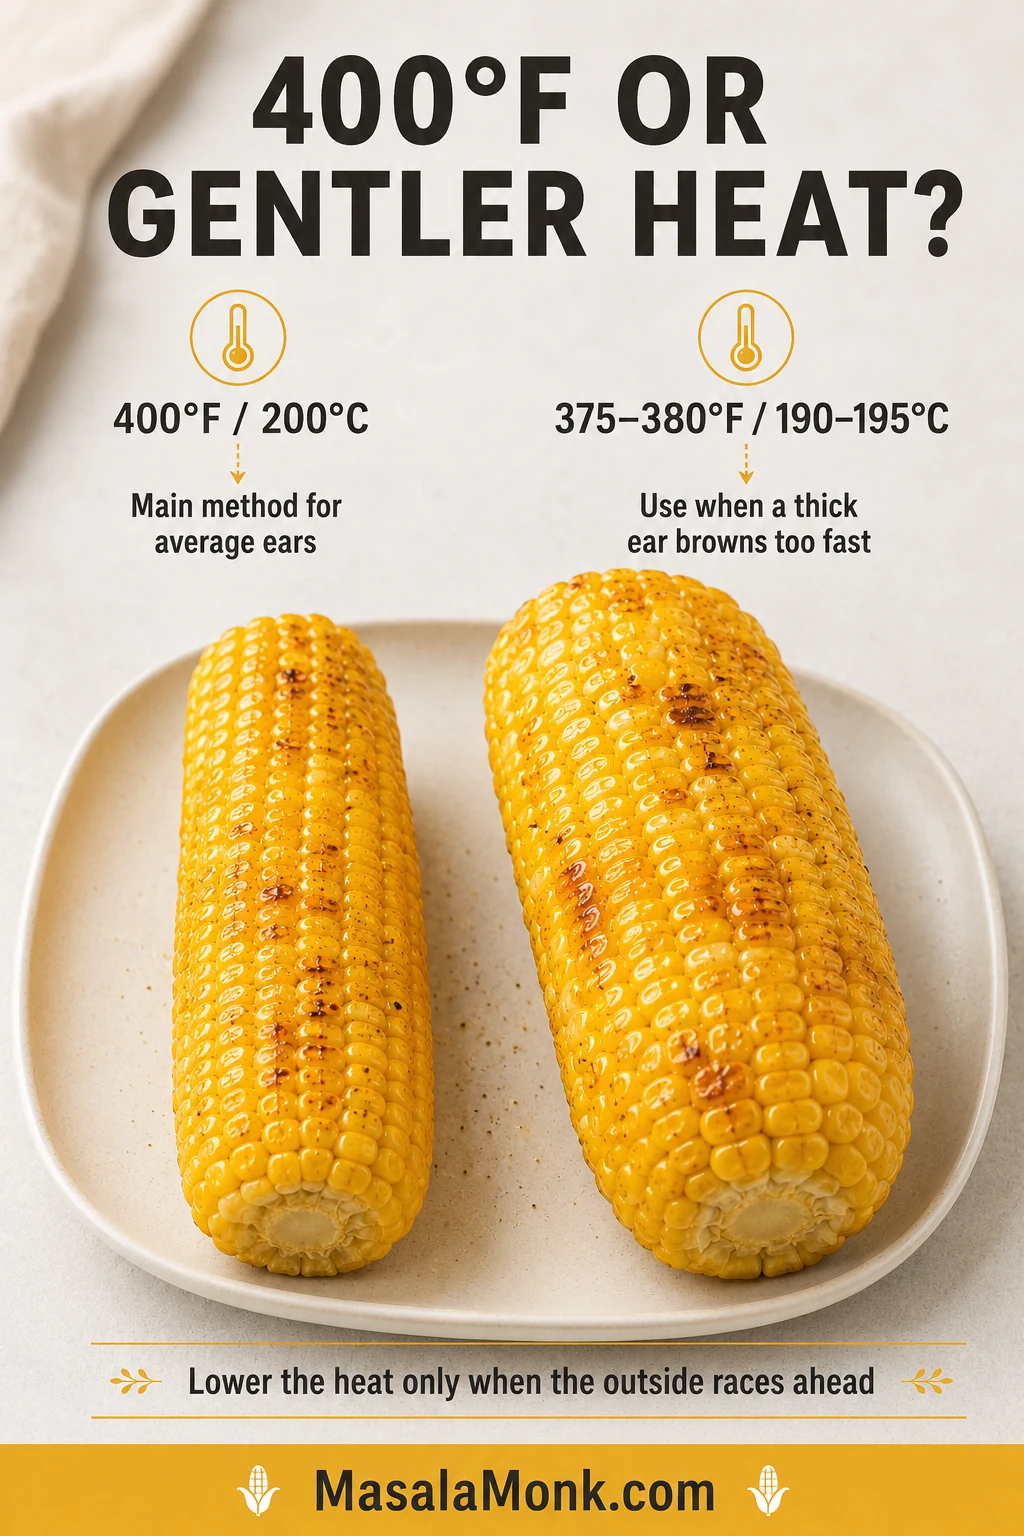
Use 400°F / 200°C for the main method. Lower the heat only when the outside is colouring faster than the centre is softening.
How Different Air Fryer Styles Change the Timing
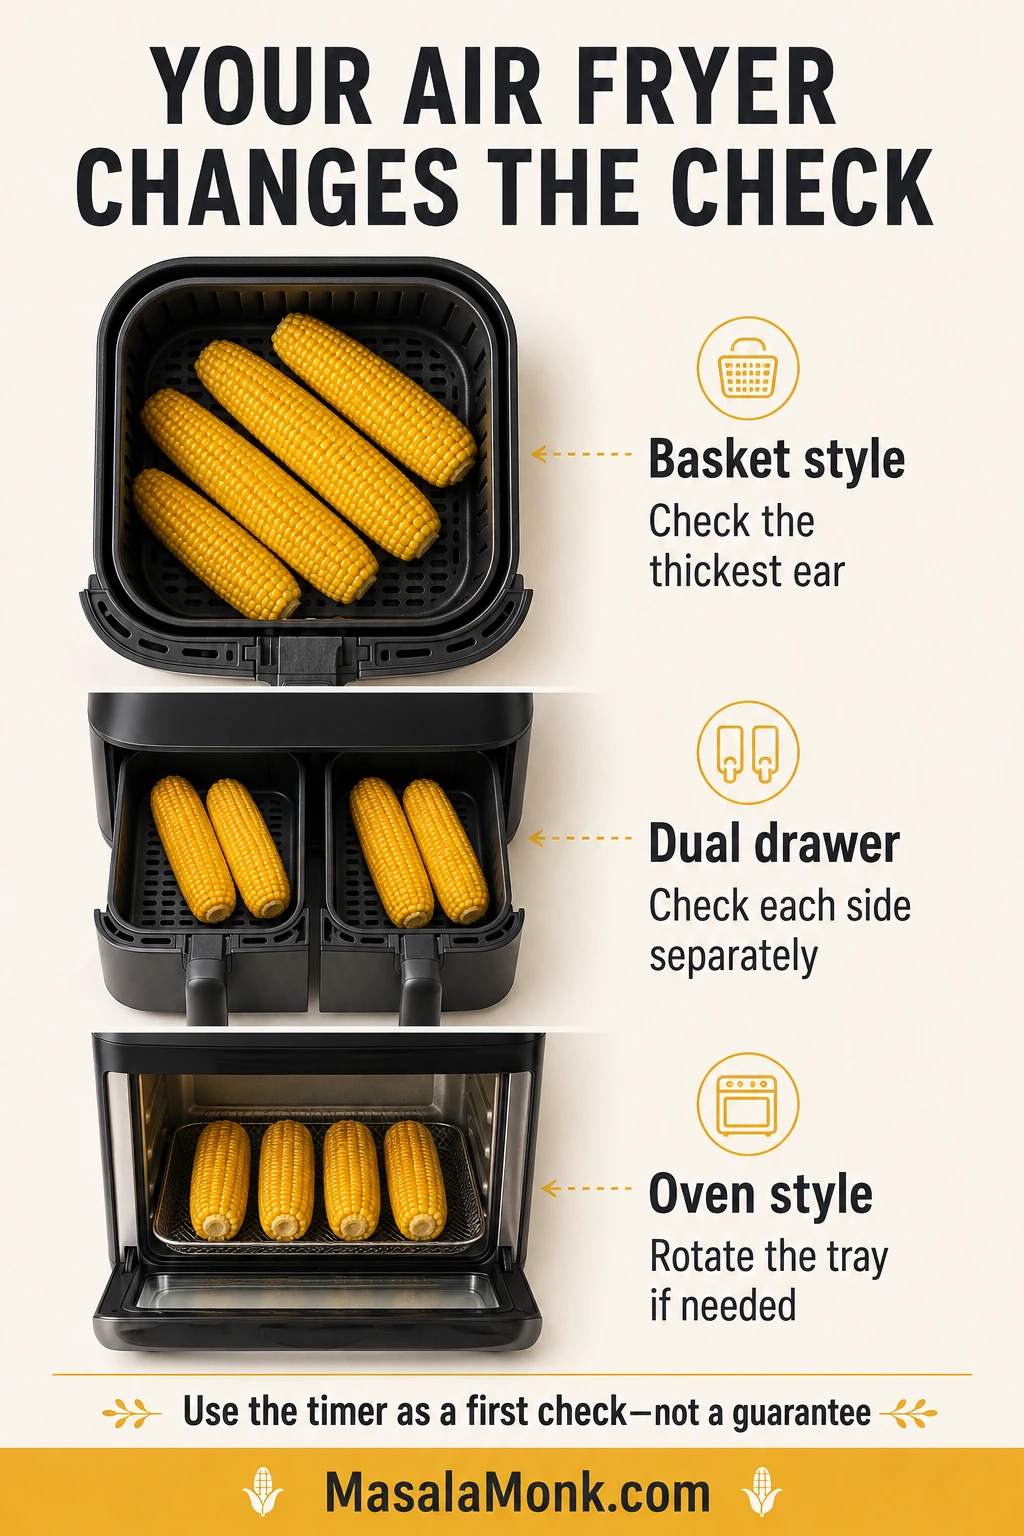
- Thick ears: allow more time for heat to reach the centre.
- A full basket: expect the later end of the timing range.
- A compact fryer: check sooner because the corn may sit closer to the element.
- Dual drawers: inspect both sides separately; they may not finish together.
- Oven-style fryer: allow a little longer and rotate the tray if one side colours faster.
A broil, max-crisp or extra-high setting is much more aggressive than Air Fry. Use it only as a brief finishing boost when the appliance manual permits it.
Once you find the timing that suits your machine, note the number and approximate thickness of the ears. That result will be more useful next time than trying to match somebody else’s exact minute.
Fresh, Frozen or Foil-Wrapped Corn
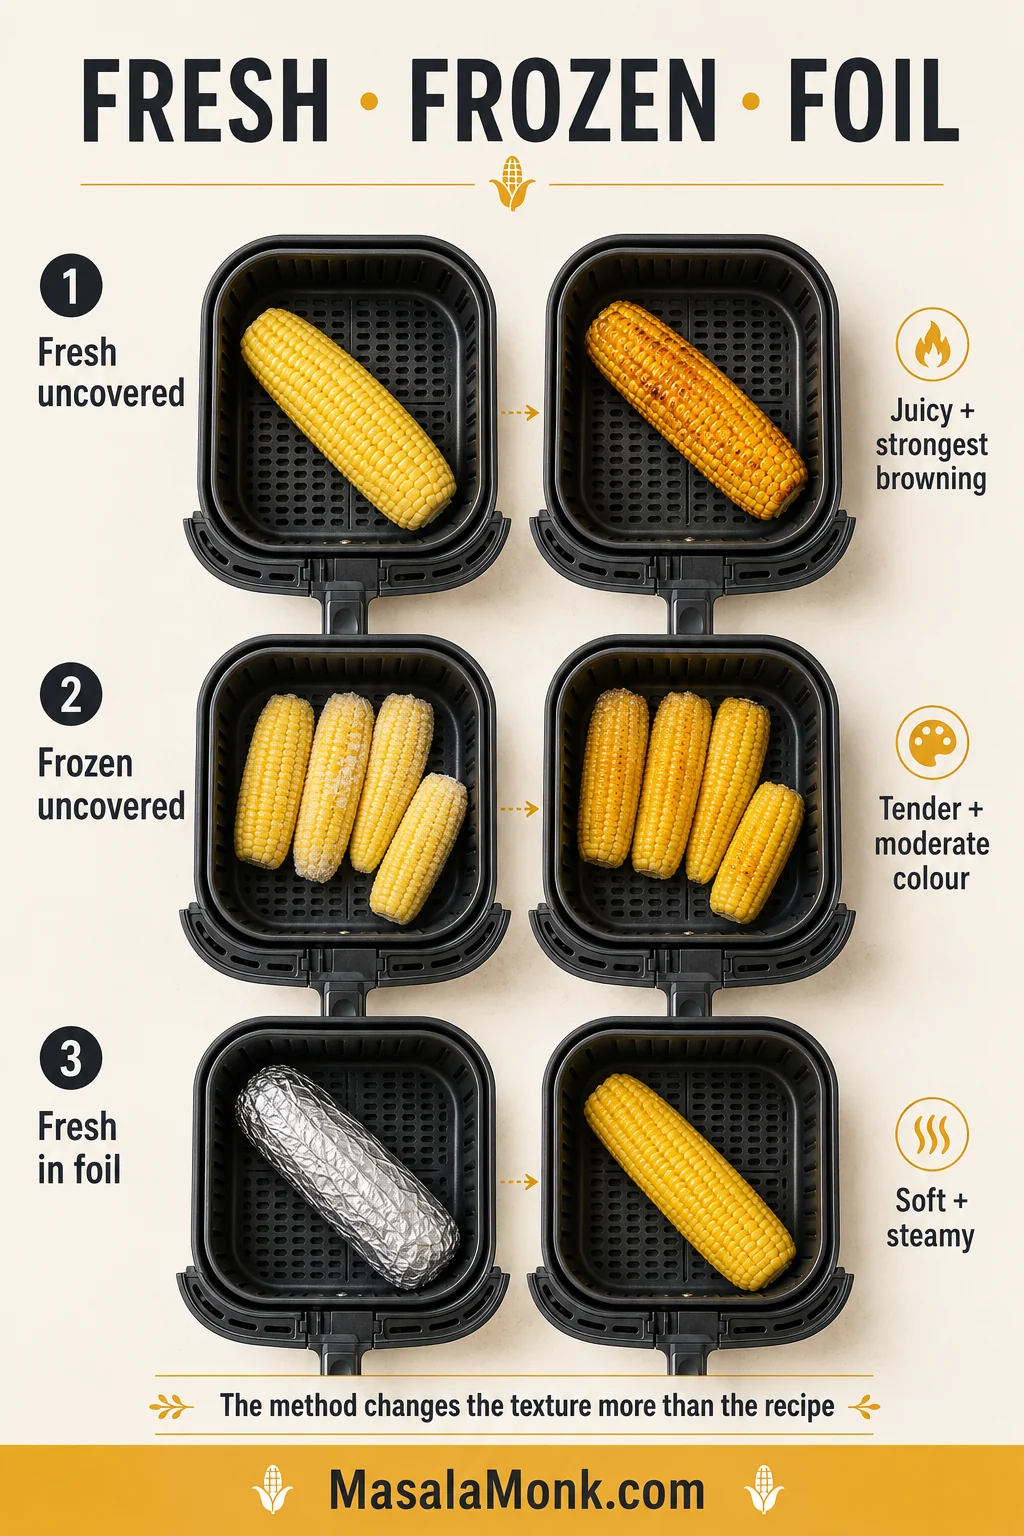
Fresh uncovered corn gives the strongest browning. Frozen corn needs time to shed its icy coating, while foil shifts the result toward soft, buttery and steamy.
| Corn | Method | First check | Usual time | Texture |
|---|---|---|---|---|
| Fresh | Uncovered | 8 minutes | 8–12 minutes | Juicy with the strongest browning |
| Fresh | Foil-wrapped | 11 minutes | 11–15 minutes | Soft and steamy with little colour |
| Frozen | Uncovered | 12 minutes | 12–15 minutes for half-cobs or average ears | Tender with moderate colour |
How to Air Fry Frozen Corn on the Cob
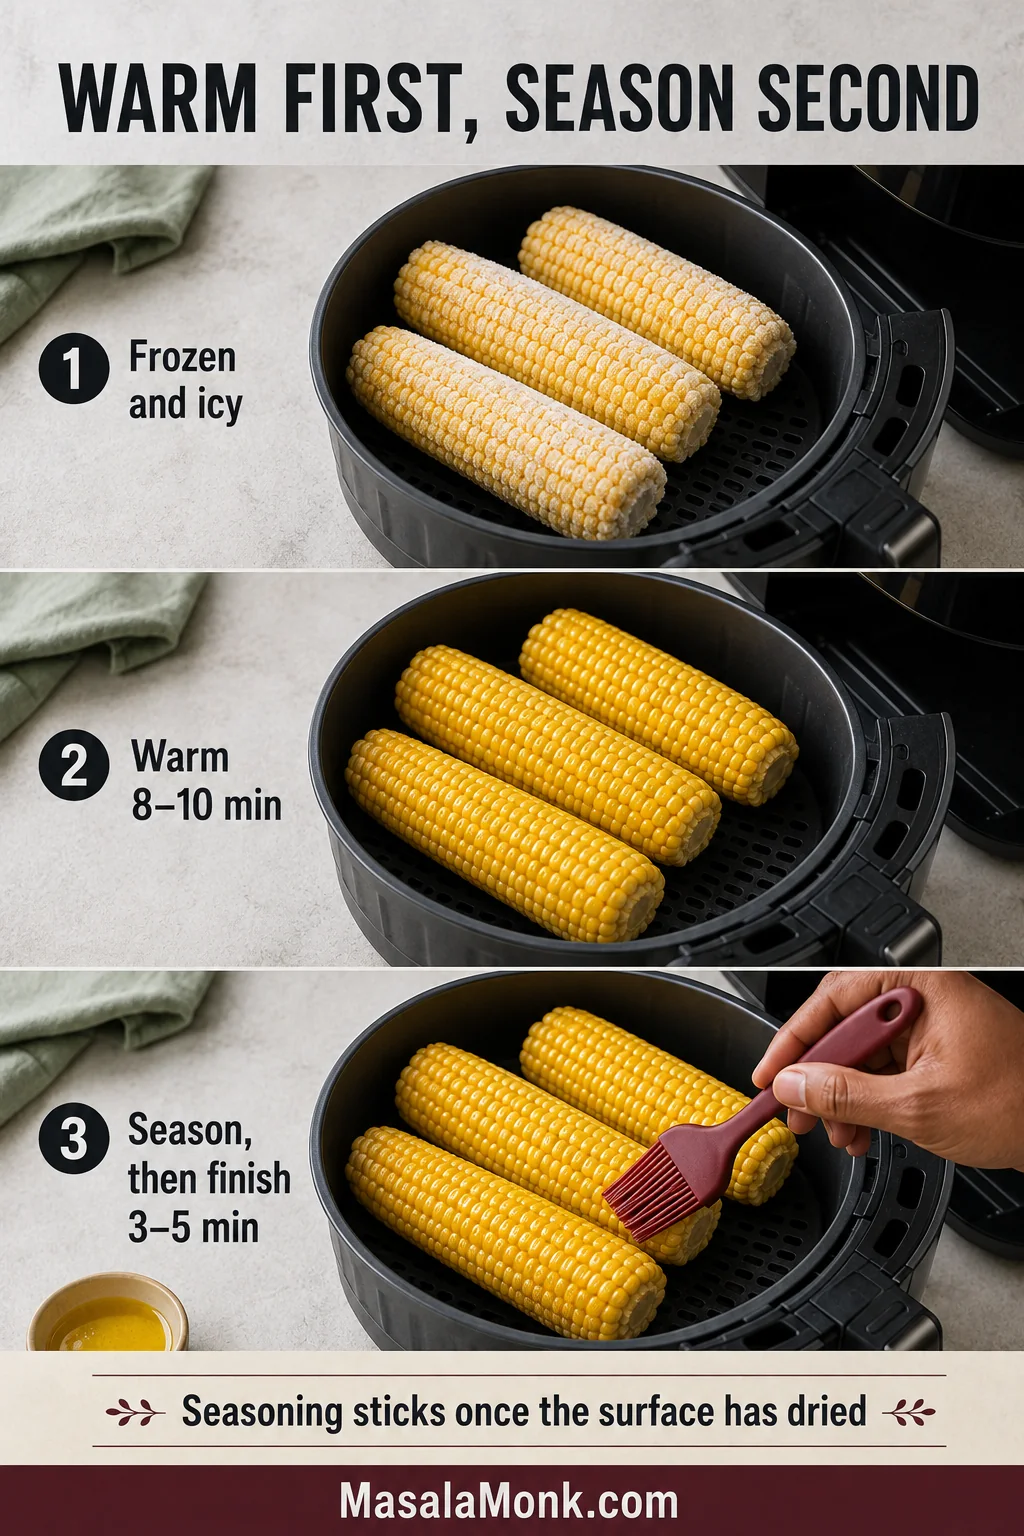
Frozen corn releases water as the ice melts. Butter and dry seasoning can slide away during that early stage, and the extra moisture slows browning.
- Arrange frozen half-cobs or average ears in one layer.
- Air fry at 400°F / 200°C.
- Turn once the outside has thawed and begun to dry.
- Test a kernel at 12 minutes.
- Continue until tender, usually 12–15 minutes. Large whole frozen ears may need longer.
- Add butter and seasoning once the corn is hot and no longer icy.
For better seasoning adhesion: warm the frozen corn for 8–10 minutes first. Once the icy surface has dried, brush with butter or oil, season and finish at 400°F / 200°C for another 3–5 minutes, or until tender. Then choose a buttery, spicy or tangy finish.
Thawed corn cooks faster than fully frozen corn. Start near the early end of the fresh-corn range and check frequently.
How to Air Fry Corn in Foil
Foil traps steam and butter around each ear, giving you softer kernels with much less roasted colour. Some manufacturers permit foil when food holds it securely; others advise against it.
Philips, for example, warns that foil or baking paper can restrict airflow or lift toward the heating element. Check the Philips Airfryer foil and paper guidance, then follow the manual for your own model.
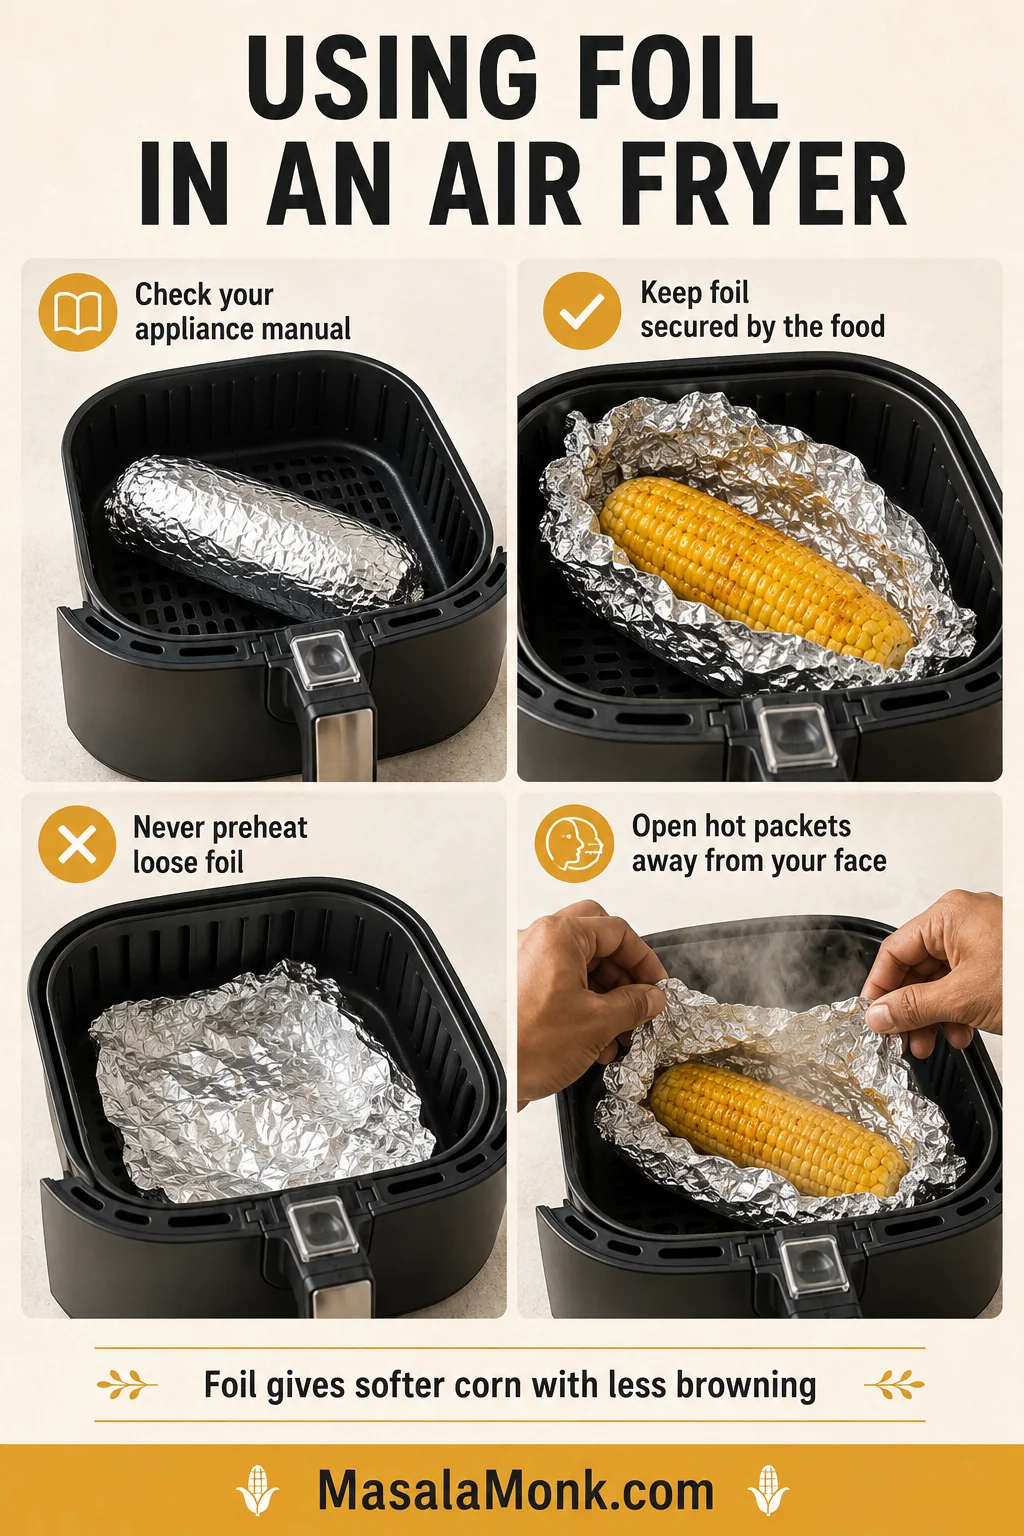
- Spread ½ tablespoon / 7 g butter over each fresh ear and season lightly. This butter replaces the 2 tablespoons used for serving in the main recipe.
- Wrap each ear securely without covering the entire basket base.
- Air fry at 400°F / 200°C, turning once.
- Test the corn at 11 minutes and expect 11–15 minutes.
- Open the packet away from your face because hot steam will escape.
- For more colour, remove the foil and cook uncovered for another 1–3 minutes.
Add lemon or lime after cooking for the brightest flavour.
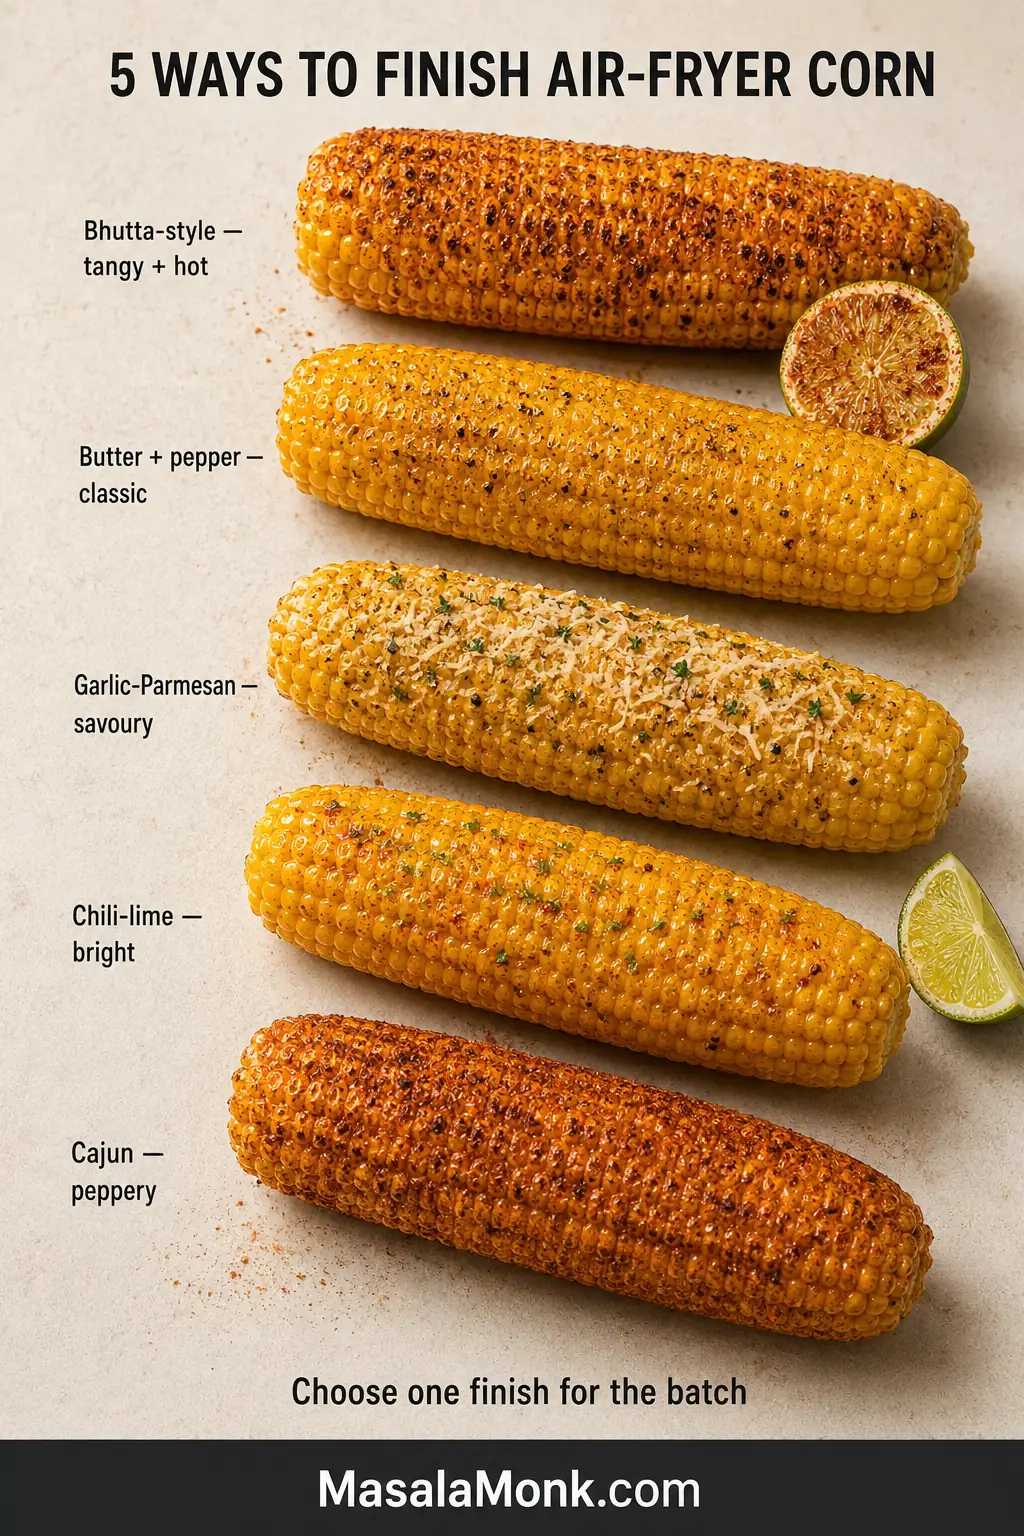
Five Easy Ways to Season the Corn
Keep it buttery and simple when everyone wants something familiar, use chili-lime beside a rich main dish, choose Cajun seasoning for a peppery edge, or reach for lime and chaat masala when the plate needs something sharp and bright.
Before choosing a finish: each variation below seasons four ears and replaces the 2 tablespoons of serving butter in the main recipe. Bhutta-style corn uses no butter unless you choose to add it. When using Parmesan, Cajun seasoning or chaat masala, reduce or omit the salt added before cooking and adjust after tasting.
Bhutta-Style Lime and Chaat Masala
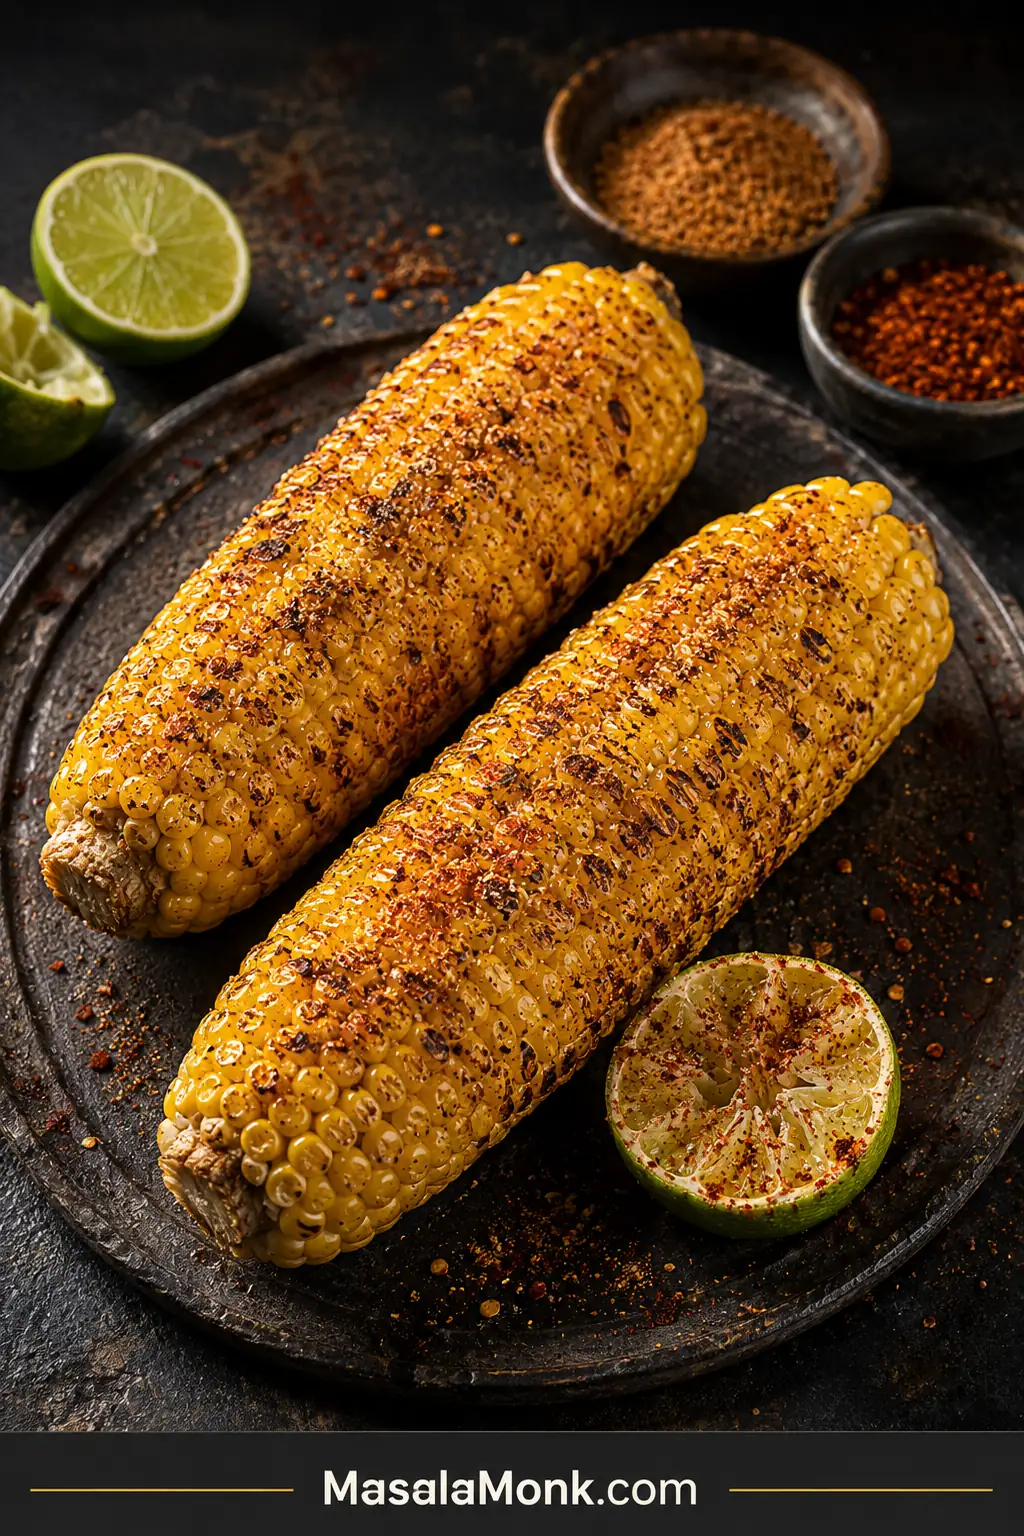
Use: 1 lime, 1 teaspoon chaat masala and ¼ teaspoon red chili powder. Butter is optional.
This is the brightest finish in the set—tangy, salty and hot rather than rich and buttery. Place the spices on the cut side of the lime, then rub it over the hot corn. The juice carries the seasoning between the rows.
Classic Butter and Pepper
Use: 2 tablespoons / 28 g melted butter, black pepper and salt to taste.
Brush the butter over the hot corn, add pepper and taste before adding more salt. Simple, sweet and buttery.
Garlic-Parmesan
Use: 2 tablespoons / 28 g melted butter, ½ teaspoon garlic powder, ¼ cup finely grated Parmesan and 1 tablespoon chopped parsley.
Mix the garlic into the butter, brush it over the corn, then add the Parmesan and parsley for a savoury, nutty finish.
Chili-Lime
Use: 2 tablespoons / 28 g melted butter, ½ teaspoon mild chili powder, plus the zest and juice of 1 lime.
Brush with chili butter, then add the lime zest and juice for a bright finish that cuts through richer main dishes.
Cajun Corn
Use: 2 tablespoons / 28 g melted butter and 1–1½ teaspoons Cajun seasoning.
Brush with butter, sprinkle lightly and taste before adding separate salt. The result is warm, peppery and lightly smoky.
What Went Wrong—and How to Fix It
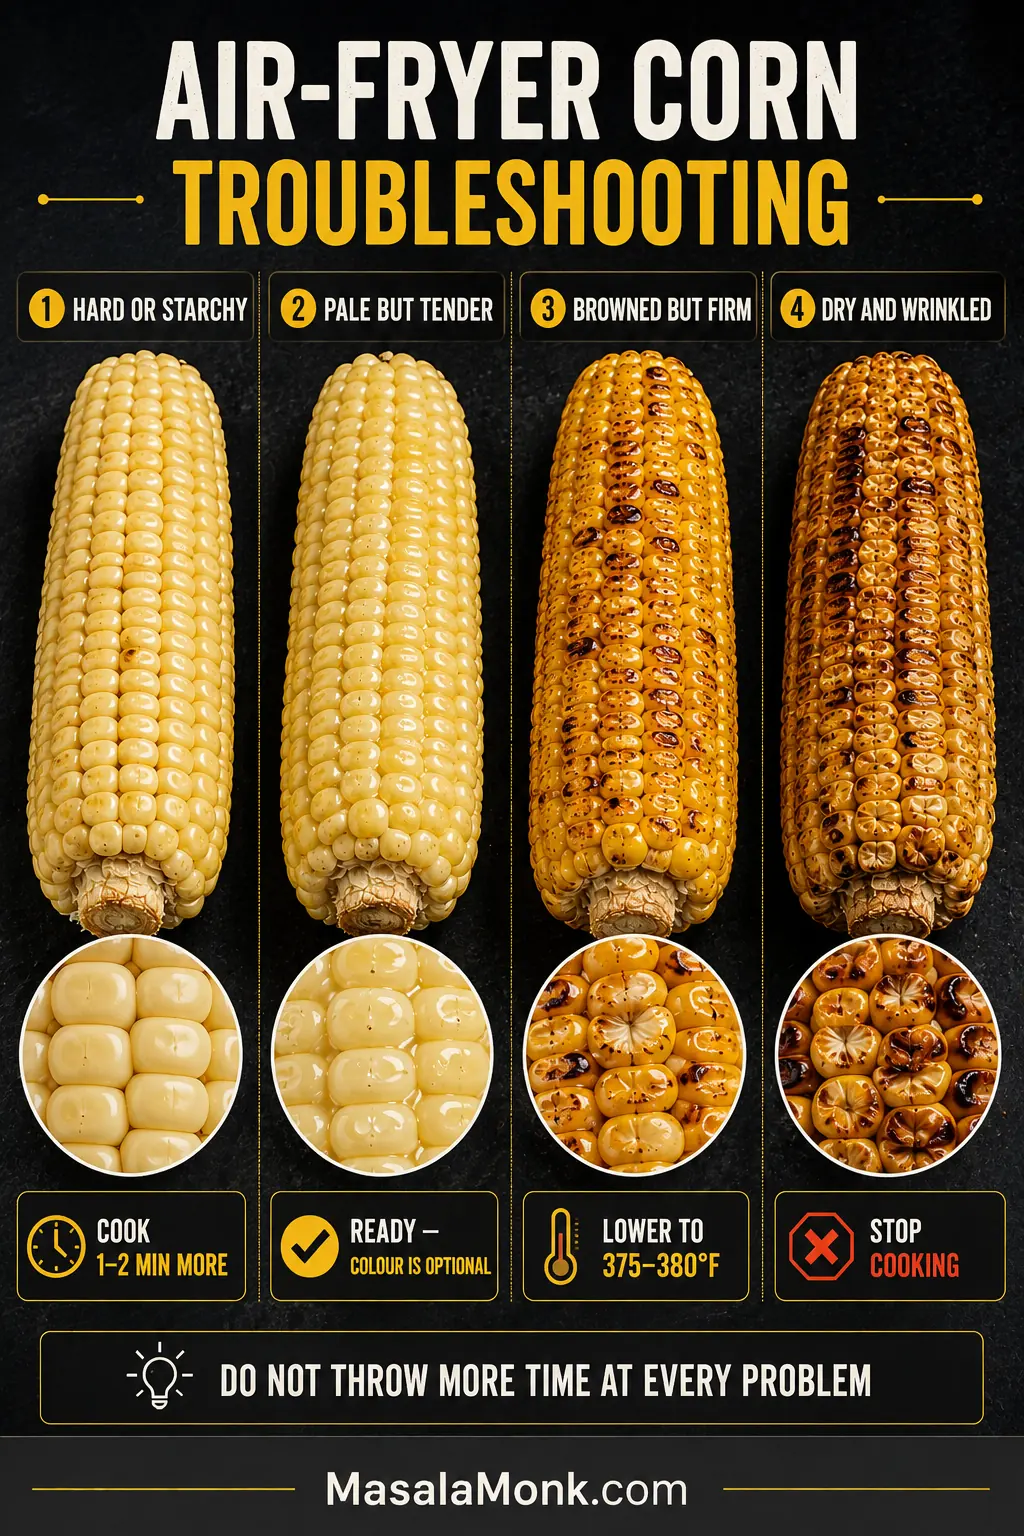
Plump kernels that still feel hard or dense usually need more cooking. Pale but tender corn is ready—add colour only if you want it. Browned but firm corn needs gentler heat. If tender corn still tastes starchy, the ear may simply be older rather than undercooked.
Do not throw more time at every problem. Many batches can still be improved while dinner comes together.
Texture and Doneness Problems
| What you see | Why it happened | What to do now |
|---|---|---|
| Kernels look plump but remain hard or starchy | Thick ears, a full basket or too little cooking time | Continue in 1–2-minute intervals and test the thickest ear again. |
| Corn is pale but tender | Wet kernels, foil, a liner or limited airflow | Serve it as it is, or uncover and create more space for another minute when you want deeper colour. |
| Corn is pale and firm | It needs more cooking and better surface drying | Continue uncovered and roll the ears once more. |
| The browned side is dark but the centre is firm | The outside heated faster than the middle | Lower the temperature to 375–380°F / 190–195°C and continue in short intervals. |
| Kernels are dry or wrinkled | Too much time, slim ears or older corn | Remove immediately. Butter adds richness but cannot replace lost moisture. |
| Kernels look full but still taste starchy | The corn may have been older or less sweet before cooking | Serve with butter and a bright seasoning; more cooking is unlikely to restore sweetness. |
Uneven Browning, Seasoning and Smoke Problems
| What you see | Why it happened | What to do now |
|---|---|---|
| One side is burning | The ear is close to the element or was turned too late | Roll the ear, lower the heat if needed and check more frequently. |
| Different ears are cooking at different speeds | The batch contains mixed thicknesses | Remove tender ears and leave the thicker ones to continue. |
| Butter, garlic, cheese or sugar is burning | Delicate ingredients were added too early | Remove badly burnt bits and add a fresh topping after cooking. |
| Seasoning slides off frozen corn | The icy outside is melting | Warm the corn first, then season it once the ears are hot and the surface has dried. |
| The basket is smoking | Fat, sugary seasoning or old residue is reaching the base | Stop the air fryer if smoke is heavy or persistent. Let it cool, remove burnt residue or excess fat, and clean the basket before continuing. |
Make Ahead, Storage and Reheating
Air fryer corn is best as soon as it leaves the basket, while the kernels are hot and the blistered patches still taste roasted.
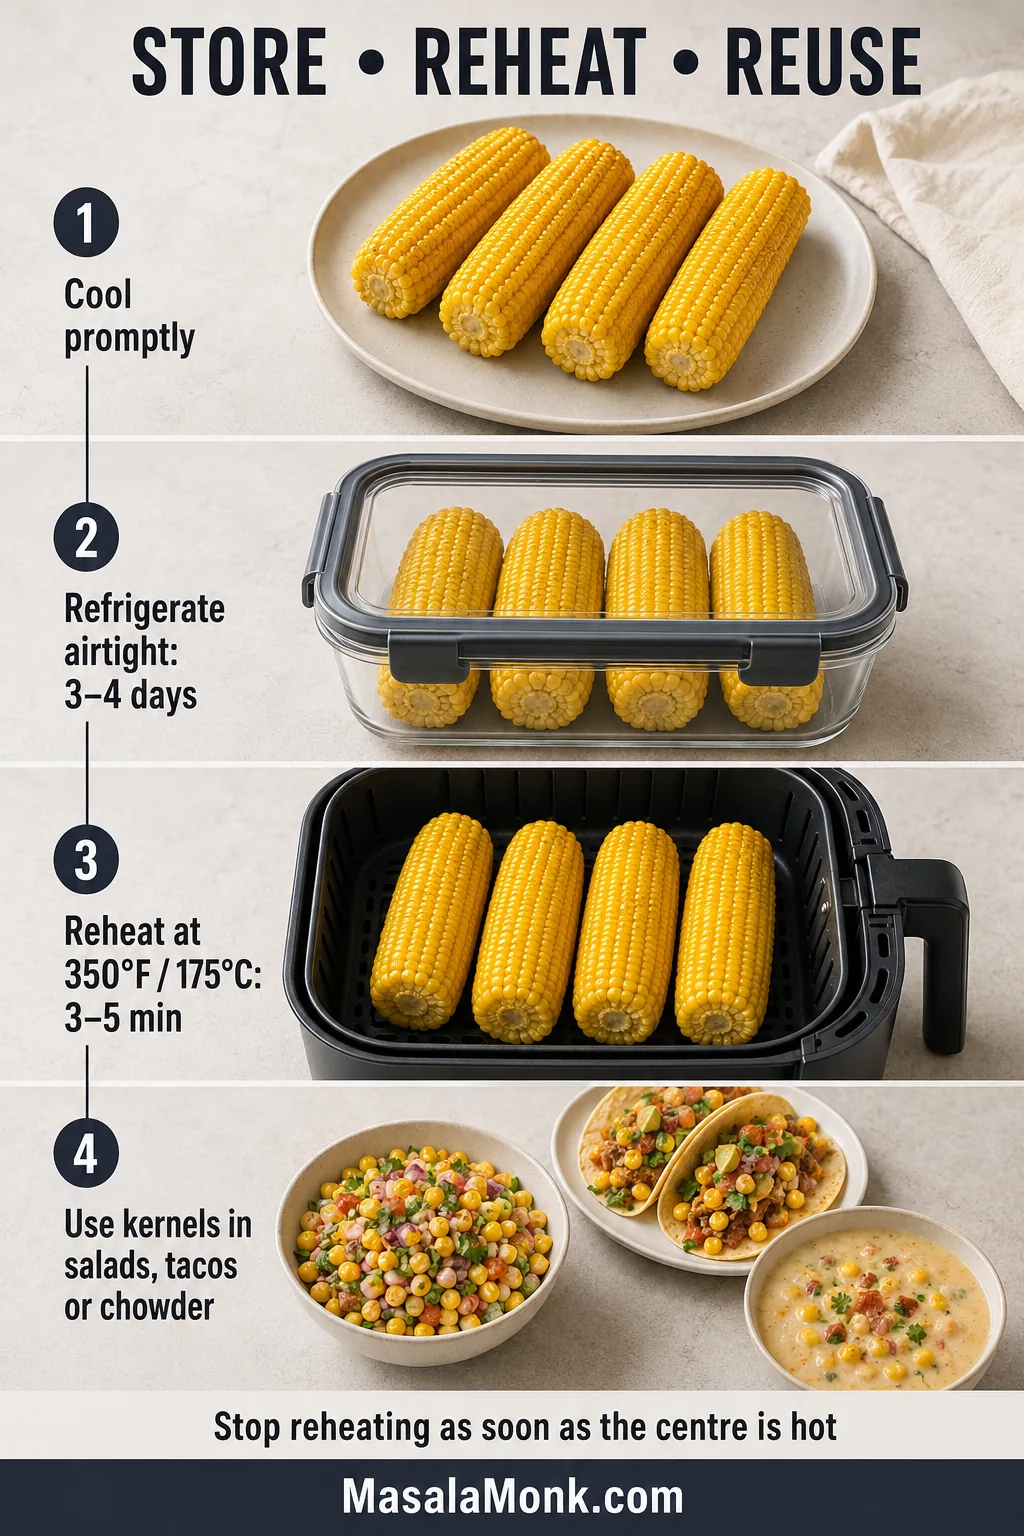
- Prepare ahead: shuck the corn earlier in the day and refrigerate it tightly covered so the exposed kernels do not dry out.
- Refrigerate: cool cooked corn promptly and store it in an airtight container for up to 3–4 days.
- Reheat: air fry at 350°F / 175°C for 3–5 minutes, checking early.
- Serve again: add a little fresh butter after reheating rather than warming the corn in a pool of butter.
Stop as soon as the centre is hot; extended reheating tightens the kernel skins. For broader refrigerator and freezer guidance, see the FoodSafety.gov cold-storage chart.
Have several ears left? Slice off the kernels for salsa, salads, tacos or grain bowls, or turn a larger amount into creamy vegetarian corn chowder.
What to Serve With Air Fryer Corn
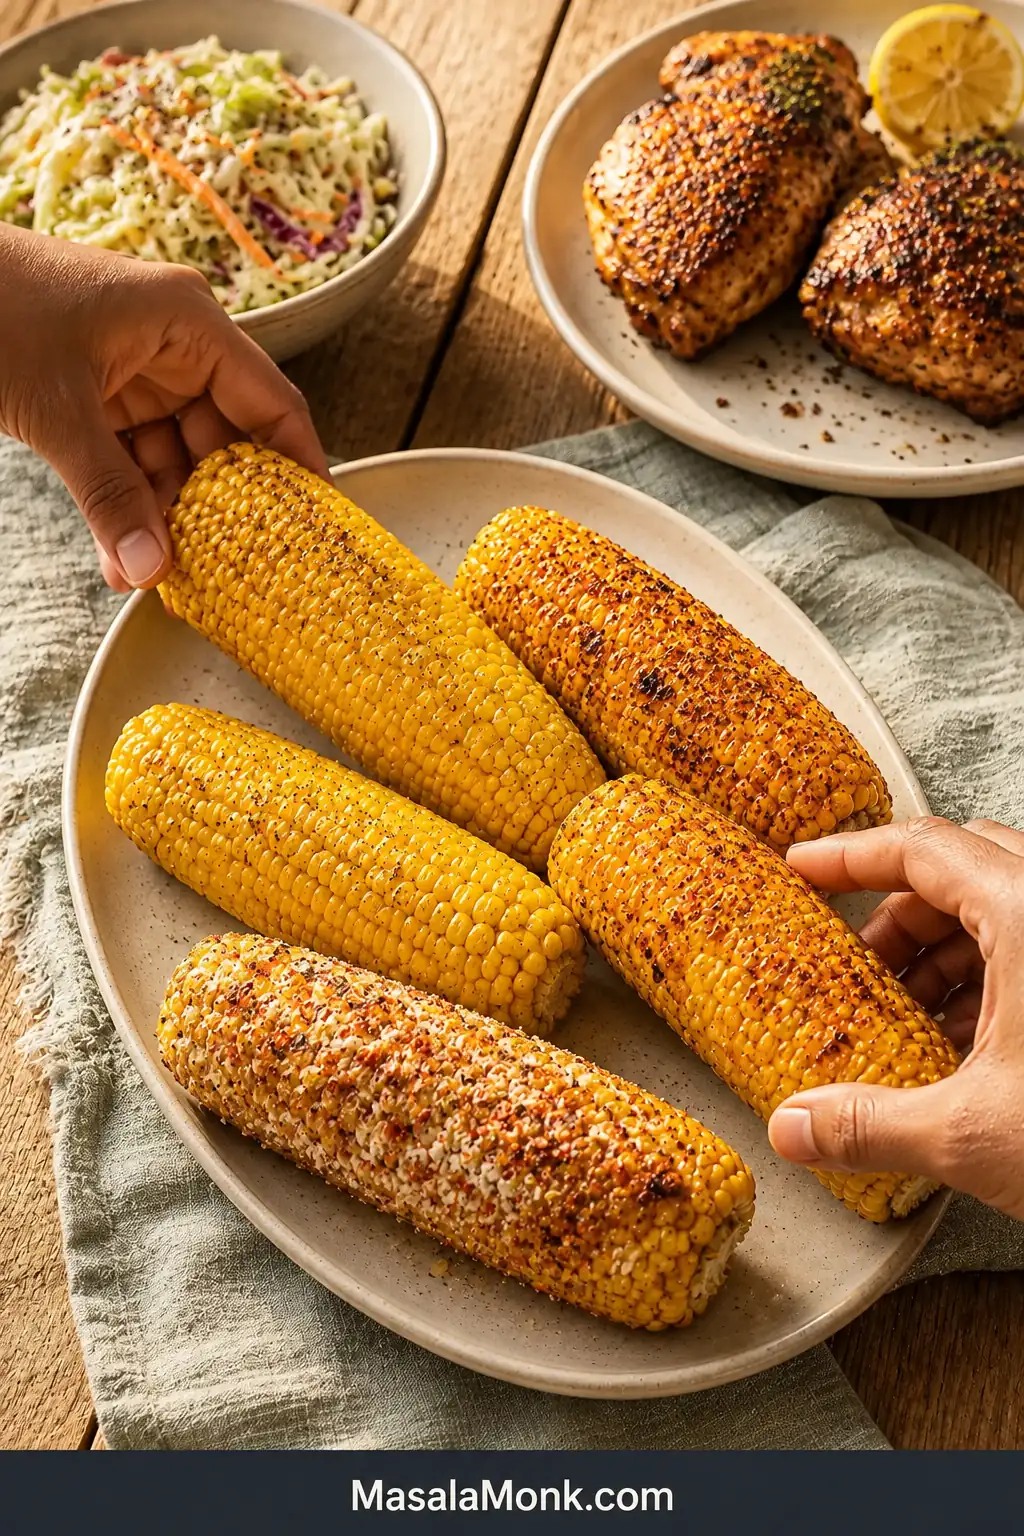
For a cookout or summer dinner, make a bowl of crisp homemade coleslaw first and refrigerate it while the meal comes together. Air fry the corn last so the slaw stays cold and crunchy while the ears reach the table hot.
Garlic-Parmesan corn adds savoury richness beside juicy baked chicken breast, while classic butter and pepper keeps the plate familiar beside air fryer burgers.
Chili-lime corn works especially well with honey garlic salmon because the lime cuts through the sweet glaze.
For a vegetarian plate, pair bhutta-style corn with a sturdy black bean burger. Lime and chaat masala brighten the burger’s earthy filling.
When one finish will cover the whole batch, use the chart below to match the corn to the meal. For mixed preferences, season individual ears separately after cooking.
Frequently Asked Questions
Why Do Air-Fryer Corn Recipes Give Such Different Cooking Times?
Ear thickness, basket load, preheating, appliance shape and the desired amount of browning all affect the final time. Treat a published time as a first-check point, then stop when the thickest ear is tender and juicy.
For a single-screen recap, use this guide after identifying the approximate thickness and basket load. It condenses the checkpoints, while tenderness still decides the finish.
Do You Need to Soak Corn Before Air Frying?
No. Soaking adds moisture to the exposed kernels and delays browning. Remove the husks and silk, dry the ears and cook them directly.
Do You Need to Boil or Microwave Corn First?
No. Fresh average ears cook completely in the air fryer. If very thick ears brown before the centre softens, lower the temperature to 375–380°F / 190–195°C and continue in short intervals.
Should You Salt Corn Before or After Air Frying?
A light seasoning before cooking gives the kernels a base layer of flavour. Reduce or omit it when the finish contains Parmesan, Cajun seasoning or chaat masala, then adjust after tasting.
Can You Cook More Than Four Ears?
Cook only as many ears as fit in one layer. For a larger batch, work in rounds and check the second batch slightly earlier because the air fryer is already fully hot.
This basket shows the practical limit: the ears may touch at narrow points, but the fuller middle sections still need open space for moving air.
Can You Air Fry Corn Without Oil?
Yes. Place dry, shucked ears directly in the basket and follow the fresh-corn timing. The kernels soften normally, though the exposed rows may brown less evenly and dry seasoning will not cling as readily.
Can You Air Fry Corn in the Husk?
Some appliances permit husk-on corn, but loose silk and dry husk can move toward the heating element. Because timing and appliance guidance vary, fully shucked corn is the more predictable choice for this recipe.
Once the rest of the meal is ready, bring the corn out last and let each person add butter, lime or spice at the table. The point is not matching every ear; it is serving each one while the kernels are still hot and juicy.
Tender First, Char Second
For three or four average fresh ears, begin at 400°F / 200°C and test the thickest ear at eight minutes. Turn once, stop when the kernels are juicy and tender, and add only a short final burst when you want darker roasted patches.
Bring the corn to the table while the butter is still disappearing between the rows. Some ears may be only lightly browned while others are more deeply blistered; tenderness is the part that matters.
How long did your corn need? Share the time below—and add your air-fryer model if you know it.








