Posted on Leave a comment

Stuffed Red Pepper Recipe

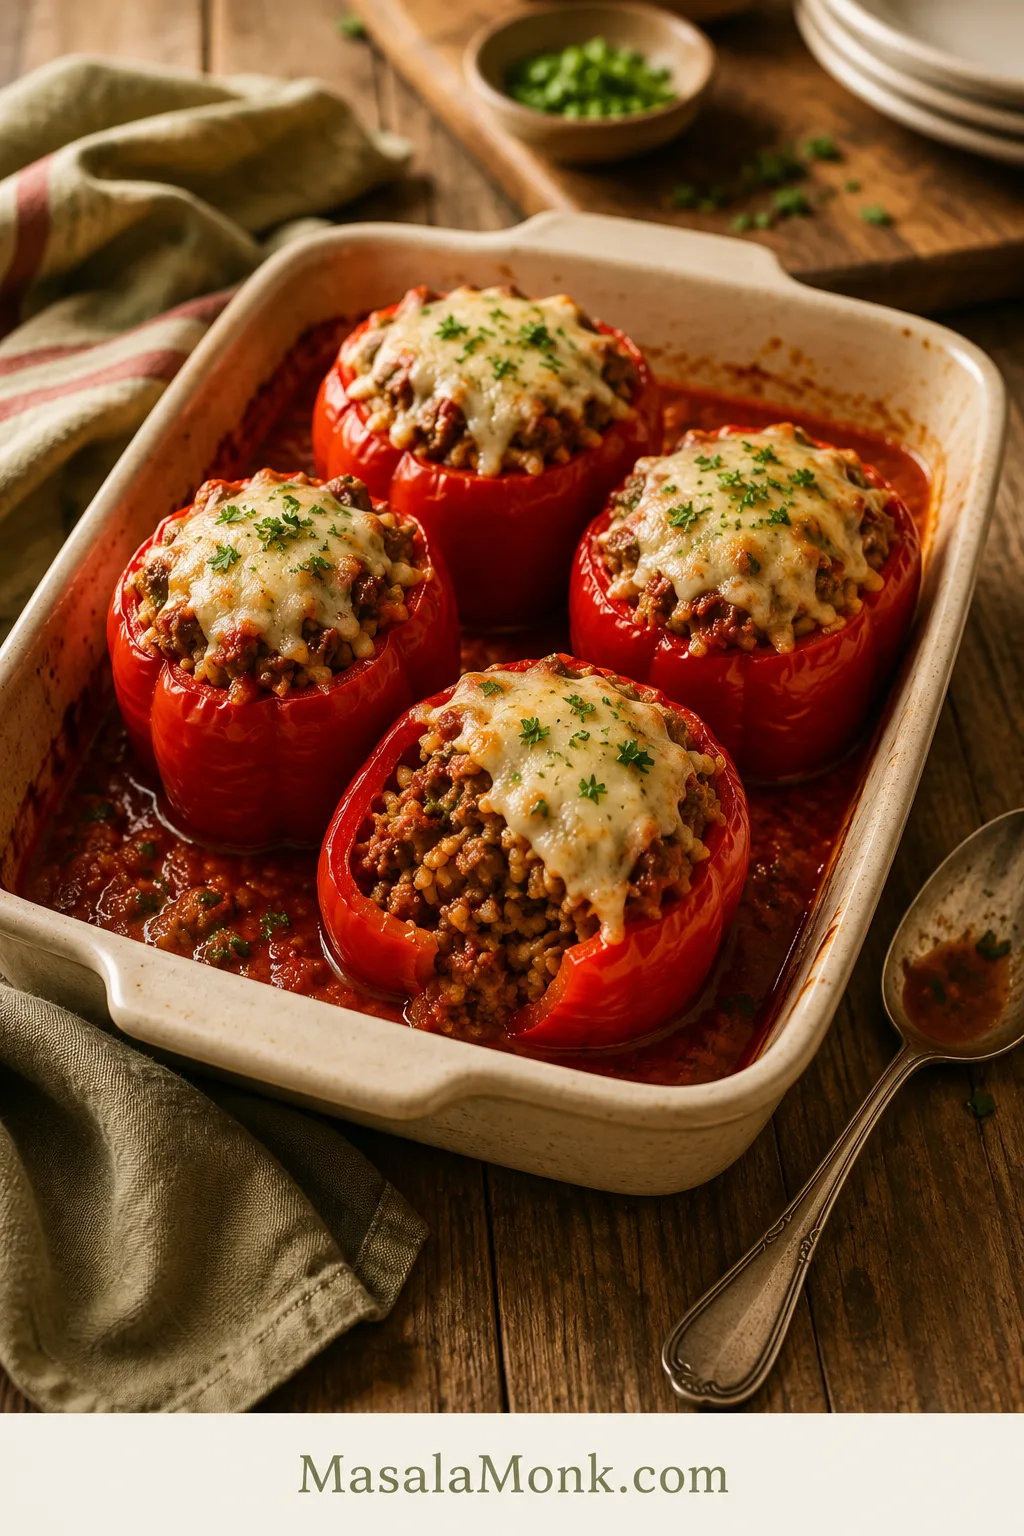
Baked red bell peppers stuffed with ground beef, rice, tomato sauce, and melted cheese in a cream ceramic baking dish

Stuffed red peppers should feel like dinner is handled: sweet pepper walls, savory beef-and-rice filling, tomato sauce, and melted cheese all baked together in one cozy dish. The only catch is that small details matter. If the peppers stay too firm, the rice tastes bland, the filling turns watery, or the cheese browns too early, the whole dish feels less comforting than it should.

This is the no-guesswork version built to avoid those problems. The filling is cooked and seasoned before it ever goes into the peppers, the sauce stays underneath instead of drowning the dish, and the peppers bake covered first so they soften before the cheese goes on. By the time the foil comes off, the dish should smell like tomato sauce, garlic, roasted peppers, and melting cheese.

Think of this as classic baked stuffed bell peppers tuned specifically for red peppers: sweeter, softer in flavor, and especially good with tomato sauce, ground beef, cooked rice, and cheese. You get the old-fashioned dinner feeling, but with clear cues for what the filling, sauce, peppers, and cheese should look like at every step.

The promise

These stuffed red peppers bake up tender, saucy, and full of flavor, with a seasoned beef-and-rice center that holds together instead of turning loose and watery.

Quick Answer: How to Make Stuffed Red Peppers

To make stuffed red peppers, cut the tops off large red bell peppers and remove the seeds. Brown ground beef with onion, garlic, tomato paste, salt, pepper, and herbs, then stir in cooked rice and diced tomatoes. Spread tomato sauce or marinara in a baking dish, fill the peppers, cover with foil, and bake at 375°F / 190°C for 30 to 35 minutes. Uncover, add cheese, and bake for another 10 to 15 minutes, until the peppers are fork-tender, the sauce is bubbling, and the cheese is melted.

Remember the order: filling first, sauce underneath, foil first, cheese last. The key is not to rush the cheese; let the peppers soften under foil before finishing them uncovered.

Make This Version When

Make this version when you want classic stuffed bell peppers, but you do not want to gamble on the texture. The red peppers soften without collapsing, the beef-and-rice filling tastes seasoned before it goes into the oven, and the cheese goes on late enough to melt instead of drying out. It is hearty enough to count as dinner without needing much else, but still flexible enough for turkey, sausage, vegetarian, vegan, no-rice, or halved-pepper versions.

What the Finished Stuffed Red Pepper Should Look Like

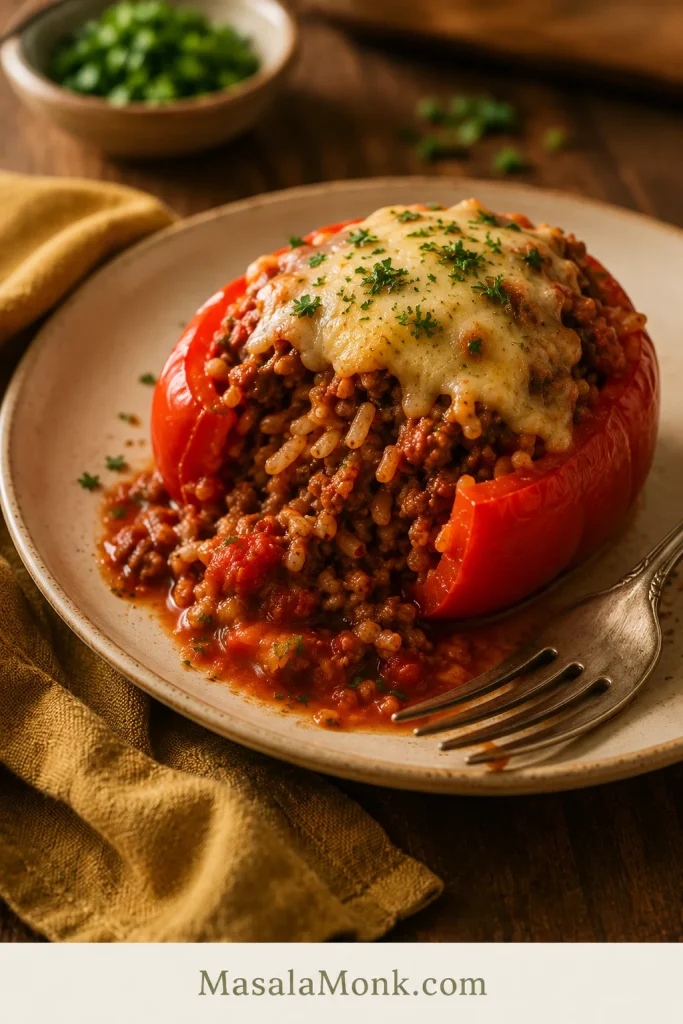
Use this as the visual target before you start: the pepper should soften around the edges, while the rice, beef, sauce, and cheese still read as one generous filling.

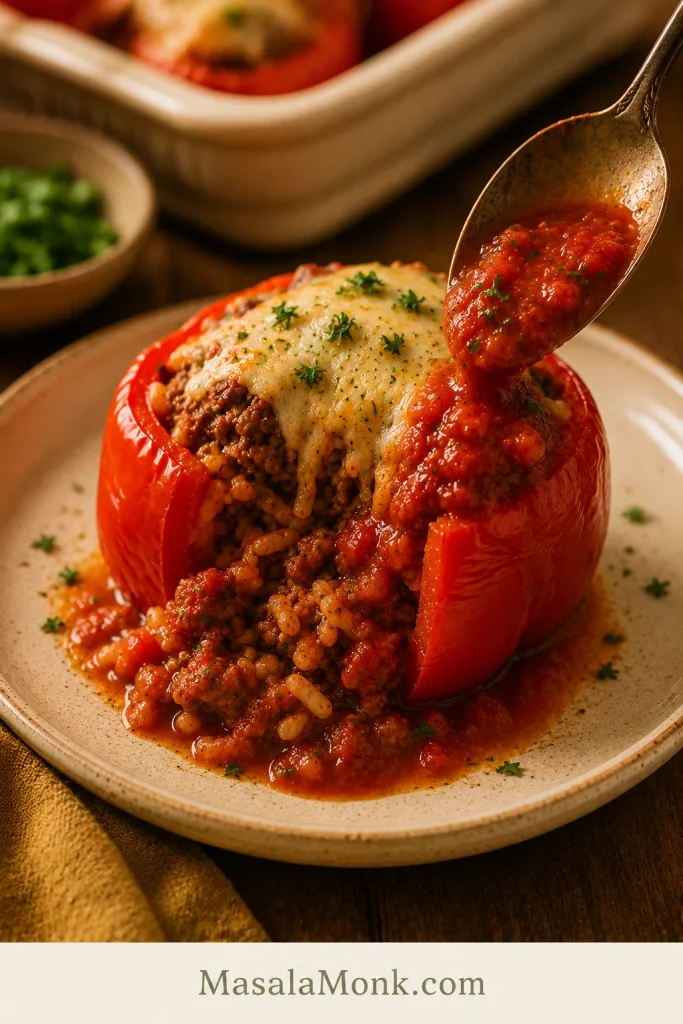
Cut-open stuffed red pepper on a plate with visible beef, rice, tomato sauce, and melted cheese inside
A cut-open stuffed red pepper shows what matters inside: tender rice, seasoned beef, enough sauce to keep the filling juicy, and melted cheese in every forkful.

Stuffed Red Pepper Recipe Card

Easy Baked Stuffed Red Peppers

Whole red bell peppers filled with seasoned ground beef, cooked rice, tomato sauce, and melted cheese. A reliable baked stuffed peppers recipe that turns tender, saucy, and comforting without becoming watery.

Prep Time20 minutes
Cook Time50 minutes
Total Time1 hour 10 minutes
Servings6 stuffed red peppers
Oven Temperature375°F / 190°C
Baking Dish13×9-inch / 33×23 cm dish
Main MethodBake covered first, then finish uncovered with cheese

Ingredients

IngredientAmount
Large red bell peppers6
Olive oil2 tablespoons / 30 ml
Yellow onion, finely chopped1 medium / about 150 g
Garlic, minced3 cloves
Tomato paste2 tablespoons / about 30 g
Ground beef1 lb / 450 g
Cooked white or brown rice1½ cups / about 240 to 260 g
Diced tomatoes, with juices1 can, 14.5 oz / 411 g
Tomato sauce or marinara1½ cups / 360 ml
Italian seasoning or dried oregano1½ teaspoons
Salt1 teaspoon, plus more to taste
Black pepper½ teaspoon
Shredded mozzarella, Monterey Jack, cheddar, or a blend1 cup / about 110 g, or up to 1½ cups / 170 g for a cheesier top
Fresh parsleyOptional, for serving

Instructions

Build the Filling

  1. Preheat the oven. Heat the oven to 375°F / 190°C.
  2. Prepare the peppers. Slice the tops off the red bell peppers. Remove the seeds and membranes. If needed, trim a very thin slice from the bottom so the peppers stand upright, but do not cut through into the hollow center.
  3. Soften the onion. Warm the olive oil in a large skillet over medium heat. Add the onion and cook for 3 to 4 minutes, until softened.
  4. Build the flavor base. Add the garlic and tomato paste. Stir for about 1 minute, until the tomato paste darkens slightly and the garlic smells fragrant.
  5. Brown the beef. Add the ground beef, salt, black pepper, and Italian seasoning. Cook until the beef is browned and no longer pink, breaking it up as it cooks. Drain excess fat if the skillet looks greasy.
  6. Add rice and tomatoes. Stir in the cooked rice and diced tomatoes with their juices. Simmer for 3 to 5 minutes, until the mixture is moist but not soupy. Taste and adjust salt if needed.

Fill, Bake, and Finish

  1. Add sauce to the dish. Spread the tomato sauce or marinara in a shallow layer in the bottom of a 13×9-inch / 33×23 cm baking dish.
  2. Stuff the peppers. Spoon the beef and rice mixture into the peppers. Fill generously, but do not press it down hard.
  3. Bake covered. Place the peppers upright in the baking dish. Cover tightly with foil and bake for 30 to 35 minutes, until the pepper walls are starting to soften.
  4. Add cheese and finish uncovered. Remove the foil. Spoon a little sauce over the peppers if they look dry, then top with shredded cheese. Bake uncovered for 10 to 15 minutes, until the cheese is melted and the peppers are tender.
  5. Check doneness. The peppers are done when they are fork-tender but still holding their shape, the sauce is bubbling around the edges, the center is hot, and the cheese is melted.
  6. Rest before serving. Let them rest for 5 minutes. Spoon extra sauce from the dish over the top and finish with parsley if using.

Recipe Notes

  • Cooked rice gives the most reliable texture. Leftover rice works well.
  • Taste the filling before stuffing the peppers. It should taste slightly bold in the skillet because the pepper and rice will soften the flavor once baked.
  • If your marinara, canned tomatoes, or cheese are salty, start with ¾ teaspoon salt and adjust after the rice goes in.
  • For ground turkey or very lean beef, add an extra spoonful or two of sauce to keep the filling moist.
  • Very large peppers may need 5 to 10 extra minutes of covered baking time.
  • Let the peppers rest before serving so the filling settles instead of spilling out immediately.

Before You Start: The Stuffed Red Pepper Rules

Use these as your quick mistake-prevention cues, and your stuffed peppers with ground beef and rice are much less likely to turn watery, bland, undercooked, or dry on top.

RuleWhy It Matters
Use cooked riceIt prevents crunchy grains and makes the filling easier to season.
Cook the beef firstBrowning builds flavor and lets you drain excess fat.
Keep the filling thickThe mixture should mound slightly, not run across the skillet.
Use a shallow sauce layerSauce should cushion the peppers, not boil them.
Bake covered firstSteam softens the pepper walls before the top dries out.
Add cheese lateThe cheese melts cleanly instead of drying out while the peppers finish.
Rest before servingThe filling settles, and the peppers are easier to lift from the dish.

Table of Contents

What This Recipe Is Built Around

This is the classic baked stuffed bell pepper dinner, but tuned for red peppers: sweeter pepper walls, a thicker beef-and-rice filling, sauce underneath instead of too much liquid inside, and cheese added only once the peppers are nearly tender.

It is practical comfort food, not a fancy project. The dish works because the filling is seasoned well, the sauce is in the right place, and the covered bake gives the peppers enough time to soften before the top is finished.

If you like this kind of saucy, cheesy covered-bake dinner, these baked stuffed shells follow the same comfort-food logic with pasta, filling, sauce, and cheese.

Choose Your Stuffed Red Pepper Path

The main recipe is the classic stuffed bell peppers with ground beef and rice version. Use this table if you already know what style you want.

If You WantUse This Approach
Classic stuffed red peppersUse ground beef, cooked rice, tomato sauce, and melty cheese.
Softer peppersBake covered 5 to 10 minutes longer before adding cheese.
No boil stuffed peppersSkip boiling and let the covered bake soften the peppers.
Saucier peppersAdd a little extra marinara to the dish and spoon sauce over before serving.
Less watery peppersSimmer the filling until thick and finish the bake uncovered.
Ground turkey versionReplace beef with turkey and add a little extra oil or sauce.
Vegetarian versionUse beans, lentils, mushrooms, quinoa, vegetables, and cheese.
Vegan versionUse beans or lentils, rice or quinoa, tomato sauce, herbs, and vegan cheese or no cheese.
No-rice versionUse cauliflower rice, mushrooms, eggplant, extra meat, lentils, or beans.
Faster weeknight bakeUse halved peppers instead of whole peppers.

Why This Stuffed Red Pepper Recipe Works

The trick is not a special ingredient. It is timing and moisture. These stuffed red bell peppers work because the rice is already cooked, the beef is browned first, the sauce stays shallow, and the cheese goes on only after the peppers have started to soften.

  • Cooked rice prevents crunchy grains. The filling bakes evenly instead of waiting for dry rice to soften inside the pepper.
  • Browned beef gives better flavor. It also lets you drain extra fat before the rice and tomatoes go in.
  • Tomato paste deepens the skillet mixture. One minute in the pan makes the filling taste more rounded.
  • A shallow sauce layer prevents boiling. The sauce keeps the peppers moist without turning the dish soupy.
  • Foil softens the peppers first. The covered bake gives the pepper walls time to relax before the cheese is added.
  • A short rest helps the filling settle. The peppers lift from the dish more neatly after a few minutes.

Ingredients You’ll Need

The ingredients are familiar, which is exactly why the balance matters. A little tomato paste makes the beef taste deeper, cooked rice keeps the texture steady, and tomato sauce in the dish makes the peppers feel finished instead of dry.

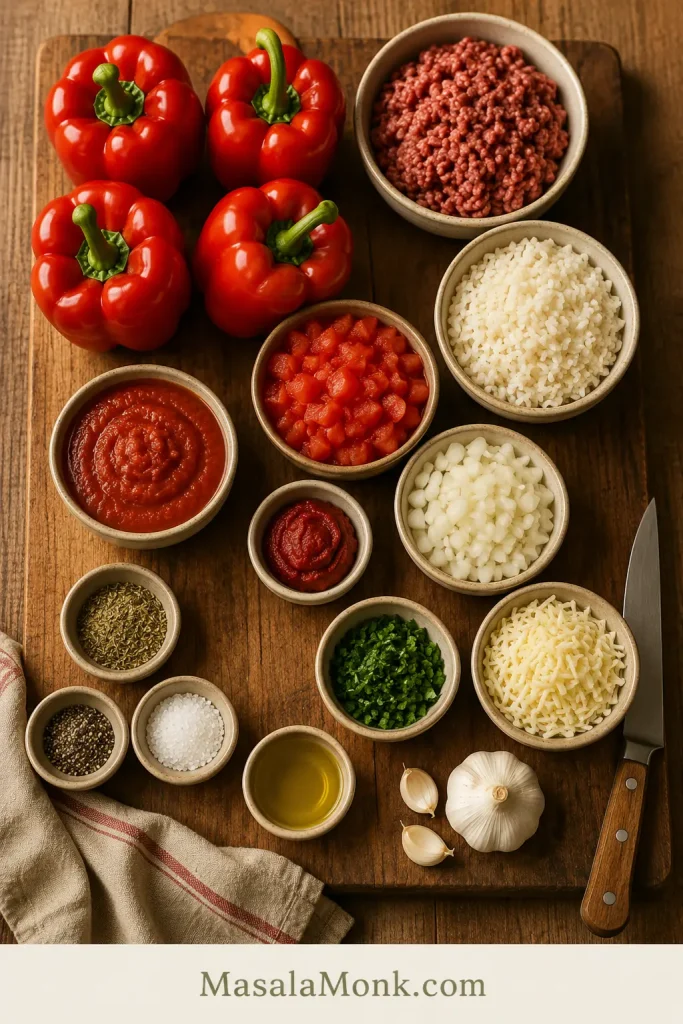
Stuffed red pepper ingredients arranged on a board, including red bell peppers, ground beef, cooked rice, tomato sauce, cheese, onion, garlic, and herbs
The ingredients are simple, but each one has a job: peppers hold the filling, cooked rice gives structure, tomato sauce adds moisture, and cheese finishes the baked top.

Red Bell Peppers

Use large red bell peppers for this recipe. Red peppers are sweet, colorful, and mild, which makes them especially good with beef, rice, tomato sauce, and cheese. In some countries, red bell peppers are sold as red capsicum. Choose the large sweet kind, not small hot red peppers.

Ground Beef

Ground beef gives the filling its classic flavor. Beef that is around 85% to 90% lean works well because it has enough richness without making the dish greasy. The beef should taste a little bold in the skillet because the rice, pepper, and sauce will mellow it once everything bakes together.

Cooked Rice

Cooked rice is the most reliable choice for baked stuffed peppers. White rice, brown rice, basmati, jasmine rice, or leftover rice can all work. The important part is that the rice should already be cooked before it goes into the filling.

Tomato Paste, Diced Tomatoes, and Sauce

Tomato paste adds depth, diced tomatoes bring moisture and texture, and tomato sauce or marinara keeps the baking dish saucy. Together, they stop the filling from tasting flat or dry.

Cheese

Mozzarella gives a mild, stretchy melt. Monterey Jack melts smoothly and tastes creamy. Cheddar adds sharper flavor. Add the cheese near the end, when the peppers are almost tender, so it melts into the top instead of drying out while the peppers catch up.

Seasoning

Italian seasoning or oregano keeps the flavor classic. Paprika, chili flakes, basil, parsley, or a little cumin can also work depending on the version you want. Season the beef before adding the rice, because rice softens the flavor once it goes in.

Best Red Peppers to Use

Choose large, firm, glossy red bell peppers that are close to the same size. Similar-sized peppers bake more evenly, and flat-bottomed peppers are easier to stand upright in the dish.

  • Use: large red bell peppers.
  • Good backup: yellow or orange bell peppers.
  • For a sharper flavor: green bell peppers can work, but they taste less sweet.
  • Not ideal for this main recipe: mini peppers, cherry peppers, pimento peppers, long hot red peppers, or red jalapeños.

Mini peppers and pimento peppers are delicious, but they behave differently. They need different filling amounts and shorter cooking times, so save them for appetizer-style stuffed pepper recipes.

No Boil Stuffed Peppers: Do You Need to Boil or Pre-Bake?

You do not need to boil red peppers before stuffing them for this recipe. This no-boil method uses the covered bake to create enough steam to soften the peppers while the filling stays moist.

For very soft peppers, blanch the empty peppers in boiling water for about 5 minutes, then drain and dry them before stuffing. When you prefer peppers that hold their shape and keep a little bite, skip boiling and let the oven do the work.

With halved peppers, pre-baking is more useful than boiling. Bake the empty halves for 10 minutes, tip out any liquid, then add the filling. This helps prevent watery halves and shortens the final bake.

MethodUse It WhenWhat to Know
No boilingYou want classic whole stuffed red peppersGood balance of tenderness and shape
Blanch 5 minutesYou like very soft peppersDrain and dry well before stuffing
Pre-bake 10 minutesYou are using halved peppersTip out liquid before adding filling

Equipment

You need a large skillet for the filling and a snug 13×9-inch / 33×23 cm baking dish for the peppers. A snug dish helps the peppers support each other instead of tipping into the sauce.

  • 13×9-inch / 33×23 cm baking dish
  • Large skillet
  • Cutting board and sharp knife
  • Spoon for stuffing
  • Foil
  • Optional baking sheet under the dish to catch bubbling sauce

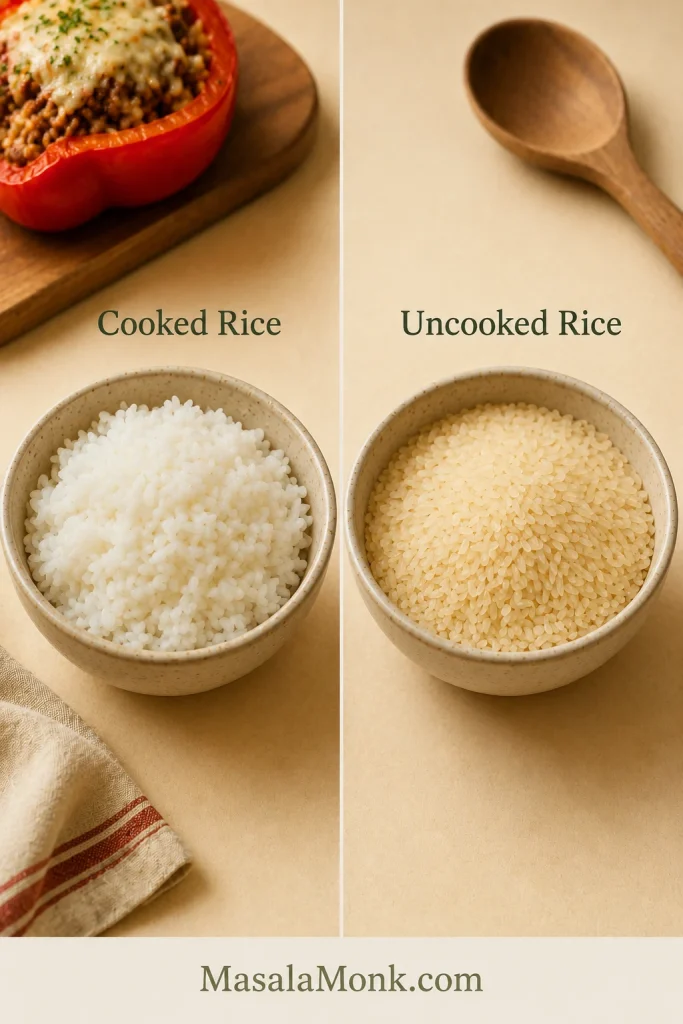
Cooked Rice or Uncooked Rice?

Use cooked rice for this stuffed red pepper recipe. Cooked rice lets you control the texture before the dish goes into the oven, so you are not guessing whether the grains will soften in time.

Side-by-side bowls of fluffy cooked rice and dry uncooked rice used to compare rice texture for stuffed peppers
For stuffed red peppers, cooked rice gives a more reliable texture because the grains are tender before baking. In contrast, uncooked rice needs extra liquid and can stay firm inside the peppers.

If rice texture is the part that usually trips you up, this guide on how to cook rice is useful before you make the filling.

Uncooked rice can work in some stuffed peppers with tomato sauce, but it needs more liquid, more time, and closer control. Without enough liquid, the rice can stay hard. With too much liquid, the peppers can become watery.

Cooked rice also makes the filling easier to taste and adjust. Rice absorbs seasoning, so the mixture may need a final pinch of salt after the grains go in.

Leftover rice tip: leftover rice is excellent here. Break up any clumps before stirring it into the beef and tomato mixture.

Leftover rice can do double duty: use some here, then save the rest for this shrimp fried rice recipe later in the week.

For uncooked rice, do not add it dry straight into the peppers. Simmer the grains with the meat, tomatoes, and extra liquid until they are mostly tender, then stuff the peppers and bake.

Do You Cook the Meat First?

Yes. Cook the beef first. It is one of the simplest ways to make stuffed peppers with ground beef and rice taste deeper and bake more evenly.

Browning the meat first helps the onion and garlic cook properly, gives you a chance to season the filling, and lets you drain off excess fat. It also makes the final bake more predictable because the oven’s job is to soften the peppers, heat the filling through, and melt the cheese — not cook raw meat hidden inside a pepper.

For a thermometer check, USDA guidance lists ground beef at 160°F / 71°C. Since the beef is browned before stuffing, the oven is mainly heating the filling through and finishing the peppers.

Red Sauce for Stuffed Peppers

The best red sauce for stuffed peppers is tomato sauce or marinara. Use about 1½ cups / 360 ml for six peppers, spread in a shallow layer under the peppers, then spoon the sauce over the top after baking.

How Much Sauce to Add First

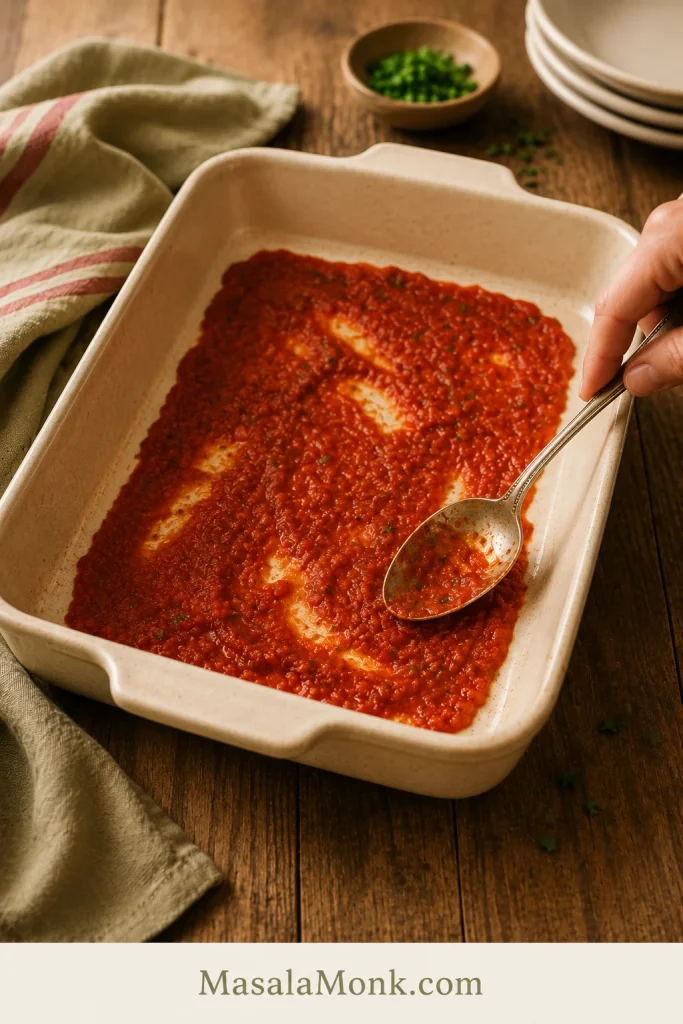
Start with a thin layer across the bottom of the dish. That gives the peppers moisture from below without turning the baking dish into a pot of sauce.

Shallow tomato sauce layer spread across the bottom of a cream baking dish for stuffed red peppers
Next, spread tomato sauce or marinara in a thin, even layer. You need enough sauce to keep the peppers juicy, but not so much that they sit in a deep pool.

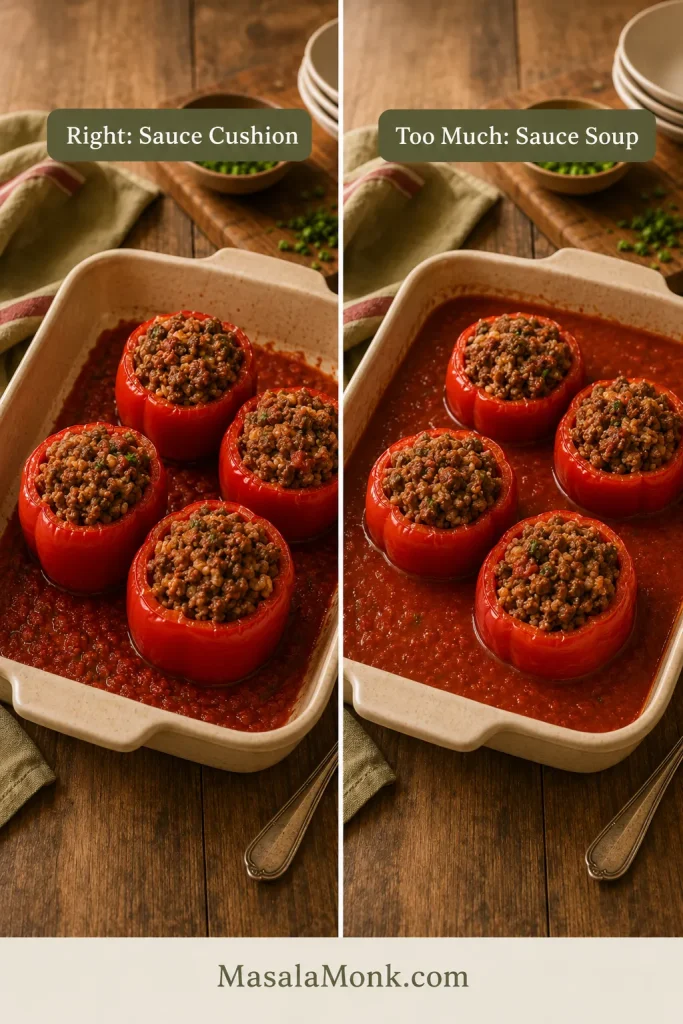
Think of the sauce as the cushion under the peppers, not a soup for them to sit in. You want enough to keep the dish moist and give every serving extra tomato flavor, but not so much that the peppers boil in liquid.

Sauce Cushion, Not Soup

This is the main sauce mistake to avoid. A shallow layer supports the peppers; a deep pool can make them taste more boiled than baked.

Comparison image showing stuffed peppers in a shallow tomato sauce layer beside peppers sitting in too much sauce
Too much sauce can turn stuffed peppers watery. Instead, use a shallow tomato sauce layer that keeps the peppers moist without making them taste boiled.

A good sauce layer should show up when you cut into the pepper, without making the pepper taste boiled.

The sauce in the dish is also your finishing sauce. Spoon it over the peppers at the table so the rice and beef taste juicy all the way through.

Jarred sauce is fine, but if you want the dish to feel more homemade, use this marinara sauce recipe as the base.

Sauce StyleUse It For
Plain tomato sauceClassic stuffed red peppers with a clean tomato flavor
MarinaraAn easy shortcut when you want more flavor
Slightly sweet red sauceOld-fashioned stuffed pepper flavor
Spicy red sauceAdd chili flakes, cayenne, or chopped jalapeño

When tomatoes are in season, this tomato sauce from fresh tomatoes can also become the base sauce for the baking dish.

For very thick sauce, loosen it with a splash of broth or water before adding it to the dish. With thin sauce, use a little less and let the peppers finish uncovered so excess moisture can reduce.

How to Make Stuffed Red Peppers

The recipe card gives the exact steps. This section is the visual walkthrough: what you should see, smell, and check as the peppers move from raw ingredients to a finished baked dinner.

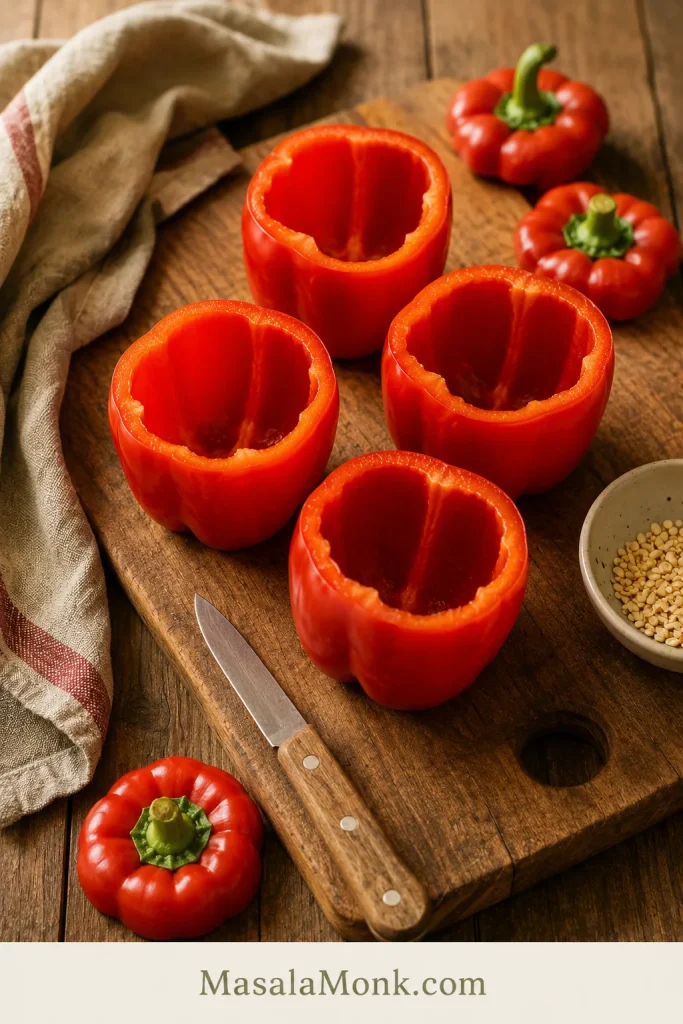
1. Prep the Red Peppers

After trimming, the peppers should look like little cups and stand upright on their own. Keep the walls intact and avoid cutting through the bottom, because any hole in the base lets filling and sauce escape into the dish.

Hollowed red bell peppers standing upright on a wooden cutting board with pepper tops, seeds, and a knife nearby
First, trim the red bell peppers into sturdy cups. Keeping the bottoms intact helps the beef-and-rice filling and tomato sauce stay inside instead of leaking into the dish.

2. Cook the Tomato Paste and Beef

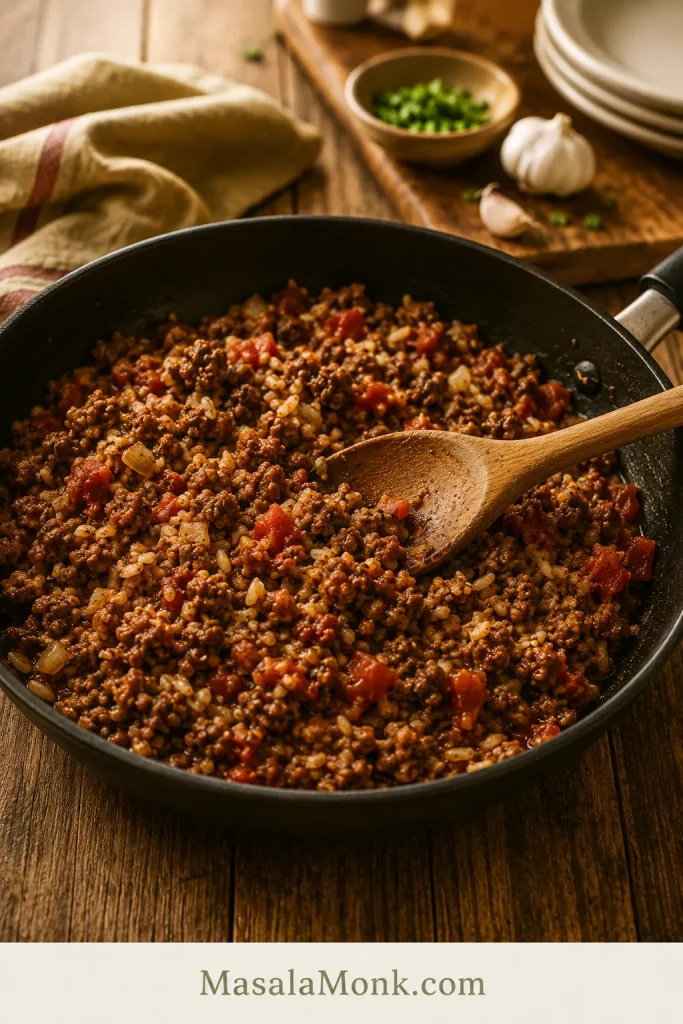
The tomato paste should darken slightly before the beef goes in. That quick minute makes the filling taste deeper and less raw-tomato sharp. Once the beef is browned, the skillet should smell savory, garlicky, and tomato-rich, not flat or boiled.

Ground beef, rice, tomatoes, onion, and garlic cooking together in a skillet for stuffed red pepper filling
Browning the ground beef before stuffing builds deeper flavor, cooks off extra moisture, and lets you season the filling before it gets tucked into the peppers.

3. Bring the Filling Together

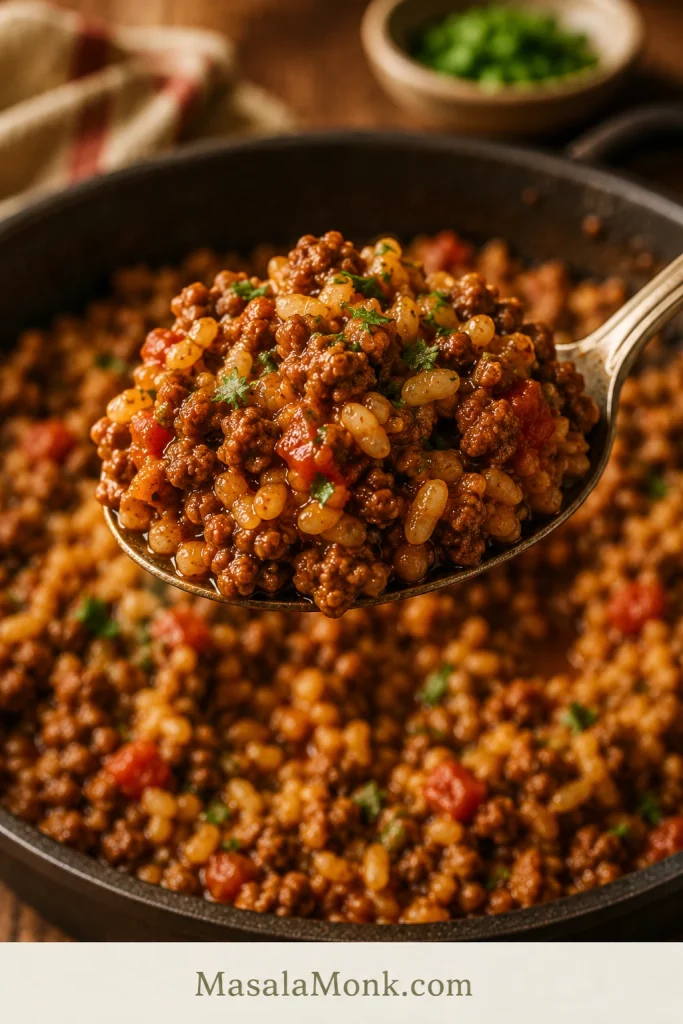
After the cooked rice and diced tomatoes go in, look for a skillet mixture that is moist, glossy, and thick enough to mound slightly. If it looks wet enough to pour, keep simmering. It should sit on the spoon, not run off it.

Thick beef and rice filling holding its shape on a spoon above a skillet with no visible liquid pooling
Before stuffing, check the filling texture. It should mound on the spoon instead of running across the skillet, which is one of the easiest ways to prevent watery stuffed peppers.

4. Fill Without Packing Too Hard

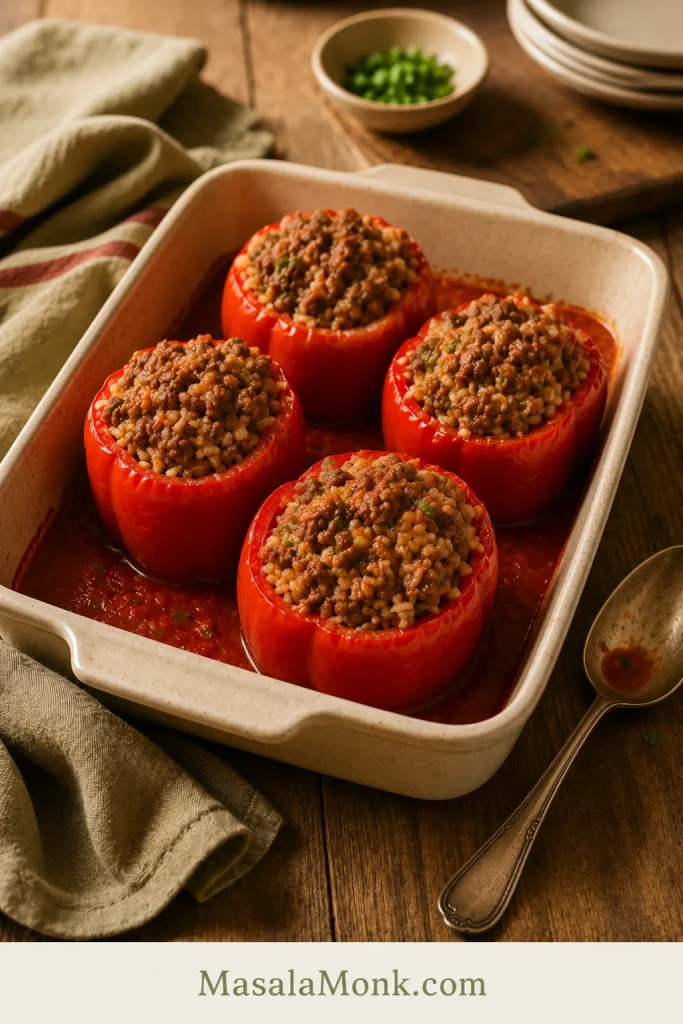
Fill each pepper generously, but keep the beef-and-rice mixture loose enough that a spoon can still move it. Pressing too hard makes the center heat less evenly and can cause the filling to spill out when served.

Red bell peppers filled with beef and rice in a baking dish before baking and before cheese is added
Once the filling is ready, spoon it into the peppers generously but gently. A looser beef-and-rice filling heats more evenly than one packed down too tightly.

5. Bake Covered Before Adding Cheese

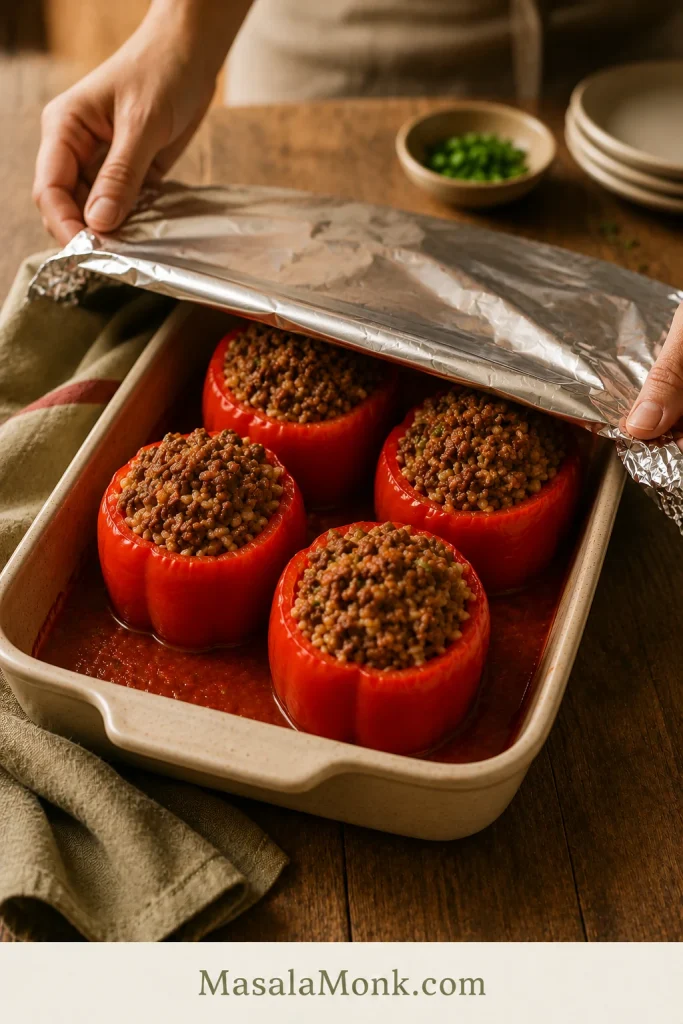
Before the cheese goes on, the pepper walls should already be starting to soften. If they still feel stiff when pierced with a fork, cover the dish again and give them a few more minutes. The cheese should finish the dish, not wait in the oven while the peppers catch up.

Hands placing foil over a baking dish of stuffed red peppers before baking
Cover the stuffed red peppers for the first part of baking so steam can soften the pepper walls before the cheese is added.

6. Add Cheese Near the End

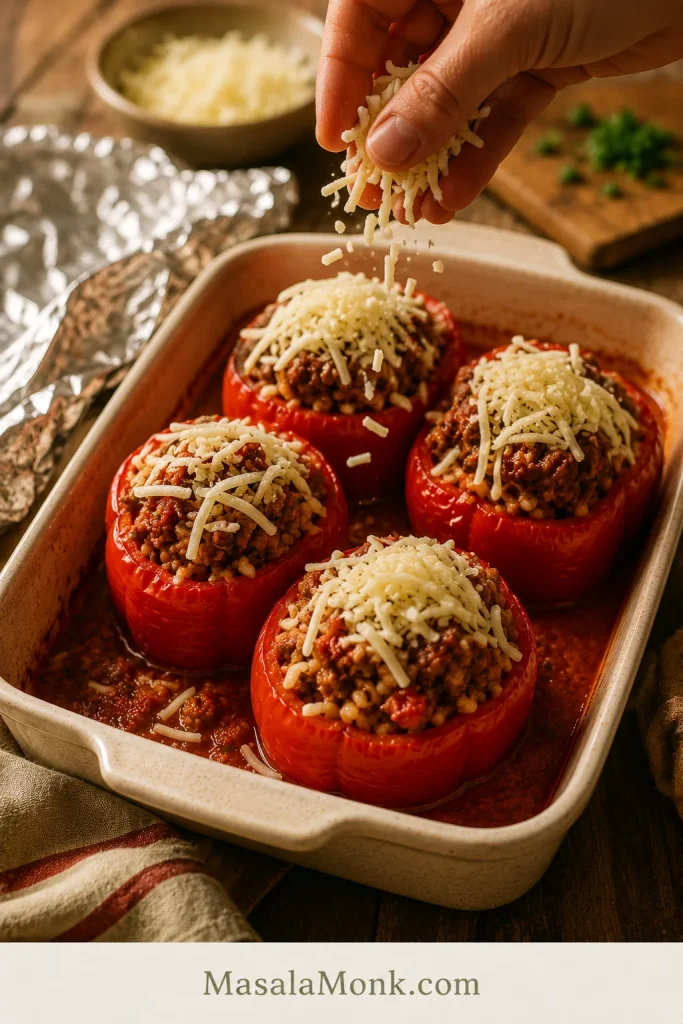
Once the peppers have softened under foil, add the cheese and return the dish to the oven uncovered. The cheese should finish the top, not sit in the oven while firm pepper walls catch up.

Hand sprinkling shredded cheese over stuffed red peppers after the covered baking stage
After the peppers begin to soften, add the cheese. This timing gives you a melted, creamy top without leaving the cheese in the oven long enough to dry out.

7. Rest and Spoon Sauce Over the Top

When the stuffed peppers come out of the oven, the sauce should be bubbling around the base and the cheese should be melted into the top. Let them rest for 5 minutes, then spoon sauce from the dish over each pepper before serving.

Bake Time and Temperature

For whole stuffed red peppers, 375°F / 190°C is the sweet spot. It is hot enough to soften the peppers in a reasonable time, but gentle enough that the filling stays moist and the sauce does not burn.

StepTimeWhat Happens
Bake covered30 to 35 minutesPeppers soften and filling heats through
Bake uncovered with cheese10 to 15 minutesCheese melts and the top finishes
Rest5 minutesFilling settles and serving gets easier

Bubbling Sauce and Melted Cheese Cues

At the end of baking, look at the sauce and the pepper walls before you rely on the clock. The dish should look hot and settled, not dry or collapsed.

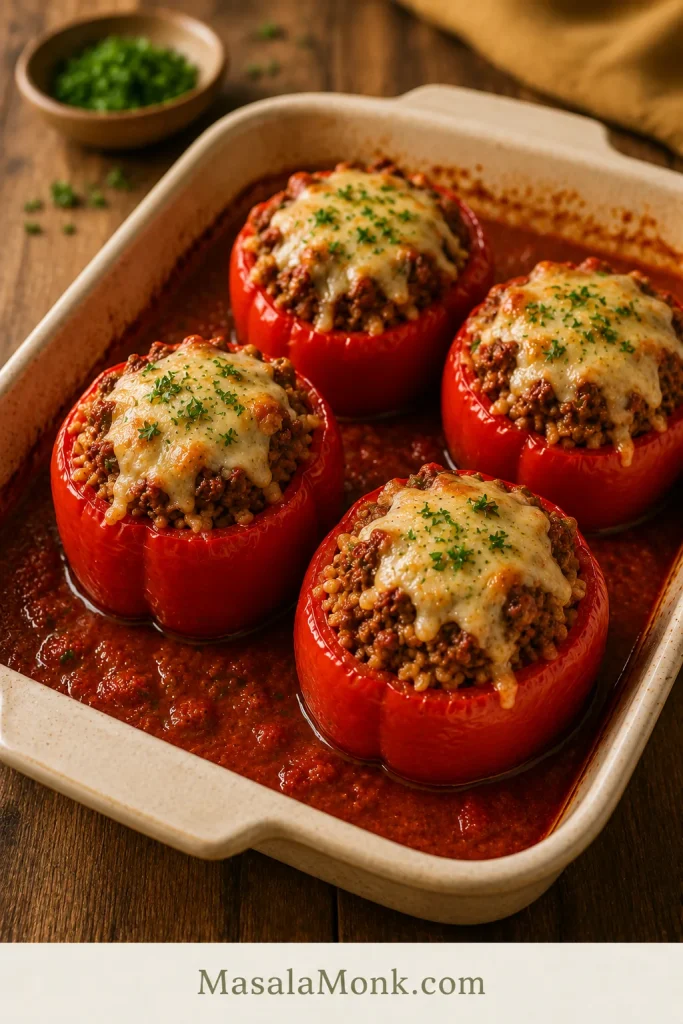
Finished baked stuffed red peppers with melted cheese and bubbling tomato sauce in a cream ceramic dish
Look for the real doneness signs: bubbling tomato sauce, melted cheese, hot filling, and red peppers that are tender but still standing. These cues matter more than the timer alone.

Total baking time is usually 40 to 50 minutes. Start checking around 40 minutes if your peppers are small, and closer to 50 minutes if they are large and thick-walled. The fork test matters more than the clock.

When the foil comes off, the peppers should look relaxed around the edges, not collapsed.

The peppers are ready when they are tender enough to pierce with a fork but still hold their shape. If they are still too firm, cover the dish again and bake a little longer before adding more uncovered time.

The Fork-Tender Test

For the final check, pierce the side of a pepper instead of judging only by the cheese. Tender but upright is the goal.

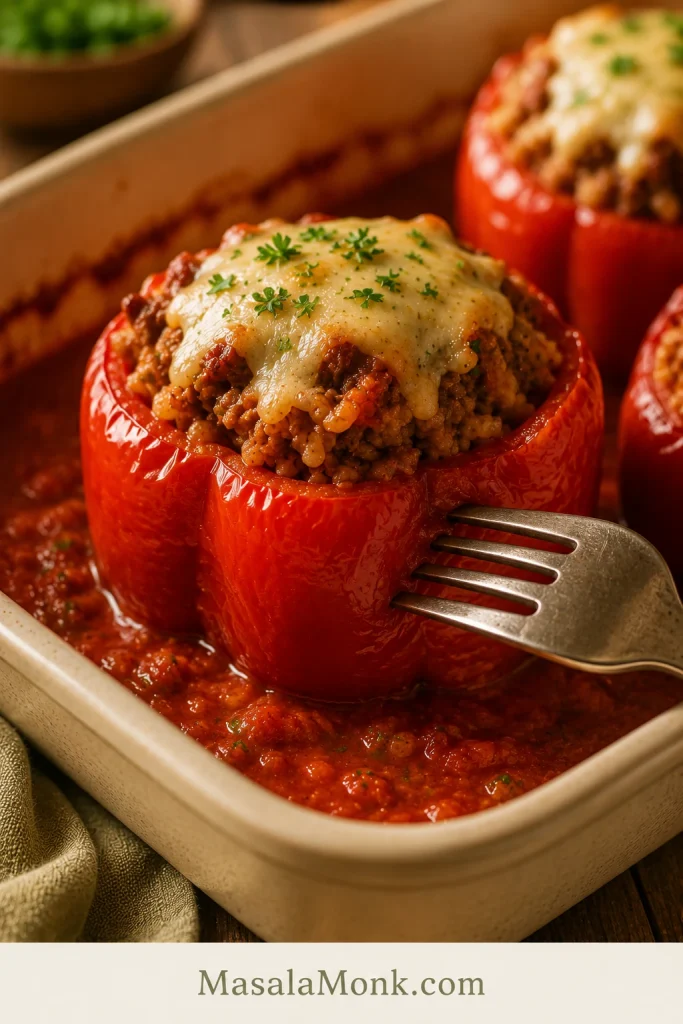
Fork piercing the side of a baked stuffed red pepper with melted cheese, beef filling, and tomato sauce
Use the fork test near the end of baking. The pepper wall should feel tender when pierced, but the stuffed pepper should still hold its shape in the sauce.

Should Stuffed Peppers Be Baked Covered or Uncovered?

Stuffed peppers should be baked covered first, then uncovered at the end. The covered bake softens the peppers; the uncovered finish melts the cheese and reduces extra moisture.

If you bake whole stuffed peppers uncovered from the beginning, the cheese and top of the filling can dry before the pepper walls become tender. Covering first and uncovering late makes the difference between peppers that taste baked and peppers that taste boiled.

How to Keep Stuffed Red Peppers From Getting Watery

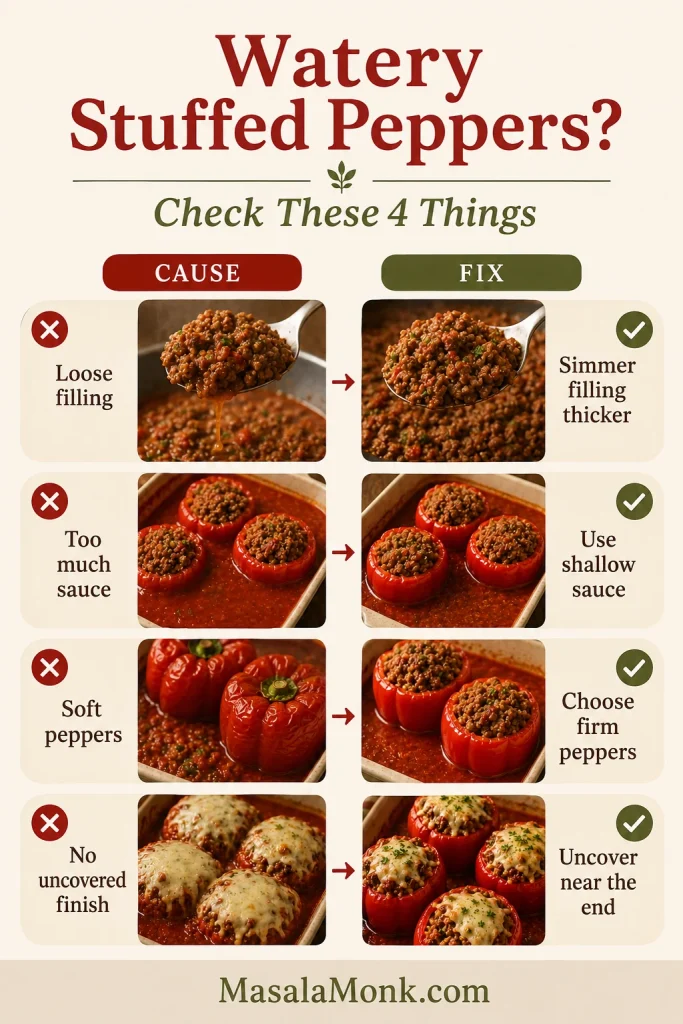
Watery stuffed peppers usually happen for one of three reasons: the filling was too loose, the peppers released a lot of liquid, or the dish had too much sauce. The fix is not complicated, but you need to control moisture before and during baking.

Infographic showing four causes and fixes for watery stuffed peppers, including loose filling, too much sauce, soft peppers, and no uncovered finish
For better texture, check the four usual trouble spots: loose filling, too much sauce, soft peppers, and skipping the uncovered finish.
  • Use cooked rice. It absorbs flavor without needing extra liquid inside the pepper.
  • Brown and drain the beef. Excess fat can make the filling feel greasy and loose.
  • Cook the filling until it is thick enough to mound. Let extra tomato liquid simmer off before stuffing.
  • Do not flood the baking dish. Use a shallow layer of sauce, not a deep pool.
  • Bake covered first, then uncovered. Covered baking softens; uncovered baking lets extra moisture reduce.
  • Use firm peppers. Older, softer peppers collapse and release more liquid.
  • Rest before serving. Five minutes helps the filling settle.
  • For halved peppers, pre-bake and tip out liquid. Halved peppers can release moisture quickly.

Texture cue: the filling should look glossy before stuffing, but not loose enough to run across the skillet. If it looks soupy, simmer it a few minutes longer.

Freezer note: for the best texture, freeze cooked stuffed peppers rather than raw stuffed peppers. Raw peppers can release more water after thawing.

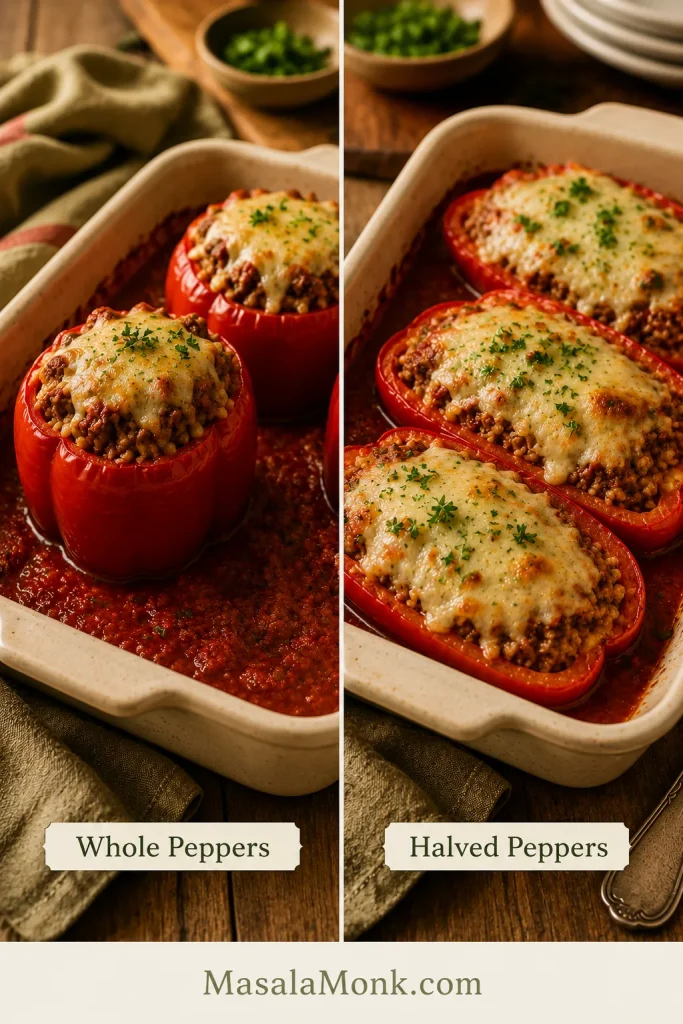
Whole vs Halved Stuffed Red Peppers

This recipe uses whole upright peppers because they give the classic stuffed pepper presentation and hold a generous amount of filling. They need a longer bake and a snug dish, but they look beautiful on the plate.

Halved peppers are better when you want a faster weeknight bake. They cook faster, are easier to portion, and give you more surface area for cheese. Because the cut sides release moisture quickly, a short pre-bake helps.

Side-by-side comparison of whole stuffed red peppers and halved stuffed red peppers topped with cheese
Whole stuffed red peppers give you the classic upright presentation and hold more filling. Meanwhile, halved peppers cook faster and create more surface area for melted cheese.

How to Make Halved Stuffed Red Peppers

To use halved peppers, slice them from stem to base, remove the seeds, and place them cut-side up in the dish. Pre-bake the empty halves at 375°F / 190°C for 10 minutes, then tip out any pooled liquid.

Add the filling, cover the dish, and bake for 15 to 20 minutes. Finish uncovered with cheese for another 5 to 10 minutes, until the cheese melts and the peppers are tender. Halved peppers cook faster than whole peppers, so start checking early.

Easy Variations

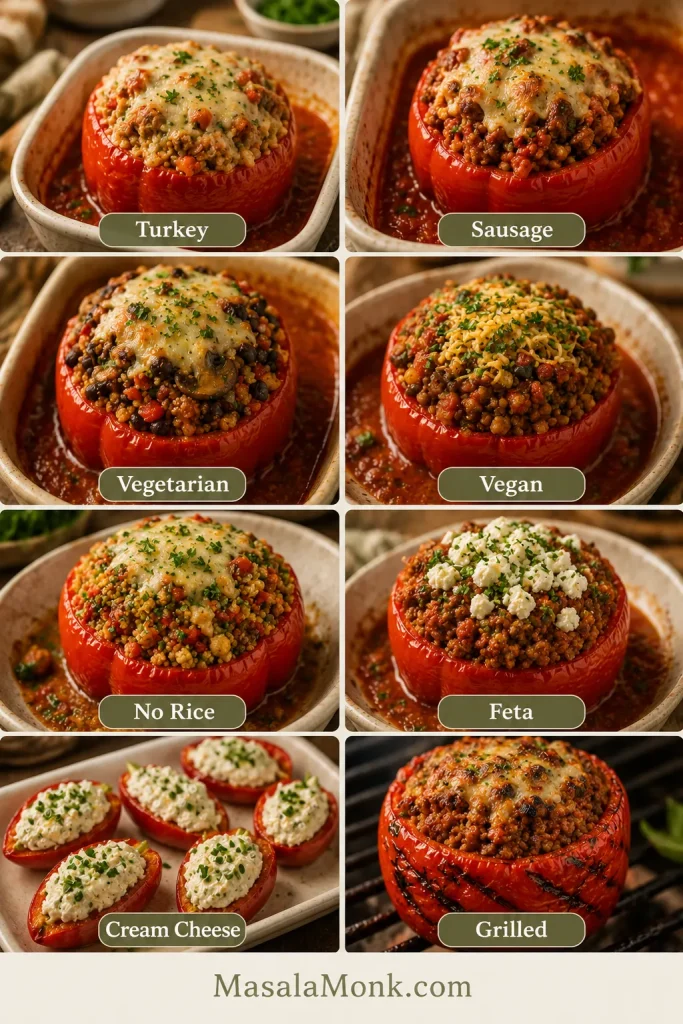
Once you know the base method, the filling can change without the whole recipe falling apart. Keep the mixture thick, keep the sauce shallow, bake covered first, and add cheese near the end.

Guide board with stuffed red pepper variations labeled turkey, sausage, vegetarian, vegan, no rice, feta, cream cheese, and grilled
Once the base method works, you can change the filling without losing the texture logic. Turkey, sausage, vegetarian, vegan, no-rice, feta, cream cheese, and grilled versions all follow the same core cues.

Ground Turkey Stuffed Red Peppers

Ground turkey works well when you want a lighter filling. Since turkey is leaner than beef, add a little extra olive oil or a few extra spoonfuls of tomato sauce so the center does not turn dry. Season well, because turkey needs more help than beef.

Sausage Stuffed Red Peppers

For a richer, more seasoned filling, use half ground beef and half Italian sausage. Because sausage brings salt and flavor, reduce the added salt at first and adjust after tasting.

Vegetarian Stuffed Red Peppers

For a vegetarian version, replace the beef with black beans, pinto beans, lentils, mushrooms, quinoa, or extra vegetables. Beans and lentils make the peppers hearty; mushrooms add savory depth if you cook off their moisture first.

Vegan Stuffed Red Peppers

For a vegan version, use beans, lentils, mushrooms, rice, quinoa, or vegetables cooked down with tomato sauce and herbs. Skip the cheese or use vegan cheese. Keep the mixture moist and well-seasoned so it does not taste like plain rice and vegetables.

Stuffed Red Peppers Without Rice

For no-rice stuffed red peppers, use cauliflower rice, chopped mushrooms, cooked eggplant, extra ground beef, ground turkey, lentils, or beans. If you use watery vegetables like zucchini, mushrooms, or eggplant, cook them first so they release moisture before going into the peppers.

Feta Stuffed Red Peppers

For a Mediterranean-style version, use feta, herbs, lemon, olives, chickpeas, couscous, or rice. Because feta is salty, taste the filling before adding extra salt. This version works especially well with halved peppers.

Cream Cheese Stuffed Red Peppers

Cream cheese stuffed red peppers are usually more of an appetizer than a full dinner. For that style, mini red peppers or small sweet peppers work better than large whole bell peppers. Mix cream cheese with herbs, garlic, cheddar, chives, smoked paprika, or crispy breadcrumbs, then bake or air fry until warm.

Grilled Stuffed Red Peppers

Grilled stuffed red peppers work best with a fully cooked filling. Place the stuffed peppers over medium heat, close the grill, and cook until the pepper walls soften and the center is hot. Add cheese near the end so it melts without burning.

What to Serve With Stuffed Red Peppers

This dish can be a full meal on its own because it already has vegetables, protein, rice, sauce, and cheese. On a busy night, choose one simple side based on the kind of plate you want.

  • Fresh and crisp: a cucumber salad for something cold and tangy
  • Starchy and cozy: roasted potatoes or warm bread
  • Sauce-friendly: homemade garlic bread for catching extra tomato sauce
  • Light and vegetable-heavy: steamed broccoli, green beans, or a simple green salad
  • For spicy versions: plain yogurt or sour cream

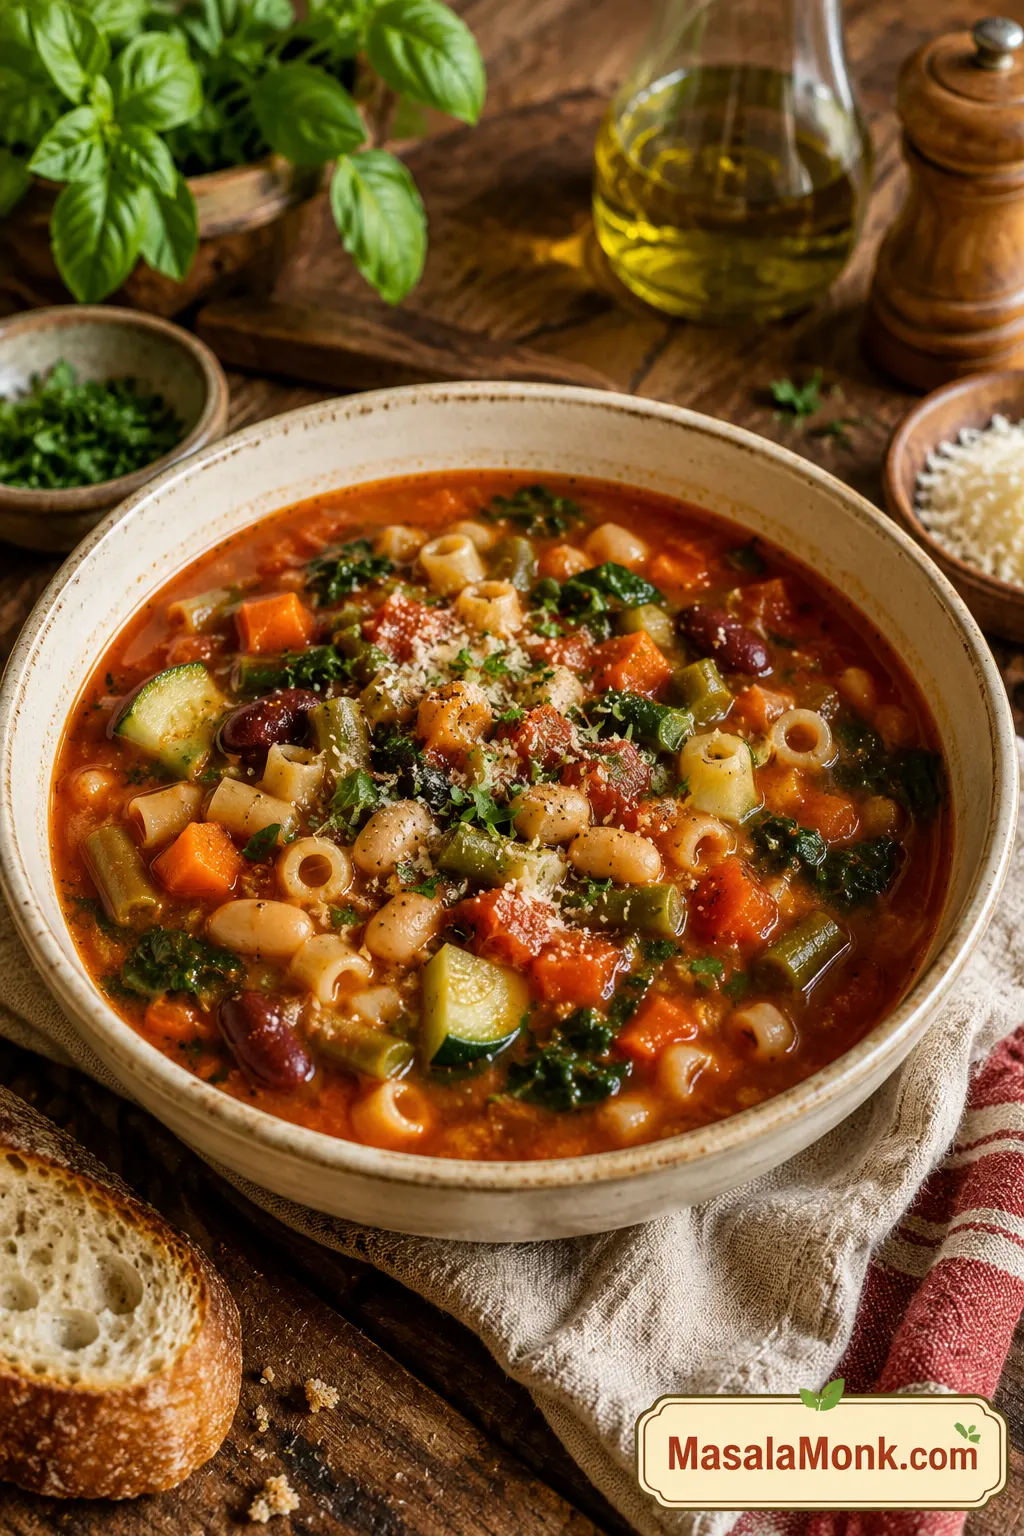
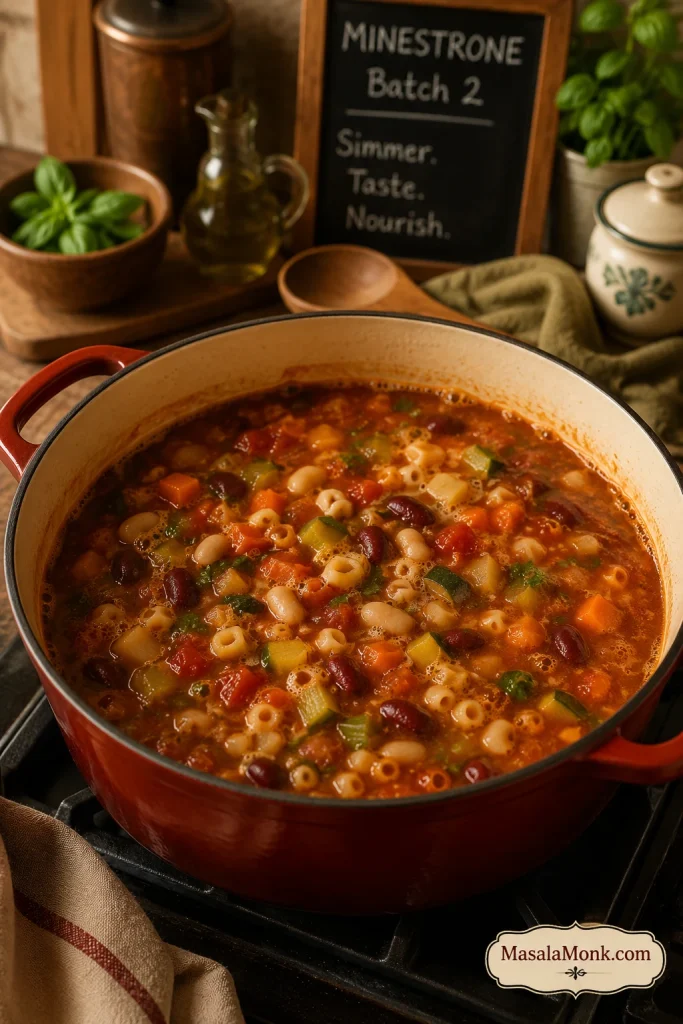
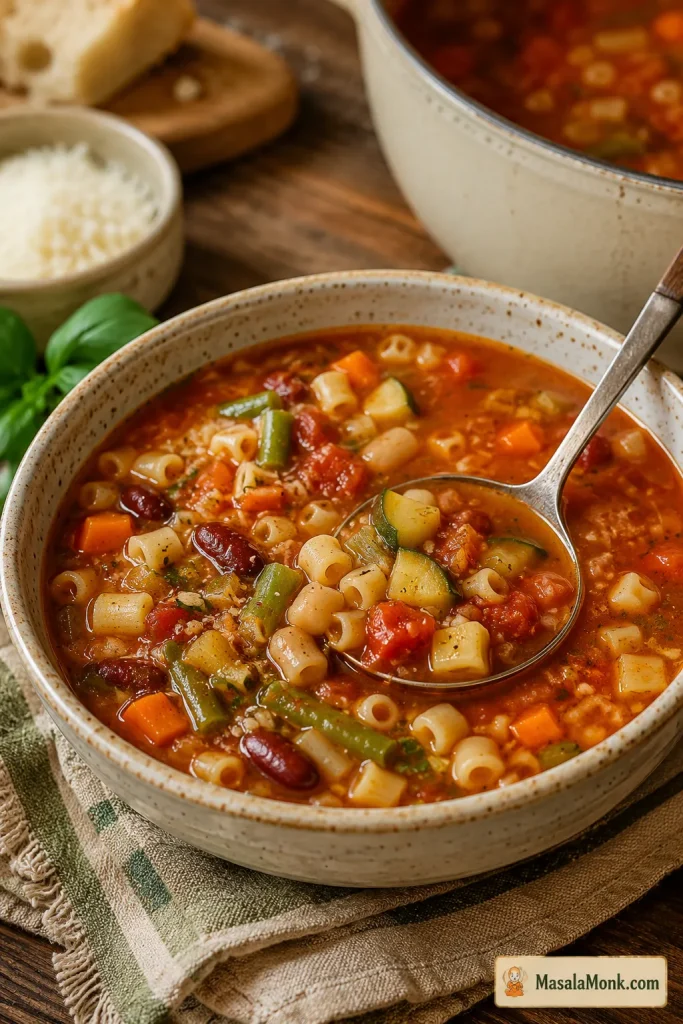
If you want a soup-and-peppers dinner, a bowl of minestrone soup keeps the meal vegetable-heavy without making it feel too rich.

Make Ahead, Storage, Freezing, and Reheating

Make Ahead

You can make the filling 1 to 2 days ahead and store it in the fridge. You can also stuff the peppers several hours ahead, cover the dish, and refrigerate until ready to bake. If baking straight from the fridge, add about 5 to 10 extra minutes to the covered baking time.

For the cleanest make-ahead stuffed peppers, keep a little extra sauce ready. Cold filling can feel drier when it goes into the oven, so spooning sauce into the dish before baking helps everything heat more evenly.

Storage

Store leftovers in an airtight container in the fridge for 3 to 4 days. Keep extra sauce with the peppers if possible, because it helps them reheat without drying out.

That timing also matches USDA leftover guidance, which recommends keeping cooked leftovers in the refrigerator for 3 to 4 days.

Freezing

These peppers freeze best after they are cooked. Let them cool completely, then wrap them well or store them in freezer-safe containers. Freeze for up to 2 to 3 months.

Raw stuffed peppers can be frozen, but the texture is usually softer and wetter after thawing. For the best result, bake first, cool, then freeze.

Reheating

To reheat in the oven, place the peppers in a baking dish with a spoonful of sauce, cover, and warm at 350°F / 175°C until the center is hot. The microwave is faster, but the peppers will be softer. Add a little sauce before reheating if the filling looks dry.

Troubleshooting

Most stuffed red pepper problems come down to moisture, timing, or seasoning. Use this table if something feels off.

ProblemLikely CauseFix
Peppers are wateryLoose filling, too much sauce, or peppers released liquidSimmer filling longer, use less sauce, bake uncovered at the end, and rest before serving
Peppers are still firmNot enough covered baking timeCover again and bake 5 to 10 minutes longer
Rice is undercookedUncooked or partly cooked rice was addedUse fully cooked rice for this recipe
Filling tastes blandNot enough seasoning before rice was addedSeason the beef well and use tomato paste, garlic, herbs, and enough salt
Filling is dryVery lean meat or not enough sauceAdd extra tomato sauce or a splash of broth
Peppers collapsedOverbaking or very soft peppersUse firm peppers and bake only until tender
Cheese browned too fastCheese was added too earlyAdd cheese during the last 10 to 15 minutes only
Filling spills out when servedPeppers were overfilled or served immediatelyPack gently and rest 5 minutes before lifting from the dish
Peppers will not stand uprightUneven bottoms or dish is too largeTrim a tiny slice from the bottom or use a snugger dish

FAQ

Do you cook rice before adding it to stuffed red peppers?

Yes. Cooked rice gives the most reliable texture and keeps you from finding hard grains inside an otherwise tender pepper. Leftover rice works well.

Can I use uncooked rice in stuffed red peppers?

You can, but cooked rice is easier. If using uncooked rice, simmer it with the filling and extra liquid until mostly tender before stuffing the peppers.

Should the ground beef be cooked before stuffing peppers?

Yes. Brown the beef first so the filling tastes deeper, releases excess fat in the skillet, and heats more predictably in the oven.

Do you have to boil red peppers before stuffing them?

No. This recipe uses a no-boil method. Baking the peppers covered gives enough steam to soften them.

How long do stuffed red peppers take in the oven?

Whole peppers usually take 40 to 50 minutes at 375°F / 190°C: 30 to 35 minutes covered, then 10 to 15 minutes uncovered with cheese.

What temperature is best for baking stuffed red peppers?

375°F / 190°C works well because it gives whole peppers time to soften while keeping the filling moist.

How do I know when stuffed red peppers are done?

The peppers should be fork-tender but still holding their shape. Around the edges, the sauce should bubble, the filling should be hot, and the cheese should be melted.

Why are my stuffed peppers watery?

They can turn watery if the filling is loose, the meat was not drained, the dish had too much sauce, or the peppers released liquid. Simmer the filling until thick and finish the bake uncovered.

Do stuffed peppers need to be covered while baking?

Yes, for the first part of baking. Covering traps steam and helps the peppers soften; uncover near the end for melted cheese and reduced moisture.

Is it better to make stuffed peppers whole or halved?

Whole peppers look classic and hold more filling. Halved peppers cook faster, are easier to eat, and give more surface area for cheese.

What sauce goes with stuffed red peppers?

Tomato sauce or marinara is the easiest choice because it keeps the peppers moist and gives you sauce to spoon over the finished dish.

Which cheese melts best on stuffed peppers?

Mozzarella, Monterey Jack, cheddar, or a blend all work. For the final texture, mozzarella is mild and stretchy, Monterey Jack is creamy, and cheddar tastes sharper.

How do you make stuffed red peppers without rice?

Replace the rice with cauliflower rice, mushrooms, eggplant, extra meat, lentils, beans, or quinoa. Cook watery vegetables first so they do not loosen the filling.

What is a good vegetarian filling for red peppers?

Beans, lentils, mushrooms, quinoa, rice, corn, tomatoes, onions, garlic, herbs, and cheese all work well. Keep the filling hearty and well-seasoned.

Can I make stuffed red peppers ahead of time?

Yes. Make the filling 1 to 2 days ahead or stuff the peppers several hours ahead. If baking from cold, add 5 to 10 extra minutes to the covered bake.

Do stuffed red peppers freeze well?

Yes. They freeze best after baking. Cool completely, wrap or store airtight, and freeze for up to 2 to 3 months.

How do you reheat stuffed red peppers without drying them out?

Reheat them covered with a spoonful of sauce in the dish. Use a 350°F / 175°C oven until the center is hot, or microwave gently for a softer result.

Can I use red capsicum for this recipe?

Yes. Red capsicum is another name for red bell pepper in many countries. Use large sweet red capsicum, not small hot red peppers.

Are red peppers better than green peppers for stuffed peppers?

Red peppers are sweeter and milder, which works especially well with tomato, beef, rice, and cheese. Green peppers still work if you prefer a sharper flavor.

Final Bite

The best part is cutting into the pepper while the sauce is still warm enough to slip into the rice and beef. That is when the dish stops feeling like separate parts and becomes the comfort food it is supposed to be: soft red pepper, savory filling, tomato sauce, and melted cheese in one forkful.

Tomato sauce being spooned over a cut-open stuffed red pepper with beef, rice, and melted cheese
Finally, spoon extra tomato sauce over the stuffed red peppers before serving. That last spoonful brings the rice, beef, pepper, and cheese together in the first bite.

Let the peppers rest just long enough for the first forkful to hold together, then serve while the sauce is still warm and glossy.

Posted on Leave a comment

Sausage Rolls Recipe: Easy Homemade Puff Pastry Sausage Rolls

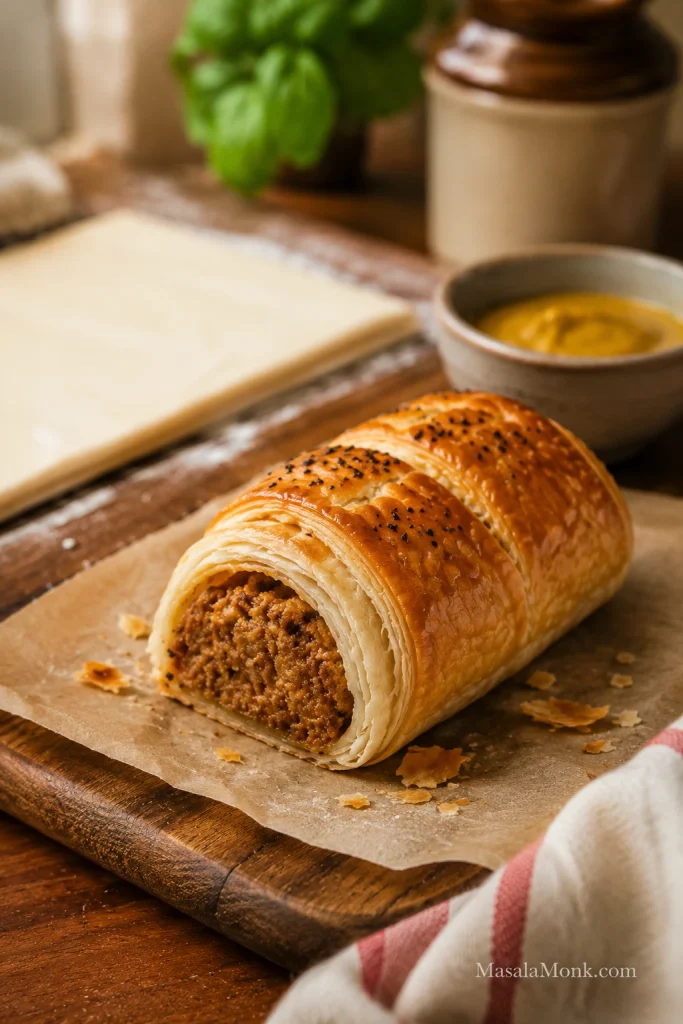
Homemade puff pastry sausage rolls on parchment with one roll cut open beside a small bowl of mustard.

If you have puff pastry and sausages, you are already close to a tray of homemade sausage rolls: buttery layers, savory filling, crisp bottoms, and the kind of warm snack people reach for before you have even moved the tray to the table.

Sausage rolls are savory pastry rolls filled with seasoned sausage meat and baked until flaky, golden, and hot in the center. This version keeps the classic idea but makes it practical for real kitchens: store-bought puff pastry, everyday sausages if that is what you have, clear cutting sizes, and enough small technique to avoid greasy, soft pastry.

The method itself is simple: fill, roll, seal, cut, glaze, and bake. You do not need special sausage meat, you do not need to guess the bake time, and you do not have to settle for soggy bottoms.

Make them large for dinner, small for parties, or freeze them unbaked for later. Once you know the basic shape, the same method works for lunchboxes, snack trays, and the kind of warm batch that disappears faster than expected.

Quick Answer: How to Make Sausage Rolls

To make sausage rolls, fill cool puff pastry with seasoned sausage meat or regular sausages with the skins removed, roll and seal the pastry, brush with egg wash, then bake at 200°C / 400°F, or 180°C fan / convection, until the pastry is puffed and well browned.

Large sausage rolls usually take 25–30 minutes, 16 medium rolls usually take 22–25 minutes, and mini sausage rolls usually take 18–22 minutes.

The easiest version uses puff pastry, sausages, and egg wash. The better version adds softened onion, breadcrumbs, herbs, and a little mustard, so the filling tastes rounder, stays juicy, and does not soak the pastry as it bakes.

For pork or beef sausage rolls, the filling should reach 160°F / 71°C in the center. For chicken or turkey sausage rolls, use 165°F / 74°C. If the pastry browns before the center is done, lower the oven slightly and bake a few minutes longer.

When they come out right, you get the best kind of contrast: flaky pastry on top, a clean, crisp base, and a savory filling that stays juicy without soaking through.

Hands holding a sausage roll broken open to show flaky puff pastry layers and cooked sausage filling.
When the roll breaks open, the pastry should flake instead of collapse, and the filling should look moist, cooked, and evenly packed.

Sausage Rolls Recipe Card

Easy Homemade Puff Pastry Sausage Rolls

This recipe makes flaky homemade sausage rolls with ready-rolled puff pastry and sausage meat, or regular sausages with the skins removed. Make them big enough for lunchboxes, small enough for party trays, or somewhere in the middle for the kind of snack that disappears while it is still warm.

Prep time20 minutes
Optional chill time10–20 minutes
Cook time18–30 minutes, depending on size
Total time40–60 minutes
Yield8 large, 16 medium, or 24–32 mini sausage rolls
Oven200°C / 400°F, or 180°C fan / convection

Equipment: You need a baking sheet, parchment paper, mixing bowl, small pan, sharp knife, pastry brush, and wire rack. An instant-read thermometer is helpful for large rolls or chicken and turkey fillings.

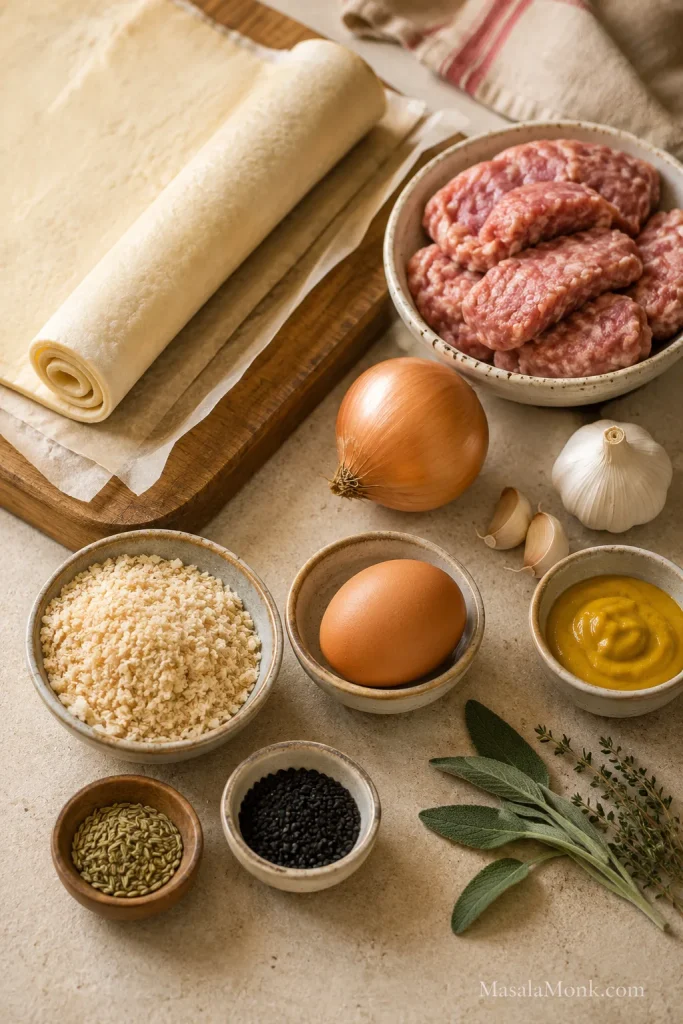
Sausage Roll Ingredients

Puff pastry, sausage meat, onion, garlic, breadcrumbs, egg, mustard, herbs, and seeds arranged on a kitchen work surface.
This ingredient mix shows why the full version tastes rounder: breadcrumbs hold moisture, onion adds sweetness, and mustard sharpens the sausage filling.
  • 320–375g / 11–13 oz ready-rolled puff pastry, thawed if frozen but still cool
  • 450–500g / about 1 lb sausage meat, or 6–8 medium sausages with skins removed
  • 1 teaspoon oil or butter, for softening the onion
  • 1 small onion, about 70–90g / ½ cup very finely chopped
  • 1–2 garlic cloves, minced
  • 35–40g / about ½ cup panko breadcrumbs or fresh breadcrumbs, plus more if the filling feels loose
  • 1 egg for the filling
  • 1 egg for egg wash
  • 1 tablespoon / 15ml Dijon mustard or English mustard, optional
  • 1 teaspoon dried sage or thyme, or 1 tablespoon finely chopped fresh herbs
  • ½–1 teaspoon fennel seeds, lightly crushed, optional
  • Black pepper, to taste
  • Salt, only if using plain ground meat instead of seasoned sausage meat or sausages
  • Sesame seeds or nigella seeds, optional topping

If using plain ground pork or beef: start with about ¾ teaspoon fine salt per 500g / 1 lb meat. To check the seasoning safely, cook a tiny pinch of the filling in a pan before shaping the rolls.

Make the Filling and Shape the Rolls

  1. Preheat and line the tray. Preheat the oven to 200°C / 400°F, or 180°C fan / convection. Line a large baking sheet with parchment paper.
  2. Prepare the pastry. If frozen, thaw the puff pastry until flexible but still cool. It should unroll without cracking.
  3. Cook the onion. Warm the oil or butter in a small pan. Soften the onion for a few minutes, then add garlic for 30 seconds. Cool completely.
  4. Prepare the sausage meat. If using regular sausages, slit the skins lengthwise and squeeze the meat into a mixing bowl.
  5. Mix the filling. Combine sausage meat, cooled onion and garlic, breadcrumbs, 1 egg, mustard, herbs, optional fennel, and black pepper. Mix gently.
  6. Check the texture. You want a soft log that holds together without spreading like paste or crumbling apart. Add 1–2 tablespoons more panko if it feels loose, or 1–2 teaspoons cold water or milk if it feels dry.
  7. Cut the pastry. For one 320–375g sheet, cut the pastry in half lengthwise to make 2 long strips. If your pastry sheet is a different size, aim for strips wide enough to wrap around the filling without stretching.
  8. Add the filling. Divide the sausage filling into 2 even logs and place one log down the center of each pastry strip. For mini sausage rolls, shape thinner logs rather than simply cutting overfilled rolls smaller.
  9. Seal. Leave a small border beside the filling. Brush the edge lightly with beaten egg, fold the pastry over, and press just enough to close. Place seam-side down. Too much egg wash can make the edge slippery, and too much pressure can flatten the layers.
  10. Chill if soft. Chill the shaped rolls for 10–20 minutes if the pastry feels sticky, warm, or loose.

Cut, Bake, and Cool

  1. Cut and glaze. Cut each long roll into 4 pieces for 8 large rolls, 8 pieces for 16 medium rolls, or 12–16 pieces for 24–32 mini rolls. Brush tops with egg wash, add seeds if using, and slash lightly.
  2. Bake. Space the rolls at least 2.5cm / 1 inch apart on the baking sheet. Bake large rolls for 25–30 minutes, 16 medium rolls for 22–25 minutes, or mini rolls for 18–22 minutes.
  3. Cool. Rest for a few minutes on the tray, then move to a wire rack so the bottoms stay crisp.

Doneness: Look for well-browned pastry and cooked-through filling. Pork or beef sausage filling should reach 160°F / 71°C. Chicken or turkey filling should reach 165°F / 74°C.

What good looks like: the rolls should feel firm before baking, sit seam-side down, and come out browned on top with crisp bottoms and hot filling.

Freezer note: For best texture, freeze sausage rolls unbaked after shaping and cutting. Bake from frozen at 200°C / 400°F, or 180°C fan / convection, and add extra time. Do not thaw first unless your pastry packet specifically recommends it.

First batch recommendation: make the full version with onion, breadcrumbs, mustard, and herbs. It gives you the best balance of juicy filling and crisp pastry. Once you know how your pastry and sausages behave, use the 3-ingredient shortcut for faster batches.

The 3 Rules for Better Sausage Rolls

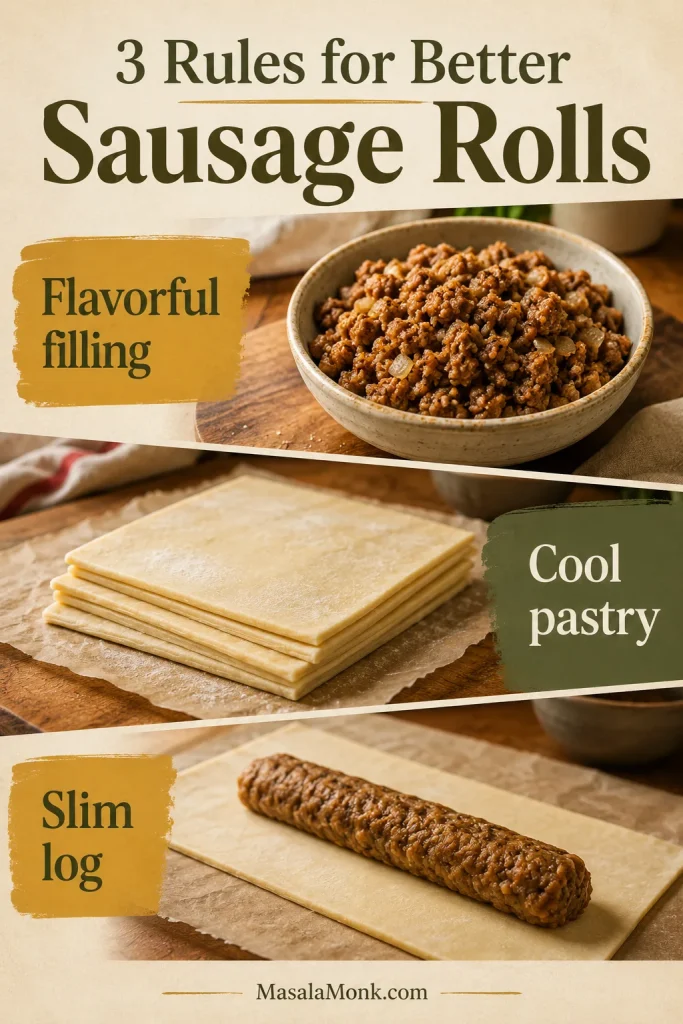
Good sausage rolls do not need fancy pastry or special sausage meat. They need three small things done well: filling that tastes good before it goes in, pastry that stays cool enough to puff, and a filling log slim enough for the pastry to close without a fight.

Visual guide showing flavorful filling, cool pastry, and a slim filling log for making sausage rolls.
Think of this as the sausage roll safety net: seasoned filling for flavor, cold pastry for lift, and a slim log for a clean seal.
  • Use filling that tastes good before it goes in. Sausage rolls are simple, so bland sausage has nowhere to hide.
  • Keep the pastry cool. Sticky, greasy, or slack pastry is a sign to pause and chill the tray.
  • Shape thinner than you think. The pastry should close like a wrapper, not stretch like a blanket.

Get those right and the rolls bake neater, crisper, and juicier, with fewer split seams, fewer soggy bottoms, and a center that cooks through before the pastry over-browns. Next, choose the filling, pastry, and size that fit the batch you actually want to make.

Need the exact amounts now? Jump back to the recipe card, or compare options in Choose the Sausage Roll Version You Want.

Choose the Sausage Roll Version You Want

A party tray, lunchbox roll, freezer batch, and fast snack all use the same base method, but the size and filling choices change slightly. Start with the version that fits the moment, then use the rest of the guide to fine-tune it.

Decision board showing sausage rolls for a fast snack, party tray, lunchbox, dinner, air fryer batch, freezer batch, and bakery-style serving.
Once the base method is clear, the same sausage roll recipe can become a snack, party tray, lunchbox option, air fryer batch, or freezer prep.
SituationBest sausage roll version
Fast snack3-ingredient sausage rolls with puff pastry, sausages, and egg wash
Best flavorMain recipe with onion, breadcrumbs, mustard, herbs, and optional fennel
Party trayMini sausage rolls, shaped thinner and frozen unbaked if making ahead
LunchboxesMedium rolls, cooled completely before packing
DinnerLarger rolls with salad, beans, soup, or potatoes
Air fryer batchMini or medium rolls cooked in one layer
Rich bakery-stylePork sausage, all-butter puff pastry, generous egg wash, and a short chill before baking

Can I Use Regular Sausages?

Yes. Most people do not buy “sausage meat” every week. Regular sausages are usually easier to find, and they work beautifully when the flavor is already good. Slit the skins, squeeze out the meat, and loosen it with a fork so it shapes evenly inside the pastry.

Hands opening regular sausages and shaping the sausage meat into a log on a kitchen counter.
Regular sausages can become sausage roll filling once the skins are removed; after that, shape the meat evenly so the pastry wraps cleanly.

Choose sausages you already like because the filling is the main flavor of the roll. If the sausage tastes bland before it goes in, the pastry cannot fix it.

Ingredient note: In the UK and Australia, “sausage meat” usually means seasoned loose sausage filling. In the US, look for bulk sausage, breakfast sausage meat, or simply remove the meat from sausages. Plain ground pork works too, but it needs proper seasoning.

  • Sausage meat: fastest and most classic, but check salt before adding more.
  • Regular sausages: easiest supermarket shortcut; slit the skins and use the filling.
  • Plain ground pork or beef: works if you season it properly and keep enough fat or moisture for juiciness.
  • Chicken, turkey, or vegetarian sausage: useful alternatives, but watch dryness or excess moisture.

Check the Seasoning Safely

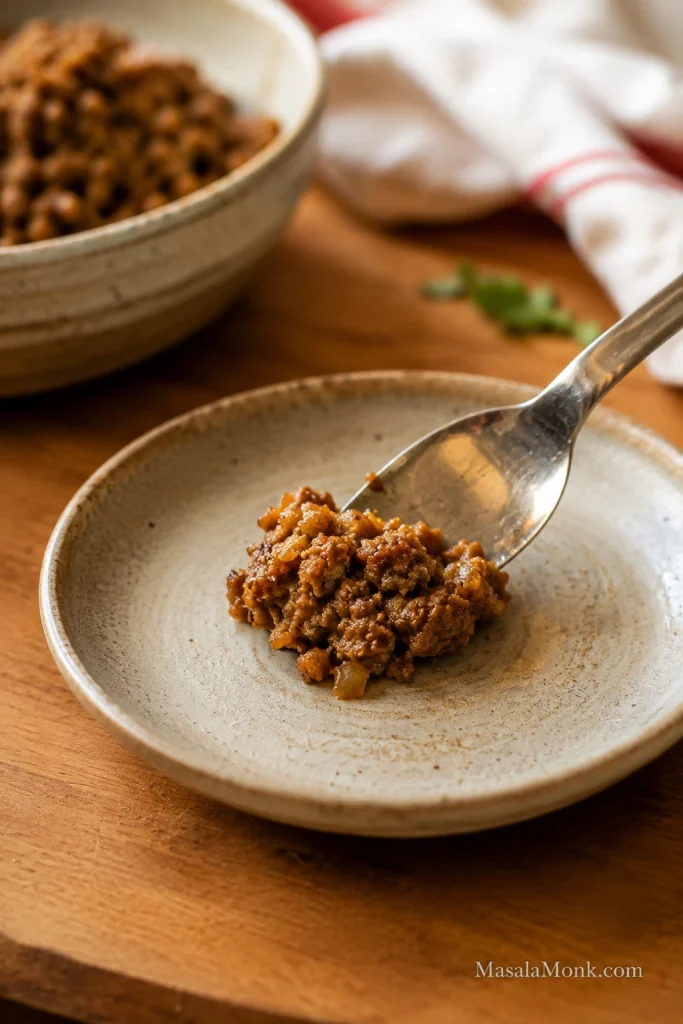
Salt note: most sausages are already seasoned, so cook a tiny test piece before adding more salt. If you are using plain ground pork or beef instead, season it properly and test a small cooked piece before shaping.

Small cooked spoonful of sausage roll filling on a plate with a bowl of filling in the background.
A tiny cooked test piece lets you adjust seasoning before the pastry is involved, so the final sausage rolls taste balanced from the center out.

Which Sausages Make the Best Filling?

The best sausage rolls start with sausages you would happily eat on their own: savory, well-seasoned, and juicy without flooding the pan. Pork sausages are the classic choice because they usually have enough fat to stay tender. Breakfast sausage, Cumberland-style sausage, mild Italian sausage, chicken, turkey, and vegetarian sausage can all work too, as long as they are not too lean or watery.

For your first batch, avoid sausages that release a lot of liquid in the pan. Extra moisture can soften the pastry before it has time to crisp.

Simple rule: use sausage meat when you want speed, sausages when that is what you already have, and plain ground meat only when you are ready to season the filling properly.

What Pastry Is Best for Sausage Rolls?

Puff pastry is best for classic sausage rolls because it gives them lift, flakes, and crisp edges. Store-bought puff pastry is the right choice here because the point is a reliable homemade roll, not a pastry project.

All-butter puff pastry gives the richest flavor and the cleanest flaky bite: the kind that shatters a little when you bite in. Standard ready-rolled puff pastry still works well, especially if it stays cold and is not stretched around too much filling.

Close-up of a baked sausage roll with flaky puff pastry layers and cooked sausage filling on parchment.
Puff pastry gives sausage rolls their classic lift and crisp edges; keeping it cool helps those layers rise instead of melting flat.

Shortcrust pastry gives a firmer, more crumbly shell. Crescent roll dough makes a softer, breadier shortcut. Both can work, but neither gives the same flaky puff pastry bite.

How Much Filling Fits the Pastry?

Puff pastry sheets vary by country and brand. Use this table to avoid overfilling the pastry.

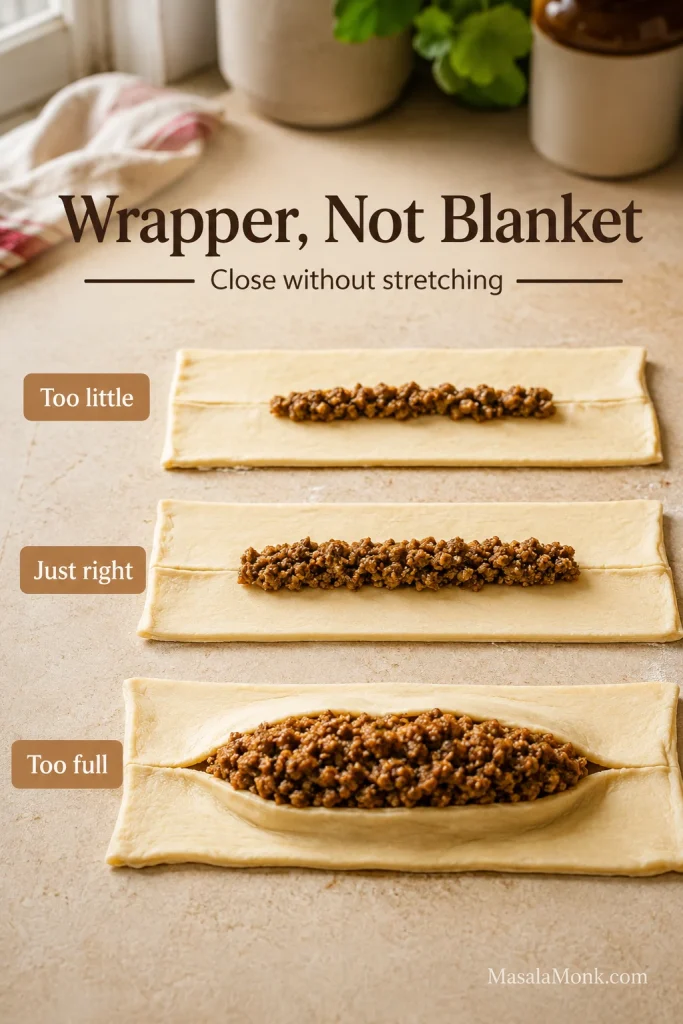
Pastry-to-filling ratio guide showing too little, just right, and too much sausage filling on puff pastry strips.
The best sausage roll ratio leaves a visible pastry border, so the roll seals better, puffs cleaner, and leaks less.
Pastry amountFilling amountBest use
280g / 10 oz puff pastry350–400g / 12–14 oz fillingSmaller batch or mini rolls
320g / 11 oz puff pastry400–450g / 14–16 oz fillingOne ready-rolled sheet
375g / 13 oz puff pastry450–500g / about 1 lb fillingStandard full batch
1 smaller US puff pastry sheet, about 225–250g / 8–9 oz275–350g / 10–12 oz fillingSmall batch
2 US puff pastry sheets, about 450–500g / 16–18 oz450–500g / about 1 lb fillingFull batch

When in doubt, use the visual cue: the filling log should let the pastry wrap around it without stretching. Think slim log, not stuffed tube. A sausage roll that looks slightly modest before baking often comes out neater, flakier, and better balanced after the pastry puffs.

The pastry is a wrapper, not a stretchable blanket. If you have to pull it hard to close, the roll is overfilled.

What Makes the Filling Better?

Cooked onion gives the filling deeper flavor without raw sharpness. Breadcrumbs are not just filler; they catch juices from the sausage so the filling stays tender without soaking the base. Mustard adds lift, sage and thyme bring classic savory flavor, and fennel seeds give pork sausage rolls a more aromatic, bakery-style finish.

Egg wash note: A whole beaten egg gives good shine and color. Egg yolk gives a deeper golden finish. Milk gives a softer, lighter color. For vegan sausage rolls, use plant milk, aquafaba, or a little oil depending on the finish you want.

The 3-Ingredient Sausage Roll Shortcut

Yes, you can make 3-ingredient sausage rolls with puff pastry, sausages, and egg wash. They will be simpler than the full recipe, but still good if the sausages are well seasoned and the pastry stays cool.

Use the full recipe when you want a juicier filling with onion, breadcrumbs, mustard, and herbs.

  • Unroll the pastry and cut it into strips.
  • Remove the sausage skins and shape the meat into logs.
  • Roll, seal, brush with beaten egg, and bake until golden and cooked through.

Step-by-Step Visual Cues for Better Sausage Rolls

The recipe card tells you what to do. This section shows you what to look for, because sausage rolls are much easier when you know how the pastry and filling should feel before they go into the oven.

1. Look for Pastry That Bends Without Grease

The puff pastry needs to unroll without cracking while still feeling cool to the touch. Sticky pastry is a sign to pause, not push through. A few minutes in the fridge gives the butter a cleaner start in the oven.

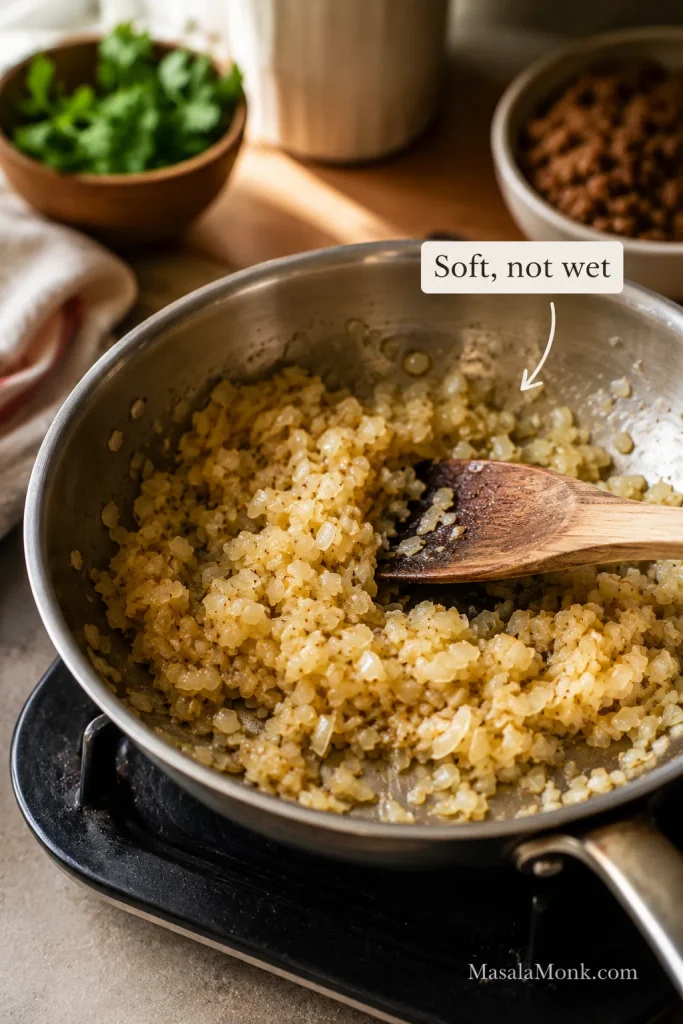
2. Cook the Onion Until Soft, Not Wet

The onion should be soft and fragrant before it goes into the sausage mixture, but not watery. Cooking it first gives sweetness and keeps raw onion moisture from softening the pastry.

Finely chopped onion softened in a pan with a wooden spoon for sausage roll filling.
Softened onion should look glossy and dry around the edges; that gives the filling sweetness without adding steam inside the pastry.

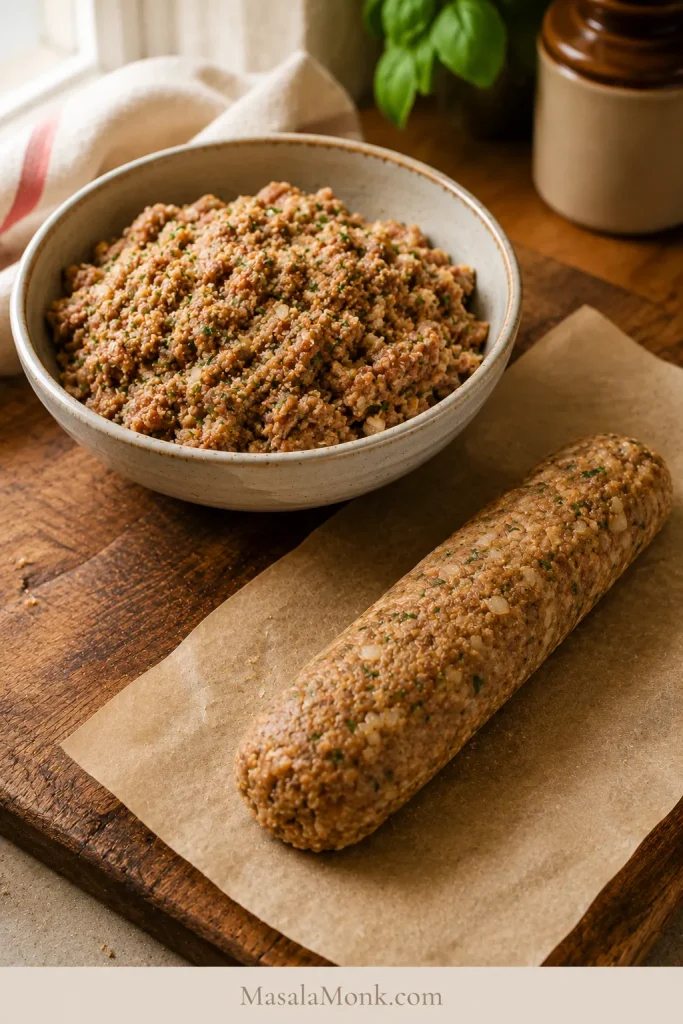
3. Shape a Filling Log That Holds Together

A good filling log holds its shape without slumping across the pastry. Loose filling needs a little more panko before it reaches the pastry. Dry, crumbly filling can take a teaspoon or two of cold water or milk.

Mixed sausage roll filling in a bowl with a shaped sausage filling log on parchment.
A filling that holds as a soft log is easier to roll, seal, and bake evenly; loose filling is more likely to soften the pastry.

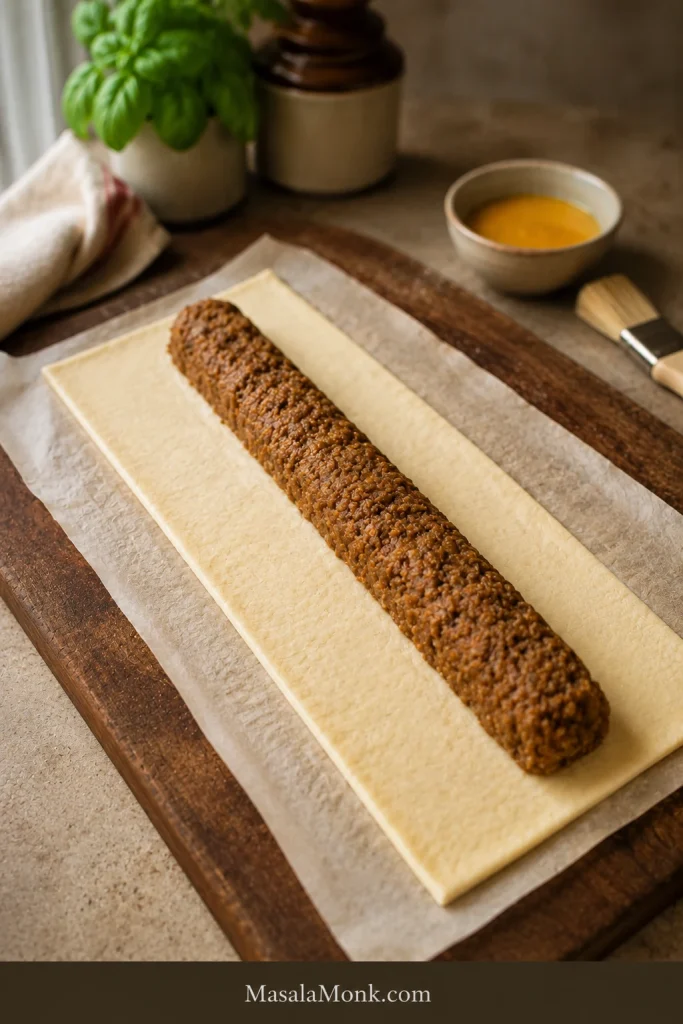
4. Place the Filling on the Pastry

The pastry needs to wrap easily around the filling. If you have to pull hard to close it, the log is too thick. Shape thinner than you think, especially for mini sausage rolls.

A slim sausage filling log placed down the center of a puff pastry strip with clear pastry borders.
Center the filling like a narrow ridge, not a mound; then the pastry can wrap around it without stretching thin at the seam.

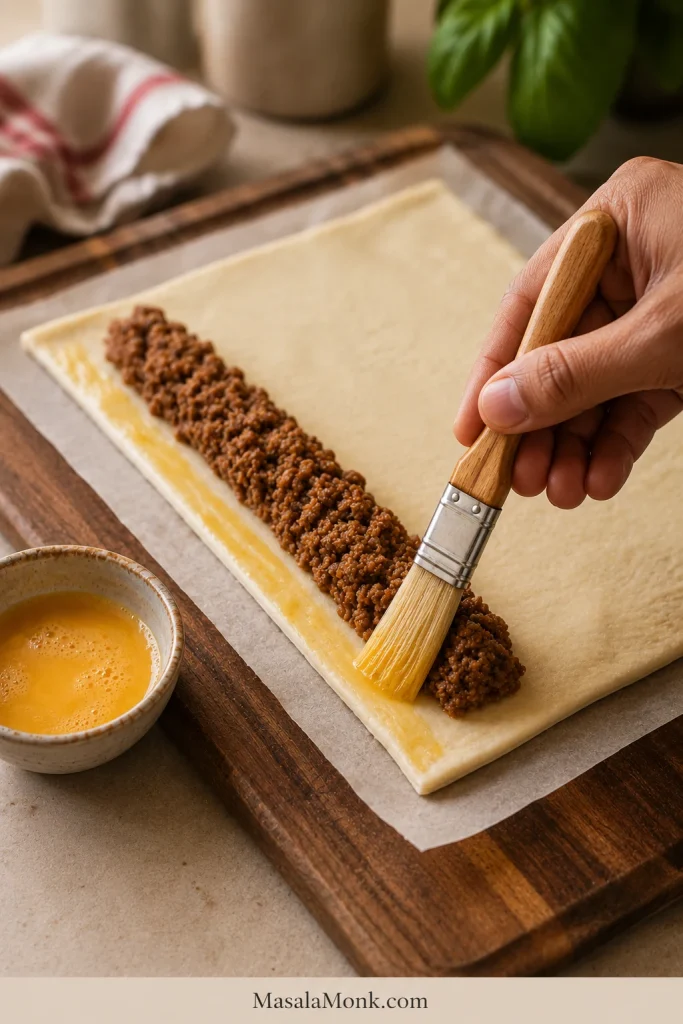
5. Seal with a Light Line of Egg Wash

Brush the edge lightly with egg wash, fold the pastry over, and press just enough to close. The seam needs to hold, but the layers should not be flattened.

A pastry brush applying egg wash along the edge of puff pastry beside sausage filling.
Egg wash works best as a thin glue line; a heavy brush of liquid can make the pastry edge slide open.

6. Bake Seam-Side Down

The sealed edge should sit against the tray, not face up. That way, the baking sheet supports the roll while the filling heats and the pastry expands.

Unbaked sausage rolls brushed with egg wash and arranged seam-side down on a parchment-lined tray.
Seam-side down placement turns the tray into support, so the pastry stays closed while the sausage filling heats and expands.

7. Cut Large, Medium, or Mini Sausage Rolls

Cut larger rolls for dinner or lunchboxes, medium rolls for snacks, and mini rolls for parties. Small rolls need thinner filling logs, not just shorter pieces of an overfilled roll.

Guide showing large, medium, and mini sausage rolls cut into different sizes.
Size changes the eating moment: large rolls suit dinner, medium rolls suit snacks, and mini sausage rolls suit parties or lunchboxes.

8. What the Tray Should Look Like Before Baking

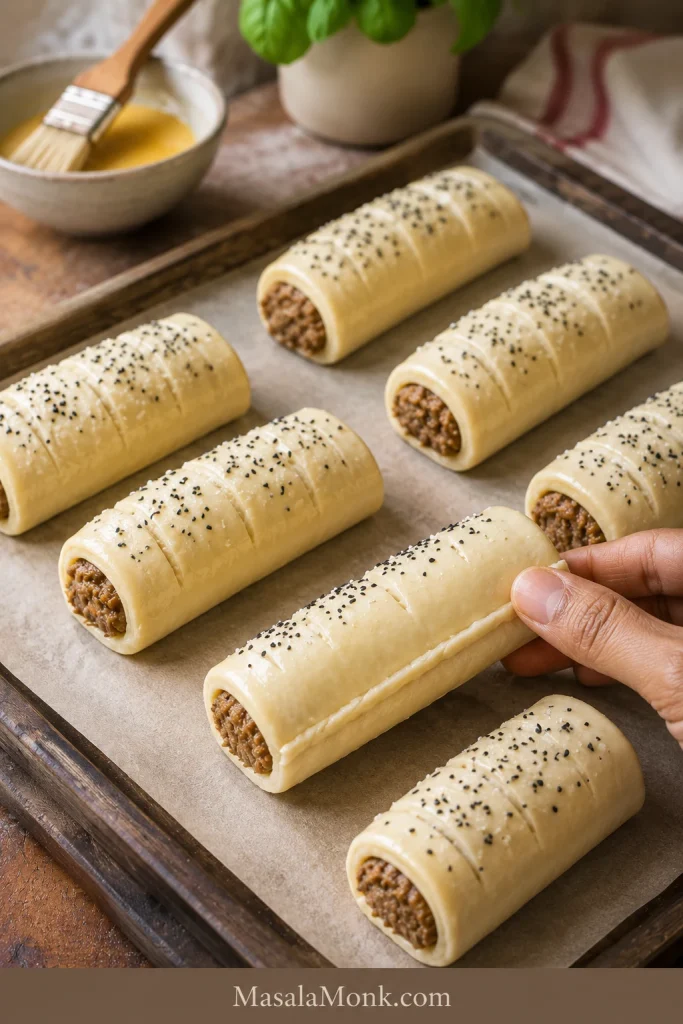
The final tray should look tidy but not crowded: glossy tops, clear gaps between rolls, and pastry that still holds its shape when moved.

Unbaked sausage rolls brushed with egg wash, topped with seeds, and spaced on a parchment-lined tray.
Before baking, the best tray looks tidy but not crowded: glazed tops, visible gaps, and pastry firm enough to hold its shape.

9. Look for Bronzed Tops and Clean Bottoms

Look for deeply browned tops, set seams, and bottoms that lift cleanly from the paper. If the pastry bends or feels damp underneath, it likely needs more time or better air circulation after baking.

10. Cool on a Rack, Not a Plate

Let the rolls sit briefly on the tray, then move them to a wire rack. A plate traps steam underneath; a rack keeps the base crisp while the filling settles.

Before baking check: the rolls should be easy to lift, not stretched tight, with the seam tucked underneath and small gaps between each piece. If the pastry feels greasy or the filling is bulging through the seam, chill the tray before baking.

Changing the size? Check sausage roll cooking times before baking. If the pastry feels soft or crowded, go to How to Stop Soggy Sausage Rolls.

How Long to Cook Sausage Rolls

Once the rolls pass that before-baking check, size matters more than anything else. A mini party roll and a thick lunchbox roll should not bake for the same amount of time.

Most homemade sausage rolls bake best at 200°C / 400°F, or 180°C fan / convection. That temperature is hot enough to puff and brown the pastry while giving the sausage filling time to cook through.

The goal is not pale pastry with cooked meat, or dark pastry with a doubtful center. The sweet spot is a bronzed top, a clean base, and filling that is hot all the way through.

Cooking time guide for mini, medium, large, and frozen unbaked sausage rolls.
Size is the reason one timing never fits all; mini rolls, large rolls, and frozen unbaked rolls each need their own bake cue.
TypeTemperatureApprox. timeDoneness cue
Large fresh sausage rolls, 8 pieces200°C / 400°F, or 180°C fan25–30 minWell browned pastry, hot center
Medium sausage rolls, 16 pieces200°C / 400°F, or 180°C fan22–25 minGolden, crisp, cooked through
Mini sausage rolls, 24–32 pieces200°C / 400°F, or 180°C fan18–22 minPuffed, browned, and crisp
Frozen unbaked sausage rolls200°C / 400°F, or 180°C fanAdd 6–10 min to the fresh time for that sizeGolden pastry with bubbling edges
Reheating baked rolls180°C / 350°F, or 160°C fan8–12 minHot center and crisp pastry

When they are ready, look for bronzed, firm tops, set seams, and bottoms that lift cleanly from the paper instead of bending or feeling damp.

Check the Internal Temperature

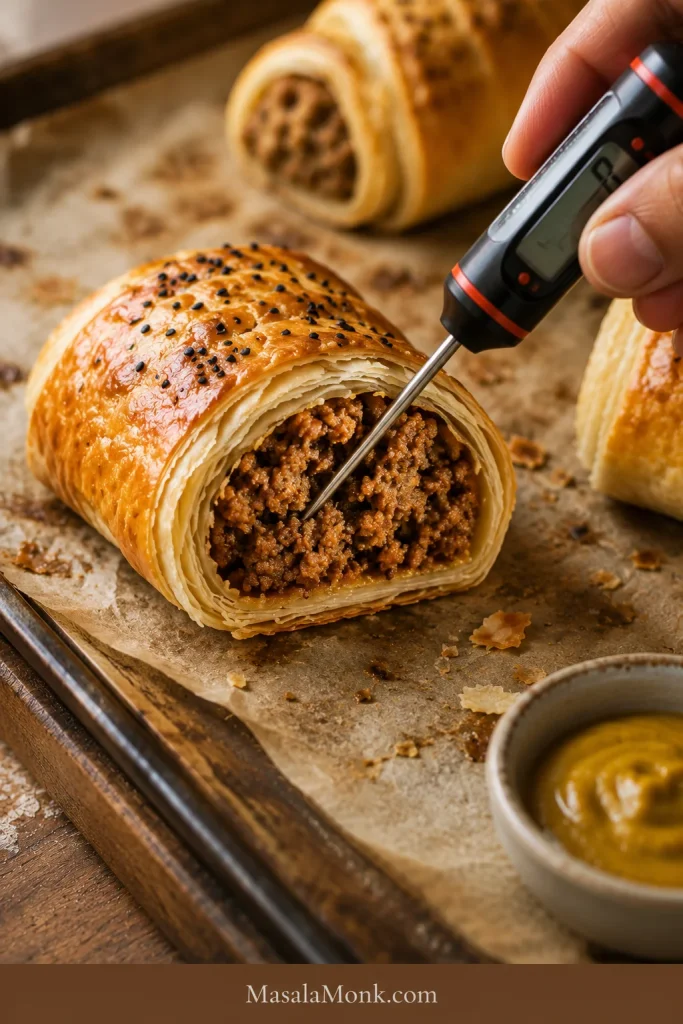
Instant-read thermometer inserted into the cooked filling of a baked sausage roll.
A thermometer checks what pastry color cannot show: whether the center of a thicker sausage roll is cooked through.

Use color as a clue, not the only test. Puff pastry should look well browned, but thick rolls can brown before the center is fully cooked. For a safe check, use an instant-read thermometer in the thickest part of the filling. For the official temperature chart, FoodSafety.gov has a simple safe minimum internal temperatures guide.

Making a batch for later? Go to Freezing, Reheating, and Making Ahead, or jump back to the recipe card.

How to Stop Soggy Sausage Rolls

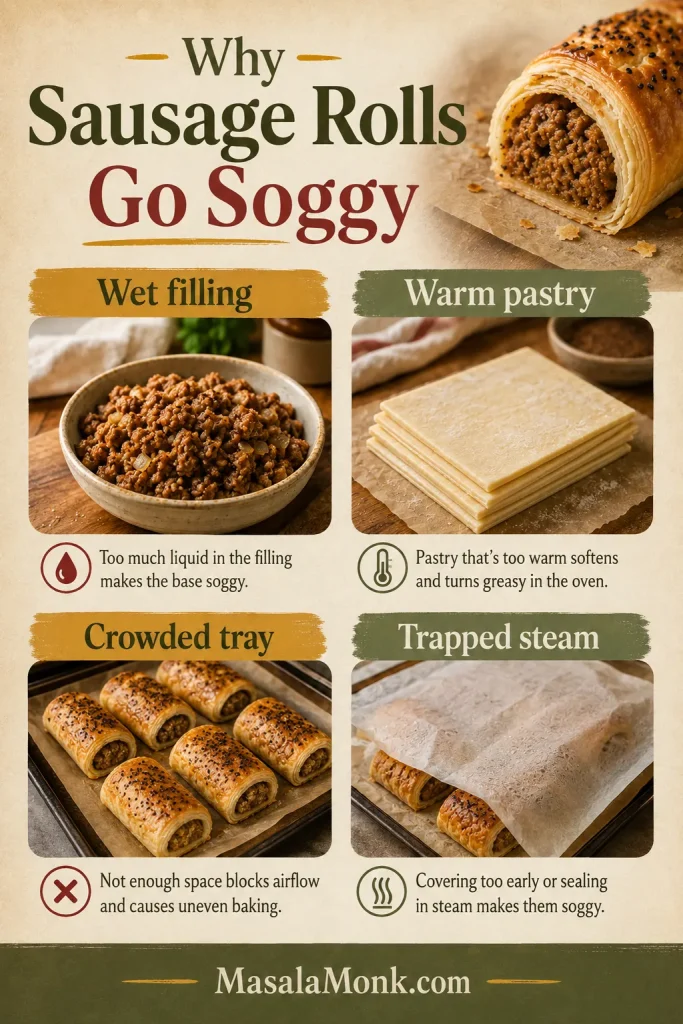
Soggy sausage rolls are disappointing, but they are rarely mysterious. If the base is soft, the seam opens, or fat leaks around the edges, the problem usually started before the tray went into the oven: wet filling, warm pastry, overfilling, or trapped steam after baking.

The oven can brown pastry, but it cannot fully rescue a filling that went in too wet.

Troubleshooting guide showing wet filling, warm pastry, crowded tray, and trapped steam as causes of soggy sausage rolls.
Soggy sausage rolls usually start before serving, with wet filling, warm pastry, crowding, or trapped steam weakening the crisp base.
ProblemLikely causeFix
Soggy bottomWet filling or pastry sitting in steamUse breadcrumbs, cool cooked onion, avoid watery vegetables, and move baked rolls to a wire rack.
Pastry leaking fatVery fatty filling, warm pastry, or oven too lowChill the shaped rolls if needed, bake at the right heat, and space rolls apart.
Pastry split openOverfilled rolls or weak sealUse egg wash on the edge, press firmly, and bake seam-side down.
Pale pastryWeak egg wash or underbakingBrush well with beaten egg and bake until golden and firm.
Dry fillingMeat too lean or filling overmixedUse sausage with enough fat, mix gently, and do not overbake.
Soft after bakingRolls cooled on a plate or covered too tightlyCool on a wire rack and avoid trapping steam.

A sturdy metal baking sheet also helps. Very thin trays can brown unevenly, and crowded trays trap steam. For extra-crisp bottoms, place the rolls on parchment on a hot tray only if you can transfer them safely.

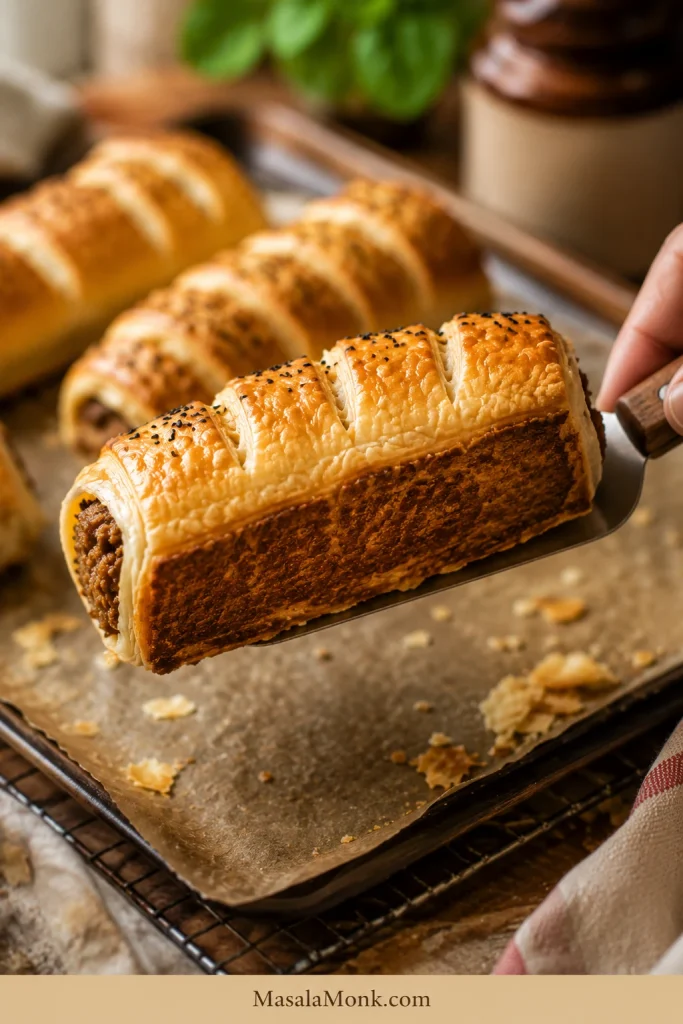
What a Crisp Bottom Looks Like

A baked sausage roll lifted with a spatula to show an evenly browned crisp bottom.
A golden underside shows the pastry baked instead of steamed, which is why rack cooling matters as much as oven heat.

Cold pastry, confident bake: if the puff pastry feels greasy, sticky, or slack, pause and chill the tray before it goes into the oven.

Most batches do not need every fix here. If the pastry is cool, the rolls are not overfilled, and the tops are deeply browned, you are already most of the way there.

That is the sweet spot: hot filling, crisp base, and pastry that flakes instead of bending.

Mini Sausage Rolls for Parties, Lunchboxes, and Snacks

Mini sausage rolls are the party version for a reason: they bake faster, serve neatly, and disappear from a platter while people are still deciding what to drink. They are the thing people pick up while talking, then return for before they realize they have already had three.

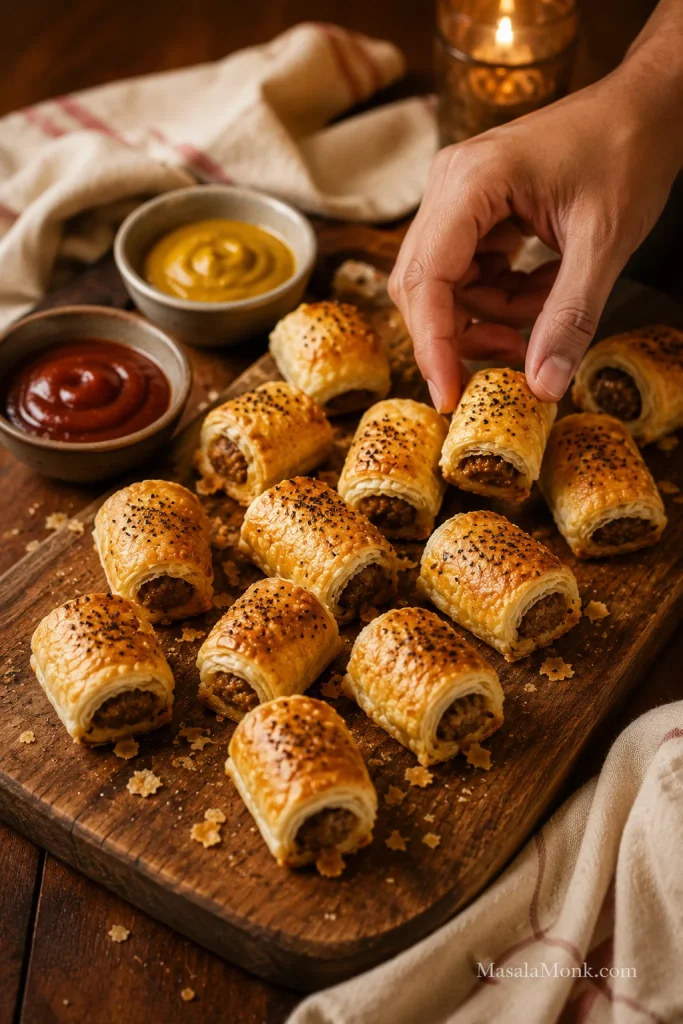
Mini sausage rolls on a wooden party platter with dips and a hand reaching for one roll.
Mini sausage rolls stay easy to grab, dip, and share, which makes them especially useful for appetizers, party boards, and casual snack trays.
  • Cut each long roll into 12–16 small pieces for party-size sausage rolls.
  • Bake mini sausage rolls at 200°C / 400°F, or 180°C fan, for 18–22 minutes.
  • Shape thinner filling logs so each mini roll is balanced, not overstuffed.
  • Leave space between pieces so the pastry can puff.
  • Use sesame or nigella seeds if you want a more finished party-platter look.
  • Cool fully before packing into lunchboxes so steam does not soften the pastry.

Party math is simple: plan on 3–4 mini sausage rolls per person if they are one of several snacks, and more if these are the main warm bite on the table. Think two-bite snacks, not tiny overstuffed parcels.

How to Keep Sausage Rolls Warm for a Party

Keep baked sausage rolls in a low oven, loosely covered, so steam can escape. Wrapping them tightly in foil while hot softens the pastry. Softened rolls come back quickly in the oven or air fryer for a few minutes before serving.

For another easy party appetizer in the same make-ahead lane, these grape jelly meatballs are a useful option beside mini sausage rolls.

If you are baking a full party tray, the oven is still easier. For a handful of mini rolls, leftovers, or a small frozen batch, the air fryer is the faster tool.

Baking only a few? The air fryer section covers small batches. Planning ahead? Go to freezing and reheating.

Air Fryer Sausage Rolls

The air fryer is not the best tool for a full tray, but it is excellent for small batches, leftovers, and frozen mini sausage rolls when you want hot pastry without heating the oven.

It is especially useful for the last few frozen rolls in the bag: enough for a snack, not enough to justify a full oven.

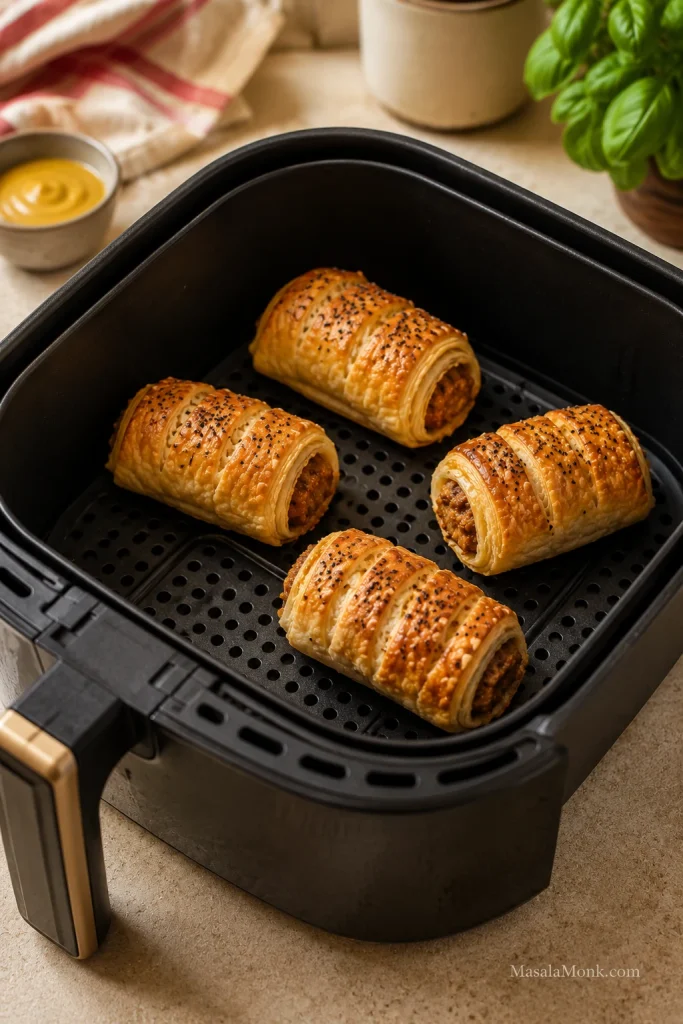
Golden sausage rolls arranged in one layer inside a clean air fryer basket.
Air fryer sausage rolls need breathing room; with one open layer, hot air can reach the pastry instead of steaming it.
Air fryer useTemperatureApprox. time
Fresh mini sausage rolls180–190°C / 350–375°F10–14 min
Fresh medium sausage rolls190°C / 375°F13–16 min
Frozen unbaked sausage rolls180°C / 350°F18–22 min
Reheating cooked sausage rolls180°C / 350°F4–6 min

These air fryer times are for homemade sausage rolls. Store-bought frozen mini sausage rolls can vary by brand, so start checking early and use the package instructions as the first guide.

Air fryer timing is most reliable for mini and medium rolls. Cook in one layer with space for the pastry to expand, and start checking early the first time because machines vary. Large rolls can brown outside before the middle is hot, so lower the heat and cook a little longer if needed.

Freezing, Reheating, and Making Ahead

This is the kind of tray that earns its keep: hot enough for dinner, small enough for a party, and easy enough to freeze before you need it.

Freeze sausage rolls unbaked for the best texture. Shape, cut, freeze on a tray, then bake from frozen with extra time whenever you want a hot batch later.

When the rolls bake for the first time from frozen, the pastry stays fresher than it does after being baked, frozen, and reheated. It is the quiet freezer win: a tray you shaped when you had time, ready to bake when you do not.

That is the freezer version at its best: no flour on the counter, no filling bowl to wash, just a cold tray becoming hot, flaky sausage rolls when you need them.

Freezing Unbaked Sausage Rolls

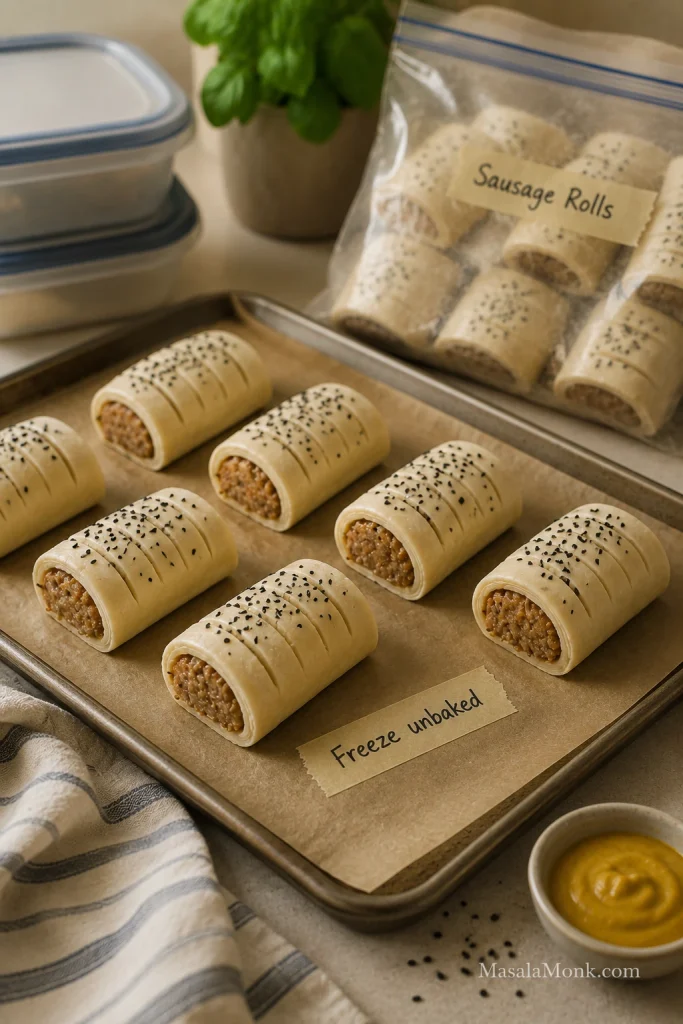
Unbaked sausage rolls on a parchment-lined tray beside a freezer bag labeled for sausage rolls.
Freezing unbaked keeps the pastry from drying out twice; when baking from frozen, use the size of the roll to judge the extra time.
  1. Shape and cut the sausage rolls.
  2. Place them on a parchment-lined tray.
  3. Freeze until firm.
  4. Transfer to a freezer-safe bag or container.
  5. Bake from frozen at 200°C / 400°F, or 180°C fan, adding extra time.

Frozen unbaked sausage rolls usually need 6–10 minutes longer than fresh rolls, depending on size; very large rolls may need a few minutes more. Brush with egg wash before baking if possible. If the egg wash does not stick well to frozen pastry, bake the rolls plain or brush lightly after the first few minutes. Bake unbaked frozen rolls straight from the freezer unless the pastry packet says otherwise.

Simple Party-Day Plan

  • A few hours ahead: shape and cut the sausage rolls, then refrigerate until baking.
  • The day before or earlier: freeze them unbaked for the best texture.
  • Before guests arrive: brush with egg wash and bake until golden and cooked through.
  • To hold briefly: keep warm in a low oven, loosely covered, so steam can escape.
  • To refresh: return softened rolls to the oven or air fryer for a few minutes instead of wrapping them tightly.
  • For the table: serve with mustard or chutney, one creamy dip, and one fresh side so the pastry does not feel too heavy.

Can You Freeze Baked Sausage Rolls?

Yes, baked sausage rolls can be frozen, but the pastry is usually better when the rolls are frozen unbaked. If you freeze baked rolls, cool them completely first, pack airtight, and reheat in the oven or air fryer until hot and crisp again.

Storing Leftovers

Sausage rolls are best the day they are baked, especially while the pastry is crisp. Once cooled, store leftovers in an airtight container in the fridge for up to 3 days. Try to refrigerate them within 2 hours of baking.

Reheating Without Soft Pastry

Reheat baked sausage rolls in the oven at 180°C / 350°F, or 160°C fan, for 8–12 minutes. You can also use the air fryer at 180°C / 350°F for 4–6 minutes. Avoid the microwave when you want crisp pastry. It heats quickly, but it makes puff pastry soft.

Making Them Ahead

You can assemble sausage rolls a few hours ahead and keep them covered in the fridge until baking. For longer storage, freeze them unbaked. If the pastry softens while sitting, give the tray a short fridge rest before baking.

Serving a tray now? See what to serve with sausage rolls, or go back to top.

Sausage Roll Variations

Once the base recipe works, sausage rolls become easy to riff on. Keep the filling savory and not too wet, then change the mood: fennel for bakery-style rolls, apple for sweetness, cheddar for comfort, chili for heat, or cranberry and sage for a holiday tray.

  • Pork and fennel sausage rolls: add ½–1 teaspoon lightly crushed fennel seeds for an aromatic, bakery-style finish.
  • Pork and apple sausage rolls: add a small amount of grated apple, squeezed dry, for gentle sweetness.
  • Beef sausage rolls: use beef sausage meat and stronger seasoning such as mustard, pepper, or Worcestershire-style flavor.
  • Chicken sausage rolls: use chicken sausage or ground chicken and cook to 165°F / 74°C.
  • Cheese and onion sausage rolls: add grated cheddar and softened onion for a richer, more savory filling, but avoid overfilling.
  • Spicy sausage rolls: add chili flakes, smoked paprika, black pepper, or mustard.
  • Christmas sausage rolls: use sage, onion, apple, cranberry, chutney, or a little stuffing-style seasoning.
  • Bakery-style sausage rolls: keep the filling simple, use well-seasoned sausages, chill before baking, and egg wash generously.

When adding vegetables, be careful with moisture. Carrot, zucchini, mushrooms, spinach, and apple can all work, but watery ingredients should be cooked, squeezed, or used sparingly so the pastry does not turn soggy. For a completely different sausage dinner, this smoky kielbasa pasta is better when you want a full meal instead of a pastry snack.

Vegetarian, Vegan, Gluten-Free, and Lighter Sausage Rolls

Vegetarian, vegan, gluten-free, and lighter sausage rolls can all work, but they need the same care as the classic version. The filling needs body, the pastry needs to stay cool, and anything watery needs to be cooked, squeezed, or used sparingly before it is wrapped.

Vegetarian Sausage Rolls

For vegetarian sausage rolls, build savoriness first. Mushrooms, lentils, cheese, paneer, onions, herbs, and plant-based sausage can all work, but the mixture should be thick enough to shape into a log. If it slumps before baking, it will likely soften the pastry.

Vegan Sausage Rolls

For vegan sausage rolls, use vegan puff pastry and a plant-based filling. Replace egg wash with plant milk, aquafaba, or a little oil depending on the finish you want. Check both the pastry and the filling: many puff pastries are accidentally vegan, but not all are.

Gluten-Free Sausage Rolls

For gluten-free sausage rolls, check the pastry, sausage, breadcrumbs, mustard, and sauces. Gluten-free pastry can crack more easily, so let it soften just enough to fold, then chill again before baking if it turns sticky or fragile.

Healthy or Lighter Sausage Rolls

For a lighter version, make smaller rolls, use leaner sausage or chicken/turkey filling, add cooked vegetables, and serve with salad instead of heavier sides. Keep the promise honest: these are lighter sausage rolls, not diet food. Puff pastry and sausage are still rich ingredients.

What to Serve with Sausage Rolls

The best sausage rolls do not need much around them; they just need contrast. Add one sharp thing, one fresh thing, or one dip that cuts through the buttery pastry and makes people reach for another. A crisp wedge salad works especially well because the cold lettuce and creamy dressing balance the hot, flaky pastry.

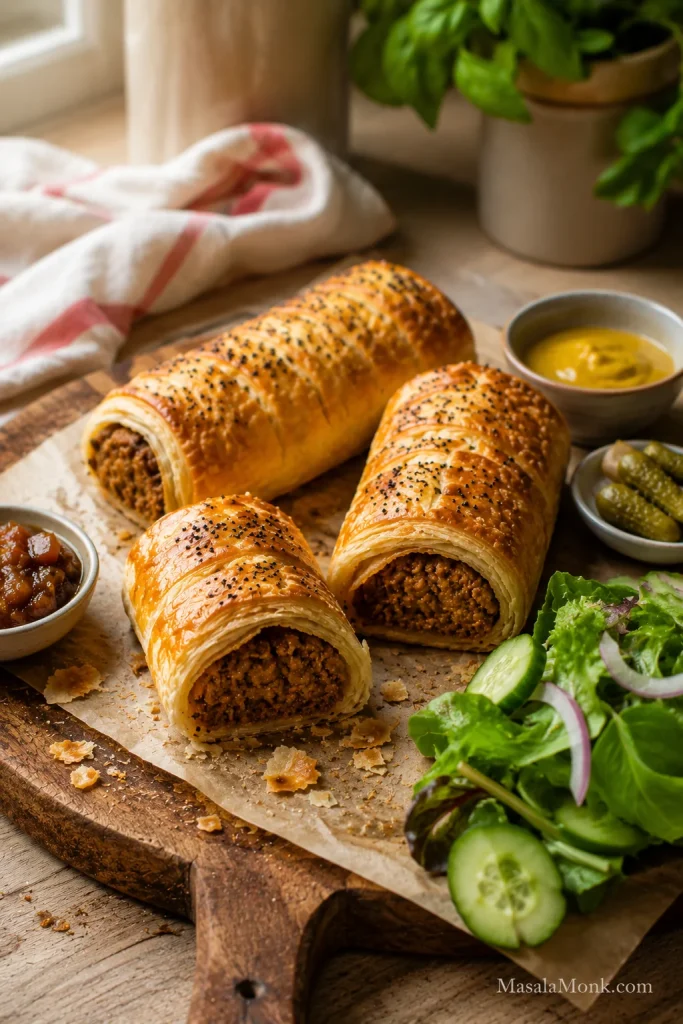
Warm sausage rolls served on a wooden board with mustard, chutney, pickles, and green salad.
Sharp mustard, chutney, pickles, or fresh salad cut through the buttery pastry and make sausage rolls feel complete on the plate.
  • Sharp: English mustard, Dijon mustard, brown sauce, steak sauce, onion chutney, apple chutney, or pickles.
  • Fresh: green salad, wedge salad, slaw, cucumber salad, or a simple tomato salad.
  • Cozy: baked beans, soup, mashed potatoes, potato wedges, or chips.
  • Party-style: ketchup, creamy dips, chutney, mustard, pickles, or a cheese ball.

For a party platter, serve mini sausage rolls with two or three dips rather than too many sides. In lunchboxes, cool the rolls completely before packing so the pastry does not steam itself soft. On another sausage dinner night, this slow cooker sausage casserole gives you the opposite comfort-food mood: soft sausages, beans, vegetables, and a spoonable sauce.

FAQs About Sausage Rolls

Do you need sausage meat for sausage rolls?

No. Sausage meat is convenient, but regular sausages work well. Slit the skins, squeeze out the meat, and loosen the filling before shaping.

Do you cook sausage meat before making sausage rolls?

No. The sausage meat usually goes into the pastry raw and cooks as the pastry bakes. Cook only the onion, garlic, or watery vegetables first, then cool them before mixing. The filling is done at 160°F / 71°C for pork or beef, and 165°F / 74°C for chicken or turkey.

How do you make sausage rolls with regular sausages?

Remove the skins, loosen the meat with a fork, shape it into logs, and roll it inside cool puff pastry. Season only if needed because most sausages are already salted.

What pastry is best for sausage rolls?

Puff pastry is best for classic sausage rolls because it bakes flaky, crisp, and golden. All-butter puff pastry gives the richest flavor, but standard ready-rolled puff pastry works well if you keep it cool.

Can you use crescent dough instead of puff pastry?

Yes, but the result will be softer and breadier. Puff pastry gives the classic flaky sausage roll texture. Crescent dough is better for a quick shortcut than for a bakery-style sausage roll.

How long do sausage rolls take to cook?

Large sausage rolls usually take 25–30 minutes at 200°C / 400°F, or 180°C fan. Medium rolls usually take 22–25 minutes, while mini sausage rolls usually take 18–22 minutes. Frozen unbaked rolls need extra time.

What temperature should sausage rolls be cooked at?

Cook sausage rolls at 200°C / 400°F, or 180°C fan, for the best balance of puffed pastry and cooked filling. For reheating, use a slightly lower temperature such as 180°C / 350°F, or 160°C fan.

How do you know sausage rolls are cooked inside?

Use three checks: browned pastry, a base that lifts cleanly from the paper, and hot filling in the center. For thick rolls, use a thermometer rather than color alone.

Why is my sausage roll filling still pink?

Some sausage fillings stay slightly pink because of seasoning, curing ingredients, or the type of meat used. Use temperature, not color alone, as the final check. Pork or beef filling should reach 160°F / 71°C, and chicken or turkey filling should reach 165°F / 74°C.

Why are my sausage rolls soggy underneath?

Usually, moisture got trapped somewhere: wet filling, warm pastry, underbaking, or cooling on a tray. Breadcrumbs, a hot bake, and a wire rack solve most of it.

Why did my sausage rolls burst open?

Sausage rolls usually burst open when they are overfilled, sealed weakly, or baked seam-side up. Leave a pastry border, seal with a little egg wash, press gently, and bake seam-side down.

Should sausage rolls be frozen before or after baking?

Before baking is best. Shape and cut the rolls, freeze them on a tray, then store them in a freezer-safe bag or container. They bake up fresher because the pastry gets its first full bake from frozen.

Can sausage rolls be served cold?

Yes, sausage rolls can be served cold once they are fully cooked and properly cooled. They are best warm if you want crisp pastry, but cold rolls work well for lunchboxes, picnics, and party platters. Keep leftovers refrigerated.

How do you keep sausage rolls warm for a party?

Keep sausage rolls in a low oven, loosely covered, so steam can escape. Avoid wrapping them tightly while hot. If the pastry softens, refresh the rolls in the oven or air fryer for a few minutes before serving.

How do you reheat sausage rolls without making them soft?

Reheat sausage rolls in the oven at 180°C / 350°F for 8–12 minutes or in the air fryer for 4–6 minutes. Avoid the microwave if you want crisp pastry.

What is the best way to make mini sausage rolls?

Use thinner filling logs, then cut each long roll into small pieces before baking. Mini sausage rolls usually bake in 18–22 minutes at 200°C / 400°F, or 180°C fan.

Final Tip for Better Sausage Rolls

Good sausage rolls come down to three things: filling that tastes good before it goes in, pastry that stays cool and relaxed, and a bake that goes far enough for real color. Once those are right, the same base method works for regular sausages, mini party rolls, freezer batches, and air fryer snacks.

Make the first batch plain and classic. After that, sausage rolls become the kind of recipe you can adapt without overthinking: a warm tray for dinner, a freezer stash for later, lunchbox rolls for the next day, or the party snack people keep circling back to while pretending they are only having one more.

Back to top

Posted on Leave a comment

Minestrone Soup Recipe

Bowl of minestrone soup with tomato broth, white beans, kidney beans, small pasta, carrots, zucchini, greens, herbs, and bread on the side.

A good minestrone soup should look generous before you even take the first spoonful: tender vegetables, creamy beans, small pasta, herbs, and a tomato broth that tastes rich instead of watery. The first spoonful should catch a little of everything — a soft bean, a piece of pasta, sweet carrot, zucchini, greens, and enough tomato broth to pull it all together.

This pot works because it protects the three things that matter most in minestrone: rich tomato broth, vegetables with texture, and pasta that does not turn the leftovers into mush. Even a half-used zucchini, a tired carrot, two cans of beans, and the last handful of pasta can become a proper dinner.

Homemade minestrone also gives you something canned soup rarely does: better texture. The vegetables do not have to be overcooked, the pasta can stay tender, and you control the salt, broth, and finish.

Cooking now? Jump to the recipe card. The notes below help keep the broth rich, the vegetables tender, and the leftovers useful.

What a Good Minestrone Spoonful Should Show

Before you start, notice the target balance: beans, vegetables, pasta, greens, and tomato broth should all show up in the same spoonful.

Spoon lifting minestrone soup with small pasta, white bean, kidney bean, carrot, zucchini, greens, and tomato broth dripping back into the bowl.
This spoonful shows the balance you want: beans for body, vegetables for freshness, small pasta for comfort, and tomato broth tying everything together.

Recipe at a Glance

Prep time20 minutes
Cook time45 minutes
Total time1 hour 5 minutes
Faster versionAbout 40 to 45 minutes with smaller diced vegetables, the full 6 cups broth, and a shorter 15 to 20 minute base simmer
Servings6 generous bowls
YieldAbout 11 to 13 cups soup
MethodStovetop
Best pot5 to 6 quart / 5 to 6 liter Dutch oven or heavy soup pot
Best forWeeknight dinner, meal prep, and freezer-friendly soup base
DietMeatless when made with vegetable broth; vegan option

The Minestrone Rule of 5: soften the aromatics, build the tomato base, add beans for body, keep the pasta small, and save tender greens for the end. Vegetables can change; the rhythm is what keeps the pot balanced.

Why this works: tomato paste gives the soup depth, beans make it feel full, late-added vegetables keep their shape, and pasta goes in only when the broth already tastes good. That is what keeps the soup hearty without letting it turn heavy or dull.

The Minestrone Rule of 5

This visual is the memory hook for the whole recipe: keep the rhythm steady, even when the vegetables change.

Rustic board showing minestrone ingredients arranged as aromatics, tomato base, beans, small pasta, and leafy greens.
Use the Minestrone Rule of 5 when you want the recipe to feel flexible: aromatics, tomato base, beans, small pasta, and greens are the core building blocks.

Easy minestrone ratio: for 6 bowls, use about 5 to 6 cups broth, 2 cans beans, 4 to 5 cups chopped vegetables, and 3/4 cup small pasta.

Short on time? Dice the vegetables smaller, use the full 6 cups broth, and simmer the soup base for 15 to 20 minutes before adding pasta and greens. The full cook gives deeper flavor, but the faster version still makes a good weeknight bowl.


Minestrone Soup Recipe Card

Description: A hearty minestrone soup with vegetables, beans, small pasta, and a rich tomato broth. It is meatless when made with vegetable broth, cozy without cream, and easy to adjust for leftovers or a thicker dinner-style bowl.

Prep: 20 minutes | Cook: 45 minutes | Total: 1 hour 5 minutes | Serves: 6 generous bowls | Yield: about 11 to 13 cups

Equipment: 5 to 6 quart / 5 to 6 liter Dutch oven or heavy soup pot, knife, cutting board, can opener, colander, wooden spoon, and ladle.

Ingredients

Base

  • 2 tablespoons olive oil, plus more for finishing, about 30 ml
  • 1 medium yellow onion, diced, about 150 to 180 g
  • 2 medium carrots, diced, about 130 to 160 g
  • 2 celery ribs, diced, about 90 to 120 g
  • 4 garlic cloves, minced
  • 3 tablespoons tomato paste, about 45 g

Broth and Seasoning

  • 1 can crushed or diced tomatoes, 28 oz / 794 g
  • 5 to 6 cups vegetable broth, 1.2 to 1.4 liters
  • 1 bay leaf
  • 1 1/2 teaspoons Italian seasoning
  • 1/2 teaspoon dried oregano, optional
  • 1/4 teaspoon red pepper flakes, optional
  • 1 teaspoon kosher salt or 3/4 teaspoon fine salt, plus more to taste; start with less if your broth is salted
  • 1/2 teaspoon black pepper, plus more to taste
  • 1 parmesan rind, optional; skip for vegan minestrone

Beans, Vegetables, and Pasta

  • 1 can cannellini beans or white beans, 15 oz / 425 g, drained and rinsed
  • 1 can kidney beans, 15 oz / 425 g, drained and rinsed
  • 1 cup chopped green beans, about 100 to 125 g
  • 1 medium zucchini, diced, about 180 to 220 g
  • 3/4 cup small pasta such as ditalini, small shells, elbows, or macaroni, about 75 to 90 g
  • 2 cups packed spinach or chopped kale, about 60 to 80 g

Finish

  • 1 to 2 teaspoons lemon juice or red wine vinegar, 5 to 10 ml
  • 1/4 cup chopped parsley or basil, about 10 to 15 g
  • Extra olive oil, for finishing
  • Grated parmesan, optional, for serving

Instructions

  1. Heat olive oil in a 5 to 6 quart / 5 to 6 liter Dutch oven or heavy soup pot over medium heat.
  2. Add onion, carrot, celery, and salt. Cook for 7 to 10 minutes, stirring often, until softened and fragrant.
  3. Add garlic and tomato paste. Cook for 1 to 2 minutes, stirring often, until the tomato paste darkens slightly.
  4. Add crushed or diced tomatoes, vegetable broth, bay leaf, Italian seasoning, oregano if using, red pepper flakes if using, black pepper, and parmesan rind if using. Stir well and scrape the bottom of the pot.
  5. Add the cannellini beans and kidney beans. Bring to a boil, then reduce to a gentle simmer.
  6. Simmer partly covered for 20 to 25 minutes, until the broth tastes developed. Add firm vegetables such as cabbage, potato, or squash during this simmer if using them.
  7. Add green beans, zucchini, and pasta. Cook for 8 to 10 minutes, or until the pasta is just tender.
  8. Stir in spinach or kale and cook for 1 to 3 minutes, just until wilted.
  9. Remove the bay leaf and parmesan rind. Stir in lemon juice or red wine vinegar, parsley or basil, and a drizzle of olive oil.
  10. Taste and adjust salt, pepper, and acidity. Let the soup rest for 5 minutes before serving.
  11. Serve hot with parmesan, extra herbs, crusty bread, garlic bread, or a simple salad.

Recipe Notes

  • Brothier soup: use 3/4 cup pasta and the full 6 cups broth.
  • Thicker soup: use 1 cup pasta or mash 1/2 cup beans into the broth.
  • Firmer zucchini: add zucchini during the final 5 minutes instead of with the pasta.
  • Better leftovers: cook pasta separately and add it to bowls.
  • Vegan version: use vegetable broth and skip parmesan rind and parmesan cheese.
  • Meal prep: toss separately cooked pasta with a tiny drizzle of olive oil after draining so it does not clump.
  • Gluten-free version: use gluten-free pasta or rice, preferably cooked separately.
  • Rice version: cooked rice is easiest. Add it near the end or directly to bowls because rice absorbs broth quickly.
  • Extra richness: simmer with a parmesan rind or finish with olive oil and herbs.

The recipe works on its own, but the notes below help you adjust the beans, pasta, vegetables, storage, and appliance methods without losing the minestrone feel. If leftovers matter, the storage and freezing notes are especially useful.

Before the deeper notes, this quick visual ratio gives you a flexible way to adjust the pot without losing the minestrone balance.

Easy Minestrone Ratio

Use this ratio when you want to adjust the recipe without losing the soup’s balance.

Broth, beans, chopped vegetables, and small pasta arranged on a rustic counter as an easy minestrone ratio guide.
Instead of measuring every vegetable perfectly, follow the ratio: broth keeps it loose, beans make it filling, vegetables add bulk, and pasta should stay modest.

What Is Minestrone Soup?

Minestrone is an Italian vegetable soup made with vegetables, beans, tomatoes, broth, herbs, olive oil, and usually pasta or rice. Classic minestrone is not about one fixed vegetable list; it is about building a generous, seasonal soup with enough beans and starch to feel like a meal.

That is why one pot might have zucchini and green beans while another has cabbage, kale, potato, or squash. A good bowl should be crowded, not dry: enough vegetables and beans to make it feel like dinner, but enough tomato broth to keep it unmistakably soup.

Why You’ll Like This Recipe

  • The broth tastes built, not diluted. Tomato paste, sautéed aromatics, herbs, beans, and olive oil give it a rounded tomato flavor.
  • The vegetables keep their texture. Firm vegetables simmer first, while zucchini and greens go in later.
  • The pasta will not hijack the leftovers. Cook it in the soup when serving right away, or separately when you want better storage.
  • It starts meatless. Use vegetable broth, and the whole pot stays hearty without meat.
  • It gives you room to use what you have. Small shells, elbows, ditalini, zucchini, green beans, cabbage, kale, spinach, white beans, kidney beans, or chickpeas can all work.
  • It can be lighter or heartier. Use more greens and less pasta for a lighter bowl, or extra beans and a little more pasta for a thicker dinner-style soup.

Minestrone feels hearty without cream because beans, vegetables, pasta, and olive oil do the work. If you like cozy tomato-and-pasta dinners, this sits near the same comfort zone as baked ziti, but it is lighter, brothier, and packed with vegetables.

Minestrone Soup Ingredients

These ingredients follow the same Rule of 5: aromatics, tomato broth, beans, small pasta or rice, and tender greens at the end. Do not worry if you are missing one vegetable. Minestrone is forgiving as long as the base stays balanced.

If you are missing one vegetable or bean, check the easy minestrone swaps before changing the broth or pasta ratio.

Ingredients for minestrone soup on a counter, including tomatoes, broth, beans, pasta, carrots, celery, onion, garlic, zucchini, green beans, greens, herbs, olive oil, and parmesan rind.
Each minestrone ingredient has a role: aromatics create sweetness, tomatoes shape the broth, beans add substance, pasta brings comfort, and greens freshen the finish.

If you remember one thing: taste the broth before adding pasta. When it tastes thin or flat at that point, fix the broth first; pasta will not rescue a weak soup.

Build the Aromatic Base

Onion, carrot, celery, garlic, and olive oil create the base. Cook the onion, carrot, and celery until the sharp onion smell softens and the pot starts smelling sweet. The onion should look translucent and the carrot edges should soften. This is the first moment the soup starts smelling like dinner instead of chopped vegetables.

Onion, carrot, and celery sautéing in olive oil inside a Dutch oven with a wooden spoon.
First, cook the onion, carrot, and celery until they soften and smell sweet. This step gives homemade minestrone a deeper base before the tomatoes arrive.

Cook the Tomato Paste Before Broth


Tomato paste and a large can of crushed or diced tomatoes give the broth its color and flavor. Cook the tomato paste until it darkens slightly; it should leave orange-red streaks on the bottom of the pot, not black bits. Crushed tomatoes make a fuller, smoother broth, while diced tomatoes give a chunkier texture.

Tomato paste cooked with onion, carrot, and celery in a pot, with a wooden spoon dragging through the red paste.

Next, let the tomato paste cook briefly with the aromatics. It deepens the soup base and helps the broth taste rich instead of thin.

Broth


Vegetable broth keeps the soup meatless and easy to make vegan. Chicken broth also works if you are not keeping the soup vegetarian. Low-sodium broth gives you more control because canned beans, tomatoes, pasta, and cheese can all add salt.

Beans


White beans and kidney beans are a strong everyday combination. The white beans soften into the tomato broth and make the soup feel fuller, almost as if it simmered longer than it did. Kidney beans add color, bite, and the familiar minestrone look. Rinse canned beans before adding them so the broth stays clean and balanced.

Pasta or Rice


Small pasta is what keeps minestrone easy to eat by the spoonful. Ditalini is classic, but small shells, elbows, macaroni, or orzo all work. Use 3/4 cup for a brothier soup and up to 1 cup for a thicker bowl. Cooked rice also works when you want a pasta-free version. If you are cooking for leftovers, see how to keep minestrone pasta from getting mushy before adding pasta directly to the pot.

Vegetables


Zucchini, green beans, spinach, kale, cabbage, potato, peas, squash, carrots, and celery can all work. Dense vegetables such as potato, squash, cabbage, and carrots need more time. Zucchini, peas, spinach, and tender greens should go in later so they keep some color and shape.

Minestrone is not a test of whether you bought the exact vegetables; it is a way to turn the vegetables you have into a balanced soup.

Herbs and Finishers


Italian seasoning, oregano, basil, thyme, bay leaf, black pepper, parsley, and fresh basil all fit well. A parmesan rind is optional for extra depth, but use vegetarian-style parmesan if that matters to you, or skip cheese completely for a vegan version.

A small splash of lemon juice or red wine vinegar wakes up the whole pot at the end, especially after the beans and pasta have softened the broth. A spoonful of pesto can make the finish taste brighter; these basil pesto variations are useful if you like that herby direction.

How to Make Minestrone Soup

The steps follow the same rhythm as the Rule of 5: sauté, deepen, simmer, add quick-cooking ingredients late, finish fresh.

1. Sauté the Onion, Carrot, and Celery


Heat olive oil in a large Dutch oven or heavy soup pot over medium heat. Add onion, carrot, celery, and salt. Cook for 7 to 10 minutes, stirring often, until the vegetables soften and the onion turns translucent. The pot should smell sweet and savory before you move on.

2. Add Garlic and Tomato Paste


Stir in the garlic and tomato paste. Cook for 1 to 2 minutes, stirring often. The tomato paste should darken slightly and smell richer, but it should not scorch. A watery minestrone usually means the base was rushed, so give this step its minute.

3. Build the Broth


Add crushed or diced tomatoes, broth, Italian seasoning, bay leaf, black pepper, and parmesan rind if using. Scrape the bottom of the pot so all the tomato paste and aromatics dissolve into the broth.

Minestrone soup base in a Dutch oven with tomato broth, beans, carrots, celery, and firm vegetables before pasta and greens are added.

Let the tomato broth, beans, and firm vegetables simmer before adding pasta. As a result, the base tastes rounded instead of rushed.

4. Add Beans and Simmer Gently


Add the rinsed beans and any firm vegetables such as cabbage, potato, or squash. Bring the soup to a boil, then reduce it to a gentle simmer. You want small bubbles, not a rolling boil. Cook partly covered for 20 to 25 minutes, until the broth tastes fuller and the vegetables are tender.

Taste the broth before adding pasta. If it tastes thin or flat now, give it more simmering time, adjust the salt, or brighten it with a little lemon juice or vinegar. The broth should already taste good before the pasta goes in; if it still tastes weak, use the troubleshooting section before adding pasta.

Minestrone soup gently simmering in a Dutch oven with tomato broth, beans, carrots, celery, pasta, and vegetables.

Keep minestrone at a gentle simmer, not a hard boil. Small bubbles build flavor while helping the vegetables stay tender and intact.

5. Add Quick-Cooking Vegetables and Pasta


Add green beans, zucchini, and small pasta near the end. Cook for 8 to 10 minutes, or until the pasta is just tender. Stop while it still has a little structure, because it will keep softening in the hot broth.

Small pasta being poured into a pot of minestrone soup with spinach added near the end of cooking.

Add pasta and greens near the end. This keeps the soup brighter, protects the greens, and helps prevent pasta from swelling in the pot.

6. Finish with Greens, Herbs, and Brightness


Stir in spinach or kale for the final 1 to 3 minutes. The greens only need to wilt; they do not need to cook down into the broth. Remove the bay leaf and parmesan rind. Finish with parsley or basil, a drizzle of olive oil, and lemon juice or red wine vinegar. Rest the soup for 5 minutes before serving so the broth settles and the flavors come together.

Finished pot of homemade minestrone soup with tomato broth, beans, pasta, carrots, zucchini, green beans, greens, herbs, and olive oil.

When the pot is ready, it should look colorful and ladle easily. If it feels crowded, loosen it with a splash of broth before serving.

Easy Minestrone Swaps

Once the base makes sense, the soup becomes forgiving. You do not need the exact same vegetables every time; you just need the right balance of broth, beans, pasta or rice, and timing.

Use What You Have

Use this section when the pot needs to adapt to the vegetables, beans, and pasta you already have.

Rustic board with minestrone swaps including zucchini, carrot, cabbage, kale, potato, white beans, green beans, herbs, and small pasta.

Minestrone is made for flexible cooking. Therefore, zucchini, cabbage, kale, potato, beans, herbs, and small pasta can all work when you add them at the right time.

If you do not have Use this instead
Cannellini beans Navy beans, great northern beans, white beans, or chickpeas
Kidney beans More white beans, borlotti beans, chickpeas, or lentils
Zucchini Cabbage, green beans, peas, spinach, kale, or squash
Ditalini Small shells, elbows, macaroni, or orzo
Vegetable broth Water with extra tomato paste, herbs, olive oil, and careful seasoning
Fresh greens Frozen spinach, frozen kale, or chopped cabbage added earlier
Parmesan rind Skip it, or finish with olive oil, herbs, and a little lemon juice or vinegar

This is also where minestrone becomes personal. One cook adds cabbage, another adds potato, another uses chickpeas, and another keeps it brothy. The base stays the same, but the pot can still feel like yours. For more timing help, see the firm-early, tender-late vegetable guide.

What the Soup Should Look and Taste Like

You are looking for a soup that is chunky but still brothy. The tomato broth should taste rounded rather than sharp or thin. Vegetables should be tender without collapsing, beans should stay creamy but mostly intact, and the pasta should be just tender, not swollen.

Finished Bowl Texture Check

Use the finished bowl as a quick check before serving: the soup should look full, but it should still move like soup.

Close-up bowl of finished minestrone soup with tomato broth, white beans, kidney beans, pasta, carrots, zucchini, greens, and herbs.

Use the finished bowl as a texture check. The vegetables and beans should stand out clearly, while the tomato broth still fills the gaps around them.

Chunky but Still Soup

If the pot looks crowded but still has enough broth to move around the vegetables, you are in the right place. You should be able to drag the spoon through the bowl and see vegetables and beans settle back into the tomato broth, not sit in a dry pile. The final olive oil, herbs, and lemon juice or vinegar should make the bowl taste brighter, not sour.

Close bowl of chunky but brothy minestrone soup with visible tomato broth, beans, pasta, carrots, zucchini, greens, and herbs.

Aim for chunky but not dry. The spoon should catch vegetables and beans, while the broth still makes the bowl feel like soup.

Best Beans, Pasta, and Vegetables for Minestrone

Beans, pasta, and vegetables are where minestrone becomes dinner. The choices do not need to be fancy; they just need to make sense together in the spoon.

Best Beans and Pasta for Minestrone

Start with spoon-friendly beans and small pasta shapes, then choose vegetables that match the season and cooking time.

Bowls and spoons of cannellini beans, kidney beans, ditalini pasta, small shells, elbows, and orzo for minestrone soup.

Choose beans and pasta that fit easily on a spoon. Cannellini beans, kidney beans, ditalini, elbows, or small shells keep minestrone hearty without making it clumsy.

Best Beans


  • Cannellini or white beans: creamy, mild, and classic.

  • Kidney beans: firmer, colorful, and familiar in restaurant-style minestrone.

  • Borlotti beans: rustic and soft with a fuller bean flavor.

  • Chickpeas: nutty and firmer, good when you want more bite.

  • Lentils: useful for a thicker, higher-protein variation.

Best Pasta


  • Ditalini: classic and spoon-friendly.

  • Small shells: good for catching tomato broth.

  • Elbows or macaroni: easy pantry choice.

  • Orzo: soft and pleasant, but it thickens leftovers quickly.

  • Rice: useful if you do not want pasta. Cooked rice is easiest.

Once the beans and pasta are chosen, the vegetables are mostly about timing: firm ones early, tender ones late. That is what keeps the bowl generous without making it taste tired.

Firm Vegetables Early, Tender Vegetables Late


A good minestrone should never feel trapped by one vegetable list. Keep the tomato broth, aromatics, beans, herbs, and small pasta structure, then choose vegetables that fit the pot.

  • Summer: zucchini, green beans, fresh tomatoes, basil, spinach.

  • Winter: cabbage, kale, potato, squash, carrots, celery.

  • Spring: peas, asparagus, spinach, leeks, fresh herbs.

  • Pantry version: canned tomatoes, canned beans, frozen vegetables, cabbage, carrots, small pasta.

Add dense vegetables like potato, squash, cabbage, and carrots earlier. Add zucchini, peas, spinach, and tender greens near the end. Try not to overload the pot; minestrone should be hearty, but it should still have enough broth to feel like soup.

Rustic vegetable timing board showing firm vegetables like potato, cabbage, carrot, and squash beside tender vegetables like zucchini, peas, spinach, kale, and herbs.

Vegetable timing matters more than a perfect shopping list. Add firm vegetables early, then save tender greens, zucchini, peas, and herbs for the final minutes.

How to Fix Minestrone Soup Problems

If your minestrone tastes bland, watery, too thick, too acidic, or overcooked, it can usually be fixed. Most problems come down to seasoning, simmering, pasta timing, vegetable timing, or broth balance.

Fix Bland Minestrone Soup

Before rebuilding the whole pot, taste for salt, acid, herbs, pepper, and olive oil; those small finishes often fix a flat bowl.

Bowl of minestrone soup beside salt, lemon wedge, red wine vinegar, olive oil, parsley or basil, and black pepper.

Bland minestrone often needs a finish, not a rebuild. Salt, lemon or vinegar, herbs, black pepper, and olive oil can wake up the whole pot.

Problem Fix
Soup tastes flat Add salt first, then a small splash of lemon juice or red wine vinegar.
Broth is too thin Simmer uncovered for a few minutes or mash 1/2 cup of beans into the broth.
Soup is too thick Add broth or water until it becomes spoonable again.
Pasta is too soft Add more broth, fresh herbs, and a little acidity. Next time, cook pasta separately.
Vegetables are overcooked Freshen the bowl with herbs, olive oil, and extra broth. Next time, add zucchini and greens later.
Soup tastes too acidic Add a drizzle of olive oil or a tiny pinch of sugar to round the tomato flavor.
Soup is too salty Add unsalted broth, water, extra beans, or more vegetables.

Most of the time, the fix is smaller than you think. A little salt, a little acid, a splash of broth, or a few mashed beans can bring the pot back.

Fix Watery Minestrone Soup

When the broth looks thin, mashed white beans are the quickest natural thickener because they add body without changing the soup into cream sauce.

Two bowls of minestrone comparing thin watery broth with richer tomato broth, with mashed white beans shown as the thickening fix.

If the broth tastes watery, mash a few white beans into the soup and simmer briefly. This thickens minestrone naturally without cream or flour.

How to Make Minestrone Richer

  • Cook the onion, carrot, and celery until they soften and smell sweet.

  • Cook the tomato paste before adding broth.

  • Use crushed tomatoes for a fuller broth.

  • Add a parmesan rind if you are using cheese.

  • Mash some of the beans into the soup for natural body.

  • Simmer partly uncovered when the soup looks too thin.

  • Finish with olive oil, herbs, and a small splash of lemon juice or vinegar.

How to Keep Pasta from Getting Mushy


Minestrone pasta gets mushy when it sits in hot broth for too long or stays in the soup through storage. The safest method depends on how you plan to serve it.

  • Serving immediately: add dry pasta during the final 8 to 10 minutes.

  • Meal prep: cook pasta separately and add it to each bowl.

  • Freezing: freeze the soup without pasta and add fresh pasta later.

  • Thick leftovers: reheat with extra broth or water.

Glass containers showing minestrone soup base stored separately from cooked small pasta, with pasta being added to a serving bowl.

For better leftovers, store the soup base and pasta separately. Then add pasta to each serving so the next bowl stays fresh instead of soggy.

Slow Cooker and Instant Pot Minestrone

Slow Cooker vs Instant Pot Minestrone

For both appliance methods, the texture rule is the same: cook the base first and keep pasta and greens late. The pasta texture notes are especially useful for meal prep.

Slow cooker and Instant Pot filled with minestrone soup, with small bowls of pasta and greens nearby for adding near the end.

Whether you use a slow cooker or Instant Pot, cook the soup base first. Meanwhile, keep pasta and greens for the end so the texture stays better.

Slow Cooker Minestrone

Slow cooker minestrone is best for a hands-off soup base. Cook the broth, beans, aromatics, and firm vegetables first, then add zucchini, pasta, and greens near the end so they do not overcook.

  1. Add onion, carrot, celery, garlic, tomato paste, tomatoes, broth, herbs, bay leaf, beans, and firm vegetables to the slow cooker.

  2. Cook on low for 6 to 8 hours or high for 3 to 4 hours.

  3. Add zucchini and green beans during the final 30 minutes.

  4. Add pasta only during the final 20 to 30 minutes, or cook pasta separately.

  5. Stir in spinach or kale at the end, then finish with herbs, olive oil, and lemon juice or vinegar.

Instant Pot Minestrone


Instant Pot minestrone is best for a fast soup base. Pressure cook the broth, beans, and firm vegetables, then add cooked pasta and greens at the end so the pasta does not turn soft under pressure.

  1. Use sauté mode to cook onion, carrot, celery, and olive oil for 4 to 5 minutes.

  2. Add garlic and tomato paste. Cook for 1 minute.

  3. Add tomatoes, broth, herbs, bay leaf, beans, and firm vegetables.

  4. Pressure cook on high for 4 to 5 minutes.

  5. Let pressure release naturally for 5 to 10 minutes, then quick release carefully.

  6. Stir in greens and cooked pasta, then finish with herbs, olive oil, and lemon juice or vinegar.

Olive Garden-Style Minestrone Soup

If you like Olive Garden’s lighter tomato-broth style, use these adjustments while keeping the main recipe homemade. Olive Garden describes its minestrone as vegetables, beans, and pasta in a light tomato broth, so this is a home version in that familiar direction, not the official recipe. You can see Olive Garden’s menu description for the style reference.

Light tomato-broth minestrone soup in a cream bowl with kidney beans, white beans, pasta, carrots, zucchini, green beans, celery, spinach, and herbs.

For Olive Garden-style minestrone at home, keep the broth lighter, the beans whole, the vegetables small, and the pasta modest.

  • Use diced tomatoes instead of crushed for a lighter restaurant-style texture.

  • Do not mash the beans into the broth.

  • Keep the pasta modest so the soup stays brothy.

  • Use kidney beans, white beans, zucchini, green beans, carrots, celery, and spinach.

  • Finish with herbs and acidity so the bowl tastes bright, not heavy.

Minestrone Soup Variations

After the base tastes good, you can take the soup in a few different directions without losing the minestrone feel. Keep the tomato base, beans, vegetable timing, and small pasta structure in place, then adjust the bowl you want. For gluten-free, rice-based, or pasta-free versions, the storage section is useful if you plan to cook the starch separately.

Three bowls of minestrone variations showing a vegan version, a gluten-free or rice version, and a thicker bean-rich version on a rustic table.

Once the tomato-bean base tastes good, you can take minestrone in several directions: vegan, gluten-free, rice-based, or thicker and extra hearty.

  • Vegan minestrone: use vegetable broth and skip parmesan rind, parmesan cheese, meat, and egg pasta. Finish with olive oil, herbs, nutritional yeast, or vegan pesto.

  • Gluten-free minestrone: use gluten-free pasta or rice. Cook gluten-free pasta separately for the best texture. Do not use barley or farro.

  • Minestrone without pasta: skip the pasta and add extra beans, cabbage, zucchini, potato, kale, spinach, or cooked rice.

  • Thick and hearty minestrone: use crushed tomatoes, 1 cup pasta, extra white beans, and a small potato. Mash some beans into the broth.

  • Brothy minestrone: use 3/4 cup pasta, unmashed beans, and an extra cup of broth for a lighter, restaurant-style bowl.

  • Low-sodium minestrone: start with low-sodium broth, rinse canned beans well, and choose no-salt-added tomatoes if available. Use garlic, herbs, lemon juice, vinegar, and olive oil to build flavor.

  • Add meat: brown Italian sausage or ground beef before adding the aromatics, or stir in shredded cooked chicken near the end.

Think of these as directions, not separate recipes. The same pot can become lighter, heartier, vegan, gluten-free, or meatier without losing its minestrone backbone.

What to Serve with Minestrone Soup

Minestrone can stand alone as dinner, especially with beans and pasta, but a simple side makes the meal feel complete.

  • A lighter meal: serve minestrone with a crisp salad, roasted vegetables, or something bright like beet salad.

  • For a heartier dinner: add garlic bread, focaccia, grilled cheese, parmesan toast, or pesto toast.

Bowl of minestrone soup served with garlic bread, a green salad with tomatoes, herbs, and a spoon on a wooden table.

Minestrone can stand alone, but the sides change the meal. Garlic bread makes it heartier, while a fresh salad keeps dinner lighter.

The best side is something that balances the tomato broth without making the meal feel heavy.

Make-Ahead, Storage, Freezing, and Reheating

Make-Ahead Plan


Yes, you can make minestrone ahead of time. For the best texture, make the soup base without pasta, refrigerate it, and add freshly cooked pasta when serving.

  • Chop the onion, carrot, celery, zucchini, and green beans up to 1 day ahead.

  • Drain and rinse the beans ahead of time.

  • Make the soup base without pasta up to 3 days ahead.

  • Add greens when reheating so they stay brighter.

  • Cook pasta fresh, or store cooked pasta separately with a tiny drizzle of olive oil.

Store and Freeze Minestrone with Pasta Separately

This storage setup keeps the soup base useful and protects the pasta from swelling before the next serving.

Glass containers of minestrone soup base and a separate bowl of cooked small pasta for storing and freezing.

For freezing, leave pasta out of the soup base. This way, the broth, beans, and vegetables reheat well, and fresh pasta can be added later.

Fridge

Store minestrone soup in an airtight container in the fridge for 3 to 4 days, which matches the USDA’s general guidance for refrigerated leftovers. The next-day soup is often thicker and more flavorful. Loosen it with broth before reheating.

Freezer


Minestrone freezes best without pasta. Freeze the soup base for up to 3 months, then add freshly cooked pasta when reheating. If you freeze it with pasta, the flavor will still be good, but the pasta will become softer.

Reheating


Reheat gently on the stovetop over low to medium-low heat. Add broth or water to loosen the soup. After reheating, freshen the bowl with olive oil, herbs, lemon juice, vinegar, or parmesan. For the fastest fix when leftovers get thick, see the troubleshooting table.

Serve Minestrone Family-Style

Family-style Dutch oven of minestrone soup on a wooden table with a ladle, bowls of soup, bread, herbs, cheese, and a hand serving soup.

Serve minestrone family-style when you want the meal to feel relaxed and generous, with herbs, cheese, bread, or extra broth added at the table.

Once you have the rhythm down, minestrone becomes one of those soups you can make again and again without overthinking it. Keep the tomato broth, beans, small pasta, and vegetable timing in place, then let the pot change with the season.

The best minestrone is not the one with the longest ingredient list; it is the one where the broth, beans, vegetables, and pasta all still feel like they belong in the same spoonful.

Minestrone changes from kitchen to kitchen. If your pot had cabbage, potato, chickpeas, kale, extra zucchini, or a pasta shape that worked beautifully, tell us. Those small choices are often what help the next person make a better pot from what they already have.


Frequently Asked Questions

What is minestrone soup made of?


Minestrone soup is an Italian vegetable soup made with vegetables, beans, tomatoes, broth, herbs, olive oil, and usually pasta or rice. Common vegetables include onion, carrot, celery, zucchini, green beans, cabbage, spinach, kale, potato, and peas.

Is minestrone soup vegetarian?


Minestrone soup is vegetarian when it is made with vegetable broth and no meat. If you add parmesan, choose vegetarian-style parmesan if that matters to you.

Is minestrone soup vegan?


Minestrone soup is vegan when it is made with vegetable broth and no parmesan, parmesan rind, meat, or egg pasta. For a vegan finish, use olive oil, herbs, nutritional yeast, or vegan pesto.

What is the best pasta for minestrone?


Ditalini is one of the best pasta shapes for minestrone because it is small and spoon-friendly. Small shells, elbows, macaroni, and orzo also work.

What beans are best for minestrone?


Cannellini beans, white beans, and kidney beans are the best everyday beans for minestrone. Borlotti beans, navy beans, chickpeas, and lentils also work.

Why does my minestrone taste bland?


Bland minestrone usually needs salt, acidity, or more simmering time. Cook the aromatics well, cook the tomato paste until it darkens slightly, taste the broth before adding pasta, then finish with lemon juice or vinegar if the tomato flavor tastes flat.

How do you make minestrone less watery?


To make minestrone less watery, simmer it uncovered, mash some beans into the broth, use crushed tomatoes, or add a parmesan rind if you are using cheese. A watery soup often means the aromatics or tomato paste needed more time at the beginning.

How do you keep pasta from getting mushy in minestrone?


To keep pasta from getting mushy in minestrone, add it only near the end and stop when it is just tender. For leftovers, meal prep, or freezing, cook pasta separately and add it to each bowl.

Can you make minestrone soup ahead of time?


Yes, minestrone is a good make-ahead soup, especially if you make the soup base without pasta. Refrigerate the base for 3 to 4 days, then add freshly cooked pasta when serving.

Can you freeze minestrone soup?


Yes, minestrone soup freezes well, but it freezes best without pasta. Freeze the soup base for up to 3 months, then add freshly cooked pasta when serving.

What is the difference between minestrone and vegetable soup?


Minestrone is usually heartier than plain vegetable soup because it often includes beans, pasta or rice, tomatoes, Italian herbs, and olive oil. Vegetable soup can be any broth-based soup made with vegetables.

What is the difference between minestrone and pasta e fagioli?


Minestrone is a vegetable-heavy soup that often includes beans plus pasta or rice. Pasta e fagioli means pasta and beans, so it is more focused on those two ingredients and is often thicker and more bean-forward.

Can I make minestrone without pasta?


Yes, you can make minestrone without pasta. Add extra beans, cabbage, zucchini, potato, kale, spinach, or cooked rice instead.

Can I use frozen vegetables in minestrone?


Yes, frozen peas, green beans, spinach, kale, and mixed vegetables can work well in minestrone. Add quick-cooking frozen vegetables near the end unless they are dense vegetables. If frozen spinach releases too much water, squeeze it before adding.

Can I make minestrone with canned vegetables?


Yes, canned vegetables can work in minestrone when you need a pantry version. Drain them well and add them near the end because they are already cooked and can become too soft if simmered for a long time.

Posted on Leave a comment

Shrimp Scampi Recipe: Garlic Butter Pasta & No-Wine Option

Shrimp scampi pasta in a skillet with shrimp, lemon, parsley, bread, and tongs lifting noodles.

This shrimp scampi recipe gives you tender shrimp or prawns in a silky garlic butter lemon sauce, with enough sauce to toss through pasta or drag a piece of crusty bread through at the end.

It feels like you did more than you did: shrimp sizzling in garlic butter, lemon cutting through the richness, parsley going in at the end, and a skillet that makes a weeknight dinner feel a little restaurant-style. It also keeps real-life scampi problems covered, whether you are using shrimp or prawns, wine or stock, pasta or bread, fresh or frozen shrimp.

The quick answer: shrimp scampi is shrimp cooked quickly in garlic, butter, olive oil, lemon, parsley, and white wine or stock. Serve it with pasta for dinner or with bread for a lighter skillet meal. The key is to pull the shrimp while it is still tender, build the garlic butter in the pan, then return the shrimp just long enough to finish.

Making the pasta version? Go straight to shrimp scampi pasta. Skipping alcohol? Use the no-wine shrimp scampi method.

If the pan juices turn thin, oily, flat, salty, or split, this guide shows you how to bring them back.

Recipe at a Glance

Prep time10 minutes
Cook time10 minutes
Total time20 minutes
Servings4
Main ingredient500g / 1.1 lb large shrimp or prawns
Best shrimp sizeLarge shrimp or prawns, about 16–20 or 21–25 count per pound
Pasta amount225g / 8 oz for a saucy shrimp scampi pasta
No-wine optionLow-sodium seafood stock, chicken stock, or vegetable stock
Main cooking cueShrimp should be pink, opaque, and curled into a loose C

Choose Your Shrimp Scampi Path

Use this as the quick choice point before cooking: pasta or bread, wine or stock, shrimp or prawns.

Visual guide showing shrimp or prawns, garlic butter lemon sauce, wine or stock, pasta or bread, and 20 minutes.
Before cooking, choose your path: shrimp or prawns, wine or stock, pasta or bread. This quick scampi map shows how the recipe stays flexible while still landing in about 20 minutes.

In This Recipe Guide

Before You Start

Shrimp scampi moves quickly once the pan is hot, so keep the shrimp dry, the garlic minced, the lemon ready, and the wine or stock measured before you start. Once those are ready, the cooking is simple: sear, simmer, swirl, toss, serve.

Using frozen shrimp, cooked shrimp, prawns, or king prawns? Check the shrimp type guide before the skillet gets hot.

Dry the Shrimp Before Cooking

This is the prep check that keeps the skillet from filling with excess moisture.

Raw shrimp being patted dry with a paper towel before making shrimp scampi.
First, blot the shrimp until the surface looks dry. This helps the seafood brown lightly and keeps extra water from thinning the scampi sauce.
  • Use a wide skillet. An 11–12 inch pan gives shrimp room to sear. If the shrimp do not fit in one layer, cook in batches.
  • Dry the shrimp well. Wet shrimp steam in the pan and can make the pan juices thin.
  • Pull the shrimp early. It should be almost done before it goes back into the sauce.
  • Keep the finish light. You want the garlic butter to lightly coat the shrimp and pasta, not turn thick like gravy or pool underneath.

You are aiming for shrimp that is just opaque, garlic that smells sweet and fragrant, and a buttery lemon coating that clings lightly to whatever you serve it with.

How to Make Shrimp Scampi

The actual cooking is fast. The shrimp should sizzle when it hits the pan, the garlic should stay pale and fragrant, and the finished pan should smell like garlic and lemon first, then butter and sweet shrimp.

  1. Prepare the shrimp. Thaw if frozen, drain well, pat dry, then season with salt and black pepper.
  2. Cook the pasta, if using. Cook pasta 1–2 minutes less than the package directions. Reserve 1 cup / 240ml pasta water before draining.
  3. Sear the shrimp. Heat a wide skillet over medium-high heat. Add olive oil and 1 tablespoon butter. Add shrimp in one layer and cook large shrimp for about 60–90 seconds per side, or up to 2 minutes per side for very large prawns. Transfer to a plate when almost cooked through.
  4. Cook the garlic. Lower heat to medium. Add minced garlic and red pepper flakes. Cook for 30–45 seconds, stirring constantly, until fragrant but not browned.
  5. Build the sauce. Add wine or stock and simmer for 2–3 minutes, scraping up any flavorful bits from the pan.
  6. Finish the sauce. Add lemon juice, lemon zest, and the remaining butter. Swirl until the butter melts into the wine or stock and the pan juices look silky.
  7. For pasta scampi, add pasta before the shrimp. Toss drained pasta in the sauce first, adding pasta water 2–3 tablespoons at a time until the noodles look loose, shiny, and lightly coated.
  8. Return the shrimp at the end. Add the shrimp back to the skillet and toss for 30–60 seconds, just until fully cooked. If you are not using pasta, return the shrimp directly after finishing the sauce.
  9. Finish and serve. Turn off the heat, stir in parsley, taste for salt, pepper, and lemon, and serve immediately.

Making this with pasta? Use the shrimp scampi pasta method next. If the pan juices look thin, oily, or split, jump to how to fix the sauce.

Visual Cues for the Skillet

Use these quick checks while cooking so the skillet cues match what you see in front of you.

Sear the shrimp in hot butter and oil. The first contact with the pan should be quick and active, not slow and watery.

Shrimp being added to a hot skillet with melted butter and olive oil.
Once the butter and oil shimmer, add the shrimp. The goal is quick pan contact and gentle color, not simmering the shrimp in liquid.

Give the shrimp room in the skillet. A single layer keeps each piece in direct contact with the hot pan instead of steaming in its own moisture.

Raw shrimp spaced in one layer in a wide skillet with oil or butter.
Next, leave space between the shrimp. A crowded skillet steams the seafood, while a single layer gives faster cooking and a better bite.

Remove the shrimp before building the sauce. This short plate rest protects the shrimp texture while the pan flavor turns into sauce.

Cooked shrimp resting on a plate beside a skillet with garlic butter pan juices.
After the shrimp turns mostly pink, move it to a plate. That short rest keeps it tender while the skillet flavor becomes the garlic butter base.

Keep the garlic pale. Garlic is the backbone of the sauce, but it needs gentle heat.

Pale minced garlic cooking gently in butter or olive oil with red pepper flakes.
Meanwhile, keep the garlic pale and fragrant. Light garlic tastes sweet and savory; dark garlic can make the whole shrimp scampi taste bitter.

Deglaze with wine or stock. This is where the browned shrimp and garlic flavor lift from the skillet.

Wine or stock being poured into a skillet with garlic butter pan juices.
Then deglaze with dry white wine or stock. The liquid lifts the shrimp and garlic flavor from the pan, which is what gives the sauce depth.

Swirl butter into the pan juices. The sauce should come together as a glossy coating rather than a heavy gravy.

Butter melting into garlic lemon pan juices in a skillet.
Now swirl in butter until the pan juices look glossy and connected. If the sauce looks greasy, reduce the heat before adding more butter.

Return the shrimp at the end. The shrimp goes back only long enough to finish and coat.

Cooked shrimp being added back to shrimp scampi pasta in a skillet.
Finally, return the shrimp for coating and warming only. When the shrimp is already pink and curled, another long cook is what makes it tough.

Finish with parsley and lemon. Fresh herbs and lemon zest belong at the end, where they stay bright.

Parsley and lemon zest being sprinkled over finished shrimp scampi pasta in a skillet.
Finish off the heat with parsley and lemon zest. This fresh layer cuts through the butter and makes the shrimp scampi taste bright instead of heavy.

Doneness cue: shrimp are done when they turn pink, opaque, and curl into a loose C shape. If they curl tightly into an O, they are usually overcooked. If using a thermometer, shrimp should reach 63°C / 145°F; that matches the USDA safe minimum temperature chart for fish and shellfish.

Use the Loose C Doneness Cue

This visual check is faster than guessing by time, especially when shrimp sizes vary.

Comparison showing a loose C-shaped cooked shrimp and a tight O-shaped overcooked shrimp.
Use shape as a fast doneness check. Shrimp curled into a loose C are tender; shrimp curled into a tight O have usually gone too far.

Shrimp timing rule: pull shrimp when it looks almost done, not fully done. It will continue cooking from residual heat and again when it returns to the sauce.

Back to top · Back to recipe guide

How to Make Shrimp Scampi Pasta

For shrimp scampi pasta, toss the pasta directly in the skillet instead of spooning sauce over it later. This helps the garlic butter cling to the noodles.

If the noodles look dry, sticky, or oily while tossing, the sauce fixes will help before the shrimp overcooks.

  1. Use 225g / 8 oz linguine, spaghetti, angel hair, or capellini for the sauciest version.
  2. Cook the pasta 1–2 minutes shy of done and reserve 1 cup / 240ml pasta water.
  3. Build the sauce after removing the shrimp from the pan.
  4. Add the pasta to the sauce before returning the shrimp.
  5. Add pasta water 2–3 tablespoons at a time until the pasta looks loose and lightly coated.
  6. Return the shrimp only at the end and toss briefly.

Add Pasta Before the Shrimp Returns

This is the order that keeps the noodles saucy and the shrimp tender.

Pasta being tossed in garlic butter sauce while cooked shrimp waits on a plate beside the skillet.
For shrimp scampi pasta, let the noodles hit the sauce before the shrimp returns. The pasta absorbs the lemony garlic butter while the shrimp avoids extra heat.

When the pasta is right, it should look shiny and loose, with little flecks of garlic, parsley, and lemon zest clinging to the noodles. That is the moment where the dish stops being shrimp plus pasta and becomes shrimp scampi pasta.

Check the Pasta Texture Before Serving

This is the texture cue to look for before you turn off the heat.

Tongs lifting shiny shrimp scampi pasta with shrimp, parsley, and lemon in a skillet.
Good shrimp scampi pasta should look loose, shiny, and lightly coated. If the noodles look sticky, toss in reserved pasta water one spoonful at a time.

Pasta ratio rule: 225g / 8 oz pasta gives you saucy, shrimp-forward scampi. A full 450g / 1 lb pasta box needs double the sauce, or the shrimp will get lost in the noodles.

Back to top · Back to recipe guide

Shrimp Scampi Without Wine

You can make shrimp scampi without wine. No wine does not mean less flavor; it just means you need body from stock and lift from lemon.

For the best no-wine shrimp scampi, use ½ cup / 120ml low-sodium seafood stock or chicken stock, then adjust acidity at the end. Vegetable stock works too, but it gives a lighter finish. Add up to ½ teaspoon white wine vinegar only if the sauce tastes flat after the lemon.

Wine vs Stock in Shrimp Scampi

This comparison is useful when you want the classic flavor or a no-wine version with enough body.

Split image comparing shrimp scampi made with wine and shrimp scampi made with stock.
Wine brings crisp acidity; stock makes the no-wine version savory and family-friendly. Either way, lemon keeps the garlic butter sauce lively.

Avoid sweet juices, too much vinegar, and salty cooking wine. Plain water can loosen the skillet juices in a pinch, but stock gives much better flavor.

Ingredients You Need

The ingredient list is short, which is part of the charm: shrimp, garlic, lemon, butter, parsley, and a pan sauce that tastes bigger than the effort.

Still choosing between shrimp, prawns, fresh, frozen, or cooked shrimp? Jump to the shrimp type guide before buying or thawing.

Shrimp Scampi Ingredients at a Glance

Use this image as the shopping and prep check before cooking.

Shrimp scampi ingredients including shrimp, garlic, lemon, butter, parsley, pasta, wine, and stock.
The ingredient list is short, so each choice matters. Shrimp, garlic, lemon, butter, parsley, pasta, and wine or stock are enough when the balance is right.
  • Shrimp or prawns: Use 500g / 1.1 lb large shrimp or prawns, peeled, deveined, and patted dry. A 450g / 1 lb pack also works. The shrimp should smell clean, not fishy.
  • Pasta: Use 225g / 8 oz linguine, spaghetti, angel hair, or capellini if making shrimp scampi pasta.
  • Unsalted butter: 3 tablespoons / 42g gives the sauce richness. If using salted butter, reduce the added salt.
  • Olive oil: 2 tablespoons / 30ml helps sauté the shrimp and garlic without the butter burning too quickly.
  • Garlic: Use 5–6 medium cloves, finely minced, or about 18–25g minced garlic. Fresh garlic is best here.
  • Dry white wine: Use ½ cup / 120ml for the classic version.
  • Stock: Use ½ cup / 120ml low-sodium seafood stock, chicken stock, or vegetable stock for the no-wine version.
  • Lemon: Use 2 tablespoons / 30ml fresh lemon juice plus 1 teaspoon lemon zest. Zest before juicing.
  • Parsley: ¼ cup chopped fresh parsley adds color and freshness at the end.
  • Red pepper flakes: ¼ teaspoon is optional, but it gives gentle heat.
  • Salt and pepper: Start with ½ teaspoon fine salt for the shrimp, plus more for pasta water and final adjustment.
  • Pasta water: Reserve 1 cup / 240ml before draining pasta if making the pasta version.

Back to top · Back to recipe guide

What Is Shrimp Scampi?

Shrimp scampi is a quick shrimp dish made with garlic, butter, olive oil, lemon, white wine, parsley, and sometimes red pepper flakes. Many American versions serve it with pasta, especially linguine, spaghetti, angel hair, or capellini.

Across the US, this dish is usually called shrimp scampi. In India, Australia, and many other places, readers may also think of it as prawn scampi, king prawn scampi, tiger prawn scampi, or garlic butter prawns. UK readers may know “scampi” as langoustine tails, often breaded; this recipe is the American-style garlic butter shrimp or prawn scampi.

The sauce should be light and silky, not thick like Alfredo and not thin like soup. You are making a bright garlic butter sauce that coats the shrimp and clings to pasta if you use it.

Shrimp vs Prawns

You can use shrimp or prawns in this recipe. The method stays the same: cook them quickly, remove them from the pan, build the sauce, then return them briefly at the end.

Large shrimp or prawns give the best texture. Shrimp labeled 16–20 or 21–25 count per pound are ideal. Smaller shrimp cook faster, while very large king prawns or tiger prawns may need 30–60 seconds more.

Tail-on shrimp look good and can add a little extra flavor, especially if serving the scampi with bread, rice, or vegetables. Tail-off shrimp are easier to eat with pasta.

Fresh, Frozen, Raw, or Cooked Shrimp?

Raw shrimp or prawns give the best texture, but frozen raw shrimp is often the most practical choice. Avoid freezer-burned shrimp, thaw gently, drain well, and pat dry before cooking.

Shrimp typeHow to use it
Raw frozen shrimpThaw fully, drain well, and pat very dry before cooking.
Fresh raw shrimpUse if clean-smelling and truly fresh. Cook the same way as thawed frozen shrimp.
Cooked shrimpAdd only at the end for 30–60 seconds, just to warm through.
Frozen cooked shrimpThaw fully, pat dry, and warm gently in the finished sauce.
Shell-on shrimpMore flavor but more work. Better for baked versions or homemade stock.

Choose the Right Shrimp or Prawns

The timing changes depending on whether the seafood is raw, frozen, cooked, or extra large.

Guide showing shrimp, prawns, raw or frozen shrimp, and cooked shrimp for shrimp scampi.
Shrimp, prawns, raw frozen shrimp, and cooked shrimp can all work, but not the same way. Raw shrimp cooks into the best texture; cooked shrimp only needs a brief warm-through.

For thawing, use the fridge overnight or place the sealed shrimp bag in cold water. Cooked shrimp needs the lightest touch because it has already been cooked once.

Best Pasta to Use

Long, thin pasta works best because it catches the garlic butter sauce without overpowering the shrimp.

  • Linguine: classic and restaurant-style.
  • Spaghetti: easy, familiar, and reliable.
  • Angel hair: delicate and quick-cooking.
  • Capellini: light and excellent with this sauce.
  • Fettuccine: works if you increase the sauce.
  • Zucchini noodles: useful for a low-carb scampi-style bowl.

This recipe uses less pasta than some versions because the goal is a shrimp-forward, saucy skillet, not a big pot of noodles with a little shrimp scattered through it. For another seafood pasta with lemon, garlic, Parmesan, and pasta-water control, try this creamy salmon pasta.

The Garlic Butter Sauce

The sauce is why people come back to shrimp scampi. It should be buttery enough to feel special, lemony enough to stay fresh, and loose enough to coat instead of sit heavily underneath.

A good scampi sauce has three parts in balance: butter for richness, lemon for lift, and garlic for warmth. Wine or stock gives the sauce body, parsley freshens the finish, and pasta water helps everything cling if you are adding noodles.

When it lands right, the shrimp stays tender, the garlic tastes warm instead of sharp, and the last bit of lemon butter is exactly what the bread is for.

The sauce is right when the shrimp looks shiny and the pasta looks lightly coated. If there is a puddle underneath, it needs a little more tossing, reducing, or pasta-water control.

Best Wine for Shrimp Scampi

Use a dry, crisp white wine. The wine should brighten the garlic butter sauce, not make it sweet. Use something you would drink with lemony seafood; if it tastes sweet in the glass, it will taste sweet in the skillet.

Skipping alcohol entirely? Go back to the shrimp scampi without wine section and use stock instead.

  • Sauvignon Blanc
  • Pinot Grigio
  • Dry unoaked Chardonnay
  • Dry vermouth

Save sweet wine for sipping or dessert; scampi wants something crisp and dry. Skip salty cooking wine because it can make the sauce harsh.

Back to top · Back to recipe guide

How to Fix the Sauce

Most scampi problems are easy to fix if you catch them early.

ProblemFix
Too thinSimmer for 1–2 minutes, then swirl in a little butter. Next time, dry the shrimp better.
Greasy or splitAdd 1–2 teaspoons pasta water or warm water and swirl hard until shiny and smooth.
Too sharpAdd a little more butter or a splash of pasta water.
Flat flavorAdd lemon zest, parsley, or a tiny splash of white wine vinegar.
Bitter garlicThe garlic probably burned. Start the garlic again if possible.
Tough shrimpIt was overcooked. Next time, remove it earlier and finish briefly in the sauce.
Dry pastaAdd reserved pasta water a little at a time and toss well.
Too saltyAdd unsalted butter, pasta water, or more pasta. Use low-sodium stock next time.

Fix Thin Shrimp Scampi Sauce

This is the rescue when the pan juices look loose instead of glossy.

Before and after comparison of thin shrimp scampi sauce and fixed sauce coating shrimp.
If the sauce looks thin, reduce it briefly before adding more butter. The fixed scampi sauce should lightly cling to shrimp or pasta instead of pooling underneath.

Fix Split or Oily Scampi Sauce

This is the rescue when butter separates from the wine, stock, or pasta water.

Before and after comparison of split oily shrimp scampi sauce and smooth sauce.
If the sauce splits, add a spoonful of pasta water or warm water and swirl hard. Starch and motion help the butter reconnect into a smooth coating.

Back to top · Back to recipe guide

Variations

Use these when you want the same garlic-lemon-butter idea in a different mood: creamier, baked, low-carb, air-fried, or more like a restaurant pasta.

Creamy Shrimp Scampi

Add ¼ to ½ cup / 60–120ml heavy cream after the wine or stock has reduced. Add 2–4 tablespoons Parmesan if you want a richer pasta-style sauce. Keep the heat low after adding cream so the sauce does not split.

Baked Shrimp Scampi

Arrange shrimp or prawns in a shallow baking dish with garlic butter, lemon, white wine or stock, salt, pepper, and parsley. Add panko and Parmesan if you want a crisp finish. Bake at 220°C / 425°F for 8–12 minutes, just until the shrimp are pink, opaque, and loosely curled.

If you want another lemon-garlic seafood dinner that cooks quickly, this baked tilapia keeps the same easy weeknight feel.

Air Fryer Shrimp Scampi

Toss shrimp with melted butter, olive oil, garlic, lemon juice, salt, pepper, and red pepper flakes. Air fry at about 190°C / 370°F for 5–6 minutes, shaking or turning once, just until the shrimp are pink, opaque, and loosely curled. Use a small oven-safe dish if you want to keep more sauce.

Restaurant-Style Shrimp Scampi Pasta

For restaurant-style shrimp scampi pasta, angel hair or linguine gives the cleanest finish. Add asparagus tips or cherry tomatoes if you want color, then finish with parsley, lemon, and Parmesan. Increase the sauce if you cook more than 225g / 8 oz pasta.

Low-Carb Shrimp Scampi

Skip the pasta and serve the shrimp with zucchini noodles, roasted vegetables, cauliflower rice, or a green salad. Keep the sauce slightly more concentrated because vegetables can release moisture.

Shrimp Scampi With Rice

Serve the shrimp and sauce over plain rice, rice pilaf, or lightly seasoned basmati rice. For a more generous seafood-and-rice dinner, this home-style paella is another natural place to go.

For a brighter plate, keep the rice simple and let the lemony shrimp and crisp salad do the work.

Shrimp scampi served over white rice with lemon, parsley, fork, and a green salad nearby.
For a lighter non-pasta dinner, spoon shrimp scampi over rice and add a crisp salad. The rice catches the butter sauce while the greens keep the plate fresh.

For another fast shrimp dinner with a completely different mood, these shrimp tacos with slaw and creamy cilantro-lime sauce are easy, bright, and weeknight-friendly.

What to Serve With It

The side you choose changes the mood of the meal. Pasta makes it dinner, bread makes it casual, rice keeps it simple, and salad keeps it light.

If you want…Serve shrimp scampi with…
Something to soak up sauceCrusty bread, garlic bread, toasted baguette
A classic pasta dinnerLinguine, spaghetti, angel hair, capellini
A simple non-pasta mealRice, rice pilaf, or orzo
A lighter plateGreen salad, zucchini noodles, roasted vegetables
A vegetable sideAsparagus, broccoli, zucchini, green beans, cherry tomatoes

Serve Shrimp Scampi With Crusty Bread

Bread turns the pan sauce into part of the meal instead of something left behind.

Crusty bread being dragged through lemon garlic butter shrimp scampi with shrimp nearby.
For a no-pasta shrimp scampi moment, use crusty bread to drag through the lemon garlic butter. The last swipe in the pan is often the best bite.

A crisp wedge salad keeps the plate cool and crunchy, while a homemade garlic bread loaf is the move when you want every bit of sauce gone. Plates are optional; bread is not.

If you make it, note how you served it — pasta, bread, rice, or vegetables — because that changes how much sauce you may want next time. The last spoonful of sauce is the point.

Back to top · Back to recipe guide

Storage and Reheating

Shrimp scampi is best eaten fresh because shrimp can toughen when reheated. Leftovers can be refrigerated in an airtight container for up to 2 days.

Reheat gently in a skillet over low heat with a splash of water, stock, or pasta water. Warm just until the shrimp is heated through. If storing shrimp scampi pasta, add a splash of liquid while reheating because the pasta will absorb sauce.

Freezing cooked shrimp scampi is not ideal. For prep ahead, clean and dry the shrimp, mince the garlic, chop the parsley, zest the lemon, and measure the sauce ingredients before cooking.

The best shrimp scampi feels simple at the table: tender shrimp, warm garlic, lemony butter, and just enough sauce left behind for bread or one last forkful of pasta.

Back to top · Back to recipe guide

Final Shrimp Scampi Texture Check

Right before the recipe card, this is the finished look to aim for: tender shrimp, bright lemon, loose pasta, and a clean buttery finish.

Finished shrimp scampi pasta on a plate with shrimp, lemon wedge, parsley, bread, and garlic butter sauce.
This is the recipe-card payoff: tender shrimp, lemony garlic butter, parsley, bread, and a clean plated finish. It shows exactly what the final shrimp scampi should feel like.

Shrimp Scampi Recipe

Here is the clean skillet version to cook from when you want tender shrimp, lemony garlic butter, and enough sauce for pasta or bread.

Description: Tender shrimp or prawns in a silky garlic butter lemon sauce, with a white wine or no-wine option and instructions for serving with pasta.

Prep Time10 minutes
Cook Time10 minutes
Total Time20 minutes
Servings4
MethodSkillet / sauté
CourseDinner, Main Course, Seafood
EquipmentWide skillet, pasta pot if using pasta, tongs, colander, zester, measuring cup

Ingredients

  • 500g / 1.1 lb large shrimp or prawns, peeled, deveined, and patted dry
  • ½ teaspoon fine salt, plus more for pasta water and final adjustment
  • Freshly ground black pepper, to taste
  • 225g / 8 oz linguine, spaghetti, angel hair, or capellini, optional
  • 3 tablespoons / 42g unsalted butter, divided
  • 2 tablespoons / 30ml olive oil
  • 5–6 medium garlic cloves, finely minced, or about 18–25g minced garlic
  • ½ cup / 120ml dry white wine, or low-sodium seafood stock, chicken stock, or vegetable stock
  • 2 tablespoons / 30ml fresh lemon juice
  • 1 teaspoon lemon zest
  • ¼ teaspoon red pepper flakes, optional
  • ¼ cup chopped fresh parsley
  • 1 cup / 240ml reserved pasta water, if using pasta

Instructions

  1. Prepare the shrimp. If using frozen shrimp, thaw fully. Drain well and pat dry with paper towels. Season with ½ teaspoon fine salt and black pepper.
  2. Cook the pasta, if using. Bring a large pot of salted water to a boil. Cook pasta 1–2 minutes less than the package directions. Reserve 1 cup / 240ml pasta water, then drain. Leave the pasta unrinsed.
  3. Sear the shrimp. Heat a wide skillet over medium-high heat. Add olive oil and 1 tablespoon butter. Add shrimp in one layer. Cook large shrimp for about 60–90 seconds per side, or up to 2 minutes per side for very large prawns. Transfer to a plate when almost cooked through. Cook in batches if needed.
  4. Cook the garlic. Lower heat to medium. Add minced garlic and red pepper flakes. Cook for 30–45 seconds, stirring constantly, until fragrant but not browned.
  5. Reduce the pan liquid. Add dry white wine or stock and simmer for 2–3 minutes, scraping the pan gently.
  6. Finish the sauce. Add lemon juice, lemon zest, and the remaining 2 tablespoons butter. Swirl or stir until the sauce comes together.
  7. Add pasta first, if using. Toss the drained pasta in the sauce. Pour in reserved pasta water a few tablespoons at a time until the noodles look loose, shiny, and lightly coated.
  8. Return the shrimp at the end. Add the shrimp back to the skillet and toss for 30–60 seconds, just until fully cooked. If not using pasta, return the shrimp directly after finishing the sauce.
  9. Finish and serve. Turn off the heat. Stir in parsley. Taste and adjust salt, pepper, and lemon. Serve immediately.

Notes

  • Success cue: shrimp should be just opaque, garlic should be fragrant, and sauce should lightly coat rather than pool.
  • For no-wine shrimp scampi, use low-sodium stock instead of wine and add up to ½ teaspoon white wine vinegar only if the sauce tastes flat.
  • Use 225g / 8 oz pasta for a saucy shrimp scampi pasta. A full 450g / 1 lb pasta box needs double sauce.
  • Smaller shrimp may cook in under 60 seconds per side. Very large prawns may need closer to 2 minutes per side.
  • Cooked shrimp should go in only at the end and warm for 30–60 seconds.
  • A split sauce can usually be saved with 1–2 teaspoons pasta water or warm water.
  • When shrimp, stock, butter, or Parmesan is salty, start with less salt and adjust at the end.
  • This dish is best served immediately. Leftovers can be refrigerated for up to 2 days, but reheating should be gentle.

Back to top · Back to recipe guide

FAQs

What is shrimp scampi?

Shrimp scampi is shrimp cooked quickly in garlic, butter, olive oil, lemon, white wine or stock, parsley, and sometimes red pepper flakes. It is often served with pasta or crusty bread.

Is prawn scampi the same as shrimp scampi?

For this recipe, yes. Shrimp and prawns can be cooked the same way, though very large prawns may need slightly more time.

What is scampi sauce made of?

Scampi sauce is usually made with butter, olive oil, garlic, dry white wine or stock, lemon juice, lemon zest, parsley, salt, pepper, and sometimes red pepper flakes.

Can I make shrimp scampi without wine?

Yes. Use low-sodium seafood stock, chicken stock, or vegetable stock, then add lemon and a tiny splash of white wine vinegar only if the sauce tastes flat.

What can I use instead of white wine?

Seafood stock gives the most natural flavor, chicken stock is the easiest pantry option, and vegetable stock keeps the sauce lighter.

What is the best wine for shrimp scampi?

Use a dry white wine that tastes crisp rather than sweet, such as Sauvignon Blanc, Pinot Grigio, dry unoaked Chardonnay, or dry vermouth.

Can I use frozen shrimp?

Yes. Thaw fully, drain well, and pat dry. Wet shrimp steam in the pan and can make the sauce thin.

Can I use cooked shrimp?

Yes, but add cooked shrimp only at the end for 30–60 seconds. It only needs to warm through.

What pasta goes best with shrimp scampi?

Linguine, spaghetti, angel hair, and capellini work best because they catch the light garlic butter lemon sauce.

How much pasta should I use?

Use 225g / 8 oz pasta for a shrimp-forward, saucy pasta. Use 450g / 1 lb only if you double the sauce.

Why is my shrimp rubbery?

Shrimp becomes rubbery when overcooked. Pull it when it is almost done and finish it briefly in the sauce.

Why is my shrimp scampi sauce thin?

The most common reason is wet shrimp. Simmer the sauce briefly, swirl in a little butter, and dry the shrimp better next time.

Why did my scampi sauce split?

The butter and liquid may have separated. Add 1–2 teaspoons pasta water or warm water and swirl until smooth again.

Can I make shrimp scampi ahead of time?

It is best cooked fresh, but you can prep the shrimp, garlic, parsley, lemon, and measured sauce ingredients ahead so the skillet cooking takes only minutes.

Can I make creamy shrimp scampi?

Yes. Add ¼ to ½ cup / 60–120ml heavy cream after reducing the wine or stock, then keep the heat low so the sauce does not split.

Can I bake shrimp scampi?

Yes. Bake shrimp with garlic butter, lemon, wine or stock, and optional breadcrumbs at 220°C / 425°F for 8–12 minutes, just until pink, opaque, and loosely curled.

Can I make shrimp scampi in the air fryer?

Yes. Air fry seasoned shrimp with butter, olive oil, garlic, and lemon at about 190°C / 370°F for 5–6 minutes, just until pink, opaque, and loosely curled.

What do you serve with shrimp scampi?

Serve it with pasta, crusty bread, garlic bread, rice, orzo, roasted vegetables, zucchini noodles, or a green salad.

Back to top · Back to recipe guide

Posted on 5 Comments

Indian Inspired Alfredo Pasta: 5 Indian Twists on Creamy Alfredo

Magazine-style cover featuring a bowl of creamy Indian-inspired Alfredo pasta topped with charred paneer tikka. Text overlay reads “Indian-Inspired Alfredo Pasta” and “5 Indian Twists on Creamy Alfredo,” listing masala, paneer tikka, korma, spinach paneer, and coconut curry, plus “one-pot + baked options included,” with MasalaMonk.com in the footer.

Creamy Alfredo has a certain pull—soft, glossy, and comforting in a way that makes a normal weeknight feel oddly luxurious. At the same time, the classic bowl can start to feel predictable once you’ve made it a few times. That’s exactly why Indian inspired Alfredo pasta works so well: it keeps everything you love about Alfredo—the cling, the richness, the peppery warmth—while letting you steer the flavor somewhere exciting.

Sometimes that means a masala bloom in ghee that perfumes the whole pan. Other times, it’s smoky paneer tikka folded into cream so the char and the sauce play off each other. On quieter evenings, a korma-style nuttiness turns Alfredo mellow and restaurant-like. And when you want something that tastes rich yet feels balanced, spinach paneer Alfredo delivers a green, velvety comfort that’s hard to stop eating. Finally, coconut curry Alfredo brings coastal warmth that’s ridiculously good with shrimp.

Even better, these aren’t “one-off” novelty ideas. Each twist below reads as a complete, standalone recipe you can cook tonight—yet everything is built on a shared base so you’re not learning five totally different methods. Along the way, you’ll also get an easy jar-sauce upgrade, a one pot Alfredo approach, and a baked Alfredo pasta approach (ziti, penne, tortellini) so you can match the mood of the day.

If you want the deeper technique story behind classic Alfredo, you can also read Classic vs. Authentic Alfredo: 5 Essential Recipes—it’s a great companion when you’re in the “I want the why, not just the what” mood.


Indian Inspired Alfredo Pasta Base: A Creamy Alfredo Sauce That Stays Silky

Alfredo is at its best when it behaves like a sauce rather than a thick dairy blanket. The ideal version is glossy and cohesive—fat, cheese, and starch held together in a smooth emulsion so every strand of pasta looks lacquered. That’s why gentle heat and starchy pasta water matter so much. When you build the sauce in the pan and finish the pasta in it, the results feel restaurant-level without requiring restaurant tools. The mechanics are beautifully explained in Serious Eats’ fettuccine Alfredo method, and once you understand the approach, the Indian twists become easy choices instead of stressful experiments.

Dark luxe recipe card for Indian inspired Alfredo pasta base showing creamy Alfredo pasta, ingredients, step-by-step method, and “Silky Rules” tips to prevent splitting and keep the sauce glossy.
Indian inspired Alfredo pasta starts here: a silky, glossy Alfredo base that won’t split (plus the “Silky Rules” that make it foolproof). Save this recipe card, then scroll for 5 Indian twists—masala, paneer tikka, korma, spinach paneer, and coconut curry.

Alfredo base (serves 4)

  • 300–350 g pasta (fettuccine, penne, fusilli, ziti; or tortellini if you want a faster “wow” bowl)
  • 2 tbsp butter (or ghee if you like a warmer, rounder finish)
  • 3–5 garlic cloves, finely grated (optional, but very good)
  • 1 to 1¼ cups cream (or cooking cream)
  • ¾ cup finely grated parmesan (or a parmesan-style hard cheese)
  • ½ to 1 cup reserved pasta water (you’ll add it gradually)
  • ½ tsp freshly ground black pepper (plus more to finish)
  • Salt, to taste (go light until cheese is in)

The method (steady, reliable, forgiving)

  1. Bring a big pot of water to a boil. Salt it generously. Cook pasta until just al dente. Before draining, reserve at least ½ cup pasta water (a full cup is safer).
  2. Meanwhile, melt butter (or ghee) in a wide pan over medium-low heat. If using garlic, add it and warm gently until fragrant—soften it, don’t scorch it.
  3. Lower the heat. Add cream and warm until steaming. Avoid a rolling boil; high heat encourages separation.
  4. Add grated cheese in small handfuls, whisking constantly so it melts smoothly.
  5. Now, adjust with pasta water: add a splash, whisk, and watch the sauce loosen into a glossy, clingy texture. Repeat until it coats the back of a spoon.
  6. Add pasta to the pan and toss well so the sauce grips every strand.

That final step—tossing pasta in the sauce instead of pouring sauce over pasta—makes a real difference. If you enjoy the technique, Serious Eats’ guidance on saucing pasta the right way is worth reading.

Dark luxe infographic explaining why Alfredo sauce splits, turns grainy, or gets too thick, with quick fixes: lower heat, whisk in warm pasta water, and add finely grated cheese slowly.
Why does Alfredo split or turn grainy? This quick rescue guide fixes 3 common problems—split/oily, grainy, and too thick—using low heat, warm pasta water, and slow-added fine cheese for a glossy emulsion. Save this, then use it with any Indian inspired Alfredo pasta twist in the post.

Best cheese for fettuccine Alfredo (and practical substitutes)

A finely grated hard cheese melts more evenly and emulsifies more easily. The shape of the cheese matters too; fine, snowy shreds melt into the cream without clumping, especially when the heat is low, as described in Serious Eats’ Alfredo guide.

If parmesan is expensive or hard to find, use what’s available: a parmesan-style hard cheese for flavor plus a small amount of melt-friendly cheese if you need a smoother texture. Still, keep the melt cheese in check so it doesn’t overwhelm the sauce. Alfredo should taste creamy and peppery, not like generic cheese sauce.

Also Read: Chicken Pesto Pasta (Easy Base Recipe + Creamy, One-Pot, Baked & More)


Alfredo Pasta With an Indian Twist: Choosing the Right Pasta Shape

Different shapes change the entire experience.

  • Fettuccine Alfredo pasta feels classic and indulgent because broad noodles wear the sauce like satin.
  • Penne Alfredo and alfredo penne pasta feel “bitey” and complete because sauce hides inside the tubes.
  • Ziti with Alfredo sauce (alfredo ziti) is tailor-made for baking—saucy inside, bubbly on top.
  • Tortellini in Alfredo sauce feels restaurant-level fast because stuffed pasta adds richness without extra work.
  • Fusilli Alfredo catches sauce in the spirals, which is especially satisfying for thicker versions like spinach paneer Alfredo.
Dark luxe infographic showing the best pasta shapes for Alfredo sauce—fettuccine, penne, ziti, tortellini, and fusilli—with quick notes on which shapes coat best, hold sauce inside, work for baked Alfredo, or suit thicker sauces like spinach paneer Alfredo.
Choosing the right pasta shape makes Alfredo instantly better. Use this quick guide for Indian inspired Alfredo pasta: fettuccine for silky coating, penne for sauce-in-every-bite, ziti for baked Alfredo, tortellini for fast “restaurant wow,” and fusilli for thicker sauces like spinach paneer Alfredo. Save this, then pick your twist below.

If you’re using tortellini and want timing confidence, How to cook tortellini (fresh, frozen, dried) is a helpful companion.

Also Read: Pork Tenderloin in Oven (Juicy, Easy, 350°F or 400°F) Recipe


How to Make Easy Alfredo Pasta With Jar Sauce Taste Homemade (Without Overdoing It)

Some nights you want the comfort without the extra steps. Easy Alfredo pasta with jar sauce can absolutely work—as long as you treat jar Alfredo like a base rather than the final answer.

Dark luxe infographic showing how to upgrade jar Alfredo sauce to taste homemade in 5 minutes using reserved pasta water, black pepper, a small squeeze of lemon or lime, and optional butter, with a “twist it into” list for masala, spinach paneer, coconut curry, or tikka-style versions.
Easy Alfredo pasta with jar sauce can taste homemade—fast. This 5-minute jar Alfredo upgrade uses pasta water for silkiness, pepper for warmth, and a squeeze of lemon/lime for lift (plus optional butter for gloss). Save this shortcut, then turn it into Indian inspired Alfredo pasta: masala, spinach paneer, coconut curry, or tikka-style protein.

The fastest jar Alfredo upgrade (serves 4)

  • 1 jar Alfredo sauce (about 400–500 g)
  • ¼–½ cup reserved pasta water
  • 1 tbsp butter (optional, for gloss)
  • Black pepper
  • 1 small squeeze of lemon or lime

Warm the jar sauce on low heat. Whisk in pasta water until it loosens and turns silky. Add butter if you want extra shine. Finish with black pepper and a squeeze of citrus.

From here, you can steer it toward any twist in this post by adding the spice bloom, spinach puree, coconut milk, or tikka-style protein.

If you like shortcut-friendly creamy pasta nights, Chicken Alfredo Pasta, 5 Ways is a natural companion—plenty of weeknight structure and add-in ideas without losing the comfort.

Also Read: How to Make a Flax Egg (Recipe & Ratio for Vegan Baking)


Indian Inspired Alfredo Pasta: 5 Indian Twists You’ll Keep Coming Back To

Each recipe below is written as a complete “recipe card” section—ingredients, method, timing, and the small sensory details that make the bowl feel special. Even so, the flow stays simple: cook pasta, build sauce, add twist, toss, finish.


1) Masala Alfredo Pasta (Warm, Spicy, Comforting)

Masala Alfredo pasta tastes like a familiar cream sauce took a confident step toward Indian flavors. The aroma hits first: cumin and coriander blooming in ghee, then a warm red chili note that feels inviting rather than aggressive. Finally, a little kasuri methi and lemon add a restaurant-style lift that keeps the sauce from tasting heavy.

Pasta choice: fettuccine for classic comfort, penne for a heartier bite, or fusilli for maximum sauce-catching.

Dark luxe recipe card for Masala Alfredo Pasta (Indian inspired Alfredo) showing creamy pasta with lemon and kasuri methi, plus an ingredients list and step-by-step method including blooming cumin and coriander, adding cream and parmesan, and loosening with pasta water for a glossy sauce.
Masala Alfredo pasta = creamy comfort with warm Indian spice. This recipe card walks you through blooming cumin + coriander in ghee, building a silky parmesan sauce, then finishing with kasuri methi and lemon for that restaurant-style lift. Save this pin, then try the other Indian inspired Alfredo pasta twists in the post.

Ingredients (serves 4)

For the pasta

  • 300–350 g pasta
  • Salt for boiling water

For the masala Alfredo sauce

  • 2 tbsp butter or ghee (ghee is excellent here)
  • 4 garlic cloves, finely grated (optional but highly recommended)
  • 1 to 1¼ cups cream
  • ¾ cup finely grated parmesan (or hard cheese)
  • ½ to 1 cup reserved pasta water
  • 1 tsp cumin
  • 1 tsp coriander
  • ½ to 1 tsp Kashmiri chili powder (adjust to your heat preference)
  • ¼ to ½ tsp garam masala (optional)
  • ½ tsp black pepper (plus more to finish)
  • ½ tsp crushed kasuri methi (optional, but magic)
  • Lemon wedge to finish
  • Salt, to taste

Method

  1. Boil pasta in salted water until just al dente. Reserve 1 cup pasta water, then drain.
  2. In a wide pan, warm ghee (or butter) over medium-low heat. Add garlic and let it soften until fragrant.
  3. Add cumin and coriander. Let them bloom for about 10–15 seconds—just enough to smell nutty and warm.
  4. Add Kashmiri chili powder and stir quickly; don’t let it burn.
  5. Lower heat. Add cream and warm gently.
  6. Whisk in cheese in small handfuls until smooth.
  7. Add pasta water a splash at a time until the sauce turns glossy and coats a spoon.
  8. Toss pasta in the sauce until every piece looks lacquered.
  9. Finish with black pepper, crushed kasuri methi, and a squeeze of lemon.

Kasuri methi is one of those small additions that changes the impression of the entire dish. If you want to understand why it works so well, NDTV’s guide on using kasuri methi explains its flavor boost clearly.

Variations (choose one)

  • Chicken broccoli Alfredo: sauté 300 g chicken until golden; blanch 2 cups broccoli florets for 60–90 seconds; fold both in at the end. This gives you the comfort of chicken alfredo pasta with broccoli while keeping the spice profile interesting.
  • Alfredo mushroom pasta: brown 250 g mushrooms deeply first (don’t rush this). Fold into sauce for savory depth.
  • Sausage Alfredo pasta: brown sliced sausage or spiced mince; fold in for a hearty bowl that feels weeknight-friendly and indulgent.

If you enjoy Italian classics reimagined with Indian flavors, you’ll likely also love Ravioli reinvented with Indian-inspired twists—same spirit, different pasta format.

Also Read: Croquettes Recipe: One Master Method + 10 Popular Variations


2) Paneer Tikka Alfredo (Smoky, Charred, Crowd-Pleasing)

Paneer tikka Alfredo is what you make when you want creamy pasta that still has drama. The charred edges of paneer are essential here: smoky, slightly crisp, and bold enough to stand up to the richness of Alfredo. In every bite, you get creamy sauce followed by a pop of spice and a whisper of tandoor-like flavor.

Pasta choice: penne or fusilli—both catch sauce and hold paneer pieces beautifully.

Dark luxe recipe card for Paneer Tikka Alfredo pasta showing creamy penne Alfredo topped with smoky, charred paneer tikka cubes, plus a paneer tikka marinade list, Alfredo sauce ingredients, and step-by-step method including searing paneer in batches and loosening sauce with pasta water.
Paneer Tikka Alfredo is creamy pasta with real smoky drama—charred paneer cubes folded into a silky Alfredo sauce. This recipe card includes the quick tikka marinade, the “sear in batches (don’t steam)” tip, and the easy method for glossy sauce using pasta water. Save it, then try the other Indian inspired Alfredo pasta twists in the post.

Ingredients (serves 4)

For the pasta

  • 300–350 g penne or fusilli
  • Salt for boiling water

What you need for paneer tikka

  • 300 g paneer, cut into bite-size cubes
  • ⅓ cup thick yogurt (hung curd works brilliantly)
  • 1 tbsp ginger-garlic paste
  • 1 tsp Kashmiri chili powder (or mild red chili powder)
  • ½ tsp turmeric
  • 1 tsp garam masala (or tikka masala blend)
  • ½ tsp cumin
  • 1 tbsp lemon juice
  • 1 tbsp oil (for searing)
  • Salt, to taste

For Alfredo sauce

  • 2 tbsp butter
  • 1 to 1¼ cups cream
  • ¾ cup finely grated parmesan (or hard cheese)
  • ½ to 1 cup reserved pasta water
  • Black pepper

To finish

  • Chopped coriander
  • Lime wedge

If you want a reliable reference for the paneer tikka method and marinade structure, Hebbar’s paneer tikka recipe is a solid baseline.

Method

  1. Boil pasta until al dente. Reserve 1 cup pasta water, then drain.
  2. Marinate paneer in yogurt, spices, lemon, and salt for at least 15–20 minutes (longer is great, but not required).
  3. Heat a pan until hot. Add oil and sear paneer cubes in batches so they char instead of steaming. Turn gently until multiple sides develop dark, smoky spots.
  4. In a separate wide pan, melt butter over low heat. Add cream and warm.
  5. Whisk in cheese gradually until smooth.
  6. Add pasta water to loosen into a silky sauce.
  7. Toss pasta in the sauce, then fold in paneer tikka.
  8. Finish with black pepper, coriander, and a squeeze of lime.

Variations (choose your mood)

  • Easy spinach Alfredo pasta: wilt a couple of handfuls of spinach and fold in right before serving. The green bitterness balances cream.
  • Chicken tikka Alfredo: swap paneer for cooked chicken tikka pieces.
  • Baked paneer tikka Alfredo: pour into a baking dish, top with mozzarella, and bake until bubbly—crispy edges, creamy center.

When you want more baked pasta inspiration in the same comfort lane, Baked ziti variations is a natural next click.

Also Read: Fish and Chips Reimagined: 5 Indian Twists (Recipe + Method)


3) Chicken Korma Alfredo (Mellow, Nutty, Restaurant-Style)

Chicken korma Alfredo is creamy comfort turned elegant. Instead of heat-forward spice, you get warm aromatics, gentle sweetness from onion, and that unmistakable nutty richness that makes the sauce taste “finished.” It’s the kind of bowl that feels special without being loud.

Pasta choice: fettuccine for a classic luxurious feel, or penne for a family-friendly, scoopable version.

Dark luxe recipe card for Chicken Korma Alfredo pasta showing creamy pale-gold Alfredo with juicy chicken, plus ingredients for a korma-style base (onion, ginger-garlic, cashew paste, warm spices) and a step-by-step method to keep the sauce silky using low heat and pasta water, finished with lemon and optional saffron.
Chicken Korma Alfredo is creamy comfort with a mellow, nutty, restaurant-style finish. This recipe card shows the korma-style base (onion + cashew paste + warm spices), then the silky Alfredo method with pasta water for a glossy sauce—finished with lemon (and optional saffron). Save this, then try the other Indian inspired Alfredo pasta twists in the post.

Ingredients (serves 4)

For the pasta

  • 300–350 g pasta
  • Salt for boiling water

What you need for the chicken korma component

  • 350–400 g boneless chicken (thighs stay juicy; breast works too)
  • 1 medium onion, finely grated or minced
  • 1 tbsp ginger-garlic paste
  • 2 tbsp butter or ghee
  • 2 tbsp cashew paste (blend ¼ cup cashews with a few tbsp water)
  • ½ tsp ground cardamom (or 3 green cardamoms, crushed)
  • Pinch of cinnamon
  • ½ tsp cumin
  • ½ tsp coriander
  • ¼ tsp turmeric
  • Salt, to taste

For Alfredo sauce

  • 1 to 1¼ cups cream
  • ¾ cup finely grated parmesan (or hard cheese)
  • ½ to 1 cup reserved pasta water
  • Black pepper

To finish

  • Lemon wedge
  • Optional: a few saffron strands soaked in warm milk

For a reference point on korma-style flavor structure, Sanjeev Kapoor’s chicken korma recipe is a helpful baseline.

Method

  1. Boil pasta to al dente. Reserve 1 cup pasta water and drain.
  2. In a wide pan, warm butter or ghee. Add onion and cook on low heat until soft and lightly golden. This step creates the mellow sweetness that makes korma taste luxurious.
  3. Add ginger-garlic paste and cook until fragrant.
  4. Add chicken and cook until nearly done.
  5. Stir in spices and cashew paste. Add a small splash of water if it looks too thick, then simmer briefly so everything becomes cohesive.
  6. Lower heat. Add cream and warm gently.
  7. Whisk in cheese gradually until smooth.
  8. Add pasta water to loosen into a silky sauce.
  9. Toss pasta in the sauce, finish with black pepper and lemon.

Variations and add-ins

  • Chicken and broccoli penne Alfredo: add blanched broccoli at the end; it brightens the bowl and balances richness.
  • Chicken and mushroom Alfredo pasta: fold in browned mushrooms for deeper savoriness.
  • Crock pot direction: if you love creamy comfort meals in slower formats, it’s easy to stay in the same mood with Crock pot lasagna soup—different format, similar coziness.

Also Read: Dirty Martini Recipe (Classic, Extra Dirty, No Vermouth, Spicy, Blue Cheese, Tequila + Batched)


4) Spinach Paneer Alfredo (Green, Creamy, Balanced)

Spinach paneer Alfredo is for people who want creamy pasta that doesn’t feel heavy. The spinach brings freshness and a gentle earthiness; paneer adds soft richness without overwhelming the sauce. The result feels comforting yet surprisingly lively, especially with lemon and black pepper to finish.

Pasta choice: fusilli or penne for sauce-catching, or fettuccine for a smooth, green-sauce luxury.

Dark luxe recipe card for Spinach Paneer Alfredo pasta showing creamy green spinach Alfredo with paneer cubes and lemon, plus ingredients and step-by-step method for blending spinach puree, keeping heat low, adding parmesan slowly, and loosening with pasta water for a silky sauce.
Spinach Paneer Alfredo is the “creamy but balanced” bowl—vibrant green sauce, soft paneer, black pepper warmth, and a lemon finish that keeps it lively. This recipe card shows the spinach-puree trick and the low-heat method for a smooth, glossy Alfredo. Save it, then try the other Indian inspired Alfredo pasta twists in the post.

Ingredients (serves 4)

Needed for the pasta

  • 300–350 g pasta
  • Salt for boiling water

For spinach paneer

  • 200–250 g paneer, cubed (or lightly crumbled)
  • 200 g spinach (roughly 5–6 packed cups)
  • 2 tbsp butter
  • 1 tbsp garlic, grated or minced (optional)
  • 1 to 1¼ cups cream
  • ¾ cup finely grated parmesan (or hard cheese)
  • ½ to 1 cup reserved pasta water
  • ½ tsp black pepper
  • 1 small green chili (optional)
  • Salt, to taste
  • Lemon wedge to finish

Method

  1. Boil pasta until al dente. Reserve 1 cup pasta water and drain.
  2. Wilt spinach in a pan with a splash of water. Once it collapses, blend into a smooth puree. Add green chili if you want a gentle kick.
  3. In a wide pan, melt butter over low heat. Add garlic if using and warm gently.
  4. Add cream and warm. Whisk in cheese gradually until smooth.
  5. Whisk in spinach puree. Keep heat low so the sauce stays smooth and vibrant.
  6. Add pasta water to adjust consistency.
  7. Toss pasta in sauce and fold in paneer.
  8. Finish with black pepper and lemon.

Herb-forward “basil Alfredo” option

If you want alfredo with basil vibes without turning the dish into a different pasta category, fold in chopped basil off heat or swirl in a spoon of pesto at the end. For pesto ideas that work well in Indian kitchens, Pesto recipe variations is a reliable companion. If you want to stay within the “Indian twist pasta” universe, Pesto pasta with Indian twists fits naturally.

Also Read: Keto Hot Chocolate Recipe (Sugar-Free Hot Cocoa) + Best Homemade Mix


5) Coconut Curry Alfredo (Coastal, Fragrant, Perfect With Shrimp)

Coconut curry Alfredo is the twist that surprises people, then immediately converts them. Coconut milk brings silk; curry spices bring warmth; Alfredo keeps the creamy comfort intact. With shrimp, the bowl feels special. With spinach, it feels balanced. And with tortellini, it feels like restaurant food in sweatpants.

Pasta choice: fettuccine for a luxurious coating, or tortellini for a fast “wow.”

Dark luxe recipe card for Coconut Curry Alfredo pasta with shrimp, showing creamy coconut-cream Alfredo with curry spices, lime, and coriander, plus ingredients and step-by-step method for keeping the sauce silky using low heat and pasta water and adding shrimp at the end to prevent overcooking.
Coconut Curry Alfredo is coastal comfort in a creamy bowl—silky coconut-cream sauce, warm spices, and shrimp finished with lime and coriander. This recipe card keeps it foolproof (low heat + pasta water = glossy sauce, shrimp added at the end). Save it, then explore the other Indian inspired Alfredo pasta twists in the post.

Ingredients (serves 4)

What you need for the Pasta

  • 300–350 g pasta (or 500 g tortellini)
  • Salt for boiling water

For coconut curry Alfredo

  • 2 tbsp butter
  • 1 tbsp ginger-garlic paste (optional)
  • ¾ cup coconut milk (adjust for richness)
  • 1 cup cream (you can reduce a bit if using more coconut milk)
  • ¾ cup finely grated parmesan (or hard cheese; keep slightly lighter if you want coconut-forward flavor)
  • ½ to 1 cup reserved pasta water
  • ½ tsp turmeric
  • 1 tsp cumin
  • 1 tsp coriander
  • Curry leaves (optional, but exceptional)
  • Black pepper
  • Salt, to taste

Shrimp option

  • 250–300 g shrimp, peeled and deveined
  • 1 tbsp butter or oil
  • Salt and pepper
  • Optional: a pinch of chili

To finish

  • Lime juice
  • Chopped coriander

Method

  1. Boil pasta until al dente. Reserve 1 cup pasta water. Drain.
  2. If using shrimp, sauté quickly in butter or oil until just pink and curled. Remove and set aside.
  3. In a wide pan, melt butter. Add curry leaves (if using) and ginger-garlic paste. Warm until fragrant.
  4. Add turmeric, cumin, coriander, and stir briefly.
  5. Pour in coconut milk and cream. Warm gently.
  6. Whisk in cheese gradually until smooth.
  7. Add pasta water to reach a glossy, clingy consistency.
  8. Toss pasta in sauce and fold in shrimp.
  9. Finish with lime and coriander.

Variations

  • Shrimp fettuccine Alfredo with spinach: wilt spinach and fold in right at the end for a bright, balanced bowl.
  • Shrimp Alfredo tortellini: use tortellini as the base; it becomes rich and special very quickly.
  • Plant-based alternative: tofu works beautifully, and if you want a seafood-like swap, this guide to vegan shrimp substitutes keeps the idea accessible without pulling you out of the comfort-food mood.

Also Read: 10 Low Carb Chia Pudding Recipes for Weight Loss (Keto, High-Protein, Dairy-Free)


One Pot Indian Inspired Alfredo Pasta (Creamy, Fast, Minimal Dishes)

One pot Alfredo pasta is the weeknight hero when you want fewer dishes and still want sauce that coats properly. The key is concentrated starch: cook pasta in less water so the starchy liquid left in the pot becomes a tool for emulsifying the sauce. Serious Eats’ lighter Alfredo approach explains how that concentrated pasta water changes everything.

Dark luxe infographic showing a one pot Indian inspired Alfredo pasta method with three steps: cook pasta in minimal water, lower heat and add butter/cream/cheese without boiling, then finish with a twist like masala, tikka, korma, spinach, or coconut; includes a tip to keep starchy liquid for a glossy sauce and a warning to avoid boiling after cheese.
One pot Indian inspired Alfredo pasta = creamy comfort with minimal dishes. This no-split method keeps sauce silky by using concentrated starchy pasta water, then adding butter, cream, and cheese on low heat (no boiling). Save this cheat sheet, then choose your twist—masala, tikka, korma, spinach paneer, or coconut curry.

One pot method (serves 4)

  • 300–350 g pasta
  • Water or broth, just enough to barely cover pasta
  • 2 tbsp butter
  • 1 to 1¼ cups cream (or jar Alfredo + cream)
  • ¾ cup grated cheese
  • Black pepper
  • Your chosen twist add-ins (masala bloom, spinach puree, paneer tikka, korma chicken, coconut curry)

Cook pasta with minimal water, stirring often. When pasta is nearly done and there’s starchy liquid left, lower heat and add butter, cream, and cheese. Stir until glossy. Then add your twist components and finish with citrus or herbs.

If you like creamy one-pot dinners beyond Alfredo, One pot chicken bacon ranch pasta sits close to this vibe—comforty, saucy, weeknight-friendly.

Also Read: Garlic & Paprika Cabbage Rolls (Keto-Friendly Recipes) – 5 Bold Savory Twists


Baked Alfredo Pasta (Ziti, Penne, Tortellini) That Doesn’t Turn Dry

Baked Alfredo pasta is its own category of comfort: bubbling cheese, crisp edges, creamy center. However, it can also turn dry if you bake it too long or start with a sauce that’s too thick. The solution is simple: keep the sauce a touch looser than stovetop Alfredo and bake just until hot and bubbly.

Dark luxe infographic showing how to make baked Alfredo pasta that stays creamy (not dry) for ziti, penne, or tortellini: keep sauce looser with extra pasta water, undercook pasta by 2 minutes, and bake only until bubbly; includes notes to cover most of the bake and uncover briefly to brown.
Baked Alfredo pasta doesn’t have to turn dry. This bake-plan card shows the 3 rules that keep it creamy: loosen the sauce with extra pasta water, undercook pasta by 2 minutes, and bake only until bubbly (cover most of the bake, uncover briefly to brown). Save this for ziti, penne, or tortellini nights—then use any Indian inspired Alfredo twist from the post.

Baked ziti Alfredo sauce pasta plan (serves 6)

  • 450–500 g ziti or penne
  • Your chosen Alfredo twist sauce (make it slightly looser with extra pasta water)
  • 1½ cups mozzarella (or a melt-friendly cheese)
  • Add-ins: chicken, broccoli, mushrooms, paneer tikka, spinach paneer, or shrimp (shrimp is best added near the end)

Cook pasta slightly under al dente. Mix with sauce. Pour into a baking dish. Top with cheese. Bake until bubbly and lightly golden.

For more baked pasta inspiration in the same comfort lane, Baked ziti variations is an easy next step.

Baked tortellini with Alfredo sauce (fastest bake)

Tortellini cooks quickly, so it’s ideal for a weeknight baked dish. Warm sauce, fold in tortellini, top with cheese, bake until bubbling—then stop. If you’re unsure about timing differences between fresh and frozen tortellini, How to cook tortellini keeps it simple.

Also Read: Eggless Yorkshire Pudding (No Milk) Recipe


Flavor Directions That Work With Any Twist: Lemon, Basil, Cajun-Style Heat, and Truffle-Style Umami

Even within these five recipes, small changes keep dinner from feeling repetitive.

Want Indian inspired Alfredo pasta to taste “restaurant-level” fast? Use one finishing move: black pepper bloom, lemon at the end for brightness, basil/pesto off heat, paprika + chili for a smoky Cajun-ish lane, or browned mushrooms for truffle-style umami. Save this guide and use it with any twist in the post—masala, paneer tikka, korma, spinach paneer, or coconut curry.

Lemon Alfredo

Lemon Alfredo is the quickest way to brighten a rich sauce. Add zest and juice at the end with black pepper. It’s especially good with chicken, shrimp, broccoli, and mushrooms because it keeps everything tasting alive.

Alfredo with basil

Fold in chopped basil off heat, or swirl pesto into the bowl right before serving. For pesto ideas that fit Indian kitchens, Pesto recipe variations helps you keep it fresh.

Cajun chicken Alfredo (Indian-friendly)

You don’t need a strict Cajun mix. Black pepper, paprika, garlic, and chili create a similar direction, while a tandoori-style rub can hit the same smoky lane. If you’re using jar Alfredo, this becomes a particularly easy weeknight version.

Truffle Alfredo (truffle-style mood without chasing ingredients)

Deeply browned mushrooms, extra black pepper, and gentle garlic create that “truffle-style” feeling—earthy, aromatic, luxurious—without relying on specialty products.

Also Read: Crock Pot Chicken Breast Recipes: 10 Easy Slow Cooker Dinners (Juicy Every Time)


Dairy-Free, Lactose-Free, Low Carb, and Keto Directions (Without Losing the Comfort)

Creamy pasta can still work for different needs; the foundation simply shifts.

Dark infographic titled “Creamy Alfredo for Every Diet” showing four Alfredo options: lactose-free Alfredo (lactose-free cream, low heat, pasta water), dairy-free Alfredo (cashew or oat cooking cream with nutritional yeast), low carb Alfredo (zucchini noodles or cabbage ribbons with salt-and-drain tip), and keto Alfredo (shirataki noodles rinsed and dry-panned or roasted spaghetti squash), with a golden rule about low heat and gradual liquid for a glossy sauce.
Creamy Alfredo can still work for different needs—lactose-free, dairy-free, low carb, or keto—without losing that glossy comfort. This chart shows the best base swaps (zoodles, cabbage ribbons, shirataki, spaghetti squash) plus the key sauce rule: keep heat low and add liquid gradually for a silky emulsion. Save this, then use it with any Indian inspired Alfredo pasta twist in the full post.

Lactose-free Alfredo

Use lactose-free cream and keep heat low. Add pasta water gradually to maintain a smooth emulsion.

Dairy-free Alfredo / non dairy fettuccine Alfredo

Cashew cream or oat cooking cream can create a satisfying sauce. Nutritional yeast adds savory depth. The result won’t be identical to parmesan Alfredo, yet it can still be glossy, rich, and comforting.

Dark luxe infographic titled “Dairy-Free Alfredo (Still Glossy)” showing a creamy dairy-free Alfredo pasta bowl and a side-by-side comparison of cashew cream versus oat cooking cream, plus an umami boost strip with nutritional yeast, garlic and black pepper, lemon added at the end, and pasta water for emulsifying; includes a low-heat rule and MasalaMonk.com footer.
Making dairy-free Alfredo that still feels rich is all about the base + umami. Choose cashew cream for the closest “classic” vibe or oat cooking cream for an easy weeknight version, then level it up with nutritional yeast, garlic + black pepper, lemon at the end, and pasta water for a glossy sauce. Save this guide and use it with any Indian inspired Alfredo twist in the full post.

Low carb Alfredo Pasta and keto-friendly options

The sauce can stay creamy while the base changes:

  • zucchini noodles
  • spaghetti squash
  • sautéed cabbage ribbons
  • shirataki noodles (well rinsed and dried)
Dark luxe infographic titled “Low-Carb Alfredo Bases (No Watery Sauce)” with a 2×2 grid showing zucchini noodles (salt 10 min then squeeze dry), spaghetti squash (roast cut-side down then fluff), cabbage ribbons (quick sauté 2–3 min to wilt), and shirataki noodles (rinse then dry-pan 5–7 min), plus a note to finish with Alfredo on low heat and a MasalaMonk.com footer.
Doing low carb or keto Alfredo? The base matters as much as the sauce. This cheat sheet shows the prep step that prevents watery pasta: salt + squeeze zoodles, roast spaghetti squash, quick-sauté cabbage ribbons, and dry-pan shirataki after rinsing. Save this for weeknights, then use your favorite Indian inspired Alfredo twist from the full post.

If you like the smart-carb pasta angle, Lentil pasta for weight loss (nutrition + recipes) is a helpful post that would allow you to move through a cohesive pasta ecosystem.

Also Read: Mozzarella Sticks Recipe (Air Fryer, Oven, or Fried): String Cheese, Shredded Cheese, and Every Crunchy Variation


A White Sauce Detour That Makes Sense in Indian Kitchens

Many Indian home cooks already know white sauce from baked pasta nights. Alfredo and béchamel aren’t identical, yet they share a creamy logic that makes the comparison useful. If you want an Indian-friendly explanation of white sauce for baking, Tarla Dalal’s white sauce guide is a helpful reference. For a strong internal companion, Béchamel sauce for lasagna fits naturally if you’re building a small collection of creamy, bake-ready sauces.


What to Serve With Indian Inspired Alfredo Pasta

Because Alfredo is rich, the best sides bring contrast—crunch, brightness, or both.

  • A lemony salad
  • Roasted vegetables
  • Sautéed greens
  • Garlic bread that makes everyone suspiciously cheerful

For a side that pairs with any Alfredo variation, Homemade garlic bread loaf is a perfect companion.

If you want another creamy pasta “cousin” that keeps you in the comfort lane without repeating Alfredo, try Vodka pasta recipe—it’s the same glossy, restaurant-style comfort, but with a totally different flavor direction.

Also Read: Sourdough Starter Recipe: Make, Feed, Store & Fix Your Starter (Beginner Guide)


Bringing It All Together: A Simple Way to Choose Your Next Bowl

If you want bold and warming, go Masala Alfredo pasta. If you want smoky and festive, paneer tikka Alfredo is the answer. Then if you want mellow and luxurious, chicken korma Alfredo hits perfectly. For those who want green and balanced, spinach paneer Alfredo stays creamy while feeling fresh. And if you want coastal comfort, coconut curry Alfredo belongs on your table—especially with shrimp.

Dark luxe decision-map infographic titled “Choose Your Alfredo Twist” with a central Alfredo Base badge and five connected cards: Masala Alfredo (bold), Paneer Tikka Alfredo (smoky), Chicken Korma Alfredo (mellow), Spinach Paneer Alfredo (green), and Coconut Curry Alfredo with shrimp (coastal), each listing the best pasta shapes; includes a bottom line suggesting formats like one pot, baked, tortellini, or classic fettuccine.
Not sure which Indian inspired Alfredo pasta to make tonight? Use this quick “pick by mood” map: Masala for bold comfort, Paneer Tikka for smoky drama, Korma for mellow nuttiness, Spinach Paneer for a green balanced bowl, or Coconut Curry (shrimp) for coastal warmth. Save this pin, then jump into the full post for the exact recipe cards + one-pot and baked options.

From there, pick the format: classic fettuccine Alfredo pasta when you want silky comfort, one pot Alfredo when you want fewer dishes, baked Alfredo pasta when you want bubbling edges, tortellini Alfredo when you want fast restaurant energy, or ziti with Alfredo sauce when you want a casserole you can share.

Once you’ve made one or two of these, you’ll start noticing something satisfying: you’re not repeating the same dinner—you’re rotating a creamy pasta universe. The base stays familiar, while the flavor moves. And that’s exactly what makes Indian inspired Alfredo pasta such a keeper.

Also Read: Peanut Butter Fudge: Recipes & Guide (8 Methods + Easy Variations)

FAQs: Indian Inspired Alfredo Pasta

1) What is Indian inspired Alfredo pasta?

Indian inspired Alfredo pasta is a creamy Alfredo-style pasta that’s finished with Indian flavors such as cumin, coriander, garam masala, kasuri methi, paneer tikka-style spice, spinach-paneer notes, or coconut curry warmth. In other words, the sauce stays rich and silky, yet the flavor shifts into an Indian-leaning comfort zone.

2) Can I make Alfredo pasta with an Indian twist using jar Alfredo sauce?

Yes. Start by warming the Alfredo pasta sauce jar on low heat, then loosen it with a splash of reserved pasta water (or warm milk) until it turns smooth and glossy. After that, fold in your Indian twist—masala bloom, tikka seasoning, spinach puree, or coconut curry base—so it tastes layered rather than flat.

3) What’s the best cheese for fettuccine Alfredo pasta?

Traditionally, a finely grated hard cheese gives the cleanest melt and the smoothest texture. Because Alfredo is simple, the cheese choice matters: it should taste nutty and savory without turning the sauce heavy or grainy. If you’re experimenting, combine a hard cheese for flavor with a small amount of melt-friendly cheese for extra creaminess.

4) Why does my Alfredo sauce turn grainy or split?

Most often, Alfredo splits because the heat is too high or the cheese is added too quickly. Similarly, graininess can happen when the sauce boils or when pre-shredded cheese doesn’t melt smoothly. To fix it, reduce the heat, whisk steadily, and add small splashes of pasta water until the sauce comes back together.

5) How do I fix Alfredo sauce that’s too thick?

Add warm pasta water a tablespoon at a time while stirring until the sauce loosens and coats the pasta evenly. If you don’t have pasta water, warm milk or cream can help; however, pasta water usually creates the most “clingy” texture.

6) How do I make one pot Alfredo pasta without it turning gummy?

Use just enough water to barely cover the pasta and stir frequently so it doesn’t stick. When the pasta is nearly done, you should still have a little starchy liquid left—this helps the sauce bind. Then lower the heat before adding dairy and cheese so the sauce stays smooth rather than gluey.

7) Is one pot Alfredo pasta with jar sauce a good idea?

It can be, especially on busy nights. The key is gentle heat and enough liquid to keep the sauce silky. If the jar sauce seems overly thick, thin it gradually with pasta water. Afterward, add your chosen twist—masala, basil-aligned herbs, lemon, spinach, or coconut curry—so it tastes intentional.

8) Which pasta shape is best for Alfredo: fettuccine, penne, or ziti?

Fettuccine Alfredo pasta feels classic because wide noodles carry sauce beautifully. Meanwhile, penne Alfredo holds sauce inside the tubes, so each bite tastes richer. Ziti with Alfredo sauce is ideal when you’re planning a bake because it stays sturdy and doesn’t collapse.

9) Can I make Alfredo ziti or baked Alfredo pasta ahead of time?

Yes. For baked Alfredo pasta, slightly undercook the pasta, keep the sauce a little looser than usual, and assemble everything in a dish. Then bake just until hot and bubbly. If it sits too long in the oven, it can dry out, so aim for “bubbly and done,” not “baked forever.”

10) How do I make baked fettuccine Alfredo with jar sauce without drying it out?

First, loosen the jar sauce with pasta water or milk so it’s silky before mixing it with pasta. Next, cover the dish for most of the bake, then uncover briefly at the end for a golden top. Finally, avoid overbaking—Alfredo stays best when it’s heated through rather than aggressively reduced.

11) How do I make chicken broccoli and ziti Alfredo taste better?

Season each part. Brown the chicken well for flavor, blanch the broccoli briefly so it stays bright, and keep the sauce smooth with pasta water. Then combine everything and bake only until bubbly. As a result, you get a creamy chicken broccoli ziti Alfredo that tastes layered instead of bland.

12) What’s the easiest way to make chicken Alfredo penne with jar sauce?

Cook penne until al dente. Warm jar Alfredo on low heat, thin it with pasta water, and add black pepper. Then stir in cooked chicken and toss everything together. If you want an Alfredo pasta with an Indian twist, finish with a quick masala bloom or tikka-style seasoning.

13) How do I keep shrimp from turning rubbery in shrimp Alfredo pasta?

Cook shrimp separately and briefly—just until pink and curled. Then add it to the sauce at the end so it warms through without overcooking. This approach works especially well for shrimp fettuccine Alfredo with spinach or shrimp Alfredo tortellini.

14) Can I make shrimp and tortellini Alfredo?

Absolutely. Tortellini cooks quickly and feels extra hearty in Alfredo. Keep the sauce smooth, add shrimp at the end, and finish with lemon or black pepper. If you like, add spinach for a shrimp spinach Alfredo variation that tastes brighter.

15) How do I make Alfredo mushroom pasta taste richer?

Brown mushrooms deeply first so they develop a roasted, savory flavor. Then fold them into the sauce. In particular, mushroom Alfredo becomes even more satisfying with extra black pepper and a small squeeze of lemon to lift the richness.

16) How do I make basil Alfredo or Alfredo with basil without it tasting flat?

Add basil at the end, off the heat, so it stays fragrant. Also, balance it with black pepper and a little citrus. If you want more depth, a small spoon of herb paste or pesto-style basil mixture can intensify the flavor without overpowering the sauce.

17) What is lemon Alfredo, and when should I add the lemon?

Lemon Alfredo is Alfredo finished with lemon zest and juice for brightness. Add lemon at the very end so it stays fresh and doesn’t curdle the dairy. It’s especially good with chicken, shrimp, broccoli, and spinach.

18) Can I make Cajun chicken Alfredo using this Indian-inspired approach?

Yes. You can build a Cajun-style direction with black pepper, paprika, garlic, and a bit of chili. Then, if you want it to feel more Indian-leaning, add a pinch of cumin or garam masala and finish with lime. That way, the flavor stays bold while still fitting the Indian inspired Alfredo pasta theme.

19) How do I make Alfredo pasta with Italian sausage (or sausage Alfredo pasta) without making it too heavy?

Use browned sausage for flavor, then keep the sauce slightly looser with pasta water. Additionally, finish with black pepper and lemon so the bowl tastes lively instead of heavy. You can also add broccoli or spinach for balance.

20) Can I make Alfredo pasta with tuna or ham?

Yes—both tuna Alfredo pasta and ham Alfredo pasta are common quick options. Add the tuna or ham toward the end so it warms through gently. Then finish with lemon and pepper to brighten the sauce.

21) Is there a lactose-free fettuccine Alfredo option?

Yes. Use lactose-free cream (or lactose-free milk with a thickener), then choose a hard cheese that melts smoothly. Keep the heat low and rely on pasta water to help the sauce bind so it stays silky.

22) How do I make dairy free fettuccine Alfredo or non dairy Alfredo sauce?

Use cashew cream, oat cooking cream, or another creamy plant base. Then add savory depth with nutritional yeast, garlic, and black pepper. After that, use pasta water to create a cohesive, glossy texture so it still feels like Alfredo.

23) What’s a good low carb fettuccine sauce or keto Alfredo sauce option?

For keto fettuccine Alfredo sauce, keep the sauce creamy and swap the base: zucchini noodles, spaghetti squash, sautéed cabbage ribbons, or well-prepped shirataki. That way, you keep the comfort while cutting the carbs.

24) How long does Alfredo pasta last in the fridge, and what’s the best way to reheat it?

Typically, Alfredo pasta keeps well for a few days when stored properly in the fridge. When reheating, do it gently on low heat with a splash of milk, cream, or water to loosen the sauce. If you microwave it, stir halfway through so it warms evenly and doesn’t separate.

25) Why does my Alfredo sauce taste bland, and how do I fix it quickly?

Usually it needs salt, black pepper, and a bright finish. Add pepper, a tiny pinch of salt, and a squeeze of lemon. For an Alfredo pasta with Indian twist, add crushed kasuri methi or a quick masala bloom—those small touches often transform the flavor immediately.

Alfredo Pasta Reinvented: 5 Indian-Inspired Twists