
Posted on Leave a comment

Ratatouille Recipe: Easy, Classic French Vegetable Stew

Finished classic ratatouille in a wide dark pan, with a serving spoon lifting chunks of eggplant, zucchini and bell pepper coated in thick tomato sauce.

A good ratatouille gives you a little bit of everything in the same spoon: eggplant soft enough to almost melt, zucchini that is tender but still unmistakably zucchini, sweet pepper, and glossy tomato caught around the vegetables instead of pooling underneath them.

That sounds simple until five very different vegetables share the same pan. Eggplant needs enough heat and time to lose its spongy center. Zucchini can go from pleasantly tender to collapsed remarkably quickly. Tomatoes release plenty of water before they start behaving like sauce.

Ratatouille makes particular sense when the garden, market—or just your vegetable drawer—suddenly seems full of zucchini, tomatoes, peppers and eggplant. And after all that chopping, watching those vegetables disappear into a pale, watery pot feels particularly unfair.

This easy ratatouille recipe uses one wide pan and a staged method so the vegetables can finish tender without collapsing into one texture.

We stop when the stew is soft and generous but still varied from bite to bite. Serve it with bread, eggs or a simple grilled main, eat it warm or at room temperature, and save the leftovers for another meal—the flavors settle together beautifully overnight.

Quick Answer: How to Make Classic Ratatouille

Classic ratatouille is a Provençal vegetable stew made with eggplant, zucchini or courgette, bell peppers, tomatoes, onion, garlic, olive oil and herbs.

For about 6 side servings or 4 generous main-dish portions, use roughly 500 g / 18 oz eggplant, 400 g / 14 oz zucchini, 300 g / 10½ oz peppers and 750 g / 26 oz tomatoes. Cut the main vegetables into about ¾-inch / 2 cm pieces.

The easiest way to keep ratatouille from turning watery or mushy is to brown the eggplant and zucchini in separate turns, reduce the tomatoes before recombining, then return the zucchini only near the end. The eggplant gets enough time to become creamy while the zucchini keeps its shape.

What does ratatouille taste like? Sweet tomato and peppers, savory olive oil and garlic, creamy eggplant, tender zucchini, thyme and basil. It is rich enough to feel substantial while still tasting unmistakably of vegetables.

Close-up of finished ratatouille with callouts identifying creamy eggplant, intact zucchini and thick tomato coating.
Judge the spoonful, not just the pan: the best ratatouille gives you creamy eggplant, a little resilience from zucchini and concentrated tomato in the same bite.

Before you start: use fresh tomatoes when they are flavorful; otherwise use good canned whole peeled tomatoes. Fresh, firm eggplant can go straight into the pan—save pre-salting for unusually mature, heavily seeded or wet eggplant.

Classic Ratatouille Recipe

A staged one-pan French ratatouille with creamy eggplant, tender zucchini and sweet peppers in a concentrated tomato base.

Recipe at a Glance

  • Difficulty: easy
  • Prep: about 25–30 minutes
  • Cook: about 45–60 minutes
  • Rest: 15 minutes recommended
  • Total: about 1 hour 25 minutes to 1 hour 45 minutes
  • Serves: about 6 as a side or 4 as a generous main
  • Best pan: 12-inch / 30 cm wide high-sided sauté pan or wide shallow 5–6 qt / 5–6 L Dutch oven
  • Vegetable cut: about ¾ inch / 2 cm
  • Texture target: tender vegetables with a little thick tomato sauce around them and very little free liquid
  • Diet: naturally vegan, vegetarian, dairy-free and gluten-free

The technique is easy; the chopping takes time. The staged cooking adds minutes, not difficulty, and gives each vegetable enough room to keep its own texture.

Equipment

  • 12-inch / 30 cm wide high-sided sauté pan or wide shallow Dutch oven
  • Chef’s knife and cutting board
  • Wooden spoon or flexible spatula
  • Two bowls or plates for holding the eggplant and zucchini separately
  • Slotted spoon, useful but not essential

Pan shape matters. A broad cooking surface lets vegetable moisture escape. With a smaller pan, brown the eggplant and zucchini in batches instead of piling them high.

Side-by-side comparison of vegetables spread across a wide sauté pan and crowded into a deeper pot with more visible steam.
With a wider pan, steam has somewhere to go. Crowding a deep pot not only limits browning; it can also slow tomato reduction later and leave the whole dish wetter.

Ingredients

Weights are before trimming.

  • 500 g / 18 oz eggplant, about 1 medium-large or 2 small, cut into ¾-inch / 2 cm pieces
  • 400 g / 14 oz zucchini or courgette, about 2 medium, cut into ¾-inch / 2 cm pieces
  • 300 g / 10½ oz red, yellow or orange bell peppers, about 2 medium, cored and cut into ¾-inch / 2 cm pieces; green works too but gives a more vegetal, less sweet result
  • 200 g / 7 oz yellow onion, about 1 medium-large, chopped
  • 750 g / 26 oz ripe fresh tomatoes, about 5–6 medium, chopped with their juices or 1 x 28 oz / 794 g can whole peeled tomatoes, hand-crushed with the juices
  • 18 g garlic, about 4–5 large cloves, finely chopped
  • 75 ml / 5 tablespoons extra-virgin olive oil, divided, plus up to 15 ml / 1 tablespoon more if needed
  • 10 g fine sea salt, about 1¾ teaspoons depending on the salt, divided, plus more after tasting if needed
  • ½ teaspoon freshly ground black pepper
  • 2 teaspoons fresh thyme leaves, or 4–5 thyme sprigs
  • 15 g / ½ oz fresh basil leaves, roughly torn
  • 1–2 teaspoons red wine vinegar, optional, for finishing
Eggplant, zucchini, bell peppers, tomatoes, onion, garlic, basil, thyme and olive oil arranged on a neutral work surface.
Because ratatouille has such a short ingredient list, condition matters: tired eggplant, watery zucchini or bland tomatoes affect the final pan more than an extra pinch of herbs.

Method

  1. Cut the vegetables. Cut the eggplant, zucchini and peppers into roughly ¾-inch / 2 cm pieces. Don’t worry about perfect cubes; aim for pieces that are reasonably even.
  2. Brown the eggplant. Heat 3 tablespoons / 45 ml olive oil over medium-high heat. Add the eggplant and ½ teaspoon of the measured salt. Spread the pieces as loosely as the pan allows and cook for 8–10 minutes, turning occasionally. Look for scattered brown patches and centers beginning to lose their raw, cottony resistance. Transfer the eggplant to a bowl.
  3. Give the zucchini a shorter turn. Add 1 tablespoon / 15 ml olive oil, the zucchini and ¼ teaspoon salt. Cook for 4–5 minutes. Let it pick up some color, then remove it while the centers still feel firm. Transfer the zucchini to a separate plate or bowl; it returns to the pan later than the eggplant.
  4. Soften the onion and peppers. Reduce the heat to medium. Add the remaining 1 tablespoon / 15 ml olive oil, followed by the onion, peppers and ¼ teaspoon salt. Cook for 8–10 minutes. The onion should be soft, the peppers should bend easily under the spoon, and their raw grassy smell should have become noticeably sweeter.
  5. Add the garlic and thyme. Stir for 30–60 seconds. As soon as the garlic aroma rises clearly from the pan, add the tomatoes.

Reduce the Tomatoes, Then Recombine

  1. Reduce the tomatoes. Add the tomatoes, black pepper and another ½ teaspoon salt, leaving the remaining salt for the final tasting. Bring to a lively simmer and cook uncovered for about 10–15 minutes, stirring occasionally. Very juicy tomatoes may need longer. Continue until the tomatoes have relaxed into a loose sauce and a spatula dragged across the bottom leaves a trail for a moment before the liquid closes behind it.
  2. Return the eggplant. Fold it into the tomato base. Lower the heat to a gentle simmer and cook uncovered for 8–10 minutes. Bite or press a piece when you are unsure: the center should be creamy, with no dry or cottony resistance.
  3. Return the zucchini. Fold it in gently and cook for another 3–5 minutes, just until tender. Stir only as much as necessary from here on so the softened vegetables hold together.
  4. Check the consistency. Tilt the pan. A small amount of thick sauce should move around the vegetables; you should not see a broad puddle of thin red juice. If the vegetables still need cooking, continue simmering uncovered. If they are already tender but the sauce is thin, lift them out with a slotted spoon, reduce the liquid on its own until glossy, then gently fold the vegetables back in.
  5. Finish and rest. Remove any thyme stems and taste for salt. If the ratatouille tastes rich but slightly dull, add 1 teaspoon red wine vinegar. Taste again and add the second teaspoon only if it still needs brightness. Fold in most of the basil, remove the pan from the heat and rest for 15 minutes. Finish with the remaining basil.

Recipe Notes

  • Fresh or canned tomatoes: ordinary ripe tomatoes need no routine peeling or seeding. Use canned whole peeled tomatoes with their juices when fresh ones are disappointing. Judge either version by the consistency of the sauce.
  • Optional eggplant salting: unusually mature, heavily seeded or wet eggplant can be salted with about ½ teaspoon of the measured salt for 20–30 minutes, then blotted very thoroughly. Skip the ½ teaspoon normally added with the eggplant in Step 2 and adjust the final seasoning by taste.
  • Water: the vegetables and tomatoes normally provide enough. If the tomato base begins catching before it has reduced, add only 1–2 tablespoons / 15–30 ml at a time.
  • Extra oil: the reserved tablespoon is there for an unusually absorbent batch of eggplant. Add it only if the pieces begin catching or scorching.

Check Doneness · Troubleshooting · Back to Top

Need Help With Your Ratatouille?

Classic Ratatouille Is the Rustic Stovetop Dish

Traditional ratatouille does not follow one fixed cooking sequence. Some versions cook the vegetables separately; others add them successively. Both approaches recognize the same thing: eggplant, zucchini, peppers and tomatoes do not soften or release water at the same rate. This recipe keeps one pan but gives the vegetables separate turns.

Classic ratatouille is a rustic Provençal vegetable stew; the neat spiral of thin vegetables popularized by the movie is a different refined preparation commonly associated with confit byaldi. If the immaculate vegetable spiral from the film is what you pictured, this pan will look much more relaxed and rustic. That’s the point: everyday stovetop ratatouille is about tender vegetables coming together in the pan, not maintaining a carefully arranged pattern.

Comparison of chunky classic stovetop ratatouille in a pan and a movie-style preparation made from thin overlapping vegetable slices.
The different cuts also change the eating experience. Chunky stovetop ratatouille gives varied textures in each spoonful, while thin layered vegetables create a more even, refined bite.

Ratatouille comes from Provence in southern France and is particularly associated with Nice. Classic versions usually bring together eggplant, zucchini or courgette, peppers, tomatoes, onion, garlic, olive oil and Mediterranean herbs. Some cooks keep the vegetables fairly distinct; others continue toward a soft, almost confited consistency. There is room for both.

Lidia Bastianich’s classic ratatouille on PBS, for example, sautés the vegetables separately before bringing them together for a much longer final cook. Here we keep that useful principle while doing the work in one pan.

Ingredients That Change the Result

The formula itself is simple. What matters most is the quality of the vegetables and how each one behaves in the pan.

Eggplant: Choose Firm, Then Cook Until Creamy

Eggplant or aubergine gives ratatouille much of its soft body. Choose one that feels firm and heavy for its size, with smooth skin. Leave the skin on; it helps the pieces hold together.

Fresh firm dark-purple eggplant with compact pale flesh beside a more mature eggplant with numerous developed seeds and a wetter interior.
Seediness is a better warning sign than size alone. A large eggplant with compact pale flesh can cook beautifully; a loose, heavily seeded center is more likely to need extra attention.

The important change happens inside. Raw eggplant has a dry, spongy bite. Properly cooked eggplant gives easily under the spoon and feels creamy through the center—the same tenderness cue that matters in baked Eggplant Parmesan.

Comparison of eggplant showing a pale dry fibrous center labeled “Spongy — more time” and a soft glossy center labeled “Creamy — ready.”
Surface color cannot tell you whether eggplant is done. A beautifully browned piece can still be spongy inside, so judge the softness of the center instead.

Zucchini: Choose Small or Medium When You Can

Small and medium zucchini have firmer flesh and smaller seed cavities, so you can simply cut them whole. An enormous garden zucchini with a pale, heavily seeded core benefits from having that loose watery center scooped out first.

Small zucchini with compact flesh beside an oversized zucchini split lengthwise while a spoon removes its loose watery seed core.
Use the center as your guide, not just the ruler. Scoop an oversized zucchini only when its seed core has become loose and watery enough to dilute the ratatouille.

Tomatoes: Use the Ones That Taste Good

Fresh tomatoes earn their place when they are fragrant and flavorful before cooking. Ordinary ripe tomatoes can be chopped whole; blanching, peeling and routine seeding only add work.

Outside peak tomato season, good canned whole peeled tomatoes often give you a deeper, more reliable base—crush them by hand and pour in the juices too. If you have more ripe tomatoes to use, they can go into this fresh tomato sauce.

Ripe fresh tomatoes beside whole peeled canned tomatoes sitting in their juices.
Fresh versus canned tomatoes changes the journey more than the destination. Whichever you use, keep reducing until the sauce coats rather than judging doneness by a fixed cooking time.

Olive Oil, Peppers, Onion, Garlic and Herbs

Measure the olive oil before you start. Eggplant can make a pan look surprisingly dry for a few minutes, and having a measured amount makes it easier to resist pouring endlessly.

Red, yellow and orange peppers bring sweetness. Onion builds the base underneath them. Add the garlic once both have softened so it can perfume the pan without scorching. Thyme handles the simmer happily; basil tastes fresher near the end.

Ratatouille Substitutions That Still Make Sense

One missing vegetable does not have to derail dinner. The useful question is what the swap changes.

Change What to do What changes
No eggplant Increase zucchini and peppers for a lighter stew. Dense squash can add body but needs a longer head start. There is no exact substitute for eggplant’s rich, creamy texture. Winter squash also adds sweetness and takes the dish farther from classic ratatouille.
No zucchini Increase eggplant and peppers modestly. The finished dish will be richer and heavier.
No peppers Simply leave them out. You lose some sweetness and fruity pepper flavor.
Yellow summer squash Use it in place of zucchini. Very little changes; give it the same short cooking window.
No good fresh tomatoes Use canned whole peeled tomatoes with their juices. The reduction time may change, but the flavor can be better than with poor fresh tomatoes.
No fresh thyme Use about 1 teaspoon dried thyme or 1–1½ teaspoons herbes de Provence. Dried herbs are more concentrated, so use them with restraint.

Take away the tomatoes along with several of the defining vegetables and you’re moving toward another kind of vegetable stew. It may still be excellent; it does not need ratatouille’s name to be worth eating.

How to Make Ratatouille for Two

Halve the ingredients and keep the same sequence. Start with about 2½ tablespoons olive oil and keep another teaspoon or two nearby in case the eggplant starts catching.

Don’t shrink the cooking surface too aggressively. A tiny deep saucepan traps moisture more readily than a broad skillet even with half the vegetables.

The smaller batch may reduce faster once the tomatoes go in. Follow the appearance of the sauce instead of cutting every cooking time exactly in half.

Three Things Decide the Texture Before Cooking Starts

Cut the main vegetables around ¾ inch / 2 cm. Tiny dice soften quickly and disappear more readily into the sauce. Very large pieces keep more structure but need considerably longer. Two centimeters gives you a forgiving middle and keeps the chopping reasonable.

Eggplant, zucchini and bell pepper cut into roughly 2-centimeter chunks beside a ruler and 3/4-inch measurement guide.
Consistency matters more than perfect 2 cm cubes. A few uneven pieces are harmless; mixing tiny dice with large chunks creates vegetables that reach tenderness at completely different times.

Use a broad cooking surface. A broad surface gives steam somewhere to escape instead of trapping it around the vegetables.

Listen as well as look. Eggplant or zucchini hitting a properly heated pan should sizzle. A deep mound that quickly turns quiet and steamy needs more space.

Cooking Stages · Check Doneness

How Ratatouille Changes in the Pan

Times are useful checkpoints. The vegetables give better signals.

Watch the eggplant first. For a few minutes it can look alarmingly thirsty while the center is still spongy, which is exactly when another pour of oil feels tempting. Give it time. As the pieces brown and begin to soften, that urge to add more oil fades.

Eggplant chunks browning in a mostly dry-looking sauté pan with the words “Looks thirsty? Give it time.”
A dry-looking pan does not automatically mean the eggplant needs more oil. Give the flesh time to soften before deciding whether that reserved spoonful is actually necessary.

Zucchini needs almost the opposite treatment. Take it out while it still seems slightly underdone. That firmness gives it enough room to finish later without disappearing into the stew.

Chunky zucchini pieces lightly browned in a sauté pan with an instruction to remove them while still firm.
The brief sauté is for surface flavor, not full doneness. The center should still resist slightly when the zucchini leaves the pan.

Then the tomatoes usually make the pan look worse before they make it look better. Juice spreads across the bottom, steam lifts from the surface, and for a while everything looks far too wet. Keep cooking. The tomato flesh slumps, the color darkens and turns glossier, and the sharp raw-tomato smell softens.

Tomatoes, softened onions and bell peppers simmering in abundant loose tomato liquid with steam rising from a wide pan.
Watch the direction of travel, not one wet-looking moment. If the tomato liquid is steadily reducing and becoming glossier, the ratatouille is moving toward the right consistency.

When the Tomatoes Start Behaving Like Sauce

Drag a spatula across the bottom. Early on, liquid rushes straight back into the trail. Later, the path stays visible for a moment before the sauce closes behind it. That same trail test works whenever you reduce a tomato sauce, including marinara: thin sauce usually needs evaporation before it needs another ingredient.

Reduced tomato base in a dark pan with a spatula dragged through the center, leaving a visible trail.
The spatula trail works across tomato types. Fresh and canned tomatoes can release very different amounts of water, but both are ready when the reduced sauce briefly holds a path.

When the eggplant returns, the pan may still look like several cooked vegetables sharing a sauce. A few minutes later the tomato begins settling around the pieces, the peppers soften into the background, and the zucchini finishes gently. Suddenly it looks like ratatouille.

From here, fold rather than churn. Soft vegetables can be broken with a spoon even when the cooking itself is exactly right.

Check Doneness · Back to Recipe

The Pan, Not the Timer, Tells You When Ratatouille Is Done

Start checking around the suggested times, then stop when the food reaches these cues. No single vegetable decides doneness; the useful window is when the slowest pieces are tender but the quickest-cooking ones have not started falling apart.

Final Consistency: Read the Whole Pan

Look at Ready when…
Eggplant The center is creamy and yielding with no dry, cottony resistance
Zucchini Tender enough to cut easily with a spoon while still holding its shape
Peppers Soft and sweet with no raw crunch
Tomato Thick enough to coat the vegetables without running freely around them
Pan bottom A small amount of sauce remains; there is no broad puddle of thin red liquid
Whole dish The flavors have come together, but the spoon still gives you different textures
Finished ratatouille in a tilted pan with thick sauce surrounding distinct vegetables and very little free liquid.
Stop just before the dish looks completely settled. Ratatouille tightens slightly during its rest, so a pan that is perfect over the heat can become too dry on the table.

Zucchini: Stop Before It Collapses

Like your ratatouille softer? Continue the gentle simmer. Some traditional versions go much farther toward a deep, almost jammy consistency. Our stopping point is a preference, not a universal rule.

Three stages of cooked zucchini labeled “Remove here,” “Finished here” and “Too far,” progressing from firm pieces to tender pieces and then collapsing pieces.
Zucchini texture changes before its color changes dramatically. That is why firmness is a much better doneness cue than waiting for the pieces to look visibly different.

Troubleshooting · Back to Recipe

Ratatouille Troubleshooting

Before adding ingredients or automatically cooking longer, look at what is actually wrong. Most ratatouille problems have a specific fix.

Decision guide showing watery ratatouille simmered uncovered when vegetables are firm, or tender vegetables removed while excess juices reduce before recombining.
A watery ratatouille is really two possible problems: excess liquid needs more heat, while vegetables that are already tender need protection from that extra cooking.

Texture and Moisture Problems

Problem Fix it now Why it happened / next time
Thin red liquid pooling Vegetables still firm? Simmer uncovered. Already tender? Lift them out, reduce the liquid alone until glossy, then fold them back in. Too much moisture was trapped. Give the vegetables more room and reduce the tomato base farther before recombining.
Eggplant is spongy Give it more time in the tomato sauce until the center becomes creamy. The eggplant is undercooked. Let it begin softening properly during the first browning.
Eggplant seems to absorb all the oil Turn the pieces and give them time. Use the reserved oil only if they begin to scorch. Some absorption is normal; weak heat can exaggerate it. Measure the oil and use active sautéing heat.
Finished ratatouille is greasy Spoon off obvious excess oil if necessary. Too much oil was added, often in repeated pours while the eggplant looked dry. Start with the measured amount.
Zucchini is collapsing Stop cooking. The flavor can still be excellent even if the zucchini has lost its shape. It cooked too long or returned too early. Brown briefly and add it back near the end.

Flavor and Seasoning Problems

Problem Fix it now Why it happened / next time
Vegetables are pale and bland Reduce loose liquid first, then correct the salt before adding more herbs. The vegetables steamed or excess water diluted the flavor. Use stronger heat, more pan surface or smaller batches.
Ratatouille tastes rich but flat Correct the salt first, then add 1 teaspoon red wine vinegar and taste again. The finished pan needs seasoning or a touch of acidity.
Tomato tastes harsh If the vegetables still need time, continue uncovered. If they are tender, remove them and reduce some sauce separately. Check salt before trying a tiny pinch of sugar. The tomato may be under-reduced or unusually acidic. Better tomatoes and sufficient reduction help next time.
Garlic tastes bitter Burned garlic is difficult to rescue; dilution may soften the bitterness. The garlic scorched. Add it only after the onion and peppers have softened.

Once the sauce is right, all of that diagnosis disappears from the plate. What remains is the good part: sweet pepper, soft eggplant, zucchini, basil and tomato in the same warm spoonful.

Overhead view of rested ratatouille in a dark pan with visible eggplant, zucchini, peppers, tomato sauce and fresh basil.
After resting, the dish should look unified without becoming uniform: tomato fills the gaps, while the shapes and colors of the vegetables still reveal what went into the pan.

Back to Recipe · Back to Top

What to Serve With Ratatouille

Serve ratatouille with crusty bread, polenta, rice or eggs for a vegetarian meal, or use it as a side for chicken, fish, lamb or sausages.

Once the pan is where you want it, ratatouille becomes wonderfully undemanding. Spoon it beside dinner, pile it onto bread, or let the vegetables become the meal.

Make it the main: add crusty bread or sourdough focaccia, creamy polenta, rice, couscous, white beans or chickpeas. A fried or poached egg makes it more substantial without taking attention away from the vegetables.

Chunky ratatouille spooned over pale creamy polenta in a shallow ceramic bowl and finished with basil.
Polenta works especially well with a strongly reduced batch of ratatouille. Its mild creaminess softens concentrated tomato and olive-oil flavors without competing with the vegetables.

Serve it as a side: simply cooked chicken, fish, lamb, sausages or roasted meat all leave plenty of room for the ratatouille.

Or make lunch out of it: spoon warm ratatouille over crisp toast and add a fried egg. The tomato and olive oil soften the top of the bread while the edges stay crisp, and the yolk runs straight into the vegetables. Goat cheese or another tangy cheese is good here too, and a smaller amount of ratatouille can go into an easy frittata.

Thick crisp toast topped with chunky ratatouille and a fried egg, with runny golden yolk flowing over the vegetables.
Crisp toast is especially useful with next-day ratatouille: as the vegetables become softer and more integrated overnight, the bread puts a fresh layer of texture back into the meal.

Ratatouille does not need to be piping hot; it is good warm, at room temperature or chilled. During the 15-minute rest, the bubbling settles and the sauce thickens slightly around the vegetables, while the olive oil, herbs and tomato become easier to taste. If serving leftovers cold, let them lose the deepest refrigerator chill first.

Make Ahead, Store, Freeze and Reheat

Yes—ratatouille is excellent made a day ahead. The vegetables become softer, but the tomato, garlic, herbs and olive oil taste more integrated after a night in the refrigerator.

If you’re cooking specifically for the next day, hold back most of the basil and add it just before serving so its fresh flavor does not disappear into the overnight rest.

Day one gives you clearer textures. Day two gives you deeper integration. Neither is a consolation prize.

Fridge, Freezer and Reheating at a Glance

For the practical timeline, keep the three jobs separate: chill leftovers promptly, freeze airtight portions you will not use soon, and reheat only what you plan to eat.

Three-part guide showing ratatouille refrigerated in a covered container, frozen in an airtight container and gently reheated in a pan, with storage times and 165°F or 74°C reheating guidance.
Shallow containers help leftovers cool more quickly and make it easier to reheat only the amount you actually plan to serve.

Refrigerate and Reheat Gently

Refrigerate leftovers within 2 hours of cooking—or within 1 hour when the surrounding temperature is above 90°F / 32°C—in covered, preferably shallow containers. USDA leftover guidance recommends using refrigerated cooked leftovers within 3–4 days and reheating them to 165°F / 74°C.

Reheat only the portion you plan to eat. The microwave works well for a single serving because the heating is brief. On the stovetop, use low to medium-low heat and stir only as much as necessary. Once it is hot, stop. Yesterday’s zucchini does not need another fifteen-minute simmer.

An oilier appearance after reheating does not necessarily mean the original batch contained too much oil. Extra evaporation removes water while the olive oil remains, making it more visible.

Can You Freeze Ratatouille?

Yes. Freeze it in an airtight container and use it within about 2–3 months for best quality. Expect softer vegetables after thawing, especially the zucchini.

That softer texture works well in pasta, eggs, soup or on toast. A thawed batch that has become too soft to enjoy on its own can also become the start of a vegetable soup; minestrone takes the tomato-and-vegetable idea in a heartier beans-and-pasta direction.

Leftover Ideas · Back to Recipe

Five Good Ways to Use Leftover Ratatouille

Leftover ratatouille can become pasta sauce, a toast topping, frittata filling, a spoonful over polenta, or the beginning of a vegetable soup.

Rigatoni tossed with leftover ratatouille, with visible eggplant, zucchini and red and yellow peppers coated in tomato sauce and finished with basil.
Short pasta has a practical advantage here: chunky eggplant, zucchini and peppers settle between the tubes and ridges instead of slipping away from long strands to the bottom of the bowl.
  1. Toss it with pasta. Warm the ratatouille, loosen it with some pasta water and fold it through. Basil, Parmesan or goat cheese can finish it. For something cheesier and more substantial, the same vegetables also work beautifully in vegetable baked ziti.
  2. Pile it onto toast. Add an egg or tangy cheese and lunch is essentially done.
  3. Put it into eggs. Warm it under fried or poached eggs, or use a modest amount as a cooked vegetable filling for an omelet or frittata.
  4. Spoon it over polenta. Soft vegetables and concentrated tomato are particularly good against creamy polenta.
  5. Turn a very soft batch into sauce or soup. Crush it into a chunky pasta sauce or blend some of it into a smoother vegetable base. The texture changed; dinner did not fail.

When the Vegetables Come Together

When the pan is right, you don’t really need the clock anymore. The tomato has thickened around the vegetables, the eggplant gives under the spoon, the peppers are sweet, and the zucchini has made it to the end intact.

Give it fifteen minutes to settle. By then the sauce has gathered around the vegetables, the steaming heat has eased, and the ratatouille is ready to eat.

If you make it, tell me where you like your ratatouille to land: vegetables still clearly distinct, or soft and deeply confited?

Back to Recipe · Back to Top

Posted on Leave a comment

Stuffed Red Pepper Recipe

Baked red bell peppers stuffed with ground beef, rice, tomato sauce, and melted cheese in a cream ceramic baking dish

Stuffed red peppers should feel like dinner is handled: sweet pepper walls, savory beef-and-rice filling, tomato sauce, and melted cheese all baked together in one cozy dish. The only catch is that small details matter. If the peppers stay too firm, the rice tastes bland, the filling turns watery, or the cheese browns too early, the whole dish feels less comforting than it should.

This is the no-guesswork version built to avoid those problems. The filling is cooked and seasoned before it ever goes into the peppers, the sauce stays underneath instead of drowning the dish, and the peppers bake covered first so they soften before the cheese goes on. By the time the foil comes off, the dish should smell like tomato sauce, garlic, roasted peppers, and melting cheese.

Think of this as classic baked stuffed bell peppers tuned specifically for red peppers: sweeter, softer in flavor, and especially good with tomato sauce, ground beef, cooked rice, and cheese. You get the old-fashioned dinner feeling, but with clear cues for what the filling, sauce, peppers, and cheese should look like at every step.

The promise

These stuffed red peppers bake up tender, saucy, and full of flavor, with a seasoned beef-and-rice center that holds together instead of turning loose and watery.

Quick Answer: How to Make Stuffed Red Peppers

To make stuffed red peppers, cut the tops off large red bell peppers and remove the seeds. Brown ground beef with onion, garlic, tomato paste, salt, pepper, and herbs, then stir in cooked rice and diced tomatoes. Spread tomato sauce or marinara in a baking dish, fill the peppers, cover with foil, and bake at 375°F / 190°C for 30 to 35 minutes. Uncover, add cheese, and bake for another 10 to 15 minutes, until the peppers are fork-tender, the sauce is bubbling, and the cheese is melted.

Remember the order: filling first, sauce underneath, foil first, cheese last. The key is not to rush the cheese; let the peppers soften under foil before finishing them uncovered.

Make This Version When

Make this version when you want classic stuffed bell peppers, but you do not want to gamble on the texture. The red peppers soften without collapsing, the beef-and-rice filling tastes seasoned before it goes into the oven, and the cheese goes on late enough to melt instead of drying out. It is hearty enough to count as dinner without needing much else, but still flexible enough for turkey, sausage, vegetarian, vegan, no-rice, or halved-pepper versions.

What the Finished Stuffed Red Pepper Should Look Like

Use this as the visual target before you start: the pepper should soften around the edges, while the rice, beef, sauce, and cheese still read as one generous filling.

Cut-open stuffed red pepper on a plate with visible beef, rice, tomato sauce, and melted cheese inside
A cut-open stuffed red pepper shows what matters inside: tender rice, seasoned beef, enough sauce to keep the filling juicy, and melted cheese in every forkful.

Stuffed Red Pepper Recipe Card

Easy Baked Stuffed Red Peppers

Whole red bell peppers filled with seasoned ground beef, cooked rice, tomato sauce, and melted cheese. A reliable baked stuffed peppers recipe that turns tender, saucy, and comforting without becoming watery.

Prep Time20 minutes
Cook Time50 minutes
Total Time1 hour 10 minutes
Servings6 stuffed red peppers
Oven Temperature375°F / 190°C
Baking Dish13×9-inch / 33×23 cm dish
Main MethodBake covered first, then finish uncovered with cheese

Ingredients

IngredientAmount
Large red bell peppers6
Olive oil2 tablespoons / 30 ml
Yellow onion, finely chopped1 medium / about 150 g
Garlic, minced3 cloves
Tomato paste2 tablespoons / about 30 g
Ground beef1 lb / 450 g
Cooked white or brown rice1½ cups / about 240 to 260 g
Diced tomatoes, with juices1 can, 14.5 oz / 411 g
Tomato sauce or marinara1½ cups / 360 ml
Italian seasoning or dried oregano1½ teaspoons
Salt1 teaspoon, plus more to taste
Black pepper½ teaspoon
Shredded mozzarella, Monterey Jack, cheddar, or a blend1 cup / about 110 g, or up to 1½ cups / 170 g for a cheesier top
Fresh parsleyOptional, for serving

Instructions

Build the Filling

  1. Preheat the oven. Heat the oven to 375°F / 190°C.
  2. Prepare the peppers. Slice the tops off the red bell peppers. Remove the seeds and membranes. If needed, trim a very thin slice from the bottom so the peppers stand upright, but do not cut through into the hollow center.
  3. Soften the onion. Warm the olive oil in a large skillet over medium heat. Add the onion and cook for 3 to 4 minutes, until softened.
  4. Build the flavor base. Add the garlic and tomato paste. Stir for about 1 minute, until the tomato paste darkens slightly and the garlic smells fragrant.
  5. Brown the beef. Add the ground beef, salt, black pepper, and Italian seasoning. Cook until the beef is browned and no longer pink, breaking it up as it cooks. Drain excess fat if the skillet looks greasy.
  6. Add rice and tomatoes. Stir in the cooked rice and diced tomatoes with their juices. Simmer for 3 to 5 minutes, until the mixture is moist but not soupy. Taste and adjust salt if needed.

Fill, Bake, and Finish

  1. Add sauce to the dish. Spread the tomato sauce or marinara in a shallow layer in the bottom of a 13×9-inch / 33×23 cm baking dish.
  2. Stuff the peppers. Spoon the beef and rice mixture into the peppers. Fill generously, but do not press it down hard.
  3. Bake covered. Place the peppers upright in the baking dish. Cover tightly with foil and bake for 30 to 35 minutes, until the pepper walls are starting to soften.
  4. Add cheese and finish uncovered. Remove the foil. Spoon a little sauce over the peppers if they look dry, then top with shredded cheese. Bake uncovered for 10 to 15 minutes, until the cheese is melted and the peppers are tender.
  5. Check doneness. The peppers are done when they are fork-tender but still holding their shape, the sauce is bubbling around the edges, the center is hot, and the cheese is melted.
  6. Rest before serving. Let them rest for 5 minutes. Spoon extra sauce from the dish over the top and finish with parsley if using.

Recipe Notes

  • Cooked rice gives the most reliable texture. Leftover rice works well.
  • Taste the filling before stuffing the peppers. It should taste slightly bold in the skillet because the pepper and rice will soften the flavor once baked.
  • If your marinara, canned tomatoes, or cheese are salty, start with ¾ teaspoon salt and adjust after the rice goes in.
  • For ground turkey or very lean beef, add an extra spoonful or two of sauce to keep the filling moist.
  • Very large peppers may need 5 to 10 extra minutes of covered baking time.
  • Let the peppers rest before serving so the filling settles instead of spilling out immediately.

Before You Start: The Stuffed Red Pepper Rules

Use these as your quick mistake-prevention cues, and your stuffed peppers with ground beef and rice are much less likely to turn watery, bland, undercooked, or dry on top.

RuleWhy It Matters
Use cooked riceIt prevents crunchy grains and makes the filling easier to season.
Cook the beef firstBrowning builds flavor and lets you drain excess fat.
Keep the filling thickThe mixture should mound slightly, not run across the skillet.
Use a shallow sauce layerSauce should cushion the peppers, not boil them.
Bake covered firstSteam softens the pepper walls before the top dries out.
Add cheese lateThe cheese melts cleanly instead of drying out while the peppers finish.
Rest before servingThe filling settles, and the peppers are easier to lift from the dish.

Table of Contents

What This Recipe Is Built Around

This is the classic baked stuffed bell pepper dinner, but tuned for red peppers: sweeter pepper walls, a thicker beef-and-rice filling, sauce underneath instead of too much liquid inside, and cheese added only once the peppers are nearly tender.

It is practical comfort food, not a fancy project. The dish works because the filling is seasoned well, the sauce is in the right place, and the covered bake gives the peppers enough time to soften before the top is finished.

If you like this kind of saucy, cheesy covered-bake dinner, these baked stuffed shells follow the same comfort-food logic with pasta, filling, sauce, and cheese.

Choose Your Stuffed Red Pepper Path

The main recipe is the classic stuffed bell peppers with ground beef and rice version. Use this table if you already know what style you want.

If You WantUse This Approach
Classic stuffed red peppersUse ground beef, cooked rice, tomato sauce, and melty cheese.
Softer peppersBake covered 5 to 10 minutes longer before adding cheese.
No boil stuffed peppersSkip boiling and let the covered bake soften the peppers.
Saucier peppersAdd a little extra marinara to the dish and spoon sauce over before serving.
Less watery peppersSimmer the filling until thick and finish the bake uncovered.
Ground turkey versionReplace beef with turkey and add a little extra oil or sauce.
Vegetarian versionUse beans, lentils, mushrooms, quinoa, vegetables, and cheese.
Vegan versionUse beans or lentils, rice or quinoa, tomato sauce, herbs, and vegan cheese or no cheese.
No-rice versionUse cauliflower rice, mushrooms, eggplant, extra meat, lentils, or beans.
Faster weeknight bakeUse halved peppers instead of whole peppers.

Why This Stuffed Red Pepper Recipe Works

The trick is not a special ingredient. It is timing and moisture. These stuffed red bell peppers work because the rice is already cooked, the beef is browned first, the sauce stays shallow, and the cheese goes on only after the peppers have started to soften.

  • Cooked rice prevents crunchy grains. The filling bakes evenly instead of waiting for dry rice to soften inside the pepper.
  • Browned beef gives better flavor. It also lets you drain extra fat before the rice and tomatoes go in.
  • Tomato paste deepens the skillet mixture. One minute in the pan makes the filling taste more rounded.
  • A shallow sauce layer prevents boiling. The sauce keeps the peppers moist without turning the dish soupy.
  • Foil softens the peppers first. The covered bake gives the pepper walls time to relax before the cheese is added.
  • A short rest helps the filling settle. The peppers lift from the dish more neatly after a few minutes.

Ingredients You’ll Need

The ingredients are familiar, which is exactly why the balance matters. A little tomato paste makes the beef taste deeper, cooked rice keeps the texture steady, and tomato sauce in the dish makes the peppers feel finished instead of dry.

Stuffed red pepper ingredients arranged on a board, including red bell peppers, ground beef, cooked rice, tomato sauce, cheese, onion, garlic, and herbs
The ingredients are simple, but each one has a job: peppers hold the filling, cooked rice gives structure, tomato sauce adds moisture, and cheese finishes the baked top.

Red Bell Peppers

Use large red bell peppers for this recipe. Red peppers are sweet, colorful, and mild, which makes them especially good with beef, rice, tomato sauce, and cheese. In some countries, red bell peppers are sold as red capsicum. Choose the large sweet kind, not small hot red peppers.

Ground Beef

Ground beef gives the filling its classic flavor. Beef that is around 85% to 90% lean works well because it has enough richness without making the dish greasy. The beef should taste a little bold in the skillet because the rice, pepper, and sauce will mellow it once everything bakes together.

Cooked Rice

Cooked rice is the most reliable choice for baked stuffed peppers. White rice, brown rice, basmati, jasmine rice, or leftover rice can all work. The important part is that the rice should already be cooked before it goes into the filling.

Tomato Paste, Diced Tomatoes, and Sauce

Tomato paste adds depth, diced tomatoes bring moisture and texture, and tomato sauce or marinara keeps the baking dish saucy. Together, they stop the filling from tasting flat or dry.

Cheese

Mozzarella gives a mild, stretchy melt. Monterey Jack melts smoothly and tastes creamy. Cheddar adds sharper flavor. Add the cheese near the end, when the peppers are almost tender, so it melts into the top instead of drying out while the peppers catch up.

Seasoning

Italian seasoning or oregano keeps the flavor classic. Paprika, chili flakes, basil, parsley, or a little cumin can also work depending on the version you want. Season the beef before adding the rice, because rice softens the flavor once it goes in.

Best Red Peppers to Use

Choose large, firm, glossy red bell peppers that are close to the same size. Similar-sized peppers bake more evenly, and flat-bottomed peppers are easier to stand upright in the dish.

  • Use: large red bell peppers.
  • Good backup: yellow or orange bell peppers.
  • For a sharper flavor: green bell peppers can work, but they taste less sweet.
  • Not ideal for this main recipe: mini peppers, cherry peppers, pimento peppers, long hot red peppers, or red jalapeños.

Mini peppers and pimento peppers are delicious, but they behave differently. They need different filling amounts and shorter cooking times, so save them for appetizer-style stuffed pepper recipes.

No Boil Stuffed Peppers: Do You Need to Boil or Pre-Bake?

You do not need to boil red peppers before stuffing them for this recipe. This no-boil method uses the covered bake to create enough steam to soften the peppers while the filling stays moist.

For very soft peppers, blanch the empty peppers in boiling water for about 5 minutes, then drain and dry them before stuffing. When you prefer peppers that hold their shape and keep a little bite, skip boiling and let the oven do the work.

With halved peppers, pre-baking is more useful than boiling. Bake the empty halves for 10 minutes, tip out any liquid, then add the filling. This helps prevent watery halves and shortens the final bake.

MethodUse It WhenWhat to Know
No boilingYou want classic whole stuffed red peppersGood balance of tenderness and shape
Blanch 5 minutesYou like very soft peppersDrain and dry well before stuffing
Pre-bake 10 minutesYou are using halved peppersTip out liquid before adding filling

Equipment

You need a large skillet for the filling and a snug 13×9-inch / 33×23 cm baking dish for the peppers. A snug dish helps the peppers support each other instead of tipping into the sauce.

  • 13×9-inch / 33×23 cm baking dish
  • Large skillet
  • Cutting board and sharp knife
  • Spoon for stuffing
  • Foil
  • Optional baking sheet under the dish to catch bubbling sauce

Cooked Rice or Uncooked Rice?

Use cooked rice for this stuffed red pepper recipe. Cooked rice lets you control the texture before the dish goes into the oven, so you are not guessing whether the grains will soften in time.

Side-by-side bowls of fluffy cooked rice and dry uncooked rice used to compare rice texture for stuffed peppers
For stuffed red peppers, cooked rice gives a more reliable texture because the grains are tender before baking. In contrast, uncooked rice needs extra liquid and can stay firm inside the peppers.

If rice texture is the part that usually trips you up, this guide on how to cook rice is useful before you make the filling.

Uncooked rice can work in some stuffed peppers with tomato sauce, but it needs more liquid, more time, and closer control. Without enough liquid, the rice can stay hard. With too much liquid, the peppers can become watery.

Cooked rice also makes the filling easier to taste and adjust. Rice absorbs seasoning, so the mixture may need a final pinch of salt after the grains go in.

Leftover rice tip: leftover rice is excellent here. Break up any clumps before stirring it into the beef and tomato mixture.

Leftover rice can do double duty: use some here, then save the rest for this shrimp fried rice recipe later in the week.

For uncooked rice, do not add it dry straight into the peppers. Simmer the grains with the meat, tomatoes, and extra liquid until they are mostly tender, then stuff the peppers and bake.

Do You Cook the Meat First?

Yes. Cook the beef first. It is one of the simplest ways to make stuffed peppers with ground beef and rice taste deeper and bake more evenly.

Browning the meat first helps the onion and garlic cook properly, gives you a chance to season the filling, and lets you drain off excess fat. It also makes the final bake more predictable because the oven’s job is to soften the peppers, heat the filling through, and melt the cheese — not cook raw meat hidden inside a pepper.

For a thermometer check, USDA guidance lists ground beef at 160°F / 71°C. Since the beef is browned before stuffing, the oven is mainly heating the filling through and finishing the peppers.

Red Sauce for Stuffed Peppers

The best red sauce for stuffed peppers is tomato sauce or marinara. Use about 1½ cups / 360 ml for six peppers, spread in a shallow layer under the peppers, then spoon the sauce over the top after baking.

How Much Sauce to Add First

Start with a thin layer across the bottom of the dish. That gives the peppers moisture from below without turning the baking dish into a pot of sauce.

Shallow tomato sauce layer spread across the bottom of a cream baking dish for stuffed red peppers
Next, spread tomato sauce or marinara in a thin, even layer. You need enough sauce to keep the peppers juicy, but not so much that they sit in a deep pool.

Think of the sauce as the cushion under the peppers, not a soup for them to sit in. You want enough to keep the dish moist and give every serving extra tomato flavor, but not so much that the peppers boil in liquid.

Sauce Cushion, Not Soup

This is the main sauce mistake to avoid. A shallow layer supports the peppers; a deep pool can make them taste more boiled than baked.

Comparison image showing stuffed peppers in a shallow tomato sauce layer beside peppers sitting in too much sauce
Too much sauce can turn stuffed peppers watery. Instead, use a shallow tomato sauce layer that keeps the peppers moist without making them taste boiled.

A good sauce layer should show up when you cut into the pepper, without making the pepper taste boiled.

The sauce in the dish is also your finishing sauce. Spoon it over the peppers at the table so the rice and beef taste juicy all the way through.

Jarred sauce is fine, but if you want the dish to feel more homemade, use this marinara sauce recipe as the base.

Sauce StyleUse It For
Plain tomato sauceClassic stuffed red peppers with a clean tomato flavor
MarinaraAn easy shortcut when you want more flavor
Slightly sweet red sauceOld-fashioned stuffed pepper flavor
Spicy red sauceAdd chili flakes, cayenne, or chopped jalapeño

When tomatoes are in season, this tomato sauce from fresh tomatoes can also become the base sauce for the baking dish.

For very thick sauce, loosen it with a splash of broth or water before adding it to the dish. With thin sauce, use a little less and let the peppers finish uncovered so excess moisture can reduce.

How to Make Stuffed Red Peppers

The recipe card gives the exact steps. This section is the visual walkthrough: what you should see, smell, and check as the peppers move from raw ingredients to a finished baked dinner.

1. Prep the Red Peppers

After trimming, the peppers should look like little cups and stand upright on their own. Keep the walls intact and avoid cutting through the bottom, because any hole in the base lets filling and sauce escape into the dish.

Hollowed red bell peppers standing upright on a wooden cutting board with pepper tops, seeds, and a knife nearby
First, trim the red bell peppers into sturdy cups. Keeping the bottoms intact helps the beef-and-rice filling and tomato sauce stay inside instead of leaking into the dish.

2. Cook the Tomato Paste and Beef

The tomato paste should darken slightly before the beef goes in. That quick minute makes the filling taste deeper and less raw-tomato sharp. Once the beef is browned, the skillet should smell savory, garlicky, and tomato-rich, not flat or boiled.

Ground beef, rice, tomatoes, onion, and garlic cooking together in a skillet for stuffed red pepper filling
Browning the ground beef before stuffing builds deeper flavor, cooks off extra moisture, and lets you season the filling before it gets tucked into the peppers.

3. Bring the Filling Together

After the cooked rice and diced tomatoes go in, look for a skillet mixture that is moist, glossy, and thick enough to mound slightly. If it looks wet enough to pour, keep simmering. It should sit on the spoon, not run off it.

Thick beef and rice filling holding its shape on a spoon above a skillet with no visible liquid pooling
Before stuffing, check the filling texture. It should mound on the spoon instead of running across the skillet, which is one of the easiest ways to prevent watery stuffed peppers.

4. Fill Without Packing Too Hard

Fill each pepper generously, but keep the beef-and-rice mixture loose enough that a spoon can still move it. Pressing too hard makes the center heat less evenly and can cause the filling to spill out when served.

Red bell peppers filled with beef and rice in a baking dish before baking and before cheese is added
Once the filling is ready, spoon it into the peppers generously but gently. A looser beef-and-rice filling heats more evenly than one packed down too tightly.

5. Bake Covered Before Adding Cheese

Before the cheese goes on, the pepper walls should already be starting to soften. If they still feel stiff when pierced with a fork, cover the dish again and give them a few more minutes. The cheese should finish the dish, not wait in the oven while the peppers catch up.

Hands placing foil over a baking dish of stuffed red peppers before baking
Cover the stuffed red peppers for the first part of baking so steam can soften the pepper walls before the cheese is added.

6. Add Cheese Near the End

Once the peppers have softened under foil, add the cheese and return the dish to the oven uncovered. The cheese should finish the top, not sit in the oven while firm pepper walls catch up.

Hand sprinkling shredded cheese over stuffed red peppers after the covered baking stage
After the peppers begin to soften, add the cheese. This timing gives you a melted, creamy top without leaving the cheese in the oven long enough to dry out.

7. Rest and Spoon Sauce Over the Top

When the stuffed peppers come out of the oven, the sauce should be bubbling around the base and the cheese should be melted into the top. Let them rest for 5 minutes, then spoon sauce from the dish over each pepper before serving.

Bake Time and Temperature

For whole stuffed red peppers, 375°F / 190°C is the sweet spot. It is hot enough to soften the peppers in a reasonable time, but gentle enough that the filling stays moist and the sauce does not burn.

StepTimeWhat Happens
Bake covered30 to 35 minutesPeppers soften and filling heats through
Bake uncovered with cheese10 to 15 minutesCheese melts and the top finishes
Rest5 minutesFilling settles and serving gets easier

Bubbling Sauce and Melted Cheese Cues

At the end of baking, look at the sauce and the pepper walls before you rely on the clock. The dish should look hot and settled, not dry or collapsed.

Finished baked stuffed red peppers with melted cheese and bubbling tomato sauce in a cream ceramic dish
Look for the real doneness signs: bubbling tomato sauce, melted cheese, hot filling, and red peppers that are tender but still standing. These cues matter more than the timer alone.

Total baking time is usually 40 to 50 minutes. Start checking around 40 minutes if your peppers are small, and closer to 50 minutes if they are large and thick-walled. The fork test matters more than the clock.

When the foil comes off, the peppers should look relaxed around the edges, not collapsed.

The peppers are ready when they are tender enough to pierce with a fork but still hold their shape. If they are still too firm, cover the dish again and bake a little longer before adding more uncovered time.

The Fork-Tender Test

For the final check, pierce the side of a pepper instead of judging only by the cheese. Tender but upright is the goal.

Fork piercing the side of a baked stuffed red pepper with melted cheese, beef filling, and tomato sauce
Use the fork test near the end of baking. The pepper wall should feel tender when pierced, but the stuffed pepper should still hold its shape in the sauce.

Should Stuffed Peppers Be Baked Covered or Uncovered?

Stuffed peppers should be baked covered first, then uncovered at the end. The covered bake softens the peppers; the uncovered finish melts the cheese and reduces extra moisture.

If you bake whole stuffed peppers uncovered from the beginning, the cheese and top of the filling can dry before the pepper walls become tender. Covering first and uncovering late makes the difference between peppers that taste baked and peppers that taste boiled.

How to Keep Stuffed Red Peppers From Getting Watery

Watery stuffed peppers usually happen for one of three reasons: the filling was too loose, the peppers released a lot of liquid, or the dish had too much sauce. The fix is not complicated, but you need to control moisture before and during baking.

Infographic showing four causes and fixes for watery stuffed peppers, including loose filling, too much sauce, soft peppers, and no uncovered finish
For better texture, check the four usual trouble spots: loose filling, too much sauce, soft peppers, and skipping the uncovered finish.
  • Use cooked rice. It absorbs flavor without needing extra liquid inside the pepper.
  • Brown and drain the beef. Excess fat can make the filling feel greasy and loose.
  • Cook the filling until it is thick enough to mound. Let extra tomato liquid simmer off before stuffing.
  • Do not flood the baking dish. Use a shallow layer of sauce, not a deep pool.
  • Bake covered first, then uncovered. Covered baking softens; uncovered baking lets extra moisture reduce.
  • Use firm peppers. Older, softer peppers collapse and release more liquid.
  • Rest before serving. Five minutes helps the filling settle.
  • For halved peppers, pre-bake and tip out liquid. Halved peppers can release moisture quickly.

Texture cue: the filling should look glossy before stuffing, but not loose enough to run across the skillet. If it looks soupy, simmer it a few minutes longer.

Freezer note: for the best texture, freeze cooked stuffed peppers rather than raw stuffed peppers. Raw peppers can release more water after thawing.

Whole vs Halved Stuffed Red Peppers

This recipe uses whole upright peppers because they give the classic stuffed pepper presentation and hold a generous amount of filling. They need a longer bake and a snug dish, but they look beautiful on the plate.

Halved peppers are better when you want a faster weeknight bake. They cook faster, are easier to portion, and give you more surface area for cheese. Because the cut sides release moisture quickly, a short pre-bake helps.

Side-by-side comparison of whole stuffed red peppers and halved stuffed red peppers topped with cheese
Whole stuffed red peppers give you the classic upright presentation and hold more filling. Meanwhile, halved peppers cook faster and create more surface area for melted cheese.

How to Make Halved Stuffed Red Peppers

To use halved peppers, slice them from stem to base, remove the seeds, and place them cut-side up in the dish. Pre-bake the empty halves at 375°F / 190°C for 10 minutes, then tip out any pooled liquid.

Add the filling, cover the dish, and bake for 15 to 20 minutes. Finish uncovered with cheese for another 5 to 10 minutes, until the cheese melts and the peppers are tender. Halved peppers cook faster than whole peppers, so start checking early.

Easy Variations

Once you know the base method, the filling can change without the whole recipe falling apart. Keep the mixture thick, keep the sauce shallow, bake covered first, and add cheese near the end.

Guide board with stuffed red pepper variations labeled turkey, sausage, vegetarian, vegan, no rice, feta, cream cheese, and grilled
Once the base method works, you can change the filling without losing the texture logic. Turkey, sausage, vegetarian, vegan, no-rice, feta, cream cheese, and grilled versions all follow the same core cues.

Ground Turkey Stuffed Red Peppers

Ground turkey works well when you want a lighter filling. Since turkey is leaner than beef, add a little extra olive oil or a few extra spoonfuls of tomato sauce so the center does not turn dry. Season well, because turkey needs more help than beef.

Sausage Stuffed Red Peppers

For a richer, more seasoned filling, use half ground beef and half Italian sausage. Because sausage brings salt and flavor, reduce the added salt at first and adjust after tasting.

Vegetarian Stuffed Red Peppers

For a vegetarian version, replace the beef with black beans, pinto beans, lentils, mushrooms, quinoa, or extra vegetables. Beans and lentils make the peppers hearty; mushrooms add savory depth if you cook off their moisture first.

Vegan Stuffed Red Peppers

For a vegan version, use beans, lentils, mushrooms, rice, quinoa, or vegetables cooked down with tomato sauce and herbs. Skip the cheese or use vegan cheese. Keep the mixture moist and well-seasoned so it does not taste like plain rice and vegetables.

Stuffed Red Peppers Without Rice

For no-rice stuffed red peppers, use cauliflower rice, chopped mushrooms, cooked eggplant, extra ground beef, ground turkey, lentils, or beans. If you use watery vegetables like zucchini, mushrooms, or eggplant, cook them first so they release moisture before going into the peppers.

Feta Stuffed Red Peppers

For a Mediterranean-style version, use feta, herbs, lemon, olives, chickpeas, couscous, or rice. Because feta is salty, taste the filling before adding extra salt. This version works especially well with halved peppers.

Cream Cheese Stuffed Red Peppers

Cream cheese stuffed red peppers are usually more of an appetizer than a full dinner. For that style, mini red peppers or small sweet peppers work better than large whole bell peppers. Mix cream cheese with herbs, garlic, cheddar, chives, smoked paprika, or crispy breadcrumbs, then bake or air fry until warm.

Grilled Stuffed Red Peppers

Grilled stuffed red peppers work best with a fully cooked filling. Place the stuffed peppers over medium heat, close the grill, and cook until the pepper walls soften and the center is hot. Add cheese near the end so it melts without burning.

What to Serve With Stuffed Red Peppers

This dish can be a full meal on its own because it already has vegetables, protein, rice, sauce, and cheese. On a busy night, choose one simple side based on the kind of plate you want.

  • Fresh and crisp: a cucumber salad for something cold and tangy
  • Starchy and cozy: roasted potatoes or warm bread
  • Sauce-friendly: homemade garlic bread for catching extra tomato sauce
  • Light and vegetable-heavy: steamed broccoli, green beans, or a simple green salad
  • For spicy versions: plain yogurt or sour cream

If you want a soup-and-peppers dinner, a bowl of minestrone soup keeps the meal vegetable-heavy without making it feel too rich.

Make Ahead, Storage, Freezing, and Reheating

Make Ahead

You can make the filling 1 to 2 days ahead and store it in the fridge. You can also stuff the peppers several hours ahead, cover the dish, and refrigerate until ready to bake. If baking straight from the fridge, add about 5 to 10 extra minutes to the covered baking time.

For the cleanest make-ahead stuffed peppers, keep a little extra sauce ready. Cold filling can feel drier when it goes into the oven, so spooning sauce into the dish before baking helps everything heat more evenly.

Storage

Store leftovers in an airtight container in the fridge for 3 to 4 days. Keep extra sauce with the peppers if possible, because it helps them reheat without drying out.

That timing also matches USDA leftover guidance, which recommends keeping cooked leftovers in the refrigerator for 3 to 4 days.

Freezing

These peppers freeze best after they are cooked. Let them cool completely, then wrap them well or store them in freezer-safe containers. Freeze for up to 2 to 3 months.

Raw stuffed peppers can be frozen, but the texture is usually softer and wetter after thawing. For the best result, bake first, cool, then freeze.

Reheating

To reheat in the oven, place the peppers in a baking dish with a spoonful of sauce, cover, and warm at 350°F / 175°C until the center is hot. The microwave is faster, but the peppers will be softer. Add a little sauce before reheating if the filling looks dry.

Troubleshooting

Most stuffed red pepper problems come down to moisture, timing, or seasoning. Use this table if something feels off.

ProblemLikely CauseFix
Peppers are wateryLoose filling, too much sauce, or peppers released liquidSimmer filling longer, use less sauce, bake uncovered at the end, and rest before serving
Peppers are still firmNot enough covered baking timeCover again and bake 5 to 10 minutes longer
Rice is undercookedUncooked or partly cooked rice was addedUse fully cooked rice for this recipe
Filling tastes blandNot enough seasoning before rice was addedSeason the beef well and use tomato paste, garlic, herbs, and enough salt
Filling is dryVery lean meat or not enough sauceAdd extra tomato sauce or a splash of broth
Peppers collapsedOverbaking or very soft peppersUse firm peppers and bake only until tender
Cheese browned too fastCheese was added too earlyAdd cheese during the last 10 to 15 minutes only
Filling spills out when servedPeppers were overfilled or served immediatelyPack gently and rest 5 minutes before lifting from the dish
Peppers will not stand uprightUneven bottoms or dish is too largeTrim a tiny slice from the bottom or use a snugger dish

FAQ

Do you cook rice before adding it to stuffed red peppers?

Yes. Cooked rice gives the most reliable texture and keeps you from finding hard grains inside an otherwise tender pepper. Leftover rice works well.

Can I use uncooked rice in stuffed red peppers?

You can, but cooked rice is easier. If using uncooked rice, simmer it with the filling and extra liquid until mostly tender before stuffing the peppers.

Should the ground beef be cooked before stuffing peppers?

Yes. Brown the beef first so the filling tastes deeper, releases excess fat in the skillet, and heats more predictably in the oven.

Do you have to boil red peppers before stuffing them?

No. This recipe uses a no-boil method. Baking the peppers covered gives enough steam to soften them.

How long do stuffed red peppers take in the oven?

Whole peppers usually take 40 to 50 minutes at 375°F / 190°C: 30 to 35 minutes covered, then 10 to 15 minutes uncovered with cheese.

What temperature is best for baking stuffed red peppers?

375°F / 190°C works well because it gives whole peppers time to soften while keeping the filling moist.

How do I know when stuffed red peppers are done?

The peppers should be fork-tender but still holding their shape. Around the edges, the sauce should bubble, the filling should be hot, and the cheese should be melted.

Why are my stuffed peppers watery?

They can turn watery if the filling is loose, the meat was not drained, the dish had too much sauce, or the peppers released liquid. Simmer the filling until thick and finish the bake uncovered.

Do stuffed peppers need to be covered while baking?

Yes, for the first part of baking. Covering traps steam and helps the peppers soften; uncover near the end for melted cheese and reduced moisture.

Is it better to make stuffed peppers whole or halved?

Whole peppers look classic and hold more filling. Halved peppers cook faster, are easier to eat, and give more surface area for cheese.

What sauce goes with stuffed red peppers?

Tomato sauce or marinara is the easiest choice because it keeps the peppers moist and gives you sauce to spoon over the finished dish.

Which cheese melts best on stuffed peppers?

Mozzarella, Monterey Jack, cheddar, or a blend all work. For the final texture, mozzarella is mild and stretchy, Monterey Jack is creamy, and cheddar tastes sharper.

How do you make stuffed red peppers without rice?

Replace the rice with cauliflower rice, mushrooms, eggplant, extra meat, lentils, beans, or quinoa. Cook watery vegetables first so they do not loosen the filling.

What is a good vegetarian filling for red peppers?

Beans, lentils, mushrooms, quinoa, rice, corn, tomatoes, onions, garlic, herbs, and cheese all work well. Keep the filling hearty and well-seasoned.

Can I make stuffed red peppers ahead of time?

Yes. Make the filling 1 to 2 days ahead or stuff the peppers several hours ahead. If baking from cold, add 5 to 10 extra minutes to the covered bake.

Do stuffed red peppers freeze well?

Yes. They freeze best after baking. Cool completely, wrap or store airtight, and freeze for up to 2 to 3 months.

How do you reheat stuffed red peppers without drying them out?

Reheat them covered with a spoonful of sauce in the dish. Use a 350°F / 175°C oven until the center is hot, or microwave gently for a softer result.

Can I use red capsicum for this recipe?

Yes. Red capsicum is another name for red bell pepper in many countries. Use large sweet red capsicum, not small hot red peppers.

Are red peppers better than green peppers for stuffed peppers?

Red peppers are sweeter and milder, which works especially well with tomato, beef, rice, and cheese. Green peppers still work if you prefer a sharper flavor.

Final Bite

The best part is cutting into the pepper while the sauce is still warm enough to slip into the rice and beef. That is when the dish stops feeling like separate parts and becomes the comfort food it is supposed to be: soft red pepper, savory filling, tomato sauce, and melted cheese in one forkful.

Tomato sauce being spooned over a cut-open stuffed red pepper with beef, rice, and melted cheese
Finally, spoon extra tomato sauce over the stuffed red peppers before serving. That last spoonful brings the rice, beef, pepper, and cheese together in the first bite.

Let the peppers rest just long enough for the first forkful to hold together, then serve while the sauce is still warm and glossy.

Posted on Leave a comment

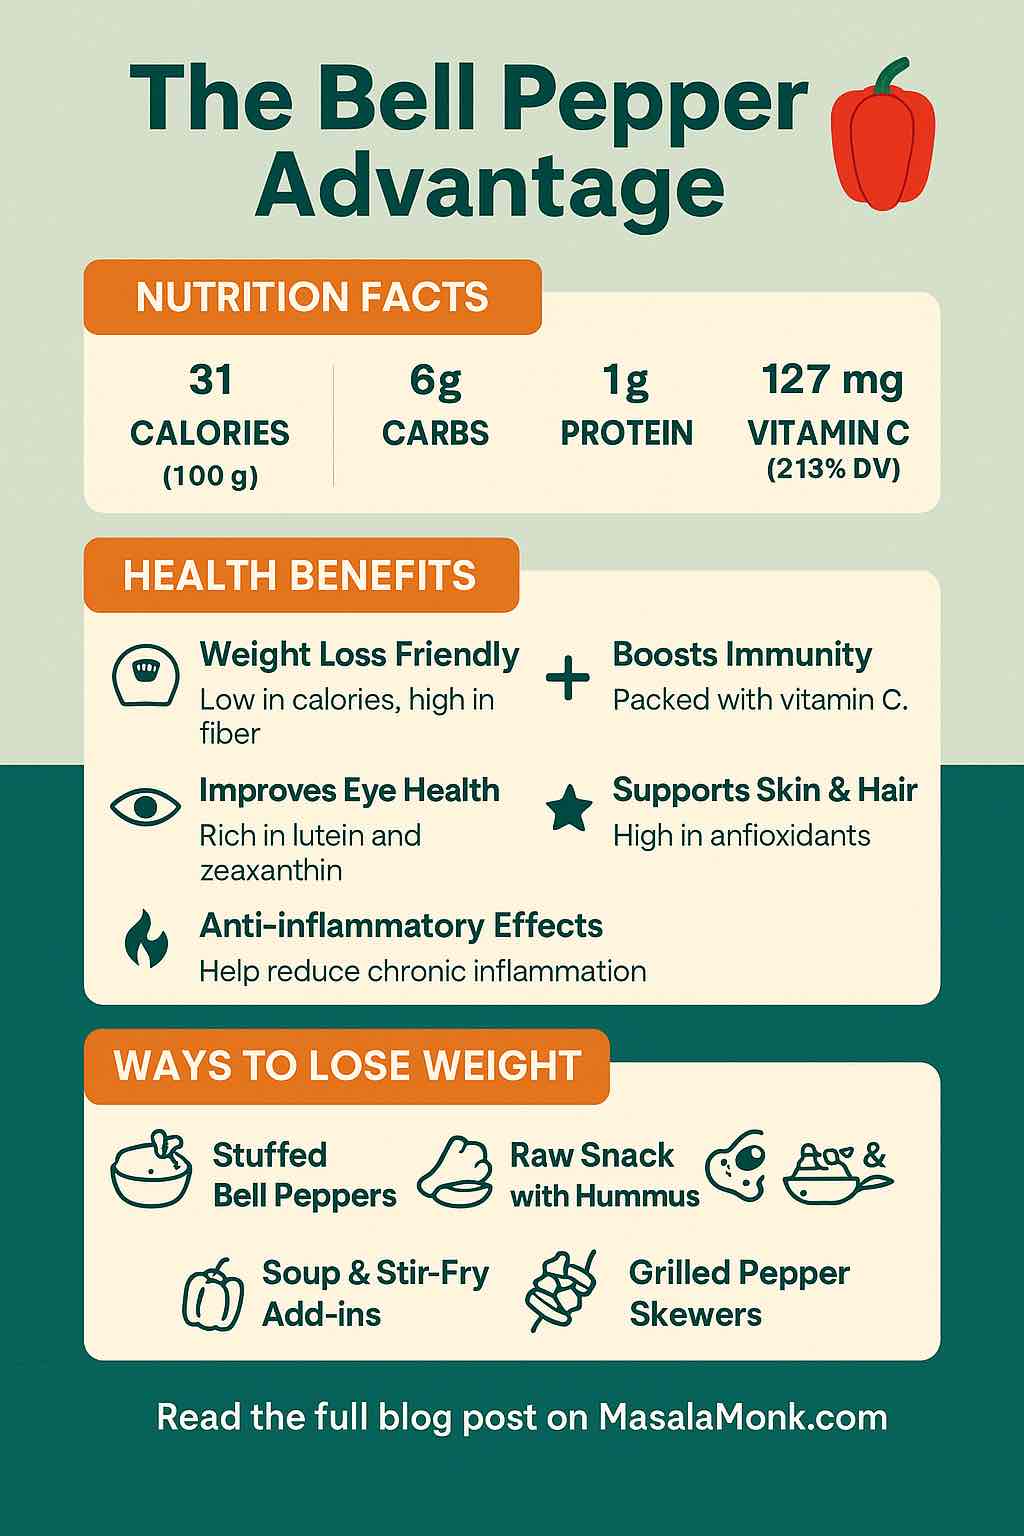
The Bell Pepper – Nutrition, Benefits, and 5 Practical Ways for Weight Loss

Bell Pepper - Nutrition, Benefits

When it comes to weight loss, we often search for exotic superfoods or expensive supplements. But what if a humble, colorful, and delicious vegetable in your local produce aisle could help you trim fat, reduce inflammation, and supercharge your metabolism? Enter the bell pepper.

What Are Bell Peppers?

Bell peppers (Capsicum annuum), also known as sweet peppers, are non-spicy, thick-walled fruits that come in vibrant shades of red, green, yellow, and orange. Unlike their fiery relatives in the Capsicum family, bell peppers are mild, sweet, and exceptionally nutrient-dense.

Nutritional Powerhouse

Here’s what you get in just one cup (about 100g) of raw red bell pepper:

  • Calories: 31
  • Water: ~92%
  • Carbohydrates: 6g (of which 4g are natural sugars)
  • Fiber: 2.1g
  • Protein: 1g
  • Fat: 0.3g
  • Vitamin C: 127mg (213% DV)
  • Vitamin A: 157mcg (19% DV)
  • Potassium: 211mg
  • Folate, Vitamin B6, Lutein, Zeaxanthin, Capsanthin, and Beta-carotene

Red bell peppers, which are fully ripened, have the highest levels of nutrients and antioxidants.

Science-Backed Health Benefits

1. Boosts Immunity and Skin Health

Vitamin C is essential for collagen production, wound healing, and immune function. Bell peppers contain more vitamin C than oranges, making them a powerful ally against seasonal illness and aging skin.

2. Enhances Metabolism and Fat Burning

Bell peppers contain capsiate, a non-spicy cousin of capsaicin, found in chili peppers. Capsiate has been shown in human and animal studies to modestly increase energy expenditure and fat oxidation without the burning sensation of capsaicin.

3. Fights Inflammation and Oxidative Stress

Antioxidants like beta-carotene, lutein, and zeaxanthin help neutralize free radicals. Capsanthin, unique to red bell peppers, has powerful anti-inflammatory and anti-obesity effects.

4. Improves Eye Health

Lutein and zeaxanthin accumulate in the retina and protect against macular degeneration and cataracts. Orange and yellow bell peppers are particularly rich in these carotenoids.

5. Promotes Fullness with Fewer Calories

High water content, dietary fiber, and low calorie density make bell peppers ideal for adding bulk to meals without increasing caloric load.

5 Practical Ways to Use Bell Peppers for Weight Loss

1. Stuffed Bell Peppers

Slice off the tops, remove seeds, and stuff with lean protein like turkey or lentils, brown rice, and herbs. Bake until soft. It’s a complete meal that’s filling, low-calorie, and fiber-rich.

2. Pepper & Hummus Snack Packs

Chop raw bell peppers into sticks and pair with 2 tablespoons of hummus. This crunchy, protein-rich snack keeps you full and curbs junk food cravings.

3. Egg & Pepper Breakfast Scramble

Saute diced bell peppers with onions and spinach. Add whisked eggs or tofu and scramble for a colorful, protein-packed breakfast that keeps you satisfied for hours.

4. Low-Cal Stir Fry Base

Bell peppers add volume, texture, and nutrition to stir fries. Use them with lean meats, tofu, or legumes in a light soy or garlic sauce over cauliflower rice for a low-carb dinner.

5. Grilled or Roasted as a Side Dish

Roast or grill peppers with a drizzle of olive oil and your favorite spices. Serve as a fiber-rich, antioxidant-loaded side dish that enhances any meal.

Cooking Tips to Maximize Benefits

  • Eat some raw to preserve vitamin C.
  • Cook lightly to boost carotenoid absorption.
  • Pair with healthy fats like olive oil or avocado to enhance nutrient uptake.
  • Mix colors to get a spectrum of nutrients and flavors.

Final Thoughts

Bell peppers aren’t just a colorful garnish. They’re a scientifically supported, budget-friendly powerhouse for weight loss and overall health. With their unique mix of fiber, water, antioxidants, and metabolism-boosting compounds, incorporating bell peppers into your daily meals is a simple yet effective way to support a leaner, healthier you.

So next time you shop, grab a rainbow of bell peppers and start reaping their delicious and transformative benefits.


📌 FAQs

1. Are bell peppers good for weight loss?
Yes. Bell peppers are low in calories, high in fiber and water, and contain metabolism-boosting compounds like capsiate, which can help support fat loss.

2. Which bell pepper is healthiest?
Red bell peppers are the most nutrient-dense. They’re fully ripened and contain the highest levels of vitamin C, beta-carotene, and capsanthin.

3. Can I eat bell peppers every day?
Absolutely. Eating bell peppers daily can support digestion, immunity, eye health, and weight management. Just vary the colors to maximize nutrient intake.

4. Do bell peppers burn belly fat?
While no food targets belly fat specifically, bell peppers contain compounds like capsiate and fiber that may help reduce overall fat and support metabolism.

5. How do I store bell peppers for freshness?
Keep unwashed bell peppers in the fridge’s crisper drawer. Use within 5–7 days for optimal freshness, or freeze sliced peppers for longer use.

6. Should I eat bell peppers raw or cooked?
Both are beneficial. Raw peppers preserve vitamin C, while cooking helps absorb carotenoids. A mix of both is ideal.

7. Can I eat bell peppers at night?
Yes. They are easy to digest and low in calories, making them a great late-night snack when paired with protein like hummus or cottage cheese.

8. Are green bell peppers less nutritious?
Green peppers are less sweet and contain fewer antioxidants than red or orange ones but still provide fiber, vitamin C, and B6.

9. Can bell peppers cause bloating or gas?
Some people with sensitive stomachs may experience mild bloating. Start with smaller amounts and cook them to reduce potential discomfort.

10. Are bell peppers keto-friendly?
Yes. Bell peppers are relatively low in carbs (~6g per 100g), making them suitable for most low-carb and ketogenic diets in moderation.








