Posted on Leave a comment

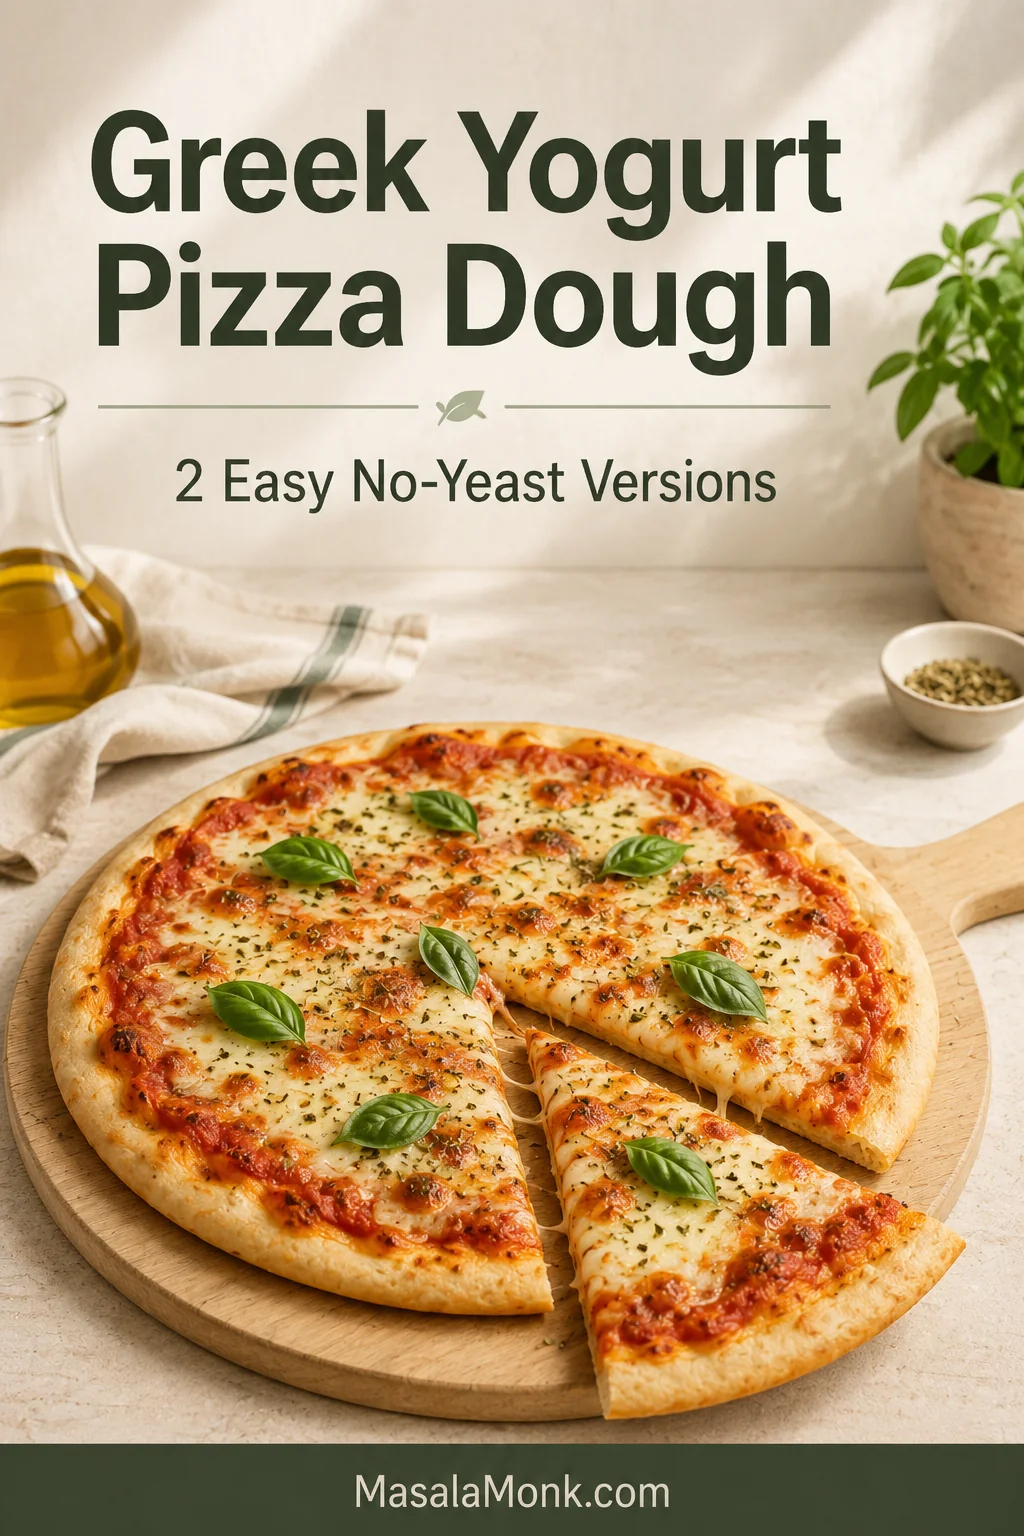
Greek Yogurt Pizza Dough: 2 Easy No-Yeast Versions

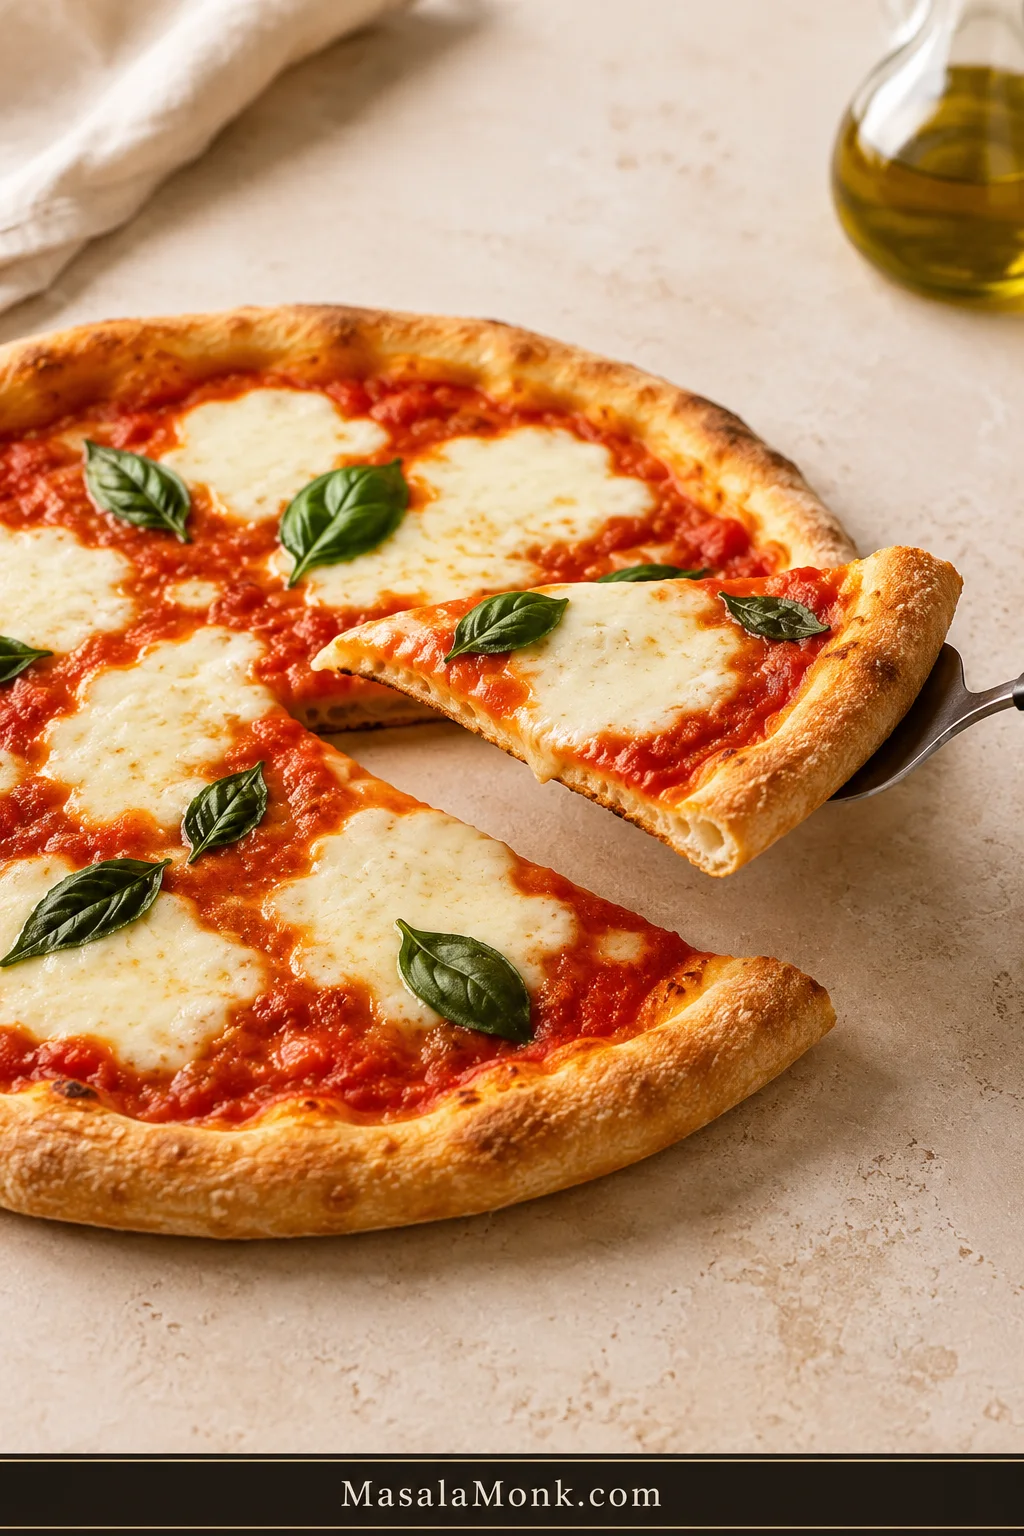
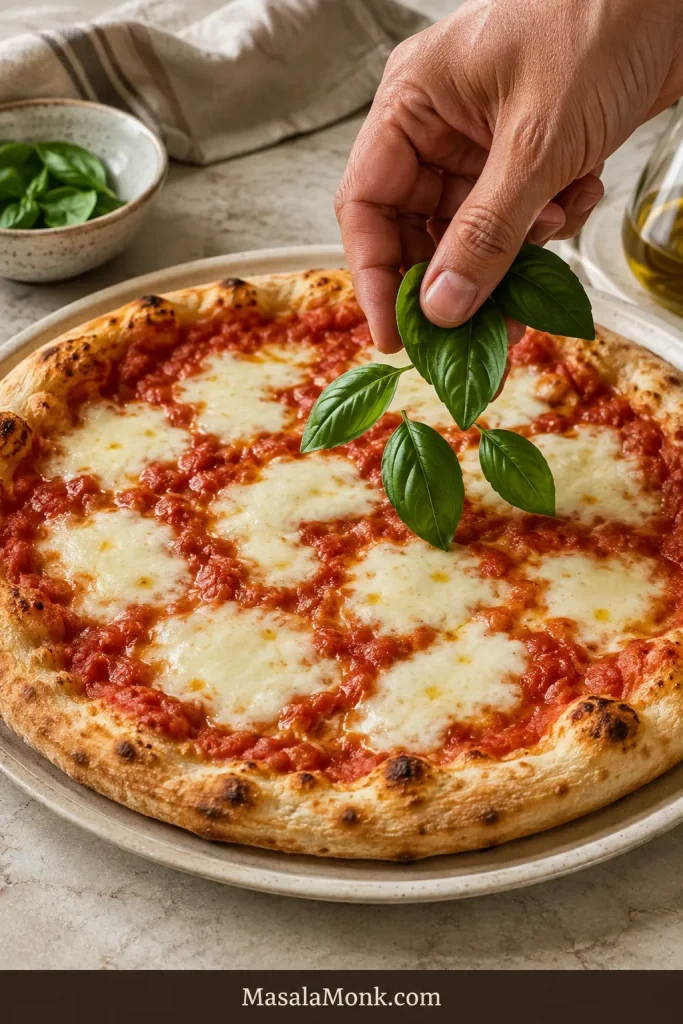
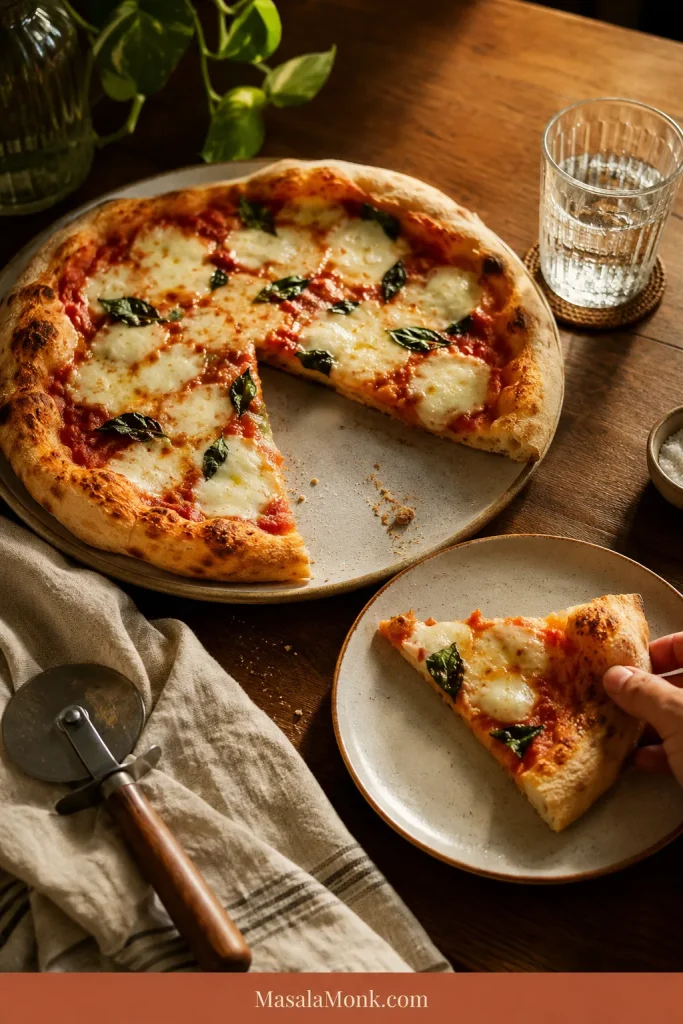
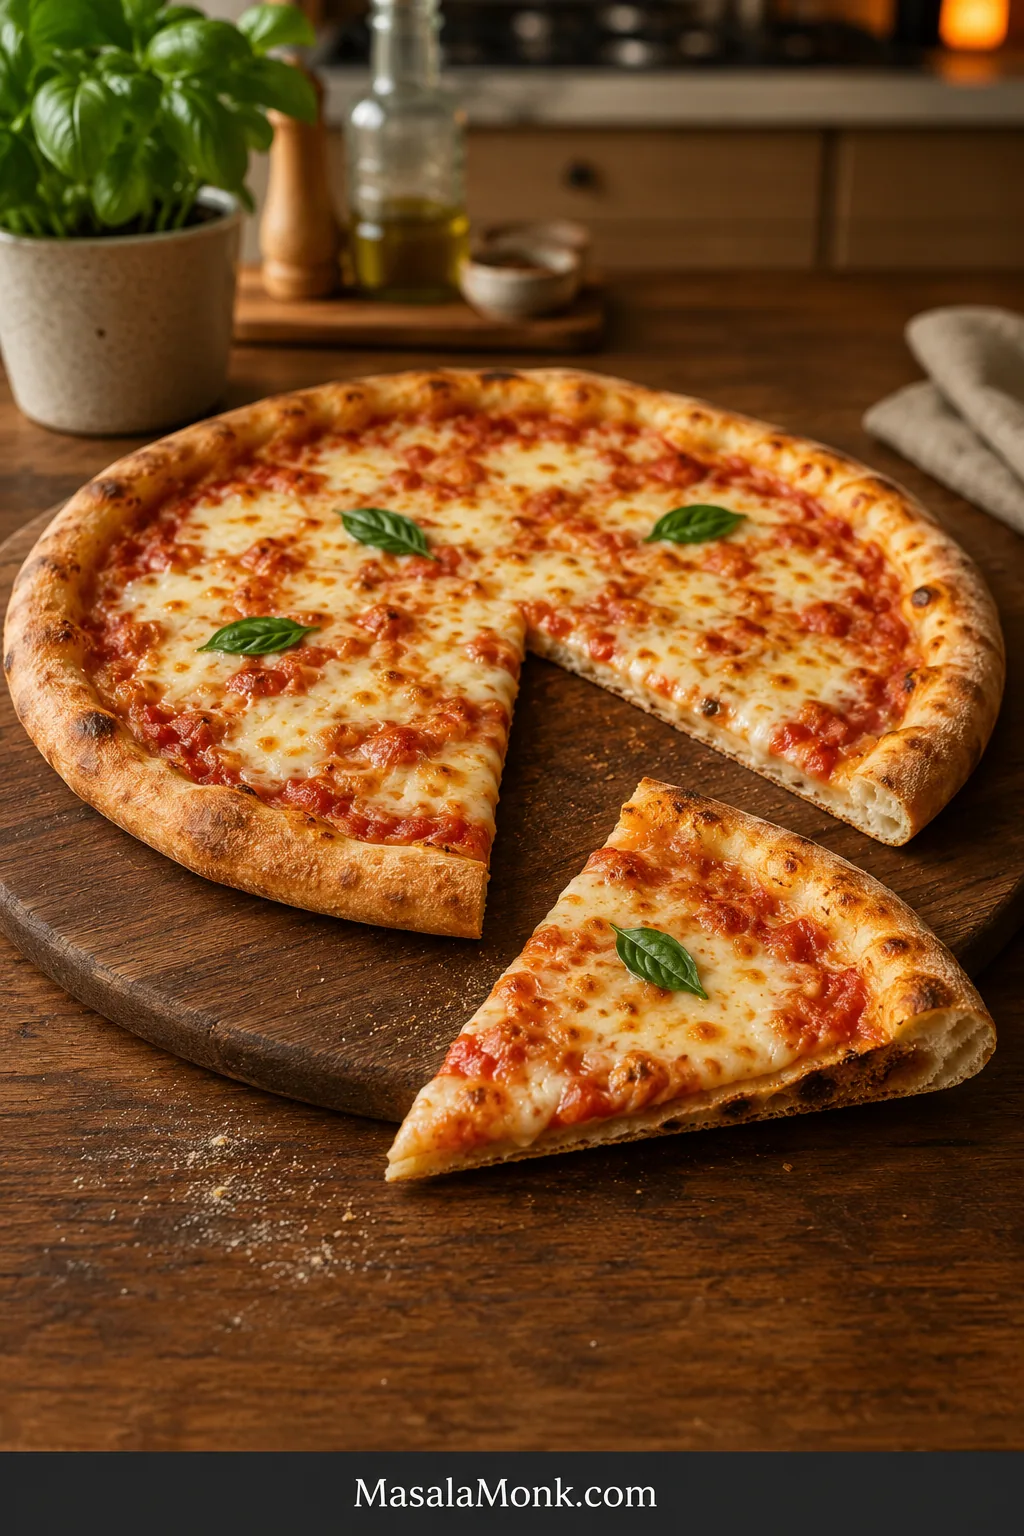
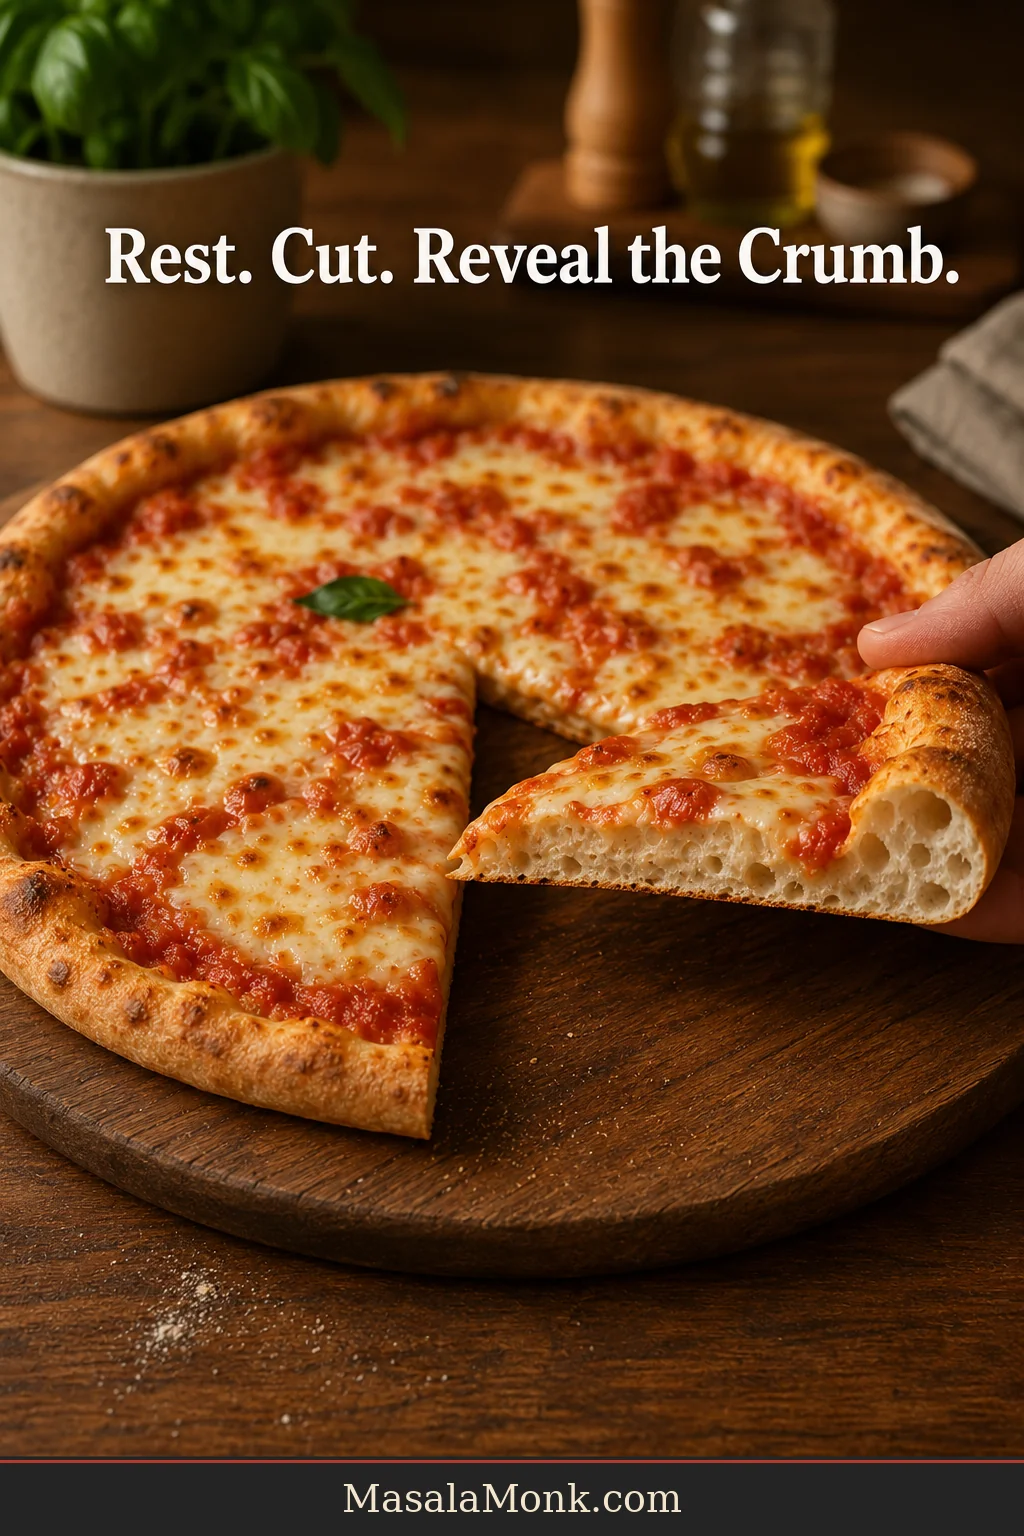
Round homemade pizza with tomato sauce, melted cheese, basil leaves and one slice pulled away.

Pizza cravings rarely arrive with two hours of notice.

This Greek yogurt pizza dough is for the night when the sauce, cheese and appetite are ready, but no dough is rising on the counter. Thick Greek yogurt and flour come together in minutes, there is no yeast to activate, and dinner does not need to become an afternoon project.

The crust bakes up soft through the center, lightly chewy at the rim and crisp around the edges. It is not as stretchy or deeply flavored as an overnight yeast dough, but it gives you something that matters more tonight: genuinely good homemade pizza without the wait.

The dough is ready in about 15 minutes, including its short rest. With a heated metal baking sheet, the whole pizza usually reaches the table in about 35–45 minutes. A stone or steel needs a longer head start.

Quick Answer

Mix all-purpose flour with baking powder and salt, then add thick plain Greek yogurt until a soft dough forms. Rest it for five minutes, roll it into an 11–12-inch crust and par-bake at 450°F (230°C) for 5–6 minutes. Add the toppings and bake for another 6–8 minutes, until the cheese bubbles and the base develops golden-brown patches. For the true two-ingredient version, use self-rising flour and begin with slightly less yogurt.

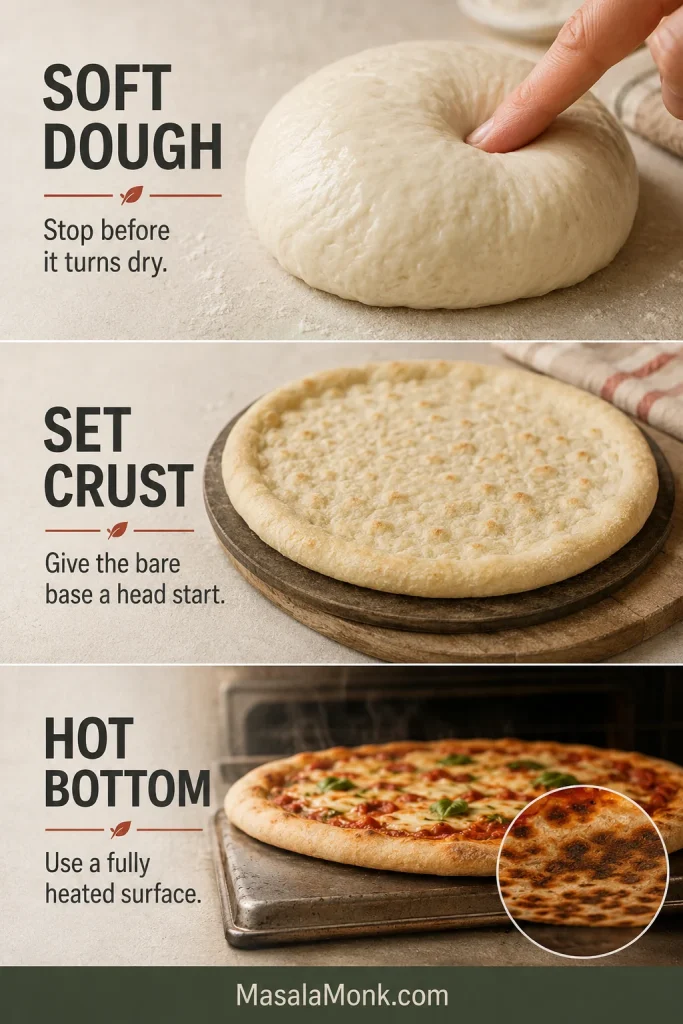
Soft dough. Set crust. Hot bottom. Keep the dough slightly tacky, give the bare crust a short first bake before wet toppings and use a fully heated baking surface.

Greek Yogurt Pizza Dough Recipe

Easy No-Yeast Greek Yogurt Pizza Dough

A soft, lightly chewy pizza crust with crisp edges and enough structure to carry sauce and bubbling cheese—all without yeast or rising time.

Active prep10 minutesDough rest5 minutes
Bake11–14 minutesTable-ready with metal sheetAbout 35–45 minutes
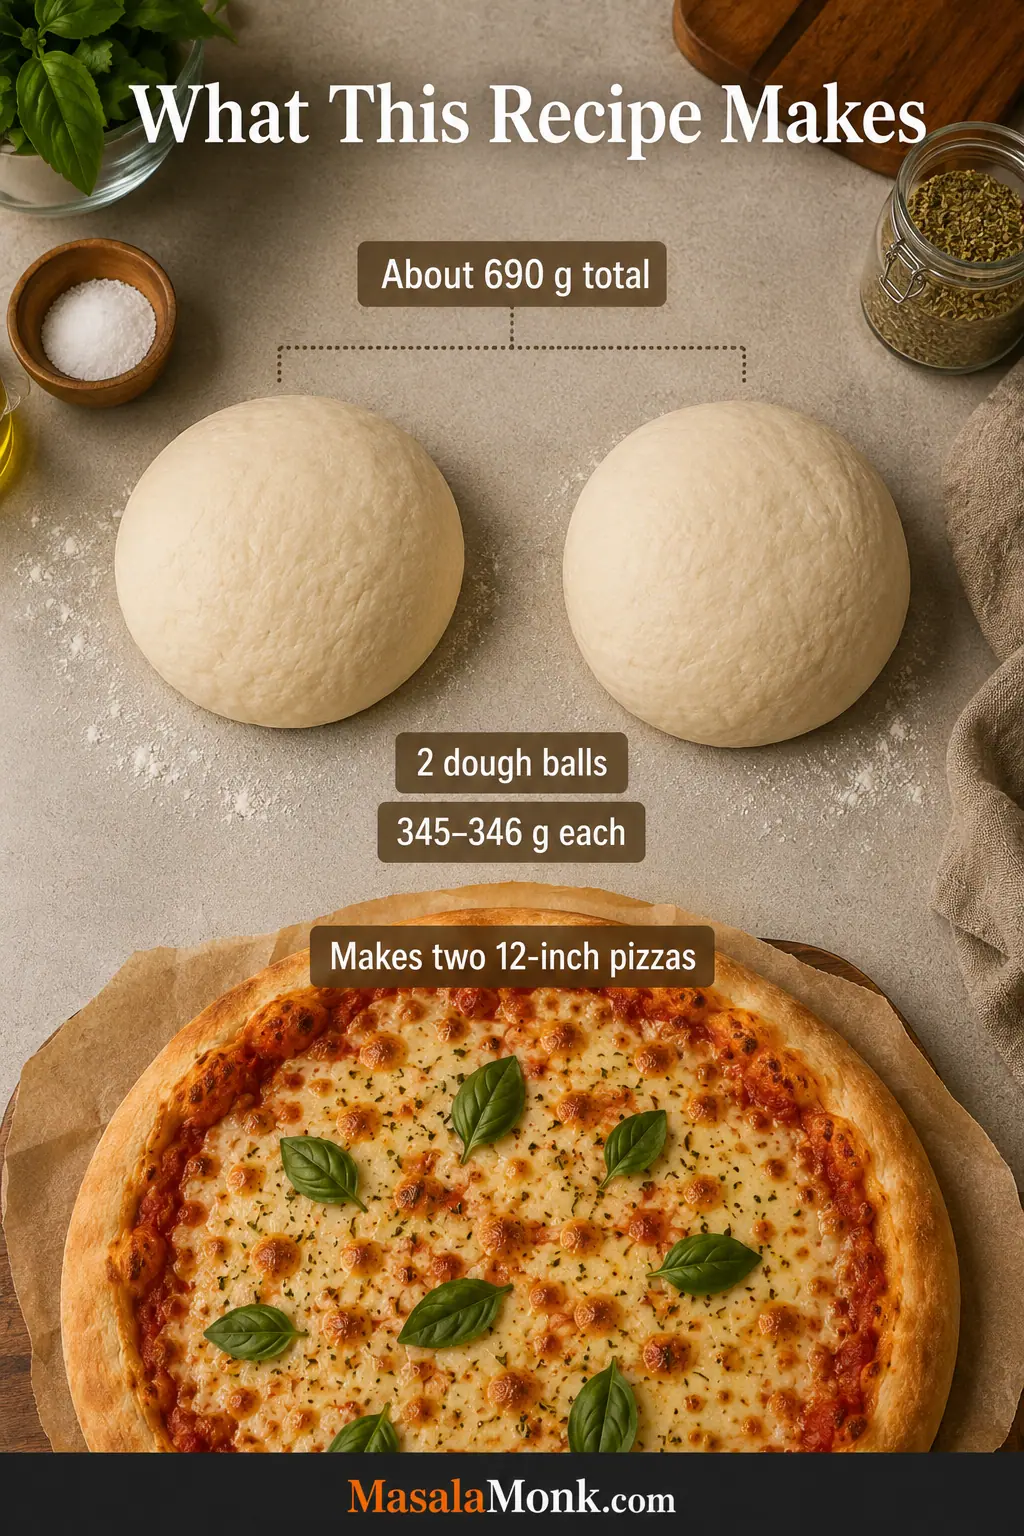
YieldOne 11–12-inch pizzaServes2 as a meal
Oven450°F (230°C)MethodPar-baked crust

Baseline method in this guide: Thick 2% Greek yogurt, the all-purpose flour formula, an 11–12-inch crust and a fully heated heavy metal sheet give the clearest route to a tender middle, crisp edge and browned base.

Choose Your Flour

VersionBest forMain advantage
All-purpose flourThe easiest first batchFull control over the salt and baking powder
Self-rising flourThe shortest ingredient listA true two-ingredient dough

Useful Equipment

Medium mixing bowl, spoon or spatula, rolling pin, heat-rated parchment, heavy metal baking sheet, wide spatula and wire rack.

All-Purpose-Flour Dough

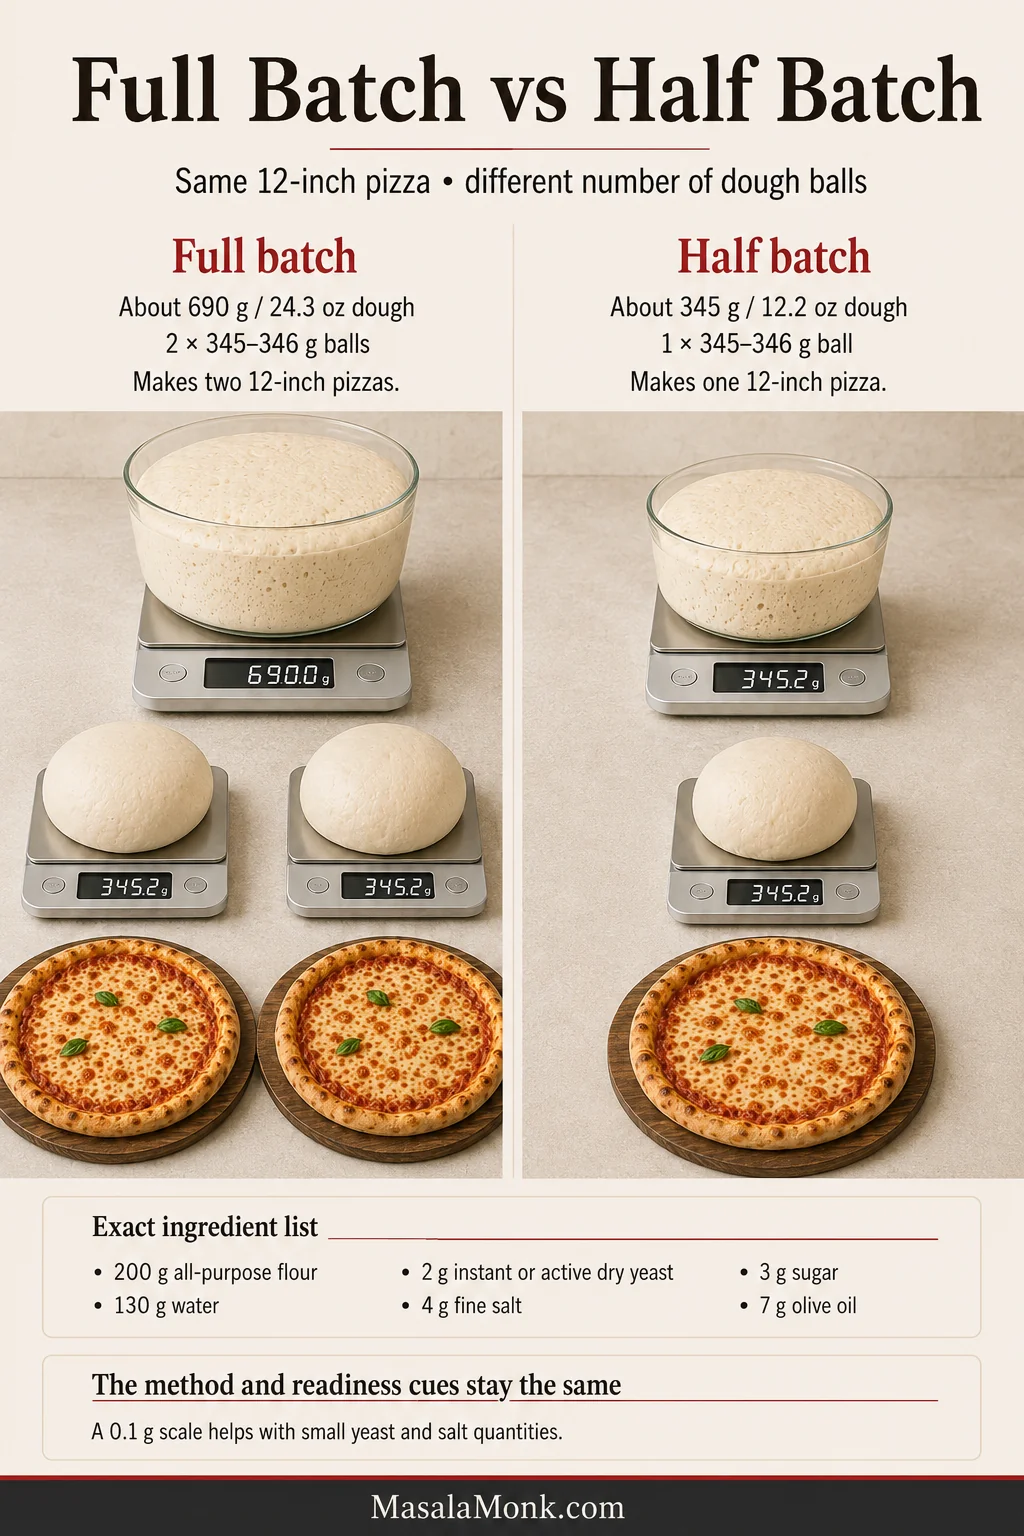
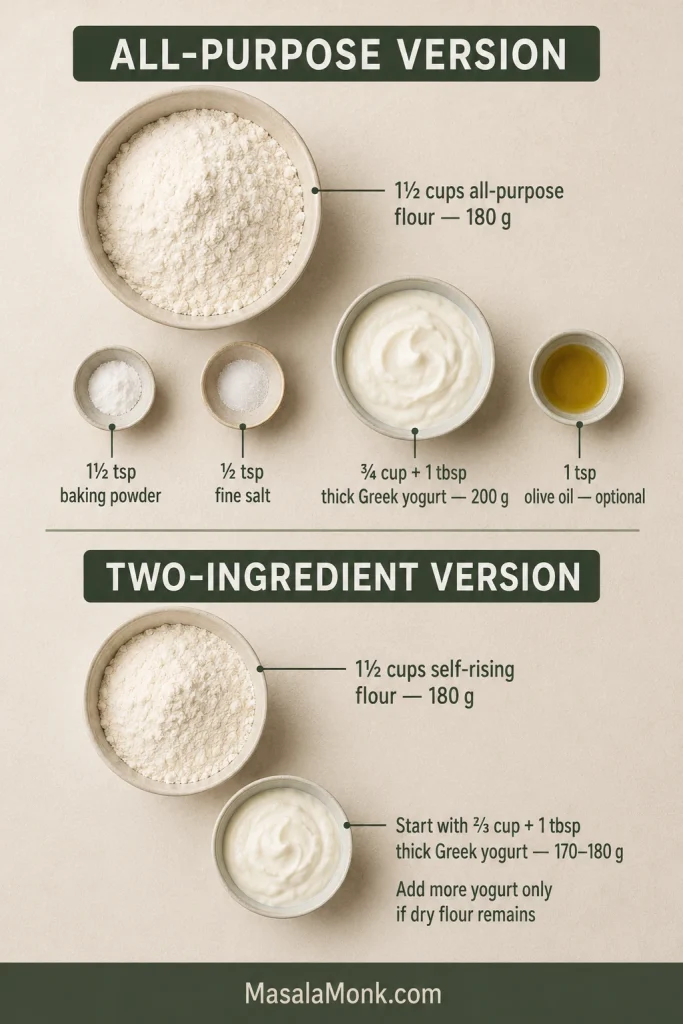
  • 1½ cups all-purpose flour (180 g / 6.3 oz), plus up to 2 tablespoons (20 g / 0.7 oz) if needed
  • 1½ teaspoons baking powder (about 6 g)
  • ½ teaspoon fine salt (about 3 g)
  • ¾ cup plus 1 tablespoon thick plain Greek yogurt (200 g / 7.1 oz), preferably 2%
  • 1 teaspoon olive oil (5 ml), optional

Two-Ingredient Self-Rising Variation

Use this variation instead of the all-purpose ingredient list:

  • 1½ cups self-rising flour (180 g / 6.3 oz)
  • Start with about ⅔ cup plus 1 tablespoon thick plain Greek yogurt (170–180 g / 6–6.3 oz)
  • Add more yogurt a spoonful at a time, up to about ¾ cup plus 1 tablespoon (200 g / 7.1 oz), only until the final dry patches disappear

Do not add separate baking powder or salt. Place the self-rising flour in the bowl and, at Step 3, begin with the lower yogurt amount.

Toppings for One 11–12-Inch Pizza

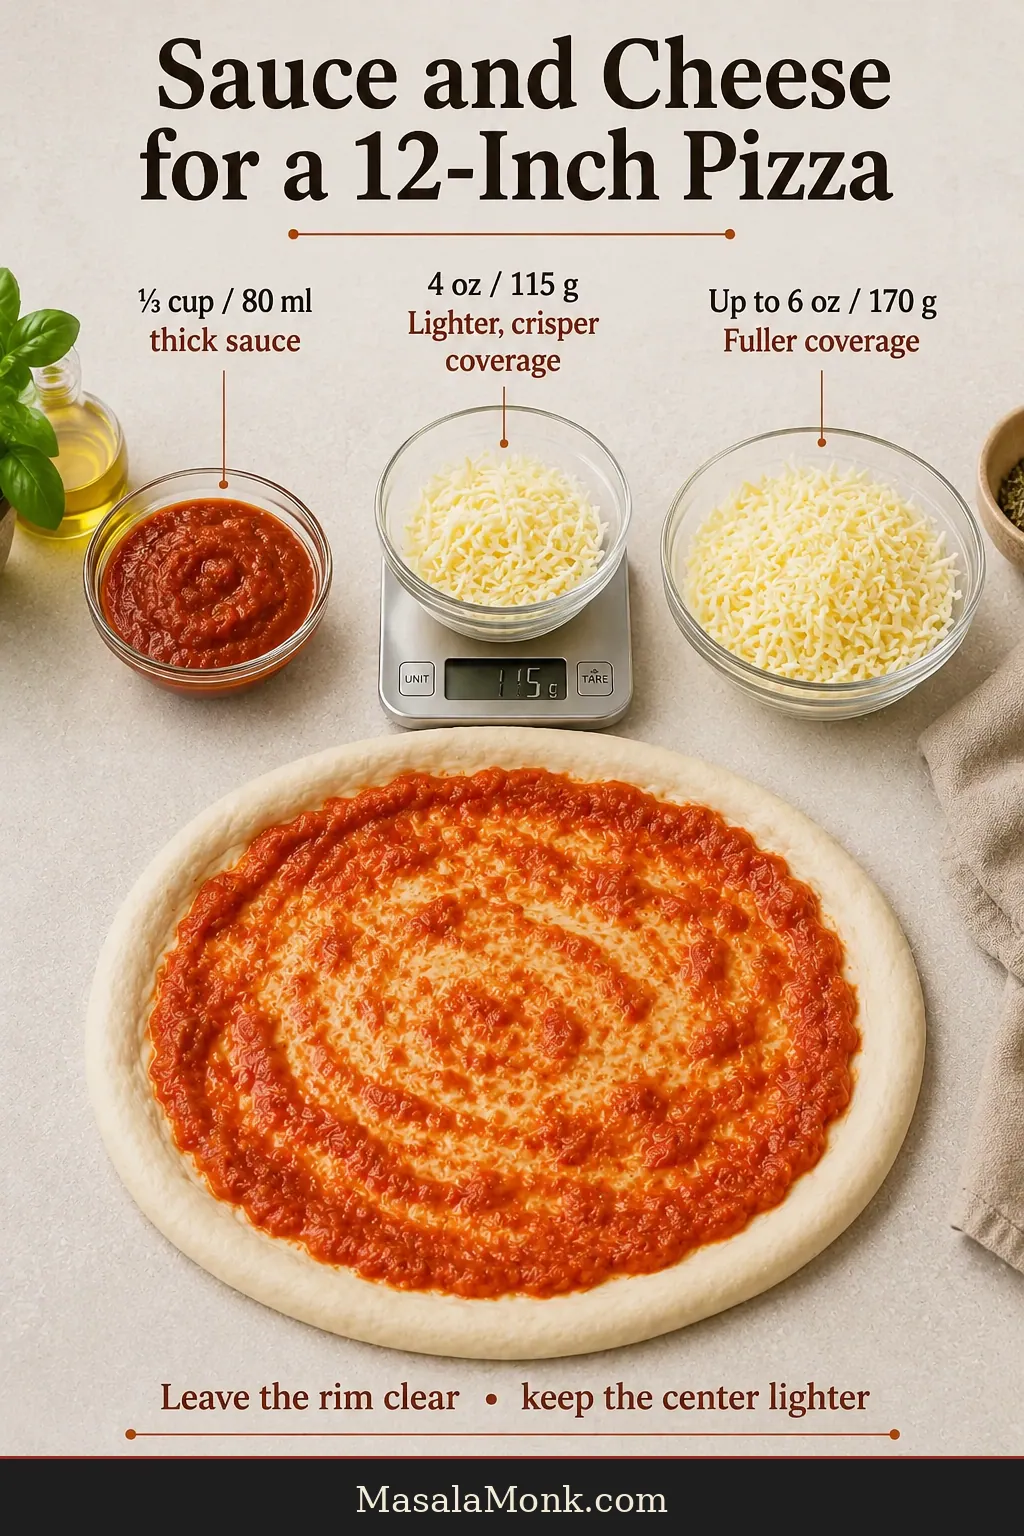
  • ¼ cup thick pizza sauce or marinara (60 ml)
  • ¾ cup shredded low-moisture mozzarella (80–90 g / 2.8–3.2 oz)
  • Up to ½ cup cooked or well-drained toppings
  • Olive oil, oregano, chili flakes or grated Parmesan for the rim, optional

Make and Rest the Dough

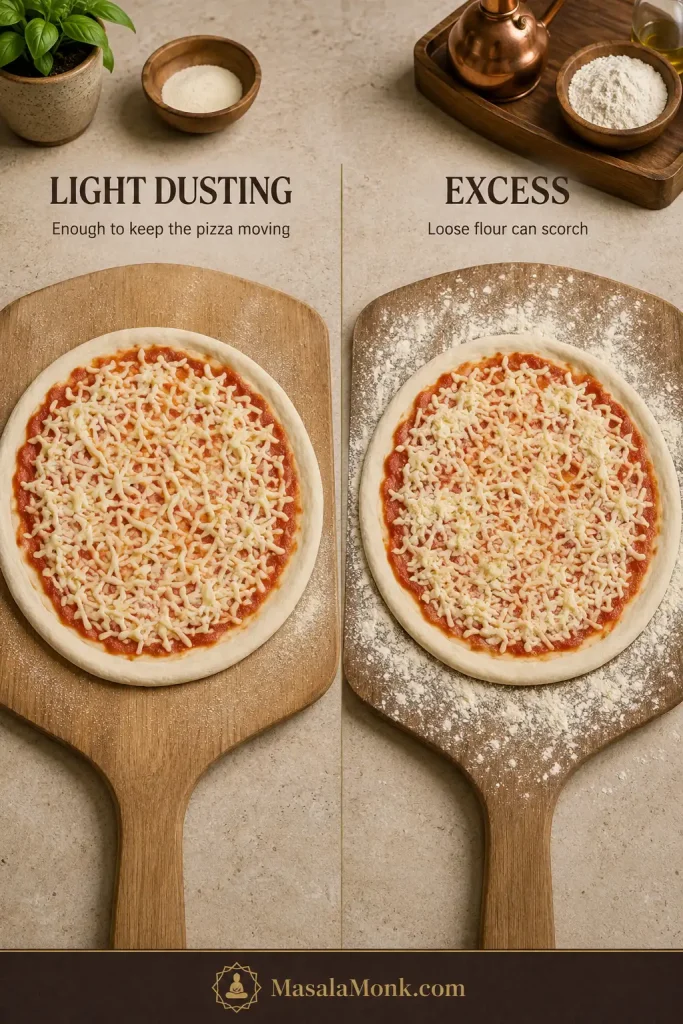
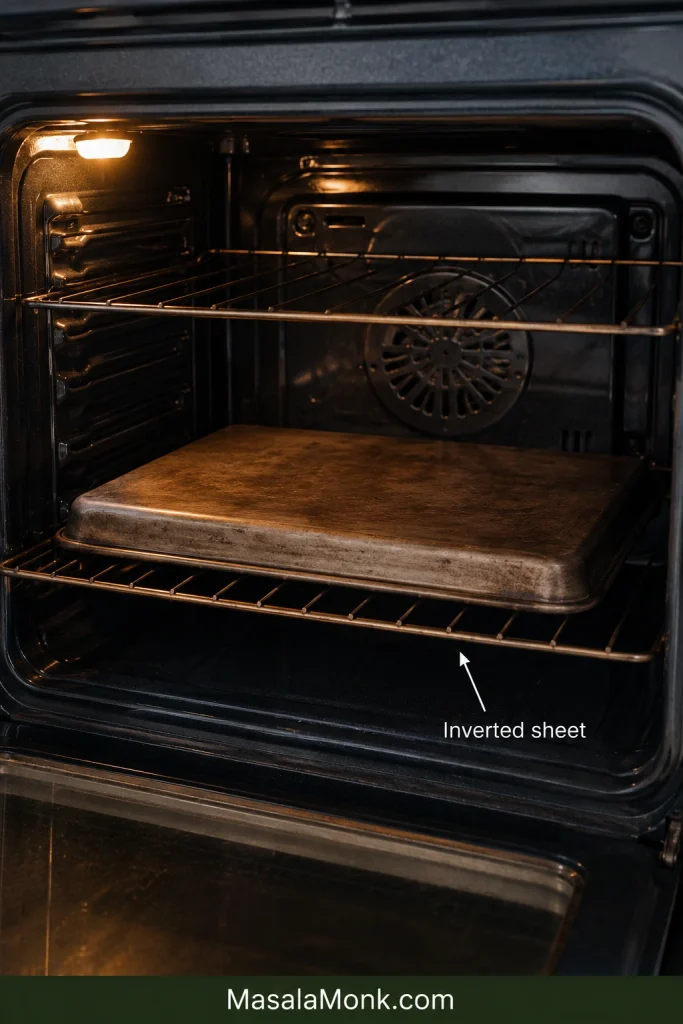
  1. Heat the oven and metal sheet. Place a rack in the lower-middle of the oven. Turn a heavy metal baking sheet upside down and heat it at 450°F (230°C). Use it once the oven is fully heated, or give it another 5–10 minutes for stronger browning.
  2. Mix the dry ingredients. Whisk the all-purpose flour, baking powder and salt in a medium bowl.
  3. Add the yogurt. Stir in about 180 g yogurt and the optional olive oil. Add the remaining yogurt a spoonful at a time, stopping when the last dry patches disappear. For the self-rising variation, begin with 170–180 g and add more only as needed.
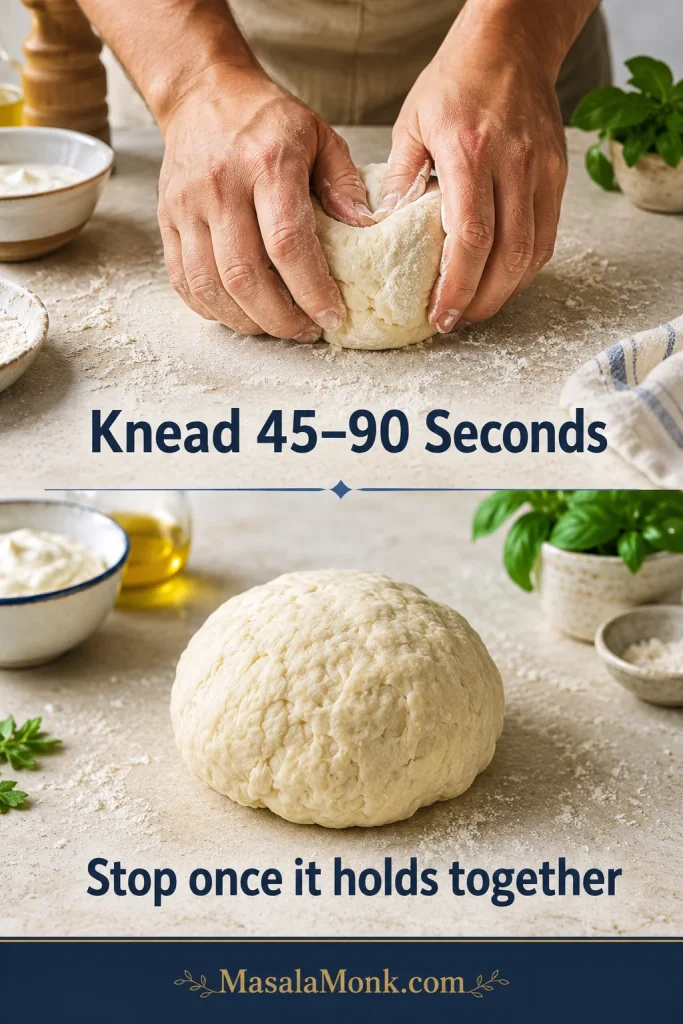
  4. Bring the dough together. Mix until a rough dough forms. Turn it onto a lightly floured surface and knead for 45–90 seconds, just until it holds together and looks mostly smooth.
  5. Rest, then assess. Cover the dough for 5 minutes. If it leaves wet paste on your fingers, add flour 1 tablespoon (8–10 g) at a time. If it cracks or refuses to hold together, add yogurt 1 teaspoon (about 5 g) at a time.

Shape and Par-Bake the Crust

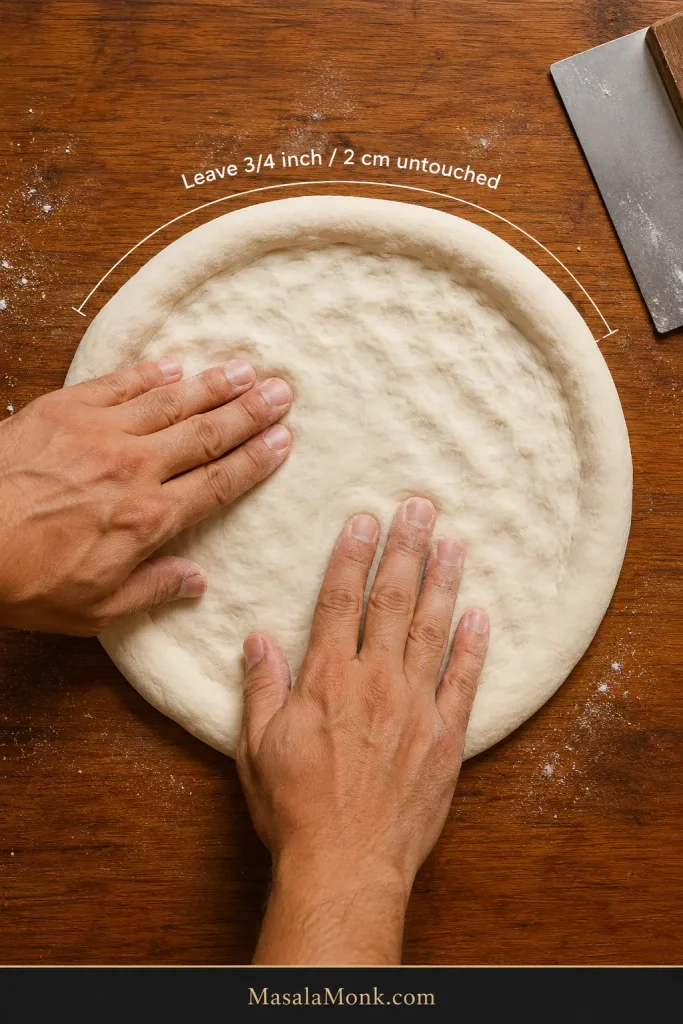
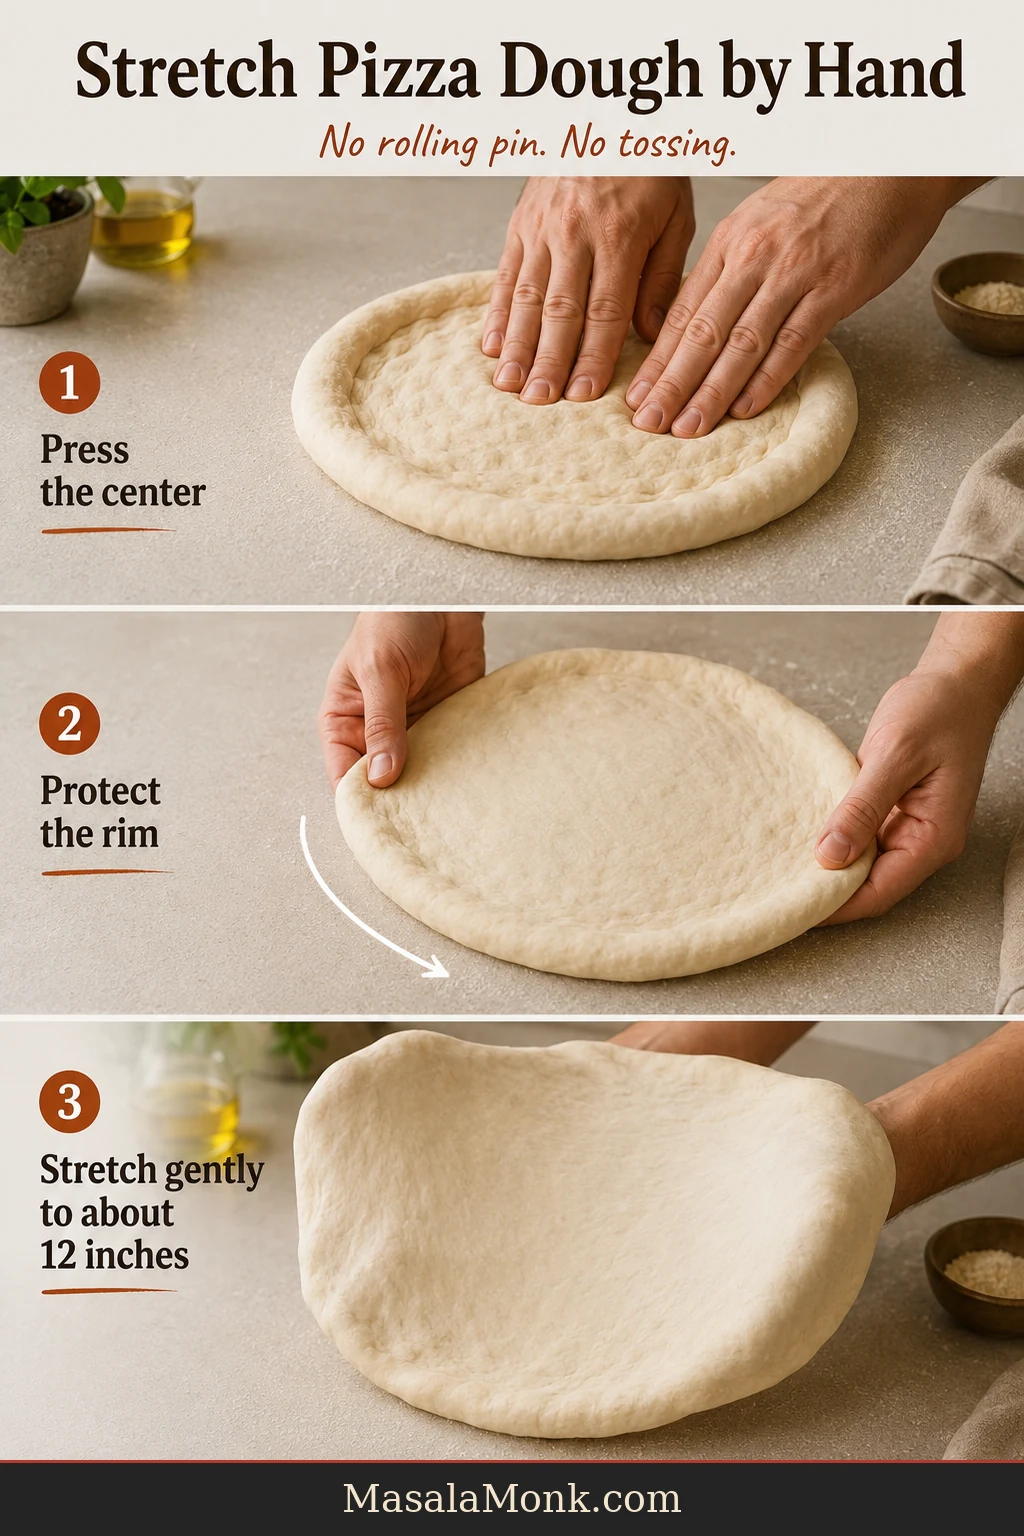
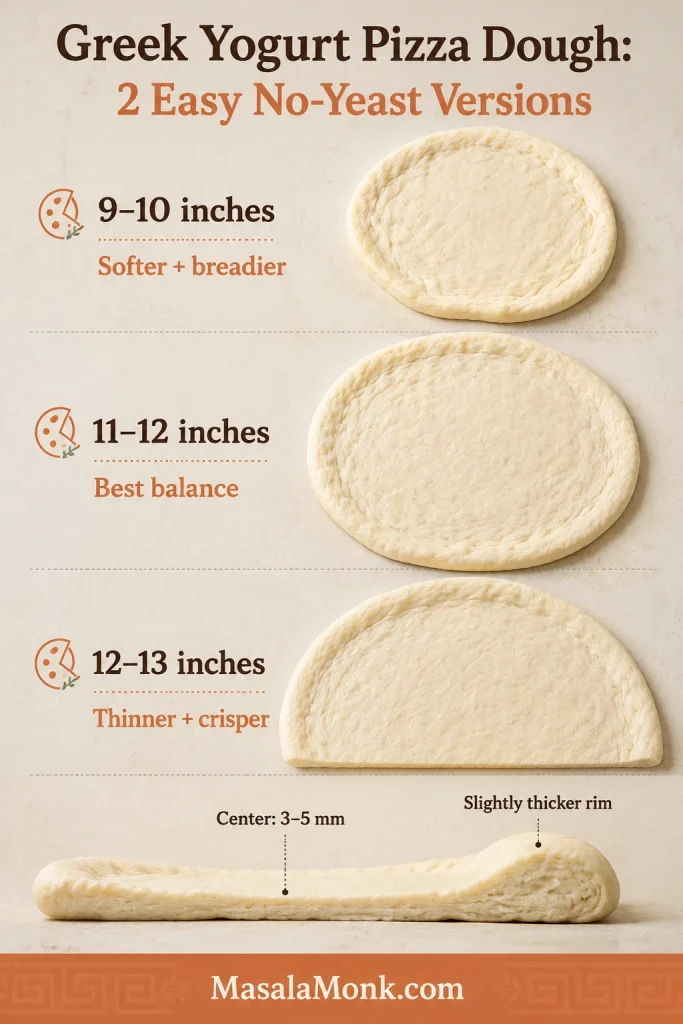
  1. Shape the crust. Place the dough on parchment rated for at least 450°F (230°C), or use a lightly floured peel or inverted tray. Roll or press it into an 11–12-inch circle, with a center about ⅛–3/16 inch (3–5 mm) thick and a slightly thicker rim.
  2. Give the bare crust a head start. Pierce the center lightly with a fork, avoiding the rim. Transfer it to the hot surface and bake for 5–6 minutes. It will still look pale; the surface only needs to look dry and firm enough to hold the toppings.

Top, Finish and Cool

  1. Add the toppings. Spread the sauce thinly, leave a visible rim and avoid crowding the center. Add the cheese and any cooked or well-drained toppings.
  2. Finish baking. Bake for another 6–8 minutes, until the cheese bubbles, the rim turns golden and the base develops browned patches. Near the end, the cheese will bubble more actively and the exposed rim will begin to smell toasted.
  3. Cool briefly. Transfer the pizza to a wire rack for 2 minutes before slicing. This lets steam escape so the bottom stays crisp.

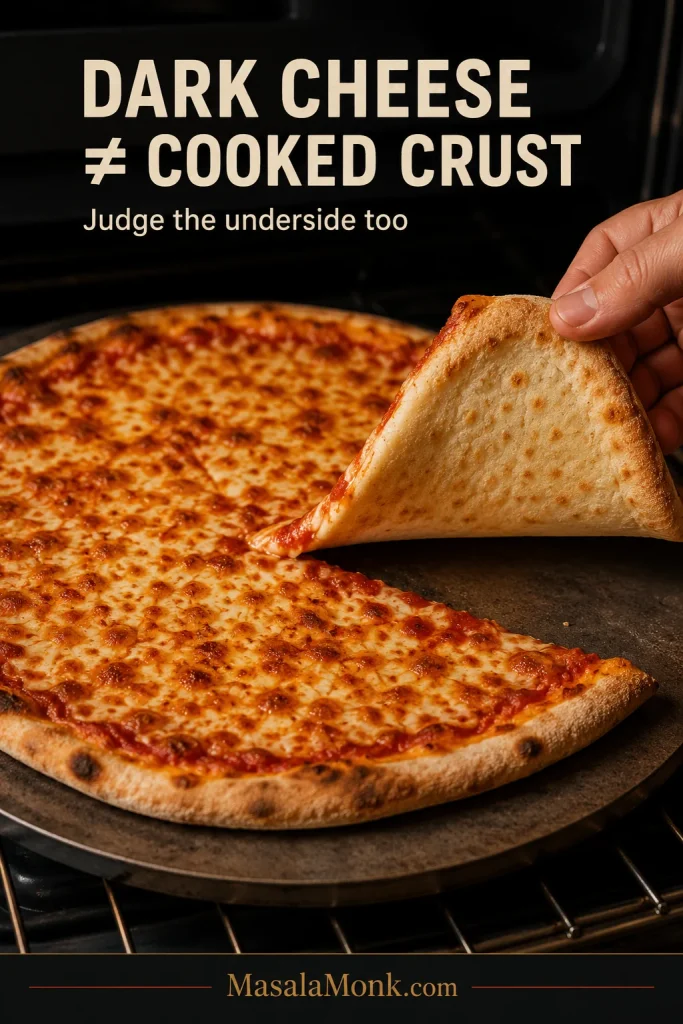
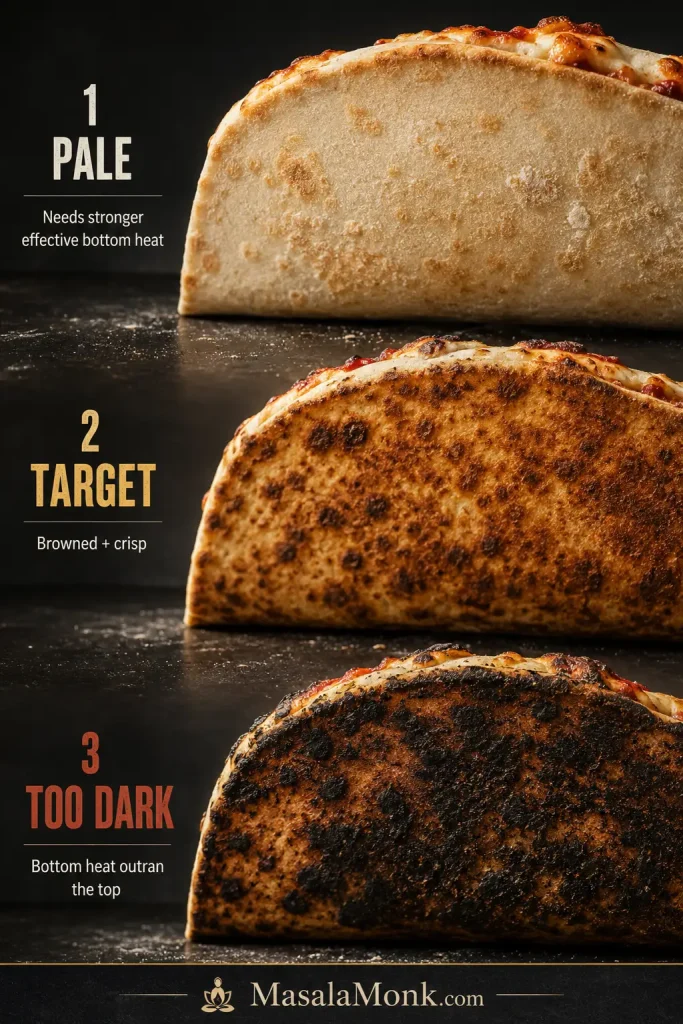
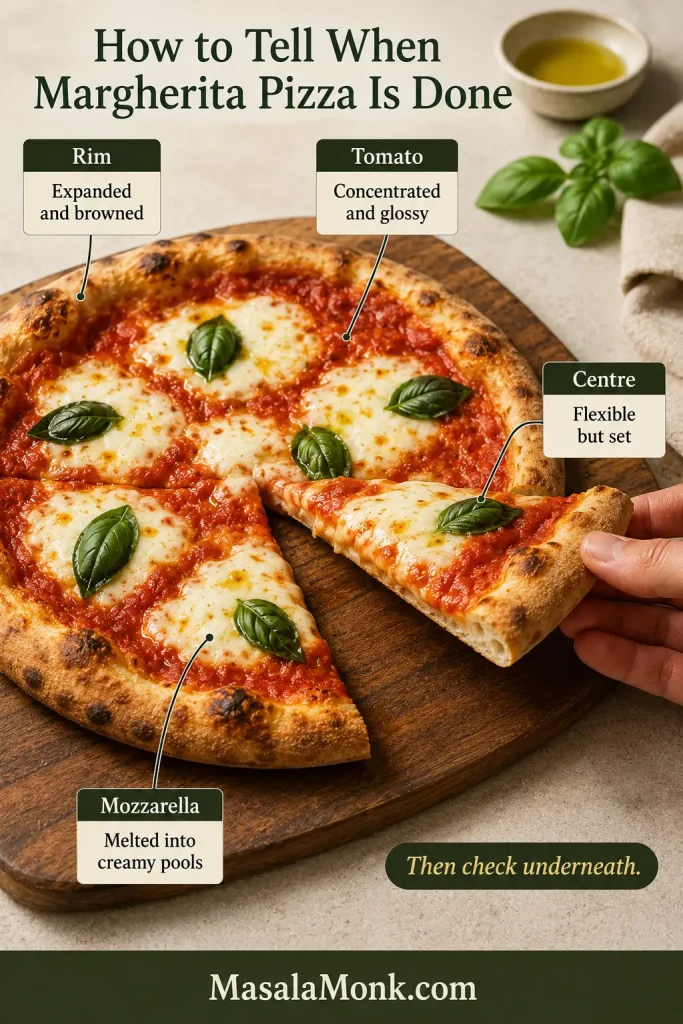
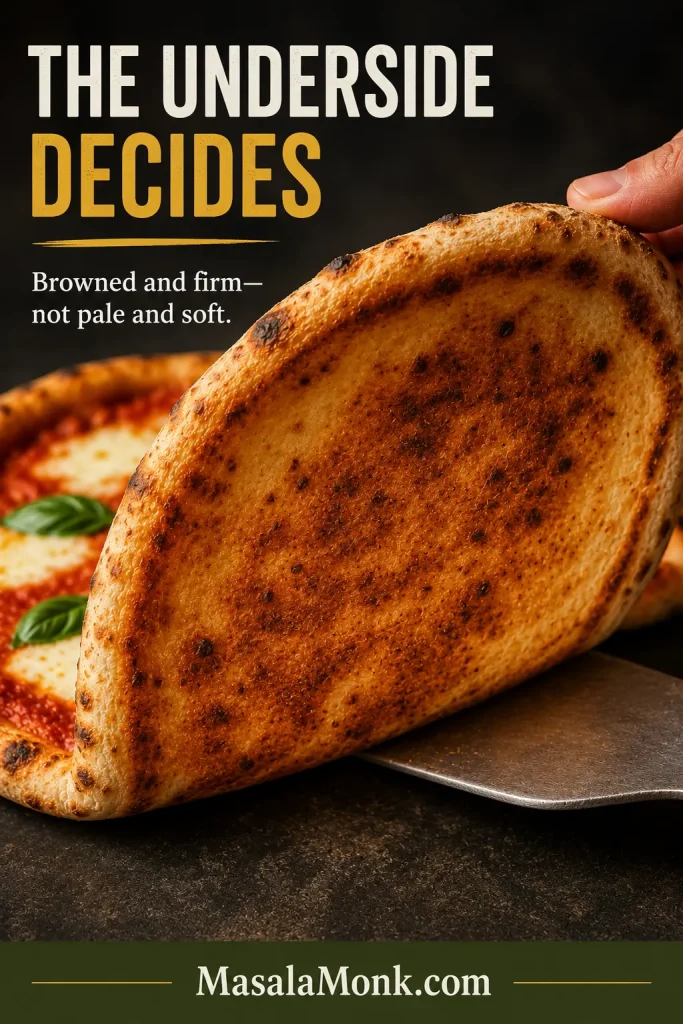
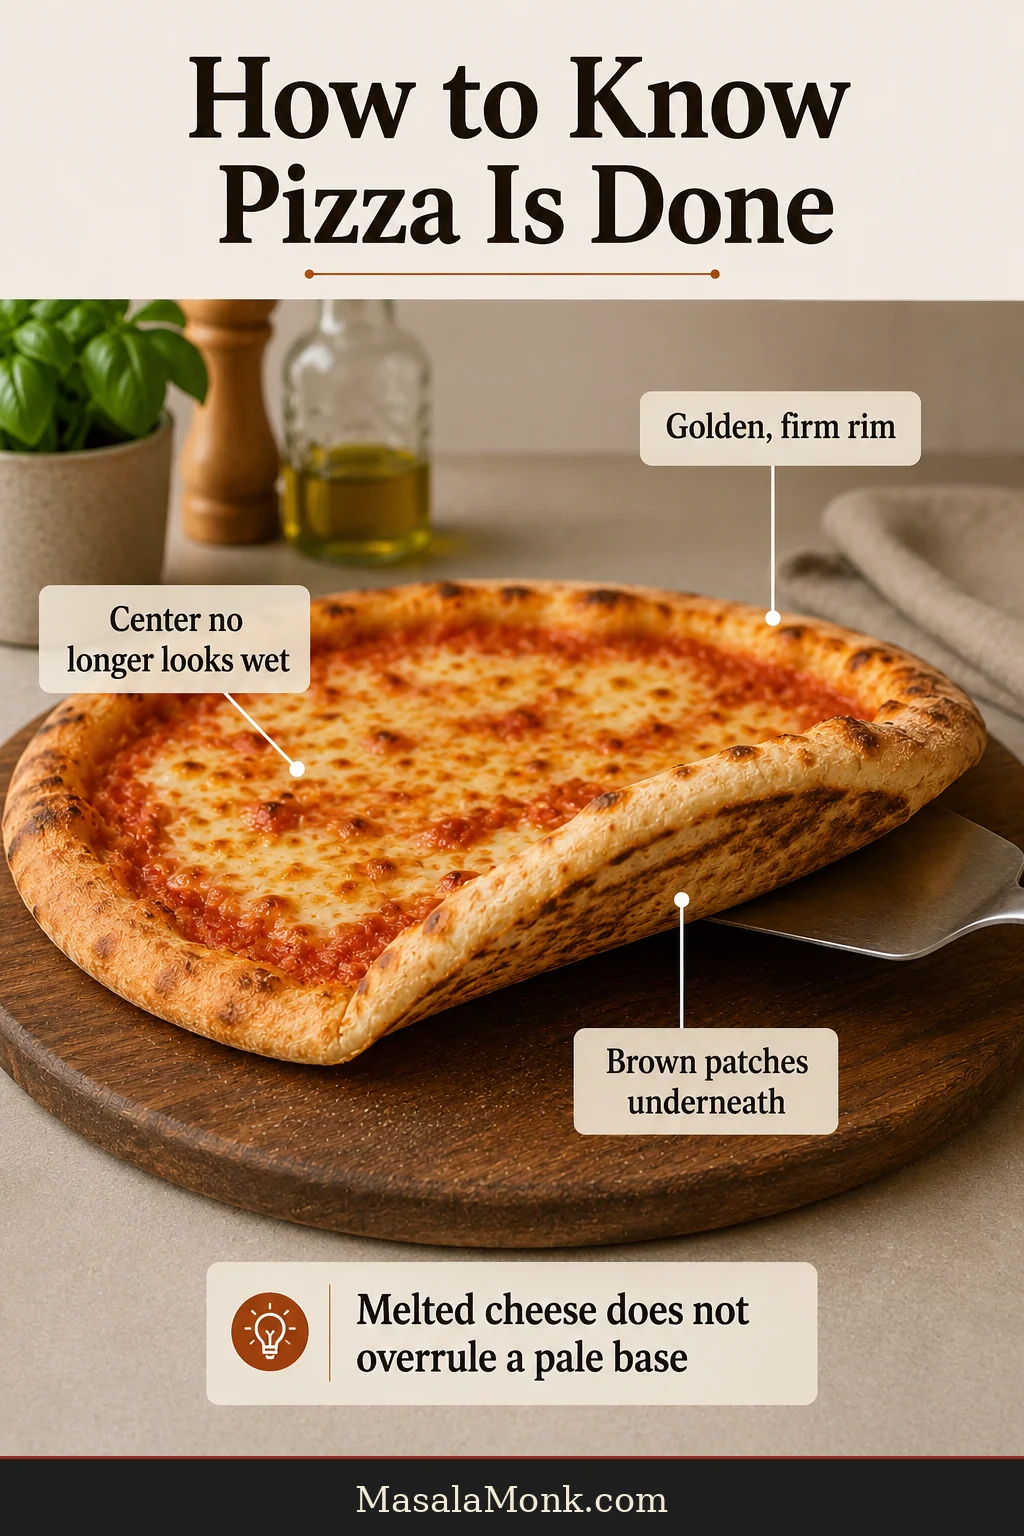
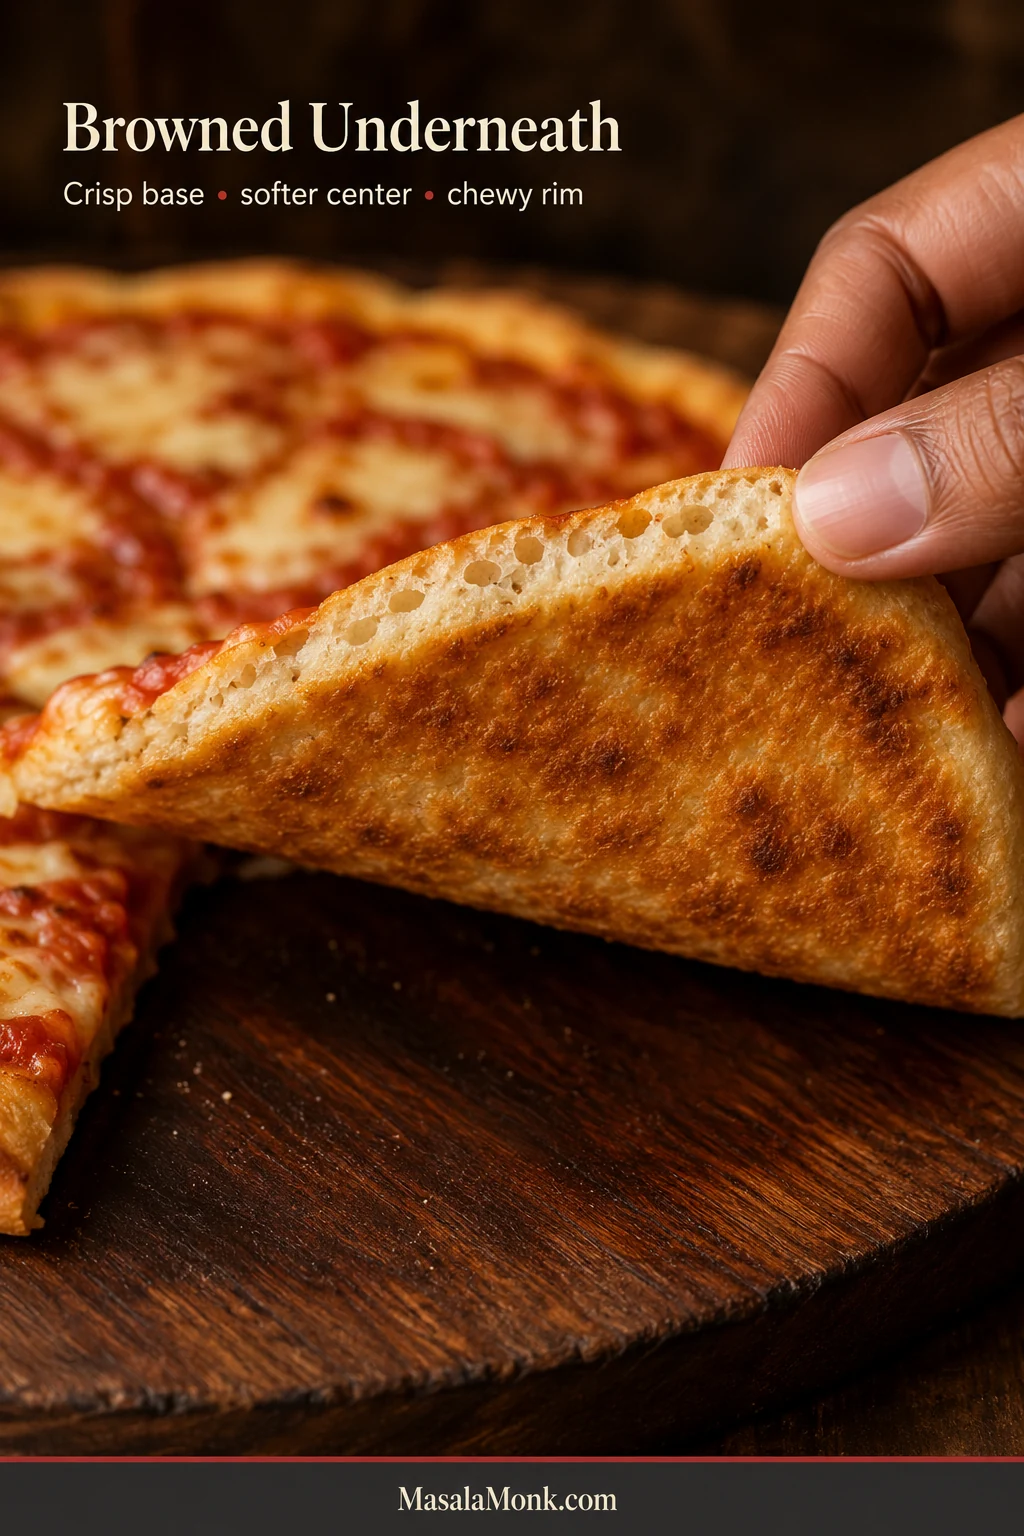
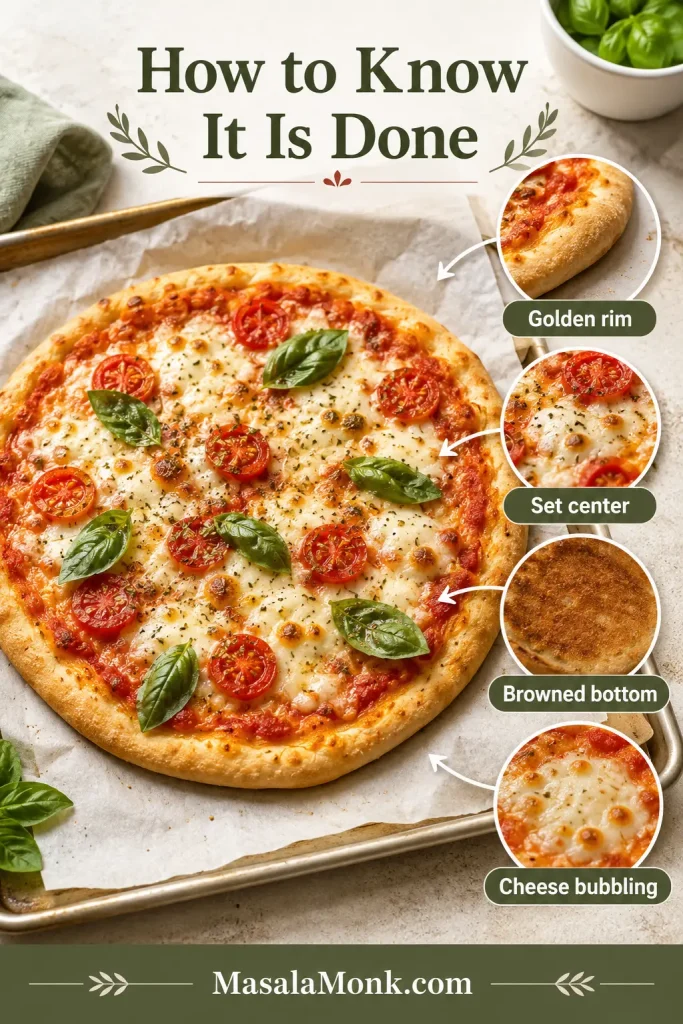
What success looks like: Lift an edge with a wide spatula. The base should show golden-brown patches, and the center should lift with the slice instead of folding like wet dough. After cutting, the middle should look set rather than wet or shiny, while remaining tender.

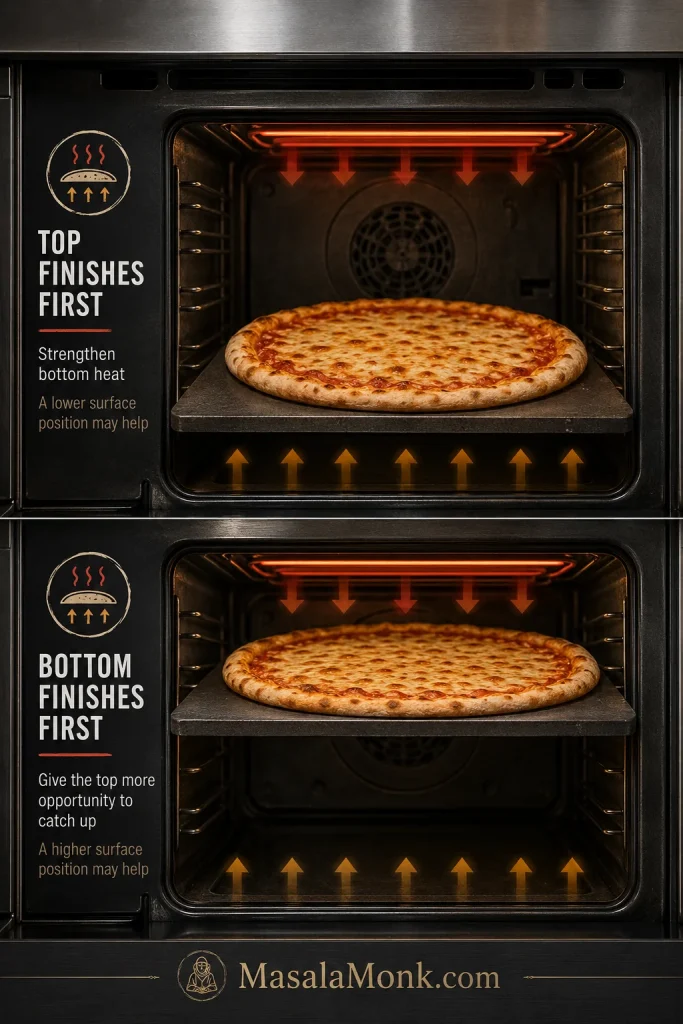
If the cheese is ready before the bottom, move the pizza lower in the oven. Trim exposed parchment and keep it away from the broiler.

Finished Greek yogurt pizza with callouts for golden rim, set center, browned bottom and bubbling cheese.
Time is only a guide; doneness is visual. Look for a golden rim, set center, browned bottom and bubbling cheese before pulling the pizza from the oven.

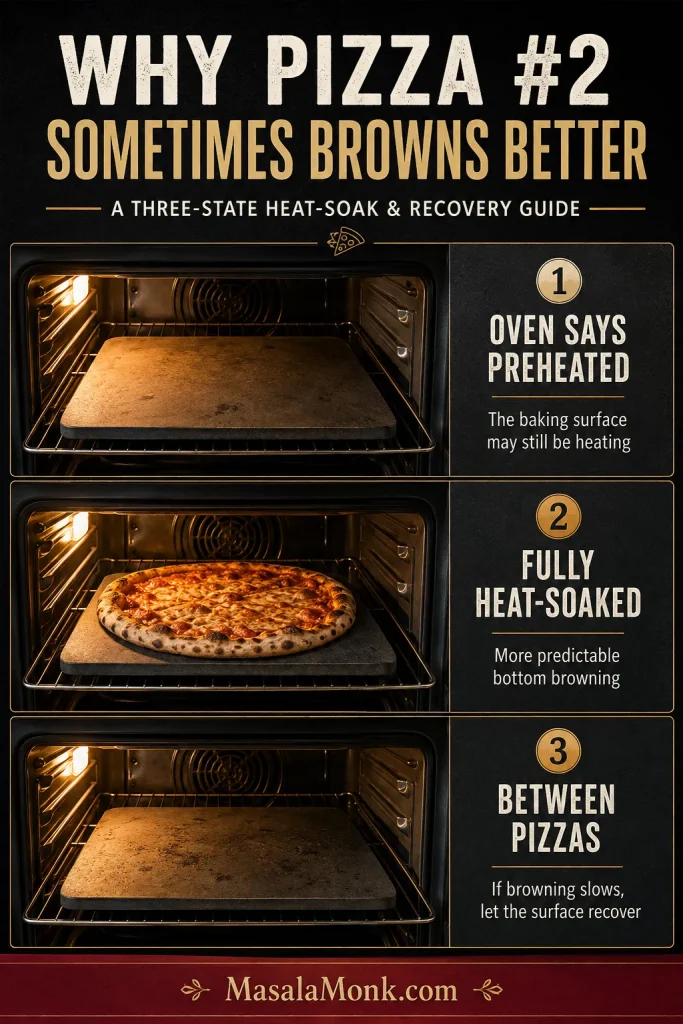
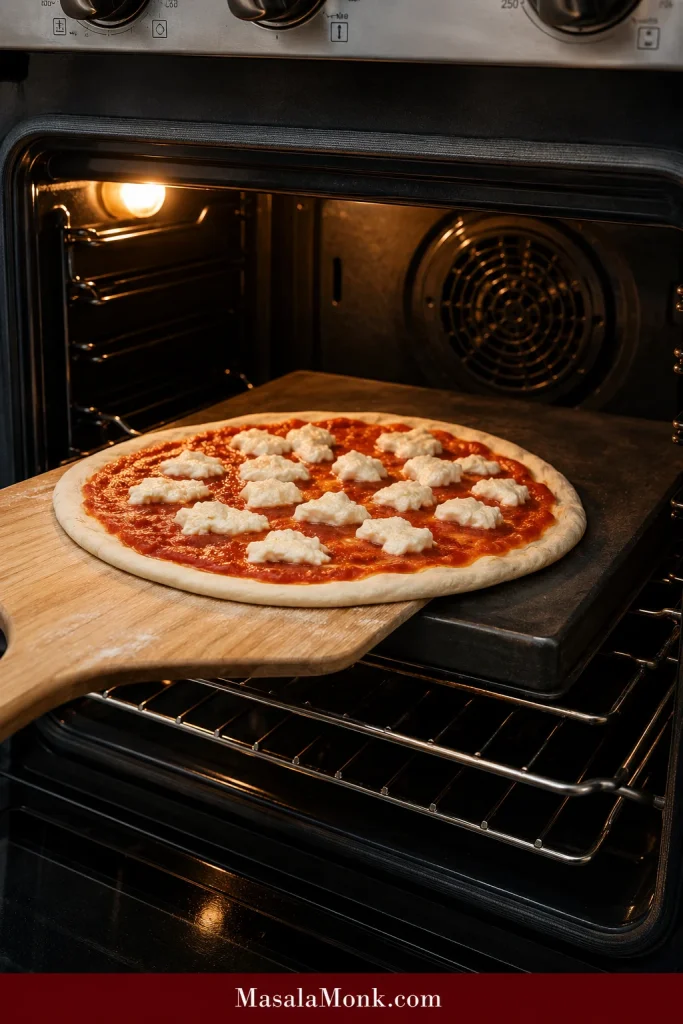
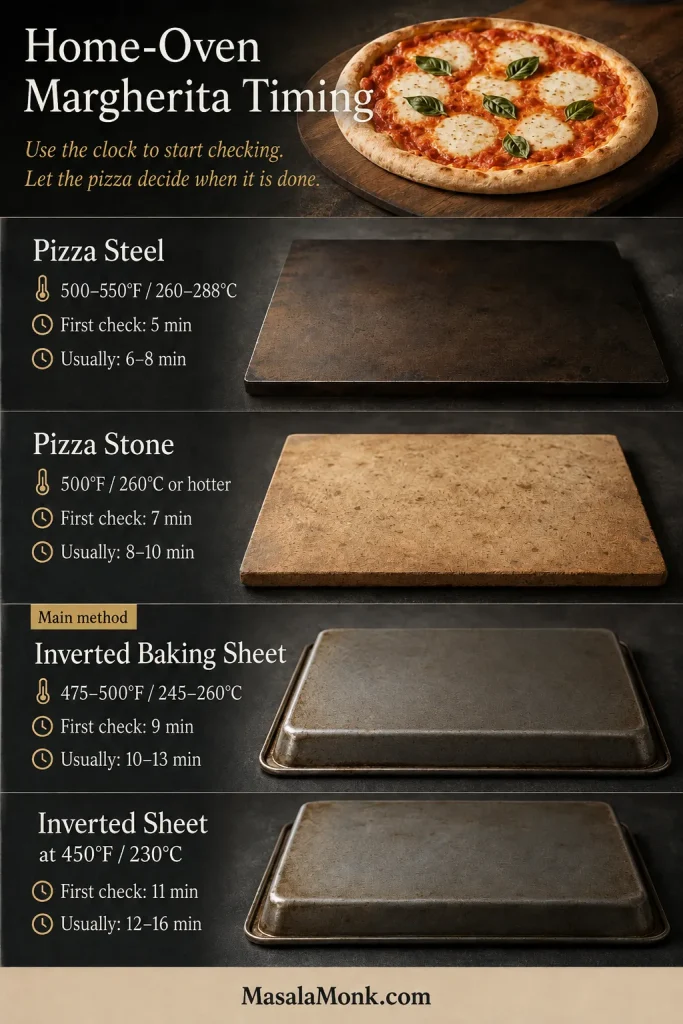
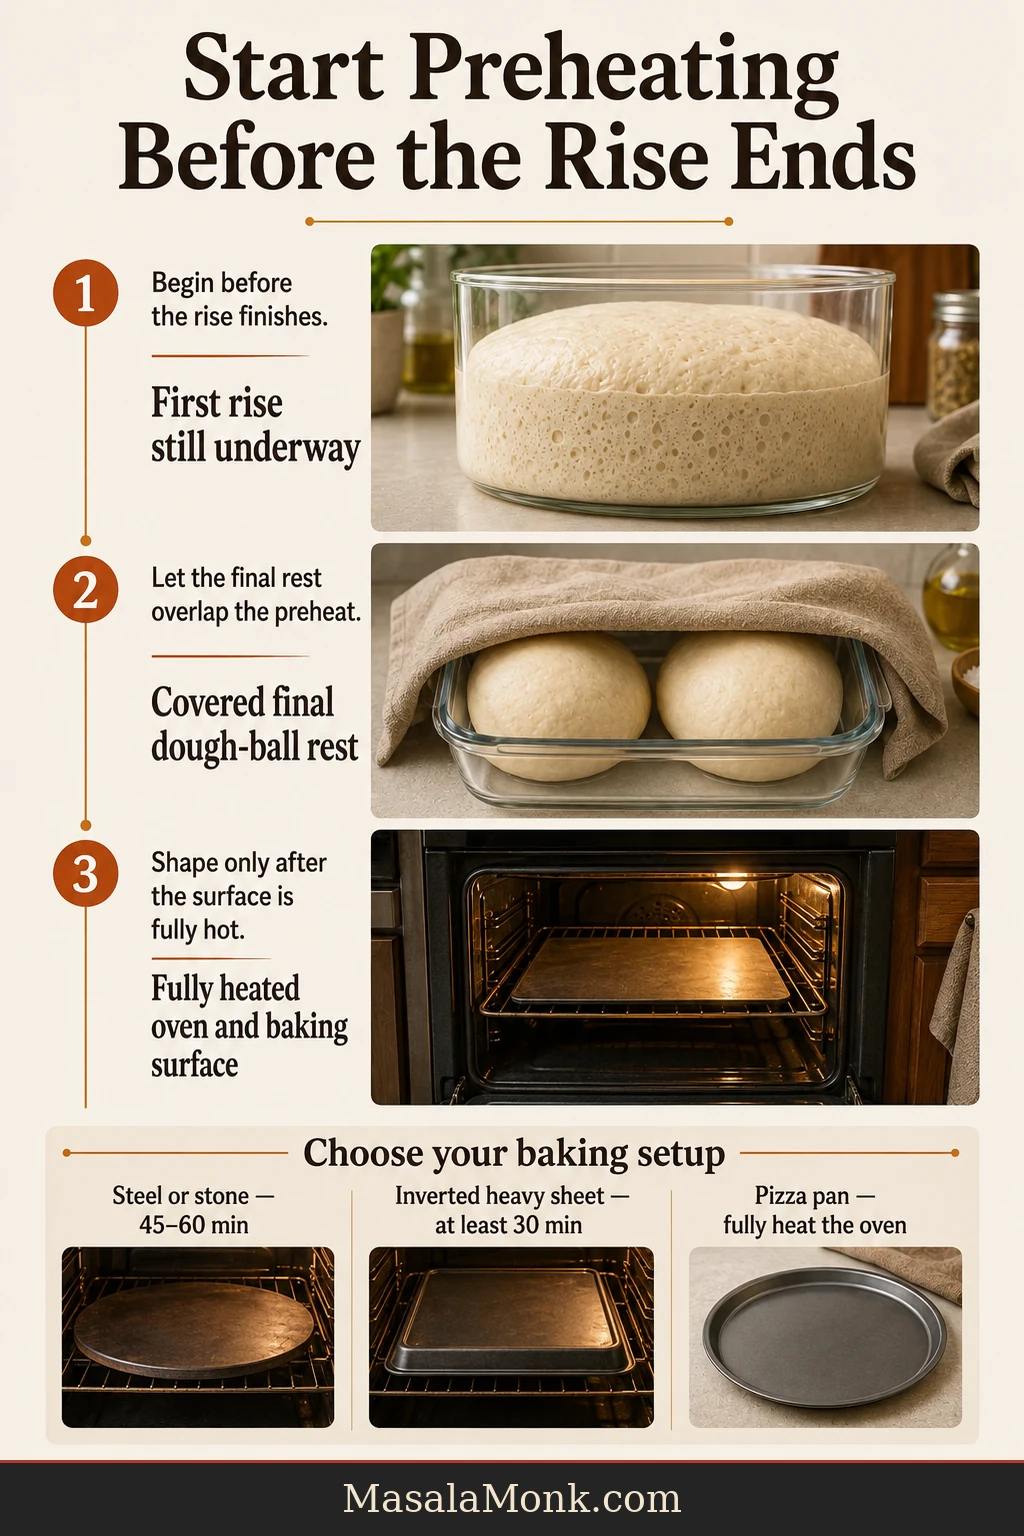
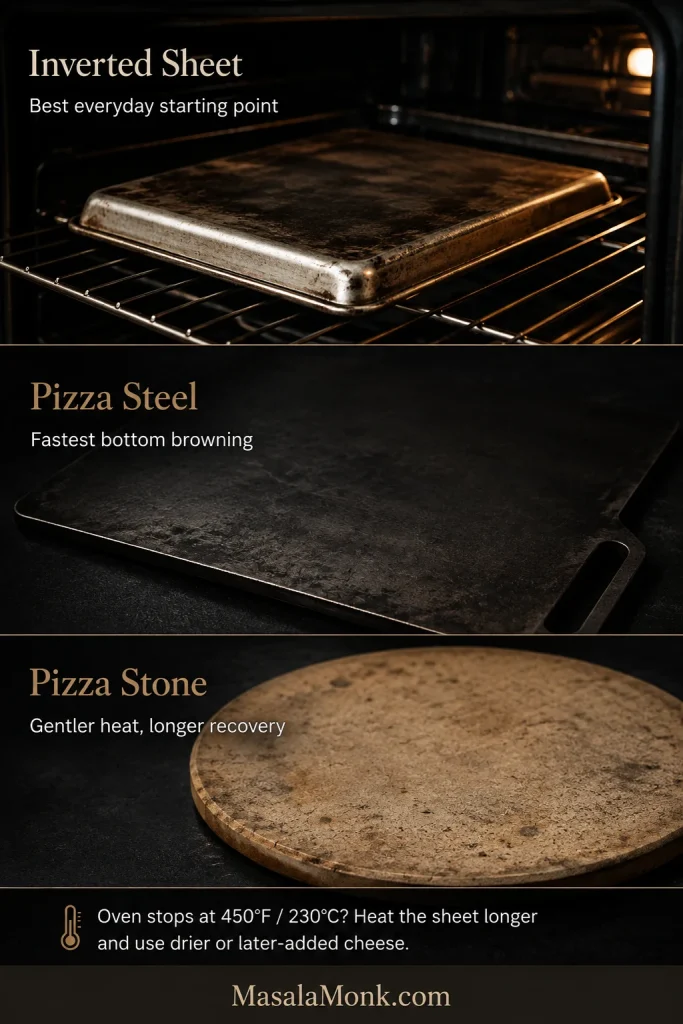
Using a stone or steel? Heat a pizza steel for 30–45 minutes or a stone for 45–60 minutes. Start it first; either surface needs longer to heat than the dough needs to come together.

Once the basic method makes sense, the sections below will help you adjust for your yogurt, flour, baking surface and toppings without making the dough feel complicated.

Need help before shaping? See how the dough should feel, or skip to baking without a gummy center.

The recipe works best when you keep one simple system in mind: soft dough, a crust that sets before heavy toppings sink in and enough bottom heat for browning.

Instructional guide showing soft dough, set crust and hot bottom cues for Greek yogurt pizza dough.
Think of this crust in three parts: soft dough before baking, a set center after baking and a browned bottom underneath. Dough texture and baking surface both matter.

What Does Greek Yogurt Pizza Dough Taste Like?

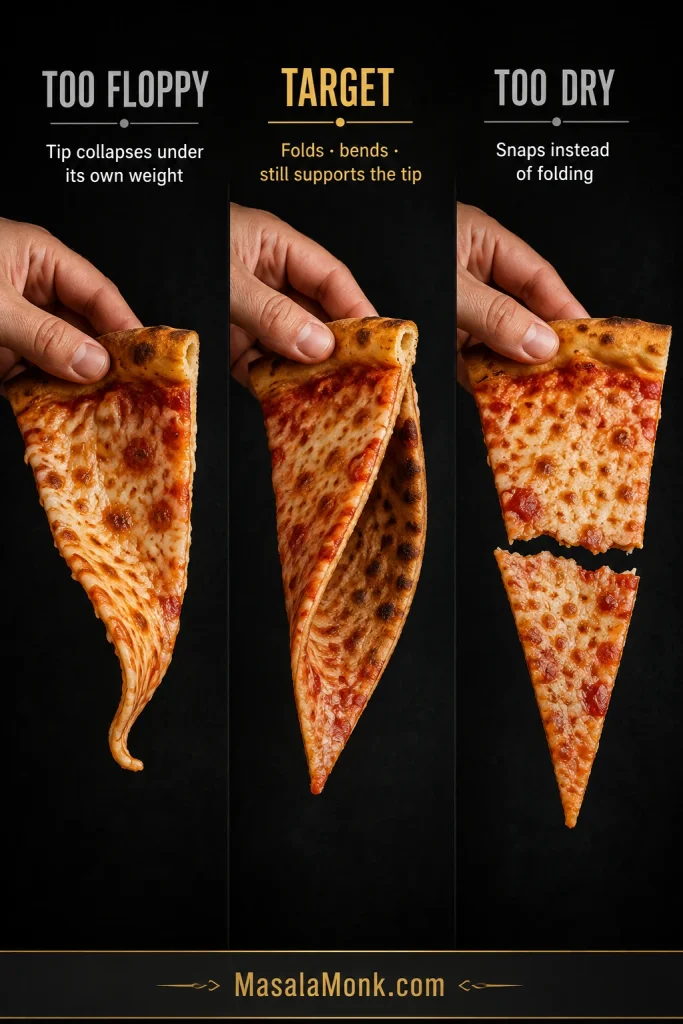
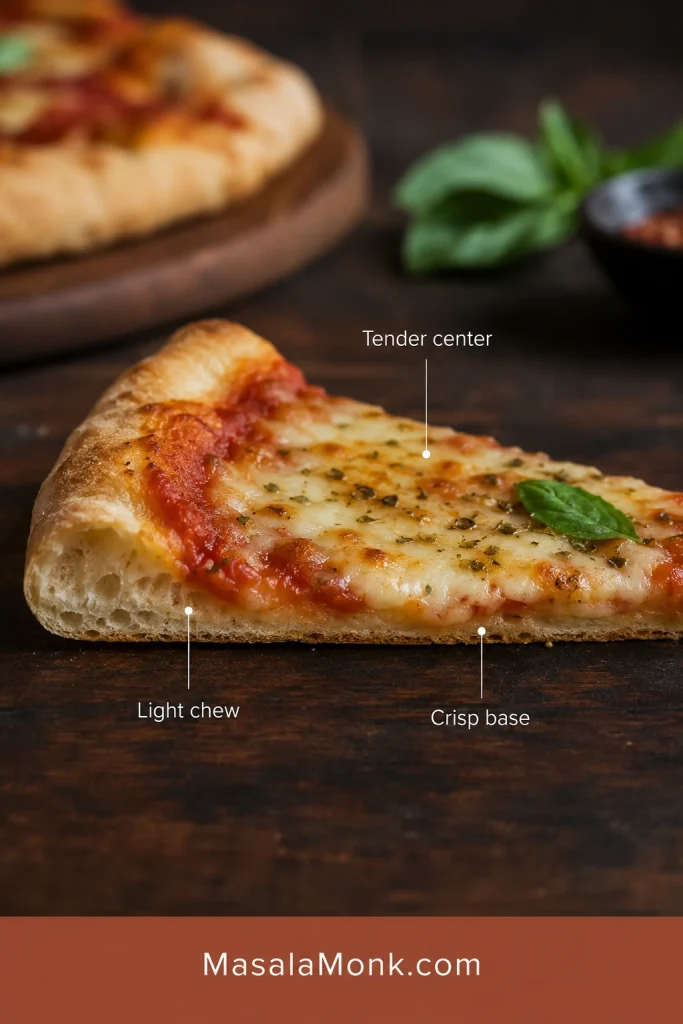
The crust has a mild tang, a tender center and a light chew. Rolled to 11–12 inches and baked on a properly heated surface, it develops crisp edges and enough structure to lift as a slice without becoming dry.

The middle bends gently instead of snapping like a cracker. Once the sauce and cheese go on, the yogurt stays quietly in the background and does not make the finished pizza taste sour.

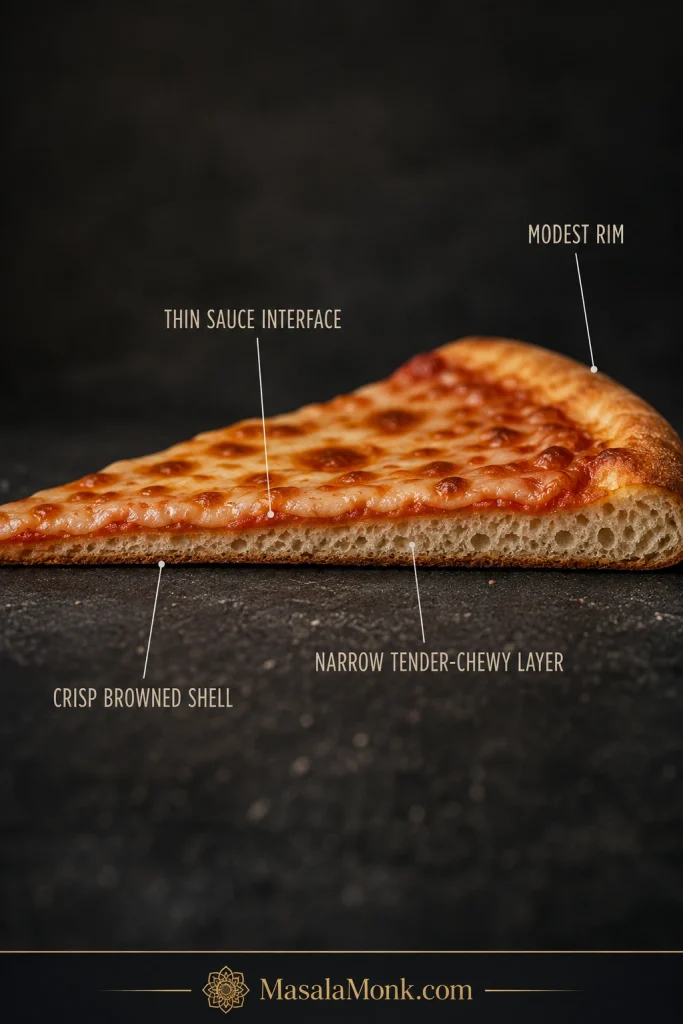
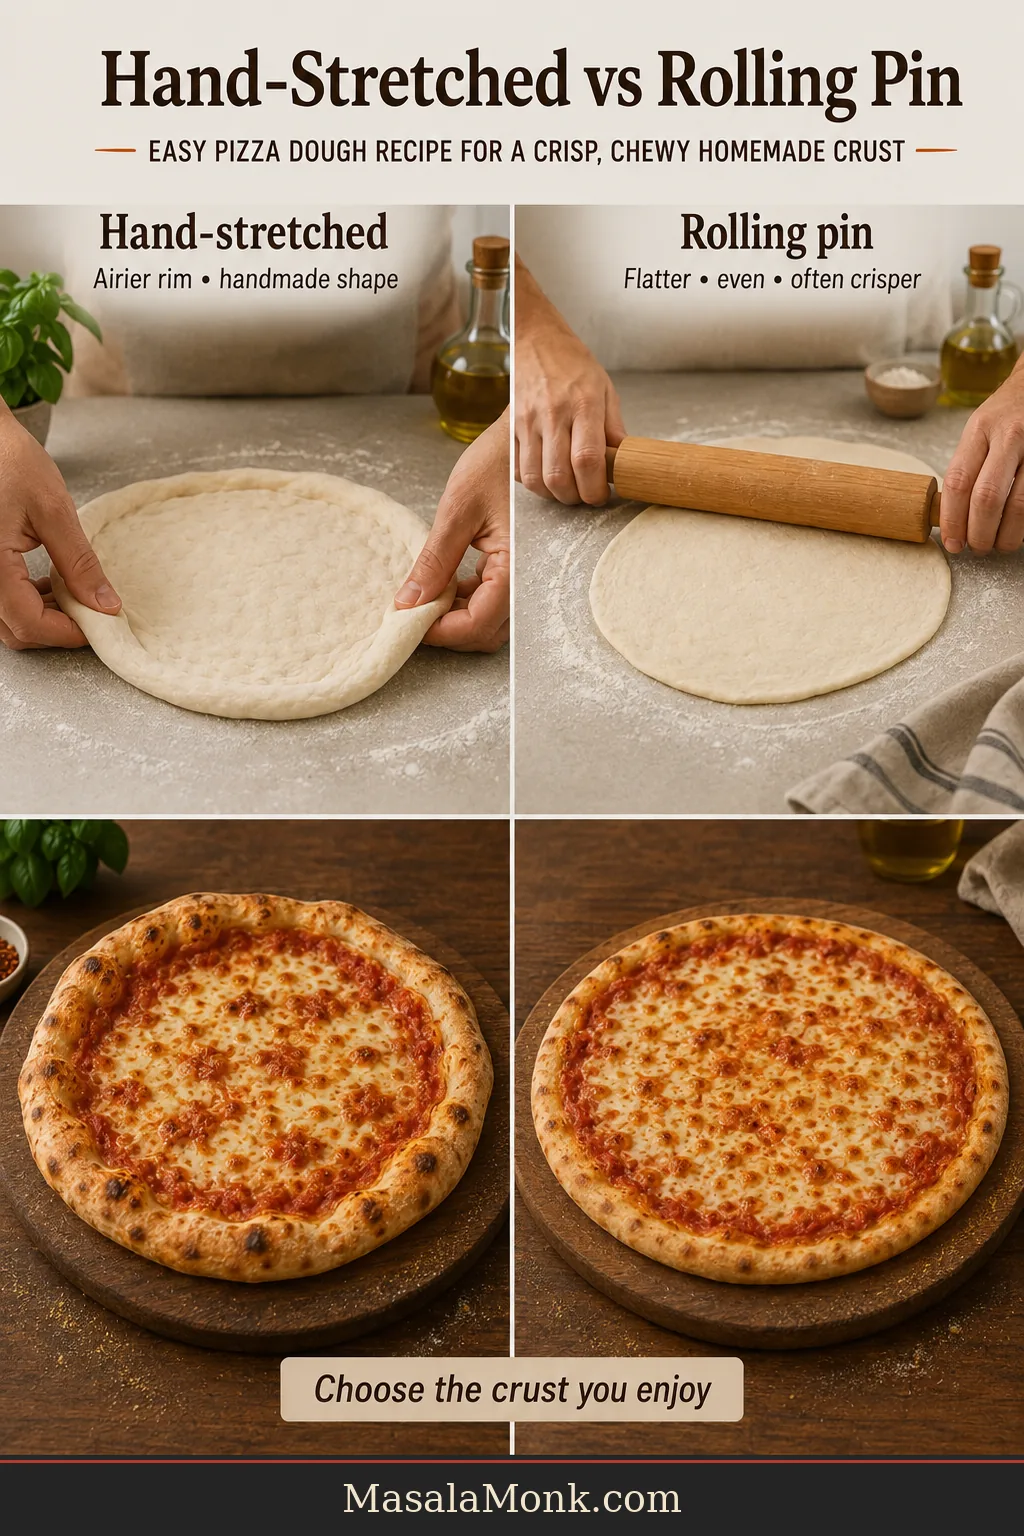
This dough is less stretchy than yeast dough, so rolling or pressing works better than tossing it. For a stretchier crust with deeper fermented flavor, use MasalaMonk’s sourdough pizza dough recipe. The sliced crust below shows the close, tender texture to expect from a quick yogurt dough.

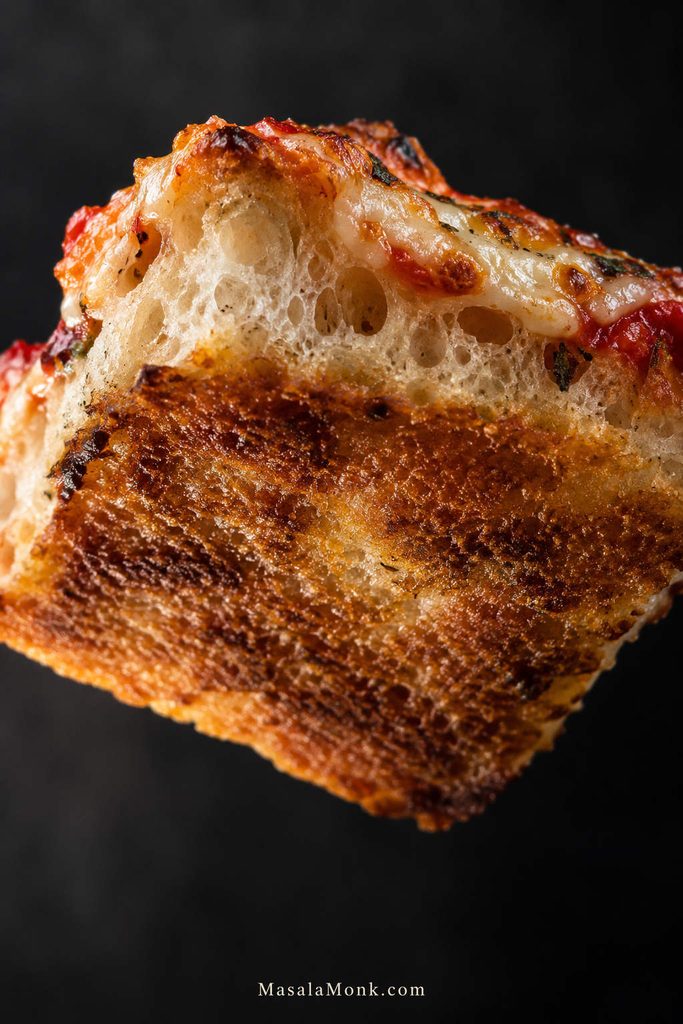
Close-up of a sliced Greek yogurt pizza crust showing a golden edge and tender close-textured crumb.
A compact, tender crumb is normal for a no-yeast yogurt crust; large open bubbles belong to longer-fermented dough.

Choosing the Yogurt and Flour

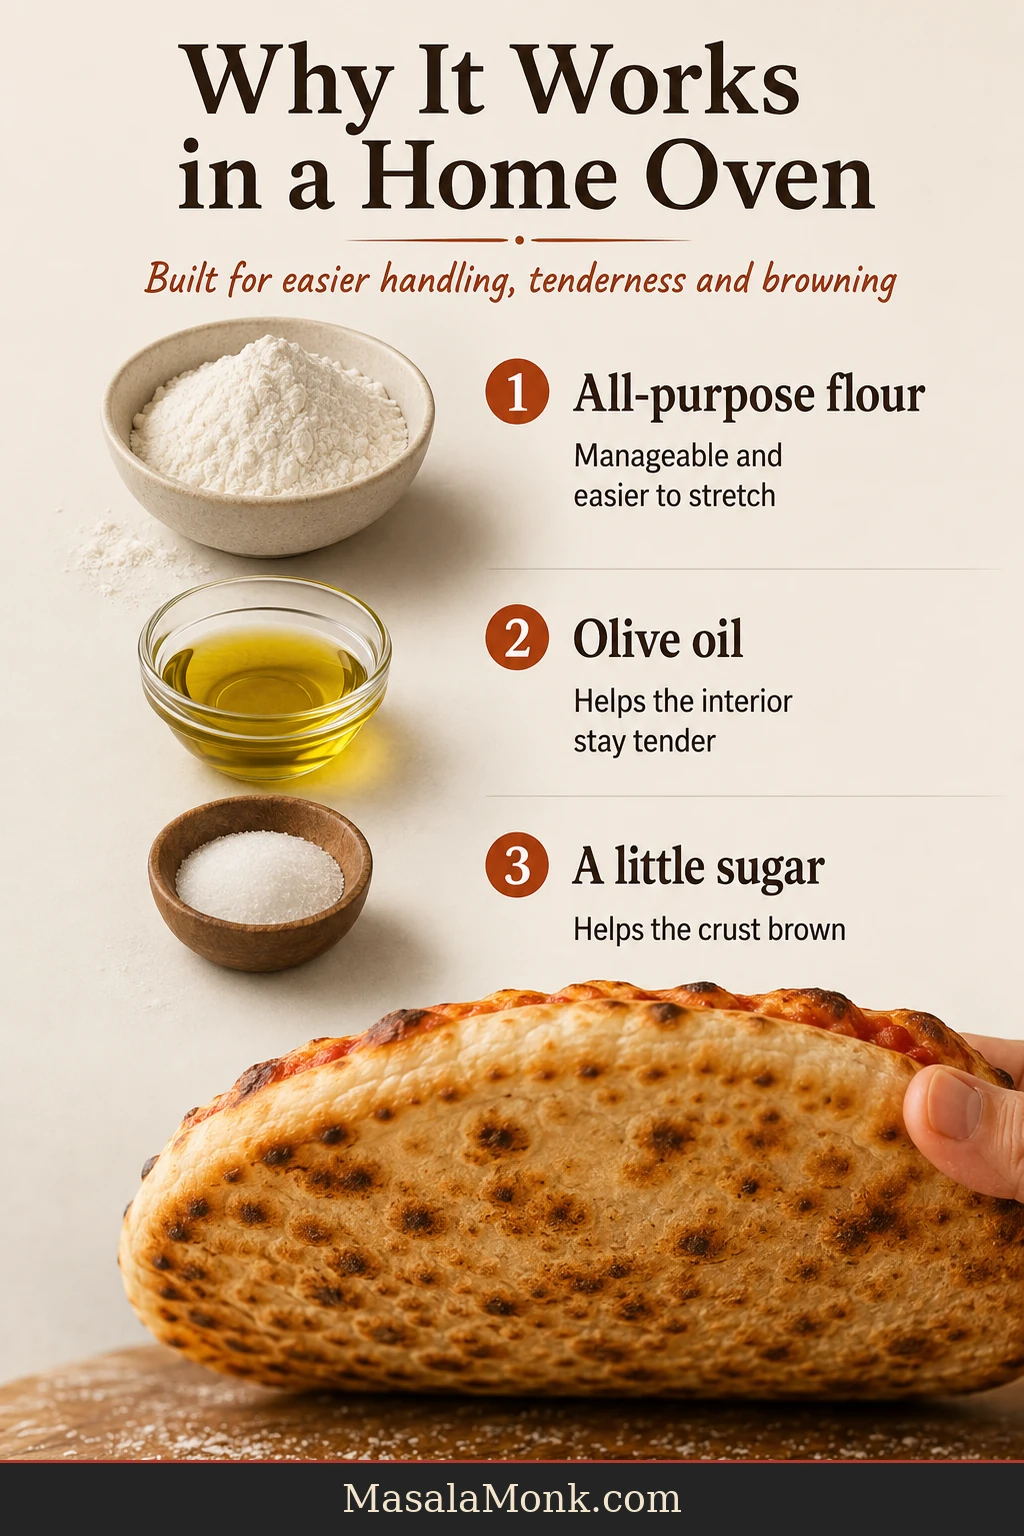
Thick Greek yogurt supplies the moisture while adding mild tang, richness and protein. Plain 2% yogurt is a practical starting point because it is thick enough to control the dough and rich enough to keep the crust tender.

Whole-milk yogurt often gives the edge a softer, more tender texture. Nonfat yogurt can bake a little firmer, and the optional teaspoon of olive oil helps soften the result.

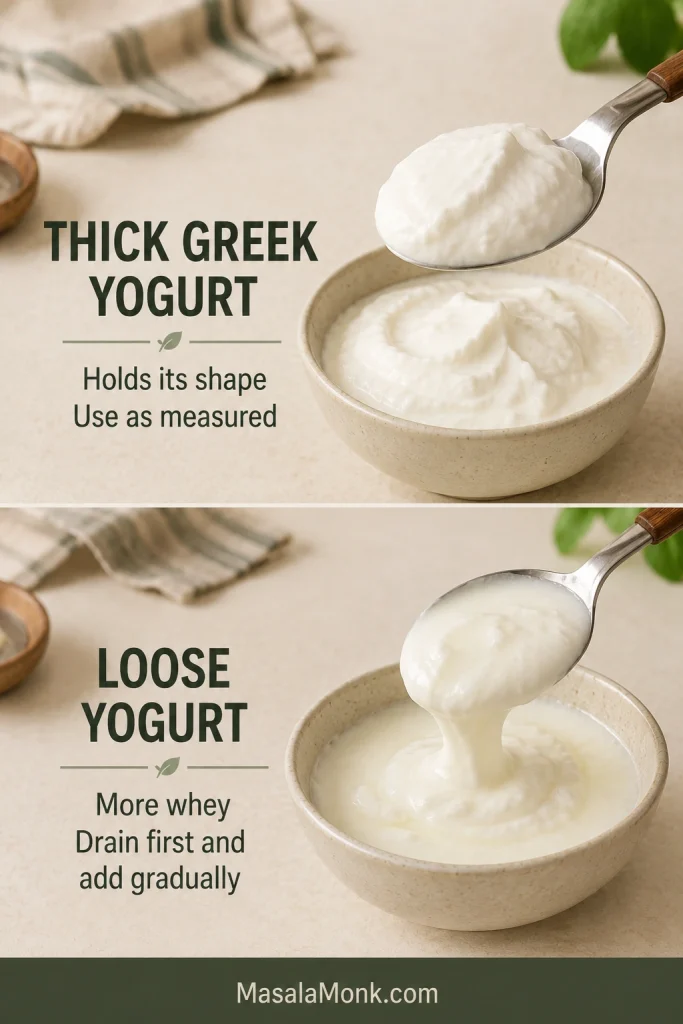
The yogurt can go straight from the refrigerator into the bowl. A small amount of whey can be stirred back in. If there is a large pool of whey or the yogurt becomes pourable, drain it briefly or measure from the thicker portion. Vanilla, fruit-flavored and sweetened yogurts belong at breakfast, not in this dough.

Check yogurt texture before measuring; a little whey is fine, but pourable yogurt can push the dough too wet.

Comparison of thick Greek yogurt and loose yogurt in bowls for pizza dough texture.
Yogurt thickness changes the dough before kneading begins. Thick Greek yogurt gives structure; loose yogurt needs slower flour adjustments.

All-Purpose or Self-Rising Flour?

All-purpose flour is widely available and lets you control the baking powder and salt. Weighing it gives the most consistent result. When using cups, spoon the flour lightly into the cup and level the top without packing it down.

Self-rising flour gives you the classic two-ingredient version because the leavener and salt are already included. It may need less yogurt. In the UK and Australia, look for self-raising flour; “Greek yoghurt” is simply the regional spelling.

These two routes use the same bowl method, but the all-purpose version controls leavening separately while self-rising flour already includes it.

Ingredient guide showing two Greek yogurt pizza dough routes with flour, yogurt, baking powder, salt and olive oil.
Both routes start with thick Greek yogurt and flour, but they are not measured the same way. Choose the flour first, then build the dough around it.

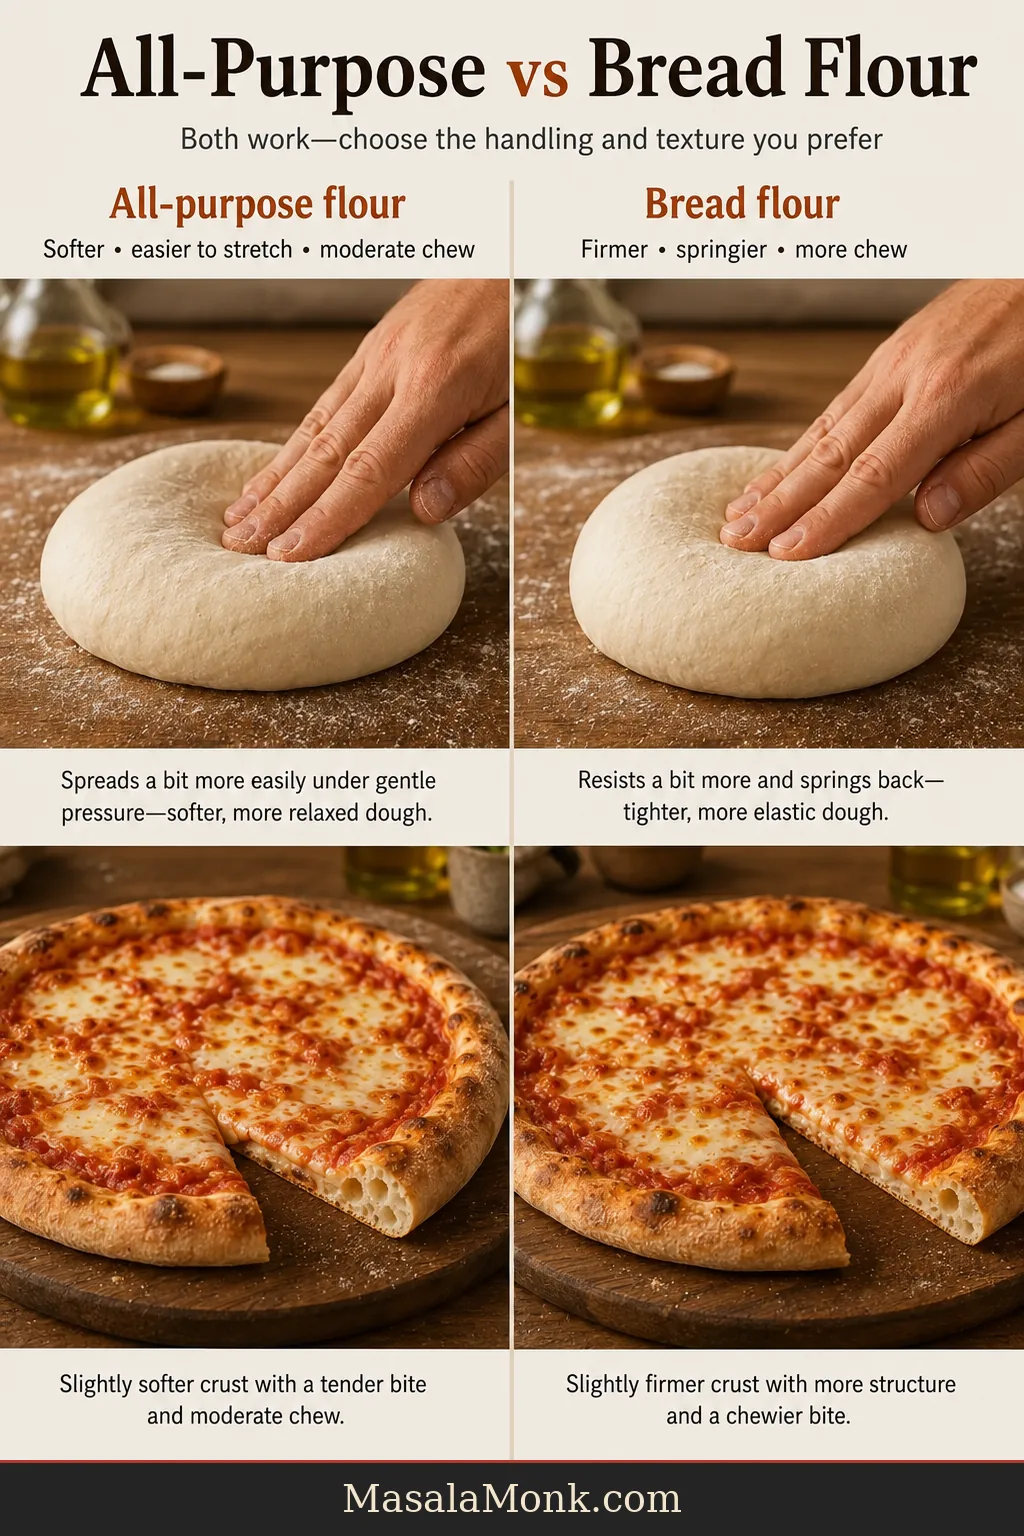
Bread flour adds chew but may spring back while rolling. Replacing up to half the all-purpose flour with whole wheat produces a heartier crust. Gluten-free blends absorb moisture differently and need a separate, blend-specific ratio.

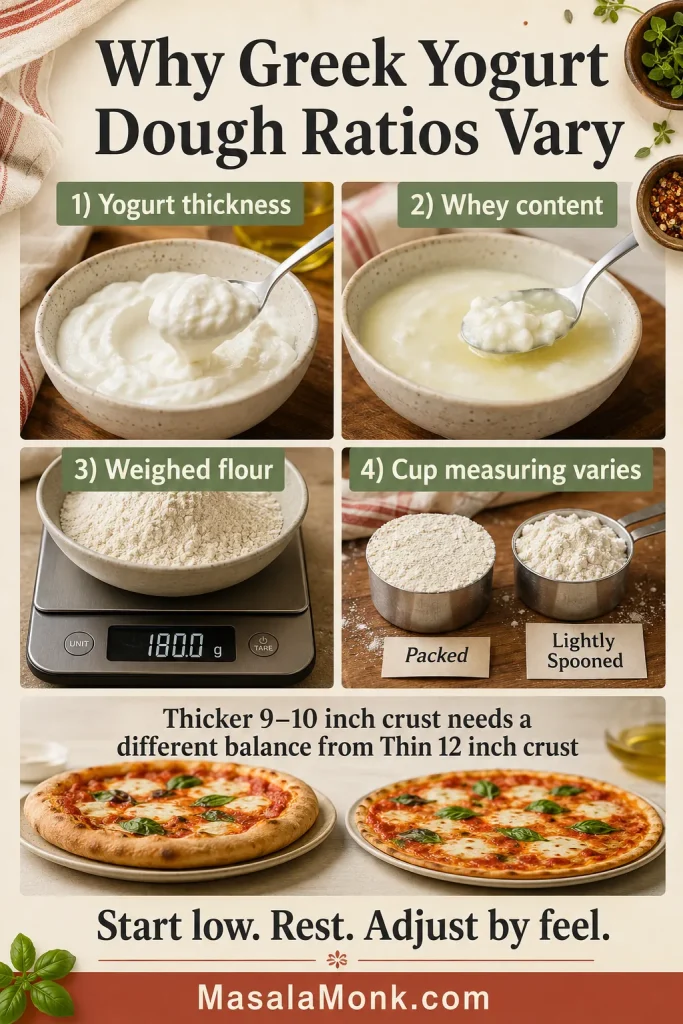
Why Greek yogurt dough ratios vary: Yogurt brands contain different amounts of whey, cup-measured flour can vary considerably, kitchen humidity can shift hydration slightly, and a thicker 9–10-inch crust needs a different balance from a thin 12-inch crust. Begin with the lower yogurt amount and adjust by feel rather than forcing every brand into one exact cup ratio.

Infographic explaining how yogurt thickness, flour and humidity affect Greek yogurt pizza dough ratios.
Greek yogurt pizza dough is a feel-based dough because yogurt thickness, flour absorbency and humidity all shift the ratio. Use the numbers, then trust the texture.

A practical protein estimate: Depending on the flour and yogurt labels, the untopped all-purpose crust contains approximately 35–45 grams of protein in total. Cut into eight slices, that is roughly 4–6 grams per slice before toppings. The exact number changes with the brands used, so treat it as an estimate.

How the Dough Should Feel and How to Shape It

Once the ingredients are combined, texture matters more than whether the dough looks perfectly smooth.

Mix, Rest and Correct

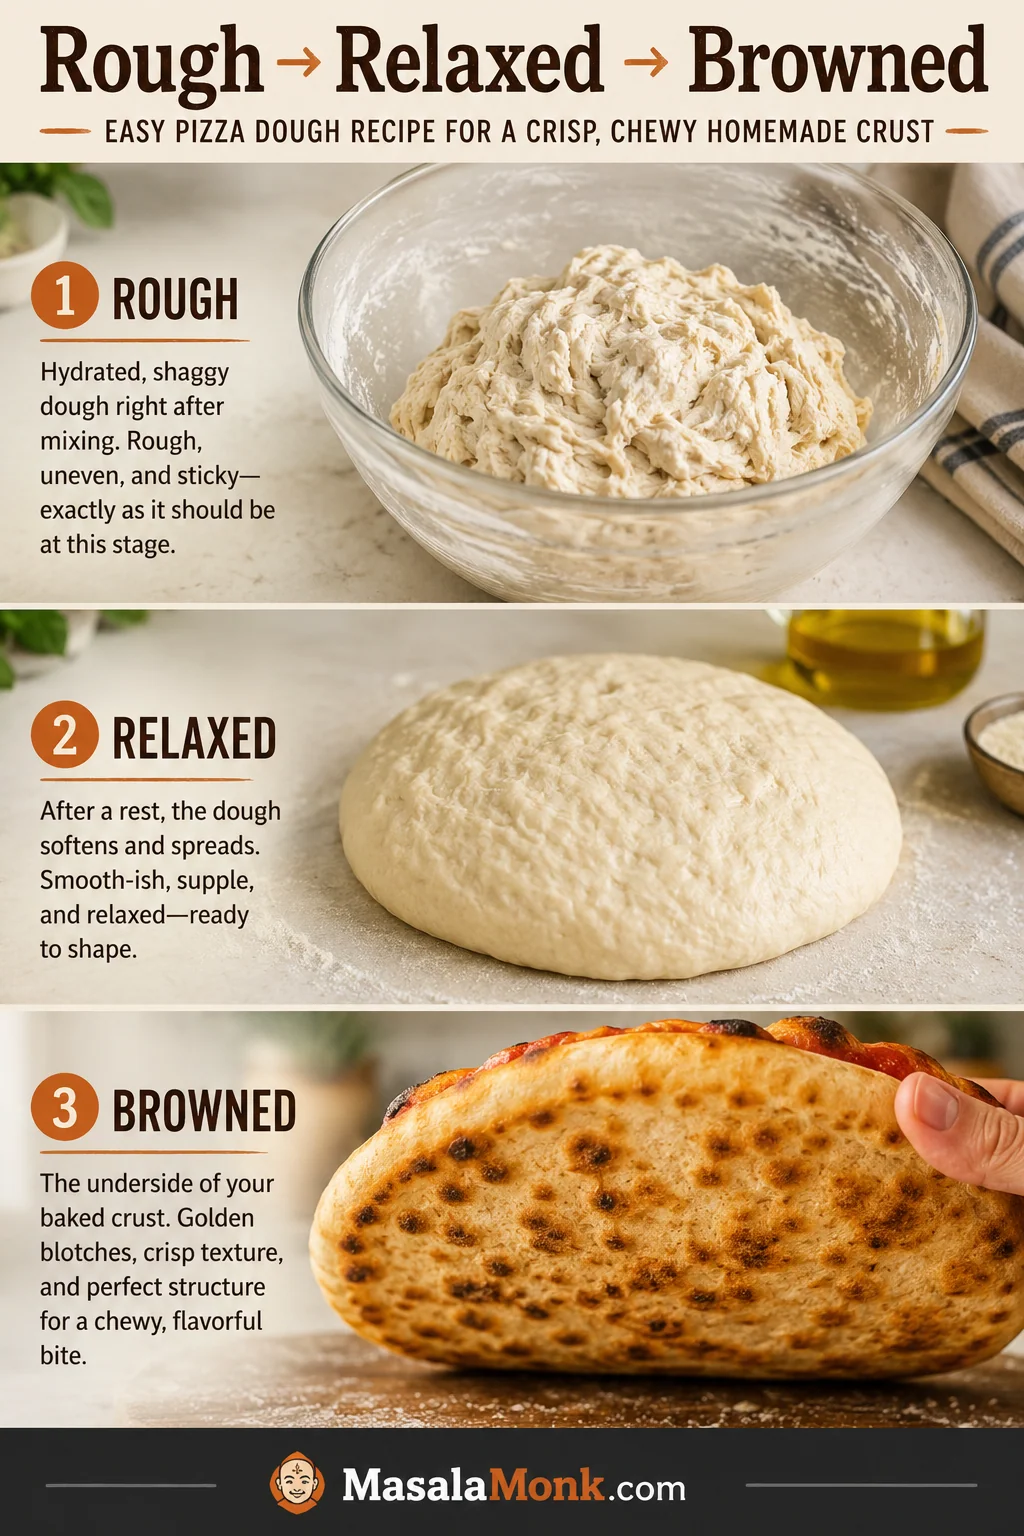
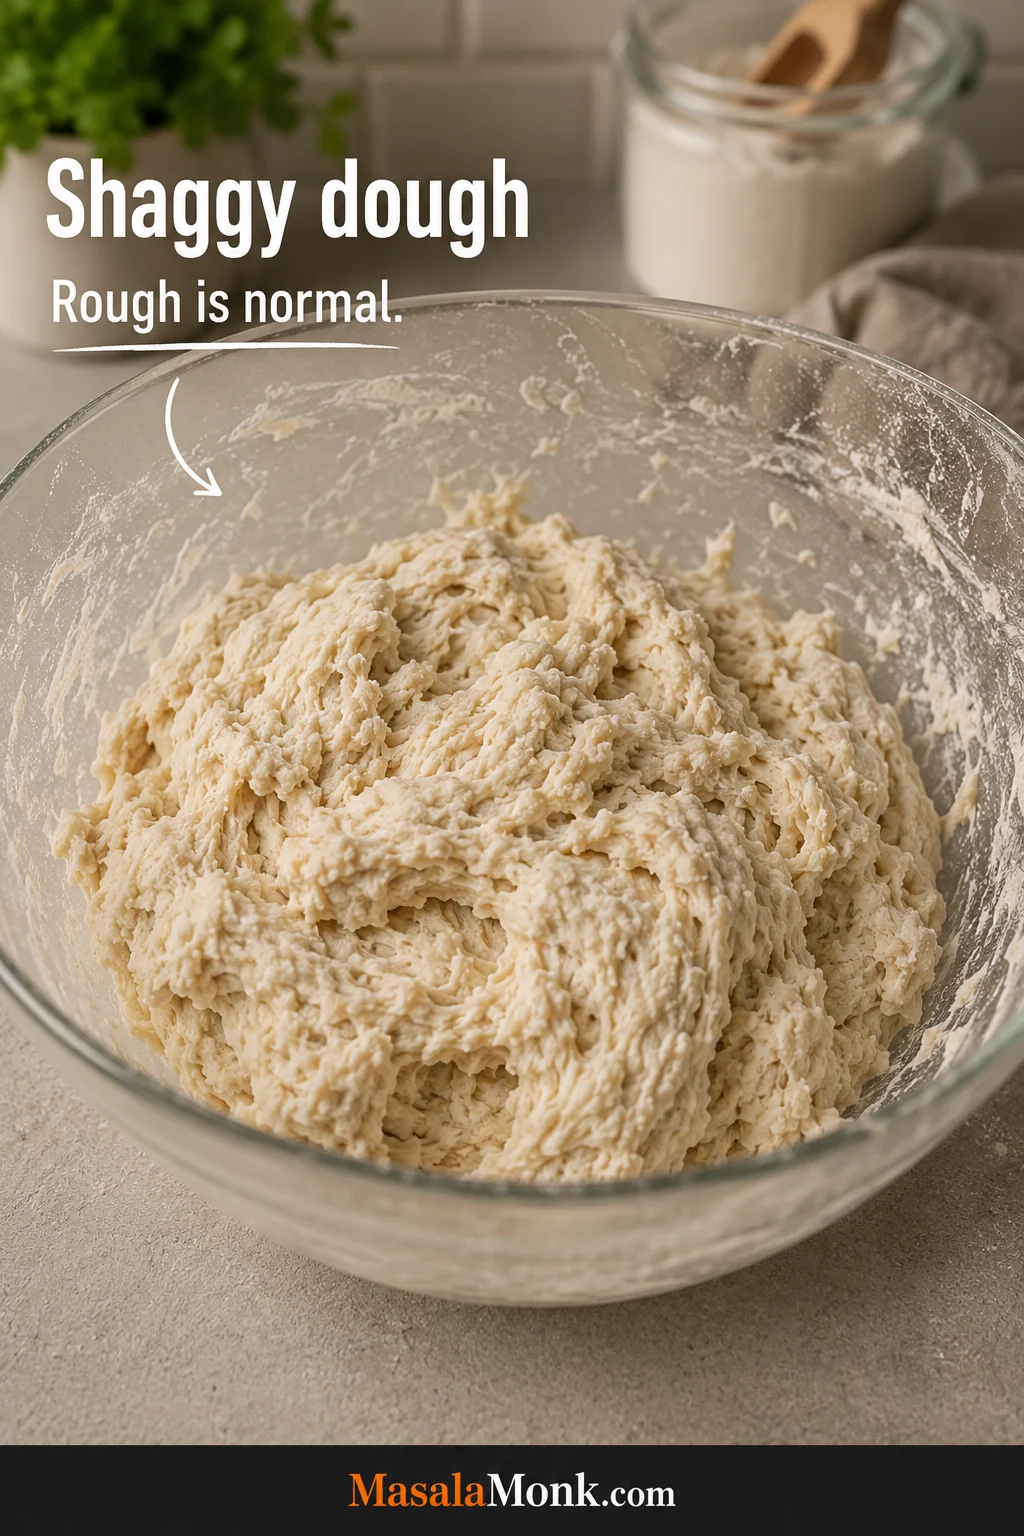
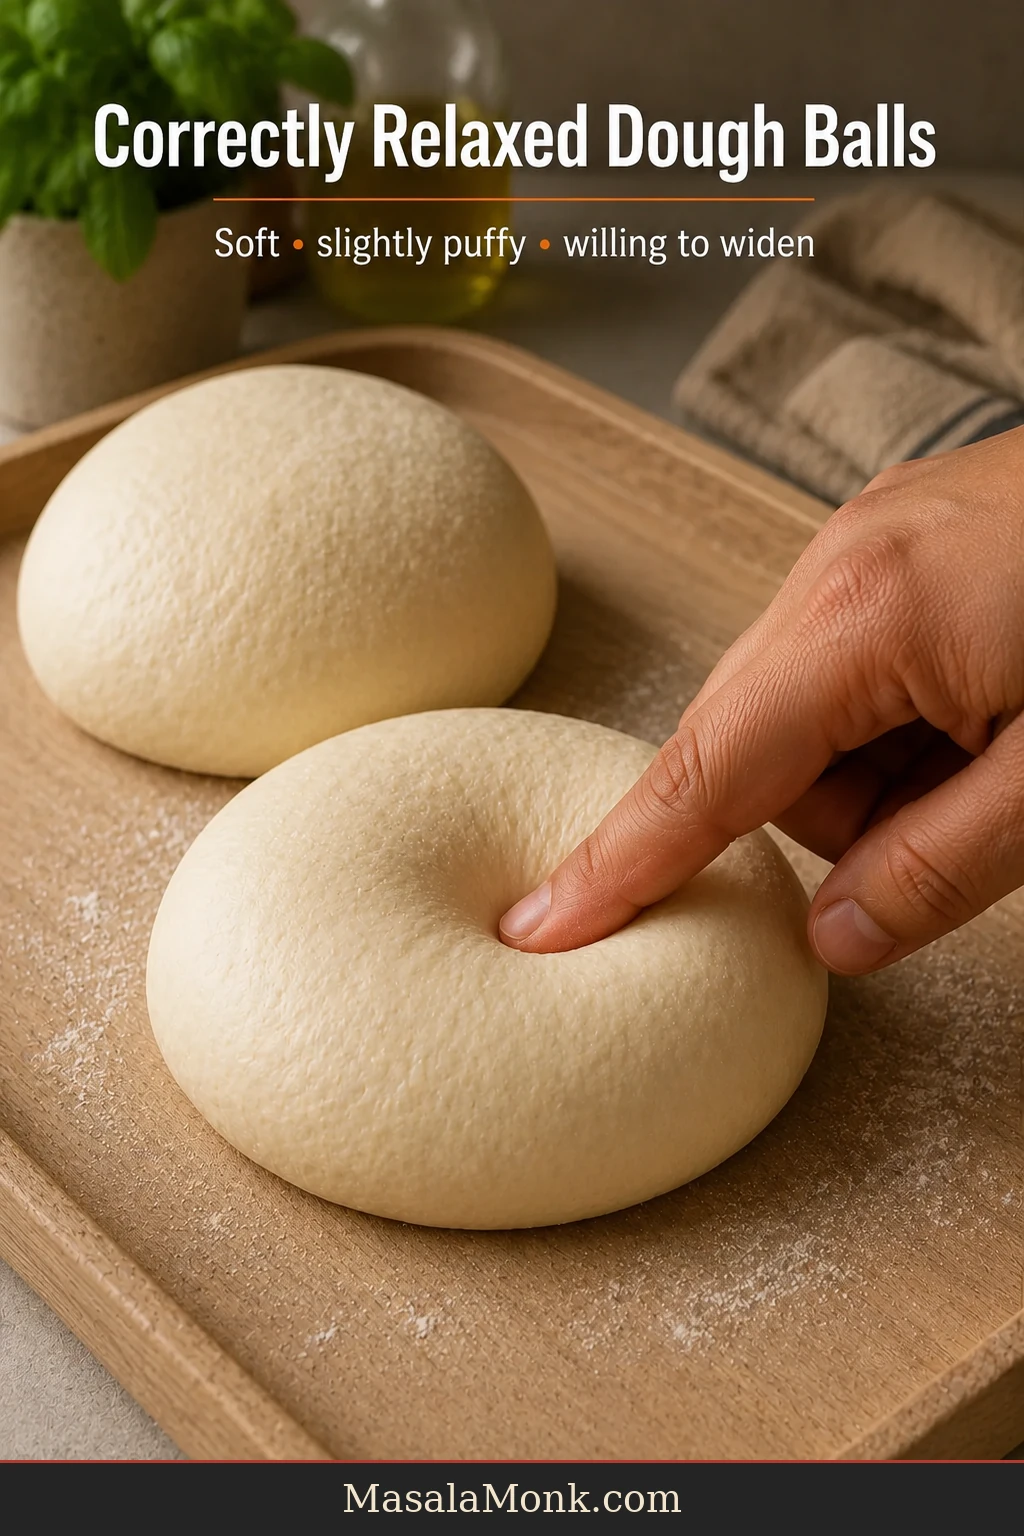
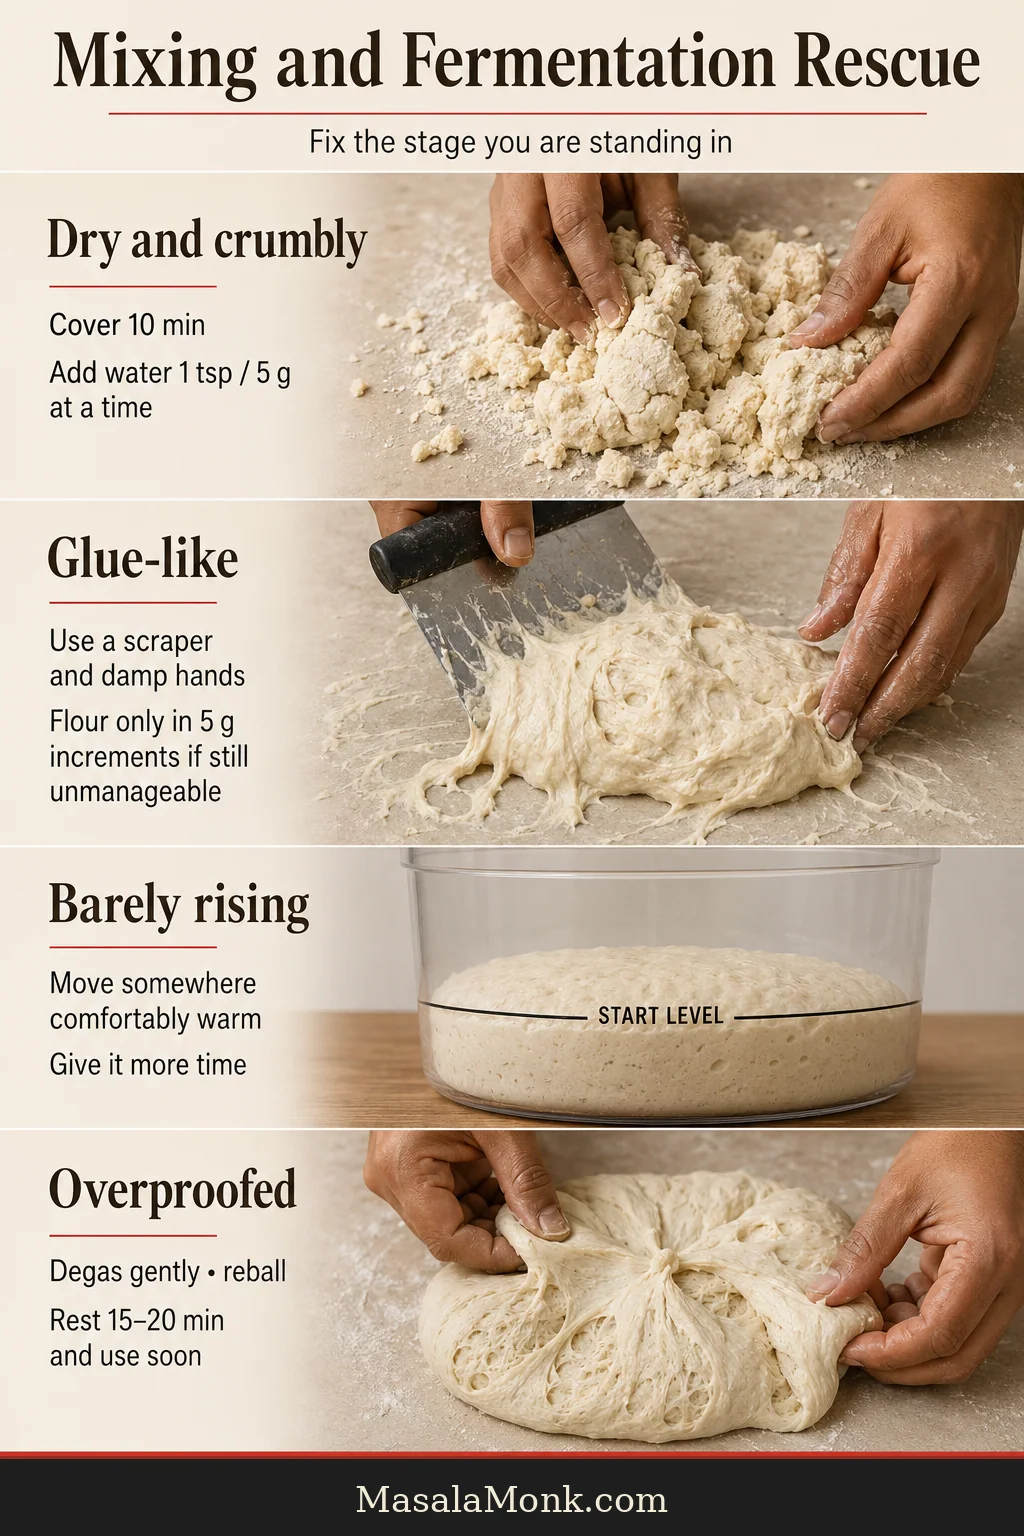
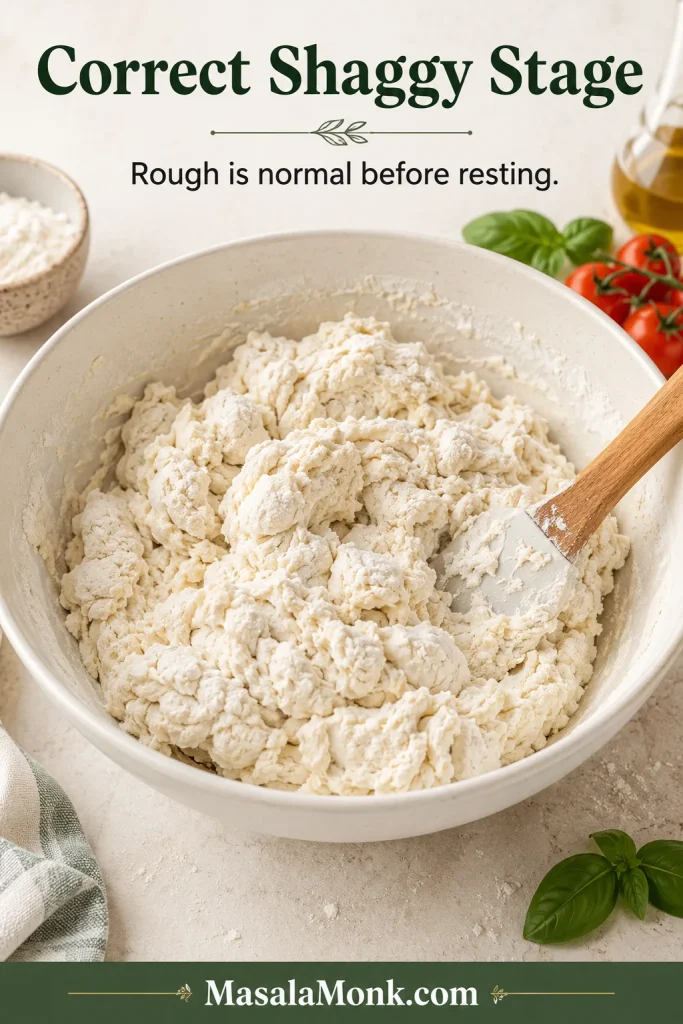
At first, the bowl may look more like yogurt-coated flour than pizza dough. It will look untidy before it looks promising, and that is normal. Keep folding gently. This rough stage is where it is easiest to add too much flour too early.

Bowl of shaggy Greek yogurt pizza dough with rough clumps, dry flour patches and a spatula.
Shaggy dough is not a mistake. Once it rests, dry patches hydrate and the rough mixture becomes easier to bring together.

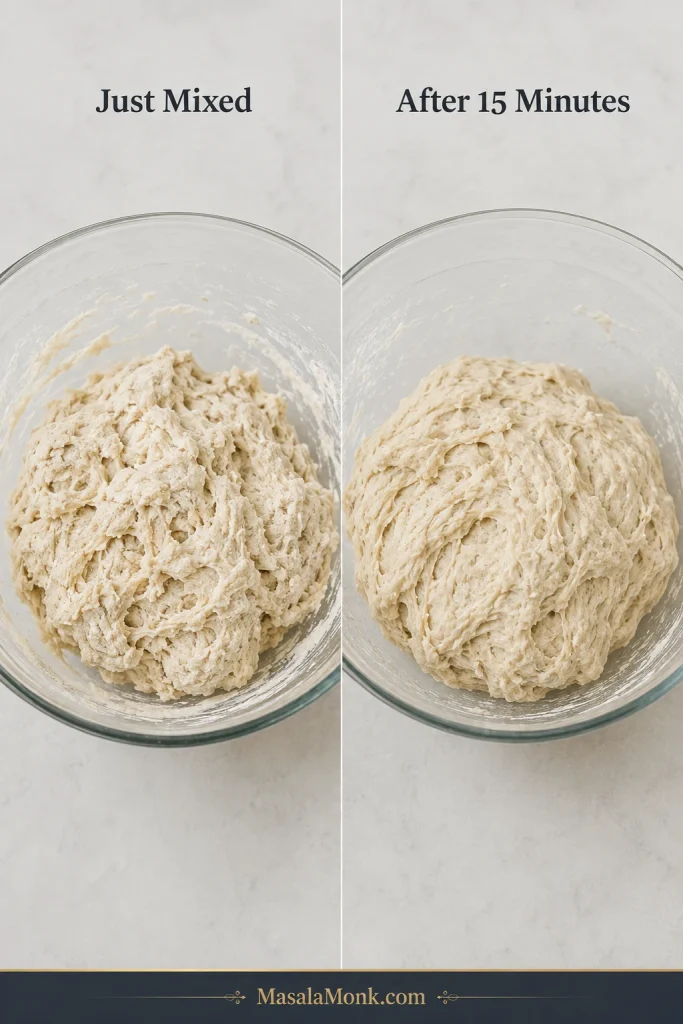
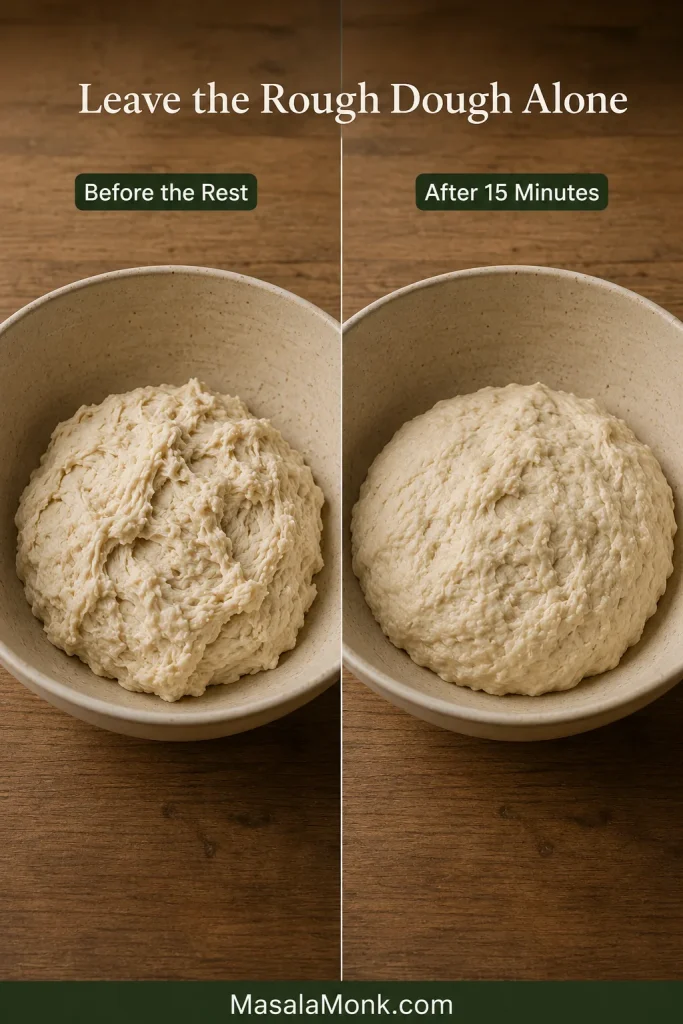
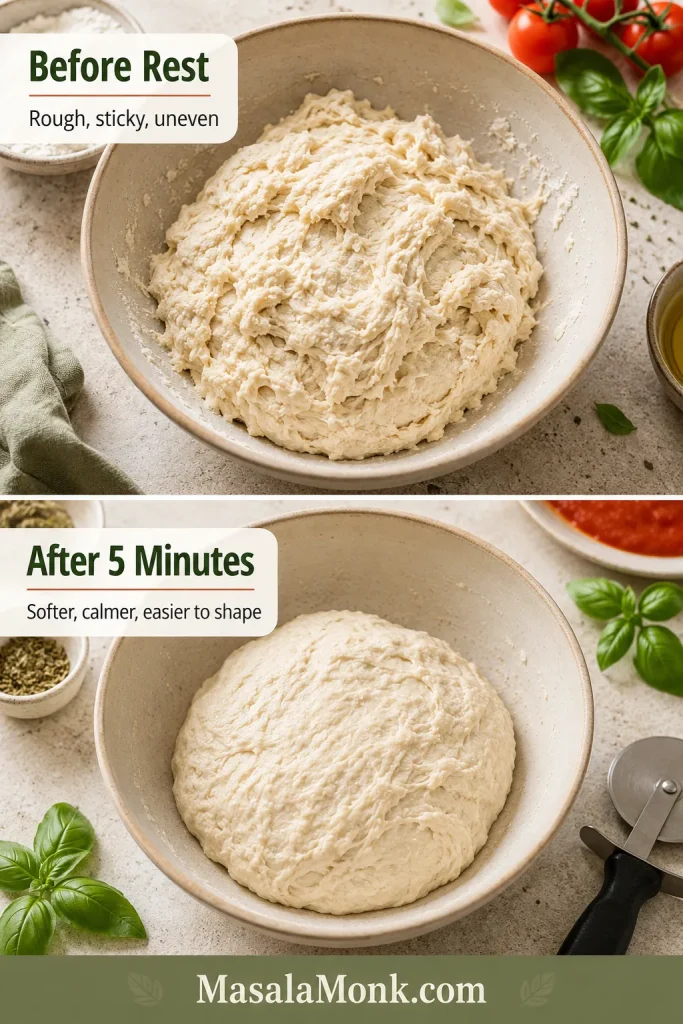
Once the rough dough holds together, cover it for five minutes. Rest first, correct second; many sticky-looking batches settle as the flour absorbs moisture.

Before-and-after guide showing rough Greek yogurt pizza dough before resting and smoother dough after five minutes.
The five-minute rest does quiet work: flour absorbs moisture, stickiness drops and the dough becomes easier to shape without extra flour.

Correct the Dough Texture

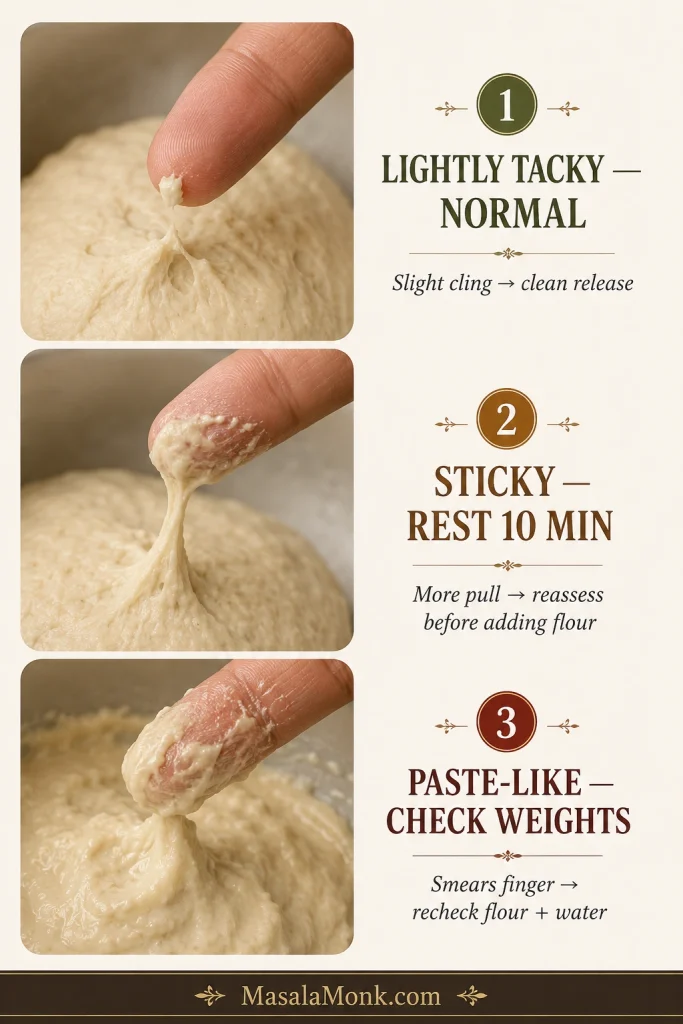
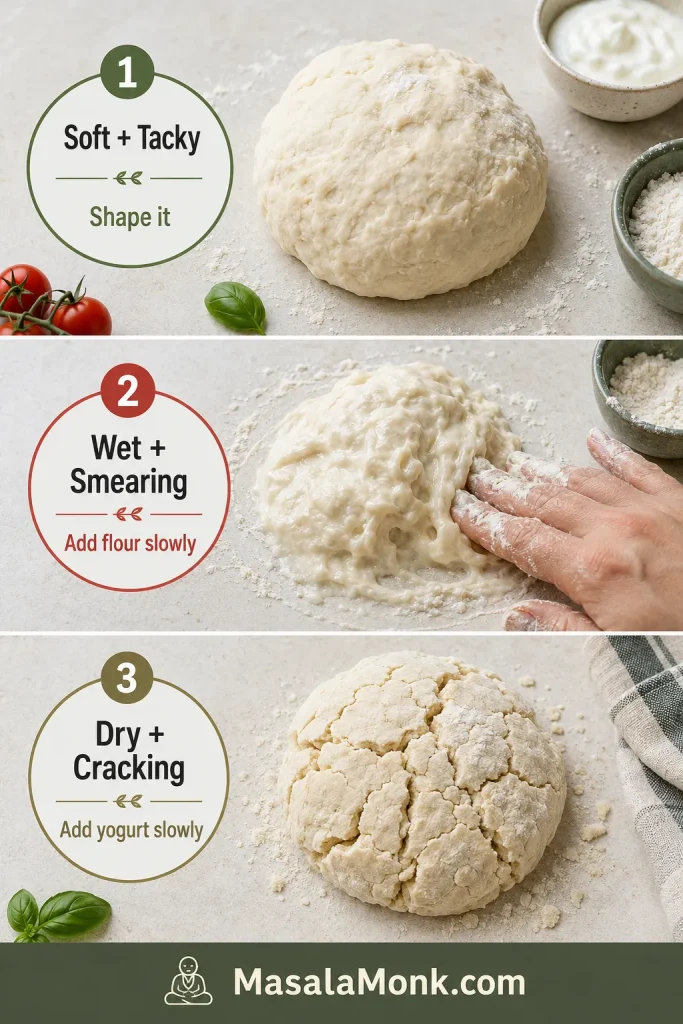
Dough conditionWhat it meansWhat to do
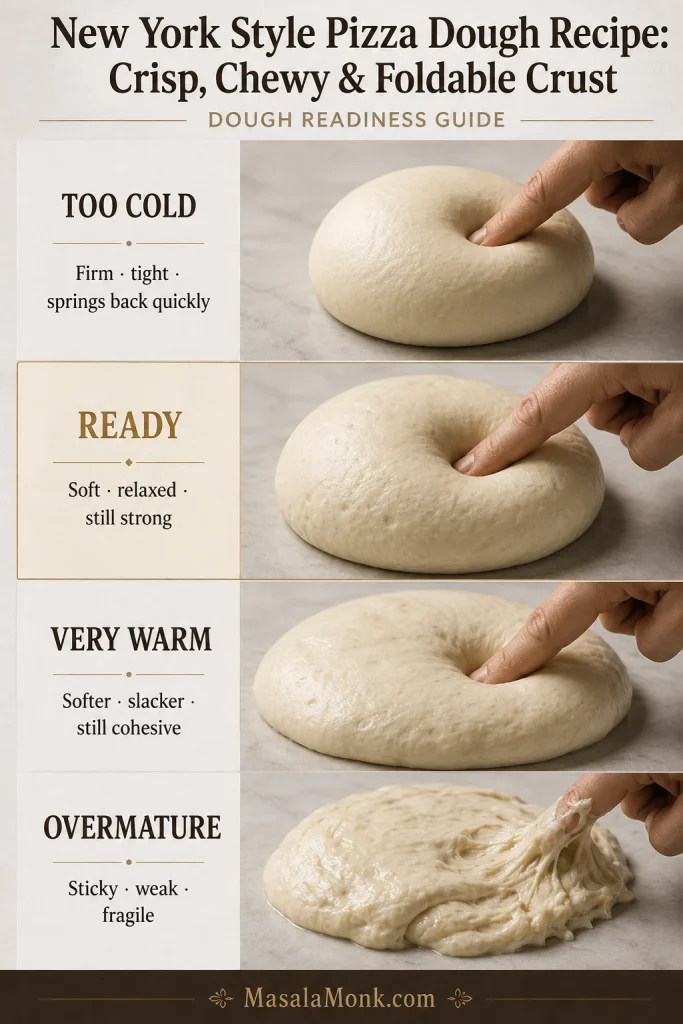
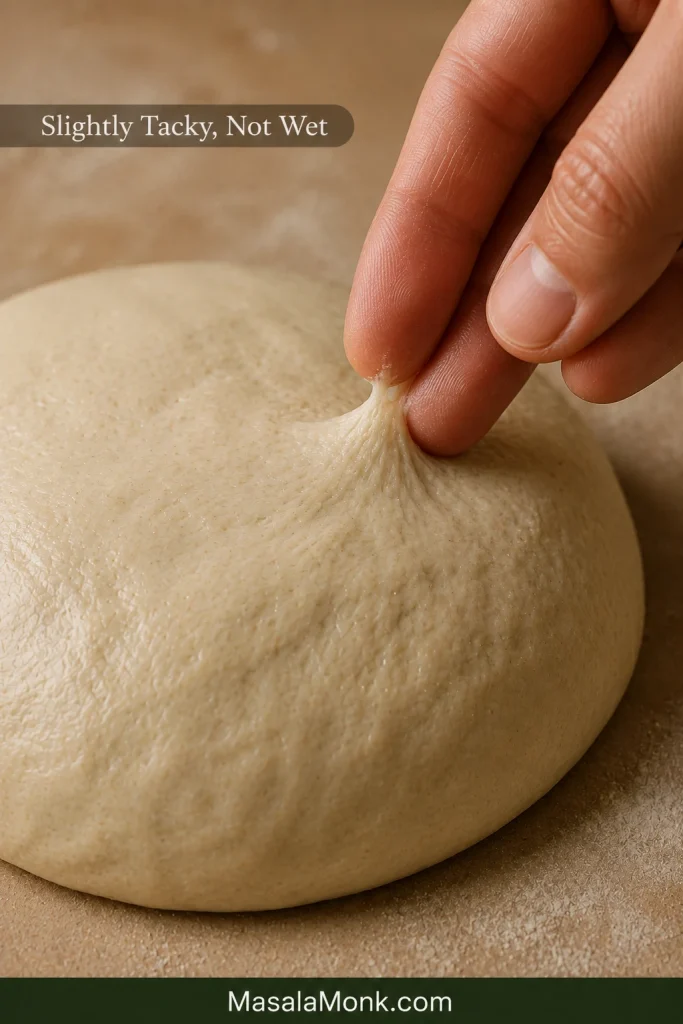
Soft and slightly tackyIt holds a ball and releases without leaving wet paste.Start shaping.
Wet and smearingIt spreads on the counter or heavily coats your fingers.Add flour 1 tablespoon (8–10 g) at a time.
Dry and crackingThe edges split and the dough breaks instead of bending.Add yogurt 1 teaspoon (about 5 g) at a time.
Three-panel dough texture guide showing soft tacky dough, wet smearing dough and dry cracked dough.
Target texture: soft, cohesive and lightly tacky. Add flour or yogurt only in small amounts when the dough clearly needs it.

Stop while the dough is still a little tacky. Knead only until it holds together; extra flour and extra kneading can make the crust tough.

Hands kneading Greek yogurt pizza dough briefly, followed by a soft dough ball on a floured counter.
Stop when the surface looks mostly smooth but still soft, not tight, dry or floury.

Roll and Shape Without Chasing Perfection

Thickness matters more than achieving a perfect circle. An uneven homemade edge will taste better than a neat round made tough with too much flour.

  • Full batch, 11–12 inches: The most balanced crust, with a tender center and crisp edge.
  • Full batch, 9–10 inches: A softer, breadier crust that may need another minute during the first bake.
  • Half batch, 6½–7 inches: A personal pizza sized for most air-fryer baskets.
Thickness guide showing 9–10 inch, 11–12 inch and 12–13 inch Greek yogurt pizza bases.
Thickness changes the eating experience. A smaller crust stays softer, while an 11–12 inch base gives the best balance of tender middle and crisp edge.

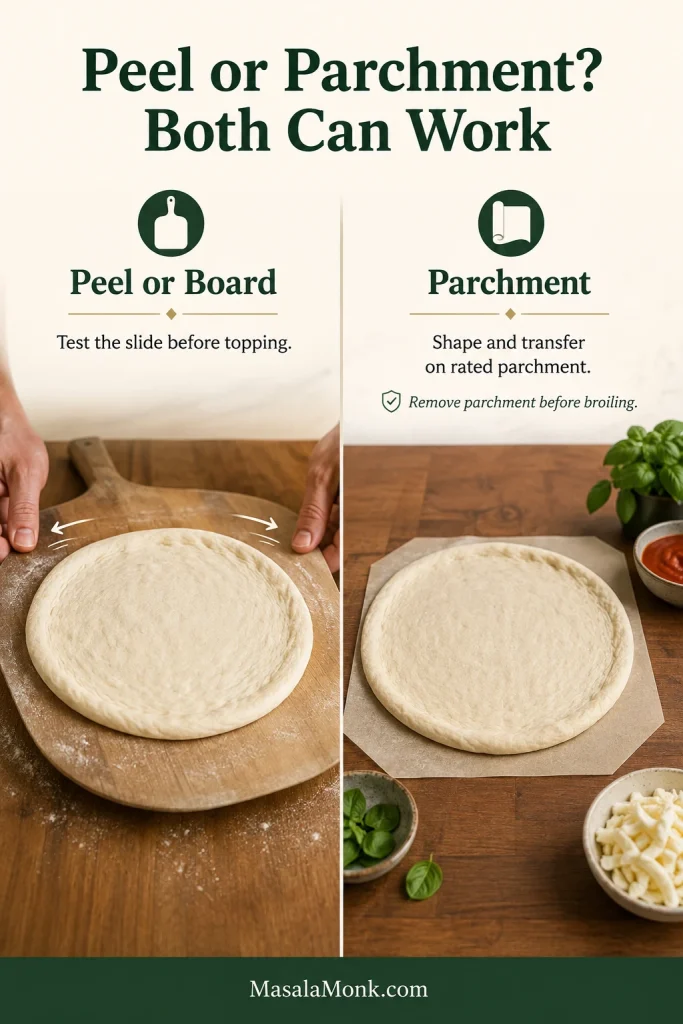
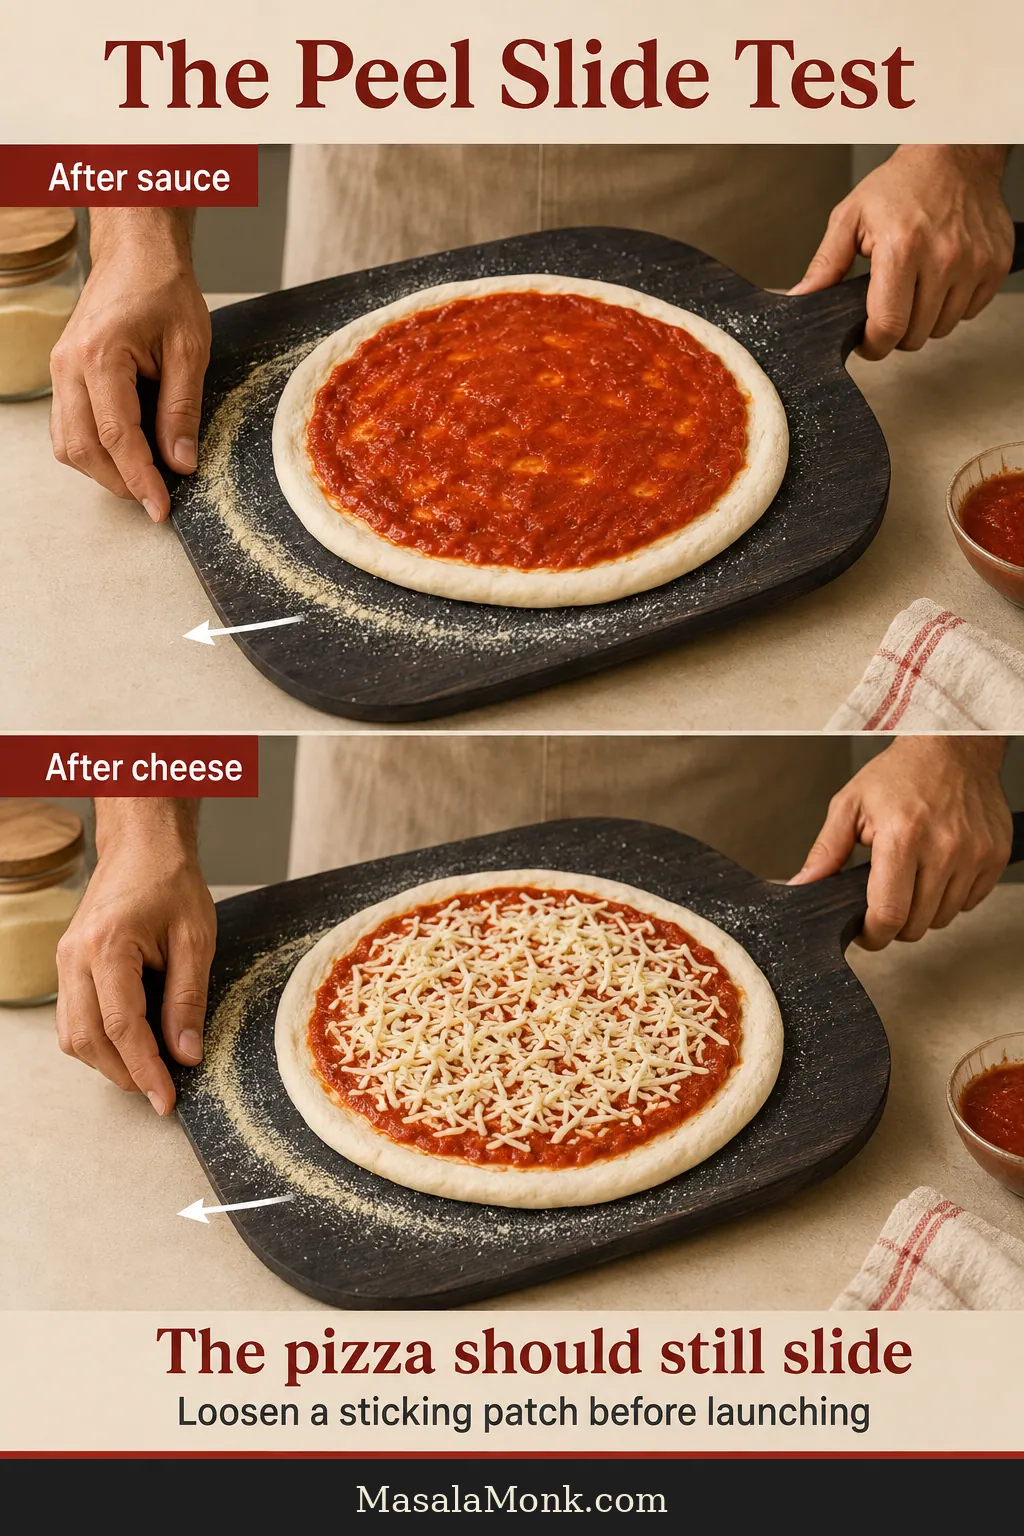
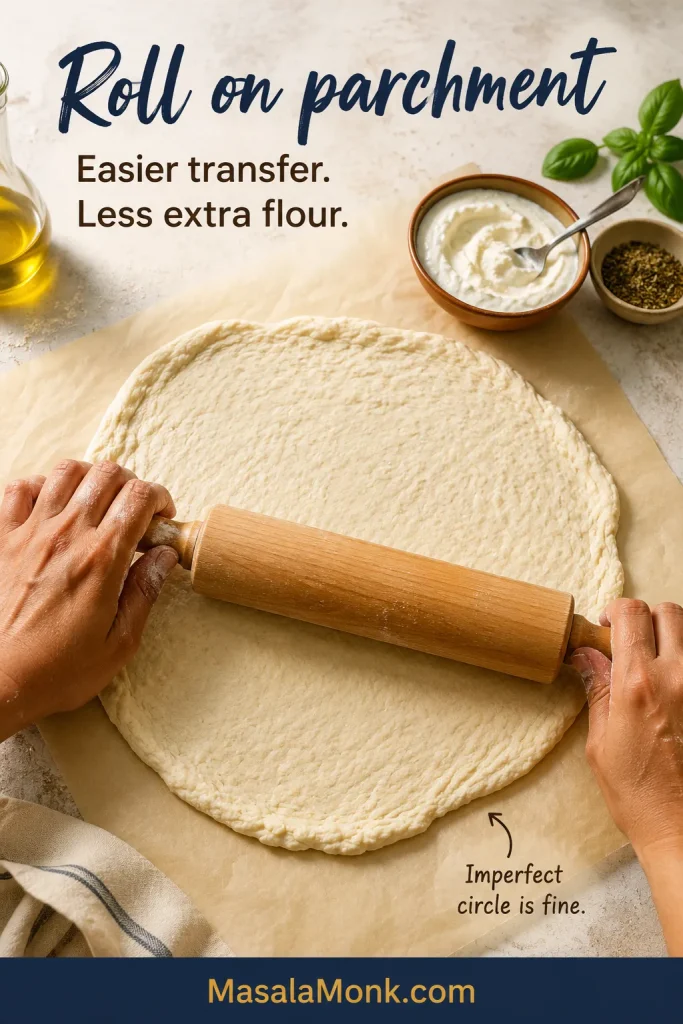
Shape the dough on the parchment, peel or inverted tray you will use to transfer it. If the rolling pin sticks, dust it lightly or roll between two sheets of parchment. A slightly uneven circle is better than a tough, over-floured one.

Greek yogurt pizza dough being rolled on parchment into a slightly uneven circle with a wooden rolling pin.
Parchment makes soft dough easier to move from counter to pan. A slightly uneven circle is better than a perfectly round crust that has been overworked.

Dough feels right? Move on to baking it without a gummy center.

How to Bake It Without a Gummy Center

Give the Bare Crust a Head Start

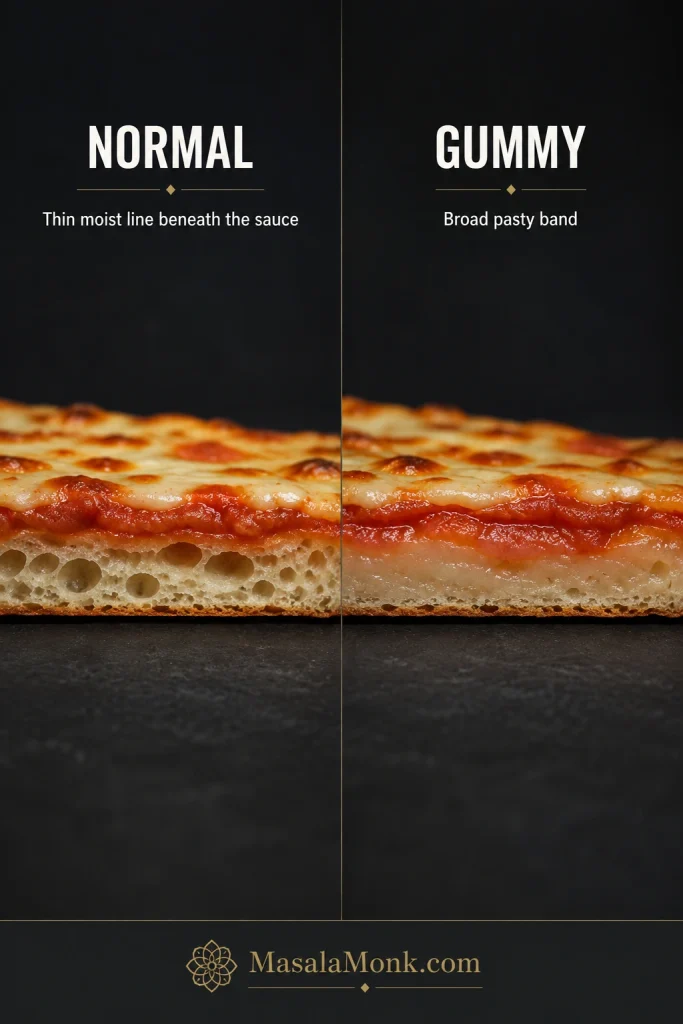
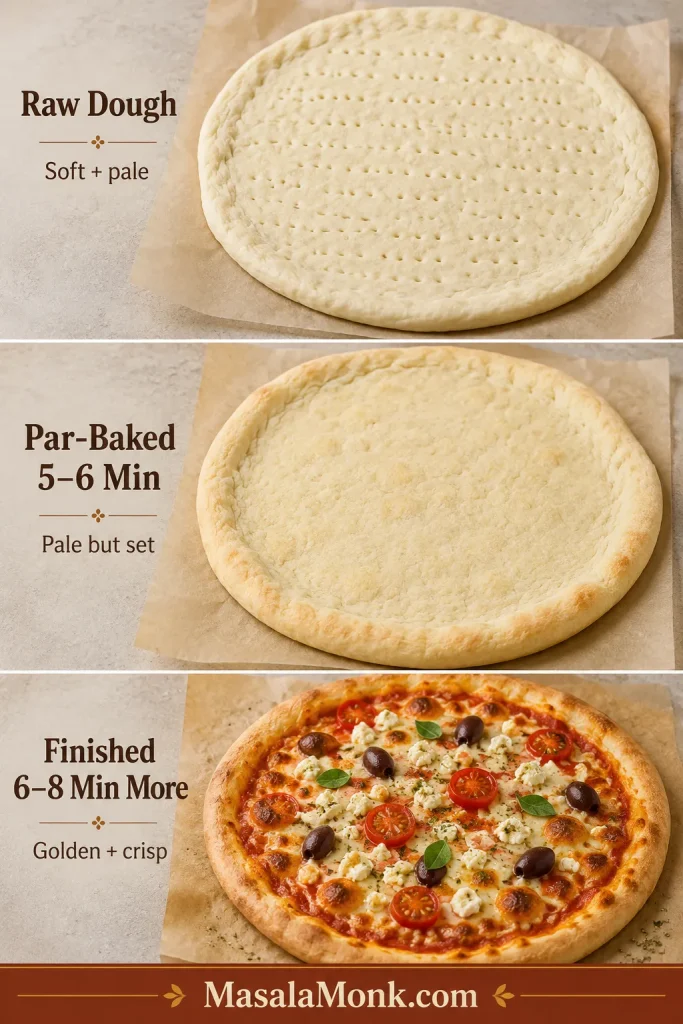
Give the bare crust five or six minutes first. That small head start keeps the sauce and cheese from sinking into a soft center. The first bake is only to set the crust, so it should still look pale.

Three-stage guide showing raw Greek yogurt pizza dough, pale par-baked crust and finished baked pizza.
Par-baking is supposed to look pale, not finished. Once the crust is set, the second bake can melt the cheese without leaving the center soft.

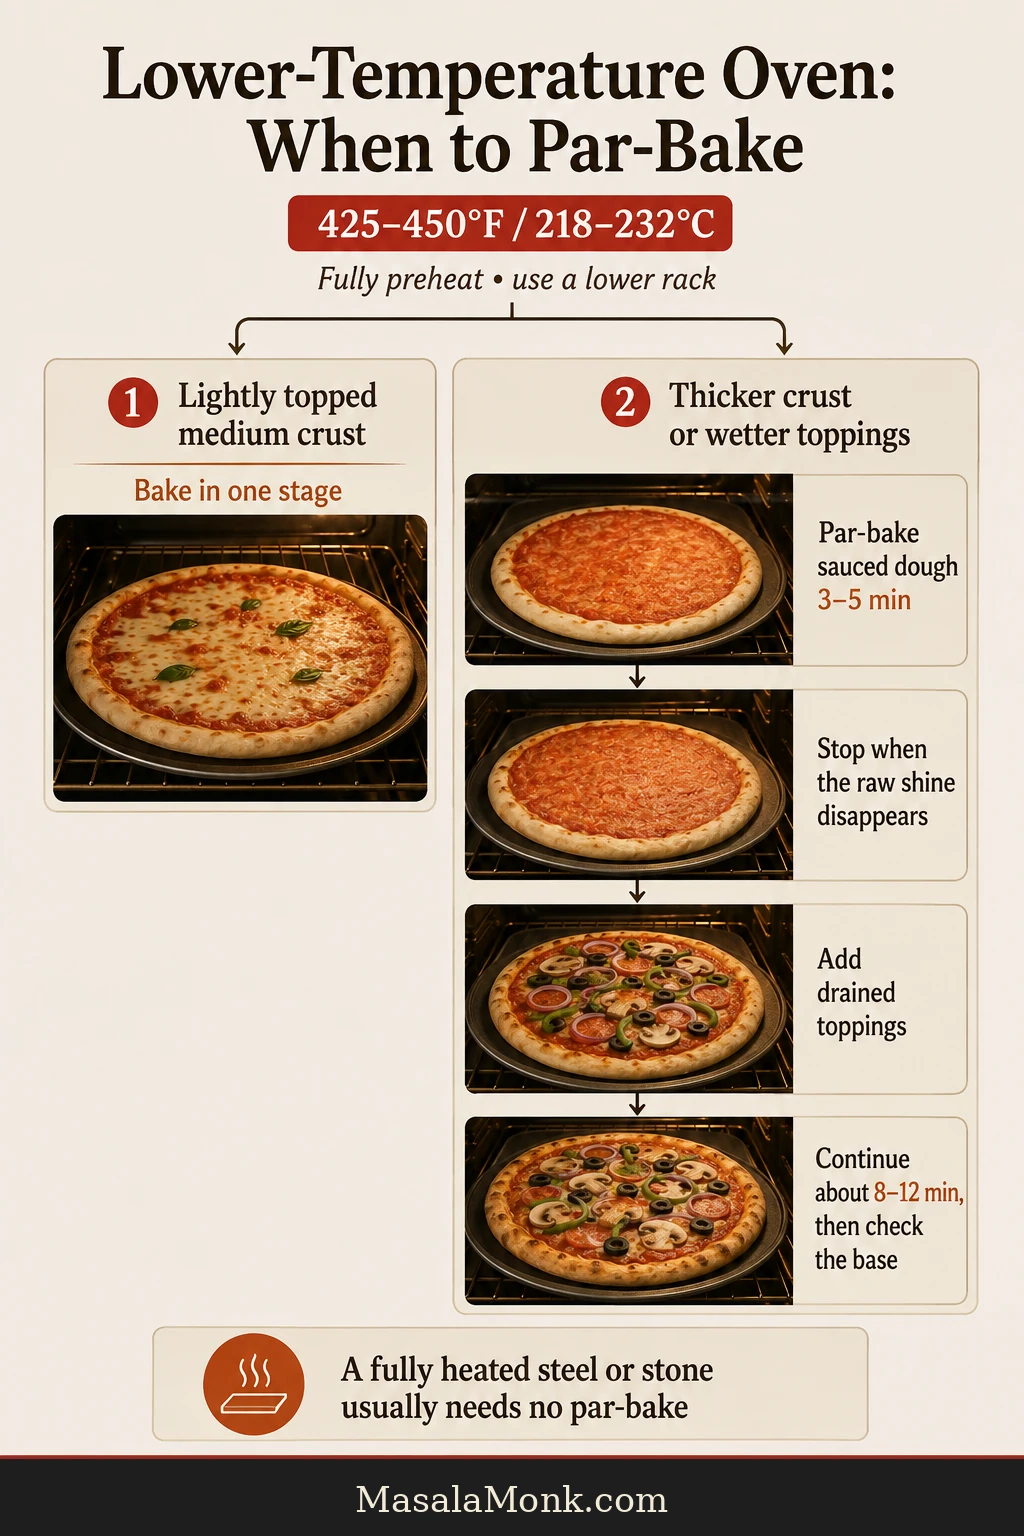
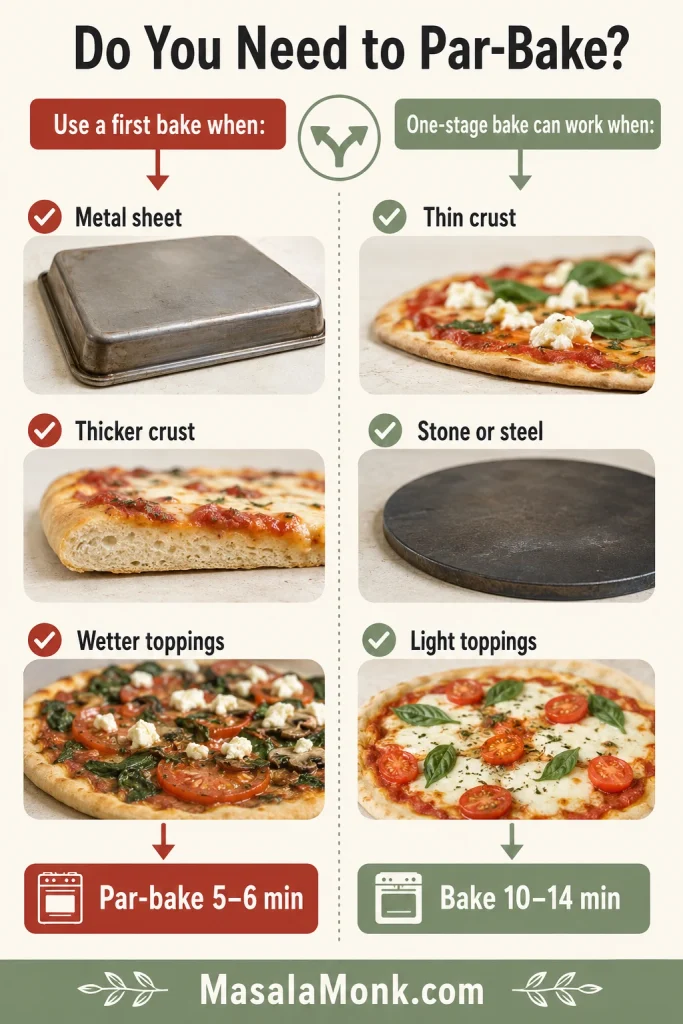
Do you have to par-bake it? Not always. A thin crust on a fully heated stone or steel with light toppings can bake in one stage. For an 11–12-inch crust on a standard metal sheet—or whenever the toppings carry more moisture—the short first bake is the more reliable route.

Decision guide showing when to par-bake pizza crust and when one-stage baking can work.
Par-bake for reliability when using a metal sheet, a thicker base or wetter toppings. Thin crust with light toppings can bake directly on a very hot stone or steel.

For a one-stage bake, roll the crust to 12–13 inches and bake it for about 10–14 minutes at 450°F (230°C). Use a fully heated surface, add a light layer of toppings and begin checking the base at 10 minutes.

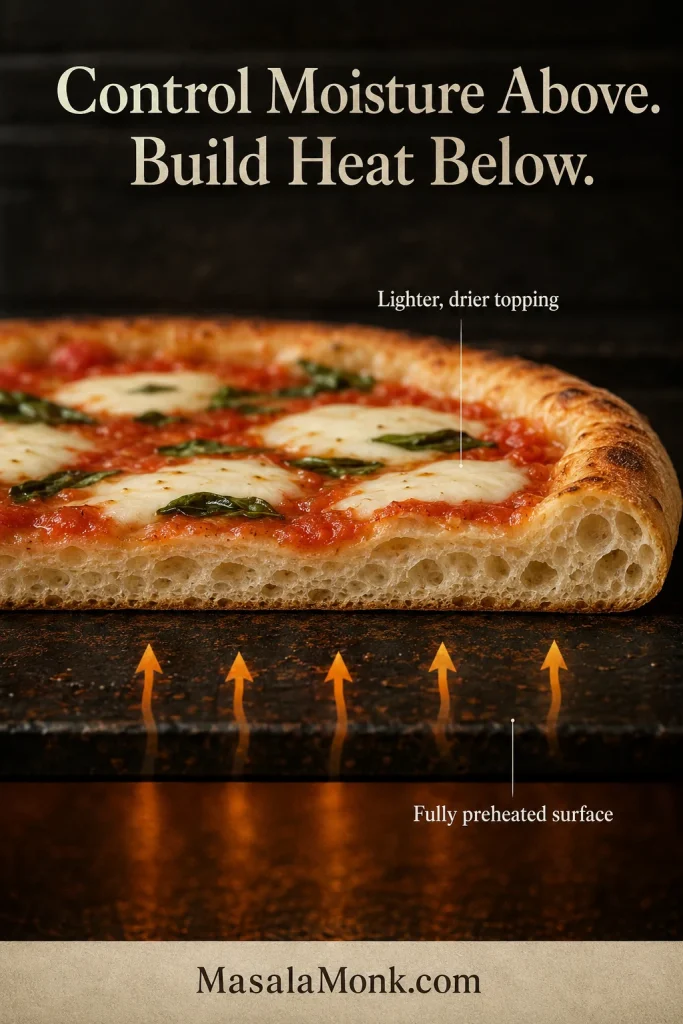
Control Moisture on Top

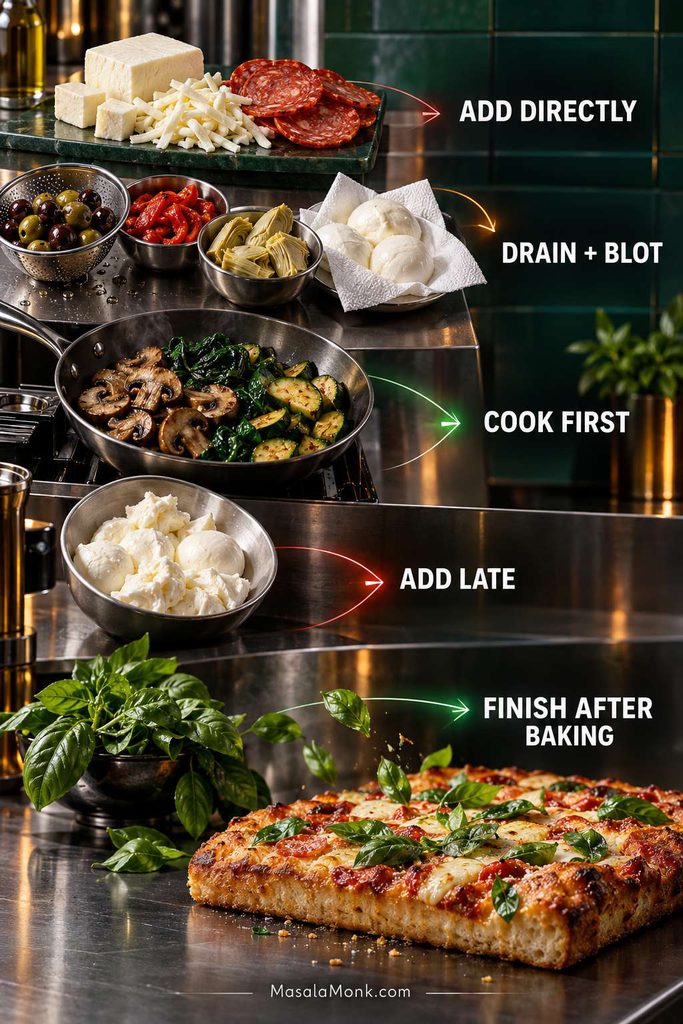
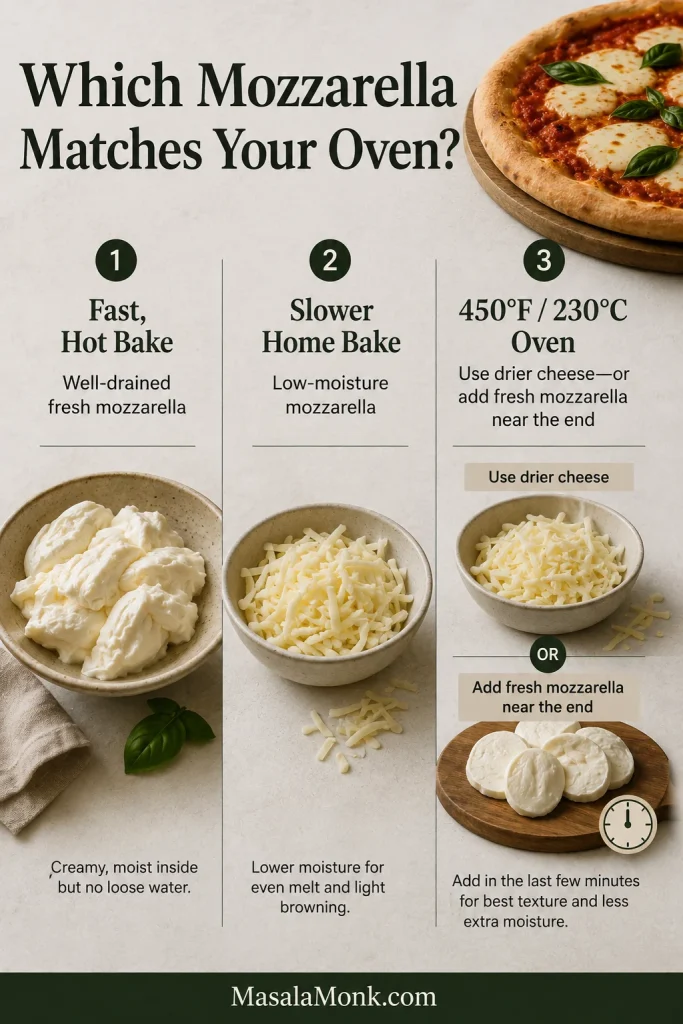
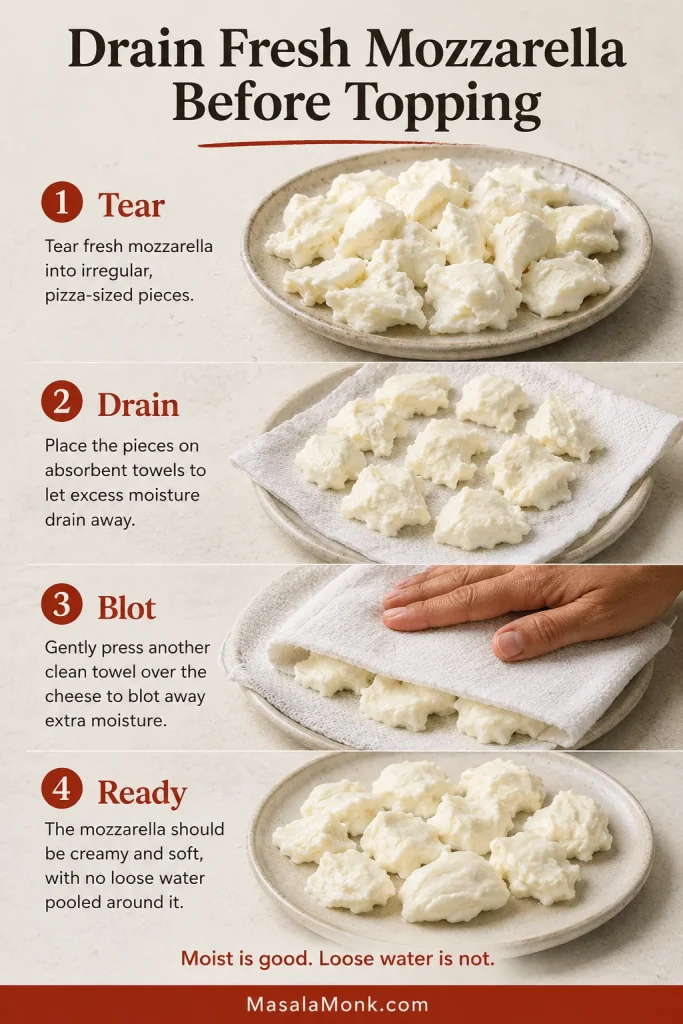
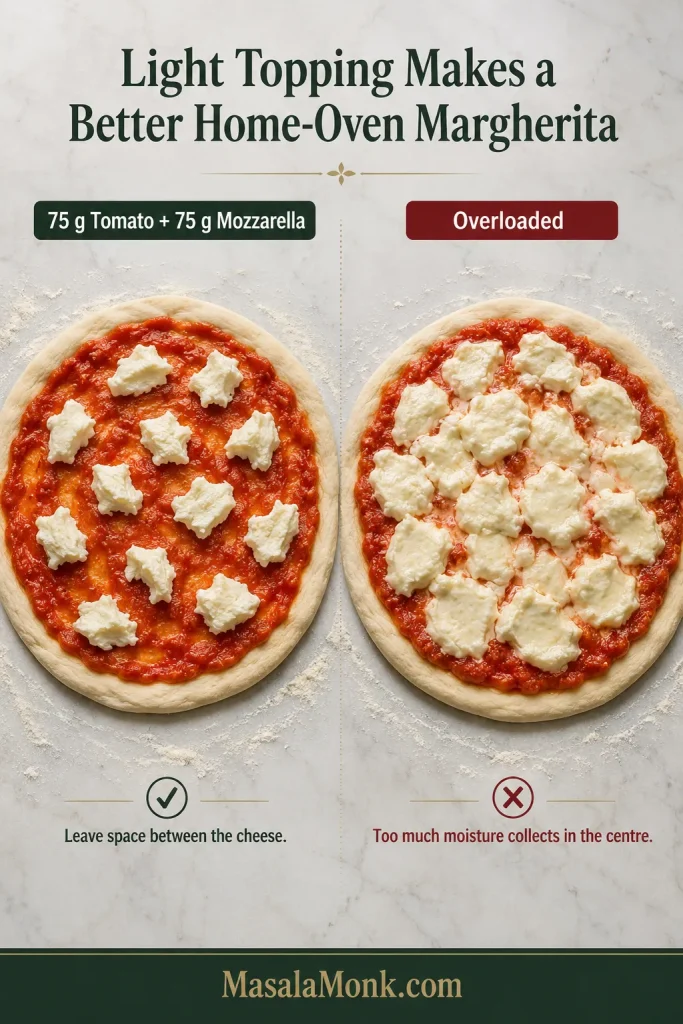
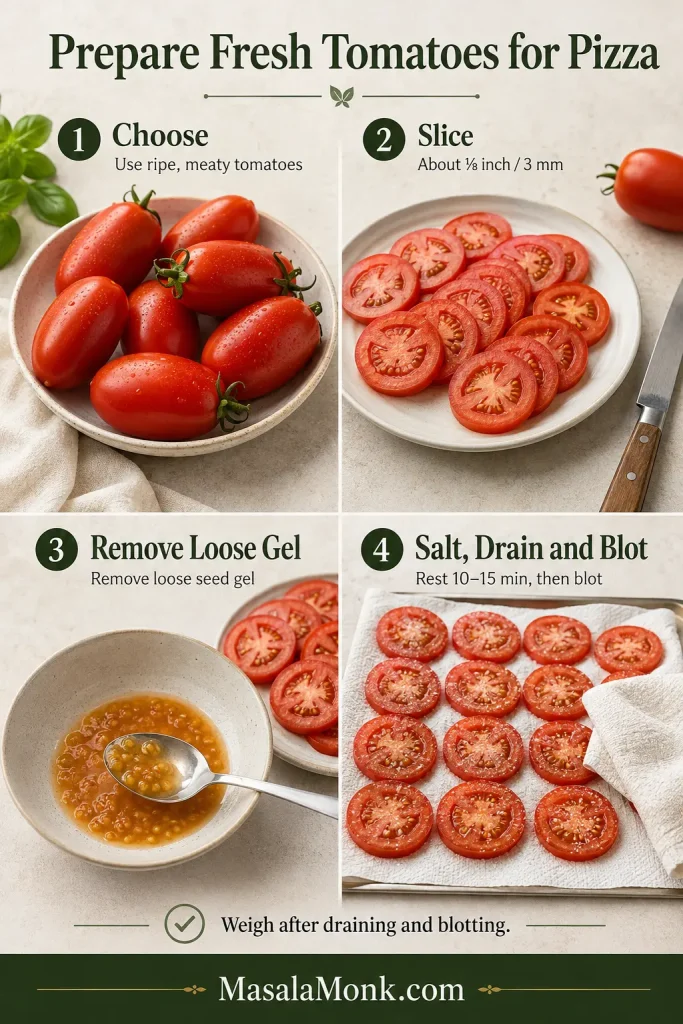
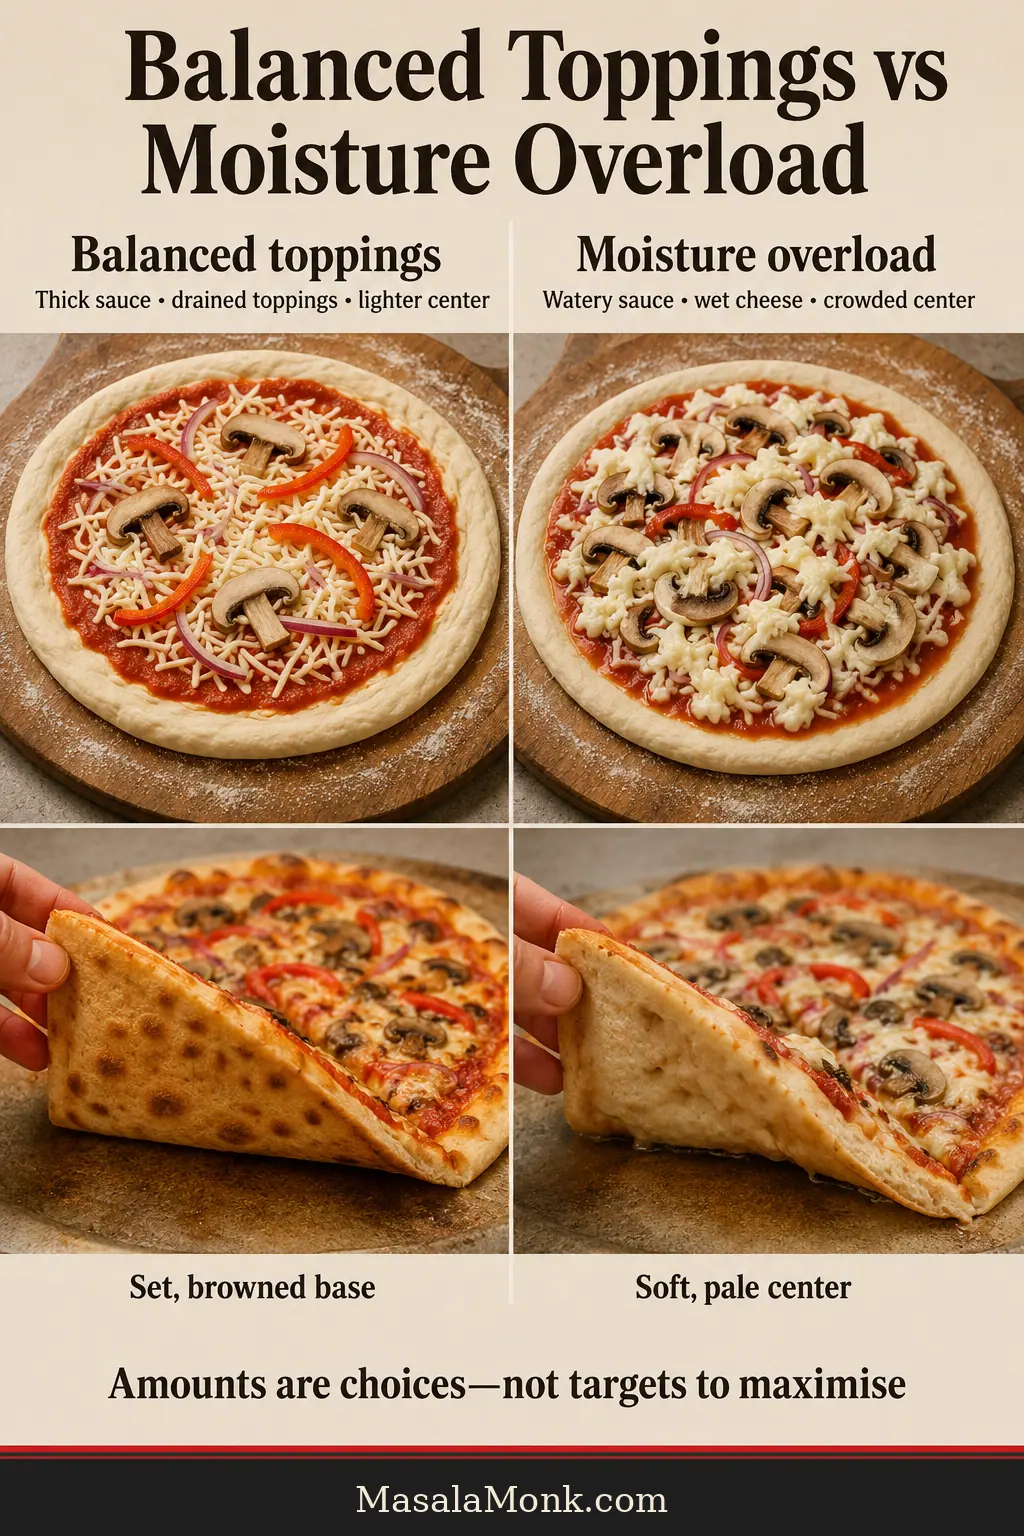
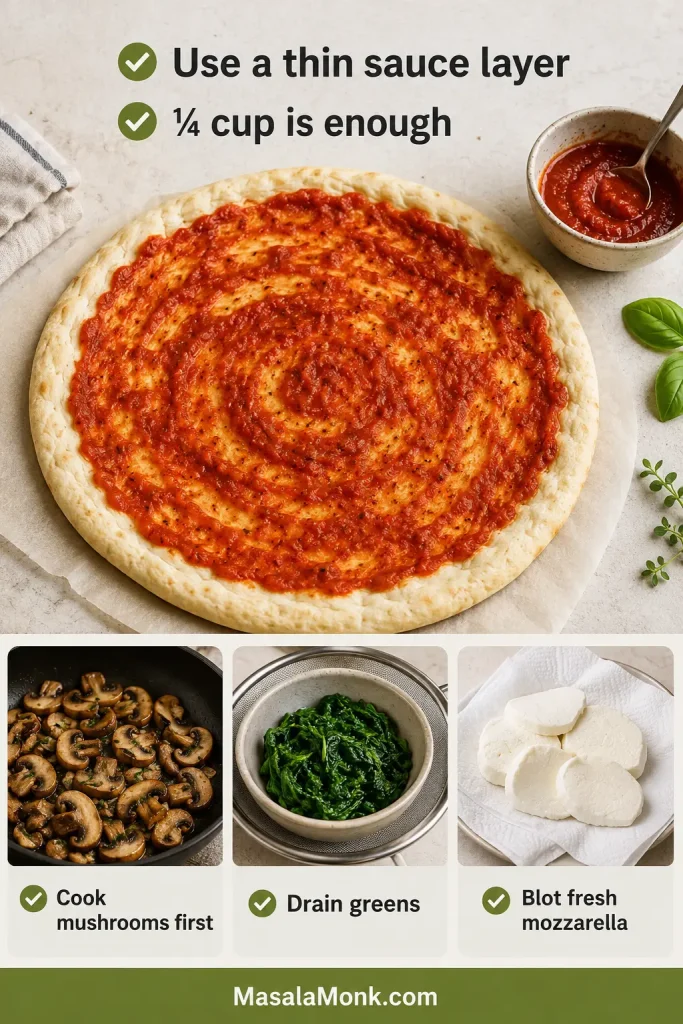
Sauce should leave a thin, even coating across the dough. A crowded center traps moisture, so cook mushrooms and spinach before using them and drain fresh mozzarella on paper towels for 10–15 minutes.

Pizza prep guide showing thin tomato sauce on crust with cooked mushrooms, drained greens and blotted mozzarella.
A restrained topping layer protects the crust. Spread sauce thinly, cook mushrooms, drain greens and blot fresh mozzarella before baking.

A thick homemade marinara sauce works better here than watery tomato purée.

Give the Bottom Real Heat

A cool tray absorbs heat from the dough and leaves the base pale. A hotter tray will do more for the crust than another handful of flour will ever do for the dough.

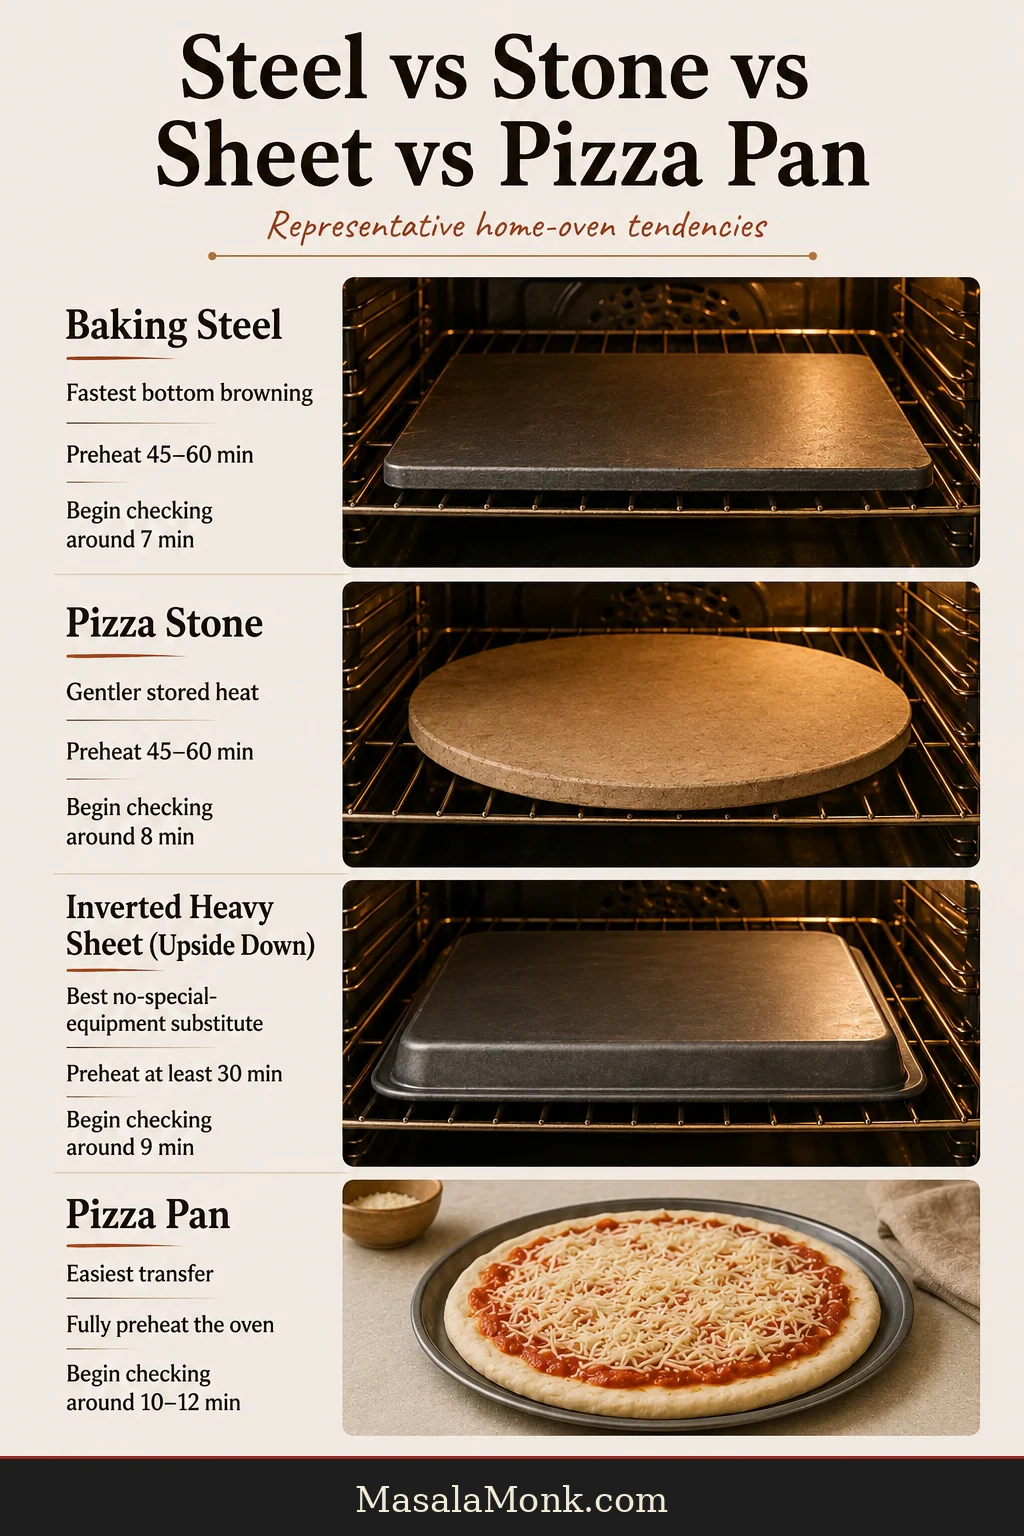
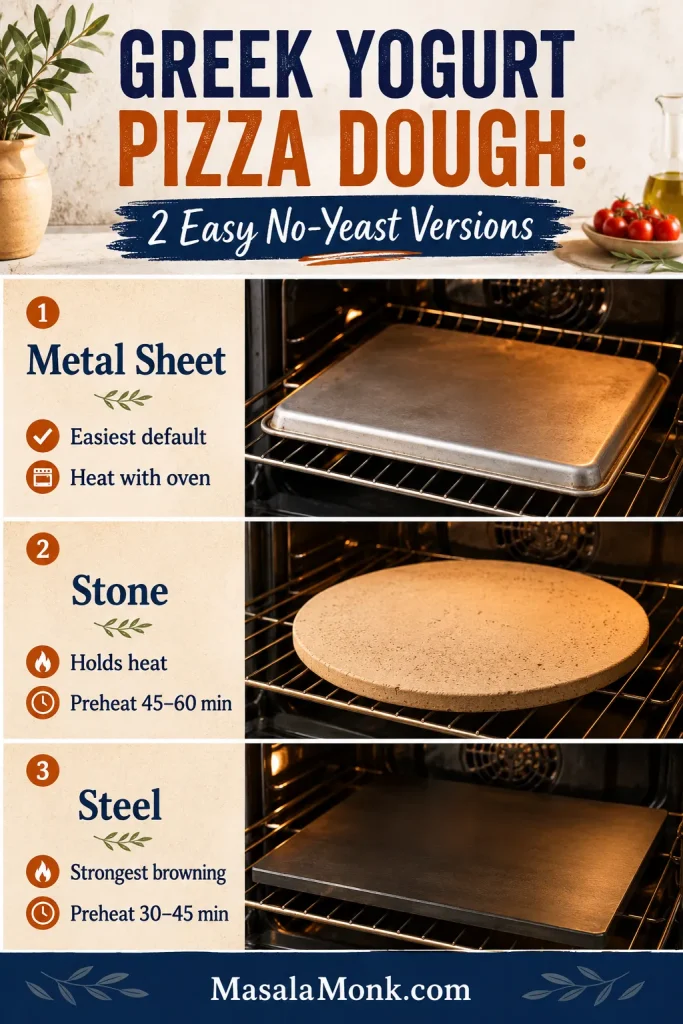
Turn a sturdy metal baking sheet upside down and heat it with the oven. A stone or steel needs longer to heat through fully; King Arthur Baking provides additional guidance on preparing pizza baking surfaces.

Three-panel guide comparing an inverted metal baking sheet, pizza stone and pizza steel for baking pizza crust.
The baking surface sets the bottom before moisture can make it gummy. A metal sheet is the easiest route; stone and steel need longer preheating but brown faster.

Parchment makes a soft round easier to move, but heat limits vary. Check the package, trim exposed paper and keep it away from the broiler. Once the crust has set, carefully pull away the parchment and finish directly on the hot surface.

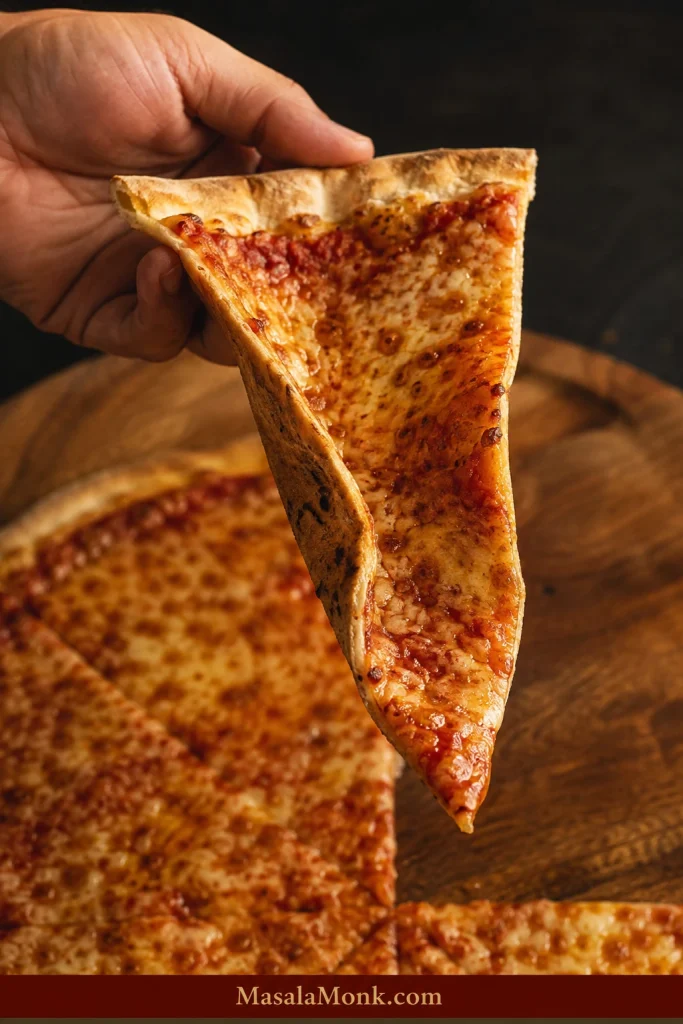
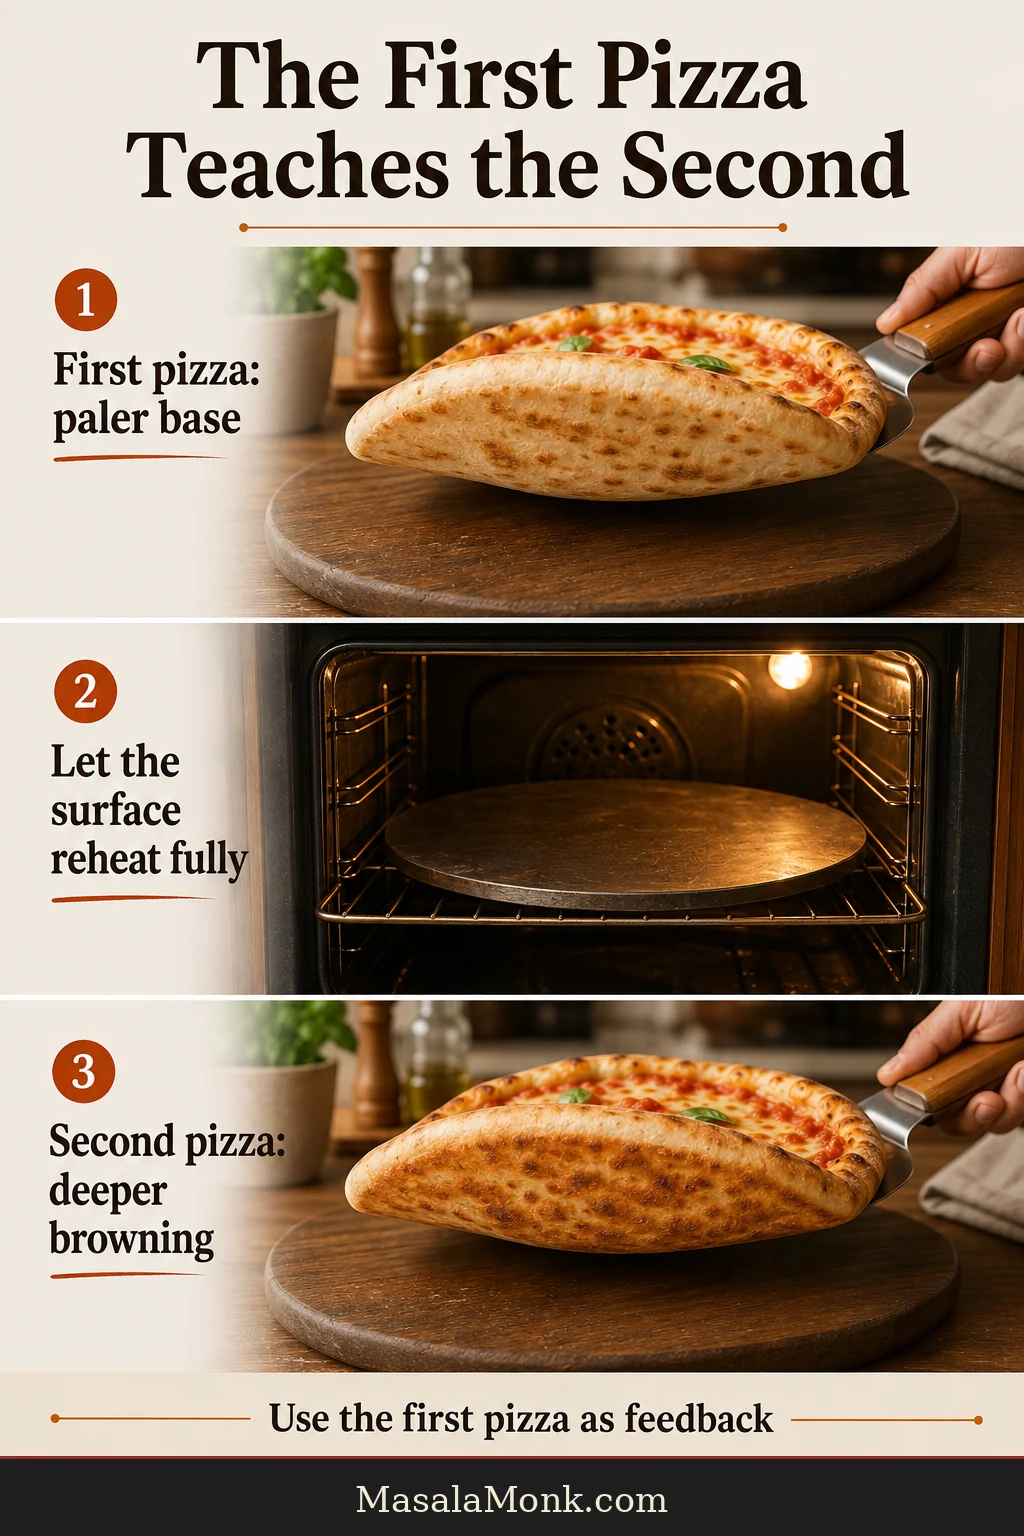
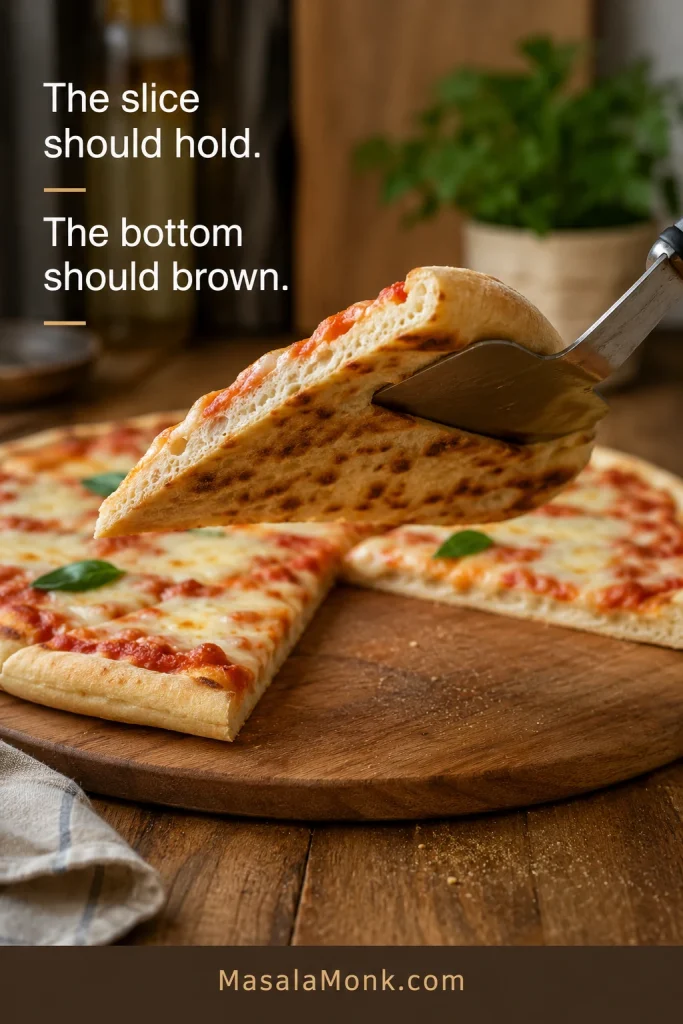
Lift an edge before taking the pizza out. Once the base has distinct golden-brown patches and the slice holds itself, the nervous part is over.

Pizza slice lifted with a spatula to show the browned bottom of a Greek yogurt pizza crust.
The underside tells you what the top cannot. If the slice holds and the base is browned, the crust has set; if it bends or looks pale, the pan needed more heat.

Toppings That Work Best on This Quick Crust

This dough can carry plenty of flavor, but the best combinations add interest without burying the center under a heavy layer. MasalaMonk’s pizza sauce guide covers red, white, pesto, buffalo and barbecue directions.

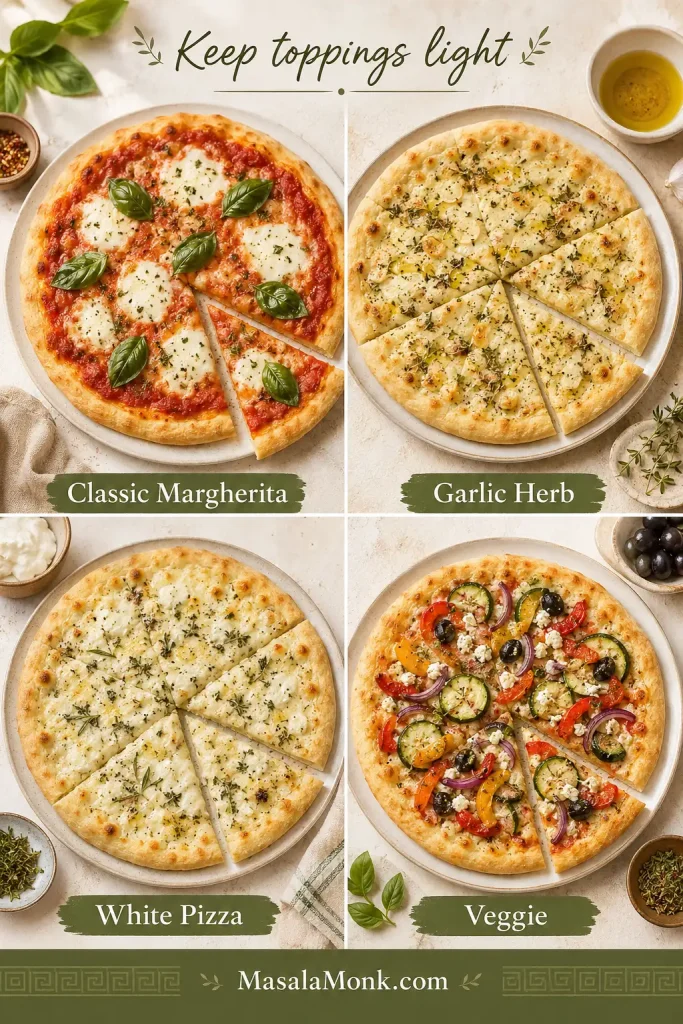
Four topping variations for Greek yogurt pizza labeled Margherita-style, Garlic Herb, White Pizza and Veggie.
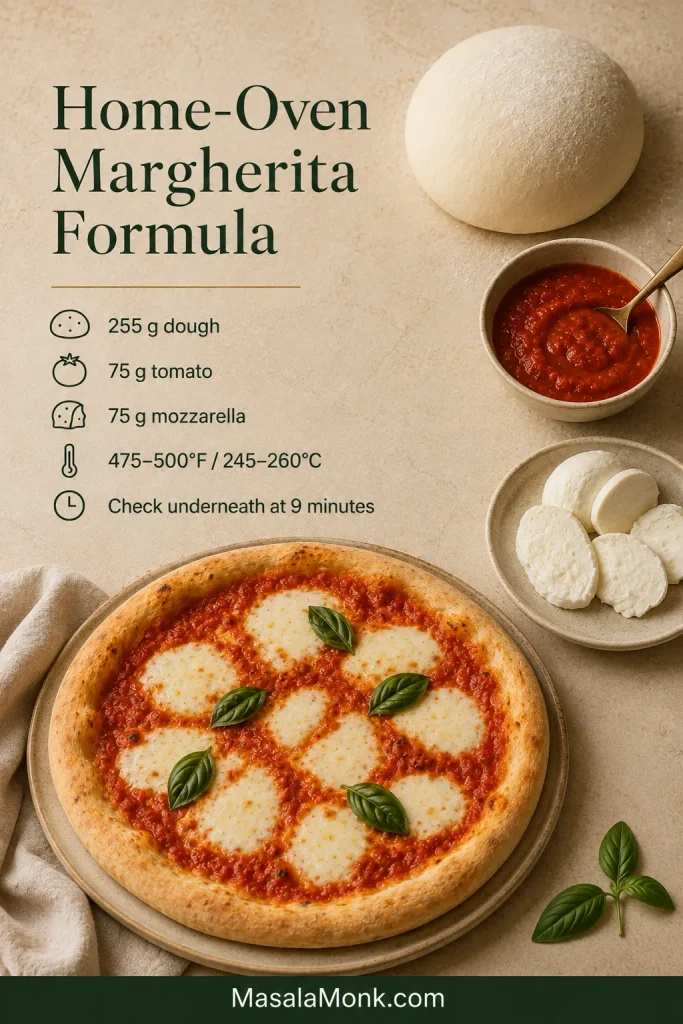
Variations work best when the topping load stays light. Margherita-style, garlic herb, white pizza and veggie versions all need the same rule: flavor first, moisture under control.
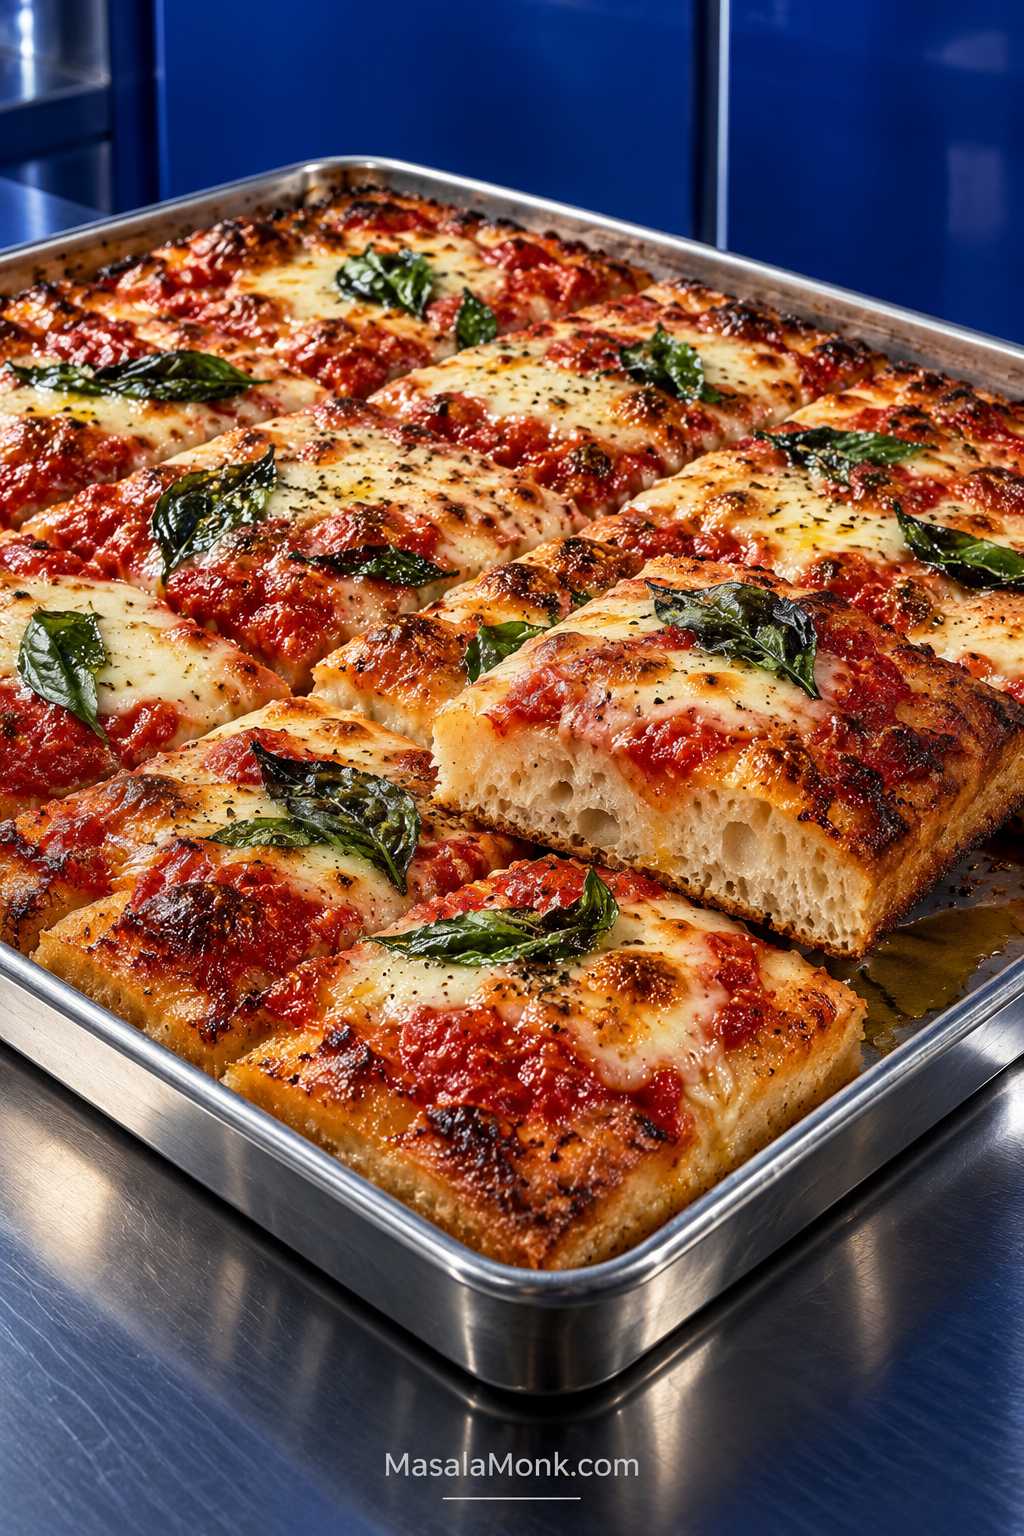
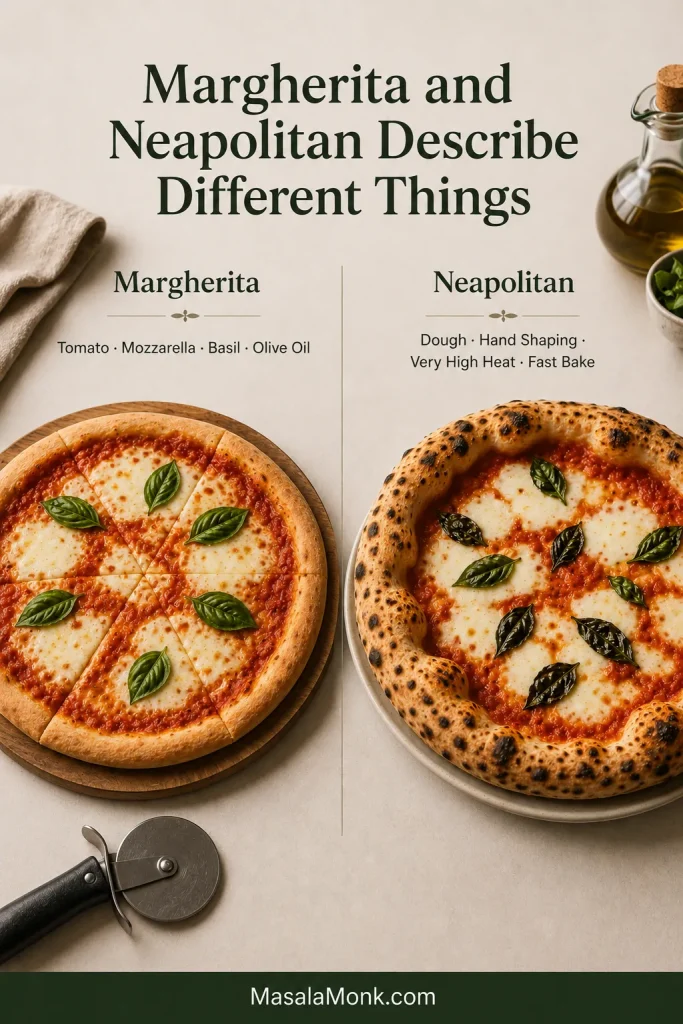
  • Margherita-style: Thick marinara, low-moisture mozzarella, oregano and basil after baking.
  • Garlic herb: A thin layer of olive oil or white sauce, mozzarella, garlic, oregano and a little Parmesan.
  • White pizza: Use a restrained layer of ricotta or white sauce with low-moisture mozzarella and keep the center light.
  • Vegetable: Cooked mushrooms, peppers, onion and well-drained spinach.
  • Extra protein: Cooked chicken, turkey pepperoni, tofu or firm paneer with peppers and onion. MasalaMonk’s homemade paneer method produces cubes that stay tender under the cheese.
  • Pesto or buffalo: Use a thin layer and avoid heavy wet toppings in the center.

Air Fryer Greek Yogurt Pizza

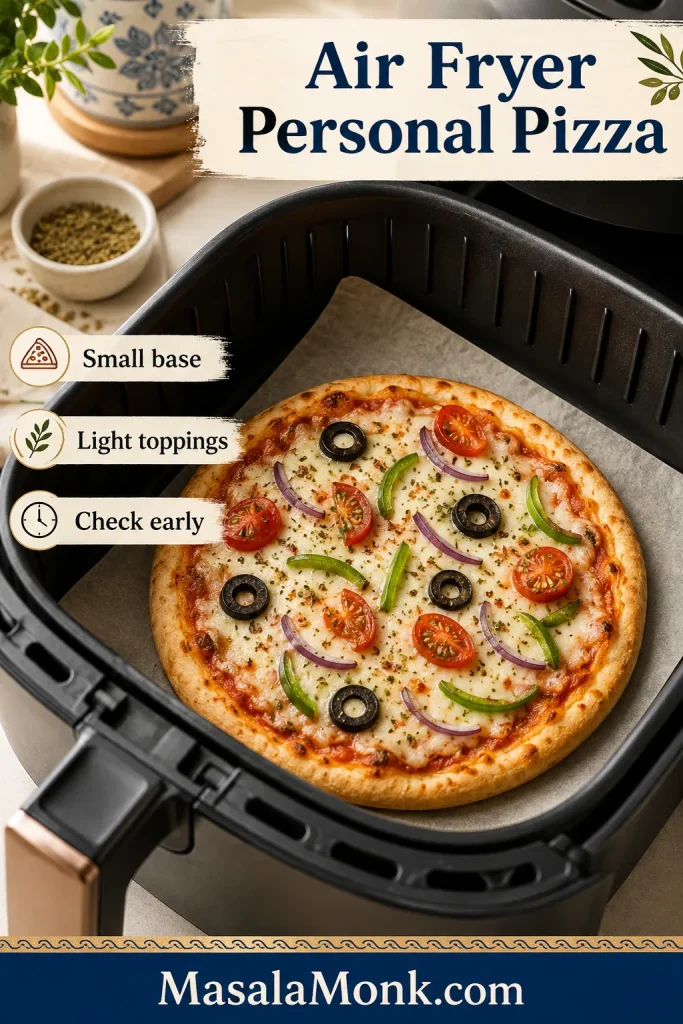
The oven gives the most even result, but half the dough makes a good personal pizza in an air fryer. Keep it small enough to check underneath before adding toppings.

  • Half the dough batch
  • 2–3 tablespoons thick pizza sauce
  • 40–50 g (1.4–1.8 oz) low-moisture mozzarella
  • A small handful of cooked or well-drained toppings
  1. Preheat the air fryer to 375°F (190°C) when your model recommends preheating.
  2. Roll the dough into a 6½–7-inch circle, or slightly smaller than the basket, and dock the center lightly with a fork.
  3. Transfer it to the basket, using suitable perforated parchment when needed.
  4. Air fry the bare crust for 6–8 minutes, until the surface looks dry and set.
  5. Check underneath. If the base is still pale, flip the crust and cook for another 1–2 minutes.
  6. Turn it upright, add the toppings and cook for another 5–7 minutes.
Small Greek yogurt personal pizza in an air fryer basket with parchment underneath and light toppings.
Air fryer pizza works best in personal size. Because the basket is small and heat moves fast, keep the base thin, toppings light and check early.

The first air fryer pizza is partly a conversation with your machine. Some baskets brown underneath quickly, while others need the flip. The center should feel set and the base should show visible color before it comes out.

Never preheat loose parchment by itself. It can lift toward the heating element unless the dough is holding it down.

Greek Yogurt Pizza Dough Troubleshooting

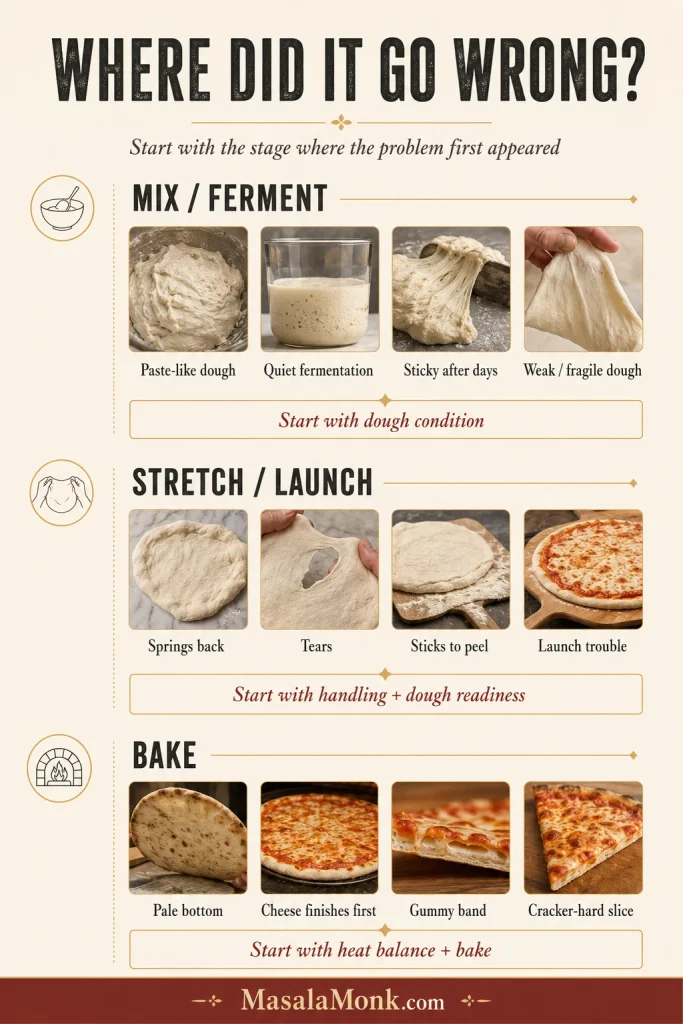
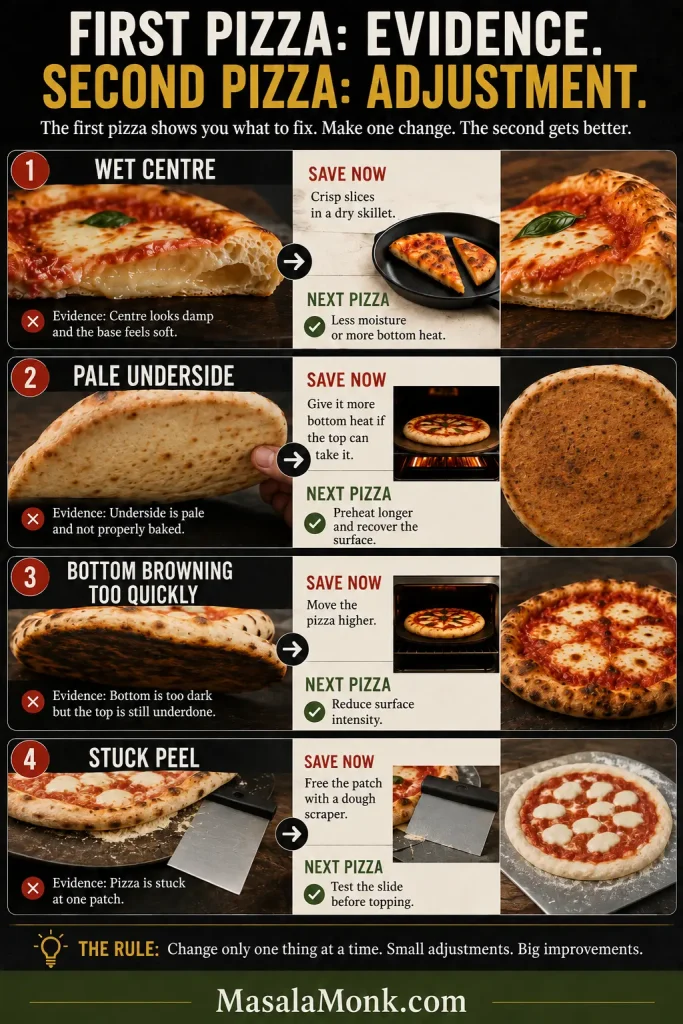
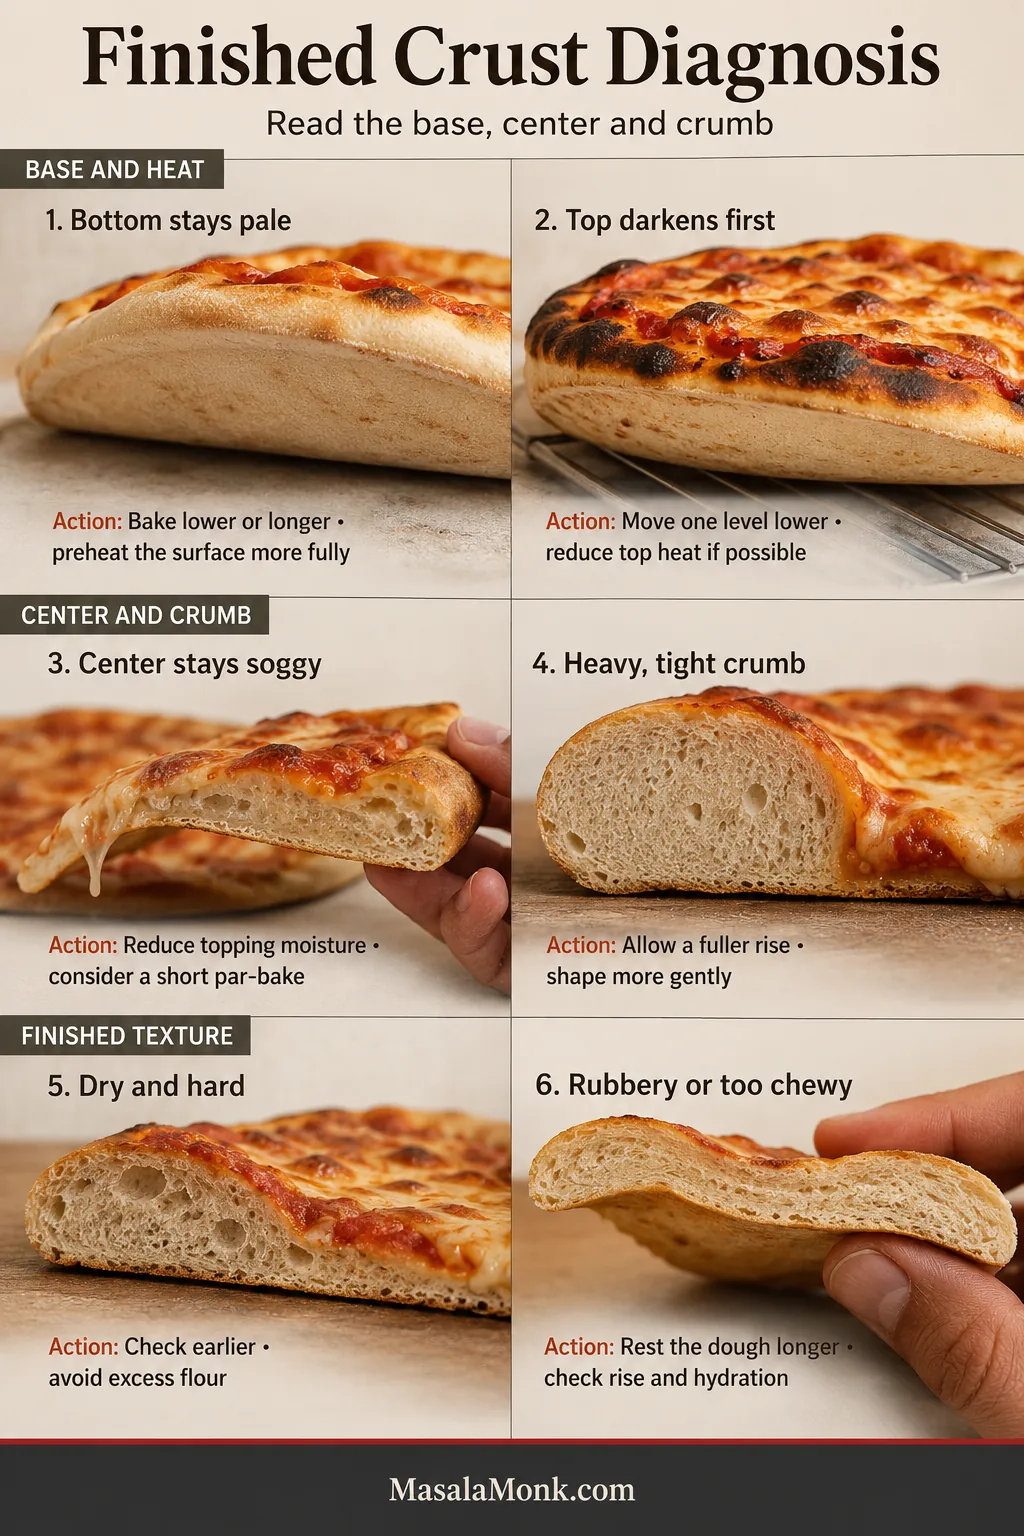
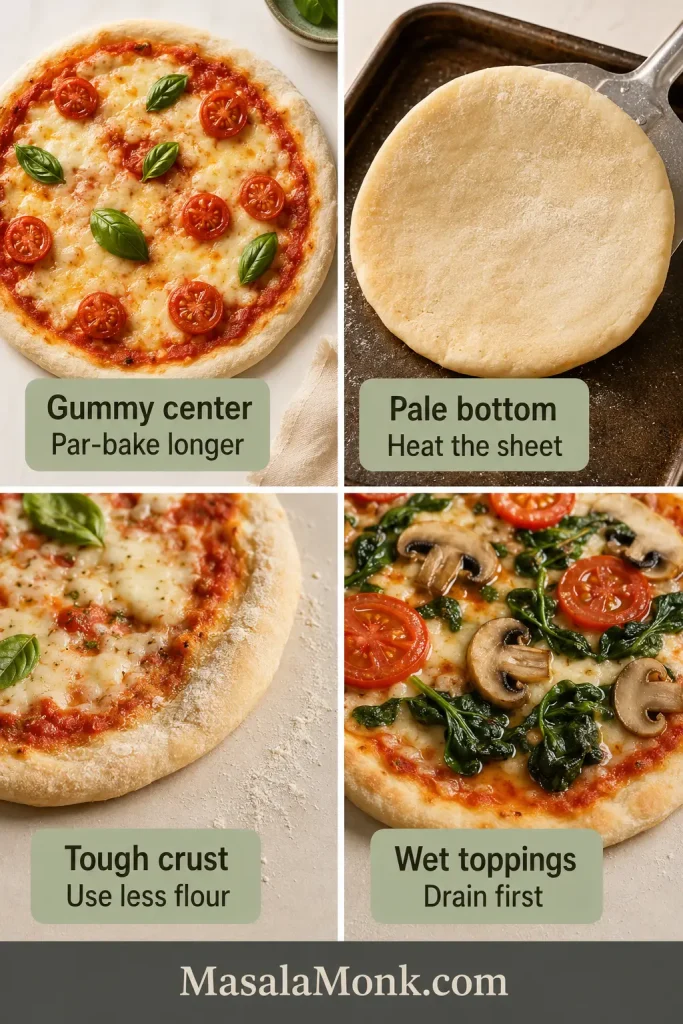
Most batches need no rescue. When something does go wrong, the problem usually traces back to hydration, thickness, bottom heat or topping moisture. The visual below groups those causes before the table gets specific.

Four-panel troubleshooting guide showing gummy center, pale bottom, tough crust and wet toppings on pizza.
Most crust problems trace back to four causes: hydration, thickness, bottom heat or topping moisture. Fix the cause and the next pizza improves fast.
ProblemLikely cause and fix
The dough is extremely stickyThe yogurt may be loose or too much was added. Rest the dough, then work in extra flour a spoonful at a time.
The dough is dry and crackingThere is too much flour or the yogurt is exceptionally thick. Work in yogurt 1 teaspoon at a time.
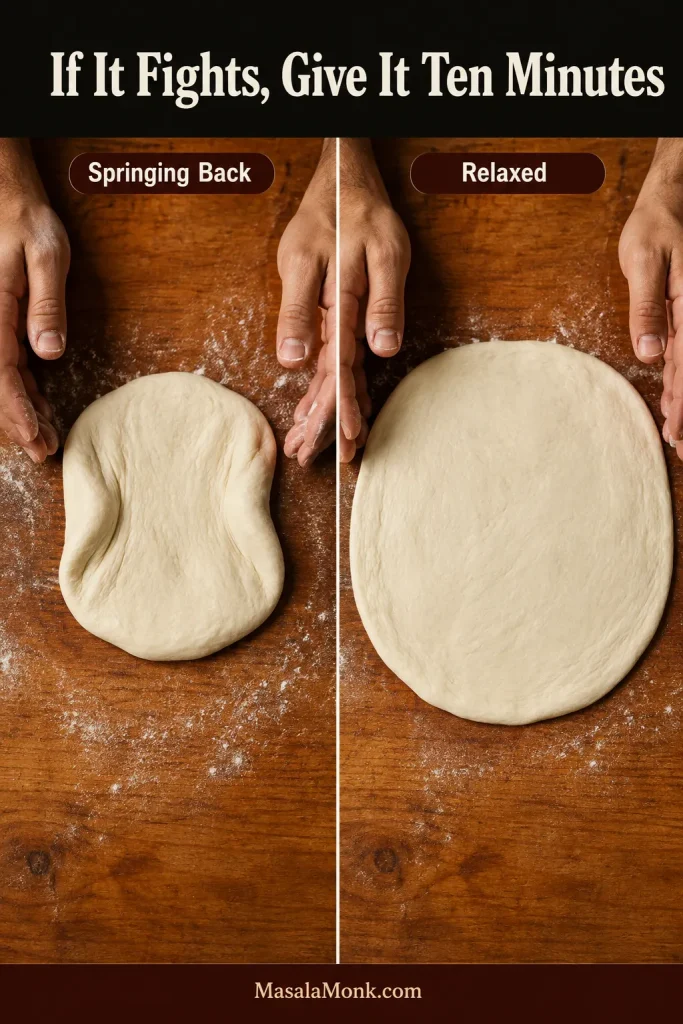
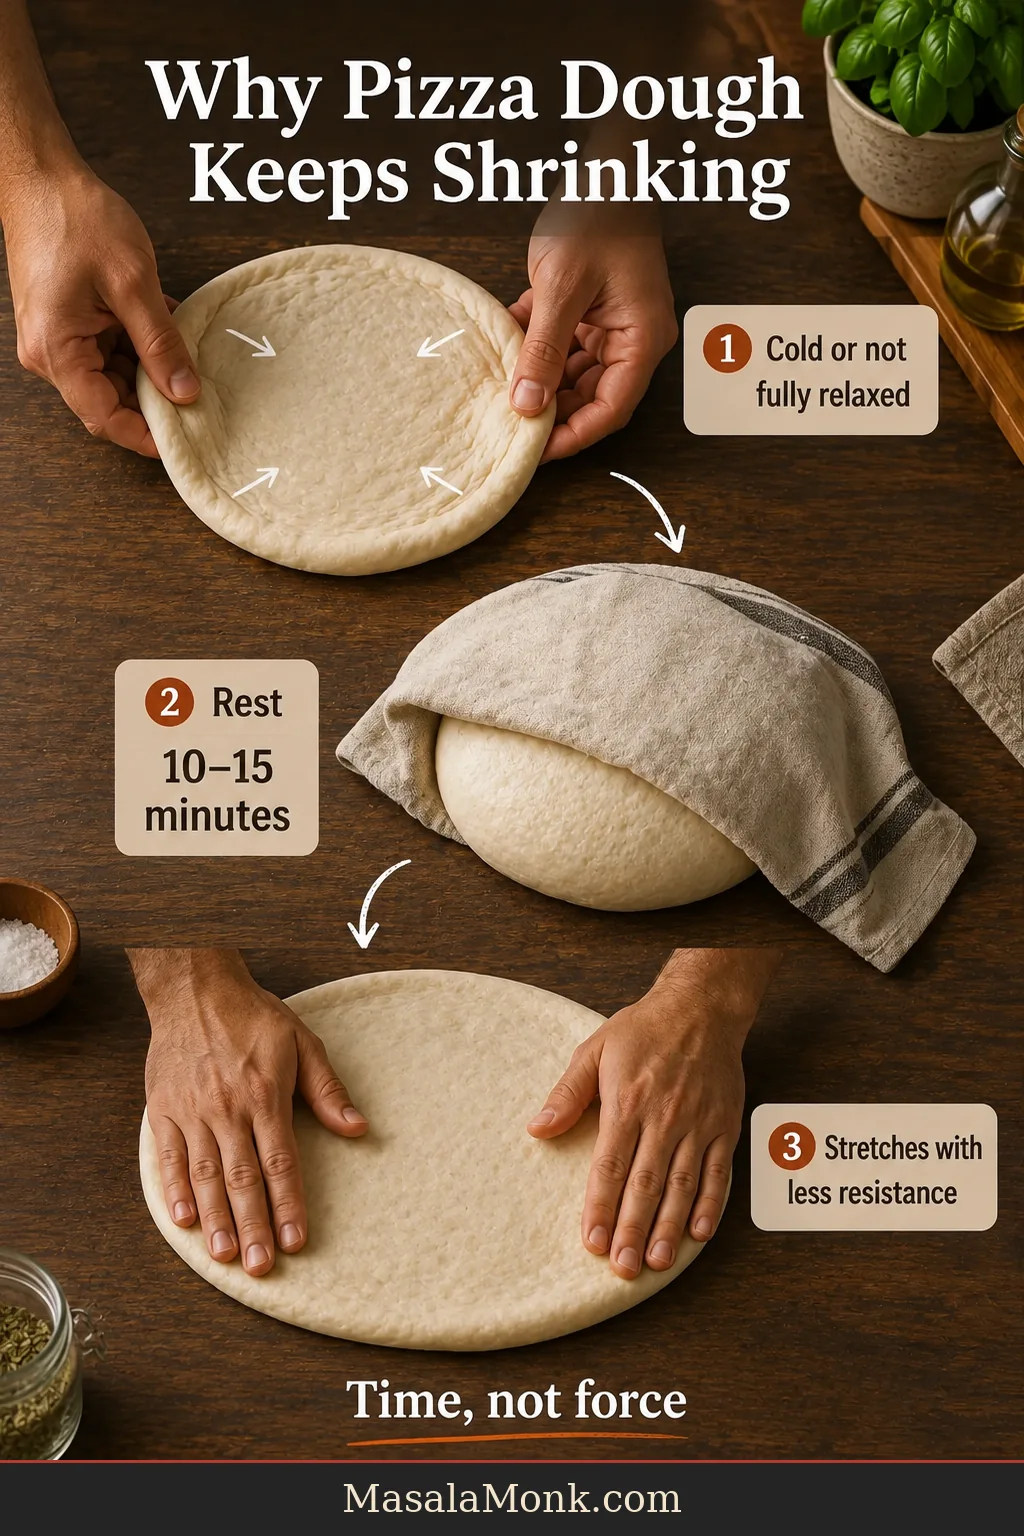
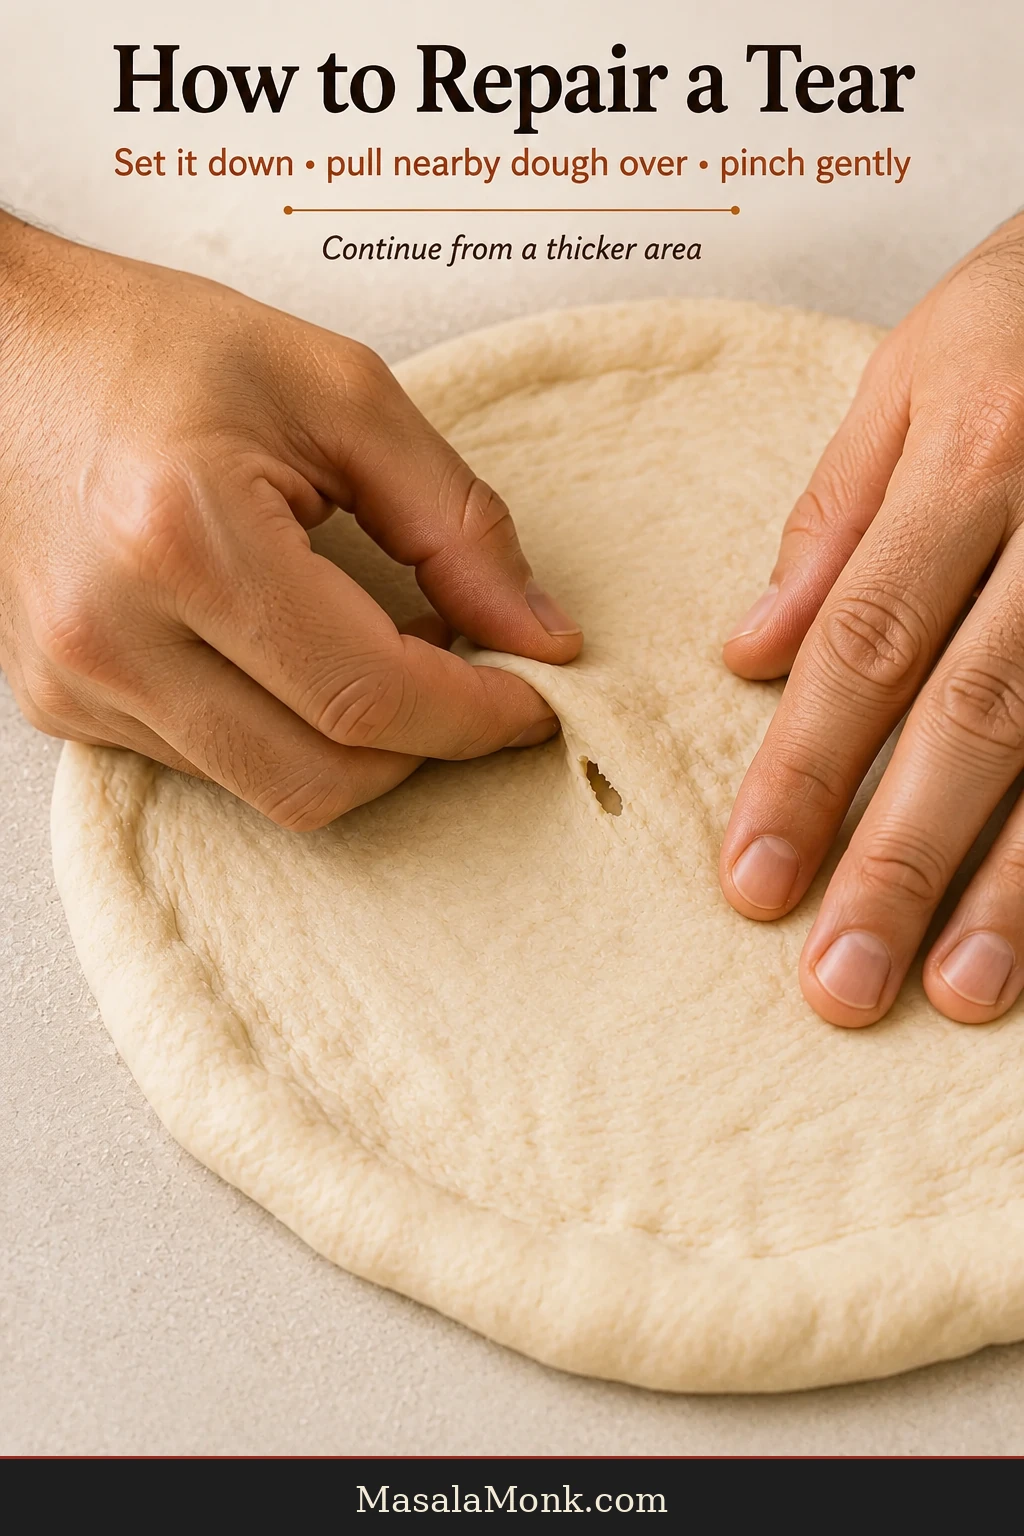
The dough tears while rollingIt may be too dry or too tight. Cover it and leave it for 5–10 minutes before rolling again.
The dough springs backThis happens more often with bread flour. Let the dough relax before widening it again.
The crust is toughToo much flour or kneading is the usual cause. Stop while the dough remains slightly tacky.
The center is gummyThe crust is too thick or carrying too much moisture. Roll it wider, drain wet toppings and give the bare crust a head start.
The bottom is paleThe baking surface needs more heat. Preheat it longer and remove the parchment near the end when possible.
The edge browns before the center cooksRoll the center thinner or extend the first bake. Cover a dark rim loosely with foil while the middle finishes.
The dough barely risesThe baking powder may be old. Replace it and bake the dough soon after mixing.
The air fryer bottom stays rawYour machine heats more strongly from above. Flip the crust during the first cooking stage.

Ready to bake again? Return to the recipe card, or see storage and reheating.

Storage, Freezing and Reheating

Best Make-Ahead Route

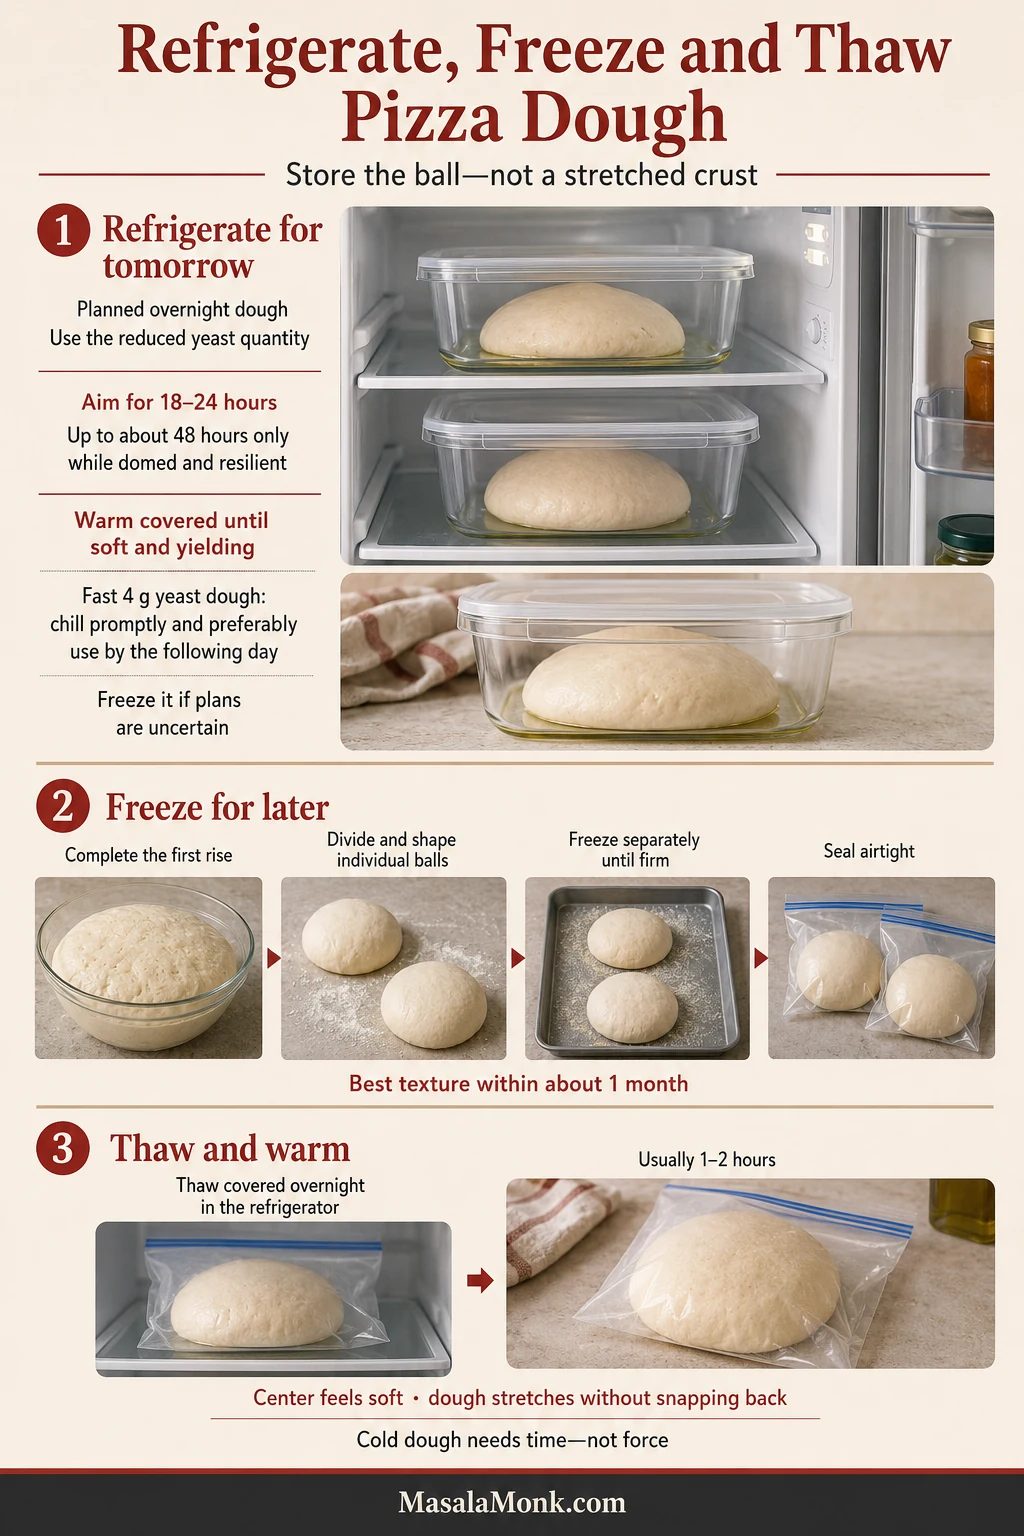
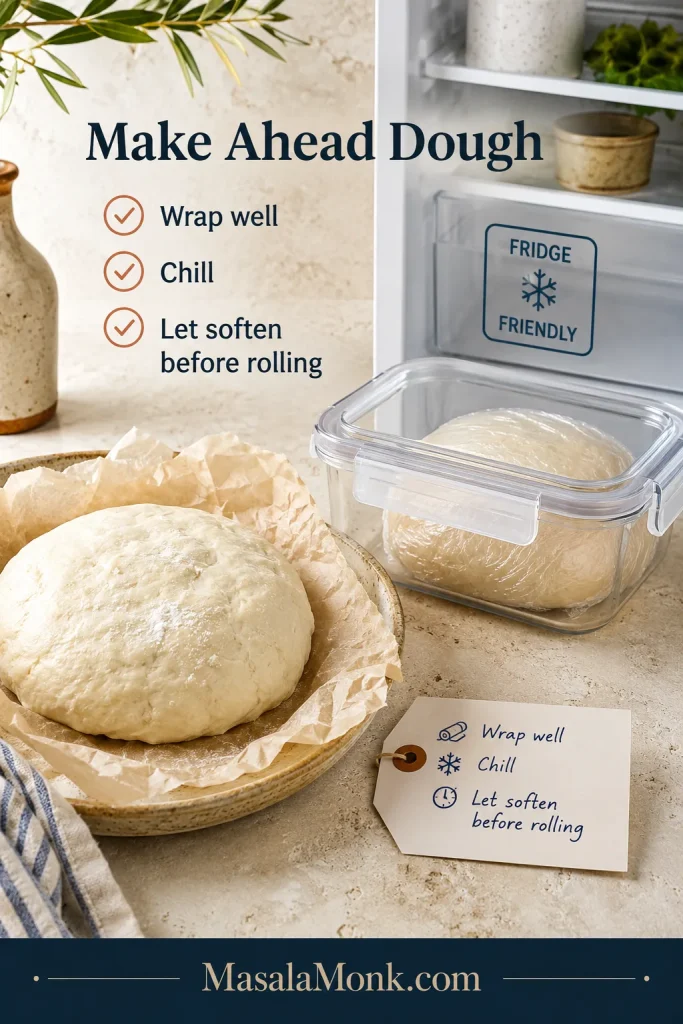
This dough is best shaped and baked soon after mixing. If you need a short pause while the oven heats or toppings are prepared, keep the dough covered so it does not dry out. For true make-ahead prep, par-bake the crust, cool it completely and then refrigerate or freeze that base.

Covered Greek yogurt pizza dough and storage notes beside a refrigerator, showing short holding before the more reliable par-baked crust method.
Cover raw dough only for a short pause. For true make-ahead pizza, par-bake the base, cool it completely and store that instead.

Refrigerate leftover pizza within two hours and keep it in an airtight container for 3–4 days. Separate stacked slices with parchment so the cheese does not stick. These timings follow the FoodSafety.gov cold-food storage chart.

How to Reheat It

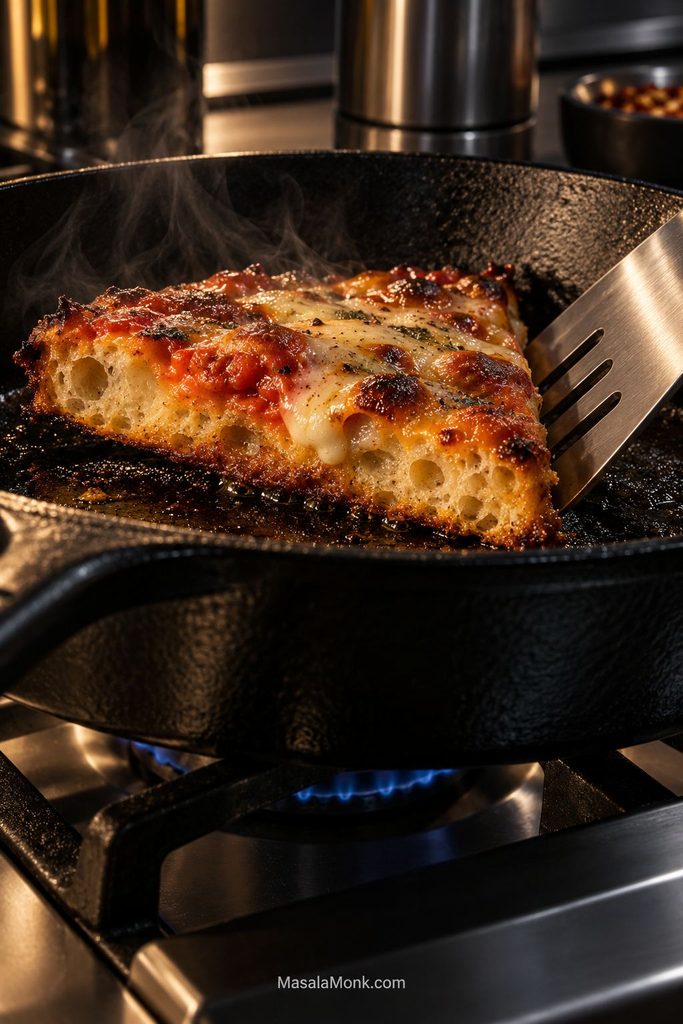
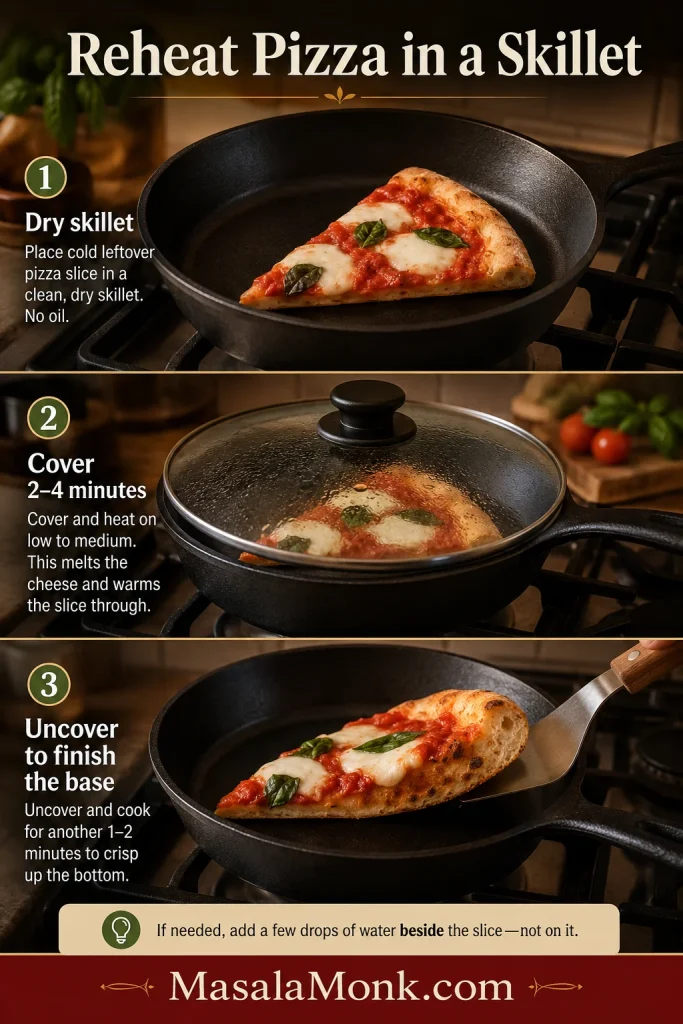
Leftover Greek yogurt pizza slice lifted from a skillet with a spatula to show a crisp reheated base.
Dry heat brings back the crisp base. Use a skillet or hot oven for the best texture; the microwave is fastest but softer.
  • Air fryer: 350°F (175°C) for 3–5 minutes
  • Oven: 375°F (190°C) for 6–10 minutes
  • Skillet: Warm over medium-low heat, then cover briefly to melt the cheese
  • Microwave: Fast, but the crust will be softer

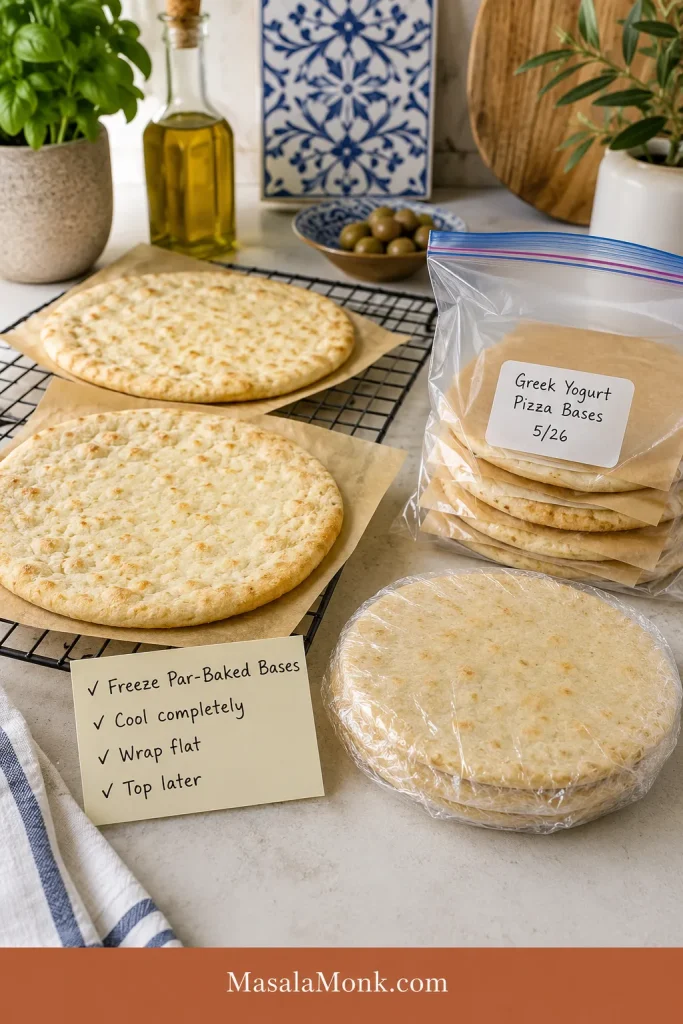
Store or Freeze the Par-Baked Crust

Par-baked Greek yogurt pizza bases cooling on a rack and stacked with parchment in a freezer bag.
Par-baked bases freeze better than raw flattened dough. Cool them completely, separate with parchment and wrap flat so they are ready to top later.

For shorter storage, cool the par-baked crust completely, wrap it well and refrigerate it for up to two days.

For longer storage, freeze the cooled crust flat. Once firm, wrap it well and keep it frozen for up to two months for the best texture. Add toppings while the crust is frozen or partly thawed, then finish at 450°F (230°C), checking from about 10 minutes.

For freezer mini pizzas, divide the dough into four rounds, par-bake and cool them, then add sauce and cheese before freezing flat. Raw dough is less dependable because the baking powder begins reacting as soon as the yogurt is mixed in.

Frequently Asked Questions

Does the finished crust taste like yogurt?

Only faintly. The plain crust has a mild tang, but sauce, cheese and toppings quickly move that flavor into the background.

Do I have to par-bake Greek yogurt pizza dough?

Not always. A thin crust on a fully heated stone or steel with light toppings can bake in one stage. On a standard metal sheet—or with a thicker crust or wetter toppings—the short first bake gives the center a more reliable structure.

What can I use instead of self-rising flour?

Use the all-purpose version with baking powder and salt. There is no need to prepare a separate homemade self-rising-flour mixture.

Does regular yogurt work?

Regular yogurt is usually looser than Greek yogurt. Drain it until thick, add it gradually and expect to use less.

Will nonfat Greek yogurt make the crust dry?

It can make the edge firmer, but it still works. The optional teaspoon of olive oil helps keep the crust tender.

How far ahead can I prepare the crust?

Cool the par-baked crust completely, then refrigerate it for up to two days or freeze it for up to two months.


The bowl may look messy, the first bake may look pale and the final circle may never resemble a pizzeria’s. None of that matters once the bottom is crisp, the cheese is bubbling and a homemade pizza is on the table while the craving still matters.

When the first slice lifts cleanly and the browned edge gives under the cutter, the rough bowl of yogurt and flour finally feels like pizza.

Which version did you make, and what topping did you reach for when the craving hit?

Posted on 13 Comments

7 Pizza Sauce Recipes | Marinara, White Garlic, Alfredo, Buffalo, BBQ, Vodka & Ranch

Hand pouring ranch over a buffalo chicken pizza on a wooden board for MasalaMonk’s pizza sauce recipe guide featuring 7 sauces.

If you’ve ever looked up a pizza sauce recipe and somehow ended up with a dozen tabs open, you already know what’s going on: pizza night isn’t one craving, it’s several. One person wants marinara pizza that tastes bright and classic. Someone else is hoping for a white base pizza with a creamy, garlicky bite. Meanwhile, another person is basically chanting “buffalo sauce on pizza” and refusing to negotiate unless pizza ranch dressing is on the table.

So, rather than forcing everyone into a single sauce choice, this post gives you a practical lineup of seven sauces that cover the major moods—red, white, rich, spicy, smoky, creamy-tomato, and tangy-cool. Each pizza sauce recipe is written to work in a hot oven (so your crust stays crisp), and each one includes the small decisions that make a big difference: whether it should be a base, a swirl, or a finish, plus the toppings that actually make sense with it.

If you like a lighter foundation for your pizza nights, you can also borrow ideas from MasalaMonk’s Satvic pizza approach. On the other hand, if you want full comfort-mode slices, you’re still in the right place—because these sauces are built to taste bold even under cheese.


The pizza sauce recipe basics: thickness, layering, timing

A sauce can taste perfect in a spoon and still fail on pizza. However, that usually isn’t because the recipe is “bad.” More often, it’s because pizza cooking is unforgiving: high heat, dry air, and dough that turns steamy if the sauce is too loose.

So before you pick your favorite pizza sauce recipe below, keep these three rules in mind. They’ll protect your crust, sharpen your flavor, and make the whole night feel smoother.

Top-down flatlay of ingredients used across 7 pizza sauce recipes, including tomatoes, tomato paste, garlic, oregano, butter, flour, milk, cream, parmesan, hot sauce, vinegar, and smoked paprika.
With a handful of pantry staples—tomatoes, tomato paste, dairy basics, and a few bold seasonings—you can make seven distinct pizza sauce recipes that cover red, white, creamy, spicy, and smoky styles.

1) Make it thicker than a pasta sauce

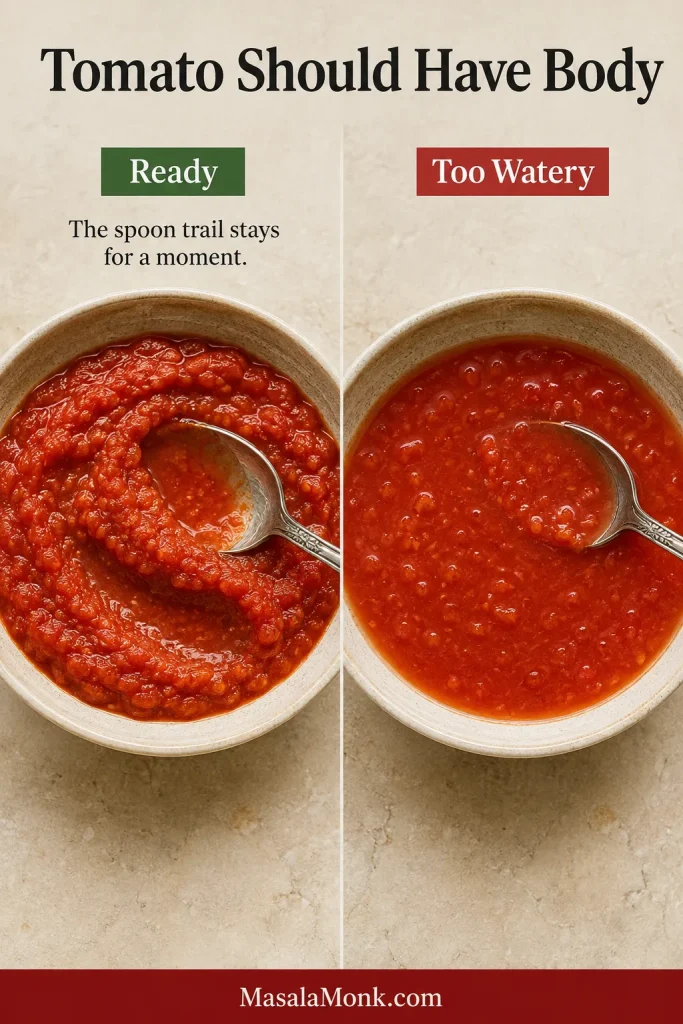
Pasta sauces can be a little loose because pasta carries them. In contrast, pizza sauce sits on top of dough and has to behave under heat. Therefore, if your sauce pours like soup, reduce it longer. When the sauce coats a spoon and slowly slides off, you’re in the right range.

If you’re starting from fresh tomatoes, MasalaMonk’s guide on tomato sauce from fresh tomatoes is useful, especially for learning how reduction changes texture.

Pizza sauce thickness test infographic showing sauce clinging to a spoon with a slow drip and a swirl holding shape on pizza dough, with quick visual cues.
If your sauce coats the spoon and drips slowly, it’s pizza-ready—thicker sauce means a crisp center and better flavor in every slice.

2) Decide: base, swirl, or finisher

This is where pizza starts tasting like you planned it.

  • Base sauce goes under cheese (marinara, white pizza sauce, Alfredo sauce, barbecue pizza sauce, pizza vodka sauce).
  • Swirl sauce goes lightly on top (buffalo sauce on pizza works best like this; vodka and BBQ can, too).
  • Finisher goes on after baking (pizza ranch dressing is the classic example).

Because of that simple choice, you stop oversaucing by default, and your crust stops turning soggy.

Infographic showing how to layer pizza sauces using base, swirl, and finish, with examples like marinara and white sauce for the base, buffalo and BBQ for swirls, and ranch as a finishing drizzle.
Layer your sauces for better flavor and texture: start with a base sauce, add a bold swirl for impact, then finish with a cool drizzle like ranch after baking.

3) Use less than your instincts suggest

Most home pizzas go wrong in the middle because there’s too much moisture. Instead of spreading a thick layer edge-to-edge, start modestly, then add extra flavor as a swirl or drizzle later. As a result, your pizza slices hold together and taste cleaner.

Infographic showing how much pizza sauce to use on dough, comparing too much sauce, a just-right thin layer, and too little sauce, with a tip to aim for a layer you can still see through.
The best pizza sauce layer is thin enough to see the dough through it—too much sauce can make the center soggy, while too little leaves dry bites.

A quick safety note on leftovers

If you’re making sauce ahead, you’ll want to store it safely. For reliable refrigerator and freezer guidance, the USDA’s Leftovers and Food Safety page and FoodSafety.gov’s Cold Food Storage Chart are good references.

And if you want a dependable dough to carry all of these sauces, King Arthur Baking’s Pizza Crust Recipe is straightforward and reliable.

Now, with that framework set, let’s get into the seven sauces—starting with the red classic.

Also Read: Negroni Recipe: Classic Cocktail & Its Variation Drinks


1) Marinara sauce recipe for pizza (marinara pizza / pizza marinara)

When people say “marinara pizza,” they usually mean a tomato base that tastes bright, garlicky, and clean—not heavy, not sweet, and not overloaded with spices. In other words, this is the pizza red sauce lane in its simplest form.

If you want a deeper companion version, MasalaMonk’s dedicated marinara sauce recipe is worth bookmarking. Additionally, Serious Eats has a solid technique reference for a classic marinara-style sauce: Serious Eats marinara.

This pizza sauce recipe, however, is tuned specifically for pizza: thick enough to cling, balanced enough to taste vivid under cheese.

Marinara pizza sauce recipe card showing sauce being spread on pizza dough with quick steps (sauté, simmer, spread) and key ingredients.
A classic marinara pizza sauce in its simplest form—reduce it until it clings to a spoon, then spread a thin layer for a crisp, non-soggy base.

Ingredients for marinara pizza sauce recipe

  • 1 tbsp olive oil
  • 1 medium onion, finely chopped (optional, but helpful for body)
  • 4–6 garlic cloves, finely chopped or grated
  • 1 can (400g) crushed tomatoes (or blended whole peeled tomatoes)
  • 1 tsp salt (start here; adjust later)
  • ½ tsp dried oregano
  • ½ tsp dried basil (or fresh basil at the end)
  • Pinch chilli flakes (optional)
  • ½ tsp sugar (optional, only if your tomatoes are sharp)

Method

  1. Warm olive oil over medium heat. If using onion, add it first with a pinch of salt. Then cook until soft and glossy, about 6–8 minutes.
  2. Add garlic and stir for 30–45 seconds. You want fragrance, not browning.
  3. Add tomatoes, salt, oregano, basil, and chilli flakes if you like.
  4. Bring to a gentle simmer and cook uncovered until thickened, usually 12–18 minutes.
  5. Taste and adjust. If it feels sharp, add a pinch of sugar; if it tastes flat, add salt gradually.

If you like comparing different classic approaches, Ooni’s Classic Pizza Sauce is another good reference point.

How to use it for pizza marinara

Spread a thin layer, then add mozzarella and minimal toppings. After baking, finish with fresh basil if you have it. That last touch makes pizza marinara feel brighter immediately.

Toppings that work especially well

Because marinara sauce for pizza is bright, it pairs beautifully with:

  • mushrooms, olives, roasted bell peppers
  • onions, jalapeños, sweet corn
  • chicken, paneer, or tofu

Make-ahead and storage

Marinara thickens further as it cools, which is ideal for pizza sauce. So, you can cook it earlier in the day, chill it, and spread it easily at night.
Quick fixes

  • If it’s watery, simmer longer or whisk in a spoon of tomato paste.
  • If it’s too acidic, add a pinch of sugar or cook onions longer next time.
  • If it tastes dull, add salt in small increments, then reassess.

This is one of the most useful “base” answers to the general pizza sauce query, and it’s the simplest pizza sauce recipe to master first.
Also Read: Classic Deviled Eggs (Easy) + 8 Flavorful Variations


2) Pizza sauce from tomato paste (fast pantry pizza sauce recipe)

Sometimes you don’t want to open a can of tomatoes. Sometimes you don’t want to simmer anything. You just want pizza—fast. That’s exactly where pizza sauce from tomato paste shines.
Because tomato paste is concentrated, this sauce tastes bold even with lots of cheese. Additionally, it starts thick, which means it’s naturally pizza-friendly. So, as a weeknight shortcut, this pizza sauce recipe is hard to beat.

Recipe card showing pizza sauce from tomato paste in a bowl with a whisk, plus quick steps (whisk, rest, spread) and pantry ingredients.
Short on time? This tomato paste pizza sauce is ready in 5 minutes—rest it briefly so the herbs bloom, then spread a thin layer for a bold, crisp base.

Ingredients

  • 6 tbsp tomato paste
  • 6–10 tbsp warm water (adjust for thickness)
  • 1–2 tbsp olive oil
  • 1 tsp dried oregano
  • ½ tsp garlic powder (or 1 small grated garlic clove)
  • ¾ tsp salt (adjust later)
  • Pinch black pepper
  • Pinch chilli flakes (optional)
  • Optional: a squeeze of lemon or a tiny pinch of sugar (choose one only if needed)

Method

  1. Whisk tomato paste and warm water until smooth.
  2. Stir in olive oil, oregano, garlic, salt, pepper, and chilli flakes if using.
  3. Let it sit 5 minutes so the herbs hydrate and the flavor rounds out.

Two easy upgrades (if you have time)

  • Warm it in a small pan with a drizzle of olive oil for 2–3 minutes; it will taste richer.
  • Add a spoon of finely grated onion; it softens the sharp edge quickly.

How to use it

Spread a thin layer as your base. Then add cheese and toppings. Because it’s concentrated, you don’t need much.

Best toppings for this style

This sauce loves bold flavors:

  • spicy toppings (jalapeños, chilli flakes, hot chicken)
  • smoky toppings (roasted peppers, tandoori-style pieces)
  • mixed cheeses (mozzarella plus something sharper)

When you want variety without extra work, pairing this with a white sauce pizza in the same night is a great move.

Also Read: Baked Jalapeño Poppers (Oven) — Time, Temp & Bacon Tips


3) White pizza sauce recipe (white sauce in pizza / white garlic pizza sauce / white base pizza)

White sauce in pizza isn’t just “cream on bread.” A proper white pizza sauce has structure, seasoning, and enough thickness to hold up under cheese.

The classic foundation is béchamel: butter, flour, milk. From there, turning it into white garlic pizza sauce is easy. If you want a clear baseline, MasalaMonk’s béchamel guide is helpful. Likewise, Serious Eats has a detailed method: béchamel / white sauce technique.

This pizza sauce recipe focuses on a white base that tastes garlicky and cozy, not bland.

White pizza sauce recipe card showing creamy white garlic sauce being whisked in a saucepan with quick steps (whisk, simmer, spread) and key ingredients.
White pizza sauce works best when it’s thick and glossy—whisk it smooth, simmer briefly, then spread a thin layer for a rich white base pizza that won’t turn watery.

Ingredients for White pizza sauce recipe

  • 2 tbsp butter
  • 2 tbsp all-purpose flour
  • 1½ cups milk (warm if possible)
  • 3–5 garlic cloves, grated (depending on preference)
  • ½ tsp salt (start light)
  • ¼–½ tsp black pepper
  • Pinch nutmeg (optional, but excellent)
  • Optional: 2–3 tbsp grated cheese (parmesan, mozzarella, or both)

Method

  1. Melt butter over medium heat.
  2. Add flour and whisk constantly for 1–2 minutes, until it smells lightly nutty.
  3. Add milk gradually while whisking. At first it may clump; nevertheless, keep whisking and it will smooth out.
  4. Simmer gently until thick, usually 3–6 minutes.
  5. Add garlic, salt, pepper, and nutmeg if using.
  6. If adding cheese, stir it in off heat to keep the sauce smooth.

How to use it on a white base pizza

Spread a thin layer—less than you’d use for marinara. Then build toppings that add contrast.

Toppings that make white pizza sauce recipe shine

  • mushrooms + caramelized onions
  • spinach + corn
  • roasted bell peppers + olives
  • chicken, paneer, or tofu

If you want plant-forward topping inspiration that fits a white base pizza, MasalaMonk’s tofu Italian meal prep ideas includes concepts that adapt nicely.

Make-ahead notes

White sauce thickens a lot in the fridge. So, when reheating, warm gently and loosen with a spoon of milk. Avoid aggressive boiling; otherwise, it can split.

Quick fixes

  • Too thick? Add warm milk, a tablespoon at a time.
  • Too bland? Add salt gradually, then recheck.
  • Too heavy? Use less sauce and finish with something bright (like a squeeze of lemon after baking).

This is the pizza sauce recipe that usually convinces people that white sauce belongs on pizza.

Also Read: Peanut Butter Cookies (Classic Recipe & 3 Variations)


4) Alfredo sauce pizza: pizza sauce recipe for a creamy base

Alfredo sauce pizza is its own craving. It’s richer than white sauce, more buttery, and more cheese-forward. At the same time, Alfredo can separate if overheated or handled roughly. Therefore, the trick is gentle heat and careful mixing.

For Alfredo variations and styles, MasalaMonk has two useful reads: Classic vs Authentic Alfredo and Alfredo Pasta Reinvented: Indian-inspired twists.

This pizza sauce recipe gives you a pizza-friendly Alfredo: smooth, rich, and spreadable.

Alfredo pizza sauce recipe card showing creamy Alfredo being spooned onto pizza dough with quick steps, time, yield, and key ingredients (butter, cream, parmesan).
For Alfredo sauce pizza, keep the heat low and spread a thin layer—this keeps the sauce smooth and creamy instead of separating under high oven heat.

Ingredients for Alfredo pizza sauce recipe

  • 3 tbsp butter
  • 1 cup cream (or half-and-half for lighter)
  • ¾ cup finely grated parmesan (or parmesan + a little mozzarella)
  • Black pepper to taste
  • Optional: 1 small garlic clove, grated
  • Salt only after tasting

Method

  1. Melt butter on low heat.
  2. Add garlic if using and stir briefly.
  3. Warm the cream gently—avoid a hard boil.
  4. Lower heat further, then whisk in cheese gradually until smooth.
  5. Add pepper, taste, and add salt only if needed.

How to use Alfredo sauce on pizza

Spread lightly as a base. Then, instead of piling on more rich items, add toppings that bring contrast: greens, roasted vegetables, or something spicy.

Best toppings for Alfredo sauce pizza

  • spinach + mushroom
  • chicken + corn
  • paneer tikka-style topping (great Indo-Italian vibe)

Make-ahead notes

Alfredo is best fresh. Still, if you store it, reheat gently with a splash of cream or milk. Stir continuously, and keep the heat low.

Quick fixes

  • Grainy texture usually means the heat was too high. Next time, lower heat and add cheese slowly.
  • Oily separation often comes from overheating or too much sauce on the pizza. Use a thinner layer.

This is a pizza sauce recipe that feels restaurant-like without requiring restaurant equipment.

Also Read: Oat Bars: The Perfect Snack or Breakfast, Tastier than Candy, No Sugar, No Baking, Ready in 5 Minutes!


5) Buffalo sauce on pizza: pizza sauce recipe used as a swirl

Buffalo sauce on pizza can be incredible. However, if you spread it thick like marinara, you’ll usually end up with a damp center and harsh acidity. So, the smartest approach is to treat buffalo as a swirl or finisher.

If you want to explore hot sauce ideas beyond buffalo, MasalaMonk’s pepper sauce guide is a great rabbit hole. For classic buffalo sauce logic (hot sauce + butter), Serious Eats’ wing technique is a useful reference: buffalo wings technique.

This pizza sauce recipe is intentionally simple so it tastes like true buffalo.

Buffalo pizza sauce recipe card showing buffalo sauce swirled over a cheese pizza with quick steps (melt, stir, swirl) and ingredients (hot sauce, butter, garlic).
Buffalo sauce on pizza works best as a swirl—add it after baking (or in the last minute) so the flavor stays bright and the crust doesn’t turn soggy.

Ingredients

  • ⅓ cup hot sauce
  • 3 tbsp butter
  • ½ tsp garlic powder (optional)
  • Optional: tiny drizzle of honey (only if you want a sweet edge)

Method

  1. Melt butter over low heat.
  2. Stir in hot sauce.
  3. Add garlic powder if using.
  4. Taste and adjust.

Two ways to use buffalo sauce on pizza

Swirl method (recommended):
Bake the pizza with a base sauce underneath (marinara, white sauce, or Alfredo). Then, right at the end, swirl buffalo sauce over the top. As a result, the flavor stays bold and the crust stays crisp.

Reduced base method:
If you want pizza with buffalo sauce as the base, simmer it for 2–3 minutes to thicken slightly, then spread very thinly.

Toppings that match pizza with buffalo sauce

  • shredded chicken (or crispy chicken)
  • onions, jalapeños
  • mozzarella + cheddar blend
  • ranch drizzle after baking

If you want the whole table to lean into the buffalo theme, MasalaMonk’s buffalo chicken dip is a natural side.

Also, because buffalo pairs beautifully with wings, MasalaMonk’s air fryer chicken wings can turn pizza night into a full-on party spread.

This is one of the most high-impact sauces in the lineup, and it’s a pizza sauce recipe that rewards restraint.

Also Read: Potato Salad Recipe: Classic, Russian, German, Vegan & More


6) BBQ pizza sauce recipe (bbq pizza sauce / barbecue pizza sauce / barbeque pizza)

Barbeque pizza is a crowd-pleaser, yet it needs balance. Many BBQ sauces are sweet, and sweetness can flatten under cheese. Therefore, the best bbq pizza sauce is smoky, thick, and slightly sharp so it stays interesting.

If you want a classic external baseline for simmer-and-thicken, BBC Good Food’s barbecue sauce recipe is a solid reference.

This pizza sauce recipe is tuned specifically for pizza: thicker and more “clingy” than a dipping BBQ sauce.

BBQ pizza sauce recipe card showing thick barbecue sauce being brushed in a swirl on pizza dough, with quick steps (stir, simmer, spread) and key ingredients.
A good BBQ pizza sauce should be thick and glossy—simmer it briefly, then spread a light layer so the crust stays crisp and the smoky-sweet flavor doesn’t overwhelm.

Ingredients for BBQ pizza sauce recipe

  • ¾ cup ketchup (or passata + extra sweetener)
  • 2 tbsp vinegar
  • 2 tbsp brown sugar or jaggery (adjust to taste)
  • 1 tbsp soy sauce
  • 1 tsp smoked paprika (or paprika + pinch cumin)
  • 1 garlic clove, grated
  • Optional: chilli flakes or hot sauce

Method

  1. Combine everything in a small pan.
  2. Simmer 8–12 minutes until glossy and thicker.
  3. Cool slightly; it thickens more as it rests.

How to use barbecue pizza sauce

Use a thin layer as a base. Then add toppings that cut sweetness: onions, jalapeños, pickled elements, or even a squeeze of lime after baking.

Best toppings for barbeque pizza

  • chicken, paneer, or tofu
  • onions (fresh or caramelized)
  • bell peppers
  • mozzarella + a sharper cheese

If you want a vegetable topping prep that works well here, MasalaMonk’s mushroom and zucchini stir fry can be adapted into a drier topping (cook off moisture, then scatter).

This pizza sauce recipe is also great for “mixed crowd” nights because you can keep it mild and still flavorful.

Also Read: Homemade Hot Chocolate with Cocoa Powder Recipe


7) Pizza vodka sauce recipe (pizza vodka sauce / vodka pizza / pizza with vodka sauce)

Pizza vodka sauce sits between marinara and Alfredo: it has tomato depth, but it’s also creamy and a little luxe. That’s why vodka pizza has become such a thing—it tastes like a “restaurant slice” even when made at home.

For technique reference, Serious Eats has a widely referenced vodka sauce method. And if you like the story behind its popularity, Bon Appétit’s piece on why vodka sauce is everywhere is a fun read.

This pizza sauce recipe is written so the sauce stays smooth and thick enough for pizza.

Pizza vodka sauce recipe card showing creamy tomato vodka sauce being spooned onto pizza dough, with quick steps and key ingredients (tomato paste, cream, garlic).
Pizza vodka sauce is a creamy tomato base that stays bold under cheese—build depth with tomato paste first, then stir in cream and keep the layer light on the dough.

Ingredients for Pizza vodka sauce recipe

  • 1 tbsp butter
  • 1 tbsp olive oil
  • 1 small onion, finely chopped
  • 2–3 garlic cloves, sliced
  • 3–4 tbsp tomato paste
  • ¼ cup vodka (optional)
  • ¾ cup crushed tomatoes (or blended peeled tomatoes)
  • ½–¾ cup cream
  • Chilli flakes
  • Salt to taste

Method

  1. Warm butter and oil. Add onion with a pinch of salt and cook until soft.
  2. Add garlic briefly, then stir in tomato paste.
  3. Cook tomato paste 1–2 minutes until it darkens slightly; this step builds depth quickly.
  4. Add vodka if using and simmer briefly.
  5. Add tomatoes and simmer 5–8 minutes.
  6. Stir in cream, add chilli flakes, and season with salt.

No-alcohol option

If you don’t want vodka, skip it and add a splash of water or stock instead. You’ll still have a creamy tomato sauce that behaves well on pizza. In other words, you can still do “vodka pizza vibes” without the vodka.

How to use pizza vodka sauce

You can use it as a base, or you can swirl it over mozzarella on top of a marinara base. Either way, keep the layer modest because cream sauces loosen under heat.

Toppings that match vodka pizza

  • mozzarella + parmesan
  • basil
  • chilli flakes
  • roasted peppers
  • spicy chicken or paneer

This is the pizza sauce recipe for nights when you want something different from classic pizza sauce, but still want tomato at the center.

Also Read: Vodka Pasta (Penne alla Vodka) + Spicy Rigatoni, Chicken, and Gigi Recipes


Ranch as the finishing move (pizza ranch dressing / pizza and ranch dressing)

Pizza and ranch dressing is a real thing for a reason: ranch is cooling, tangy, and creamy, which makes spicy pizza feel balanced. That said, ranch is almost always best as a finisher or dip—not baked into the base.

For an external reference, Serious Eats has a strong homemade ranch dressing recipe. For an egg-free foundation, MasalaMonk’s eggless mayonnaise recipe is a great starting point.

This pizza sauce recipe (in the “finisher” category) is quick, flexible, and easy to adjust.

Pizza ranch dressing recipe card showing ranch sauce being drizzled over a spicy pizza slice, with quick steps and key ingredients for dipping or drizzling.
Pizza ranch dressing is best added after baking—use it as a cool drizzle or dip to balance spicy buffalo and peppery slices.

Ingredients

  • ⅓ cup mayonnaise
  • ⅓ cup sour cream or thick yogurt
  • 2–4 tbsp buttermilk (or milk + lemon)
  • 1 tsp lemon juice
  • 1 garlic clove, grated
  • dried dill/parsley (or fresh)
  • salt and pepper

Method

  1. Whisk mayo and sour cream/yogurt until smooth.
  2. Thin gradually with buttermilk until it’s dip- or drizzle-consistency.
  3. Add lemon, garlic, herbs, salt, and pepper.
  4. Chill briefly if you can; the flavor improves as it rests.

How to serve pizza ranch dressing

Drizzle after baking, not before. Or serve it as a dip for crusts. In both cases, you get that cooling contrast that makes buffalo sauce on pizza taste even better.

Also Read: One-Pot Chicken Bacon Ranch Pasta (Easy & Creamy Recipe)


A simple way to plan pizza night so it never feels repetitive

Once you have these sauces, you don’t need to reinvent pizza night every time. Instead, you can rotate styles based on mood. As a result, even the same dough and cheese can feel completely different from week to week.

Top-down lineup of seven pizza sauce recipes in bowls—marinara, tomato paste sauce, white garlic sauce, Alfredo, buffalo, BBQ, and finishing drizzles—labeled as base, swirl, or finish.
Choose your sauce based on how you’ll use it: thick sauces work best as a base, bold sauces shine as a swirl, and cool drizzles finish the slice after baking.

Here’s a rhythm that works surprisingly well:

Build “pairs” instead of picking one pizza sauce recipe forever

If you’re making two smaller pizzas, do one red and one white. For example:

  • marinara pizza on one
  • white pizza sauce on the other

Or, for bolder nights:

  • bbq pizza sauce on one
  • pizza vodka sauce on the other

Because the flavor profiles are different, the table feels satisfied without anyone feeling like they “lost the vote.”

Use contrast like a secret ingredient

  • If the sauce is bright (marinara), you can go heavier on cheese or earthy toppings.
  • If the sauce is rich (Alfredo), add something sharp or spicy.
  • If the sauce is sweet (barbecue pizza sauce), bring acidity or heat.

In practice, this keeps every slice from tasting one-note.

Pizza sauce pairing guide infographic listing marinara, tomato paste sauce, white garlic, Alfredo, buffalo, BBQ, and vodka sauce with suggested toppings, plus MasalaMonk.com branding.
Use this quick pairing guide to match each pizza sauce recipe with toppings that balance it—bright marinara loves herbs and olives, while buffalo and BBQ taste best with savory toppings and a cooling finish.

Add sides that match the mood

If you’re leaning into marinara pizza, a side like MasalaMonk’s homemade garlic bread loaf makes the meal feel complete.

Meanwhile, if you’re doing buffalo or BBQ, wings can tie the whole spread together, and MasalaMonk’s air fryer chicken wings are an easy way to get that crispy side without fuss.


Make-ahead strategy: cook once, eat twice (or three times)

If you want this lineup to feel effortless, treat it like prep. Even one extra batch can make pizza night smoother later.

Tomato sauces (marinara and tomato paste sauce)

These store and reheat well. Additionally, they often taste better the next day. So, you can make marinara once, use it for pizza marinara tonight, and then use leftovers for another marinara pizza or a quick pasta later.

White sauce and Alfredo

These are more delicate. Still, they can be stored for a couple of days if cooled quickly and reheated gently. When reheating, add a splash of milk or cream and keep the heat low. Otherwise, they can split.

Photo-realistic magazine-style cover showing a hand drizzling creamy ranch over a freshly baked pizza on a rustic wooden board, titled “Pizza Sauce Recipe,” with MasalaMonk.com in the footer.
A quick visual cheat sheet: use thicker sauces as the base, then finish bold pizzas (like buffalo or BBQ) with a cool drizzle such as ranch to balance heat and keep the crust crisp.

Buffalo and BBQ

Both are easy to store, and both are flexible. In fact, buffalo often tastes best warmed gently and applied as a swirl at the end. Likewise, BBQ sauce thickens as it cools, which actually makes it more pizza-ready the next day.

Vodka sauce

Vodka sauce stores well, although it can thicken in the fridge. Therefore, warm it gently and loosen with a spoon of water or cream until spreadable again.

And if you ever want to add a green sauce into the rotation later, pesto is the natural next step. MasalaMonk’s pesto variations fit the same structure without changing your overall process.


Bringing it back to the point: a lineup you’ll actually use

Pizza night doesn’t need to be complicated. It just needs a small set of reliable sauces that match different cravings. That’s why this post is built as a rotation rather than a single “one true sauce.”

To recap the seven core styles covered here:

  • marinara sauce for pizza for classic pizza marinara nights
  • pizza sauce from tomato paste for speed and intensity
  • white pizza sauce for white base pizza comfort
  • Alfredo sauce pizza for rich, buttery slices
  • buffalo sauce on pizza for spicy tang and party vibes
  • bbq pizza sauce / barbecue pizza sauce for smoky-sweet crowd-pleasers
  • pizza vodka sauce for creamy tomato “restaurant slice” energy
  • plus pizza ranch dressing as the cooling finisher that makes spicy slices sing

If you save only one idea from this post, make it this: each pizza sauce recipe works best when it’s used in the right role—base, swirl, or finish—and when it’s thick enough to respect the crust.

And once that clicks, pizza night stops being stressful. Instead, it becomes the easiest kind of creative: pick a sauce, pick a couple toppings that make sense, and let the oven do the rest.

When to add pizza sauce infographic showing timing for base sauces before baking, swirl sauces in the last 1–2 minutes, and finishing sauces like ranch after baking.
Sauce timing changes everything: use thicker sauces as a base before baking, add bold swirls near the end, and finish with ranch or herb oil after the pizza comes out for the brightest flavor.

FAQs

1) What is the best pizza sauce recipe for beginners?

If you’re starting out, a basic marinara-style pizza sauce recipe is usually the easiest because it’s forgiving, fast, and doesn’t rely on tricky temperature control. Additionally, it tastes familiar under cheese, so you can focus on getting the texture right rather than chasing complex flavors.

2) What’s the difference between pizza sauce and marinara pizza sauce?

Although they’re close, marinara pizza sauce is often a little brighter and simpler, while a classic pizza sauce recipe is typically thicker and more seasoned to stand up to heavy toppings. In practice, the main difference is consistency: pizza sauce tends to be reduced more so it doesn’t waterlog the crust.

3) How do I make pizza sauce from tomato paste?

To make pizza sauce from tomato paste, whisk tomato paste with warm water until it turns smooth and spreadable, then stir in olive oil, oregano, garlic, salt, and pepper. Afterward, let it rest a few minutes so the dried herbs bloom; as a result, the flavor tastes more “cooked” even before it hits the oven.

4) Why does my pizza sauce make the center soggy?

Usually it happens because the sauce is too thin or there’s simply too much of it. Instead, aim for a thicker pizza sauce recipe and spread a lighter layer; then, if you want extra punch, add a small swirl on top near the end rather than soaking the dough from the start.

5) What is white sauce in pizza, exactly?

White sauce in pizza is a creamy base—often built from a butter-and-flour thickener plus milk—then seasoned with garlic, pepper, and sometimes cheese. Consequently, a white pizza sauce recipe behaves more like a structured cream sauce than plain cream, which is why it bakes well without turning runny.

6) Is white pizza sauce the same as Alfredo sauce?

Not necessarily. White pizza sauce is usually a lighter, béchamel-style base, whereas an Alfredo sauce pizza base is richer and more cheese-forward. Put differently, both are creamy, yet Alfredo tends to taste buttery and intense, while white sauce feels smoother and more neutral.

7) How do I keep an Alfredo sauce pizza from turning greasy?

First, keep the heat gentle when making the sauce so it stays cohesive. Then, use a thinner layer on the dough, because Alfredo loosens under oven heat. Finally, pair it with toppings that add contrast—greens, roasted vegetables, or a little spice—so the slice doesn’t feel heavy.

8) Can I use buffalo sauce on pizza as the base?

Yes, but it’s often better as a swirl. Since buffalo sauce is thinner and more acidic, spreading it as a full base can make the crust damp. Alternatively, bake with a different base sauce and add buffalo sauce on pizza as a finishing swirl so the flavor stays bright.

9) What toppings go best on pizza with buffalo sauce?

Generally, chicken, onions, jalapeños, and a mozzarella-cheddar mix work well because they balance heat and tang. Moreover, a cooling drizzle makes the whole bite feel complete, which is why pizza and ranch dressing is such a common pairing for buffalo-style slices.

10) What’s the difference between bbq pizza sauce and regular barbecue sauce?

BBQ pizza sauce is usually thicker and slightly more balanced for baking, because regular barbecue sauce can be too sweet or too loose under cheese. Therefore, a barbecue pizza sauce recipe often includes extra simmering (to thicken) and enough tang to keep the flavor lively.

11) What does “barbeque pizza” usually mean in recipes?

Typically, barbeque pizza refers to a pizza built around a smoky-sweet sauce base, often topped with onions and a savory protein like chicken or paneer. In addition, it frequently benefits from something sharp—pickled onions or jalapeños—so the sweetness doesn’t dominate.

12) What is pizza vodka sauce, and why is vodka pizza popular?

Pizza vodka sauce is a creamy tomato sauce that often starts with tomato paste cooked for depth, then finished with cream for a plush texture. Meanwhile, vodka pizza became popular because that sauce tastes “restaurant-like” at home: rich, slightly spicy, and still tomato-forward.

13) Do I need vodka to make a pizza vodka sauce recipe?

No. You can still make a great pizza vodka sauce recipe by skipping the vodka and using a small splash of water or stock instead. Even without it, the tomato paste plus cream combination delivers the same creamy tomato character most people want.

14) What’s the best way to use pizza ranch dressing?

Most of the time, pizza ranch dressing works best as a dip or a post-bake drizzle. That way, it stays cool and tangy, which contrasts nicely with hot, spicy slices. Conversely, baking ranch into the pizza can mute its flavor and make it feel heavier.

15) How much sauce should I use on one pizza?

As a rule of thumb, use just enough to lightly coat the dough—more like a thin spread than a thick layer. Then, if you want stronger sauce flavor, add a small extra swirl near the end. This approach keeps the center crisp while still delivering sauce in every bite.

16) Can one post really cover multiple pizza sauce recipes without confusing readers?

Yes, provided each section is clearly separated by sauce type and purpose. For instance, marinara pizza sauce recipe content serves a classic red base intent, while white pizza sauce recipe sections handle creamy base intent, and buffalo or ranch sections cover finishing/drizzle intent. As long as each sauce solves a distinct craving, the structure stays easy to follow.

17) Which pizza sauce recipe is best for a party crowd?

If you’re cooking for a mixed crowd, bbq pizza sauce and marinara-style sauces are usually safest because they’re familiar and broadly liked. Then, for guests who want bolder flavors, offer buffalo sauce on pizza as a swirl and keep ranch available as an optional dip.

18) How do I thicken a sauce quickly if it’s already made?

If it’s a tomato sauce, simmer it uncovered for a few minutes until it reduces. If it’s a creamy sauce, warm it gently and let it simmer briefly so water evaporates without splitting. In either case, aim for a texture that clings—because a thicker pizza sauce recipe is almost always easier to bake successfully.

Posted on 2 Comments

Healthiest Pizza in the World: A Satvic Recipe

green broccoli vegetable on brown wooden table

Introduction: 🍕🌿 Pizza – the universally loved dish that has won hearts across the globe. But, as we all know, this delicious treat often comes with a hefty price tag for our health. What if we told you that there’s a way to enjoy your favourite dish without the guilt? Yes, you read that right! The Satvic Movement, a health and wellness initiative, has shared a recipe for what could be the healthiest pizza in the world. This pizza is free from maida (refined flour), packaged cheese, and oil. Instead, it’s made with whole wheat flour, whole nuts, and homemade plant-based cashew cheese. Plus, all the sauces are made from scratch at home. Intrigued? Let’s dive into the recipe!

The Satvic Pizza Recipe: The Satvic Movement’s video titled “Healthiest Pizza in the World – Homemade Recipe | स्वादिष्ट सात्विक पिज़्ज़ा रेसिपी” provides a step-by-step guide to making this wholesome pizza. They share two variations – a colourful Garden Pizza and a Pesto Pizza.

  1. The Dough: The journey to the healthiest pizza begins with the dough. Made from whole wheat flour, the dough is kneaded to the perfect consistency and then left to rest. This ensures that the dough rises well and gives the pizza its characteristic fluffy base.
  2. The Sauce: No pizza is complete without a tangy and flavourful sauce. The tomato sauce for this pizza is prepared from fresh tomatoes and basil leaves. This homemade sauce not only enhances the taste but also ensures that no preservatives or artificial flavours are added.
  3. The Toppings: The Garden Pizza is topped with blanched sweet corn and broccoli, adding a burst of colours and nutrients. The Pesto Pizza, on the other hand, features slightly roasted carrots and brinjals, offering a unique and delicious twist.
  4. The Cheese: The star of the show is the homemade cashew cheese. Made from soaked cashews blended into a creamy paste, this vegan cheese is a healthier alternative to packaged cheese and adds a rich and creamy texture to the pizza.

The Satvic Movement emphasizes that this pizza is a celebration recipe, not something to be eaten every day. They also note that the pizza beats any restaurant pizza in taste and improves your health, making it a great combination.

Exciting Announcement: The video also announces the availability of the Satvic Food Book 2, which contains recipes for Satvic momos, frankies, nachos, rabris, cakes, new salads, and new sabzis. This book could be a great addition to your kitchen if you’re looking to explore more healthy and delicious recipes.

Conclusion: If you’re interested in more such recipes and discussions, do join our Facebook group Eatlo. We’d love to hear your experiences and experiments with Satvic cooking! So, why wait? Put on your chef’s hat, roll up your sleeves, and get ready to create some magic in your kitchen with this healthy and delicious Satvic pizza recipe! 🍕🥦🌽🥕🧀🍅🍽️

Blog Tags: Satvic Food, Healthy Pizza, Homemade Pizza, Vegan Cheese, Whole Wheat Pizza, Healthy Recipes, Vegan Recipes, Plant Based Diet, Healthy Eating, Clean Eating, Nutrition, Foodie, Cooking, Recipe, Eatlo