
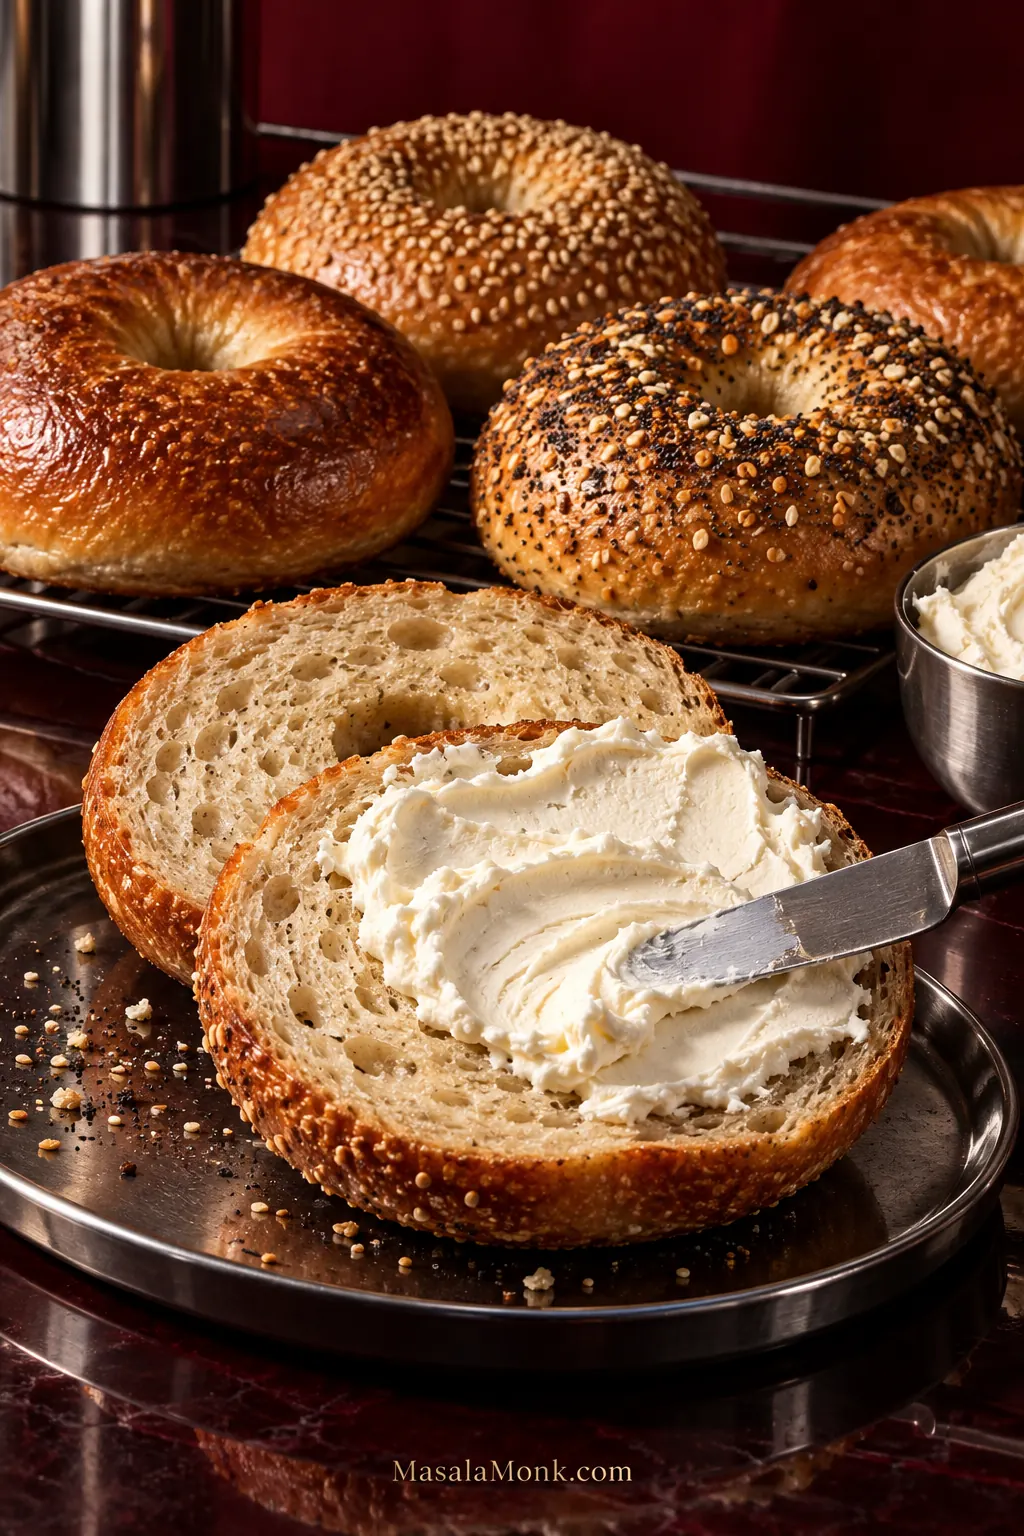
Bagel dough is supposed to feel a little strange if you are used to ordinary bread. It is firm and pushes back when you knead it. The shaped rings puff without turning soft and pillowy. Then, just when most bread dough would be heading for the oven, these rings go into boiling water first.
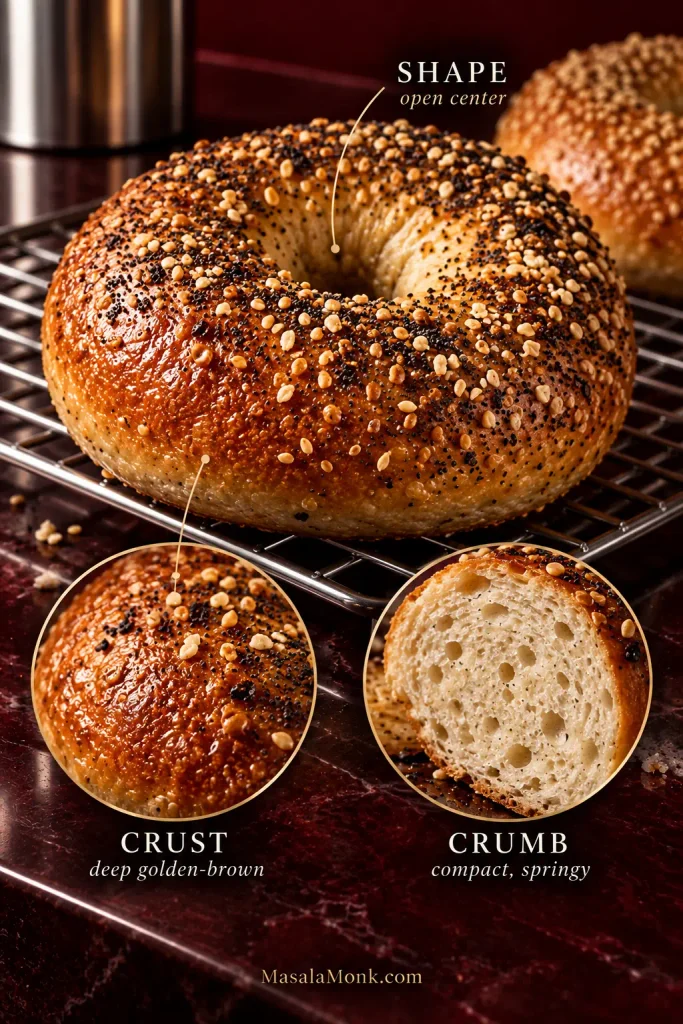
Those steps give a chewy New York-style bagel its browned, slightly taut crust, compact, springy crumb with just enough air inside, and that unmistakable bit of pull when you bite through it.
Here, New York-style means a lean yeast dough made with strong flour, controlled fermentation, hand-shaped rings, boiling before baking, and enough oven heat to build real crust. You do not need professional bakery equipment to make that happen at home.
This recipe for homemade bagels gives you exact quantities and useful time ranges, but the most important cues are physical. You will know what the dough should feel like, when it has risen enough, what the rings should look like after boiling, and when the crust has gone far enough in the oven.
The texture and flavor to aim for: compact but not solid, with some irregular air inside and a springy chew. With barley malt, the flavor should be lightly malty rather than sweet, with much of the toasted character coming from the deeply browned crust.
Homemade New York-Style Bagels Recipe
This is the same-day version. All-purpose flour, active dry yeast, and overnight adjustments are included here too, so you do not have to leave the recipe halfway through a batch.
What you’ll need
You’ll need a large mixing bowl, digital kitchen scale, two half-sheet pans (about 18 × 13 inches / 46 × 33 cm each), parchment paper, a wide pot, a spider or slotted spoon, and a cooling rack. A stand mixer with a dough hook is helpful but optional.
Weigh the flour if you can. Firm bagel dough has less room for error than a loose bread dough, and a heavily scooped cup of flour can change the texture noticeably.
For the dough
- 600 g / 21.2 oz bread flour, roughly 5 cups when spooned and leveled
- 360 g water (360 ml / 12.2 US fl oz), about 1 1/2 cups
- 4 g instant yeast, about 1 1/4 teaspoons
- 12 g fine salt, about 2 teaspoons depending on the salt
- 20 g barley malt syrup, about 1 tablespoon, or honey
In a comfortable kitchen, room-temperature to mildly warm water works well. Use somewhat warmer water in a cool room so fermentation does not crawl, then let the dough’s rise and feel—not the starting water temperature alone—tell you when it is ready.
For the boiling water
- 2 US quarts / about 1.9 liters water
- 40 g barley malt syrup, about 2 tablespoons, or honey
Optional toppings and extras
- Everything bagel seasoning
- Sesame seeds
- Poppy seeds
- Dried minced onion
- Coarse salt
- 1 egg + 1 teaspoon water for optional egg wash
- Semolina or cornmeal, optional, for dusting the parchment
Egg wash is optional. Seeds and seasoning will still cling to the damp surface after boiling; egg gives you more shine and a little extra holding power. Dried onion needs different handling because it can scorch during a full bake.
Useful Adjustments and Substitutions
All-purpose flour: keep the flour at 600 g, but hold back 20–30 g of the water when you begin mixing. Add some or all of it later if the dough needs it. Expect a slightly softer chew.
Overnight bagels: reduce the instant yeast to 2 g. After kneading, rest the dough for about 20 minutes, then divide, shape, cover and refrigerate using the method below.
Active dry yeast: use the same 4 g. If your brand recommends dissolving it first, stir it into the recipe water before mixing. Follow the dough rather than expecting the rise to match the clock exactly.
Method
Mix, knead and complete the first rise
- Mix. Combine the bread flour, yeast and salt. Stir the barley malt syrup or honey into the water, then add it to the flour. Mix until there are no obvious dry pockets. If the dough looks surprisingly dry, cover it for 5 minutes before adding extra water.
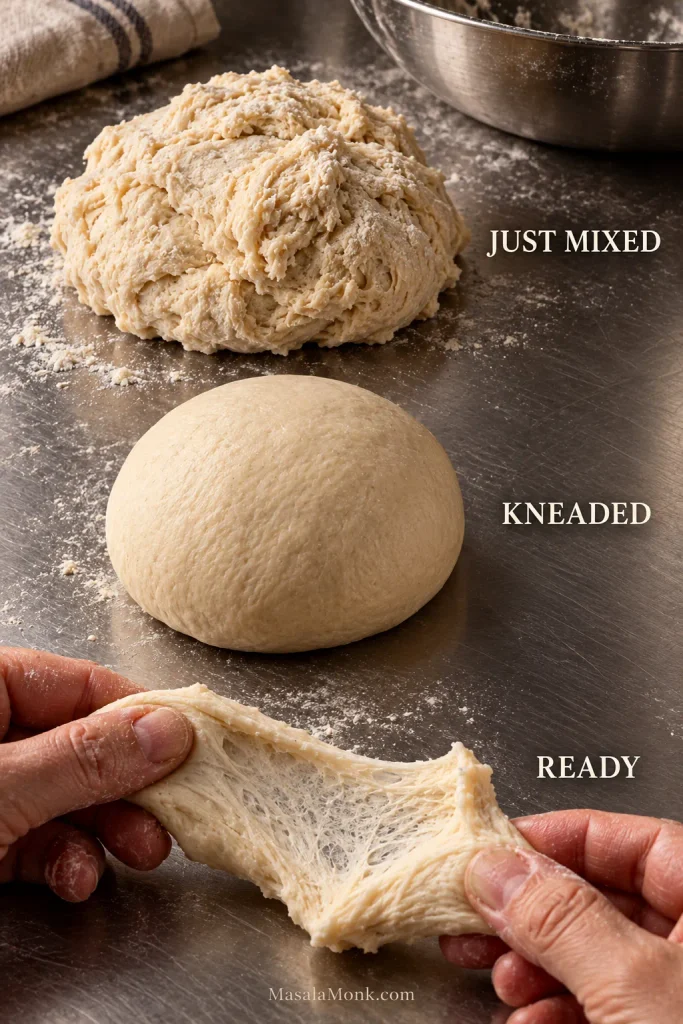
- Knead until smooth and elastic. Begin checking around 8–10 minutes in a stand mixer or about 10 minutes by hand; hand kneading can take closer to 15. The dough is ready when it feels smooth and springy and a small piece stretches thin before tearing.
- Let it rise until clearly fuller. Cover the dough and begin checking around 40–45 minutes. Move on when it looks roughly 50–75% larger and still feels resilient. A cool kitchen can take longer than 75 minutes.
Preheat, divide, shape and proof
- Position the racks, preheat and divide. Arrange oven racks in the upper and lower thirds, then preheat the oven to 425°F / 220°C. Cut the dough into 8 pieces of about 125 g / 4.4 oz each.
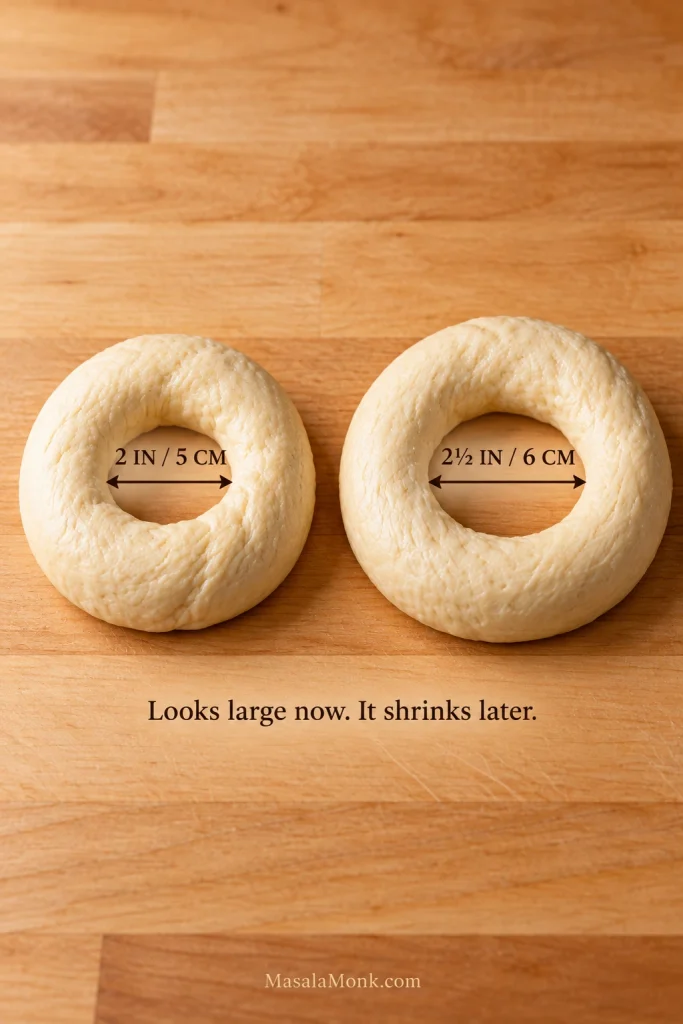
- Shape. Form each piece into a smooth, tight ball, push a finger through the center, and stretch the hole to about 2 inches / 5 cm. Go toward 2 1/2 inches / 6 cm if you particularly want a clearly open center after baking.
- Start the final proof and water bath. Arrange four rings on each prepared half-sheet pan. Lightly grease the parchment or dust it very lightly with semolina or cornmeal if sticking has been a problem. Cover without letting plastic cling to the dough. Immediately put the 2 quarts / 1.9 liters water and 40 g barley malt syrup or honey in the pot and begin heating toward a gentle boil while the rings proof. Have the toppings ready. The final proof usually takes 15–30 minutes; look for rings that are a little puffier and lighter but still sturdy enough to handle. If the water reaches a boil first, lower the heat until the bagels are ready.
Boil, bake and cool
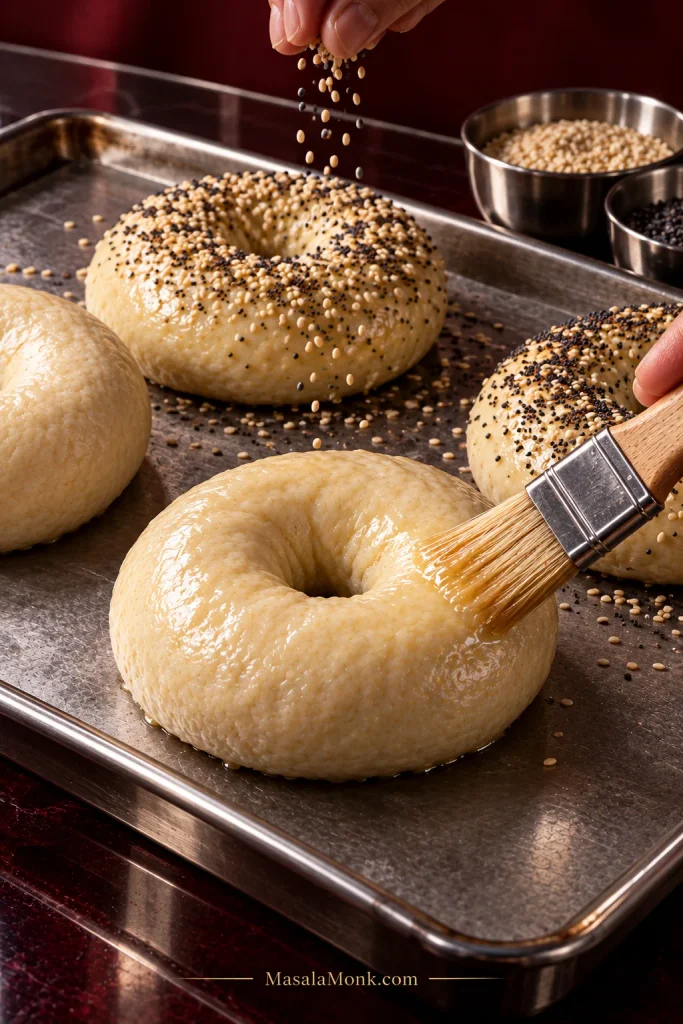
- Boil for 45 seconds per side. Work with 2–3 bagels at a time. Lift them out, drain briefly and return them to the baking sheet. If using egg wash, brush it over the boiled bagels before adding the toppings, reserving a little if you plan to add dried onion later. Add sesame, poppy seeds, coarse salt or a seed-heavy everything blend while the surface is still damp. Save dried onion or onion-heavy seasoning for the end of baking. Let the water return to a gentle boil before adding the next batch.
- Bake both trays until deeply golden. Once all eight bagels are boiled and topped, get both trays into the oven promptly. Bake for 20–24 minutes, swapping the trays top-to-bottom and rotating them front-to-back about halfway through if your oven browns unevenly.
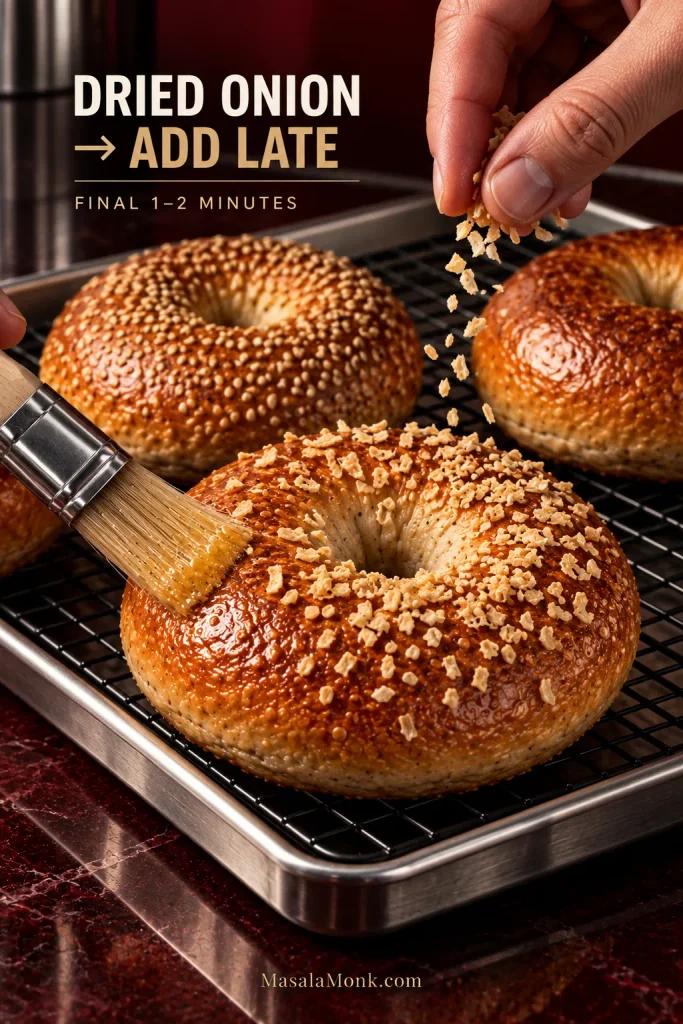
- Add dried onion late, if using. When the bagels are nearly browned, pull the trays out briefly. Brush the bagels you want to top with a little reserved egg wash, add dried minced onion or an onion-heavy everything blend, then return the trays to the oven for about 1–2 minutes, just long enough for the topping to toast without scorching.
- Cool before slicing. Transfer the bagels to a rack and give them at least 20–30 minutes. A steaming-hot crumb can look gummy even when it is properly baked.
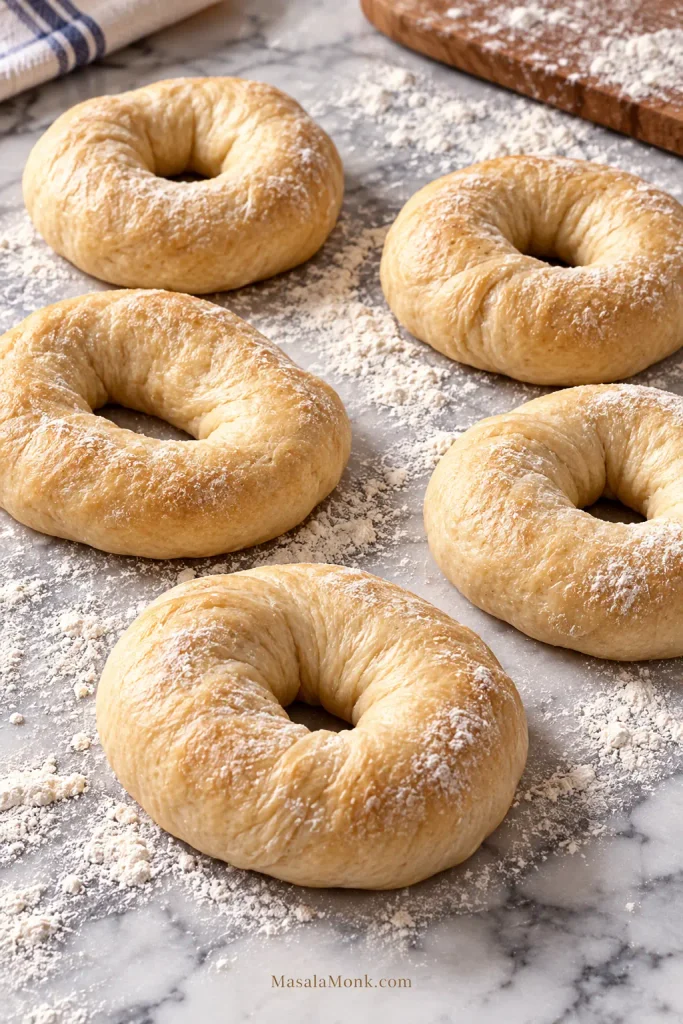
Before the boil: pick up one ring. It should feel lighter than when you shaped it but still hold itself confidently. Puffy is good. Floppy and fragile is too far.
A simple same-day schedule
| Stage | Typical time |
|---|---|
| Mix and knead | About 20 minutes |
| First rise | Usually 45–75 minutes; longer in a cool kitchen |
| Divide and shape | About 10–15 minutes; preheat the oven as you begin |
| Final proof | 15–30 minutes while the water bath heats |
| Boil and top | About 10–15 minutes |
| Bake | 20–24 minutes |
| Cool | 20–30 minutes |
The dough still gets the final say.
Same-Day or Overnight Bagels?
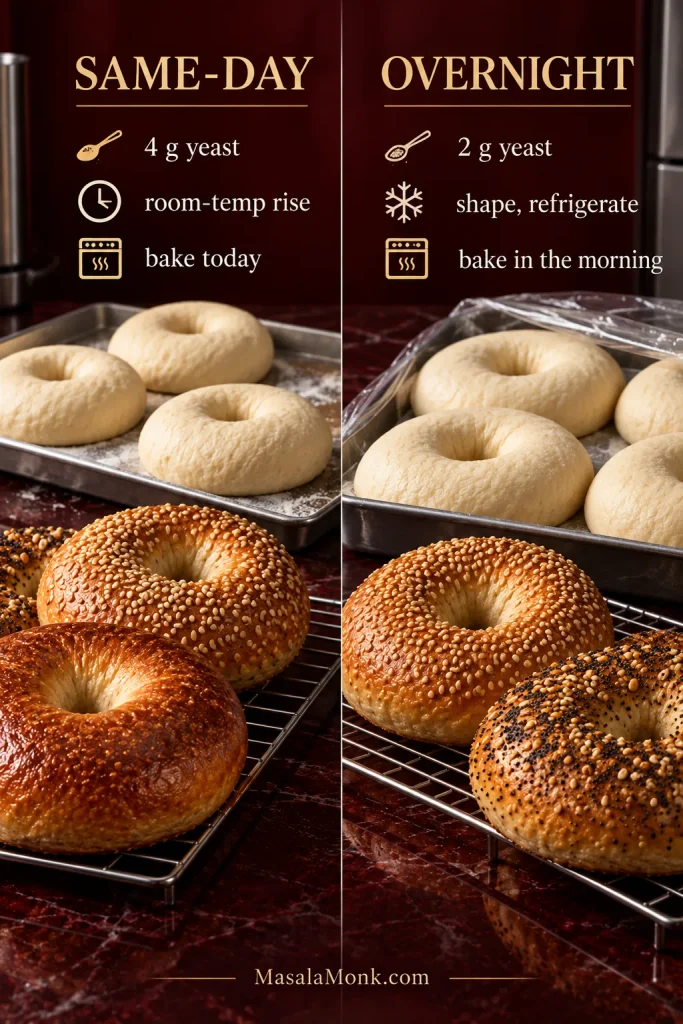
Choose the same-day route when you want good chewy bagels in a few hours. The overnight route gives you more schedule flexibility, firmer cold dough to handle in the morning, and more fermentation time for flavor development.
| Route | Best for | What changes |
|---|---|---|
| Same-day | The quickest route | 4 g instant yeast and a room-temperature first rise |
| Overnight | Morning baking, cold handling and longer fermentation | 2 g instant yeast, a short rest, then refrigerated proofing |
For the overnight version
Use 2 g instant yeast. After kneading, cover the dough and leave it for about 20 minutes. Divide and shape the rings, place them on the prepared trays, cover well and refrigerate.
For a refrigerator around 37–39°F / 3–4°C, start by planning on about 8–12 hours. A colder refrigerator slows the dough; a warmer one shortens the window.
In the morning, look at the rings before looking at the clock. They should be somewhat fuller than when they went into the refrigerator while remaining firm and easy to lift. Dramatic swelling is not necessary.
If the chilled rings already look fuller and remain sturdy enough to lift cleanly, boil them cold. Rings that still look tight and almost unchanged can stay covered at room temperature until those readiness cues appear. When they are ready, return to the recipe method.
Back to top ↑ · Jump to recipe
Bagel Technique Guide
The recipe above gets you through the batch; these sections show what to watch for at each stage.
Start With a Firm, Well-Developed Dough
Bagel dough should gather into a firm mass that needs real kneading and holds its shape on the counter. If most of your bread-making experience is with pizza, focaccia or soft sandwich bread, the resistance can be surprising.
At first it may feel stubborn enough to make you wonder whether there is enough water. Give it a few minutes. As the gluten develops, that stubbornness should turn springy instead of crumbly.
Bread Flour Gives This Dough Its Chewy Structure
Bread flour’s higher protein content gives the dough enough elasticity to hold its shape through proofing, shaping and boiling.
All-purpose flour works too
Keep the flour at 600 g and hold back 20–30 g of water at the start. Add a little of that reserved water only if the dough still feels genuinely too dry after it has begun to smooth out.
The finished bagels will usually have a softer bite than the bread-flour version. Very strong high-gluten flour often absorbs more water, so it may need a small splash extra.
The dough should fight back a little
Pull on the dough and it should resist, then stretch. Press it and it should spring back. Once kneaded, it should sit as a compact mass instead of slowly slumping across the bowl or counter.
The contrast is especially obvious if you have made focaccia. Focaccia wants a loose, sticky dough and large pockets of air; bagels need enough firmness to keep their shape through proofing and boiling.
How do you know when bagel dough is kneaded enough?
Bagel dough is kneaded enough when it is smooth and elastic and a small piece can stretch thin before tearing. Start checking after about 8–10 minutes in a stand mixer or 10 minutes by hand.
If a lightweight mixer starts laboring, heating up or walking across the counter, finish by hand. Stiff dough can give a small machine a serious workout.
Barley malt is traditional, not mandatory
Barley malt syrup adds restrained sweetness, browning and the familiar malty note found in many classic bagels. It is the preferred choice here, although honey works well when malt is difficult to find.
Diastatic malt powder is a different ingredient because it contains active enzymes, so it is not a spoon-for-spoon substitute for malt syrup. King Arthur Baking’s guide to malt explains the differences between the common forms clearly.
Let the Dough Rise Without Taking It Too Far
A beautifully doubled, feather-soft dough may be exactly right for another loaf. With bagels, stop sooner.
What matters here is the change in the dough: it becomes fuller and visibly lighter but still feels resilient rather than pillowy. It does not need to double.
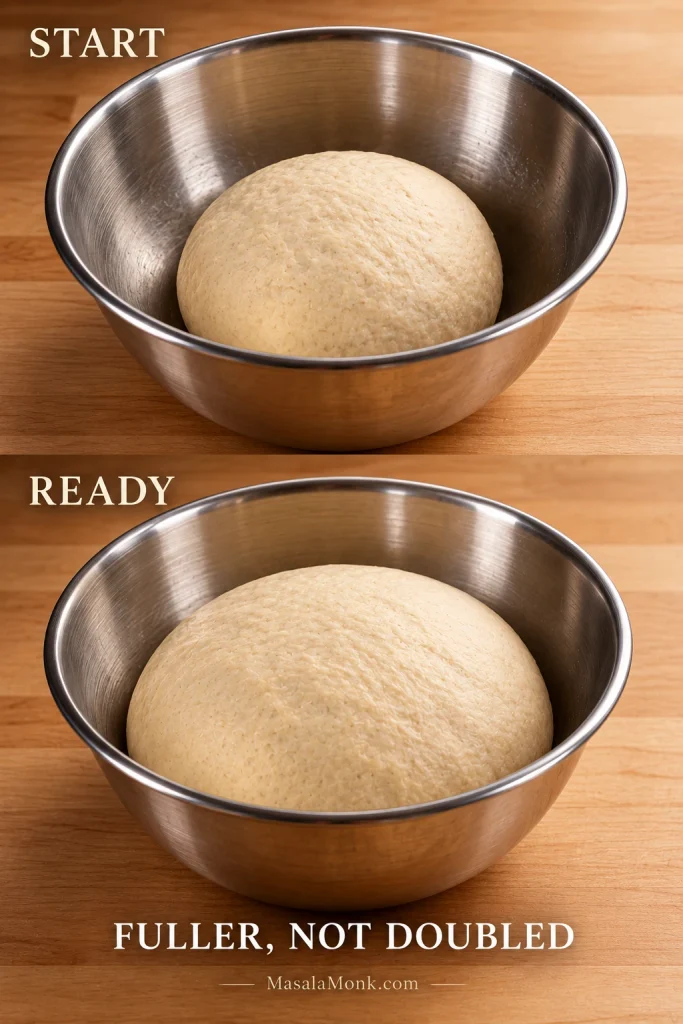
Once it reaches that point, divide it before it drifts toward the soft texture you would want from a sandwich loaf.
Shape for Height and an Open Center
A taut ring is better equipped to hold its height through the final proof, the water bath and the first few minutes in the oven.
For a first batch, use poke-and-stretch
Shape each 125 g / 4.4 oz portion into a smooth, tight ball. Push your thumb or finger through the middle, then rotate and gently widen the hole to about 2 inches / 5 cm.
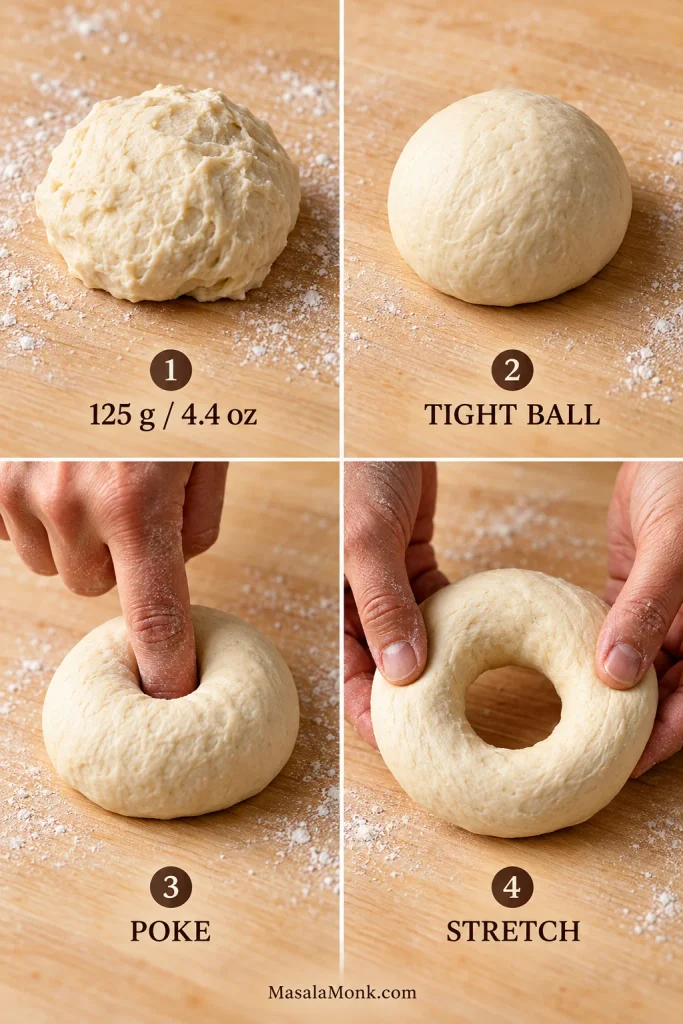
If you especially like a clearly open center, stretch toward 2 1/2 inches / 6 cm. The hole looks generous at first. Leave it that way. It will shrink as the dough relaxes, proofs and bakes.
The first ring may be lopsided. By the third or fourth, your hands usually understand the dough much better. An uneven bagel can still have a terrific crust and crumb, so do not keep reworking it just to chase perfect symmetry.
Rope shaping gives a more traditional hand-rolled look
Roll each portion into a rope about 9–10 inches / 23–25 cm long. Wrap it around your hand, overlap the ends by roughly 2 inches / 5 cm, then roll the joined section firmly against the counter until it becomes one continuous ring.
Keep flour away from the seam. A little stickiness helps the ends bond. If they have dried out, dampen your fingertips lightly before sealing.
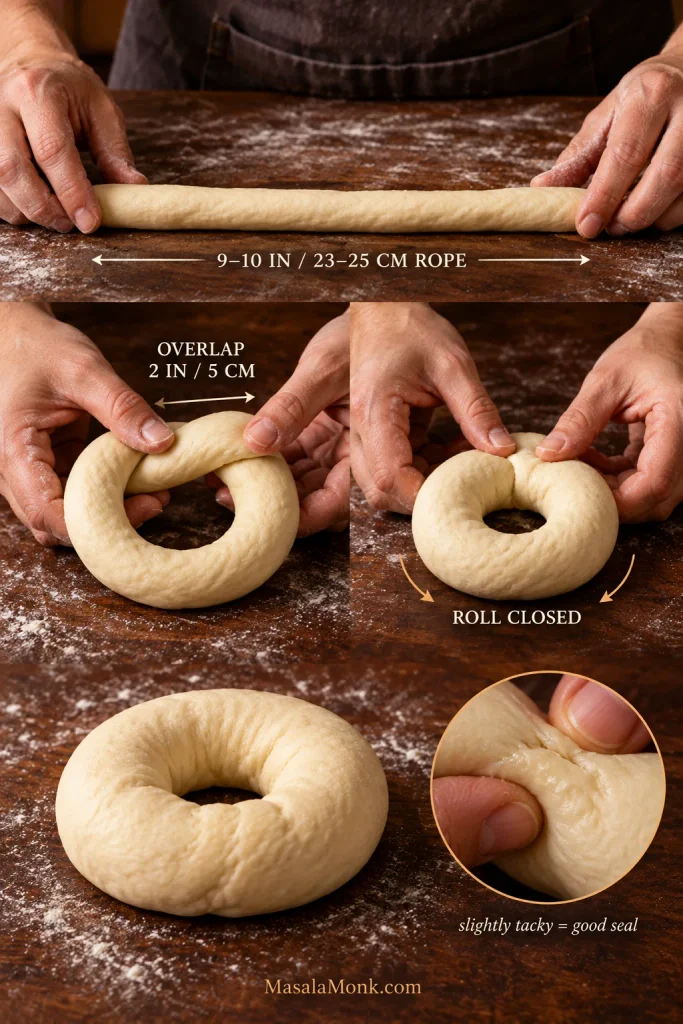
Once the rings are shaped, continue to the final proof and float test.
Give the Shaped Rings a Short Final Proof
A ready ring looks fuller but still feels firm enough to lift cleanly. You want that extra volume without losing the sturdy feel.
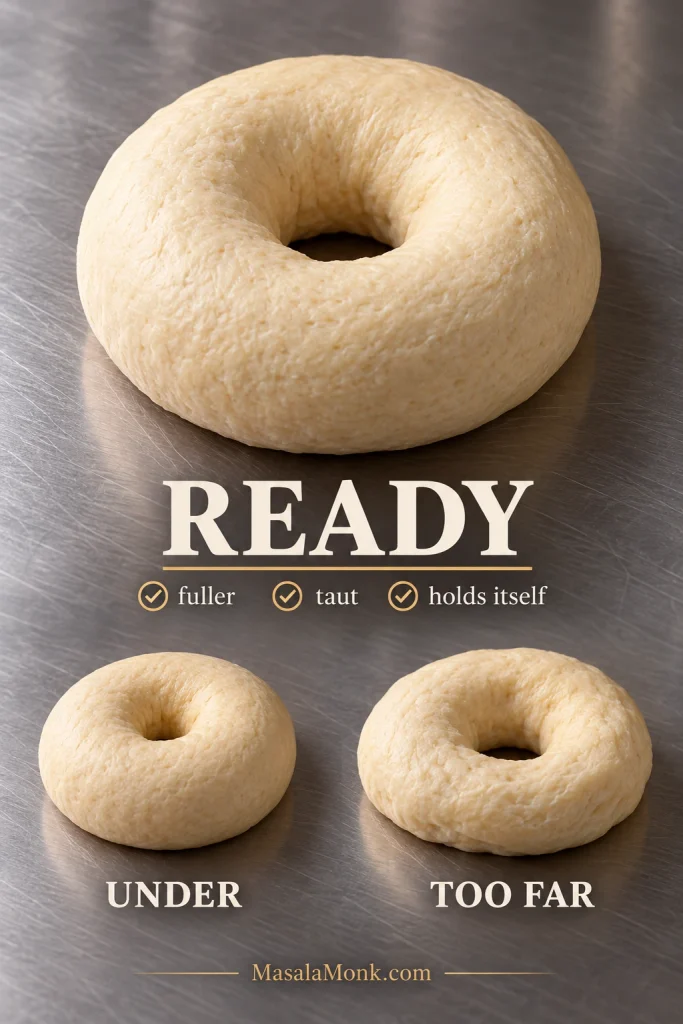
Use the float test as a clue
If you’re unsure, lower one shaped ring into a small bowl of cool water. A sufficiently fermented ring will usually float within several seconds. If it stays submerged, lift it out, pat it dry, return it to the tray and give the rings more proofing time before checking again.
Treat the float test as one clue rather than a verdict. A cold bagel can take longer to become buoyant, while an overproofed ring may float immediately and still be too fragile.
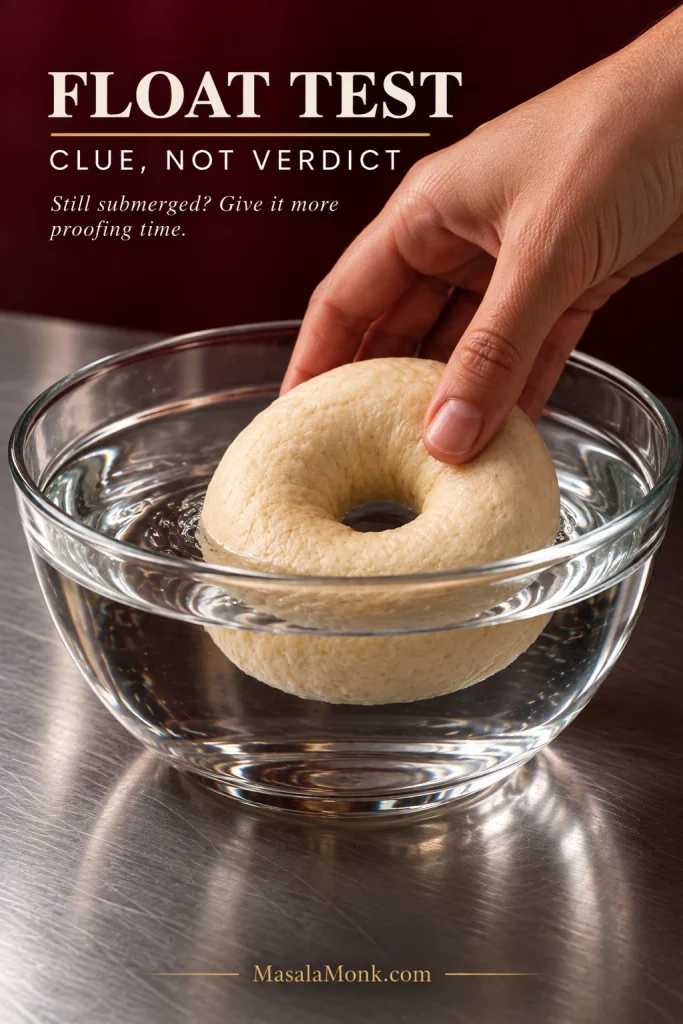
Once the rings are puffy but sturdy, move straight into the water bath.
The Boil: Set the Surface Without Flattening the Ring
Boil these bagels for 45 seconds per side. The hot water gelatinizes starch at the surface, creating the skin that later bakes into the bagel’s characteristic crust.
Some bagel recipes use much longer water baths. A shorter boil leaves more room for oven expansion while still setting that surface.
This is the moment the dough finally starts looking unmistakably like a bagel. The rings swell slightly, the surface tightens, and the raw matte finish begins to disappear.
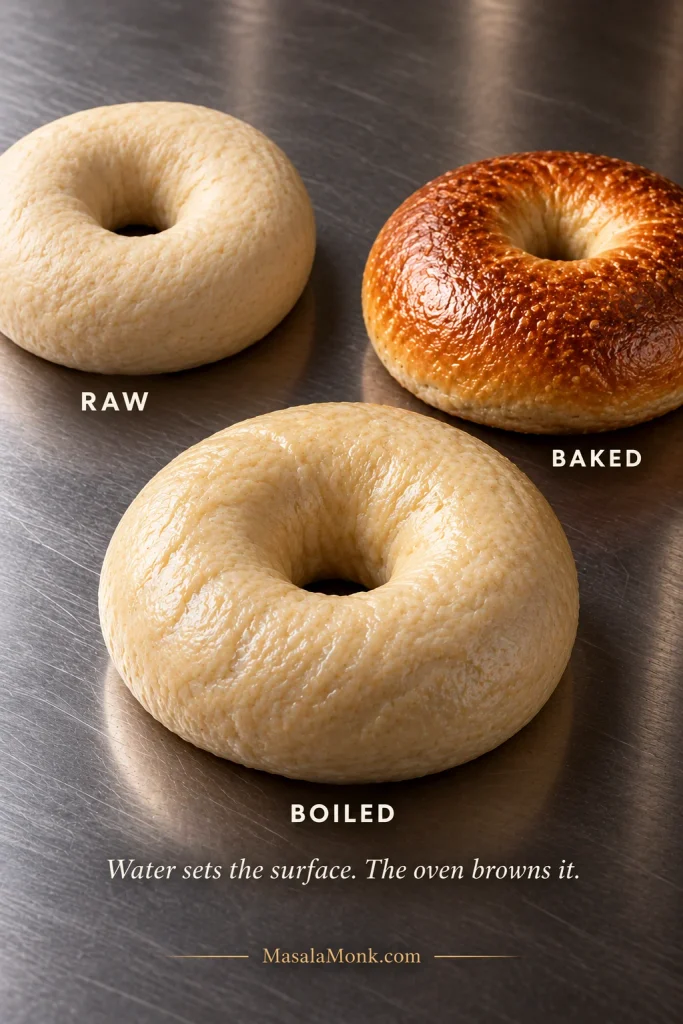
What should go in the water?
Barley malt adds a mild malty note and helps the surface brown; honey is the practical substitute when malt is unavailable.
Other recipes use sugar, brown sugar or baking soda. Baking soda increases alkalinity and encourages deeper browning; in larger amounts, it moves the crust toward pretzel-like characteristics.
Keep the water steady, not violent
A gentle, steady boil is enough. You want heat, not a pot that throws delicate proofed rings around.
Work in small batches and let the water recover before adding more. Cold dough can pull the temperature down quickly.
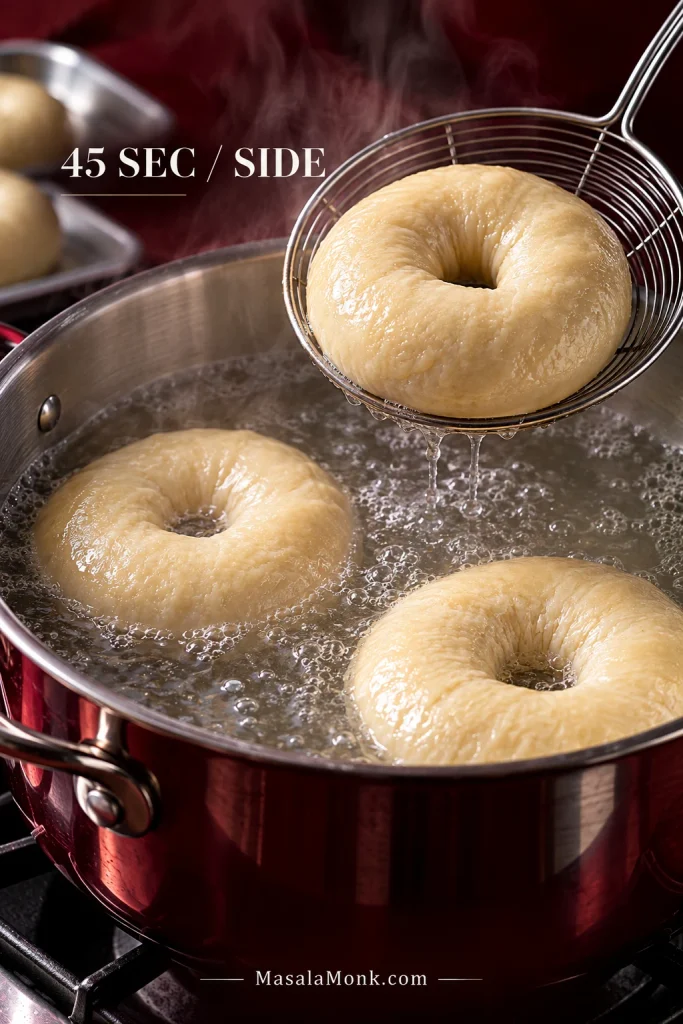
After boiling: slightly swollen is right. Ballooned is not the goal. A few wrinkles are fine; the oven still has work to do.
The first boiled ring is usually the moment the process clicks. It comes out plumper, smoother and suddenly recognizably bagel-like. Once the batch is boiled and topped, continue to baking.
Bake Until the Crust Has Real Color
The oven finishes what the water started. That pale boiled skin tightens, turns glossy in places, and deepens toward a proper golden brown.
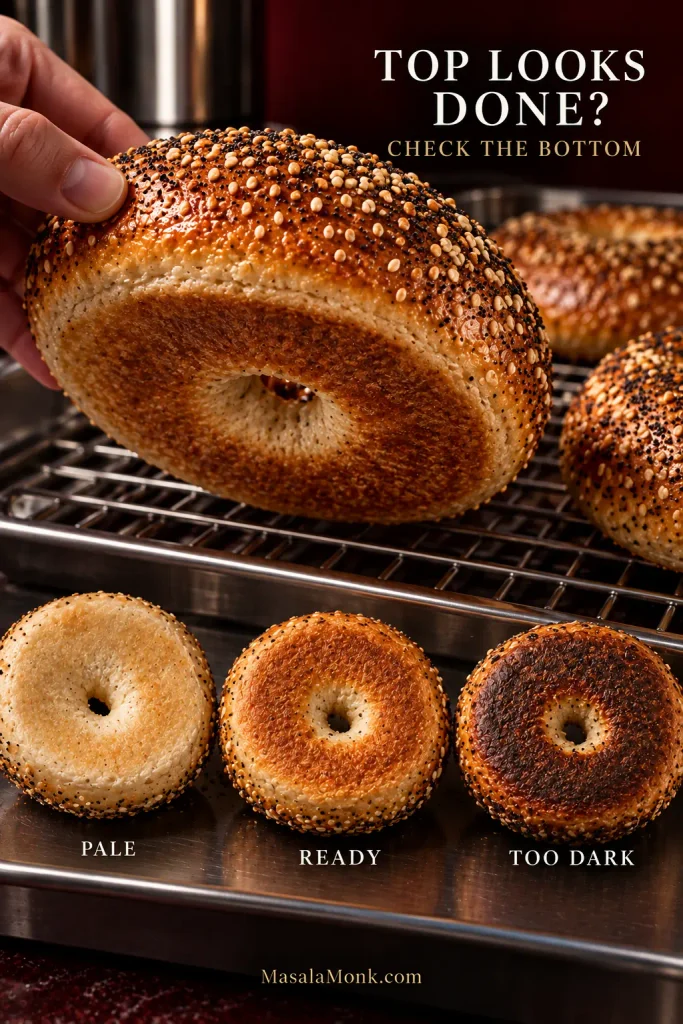
Bake at 425°F / 220°C for about 20–24 minutes. When the bagels first look “done” at pale gold, they usually still have more flavor to develop. Pale isn’t finished.
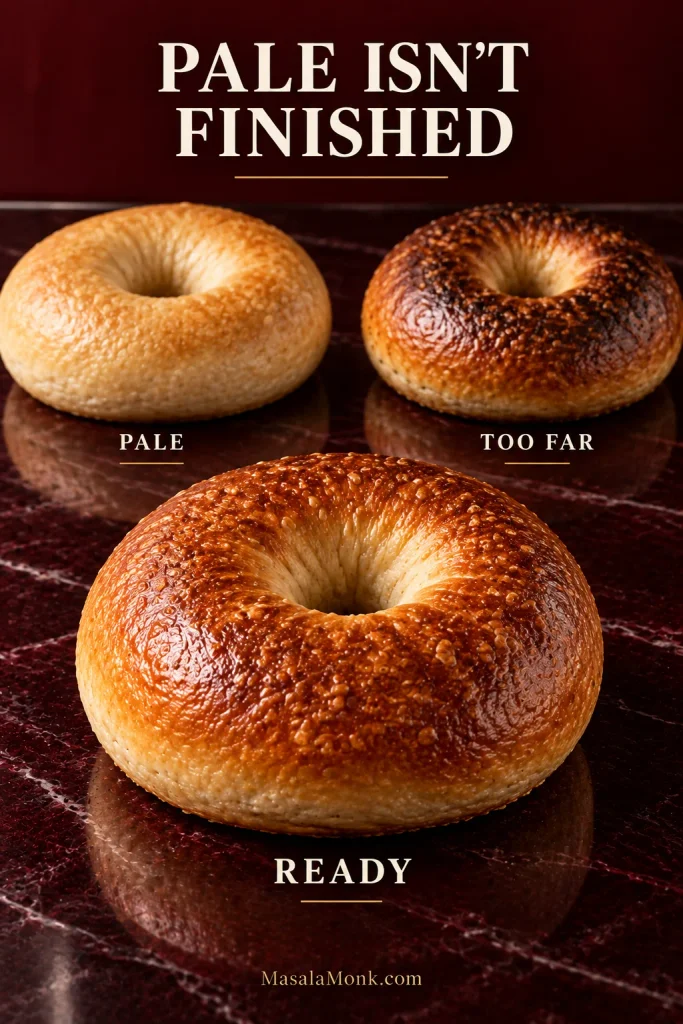
Check the bottoms too. They should be browned rather than white and soft.
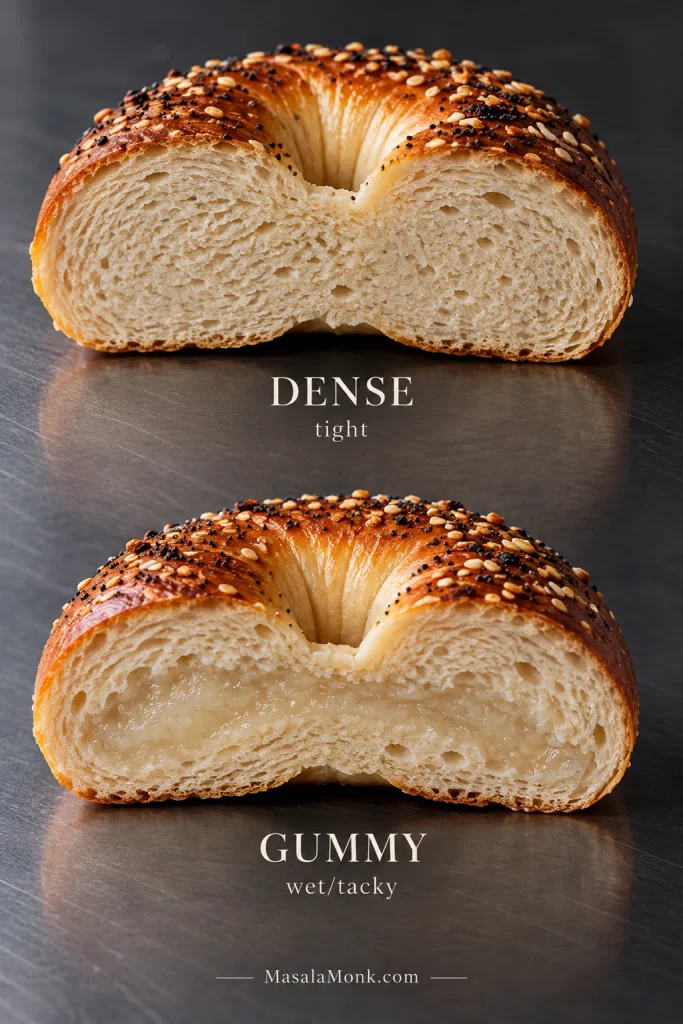
What the inside should look like
- A compact overall crumb
- Small-to-medium irregular air pockets
- No wet or gummy line through the center
- No giant bread-like cavities
- A springy, substantial chew
Wait 20–30 minutes before cutting one open. Once cooled, the knife should meet a little resistance at the crust before passing through the springy center.
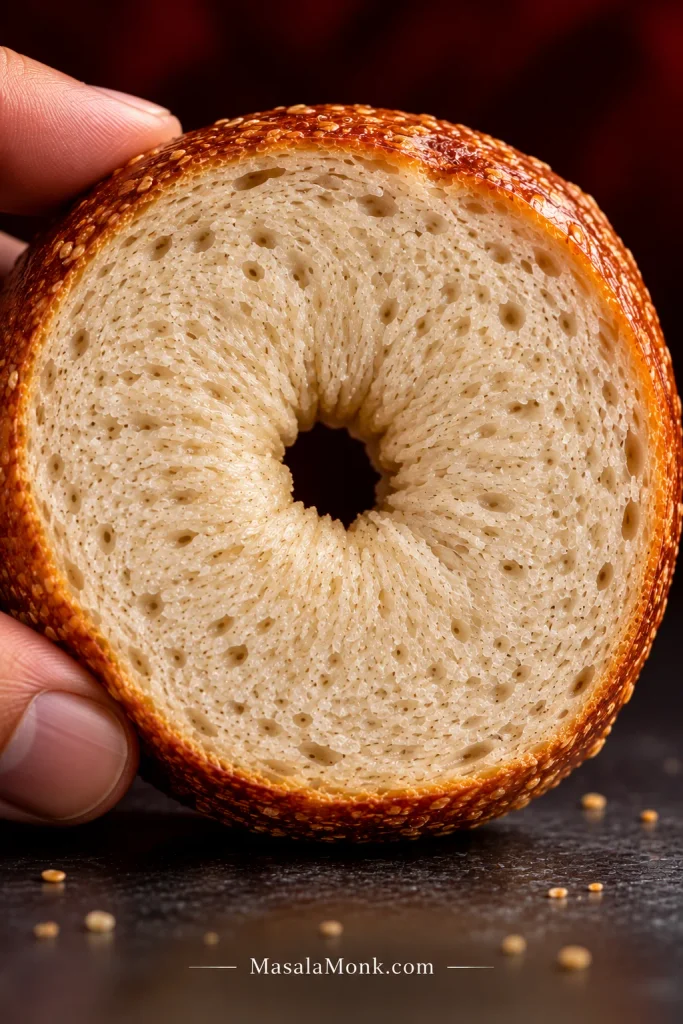
If the crust, shape or crumb does not match what you expected, jump to bagel troubleshooting and start with the first stage where the batch looked wrong.
Back to top ↑ · Jump to recipe
Bagel Troubleshooting: When Did It Go Wrong?
Think back to the first moment the batch looked wrong. That usually tells you more than the finished bagel does.
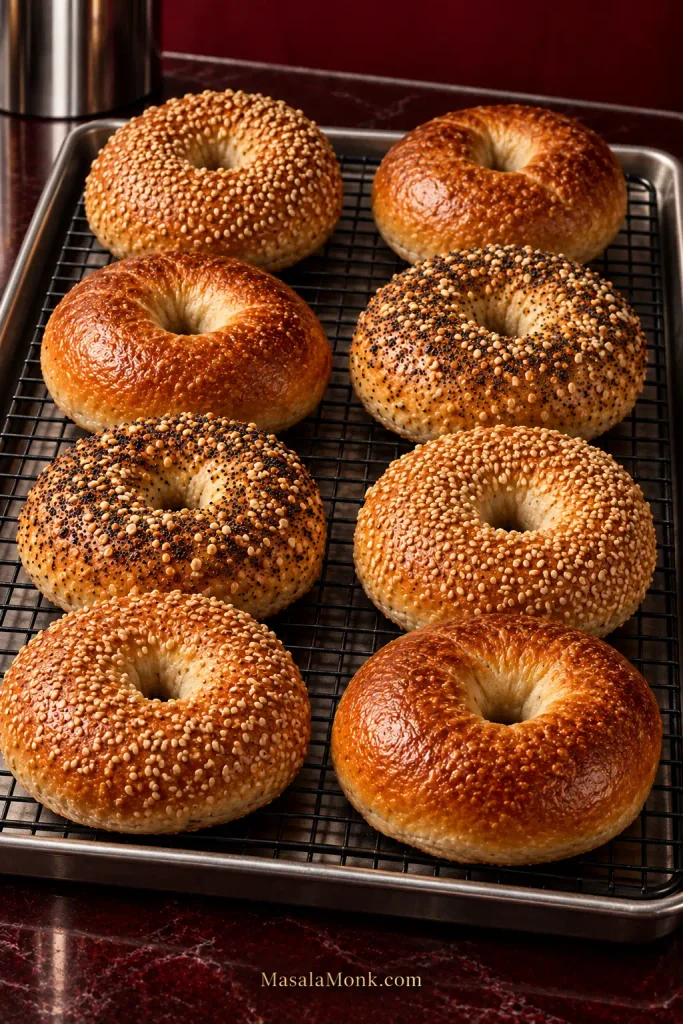
And not every imperfect-looking bagel is a failed one. A lopsided ring, a slightly closed center or a few wrinkles are mostly cosmetic. Severe collapse, a nearly solid crumb or a gummy middle point to a real process problem.
The problem started before boiling
The shaped rings are already flat. Overproofing is the first thing to check. Rings that were never especially puffy point more toward dough that was too soft or not developed enough to hold its shape. Recheck dough development and the final proof before changing the formula.
The dough barely rose. If you’ve seen almost no fermentation after a reasonable amount of time, check the yeast instead of simply waiting hour after hour. Room temperature matters too; a cool kitchen can slow an otherwise healthy dough considerably.
The dough is sticky and spreading. Make sure it is fully kneaded before adding more flour. If the dough is fully kneaded and still cannot hold its shape, add flour in small amounts rather than throwing in a large handful.
The dough cracks or crumbles. Cover it for five minutes and knead again. If it still breaks instead of bending, add water about 5 g / 1 teaspoon at a time.
The rings stick to the parchment. Lightly grease the paper or dust it very lightly with semolina or cornmeal. Lift stubborn rings from underneath with a thin bench scraper rather than peeling them up by the edge.
The problem started during handling or boiling
The rings collapse when lifted. They have probably proofed farther than ideal, especially if they already feel soft and fragile. Support them from underneath and move them gently.
Why did my bagels flatten after boiling?
Bagels that enter the pot tall but come out flat are most likely overproofed. Rough handling, a violent boil or a much longer water bath can make an already fragile ring collapse further.
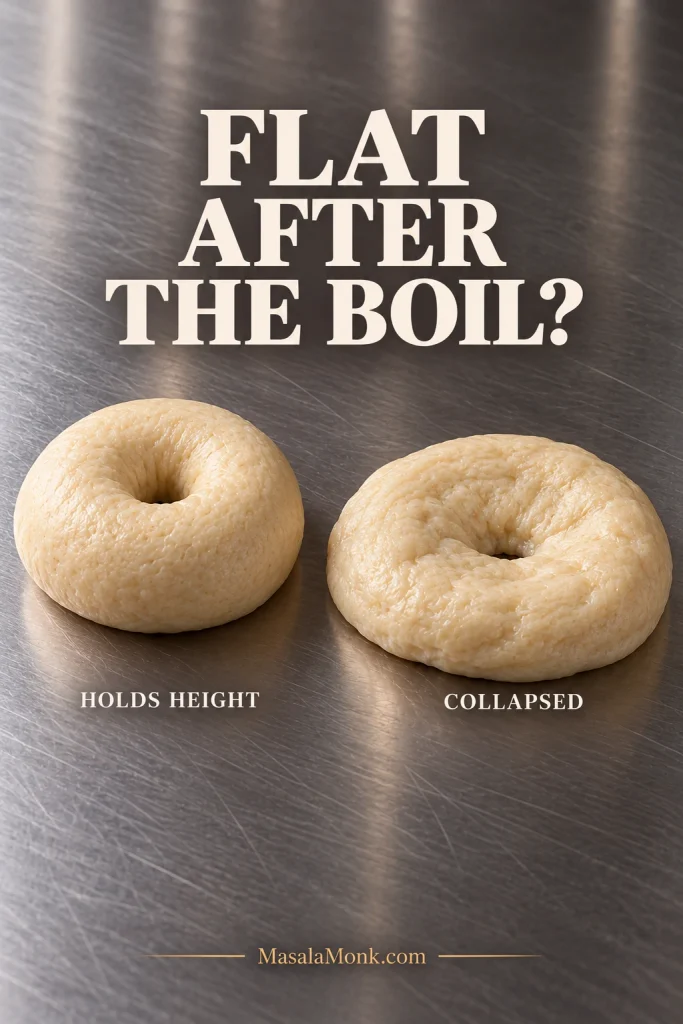
A few wrinkles appeared. Usually cosmetic. Dramatic deflation is the sign to investigate.
Why won’t my bagels float?
Persistent sinking can mean the dough needs more fermentation, but a cold ring may sink briefly before floating. A properly proofed ring should also feel lighter than when it was shaped without becoming fragile.
The rope seam opened. Use a larger overlap next time, keep flour off the join, and roll the seam firmly. Slightly damp ends seal more easily than dry ones; the shaping section shows both methods again.
The problem appeared in the oven
The bagels spread instead of rising. If they survived the boil in good shape, look first at dough strength and shaping tension. When both seemed right, check whether the oven is actually reaching its set temperature.
The bottoms burn while the tops stay pale. Dark pans, baking steels and strong bottom heat can all be responsible. Move the rack higher, use a lighter pan or double-pan if needed.
The bottoms stay pale. Give them a little more baking time. Silicone mats can also insulate the base more than parchment over metal.
The center hole disappeared. Mostly cosmetic. Stretch it wider next time and enjoy the bagel you have.
They look good, but the texture is wrong
Why are my bagels too dense?
A New York-style bagel is supposed to be tighter than sandwich bread. If the crumb is almost solid, underproofing or weak yeast is the first place to look. Dough that is too dry, underdeveloped or underbaked can make the problem worse.
They are fluffy and bread-like. In that case, the rings probably proofed farther than this style needs. Stop while they are still sturdy and give the crust enough time to brown deeply.
They are tough or rubbery. Rubbery or excessively chewy bagels can come from dough that was too dry or a much longer boil. If the bagels are simply dry and hard, check the bake time too.
Why is the center gummy?
First, let the bagel cool completely. If the crumb is still wet, check the oven temperature and bake time. Underbaking is the most common place to start.
A few smaller surface problems
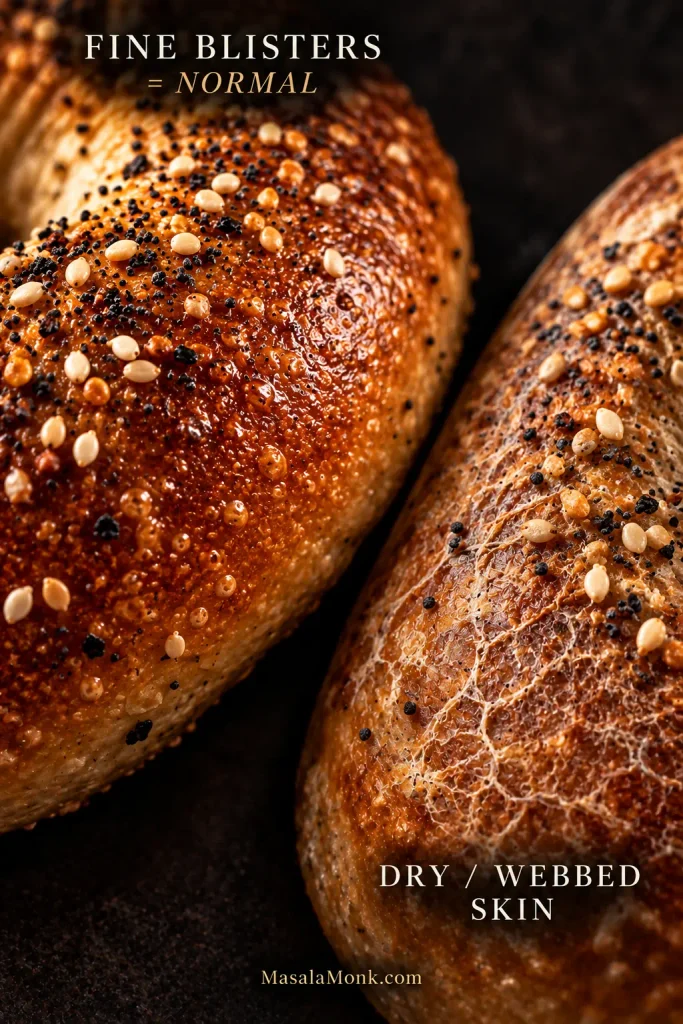
Rough or webbed crust. Fine surface blisters are normal and can be desirable. A dry, rough or webbed-looking skin is different; the dough may have dried out during proofing or may not have been kneaded enough.
Cracks or splits. Check for a dried skin, uneven shaping tension or a weak rope seam.
Toppings falling off. Add them while the boiled surface is still damp; egg wash gives extra hold and shine.
Once a batch is baked, there is very little value in judging it by perfect bakery geometry. Slice one, check the crumb, and taste it. That tells you what actually needs changing next time.
Back to top ↑ · Jump to recipe
Make the Toppings Work for You
Most seed toppings go on as soon as the bagels leave the water, while the surface is still damp. Sesame and poppy seeds adhere well this way. A seed-heavy everything blend works too.
An egg wash is optional. Brush it on before the toppings when you want a glossier crust or a little extra help keeping seeds in place.
Dried minced onion needs different handling. It can scorch during a full bake, so reserve a little egg wash. When the bagels are nearly browned, pull the trays out briefly, brush the bagels you want to top, add the dried onion or onion-heavy blend, and return them to the oven for about 1–2 minutes.
Use coarse salt sparingly; a little goes a long way on a chewy bagel.
For a much broader set of cream cheese mixtures, smoked salmon combinations, savory toppings and sweeter options, see the bagel toppings and spreads guide.
Day-old bagels also make excellent breakfast sandwiches; the breakfast sandwich guide has more combinations. If you are saving the rest of the batch, continue to storage and freezing.
Store Them Like Bread, Not Cake
Bagels are at their best on the day they are baked. Once completely cool, keep them tightly wrapped or sealed at room temperature for about 1–2 days. By the second day, toasting brings back much of the crispness and chew.
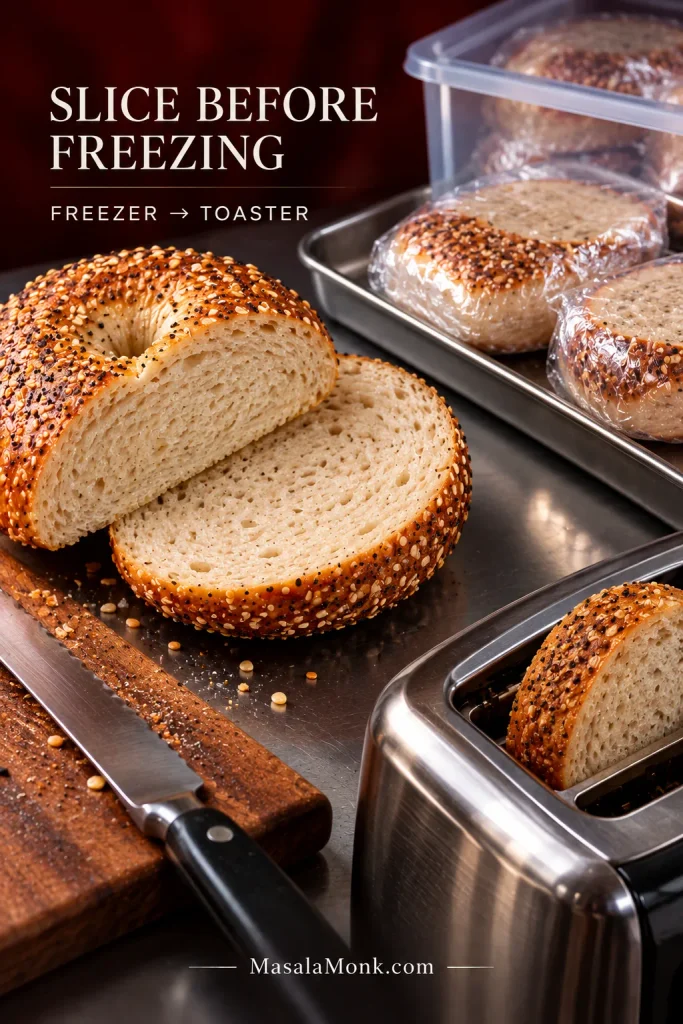
For longer storage, slice before freezing. Wrap well and freeze for up to about 3 months for best quality. A pre-sliced half can go straight from freezer to toaster.
Back to top ↑ · Jump to recipe
Frequently Asked Questions
Do New York-style bagels require New York water?
No. Water chemistry can influence dough, but you do not need New York water to make an excellent bagel at home. For most home bakers, flour, fermentation, shaping, boiling and baking are the variables worth controlling first.
Can I double the recipe?
Yes, but this is unusually stiff dough. If your mixer is small or starts laboring, two separate batches are safer than forcing a double batch through the machine. Keep dividing by weight and continue boiling in small batches so the water stays hot.
Can I make smaller bagels?
Yes. For 10 smaller bagels, divide the dough into pieces of about 100 g / 3.5 oz each and begin checking the bake several minutes earlier.
Once the bagels are cool, split one and look for that contrast between the browned crust and the springy center.
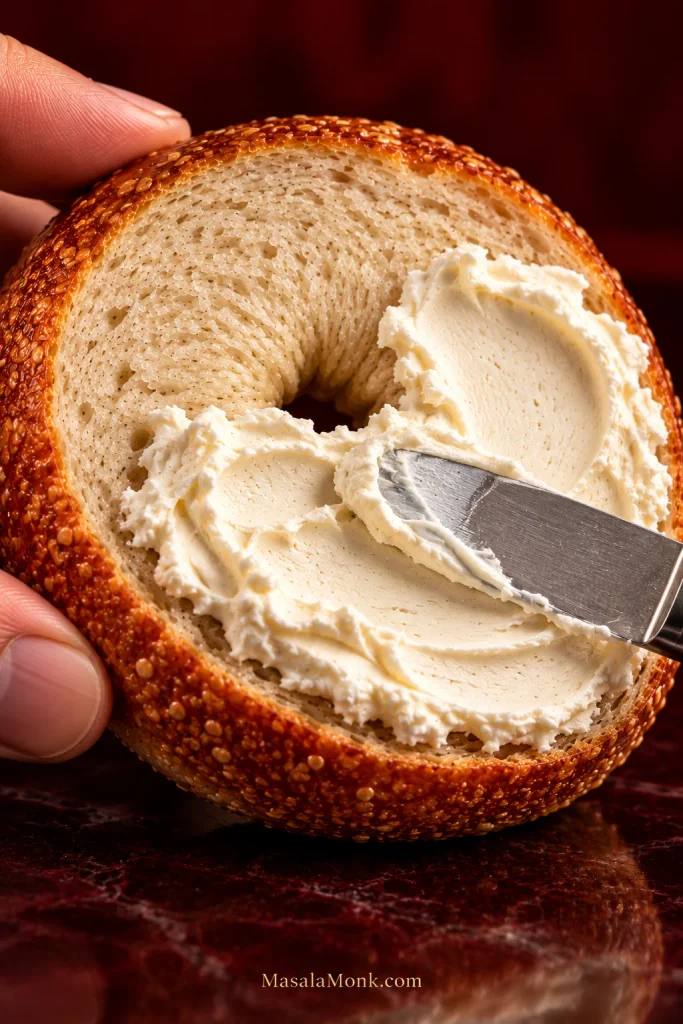
Then comes the payoff: feel the knife catch slightly on the browned crust and drag cream cheese across the springy center. At that point the boiling water and stiff dough stop feeling like bakery tricks. They are simply how you make a really good bagel.








