Posted on — Leave a comment

Mango Daiquiri Recipe

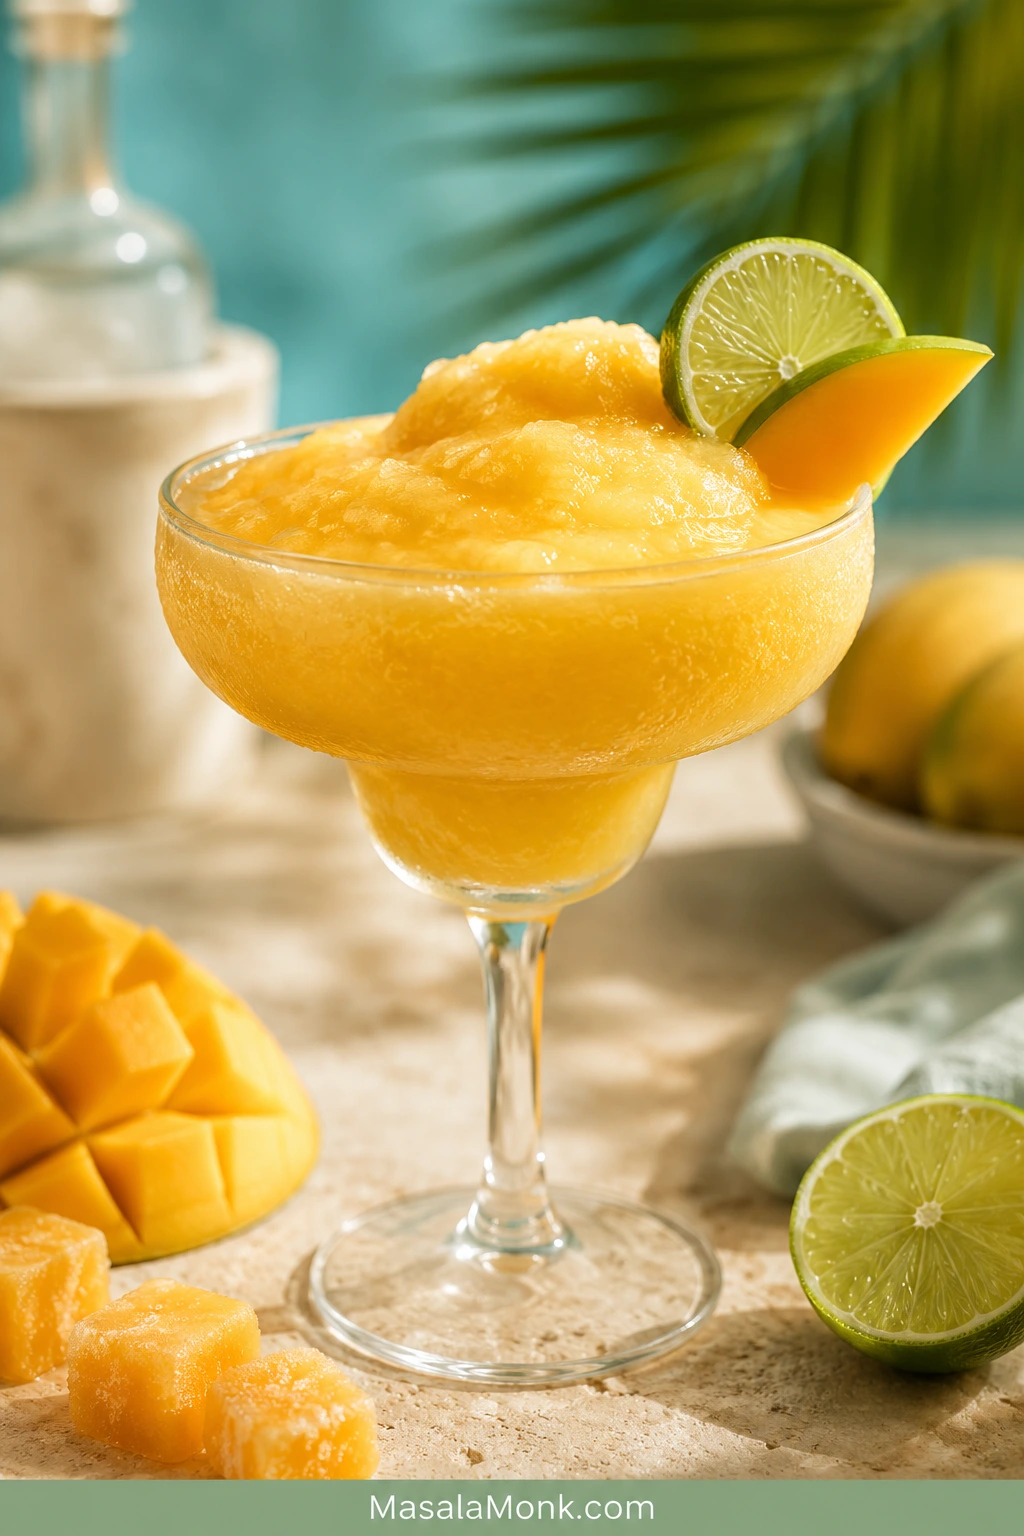
Frozen mango daiquiri in a chilled stemmed glass with a lime wheel, mango garnish, frozen mango chunks, lime halves, and crushed ice on a sunlit stone surface.

A mango daiquiri sounds easy until the blender turns it into a watery mango slush, a spoon-thick smoothie, or a drink that tastes sweet but flat. Mango, rum, lime, ice — the ingredient list is short, but the balance matters.

This recipe is built for the glass you actually want: cold, golden, lime-bright, mango-forward, and still cocktail-like. It is not a boozy smoothie, melted mango ice, or a bottled-mix drink hiding under too much sugar.

The best version should pour slowly, smell like ripe mango and fresh lime, and taste cold before it tastes sweet. Frozen fruit gives the drink body, lime keeps it awake, white rum keeps the finish crisp, and simple syrup lets you adjust for the mango you have.

Quick Answer

A mango daiquiri is made with mango, rum, fresh lime juice, sweetness, and ice. For the best frozen version, blend frozen mango chunks with white rum, lime juice, simple syrup, and crushed ice until smooth, frosty, and still loose enough to sip.

The easiest ratio for 2 drinks is 2 cups frozen mango, 4 oz white rum, 1½ oz fresh lime juice, 1 oz simple syrup, and 1 cup crushed ice. Frozen mango gives the thickest blender texture. For deeper aroma, use ripe fresh mango, but chill or freeze the cubes first so the drink does not melt too quickly.

When the balance is right, the first sip should taste like mango and lime before it tastes like alcohol. The rum should support the fruit, not bully it.

The core rule: ice makes a frozen daiquiri cold. Frozen fruit makes it taste like mango.
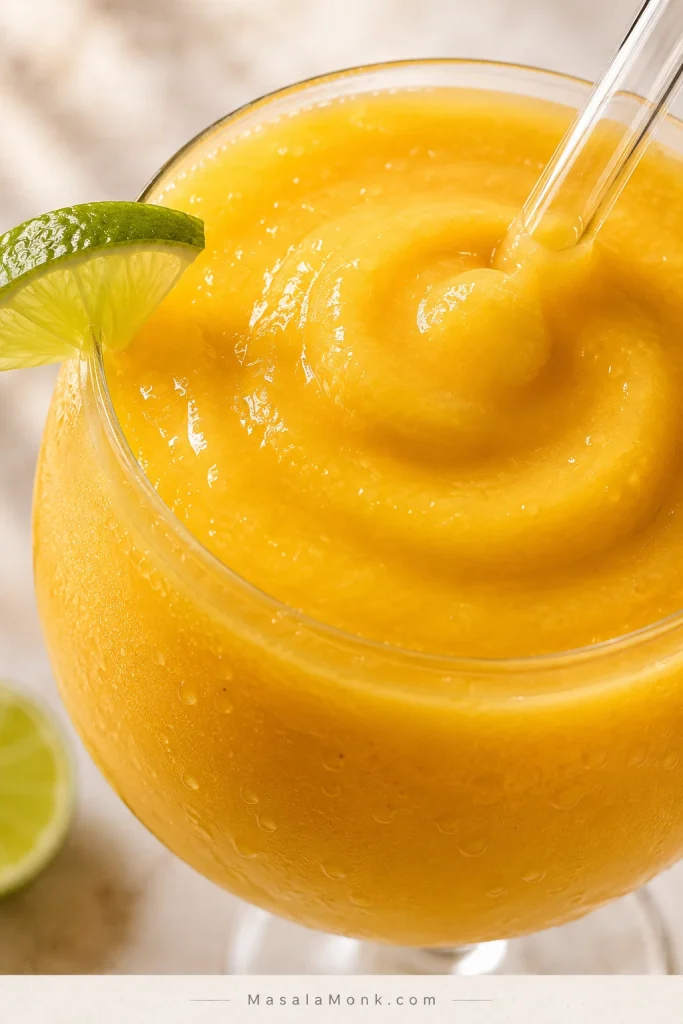
Close-up of a thick golden mango daiquiri with a lime garnish, condensation on the glass, and a clear straw touching the glossy frozen surface.
Look for a glossy texture that moves slowly but still drinks easily through a straw. If it looks scoopable, loosen it slightly; if it looks runny, blend in more frozen mango.

Make It Now

Already holding the blender jar? Liquids first, mango next, ice last. Blend only until it looks like a soft frozen cocktail, then taste before you pour.
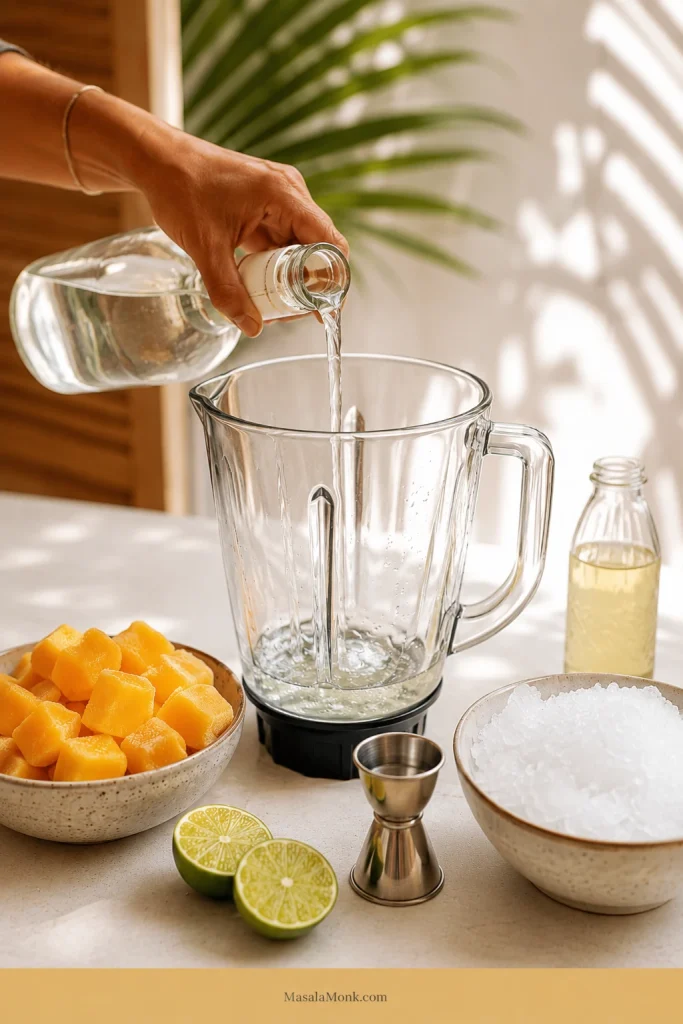
Clear liquid being poured into a blender jar with frozen mango chunks, crushed ice, lime halves, a jigger, and syrup nearby.
Start with the liquids so the blades have something to pull through the jar. After that, the frozen mango blends faster and the finished drink turns smoother.
  • Base ratio: 2 cups frozen mango, 4 oz white rum, 1½ oz lime juice, 1 oz simple syrup, 1 cup crushed ice.
  • Blend time: 20–30 seconds, just until frosty and slow-pouring.
  • Syrup range: ½ oz for very sweet mango or bottled mix; up to 1½ oz for tart or flat fruit.
  • Fast fix: lime sharpens, syrup softens, frozen fruit thickens, and 1 tablespoon liquid loosens the blender.
  • Serve: pour right away.

Recipe Card

Yield: 2 drinks · Prep time: 5 minutes · Total time: 5 minutes · Method: blender · Serve: immediately

This is the full frozen mango daiquiri recipe in one place. Start with frozen mango for the easiest texture, use fresh lime for the brightest flavor, and serve in a chilled coupe, margarita glass, martini glass, or rocks glass.

Ingredients

IngredientUS measureMetric measure
Frozen mango chunks2 cupsAbout 300 g
White rum or light rum4 oz120 ml
Fresh lime juice1½ oz / 3 tbsp45 ml
Simple syrup1 oz / 2 tbsp30 ml
Crushed ice1 cupAbout 150 g
Mango nectar, pineapple juice, coconut water, or cold water, optional1–2 tbsp, only if needed15–30 ml
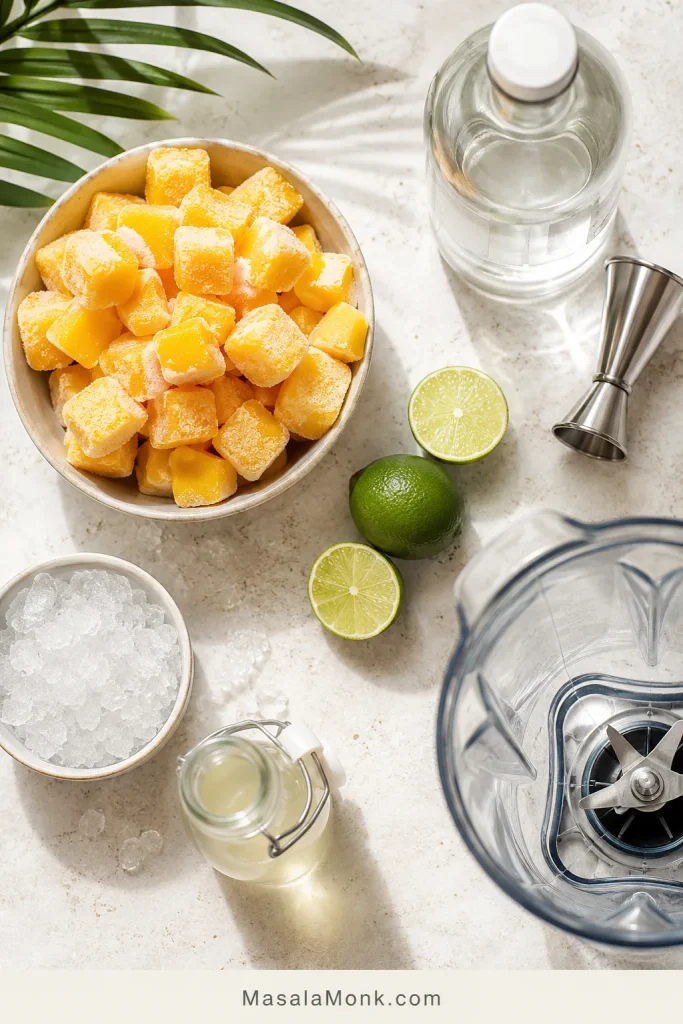
Overhead layout of frozen mango chunks, crushed ice, fresh limes, clear rum, simple syrup, a jigger, and a blender jar for a mango daiquiri.
This short ingredient list works because nothing is decorative. Frozen mango builds body, lime cuts sweetness, syrup rounds the edges, and rum keeps the drink in daiquiri territory.

Lighter drink: use 3 oz / 90 ml rum total for 2 drinks instead of 4 oz / 120 ml.

Sweeter mango or bottled mix: start with ½ oz / 15 ml simple syrup, then add more only if needed.

Instructions

  1. Chill 2 glasses in the freezer.
  2. Pour the rum, lime juice, and simple syrup into the blender.
  3. Add the frozen mango chunks.
  4. Top with crushed ice.
  5. Blend for 20–30 seconds, until smooth, slushy, and slow-pouring.
  6. Taste and adjust: lime for brightness, syrup for sweetness, frozen fruit for thickness, or 1 tbsp liquid if too thick.
  7. Pour into chilled glasses, garnish if you like, and serve immediately.

Notes

  • Fresh lime juice gives the brightest flavor.
  • Crushed ice blends better than large cubes.
  • Do not blend too long or the drink will warm and thin out.
  • Lime wheel, mango wedge, mint, or chili-lime rim all work as garnishes.
  • For the best texture, serve right away.

Need to adjust the drink? Fix the texture, choose fresh vs frozen mango, or pick a version.

Choose Your Mango Daiquiri

Once the base glass tastes right, the variations are easy. Use the same balance to make it lighter, stronger, fruitier, coconut-leaning, or alcohol-free.
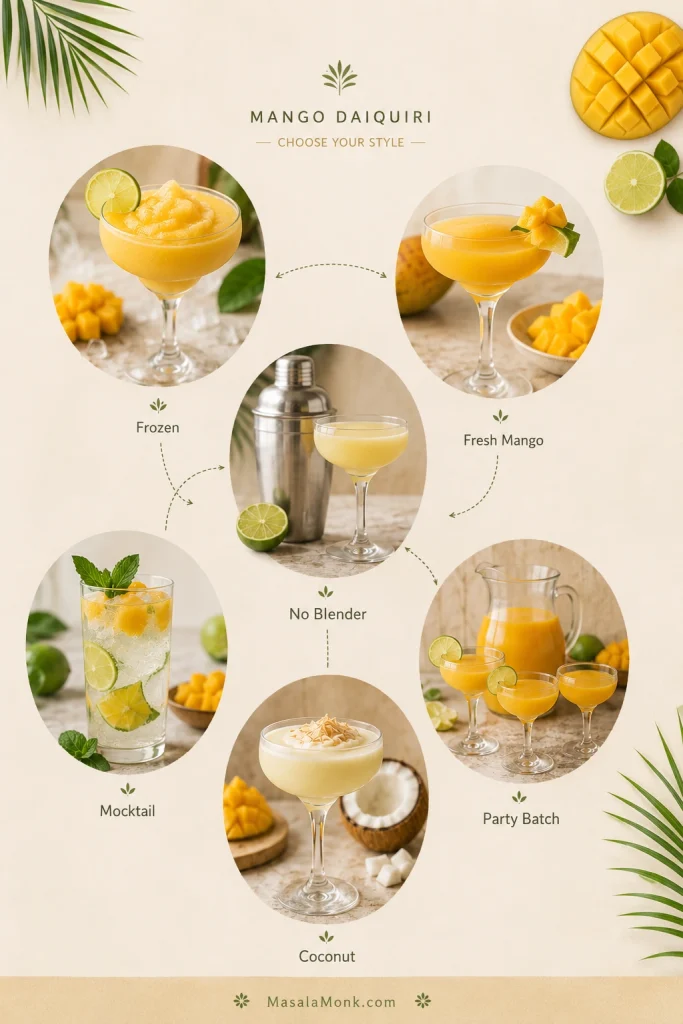
Guide board showing frozen, fresh mango, no-blender, mocktail, coconut, and party batch mango daiquiri versions with small drink and ingredient photos.
Once the mango-lime base tastes balanced, choose the version by need: frozen for texture, fresh for aroma, shaken for no blender, mocktail for a lighter glass, or coconut for a softer tropical finish.
What you wantBest version
Thick frozen cocktailUse the main frozen recipe
Fresh ripe mango flavorCube fresh mango and freeze 30–60 minutes before blending
No blenderShake mango puree or thick juice with rum, lime, and syrup
Sweeter tropical versionUse coconut rum or Malibu, then reduce syrup and add lime
Non-alcoholic drinkUse frozen mango, lime, pineapple juice or coconut water, and sparkling water
Party batchPrep liquids ahead and blend in batches right before serving

At its best, this is not a sugary frozen drink. It is mango with a lime edge, a crisp rum finish, and just enough sweetness to make the next sip feel easy.

What Is a Mango Daiquiri?

A mango daiquiri is a fruit version of the classic daiquiri, a rum cocktail built around rum, lime juice, and sweetness. At its core, the classic drink is just rum, fresh lime, and sugar; the International Bartenders Association’s daiquiri formula is a useful reference for that simple base.

The mango version can be frozen and blended, or shaken and strained when made with puree or juice. Either way, it should still taste like a cocktail: fruit first, lime brightness next, and a crisp rum finish.

For a broader look at the drink family, see our Daiquiri Recipe guide. This page stays focused on keeping the mango version balanced at home.

Why This Works

This drink works because frozen fruit does the heavy lifting, not the ice. It gives the daiquiri body, so you do not have to rely on flavor-diluting cubes to create texture.
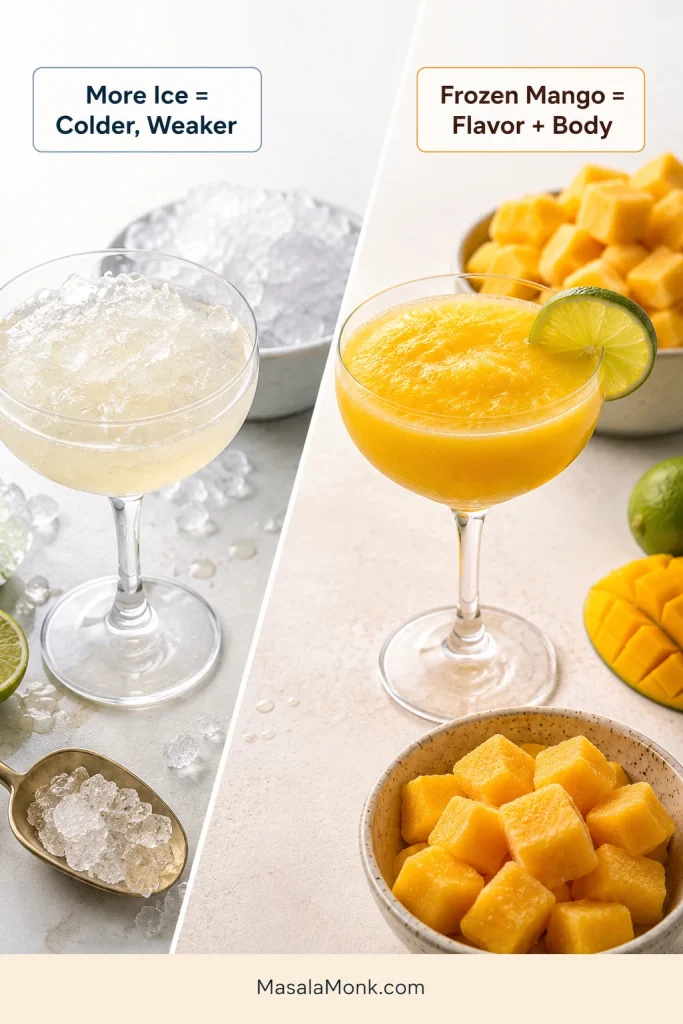
Comparison guide with a pale icy drink beside a thicker golden mango drink, showing how ice and frozen mango affect texture.
More ice can chill the drink, but it can also thin the flavor. Instead, let frozen fruit handle most of the body and use ice only for coldness and lift.

Fresh lime keeps the sweetness lively. White rum gives structure without hiding the mango. Simple syrup stays adjustable because mangoes are unpredictable — one batch may be candy-sweet, the next may be tart or flat.

The blender order matters more than it seems: liquids first, fruit second, ice last. That small step makes the mixture easier to blend and reduces the urge to pour in extra liquid too early.

Ingredients You Need

With a drink this simple, every ingredient shows up in the glass. The goal is not to bury the mango under sugar or ice. It is to let the fruit, lime, rum, cold, and sweetness show up in the right order, so every sip tastes bright instead of heavy.

Mango

Frozen chunks are the easiest win because they give the drink body without watering it down. They also make the texture more predictable from batch to batch.
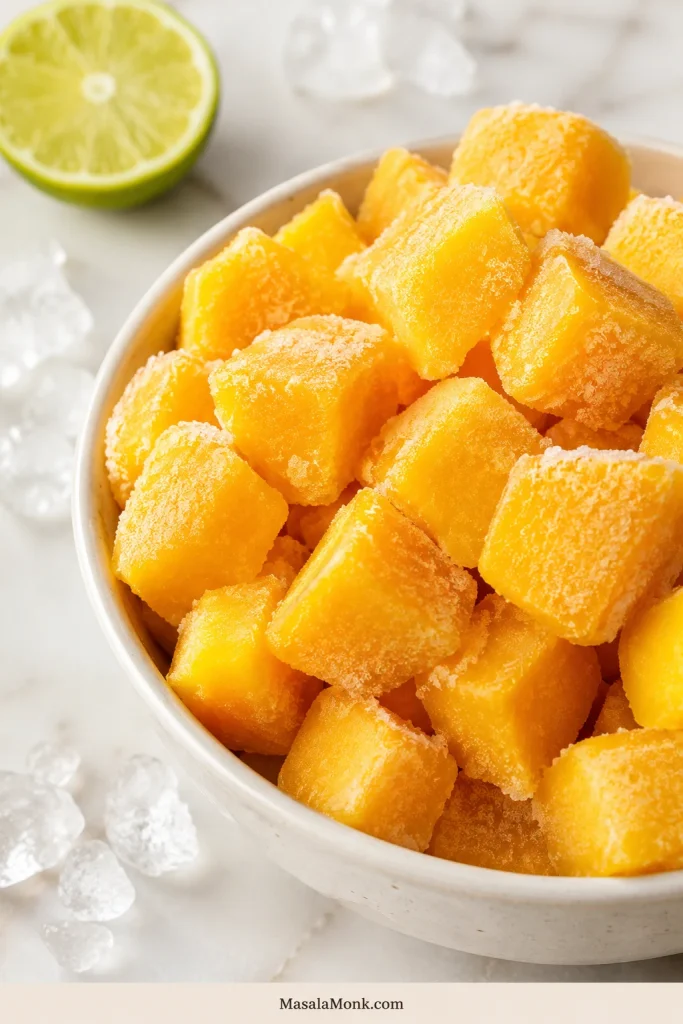
Frosty frozen mango chunks in a ceramic bowl with scattered ice pieces and a lime half on a light countertop.
Frozen mango gives the blender a head start: it chills, thickens, and flavors the drink before the crushed ice goes in.

Fresh mango is lovely when it is ripe, fragrant, and sweet. Taste a piece first. If it tastes bland, the drink will need more lime, a little more syrup, and possibly a tiny pinch of salt. For better texture, cube it and freeze for 30–60 minutes.

If your mango is fibrous, puree it first or use frozen chunks for a smoother blend. For another look at how mango changes texture in drinks, our Mango Lassi Recipe also works through fresh mango, frozen mango, and mango pulp.

Rum

Reach for white rum or light rum first. It keeps the mango and lime clear. Aged rum gives a warmer flavor. Dark rum can work in a richer tropical version, but it can cover the fruit. Coconut rum is sweeter, so pull the syrup back if you add it. Avoid overproof rum unless you deliberately want a stronger drink.

If you like crisp rum-and-lime drinks, our Mojito Recipe is another useful ratio to keep in rotation.

Fresh Lime Juice

Lime is what wakes the whole glass up. It gives the drink its proper daiquiri shape and keeps mango from tasting heavy. Lime is better than lemon here because it gives a sharper cocktail edge. Bottled lime works in a pinch, but fresh juice tastes brighter in a drink this simple.

Simple Syrup

Simple syrup smooths the lime and fruit. Start with 1 oz / 30 ml for 2 drinks, then taste. Very sweet mango may only need ½ oz / 15 ml. Tart or flat fruit may need up to 1½ oz / 45 ml.

To make a small batch, stir ¼ cup sugar with ¼ cup hot water until dissolved. Cool it before using. Store the rest in the fridge for more drinks.

Ice

Crushed ice gives the blender a head start, especially when the mango is rock-solid. Large cubes work in a strong blender, but they can leave chunks if the blender struggles. Add more only after tasting, because ice fixes texture for a moment but weakens flavor as it melts.

Fresh vs Frozen Mango for Daiquiris

The mango you start with decides the kind of drink you get. Choose based on whether you want thick frozen texture, fresh aroma, a shaken cocktail, or a shortcut.
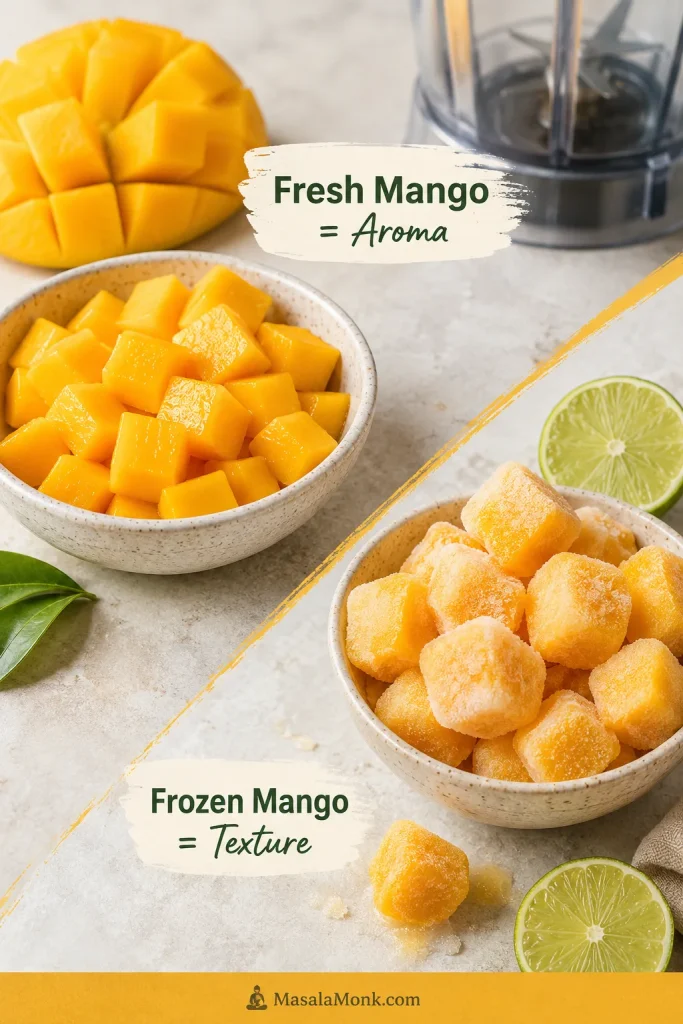
Fresh mango cubes and a scored mango cheek shown beside frosty frozen mango chunks with lime and a blender jar in the background.
Fresh mango gives perfume and ripe fruit flavor, while frozen mango gives dependable texture. For the best balance, cube fresh mango and freeze it briefly before blending.
Mango formBest forHow to adjust
Frozen mango chunksThick frozen drinksStart with less ice because the fruit already thickens the blend.
Fresh ripe mangoBest fresh flavorChill or freeze the cubes first; add ice gradually.
Mango pureeSmooth blender drinks or shaken versionsPull back the syrup because puree is often concentrated and sweet.
Mango nectarShortcut flavor or loosening a thick blendAdd lime and reduce syrup because nectar is usually sweet.
Bottled daiquiri mixConvenienceSkip or reduce syrup, then add fresh lime and frozen fruit.
Mango juiceLight shaken versionExpect a thinner drink; keep the lime strong.

Best default: frozen chunks for the main recipe. They give the easiest texture and the strongest flavor after blending.

If you actually want a creamy breakfast-style drink instead of a cocktail, this Mango Smoothie Recipe is the better direction.

Once you know what your mango is bringing, the fixes get simple: more lime to balance sweetness, less syrup for nectar, and more frozen fruit for body.

Using Mango Nectar, Puree, or Bottled Mix

Mango nectar can help when your blender needs liquid, but it should not take over the drink. Think of it as a mango boost, not the base.
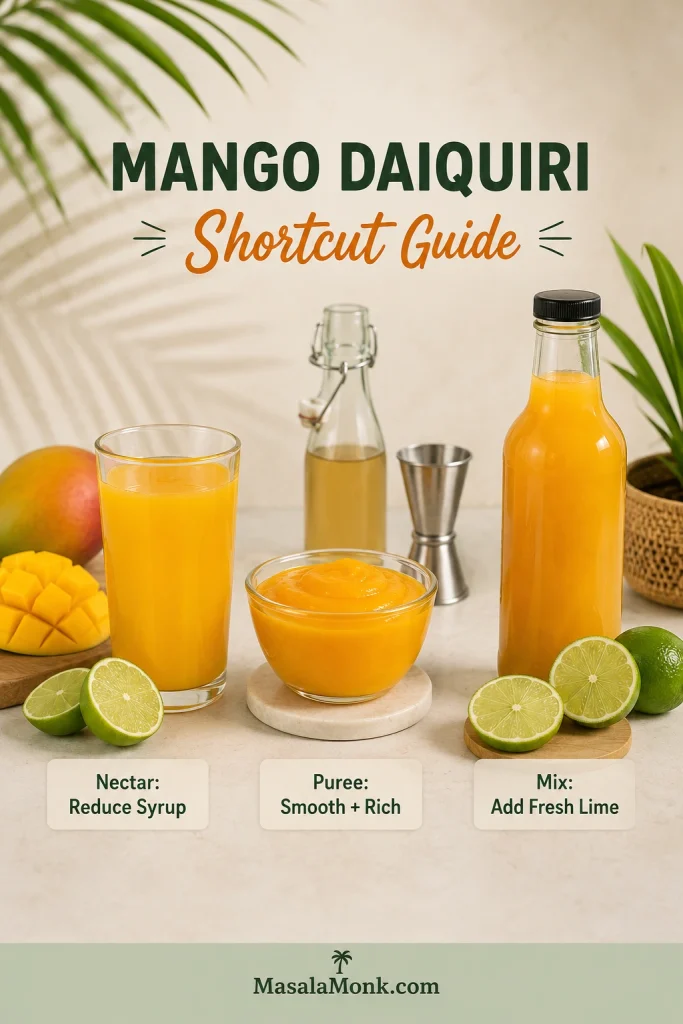
Mango daiquiri shortcut guide showing mango nectar, mango puree, bottled mix, lime halves, syrup, and a jigger on a cream background.
Mango nectar, puree, and bottled mix can all work, but they usually bring extra sweetness. Reduce the syrup first, then use fresh lime to bring the cocktail back into balance.

Puree gives a smooth texture and works especially well in the shaken version. Bottled mixes are usually sweet, so skip or reduce the syrup, add fresh lime, and blend in frozen fruit if the flavor tastes thin or artificial.

For another mango cocktail that handles fresh fruit, nectar, frozen texture, and pitcher options, see our Mango Margarita Recipe.

Back to top

How to Make a Mango Daiquiri Less Watery

You should be able to sip it, not scoop it. The ideal texture is thick enough to feel frozen, but loose enough to pour slowly from the blender. If it behaves like juice, it needs more frozen fruit. When it behaves like sorbet, it needs a small splash of liquid.
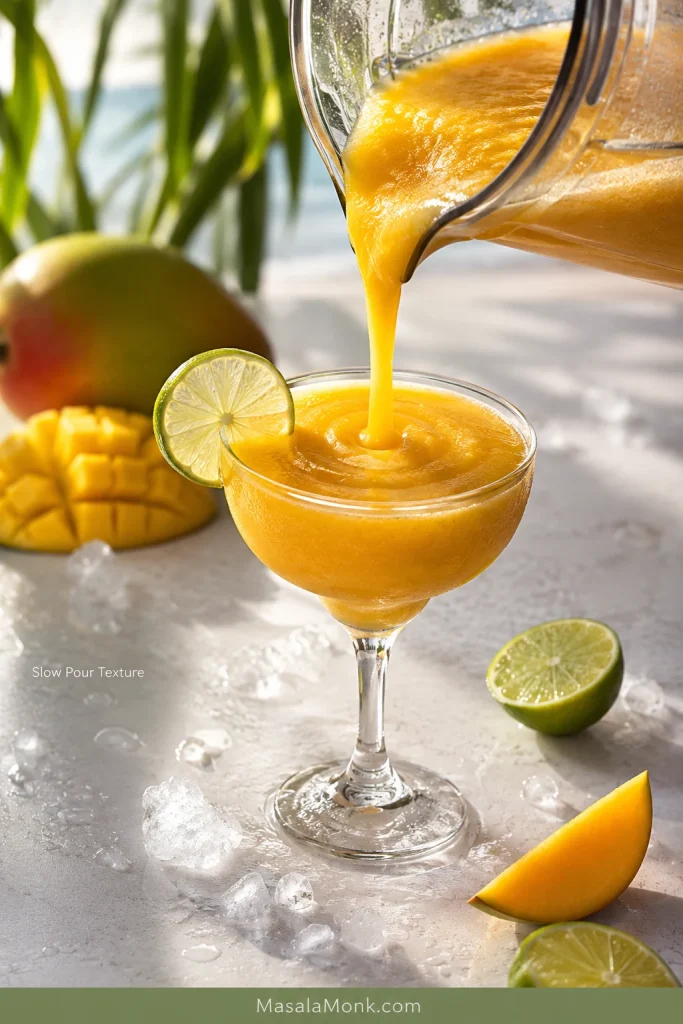
Thick golden mango daiquiri pouring slowly from a blender jar into a chilled stemmed glass with lime, mango, and ice nearby.
The best texture pours slowly, then settles into the glass without collapsing into juice. If it rushes out too quickly, add frozen mango before adding more ice.

Watery vs Perfect Mango Daiquiri Texture

Use this visual check before adding more ice. A watery daiquiri usually needs more frozen mango, while a scoop-thick one needs a small splash of liquid.
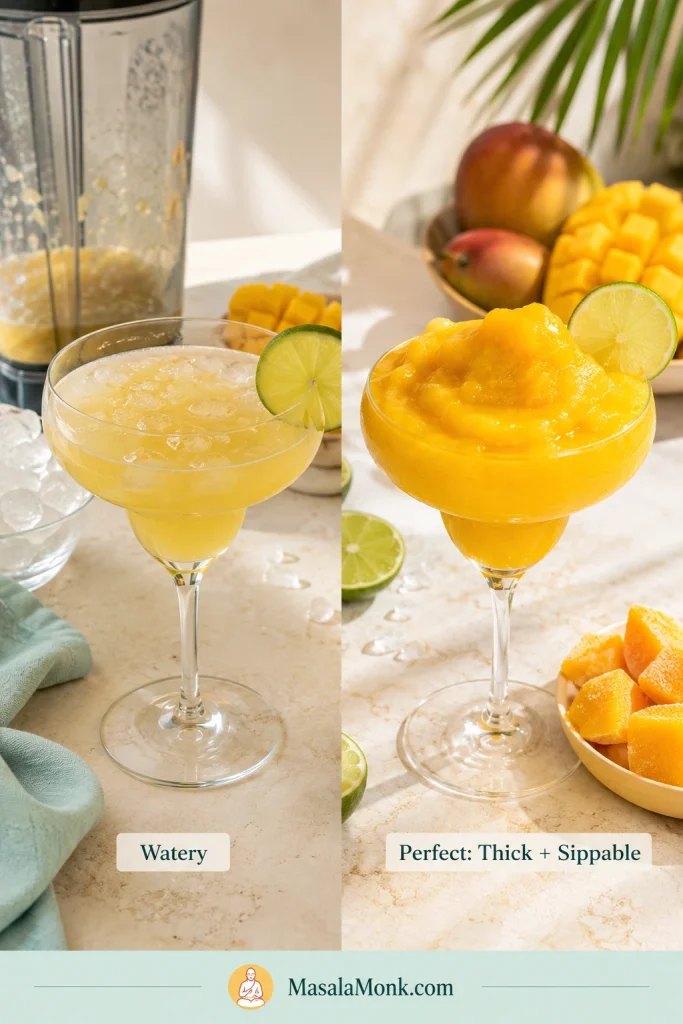
Side-by-side comparison of a watery pale mango daiquiri and a thick golden mango daiquiri with lime garnishes, ice, and mango nearby.
Watery texture usually comes from too much ice or too little frozen fruit. The better glass stays thick and bright because mango, not ice, does the heavy lifting.

The common mistake is trying to fix a thin daiquiri with more ice. That makes it colder for a minute, then more watery. Frozen fruit is the better fix because it adds body and flavor at the same time.

The same fruit-first idea is what keeps our Frozen Strawberry Daiquiri Recipe thick and bright without leaning too hard on ice.

Quick Texture Fixes

GoalWhat to do
ThickerAdd frozen fruit.
SlushierAdd crushed ice gradually.
SmootherBlend 5–10 seconds more, but avoid warming the drink.
LooserAdd 1 tbsp mango nectar, pineapple juice, coconut water, or cold water.
BrighterAdd lime juice.
SweeterAdd syrup.
More fruit-forwardReduce ice and add more mango.
Less flatAdd lime and a tiny pinch of salt.

That pinch of salt is optional, but useful when frozen fruit tastes dull. The drink should not taste salty; the salt simply makes the mango and lime feel more awake.

Once the texture is right, the pour should look slow, glossy, and still loose enough to drink through a straw.

Blender Help

A powerful blender makes this easier, but you do not need a bar machine to make a good frozen drink. The right order and small corrections matter more. For a Thermomix, use the same ingredients and blend only until slushy; if the machine struggles, let the fruit soften for a few minutes first.

  • Liquids first: rum, lime juice, and syrup help the blades start moving.
  • Fruit second: frozen chunks should be close to the blades, but not packed too tightly.
  • Crushed ice last: it blends faster than large cubes.
  • Pause before adding liquid: if the blender forms an air pocket, stop and stir first.
  • Small corrections: add liquid only 1 tablespoon at a time.
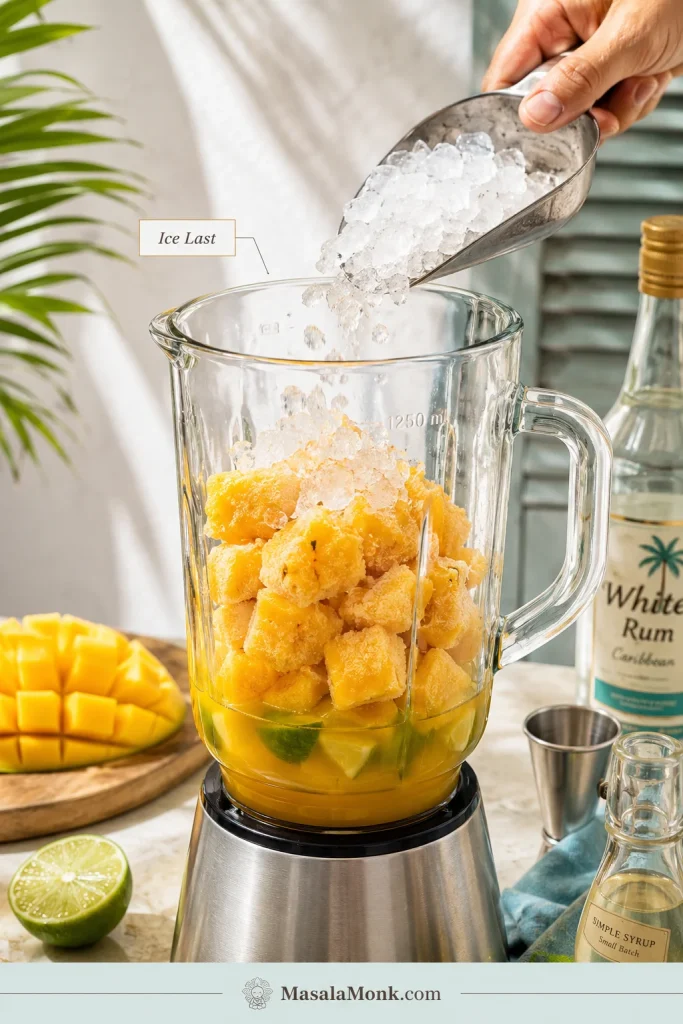
Crushed ice being poured from a metal scoop into a blender filled with frozen mango, lime, and liquid for a mango daiquiri.
Add crushed ice last so it chills the mixture without blocking the blades. This helps even weaker blenders make a smoother frozen daiquiri.

If the blender stalls, it is not a failure. Stop, stir, and only then add liquid. Extra liquid fixes movement, but it also thins the drink fast.

No crushed ice? Wrap cubes in a clean towel and tap them smaller, or pulse the ice briefly before adding the mango. For a weaker blender, let the frozen chunks sit at room temperature for 3–5 minutes.

No blender or still struggling? Try the shaken mango daiquiri, or return to the main recipe.

Back to top

Mango Daiquiri Without a Blender

For a lighter, cocktail-bar-style drink, use mango puree or thick juice and shake it instead of blending. This no-blender mango daiquiri is smooth and chilled, not frozen.

It will not have the plush frozen texture of the blender version, but it should feel cleaner, sharper, and more cocktail-bar-like.
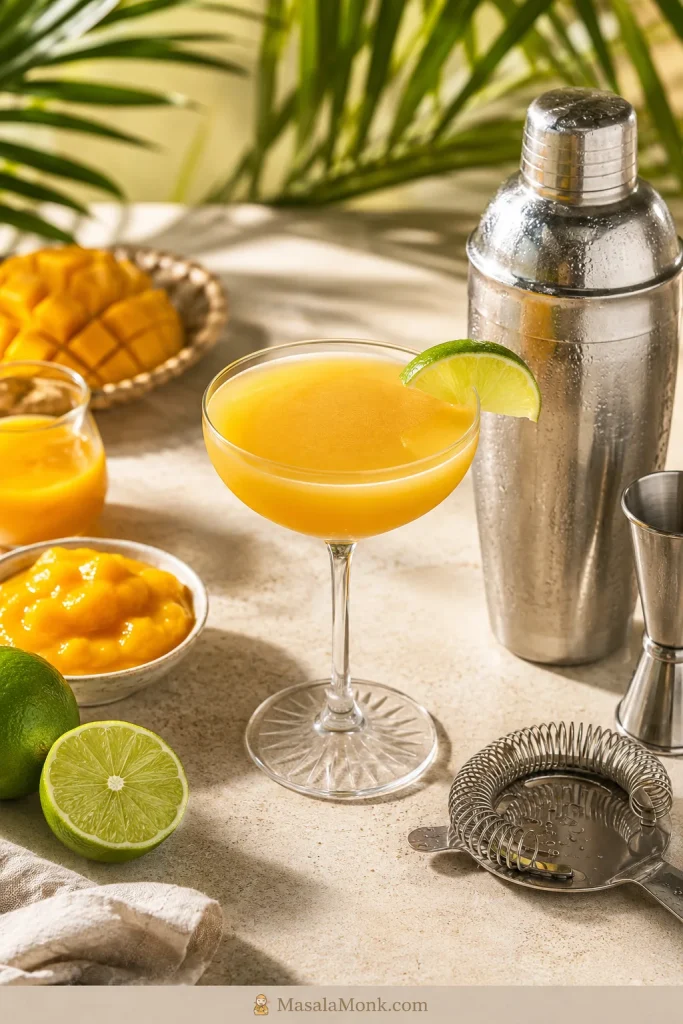
Smooth mango daiquiri in a coupe glass beside a cocktail shaker, strainer, jigger, lime, mango puree, and mango pieces.
A no-blender mango daiquiri is lighter and smoother than the frozen version. Use mango puree or nectar here, because frozen chunks need a blender to turn silky.
For 1 drinkAmount
White rum2 oz / 60 ml
Mango puree or thick mango juice1–1½ oz / 30–45 ml
Fresh lime juice¾ oz / 22 ml
Simple syrup½ oz / 15 ml
IceFor shaking

Add everything to a cocktail shaker with ice. Shake hard for 10–15 seconds, then strain into a chilled coupe or martini glass. Reduce the syrup if your puree is already sweet. Add a little more lime if the drink tastes flat.

Variations

Once the base tastes good, the fun part starts. Strawberries make it fruitier, pineapple makes it sharper, coconut makes it softer, passion fruit makes it tangier, and chili-lime makes it party-ready.

Looking for a specific version? Jump to the mocktail, mango strawberry, coconut rum, or spicy mango version.

Virgin Mango Daiquiri / Mocktail Version

For a non-alcoholic version, do not simply leave out the rum. Without the spirit, the drink still needs lift. Pineapple juice, coconut water, lime, and a splash of sparkling water keep it from becoming just a smoothie.

  • 2 cups / 300 g frozen mango
  • ⅓ cup / 80 ml pineapple juice, orange juice, or coconut water
  • 1½ oz / 45 ml fresh lime juice
  • 1–2 tbsp simple syrup, honey syrup, or maple syrup
  • ½–1 cup ice
  • Optional splash of sparkling water or lime seltzer after blending

Blend the fruit, juice or coconut water, lime, syrup, and ice until slushy. Add sparkling water after blending if you want it to feel more like a mocktail. Pineapple juice and orange juice are already sweet, so start with less syrup.
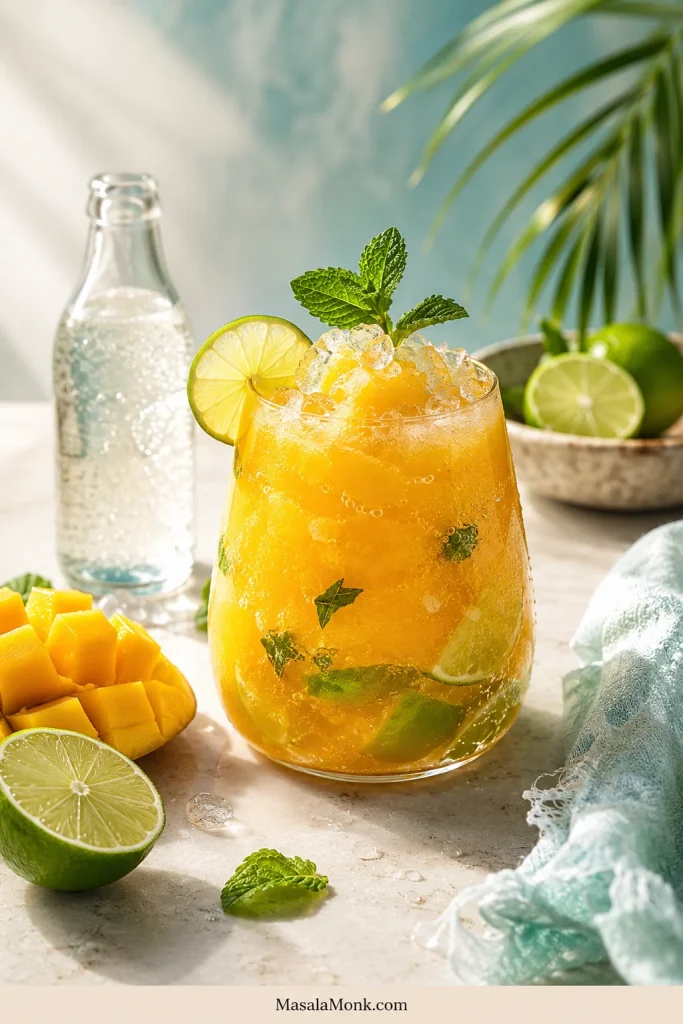
Non-alcoholic mango daiquiri mocktail in a stemless glass with crushed ice, lime, mint, mango pieces, and an unbranded sparkling water bottle.
In a virgin mango daiquiri, bubbles help replace the lift you normally get from rum. Add sparkling water gently so the mocktail stays bright, cold, and refreshing.

If coconut water is your favorite way to lighten tropical drinks, these Coconut Water Cocktails give you more rum, tequila, vodka, and mocktail-style directions.

Mango Strawberry

Replace half the mango with frozen strawberries. The drink turns brighter, pinker, and a little tarter, so taste before adding extra lime. Keep the same rum and syrup base, then add ice only as needed.
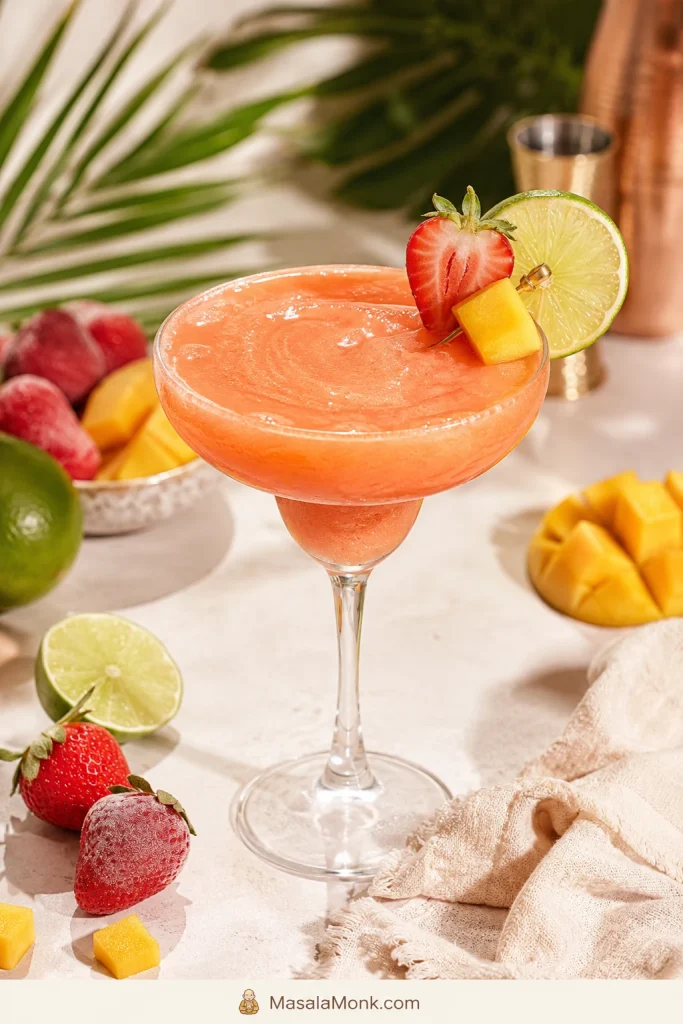
Pink-orange mango strawberry daiquiri in a stemmed glass with strawberry, lime, mango garnish, strawberries, mango chunks, and limes around it.
Strawberries make this mango daiquiri pinker, tarter, and more playful. However, the drink still needs lime for contrast, or it can drift toward smoothie territory.

Mango Pineapple

Replace 1 cup mango with 1 cup frozen pineapple. Pineapple is naturally sweet and acidic, so taste before adding extra syrup.

Mango Daiquiri with Malibu or Coconut Rum

Use coconut water as the optional thinning liquid, or replace part of the white rum with coconut rum or Malibu. Coconut rum is sweet, so reduce the syrup and add lime if the drink tastes heavy. If you want to move creamier and more pineapple-coconut, our Piña Colada Variations are the better next stop.
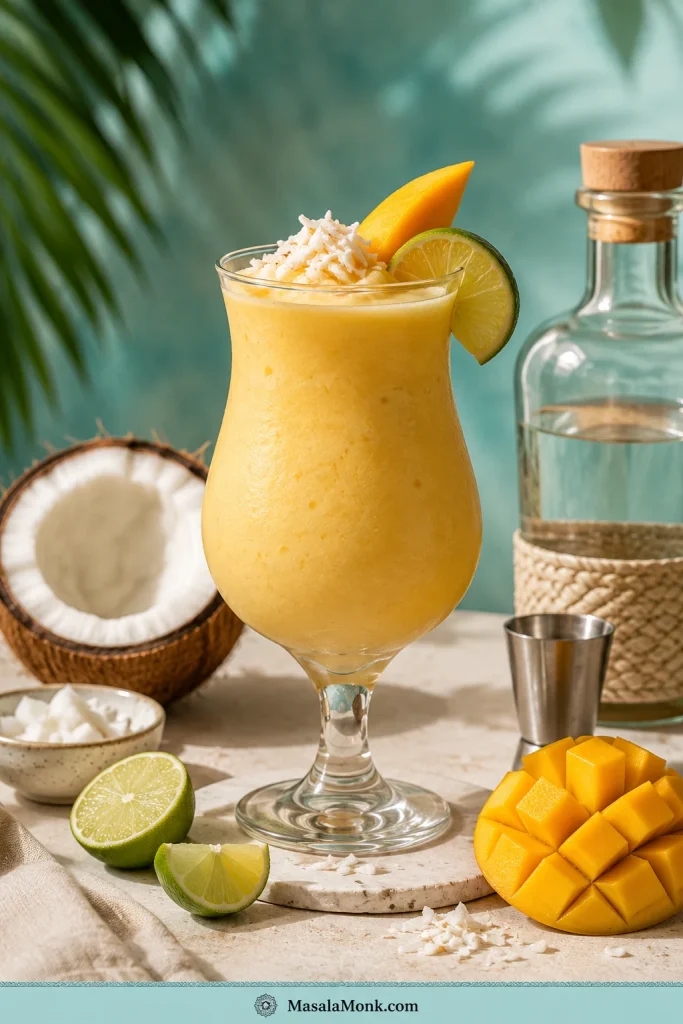
Creamy mango coconut daiquiri in a tall glass with shredded coconut, mango garnish, lime, coconut half, coconut pieces, jigger, and a clear bottle nearby.
Coconut rum or coconut water makes mango taste softer and rounder. Because coconut adds sweetness, use less syrup and let fresh lime keep the finish clean.

Mango Passion Fruit

Add 1–2 tablespoons passion fruit pulp or puree. Passion fruit is tart, so taste before adding extra lime. This version is sharp, fragrant, and very tropical.

Spicy Mango

Add a chili-lime rim, a pinch of Tajín, or one very thin slice of jalapeño to the blender. Start small. Mango takes spice well, but too much heat can overpower the lime and rum.
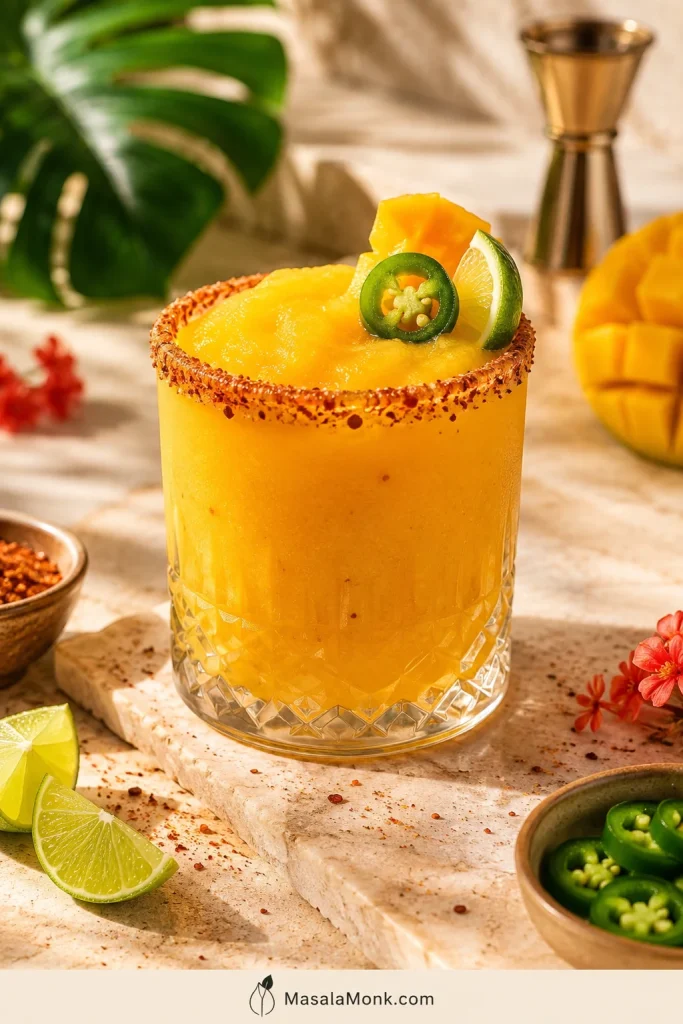
Spicy mango daiquiri in a rocks glass with a chili-lime rim, jalapeño slice, mango garnish, lime wedges, chili flakes, and sliced peppers.
A chili-lime rim turns sweet mango into a sharper party cocktail. The salt wakes up the fruit, while the chile keeps every sip from feeling too soft.

For a full chili-lime cocktail built around jalapeño and a Tajín-style rim, try the Spicy Margarita Recipe.

Vodka Mango

Vodka works as a 1:1 swap for rum, but the result is technically a mango vodka frozen cocktail rather than a daiquiri. The flavor will be cleaner and less rummy, so keep the lime strong.

Back to top

Pitcher Batch and Make-Ahead Tips

Scale the ingredients, but blend close to serving time. Frozen cocktails are best in the first few frosty minutes, before the ice melts and the fruit starts to separate.
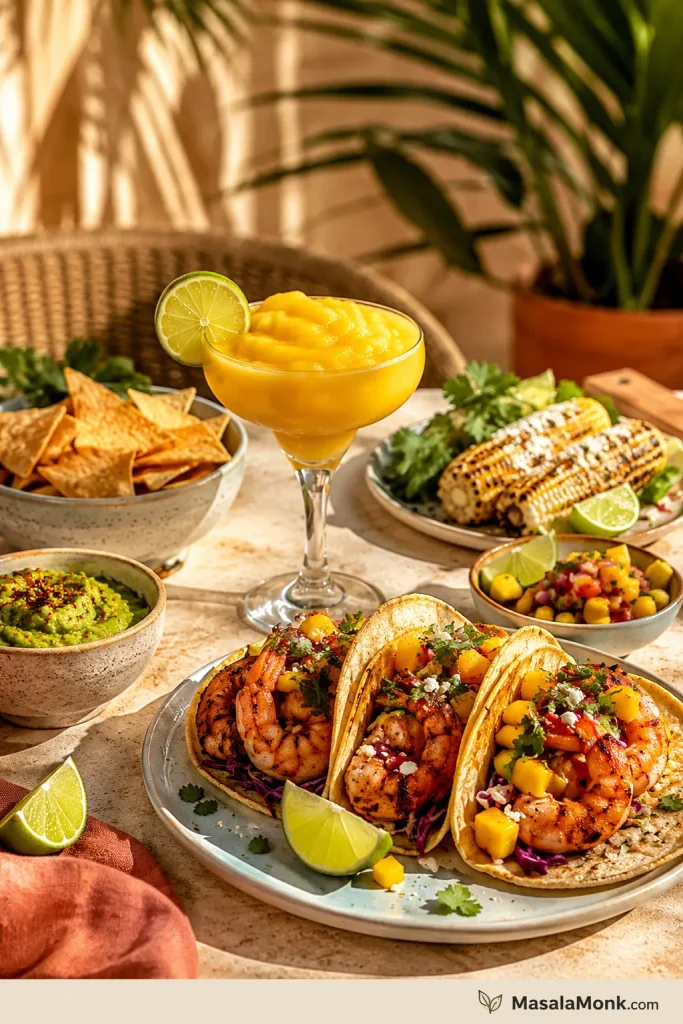
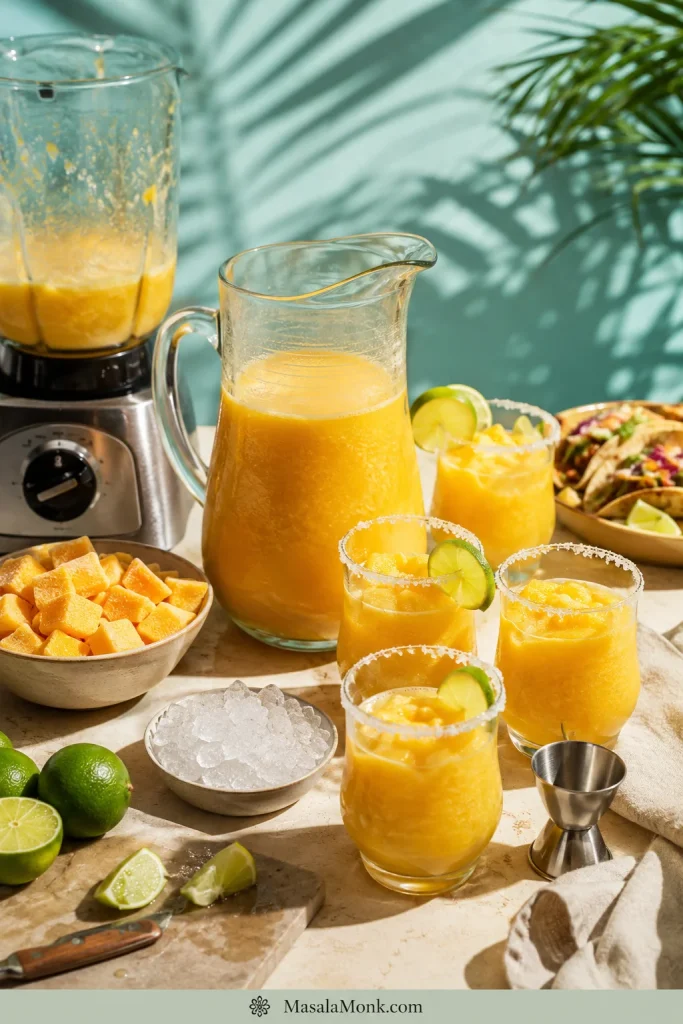
Mango daiquiri pitcher batch setup with a blender, glass pitcher, multiple glasses, frozen mango, crushed ice, limes, tacos, a jigger, and a linen napkin.
For a pitcher batch, prep the mango, lime, syrup, and rum mixture ahead, then blend close to serving. That way, the drinks stay cold, thick, and fresh for guests.

For 4 Drinks

Frozen mango4 cups / about 600 g
White rum8 oz / 240 ml
Fresh lime juice3 oz / 90 ml
Simple syrup2 oz / 60 ml
Crushed ice2 cups / about 300 g

For 8 Drinks

Frozen mango8 cups / about 1.2 kg
White rum16 oz / 480 ml
Fresh lime juice6 oz / 180 ml
Simple syrup4 oz / 120 ml
Crushed ice4 cups / about 600 g

Blend in batches if your blender jar is smaller than 64 oz / 1.9 L. Do not fill the blender to the top with frozen ingredients; leave room for movement or the blades will struggle. For parties, prep the fruit, juice the limes, make the syrup, and chill the rum mixture ahead of time. Blend only when guests are ready for drinks.

  • Best texture: serve immediately after blending.
  • Mango prep: peel, cube, and freeze fresh mango ahead.
  • Syrup prep: make simple syrup ahead and keep it chilled.
  • Avoid the fridge: a blended frozen drink will melt, separate, and lose texture.
  • Leftovers: freeze in a container, then re-blend briefly before serving.

If you want a rum drink that can sit chilled in a pitcher instead of being blended at the last minute, our Rum Punch Recipe is the easier party option.

Troubleshooting

Most mango daiquiri problems are easy to fix while the drink is still in the blender. A little lime, a little syrup, a little frozen fruit — that is usually enough to bring the glass back into balance.
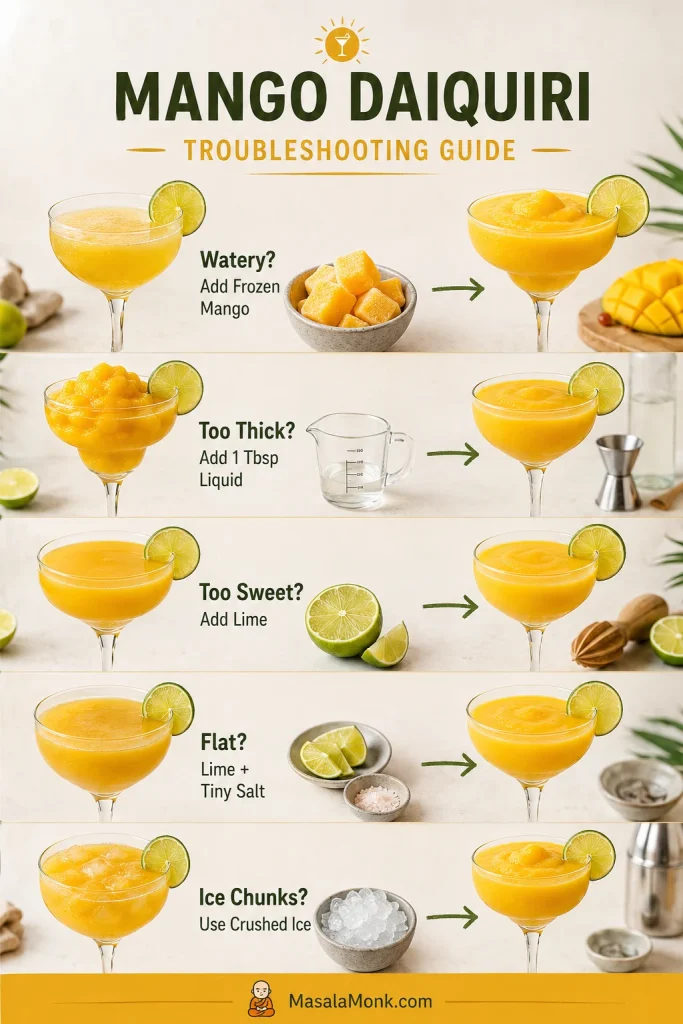
Mango daiquiri troubleshooting guide showing fixes for watery, too thick, too sweet, flat, and icy drinks using mango, lime, liquid, salt, and crushed ice.
Most texture and flavor problems can be fixed before the drink leaves the blender. Use frozen mango to fix watery texture, lime to balance sweetness, and crushed ice for smoother blending.
ProblemLikely causeFix
WateryToo much ice, melted ice, or blended too earlyAdd frozen fruit and serve immediately.
Overly thickToo much frozen fruit or not enough liquidAdd 1 tbsp liquid at a time and blend briefly.
Too sweetVery ripe mango, sweetened nectar, bottled mix, or too much syrupAdd lime juice.
Overly sharpTart mango or too much limeAdd syrup or a splash of mango nectar.
Weak fruit flavorToo much iceAdd more mango and reduce ice next time.
Smoothie-likeNot enough lime or rum structureAdd lime and check the sweetness balance.
Ice chunks remainLarge cubes or weak blenderUse crushed ice, pulse first, or soften frozen mango for a few minutes.
Too boozyRum is too high for your tasteAdd fruit, ice, or a splash of juice.
Flat flavorFruit is dull or lime is lowAdd lime and a tiny pinch of salt.
Separates quicklyThe drink sat too long after blendingRe-blend briefly with a little frozen fruit.

Back to top

What to Serve with It

This drink loves salty, spicy, grilled, and tropical food. Anything salty or chili-lime makes the mango taste even brighter.

Pairing styleServe with mango daiquiris
Salty snacksChips, guacamole, salted nuts, tortilla chips
Spicy foodShrimp Tacos, spicy chicken skewers, paneer tikka
Grilled seafoodGrilled shrimp, fish tacos, limey prawns
Fresh sidesMango Salsa, pineapple salsa, cucumber salad
Party spreadTacos, nachos, grilled corn, sliders
Mango daiquiri served with shrimp tacos, mango salsa, tortilla chips, guacamole, grilled corn, lime wedges, and cilantro on a sunlit table.
Mango daiquiris pair best with salty, spicy, and limey food. Shrimp tacos, mango salsa, chips, guacamole, and grilled corn all make the cocktail taste brighter.

This is where the drink becomes a poolside glass, a taco-night cocktail, or the cold thing people reach for between spicy bites.

FAQs

Is this always a frozen drink?

No. It can be frozen and blended or shaken and strained. The frozen version is more common at home because mango gives the drink a naturally thick texture.

Fresh or frozen mango: which is better?

Frozen mango is better for thick frozen drinks. Fresh mango has stronger ripe flavor, but it needs more ice or a short chill in the freezer before blending.

What rum works best?

White rum or light rum is the best default. It keeps the cocktail crisp and lets mango and lime stand out.

How do you keep it from getting watery?

Use frozen fruit, control the ice, blend briefly, and serve right away. If the blend gets thin, add more frozen mango instead of more ice.

Do you need simple syrup?

Usually, yes, but the amount depends on the fruit. Very sweet mango may need little or no syrup. Tart mango may need a little extra.

What if I only have mango puree?

Mango puree works well. Use it in the shaken version, or use it in the blender version with less syrup.

Is mango nectar okay?

Yes. Use it as a shortcut or thinning liquid, but reduce syrup and add fresh lime because nectar is usually sweet.

How do you make a virgin mango daiquiri?

Blend frozen mango with fresh lime juice, pineapple juice or coconut water, a little syrup, and ice. Add sparkling water after blending for a brighter mocktail feel.

Does vodka work instead of rum?

Yes, vodka works as a 1:1 swap, but the drink becomes a mango vodka frozen cocktail rather than a classic daiquiri.

How far ahead can you make it?

Prep the ingredients ahead, but blend right before serving. Once blended, the ice starts melting and the drink loses its thick texture.

Next Drinks to Try

Next, try the Lychee Martini Recipe for another tropical fruit cocktail, the Lemon Drop Martini Recipe for a sharper citrus-sweet balance, or the Appletini Recipe when you want something crisp, cold, and shaken instead of frozen.

Once you stop asking ice to do all the work, the drink becomes what it should be: golden, frosty, mango-bright, and sharp enough with lime to stay refreshing. That is the glass people finish quickly — and ask you to make again.
Posted on — Leave a comment

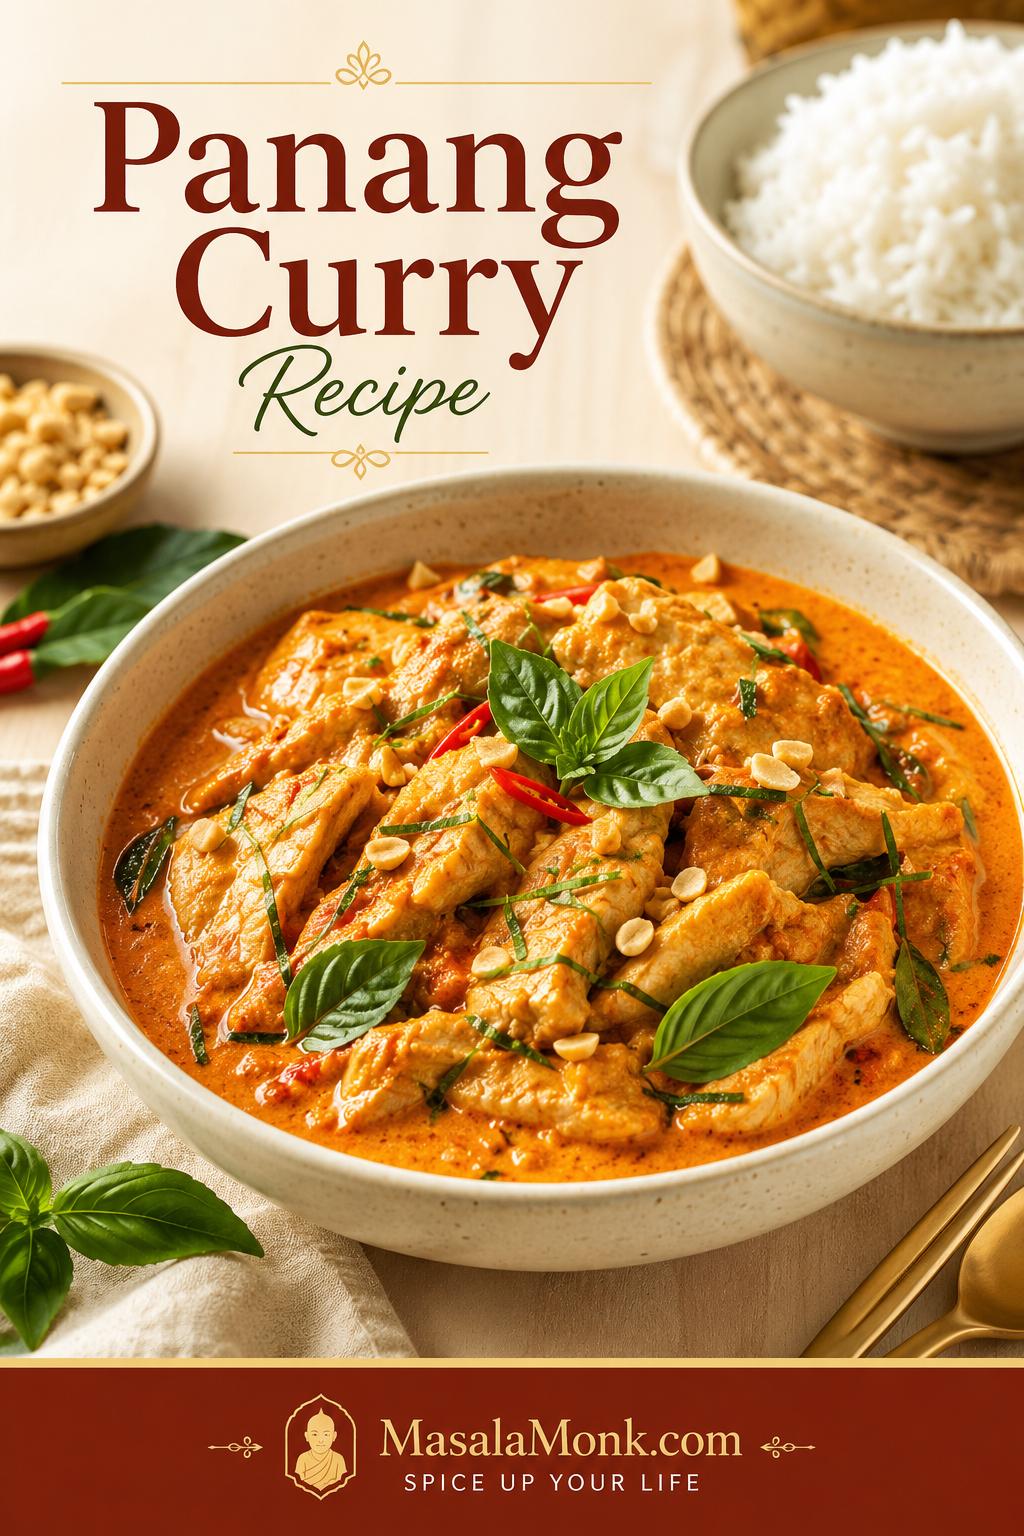
Panang Curry Recipe: Chicken Panang with Store-Bought Paste

Bowl of chicken Panang curry with orange-red coconut sauce, sliced chicken, Thai basil, crushed peanuts, makrut lime leaves, and jasmine rice.

A good Panang curry starts changing the moment the paste hits hot fat: the raw edge softens, the chile smell deepens, and the pan begins to smell warmer almost immediately. When the coconut goes in, it turns orange-red around the paste. By the time the chicken is done, the curry should look glossy and generous, not thin or tired.

This Panang curry recipe is built for the home-cook problem most recipes do not talk about enough: store-bought paste can taste flat, watery, harsh, or too much like ordinary red curry when it is rushed. The fix is not a longer shopping list. It is better paste frying, full-fat coconut, and a few clear texture cues.

The result is a 40-minute curry that still feels special: tender chicken, glossy coconut sauce, fresh basil, jasmine rice, and enough depth that the store-bought paste never feels like a compromise. The base version is chicken Panang curry, also called Panang gai, but the same method works for beef, tofu, shrimp, or vegetables once you understand the texture.

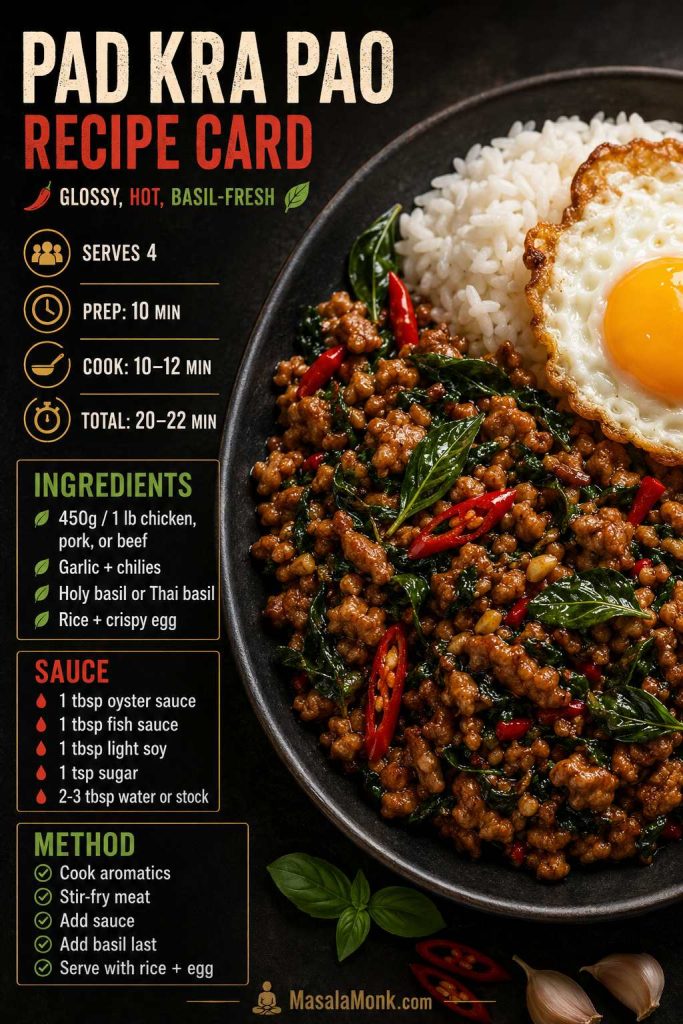
It is generous weeknight food: fragrant, creamy, a little sweet, a little spicy, and made to spoon over rice. If you like fast Thai basil-heavy dinners, this Pad Kra Pao recipe is another bold option to keep nearby.

Table of Contents

Use this guide to make Panang curry that tastes creamy, balanced, aromatic, and clearly different from ordinary red curry.

Panang Curry Recipe: Quick Answer

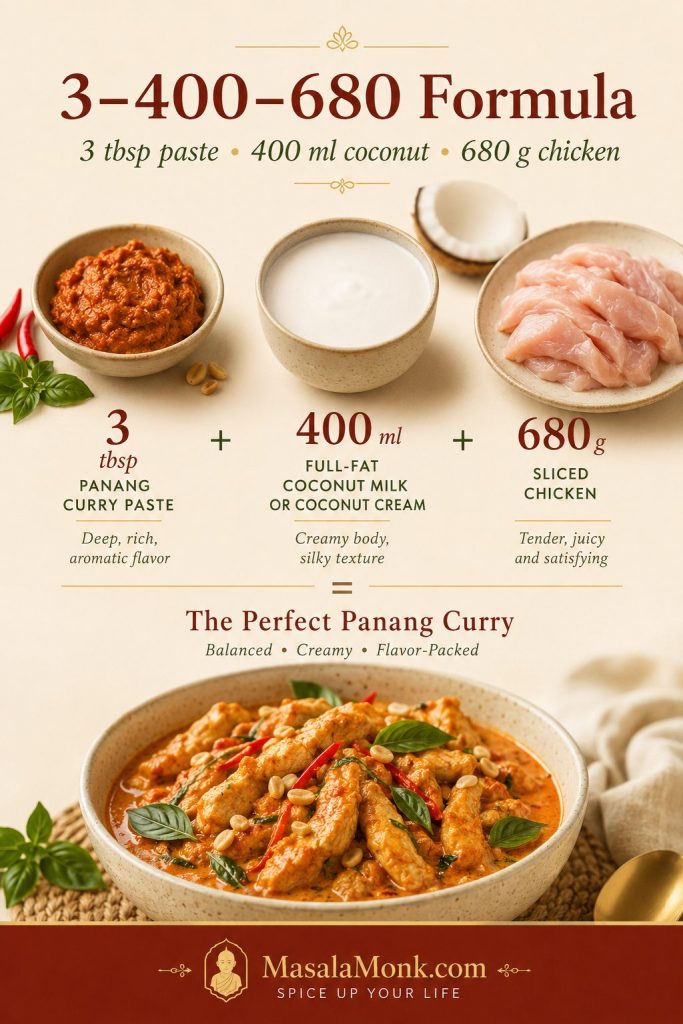
Remember it as 3–400–680: 3 tablespoons / about 45g Panang curry paste, 13.5–14 oz / 400ml full-fat coconut milk or coconut cream, and 1½ lb / 680g thinly sliced chicken for a generous 4-serving curry.

Fry the paste first in oil or thick coconut cream until it smells deeper and less raw. Stir in the coconut gradually, then add fish sauce, palm sugar or brown sugar, torn makrut lime leaves, and peanuts or peanut butter. Simmer gently until the chicken is cooked through, finish with Thai basil, and serve with jasmine rice.

Think of this as your safe starting bowl: enough paste to taste full, enough coconut to feel creamy, and enough body for the curry to settle over rice instead of running through it. Add 1–1½ cups vegetables if you want a fuller chicken curry; keep the amount modest so the flavor stays focused.

Most important cue: the spoon tells you more than the timer. The curry should coat the back of a spoon in a glossy layer while still being loose enough to serve over rice. Need the exact visual cue? Jump to the spoon-coating test. Ready to cook? Go straight to the recipe card.

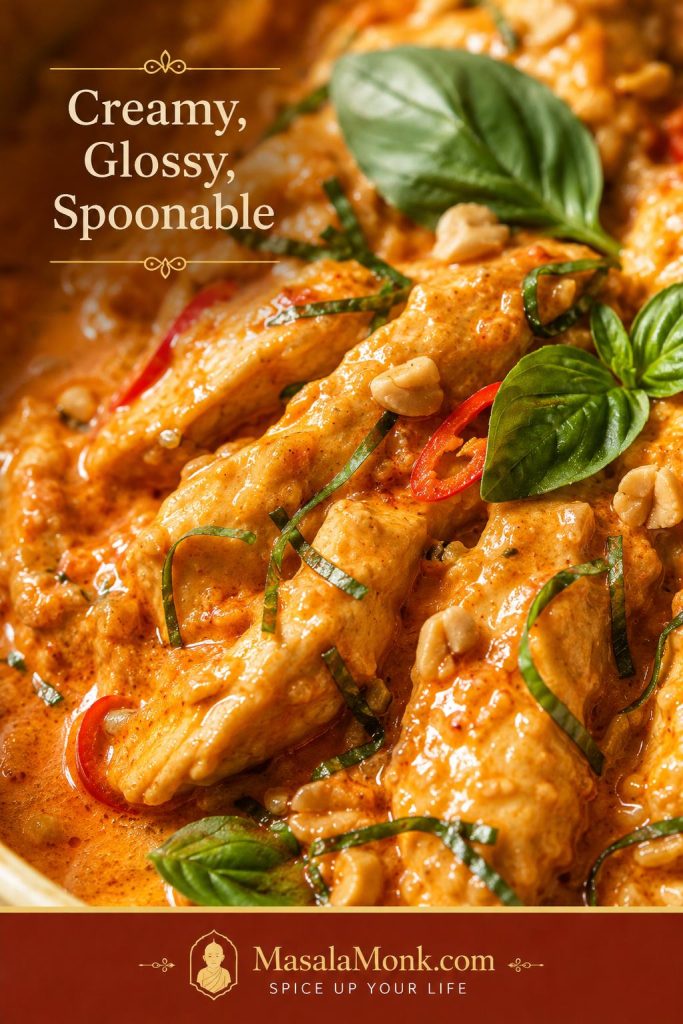
Close-up of chicken Panang curry with creamy sauce coating sliced chicken, red chile, Thai basil, peanuts, and makrut lime leaf garnish.
Look for sauce that clings to the chicken but still moves when spooned; that balance keeps Panang curry rich without making it heavy.

The Easy Panang Curry Formula

The 3–400–680 formula is not a test; it is a starting point. From there, you can adjust for paste strength, vegetable volume, protein choice, and how rich you want the final curry. More vegetables usually need a little more paste and a little more time in the pan. Saltier paste needs less fish sauce. Sweeter coconut needs less sugar.

Panang curry formula guide showing 3 tablespoons curry paste, 400 milliliters coconut milk, and 680 grams chicken.
The 3–400–680 formula gives you a reliable starting point before you adjust for paste strength, vegetable volume, or spice preference.
For 4 ServingsAmountWhy It Matters
Panang curry paste3 tbsp / about 45gThe flavor base. Start lower if your paste is very spicy or salty.
Coconut milk or coconut cream13.5–14 oz / 400mlThe body of the curry. Coconut cream gives the lushest result.
Chicken or other protein1½ lb / 680g chicken, or equivalentEnough protein for a full dinner without overcrowding the pan.
Fish sauce1–1½ tbsp / 15–22mlAdds salt and savory depth. Use less at first if your paste is salty.
Palm sugar or brown sugar2 tsp–1 tbsp / 8–15gRounds heat and salt. Start low if your paste or coconut tastes sweet.
Makrut lime leaves4–6 leavesTorn leaves perfume the simmering sauce; finely sliced tender leaves can finish the curry.
Peanuts or peanut butter2 tbsp / about 15g crushed peanuts, or 1 tbsp / about 16g peanut butterBrings Panang’s quiet nutty note without turning the sauce into satay.

Taste after the curry has simmered for a few minutes, not when the paste first hits the pan. Early tasting can trick you because the coconut is still loose, the paste has not settled, and the salt has not concentrated yet. If your paste tastes too mild or too harsh, use the store-bought paste guide before changing the whole recipe.

Why This Recipe Works

The difference between a forgettable Panang curry and a good one is usually not the ingredient list. It is the order. Curry paste needs fat and heat before the coconut goes in. The pan sauce needs enough time to come together. Basil needs to go in at the end, when its aroma will stay bright instead of disappearing into a long simmer.

If your first few homemade Thai curries have tasted thinner than takeout, this is usually where things change. You are not adding fancy ingredients; you are simply giving the paste and coconut enough time to become a sauce.

Frying the paste prevents flat flavor
Let it sizzle in fat first, and the smell changes from sharp to warm, deep, and curry-like.

Full-fat coconut gives the curry body
Light coconut milk makes the flavor feel spread out. Coconut cream gives the richest result.

The final balance happens at the end
Fish sauce, sugar, lime leaves, peanuts, and basil let you tune salt, sweetness, aroma, and nuttiness before serving.

The finished curry lands rich without feeling greasy, spicy without tasting harsh, and gently sweet without becoming sugary. It tastes like Panang curry, not red curry with peanut butter stirred in.

What Is Panang Curry?

Panang curry, also written as Phanaeng, Phanang, or Panaeng, is a Thai coconut curry with a richer, more concentrated character than a loose red curry. The easiest way to recognize a good Panang is this: if red curry pours, Panang clings.

In the bowl, Panang feels creamy, rounded, aromatic, and concentrated enough to coat the protein. Coconut gives body, curry paste gives heat and depth, makrut lime leaves give a citrusy lift, basil adds freshness, and peanuts add a quiet roasted note in the background.

Peanut belongs in the background here; it rounds the curry without turning it into satay. Chicken Panang curry is often called Panang gai or gaeng Panang gai. “Gai” means chicken, so Panang gai simply means the chicken version.

Panang Curry vs Red Curry

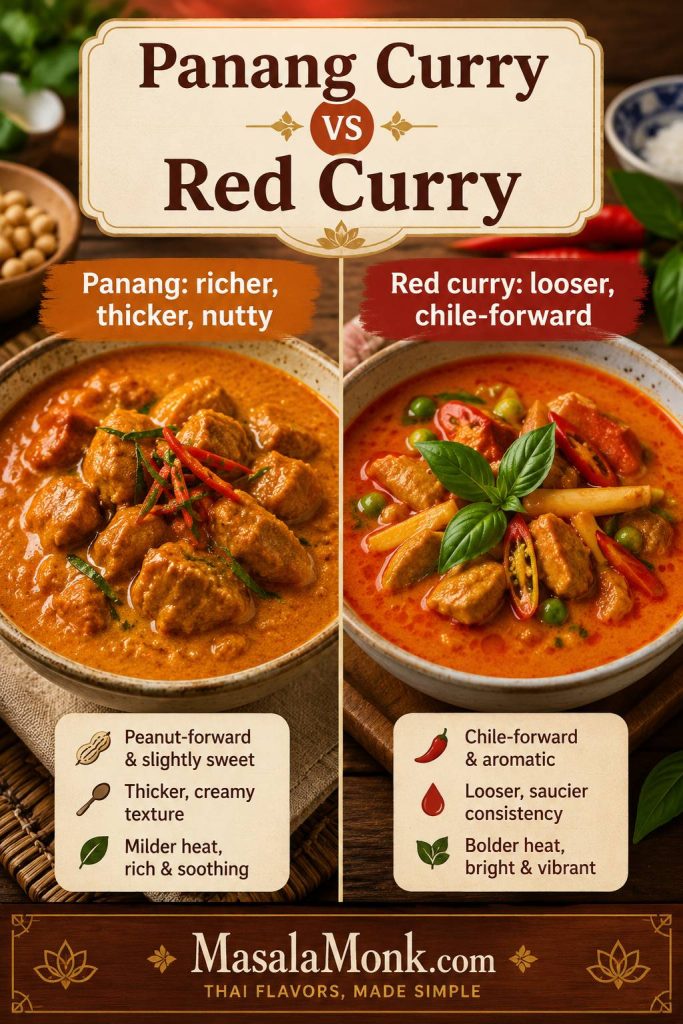
Panang curry and Thai red curry are related, but they should not taste identical. Red curry is usually looser and more chile-forward. Panang is creamier, richer, lightly sweet, and gently nutty. When homemade Panang tastes too much like red curry, the first fix is usually texture, then peanut and aromatic finish.

FeaturePanang CurryThai Red Curry
TextureThicker, creamier, more clingyLooser, saucier, more broth-like
FlavorRich, lightly sweet, savory, nuttyBrighter, chile-forward, more flexible
Paste profileRed-curry-style base with peanut and spice depthRed chile and aromatic base
Best cueCoats the protein clearlyPours more freely around the ingredients
Split-panel comparison of thicker Panang curry and looser Thai red curry with labels explaining texture and flavor differences.
Panang curry and red curry are related, but Panang is usually richer, thicker, and gently nutty, while red curry is looser and more chile-forward.

Quick fix: bring the curry back toward Panang by simmering the coconut base until it looks glossy, then finishing with peanut richness, Thai basil, and finely sliced tender makrut lime leaves if you have them.

If you are using red curry paste as a shortcut, add peanuts and a tiny pinch of warm spice so the sauce does not taste like ordinary red curry with coconut milk.

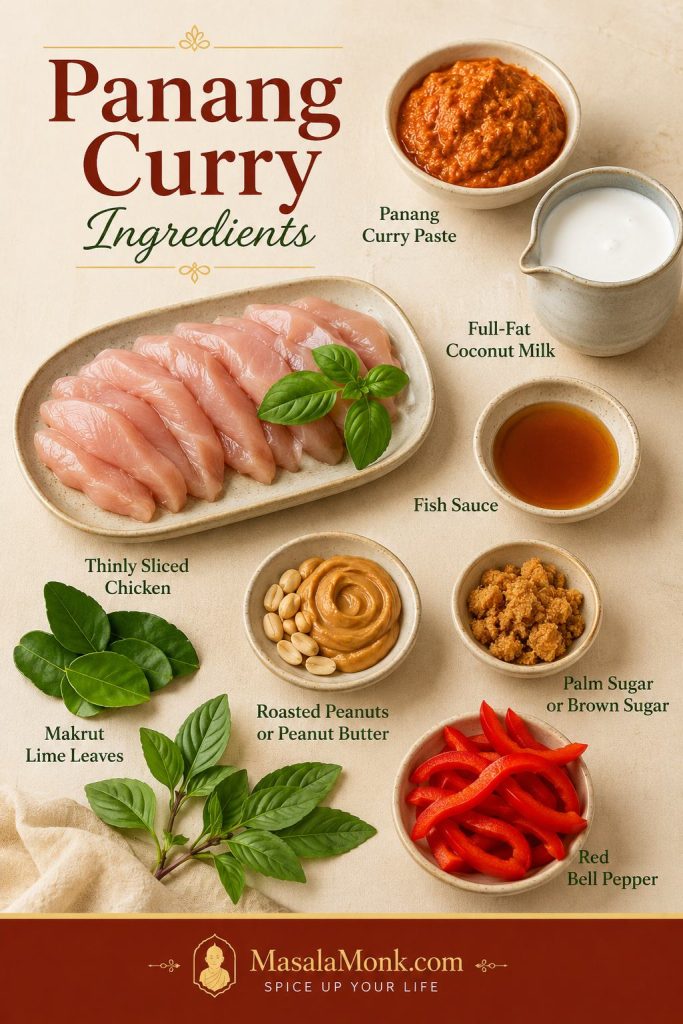
Panang Curry Ingredients

These ingredients are not equal. The paste, coconut, fish sauce, and lime leaves decide whether the curry tastes complete. Peanuts and basil finish the personality. Sugar is there to round the edges, not make the curry sweet.

The most important thing is timing. Paste goes first, coconut goes in gradually, protein cooks once the base has formed, and basil waits until the heat is low or off.

Panang curry ingredients including curry paste, coconut milk, chicken, fish sauce, sugar, makrut lime leaves, peanuts, Thai basil, and red bell pepper.
The ingredients work as a team: paste brings depth, coconut gives body, lime leaves add aroma, and peanuts round the curry without turning it into satay.

Panang curry paste

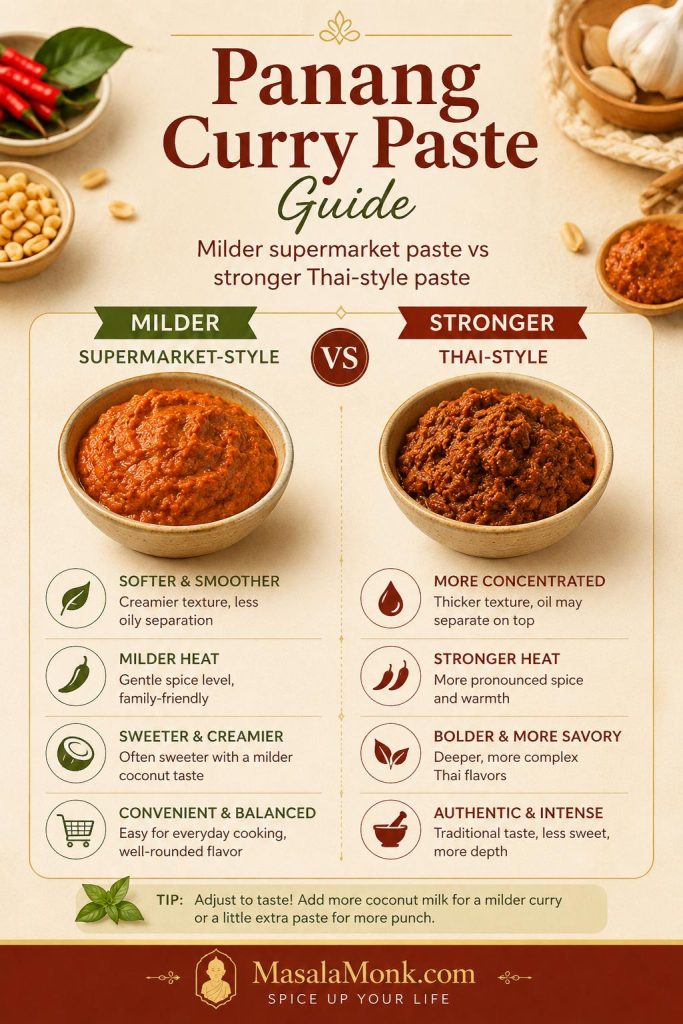
Use Thai Panang curry paste if you can find it. Some brands are stronger, saltier, and spicier than others, so start with a balanced amount and adjust. Thai Kitchen-style supermarket pastes are often milder, while Mae Ploy and Maesri-style Thai pastes are usually stronger, saltier, and more concentrated. Start lower if the brand is new to you.

Guide comparing milder supermarket-style Panang curry paste with stronger Thai-style paste for homemade Panang curry.
Because Panang curry paste brands vary in salt, heat, and intensity, taste after simmering before adding more fish sauce, sugar, or paste.

If your paste is very salty, begin with 1 tablespoon fish sauce, simmer, then add the remaining ½ tablespoon only if the curry needs it. When homemade Panang tastes flat, the paste often needed a better start: fat, heat, and enough time to smell cooked before the coconut went in. For the deeper technique, see how to bloom the paste in fat first.

Coconut milk or coconut cream

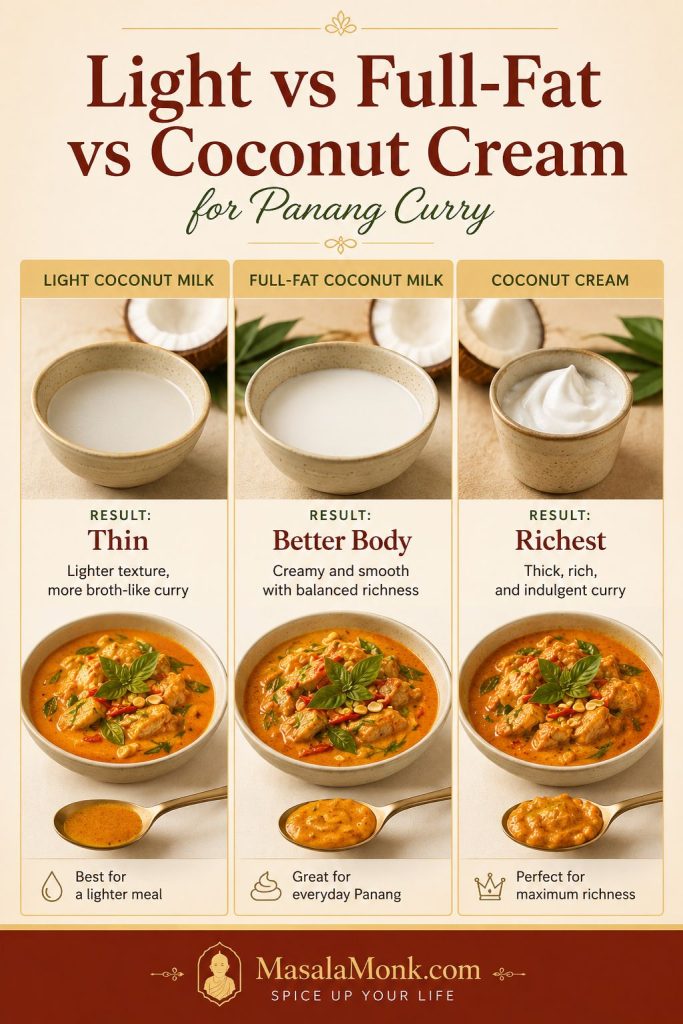
Coconut cream gives the lushest result. Full-fat coconut milk also works well; it just needs a few extra minutes in the pan. Light coconut milk makes the curry harder to concentrate and easier to dilute.

Comparison board showing light coconut milk, full-fat coconut milk, and coconut cream for Panang curry sauce texture.
For the richest Panang curry texture, full-fat coconut milk or coconut cream works better than light coconut milk, which can make the sauce feel thin.

How to use thick coconut cream first

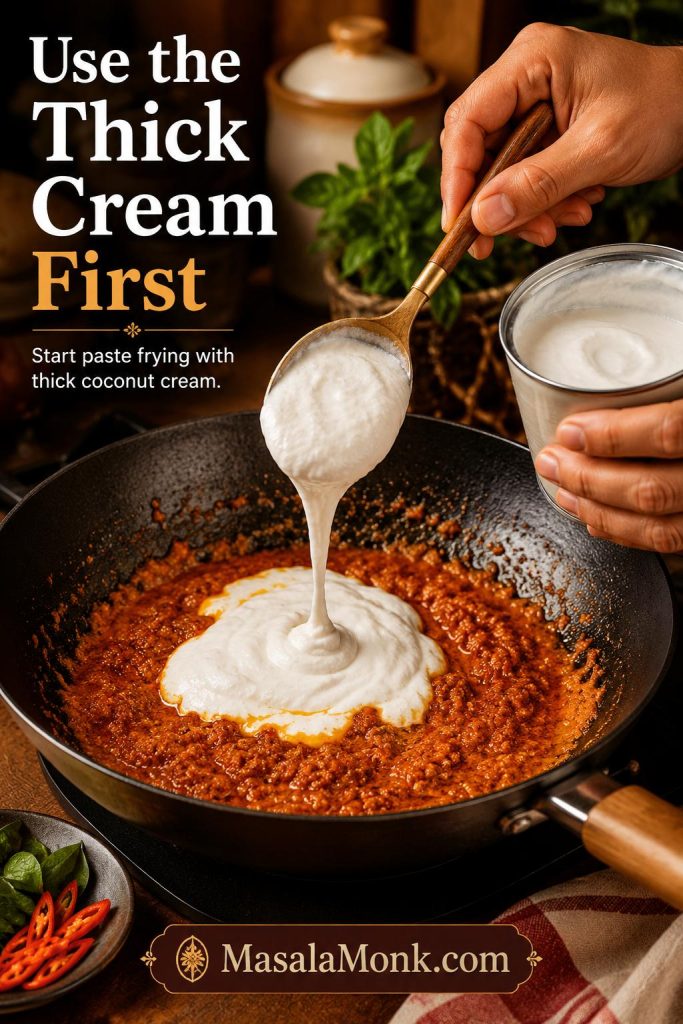
If the can has a thick layer of coconut cream at the top, scoop that into the pan first and use it to fry the curry paste. Then add the thinner coconut milk gradually. This gives the pan a richer start and helps the paste bloom in fat.

Thick coconut cream being added to fried Panang curry paste in a skillet to begin the curry sauce.
When a can has thick cream on top, use it first so the curry paste gets the fat it needs to bloom properly.

Fish sauce

Fish sauce keeps the coconut from tasting flat. You should not notice it as “fishy”; you should notice that the curry tastes deeper, saltier, and more complete. Add it gradually because the paste may already be salty.

For a vegan version, use soy sauce, tamari, or a vegetarian fish-sauce alternative. The flavor will be different, but the curry still needs savory depth.

Palm sugar or brown sugar

The sweetness should round the chile and salt; it should not announce itself first. Palm sugar gives a softer sweetness, while brown sugar works well in a home kitchen. Start with 2 teaspoons if your paste or coconut milk already tastes sweet.

Makrut lime leaves

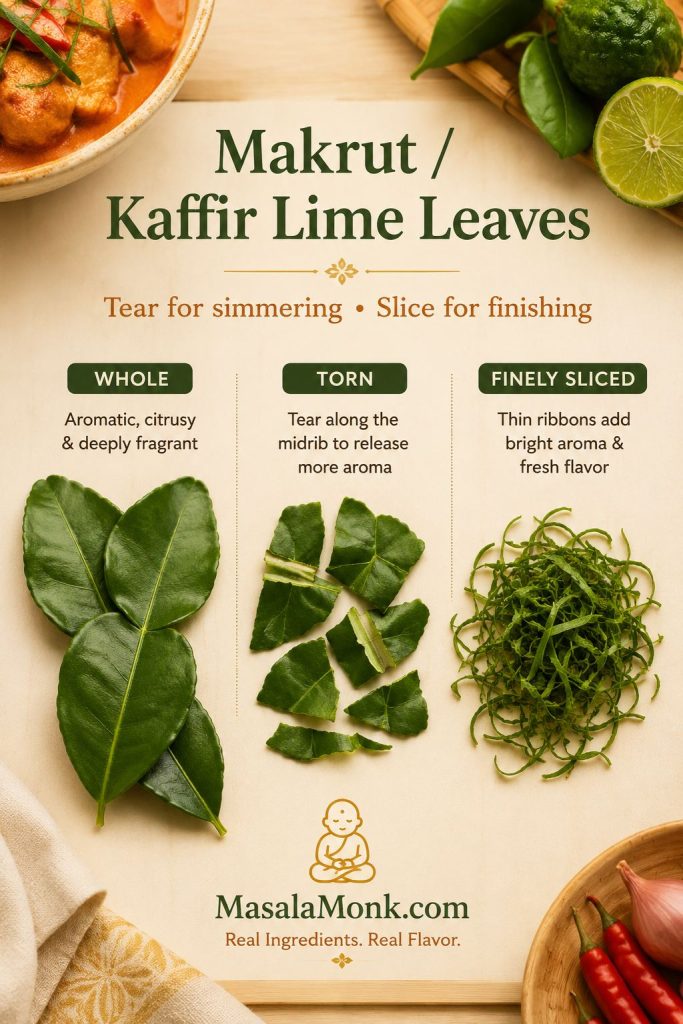
Makrut lime leaves, often sold as kaffir lime leaves, are the ingredient that makes the curry smell alive. Tear whole leaves before adding them to the simmering coconut sauce so their oils release into the pan. If you have tender leaves, slice a small amount very finely and use it at the end for a sharper aromatic finish.

Fresh or frozen leaves are best. Torn whole leaves can be left in the curry for aroma and picked out while eating. Lime juice is not a true replacement; if you need a backup, a little lime zest is closer than bottled lime juice, but use it gently. The goal is aroma, not sourness.

Makrut lime leaves shown whole, torn, and finely sliced, with guidance for simmering and finishing Panang curry.
Makrut lime leaves, often sold as kaffir lime leaves, give Panang curry its fresh citrus aroma without making the sauce sour.

Peanuts or peanut butter

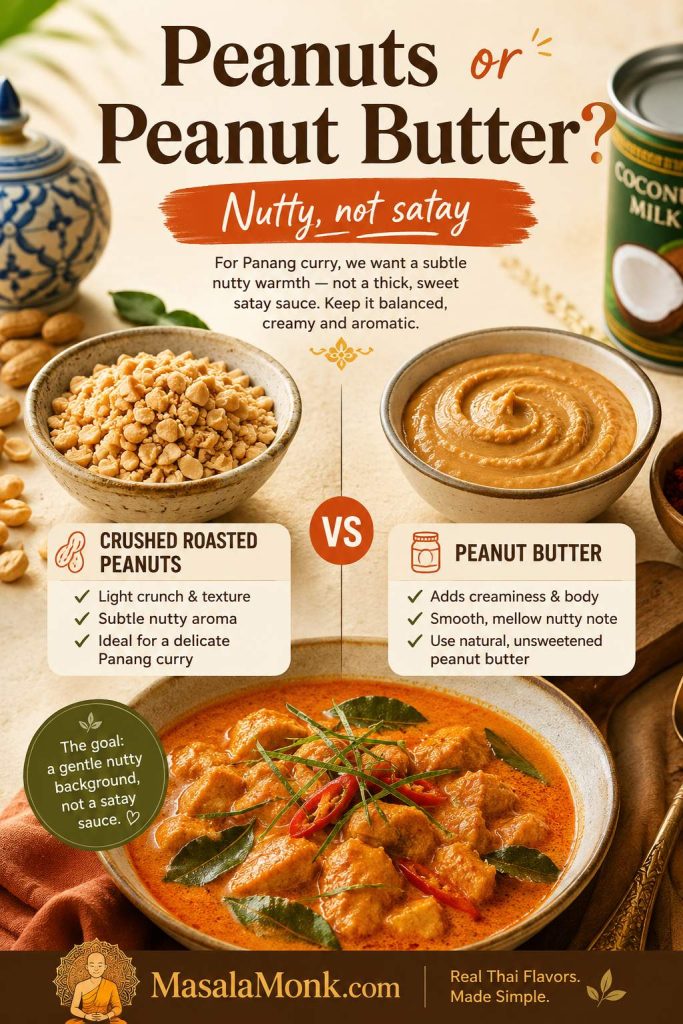
Crushed roasted peanuts give texture and a more traditional feel. Peanut butter is a practical shortcut that blends smoothly into the sauce. Either works, but keep the amount modest. The peanut note should sit in the background, not make the curry taste like peanut sauce.

Split image comparing crushed roasted peanuts and peanut butter for adding a nutty note to Panang curry.
Crushed peanuts add texture, while peanut butter blends in smoothly; either way, the peanut flavor should stay gentle and balanced.

Thai basil

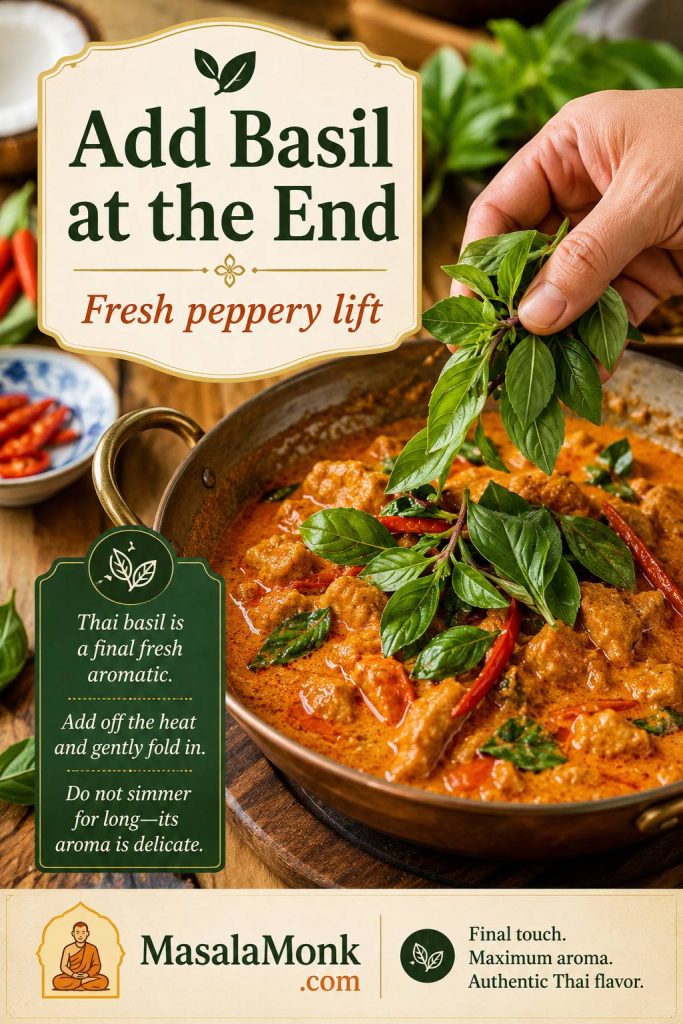
Thai basil gives the finished dish a fresh, peppery lift. Add it after the sauce thickens and the heat is low or off. If it simmers for several minutes, that fragrance fades quickly.

Thai basil being added to finished Panang curry as a final aromatic, with text about fresh peppery lift.
Add Thai basil near the end, because its peppery fragrance is strongest when it meets the hot curry right before serving.

How to Make Store-Bought Panang Curry Paste Taste Better

This is a home-kitchen Panang curry built around store-bought paste, but the technique is the point: fry the paste properly, use full-fat coconut, simmer until glossy, and finish with basil and lime leaf.

Fry it first
Cook the paste in oil or coconut cream until it smells warmer, deeper, and less raw.

Use full-fat coconut
Thin coconut milk makes the curry taste weaker. Full-fat coconut milk or cream gives body.

Finish the flavor
Fish sauce, sugar, lime leaves, peanuts, and basil make the sauce taste complete.

Bloom the paste in fat first

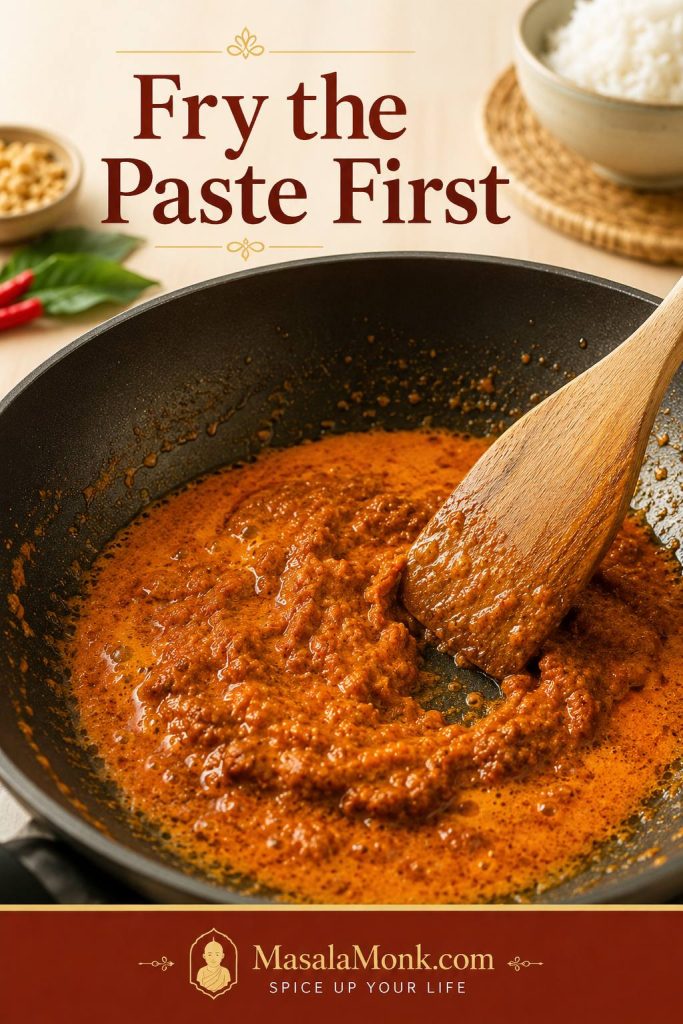
Traditional Panang methods often fry the paste in coconut cream until the oil separates. At home, canned coconut milk does not always separate well, so oil or the thick cream from the top of the can is more reliable.

Panang curry paste frying in a skillet with oil or coconut cream while a wooden spatula stirs it.
Frying the paste first is the flavor-building step that makes store-bought Panang curry paste taste fuller and less raw.

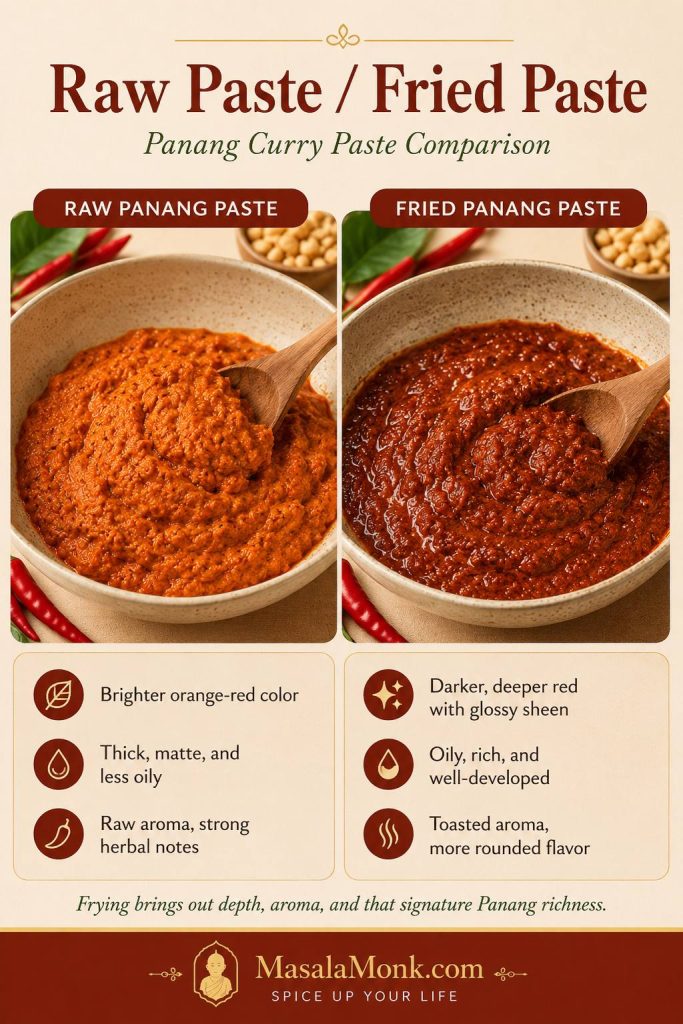
What fried Panang curry paste should look like

The color change is subtle but useful: the paste turns a little darker, smells rounder, and loses the raw edge before the coconut is stirred in.

Side-by-side comparison of raw Panang curry paste and darker fried Panang curry paste in a pan.
The paste does not need to burn or dry out; it just needs to darken slightly and smell warmer before the coconut goes in.

Choose the right paste amount

For one 13.5–14 oz / 400ml can of coconut milk or cream, use this as your starting point:

StylePaste AmountBest For
Mild2 tbsp / about 30gKids, spice-sensitive eaters, or very strong paste brands
Balanced3 tbsp / about 45gMost homemade Panang curry
Stronger4 tbsp / about 60gRestaurant-style intensity or a pan with more protein and vegetables

Adjust after simmering

If the curry tastes weak after simmering, check the texture first. A thin coconut base can make even a strong paste taste dull because the flavor is spread across too much liquid. Let the pan settle into a glossy consistency, then decide if you need more paste.

When you do add more paste, avoid stirring it in raw. Fry another teaspoon or two in a small pan with a spoon of coconut cream, then stir that back into the curry. This keeps the added flavor cooked and rounded. For a deeper look at the paste itself, Serious Eats has a helpful Panang curry paste guide that explains the peanut and warm-spice notes that separate it from a basic red curry paste.

Using red curry paste instead? For every 2–3 tablespoons red curry paste, add 1 tablespoon crushed roasted peanuts or peanut butter, a tiny pinch of nutmeg, and a small pinch of ground coriander or cumin if the sauce tastes plain. Add torn makrut lime leaves if you have them. This shortcut is best for a weeknight curry, not for a strict traditional version.

Check labels for vegan or vegetarian versions

If you are cooking for vegan or vegetarian eaters, check the paste label carefully. Many Thai curry pastes contain shrimp paste, fish sauce, or other seafood ingredients. Use a vegan Panang curry paste, or use vegan red curry paste and adjust it with peanuts and warm spices.

How to Make Panang Curry

Once the paste and coconut are ready, the cooking moves quickly. A wide skillet, wok, or 12-inch saucepan gives the paste room to fry and helps the coconut base come together faster. Have the chicken sliced, vegetables cut, herbs ready, and rice started before the paste hits the pan.

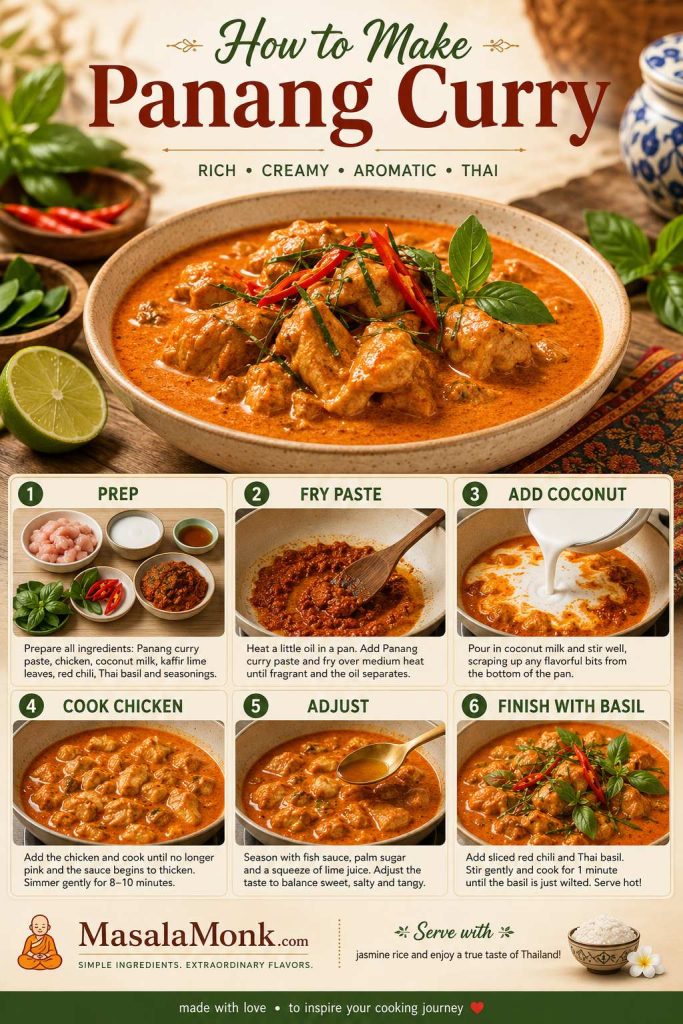
Visual overview: how to make Panang curry

Step-by-step Panang curry board showing prep, frying paste, adding coconut, cooking chicken, adjusting, and finishing with basil.
Follow the visual order before you start cooking: prep first, fry the paste, build the coconut base, cook gently, adjust, then finish fresh.

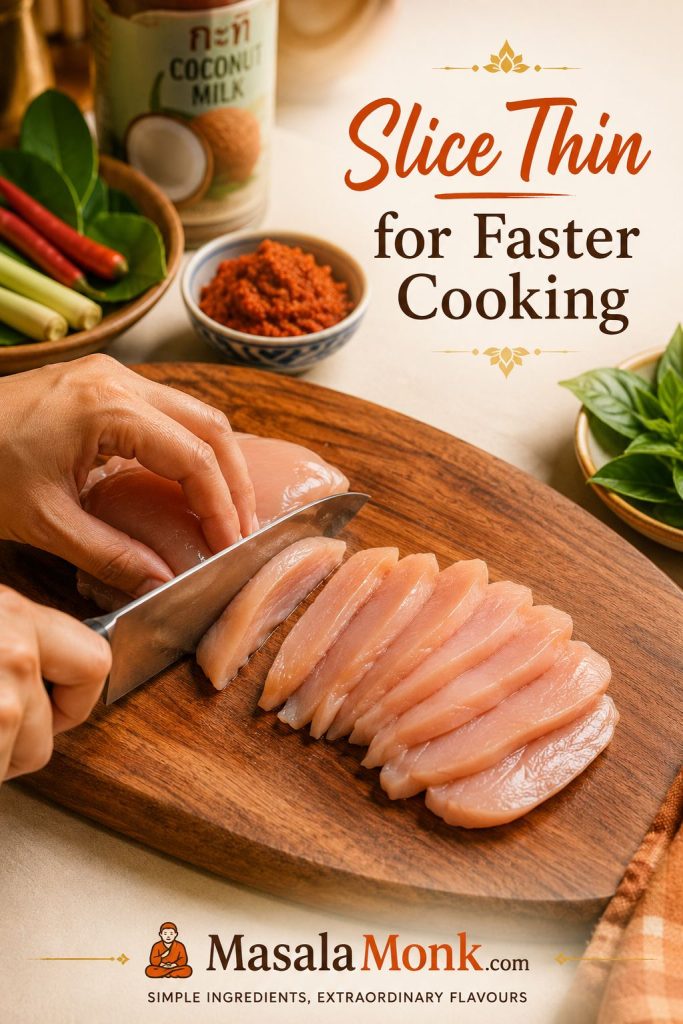
1. Slice the protein thinly

Thin slices cook quickly and pick up the curry better. Cut chicken across the grain into bite-size strips. Slice beef very thinly against the grain. For tofu, cut into cubes or slabs and pat dry before cooking.

Avoid large chunks of chicken here. Thick pieces take longer to cook, which can push the pan past its best texture before the center is done.

Hand slicing raw chicken into thin strips on a cutting board for Panang curry, with herbs and curry ingredients nearby.
Thin chicken slices cook quickly and absorb the curry better, so the meat stays tender while the sauce settles into the right texture.

2. Fry the curry paste

Heat neutral oil, or the thick cream from the top of the coconut milk can, in a wide skillet, wok, or 12-inch saucepan over medium heat. Add the paste and fry for 1–2 minutes for softer supermarket paste, or 3–5 minutes for a thicker Thai paste, stirring often, until it smells deeper and turns slightly darker.

When the paste starts sticking, lower the heat and loosen it with a spoonful of coconut cream or coconut milk. Water cools the pan, so use it only when you have no other choice.

This is the moment the curry starts smelling less like paste from a tub and more like dinner: chile, coconut fat, warm spice, and lime leaf waiting to open up.

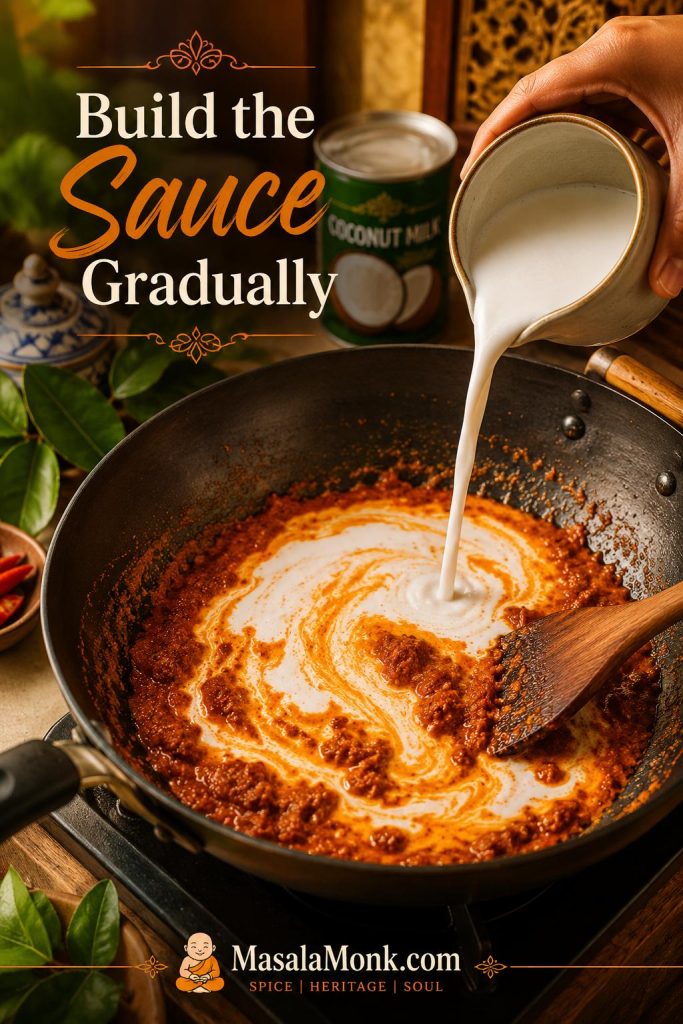
3. Build the coconut sauce

Stir in the coconut milk or coconut cream gradually until the paste dissolves into a smooth sauce. Add fish sauce, palm sugar or brown sugar, torn makrut lime leaves, and peanuts or peanut butter. Keep the curry at a gentle bubble, not a hard boil.

At this point, the pan should look creamy and red-orange. Let it bubble for a few minutes before adding delicate vegetables or herbs. A good Panang base looks slightly more intense than you think it needs to be; rice will soften everything later. When you are unsure, use the spoon-coating test before serving.

Coconut milk being poured into fried Panang curry paste in a wok, creating orange-red swirls as the sauce forms.
Add coconut gradually so the fried paste dissolves evenly; as it blends, the curry changes from separate ingredients into one smooth base.

4. Cook the protein and vegetables

Add chicken and firm vegetables such as carrots, green beans, baby corn, or broccoli stems first. Simmer gently until the chicken is cooked through; the thickest piece should reach 165°F / 74°C.

Add bell pepper, snap peas or snow peas, zucchini, or spinach later so they stay brighter and release less water. Save finely sliced makrut lime leaves for the end if you are using them as garnish.

Beef and shrimp go in later. Browned tofu can go in near the end so it keeps its shape.

Chicken Panang curry gently simmering in a wide pan with small bubbles, orange-red sauce, chicken pieces, and herbs.
A gentle simmer gives the chicken time to cook while the coconut base thickens softly, without the rough look that comes from hard boiling.

5. Taste and finish

Give the curry a few uncovered minutes before final tasting. The flavor changes as the coconut settles: salt becomes clearer, sweetness rounds out, and the paste tastes less scattered.

Turn off the heat and stir in Thai basil right before serving. Add extra finely sliced makrut lime leaves, crushed peanuts, or sliced red chile for a stronger finish. The basil should smell fresh as soon as it hits the hot curry.

Hand adding Thai basil to finished chicken Panang curry in a pan with red chile and creamy orange-red sauce.
Stir basil in right at the end, then stop cooking; as a result, the curry keeps its fresh Thai basil aroma.

Chicken safety note: chicken should reach 165°F / 74°C in the thickest piece. FoodSafety.gov lists this as the safe minimum internal temperature for poultry in its safe minimum internal temperatures chart.

The Spoon-Coating Test for Panang Curry Sauce

When you are not sure whether the curry is ready, trust the spoon more than the clock. Dip a spoon into the pan and lift it out. The sauce should coat the back in a visible layer instead of sliding off immediately.

Spoon lifted from Panang curry showing orange-red coconut sauce coating the back of the spoon above the pan.
Once the curry coats the spoon in a smooth layer, it is concentrated enough for rice but still loose enough to serve generously.

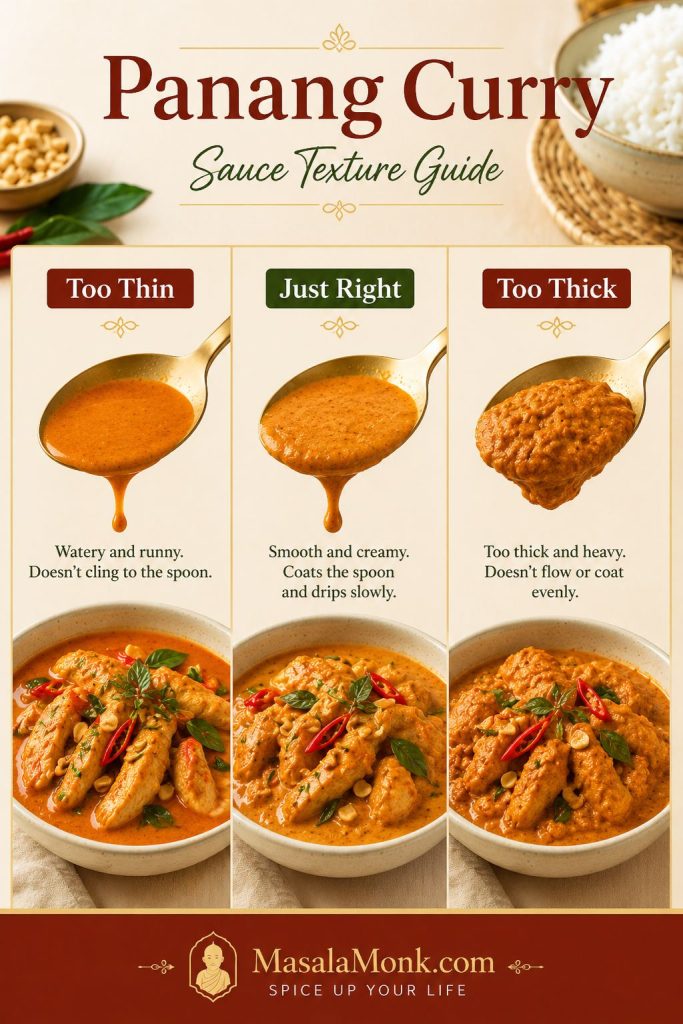
When it is right, the sauce leaves a glossy trail on the spoon and settles over rice instead of disappearing into it. If it becomes too heavy, loosen it with a spoonful of coconut milk, water, or stock. Cornstarch can rescue a rushed sauce, but it should not be the first fix. If the texture is already off, go to the sauce fixes before serving.

How thick should Panang curry sauce be?

The best texture sits between runny and pasty: it coats the spoon, moves slowly in the pan, and still spoons easily over rice.

Three-panel guide comparing Panang curry sauce that is too thin, just right, and too thick.
Use this texture guide before serving: thin curry needs more simmering, while overly thick curry needs a small splash of coconut milk or water.

Texture goal: glossy and spoonable, rich enough to coat the protein, but still loose enough for rice.

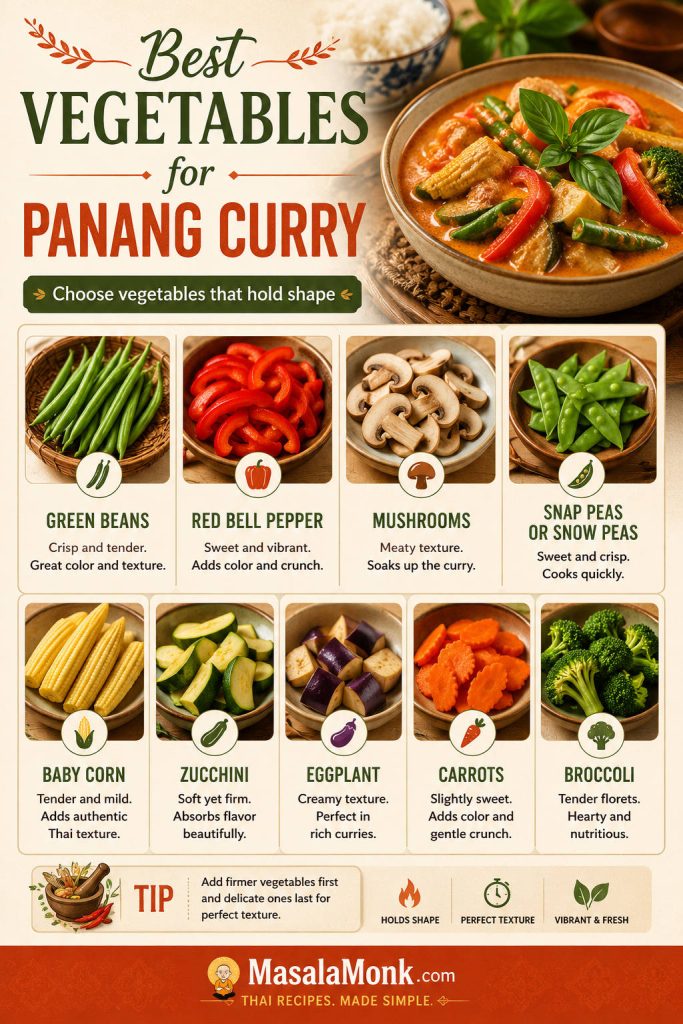
Best Vegetables for Panang Curry

Vegetables can make Panang curry feel fuller and fresher, but they need good timing. Add firm vegetables first, tender vegetables later, and basil at the very end.

Vegetable guide for Panang curry showing green beans, red bell pepper, mushrooms, snap peas, baby corn, zucchini, eggplant, carrots, and broccoli.
Choose vegetables that hold their shape so the curry stays colorful, balanced, and concentrated instead of turning watery.

Keep watery vegetables modest, especially mushrooms, zucchini, and spinach. They are delicious here, but a crowded pan can turn a glossy Panang into a thinner curry.

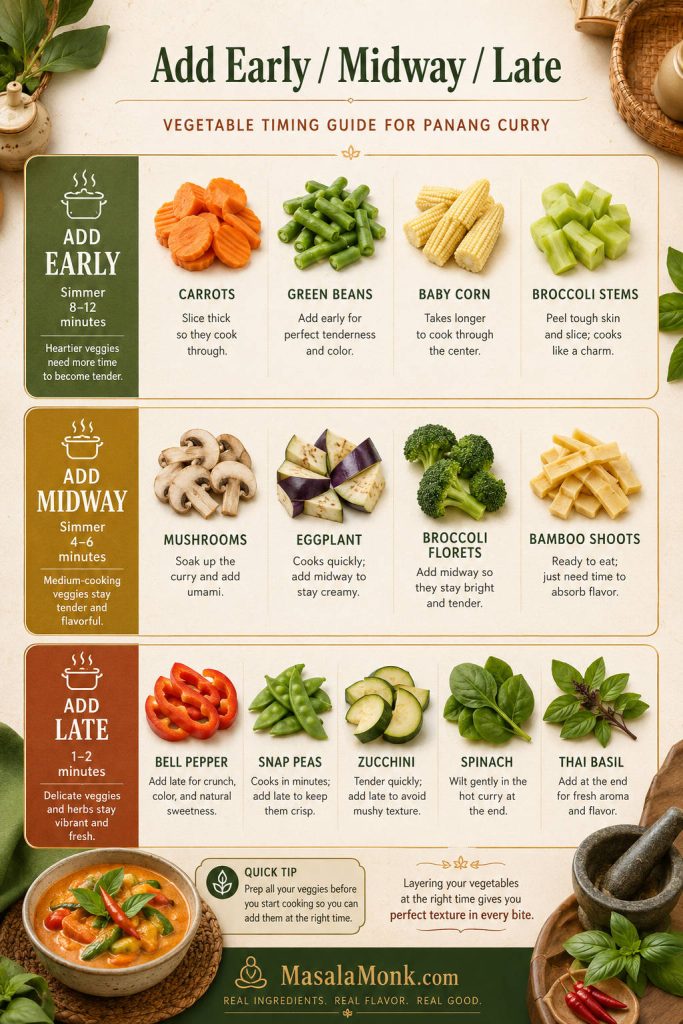
When to add vegetables to Panang curry

Vegetable timing guide for Panang curry with early, midway, and late groups for vegetables and Thai basil.
Add firmer vegetables first and delicate ones later; this way, the curry keeps both texture and fresh color.
Add EarlyAdd MidwayAdd Late
CarrotsMushroomsBell pepper
Green beansSmall eggplant piecesSnap peas or snow peas
Small cauliflower floretsBroccoli floretsZucchini
Broccoli stemsBamboo shootsSpinach
Baby cornThai basil

For a vegetable-heavy curry, use a little more paste and give the coconut base extra time to settle into the right texture. If you are skipping meat completely, jump to the vegetable Panang curry variation.

Chicken, Beef, Tofu, Shrimp and Vegetable Panang Curry

The curry base stays mostly the same, but each version has one thing to protect: juicy chicken, tender beef, intact tofu, just-cooked shrimp, or vegetables that do not water down the pan.

VersionHow Much to UseBest Method
Chicken Panang curry1½ lb / 680g chicken thighs or breastSlice thin and simmer until just cooked through. Thighs are juicier; breast cooks faster.
Beef Panang curry1–1¼ lb / 450–570g tender beefSlice thinly against the grain and add near the end so it stays tender.
Tofu Panang curry14–16 oz / 400–450g firm tofuPress if watery, brown if desired, then add after the sauce has reduced.
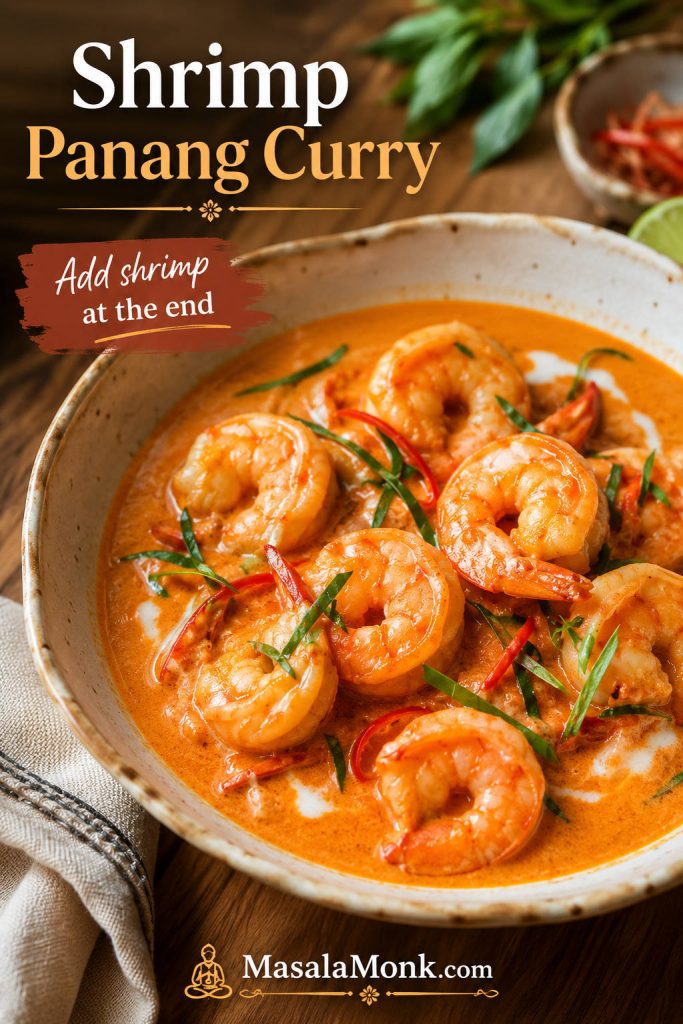
Shrimp Panang curry1 lb / 450g peeled shrimpAdd during the final few minutes and cook only until opaque.
Vegetable Panang curry3–4 cups mixed vegetablesAdd firm vegetables first and quick-cooking vegetables later.

Chicken Panang Curry

Chicken is the best first version because it is easy to cook and lets the curry shine. Thighs are the most forgiving choice because they stay juicy. Breast also works, but it needs thin slicing and close timing.

For the most reliable chicken version, use 1½ lb / 680g chicken, 3 tablespoons curry paste, one 400ml can of coconut milk or coconut cream, and 1–1½ cups vegetables. Red bell pepper, green beans, baby corn, mushrooms, and snap peas or snow peas all work well.

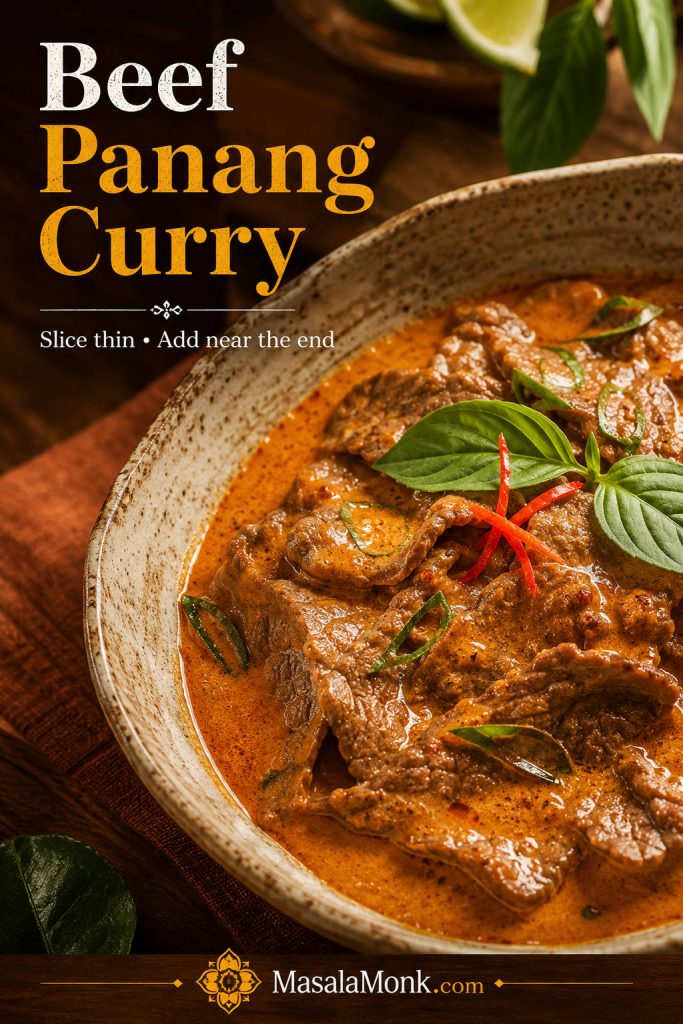
Beef Panang Curry

Use sirloin, ribeye, flank steak, flat iron, or another tender cut. Slice it thinly against the grain, then add it after the sauce is mostly finished. Simmer just until cooked through.

Beef Panang curry with thin slices of beef in orange-red coconut curry sauce, basil, makrut lime leaf garnish, and red chile.
Beef Panang curry works best with thin slices added near the end, so the beef stays tender instead of becoming chewy.

Do not simmer thin steak-style beef for 15 minutes the way you might simmer chicken. It can turn chewy, especially if it is very lean. For a slow-cooked beef Panang, use a tougher cut such as chuck or short rib and treat it as a separate slow-braised version.

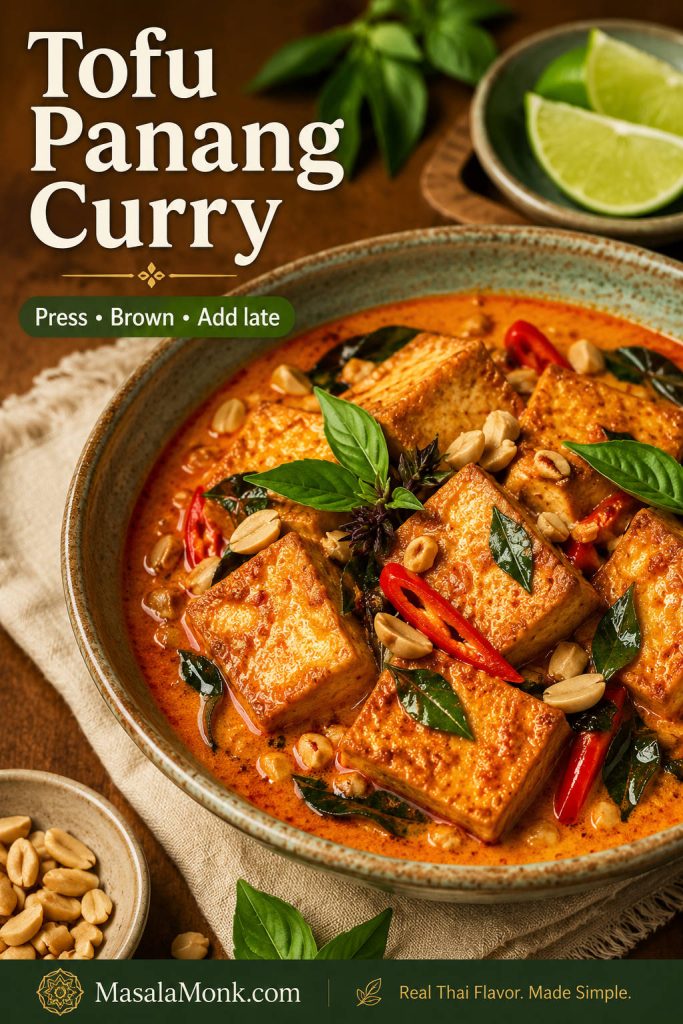
Tofu or Vegan Panang Curry

Tofu Panang curry can be excellent, but the tofu needs texture and the curry paste needs a label check if you are cooking vegan. Use firm or extra-firm tofu. Press it for 15–20 minutes if it is watery, then cut it into cubes or slabs. For better texture, brown the tofu before adding it to the sauce.

Tofu Panang curry with tofu pieces in coconut curry sauce, Thai basil, peanuts, red chile, and makrut lime leaf garnish.
Press and brown tofu before adding it to the curry; then it holds its shape and gives the sauce something firm to coat.

Vegan paste warning: many Thai curry pastes contain shrimp paste, fish sauce, or other seafood ingredients. Use a vegan Panang curry paste, or use vegan red curry paste and adjust it with peanuts, a tiny pinch of nutmeg, and a little coriander or cumin.

Replace fish sauce with soy sauce or tamari. Add tofu after the sauce has reduced so it does not break apart while the curry thickens. Finish with basil and crushed peanuts.

Shrimp Panang Curry

Shrimp Panang is the fastest version, but it asks for restraint. The sauce should be ready before the shrimp goes in, because shrimp only needs a few minutes to turn sweet, opaque, and tender.

Shrimp Panang curry with curled shrimp in creamy orange-red coconut curry sauce, Thai basil, red chile, and lime leaf garnish.
Shrimp needs only a short finish in Panang curry, so build and balance the sauce before the shrimp goes into the pan.

Once the shrimp is in the pan, simmer only until it curls gently and loses its translucency. Serve right away.

Vegetable Panang Curry

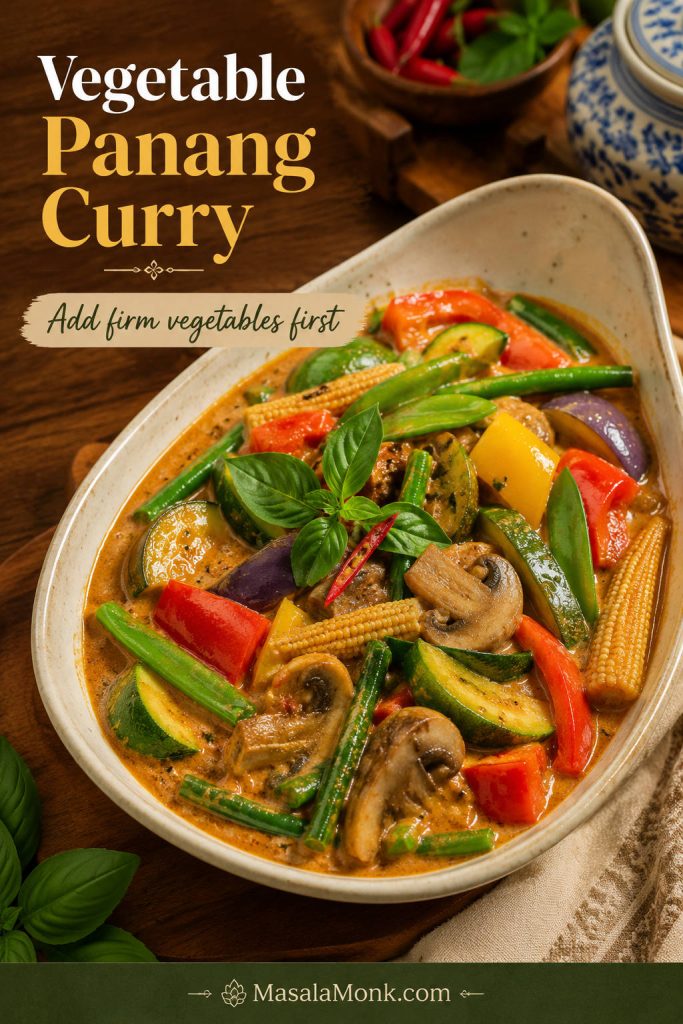
Vegetable Panang curry works best when you choose vegetables that hold their shape. Green beans, bell peppers, mushrooms, broccoli, snap peas or snow peas, baby corn, carrots, zucchini, and eggplant can all work, but they should not all go in at once.

Vegetable Panang curry with green beans, bell pepper, mushrooms, baby corn, zucchini, eggplant, snap peas, and basil in coconut curry sauce.
Vegetable Panang curry works best when the vegetables stay distinct, bright, and lightly tender instead of collapsing into the coconut sauce.

Add firm vegetables first, quick-cooking vegetables later, and basil at the very end. For a vegetable-heavy curry, start with 1 extra teaspoon of paste. A very full pan may need up to 1 extra tablespoon. Once you have chosen the version, return to the recipe card for the base method.

How to Fix Panang Curry Sauce

This is the section to use when the curry looks wrong five minutes before dinner. Most Panang problems are not disasters; they are small balance problems. A watery vegetable, a salty paste, thinner coconut milk, or too much heat can throw the pan off, but most of it is fixable.

You are looking for sauce that visibly coats the protein, but still has enough movement to spoon over rice. When the protein is already cooked, remove it with a slotted spoon and fix the sauce on its own.

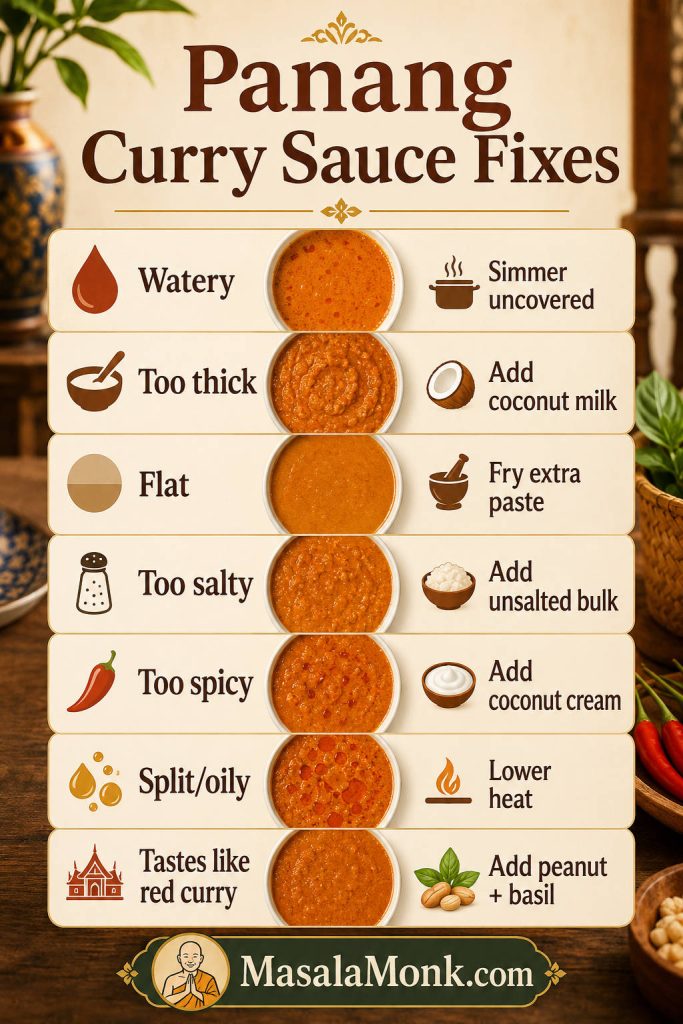
Quick fixes for Panang curry sauce

Panang curry sauce troubleshooting board with fixes for watery, thick, flat, salty, spicy, split, oily, or red-curry-like sauce.
Use this rescue guide before serving: most Panang curry sauce problems can be fixed with better simmering, coconut, paste, seasoning, or heat control.
Sauce ProblemWhat It Feels LikeHow to Fix It
Too wateryThe chicken looks like it is floating instead of coated.Simmer uncovered. If the protein is cooked, remove it and reduce the sauce alone. Use coconut cream next time.
Too thickThe curry looks heavy, pasty, or dry instead of glossy.Add coconut milk, water, or stock one spoonful at a time, then stop as soon as it turns spoonable.
Tastes flatThe curry smells fine but tastes dull or unfinished.Fry extra paste separately and stir it in. Add fish sauce, sugar, lime leaves, or basil.
Too saltyThe salt hits first and the coconut sweetness disappears.Add unsalted bulk such as coconut milk, vegetables, tofu, or chicken. Balance with a tiny amount of sugar.
Too spicyThe heat overwhelms the coconut and aromatics.Add coconut cream or coconut milk and serve with extra rice.
Oily or splitThe curry looks greasy around the edges.Lower the heat, stir gently, and add a splash of coconut milk.
Tastes like red curryThe curry is loose, chile-forward, and missing the rounded Panang note.Add peanuts or peanut butter, simmer briefly, and finish with Thai basil and finely sliced tender makrut lime leaves.

Panang Curry Recipe Card

A creamy chicken Panang curry with store-bought paste, full-fat coconut, makrut lime leaves, peanuts, and Thai basil. Rich, spoonable, and easy to adapt for beef, tofu, shrimp, or vegetables.

Yield
4 servings
Prep Time
15 minutes
Cook Time
25 minutes
Total Time
40 minutes

Ingredients

  • 1½ lb / 680g boneless chicken thighs or chicken breast, thinly sliced
  • 3 tbsp / about 45g Panang curry paste
  • 1 tbsp / 15ml neutral oil, or thick coconut cream from the top of the can
  • 13.5–14 oz / 400ml full-fat coconut milk or coconut cream
  • 1–1½ tbsp / 15–22ml fish sauce, plus more to taste, depending on paste saltiness
  • 2 tsp–1 tbsp / 8–15g palm sugar or brown sugar
  • 4–6 makrut lime leaves, torn, plus optional finely sliced tender leaves for finishing
  • 2 tbsp / about 15g crushed roasted peanuts, or 1 tbsp / about 16g peanut butter
  • 1 red bell pepper, thinly sliced, or 1–1½ cups mixed vegetables for the chicken version
  • ½ cup loosely packed Thai basil leaves
  • Optional garnish: sliced red chile, extra basil, crushed peanuts, finely sliced makrut lime leaves
  • Steamed jasmine rice, for serving

Instructions

  1. Prep. Slice the chicken thinly and prepare the vegetables, herbs, and garnishes before cooking.
  2. Fry the paste. Heat oil or thick coconut cream in a wide skillet, wok, or 12-inch saucepan over medium heat. Add the Panang curry paste and cook, stirring often, until fragrant and slightly darker — about 1–2 minutes for softer paste or 3–5 minutes for thicker Thai paste.
  3. Build the sauce. Stir in coconut milk or coconut cream gradually until smooth. Add fish sauce, sugar, torn makrut lime leaves, and peanuts or peanut butter.
  4. Simmer. Add chicken and firm vegetables such as carrots, green beans, or baby corn. Simmer gently until the chicken is cooked through: about 6–8 minutes for thin chicken breast or 8–12 minutes for thin chicken thighs. The thickest piece should reach 165°F / 74°C. Add bell pepper, snap peas or snow peas, zucchini, or spinach near the end.
  5. Adjust. If the sauce looks loose, simmer uncovered until glossy and spoonable. Taste after thickening, then adjust with fish sauce, sugar, coconut milk, or extra fried paste if needed.
  6. Finish. Turn off the heat and stir in Thai basil. Garnish with extra basil, crushed peanuts, sliced chile, or finely sliced makrut lime leaves.
  7. Serve. Serve hot with steamed jasmine rice.

Recipe Notes

  • Beef: use 1–1¼ lb / 450–570g thinly sliced sirloin, ribeye, flank steak, or another tender cut. Add near the end and simmer briefly.
  • Tofu: use firm or extra-firm tofu. Press if watery, brown first if desired, and add after the sauce has reduced.
  • Vegan Panang: use vegan curry paste and replace fish sauce with soy sauce or tamari.
  • Shrimp: build and thicken the sauce first, then add shrimp near the end and cook only until opaque.
  • Vegetable Panang: use 3–4 cups mixed vegetables and add 1 teaspoon to 1 tablespoon extra paste depending on volume.
  • Richer sauce: use coconut cream. For a milder curry, start with 2 tbsp paste and add more after tasting.

Once the paste smells cooked, the coconut turns glossy, and the basil hits the pan, the curry feels much easier to trust. Spoon it beside jasmine rice, add the final herbs, and you have the kind of weeknight Panang that tastes deliberate instead of rushed.

Instant Pot or Slow Cooker Panang Curry

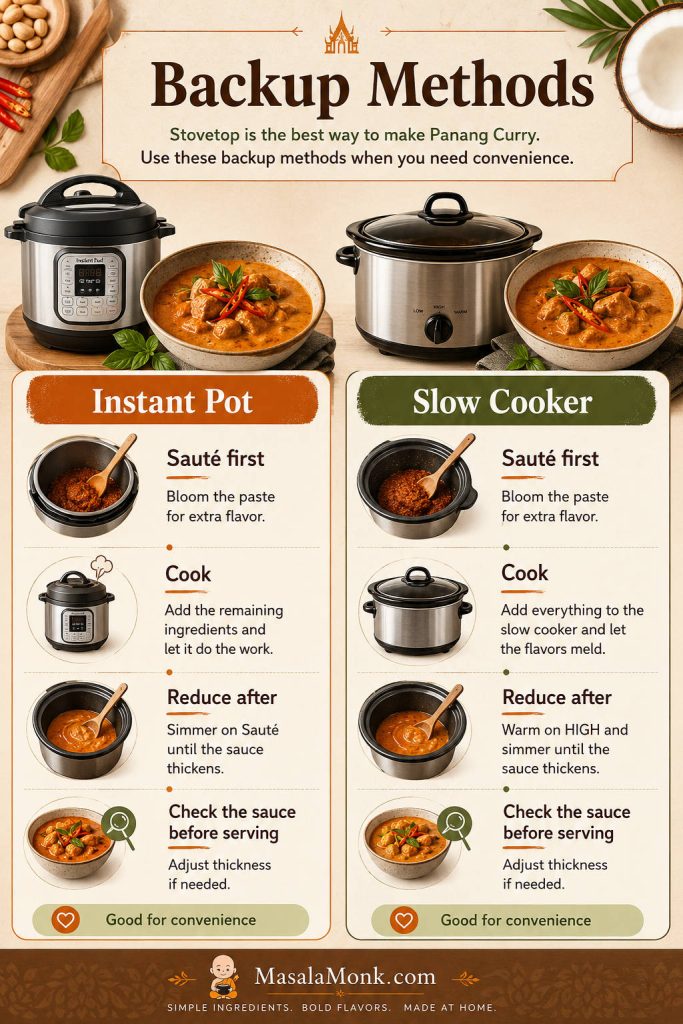
Panang rewards stovetop control, so treat Instant Pot and slow cooker versions as backup methods. They are useful for convenience, but both need a final look at the sauce before serving.

Backup-method guide for Panang curry showing Instant Pot and slow cooker options with sauté first, cook, reduce after, and check sauce cues.
Instant Pot and slow cooker Panang curry can be convenient, but the final sauce check still matters before the curry reaches the table.

Instant Pot Panang curry

Use sauté first. Fry the paste in oil or thick coconut cream for 1–2 minutes, then stir in coconut milk or cream, fish sauce, sugar, torn lime leaves, and thin chicken pieces. Pressure cook on high for 3–4 minutes, then quick release. Use sauté again to bring the sauce back to a spoonable texture, then finish with basil.

Slow cooker Panang curry

Slow cooker Panang works best with chicken thighs or beef, not thin chicken breast. Fry the paste separately first, then add it to the slow cooker with coconut milk, seasoning, and protein. Cook on low until the meat is tender, usually about 2–3 hours for boneless chicken thighs. If the sauce is thin at the end, reduce it uncovered in a saucepan before adding basil.

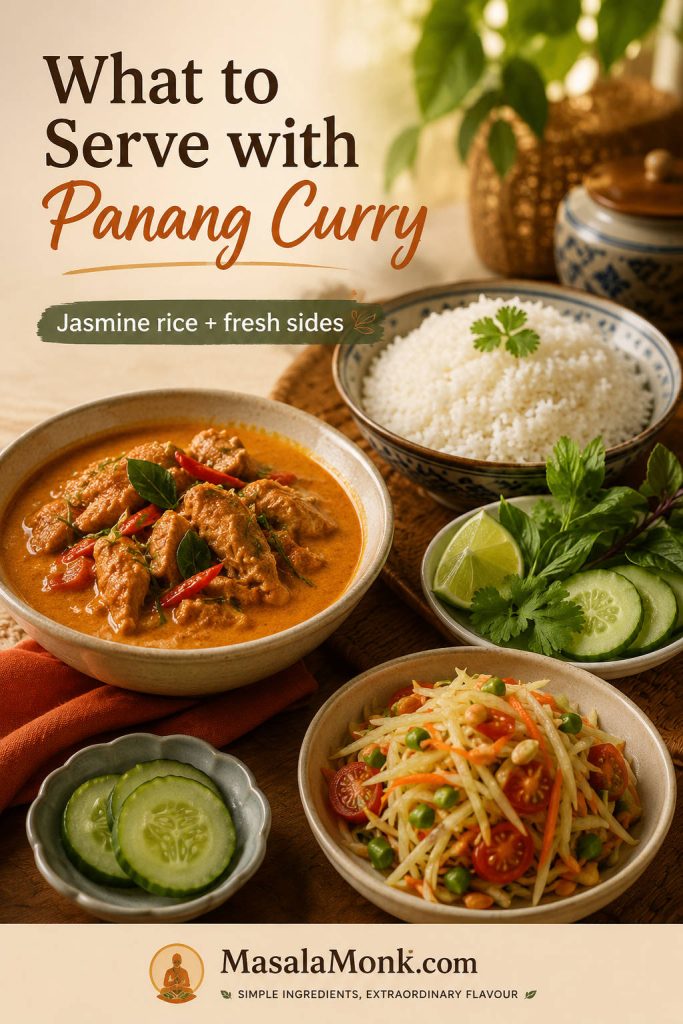
What to Serve with Panang Curry

Panang is rich, so the best sides either catch the sauce or cut through it. Jasmine rice catches the glossy curry; cucumber, herbs, lime, green beans, or Som Tam keep the bowl from feeling heavy. Planning leftovers too? Jump to storage and reheating.

What goes well with Panang curry?

Panang curry served with jasmine rice, cucumber, herbs, lime, and a fresh Som Tam-style side dish on a warm table.
Pair Panang curry with jasmine rice and a crisp side so the meal has both coconut richness and fresh contrast.

Spoon the curry beside the rice rather than burying it. That way the first few bites stay glossy and concentrated, and the rice catches the sauce slowly instead of muting it all at once. If rice is the part that usually goes wrong, this guide to cooking perfect rice can help.

Serve WithWhy It Works
Steamed jasmine riceBest default; it absorbs the sauce without competing with the curry.
Cucumber salad, herbs, lime, or lightly steamed green beansFresh sides balance the coconut richness.
Roti, flatbread, rice noodles, or coconut riceComfort options for a fuller, more restaurant-style meal.

For a crisp Thai-style side, this Vegan Som Tam Salad gives the fresh, sharp contrast that works well beside a creamy coconut curry.

Storage, Freezing and Reheating

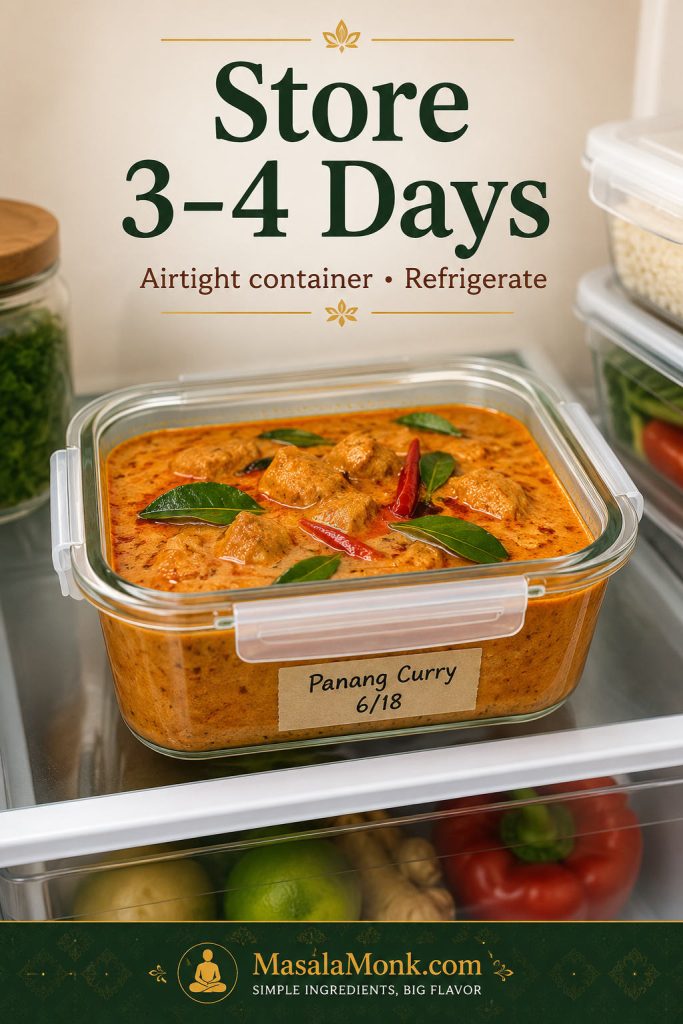
How to store Panang curry leftovers

Store leftover Panang curry in an airtight container in the refrigerator for 3–4 days. The sauce will thicken as it chills, so add a splash of coconut milk, water, or stock when reheating.

Panang curry leftovers stored in an airtight glass container on a refrigerator shelf with text saying store three to four days.
Leftover Panang curry keeps well for 3–4 days in an airtight container; for the brightest flavor, add fresh basil after reheating.

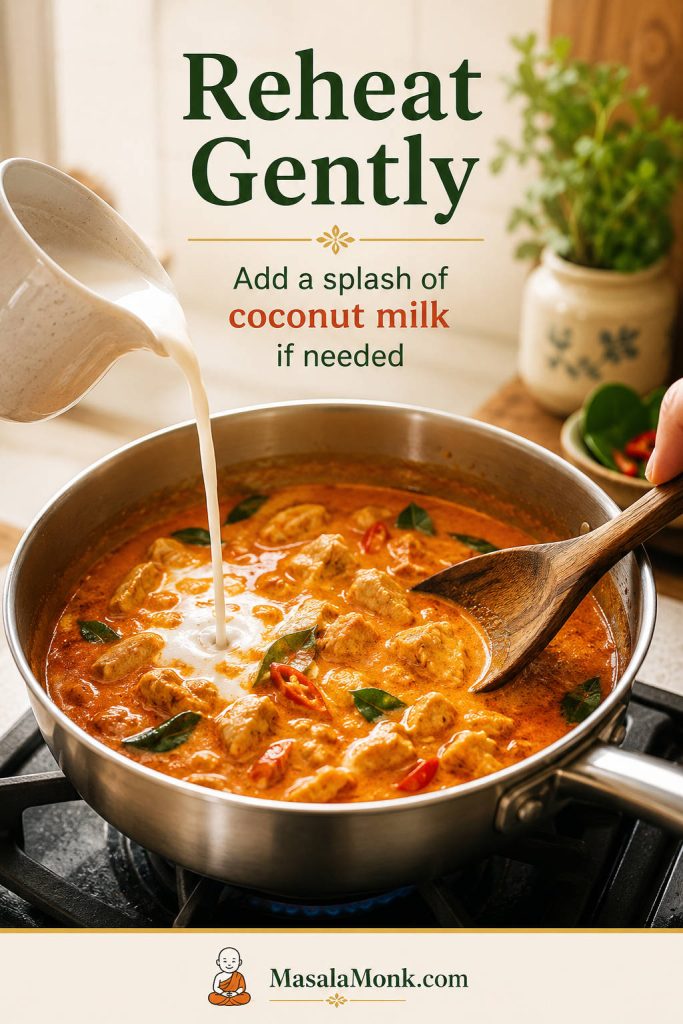
How to reheat Panang curry

Reheat gently on the stovetop over low to medium-low heat. Avoid hard boiling because coconut-based sauces can split. If the curry looks oily after reheating, lower the heat and stir in a small splash of coconut milk.

Panang curry reheating gently in a saucepan while coconut milk is poured in and the sauce is stirred with a wooden spoon.
Reheat Panang curry gently, adding a splash of coconut milk if needed, so the sauce turns smooth again instead of splitting.

The curry reheats well, but fresh basil does not. For make-ahead cooking, stop before adding the basil if you can, then add it after reheating so the curry tastes fresh again.

You can freeze Panang curry for up to 2 months, but the sauce may look slightly separated or grainy after thawing. Reheat gently and stir in a little coconut milk to smooth it out. Shrimp Panang curry is less ideal for freezing because shrimp can become rubbery after thawing and reheating. Tofu may soften slightly after storage, but it still tastes good.

Panang Curry FAQs

Is Panang curry supposed to be thick?

Panang curry is usually thicker and more concentrated than Thai red curry. It should coat the chicken, tofu, shrimp, beef, or vegetables instead of running like soup.

Is Panang curry very spicy?

Most bowls land in the medium-spicy range, but the paste controls the heat. Start with 2 tablespoons for a gentler curry and add more after tasting.

What does Panang curry taste like?

It tastes creamy, savory, lightly sweet, and aromatic, with a quiet peanut note. Peanut belongs in the background; it rounds the curry without turning it into satay sauce.

Why does my Panang curry taste like red curry?

The curry may be too loose or missing the rounded peanut and lime-leaf finish. Simmer the coconut base until glossy, then add peanut richness, basil, and finely sliced tender makrut lime leaves if you have them.

Can I use red curry paste instead of Panang curry paste?

Yes, as a shortcut. Add peanuts or peanut butter, a tiny pinch of nutmeg, and a little coriander or cumin to move it closer to Panang flavor.

What is the best coconut milk for Panang curry?

Full-fat coconut milk works well, while coconut cream gives the richest result. Light coconut milk makes the curry thinner and less satisfying.

Is Panang curry the same as Panang gai?

Panang gai means chicken Panang curry. “Gai” means chicken, so the method is the same here: thin chicken, coconut sauce, and a fresh basil finish.

Can I make Panang curry without fish sauce?

Use soy sauce, tamari, or a vegetarian fish-sauce alternative. Taste after simmering because substitutes vary in saltiness and depth.

Why is my Panang curry watery?

The coconut may need more time, the milk may be too thin, or the vegetables may have released water. Simmer uncovered before reaching for cornstarch.

Can I make Panang curry ahead?

Chicken, beef, tofu, and vegetable versions reheat well. For the freshest flavor, hold back the basil and add it after reheating.

What vegetables go well in Panang curry?

Green beans, bell peppers, mushrooms, broccoli, snap peas, baby corn, carrots, zucchini, and eggplant all work. Add watery vegetables late.

Can I make this with shrimp?

Build and thicken the sauce first, then add shrimp near the end and cook just until opaque. Do not reduce the curry after shrimp goes in.

Back to top

Posted on — 1 Comment

Salsa Verde Recipe: Easy Roasted Tomatillo Salsa

Bowl of roasted salsa verde with tortilla chips, lime, roasted tomatillos, and a spoon showing chunky green texture.

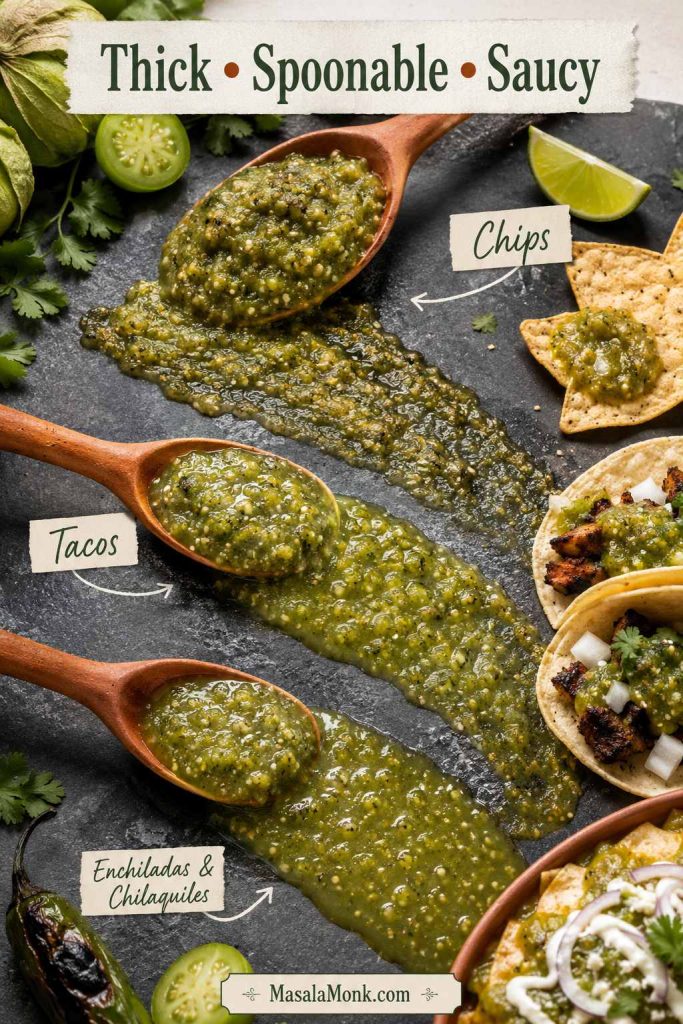
Some sauces sit politely on the side. Salsa verde wakes the plate up. It is bright, green, and alive — the kind of sauce that makes tacos taste fresher, eggs feel less ordinary, grilled chicken more exciting, and tortilla chips almost impossible to leave alone.

At its simplest, this is a one-pan, one-blender salsa: roast the tomatillos, blend everything together, then taste for salt and lime. It should be bright enough to wake up the plate, salty enough to keep you going back for one more chip, and balanced enough to spoon over dinner without thinking twice.

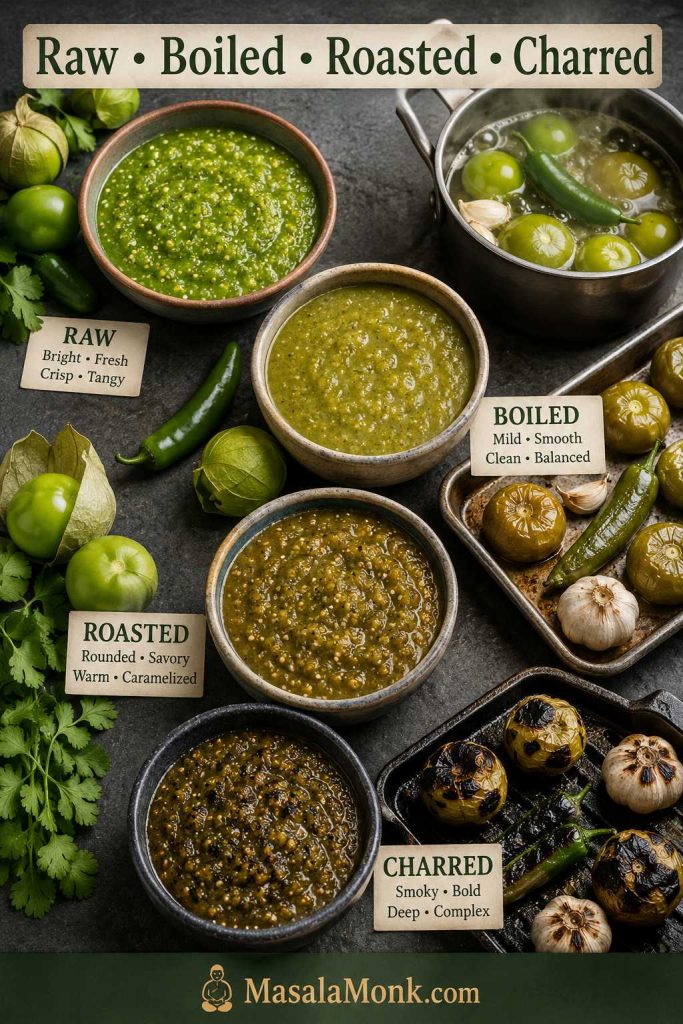
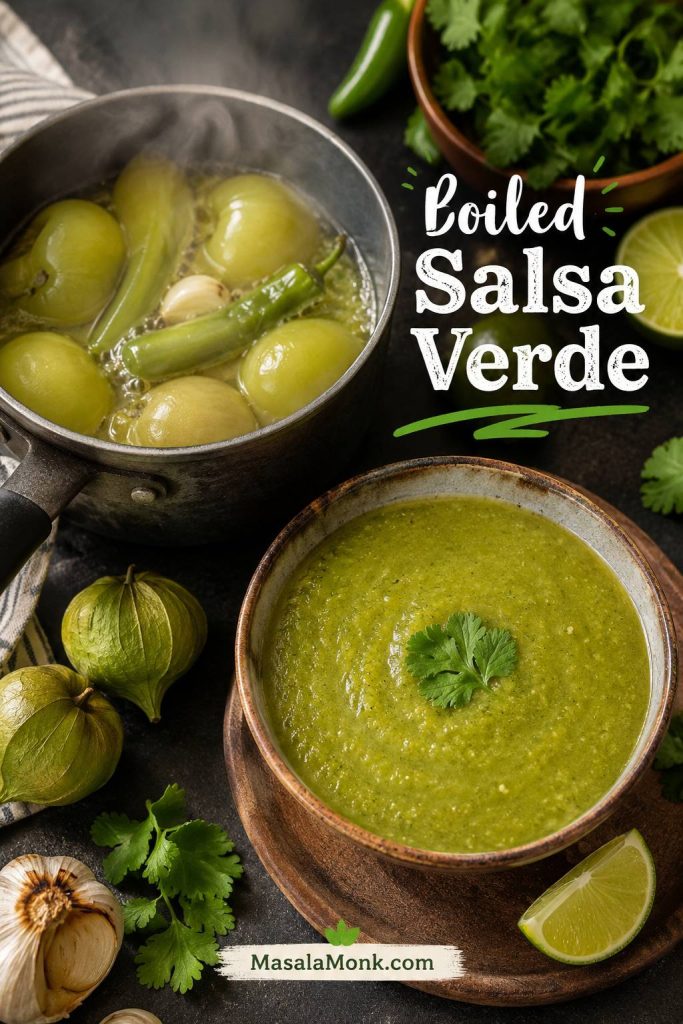
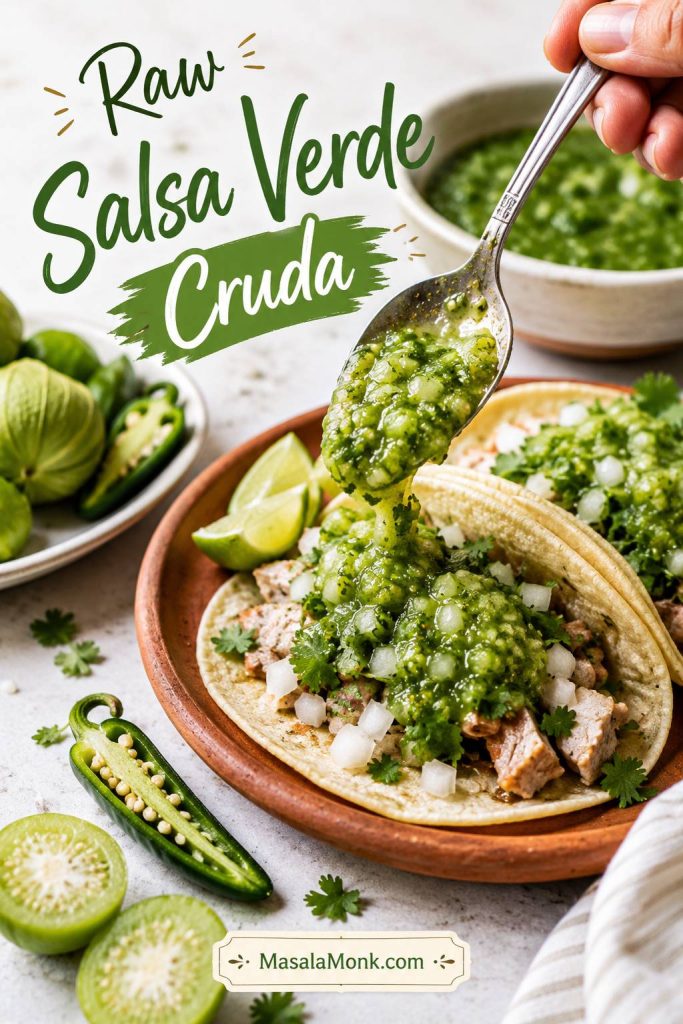
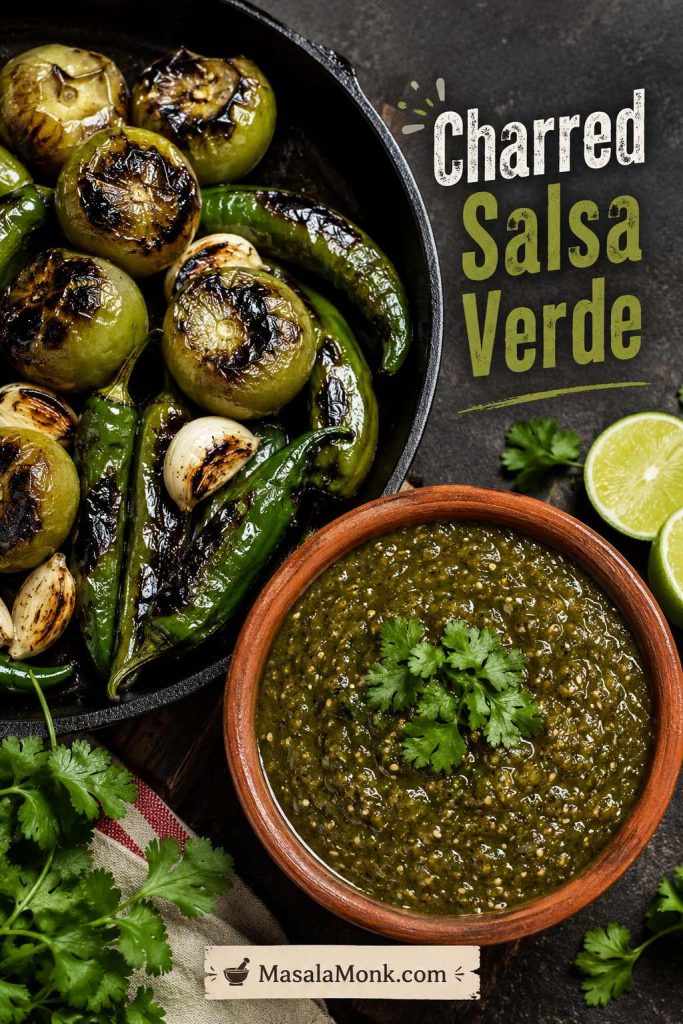
This recipe is made with tomatillos, green chiles, garlic, onion, cilantro, lime, and salt. The roasted version is the one to make first because it softens the tomatillos’ tart edge and gives the salsa a deeper, rounder flavor. Boiled, raw, and charred options are included later, but they are backup help — not homework.

One quick clarification before we start: this is Mexican salsa verde, not Italian salsa verde. Mexican salsa verde is usually made with tomatillos and green chiles. Italian salsa verde is an herb sauce made with parsley, capers, garlic, olive oil, and vinegar or lemon. Both are green sauces, but they are completely different in flavor and use.

In This Guide

Use this as a quick map for the recipe, method choices, heat control, fixes, storage, and serving ideas.

Quick Answer: What Is Salsa Verde?

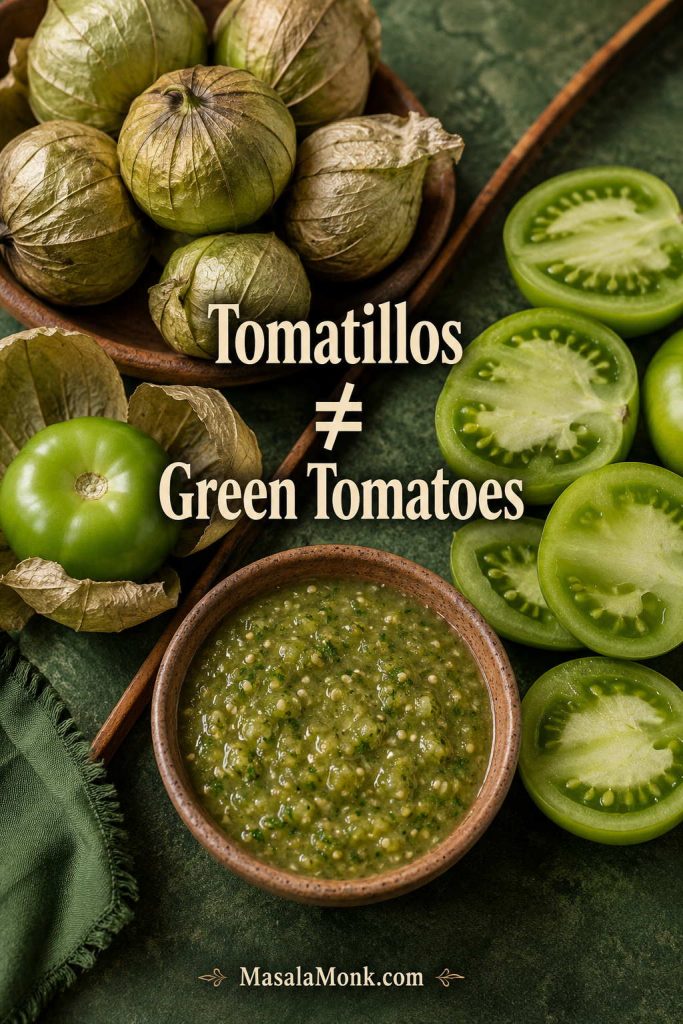
Salsa verde means “green sauce,” but in Mexican cooking it usually refers to a green salsa made with tomatillos, green chiles, onion, garlic, cilantro, salt, and sometimes lime. Tomatillos are not green tomatoes; they have papery husks and a naturally tangy, slightly fruity flavor that makes them perfect for a lively green salsa.

For the fastest path, go straight to the roasted tomatillo salsa recipe. If you are deciding between raw, boiled, roasted, or charred, use the method guide first.

Tomatillos in papery husks with green chiles, cilantro, onion, garlic, lime, salt, and a bowl of salsa verde
Tomatillos and green chiles give Mexican salsa verde its lively backbone; compared with tomato salsa, the flavor is greener, sharper, and more citrus-friendly.
Start here: If this is your first batch, roast the tomatillos. It is the easiest method to love because it keeps the salsa bright while taking away the harshest raw edge.

At a Glance

This is the kind of salsa that earns a permanent jar spot in the fridge: thick enough for chips, bright enough for tacos, and easy to loosen into a sauce when dinner needs help.

Start withRoasted tomatillo salsa verde
YieldAbout 2½ to 3 cups
Total time20 to 25 minutes under the broiler, or about 25 to 30 minutes with the oven-roasted method
Heat levelMild, medium, or hot depending on jalapeño or serrano amount
Ideal textureSpoonable, lightly textured, not watery
Works withTacos, chips, eggs, enchiladas, chicken, chilaquiles, bowls, nachos
Storage4 to 5 days in the fridge, up to 3 months in the freezer
Salsa verde jar with callouts for yield, time, tomatillo count, heat level, refrigerator storage, and freezer storage
One roasted batch gives about 2½ to 3 cups, so you can serve it with chips now and still have enough left for tacos, eggs, or enchiladas later.

Why This Works

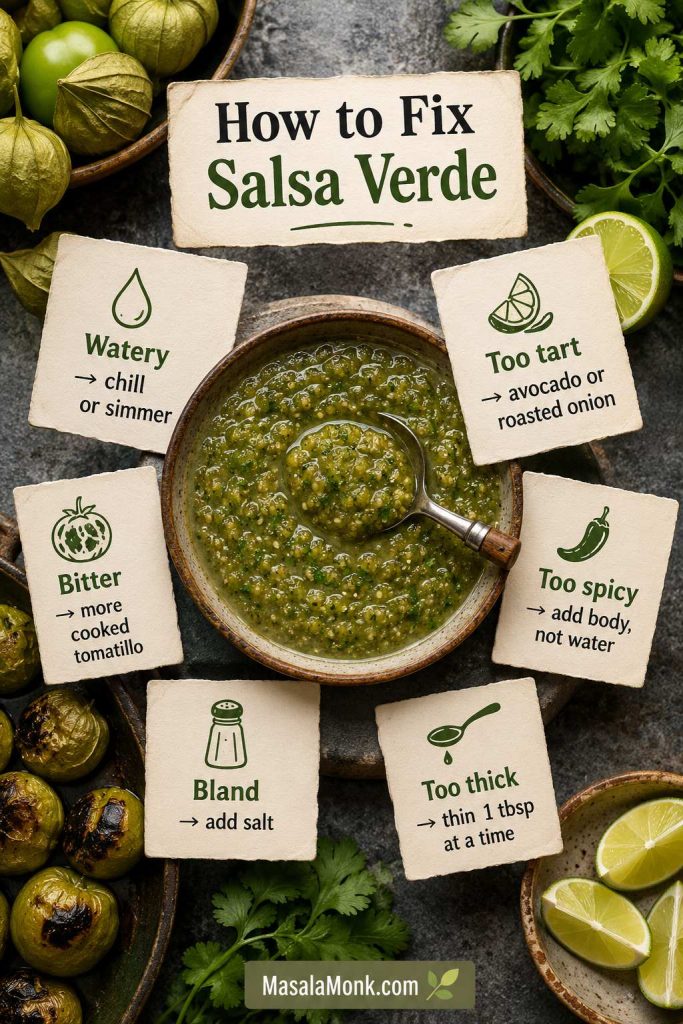
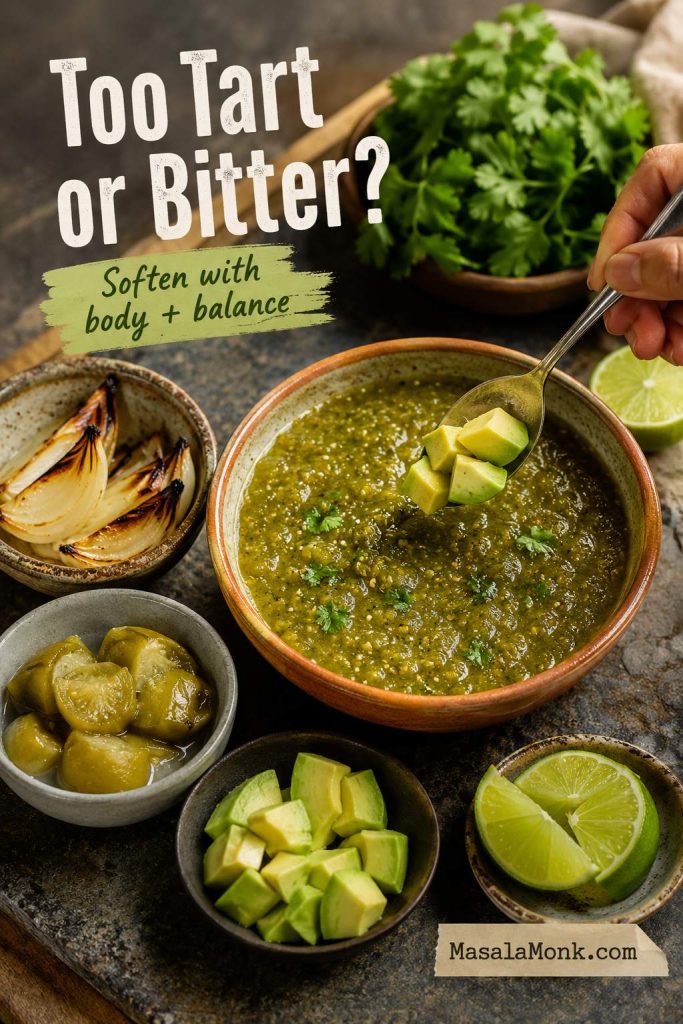
This version is built around the things that usually go wrong: watery texture, harsh garlic, too much tartness, unpredictable heat, and flat flavor. The small details — roasting the garlic, holding back pan juices, tasting before adding extra lime, and resting before the final adjustment — keep the salsa balanced instead of thin, sharp, or dull.

  • Roasting softens the tomatillos. It keeps their tangy flavor but rounds off the sharpest raw edge.
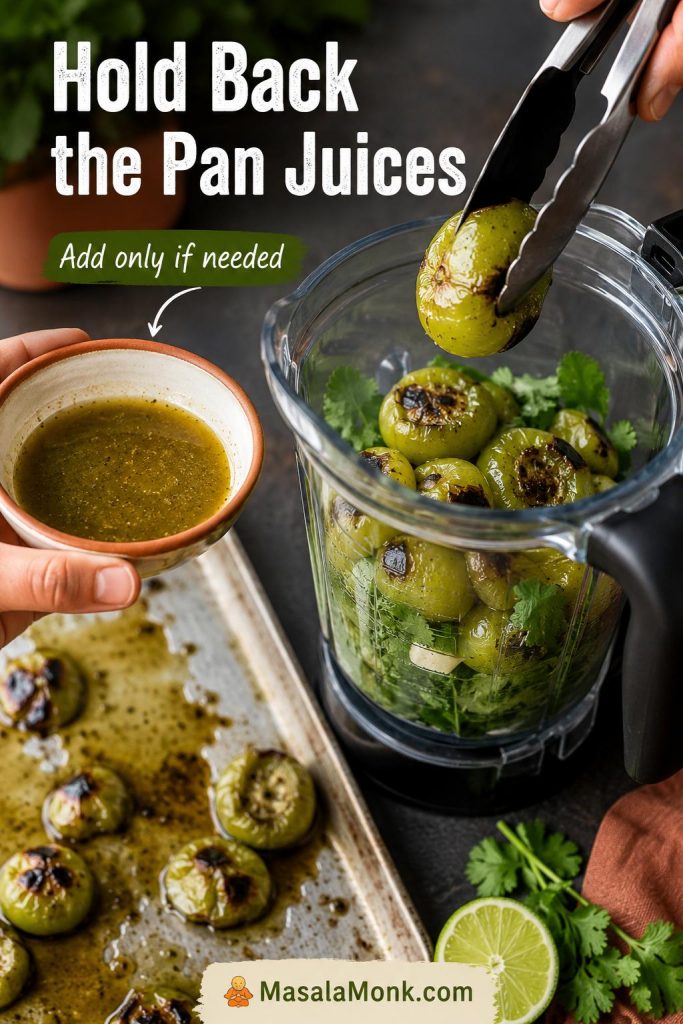
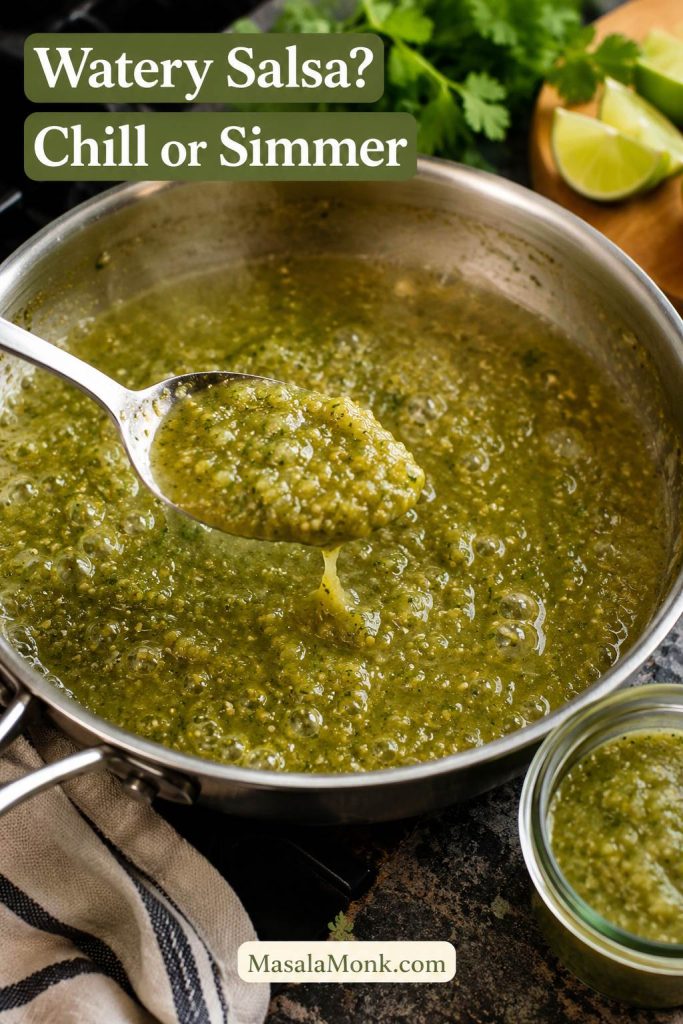
  • Pan juices are added gradually. Roasted tomatillos can release more liquid than expected, so holding some back keeps the salsa from turning watery.
  • Salt comes before extra lime. Under-salted salsa tastes flat, while too much lime can make already-tart tomatillos taste harsh.
  • The method can match the meal. Roasted is the main recipe, but boiled, raw, and charred styles help you make the salsa smoother, brighter, smokier, or more sauce-like.

What You Need

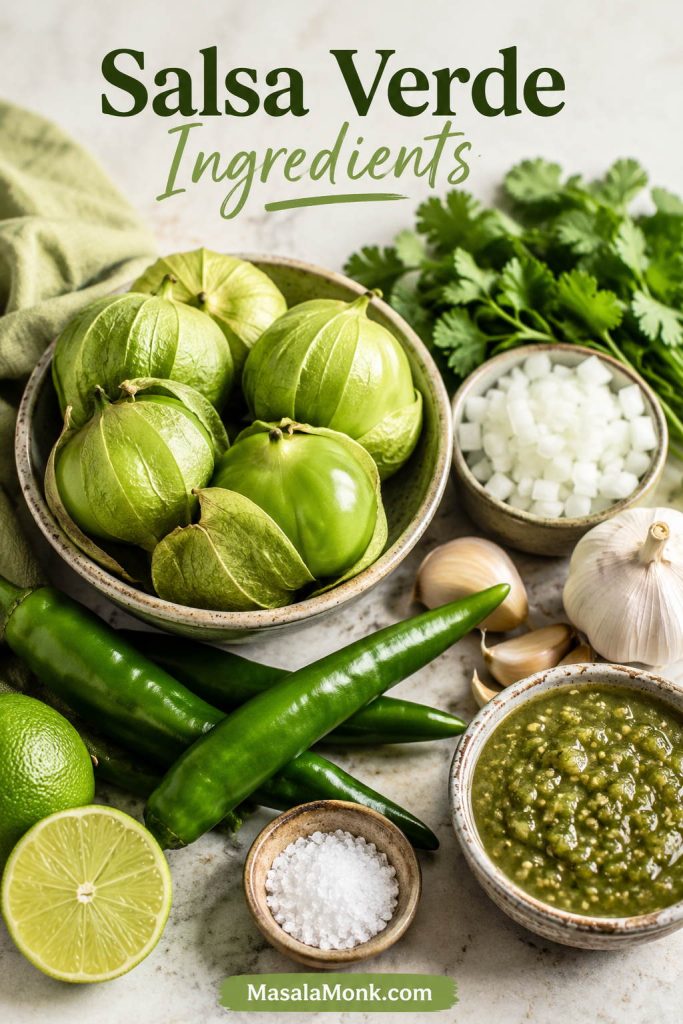
A good batch does not need a long ingredient list. The flavor comes from balancing tangy tomatillos, green chile heat, fresh cilantro, enough salt, and a little lime.

Tomatillos, green chiles, garlic, white onion, cilantro, lime, salt, and finished salsa verde arranged on a prep surface
A good salsa verde recipe does not need many ingredients, but each one has a job: tomatillos bring tang, chiles bring heat, and salt wakes everything up.

Tomatillos

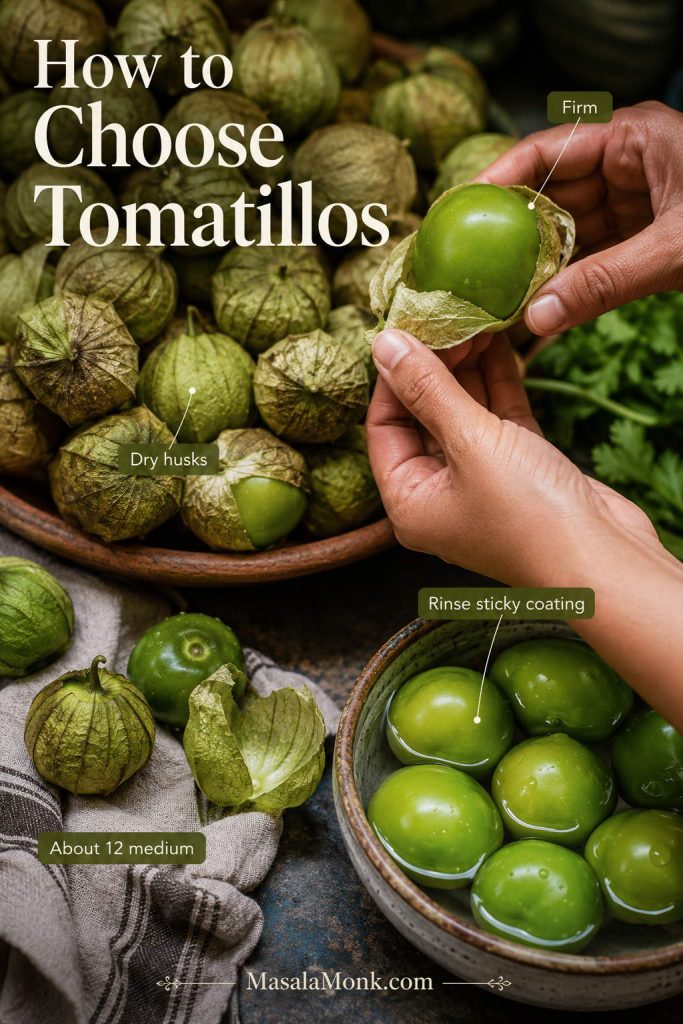
Look for firm tomatillos with dry papery husks. A little stickiness under the husk is normal; rinse it off before cooking or blending. You need 1½ pounds / 680 g tomatillos, usually about 12 medium tomatillos, for about 2½ to 3 cups salsa.

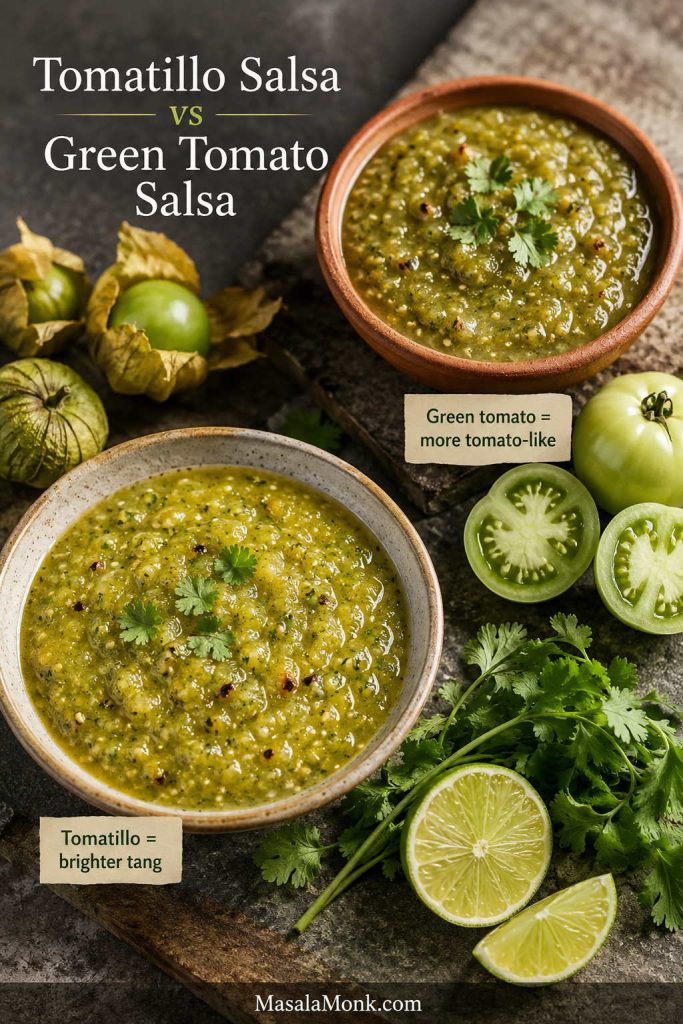
Tomatillos with papery husks beside sliced green tomatoes and a bowl of green tomatillo salsa
Tomatillos are not green tomatoes; instead, they bring the tart, fruity base that gives classic tomatillo salsa verde its lively flavor.

To prep them, remove the husks, rinse the sticky coating, and trim away any damaged spots. Large tomatillos can be halved before roasting so they soften evenly.

Hands choosing fresh tomatillos with papery husks, peeled tomatillos, and labels for firmness, dry husks, and rinsing
Firm tomatillos with dry husks usually roast best; after peeling, rinse the sticky coating so the finished salsa tastes clean rather than tacky or dull.

Jalapeño or Serrano

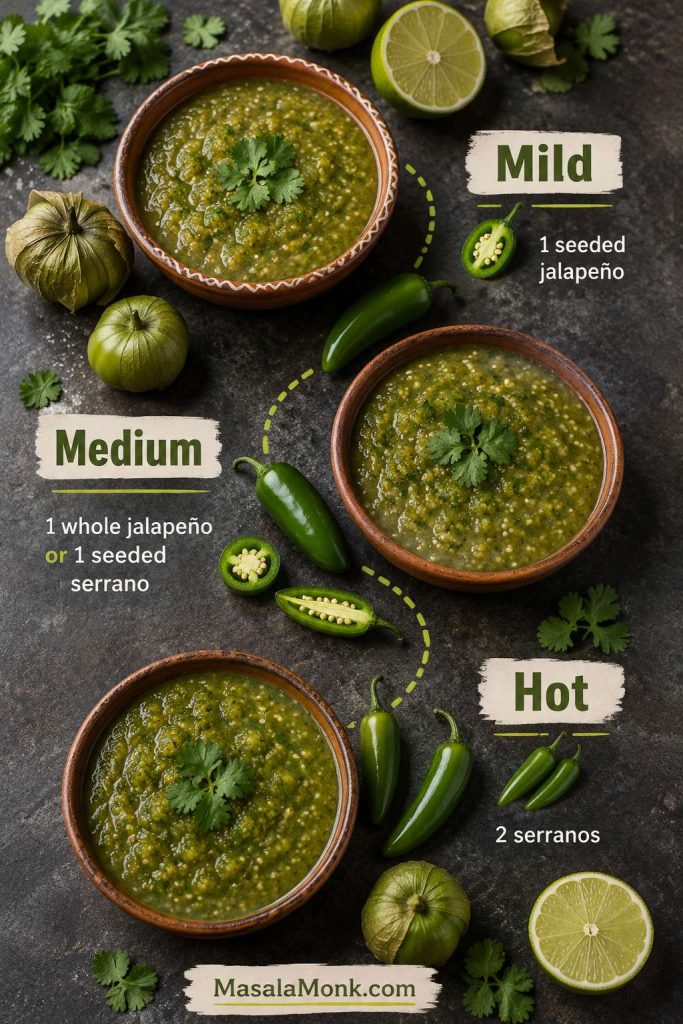
Jalapeño makes a milder, more approachable salsa. Serrano gives a sharper, more intense green-chile heat. Use one pepper for mild to medium, two serranos for hot, or three to four serranos for a very spicy batch.

Remove the seeds and white ribs for gentler heat before blending. Keep some seeds for a sharper salsa, then adjust after tasting.

Need exact mild, medium, and hot options? Use the heat level guide before blending.

Jalapeños and serrano peppers beside two bowls of salsa verde with labels comparing milder and sharper heat
Jalapeño makes the sauce milder and rounder, while serrano gives sharper green-chile heat, so choose based on who will be eating it.

Onion, Garlic, Cilantro, Lime, and Salt

White onion gives the salsa a clean bite. Rinsing chopped onion under cold water softens harsh raw onion flavor without making the sauce dull. Garlic roasts with the tomatillos in the main recipe so it turns mellow instead of sharp.

Cilantro brings the classic fresh green finish, and tender stems are fine because they carry plenty of flavor. Lime brightens the batch, but tomatillos are already tart, so add it with a light hand and adjust after tasting.

Roasted garlic, rinsed chopped onion, cilantro, lime, salt, and salsa verde arranged as flavor-building ingredients
Garlic, onion, cilantro, lime, and salt build balance around the tomatillos, so the finished green salsa tastes layered instead of flat.

How to Make It

Roast the tomatillos, chile, and garlic until blistered, then blend them with onion, cilantro, lime, and salt. Keep the texture lightly spoonable and add water only at the end when the salsa is too thick.

Four-step salsa verde process showing tomatillo prep, roasting, blending, and tasting to adjust flavor
This four-step flow keeps the recipe simple: prep clean tomatillos, roast for flavor, blend for texture, and adjust only after the salsa settles.

The one thing to watch is liquid. Roasted tomatillos can release a lot of juice, so add the tomatillos first, pulse, and use the pan juices gradually only if the salsa needs them.

Roasted tomatillos going into a blender with reserved pan juices held aside in a small cup
The roasted juices carry flavor, but adding them slowly gives you control over thickness before the salsa turns too loose for chips or tacos.

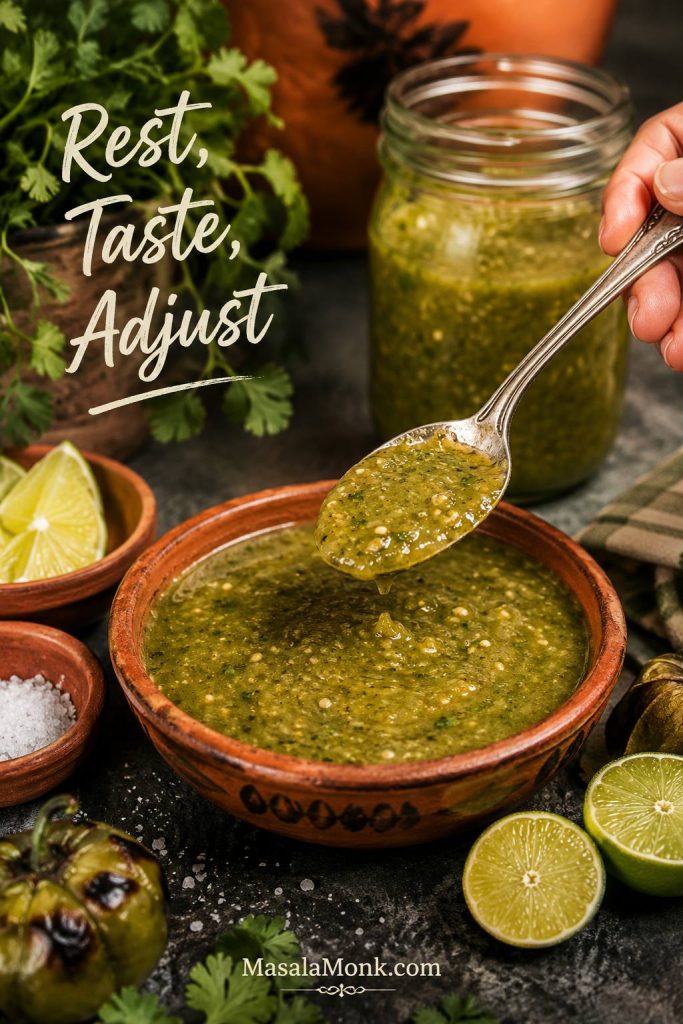
Do not worry if one batch tastes a little brighter, smokier, or spicier than the last. Tomatillos and chiles vary, so the final taste check is part of making the salsa yours.

Spoon tasting salsa verde with lime wedges, salt, and a jar of green salsa nearby
A short rest makes the flavors easier to read, so taste again before adding more lime, salt, or heat.

Roasted Tomatillo Salsa Verde Recipe

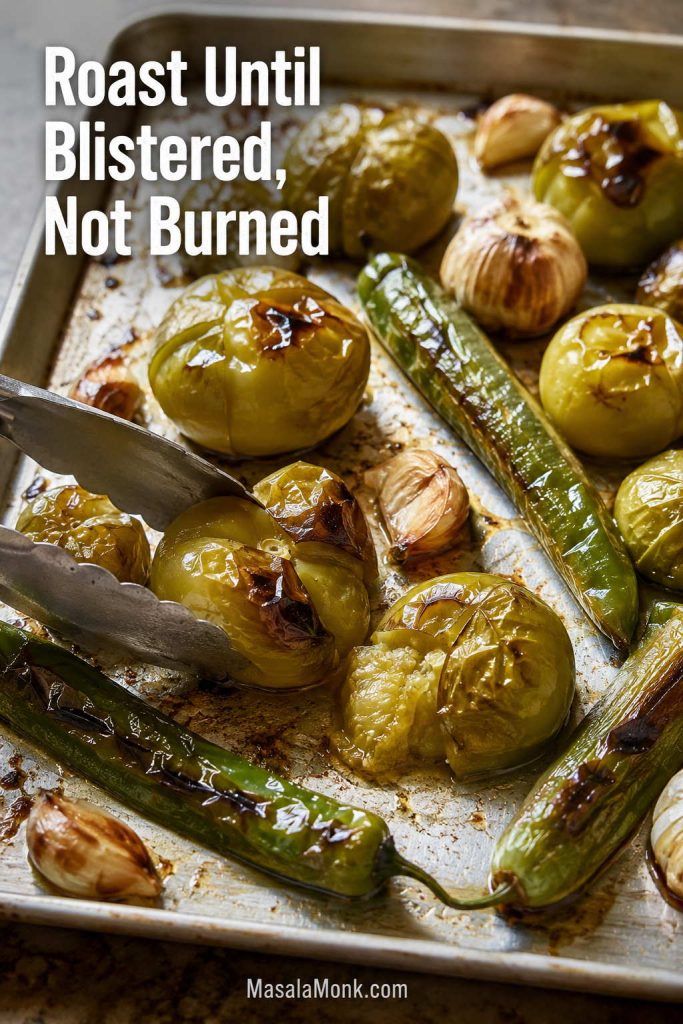
Tomatillos, green chiles, and unpeeled garlic blistered on a sheet pan for roasted salsa verde
Roast the tomatillos until they blister and soften; this rounds off their raw edge while keeping enough acidity for tacos and chips.

Roasted Tomatillo Salsa

This roasted tomatillo salsa is tangy, lightly smoky, and spoonable, with enough body for chips and enough brightness for tacos, eggs, chicken, chilaquiles, bowls, and nachos.

Prep Time 10 minutes
Cook Time About 10 to 13 minutes
Total Time 20 to 25 minutes under the broiler
Yield About 2½ to 3 cups

Equipment

  • Rimmed baking sheet
  • Foil or a bare baking sheet for broiling
  • Blender or food processor
  • Tongs
  • Fine-mesh strainer, optional, for rinsing onion
  • Airtight jar or container

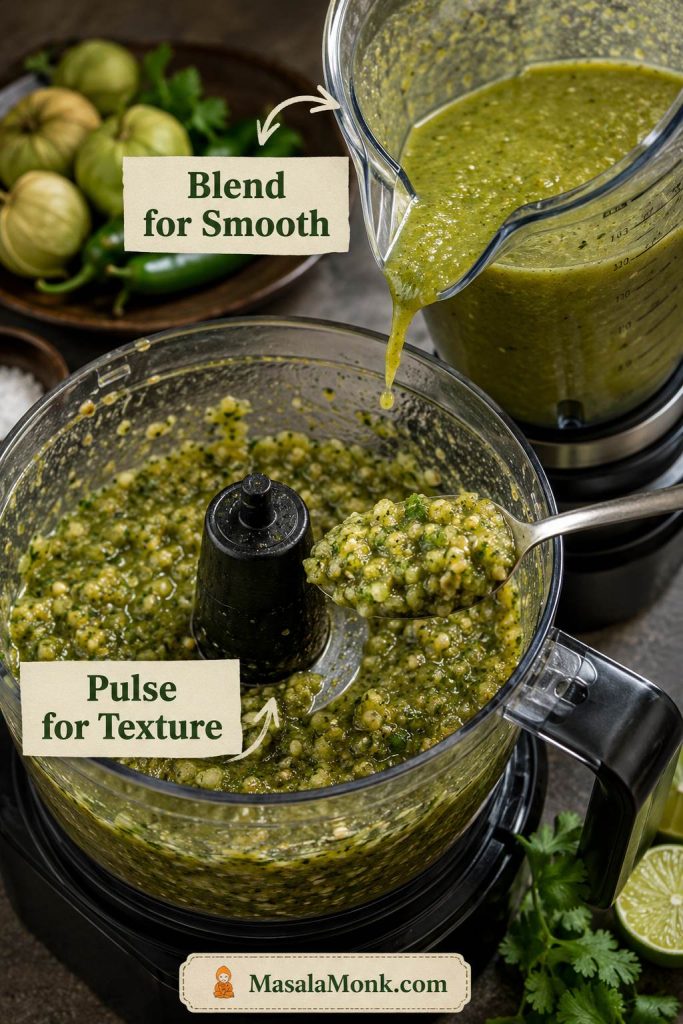
Blender or food processor? Use a food processor for a lightly textured salsa and a blender for a smoother sauce-style salsa.

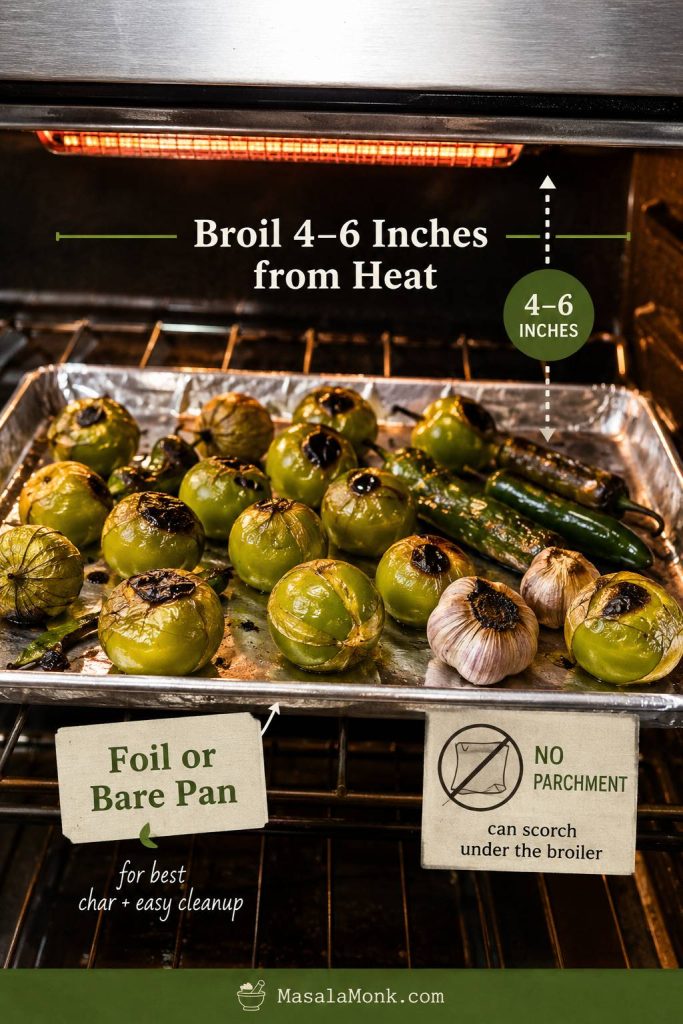
Broiler note: Use foil or a bare rimmed baking sheet under the broiler. Do not place parchment directly under the broiler. Parchment is only for the 450°F oven method when rated for that heat.

Ingredients

  • 1½ pounds tomatillos, husked and rinsed, about 680 g or 12 medium tomatillos
  • 1 to 2 jalapeños or serranos, roughly 15 to 40 g depending on size
  • 2 to 3 garlic cloves, unpeeled for roasting
  • ½ cup chopped white onion, about 70 g
  • ½ cup chopped cilantro leaves and tender stems, about 8 to 12 g
  • 1 to 2 tablespoons fresh lime juice, 15 to 30 ml, to taste
  • ¾ teaspoon fine salt, about 4 g, plus more to taste
  • 1 to 3 tablespoons water, broth, cooking liquid, or pan juices, only as needed

Instructions

  1. Prep the tomatillos. Remove the papery husks and rinse off the sticky coating. Pat dry before roasting.
  2. Set up the pan. Place tomatillos, jalapeño or serrano, and unpeeled garlic cloves on a foil-lined or bare rimmed baking sheet. Halve large tomatillos and place them cut-side down.
  3. Broil the first side. Broil 4 to 6 inches from the heat for 5 to 7 minutes, until the tomatillos begin to blister and soften.
  4. Finish roasting. Use tongs to turn the chile and garlic as needed, then broil another 4 to 6 minutes. The tomatillos may collapse; that is fine. You are looking for browned spots and a tangy-sweet smell instead of a raw, grassy one.
  5. Cool briefly. Let the roasted ingredients cool for a few minutes. Peel the garlic. Stem the chile. Remove seeds for milder salsa.
  6. Rinse the onion, optional. For a cleaner onion flavor, rinse the chopped onion under cold water and drain well.
  7. Blend carefully. Add the roasted tomatillos, chile, garlic, onion, cilantro, 1 tablespoon lime juice, and salt to a blender or food processor. When there is a lot of liquid on the pan, hold some of it back at first.
  8. Set the texture. Pulse until mostly smooth but still lightly textured. Blend longer only for a thinner sauce-style salsa.
  9. Adjust liquid. Add pan juices, water, broth, or cooking liquid 1 tablespoon at a time only when the salsa is too thick.
  10. Taste. Rest 10 to 15 minutes, then taste again. Add salt first when it tastes dull. Add more lime only when it needs brightness.
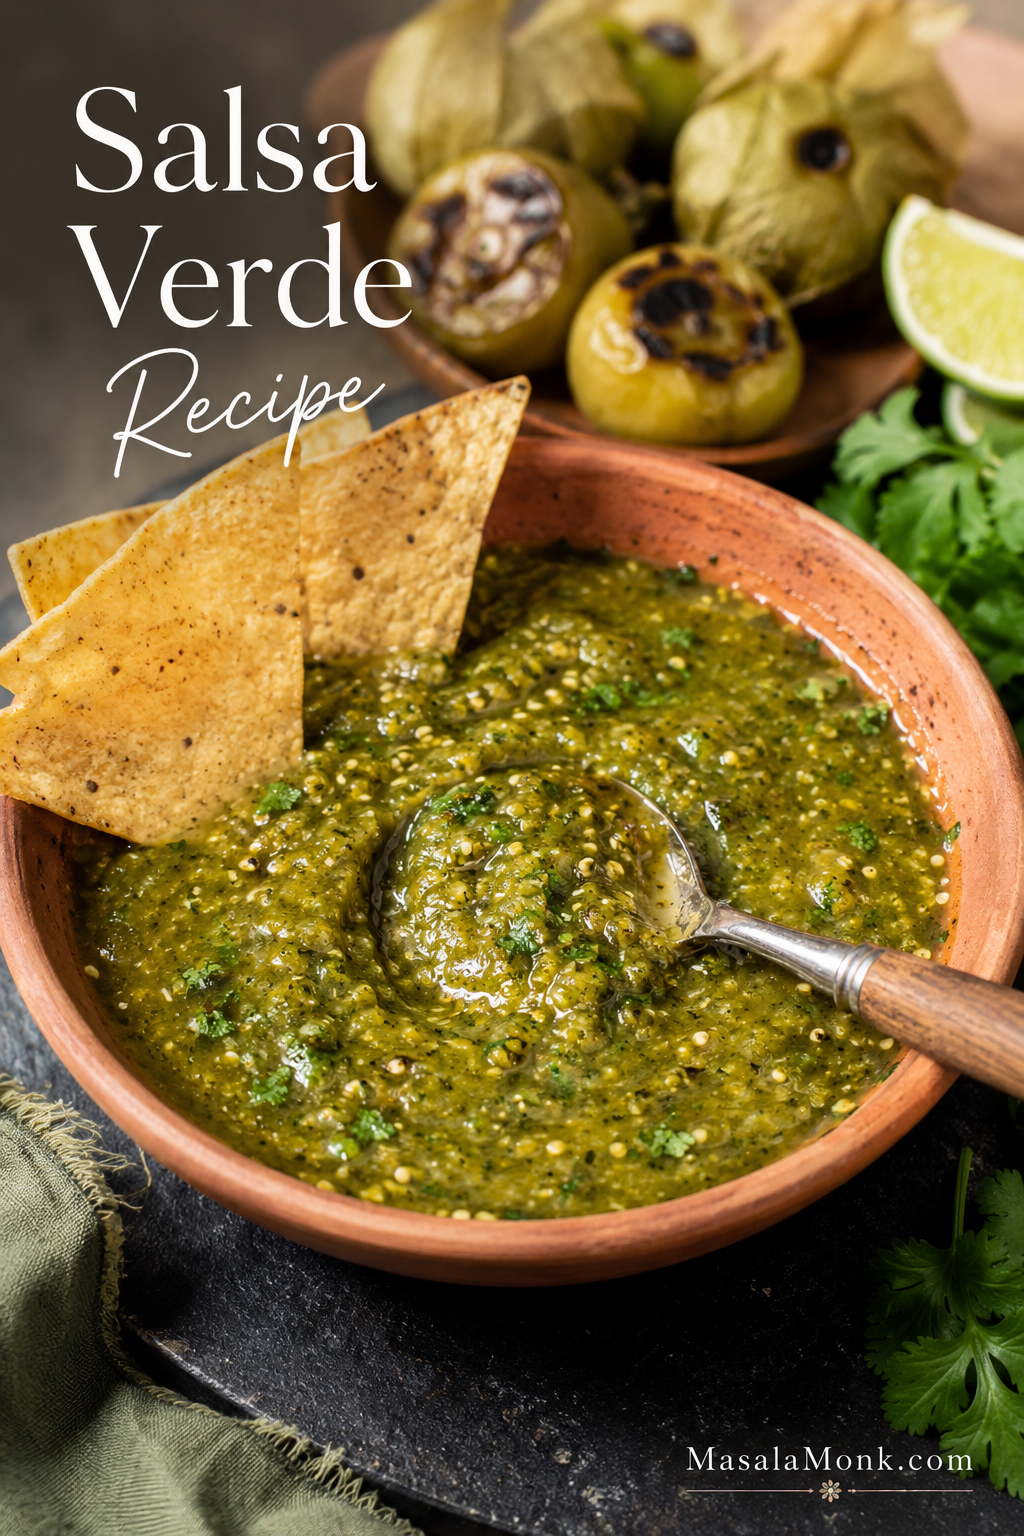
  11. Serve or store. Serve warm, room temperature, or chilled. Refrigerate leftovers in an airtight jar.

Notes

  • For mild salsa, use 1 seeded jalapeño.
  • For medium heat, use 1 whole jalapeño or 1 seeded serrano.
  • For a hot batch, use 2 serranos.
  • Without a broiler, roast at 450°F / 230°C for 15 to 20 minutes. Total time will be closer to 25 to 30 minutes.
  • For storage details, see how to store and freeze it. For shelf-stable jars, read the canning safety note before changing the recipe.

Before broiling, pan setup matters: keep the tomatillos close enough to blister, and use foil or a bare rimmed pan instead of parchment.

Sheet pan of tomatillos, green chile, and garlic under a broiler with guidance for heat distance and foil or bare pan
Broiling close to the heat helps tomatillos blister quickly; meanwhile, foil or a bare pan is safer under the broiler than parchment.

Texture depends on the tool: a food processor keeps the salsa lightly textured, while a blender makes it smoother and more sauce-like.

Salsa verde in a food processor with a spoonful of chunky salsa and a blender nearby for a smoother texture
Use a food processor for lightly textured tomatillo salsa, but use a blender when you want a smoother sauce-style finish.

You can stop with the roasted recipe above and be happy. Everything after this point is optional help for method, texture, heat, and use cases.

Raw, Boiled, Roasted, or Charred?

Once you know the base recipe, the method becomes your style choice: raw for sharp and fresh, boiled for smooth, roasted for balanced, and charred for smoky.

Four bowls of salsa verde showing raw, boiled, roasted, and charred versions with different colors and textures
Once you know the base recipe, the method becomes a style choice: raw is sharp, boiled is smooth, roasted is balanced, and charred is smoky.
MethodHow to Do ItFlavorWorks With
RawBlend raw tomatillos, chile, onion, cilantro, lime, and salt.Sharp, tart, fresh, grassy.Tacos, grilled meats, rich or fatty fillings.
BoiledSimmer tomatillos, chile, and garlic for 5 to 12 minutes, then blend.Smoother, cleaner, softer.Taqueria-style salsa, enchiladas, chilaquiles, chicken.
RoastedBroil 9 to 13 minutes total, or roast at 450°F for 15 to 20 minutes.Balanced, rounded, lightly smoky.The most flexible homemade version.
CharredBroil until deeply blistered, blend, then optionally simmer in 1 tablespoon oil for 2 to 3 minutes.Smoky, deeper, more intense.Restaurant-style salsa, tacos, grilled meats, bold bowls.

If you are unsure, choose roasted. It behaves best on a normal weeknight: bright enough for tacos, thick enough for chips, and rounded enough to spoon over dinner.

If the salsa looks too thick or too loose after blending, check the texture guide before adding more liquid.

Boiled Version

The boiled version is smooth, clean, and useful when you need a green salsa that behaves more like a sauce. Place the tomatillos, chile, and garlic in a saucepan, cover with water, and simmer until the tomatillos turn dull green and soften. This usually takes 5 to 12 minutes depending on size.

Stop when the tomatillos are soft but not completely falling apart. Drain them, save a little cooking liquid, then blend with onion, cilantro, salt, and lime to taste. Add the reserved liquid only as needed. This style is especially good for enchiladas, chilaquiles, simmered chicken, and everyday taco-shop-style salsa.

Tomatillos and green chile simmering in a pot beside a bowl of smooth boiled salsa verde
Boiled salsa verde is smoother and cleaner than roasted salsa, which makes it useful for enchiladas, chilaquiles, simmered chicken, and taqueria-style sauces.

Raw Version

Raw salsa verde, also called salsa verde cruda, is the fastest style. It is bracing and fresh, with a sharper edge than cooked salsa verde. Use it for a fresh taco salsa when a more assertive tomatillo flavor sounds good.

Because raw tomatillos can be quite tangy, taste carefully before adding much lime. Salt is usually more important than extra acid in this version.

Bright raw salsa verde cruda spooned over tacos with raw tomatillos and green chile nearby
Raw salsa verde cruda has the sharpest bite, so it works especially well when rich taco fillings need a clean green finish.

Charred Version

The charred version is for deeper flavor. Let the tomatillos and chiles blister more aggressively under the broiler. After blending, heat 1 tablespoon neutral oil in a saucepan, add the salsa, and simmer it for 2 to 3 minutes. The color will darken slightly and the flavor will become more rounded.

This step is optional, but it is excellent for tacos, grilled meats, chilaquiles, or chicken.

Charred tomatillos, green chiles, garlic, and a bowl of dark smoky salsa verde
Charring deepens the flavor of tomatillo salsa, but the vegetables should look blistered and smoky rather than burned.

Mild, Medium, or Hot

For a table of mixed heat levels, start gentler than your own taste. You can always make the next batch sharper, but once this batch is too hot, you need extra tomatillos, avocado, or crema to bring it back.

Heat LevelUse ThisWorks For
Mild1 seeded jalapeñoKids, parties, chips, mild tacos.
Medium1 whole jalapeño or 1 seeded serranoEveryday salsa with a gentle kick.
Hot2 serranosTacos, grilled meats, spicy bowls.
Very hot3 to 4 serranos, with some seeds includedHeat lovers and bold taqueria-style salsa.

If the batch is already hotter than you wanted, go straight to the too-spicy fix instead of adding water.

Mild, medium, and hot salsa verde bowls with jalapeño and serrano pepper amounts shown as labels
For a crowd-friendly salsa verde, start with jalapeño or a seeded serrano; then move hotter only when you know the table wants it.

If you like building heat with different chiles, MasalaMonk’s pepper sauce guide goes deeper into jalapeño, habanero, chipotle, and other chile-based sauces.

Once the salsa is already blended and too spicy, do not add water first. Water will thin the sauce without softening the burn much. Instead, blend in more cooked tomatillo, avocado, sour cream, Mexican crema, or a little more roasted onion, depending on the flavor you want.

The Right Texture

Good salsa verde should be spoonable, lightly glossy, and a little textured. It should not pour like water, but it should not be stiff like guacamole either.

For chips, keep it medium-thick so it clings. On tacos, it should be spoonable and a little loose, so it runs slightly into the filling. For enchiladas or chilaquiles, thin it with broth, water, or cooking liquid so it coats instead of clumping. Bowls and nachos need a thicker salsa so it does not flood the plate.

Serving temperature changes the way it feels, too. Chilled works best for chips, room temperature is great for tacos, and warm is useful when the salsa acts like a sauce for eggs, chicken, enchiladas, or chilaquiles.

If the texture has already gone wrong, the troubleshooting section covers watery, too thick, bland, bitter, tart, and too-spicy salsa.

Three salsa verde textures labeled thick, spoonable, and saucy for chips, tacos, enchiladas, and chilaquiles
A thicker salsa clings to chips, a spoonable one sits better on tacos, and a looser version spreads more evenly through enchiladas or chilaquiles.

How to Fix the Flavor or Texture

Most salsa problems are not disasters. They are usually small balance issues: too much liquid, not enough salt, too much heat, or tomatillos that were sharper than expected.

ProblemLikely CauseHow to Fix It
Watery salsaToo much liquid, hot salsa not rested, or over-blending.Chill first. If still loose, simmer briefly to reduce or blend in avocado for a creamy style.
Too tartVery sharp tomatillos or too much lime.Add roasted onion, a tiny pinch of sugar, or avocado.
BitterOld tomatillos, over-charred skins, or harsh raw garlic.Add more cooked tomatillo, cilantro, salt, or a little lime. Next time, roast until blistered, not scorched.
Too spicyToo many serranos or too many seeds.Blend in more cooked tomatillo, avocado, crema, sour cream, or roasted onion.
BlandUsually not enough salt.Add salt in small pinches, rest for a few minutes, then taste again.
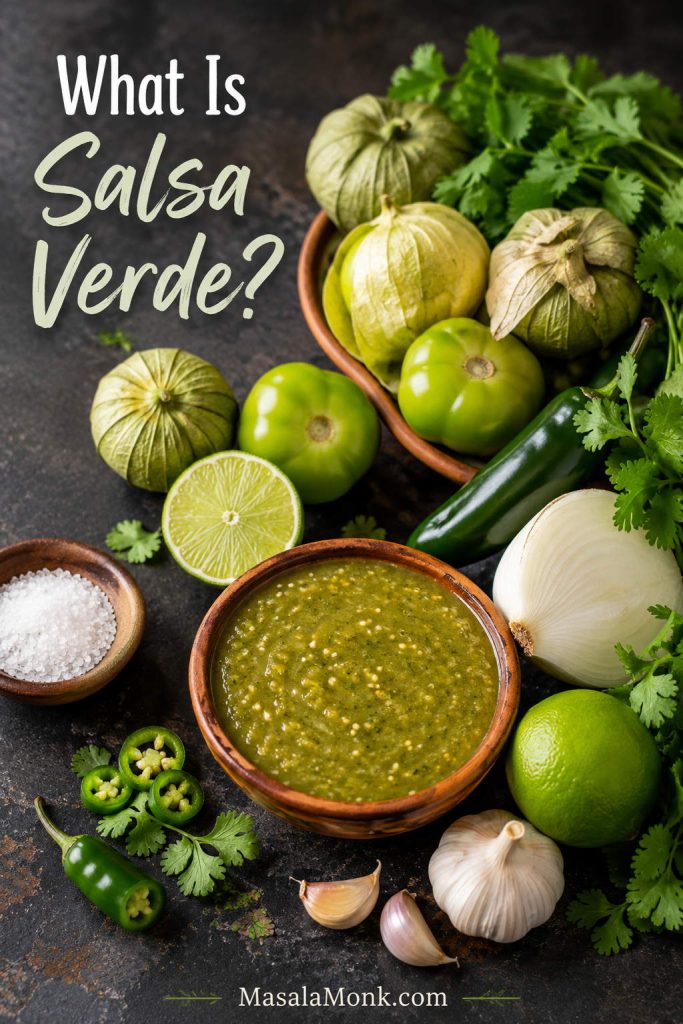
Too thickNot enough liquid or salsa chilled very thick.Add water, broth, cooking liquid, or reserved pan juices 1 tablespoon at a time.
Troubleshooting board for salsa verde with fixes for watery, tart, bitter, spicy, bland, and thick salsa
Most salsa verde problems are balance problems, so the fix is usually small: chill, simmer, salt, thin slowly, or add body instead of starting over.
If you only remember one fix: adjust salt before lime. Under-salted salsa tastes flat, but too much lime can make already-tangy tomatillos taste harsh.

Watery Salsa Verde

Watery salsa verde is usually easy to rescue. Tomatillos release liquid as they cook, and warm salsa can seem thinner than chilled salsa. First, let it cool or refrigerate it for 30 minutes. When it is still too loose, simmer it in a small saucepan for a few minutes until it thickens.

Watery salsa verde simmering in a pan with a spoonful of thicker salsa lifted above the surface
If the salsa looks thin after cooling, a brief simmer concentrates the tomatillo flavor and brings the texture back to spoonable.

For tacos and chips, you want salsa that clings. For enchiladas and chilaquiles, a looser sauce is actually useful.

Bitter or Too Tart

Tomatillos are naturally tart, so add lime slowly. When the salsa tastes too sharp, add roasted onion, a tiny pinch of sugar, or avocado. Avocado is especially helpful because it softens both tartness and heat.

Salsa verde with avocado, roasted onion, cooked tomatillo, cilantro, and lime used to fix bitter or tart flavor
If the sauce tastes too tart or bitter, ingredients with body and sweetness, such as avocado, roasted onion, or cooked tomatillo, can soften the edge.

Bitterness usually comes from old tomatillos, over-charred skins, or too much raw garlic. Next time, use firm fresh tomatillos and roast until blistered and browned in spots, not blackened all over.

Too Spicy

The easiest way to cool down heat is to add body, not water. Cooked tomatillos, avocado, sour cream, Mexican crema, or roasted onion will calm the burn while keeping the sauce useful.

Salsa verde with avocado, crema, roasted onion, and cooked tomatillos used to reduce heat
When the salsa is too spicy, add body with avocado, crema, roasted onion, or more tomatillo instead of thinning the sauce with water.

Served with rich foods like pork, fried eggs, cheese, or grilled chicken, a slightly spicy batch may taste more balanced once it is on the food.

Bland or Flat

When the salsa tastes dull, add salt in small pinches, stir, and wait a minute before tasting again. Once the tomatillo and chile flavor wakes up, you can decide whether it needs more brightness.
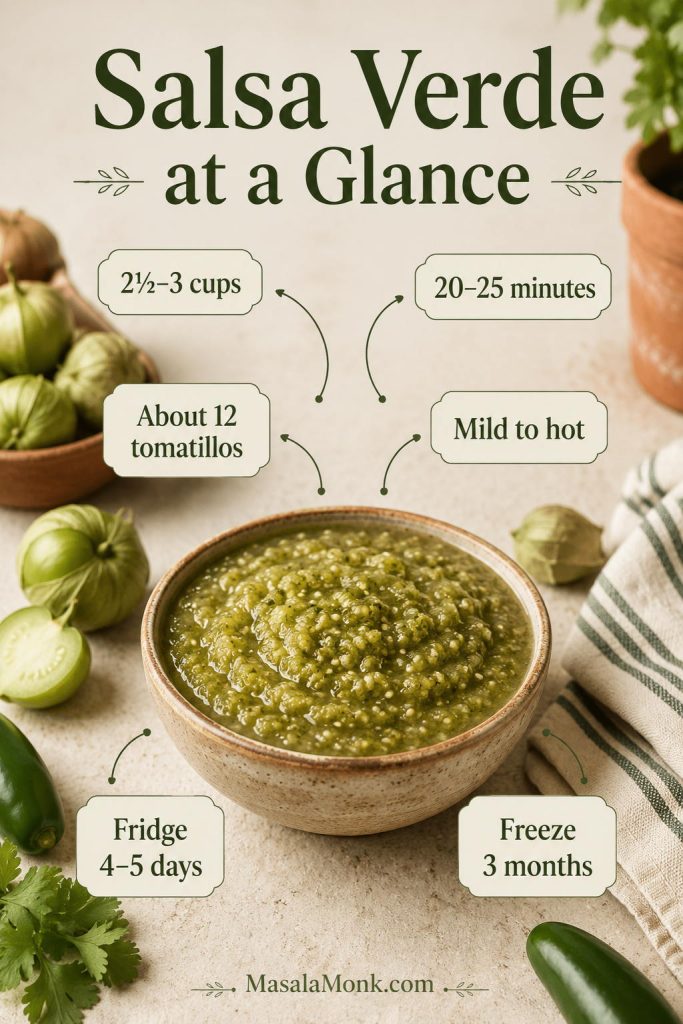
Ways to Use It Beyond Chips

Chips may be the first thing that comes to mind, but this is where the jar starts earning its space in the fridge. It can wake up eggs, rescue leftover chicken, make plain rice or tortillas feel intentional, and turn a simple plate into dinner.

Use the sections below for quick details on tacos, enchiladas, salsa verde chicken, chilaquiles verdes, and eggs, bowls, and nachos.

Salsa verde jar surrounded by tacos, eggs, chicken, chilaquiles, chips, and a bowl meal
Once there is a jar in the fridge, salsa verde becomes the green shortcut for tacos, eggs, chicken, chilaquiles, bowls, nachos, and chips.
UsePractical GuideTexture to Aim For
ChipsServe chilled or room temperature with tortilla chips or vegetables.Medium-thick and scoopable.
TacosUse 1 to 2 tablespoons per taco.Spoonable, bright, salty.
EnchiladasUse about 2 cups for a small 8-inch pan, or 2½ to 3 cups for a 9×13-inch pan.Looser, simmered, saucy.
ChickenUse 1½ to 2 cups salsa for about 1½ pounds boneless chicken.Thicker for spooning, looser for simmering.
ChilaquilesWarm 2 cups salsa with ½ to 1 cup broth or water.Loose enough to coat chips.
EggsUse about ¼ cup warm salsa per serving.Spoonable and warm or room temperature.
Bowls and nachosSpoon over at the end, not too early.Thicker so it does not flood the plate.

That is the real value of a good batch: it starts as salsa, then quietly becomes the sauce that helps you finish the week’s tacos, eggs, bowls, and chicken.

Tacos

On tacos, the salsa should be bold enough to cut through rich fillings. Raw salsa is sharp and fresh. Roasted is more rounded. Charred is excellent with grilled meats, crispy potatoes, mushrooms, chicken, pork, or eggs. It works beautifully on fish tacos when you want a clean, bright topping.

Salsa verde being spooned over tacos with lime, cilantro, onion, and warm tortillas
For tacos, the sauce should be bold enough to cut through the filling while still tasting fresh, tangy, and spoonable.

Enchiladas

For enchiladas, make the salsa looser than you would for chips. Simmer it briefly in a little oil or broth, then use enough to coat the tortillas well. Use about 2 cups for a small 8-inch pan, or 2½ to 3 cups for a 9×13-inch pan, depending on how saucy you like your enchiladas.

Salsa verde being poured over rolled tortillas in a baking dish with a note for a 9 by 13 inch pan
For enchiladas, make salsa verde looser than a dip so it can coat the tortillas evenly instead of sitting in thick clumps.

Salsa Verde Chicken

Salsa verde chicken is one of the easiest ways to turn this sauce into dinner. Use 1½ to 2 cups for about 1½ pounds boneless chicken, whether you simmer raw chicken until cooked through or spoon the sauce over sliced baked chicken breast.

Once shredded, the chicken works in tacos, bowls, nachos, quesadillas, or enchilada filling.

Shredded chicken tossed with salsa verde in a skillet with tortillas nearby
Salsa verde chicken is an easy dinner shortcut because the sauce seasons shredded chicken and turns it into filling for tacos, bowls, nachos, or enchiladas.

Chilaquiles Verdes

Chilaquiles verdes need a looser sauce than tacos. Warm 2 cups salsa with ½ to 1 cup broth or water, then add tortilla chips just long enough to coat them. Keep the chips slightly tender but not completely mushy. Finish with eggs, crema, onion, cilantro, and cheese if you like.

Chilaquiles verdes in a skillet with tortilla chips, salsa verde, egg, crema, cilantro, onion, and cheese
For chilaquiles verdes, warm the sauce first so the chips get coated quickly without soaking until they collapse.

Eggs, Bowls, and Nachos

With eggs, this salsa tastes best slightly warm or at room temperature. It is also a strong add-on for breakfast burritos, especially with eggs, potatoes, cheese, beans, or chorizo. For bowls and nachos, keep it thicker so it acts like a topping instead of a puddle.

Breakfast burrito filled with eggs, potatoes, beans, and cheese with salsa verde spooned over the top
Salsa verde wakes up eggs, potatoes, beans, and breakfast burritos, especially when the sauce is served slightly warm or at room temperature.

Creamy, Avocado, Green Tomato, and Hatch Chile Versions

Once the base salsa tastes balanced, the variations become easy. You are not starting over — you are simply changing the richness, heat, or chile character.

Because creamy and avocado versions store differently, check the storage notes before making a large batch.

Creamy Version

To make it creamy, blend ½ cup sour cream or Mexican crema into 1½ to 2 cups cooled salsa. This makes a softer taco sauce that is especially good with grilled chicken, fish tacos, potatoes, roasted vegetables, and breakfast burritos.

Do not can creamy salsa verde. Dairy changes the safety and storage rules. Keep it refrigerated and use it within 2 to 3 days.

Avocado Version

Avocado turns the sauce richer and softer. Blend 1 ripe avocado into 1½ to 2 cups cooled salsa, then thin it one tablespoon at a time only when needed. This is a good fix for a batch that tastes too sharp or too spicy.

Avocado salsa verde is best eaten the same day or within 1 to 2 days. Press plastic wrap directly against the surface before refrigerating to slow browning.

Two bowls of salsa verde showing a pale creamy version and a thicker avocado version with avocado, lime, cilantro, and roasted tomatillos
Creamy salsa verde tastes softer and tangier with crema, while avocado salsa verde becomes richer and helps tame sharpness or heat.

Green Tomato Version

Tomatillos are best for classic Mexican salsa verde. Green tomatoes can make a tangy green salsa, but the flavor is different: more tomato-like, less fruity, and often less naturally bright. Use green tomatoes as a variation when you have them, not as the first choice for this recipe.

When using green tomatoes, roast them well and taste carefully. They may need more lime, salt, or chile to get the same lively balance.

Finished tomatillo salsa and green tomato salsa in separate bowls with tomatillos, husks, sliced green tomatoes, cilantro, and lime
Green tomato salsa can work as a variation, but tomatillos give classic salsa verde its brighter, fruitier tang.

Hatch Green Chile Version

Roasted Hatch green chiles give the salsa a deeper green-chile flavor. Start with ¼ to ½ cup chopped roasted green chile for this batch, then adjust to taste. Hatch chiles can vary widely in heat, so taste before adding extra serrano or jalapeño.

Roasted Hatch green chiles being added to a bowl of salsa verde with tomatillos, cilantro, lime, and salt nearby
Hatch green chiles add deeper roasted chile flavor, so start with a small amount and taste before adding more heat.

For a sweeter, fruitier salsa for tacos, fish, shrimp, or grilled chicken, MasalaMonk’s mango salsa recipe is the better direction. This salsa is tangy and green; mango salsa is juicy, chunky, and fruit-forward.

Salsa Verde and Other Green Sauces

“Salsa verde” simply means green sauce, so different cuisines use the name for different things. The table below is not saying these sauces are interchangeable. It is here to help you recognize which green sauce a recipe or restaurant menu might mean.

SauceMain IngredientsWorks With
Mexican salsa verdeTomatillos, green chiles, onion, garlic, cilantro, salt, sometimes lime.Tacos, chips, enchiladas, chicken, eggs, chilaquiles.
Italian salsa verdeParsley, capers, garlic, olive oil, vinegar or lemon, sometimes anchovy.Fish, steak, roasted vegetables, boiled meats.
Peruvian aji verdeCilantro, green chile or aji amarillo-style heat, lime, mayo or cheese-style creaminess.Roast chicken, fries, grilled meats, rice bowls.
Chile verdeUsually pork or meat cooked with green chiles and tomatillo-style sauce.A stew or main dish, not just a table salsa.

How to Store and Freeze It

Store the salsa in an airtight jar or container in the refrigerator. Plain salsa verde is often even better after 30 minutes to a few hours because the salt, chile, cilantro, and tomatillo flavors settle together.

If you want shelf-stable jars instead of refrigerator salsa, read the canning safety section before changing the ingredients or acid.

Storage MethodHow LongStorage Tip
Refrigerator4 to 5 daysKeep it in a clean airtight jar and stir before serving.
FreezerUp to 3 monthsFreeze in small portions so you can thaw only what you need.
Avocado or creamy version1 to 2 days for avocado, 2 to 3 days for creamyKeep refrigerated and do not freeze if texture matters.
Salsa verde stored in a refrigerator jar, freezer containers, freezer bag, and ice cube tray with storage time labels
Plain salsa verde stores well in the refrigerator and freezer, but add avocado, sour cream, or crema only after thawing for the best texture.

Freeze the plain version before adding avocado, sour cream, or crema. Dairy and avocado versions do not freeze as cleanly and can turn grainy or dull after thawing. When the salsa smells off, looks fizzy, shows mold, or changes in a way that makes you unsure, throw it out.

Can You Can Salsa Verde?

Important: This fresh salsa verde recipe is for the refrigerator or freezer. Do not water-bath can this exact recipe unless you are following a tested canning formula with the correct acid level, jar size, headspace, and processing time.
Canning safety graphic with fresh salsa verde, bottled lime juice, jars, canning equipment, and notes to refrigerate or freeze this recipe
Fresh salsa verde belongs in the refrigerator or freezer unless you are using a tested canning recipe with verified acid, jar, and processing guidance.

Shelf-stable salsa is different from fresh salsa. Tomatillos are acidic, but salsa also contains low-acid ingredients like onions, garlic, and chiles. Safe canning recipes use tested ratios and added acid. The National Center for Home Food Preservation provides a tested tomatillo green salsa formula with measured tomatillos, chiles, onions, and bottled lemon or lime juice. New Mexico State University also publishes salsa canning guidance with tested processing information.

For shelf-stable salsa verde, use a tested canning recipe from a university extension, NCHFP, USDA-style source, or another reputable canning authority. Do not simply add vinegar or lemon juice to this fresh recipe and assume it is safe. Do not change the tomatillo, onion, chile, or acid ratios in a tested canning recipe unless the source specifically says that change is safe.

FAQs

Is salsa verde the same as green salsa?

In Mexican cooking, salsa verde usually means green salsa made with tomatillos and green chiles. The phrase can mean different green sauces in other cuisines, so “Mexican salsa verde” or “tomatillo salsa verde” is the clearer name.

Are tomatillos the same as green tomatoes?

Tomatillos and green tomatoes are different ingredients. Tomatillos have papery husks and a tart, fruity flavor, while green tomatoes are unripe tomatoes. You can make a green tomato salsa, but it will not taste exactly like classic tomatillo salsa verde.

Do you have to cook tomatillos?

You do not have to cook them. Raw salsa verde is sharp and fresh, boiled salsa verde is smooth and clean, roasted salsa verde is rounder, and charred salsa verde tastes deeper and smokier. When in doubt, roast them first; it is the easiest method to love.

Is roasted or boiled better?

Roasted is usually the most flexible homemade version because it tastes rounder and lightly smoky. Boiled is smoother and cleaner, which makes it excellent for taqueria-style salsa, enchiladas, chilaquiles, and simmered chicken.

Is it spicy?

The heat depends on the chile. Start with one seeded jalapeño for a gentle batch, especially when serving a crowd. You can always add more heat next time.

How do I make it less spicy?

The easiest way to cool down the heat is to add body, not water. Blend in more cooked tomatillo, avocado, sour cream, Mexican crema, or roasted onion. Plain water will thin the salsa without balancing the burn very much.

Can I use it as enchilada sauce?

For enchiladas, make the salsa looser than you would for chips. Simmer it briefly, then use enough to coat the tortillas well: about 2 cups for a small 8-inch pan, or 2½ to 3 cups for a 9×13-inch pan.

Why is my salsa verde watery?

Watery salsa usually has too much added liquid or has not cooled yet. Chill it first. If it is still loose, simmer it briefly to reduce. For a creamy fix, blend in avocado instead.

Why is my salsa verde bitter?

Bitterness can come from old tomatillos, over-charred skins, or too much harsh raw garlic. Add more cooked tomatillo, cilantro, salt, or a little lime. Next time, roast until blistered and browned in spots, not blackened all over.

Can I make it without cilantro?

You can leave cilantro out if it is not your thing. The flavor will be less classic, but the salsa can still work with enough chile, onion, lime, and salt. Flat-leaf parsley gives a green herb note, but it will not taste the same.

Can I use canned tomatillos?

Fresh tomatillos are best, but canned tomatillos can help when that is what you have. Drain them well, then blend with chile, onion, garlic, cilantro, lime, and salt. The flavor is usually softer, so taste carefully before serving.

Can I freeze it?

Plain salsa freezes well in small portions for up to 3 months. Thaw it in the refrigerator and stir before serving. Add avocado, sour cream, or crema after thawing, not before freezing.

Can I can this recipe?

This is a fresh refrigerator/freezer recipe, not a canning formula. For shelf-stable canning, use a tested recipe with the correct acid, jar size, headspace, and processing time from a reputable canning authority.

What is the difference between salsa verde and chile verde?

Salsa verde is a green salsa or sauce. Chile verde usually refers to a cooked dish, often pork or another meat simmered with green chiles and tomatillo-style sauce. They are related, but they are not the same thing.

Once you make salsa verde this way, you will start noticing how many meals need it. Keep it thick for chips and tacos, loosen it for enchiladas or chilaquiles, or blend in avocado when you want something softer and creamy. After a few batches, you will know your house style: raw and sharp, boiled and smooth, roasted and round, or charred and smoky. The best version is the one your table keeps reaching for first.

Used table scene with a bowl and jar of salsa verde, tacos, tortilla chips, lime wedges, tortillas, and grilled chicken
After a few batches, salsa verde becomes a house sauce: keep it chunky for tacos, loosen it for saucy meals, or adjust the method until it fits your table.

Back to top

Posted on — 1 Comment

Pad Kra Pao Recipe: Thai Basil Chicken, Pork, or Beef: Thai Basil Chicken, Pork, or Beef

Finished Pad Kra Pao rice plate with glossy basil minced meat, red chilies, fluffy white rice, lime, and a crispy fried egg on a dark plate.

Pad Kra Pao is the Thai rice plate you want when dinner needs to be fast but still loud: garlic in hot oil, chilies, glossy minced meat, fresh basil, steamed rice, and a crispy fried egg that breaks into the sauce.

It is bold without being complicated. Once the rice is ready and the sauce is mixed, the stir-fry itself takes only a few minutes, which is why this dish works so well for weeknights, leftovers, and those “I want takeout, but I can cook” nights.

You may know this dish as Thai basil chicken, pad krapow, pad ka pow, kra pao, or holy basil chicken. The names and spellings vary, but the craving is usually the same: a spicy basil stir-fry that tastes fresh, savory, chili-hot, and glossy.

Here, you can make it with chicken, pork, or beef, then use the same base for tofu or eggplant. You will also see what to do if you only have Thai basil instead of holy basil, how to adjust the sauce, and how to fix the common problems that make homemade Pad Kra Pao taste flat, salty, or dry.

Quick Answer: What Is Pad Kra Pao?

Pad Kra Pao is a Thai basil stir-fry made with garlic, chilies, meat or tofu, a salty-savory sauce, and basil. It is usually served over rice, often with a crispy fried egg on top.

If you came here looking for Thai basil chicken, this is the same dish family. Thai basil chicken is the version many people know from Thai restaurants: minced or chopped chicken stir-fried with garlic, chilies, basil, and sauce, then spooned over rice.

The most traditional version is made with holy basil, which has a sharper, peppery, clove-like aroma. Thai basil gives a different but still excellent home version: sweeter, more anise-like, and closer to many restaurant-style Thai basil chicken plates outside Thailand.

Best quick version: Use 450g / 1 lb ground chicken, pork, or beef; 5–8 garlic cloves; 3–6 chilies; 1½–2 cups basil leaves; and a sauce made with oyster sauce, fish sauce, soy sauce, dark soy, sugar, and a little water or stock. Stir-fry hot and fast, add basil at the end, and serve over rice with a crispy fried egg.

Need exact measurements? See the sauce ratio or jump to the recipe card.
Labeled Pad Kra Pao plate with basil stir-fry, white rice, and crispy fried egg callouts.
If you know this dish as Thai basil chicken, the idea is the same: a fast garlic-chili basil stir-fry made to land on rice, usually with a crispy fried egg on top.

Why This Pad Kra Pao Works

The flavor does not come from marinating or simmering. It comes from a hot pan, crushed garlic and chilies, meat that sizzles instead of steams, sauce that reduces until glossy, and basil added right at the end.

Keep those five things in place and the dish tastes bold even with practical substitutions. When it works, the pan smells sharp with garlic and chilies, the meat looks shiny instead of wet, and the basil hits at the end with a fresh, peppery lift.

That rhythm is the whole dish: hot, sharp, glossy, fresh.

Pad Kra Pao, Pad Krapow, Pad Ka Pow: Why So Many Spellings?

You may see this dish written as pad kra pao, pad krapow, pad ka pow, pad ka prao, pad gaprao, phat kaphrao, kra pao, or gai pad krapow. These spellings come from different ways of transliterating Thai into English.

For a home cook, the idea is simpler than the name: a hot, fast basil stir-fry with garlic, chilies, sauce, rice, and usually a fried egg. Here, we’ll call it Pad Kra Pao for consistency, but if a menu uses another spelling, you are still in the right place.

Editorial spelling guide for Pad Kra Pao with terms pad krapow, pad ka pow, pad gaprao, and a small plated basil stir-fry.
Because Thai names are transliterated several ways, pad kra pao, pad krapow, pad ka pow, and pad gaprao usually lead readers to the same basil-heavy stir-fry family.

Holy Basil vs Thai Basil

The basil question matters because it changes the flavor of the dish. It should not stop you from cooking, though.

Strictly speaking, holy basil is what gives Pad Kra Pao its name and sharper, peppery character. Thai basil is the easiest excellent home-cook route: not identical, but fresh, aromatic, easy to find, and deeply satisfying in this garlic-chili rice plate. For a deeper Thai cooking perspective on the dish, see this explanation from Hot Thai Kitchen.

Comparison board showing holy basil and Thai basil leaves with flavor notes beside a small Pad Kra Pao dish.
Holy basil gives Pad Kra Pao its sharper traditional bite; however, Thai basil is often the easiest excellent route for a home-style Thai basil chicken plate.

Holy Basil

Holy basil is the most traditional choice for Pad Kra Pao. It has a sharper, peppery, slightly clove-like flavor. If you can find Thai holy basil at an Asian grocery store, use it.

The leaves wilt quickly, so add them at the very end. Do not simmer them for several minutes or the aroma will fade.

Thai Basil

For most home cooks, Thai basil is the easiest reliable substitute. Its aroma is sweeter and more anise-like than holy basil, and it is easier to find in many places.

Many restaurant-style Thai basil chicken recipes use Thai basil, so the flavor will still feel familiar and satisfying. If you are cooking this on a normal weeknight, do not let the basil question stop dinner.

Sweet Basil

Sweet basil, also called Italian basil, will not taste the same as holy basil or Thai basil. Still, it can work when that is all you have.

The result will taste softer, sweeter, and less peppery. It may lean slightly toward a regular basil stir-fry rather than classic Pad Kra Pao, but it is better to make a good basil rice plate than to skip the dish completely.

Can You Use Tulsi?

Tulsi is related to holy basil, but it is not always a simple one-for-one replacement in cooking. Depending on the variety, it can taste medicinal, bitter, or very strong when used in large amounts.

If you want to try tulsi, use a smaller amount first and mix it with Thai basil or sweet basil if possible. Fresh basil in a hot pan is still better than waiting for the perfect herb and never cooking the dish.

Whatever basil you use, wash the leaves ahead of time and dry them well. Wet basil can splutter in the pan and add extra moisture right when you want the sauce to stay glossy.

Sweet basil and tulsi fallback herb board with notes about softer flavor and careful tulsi use.
When holy basil and Thai basil are not available, fresh herbs still help; sweet basil makes the dish softer, while tulsi should be used lightly because its flavor can turn strong.
Simple basil rule: use holy basil if you can get it, Thai basil when you want the easiest excellent home version, sweet basil only if that is what you have, and tulsi carefully.

Already know your basil choice? Go to the ingredients.
Decision board comparing holy basil, Thai basil, sweet basil, and tulsi for Pad Kra Pao.
Use the best basil you can find, but do not pause dinner over the herb question; the bigger win is keeping the garlic-chili-basil structure intact.

Ingredients You Need

Pad Kra Pao is short on ingredients, but every ingredient has a job. Think of them in two groups: the loud things that wake up the pan — garlic, chilies, basil — and the salty-sweet sauce that makes the rice worth eating.

Overhead Pad Kra Pao ingredient map with protein, garlic, chilies, basil, sauce ingredients, rice, egg, and shallot.
The ingredients work in groups: protein catches the sauce, garlic and chilies wake up the pan, basil finishes fresh, and rice plus egg turn it into dinner.

Chicken, Pork, Beef, Tofu, or Eggplant

Ground meat is easiest because it cooks quickly and catches the sauce well. Use ground chicken, ground pork, ground beef, or finely chopped boneless meat. Hand-chopped chicken thigh gives a slightly chunkier, more restaurant-style bite.

For the main recipe, use 450g / 1 lb meat. If your pack is 500g, that is fine. You may need a small extra handful of basil or a splash more water, but do not automatically increase every sauce ingredient.

You do not need to marinate the meat. The flavor comes from the hot garlic-chili base, the sauce reducing onto the meat, and the basil added at the end.

Pork gives the juiciest, most classic-feeling version. Chicken is the version many people recognize from Thai restaurant menus. Beef gives a deeper, richer stir-fry.

Garlic and Chilies

Do not be shy with garlic. Pad Kra Pao should taste bold.

Use 5–8 garlic cloves for 450g / 1 lb meat. For heat, use 3–6 Thai bird chilies, or use 2–4 Indian green chilies if that is what you have. For a mild family version, start with 1 Thai chili or 1 small green chili, then add extra chopped chilies at the table.

Shallots are optional. They add a little sweetness and body, but the dish still works without them.

A mortar and pestle gives the strongest aroma because it crushes the garlic and chilies instead of only cutting them. Finely chopping with a knife also works. The goal is rough, fragrant pieces, not a watery paste.

Garlic and chili guide with crushed garlic, Thai bird chilies, Indian green chilies, optional shallots, and a heat spectrum.
Garlic and chilies are not background flavor here; instead, they create the sharp first hit that keeps Pad Kra Pao from tasting like a regular soy-sauce stir-fry.

Sauce Ingredients

The sauce usually includes oyster sauce, fish sauce, light soy sauce, optional dark soy sauce, sugar, and a little water or stock.

Oyster sauce gives body and savory sweetness. Fish sauce gives salty depth. Light soy adds more salt and umami. Dark soy adds color, but the dish can still work without it. Sugar rounds the heat and salt.

For a vegetarian version, use vegetarian oyster sauce or mushroom sauce, replace fish sauce with light soy sauce, and keep the sugar modest because many mushroom sauces are already slightly sweet.

Pad Kra Pao sauce ingredients board with oyster sauce, fish sauce, light soy, dark soy, sugar, and water or stock role labels.
Oyster sauce gives body, fish sauce adds depth, soy brings umami, and a splash of water or stock helps the sauce coat instead of clump.

Rice and Crispy Fried Egg

Serve it over hot rice so the sauce has somewhere to land. Jasmine rice gives the most classic feel, but plain steamed rice, basmati, or even leftover rice will still do the job.

The crispy fried egg is optional only in the technical sense. In practice, it makes the plate feel complete. The runny yolk mixes with the salty basil stir-fry and rice, while the crisp edges add texture. If the egg yolk runs into the rice, that is not a problem. That is the point.

Pad Kra Pao rice plate with glossy basil meat, fluffy rice, a lacy crispy fried egg, and a close-up egg texture inset.
The crispy fried egg is more than garnish; once the yolk runs into hot rice, it softens the salty chili-basil stir-fry into a satisfying plate.

Easy Substitutions for Indian and Everyday Kitchens

Missing one bottle should not kill the dish. Losing the garlic-chili-basil structure will.

The goal is not to fake perfection. It is to keep the core of the dish intact with what you can actually buy.

Pad Kra Pao substitutions board for Indian kitchens with basil, green chilies, sauces, chicken keema, garlic, and a skillet or kadai cue.
Even with everyday swaps, keep the structure intact: fresh basil, sharp chilies, a salty-savory sauce, and a hot wide pan.
If You Do Not Have… Use This What Changes
Holy basil Thai basil Sweeter and more anise-like, but still excellent
Thai basil Sweet basil Softer and less peppery; still fresh and usable
Thai bird chilies Indian green chilies or serrano chilies Heat is less sharp, but the recipe still works
Dark soy sauce Skip it, or use a tiny extra splash of light soy Less dark color, but the flavor is still good
Fish sauce Light soy sauce plus a pinch of mushroom seasoning Less funky depth, but still savory
Oyster sauce Vegetarian oyster sauce or mushroom sauce Best vegetarian replacement for body and umami
Jasmine rice Plain steamed rice Less fragrant, but perfectly usable
Ground chicken Chicken keema or finely chopped boneless thigh Similar texture; chopped thigh stays juicier
Wok Wide skillet or wide kadai Works well if the pan is hot and not crowded

If your regular soy sauce is very dark and salty, use it like light soy sauce and skip the dark soy. Some supermarket soy sauces do not map neatly to “light soy” and “dark soy,” so taste and adjust gently.

The biggest substitution mistake is not using the “wrong” basil. It is crowding the pan and boiling the meat instead of stir-frying it. A hot, wide pan matters more than having every bottle exactly right.

Once your swaps are sorted, check the sauce ratio before you start cooking.

Best Pan and Equipment for Pad Kra Pao

A wok gives you quick heat and fast evaporation, but a wide skillet works very well for home cooking.

Use a 12-inch / 30cm skillet if you do not have a wok. A wide kadai can also work if it gives the meat enough surface area. Avoid using a small deep pan for a full batch because the meat will steam and release liquid.

For nonstick pans, use medium-high heat instead of the highest possible heat. For a wok or stainless-steel skillet, high heat is fine as long as you keep the food moving.

You will also need a small bowl for the sauce, a knife or mortar and pestle for the garlic and chilies, and a small frying pan if you are making crispy eggs.

Pan rule: the meat should sizzle, not steam. If the pan sounds quiet and wet, it is not stir-frying yet.
Best pan guide showing wok, wide skillet, and wide kadai with a sizzle versus steam cue for Pad Kra Pao.
A wide hot pan is the difference between stir-fried and steamed meat; therefore, listen for a real sizzle before adding the sauce.

If your pan setup is ready, go straight to the method.

Pad Kra Pao Sauce Ratio

The sauce should cling to the meat first and season the rice second. It should look glossy, not soupy.

When the sauce hits the pan, it should bubble hard almost immediately. When it looks like the rice underneath will want a spoonful of it, but the pan is not swimming, you are in the right zone.

Texture comparison board showing too wet Pad Kra Pao versus just-right glossy meat with basil and chilies.
The best texture is glossy and spoonable, not soupy; once the sauce clings to the meat, it flavors the rice without flooding the plate.

Balanced Sauce for 450g / 1 lb Meat

Ingredient Amount What It Does
Oyster sauce 1 tbsp / 15 ml Adds savory body and slight sweetness
Fish sauce 1 tbsp / 15 ml Gives salty, Thai-style depth
Light soy sauce 1 tbsp / 15 ml Adds salt and umami
Dark soy sauce 1–2 tsp / 5–10 ml, optional Adds color and deeper flavor
Sugar 1 tsp / about 4g Rounds the salt and chili heat
Water, chicken stock, or vegetable stock 2–3 tbsp / 30–45 ml Helps the sauce coat the meat
Saveable Pad Kra Pao sauce ratio card with measured oyster sauce, fish sauce, light soy, dark soy, sugar, and water or stock.
This Pad Kra Pao sauce ratio is built for 450g or 1 lb of meat, so the sauce should cling to the mince and lightly season the rice below.

Lower-Salt Sauce Ratio

If your fish sauce, soy sauce, or oyster sauce tastes especially salty, use this version first.

Ingredient Amount
Oyster sauce 1 tbsp / 15 ml
Fish sauce 2 tsp / 10 ml
Light soy sauce 2 tsp / 10 ml
Dark soy sauce 1 tsp / 5 ml, optional
Sugar 1 tsp / about 4g
Water, chicken stock, or vegetable stock 2 tbsp / 30 ml
Lower-salt Pad Kra Pao sauce ratio card with smaller fish sauce and soy sauce amounts for salty sauce brands.
If your fish sauce or soy sauce tastes very salty, start lower; then, after cooking, balance the plate with rice, lime, or a small extra splash of sauce.

Sauce brands vary, especially oyster sauce and soy sauce. If yours tastes very salty or very sweet straight from the bottle, start with the lower-salt ratio and adjust after cooking.

Taste after cooking. If the stir-fry is too salty, serve it with more rice and reduce fish sauce next time. If it tastes flat, it may need more garlic, chili, basil, or a better salt-sugar balance.

Once the sauce is mixed, move to the cooking method.

How to Make Pad Kra Pao

Pad Kra Pao cooks quickly, so the method is more about timing than difficulty. Once everything is lined up, the cooking feels fast rather than stressful.

Before turning on the stove, have the sauce mixed, basil picked and dried, garlic and chilies chopped, rice cooked, and eggs ready to fry. Once the pan is hot, there is not much time to stop and measure.

Pad Kra Pao prep setup with mixed sauce, basil, chopped garlic and chilies, cooked rice, and eggs on a dark surface.
Because Pad Kra Pao moves fast, prep the sauce, basil, aromatics, rice, and eggs first; then the cooking feels quick instead of chaotic.

Cook the Rice First

Start the rice before you cook the stir-fry. Once the garlic and chilies hit the pan, the dish moves fast.

Jasmine rice is the classic choice, but any plain steamed rice will work. If rice timing or water ratios are the part that usually slows you down, MasalaMonk’s guide to cooking perfect rice can help you get the base ready before the stir-fry starts. Avoid heavily seasoned rice because the stir-fry already has plenty of salt, chili, garlic, and basil.

Mix the Sauce Before You Start

Stir the oyster sauce, fish sauce, soy sauces, sugar, and water or stock in a small bowl.

Measure the sauce first, because garlic can burn while you are still looking for bottles.

Pound or Chop Garlic and Chilies

For the strongest aroma, pound garlic and chilies together in a mortar and pestle until roughly crushed. You do not need a smooth paste.

If you do not have a mortar and pestle, finely chop everything with a knife. A mini chopper also works, but stop before the mixture turns wet and pasty.

Fry the Crispy Egg

For each serving, use one egg. Heat 2–3 tablespoons of oil in a small pan, then fry the eggs one at a time or in batches. Add a little more oil between eggs only if the pan gets dry.

Crack in the egg and spoon hot oil over the whites until the edges are crisp and lacy. Keep the yolk runny if you like the classic rice-plate effect.

You can fry the eggs before the stir-fry and set them aside, or fry them right after the stir-fry if you prefer the egg hot from the pan.

Crispy fried egg technique board with hot oil, lacy golden edges, runny yolk, and spooning oil over the whites.
For a Thai-style crispy egg, hot oil matters; spoon it over the whites so the edges turn lacy while the yolk stays rich.

Stir-Fry the Meat Hot and Fast

Heat a wok over high heat, or use medium-high heat if you are cooking in a nonstick skillet. Add oil, then the garlic, chilies, and optional shallots.

The garlic and chilies should become fragrant within seconds. Do not let the garlic turn dark brown. This is the point where the kitchen should smell sharp, garlicky, and a little wild.

Garlic and sliced red and green chilies sizzling in oil in a wok with a spatula.
This is the aroma stage, so move quickly: the garlic should smell sharp and toasty before it gets dark.

Add the meat and break it up as it cooks. It should sizzle, not sit in liquid. If it releases moisture, spread it across the pan and keep cooking until most of that moisture evaporates.

If you add the sauce while the pan is still watery, the finished dish can taste boiled instead of stir-fried.

Before-and-after pan comparison showing wet minced meat versus moisture-cooked-off meat ready for sauce.
Add sauce only after the released moisture cooks off; otherwise, Pad Kra Pao turns boiled and watery instead of glossy.

If your pan is already looking wet, jump to the troubleshooting guide before adding basil.

Add Sauce and Reduce Until Glossy

Pour in the sauce and toss well. It should bubble quickly, coat the meat, and tighten around the pieces instead of pooling underneath.

If the pan looks dry, add 1–2 tablespoons of water or stock. If the pan looks soupy, keep cooking over high heat for another minute before adding basil.

The finished meat should look shiny and loose, not wet or clumpy.

Add Basil at the End

Turn the heat down or off, then add the basil leaves. Toss just until wilted.

Once the basil hits the hot meat, the whole pan should wake up. Long cooking dulls that aroma, so let the leaves collapse into the stir-fry and stop there.

Sequential board showing sauce bubbling into minced meat, coating the meat, and fresh basil added last.
Sauce goes in before basil because it needs heat to reduce; meanwhile, basil should only wilt at the end so the aroma stays fresh.

Serve Immediately

Spoon the basil stir-fry over hot rice. Add a crispy fried egg, cucumber slices, and lime if you like.

The first bite should be hot, salty, fresh, and softened by rice and yolk. This is not a dish that improves by sitting around, so serve it while the basil still smells alive.

Step-by-step Pad Kra Pao board with sauce, basil, garlic and chilies, stir-fried meat, sauce, basil, and a finished rice plate.
The method is simple when the order is clear: prep first, cook aromatics, brown the meat, reduce the sauce, then add basil right at the end.

Chicken, Pork, or Beef: Which Version Should You Make?

The same sauce and method work for chicken, pork, or beef, but each one gives the plate a different mood.

Choose chicken for the cleanest restaurant-style Thai basil chicken, pork for the juiciest street-food-style version, and beef for the darkest, most savory bowl.

Three-way Pad Kra Pao chooser board comparing chicken, pork, and beef rice plates with text labels.
The same sauce can lead to three moods: chicken is clean and fast, pork is juicy and classic, and beef is darker and more savory.

Once you choose the protein, use the recipe card for exact quantities and timing.

Thai Basil Chicken Version

For Thai basil chicken, use ground chicken, chicken keema, or finely chopped boneless chicken thigh.

Hand-chopped thigh gives little juicy pieces that catch the sauce, while ground chicken keeps the dish quick and familiar. Chicken breast works too, but it dries out faster, so chop it small and cook it quickly.

This is the lightest, fastest version and lets the basil come through clearly.

Thai basil chicken plate with glossy chicken pieces, red chilies, basil, rice, cucumber, lime, and crispy fried egg.
Thai basil chicken is the cleanest, fastest version; however, it still needs enough garlic, chilies, and basil to taste bold.

Pork Pad Kra Pao Version

Ground pork gives the richest, juiciest Pad Kra Pao. It is the version to make when you want the dish to feel more street-food-style and deeply satisfying.

Use 450g / 1 lb ground pork. If the pork is fatty, use slightly less oil and let some edges brown before adding the sauce. If it is very lean, keep the full 2 tablespoons of oil and avoid overcooking.

The fat carries the garlic and chili beautifully, especially if you can find holy basil.

Pork Pad Kra Pao plate with glossy browned pork mince, basil, red chilies, rice, and a crispy egg with runny yolk.
Pork gives the juiciest Pad Kra Pao because the fat carries garlic and chili especially well, while the egg makes the rice plate feel complete.

Thai Basil Beef Version

Thai basil beef gives the deepest, most savory bowl. Use ground beef, minced beef, or very thinly chopped steak.

Beef needs a hot, wide pan. If it steams instead of browns, the flavor turns flat. Cook in batches if needed, and use the higher end of the dark soy sauce range if you want a deeper color.

This is the version for a darker, richer rice plate with a strong garlic-chili base.

Thai basil beef rice plate with dark glossy beef, basil, red chilies, white rice, and crispy fried egg.
Thai basil beef should taste deeper and more savory than chicken, so keep the pan hot enough to brown without turning the basil dark.

Vegetarian, Tofu, and Eggplant Options

You can make a vegetarian Pad Kra Pao-style stir-fry with tofu, eggplant, mushrooms, or a mix of vegetables. These versions are not exactly the same as the classic meat rice plate, but the same garlic-chili-sauce-basil structure works well if you control moisture.

The best vegetarian version still needs the same attitude as the meat version: high heat, strong aromatics, and enough basil that the pan smells alive at the end.

For tofu, use firm or extra-firm tofu. Press it if it is very wet, then crumble it into small pieces. Cook it in a hot pan until the edges look lightly browned. The goal is the same as with meat: drive off moisture first, then let the sauce cling instead of slide off.

Tofu Pad Kra Pao plate with crisp glossy tofu, basil, red chilies, rice, and fried egg on a dark plate.
Tofu works best when it gets crisp edges first; after that, the sauce can cling instead of sliding off a wet surface.

If tofu is your main protein more often than a one-time swap, MasalaMonk’s tofu meal prep ideas go deeper into pressing, browning, saucing, and building rice-box style meals that still taste good later.

For eggplant, cut it into small pieces and cook it until tender before adding the sauce. Eggplant absorbs oil, so use a wide pan and avoid stirring too aggressively once it softens.

For mushrooms, cook them until their liquid evaporates. Then add the garlic-chili base, sauce, and basil.

Vegetarian Pad Kra Pao options board with glossy eggplant bowl and browned mushroom bowl with basil and red chilies.
Eggplant should turn tender and glossy, while mushrooms need their moisture cooked off first; otherwise, the vegetarian version can taste watery.

Use vegetarian oyster sauce or mushroom sauce. Replace fish sauce with soy sauce and, if you have it, a small pinch of mushroom seasoning.

For vegetarian sauce swaps, use the substitution guide before cooking.

What to Serve With Pad Kra Pao

Pad Kra Pao is usually served as a rice plate, not as a saucy curry. Keep the sides simple so the basil, garlic, chilies, and fried egg stay in focus.

  • Steamed jasmine rice
  • Crispy fried egg
  • Cucumber slices
  • Lime wedges
  • Extra chopped chilies
  • Prik nam pla — chopped chilies in fish sauce and lime — or soy sauce and lime for a vegetarian plate
Serving spread for Pad Kra Pao with rice, crispy fried egg, cucumber, lime, extra chilies, and prik nam pla labels.
The best sides are simple on purpose: cucumber cools the heat, lime brightens the sauce, extra chilies add control, and prik nam pla sharpens the rice.

Cucumber is especially useful because it cools the heat and gives the plate a fresh crunch. If you want that cooling side to feel a little more complete, a simple cucumber salad works well beside the hot basil stir-fry.

For a brighter Thai-style side, you can also serve it with a small portion of vegan Som Tam raw papaya salad. The crunch, lime, chili, and freshness make sense next to the rich fried egg and savory basil meat.

For the table-side chili condiment, keep the spoonful small and bright rather than drowning the rice.

Prik nam pla condiment bowl with sliced red and green chilies in fish sauce and lime, plus a soy-lime vegetarian note.
Prik nam pla adds salty heat in tiny spoonfuls; for vegetarian plates, soy sauce with lime gives a similar bright table-side lift.

If you bought a large bunch of basil, use the extra leaves quickly in another fresh herb recipe rather than letting them wilt. This dish is best when the basil tastes alive, not tired.

How to Fix Pad Kra Pao

Most Pad Kra Pao problems come from heat, timing, or sauce balance. Fortunately, the fixes are usually simple once you know what happened.

Fast diagnosis: watery usually means crowding or low heat, bland usually means weak garlic-chili-basil energy, salty usually means the sauce needs more rice or a lower-salt ratio, and dull basil flavor usually means the basil cooked too long.
Seasoning troubleshooting board for Pad Kra Pao with rice, lime, chilies, garlic, basil, fish sauce, and a glossy stir-fry bowl.
Fix the plate before you panic: rice and lime soften salt, fresh chilies restore heat, and garlic, basil, or fish sauce can wake up flat flavor.

Too Watery

Watery Pad Kra Pao almost always means the meat steamed before it fried.

Keep cooking until the liquid evaporates before adding basil. Next time, use a wider pan, higher heat, and do not double the recipe in one skillet. For larger batches, cook the meat in rounds.

Troubleshooting board showing watery Pad Kra Pao from a crowded pan and low heat beside glossy fixed stir-fry.
Watery Pad Kra Pao usually starts before the sauce goes in, so use a wider pan and cook off moisture before adding basil.

Sauce Is Pooling Under the Meat

Pooling sauce usually means the sauce went in before the pan was ready.

Keep the pan on high heat and toss until the sauce clings to the meat. Next time, start with 2 tablespoons water or stock, then add more only if the pan looks dry.

Too Salty

Salty Pad Kra Pao is usually easiest to fix on the plate, not in the pan.

Serve it with more plain rice and add a squeeze of lime. Next time, use the lower-salt sauce ratio and reduce fish sauce and light soy before reducing oyster sauce, because oyster sauce also gives body.

Too Sweet

Too much sweetness usually comes from sweet oyster sauce, dark sweet soy, or too much sugar.

To balance the current batch, add a small splash of fish sauce or light soy and serve it with plain rice. Next time, keep the added sugar modest.

Too Dry

If the meat tastes plain and dry instead of glossy, the pan probably needed a small splash of liquid near the end.

Add 1–2 tablespoons of water or stock and toss briefly over heat. The meat should be glossy enough to season the rice, not dry like plain mince.

Not Spicy Enough

If the dish tastes warm but not lively, the chilies are probably too mild or too few.

Add more chopped fresh chili next time, or serve extra chilies on the side. Fresh chilies give sharper flavor and better aroma than chili flakes alone.

Tastes Like Generic Stir-Fry

If it tastes like a regular soy-sauce stir-fry, the sharp things have been muted: garlic, chili, fish sauce, basil, or heat.

Use enough fresh basil, add it at the end, and make sure the sauce reduces onto the meat instead of staying loose in the pan.

Not Enough Basil Flavor

Weak basil flavor usually means one of two things: too little basil, or basil added while the pan was still boiling.

Use 1½–2 cups basil leaves for 450g / 1 lb meat. Add them only at the end and toss just until wilted.

Basil Turned Dark or Lost Its Aroma

Basil turns dull when it cooks too long.

Add it after the sauce has reduced and the heat is low or off. The leaves should wilt into the meat, not simmer.

Garlic Tastes Burnt

Burnt garlic means the aromatics waited too long before the meat went in.

Next time, stir the garlic and chilies only until fragrant, then add the meat as soon as the garlic smells sharp and toasty.

Meat Turned Rubbery

Rubbery meat is usually an overcooking problem, especially with chicken breast or lean beef.

Stir-fry until just cooked, reduce the sauce quickly, then finish with basil.

For texture and basil problems, focus on timing: keep the meat glossy, keep the garlic golden, and add basil only at the end.

Texture and basil troubleshooting board with dry meat, rubbery meat, weak basil, burnt garlic, glossy meat, basil leaves, and spooned stock.
Texture problems have small fixes: a splash of stock rescues dry meat, shorter cooking prevents rubbery meat, and basil belongs at the end.

Need to cook another batch instead? Return to the recipe card with the fixes in mind.

Storage and Reheating

Pad Kra Pao tastes best immediately, when the basil is fresh and the egg is crisp, but leftovers are still useful.

Store the cooked stir-fry in an airtight container in the fridge for up to 3 days. That sits within the USDA’s general 3–4 day guidance for refrigerated leftovers. Store rice separately if possible. Fried eggs are best cooked fresh, but you can skip the egg when reheating and fry a new one before serving.

To reheat, warm the stir-fry in a skillet with a splash of water. Heat just until hot. Do not cook it for too long or the basil flavor will fade further.

Leftovers will not have the same just-wilted basil aroma, but they still make a very good rice bowl the next day.

If you want to prep ahead, mix the sauce, chop the garlic and chilies, wash and dry the basil leaves, and cook the rice. Leave the actual stir-fry for right before eating.

Storage, reheating, and make-ahead board with cooked Pad Kra Pao in a glass container, reheating skillet, rice, eggs, sauce, basil, garlic, and chilies.
Pad Kra Pao is best fresh, but leftovers still work; reheat with a splash of water and fry a fresh egg if possible.

If you like salty-garlicky rice-plate dinners, MasalaMonk’s chicken adobo recipe is another strong one to cook next.

Pad Kra Pao Recipe Card

If this is your first time making it, start with the balanced sauce, use Thai basil if holy basil is hard to find, and keep the pan wide and hot. The first batch will quickly teach you your preferred salt, chili, and basil level.

Pad Kra Pao Recipe: Thai Basil Chicken, Pork, or Beef

This Pad Kra Pao recipe gives you a fast, garlicky Thai basil rice plate with chicken, pork, or beef, glossy sauce, and a crispy fried egg. Use holy basil if you can find it, or Thai basil for the easiest restaurant-style home version.

Prep Time 10 minutes
Cook Time 10–12 minutes
Total Time 20–22 minutes
Servings 4

Equipment

  • Wok or 12-inch / 30cm skillet
  • Small bowl for mixing the sauce
  • Mortar and pestle, knife, or mini chopper
  • Small frying pan for eggs
  • Spatula

Ingredients

For the Stir-Fry

  • 450g / 1 lb ground chicken, pork, or beef
  • 2 tbsp neutral oil, for the stir-fry
  • 5–8 garlic cloves, finely chopped or pounded
  • 3–6 Thai bird chilies, chopped, or 2–4 Indian green chilies
  • 1–2 shallots, thinly sliced, optional
  • 1½–2 cups holy basil or Thai basil leaves, about 30–60g depending on how tightly packed the leaves are
  • Steamed jasmine rice, for serving
  • 4 eggs
  • 2–3 tbsp neutral oil to start, plus more as needed for frying the eggs
  • Cucumber slices, optional
  • Lime wedges, optional

For the Sauce

  • 1 tbsp oyster sauce, 15 ml
  • 1 tbsp fish sauce, 15 ml
  • 1 tbsp light soy sauce, 15 ml
  • 1–2 tsp dark soy sauce, 5–10 ml, optional for deeper color
  • 1 tsp sugar, about 4g
  • 2–3 tbsp water, chicken stock, or vegetable stock, 30–45 ml

Instructions

  1. Cook the rice first. Pad Kra Pao cooks quickly, so have rice ready before you start the stir-fry.
  2. Mix the sauce. In a small bowl, stir together oyster sauce, fish sauce, light soy sauce, optional dark soy sauce, sugar, and water or stock.
  3. Prepare the aromatics. Pound or finely chop the garlic and chilies. Pick the basil leaves from the stems, wash them if needed, and dry them well.
  4. Fry the eggs. Heat 2–3 tablespoons oil in a small pan. Fry the eggs one at a time or in batches, spooning hot oil over the whites until the edges are crisp. Add more oil only if the pan gets dry. Set aside.
  5. Heat the pan. Heat a wok over high heat, or a wide nonstick skillet over medium-high heat.
  6. Cook the garlic and chilies. Add oil, then garlic, chilies, and optional shallots. Stir briefly until fragrant, without letting the garlic burn.
  7. Add the meat. Add ground chicken, pork, or beef. Break it up and stir-fry until cooked through and most moisture has evaporated.
  8. Add the sauce. Pour in the sauce and toss until the meat is glossy and coated. It should not be soupy.
  9. Add basil last. Turn the heat down or off, add basil, and toss just until wilted.
  10. Serve immediately. Spoon over rice and top each serving with a crispy fried egg. Add cucumber and lime if you like.

Notes

  • Holy basil gives the most traditional flavor; Thai basil is the easiest excellent home version.
  • Use neutral oil because olive oil or strongly flavored oils can fight the basil, garlic, and fish sauce.
  • You do not need to marinate the meat. The sauce and aromatics flavor it during the fast stir-fry.
  • If using 500g meat instead of 450g, keep the same sauce ratio first, then adjust only if needed.
  • For a less salty or milder version, reduce fish sauce and soy slightly, and start with 1 Thai chili or 1 small green chili.
  • If doubling the recipe, cook the meat in batches and add the basil only at the end.
Pad Kra Pao recipe card with serving time, ingredients, sauce amounts, method bullets, and a plated basil stir-fry with rice and egg.
Keep this card for the core formula: 1 lb meat, bold aromatics, balanced sauce, basil at the end, and rice plus egg to serve.

By the time the rice, basil stir-fry, and egg come together, the plate should feel hot, glossy, and immediate.

Close-up final Pad Kra Pao serving with glossy basil meat, white rice, crispy fried egg, runny yolk, red chilies, basil leaves, and spoon.
A good final plate should feel immediate: glossy meat, fresh basil, hot rice, and a yolk that runs into everything.

FAQs

Is Pad Kra Pao the same as Thai basil chicken?

Thai basil chicken is usually the chicken version of Pad Kra Pao. Traditionally, the dish is made with holy basil, but many restaurant and home versions use Thai basil because it is easier to find.

What does Pad Kra Pao taste like?

Pad Kra Pao tastes garlicky, salty-savory, spicy, and fresh from the basil. It should feel bold and punchy, with just enough glossy sauce to season the rice without turning the plate into curry.

What basil is best for Pad Kra Pao?

Holy basil gives the most traditional sharp, peppery flavor. Thai basil is the best practical substitute for most home kitchens. Sweet basil works only in a pinch; it makes the dish softer and less like classic Pad Kra Pao.

Can I use dried basil?

Dried basil is not a good replacement because Pad Kra Pao depends on the fresh aroma of basil added at the end. If dried basil is all you have, you can still make a garlic-chili stir-fry, but it will not taste like Pad Kra Pao or a fresh Thai basil chicken-style stir-fry.

Is Pad Kra Pao supposed to be saucy?

No, it should be glossy rather than soupy. You want enough sauce to season the rice, but not so much that the meat swims. Think juicy rice plate, not curry.

Does Pad Kra Pao need a fried egg?

The fried egg is technically optional, but it is part of the pleasure of the plate. The crisp edges add texture, and the yolk softens the salty, spicy meat into the rice.

Chicken breast, sliced chicken, or ground chicken: which works best?

Ground chicken or chopped chicken thigh is easiest and juiciest. Sliced chicken works too if you cut it small and cook it quickly. Chicken breast is usable, but it dries out faster than thigh.

What can replace fish sauce?

Use light soy sauce with a small pinch of mushroom seasoning if you have it. The flavor will be less funky and less Thai-style, but still savory.

What can replace oyster sauce?

Vegetarian oyster sauce or mushroom sauce is the best replacement. If you do not have either, use soy sauce with a little sugar, but the sauce will be thinner and less rounded.

Why did my Pad Kra Pao turn watery?

Watery Pad Kra Pao usually means the meat steamed before it fried. Use a wider pan, higher heat, and cook off moisture before adding the sauce.

Can I make Pad Kra Pao ahead?

You can prep the sauce, garlic, chilies, basil, and rice ahead of time. For the best flavor, cook the stir-fry right before eating because basil tastes freshest when added at the end.

How long does Pad Kra Pao keep in the fridge?

The cooked stir-fry keeps for up to 3 days in an airtight container. Reheat it in a skillet with a splash of water. Fry a fresh egg when serving if possible.

Once this rhythm clicks, Pad Kra Pao becomes less like a strict recipe and more like a rice-plate formula you can repeat with chicken, pork, beef, tofu, or whatever needs cooking.

Back to top ↑

Posted on — Leave a comment

Baked Tilapia Recipe

Lemon garlic baked tilapia in a white ceramic baking dish with lemon slices, parsley, paprika, and butter sauce.

This baked tilapia recipe is for the nights when dinner needs to feel easy but still taste like you tried: tender white fish, lemony garlic butter, a little paprika, and a spoonable pan sauce for rice, potatoes, or vegetables. Tilapia is mild, quick, and easy to dress up, which is exactly why it can become one of the most useful weeknight fish recipes in your rotation.

The trick is not to overthink it — but also not to underseason it. This fish is lean and delicate, so it needs enough salt, lemon, garlic, and butter or olive oil to taste bright instead of bland. It also cooks fast, which means a few extra minutes can turn flaky fish into dry fish.

For most thawed tilapia fillets, bake at 400°F / 200°C for 10–12 minutes, or until the fish is opaque, flakes easily with a fork, and reaches 145°F / 63°C in the thickest part. For more exact timing by oven temperature and fillet thickness, see the time and temperature chart. Once the timing is familiar, this baked tilapia recipe becomes one of those simple dinners you can repeat with lemon garlic butter, spicy seasoning, crispy parmesan topping, vegetables, tacos, or rice bowls.

Quick Answer: Best Way to Bake Tilapia

For the most reliable baked tilapia recipe, keep things simple: dry the fillets, season them well, spoon lemon garlic butter or olive oil over the top, and bake them uncovered at 400°F / 200°C for 10–12 minutes. The fish should come out moist and flaky, not browned like chicken or crispy like fried fish. You are looking for tender fish with a bright sauce, not a dry fillet that has been pushed too far.

Baked Tilapia Time, Temperature, and Doneness

Use this quick visual when you need the core timing before you start cooking: 400°F, 10–12 minutes, and 145°F in the thickest part.

Baked tilapia timing guide showing a cooked fillet with 400°F, 10 to 12 minutes, and 145°F temperature cues.
For most thawed tilapia fillets, start with 400°F for 10–12 minutes. However, the real finish line is texture and temperature: opaque fish that flakes easily and reaches 145°F.

Use a 9×13-inch baking dish for this lemon garlic butter version because the dish holds the sauce around the fish. For crispier parmesan or panko tilapia, use a rimmed sheet pan so the topping stays drier and lightly crisp.

Tilapia is done when it turns opaque, flakes easily, and reaches 145°F / 63°C in the thickest part. Thin fillets may be ready closer to 9–10 minutes, while thicker fillets may need 12–15 minutes.

Choose your path: For thawed average fillets, bake at 400°F / 200°C for 10–12 minutes. Very thin fillets should be checked at 9 minutes, while thicker fillets usually need 12–15 minutes. Frozen fillets are best thawed first for the cleanest texture, although you can bake them from frozen for 18–25 minutes when dinner needs saving.

If your fish is still frozen, jump to the fresh vs frozen tilapia section before you start so you know what texture and timing changes to expect.

Tilapia Fillet Timing Guide

Use this timing guide when your fillets look especially thin, thick, uneven, or still frozen. Thickness changes the bake time more than the package label does.

Tilapia fillet timing guide showing thin, average, thick, and frozen fillets with different baking times.
Tilapia fillets do not all bake at the same speed. Start checking thin pieces early, give thicker fillets a few extra minutes, and treat frozen tilapia as its own timing path.

Baked Tilapia at a Glance

Here is the simple version of this baked tilapia recipe before we get into the details. For most thawed fillets, remember this first: 400°F, 10–12 minutes, and 145°F inside.

Detail Use this as your default
Oven temperature 400°F / 200°C
Cook time 10–12 minutes for most thawed fillets
Internal temperature 145°F / 63°C
Pan 9×13-inch baking dish for saucy tilapia; rimmed sheet pan for crispy topping
Flavor base Lemon, garlic, butter or olive oil, paprika, black pepper, parsley
Frozen fillets Best thawed first; no-thaw option takes about 18–25 minutes
Texture cue Opaque, flaky, moist, and easy to separate with a fork

If you are unsure whether the fish is fully cooked, the doneness section shows the fork-flake and 145°F cues together.

What This Baked Tilapia Tastes Like

This baked tilapia recipe should taste light, lemony, and savory, with soft flakes of fish and a warm garlic-butter sauce you can spoon over rice, potatoes, or vegetables. The paprika gives the pale fish a little warmth and color, while the parsley and final squeeze of lemon keep the whole plate fresh instead of heavy.

Soft Flakes and Bright Lemon Garlic Sauce

The best texture is moist and easy to separate with a fork. You are not trying to create a dark crust here; you are looking for gentle flakes and a sauce that keeps the fish bright.

Close-up of lemon garlic baked tilapia flaking apart with a fork, butter sauce, parsley, and lemon.
The best lemon garlic baked tilapia has soft flakes and a glossy sauce. Instead of chasing a dark crust, look for tender fish that separates easily with a fork.

For a stronger flavor, use the spicy, lemon pepper, masala-spiced, or crispy parmesan variations later in the post. The base recipe is intentionally simple, so it can work with rice, vegetables, salad, tacos, or grain bowls.

Why This Baked Tilapia Recipe Works

Tilapia does not need a complicated marinade or a long oven time. In fact, those are usually where things go wrong. The fish is thin and lean, so it does best with direct seasoning, a little fat, a bright finish, and a short bake.

The lemon garlic butter does most of the heavy lifting here. Lemon juice wakes up the mild fish, zest adds aroma without extra liquid, garlic brings savory depth, paprika adds warmth and color, and butter or olive oil helps the fillets stay tender.

  • 400°F is a reliable default: it cooks tilapia quickly without forcing you into a long bake that can dry out thin fillets.
  • The sauce adds moisture and flavor: butter or olive oil keeps the fish tender, while lemon and garlic make it taste fresh.
  • Drying the fish helps: this is especially important if your tilapia was frozen and thawed.
  • The recipe is flexible: keep it lemon garlic, make it spicy, add a parmesan-panko topping, or bake it with quick-cooking vegetables.
  • Doneness is easy to check: look for opaque flesh, easy flaking, and 145°F / 63°C in the thickest part.
Useful tip: Start checking early the first time you make this. Fillet thickness matters more than the exact minute on the timer.

Ingredients for Baked Tilapia

Because this baked tilapia recipe uses only a few ingredients, each one has a clear job. Fresh lemon, enough garlic, and a balanced amount of salt and fat help the finished fish taste bright instead of plain.

Ingredients for baked tilapia including raw tilapia fillets, lemon, garlic, butter, paprika, herbs, parsley, salt, and pepper.
Because tilapia is mild, every ingredient has a job. Lemon brings brightness, garlic adds depth, butter or olive oil keeps the fish moist, and paprika gives the fillets a warmer finish.
Ingredient US measure Metric Why it matters
Tilapia fillets 4 fillets, 5–6 oz each 560–680 g total Main protein. Thaw and pat dry for best texture.
Unsalted butter, melted 4 tbsp 56 g Adds richness, moisture, and classic lemon garlic flavor.
Fresh lemon juice 1½ tbsp 22 ml Brightens the mild fish and keeps the flavor lively.
Lemon zest 1 tsp From about 1 lemon Adds lemon aroma without making the sauce watery.
Garlic, minced 3 cloves About 9 g The main savory flavor in the sauce.
Fine salt ¾ tsp About 4–5 g Seasons the fish directly. Adjust if using salted butter.
Black pepper ¼ tsp About 0.5 g Adds gentle heat and balance.
Paprika ½ tsp About 1 g Adds warm color and mild flavor.
Dried oregano or thyme ½ tsp About 0.5 g Gives the fish a more complete savory flavor.
Red pepper flakes ⅛–¼ tsp Optional Use for a little heat.
Lemon slices or wedges 1 lemon 1 lemon Use slices while baking or wedges for serving.
Fresh parsley 1–2 tbsp 4–8 g Adds freshness and color after baking.

Once the basic lemon garlic version makes sense, the seasoning guide shows how to take the same baked tilapia method toward Cajun, blackened, parmesan-panko, Mediterranean, or masala-spiced flavors.

Butter or Olive Oil?

Butter gives the richest lemon garlic flavor. Olive oil makes the recipe lighter and works well for a fresher, less buttery dinner. You can also use half butter and half olive oil for a balanced version that still tastes rounded.

Easy swap: Replace the 4 tablespoons butter with 2 tablespoons butter plus 1 tablespoon olive oil, or use 1½–2 tablespoons olive oil for a lighter version.

Equipment for Oven Baked Tilapia

Although this baked tilapia recipe does not need special equipment, the pan you choose changes the texture. A baking dish keeps the fish saucy and moist, while a sheet pan is better when you want crisp edges or a breadcrumb topping.

Baking dish and sheet pan options for oven baked tilapia, showing saucy fish in a dish and crispier fish on a pan.
The pan changes the result before the fish even goes into the oven. A baking dish holds lemon garlic sauce close to the tilapia, while a sheet pan helps parmesan or panko toppings stay crisp.
  • 9×13-inch baking dish: best for saucy lemon garlic baked tilapia because it holds the butter and lemon around the fillets.
  • Rimmed sheet pan: better for parmesan, panko, or crispier baked tilapia.
  • Parchment paper or foil: useful for cleanup, especially when using a sheet pan.
  • Paper towels: important for drying thawed fillets before seasoning.
  • Small bowl: for mixing the lemon garlic butter.
  • Instant-read thermometer: the most reliable way to check for 145°F / 63°C.

If you are using a sheet pan because you want crunch, the crispy parmesan baked tilapia variation is the better path than trying to brown plain tilapia deeply.

Best Seasoning for Tilapia

Tilapia takes seasoning well, so you do not have to stay locked into lemon garlic. The fish has a gentle flavor, which means it can go bright and buttery, spicy, herby, crispy, or lightly masala-spiced without much effort.

For the main recipe, lemon, garlic, paprika, pepper, herbs, and parsley are the easiest starting point. They keep the fish bright, clean, and flexible enough for rice, vegetables, tacos, or bowls.

Seasoning ideas for tilapia with lemon garlic, Cajun, blackened, parmesan-panko, Mediterranean, and masala-spiced options.
This baked tilapia seasoning guide gives you more than one dinner path. Keep it lemon garlic, make it Cajun or blackened, add parmesan-panko crunch, or use light masala spices for a warmer plate.
Flavor direction Use this seasoning Best with
Lemon garlic Lemon juice, lemon zest, garlic, paprika, parsley, black pepper Rice, potatoes, salad, roasted vegetables
Lemon pepper Lemon pepper seasoning, extra lemon, butter or olive oil Green beans, asparagus, couscous
Cajun or Old Bay-style Cajun seasoning or Old Bay-style seasoning, lemon, butter, parsley Slaw, corn, potatoes, tacos
Blackened Paprika, garlic powder, onion powder, thyme, oregano, cayenne Rice bowls, tacos, creamy sauce
Parmesan-panko Parmesan, panko, garlic powder, paprika, parsley, melted butter Sheet-pan dinners, kids’ plates, crispy fish nights
Mediterranean Olive oil, lemon, garlic, oregano, parsley, za’atar-style seasoning Tomatoes, zucchini, cucumber salad, couscous
Masala-spiced Paprika, cumin, turmeric, black pepper, lemon, light garam masala Rice, kachumber-style salad, yogurt sauce

If you are baking the fish for fish tacos, season it a little more boldly with paprika, cumin, garlic, lime, and black pepper. This gentle white fish needs enough flavor to stand up to slaw, sauce, and fresh toppings.

A little more flavor is usually the answer. If baked tilapia tastes flat, it usually needs one of four things: a pinch of salt, a squeeze of lemon, a little more garlic, or fresh herbs after baking.

How to Bake Tilapia

This is a short baked tilapia recipe, so the small steps carry a lot of weight. Dry fillets, even seasoning, a single layer, and an early check are what keep the fish tender instead of watery or dry.

If your fish usually turns dry, watery, or bland, check the troubleshooting section before you bake; most problems come from wet fillets, crowding, or waiting too long for browning.

Pat Dry the Tilapia Before Baking

This is the quiet prep step that prevents watery sauce and helps the seasoning stay where you put it.

Tilapia fillets being patted dry with a paper towel before seasoning and baking.
Patting the fillets dry is a small step with a big payoff. It prevents watery baked tilapia and helps the lemon garlic seasoning cling to the fish instead of sliding into the pan.

Mix the Lemon Garlic Butter Sauce

The sauce should be glossy, fragrant, and easy to spoon over the fish. Because tilapia is mild, this simple mixture carries most of the flavor.

Lemon garlic butter sauce being stirred with melted butter, lemon zest, garlic, paprika, herbs, and parsley.
This lemon garlic butter sauce does most of the flavor work. As the butter mixes with lemon, garlic, herbs, and paprika, it gives mild tilapia a brighter and more savory finish.
Before you bake: Make sure the fillets are in one layer, the surface is dry, the sauce touches every fillet, and the oven is fully preheated. Those four small things do more for texture than adding extra ingredients.
  1. Preheat the oven. Set the oven to 400°F / 200°C. Lightly grease a 9×13-inch baking dish.
  2. Dry the fish. Pat the tilapia fillets dry with paper towels. This helps the seasoning stick and reduces watery sauce.
  3. Mix the sauce. In a small bowl, stir together melted butter, lemon juice, lemon zest, garlic, salt, pepper, paprika, oregano or thyme, and optional red pepper flakes.
  4. Arrange the fillets. Place the tilapia in a single layer in the baking dish. Do not stack or overlap the fish.
  5. Add flavor. Spoon the lemon garlic butter evenly over the fillets. Add lemon slices for a stronger lemon aroma.
  6. Bake. Bake for 10–12 minutes, or until the fish is opaque, flakes easily, and reaches 145°F / 63°C in the thickest part.
  7. Finish fresh. Sprinkle with parsley and serve with extra lemon wedges. Spoon a little pan sauce over the top as needed.

Spoon Sauce Over Every Fillet

Once the fillets are in a single layer, cover each one with the lemon garlic butter so the fish bakes evenly and tastes seasoned from edge to edge.

Lemon garlic butter being spooned over raw tilapia fillets arranged in a single layer in a white baking dish.
Even sauce coverage matters because tilapia cooks quickly. Spoon the lemon garlic butter over every fillet so each piece bakes with enough moisture, seasoning, and brightness.

Before and After Baked Tilapia

Use the visual change as a cue, but do not expect the fish to look deeply roasted. Tilapia is done when it turns opaque and begins to flake.

Before and after baked tilapia showing raw seasoned fillets and cooked opaque fillets with lemon and herbs.
The change from raw to done is subtle: glossy fillets turn opaque and begin to flake. Since tilapia stays pale, do not wait for deep browning before you stop baking.

Do You Need to Flip Tilapia While Baking?

No. Tilapia fillets are thin and delicate, so flipping is not necessary. Arrange them in one layer, spoon the seasoning over the top, and let the oven do the work. Flipping can make the fillets break apart, especially once they are fully cooked.

Baked Tilapia Mistakes to Avoid

What not to do: Do not wait for tilapia to turn deeply golden, do not bake frozen fillets stuck together, do not crowd the dish, and do not keep cooking once the center is opaque and flaky. Most dry tilapia comes from trying to make it look more browned than it needs to be.
Common baked tilapia mistakes showing a crowded pan, an overcooked fillet, and frozen fillets stuck together.
Most baked tilapia mistakes start before the timer ends. Give the fillets space, avoid baking frozen pieces stuck together, and stop judging doneness by browning alone.

How Long to Bake Tilapia: Time and Temperature Chart

For this baked tilapia recipe, 400°F / 200°C is the easiest weeknight default. However, different oven temperatures can work depending on your fillets, your pan, and whether you want a softer baked finish or a little more color on top.

Use the chart below as a practical guide, then check the fish itself. Tilapia is ready when it is opaque, flakes easily, and reaches 145°F / 63°C. If your pieces look especially thin, thick, or uneven, use the fillet timing guide near the top of the post as a quick reference.

Oven temperature chart for baked tilapia showing times for 350°F, 375°F, 400°F, 425°F, and frozen fillets.
If you are wondering how long to bake tilapia, start with 400°F for most thawed fillets. Lower temperatures, thicker pieces, and frozen fillets need extra time and closer checking.
Oven temperature Best for Approximate time Notes
350°F / 175°C Gentle baking, foil packets, covered fish 18–25 minutes Useful for softer steamed-style methods, but not the fastest option.
375°F / 190°C Older/simple baked tilapia methods 15–20 minutes for average fillets Thicker or covered fillets may need closer to 25 minutes.
400°F / 200°C Everyday oven baked tilapia 10–12 minutes, or 12–15 for thicker fillets The most reliable balance of speed, moisture, and easy timing.
425°F / 220°C Faster browning, panko, parmesan topping 10–15 minutes Check early because thin fillets can overcook quickly.
400°F / 200°C from frozen No-thaw frozen tilapia fillets 18–25 minutes Expect extra liquid; check 145°F / 63°C in the center.

When in doubt, start checking early. Because the fillets are usually thin, one or two extra minutes can change the texture more than you expect.

Tilapia Thickness Chart at 400°F

Because tilapia fillets are not all the same size, thickness matters more than the package label. A thin fillet can finish before the timer reaches 10 minutes, while a thicker fillet may need a few extra minutes.

Fillet thickness Approximate cook time at 400°F / 200°C What to watch for
Thin fillets 9–10 minutes Check early; they can dry out fast.
Average fillets 10–12 minutes Most 5–6 oz fillets land here.
Thicker fillets 12–15 minutes Check the thickest part, not the edge.
Frozen fillets 18–25 minutes Expect more liquid and check the center carefully.

How Long to Bake Tilapia at 400°F

At 400°F / 200°C, most thawed tilapia fillets take 10–12 minutes. Very thin fillets may finish closer to 9 minutes. Thicker fillets may need 12–15 minutes. Start checking early, because tilapia can move from moist to dry quickly.

How Long to Bake Tilapia at 425°F

At 425°F / 220°C, tilapia usually takes 10–15 minutes. This hotter temperature is useful for panko, parmesan, or sheet-pan versions where you want a little more color. Watch closely if the fillets are thin.

How Long to Bake Tilapia at 375°F

At 375°F / 190°C, tilapia usually takes 15–20 minutes for average fillets, though thicker or covered fillets may need closer to 25 minutes. This lower temperature works, but the longer bake can make thin fillets drier.

How to Know When Tilapia Is Done

The most reliable way to check baked tilapia is to use both visual cues and temperature. The fish should look opaque, separate easily with a fork, and reach 145°F / 63°C in the thickest part.

According to FoodSafety.gov’s safe minimum internal temperature chart, fish such as tilapia should reach 145°F / 63°C, or be cooked until the flesh is no longer translucent and separates easily with a fork.

Baked tilapia doneness test with a fork separating flakes and a thermometer showing 145°F.
Use both doneness cues together: the fish should look opaque and separate easily, while the thickest part reaches 145°F. That way, you avoid undercooked fish and dry overbaked tilapia.
  • Opaque: the center should look white and cooked through, not glassy or translucent.
  • Flaky: the fish should separate easily with gentle pressure from a fork.
  • Moist: the fish should look tender, not dry and tight.
  • 145°F / 63°C: this is the safest final check if you have a thermometer.
Do not wait for heavy browning. Tilapia is lean and pale, so it may be fully cooked before it looks deeply golden. A short broil can add color, but only use it after the fish is almost done.

Fresh vs Frozen Tilapia

Frozen tilapia works in this baked tilapia recipe, but the cleanest texture comes from thawing it first. Once thawed, the fillets are easier to dry, season, and bake evenly. They also release less liquid into the baking dish. For the cleanest texture, use the thawing method below, then pat the fillets dry before seasoning.

Fresh or thawed tilapia fillet being seasoned with a frozen fillet and cold-water thawing setup in the background.
Thawed tilapia gives the cleanest texture because it is easier to dry and season. Even so, frozen tilapia can still rescue dinner when you allow extra time and expect more liquid in the pan.

When it is 6 p.m. and the fish is still frozen, you still have a path. Frozen tilapia can go straight into the oven, although the texture will be cleaner if you thaw it first. The pan may collect more liquid, but you can still get a workable dinner when you forgot to thaw anything.

Method Best use Cook time Texture notes
Thawed first Most reliable everyday baked tilapia 10–12 minutes at 400°F / 200°C Cleaner texture, less liquid, better seasoning contact.
Baked from frozen Emergency no-thaw dinner 18–25 minutes at 400°F / 200°C More liquid in the pan; check the center carefully.

How to Thaw Frozen Tilapia

The FDA seafood safety guidance recommends thawing frozen seafood gradually in the refrigerator overnight when possible. For a quicker method, keep the fish sealed in a bag and place it in cold water until flexible, then pat it very dry before seasoning. Do not bake fillets that are stuck together in a frozen block, because the outside can overcook before the center is done.

Frozen tilapia thawing setup with a refrigerator container, a sealed bag in cold water, and paper towels for drying.
Thaw frozen tilapia gently when you can, then pat it dry before baking. Refrigerator thawing is easiest overnight, while sealed cold-water thawing helps when dinner is getting close.

How to Bake Frozen Tilapia

For the best result, thaw frozen tilapia first. To bake from frozen, place the frozen fillets in a greased baking dish, season them well, and bake at 400°F / 200°C for about 18–25 minutes, or until the center reaches 145°F / 63°C.

When the frozen fillets release a lot of liquid, carefully spoon off some of the excess before serving. Then add a little fresh lemon juice, parsley, or a small spoon of melted butter at the end to bring the flavor back.

Watery pan fix: If thawed frozen tilapia releases a lot of liquid, pat the fillets drier next time. For the current batch, spoon off excess liquid before finishing with lemon, parsley, or a little extra butter.

Should You Bake Tilapia Covered or Uncovered?

For this baked tilapia recipe, bake the fish uncovered. As a result, the top stays less steamy and the lemon garlic butter tastes brighter instead of diluted.

Covered baking or foil packets are useful when you want an extra-soft, steamed texture, especially with vegetables. However, the fish will not brown, and any sauce inside the packet may taste lighter because the moisture stays trapped.

Covered and uncovered baked tilapia comparison showing an uncovered saucy baking dish and a foil packet with steam.
Bake this lemon garlic version uncovered when you want a brighter sauce and a cleaner baked finish. Foil packets are useful too, although they create a softer, more steamed texture.
Method Texture Best for
Uncovered baking Cleaner baked finish, less steamed, better flavor concentration Lemon garlic butter tilapia, parmesan tilapia, weeknight fillets
Covered baking Softer and more steamed Very delicate fillets or recipes with more liquid
Foil packets Moist, soft, no browning Vegetables, easy cleanup, individual portions

Baked Tilapia Variations

Once you know the basic time and temperature, baked tilapia becomes easy to bend toward whatever dinner needs to be: bright and lemony, spicy for tacos, crisp on top, lighter with vegetables, or warmer with masala-style spices. Keep the same core method, then change the seasoning, topping, or sides around it.

After choosing a flavor direction, use the serving ideas section to turn the fish into a full dinner with rice, vegetables, tacos, salad, potatoes, or bowls.

Not sure which version to make? Choose lemon garlic for the easiest dinner, lemon pepper for the brightest flavor, parmesan-panko for crunch, spicy tilapia for tacos, and masala-spiced tilapia when you want something warmer with rice.

Lemon Pepper Baked Tilapia

Use lemon pepper seasoning in place of the paprika and oregano. Then add extra lemon zest to the butter or olive oil and finish the baked fish with fresh lemon juice. This is one of the easiest variations because it keeps the flavor bright and simple.

Garlic Butter Baked Tilapia

For a stronger garlic butter tilapia, increase the garlic to 4 cloves and spoon a little extra melted butter over the fish right after baking. This version is especially good with rice, mashed potatoes, roasted vegetables, or crusty bread to catch the sauce.

Crispy Parmesan Baked Tilapia

For a crispier baked tilapia, use a sheet pan instead of a baking dish and add a parmesan-panko topping. This gives the delicate fish more texture without needing to fry it.

For 4 fillets, mix ¼ cup panko, 2–3 tablespoons grated parmesan, 1 tablespoon melted butter or olive oil, ½ teaspoon paprika, ½ teaspoon garlic powder, parsley, and black pepper. Spoon the topping over the fillets and bake at 400°F / 200°C for 12–15 minutes. Broil for 30–60 seconds at the end for more color.

Crispy parmesan baked tilapia on a sheet pan with golden panko topping, parsley, lemon, and a fork-flaked fillet.
Crispy baked tilapia works best when the crunch comes from the topping, not from overbaking the fish. Use a sheet pan and parmesan-panko crumbs to protect the moist flakes underneath.

If you broil at the end, watch closely. Broiling is for color, not for finishing undercooked fish. For a true fried-fish texture instead of a baked topping, use a separate fish batter recipe. The parmesan-panko version gives you crunch on top, while batter is the better route when you want a full crispy coating.

Tilapia with Quick-Cooking Vegetables

For a vegetable version, use cherry tomatoes, zucchini, thin bell pepper strips, asparagus, broccolini, or thin onion slices. Toss the vegetables with olive oil, salt, pepper, and a little garlic before arranging them around the fish.

Baked tilapia with quick-cooking vegetables including cherry tomatoes, zucchini, broccolini, bell peppers, lemon, and parsley.
Quick-cooking vegetables belong beside tilapia because the fish finishes fast. Choose tomatoes, zucchini, asparagus, broccolini, or thin peppers instead of dense vegetables that need a longer roast.

Avoid thick potatoes, large carrot pieces, or dense vegetables unless they are par-cooked first. Tilapia cooks much faster than those vegetables, so the fish can dry out while you wait for the vegetables to soften.

Spicy Baked Tilapia

For a spicy baked tilapia, add cayenne, chili powder, smoked paprika, Cajun-style seasoning, or crushed red pepper to the lemon garlic butter. Finish with lime instead of lemon for a sharper, brighter flavor. For a sweet-hot finish on tacos or rice bowls, drizzle a little mango habanero sauce over the fish after baking rather than before.

Spicy baked tilapia being flaked into tacos with slaw, lime, mango salsa, cilantro, and creamy sauce.
When baked tilapia is headed for tacos, season it more boldly than you would for a plain dinner plate. The extra spice helps the fish stand up to slaw, salsa, lime, and sauce.

Masala-Spiced Baked Tilapia

For a masala-spiced variation, season the fish with paprika, cumin, turmeric, black pepper, lemon juice, and a light pinch of garam masala. Keep the spice blend balanced so the tilapia still tastes fresh and delicate, not heavy. Serve it with rice, cucumber salad, or a spoonful of green chutney for a brighter herb finish.

Masala-spiced baked tilapia served with rice, cucumber salad, lemon, herbs, and green chutney.
A light masala-spiced baked tilapia keeps the fish fresh while adding warmth from cumin, turmeric, paprika, and pepper. Rice, cucumber salad, and green chutney turn it into a complete meal.

What to Serve with Baked Tilapia

Baked tilapia is mild enough to go with many sides. For a fast dinner, pair it with rice, roasted vegetables, salad, potatoes, or a simple grain bowl. Meanwhile, something crisp and cool next to the warm fish — like a vinegar-dill cucumber salad — keeps the plate fresh.

Serving ideas for baked tilapia with rice, roasted vegetables, salad, potatoes, tacos, and a grain bowl around the fish.
Baked tilapia is mild enough to become several dinners from one method. Serve it with rice and vegetables tonight, then use the same flaky fish for tacos, bowls, salad, or potatoes.
  • Rice or pilaf: good with lemon garlic butter from the baking dish. For fluffy plain rice as the base, this how to cook rice guide helps with stovetop, cooker, and Instant Pot timing.
  • Roasted vegetables: asparagus, zucchini, broccoli, carrots, or bell peppers.
  • Potatoes: mashed potatoes, roasted potatoes, baby potatoes, or a simple potato mash.
  • Salad: cucumber salad, green salad, tomato salad, slaw, or a lemony bean salad when you want the meal to feel more filling.
  • Tacos: flake the baked tilapia into tortillas with slaw and sauce.
  • Grain bowls: couscous, quinoa, rice, vegetables, lemon yogurt sauce, or plenty of fresh herbs.
  • Pasta: keep it light with olive oil, lemon, parsley, garlic, and vegetables.

Leftovers can also become a different meal. The fish works beautifully in tacos with slaw, lime, salsa, and a creamy sauce. A spoonful of mango salsa is especially good when the fillets are seasoned with lime, cumin, paprika, or chili powder.

Troubleshooting Baked Tilapia

If your baked tilapia did not come out the way you hoped, you are not alone. This fish cooks quickly, and small things — a wet fillet, a few extra minutes, not enough lemon or salt — can change the whole plate. The fixes below help you rescue the current batch and make the next one easier.

Troubleshooting guide for baked tilapia with dry, watery, bland, and rubbery fish fixes, including lemon butter and a 145°F thermometer.
Dry, watery, bland, or rubbery tilapia usually has a simple fix. Add lemon butter for dryness, spoon off excess liquid, brighten bland fish with salt and herbs, and stop cooking once it reaches 145°F.
Problem Why it happened How to fix it
Dry tilapia Overbaked, fillets were thin, or not enough fat/sauce Check earlier next time, use 400°F / 200°C, and add butter or olive oil before baking.
Watery baking dish Frozen fish was not fully thawed or dried Pat fillets very dry. Spoon off excess liquid before serving.
Bland fish Not enough salt, acid, garlic, or seasoning Add lemon juice, parsley, pepper, and a pinch of salt after baking.
Fishy smell Older fish, poor thawing, or too little lemon/seasoning Use fresh-smelling fillets, thaw properly, pat dry, and season boldly.
Rubbery texture Overcooked Use an instant-read thermometer and stop at 145°F / 63°C.
Sticking Pan was not greased or fish was too wet Grease the dish, use parchment on sheet pans, and dry the fish first.
No browning Tilapia is lean and cooks quickly Use a parmesan-panko topping or broil briefly at the end.

How to Fix Dry Baked Tilapia After Cooking

If the tilapia is already dry, do not put it back in the oven. Spoon a little melted butter, olive oil, lemon juice, or warm pan sauce over the top. Fresh parsley, black pepper, and a small pinch of salt can also help revive the flavor.

How to Fix Bland Baked Tilapia

Bland tilapia usually needs acid and salt. Add a squeeze of lemon, a pinch of salt, fresh herbs, and a little black pepper right before serving. If you are using the fish for tacos, add a stronger sauce, slaw, or salsa to bring the whole dish together.

Once the fixes make sense, use the recipe card for the simple bake time, ingredients, and method.

How to Store and Reheat Baked Tilapia

Although baked tilapia is best right after it comes out of the oven, leftovers can still work if you reheat them gently. The main goal is to warm the fish without cooking it all over again.
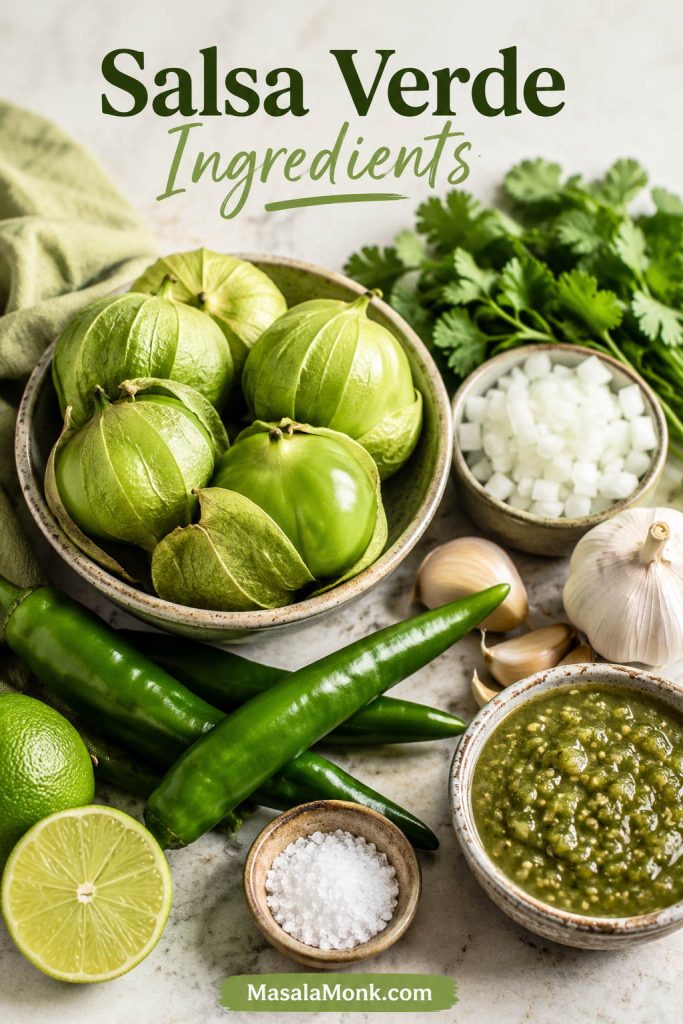
  • Fridge: Store leftover baked tilapia in an airtight container for up to 3 days.
  • Reheat gently: Warm in a low oven, covered skillet, or microwave at reduced power until just heated through.
  • Add moisture: A small spoon of butter, olive oil, lemon sauce, or broth helps prevent dryness.
  • Avoid repeated reheating: Tilapia is lean, so reheating it more than once can make it rubbery.
  • Use leftovers creatively: Flake into tacos, rice bowls, salads, wraps, or quick fish sandwiches.

Baked Tilapia Recipe Card

Baked Tilapia Recipe

This easy baked tilapia recipe uses lemon, garlic, butter, paprika, and a 400°F oven for flaky fish in about 20 minutes. It is simple enough for a weeknight dinner, but seasoned well enough to avoid bland, dry fish.

Prep Time8 minutes
Cook Time10–12 minutes
Total TimeAbout 20 minutes
Servings4

Ingredients

  • 4 tilapia fillets, 5–6 oz each / 560–680 g total
  • 4 tbsp / 56 g unsalted butter, melted
  • 1½ tbsp / 22 ml fresh lemon juice
  • 1 tsp lemon zest
  • 3 garlic cloves, minced
  • ¾ tsp fine salt, or to taste
  • ¼ tsp black pepper
  • ½ tsp paprika
  • ½ tsp dried oregano or thyme
  • ⅛–¼ tsp red pepper flakes, optional
  • 1 lemon, sliced or cut into wedges
  • 1–2 tbsp chopped fresh parsley

Instructions

  1. Preheat the oven to 400°F / 200°C. Lightly grease a 9×13-inch baking dish.
  2. Pat the tilapia fillets dry with paper towels and arrange them in a single layer in the baking dish.
  3. In a small bowl, mix melted butter, lemon juice, lemon zest, garlic, salt, pepper, paprika, oregano or thyme, and optional red pepper flakes.
  4. Spoon the lemon garlic butter evenly over the tilapia. Add lemon slices if using.
  5. Bake for 10–12 minutes, or until the fish is opaque, flakes easily, and reaches 145°F / 63°C in the thickest part.
  6. Sprinkle with parsley and serve with extra lemon wedges.

Notes

  • This baked tilapia recipe is written for thawed 5–6 oz fillets; adjust timing for very thin, thick, or frozen fillets.
  • Cook time depends on thickness. Thin fillets may finish in 9–10 minutes, average fillets in 10–12 minutes, and thicker fillets in 12–15 minutes.
  • The fish should look opaque and separate easily with a fork. Do not wait for deep browning.
  • If you do not have a thermometer, use the opaque-and-flaky test, but a thermometer is the most reliable check.
  • If there is a lot of liquid in the dish, spoon off the excess before serving and finish with lemon, parsley, or a little melted butter.
  • For frozen fillets, thaw first for best texture. To bake from frozen, cook at 400°F / 200°C for about 18–25 minutes and check the center carefully.
  • For a lighter version, replace some or all of the butter with olive oil.
  • For crispy parmesan tilapia, use the panko-parmesan topping in the variations section.
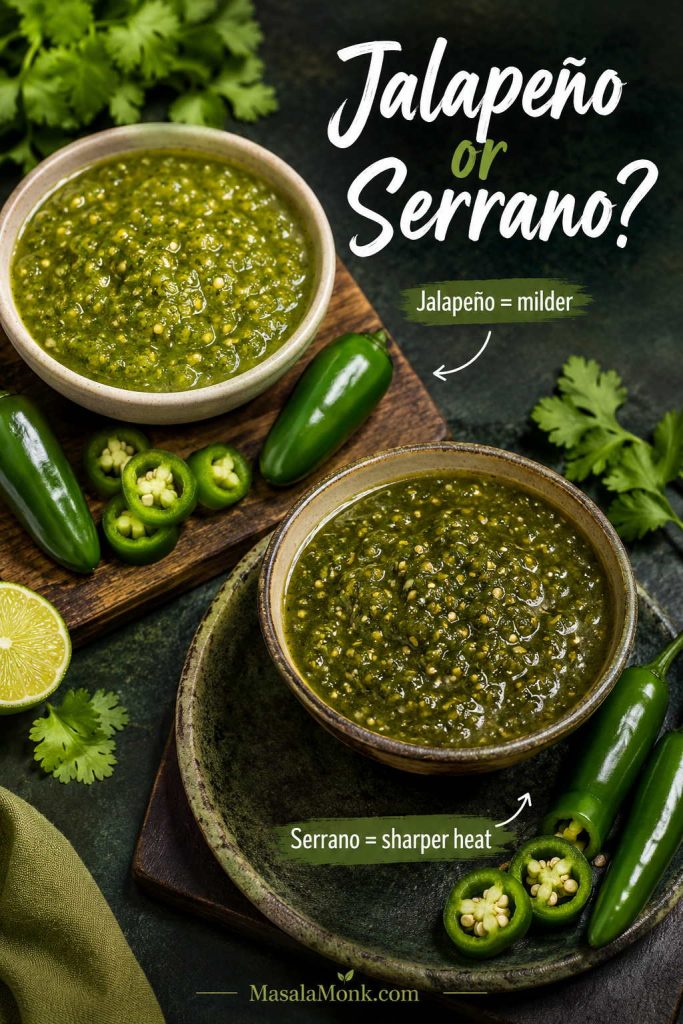
Saveable baked tilapia recipe card showing 400°F, 10 to 12 minutes, 145°F, and lemon garlic butter cues beside cooked fish.
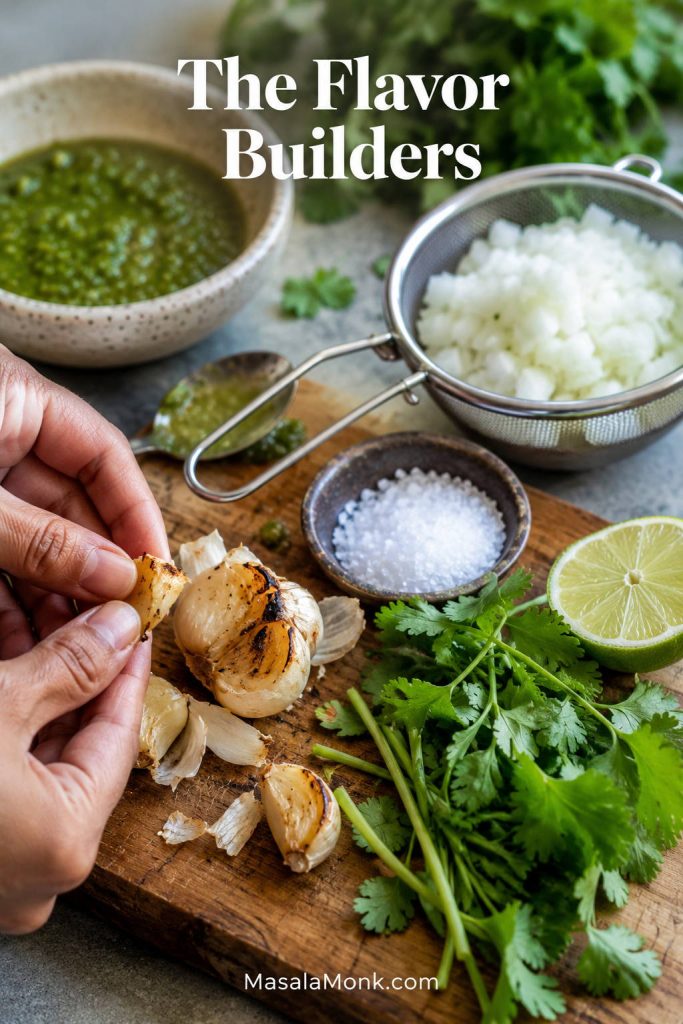
Save this baked tilapia recipe card for the core method: lemon, garlic, butter, 400°F, 10–12 minutes, and 145°F. Once those cues are familiar, the recipe becomes easy to repeat.

FAQs About Baked Tilapia

What makes this baked tilapia recipe easy?

This baked tilapia recipe is easy because the fish cooks quickly, the seasoning is simple, and you do not need to flip, fry, marinate, or guess. Most thawed fillets need only 10–12 minutes at 400°F / 200°C.

What temperature is best for baking tilapia?

400°F / 200°C is the most reliable everyday temperature for baked tilapia because it cooks the fillets quickly without drying them out as easily as a hotter oven can. It is also easy to adjust: thin fillets may need only 9–10 minutes, while thicker fillets may need 12–15 minutes.
How long does tilapia take in the oven?

Most thawed tilapia fillets take 10–12 minutes at 400°F / 200°C. The exact time depends on thickness, so check for opaque flesh, easy flaking, and an internal temperature of 145°F / 63°C.

Can you bake frozen tilapia?

You can bake frozen tilapia, but thawing first gives better texture and less liquid in the pan. When baking from frozen, use 400°F / 200°C and start checking around 18 minutes. Thicker frozen fillets may need closer to 25 minutes.

Is baked tilapia healthy?

Baked tilapia can be a light, high-protein dinner, especially when you use olive oil or a smaller amount of butter and serve it with vegetables, rice, salad, or potatoes. The main thing is to season it well so it tastes bright and satisfying without needing a heavy sauce.

Should tilapia be covered while baking?

Uncovered baking works best for this lemon garlic version because it keeps the top from getting too steamy and lets the sauce taste brighter. Foil packets are still useful when you want a softer, more steamed texture or easier cleanup.

What seasoning goes well with tilapia?

Lemon, garlic, paprika, black pepper, parsley, Cajun seasoning, lemon pepper, parmesan, chili powder, cumin, oregano, and thyme all work well because tilapia is gentle and takes on flavor easily.

Why is my baked tilapia watery?

Baked tilapia usually turns watery when frozen fillets are not fully thawed or dried before cooking. Pat the fish very dry before seasoning, and spoon off excess liquid if needed after baking.

How do you keep tilapia from drying out?

Use enough butter or olive oil, avoid overbaking, and check doneness early. Tilapia is lean and thin, so a few extra minutes can change it from flaky to dry.

Is baked tilapia good for tacos?

It works especially well for tacos because baked tilapia flakes easily and has a mild flavor that welcomes slaw, lime, salsa, and creamy sauce. Season it slightly bolder than you would for a plain dinner plate so the fish does not disappear under the toppings.

Can I use this recipe with another white fish?

This same lemon garlic method works with other mild white fish fillets, including cod, haddock, basa, swai, and pollock. Just adjust the cook time for thickness and check the thickest part for opaque flesh, easy flaking, and 145°F / 63°C.

The goal of this baked tilapia recipe is not just cooked fish. It is tilapia that tastes bright, juicy, and easy enough to make again on a busy night. Once you know the timing, the doneness cues, and how to fix watery or bland fish, this becomes one of those simple oven dinners you can trust when you need something fast, light, and actually satisfying.

Back to top