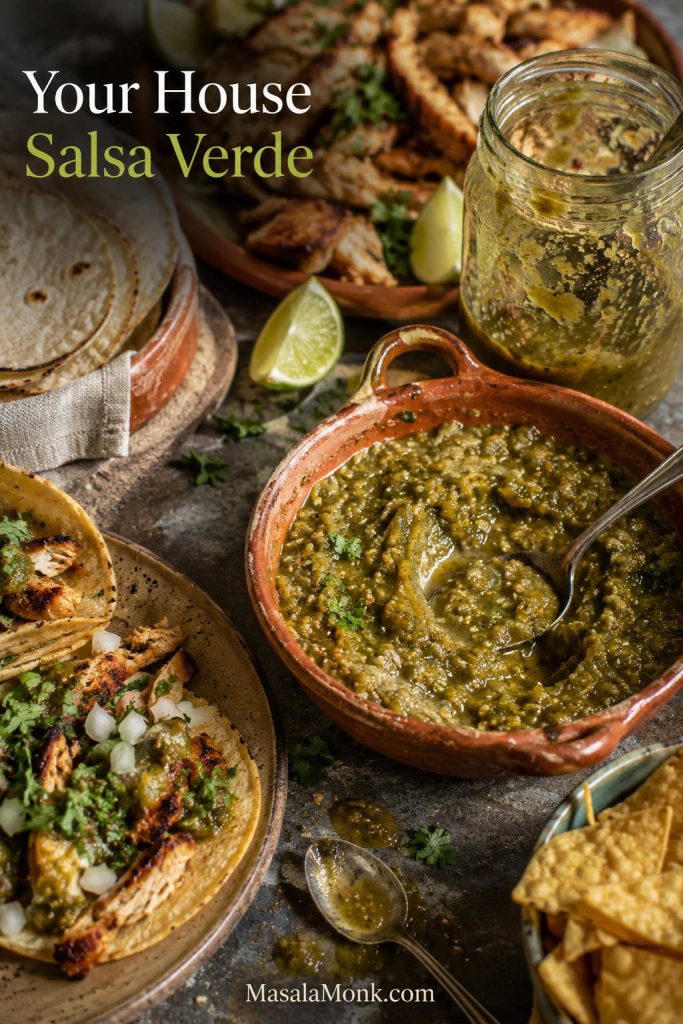
Some sauces sit politely on the side. Salsa verde wakes the plate up. It is bright, green, and alive — the kind of sauce that makes tacos taste fresher, eggs feel less ordinary, grilled chicken more exciting, and tortilla chips almost impossible to leave alone.
At its simplest, this is a one-pan, one-blender salsa: roast the tomatillos, blend everything together, then taste for salt and lime. It should be bright enough to wake up the plate, salty enough to keep you going back for one more chip, and balanced enough to spoon over dinner without thinking twice.
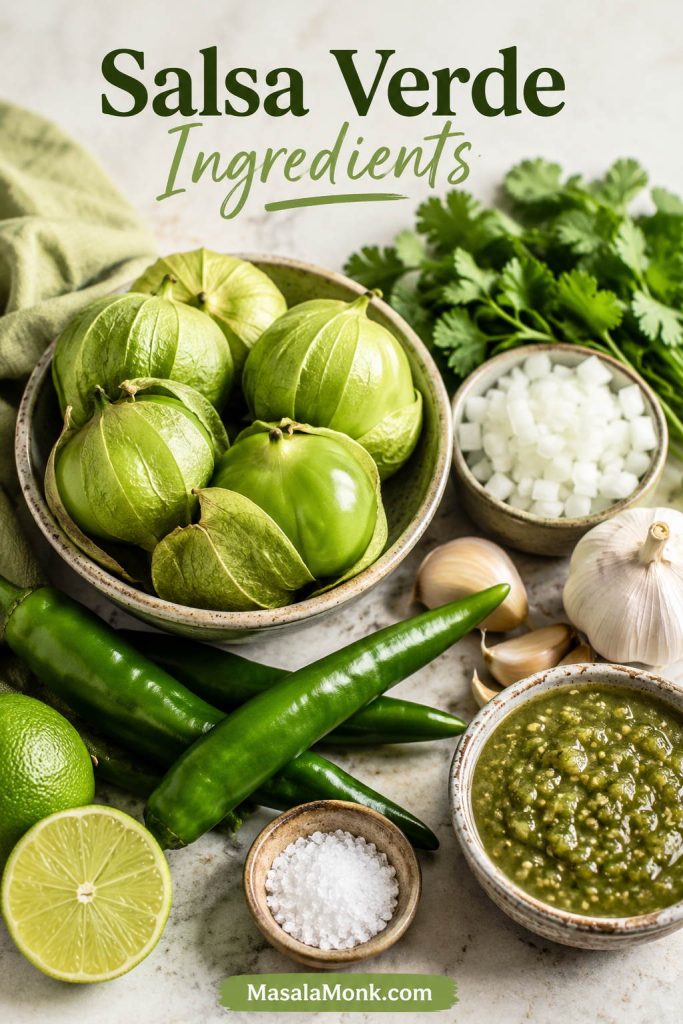
This recipe is made with tomatillos, green chiles, garlic, onion, cilantro, lime, and salt. The roasted version is the one to make first because it softens the tomatillos’ tart edge and gives the salsa a deeper, rounder flavor. Boiled, raw, and charred options are included later, but they are backup help — not homework.
One quick clarification before we start: this is Mexican salsa verde, not Italian salsa verde. Mexican salsa verde is usually made with tomatillos and green chiles. Italian salsa verde is an herb sauce made with parsley, capers, garlic, olive oil, and vinegar or lemon. Both are green sauces, but they are completely different in flavor and use.
In This Guide
Use this as a quick map for the recipe, method choices, heat control, fixes, storage, and serving ideas.
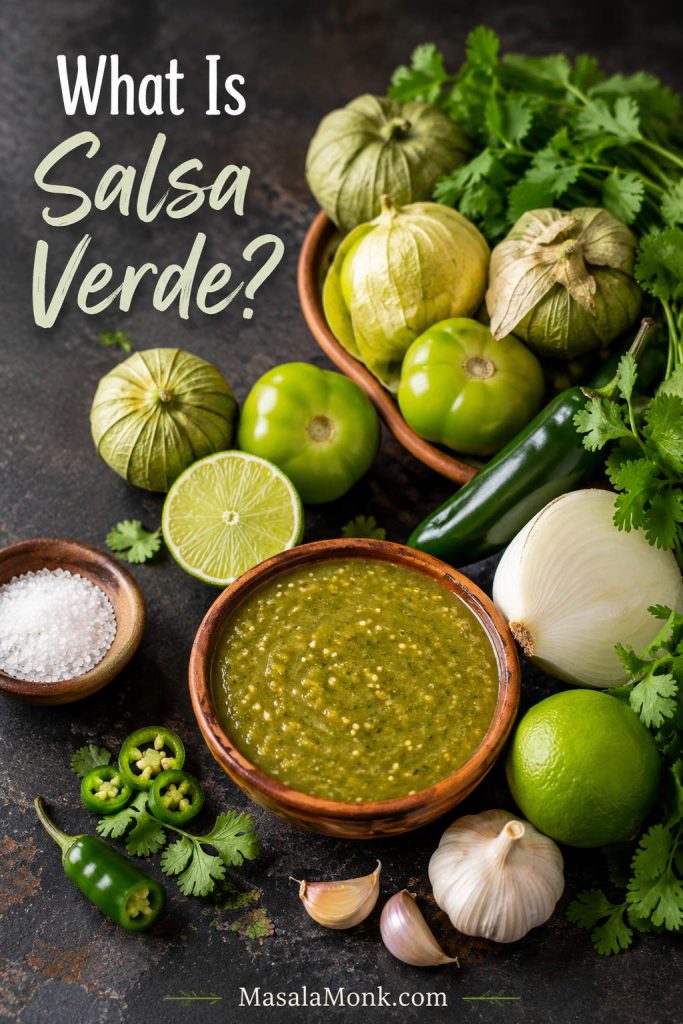
Quick Answer: What Is Salsa Verde?
Salsa verde means “green sauce,” but in Mexican cooking it usually refers to a green salsa made with tomatillos, green chiles, onion, garlic, cilantro, salt, and sometimes lime. Tomatillos are not green tomatoes; they have papery husks and a naturally tangy, slightly fruity flavor that makes them perfect for a lively green salsa.
For the fastest path, go straight to the roasted tomatillo salsa recipe. If you are deciding between raw, boiled, roasted, or charred, use the method guide first.
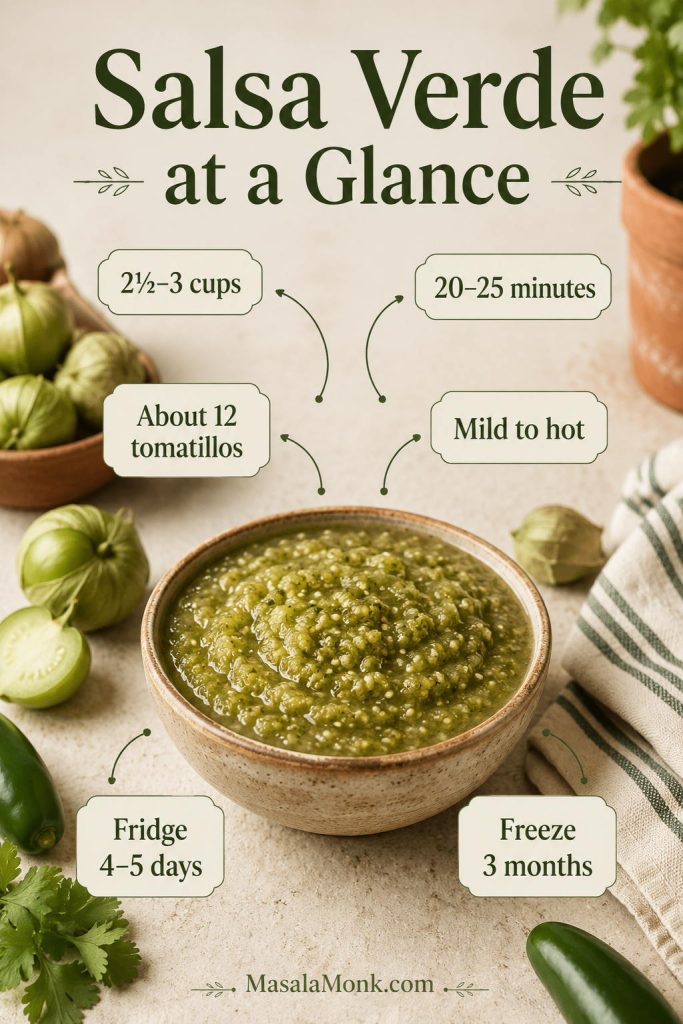
At a Glance
This is the kind of salsa that earns a permanent jar spot in the fridge: thick enough for chips, bright enough for tacos, and easy to loosen into a sauce when dinner needs help.
| Start with | Roasted tomatillo salsa verde |
|---|---|
| Yield | About 2½ to 3 cups |
| Total time | 20 to 25 minutes under the broiler, or about 25 to 30 minutes with the oven-roasted method |
| Heat level | Mild, medium, or hot depending on jalapeño or serrano amount |
| Ideal texture | Spoonable, lightly textured, not watery |
| Works with | Tacos, chips, eggs, enchiladas, chicken, chilaquiles, bowls, nachos |
| Storage | 4 to 5 days in the fridge, up to 3 months in the freezer |
Why This Works
This version is built around the things that usually go wrong: watery texture, harsh garlic, too much tartness, unpredictable heat, and flat flavor. The small details — roasting the garlic, holding back pan juices, tasting before adding extra lime, and resting before the final adjustment — keep the salsa balanced instead of thin, sharp, or dull.
- Roasting softens the tomatillos. It keeps their tangy flavor but rounds off the sharpest raw edge.
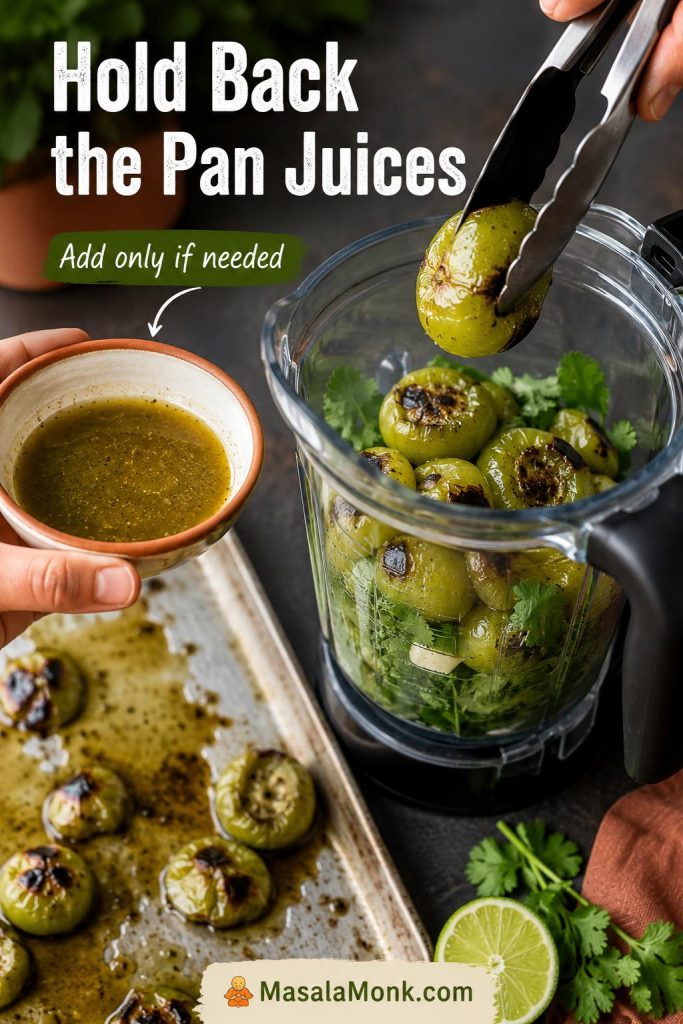
- Pan juices are added gradually. Roasted tomatillos can release more liquid than expected, so holding some back keeps the salsa from turning watery.
- Salt comes before extra lime. Under-salted salsa tastes flat, while too much lime can make already-tart tomatillos taste harsh.
- The method can match the meal. Roasted is the main recipe, but boiled, raw, and charred styles help you make the salsa smoother, brighter, smokier, or more sauce-like.
What You Need
A good batch does not need a long ingredient list. The flavor comes from balancing tangy tomatillos, green chile heat, fresh cilantro, enough salt, and a little lime.
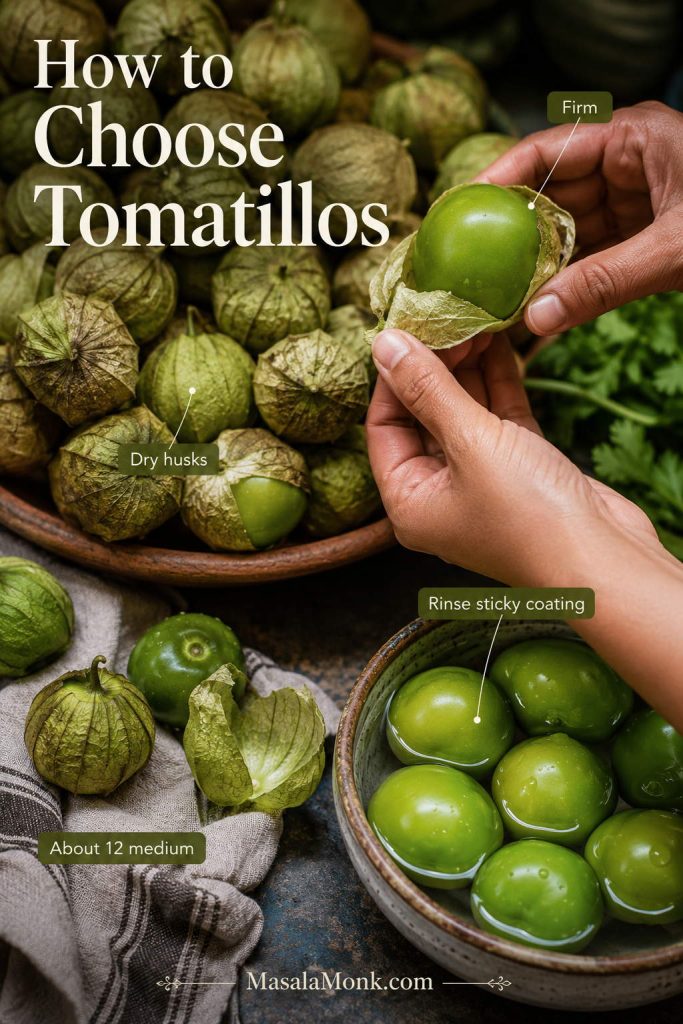
Tomatillos
Look for firm tomatillos with dry papery husks. A little stickiness under the husk is normal; rinse it off before cooking or blending. You need 1½ pounds / 680 g tomatillos, usually about 12 medium tomatillos, for about 2½ to 3 cups salsa.

To prep them, remove the husks, rinse the sticky coating, and trim away any damaged spots. Large tomatillos can be halved before roasting so they soften evenly.
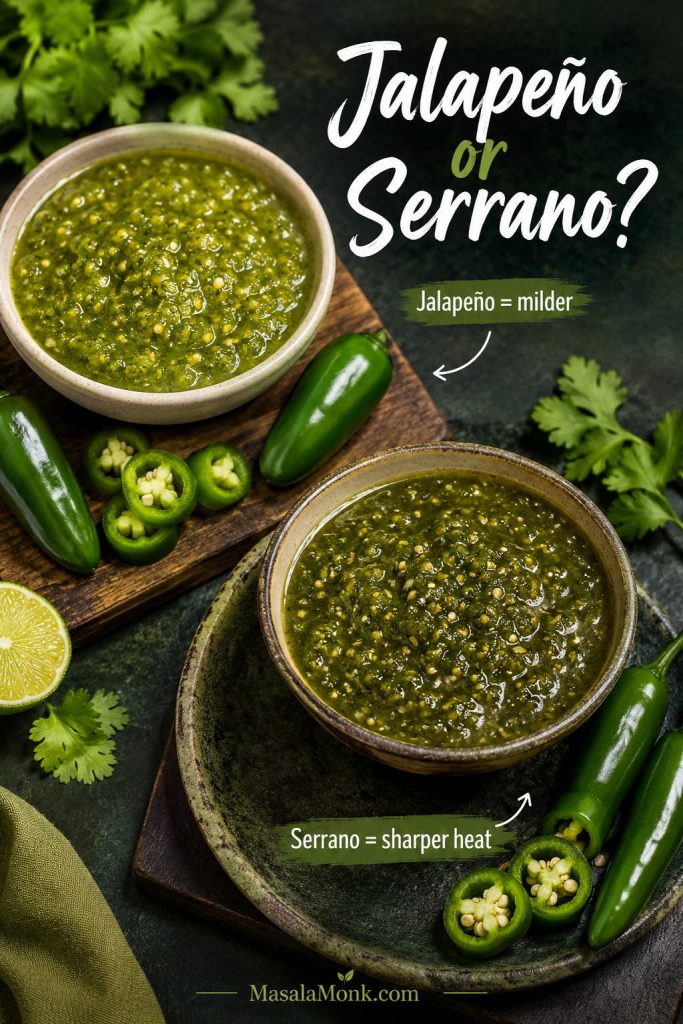
Jalapeño or Serrano
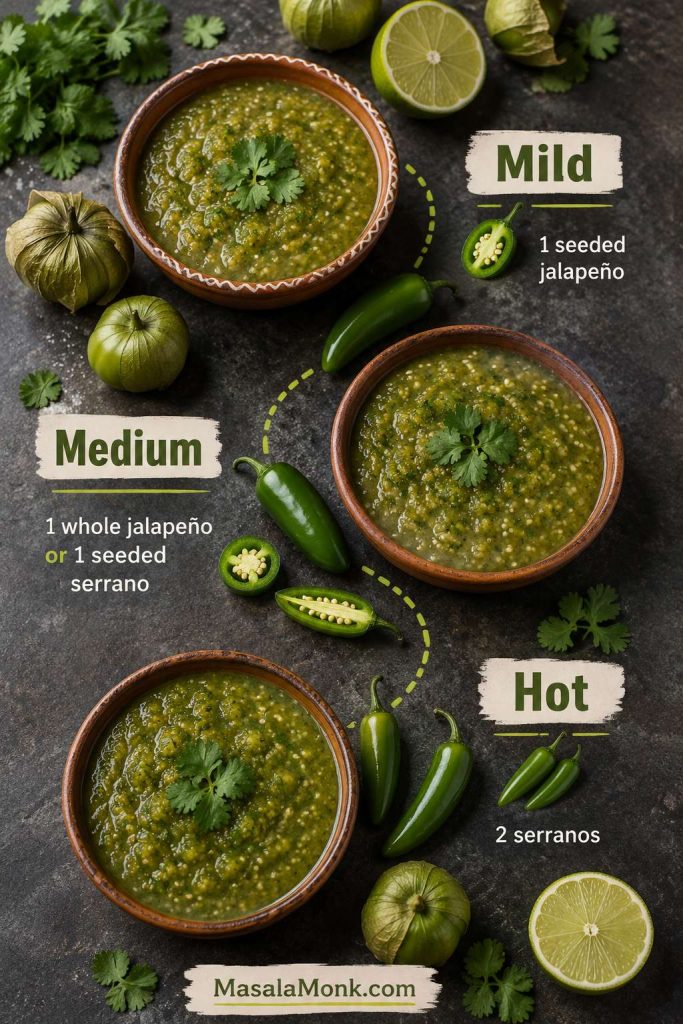
Jalapeño makes a milder, more approachable salsa. Serrano gives a sharper, more intense green-chile heat. Use one pepper for mild to medium, two serranos for hot, or three to four serranos for a very spicy batch.
Remove the seeds and white ribs for gentler heat before blending. Keep some seeds for a sharper salsa, then adjust after tasting.
Need exact mild, medium, and hot options? Use the heat level guide before blending.
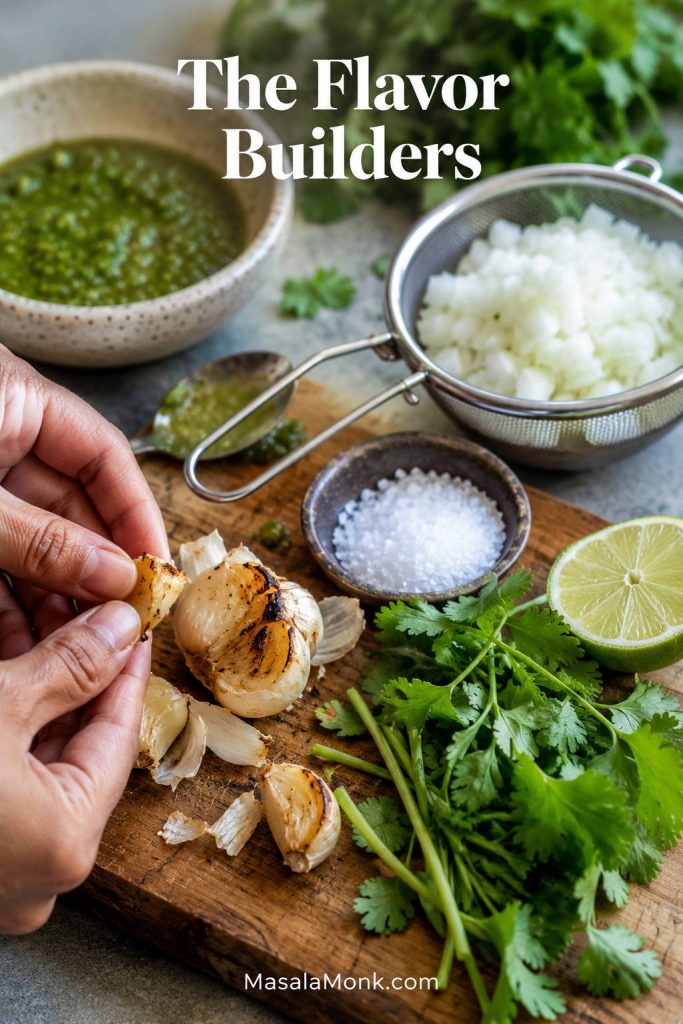
Onion, Garlic, Cilantro, Lime, and Salt
White onion gives the salsa a clean bite. Rinsing chopped onion under cold water softens harsh raw onion flavor without making the sauce dull. Garlic roasts with the tomatillos in the main recipe so it turns mellow instead of sharp.
Cilantro brings the classic fresh green finish, and tender stems are fine because they carry plenty of flavor. Lime brightens the batch, but tomatillos are already tart, so add it with a light hand and adjust after tasting.
How to Make It
Roast the tomatillos, chile, and garlic until blistered, then blend them with onion, cilantro, lime, and salt. Keep the texture lightly spoonable and add water only at the end when the salsa is too thick.

The one thing to watch is liquid. Roasted tomatillos can release a lot of juice, so add the tomatillos first, pulse, and use the pan juices gradually only if the salsa needs them.
Do not worry if one batch tastes a little brighter, smokier, or spicier than the last. Tomatillos and chiles vary, so the final taste check is part of making the salsa yours.

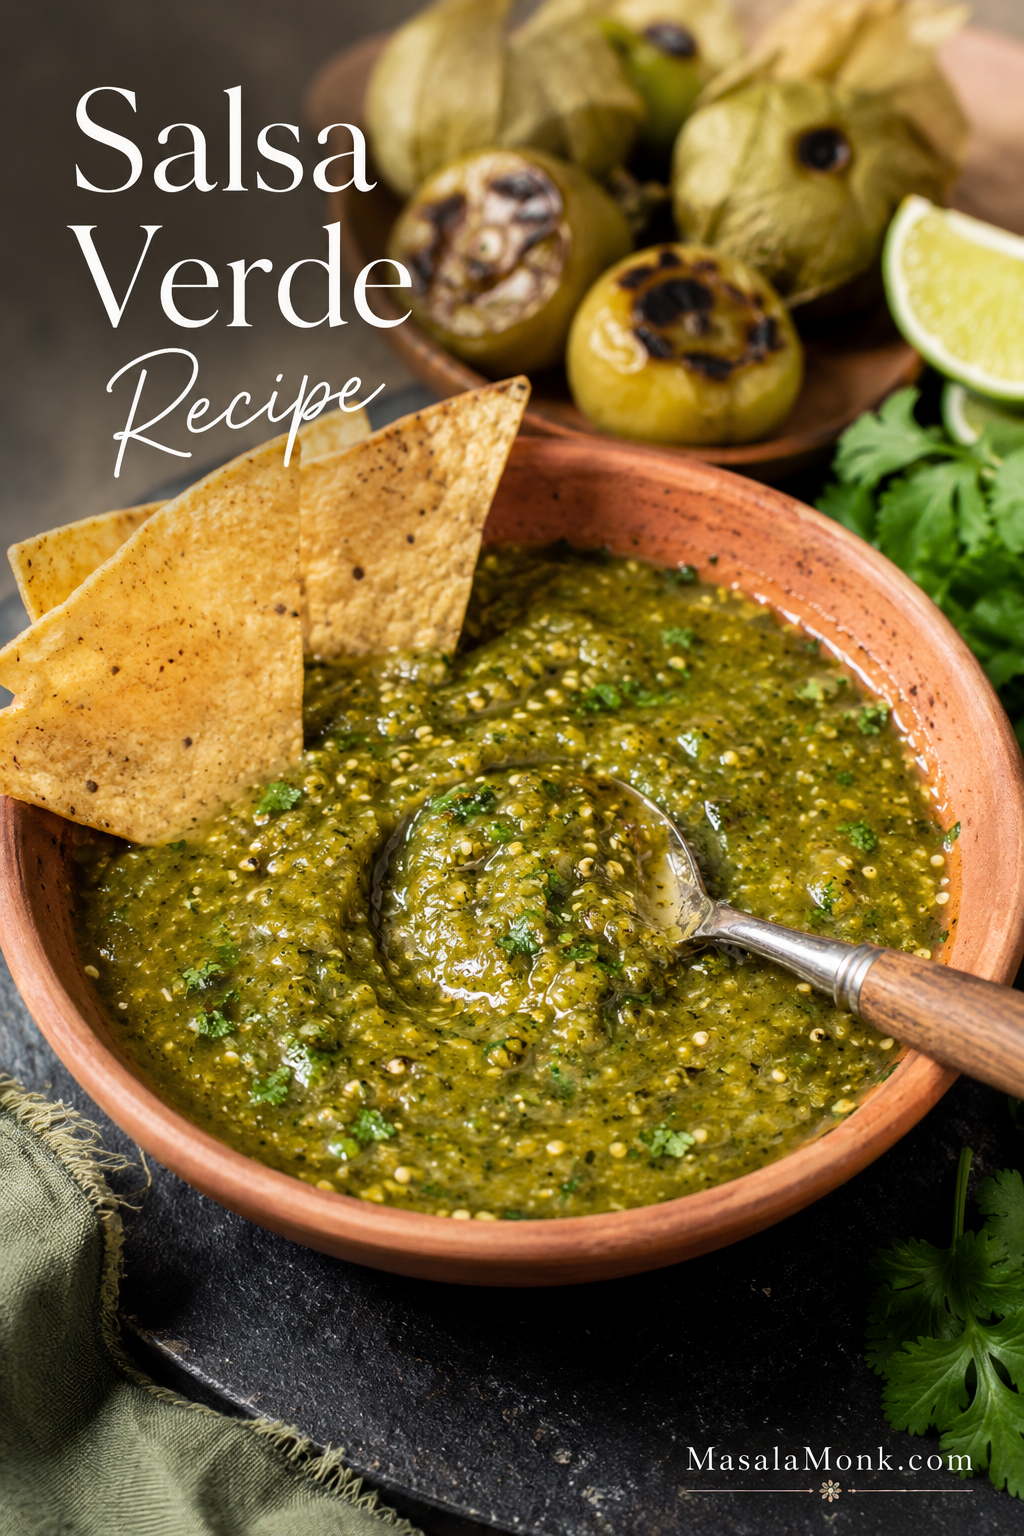
Roasted Tomatillo Salsa Verde Recipe
Roasted Tomatillo Salsa
This roasted tomatillo salsa is tangy, lightly smoky, and spoonable, with enough body for chips and enough brightness for tacos, eggs, chicken, chilaquiles, bowls, and nachos.
Equipment
- Rimmed baking sheet
- Foil or a bare baking sheet for broiling
- Blender or food processor
- Tongs
- Fine-mesh strainer, optional, for rinsing onion
- Airtight jar or container
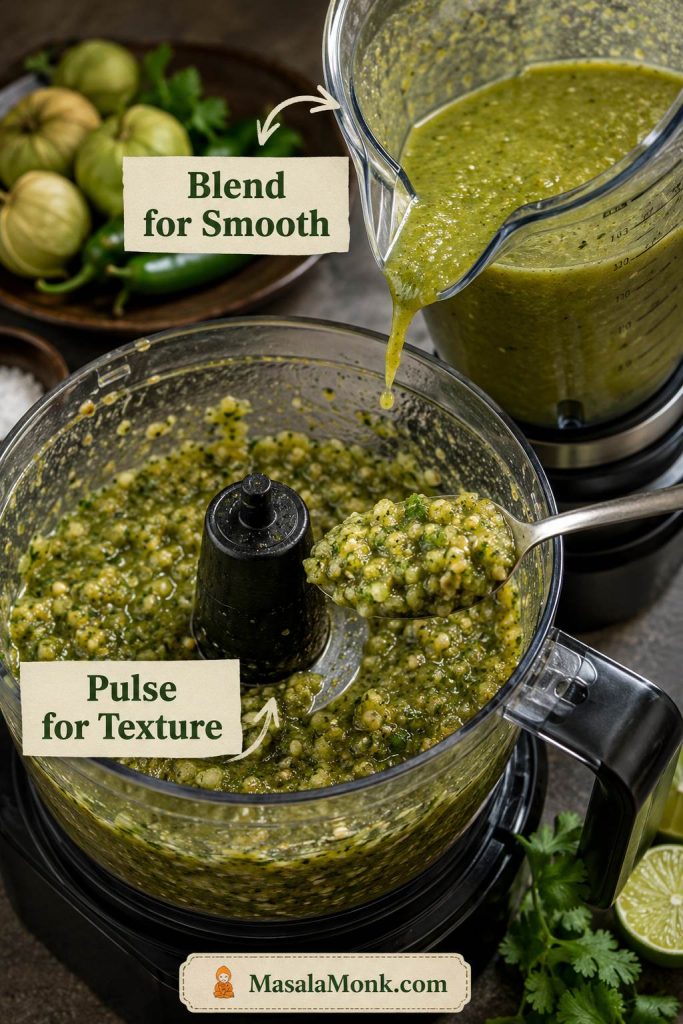
Blender or food processor? Use a food processor for a lightly textured salsa and a blender for a smoother sauce-style salsa.
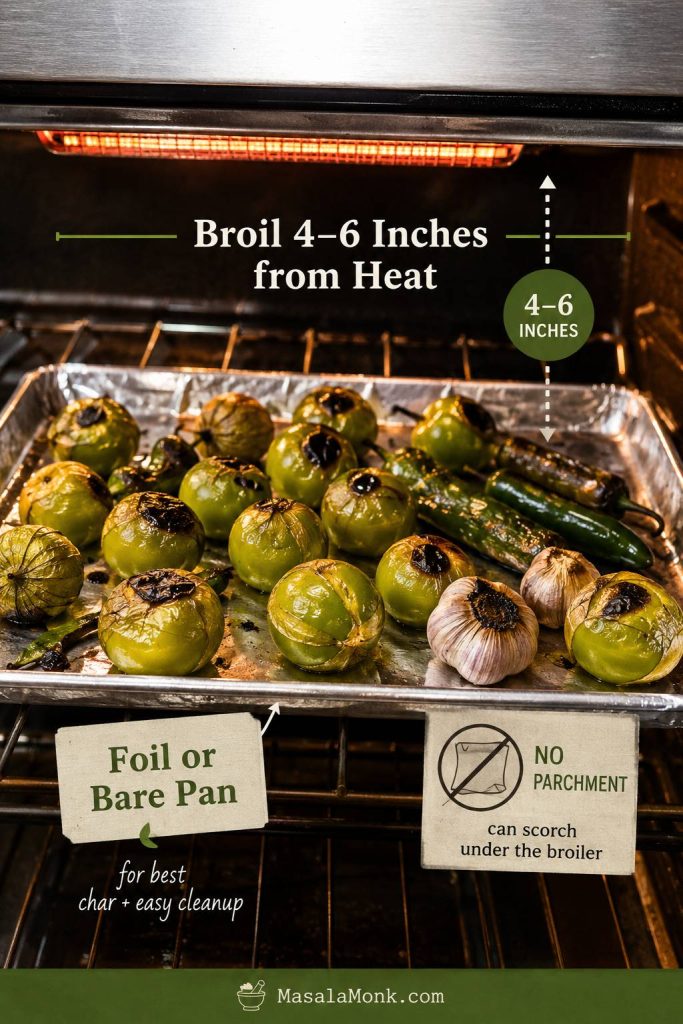
Broiler note: Use foil or a bare rimmed baking sheet under the broiler. Do not place parchment directly under the broiler. Parchment is only for the 450°F oven method when rated for that heat.
Ingredients
- 1½ pounds tomatillos, husked and rinsed, about 680 g or 12 medium tomatillos
- 1 to 2 jalapeños or serranos, roughly 15 to 40 g depending on size
- 2 to 3 garlic cloves, unpeeled for roasting
- ½ cup chopped white onion, about 70 g
- ½ cup chopped cilantro leaves and tender stems, about 8 to 12 g
- 1 to 2 tablespoons fresh lime juice, 15 to 30 ml, to taste
- ¾ teaspoon fine salt, about 4 g, plus more to taste
- 1 to 3 tablespoons water, broth, cooking liquid, or pan juices, only as needed
Instructions
- Prep the tomatillos. Remove the papery husks and rinse off the sticky coating. Pat dry before roasting.
- Set up the pan. Place tomatillos, jalapeño or serrano, and unpeeled garlic cloves on a foil-lined or bare rimmed baking sheet. Halve large tomatillos and place them cut-side down.
- Broil the first side. Broil 4 to 6 inches from the heat for 5 to 7 minutes, until the tomatillos begin to blister and soften.
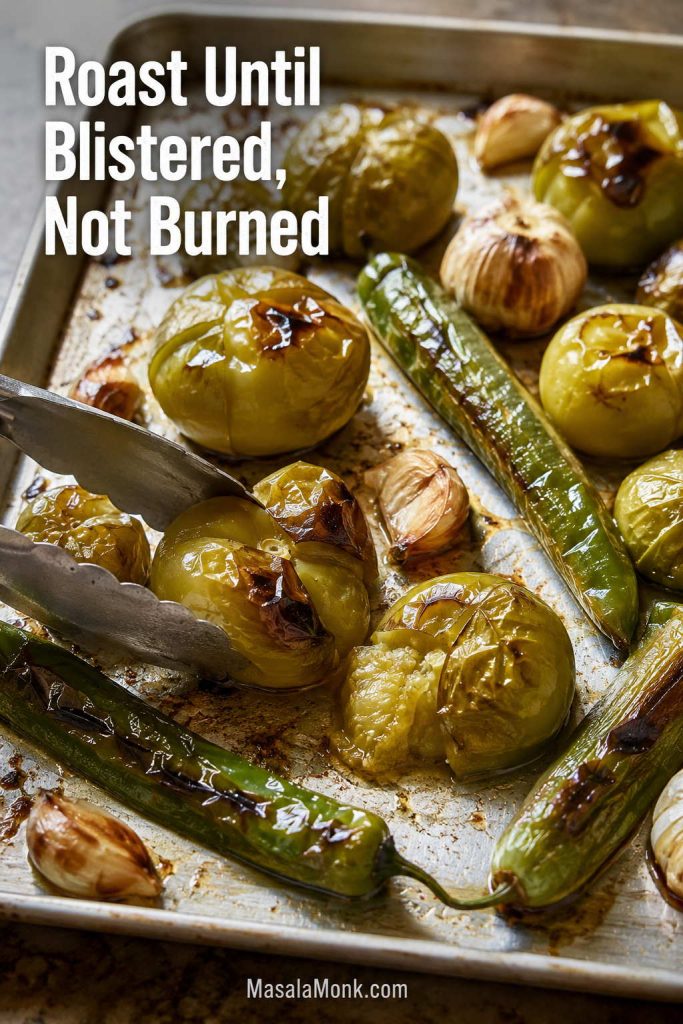
- Finish roasting. Use tongs to turn the chile and garlic as needed, then broil another 4 to 6 minutes. The tomatillos may collapse; that is fine. You are looking for browned spots and a tangy-sweet smell instead of a raw, grassy one.
- Cool briefly. Let the roasted ingredients cool for a few minutes. Peel the garlic. Stem the chile. Remove seeds for milder salsa.
- Rinse the onion, optional. For a cleaner onion flavor, rinse the chopped onion under cold water and drain well.
- Blend carefully. Add the roasted tomatillos, chile, garlic, onion, cilantro, 1 tablespoon lime juice, and salt to a blender or food processor. When there is a lot of liquid on the pan, hold some of it back at first.
- Set the texture. Pulse until mostly smooth but still lightly textured. Blend longer only for a thinner sauce-style salsa.
- Adjust liquid. Add pan juices, water, broth, or cooking liquid 1 tablespoon at a time only when the salsa is too thick.
- Taste. Rest 10 to 15 minutes, then taste again. Add salt first when it tastes dull. Add more lime only when it needs brightness.
- Serve or store. Serve warm, room temperature, or chilled. Refrigerate leftovers in an airtight jar.
Notes
- For mild salsa, use 1 seeded jalapeño.
- For medium heat, use 1 whole jalapeño or 1 seeded serrano.
- For a hot batch, use 2 serranos.
- Without a broiler, roast at 450°F / 230°C for 15 to 20 minutes. Total time will be closer to 25 to 30 minutes.
- For storage details, see how to store and freeze it. For shelf-stable jars, read the canning safety note before changing the recipe.
Before broiling, pan setup matters: keep the tomatillos close enough to blister, and use foil or a bare rimmed pan instead of parchment.
Texture depends on the tool: a food processor keeps the salsa lightly textured, while a blender makes it smoother and more sauce-like.
You can stop with the roasted recipe above and be happy. Everything after this point is optional help for method, texture, heat, and use cases.
Raw, Boiled, Roasted, or Charred?
Once you know the base recipe, the method becomes your style choice: raw for sharp and fresh, boiled for smooth, roasted for balanced, and charred for smoky.
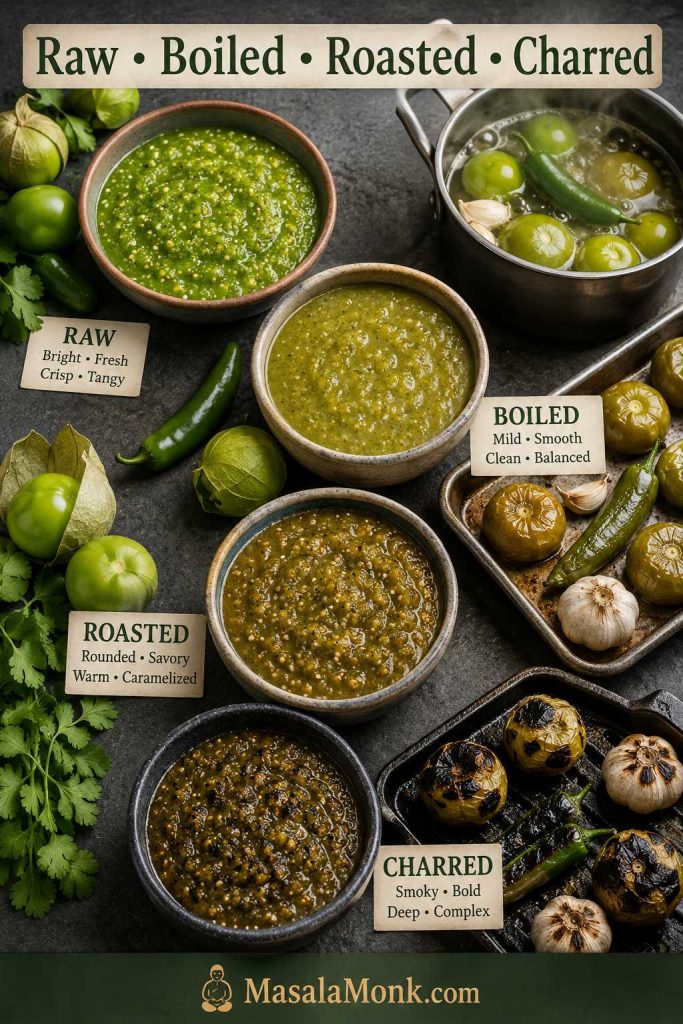
| Method | How to Do It | Flavor | Works With |
|---|---|---|---|
| Raw | Blend raw tomatillos, chile, onion, cilantro, lime, and salt. | Sharp, tart, fresh, grassy. | Tacos, grilled meats, rich or fatty fillings. |
| Boiled | Simmer tomatillos, chile, and garlic for 5 to 12 minutes, then blend. | Smoother, cleaner, softer. | Taqueria-style salsa, enchiladas, chilaquiles, chicken. |
| Roasted | Broil 9 to 13 minutes total, or roast at 450°F for 15 to 20 minutes. | Balanced, rounded, lightly smoky. | The most flexible homemade version. |
| Charred | Broil until deeply blistered, blend, then optionally simmer in 1 tablespoon oil for 2 to 3 minutes. | Smoky, deeper, more intense. | Restaurant-style salsa, tacos, grilled meats, bold bowls. |
If you are unsure, choose roasted. It behaves best on a normal weeknight: bright enough for tacos, thick enough for chips, and rounded enough to spoon over dinner.
If the salsa looks too thick or too loose after blending, check the texture guide before adding more liquid.
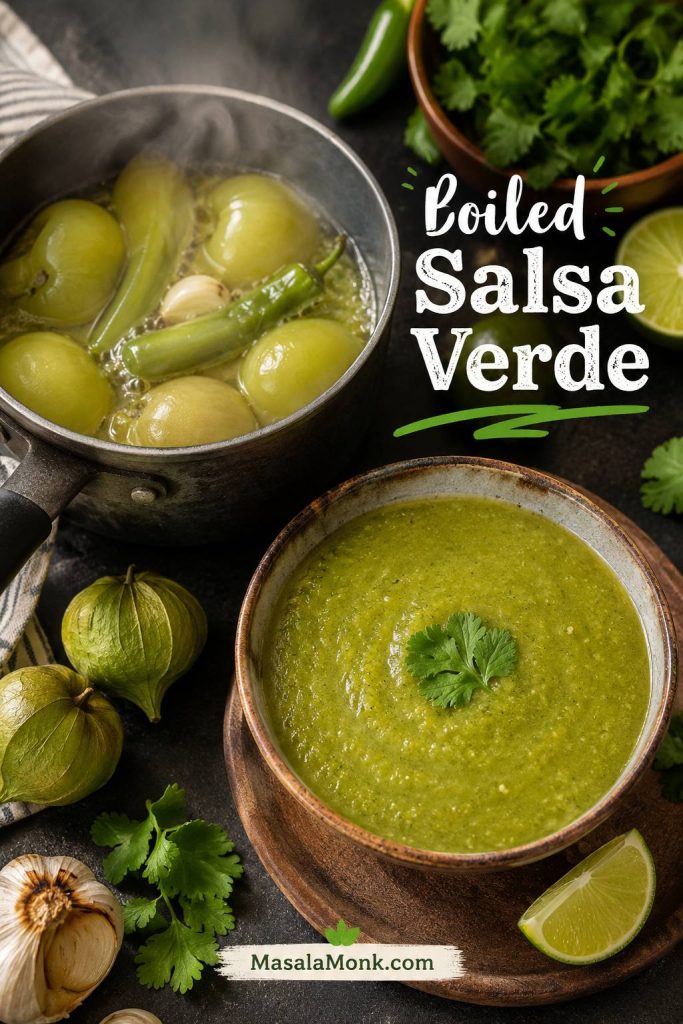
Boiled Version
The boiled version is smooth, clean, and useful when you need a green salsa that behaves more like a sauce. Place the tomatillos, chile, and garlic in a saucepan, cover with water, and simmer until the tomatillos turn dull green and soften. This usually takes 5 to 12 minutes depending on size.
Stop when the tomatillos are soft but not completely falling apart. Drain them, save a little cooking liquid, then blend with onion, cilantro, salt, and lime to taste. Add the reserved liquid only as needed. This style is especially good for enchiladas, chilaquiles, simmered chicken, and everyday taco-shop-style salsa.
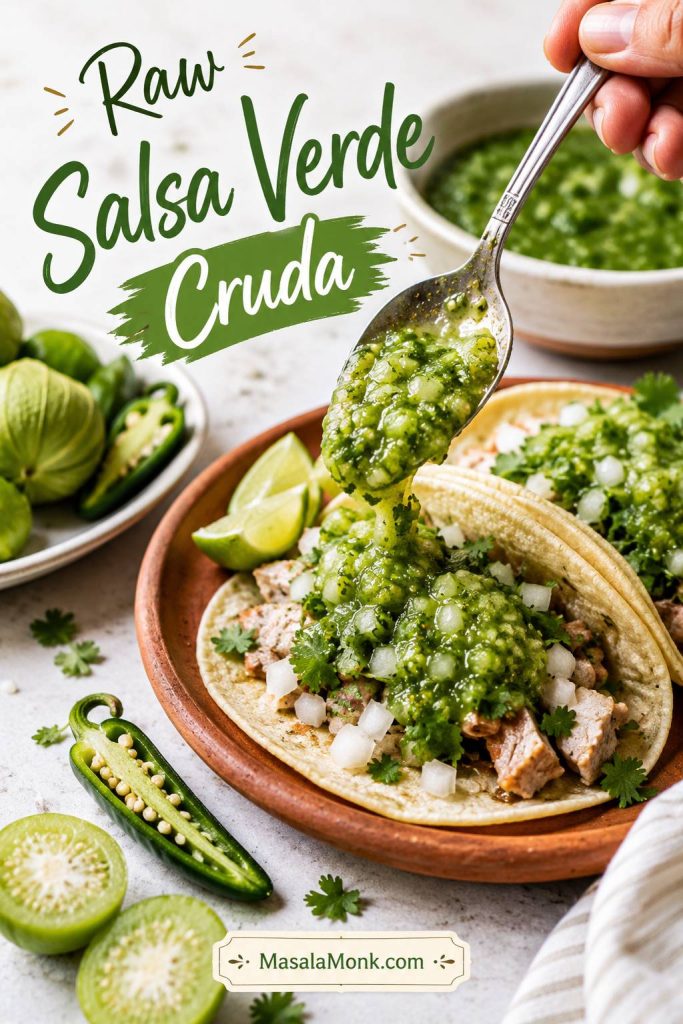
Raw Version
Raw salsa verde, also called salsa verde cruda, is the fastest style. It is bracing and fresh, with a sharper edge than cooked salsa verde. Use it for a fresh taco salsa when a more assertive tomatillo flavor sounds good.
Because raw tomatillos can be quite tangy, taste carefully before adding much lime. Salt is usually more important than extra acid in this version.
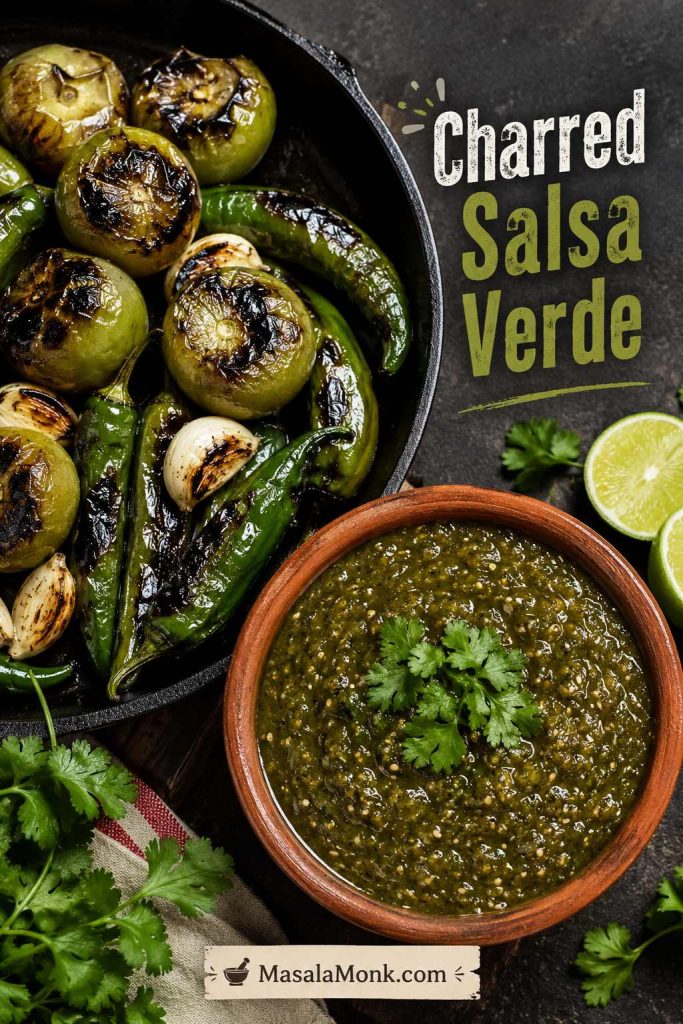
Charred Version
The charred version is for deeper flavor. Let the tomatillos and chiles blister more aggressively under the broiler. After blending, heat 1 tablespoon neutral oil in a saucepan, add the salsa, and simmer it for 2 to 3 minutes. The color will darken slightly and the flavor will become more rounded.
This step is optional, but it is excellent for tacos, grilled meats, chilaquiles, or chicken.
Mild, Medium, or Hot
For a table of mixed heat levels, start gentler than your own taste. You can always make the next batch sharper, but once this batch is too hot, you need extra tomatillos, avocado, or crema to bring it back.
| Heat Level | Use This | Works For |
|---|---|---|
| Mild | 1 seeded jalapeño | Kids, parties, chips, mild tacos. |
| Medium | 1 whole jalapeño or 1 seeded serrano | Everyday salsa with a gentle kick. |
| Hot | 2 serranos | Tacos, grilled meats, spicy bowls. |
| Very hot | 3 to 4 serranos, with some seeds included | Heat lovers and bold taqueria-style salsa. |
If the batch is already hotter than you wanted, go straight to the too-spicy fix instead of adding water.
If you like building heat with different chiles, MasalaMonk’s pepper sauce guide goes deeper into jalapeño, habanero, chipotle, and other chile-based sauces.
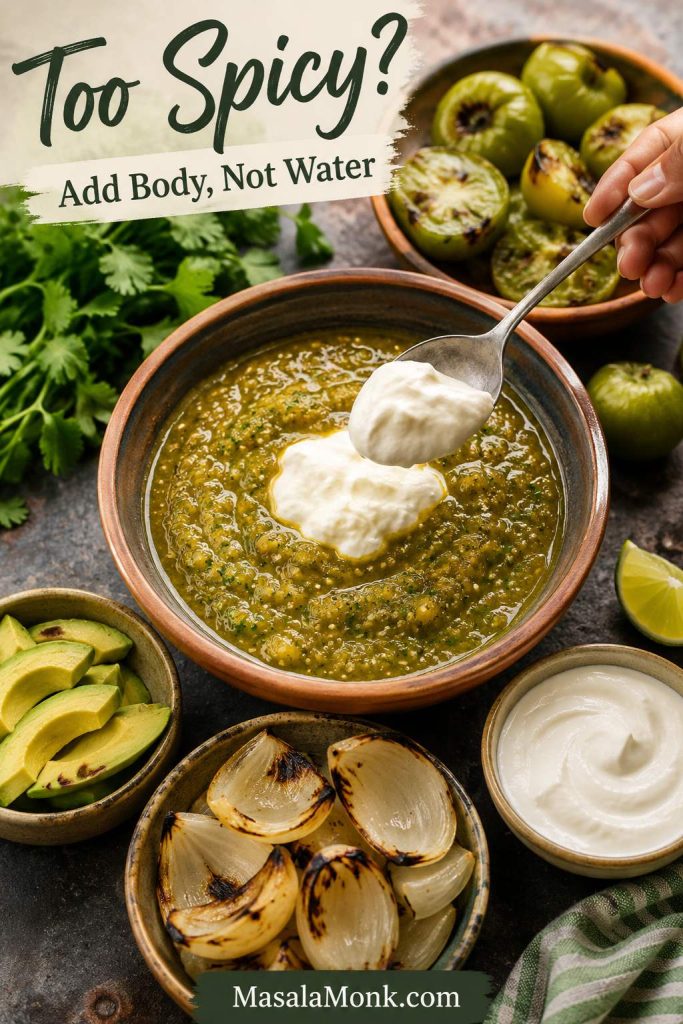
Once the salsa is already blended and too spicy, do not add water first. Water will thin the sauce without softening the burn much. Instead, blend in more cooked tomatillo, avocado, sour cream, Mexican crema, or a little more roasted onion, depending on the flavor you want.
The Right Texture
Good salsa verde should be spoonable, lightly glossy, and a little textured. It should not pour like water, but it should not be stiff like guacamole either.
For chips, keep it medium-thick so it clings. On tacos, it should be spoonable and a little loose, so it runs slightly into the filling. For enchiladas or chilaquiles, thin it with broth, water, or cooking liquid so it coats instead of clumping. Bowls and nachos need a thicker salsa so it does not flood the plate.
Serving temperature changes the way it feels, too. Chilled works best for chips, room temperature is great for tacos, and warm is useful when the salsa acts like a sauce for eggs, chicken, enchiladas, or chilaquiles.
If the texture has already gone wrong, the troubleshooting section covers watery, too thick, bland, bitter, tart, and too-spicy salsa.

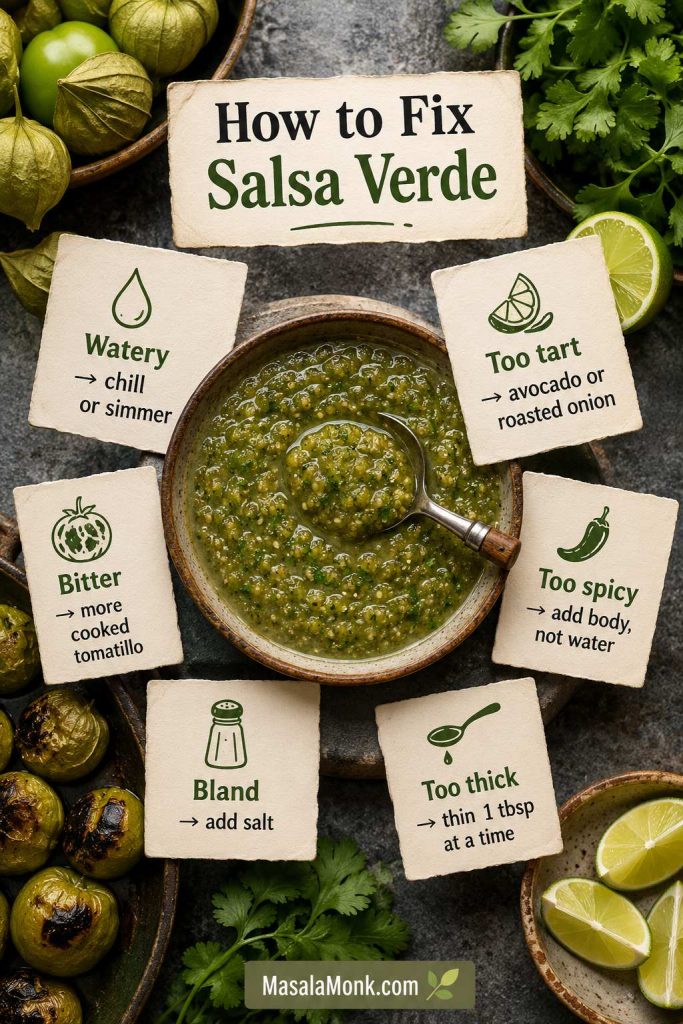
How to Fix the Flavor or Texture
Most salsa problems are not disasters. They are usually small balance issues: too much liquid, not enough salt, too much heat, or tomatillos that were sharper than expected.
| Problem | Likely Cause | How to Fix It |
|---|---|---|
| Watery salsa | Too much liquid, hot salsa not rested, or over-blending. | Chill first. If still loose, simmer briefly to reduce or blend in avocado for a creamy style. |
| Too tart | Very sharp tomatillos or too much lime. | Add roasted onion, a tiny pinch of sugar, or avocado. |
| Bitter | Old tomatillos, over-charred skins, or harsh raw garlic. | Add more cooked tomatillo, cilantro, salt, or a little lime. Next time, roast until blistered, not scorched. |
| Too spicy | Too many serranos or too many seeds. | Blend in more cooked tomatillo, avocado, crema, sour cream, or roasted onion. |
| Bland | Usually not enough salt. | Add salt in small pinches, rest for a few minutes, then taste again. |
| Too thick | Not enough liquid or salsa chilled very thick. | Add water, broth, cooking liquid, or reserved pan juices 1 tablespoon at a time. |
Watery Salsa Verde
Watery salsa verde is usually easy to rescue. Tomatillos release liquid as they cook, and warm salsa can seem thinner than chilled salsa. First, let it cool or refrigerate it for 30 minutes. When it is still too loose, simmer it in a small saucepan for a few minutes until it thickens.
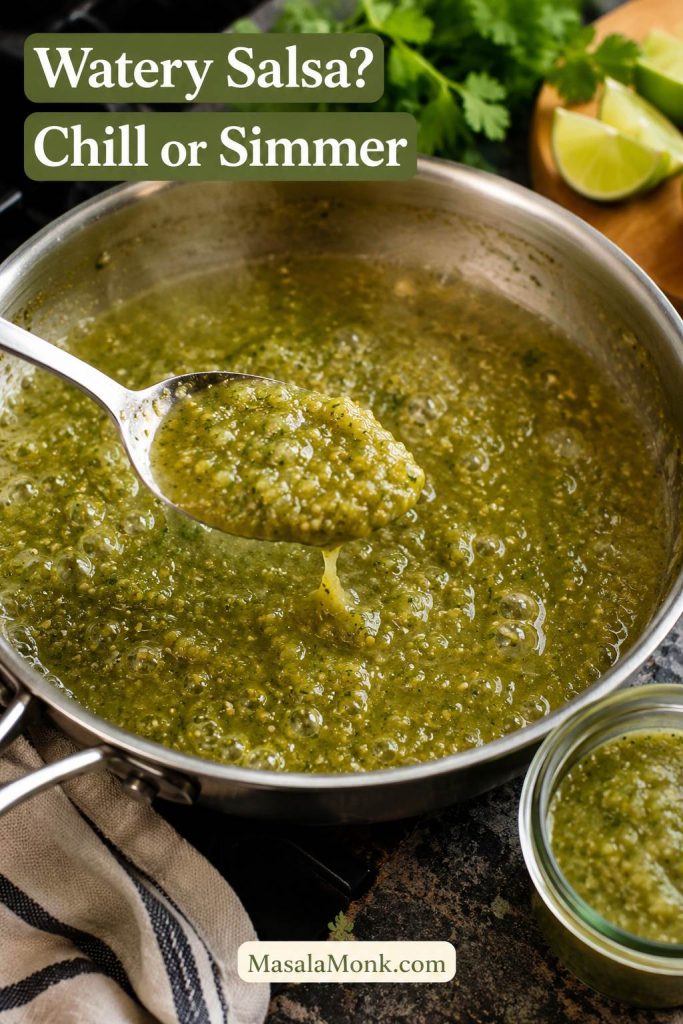
For tacos and chips, you want salsa that clings. For enchiladas and chilaquiles, a looser sauce is actually useful.
Bitter or Too Tart
Tomatillos are naturally tart, so add lime slowly. When the salsa tastes too sharp, add roasted onion, a tiny pinch of sugar, or avocado. Avocado is especially helpful because it softens both tartness and heat.
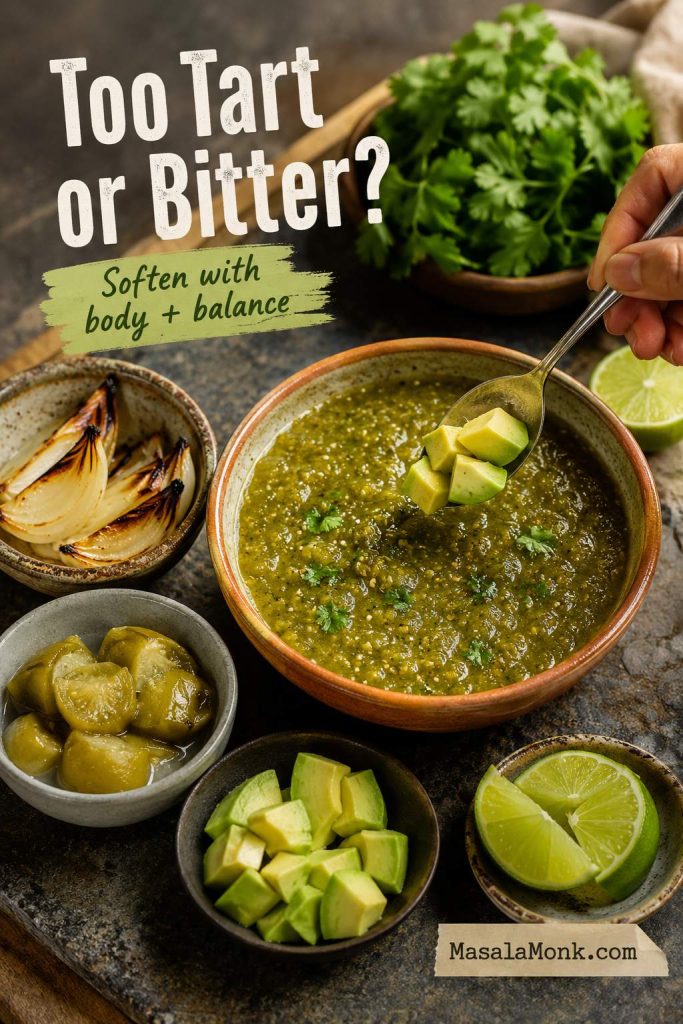
Bitterness usually comes from old tomatillos, over-charred skins, or too much raw garlic. Next time, use firm fresh tomatillos and roast until blistered and browned in spots, not blackened all over.
Too Spicy
The easiest way to cool down heat is to add body, not water. Cooked tomatillos, avocado, sour cream, Mexican crema, or roasted onion will calm the burn while keeping the sauce useful.
Served with rich foods like pork, fried eggs, cheese, or grilled chicken, a slightly spicy batch may taste more balanced once it is on the food.
Bland or Flat
When the salsa tastes dull, add salt in small pinches, stir, and wait a minute before tasting again. Once the tomatillo and chile flavor wakes up, you can decide whether it needs more brightness.
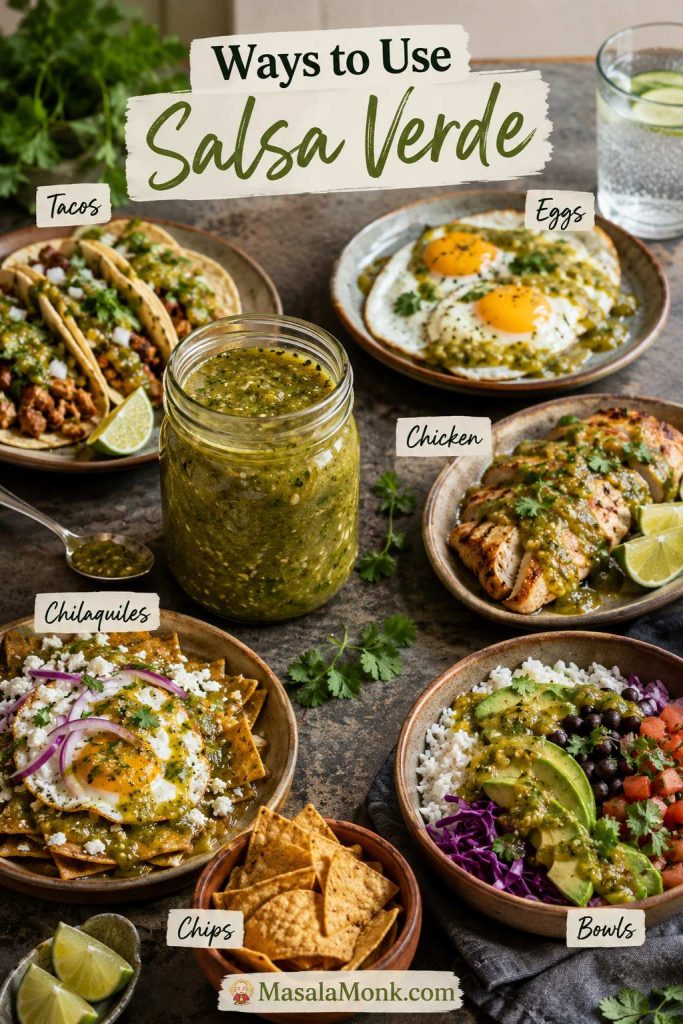
Ways to Use It Beyond Chips
Chips may be the first thing that comes to mind, but this is where the jar starts earning its space in the fridge. It can wake up eggs, rescue leftover chicken, make plain rice or tortillas feel intentional, and turn a simple plate into dinner.
Use the sections below for quick details on tacos, enchiladas, salsa verde chicken, chilaquiles verdes, and eggs, bowls, and nachos.
| Use | Practical Guide | Texture to Aim For |
|---|---|---|
| Chips | Serve chilled or room temperature with tortilla chips or vegetables. | Medium-thick and scoopable. |
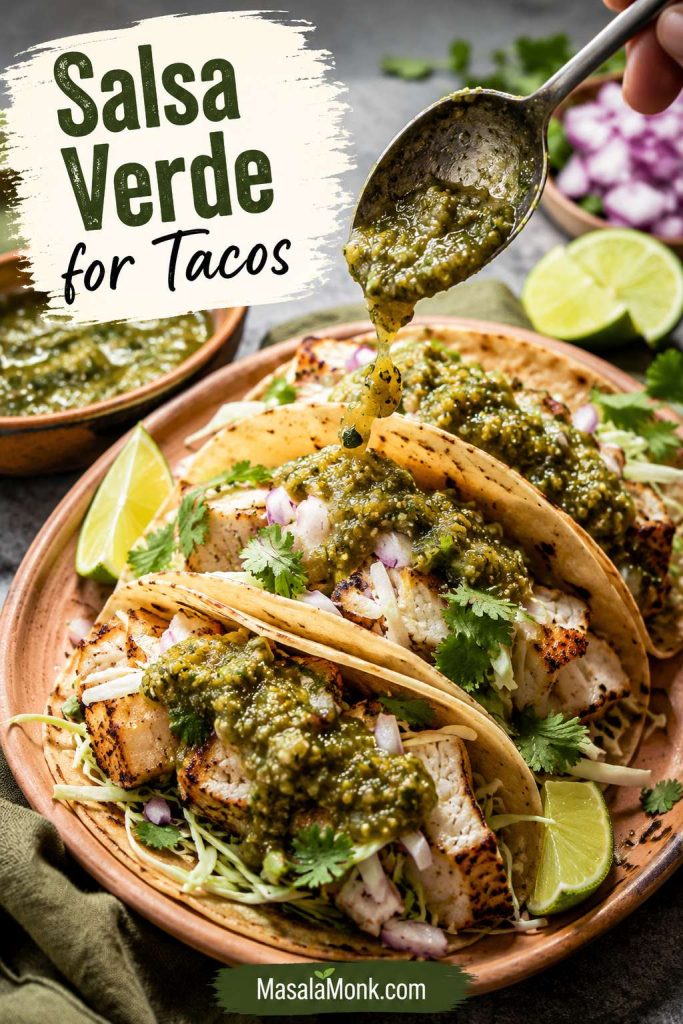
| Tacos | Use 1 to 2 tablespoons per taco. | Spoonable, bright, salty. |
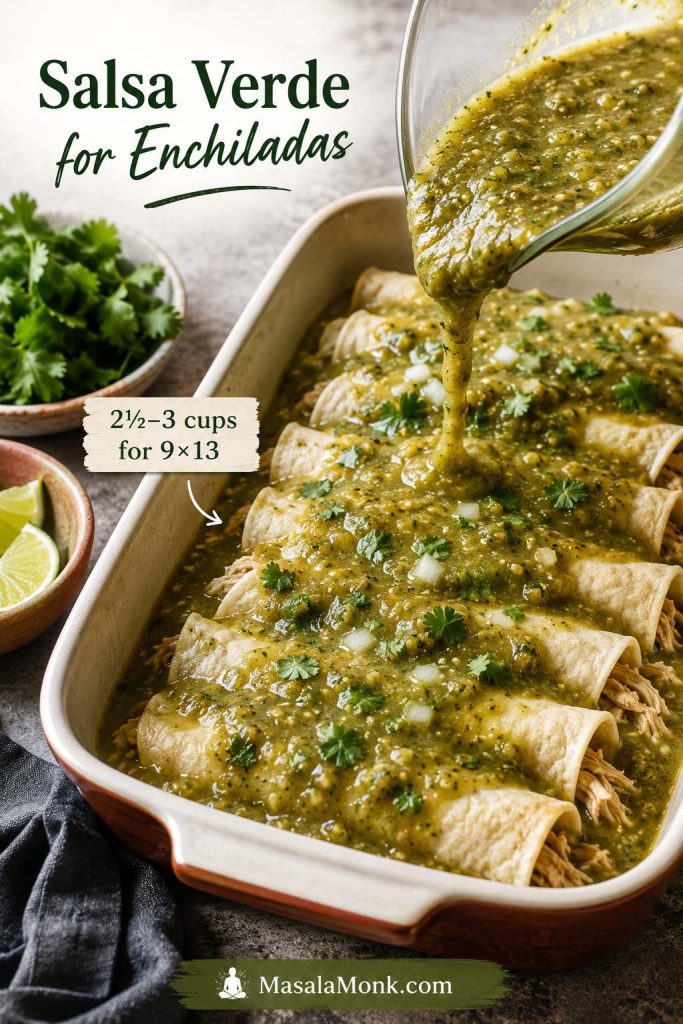
| Enchiladas | Use about 2 cups for a small 8-inch pan, or 2½ to 3 cups for a 9×13-inch pan. | Looser, simmered, saucy. |
| Chicken | Use 1½ to 2 cups salsa for about 1½ pounds boneless chicken. | Thicker for spooning, looser for simmering. |
| Chilaquiles | Warm 2 cups salsa with ½ to 1 cup broth or water. | Loose enough to coat chips. |
| Eggs | Use about ¼ cup warm salsa per serving. | Spoonable and warm or room temperature. |
| Bowls and nachos | Spoon over at the end, not too early. | Thicker so it does not flood the plate. |
That is the real value of a good batch: it starts as salsa, then quietly becomes the sauce that helps you finish the week’s tacos, eggs, bowls, and chicken.
Tacos
On tacos, the salsa should be bold enough to cut through rich fillings. Raw salsa is sharp and fresh. Roasted is more rounded. Charred is excellent with grilled meats, crispy potatoes, mushrooms, chicken, pork, or eggs. It works beautifully on fish tacos when you want a clean, bright topping.
Enchiladas
For enchiladas, make the salsa looser than you would for chips. Simmer it briefly in a little oil or broth, then use enough to coat the tortillas well. Use about 2 cups for a small 8-inch pan, or 2½ to 3 cups for a 9×13-inch pan, depending on how saucy you like your enchiladas.
Salsa Verde Chicken
Salsa verde chicken is one of the easiest ways to turn this sauce into dinner. Use 1½ to 2 cups for about 1½ pounds boneless chicken, whether you simmer raw chicken until cooked through or spoon the sauce over sliced baked chicken breast.
Once shredded, the chicken works in tacos, bowls, nachos, quesadillas, or enchilada filling.

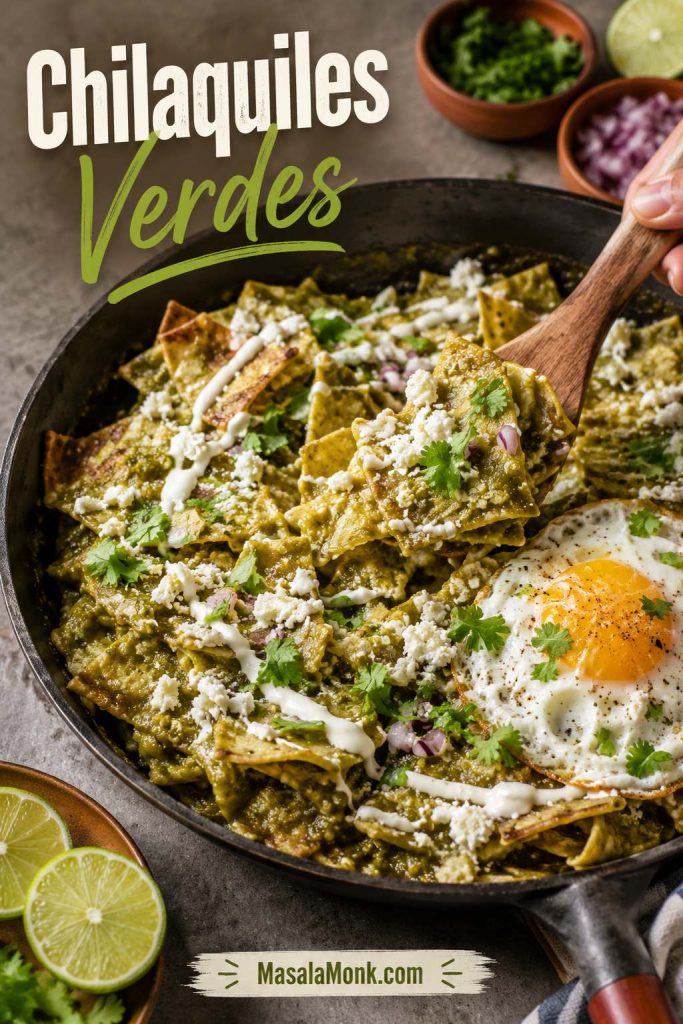
Chilaquiles Verdes
Chilaquiles verdes need a looser sauce than tacos. Warm 2 cups salsa with ½ to 1 cup broth or water, then add tortilla chips just long enough to coat them. Keep the chips slightly tender but not completely mushy. Finish with eggs, crema, onion, cilantro, and cheese if you like.
Eggs, Bowls, and Nachos
With eggs, this salsa tastes best slightly warm or at room temperature. It is also a strong add-on for breakfast burritos, especially with eggs, potatoes, cheese, beans, or chorizo. For bowls and nachos, keep it thicker so it acts like a topping instead of a puddle.

Creamy, Avocado, Green Tomato, and Hatch Chile Versions
Once the base salsa tastes balanced, the variations become easy. You are not starting over — you are simply changing the richness, heat, or chile character.
Because creamy and avocado versions store differently, check the storage notes before making a large batch.
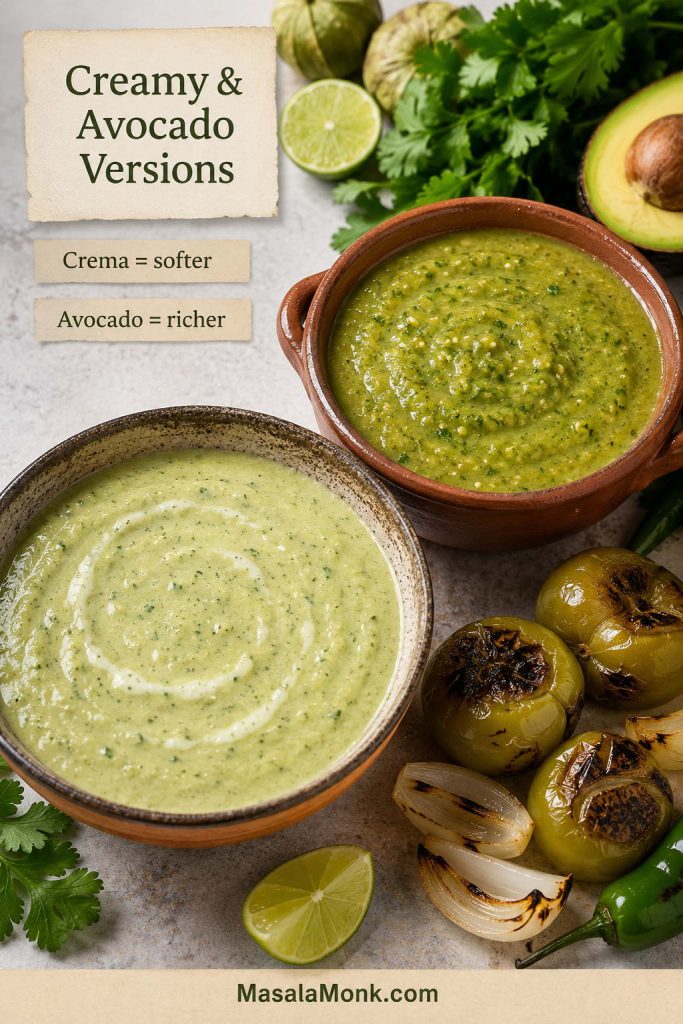
Creamy Version
To make it creamy, blend ½ cup sour cream or Mexican crema into 1½ to 2 cups cooled salsa. This makes a softer taco sauce that is especially good with grilled chicken, fish tacos, potatoes, roasted vegetables, and breakfast burritos.
Do not can creamy salsa verde. Dairy changes the safety and storage rules. Keep it refrigerated and use it within 2 to 3 days.
Avocado Version
Avocado turns the sauce richer and softer. Blend 1 ripe avocado into 1½ to 2 cups cooled salsa, then thin it one tablespoon at a time only when needed. This is a good fix for a batch that tastes too sharp or too spicy.
Avocado salsa verde is best eaten the same day or within 1 to 2 days. Press plastic wrap directly against the surface before refrigerating to slow browning.
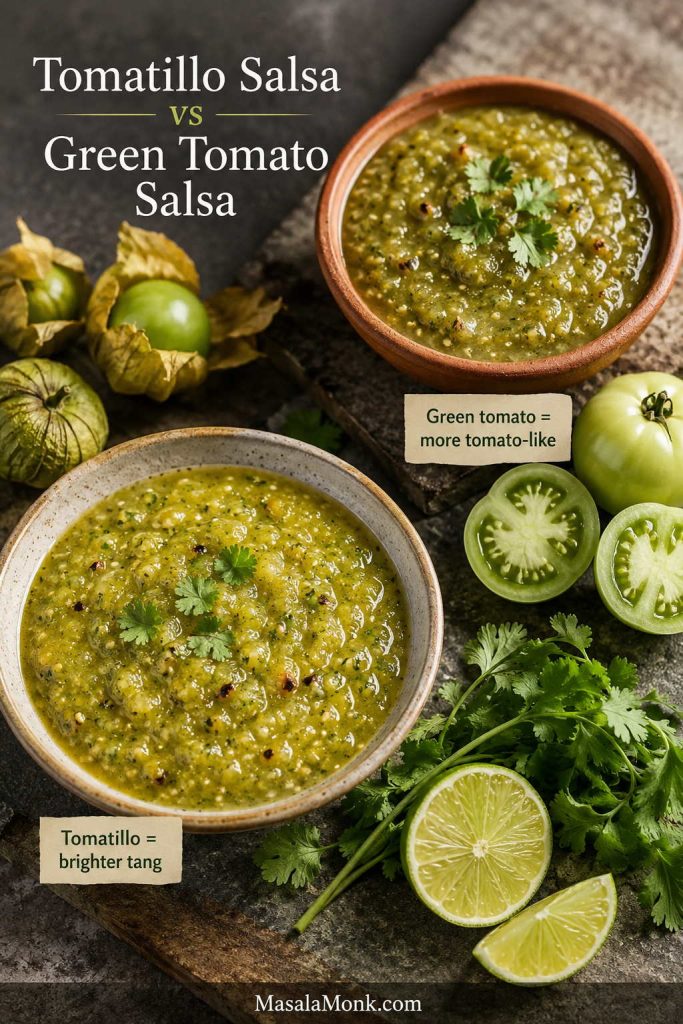
Green Tomato Version
Tomatillos are best for classic Mexican salsa verde. Green tomatoes can make a tangy green salsa, but the flavor is different: more tomato-like, less fruity, and often less naturally bright. Use green tomatoes as a variation when you have them, not as the first choice for this recipe.
When using green tomatoes, roast them well and taste carefully. They may need more lime, salt, or chile to get the same lively balance.
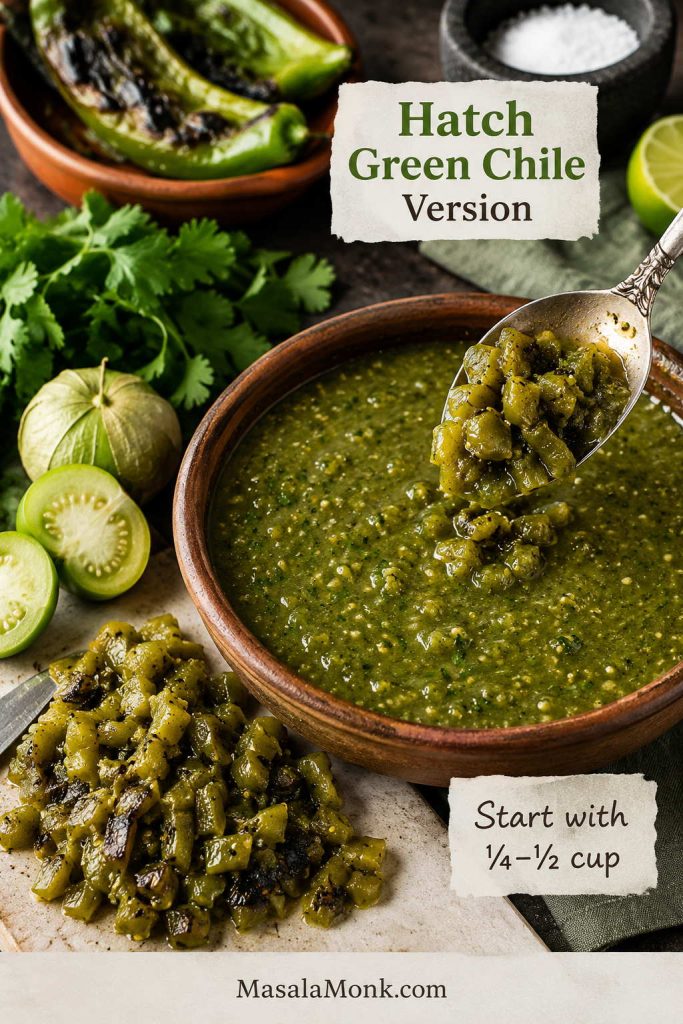
Hatch Green Chile Version
Roasted Hatch green chiles give the salsa a deeper green-chile flavor. Start with ¼ to ½ cup chopped roasted green chile for this batch, then adjust to taste. Hatch chiles can vary widely in heat, so taste before adding extra serrano or jalapeño.
For a sweeter, fruitier salsa for tacos, fish, shrimp, or grilled chicken, MasalaMonk’s mango salsa recipe is the better direction. This salsa is tangy and green; mango salsa is juicy, chunky, and fruit-forward.
Salsa Verde and Other Green Sauces
“Salsa verde” simply means green sauce, so different cuisines use the name for different things. The table below is not saying these sauces are interchangeable. It is here to help you recognize which green sauce a recipe or restaurant menu might mean.
| Sauce | Main Ingredients | Works With |
|---|---|---|
| Mexican salsa verde | Tomatillos, green chiles, onion, garlic, cilantro, salt, sometimes lime. | Tacos, chips, enchiladas, chicken, eggs, chilaquiles. |
| Italian salsa verde | Parsley, capers, garlic, olive oil, vinegar or lemon, sometimes anchovy. | Fish, steak, roasted vegetables, boiled meats. |
| Peruvian aji verde | Cilantro, green chile or aji amarillo-style heat, lime, mayo or cheese-style creaminess. | Roast chicken, fries, grilled meats, rice bowls. |
| Chile verde | Usually pork or meat cooked with green chiles and tomatillo-style sauce. | A stew or main dish, not just a table salsa. |
How to Store and Freeze It
Store the salsa in an airtight jar or container in the refrigerator. Plain salsa verde is often even better after 30 minutes to a few hours because the salt, chile, cilantro, and tomatillo flavors settle together.
If you want shelf-stable jars instead of refrigerator salsa, read the canning safety section before changing the ingredients or acid.
| Storage Method | How Long | Storage Tip |
|---|---|---|
| Refrigerator | 4 to 5 days | Keep it in a clean airtight jar and stir before serving. |
| Freezer | Up to 3 months | Freeze in small portions so you can thaw only what you need. |
| Avocado or creamy version | 1 to 2 days for avocado, 2 to 3 days for creamy | Keep refrigerated and do not freeze if texture matters. |
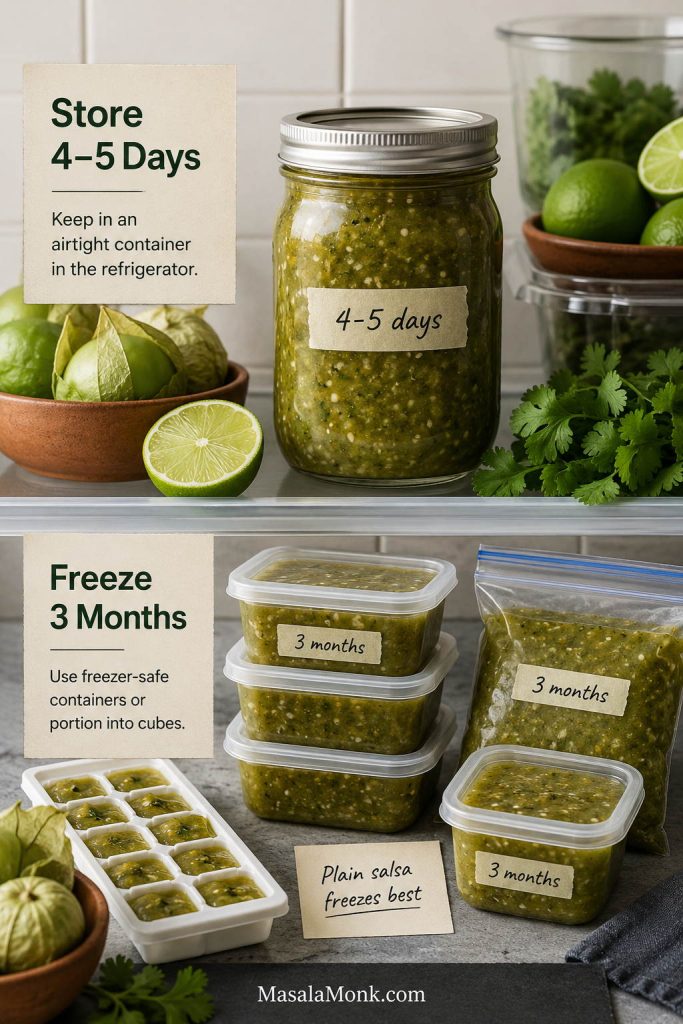
Freeze the plain version before adding avocado, sour cream, or crema. Dairy and avocado versions do not freeze as cleanly and can turn grainy or dull after thawing. When the salsa smells off, looks fizzy, shows mold, or changes in a way that makes you unsure, throw it out.
Can You Can Salsa Verde?
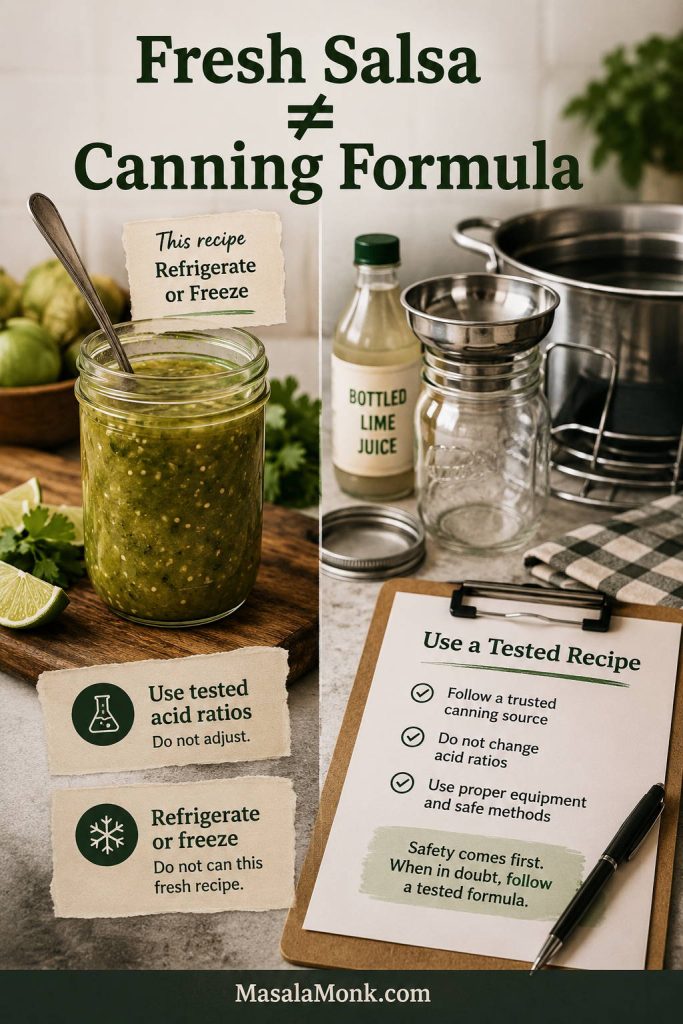
Shelf-stable salsa is different from fresh salsa. Tomatillos are acidic, but salsa also contains low-acid ingredients like onions, garlic, and chiles. Safe canning recipes use tested ratios and added acid. The National Center for Home Food Preservation provides a tested tomatillo green salsa formula with measured tomatillos, chiles, onions, and bottled lemon or lime juice. New Mexico State University also publishes salsa canning guidance with tested processing information.
For shelf-stable salsa verde, use a tested canning recipe from a university extension, NCHFP, USDA-style source, or another reputable canning authority. Do not simply add vinegar or lemon juice to this fresh recipe and assume it is safe. Do not change the tomatillo, onion, chile, or acid ratios in a tested canning recipe unless the source specifically says that change is safe.
FAQs
Is salsa verde the same as green salsa?
In Mexican cooking, salsa verde usually means green salsa made with tomatillos and green chiles. The phrase can mean different green sauces in other cuisines, so “Mexican salsa verde” or “tomatillo salsa verde” is the clearer name.
Are tomatillos the same as green tomatoes?
Tomatillos and green tomatoes are different ingredients. Tomatillos have papery husks and a tart, fruity flavor, while green tomatoes are unripe tomatoes. You can make a green tomato salsa, but it will not taste exactly like classic tomatillo salsa verde.
Do you have to cook tomatillos?
You do not have to cook them. Raw salsa verde is sharp and fresh, boiled salsa verde is smooth and clean, roasted salsa verde is rounder, and charred salsa verde tastes deeper and smokier. When in doubt, roast them first; it is the easiest method to love.
Is roasted or boiled better?
Roasted is usually the most flexible homemade version because it tastes rounder and lightly smoky. Boiled is smoother and cleaner, which makes it excellent for taqueria-style salsa, enchiladas, chilaquiles, and simmered chicken.
Is it spicy?
The heat depends on the chile. Start with one seeded jalapeño for a gentle batch, especially when serving a crowd. You can always add more heat next time.
How do I make it less spicy?
The easiest way to cool down the heat is to add body, not water. Blend in more cooked tomatillo, avocado, sour cream, Mexican crema, or roasted onion. Plain water will thin the salsa without balancing the burn very much.
Can I use it as enchilada sauce?
For enchiladas, make the salsa looser than you would for chips. Simmer it briefly, then use enough to coat the tortillas well: about 2 cups for a small 8-inch pan, or 2½ to 3 cups for a 9×13-inch pan.
Why is my salsa verde watery?
Watery salsa usually has too much added liquid or has not cooled yet. Chill it first. If it is still loose, simmer it briefly to reduce. For a creamy fix, blend in avocado instead.
Why is my salsa verde bitter?
Bitterness can come from old tomatillos, over-charred skins, or too much harsh raw garlic. Add more cooked tomatillo, cilantro, salt, or a little lime. Next time, roast until blistered and browned in spots, not blackened all over.
Can I make it without cilantro?
You can leave cilantro out if it is not your thing. The flavor will be less classic, but the salsa can still work with enough chile, onion, lime, and salt. Flat-leaf parsley gives a green herb note, but it will not taste the same.
Can I use canned tomatillos?
Fresh tomatillos are best, but canned tomatillos can help when that is what you have. Drain them well, then blend with chile, onion, garlic, cilantro, lime, and salt. The flavor is usually softer, so taste carefully before serving.
Can I freeze it?
Plain salsa freezes well in small portions for up to 3 months. Thaw it in the refrigerator and stir before serving. Add avocado, sour cream, or crema after thawing, not before freezing.
Can I can this recipe?
This is a fresh refrigerator/freezer recipe, not a canning formula. For shelf-stable canning, use a tested recipe with the correct acid, jar size, headspace, and processing time from a reputable canning authority.
What is the difference between salsa verde and chile verde?
Salsa verde is a green salsa or sauce. Chile verde usually refers to a cooked dish, often pork or another meat simmered with green chiles and tomatillo-style sauce. They are related, but they are not the same thing.
Once you make salsa verde this way, you will start noticing how many meals need it. Keep it thick for chips and tacos, loosen it for enchiladas or chilaquiles, or blend in avocado when you want something softer and creamy. After a few batches, you will know your house style: raw and sharp, boiled and smooth, roasted and round, or charred and smoky. The best version is the one your table keeps reaching for first.