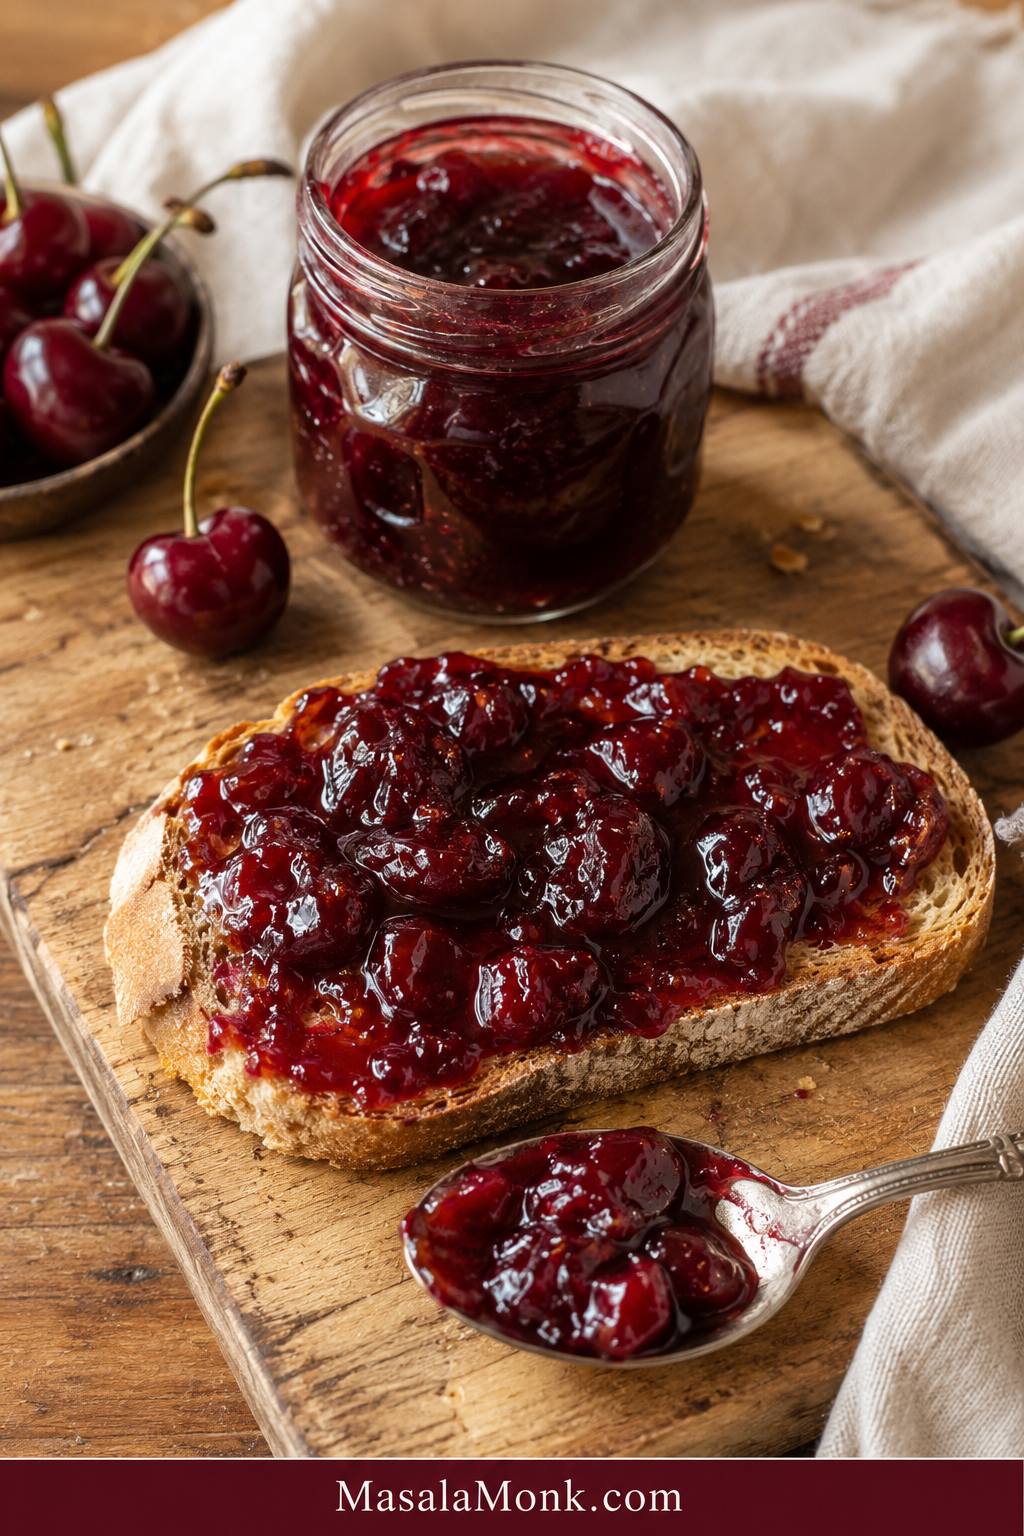
Cherry jam is one of those recipes that feels easy until the pot starts asking questions. Is it thick enough? Will it set after cooling? Should you add pectin? Can frozen cherries work? What if you want less sugar? And if the jar is going into the pantry, is the recipe actually safe for canning?
This cherry jam recipe is built to answer those questions before they ruin a batch. The main method is a small-batch, no-pectin cherry jam for the refrigerator or freezer: glossy, spoonable, fruit-forward, and bright enough to taste like cherries instead of cooked sugar.
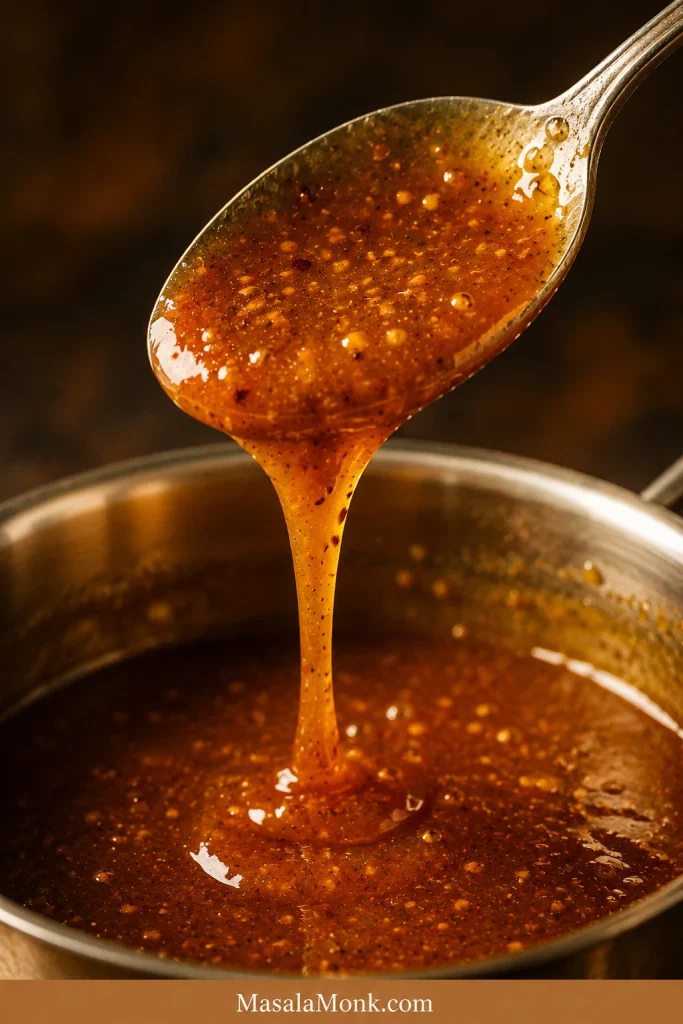
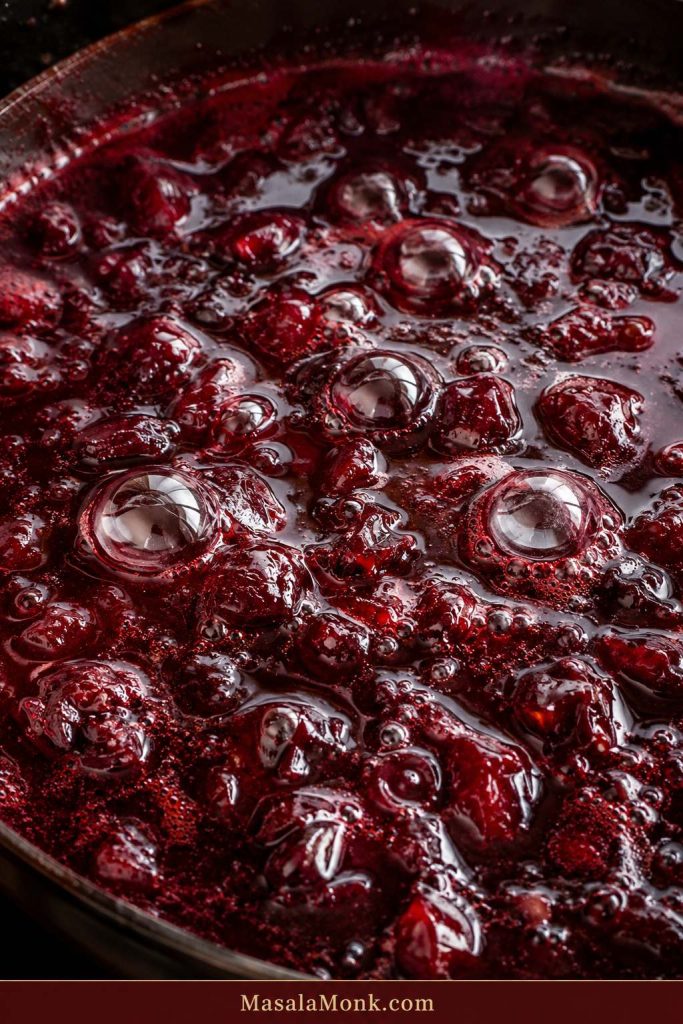
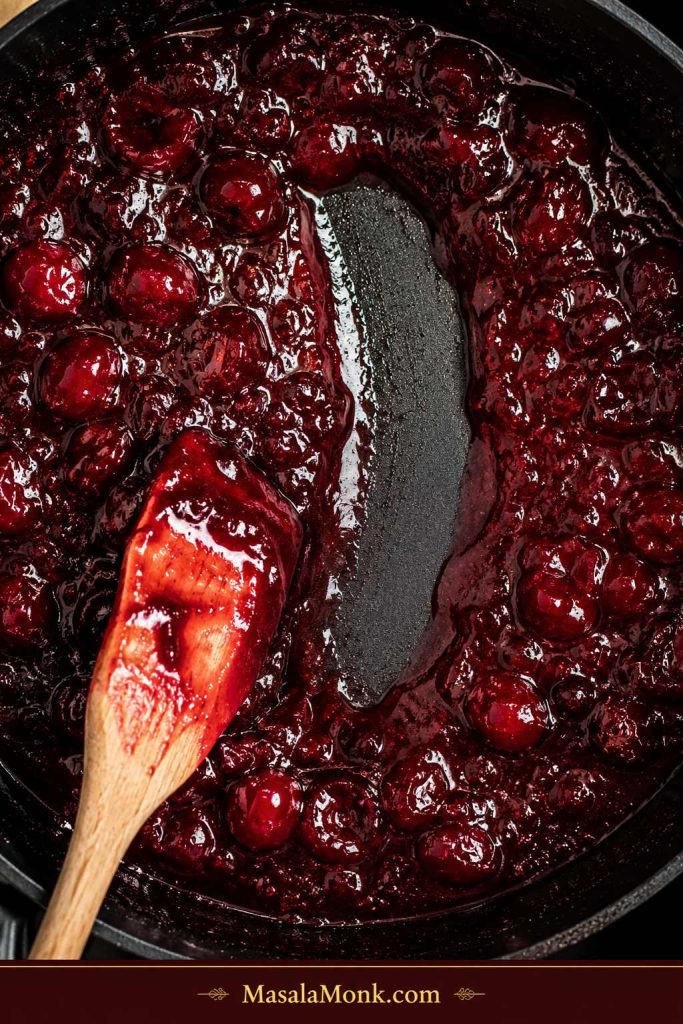
Once you know what ready jam looks and feels like, the whole process becomes much calmer. The bubbles get heavier, the spoon leaves a little trail, the fruit looks glossy, and the jam starts moving more slowly in the pan. That is the moment you are looking for.
The goal is not a stiff, factory-style jam. The goal is a soft, beautiful cherry spread that tastes fresh, sets enough to spoon and spread, and does not leave you guessing. This recipe is flexible where a refrigerator jam can be flexible, and strict where safety needs it.
Jump to Recipe · Make It Now · Set Tests · Fix Runny Jam · Canning Notes
Quick Answer: How Do You Make Cherry Jam That Sets?
To make a simple cherry jam without pectin, combine 500 g / about 3 cups pitted cherries, 200 g / about 1 cup sugar, and 2 tablespoons / 30 ml lemon juice in a wide pan. Cook until the cherries soften and the syrup turns glossy, then use the Glossy-and-Wrinkle Method: cook until the bubbles look slow and shiny, then confirm the set with a cold plate wrinkle test.
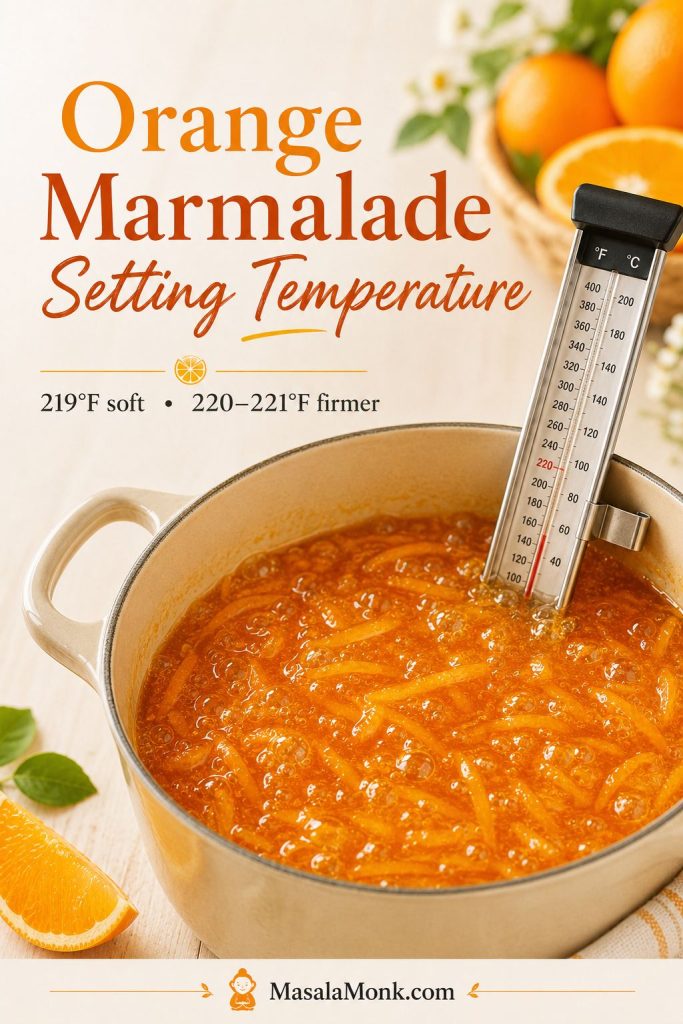
The jam usually reaches this stage around 220°F / 104–105°C. Temperature helps, but the cold plate test tells you how the jam will behave once cooled.
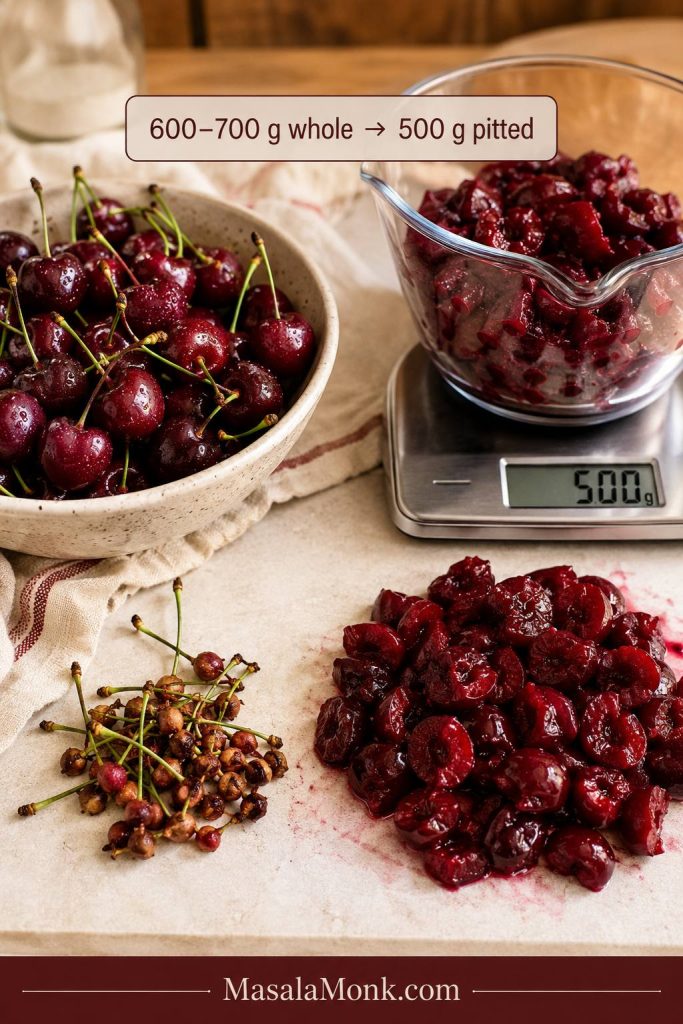
You will usually need about 600–700 g / 1 1/3–1 1/2 lb whole cherries to get around 500 g / about 3 cups pitted cherries, depending on cherry size and pit weight.
This gives you a soft-to-medium set cherry jam for the refrigerator or freezer. It should be thick enough to spread on toast, but still soft enough to spoon over pancakes, yogurt, cheesecake, ice cream, or rice pudding.
Storage note: Keep this no-pectin version chilled or frozen. Pantry jars need a canning-tested cherry jam recipe with proper processing.
Make It Now
If you are standing in front of a bowl of cherries and just want jam today, start here. Use 500 g pitted cherries, 200 g sugar, and 2 tablespoons lemon juice. Cook in a wide pan until the jam looks glossy, thickened, and heavy-bubbled, then confirm the wrinkle on a cold plate. Cool, cover, and refrigerate.
The rest of the guide is there for the moments when the pot starts looking confusing: frozen cherries releasing extra juice, sugar changes, pectin questions, loose jam, texture choices, or pantry storage.
Cherry Jam Recipe Card: No-Pectin Cherry Jam
This is the small batch to make when you want cherry jam today without turning the kitchen into a full canning project. It cooks on the stovetop, uses no boxed pectin, and sets into a soft, glossy spread once chilled.
Keep the heat lively but not wild. You want steady bubbling, not angry splattering. Near the end, slow down and test instead of rushing the jar.
| Prep time | 15 minutes |
| Cook time | 25–35 minutes |
| Total time | 40–50 minutes |
| Yield | About 1 1/2 cups / 360 ml |
| Method | Stovetop |
| Storage | Refrigerator 2–3 weeks or freezer up to 3 months |
Ingredients
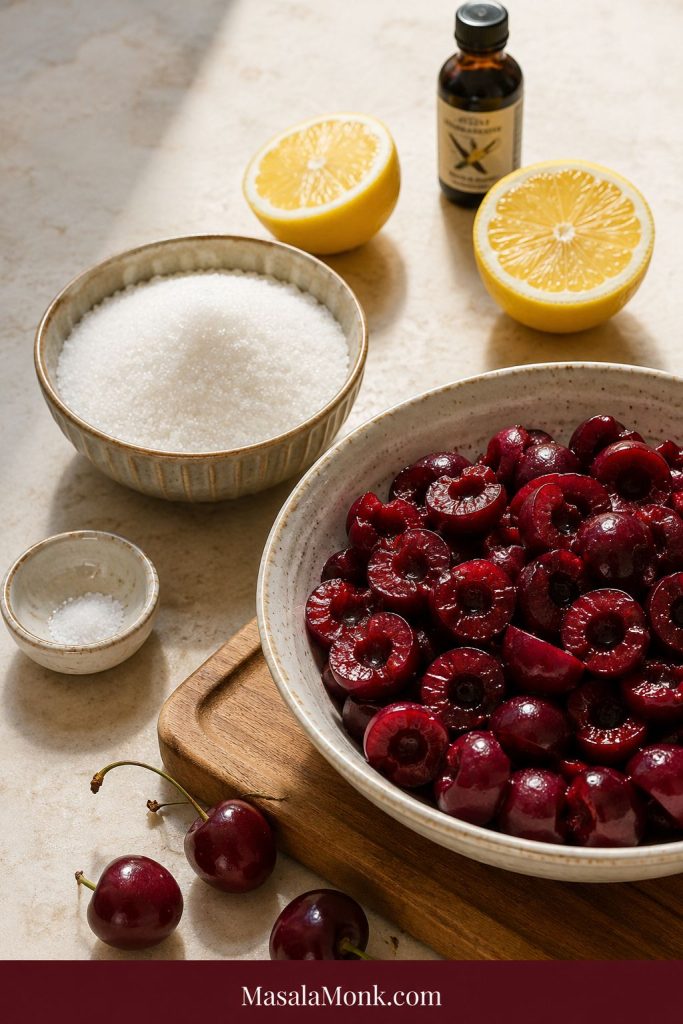
- 500 g / about 3 cups pitted cherries, fresh or thawed frozen, chopped or halved
- 200 g / about 1 cup granulated sugar
- 2 tablespoons / 30 ml lemon juice
- 1 small pinch salt, optional
- 1/8 to 1/4 teaspoon almond extract, optional
- 1 teaspoon vanilla extract, optional
Whole cherry note: Buy about 600–700 g / 1 1/3–1 1/2 lb whole cherries to get around 500 g / about 3 cups pitted cherries. The exact yield depends on cherry size, pit weight, and how much you trim.
Instructions
- Prepare the cherries. Pit the cherries and chop them roughly. Chop smaller for smoother jam or leave some halves for a chunkier preserve-style texture.
- Combine. Add cherries, sugar, lemon juice, and salt to a wide heavy-bottomed pan. Stir well.
- Rest briefly. Let the cherries sit for 15–30 minutes if you have time. This draws out juice and helps the sugar dissolve.
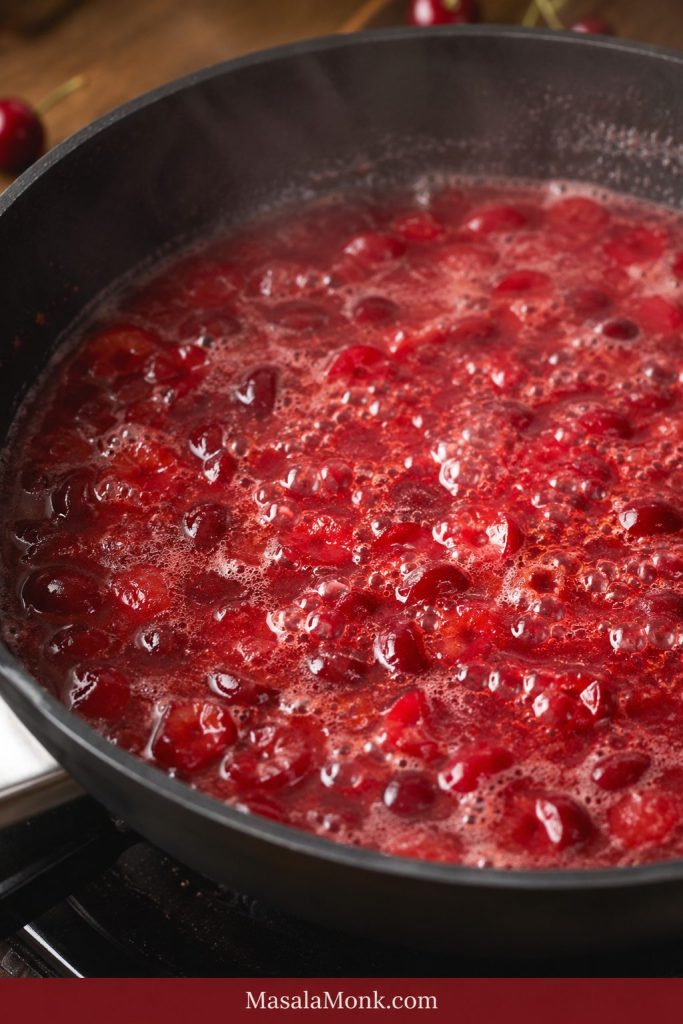
- Heat gently. Cook over medium heat until the sugar dissolves and the cherries release more liquid.
- Mash for texture. Use a potato masher or spoon to break down the fruit lightly. For smoother jam, mash more; for chunkier jam, leave more pieces intact.
- Boil and reduce. Increase the heat to medium-high and cook, stirring often, until the bubbles become slower, glossier, and heavier.
- Test the set. Aim for about 220°F / 104–105°C, then check with a cold plate test. If the cooled sample wrinkles gently and does not run like syrup, it is ready.
- Finish the flavor. Turn off the heat. Stir in almond extract or vanilla, if using. Start small, especially with almond extract.
- Jar and cool. Rest the jam for 5 minutes, spoon into clean jars, cool, cover, and refrigerate. For longer storage, freeze in freezer-safe containers with a little headspace.
What Success Looks Like
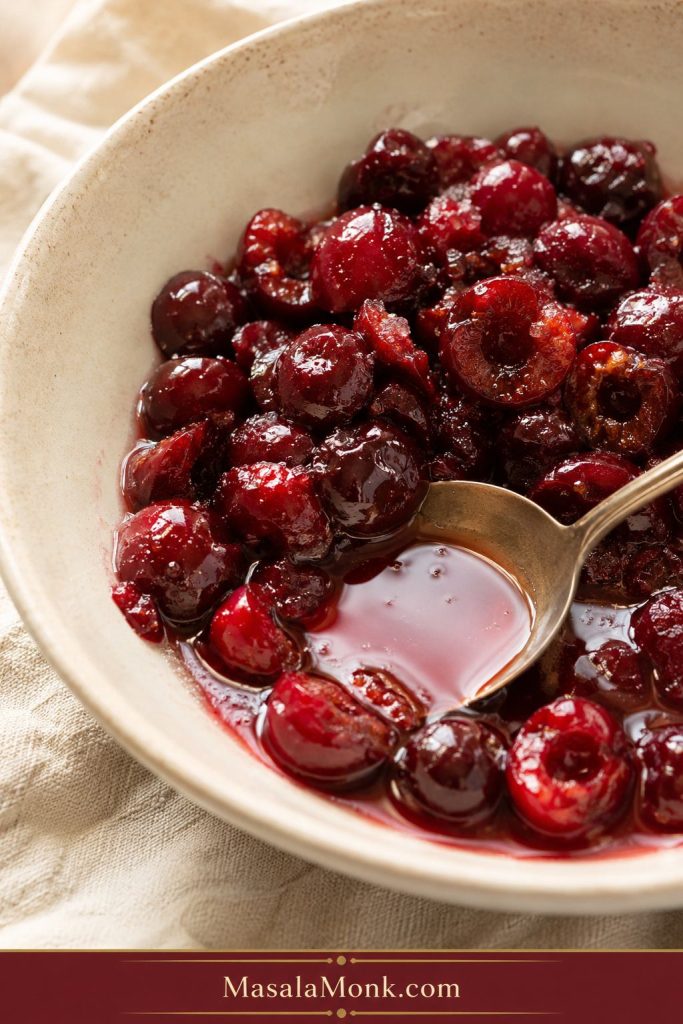
The finished jam should be glossy, deep red, spoonable, and slightly loose while warm. It should not look stiff in the pan. Once cooled, it should thicken into a soft spread that holds on toast but still falls easily from a spoon.
It helps to test on a cold plate even when the thermometer says 220°F, because cherry batches vary. If the spoon trail closes immediately, keep cooking. If it pauses for a second before filling in, you are close.
And if it cools softer than you hoped, you have not wasted the cherries. Reboil it for a thicker set, or use it as a cherry sauce over breakfast and desserts. A loose cherry jar can still be wonderful.
Need visual help before you jar? Jump to Set Tests · check if it is runny or just hot
Why You’ll Love This Cherry Jam
The best part is the first cooled spoonful: deep red, glossy, sweet-tart, and still tasting like cherries. This small batch is not for a huge pantry project. It is for toast tomorrow, yogurt tonight, cheesecake on the weekend, and the quiet satisfaction of saving good cherries before they disappear.
- Simple ingredients: cherries, sugar, lemon, and optional flavoring.
- Fresh or frozen cherries both work.
- A soft, glossy, spreadable set without boxed pectin.
- Visual cues show when the jam is ready, so you are not relying only on a timer.
- The small-batch method keeps the process manageable.
- Clear help is included for loose jam, frozen cherries, pectin, sugar changes, and canning boundaries.
- Use it as jam, dessert topping, breakfast swirl, cake filling, or cheese board spooning sauce.
In This Guide
The recipe above is the simple path. The guide below is grouped by what you need in the moment.
Make the jam: Why It Works · Ingredients · Equipment · Step-by-Step Cues
Choose your method: Fresh, Frozen, or Canned · Sweet vs Sour · Method Choice · Pectin vs No Pectin · Scaling · Low Sugar
Fix the set: Set Tests · Runny or Just Hot? · Fix Runny Jam · Canning Notes
Use and store: Texture · Adjustments · Variations · Uses · Storage · Mistakes · FAQs · Final Thoughts
Why This Cherry Jam Works
This recipe works because it asks you to watch the jam, not just the timer. Some cherries are juicy, some are firm, some are sweet, and frozen cherries often release more liquid than fresh ones. The clock helps, but the pan tells the truth.
- A wide pan helps water evaporate. More surface area means the jam thickens faster and tastes fresher.
- Sugar builds body. It sweetens the fruit, but it also helps with shine, texture, and set.
- Lemon juice keeps the flavor awake. Sweet cherries especially need acidity so the finished spread does not taste flat.
- Small batches are easier to control. The fruit cooks down faster and is less likely to set unevenly.
- Set tests prevent guessing. A thermometer, cold plate, spoon trail, and cooled texture matter more than the exact minute count.
No-pectin jam gives a concentrated, cooked-fruit flavor because it thickens by reduction. Pectin-set jam usually cooks faster and can keep a fresher fruit note, but the texture and sugar formula are more exact.
The same texture-first thinking also helps in a fig jam recipe, where the fruit thickens into a rustic spread instead of a clear jelly.
Ingredients for Cherry Jam
Cherry jam is simple, but it is not random. Each ingredient has a job: cherries bring the fruit, sugar helps the texture and shine, lemon keeps the flavor bright, and a small pinch of salt makes the sweetness taste rounder.
Cherries
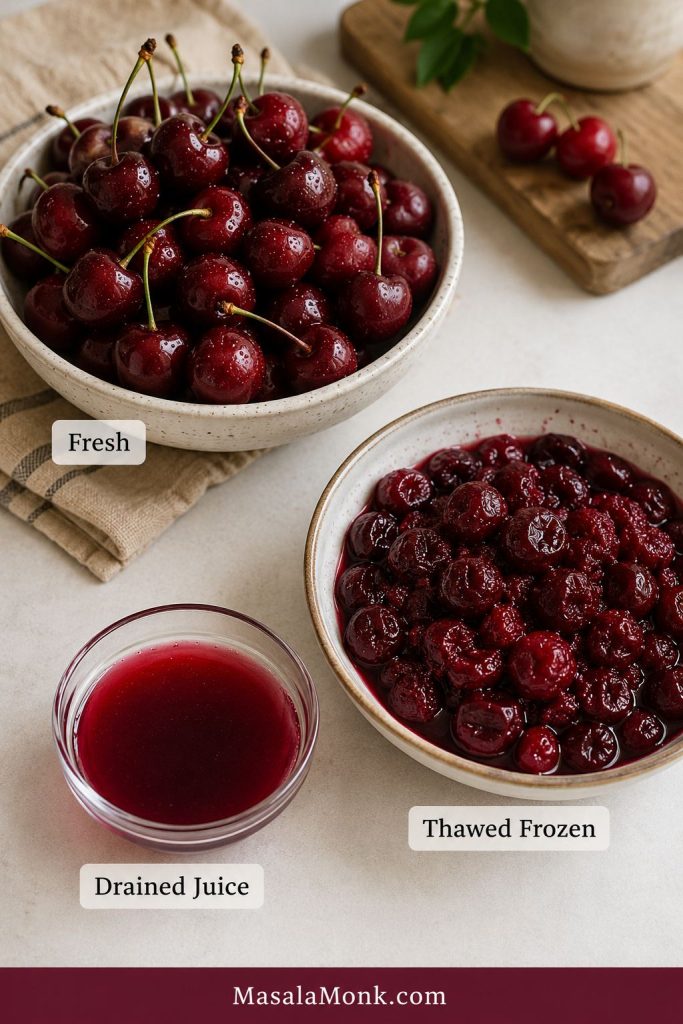
Fresh cherries give the best texture, but frozen cherries are often easier and work very well. Sweet cherries make a deep, mellow jam. Sour cherries make a brighter, tangier batch. If using frozen fruit, thaw and drain it first so the extra juice does not stretch the cooking time too far.
Whole Cherries to Pitted Cherries
This yield check is useful before you cook, because cherries lose weight to pits, stems, and trimming.
Bing and other dark sweet cherries make a rich, dark red jam. Rainier cherries can work too, but the color will be lighter and the flavor softer. Sour cherries, tart cherries, pie cherries, and Morello cherries make a brighter spread with more tang and may need slightly more sugar depending on taste. For a broader look at the fruit itself, this guide to the benefits of cherries explains sweet and tart cherries in a more general way.
Sugar
Sugar is not only a sweetener. In jam, it helps the mixture thicken, shine, and hold a spreadable texture. You can reduce it slightly for a softer refrigerated batch, but do not heavily cut sugar in any recipe you plan to can.
Lemon Juice
Lemon juice gives the jam brightness and balance. It is especially important with sweet cherries, which can taste heavy once cooked. For a fridge batch, fresh lemon juice is fine. For canning, follow the tested recipe exactly, especially if it asks for bottled lemon juice.
If you enjoy citrusy preserves, the peel-and-acid balance in this orange marmalade recipe is a useful next read.
Salt, Almond, and Vanilla
A small pinch of salt is optional, but useful. It should not make the jam salty; it simply helps the cherry flavor taste fuller. Almond extract gives a classic cherry-almond note, but it can take over quickly, so start with 1/8 teaspoon. Vanilla is gentler and gives the jam a rounder finish.
Equipment You Need
For refrigerator cherry jam, the most important tool is a wide heavy-bottomed pan. It helps extra cherry juice evaporate before the fruit tastes overcooked.
- Cherry pitter, sturdy straw, or chopstick
- Wide heavy-bottomed pan
- Wooden spoon or silicone spatula
- Potato masher
- Thermometer, optional but helpful
- Two chilled plates for set testing
- Clean jars or freezer-safe containers
No cherry pitter? Push a sturdy straw or chopstick through the stem end and pop the pit out over a bowl. It is slower than a pitter, but it works well for a small batch.
For shelf-stable canning, use a canning-tested recipe and proper water-bath equipment, not just clean storage jars.
How to Make Cherry Jam Step by Step: What to Watch For
Once the cherries are in the pan, the recipe becomes less about exact minutes and more about watching the fruit change. The recipe card gives the practical steps. This section slows them down so you know what to look for.
1. Pit and Chop the Cherries
Remove every pit before cooking. Then chop the cherries roughly. Smaller pieces give a smoother jam that spreads easily. Larger pieces give a chunkier preserve-style texture with visible fruit.
2. Mix With Sugar and Lemon, Then Rest
Add the cherries, sugar, lemon juice, and optional salt to a wide pan. Stir until the cherries are coated. If you have time, let the mixture sit for 15–30 minutes so the fruit releases juice and the sugar begins to dissolve.
3. Start Gently
Cook over medium heat at first. This lets the sugar dissolve without catching on the bottom. Stir often, especially once the mixture starts to bubble and the kitchen begins to smell like warm cherries.
4. Mash for Texture
When the cherries soften, use a potato masher or spoon to break them down lightly. You do not have to turn them into puree. For a smoother jam, mash more; for a chunkier preserve-style texture, leave some larger fruit pieces.
5. Boil Until Glossy
Increase the heat and let the jam bubble steadily. At first, the bubbles will look thin and watery. As moisture evaporates, they become slower, glossier, and heavier. Stir more often near the end because the sugar is more concentrated. The jam should smell fruity and bright, not caramelized.
A little foam is normal while the jam boils. Stir through it, then skim near the end only if you want a clearer-looking jar.
6. Test Before You Jar
Do not judge the jam only while it is hot. Hot jam always looks looser than cooled jam. Use a thermometer, cold plate, spoon test, or pan trail test before you stop cooking.
Once the jam starts looking glossy, stop watching the clock and start watching the texture.
7. Finish the Flavor
Once the set is right, turn off the heat before adding almond extract or vanilla. Starting with a small amount keeps the cherry flavor in charge.
8. Jar and Cool
Let the jam settle for a few minutes, then spoon it into clean jars. Cool it before covering tightly, then refrigerate or freeze according to the storage notes.
Before you stop cooking: use the set tests · see the cold plate test
Fresh, Frozen, or Canned Cherries: What Works Best?
Frozen cherries work well for jam if you thaw, drain, and add back only enough juice to keep the pan from drying out. Fresh and canned cherries can work too, but they need different handling.
Fresh vs Frozen Cherries for Jam
This visual comparison helps explain why thawed frozen cherries often need drainage before they go into the pan.
| Cherry type | How to use it | What to watch |
| Fresh cherries | Pit, chop, and macerate with sugar and lemon | Best texture and cleanest fruit flavor |
| Frozen cherries | Thaw, drain, reserve the juice, then cook | They release more water, so cooking may take longer |
| Canned cherries | Drain well before cooking | Texture is softer and flavor depends on syrup or packing liquid |
| Sour cherries | Taste before adjusting sugar and lemon | Bright, tart, excellent for jam |
| Sweet cherries | Use lemon juice for balance | Can taste flat if cooked without enough acidity |
How to Make Cherry Jam From Frozen Cherries
Thaw the cherries first, then drain them well. Start the jam with the drained fruit, sugar, and lemon juice. Keep the reserved juice nearby and add back only a splash if the pan looks dry. If you add all the thawed juice at once, the jam may take much longer to thicken.
Frozen cherries are not a problem. They simply bring more water to the pan, so the fix is patience and drainage, not panic. If you are using frozen cherries, notice how much juice they release after thawing; that one detail explains a lot about cook time and final set.
For another quick fridge-friendly fruit spread, this strawberry and apple preserve keeps the same simple, small-batch spirit.
Canned cherry note: Use plain canned cherries packed in juice, water, or syrup, and drain them well. Do not use cherry pie filling as a direct substitute. Pie filling already has sugar, starch or thickener, and flavoring, so it cooks and sets differently from plain cherries.
If frozen cherries made the jam look loose: compare warm vs cooled texture · see the reboil fix
Sweet Cherry Jam vs Sour Cherry Jam
Sweet cherry jam and sour cherry jam have different personalities. Sweet cherries give a dark, mellow, rounded result. Sour cherries, tart cherries, pie cherries, and Morello cherries give a brighter batch with sharper fruit flavor.
If you are using sweet cherries, lemon juice is important because it keeps the jam from tasting heavy. If you are using sour cherries, taste the fruit first. Some need a little more sugar, while others are tart in a way that makes the finished jar more exciting.
Which Cherry Jam Method Should You Use?
The easiest way to avoid confusion is to choose the goal before choosing the method. A fridge jar can be flexible. A pantry jar needs rules.
- Jam today: use the no-pectin refrigerator recipe.
- Firmer classic jam: use a pectin method.
- Less sugar: choose low/no-sugar pectin or a reduced-sugar method.
- Pantry jars: use a canning-tested recipe.
- Quick topping: stop softer and use it as cherry sauce.
This is not meant to scare you away from canning. It is meant to keep the two projects separate: a quick cherry jam for the fridge today, and a tested pantry-safe recipe when you want jars for the shelf.
Cherry Jam With Pectin or Without Pectin?
You do not need pectin for soft-set refrigerator cherry jam, but pectin is useful when you want a firmer set, a lower-sugar structure, or a canning-safe formula. Pectin is not cheating; it is just a different kind of jam.
Think of pectin as a different route, not a shortcut. No-pectin jam gives you a soft, reduced-fruit spread. Pectin gives you more structure and predictability, especially when sugar or pantry storage matters.
Pectin types are not casual swaps. Powdered pectin, liquid pectin, and low/no-sugar pectin are built for different methods, and each one has its own sugar, acid, and boiling expectations.
| Method | Best for | What to expect |
| No pectin | Simple small-batch refrigerator or freezer jam | Soft, concentrated, fruit-forward |
| Powdered pectin | Firmer jam and many canning formulas | More predictable, but method matters |
| Liquid pectin | Specific jelly, jam, or freezer jam recipes | Not a direct swap for powdered pectin |
| Low/no-sugar pectin | Reduced-sugar jam | Best route when sugar is reduced heavily |
Because cherries are naturally lower in pectin, a no-pectin batch sets mainly by reduction. The water cooks off, the sugar concentrates, the lemon sharpens the flavor, and the mixture thickens into a soft spread as it cools.
What Changes When You Use Pectin?
A classic pectin cherry jam is more exact than this flexible fridge recipe. It usually starts with prepared cherries, lemon juice, and a setting aid. The mixture is brought to a full rolling boil, sugar is added, and then the jam returns to a hard boil for the time stated in the tested recipe or package instructions.
For shelf-stable jars, follow a tested canning source rather than improvising. The National Center for Home Food Preservation’s cherry jam with pectin method uses prepared cherries, powdered pectin, sugar, hot jars, 1/4 inch headspace, and boiling-water processing with altitude guidance.
Changing sugar or storing jars on the shelf? read the low-sugar notes · check the canning boundary
Can You Scale This Cherry Jam Recipe?
The easiest ratio for a small no-pectin cherry jam is about 5 parts pitted cherries to 2 parts sugar by weight, plus enough lemon juice to brighten the fruit and help the mixture behave in the pan.
| Batch size | Pitted cherries | Sugar | Lemon juice | Notes |
| Very small test batch | 250 g / about 1 1/2 cups | 100 g / about 1/2 cup | 1 tbsp / 15 ml | Good for testing sweetness and set |
| Standard small batch | 500 g / about 3 cups | 200 g / about 1 cup | 2 tbsp / 30 ml | Best starting point for this recipe |
| Double batch | 1 kg / about 6 cups | 400 g / about 2 cups | 4 tbsp / 60 ml | Better made as two separate batches |
For best results, do not begin with the double batch. This jam sets more predictably when the fruit cooks down quickly in a wide pan. Two smaller batches are easier than one overloaded pot.
Choose Your Cherry Jam Texture
Now that the method is clear, texture is the fun part. You can make this jam smoother, chunkier, looser, or thicker depending on how you plan to use it.
- Smoother jam: chop the cherries small and mash them well as they cook.
- Chunky jam: leave some cherry halves or larger pieces so the fruit stays visible.
- Sauce-like topping: stop a little softer and use it over pancakes, yogurt, ice cream, or rice pudding.
- Preserve-style jar: mash less and let some fruit pieces stay large enough to spoon.
- Cake filling: cook a little thicker and always confirm the set on a cold plate.
Can You Use This Cherry Jam as Cake Filling?
Yes, but cook it slightly thicker than a spooning sauce and let it cool completely before using. For layer cakes, spread a thin barrier of frosting around the edge of the cake layer before adding jam so it does not slide out. If the jam is very loose, use it as a topping instead of a filling.
Substitutions and Adjustments
Flavor has room to play. Set and storage are less casual. Before you adjust sugar, acid, or pectin, decide where the jar is going to live: refrigerator, freezer, or pantry.
- Less sugar: works in a modest way for a softer refrigerated jam, but the set will be looser.
- Honey or maple syrup: possible in small amounts for fridge jam, but the texture and flavor will change.
- Lime instead of lemon: fine for flavor in a fridge batch, but follow canning-tested recipes exactly for pantry jars.
- Vanilla or almond: add after cooking, and start small so the cherry flavor stays clear.
- Double batch: not recommended for your first try. Make two small batches for better control.
How to Know Cherry Jam Is Set
This is the moment most homemade jam goes wrong: the jam looks too loose while it is hot, so you keep boiling, and then it cools into something sticky and overcooked. Cherry jam should leave the pan looking glossy and slightly softer than your final goal.
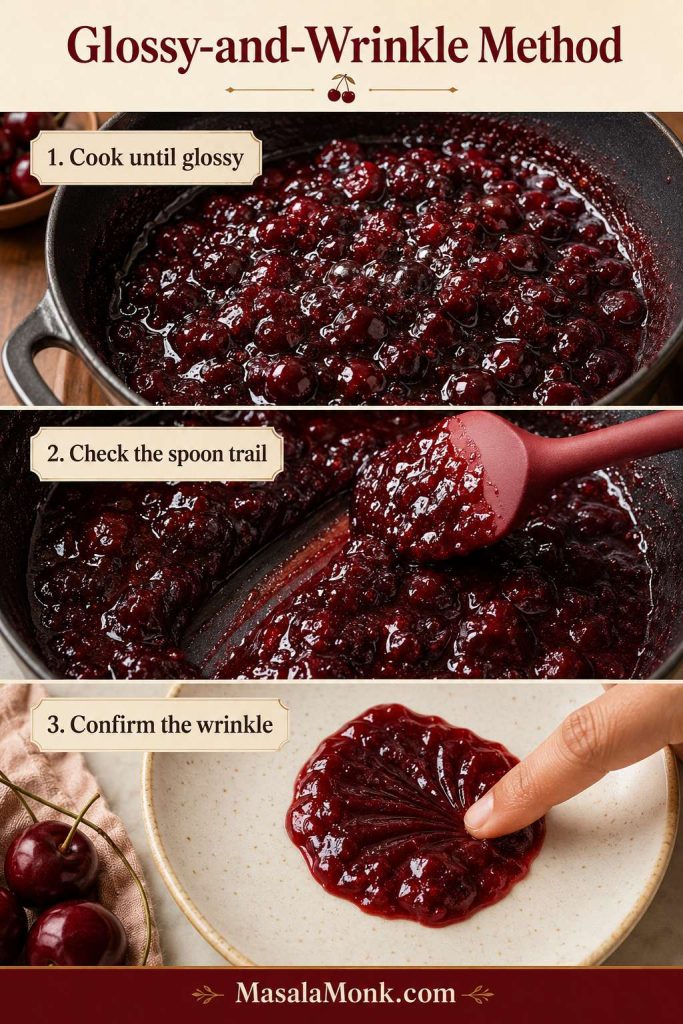
The easiest way to remember it is the Glossy-and-Wrinkle Method: cook until the bubbles turn slow and glossy, then confirm the set with the cold plate wrinkle test.
If you only remember one thing, remember this: hot jam lies. It moves more freely in the pan than it will after cooling. Give it a proper test before deciding it needs more time.
Glossy-and-Wrinkle Method
This three-part cue keeps the process practical: look for glossy bubbles, check the spoon trail, then confirm the set with a chilled plate.
You Are Close When…
- The bubbles look slower, heavier, and glossier.
- The jam looks shiny instead of watery.
- A spoon trail pauses before closing.
- A cold plate sample wrinkles gently when pushed.
- The smell is fruity and bright, not caramelized.
The goal is not to boil the jam into submission. Once it is glossy, heavy-bubbled, and passing the cold plate test, stop.
| Set test | How to do it | What you want |
| Thermometer test | Cook until the jam reaches about 220°F / 104–105°C | Jam is near the setting stage |
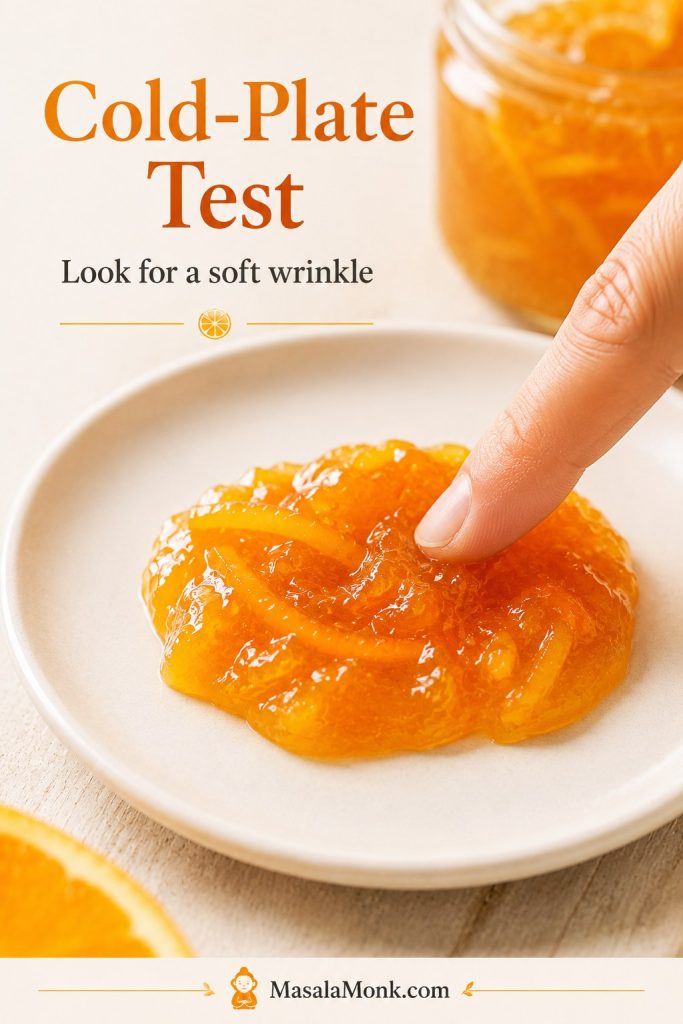
| Cold plate test | Drop jam on a chilled plate, wait, then push it | The surface wrinkles slightly and does not run like syrup |
| Spoon test | Lift a spoon and let the jam fall back | It falls in thicker drops or sheets instead of thin drips |
| Pan trail test | Drag a spatula through the jam | The trail briefly holds before filling in |
Cold Plate Test: Not Ready vs Ready
Use this test after the bubbles turn glossy, because a cooled sample shows the final texture more honestly than the hot pan.
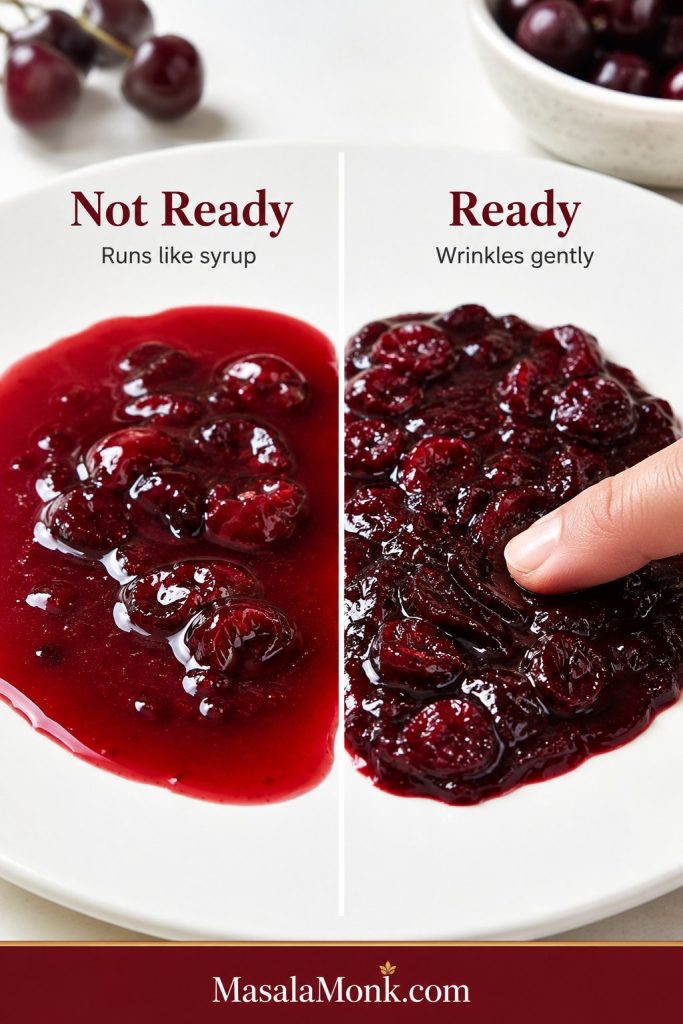
For the cold plate test, keep two small plates in the freezer before you start cooking. When the jam looks close, spoon a little onto a chilled plate, wait 30–60 seconds, then push it. A gentle wrinkle means it is ready. When the sample runs quickly, cook for a few more minutes and test again.
When your first batch sets softer than expected, write down the cook time and texture. The second batch is usually much easier because you already know how your pan and cherries behave.
Still not sure? compare warm and cooled jam · fix a truly runny batch
Is It Actually Runny, or Just Hot?
Before fixing cherry jam, let it cool completely. Warm jam can look thin even when it is going to set. After cooling, check the texture with a spoon.
Warm Jam vs Cooled Jam
This is the check that prevents overcooking: judge a cooled spoonful, not the bubbling jam in the pan.
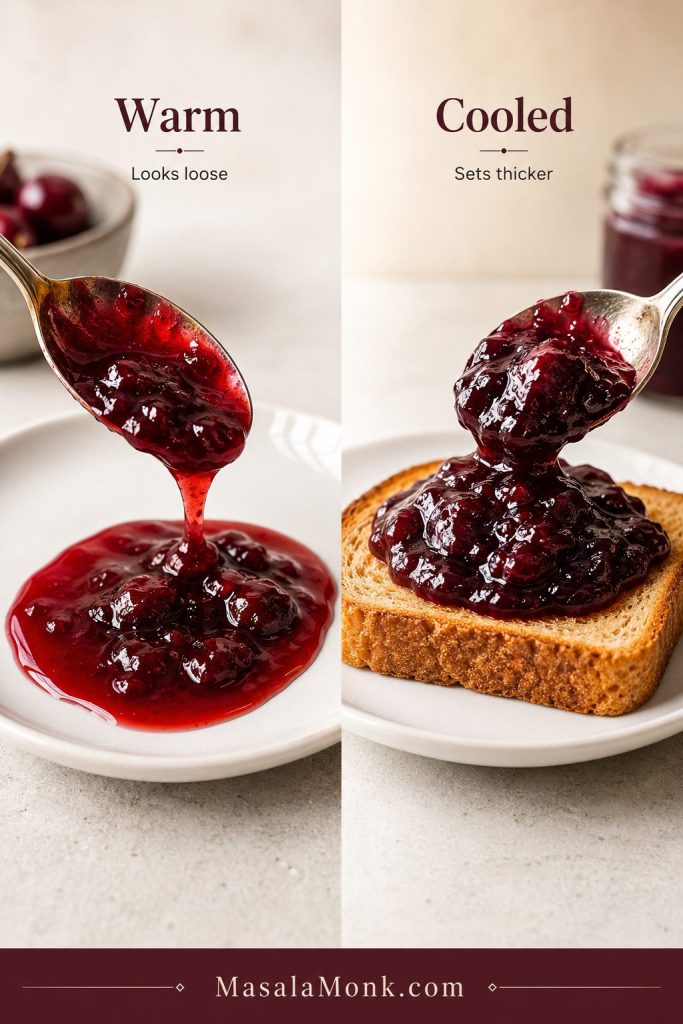
- Runs like syrup: it probably needs more cooking.
- Slowly slides from the spoon: it may be a soft-set jam, not a failed batch.
- Holds softly on toast: it is set enough for fridge jam.
- Feels sticky or chewy: it may be overcooked.
Most jam panic happens too early, while the jar is still warm. A soft set is not a mistake. It is the style of this jam.
Why Your Cherry Jam Did Not Set
Cherry jam is usually runny because it was undercooked, made with too much liquid, cooked in too large a batch, reduced too heavily in sugar, or made with the wrong pectin method. Most of the time, the jar is not ruined.
Runny, Soft-Set, or Overcooked?
A visual texture check helps you decide whether the batch needs more cooking, has reached a soft fridge set, or went too far.
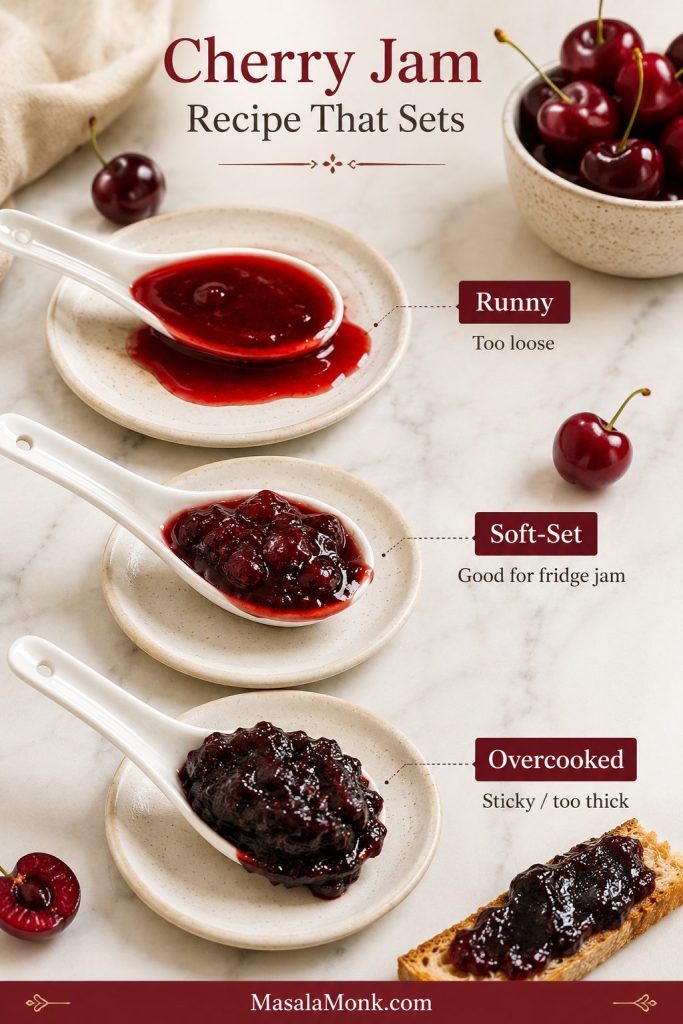
| Problem | Likely cause | What to do now | Next time |
| Very runny | Too much liquid or undercooking | Return to a wide pan and simmer longer | Drain frozen cherries and test the set |
| Syrupy after cooling | Did not reach setting stage | Reboil and use cold plate test | Cook to texture, not only time |
| Weak set with pectin | Wrong pectin method or old pectin | Follow the pectin brand’s remake instructions | Use fresh pectin and exact boil timing |
| Loose low-sugar jam | Too much sugar reduction | Use as sauce or remake with low-sugar pectin | Use pectin made for reduced sugar |
| Too thick | Overcooking | Loosen warm jam with a little hot water or lemon juice | Stop when glossy and softly set |
| Flat flavor | Not enough acid | Add lemon juice a teaspoon at a time | Use enough lemon with sweet cherries |
How to Fix Runny Cherry Jam
Let the jam cool completely before you fix it. If you used pectin, wait up to 24 hours because some pectin jams continue to set after jarring. If it is still too loose, choose the fix based on the style you made.
For No-Pectin Cherry Jam: Reboil and Retest
Use a wide pan so extra water can evaporate quickly without flattening the cherry flavor.
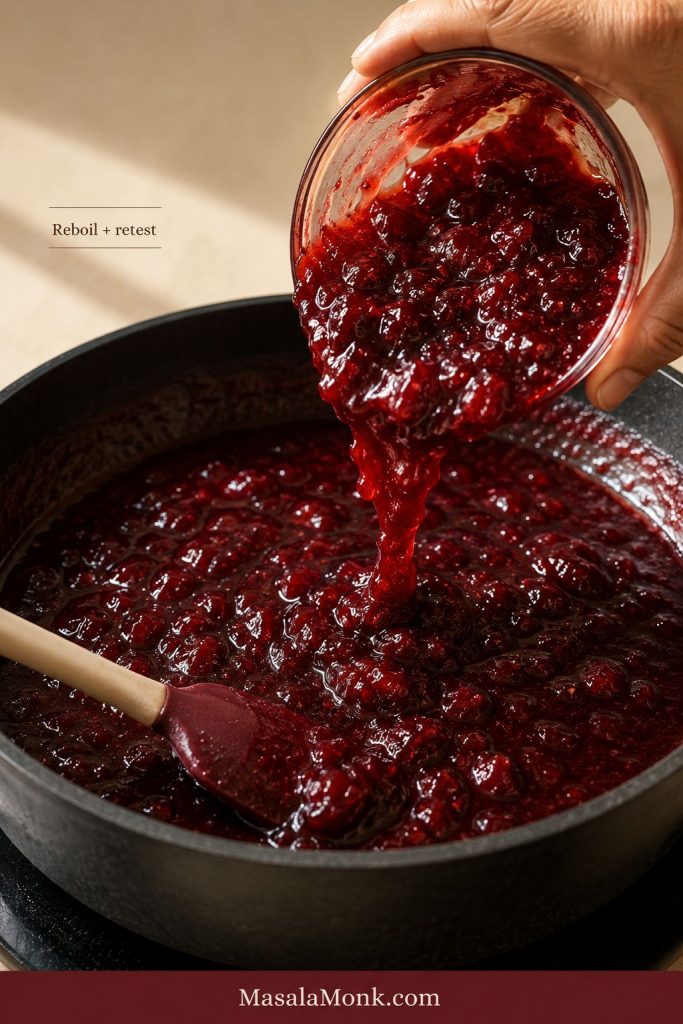
- Pour the loose jam back into a wide pan.
- Bring it to a steady boil over medium-high heat.
- Cook for a few minutes, stirring often.
- Test on a chilled plate.
- Stop when the jam wrinkles slightly or sheets from the spoon.
Do not boil it endlessly. A longer boil is not always better; sometimes it just cooks away the fresh cherry flavor.
For Pectin Cherry Jam
If you used packaged pectin, follow that pectin brand’s remake instructions. Pectin formulas vary, and adding more pectin without the correct sugar, acid, and boiling method can make the texture gummy or uneven.
For Jam That Will Not Set Firmly
Use it as cherry sauce. This is not a failure if the flavor is good. A loose cherry jam can be better than stiff jam on pancakes, yogurt, ice cream, cheesecake, waffles, oatmeal, and desserts.
Once the texture is right: return to the recipe card · see ways to use cherry jam
Can You Can This Cherry Jam?
The main no-pectin recipe in this post is written for the refrigerator or freezer. It is not a shelf-stable canning recipe.
This does not mean canning is difficult. It only means pantry storage needs a recipe built for pantry storage. The recipe card version is flexible because it stays cold; a pantry recipe has to be exact because it is stored at room temperature.
The difference is the whole formula: sugar level, acid, jar size, headspace, processing time, and altitude. For shelf-stable jars, use a canning-tested cherry jam recipe and follow the exact instructions. The National Center for Home Food Preservation’s cherry jam with pectin method is a better reference point for pantry jars than a flexible fridge-jam recipe.
Fridge Jam vs Pantry Canning
The safest way to think about storage is simple: chilled jars can stay flexible, but pantry jars need a tested process.
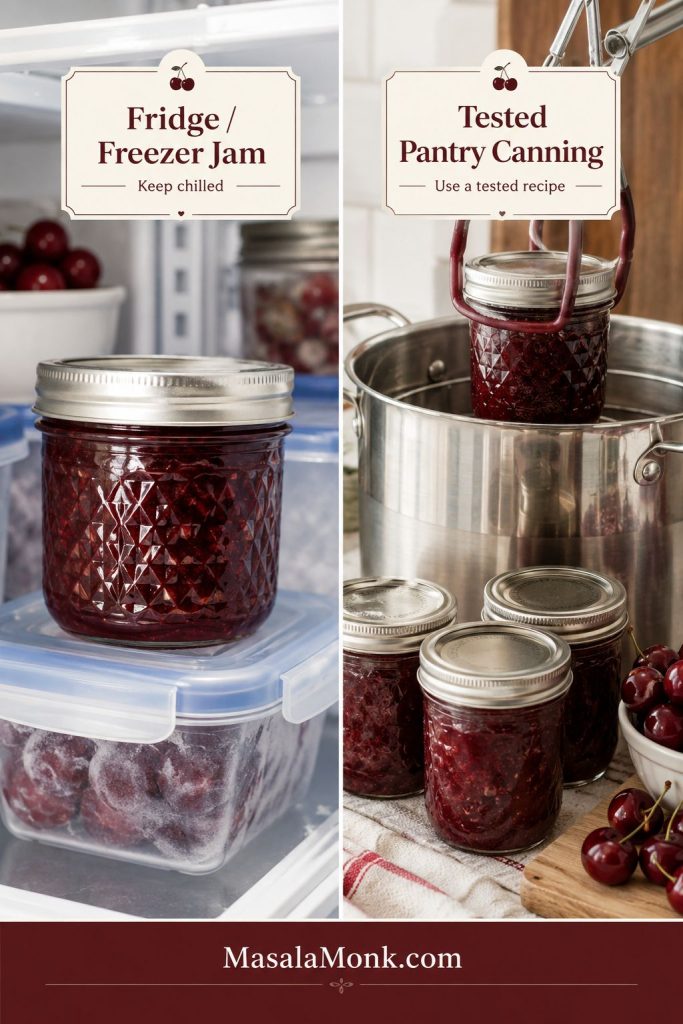
What Changes for Canned Cherry Jam?
- The recipe usually uses pectin for a reliable set.
- The sugar level is part of the pantry-safe formula, not just a taste choice.
- Jam jars need correct headspace, often 1/4 inch / about 6 mm.
- Filled jars need boiling-water processing for the correct time.
- Processing time may change with altitude.
- Jar inversion is not a substitute for proper water-bath processing.
- Low-sugar canning needs a reduced-sugar canning route or low/no-sugar pectin system.
Think of this as two different goals: a chilled homemade jar today, or a pantry-safe jar for later. Make the recipe card version when you want a quick homemade spread. Use a water-bath canning route when you want pantry jars.
Keeping this as a chilled batch? jump to storage · see serving ideas
Can You Make Low Sugar Cherry Jam?
Low sugar cherry jam can be lovely, especially when the cherries are flavorful. Just do not treat sugar like decoration. Sugar does more than sweeten the fruit; it helps the jam set, shine, and store properly.
Reducing sugar for a fridge jar is a taste choice. Reducing sugar for a pantry jar is a preservation change. That is why low-sugar cherry jam should not come from cutting sugar from a regular recipe at the end.
For a softer refrigerated batch, you can reduce sugar modestly and accept a looser finish. For a more reliable low-sugar set, use pectin designed for low-sugar or no-sugar jam and follow that pectin’s instructions. Oregon State University Extension explains why reduced-sugar fruit spreads need different handling here: Low-Sugar Jams and Jellies.
- Slightly less sweet fridge jam: reduce sugar modestly and expect a softer set.
- Firm low-sugar jam: use low/no-sugar pectin.
- Sugar-free jam: use a tested sugar-free pectin method.
- Low-sugar canned jam: use a canning-safe recipe designed for reduced sugar.
Cherry Freezer Jam Is Different
Freezer jam is its own style, not just cooked jam stored cold. It often uses fresh crushed fruit, sugar, and pectin, then sets in the fridge or freezer without water-bath processing. It is fresh-tasting and easy, but it still belongs in the freezer or refrigerator, not the pantry.
Cherry Jam, Jelly, Preserves, Compote, and Chia Jam
If you are comparing cherry jam with jelly, preserves, compote, or chia jam, here is the quick difference.
| Name | What it means | Texture |
| Cherry jam | Chopped or crushed cherries cooked with sugar | Spreadable with fruit texture |
| Cherry preserves | Larger cherry pieces in syrupy jam | Chunkier and fruitier |
| Cherry jelly | Strained cherry juice set with sugar and pectin | Clear and smooth |
| Cherry compote | Fruit cooked briefly with sugar or syrup | Loose sauce |
| Cherry chia jam | Quick fridge spread thickened with chia seeds | Soft and seedy |
If you want fruit pieces, make cherry jam or preserves. If you want a clear, smooth spread, cherry jelly is the better recipe. If you only need a quick topping, compote or chia jam may be enough.
Cherry Jam Flavor Variations
Plain cherry jam is the best first batch because it teaches you the set and sweetness. After that, small flavor changes can make the same base recipe feel completely different.
- Vanilla cherry jam: add 1 teaspoon vanilla extract after cooking.
- Cherry almond jam: add 1/8 to 1/4 teaspoon almond extract at the end.
- Amaretto cherry jam: stir in a small splash of amaretto after cooking for a dessert-style jam.
- Black forest cherry jam: pair cherry jam with chocolate desserts instead of adding too much cocoa to the jar.
- Lemon cherry jam: add lemon zest for a brighter finish.
- Jalapeño cherry jam: add finely chopped jalapeño for a sweet-savory cheese board jam.
- Mixed berry cherry jam: replace part of the cherries with raspberries, strawberries, or blueberries.
- Rhubarb cherry jam: add tart rhubarb for a sharper preserve.
When adding extracts, start small. Cherry jam has a delicate fruit flavor, and almond or alcohol-based flavors can take over quickly. If you want the chocolate-cherry direction, pair the jam with chocolate cream cheese frosting instead of adding too much cocoa to the jar.
How to Use Cherry Jam
A spoonful of cherry jam can make a plain breakfast feel like something you planned. It is especially good anywhere you want a dark, sweet-tart spoonful against something creamy, buttery, or crisp.
Serving Ideas for Cherry Jam
The best uses pair the jam with creamy, buttery, or lightly crisp foods so the cherry flavor stays bright.
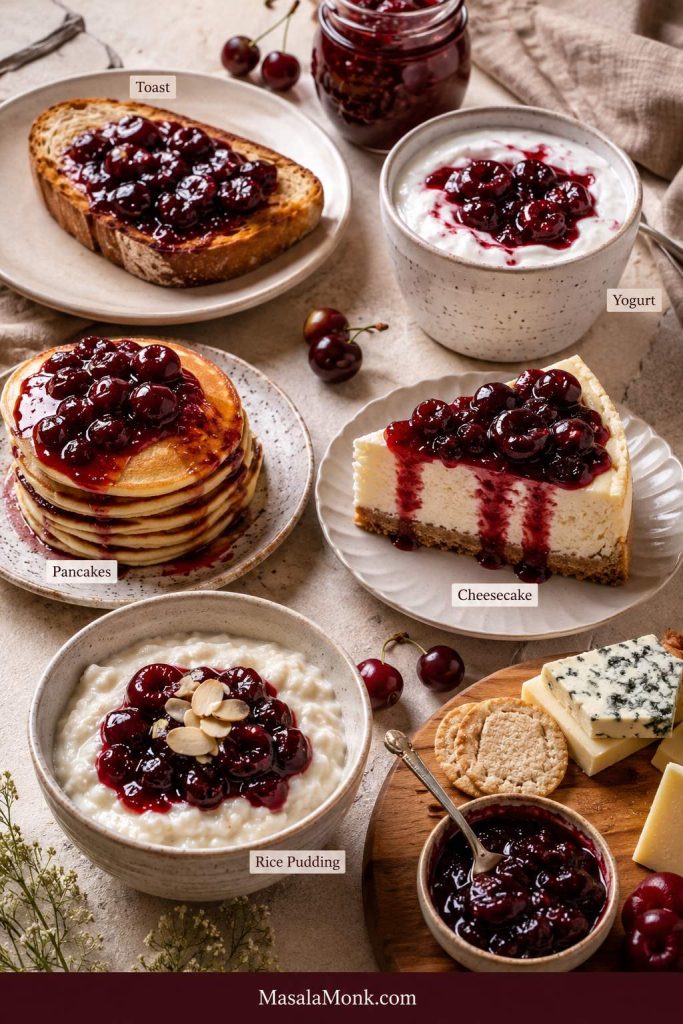
- Spread on toast, sourdough, biscuits, croissants, or English muffins.
- Spoon over protein-rich cherry pancakes for a double-cherry breakfast.
- Swirl a spoonful into overnight oats for a cherry-yogurt breakfast jar.
- Spoon it over a no bake cheesecake for an easy cherry cheesecake topping.
- Spread between cake layers with whipped cream, buttercream, or cream cheese frosting.
- Fill thumbprint cookies, sandwich cookies, hand pies, or pastries.
- Serve with brie, cream cheese, goat cheese, or a cheese board.
- Warm slightly and brush over chicken, pork, or ham as a glaze.
- Spoon a loose batch over rice pudding with cooked rice, vanilla ice cream, or pound cake.
How to Store Cherry Jam
Once the jar is cool, the storage choice matters more than the jar itself. A refrigerated jam, freezer jam, and properly canned jam should not be treated the same way.
| Storage method | How long | Notes |
| Refrigerator | 2–3 weeks | Best for the no-pectin recipe in this post |
| Freezer | Up to 3 months | Use freezer-safe containers and leave headspace |
| Properly canned jars | Follow tested canning guidance | Only for correctly processed shelf-stable recipes |
| Opened canned jar | Refrigerate after opening | Use as you would regular jam |
Always use clean utensils when scooping jam from the jar. If jam smells fermented, grows mold, becomes fizzy, or looks unusual, discard it.
Common Cherry Jam Mistakes to Avoid
Most cherry jam problems come from the same few moments: too much liquid, not enough testing, too much heat, or treating a fridge jar like a pantry jar. Watch for these and the whole batch becomes much easier to control.
- Using a deep narrow pot. A wide pan helps extra water evaporate faster.
- Skipping lemon juice with sweet cherries. Sweet cherries need acidity for a brighter flavor.
- Adding all the thawed frozen cherry juice. Too much liquid makes the jam take longer to set.
- Using cherry pie filling as the fruit. Pie filling already contains sugar and thickeners, so it is not the same as plain cherries.
- Reducing sugar randomly. Sugar affects texture, shine, set, and storage.
- Doubling the batch without adjusting technique. Larger batches take longer to reach the setting stage.
- Boiling too long. Overcooked jam can become sticky, dull, and too firm.
- Judging set while hot. Jam thickens as it cools.
- Using expired pectin. Old pectin can lead to a weak set.
- Swapping pectin types without checking the method. Powdered, liquid, and low/no-sugar pectin behave differently.
- Treating cold-storage jam like pantry jam. Fridge and freezer jams stay chilled; shelf-stable jars need a canning-tested method.
Cherry Jam Recipe FAQ
Why is my cherry jam runny?
Cherry jam is usually runny because it was undercooked, made with too much liquid, cooked in too large a batch, reduced too heavily in sugar, or made with the wrong pectin method. Let the jam cool fully before deciding it failed, because jam thickens as it cools.
Does cherry jam need pectin?
No. Cherry jam does not need pectin for a soft refrigerator set, but pectin helps when you want a firmer jam, reduced-sugar structure, or pantry-safe canning recipe. For the no-pectin version here, cook the fruit down properly and test it on a cold plate.
What cherries are best for jam?
Sweet cherries make a deep, mellow jam, while sour cherries make a brighter and tangier jam. Bing cherries, dark sweet cherries, tart cherries, pie cherries, and Morello cherries can all work. Rainier cherries are fine too, but the jam will be lighter in color and softer in flavor.
How many cherries do I need for this recipe?
You need 500 g / about 3 cups pitted cherries for this recipe. Start with about 600–700 g / 1 1/3–1 1/2 lb whole cherries to allow for the pits and stems.
Do frozen cherries work for cherry jam?
Yes. Frozen cherries work well for cherry jam if you thaw and drain them first, then add back only a splash of reserved juice if the pan looks dry. They often release more liquid than fresh cherries, so the jam may take a little longer to thicken.
Can I make cherry jam with canned cherries?
Yes, but use plain canned cherries and drain them well before cooking. Cherries packed in syrup, juice, or water can work, but cherry pie filling is not a direct substitute because it already contains sugar, thickeners, and flavoring.
How much sugar do I need for cherry jam?
For the no-pectin fridge jam in this post, use 200 g / about 1 cup sugar for 500 g / about 3 cups pitted cherries. That gives a balanced soft-to-medium set. Less sugar can work for a softer fridge jam, but the texture will be looser. Pectin canning recipes often use more sugar because the sugar level is part of the formula.
Is lemon juice necessary in cherry jam?
Lemon juice is strongly recommended, especially with sweet cherries. It brightens the flavor and helps the jam set better. Without lemon, sweet cherry jam can taste flat or overly heavy after cooking.
What temperature should cherry jam reach?
Cherry jam usually sets around 220°F / 104–105°C. At higher altitudes, the setting point may be closer to about 8°F above your local boiling point of water. Temperature is helpful, but it should be used with a cold plate test instead of replacing it.
Can this cherry jam recipe be canned?
The main no-pectin recipe is for refrigerator or freezer storage. For shelf-stable pantry jars, use a canning-safe recipe with proper boiling-water processing, correct headspace, and altitude adjustments.
Is low-sugar cherry jam safe for canning?
Only when the recipe is designed for that. Low-sugar cherry jam can be canned when you use a tested reduced-sugar canning recipe or a low/no-sugar pectin method designed for canning. Do not simply cut sugar from a traditional recipe and store the jars in the pantry.
What is the difference between cherry jam and cherry jelly?
Cherry jam is made with chopped or crushed cherries, so it has fruit texture. Cherry jelly is made from strained cherry juice, so it is smooth and clear. Jelly usually needs a different method and often uses pectin for a firm set.
Can I make cherry jam without a thermometer?
Yes. Use the cold plate test. Place a small plate in the freezer before cooking, spoon a little jam onto it, wait briefly, then push the jam with your finger. If it wrinkles and does not run like syrup, the jam is ready.
Can I double this cherry jam recipe?
It is better to make two small batches instead of one large batch. Small batches cook faster, evaporate more evenly, and are easier to set. Large batches can stay watery longer and may overcook before they thicken properly.
Did you make this with sweet cherries, sour cherries, or frozen cherries? Tell us which one you used, whether you used pectin, and whether your jam set soft, medium, or firm. Your note can help the next person decide how long to cook their batch.
Final Thoughts
That is the real point of jam: catching fruit at its best and giving it a second life in a jar. A good cherry jam does not have to be perfect like store-bought jelly. It should taste bright, look glossy, spread easily, and remind you why cherries were worth saving in the first place.