Posted on Leave a comment

Orange Marmalade Recipe: Easy, Bright, No Boxed Pectin

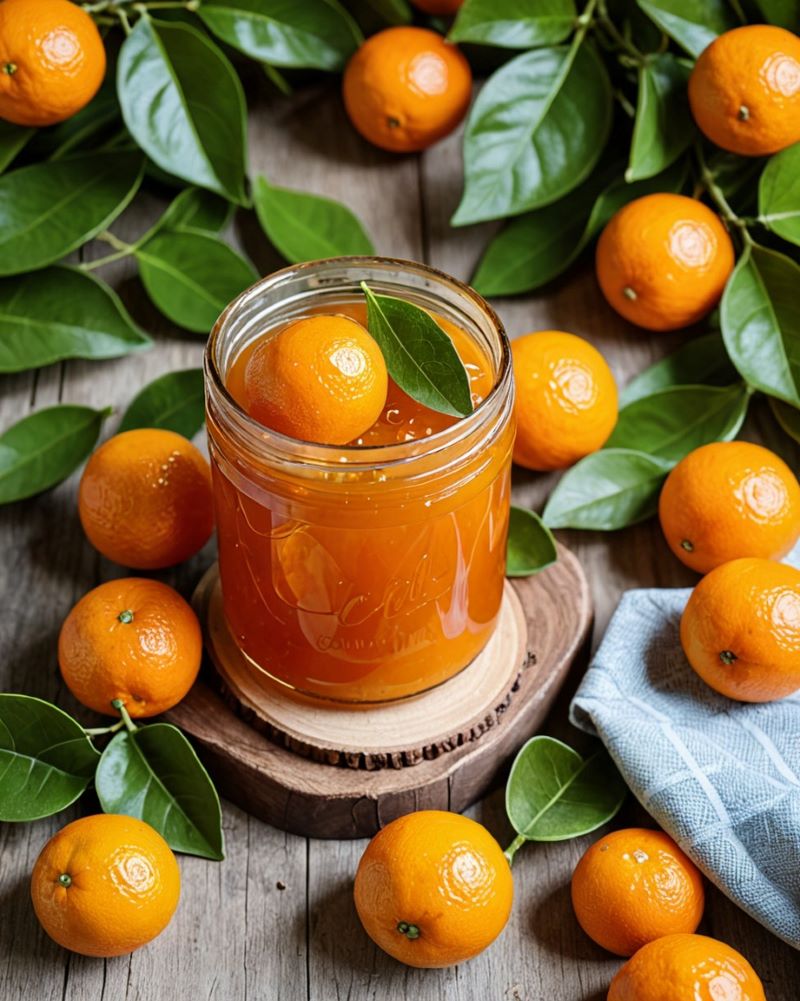
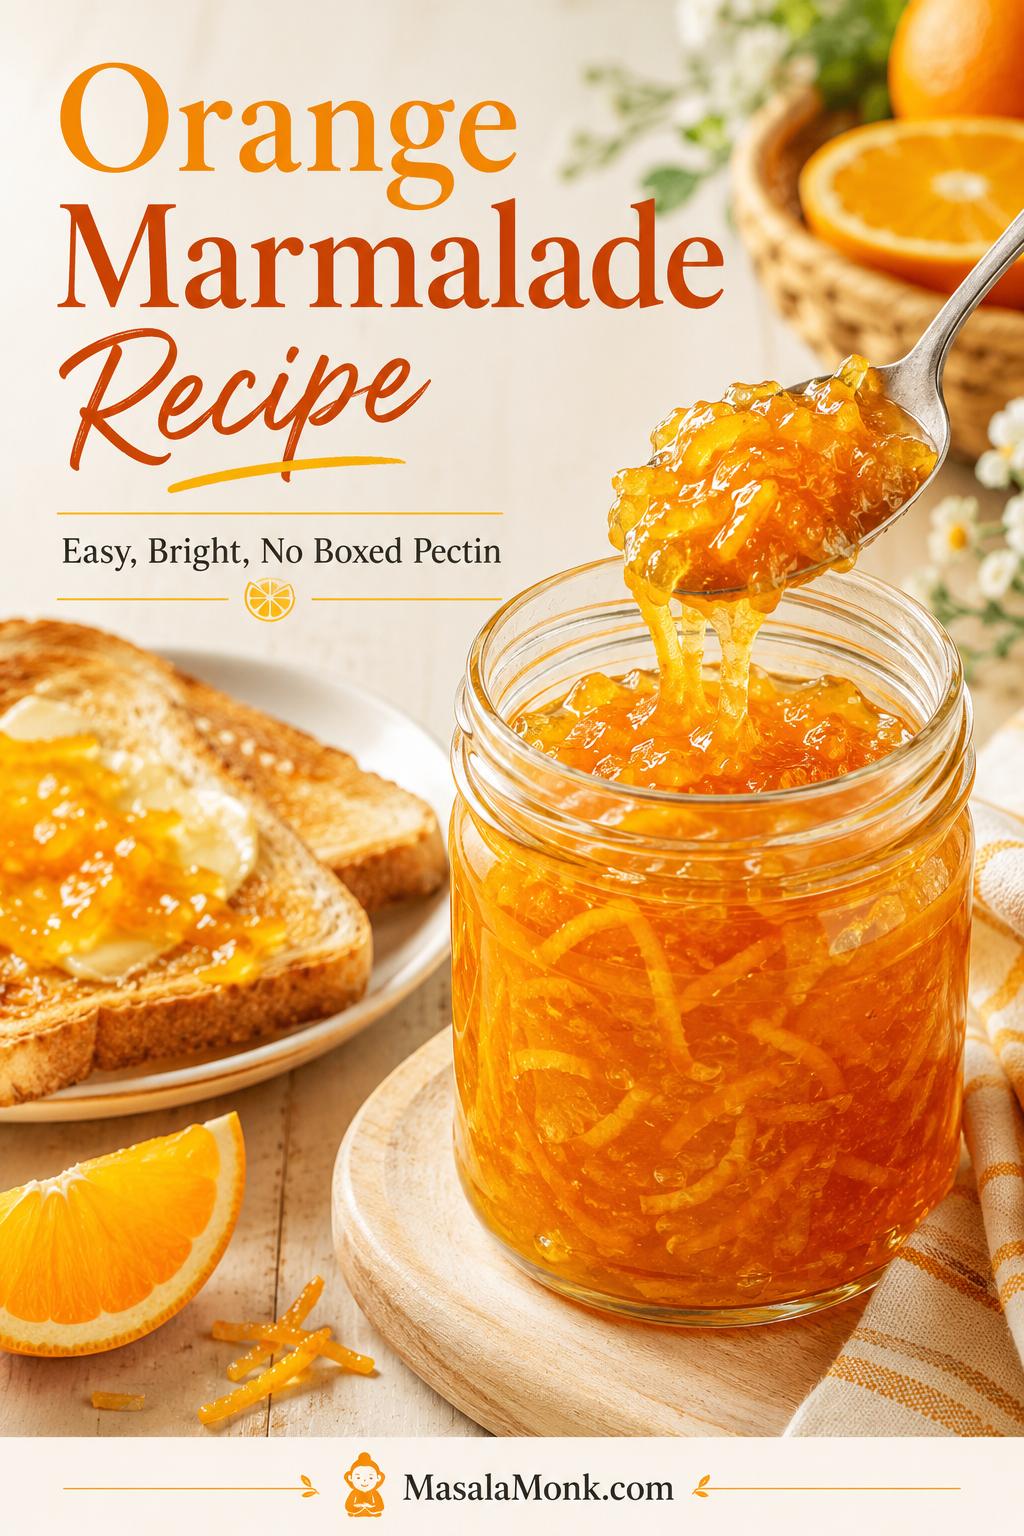
Clear glass jar of homemade orange marmalade with visible peel, a spoon lifting marmalade, buttered toast, and fresh oranges on a warm kitchen surface.

Orange marmalade sounds simple until you make it for the first time. Then the questions arrive all at once: how much peel should stay in, why does it taste bitter, does it need pectin, how do you know it has set, and what happens if it is still runny after cooling?

But a good batch is worth the small bit of patience. It makes the kitchen smell like orange peel and warm sugar, turns plain toast into something golden and deliberate, and gives you a jar that can brighten cakes, glazes, yogurt, cheese boards, and sauces for weeks.

This is not a giant traditional Seville marmalade project. It is a practical orange marmalade recipe for regular sweet oranges: real orange peel that softens instead of turning chewy, balanced bitterness, no boxed pectin, and a soft fridge/freezer set you can actually use.

The method is built for the kind of jar you want to open again: bright citrus, delicate peel, enough bittersweet edge to taste like marmalade, and a set that spreads instead of bouncing like jelly. The working formula is 900 g to 1 kg oranges, 1 lemon, 600 ml water, and 700 to 800 g sugar for about 4 cups of fridge/freezer marmalade.

Quick Answer: How Do You Make Orange Marmalade?

To make orange marmalade, scrub the oranges, slice the peel, simmer the peel in water until it gives easily, then add chopped orange flesh, lemon juice, and sugar. Boil the mixture at an active bubble until the syrup turns glossy and thick enough to pass the cold-plate test.

This is an orange peel marmalade, not a smooth orange jam: the peel is sliced, softened, and suspended in the final jar. You still get real marmalade texture, but the peel is cooked gently first so it tastes balanced instead of harsh.

No added pectin is required. The set comes from citrus peel, lemon, sugar, and reduction, with the cold plate showing you when the hot syrup will cool into a soft spread.

What Good Orange Marmalade Texture Looks Like

Use this visual before the first batch: it shows the difference between a loose orange syrup and a preserve with peel held through the body of the marmalade.
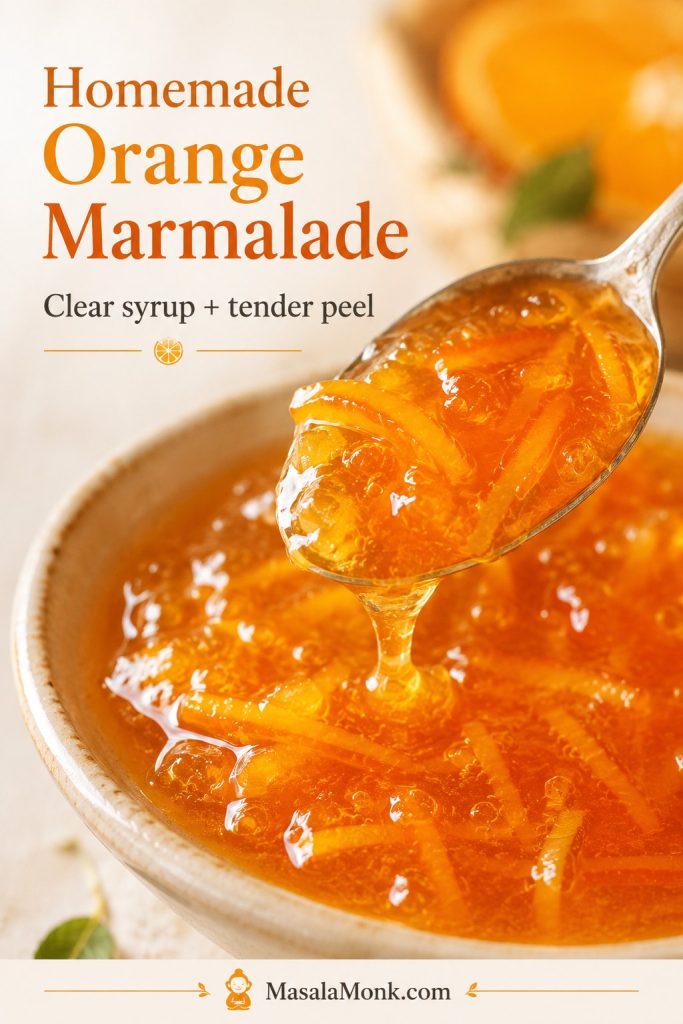
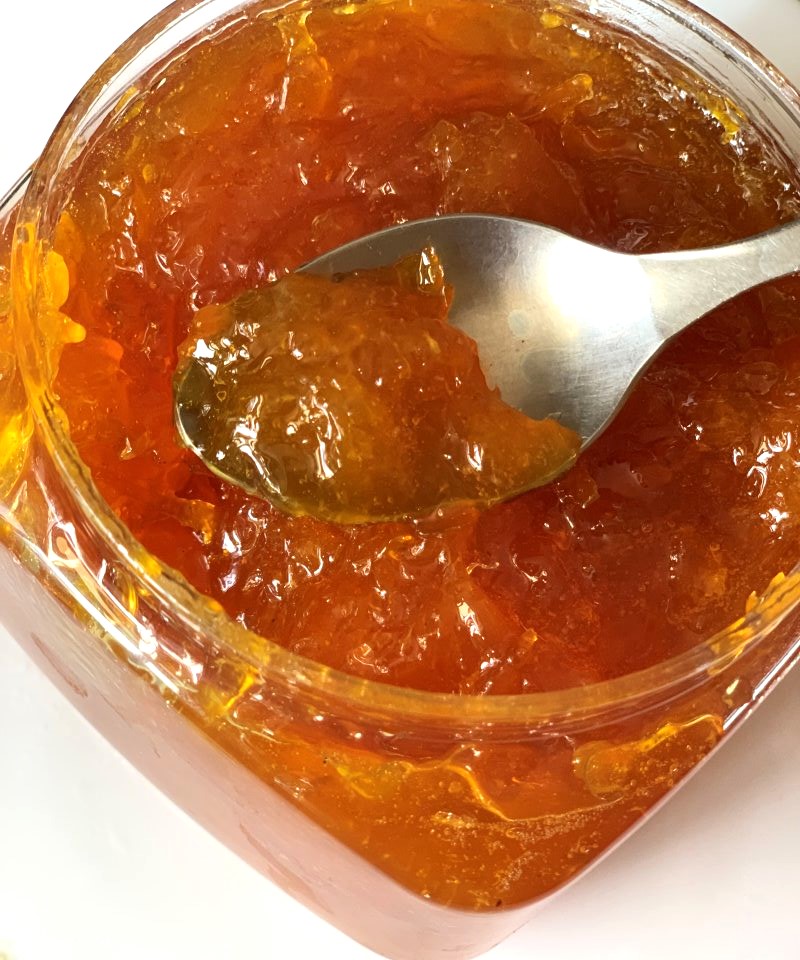
Close-up spoonful of orange marmalade showing clear amber syrup, tender orange peel strips, and a glossy spoonable texture.
Before you cook, notice the texture target. Good orange marmalade should look clear and glossy, with tender peel suspended through the syrup instead of floating in watery liquid.

At a Glance

Best forBeginners who want tender peel, bright citrus, and a soft set
Batch styleFridge/freezer marmalade, about 4 cups
Main fruitRegular sweet oranges, preferably thin-skinned
PectinNo added pectin in the main recipe
TextureSpoonable, glossy, with tender orange peel
Best testCold-plate wrinkle test
StorageRefrigerator or freezer by default
CanningUse a preservation-tested method for shelf-stable jars

This Recipe Is Best If…

Choose this version if you want one manageable fridge/freezer batch made with regular sweet oranges, real peel, no boxed pectin, and a soft set that spreads easily. For pantry canning, sugar-free marmalade, Seville-only marmalade, or smooth orange jam, use a method written for that style.

What Is Orange Marmalade?

Orange marmalade is a citrus preserve made with orange peel, orange pulp or juice, sugar, and water. The peel is the personality of marmalade: it brings texture, bitterness, aroma, and natural pectin support.

A good jar should be sweet, bright, glossy, and a little bitter. It should spread easily, but it should not run off toast like syrup. Orange juice alone makes more of a jelly-style base; marmalade needs peel to feel like marmalade.

At the table, it should make breakfast feel less automatic: bitter enough to wake up the butter, bright enough to cut through cream, and soft enough to drag across toast without tearing it.

Orange Marmalade vs Orange Jam

The simplest difference is peel. Orange marmalade includes citrus peel, while orange jam is usually smoother, sweeter, and less peel-forward. If you remove almost all the peel or blend the mixture until completely smooth, the result may still taste delicious, but it will feel closer to orange jam than classic marmalade.

If peel is the reason you avoid marmalade, do not start with thick-cut. Start with a fine shred. You may find you like marmalade more when the peel is tender, delicate, and spreadable rather than chunky and chewy.

Ingredients and Equipment for Homemade Orange Marmalade

Core Ingredients and What They Do

Start here if you want the recipe to make sense before you cook. These few ingredients control flavor, peel tenderness, natural set, and storage style.
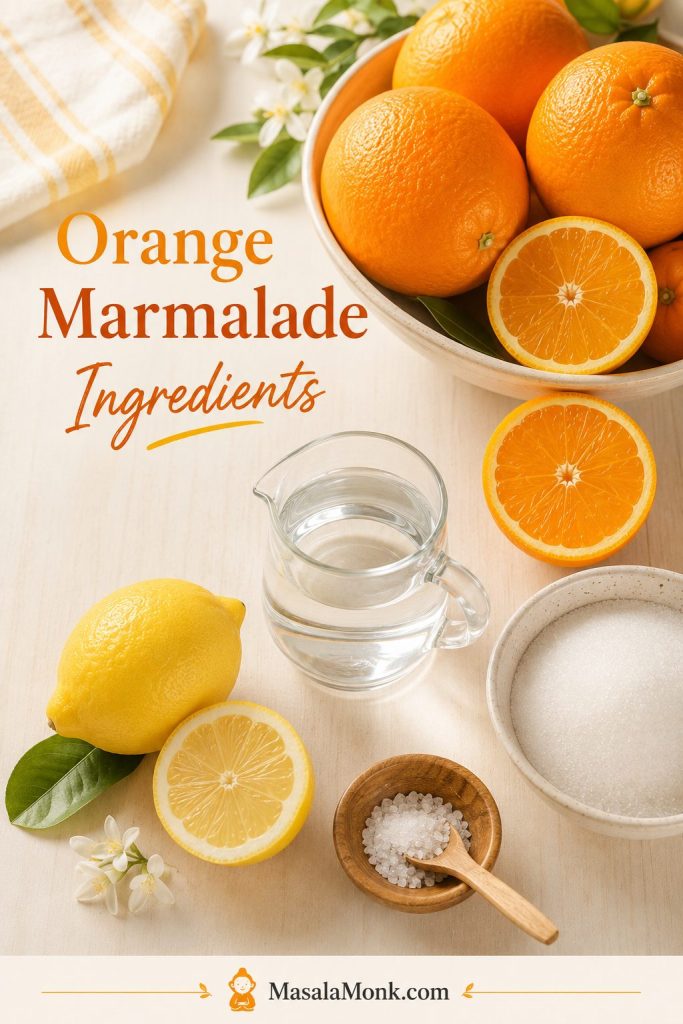
Oranges, lemon, sugar, water, and a small bowl of salt arranged on a light surface for making orange marmalade.
Because this orange marmalade recipe uses only a few ingredients, each one matters: oranges bring peel and flavor, lemon supports acidity, and sugar gives the preserve body.

Marmalade does not hide behind many ingredients. If the oranges are fragrant, the lemon is bright, and the peel is soft before the sugar goes in, the jar tastes alive.

The oranges bring flavor, peel, juice, and natural citrus pectin. Lemon is not just for flavor; its acidity helps that pectin work. Sugar gives the marmalade body, gloss, and keeping power. Water buys the peel time to soften before the syrup starts tightening.

IngredientAmount for this recipeWhy it matters
Regular sweet oranges900 g to 1 kg / about 2 to 2.2 lbProvide the citrus flavor, peel texture, juice, and natural pectin base.
Lemon1 medium lemon, juiced, about 2 to 3 tablespoons / 30 to 45 mlAdds brightness and acidity, which helps the natural pectin work.
Water600 ml / 2 1/2 cups, plus more if neededSoftens the peel before sugar is added and prevents scorching early on.
Sugar700 to 800 g / about 3 1/2 to 4 cupsSweetens, supports set, gives gloss, and improves keeping quality.
SaltA tiny pinch, optionalRounds the sweetness and makes the citrus taste brighter.

Sugar, Set, and Low-Sugar Boundaries

Which sugar amount should you choose? Use 700 g for a brighter, softer refrigerator marmalade. Use 800 g for a firmer, more classic set. If you reduce the sugar heavily in this natural-pectin recipe, expect a softer, shorter-keeping marmalade.

Sugar substitutes do not behave like sugar in regular marmalade. They may sweeten the fruit, but they do not provide the same set, gloss, or preservation. For very low-sugar or sugar-free marmalade, use a method designed for that style rather than simply swapping the sugar here.

Equipment You’ll Need

You do not need a professional preserving setup for this refrigerator marmalade. A few basics are enough: a digital scale, a large deep non-reactive pot, a sharp knife and board, two small freezer-safe plates for the cold-plate set test, and clean jars. A thermometer is helpful but optional; cheesecloth or muslin is only needed if you want to simmer seeds for extra natural pectin support.

For pantry storage, use proper water-bath canning equipment and a preservation-tested recipe. This main recipe is written first as a refrigerator or freezer marmalade.

Which Oranges Should You Use?

Best Sweet Oranges for a First Batch

Use this guide before you shop: the orange variety changes sweetness, bitterness, color, and how beginner-friendly the finished jar feels.
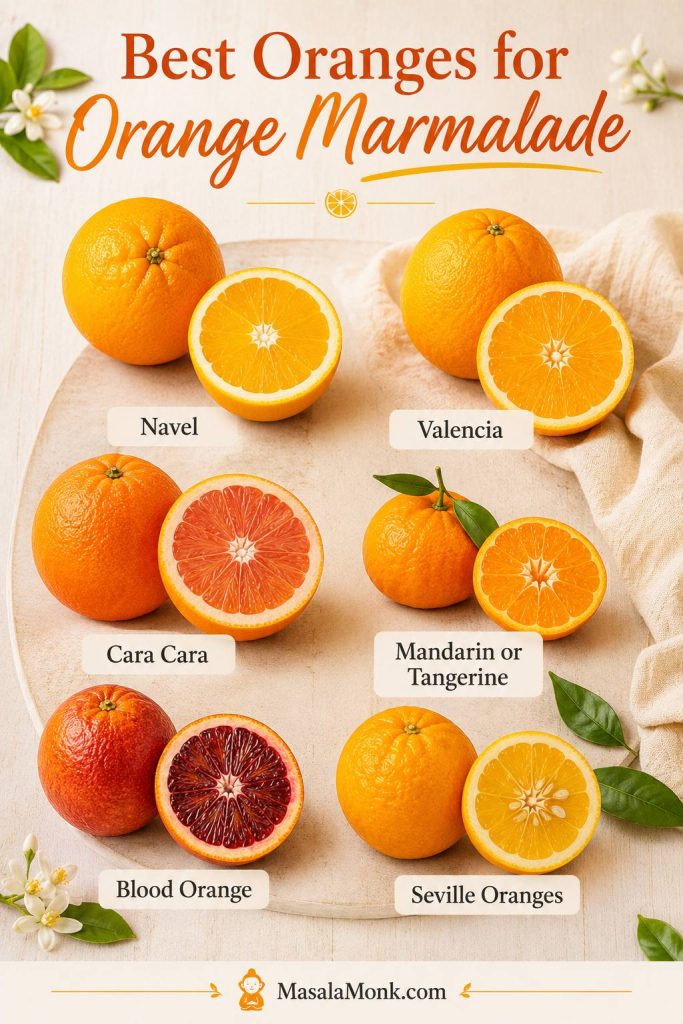
Labeled guide showing navel, Valencia, Cara Cara, mandarin or tangerine, blood orange, and Seville oranges for marmalade.
The best oranges for marmalade depend on the flavor you want. Sweet oranges make a gentler beginner-friendly jar, while Seville oranges create a more traditional bitter-orange marmalade.

Choose oranges with fresh, fragrant peel. Thin-skinned fruit is easiest because it gives you delicate shreds without too much thick, bitter white pith.

Navel oranges are the simplest choice for most kitchens. Valencia oranges give a bright, juicy flavor. Cara Cara oranges make a softer, sweeter-tasting marmalade with a rosy citrus note. Mandarins and tangerines can work too, especially for a sweeter preserve, but they behave slightly differently because their peel is thinner and their flavor is less bitter.

Seville, Mandarins, and Other Marmalade Styles

Small sour oranges or calamondins make a sharper preserve. MasalaMonk also has a calamondin orange marmalade recipe for that more intense citrus style.

For most sweet-orange variations, keep the fruit weight the same and adjust by the set test rather than by the clock.

Orange typeFlavor and textureBest use
Navel orangesSweet, easy to find, usually seedlessBest beginner choice
Valencia orangesJuicy, bright, classic orange flavorSweet orange marmalade
Cara Cara orangesSweeter, softer, gently floralMilder marmalade
Mandarins or tangerinesThin peel, sweeter flavor, softer textureSmall-batch marmalade or jam-style spreads
Blood orangesDeep color, berry-like citrus noteSeasonal variation
Seville orangesBitter, aromatic, traditionalClassic bitter marmalade

This main recipe uses sweet oranges because they are easy to find and mild enough for a first batch. Seville oranges make a more traditional, bitter, aromatic jar, so treat them as a focused variation rather than a required ingredient.

The peel is going into the jar, so treat the outside of the orange like an ingredient. Remove stickers, rinse the fruit under running water, and scrub the peel well. Unwaxed or organic oranges are ideal if you can get them, but regular oranges can still work if they are washed thoroughly. Avoid bruised, moldy, or damaged fruit because marmalade concentrates the flavor of the whole orange.

How Thin Should You Cut the Orange Peel?

The peel is the personality of marmalade. Thin shreds feel delicate and spread easily. Medium shreds taste more classic. Thick-cut peel gives a stronger bitter bite and a more traditional feel, but it needs more time to soften.

Texture target: Choose the peel cut before you cook; the thinner the shred, the gentler and more spreadable the jar will feel.
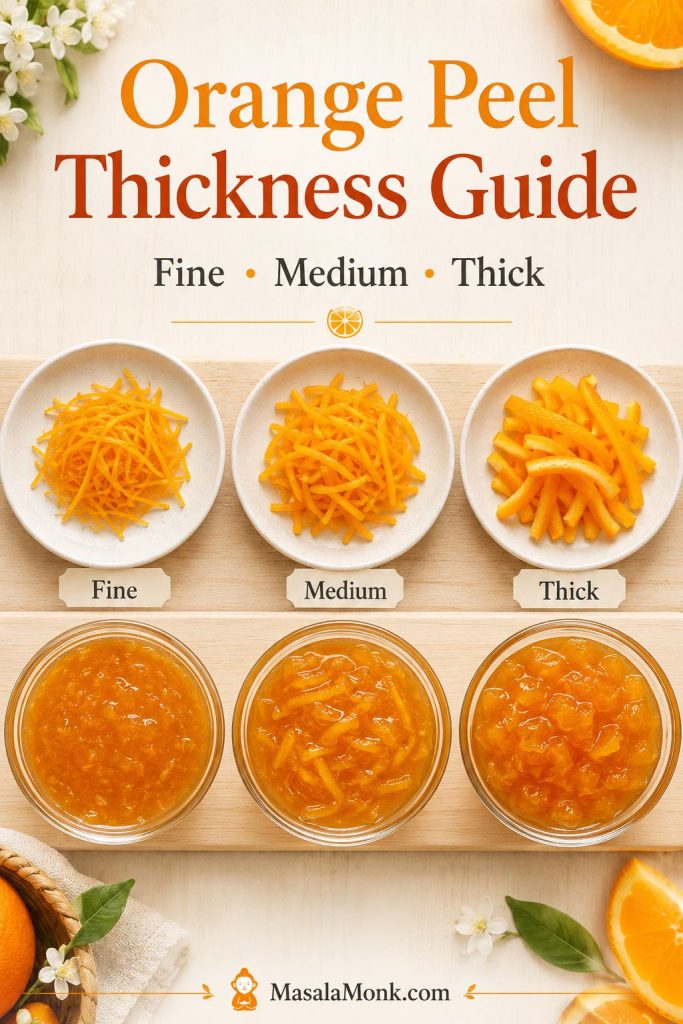
Guide showing fine, medium, and thick orange peel strips with matching marmalade texture samples underneath.
Peel thickness changes the whole jar. Fine peel gives a softer breakfast-style marmalade, while thicker peel creates a stronger, more traditional bite.
Peel styleResultBest for
Fine shredTender, easy to spread, less chewyBeginners, toast, scones, yogurt
Medium shredClassic marmalade textureAll-purpose jars
Thick cutStronger bite, more bitterness, more chewTraditional marmalade lovers
Food processorRustic, quick, less elegantShortcut marmalade
Low-peelSweeter, softer, more jam-likePeople afraid of bitterness

Tender peel is where good marmalade begins. Simmer the peel until it gives easily before adding sugar. Once sugar enters the pot, the peel is much less willing to soften. This is the difference between delicate shreds and chewy strips.

Can You Use a Food Processor?

Yes, but use it carefully. A food processor can save time, especially if you like a rustic marmalade, but it can also chop the peel unevenly or turn the fruit too pulpy. Pulse in short bursts and stop before the mixture becomes a puree.

A food processor version will taste good, but it may feel closer to orange jam if the peel disappears into the spread. Whole-orange methods are faster, but this separated-peel method gives you better control over bitterness, pith, and final texture. If your oranges have very thick pith, separating the peel is the safer choice.

Why This Method Works

This method is built around the places small-batch marmalade usually goes wrong: peel that stays chewy, syrup that refuses to set, and a pot that can move from bright citrus to overcooked sugar faster than expected.

What you doWhy it works
Soften the peel before adding sugarSugar slows further softening, so this prevents tough, chewy peel.
Add lemonAcidity helps natural citrus pectin work and keeps the flavor bright.
Dissolve sugar before boiling hardThis lowers the risk of graininess and scorching.
Boil after the peel is tenderWater evaporates, sugar concentrates, and the syrup gains body.
Test on a cold plateHot marmalade looks loose; the chilled test shows the final set more clearly.

Optional seed bag: If your oranges or lemon have seeds, you can tie the seeds and membranes in cheesecloth and simmer the bag with the fruit. Skip this for the simplest version; the marmalade can still set with peel, lemon, sugar, and proper cooking.

How to Make Orange Marmalade

The method below focuses on the cues that matter most: soft peel, syrupy body, and a set that holds after cooling. Aim for a jar with peel suspended through the syrup and a texture that spoons easily once cooled. If it bounces like jelly, it has gone too far. If it runs like syrup, it needs more cooking.

Your first batch does not need to be perfect to be useful. If it sets softly, spreads easily, and tastes bright once cooled, it is a successful jar.

Before You Start: 5 Small Safeguards

  • Let the peel soften before sugar goes in.
  • Use a deep pot because marmalade rises as it boils.
  • Judge the set from a chilled sample, not the hot pot.
  • Keep enough sugar if you want a classic set.
  • Treat this as fridge/freezer marmalade unless you follow tested canning guidance.

What you should see: first the peel softens; then the syrup looks thin and loose; later the bubbles slow, the spoonful lands heavier, and the peel starts to sit inside the syrup instead of floating in watery liquid.

Step 1: Prepare the fruit

Wash and scrub the oranges and lemon. Slice off the hard ends. Remove the orange peel in wide strips, then cut the peel into fine or medium shreds. Chop the orange flesh and save as much juice as possible. Remove seeds so they do not end up in the jar; save them only if you plan to use the optional seed bag.

Before you chop: This is where the marmalade gets its final texture, so keep the peel intentional instead of chopping everything into a pulp.

Hands cutting oranges on a wooden board with sliced peel strips, chopped orange flesh, and peeled fruit separated for marmalade.
Separating the peel from the fruit gives you more control over bitterness, texture, and tenderness, especially when making orange marmalade without boxed pectin.

Rustic shortcut: Instead of separating peel and flesh, you can slice the whole oranges very thinly and remove seeds as you go. This is faster, but the final texture is more rustic and may taste more bitter if the fruit has thick pith.

Step 2: Simmer the peel until tender

Put the sliced peel into a large heavy non-reactive saucepan with the water. Bring it to a boil, then reduce to a steady simmer. Simmer partly covered if the water is evaporating too fast; uncover once you start reducing after the sugar goes in. Cook until the peel is soft enough to squash between your fingers or cut against the side of the pot with a spoon. Depending on peel thickness, this may take 20 to 35 minutes.

Before sugar: At this point you are cooking the peel, not setting the marmalade. Give the strips time to relax before the syrup tightens.
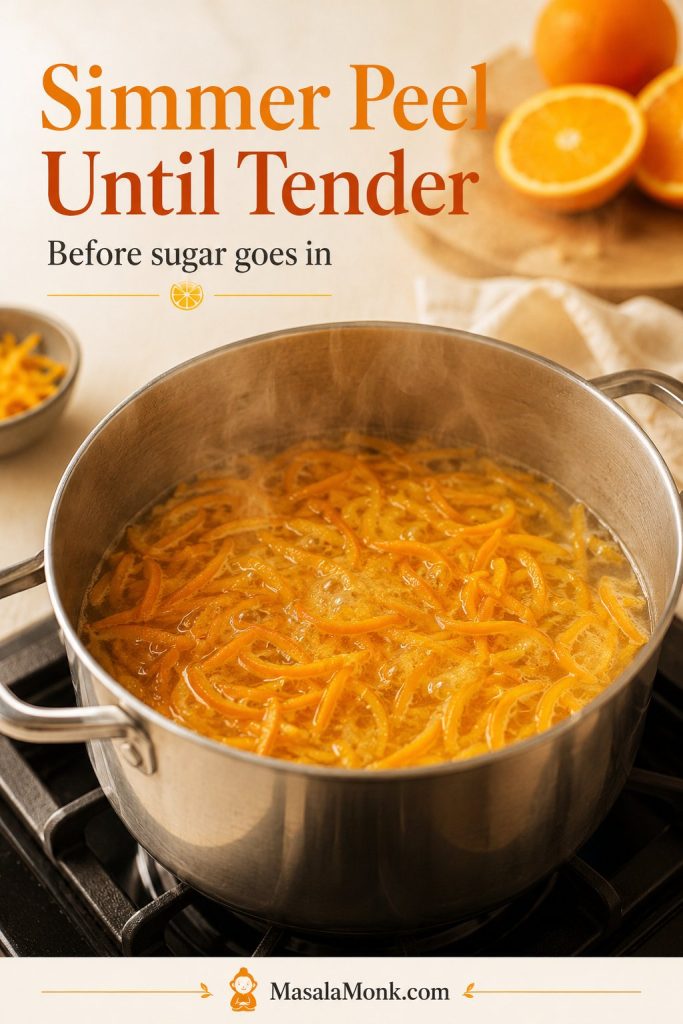
Orange peel strips simmering in water inside a saucepan on the stovetop before sugar is added.
This is the quiet step that decides peel texture. If the strips still feel firm now, they will stay chewy in the finished orange marmalade.

This stage can feel slow, but it is where good marmalade is made. By the time the peel is ready, there should still be some liquid in the pot. If the pan is nearly dry, add a splash more water. If it looks very watery, simmer uncovered for a few extra minutes before adding sugar.

Look for this: Move on only when the peel gives easily. Sugar will sweeten the pot, but it will not magically soften chewy strips later.
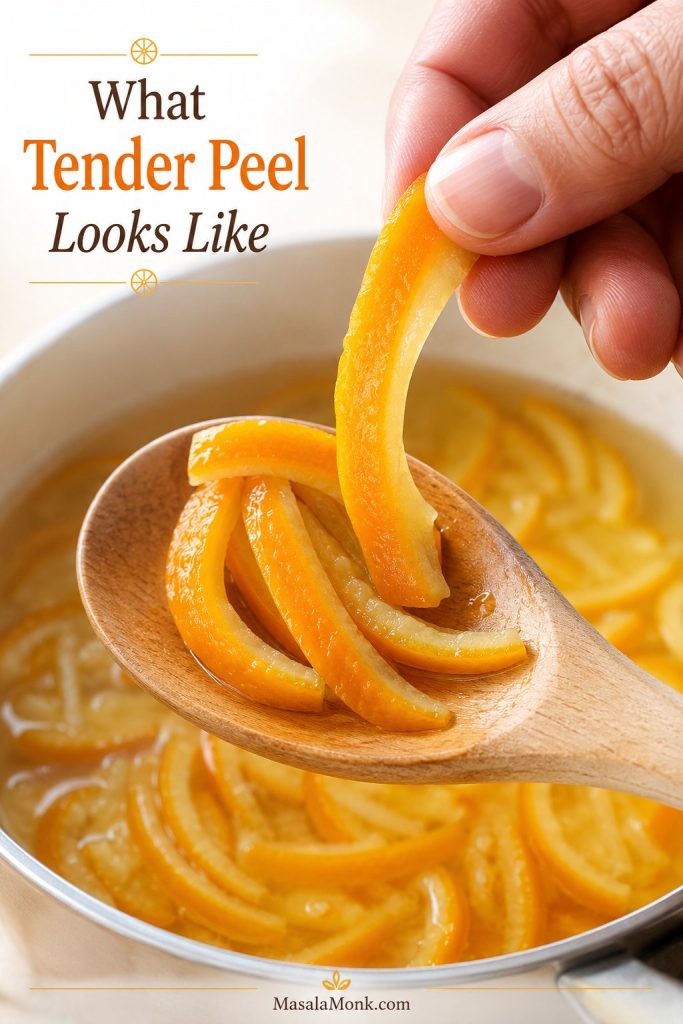
Fingers bending a softened orange peel strip over a wooden spoon above a pot of simmered peel.
The peel is ready when it bends easily instead of snapping or feeling chewy. This small cue helps prevent tough peel in the finished marmalade.

Step 3: Add fruit, lemon, and sugar

Add the chopped orange flesh, saved orange juice, lemon juice, and optional pinch of salt. If you are using a seed bag, add it now too. Stir in the sugar over medium heat until it dissolves fully. Letting the sugar disappear into the liquid before the hard boil helps prevent graininess and scorching.

Once sugar goes in: The mixture behaves more like syrup, so dissolve it fully before turning up the heat.
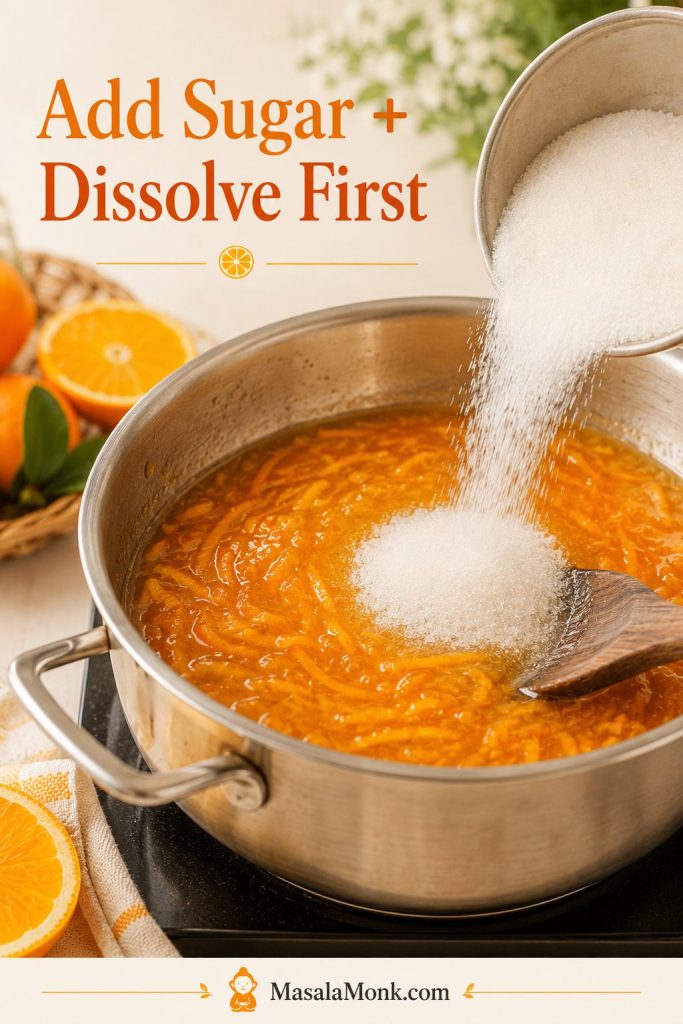
Sugar being poured into a pot of orange marmalade mixture with visible orange peel and a wooden spoon.
Once sugar enters the pot, the cooking changes quickly. Dissolving it fully first gives the marmalade a smoother syrup and lowers the risk of scorching.

Step 4: Boil until glossy and spoonable

Once the sugar has dissolved, increase the heat and cook the marmalade at a steady, active bubble rather than a violent boil. Use a pot with enough room because the mixture rises and spatters as it cooks. Stir often enough to prevent sticking, and stir more often near the end when the syrup thickens and the peel can catch on the bottom.

This is the point where marmalade can test your patience. It looks loose, the bubbles keep changing, and the urge to keep boiling is strong. Watch the texture instead: early bubbles are thin and watery; later, the syrup looks heavier, the peel turns more translucent, and the spoonful starts to cling lightly instead of splashing thinly.

Watch the bubbles: The bubbles are your early warning system. They move from thin and splashy to slower, heavier, and glossier as the syrup concentrates.

Three-stage guide showing orange marmalade at early watery bubbles, thicker reduction bubbles, and glossy near-set bubbles.
As the marmalade reduces, the bubbles change from light and watery to thicker and glossier. Watching that shift is often more useful than watching the clock.

After the sugar goes in, the boiling stage usually takes 20 to 35 minutes, depending on pot width, orange juiciness, and heat level. Wide pans reduce faster; narrower pots may take longer. Start testing before you think it is done, because hot marmalade always looks looser than cooled marmalade.

Stop when the chilled sample wrinkles softly, not when the pot looks stiff. If the syrup starts smelling deeply caramelized or darkens quickly, it is moving away from bright citrus and into cooked sugar.

Step 5: Rest and jar

If you used a seed bag, lift it out carefully just before jarring. Press it gently against the side of the pot with a spoon, using tongs if needed, then discard it. When the marmalade passes the cold-plate test, take it off the heat and let it rest for 5 to 10 minutes so the peel distributes more evenly.

If you jar immediately while the mixture is very fluid, the peel can float toward the top. That short rest helps the syrup settle just enough to hold the peel more evenly.

Foam is normal and does not mean the batch has failed. It is mostly trapped air from boiling. Skim it for a clearer jar, or leave a little if you do not mind a rustic finish. Spoon the marmalade into clean jars. Let refrigerator jars cool, then chill them. If you plan to freeze the marmalade, leave headspace so the preserve can expand. Pantry storage needs a reliable water-bath canning process from a tested source.

Before filling jars: A short rest before filling helps the peel stay more evenly distributed, especially in a soft-set fridge marmalade.
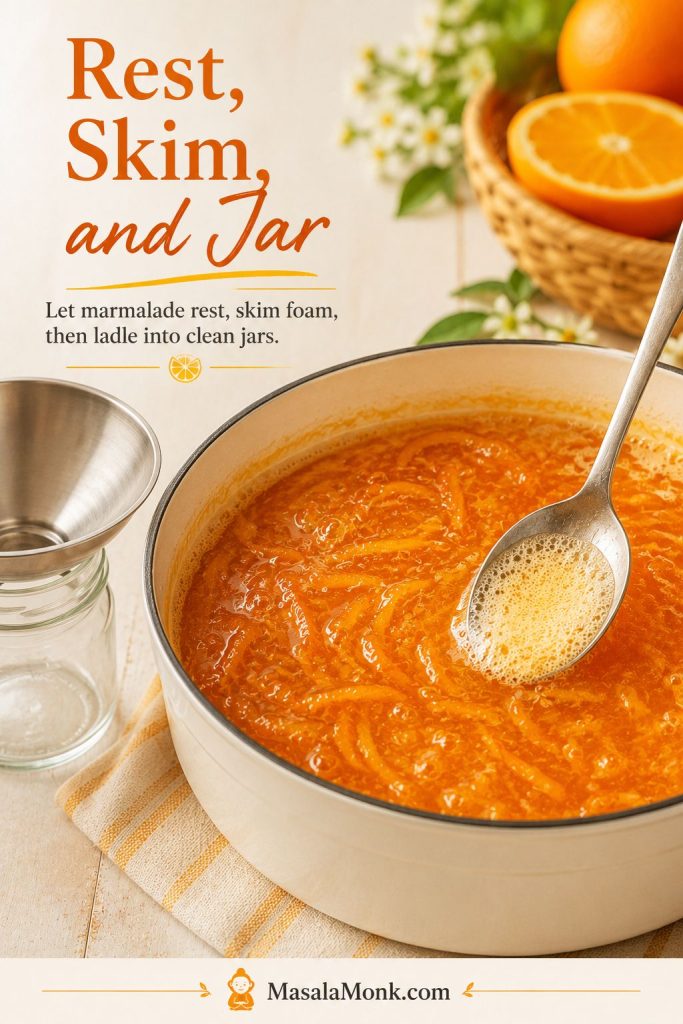
Spoon skimming foam from a pot of finished orange marmalade with a jar and funnel nearby for filling.
After boiling, let the marmalade settle briefly, skim excess foam, and then jar it. This helps the peel distribute more evenly and keeps the jars cleaner.

How to Know Orange Marmalade Has Set

Set is not a timer. It is a texture.

This is the moment people usually panic, but the cold plate is your calm button. Marmalade does not look fully set while it is still boiling. The pot will almost always look looser than you expect; that is why you test a cooled spoonful instead of arguing with the boiling syrup.

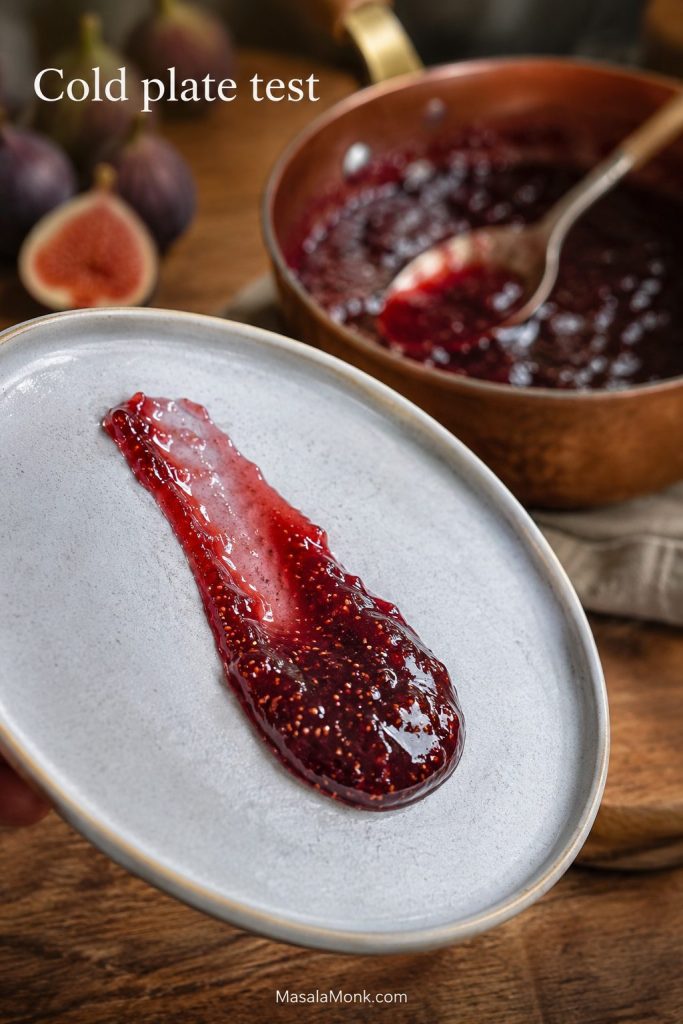
The Cold-Plate Test

Before you start cooking, put two small plates in the freezer. When the marmalade looks clear and slightly thickened, spoon a little onto a cold plate. Wait about one minute, then push the edge with your finger. If the surface wrinkles softly and does not run back like syrup, the marmalade is ready.

Set check: The sample should wrinkle softly after chilling. If it snaps firm or feels rubbery, the batch has gone past the soft-set stage.
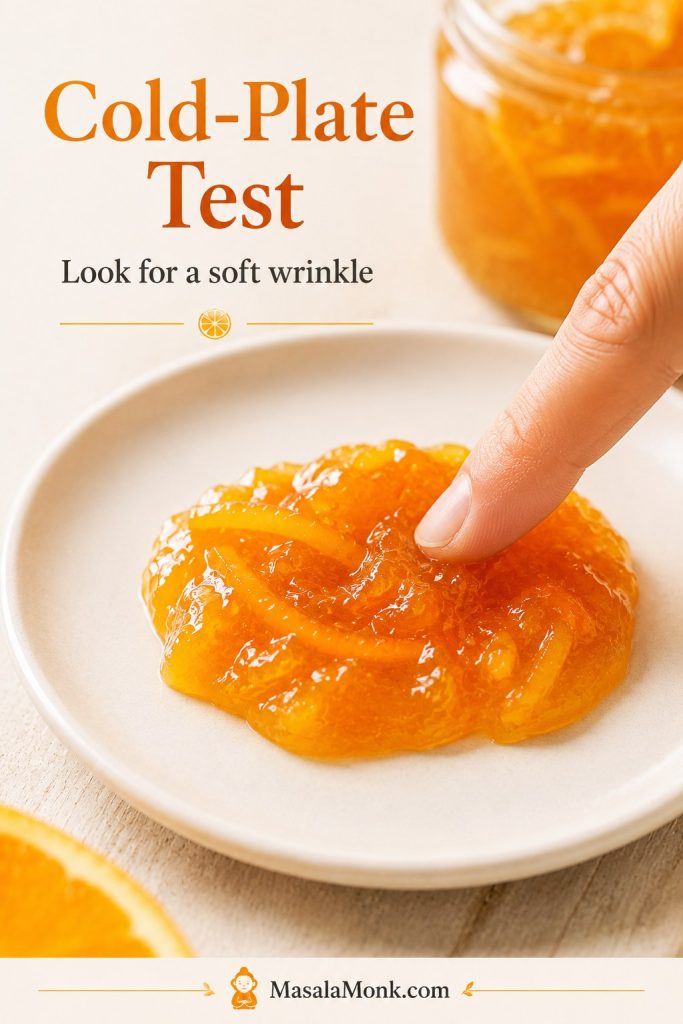
Finger pushing a spoonful of orange marmalade on a small white plate to check for a soft wrinkle.
The cold-plate test shows how hot marmalade will behave after cooling. Look for a soft wrinkle, not a rubbery or stiff set.

If it runs freely, cook for a few more minutes and test again. Use a clean cold plate each time if possible. Taste only after the marmalade cools a little; hot marmalade can taste sharper and sweeter in a way that does not represent the final jar.

Marmalade Setting Temperature: When to Stop Boiling

At sea level, many marmalades set near 220°F / 104.4°C, but the exact number shifts with altitude, batch size, fruit, and pot shape. Treat the thermometer as a cue, not the final judge. At higher elevations, trust the cold-plate test more than the number on the thermometer.

Thermometer check: Use the thermometer as a checkpoint, then confirm with a cooled sample so you do not overshoot a soft spreadable set.
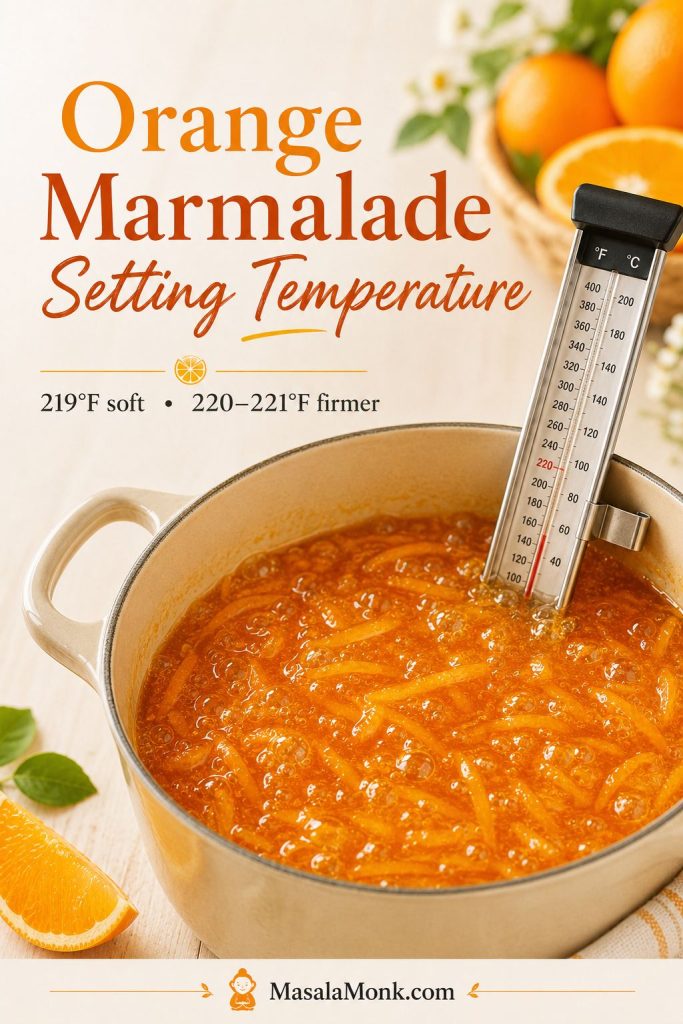
Candy thermometer clipped into a pot of bubbling orange marmalade with visible peel and temperature guidance above.
A thermometer can guide you toward the set point, but it should not work alone. Pair the temperature reading with the cold-plate or spoon test for better judgment.
Temperature cueLikely texture
217°F / 103°CBrighter and looser; may still be runny depending on fruit and pot shape.
219°F / 104°CSoft-set range for many home batches; confirm with the cold-plate test.
220–221°F / 104.4–105°CFirmer, more classic set; watch closely so it does not become stiff.
Past this rangeHigher risk of dark flavor, chewy peel, or a set that is too firm.

Spoon Test: What Marmalade Looks Like When It Is Ready

Near the set point, the syrup looks more polished and falls from the spoon in heavier drops rather than thin streams. The peel also looks suspended in the syrup instead of floating in watery liquid.

Spoon check: Use this when the cold plate is not enough. Heavier drops and clinging peel tell you the syrup is gaining body.
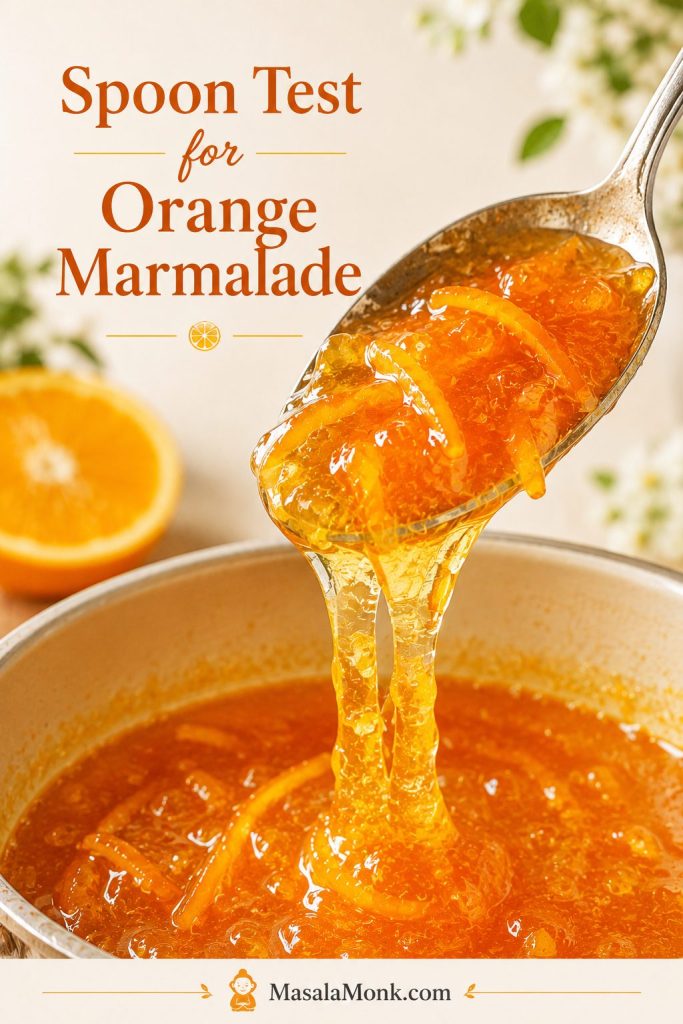
Spoon lifted above a pot of orange marmalade with thick glossy syrup and orange peel dripping slowly back into the pot.
The spoon test helps you read the syrup while it is still hot. Near the set point, the marmalade falls more slowly and the peel clings to the spoon.

Small-batch warning: fridge/freezer batches and wide pans can over-reduce quickly. Start testing early, especially once the mixture looks syrupy and thickened. It is easier to cook runny marmalade a little more than to rescue a jar that has gone too stiff.

What Runny, Just Right, and Too Stiff Look Like

Use this visual before troubleshooting. It helps you compare your jar to the texture you actually want, not just to a timer or temperature number.
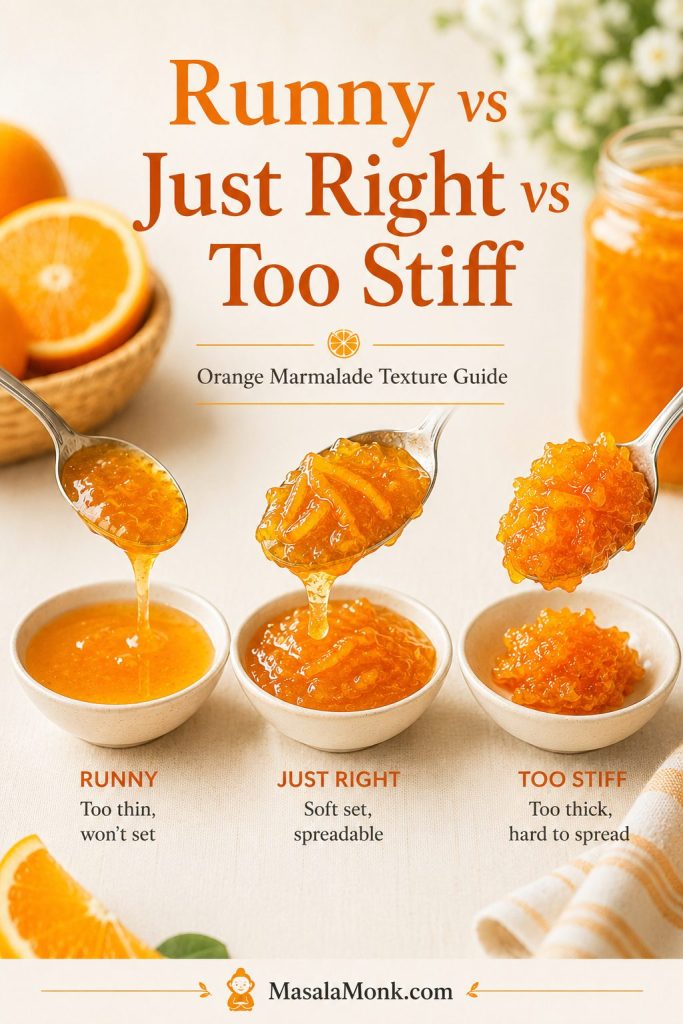
Three bowls and spoons comparing runny orange marmalade, softly set marmalade, and overly stiff marmalade.
This texture guide helps you judge your own batch. Runny marmalade needs more cooking, just-right marmalade mounds softly, and too-stiff marmalade can be hard to spread.

Why This Orange Marmalade Sets Naturally

There is no added pectin in this recipe. Pectin is the fruit’s natural setting helper, and citrus keeps much of it in the peel, pith, seeds, and membranes. Think of the peel, pith, and seeds as the structure; the lemon as the acidity; and the sugar reduction as the syrup that lets everything hold together.

Natural set check: This recipe still has structure; it simply uses the fruit’s own pectin instead of a boxed packet.
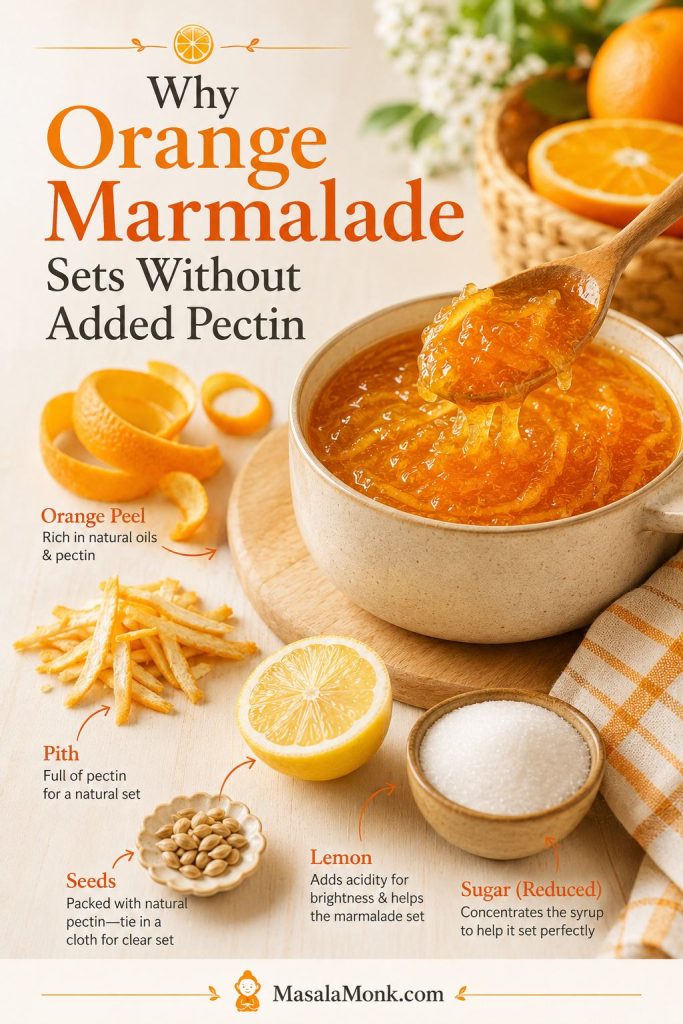
Kitchen explainer showing orange peel and pith, lemon, sugar, boiling marmalade, and a finished jar to explain natural marmalade set.
No added pectin does not mean no structure. Orange peel, pith, lemon, sugar, boiling, and cooling all work together to create a soft marmalade set.

If you remove almost all the peel and pith, reduce the sugar heavily, or stop cooking too early, the marmalade may stay loose. Sugar also matters: it does not only sweeten the preserve; it helps the syrup thicken as water evaporates. If you enjoy this kind of small-batch preserve logic, MasalaMonk’s fig jam recipe also shows how fruit, sugar, and testing work together without making the process feel complicated.

How to Make Orange Marmalade Less Bitter

A little bitterness is the point; harsh bitterness is the problem. The right bitterness should make the orange taste deeper, not make the peel taste harsh or medicinal. For a milder jar, start with sweet oranges, slice the peel thinly, and avoid using too much thick white pith.

Flavor balance: Aim for orange depth, not harsh peel. The choices you make before boiling decide most of that balance.
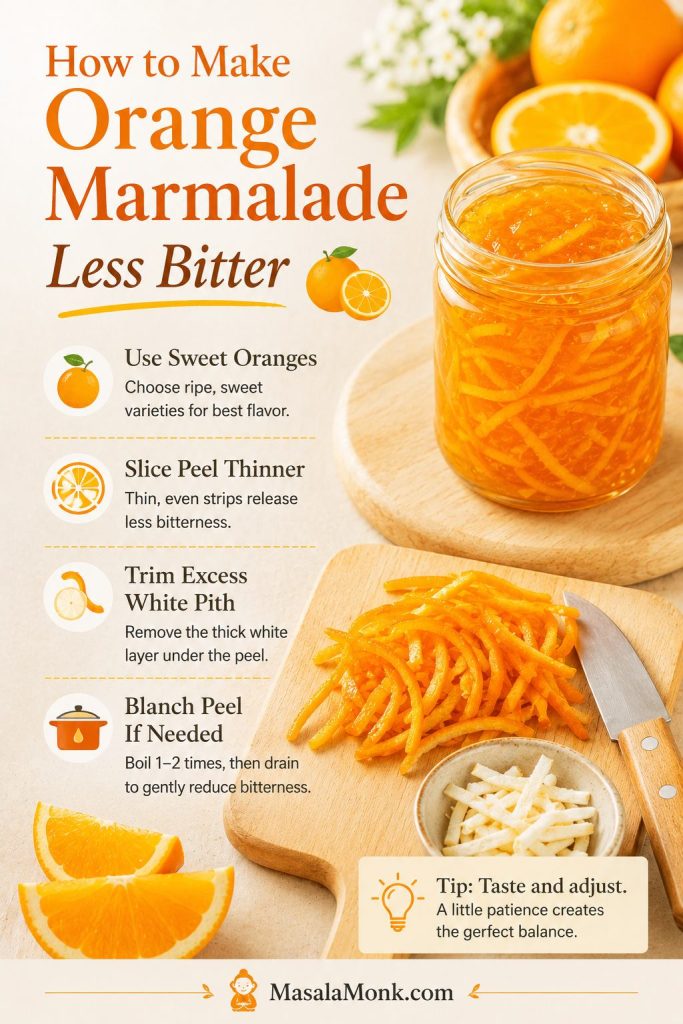
Guide showing sweet oranges, thin orange peel strips, trimmed white pith, and blanching tips for less bitter orange marmalade.
Bitterness is part of marmalade, but it should not take over. Use sweeter oranges, thinner peel, and less thick white pith for a brighter, gentler jar.

The most important step is simmering the peel until it gives easily. This mellows the sharp edge and prevents chewy strips in the finished jar. Very bitter peel can be blanched once: cover it with water, boil for 2 minutes, drain, then continue with the recipe using fresh water.

Leave some pith for structure, though. Removing every trace of pith can make the marmalade sweeter, but it can also weaken the set. The goal is balance: trim thick, spongy excess pith when needed, but leave enough citrus structure for the marmalade to set. Judge bitterness after the marmalade cools; hot syrup can taste sharper than the final jar.

Orange Marmalade Troubleshooting

Marmalade is forgiving in a way that does not seem obvious while it is boiling. A loose jar can become sauce, a bitter jar can become glaze, and a firm jar can often be warmed back into usefulness. If something looks wrong, do not assume the batch is ruined; it usually tells you what it needs: more cooking, less heat, softer peel, or a different use for a jar that set too firmly.

Quick Fixes Before You Reboil

Fast fixes: runny marmalade can be cooked again, stiff marmalade can be loosened with a little hot water, bitter marmalade is best used in glazes or baking, and tough peel is mostly a next-time fix.

Common Marmalade Problems and Fixes

ProblemLikely reasonFix nowNext time
Marmalade is runnyUndercooked, too much water, low sugar, or weak pectinReturn it to the pot, boil again, and retest on a cold plateCook to a soft wrinkle and avoid reducing sugar too much
Marmalade is too stiffOvercooked or boiled past the set pointWarm gently with a spoonful or two of hot water until looserStop when the cold-plate test shows a soft wrinkle, not a firm rubbery set
Peel is toughSugar was added before the peel softenedUse the batch in glazes or sauces where texture matters lessSimmer peel until tender before adding sugar
Marmalade is too bitterToo much pith, bitter oranges, thick peel, or overcookingUse it in savory glazes, salad dressings, or bakingUse sweeter oranges, slice peel thinner, or blanch peel once
Sugar crystallizedSugar was not fully dissolved before boiling hardRewarm gently and stir; add a small splash of water if neededLet sugar dissolve over medium heat before a rolling boil
Marmalade darkened too muchCooked too long or heat was too high near the endUse darker marmalade in glazes, cheese boards, or baking if it tastes caramelized but not burntStart testing earlier and reduce heat slightly as it thickens
Peel floated to the topMarmalade was jarred immediately while very hot and looseStir the jar after partial cooling if using as fridge marmaladeLet marmalade rest 5 to 10 minutes before jarring

Once you understand this kind of cold-plate testing, the same logic helps with other small-batch preserves, like MasalaMonk’s cape gooseberry and mint jam.

Low-Sugar Orange Marmalade: What You Can and Cannot Reduce

A slightly softer, lower-sugar fridge jar can still be lovely; it just needs to be treated as a different kind of marmalade. Think of it as a spoonable citrus spread rather than a classic pantry marmalade. You can reduce sugar a little for refrigerator storage if you accept a softer set, but it should not be treated like a traditional pantry preserve.

Lower-sugar reminder: Softer texture is not failure here; it is the expected tradeoff when you move away from classic marmalade sugar levels.
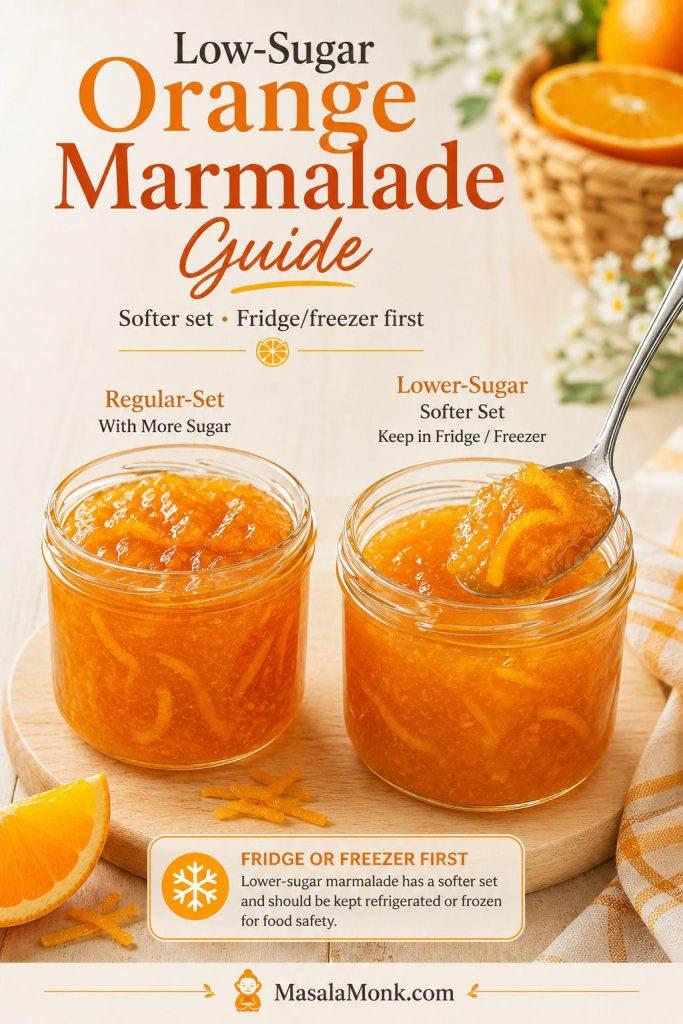
Two jars comparing regular-set orange marmalade and lower-sugar softer-set marmalade with a fridge or freezer storage reminder.
For lower-sugar marmalade, expect a softer spoonable texture rather than a firm classic set. Treat it as a fridge or freezer preserve unless using a tested method.

Very low-sugar marmalade is a separate style, not a simple subtraction. A very low-sugar or sugar-free orange marmalade usually needs special low/no-sugar pectin or a different method. For very low-sugar or sugar-free fruit spreads, the NCHFP reduced-sugar fruit spread guidance is a safer starting point than simply swapping sugar in a regular marmalade recipe.

For shelf-stable low-sugar jars, use a tested low-sugar canning recipe. Sugar substitutes do not give the same set or preservation as sugar in a regular marmalade recipe.

How to Store Orange Marmalade: Fridge, Freezer, and Safe Canning Notes

Fridge jar and pantry jar are not the same thing. This recipe is written first as a refrigerator or freezer orange marmalade, which keeps the method approachable and avoids pretending that every homemade jar is automatically shelf-stable.

Storage reminder: Choose the storage method before you fill the jars, because fridge, freezer, and pantry storage are not interchangeable.
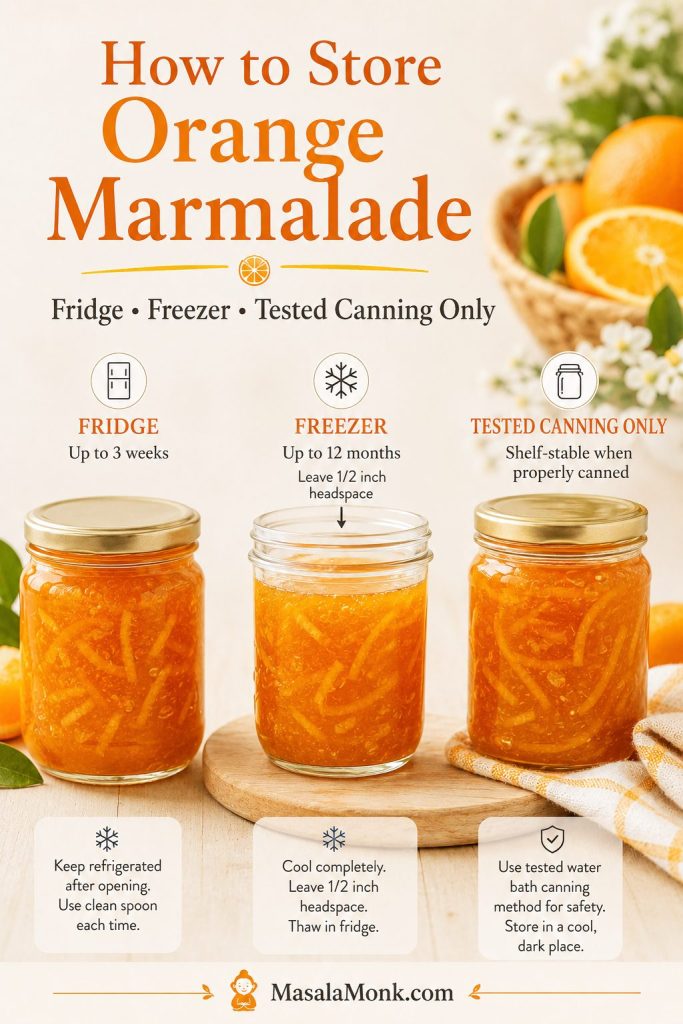
Three jars of orange marmalade showing fridge storage, freezer storage with headspace, and tested canning-only pantry storage.
Fridge and freezer storage are simple for this small-batch marmalade. Pantry storage is a different process and needs tested canning instructions.

Refrigerator storage

Spoon the hot marmalade into clean jars, let it cool, then refrigerate. Use clean spoons when serving, and avoid leaving the jar out at room temperature for long stretches. For best quality, use refrigerated marmalade within 3 to 4 weeks, sooner if you reduced the sugar. Discard it if you see mold, bubbles, fermentation, or notice an off smell.

Freezer storage

Orange marmalade freezes well. Use freezer-safe jars or containers and leave headspace because the marmalade can expand as it freezes. Thaw in the refrigerator before using.

Shelf-stable canning

For shelf-stable marmalade, you need a tested formula, hot jars, correct headspace, proper lids, and the right boiling-water processing time for your jar size and elevation. The National Center for Home Food Preservation citrus marmalade guidance is a good authority to consult for jar preparation, headspace, and processing.

If you want pantry storage, use a proper water-bath canning method from the start.

Ways to Use Orange Marmalade

Orange marmalade is not only for toast, although toast with butter is still its natural home. The best marmalade is not just sweet orange spread; it is a ready-made balance of citrus oil, sugar, bitterness, and peel. That is why one spoonful can do the work of zest, juice, syrup, and glaze.

A good jar earns its space in the fridge because it keeps solving small problems: breakfast needs brightness, cake needs a bittersweet seam, chicken needs a glaze, and cheese needs contrast.

Use-it-up idea: Think of marmalade as citrus, sweetness, bitterness, and peel in one spoonful, then use it wherever a dish needs brightness and gloss.
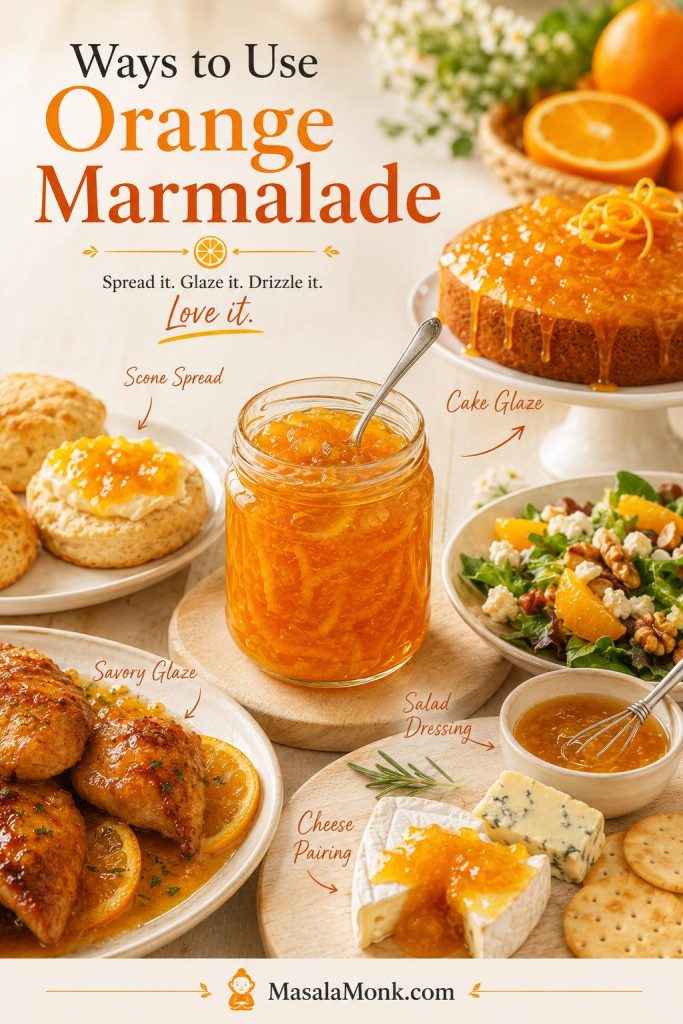
Orange marmalade served with scones, cake glaze, savory glazed chicken, salad dressing, cheese, crackers, and a central jar.
A good jar of orange marmalade is useful far beyond toast. Try it as a cake glaze, savory glaze, salad dressing base, or cheese board pairing.

Quick orange marmalade formulas

  • Quick glaze: 2 tablespoons marmalade + 1 teaspoon mustard + a splash of vinegar.
  • Savory glaze: 2 tablespoons marmalade + 1 teaspoon soy sauce + 1 teaspoon vinegar + a pinch of chili or ginger.
  • Salad dressing: 1 tablespoon marmalade + 1 tablespoon vinegar + 2 tablespoons olive oil.
  • Cake glaze: warm marmalade with a splash of water or lemon juice until brushable.
  • Cheese board pairing: marmalade + sharp cheese + roasted nuts + crackers.

Breakfast ideas

Spread orange marmalade on toast, croissants, English muffins, pancakes, waffles, and biscuits. It is especially good with warm easy English scones, where the citrus peel cuts through butter, cream, or clotted cream.

For a weekend breakfast plate, use a smaller spoonful with almond flour pancakes, where the almond flavor pairs naturally with orange.

Baking ideas

Use it as a cake filling, loaf cake glaze, thumbprint cookie center, bread pudding accent, or tart layer. It works especially well with almond, chocolate, vanilla, and warm spices.

For a citrus-on-citrus dessert, try it with an orange olive oil cake. For a nutty pairing, add a thin glossy layer to an almond cake.

Savory glazes and sauces

Warm orange marmalade with mustard, vinegar, soy sauce, chili, garlic, or ginger to make a quick glaze for chicken, duck, pork, ham, salmon, carrots, or roasted vegetables. The sweet-bitter citrus flavor works beautifully with rich meats. For a classic citrus-meat pairing, MasalaMonk’s orange sauce for duck shows how orange, acidity, stock, and a little sweetness can stay savory rather than sticky.

Holiday, drinks, and cheese boards

Stir a spoonful into cranberry sauce for peel, gloss, and citrus depth; this cranberry sauce with orange juice is a natural pairing.

Marmalade can also sweeten cocktails, mocktails, hot tea, and sparkling citrus drinks. For drinks, treat it like a citrus syrup: shake or stir it well with lemon, orange juice, or soda so the peel and sugar dissolve into the drink instead of sitting at the bottom.

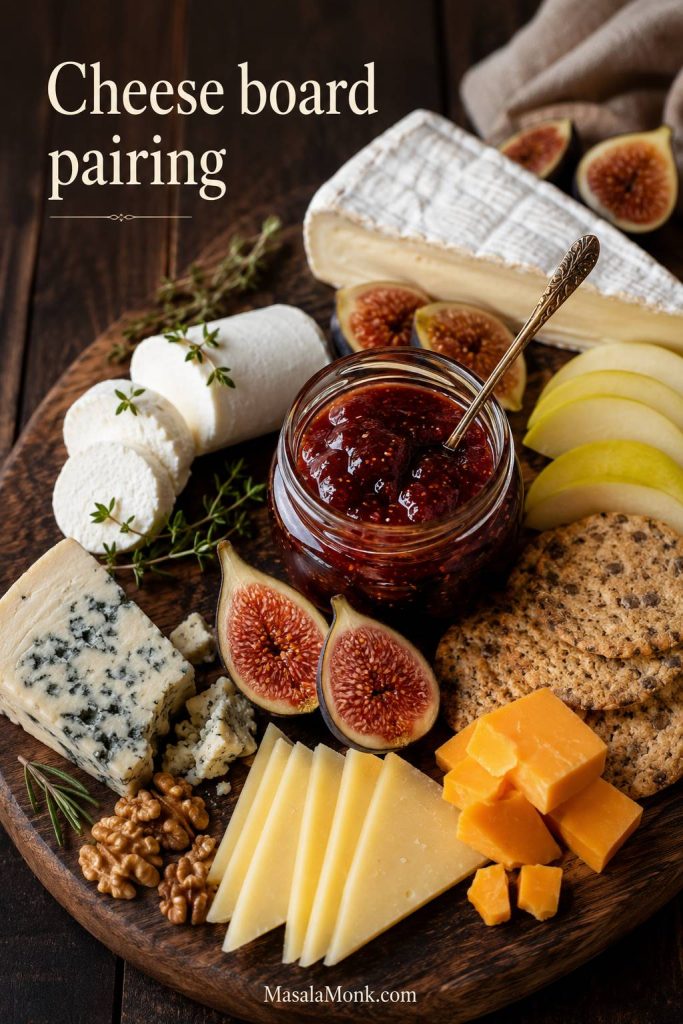
For a cheese board, serve marmalade with soft cheese, sharp cheddar, blue cheese, crackers, roasted nuts, and dried fruit. A slightly bitter jar is especially good here because it cuts through richness instead of making the board taste too sweet.

Orange Marmalade Variations

Once you understand the base method, the variation depends on what you want to change: sweetness, bitterness, color, spice, or gifting value.

Choose Your Marmalade Style

  • Mild breakfast marmalade: sweet oranges, fine peel, and 700 g sugar.
  • Firmer classic set: sweet oranges or mixed citrus, medium peel, and 800 g sugar.
  • More bitter traditional flavor: Seville oranges or a Seville blend.
  • Sweeter soft spread: mandarins or tangerines.
  • Glaze or cheese-board jar: slightly stronger bitterness and medium peel.

Choose a style: Choose the version by mood and use: breakfast-soft, classic-bitter, ginger-warm, spiced-holiday, or low-peel sweet.
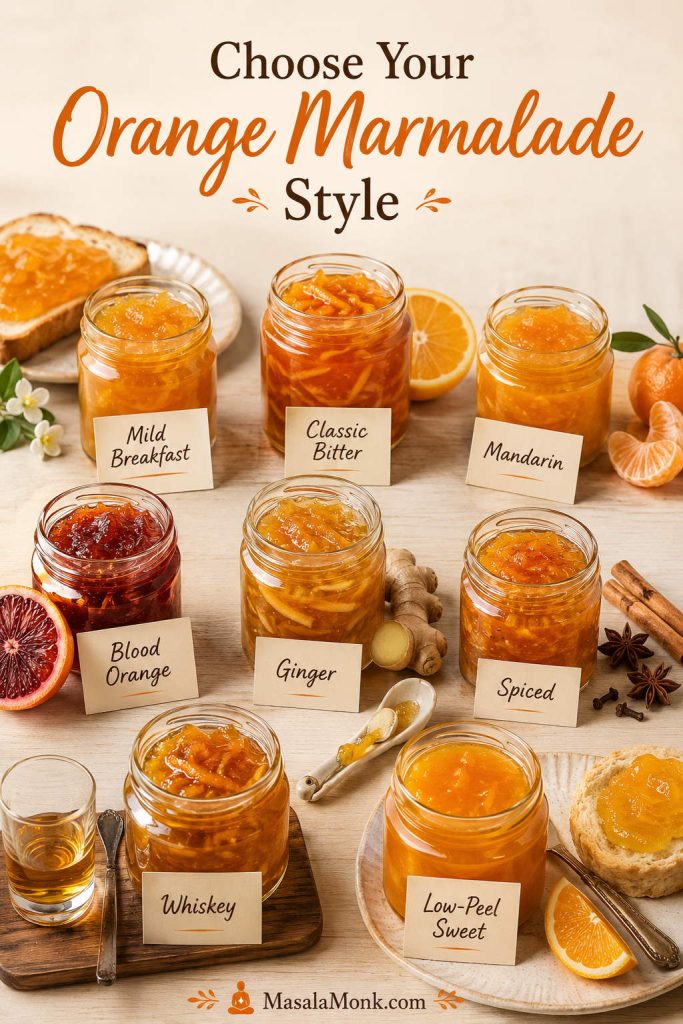
Multiple jars of orange marmalade variations labeled mild breakfast, classic bitter, mandarin, blood orange, ginger, spiced, whiskey, and low-peel sweet.
Once the base orange marmalade method makes sense, you can adjust the style toward sweeter, bitter, spiced, ginger, blood orange, or gifting-friendly versions.

Mandarin orange marmalade

Mandarins and tangerines are best when you want a softer, sunnier breakfast jar. Their peel is thinner and their flavor is naturally gentler, so the final marmalade feels less bitter than a classic Seville-style version.

Seville orange marmalade

Seville is for people who love marmalade’s bitter backbone: sharp, aromatic, and traditional. These oranges usually need enough sugar and careful use of seeds or membranes for natural pectin, so it is worth treating them as their own focused recipe.

Blood orange marmalade

Blood oranges are the dramatic color route: deeper, rosier, and lightly berry-like, but easier to over-darken if you cook them too far.

Orange ginger marmalade

Ginger pushes the jar toward toast, tea, winter baking, and savory glazes. Add finely grated fresh ginger or thin matchsticks of ginger during the final cooking stage.

Whiskey orange marmalade

Whiskey turns marmalade into a warmer gifting jar. Stir in a small splash after the marmalade comes off the heat. Keep it subtle: the goal is aroma and warmth, not a harsh alcohol taste.

Spiced orange marmalade

Spices make sense for holiday toast and cheese boards. Add a small piece of cinnamon, a few cloves, or a little star anise while the marmalade cooks, then remove the spices before jarring. Use a light hand so the spices support the orange instead of overpowering it.

Orange marmalade without peel

A low-peel version is better for a sweeter, softer spread, but it will be closer to orange jam than classic marmalade. Because peel and pith help with natural pectin, a no-peel version may need longer cooking, added pectin, or a softer-set expectation.

Orange Marmalade Recipe

If you remember only three things, remember these: soften the peel first, dissolve the sugar before the hard boil, and test the set on a cold plate.

The finished marmalade should be loose enough to spoon, with peel suspended in a clear, syrupy set. It will thicken more as it cools.

Small-Batch Sweet Orange Marmalade, No Boxed Pectin

This orange marmalade recipe uses regular sweet oranges, lemon, sugar, and water for a bittersweet, spoonable preserve with tender peel. It is written as a refrigerator or freezer marmalade, with separate canning safety notes if you want shelf-stable jars.

Prep time
20 to 25 minutes
Cook time
45 to 70 minutes
Total time
About 1 hour 10 minutes to 1 hour 35 minutes
Yield
About 4 cups

Before you start: Place two small plates in the freezer for testing, choose a large deep pot because marmalade bubbles up, and have clean jars ready.

Ingredients

  • 900 g to 1 kg regular sweet oranges, preferably thin-skinned, about 2 to 2.2 lb
  • 1 medium lemon, juiced, about 2 to 3 tablespoons / 30 to 45 ml
  • 600 ml water, about 2 1/2 cups, plus more if needed
  • 700 to 800 g sugar, about 3 1/2 to 4 cups
  • Tiny pinch of salt, optional

Method

Prepare and Soften the Peel
  1. Wash and prepare. Scrub the oranges and lemon well. Slice off the hard ends. Remove the orange peel in strips and cut it into fine or medium shreds. Fine peel gives the easiest spread; medium peel gives the most classic marmalade feel. Chop the orange flesh and save the juice. Remove seeds so they do not end up in the jar; save them only if you plan to use the optional seed bag.
  2. Simmer the peel. Add the sliced peel and water to a large heavy non-reactive saucepan. Bring to a boil, then simmer partly covered if the water is evaporating too quickly. Cook until the peel is soft enough to pinch or cut against the side of the pot with a spoon, about 20 to 35 minutes. Do not add sugar before this point.
  3. Check the liquid. When the peel is tender, there should still be some liquid in the pot. If it is nearly dry, add a splash more water. If it looks very watery, simmer uncovered for a few minutes before adding sugar.
  4. Add fruit and lemon. Add the chopped orange flesh, saved juice, lemon juice, and optional salt. If you are using a seed bag for extra natural pectin, add it now.
Boil, Test, Rest, and Store
  1. Dissolve the sugar. Stir in the sugar over medium heat until fully dissolved. Use 700 g for a softer fridge marmalade or 800 g for a firmer set.
  2. Boil to set. Increase the heat and cook at a steady, active bubble in a large deep pot, stirring often. Stir more often near the end as the syrup thickens. Start testing before it looks fully done, especially in a wide pan.
  3. Use the cold-plate test. Spoon a little marmalade onto a chilled plate, wait 1 minute, then push it gently. If it wrinkles softly, it is ready. Hot marmalade looks looser than cooled marmalade, so judge the chilled sample rather than the pot.
  4. Rest and jar. If using a seed bag, lift it out carefully, press it gently against the side of the pot, and discard. Remove the marmalade from heat and let it rest for 5 to 10 minutes. Skim foam if needed, then spoon into clean jars.
  5. Store safely. Spoon into clean jars, let cool at room temperature until no longer hot, then refrigerate. For freezing, leave headspace. Do not store this fridge/freezer version in the pantry unless you follow a tested water-bath canning method.

Recipe Notes

  • For a milder marmalade, use fine shreds of peel and sweet, thin-skinned oranges.
  • For a stronger, more traditional flavor, use some Seville orange or thicker peel.
  • If the peel tastes very bitter, blanch it once for 2 minutes, drain, then continue with the recipe.
  • If your fruit has seeds, you can simmer them in a small cheesecloth bag for extra natural pectin, but this is optional.
  • Yield can vary slightly depending on orange juiciness, pot width, and how far you reduce the syrup.
  • For pantry jars, follow tested canning guidance.

Saveable Orange Marmalade Recipe Card

Use the written recipe card above while cooking; this image is the quick visual version to save for your next batch.
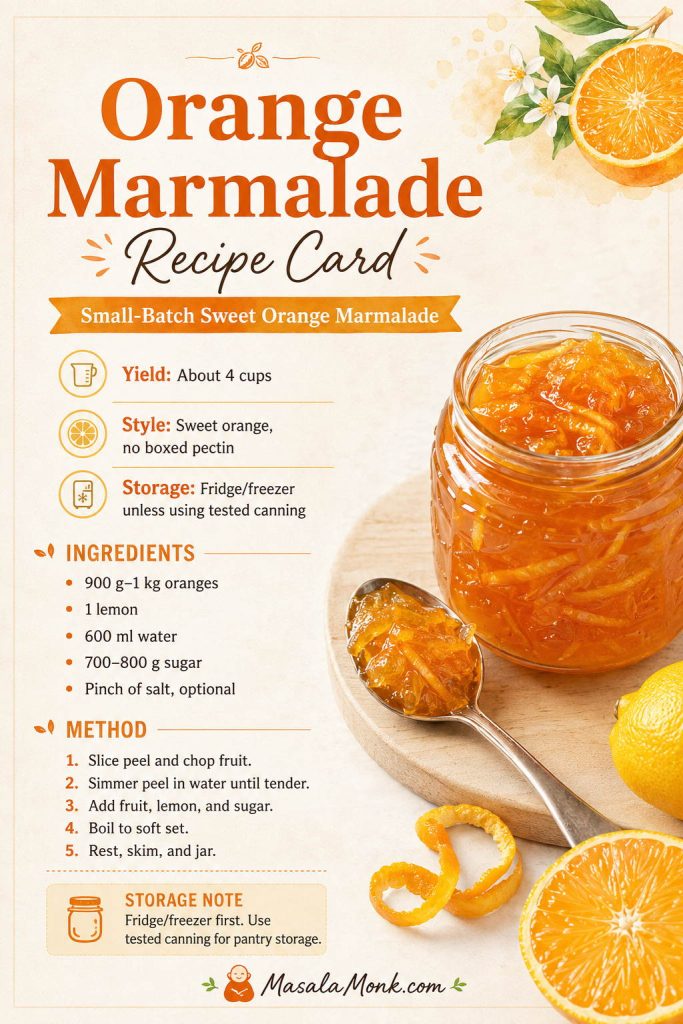
Saveable orange marmalade recipe card with a jar of marmalade, ingredients, short method, yield, and fridge or freezer storage note.
Keep this recipe card handy when cooking. It brings the sweet-orange formula, soft-set method, and fridge/freezer storage reminder into one quick reference.

FAQs About Orange Marmalade

What is the difference between orange marmalade and orange jam?

Orange marmalade includes citrus peel, which gives it texture and a bittersweet edge. Orange jam is usually smoother, sweeter, and less peel-forward. If you blend the mixture completely or remove most of the peel, it will feel more like jam.

Do you need pectin for orange marmalade?

No boxed pectin is needed. Citrus naturally carries pectin in the peel, pith, seeds, and membranes; lemon, sugar, and cooking time help that pectin create a soft set. Low-sugar or no-peel versions may need extra pectin support.

Why did my orange marmalade not set?

It may be undercooked, too watery, too low in sugar, or short on natural pectin from peel and pith. Reboil it for a few minutes, then test again on a cold plate.

How do you fix runny marmalade?

Pour it back into a pot and bring it to a steady boil. Cook briefly, then test on a chilled plate. Stop when the cooled sample wrinkles softly.

Why is my marmalade bitter?

A little bitterness is normal; harsh bitterness is the problem. Too much thick pith, bitter fruit, thick-cut peel, or overcooking can make the jar taste too sharp.

How do you make marmalade less bitter?

Use sweet oranges, fine peel shreds, and only trim the thickest pith. Simmer the peel fully before sugar goes in. If the peel is very bitter, blanch it once for 2 minutes, drain, and continue with fresh water.

Which oranges are best for orange marmalade?

For beginner-friendly marmalade, use sweet, thin-skinned oranges such as navel, Valencia, or Cara Cara. Seville oranges are best for traditional bitter marmalade, while mandarins and tangerines make a sweeter, softer preserve.

Do I have to use Seville oranges?

No. Seville oranges are traditional, but this recipe is designed for regular sweet oranges. The result is milder, easier to shop for, and still properly marmalade-like.

Why is the peel in my marmalade tough?

Tough peel almost always means the sugar arrived too early. Simmer the peel until tender before adding sugar, because sugar slows further softening.

How long does homemade orange marmalade last?

Refrigerator marmalade is best used within 3 to 4 weeks, sooner if you reduced the sugar. Freezer marmalade lasts longer when packed with headspace in freezer-safe containers.

Is this orange marmalade safe for canning?

This fridge/freezer version should not be treated as pantry-safe by default. Orange marmalade can be canned when you use a tested formula and proper boiling-water processing, but do not simply jar this version and store it at room temperature.

What can I make with orange marmalade?

Use it on toast, scones, croissants, pancakes, yogurt, and oatmeal. It also works in cake fillings, thumbprint cookies, salad dressings, cheese boards, and savory glazes for chicken, duck, pork, ham, salmon, or roasted vegetables.

Can I make marmalade with less sugar?

You can reduce sugar slightly for a softer refrigerator jar. Very low-sugar or sugar-free marmalade needs a different method, often with special pectin, and should not be canned unless you use tested low-sugar canning guidance.

The first batch teaches you the rhythm: soften the peel, watch the bubbles slow, trust the cold plate, and stop before the jar gets stiff. After that, marmalade stops feeling fussy and starts feeling like one of those quiet kitchen skills that pays you back every time you open the fridge.
Back to top ↑

Posted on Leave a comment

Fig Jam Recipe

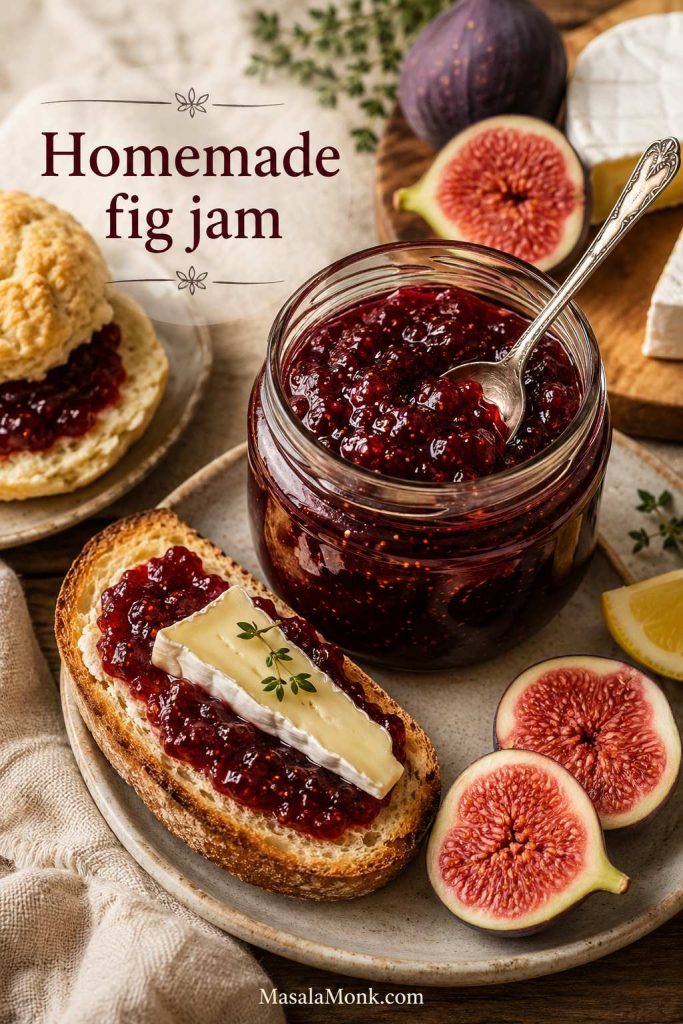
Open jar of homemade fig jam with a spoon lifting glossy no-pectin jam, fresh halved figs, lemon, and toast nearby.

When figs are good, they do not wait. They soften quickly, bruise easily, split at the seams, and can go from perfect to overripe almost overnight. Fig jam is one of the best ways to save that short, honeyed moment before it slips away.

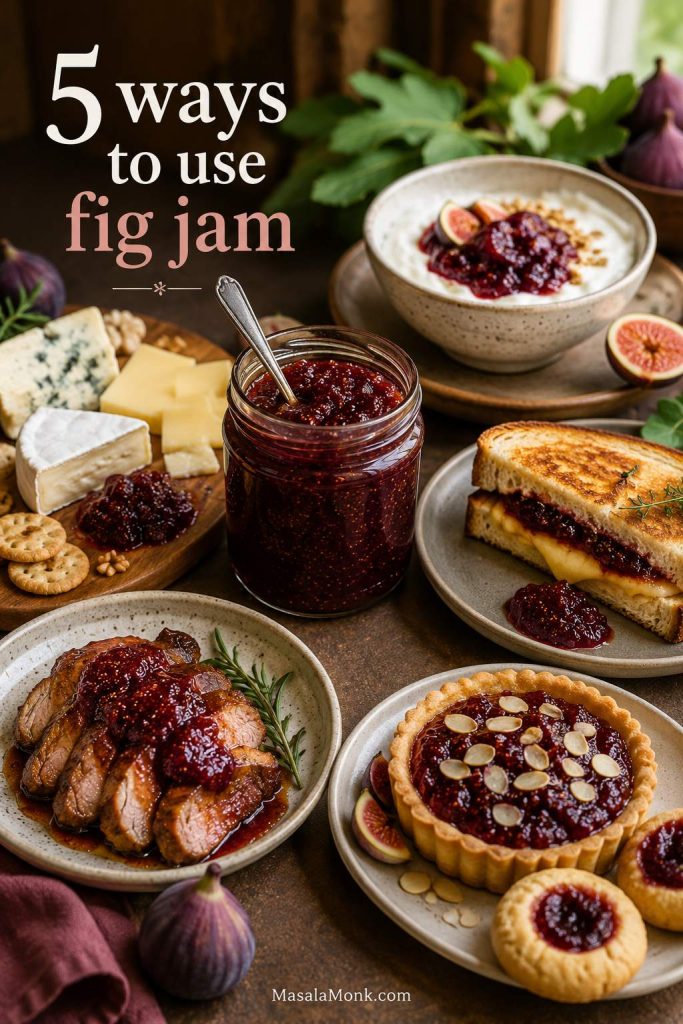
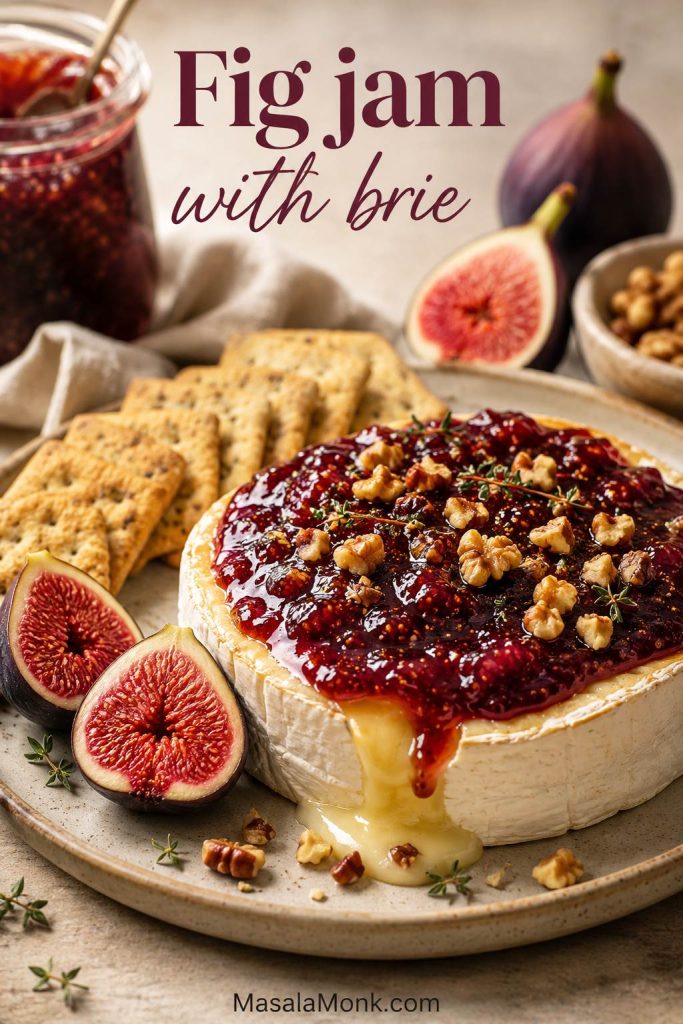
This is the recipe for the day the figs finally give in — too soft to ignore, too fragrant to waste, and exactly ready for a pot of glossy, spoonable jam. The finished jar should taste like figs first: gently sweet, lifted by lemon instead of dulled by sugar, thick enough to spread, and soft enough to spoon over toast, yogurt, brie, goat cheese, cakes, cookies, sandwiches, flatbreads, and roasted meats.

The main method stays simple: fresh figs, sugar, lemon, a little water, and no commercial pectin. This is a fresh fig jam recipe first — soft-set, fruit-forward, and written for the refrigerator or freezer. Once the main method is clear, you will find dried fig, frozen fig, low-sugar, honey, cheese-board, and canning-safe notes clearly separated so you do not have to guess your way through substitutions.

So instead of giving you only one pot of jam, this guide shows you how to choose the right version for the figs you actually have.

Close-up spoonful of glossy fresh fig jam with visible fig seeds and soft fruit pieces.
Because fig jam firms as it cools, the best stopping point is shiny, slow-moving, and spoonable rather than stiff.

In This Guide

Start with the quick answer, or use the deeper sections for dried figs, lower sugar, canning questions, cheese-board ideas, and quick fixes if a batch looks too loose or too thick.

Quick Answer: How to Make Fig Jam

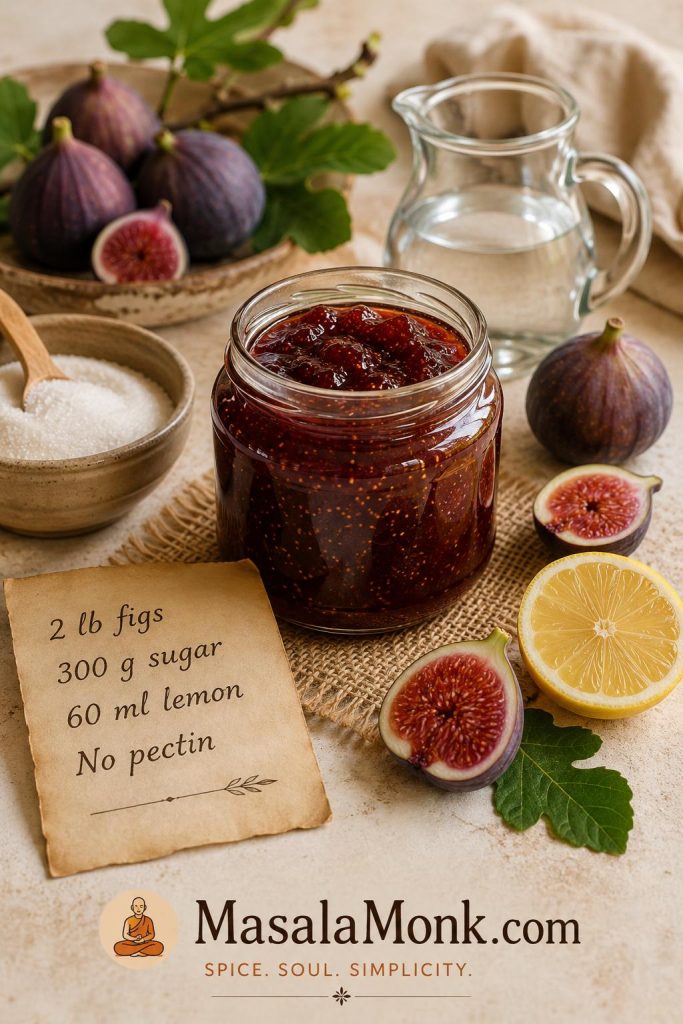
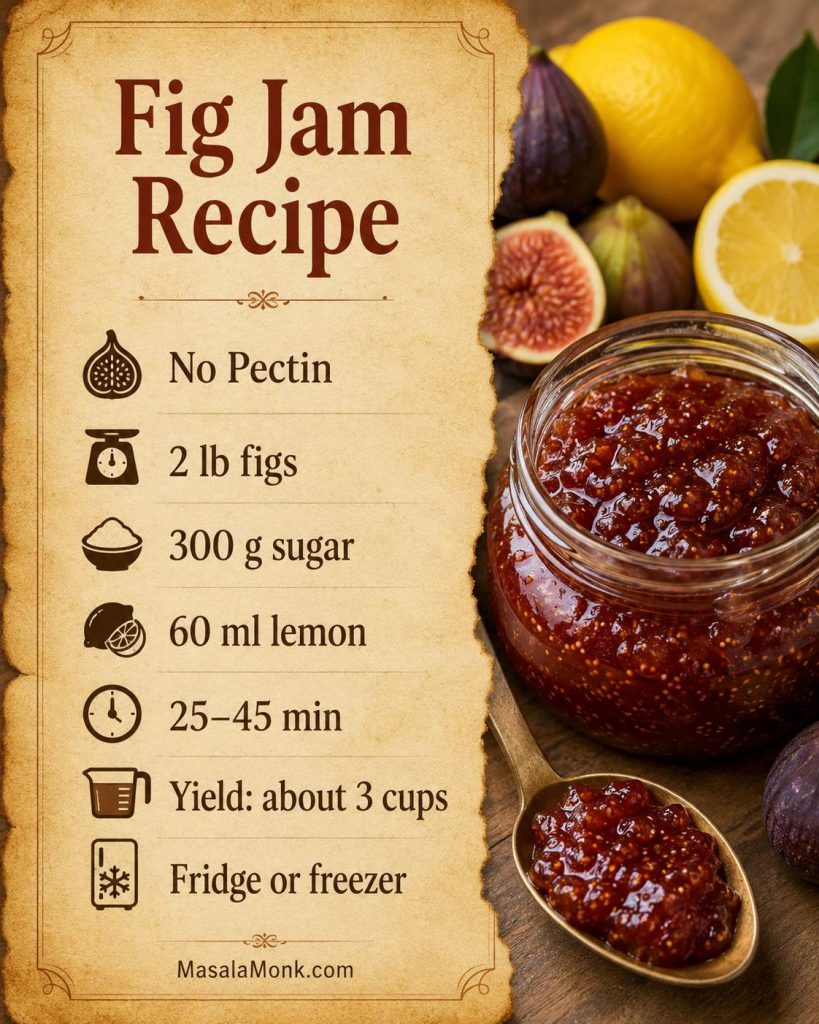
To make easy homemade fig jam, combine 2 lb / 900 g ripe fresh figs, 1½ cups / 300 g sugar, ¼ cup / 60 ml lemon juice, and ¼–½ cup / 60–120 ml water as needed. Start with the smaller amount of water.

Simmer uncovered until the figs soften, collapse, and turn shiny enough to coat the spoon, then mash or blend to your preferred texture. You do not need to peel the figs or add commercial pectin. The jam usually takes 25–45 minutes to cook, yields about 3 cups / 720 ml, and thickens more as it cools.

Keep these four things in mind as you cook: the figs should still smell sweet, the water should start low, the finish should be slow-moving rather than stiff, and this batch belongs in the fridge or freezer unless you use a tested canning recipe.

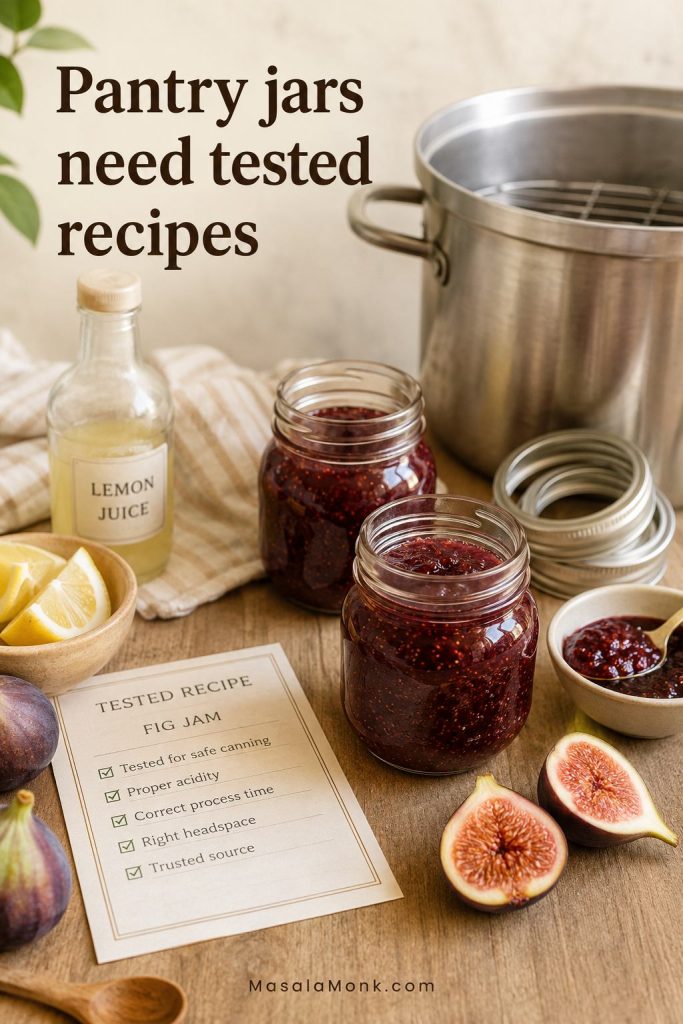
This recipe is written for the fridge or freezer. Do not water-bath can it unless you switch to a tested canning formula with exact acid, sugar, jar size, headspace, and processing instructions.

That may sound strict, but it keeps the recipe low-stress: make the jam, chill it, use it generously, and freeze the extra.

If the pan still looks loose near the end, use the doneness tests before cooking it much longer.

Recipe Snapshot

Here is the whole batch at a glance before the deeper choices begin.

Fig jam recipe snapshot with fresh figs, sugar, lemon, water, and a no-pectin measurement card.
The simplest fig jam recipe starts with ripe fruit, measured sugar, enough lemon for lift, and only enough water to protect the pan.
Figs to useRipe fresh figs that smell sweet and feel soft, but not sour, fizzy, or moldy
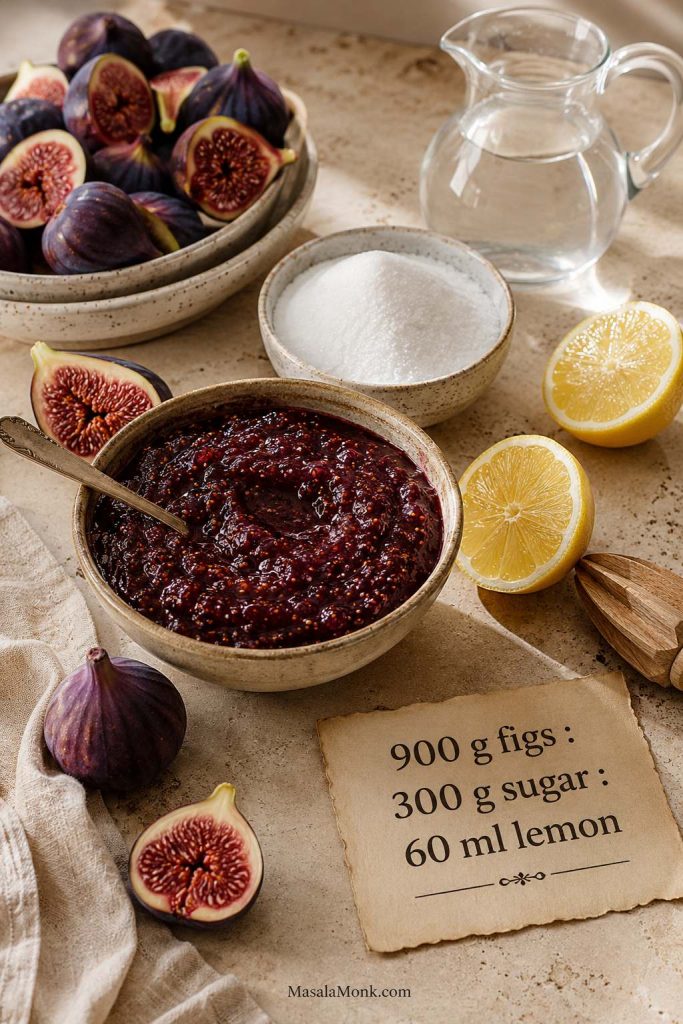
Base ratio900 g figs : 300 g sugar : 60 ml lemon juice : 60–120 ml water
PectinNot needed for this soft-set version
Peel figs?No. Remove stems, but leave the skins on.
Cook timeUsually 25–45 minutes, depending on fig moisture and pan width
Texture to aim forLoose enough to spoon, thick enough to stay on toast
StorageRefrigerator or freezer, unless using a tested canning recipe
Full recipeJump to the recipe card

Before You Start: What This Recipe Gives You

Good fit if you want…

  • A fresh fig jam recipe first
  • No commercial pectin
  • A soft-set, fruit-forward jar
  • Refrigerator or freezer storage
  • Clear notes for dried figs, honey, and lower sugar

Not the right fit if you want…

  • A stiff store-bought jelly set
  • Shelf-stable canning as written
  • Traditional whole-fig preserves
  • No-sugar pantry storage
  • Peeling, deseeding, or a firm jelly finish

With that boundary clear, the actual cooking is simple. Start with ripe figs, use just enough water to protect the pan, and let the fruit tell you when it has softened into jam.

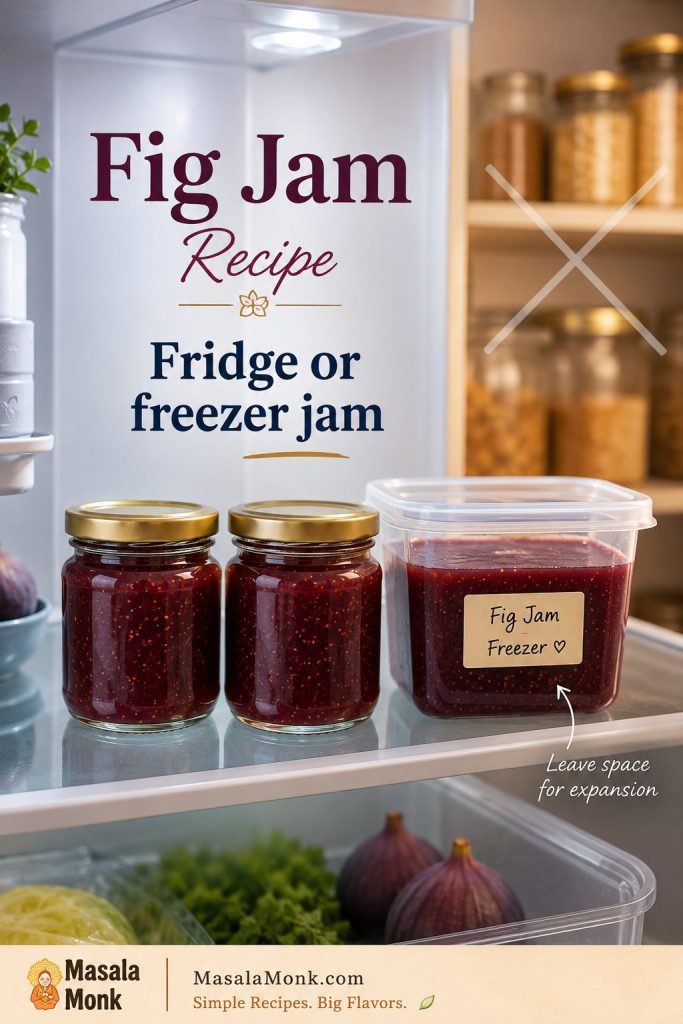
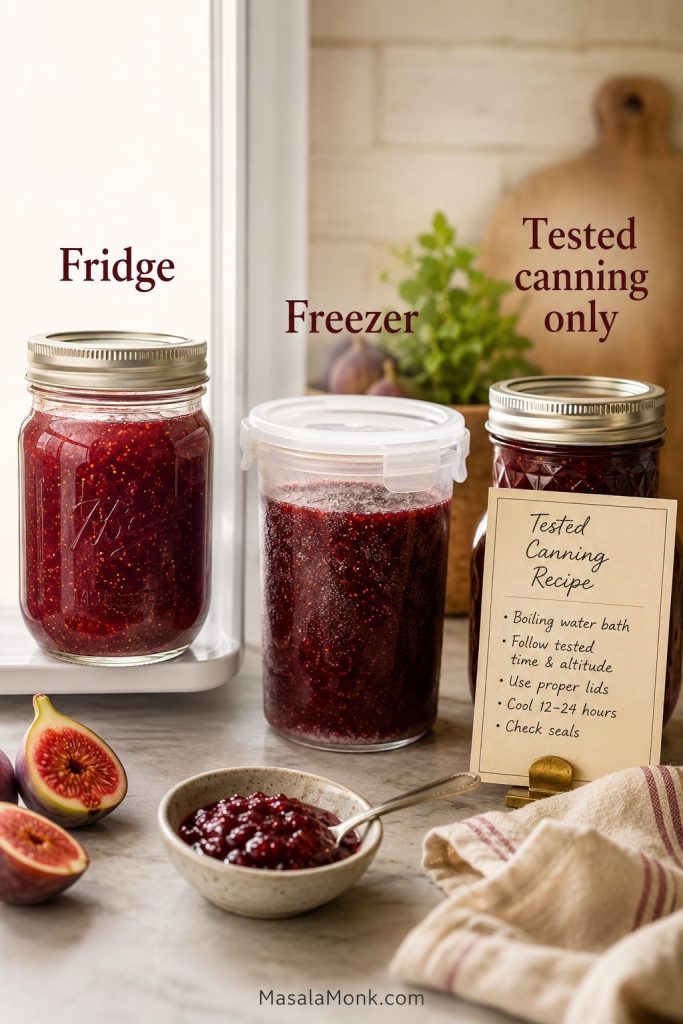
Fig jam jars shown for refrigerator storage, freezer storage, and tested canning only.
Treat this as fridge or freezer fig jam unless you are following tested canning directions with exact acid, jar size, and processing time.

What Is Fig Jam?

Fig jam is made by cooking figs with sugar and acid, usually lemon juice, until the fruit softens and the mixture thickens into a spread. Because figs are full of tiny edible seeds, the texture is naturally a little rustic. It is not usually clear or glassy like jelly. Instead, it is rich, slightly seedy, and naturally honeyed, with a texture that can lean chunky or smooth depending on how much you mash it.

It will not set like a stiff jelly, and it is not supposed to. This is a softer, fruit-forward jar — the kind that spreads on toast but still spoons over yogurt, cheese, cake, or roasted meat.

The best version has balance. Figs are naturally sweet, so lemon stops the jar from tasting like flat sugar syrup. Sugar gives body and shine. A small pinch of salt can make the fruit taste rounder, especially if you plan to serve the finished spread with cheese or savory food.

Fig Jam vs Fig Preserves vs Fig Spread

Fig jam, fig preserves, fig spread, fig jelly, and fig confiture often overlap in everyday use. Still, the texture and best use can be slightly different.

NameUsual TextureWhere It Shines
JamCooked figs, usually mashed or partly broken downToast, yogurt, cheese, pastries, desserts, sandwiches
PreservesChunkier, often with larger pieces of fig or whole small figsBiscuits, cheese boards, spooning over desserts
SpreadSmoother and softer, often less stiff than classic jamCrackers, brie, sandwiches, flatbreads, charcuterie boards
JellyClearer and more strained, with less fruit pulpClassic jelly use, though figs are more commonly made into jam or preserves
ConfitureA French-style word often used for jam or preservesBreakfast, pastry, cheese, gifting
Paste or butterThicker, denser, and more concentratedCookies, fig bars, cheese plates, baking fillings

The finished texture sits between classic jam and a softer fig spread: fruit-forward, spoonable, and easy to adapt. Cook it less for a softer spread, longer for a thicker set, or mash lightly for a preserve-style texture.

Fresh Figs vs Dried Figs: Which Should You Use?

Fresh figs and dried figs both work well, but they make different jars. And then fresh figs also give you a brighter, softer, more seasonal jam. Dried figs make a deeper, denser, more concentrated spread that is useful year-round. Neither is wrong; fresh figs are for a lighter fruit-forward batch, while dried figs are especially good when you want a rich cheese-board spread.

Fresh fig jam is the version you make because the fruit is already asking for it — soft at the neck, fragrant on the counter, and too delicate to keep waiting. Dried fig jam belongs to a different mood: less about saving summer, more about building a rich pantry spread for cheese, toast, and cooler-weather boards.

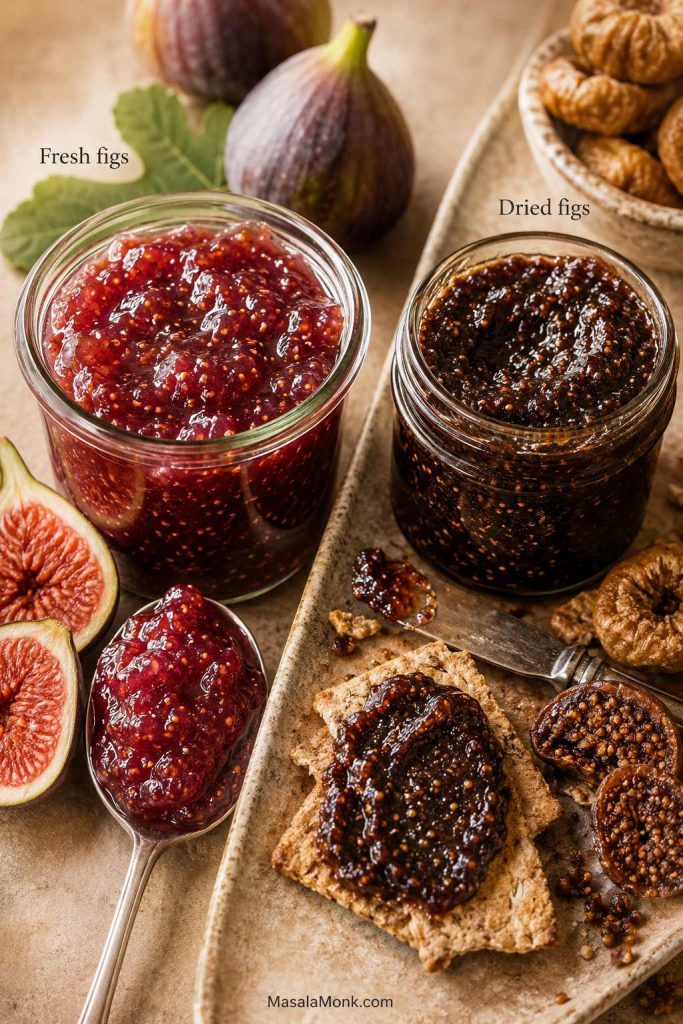
Fresh fig jam compared with darker dried fig jam, with fresh figs on one side and dried figs on the other.
Fresh fig jam tastes brighter and softer, while dried fig jam turns deeper, darker, and more spread-like for year-round use.
Use ThisWhenWhat to Expect
Fresh figsYou want a brighter, softer, seasonal jamQuick cook time, fresh fruit flavor, soft set
Dried figsYou want a darker, thicker, year-round cheese-board spreadDeeper flavor, denser texture, more water needed
Frozen figsYou already have figs in the freezerMore released liquid and usually a longer simmer
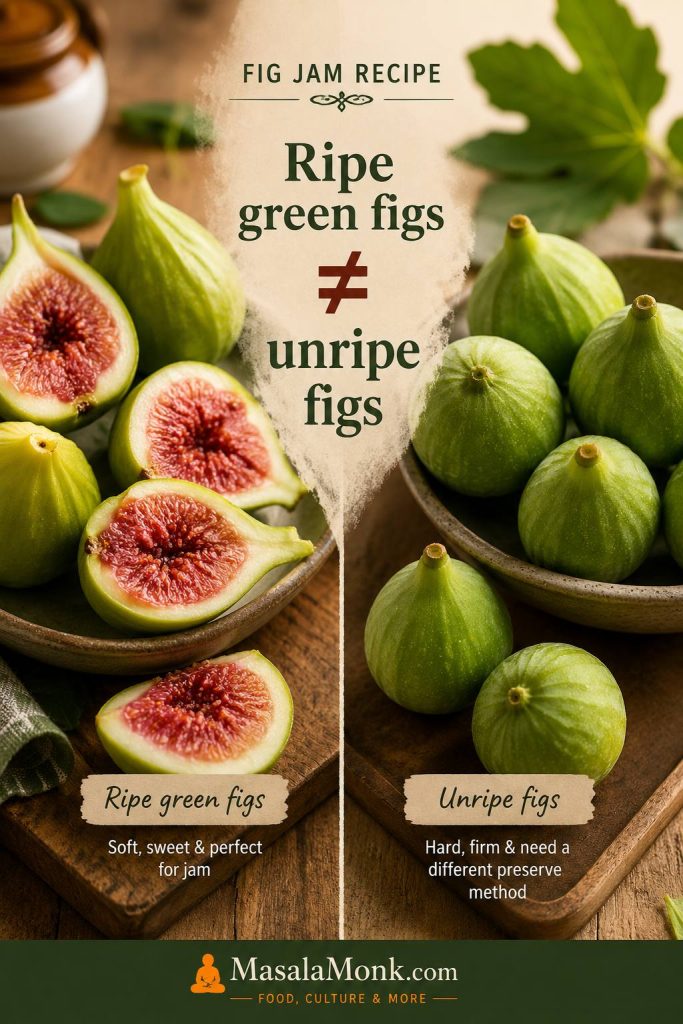
Ripe green-skinned figsThey are soft, sweet, and ripe insideUse them like any other ripe fig
Truly unripe figsThey are hard, dry, bitter, or not sweet yetUse a dedicated green fig preserve method instead

Using dried figs instead of fresh? Go straight to the dried fig jam variation once you understand the main texture cues.

Fresh figs

Fresh figs are the best choice for a classic, bright homemade batch. They are tender, juicy, and quick to cook down when ripe. The flavor can be floral, honeyed, berry-like, or lightly caramelized depending on the variety and ripeness.

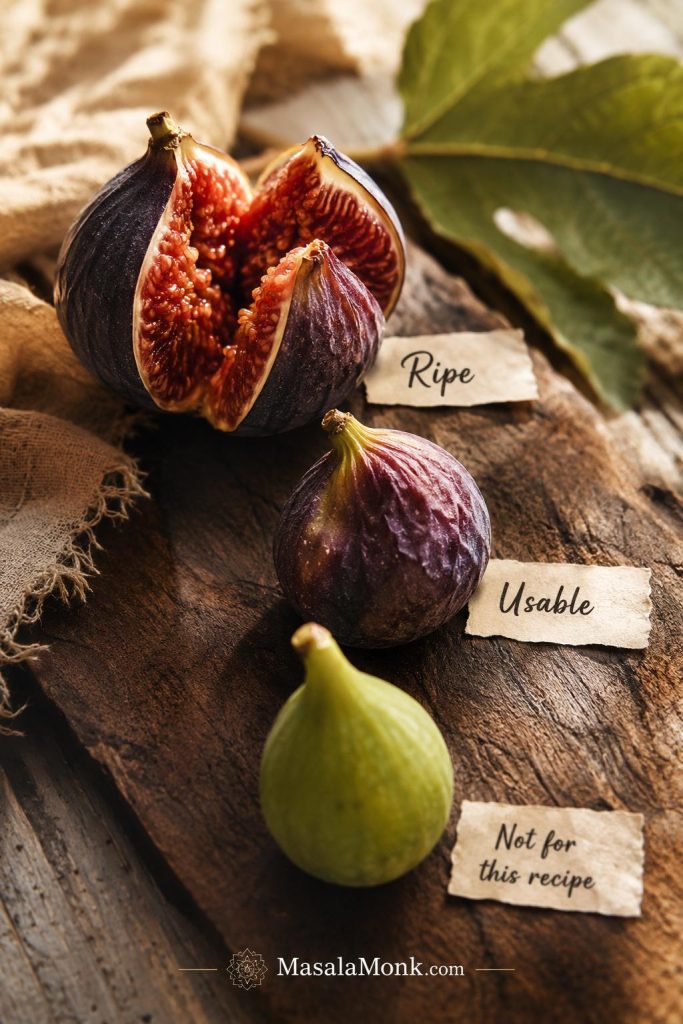
Fresh fig ripeness guide showing ripe, usable wrinkled, and hard unripe figs for jam.
Sweet-smelling, soft figs make the best fresh fig jam; meanwhile, hard green figs need a slower preserve-style method.
  • Use ripe figs that feel soft but not fermented.
  • Remove the stems, but do not peel the figs.
  • Quarter or chop them so they cook evenly.
  • Add water only as needed; very juicy figs may need little or none.

Dried figs

Dried figs are sweeter, denser, and lower in moisture. They need water to soften before they can become jam. Once cooked and blended, they make a thick fig spread that gives brie, goat cheese, blue cheese, crackers, toast, and sandwiches a darker, almost caramel-like contrast.

  • Remove any tough stems before cooking.
  • Chop the figs so they soften faster.
  • Simmer with water until very tender before blending or mashing.
  • Use less sugar if the dried figs are already very sweet.

Frozen figs

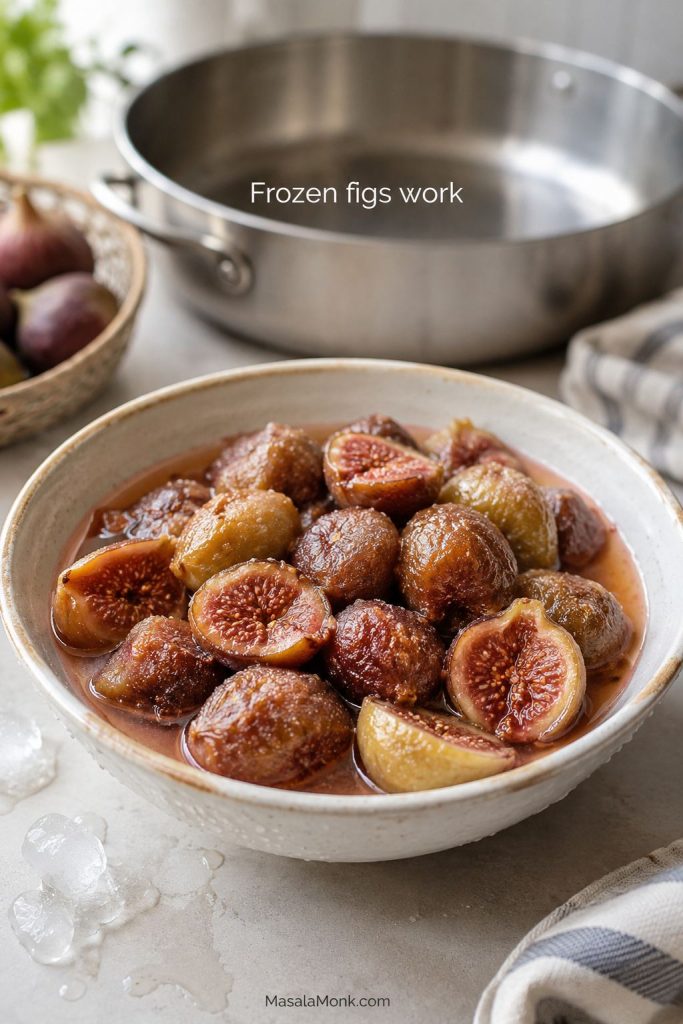
Frozen figs can work for jam. Thaw them first if possible, then use the fruit and any juices that collect. Frozen figs often release extra liquid, so the batch may need a slightly longer cook time. If you are using a weight-based recipe, weigh the figs consistently either before freezing or after thawing and draining lightly.

Thawed frozen figs in a bowl with released juices and a jam pan in the background.
Frozen figs are useful for jam, although their extra thawed juices usually need more time to simmer down.

Because thawed figs release extra liquid, check the doneness tests carefully before deciding the batch is finished.

What about green or unripe figs?

Green-skinned ripe figs are fine. Truly unripe figs are different. They can be firmer, less sweet, and sometimes bitter or latex-like. Green fig preserves are usually a separate style of recipe and often involve soaking, boiling, draining, and then cooking in syrup. If your figs are ripe but green on the outside, use them here. If they are hard and unripe, use a dedicated green fig preserve method instead.

Ripe green-skinned figs with pink centers compared with hard unripe green figs.
Ripe green-skinned figs can go straight into this recipe; hard unripe figs are less sweet and belong in a different preserve.

Ingredients You Need

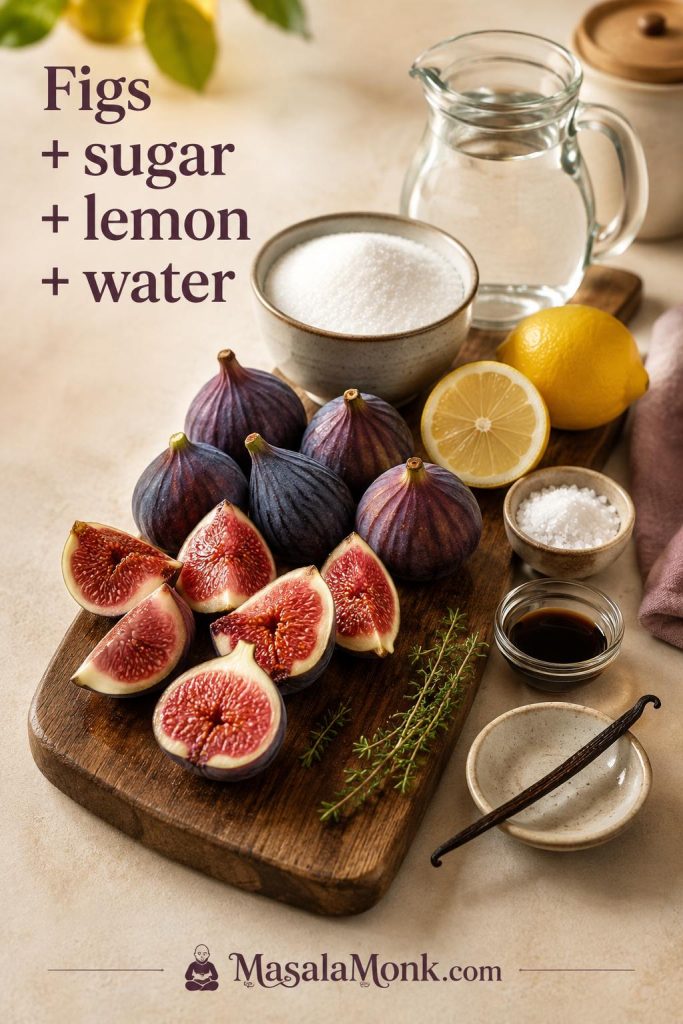
The ingredient list is short, which is part of the charm: ripe figs, enough sugar to make them shine, lemon to wake them up, and just enough water to keep the pot moving before the fruit releases its own syrup.

Fresh figs, sugar, lemon, water, salt, vanilla, balsamic, and herbs arranged as ingredients for fig jam.
Figs provide body, sugar helps the jam set, lemon keeps the flavor awake, and small add-ins should stay in the background.

Fresh figs

Use ripe fresh figs for the main version. Black Mission, Brown Turkey, Kadota, Adriatic, or other edible fig varieties can all work. The exact flavor will change, but the method stays the same. Trim away the stems and any spoiled spots. The skins and seeds are edible, so there is no need to peel or deseed the fruit.

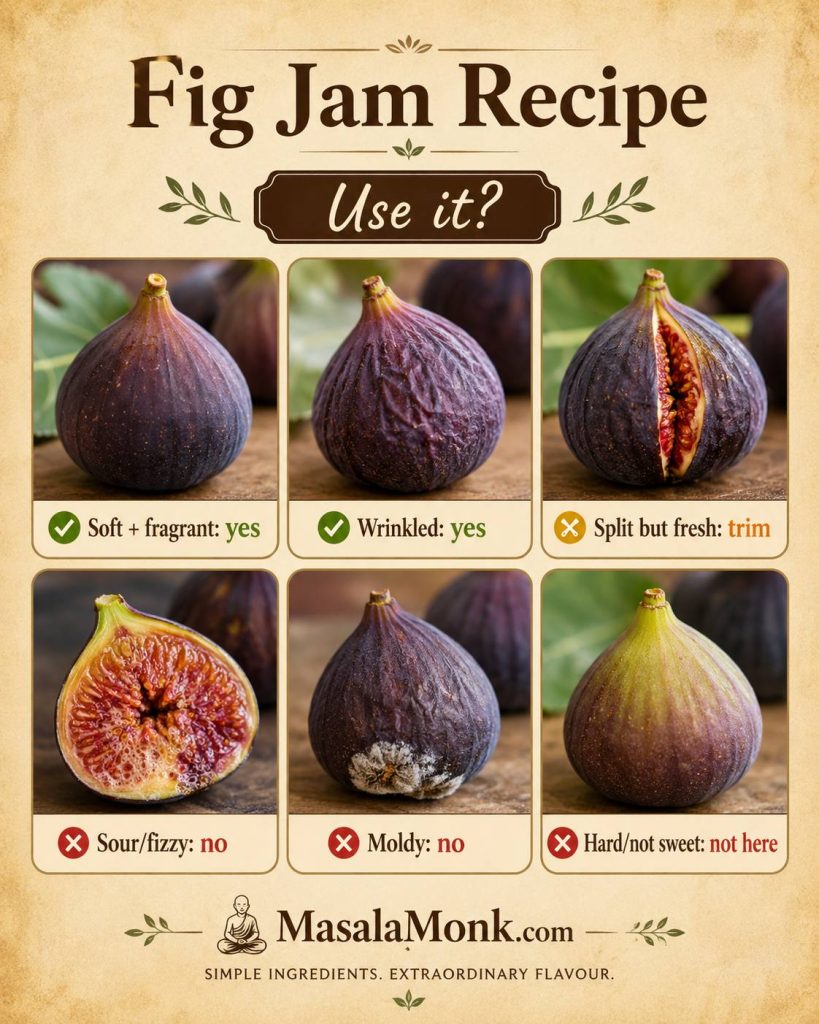
Fig condition guide: Fig jam is forgiving, but spoiled fruit is not. Use the table below when the figs are soft enough to make you wonder.

Fig ConditionUse It?What to Do
Soft, fragrant, and sweetYesPerfect for jam
Slightly wrinkledYesTrim stems and use
Split but fresh-smellingUsuallyTrim dry or exposed spots first
Sour, fizzy, or fermented smellNoDiscard
MoldNoDiscard
Hard and not sweetNot for this recipeUse a green fig preserve method instead
Guide showing which figs to use or discard for jam, including soft, wrinkled, split, sour, moldy, and hard figs.
Slightly wrinkled or very soft figs can still work, but sour, fizzy, or moldy fruit should be discarded before cooking.

Sugar

Sugar is not just there for sweetness; it gives the syrup its shine, helps the fruit look glossy instead of dull, and gives the finished jar a little more body. The amount here is moderate compared with many old-fashioned preserves, so the figs still lead. If your fruit is extremely sweet, you can reduce the sugar, but the batch will usually set softer, cook longer, and have a shorter refrigerator life.

Lemon juice

Lemon is what keeps the jar from tasting heavy. It lifts the fig flavor, sharpens the sweetness, and helps the mixture thicken. For refrigerator jam, fresh lemon juice works well. For pantry jars, switch to a tested preservation recipe and follow it exactly; many canning formulas call for bottled lemon juice because its acidity is standardized.

Water

Water keeps the figs from scorching before they release their own juices. Very ripe, juicy figs may need only a splash. Firmer figs, drier figs, or dried figs need more. Start with the smaller amount first; you can always add a little more if the pot looks dry.

Salt

A small pinch of salt is optional, but it makes the fig flavor taste rounder and less flat. It is especially useful if you plan to serve the jam with cheese or savory dishes.

Vanilla, citrus zest, balsamic, or herbs

These are optional, not required. Vanilla makes the jam more dessert-like. Lemon or orange zest adds fragrance. Balsamic pulls the jam into savory territory, where it tastes less like breakfast and more like something you would spoon beside brie, pork, or sharp cheese. Rosemary or thyme makes it more savory.

Equipment That Makes Fig Jam Easier

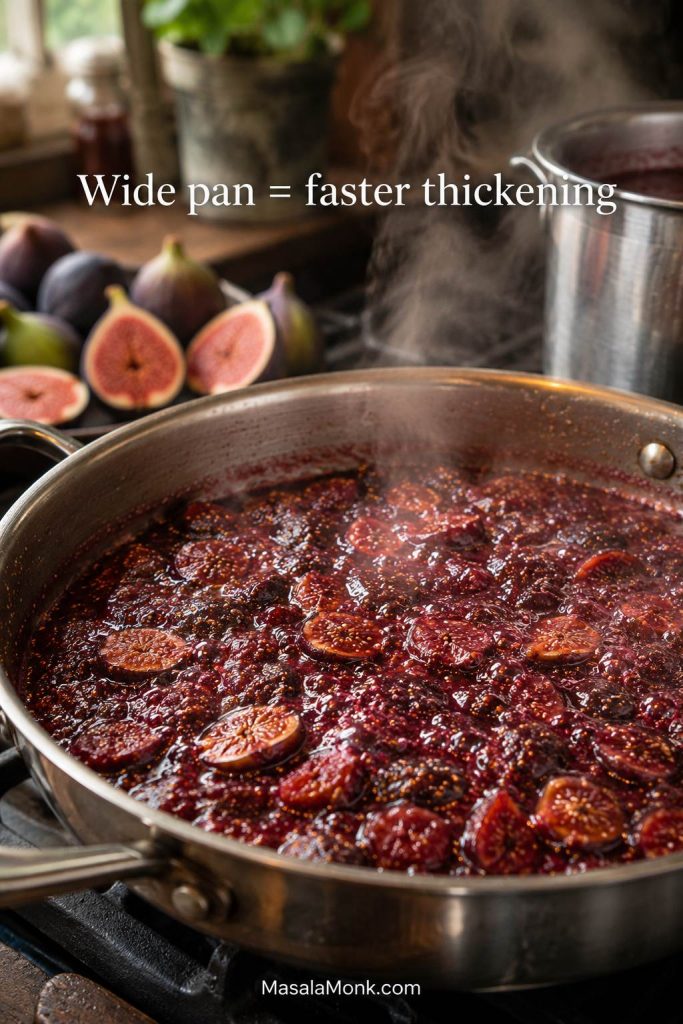
You do not need special jam gear here, but the pan matters more than most people expect. A wide pan is not fancy equipment; it lets steam escape quickly, so the figs thicken before their flavor turns dull. A masher or blender simply lets you choose whether the fruit stays chunky or turns smooth.

Wide pan of fig jam beginning to simmer with steam rising and a narrower pot in the background.
A wide pan gives steam room to escape, helping the jam thicken before the fig flavor turns dull.
  • Wide heavy-bottomed pan: a saucepan, sauté pan, or Dutch oven with enough surface area for steady evaporation.
  • Non-reactive material: stainless steel or enameled cast iron is best because the recipe includes lemon juice.
  • Wooden spoon or silicone spatula: useful for stirring and checking whether the jam leaves a trail on the bottom of the pan.
  • Potato masher or immersion blender: use a masher for rustic texture or an immersion blender for a smoother spread.
  • Small plate or spoon: chill it in the freezer for a simple doneness test.
  • Clean jars and a kitchen scale: clean jars help with storage, and a scale helps because figs vary so much in size.

A ladle and funnel are helpful but not essential. A narrow pot can still work, but the jam will usually need more time because evaporation is slower. If your pan is thin, keep the heat moderate and stir often so the sugar and fruit do not scorch before the mixture thickens.

The Best Fig Jam Ratio

The sweet spot is enough sugar to make the figs shine, enough lemon to keep the flavor bright, and only enough water to keep the fruit moving. This is not meant to be a stiff, candy-sweet preserve. It is a softer, fruit-forward jar you can use generously.

900 g fresh figs : 300 g sugar : 60 ml lemon juice : 60–120 ml water

Fig jam ratio guide with measured fresh figs, sugar, lemon, and water on a warm kitchen surface.
A reliable fig jam ratio gives the fruit enough sugar for body, enough lemon for balance, and no excess water to cook off later.

In US kitchen measurements, that is about 2 lb fresh figs, 1½ cups sugar, ¼ cup lemon juice, and ¼–½ cup water. The result is sweet enough to feel like jam, but still fig-forward enough that you taste the fruit, not just sugar.

Because this is less sugar-heavy than many old-fashioned preserves, it is best treated as a refrigerator or freezer batch.

BatchFresh FigsSugarLemon JuiceWaterApprox. Yield
Small batch1 lb / 450 g¾ cup / 150 g2 tbsp / 30 ml2–4 tbsp / 30–60 mlAbout 1½ cups / 360 ml
Standard batch2 lb / 900 g1½ cups / 300 g¼ cup / 60 ml¼–½ cup / 60–120 mlAbout 3 cups / 720 ml
Large batch3 lb / 1.35 kg2¼ cups / 450 g6 tbsp / 90 ml⅓–¾ cup / 80–180 mlAbout 4½ cups / 1 liter

The yield is approximate because figs vary in moisture. Very juicy fruit cooks down differently from firmer, drier fruit.

Small-Batch Fig Jam

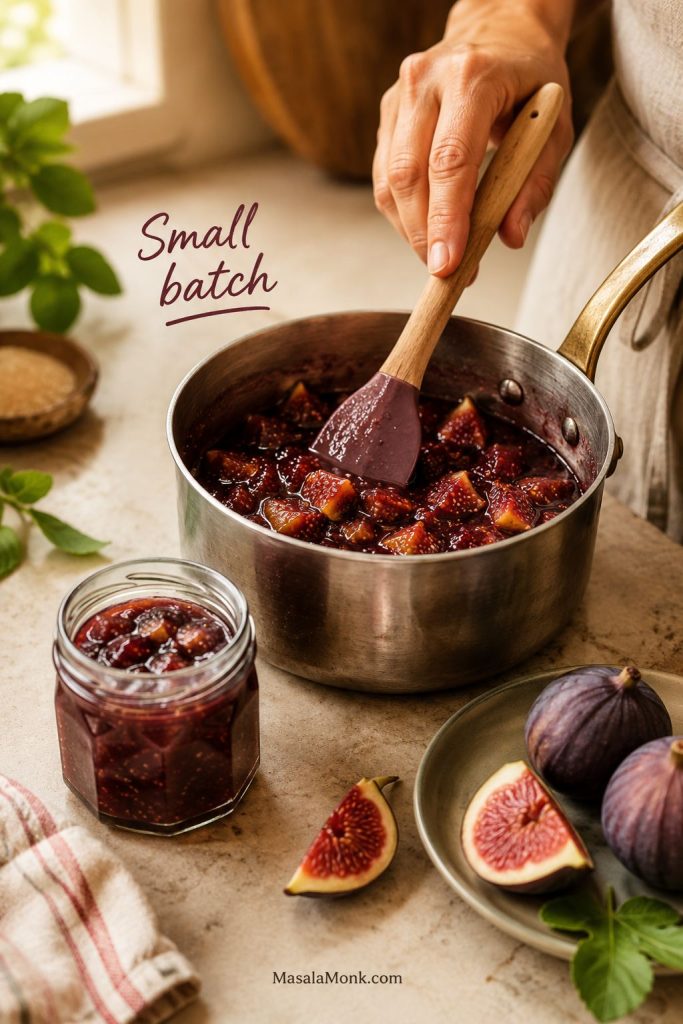
If you only have a small basket of figs, make a half batch. Use 1 lb / 450 g fresh figs, ¾ cup / 150 g sugar, 2 tbsp / 30 ml lemon juice, and 2–4 tbsp / 30–60 ml water. A small batch usually cooks faster, often in about 20–30 minutes, especially in a wide pan.

This is a good option when you have a few ripe figs that need using immediately. It gives you enough jam for toast, yogurt, a small cheese board, or a quick baked brie without committing to several jars.

Small saucepan of chopped figs cooking into jam beside a small finished jar.
Small-batch fig jam is the right move when a few ripe figs need saving but you do not want multiple jars.

Why This Fig Jam Recipe Works

The pot does most of the work once the balance is right: enough sugar for gloss, enough lemon for brightness, and enough time for the figs to thicken naturally.

  • Moderate sugar keeps the fig flavor clear. The jam tastes sweet and glossy, but not like sugar syrup.
  • Lemon keeps the flavor bright. Without enough acid, the finished jar can taste heavy, flat, or overly sweet.
  • A short maceration helps the figs release juice. This makes the jam easier to start and reduces scorching risk.
  • A wide pan thickens the jam faster. More surface area means better evaporation and less overcooking.
  • No pectin keeps the texture soft and homemade. The jam thickens through cooking, but stays spoonable rather than stiff.
  • Stopping slightly early prevents over-thick jam. It continues to firm as it cools.

Figs are delicate. If you cook them too hard for too long, the flavor can move from honeyed and rounded to dull and sticky. The goal is to reduce the syrup, not punish the fruit.

How to Make Fig Jam

Start with ripe fresh figs and let simmering, lemon, sugar, and evaporation do the thickening. Read through the steps once before starting, especially the texture cues, because the jam thickens more after it cools.

Step 1: Prep the figs

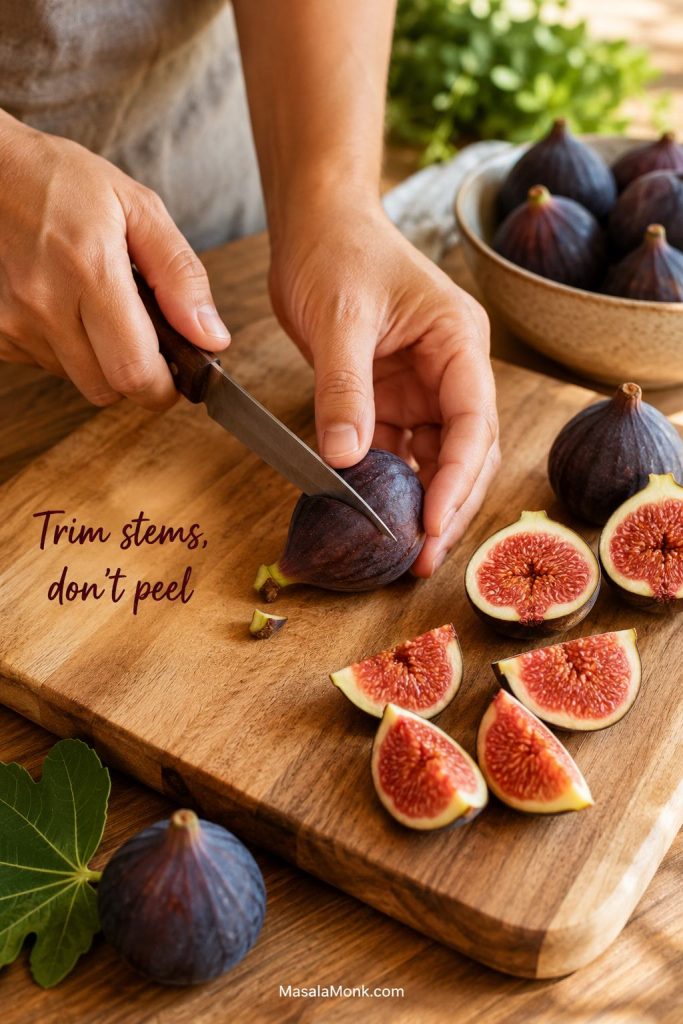
Rinse the figs gently and pat them dry. Trim off the tough stems. Quarter small figs or chop larger figs into small pieces. You do not need to peel them. The skins soften as the jam cooks, and the seeds are part of its natural texture.

Hands trimming stems and quartering fresh figs on a cutting board for homemade jam.
Trim the stems and cut the figs evenly, but skip peeling because the skins soften into the finished jam.

Step 2: Combine figs, sugar, lemon, and water

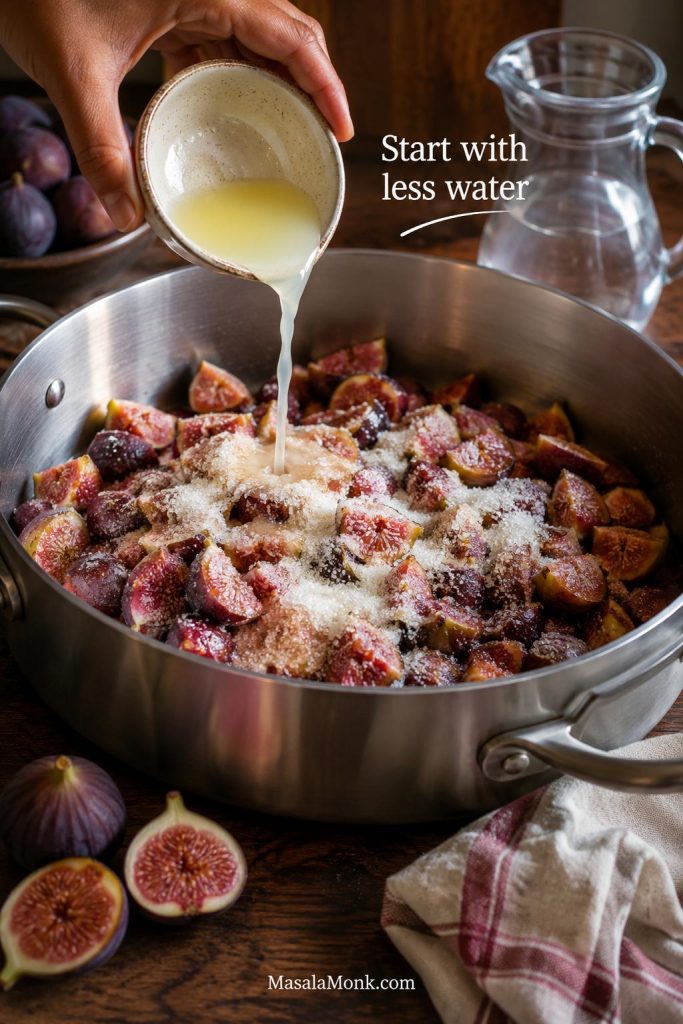
Add the figs, sugar, lemon juice, a pinch of salt if using, and ¼ cup / 60 ml water to a wide heavy pan. Stir well so the sugar, lemon, and fruit are evenly distributed before heat goes on.

Fresh figs and sugar in a pan while lemon juice is poured in and water waits nearby.
Start with less water, then add a splash only if the figs stick before their own juices release.

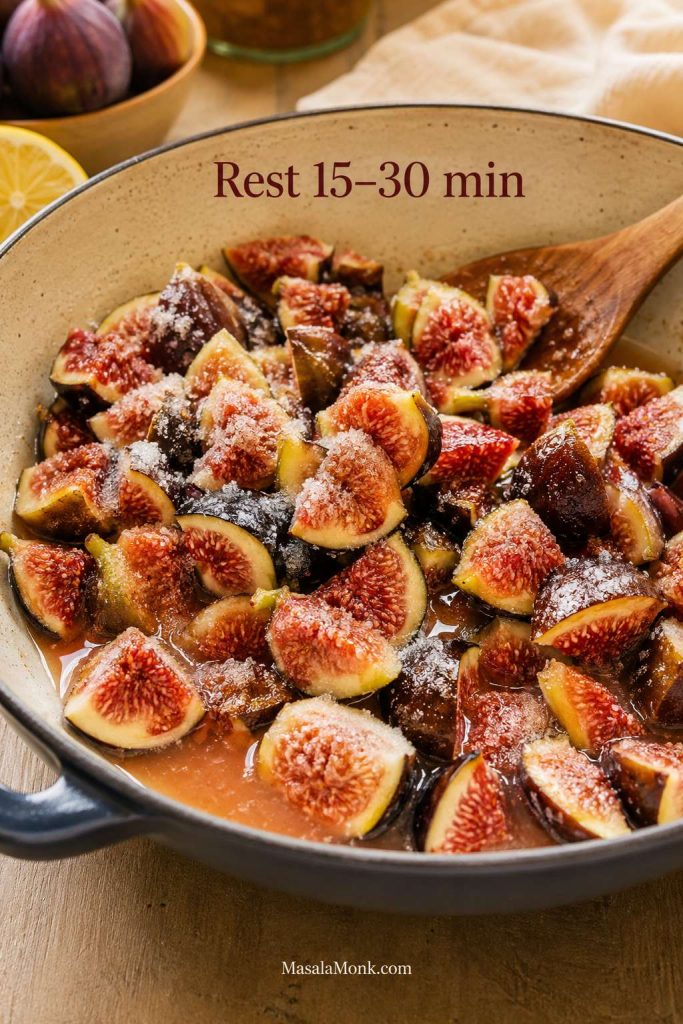
If you have time, let the mixture sit for 15–30 minutes before cooking. This short rest helps the sugar draw juice from the figs, so the fruit starts cooking in its own syrup instead of scorching against the pan.

Chopped figs resting with sugar and lemon juice as syrup begins forming in the bowl.
A short rest with sugar and lemon draws juice from the figs, so the batch begins glossy instead of dry.

Add the remaining water only if the figs look dry, stick before releasing juices, or need a little help softening. Starting with less water prevents a thin batch that needs extra time to reduce.

Step 3: Bring the mixture to a simmer

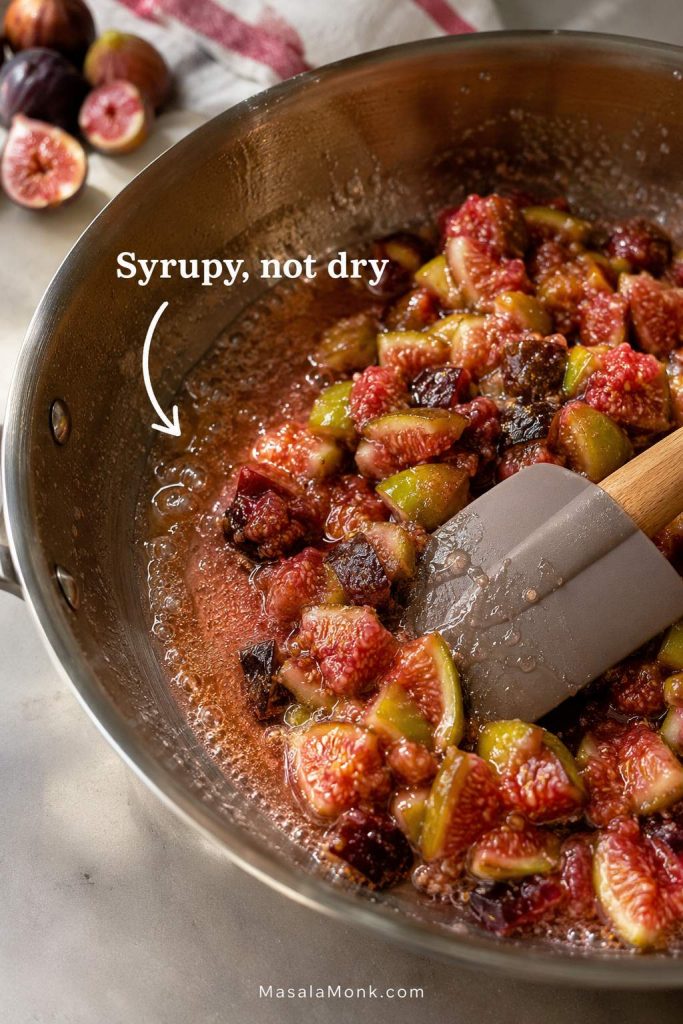
Set the pan over medium heat and stir until the sugar dissolves. Once the mixture starts bubbling, reduce the heat as needed to maintain a steady simmer. You want active bubbling, but not a violent boil that splashes, scorches, or caramelizes too fast.

At this point the pan should look syrupy around the edges, not dry and sandy. If the figs are still sitting in dry sugar, add a splash more water and give them time.

Chopped figs in a pan with syrupy edges forming as a spatula pulls through the mixture.
When syrup forms around the pan edges, the figs are ready to soften evenly without scorching on dry sugar.

Cook uncovered once the figs are simmering. Covering the pan traps moisture and slows thickening.

Step 4: Cook until the figs soften and collapse

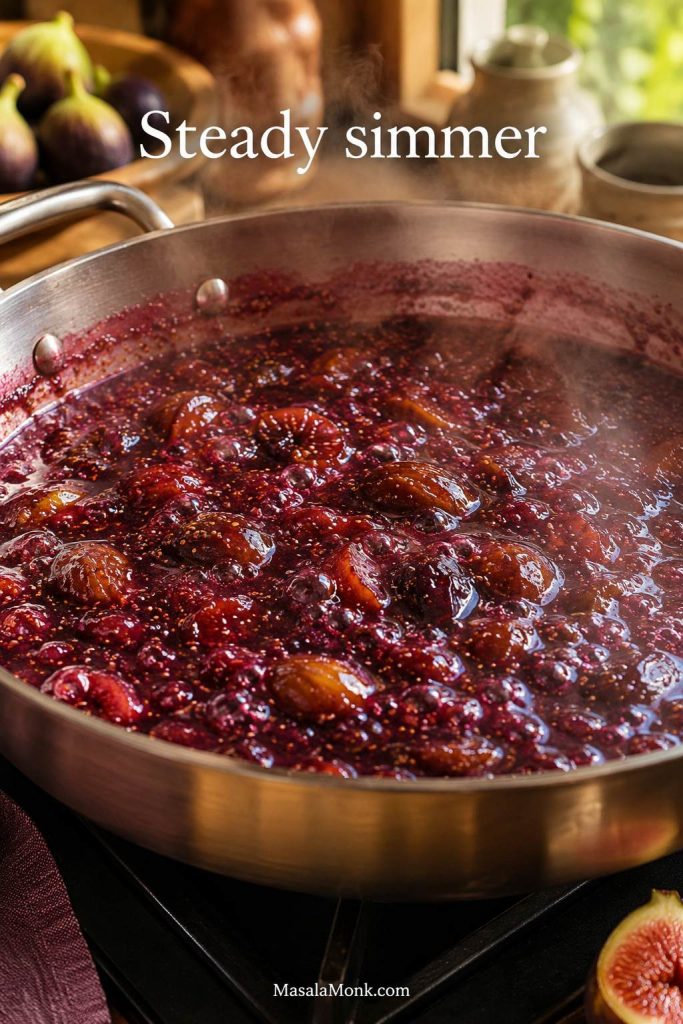
Simmer the jam, stirring often, until the figs soften, slump, and begin to collapse into the syrup. The kitchen should smell like warm figs and lemon, not burnt sugar. This usually takes 25–45 minutes. The exact time depends on fig ripeness, moisture, pan width, and heat level.

Fig jam simmering in a wide pan with steady bubbles and softened fruit.
A steady simmer concentrates the syrup gently, which keeps homemade fig jam glossy, rounded, and fruit-forward.

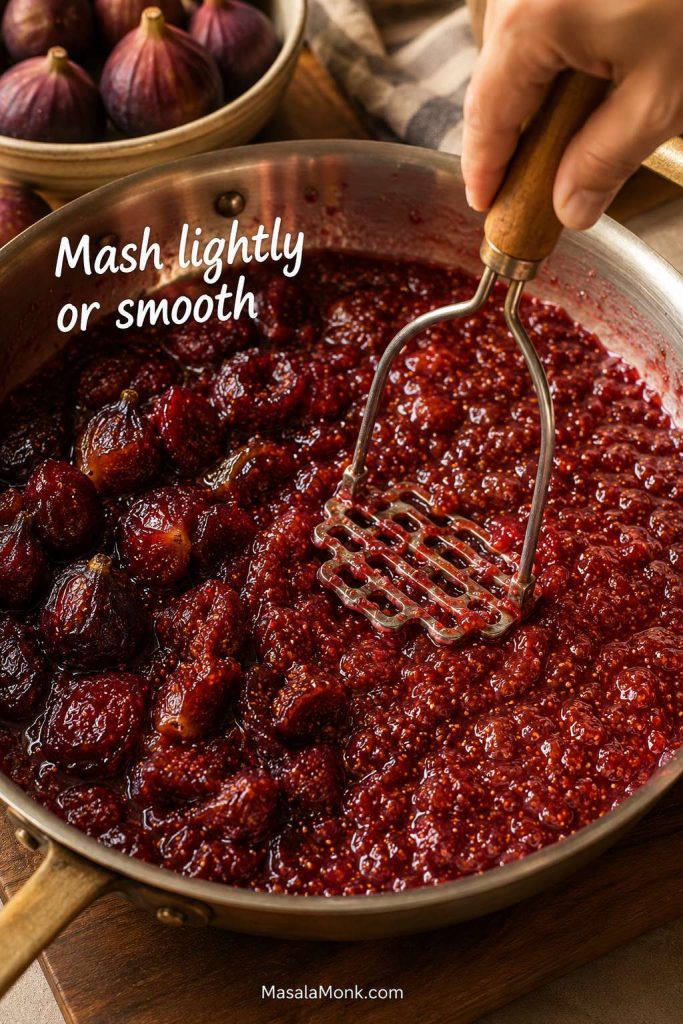
As the fruit softens, mash it with the back of a spoon or a potato masher. For a chunky preserve-style texture, mash lightly and leave some pieces intact. For a smoother spread, mash more thoroughly or blend briefly later.

Potato masher pressing softened figs in a pan to adjust the jam texture.
Mash lightly for a chunky fig preserve feel, or mash longer when you want a smoother spoonable jam.

If foam gathers on the surface, you can skim it off for a clearer finish. A little foam is not a problem for refrigerator jam.

Step 5: Adjust the texture

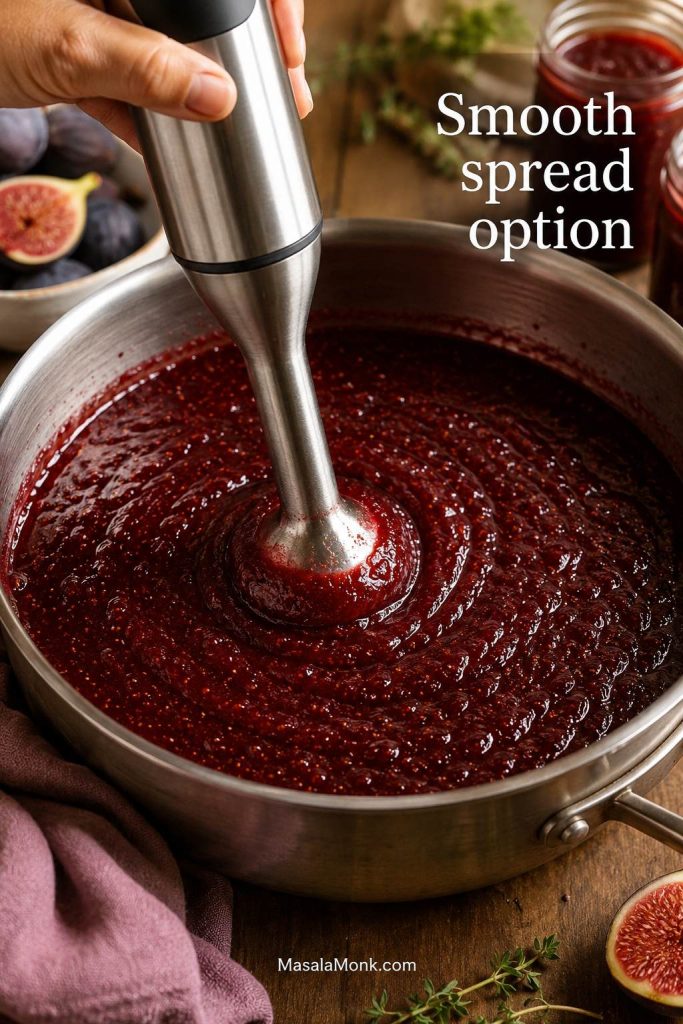
If you like a rustic jam, leave it slightly chunky. For a smoother fig spread for crackers, cheese boards, sandwiches, or cookies, use an immersion blender for a few short pulses. Do not overblend unless you want a very smooth paste.

Immersion blender smoothing fig jam in a pan into a glossy fig spread.
A brief blend makes fig spread smoother for crackers, cheese boards, cookies, and sandwiches without losing its homemade texture.

After blending, simmer for another few minutes so the texture settles and any extra moisture evaporates.

Step 6: Test the jam

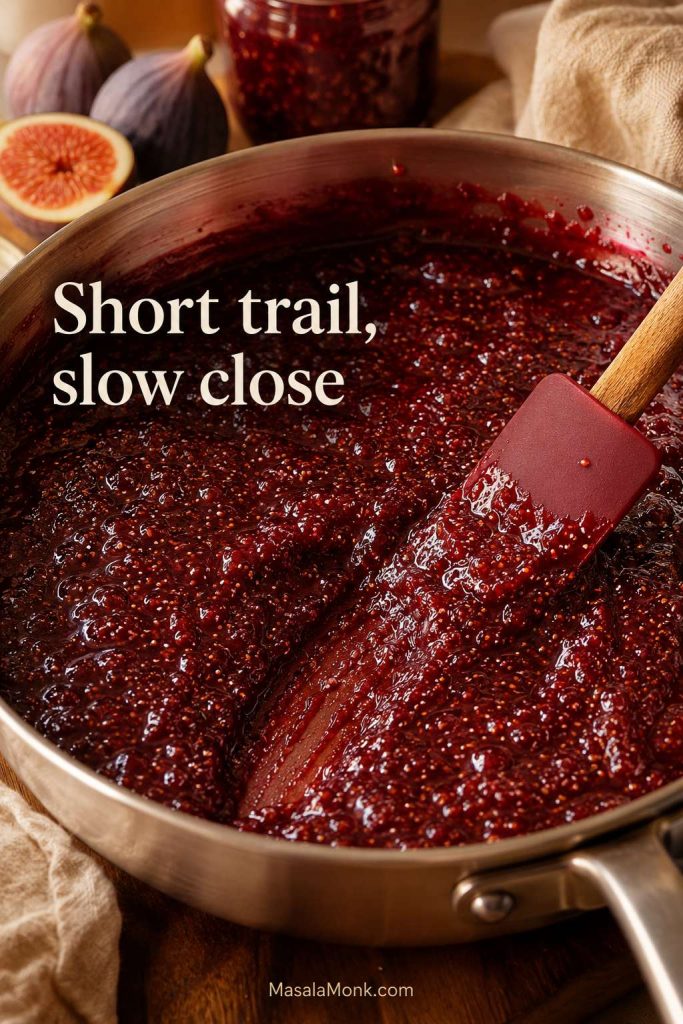
It is ready when it looks shiny, moves slowly, and mounds softly on a spoon. The syrup should bubble slowly, not splash like water. A spoonful should fall slowly, not pour like syrup or sit like paste. A spatula dragged through the pan should leave a short trail before the mixture flows back. You can also use a cold plate test or a thermometer; both are explained below.

If the jam looks too loose or too stiff at this point, use the troubleshooting guide before changing the recipe.

Step 7: Jar, cool, and store

Spoon the hot jam into clean jars. Let it cool, then refrigerate. Do not worry if it looks slightly loose while hot; it will thicken more as it cools. For longer storage, freeze it in freezer-safe containers with headspace.

Texture Target

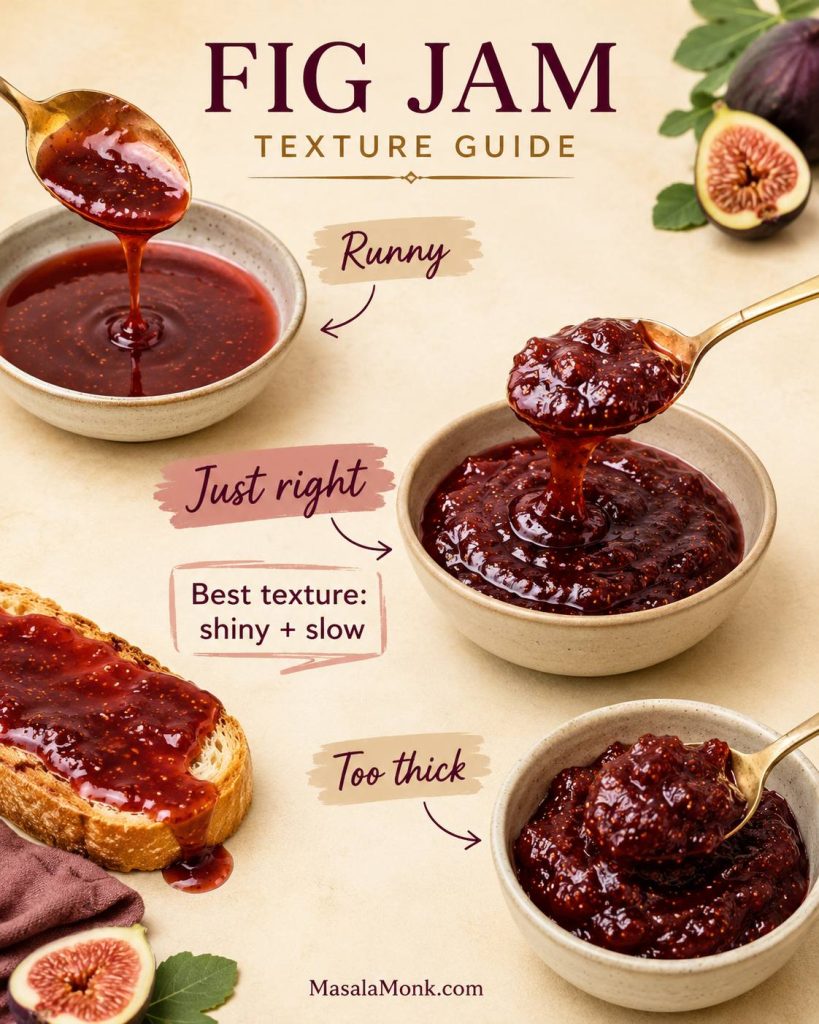
The target is not a firm jelly set. The best texture for this recipe is thick enough to spread on toast, but loose enough to spoon over yogurt or cheese. Stop when the jam looks shiny and slow, not stiff. If it looks firm in the boiling pan, it will likely cool too thick.

Fig jam texture guide comparing runny, just right, and too thick jam on spoons or toast.
Aim for a texture that clings to toast but still spoons easily over yogurt, brie, pancakes, or desserts.

How to Tell When Fig Jam Is Done

The tricky part is that jam can look loose while hot and much thicker after cooling. Look for several signs together rather than relying on one exact minute mark.

  • Shiny look: the liquid around the figs should look syrupy, not watery.
  • Soft fruit: the figs should be tender, slumped, and partly collapsed.
  • Slow bubbles: the bubbles become thicker and slower as water evaporates.
  • Spatula trail: a spoon or spatula should leave a short path through the jam before it closes.
  • Spoon mound: the jam should mound lightly on a spoon instead of running off like juice.
  • Cold plate test: a small spoonful on a chilled plate should move slowly when tilted.
  • Temperature cue: at sea level, a firmer jam set is often around 220°F / 104°C, but texture matters more than the thermometer reading.
  • Aroma: the jam should smell bright and honeyed, not burnt or overly caramelized.

Spatula Trail Test

Drag a spatula through the pan when the jam looks close. If the path opens briefly and then closes slowly, the texture is moving toward a soft set.

Spatula dragged through thick fig jam in a pan, leaving a short trail that slowly closes.
The spatula trail is a visual doneness cue: it should open briefly, then close slowly as the jam settles.

Cold Plate Test

Chill a small plate, add a spoonful of jam, and tilt it. The cooled jam should move slowly, which helps you avoid overcooking the hot batch.

Spoonful of fig jam on a tilted chilled plate during a cold plate doneness test.
The cold plate test shows the cooled texture, so it prevents overcooking a batch that still looks loose while hot.

Important: Stop slightly before the jam looks perfect in the pot. If it looks stiff while boiling, it may cool into something too thick or sticky. You can always simmer a loose batch a little longer, but it is much harder to undo a stiff, overcooked one.

Do You Need Pectin for Fig Jam?

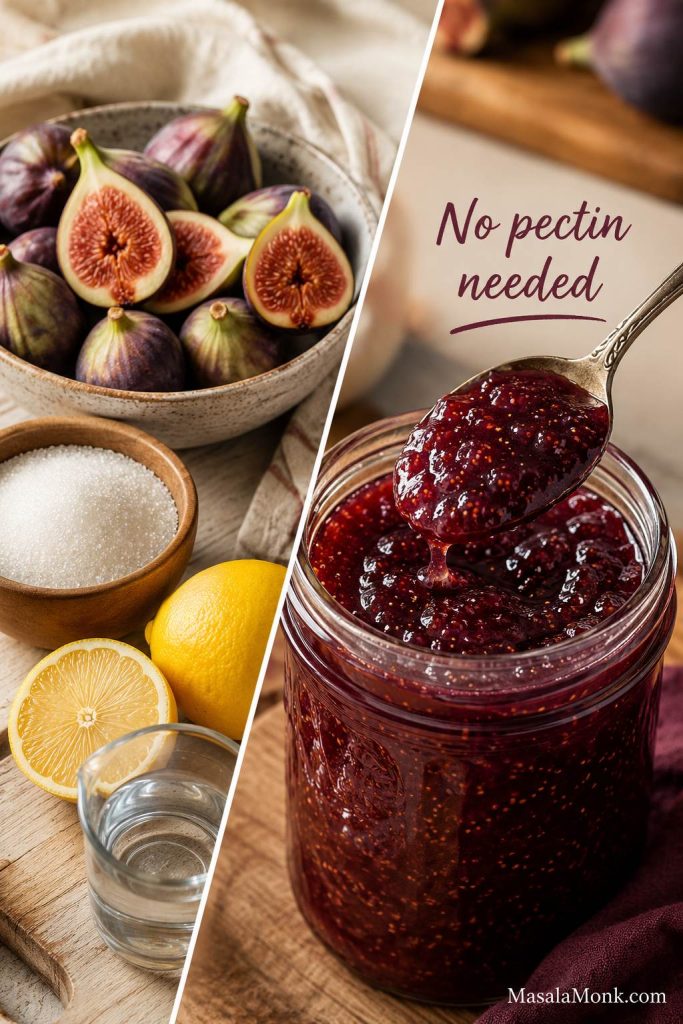
No, you do not need commercial pectin for this style of fig jam. Figs, sugar, lemon juice, and evaporation can create a soft, spoonable jam on their own. The finished texture will usually be softer than a firm store-bought jelly, but that is exactly why it works so well as both a jam and a fig spread.

Do not chase a store-bought jelly wobble here. For a homemade spread, a softer set is often better because it spoons more easily over cheese, yogurt, toast, desserts, and savory dishes. A soft no-pectin set is not a failure; it is part of what makes the jar so useful.

No-pectin fig jam shown with fresh figs, sugar, lemon, water, and a spoonful of finished jam.
With enough simmering and lemon balance, no-pectin fig jam thickens naturally without needing a boxed setting mix.

If you want a very firm set, commercial pectin can help, but it changes the method. Boxed pectin and products like Sure-Jell often require specific sugar and liquid ratios, so follow the instructions for that product rather than adding it casually to this recipe.

Let the pan do the work: steady simmering, a wide surface, and a few spoon tests matter more than extra thickeners.

Dried Fig Jam Variation

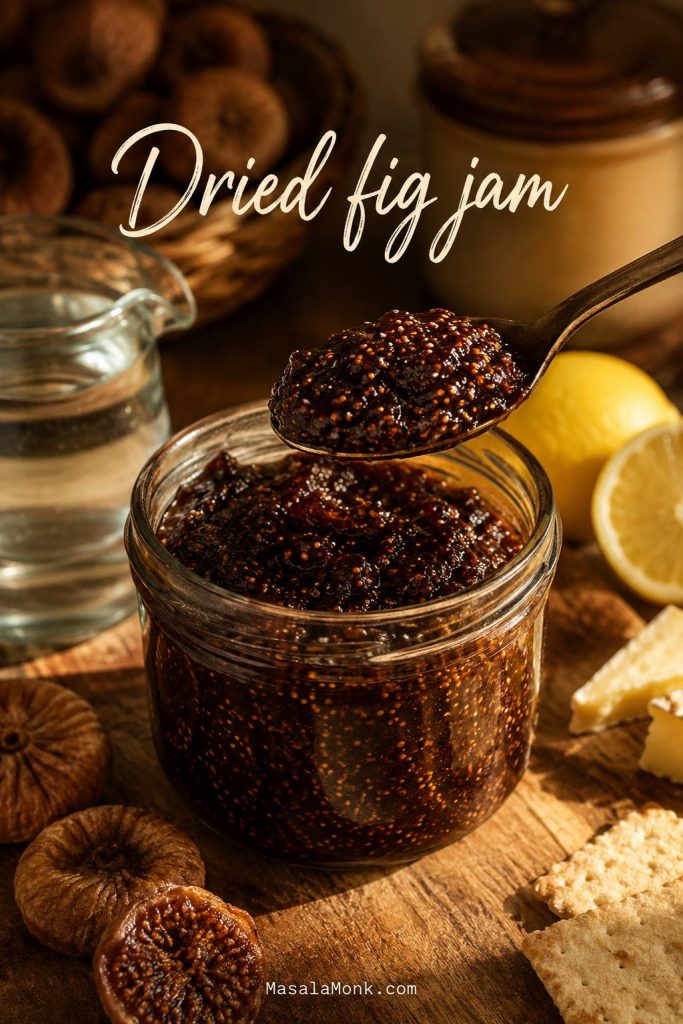
Dried figs are not second-best; they simply make a different kind of jar. The flavor is deeper, darker, and more concentrated, closer to a thick fig spread than a bright fresh-fruit jam. This is the version to make when fresh figs are out of season, expensive, or hard to find.

Think of it as a pantry-friendly spread with a darker mood: less fresh summer fruit, more rich fig, caramel, and cheese-board depth.

Dried fig jam served on a spoon with dried figs, lemon, water, crackers, and cheese-board elements nearby.
Dried fig jam is darker and denser than fresh fig jam, which makes it especially good with crackers and cheese.

Dried Fig Jam Formula

  • Dried figs: 12–14 oz / 340–400 g, stems removed and chopped
  • Water: 2 cups / 480 ml, plus more if needed
  • Sugar: ½–1 cup / 100–200 g to start, plus more to taste
  • Lemon juice: 2 tbsp / 30 ml
  • Optional flavorings: orange zest, vanilla, balsamic vinegar, rosemary, thyme, or a pinch of salt

To make it, simmer the chopped dried figs with water until very soft, usually 20–40 minutes depending on how dry they are. Blend or mash the softened figs, then add sugar and lemon juice. Simmer again until thick and spoonable. Add more hot water if it becomes too dense before the figs fully soften, especially before adding more sugar.

Start with ½ cup / 100 g sugar for a less-sweet fig spread, or 1 cup / 200 g sugar for a sweeter jam. Add more only after tasting. Dried figs are already concentrated, so use up to 1½ cups / 300 g sugar only if you want a very sweet, glossy jam.

The dried fig version thickens quickly after blending, so keep it slightly looser than you want while it is hot. If it looks perfect in the pot, it may cool into a paste.

Low-Sugar, Honey, and No-Added-Sugar Options

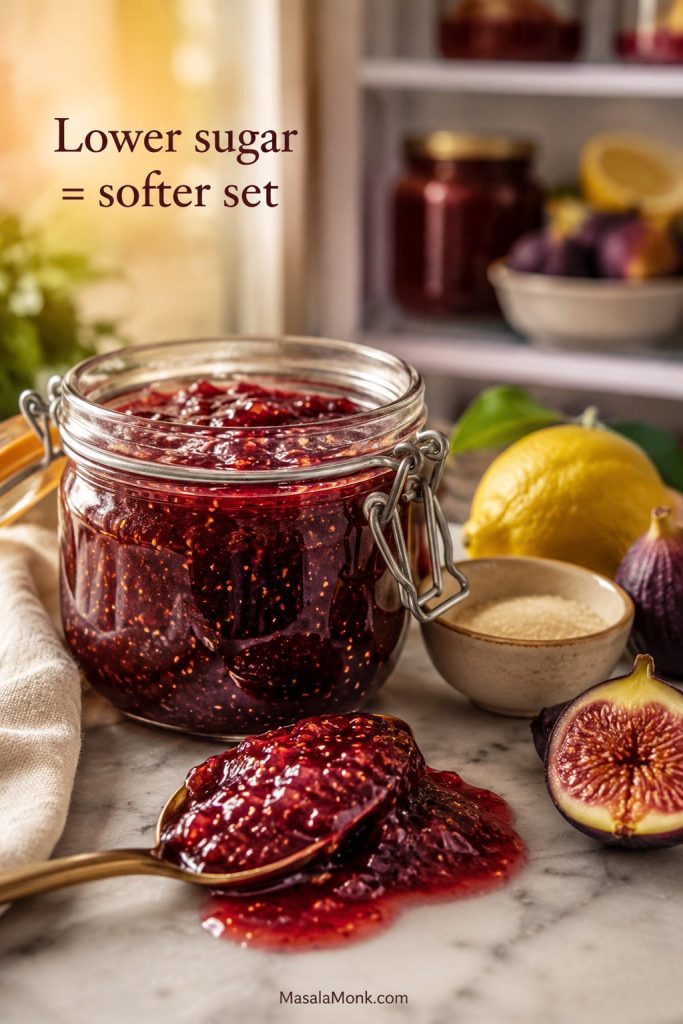
Lower sugar changes more than sweetness. It changes set, cook time, and storage life. Figs are naturally sweet, so reducing sugar can work, but the batch will usually be softer, a little less glossy, and shorter-lived in the refrigerator.

Low-sugar fig jam

For a lower-sugar version, use 150–200 g sugar per 900 g figs instead of 300 g. Cook the jam a little longer and expect a softer, more fruit-spread-like texture. A lower-sugar batch may never pass the cold-plate test as firmly as a higher-sugar jam. If it is shiny, thick, and spoonable, it can still be done.

Low-sugar fig jam in a jar with lemon and a smaller amount of sugar nearby.
Lower-sugar fig jam often tastes fruitier, although the softer set makes fridge or freezer storage more important.

Store low-sugar batches in the refrigerator and use within 1–2 weeks for best quality, or freeze for longer storage.

Honey fig jam

Honey adds a floral sweetness that works beautifully with figs. Replace part of the sugar with honey rather than all of it for the best texture. For example, use 200 g sugar plus ¼ cup honey for 900 g figs. Honey-sweetened jam may be softer, darker, and more aromatic than the granulated-sugar version.

Honey being drizzled into glossy fig jam with fresh figs nearby.
Honey brings floral sweetness to fig jam, but it also softens the set and works best as a chilled variation.

Keep honey-sweetened batches refrigerated or frozen for the best texture and freshness.

No-added-sugar fig spread

If you are searching for no-sugar fig jam, think of this version as a no-added-sugar fig spread instead of a classic jam. Cook ripe figs with lemon juice and a splash of water until very soft and thick, then mash or blend. Refrigerate and use within about 5–7 days, or freeze for longer storage.

Storage note: Low-sugar, honey, and no-added-sugar versions are softer, shorter-life batches. Keep them refrigerated or frozen rather than treating them like pantry preserves.

Before reducing sugar further, read the storage and canning safety notes so you choose the right storage path.

Fig Jam Variations

Once you understand the base recipe, the flavor is easy to adjust. Start small with add-ins because figs are delicate and can be overwhelmed by strong spices, vinegar, or herbs.

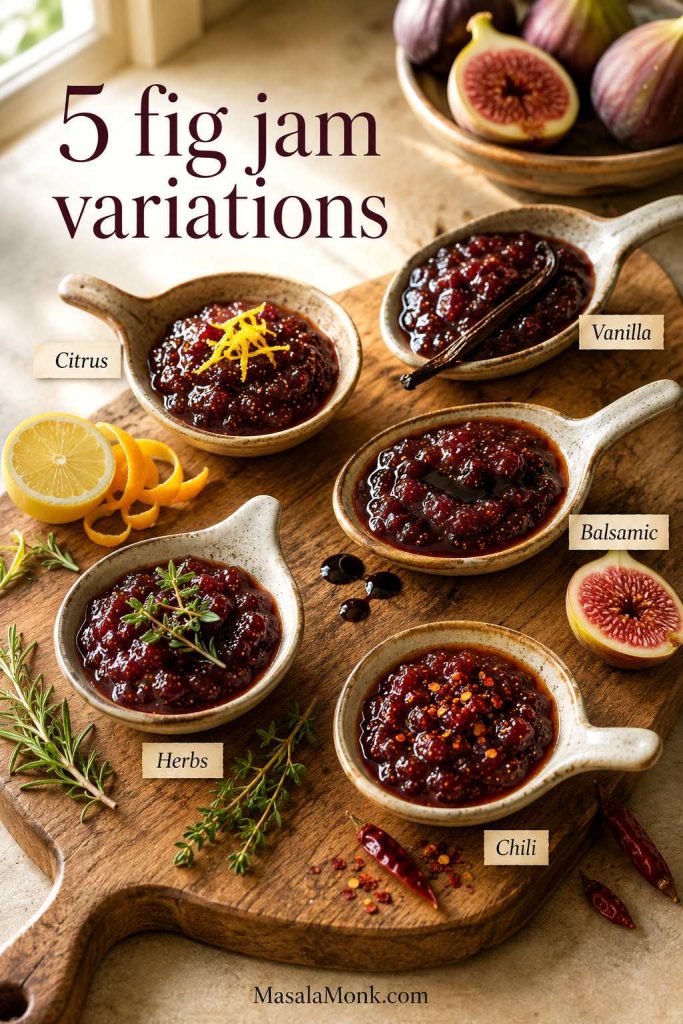
The Best First Variations

  1. Lemon-orange: brighter and more fragrant for breakfast and desserts.
  2. Vanilla: softer, rounder, and more dessert-like.
  3. Balsamic: deeper and better for cheese, pork, chicken, and sandwiches.
  4. Rosemary or thyme: savory enough for boards, baked brie, and grilled cheese.
  5. Chili: just enough heat for cheese, flatbreads, and sandwiches.
Five fig jam variations in small bowls labeled citrus, vanilla, balsamic, herbs, and chili.
Use fig jam flavor variations sparingly: citrus brightens, vanilla rounds, balsamic deepens, herbs turn savory, and chili adds heat.
VariationWhat to AddWhere It Shines
LemonExtra lemon zest or a little extra lemon juiceToast, yogurt, scones, breakfast boards
OrangeOrange zest, or a mix of orange and lemonCroissants, cakes, desserts, cheese boards
VanillaVanilla bean or vanilla extractPastries, cakes, ice cream, cheesecake
Balsamic1–2 tbsp balsamic vinegar near the endBrie, goat cheese, blue cheese, pork, chicken, sandwiches
HoneyReplace part of the sugar with honeySoft floral jam, yogurt, toast, cheese
Brown sugarReplace part or all of the white sugar with light brown sugarA deeper caramel note, toast, baking, cheese boards
GingerFresh grated ginger or a pinch of ground gingerWinter breakfasts, cheese boards, roasted meats
Rosemary or thymeA small herb sprig while cooking, removed before jarringSavory boards, baked brie, grilled cheese
ChiliA small pinch of chili flakesCheese, sandwiches, flatbreads
StrawberryReplace part of the figs with strawberriesA fruitier Southern-style jam
Fig onion-style condimentOnions, vinegar, and savory cookingA separate condiment, better treated as its own recipe

For cheese boards, the best directions are balsamic, rosemary, thyme, honey, orange, brown sugar, and chili. For breakfast and desserts, vanilla, lemon, orange, ginger, and strawberry are especially good.

How to Store Fig Jam

Think of this as the kind of jam you keep in the fridge and actually use: spooned over breakfast, tucked beside cheese, or frozen in small jars for later. It is flexible, lower-stress, and less sugar-heavy than a shelf-stable canning preserve.

Fig jam storage guide showing a refrigerator jar, freezer container, and tested canning-only jar cue.
For this recipe, choose fridge or freezer storage; pantry jars need tested canning instructions, not casual adjustments.

Refrigerator storage

Cool the jam, transfer it to clean jars, and refrigerate. For best quality, use the main version within 2–3 weeks. Always use a clean spoon, keep the jar chilled, and discard it if you see mold, fermentation, off smells, or unusual bubbling.

Freezer storage

The jam freezes well. Spoon it into freezer-safe jars or containers, leaving headspace because it expands as it freezes. Freeze for up to 3 months for best quality. Thaw overnight in the refrigerator and stir before using.

Canning fig jam

For pantry jars, switch to a tested preservation recipe and follow it exactly. Canning safety depends on the exact fruit, sugar, acid, headspace, jar size, and processing time. Figs also need proper acidification for safe boiling-water canning.

Canning safety setup for fig jam with jars, lemon juice, jar lids, water-bath pot, and a tested recipe checklist.
Shelf-stable fig jam depends on tested acidity, headspace, jar size, and processing time, so do not guess with canning.

Canning safety: Do not can this version as written. Sterilized jars do not make an untested refrigerator jam shelf-stable.

For shelf-stable jars, use a tested canning recipe and follow its processing instructions exactly. The National Center for Home Food Preservation has a tested fig jam without pectin formula, and Oregon State University Extension explains why figs need added acid for safe preservation.

Do not use low-sugar, honey-sweetened, or no-added-sugar variations for room-temperature storage unless you are following a tested recipe designed for that exact style.

What to Eat With Fig Jam

This is where the jar earns its space in the fridge. A spoonful can rescue plain yogurt, make toast feel planned, or turn a last-minute cheese plate into something generous. The easiest rule: pair it with something creamy, salty, tangy, smoky, or crisp so the sweetness has contrast.
Fig jam served with yogurt, cheese and crackers, grilled cheese, pork, tart, and cookies.
After chilling, fig jam moves easily from breakfast to cheese boards, savory glazes, sandwiches, and simple desserts.
UseTexture to Aim ForFlavor Direction
Toast, yogurt, oatmealSoft and spoonableLemon, vanilla, honey
Brie or goat cheeseSlightly thicker spreadBalsamic, orange, rosemary
Sandwiches and grilled cheeseSmooth or lightly chunkyChili, balsamic, thyme
Cookies, cakes, tartsThicker jamVanilla, orange, brown sugar
Pork or chicken glazeLoosened with acid or pan juicesBalsamic, chili, thyme

For cheese-specific serving ideas, jump to fig jam with brie and cheese boards.

Breakfast ideas

At breakfast, use it where you would use berry jam, but expect a deeper, honeyed flavor.

  • Spread on toast, English muffins, biscuits, or croissants
  • Spoon over Greek yogurt or labneh
  • Swirl into oatmeal or overnight oats
  • Serve with pancakes, waffles, or French toast
  • Add to a bowl of granola, nuts, and fruit

If you like breakfast bowls, fig jam pairs naturally with nuts, oats, yogurt, and dried fruit. Spoon it into overnight oats, or serve it with a crunchy bowl of this homemade granola recipe.

It is also excellent with warm toast, biscuits, or English scones, especially when the jam is soft enough to spoon rather than slice.

Cheese and board ideas

On a cheese board, fig jam gives you the sweet-tart contrast that makes salty, creamy, sharp, and funky cheeses taste better. Brie loves lemon, orange, balsamic, or rosemary. Goat cheese works beautifully with honey or vanilla. Blue cheese needs a smaller spoonful and a stronger direction like balsamic, orange, or chili.

  • Brie or baked brie
  • Goat cheese or whipped goat cheese
  • Blue cheese or Gorgonzola
  • Camembert
  • Manchego
  • Cream cheese
  • Sharp cheddar
  • Charcuterie boards with crackers, nuts, fruit, and cured meats
Cheese board with fig jam, brie, goat cheese, blue cheese, cheddar, crackers, nuts, figs, and sliced fruit.
On a cheese board, fig jam bridges creamy, salty, sharp, and tangy cheeses with one sweet-tart spoonful.

For party boards, fig jam fits naturally into a larger spread like this charcuterie board guide.

Savory uses

In savory food, use fig jam like a sweet-tart glaze or condiment, especially with salty, smoky, roasted, or sharp flavors.

Fig jam grilled cheese: Spread a thin layer inside the sandwich so the jam melts into the salty cheese instead of overwhelming it.

Grilled cheese sandwich with melted cheese and a visible layer of fig jam, served with a jar and fresh figs.
Inside grilled cheese, a thin layer of fig jam melts into the salty cheese and adds sweet-tart contrast.
  • Use in turkey, ham, or chicken sandwiches
  • Brush over pork or chicken as a glaze
  • Spoon onto pizza or flatbread with cheese and herbs
  • Serve with roasted vegetables
  • Stir into a pan sauce with vinegar or mustard

For meat, loosen the jam with lemon juice, vinegar, or pan juices and brush it over something simple like pork tenderloin in oven.

Pork tenderloin brushed with glossy fig jam glaze beside lemon, herbs, and a small bowl of jam.
For a quick fig jam glaze, loosen the jam with lemon, vinegar, or pan juices before brushing it over pork or chicken.

Dessert uses

For desserts, choose a thicker batch or simmer the jam a little longer so it holds its place in cookies, cakes, and tarts.

Fig jam used in a tart slice, thumbprint cookies, cream topping, and a spoonful of dessert.
A thicker fig jam holds its shape in cookies, tarts, and cream desserts while adding a glossy fruit center.
  • Fill thumbprint cookies
  • Use in fig bars or Fig Newton-style cookies
  • Layer into cakes
  • Spoon over cheesecake
  • Serve with vanilla ice cream
  • Use as a tart or galette filling
  • Swirl into whipped cream or mascarpone

For tart-style desserts, use a thicker batch the way you would use a glossy fruit layer in an apple tart recipe.

Fig Jam With Brie, Goat Cheese, and Cheese Boards

With cheese, the sweetness and texture do the heavy lifting. The jam brings fruit, acidity, and softness, while the cheese brings salt, fat, and creaminess. The combination tastes generous without needing much work.

For an easy baked brie-style appetizer, use about 2–3 tablespoons per 8 oz brie wheel. Place the brie in a small oven-safe dish, warm it until soft but not completely melted and leaking, then spoon the jam over the top. Add toasted walnuts, pecans, or pistachios. Finish with honey, thyme, rosemary, orange zest, or a few drops of balsamic vinegar. Serve with crackers, baguette slices, apple slices, or pear wedges.

Warm brie topped with glossy fig jam, nuts, crackers, and fresh figs.
Fig jam with brie works because sweet fruit, lemon brightness, creamy cheese, and crunchy nuts balance one another.

If you are serving the brie as part of a drinks-and-snacks spread, a bright French 75 works well because lemon and bubbles cut through creamy cheese and sweet jam.

Add nuts after warming if you want them to stay crisp. A balsamic variation is especially good with stronger cheeses because the vinegar keeps the sweetness from becoming heavy.

Goat cheese is especially good with a spoonful of jam, cracked pepper, toasted nuts, and a drizzle of olive oil or honey. Blue cheese is stronger, so use a smaller spoonful and choose a sharper variation like balsamic, orange, or chili. Sharp cheddar and Manchego work best with a thicker batch, crackers, and crisp fruit.

Want a savory path instead? Use the fig jam glaze idea for pork or chicken.

Fig Jam Troubleshooting

Most jam problems look dramatic while the pot is hot. Usually, they are texture problems — and texture problems can often be fixed before the jar cools. Use this table before adding thickeners or throwing anything away.

Fig jam troubleshooting guide with examples of runny, too thick, too sweet, flat, scorched, and loose-set jam.
Troubleshooting fig jam is easier once you know whether the problem is moisture, heat, sweetness, acid, or cook time.

If you are unsure whether the batch is actually done, compare it with the doneness tests before making a fix.

Common Problems and Fixes

ProblemLikely CauseFix NowNext Time
RunnyToo much water, undercooking, very juicy figs, or low sugarSimmer longer in a wide pan, stirring oftenStart with less water, cook to the doneness tests, and avoid rushing
Too thickOvercooking or too much evaporationStir in a spoonful of hot water or lemon juice until loosenedStop cooking when the jam is shiny and spoonable, not stiff
Too sweetVery ripe figs or too much sugarAdd lemon juice a teaspoon at a timeChoose the lower end of the sugar range
Flat flavorNot enough acid or saltAdd lemon juice and a tiny pinch of saltBuild in zest, lemon juice, or a small balsamic finish
ScorchedHeat too high, pan too thin, or not enough stirringDo not scrape burnt bits into the jam; move unburnt jam to a clean potKeep the heat lower, use a heavier pan, and stir more often
Loose setNo pectin, low sugar, or not enough reductionTreat it as fig spread or simmer longerCheck with the cold plate test or thermometer cue
Noticeable seedsFigs naturally have many tiny seedsBlend the jam smootherChoose a smoother fig spread texture from the start
Dried fig version too denseDried figs absorbed too much liquid or cooked down too farBlend in hot water a spoonful at a timeSimmer figs until fully soft before reducing hard

Runny Fig Jam Fix

A loose batch usually needs more evaporation before it needs anything else, so return it to a wide pan and simmer gently.

Runny fig jam simmering again in a wide pan to thicken.
Runny fig jam usually needs patience, not cornstarch; simmer it in a wide pan until the extra moisture leaves.

Too-Thick Fig Jam Fix

A stiff batch can often be saved while warm if you add liquid slowly and stop as soon as the jam relaxes.

Thick fig jam being loosened with a small amount of liquid from a spoon.
If the jam becomes too thick, loosen it while warm with a small splash of hot water or lemon juice.

About cornstarch: Cornstarch can thicken many fruit sauces, but it is not the best fix for classic fig jam and should not be used in anything you plan to can. If the jam is runny, simmering longer is usually the better solution.

FAQs About Fig Jam

Do figs need to be peeled before making jam?

No. The skins are edible and soften as the fruit cooks. Remove the stems and any damaged spots, but leave the skins on for better texture, color, and flavor.

What kind of figs are best for fig jam?

Use ripe, flavorful figs. Black Mission, Brown Turkey, Kadota, Adriatic, and other edible varieties can all work. Ripeness matters more than the exact variety: the fruit should be sweet and soft, not hard, dry, sour, or spoiled.

Fresh figs or dried figs — which makes better jam?

Fresh figs make a brighter, more classic batch. Dried figs make a darker, denser spread that is available year-round and excellent with cheese. If fresh figs are in season, use them. If not, dried figs are a very good option.

Can green figs be used for fig jam?

Ripe green-skinned figs can be used. Truly unripe figs are different and usually need a separate green fig preserve method with soaking or boiling steps to reduce bitterness and firmness. If the figs are hard, dry, and not sweet yet, do not treat them like ripe figs in this quick jam.

Why is lemon juice used in fig jam?

Lemon juice balances the natural sweetness of figs, brightens the flavor, and helps the mixture thicken. It also matters in canning safety, although shelf-stable canning requires a tested recipe rather than casual adjustments.

Does fig jam need pectin?

No, not for a soft homemade version. This recipe thickens through sugar, lemon juice, and evaporation. Commercial pectin gives a firmer set, but it requires different ratios and instructions.

Why is my fig jam runny?

It may need more cooking time. Runny jam usually comes from too much water, very juicy figs, low sugar, a narrow pot, or stopping before enough moisture has evaporated. Simmer it longer in a wide pan and test again.

How long does homemade fig jam last?

For the main refrigerator version, use it within 2–3 weeks for best quality. Low-sugar batches are best within 1–2 weeks, and no-added-sugar spread is best within about 5–7 days. You can also freeze it for about 3 months. Room-temperature jars require a tested preservation method and proper processing.

Is this fig jam recipe safe for canning?

The version here is meant for refrigerator and freezer storage. For shelf-stable canning, use a tested canning formula and processing time from a trusted source. Sterilized jars alone do not make refrigerator jam safe for room-temperature storage. Do not can low-sugar, honey, or no-added-sugar versions unless the recipe is specifically tested for that method.
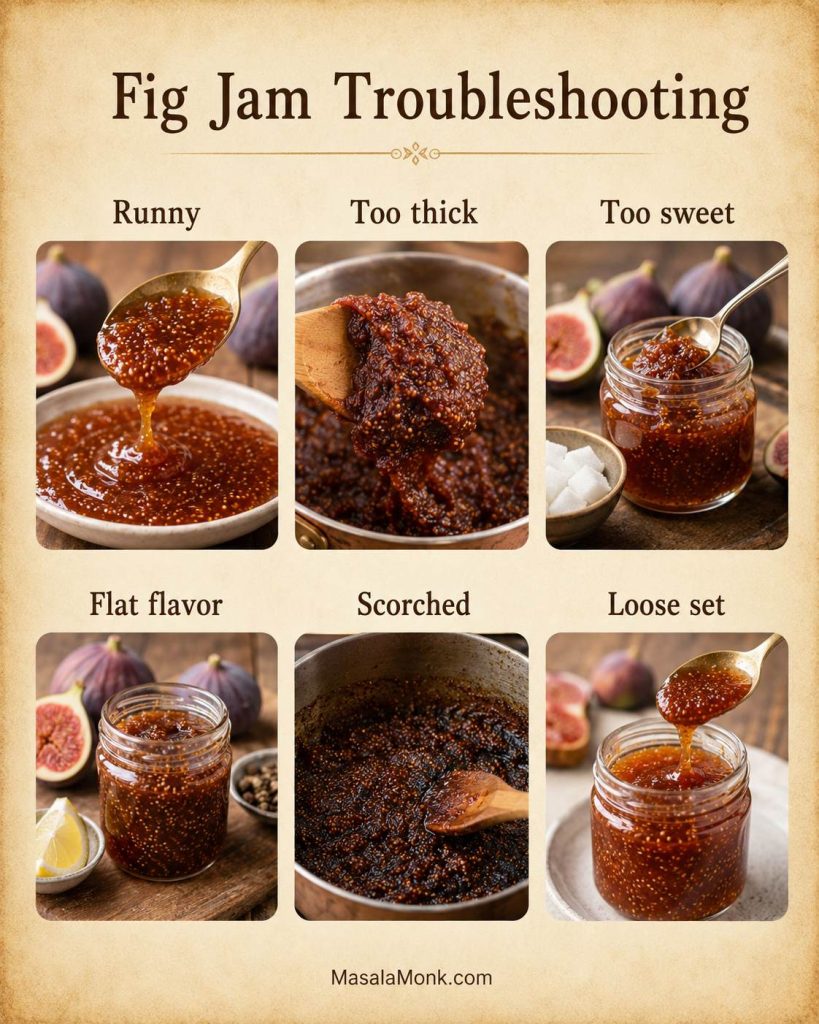
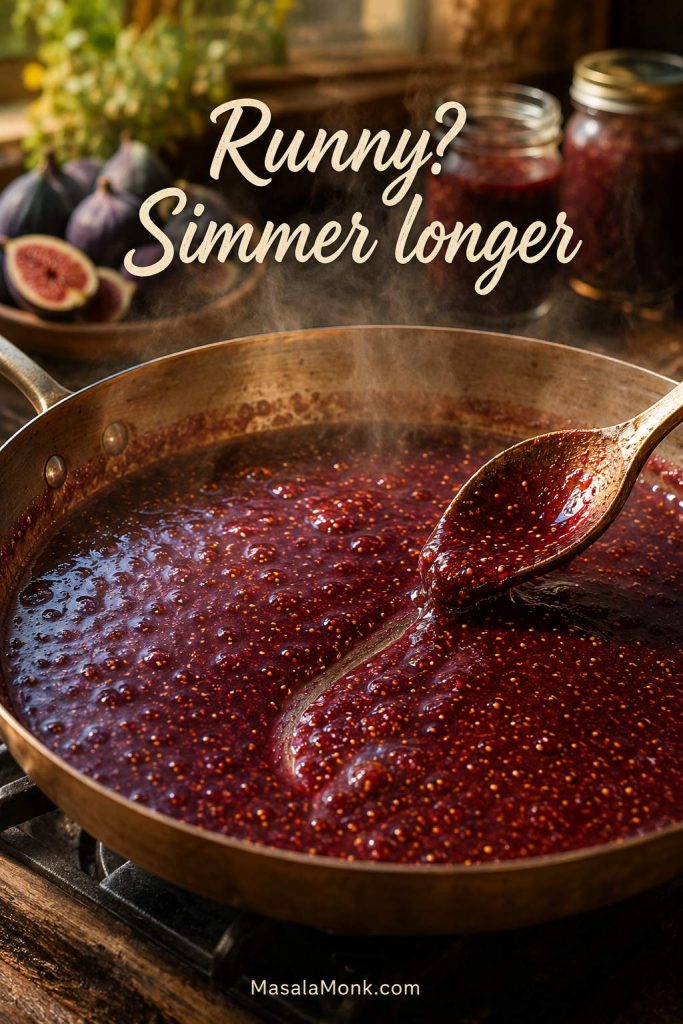
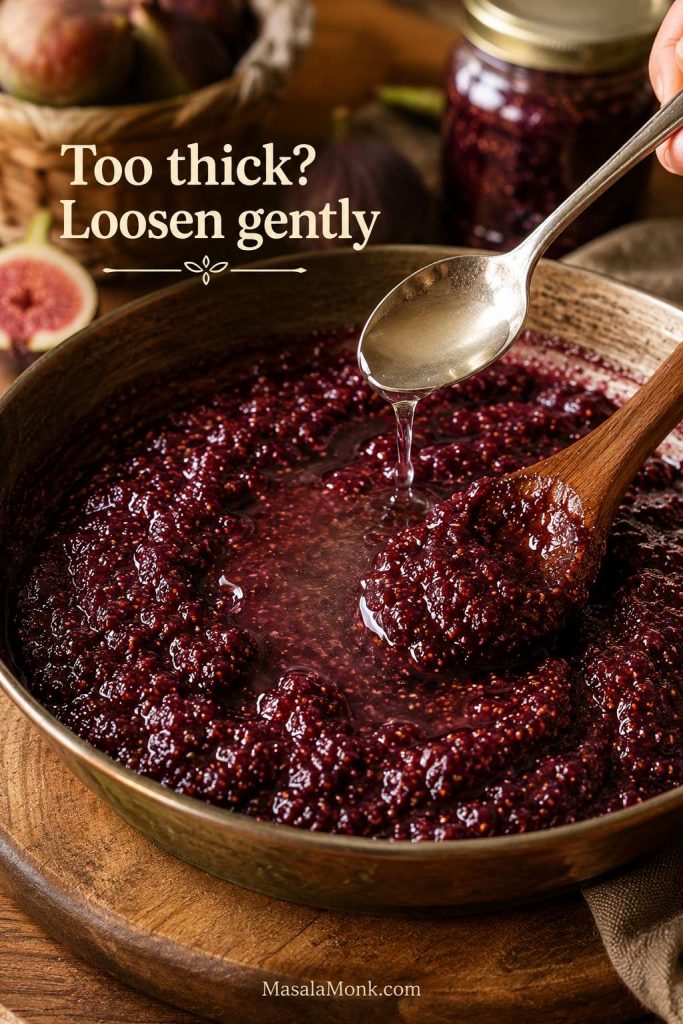
Can frozen figs be used for jam?

Frozen figs work well, but they usually bring extra liquid. Thaw the fruit first if possible and include the juices unless they seem excessive. The batch may need a longer simmer to thicken.

Can I double this recipe?

Yes, but use a very wide pan and expect a longer cook time. Jam thickens through evaporation, so one large deep pot can take much longer and may cook unevenly. For the best texture control, two smaller batches are usually easier than one oversized batch.

Brown sugar in fig jam — does it work?

Yes. You can replace part or all of the white sugar with light brown sugar for a deeper, warmer, slightly caramel-like flavor. The finished jar will taste less bright, so lemon juice becomes even more important.

What cheese goes best with fig jam?

Brie, goat cheese, blue cheese, Camembert, Manchego, cream cheese, sharp cheddar, and Gorgonzola all pair well with it. Use a balsamic or herb variation for a more savory board.

Final Tips Before You Make It

  • Do not peel the figs; the skins soften during cooking.
  • Start with less water and add more only if the pot looks dry.
  • Cook uncovered so moisture can evaporate.
  • Use a wide pan so the jam reduces efficiently.
  • Stop cooking before the jam looks stiff; it thickens as it cools.

Once the figs soften and the kitchen smells warm and lemony, the rest is patience: stir, test, stop early, and let the jar finish thickening as it cools.

Fig Jam Recipe

A soft-set fresh fig jam made without commercial pectin. It cooks down into a shiny, fruit-forward spread for toast, yogurt, cheese boards, baked brie, desserts, sandwiches, and savory glazes. Keep it refrigerated or frozen unless you switch to a tested canning recipe.

YieldAbout 3 cups / 720 ml, or three 8 oz jars
Prep Time15 minutes
Cook Time25–45 minutes
Total Time40–60 minutes, plus optional resting and cooling
Saveable fig jam recipe card with no pectin, 2 pounds figs, 300 grams sugar, 60 milliliters lemon, cook time, yield, and fridge or freezer storage.
Keep this no-pectin fig jam card handy for the core ratio, cook-time window, yield, and fridge-or-freezer reminder.

Ingredients

  • Ripe fresh figs: 2 lb / 900 g, stems removed, chopped or quartered
  • Granulated sugar: 1½ cups / 300 g
  • Fresh lemon juice: ¼ cup / 60 ml, plus more to taste
  • Water: ¼–½ cup / 60–120 ml, as needed
  • Fine salt: ⅛ tsp, optional
  • Lemon or orange zest: 1 tsp finely grated, optional
  • Vanilla: 1 tsp vanilla extract or ½ vanilla bean, optional
  • Balsamic vinegar: 1–2 tbsp, optional for a cheese-board variation

Instructions

  1. Prep the figs. Rinse gently, pat dry, remove stems, and chop or quarter the figs. Do not peel them; fig skins soften during cooking.
  2. Combine the ingredients. Add figs, sugar, lemon juice, ¼ cup / 60 ml water, and salt if using to a wide heavy-bottomed pan. Stir well. Let sit for 15–30 minutes if you have time.
  3. Start cooking. Set the pan over medium heat and stir until the sugar dissolves and the figs begin to release juice. Add the remaining water only if the pot looks dry or the figs start sticking before they soften.
  4. Simmer uncovered. Reduce the heat to maintain a steady simmer. Cook uncovered, stirring often, until the figs soften, slump, and begin to collapse, about 25–45 minutes.
  5. Mash or blend. Mash lightly for fig preserves-style texture with visible pieces. Mash more for rustic jam. For a smoother fig spread, pulse briefly with an immersion blender.
  6. Cook to thickness. Continue simmering until the jam looks shiny, mounds softly on a spoon, and moves slowly on a chilled plate. At sea level, a thermometer may read around 220°F / 104°C for a firmer set, but texture matters more than temperature alone.
  7. Adjust flavor. Add more lemon juice if the jam tastes too sweet or flat. Stir in vanilla, zest, or balsamic vinegar near the end if using.
  8. Jar and cool. Spoon into clean jars. Cool, then refrigerate. The jam will thicken more as it cools.

Dried Fig Variation

Use 12–14 oz / 340–400 g dried figs, 2 cups / 480 ml water, ½–1 cup / 100–200 g sugar to start, and 2 tbsp / 30 ml lemon juice. Simmer the chopped dried figs with water until very soft, 20–40 minutes. Mash or blend, add sugar and lemon, then simmer until thick and spoonable. Add more sugar only after tasting. Keep the jam slightly loose while hot because dried fig jam firms quickly as it cools.

Small-Batch Version

Use 1 lb / 450 g fresh figs, ¾ cup / 150 g sugar, 2 tbsp / 30 ml lemon juice, and 2–4 tbsp / 30–60 ml water. Cook time is usually shorter, about 20–30 minutes.

Sugar Notes

For a lower-sugar version, use 150–200 g sugar per 900 g fresh figs and expect a softer set; refrigerate and use within 1–2 weeks. For no-added-sugar fig spread, cook ripe figs with lemon juice and a splash of water until thick, then refrigerate and use within about 5–7 days or freeze.

Storage and Canning

Keep this batch refrigerated and use within 2–3 weeks for best quality, or freeze for up to 3 months. Do not can this version as written. For shelf-stable jars, switch to a tested canning formula.

Once the jars are cool, keep one where you can reach it easily. This is the spoonful that turns plain toast, cheese, or a quick dessert into something finished.

Open jar of homemade fig jam with a spoon, toast with brie, fresh halved figs, lemon, and a linen cloth.
Once cooled, homemade fig jam becomes the jar you reach for at breakfast, with cheese, or when dessert needs fruit.

Back to top

Posted on Leave a comment

Calamondin Orange Marmalade- Simple Quick Recipe

I have a plant of this gorgeous beauty in my garden. I planted calamondin oranges as a mere ornamental beauty. Little did I know that they are a remarkable member of the citrus family. Calamondins originated in China and the Philippines. But this fruit soon gained popularity across the world for its versatility. This fruit is a hybrid between a mandarin orange and a kumquat.

The fruits are sour and slightly sweet, resembling a tarter version of traditional oranges. The peel of this fruit tastes sweet and the inside is sour but very flavorful. Despite its sour taste, the calamondin orange is a culinary delight. It’s widely used in marmalades, jams, and as a flavor enhancer in beverages and desserts. In Southeast Asian cuisine, it’s a common condiment, adding zest to dishes.

This fruit yields fabulous marmalade. The distinct aroma and sweet taste of the peels makes this marmalade quite different from the regular orange marmalade you had. And dare I say tastes so much better! If you personally ask me, this is best citrus food marmalade I have ever made.

This vital little fruit is also known for it’s healthy benefits. One of the most common applications is in the treatment of respiratory ailments such as coughs and phlegm. The fruit’s juice, when consumed, can help in loosening and expelling phlegm, making it easier to clear congested airways.

The fruit’s acidity can aid in digestion and help alleviate gastrointestinal discomfort such as bloating and indigestion. Its mild laxative effect can also be beneficial in regulating bowel movements.

I think I have given you enough insight about this fruit. Now coming to the recipe. You only need 3 ingredients to make this marmalade. The entire recipe will take you no time since you don’t require much cooking unlike other citrus marmalades because the peels are very soft.

Recipe

Prep time: 15 minutes Cook time: 12 minutes 
Yields: 700 grams

Ingredients

  • 500 grams Calamondin Orange
  • 500 grams sugar
  • 1/2 tsp Salt
  • 1 tbsp Lemon juice
  • 1 tbsp minced Ginger (optional, but adds flavor)

Instructions

  • Before starting the recipe, put a plate in a freezer for later testing the marmalade.
  • Cut the calamondins into half and take out all the seeds. This might take you 10 to 12 minutes but as soon as you are done with this step, this recipe is a piece of cake.
  • Now blend all the calamondins in a blender. 500 grams of this fruit will roughly give you 2 cups pulp.
  • Bring a heavy bottom pan to a medium heat. Add the pulp and cook it for 3-4 minutes.
  • Now add sugar and cook the pulp for 7-8 minutes. After 7 minutes of cooking, do the plate test.
  • Pour a tsp of marmalade on a chilled plate and try to wriggle it using your fingers. If the liquid starts getting wrinkles and it resembles a set jelly, you know that your marmalade is ready.
  • Pour the marmalade in a sterilized glass jar. Now add a tbsp of lemon juice and mix well. It will last you months at room temperature. Refrigerate for longer shelf life.

Enjoy this delicious treat!!! 🙂

Notes:

  • Never try to cook this marmalade beyond 10-12 minutes. Do the plate test precisely after 7 minutes. The marmalade might appear loose but as it cools, it will become thick. If you are still unsure, then once the marmalade coats the back of your spoon, it is time to take it off heat. If you keep cooking it beyond that time, your marmalade on cooling will become like a solid mass.
  • Do not reduce the sugar. Since calamondin is a sour fruit, you will have to add equal amount of sugar to balance the tartness.
  • Always take the ripest calamondins for better flavor.
  • Always store the marmalade in a glass jar due to its acidic nature.