
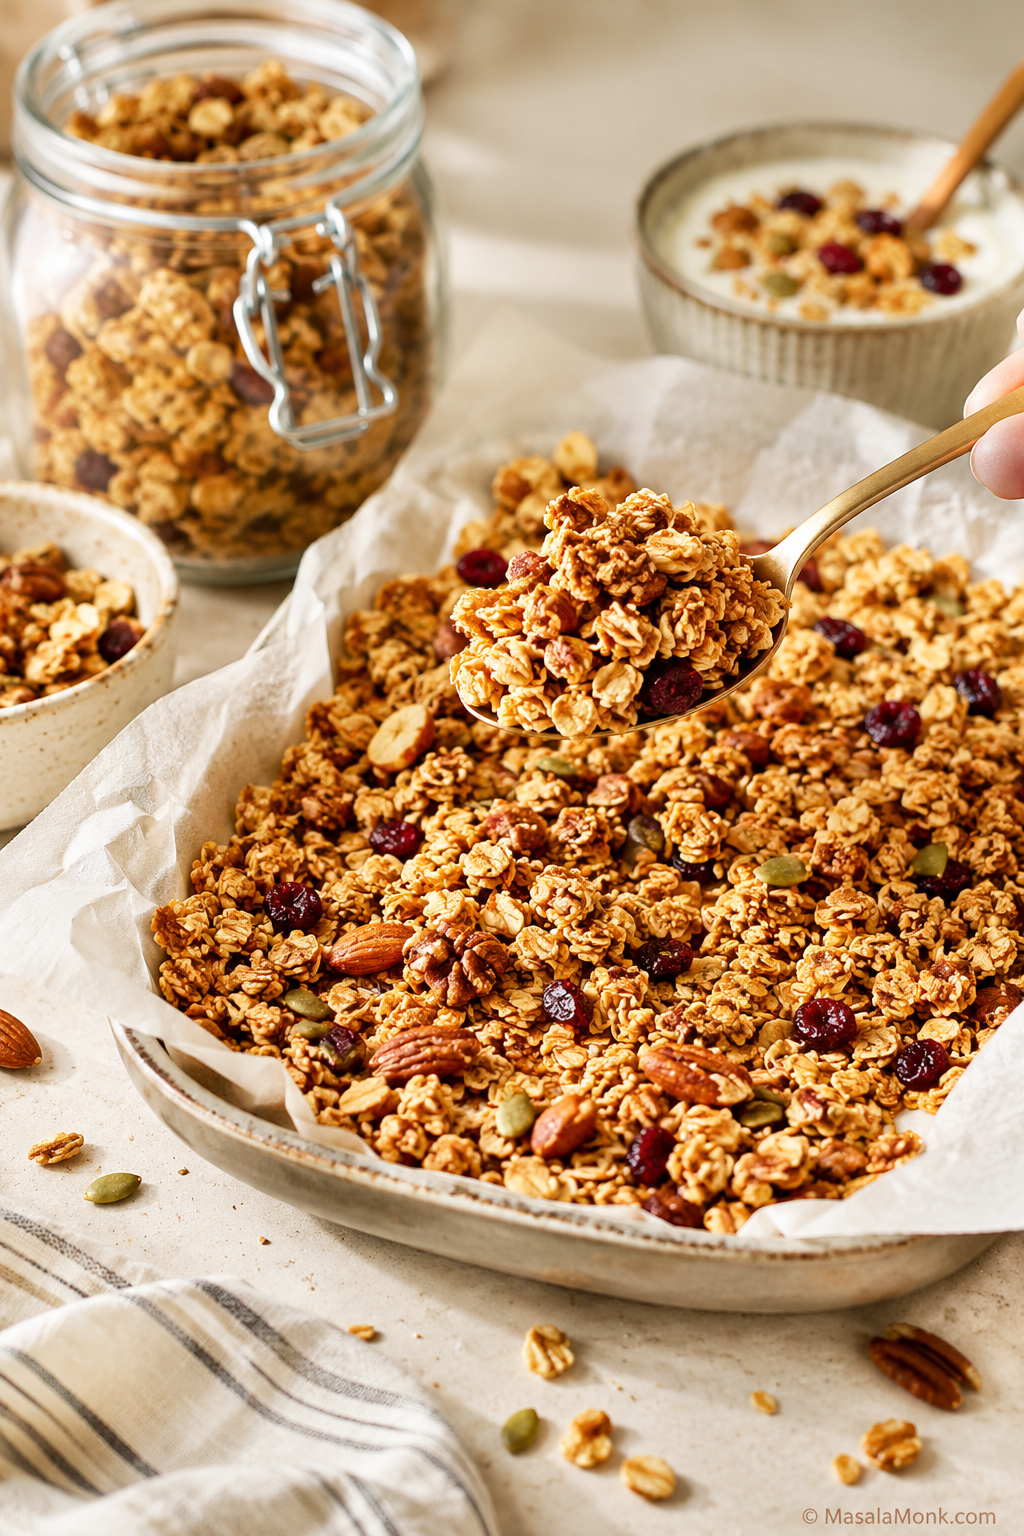
Homemade granola is one of those small kitchen wins that feels much bigger than the effort. A tray of oats, nuts, maple syrup or honey, cinnamon, and vanilla goes into the oven, and soon the kitchen smells like breakfast for the whole week.
It is especially satisfying if you have ever bought a bag of granola that looked beautiful but tasted too sweet, too bland, or too dusty by the time it reached the bowl. The goal here is simple: crunchy granola that does not burn, clusters that actually hold, and a jar you will want to use all week.
This is a base-ratio recipe first. Once you understand the method, you can make the granola crunchier, chunkier, less sweet, nut-free, vegan, gluten-free, or better for yogurt without starting from scratch.
The base uses old-fashioned rolled oats, nuts or seeds, oil, maple syrup or honey, salt, cinnamon, and vanilla. It bakes low and steady at 300°F / 150°C, which gives the oats time to crisp while keeping the nuts and coconut from browning too aggressively.
The first batch teaches the method. The second batch starts to become your house granola: almonds and cranberries one week, peanut butter and chocolate the next, or pumpkin seeds and coconut when you want something nut-free.
| Homemade Granola at a Glance | Quick Answer |
|---|---|
| Oats to use | Old-fashioned rolled oats |
| Oven temperature | 300°F / 150°C |
| Bake time | 35–40 minutes |
| Yield | 7–8 cups granola |
| Servings | 14–16 larger ½-cup servings or 28–32 smaller ¼-cup topping portions |
| Pan to use | Large rimmed baking sheet lined with parchment |
| For clusters | Press after stirring and cool fully before breaking |
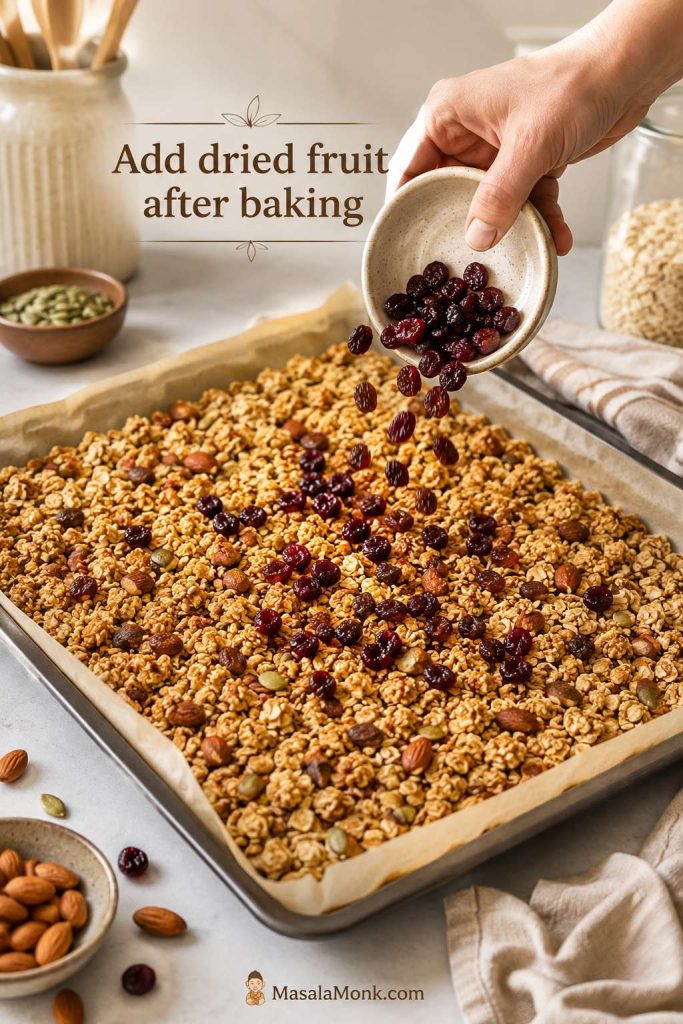
| Add dried fruit | After baking, not before |
| How to use it | Yogurt bowls, parfaits, milk, smoothie bowls, snack jars, and make-ahead breakfasts |
In This Guide
Make the Granola
Texture, Variations & Storage
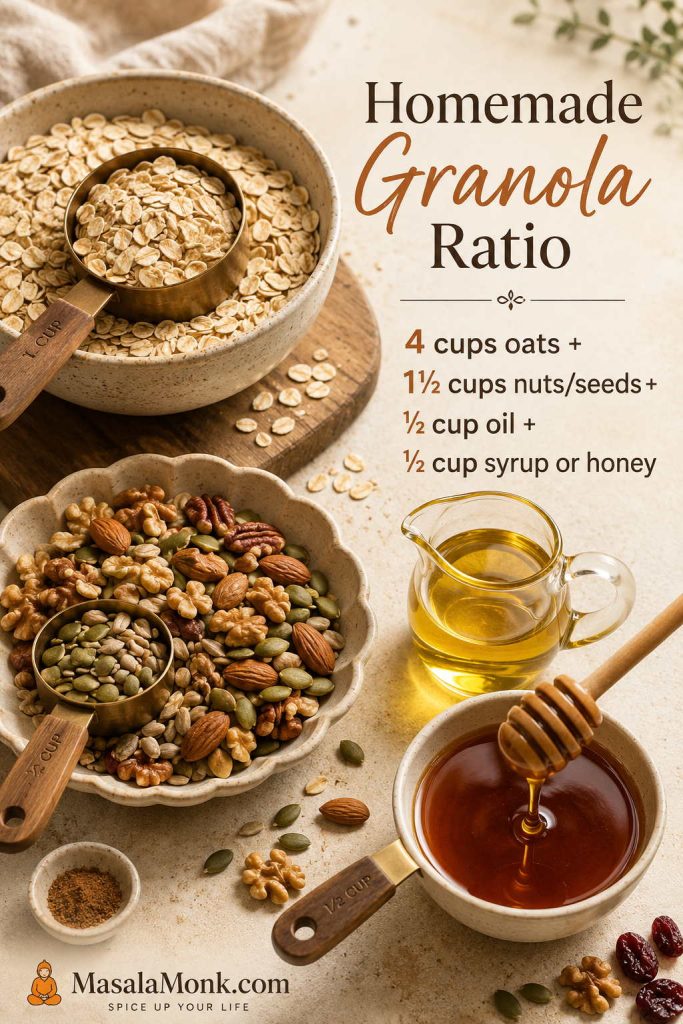
Quick Answer: The Best Homemade Granola Ratio
The easiest homemade granola ratio is:
4 cups / about 320–360g rolled oats + 1½ cups / 150–180g nuts or seeds + ½ cup / 120ml oil + ½ cup / 120ml maple syrup or honey.
Mix that with salt, cinnamon, and vanilla, then bake it on a parchment-lined rimmed baking sheet at 300°F / 150°C for 35–40 minutes. Stir once halfway through, press it back down if you want clusters, and let it cool fully on the pan before breaking it apart.
Hot granola lies a little. It often feels slightly soft when it first comes out of the oven, then crisps as it cools. If you bake it until it feels fully crunchy while hot, the edges and nuts can turn bitter.
That is the real appeal of homemade granola: one pan, one jar, and several breakfasts that feel easier before the week even starts.
Want the exact measurements without the full guide? Skip to the recipe card. If your last batch stayed soft, the troubleshooting section has the quick re-crisp fix.
Homemade granola ratio guide
Why This Homemade Granola Recipe Works
The promise here is straightforward: granola should be easy, but texture should not be left to luck. This recipe keeps the ratio steady and shows you how to read the four things that matter most: heat, coating, space on the pan, and cooling.
A lower oven protects the edges
Many granola recipes bake hotter, but nuts, coconut, and the edges of the tray can brown quickly. At 300°F / 150°C, the oats have time to dry and crisp before the mix-ins over-toast.
Oil and sweetener do different jobs
Oil helps the oats toast evenly instead of turning dry and dusty. Maple syrup or honey adds sweetness, but it also helps bind the oats into clusters. Reduce either one too much and the batch will still work, but the texture will change.
Cooling is part of the cook time
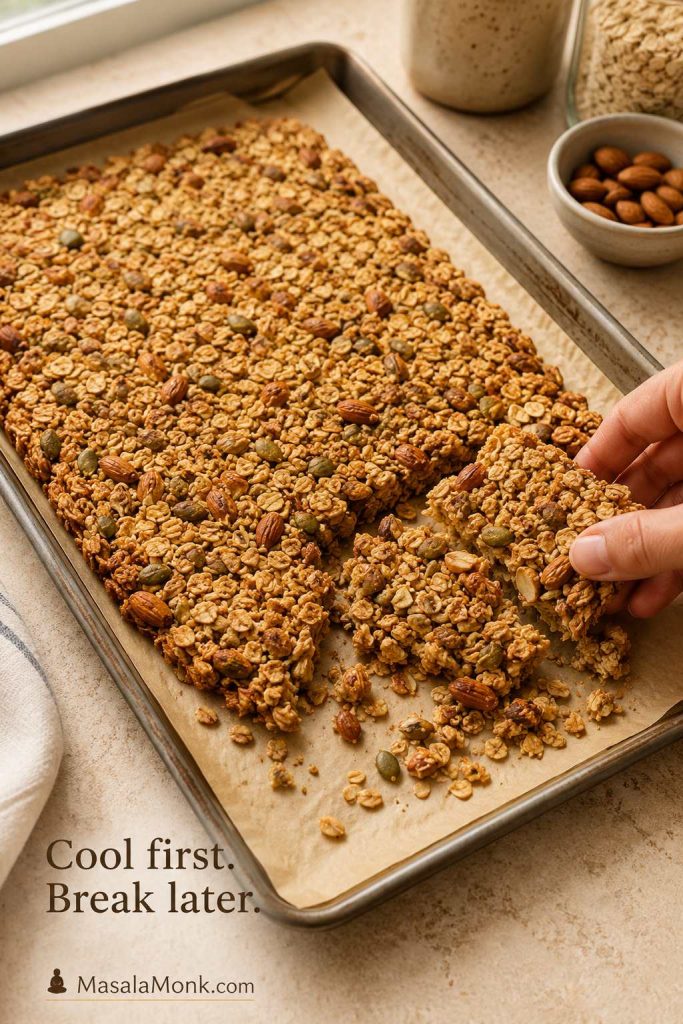
The hardest part is leaving the pan alone. If you break the granola while it is warm, you get smaller pieces. If you wait until it firms up, the clusters hold better.
The base is flexible without becoming vague
Because nuts, seeds, honey, maple syrup, and dried fruit are not ingredients you want to waste, the recipe leans on clear signs instead of guesswork: glossy coated oats, an even layer, dry-looking edges, a warm nutty smell, and a full cool-down before breaking.
Once you know those signs, you can make the batch more snack-like, more yogurt-friendly, less sweet, vegan, gluten-free, nut-free, or cluster-heavy without losing the basic structure.
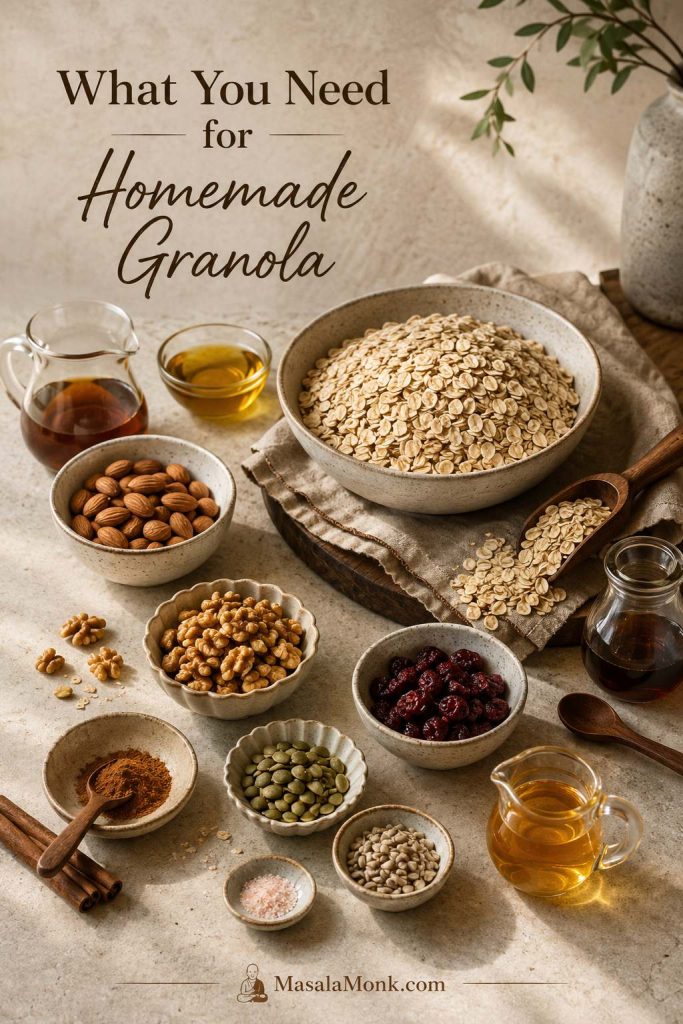
Ingredients for Homemade Granola
The ingredients are simple, but each one has a job. Once you understand those jobs, granola stops feeling like a strict formula and becomes something you can adjust with confidence.
Homemade granola ingredients at a glance
| Ingredient | Amount | Why it matters |
|---|---|---|
| Old-fashioned rolled oats | 4 cups / about 320–360g | The main base. They toast well and create the best classic granola texture. |
| Nuts and seeds | 1½ cups / 150–180g | Add crunch, richness, flavor, and a more satisfying bite. |
| Oil | ½ cup / 120ml | Helps the oats crisp and brown evenly. |
| Maple syrup or honey | ½ cup / 120ml | Sweetens the granola and helps bind clusters. |
| Fine salt | ¾ teaspoon, plus more to taste | Balances the sweetness and keeps the granola from tasting flat. |
| Cinnamon | 1–2 teaspoons / about 3–5g | Adds warm breakfast flavor. |
| Vanilla extract | 1 teaspoon / 5ml | Rounds out the flavor and makes the granola smell bakery-like. |
| Dried fruit | ⅔ cup / 80–100g | Add after baking so it stays chewy instead of hard or burnt. |
Rolled oats or old-fashioned oats
Old-fashioned rolled oats are the best oats for homemade granola. They are sturdy enough to toast, but thin enough to become crisp. They also hold their shape, which helps the granola feel like granola instead of powdery cereal crumbs.
If you are unsure about oat types, MasalaMonk’s guide to oats explains the differences between rolled oats, quick oats, instant oats, and steel-cut oats in more detail.
Nuts and seeds
Use almost any mix you like. Almonds, walnuts, pecans, cashews, pistachios, pumpkin seeds, sunflower seeds, sesame seeds, flaxseed, chia seeds, and hemp hearts all work.
For the best texture, use both larger pieces and smaller seeds. Sliced almonds plus pumpkin seeds give you crisp flakes and deeper crunch, while a good mix of nuts and seeds makes the granola more satisfying. For nut-free granola, skip the tree nuts and use seeds, coconut, and hemp hearts instead.
Oil
Coconut oil gives a classic sweet breakfast flavor. Olive oil tastes a little more savory and grown-up. Avocado oil or a neutral oil stays quieter in the background. Melted butter is delicious too, but it makes the batch richer and more dessert-like.
Do not remove the oil completely unless you are intentionally making an oil-free version. It is one of the reasons granola becomes crisp instead of papery.
Trying to skip oil completely? Read the oil-free granola notes before swapping it out, because fruit binders change the final texture.
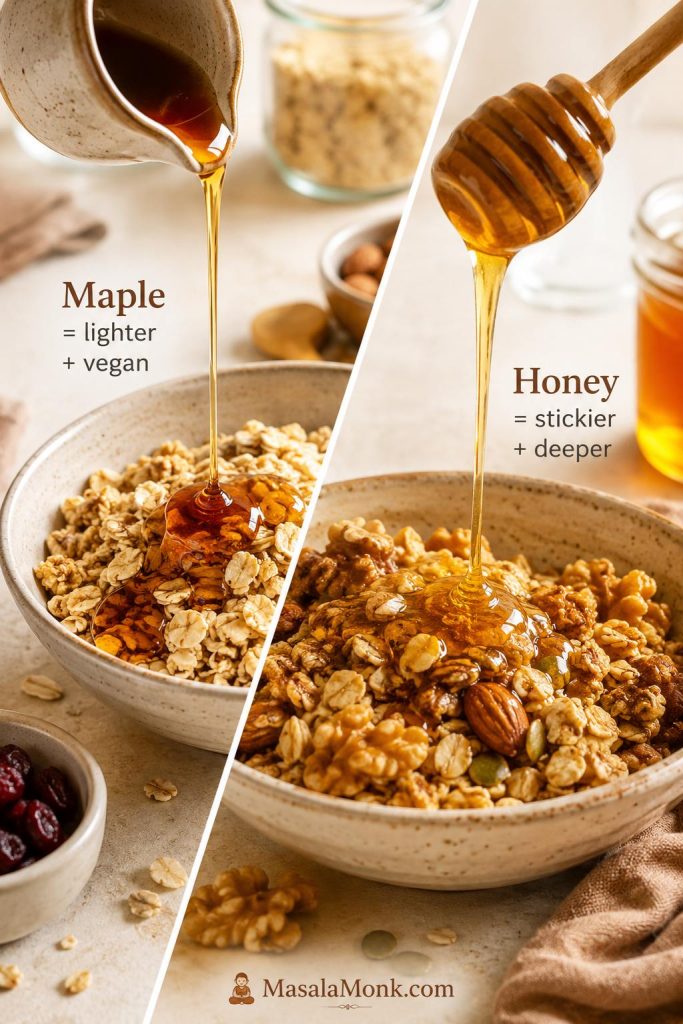
Maple syrup or honey
Both work, but they give slightly different results. Use maple syrup if you want vegan granola, cleaner sweetness, and a lighter flavor. Use honey if you want deeper sweetness, a more golden finish, and slightly stickier clusters.
Using maple syrup for a vegan batch? The variation guide shows how to keep the texture flexible without relying on honey.
Salt, cinnamon, and vanilla
These small ingredients make a big difference. Salt keeps the granola from tasting one-dimensional. Cinnamon adds warmth. Vanilla makes the finished batch smell like something you bought from a very good bakery.
Dried fruit and chocolate
Raisins, cranberries, chopped dates, apricots, figs, cherries, and dried blueberries all work well. Stir them in after baking so they stay chewy instead of turning hard or bitter.
Chocolate chips should also go in after the granola cools. Add them while the tray is hot and they will melt through the batch, which can be delicious, but it is not the same as little chocolate pieces scattered through crisp granola.
Best Oats for Granola
The best oats for granola are old-fashioned rolled oats. They toast evenly, hold their shape, and give the finished granola a crisp but hearty texture.
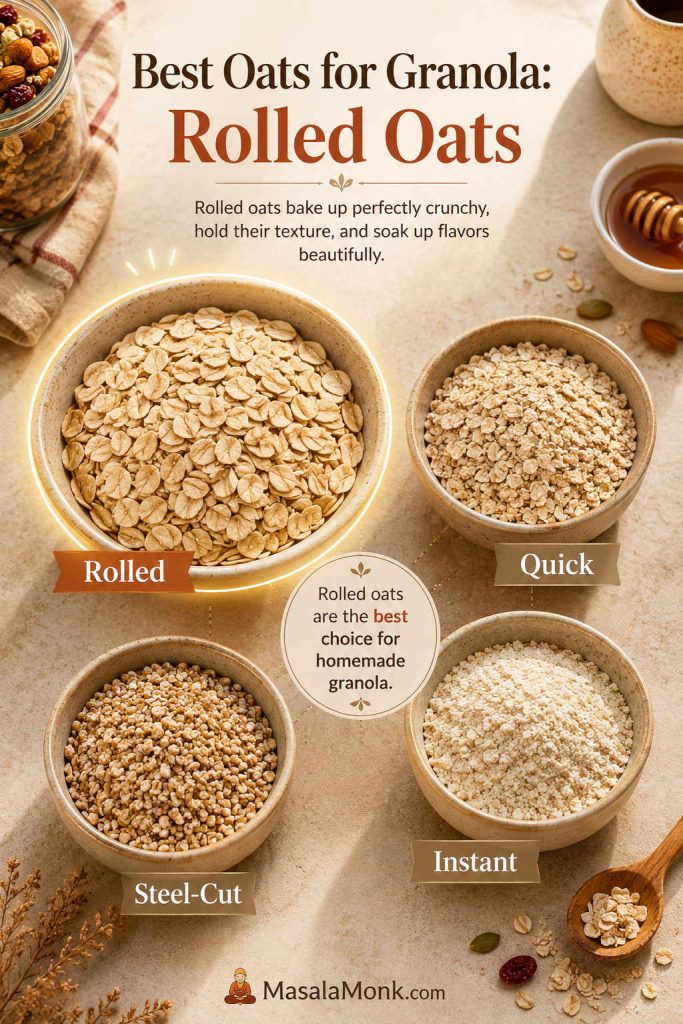
| Oat type | Use for granola? | Best answer |
|---|---|---|
| Rolled oats / old-fashioned oats | Yes | Use for classic homemade granola, clusters, and crunch. |
| Quick oats | Only in a pinch | They make softer, less defined granola and fewer sturdy clusters. |
| Instant oats | No | Too fine and powdery for good granola texture. |
| Steel-cut oats | Not for classic granola | Too hard and not a direct swap for rolled oats. |
| Certified gluten-free rolled oats | Yes | Best choice for gluten-free homemade granola. |
Rolled oats and old-fashioned oats are usually the same style of oat for recipe purposes, while steel-cut oats are cut pieces of the oat groat and do not behave the same way on a baking sheet. For more detail, see MasalaMonk’s guide to old-fashioned oats and rolled oats.
How to Make Homemade Granola
The method is simple, but a few small choices decide whether the tray comes out crisp and chunky or pale and soft. Think of it as controlled drying: coat the oats well, spread them evenly, bake low and steady, stir once, and let cooling do the final crisping.
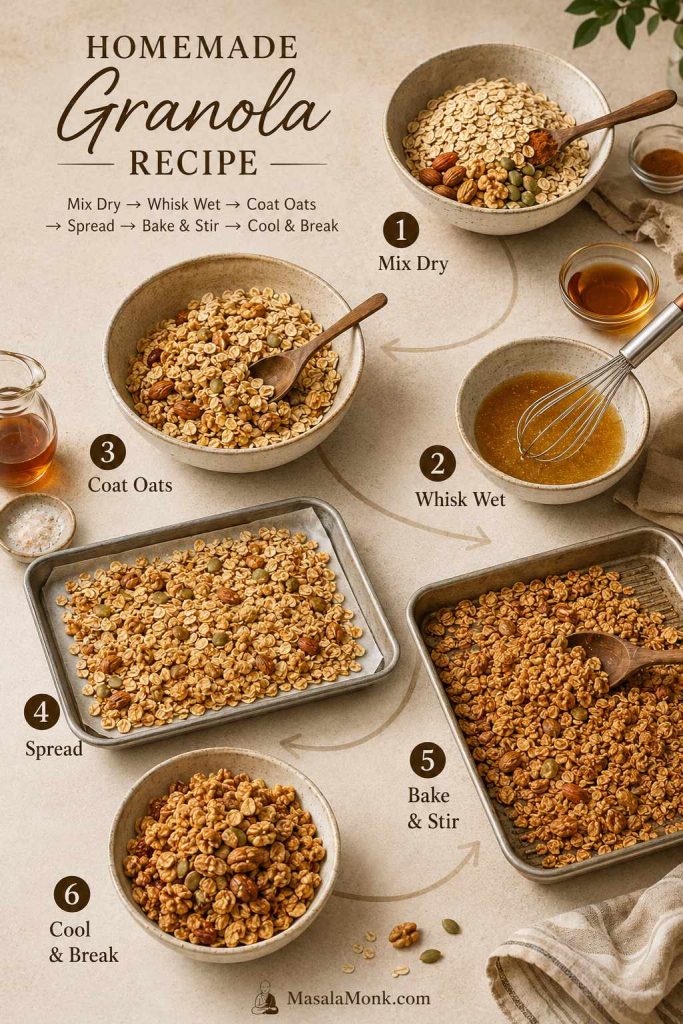
Step 1: Heat the oven and line the pan
Preheat the oven to 300°F / 150°C. Line a large rimmed baking sheet with parchment paper.
A rimmed pan keeps the granola from sliding off when you stir. Parchment prevents sticking and makes it easier to lift off bigger clusters later. If your baking sheet is small, divide the mixture between two pans. Crowded granola steams before it crisps.
If your baking sheet is very dark, start checking a few minutes early. Dark pans can brown granola faster than light-colored pans.
Step 2: Mix the dry ingredients
In a large bowl, combine the rolled oats, nuts, seeds, salt, and cinnamon. If your coconut flakes are delicate or already toasted, save them for the halfway stir so they do not brown too fast.
Step 3: Mix the wet ingredients
In a smaller bowl or measuring cup, whisk together the oil, maple syrup or honey, and vanilla. When honey is thick or coconut oil has solidified, warm the wet ingredients gently just until pourable, not hot.
Step 4: Coat the oats well
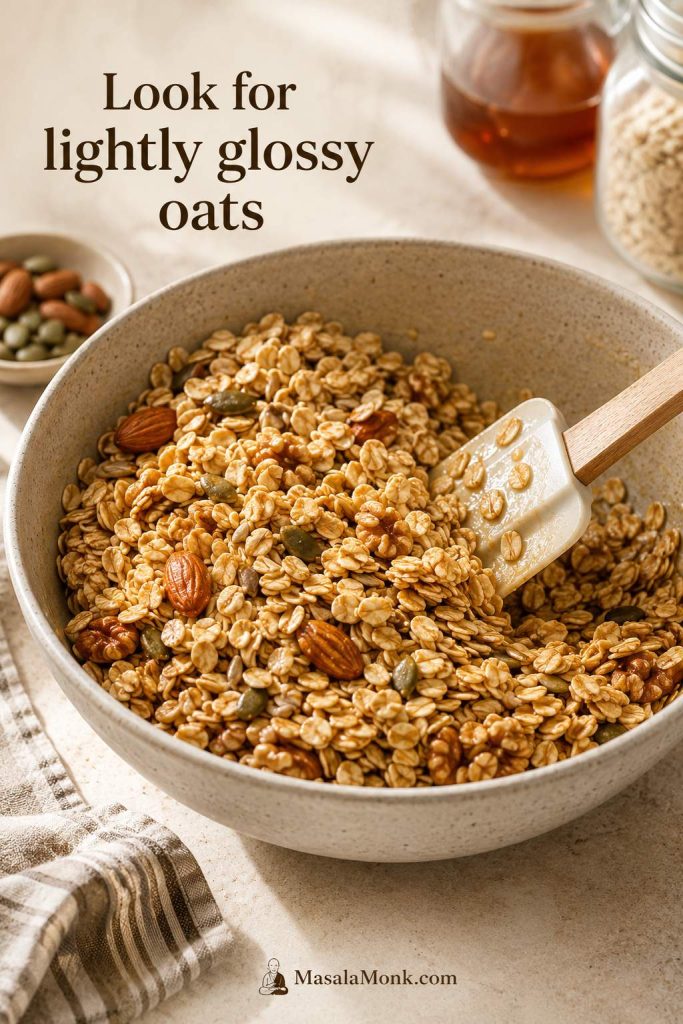
Pour the wet mixture over the oats and stir thoroughly. Every oat should look lightly glossy. Dry, dusty oats will not toast or cluster as well.
Step 5: Spread and press
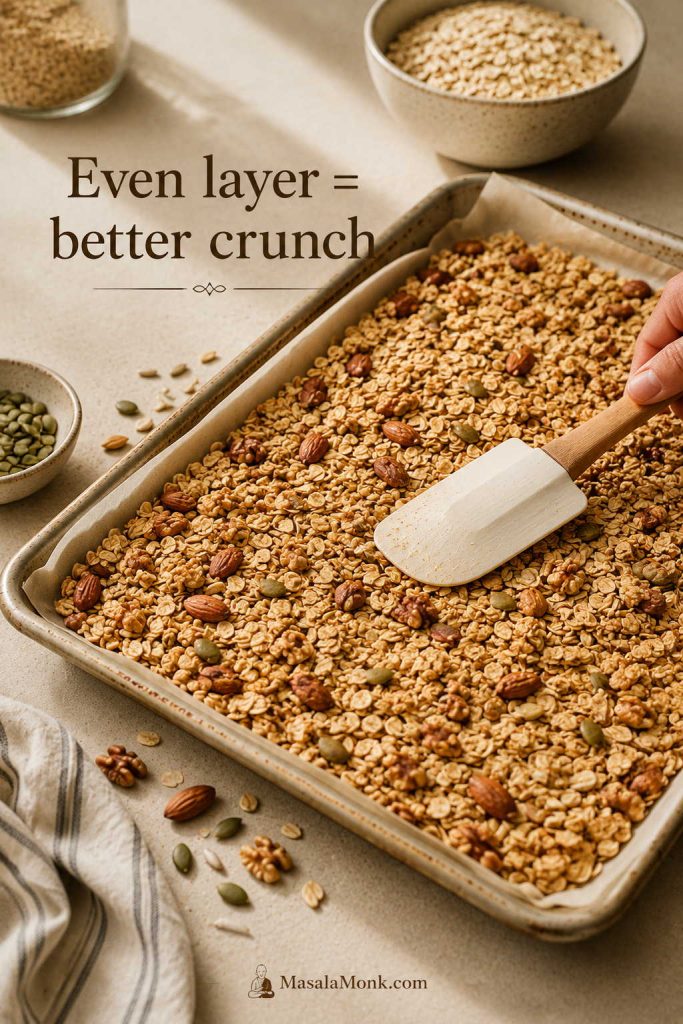
Tip the mixture onto the prepared pan and spread it into an even layer. For looser granola, spread it evenly and leave it alone. For clusters, press the mixture down gently with a spatula so the oats bake together.
Step 6: Bake, stir once, and press again
Bake for 20 minutes. Remove the pan, stir once, add delicate coconut now if using, spread the granola back out, and press again for clusters.
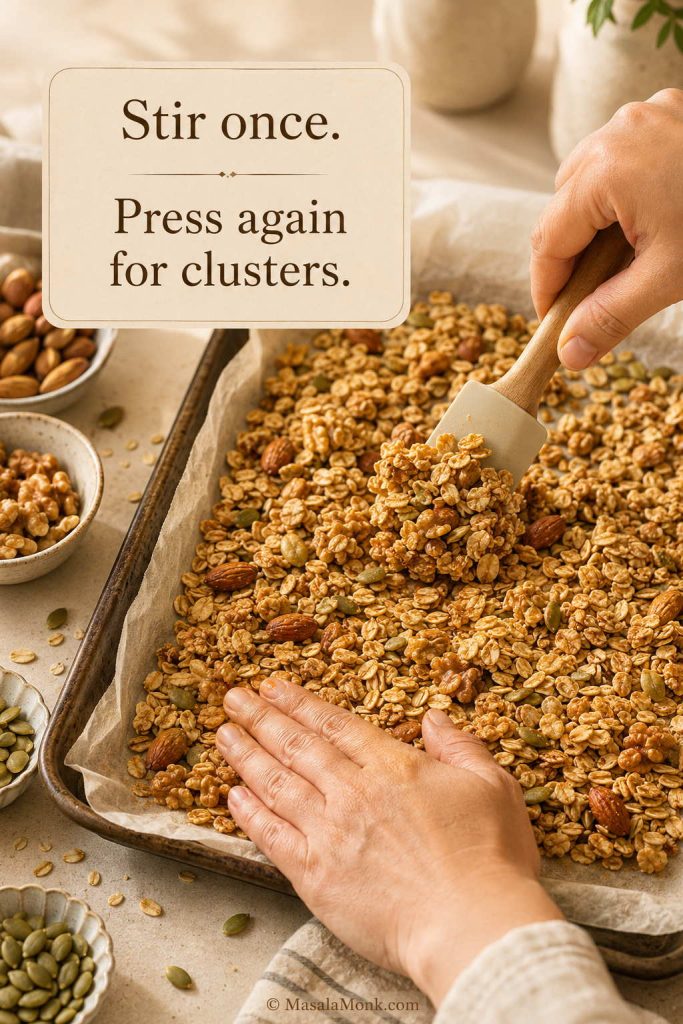
For bigger pieces, check the granola clusters section before changing the binder or stirring pattern.
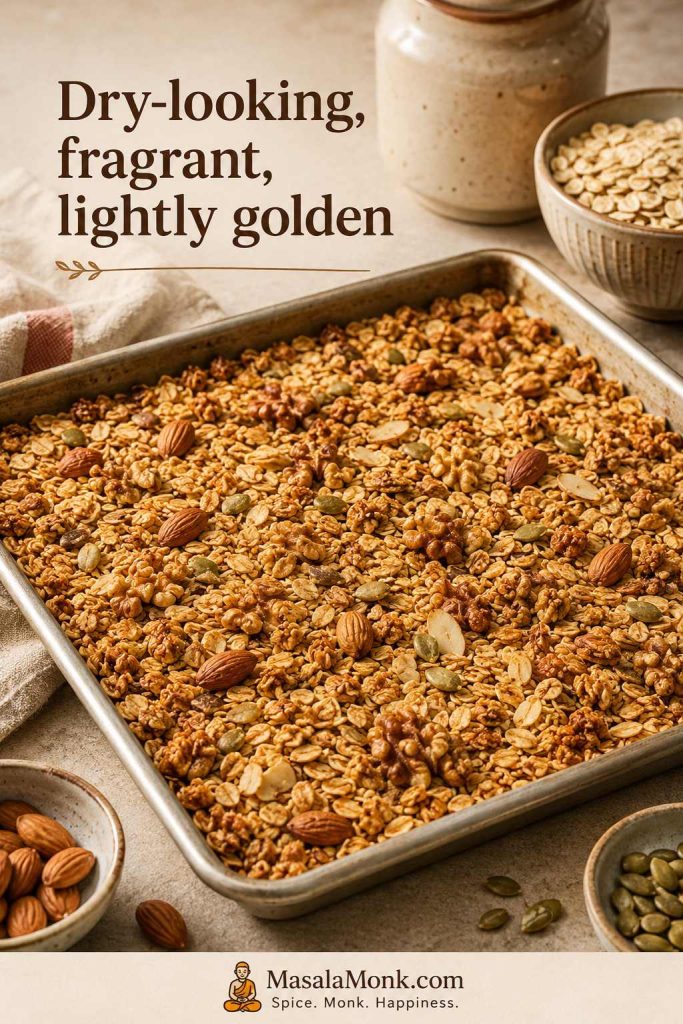
Return the pan to the oven and bake for another 15–20 minutes, until the kitchen smells toasted and warm, the surface looks dry, and the edges are lightly golden. It should smell nutty, not sharp or burnt, and the granola will still feel softer than it tastes later.
What finished granola should look like
Step 7: Cool before breaking
Set the pan on a rack or heat-safe surface and leave it alone until the granola firms up, usually 35–45 minutes. Break it too early and the clusters will be smaller.
Step 8: Add dried fruit
Once the granola is cool or just barely warm, add dried fruit. Break the granola into the size you like, then transfer it to an airtight jar or container.
How to Make Granola Crunchy
Crunchy granola comes from four things: enough coating, enough space on the pan, low, steady heat, and a full cool-down. If one of those is missing, the batch may taste soft, dusty, steamed, or overbaked.
The four controls for crunchy granola
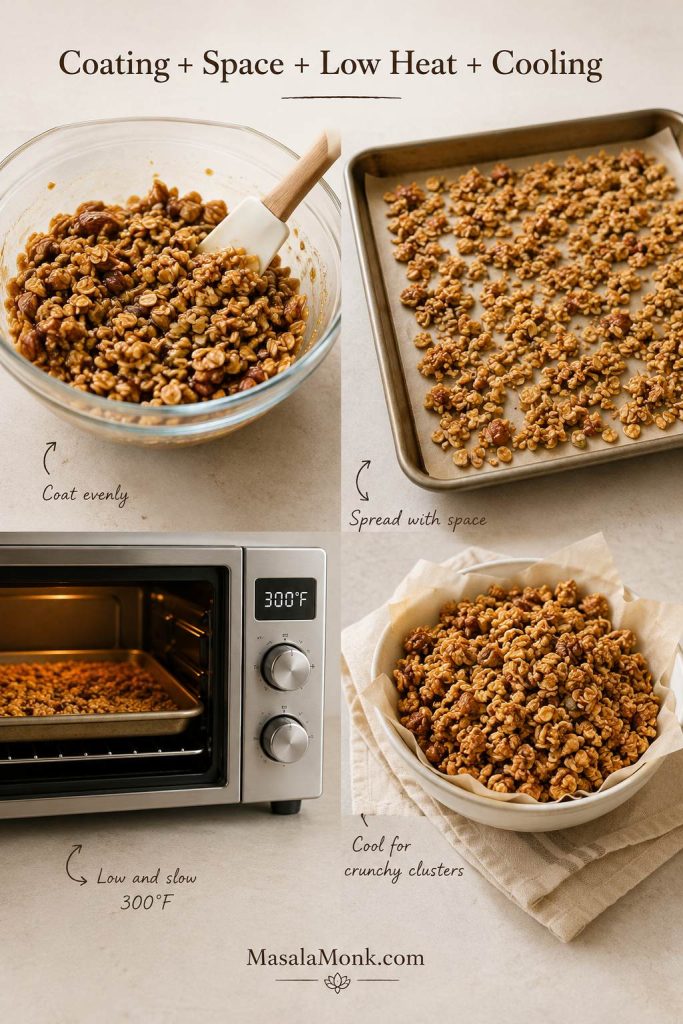
| Crunch factor | What to do | What it prevents |
|---|---|---|
| Good coating | Stir until the oats look lightly glossy. | Dry, papery oats. |
| Space on the pan | Spread in an even layer; use two pans if needed. | Steamed, soft granola. |
| Low heat | Bake at 300°F / 150°C. | Burnt nuts and dark edges. |
| Full cooling | Let the tray rest before judging texture. | Breaking clusters too soon. |
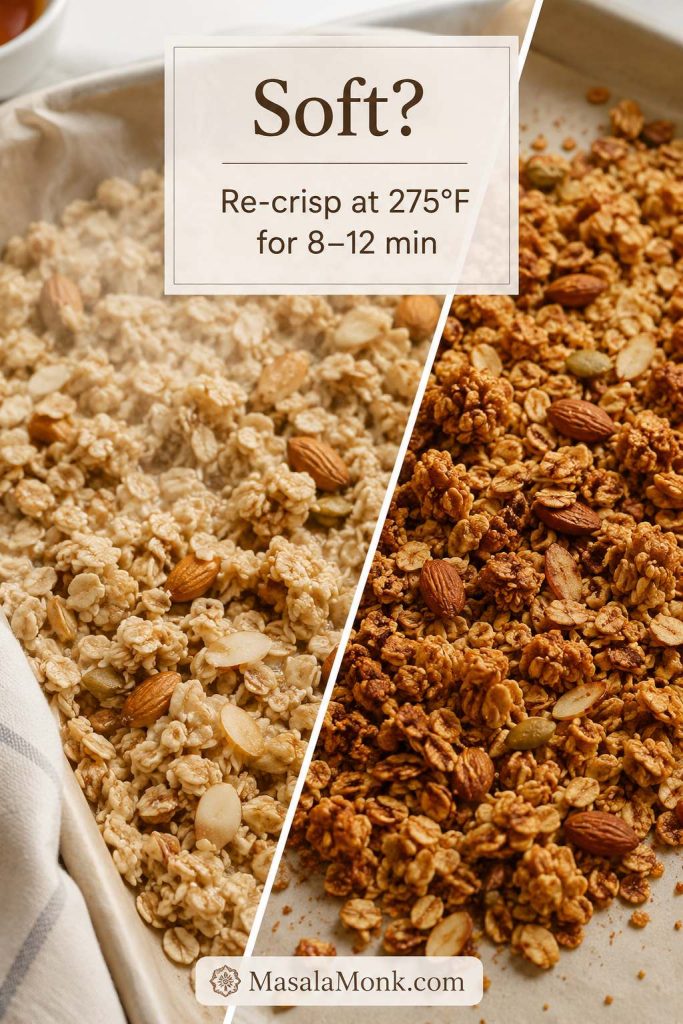
Soft vs crunchy granola
How to Make Granola Clusters
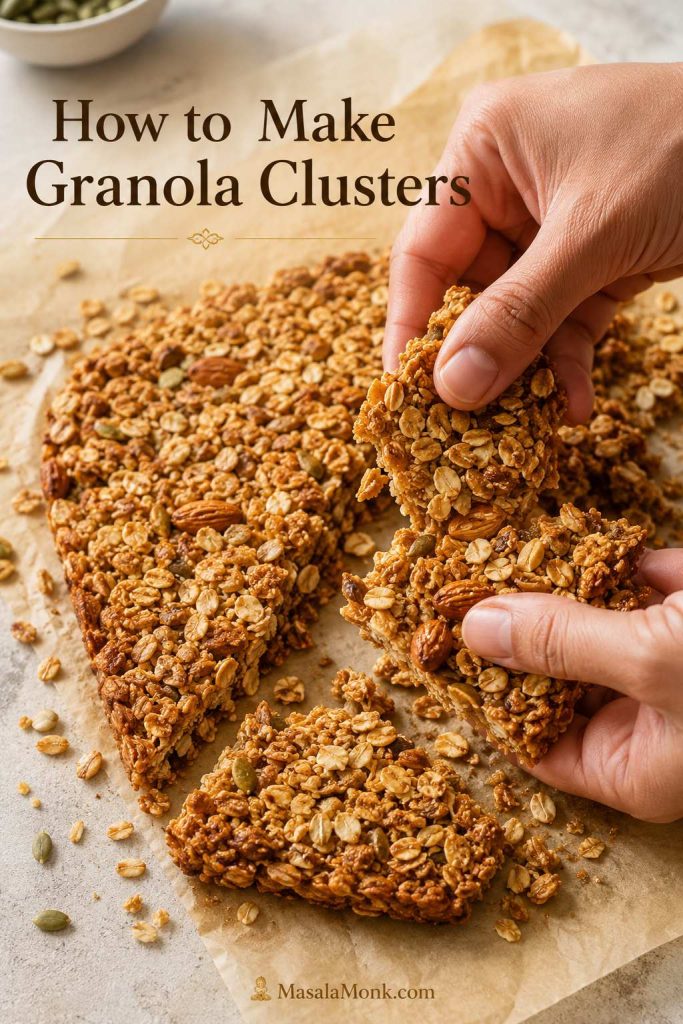
Clusters are the pieces people pick out of the jar first. Some readers want loose, cereal-style granola they can scoop with milk; others want big crunchy chunks for yogurt, parfaits, snack jars, and smoothie bowls.
You can choose that texture instead of hoping for it.
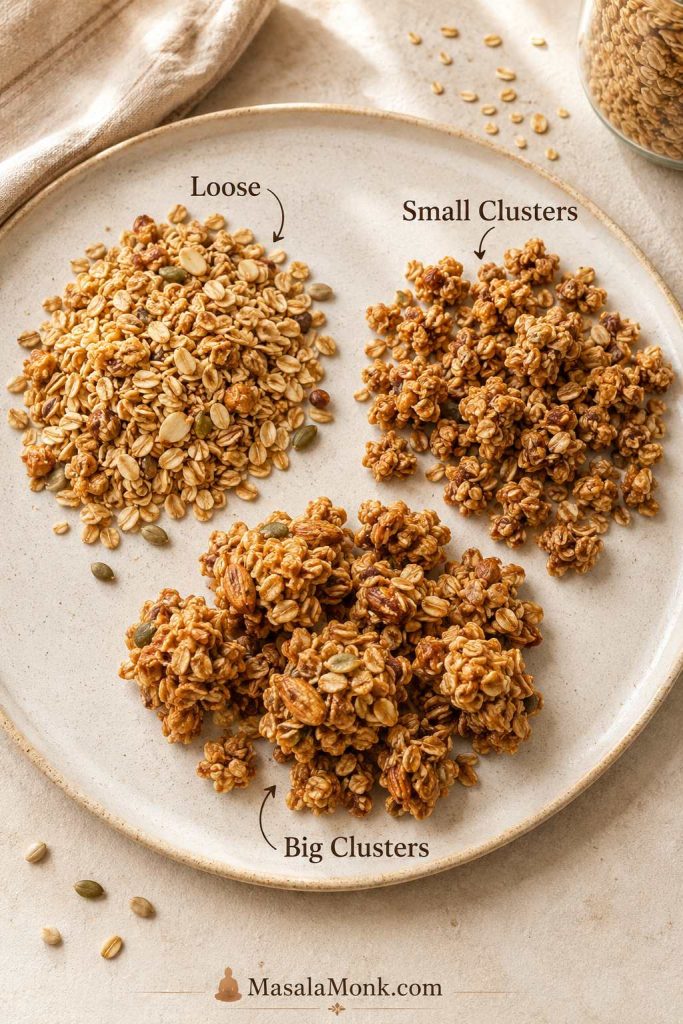
Choose your granola cluster size
| Texture you want | What to do |
|---|---|
| Loose cereal-style granola | Stir twice, spread evenly, and break into smaller pieces after cooling. |
| Small everyday clusters | Stir once, press down after stirring, and wait until firm before breaking. |
| Big bakery-style clusters | Add 1 beaten egg white, press firmly, stir minimally, and cool completely. |
| Vegan clusters | Add almond butter or peanut butter, press into a compact layer, and let the slab set before breaking. |
| Extra crisp clusters | Bake 5 minutes longer if needed, then cool before breaking. |
The base recipe is enough for small everyday clusters. To make larger bakery-style clusters, add 1 beaten egg white to the coated oats before baking. A vegan version can use 2 tablespoons almond butter or peanut butter in the wet mixture instead.
Why too many add-ins break clusters
If you want bigger clusters, avoid overloading the mixture with too many loose add-ins. Extra nuts, seeds, coconut, and dried fruit can taste great, but heavy mix-ins make the slab easier to break apart.
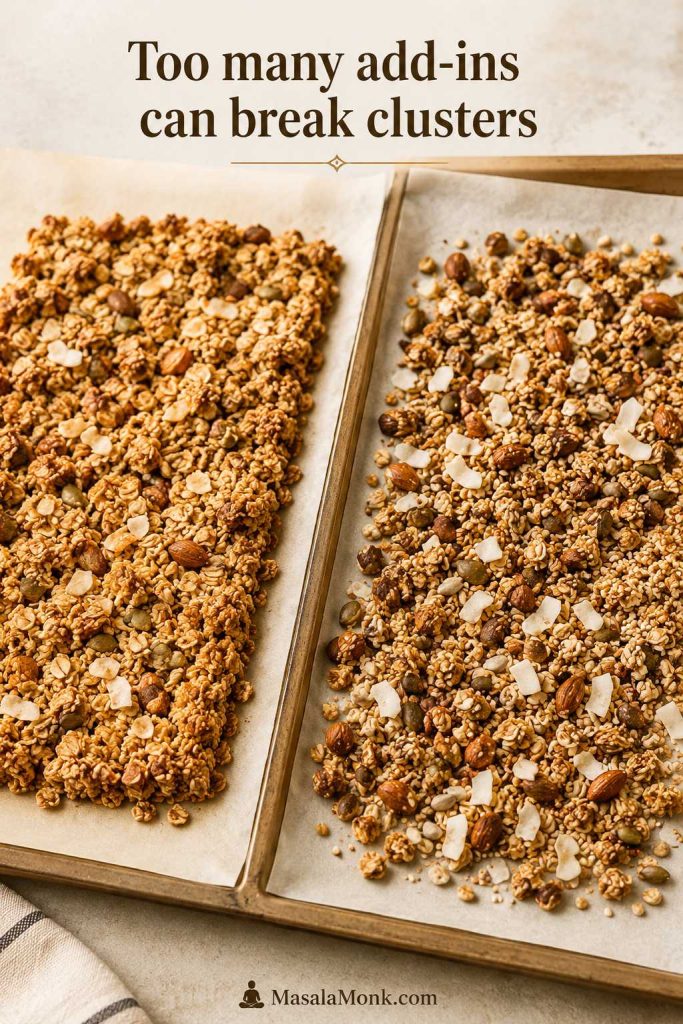
If you warmed the oil and sweetener, let that mixture cool until just warm before adding egg white. Hot liquid can cook the egg white before it reaches the oats.
Loose granola is not a failure either. It is often better when you want a cereal-style bowl with milk or a lighter topping that scatters over fruit.
Homemade Granola for Yogurt, Parfaits, Bowls, and Milk
A spoonful of crunchy granola can turn plain yogurt into breakfast, make a smoothie bowl feel finished, and make a simple fruit bowl feel more satisfying. Granola is often best as the finishing crunch, not the base of the whole bowl.
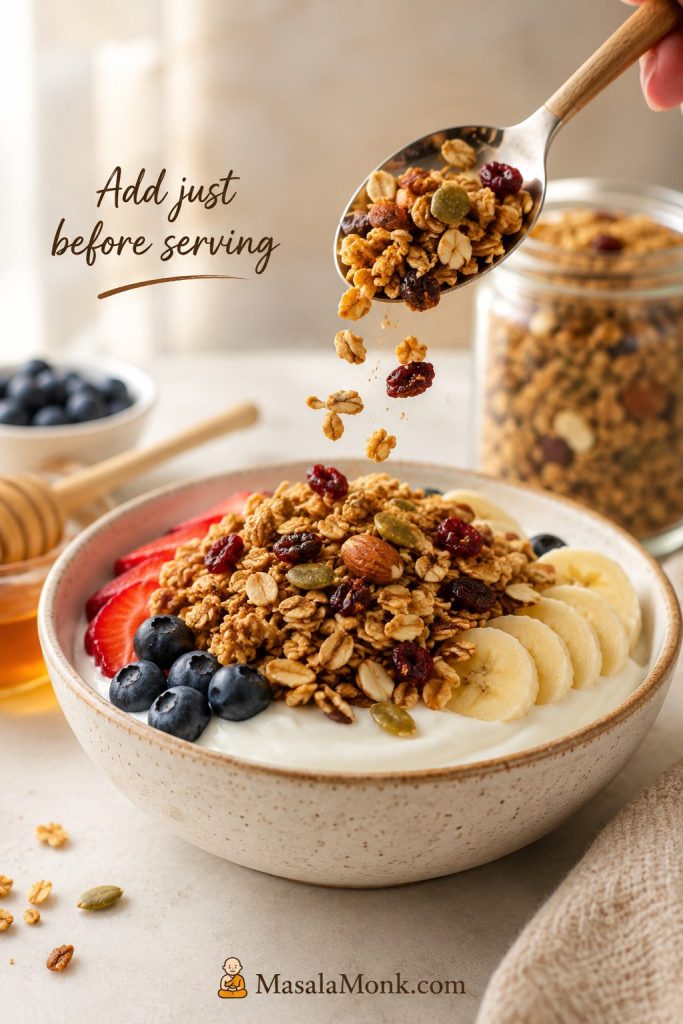
For crisp granola, timing matters: add it close to serving. Yogurt softens granola as it sits.
How much granola to use
| Use | Good starting amount | Texture that works well | Tip |
|---|---|---|---|
| Yogurt bowl | ¾–1 cup yogurt + ¼ cup granola + fruit | Loose granola or small clusters | Add just before eating so it stays crisp. |
| Parfait jar | ¾ cup Greek yogurt + ¼ cup fruit + ¼ cup granola | Larger clusters | Keep granola separate until serving if making ahead. |
| Larger breakfast bowl | ½ cup granola + milk or yogurt + fruit | Loose granola or small clusters | Use a bigger bowl when granola is the main base. |
| Smoothie bowl | 2–4 tablespoons granola | Crunchy clusters | Sprinkle on top instead of mixing in, especially with a thick fruit base like mango, banana, or berries. |
| Kids snack bowl | ¼ cup granola + banana or berries | Peanut butter or chocolate variation | Add chocolate chips after cooling. |
| High-protein bowl | Greek yogurt + ¼ cup granola + seeds | Protein granola with small clusters | Add hemp hearts, chia, flax, or nuts. |
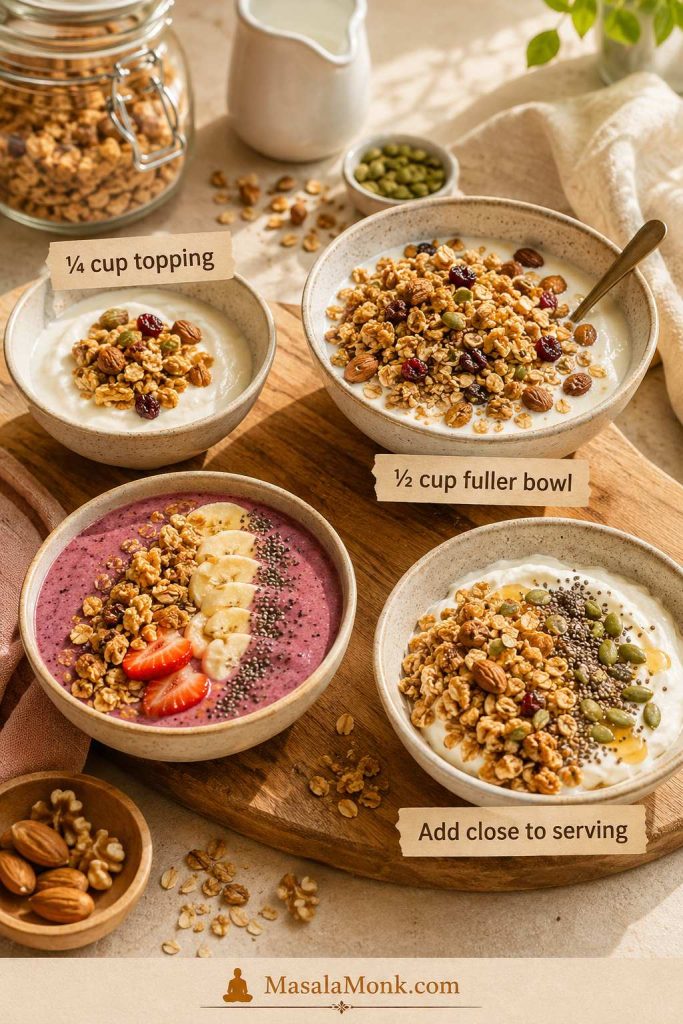
Use these amounts as starting points, not rules. Granola is forgiving once you know whether you want it as a topping, a cereal-style bowl, or a snacky cluster.
Make-ahead parfaits without soggy granola
For meal-prepped yogurt parfaits, keep the granola separate unless you prefer a softer texture. If you layer it early, expect a softer, chewier granola layer rather than crisp clusters. The same rule applies to smoothie bowls: blend the fruit first, then finish with granola right before serving.
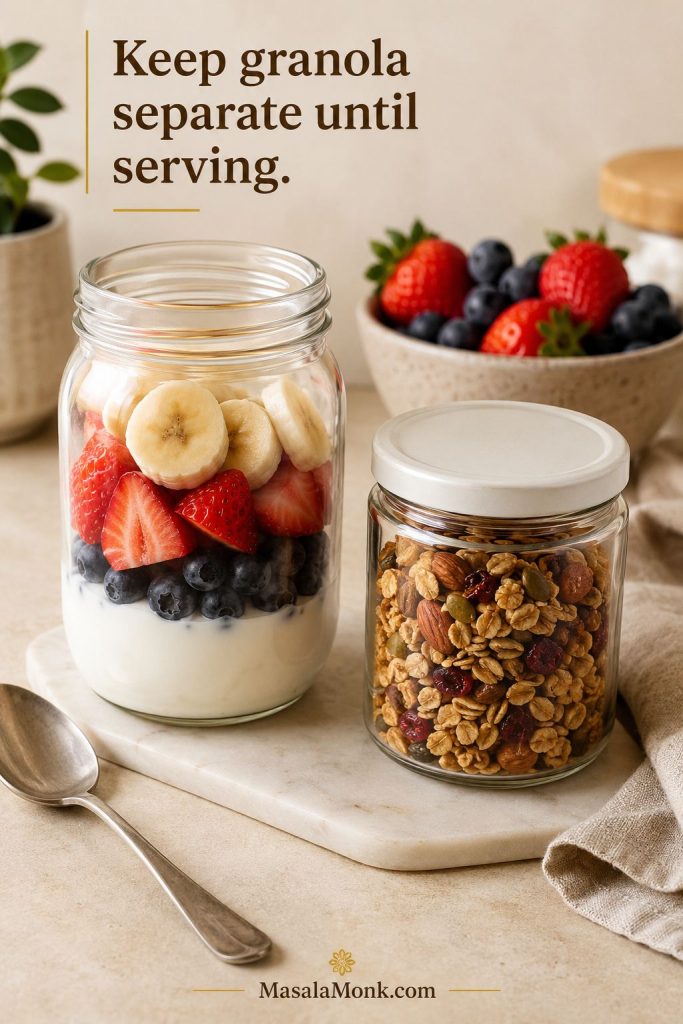
If you are making a batch for the week, the storage section explains how to keep the main jar crisp.
This recipe also works beautifully as a topping for overnight oats. For a higher-protein breakfast, pair a smaller handful of granola with Greek yogurt or use it on high-protein overnight oats.
Homemade Granola Variations: Gluten-Free, Vegan, Nut-Free, Low-Sugar, and More
Homemade granola is not automatically low-calorie, but it can be a smarter everyday choice because you control the oats, nuts, seeds, oil, sweetener, and portion size. Starting with whole-grain oats gives the recipe a hearty base, while the rest of the mix-ins are up to you.
Think of granola as a flavorful crunch booster: a ¼-cup handful can make yogurt, fruit, oatmeal, or a smoothie bowl feel much more satisfying. For a fuller bowl, use ½ cup with milk or yogurt and add fresh fruit.
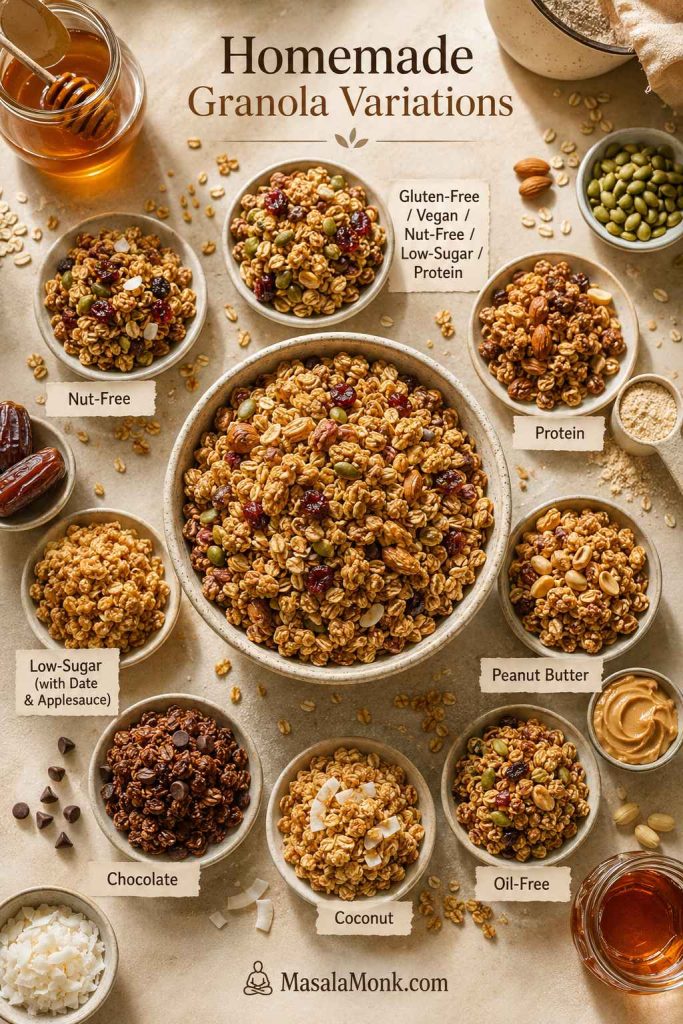
Choose the variation you need
| Variation | How to adjust | Texture note |
|---|---|---|
| Gluten-free granola | Use certified gluten-free rolled oats. | Texture stays close to the original. |
| Vegan granola | Use maple syrup instead of honey. | For vegan clusters, add almond butter or peanut butter. |
| Nut-free granola | Use pumpkin seeds, sunflower seeds, sesame seeds, coconut, or hemp hearts. | Still crunchy, but lighter than nut-based granola. |
| Protein granola | Add more seeds and nuts, or start with ¼ cup protein powder. | Too much protein powder can make granola dry or chalky. |
| Low-sugar granola | Reduce maple syrup or honey to ⅓ cup. | Less sweetener usually means fewer clusters. |
| Peanut butter granola | Add 2–3 tablespoons peanut butter to the wet mixture. | Better clusters and a stronger snack-like flavor. |
| Chocolate granola | Add 2 tablespoons cocoa powder before baking; add chocolate chips after cooling. | Do not bake chocolate chips unless you want them melted through. |
| Coconut granola | Add coconut flakes halfway through baking if they brown quickly. | Large coconut flakes can burn if added too early. |
| Oil-free granola | Replace oil with mashed banana, applesauce, date paste, or extra nut butter. | Softer and chewier than the main recipe. |
| No-added-sugar style | Use mashed banana or date paste instead of syrup. | Softer, less crisp, and less clumpy than the base recipe. |
Use the variations as steering points, not separate recipes: a little more protein here, a little less sugar there, a different binder when you want clusters.
Gluten-free granola
Oats are naturally gluten-free, but cross-contact during processing can be an issue. For gluten-free homemade granola, use gluten-free oats and check the labels on nuts, seeds, dried fruit, chocolate, and other mix-ins.
Vegan granola
Use maple syrup instead of honey. For vegan clusters, use almond butter, peanut butter, or another nut or seed butter as the binder instead of egg white.
Protein granola
For a protein granola variation, start with ingredients that naturally improve texture: pumpkin seeds, sunflower seeds, hemp hearts, chia seeds, flaxseed, almonds, peanuts, or walnuts.
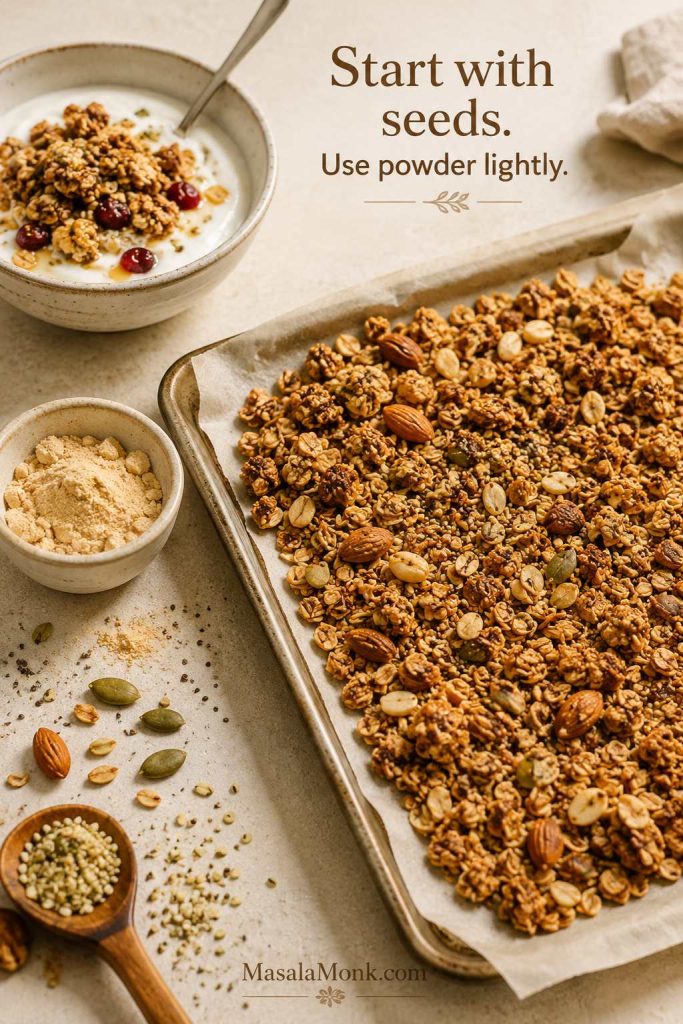
With protein powder, start with ¼ cup, not ½ cup. Mix it into the dry ingredients before adding the wet mixture. If the oats look dusty or dry after mixing, add 1–2 extra tablespoons of maple syrup, honey, oil, or nut butter.
Plant-based powders usually absorb more moisture, while some whey powders brown faster, so start small before scaling up. Seeds and nuts are the safer protein boost if texture matters most.
If you enjoy protein-rich oat breakfasts, this high-protein oatmeal guide has more ideas for building a satisfying bowl.
Low-sugar granola
You can reduce the maple syrup or honey to ⅓ cup. The granola will be less sweet and may form fewer clusters, but it can still be crisp and flavorful.
To make it taste fuller, keep the salt, increase the cinnamon and vanilla slightly, use flavorful toasted nuts or seeds, and add dried fruit after baking if you want little pockets of sweetness.
Peanut butter granola
Add 2–3 tablespoons peanut butter to the wet mixture. If your peanut butter is thick, warm it gently with the oil and maple syrup or honey so it mixes smoothly. A spoonful of homemade peanut butter works especially well when you want a stronger roasted-peanut flavor.
Peanut butter granola is especially good with bananas, chocolate chips, raisins, Greek yogurt, or a splash of milk.
Oil-free granola
Oil-free granola is possible, but it will not have the same crisp texture as the main recipe. Use mashed banana, applesauce, date paste, or extra nut butter to help coat the oats, and expect a softer, chewier finish.
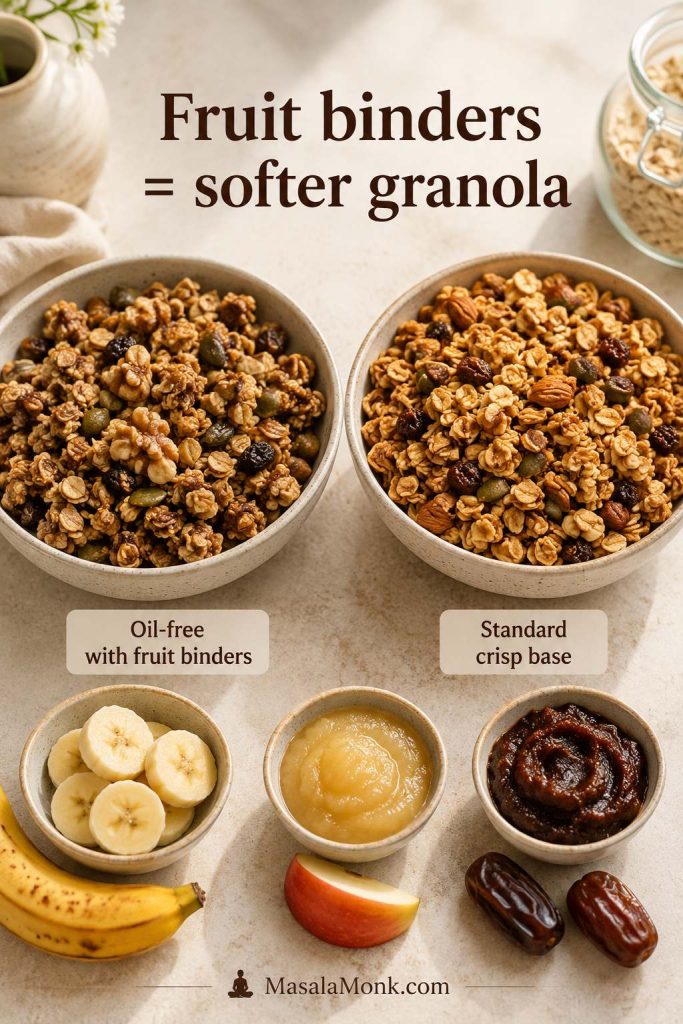
Fruit-based binders like banana, applesauce, and date paste add moisture, so the granola will usually be softer and less crisp than the maple or honey version. For a firmer oat-based snack that leans into fruit and dates instead of syrup, these healthy oat cookies are a better direction than trying to make this granola behave like a cookie.
Easy Homemade Granola Flavor Ideas
Once the base recipe feels familiar, the fun is in changing the flavor without changing the method. Keep the oats, oil, sweetener, and salt steady, then change the nuts, seeds, spices, fruit, or finishing mix-ins.
Pick one direction for each batch instead of adding everything at once; the best granola usually tastes intentional, not crowded.
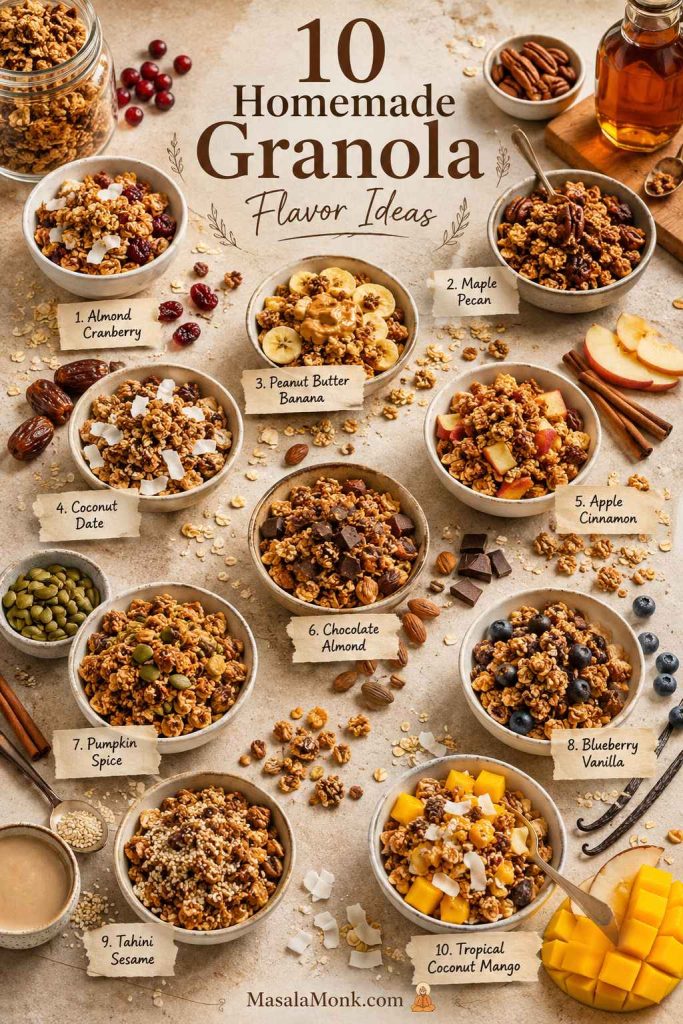
| Flavor idea | What to add |
|---|---|
| Almond cranberry granola | Sliced almonds, dried cranberries, vanilla, and a little orange zest after baking. |
| Maple pecan granola | Pecans, maple syrup, cinnamon, and a pinch of nutmeg. |
| Peanut butter banana granola | Peanut butter in the wet mixture, banana chips after baking, and optional chocolate chips once cool. |
| Coconut date granola | Coconut flakes, chopped dates after baking, cinnamon, and a pinch of cardamom. |
| Apple cinnamon granola | Extra cinnamon, walnuts, dried apple, and raisins after baking. |
| Chocolate almond granola | Cocoa powder before baking, almonds, and chocolate chips after cooling. |
| Pumpkin spice granola | Pumpkin pie spice, pecans or walnuts, pumpkin seeds, and dried cranberries after baking. |
| Blueberry vanilla granola | Extra vanilla, almonds or cashews, and dried blueberries after baking. |
| Tahini sesame granola | Tahini in the wet mixture, sesame seeds, pistachios, and a little honey or maple syrup. |
| Tropical coconut mango granola | Coconut flakes, cashews or macadamias, and dried mango after baking. |
If you make your own version, note what went in. Granola is one of those recipes where the second batch is often even better because you learn exactly how sweet, chunky, nutty, or fruit-heavy you like it. If one batch disappears faster than the others, write that combination down; that is usually your house granola trying to announce itself.
How to Store Homemade Granola
Cool the granola before storing it. This is the storage rule that matters most.
If you close the lid while the batch is still warm, steam gets trapped in the jar and softens the oats. Let the pan sit first, then move the granola to an airtight container.
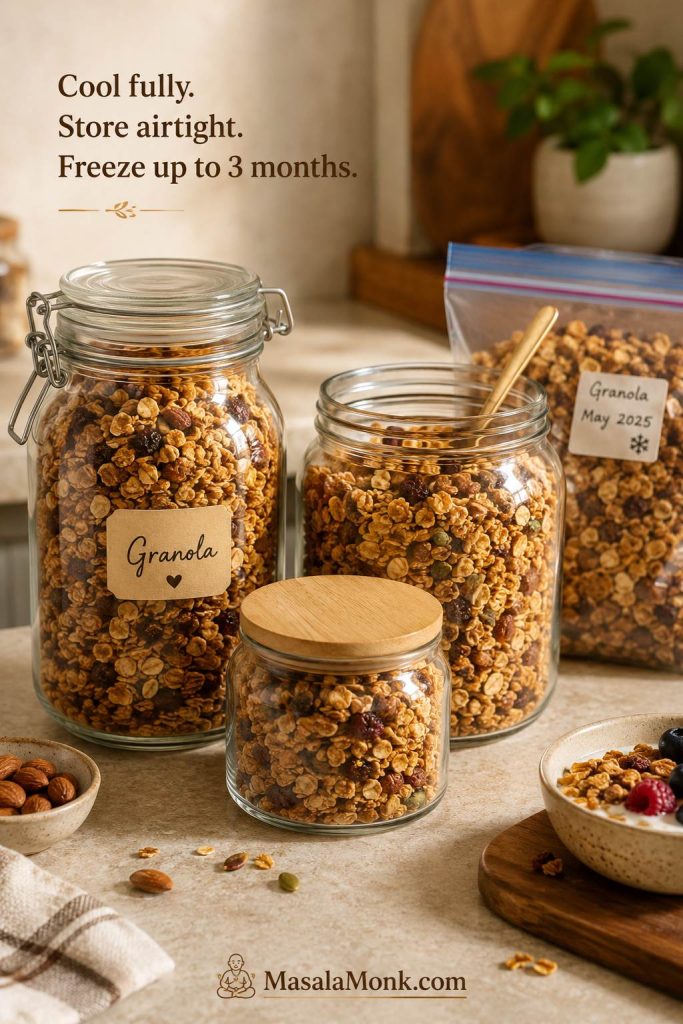
For everyday use, store homemade granola in a clean airtight jar or container at room temperature. For the best texture, use it within 2 weeks. It may last longer in a sealed container, but the crunch is usually best earlier.
Once a jar is ready, it becomes the easiest breakfast helper in the kitchen: the thing that makes plain yogurt, fruit, or milk feel like you planned ahead.
For longer storage, freeze granola for up to 3 months in a freezer-safe bag or container. Let it come back to room temperature before serving, or refresh it briefly in a low oven if you want the crunch to come back more strongly.
Homemade Granola Troubleshooting
Most granola problems are fixable, and almost all of them come down to heat, moisture, binder, or timing. A less-than-perfect batch is rarely wasted: soft granola can usually be re-crisped, too-sweet granola can be balanced with yogurt or nuts, and a loose batch still works beautifully over fruit or milk.
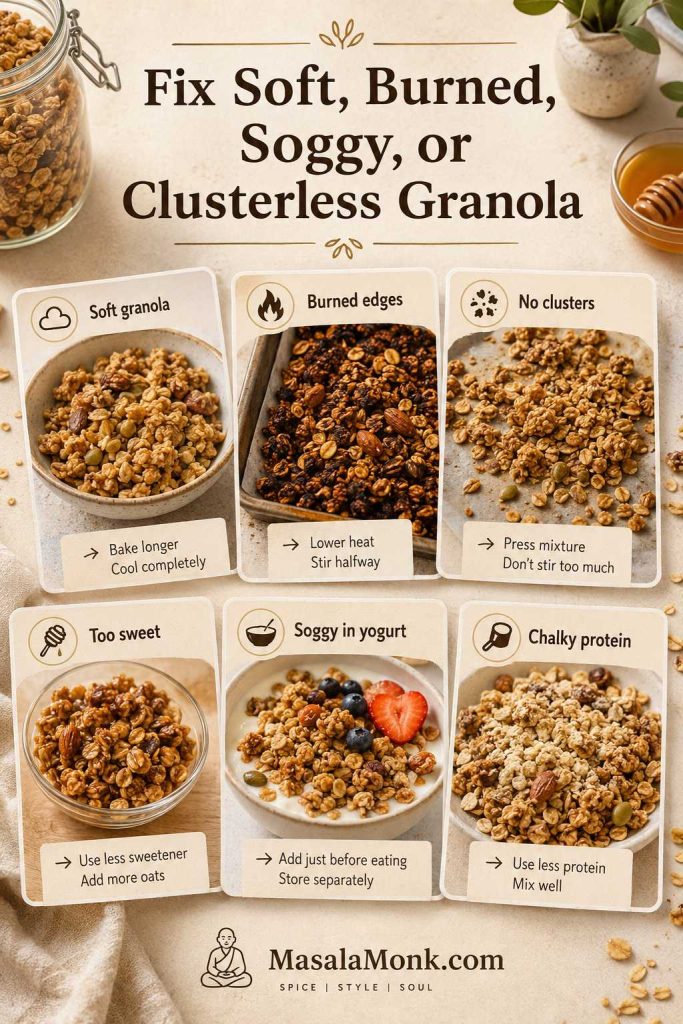
Texture and cluster fixes
Start here if the problem is crunch, clusters, sticking, or sogginess. Most texture problems come from moisture, pan crowding, heat, or breaking the granola too soon.
| Problem | Fix this batch | Adjust next time |
|---|---|---|
| Granola is soft | Spread it out and bake at 275°F / 135°C for 8–12 minutes, then cool fully. | Bake a few minutes longer, cool before storing, and avoid trapping steam in the jar. |
| Granola burned | Pick out very dark or bitter pieces if needed. | Use 300°F / 150°C, check early with dark pans, and add delicate coconut later. |
| No clusters | Use it as loose granola for milk, yogurt, or fruit. | Press after stirring, stir less, and add egg white or nut butter for more binding. |
| Granola stuck to the pan | Let it cool, then lift gently with a spatula. | Use parchment paper and avoid baking sticky sweetener directly onto the pan. |
| Granola got soggy in yogurt | Eat it as a softer parfait layer. | Keep granola separate and add it right before serving. |
Flavor, fruit, and protein fixes
Use this section when the texture is fine but the flavor, sweetness, dried fruit, or protein add-ins need help. These fixes are mostly about balance rather than rebaking the whole batch.
| Problem | Fix this batch | Adjust next time |
|---|---|---|
| Granola is too sweet | Serve over unsweetened Greek yogurt or add plain toasted nuts for balance. | Reduce syrup or honey slightly and use less dried fruit or chocolate. |
| Granola is not sweet enough | Add dried fruit, a few chocolate chips, or a light drizzle of honey when serving. | Use the full ½ cup sweetener or choose sweeter dried fruit. |
| It tastes bitter | Remove scorched nuts, coconut, or dark edge pieces if possible. | Lower heat, check earlier, and add coconut halfway through. |
| Dried fruit is hard | Pick out the hardest pieces if they bother you. | Add dried fruit after baking, not before. |
| Protein granola tastes chalky | Use it over yogurt or with milk to soften the dryness. | Start with ¼ cup protein powder and add extra wet binder only if needed. |
By this point, the recipe is less about memorizing rules and more about knowing the signs: glossy coated oats, an even layer, dry-looking edges, a warm nutty smell, and a full cool-down before breaking.
If a fix points back to bake time or cooling, compare it with the step-by-step method or the recipe card.
Recipe Card: Easy Crunchy Homemade Granola
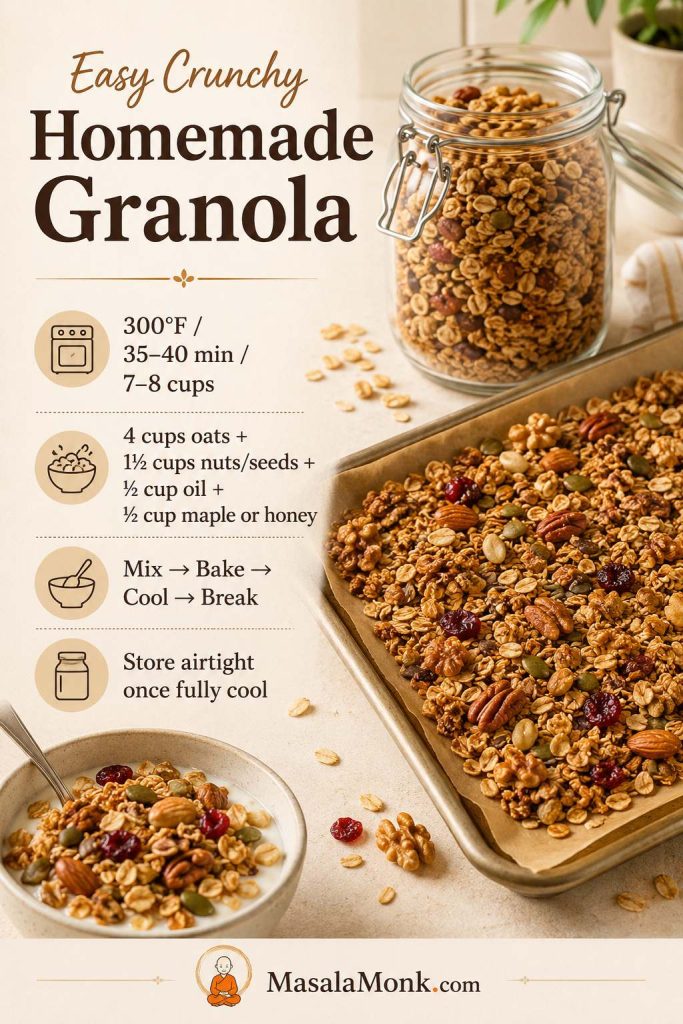
Easy Crunchy Homemade Granola
Crunchy homemade granola made with rolled oats, nuts, seeds, maple syrup or honey, oil, cinnamon, and vanilla. Bake it low and steady, then let it cool on the pan so the oats turn crisp and the clusters hold together.
Equipment
- Large rimmed baking sheet or half-sheet pan
- Parchment paper
- Large mixing bowl
- Small bowl or measuring cup for wet ingredients
- Rubber spatula or flexible spatula
- Measuring cups, measuring spoons, or kitchen scale
- Airtight jar or container for storage
Ingredients
- 4 cups old-fashioned rolled oats / about 320–360g
- 1½ cups chopped nuts and/or seeds / 150–180g
- ½ cup oil / 120ml, such as coconut oil, olive oil, avocado oil, or neutral oil
- ½ cup maple syrup or honey / 120ml
- ¾ teaspoon fine salt, plus more to taste
- 1–2 teaspoons ground cinnamon / about 3–5g
- 1 teaspoon vanilla extract / 5ml
- ⅔ cup dried fruit / 80–100g, added after baking
- Optional: ½–1 cup coconut flakes / 40–80g
- Optional for bigger clusters: 1 large egg white, beaten
- Optional for vegan clusters: 2 tablespoons almond butter or peanut butter / about 32g
Instructions
- Preheat the oven to 300°F / 150°C. Line a large rimmed baking sheet with parchment paper.
- In a large bowl, mix the rolled oats, nuts and/or seeds, salt, and cinnamon. If using delicate coconut flakes, stir them in when you stir the granola halfway through baking instead of adding them at the beginning.
- In a smaller bowl or measuring cup, whisk together the oil, maple syrup or honey, and vanilla. If using almond butter or peanut butter for vegan clusters, whisk it into this wet mixture.
- Pour the wet mixture over the oats. Stir thoroughly until every oat looks lightly coated and glossy.
- If using egg white for bigger clusters, make sure the oat mixture is not hot, then stir the beaten egg white into the coated oats.
- Spread the granola evenly on the prepared pan. Press it lightly with a spatula if you want clusters.
- Bake for 20 minutes. Stir once, spread the granola back out, and press it down again for clusters. Bake for another 15–20 minutes, until lightly golden, dry-looking, and fragrant.
- Let the granola cool on the pan until firm. Break it into the size you like, then stir in dried fruit. Store in an airtight jar or container once fully cool.
Notes
- Do not judge the crunch straight from the oven. Granola firms and crisps as it cools.
- For clusters, press after stirring and cool fully before breaking; for very big clusters, add 1 beaten egg white.
- For vegan clusters, add 2 tablespoons almond butter or peanut butter to the wet mixture.
- For gluten-free granola, use certified gluten-free rolled oats.
- For low-sugar granola, reduce the maple syrup or honey to ⅓ cup, but expect fewer clusters.
- Add delicate coconut halfway through baking if it browns quickly.
- Divide between two pans if the baking sheet is crowded.
- Store only once fully cool. Use within 2 weeks at room temperature or freeze for up to 3 months.
Use the recipe card as the base, then let the rest of the guide help you steer the texture, sweetness, and mix-ins.
FAQs About Homemade Granola
What are the best oats for homemade granola?
Old-fashioned rolled oats are best because they toast evenly, hold their shape, and create a crisp texture. Quick oats are softer, instant oats are too fine, and steel-cut oats are too hard for classic granola.
Why did my homemade granola turn soft?
Soft granola is usually underbaked, stored before cooling, or exposed to moisture. Re-crisp it at 275°F / 135°C for 8–12 minutes, then cool fully before storing.
How do I get bigger granola clusters?
Press before and after the halfway stir, then cool fully before breaking. For very large clusters, add egg white; for vegan clusters, use nut butter.
Is homemade granola healthy?
Homemade granola can be a better everyday choice because you control the oats, nuts, seeds, oil, sweetener, and portion size. It is still calorie-dense, so it works especially well as a measured topping for yogurt, fruit, or oatmeal.
When should I add dried fruit?
Add dried fruit after baking. If it bakes with the oats for the full time, it can become hard, bitter, or burnt.
How long does homemade granola keep?
Homemade granola is usually best within 2 weeks at room temperature when stored fully cool in an airtight container. For longer storage, freeze it for up to 3 months.
How do I make gluten-free granola?
Use certified gluten-free rolled oats and check that your nuts, seeds, dried fruit, chocolate, and other mix-ins are also labeled gluten-free if needed.
What granola texture is best for yogurt?
Small or medium clusters are best for yogurt. Add granola just before eating if you want crunch, or layer it earlier if you like a softer, chewier parfait texture.
What changes in oil-free granola?
Oil-free granola is usually softer and chewier than the base recipe. Mashed banana, applesauce, date paste, egg white, or nut butter can help coat the oats, but the finish will not be as crisp as granola made with oil.
Can I turn this granola into bars?
This recipe is not designed to slice into bars because granola bars need more binder. For that version, use MasalaMonk’s homemade granola bars recipe.
Your house granola for the week
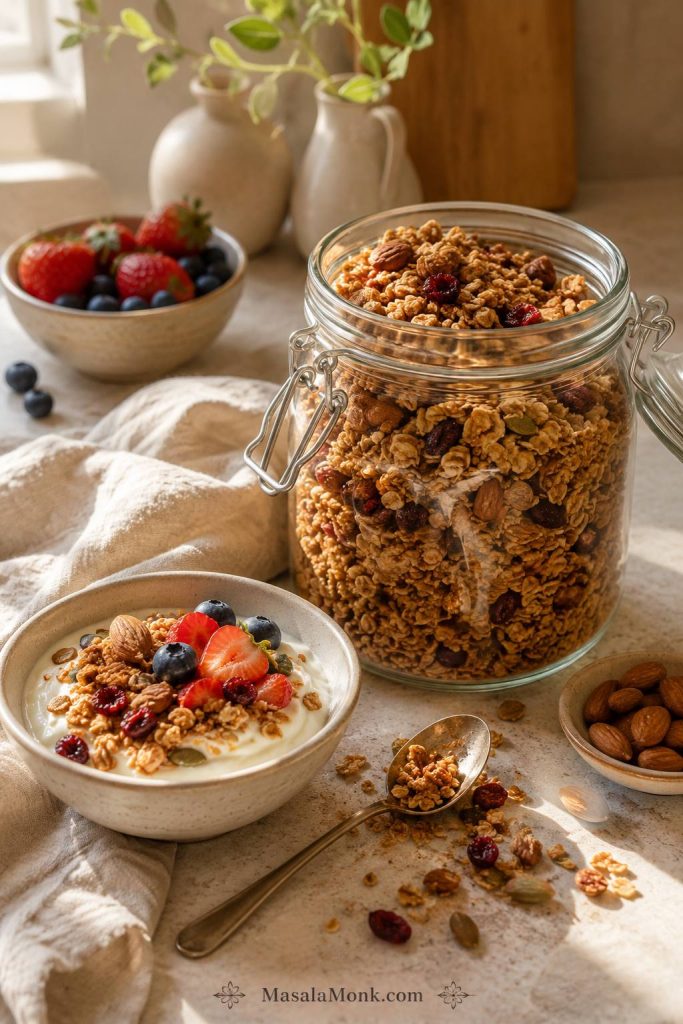
The first batch teaches you the method. After that, granola becomes a small weekly habit: the sweetness you like, the cluster size you reach for, and the jar that makes plain yogurt, fruit, or milk feel like breakfast without extra work.








