Posted on Leave a comment

Orange Marmalade Recipe: Easy, Bright, No Boxed Pectin

Clear glass jar of homemade orange marmalade with visible peel, a spoon lifting marmalade, buttered toast, and fresh oranges on a warm kitchen surface.

Orange marmalade sounds simple until you make it for the first time. Then the questions arrive all at once: how much peel should stay in, why does it taste bitter, does it need pectin, how do you know it has set, and what happens if it is still runny after cooling?

But a good batch is worth the small bit of patience. It makes the kitchen smell like orange peel and warm sugar, turns plain toast into something golden and deliberate, and gives you a jar that can brighten cakes, glazes, yogurt, cheese boards, and sauces for weeks.

This is not a giant traditional Seville marmalade project. It is a practical orange marmalade recipe for regular sweet oranges: real orange peel that softens instead of turning chewy, balanced bitterness, no boxed pectin, and a soft fridge/freezer set you can actually use.

The method is built for the kind of jar you want to open again: bright citrus, delicate peel, enough bittersweet edge to taste like marmalade, and a set that spreads instead of bouncing like jelly. The working formula is 900 g to 1 kg oranges, 1 lemon, 600 ml water, and 700 to 800 g sugar for about 4 cups of fridge/freezer marmalade.

Quick Answer: How Do You Make Orange Marmalade?

To make orange marmalade, scrub the oranges, slice the peel, simmer the peel in water until it gives easily, then add chopped orange flesh, lemon juice, and sugar. Boil the mixture at an active bubble until the syrup turns glossy and thick enough to pass the cold-plate test.

This is an orange peel marmalade, not a smooth orange jam: the peel is sliced, softened, and suspended in the final jar. You still get real marmalade texture, but the peel is cooked gently first so it tastes balanced instead of harsh.

No added pectin is required. The set comes from citrus peel, lemon, sugar, and reduction, with the cold plate showing you when the hot syrup will cool into a soft spread.

What Good Orange Marmalade Texture Looks Like

Use this visual before the first batch: it shows the difference between a loose orange syrup and a preserve with peel held through the body of the marmalade.

Close-up spoonful of orange marmalade showing clear amber syrup, tender orange peel strips, and a glossy spoonable texture.
Before you cook, notice the texture target. Good orange marmalade should look clear and glossy, with tender peel suspended through the syrup instead of floating in watery liquid.

At a Glance

Best forBeginners who want tender peel, bright citrus, and a soft set
Batch styleFridge/freezer marmalade, about 4 cups
Main fruitRegular sweet oranges, preferably thin-skinned
PectinNo added pectin in the main recipe
TextureSpoonable, glossy, with tender orange peel
Best testCold-plate wrinkle test
StorageRefrigerator or freezer by default
CanningUse a preservation-tested method for shelf-stable jars

This Recipe Is Best If…

Choose this version if you want one manageable fridge/freezer batch made with regular sweet oranges, real peel, no boxed pectin, and a soft set that spreads easily. For pantry canning, sugar-free marmalade, Seville-only marmalade, or smooth orange jam, use a method written for that style.

What Is Orange Marmalade?

Orange marmalade is a citrus preserve made with orange peel, orange pulp or juice, sugar, and water. The peel is the personality of marmalade: it brings texture, bitterness, aroma, and natural pectin support.

A good jar should be sweet, bright, glossy, and a little bitter. It should spread easily, but it should not run off toast like syrup. Orange juice alone makes more of a jelly-style base; marmalade needs peel to feel like marmalade.

At the table, it should make breakfast feel less automatic: bitter enough to wake up the butter, bright enough to cut through cream, and soft enough to drag across toast without tearing it.

Orange Marmalade vs Orange Jam

The simplest difference is peel. Orange marmalade includes citrus peel, while orange jam is usually smoother, sweeter, and less peel-forward. If you remove almost all the peel or blend the mixture until completely smooth, the result may still taste delicious, but it will feel closer to orange jam than classic marmalade.

If peel is the reason you avoid marmalade, do not start with thick-cut. Start with a fine shred. You may find you like marmalade more when the peel is tender, delicate, and spreadable rather than chunky and chewy.

Ingredients and Equipment for Homemade Orange Marmalade

Core Ingredients and What They Do

Start here if you want the recipe to make sense before you cook. These few ingredients control flavor, peel tenderness, natural set, and storage style.
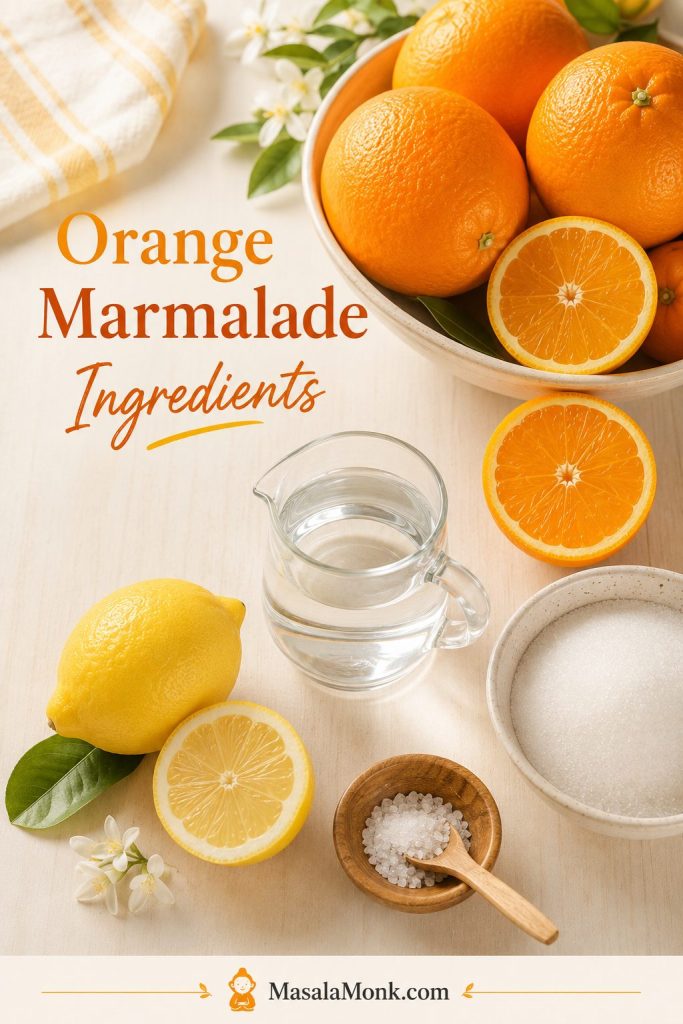
Oranges, lemon, sugar, water, and a small bowl of salt arranged on a light surface for making orange marmalade.
Because this orange marmalade recipe uses only a few ingredients, each one matters: oranges bring peel and flavor, lemon supports acidity, and sugar gives the preserve body.

Marmalade does not hide behind many ingredients. If the oranges are fragrant, the lemon is bright, and the peel is soft before the sugar goes in, the jar tastes alive.

The oranges bring flavor, peel, juice, and natural citrus pectin. Lemon is not just for flavor; its acidity helps that pectin work. Sugar gives the marmalade body, gloss, and keeping power. Water buys the peel time to soften before the syrup starts tightening.

IngredientAmount for this recipeWhy it matters
Regular sweet oranges900 g to 1 kg / about 2 to 2.2 lbProvide the citrus flavor, peel texture, juice, and natural pectin base.
Lemon1 medium lemon, juiced, about 2 to 3 tablespoons / 30 to 45 mlAdds brightness and acidity, which helps the natural pectin work.
Water600 ml / 2 1/2 cups, plus more if neededSoftens the peel before sugar is added and prevents scorching early on.
Sugar700 to 800 g / about 3 1/2 to 4 cupsSweetens, supports set, gives gloss, and improves keeping quality.
SaltA tiny pinch, optionalRounds the sweetness and makes the citrus taste brighter.

Sugar, Set, and Low-Sugar Boundaries

Which sugar amount should you choose? Use 700 g for a brighter, softer refrigerator marmalade. Use 800 g for a firmer, more classic set. If you reduce the sugar heavily in this natural-pectin recipe, expect a softer, shorter-keeping marmalade.

Sugar substitutes do not behave like sugar in regular marmalade. They may sweeten the fruit, but they do not provide the same set, gloss, or preservation. For very low-sugar or sugar-free marmalade, use a method designed for that style rather than simply swapping the sugar here.

Equipment You’ll Need

You do not need a professional preserving setup for this refrigerator marmalade. A few basics are enough: a digital scale, a large deep non-reactive pot, a sharp knife and board, two small freezer-safe plates for the cold-plate set test, and clean jars. A thermometer is helpful but optional; cheesecloth or muslin is only needed if you want to simmer seeds for extra natural pectin support.

For pantry storage, use proper water-bath canning equipment and a preservation-tested recipe. This main recipe is written first as a refrigerator or freezer marmalade.

Which Oranges Should You Use?

Best Sweet Oranges for a First Batch

Use this guide before you shop: the orange variety changes sweetness, bitterness, color, and how beginner-friendly the finished jar feels.

Labeled guide showing navel, Valencia, Cara Cara, mandarin or tangerine, blood orange, and Seville oranges for marmalade.
The best oranges for marmalade depend on the flavor you want. Sweet oranges make a gentler beginner-friendly jar, while Seville oranges create a more traditional bitter-orange marmalade.

Choose oranges with fresh, fragrant peel. Thin-skinned fruit is easiest because it gives you delicate shreds without too much thick, bitter white pith.

Navel oranges are the simplest choice for most kitchens. Valencia oranges give a bright, juicy flavor. Cara Cara oranges make a softer, sweeter-tasting marmalade with a rosy citrus note. Mandarins and tangerines can work too, especially for a sweeter preserve, but they behave slightly differently because their peel is thinner and their flavor is less bitter.

Seville, Mandarins, and Other Marmalade Styles

Small sour oranges or calamondins make a sharper preserve. MasalaMonk also has a calamondin orange marmalade recipe for that more intense citrus style.

For most sweet-orange variations, keep the fruit weight the same and adjust by the set test rather than by the clock.

Orange typeFlavor and textureBest use
Navel orangesSweet, easy to find, usually seedlessBest beginner choice
Valencia orangesJuicy, bright, classic orange flavorSweet orange marmalade
Cara Cara orangesSweeter, softer, gently floralMilder marmalade
Mandarins or tangerinesThin peel, sweeter flavor, softer textureSmall-batch marmalade or jam-style spreads
Blood orangesDeep color, berry-like citrus noteSeasonal variation
Seville orangesBitter, aromatic, traditionalClassic bitter marmalade

This main recipe uses sweet oranges because they are easy to find and mild enough for a first batch. Seville oranges make a more traditional, bitter, aromatic jar, so treat them as a focused variation rather than a required ingredient.

The peel is going into the jar, so treat the outside of the orange like an ingredient. Remove stickers, rinse the fruit under running water, and scrub the peel well. Unwaxed or organic oranges are ideal if you can get them, but regular oranges can still work if they are washed thoroughly. Avoid bruised, moldy, or damaged fruit because marmalade concentrates the flavor of the whole orange.

How Thin Should You Cut the Orange Peel?

The peel is the personality of marmalade. Thin shreds feel delicate and spread easily. Medium shreds taste more classic. Thick-cut peel gives a stronger bitter bite and a more traditional feel, but it needs more time to soften.

Texture target: Choose the peel cut before you cook; the thinner the shred, the gentler and more spreadable the jar will feel.

Guide showing fine, medium, and thick orange peel strips with matching marmalade texture samples underneath.
Peel thickness changes the whole jar. Fine peel gives a softer breakfast-style marmalade, while thicker peel creates a stronger, more traditional bite.
Peel styleResultBest for
Fine shredTender, easy to spread, less chewyBeginners, toast, scones, yogurt
Medium shredClassic marmalade textureAll-purpose jars
Thick cutStronger bite, more bitterness, more chewTraditional marmalade lovers
Food processorRustic, quick, less elegantShortcut marmalade
Low-peelSweeter, softer, more jam-likePeople afraid of bitterness

Tender peel is where good marmalade begins. Simmer the peel until it gives easily before adding sugar. Once sugar enters the pot, the peel is much less willing to soften. This is the difference between delicate shreds and chewy strips.

Can You Use a Food Processor?

Yes, but use it carefully. A food processor can save time, especially if you like a rustic marmalade, but it can also chop the peel unevenly or turn the fruit too pulpy. Pulse in short bursts and stop before the mixture becomes a puree.

A food processor version will taste good, but it may feel closer to orange jam if the peel disappears into the spread. Whole-orange methods are faster, but this separated-peel method gives you better control over bitterness, pith, and final texture. If your oranges have very thick pith, separating the peel is the safer choice.

Why This Method Works

This method is built around the places small-batch marmalade usually goes wrong: peel that stays chewy, syrup that refuses to set, and a pot that can move from bright citrus to overcooked sugar faster than expected.

What you doWhy it works
Soften the peel before adding sugarSugar slows further softening, so this prevents tough, chewy peel.
Add lemonAcidity helps natural citrus pectin work and keeps the flavor bright.
Dissolve sugar before boiling hardThis lowers the risk of graininess and scorching.
Boil after the peel is tenderWater evaporates, sugar concentrates, and the syrup gains body.
Test on a cold plateHot marmalade looks loose; the chilled test shows the final set more clearly.

Optional seed bag: If your oranges or lemon have seeds, you can tie the seeds and membranes in cheesecloth and simmer the bag with the fruit. Skip this for the simplest version; the marmalade can still set with peel, lemon, sugar, and proper cooking.

How to Make Orange Marmalade

The method below focuses on the cues that matter most: soft peel, syrupy body, and a set that holds after cooling. Aim for a jar with peel suspended through the syrup and a texture that spoons easily once cooled. If it bounces like jelly, it has gone too far. If it runs like syrup, it needs more cooking.

Your first batch does not need to be perfect to be useful. If it sets softly, spreads easily, and tastes bright once cooled, it is a successful jar.

Before You Start: 5 Small Safeguards

  • Let the peel soften before sugar goes in.
  • Use a deep pot because marmalade rises as it boils.
  • Judge the set from a chilled sample, not the hot pot.
  • Keep enough sugar if you want a classic set.
  • Treat this as fridge/freezer marmalade unless you follow tested canning guidance.

What you should see: first the peel softens; then the syrup looks thin and loose; later the bubbles slow, the spoonful lands heavier, and the peel starts to sit inside the syrup instead of floating in watery liquid.

Step 1: Prepare the fruit

Wash and scrub the oranges and lemon. Slice off the hard ends. Remove the orange peel in wide strips, then cut the peel into fine or medium shreds. Chop the orange flesh and save as much juice as possible. Remove seeds so they do not end up in the jar; save them only if you plan to use the optional seed bag.

Before you chop: This is where the marmalade gets its final texture, so keep the peel intentional instead of chopping everything into a pulp.

Hands cutting oranges on a wooden board with sliced peel strips, chopped orange flesh, and peeled fruit separated for marmalade.
Separating the peel from the fruit gives you more control over bitterness, texture, and tenderness, especially when making orange marmalade without boxed pectin.

Rustic shortcut: Instead of separating peel and flesh, you can slice the whole oranges very thinly and remove seeds as you go. This is faster, but the final texture is more rustic and may taste more bitter if the fruit has thick pith.

Step 2: Simmer the peel until tender

Put the sliced peel into a large heavy non-reactive saucepan with the water. Bring it to a boil, then reduce to a steady simmer. Simmer partly covered if the water is evaporating too fast; uncover once you start reducing after the sugar goes in. Cook until the peel is soft enough to squash between your fingers or cut against the side of the pot with a spoon. Depending on peel thickness, this may take 20 to 35 minutes.

Before sugar: At this point you are cooking the peel, not setting the marmalade. Give the strips time to relax before the syrup tightens.

Orange peel strips simmering in water inside a saucepan on the stovetop before sugar is added.
This is the quiet step that decides peel texture. If the strips still feel firm now, they will stay chewy in the finished orange marmalade.

This stage can feel slow, but it is where good marmalade is made. By the time the peel is ready, there should still be some liquid in the pot. If the pan is nearly dry, add a splash more water. If it looks very watery, simmer uncovered for a few extra minutes before adding sugar.

Look for this: Move on only when the peel gives easily. Sugar will sweeten the pot, but it will not magically soften chewy strips later.

Fingers bending a softened orange peel strip over a wooden spoon above a pot of simmered peel.
The peel is ready when it bends easily instead of snapping or feeling chewy. This small cue helps prevent tough peel in the finished marmalade.

Step 3: Add fruit, lemon, and sugar

Add the chopped orange flesh, saved orange juice, lemon juice, and optional pinch of salt. If you are using a seed bag, add it now too. Stir in the sugar over medium heat until it dissolves fully. Letting the sugar disappear into the liquid before the hard boil helps prevent graininess and scorching.

Once sugar goes in: The mixture behaves more like syrup, so dissolve it fully before turning up the heat.

Sugar being poured into a pot of orange marmalade mixture with visible orange peel and a wooden spoon.
Once sugar enters the pot, the cooking changes quickly. Dissolving it fully first gives the marmalade a smoother syrup and lowers the risk of scorching.

Step 4: Boil until glossy and spoonable

Once the sugar has dissolved, increase the heat and cook the marmalade at a steady, active bubble rather than a violent boil. Use a pot with enough room because the mixture rises and spatters as it cooks. Stir often enough to prevent sticking, and stir more often near the end when the syrup thickens and the peel can catch on the bottom.

This is the point where marmalade can test your patience. It looks loose, the bubbles keep changing, and the urge to keep boiling is strong. Watch the texture instead: early bubbles are thin and watery; later, the syrup looks heavier, the peel turns more translucent, and the spoonful starts to cling lightly instead of splashing thinly.

Watch the bubbles: The bubbles are your early warning system. They move from thin and splashy to slower, heavier, and glossier as the syrup concentrates.

Three-stage guide showing orange marmalade at early watery bubbles, thicker reduction bubbles, and glossy near-set bubbles.
As the marmalade reduces, the bubbles change from light and watery to thicker and glossier. Watching that shift is often more useful than watching the clock.

After the sugar goes in, the boiling stage usually takes 20 to 35 minutes, depending on pot width, orange juiciness, and heat level. Wide pans reduce faster; narrower pots may take longer. Start testing before you think it is done, because hot marmalade always looks looser than cooled marmalade.

Stop when the chilled sample wrinkles softly, not when the pot looks stiff. If the syrup starts smelling deeply caramelized or darkens quickly, it is moving away from bright citrus and into cooked sugar.

Step 5: Rest and jar

If you used a seed bag, lift it out carefully just before jarring. Press it gently against the side of the pot with a spoon, using tongs if needed, then discard it. When the marmalade passes the cold-plate test, take it off the heat and let it rest for 5 to 10 minutes so the peel distributes more evenly.

If you jar immediately while the mixture is very fluid, the peel can float toward the top. That short rest helps the syrup settle just enough to hold the peel more evenly.

Foam is normal and does not mean the batch has failed. It is mostly trapped air from boiling. Skim it for a clearer jar, or leave a little if you do not mind a rustic finish. Spoon the marmalade into clean jars. Let refrigerator jars cool, then chill them. If you plan to freeze the marmalade, leave headspace so the preserve can expand. Pantry storage needs a reliable water-bath canning process from a tested source.

Before filling jars: A short rest before filling helps the peel stay more evenly distributed, especially in a soft-set fridge marmalade.

Spoon skimming foam from a pot of finished orange marmalade with a jar and funnel nearby for filling.
After boiling, let the marmalade settle briefly, skim excess foam, and then jar it. This helps the peel distribute more evenly and keeps the jars cleaner.

How to Know Orange Marmalade Has Set

Set is not a timer. It is a texture.

This is the moment people usually panic, but the cold plate is your calm button. Marmalade does not look fully set while it is still boiling. The pot will almost always look looser than you expect; that is why you test a cooled spoonful instead of arguing with the boiling syrup.

The Cold-Plate Test

Before you start cooking, put two small plates in the freezer. When the marmalade looks clear and slightly thickened, spoon a little onto a cold plate. Wait about one minute, then push the edge with your finger. If the surface wrinkles softly and does not run back like syrup, the marmalade is ready.

Set check: The sample should wrinkle softly after chilling. If it snaps firm or feels rubbery, the batch has gone past the soft-set stage.

Finger pushing a spoonful of orange marmalade on a small white plate to check for a soft wrinkle.
The cold-plate test shows how hot marmalade will behave after cooling. Look for a soft wrinkle, not a rubbery or stiff set.

If it runs freely, cook for a few more minutes and test again. Use a clean cold plate each time if possible. Taste only after the marmalade cools a little; hot marmalade can taste sharper and sweeter in a way that does not represent the final jar.

Marmalade Setting Temperature: When to Stop Boiling

At sea level, many marmalades set near 220°F / 104.4°C, but the exact number shifts with altitude, batch size, fruit, and pot shape. Treat the thermometer as a cue, not the final judge. At higher elevations, trust the cold-plate test more than the number on the thermometer.

Thermometer check: Use the thermometer as a checkpoint, then confirm with a cooled sample so you do not overshoot a soft spreadable set.

Candy thermometer clipped into a pot of bubbling orange marmalade with visible peel and temperature guidance above.
A thermometer can guide you toward the set point, but it should not work alone. Pair the temperature reading with the cold-plate or spoon test for better judgment.
Temperature cueLikely texture
217°F / 103°CBrighter and looser; may still be runny depending on fruit and pot shape.
219°F / 104°CSoft-set range for many home batches; confirm with the cold-plate test.
220–221°F / 104.4–105°CFirmer, more classic set; watch closely so it does not become stiff.
Past this rangeHigher risk of dark flavor, chewy peel, or a set that is too firm.

Spoon Test: What Marmalade Looks Like When It Is Ready

Near the set point, the syrup looks more polished and falls from the spoon in heavier drops rather than thin streams. The peel also looks suspended in the syrup instead of floating in watery liquid.

Spoon check: Use this when the cold plate is not enough. Heavier drops and clinging peel tell you the syrup is gaining body.

Spoon lifted above a pot of orange marmalade with thick glossy syrup and orange peel dripping slowly back into the pot.
The spoon test helps you read the syrup while it is still hot. Near the set point, the marmalade falls more slowly and the peel clings to the spoon.

Small-batch warning: fridge/freezer batches and wide pans can over-reduce quickly. Start testing early, especially once the mixture looks syrupy and thickened. It is easier to cook runny marmalade a little more than to rescue a jar that has gone too stiff.

What Runny, Just Right, and Too Stiff Look Like

Use this visual before troubleshooting. It helps you compare your jar to the texture you actually want, not just to a timer or temperature number.

Three bowls and spoons comparing runny orange marmalade, softly set marmalade, and overly stiff marmalade.
This texture guide helps you judge your own batch. Runny marmalade needs more cooking, just-right marmalade mounds softly, and too-stiff marmalade can be hard to spread.

Why This Orange Marmalade Sets Naturally

There is no added pectin in this recipe. Pectin is the fruit’s natural setting helper, and citrus keeps much of it in the peel, pith, seeds, and membranes. Think of the peel, pith, and seeds as the structure; the lemon as the acidity; and the sugar reduction as the syrup that lets everything hold together.

Natural set check: This recipe still has structure; it simply uses the fruit’s own pectin instead of a boxed packet.

Kitchen explainer showing orange peel and pith, lemon, sugar, boiling marmalade, and a finished jar to explain natural marmalade set.
No added pectin does not mean no structure. Orange peel, pith, lemon, sugar, boiling, and cooling all work together to create a soft marmalade set.

If you remove almost all the peel and pith, reduce the sugar heavily, or stop cooking too early, the marmalade may stay loose. Sugar also matters: it does not only sweeten the preserve; it helps the syrup thicken as water evaporates. If you enjoy this kind of small-batch preserve logic, MasalaMonk’s fig jam recipe also shows how fruit, sugar, and testing work together without making the process feel complicated.

How to Make Orange Marmalade Less Bitter

A little bitterness is the point; harsh bitterness is the problem. The right bitterness should make the orange taste deeper, not make the peel taste harsh or medicinal. For a milder jar, start with sweet oranges, slice the peel thinly, and avoid using too much thick white pith.

Flavor balance: Aim for orange depth, not harsh peel. The choices you make before boiling decide most of that balance.

Guide showing sweet oranges, thin orange peel strips, trimmed white pith, and blanching tips for less bitter orange marmalade.
Bitterness is part of marmalade, but it should not take over. Use sweeter oranges, thinner peel, and less thick white pith for a brighter, gentler jar.

The most important step is simmering the peel until it gives easily. This mellows the sharp edge and prevents chewy strips in the finished jar. Very bitter peel can be blanched once: cover it with water, boil for 2 minutes, drain, then continue with the recipe using fresh water.

Leave some pith for structure, though. Removing every trace of pith can make the marmalade sweeter, but it can also weaken the set. The goal is balance: trim thick, spongy excess pith when needed, but leave enough citrus structure for the marmalade to set. Judge bitterness after the marmalade cools; hot syrup can taste sharper than the final jar.

Orange Marmalade Troubleshooting

Marmalade is forgiving in a way that does not seem obvious while it is boiling. A loose jar can become sauce, a bitter jar can become glaze, and a firm jar can often be warmed back into usefulness. If something looks wrong, do not assume the batch is ruined; it usually tells you what it needs: more cooking, less heat, softer peel, or a different use for a jar that set too firmly.

Quick Fixes Before You Reboil

Fast fixes: runny marmalade can be cooked again, stiff marmalade can be loosened with a little hot water, bitter marmalade is best used in glazes or baking, and tough peel is mostly a next-time fix.

Common Marmalade Problems and Fixes

ProblemLikely reasonFix nowNext time
Marmalade is runnyUndercooked, too much water, low sugar, or weak pectinReturn it to the pot, boil again, and retest on a cold plateCook to a soft wrinkle and avoid reducing sugar too much
Marmalade is too stiffOvercooked or boiled past the set pointWarm gently with a spoonful or two of hot water until looserStop when the cold-plate test shows a soft wrinkle, not a firm rubbery set
Peel is toughSugar was added before the peel softenedUse the batch in glazes or sauces where texture matters lessSimmer peel until tender before adding sugar
Marmalade is too bitterToo much pith, bitter oranges, thick peel, or overcookingUse it in savory glazes, salad dressings, or bakingUse sweeter oranges, slice peel thinner, or blanch peel once
Sugar crystallizedSugar was not fully dissolved before boiling hardRewarm gently and stir; add a small splash of water if neededLet sugar dissolve over medium heat before a rolling boil
Marmalade darkened too muchCooked too long or heat was too high near the endUse darker marmalade in glazes, cheese boards, or baking if it tastes caramelized but not burntStart testing earlier and reduce heat slightly as it thickens
Peel floated to the topMarmalade was jarred immediately while very hot and looseStir the jar after partial cooling if using as fridge marmaladeLet marmalade rest 5 to 10 minutes before jarring

Once you understand this kind of cold-plate testing, the same logic helps with other small-batch preserves, like MasalaMonk’s cape gooseberry and mint jam.

Low-Sugar Orange Marmalade: What You Can and Cannot Reduce

A slightly softer, lower-sugar fridge jar can still be lovely; it just needs to be treated as a different kind of marmalade. Think of it as a spoonable citrus spread rather than a classic pantry marmalade. You can reduce sugar a little for refrigerator storage if you accept a softer set, but it should not be treated like a traditional pantry preserve.

Lower-sugar reminder: Softer texture is not failure here; it is the expected tradeoff when you move away from classic marmalade sugar levels.

Two jars comparing regular-set orange marmalade and lower-sugar softer-set marmalade with a fridge or freezer storage reminder.
For lower-sugar marmalade, expect a softer spoonable texture rather than a firm classic set. Treat it as a fridge or freezer preserve unless using a tested method.

Very low-sugar marmalade is a separate style, not a simple subtraction. A very low-sugar or sugar-free orange marmalade usually needs special low/no-sugar pectin or a different method. For very low-sugar or sugar-free fruit spreads, the NCHFP reduced-sugar fruit spread guidance is a safer starting point than simply swapping sugar in a regular marmalade recipe.

For shelf-stable low-sugar jars, use a tested low-sugar canning recipe. Sugar substitutes do not give the same set or preservation as sugar in a regular marmalade recipe.

How to Store Orange Marmalade: Fridge, Freezer, and Safe Canning Notes

Fridge jar and pantry jar are not the same thing. This recipe is written first as a refrigerator or freezer orange marmalade, which keeps the method approachable and avoids pretending that every homemade jar is automatically shelf-stable.

Storage reminder: Choose the storage method before you fill the jars, because fridge, freezer, and pantry storage are not interchangeable.

Three jars of orange marmalade showing fridge storage, freezer storage with headspace, and tested canning-only pantry storage.
Fridge and freezer storage are simple for this small-batch marmalade. Pantry storage is a different process and needs tested canning instructions.

Refrigerator storage

Spoon the hot marmalade into clean jars, let it cool, then refrigerate. Use clean spoons when serving, and avoid leaving the jar out at room temperature for long stretches. For best quality, use refrigerated marmalade within 3 to 4 weeks, sooner if you reduced the sugar. Discard it if you see mold, bubbles, fermentation, or notice an off smell.

Freezer storage

Orange marmalade freezes well. Use freezer-safe jars or containers and leave headspace because the marmalade can expand as it freezes. Thaw in the refrigerator before using.

Shelf-stable canning

For shelf-stable marmalade, you need a tested formula, hot jars, correct headspace, proper lids, and the right boiling-water processing time for your jar size and elevation. The National Center for Home Food Preservation citrus marmalade guidance is a good authority to consult for jar preparation, headspace, and processing.

If you want pantry storage, use a proper water-bath canning method from the start.

Ways to Use Orange Marmalade

Orange marmalade is not only for toast, although toast with butter is still its natural home. The best marmalade is not just sweet orange spread; it is a ready-made balance of citrus oil, sugar, bitterness, and peel. That is why one spoonful can do the work of zest, juice, syrup, and glaze.

A good jar earns its space in the fridge because it keeps solving small problems: breakfast needs brightness, cake needs a bittersweet seam, chicken needs a glaze, and cheese needs contrast.

Use-it-up idea: Think of marmalade as citrus, sweetness, bitterness, and peel in one spoonful, then use it wherever a dish needs brightness and gloss.

Orange marmalade served with scones, cake glaze, savory glazed chicken, salad dressing, cheese, crackers, and a central jar.
A good jar of orange marmalade is useful far beyond toast. Try it as a cake glaze, savory glaze, salad dressing base, or cheese board pairing.

Quick orange marmalade formulas

  • Quick glaze: 2 tablespoons marmalade + 1 teaspoon mustard + a splash of vinegar.
  • Savory glaze: 2 tablespoons marmalade + 1 teaspoon soy sauce + 1 teaspoon vinegar + a pinch of chili or ginger.
  • Salad dressing: 1 tablespoon marmalade + 1 tablespoon vinegar + 2 tablespoons olive oil.
  • Cake glaze: warm marmalade with a splash of water or lemon juice until brushable.
  • Cheese board pairing: marmalade + sharp cheese + roasted nuts + crackers.

Breakfast ideas

Spread orange marmalade on toast, croissants, English muffins, pancakes, waffles, and biscuits. It is especially good with warm easy English scones, where the citrus peel cuts through butter, cream, or clotted cream.

For a weekend breakfast plate, use a smaller spoonful with almond flour pancakes, where the almond flavor pairs naturally with orange.

Baking ideas

Use it as a cake filling, loaf cake glaze, thumbprint cookie center, bread pudding accent, or tart layer. It works especially well with almond, chocolate, vanilla, and warm spices.

For a citrus-on-citrus dessert, try it with an orange olive oil cake. For a nutty pairing, add a thin glossy layer to an almond cake.

Savory glazes and sauces

Warm orange marmalade with mustard, vinegar, soy sauce, chili, garlic, or ginger to make a quick glaze for chicken, duck, pork, ham, salmon, carrots, or roasted vegetables. The sweet-bitter citrus flavor works beautifully with rich meats. For a classic citrus-meat pairing, MasalaMonk’s orange sauce for duck shows how orange, acidity, stock, and a little sweetness can stay savory rather than sticky.

Holiday, drinks, and cheese boards

Stir a spoonful into cranberry sauce for peel, gloss, and citrus depth; this cranberry sauce with orange juice is a natural pairing.

Marmalade can also sweeten cocktails, mocktails, hot tea, and sparkling citrus drinks. For drinks, treat it like a citrus syrup: shake or stir it well with lemon, orange juice, or soda so the peel and sugar dissolve into the drink instead of sitting at the bottom.

For a cheese board, serve marmalade with soft cheese, sharp cheddar, blue cheese, crackers, roasted nuts, and dried fruit. A slightly bitter jar is especially good here because it cuts through richness instead of making the board taste too sweet.

Orange Marmalade Variations

Once you understand the base method, the variation depends on what you want to change: sweetness, bitterness, color, spice, or gifting value.

Choose Your Marmalade Style

  • Mild breakfast marmalade: sweet oranges, fine peel, and 700 g sugar.
  • Firmer classic set: sweet oranges or mixed citrus, medium peel, and 800 g sugar.
  • More bitter traditional flavor: Seville oranges or a Seville blend.
  • Sweeter soft spread: mandarins or tangerines.
  • Glaze or cheese-board jar: slightly stronger bitterness and medium peel.

Choose a style: Choose the version by mood and use: breakfast-soft, classic-bitter, ginger-warm, spiced-holiday, or low-peel sweet.

Multiple jars of orange marmalade variations labeled mild breakfast, classic bitter, mandarin, blood orange, ginger, spiced, whiskey, and low-peel sweet.
Once the base orange marmalade method makes sense, you can adjust the style toward sweeter, bitter, spiced, ginger, blood orange, or gifting-friendly versions.

Mandarin orange marmalade

Mandarins and tangerines are best when you want a softer, sunnier breakfast jar. Their peel is thinner and their flavor is naturally gentler, so the final marmalade feels less bitter than a classic Seville-style version.

Seville orange marmalade

Seville is for people who love marmalade’s bitter backbone: sharp, aromatic, and traditional. These oranges usually need enough sugar and careful use of seeds or membranes for natural pectin, so it is worth treating them as their own focused recipe.

Blood orange marmalade

Blood oranges are the dramatic color route: deeper, rosier, and lightly berry-like, but easier to over-darken if you cook them too far.

Orange ginger marmalade

Ginger pushes the jar toward toast, tea, winter baking, and savory glazes. Add finely grated fresh ginger or thin matchsticks of ginger during the final cooking stage.

Whiskey orange marmalade

Whiskey turns marmalade into a warmer gifting jar. Stir in a small splash after the marmalade comes off the heat. Keep it subtle: the goal is aroma and warmth, not a harsh alcohol taste.

Spiced orange marmalade

Spices make sense for holiday toast and cheese boards. Add a small piece of cinnamon, a few cloves, or a little star anise while the marmalade cooks, then remove the spices before jarring. Use a light hand so the spices support the orange instead of overpowering it.

Orange marmalade without peel

A low-peel version is better for a sweeter, softer spread, but it will be closer to orange jam than classic marmalade. Because peel and pith help with natural pectin, a no-peel version may need longer cooking, added pectin, or a softer-set expectation.

Orange Marmalade Recipe

If you remember only three things, remember these: soften the peel first, dissolve the sugar before the hard boil, and test the set on a cold plate.

The finished marmalade should be loose enough to spoon, with peel suspended in a clear, syrupy set. It will thicken more as it cools.

Small-Batch Sweet Orange Marmalade, No Boxed Pectin

This orange marmalade recipe uses regular sweet oranges, lemon, sugar, and water for a bittersweet, spoonable preserve with tender peel. It is written as a refrigerator or freezer marmalade, with separate canning safety notes if you want shelf-stable jars.

Prep time
20 to 25 minutes
Cook time
45 to 70 minutes
Total time
About 1 hour 10 minutes to 1 hour 35 minutes
Yield
About 4 cups

Before you start: Place two small plates in the freezer for testing, choose a large deep pot because marmalade bubbles up, and have clean jars ready.

Ingredients

  • 900 g to 1 kg regular sweet oranges, preferably thin-skinned, about 2 to 2.2 lb
  • 1 medium lemon, juiced, about 2 to 3 tablespoons / 30 to 45 ml
  • 600 ml water, about 2 1/2 cups, plus more if needed
  • 700 to 800 g sugar, about 3 1/2 to 4 cups
  • Tiny pinch of salt, optional

Method

Prepare and Soften the Peel
  1. Wash and prepare. Scrub the oranges and lemon well. Slice off the hard ends. Remove the orange peel in strips and cut it into fine or medium shreds. Fine peel gives the easiest spread; medium peel gives the most classic marmalade feel. Chop the orange flesh and save the juice. Remove seeds so they do not end up in the jar; save them only if you plan to use the optional seed bag.
  2. Simmer the peel. Add the sliced peel and water to a large heavy non-reactive saucepan. Bring to a boil, then simmer partly covered if the water is evaporating too quickly. Cook until the peel is soft enough to pinch or cut against the side of the pot with a spoon, about 20 to 35 minutes. Do not add sugar before this point.
  3. Check the liquid. When the peel is tender, there should still be some liquid in the pot. If it is nearly dry, add a splash more water. If it looks very watery, simmer uncovered for a few minutes before adding sugar.
  4. Add fruit and lemon. Add the chopped orange flesh, saved juice, lemon juice, and optional salt. If you are using a seed bag for extra natural pectin, add it now.
Boil, Test, Rest, and Store
  1. Dissolve the sugar. Stir in the sugar over medium heat until fully dissolved. Use 700 g for a softer fridge marmalade or 800 g for a firmer set.
  2. Boil to set. Increase the heat and cook at a steady, active bubble in a large deep pot, stirring often. Stir more often near the end as the syrup thickens. Start testing before it looks fully done, especially in a wide pan.
  3. Use the cold-plate test. Spoon a little marmalade onto a chilled plate, wait 1 minute, then push it gently. If it wrinkles softly, it is ready. Hot marmalade looks looser than cooled marmalade, so judge the chilled sample rather than the pot.
  4. Rest and jar. If using a seed bag, lift it out carefully, press it gently against the side of the pot, and discard. Remove the marmalade from heat and let it rest for 5 to 10 minutes. Skim foam if needed, then spoon into clean jars.
  5. Store safely. Spoon into clean jars, let cool at room temperature until no longer hot, then refrigerate. For freezing, leave headspace. Do not store this fridge/freezer version in the pantry unless you follow a tested water-bath canning method.

Recipe Notes

  • For a milder marmalade, use fine shreds of peel and sweet, thin-skinned oranges.
  • For a stronger, more traditional flavor, use some Seville orange or thicker peel.
  • If the peel tastes very bitter, blanch it once for 2 minutes, drain, then continue with the recipe.
  • If your fruit has seeds, you can simmer them in a small cheesecloth bag for extra natural pectin, but this is optional.
  • Yield can vary slightly depending on orange juiciness, pot width, and how far you reduce the syrup.
  • For pantry jars, follow tested canning guidance.

Saveable Orange Marmalade Recipe Card

Use the written recipe card above while cooking; this image is the quick visual version to save for your next batch.

Saveable orange marmalade recipe card with a jar of marmalade, ingredients, short method, yield, and fridge or freezer storage note.
Keep this recipe card handy when cooking. It brings the sweet-orange formula, soft-set method, and fridge/freezer storage reminder into one quick reference.

FAQs About Orange Marmalade

What is the difference between orange marmalade and orange jam?

Orange marmalade includes citrus peel, which gives it texture and a bittersweet edge. Orange jam is usually smoother, sweeter, and less peel-forward. If you blend the mixture completely or remove most of the peel, it will feel more like jam.

Do you need pectin for orange marmalade?

No boxed pectin is needed. Citrus naturally carries pectin in the peel, pith, seeds, and membranes; lemon, sugar, and cooking time help that pectin create a soft set. Low-sugar or no-peel versions may need extra pectin support.

Why did my orange marmalade not set?

It may be undercooked, too watery, too low in sugar, or short on natural pectin from peel and pith. Reboil it for a few minutes, then test again on a cold plate.

How do you fix runny marmalade?

Pour it back into a pot and bring it to a steady boil. Cook briefly, then test on a chilled plate. Stop when the cooled sample wrinkles softly.

Why is my marmalade bitter?

A little bitterness is normal; harsh bitterness is the problem. Too much thick pith, bitter fruit, thick-cut peel, or overcooking can make the jar taste too sharp.

How do you make marmalade less bitter?

Use sweet oranges, fine peel shreds, and only trim the thickest pith. Simmer the peel fully before sugar goes in. If the peel is very bitter, blanch it once for 2 minutes, drain, and continue with fresh water.

Which oranges are best for orange marmalade?

For beginner-friendly marmalade, use sweet, thin-skinned oranges such as navel, Valencia, or Cara Cara. Seville oranges are best for traditional bitter marmalade, while mandarins and tangerines make a sweeter, softer preserve.

Do I have to use Seville oranges?

No. Seville oranges are traditional, but this recipe is designed for regular sweet oranges. The result is milder, easier to shop for, and still properly marmalade-like.

Why is the peel in my marmalade tough?

Tough peel almost always means the sugar arrived too early. Simmer the peel until tender before adding sugar, because sugar slows further softening.

How long does homemade orange marmalade last?

Refrigerator marmalade is best used within 3 to 4 weeks, sooner if you reduced the sugar. Freezer marmalade lasts longer when packed with headspace in freezer-safe containers.

Is this orange marmalade safe for canning?

This fridge/freezer version should not be treated as pantry-safe by default. Orange marmalade can be canned when you use a tested formula and proper boiling-water processing, but do not simply jar this version and store it at room temperature.

What can I make with orange marmalade?

Use it on toast, scones, croissants, pancakes, yogurt, and oatmeal. It also works in cake fillings, thumbprint cookies, salad dressings, cheese boards, and savory glazes for chicken, duck, pork, ham, salmon, or roasted vegetables.

Can I make marmalade with less sugar?

You can reduce sugar slightly for a softer refrigerator jar. Very low-sugar or sugar-free marmalade needs a different method, often with special pectin, and should not be canned unless you use tested low-sugar canning guidance.

The first batch teaches you the rhythm: soften the peel, watch the bubbles slow, trust the cold plate, and stop before the jar gets stiff. After that, marmalade stops feeling fussy and starts feeling like one of those quiet kitchen skills that pays you back every time you open the fridge.


Back to top ↑

Posted on Leave a comment

Apple Cider Vinegar & Cayenne Pepper: Weight Loss, Benefits, and Results

Woman holding an apple cider vinegar and cayenne pepper drink in a modern kitchen—magazine-style Pinterest cover.

If you’ve been wondering whether mixing apple cider vinegar and cayenne pepper is actually worth doing, you’re not alone. The tart-meets-spicy combo pops up in kitchen lore, wellness routines, and the occasional bottled “cleanse.” However, beyond the buzz, there’s a slower, steadier story to tell—one about repeatable habits that make meals feel calmer, appetite feel friendlier, and energy feel a little more even. This guide gives you a simple ACV + cayenne drink, several variations you’ll genuinely enjoy, and a grounded explanation of what the research suggests (and what it doesn’t). It also folds in safety tips that protect your teeth and your gut, plus practical day-by-day ideas so the habit sticks.

Take a breath. Instead of chasing miracles, let’s build a ritual you’ll actually repeat.


Why people mix apple cider vinegar and cayenne pepper

To set the stage, it helps to know what’s in the glass. Apple cider vinegar (ACV) contains acetic acid, which in controlled settings can slow gastric emptying and blunt post-meal glucose spikes. Consequently, some people experience steadier energy and an easier time stopping at comfortable portions. Cayenne pepper, for its part, brings capsaicin and related capsinoids, compounds associated with a small thermogenic bump and, in several trials, a gentle reduction in perceived appetite. None of this makes the drink a magic bullet; nevertheless, it can become a before-meal cue that nudges you toward mindful pacing and balanced plates.

Taste matters, too. The sip is tangy and gently hot, which many find satisfying. As a result, they approach the next meal more calmly—often enough to shift portions down a notch without white-knuckling.


The everyday apple cider vinegar and cayenne pepper drink (base recipe)

Serves: 1 | Time: 2 minutes

  • 250 ml (1 cup) warm or room-temperature water
  • 1–2 tsp (5–10 ml) raw, unfiltered apple cider vinegar (with the “mother”)
  • A pinch (1/16–1/8 tsp) ground cayenne pepper
  • Optional: 1–2 Tbsp fresh lemon juice; 1–2 tsp honey or maple; a few thin slices of fresh ginger; a pinch of turmeric; or 1/8 tsp cinnamon

Method:
Pour the water first. Then add ACV, sprinkle in cayenne, and stir. Finally, fold in any add-ins and sip before or with a meal. Begin with 1 tsp ACV for a few days and notice how you feel.

Why this version works:
It’s fast, repeatable, and flexible. Moreover, it’s simple to tailor—more lemon on warm afternoons, a whisper of cinnamon when evenings cool, or ginger when you want something soothing yet bright.


Apple cider vinegar and cayenne pepper for weight loss: realistic expectations

Let’s keep this honest. Drinks don’t melt fat. Even so, certain sips can change how you approach food, and that’s where the leverage lives. Taken just before or with a meal, apple cider vinegar and cayenne pepper may help you feel satisfied sooner; consequently, portions often shrink gently without a sense of deprivation. Additionally, ACV’s acetic acid can smooth post-meal glucose waves—something many notice as fewer energy dips and less frantic snacking. Meanwhile, capsaicin’s heat adds a small thermogenic nudge.

That said, the effects are modest in the literature. Meta-analyses and randomized trials suggest that ACV and capsaicin can support small improvements across weight or waist measures over several weeks, particularly when the rest of the day—protein, fiber, movement, sleep—pulls in the same direction. If you want receipts, here are two plain-English starting points: a systematic review on ACV and body metrics in the journal Nutrients (systematic review on ACV) and a meta-analysis on capsaicin and weight outcomes in the British Journal of Nutrition (capsaicin meta-analysis).


When to sip the ACV and cayenne pepper drink (and how often)

Rituals stick when they’re simple. Many people sip the drink 10–15 minutes before lunch; others prefer it with a meal. Start with 1 tsp (5 ml) ACV in a full glass of water plus a tiny pinch of cayenne, once daily. After a week—if everything feels fine—move to 2 tsp (10 ml); later, if you wish, try 1 Tbsp (15 ml). Consistency matters more than bravado.

If an empty stomach feels harsh, place the drink alongside a meal. Comfort drives adherence; adherence shapes results.


Variations people actually stick with (since taste keeps habits alive)

Apple cider vinegar and cayenne pepper with lemon

When you want freshness, add 1–2 Tbsp lemon juice to the base. The flavor brightens immediately, and the sip begins to feel almost like a wellness mocktail. For a deeper dive into this duo—timing, tweaks, and flavor ideas—see Apple Cider Vinegar and Lemon Juice for Weight Loss.

Apple cider vinegar and cayenne pepper with honey

Sometimes, a touch of sweetness makes the ritual inviting. Stir in 1–2 tsp honey, taste, and adjust. It’s smoother and easier for beginners. Nevertheless, measure the honey so the drink stays light. For balanced, non-hype guidance, read Lemon, Cayenne Pepper, and Honey for Detox.

“Bragg-style” at home

Prefer the bottled vibe—ACV + lemon + cayenne + honey—but want control? Make it yourself. The ingredient lineup on Bragg Honey Cayenne Wellness Cleanse provides a useful taste map; afterward, dial sweetness to your preference and keep the drink well-diluted. For a quick check, here are straightforward ingredient references: Bragg’s product page and a neutral retailer listing like Good Eggs.

Ginger–turmeric comfort

On cooler evenings, add a few ginger slices and a pinch of turmeric; let it steep for three to five minutes so the aromatics bloom. If you want to understand how turmeric and ACV fit together more broadly, explore Turmeric and Apple Cider Vinegar for Weight Loss.

Cinnamon whisper

When you crave warmth without extra heat, whisk in 1/8 tsp cinnamon. Stir well—cinnamon clumps. For more spice-led kitchen tweaks, browse 10 Metabolism-Boosting, Fat-Burning, Weight-Loss Inducing Spices.


A day built around apple cider vinegar and cayenne pepper (without diet drama)

Morning: Hydrate first. If you already love warm lemon water, keep it; then slide your ACV drink closer to lunch.

Before lunch: Sip your apple cider vinegar and cayenne pepper drink. Build your plate around protein (eggs, curd/Greek yogurt, paneer/tofu, legumes, fish, or chicken) plus vegetables and fiber-rich carbs. Furthermore, season generously; flavor makes restraint easier.

After lunch: Take a short walk—ten to twenty minutes resets energy more than you’d expect.

Dinner: If appetite swells at night, begin with a salad dressed in an ACV vinaigrette to echo the theme while slowing the meal’s pace. On days you want variety, try switchel (a vinegar-ginger classic); the tradition feels old-school, yet it fits perfectly in modern kitchens.

Evening: Rinse with plain water after acidic drinks and wait 30–60 minutes before brushing so enamel can re-harden. Dental organizations and clinicians consistently recommend this timeline; for quick reads, see Mayo Clinic’s brushing-after-acid advice and a concise ADA newsroom explainer.


Apple cider vinegar and cayenne pepper benefits (tempered, practical, and honest)

Since nuance matters, here are the main points, calmly stated:

  • Satiety & portions: With meals, ACV can help some people feel content with slightly less; over time, that can gently reduce calorie intake.
  • Post-meal steadiness: By smoothing glucose spikes, ACV often translates to fewer crashes and steadier focus. For background, skim a short clinical overview of vinegar’s effect on postprandial glucose and a nutrition review abstract.
  • Thermogenic nudge: Capsaicin’s heat effect is small yet real, especially with balanced meals and regular movement. For perspective, here’s a broad capsaicin review in addition to the meta-analysis above.
  • Habit stack: Most importantly, the drink becomes a cue for better choices—protein, vegetables, and reasonable pacing. In practice, that’s where sustainable change comes from.

Safety first: how to enjoy ACV and cayenne while protecting teeth and digestion

ACV is acidic and cayenne is spicy; dilution is non-negotiable. In addition, consider a straw and always rinse with plain water afterward. Crucially, wait at least 30 minutes (up to an hour) before brushing so saliva can buffer acids and enamel can re-harden—guidance echoed by clinicians and dental groups (see the Mayo Clinic note and the ADA item once more).

If you have reflux, ulcers, or a sensitive stomach, place the drink with food, reduce the ACV amount, or skip the cayenne entirely. Moreover, if you use diuretics or diabetes medications, or you manage kidney disease, talk to your clinician about ACV’s potassium and glycemic effects. Personal thresholds vary; prudence keeps the habit comfortable.


Apple cider vinegar and cayenne pepper drink: recipes you’ll actually repeat

Although one size never fits all, the following options cover most palates:

Everyday base (unsweetened)

Water 250 ml + ACV 1–2 tsp + tiny pinch cayenne. Optionally, add lemon. Sip before or with a meal.

Gentle honey-lemon

Base + 1–2 tsp honey + 1–2 Tbsp lemon. Still dilute, still simple, noticeably smoother. For balancing sweetness and spice, here’s the internal guide: Lemon, Cayenne Pepper, and Honey for Detox.

Ginger-turmeric steam

Base + fresh ginger slices + pinch turmeric; let it sit three to five minutes. For broader context, read Turmeric and Apple Cider Vinegar for Weight Loss.

Cinnamon comfort

Base + 1/8 tsp cinnamon; whisk well to avoid clumps. For more spice-first strategies, skim Metabolism-Boosting Spices.


Beyond the glass: simple ways to make apple cider vinegar and cayenne pepper work in real life

  • Lead with protein. Breakfasts built around eggs, yogurt, paneer/tofu, or dal steady appetite; evenings feel far less chaotic.
  • Add fiber and color. Vegetables, pulses, whole grains, and fruit deliver fullness on fewer calories; as a result, the day feels more even.
  • Walk after meals. Even brief strolls improve post-meal glucose; consequently, energy steadies.
  • Keep rituals flexible. If mornings are rushed, move the drink to lunch. Conversely, if lunch is unpredictable, sip before dinner.
  • Swap when needed. On days the drink doesn’t appeal, toss a salad with a bright ACV vinaigrette; the theme remains, the texture changes.

If you want a wider beverage bench, these sit nicely alongside your ACV habit: 5 Green Tea & Spice Infusions for Weight Loss and a friendly intro to switchel, the classic vinegar-ginger refresher.


What about bottled blends, pills, or gummies?

Convenience tempts everyone. Bottled ACV + lemon + cayenne + honey tastes familiar and travels well. Nevertheless, homemade versions let you adjust acidity and sweetness, which can be kinder to teeth and digestion, and they’re typically cheaper. For quick ingredient snapshots, cross-check the Bragg Honey Cayenne Wellness Cleanse or a neutral retailer page like Good Eggs.

As for pills or gummies, doses vary and labels aren’t standardized. Furthermore, some people report throat irritation from capsules. For these reasons, many prefer the drink for control and timing—especially when pairing it with meals rather than taking it in isolation.


Apple cider vinegar and cayenne pepper with lemon: where it shines

When brightness motivates you, the lemon variation really sings. Lemon’s aroma wakes the palate; you often pace yourself at the next meal. Additionally, vitamin C adds a small perk. For recipes and nuance, head to Apple Cider Vinegar and Lemon Juice for Weight Loss. If you enjoy morning rituals, pair that with The Morning Ritual: Warm Lemon Water—no need to force ACV on an empty stomach if that doesn’t suit you.


Apple cider vinegar and cayenne pepper with honey: when smoothness keeps you consistent

Not everyone loves sharp, unsweetened drinks. If a teaspoon or two of honey keeps you showing up, that’s a win. Measure it, taste, and adjust. Sustainability beats perfection every time. For more mix-and-match ideas, revisit Lemon, Cayenne Pepper, and Honey for Detox.


Bottom line

At the end of the day, apple cider vinegar and cayenne pepper can be a low-effort, high-consistency ritual. It’s quick to mix, easy to personalize, and grounded enough to respect your body’s pace. As you keep it diluted, sip it before or with meals, and give your teeth a little care, you may notice that meals feel calmer and energy feels steadier. From there, it’s much easier to make choices you’re proud of—day after day.

Ultimately, the habit is the hero. The drink is just how you start.


External sources

FAQs

1) Can I mix cayenne pepper with apple cider vinegar?

Absolutely. However, always dilute the combo in water. Start with 250 ml water + 1 tsp ACV + a tiny pinch of cayenne. Consequently, you’ll reduce enamel/gut irritation while keeping the flavor pleasant. If it’s too spicy, alternatively scale the cayenne down to a “dusting.”

2) Apple cider vinegar and cayenne pepper for weight loss—does it actually help?

Yes, but modestly. Moreover, the real benefit arrives when you pair the drink with protein-rich meals, fiber, movement, and sleep. Therefore, treat it as a helpful ritual, not a miracle.

3) What are the benefits of apple cider vinegar and cayenne pepper?

In brief: potential appetite control, smoother post-meal energy, and a small thermogenic nudge. Additionally, the habit itself cues mindful eating. Nonetheless, results build gradually over weeks, not days.

4) How to drink cayenne pepper for weight loss (timing and dose)?

Sip 10–15 minutes before a main meal (or with it). Begin with 1 tsp ACV in 250 ml water + a tiny pinch of cayenne once daily. Subsequently, if you tolerate it well after a week, increase to 2 tsp, and, if desired, later to 1 Tbsp.

5) Apple cider vinegar and cayenne pepper drink—what’s the simplest recipe?

Mix 250 ml water + 1–2 tsp raw ACV + a pinch of cayenne. Optionally, add lemon (1–2 Tbsp) or honey (1–2 tsp). Consequently, you’ll get a bright, sippable base you can repeat daily.

6) Apple cider vinegar, lemon and cayenne pepper—any extra advantages?

Lemon adds freshness and vitamin C; meanwhile, the core effects remain modest. Importantly, this variation tends to improve adherence because it tastes better, which ultimately matters most.

7) Apple cider vinegar, cayenne pepper and honey—is honey OK?

Yes—in moderation. However, honey adds calories, so measure 1–2 tsp. Alternatively, swap honey for a zero-calorie sweetener if you’re strictly counting.

8) What is the benefits of apple cider vinegar with lemon and cayenne pepper (as searched)?

Primarily, a tastier apple cider vinegar and cayenne pepper base with similar satiety and post-meal steadiness; plus, lemon’s aroma can slow your pace at meals. Nevertheless, keep expectations realistic.

9) Can this drink burn belly fat or “spot-reduce”?

No drink can target belly fat specifically. Instead, think whole-body change: consequently, consistent meals, steps, sleep, and this pre-meal ritual together move the needle.

10) Apple cider vinegar weight-loss recipe with cayenne pepper—what’s a friendly starter?

Try 250 ml water + 1 tsp ACV + a tiny pinch of cayenne + 1 Tbsp lemon. Subsequently, as tolerance grows, move up to 2 tsp ACV. If needed, 1 tsp honey can smooth the edges.

11) Apple cider vinegar and cayenne pepper drink with lemon—morning or night?

Either. However, if your stomach is sensitive in the morning, alternatively place it before lunch. Consistency, therefore, beats perfect timing.

12) ACV and cayenne vs pills/capsules—what’s better?

The drink is easier to titrate and pair with meals; moreover, it avoids some throat irritation reported with capsules. Capsules, meanwhile, are convenient but vary in dose/quality. Ultimately, choose what you’ll repeat.

13) Can I take apple cider vinegar and cayenne while fasting?

Plain ACV + water is very low-calorie; some fasting styles allow it. Honey, however, breaks a fast. Consequently, follow the rules of your chosen protocol.

14) Side effects of apple cider vinegar and cayenne pepper?

Undiluted ACV can affect enamel and the throat; cayenne can irritate reflux-prone stomachs. Therefore, always dilute, consider a straw, rinse with water afterward, and wait 30 minutes before brushing. Additionally, if you have GERD, ulcers, kidney disease, or take diuretics/diabetes meds, consult your clinician first.

15) ACV and cayenne pepper drink—can I use warm water?

Yes. In fact, slightly warm (not hot) water helps flavors meld. Nevertheless, avoid boiling water; it’s unnecessary and may taste harsh with ACV.

16) Apple cider vinegar and cayenne pepper with cinnamon—worth trying?

Definitely, if you enjoy warmth without extra heat. Add 1/8 tsp cinnamon; whisk well so it doesn’t clump. Alternatively, swap cinnamon for fresh ginger slices.

17) ACV, turmeric and cayenne pepper—is that combo fine?

Yes—start with a pinch of turmeric plus ginger slices. Meanwhile, let it steep 3–5 minutes for aroma. Consequently, many find this evening-friendly and soothing.

18) Apple cider vinegar and cayenne pepper drink—how long until results?

Give it 3–8 weeks alongside balanced plates and regular steps. Importantly, track appetite, portions, and energy rather than only the scale; progress, therefore, feels more obvious.

19) Can I mix apple cider vinegar and cayenne pepper with lemon water I already drink?

Sure. Moreover, it’s an easy habit stack: keep your lemon water ritual and, subsequently, fold ACV + a tiny pinch of cayenne into one serving per day.

20) How much cayenne is too much in an ACV drink?

Stay at a pinch (about 1/16–1/8 tsp). If you feel throat or gut irritation, consequently cut it in half—or skip cayenne and keep only ACV + lemon.

21) Apple cider vinegar and cayenne pepper drink recipe—can I batch-prep?

You can pre-mix ACV + water in a bottle (refrigerated) for 24 hours. However, add lemon, cayenne, or honey right before drinking; flavors and potency hold better that way.

22) ACV and cayenne pepper for weight loss—should I take it twice a day?

Once daily is sufficient for most. Nevertheless, if tolerance is good, you could split your usual ACV amount across two small pre-meal drinks. Ultimately, let comfort and consistency guide you.

23) Apple cider vinegar and cayenne pepper drink—does brand matter?

Choose raw, unfiltered ACV with the “mother.” As for cayenne, any reputable, fresh, bright-red ground cayenne works. Additionally, check best-by dates for potency.

24) Apple cider vinegar, cayenne pepper and lemon—can I sweeten without honey?

Yes. Alternatively, use a few drops of stevia/monk fruit, or even a thin apple slice muddled in the glass. Consequently, you’ll keep calories low while softening the tang.

25) Vinegar and cayenne pepper for weight loss—can I use white vinegar?

Technically yes, though apple cider vinegar is the focus here and tends to be gentler in flavor. If you swap, subsequently start at an even smaller dose and assess taste/tolerance.

26) Apple cider vinegar and cayenne—is a “shot” better than a drink?

No—avoid straight shots. Instead, always dilute in a full glass of water. Consequently, you’ll protect teeth and reduce throat discomfort while getting the same practical effect.

27) How do I scale the recipe without overdoing acid or heat?

Keep a simple ratio: per 250 ml water, use 1–2 tsp ACV + a pinch of cayenne. Moreover, if you want a larger glass (500 ml), simply double the water and lemon first; then, cautiously increase ACV.

28) Apple cider vinegar and cayenne pepper—which meal is best?

Whichever meal you overeat most. For many, that’s lunch. Alternatively, use it before dinner if evenings are your challenge. Therefore, align timing with the moment of highest payoff.

29) Apple cider vinegar and cayenne pepper benefits—will this affect my workouts?

Possibly. Some experience steadier energy and fewer cravings post-workout. Conversely, if spicy drinks bother you before training, simply have it with a different meal.

30) Final guide: what’s the smartest starting plan?

Week 1: 250 ml water + 1 tsp ACV + tiny pinch cayenne once daily before a main meal. Week 2: if comfortable, 2 tsp ACV. Meanwhile, keep meals protein-forward with veggies and fiber; add lemon for taste, and honey only if needed. Ultimately, consistency beats intensity.

Posted on 3 Comments

Lemon for Hair: Growth, Dandruff, Shine & Safe Uses

Photorealistic magazine-style cover image of a South Asian woman with glossy hair, lemon, coconut oil, and lemon water on a vanity table. Text overlay: Lemon for Hair: Growth, Dandruff, Shine & Safe Uses — MasalaMonk.com

We’ve all heard them — the home remedies passed down like sacred secrets. “Rub lemon on your scalp, it will make your hair grow faster.” Or, “Rinse with lemon water after oiling, and your hair will shine like silk.”

For many of us, these aren’t just tips; they’re memories. Of sitting on a charpai on hot afternoons while a grandmother massaged warm coconut oil mixed with a few drops of lemon into our scalp. Of rinsing hair after henna with lemon water, hoping the strands would catch that extra glint of copper under the sun.

Lemon has always had a place in traditional beauty care — across Ayurveda, Unani medicine, and even Western DIY culture. In Ayurveda, lemon (Nimbuka) is described as a cooling, cleansing fruit, balancing excess oil and refreshing the body. In folk rituals, it wasn’t just used for cooking — it was rubbed on oily scalps, applied to lighten mehndi stains, and even added to oils as a “purifier.”

Fast forward to today, and Google is filled with questions like:

  • Is lemon good for hair growth?
  • Can lemon stop dandruff?
  • How do I use lemon juice safely on my scalp?

The good news: lemon really does have benefits for hair. But the truth is also more nuanced than the old wives’ tales. Lemon won’t magically regrow bald spots. It can, however, support scalp health, reduce mild dandruff, add shine, and make your hair feel fresher — if used correctly.

So, let’s explore what science and tradition agree on, what’s hype, and how you can safely use lemon for your hair today.


Is Lemon Good for Hair? What Science and Ayurveda Say

🍋 The Ayurvedic view

In Ayurveda, lemon is known as Nimbuka and is considered “kapha-shamaka” — meaning it balances Kapha, the dosha associated with excess oil, heaviness, and sluggishness. When Kapha is high, you often see greasy scalps, buildup, or dandruff-like flakes. That’s why traditional remedies often involved squeezing lemon juice into hair oils or using lemon rinses after washing — to purify and lighten the scalp.

Ayurvedic texts also describe lemon as shita virya (cooling in potency), which makes it soothing for scalp irritation and itchiness.

🔬 The scientific explanation on Lemon for Hair

From a modern perspective, lemon’s biggest gift to hair is its acidity. Here’s why that matters:

  • Hair and scalp are naturally slightly acidic (pH 4.5–5.5).
  • Many shampoos are alkaline, which raises the hair cuticle (the outer layer), making strands rough, frizzy, and prone to breakage.
  • Acidic rinses — like lemon water — flatten the cuticle, lock in moisture, and make hair shinier (Dias, 2014).

Think of it this way: your hair cuticle is like roof tiles. When alkaline products lift them, the roof leaks — your hair loses moisture, feels rough, and looks dull. When you restore acidity with lemon, those tiles flatten and seal again, keeping everything smooth and reflective.

Macro graphic of two hair strands — one with raised, rough cuticles (frizzy and dull) and one with smooth, flat cuticles (shiny and healthy) — showing how lemon acidity flattens cuticles for shine, MasalaMonk.com.
Why lemon makes hair shine: its natural acidity helps flatten raised cuticles, locking in moisture and creating smooth, light-reflecting strands.

✅ The bottom line

So, is lemon good for hair? Yes — but mainly as a clarifier, shine booster, and scalp balancer.
It won’t give you Rapunzel-like growth overnight, but it will help your hair look and feel healthier when used wisely.


Lemon for Hair Growth: What’s True & What’s Hype

If you search online for “lemon for hair growth”, you’ll find endless blogs, YouTube videos, and Instagram reels promising that a squeeze of lemon will make your hair sprout like grass after rain. The truth? It’s not that simple.

🌱 Why people believe lemon makes hair grow

There are reasons this belief became so popular:

  • The tingling effect: When you apply lemon juice directly to the scalp, it stings a little. That sensation gets mistaken for “stimulation” — people assume if it tingles, it must be working to grow new hair.
  • Mixed remedies: Traditional recipes often combined lemon with coconut oil, onion juice, or castor oil — all of which do support growth or thickness. Over time, lemon became associated with those effects, even though it was more of a supporting player.
  • The “clean scalp = growth” link: A clean, fresh scalp does create a better environment for follicles. So when people used lemon and saw less buildup, they assumed it was directly making hair grow.

🔬 What science actually says about Lemon for Hair

Modern research gives us a more nuanced picture:

  • Citrus compounds like limonin: Lab studies suggest limonin (found in citrus seeds and peels) can activate pathways linked to follicle activity and hair regeneration (Kang, 2022).
  • Citric acid and fiber strength: A 2025 study showed citric acid helps reinforce chemically treated hair fibers, making them stronger and less prone to breakage (Zhang, 2025). Stronger strands can give the appearance of fuller hair, even if no new hair is growing.
  • The cautionary side: Other research has found that disruptions in citric acid metabolism may actually suppress follicle growth and increase inflammation (Shi, 2022). This means using lemon carelessly could backfire — especially if applied too often or too harshly.

✅ So, does lemon regrow hair?

Here’s the straight answer: No, lemon cannot regrow hair on bald patches or reverse genetic hair loss.

What it can do is:

  • Cleanse the scalp and reduce buildup → better follicle environment
  • Strengthen existing strands → less breakage, more thickness retention
  • Support overall scalp health → which indirectly supports natural growth

Think of lemon as a gardener: it cleans and prepares the soil, but it doesn’t plant new seeds. For true regrowth, you’d need proven treatments like minoxidil, microneedling, or rosemary oil. Lemon’s role is supportive, not transformative.

🙋 Common reader questions

  • “Does lemon juice stop hair fall?” → It may reduce breakage and improve scalp condition, but it doesn’t stop hormonal or genetic hair loss.
  • “Can I apply lemon daily to grow hair?” → No. Daily use will irritate and dry out your scalp. Stick to once a week.
  • “Can lemon grow new hair?” → No. It helps maintain the hair you have, not regrow what’s lost.

Lemon and Dandruff: Does It Really Work?

For many people, dandruff is the real reason they reach for lemon. Those embarrassing white flakes on your shoulders, the constant urge to scratch your scalp — it’s frustrating, and the kitchen often feels like the first place to look for a fix. But does lemon really help?

🌿 The traditional wisdom

In South Asian homes, lemon has long been rubbed directly on flaky scalps or squeezed into oils as a quick antidote. Ayurveda describes lemon as cleansing and light, which makes it a natural choice for conditions linked with excess oiliness (Kapha imbalance). Folk wisdom believed that because lemon “cuts through grease,” it could also cut through flakes.

And culturally, it became a go-to “first aid” before weddings, festivals, or social events — whenever you needed your scalp to feel instantly fresher.

🔬 The science behind it

Modern dermatology tells us dandruff is mainly caused by:

  • An overgrowth of a yeast-like fungus called Malassezia.
  • Excess scalp oil (sebum), which feeds the fungus.
  • A sensitive scalp that reacts with irritation and flaking.

Here’s where lemon can help:

  • Citrus oils vs. fungi → Citrus fruits (lime, kaffir lime, lemon) have shown antifungal activity against Malassezia in lab studies (Tadtong, 2025).
  • Human trial evidence → A small clinical study found that a citrus-extract shampoo reduced dandruff and scalp greasiness within four weeks (Lee, 2019).
  • Clarifying action → The acidity of lemon helps strip excess oil and buildup, making the scalp feel lighter and less itchy.

So yes — lemon can help with mild dandruff, especially if your scalp is very oily.

⚠️ But here’s the catch

  • It’s not as strong as medicated shampoos. Ingredients like ketoconazole, selenium sulfide, or zinc pyrithione are proven to fight dandruff more effectively. Lemon is more of a supporting remedy than a standalone cure. If flakes are thick or itchy, and don’t respond to mild remedies, see What’s the Difference Between Dandruff and Psoriasis? to know when it might be something more serious.
  • It can irritate sensitive skin. Overusing lemon — or applying it undiluted — may sting, redden, or even worsen flakes if your scalp barrier is already weak.
  • Results vary. Some people find relief, while others feel more itchy after.

✅ Best way to use lemon for dandruff

  • Always dilute lemon juice with water or mix with oil/yogurt before applying.
  • Use it once a week, not daily.
  • Combine with your regular dandruff shampoo if you have moderate-to-severe flakes.

👉 Think of lemon as a “quick refresher” or mild helper for oily, flaky scalps — not a replacement for proven medical treatments.


Other Benefits of Lemon for Hair (Shine, Strength, Antioxidants)

Even if lemon won’t magically regrow hair, it still brings plenty to the table. Think of it as a natural multi-tasker: part clarifier, part shine-booster, part protector. Here’s how it helps beyond growth and dandruff.

✨ For shine and smoothness

One of the first things you’ll notice after a lemon rinse is how much lighter and shinier your hair feels. That’s not an illusion — it’s chemistry.

Hair is covered in overlapping scales called cuticles. When they lie flat, light reflects smoothly, making hair look glossy. When they lift (as happens with alkaline shampoos or hard water), hair feels rough, looks dull, and tangles easily.

Lemon juice, being acidic, helps flatten those cuticles back down. It’s like sealing tiles on a roof — suddenly the “surface” is smoother, and the shine returns. That’s why women across India and the Middle East traditionally rinsed their hair with lemon water after oiling or henna: it left strands sleeker, softer, and more manageable.

A similar method is using apple cider vinegar and lemon rinses, which are popular for removing buildup and restoring shine.

🛡️ For antioxidant protection

Modern life is tough on hair. Pollution, dust, harsh styling, and UV rays all create oxidative stress, which weakens follicles and makes strands brittle.

Lemon is naturally rich in flavonoids and vitamin C — compounds that act like tiny shields against free radicals. Recent studies confirm citrus extracts help buffer oxidative damage and support healthier tissue (Du, 2024; Klimek-Szczykutowicz, 2020).

While rubbing lemon on your scalp won’t erase years of sun damage, using it occasionally can give your hair an antioxidant “boost” — and consuming lemons in your diet supports both skin and hair health from within.

🧴 For oil control

If your scalp turns greasy within a day of washing, lemon can be a lifesaver. The citric acid cuts through excess sebum, giving you that just-washed freshness without needing another round of shampoo.

That’s why many DIY recipes recommend lemon water rinses for people with oily scalp types. Used sparingly, it can help extend the time between washes, keeping your hair feeling cleaner and lighter.

☀️ For natural lightening

This one is both a benefit and a warning. Lemon juice + sunlight can lighten hair, which is why it became a popular hack among teens in the West. On lighter brown or blonde shades, it creates sun-kissed highlights.

But on darker hair, it often leads to uneven tones, dryness, and even scalp burns if applied carelessly in the sun. So yes, lemon can lighten — but it’s a risky trick best avoided unless you know what you’re doing (and are willing to accept some damage).

🍊 From the inside out

Interestingly, lemon’s benefits aren’t limited to topical use. A 2019 study on mice showed that lemon polyphenols in drinking water helped delay age-related hair thinning and coarseness (Shimizu, 2019).

We can’t directly translate mouse studies to humans, but it does hint at a bigger truth: your diet impacts your hair. Eating a citrus-rich diet supports collagen, immunity, and overall scalp health — all of which reflect in stronger, shinier hair.

For example, Amla, another vitamin-C-rich natural, also supports scalp health and antioxidant protection.


How to Use Lemon for Hair (DIY Recipes That Actually Work)

One of the reasons lemon is so popular is its versatility. You don’t need expensive products — just a fruit you probably already have in your kitchen. But the secret is how you use it. Apply lemon the wrong way (too strong, too often), and you risk dryness and irritation. Use it wisely, and it can become a refreshing, effective part of your routine.

Here are some tried-and-tested ways to use lemon for hair:

1. The Classic Lemon Rinse (for Shine & Oil Control)

Best for: Oily scalps, dull or frizzy hair.

  • How to make it: Mix 1 tablespoon of fresh lemon juice with 1 cup of cool water. After shampooing, pour it slowly over your scalp and hair, massage gently for a minute, then rinse off with plain water.
  • Why it works: The acidity balances scalp pH, flattens cuticles, and cuts through excess oil. You’ll instantly notice softer, shinier strands.
  • Pro tip: Don’t leave lemon water sitting in your hair for long — rinse it off after a minute or two to avoid over-drying.
  • Mistake to avoid: Using concentrated juice directly — it can sting, especially if you have scratches or sensitive skin.

2. Coconut Oil + Lemon Scalp Massage (for Mild Dandruff Relief)

Best for: Oily, flaky scalps with mild dandruff.

Flat-lay of a glass bowl of coconut oil, two halved lemons, and a folded towel on a beige surface. Magazine-style educational image with overlay text: Coconut Oil + Lemon Scalp Massage — Nourishes scalp, eases mild dandruff, adds freshness — MasalaMonk.com.
DIY Coconut Oil + Lemon Scalp Massage: a traditional remedy to nourish the scalp, ease mild dandruff, and leave your hair feeling fresh and balanced.
  • How to make it: Warm 2 tablespoons of coconut oil, add 1 teaspoon of lemon juice, and mix well. Massage gently into the scalp for 10–15 minutes, then wash with a mild shampoo.
  • Why it works: Coconut oil nourishes and moisturizes, while lemon adds antifungal power and clarifies buildup.
  • Pro tip: Wrap your head in a warm towel after applying — it helps the oil penetrate better.
  • Mistake to avoid: Leaving it overnight. Lemon sitting too long on the scalp can irritate.

3. Lemon + Honey + Yogurt Mask (for Softness & Shine)

Best for: Dull, rough, or frizzy hair.

Flat-lay of a halved lemon, a glass bowl of golden honey with a wooden dipper, and a bowl of creamy yogurt on a beige background. Magazine-style DIY image with overlay text: DIY Lemon + Honey + Yogurt Mask — Softens hair, adds shine, nourishes — MasalaMonk.com.
DIY Lemon + Honey + Yogurt Mask: a natural blend that softens hair, boosts shine, and nourishes the scalp for a healthy feel.
  • How to make it: Mix 1 tablespoon lemon juice, 1 tablespoon honey, and 2–3 tablespoons plain yogurt. Apply evenly to scalp and hair. Leave on for 15 minutes, then rinse and shampoo.
  • Why it works: Honey adds moisture, yogurt soothes and nourishes, and lemon clarifies. It’s like a natural spa treatment for your scalp.
  • Pro tip: Apply on damp hair for better spread and absorption.
  • Mistake to avoid: Sitting out in the sun with this mask on — lemon + sunlight can burn skin.

You could also experiment with traditional pairings, like lemon + garlic or fenugreek. See Garlic for Hair and Fenugreek Seeds for Hair for detailed guides on how these work.

4. Aloe Vera + Lemon Soother (for Itchy, Sensitive Scalps)

Best for: Itchy, irritated scalps or people with mild dermatitis.

Flat-lay of a glass bowl of aloe vera gel, a halved lemon, and a fresh aloe leaf on a beige background. Magazine-style DIY image with overlay text: DIY Aloe Vera + Lemon Soother — Calms itchiness, hydrates, balances — MasalaMonk.com.
DIY Aloe Vera + Lemon Soother: a gentle blend to calm itchy scalps, reduce excess oil, and restore balance with refreshing hydration.
  • How to make it: Blend 2 tablespoons of aloe vera gel with 1 teaspoon of lemon juice. Massage gently into scalp, leave for 10 minutes, then rinse.
  • Why it works: Aloe calms and hydrates, while lemon balances oiliness and adds a cooling effect.
  • Pro tip: Use fresh aloe gel (from the plant) if possible — it works better than store-bought.
  • Mistake to avoid: Don’t rub harshly; a gentle massage is enough.

5. Lemon Highlight Hack (Use with Caution)

Best for: Light brown or blonde hair only.

  • How to do it: Dilute lemon juice with water (1:1 ratio), apply with a spray bottle to strands you want to lighten, and sit in the sun for 15–20 minutes. Rinse thoroughly and condition afterward.
  • Why it works: Citric acid reacts with UV light, breaking down melanin and making hair appear lighter.
  • Pro tip: Apply only on sections (like face-framing strands), not your whole head, for a sun-kissed look.
  • Mistake to avoid: Doing this often. It can severely dry out and damage hair. Always deep-condition after.

Side Effects of Applying Lemon on Hair (Read Before You Try)

While lemon has real benefits for hair and scalp, it also comes with risks. The same compounds that make it refreshing and clarifying can be harsh if you overuse them or apply them the wrong way. Here’s what you need to know before squeezing that lemon onto your head.

🍋 1. Dryness & Brittleness

Lemon juice is highly acidic and astringent. While this helps cut grease and balance pH, it can also strip away natural oils if used too often. The result? Dry, brittle strands that snap more easily.

What to do instead: Always dilute lemon juice with water, oil, or yogurt. And never use it more than once a week. If you already have dry or curly hair, pair it with moisturizing ingredients like honey or aloe.

To balance lemon’s drying effect, combine with hydrating ingredients like yogurt or coconut water, or nourishing oils such as almond oil.

🍋 2. Scalp Irritation & Stinging

Have you ever squeezed lemon on a tiny cut and winced at the sting? The same thing happens on your scalp if you have scratches, eczema, or sensitivity. Undiluted lemon juice can cause redness, burning, and even small chemical-like burns.

What to do instead: Always do a patch test first. Apply a little diluted lemon juice behind your ear or on your inner arm — if it stings or causes redness after 10 minutes, don’t use it on your scalp.

🍋 3. Phototoxicity (The “Lime Burn” Problem)

One of the biggest hidden dangers of lemon is phototoxicity — a skin reaction when citrus juice meets sunlight.

Dermatologists even have a name for it: phytophotodermatitis. It happens because compounds in lemon (furanocoumarins) react with UV light, causing redness, dark patches, or even blister-like burns.

It’s so common among bartenders who mix drinks with lime that it’s nicknamed “Margarita Burn.” Case reports have shown severe burns on skin exposed to citrus juice followed by sun (Abugroun et al., 2019).

What to do instead:

  • Never sit in the sun with lemon juice on your scalp or skin.
  • Always rinse your hair thoroughly after a lemon treatment.
  • If you want natural highlights, do it carefully and condition deeply afterward.

🍋 4. Uneven Hair Lightening

While lemon can lighten hair, it does so unpredictably. On darker hair, it often creates brassy, patchy tones instead of golden highlights. And combined with dryness, this can leave hair looking worse than before.

What to do instead: If you want highlights, consider safer options like chamomile tea rinses or professional coloring.

Split-screen educational image showing left side with healthy glossy hair, right side with dry frizzy hair and irritated scalp. A halved lemon with a caution icon sits at the bottom. Overlay text reads: Use Lemon Safely — Dilute, Once a Week, Rinse Before Sunlight — MasalaMonk.com.
Use lemon safely: always dilute, limit use to once a week, and rinse thoroughly before stepping into sunlight to avoid irritation.

✅ Golden Rules for Safe Use

  • Always dilute lemon juice before applying.
  • Use lemon no more than once a week.
  • Patch test before first use.
  • Rinse thoroughly before going out in sunlight.
  • Pair with hydrating ingredients (coconut oil, honey, aloe) to balance dryness.

Final Thoughts on Lemon for Hair

For centuries, lemon has been part of our hair care traditions — whether squeezed into oil, poured as a rinse, or simply rubbed onto the scalp before a big occasion. Our grandmothers didn’t have lab studies, but they noticed the effects: a fresher scalp, shinier strands, and a cleaner feel.

Modern science now helps us understand why those remedies worked:

  • Lemon’s acidity balances scalp pH and smooths the cuticle.
  • Its antioxidants help protect against everyday damage.
  • Its citrus compounds show mild antifungal effects that can ease dandruff.

At the same time, research also shows us where lemon falls short. It doesn’t regrow lost hair, it’s not as effective as medicated dandruff treatments, and careless use can irritate or damage hair.

The sweet spot? Using lemon as a supportive ally — not as a miracle cure. A weekly rinse, a drop in warm oil, or a soothing mask can refresh your scalp and add shine without harm. Pair it with good nutrition, gentle hair care, and proven treatments when needed, and lemon becomes a safe, natural addition to your toolkit.

Minimal flat-lay of a halved lemon, a fresh aloe vera leaf, and a small glass bowl of coconut oil on a beige background. Magazine-style closing image with overlay text: Lemon: A Weekly Ally for Fresh, Shiny Hair — MasalaMonk.com.
Lemon: a gentle weekly ally to keep your scalp balanced, your hair shiny, and your routine rooted in natural care.

So next time you slice a lemon for your salad or chai, remember: that humble fruit carries generations of wisdom, a touch of science, and just enough magic to keep your hair feeling fresh and alive. ✨🍋


FAQs About Lemon for Hair

1. Is lemon good for hair?

Yes — lemon can be good for your hair when used correctly. Its acidity balances scalp pH, reduces excess oil, and adds shine. However, it should always be diluted and not applied daily, otherwise it may dry out or irritate your scalp.

2. Does lemon juice help hair growth?

Not directly. Lemon juice doesn’t regrow new hair, but it can improve scalp health and strengthen strands, which helps reduce breakage. A clean, balanced scalp creates a better environment for natural growth.

3. How do I use lemon for hair growth?

The safest way is to dilute 1 tablespoon of lemon juice in 1 cup of water and use it as a post-shampoo rinse once a week. You can also mix a few drops with coconut oil or aloe vera gel for scalp massages.

4. Can lemon stop hair fall?

Lemon may reduce breakage-related hair fall by strengthening strands and clarifying the scalp. But it does not stop genetic or hormonal hair loss. For persistent hair fall, it’s best to consult a dermatologist.

5. Is lemon good for dandruff?

Yes — lemon has mild antifungal properties that can help with oily, flaky dandruff. Studies show citrus extracts can reduce Malassezia fungus, which is linked to dandruff. Still, it’s less effective than medicated shampoos and works best for mild cases.

6. How do I apply lemon on my scalp safely?

Always dilute lemon juice before applying. Mix it with water, oil, or yogurt, and leave it on for no longer than 10–15 minutes. Then rinse thoroughly. Never apply lemon directly before going out in the sun — it can cause burns.

7. Can drinking lemon water help with hair growth?

Indirectly, yes. Lemon water provides vitamin C and antioxidants that support collagen production and overall scalp health. While it won’t regrow hair by itself, it helps strengthen your body’s foundation for healthy hair.

8. Does lemon lighten hair naturally?

Yes, lemon juice combined with sunlight can lighten hair — especially lighter shades like brown or blonde. But it often leads to uneven tones and dryness. If you want highlights, use this trick carefully and follow with deep conditioning.

9. Can lemon cause side effects on hair?

Yes. Overuse can cause dryness, brittleness, scalp irritation, and even phototoxic burns if exposed to sunlight. That’s why moderation is key — use lemon no more than once a week.

10. Is lemon good for all hair types?

Not really. Lemon works best for oily scalps and straight or wavy hair types. If your hair is already dry, curly, or chemically treated, use lemon with extra caution and always combine it with moisturizing ingredients like honey or aloe vera.

11. Can lemon regrow hair on bald spots?

No — lemon cannot regrow hair on bald patches caused by genetics or conditions like alopecia. It only supports existing hair and scalp health. For baldness, proven treatments like minoxidil or medical therapies are required.

12. How often can I use lemon on hair?

Once a week is enough for most people. Using it daily or even every other day increases the risk of dryness and scalp irritation. Think of lemon as a scalp refresher, not an everyday tonic.

Posted on Leave a comment

Cape Gooseberry and Mint Jam: Homemade Preserve

There’s something incredibly satisfying about making your own jam the simmering fruit, the sweet fragrance filling the kitchen, and that rewarding pop of the jar sealing just right. An extremely delicious, uniquely flavoured cape gooseberry jam that titillates the palate slightly fruity, tangy, mildly sweet Cape Gooseberry & Mint Jam to add the right amount of crunch and piquant to your breakfast or dessert. With its tangy sweet flavor, golden hue, and fresh herbal lift from mint, this jam is a refreshing twist on traditional fruit preserves. It pairs beautifully with toast, pancakes, cheese platters, or even as a glaze for desserts.

Today’s recipe is a little different and absolutely delightful: Cape Gooseberry and Mint Jam.

Ingredients:

  • 500g Cape gooseberries (also called Rasbhari or golden berries), husked and rinsed
  • 350g sugar (adjust to your taste)
  • 1 tbsp lemon juice (for brightness and natural acidity)
  • 1 tsp natural pectin (optional, depending on how thick you like your jam)
  • 2 tbsp fresh mint leaves, finely chopped

Instructions:

Gently rinse the cape gooseberries, remove their papery husks, and pat them dry. Cut larger ones in half. In a heavy-bottomed pan, combine the gooseberries, sugar, and lemon juice. Let it sit for 15–20 minutes to macerate this helps release the juices.

Turn on the heat to medium and bring the mixture to a boil. Stir frequently as the fruit begins to break down and the sugar dissolves. Skim off any foam that forms. Once the jam starts to thicken (about 15–20 mins), add the chopped mint and natural pectin. Stir continuously for another 5–7 minutes until it reaches your desired consistency.

Use the cold plate test: drop a small spoonful on a chilled plate, wait a few seconds, then run your finger through it. If it wrinkles and holds its shape, it’s done! Pour the hot jam into sterilized jars, leaving a little space at the top. Seal immediately and let it cool. Store in the refrigerator if not canning for long-term storage.

Spread on hot buttered toast or scones, swirl into yogurt or oatmeal, Pair with cheese boards or Dollop on pancakes or waffles for a gourmet touch.

Tips & Tricks:

  • Cape gooseberries naturally contain some pectin, so you can skip added pectin if you’re okay with a softer-set jam.
  • The mint should be added towards the end of cooking to retain its fresh flavor and green flecks.
  • You can blend the jam slightly if you prefer a smoother texture.
  • For a bolder citrus note, add some lemon zest along with juice.

This Cape Gooseberry and Mint Jam is sunshine in a jar tangy, sweet, and kissed with herbal freshness. Whether you’re a seasoned jam maker or a curious beginner, this recipe is simple to follow and incredibly rewarding. Try it once, and it just might become your favorite homemade preserve. Find out more jam recipe here!

If you try this recipe, do give us a shout out. Just click a picture and tag us on @masala.monk or use the hashtag #MasalaMonkRecipe and share on Instagram and Facebook. We would love to hear from you. 🙂Happy cooking!

Posted on 1 Comment

Should you be eating Mustard oil regularly? Nutritional Benefits, Warnings, and How to use it in your cooking.

Should You Be Eating Mustard Oil Regularly?

Mustard oil has long been a staple in many South Asian kitchens, prized for its pungent aroma, bold flavor, and versatile cooking properties. But beyond its culinary charm, mustard oil has sparked debates about its health effects, safety, and whether it deserves a permanent spot in your pantry. So, should you be eating mustard oil regularly? Let’s dive deep into the science, benefits, potential risks, and practical cooking tips to help you make an informed choice.


What Is Mustard Oil?

Mustard oil is extracted from the seeds of the mustard plant, known scientifically as Brassica juncea. It has a distinctive pungent aroma and a spicy, slightly bitter flavor. Traditionally used in Indian, Bangladeshi, and Nepalese cooking, mustard oil is valued not only for frying and sautéing but also for pickling and even therapeutic uses in massage and home remedies.


Nutritional Profile: What’s Inside Mustard Oil?

Mustard oil stands out for its unique composition of fats and micronutrients:

  • Monounsaturated Fatty Acids (MUFAs): About 60% of mustard oil’s fats are MUFAs, predominantly oleic acid, which is known to support heart health by helping to lower LDL (“bad”) cholesterol.
  • Polyunsaturated Fatty Acids (PUFAs): Contains omega-3 fatty acids like alpha-linolenic acid (ALA), which have anti-inflammatory benefits.
  • Saturated Fat: Roughly 12%, lower than many other cooking oils.
  • Vitamin E and Antioxidants: Mustard oil provides vitamin E, a powerful antioxidant that helps protect cells from damage caused by free radicals.
  • Selenium: A trace mineral that supports immune function and has antioxidant properties.

This blend of fats and nutrients means mustard oil has potential health benefits, but its safety and consumption require a closer look.


Health Benefits of Mustard Oil

1. Heart Health

Thanks to its high content of monounsaturated fats and omega-3 fatty acids, mustard oil can support cardiovascular health. MUFAs help reduce LDL cholesterol levels and raise HDL (“good”) cholesterol, which may decrease the risk of heart disease. Moreover, omega-3s contribute to lowering inflammation and improving blood vessel function.

However, research is mixed on mustard oil’s impact on heart health, partly because it contains erucic acid (more on this below). Some studies suggest moderate use is beneficial, while excessive consumption could pose risks.

2. Anti-Inflammatory and Antioxidant Properties

Mustard oil contains natural antioxidants like vitamin E and selenium, which help neutralize harmful free radicals in the body. This antioxidant action can reduce oxidative stress, a factor involved in aging and many chronic diseases.

Additionally, the omega-3s and other compounds in mustard oil may help reduce inflammation, which is linked to conditions like arthritis, asthma, and some autoimmune diseases.

3. Respiratory Benefits

Traditionally, mustard oil has been used in natural remedies for respiratory issues. Its strong aroma acts as a natural decongestant, helping to clear blocked nasal passages. Applying warm mustard oil mixed with garlic on the chest is a common folk remedy to ease congestion and coughs.

4. Skin and Hair Health (Bonus)

While this post focuses on dietary use, it’s worth noting that mustard oil is also used topically for skin and hair care, thanks to its antimicrobial and nourishing properties.


The Controversy: Erucic Acid and Health Concerns

What Is Erucic Acid?

Erucic acid is a type of monounsaturated omega-9 fatty acid found in high amounts in unrefined mustard oil. Historically, animal studies linked high erucic acid intake to heart lesions, raising concerns about its safety in humans.

How Much Is Too Much?

The exact risk level for humans remains unclear, and modern refining processes reduce erucic acid content significantly. Many countries regulate mustard oil and recommend limits on erucic acid consumption.

Potential Risks

  • Heart Health: Excessive consumption of high-erucic acid mustard oil may contribute to heart muscle damage.
  • Pregnancy: High doses during pregnancy are not advised due to potential risks to fetal development.
  • Allergic Reactions: Mustard oil can cause skin irritation and allergic responses in sensitive individuals.
  • Digestive Issues: Some people report stomach irritation, heartburn, or bloating when consuming mustard oil.

Regulatory Status

In the United States, mustard oil is labeled “for external use only” due to erucic acid concerns. However, in South Asia, where it’s widely used as cooking oil, consumption is common, and refined versions are considered safer.


Should You Eat Mustard Oil Regularly?

The answer depends on multiple factors: your health status, cooking habits, and where you live.

  • Moderation Is Key: Using mustard oil occasionally or in moderate amounts as part of a varied diet is unlikely to cause harm for most people.
  • Choose Refined Oil: Refined mustard oil has reduced erucic acid and is generally safer for cooking.
  • Consider Your Health: If you have heart issues, allergies, or are pregnant, consult your doctor before regular use.
  • Balance Your Fats: Use a mix of oils rich in omega-3s and MUFAs, such as olive, canola, and flaxseed oils, alongside mustard oil.

How to Use Mustard Oil in Cooking

1. High-Heat Cooking

Mustard oil has a high smoke point (~250°C or 482°F), making it excellent for frying, deep-frying, and sautéing. This means it remains stable and does not break down easily under heat, preserving nutrients and flavor.

2. Flavor Enhancer

Its strong, pungent flavor is perfect for adding depth to dishes like curries, stir-fries, pickles, and marinades. A small amount can impart a rich aroma and spice that elevates simple meals.

3. Tempering and Finishing

Use mustard oil for tempering spices (known as tadka) in Indian cuisine, where hot oil is poured over cumin seeds, mustard seeds, or dried chilies to release flavors.

4. Storage Tips

Store mustard oil in a cool, dark place, preferably in a sealed container, to maintain freshness and prevent rancidity.


Final Thoughts

Mustard oil is a flavorful, nutrient-rich cooking oil with potential health benefits and some risks to be aware of. While concerns about erucic acid are valid, moderate use of refined mustard oil is generally safe for most people and can add unique taste and nutrition to your cooking.

If you decide to include mustard oil in your diet:

  • Use it thoughtfully and sparingly.
  • Combine with other healthy fats.
  • Choose refined versions if possible.
  • Be attentive to any allergic reactions or digestive discomfort.

Ultimately, mustard oil can be a valuable addition to your kitchen — when used with knowledge and care.


Have you tried cooking with mustard oil? What’s your favorite dish? Let me know in the comments below!

FAQs About Mustard Oil

1. Is mustard oil safe for cooking?
Yes, mustard oil is safe for cooking, especially when using refined versions with lower erucic acid. Use it in moderation and avoid excessive consumption.

2. What are the health benefits of mustard oil?
Mustard oil provides heart-healthy monounsaturated fats, omega-3 fatty acids, antioxidants like vitamin E, and anti-inflammatory properties that may benefit cardiovascular and respiratory health.

3. What is erucic acid, and why is it a concern?
Erucic acid is a fatty acid found in high amounts in unrefined mustard oil. Excessive intake has been linked to heart damage in animal studies, which is why consumption should be moderate and refined oils preferred.

4. Can mustard oil cause allergies?
Yes, some people may experience allergic reactions such as skin irritation, rashes, or respiratory issues. It’s advisable to do a patch test before topical use and monitor for any digestive discomfort if consumed.

5. Is mustard oil good for heart health?
Mustard oil contains beneficial fats that may support heart health, but due to erucic acid concerns, it should be consumed in moderation and balanced with other healthy oils.

6. Can pregnant women use mustard oil?
Pregnant women should consult their healthcare provider before using mustard oil, as high erucic acid intake may pose risks during pregnancy.

7. How does mustard oil taste and how is it used in cooking?
Mustard oil has a pungent, spicy flavor and is widely used for frying, sautéing, pickling, and tempering spices in South Asian cuisine.

8. What is the smoke point of mustard oil?
Mustard oil has a high smoke point of around 250°C (482°F), making it ideal for high-heat cooking like frying.

9. How should mustard oil be stored?
Store mustard oil in a cool, dark place in an airtight container to maintain freshness and prevent it from becoming rancid.

10. Can mustard oil be used topically?
Yes, mustard oil is traditionally used for massage and skin care, but always perform a patch test first to check for allergic reactions.