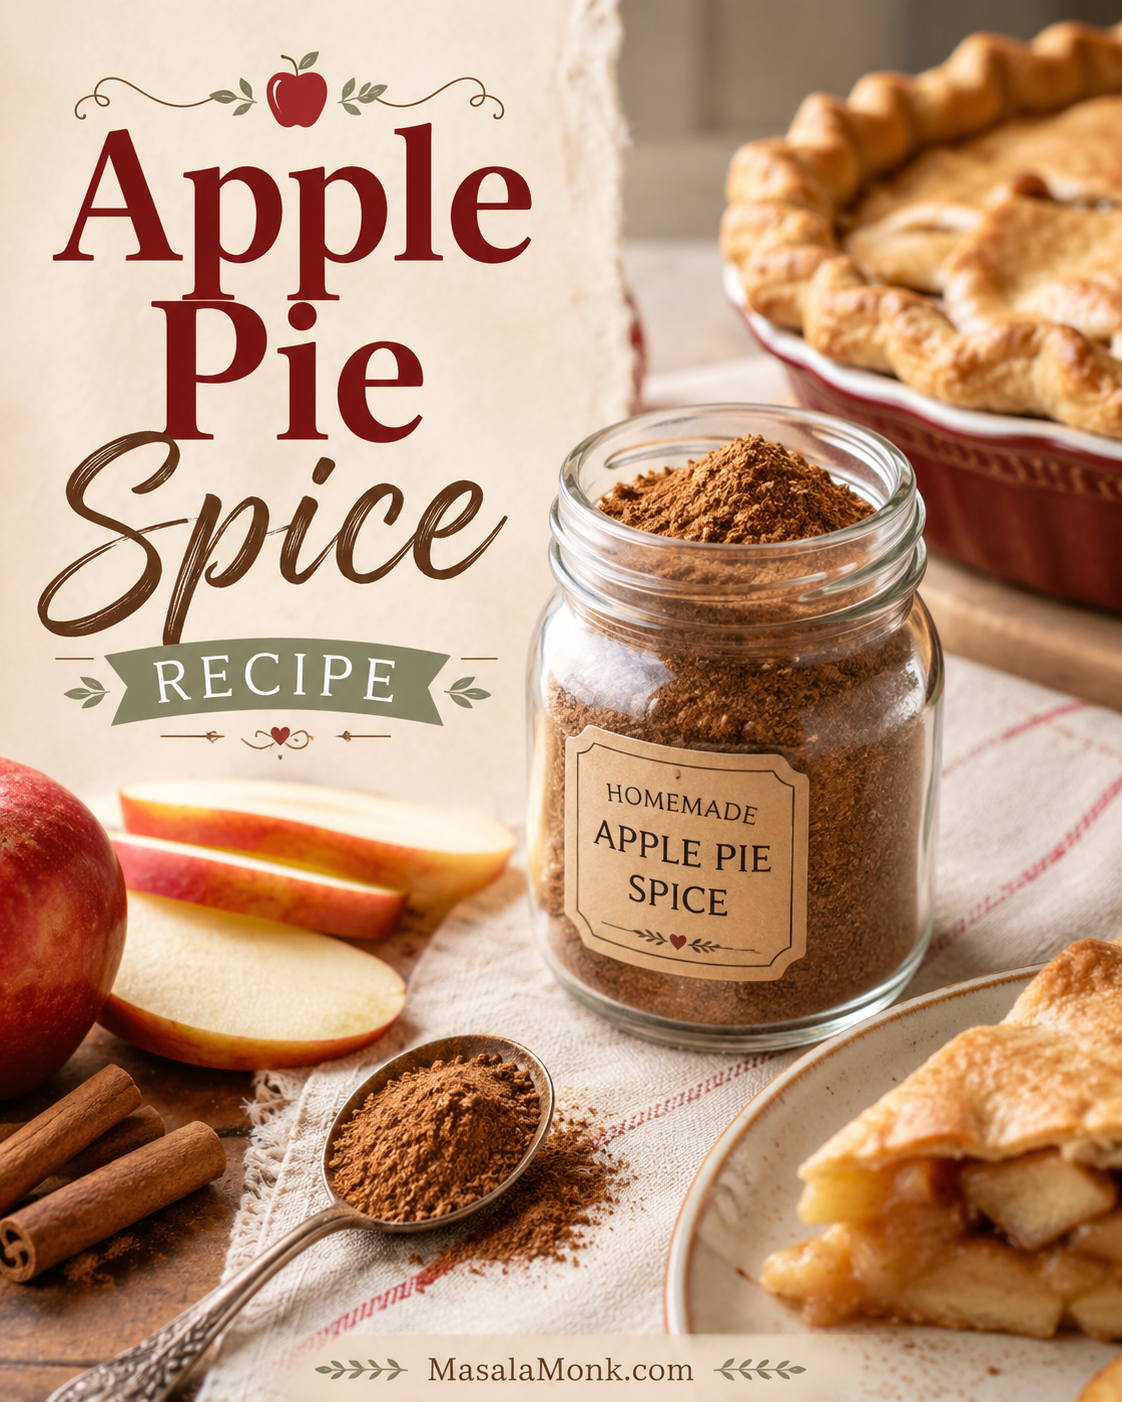
This apple pie spice recipe is for the moment when a dessert calls for apple pie spice and the jar is missing. You do not need to abandon the pie, run to the store, or guess your way through every warm spice in the cabinet. In five minutes, you can mix a small homemade pantry blend that makes apples smell like dessert before they even reach the oven.
The base is simple: cinnamon, nutmeg, allspice, and ginger. That is enough for apple pie, apple pie filling, apple crisp, muffins, oatmeal, pancakes, cider, baked apples, coffee, and simple apple desserts. If you like a deeper aroma, you can add a couple of stronger accents, but the recipe works beautifully without them.
This is an apple-first, cinnamon-forward, unsweetened apple pie spice blend: warm enough for pie, soft enough not to bury the apples. The goal is not to make apples taste like a spice cabinet. The goal is to make them smell warmer, taste rounder, and still finish like apples.
In This Apple Pie Spice Guide
Quick Answer: What Spices Are in Apple Pie Spice?
Apple pie spice is a dry blend of warm ground spices, usually cinnamon, nutmeg, and allspice, with ginger in many homemade versions. Cardamom and cloves can add depth, but they are accents, not requirements. If a recipe says apple pie seasoning or apple pie spice mix, you can usually use this blend the same way.
At a glance:
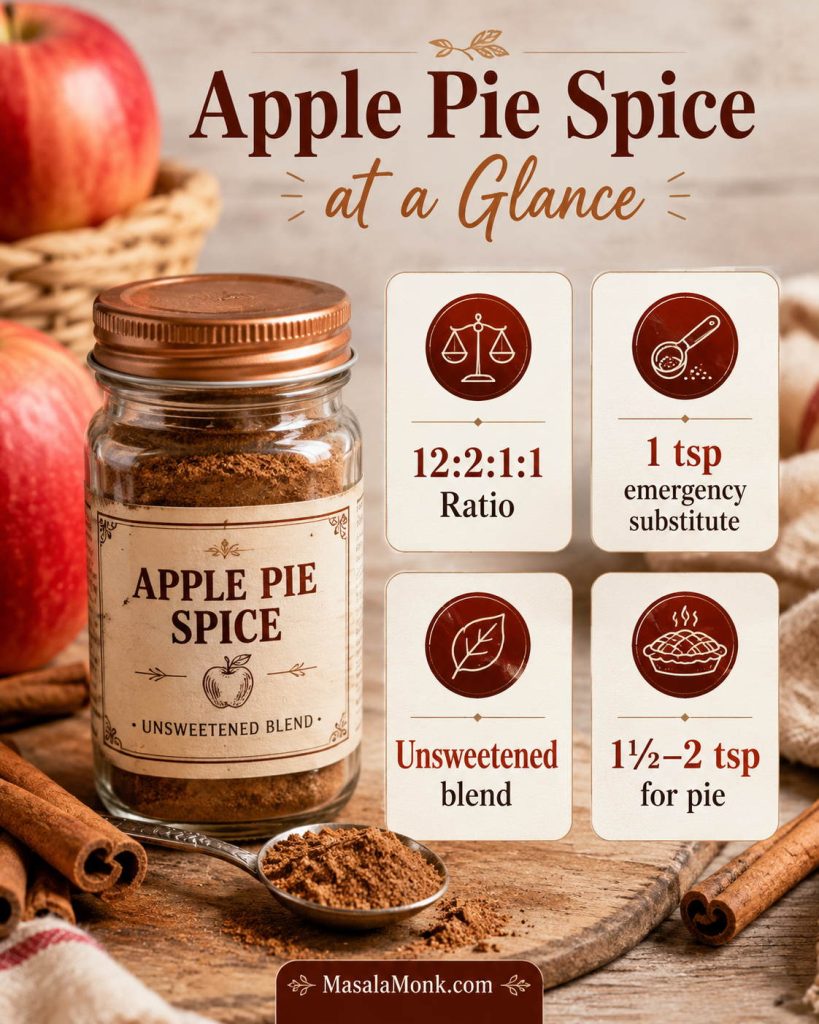
- Ratio to remember: 12 parts cinnamon, 2 parts nutmeg, 1 part allspice, and 1 part ginger.
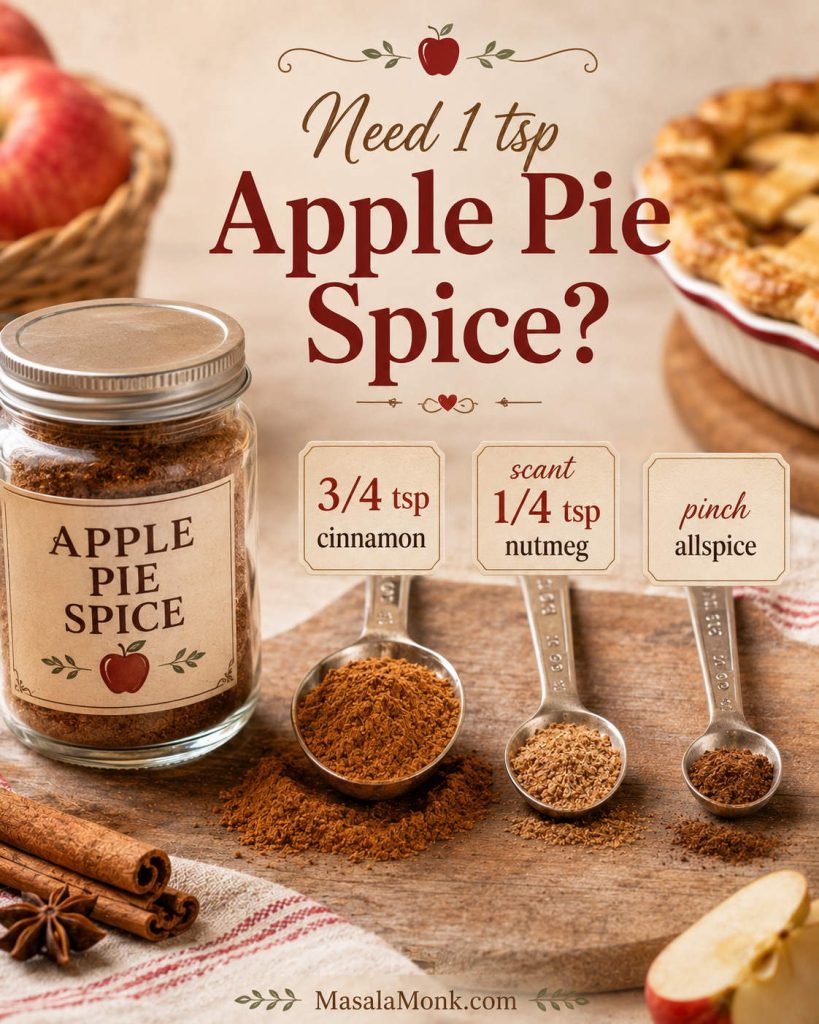
- Need 1 teaspoon now? Use the emergency 3-spice substitute: ¾ teaspoon cinnamon, a scant ¼ teaspoon nutmeg, and a small pinch of allspice.
- Unsweetened blend: No sugar in the jar, so it works in pie filling, oatmeal, drinks, toppings, muffins, and baking.
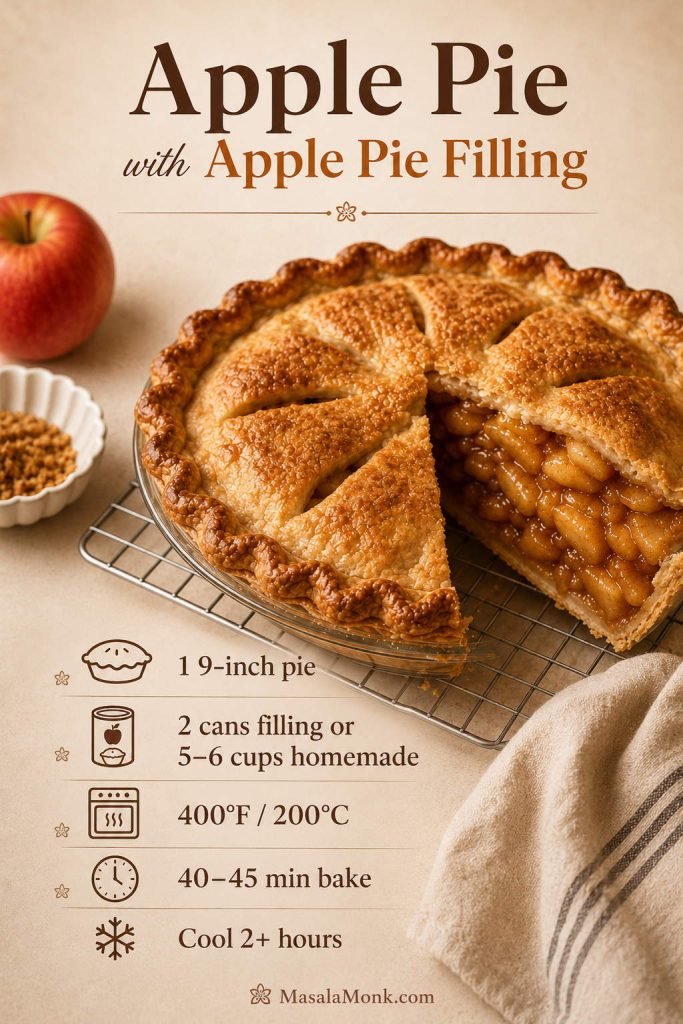
- Baking a full pie? Start with 1½–2 teaspoons in the filling.
Apple Pie Spice Recipe
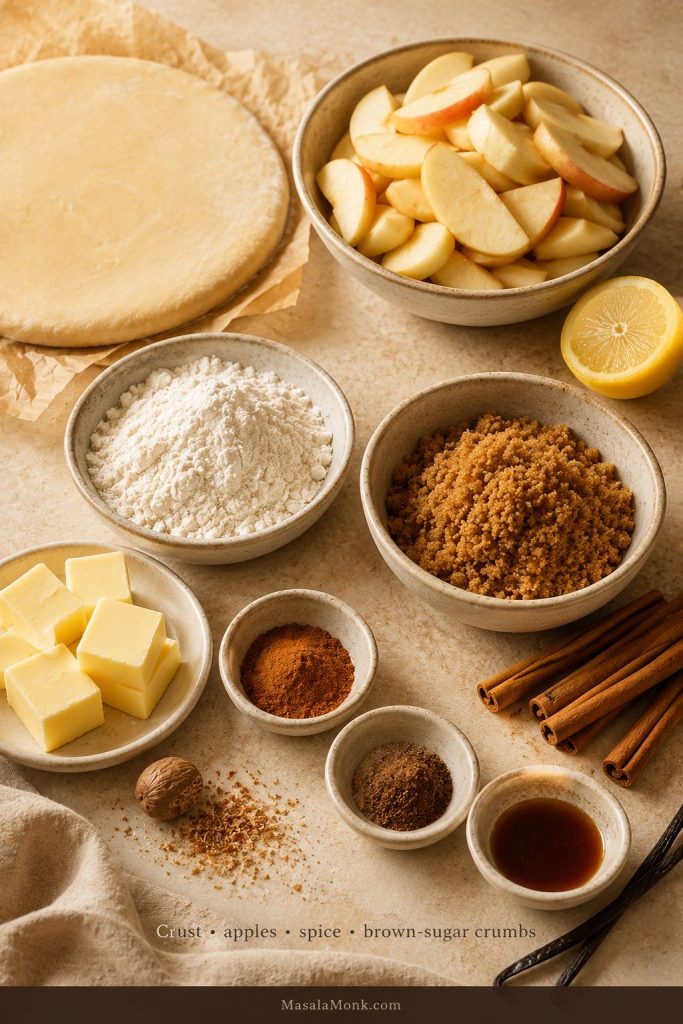
Make the base blend first. It is unsweetened, works for most apple desserts without any specialty spices, and can be used in fillings, drinks, toppings, oatmeal, muffins, and baked apples. The measurements do not need to feel fussy: keep cinnamon dominant, keep cloves optional, and the blend will work.
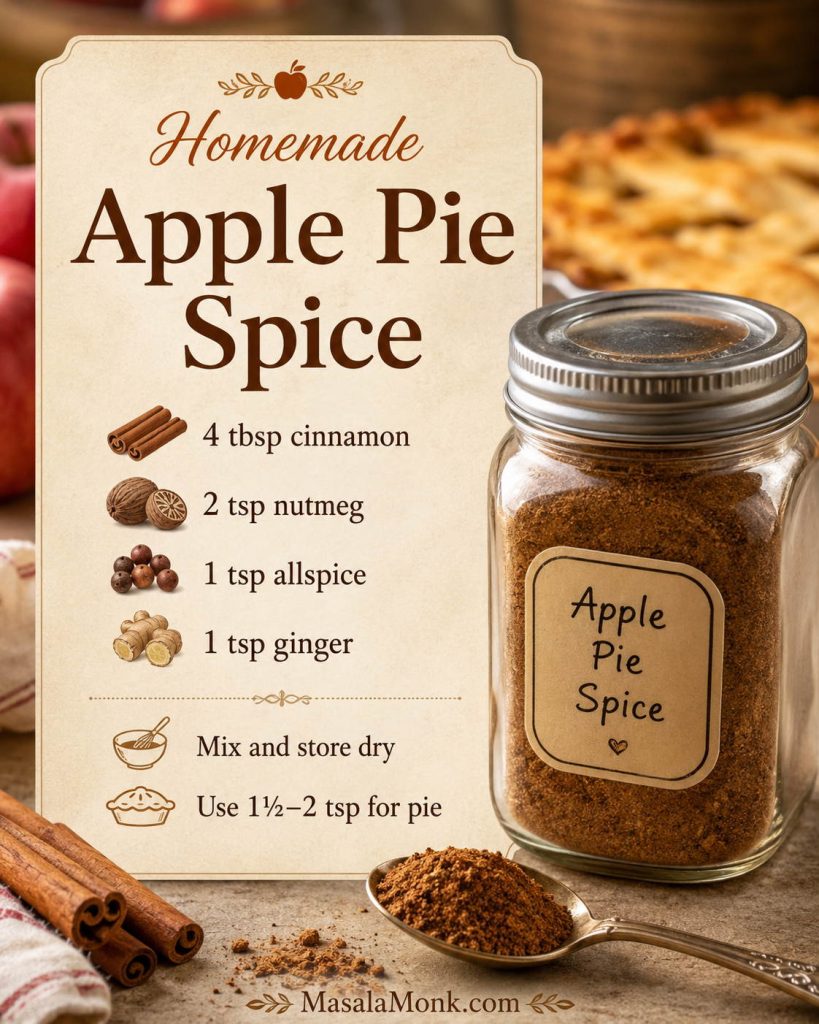
Base Blend
- 4 tablespoons ground cinnamon
- 2 teaspoons ground nutmeg
- 1 teaspoon ground allspice
- 1 teaspoon ground ginger
Optional Add-Ins for the Full Batch
- ½ teaspoon ground cardamom
- ¼ teaspoon ground cloves
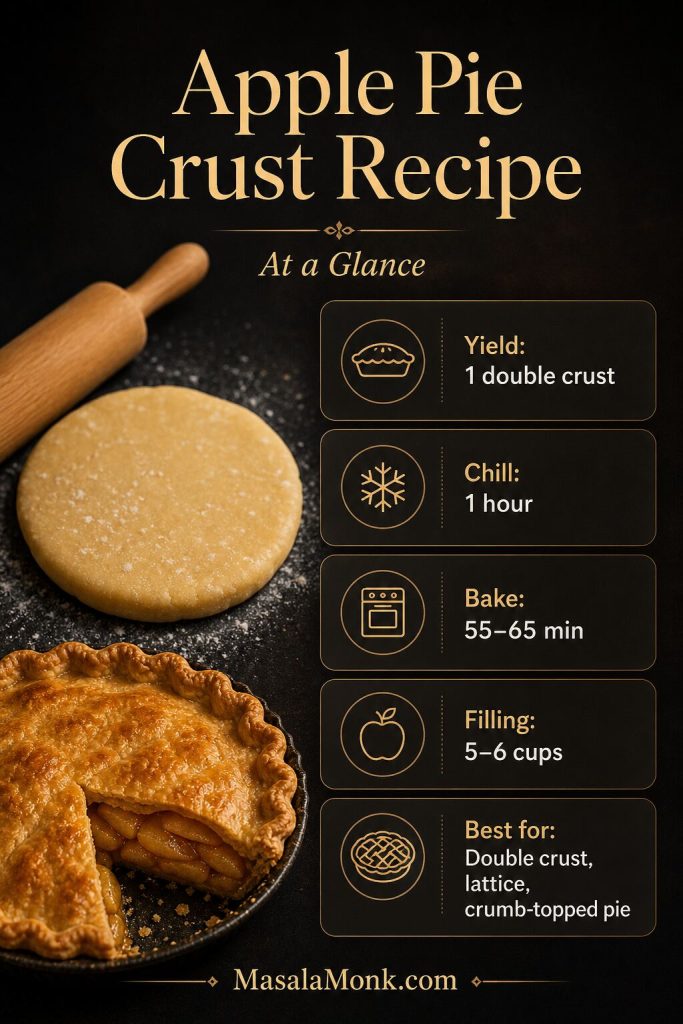
Approximate metric yield: about 16 teaspoons for the base blend, or about 16¾ teaspoons with both optional spices. That is about 80–85 ml, or roughly 36–43 g / 1.3–1.5 oz by weight, depending on spice density. Use spoon measurements first; gram amounts are estimates because ground spices vary by brand, grind, and age.
Equipment
- Measuring spoons
- Small mixing bowl
- Mini whisk, fork, or spoon
- Clean airtight 4 fl oz spice jar for the full batch
Method
- Measure the base spices into a small bowl.
- Add cardamom or cloves if using.
- Whisk until the color looks even, breaking up clumps with the back of a spoon. If the spices are very clumpy, sift them first.
- Transfer to a clean, dry, airtight spice jar. Close and shake briefly if you want to make sure everything is evenly mixed.
- Label with the month you mixed it and store in a cool, dark, dry pantry away from the stove, oven, sunlight, and steam.
Homemade Apple Pie Spice Recipe Card
Keep this card as a measuring reference after you read the method; it gives the full batch amounts in one quick view.
Why This Ratio Works
This ratio is a strong default because it keeps cinnamon in charge, gives enough nutmeg and allspice to taste like pie, and leaves sharper spices optional so the apples stay bright.
Apple Pie Spice Ratio Guide
The simple ratio is easier to use than a long list of rules: keep cinnamon dominant, then let the smaller spices round out the apples.
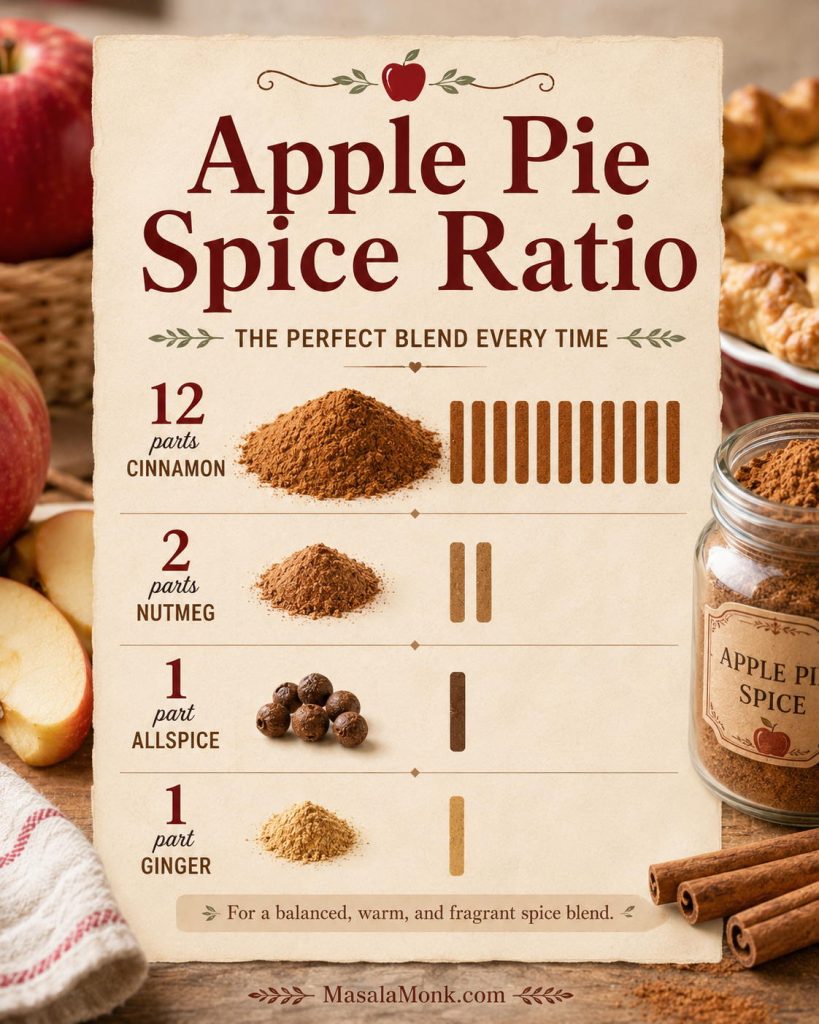
Cinnamon carries the familiar apple-pie aroma. Nutmeg adds classic bakery warmth. Allspice rounds out the middle. Ginger keeps the mix from tasting flat. A good blend should disappear into the filling: apple first, warmth second.
Homemade also lets you keep cloves low, skip cardamom if you do not love it, and avoid sugar in the storage jar. That is the real advantage: you can make the blend support the dessert instead of forcing every apple recipe into the same store-bought flavor.
Before you store the finished mix, smell it. A balanced blend should smell mostly like cinnamon with a warm, rounded finish. Sharp, clove-heavy, or dusty notes are signs to adjust the mix before it goes into the jar.
Freshly grated nutmeg can taste louder than pre-ground nutmeg, especially in a simple apple filling, so start slightly lighter than the recipe amount if you grate it fresh.
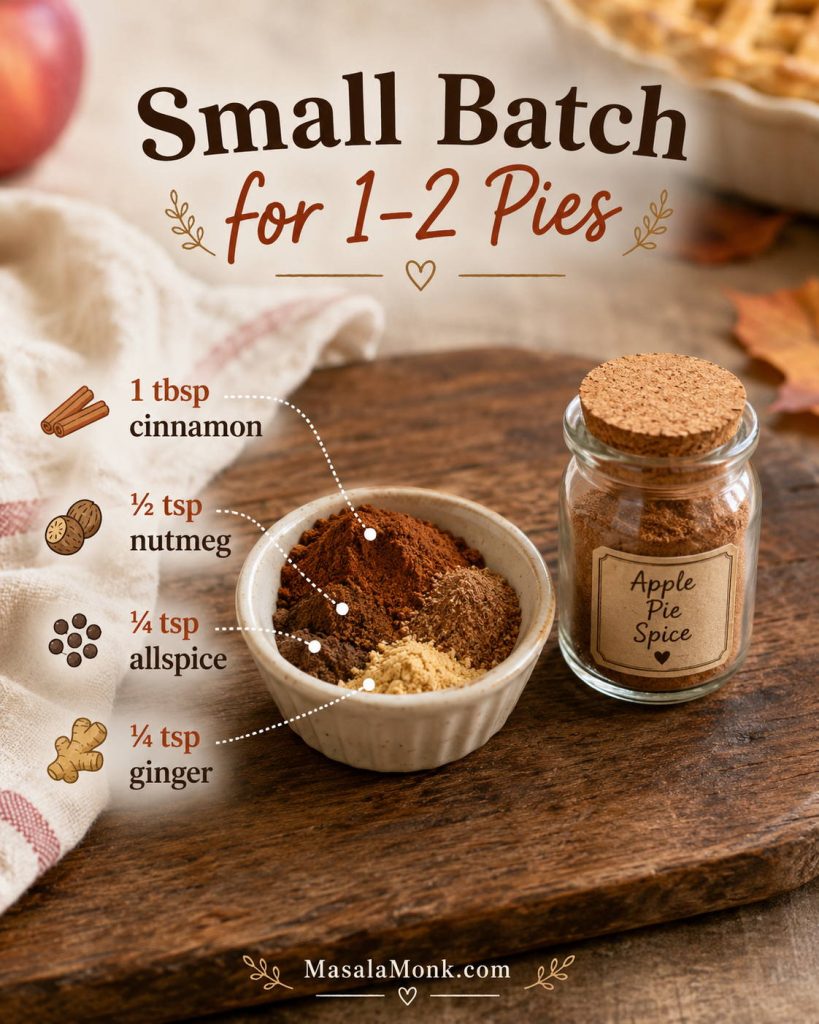
Small Batch for 1–2 Pies
This is the batch to make when you do not want a full pantry jar. It gives you about 4 teaspoons, enough for two standard pies, or one pie plus extra for cider, oatmeal, or a cinnamon sugar topping. For one 9-inch pie, start with 1½–2 teaspoons in the filling.
- 1 tablespoon ground cinnamon
- ½ teaspoon ground nutmeg
- ¼ teaspoon ground allspice
- ¼ teaspoon ground ginger
- Optional: a tiny pinch of cardamom or cloves
This small batch follows the same base ratio as the full recipe. It is also a good way to test the flavor before making more. If it smells too sharp, skip the cloves next time. If it tastes flat in a cooked filling, add a little more ginger or allspice.
Small Batch Apple Pie Spice Guide
This smaller blend is also a low-risk way to test whether you prefer a softer, brighter, or deeper apple spice flavor.
For a half batch of the full pantry blend, simply cut the main recipe in half and store it in a 2 fl oz spice jar.
How to Adjust the Flavor
Once you understand what each spice adds, you can adjust the mix without worrying that you have ruined it. Keep cinnamon in charge, then use the other spices to make the flavor rounder, brighter, or deeper.
How Each Spice Changes the Blend
Use the visual first, then the table below, so the blend feels easier to adjust by smell and taste.
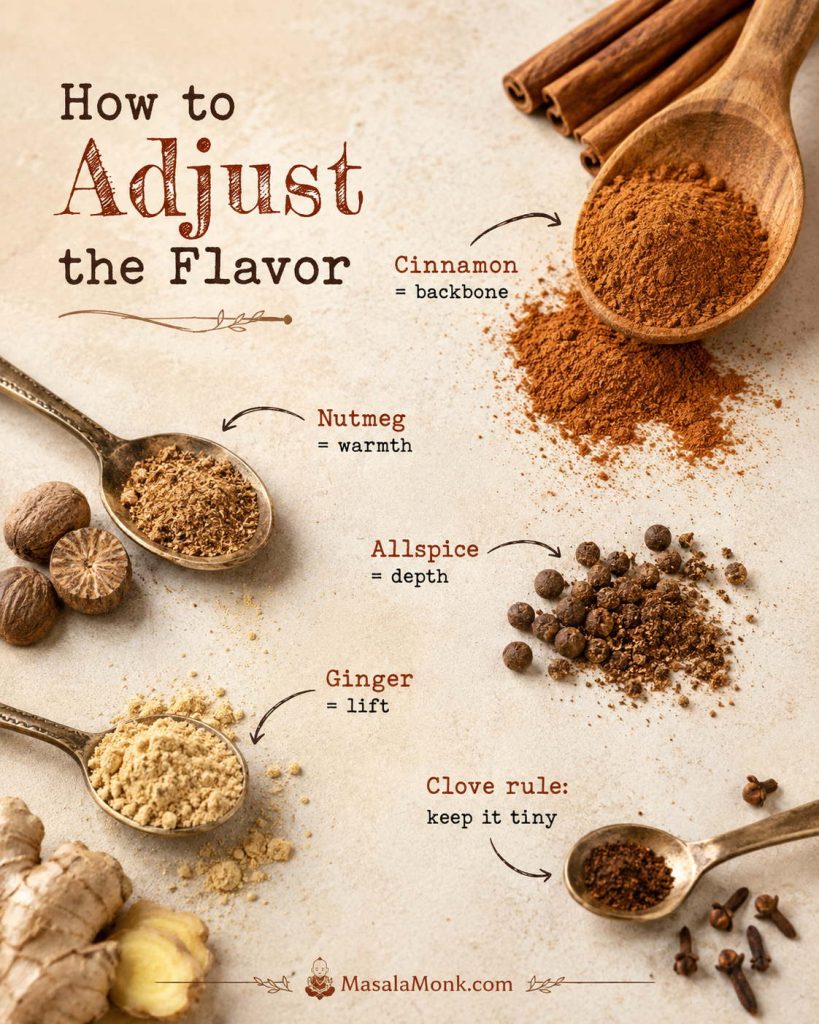
| Spice | Adds | Adjust carefully when… |
|---|---|---|
| Ground cinnamon | Main apple-pie flavor and the backbone of the mix. | Use a little more for casual recipes if the blend smells weak; make a fresh batch for an important pie. |
| Ground nutmeg | Classic pie-shop warmth and a slightly sweet, nutty aroma. | Use less with freshly grated nutmeg or very delicate apple desserts. |
| Ground allspice | Rounded depth. Despite the name, allspice is one spice, not a spice mix. | Use a little more if the blend tastes flat; use less if it tastes heavy. |
| Ground ginger | Brightness and gentle heat. | Use more for lift; skip it if you want a softer, simpler flavor. |
| Ground cardamom | A fragrant bakery note in small amounts. | Use only as an accent; too much can pull the blend away from classic apple pie. |
| Ground cloves | Deep, sharp warmth. | The clove rule: if you can identify clove before baking, you probably used too much. |
Good to know: You do not need every warm spice in the cabinet. For the most familiar pantry flavor, keep the mix mostly cinnamon, nutmeg, and allspice, then add ginger if you like a little extra warmth.
3 Ways to Make It
Choose by what you want the apples to do: classic and familiar, simple and store-bought-style, or deeper and more bakery-like. There is no single official version, so use the one that fits your pantry and the dessert in front of you.
| Version | Formula | Yield | Best for |
|---|---|---|---|
| Classic homemade | 4 tbsp cinnamon + 2 tsp nutmeg + 1 tsp allspice + 1 tsp ginger | About 16 tsp | Pies, crisps, muffins |
| Store-bought-style | 3 tsp cinnamon + ¾ tsp nutmeg + ½ tsp allspice | About 4¼ tsp | Three-spice substitute |
| More aromatic | Classic homemade blend + ½ tsp cardamom + ¼ tsp cloves | About 16¾ tsp | Richer crisps, cider, muffins |
Three Apple Pie Spice Versions
This side-by-side view helps you choose a classic, simpler, or more aromatic blend before you start baking.
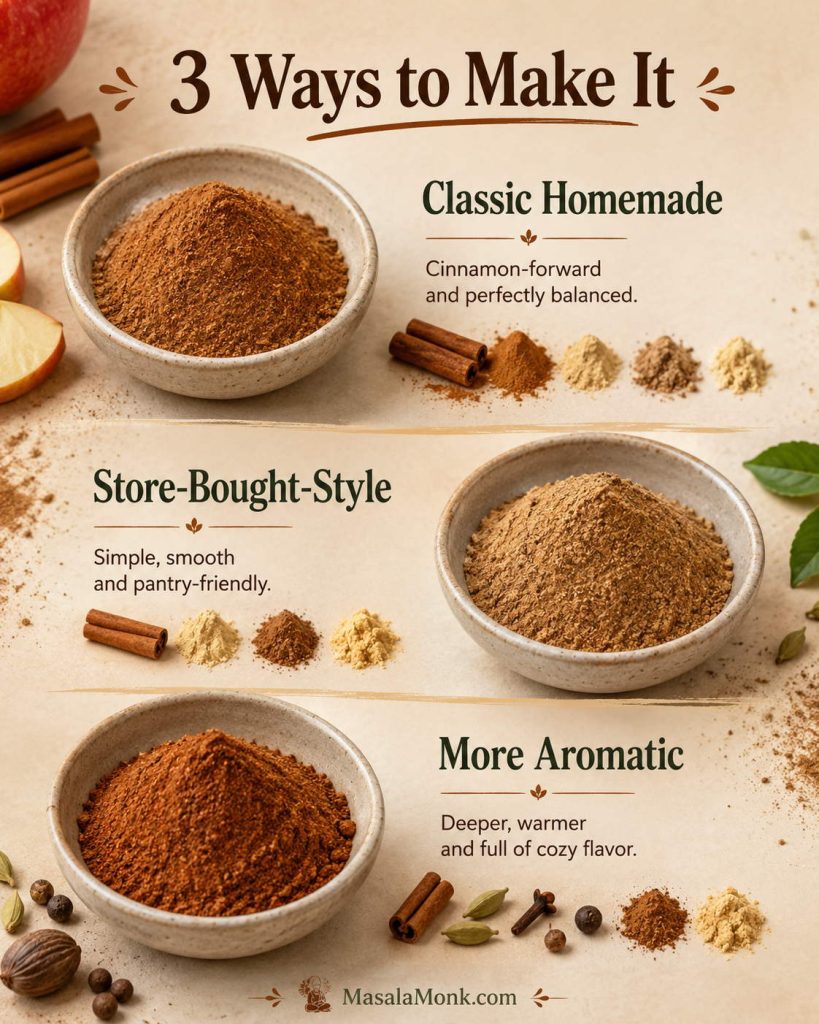
Use the store-bought-style version the same way you would use the full blend, but expect a simpler, more classic flavor. Use the aromatic version only when a deeper spice note will not overpower the apples.
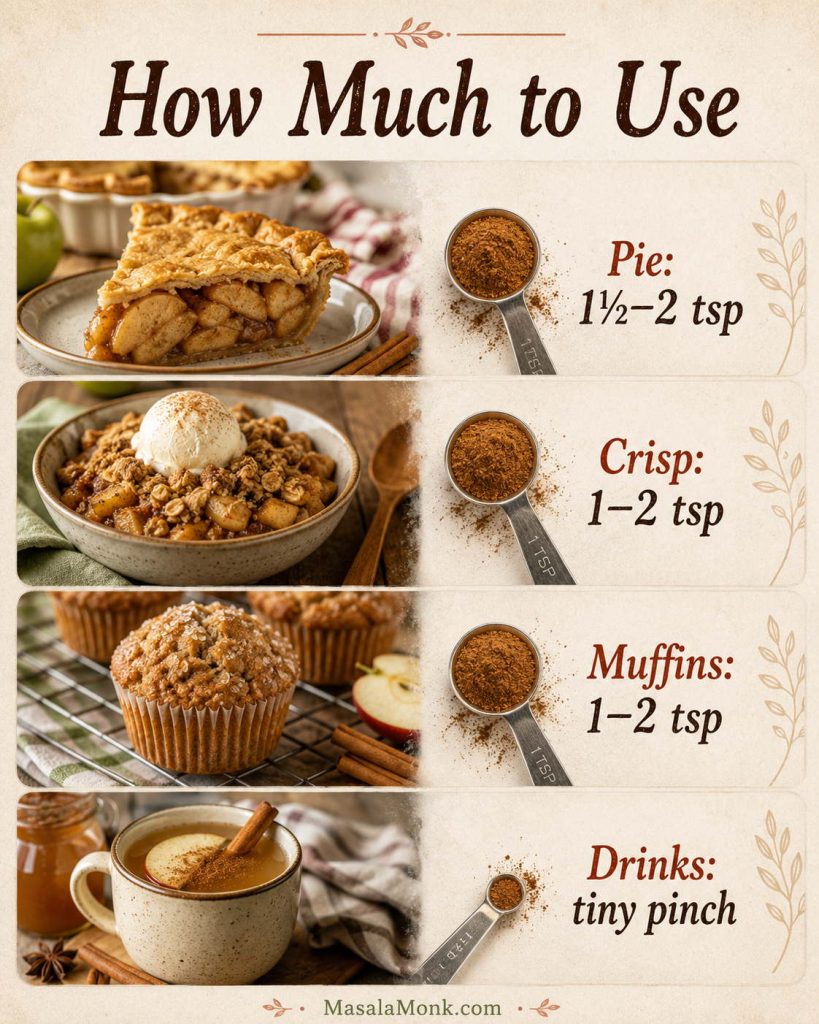
How Much to Use
The easiest mistake with apple pie spice is not making the blend; it is adding too much of a good blend. Start lower than your instincts tell you. Once apples warm up with sugar, lemon, and butter, the spices bloom, and a mix that seemed quiet in the bowl can suddenly taste much louder.
Start Low, Then Taste After Heating
For cooked apple pie filling, cider, or a stovetop apple topping, let the mixture heat for a few minutes before deciding whether to add more. Heat changes the flavor quickly: cinnamon becomes rounder, nutmeg gets warmer, and clove or ginger can become more noticeable.
Older spice blends may need a slightly larger pinch in casual recipes like oatmeal, pancakes, or cider. However, for a pie you care about, a fresh batch is better than trying to rescue tired spices with a heavier hand.
Quick Usage Amounts
| Use | Start with | Quick note |
|---|---|---|
| 9-inch apple pie | 1½–2 tsp | Lower end for brighter apple flavor. |
| 6 medium apples | About 1½ tsp | Good for raw sliced apples before baking. |
| 5–6 cups apple pie filling | 1½–2 tsp | Perfect for homemade apple pie filling. |
| Apple crisp or crumble | 1–2 tsp | Add some to fruit and a pinch to topping. Try this apple crisp recipe. |
| Apple muffins or quick bread | 1–2 tsp per batch | Use more for rich batters. |
| Pancakes or waffles | ½–1 tsp per batch | Works with applesauce or grated apple. |
| Oatmeal, yogurt, or smoothie bowls | ⅛–¼ tsp per serving | Mix with honey, maple, or apples. |
| Hot apple cider | ¼–½ tsp per mug | Whisk with hot liquid first. |
| Coffee, latte, or cocoa | Tiny pinch to ⅛ tsp | Expect a little settling unless blended. |
| Baked apples | About ¼ tsp per apple | Mix with butter, sugar, oats, or nuts. |
| Cinnamon sugar topping | ¼ tsp per 1 tbsp sugar | Use on toast, pancakes, or pie scraps. |
When to use less: Reduce the spice in recipes where the apples are meant to taste very fresh, tart, or floral, such as simple raw apple salads or lightly sweetened compotes. A pinch is enough there.
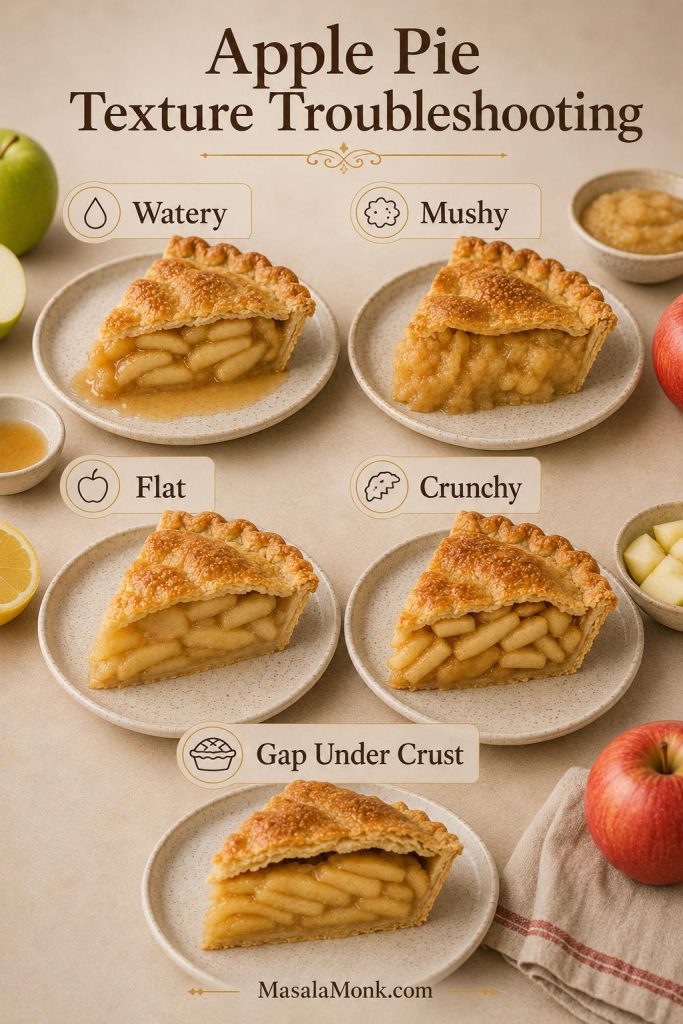
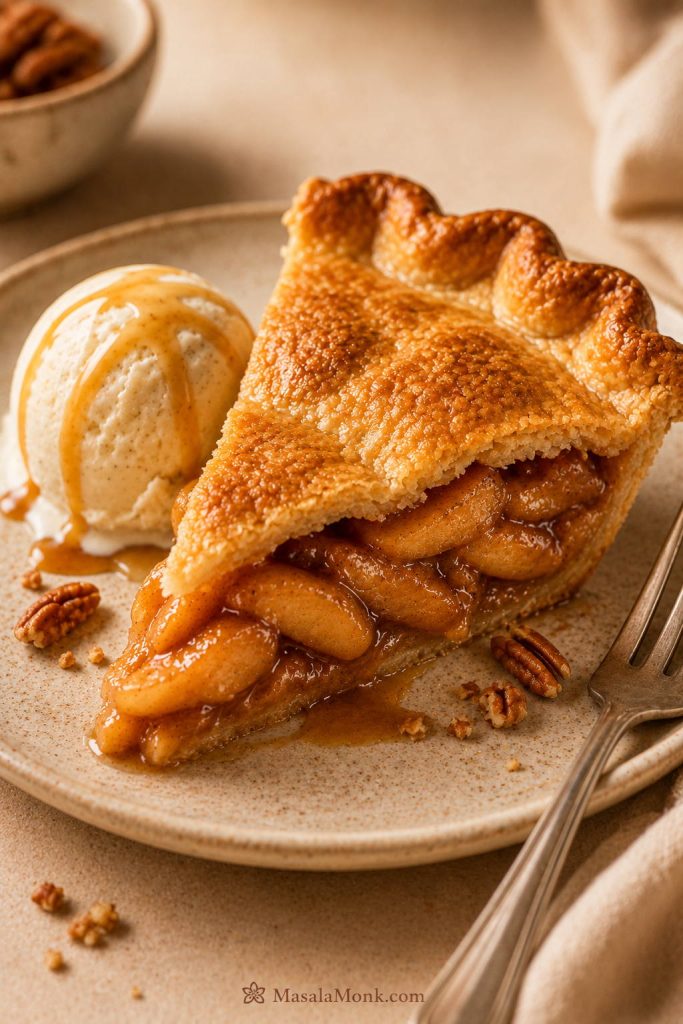
A Useful Pie Benchmark
For a store-bought benchmark, McCormick’s easy apple pie recipe uses 1½ teaspoons apple pie spice for a full pie with about 8 cups of sliced apples. That makes 1½ teaspoons a safe starting point for many full pies, with 2 teaspoons useful when the filling is richer or the apple volume is higher.
Adjust for the Apples and Crust
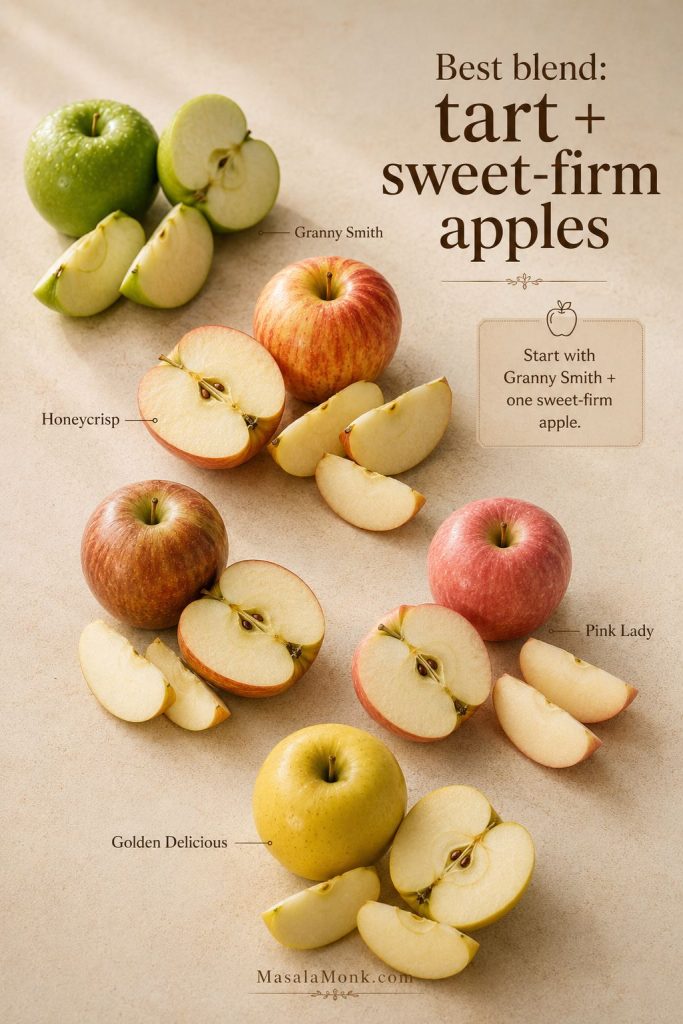
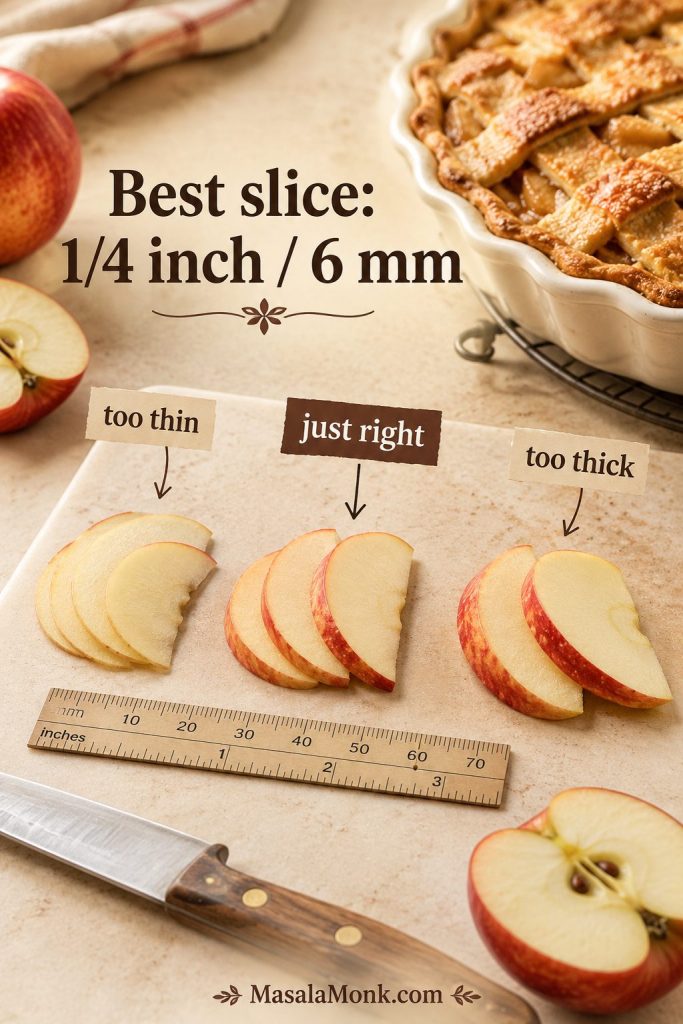
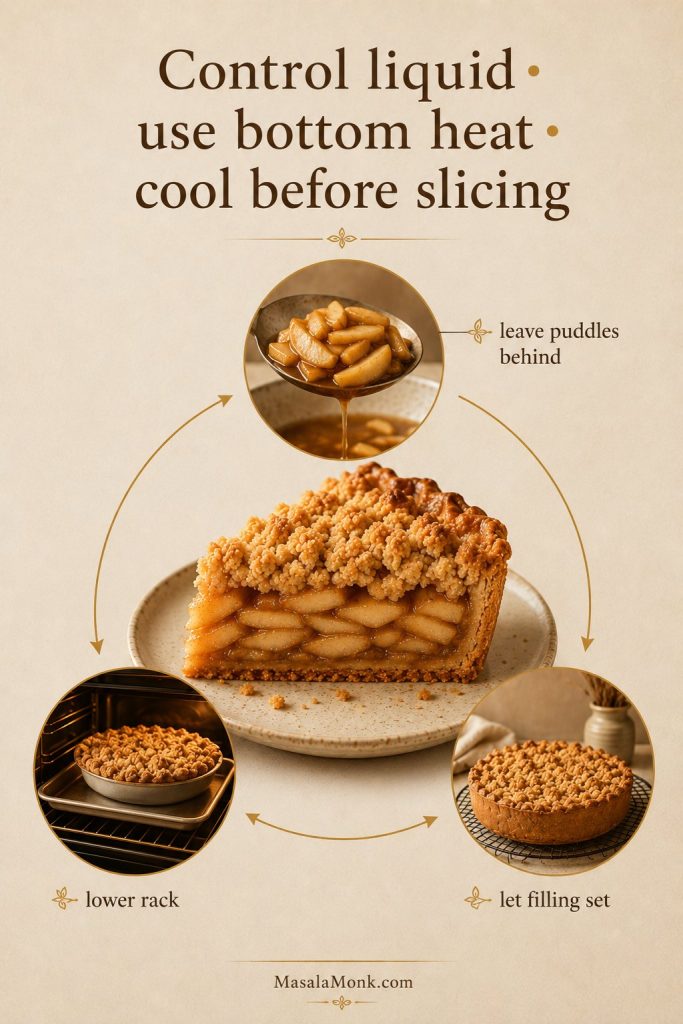
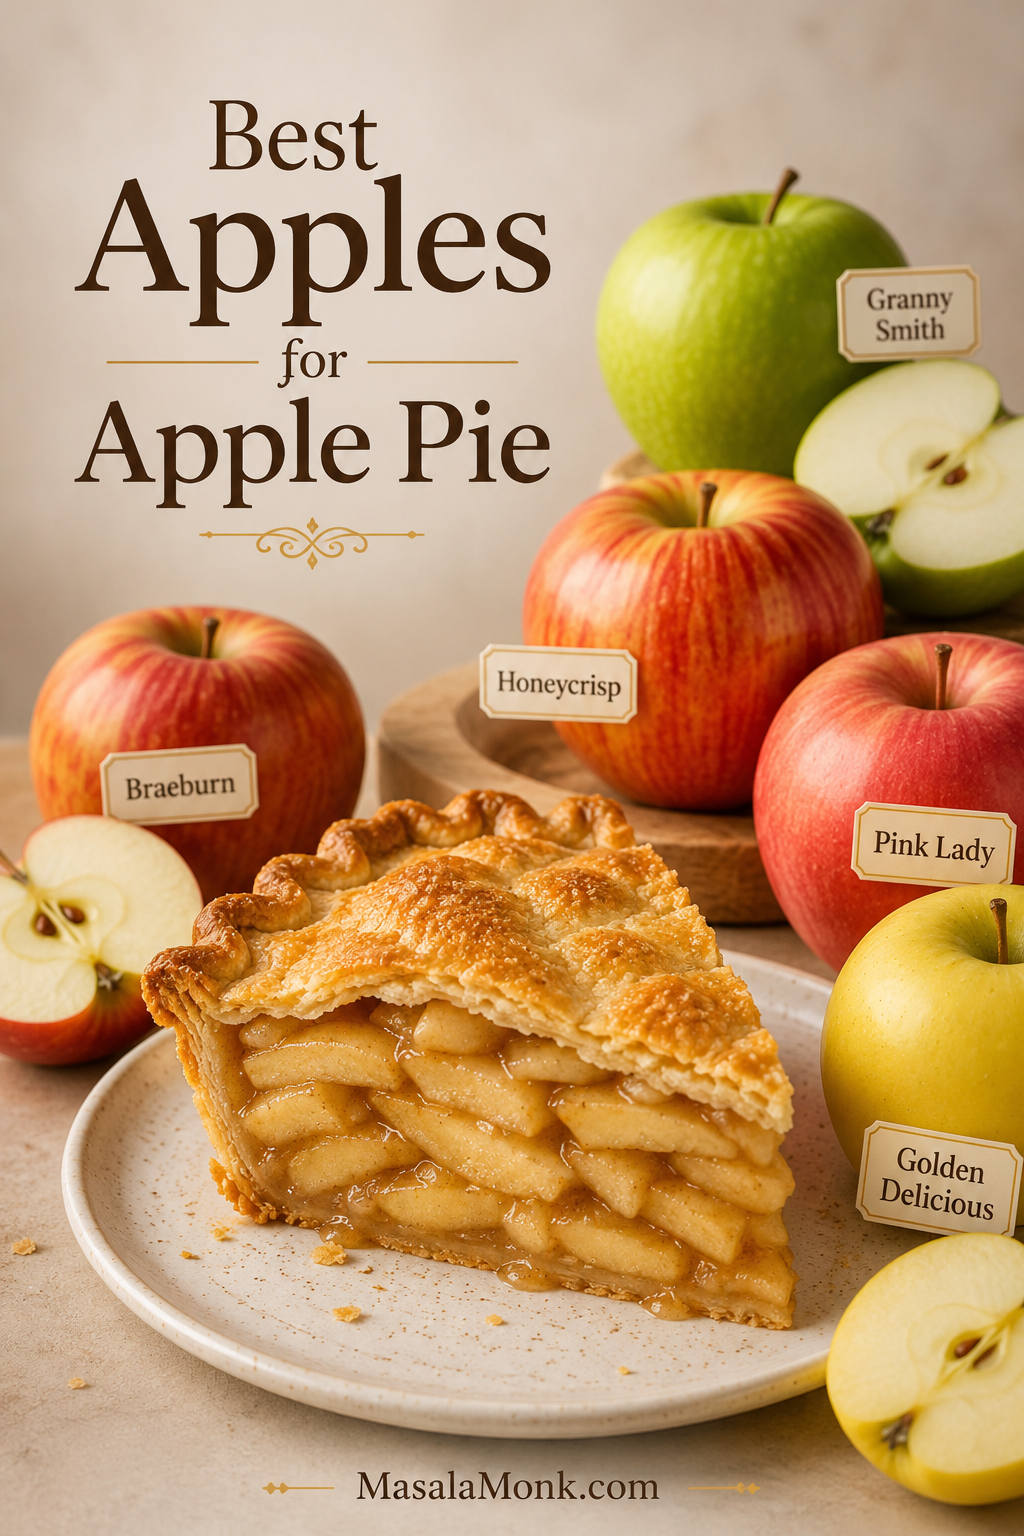
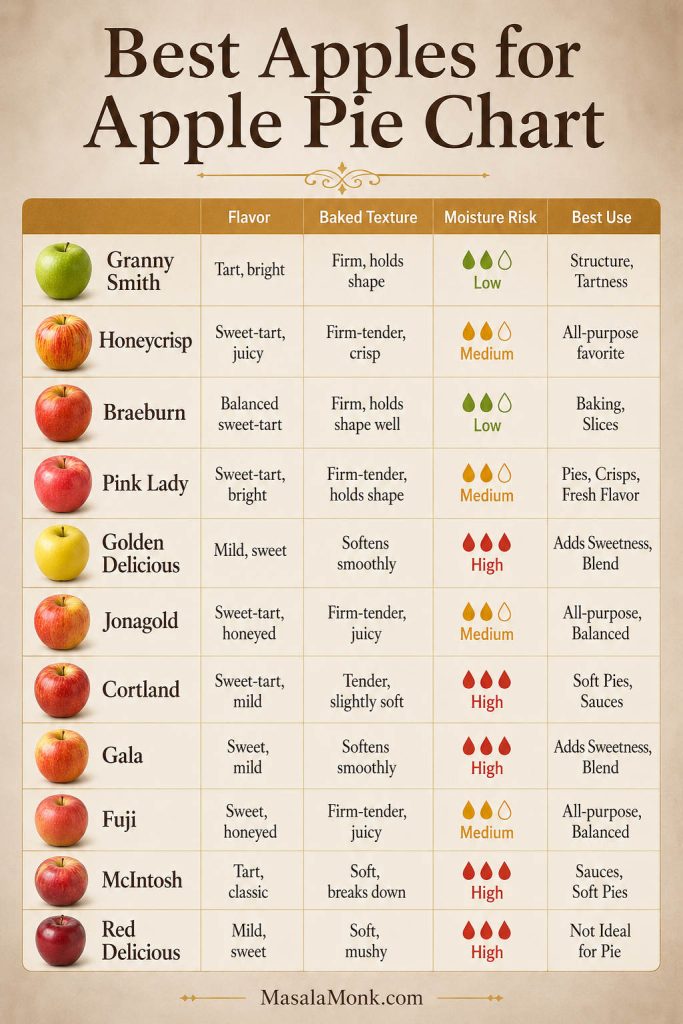
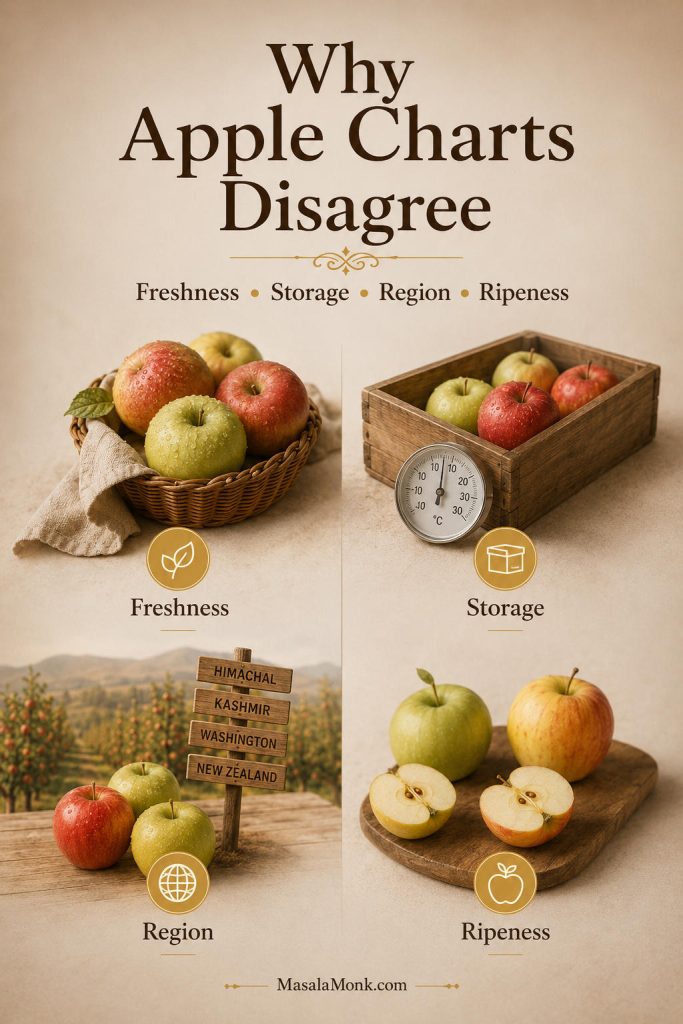
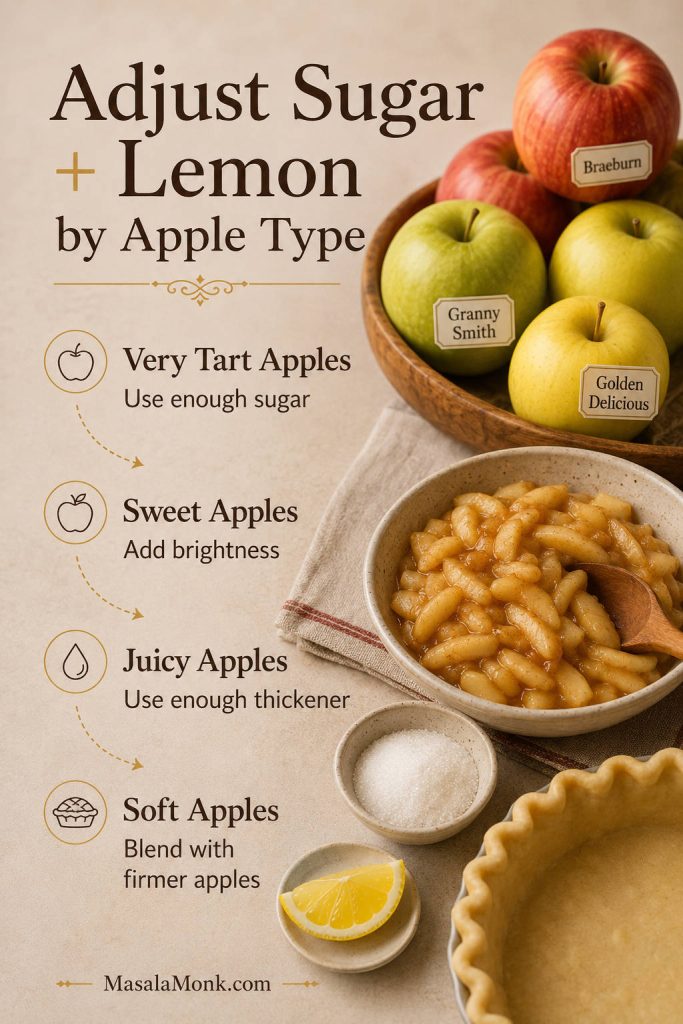
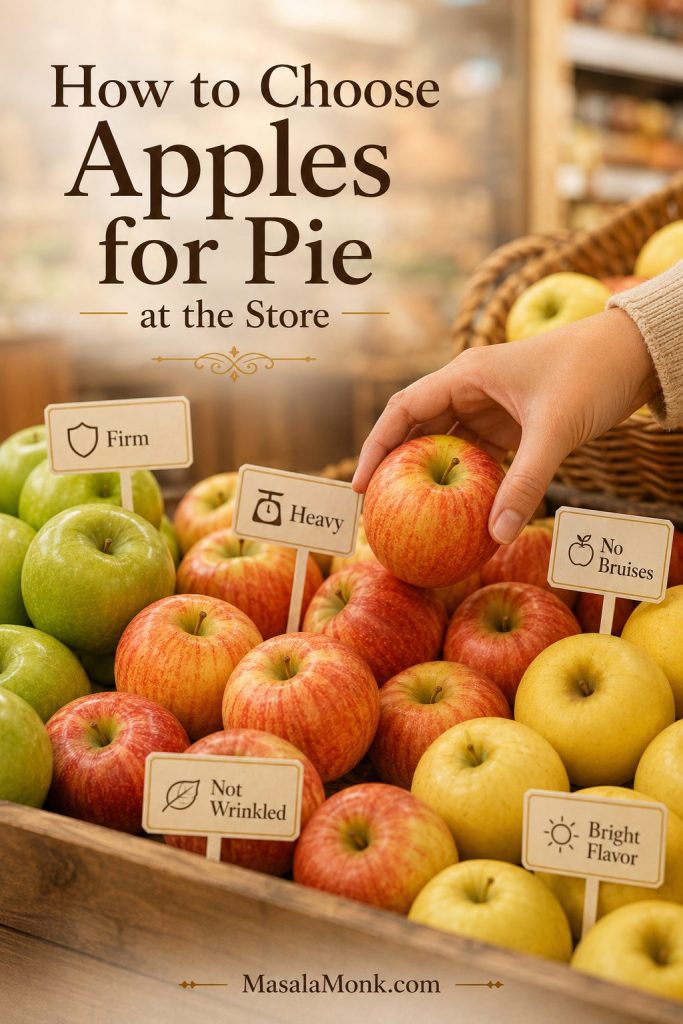
For a full apple pie, the spice amount also depends on the apples. Sweet apples often need lemon and a balanced hand with warm spices, while very tart apples can handle more depth. For a deeper apple-by-apple breakdown, see this guide to the best apples for apple pie.
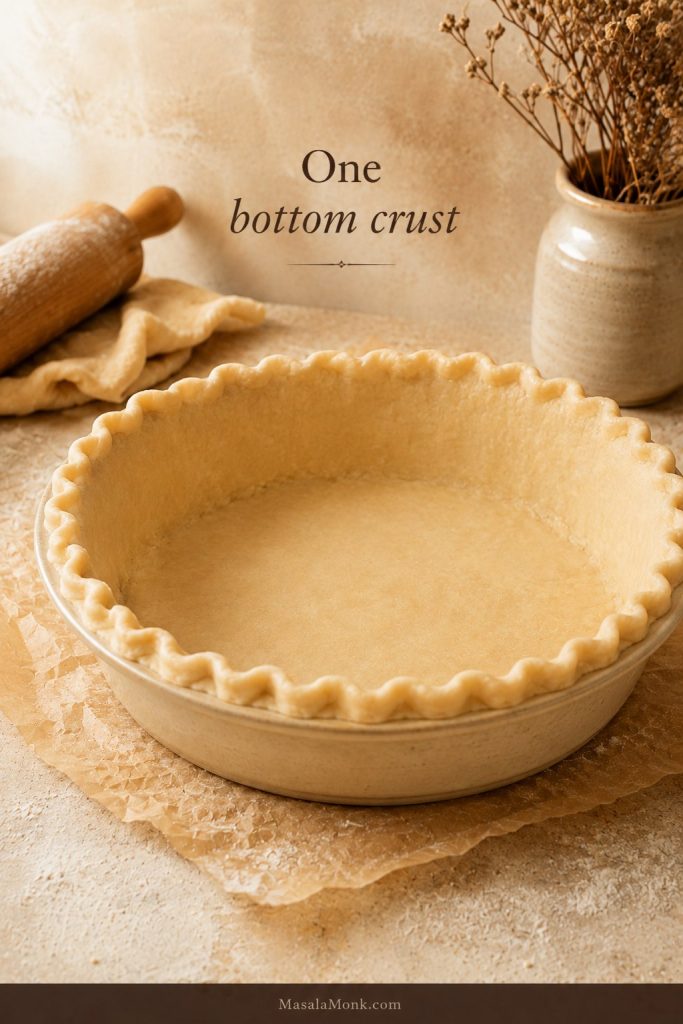
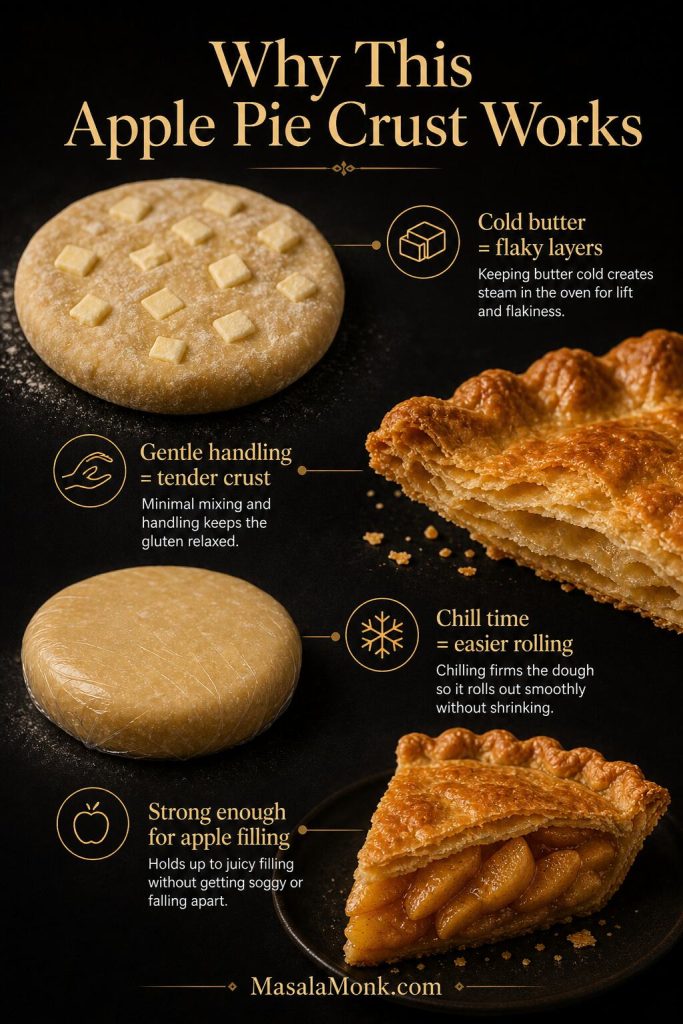
When this mix goes into a pie with homemade pastry, keep the filling warmly spiced but not overpowering. A buttery apple pie crust makes heavy spice taste even heavier, so the filling should still finish like apples.
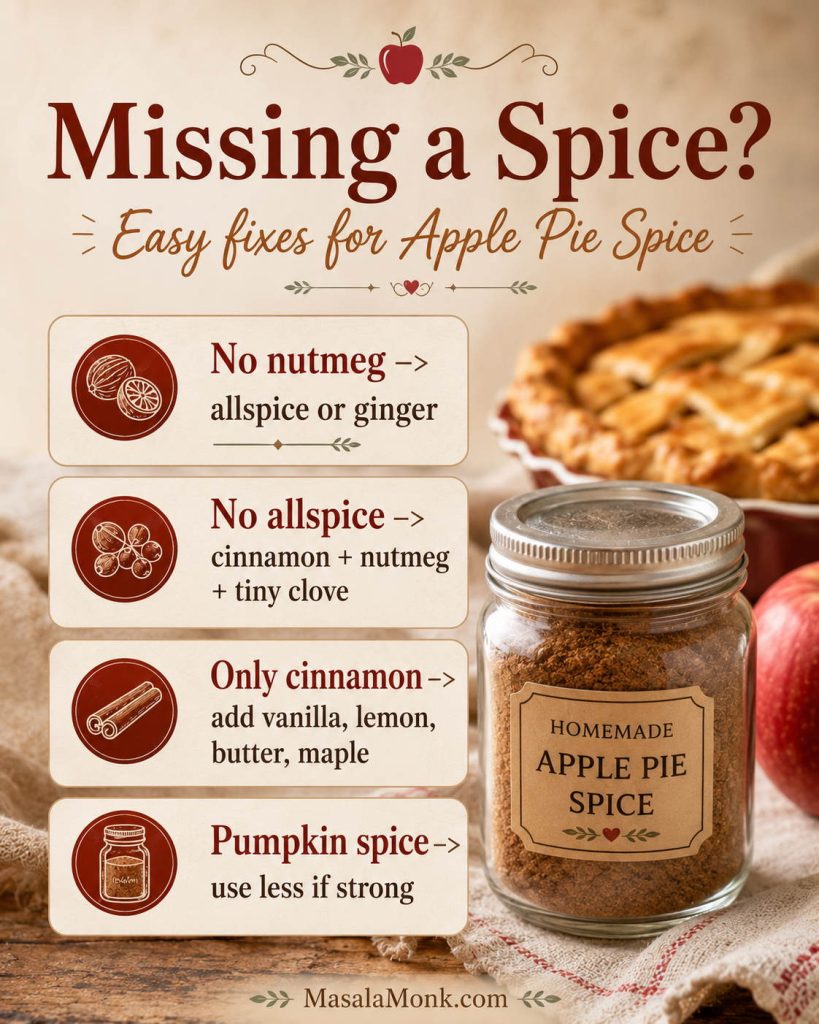
Substitutions When You’re Missing a Spice
Most missing-spice problems are smaller than they feel in the moment. Apple pie spice is a support flavor, not the whole recipe, so one missing spice should not stop the dessert. The safest emergency substitute is cinnamon plus a smaller amount of nutmeg and allspice. After that, adjust based on what you have.
Need 1 Teaspoon Apple Pie Spice Right Now?
Use this quick fix when the jar is missing and you need enough spice to keep baking today. It will not taste as layered as the full blend, but it gives cinnamon and nutmeg a rounder pie-spice finish.
Missing-Spice Fixes
| Problem | What to do |
|---|---|
| Need 1 tsp apple pie spice | Use the emergency 3-spice substitute: ¾ tsp cinnamon + scant ¼ tsp nutmeg + pinch allspice. |
| No nutmeg | Use a little extra allspice or ginger. Mace can also work in a tiny amount if you have it. |
| No allspice | Use cinnamon + nutmeg + tiny pinch cloves. |
| No ginger | Skip it. The mix will still taste familiar. |
| No cardamom | Skip it. It is only an accent. |
| No cloves | Skip them. Cloves are easy to overdo. |
| Only have cinnamon | Use cinnamon, then add vanilla, lemon, brown sugar, maple, or butter. |
| Have pumpkin pie spice | Use 1:1; use about ¾ amount if it smells clove- or ginger-heavy. |
If you are baking today, close enough is usually enough; the apples, sugar, lemon, and butter will carry the dessert. If a recipe says apple pie seasoning instead of apple pie spice, use this blend the same way.
That tiny emergency pinch of allspice matters because it gives cinnamon and nutmeg a rounder pie-spice flavor without making you stop and run to the store. Chai spice can also work in some apple desserts, but use it carefully because it may taste stronger, more cardamom-forward, or slightly peppery.
Can You Use Cinnamon Instead?
Yes, but the flavor will be simpler. Cinnamon gives the main apple-pie aroma, so it is the best single-spice backup. If cinnamon is all you have, use it, then add vanilla, lemon, brown sugar, maple syrup, or butter in the dessert to make the flavor feel fuller.
Can You Make It Without Cinnamon?
You can make a warm apple seasoning without cinnamon, but it will not taste like classic apple pie spice. Cinnamon is the defining flavor in most versions.
For one pie, try a cinnamon-free apple seasoning with ½ teaspoon allspice, ¼ teaspoon ginger, ⅛ teaspoon nutmeg, and a tiny pinch of cardamom. Use it carefully and treat it as a cinnamon-free apple spice blend, not an exact flavor match.
Can You Make It Without Nutmeg?
Yes. Use cinnamon, allspice, and ginger. If you have mace, use a tiny pinch because mace is related to nutmeg and has a similar warm, aromatic quality. The flavor will be slightly less classic, but it will still work in apple pie filling, apple crisp, muffins, oatmeal, pancakes, and baked apples.
Apple Pie Spice vs Pumpkin Pie Spice
Apple pie spice and pumpkin pie spice are similar warm blends, and in everyday baking they can often replace each other. The difference is usually the flavor direction. Apple pie spice tends to be softer and more cinnamon-forward so the apple flavor stays bright and fruit-forward. Pumpkin pie spice is often deeper, warmer, and more ginger- or clove-forward because pumpkin needs stronger spice support.
Apple Pie Spice vs Pumpkin Pie Spice Comparison
| Blend | Usually tastes like | Best use |
|---|---|---|
| Apple pie spice | Softer, cinnamon-forward, apple-focused. | Apple pie, filling, crisp, oatmeal, cider. |
| Pumpkin pie spice | Deeper, often ginger- or clove-forward. | Pumpkin pie, pumpkin bread, lattes, cookies. |
| Substitution | Usually works 1:1. | Use about ¾ amount if it smells strong. |
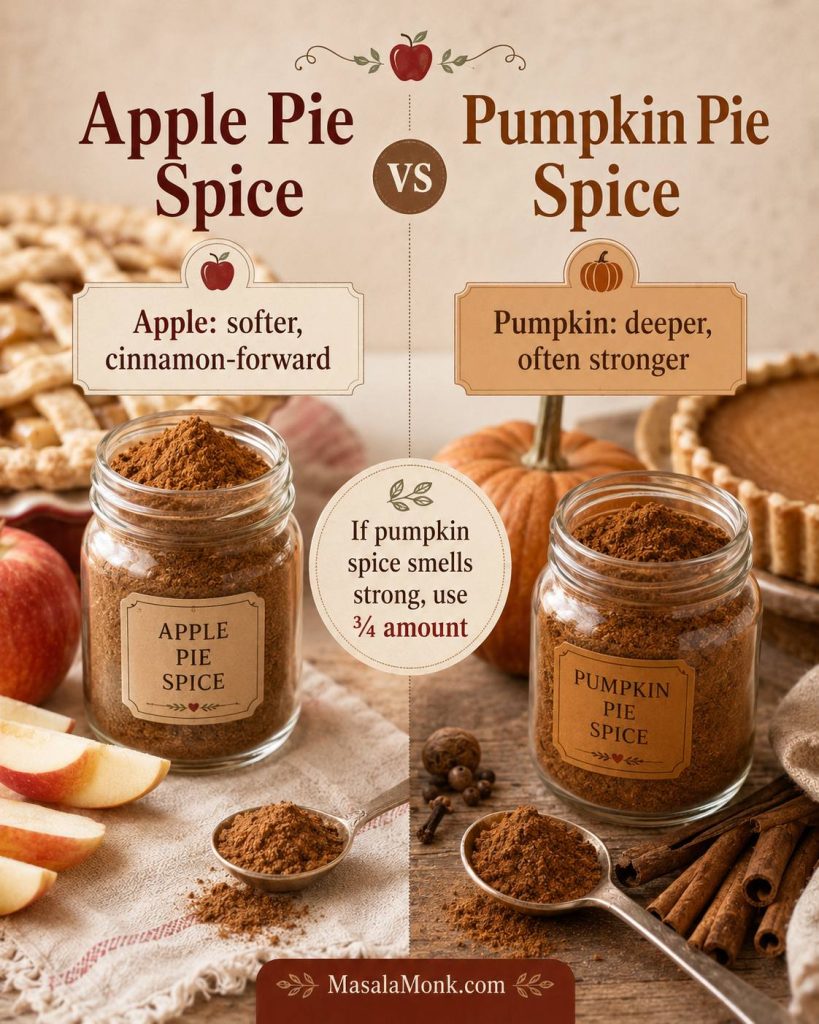
Choose apple pie spice when the apple should stay the star. Pumpkin pie spice works better when you want a deeper, heavier spice flavor. When your pumpkin pie spice smells strongly of clove or ginger, start with about ¾ of the amount called for, then add more after smelling the mixed filling or tasting a cooked filling, cider, or topping.
If you already keep homemade pumpkin pie spice in your pantry, this apple version is still worth making because it gives you a gentler mix for apple pie filling, apple crisp, oatmeal, and everyday baking.
Where This Blend Works Best
Think of this blend as a warm base note. It belongs wherever apples need a little roundness, but the amount changes depending on whether the spice is baked, simmered, sprinkled, or stirred into a drink.
Apple Desserts
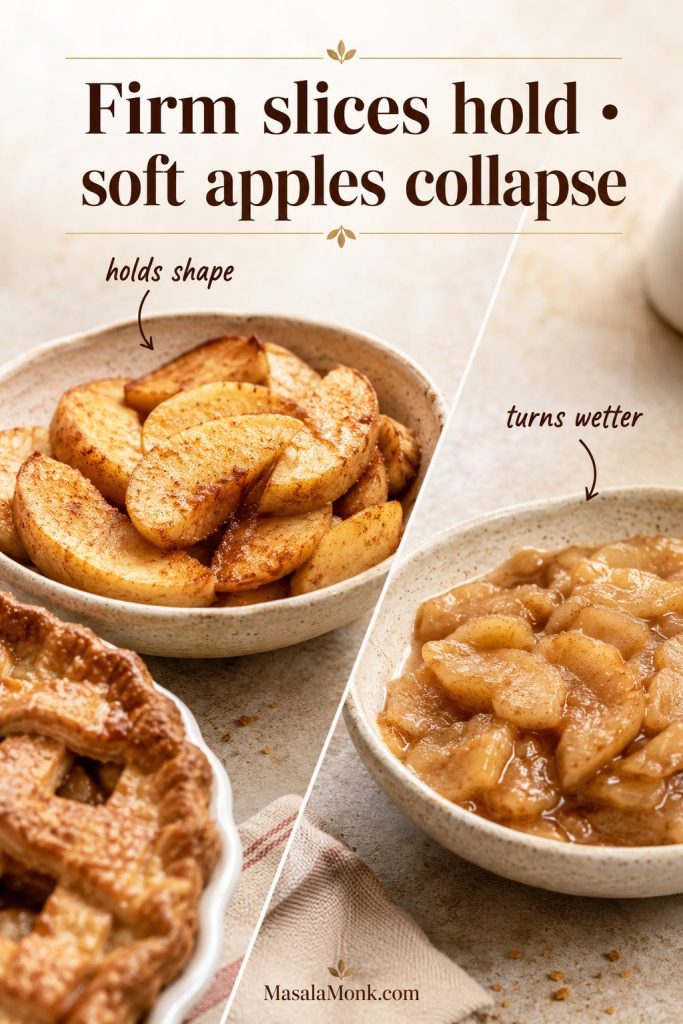
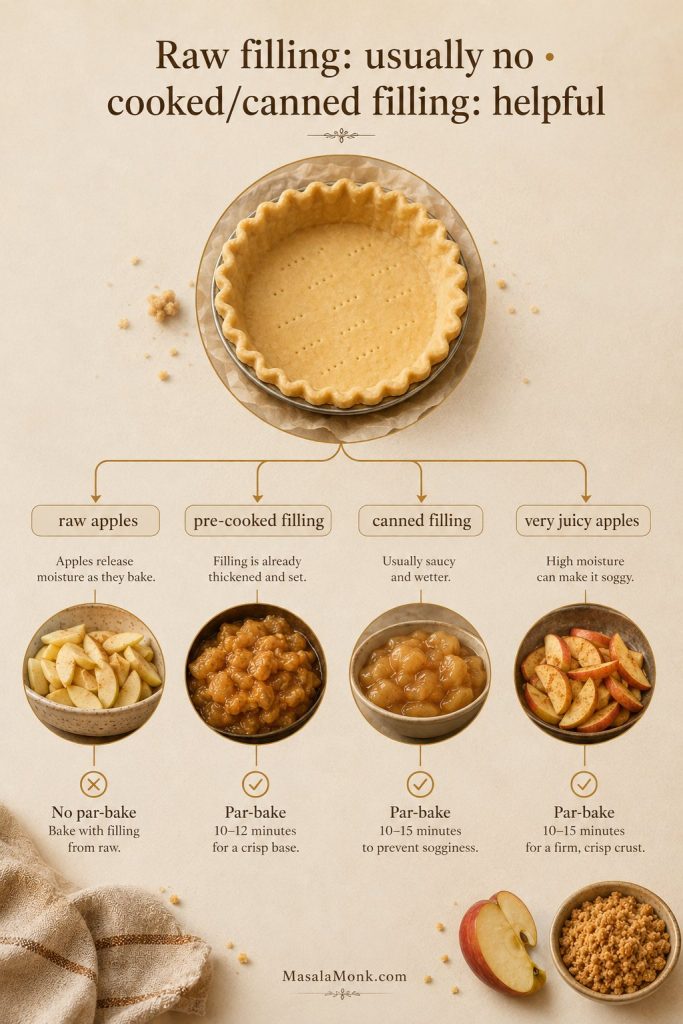
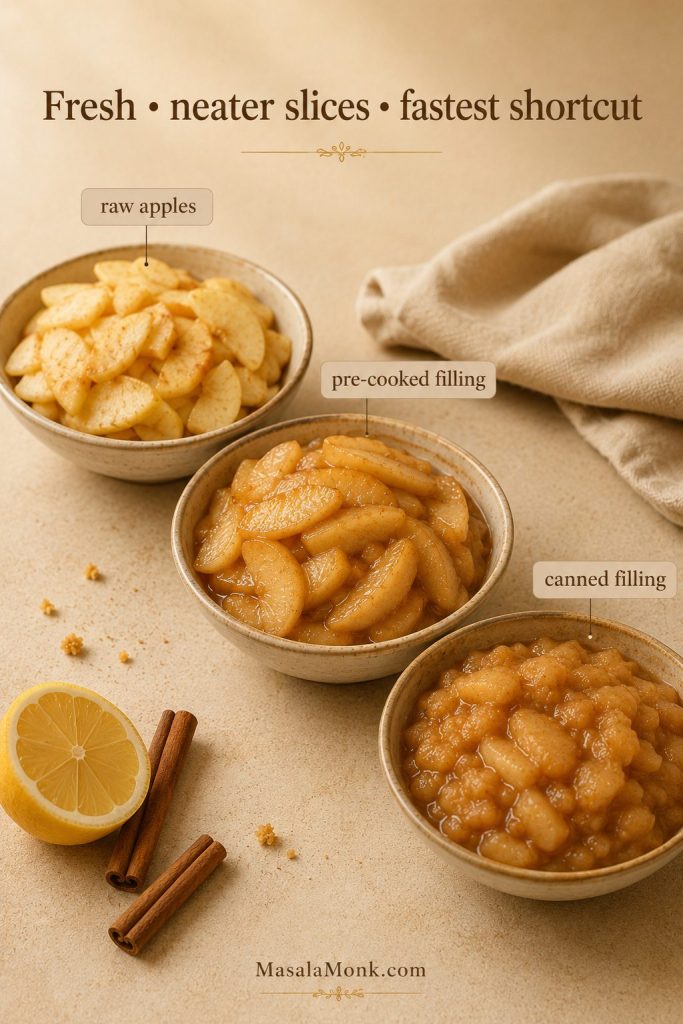
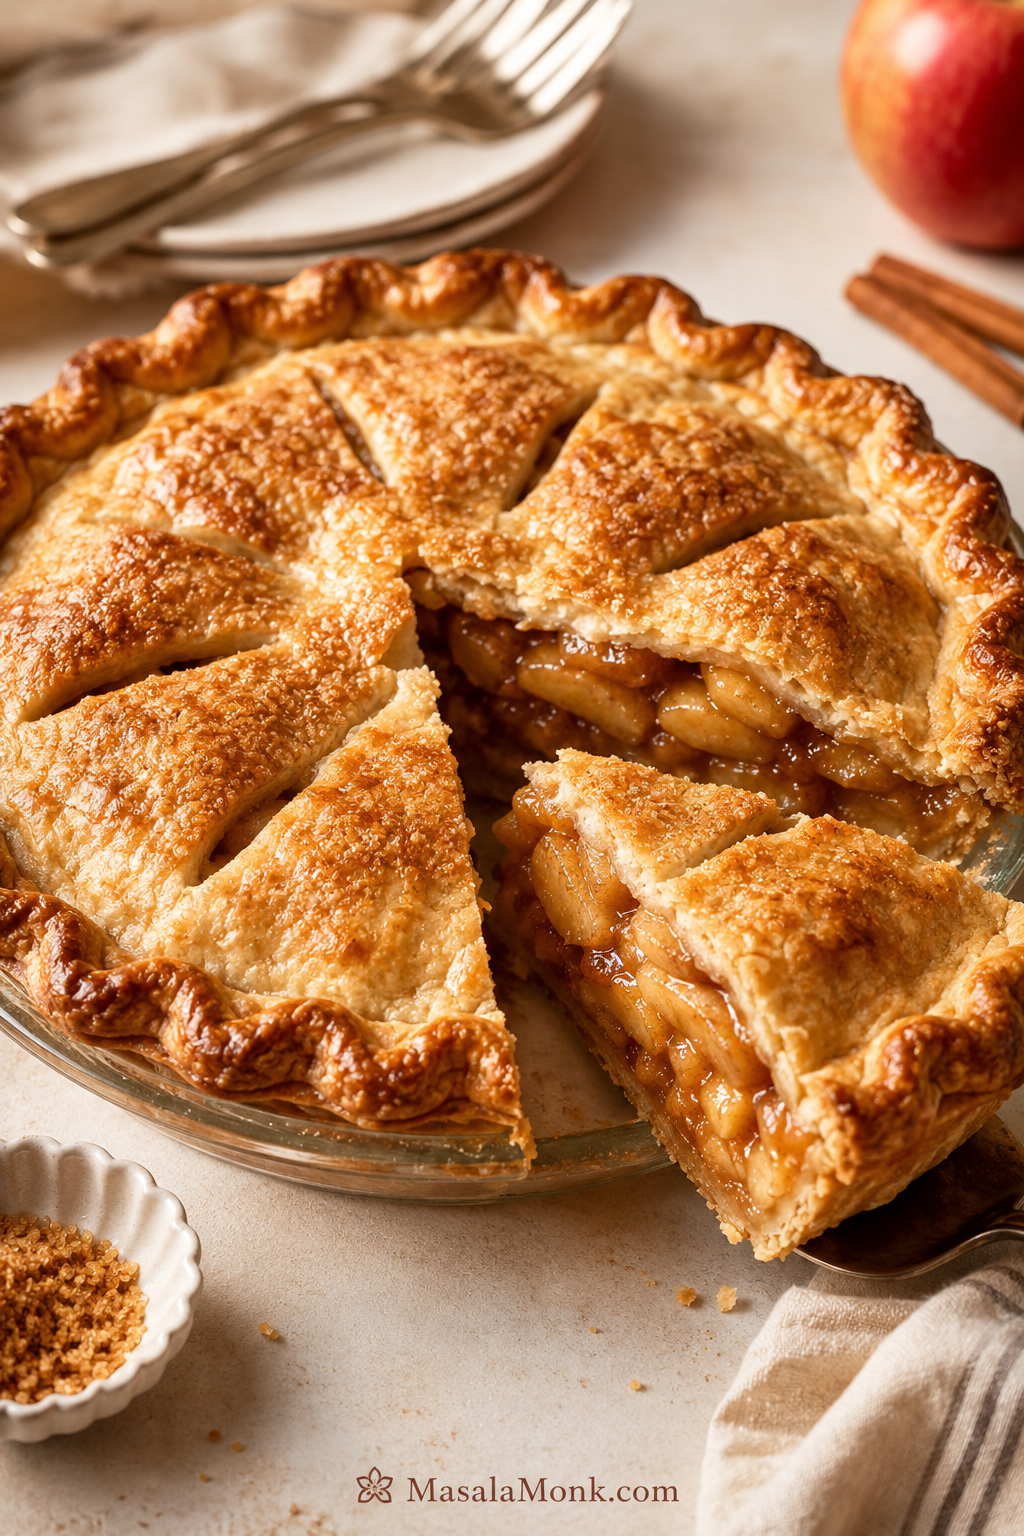
Cooked apples can handle more spice because heat softens the edges and lets cinnamon, nutmeg, and allspice settle into the filling.
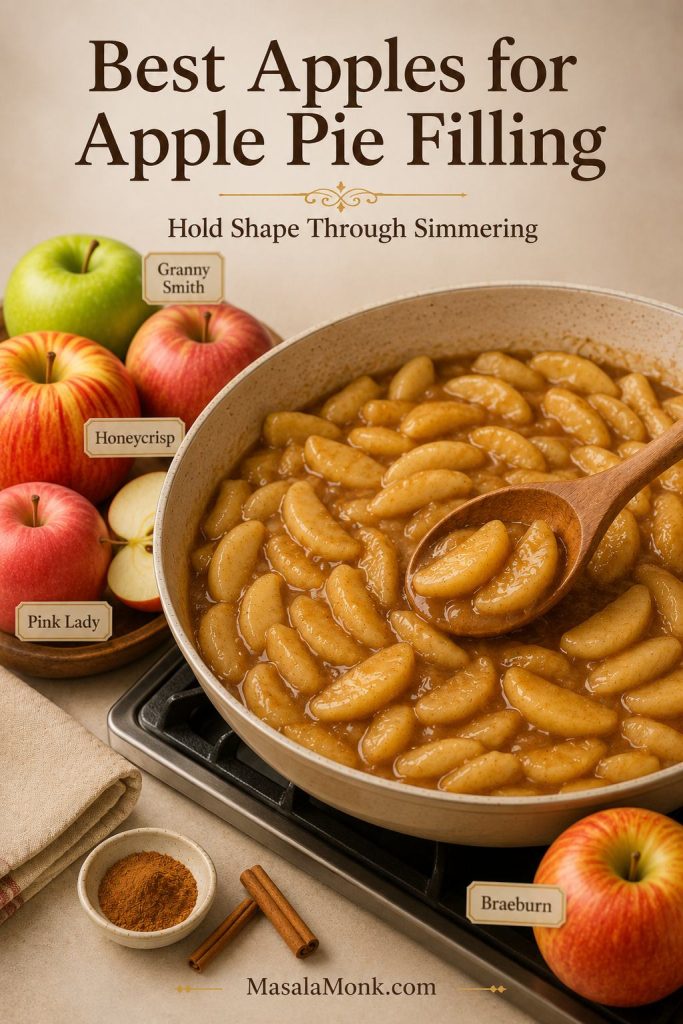
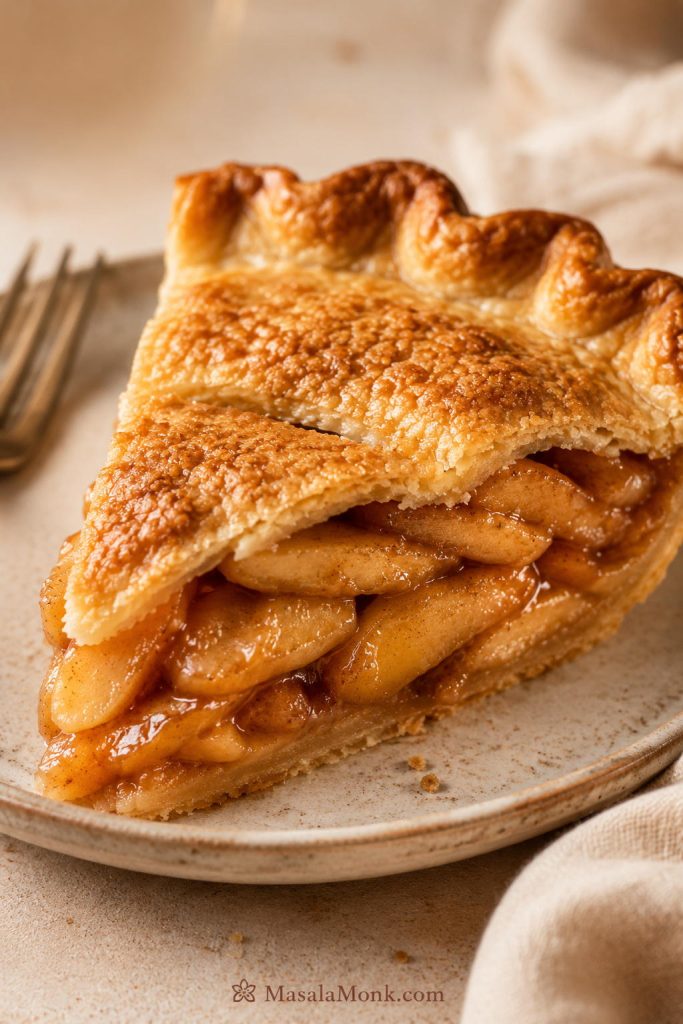
Apple Pie Filling
Apple pie filling is the clearest test for this blend because the spices bloom as the apples cook. Start with the usage amounts above, warm the filling, and then decide whether it needs more spice.
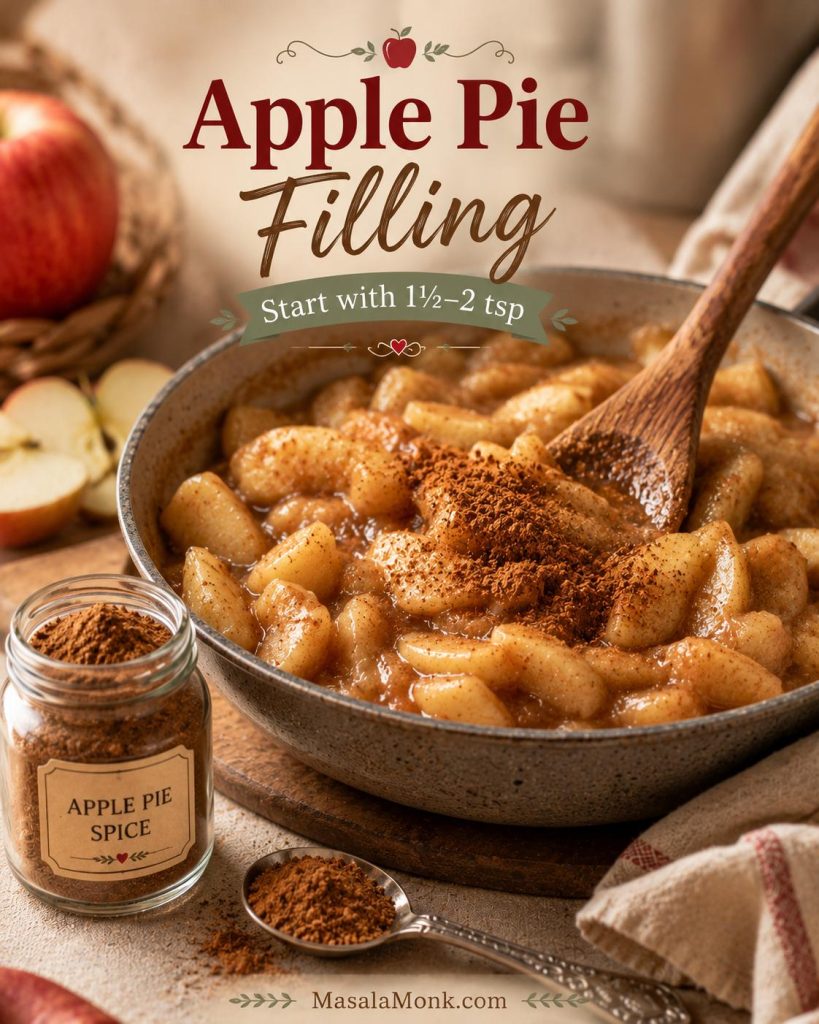
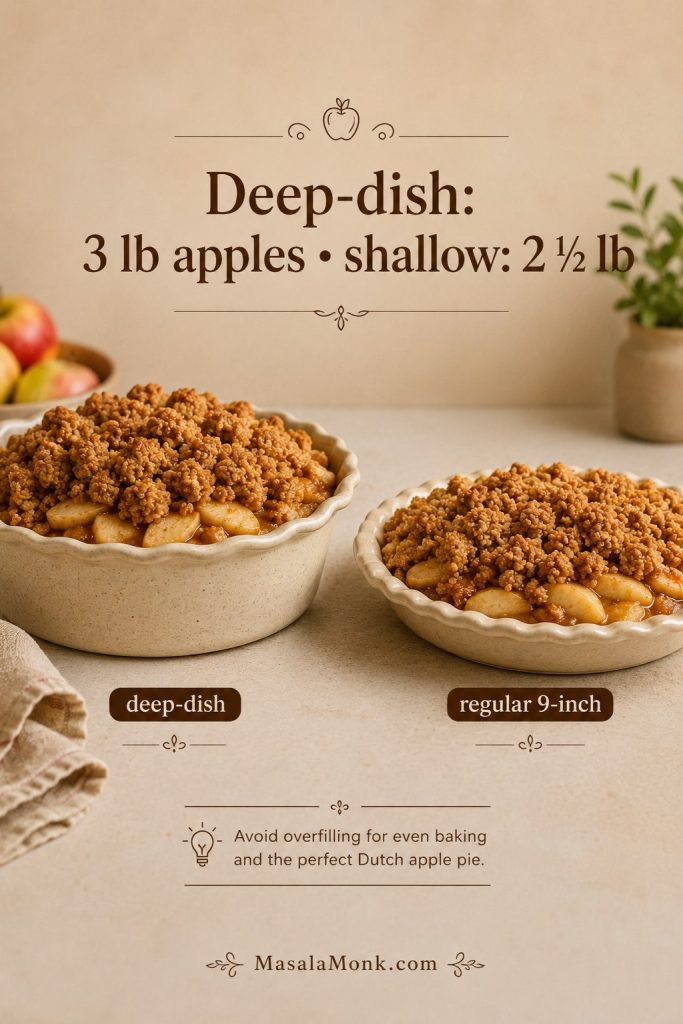
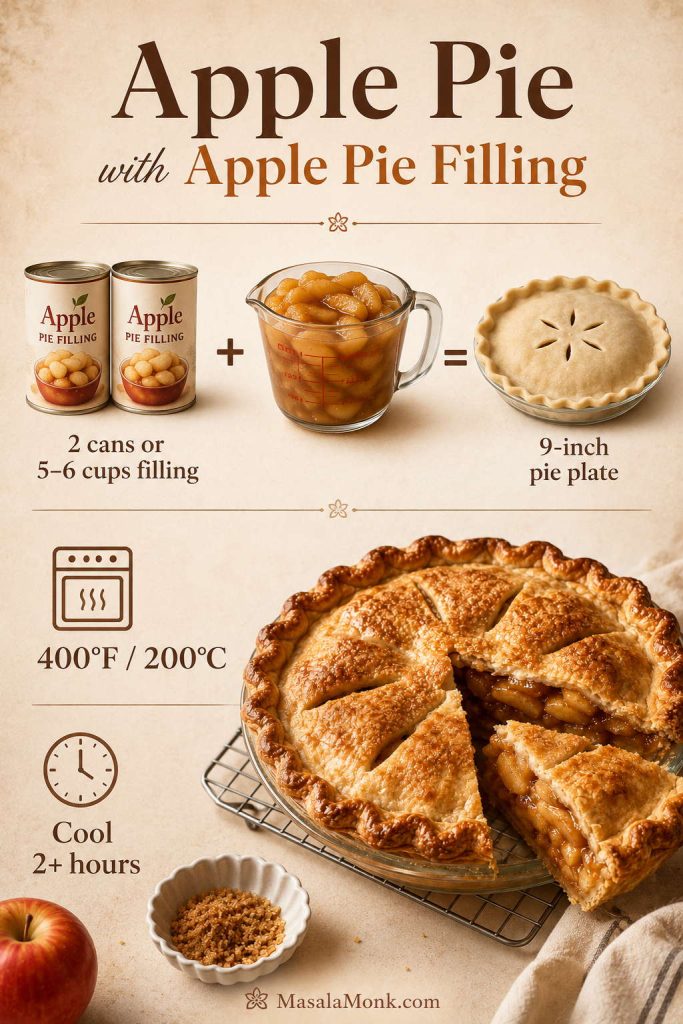
- Apple pie filling: Use 1½–2 teaspoons for 5–6 cups of filling.
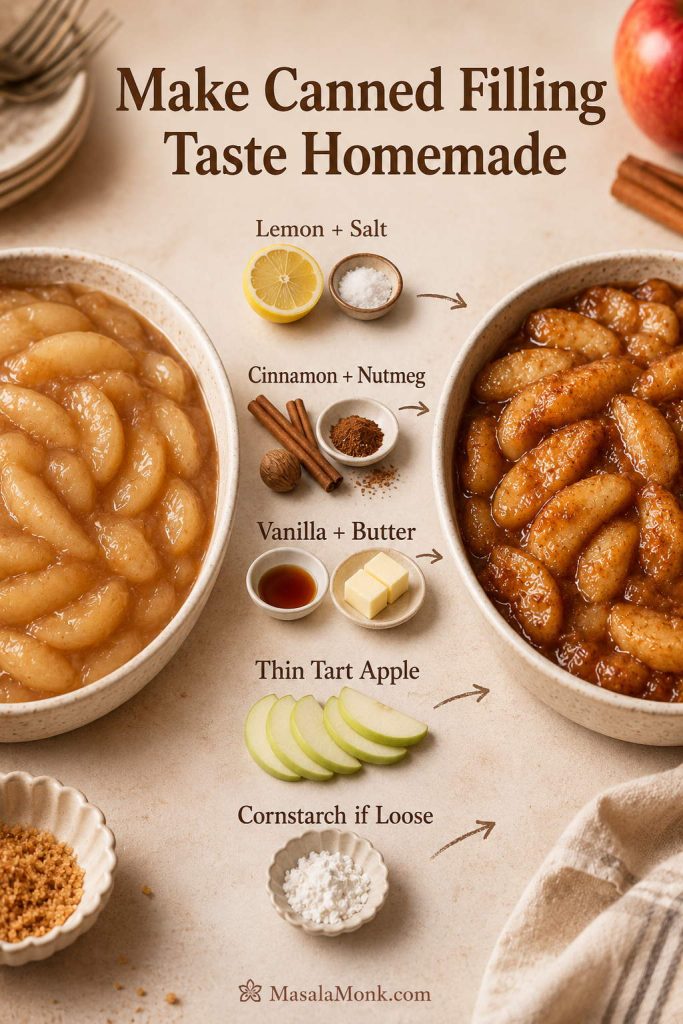
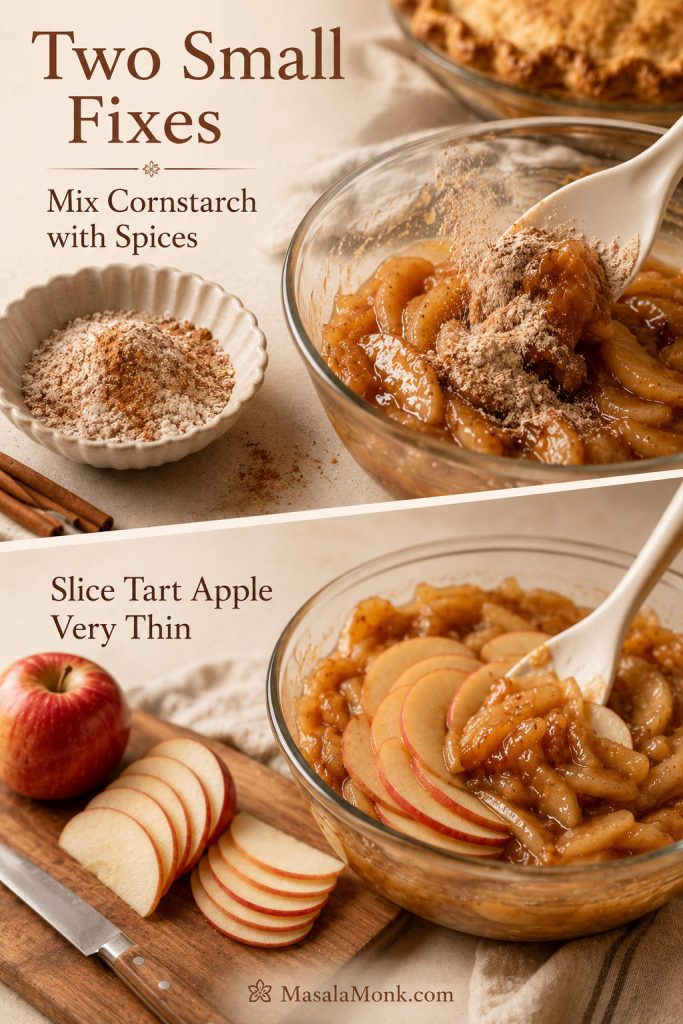
- Shortcut apple pie: Add a small pinch if prepared filling tastes flat, especially in a shortcut pie made with ready-made or homemade filling.
- Classic apple pie: Use it in the filling with firm apples, lemon, sugar, and a buttery crust.
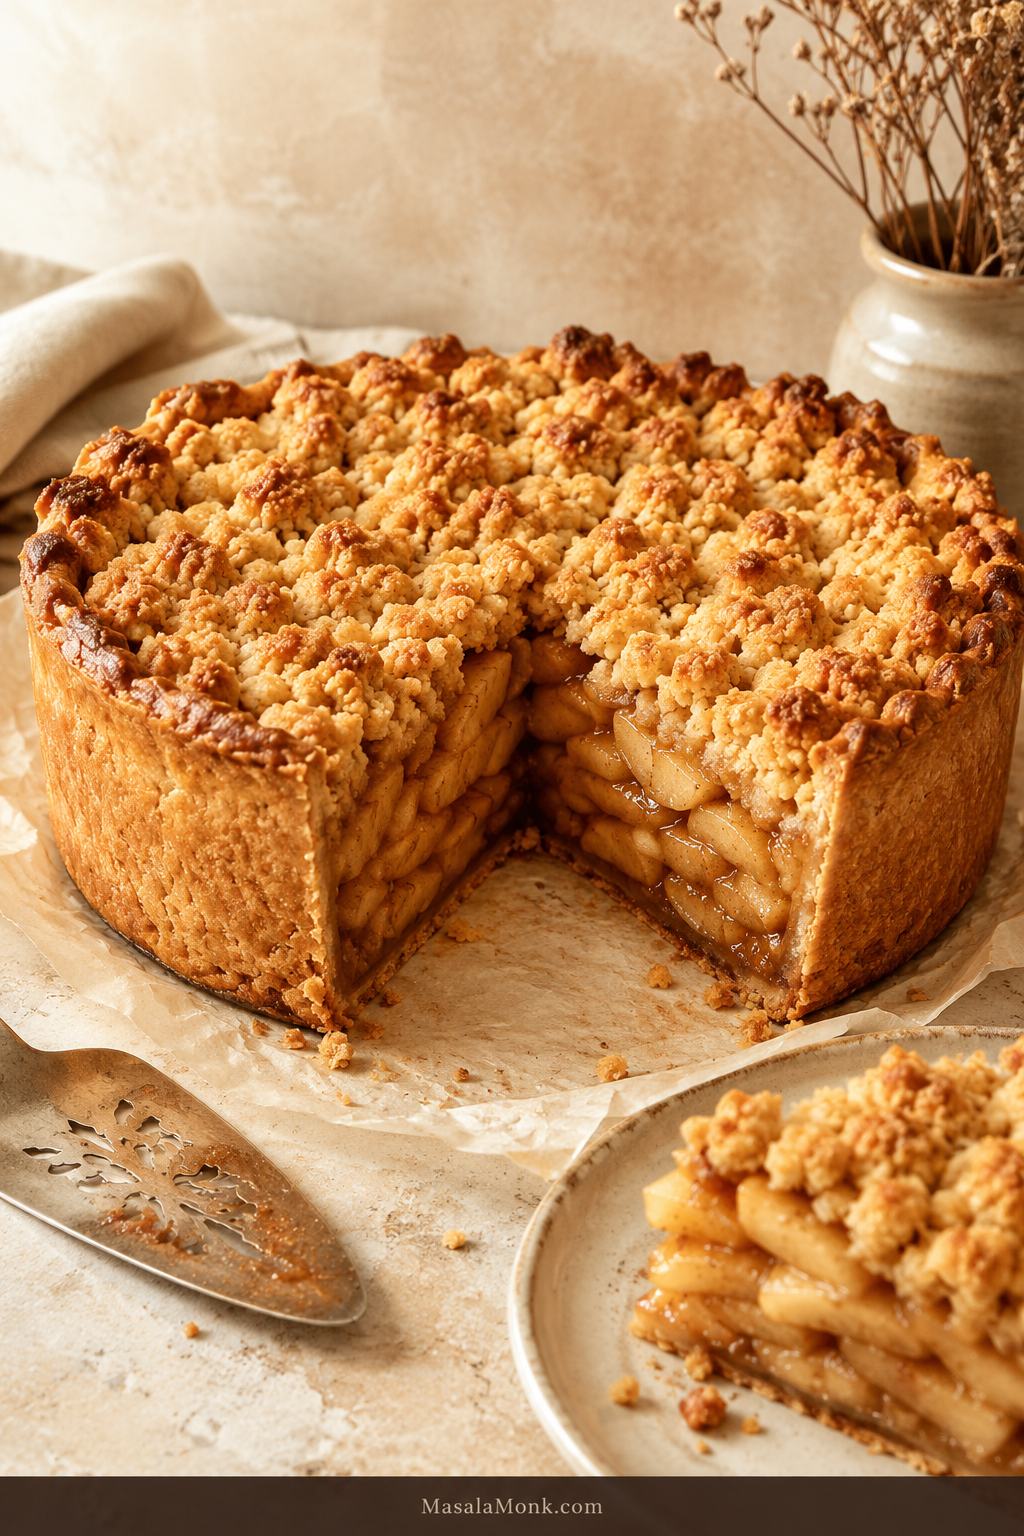
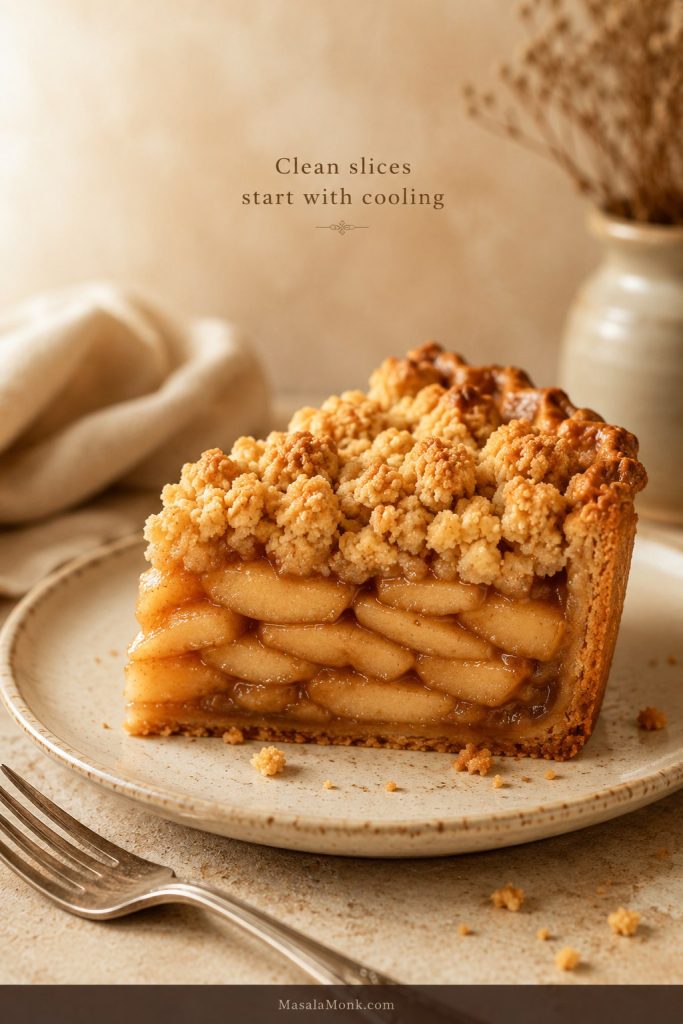
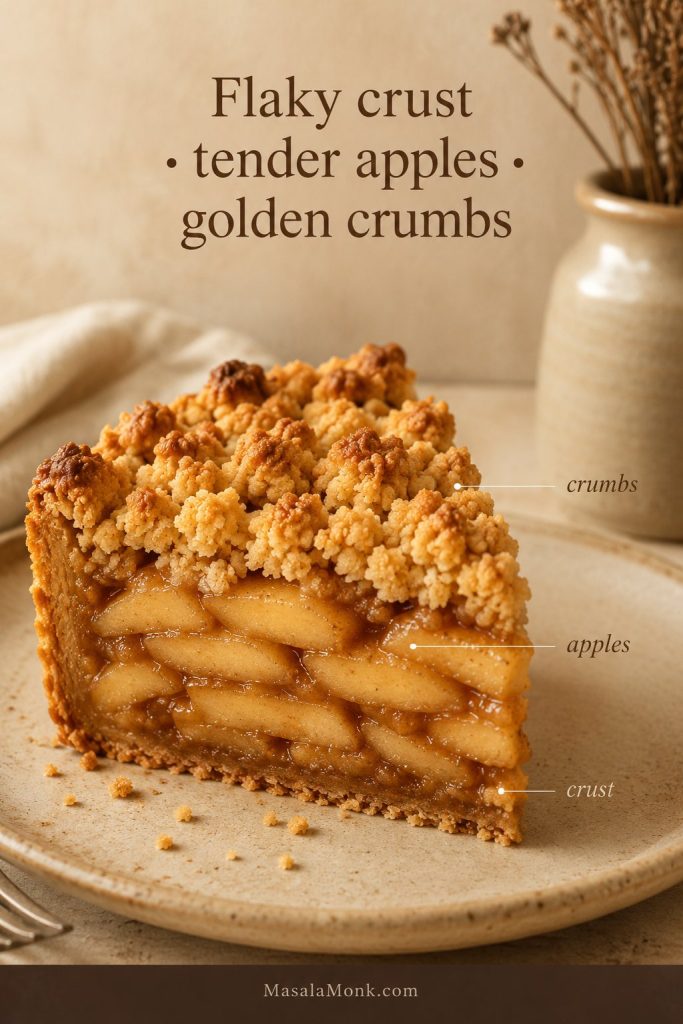
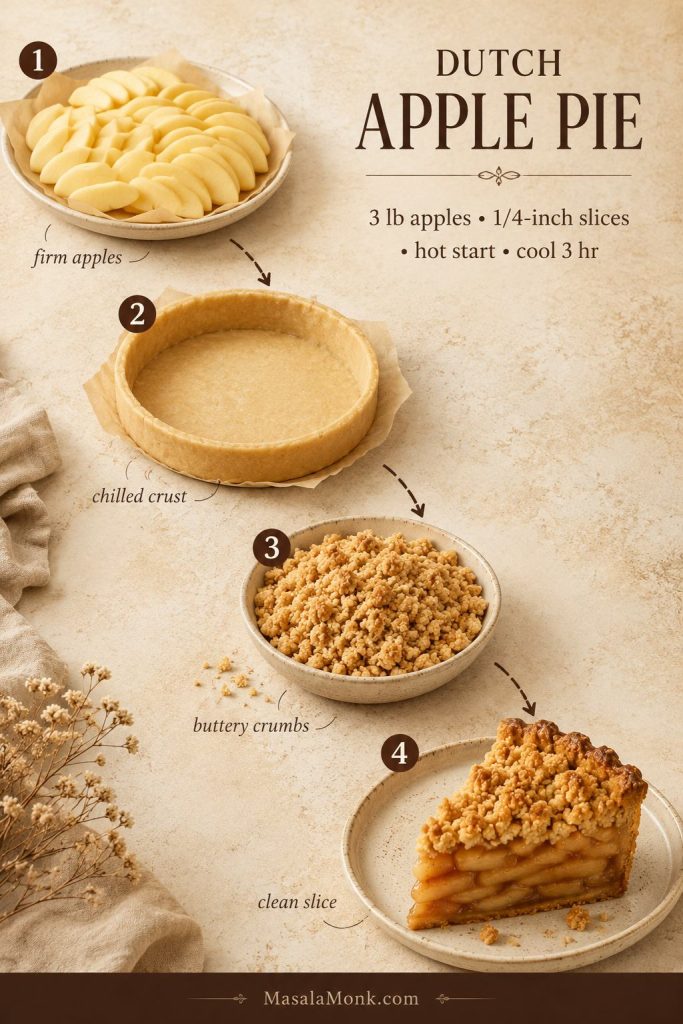
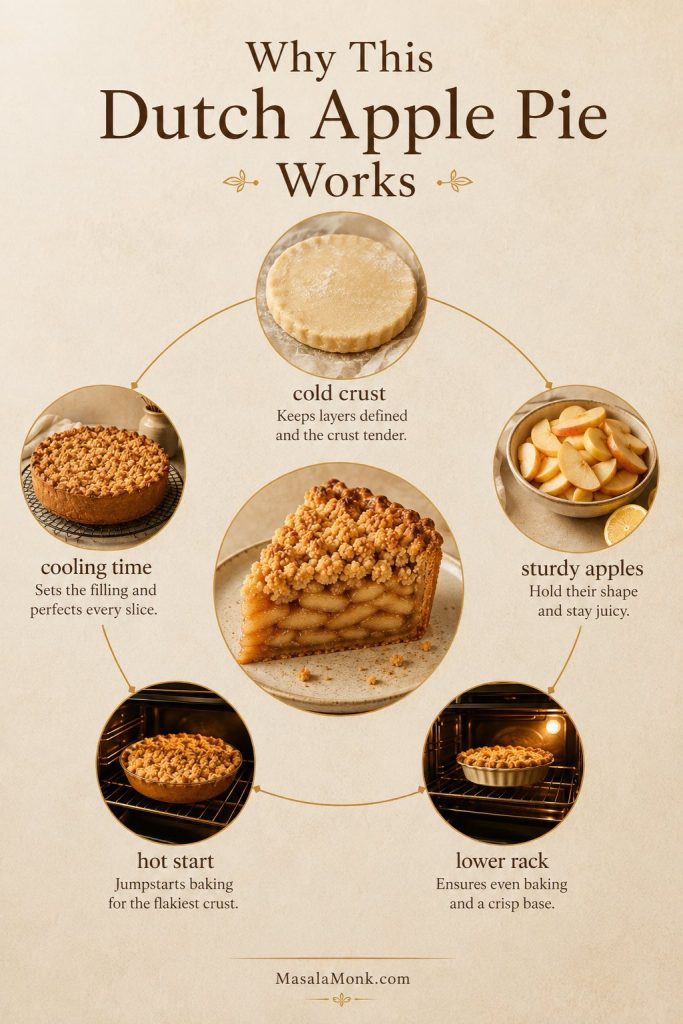
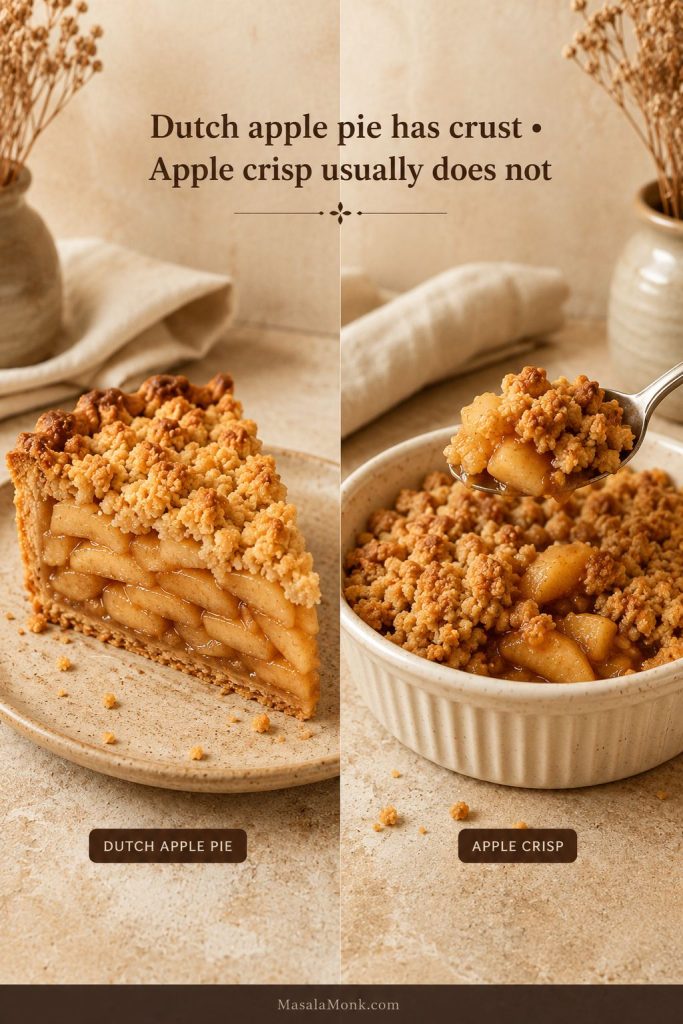
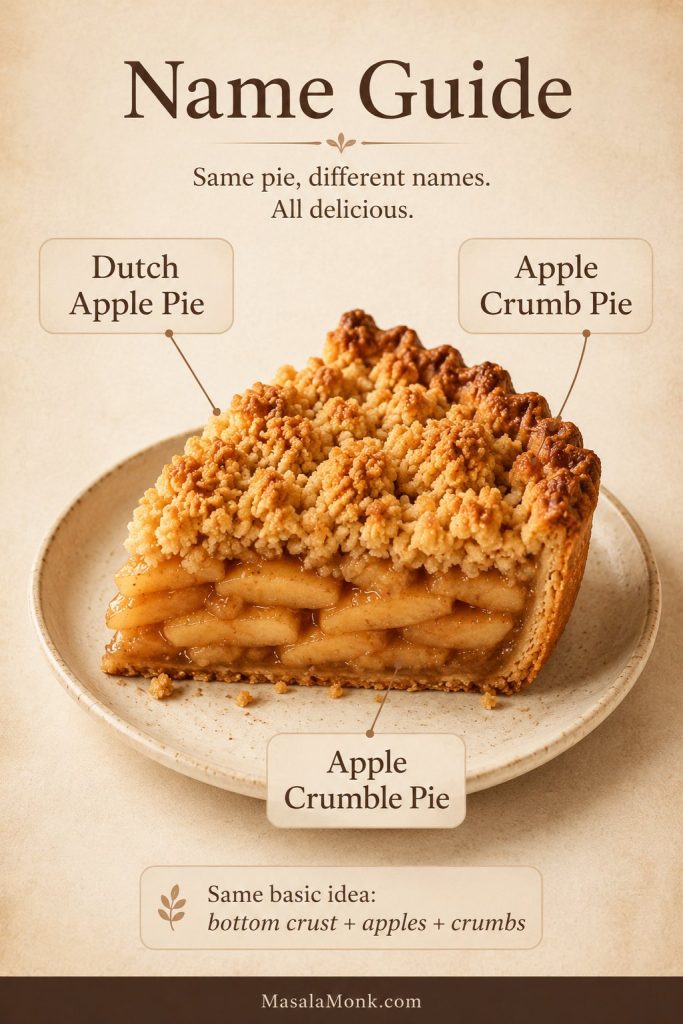
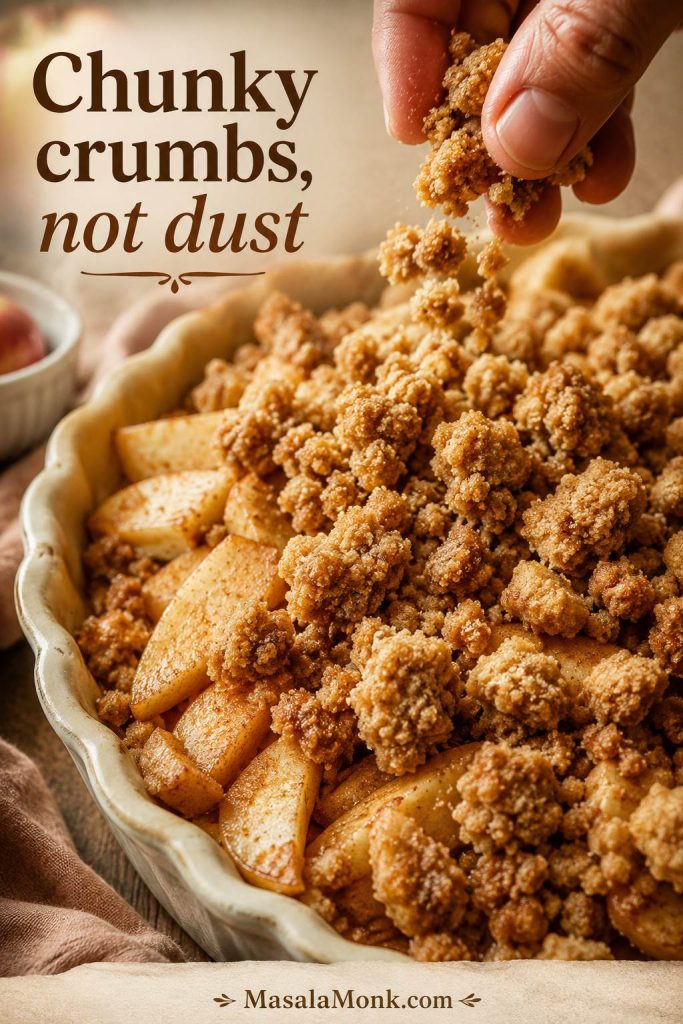
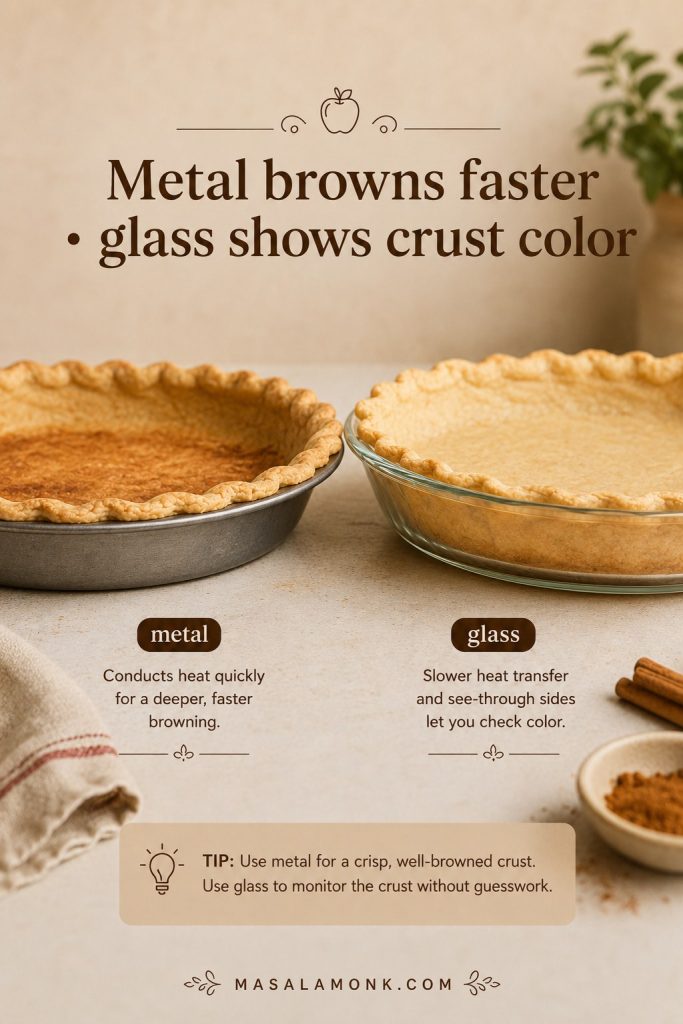
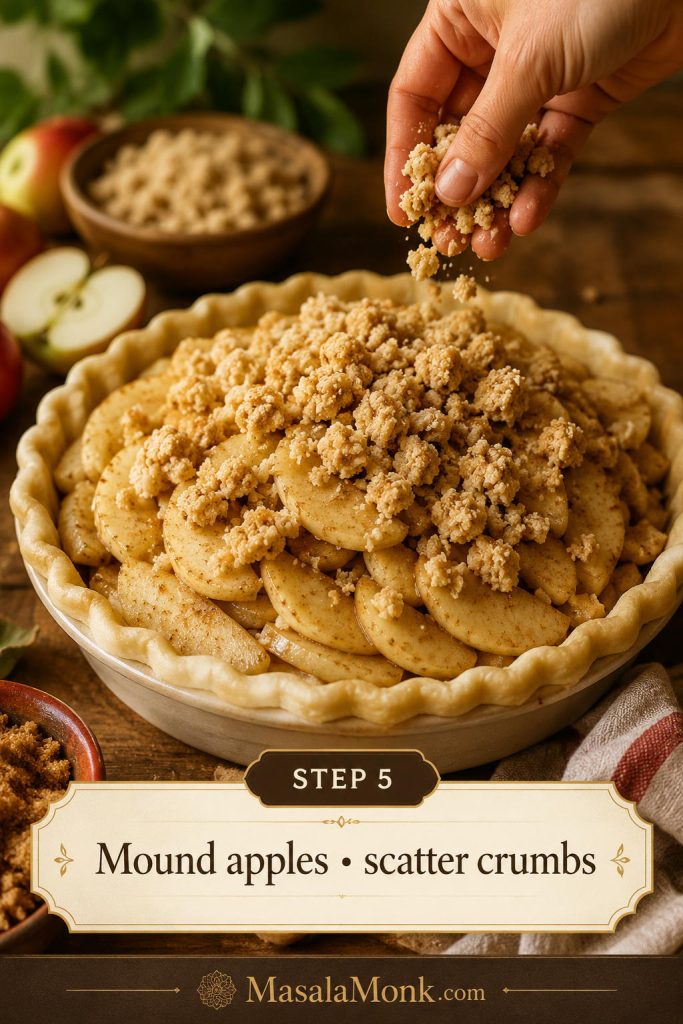
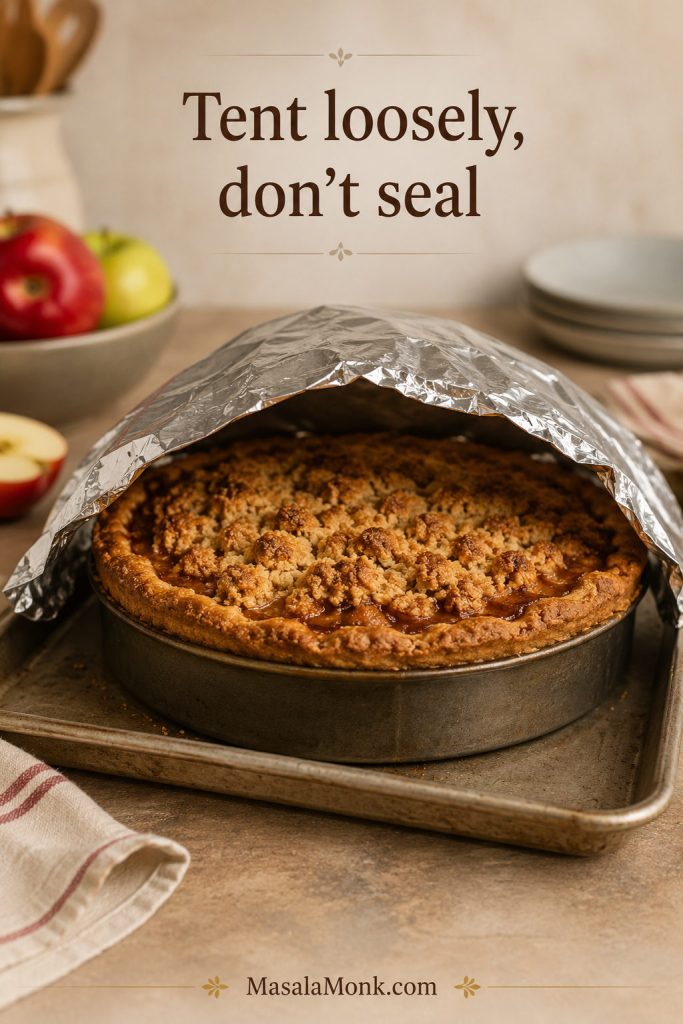
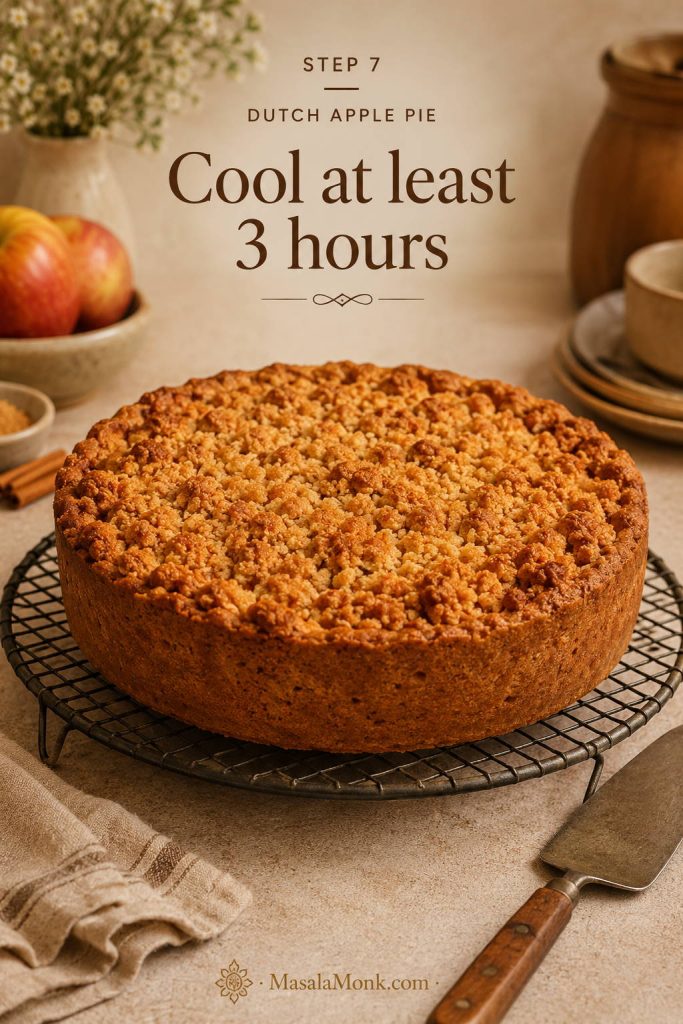
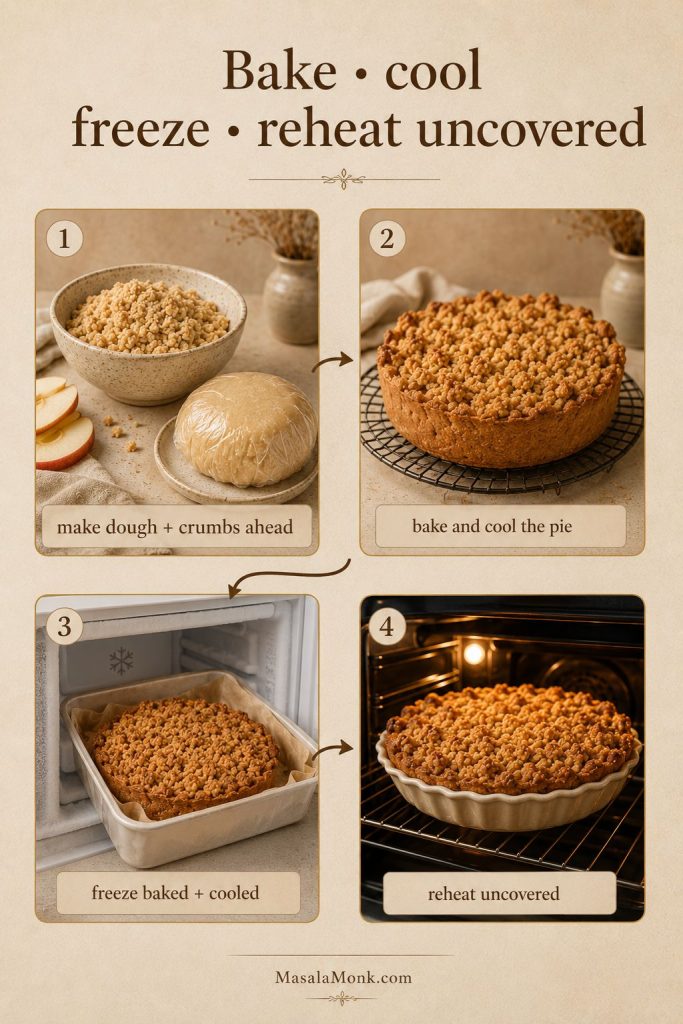
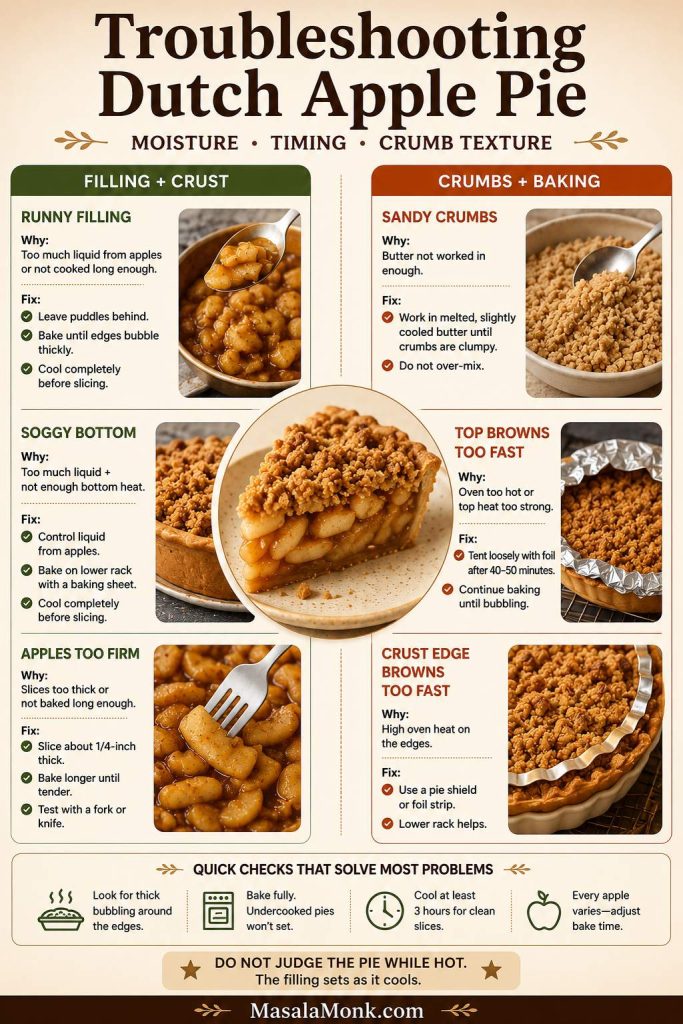
- Dutch apple pie: Season the apples, not the crumb topping heavily. The topping already brings butter and brown sugar, so too much spice in both layers can make the pie taste dull. This works naturally in a Dutch apple pie style filling.
- Apple tart: Use a lighter hand than you would in pie filling. A small pinch is enough for a thin easy puff pastry apple tart, where the apples and pastry should still taste bright.
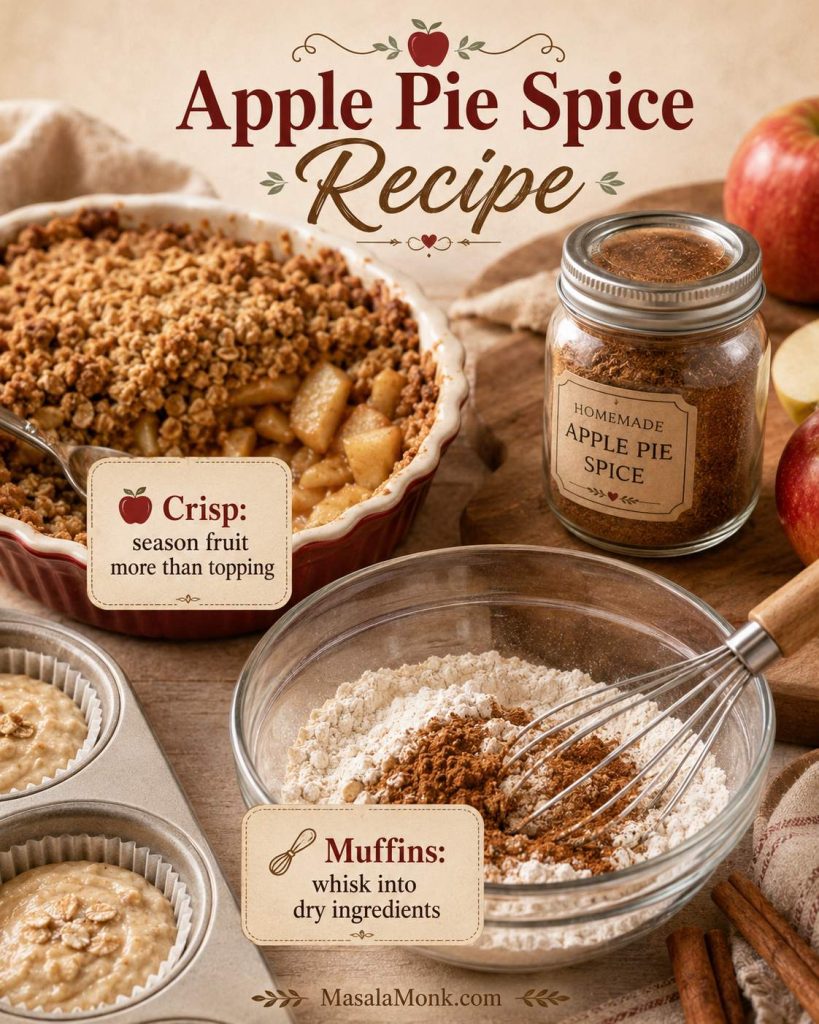
- Apple crisp or crumble: Season the fruit more than the topping. The topping already has butter, sugar, and browning, so a smaller pinch there is usually enough.
- Baked apples: Mix with butter, brown sugar, oats, or chopped nuts before stuffing apples.
Breakfast and Snacks
- Pancakes with apples: Stir a small pinch into warm apple topping for pancakes with stewed cinnamon apples, especially when you want breakfast to taste a little like dessert.
- Oatmeal: Stir in a small pinch with apples, maple syrup, and nuts.
- Muffins and quick bread: Whisk the spice into the dry ingredients so it spreads evenly through the batter.
- Apple cinnamon roll bakes: Add a small amount to apple pie filling before layering it with cinnamon rolls, especially in an apple cinnamon roll bake with apple pie filling.
Apple Crisp, Muffins, and Quick Breads
Apple crisp and crumble taste better when most of the spice goes into the fruit, where it can bloom as the apples bake. Muffins and quick breads work best when the blend is whisked into the dry ingredients before the wet ingredients go in.
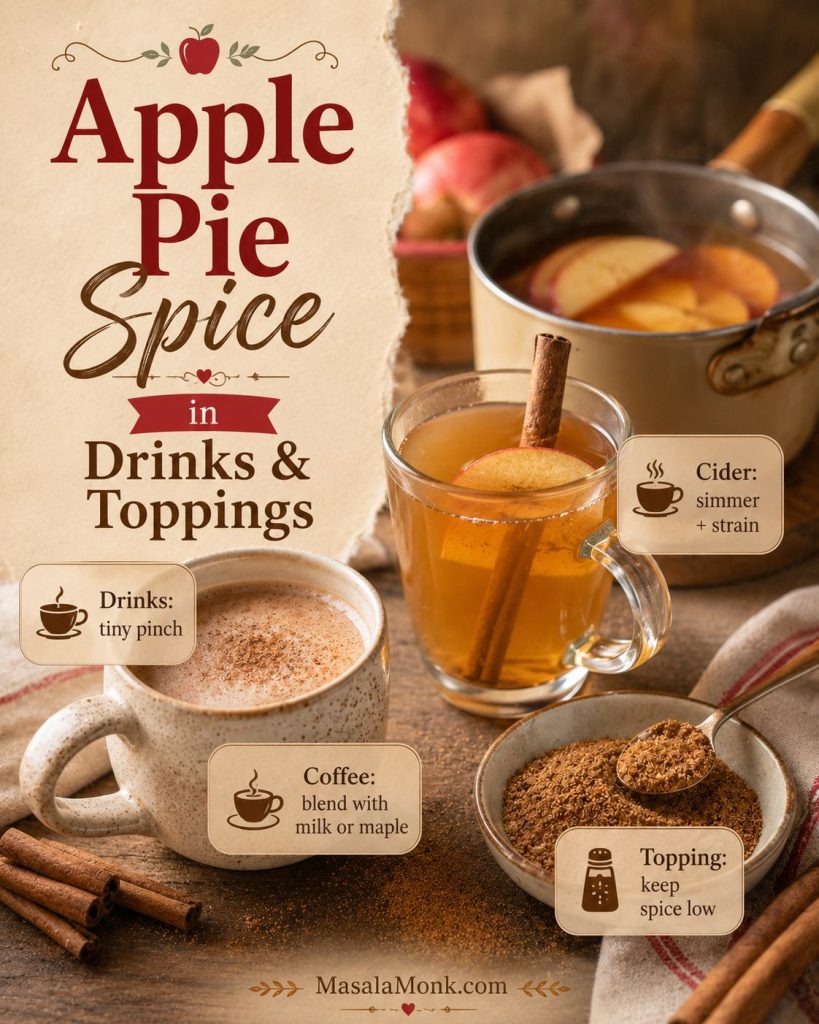
Drinks and Toppings
Start tiny in drinks. Ground spices do not dissolve the way syrup does, so they need heat, fat, sugar, or blending to taste smooth.
- Hot apple cider: Simmer gently with apple juice or cider, orange peel, and a little sweetener if needed. Strain before serving if you want a smoother mug.
- Coffee, latte, or cocoa: Use a tiny pinch with milk, cream, or maple syrup so the spice has something to cling to.
- Cinnamon sugar topping: Mix ¼ teaspoon apple pie spice with 1 tablespoon sugar. Keep the spice low because this topping is direct, not baked into a filling.
How to Store It So It Stays Fragrant
Ground spices do not fail loudly; they fade quietly. Once the mix is made, storage decides whether it stays fragrant.
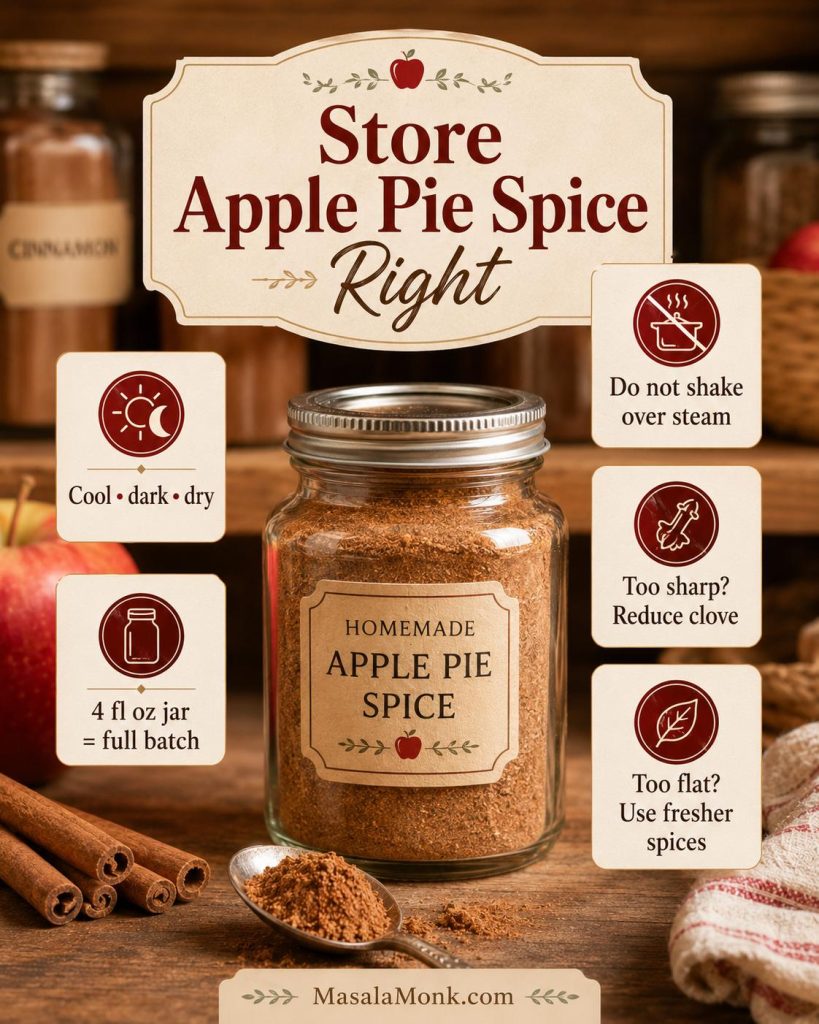
Keep the finished seasoning in a clean, dry, airtight spice jar or container in a cool, dark pantry or cabinet. Keep it away from the stove, oven, dishwasher, sunny windows, and any place where steam or heat can reach it. Do not shake the jar directly over a steaming pot; steam is one of the fastest ways to make ground spices clump and fade.
For best flavor, use it within 6–12 months. It may remain usable longer if stored dry, but the aroma and flavor will fade over time. If the blend smells flat when you open it, it will probably taste flat in your pie or crisp too.
Do not add brown sugar to the stored mix if you want a pure spice blend. Brown sugar is useful in pie filling, crisp topping, and cinnamon sugar, but it can clump during storage and turns the blend into a sweetened topping rather than a flexible seasoning.
Best jar size
This recipe makes about 80–85 ml, so use a 4 fl oz spice jar for the full batch. A 2 fl oz spice jar is better for a half batch, not the full recipe.
Freshness test
Open the jar and smell the blend. It should smell warm, sweet, and clearly spiced. If you have to work hard to smell anything, use a little more in casual recipes like oatmeal or pancakes, but consider making a fresh batch before using it in a holiday pie.
Storage and Troubleshooting Cues
Use the smell test before important baking: flat spices need replacing, while sharp blends usually need softer cinnamon or fewer strong accents next time.
Common Mistakes to Avoid
- Using too much clove: If the blend smells sharp before you bake with it, it will taste even stronger in a warm filling. Keep cloves to a pinch or skip them.
- Treating cardamom as required: Cardamom is beautiful, but it is not the test of whether this recipe works. A no-cardamom version is completely normal.
- Adding sugar to the spice mix: Keep the stored blend unsweetened so you can use it in pies, drinks, oatmeal, toppings, and baking without locking it into one sweetness level.
- Using tired or poorly stored spices: Heat, steam, and age weaken spice blends. Smell the cinnamon and nutmeg before making the full batch.
- Overspicing mild apple desserts: If the filling smells more like clove or nutmeg than apple, use less spice next time and add a little extra lemon or apple to rebalance the batch.
When in doubt, make the mix softer rather than sharper. You can always add a pinch more, but it is much harder to pull harsh clove or heavy nutmeg back out of a pie filling.
FAQs About Apple Pie Spice
What is apple pie spice made of?
Most blends start with cinnamon, nutmeg, and allspice. Ginger is common in homemade versions because it adds brightness. Cardamom and cloves are optional accents for a deeper aroma.
What is the ratio for apple pie spice?
A good basic ratio is about 12 parts cinnamon, 2 parts nutmeg, 1 part allspice, and 1 part ginger. That keeps the blend cinnamon-forward, rounded, and still apple-friendly.
Is apple pie spice the same as apple pie seasoning?
Yes, in most recipes. Those names usually point to the same kind of dry spice blend for apple pie, apple crisp, apple filling, and other apple desserts.
What can I use instead of apple pie spice?
For a quick emergency substitute, use ¾ teaspoon cinnamon, a scant ¼ teaspoon nutmeg, and a small pinch of allspice for every 1 teaspoon apple pie spice. It is not the exact full blend, but it gets you close enough to keep baking.
Does apple pie spice have sugar in it?
Usually, no. A traditional apple pie spice blend is just ground spices; sweetness comes later from the filling, topping, drink, or dessert you add it to.
Can I add apple pie spice directly to coffee?
You can, but start with a tiny pinch. Ground spices do not dissolve like syrup, so they may settle at the bottom unless you blend them with milk, cream, sugar, or maple syrup first.
Why does my homemade apple pie spice taste bitter or sharp?
It usually has too much clove, too much nutmeg, or old spices that have turned dusty. Add more cinnamon to soften the blend, or make a fresh batch with the sharper spices kept very low.
Is allspice the same thing?
No. Allspice is one ground spice. Apple pie spice is a blend. Allspice helps the blend taste rounded, but it is not the whole mixture.
How much should I use in apple pie?
For a standard 9-inch apple pie, start with 1½–2 teaspoons in the filling. Use the lower amount if your blend contains cloves or if the recipe already has cinnamon and nutmeg.
Can pumpkin pie spice replace it?
Usually, yes. If the pumpkin pie spice smells strongly of clove or ginger, start with about ¾ of the amount called for, then add more after smelling the mixed filling or tasting a cooked filling.
Final Thoughts
A good apple pie spice recipe should feel like a shortcut, not another project. It should make the pie feel easier before you even peel the apples.
Keep cinnamon as the base, let nutmeg and allspice round it out, and use the stronger spices only as accents. The best version is the one that makes your apples taste more like themselves. The blend should smell warm when you open it, taste rounded in the filling, and melt into the dessert rather than announce itself.
After one batch, you will probably know your house version: brighter with ginger, softer without cloves, or deeper with cardamom. Use 1½–2 teaspoons for a pie, keep the rest dry and dark, and let the jar do what it is meant to do: make apples taste warmer without stealing the show.