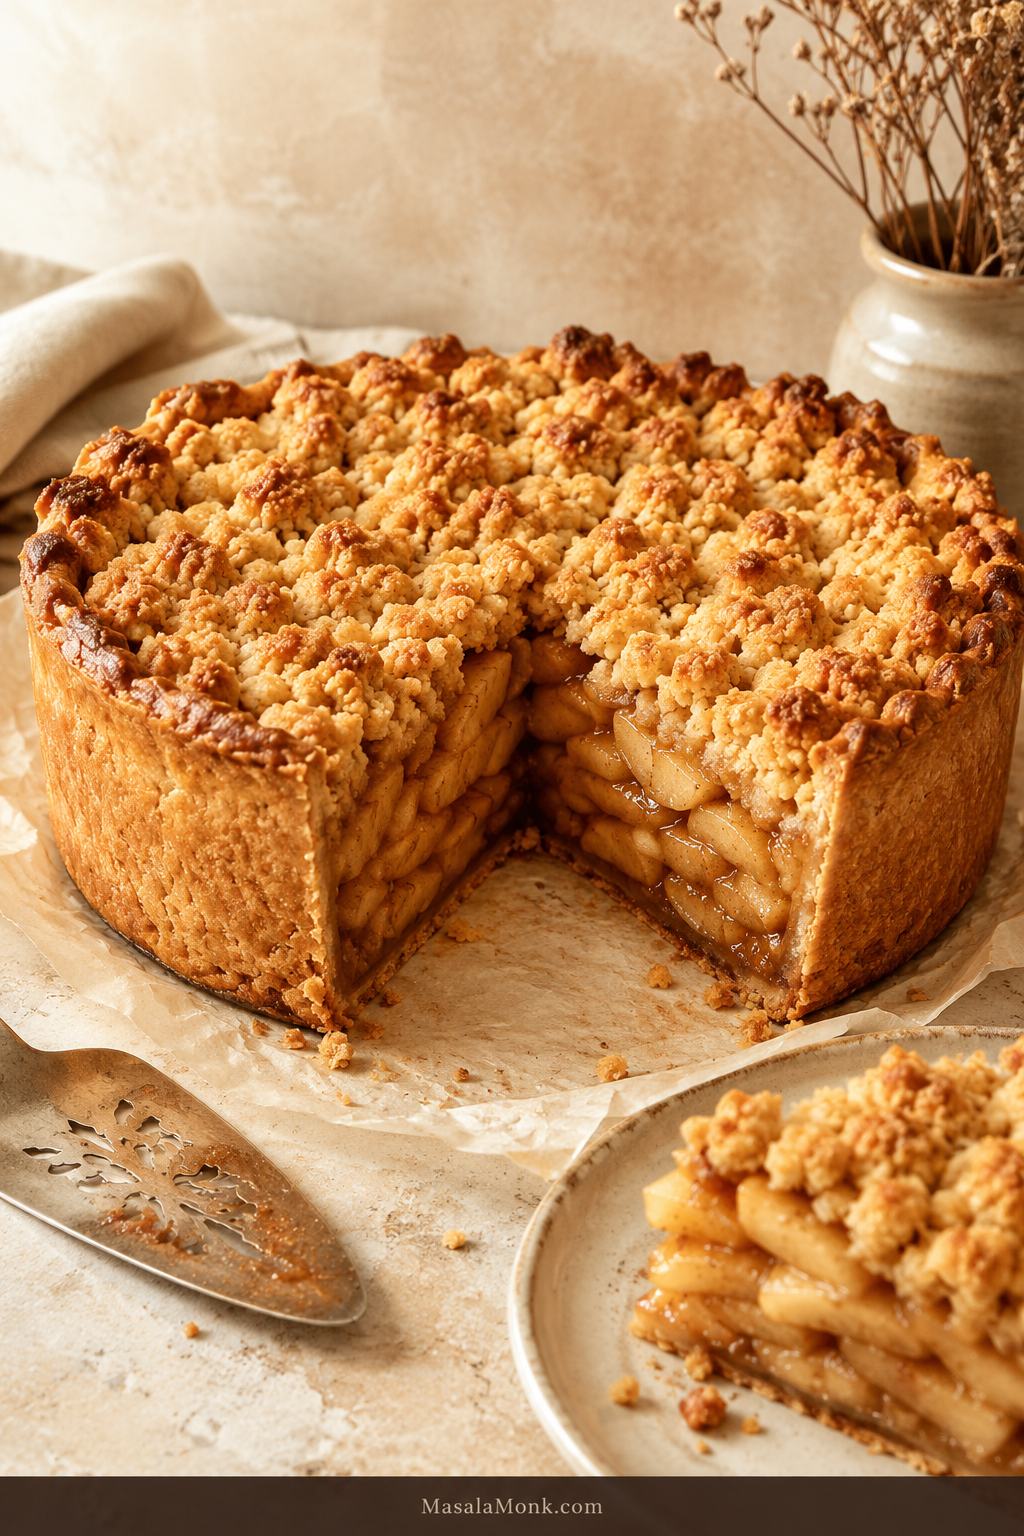
This Dutch apple pie recipe is for the slice everyone wants: a flaky bottom crust, tender cinnamon apples that still hold their shape, and a buttery brown-sugar crumb topping that bakes into golden clusters. It is easier than a lattice apple pie, richer than a plain crumble, and sturdy enough to slice cleanly once it cools.
If you have seen this dessert called apple crumb pie, apple crumble pie, or apple pie with crumb topping, you are in the right place. Although the names overlap, the structure is simple: one bottom crust, a generous apple filling, and a thick layer of cinnamon crumbs on top.
A Sliceable Dutch Apple Pie, Not a Runny Scoop
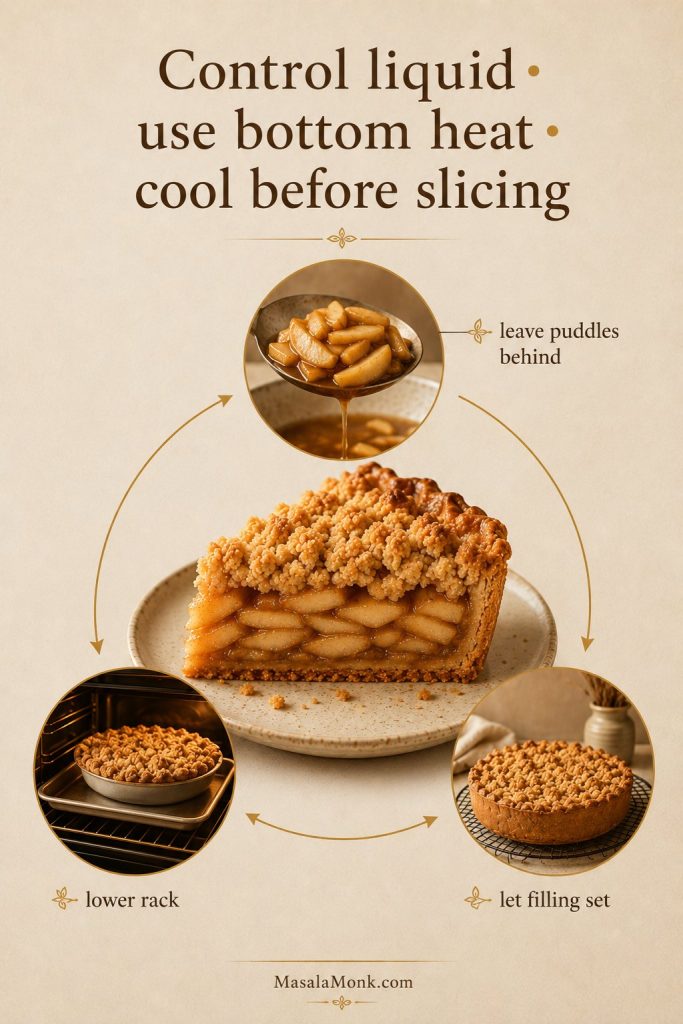
The method below is built for the problems that usually ruin this kind of pie: a soft bottom crust, apples that shrink under the crumbs, and topping that browns before the center is done. A hot-start bake, lower oven rack, firm apple blend, and full cooling window give the pie its best chance to bake through and slice neatly.
When it works, every forkful gives you the whole point of the pie: flaky crust underneath, soft spiced apples in the middle, and golden buttery crumbs on top.
This is the version to make when you want the comfort of apple crisp, the structure of pie, and a slice that can actually stand up on a plate.
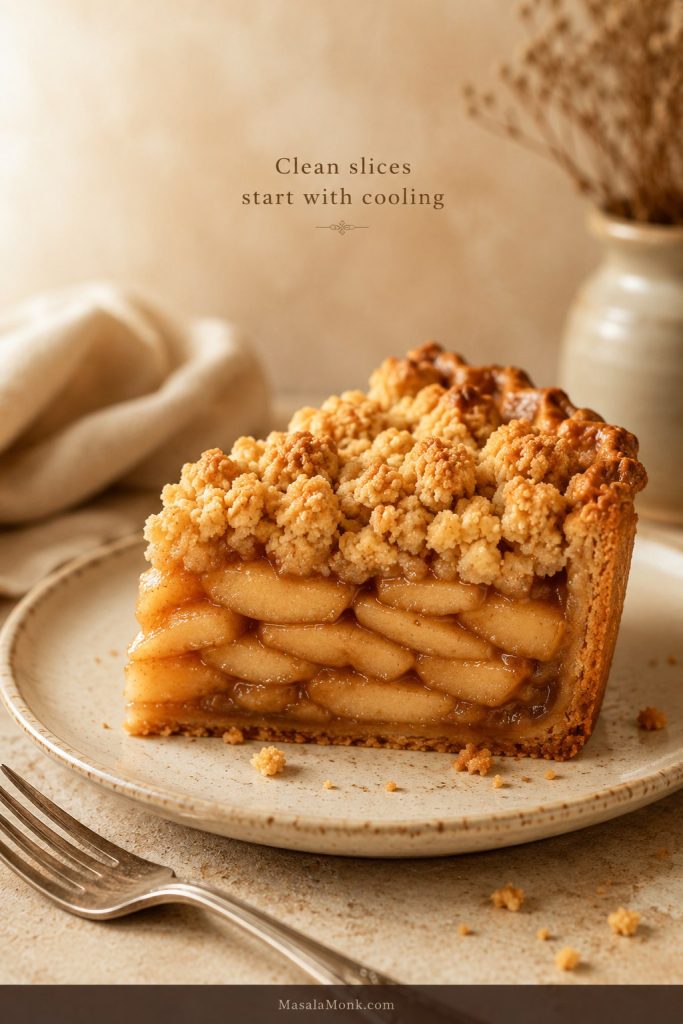
Clean Slice Cue
Why the Layers Matter
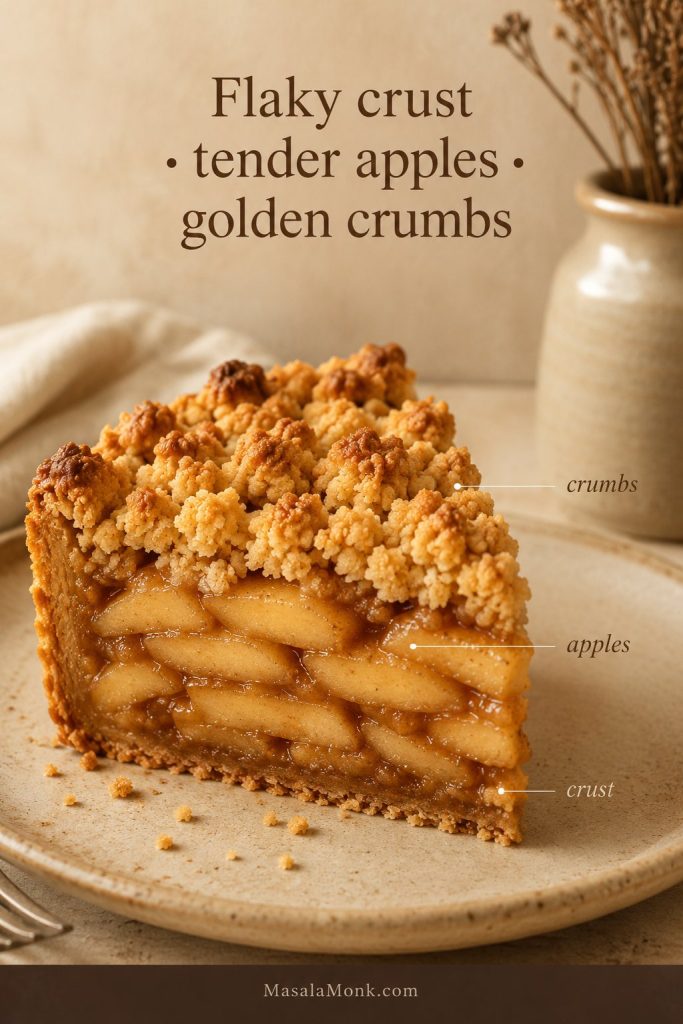
Table of Contents
Make the Pie
Quick Answer
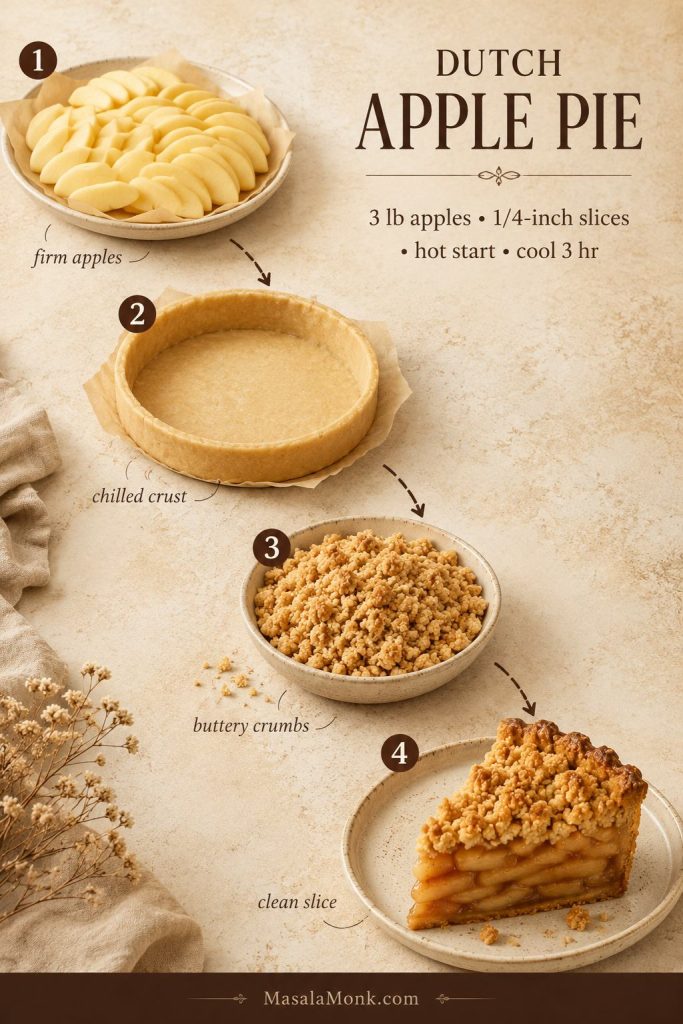
This Dutch apple pie recipe is built around a single-crust apple pie topped with buttery crumbs instead of a second sheet of pastry. For the best homemade version, use about 3 lb / 48 oz / 1.35 kg firm apples sliced 1/4 inch / 6 mm thick. Add them to a chilled single crust in a 9-inch deep-dish pie plate, cover with crumb topping, and bake for 55–65 minutes.
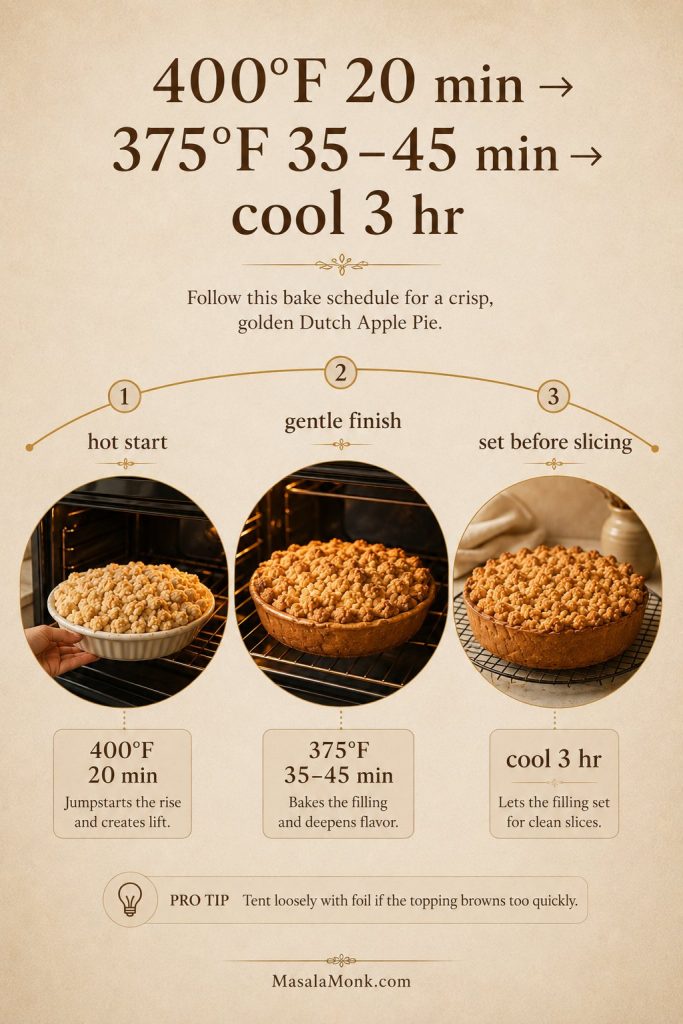
The most reliable oven schedule is 400°F / 200°C for 20 minutes, then 375°F / 190°C for 35–45 minutes more. The pie is done when the topping is golden, the filling bubbles around the edges, and the apples are tender. Let it cool for at least 3 hours before slicing so the filling sets.
Need more help before baking? Check the best apples, crumb topping, or bake time sections before you start.
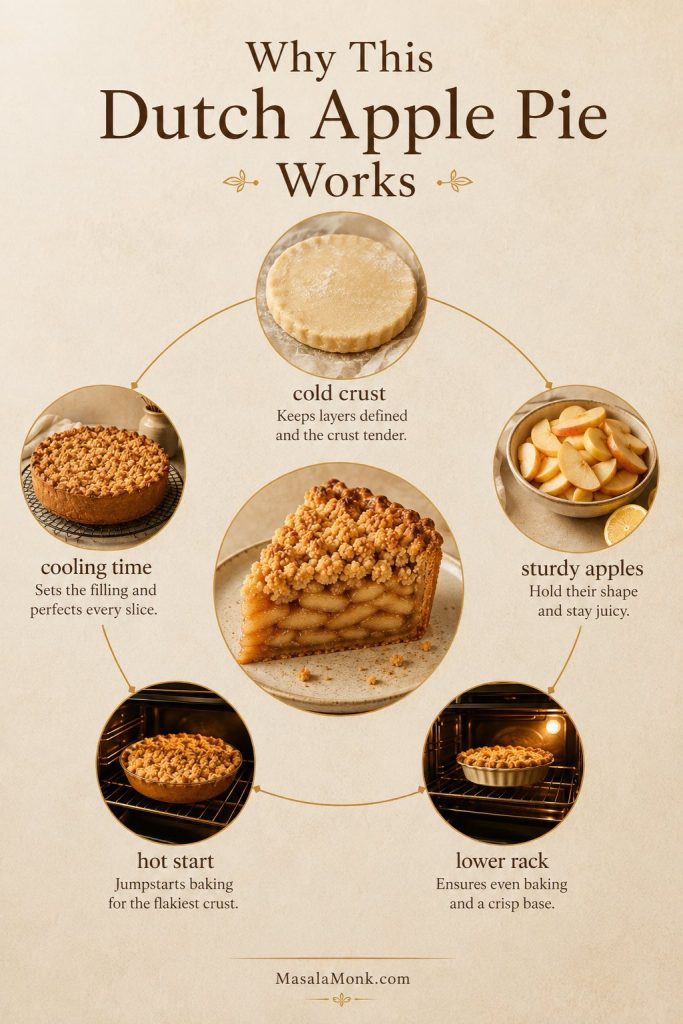
Why This Dutch Apple Pie Works
This pie is simple, but a few small details make the difference between a clean slice and a runny scoop. Too much loose apple juice softens the crust, too little butter makes the topping sandy, and soft apples can collapse before the filling sets. The method here keeps those problems in check so you get tender apples, crisp-edged crumbs, and slices that hold together.
Five Details That Protect the Pie
- A hot-start bake gives the crust a head start. The first 20 minutes at 400°F / 200°C helps the bottom crust set before the apples release too much liquid.
- Apples with structure keep the filling from collapsing. Granny Smith with Honeycrisp, Braeburn, or Pink Lady gives tartness, sweetness, and shape.
- Flour thickens the apple juices gently. It gives the filling a classic apple pie texture without turning the center gummy.
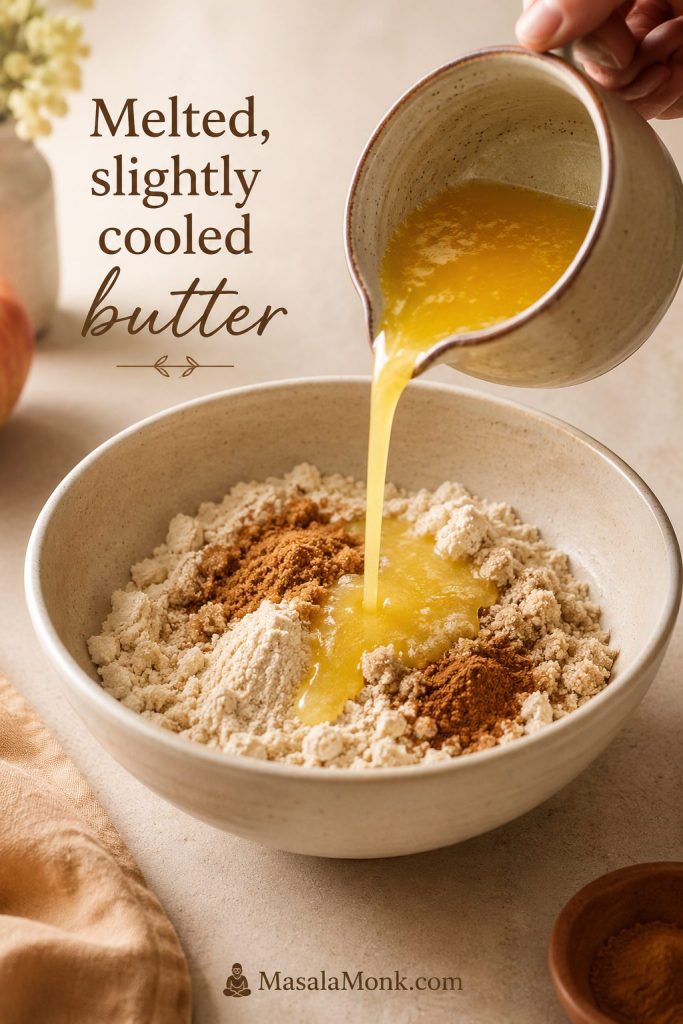
- Melted, slightly cooled butter makes easy crumb clumps. The topping holds together without needing a pastry cutter.
- A full cooling window gives cleaner slices. The pie tastes wonderful warm, but it slices much better after the filling has had time to settle.
The method works because the protections stack: cold crust, sturdy apples, lower oven rack, hot-start bake, and enough cooling time. Skip one and the pie can still work; skip several and you are much more likely to get a soggy bottom or runny filling.
The Method at a Glance
If you are here because apple pies often turn runny or soft on the bottom, the two most useful sections are how to prevent a soggy bottom and troubleshooting Dutch apple pie.
What Is Dutch Apple Pie?
Dutch apple pie is the crumb-topped cousin of classic apple pie: the same bottom crust and spiced apple filling, but with buttery streusel instead of a second pastry crust. That makes it easier to assemble because you do not have to roll, lattice, vent, or seal a pastry top.
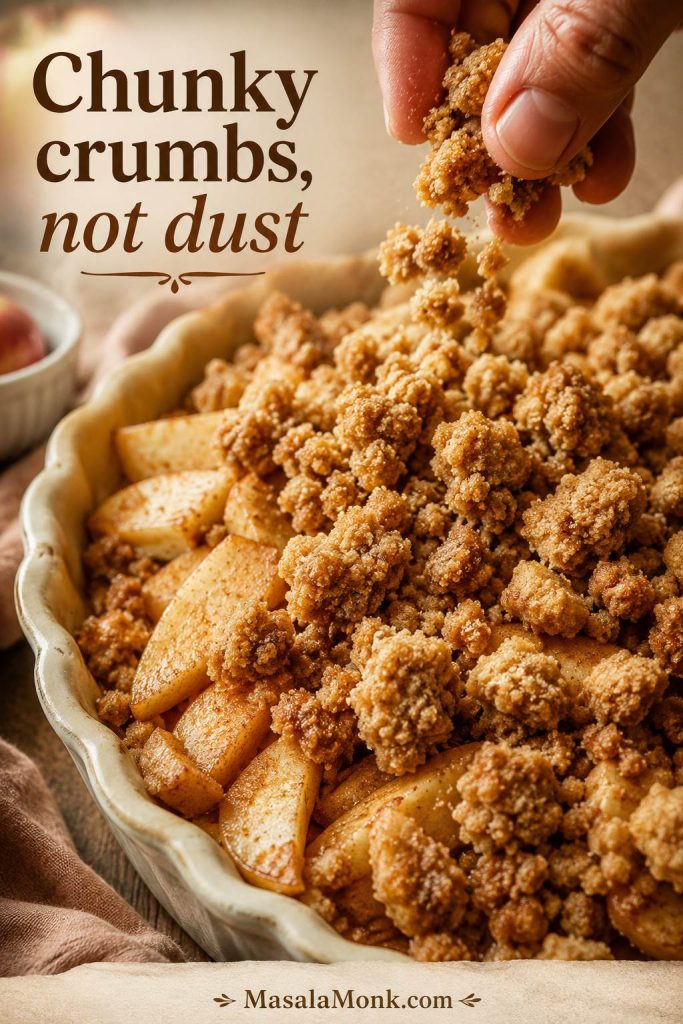
What makes this pie distinct is the topping. It bakes into buttery clumps with crisp edges and a soft cinnamon-brown-sugar center. Meanwhile, the apples underneath soften and release enough juice to make a saucy filling without turning into applesauce.
A chilled bottom crust gives structure, firm apples keep the filling shapely, and the cinnamon crumbs bring the buttery texture that makes this pie so comforting. That is why the top eats a little like apple crisp while the bottom still feels like pie.
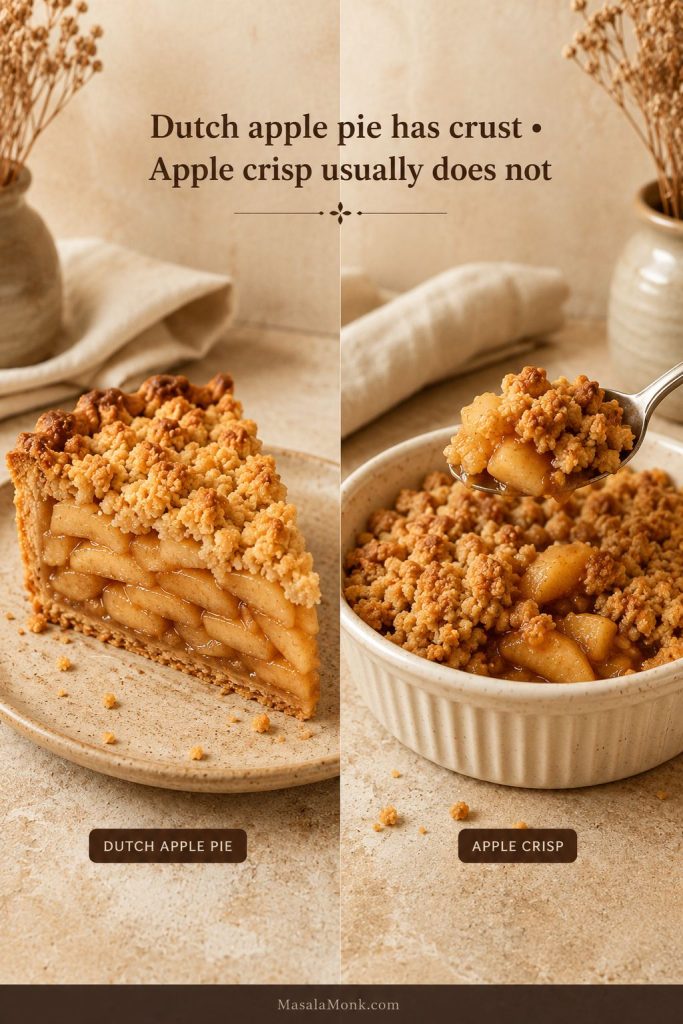
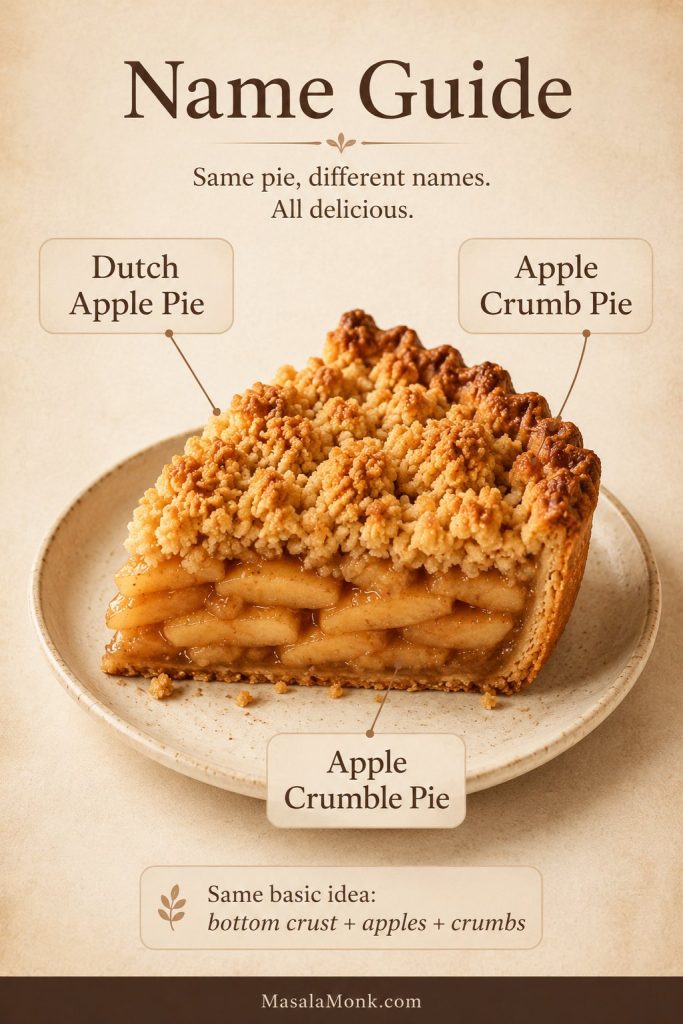
Dutch Apple Pie vs Apple Crumble Pie vs Apple Crumb Pie
These names are often used for similar desserts, especially in home baking. The main idea is the same: apples, a bottom crust, and a crumb topping instead of a second pastry crust.
| Name | Usually Means | What to Expect |
|---|---|---|
| Dutch apple pie | Apple pie with a bottom crust and crumb topping | The most common name for this style of pie |
| Apple crumb pie | Apple pie with a crumb topping | Same basic dessert, with emphasis on the topping |
| Apple crumble pie | Apple pie with a crumble-style topping | Often used when the topping is thicker or more rustic |
| Apple crisp | Baked apples with a crisp or oat-style topping, usually without pie crust | More of a baked fruit dessert than a pie |
This version is a Dutch apple pie, but it also fits what many bakers mean by apple crumb pie or apple crumble pie: a flaky crust, tender apples, and a generous crumb topping.
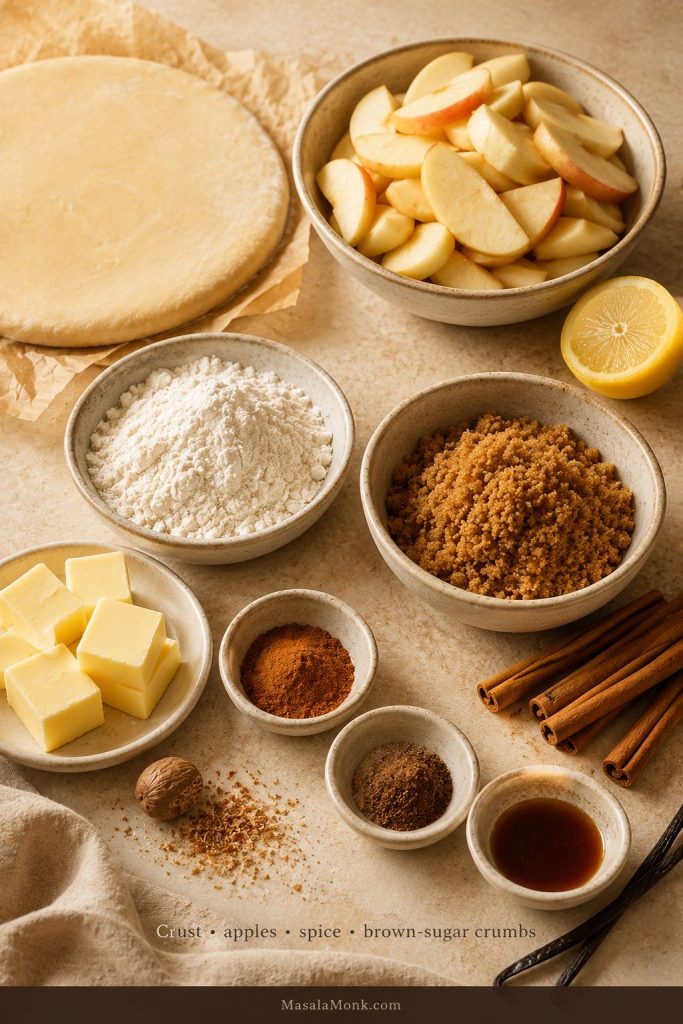
Ingredients for Dutch Apple Pie
The ingredient list is short, but each part has to pull its weight. The crust needs to stay cold, the apples need enough structure, the filling needs just enough thickener, and the topping needs enough butter to bake into real crumbs instead of loose sugar-flour dust.
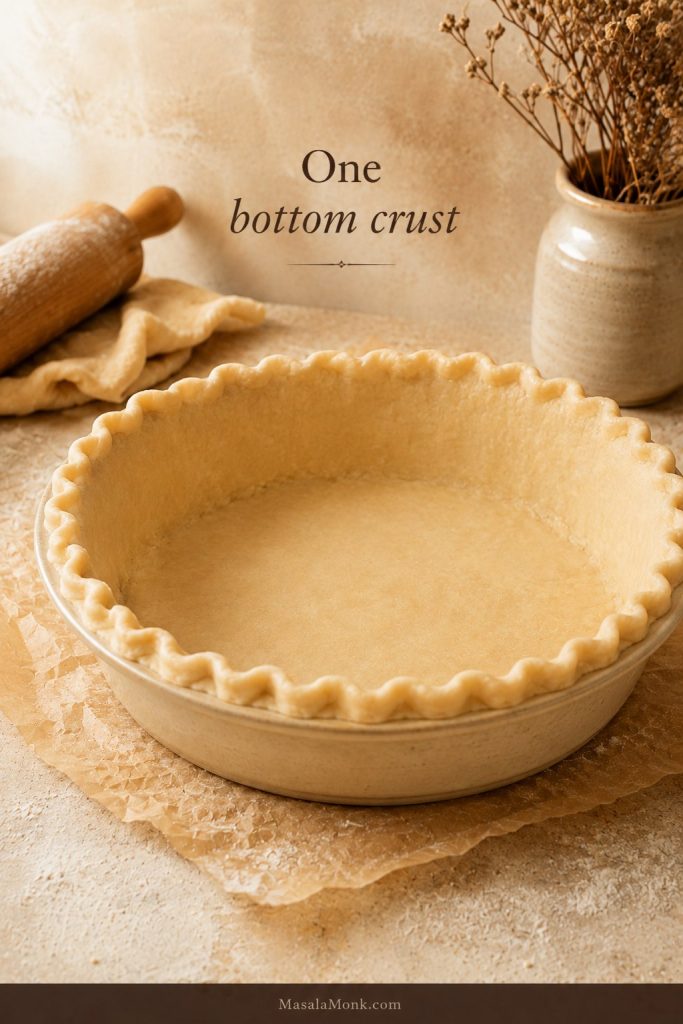
One Bottom Pie Crust
You need one chilled 9-inch pie crust. Homemade crust gives the best flavor and flake, but a good store-bought crust works if you are focused on the apple filling and crumb topping.
If you want a fully homemade base, use this apple pie crust recipe. For this style, you only need a single bottom crust, not a double crust.
Using a shallow pie plate instead of deep-dish? Check the pan-size notes before adding all the apples.
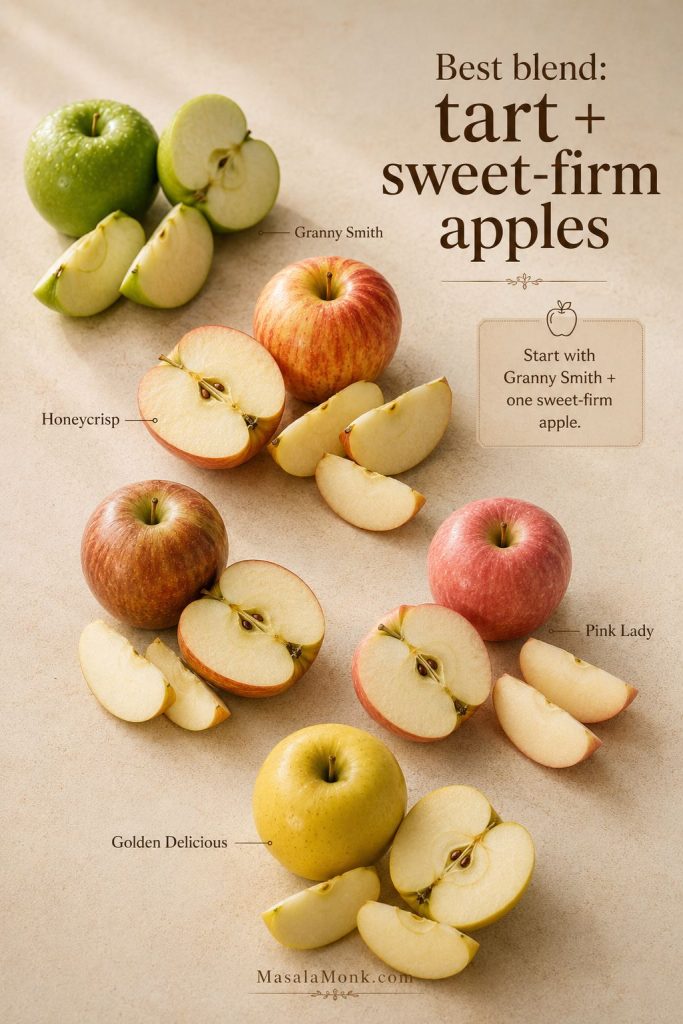
Firm Apples
Use firm baking apples that hold their shape. Granny Smith gives tart structure, while Honeycrisp, Braeburn, Pink Lady, or Golden Delicious can round out the flavor.
The best all-purpose blend is 2 lb Granny Smith plus 1 lb Honeycrisp, Braeburn, or Pink Lady. For a sweeter pie, use half Granny Smith and half Honeycrisp or Golden Delicious.
For a deeper apple-by-apple breakdown, see this guide to the best apples for apple pie.
Peel the Apples for the Smoothest Filling
Peeling gives the smoothest, most classic filling. You can leave the skins on if you like a more rustic pie, but the slices will feel chewier and the skins may separate slightly from the softened apple flesh.
Sugar, Lemon, Flour, and Spices
Granulated sugar sweetens the apples, brown sugar adds warmth, lemon juice brightens the filling, and flour helps thicken the juices as the pie bakes. Cinnamon is essential, while a little nutmeg gives the filling a classic bakery-style aroma.
All-purpose flour works best here because it gives a classic apple pie texture. Cornstarch can work in many fruit fillings, but it can become gummy when overused in a long-baked apple pie.
Buttery Crumb Topping
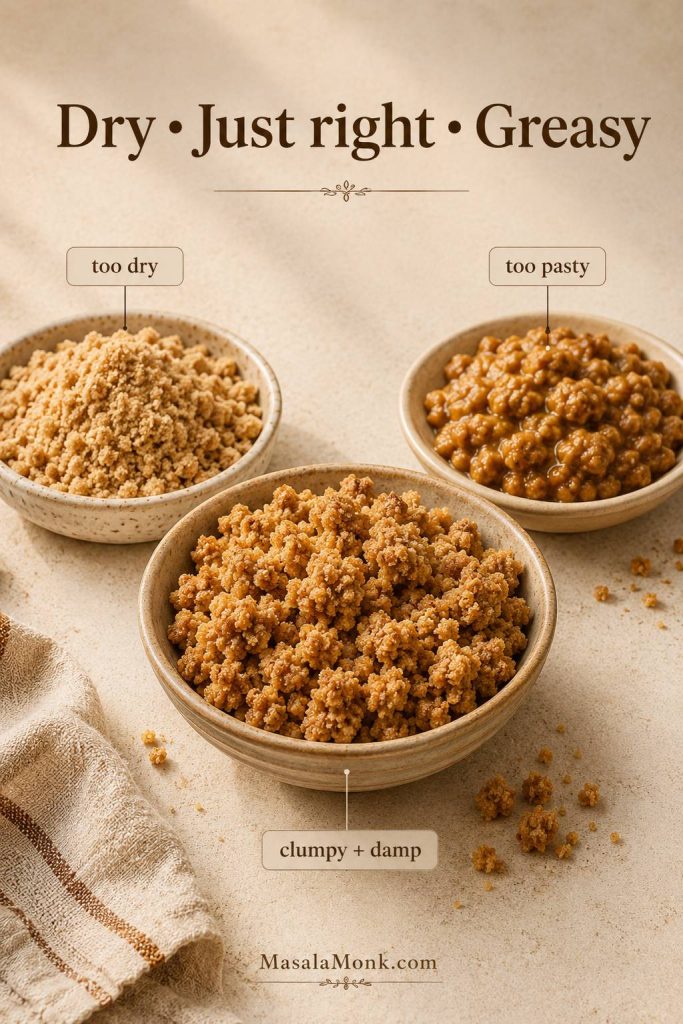
The crumb layer is made with flour, brown sugar, a little granulated sugar, cinnamon, salt, and melted butter. Once mixed, it should hold together in soft clumps when squeezed. If it looks dusty or powdery, it needs to be worked together a little more.
Best Apples for Dutch Apple Pie
Apple Varieties That Hold Shape
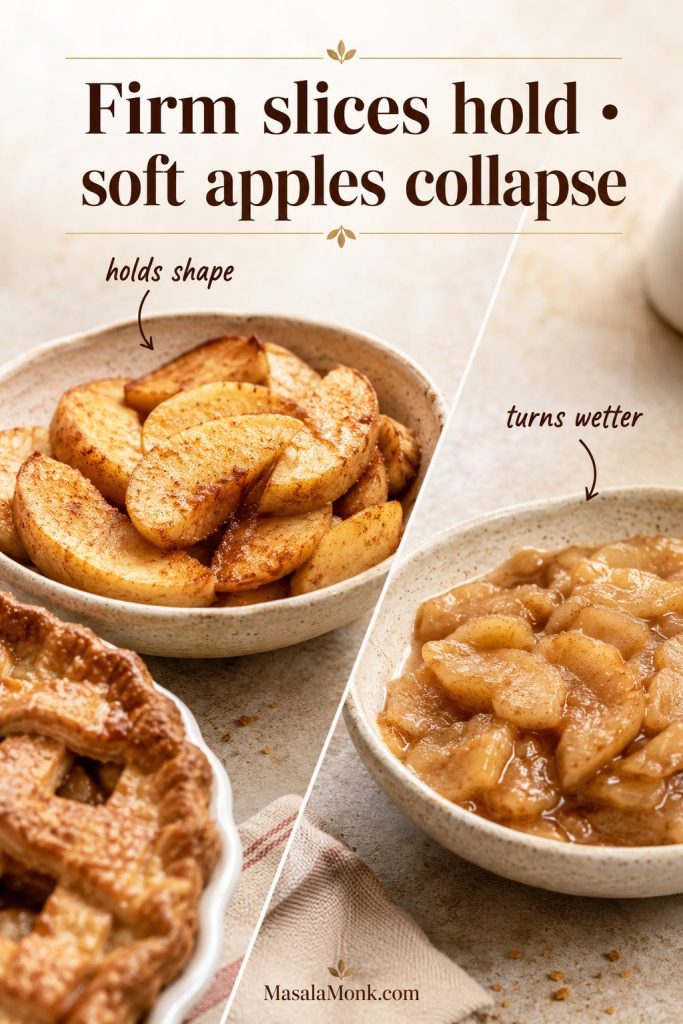
The best apples are firm, flavorful varieties that can survive a long bake without collapsing. Because this pie spends nearly an hour in the oven, avoid soft, mealy, or overripe apples that break down too quickly.
| Apple | Best Use | Flavor / Texture |
|---|---|---|
| Granny Smith | Best tart backbone | Firm, sharp, holds shape well |
| Honeycrisp | Best sweet-tart partner | Juicy, crisp, fragrant |
| Braeburn | Best balanced baking apple | Sweet-tart, firm, aromatic |
| Pink Lady | Best bright flavor | Tart-sweet, firm, lively |
| Golden Delicious | Best softer sweet blend apple | Mellow, sweet, less tart |
Avoid very soft, mealy, or overripe apples here. They may taste fine raw, but they can collapse during the long bake and leave you with a flatter, wetter filling.
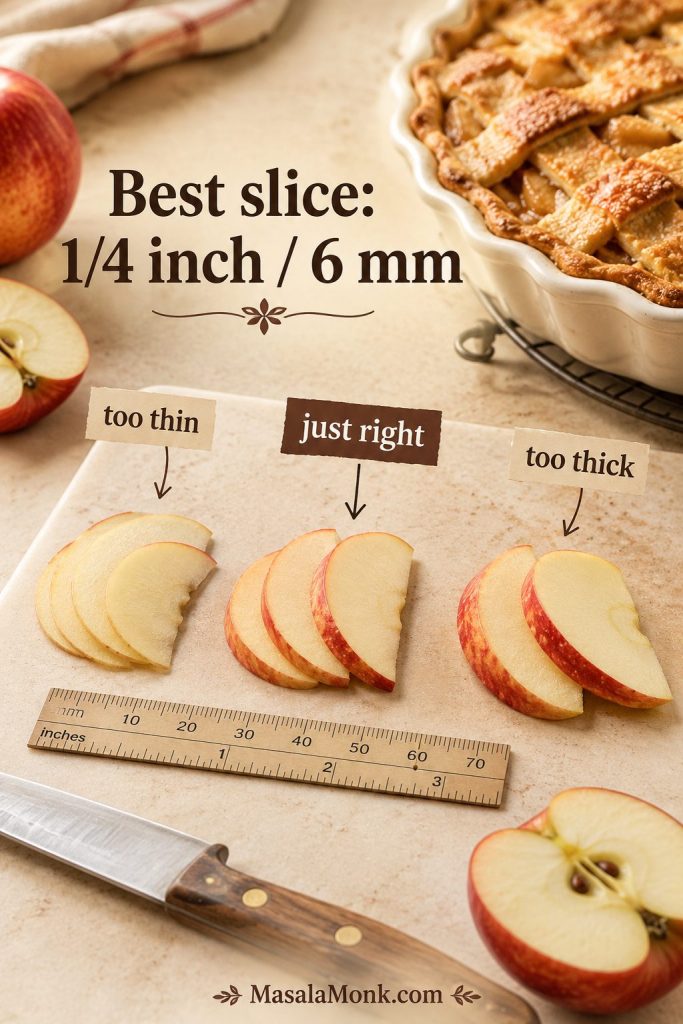
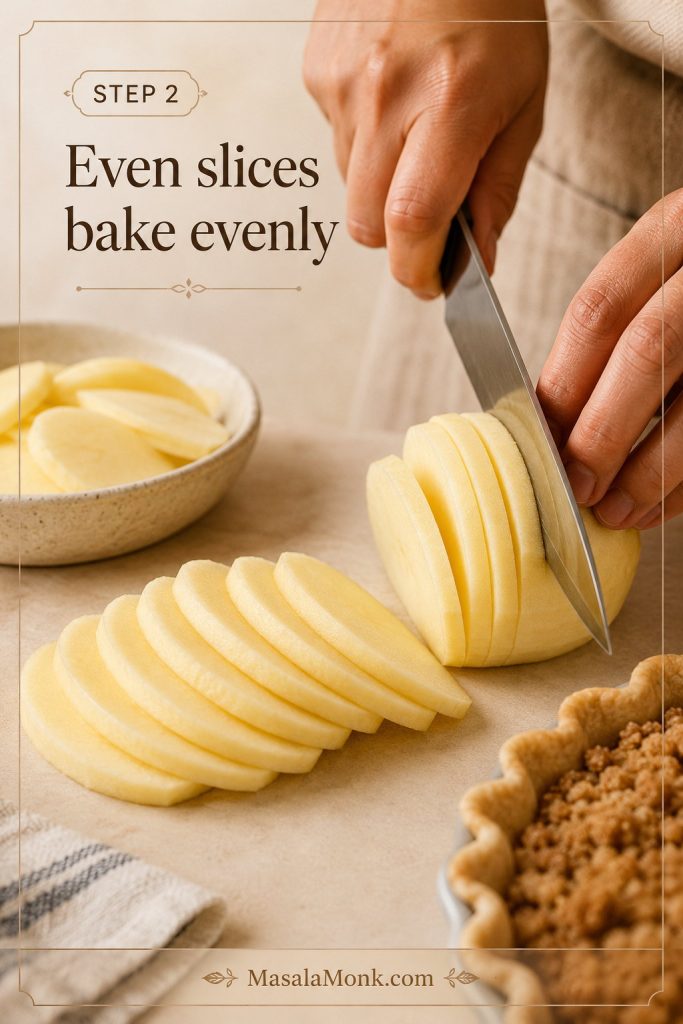
Slice the apples about 1/4 inch / 6 mm thick. Very thin slices soften faster but can turn compact and jammy. Thick slices can stay firm even when the crust and topping are done.
Slice Thickness for Even Baking
If your apples are extra juicy or you want neater slices, compare the raw, pre-cooked, and canned filling options before assembling the pie.
Apple Crumb Topping for Dutch Apple Pie
The crumble layer is not just decoration. It is the main reason this pie tastes different from a regular apple pie: buttery, cinnamon-scented, lightly crisp on top, and soft enough underneath to melt into the apples. The goal is chunky crumbs, not loose sugar-flour dust.
For one 9-inch deep-dish pie, use:
- 1 cup / 4.4 oz / 125 g all-purpose flour
- 1/2 cup / 3.5 oz / 100 g packed light brown sugar
- 2 tablespoons / 0.9 oz / 25 g granulated sugar
- 1 teaspoon ground cinnamon
- 1/4 teaspoon fine salt
- 1/2 cup / 4 oz / 113 g unsalted butter, melted and cooled slightly
- Optional: 1/2 cup / 2 oz / 55–60 g chopped pecans or walnuts
Stir the dry ingredients first, then add the melted butter. Mix until the topping forms damp crumbs. It should not look like loose flour, and it should not become one greasy paste. When squeezed, it should hold together, then break into chunky crumbs.
Melted Butter vs Cold Butter
Melted butter is easiest for this style of topping because it quickly coats the flour and sugar. Let it cool slightly before mixing. Boiling-hot butter can make the crumbs pasty or greasy instead of clumpy.
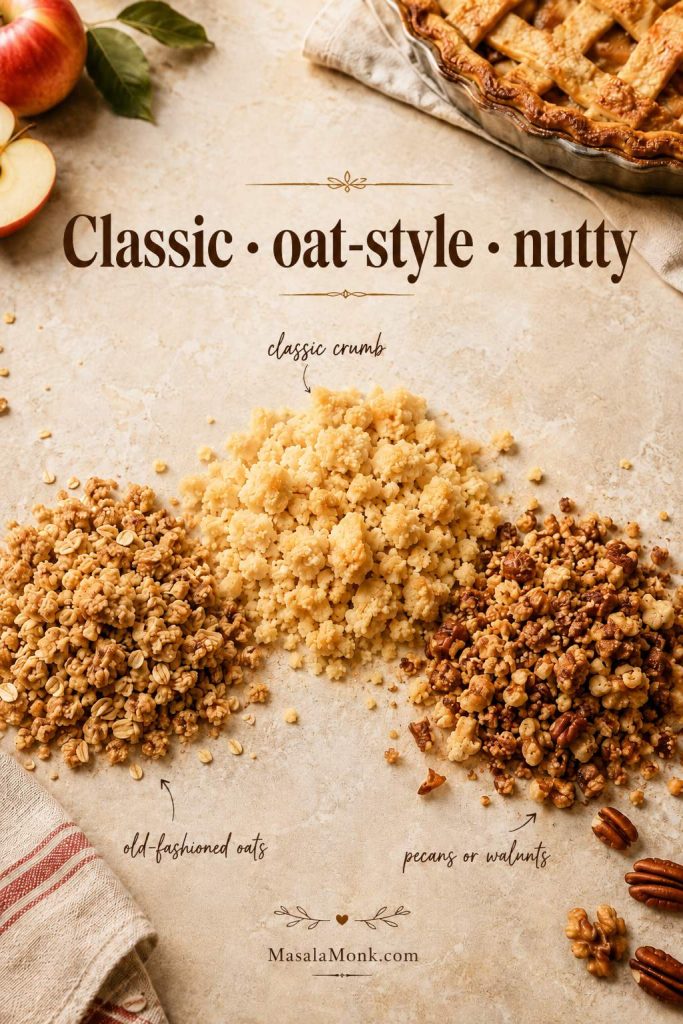
Oats or No Oats?
Classic Dutch apple pie often uses a flour-based topping without oats. For a more apple-crisp-style texture, replace 1/4 cup / 1 oz / 30 g of the flour with 1/4 cup / 0.9 oz / 25 g old-fashioned oats. Do not use instant oats; they can make the topping feel dusty.
Nuts or No Nuts?
Pecans or walnuts add crunch and a deeper toasted flavor. Leave them out for a smoother, more classic crumb topping, or add them when you want the pie to feel richer and more holiday-ready.
Crumb Topping Texture Guide
| What You See | What It Means | How to Fix It |
|---|---|---|
| Dry and sandy | The butter has not been worked in enough | Press the mixture with your fingers until clumps form |
| Wet and pasty | The butter was too hot or the topping was overmixed | Chill 10 minutes, then break into crumbs |
| Huge greasy chunks | The topping was over-compressed | Break apart gently before adding to the pie |
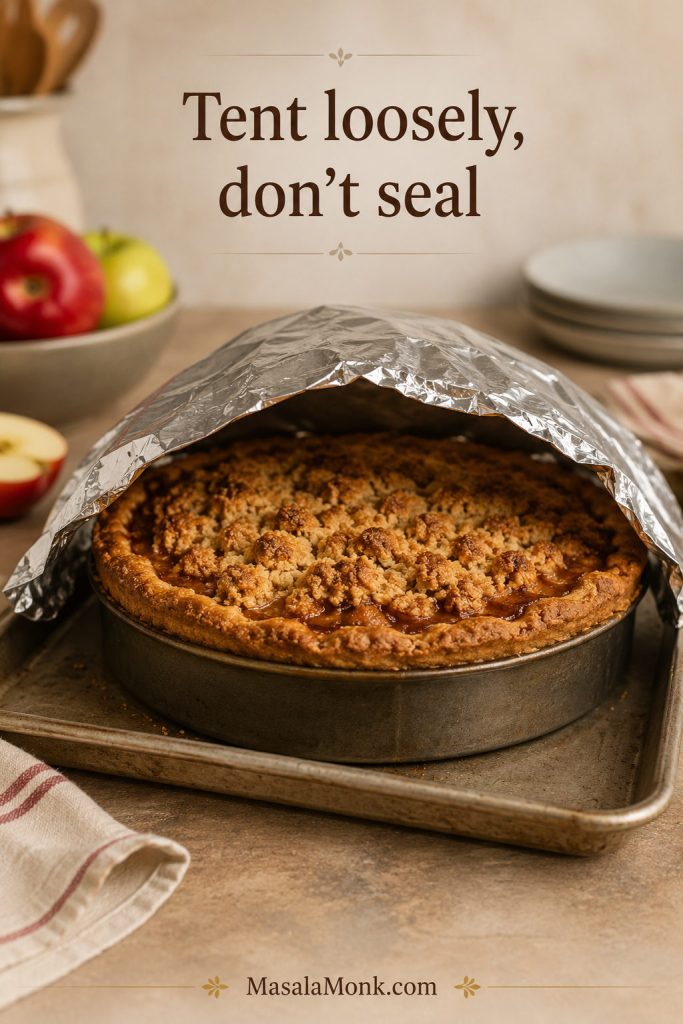
| Browning too fast | The topping is exposed to heat before the apples are done | Tent loosely with foil once golden |
| Soft after storage | The pie was covered warm or refrigerated | Reheat slices uncovered in the oven |
For sandy, greasy, or overly dark crumbs, the troubleshooting section gives quick fixes without changing the whole recipe.
The Pan and Tools That Matter Most
You do not need anything fancy. The three tools worth caring about most are a deep-dish pie plate, a rimmed baking sheet, and something to protect the crust edges if they brown early.
- 9-inch deep-dish pie plate: holds the full 3 lb / 48 oz / 1.35 kg apple filling.
- Rimmed baking sheet: catches drips and gives the pie a stable surface in the oven.
- Foil or pie shield: protects the crust edge or crumbs if they brown before the apples are tender.
- Large mixing bowl: gives the apples room to coat evenly with sugar, flour, lemon, and spices.
- Small mixing bowl: keeps the topping separate until assembly.
- Rolling pin: needed if you are using homemade pie crust.
- Apple peeler, corer, or sharp knife: helps keep the slices even.
- Instant-read thermometer: optional, but useful if you want a doneness cue beyond color and bubbling.
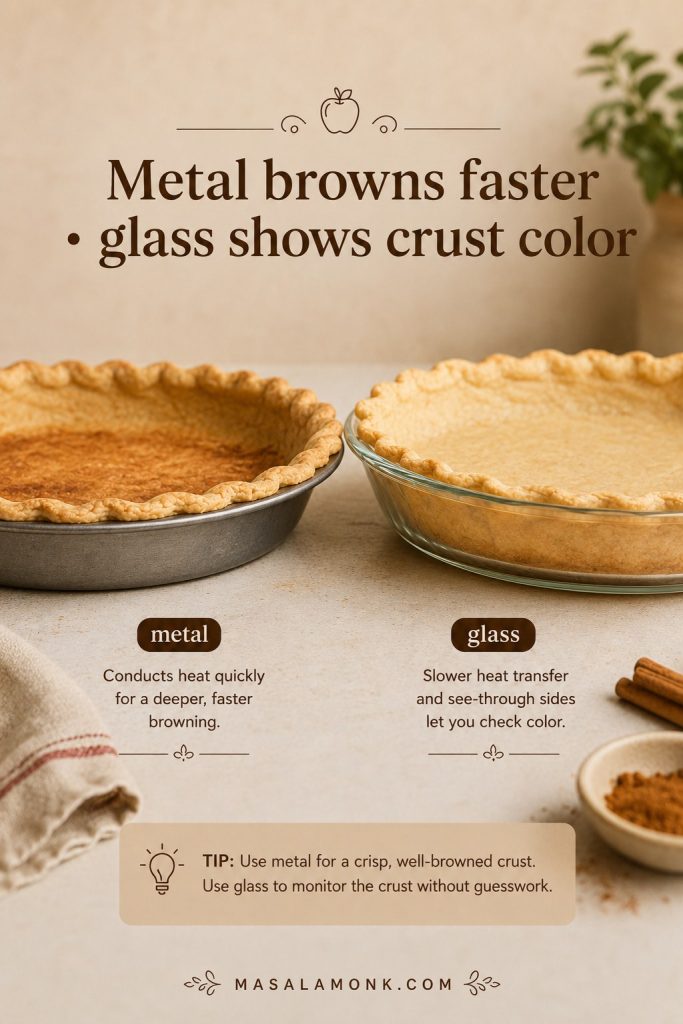
A metal pie plate browns the bottom crust more quickly, while glass lets you see the crust color but heats more slowly. With glass, the lower rack and full bake time matter even more.
Choosing Metal or Glass
Using a Regular 9-Inch Pie Plate?
The amounts here are sized for a deep-dish 9-inch pie plate. For a shallow or standard-depth plate, use about 2 1/2 lb / 40 oz / 1.1 kg apples instead of the full 3 lb. Do not force every apple slice into the crust; an overfilled shallow pie can overflow, bake unevenly, and soften the bottom crust.
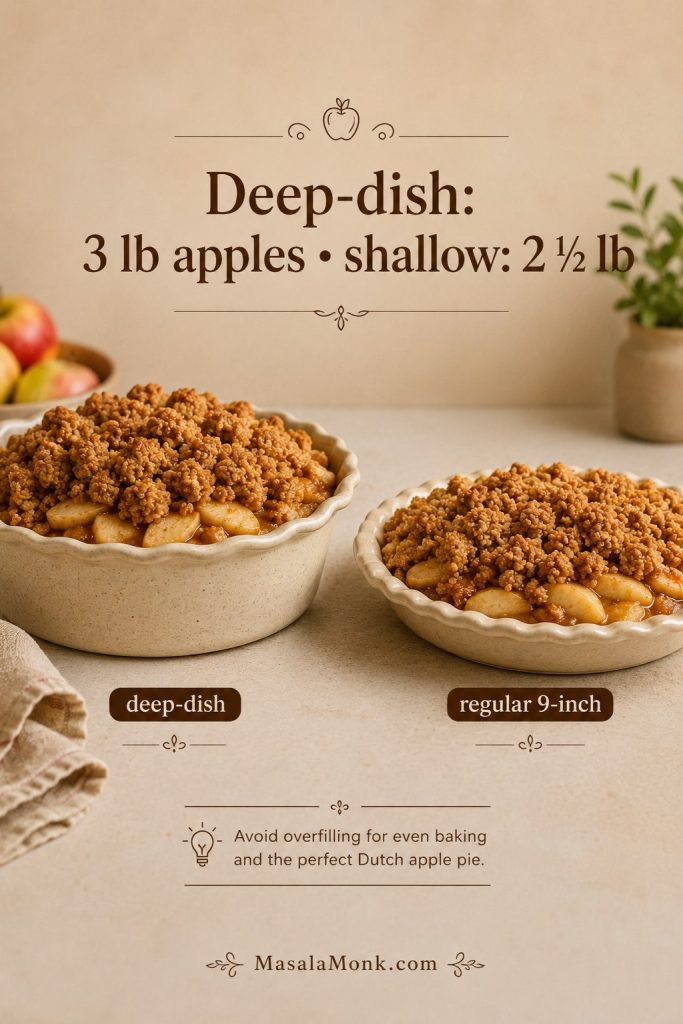
You can also use slightly less crumb topping if the pie is very full. Place the pie on a rimmed baking sheet and start checking for doneness around 50 minutes.
How to Make Dutch Apple Pie
Once the crust is cold, the apples are sliced evenly, and the crumbs hold together when squeezed, the assembly is straightforward. The main thing is to keep the crust chilled and give the pie enough time in the oven for the filling to bubble.
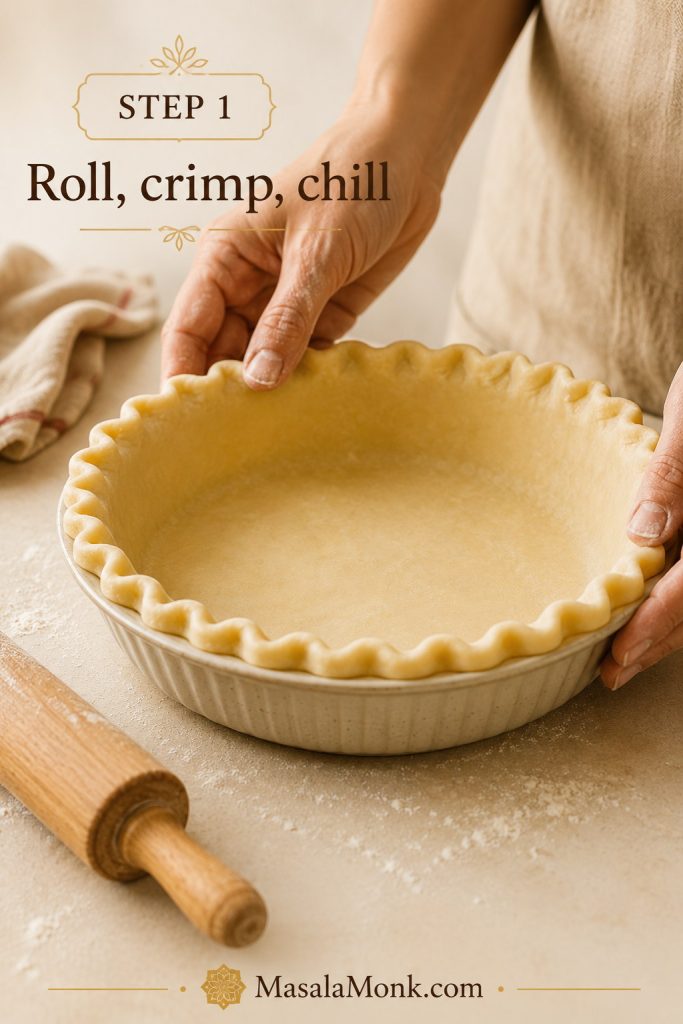
Step 1: Roll and Chill the Crust
Roll one pie crust into a 12-inch circle and fit it into a 9-inch deep-dish pie plate. Trim and crimp the edges, then chill the crust while you prepare the apples and crumb topping.
Chilling gives the bottom crust a better chance to set before the apple juices release fully.
Step 2: Peel, Core, and Slice the Apples
Peel and core the apples, then slice them about 1/4 inch / 6 mm thick. Keep the slices as even as possible so they soften at the same rate.
Step 3: Toss the Apple Filling
In a large bowl, toss the sliced apples with granulated sugar, brown sugar, flour, lemon juice, cinnamon, nutmeg, salt, and vanilla. Let the mixture sit for 10 minutes while you make the topping.
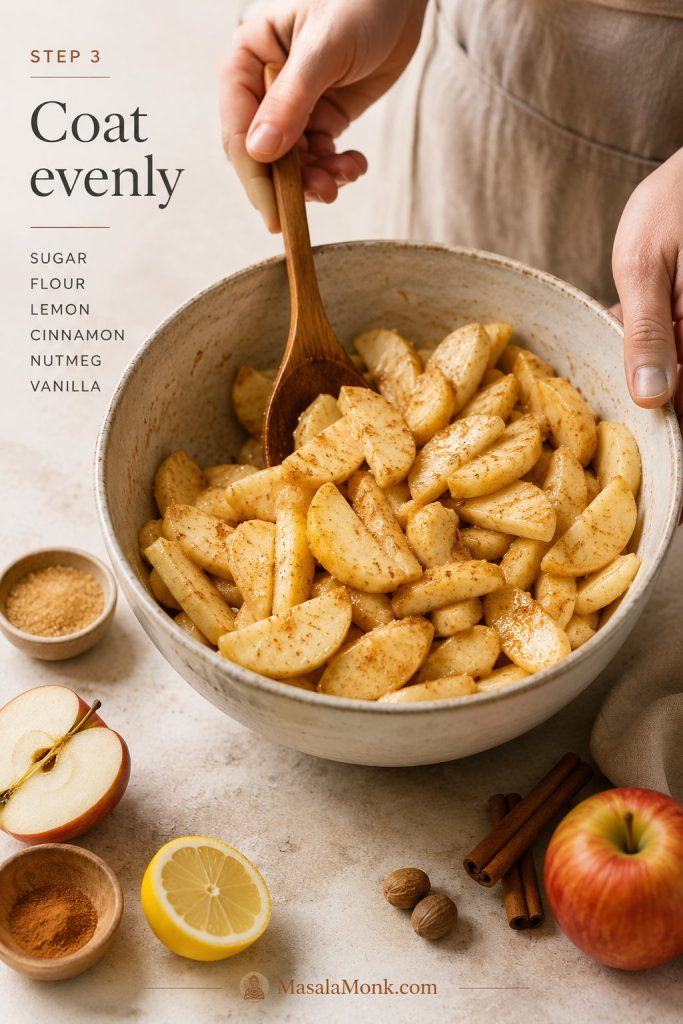
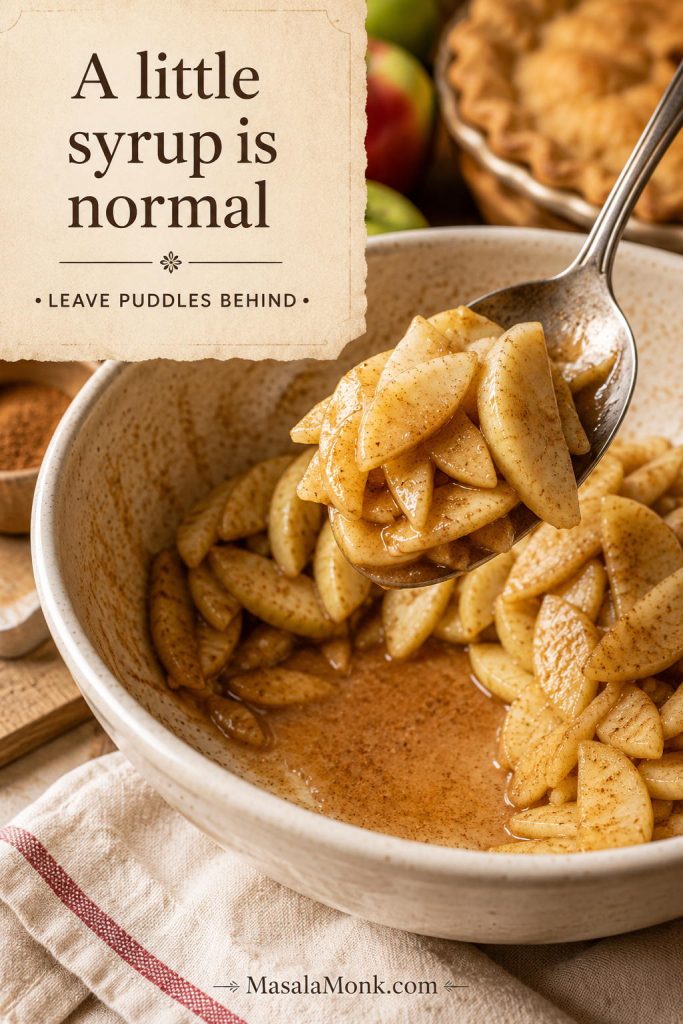
That short rest lets the sugar begin drawing moisture from the apples. A little syrup in the bottom of the bowl is normal; if the slices are sitting in a visible puddle, lift the apples into the crust and leave most of that liquid behind.
This liquid-control step is also one of the easiest ways to avoid a soft crust; for the full prevention list, see how to keep Dutch apple pie from getting soggy.
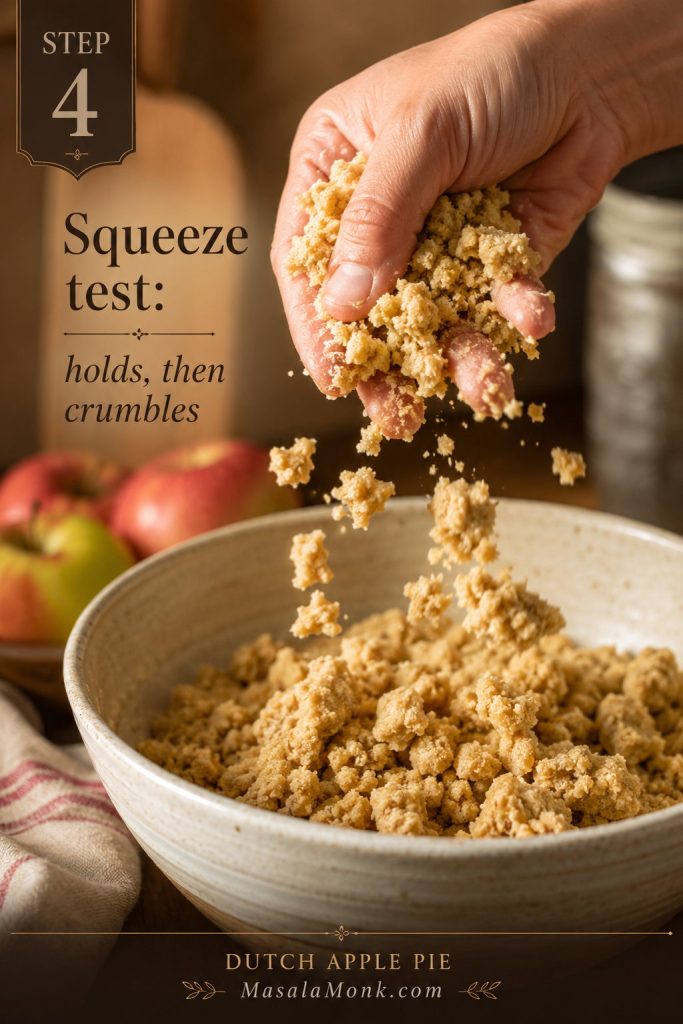
Step 4: Make the Crumb Topping
Stir flour, brown sugar, granulated sugar, cinnamon, and salt in a bowl. Add melted, slightly cooled butter and mix until the topping forms chunky crumbs. When squeezed in your hand, it should hold together, then break apart easily.
Now place a rack in the lower third of the oven and heat the oven to 400°F / 200°C. The lower rack gives the bottom crust more direct heat, while the crumbs still brown from above.

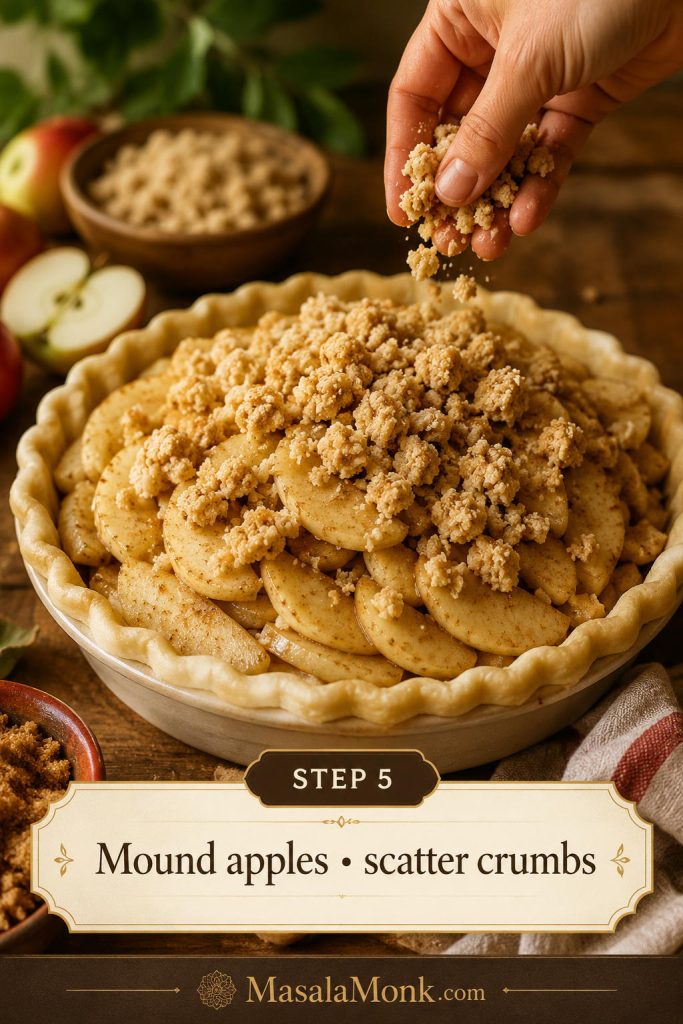
Step 5: Fill the Pie
Spoon the apples into the chilled crust, mounding them slightly in the center. Do not worry if the apples sit a little high before baking; they settle as they soften. Scatter the crumb topping over the apples and press it just lightly enough to stay in place without compacting it.
Step 6: Bake Hot, Then Lower the Heat
Place the assembled pie on a rimmed baking sheet and bake at 400°F / 200°C for 20 minutes. Without removing the pie, reduce the oven temperature to 375°F / 190°C and bake for 35–45 minutes more.
If the crumbs or crust edges brown too quickly, usually after the first 30–35 minutes, tent the pie loosely with foil. Do not seal it tightly, or trapped steam can soften the top.
Not sure whether the pie is fully baked? Use the bake time and doneness cues before pulling it from the oven.
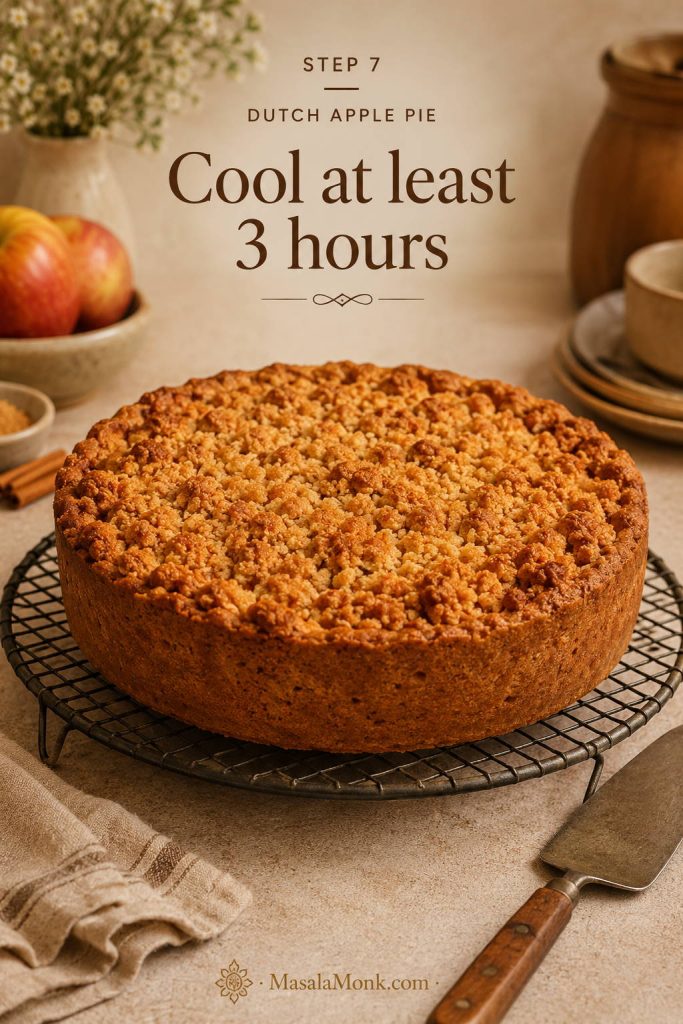
Step 7: Cool Before Slicing
Cool the pie for at least 3 hours before slicing. As the pie cools, the filling keeps thickening. The pie can be warm when served, but not straight-from-the-oven hot if you want clean slices.
How Long to Bake Dutch Apple Pie
A deep-dish pie made with raw sliced apples usually needs 55–65 minutes total bake time.
Two-Temperature Bake Schedule
| Stage | Temperature | Time | What It Does |
|---|---|---|---|
| Hot start | 400°F / 200°C | 20 minutes | Gives the crust a head start and begins browning |
| Gentle finish | 375°F / 190°C | 35–45 minutes | Softens apples and thickens filling without burning topping |
| Cooling | Room temperature | At least 3 hours | Lets the filling settle for cleaner slices |
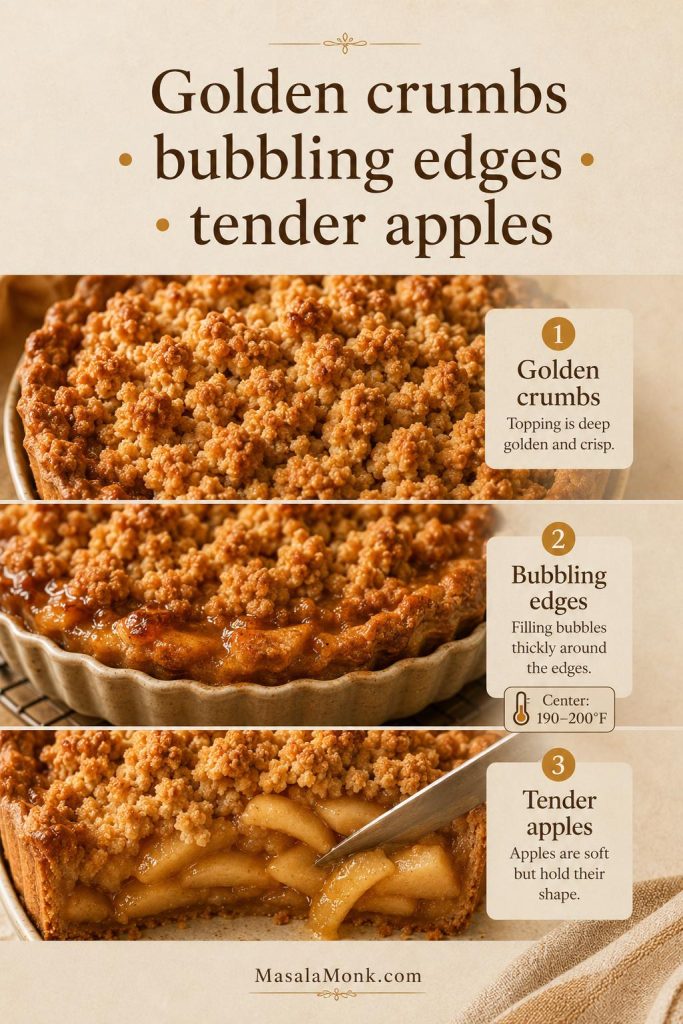
Do not pull the pie just because the crumbs look golden. The filling also needs to bubble and the apples need to feel tender; otherwise, the crust and topping may look done while the center still needs time.
Look for golden brown crumbs, bubbling juices around the edges, and apples that feel tender when pierced with a thin knife. An instant-read thermometer is optional, but the center of the filling should be about 190–200°F / 88–93°C.
Doneness Cues Beyond Color
Should You Par-Bake the Crust for Dutch Apple Pie?
You can usually skip par-baking for this raw-apple Dutch apple pie recipe as long as the crust gets three protections: a cold start, a lower oven rack, and enough total bake time. The apples need nearly an hour in the oven anyway, so the bottom crust has time to cook through.
Par-baking becomes more helpful when the filling is already cooked, canned, or unusually wet. In those cases, the filling may not need as much oven time after assembly, so the crust benefits from a head start.
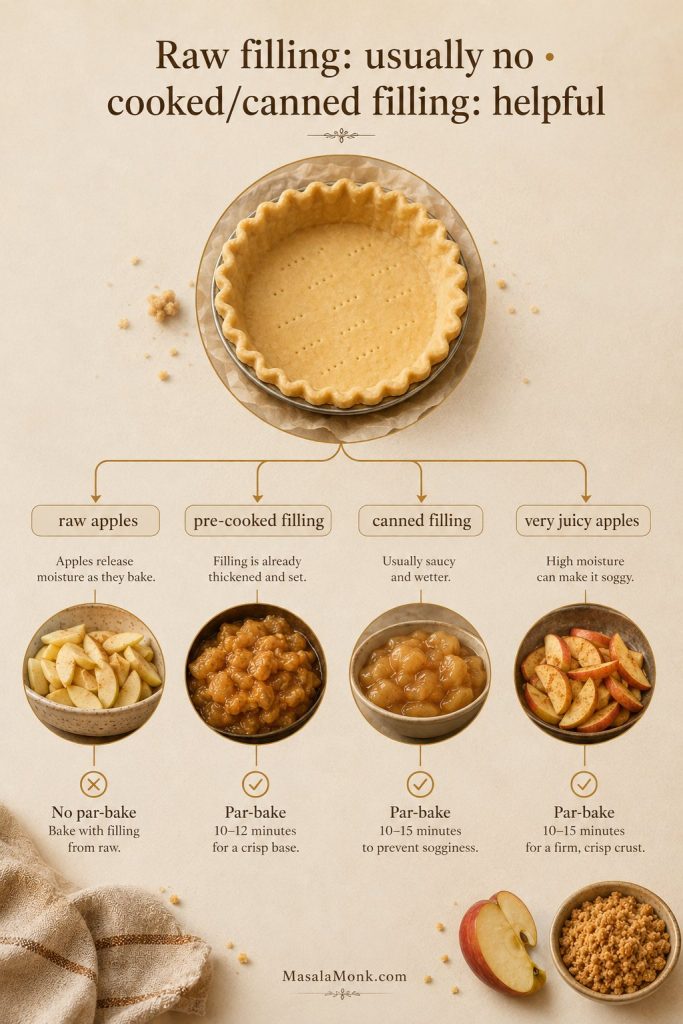
| Situation | Par-Bake? | Why |
|---|---|---|
| Raw apple filling, this recipe | Usually no | The long bake gives the crust enough time to cook |
| Pre-cooked apple filling | Helpful | The filling is already soft, so the assembled pie may bake for less time |
| Canned apple pie filling | Helpful | Canned filling is soft, sweet, and already thickened |
| Very juicy apples | Optional | Par-baking adds extra protection against a soft bottom crust |
| Glass pie plate | More helpful | Glass heats more slowly than metal |
| Metal pie plate | Less necessary | Metal conducts heat faster and helps the bottom crust brown |
How to Keep Dutch Apple Pie from Getting Soggy
A soggy bottom usually comes from one of three places: too much loose apple juice, not enough heat under the crust, or slicing before the filling has settled. This style of pie is especially vulnerable because it has a juicy fruit filling and only one crust.
Three Causes to Control
- Chill the crust before filling. Cold dough holds its structure better in the oven.
- Choose apples with structure. Soft apples collapse quickly and release more liquid.
- Do not pour in all pooled apple juice. Spoon in the apples, but leave excess liquid behind if the bowl is very wet.
- Use enough thickener. Flour helps bind the juices as the pie bakes.
- Bake on a lower rack. This gives the bottom crust more direct heat.
- Use a rimmed baking sheet. It catches drips and keeps the pie stable.
- Give the filling a full cooling window. Cutting too early makes even a well-baked pie look runny.
- Do not cover while warm. Trapped steam softens the crumb layer and crust.
Optional Crust Barrier
For an extra barrier against fruit juices, King Arthur Baking suggests using a thin layer of “crust dust” on the bottom crust before adding fruit filling. It is optional, but useful if you often struggle with soggy pie bottoms. You can read their technique here: King Arthur Baking’s crust dust method.
Raw Apples vs Pre-Cooked Apple Filling
All three routes can work, but they give you different pies. Fresh apple slices taste brighter and more classic, pre-cooked filling slices more neatly, and canned filling is the fastest shortcut when you want the crumb-topped version with less prep.
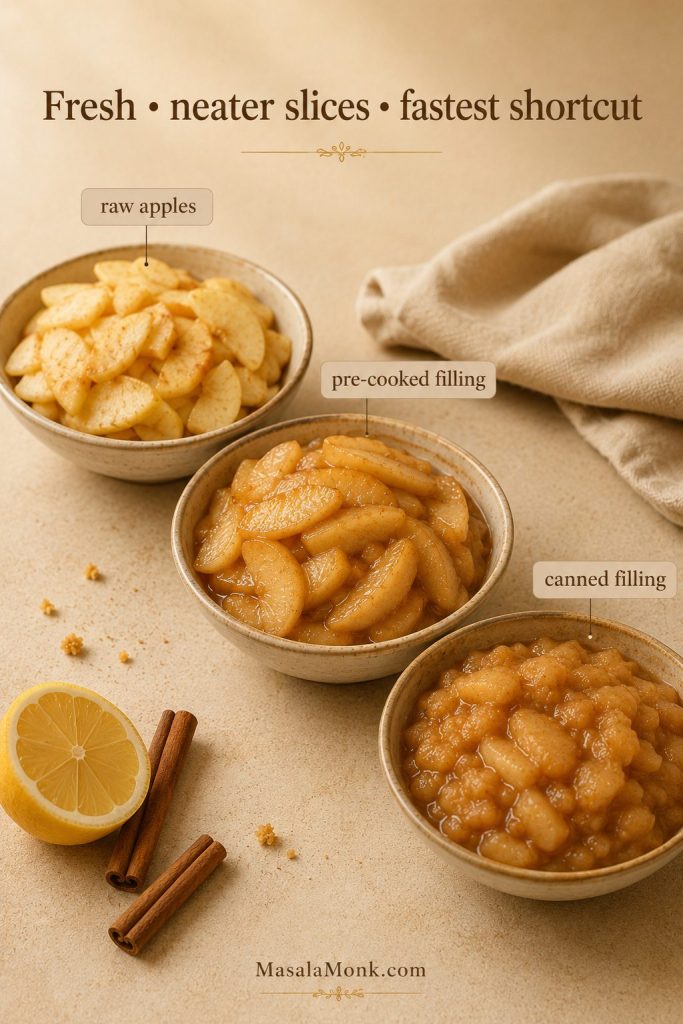
| Method | Best For | Tradeoff |
|---|---|---|
| Raw sliced apples | Easiest classic pie | More shrinkage and more juice management |
| Pre-cooked apple filling | Neater slices, make-ahead baking, less gap under topping | Extra step; filling must cool before going into crust |
| Canned apple pie filling | Fastest shortcut | Softer, sweeter, less fresh-tasting |
I use raw apples here because the full 55–65 minute bake gives them enough time to soften while keeping the flavor fresher and less jammy. Even slices, enough thickener, and visible bubbling are the keys.
Pre-cooked filling is better when you want less shrinkage, fewer hollow gaps under the topping, or cleaner slices for a holiday table. It is also useful if you want to make the filling ahead. Just cool it completely before adding it to the crust; warm filling can melt the butter in the dough and make the bottom crust heavy.
If you want the make-ahead route, use cooled homemade filling from this apple pie filling recipe.
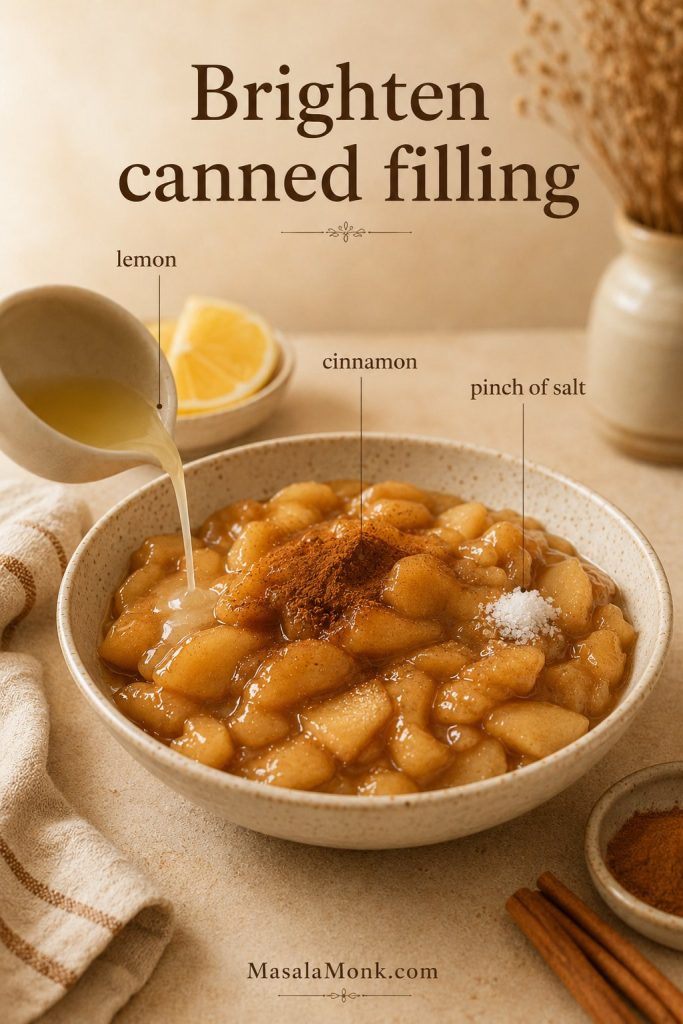
Dutch Apple Pie with Canned Apple Pie Filling
Canned apple pie filling works when you want the shortcut version, but it needs a lighter hand. Because it is already sweetened, softened, and thickened, skip the flour, reduce the sugar, and wake it up with lemon juice, cinnamon, and a small pinch of salt.
If you are using canned filling because you need a faster pie, the par-bake section is worth checking before you assemble it.
How to Adjust Canned Apple Pie Filling
- Use about 2 cans, 20–21 oz each, for one 9-inch pie.
- Do not add the flour from the raw-apple filling.
- Skip most or all of the added sugar in the apple layer.
- Brighten the flavor with 1 tablespoon / 0.5 fl oz / 15 ml lemon juice.
- Stir in 1/2 teaspoon cinnamon if the filling tastes flat.
- Balance the sweetness with a small pinch of salt.
- Use the same brown-sugar crumb topping listed above.
- Consider par-baking the crust because canned filling needs less time in the oven.
- If your pie plate is shallow, do not force in both full cans; leave a little behind rather than overfilling.
Bake Time for the Shortcut Version
A canned-filling version may bake closer to 45–55 minutes, depending on the crust, pan, and whether the filling went in cold or at room temperature. Bake until the crumb topping is golden and the filling bubbles. Cool fully before slicing, because canned filling can look thick while hot but loosen once cut.
For a full shortcut pie, see this apple pie with apple pie filling.
If you have extra filling after baking, it can also go into easy desserts like this apple cinnamon roll bake with apple pie filling.
How to Serve Dutch Apple Pie: Warm, Room Temperature, or Reheated
Dutch apple pie is best after it has cooled long enough to slice cleanly. Serve it at room temperature, gently warmed, or with vanilla ice cream if you want the contrast of warm apples and cold cream. A small drizzle of caramel works too, but the pie is already sweet enough that it does not need much.
For the cleanest slices, cool the pie completely first, then rewarm individual pieces in a 325°F / 160°C oven for 10–15 minutes before serving.
Planning this for Thanksgiving or a holiday table? The make-ahead and reheating section gives the cleanest workflow.
Make Ahead, Storage, Freezing, and Reheating
Dutch apple pie is best the day it is baked, after it has cooled enough to slice cleanly. You can still make several parts ahead, which is helpful for Thanksgiving, fall dinners, and holiday baking days.
What to Prep Ahead
| Part | Make-Ahead / Storage | What Matters |
|---|---|---|
| Pie dough | Refrigerate 2–3 days or freeze up to 3 months | Let it soften slightly before rolling |
| Crumb topping | Refrigerate up to 2 days | Break into crumbs again before using |
| Raw apple filling | Best made the same day | Apples release liquid as they sit |
| Cooked apple filling | Refrigerate 2–3 days | Cool completely before filling crust |
| Baked pie | Room temperature up to 2 days; refrigerate leftovers 3–4 days | Keep loosely covered once fully cool |
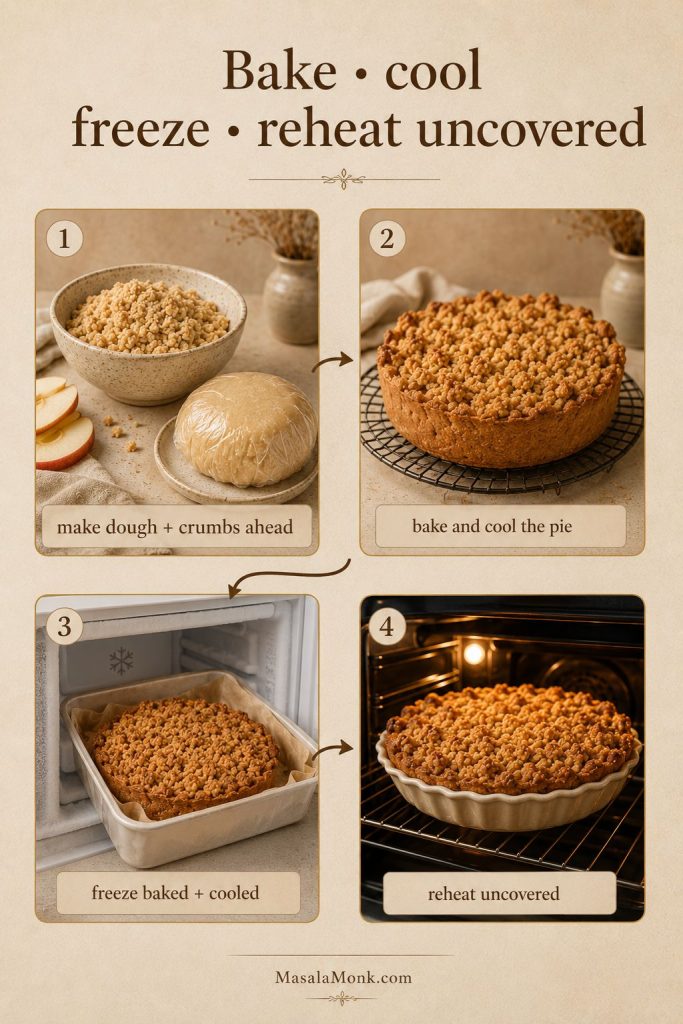
| Baked pie, frozen | Freeze fully cooled pie up to 2–3 months | Thaw overnight in the refrigerator, then reheat uncovered at 325°F / 160°C |
| Reheating | 325°F / 160°C for 15–20 minutes | Reheat uncovered to help the topping crisp |
For a holiday workflow, make the pie dough and crumb topping ahead, then bake the pie the day before you need it. Let it cool fully, keep it loosely covered, and rewarm slices or the whole pie uncovered before serving.
Freezing and Reheating the Baked Pie
For the best texture, freeze the pie after baking and cooling. Wrap it well once completely cool, freeze for up to 2–3 months, thaw overnight in the refrigerator, and reheat uncovered so the buttery crumbs can crisp back up. An unbaked pie can be frozen too, but raw apples release more liquid as they thaw, so the baked-and-cooled route is easier to control.
Can You Make Dutch Apple Pie the Day Before Thanksgiving?
Yes. Bake the pie the day before, cool it completely, and keep it loosely covered. Reheat it uncovered at 325°F / 160°C until warmed through. The crumb topping is crispest the day the pie is baked, but reheating uncovered helps bring back some texture.
Refrigeration is useful after the first couple of days, but it will soften the crumb topping. For the best texture, reheat slices in the oven instead of the microwave.
For food-safety storage guidance, Iowa State University Extension notes that fruit pies made with sugar can be stored at room temperature for up to two days, then refrigerated for additional storage. See their pie storage guidance here: ISU Extension pie storage guide.
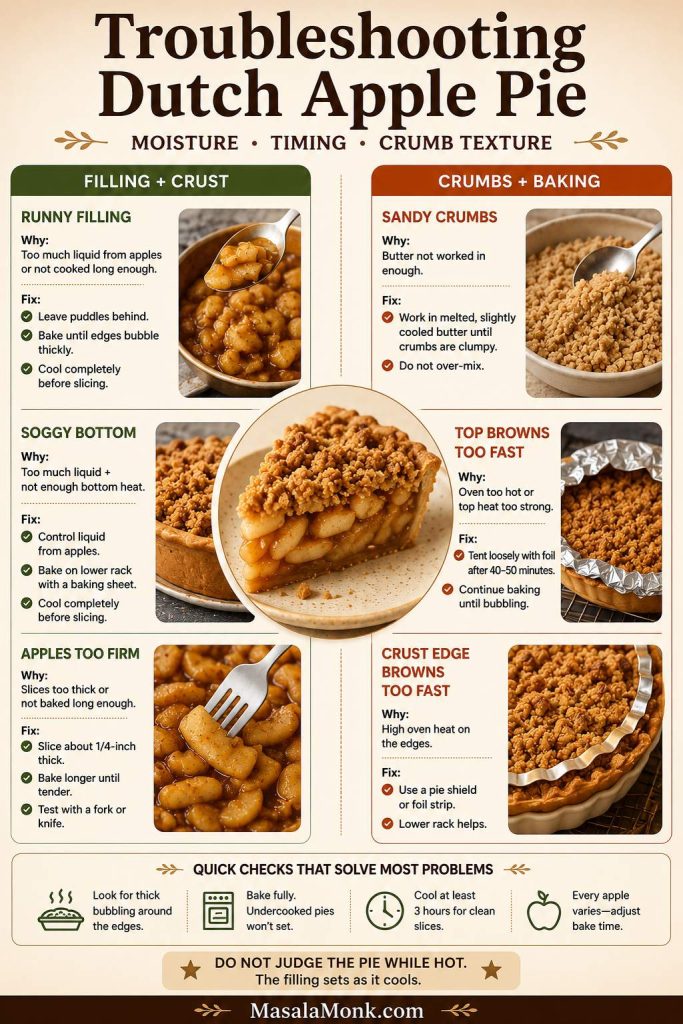
Troubleshooting Dutch Apple Pie
Do not judge the pie while it is still hot. Many problems that look serious right out of the oven, especially loose filling, improve as the pie cools and the juices thicken.
Most real issues come down to moisture, timing, or crumb texture. Once you know which one caused the problem, the fix is usually simple.
Filling and Crust Problems
| Problem | Likely Cause | Fix |
|---|---|---|
| Soggy bottom crust | Too much apple juice, underbaked crust, or pie cut too soon | Use lower rack, hot start, sturdy apples, and a full cooling window |
| Runny filling | Not enough thickener, underbaked apples, or sliced while too hot | Bake until bubbling and let the filling fully settle before slicing |
| Apples stay too firm | Slices too thick or bake time too short | Slice 1/4 inch / 6 mm thick and bake until the juices bubble |
| Large gap under the crumbs | Raw apples shrank during baking | Mound the apples slightly, slice them evenly, or use cooled pre-cooked filling |
| Filling tastes flat | Apples were very sweet or the filling needed more balance | Add lemon juice and a pinch of salt next time |
Crumb Topping and Baking Problems
| Problem | Likely Cause | Fix |
|---|---|---|
| Crumb topping is sandy | Butter was not worked into the dry ingredients enough | Press the mixture into clumps, then break it into crumbs |
| Crumb topping is greasy | Butter was too hot or the topping was overmixed | Chill the topping for 10 minutes, then crumble it again |
| Topping burns before apples soften | Top heat is too strong or the pie needs a longer bake | Tent loosely with foil after the crumbs turn golden |
| Crust edge burns | The edge was exposed too long | Use foil or a pie shield after the first 20–30 minutes |
| Pie overflows | Pie plate was too shallow or the filling had too much liquid | Use a deep-dish plate, leave excess juice behind, and bake on a rimmed sheet |
Most of these problems are easy to prevent once you control moisture, heat, and cooling time. With sturdy apples, a cold crust, and a full cooling window, the oven does most of the work; the reward is a pie that smells like cinnamon, cuts cleanly, and still tastes like real apples.
Dutch Apple Pie Recipe
This deep-dish Dutch apple pie has tender spiced apples, a flaky bottom crust, and a buttery brown-sugar crumb topping that bakes into golden clusters.
Ingredients
Crust
- 1 unbaked 9-inch pie crust, chilled
Apple Filling
- 3 lb / 48 oz / 1.35 kg firm apples, peeled, cored, and sliced 1/4 inch / 6 mm thick
- 1/2 cup / 3.5 oz / 100 g granulated sugar
- 2 tablespoons / 0.9 oz / 25 g packed light brown sugar
- 3 tablespoons / 0.85 oz / 24 g all-purpose flour
- 1 tablespoon / 0.5 fl oz / 15 ml fresh lemon juice
- 1 1/2 teaspoons ground cinnamon
- 1/4 teaspoon ground nutmeg
- 1/4 teaspoon fine salt
- 1 teaspoon / 5 ml vanilla extract
- Optional: 1 tablespoon / 0.5 oz / 14 g melted unsalted butter
Crumb Topping
- 1 cup / 4.4 oz / 125 g all-purpose flour
- 1/2 cup / 3.5 oz / 100 g packed light brown sugar
- 2 tablespoons / 0.9 oz / 25 g granulated sugar
- 1 teaspoon ground cinnamon
- 1/4 teaspoon fine salt
- 1/2 cup / 4 oz / 113 g unsalted butter, melted and cooled slightly
- Optional: 1/2 cup / 2 oz / 55–60 g chopped pecans or walnuts
Instructions
- Prepare the crust. Roll the pie dough into a 12-inch circle and fit it into a 9-inch deep-dish pie plate. Trim, crimp, and chill while you prepare the filling.
- Slice the apples. Peel, core, and slice apples about 1/4 inch / 6 mm thick.
- Make the filling. In a large bowl, toss apples with granulated sugar, brown sugar, flour, lemon juice, cinnamon, nutmeg, salt, vanilla, and melted butter if using. Let sit for 10 minutes; leave behind excess pooled liquid if the bowl looks very wet.
- Make the crumb topping. In another bowl, mix flour, brown sugar, granulated sugar, cinnamon, and salt. Add melted cooled butter and stir until clumpy crumbs form. Add nuts if using.
- Prepare the oven. Place a rack in the lower third of the oven and heat to 400°F / 200°C. Set a rimmed baking sheet nearby for baking the pie.
- Fill the crust. Spoon apples into the chilled crust, leaving behind excess pooled liquid if the bowl is very wet. Mound apples slightly in the center.
- Add topping. Sprinkle crumb topping evenly over the apples. Press lightly so the crumbs sit in place without compacting them.
- Bake. Place the pie on the rimmed baking sheet. Bake at 400°F / 200°C for 20 minutes. Reduce heat to 375°F / 190°C and bake 35–45 minutes more, until the topping is golden and the filling bubbles around the edges.
- Protect if needed. If the crumbs or crust edges brown too quickly, usually after the first 30–35 minutes, tent loosely with foil.
- Cool. Let the pie cool at least 3 hours before slicing.
Notes
- Best apple blend: Use 2 lb Granny Smith plus 1 lb Honeycrisp, Braeburn, or Pink Lady.
- Regular pie plate: For a shallow 9-inch pie plate, use about 2 1/2 lb / 40 oz / 1.1 kg apples.
- Do not overfill: Extra apples in a shallow plate can cause overflow and a softer bottom crust.
- Very juicy apples: Use 1 extra tablespoon / about 0.3 oz / 8 g flour and be strict about leaving pooled liquid behind.
- Optional butter in filling: Add it for a slightly richer apple layer, or leave it out for a cleaner fruit flavor.
- Salted butter: If using salted butter in the crumb topping, reduce the added salt to a small pinch.
- Oat crumb variation: Replace 1/4 cup / 1 oz / 30 g flour with 1/4 cup / 0.9 oz / 25 g old-fashioned oats.
- Canned filling shortcut: Use 2 cans of apple pie filling, skip the flour and most added sugar in the apple layer, and consider par-baking the crust.
- Cleaner slices: Cool completely, then rewarm individual pieces before serving.
FAQs
What makes Dutch apple pie different from regular apple pie?
Dutch apple pie has a bottom crust and a crumb or streusel topping. Regular apple pie usually has a second pastry crust on top, either solid, vented, or arranged as a lattice.
Is Dutch apple pie the same as apple crumb pie or apple crumble pie?
In many home-baking recipes, yes. Apple crumb pie and apple crumble pie usually emphasize the crumb layer, while Dutch apple pie is the more common name for the full pie style with a bottom crust, apple filling, and streusel-style top.
Should the apples be cooked before baking?
Raw apples work well in this recipe because the pie bakes long enough for them to soften. Pre-cooked apples are useful when you want less shrinkage, fewer gaps under the topping, or a make-ahead filling.
Should the crust for this Dutch apple pie recipe be par-baked?
For the raw-apple version, par-baking is usually not required. A chilled crust, hot-start bake, and lower oven rack are enough for most pies. Par-baking is more useful with canned filling, pre-cooked filling, glass pie plates, or very juicy apples.
Do I have to peel the apples?
Peeling gives the smoothest, most classic filling. Unpeeled apples work if you like a rustic texture, but the skins can feel chewy after baking.
Why is there a gap under my crumb topping?
A gap usually means the raw apples shrank while baking. Mound the apples slightly, slice them evenly, and avoid overly soft apples. For the most compact filling, use cooled pre-cooked apple filling.
Why did my crumb topping turn sandy?
The butter probably was not worked into the flour and sugar enough. Press the mixture between your fingers until it forms clumps before sprinkling it over the apples.
How long should Dutch apple pie cool before slicing?
Give it at least 3 hours. The filling thickens as it cools, so a pie that would run if sliced hot can still cut beautifully later.
Can I bake Dutch apple pie the day before Thanksgiving?
Yes. Bake it the day before, cool it completely, and keep it loosely covered. Reheat uncovered at 325°F / 160°C before serving if you want the pie warm and the crumbs a little crisper.
Can I use canned apple pie filling?
Canned apple pie filling works well for a shortcut version, especially when you brighten it with lemon juice and balance the sweetness with a pinch of salt. Use about two 20–21 oz cans for a 9-inch pie, skip most added sugar, and do not add flour to the filling.
What is the best way to reheat Dutch apple pie?
Reheat slices uncovered in a 325°F / 160°C oven for 15–20 minutes. The oven helps revive the crumb topping better than the microwave.
If you make this pie, I’d love to know which apple blend you used. Did you go classic with Granny Smith and Honeycrisp, or sweeter with Golden Delicious?


