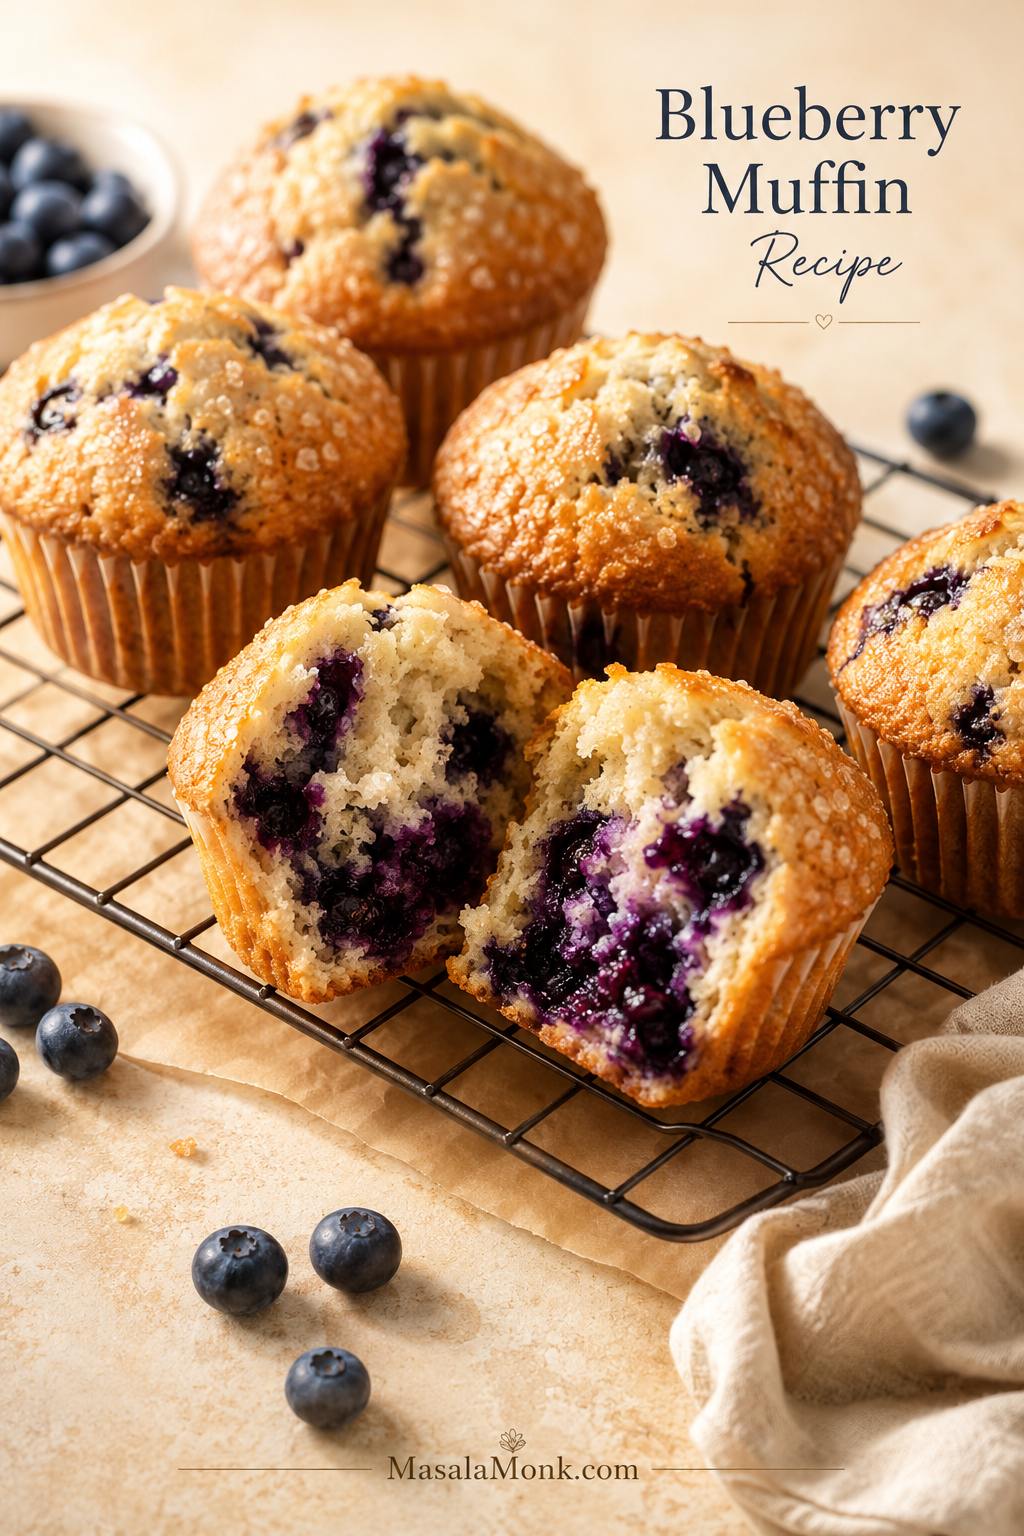
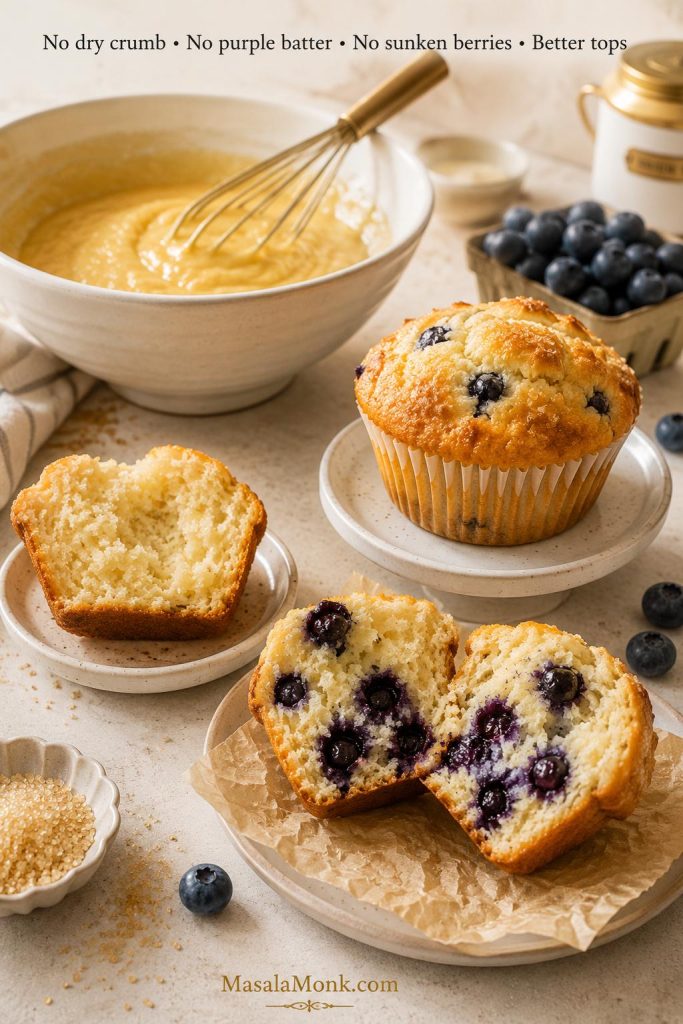
A good blueberry muffin recipe should give you that warm bakery moment at home: golden tops, soft centers, juicy blueberries, and a crumb tender enough to pull apart while the muffin is still a little warm. The top should have a light sugar crunch, the center should stay plush, and the berries should burst into little jammy pockets instead of sinking into one wet layer.
Blueberry muffins can look simple and still go wrong in familiar ways: dry, flat, dense, or streaked purple. Usually, the difference comes down to small choices — how much flour you use, how gently you mix, how cold the berries are, and how hot the oven starts.
The method stays easy. First, melted butter brings the flavor; then a small amount of oil keeps the crumb soft, sour cream adds tenderness, and a hot-start oven helps the tops rise tall and golden. Finally, use fresh berries when you have them, frozen berries when you need them, and coarse sugar or streusel depending on the kind of muffin you want today.
Think of this as the comfort of classic blueberry muffins with fewer of the usual disappointments: no dry crumb, no purple batter, no sunken berry layer, and no flat little tops hiding under the liner.
Already baking? Go straight to the recipe card. Working with frozen berries? The fresh vs frozen blueberry section will help before you mix.
In This Guide
Make the Muffins
Quick Answer: How to Make Moist Blueberry Muffins
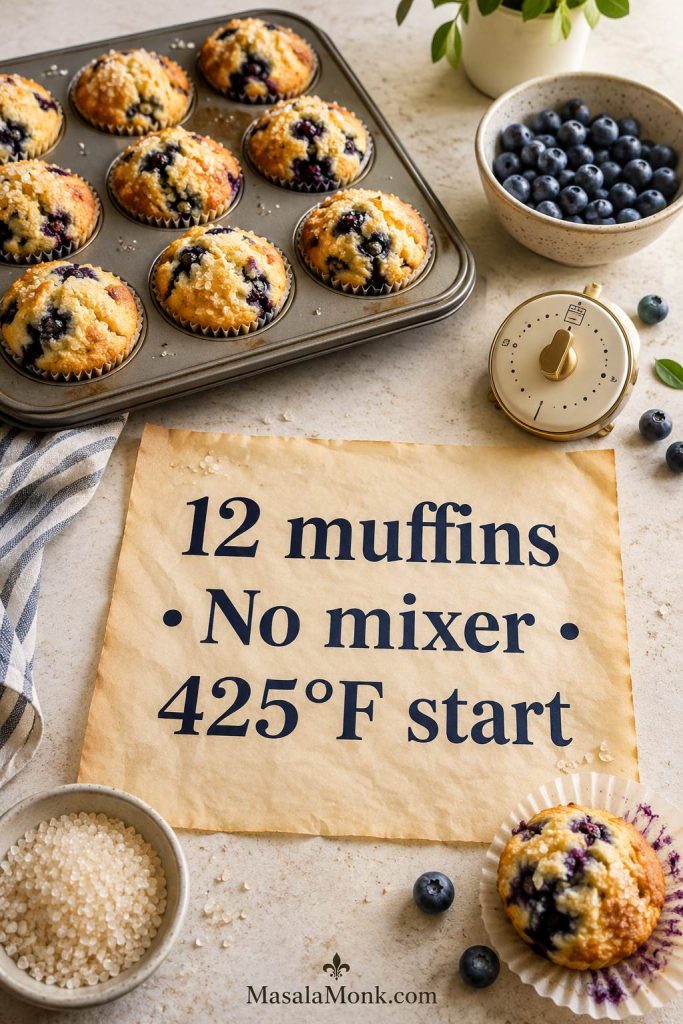
For moist, fluffy blueberry muffins, this recipe uses a thick, scoopable batter made with melted butter, a little oil, sour cream, milk, and 1½ cups of blueberries. Then, fill the muffin cups almost to the top, bake at 425°F / 220°C for 5 minutes, and reduce the oven to 375°F / 190°C until the tops are golden and the centers are set.
Fresh blueberries give the cleanest-looking crumb, but frozen blueberries work well too. Keep them frozen until the last moment, fold them in gently, and bake right away so the batter stays bright instead of turning streaky purple.
If your last batch turned purple, flat, or soggy, the blueberry muffin troubleshooting table will help you fix the next one quickly.
The result should feel like a real bakery muffin: domed, golden, soft in the middle, and full of berries without turning wet at the bottom.
Blueberry Muffins at a Glance
Dry, flat, dense, or streaky muffins usually come from a few fixable choices. This quick overview shows what keeps the batch on track before you start mixing.
| Yield | 12 standard blueberry muffins |
|---|---|
| Prep time | 15 minutes; add 3–5 minutes if making streusel |
| Optional rest | 10–15 minutes for slightly taller tops |
| Bake time | 18–22 minutes |
| Total time | 35–40 minutes without rest; 45–55 minutes with optional rest; add 3–5 minutes if making streusel |
| Oven method | 425°F / 220°C for 5 minutes, then 375°F / 190°C |
| Blueberries | Fresh or frozen |
| Texture | Soft, tender, golden, and blueberry-packed |
| Topping | Coarse sugar by default, optional streusel |
| Mixer needed? | No |
Why This Blueberry Muffin Recipe Works
Because this muffin recipe balances butter, oil, sour cream, and a hot-start bake, the blueberry muffins come out soft, lifted, and flavorful without needing a mixer.
Butter gives flavor, oil keeps the crumb soft
Butter gives blueberry muffins that rich homemade flavor. A small amount of oil keeps the crumb soft after cooling. The amount is small on purpose: enough for tenderness, not so much that the muffins feel greasy.
Sour cream gives the batter enough body
Sour cream adds richness, tenderness, and light tang. Full-fat sour cream gives the softest crumb, while low-fat sour cream can work if that is what you have. It also gives the batter enough structure to hold the berries instead of letting them slide straight to the bottom. The finished muffin should taste soft and buttery, not wet or oily.
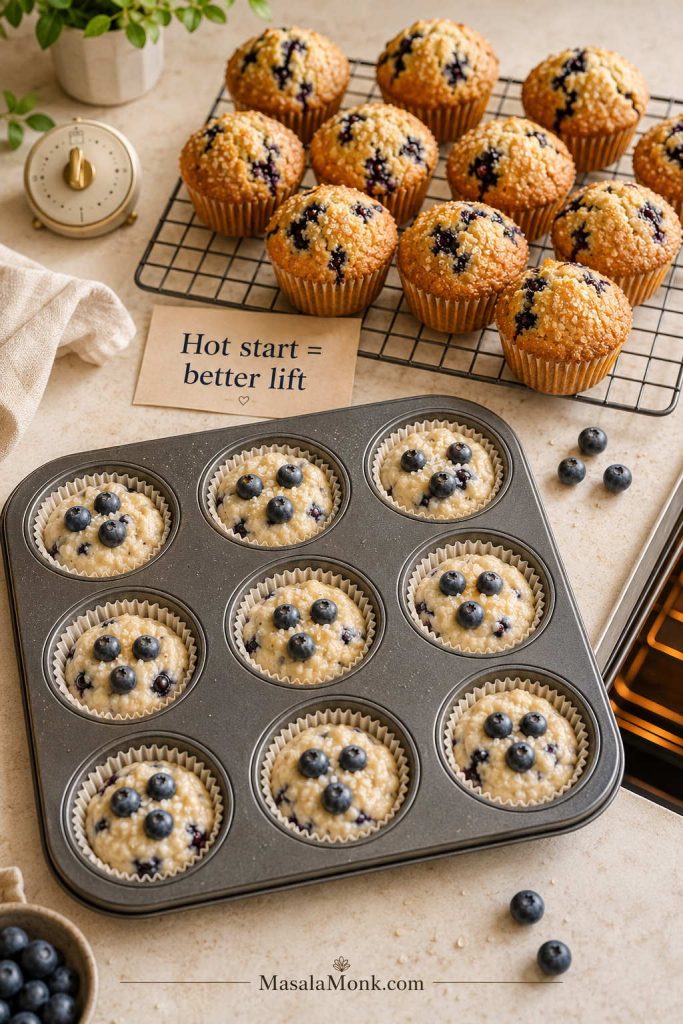
A hot-start bake helps create taller tops
The muffins begin in a hot oven, which gives the batter an early lift. After 5 minutes, the temperature drops so the centers can bake through without drying out. That first burst of heat helps create a taller, more golden top without making the method complicated.
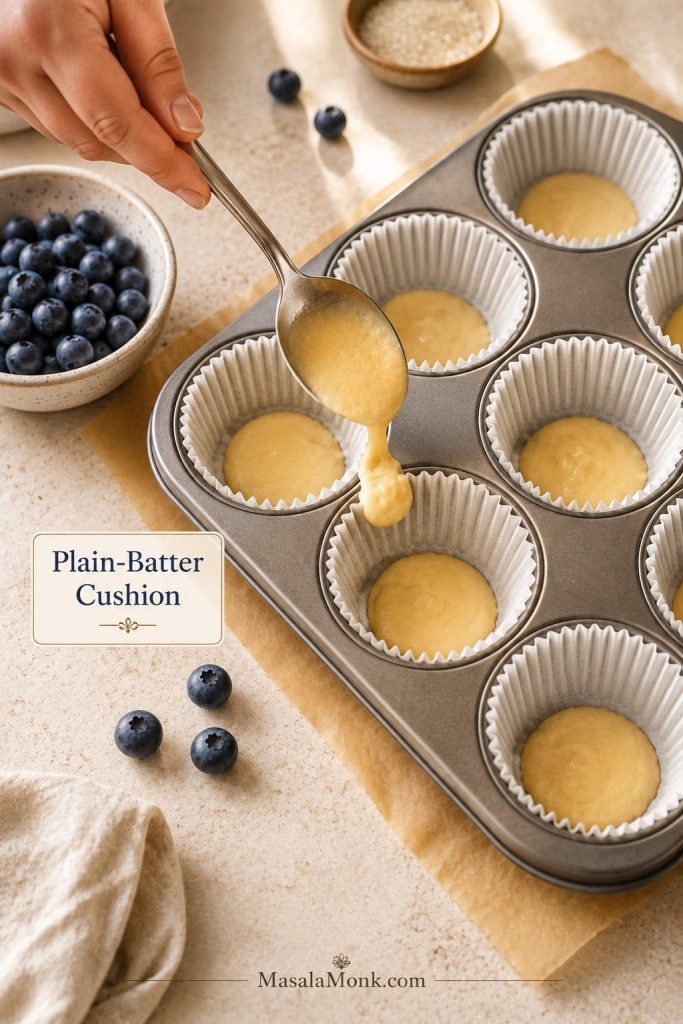
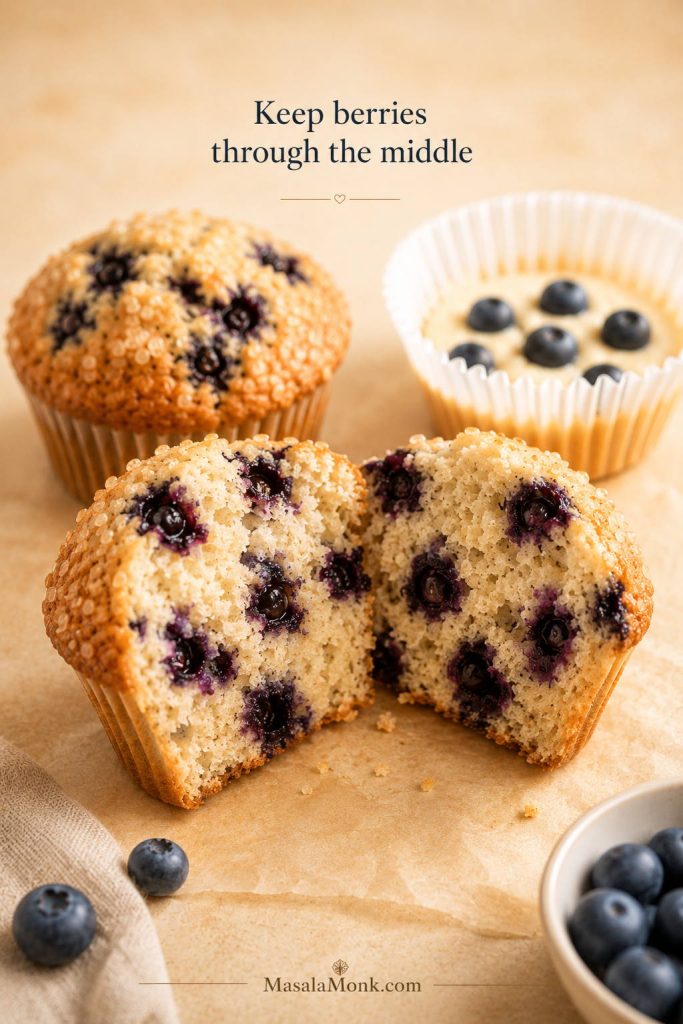
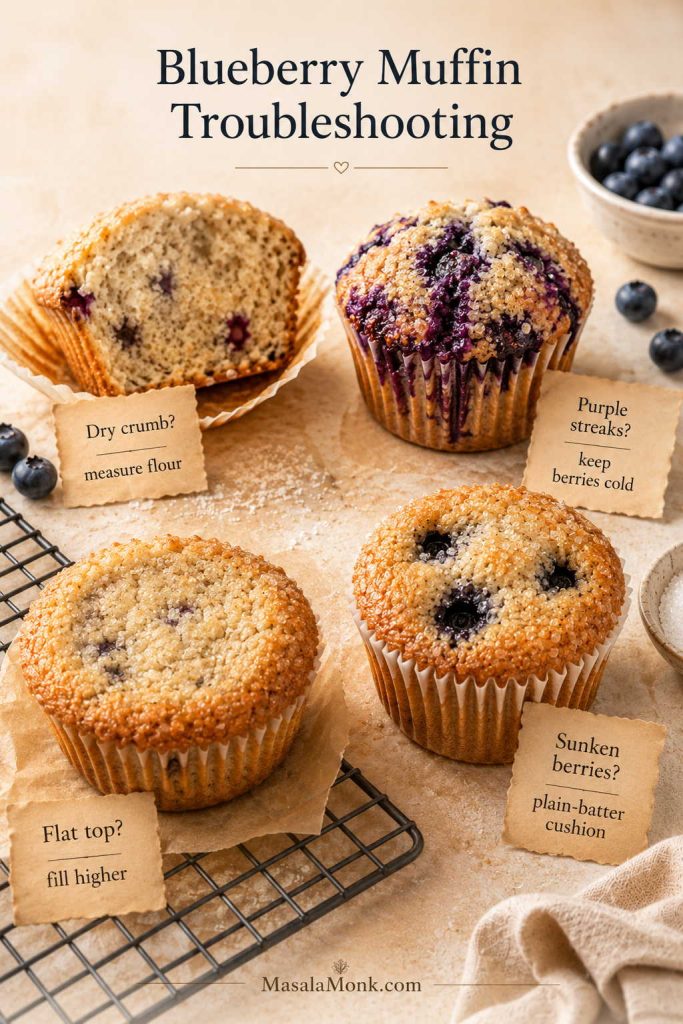
The plain-batter cushion keeps berries from sinking
This is the little step most blueberry muffin recipes skip. Before the blueberries go into the batter, spoon a small amount of plain batter into the bottom of each muffin cup. Then fold the berries into the remaining batter and fill the cups. It takes less than a minute, but it helps prevent that wet, sticky berry layer that can glue itself to the liner.
This idea is also discussed in Serious Eats’ blueberry muffin testing, and it is more useful than relying only on the old “toss the berries in flour” trick.
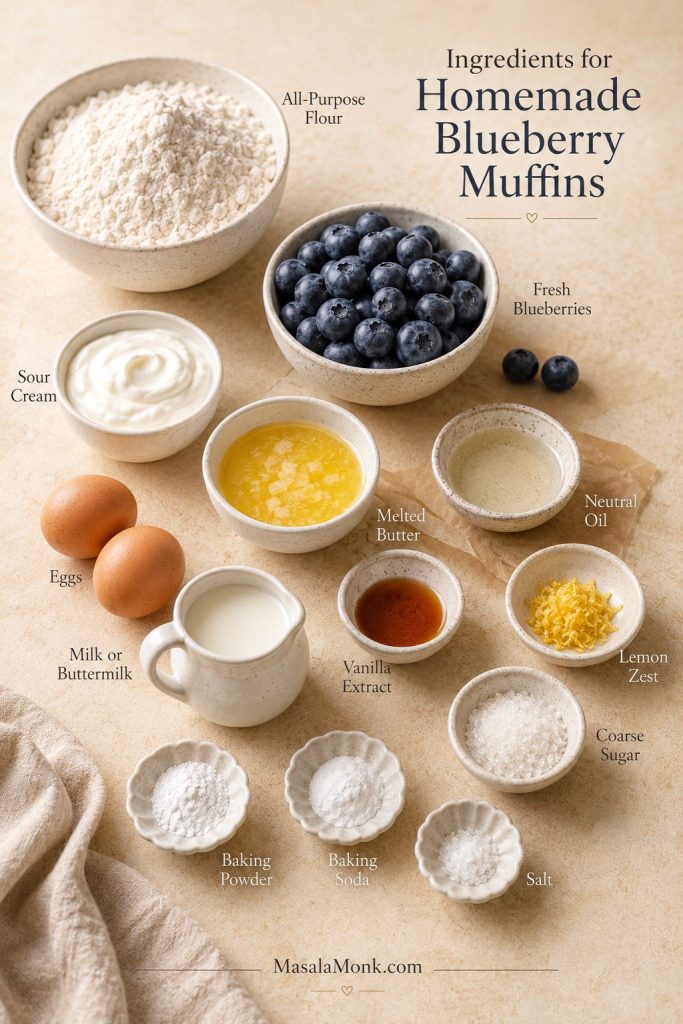
Ingredients for Homemade Blueberry Muffins
The ingredients are simple, but each one has a job. Together, they create a soft crumb, steady lift, and enough support to keep the blueberries evenly distributed.
All-purpose flour
Use regular all-purpose flour for a tender, familiar muffin crumb. Weigh the flour if possible, because too much flour is one of the fastest ways to make muffins dry, dense, or heavy. When measuring by cups, spoon the flour into the cup and level it off instead of scooping directly from the bag.
Baking powder and baking soda
Baking powder gives the muffins lift, while baking soda works with the sour cream to help the batter rise and brown. Make sure both are fresh. Old leavening can give you flat muffins even when the mixture looks right.
Sugar
Three-quarters cup of granulated sugar keeps these muffins sweet enough for breakfast or brunch without pushing them into cupcake territory. Coarse sugar on top adds a light crunch and a bakeshop-style finish.
Melted butter and neutral oil
Melted butter keeps the method easy because you do not need a mixer. A small amount of neutral oil adds softness. Use a mild oil such as canola, vegetable, sunflower, or another neutral baking oil.
Eggs
Two large eggs help the muffins rise and hold together. Very cold eggs can be placed in a bowl of warm water for a few minutes while you prepare the dry ingredients.
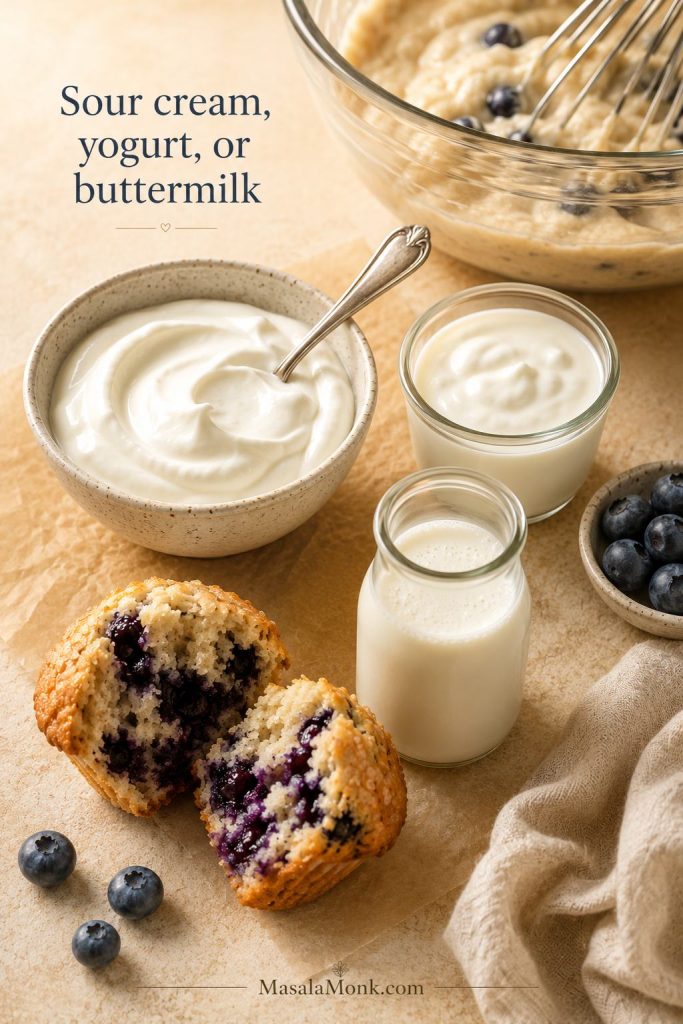
Sour cream, milk, buttermilk, or Greek yogurt
Sour cream gives the muffins tenderness and moisture. Milk loosens the batter just enough so it folds together without becoming runny. Buttermilk can replace the milk if you want a slightly tangier crumb, and plain Greek yogurt can replace the sour cream if it is thick rather than watery.
If you are mainly trying to make muffins more filling, keep this classic version as the texture benchmark first. Then use our high protein muffins guide for versions built around Greek yogurt, protein powder, cottage cheese, and freezer-friendly breakfast prep.
Blueberries
Use 1½ cups of blueberries for juicy muffins that still bake evenly. Smaller berries distribute more evenly, while large berries give bigger jammy pockets. Fresh blueberries are easiest, though frozen berries are completely fine when handled gently. For an extra berry-packed batch, you can increase to 1¾ cups, but the muffins will be softer and a little more delicate.
Using frozen berries today? Read the fresh vs frozen blueberry guide before folding them in, because handling matters more than the berries themselves.
If blueberries are the breakfast flavor you keep coming back to, these blueberry pancakes are another easy way to use fresh or frozen berries without turning breakfast into a project.
Coarse sugar or streusel
Coarse sugar is the cleanest default topping because it gives the muffins a light crunch without making them heavy. Use the quick streusel variation in the recipe card when you want a sweeter bakery-style crumb topping.
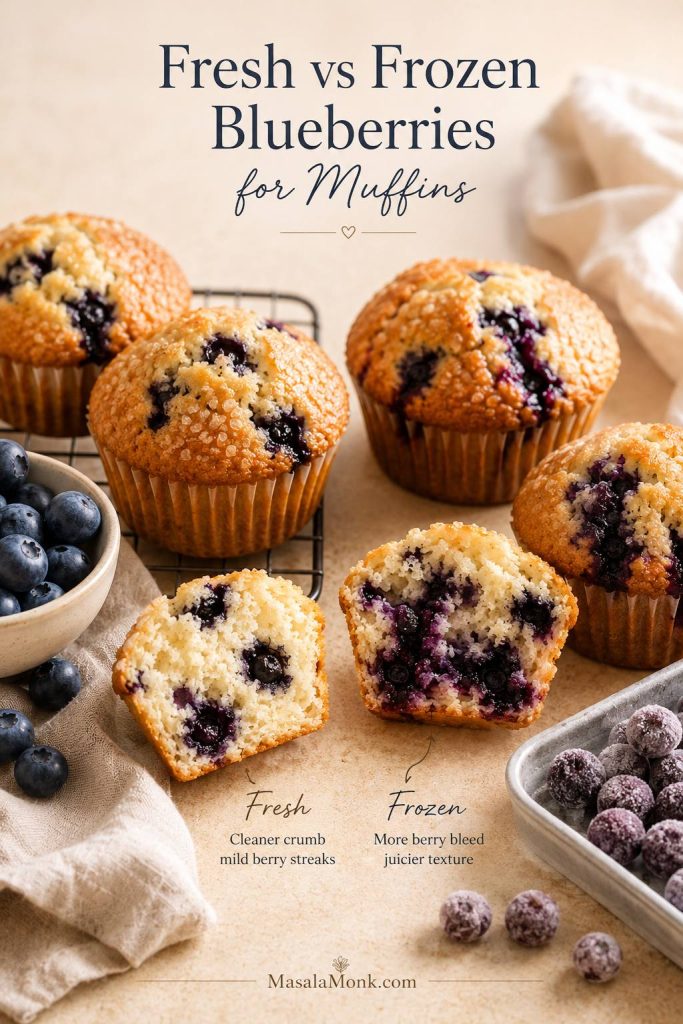
Fresh vs Frozen Blueberries for Muffins
Both fresh and frozen blueberries work in this muffin recipe. The real difference is how much color and moisture they release into the batter.
Use fresh berries when presentation matters most. Use frozen berries when convenience matters most. If you want the cleanest crumb with frozen berries, use the rinse-and-dry method; otherwise, frozen-from-the-freezer is the fastest reliable route.
| Blueberry type | Best use | How to handle it |
|---|---|---|
| Fresh blueberries | Cleanest batter and easiest folding | Rinse, dry well, and fold gently |
| Frozen blueberries, fast method | Convenience and year-round baking | Add straight from the freezer |
| Frozen blueberries, cleanest batter method | Less purple streaking | Rinse briefly, dry very well, fold gently, and bake right away |
| Wild blueberries | More even berry distribution | Use slightly less if they are very small or juicy |
For the fastest method, use frozen blueberries straight from the freezer. Once they thaw, they release juice quickly, which can turn the batter purple and make the muffins wetter.
For the cleanest golden batter, you can briefly rinse frozen blueberries in cold water, dry them very well, and fold them in gently. King Arthur Baking’s frozen-blueberry guide explains this method in more detail.

How to Make Blueberry Muffins
The method is simple, but the order matters. First, mix the dry and wet ingredients separately; then fold them together gently so the muffins stay tender.

1. Prepare the pan and oven
Line a standard 12-cup muffin pan with paper liners. Then, heat the oven to 425°F / 220°C. To protect high muffin tops from sticking, lightly spray the top surface of the pan before filling the cups.
2. Mix the dry ingredients
In a large bowl, whisk together the flour, baking powder, baking soda, and salt. This helps distribute the leavening evenly so the muffins rise consistently.
3. Whisk the wet ingredients
In another bowl or large measuring jug, whisk the sugar, melted butter, oil, eggs, sour cream, milk, vanilla, and lemon zest if using until smooth. Let the butter cool slightly first, so it does not scramble the eggs.
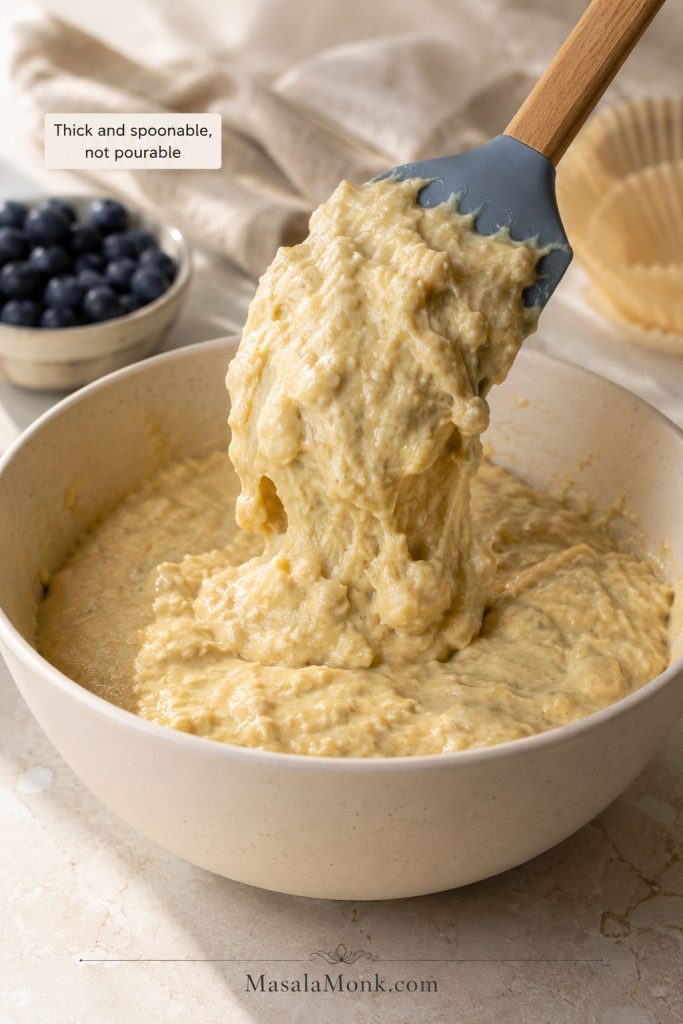
4. Combine into a heavy, spoonable batter
Pour the wet ingredients into the dry ingredients and fold with a spatula until no dry pockets of flour remain. A few small lumps are fine. At this point, the batter should look thick and spoonable, not pourable; when you lift the spatula, it should fall slowly in heavy ribbons.
A 10–15 minute rest can help if you have time. Let the plain batter sit before filling the muffin cups or folding in the blueberries; the short rest lets the flour hydrate and can make the batter bake up a little taller. The muffins still work without it.
5. Add the plain-batter cushion
Before adding blueberries to the bowl, spoon about 1 tablespoon of plain batter into the bottom of each muffin cup. You are not filling the cup yet — just covering the bottom so the first berries do not bake directly against the liner.
Want to see why this matters? The blueberries sinking section shows how this step keeps the fruit from collecting at the bottom.
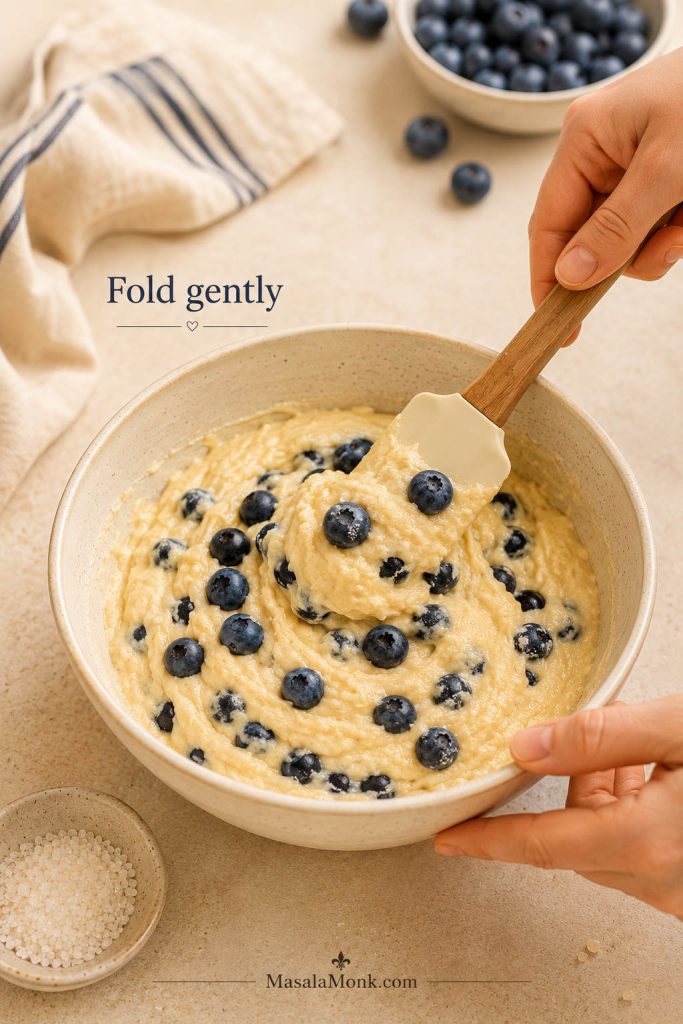
6. Fold in the blueberries
Add the blueberries to the remaining batter and fold gently. Use as few strokes as possible, especially with frozen berries. The goal is to distribute the fruit without crushing it or staining the batter.
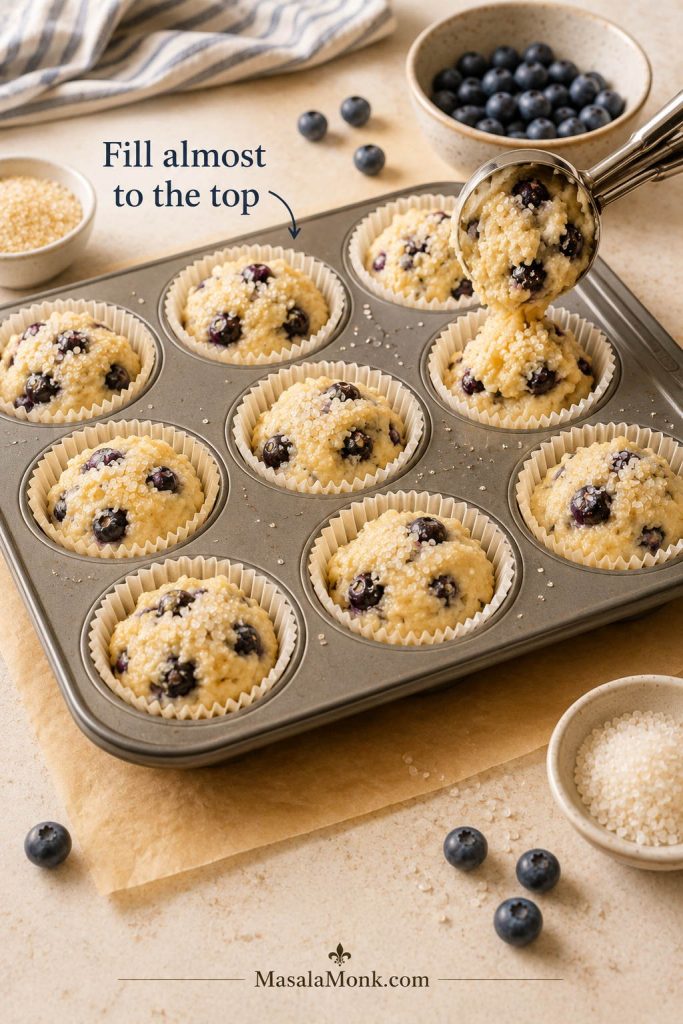
7. Fill and top
Divide the batter between the muffin cups, filling each one almost to the top. Then, sprinkle with coarse sugar, or add the streusel topping if using.
For taller domes, see the bakery-style muffin tops section before you bake.
8. Bake hot, then finish lower
Bake at 425°F / 220°C for 5 minutes. Without opening the oven door, reduce the temperature to 375°F / 190°C and bake for another 13–17 minutes, or until the tops are golden and a toothpick inserted into the center comes out clean or with a few moist crumbs. Start checking at the early end of the range if your oven runs hot, and expect the upper end if your berries are frozen or very large.
Baking mini or jumbo muffins instead? Use the mini, standard, and jumbo bake-time chart instead of guessing.
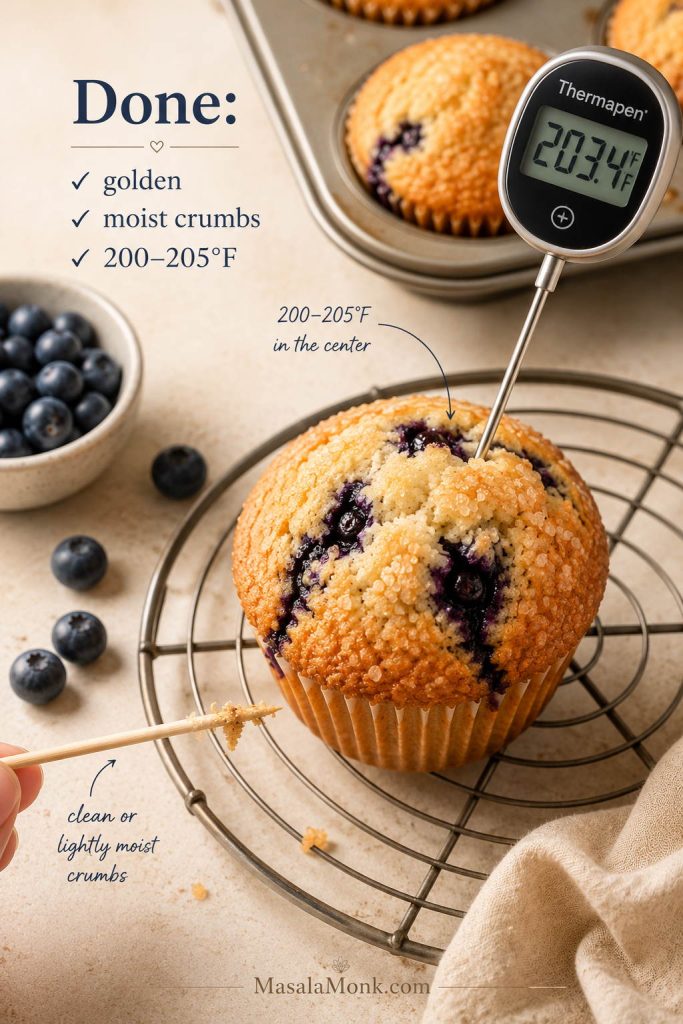
How to tell when blueberry muffins are done
When they are ready, the tops should look set and lightly golden, and the muffins should spring back gently when touched near the center. For extra precision, the center of a fully baked muffin should register about 200–205°F / 93–96°C on an instant-read thermometer.
9. Cool before serving
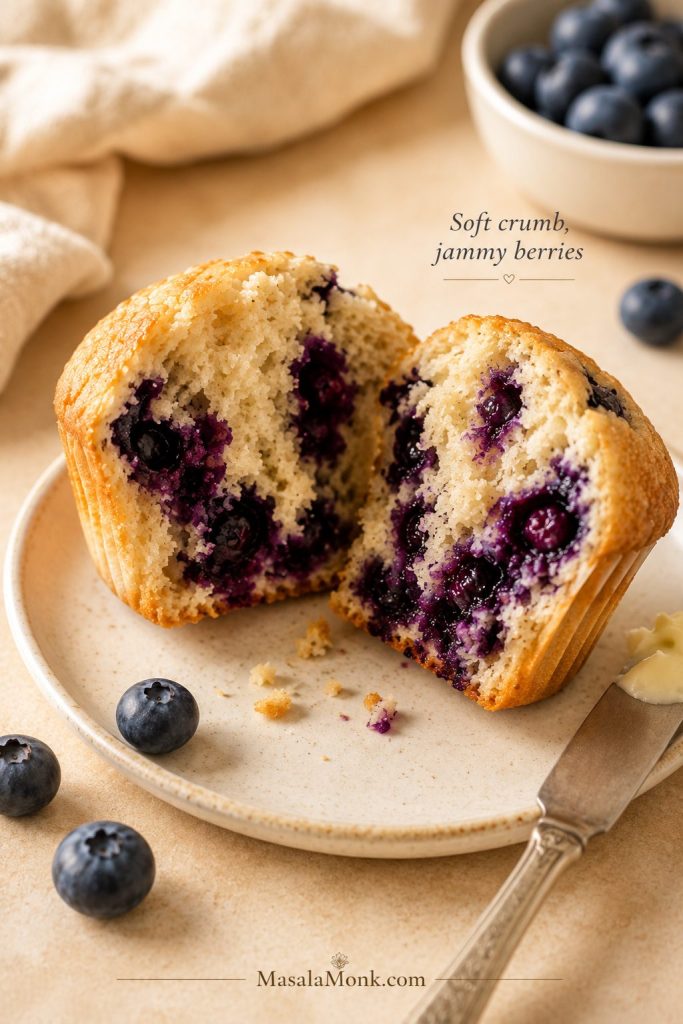
Let the muffins cool in the pan for 5–10 minutes, then move them to a wire rack. Although they are wonderful warm, the crumb sets better if they get a few minutes to settle before you tear one open.
The first muffin is worth eating while it is still a little warm. Split it open, let the steam escape, and you should see a soft crumb with blueberries tucked through the center instead of pooled at the bottom.
Blueberry Muffin Recipe Card
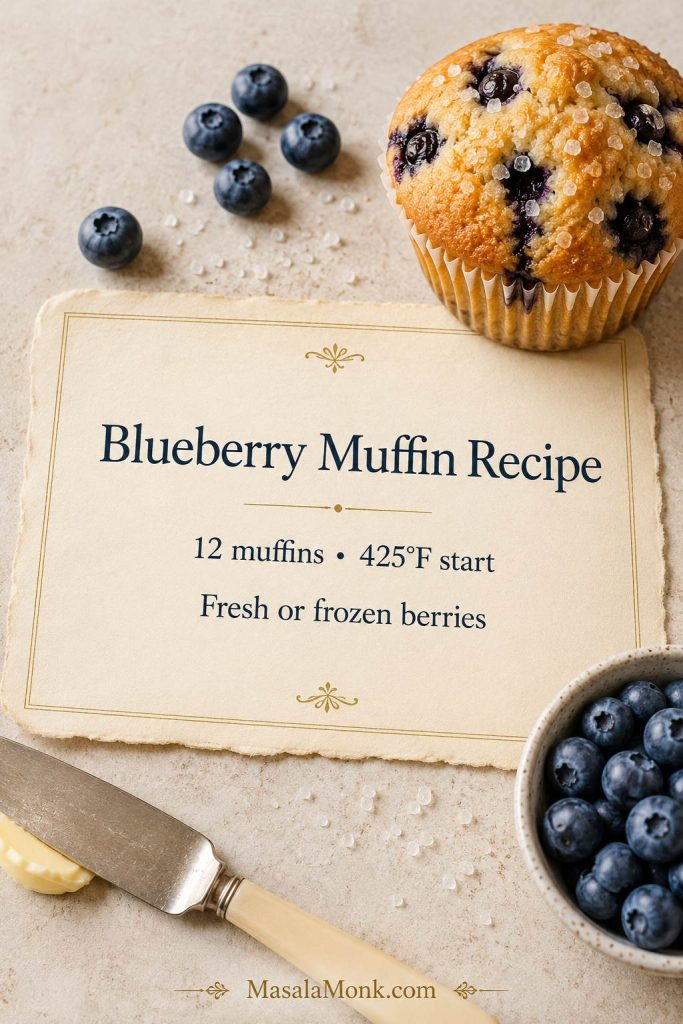
Blueberry Muffin Recipe
This blueberry muffin recipe makes soft, fluffy muffins with golden tops, juicy blueberries, and a simple no-mixer batter. Use fresh or frozen blueberries, finish with coarse sugar, or add the optional streusel topping.
Equipment
- Standard 12-cup muffin pan
- Paper liners
- Large mixing bowl
- Medium bowl or large measuring jug
- Whisk
- Silicone spatula
- Large cookie scoop or ⅓-cup measure, optional
- Wire cooling rack
Ingredients
- 2 cups / 250g all-purpose flour
- 2 teaspoons / about 8g baking powder
- ½ teaspoon / about 2–3g baking soda
- ½ teaspoon / about 3g fine salt
- ¾ cup / 150g granulated sugar
- ½ cup / 113g unsalted butter, melted and slightly cooled
- 2 tablespoons / 30ml neutral oil
- 2 large eggs, about 100g without shells
- ½ cup / 120g sour cream
- ¼ cup / 60ml milk or buttermilk
- 2 teaspoons / 10ml vanilla extract
- Optional: 1 teaspoon finely grated lemon zest, for a brighter blueberry flavor
- 1½ cups / 210–225g / about 7½–8 oz blueberries, fresh or frozen
- 1–2 tablespoons coarse sugar or turbinado sugar, for topping
Optional Streusel Topping
- ⅓ cup / 42g all-purpose flour
- ⅓ cup / 65g brown sugar or granulated sugar
- ½ teaspoon cinnamon
- 3 tablespoons / 42g melted butter
Instructions
- Line a standard 12-cup muffin pan with paper liners. Heat the oven to 425°F / 220°C.
- In a large bowl, whisk together the flour, baking powder, baking soda, and salt.
- In a separate bowl, whisk the sugar, melted butter, oil, eggs, sour cream, milk, vanilla, and lemon zest if using until smooth.
- Pour the wet ingredients into the dry ingredients. Fold gently with a spatula until no dry pockets of flour remain. A few small lumps are fine. The batter should be thick and spoonable, not dry or pourable.
- For slightly taller tops, let the plain batter rest for 10–15 minutes before folding in the blueberries. This step helps, but the muffins still work without it.
- Spoon about 1 tablespoon of plain batter into the bottom of each muffin cup.
- Fold the blueberries into the remaining batter with as few strokes as possible.
- Divide the batter among the muffin cups, filling each almost to the top.
- Sprinkle with coarse sugar. For streusel, stir the flour, sugar, cinnamon, and melted butter together until crumbly, then sprinkle over the muffins instead.
- Bake at 425°F / 220°C for 5 minutes. Without opening the oven, reduce the temperature to 375°F / 190°C and bake for another 13–17 minutes, until the tops are golden and a toothpick inserted in the center comes out clean or with a few moist crumbs. The center should be about 200–205°F / 93–96°C if checked with an instant-read thermometer.
- Cool in the pan for 5–10 minutes, then transfer to a wire rack.
Recipe Notes
- Frozen blueberries: use straight from the freezer for the fastest method.
- Cleanest batter with frozen berries: rinse briefly, dry very well, fold gently, and bake right away.
- Plain-batter cushion: spoon a little plain batter into each cup before folding in the blueberries. This helps keep berries from baking directly against the liner.
- For taller tops: let the plain batter rest for 10–15 minutes before folding in the blueberries.
- With streusel: add about 3–5 minutes to the prep time.
- For extra-tall bakery-style muffins: bake only 6 muffins at a time, using every other cup in the pan.
- For more berries: increase to 1¾ cups / about 245g blueberries, but the muffins will be softer and slightly more delicate.
- If the batter feels unusually stiff: fold in 1 extra tablespoon of milk. The batter should be thick and spoonable, not dry.
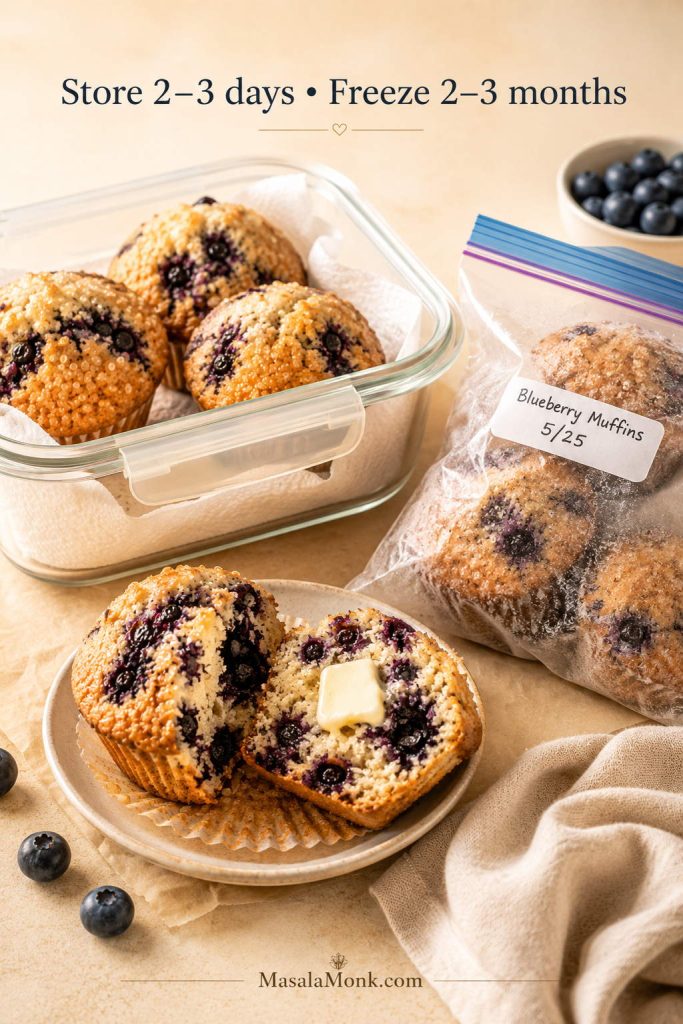
Storage
Store cooled muffins in an airtight container at room temperature for 2–3 days. Add a paper towel to absorb extra moisture and keep the tops from turning sticky. Freeze for up to 2–3 months.
How to Get Tall Bakery-Style Blueberry Muffin Tops
Tall muffin tops come from a few small habits working together: a batter with enough body, full muffin cups, and a hot oven at the beginning. This is the difference between a good homemade muffin and the one people reach for first on the brunch table.
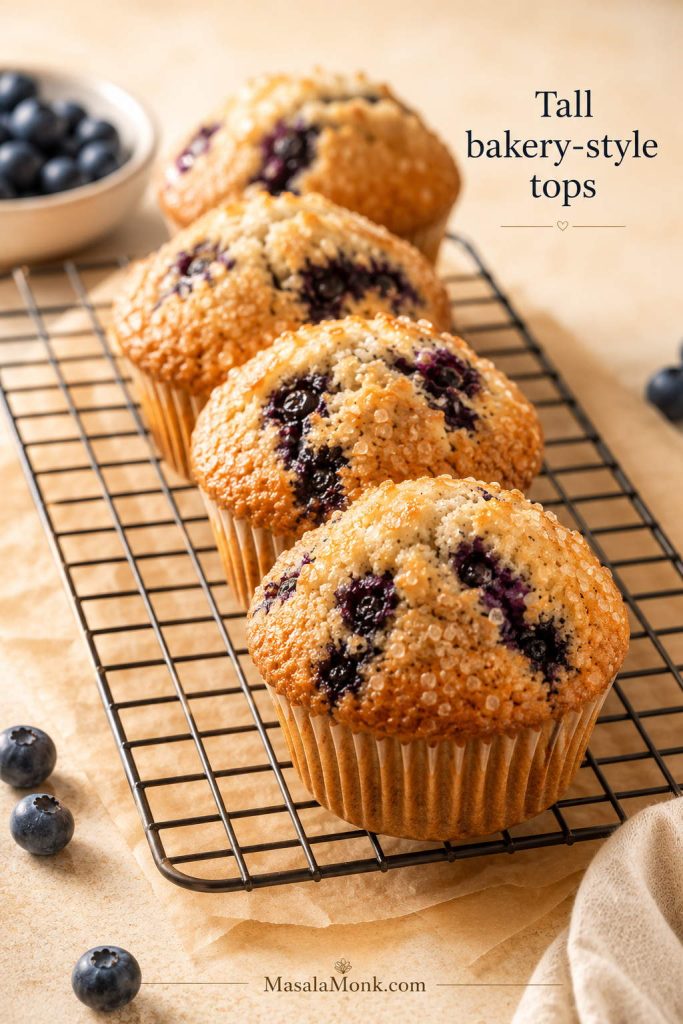
- Use a batter that mounds instead of pours. Thin batter spreads before it rises.
- Fill the cups almost to the top. Underfilled cups make shorter muffins.
- Start with high heat. The first 5 minutes at 425°F / 220°C help push the tops upward.
- Keep the oven closed when lowering the temperature. Just reduce the dial and let the muffins keep baking.
- Use coarse sugar. It helps the tops bake with a light crunch.
- Rest the plain batter for 10–15 minutes if you have time. This lets the flour hydrate and the batter thicken slightly before the berries go in.
For an extra bakery-style lift, bake only 6 muffins at a time and use every other cup in the muffin pan. This gives each muffin more heat circulation. It is optional, but helpful when you want especially tall domes.
If your muffins still bake up flat, the troubleshooting table will help you check oven heat, fill level, and leavening.
How to Keep Blueberries from Sinking
The most common advice is to toss blueberries in flour, but that is not always enough. Instead, the better approach is to build a batter that can actually support the berries and use the plain-batter cushion before the fruit goes in.
- Use a heavy, spoonable batter. This is the biggest help.
- Dry fresh berries well. Wet berries slide and bleed more easily.
- Keep frozen berries frozen. Once they thaw, they release juice quickly.
- Use a reasonable amount of fruit. More berries are delicious, but too many can make muffins wet or fragile.
- Add plain batter to the cups first. This keeps berries from sitting directly on the bottom.
A teaspoon of flour can help a little, but the plain-batter cushion does more of the real work.
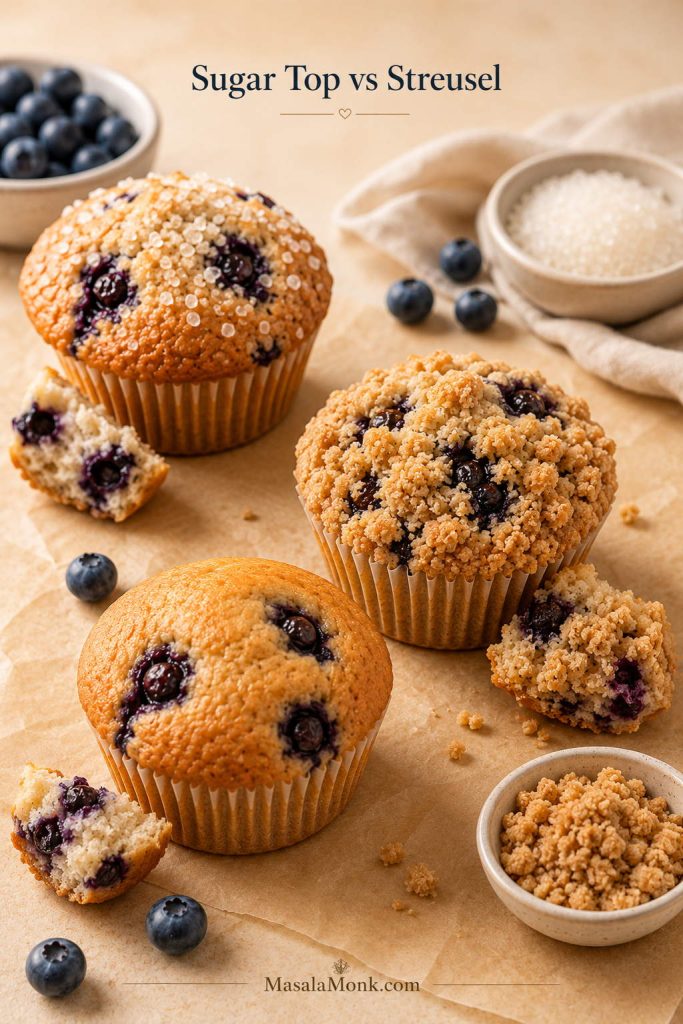
Sugar Top vs Streusel Topping
Choose the topping based on the kind of muffin you want today: a simple breakfast muffin, a sweeter bakery-style muffin, or a soft everyday snack.
Coarse sugar is the everyday choice. Streusel is the “people will ask where you bought these” choice. Either way, the topping should make the muffin more inviting without hiding the blueberries.
| Topping | Best for | Texture |
|---|---|---|
| Coarse sugar | Simple breakfast muffins | Light crunch, golden top, not too sweet |
| Streusel | Bakery-style muffins | Buttery crumb topping, sweeter finish |
| No topping | Everyday breakfast muffins | Softer top, less sweetness |
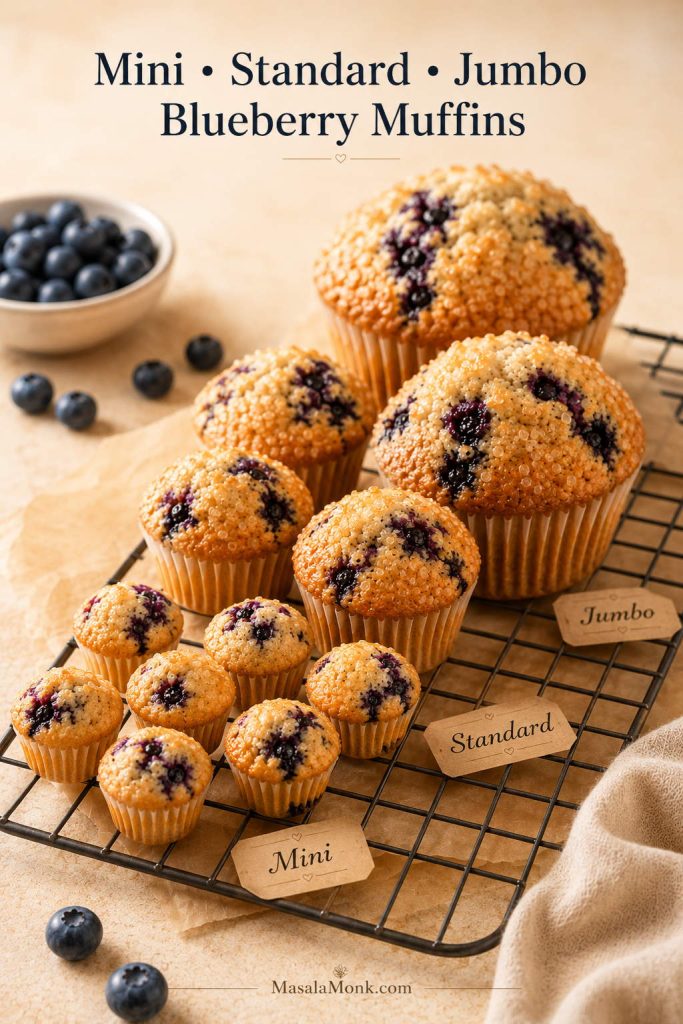
Mini, Standard, and Jumbo Blueberry Muffin Bake Times
The amounts below fit a regular 12-cup muffin pan, but you can use the same mixture for mini or jumbo muffins with a few timing changes.
| Muffin size | Fill level | Temperature | Bake time |
|---|---|---|---|
| Mini muffins | About ¾ full | 350°F / 175°C throughout | 11–14 minutes |
| Standard muffins | Almost to the top | 425°F / 220°C for 5 minutes, then 375°F / 190°C | 18–22 minutes total |
| Jumbo muffins | Almost to the top | 425°F / 220°C for 5 minutes, then 350°F / 175°C | 26–30 minutes total |
Always check early the first time you use a new pan. Dark pans, thin pans, and frozen blueberries can all change the bake time slightly.
Blueberry Muffin Troubleshooting
Most blueberry muffin problems are fixable once you know what caused them. So, if a batch from this recipe ever turns out differently than expected, use this table to adjust the next one.
If your last batch was dry and purple, start with flour measurement and frozen-berry handling before changing the whole recipe. If it was flat, look first at fill level, oven heat, and whether your leavening is still fresh.
| Problem | Likely cause | Fix next time |
|---|---|---|
| Dry muffins | Too much flour or overbaking | Use grams if possible, spoon-and-level flour, and check the muffins early |
| Dense muffins | Overmixed batter | Fold gently and stop when no dry pockets of flour remain |
| Flat tops | Oven not hot enough or cups underfilled | Preheat fully, fill cups almost to the top, and use the hot-start bake |
| Purple batter | Frozen berries thawed or batter overmixed after berries were added | Add frozen berries cold, fold gently, and bake right away |
| Sunken blueberries | Thin batter, wet berries, or berries sitting at the bottom | Add a spoonful of plain batter to each cup first and avoid thinning the batter |
| Soggy bottoms | Too many berries or wet berries at the base | Dry berries well and use the plain-batter cushion |
| Pale tops | Low oven heat or no topping | Use the hot start and sprinkle with coarse sugar |
| Muffins stuck to the pan | Pan not lined or greased enough | Use liners or grease the pan well, including the top surface if filling high |
How to Store and Freeze Blueberry Muffins
Room temperature
Once the muffins cool completely, store them in an airtight container at room temperature for 2–3 days. When stacking, add a paper towel to the bottom of the container and another between layers. This helps absorb moisture from the blueberries and keeps the tops from turning sticky too quickly.
They are best the day they are baked, but the next morning they should still be soft enough to split and warm with a little butter.
Refrigerator
The refrigerator is not ideal because it can dry out the crumb. Use it only if your kitchen is very warm or humid.
Freezer
Freeze fully cooled muffins in a freezer-safe bag or container for up to 2–3 months. For the neatest muffins, freeze them in a single layer first, then pack them together once firm.
Reheating
Warm a room-temperature muffin in the microwave for 10–15 seconds. Meanwhile, warm a frozen muffin for 25–40 seconds, or reheat in a low oven until soft and warmed through.
Blueberry Muffin Variations
Once you have the basic method down, you can take blueberry muffins in several directions. Lemon zest and topping changes are easy. Oats, almond flour, eggless, vegan, cottage cheese, and sourdough versions need more adjustment, but the same goal stays the same: a soft crumb, berries through the middle, and a top that rises instead of spreading.
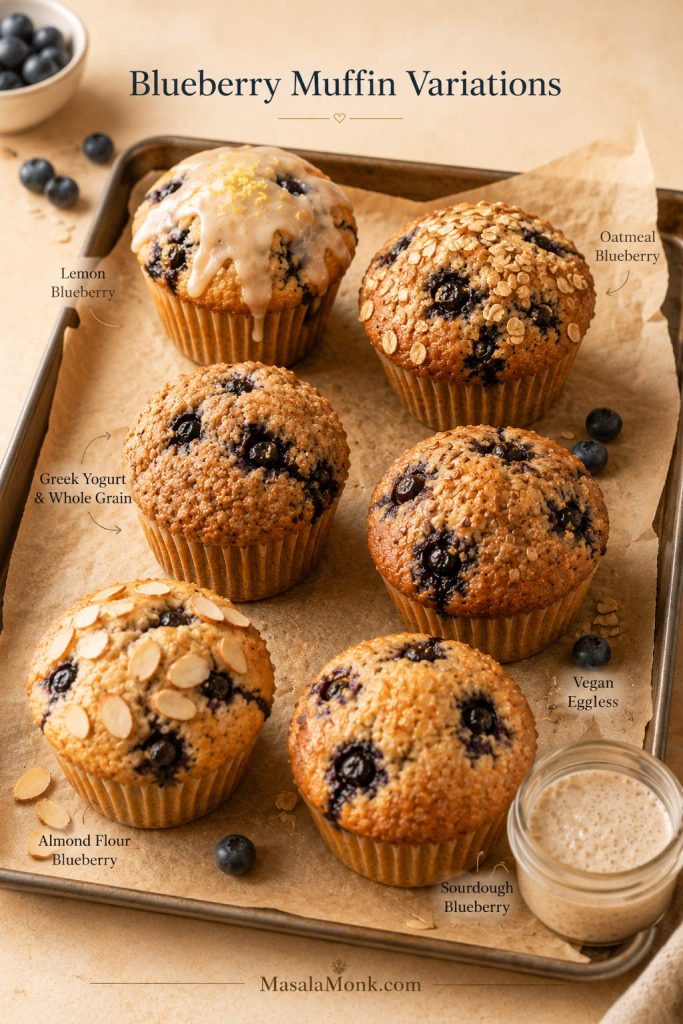
Lemon Blueberry Muffins
Add 1–2 teaspoons of fresh lemon zest to the batter for a brighter muffin. If you want a sweeter bakery finish, skip the coarse sugar and use a light lemon glaze after the muffins cool. Keep the lemon modest if you want blueberry to stay in front.
Blueberry Oatmeal Muffins
For a light oatmeal direction, replace ¼ cup of the flour with quick oats and add 1–2 tablespoons extra milk if the batter feels too stiff. For a true oat-heavy muffin, use a dedicated formula because oats absorb more moisture than flour. If you are choosing between rolled, quick, or oat-flour-style baking, this guide to oats will help you pick the right type before making an oatmeal version.
Healthy Blueberry Muffins
A lighter blueberry muffin usually leans on whole wheat flour, oats, Greek yogurt, applesauce, maple syrup, or less refined sugar. Do not cut all the fat at once; a little butter or oil is what keeps the crumb from tasting dry. The goal is a muffin that feels soft and satisfying, not worthy-but-disappointing.
Eggless Blueberry Muffins
Eggless blueberry muffins need enough moisture, lift, and structure to replace what eggs do. Yogurt, milk, vinegar, baking soda, and flax can all help, depending on the formula. If you are testing egg-free bakes, start with this flax egg guide so the swap is measured instead of guessed.
Vegan Blueberry Muffins
For vegan blueberry muffins, keep the spirit of this recipe — tender crumb, enough fat, and a batter that can hold berries — but use a formula built around plant milk and oil from the start. A straight swap for the butter, sour cream, milk, and eggs may work in small tweaks, but a fully vegan version needs its own balance.
Almond Flour Blueberry Muffins
Almond flour is not a 1:1 swap for all-purpose flour because it has no gluten and carries more fat. It can make tender low-carb bakes, but the batter needs more structural support. Before adapting this recipe, read this keto flour for baking guide so you understand how almond flour, coconut flour, binders, moisture, and lift work together.
Blueberry Cottage Cheese Muffins
Cottage cheese can add protein and moisture, especially when blended smooth before mixing. It works best when the batter is adjusted around it, because too much cottage cheese can make muffins heavy or damp instead of tender.
Blueberry Sourdough Muffins
Sourdough discard can add light tang and moisture to blueberry muffins, but it changes the flour-liquid balance. Add it only when the rest of the batter has been adjusted for the extra moisture and acidity. If you are still building or maintaining your starter, start with this sourdough starter recipe before using discard in sweet bakes.
What to Serve with Blueberry Muffins
For a cozy breakfast, split one warm and let a little butter melt into the center. For brunch, pile the muffins into a basket with fruit, yogurt, eggs, and coffee so they feel like part of the table rather than a quick side.
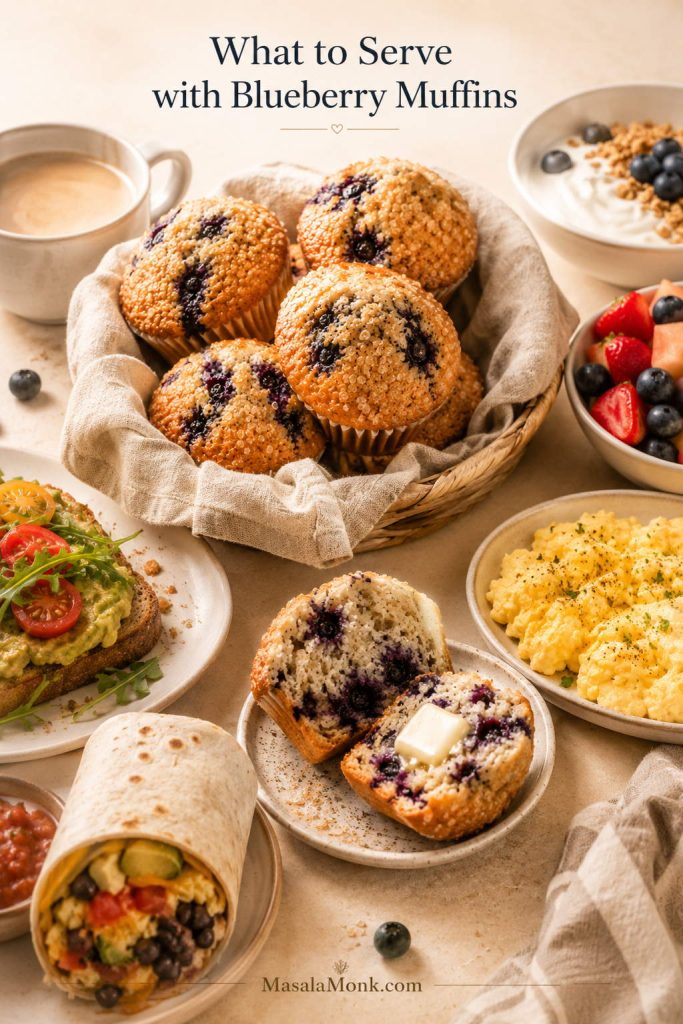
Blueberry muffins also work well with something savory, especially if you are serving them for brunch or meal prep. Try them with breakfast egg muffins, soft scrambled eggs, a simple yogurt bowl, or freezer-friendly meal prep breakfast burritos so the table has something sweet, something savory, and something fresh.
FAQs About Blueberry Muffins
Fresh or frozen blueberries: which is better for muffins?
Fresh blueberries are easiest because they release less color into the batter. Frozen blueberries are still a good option, especially when berries are out of season. Keep them cold, fold gently, and bake the muffins soon after mixing.
Should frozen blueberries be thawed before baking?
Keep them frozen until the last moment. Once frozen berries soften, they leak into the batter before the oven can set the crumb, which is why thawed berries often create purple streaks and wetter pockets.
Why did my blueberry muffin batter turn purple?
This usually happens when frozen berries thaw, when berries are wet, or when the batter is mixed too much after the fruit is added. Add blueberries last and fold with as few strokes as possible.
What keeps blueberry muffins moist?
These blueberry muffins stay moist because the recipe uses butter for flavor, a little oil for softness, sour cream for tenderness, and careful baking so the centers set without drying out.
Can I make these blueberry muffins with buttermilk?
Yes. Buttermilk can replace the milk in this recipe. It gives the muffins a slightly tangier flavor and works well with the baking soda and sour cream. The batter should still look thick and spoonable, so add only a small splash more milk if it feels unusually stiff.
Can I use Greek yogurt instead of sour cream?
Yes. Plain Greek yogurt can replace the sour cream in this recipe. Use full-fat or 2% yogurt for the softest crumb, and avoid very thin yogurt because it can loosen the batter too much.
How full should muffin cups be?
For tall standard muffins, fill the cups almost to the top. If you fill them only halfway, the muffins will usually bake up shorter and flatter.
Why are my blueberry muffins dense?
Dense muffins usually come from overmixing, too much flour, or old baking powder. Fold the batter gently, use grams if possible, and stop mixing as soon as no dry pockets of flour remain.
How do I make the muffin tops taller?
Fill the cups almost to the top and start the muffins in a hot oven. A short batter rest and baking every other cup can help even more if you want extra-tall tops.
Is streusel necessary?
No. Coarse sugar is enough for a blueberry muffin with a light crunchy top. Streusel is the sweeter bakery-style option when you want a crumb topping.
How do I know when blueberry muffins are done?
The tops should be golden and set, and a toothpick inserted into the center should come out clean or with a few moist crumbs. If you use an instant-read thermometer, aim for about 200–205°F / 93–96°C in the center.
Do blueberry muffins freeze well?
They freeze very well. Cool them completely first, then pack them in a freezer-safe bag or container for up to 2–3 months. Reheat gently in the microwave or a low oven.
Once you understand the batter texture, berry handling, and hot-start bake, blueberry muffins stop feeling unpredictable. The first batch gives you soft centers, golden tops, and berries through the middle; the next one lets you decide whether you are a coarse-sugar person, a streusel person, or a lemon-zest person.