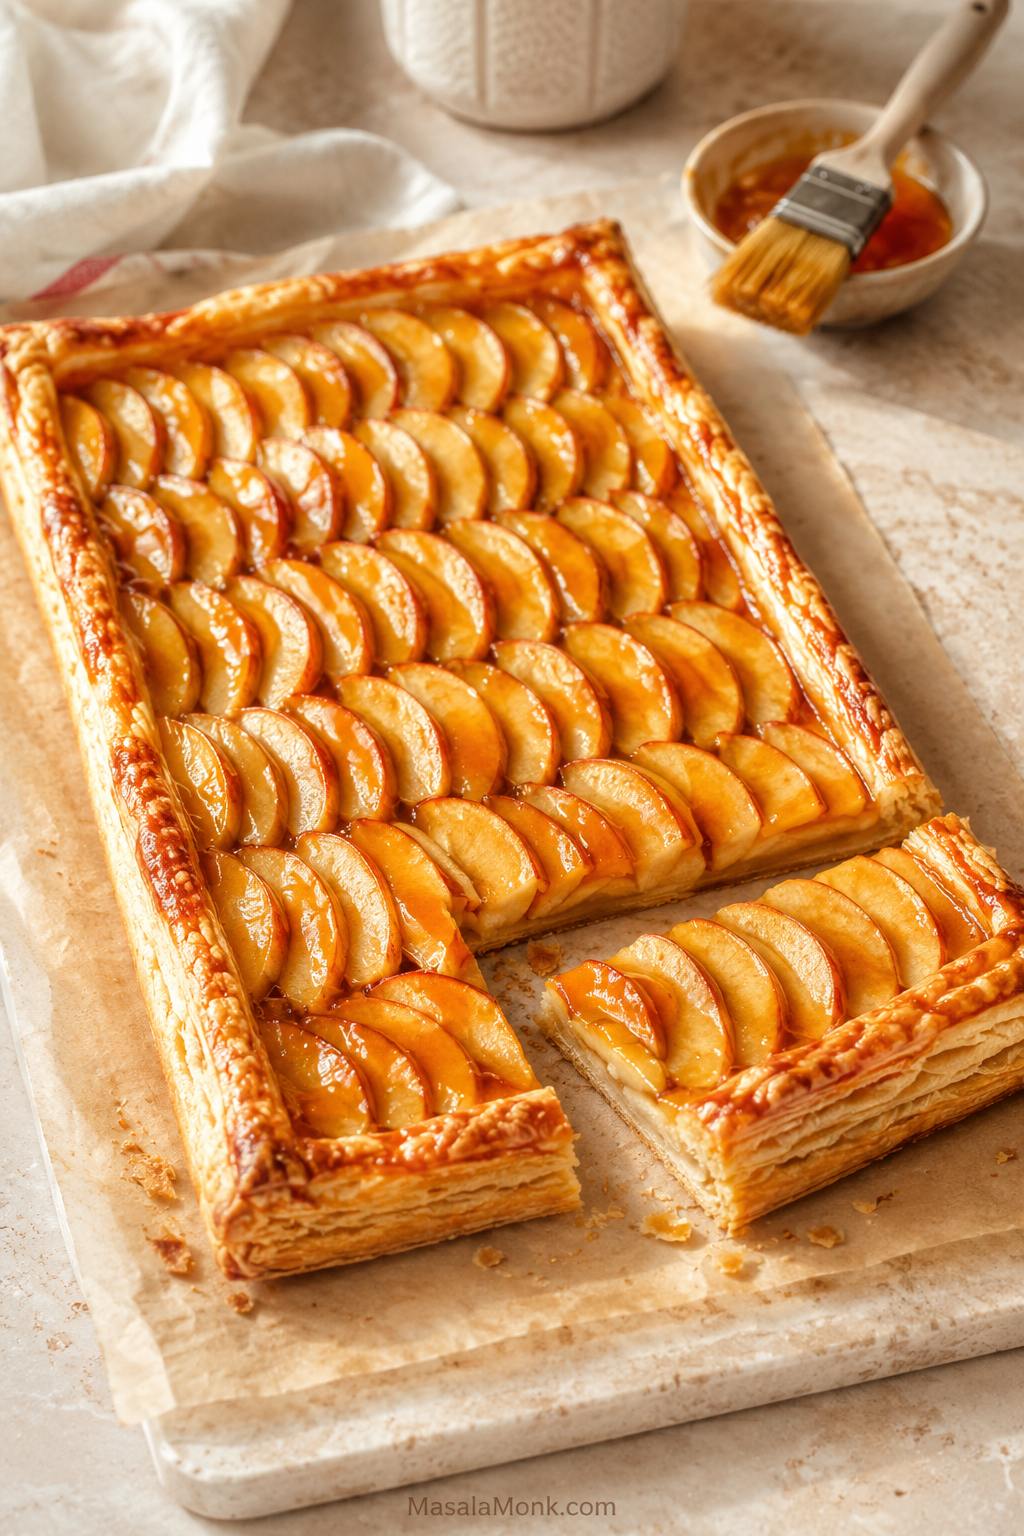
This apple tart recipe is for the moment when you want something prettier than a basic apple dessert but easier than a full apple pie. Store-bought puff pastry, thin apple slices, cinnamon sugar, melted butter, and a glossy apricot finish bake into a crisp, bakery-style tart that smells like cinnamon apples and slices cleanly enough to serve with pride.
The method is simple, but the details matter. Keep the pastry cool, slice the apples evenly, and bake the tart until the base feels firm enough to lift with a spatula. The best slices have flaky pastry, soft cinnamon-scented apples, and just enough glaze to catch the light.
Start with the puff pastry version, then use the notes below when you want a round shortcrust tart, a French-style applesauce layer, mini tarts, or a fix for a base that keeps turning soft.
Apple Tart Recipe Guide
Start Here
Build the Tart
Fix, Vary & Save
Quick Answer: How to Make Apple Tart
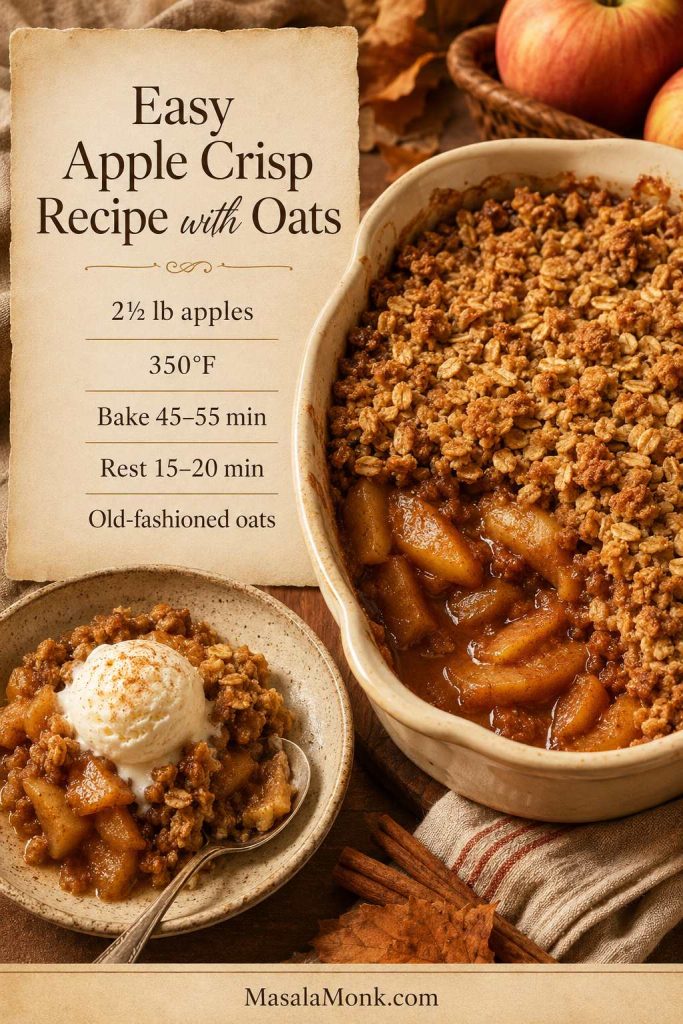
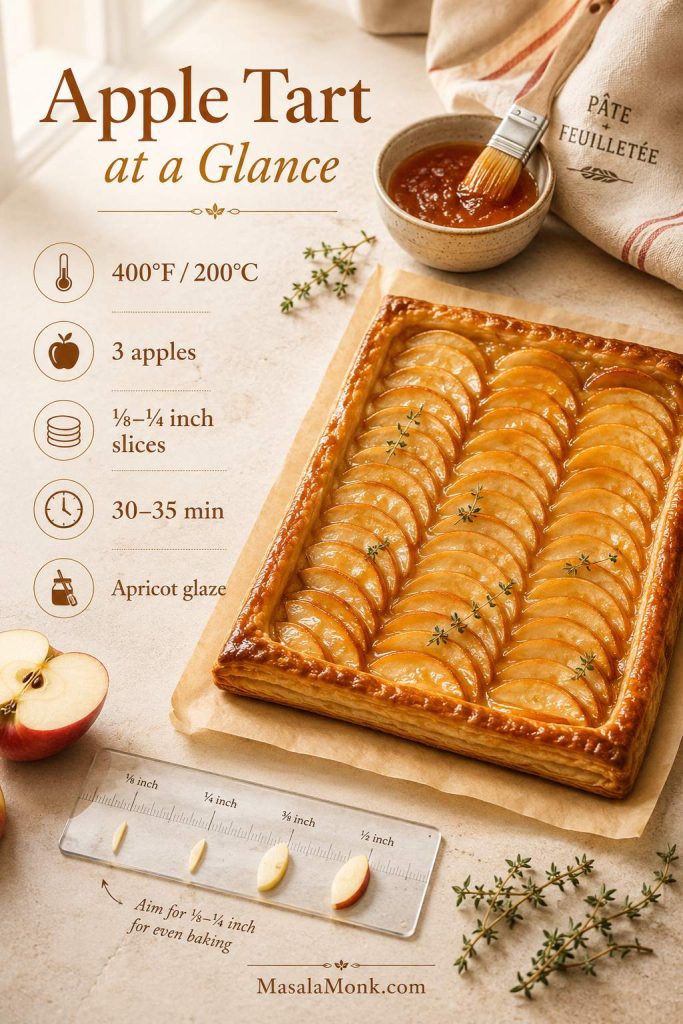
To make an easy apple tart, place cold puff pastry on parchment, score a border around the edge, dock the center with a fork, and arrange thin apple slices in one overlapping layer. Brush the apples with melted butter, sprinkle with cinnamon sugar, then bake at 400°F / 200°C, or 180°C fan, for 30–35 minutes, until the pastry is well browned and the apples are tender. Brush the warm tart with apricot jam or apple jelly for a glossy finish.
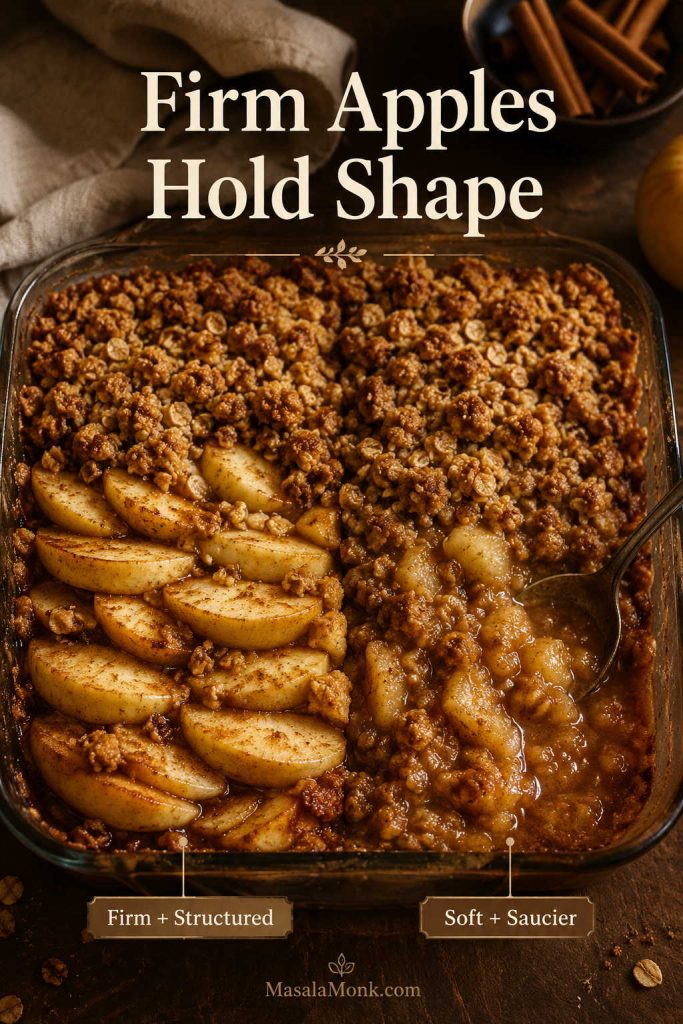
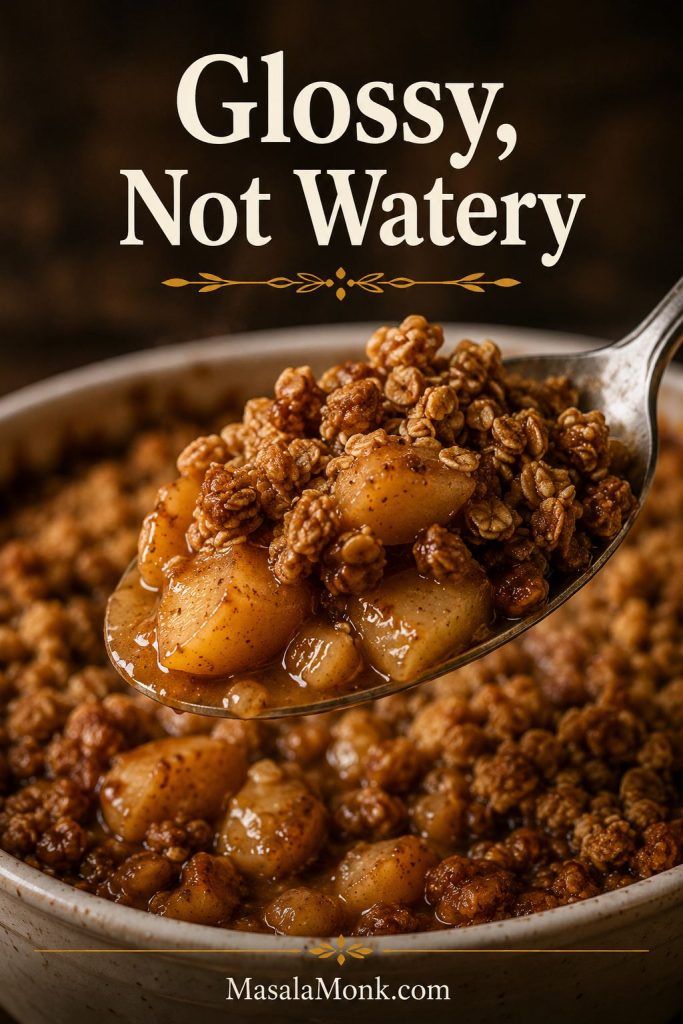
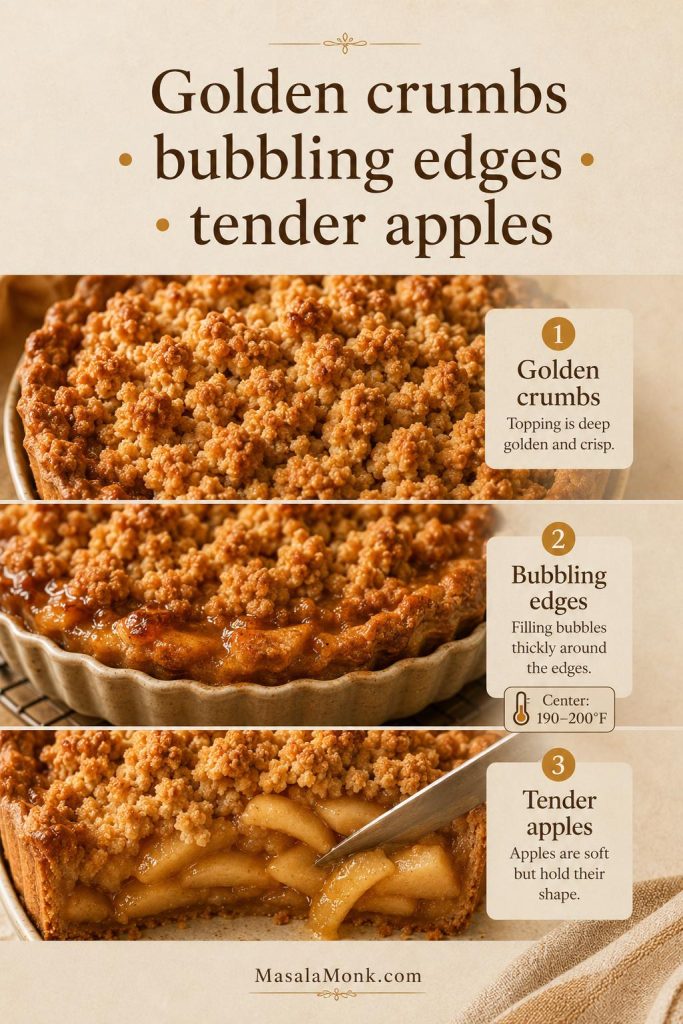
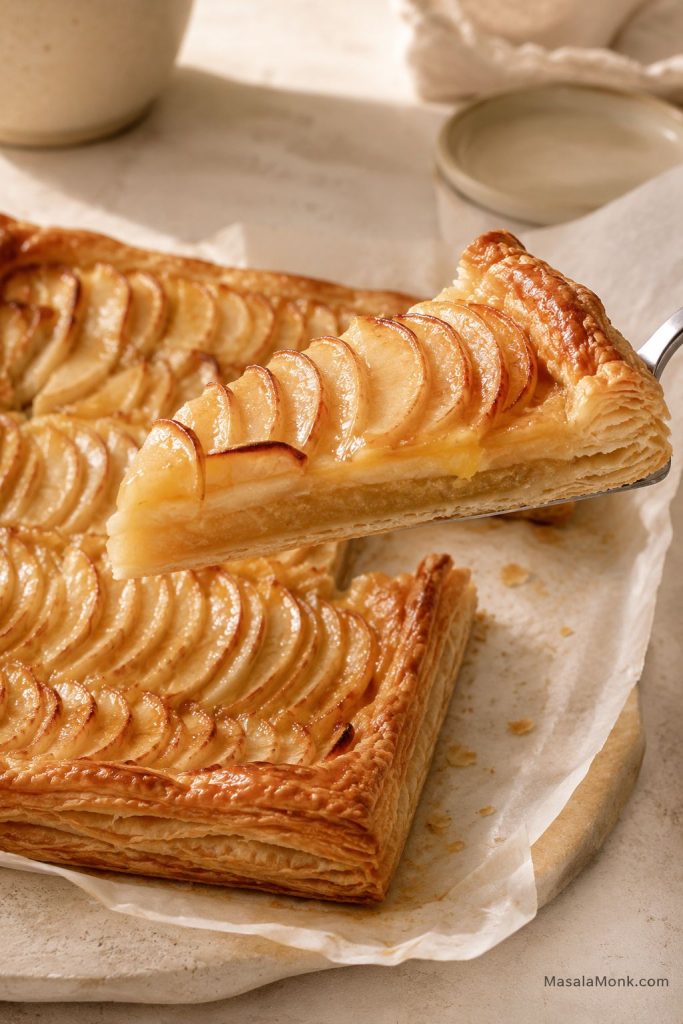
When it is right, the edges will puff into a flaky frame, the apples will look glossy and slightly curled at the tips, and the bottom will feel firm instead of bendy. The goal is not a mountain of apples. The goal is a crisp sheet of pastry with enough fruit to taste generous, but not so much that the juices flood the base.
For the full printable-style version, go straight to the recipe card. If your main worry is texture, the crisp base tips explain how to avoid a soggy apple tart.
Apple Tart at a Glance
| Best pastry for the simple version | Store-bought all-butter puff pastry |
|---|---|
| Apple amount | 3 medium apples, about 450–550 g / 1–1¼ lb before peeling and coring |
| Apple slice thickness | ⅛–¼ inch / 3–6 mm |
| Oven temperature | 400°F / 200°C, or 180°C fan |
| Bake time | 30–35 minutes for puff pastry |
| Best finish | Warm apricot jam or apple jelly glaze |
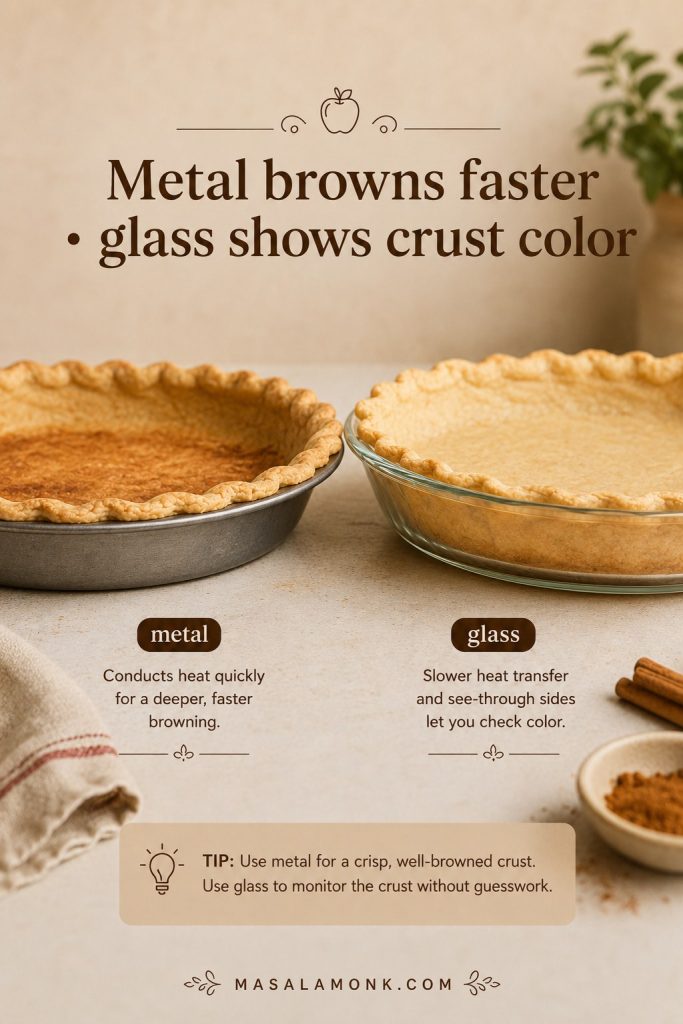
| Most important texture cue | The pastry should be crisp, browned underneath, and firm enough to lift |
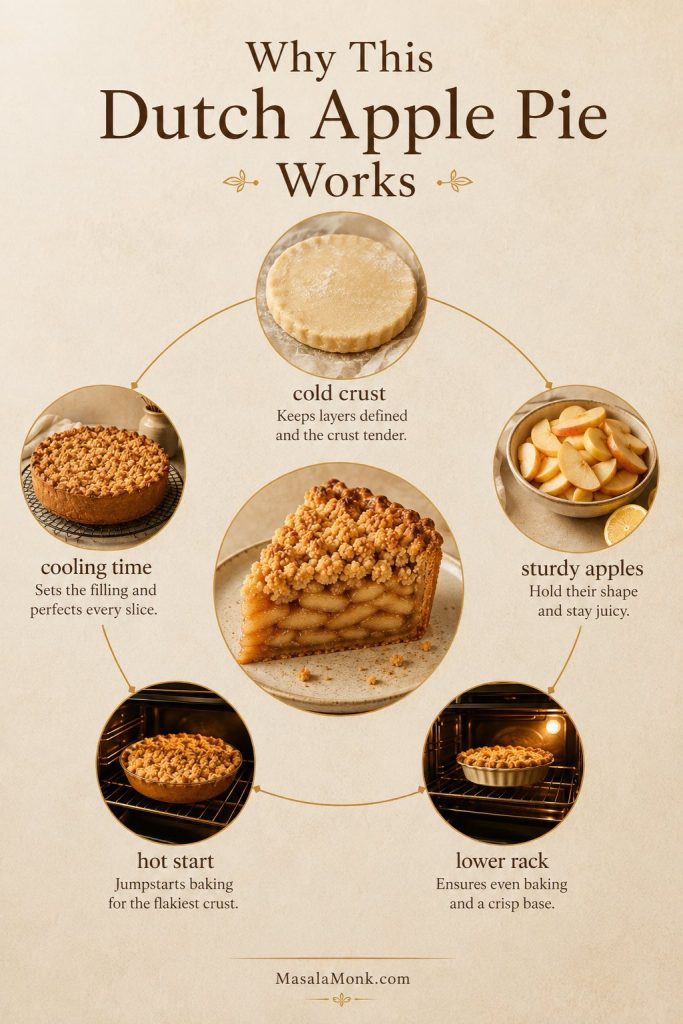
Why This Apple Tart Works
The secret is giving puff pastry the conditions it likes: cold dough, a hot oven, a scored edge, and a thin apple layer that does not weigh down the center. Store-bought puff pastry is the shortcut here; it gives you a flaky, bakery-style apple tart without making dough from scratch.
- Puff pastry keeps the recipe approachable. You get flaky layers without a homemade dough project.
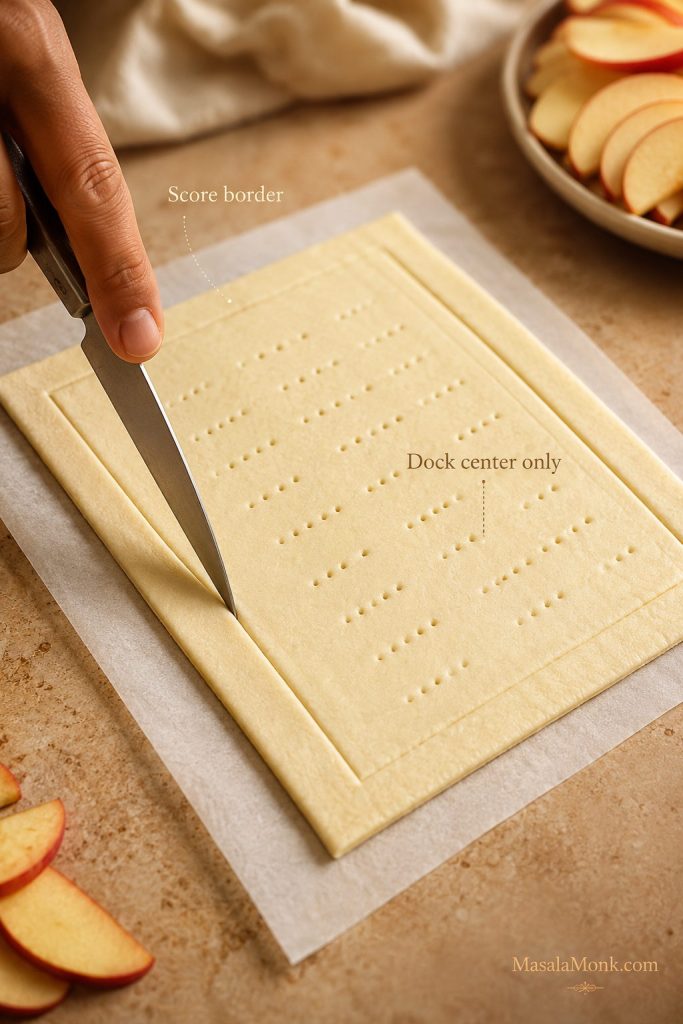
- A scored border gives the tart structure. The edge rises around the apples and creates a clean frame.
- Docking the center keeps it flatter. The middle stays lower while the border puffs.
- Thin apples bake quickly. Slices around ⅛–¼ inch / 3–6 mm soften before the pastry overbrowns.
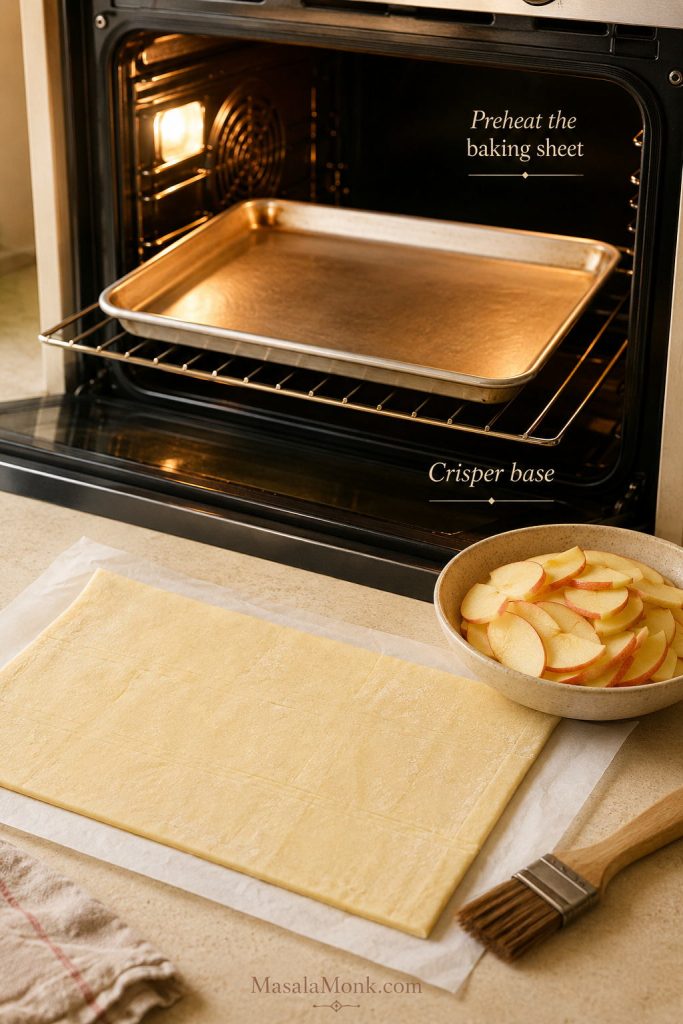
- A hot baking sheet helps the bottom set. This gives the pastry a better chance to crisp before apple juices collect.
- A light glaze makes it look finished. Apricot jam or apple jelly gives shine without making the tart heavy.
The result is the kind of dessert that feels dressed up without being fussy: crisp enough to lift neatly, tender enough to eat with a fork, and glossy enough to look finished even if your apple rows were not perfect.
This is the tart you make when pie sounds too heavy but sliced apples on buttery pastry still feels special. It looks like it took more effort than it did, which is exactly the charm.
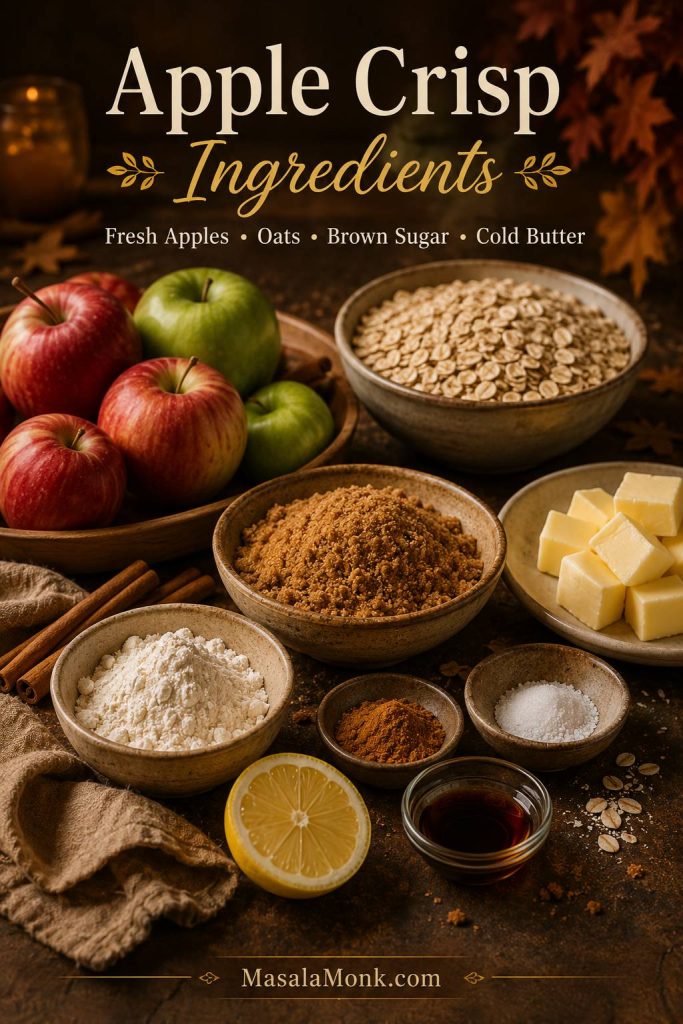
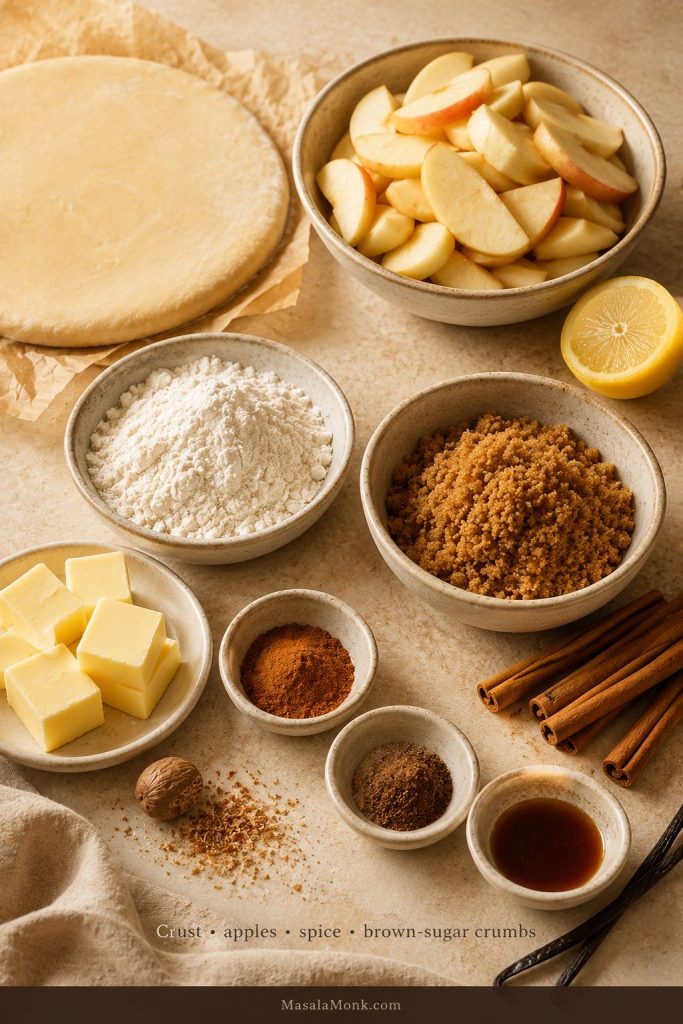
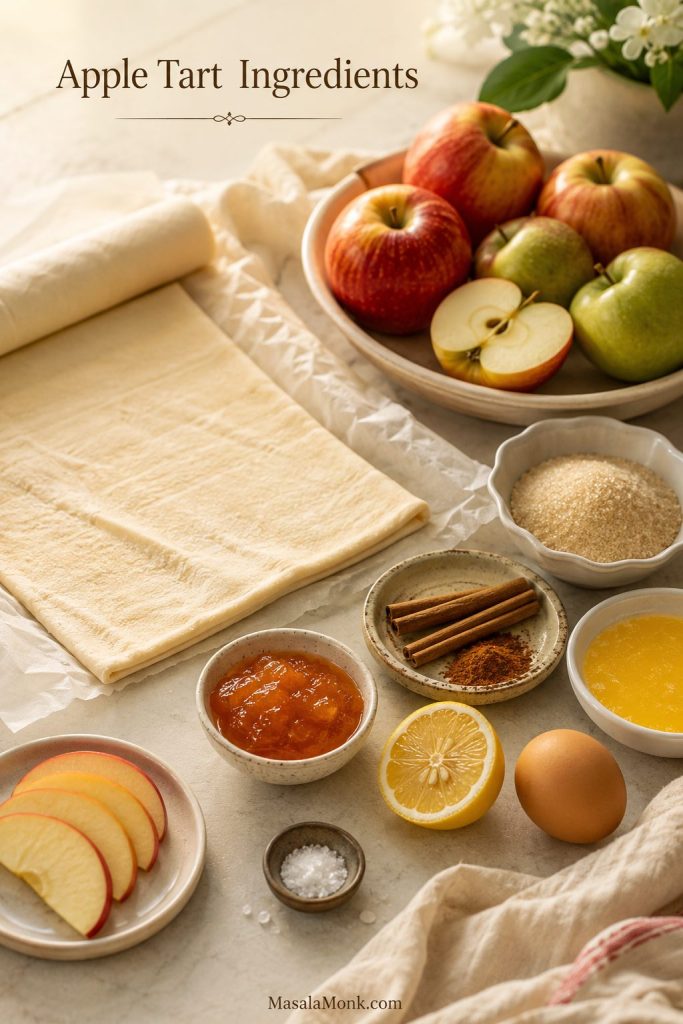
Ingredients You Need
The ingredient list is short, so each piece has to pull its weight: buttery pastry, flavorful apples, a little sugar, a little butter, and a glossy finish at the end.
If you are still choosing apples, the best apples for apple tart section gives a quick variety guide before you start slicing.
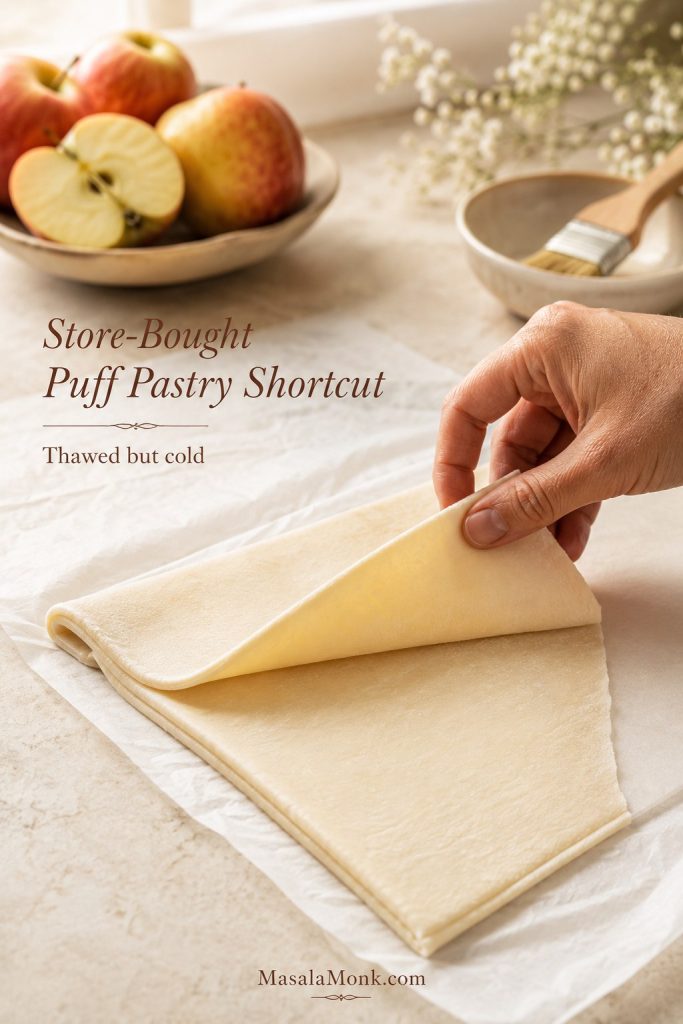
Store-Bought Puff Pastry
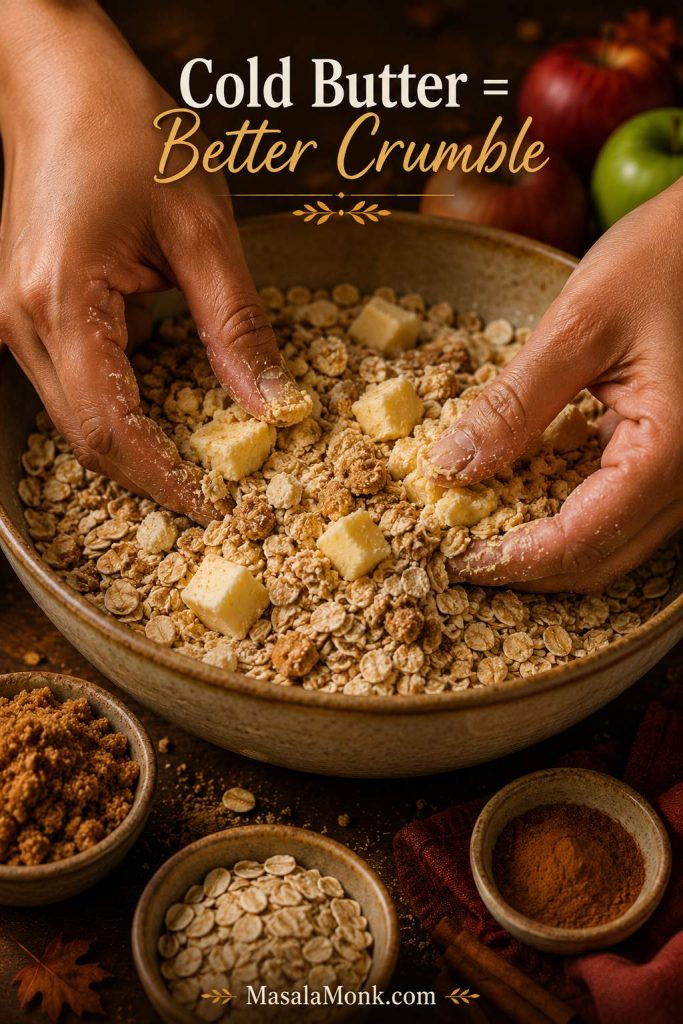
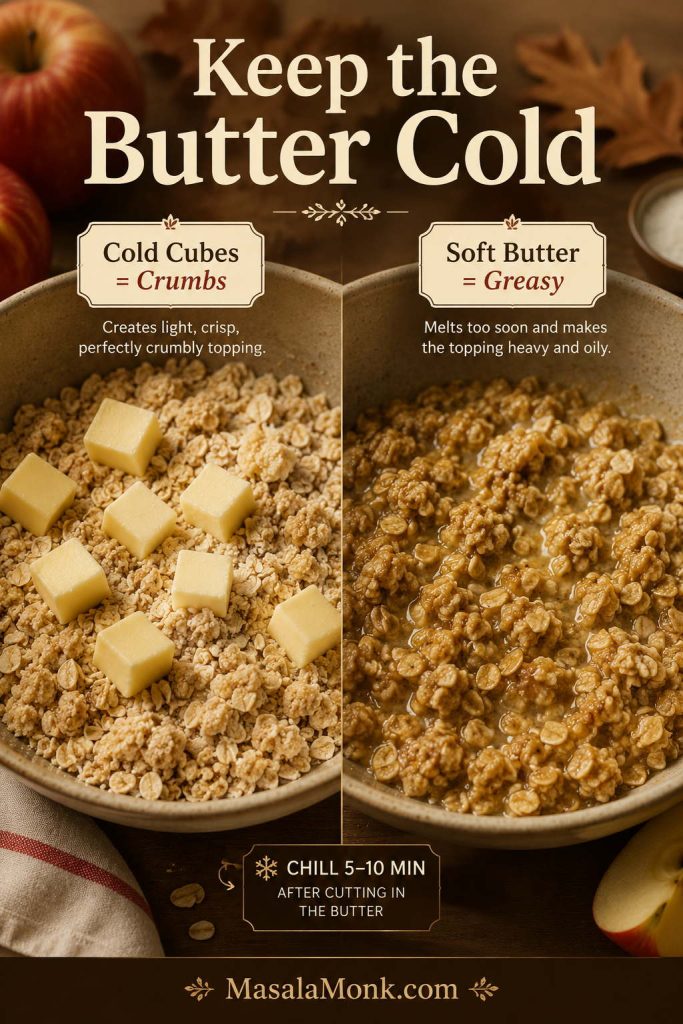
Use one sheet of all-butter puff pastry if you can find it. It bakes with better flavor and cleaner flaky layers than pastry made mostly with shortening. Thaw frozen puff pastry in the refrigerator, not on a warm counter, so it unfolds without getting greasy. Soft pastry should go back into the fridge before baking.
Cold pastry matters because firm butter layers create better lift in the oven. King Arthur Baking’s puff pastry guidance explains the same cold-dough, hot-oven principle in more detail.
Not sure whether puff pastry or shortcrust is better for your tart? See the puff pastry vs shortcrust comparison before you choose.
Apples
You need about 3 medium apples, or 450–550 g / 1–1¼ lb before peeling and coring. That amount covers one rectangular puff pastry tart without weighing down the center. Pink Lady and Honeycrisp give an easy sweet-tart balance, while Granny Smith makes a sharper tart when mixed with a sweeter apple.
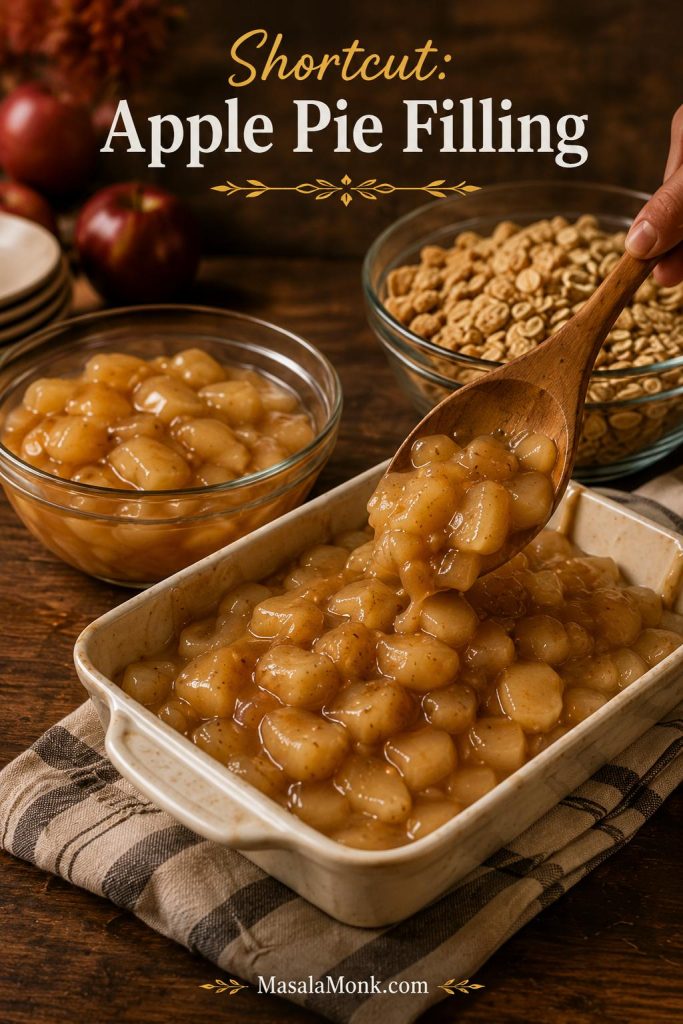
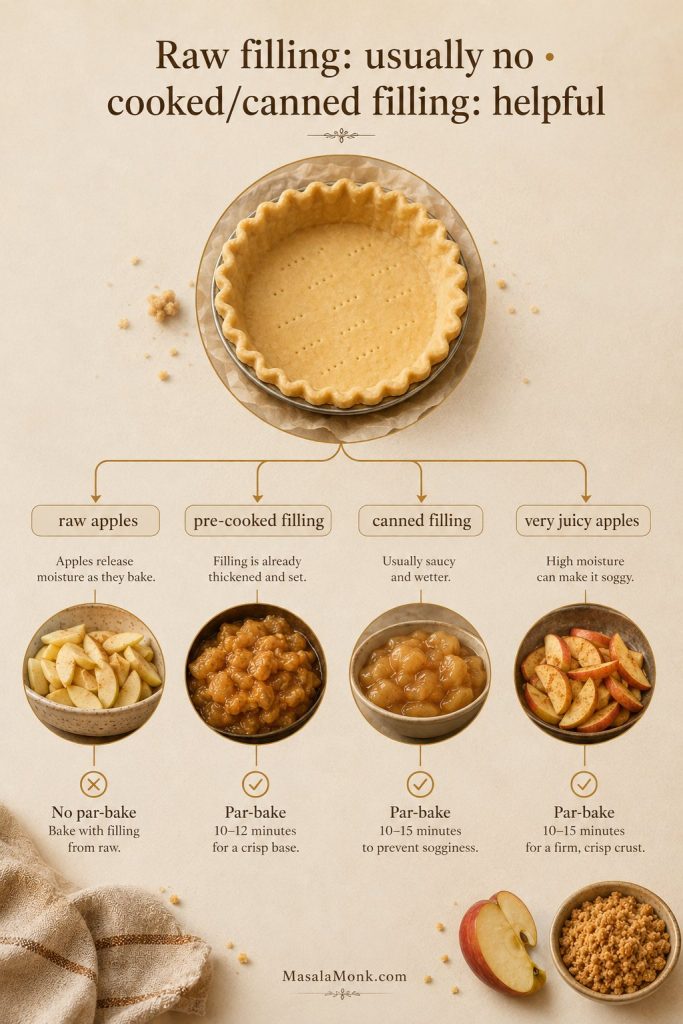
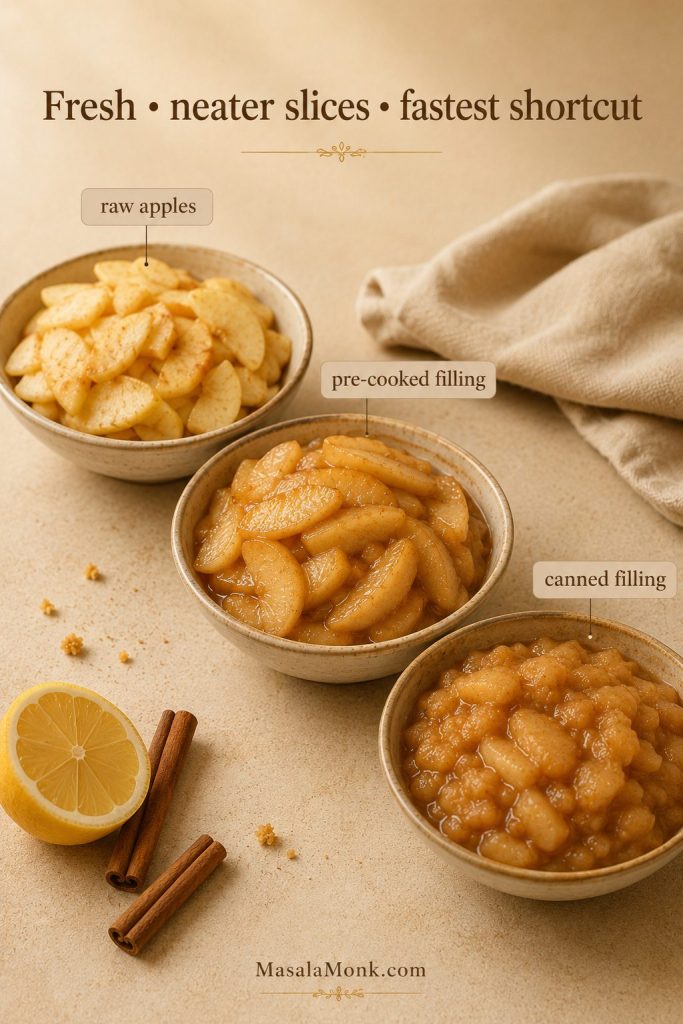
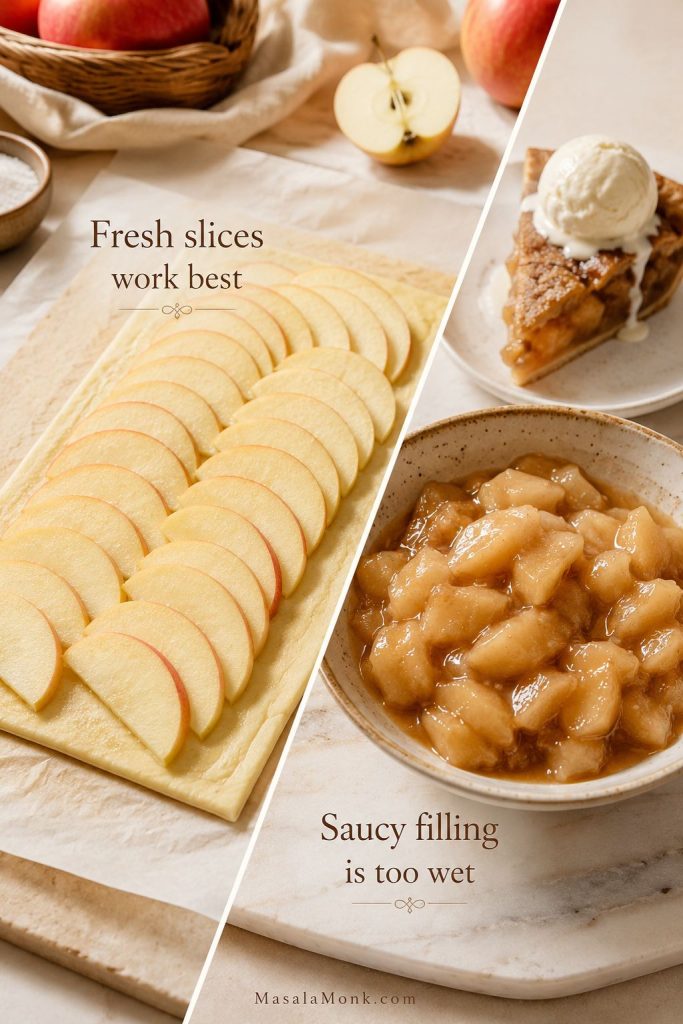
Fresh Apples vs Apple Pie Filling
This tart works best with fresh thin apple slices, not thick cooked filling. A saucy apple pie filling recipe is better for pies, crisps, hand pies, and spoonable toppings because it has more moisture and body than this thin pastry base needs.
For a deeper, saucier apple dessert instead, compare this with the apple tart vs pie section.
Sugar
Granulated sugar gives a clean, light sweetness. Light brown sugar adds a warmer caramel note. Use 3 tablespoons for sweet apples or 4 tablespoons for sharper apples.
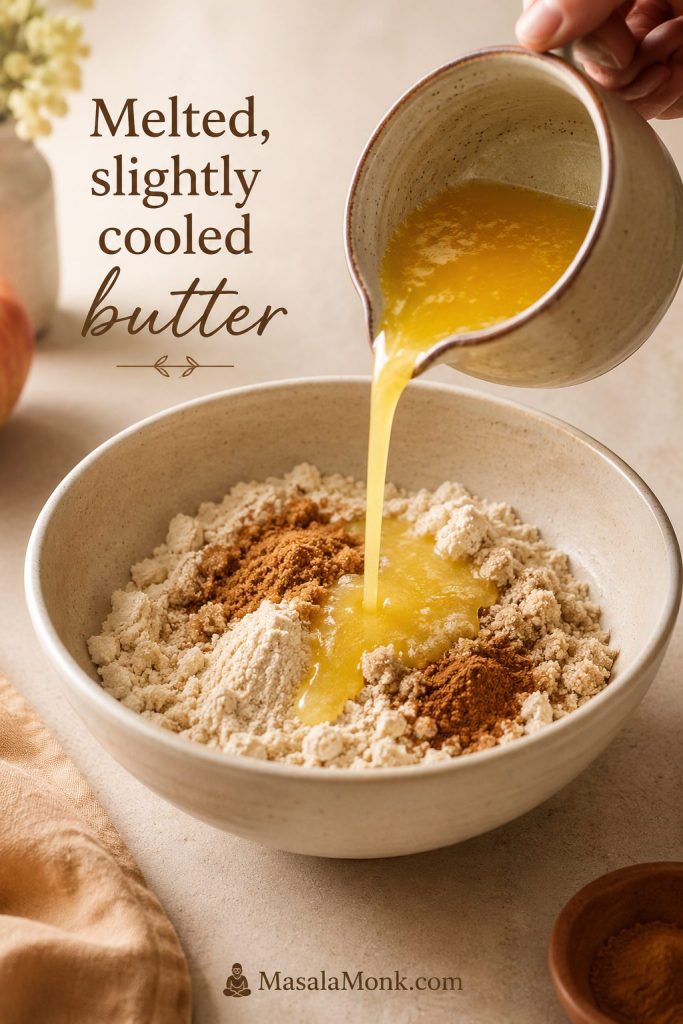
Butter
A little melted butter helps the apple edges soften, shine, and brown. You do not need much because puff pastry already contains fat.
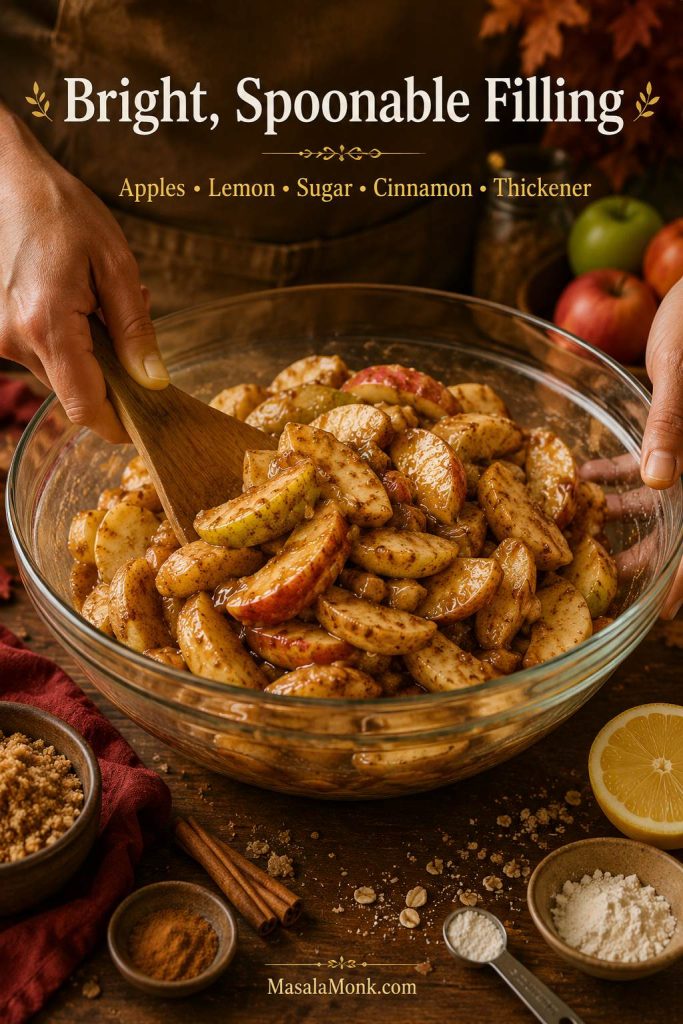
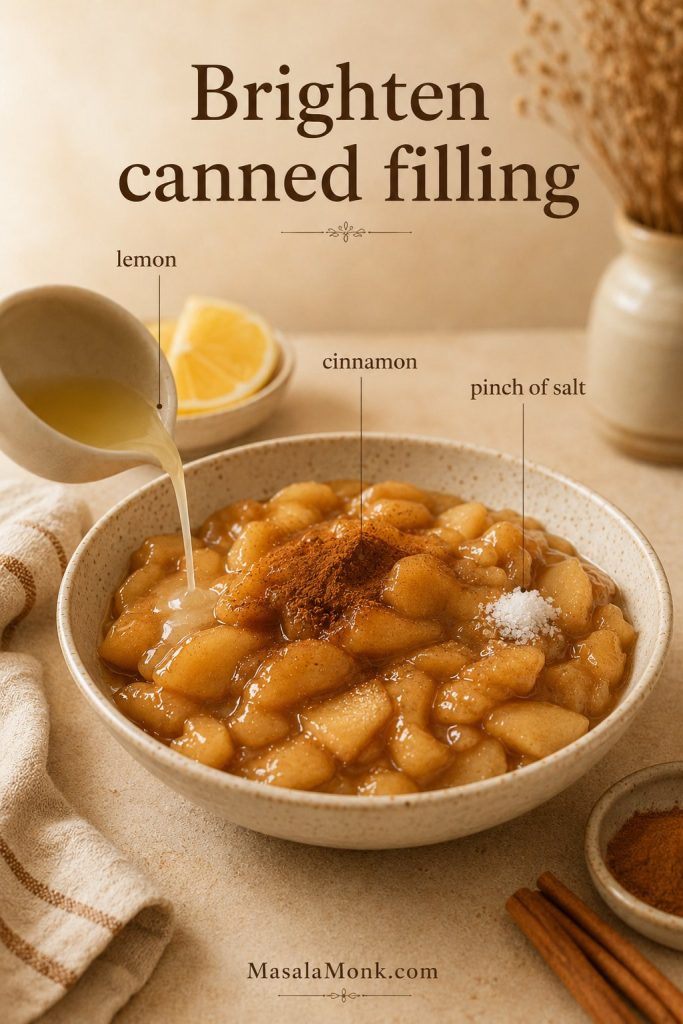
Lemon Juice
Lemon keeps the apples bright so the tart does not taste flat or overly sweet. It also buys you a little time while you arrange the slices.
Cinnamon and Salt
Cinnamon gives warmth without making the tart taste like heavy apple pie filling. A pinch of salt makes the apples and pastry taste fuller.
Apricot Jam or Apple Jelly
A warm glaze brushed over the baked tart gives it shine. Apricot jam is classic because it looks glossy and does not overpower the apples. Apple jelly works well for a more apple-forward finish.
Egg Wash, Optional
Egg wash helps the pastry border brown and shine. Brush it only on the top of the border, not down the cut or scored sides, so the pastry layers can rise cleanly. The tart still works without egg wash; the edge will simply look a little softer.
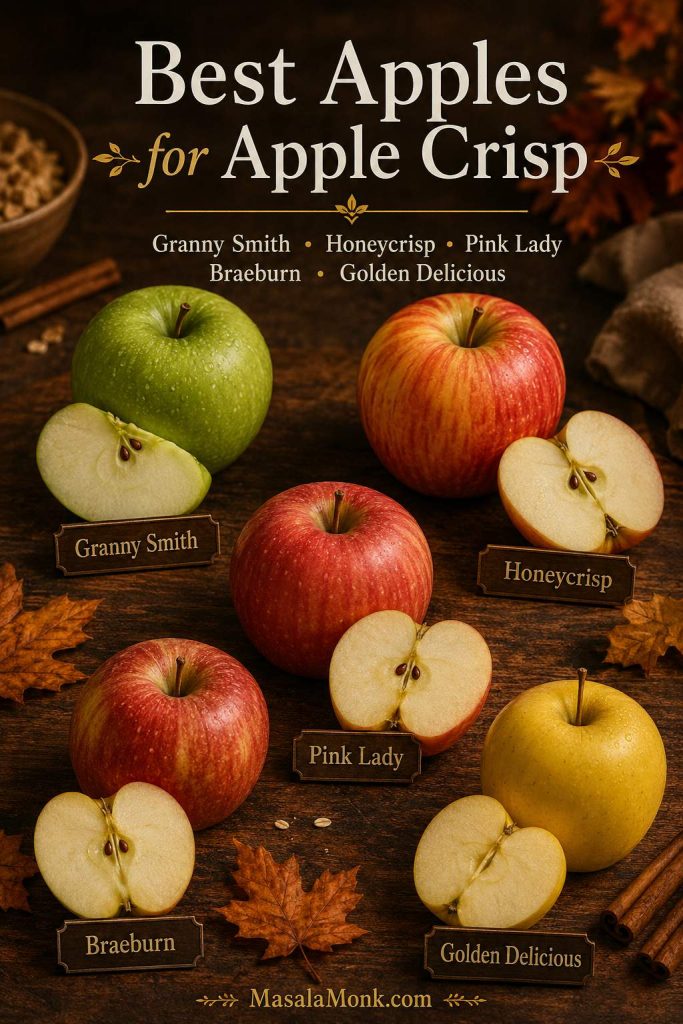
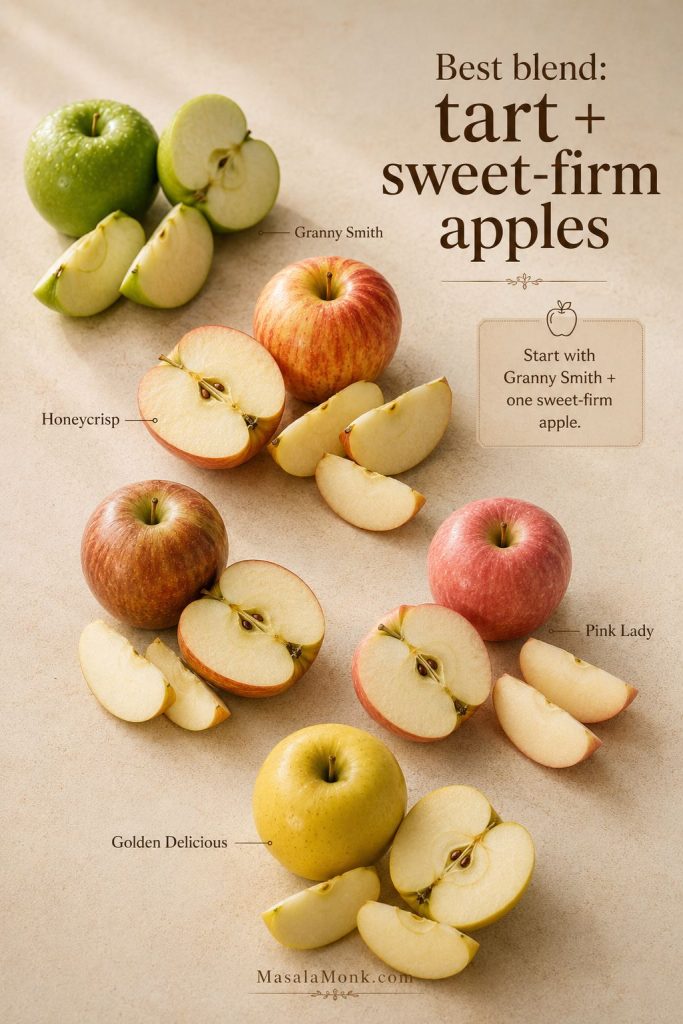
Best Apples for Apple Tart
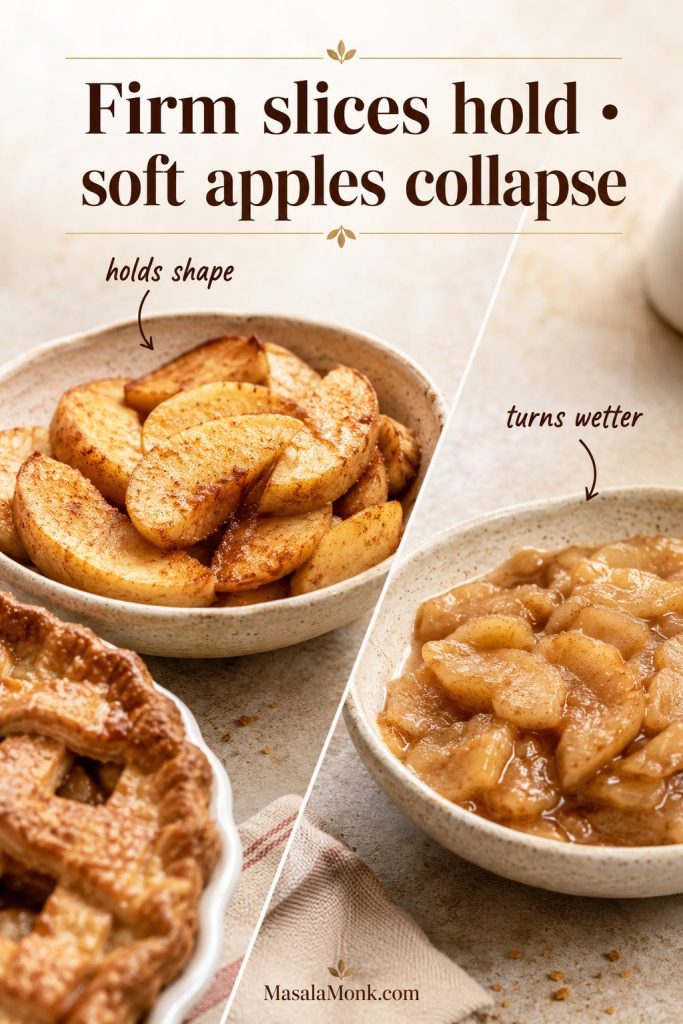
The best apples for apple tart should taste good, slice neatly, and soften without collapsing. Because this tart is thin, the apples do not need to stay as firm as apples in a deep pie. Flavor matters just as much as structure.
For the easiest first tart, use Pink Lady or Honeycrisp. They slice neatly, taste bright, and do not need much adjustment. For a sharper flavor, mix Granny Smith with a sweeter apple so the tart tastes lively without becoming too sour.
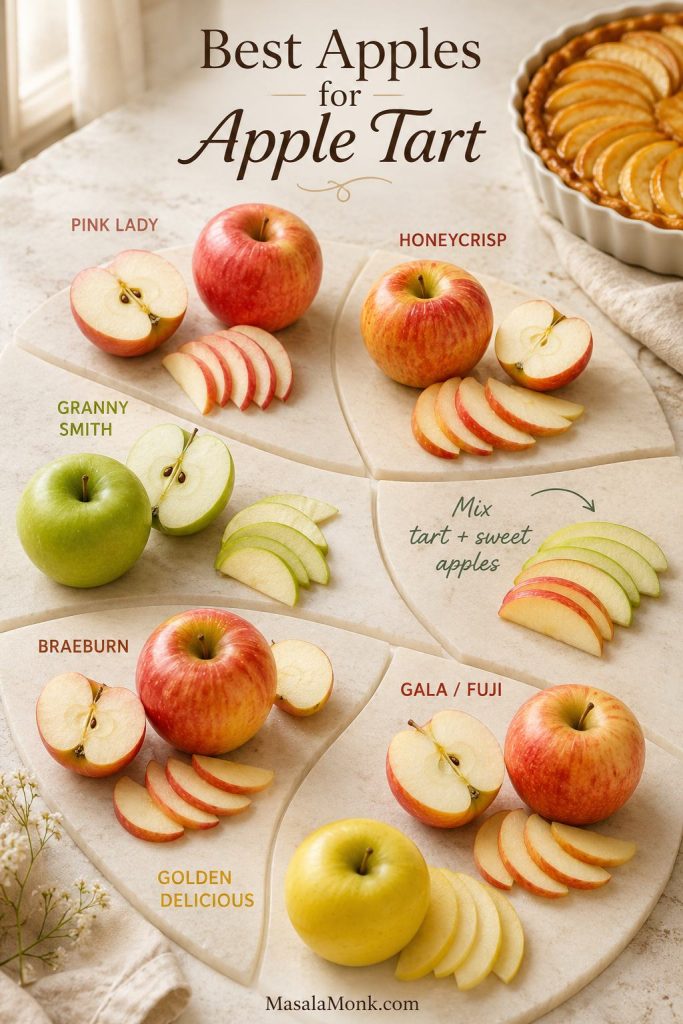
| Apple | Best For | Flavor and Texture |
|---|---|---|
| Pink Lady | Best overall apple tart | Sweet-tart, firm, neat slices |
| Honeycrisp | Sweet-tart, familiar flavor | Juicy, crisp, and easy to like |
| Granny Smith | Tarter apple tart | Firm and sharp; best mixed with a sweeter apple |
| Braeburn | Balanced baking flavor | Warm, aromatic, holds shape well |
| Gala or Fuji | Sweeter puff pastry tart | Softer and sweeter; good for quick tarts |
| Golden Delicious | Classic French-style tart | Soft, mellow, aromatic |
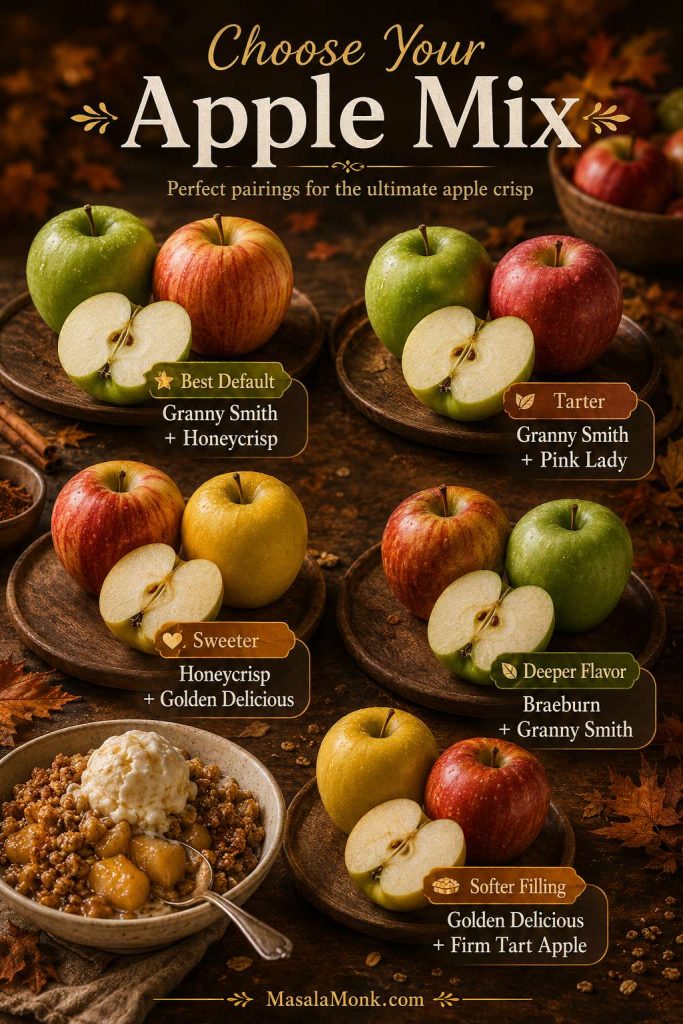
A mix of one tart apple and one sweeter apple often gives the best flavor. For example, use Granny Smith with Honeycrisp, Pink Lady, or Fuji. For a deeper baking-apple guide, see best apples for apple pie; the same flavor logic applies, but tart apples should be sliced thinner and arranged more evenly.
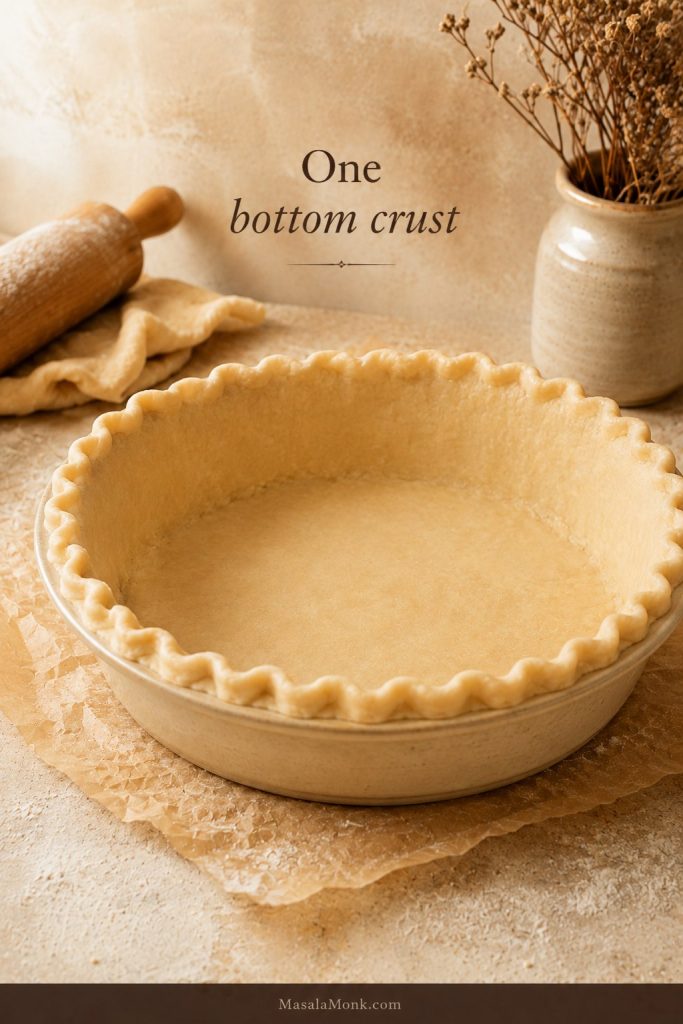
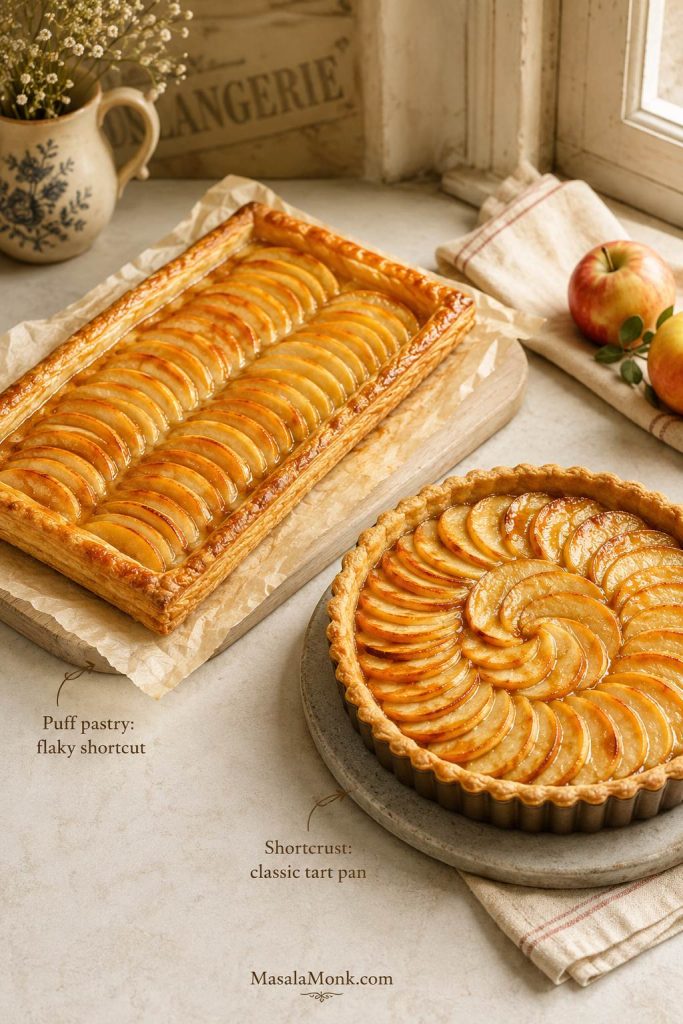
Puff Pastry vs Shortcrust for Apple Tart
For this specific recipe, puff pastry is the best first choice. It gives flaky, dramatic edges with very little work, and it keeps the tart feeling light instead of heavy. Shortcrust or pie crust gives a more classic tart-pan texture, but it needs a little more care.
| Pastry | Best For | Texture | Notes |
|---|---|---|---|
| Puff pastry | Easy apple tart, French-style sheet tart | Flaky, light, crisp edges | Great for a quick, flaky tart; keep it cold and bake on a hot tray. |
| Shortcrust pastry | Classic round apple tart | Buttery, tender, sturdier | Best in a 9–10 inch tart pan. |
| Pie crust | Homemade tart-pan version | Flaky but less puffy | Works well if rolled thin and chilled. |
| Store-bought pie crust | Shortcut tart-pan version | Softer, simpler | Chill before baking so it holds shape. |
To make the tart with homemade crust, use a buttery pie dough and roll it thin. This apple pie crust recipe is a good base for a shortcrust-style apple tart when you want something more homemade than puff pastry.
How to Make a Shortcrust Apple Tart
For a shortcrust apple tart, line a 9–10 inch tart pan with chilled dough, prick the base with a fork, and chill the lined pan before adding apples. With especially juicy apples or an applesauce layer, partially blind bake the crust until it looks dry and lightly set before adding the fruit.
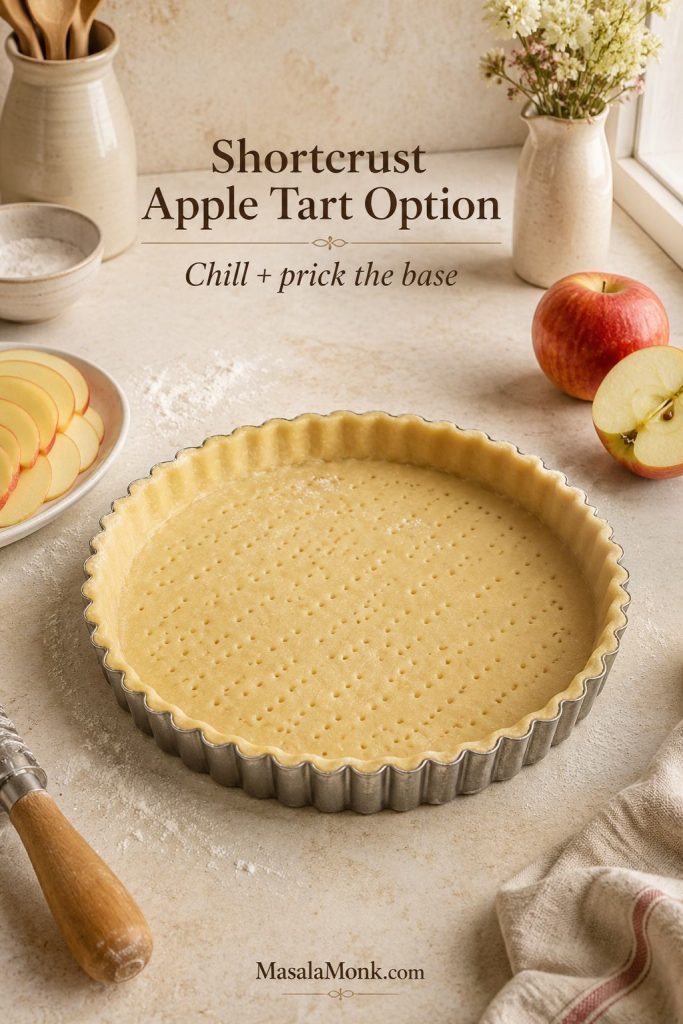
Shortcrust usually needs longer than puff pastry. Plan on 40–55 minutes, depending on the pan, crust thickness, and apple slice thickness. The tart is ready when the apples are tender and the crust is golden all the way through, not just browned at the rim.
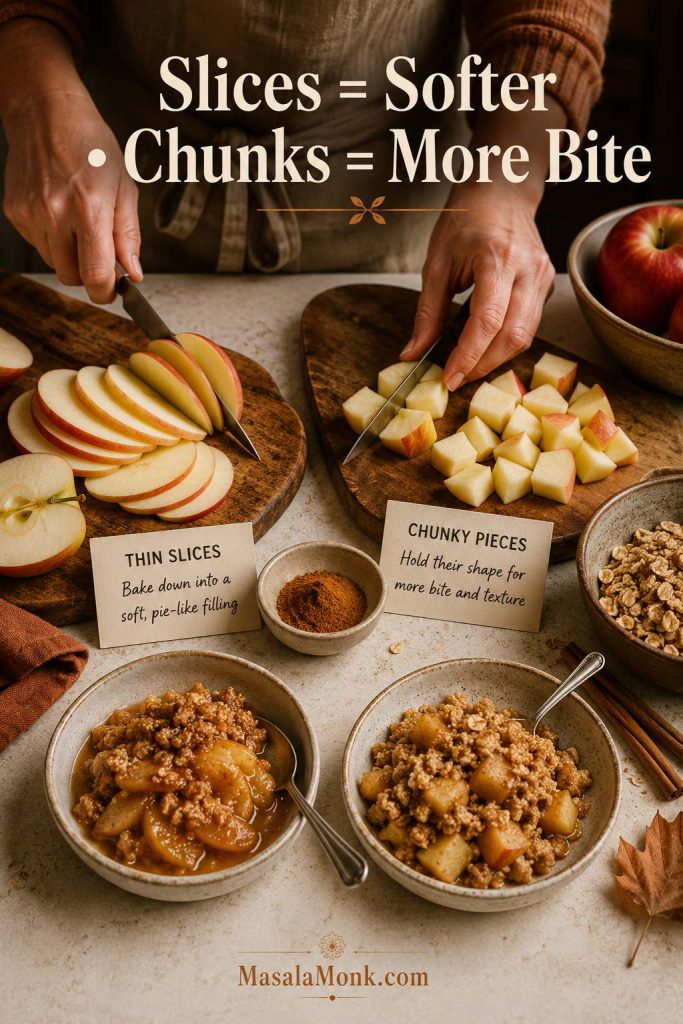
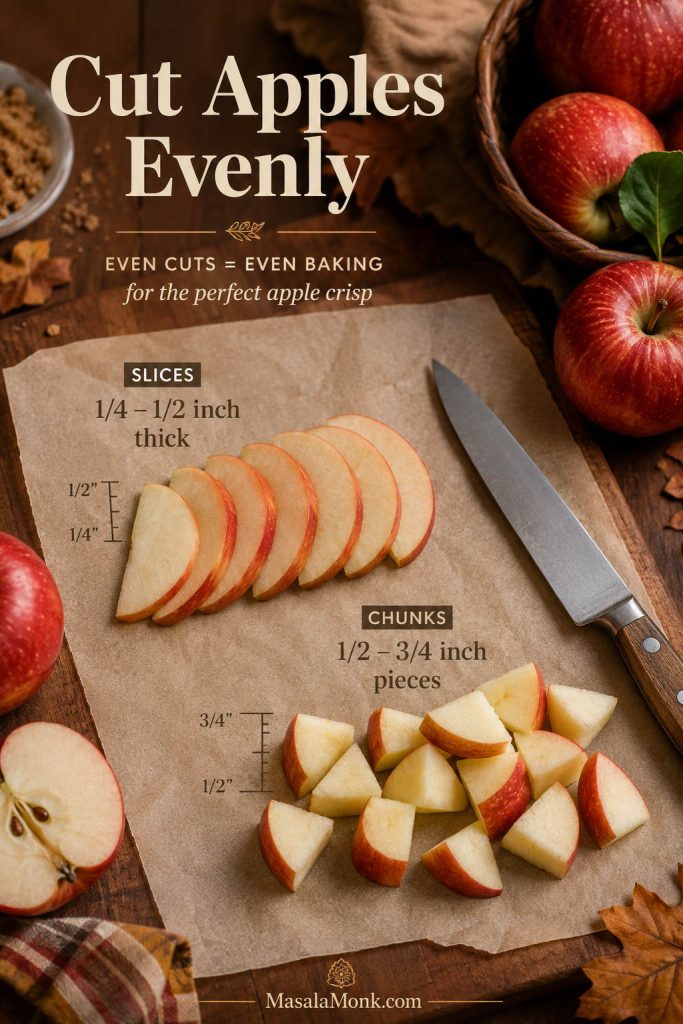
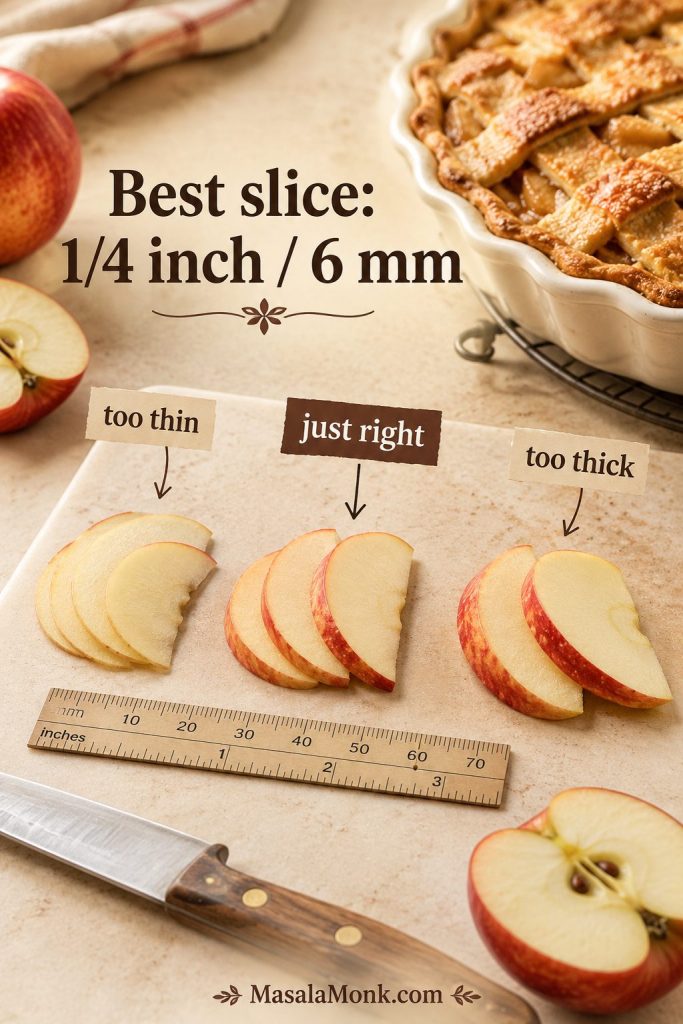
How to Slice Apples for Apple Tart
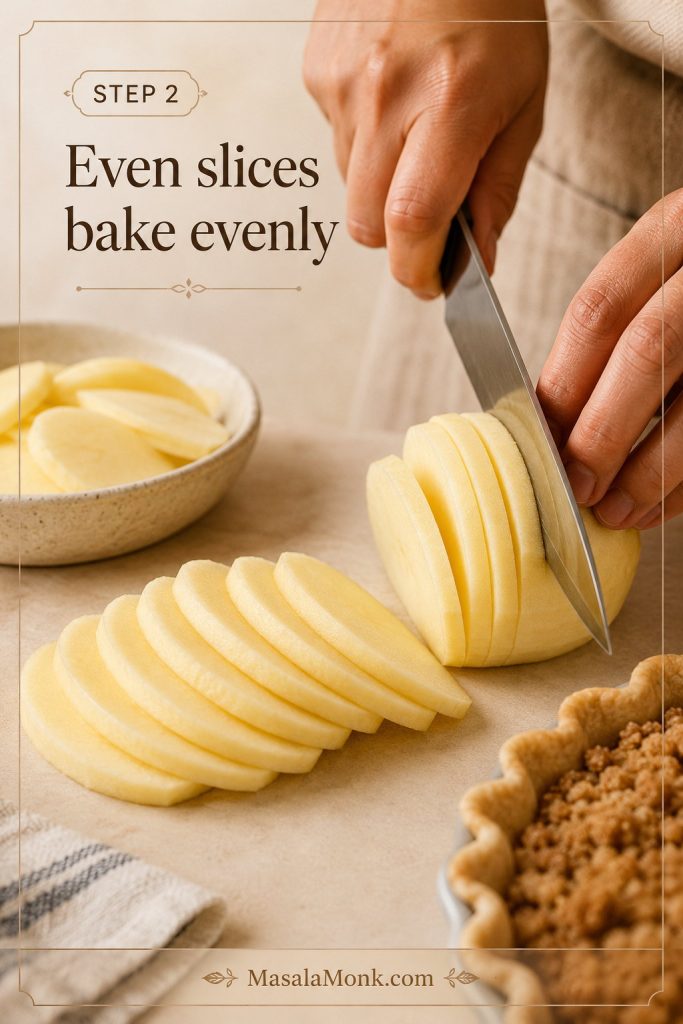
For a neat apple tart, slice the apples evenly. Aim for ⅛–¼ inch / 3–6 mm. Thinner slices give a polished French-style look, while slices closer to ¼ inch / 6 mm feel more rustic and apple-forward. Whatever thickness you choose, keep the slices similar so they soften at the same pace.
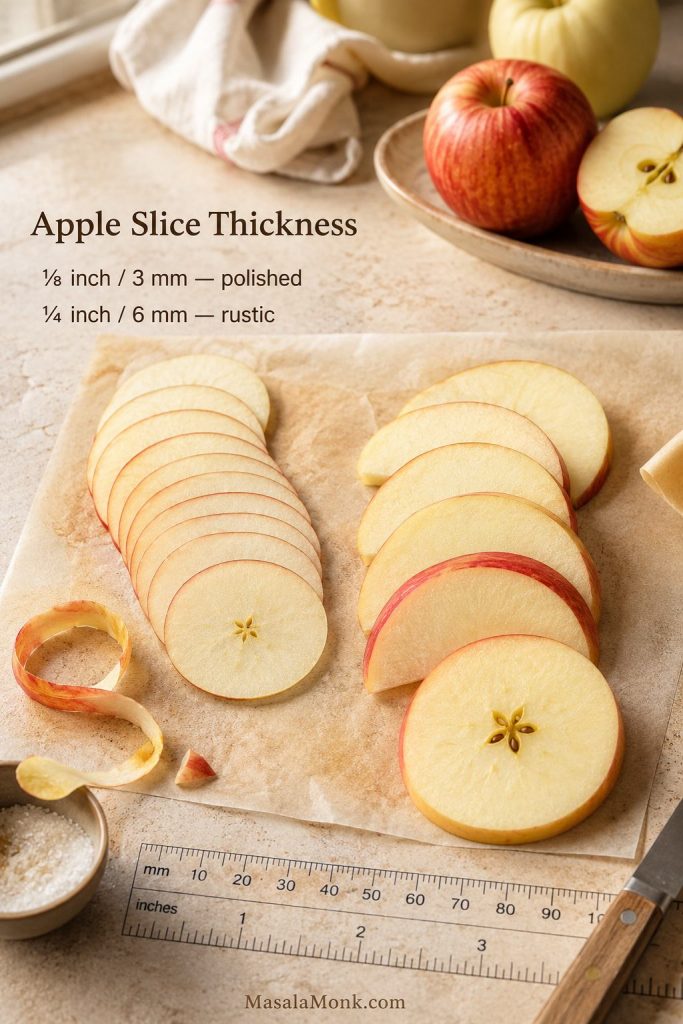
For easier prep, cut the apples into cheeks first, then slice each piece thinly. You can peel the apples or leave the skin on. Peeled apples give a softer, more classic finish. Unpeeled apples add color and a little bite, especially with Pink Lady, Honeycrisp, or another red-skinned apple. A little browning before baking is harmless, especially once cinnamon and glaze go on.
Need to slice the apples a little ahead of time? Lemon water or lemon juice can slow browning. This guide on how to keep sliced apples from turning brown is useful when you are prepping fruit before baking.
Once the apples are sliced, move to the arranging step for simple rows, shingles, or fans.
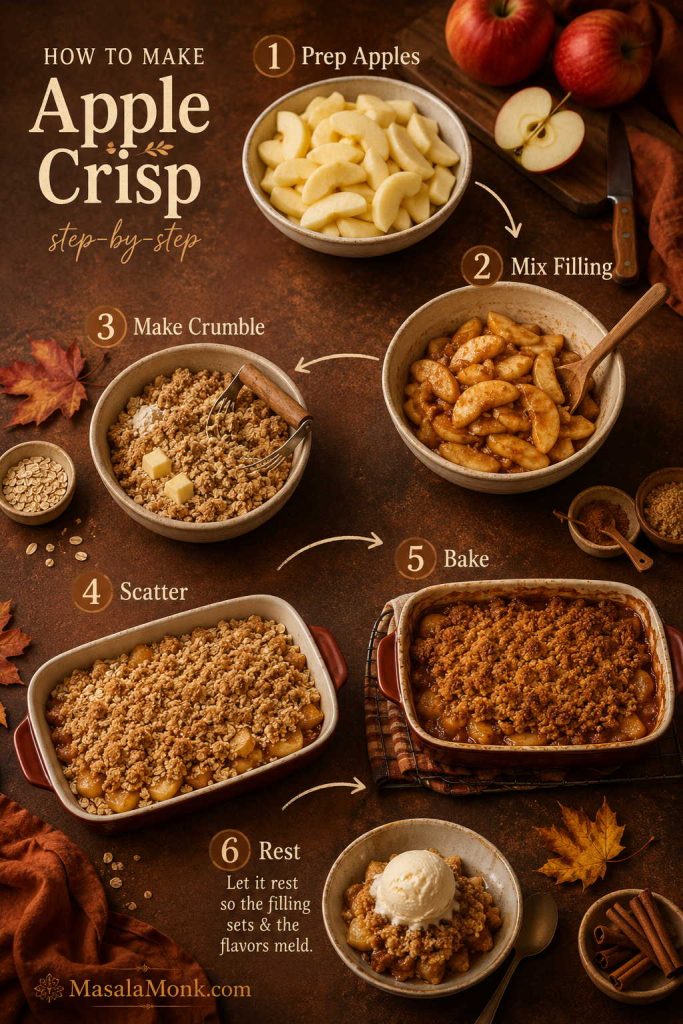
How to Make Apple Tart Step by Step
Do not worry about making every slice identical. Even slices help the tart bake evenly, but a slightly rustic pattern still looks lovely once the apples soften and the glaze goes on.
1. Preheat the oven and baking sheet
Heat the oven to 400°F / 200°C, or 180°C fan. Place a rimmed baking sheet on the middle rack while the oven preheats. A hot tray helps the pastry bottom set instead of steaming underneath the apples.
2. Prepare the puff pastry
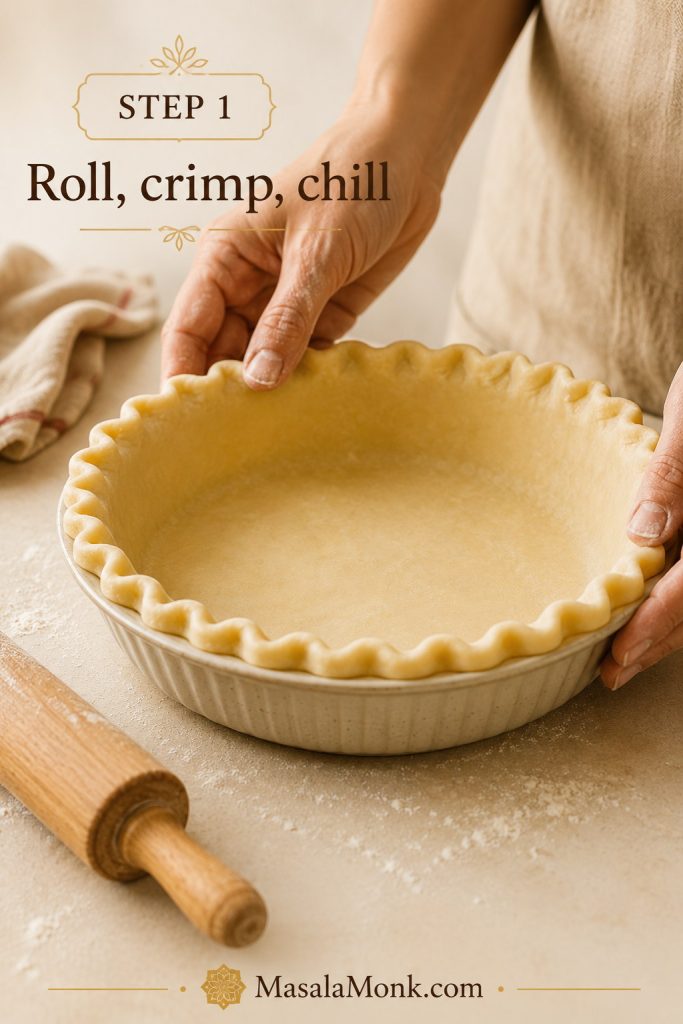
Place the cold puff pastry on parchment paper. Roll it lightly to smooth creases or even out the shape. Keep it close to a standard sheet-pan tart size; pastry rolled too thin will not puff as well.
Score a ¾–1 inch / 2–2.5 cm border around the edge with a knife, without cutting all the way through. Dock the center with a fork, leaving the border untouched so it can rise.
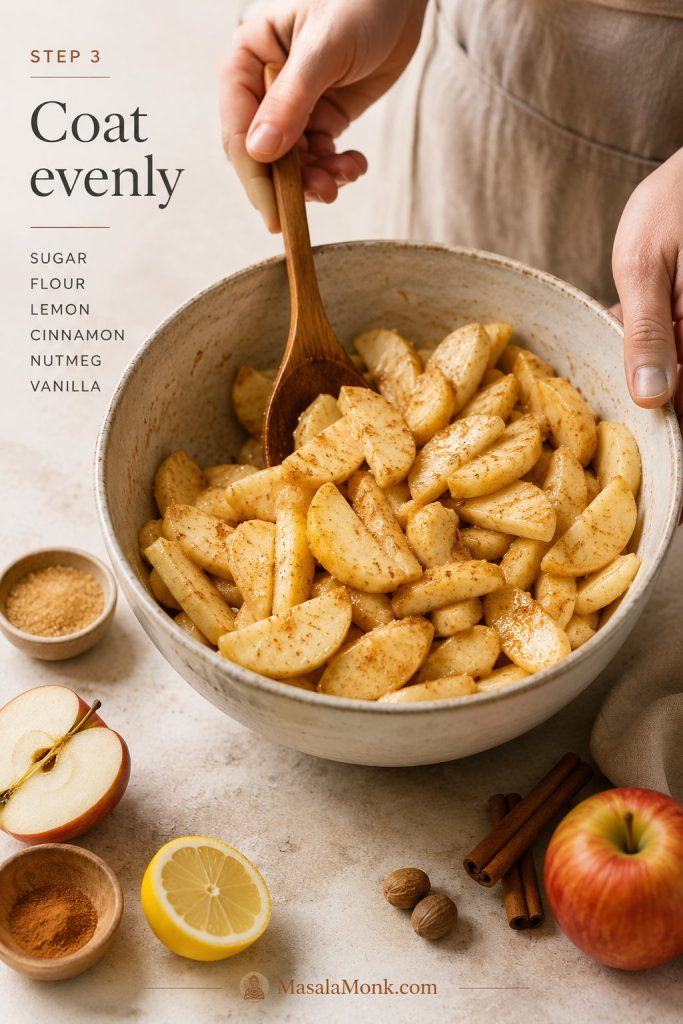
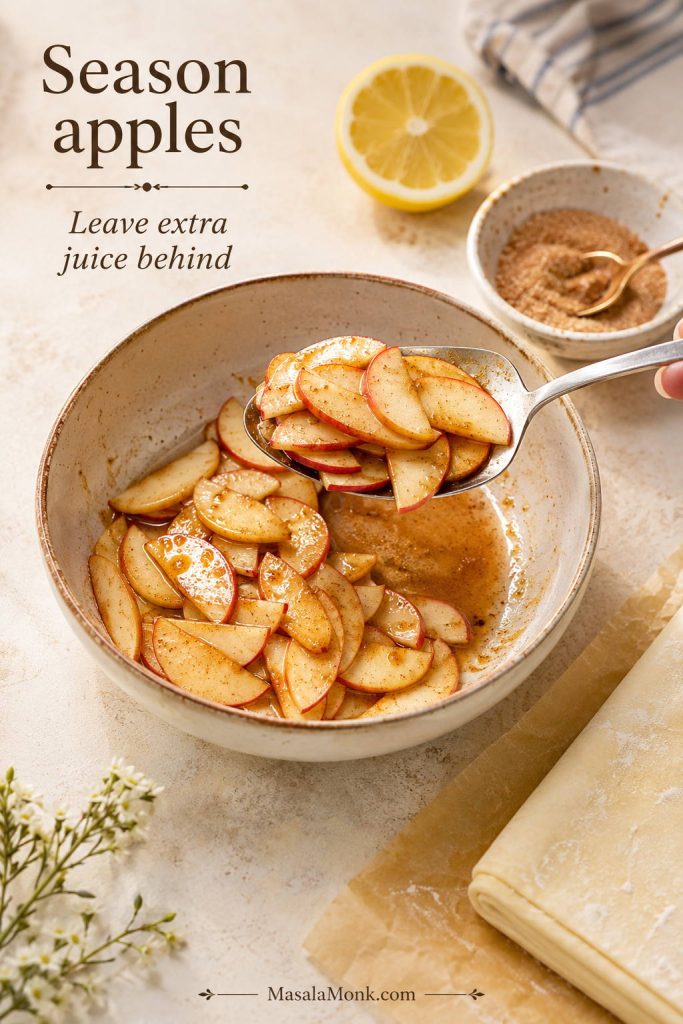
3. Slice and season the apples
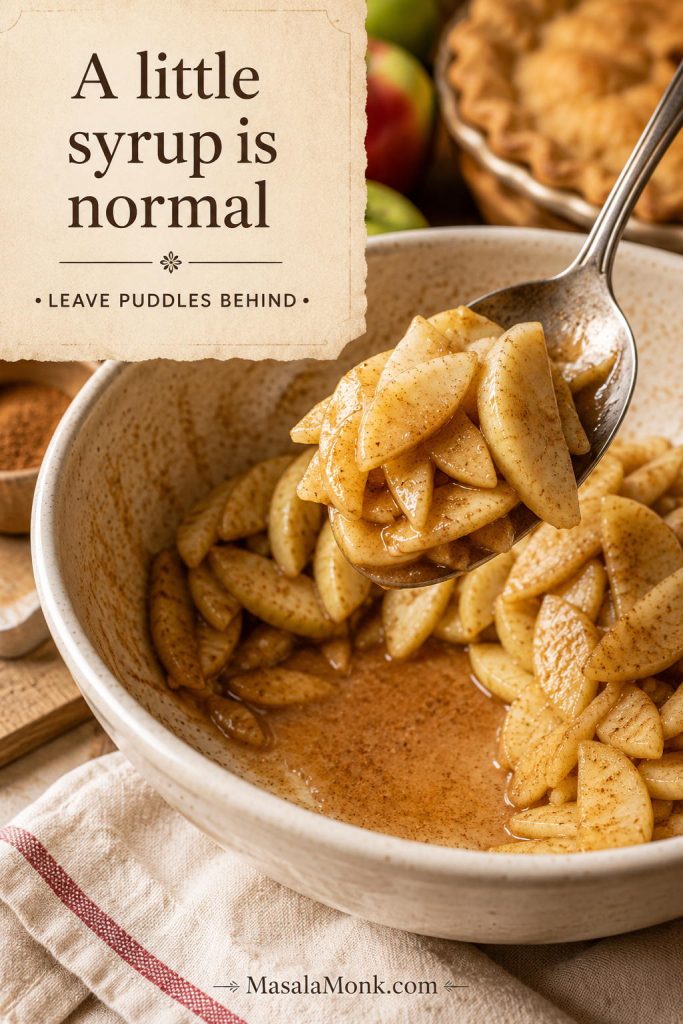
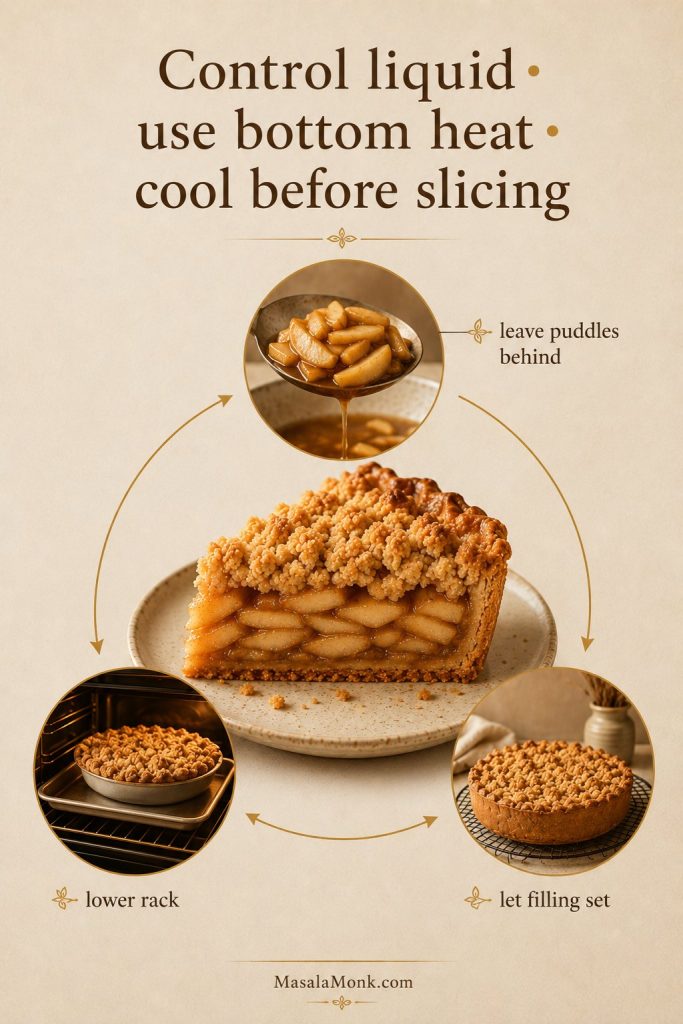
Slice the apples thinly and toss them with lemon juice, sugar, cinnamon, and a pinch of salt. When the apples release a lot of juice while they sit, leave the extra liquid behind instead of pouring it onto the pastry.
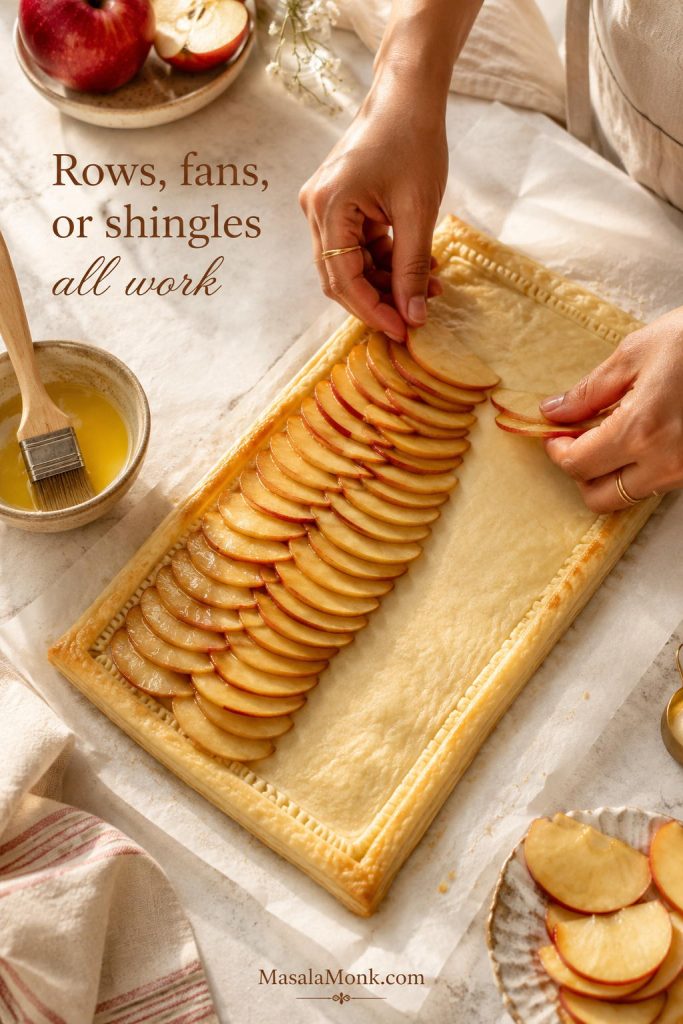
4. Arrange the apples
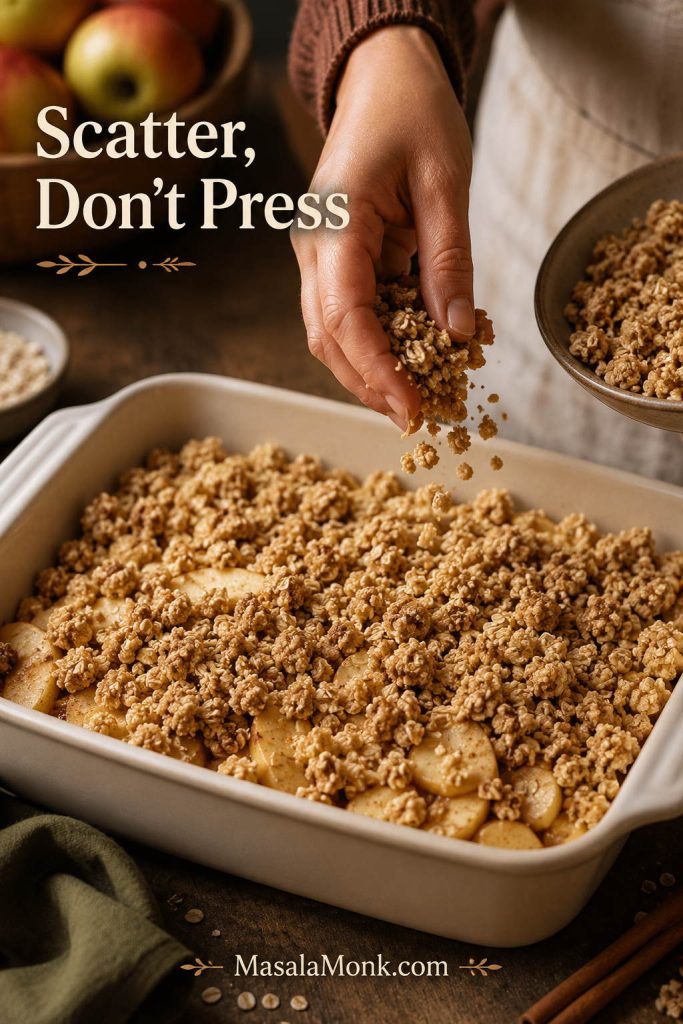
Arrange the apple slices inside the scored border in overlapping rows, shingles, fans, or a simple diagonal pattern. Keep them in one tidy layer. Brush the apples with melted butter. Brush egg wash on the top border if using, but avoid the cut sides.
Rows, shingles, fans, or a loose spiral all work. The pattern matters less than keeping the apples in an even layer, so do not worry if it looks a little rustic before baking.
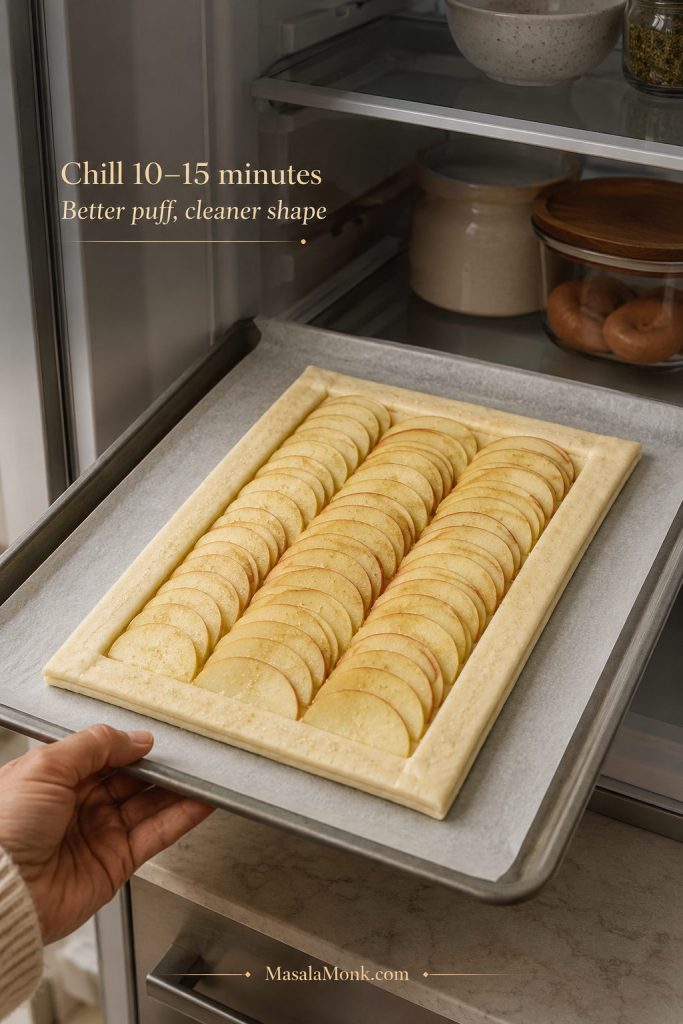
5. Chill the assembled tart
Refrigerate the assembled tart for 10–15 minutes while the oven finishes heating. This keeps the butter layers firm and helps the pastry puff more cleanly.
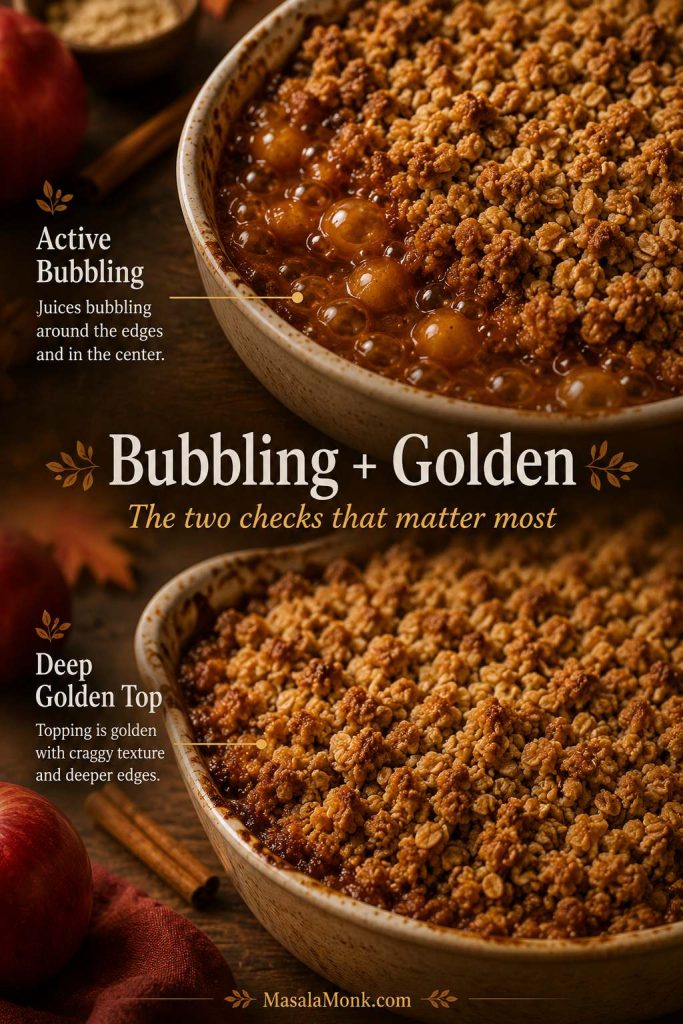
6. Bake until crisp and browned
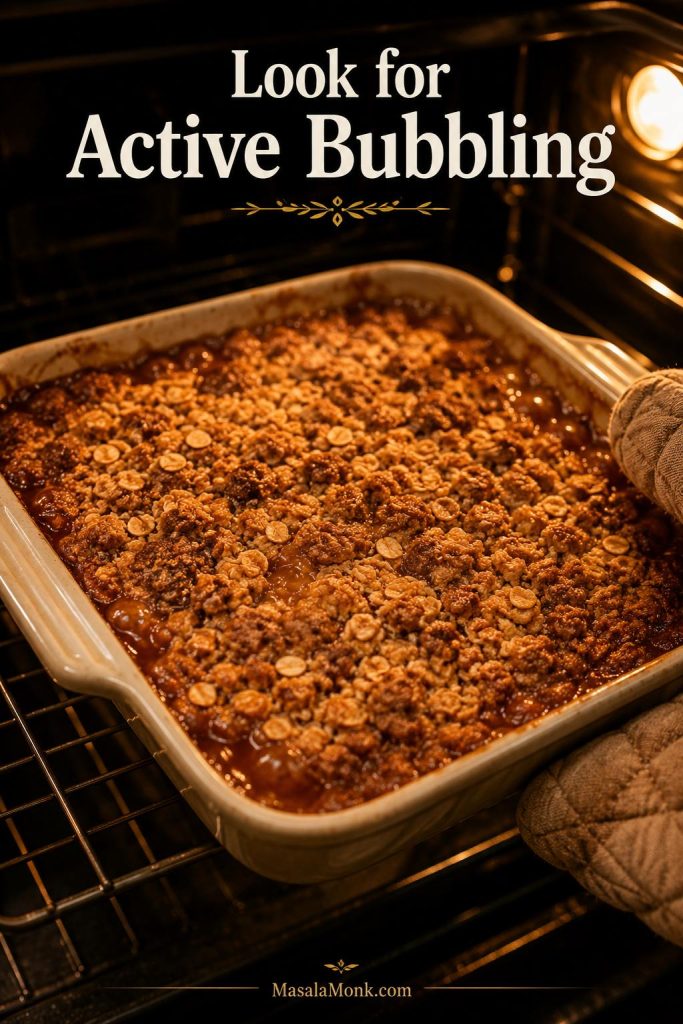
Carefully slide the parchment with the tart onto the hot baking sheet. Bake for 30–35 minutes, until the edges are puffed, the bottom is browned, and the apples are tender at the edges.
By the last 10 minutes, the kitchen should smell buttery and cinnamon-warm. Do not pull the tart when the border is only lightly golden; puff pastry tastes best when it has real color, and a pale base is the first sign it may soften as it cools.

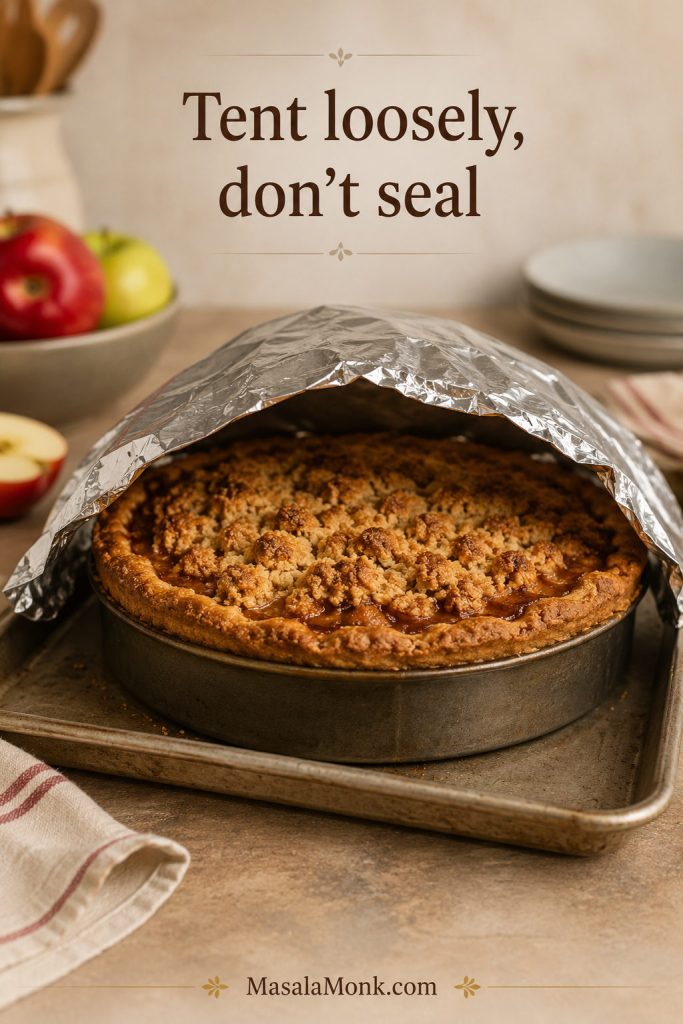
For ovens that brown pastry quickly, bake on the middle rack or slightly lower. A lower rack can help the base cook before the top gets too dark. If the pastry is browning unevenly or the center looks soft, check the troubleshooting guide before changing the recipe next time.
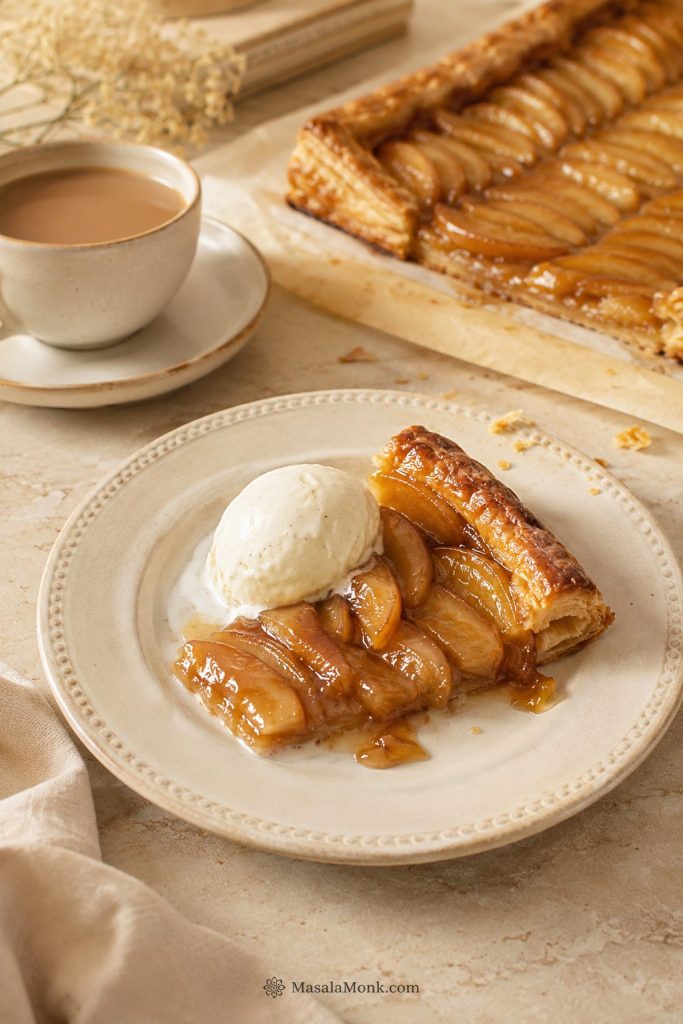
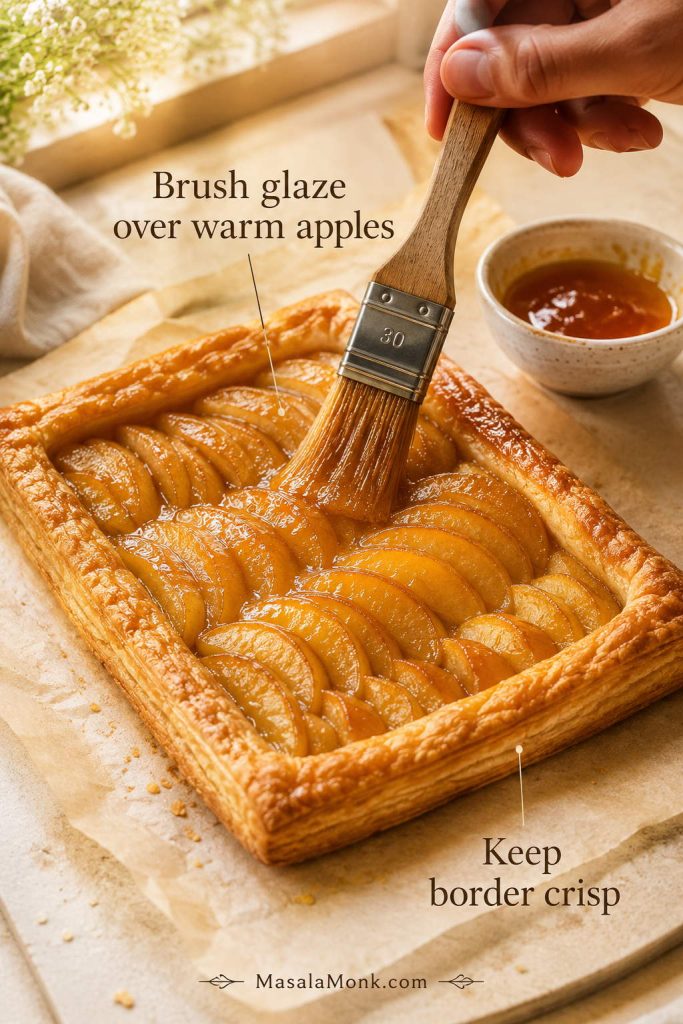
7. Glaze and cool
Warm the apricot jam with a teaspoon of water until loose, then brush it mostly over the apples while the tart is still warm. For the smoothest glaze, strain out large fruit pieces before brushing, and avoid soaking the pastry border so the edge stays crisp.
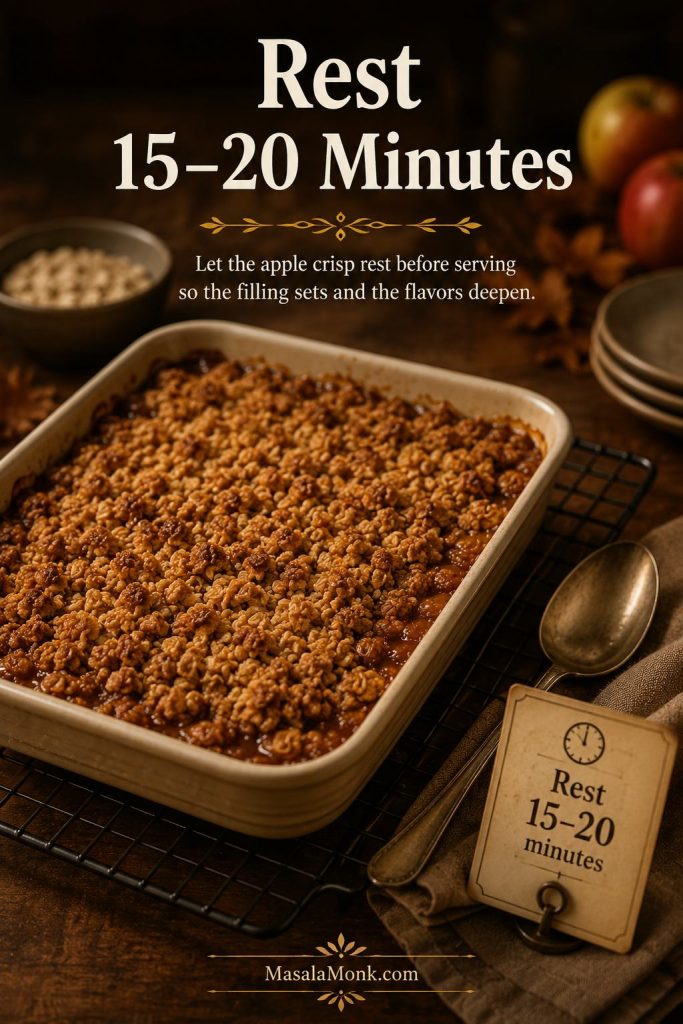
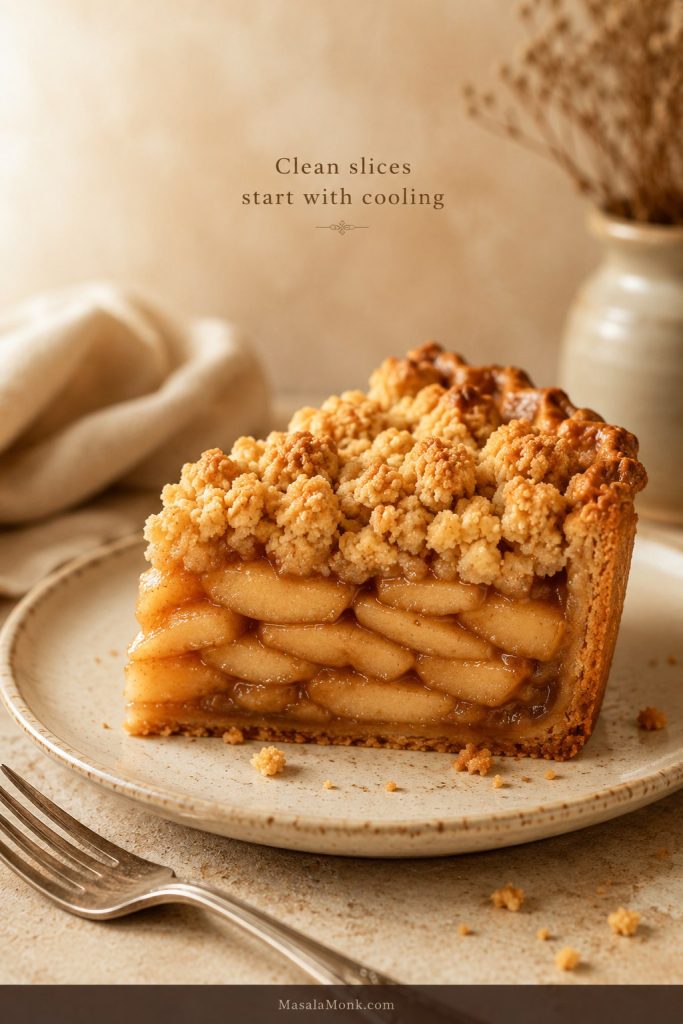
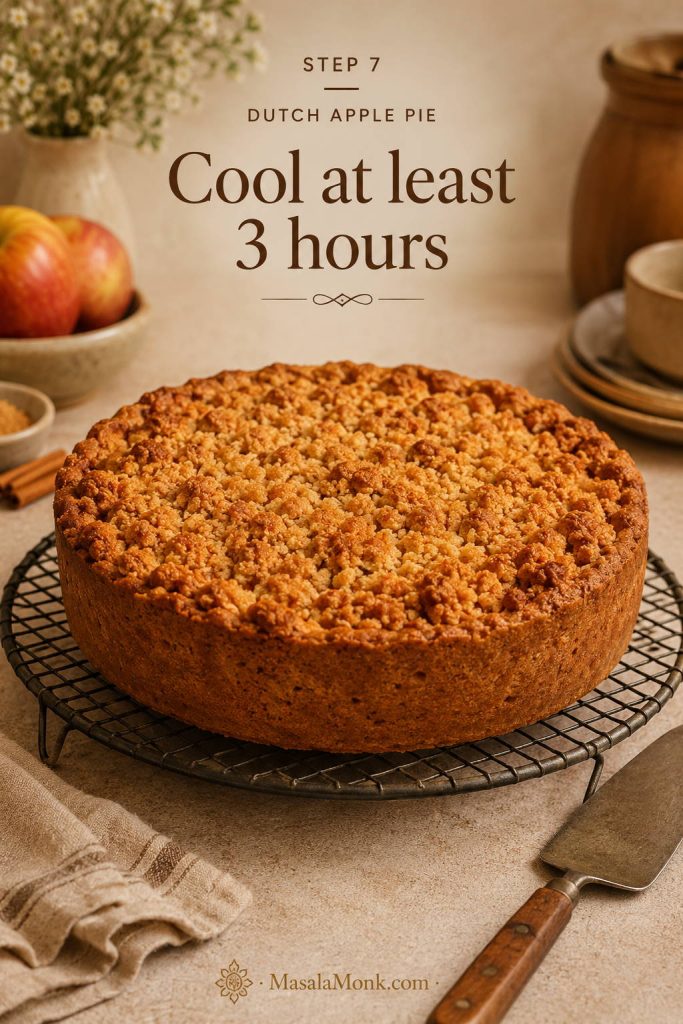
Let the tart cool for at least 10–15 minutes before slicing so the pastry can settle. Serve it warm when the apples are soft and fragrant, or at room temperature when you want cleaner slices for a dessert table.
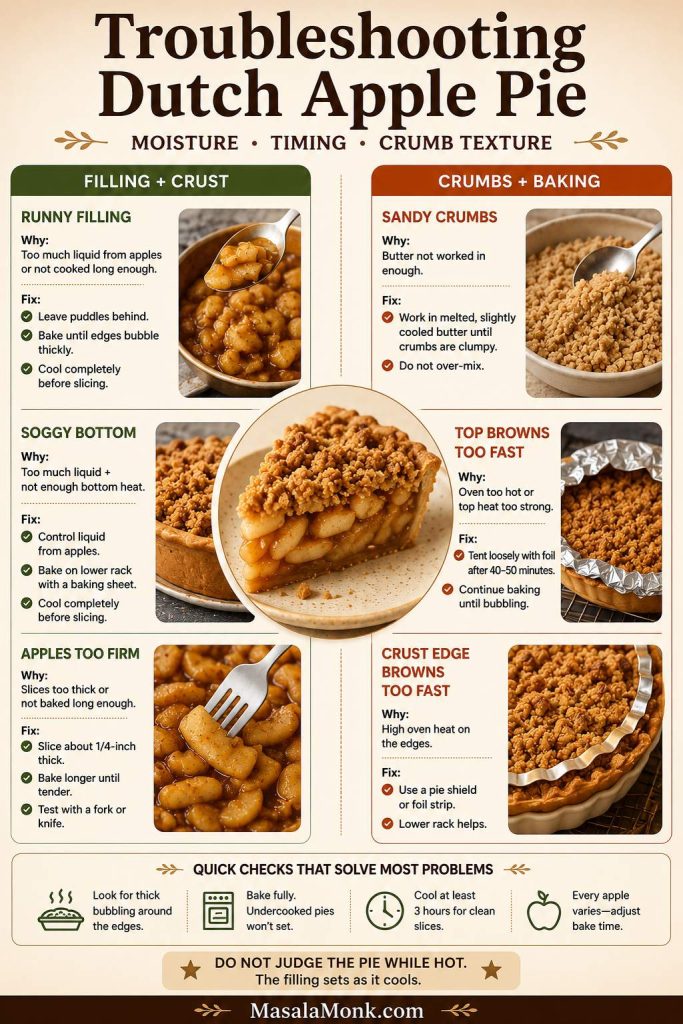
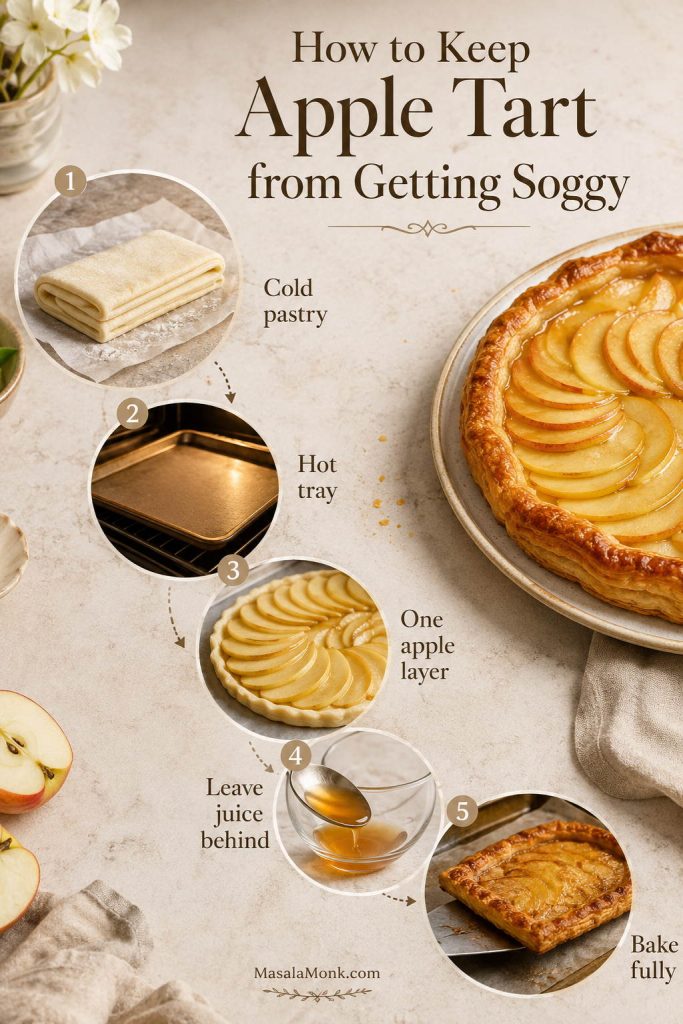
How to Keep Apple Tart from Getting Soggy
A soggy apple tart usually comes from warm pastry, too many apples, excess apple juice, or underbaking. The fix is not one trick; it is a small chain of good habits that keep the pastry cool, the fruit layer controlled, and the base properly baked.
If you are still assembling the tart, the preheated baking sheet step, apple seasoning step, and chilling step are the most important places to prevent sogginess.
Before Baking: Keep the Pastry Cold and the Apples Controlled
- Keep the pastry cool and firm. Warm puff pastry tends to slump before it rises.
- Use a hot baking sheet. The heat hits the bottom quickly and helps the base set.
- Score the border. This encourages the edges to puff around the apples.
- Dock the center only. The middle stays flatter while the border rises.
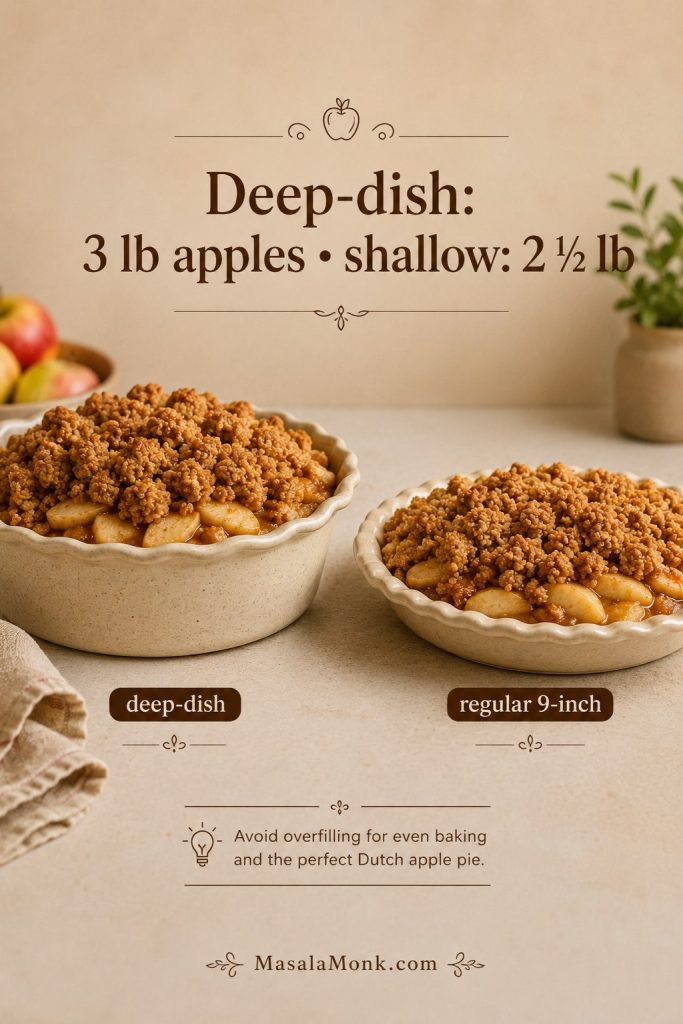
- Use one layer of apples. A heavy pile releases too much juice.
- Leave excess juice behind. Season the apples, then avoid dumping watery liquid onto the pastry.
- Add a light barrier when needed. For very juicy apples, sprinkle 1 tablespoon almond flour, fine breadcrumbs, or flour over the pastry center before adding apples.
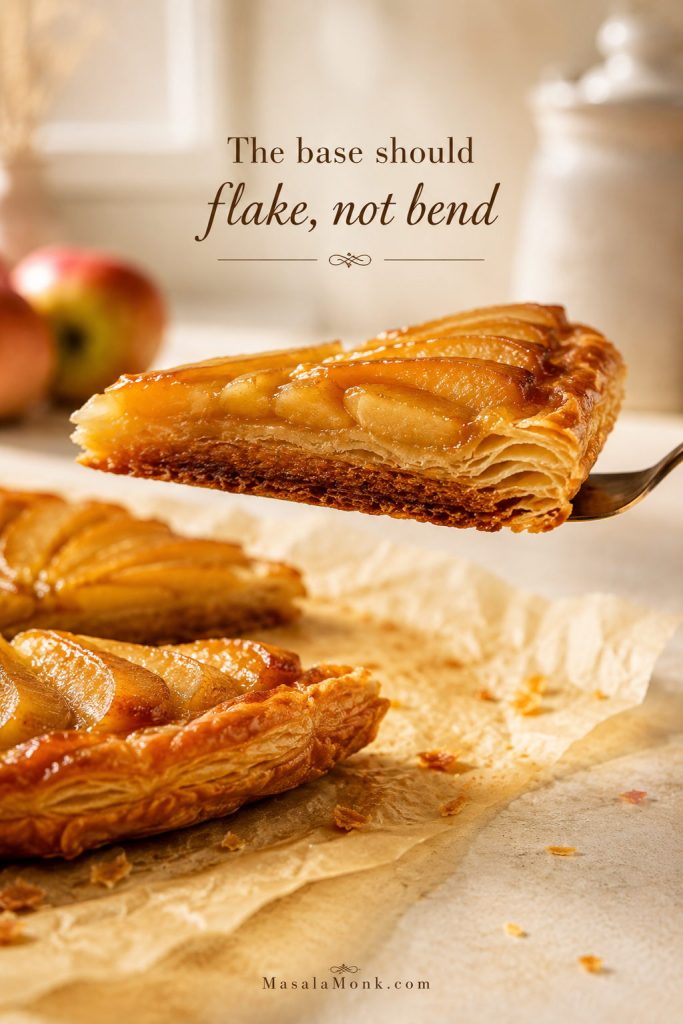
- Bake until the bottom is firm. The pastry should flake instead of bend.
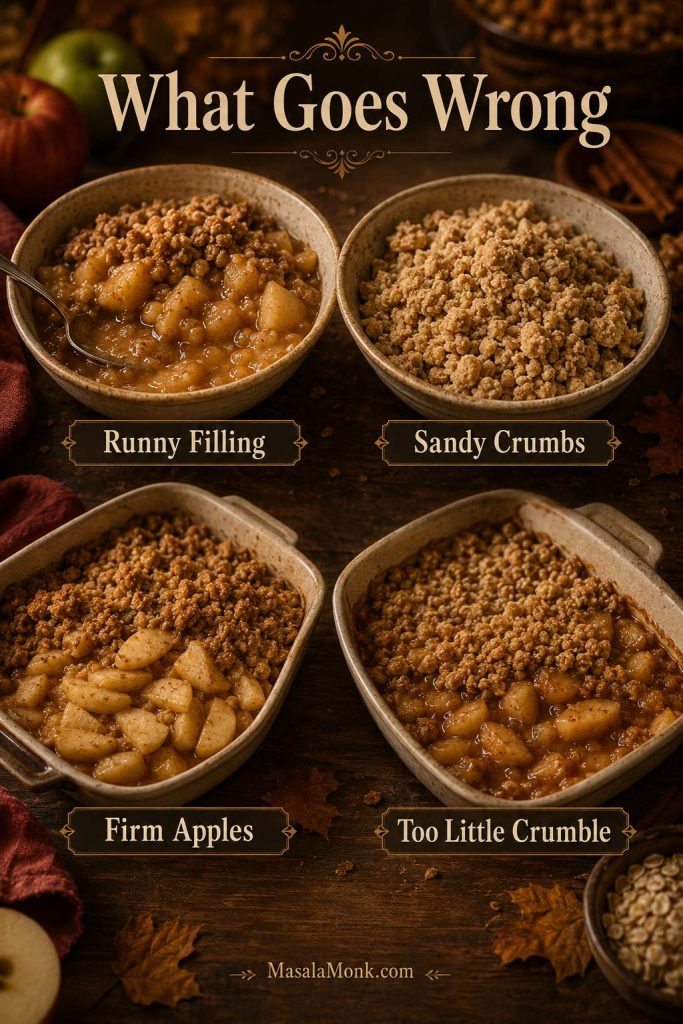
After Baking: Diagnose What Went Wrong
If the tart has already gone wrong, use the table below to work out what happened. Most texture problems come back to the same few causes: soft pastry, too much moisture, thick apple slices, or pulling the tart from the oven too early.

| Problem | Likely Cause | Fix |
|---|---|---|
| Soggy center | Too much apple juice or underbaked pastry | Leave excess liquid behind and bake until the base is browned. |
| Flat edges | Border was docked, cut too deeply, or pastry got too warm | Dock only the center and chill the assembled tart before baking. |
| Burnt edges | Oven too hot, sugar on the border, or tart baked too high in the oven | Brush sugar off the border before baking and move the tart lower if needed. |
| Apples still firm | Slices were too thick | Slice apples ⅛–¼ inch / 3–6 mm thick. |
| Juice leaking everywhere | Too many apples or too much liquid added to pastry | Use one overlapping layer and leave extra apple liquid in the bowl. |
| Pastry tastes greasy | Pastry was warm before baking | Chill the tart for 10–15 minutes before it goes into the oven. |
Final Texture Cue
Apple Tart vs Pie, Tarte Tatin, and Galette
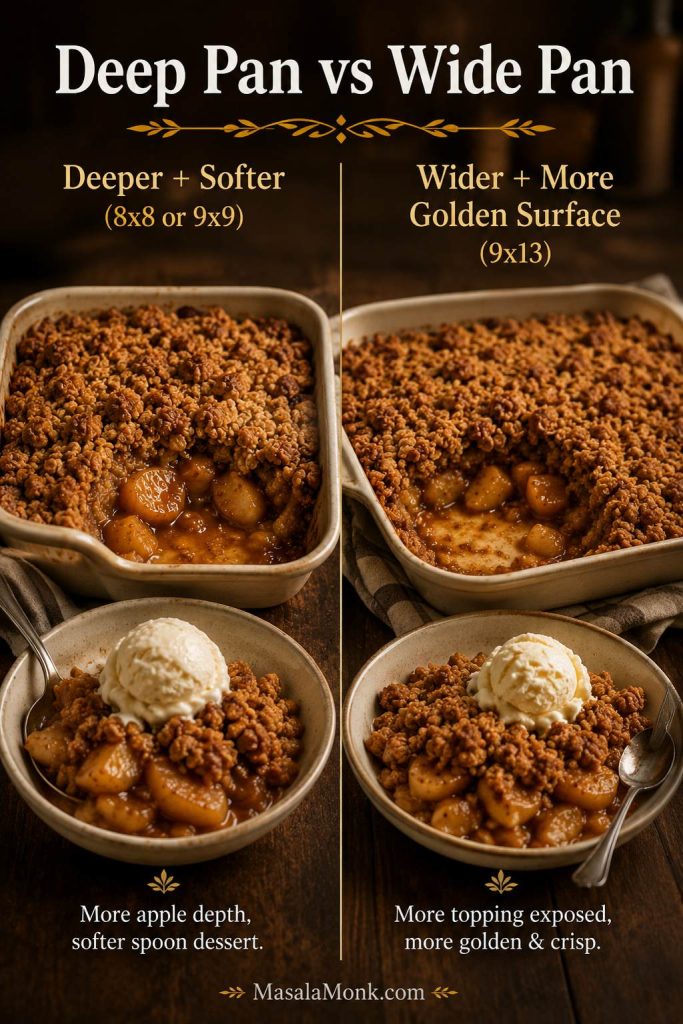
An apple tart gives you the apple-and-pastry feeling of pie, but in a lighter, neater form. Instead of a deep layer of saucy filling, the apples are sliced thin and baked right on top of the pastry.

| Dessert | What It Is | Main Difference |
|---|---|---|
| Apple tart | Open-faced pastry with sliced apples on top | Thin, elegant, less filling-heavy |
| Apple pie | Deeper apple filling baked in pie crust | Juicier, taller, usually more filling |
| Tarte Tatin | Upside-down caramelized apple tart | Apples cook in caramel, then the tart is flipped |
| Apple galette | Free-form rustic apple tart | No tart pan or neat border needed |
For a deeper, softer dessert with a fuller filling, make a pie instead. This apple pie with apple pie filling is better when you want a shortcut pie with a thicker apple center. For this apple tart recipe, fresh thin apple slices are the better choice because they bake neatly and do not flood the pastry.
French-Style Apple Tart: What Makes It Different?
A French-style apple tart is usually open-faced, neat, and lighter than apple pie. The apples are sliced thin, arranged in rows, shingles, spirals, or fans, and often brushed with apricot glaze after baking. Some versions use puff pastry, while others use shortcrust or a sweet tart dough.
A very thin puff pastry apple tart like this is close to tarte fine aux pommes, the slim French-style apple tart built on pastry, thin apples, and a glossy finish. Deeper tart-pan versions often use shortcrust and sometimes a thin applesauce or compote layer.
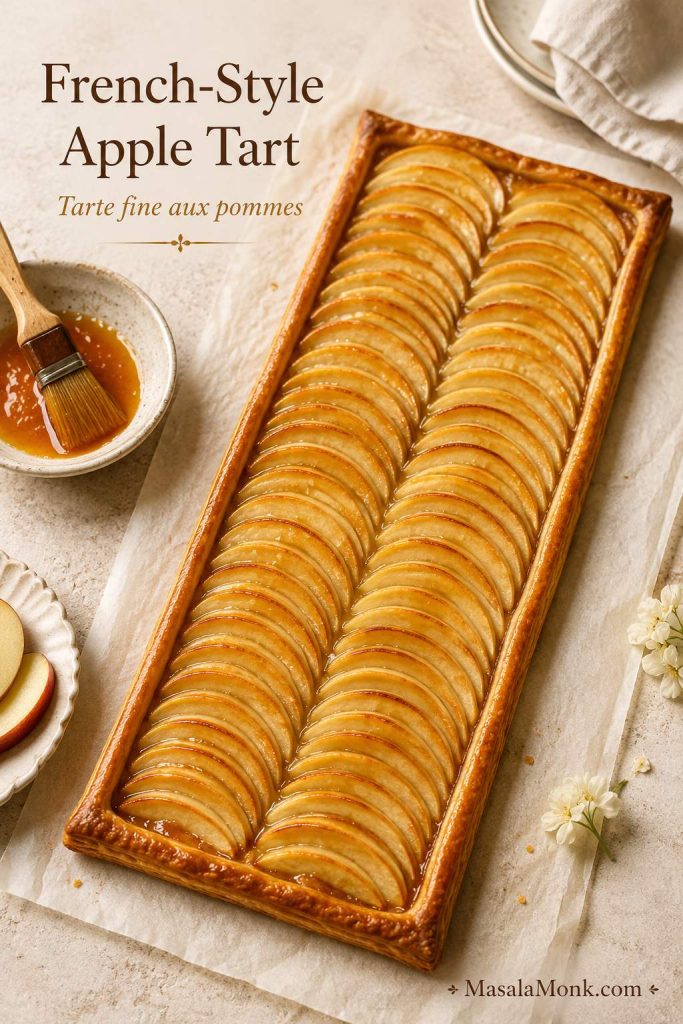
The classic look is polished but not complicated. Keep the apple layer even, leave a clear pastry border, and glaze the tart while it is still warm. That gives you the glossy bakery finish without turning the recipe into a pastry-school project.
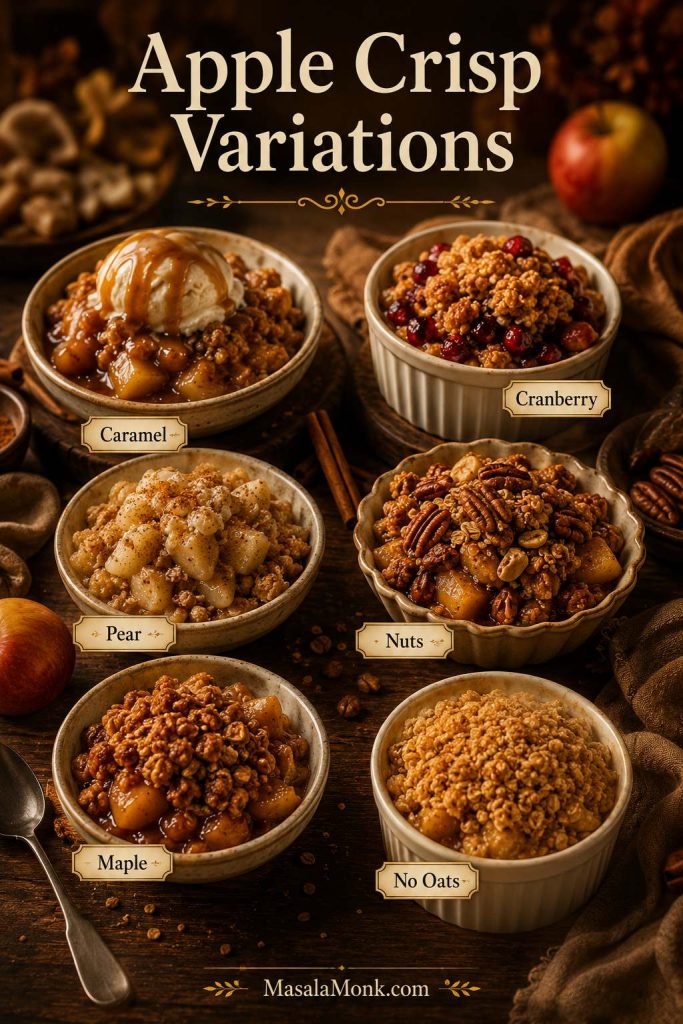
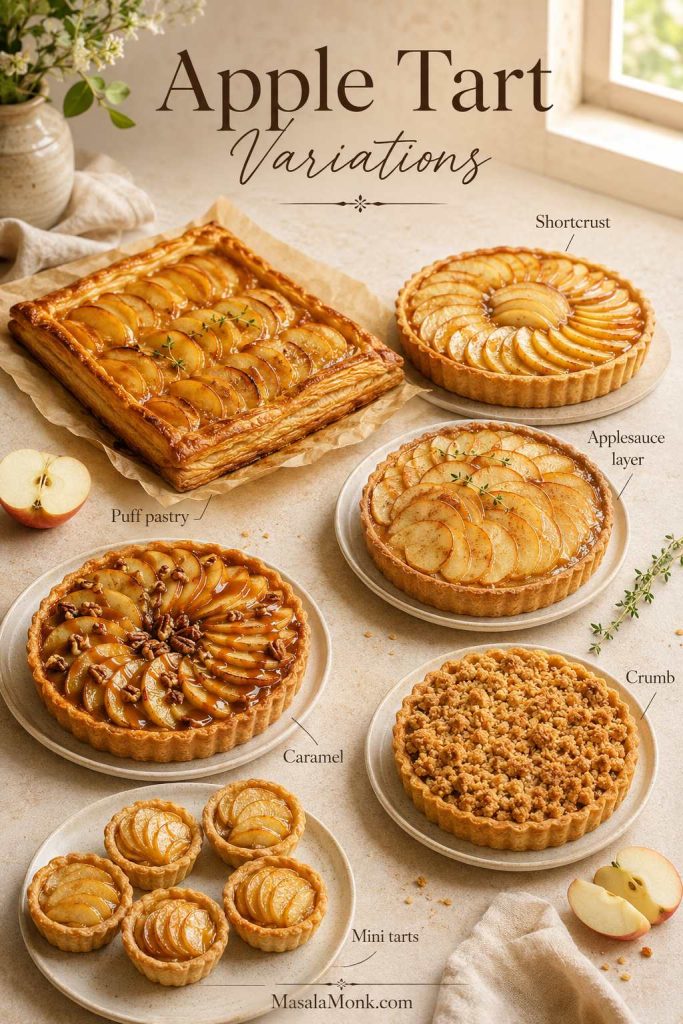
Apple Tart Variations
Use these variations when you want the same apple-and-pastry idea in a different shape: quicker, richer, more classic, more party-friendly, or better suited to a specific diet.
For the simplest version, stay with the main apple tart recipe. For a more classic tart-pan version, jump back to the shortcrust apple tart notes.
Puff Pastry Apple Tart
Choose this when you want the flakiest apple tart with the least dough work. Store-bought puff pastry does most of the heavy lifting, so this is the best starting point for a weeknight dessert, a last-minute guest dessert, or a simple French-style tart.
Shortcrust Apple Tart
Choose shortcrust when you want a more classic round apple tart in a 9–10 inch tart pan. Chill the lined pan before baking. With juicy apples, a light partial blind bake helps the base set before the fruit goes in.
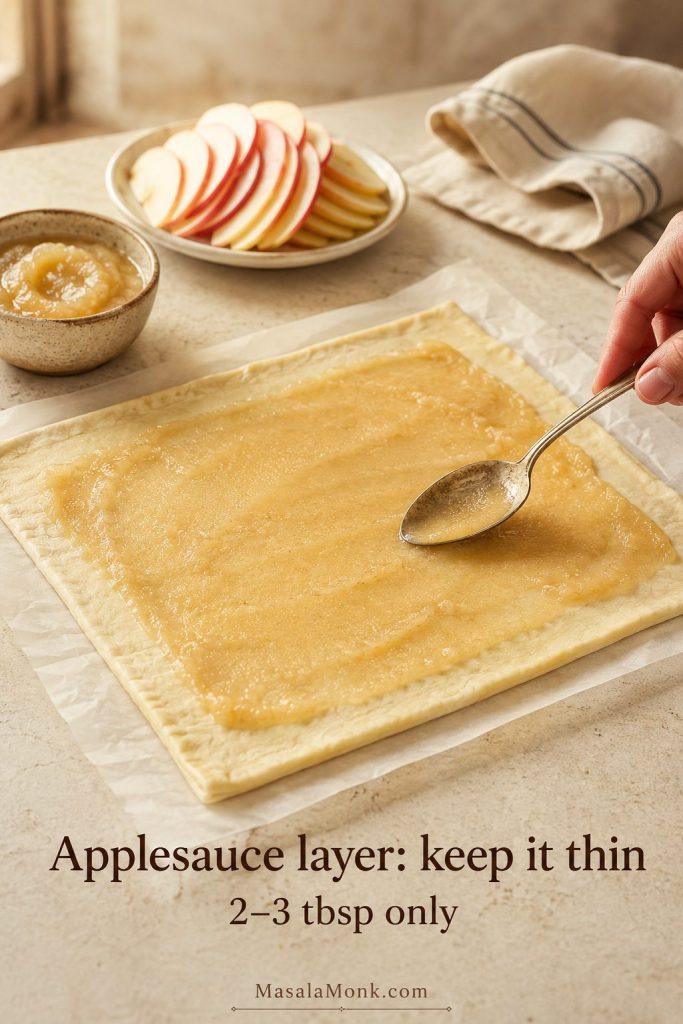
French-Style Apple Tart with Applesauce
For a more classic French-style apple tart, spread a thin layer of smooth, unsweetened applesauce or apple compote over the pastry before arranging the apple slices. For a puff pastry tart, use only 2–3 tablespoons. A tart-pan shortcrust version can take a slightly thicker layer, but keep it controlled because too much applesauce will soften the base.
Caramel Apple Tart
Drizzle a little caramel sauce over the baked tart just before serving. Avoid adding too much caramel before baking because it can burn around the pastry edges.
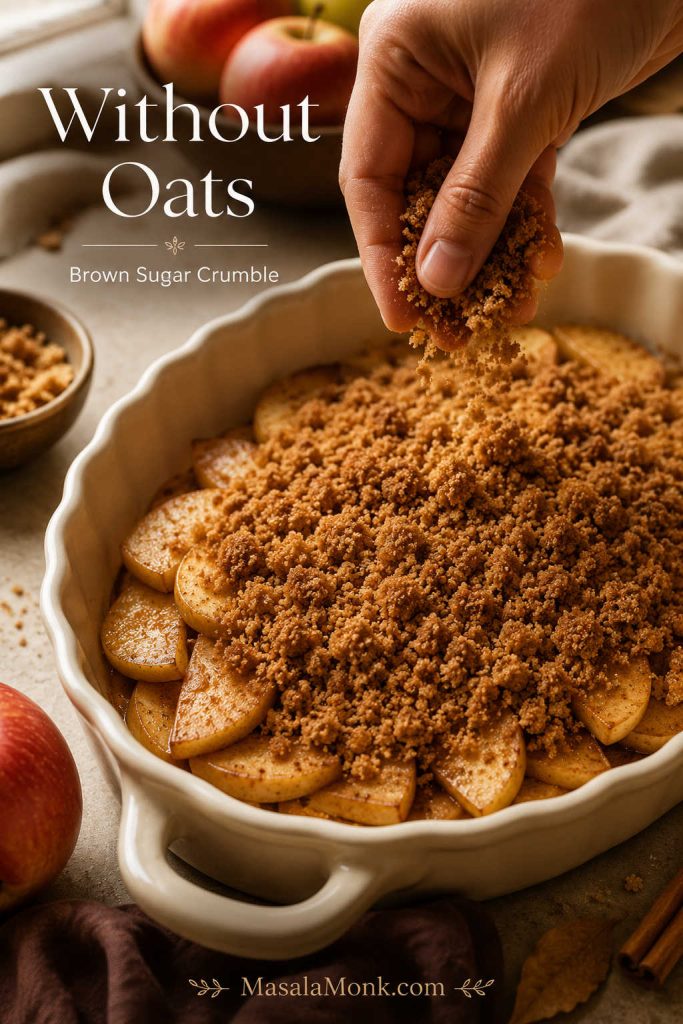
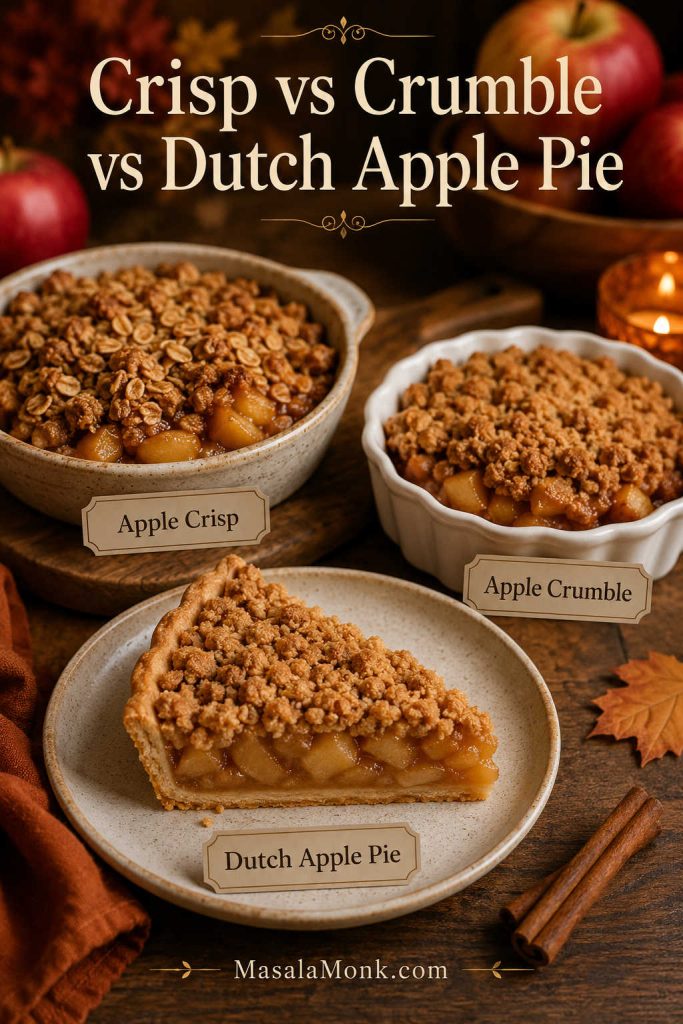
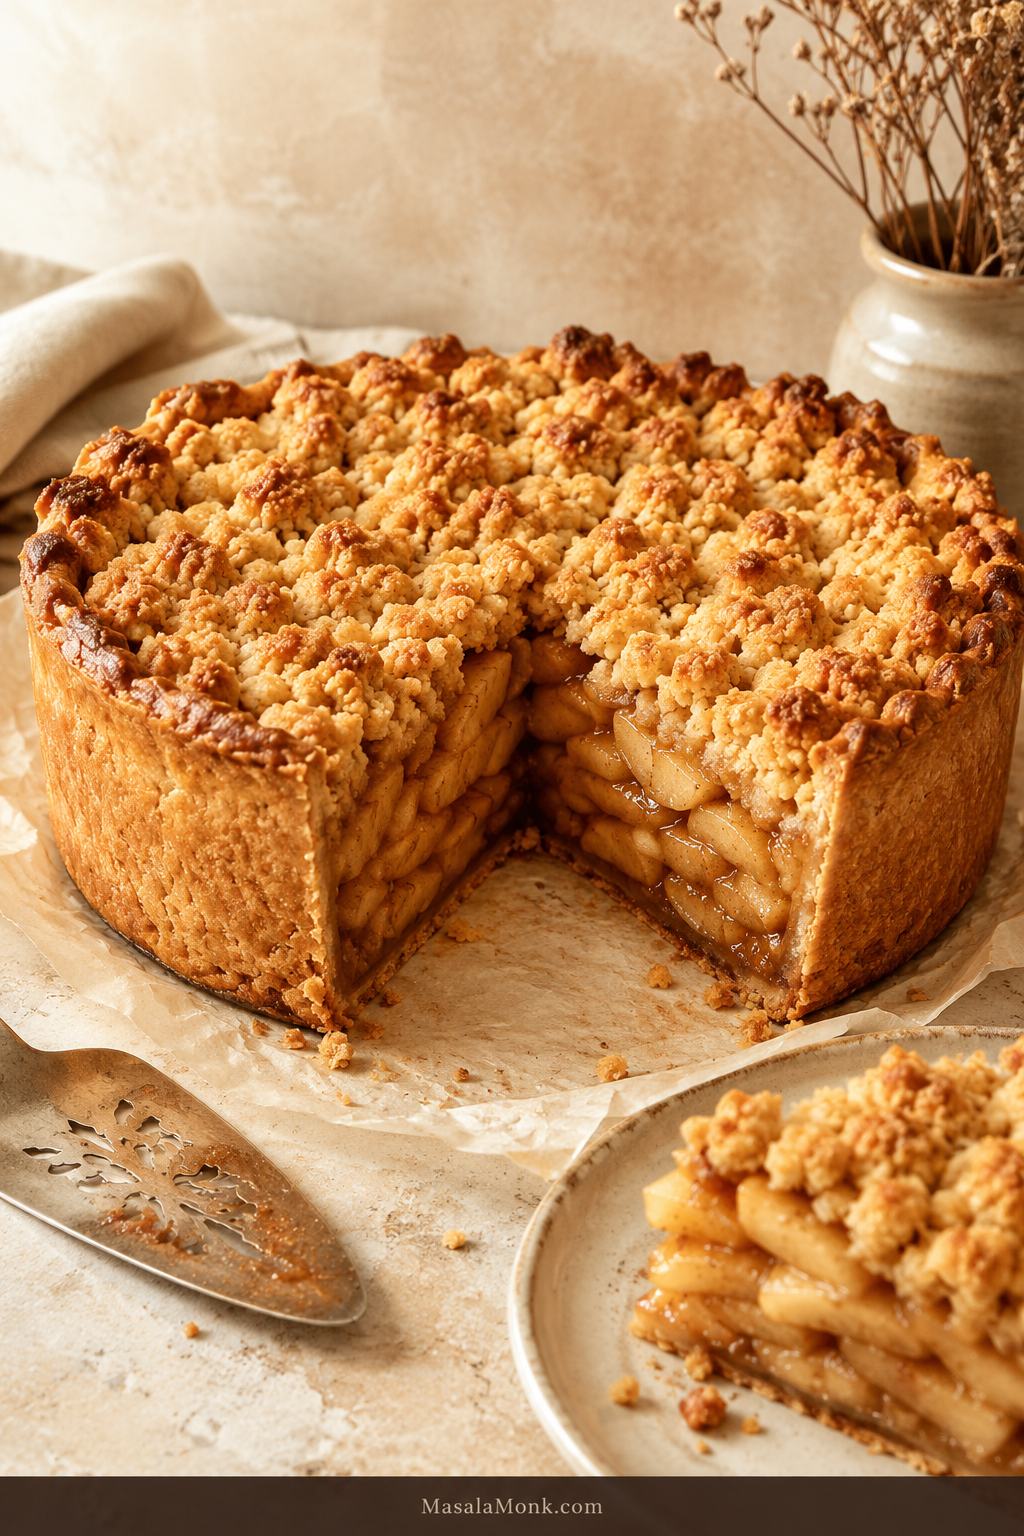
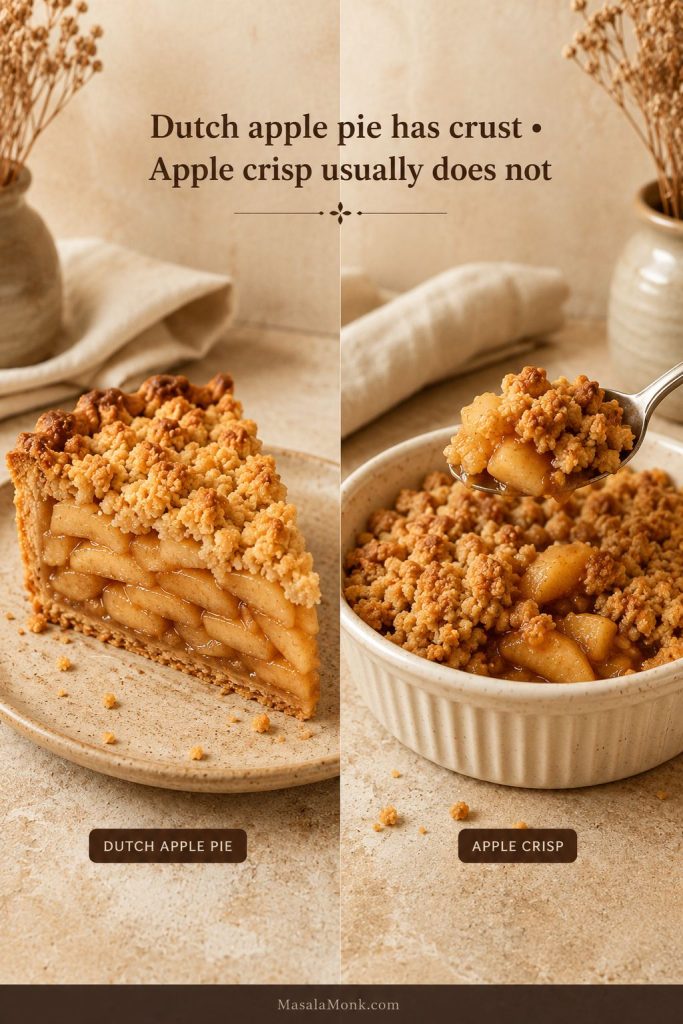
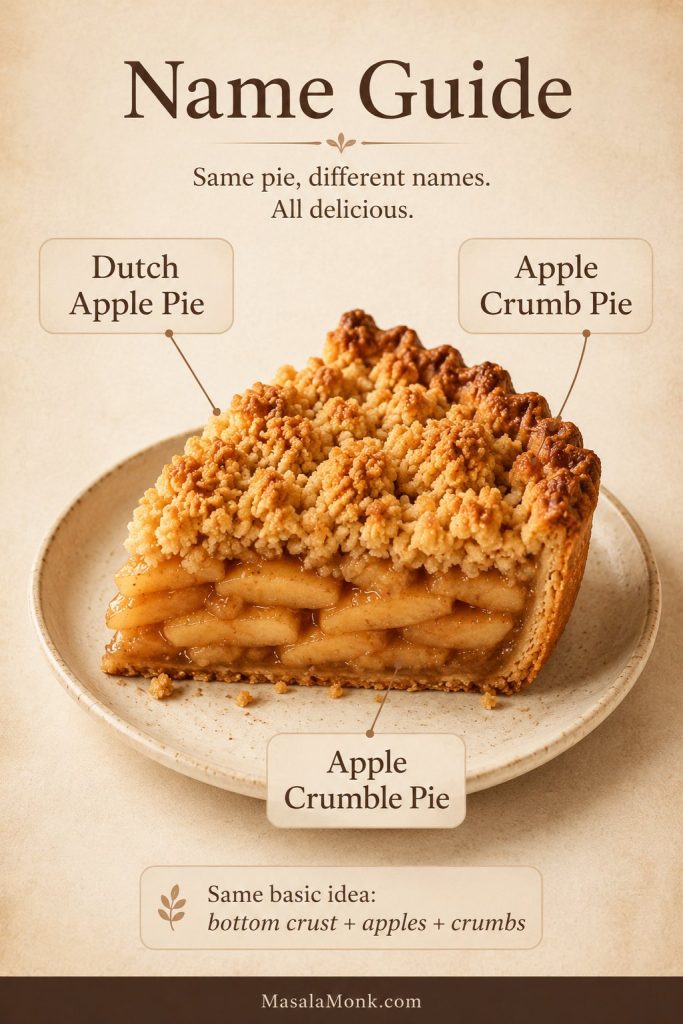
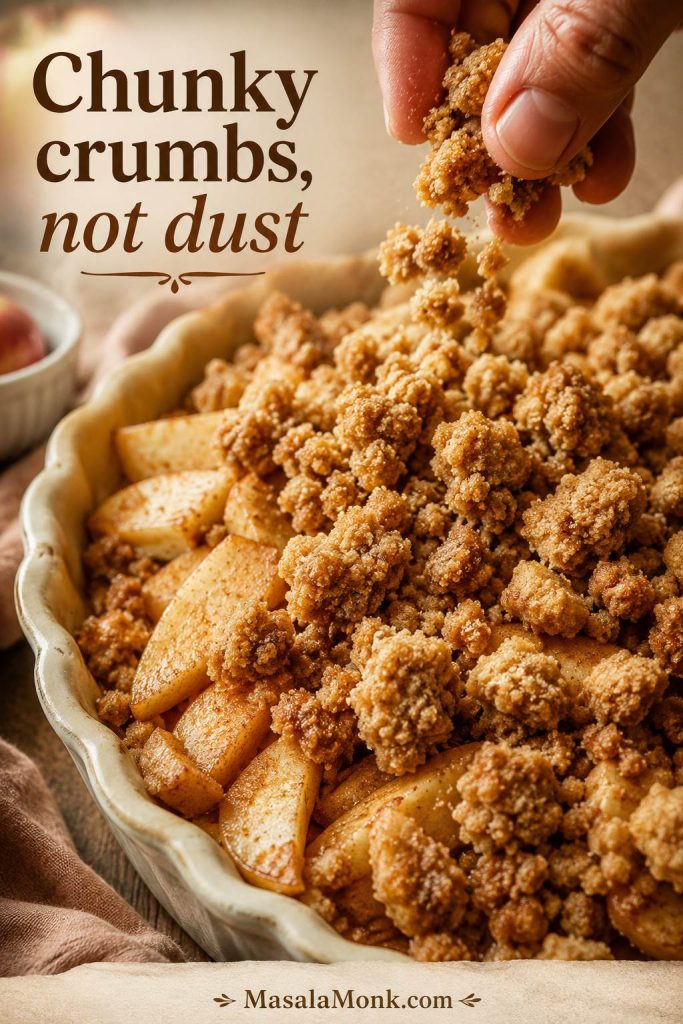
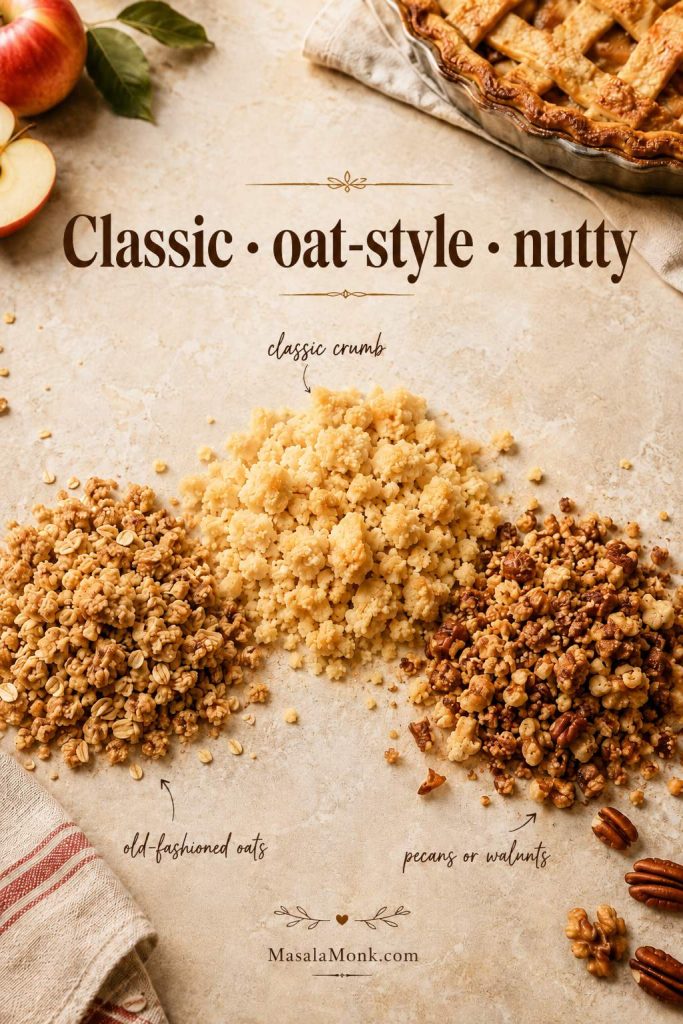
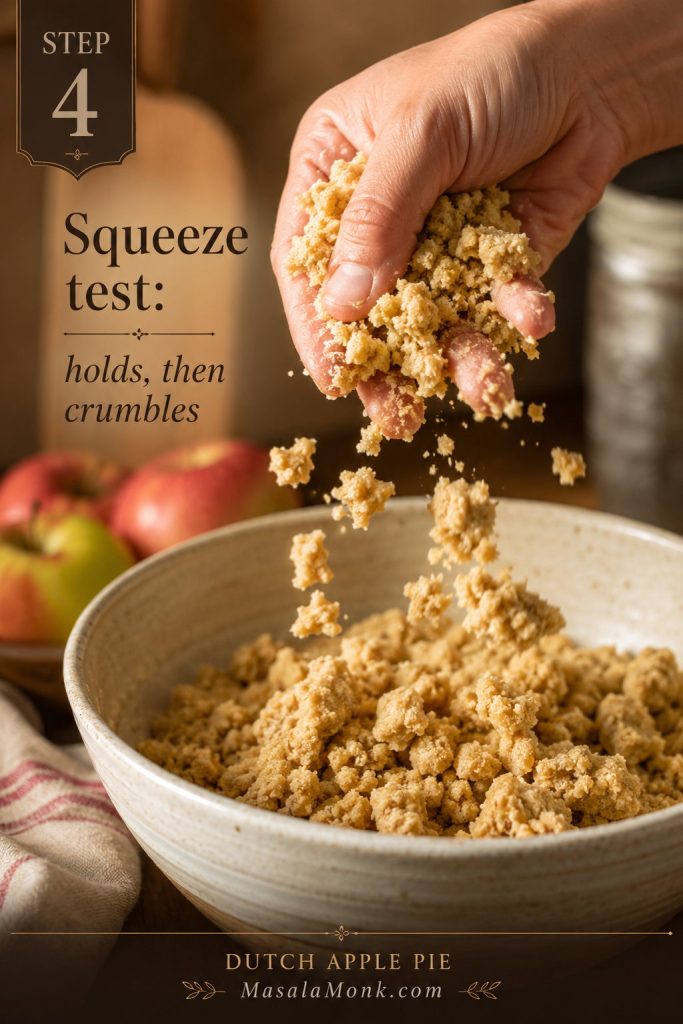
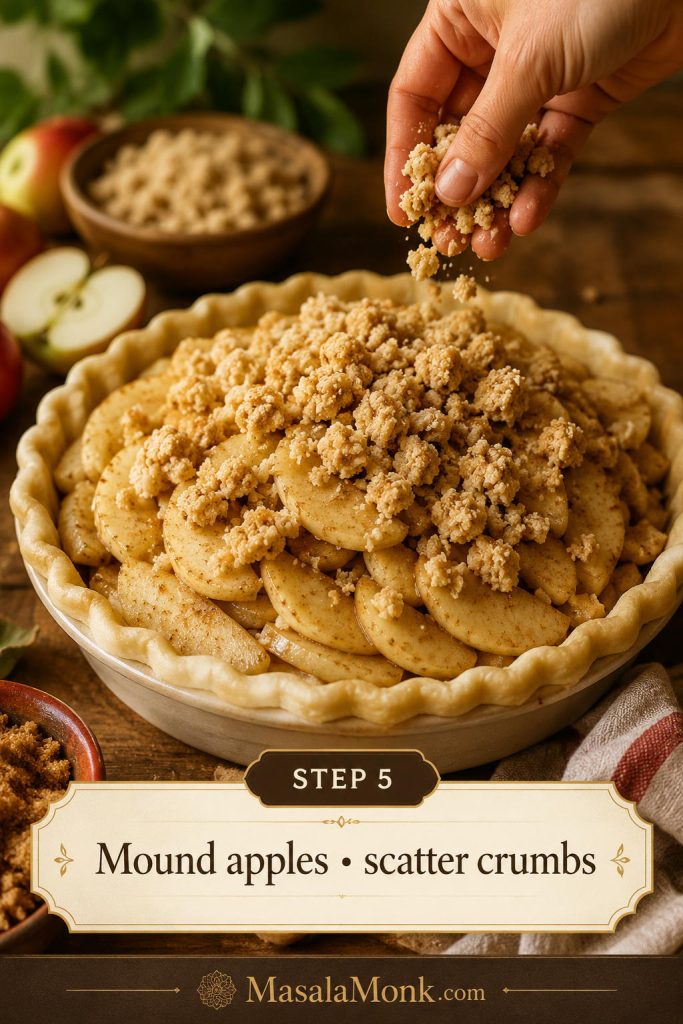
Apple Crumb Tart
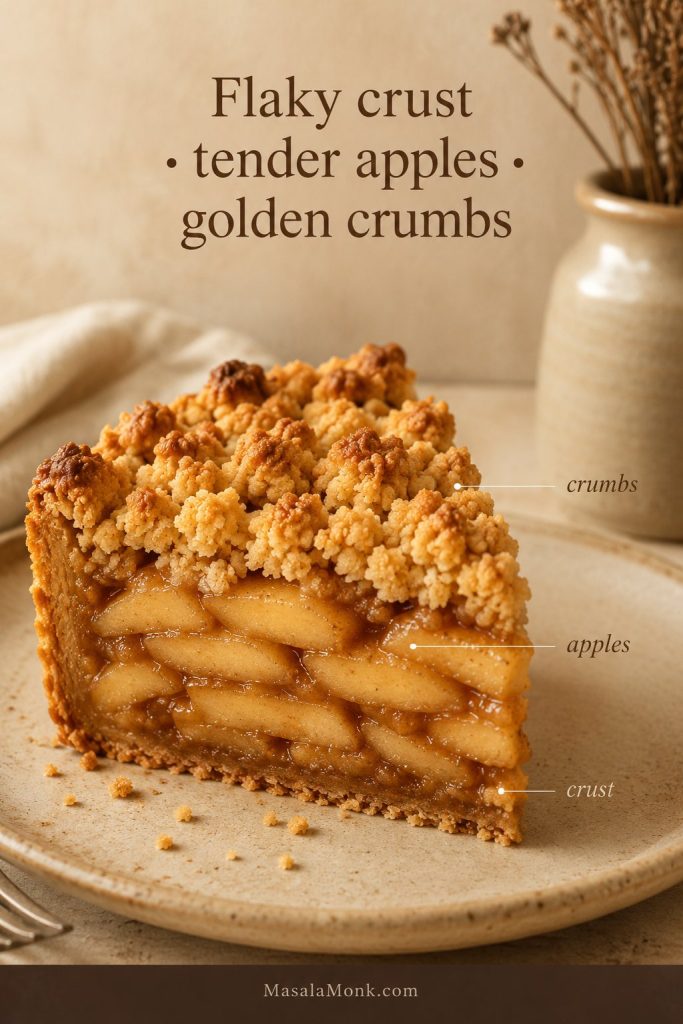
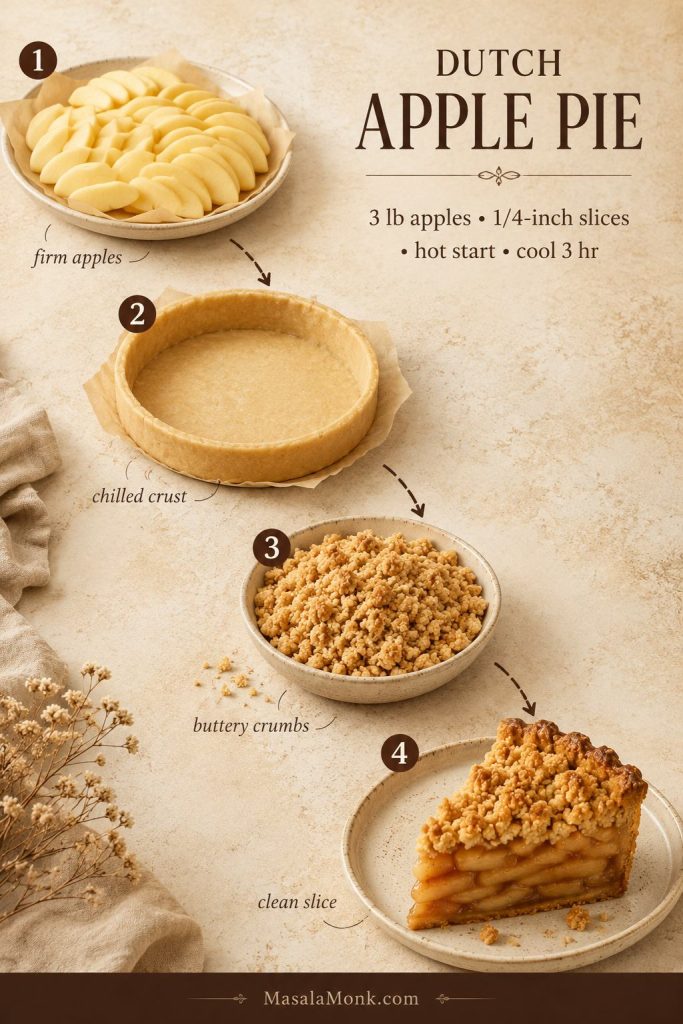
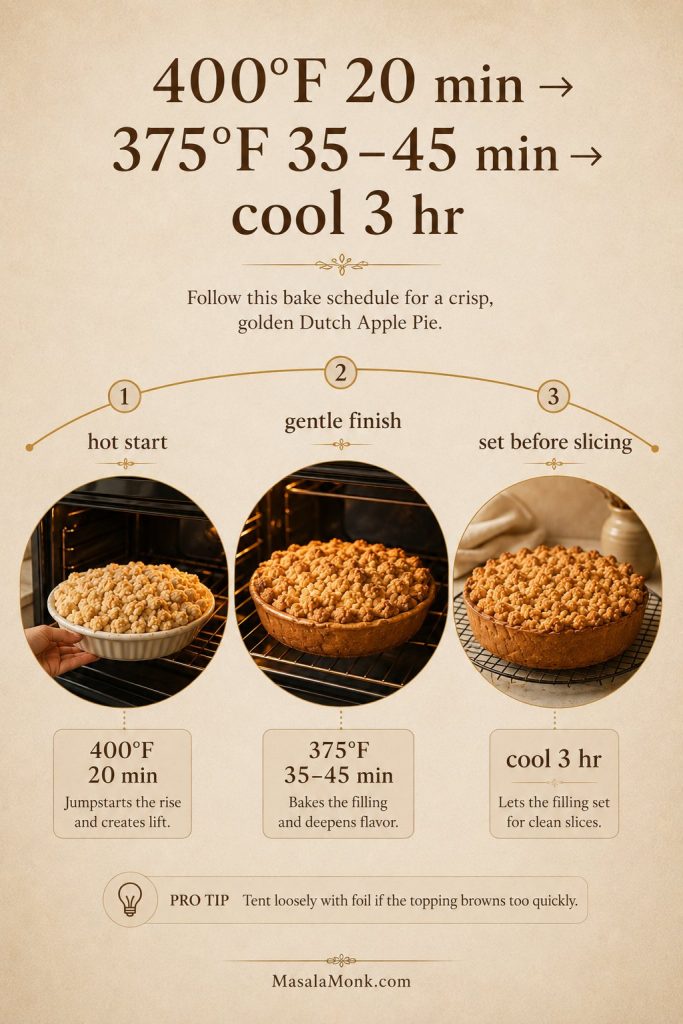
Add a light crumb topping over the apples before baking if you want a Dutch-style feel. For a fuller crumb-topped apple dessert, this Dutch apple pie recipe is the better route.
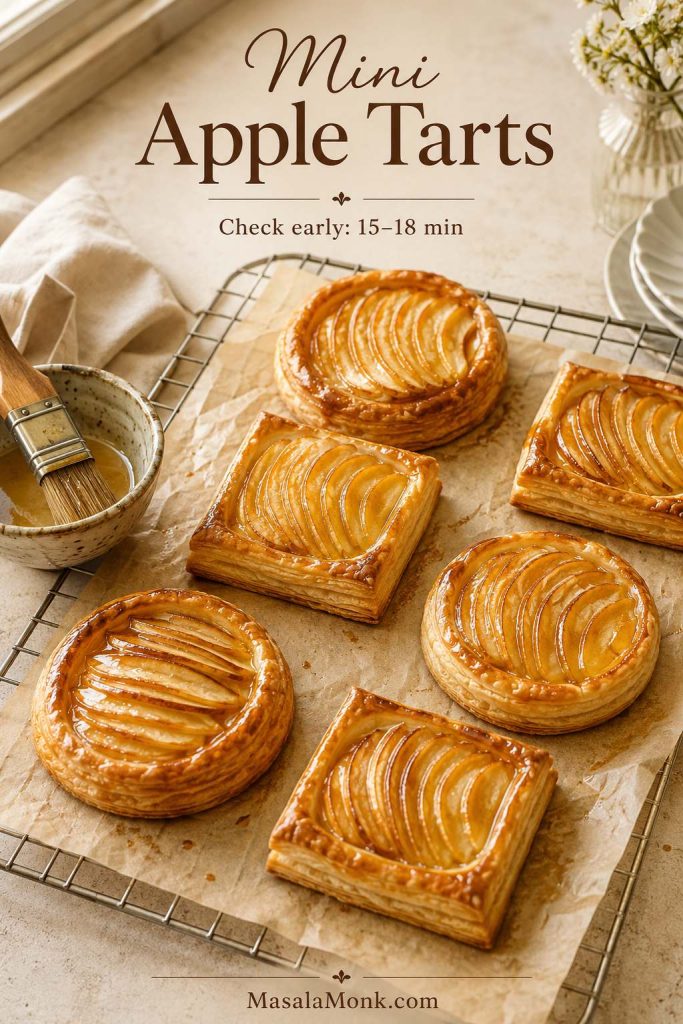
Mini Apple Tarts
Mini apple tarts are the party-friendly version. Cut puff pastry into smaller squares or rounds, top each piece with a few apple slices, and start checking around 15–18 minutes because small tarts brown faster than one large sheet tart.
Apple Frangipane Tart
For a richer bakery-style tart, add a thin layer of almond frangipane under the apples. Because the almond filling needs time to cook through, it is better treated as its own tart style rather than a quick add-on.
Prepared Apple Filling Dessert
Prepared apple pie filling is better in desserts designed for a softer, saucier texture. An apple cinnamon roll bake with apple pie filling is a much better fit when you want a quick dessert using ready-made filling.
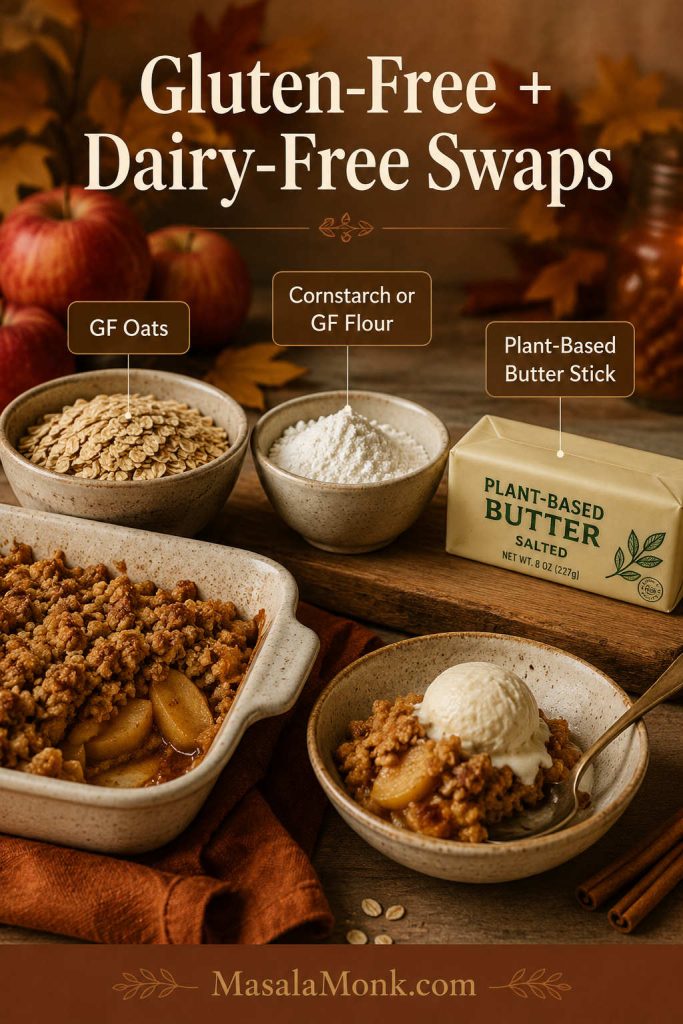
Vegan Apple Tart
For a vegan apple tart, choose vegan puff pastry, brush the border with plant milk, and use vegan butter or a neutral oil on the apples. Most of the method stays the same; just check the jam if you are cooking for strict vegans.
Gluten-Free Apple Tart
Use a tested gluten-free puff pastry or a gluten-free tart crust. Do not assume regular pie dough can be swapped one-for-one with gluten-free flour, because pastry structure changes quickly without gluten.
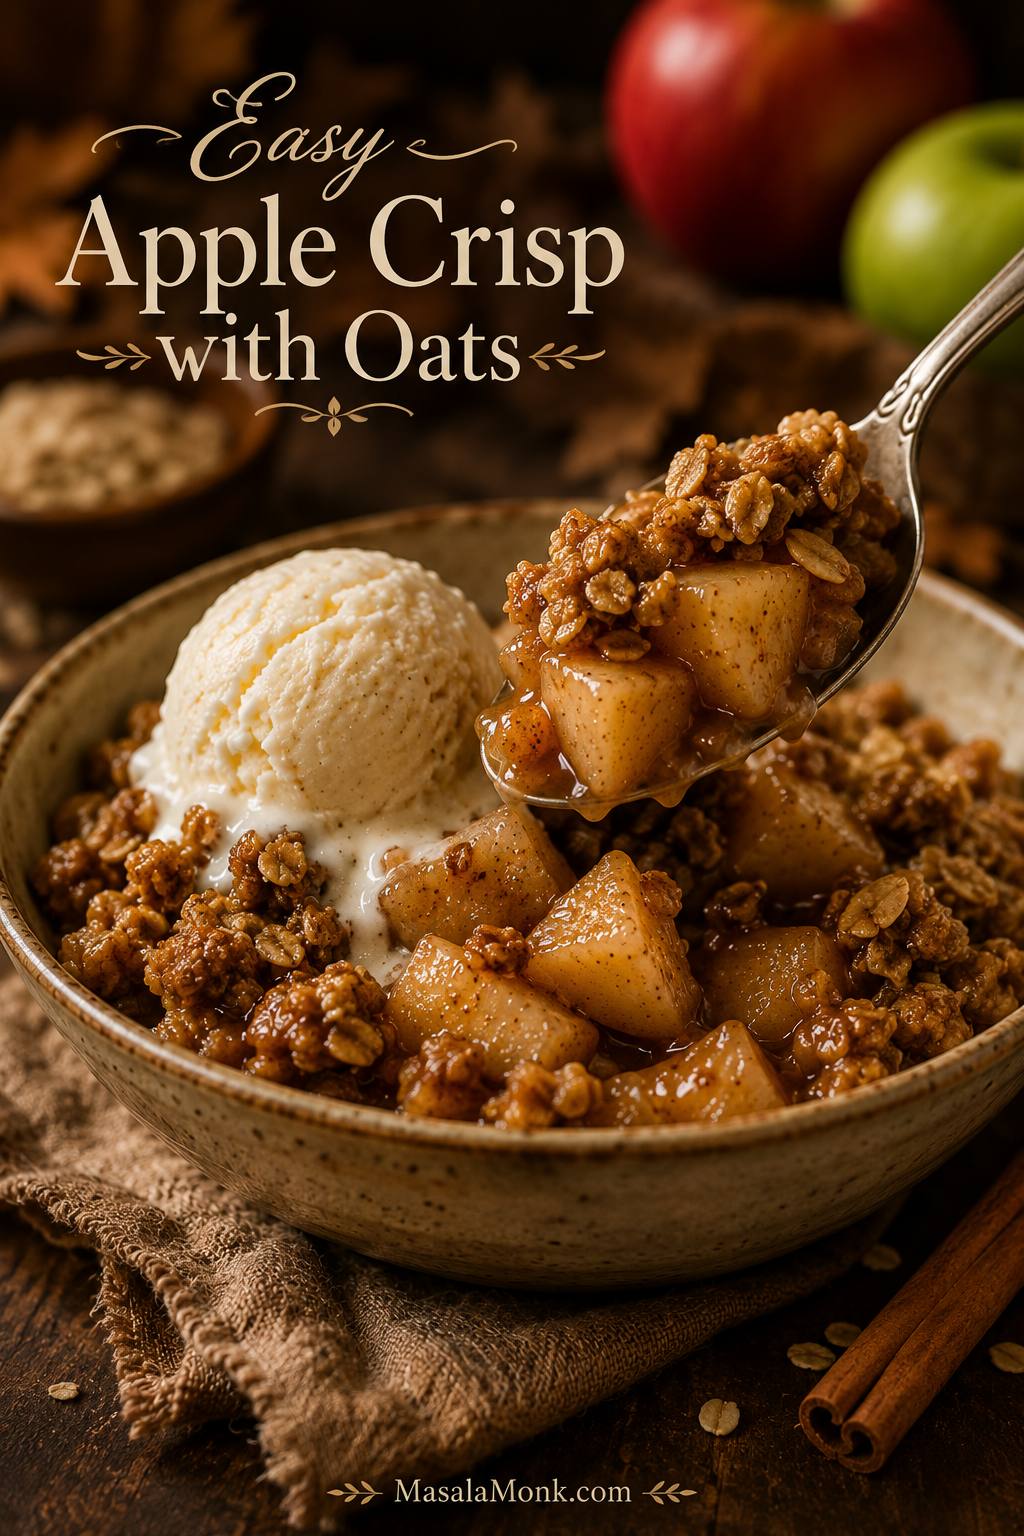
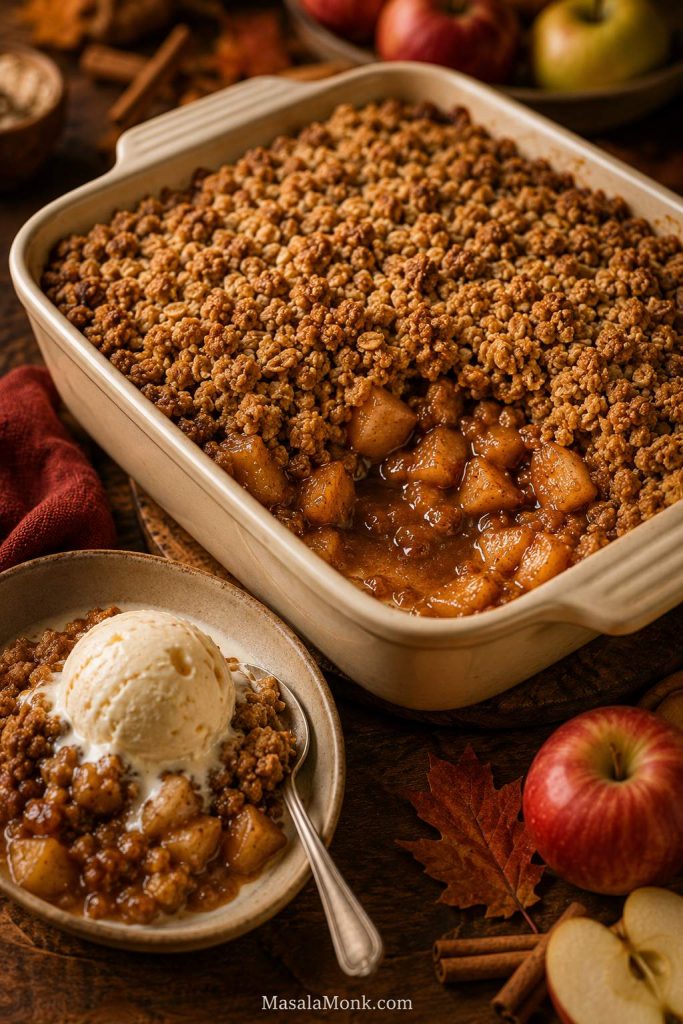
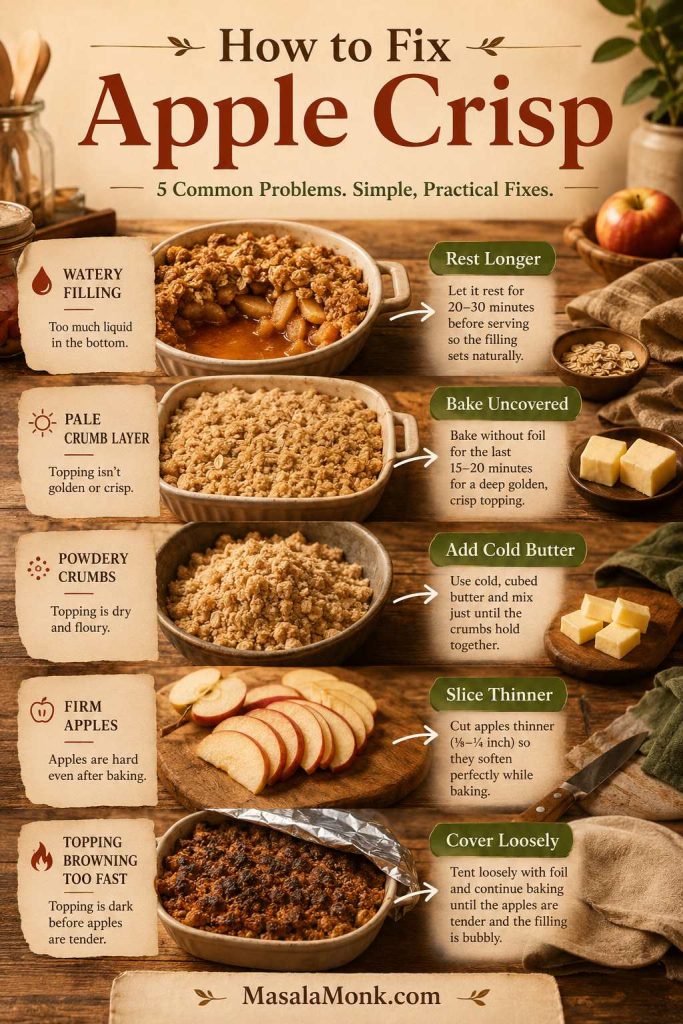
For apple flavor without pastry at all, make an apple crisp recipe instead. It gives you tender cinnamon apples and a crunchy topping without worrying about tart dough.
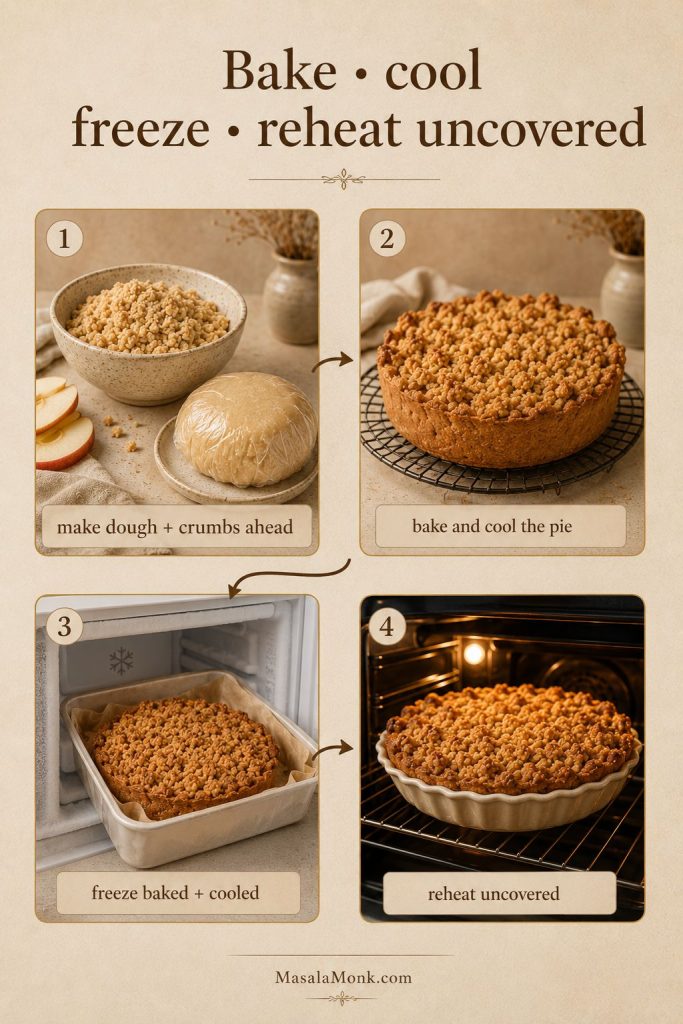
Storage, Freezing, and Reheating
How to store apple tart
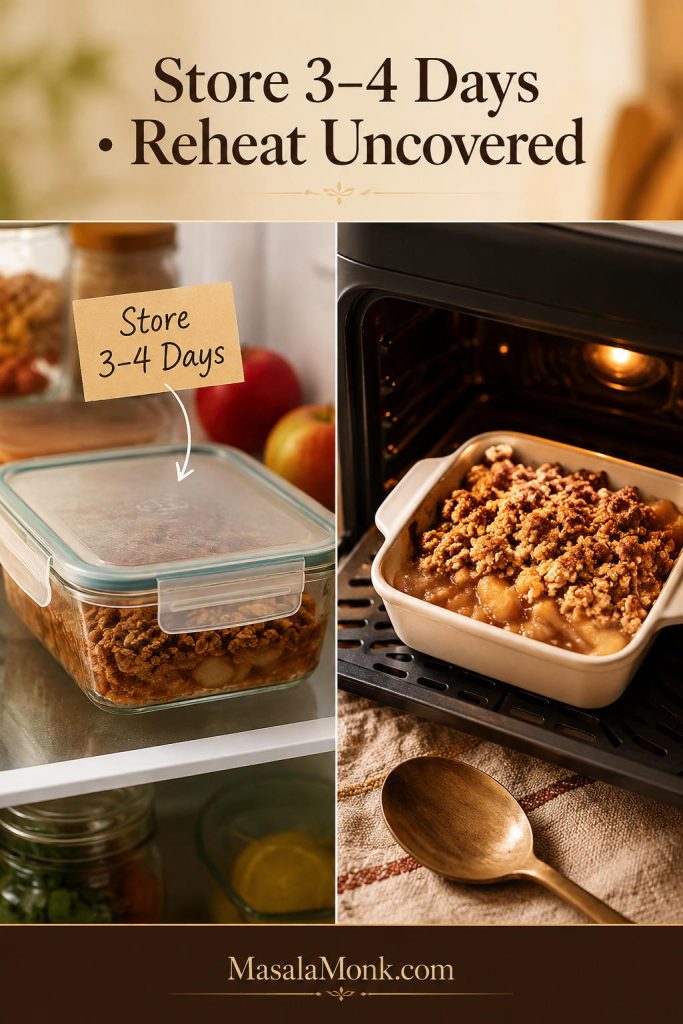
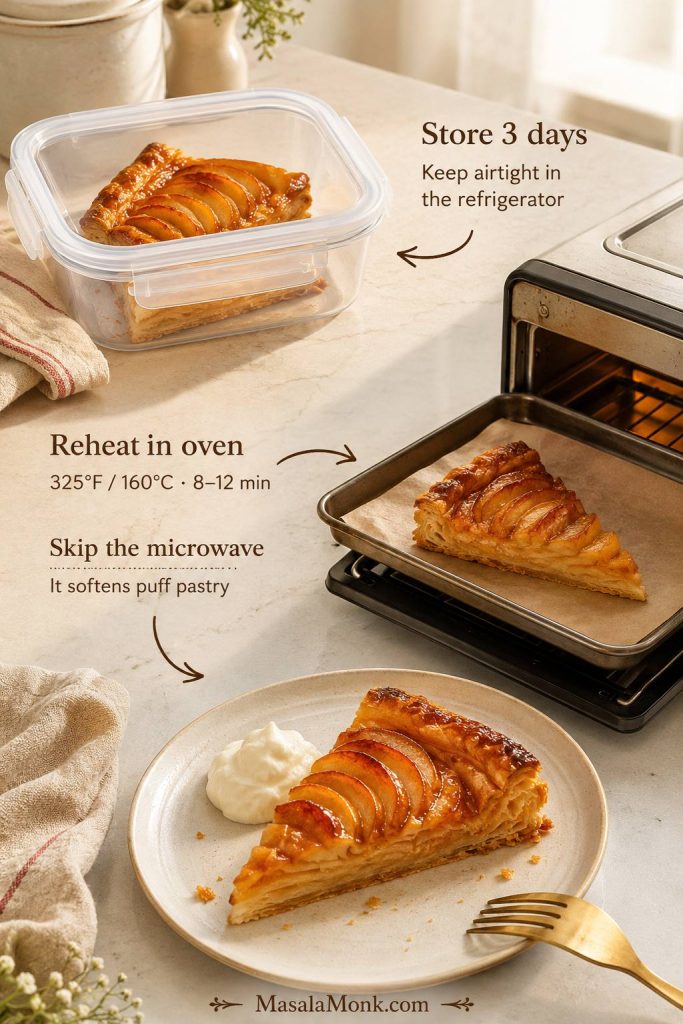
Apple tart is best the day it is baked, when the pastry is crispest. Store leftovers in an airtight container in the refrigerator for up to 3 days; this also stays in line with the USDA’s general leftovers and food safety guidance.
How to reheat apple tart
Reheat slices in a 325°F / 160°C oven or toaster oven for 8–12 minutes, until the pastry feels crisp again. Avoid microwaving if you care about texture; it softens puff pastry quickly.
Can you freeze apple tart?
You can freeze baked apple tart slices, but the pastry will not be quite as crisp after thawing. Reheat from chilled or partially thawed in the oven until warm and crisp at the edges.
Can you make apple tart ahead?
The best make-ahead plan is to prepare the small pieces, then assemble close to baking. Mix the cinnamon sugar ahead, measure the jam or jelly ahead, and keep thawed puff pastry cold in the refrigerator. Slice the apples shortly before assembly for the freshest texture and color, then warm the glaze just before brushing it over the tart.
For guests, bake the tart the same day and let it sit at room temperature before serving. It slices more neatly once it has cooled slightly, but still tastes special with ice cream, cream, coffee, or tea.
For serving ideas, jump to what goes well with apple tart near the FAQs.
Apple Tart Recipe Card

Apple Tart Recipe
This easy apple tart recipe bakes thin apple slices over store-bought puff pastry with cinnamon sugar and a glossy apricot glaze. It looks bakery-style, but the method is simple enough for a casual dessert.
Ingredients
- 1 sheet all-butter puff pastry, about 8–9 oz / 240–260 g, thawed but cold
- 3 medium apples, about 450–550 g / 1–1¼ lb before peeling and coring
- 1 tablespoon lemon juice / 15 ml
- 3–4 tablespoons granulated sugar or light brown sugar / 38–50 g
- ½ teaspoon ground cinnamon
- Pinch of fine salt
- 2 tablespoons unsalted butter / 28 g, melted
- 2 tablespoons apricot jam or apple jelly / 35–40 g
- 1 teaspoon water / 5 ml, for loosening the glaze
- Optional egg wash: 1 egg beaten with 1 teaspoon water
- Optional base barrier: 1 tablespoon almond flour, fine breadcrumbs, or all-purpose flour for juicy apples
Instructions
- Preheat the oven. Heat the oven to 400°F / 200°C, or 180°C fan. Place a rimmed baking sheet on the middle rack while the oven preheats.
- Prepare the pastry. Place the cold puff pastry on parchment paper. Roll lightly if needed to even it out. Score a ¾–1 inch / 2–2.5 cm border around the edge without cutting all the way through. Dock the center with a fork, leaving the border untouched.
- Slice the apples. Peel the apples if you like, then slice them ⅛–¼ inch / 3–6 mm thick.
- Season the apples. Toss the apple slices with lemon juice, sugar, cinnamon, and salt. Leave extra juice behind if the apples release a lot of liquid.
- Arrange the tart. If using the optional base barrier, sprinkle it lightly over the docked center of the pastry. Arrange the apples in overlapping rows or shingles inside the scored border. Brush the apples with melted butter. Brush egg wash only on the top border if using.
- Chill. Refrigerate the assembled tart for 10–15 minutes.
- Bake. Carefully slide the parchment and tart onto the hot baking sheet. Bake for 30–35 minutes, until the edges are puffed, the bottom is browned, and the apples are tender.
- Glaze. Warm the apricot jam with 1 teaspoon water until loose. Brush mostly over the warm apples.
- Cool and serve. Let the tart cool for 10–15 minutes before slicing. Serve warm or at room temperature.
Notes
- For a sharper tart, use Granny Smith or mix Granny Smith with Honeycrisp or Pink Lady.
- Honeycrisp, Gala, Fuji, and Golden Delicious make a sweeter, softer tart.
- A larger 300–320 g puff pastry sheet can take 4 medium apples and may need 3–5 extra minutes in the oven.
- Shortcrust or pie crust works best in a 9–10 inch tart pan and usually needs 40–55 minutes.
- Do not overload the pastry with apples. One generous overlapping layer is enough.
- For a French-style applesauce layer, use only 2–3 tablespoons of smooth, unsweetened applesauce on puff pastry so the base does not soften.
- Leftovers keep in the refrigerator for up to 3 days. Reheat in the oven, not the microwave, for the best texture.
FAQs
Can I use puff pastry for apple tart?
Yes. Puff pastry works especially well for apple tart because it gives a flaky base and raised edge without homemade dough. The key is to bake it from cold and avoid piling on too many apples.
Do the apples need to be cooked first?
No. For this style of apple tart, thin raw apple slices bake directly on the pastry. Pre-cooked apple pie filling is usually too wet and thick for a thin puff pastry tart.
Can apple pie filling be used for apple tart?
Apple pie filling is not the best choice for this tart. It is saucier and heavier, so it can make puff pastry soggy. Use fresh thin apple slices for this recipe and save cooked filling for deeper pies, crisps, hand pies, cinnamon roll bakes, or shortcut desserts.
What temperature is best for apple tart?
For puff pastry apple tart, 400°F / 200°C, or 180°C fan, is reliable. It is hot enough to puff and brown the pastry, but not so aggressive that the apple edges burn before the base cooks.
How thin should apples be for apple tart?
Slice apples about ⅛–¼ inch / 3–6 mm thick. Thin slices soften quickly and create a neater tart. Thicker slices work, but they make the tart more rustic and may need a few extra minutes in the oven.
Should apples be peeled for apple tart?
Peeling is optional. Peeled apples give a softer, more classic tart. Unpeeled apples add color and a little bite, especially with red-skinned apples like Pink Lady or Honeycrisp.
Why is my apple tart soggy?
The most common reasons are warm pastry, too many apples, too much apple juice, or underbaking. Keep the pastry cold, bake on a hot sheet pan, leave excess apple juice behind, and bake until the bottom is crisp.
Does shortcrust pastry work for apple tart?
Shortcrust pastry works well for a classic round apple tart in a tart pan. Chill the lined pan before baking, prick the base, and bake long enough for the crust to turn fully golden.
Can apple tart be made in an air fryer?
Small puff pastry apple tarts can be made in an air fryer, but a full rectangular tart is usually better in the oven. For mini versions, use parchment, leave room for the pastry to puff, and check early because air fryers brown quickly.
What goes well with apple tart?
Warm slices love vanilla ice cream because the cold cream melts into the glossy apples. At room temperature, the tart is lovely with whipped cream, crème fraîche, plain Greek yogurt, coffee, or tea, especially once the pastry has settled and the apple flavor tastes a little deeper.