Posted on — Leave a comment

Apple Crumble Recipe: Easy, Buttery & Crisp

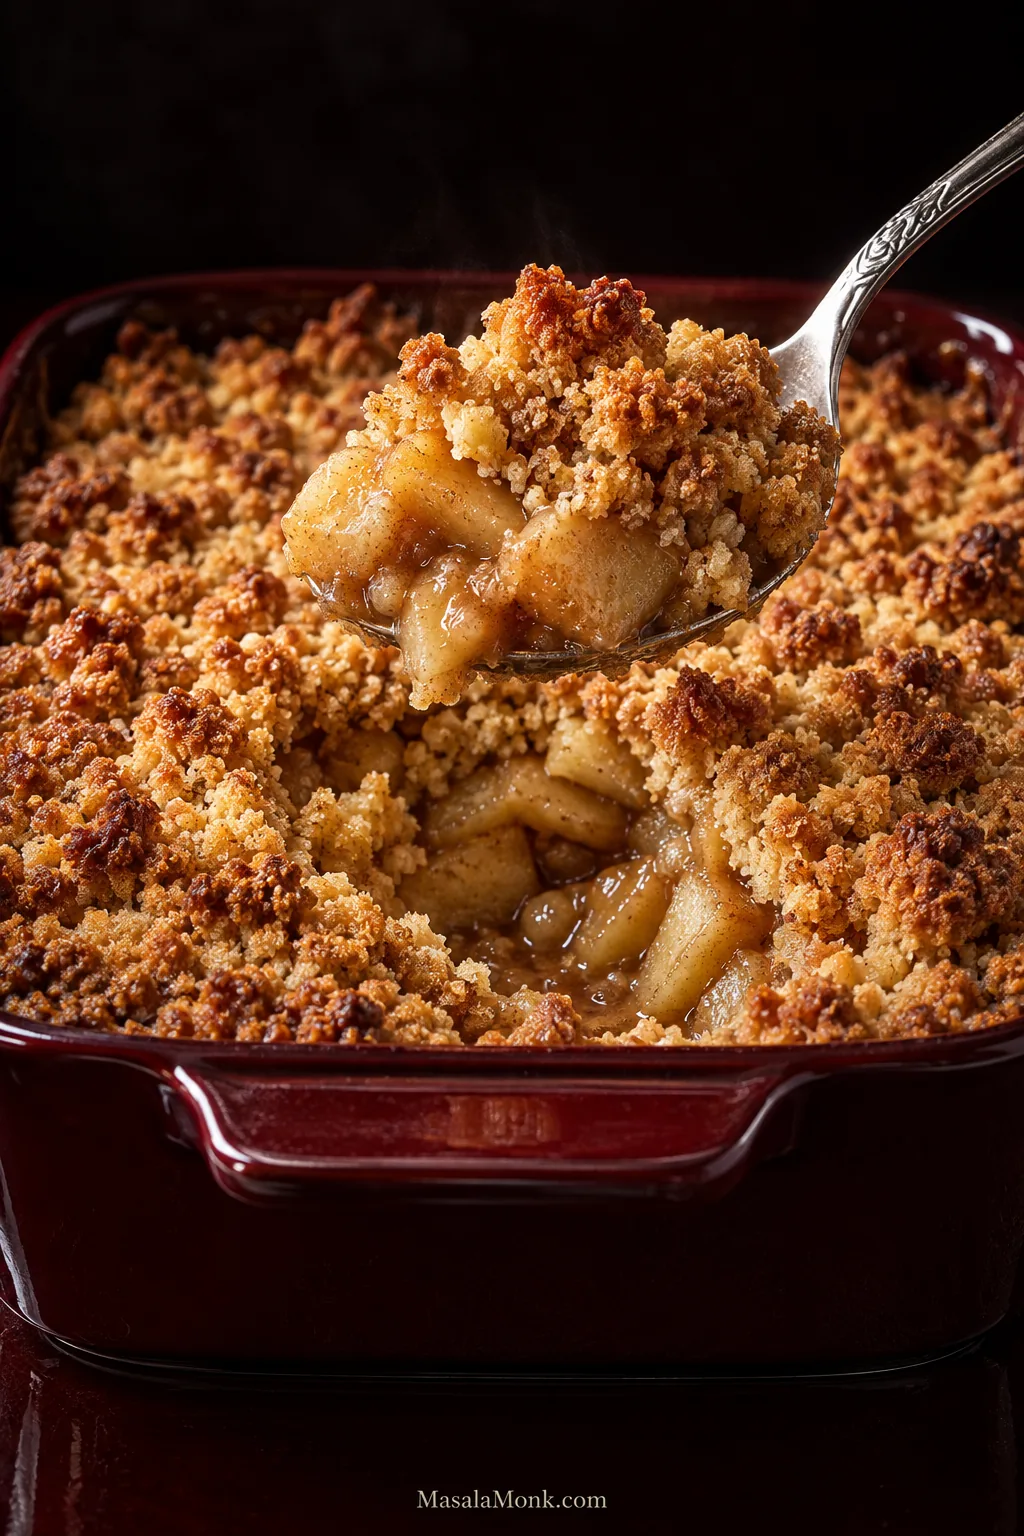
A spoon lifts apple crumble from a dark red baking dish, revealing golden crumb topping, tender apple pieces and lightly thickened cinnamon juices underneath.

The awkward thing about apple crumble is that the top can look completely finished before the apples underneath are ready.

The crumbs are deeply golden. Butter is sizzling at the edges. The kitchen smells like baked apple and cinnamon. Then you push a knife through the middle and hit firm fruit. Or the apples are perfect, but enough steam has worked its way into the topping to take away the crisp rubble you wanted.

Apple crumble is too simple a dessert to deserve that much uncertainty.

This apple crumble recipe is built around getting the fruit and topping to finish together. Underneath, the apples become tender in a light cinnamon-scented sauce. Above them is a generous flour-butter-sugar crumble with crisp edges, fine buttery crumbs and a few larger craggy pieces.

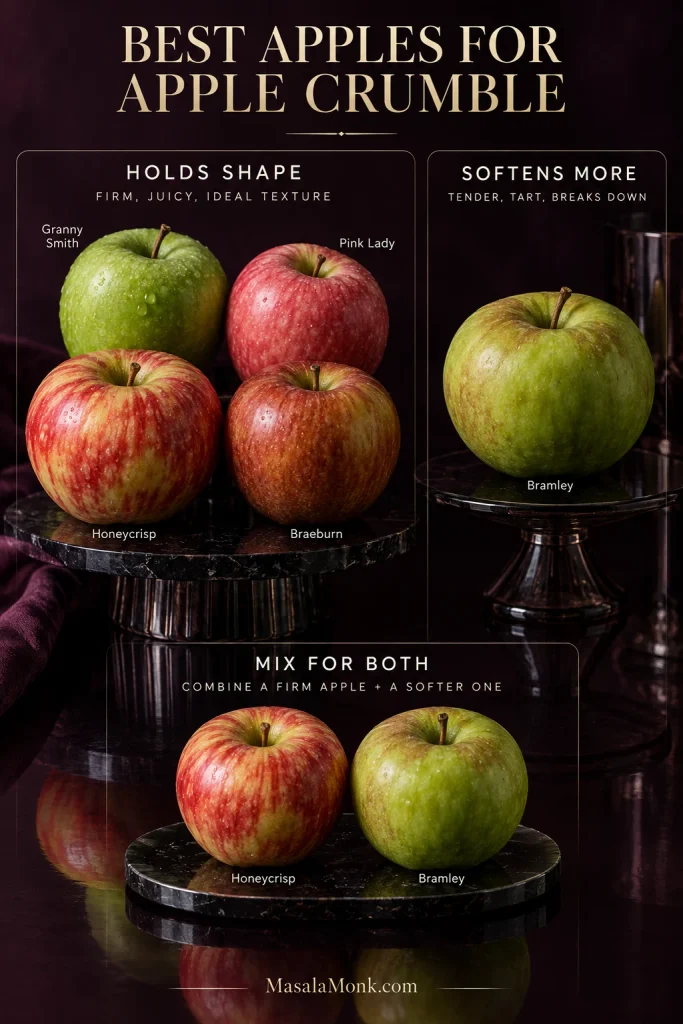
If you want one easy default, a firm-tart apple such as Granny Smith is a good place to start. Bramley gives a softer, more spoonable filling, while Pink Lady, Honeycrisp, Braeburn and ordinary eating apples can all work too. The method is designed to adapt to the apples you actually have.

Apple Crumble Recipe at a Glance

Prep20–25 minutes
Serves6 generously or 8 more modestly
Prepared apples30–32 oz / 850–900 g, peeled and cored
Baking dish8×8 in / 20×20 cm, about 2 qt / 1.9 L
Oven375°F / 190°C conventional / 170°C fan
BakeAbout 45–55 minutes; begin checking around 40
Done whenGolden crumbs + bubbling juice + tender apples
Rest15–20 minutes

Time is only the starting point. The fruit and topping decide when the crumble is ready.

Apple Crumble Recipe

The crumble itself is simple: apples underneath and a four-ingredient topping above. The rest is mostly knowing what to change when your fruit is sweeter, firmer or juicier than expected.

Easy Apple Crumble Recipe

Tender cinnamon apples in their own lightly thickened juices, covered with a generous buttery crumble that bakes crisp at the edges and craggy on top.

Prep: 20–25 minutes Bake: 45–55 minutes Rest: 15–20 minutes Serves: 6 generously or 8 more modestly Dish: 8×8 in / 20×20 cm, about 2 qt / 1.9 L

Apple Filling

  • 30–32 oz / 850–900 g apples, weighed after peeling and coring; buy about 2¼–2½ lb / 1–1.1 kg whole apples
  • ¼ cup / 50 g caster or granulated sugar
  • 1 tbsp / 8–10 g all-purpose/plain flour
  • 2 tsp / 10 ml lemon juice
  • 1 tsp ground cinnamon
  • Pinch of fine salt

Crumble Topping

  • 7 oz / 200 g all-purpose/plain flour
  • 4½ oz / 125 g cold unsalted butter, cut into small cubes
  • 3½ oz / 100 g caster or granulated sugar
  • ¼ tsp fine salt

Instructions

  1. Heat the oven: Preheat to 375°F / 190°C conventional / 170°C fan. Use an 8×8-inch / 20×20 cm baking dish if you have one.
  2. Cut the apples: For a softer, more cohesive filling, slice them about ¼ inch / 6–7 mm thick. For more distinct pieces, cut them into roughly ½-inch / 1.25 cm chunks. Keep the pieces fairly even. Chunkier fruit may need the longer end of the baking range.
  3. Season the fruit: Toss the apples with the sugar, flour, lemon juice, cinnamon and salt. Use 35–40 g sugar for sweet apples, 50 g for most apples, and 55–60 g for very tart cooking apples. Very tart fruit may need less lemon—or none.
  4. Make the crumble: Mix the flour, sugar and salt. Rub or cut in the cold butter until you have coarse crumbs with plenty of pea-sized buttery pieces and a few larger clumps. Squeeze a handful: it should hold briefly, then break apart when nudged. Think rubble, not dough.
  5. Assemble: Spread the apples evenly in the dish. Scatter the topping loosely over them and keep the surface irregular. Do not press it into a thick, compact blanket.
  6. Leave room to bubble: Leave a little headroom if you can. If the dish looks very full, set it on a rimmed baking sheet or baking tray.
Bake, Check and Rest
  1. Bake: Bake for about 45–55 minutes, checking from 40 minutes onward. The high spots should be deeply golden and thick apple juice should be bubbling around several edges.
  2. Check the fruit: Slide a thin knife through an open spot near the center. It should pass through the apple with very little resistance.
  3. Protect the top if necessary: Crumbs already dark enough? Tent the dish loosely with foil and keep baking until the fruit is tender.
  4. Rest: Leave the crumble for 15–20 minutes before serving. The juices thicken slightly as they settle around the apples.

Recipe Notes

  • Unusually dry apples: add about 1 tbsp / 15 ml water with the filling.
  • With oats: replace 1¾ oz / 50 g of the topping flour with 1¾ oz / 50 g old-fashioned rolled oats.
  • Salted butter: use the same weight and omit the ¼ tsp salt from the topping.
  • Make ahead: the topping is the best part to prepare in advance; refrigerate it overnight or freeze it for longer storage.

The best crumble is not perfectly even. Leave the surface craggy and loose; more exposed edges mean more places to toast.
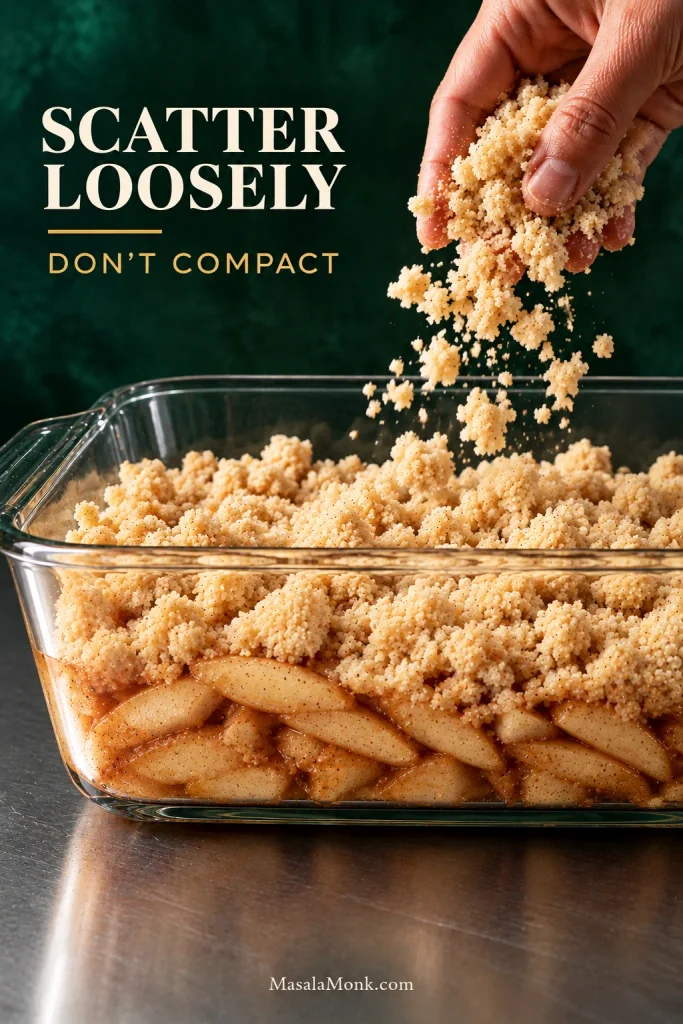
A hand scatters loose raw crumble over seasoned apple slices in a clear baking dish, showing the fruit layer, irregular topping and space below the rim.
A few low spots and larger crags create more exposed edges for browning than a perfectly level blanket.

Why This Apple Crumble Works

  • Apples: a little flour thickens their juices without making the filling pasty.
  • Topping: the flour-forward ratio stays crumbly rather than baking into a dense cap.
  • Dish: the 8×8 keeps the fruit layer substantial without making the center unnecessarily slow to cook.
  • Doneness: judge the fruit and bubbling juice as well as the color on top.
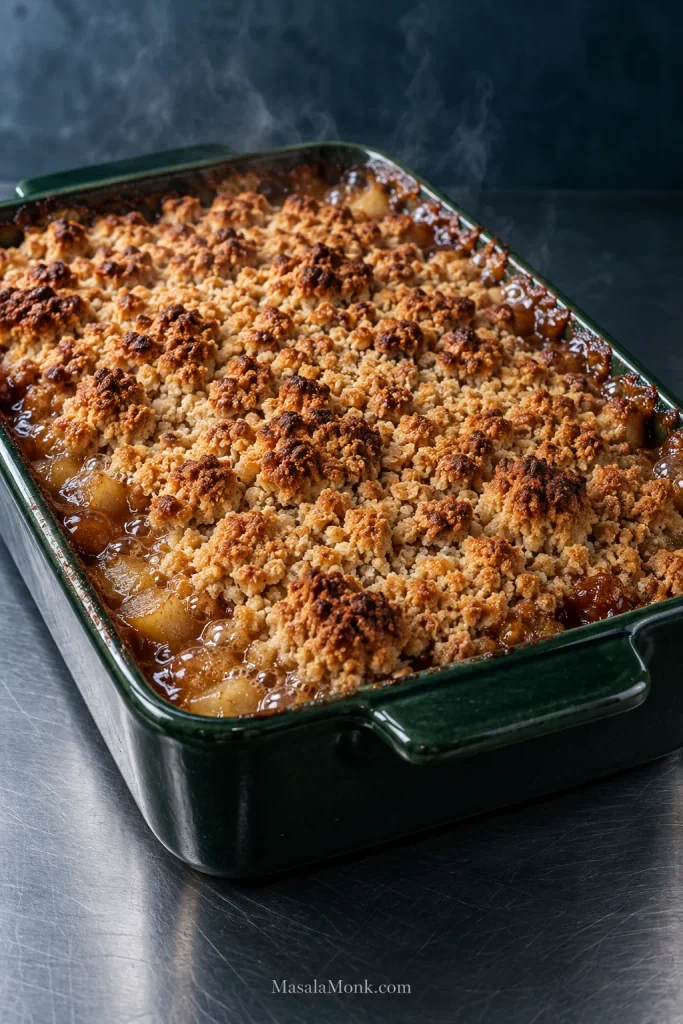
Freshly baked apple crumble in a dark green dish with an irregular golden topping and thick apple juices visibly bubbling around the edges.
Bubbles around several edges are a better cue than one active corner; they show the fruit layer is hot through.

Apple Crumble Guide

The recipe above is enough for an ordinary batch. The rest is for the things that make crumble behave differently: the apples you have, the dish you use and the problems that occasionally show up.

Which Apples Make the Best Crumble?

If you want one easy default, use a firm-tart apple such as Granny Smith. It stays recognizably apple while balancing the sweet topping. Bramley gives a softer, more spoonable filling. Both work well; the main difference is the texture of the finished fruit.

If You Want…Good ChoicesWhat to Expect
Distinct apple piecesGranny Smith, Pink Lady, Braeburn, HoneycrispFruit stays more recognizably apple
A softer fillingBramley or another cooking appleMore breakdown and a more cohesive sauce
A mix of bothOne firm apple + one softer varietyDifferent textures in the same spoonful
Whatever is already in the fruit bowlAlmost any eating appleTaste first, then adjust sugar and cut
Granny Smith, Pink Lady, Honeycrisp, Braeburn and Bramley apples arranged by whether they hold their shape, soften more or work well mixed together.
Taste an unfamiliar apple first: sweetness guides the sugar, while firmness hints at how much shape it will keep.

If you are working with a variety you do not know well, Penn State Extension has a useful apple chart covering sweetness, tartness, firmness and juiciness.

Use the Apples You Have

Most apples will work. The trick is to notice what you are working with before you season them.

Sweet eating apples need less sugar, while very tart cooking apples can take more. Taste the fruit first, then adjust the sugar in the filling rather than changing the topping.
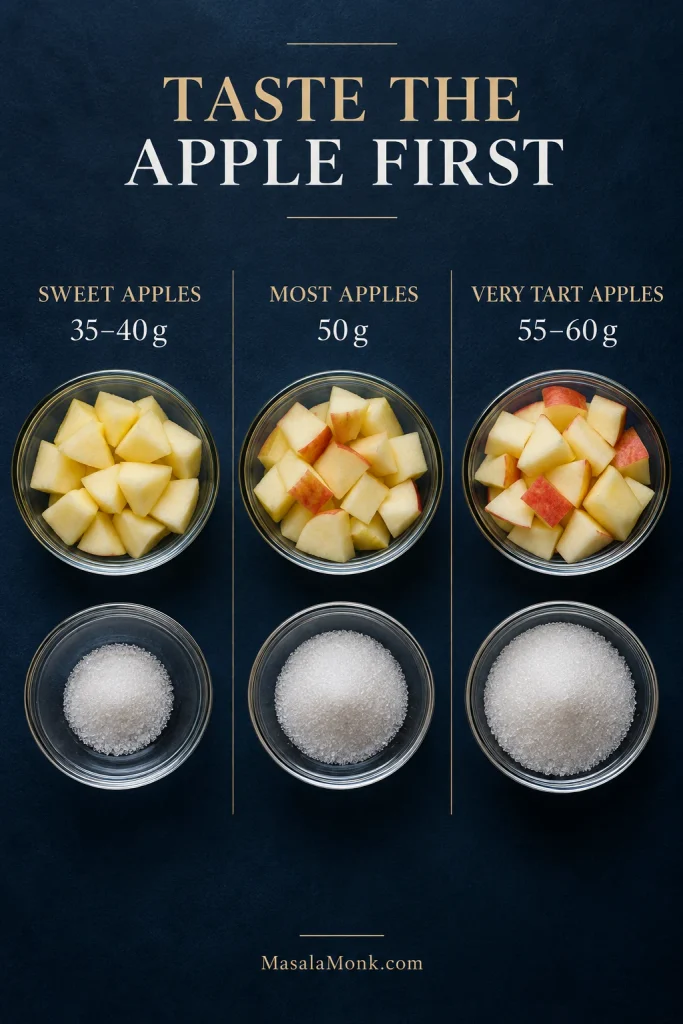
Three portions of prepared apples with increasing amounts of sugar: 35–40 grams for sweet apples, 50 grams for most apples and 55–60 grams for very tart apples.
These adjustments belong to the fruit layer, so you can correct sweet or tart apples without changing the topping.

For the cut, firmer fruit benefits from even, slightly thinner pieces; softer apples are better in somewhat larger pieces. If the fruit seems unusually dry as you cut it, add about 1 tbsp / 15 ml water with the filling.
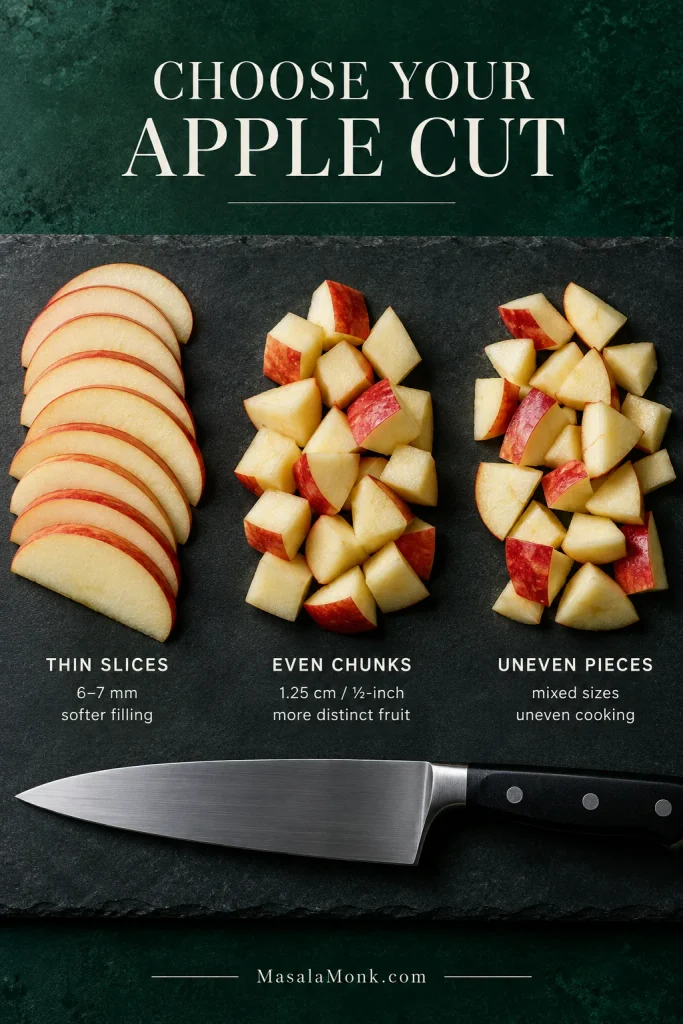
Three apple preparations compared on a dark surface: even thin slices, evenly sized chunks and uneven chunks of mixed sizes beside a kitchen knife.
Even sizing matters more than slices versus chunks; mixed thicknesses create different cooking speeds in the same dish.

You do not have to get every variable exactly right. Apple crumble is forgiving once you know what to look for.

For this version, the target is tender apple with a light cinnamon sauce clinging to it. A little breakdown is welcome. Complete collapse only matters when you wanted distinct pieces.
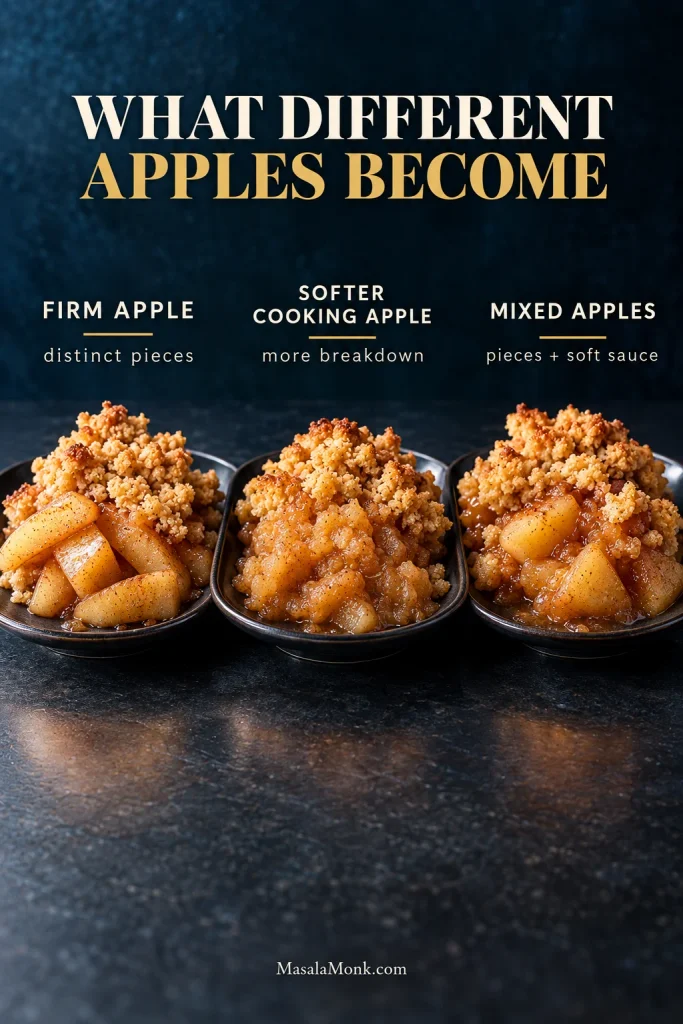
Three finished apple crumble portions compare firm apples with distinct pieces, softer cooking apples with more breakdown and mixed apples with both pieces and soft sauce.
Mixing firm and softer apples gives you both recognizable pieces and a more spoonable filling in the same dish.

How the Apple Juices Turn Into a Light Sauce

The apples do most of the work. Their juices mix with the sugar and cinnamon as the dish bakes, while the small amount of flour thickens them just enough to cling to the fruit rather than run across the bowl.

The flour is not there to create the firm, sliceable texture of pie filling. This should still feel like crumble: soft fruit, a little sauce and plenty of crisp topping.

Straight from the oven, do not worry if the sauce still looks a little loose. Give it 15 minutes and it will settle around the apples.
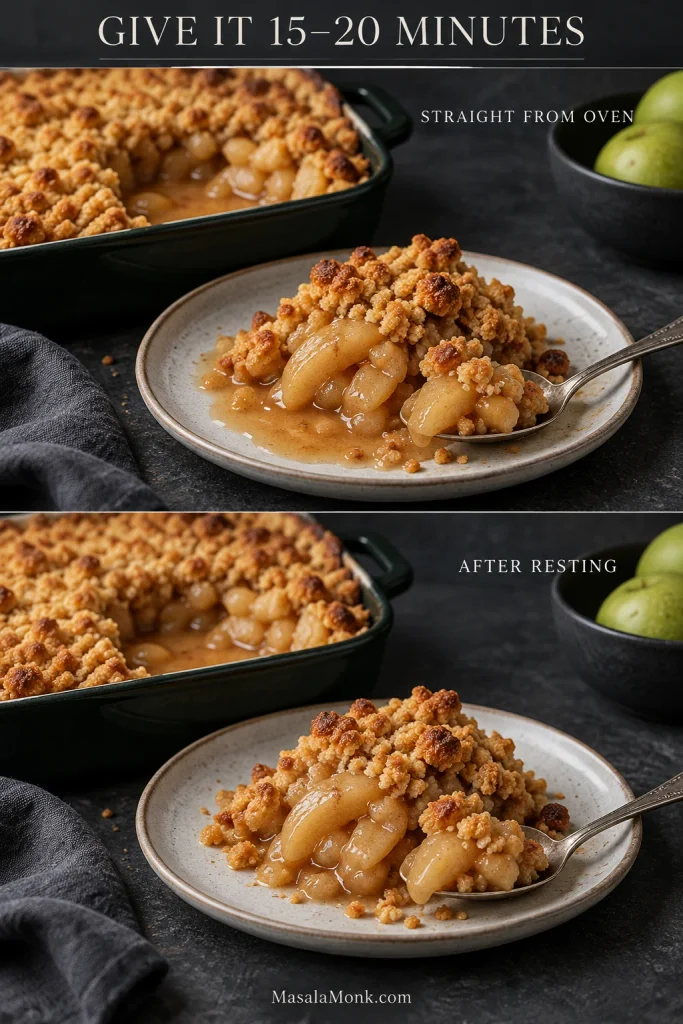
The same apple crumble compared straight from the oven and after resting 15–20 minutes, with loose juice first and thicker sauce clinging to the apples afterward.
Resting thickens loose juices; it cannot soften firm apples. Hard fruit still needs more baking.

For pies, turnovers and other desserts that need a thicker pre-cooked fruit layer, the Apple Pie Filling Recipe uses a different stovetop method.

Get the Crumble Texture You Actually Want

For crisp crumble topping, keep the butter cold and stop while the mixture is still irregular rather than working it into a smooth dough.

The ratio here is 200 g flour, 125 g butter and 100 g sugar. It is flour-forward enough to stay crumbly rather than melting into a dense, cookie-like cap.

Work it a little longer and the crumbs become finer. Stop sooner and you keep more pea-sized buttery pieces. Squeeze a few handfuls together if you want larger clusters.
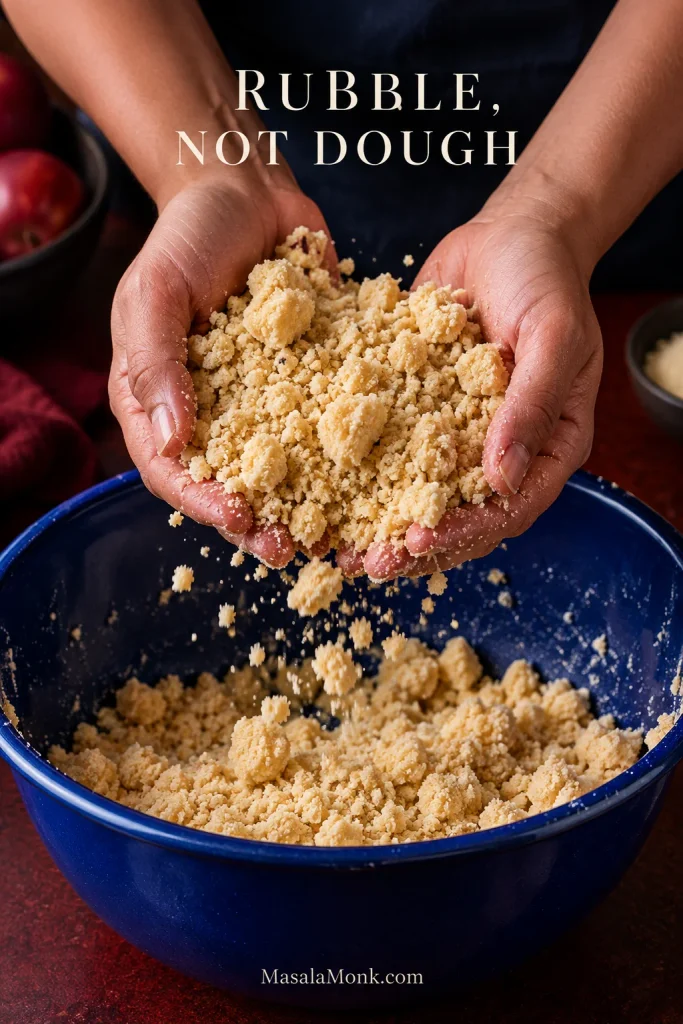
Hands hold raw flour-butter-sugar crumble above a blue bowl, showing fine crumbs, small pieces and larger irregular clusters falling apart loosely.
Fine crumbs fill gaps; larger buttery clusters create the pieces that crack under the spoon.

The nicest spoonful has both: tiny toasted crumbs catching a little apple juice and a few buttery pieces big enough to crack under the spoon. Those larger pieces tend to be the bits people go looking for.
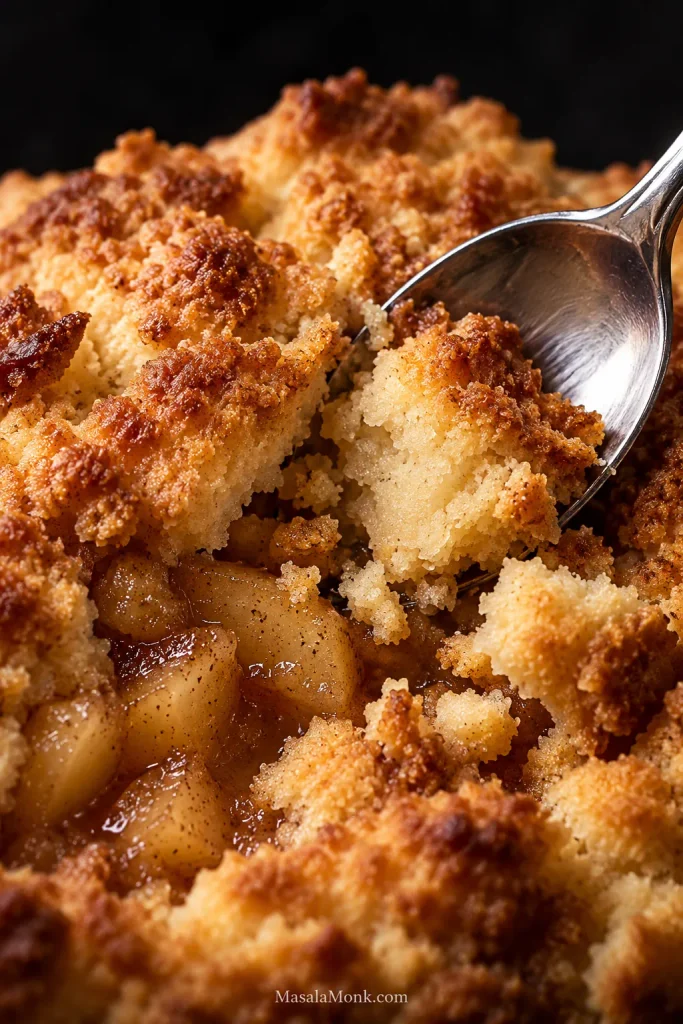
A spoon breaks through a deeply golden apple crumble topping, exposing pale buttery crumb inside the crisp clusters and tender cinnamon apples underneath.
The browned surface should snap, while larger clusters can stay paler and buttery inside.

Caster or ordinary granulated sugar keeps the topping crisp and straightforward. Brown sugar gives a deeper caramel flavor and a slightly softer crumb. A little demerara or turbinado over the surface adds extra crunch.

Check the Crumble Topping Before Baking

Before it goes into the oven, the mixture should sit between two obvious failures: loose, dusty flour on one side and a smooth, cohesive dough on the other. Aim for irregular crumbs that clump lightly without smearing.
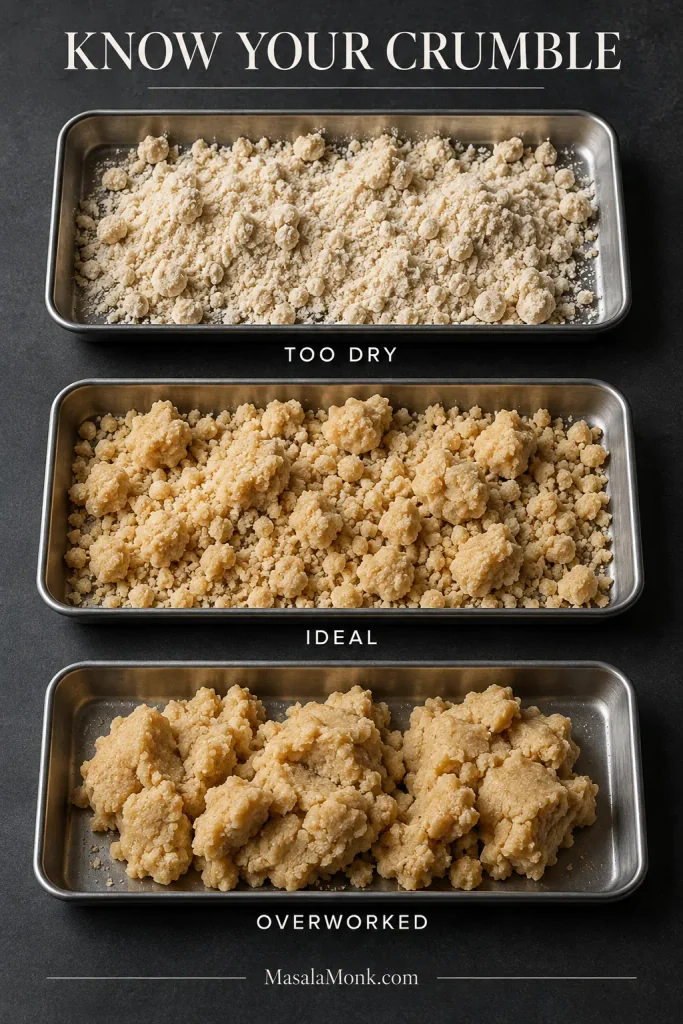
Three raw crumble mixtures labeled too dry, ideal and overworked, ranging from powdery crumbs to irregular clusters to a cohesive dough-like mixture.
Powdery crumbs need better butter distribution; greasy or doughy crumbs usually need cooling before more flour.

Topping rescue rule: chill first, change the ratio second. Warm butter can make a perfectly good mixture look greasy or doughy. Refrigerate it for 10–15 minutes before deciding it needs more flour.
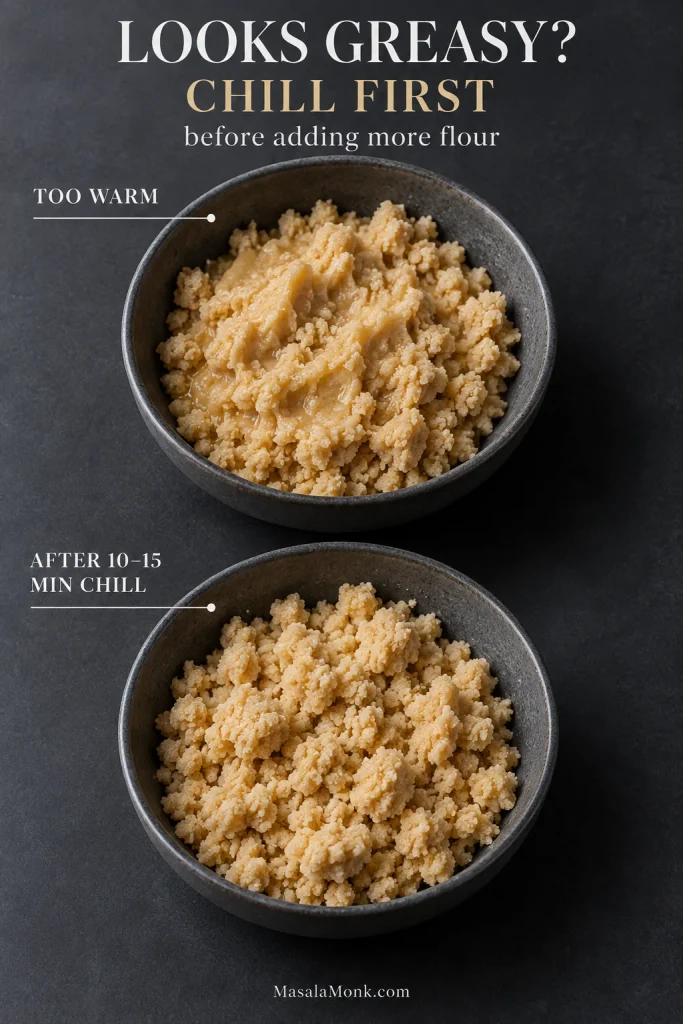
The same raw crumble mixture shown warm and greasy-looking, then after chilling 10–15 minutes with firmer, more distinct crumbs and clusters.
If chilling restores distinct crumbs, warmth was the problem. If it still smears, overworking is more likely.

A quick squeeze tells you more than appearance alone. The crumbs should hold together briefly in your hand and then fall apart when nudged. Loose flour at the bottom of the bowl needs better butter distribution. Smooth, smearable dough has gone too far.
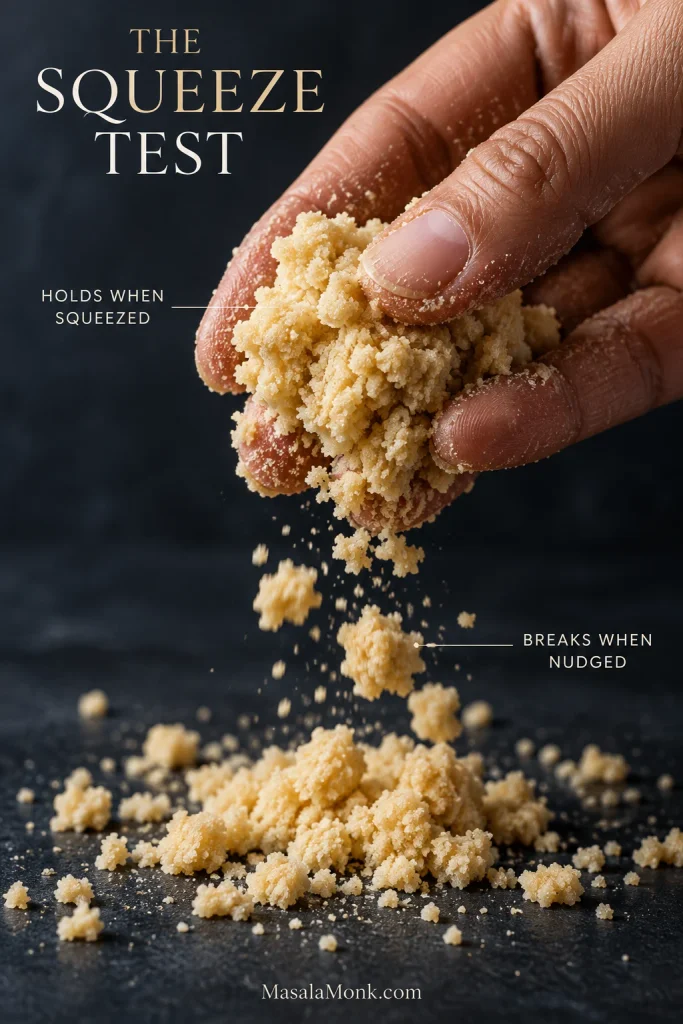
A hand squeezes raw crumble into a loose clump while pieces fall away, demonstrating that it holds when squeezed but breaks apart when nudged.
A good clump holds briefly under a light squeeze, then breaks apart again with very little pressure.

Cold Butter vs Melted Butter

Cold butter gives the craggy topping used here. Melted butter makes a denser, more cohesive streusel-like crumb. Using a food processor? Pulse only until irregular crumbs appear so the butter stays cold.

Should Apple Crumble Have Oats?

No. Apple crumble does not need oats. Flour, butter and sugar make the classic topping; rolled oats are optional when you want more chew and crunch. In North America, oat-heavy versions are often called apple crisp, although the names overlap.

In practice, the topping matters more than the label. If you want oats to be a major part of every spoonful, the Apple Crisp Recipe is built around that texture from the start.

For just a little oat crunch here, replace 1¾ oz / 50 g flour with 1¾ oz / 50 g old-fashioned rolled oats.

Should You Cook the Apples First?

No, not for this recipe. Raw, evenly cut apples cook through underneath the crumble. Pre-cooking is worth considering only for unusually firm fruit, very thick pieces or a particularly deep baking dish.

Pre-cooking also makes sense when you deliberately want a very soft filling. Let the fruit cool before adding the topping so the butter does not begin melting before the dish reaches the oven.

Can I Use Frozen or Unpeeled Apples?

Peels on: perfectly fine if the skins are thin and you enjoy a little more texture.

Frozen: use sliced apples without fully thawing. They soften more and release extra juice, so expect a little more baking time. Already thawed into a pool of watery liquid? Drain the obvious excess rather than automatically adding extra flour.

Your Baking Dish Changes the Crumble

Use the 8×8-inch / 20×20 cm dish if you have one. It gives this amount of fruit enough depth without making the center unnecessarily slow to cook.

A wide, shallow dish is the easier route to lots of crisp topping. A deep casserole traps more moisture around the fruit and takes longer through the middle.
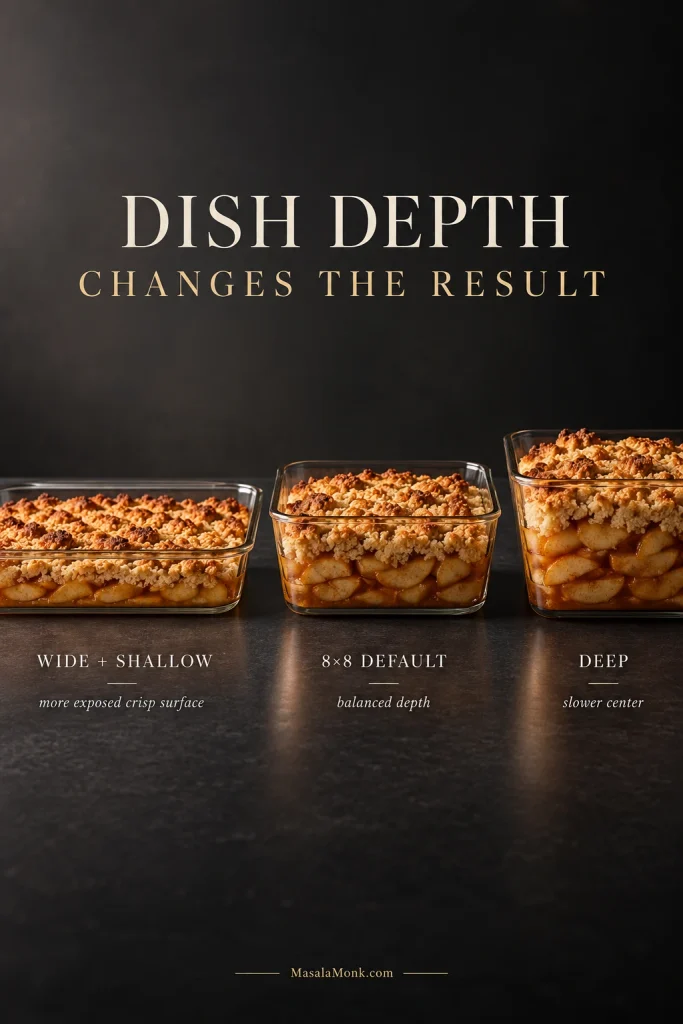
Three clear dishes of apple crumble show a wide shallow layer, a balanced 8×8-inch depth and a much deeper fruit layer with less exposed surface.
Shallow dishes favor more crisp surface; deeper dishes put proportionally more fruit under each spoonful.

Dish depth matters more than material here, but heavy ceramic usually takes a little longer to heat through than metal. Let the apples, not the clock, make the final decision.

For a 9×13-inch / 23×33 cm dish, use a 1½× batch when you want a shallower crumble with more exposed topping. For something closer to the depth of the 8×8, use about a 1¾× batch.
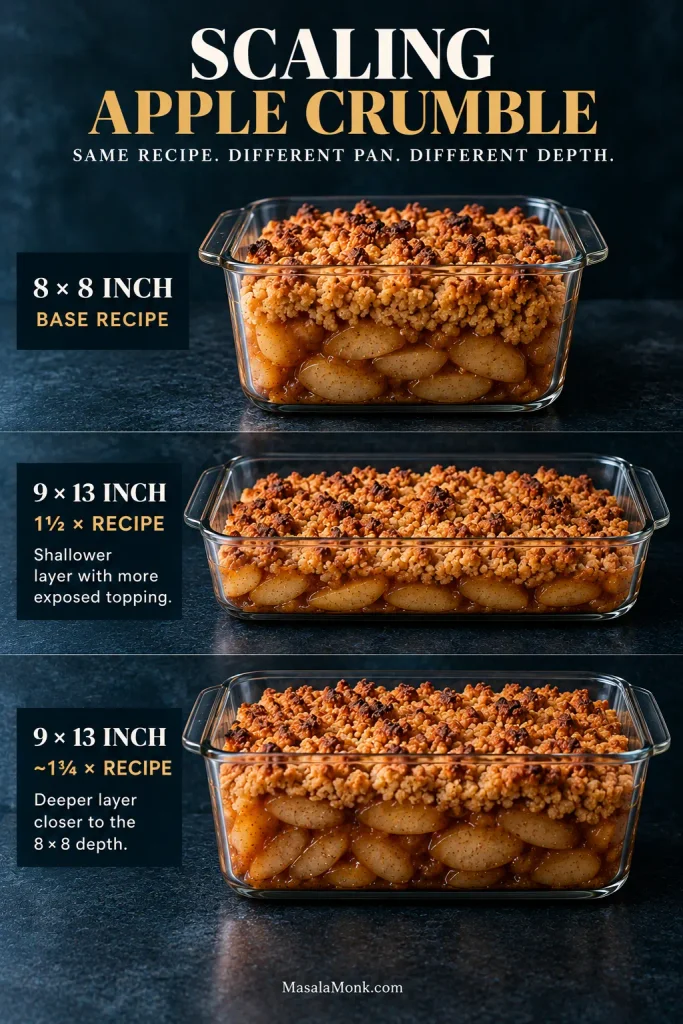
Clear-sided apple crumbles compare an 8×8 base recipe, a shallow 9×13 pan using 1½ times the recipe and a deeper 9×13 using about 1¾ times.
Use 1½× for a shallower 9×13; move toward 1¾× to preserve more of the original 8×8 balance.

How to Know Apple Crumble Is Actually Done

A brown top is not permission to stop while the apples are still hard.

  • Golden crumbs: the high spots should be richly toasted.
  • Bubbling juice: thick bubbles should appear in several places around the edge.
  • Tender apples: a thin knife inserted near the center should pass through the fruit easily.
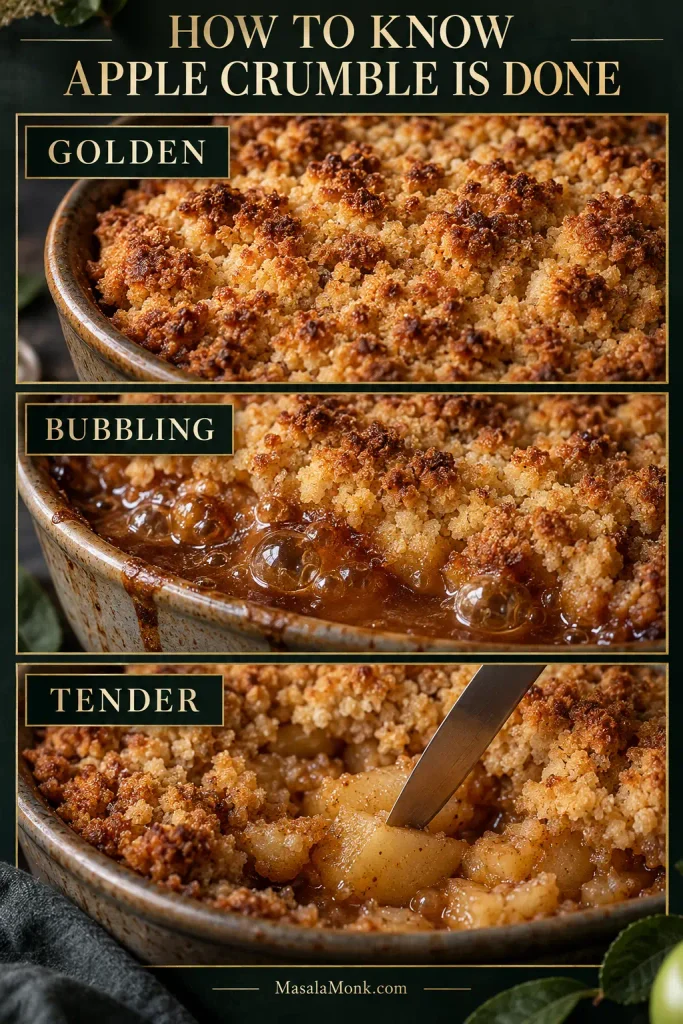
Three close-ups show apple crumble doneness cues: deeply golden topping, thick juices bubbling at the edge and a knife sliding into a tender center apple piece.
If only two cues are present, check the missing one: golden, bubbling and tender should agree.

Tender does not have to mean collapsing. A firm apple can still hold its shape while being soft enough to cut with the side of a spoon.

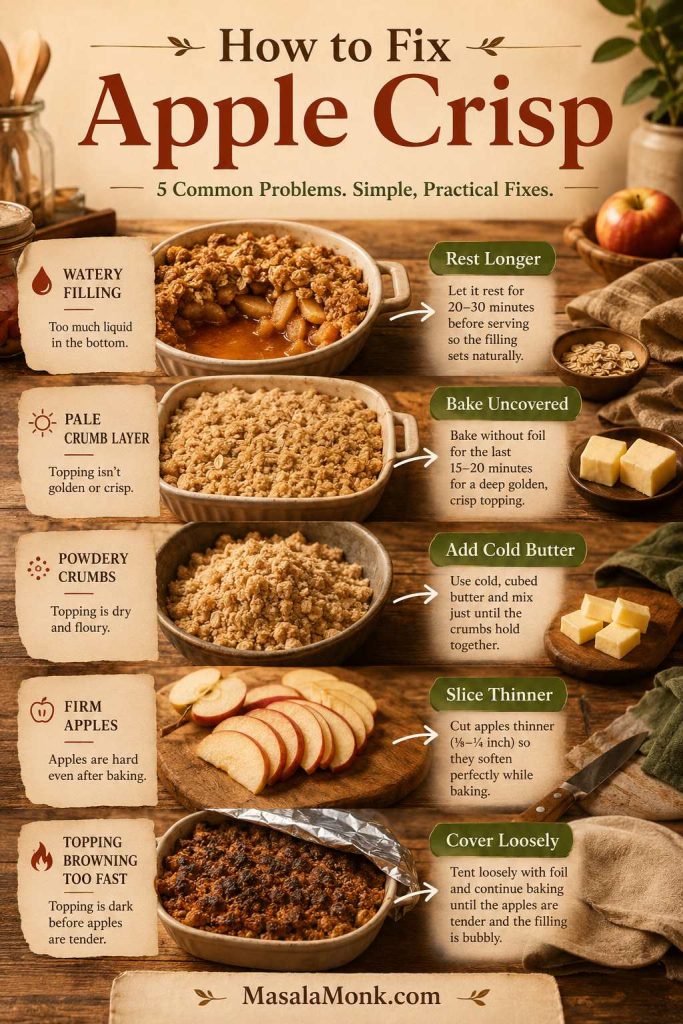
Fix My Apple Crumble

Before It Goes In

Dusty crumbs: loose flour at the bottom of the bowl means the butter needs working through a little more.

The topping turned to dough: don’t reach for more flour yet. Chill it for 10–15 minutes, then break it back into irregular pieces. Too much extra flour can leave the baked topping chalky.

Greasy-looking crumbs: don’t panic and add flour straight away. Chill them first; warm butter can make a perfectly good mixture look much wetter than it really is.

While It Bakes

The topping melted flat: the butter was probably too warm or the mixture was overworked. It will usually still taste good. Next time start colder and stop sooner.

Brown top, hard apples: cover loosely with foil and keep going. Thick pieces, firm varieties and deep dishes are the usual reasons.
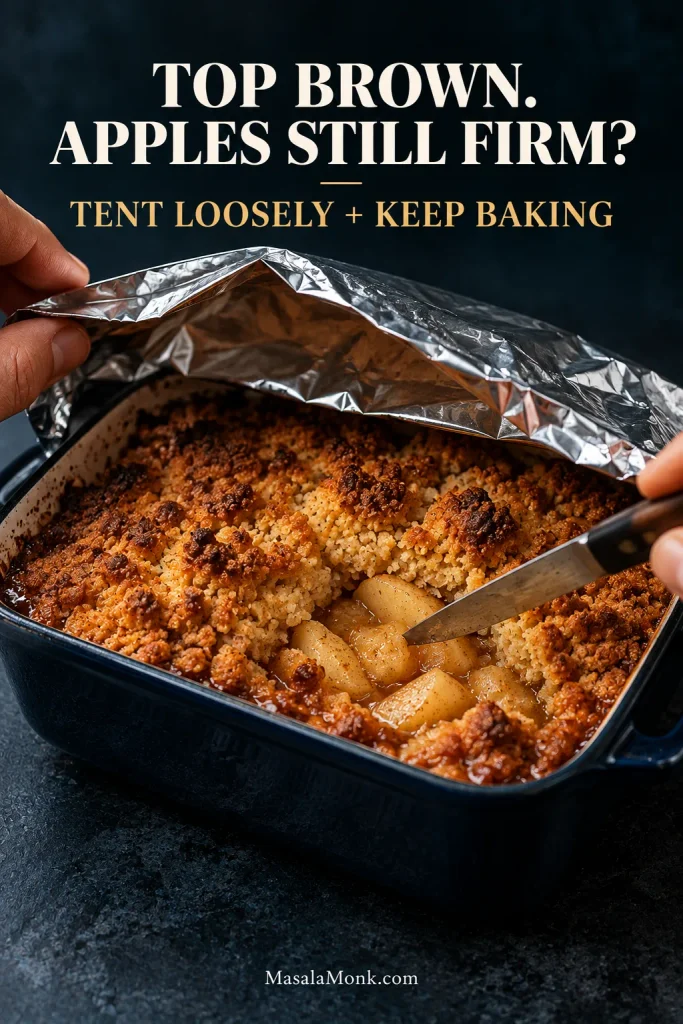
A browned apple crumble is loosely covered with foil while a knife checks an apple in the center to see whether the fruit has become tender.
Tent loosely so the apples can finish while steam escapes and the already-crisp topping stays protected.

No juice at the edges yet: check the fruit near the center. Firm apples plus a quiet filling usually means the crumble needs longer; very dry fruit may simply release less visible juice.

After Baking

Watery filling: give it the full 15–20-minute rest first. If it is still thin and the apples are firm, return the crumble to the oven and keep baking until the fruit softens and the juices bubble properly.

Mushy apples: nothing will make them firm again now. Use firmer fruit or slightly larger pieces next time.

Dry fruit with hardly any sauce: add a spoonful of water next time and do not remove nearly all of the filling sugar.

When the problem is the liquid around the apples, look at what remains after a spoonful leaves the dish. Pooled juice points to a loose filling; almost no sauce points to fruit that has cooked dry.
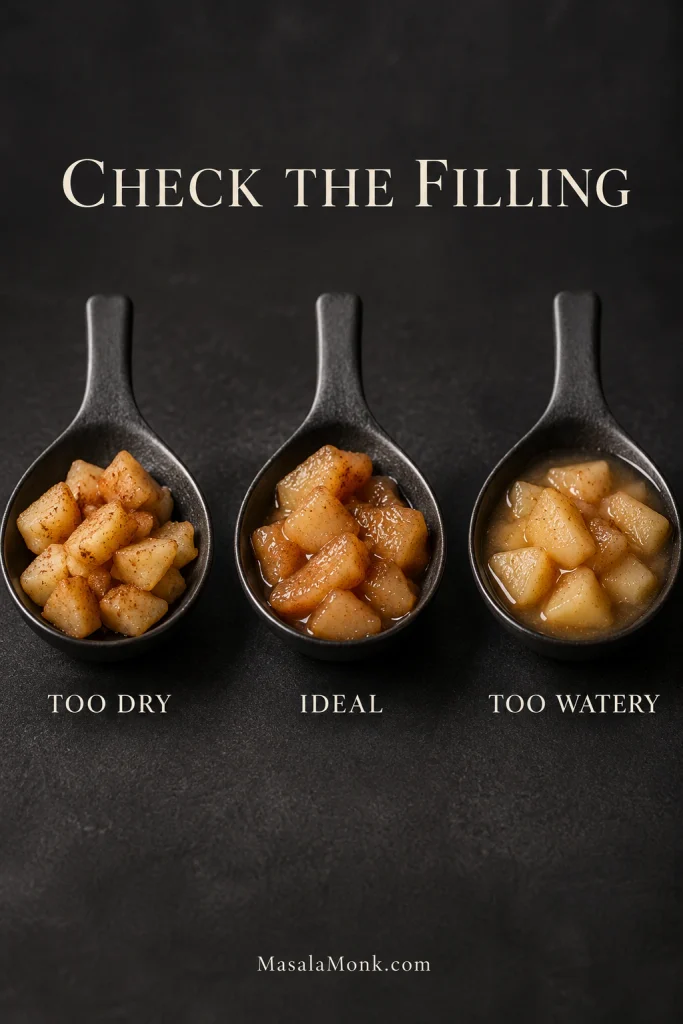
Three spoonfuls of cooked apples compare a dry filling with little sauce, an ideal filling with sauce clinging to the fruit and a watery filling with pooled liquid.
Ideal filling clings to the fruit with little free liquid left behind; runny juice is still too loose.

Too sweet: reduce the sugar in the fruit layer before changing the topping.

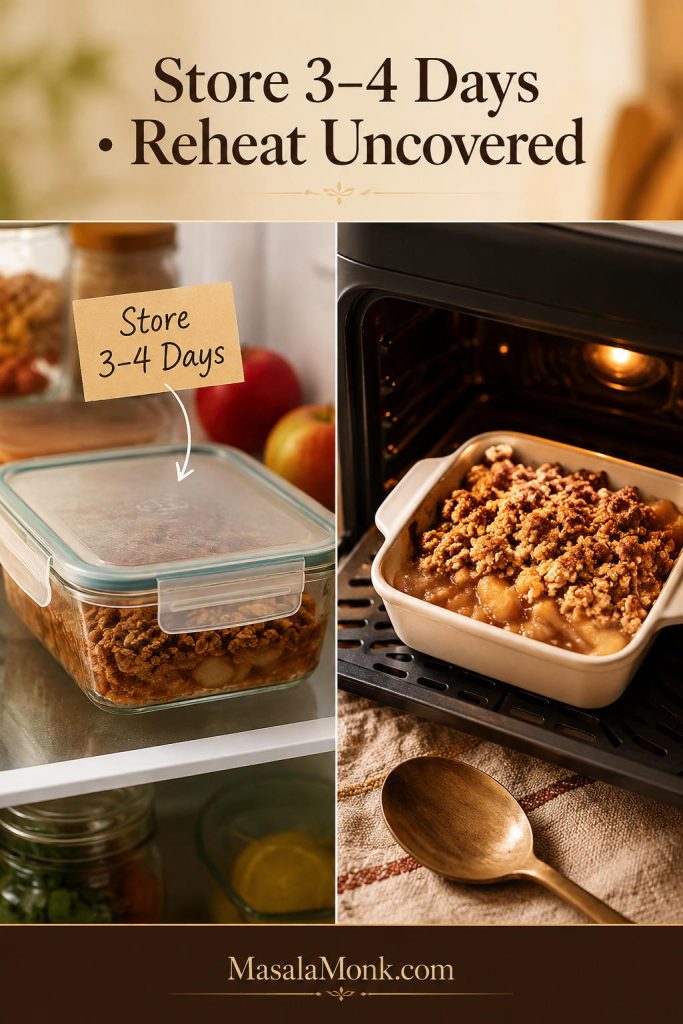
Soft topping the next day: reheat the crumble uncovered so trapped moisture can escape.

Apple Crumble Troubleshooting at a Glance

ProblemWhy It HappensFix NowNext Time
Doughy or greasy crumbsButter got too warm or the mixture was overworkedChill and break the crumbs back upStart colder and stop mixing sooner
Brown top, hard applesFruit is firm or thick, or the dish is too deepCover loosely with foil and keep bakingCut fruit thinner or use a shallower dish
Watery fillingVery juicy fruit, insufficient baking or no resting timeRest first; if fruit is firm and filling stays thin, bake longerBake until the juices are bubbling well
Mushy fruitSoft apples, very small pieces or too much cookingNothing to rescue nowUse firmer apples or larger pieces
Soft leftoversMoisture has moved from the fruit into the toppingReheat uncoveredAvoid covering during reheating

↑ Back to top

Apple Crumble for Two

Sometimes the correct amount of crumble is not a family dish. It is two ramekins on a Tuesday night.

Use about 10½ oz / 300 g prepared apples divided between two 8–10 oz / 240–300 ml ramekins, or use one small baking dish of similar capacity.

For the topping, use 2½ oz / 70 g all-purpose/plain flour, 1½ oz / 40 g cold butter and 1¼ oz / 35 g sugar with a pinch of salt. Season the fruit with about a tablespoon of sugar, a teaspoon of flour, a squeeze of lemon and a little cinnamon.

Bake at the same temperature as the full recipe and begin checking around 25 minutes. Most individual crumbles need roughly 25–35 minutes.
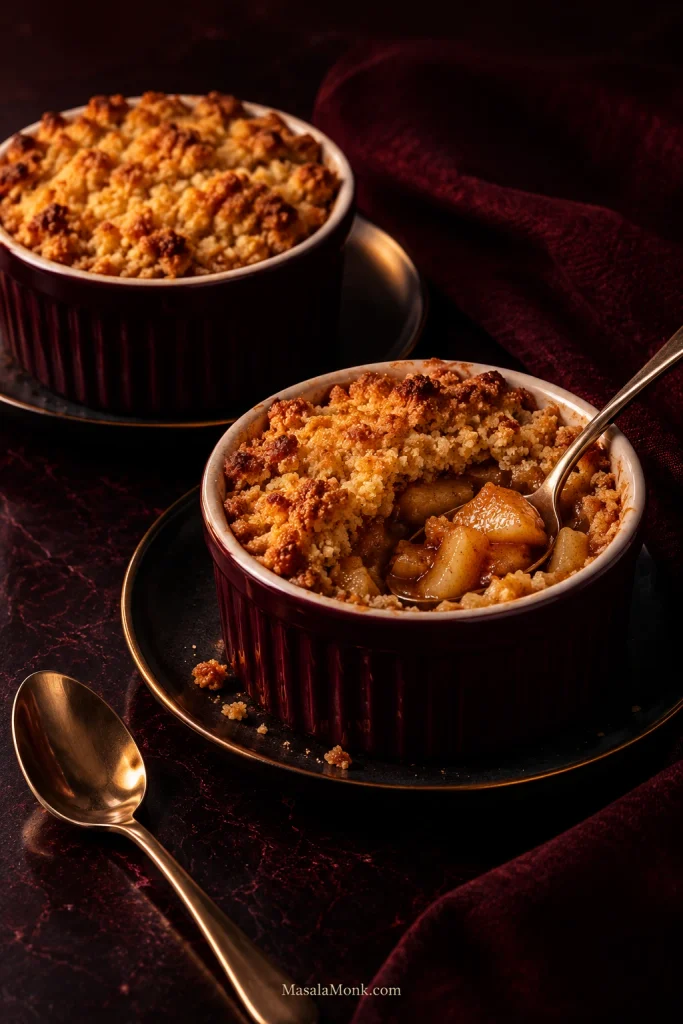
Two dark red ramekins of apple crumble on a dark table, with one intact and the other opened to reveal tender cinnamon apples beneath the golden topping.
Ramekins brown fast around the edges, so judge doneness by the fruit at the center.

Air Fryer Apple Crumble

Air fryers brown the topping quickly, so the fruit needs a head start.

The two-portion version fits especially well in a small air-fryer-safe dish. Keep the fruit layer shallow; a heavy ceramic dish may take a little longer than a lighter metal or silicone one.

Cook the seasoned apples at about 360°F / 180°C until they are beginning to soften. Start checking at 10 minutes; depending on the apple, cut and dish, this will usually take about 10–15 minutes.

Add the topping and continue air frying until it is golden and the fruit is hot and tender underneath. Start checking after 8 minutes; many small crumbles need roughly 10–15 minutes more. Air fryers vary considerably, so use the color of the crumbs and tenderness of the apples as the final guide.

Keep it shallow. A deep air-fryer dish makes it much easier for the surface to brown while the center fruit is still firm.
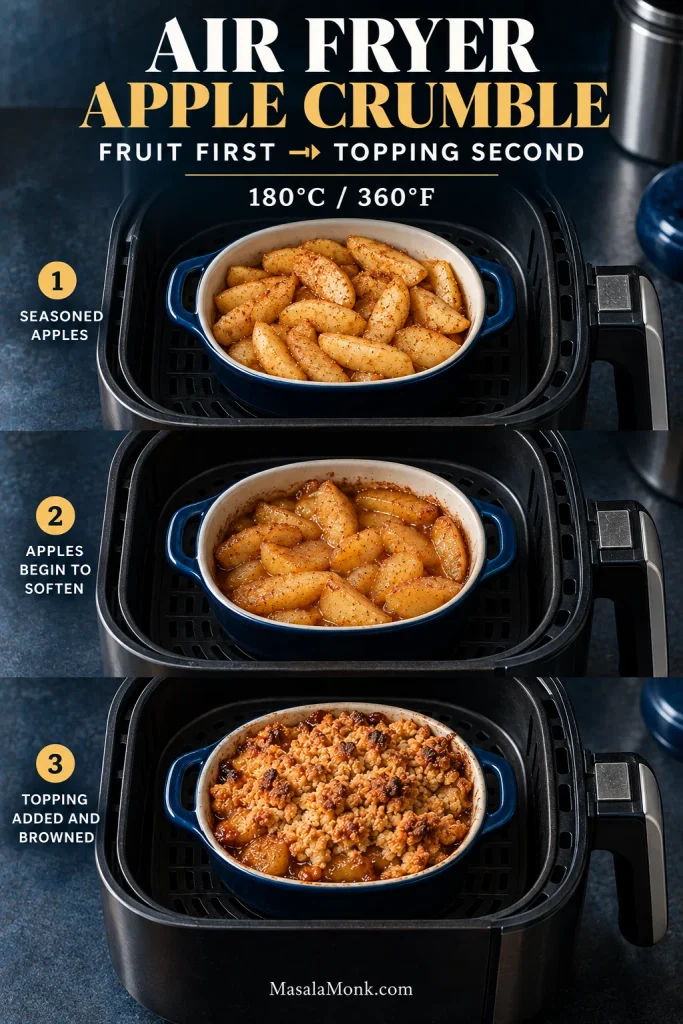
Three stages of air fryer apple crumble show seasoned apples first, partially softened apples next and a finished shallow dish with golden crumble topping at 180°C or 360°F.
A shallow dish helps the apples keep pace with the fast-browning topping in an air fryer.

Easy Variations That Don’t Change the Method

  • Add oats: replace 50 g topping flour with 50 g rolled oats.
  • Make it gluten-free: replace both the topping flour and the tablespoon of flour used with the apples with a 1:1 gluten-free baking blend.
  • Make it dairy-free or vegan: use the same weight of a firm plant-based baking block rather than a soft tub spread. If it is salted, reduce or omit the added topping salt.
  • Add pear: replace up to half the prepared apple weight with firm, not fully ripe pear.
  • Use warmer spice: replace the cinnamon with 1–1½ tsp of homemade apple pie spice.

Blackberries and rhubarb are different. They change the moisture and acidity of the filling enough that they deserve their own balance rather than being treated as a casual handful stirred into this recipe.

Make Apple Crumble Ahead, Freeze It and Reheat It

The topping is the best part to make ahead. Cover it and refrigerate it overnight, then scatter it over freshly prepared apples before baking.

You can also prep the apples ahead. Peel and cut them, toss them with the lemon juice and refrigerate them well covered. Add the sugar, flour, cinnamon and salt closer to baking. Fully seasoned apples can sit overnight, but the sugar will draw out more juice.

Both frozen crumble topping and baked crumble are best used within about 2–3 months for quality.

Freezing Crumble Topping

Freeze the topping as loose crumbs. Spread it on a tray until firm, then transfer it to a freezer bag or airtight container. Scatter it over the apples while still frozen; it may need a little longer in the oven.

Freezing Baked Apple Crumble

Cool the crumble completely, wrap the dish well or divide it into airtight freezer containers, then freeze. Thaw in the refrigerator and reheat uncovered so the top has a chance to crisp again.

Storing Leftovers

Once cooled, cover the crumble and refrigerate it. The USDA’s guidance for cooked leftovers recommends using them within 3–4 days.

For several servings or the whole dish, reheat uncovered at about 300–325°F / 150–165°C until hot through and crisp at the surface, usually around 15–20 minutes. An air fryer works nicely for one or two portions. A microwave reheats the fruit quickly, but the crumbs will soften.
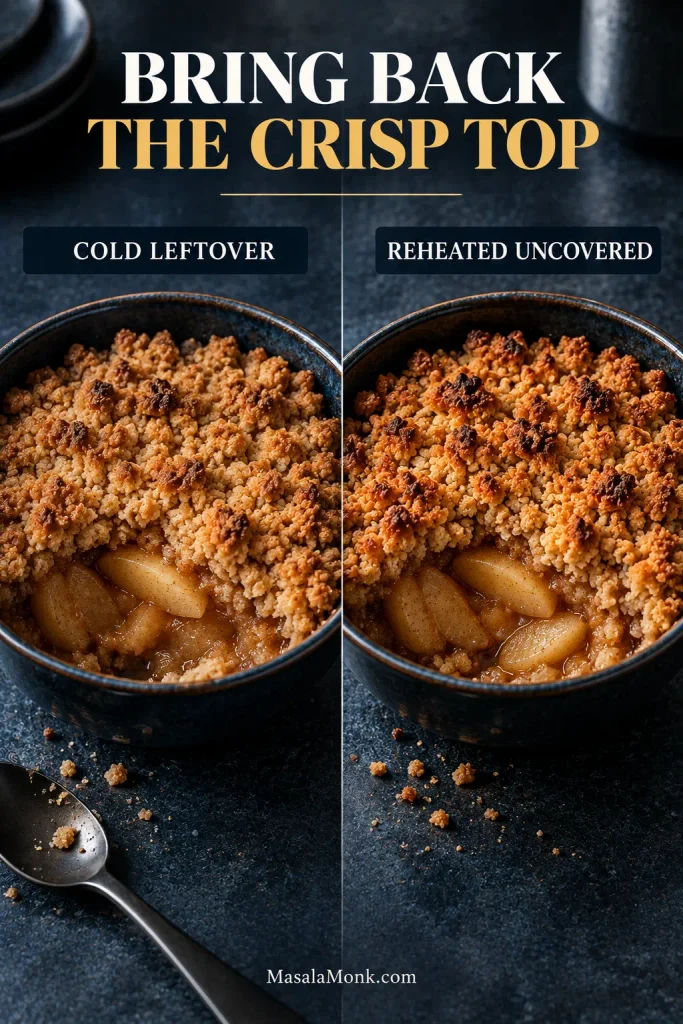
The same apple crumble portion shown cold with a softer golden topping and reheated uncovered with darker, drier and more sharply defined crisp crumbs.
Reheat only until hot and crisp again; extra oven time starts drying the fruit.

What to Serve With Apple Crumble

For the classic British finish, serve apple crumble with hot vanilla custard. It slips through the craggy crumbs and gathers around the cinnamon-scented fruit beneath them.
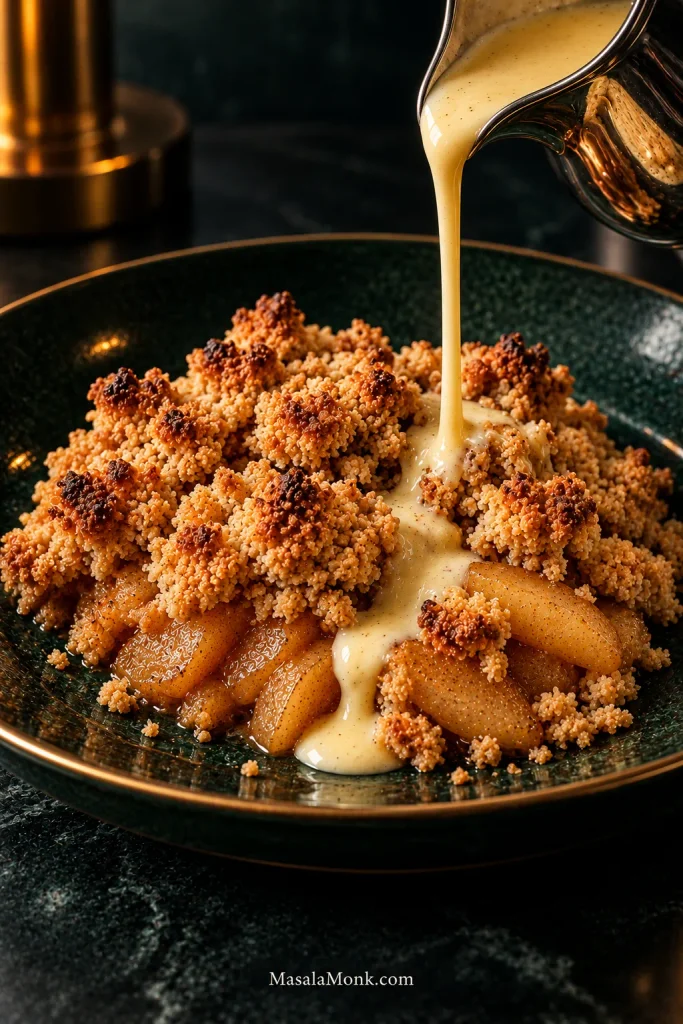
Vanilla custard pours from a silver jug through one section of golden apple crumble on a dark green plate, while much of the crisp topping remains uncovered.
Pour custard after plating so part of the crumble stays dry and crisp in every serving.

For the best hot-and-cold contrast, vanilla ice cream is hard to beat. It starts melting into the hot apples while the exposed topping stays crisp.

Softly whipped cream or cold pouring cream is the quieter choice when you want richness without much extra sweetness.

Whichever you choose, give the crumble its short rest first. You want cinnamon-apple sauce clinging to the spoon, not molten juice racing across the bowl.

Apple Crumble, Apple Crisp, Cobbler or Dutch Apple Pie?

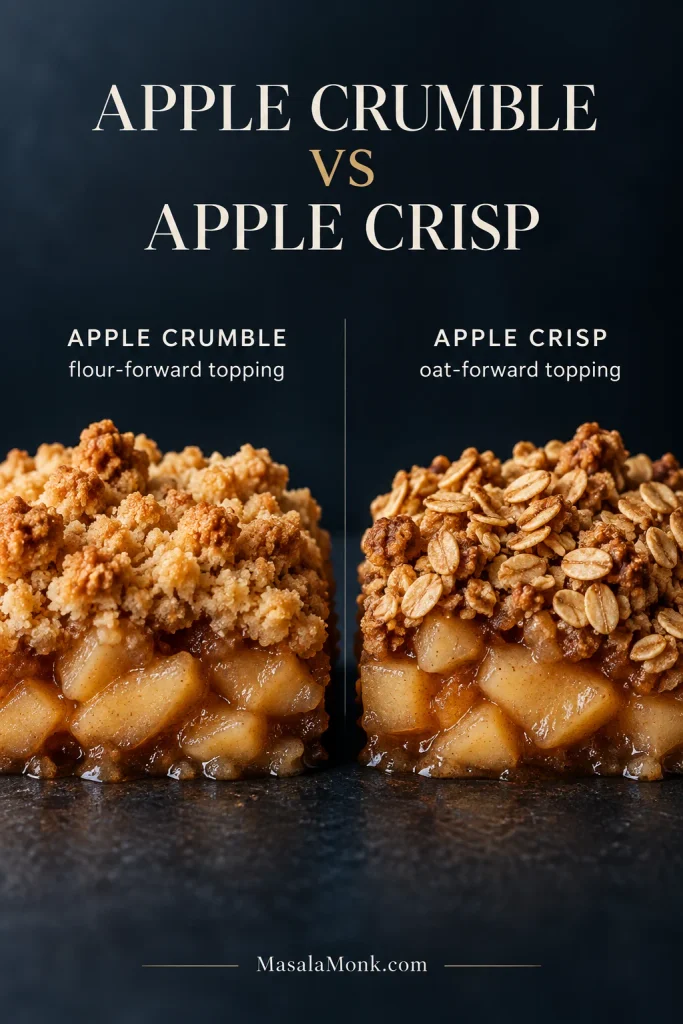
In the simplest terms, crumble has a flour-forward crumb topping, crisp is usually more oat-forward, cobbler uses biscuit or batter, and Dutch apple pie adds pastry underneath.

The names vary between countries and cookbooks, so how the dessert is built is more useful than insisting on one universal definition.

DessertWhat Is on Top?Bottom Crust?
Apple crumbleFlour-forward butter-and-sugar crumbs; oats optionalNo
Apple crispUsually a more oat-forward crumb toppingNo
Apple cobblerBiscuit, dumpling or batter-style toppingNo
Dutch apple pieCrumb toppingYes
Side-by-side apple desserts with similar filling: apple crumble has a flour-based crumb topping, while apple crisp has a visibly oat-heavy topping.
Texture is the clearer distinction: crumble is flour-forward and buttery; crisp usually brings more oat chew.

If what you want is pastry underneath the fruit as well as crumbs above it, the Dutch Apple Pie Recipe is the closer match.

By this point, the target is easy to see: crisp crumble on top, tender apples underneath and just enough sauce to cling between the fruit.
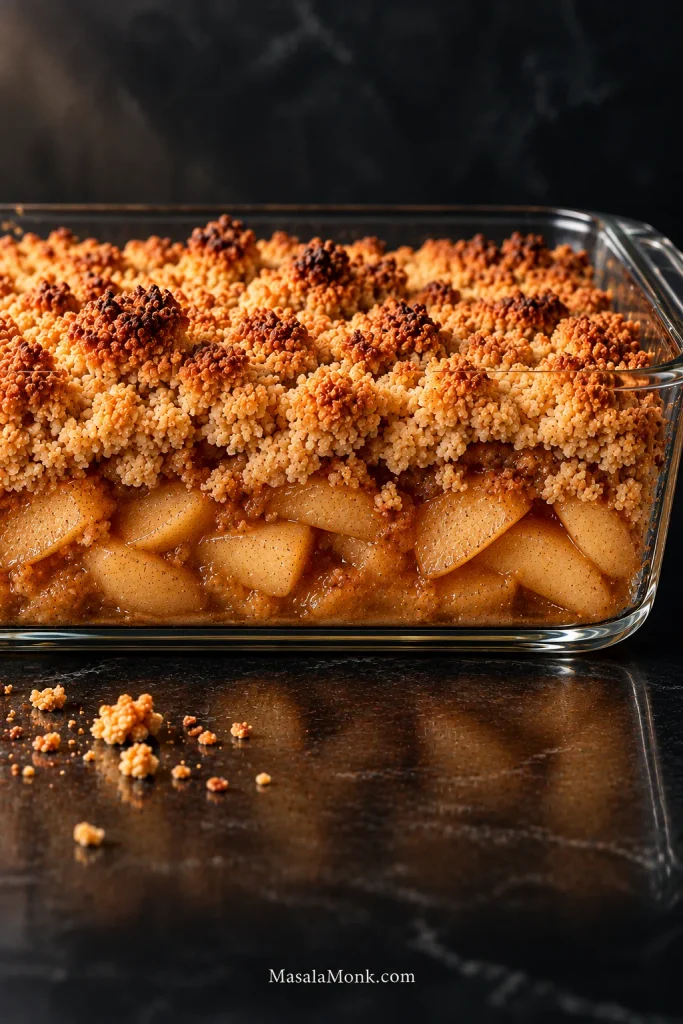
Side view through a clear glass dish shows golden apple crumble topping over a deep layer of tender apple slices with lightly thickened cinnamon sauce between them.
The finished structure should show crisp crumb above tender apples, with lightly thickened cinnamon juices clinging between the fruit.

Apple Crumble Recipe FAQs

1. What Are the Best Apples for Apple Crumble?

A firm-tart apple such as Granny Smith is an easy default when you want distinct pieces. Bramley and other cooking apples give a softer filling. The recipe works well with either style.

2. Can I Make Apple Crumble Without Peeling the Apples?

Yes. Thin apple skins can stay on if you enjoy a little more texture. Peeling gives a softer, more traditional filling.

3. Does Apple Crumble Need Oats?

No. All-purpose/plain flour, butter and sugar are enough for a classic crumble topping. For some oat texture, replace 50 g of the flour with 50 g rolled oats.

4. Why Is My Apple Crumble Watery?

Juicy apples, insufficient baking or serving too soon can all leave the filling thin. Rest it for 15–20 minutes; if the fruit is still firm and the filling stays watery, return it to the oven.

5. Why Is My Crumble Topping Floury?

A floury or powdery topping usually means the butter was not distributed thoroughly enough. Keep working it through until a squeezed handful briefly holds together, then breaks apart.

6. Can I Make Apple Crumble the Night Before?

Yes. Make the topping ahead and refrigerate it separately for the crispest result. Prepare the fruit closer to baking when possible.

7. How Do You Freeze Apple Crumble?

You can freeze either loose crumble topping or a fully baked, cooled crumble. For best quality, use either within about 2–3 months and reheat baked crumble uncovered.

8. Can I Use Frozen Apples?

Frozen apples work too. Use them without fully thawing, expect a softer filling and allow some extra baking time. Drain obvious excess liquid if they have already thawed.

There is no secret ingredient hiding in a good apple crumble. What matters is getting a handful of ordinary things to agree with one another: apples cut for the way they cook, sweetness adjusted to the fruit in front of you, crumbs that stay irregular instead of turning into dough, and enough oven time for the filling to catch up with the top.

Golden crumbs. Bubbling juice. Tender apples.

Once all three are there, bring out the custard.
Posted on — Leave a comment

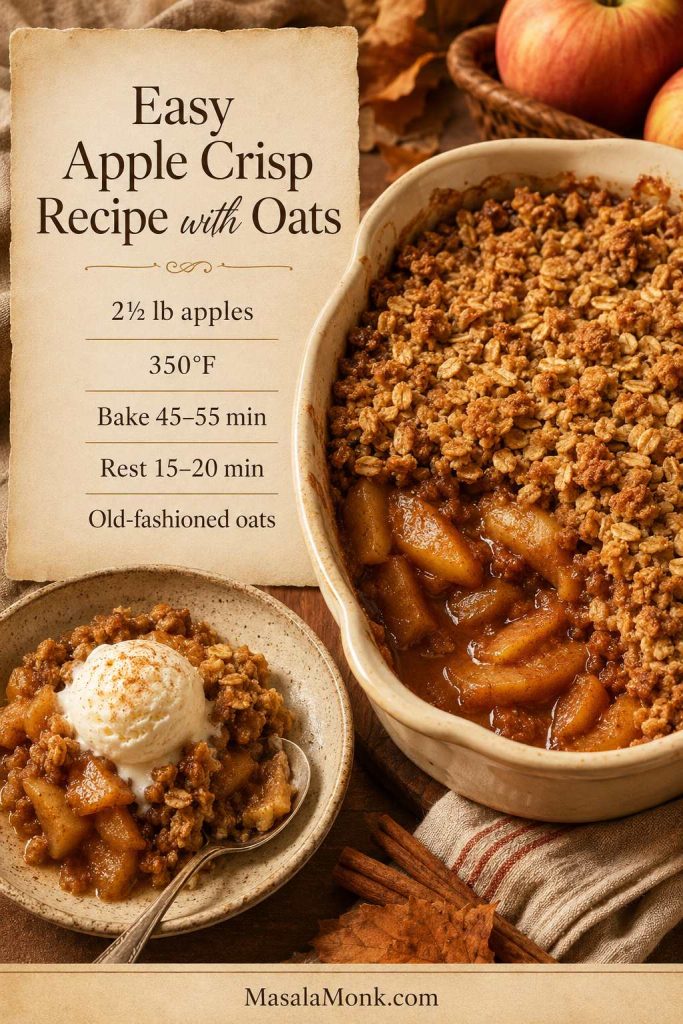
Easy Apple Crisp Recipe with Oats

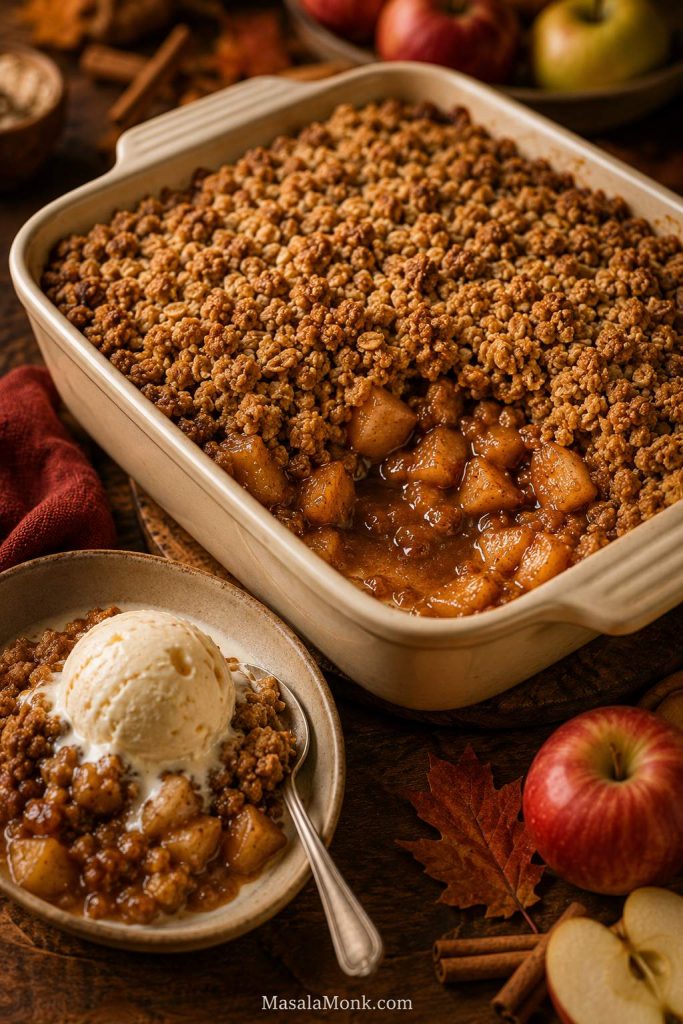
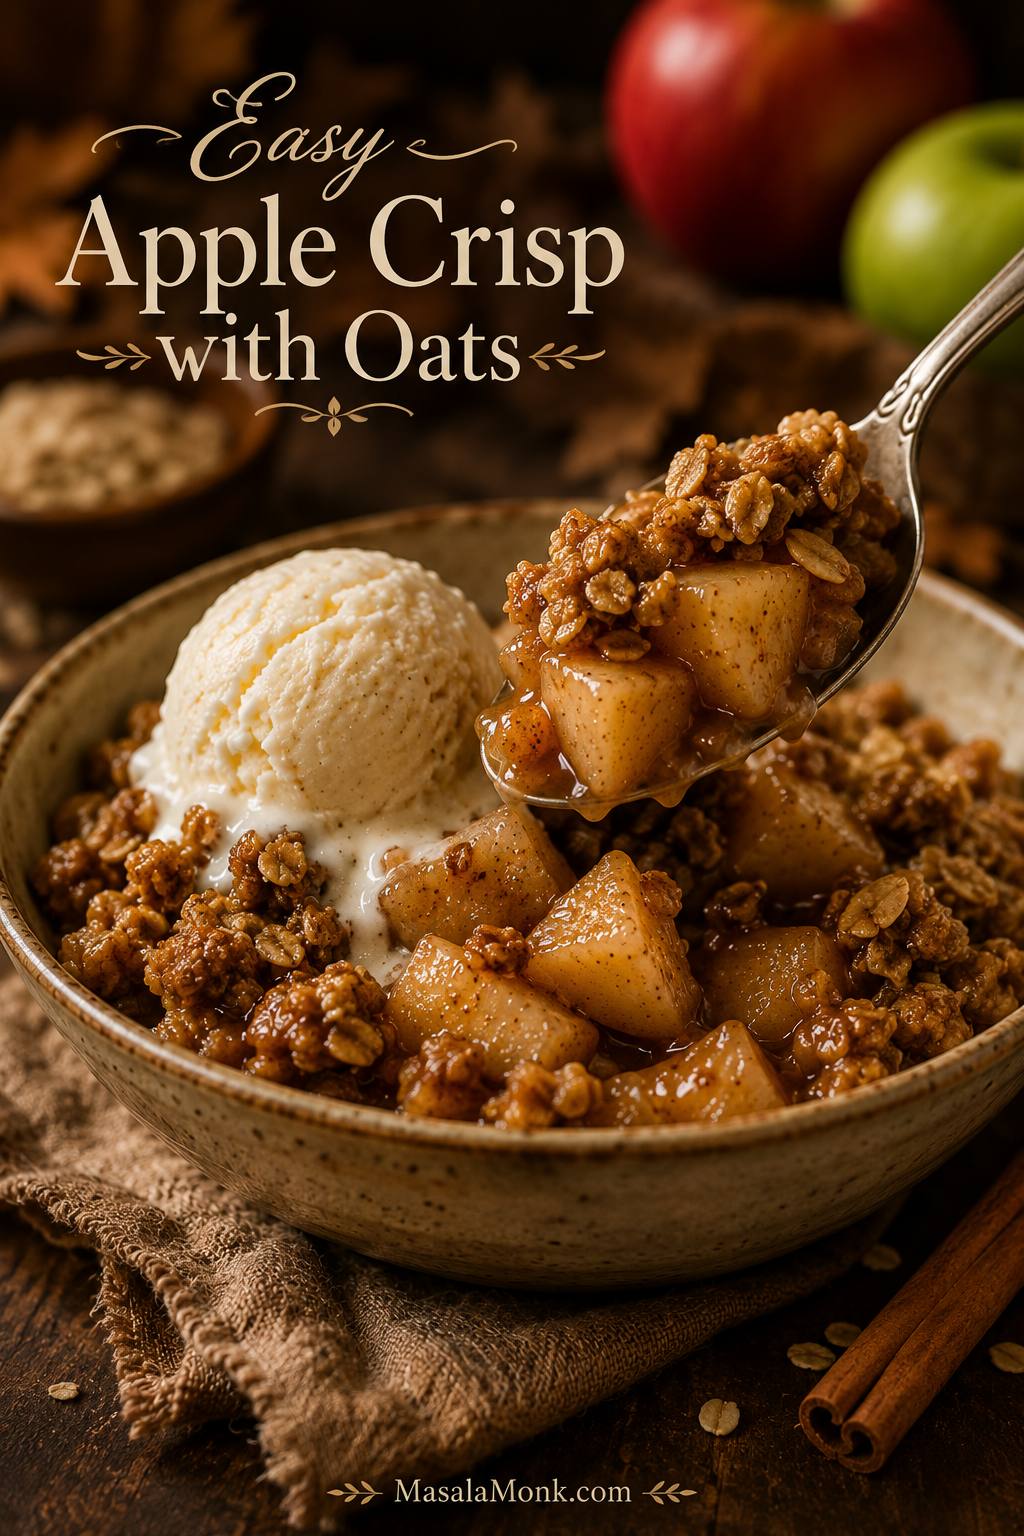
Baked apple crisp in a cream dish with golden oat topping, glossy cinnamon apples, and vanilla ice cream.

This easy apple crisp recipe is for the night when you want the house to smell like cinnamon, butter, and brown sugar without making pie crust. The apples bake down into glossy cinnamon juices, the oat topping turns craggy and golden, and the corners get just crisp enough that someone always tries to claim them first.

It gives you the cozy part of apple pie with much less work: no rolling dough, no chilling crust, and no worrying about perfect slices. Better still, this crisp is forgiving. An 8×8, 9×9, or 9×13 pan can all work with the right scaling, and you can slice the apples thin for a softer filling or chop them for more bite.

It is the kind of dessert that works on a random weeknight with apples you already have, but it also earns its place on a fall table, Thanksgiving spread, or potluck when pie feels like too much. And although it is good plain, it becomes the version people remember when vanilla ice cream melts into the cinnamon juices and catches in the oat topping.

The promise here is simple: the right apple amount, a generous brown sugar oat topping, clear doneness cues, and pan guidance for both small family desserts and bigger holiday-style bakes.

Most importantly, this version helps you avoid the usual apple crisp problems: watery filling, underbaked apples, sandy topping, or a pan that tastes like baked apples with a thin sprinkle of oats. The goal is warm fruit underneath, crisp topping on top, and enough structure that every scoop feels complete.

Serving tip: A good apple crisp should give you warm apples, oat crumble, and just enough glossy cinnamon juice for vanilla ice cream to melt into.

Warm apple crisp with oats served in a bowl with a spoonful of cinnamon apples and melting vanilla ice cream.
Apple crisp with oats gives you the comfort of apple pie without crust work, while the crumble topping keeps the method simple and forgiving.

Quick Answer: What Makes a Good Apple Crisp?

A good apple crisp recipe has tender apples, a buttery oat topping, and enough thickener to keep the filling spoonable instead of watery. For a standard 8×8 or 9×9-inch baking dish, use about 2 1/2 pounds / 1.1 kg apples, which is about 8 cups sliced or chopped apples. For a larger holiday pan, see the apple crisp pan guide. Toss the apples with lemon, brown sugar, cinnamon, vanilla, and a little flour or cornstarch.

Then cover the apples with a topping made from old-fashioned oats, flour, brown sugar, cold butter, cinnamon, and salt. Bake at 350°F / 175°C until the apple juices are bubbling and the topping is golden. Finally, let the crisp rest for 15–20 minutes before serving so the filling thickens instead of running across the bowl.

Apple Crisp at a Glance

Best pan8×8 or 9×9 inch
Apples2 1/2 lb / 1.1 kg
Oven350°F / 175°C
Bake time45–55 minutes

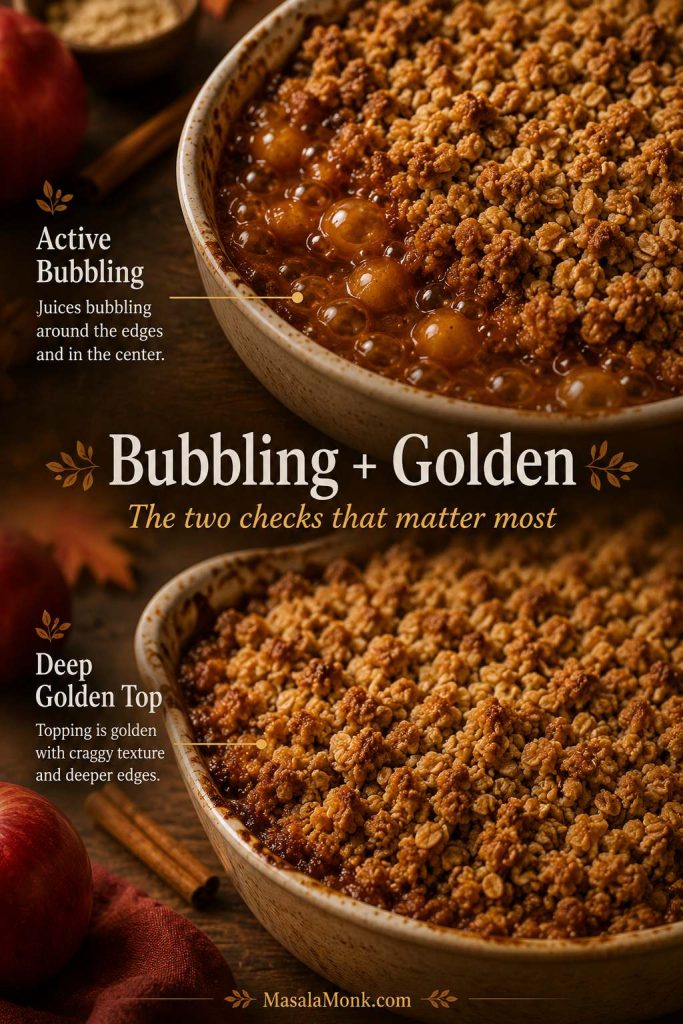
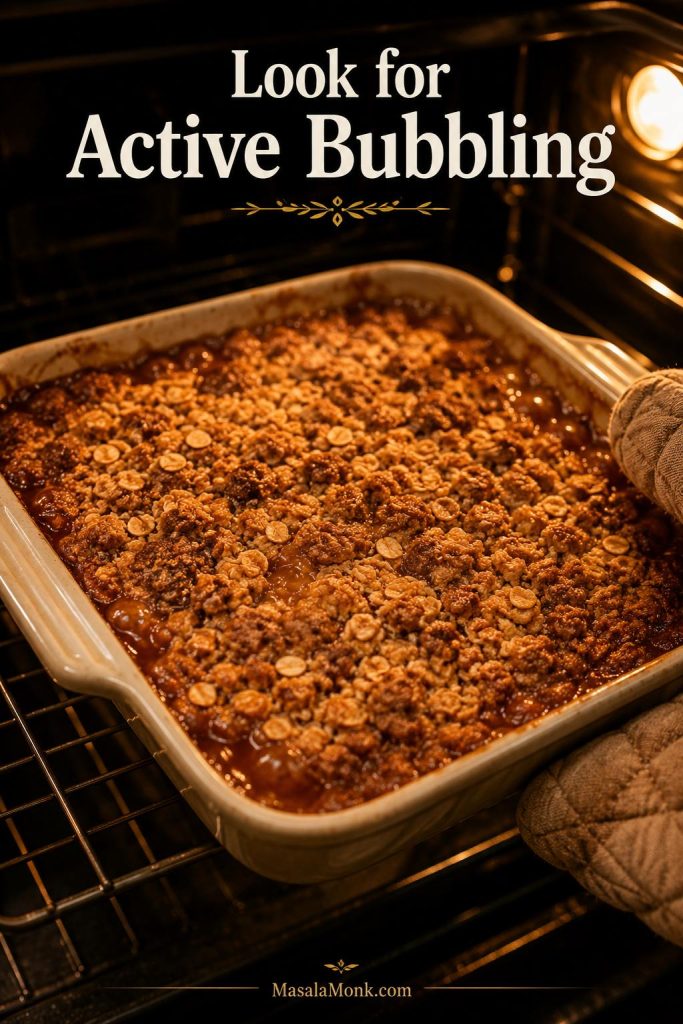
Texture cue: the crisp is done when the fruit is actively bubbling, the topping is golden and craggy, and a knife slides into the apples without resistance.

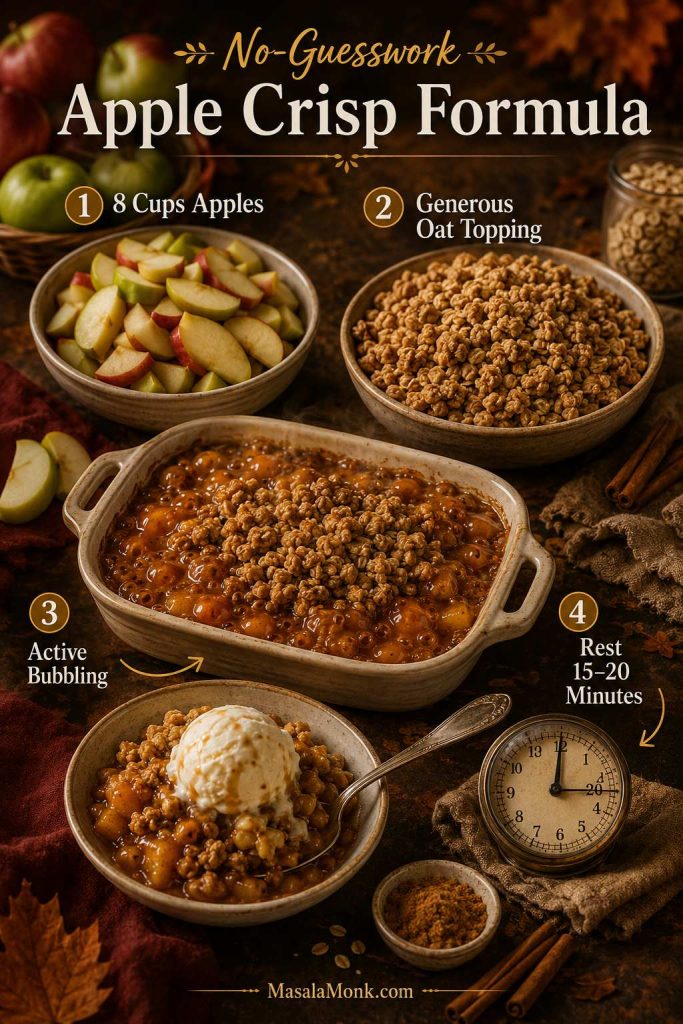
The no-guesswork formula: 8 cups apples, a generous oat topping, active bubbling, and a 15–20 minute rest. Those four details prevent most watery, underbaked, or thin-topped crisps.

No-guesswork apple crisp formula showing apples, oat topping, bubbling filling, and resting time.
For a no-guesswork apple crisp, start with enough apples, a generous oat layer, active bubbling, and a short rest before serving.

The two checks before you pull it from the oven: First, the apple juices should bubble at the edges and toward the center, not just around the sides. Second, the topping should look golden and craggy, with a few deeper brown-sugar edges. If the topping is brown but the middle still looks quiet, cover loosely with foil and keep baking a little longer.

Apple crisp doneness guide showing bubbling apple filling and golden brown oat topping.
A brown top is only half the cue; the apple filling also needs to bubble so the juices thicken properly.

Why This Apple Crisp Recipe Works

A good apple crisp is not just baked apples with crumbs on top. The filling has to bubble long enough for the juices to thicken, and the topping has to stay loose enough to brown instead of steaming against the fruit. This recipe is built around those two cues: glossy apple juices and a craggy, buttery oat topping.

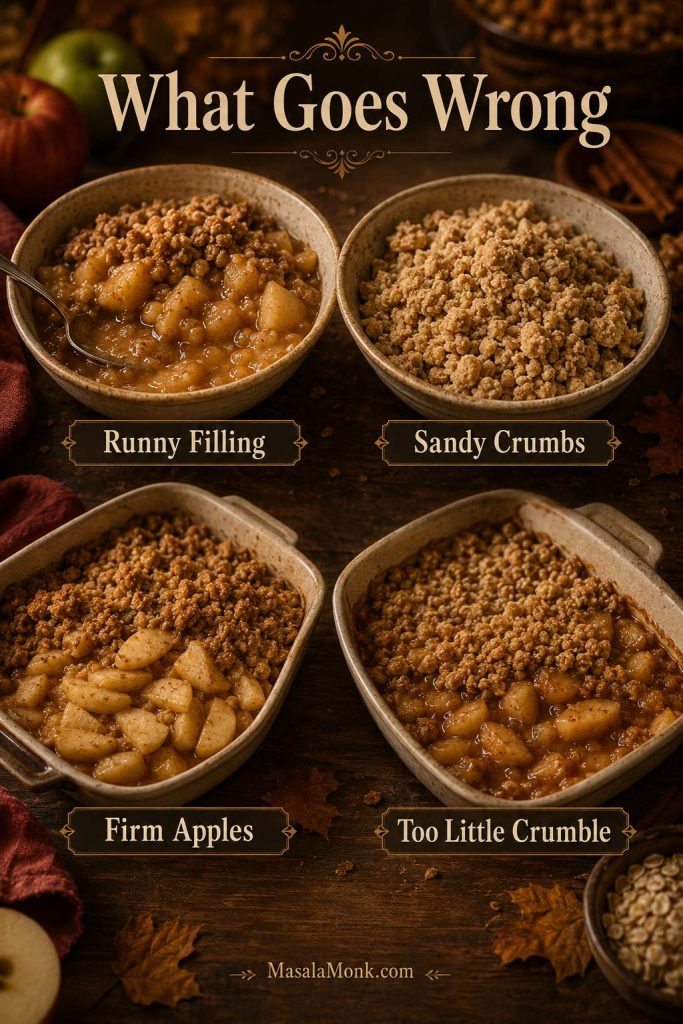
Most disappointing apple crisps fail in the same few ways. The apples stay firm, the filling runs across the bowl, the topping turns sandy, or there simply is not enough crumble to make every scoop satisfying. So the goal here is simple: enough apples to feel generous, enough topping to cover every serving, and enough thickener to turn the cinnamon juices glossy instead of soupy.

Apple crisp mistakes board showing runny filling, sandy crumbs, firm apples, and too little crumble.
Runny filling, sandy crumbs, firm apples, and too little crumble usually trace back to prep, butter temperature, or bake time.

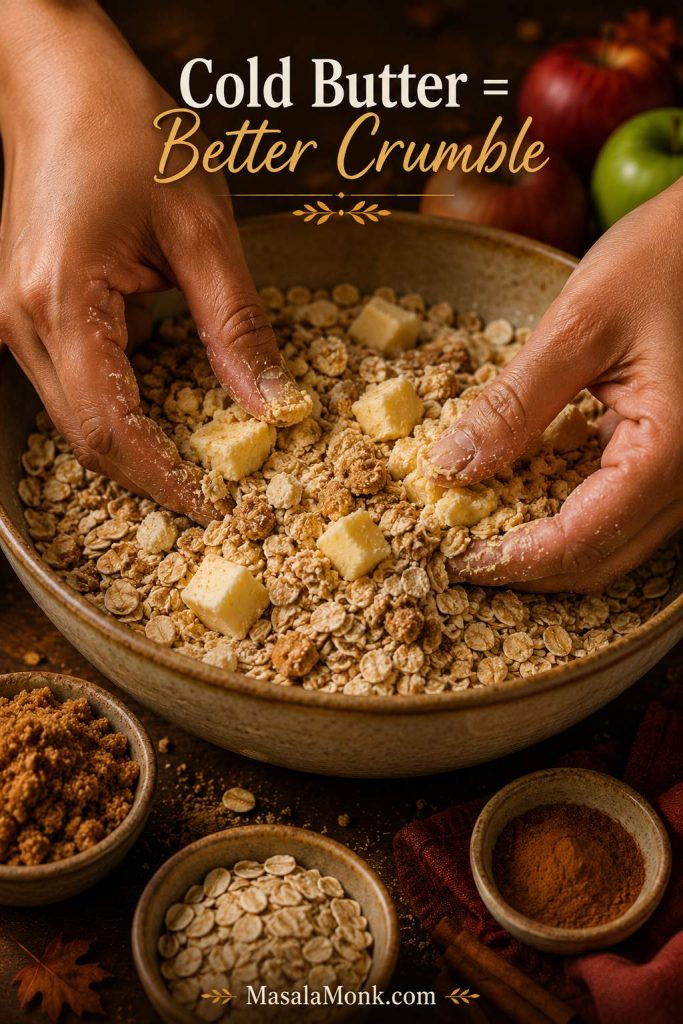
Cold butter is the key to the crumble. It helps the oats, flour, brown sugar, cinnamon, and salt bake into rough crumbs instead of melting into the apples. A small amount of flour or cornstarch in the filling catches the apple juices as they bubble, so the crisp sets up after a short rest.

It also gives you enough crumble. Apple crisp should not look like apples with a little dusting on top. The brown-sugar crumbs are part of the dessert, and the larger clumps are not mistakes; they are the pieces people go looking for.

Equipment You’ll Need

You do not need special equipment for this crisp, but the right dish makes the bake more predictable. The pan matters more than the tool list; a very deep dish bakes differently from a shallow metal pan, even with the same ingredients. A ceramic, glass, or light-colored metal baking dish works best for the main recipe because it gives the apples enough time to soften before the topping gets too dark.

  • 8×8 or 9×9-inch baking dish: best for the base recipe.
  • Large mixing bowl: for tossing the apples evenly with sugar, lemon, spice, and thickener.
  • Medium bowl: for the oat topping.
  • Pastry cutter, fork, or clean hands: for working cold butter into the topping.
  • Peeler, knife, and cutting board: for prepping the apples.
  • Rimmed baking sheet: useful under the dish in case the apple juices bubble over.
  • Foil: helpful if the surface browns before the apples are tender.

The rimmed baking sheet is optional, but it is one of those small things you are grateful for if the apple juices start bubbling over at the edges.

Dish note: Glass and ceramic dishes give a steady, even bake. Metal pans can brown the edges faster. Cast iron works too, although it holds heat aggressively, so watch the top near the end of baking.

Ingredients for Apple Crisp with Oats

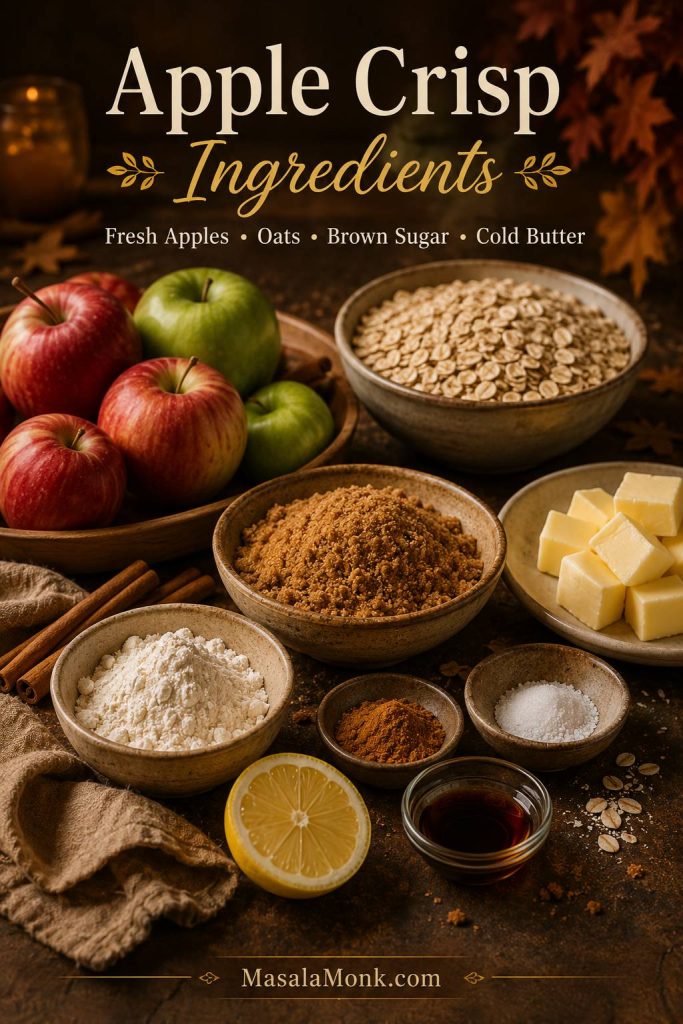
You only need fresh apples, butter, oats, sugar, and pantry baking ingredients. The list is simple, but the small choices matter: cold butter instead of soft, old-fashioned oats instead of instant oats, and enough lemon and salt to keep the filling from tasting flat.

Apple crisp ingredients arranged on a baking surface, including apples, oats, brown sugar, butter, lemon, cinnamon, and flour.
Every ingredient has a job: apples bring body, oats add texture, lemon brightens the filling, and cold butter helps the crumble bake properly.

For the Apple Filling

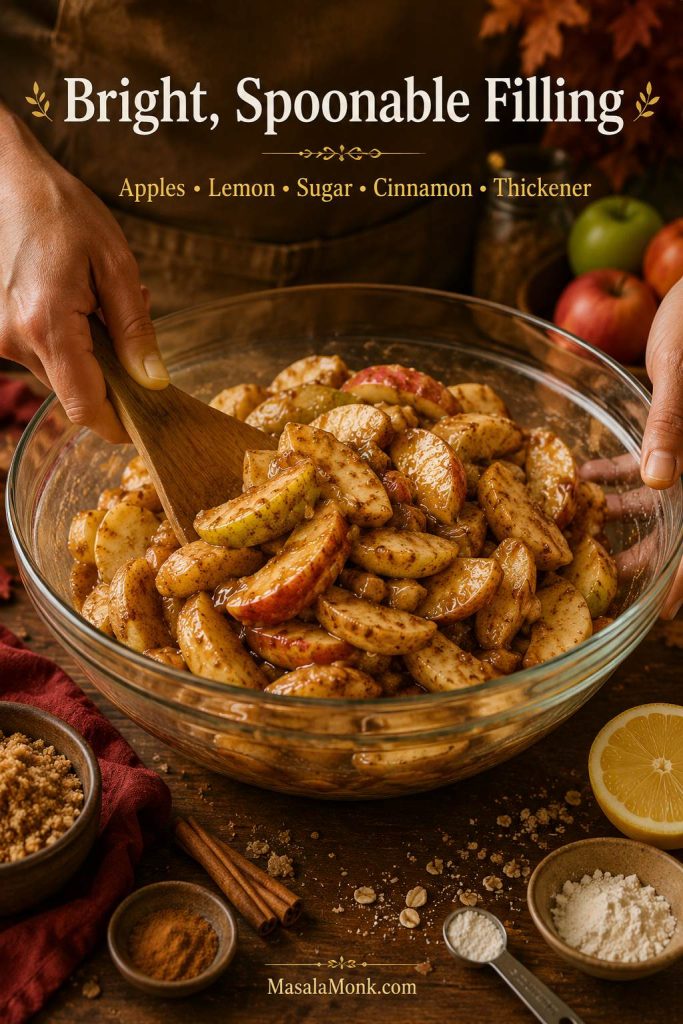
Sliced apples being mixed with lemon juice, brown sugar, cinnamon, and thickener for apple crisp filling.
Coating the apples evenly helps the sugar, spice, lemon, and thickener work through the whole filling instead of settling in patches.
  • Apples: Use about 2 1/2 pounds / 1.1 kg apples before peeling and coring. This gives you about 8 cups sliced or chopped apples.
  • Lemon juice: Brightens the apples and keeps the filling from tasting flat.
  • Brown sugar: Adds caramel warmth. Use less if your apples are very sweet and a little more if they are very tart.
  • Flour or cornstarch: Use 2 tablespoons flour in the apple layer, or 1 tablespoon cornstarch for a glossier, slightly clearer filling.
  • Cinnamon: The main spice. It should be present but not dusty or overpowering.
  • Nutmeg: Optional, but a small pinch makes the filling taste warmer.
  • Vanilla: Softens the sharpness of the apples and sugar.
  • Salt: Makes the apples and topping taste more balanced.

Before it bakes, the filling should taste bright. If the apples taste flat in the bowl, they will taste flat after baking too, so do not skip the lemon juice and salt.

For the Brown Sugar Oat Topping

Hands mixing cold butter into oats, brown sugar, flour, and cinnamon for apple crisp topping.
Cold butter helps the oat topping bake into rough, buttery crumbs instead of melting into the apple layer.
  • Old-fashioned rolled oats: Best for a classic crisp texture.
  • All-purpose flour: Helps the topping hold together in buttery crumbs.
  • Brown sugar: Gives the topping its caramel flavor and golden color.
  • Cinnamon: Ties the topping to the apple filling.
  • Cold butter: The most important topping detail. Cold butter creates crumbly pieces instead of a greasy layer.
  • Salt: Keeps the topping from tasting only sweet.
  • Chopped nuts, optional: Pecans or walnuts add crunch, but the recipe works beautifully without them.

At this point, the topping should taste like a brown sugar oatmeal cookie before it ever goes into the oven. That is the flavor you want baking into the top layer.

No scale? Use about 8 cups of sliced or chopped apples for the base recipe. Very large apples may give you that amount with only 4–5 apples, while smaller apples may take 7–8.

Best Apples for Apple Crisp

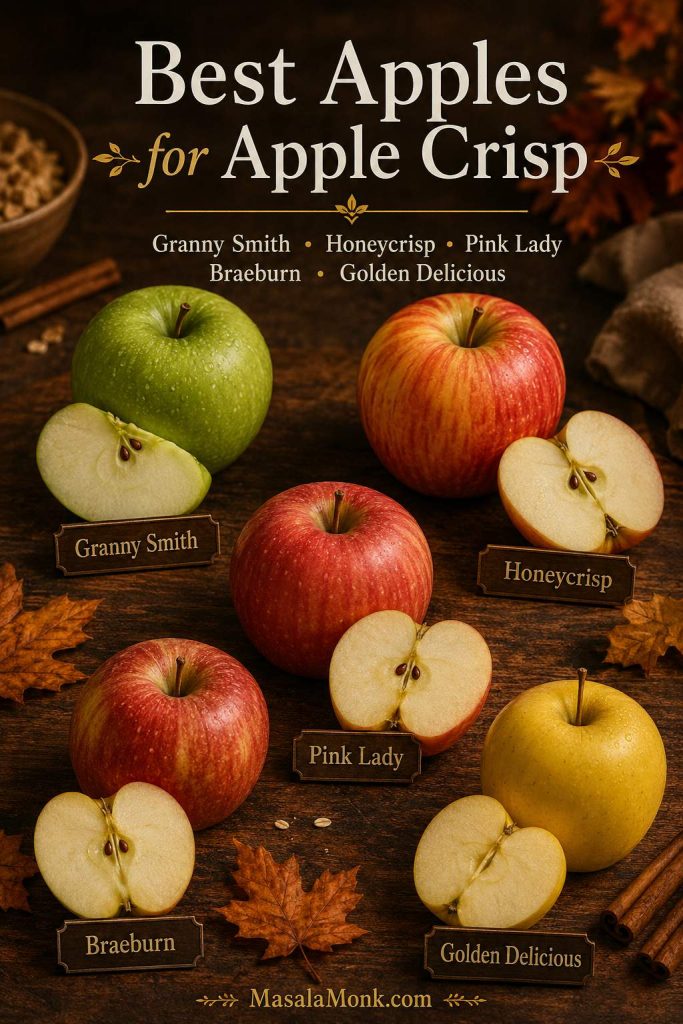
The best apples for apple crisp hold their shape while baking and bring enough tartness to balance the brown sugar topping. In most cases, a mix is better than one apple variety because you get both structure and flavor.

Best apples for apple crisp guide with Granny Smith, Honeycrisp, Pink Lady, Braeburn, and Golden Delicious apples.
The best apples for apple crisp usually come from a mix: one firm tart apple for structure and one sweeter apple for aroma.

For an easy blend, use Granny Smith + Honeycrisp. Granny Smith apples bring tartness and structure, while Honeycrisp apples add sweetness and a juicy bite. Braeburn, Pink Lady, Golden Delicious, and Jonagold also work well.

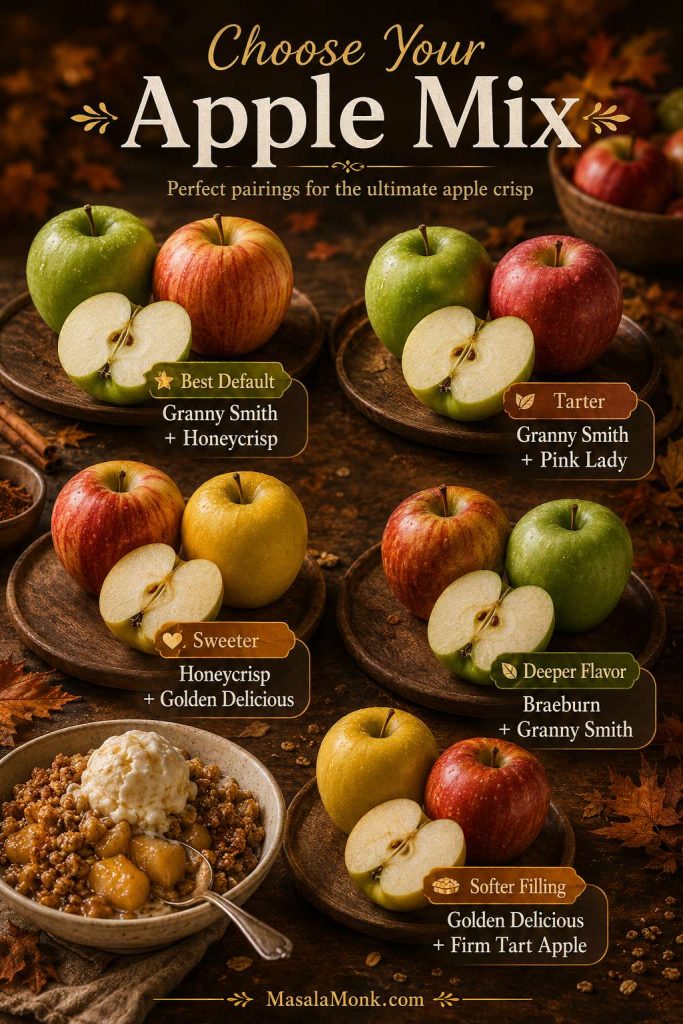
Easy Apple Mixes for Apple Crisp

Apple mix guide for apple crisp showing different apple pairings for tart, sweet, deep, and soft fillings.
Choose the apple mix by texture and flavor: tarter, sweeter, deeper, or softer and more spoonable.
Apple Mix Best For Flavor and Texture
Granny Smith + Honeycrisp Best default mix Tart, sweet, juicy, and sturdy
Granny Smith + Pink Lady Tarter apple crisp Bright, firm, and less sweet
Honeycrisp + Golden Delicious Sweeter family-style crisp Softer, sweeter, and very cozy
Braeburn + Granny Smith Deeper baked flavor Warm, aromatic, and balanced
Golden Delicious + a firm tart apple Softer, saucier filling Good when you want a more spoonable dessert

If you use a local apple variety that bakes well, tell us which one. Apple crisp is one of those recipes where regional apples can completely change the flavor, and the underrated local ones are often the most interesting.

Once you choose the apples, the cut matters too; see the sliced vs chopped apple guide before you prep the fruit.

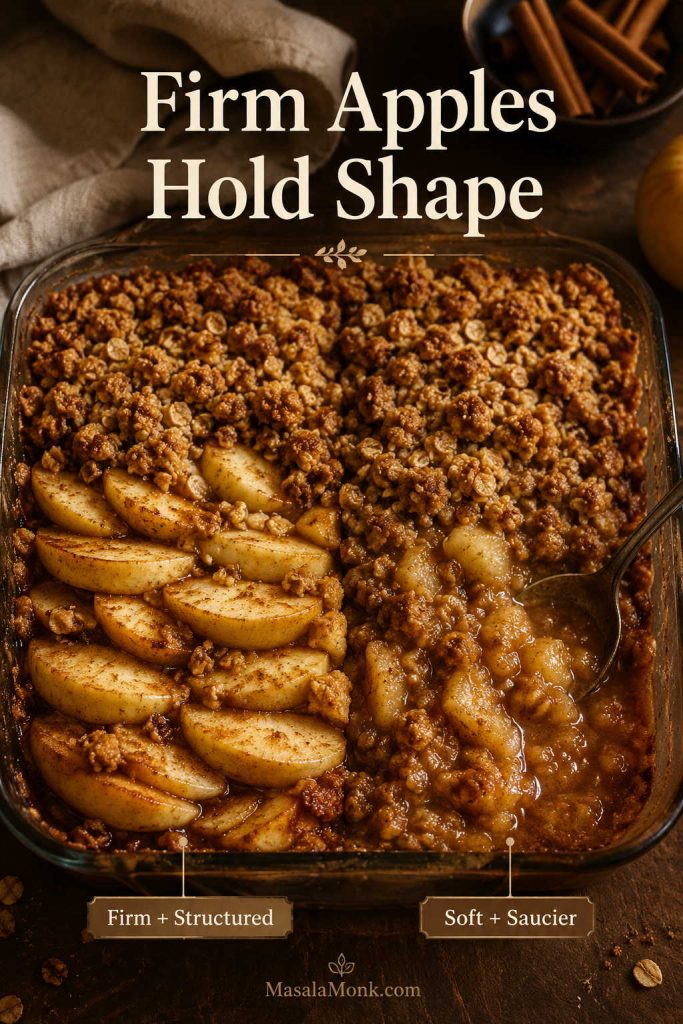
By contrast, very soft apples can break down quickly under a long bake. They still taste good, but they may create a saucier, almost applesauce-like filling and make the bottom of the crisp wetter.

Firm apple slices holding their shape beside softer apples breaking down into saucier apple crisp filling.
Firm apples help apple crisp hold its shape, while softer apples create a saucier filling; mixing varieties gives better balance.
Apple Best Use What to Expect
Granny Smith Best tart backbone Firm, bright, less sweet
Honeycrisp Best sweet-tart flavor Juicy, aromatic, holds well
Pink Lady Balanced crisp filling Tangy, firm, colorful
Braeburn Warm baked flavor Sweet-tart and sturdy
Golden Delicious Softer, sweeter filling Good when mixed with tart apples
Red Delicious Not recommended Often too soft and mild after baking

For a deeper apple breakdown, the best apples for apple pie guide is also useful for apple crisp because the same basic rule applies: choose apples that taste good after baking and do not collapse too quickly.

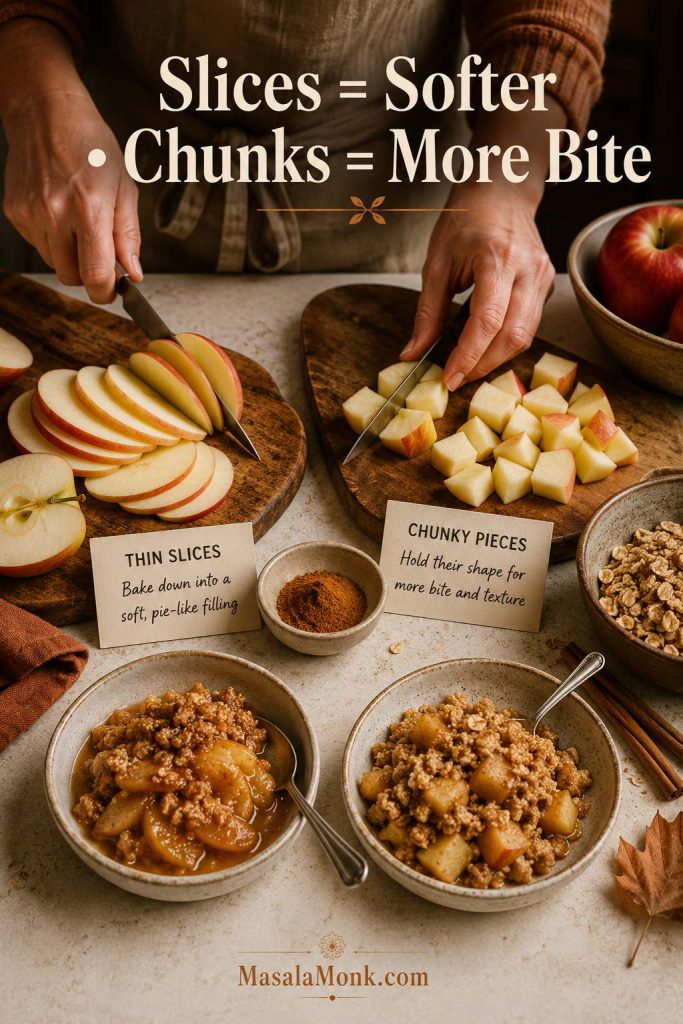
Should Apples Be Sliced or Chopped for Apple Crisp?

Hands preparing sliced and chopped apples for apple crisp with examples of softer and chunkier filling textures.
Sliced apples bake into a softer, layered filling, while chopped apples keep more bite in each spoonful.

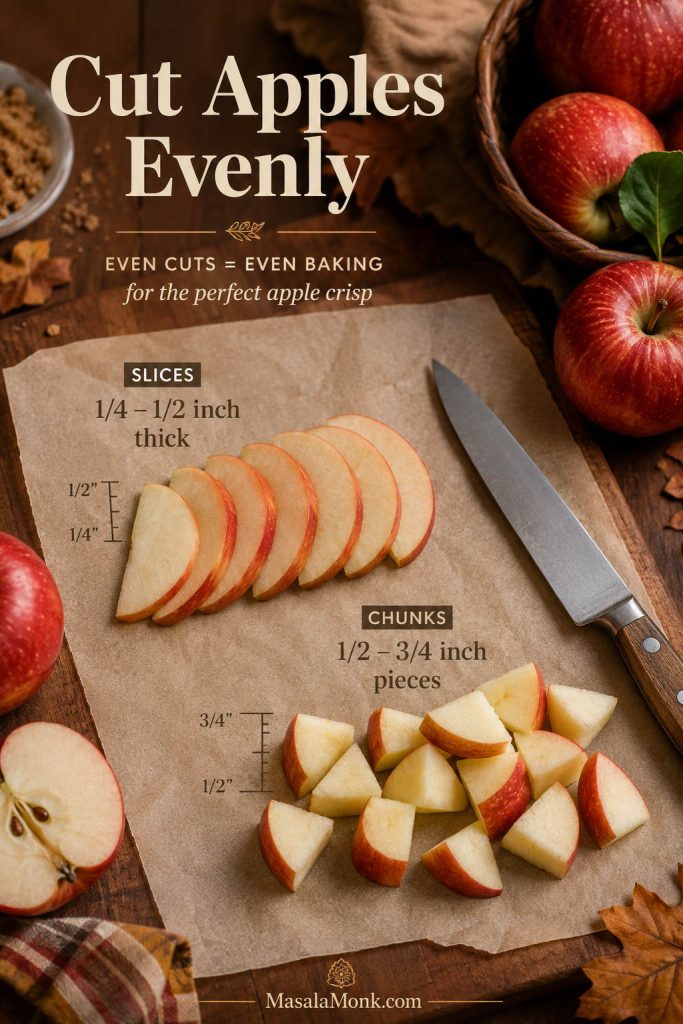
Both work, but they give different textures. Thin slices bake into a softer, more layered filling. Chunks give more bite and make the dessert feel fruitier. Either way, even cutting matters because uneven apples can leave you with mushy small pieces and firm large pieces in the same pan.

Cut-size tip: Keep slices and chunks even so the apple crisp filling bakes at the same pace.

Apple slice and chunk size guide showing even pieces for apple crisp preparation.
Even apple pieces bake at the same pace, which helps prevent mushy bits and underbaked chunks in the same pan.
Cut Best Size Result
Slices 1/4–1/2 inch thick Softer, layered, classic spoon-dessert texture
Chunks 1/2–3/4 inch More apple bite and a chunkier filling
Very thick pieces Over 3/4 inch May stay firm unless baked longer

For the most classic texture, use mostly slices with a few slightly thicker pieces mixed in. As a result, some apples soften into the cinnamon juices, while others stay tender enough to bite.

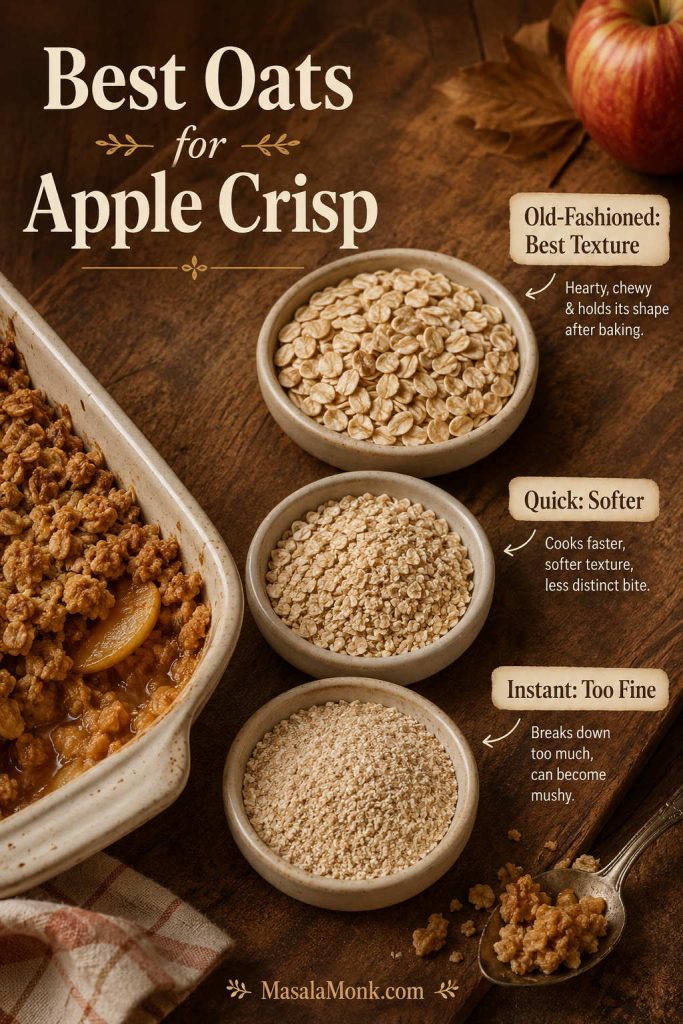
Old-Fashioned Oats vs Quick Oats for Apple Crisp

Oat choice: Old-fashioned oats give the topping more visible texture, while quick oats make the crumble finer and softer.

Old-fashioned oats, quick oats, and instant oats compared for apple crisp topping texture.
Old-fashioned oats give apple crisp a chewy-crisp topping; quick oats make it finer and softer, while instant oats can turn powdery.

Old-fashioned rolled oats are the best oats for apple crisp. They hold their shape in the oven and give the topping the chunky, crisp texture people expect. Quick oats can work in an emergency, but they make a softer, finer topping. Instant oats are too powdery, and steel-cut oats are too hard for this kind of topping.

Oat Type Use in Apple Crisp? Result
Old-fashioned rolled oats Yes, best choice Classic crisp topping with good texture
Quick oats Yes, only if needed Softer, finer topping with less chew
Instant oats Not ideal Can become too soft or powdery
Steel-cut oats No Too hard and chewy for this topping

That little bit of chew is what makes apple crisp feel like apple crisp instead of baked apples with crumbs. Old-fashioned oats stay visible, toasty, and slightly chewy, so the topping has more texture than a plain crumble.

For a version without oats, make a flour-butter-brown-sugar crumble topping instead. That leans closer to apple crumble than classic apple crisp, and it needs slightly different handling because the topping does not have the same chewy oat structure. You can also jump to the apple crisp without oats variation below.

How to Make Apple Crisp

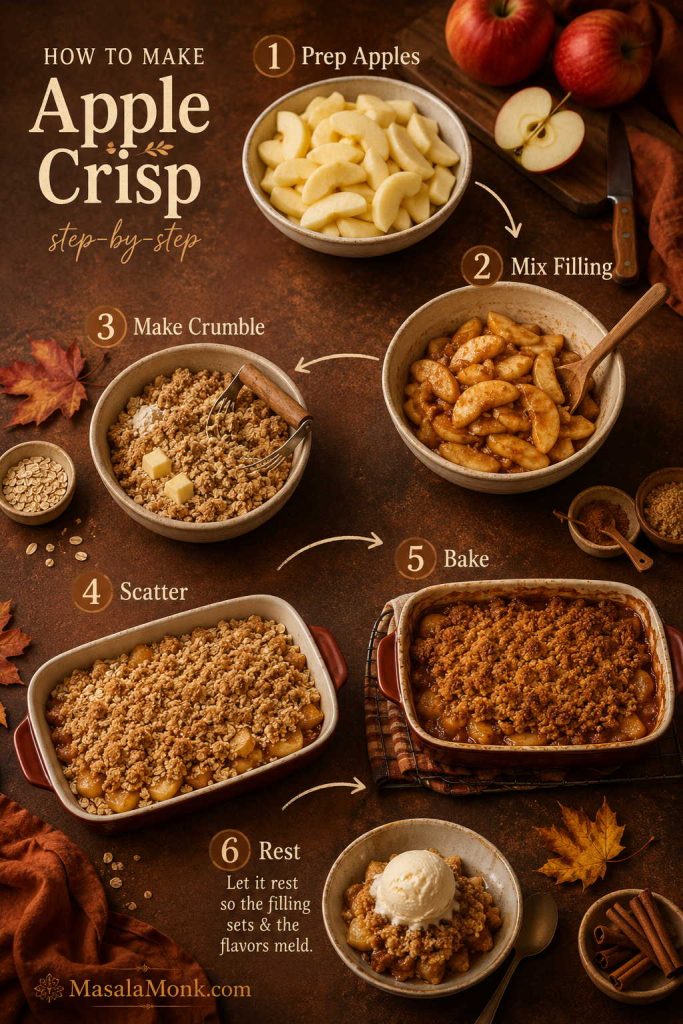
Method overview: The recipe is easiest when you follow the same order every time: prep, mix, crumble, scatter, bake, and rest.

Step-by-step apple crisp guide showing apple prep, filling, crumble topping, baking, and resting.
The method works best in order: prep the apples, coat the filling, make the crumble, scatter it loosely, bake until bubbling, and rest.

1. Prep the Apples

First, preheat the oven to 350°F / 175°C. Lightly butter an 8×8 or 9×9-inch baking dish, and place it on a rimmed baking sheet if the dish is quite full.

Next, peel the apples for a softer, more classic dessert texture. For a more rustic crisp with extra texture, leave the skins on. Core the apples, then cut them into even slices or chunks.

  • Thin slices: softer, more layered filling
  • 1/2-inch chunks: more apple bite and texture
  • Uneven pieces: some apples may turn mushy while others stay firm

2. Mix the Apple Filling

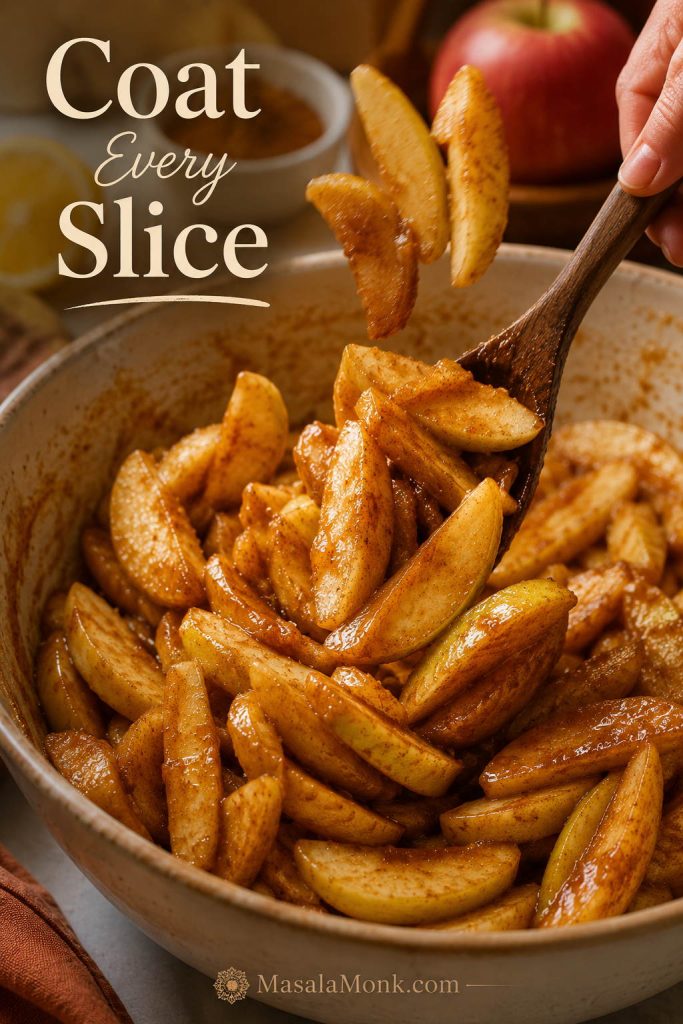
Add the apples to a large bowl with lemon juice, brown sugar, flour or cornstarch, cinnamon, nutmeg, vanilla, and salt. Then toss until the apples are evenly coated. The thickener should disappear into the juices and sugar instead of sitting in dry patches.

Apple crisp filling being mixed until apple pieces are coated with cinnamon, brown sugar, lemon, and thickener.
Mix until the thickener disappears into the apple juices so the filling bakes glossy instead of floury.

After mixing, spread the apples into the prepared baking dish. Do not worry if the dish looks full; the apples shrink as they bake.

3. Make the Oat Topping

In a separate bowl, mix the oats, flour, brown sugar, cinnamon, and salt. Add cold cubed butter. Then use your fingers, a fork, or a pastry cutter to rub the butter into the dry ingredients.

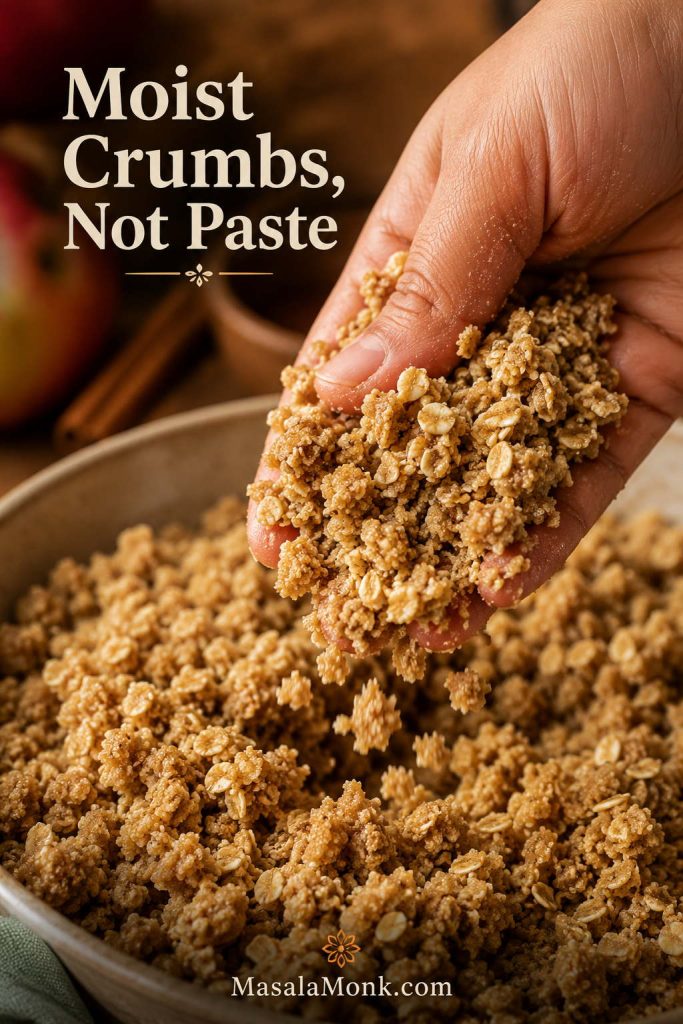
The mixture should look like uneven, buttery crumbs, not dry flour and not a smooth paste. When you squeeze a handful, it should hold together in rough clumps, then break apart easily. Leave some larger clumps on purpose; those become the crispest brown-sugar bites after baking.

Hand holding moist oat crumbs for apple crisp topping before baking.
The oat topping should form rough crumbs that hold together lightly, then break apart before baking.

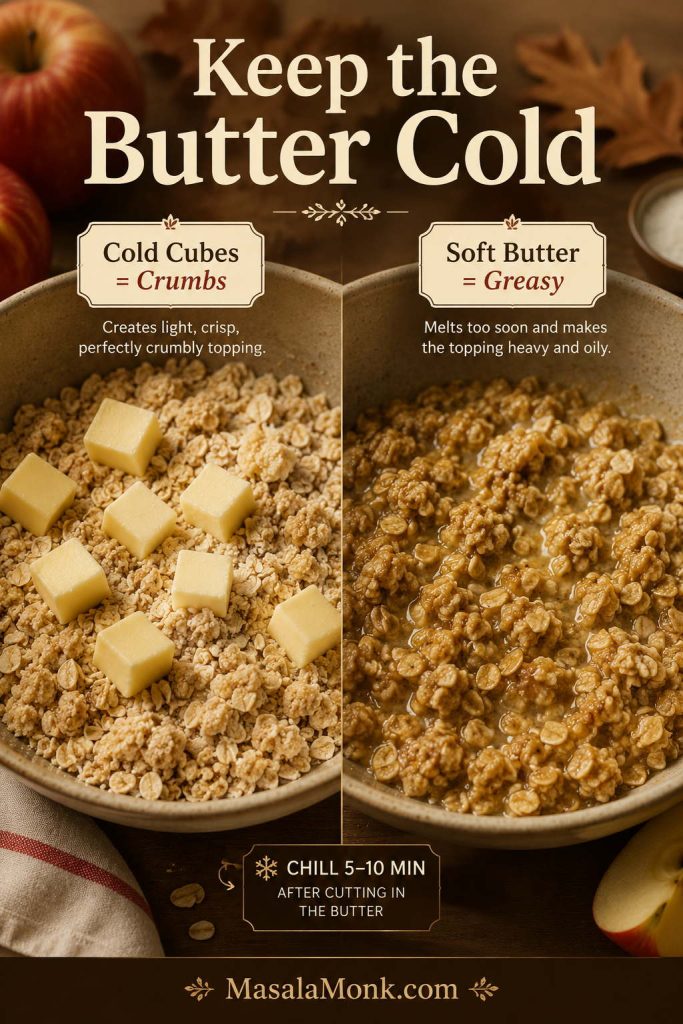
If the mixture still looks dusty, keep working in the butter. Dry crumbs bake up floury. If it looks wet or greasy before baking, the butter has softened too much; chill the bowl for 10 minutes before sprinkling the oat mixture over the apples.

Warm kitchen tip: In a warm kitchen, cube the butter and chill or freeze it for 5–10 minutes before making the topping. Cold butter helps the oat topping bake into distinct crumbs instead of melting into the apples.

Cold butter cubes compared with softened butter for making apple crisp topping.
If the butter softens, chill the topping briefly; cold butter keeps the crumble distinct instead of greasy.

4. Add the Topping

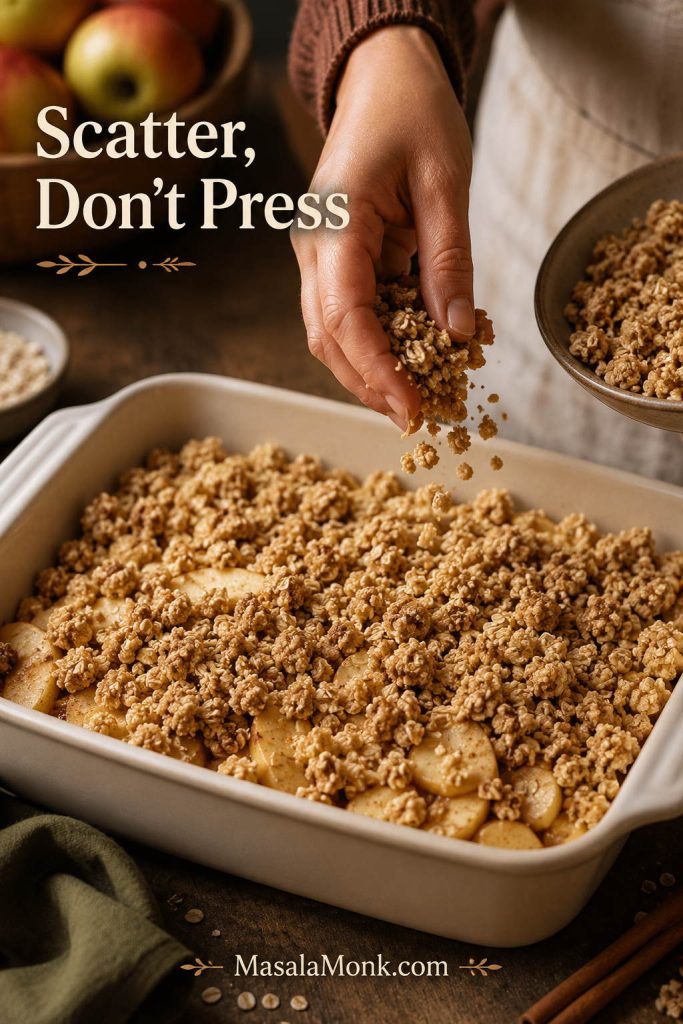
Scatter the oat mixture evenly over the apples. Do not press it down firmly. A loose crumb layer allows heat to move through the apples while the surface browns.

Oat crumble topping being scattered loosely over apple filling in a baking dish.
Scatter the topping loosely rather than pressing it down, so heat reaches the apples while the surface browns.

5. Bake Until Bubbling

Bake for 45–55 minutes, or until the oat layer is golden and the apple juices are visibly active beneath the surface. That heat is what wakes up the flour or cornstarch and turns the juices glossy instead of loose.

Apple crisp bubbling in the oven with golden oat topping in a cream baking dish.
Active bubbling is the doneness cue that tells you the filling has enough heat for the thickener to work.

If the surface browns too quickly before the apples are tender, loosely cover the dish with foil and continue baking. Do not seal the foil tightly, because trapped steam can soften the crumb layer. If the crisp still looks off, use the troubleshooting chart before you pull it from the oven.

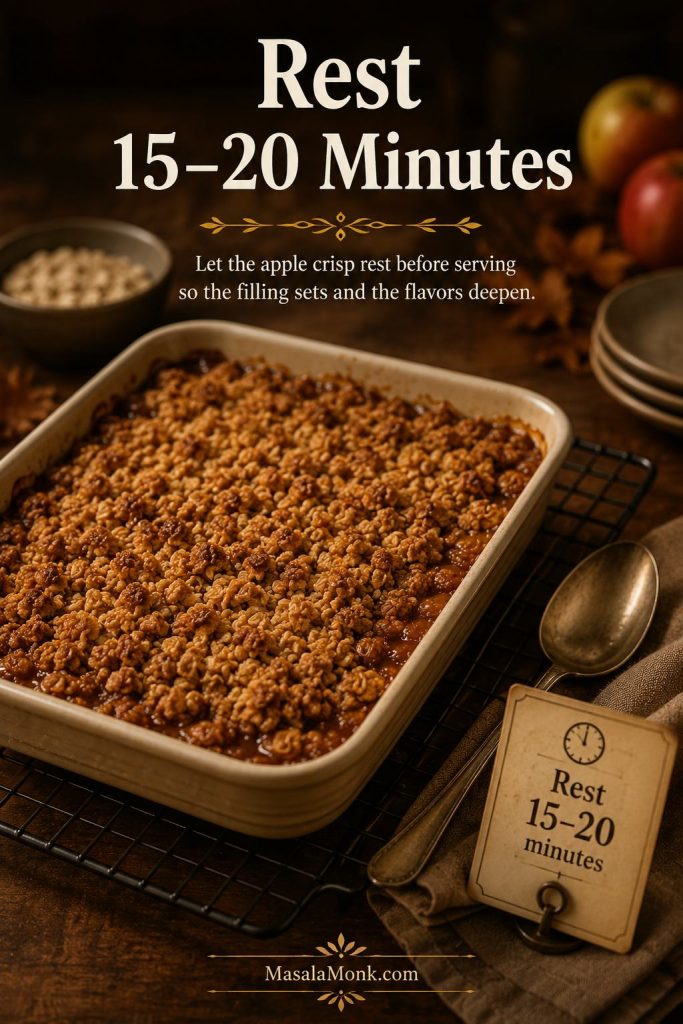
6. Let It Rest Before Serving

Once the crisp comes out of the oven, let it rest for at least 15–20 minutes before scooping. This short rest helps the juices settle so the filling is glossy and spoonable instead of runny.

Freshly baked apple crisp resting on a cooling rack with a 15 to 20 minute rest cue.
That short wait after baking is not wasted time; it helps the hot apple juices thicken so the first scoop does not collapse into the bowl.

Should Apple Crisp Be Baked Covered or Uncovered?

Bake apple crisp uncovered so the oat layer can brown and crisp. If the surface turns dark before the apples are tender, cover the dish loosely with foil for the last 10–15 minutes. Do not cover it from the beginning unless your oven runs very hot.

Once the apples are coated and the crumble is ready, the hardest part is already done. From here, the oven does most of the work: softening the apples, thickening the juices, and turning those rough oat clumps into the bites everyone wants first.

Easy Apple Crisp Recipe with Oats

Easy Apple Crisp Recipe with Oats

This easy apple crisp bakes tender cinnamon apples under a generous brown sugar oat topping, with clear doneness cues so the filling turns glossy instead of watery. Serve it warm with vanilla ice cream, especially if you want the corner pieces to disappear first.

Prep Time20 minutes
Cook Time45–55 minutes
Rest Time15 minutes
Servings6–8

Ingredients

For the apple filling

  • 2 1/2 lb / 1.1 kg apples, weighed before peeling and coring; about 8 cups sliced or chopped apples
  • 1 tablespoon / 15 ml lemon juice
  • 1/3 cup / 65 g packed light brown sugar, or up to 1/2 cup / 100 g for very tart apples
  • 2 tablespoons / 16 g all-purpose flour, or 1 tablespoon / 8 g cornstarch
  • 1 teaspoon ground cinnamon
  • 1/4 teaspoon ground nutmeg, optional
  • 1 teaspoon / 5 ml vanilla extract
  • 1/4 teaspoon fine salt

For the oat topping

  • 1 cup / 90 g old-fashioned rolled oats
  • 3/4 cup / 95 g all-purpose flour
  • 3/4 cup / 150 g packed light brown sugar
  • 1 teaspoon ground cinnamon
  • 1/4 teaspoon fine salt
  • 1/2 cup / 113 g cold unsalted butter, cut into small cubes
  • Optional: 1/2 cup / 55–60 g chopped pecans or walnuts

Instructions

  1. Preheat the oven to 350°F / 175°C. Lightly butter an 8×8 or 9×9-inch baking dish. Place the dish on a rimmed baking sheet if it is very full.
  2. Add the apples to a large bowl. Toss with lemon juice, brown sugar, flour or cornstarch, cinnamon, nutmeg, vanilla, and salt until evenly coated.
  3. Spread the apple mixture into the prepared baking dish.
  4. In another bowl, stir together the oats, flour, brown sugar, cinnamon, and salt.
  5. Add the cold cubed butter. Rub it into the oat mixture with your fingers, a fork, or a pastry cutter until the topping forms moist crumbs and rough clumps.
  6. Sprinkle the topping evenly over the apples. Do not press it down firmly.
  7. Bake for 45–55 minutes, until the topping is golden and the apple juices are bubbling at the edges and toward the center.
  8. If the topping browns before the apples are tender, cover loosely with foil and continue baking.
  9. Let the crisp rest for 15–20 minutes before serving. Serve warm, plain or with vanilla ice cream.

Notes

  • Use old-fashioned oats for the best topping texture.
  • The crisp is not done just because the topping is brown. Look for bubbling juices near the center too.
  • If the topping looks powdery before baking, work in the butter a little more or add 1–2 teaspoons extra cold butter.
  • If using a 9×9 pan, check a few minutes early because it is slightly shallower than an 8×8.
  • Use less sugar for sweet apples and more for very tart apples.
  • For a glossier filling, use cornstarch instead of flour.
  • For a thicker filling, let the crisp cool for at least 20 minutes before scooping.
Saveable apple crisp recipe card with baked apple crisp, vanilla ice cream, apples, oats, bake time, and rest time.
Keep the base formula simple: 2½ pounds of apples, 350°F, old-fashioned oats, and a proper rest before serving.

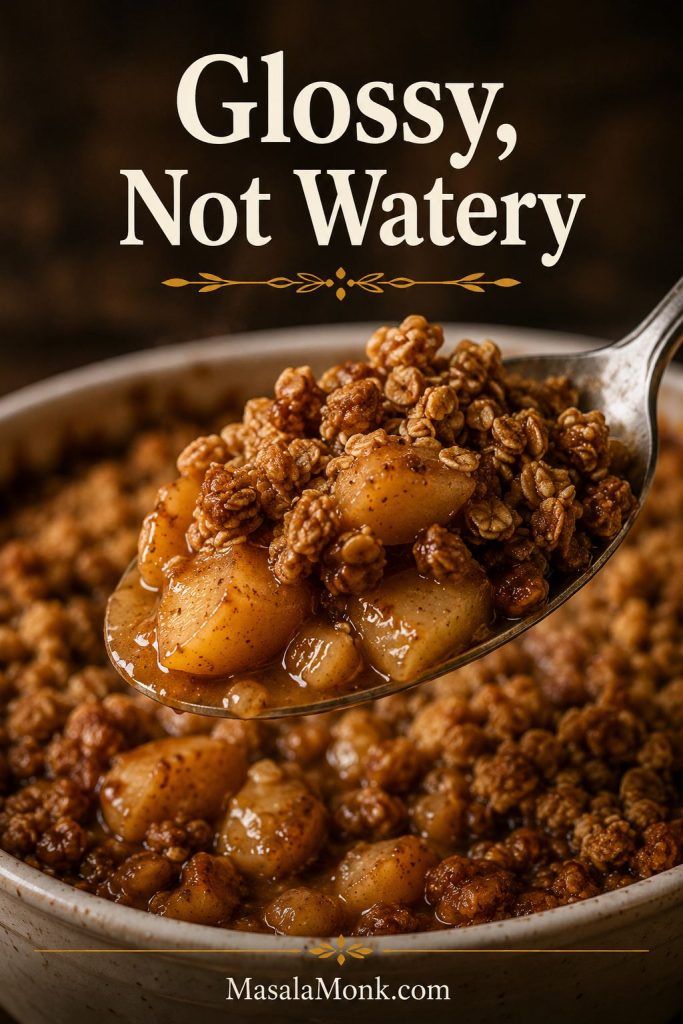
Finished texture: The best scoop holds glossy apples and crumble together without leaving a watery puddle behind.

Spoon lifting glossy apple crisp filling with golden oat crumble from a warm bowl.
The ideal spoonful holds tender apples, glossy cinnamon juices, and enough crumble to give every bite texture.

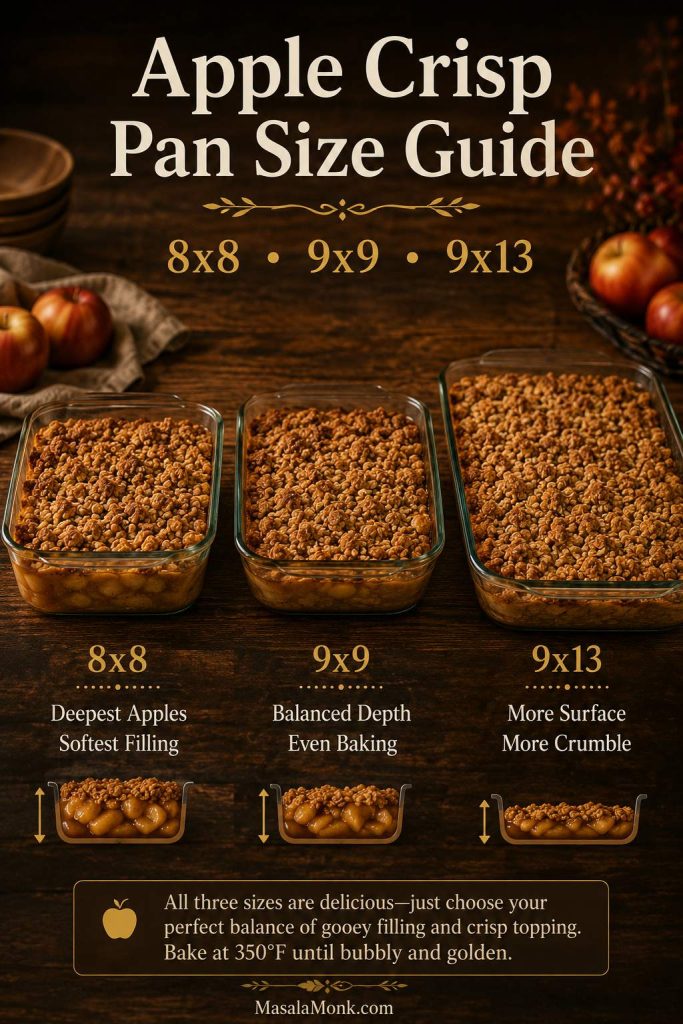
Apple Crisp Pan Guide: 8×8, 9×9, and 9×13

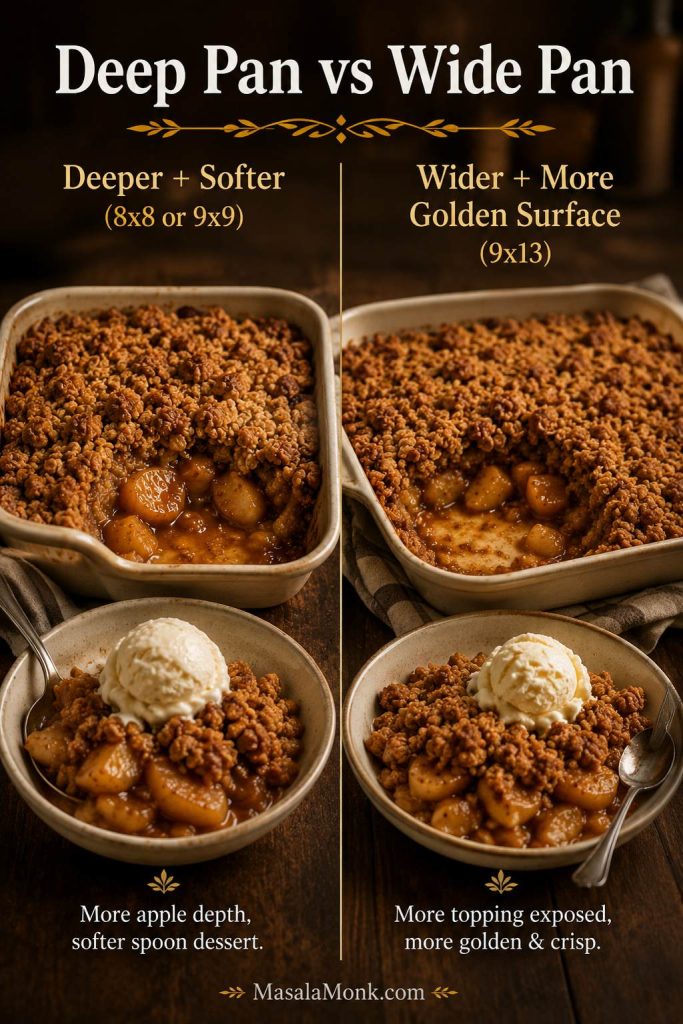
Pan size changes the depth of the apples, the bake time, and how much crumble you need. A deeper crisp feels softer and more spoonable, while a wider dish gives the oat layer more exposure and more golden edges.

Apple crisp pan size guide comparing 8x8, 9x9, and 9x13 baking dishes.
Use the pan guide before you bake, because a deeper dish needs more time while a wider dish exposes more crumble to direct heat.
Pan Size Apple Amount Topping Amount Bake Time Best For
8×8 inch 2–2 1/2 lb / 900 g–1.1 kg Use full recipe 45–55 minutes Deeper family-style crisp
9×9 inch 2 1/2 lb / 1.1 kg Use full recipe 45–55 minutes Best balanced default
9×13 inch 3 1/2–4 lb / 1.6–1.8 kg Use 1 1/2x topping 50–60 minutes Holidays, potlucks, larger families

How to Make a 9×13 Apple Crisp

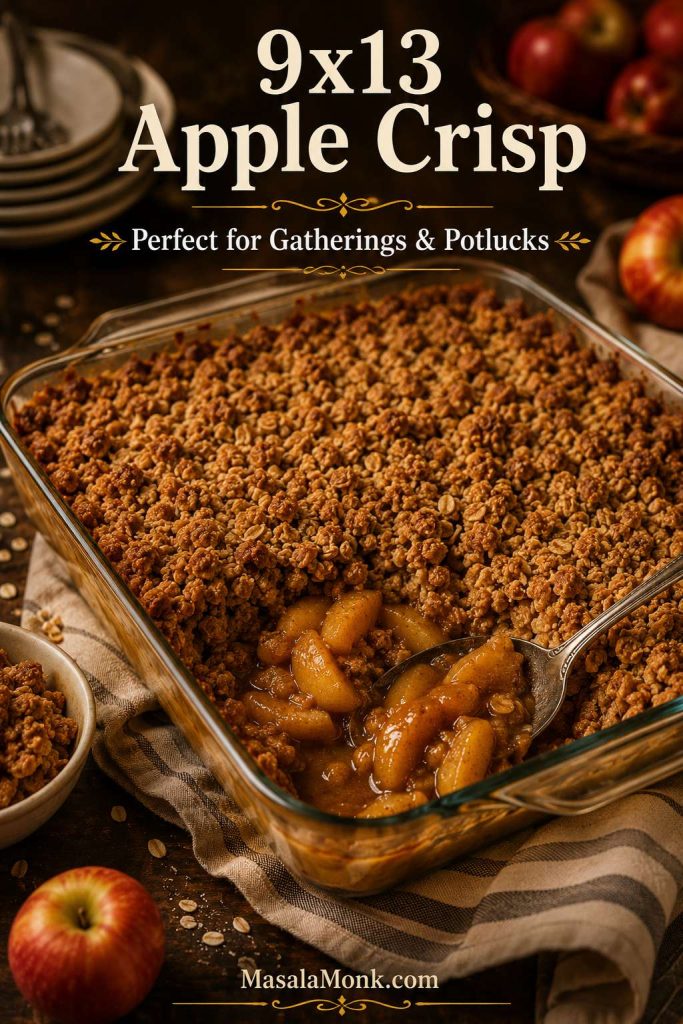
A 9×13 apple crisp is the version to make for a holiday table, potluck, or family dinner where people will go back for seconds. The trick is not just adding more apples; the topping has to scale too, or the pan tastes like baked apples with a thin oat sprinkle.

Large 9x13 apple crisp in a glass baking dish with golden oat topping and spooned cinnamon apple filling.
For a 9×13 apple crisp, scaling the crumble matters as much as scaling the apples; otherwise, each serving can feel thin on top.

For a 9×13-inch apple crisp, increase the recipe so the pan still has enough fruit and topping. Otherwise, a thin layer of apples can dry out, while a thin topping makes the crisp feel unfinished.

Ingredient 9×13 Amount
Apples 3 1/2–4 lb / 1.6–1.8 kg, about 11–12 cups sliced or chopped
Lemon juice 1 1/2 tablespoons / 22 ml
Brown sugar for filling 1/2 cup / 100 g, or less for sweet apples
Flour for filling 3 tablespoons / 24 g, or 1 1/2 tablespoons cornstarch
Old-fashioned oats 1 1/2 cups / 135 g
Flour for topping 1 cup plus 2 tablespoons / about 140 g
Brown sugar for topping 1 cup plus 2 tablespoons / about 225 g
Cold butter 3/4 cup / 170 g
Bake time 50–60 minutes at 350°F / 175°C

For the 9×13 version, give the middle of the pan enough time to catch up with the edges, then rest it at least 20 minutes before serving. A larger pan holds more hot apple juice, so the short wait makes each scoop cleaner.

Pan texture tip: Think of dish size as a texture decision, not only a volume decision.

Deep pan and wide pan apple crisp comparison showing different apple depth and golden topping exposure.
Think of pan size as a texture choice: deeper dishes give a softer fruit layer, while wider dishes create more browned crumble and edges.

If you make this in a different dish size, share the pan and bake time. Someone else will absolutely be standing in their kitchen with a deep ceramic dish or shallow glass pan wondering if it will work.

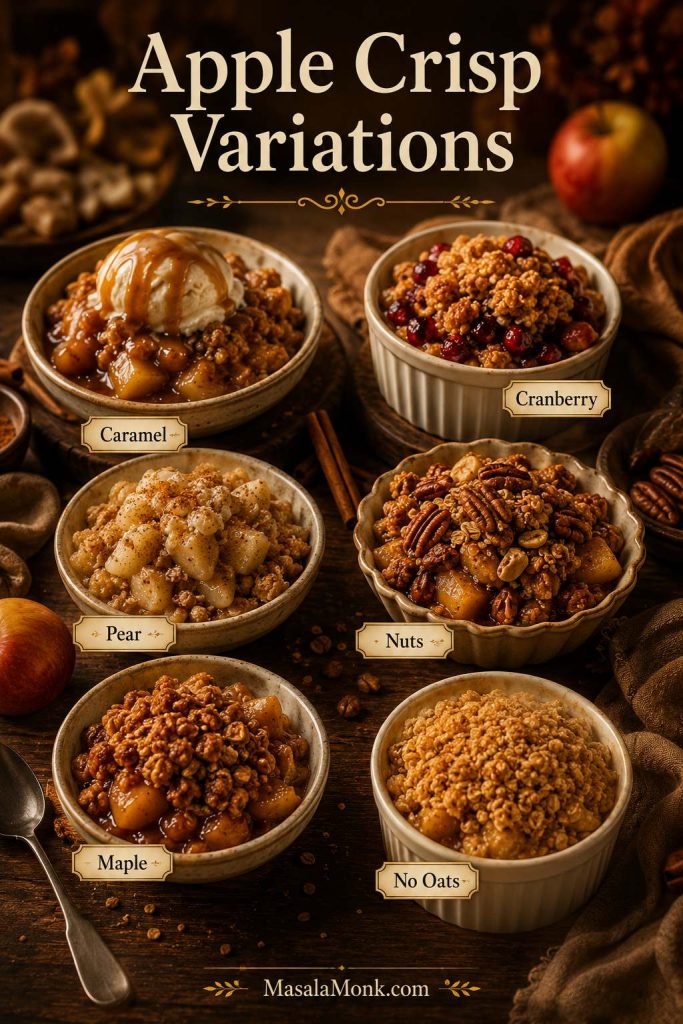
Popular Apple Crisp Variations

This apple crisp recipe uses fresh apples and oats, but the basic ratio is flexible. Once you understand the filling, topping, and doneness cues, you can adjust the crisp for prepared apple pie filling, no oats, gluten-free flour, cranberries, pears, caramel, nuts, or a dairy-free topping.

Apple crisp variations with caramel, cranberry, pear, nuts, maple, and no-oat crumble servings.
Start with the classic version, then choose the variation by purpose: caramel for richness, cranberry for tartness, nuts for crunch, or no oats for a softer crumble.

Start with the base apple crisp recipe, then choose the variation based on what you want the crisp to do: caramel makes it richer, cranberries make it sharper for a holiday table, pears make the fruit layer softer, nuts add crunch, and gluten-free or dairy-free swaps make the same base recipe work for more people.

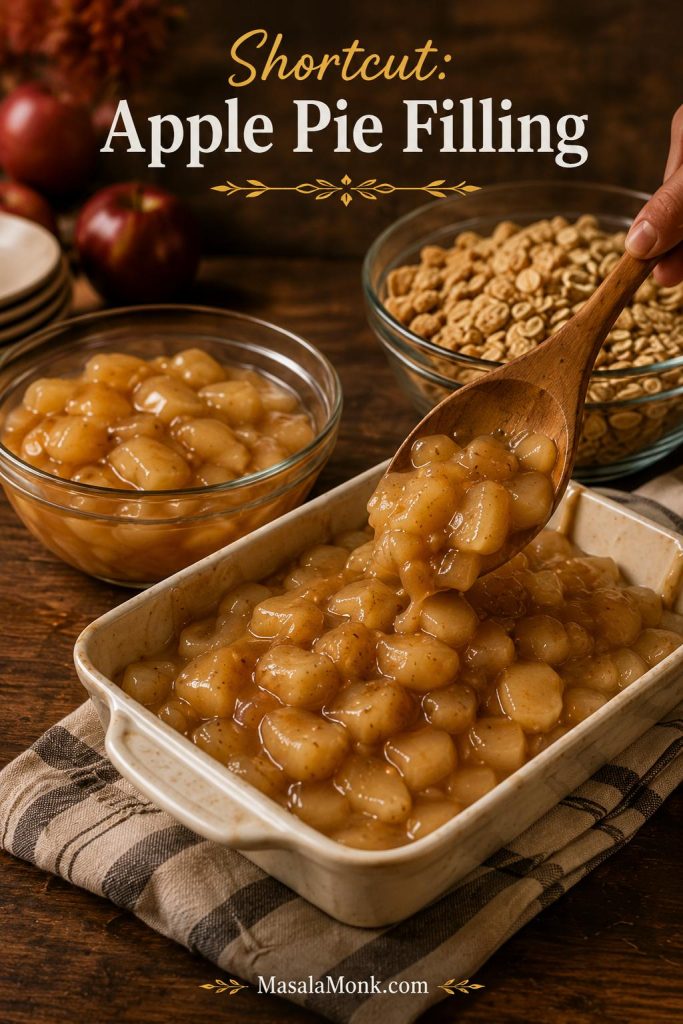
Apple Crisp with Apple Pie Filling

Apple pie filling being spooned into a baking dish with oat topping nearby for shortcut apple crisp.
Apple pie filling makes a shortcut apple crisp possible, but fresh apples give you more control over sweetness and texture.

Use apple pie filling when you need a shortcut crisp with no peeling or slicing. Because the filling is already sweetened and thickened, skip the fresh-apple sugar, flour, lemon, and spice mixture. Spread 5–6 cups filling in the dish, add the oat topping, and bake until bubbling.

Homemade filling gives you more control over sweetness and texture. This apple pie filling recipe works for pies, crisps, hand pies, turnovers, and toppings, so it is useful to keep around when apples are in season.

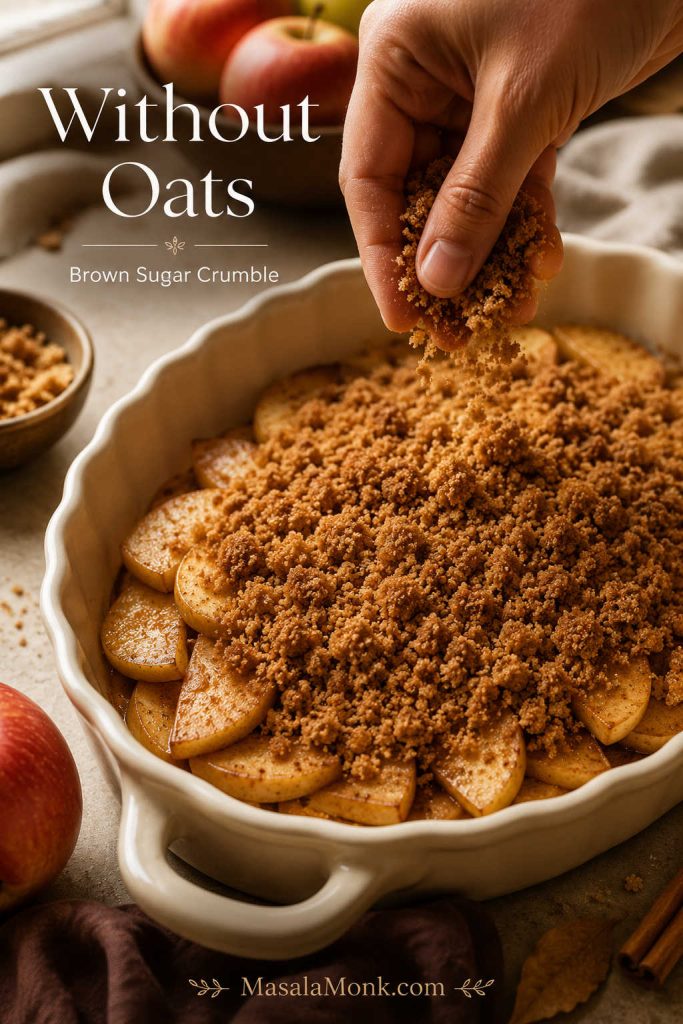
Apple Crisp Without Oats

Brown sugar crumble being scattered over sliced apples for apple crisp without oats.
Choose the no-oat version when you want a finer brown-sugar crumble instead of the chewy texture that oats bring to classic apple crisp.

For a no-oat version, make a flour, brown sugar, butter, and cinnamon crumble topping. The texture is closer to apple crumble: buttery and tender rather than chewy-crisp. Keep the butter cold and work it in until the topping forms rough crumbs, not a smooth paste.

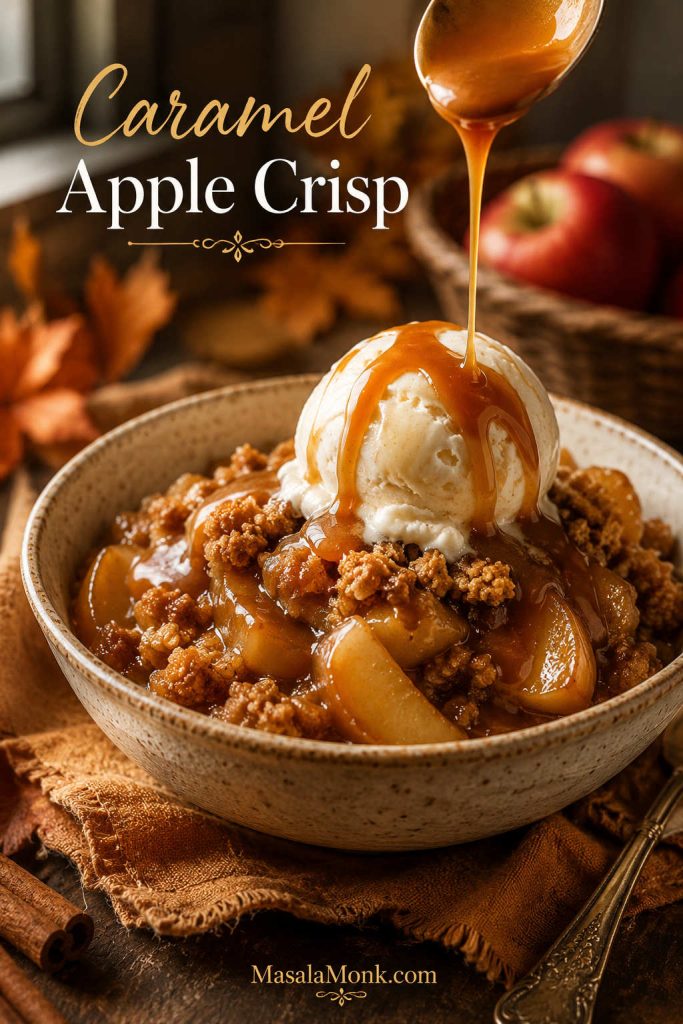
Caramel Apple Crisp

Caramel apple crisp served with vanilla ice cream and caramel sauce drizzled over the top.
Drizzle caramel over each serving instead of loading the filling with it, so the apples stay balanced.

For caramel apple crisp, use the base recipe and drizzle caramel over each serving instead of stirring a lot of caramel into the filling. That keeps the apples from becoming overly sweet or sticky while still giving you the caramel-apple flavor people expect.

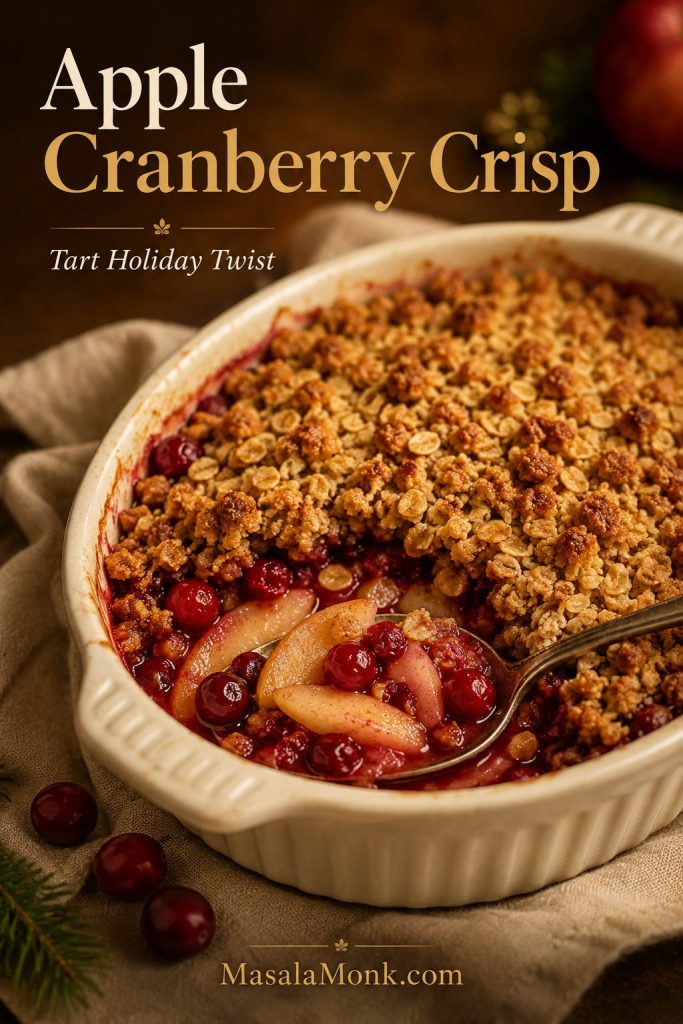
Apple Cranberry Crisp

Apple cranberry crisp with ruby cranberries, sliced apples, and golden oat crumble in a cream baking dish.
Cranberries add tartness and color, making apple cranberry crisp especially useful for fall dinners and holiday menus.

Add 3/4 to 1 cup fresh or frozen cranberries to the apples for a sharper holiday-style crisp. Because cranberries are tart, taste the apple mixture before baking and add 1–2 extra tablespoons of sugar if needed.

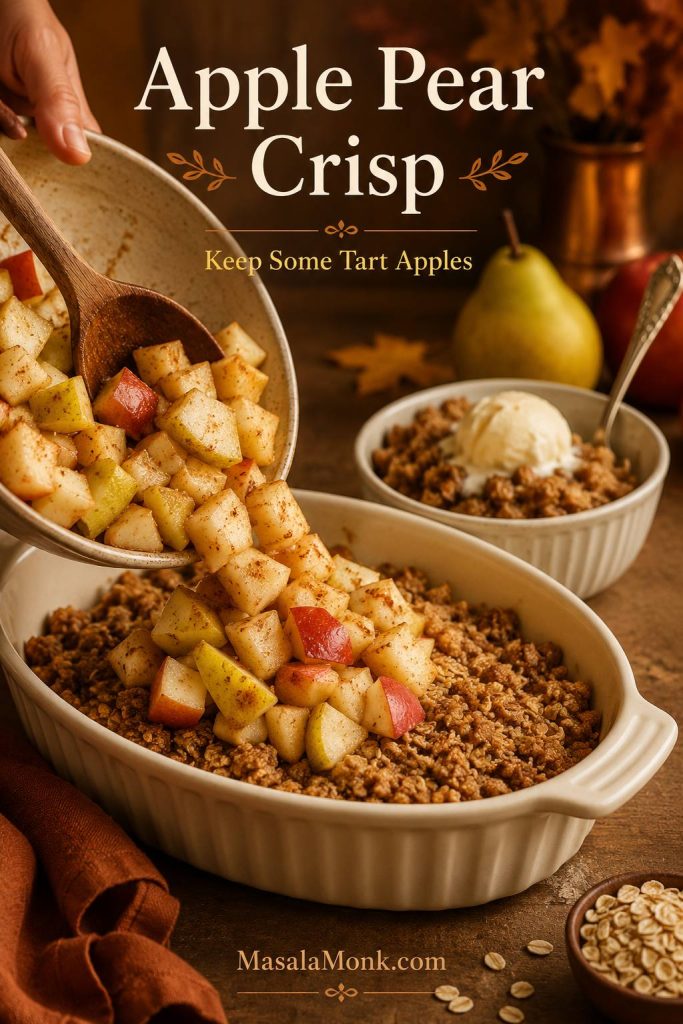
Apple Pear Crisp

Apple pear crisp being assembled with chopped apples, pears, cinnamon, and oat crumble in a baking dish.
Apple pear crisp works best with firm pears and tart apples together, because the pears add softness while the apples keep the flavor bright.

Replace about one-third of the apples with firm pears. Keep some tart apples in the mix so the filling does not taste flat. Softer pears can work, but they will make the filling more delicate and saucy.

Apple Crisp with Nuts

Add 1/2 cup chopped pecans or walnuts to the topping for extra crunch. If the nuts start browning before the apples are tender, cover the dish loosely with foil near the end of baking.

Maple Apple Crisp

Replace 1–2 tablespoons of the filling sugar with maple syrup for a deeper fall flavor. Do not add too much extra liquid; maple should support the apples, not make the filling loose.

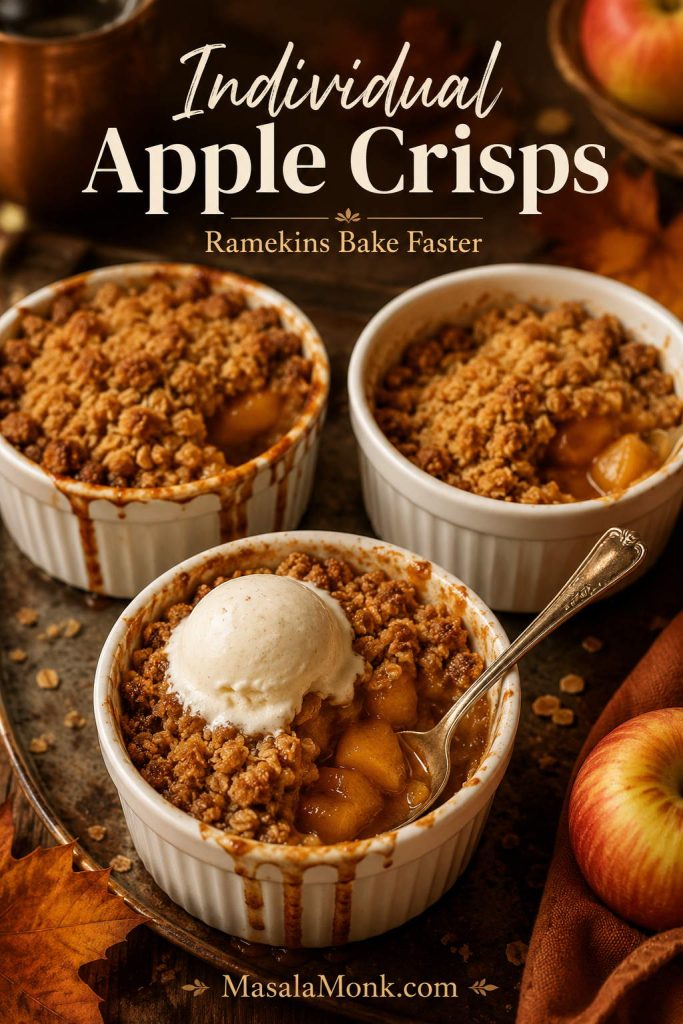
Individual Apple Crisps

Individual apple crisps baked in white ramekins with golden oat topping and one serving topped with vanilla ice cream.
Individual apple crisps bake faster than a full pan, so start checking early and serve while the topping still has texture.

Divide the filling and topping among small ramekins and bake until the fruit bubbles and the topping is golden. Start checking around 25–30 minutes because smaller portions bake faster.

No-Peel Apple Crisp

Leave the skins on if your apples have thin, pleasant skins and you like a more rustic texture. Peel thick-skinned or waxy apples for a softer, more classic filling.

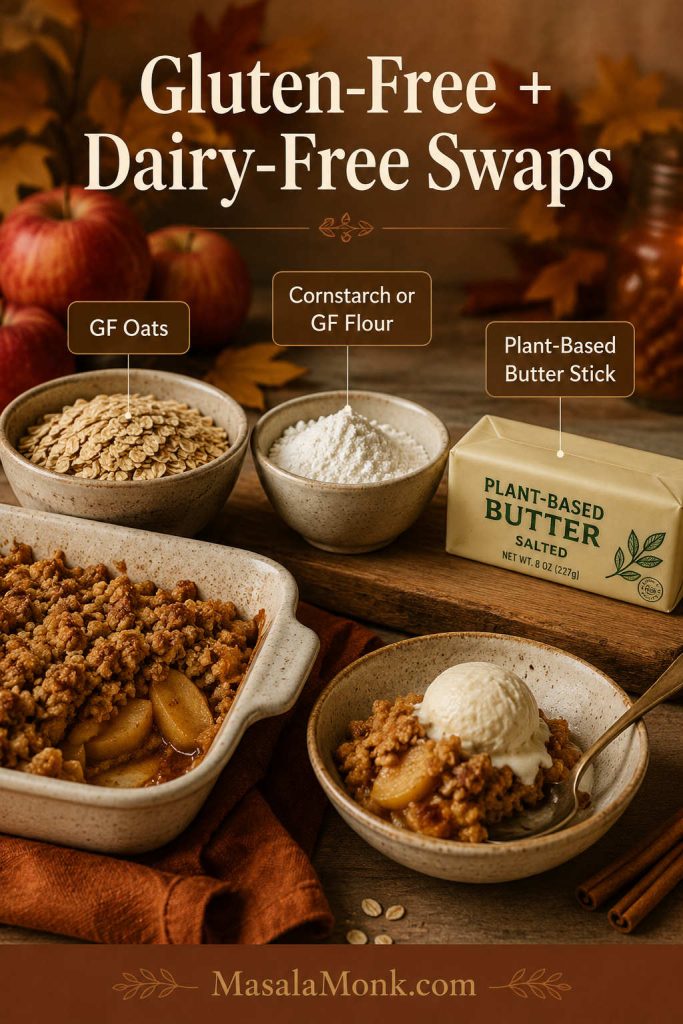
Gluten-free and dairy-free tip: Keep the base method, but choose certified gluten-free oats and a firm plant-based butter stick so the crumble still works.

Gluten-free and dairy-free apple crisp swaps with oats, cornstarch or gluten-free flour, plant-based butter, apples, and a finished serving.
For gluten-free or dairy-free apple crisp, keep the method the same but choose certified gluten-free oats and a firm plant-based butter stick.

Gluten-Free Apple Crisp

For a gluten-free apple crisp, use certified gluten-free oats and replace the flour with a gluten-free blend or cornstarch in the filling. The topping can use gluten-free all-purpose flour, oat flour, or almond flour, depending on the texture you want.

Dairy-Free Apple Crisp

Use a good plant-based butter stick instead of a soft tub spread. A firmer vegan butter works better because it can be cut into the topping and form crumbs, while softer spreads can make the topping greasy.

Lower-Sugar Apple Crisp

To make a lower-sugar apple crisp, start with naturally sweet apples and reduce the sugar in the apple layer first. Still, keep some sugar in the topping because it helps with browning, flavor, and crisp texture.

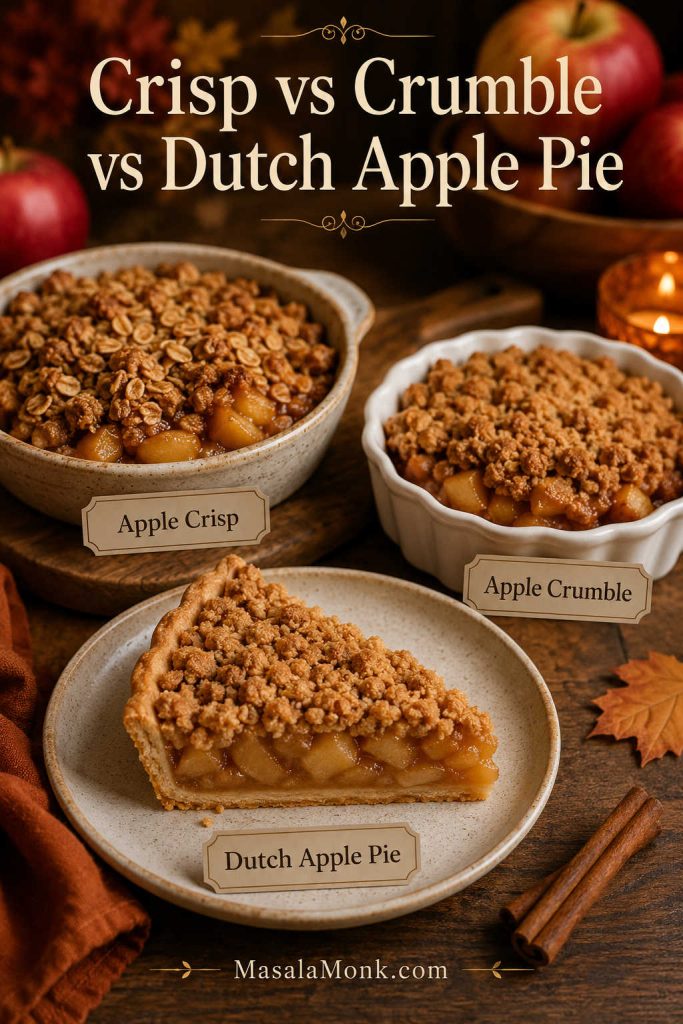
Apple Crisp vs Apple Crumble vs Dutch Apple Pie

Apple crisp, apple crumble, and Dutch apple pie all live in the same cozy dessert family, but the topping and crust make them different.

Apple crisp, apple crumble, and Dutch apple pie compared with oat topping, crumb topping, and a pie slice with crust.
This comparison helps readers choose the dessert they actually want: chewy oat-topped crisp, softer crumble, or a sliceable Dutch apple pie with crust.
Dessert Has Oats? Has Crust? Texture
Apple crisp Usually yes No Chewy, crumbly, oat-topped
Apple crumble Usually no No Softer, buttery crumb topping
Dutch apple pie Usually no oats Yes, bottom crust Slices like pie with a crumb top

For the crumb-topped pie version, see this Dutch apple pie recipe. For the easiest spoon dessert, stay with apple crisp.

Troubleshooting Apple Crisp

Most apple crisp problems can be fixed or at least improved. If the apples are underbaked, the dish can go back in the oven. If the oat layer is pale, give it more uncovered time. A runny-looking filling may simply need time to rest; hot apple juices thicken as they cool.

Quick Fixes Before You Serve It

Trying to save it right now? If the topping is pale or powdery, put the crisp back in the oven uncovered. If the apples are still firm but the topping is already dark, cover loosely with foil and keep baking. If the filling looks runny, let it rest 20 minutes before deciding it failed; apple juices thicken as they cool.

Apple crisp troubleshooting guide showing fixes for watery filling, pale topping, powdery crumbs, firm apples, and fast browning.
When apple crisp goes wrong, match the fix to the texture: rest runny filling, bake pale topping longer, add cold butter to dry crumbs, or cover fast-browning topping loosely.

Apple Crisp Troubleshooting Chart

Problem Likely Cause How to Fix It
Apple crisp is watery Very juicy apples, too little thickener, underbaking, or not enough resting time Use flour or cornstarch, bake until bubbling, and rest 15–20 minutes before serving
Crumb layer is soggy Butter was too warm, crisp was covered while hot, or it was underbaked Use cold butter, bake until golden, and reheat uncovered
Crumb layer is dry or floury Not enough butter worked into the topping Rub butter in until the mixture forms moist crumbs and clumps
Crumb layer is greasy Butter was too soft or melted before baking Use cold cubed butter; chill the topping briefly in a warm kitchen
Apples are still firm Apple pieces were too thick or the crisp needed more time Slice apples thinner next time; cover loosely with foil and continue baking
Apple crisp is too sweet Sweet apples plus too much sugar Use more tart apples, reduce filling sugar, and add lemon juice
Apple crisp tastes flat Not enough salt, lemon, or spice Add enough salt to both layers and use lemon juice in the apples

If your crisp came out watery, too firm, or softer than expected, drop the apple variety and pan size in the comments. Those two clues usually explain what happened and make it much easier to adjust the next batch.

How Do You Keep Apple Crisp from Getting Watery?

Use a small amount of flour or cornstarch in the apple layer, cut the apples evenly, and bake until the juices are actively bubbling. The bubbling matters because the thickener needs heat to do its job. After baking, let the crisp rest before serving so the juices can settle.

How Do You Keep the Topping Crisp?

Use cold butter, do not overmix the topping into a paste, and do not cover the crisp while it is still hot. If the problem is leftover texture rather than fresh-baked texture, see storage and reheating.

Can You Put Apple Crisp Back in the Oven?

Yes. If the apples are still firm, the topping is pale, or the filling has not bubbled, return the dish to the oven at 350°F / 175°C. If the topping is already brown, cover it loosely with foil and keep baking until the apples are tender.

Make Ahead, Storage, Freezing, and Reheating

Leftover texture tip: Chill the extra crisp safely, then reheat single portions uncovered when you want the oat topping to recover some crunch.

Apple crisp leftovers stored in a covered glass container and reheated uncovered in an oven.
For better leftover texture, keep the extra crisp chilled and reheat single portions uncovered so the oat topping has a chance to crisp again.

Can You Make Apple Crisp Ahead?

Yes. For the best texture, prepare the apple filling and topping separately, refrigerate them, and assemble right before baking. This keeps the topping crumbly. If the whole dish is assembled ahead, the topping can absorb moisture from the apples and bake up softer.

How to Store Apple Crisp

Let the apple crisp cool after serving, then cover and refrigerate leftovers within 2 hours. Store in the refrigerator for 3–4 days. The topping softens as it sits, but the flavor stays good. For general leftover safety, the USDA recommends refrigerating leftovers promptly and using refrigerated leftovers within 3–4 days.

How to Reheat Apple Crisp

For the best topping texture, reheat apple crisp uncovered in a 325°F / 160°C oven until warm. Small portions can also be reheated in an air fryer. The microwave works for speed, but it softens the topping. For the best next-day texture, reheat only what you plan to eat and keep the rest covered in the fridge; repeated reheating softens the oat layer faster.

Can You Freeze Apple Crisp?

Yes, although the topping is best when baked fresh. You can freeze baked apple crisp tightly wrapped, then thaw overnight in the refrigerator and reheat uncovered. You can also freeze the apple filling and topping separately for a fresher result later.

What to Serve with Apple Crisp

Apple crisp is best warm, after a short rest, because the filling has time to settle while the topping still has texture. Vanilla ice cream is the classic pairing because the cold cream melts into the cinnamon apples. Whipped cream, caramel sauce, Greek yogurt, or a spoonful of custard also work.

For a holiday dessert table, apple crisp is easier to serve than pie because it does not need neat slices. Spoon it into bowls, add ice cream, and let the topping do the work.

For another soft, cozy apple dessert that starts with prepared filling, this apple cinnamon roll bake with apple pie filling is closer to a brunch-style bake than a crisp, but it scratches the same cinnamon-apple craving.

FAQs About Apple Crisp

Do you have to peel apples for apple crisp?

No. Peeled apples give a softer, more classic dessert texture. Unpeeled apples add color and texture. If the apple skins are thick or waxy, peeling is usually better.

Is it better to slice or chop apples for apple crisp?

Slices give you a softer, more layered filling, almost like the inside of apple pie. Chunks give you more bite and make the crisp feel fruitier. The best middle ground is thin slices with a few thicker pieces mixed in, so the filling has both softness and texture.

Can quick oats be used instead of old-fashioned oats?

Quick oats work if that is what you have, but they make the topping finer and softer, more like an oatmeal crumble than a chunky crisp. For the best golden, craggy topping, old-fashioned rolled oats are still the better choice.

Why is my apple crisp runny?

Apple crisp is usually runny because the apples were very juicy, the filling did not have enough thickener, the center did not bake long enough, or the crisp was served too soon. Bake until the filling is visibly bubbling, then let it rest for 15–20 minutes so the juices can thicken.

Why is my apple crisp topping powdery?

Powdery topping usually means the butter was not worked in enough. The oat mixture should look like moist crumbs and rough clumps before it goes over the apples. If it still looks dusty, rub in a little more cold butter before baking.

Can apple crisp be made with canned apples?

Yes, but canned apples are softer than fresh apples, so the filling will be more tender and less structured. Drain canned apples well, reduce added sugar if they are packed in syrup, and expect a softer scoop. Apple pie filling also works, although it is already sweetened and thickened, so it needs a shortcut-style method.

For a true shortcut pie rather than a crisp, this apple pie with apple pie filling keeps the focus on prepared filling inside a crust.

What is the difference between apple crisp and apple crumble?

Apple crisp usually has oats in the topping, which gives it more chew and texture. Apple crumble usually leans on flour, butter, and sugar without oats, so the topping is softer and more crumbly. The names overlap in everyday baking, but oats are the easiest clue.

How do you know when apple crisp is done?

The topping should be golden, the filling should be visibly active beneath the surface, and the apples should be tender when pierced with a knife. If the topping is brown but the apples are still firm, cover loosely with foil and bake longer.

Should apple crisp be served warm or cold?

Apple crisp is best warm after a short rest, when the cinnamon juices have settled but the topping still has texture. Cold leftovers are still delicious, especially for breakfast-style snacking, but the topping will be softer.

Can you double apple crisp?

Yes. For a 9×13-inch pan, use 3 1/2–4 pounds / 1.6–1.8 kg apples and increase the topping by about 1 1/2 times. The pan is wider, not just bigger, so give the middle enough time to bake through before serving.

Final Thoughts

Apple crisp is one of those desserts that proves simple baking can still feel generous. You do not need a perfect crust, a fancy pan, or a long ingredient list. You just need apples that hold their shape, cold butter in the topping, enough salt and lemon to wake up the filling, and the patience to let the juices bubble before you pull the pan from the oven.

Serve it warm, give it a few minutes to settle, and add vanilla ice cream if that is the kind of night you want. Then watch what happens to the corner pieces.

What apple mix did you use: Granny Smith and Honeycrisp, Pink Lady and Braeburn, or something local? Leave your combination in the comments, especially if you found an underrated apple that bakes beautifully.

That is the difference between a loose, forgettable apple dessert and a warm, spoonable crisp with a topping people quietly chase around the pan.

Back to top ↑