
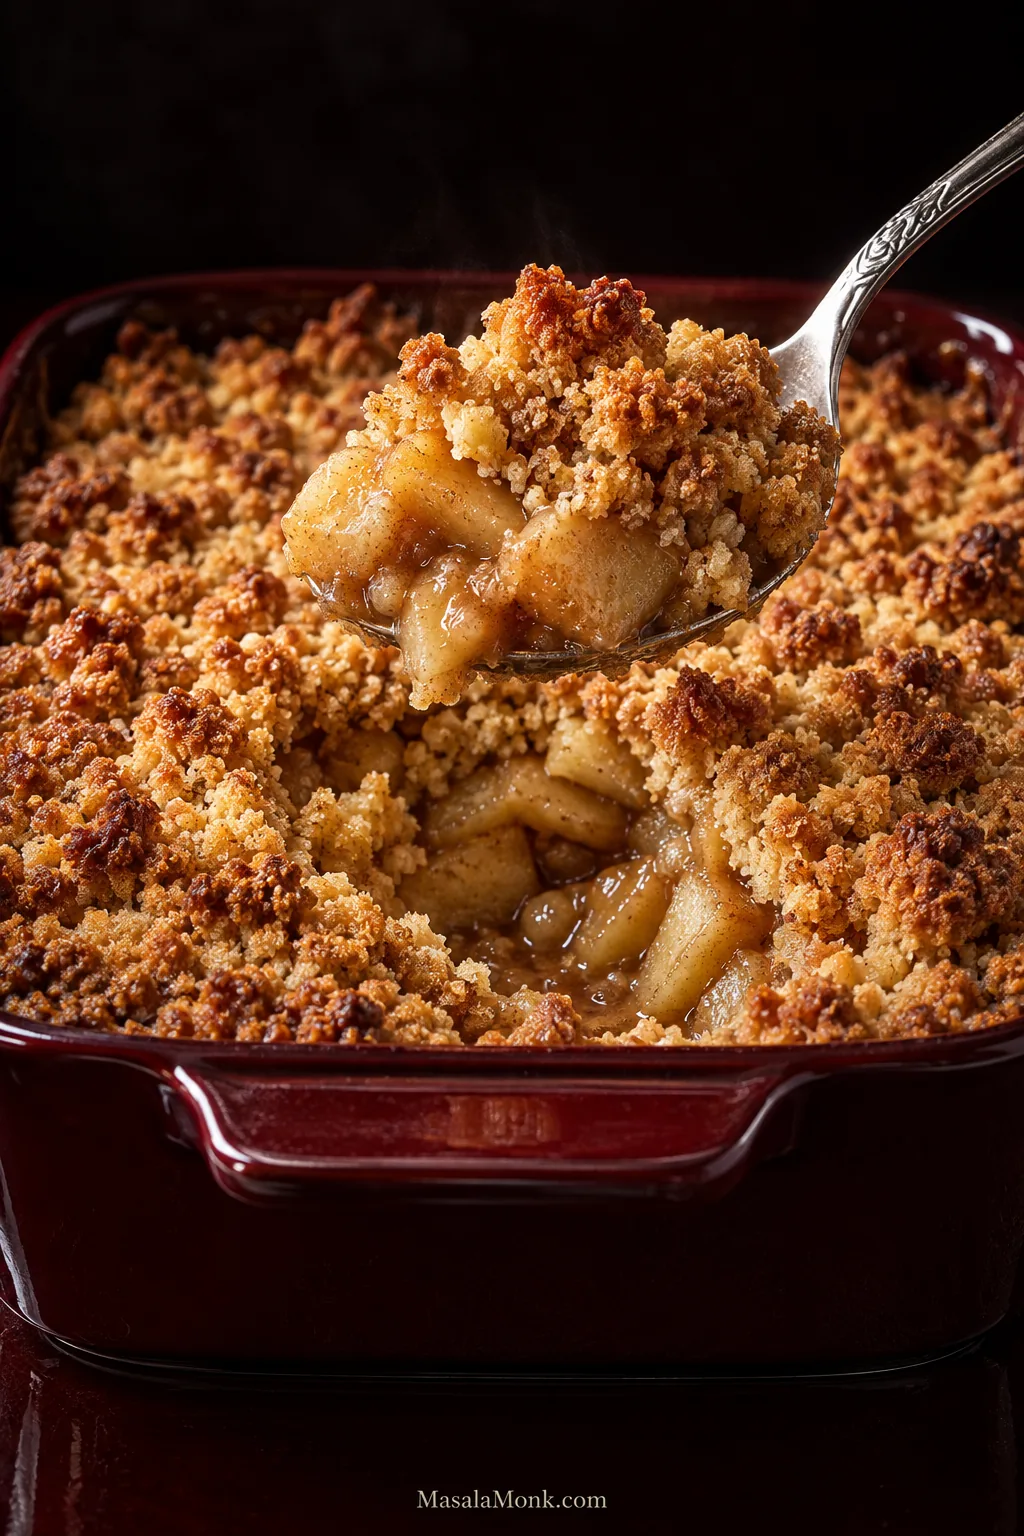
The awkward thing about apple crumble is that the top can look completely finished before the apples underneath are ready.
The crumbs are deeply golden. Butter is sizzling at the edges. The kitchen smells like baked apple and cinnamon. Then you push a knife through the middle and hit firm fruit. Or the apples are perfect, but enough steam has worked its way into the topping to take away the crisp rubble you wanted.
Apple crumble is too simple a dessert to deserve that much uncertainty.
This apple crumble recipe is built around getting the fruit and topping to finish together. Underneath, the apples become tender in a light cinnamon-scented sauce. Above them is a generous flour-butter-sugar crumble with crisp edges, fine buttery crumbs and a few larger craggy pieces.
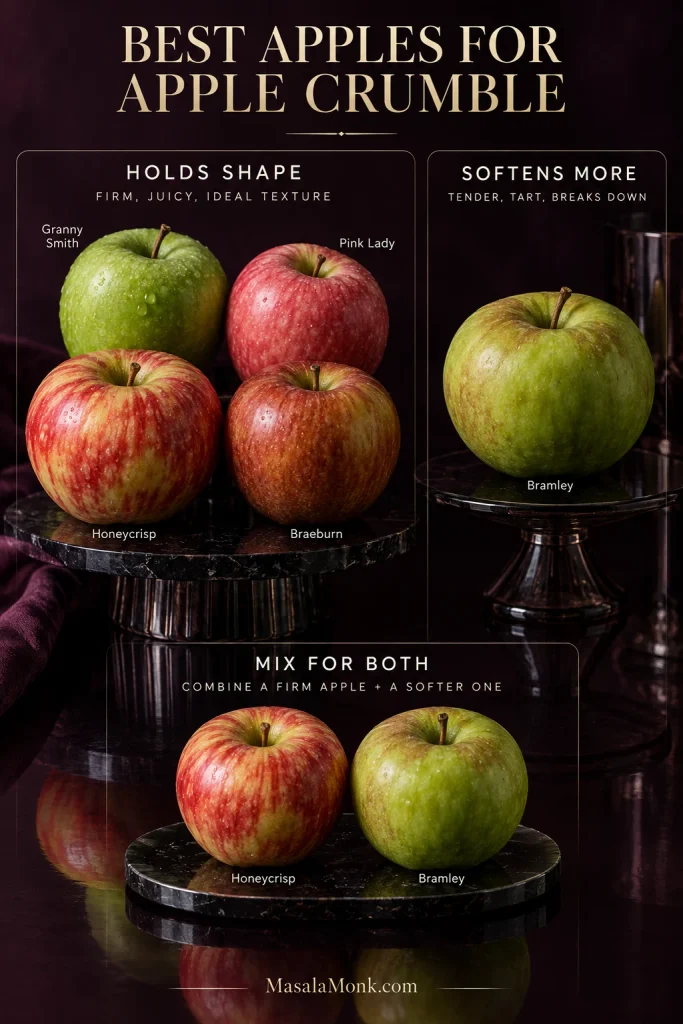
If you want one easy default, a firm-tart apple such as Granny Smith is a good place to start. Bramley gives a softer, more spoonable filling, while Pink Lady, Honeycrisp, Braeburn and ordinary eating apples can all work too. The method is designed to adapt to the apples you actually have.
Apple Crumble Recipe at a Glance
| Prep | 20–25 minutes |
|---|---|
| Serves | 6 generously or 8 more modestly |
| Prepared apples | 30–32 oz / 850–900 g, peeled and cored |
| Baking dish | 8×8 in / 20×20 cm, about 2 qt / 1.9 L |
| Oven | 375°F / 190°C conventional / 170°C fan |
| Bake | About 45–55 minutes; begin checking around 40 |
| Done when | Golden crumbs + bubbling juice + tender apples |
| Rest | 15–20 minutes |
Time is only the starting point. The fruit and topping decide when the crumble is ready.
Apple Crumble Recipe
The crumble itself is simple: apples underneath and a four-ingredient topping above. The rest is mostly knowing what to change when your fruit is sweeter, firmer or juicier than expected.
Easy Apple Crumble Recipe
Tender cinnamon apples in their own lightly thickened juices, covered with a generous buttery crumble that bakes crisp at the edges and craggy on top.
Apple Filling
- 30–32 oz / 850–900 g apples, weighed after peeling and coring; buy about 2¼–2½ lb / 1–1.1 kg whole apples
- ¼ cup / 50 g caster or granulated sugar
- 1 tbsp / 8–10 g all-purpose/plain flour
- 2 tsp / 10 ml lemon juice
- 1 tsp ground cinnamon
- Pinch of fine salt
Crumble Topping
- 7 oz / 200 g all-purpose/plain flour
- 4½ oz / 125 g cold unsalted butter, cut into small cubes
- 3½ oz / 100 g caster or granulated sugar
- ¼ tsp fine salt
Instructions
- Heat the oven: Preheat to 375°F / 190°C conventional / 170°C fan. Use an 8×8-inch / 20×20 cm baking dish if you have one.
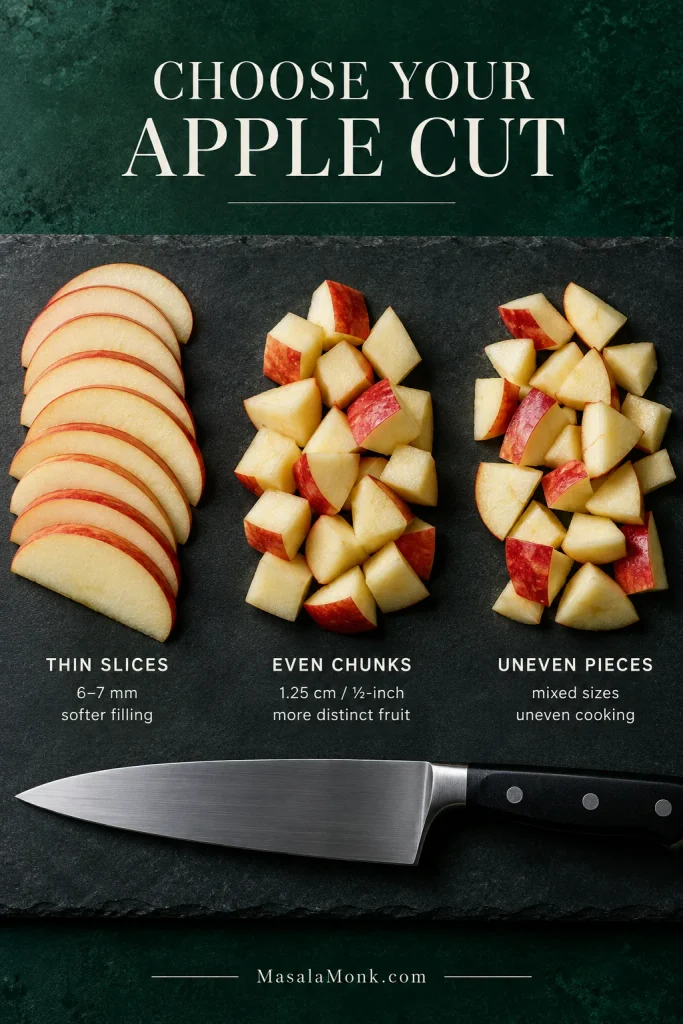
- Cut the apples: For a softer, more cohesive filling, slice them about ¼ inch / 6–7 mm thick. For more distinct pieces, cut them into roughly ½-inch / 1.25 cm chunks. Keep the pieces fairly even. Chunkier fruit may need the longer end of the baking range.
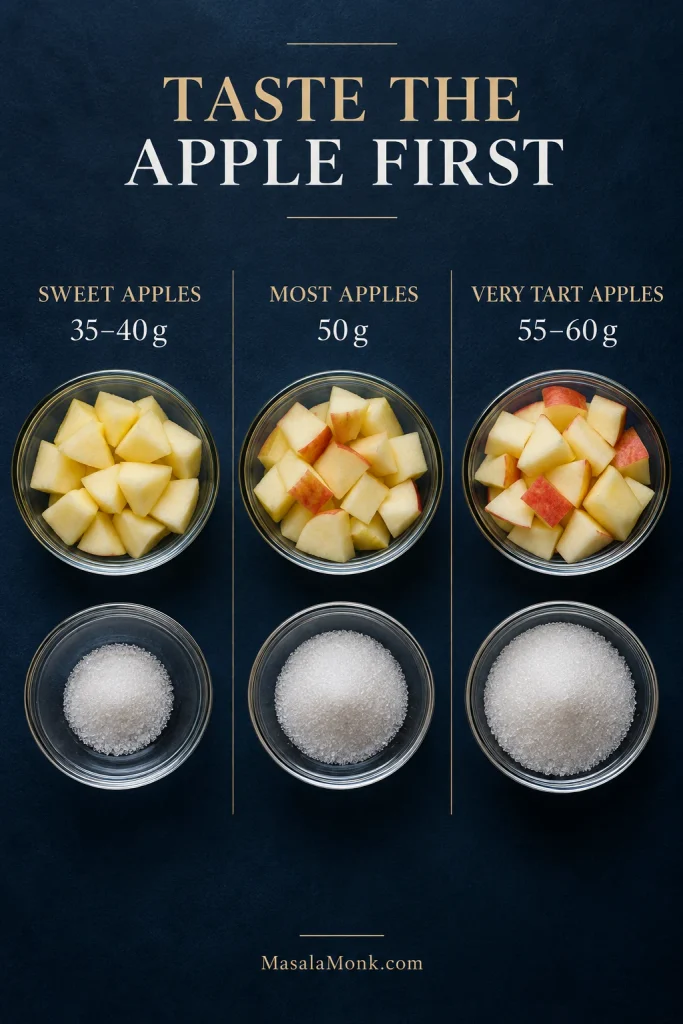
- Season the fruit: Toss the apples with the sugar, flour, lemon juice, cinnamon and salt. Use 35–40 g sugar for sweet apples, 50 g for most apples, and 55–60 g for very tart cooking apples. Very tart fruit may need less lemon—or none.
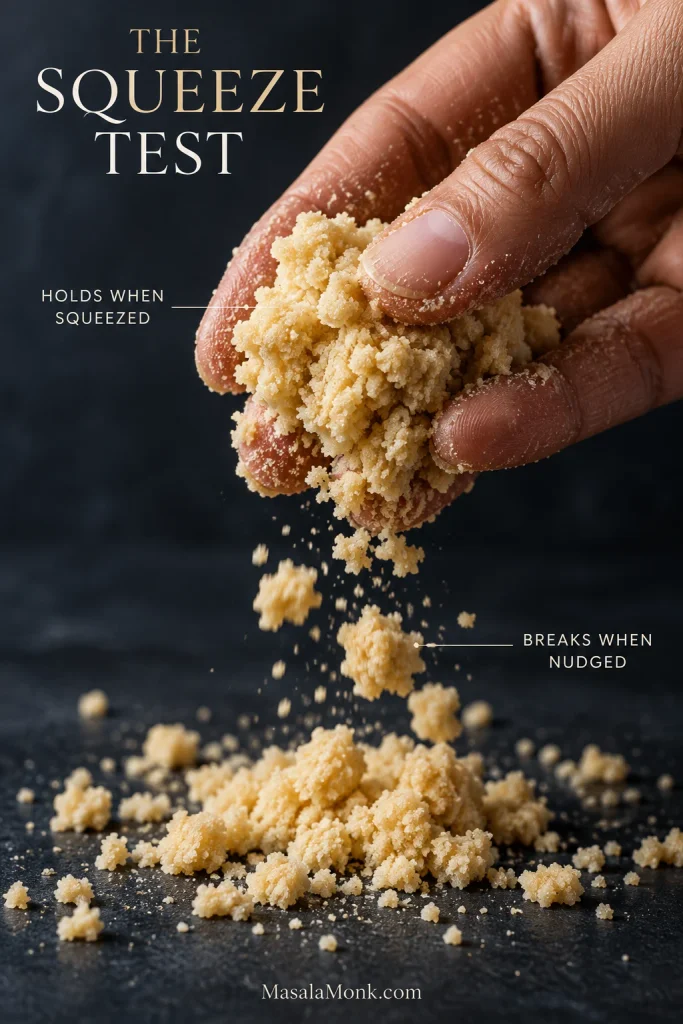
- Make the crumble: Mix the flour, sugar and salt. Rub or cut in the cold butter until you have coarse crumbs with plenty of pea-sized buttery pieces and a few larger clumps. Squeeze a handful: it should hold briefly, then break apart when nudged. Think rubble, not dough.
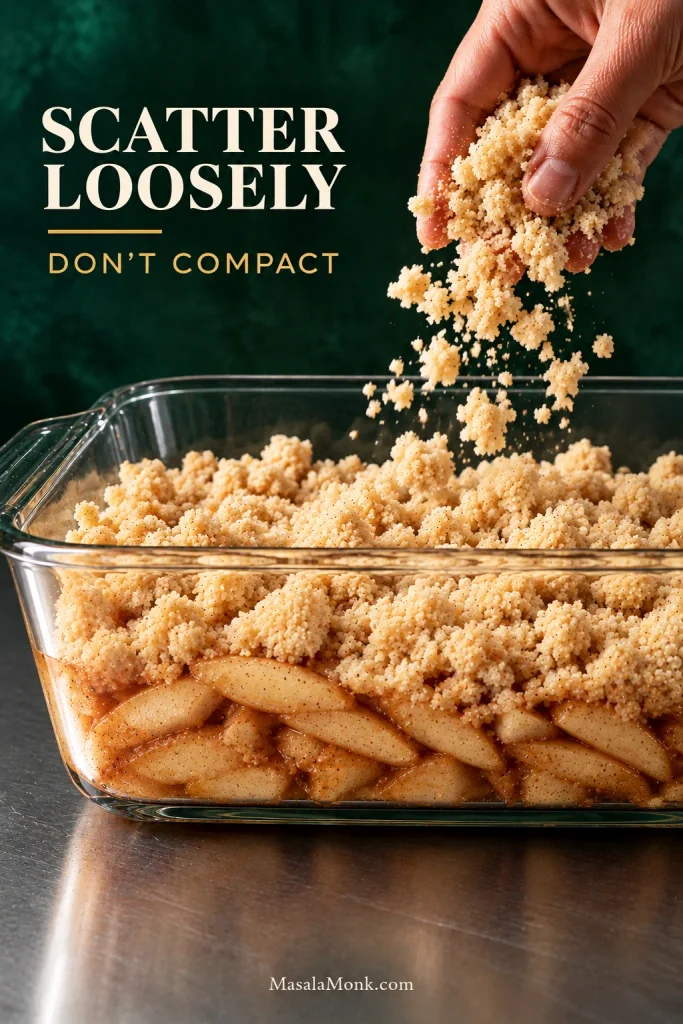
- Assemble: Spread the apples evenly in the dish. Scatter the topping loosely over them and keep the surface irregular. Do not press it into a thick, compact blanket.
- Leave room to bubble: Leave a little headroom if you can. If the dish looks very full, set it on a rimmed baking sheet or baking tray.
Bake, Check and Rest
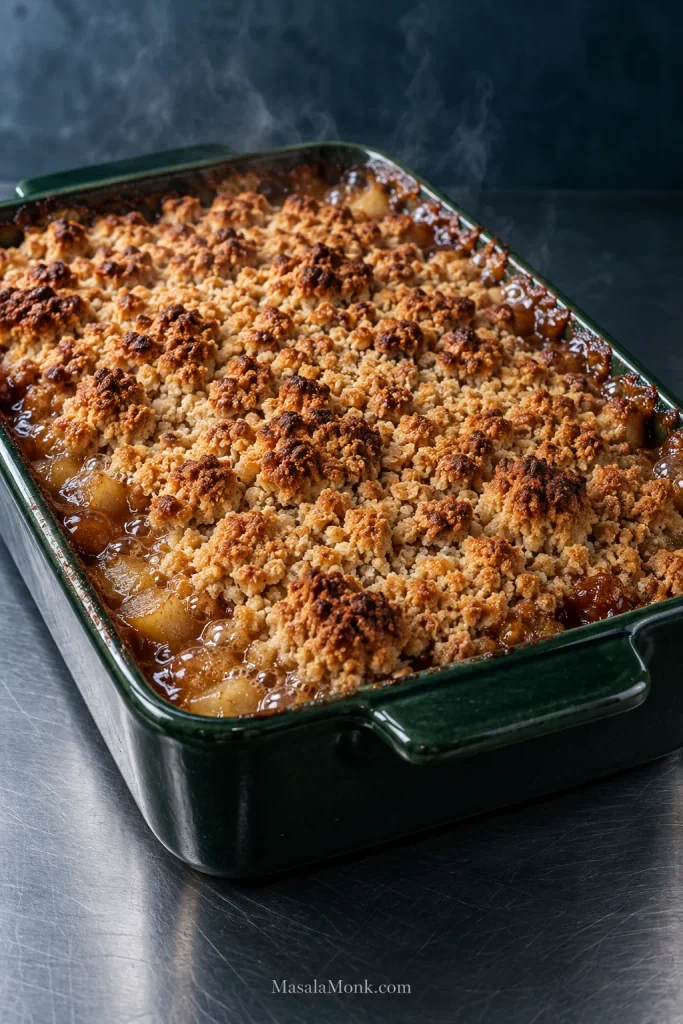
- Bake: Bake for about 45–55 minutes, checking from 40 minutes onward. The high spots should be deeply golden and thick apple juice should be bubbling around several edges.
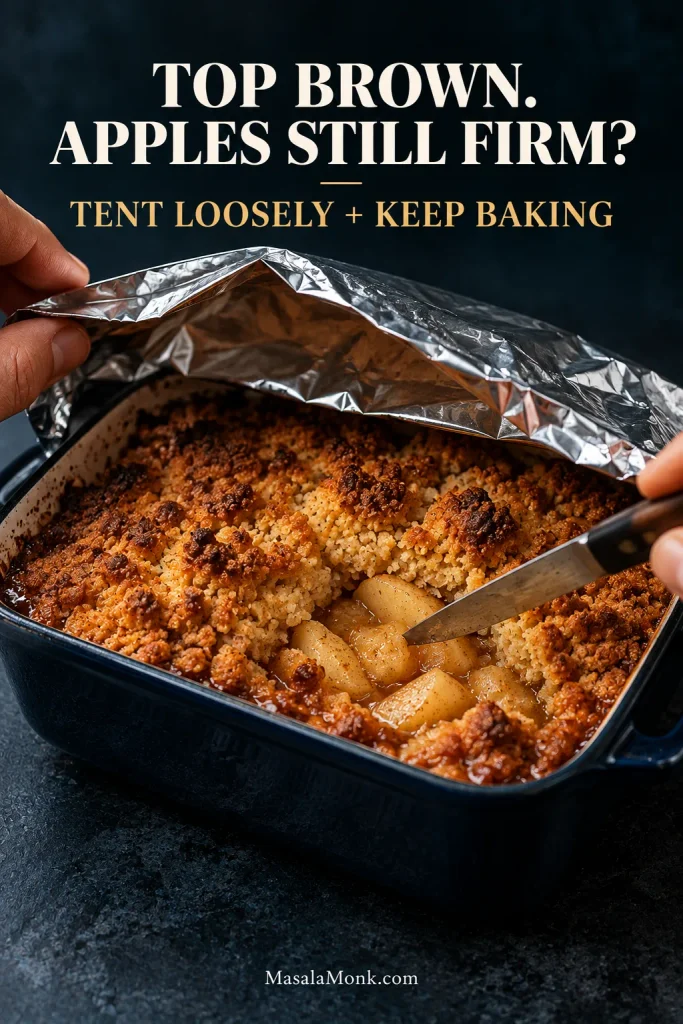
- Check the fruit: Slide a thin knife through an open spot near the center. It should pass through the apple with very little resistance.
- Protect the top if necessary: Crumbs already dark enough? Tent the dish loosely with foil and keep baking until the fruit is tender.
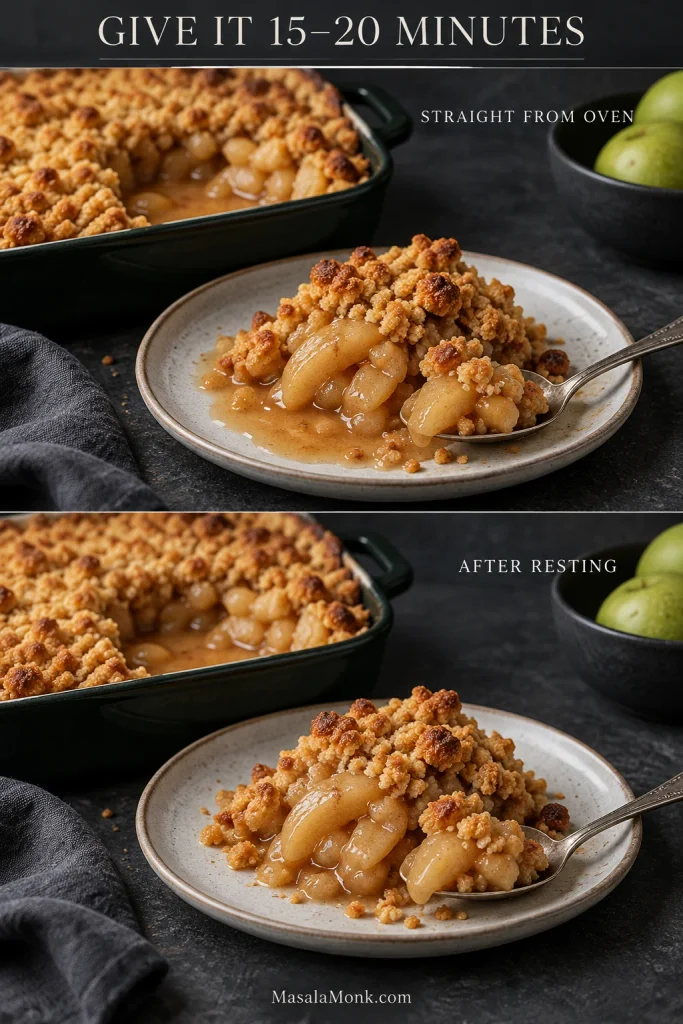
- Rest: Leave the crumble for 15–20 minutes before serving. The juices thicken slightly as they settle around the apples.
Recipe Notes
- Unusually dry apples: add about 1 tbsp / 15 ml water with the filling.
- With oats: replace 1¾ oz / 50 g of the topping flour with 1¾ oz / 50 g old-fashioned rolled oats.
- Salted butter: use the same weight and omit the ¼ tsp salt from the topping.
- Make ahead: the topping is the best part to prepare in advance; refrigerate it overnight or freeze it for longer storage.
The best crumble is not perfectly even. Leave the surface craggy and loose; more exposed edges mean more places to toast.
Why This Apple Crumble Works
- Apples: a little flour thickens their juices without making the filling pasty.
- Topping: the flour-forward ratio stays crumbly rather than baking into a dense cap.
- Dish: the 8×8 keeps the fruit layer substantial without making the center unnecessarily slow to cook.
- Doneness: judge the fruit and bubbling juice as well as the color on top.
Apple Crumble Guide
The recipe above is enough for an ordinary batch. The rest is for the things that make crumble behave differently: the apples you have, the dish you use and the problems that occasionally show up.
Which Apples Make the Best Crumble?
If you want one easy default, use a firm-tart apple such as Granny Smith. It stays recognizably apple while balancing the sweet topping. Bramley gives a softer, more spoonable filling. Both work well; the main difference is the texture of the finished fruit.
| If You Want… | Good Choices | What to Expect |
|---|---|---|
| Distinct apple pieces | Granny Smith, Pink Lady, Braeburn, Honeycrisp | Fruit stays more recognizably apple |
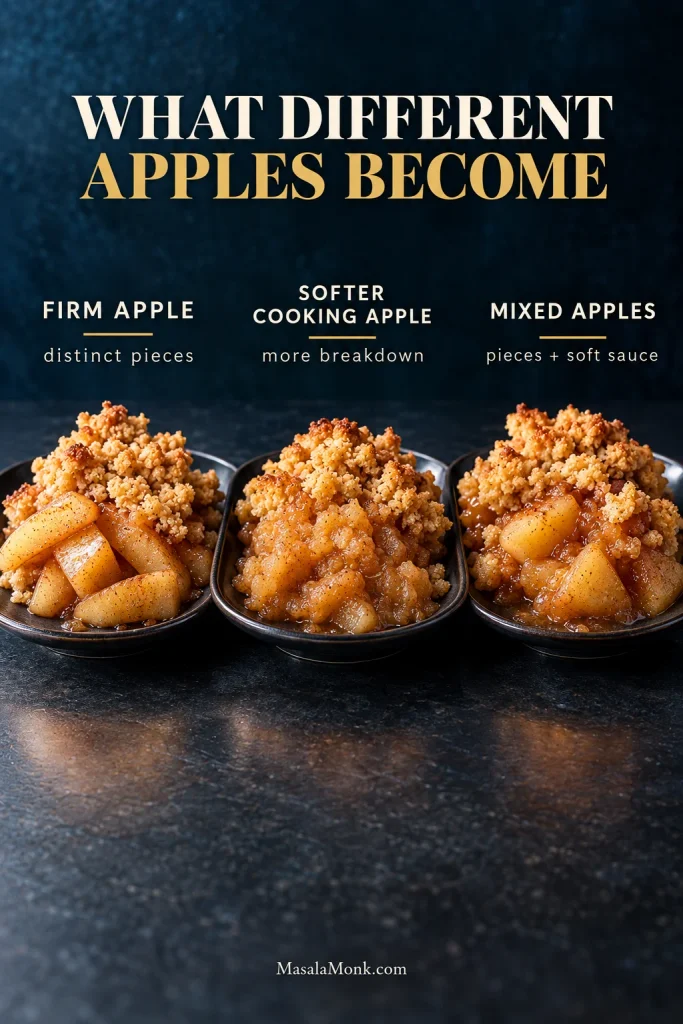
| A softer filling | Bramley or another cooking apple | More breakdown and a more cohesive sauce |
| A mix of both | One firm apple + one softer variety | Different textures in the same spoonful |
| Whatever is already in the fruit bowl | Almost any eating apple | Taste first, then adjust sugar and cut |
If you are working with a variety you do not know well, Penn State Extension has a useful apple chart covering sweetness, tartness, firmness and juiciness.
Use the Apples You Have
Most apples will work. The trick is to notice what you are working with before you season them.
Sweet eating apples need less sugar, while very tart cooking apples can take more. Taste the fruit first, then adjust the sugar in the filling rather than changing the topping.
For the cut, firmer fruit benefits from even, slightly thinner pieces; softer apples are better in somewhat larger pieces. If the fruit seems unusually dry as you cut it, add about 1 tbsp / 15 ml water with the filling.
You do not have to get every variable exactly right. Apple crumble is forgiving once you know what to look for.
For this version, the target is tender apple with a light cinnamon sauce clinging to it. A little breakdown is welcome. Complete collapse only matters when you wanted distinct pieces.
How the Apple Juices Turn Into a Light Sauce
The apples do most of the work. Their juices mix with the sugar and cinnamon as the dish bakes, while the small amount of flour thickens them just enough to cling to the fruit rather than run across the bowl.
The flour is not there to create the firm, sliceable texture of pie filling. This should still feel like crumble: soft fruit, a little sauce and plenty of crisp topping.
Straight from the oven, do not worry if the sauce still looks a little loose. Give it 15 minutes and it will settle around the apples.
For pies, turnovers and other desserts that need a thicker pre-cooked fruit layer, the Apple Pie Filling Recipe uses a different stovetop method.
Get the Crumble Texture You Actually Want
For crisp crumble topping, keep the butter cold and stop while the mixture is still irregular rather than working it into a smooth dough.
The ratio here is 200 g flour, 125 g butter and 100 g sugar. It is flour-forward enough to stay crumbly rather than melting into a dense, cookie-like cap.
Work it a little longer and the crumbs become finer. Stop sooner and you keep more pea-sized buttery pieces. Squeeze a few handfuls together if you want larger clusters.
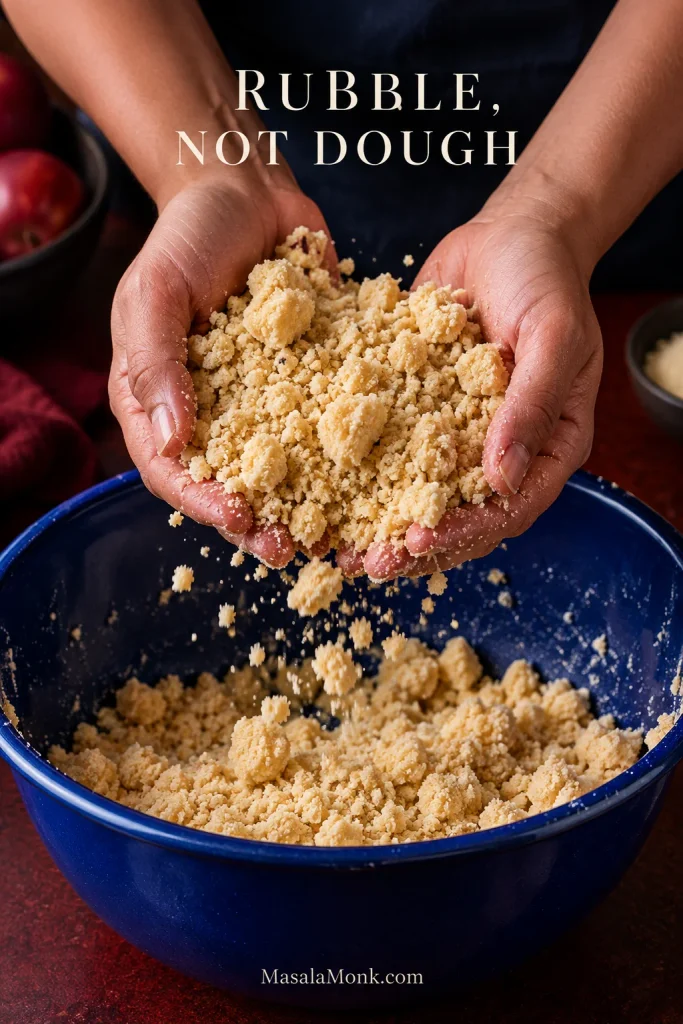
The nicest spoonful has both: tiny toasted crumbs catching a little apple juice and a few buttery pieces big enough to crack under the spoon. Those larger pieces tend to be the bits people go looking for.
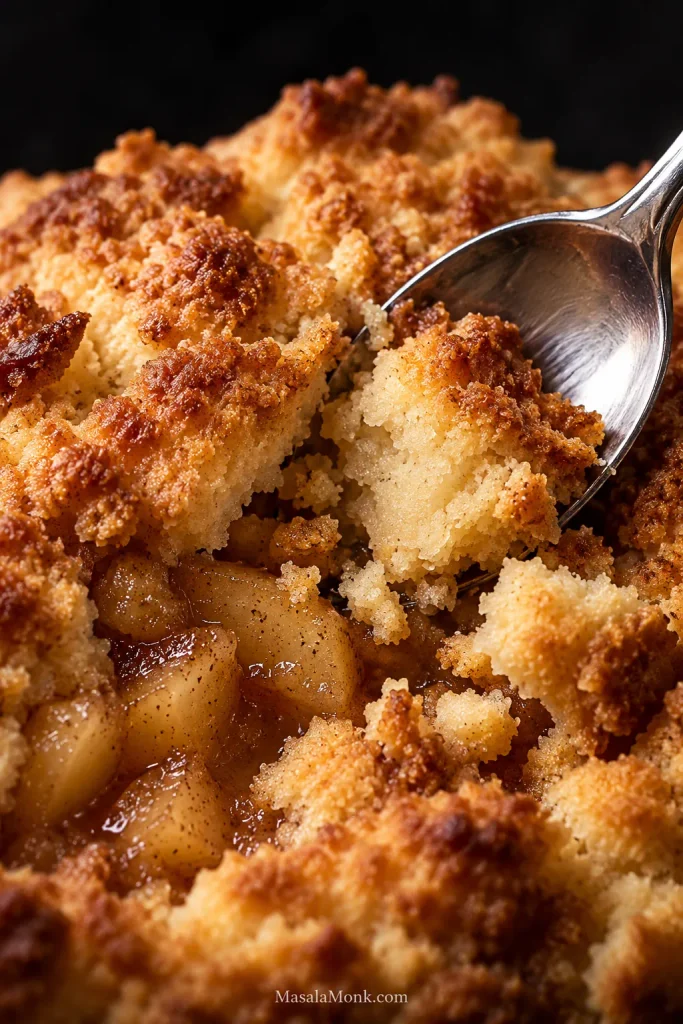
Caster or ordinary granulated sugar keeps the topping crisp and straightforward. Brown sugar gives a deeper caramel flavor and a slightly softer crumb. A little demerara or turbinado over the surface adds extra crunch.
Check the Crumble Topping Before Baking
Before it goes into the oven, the mixture should sit between two obvious failures: loose, dusty flour on one side and a smooth, cohesive dough on the other. Aim for irregular crumbs that clump lightly without smearing.
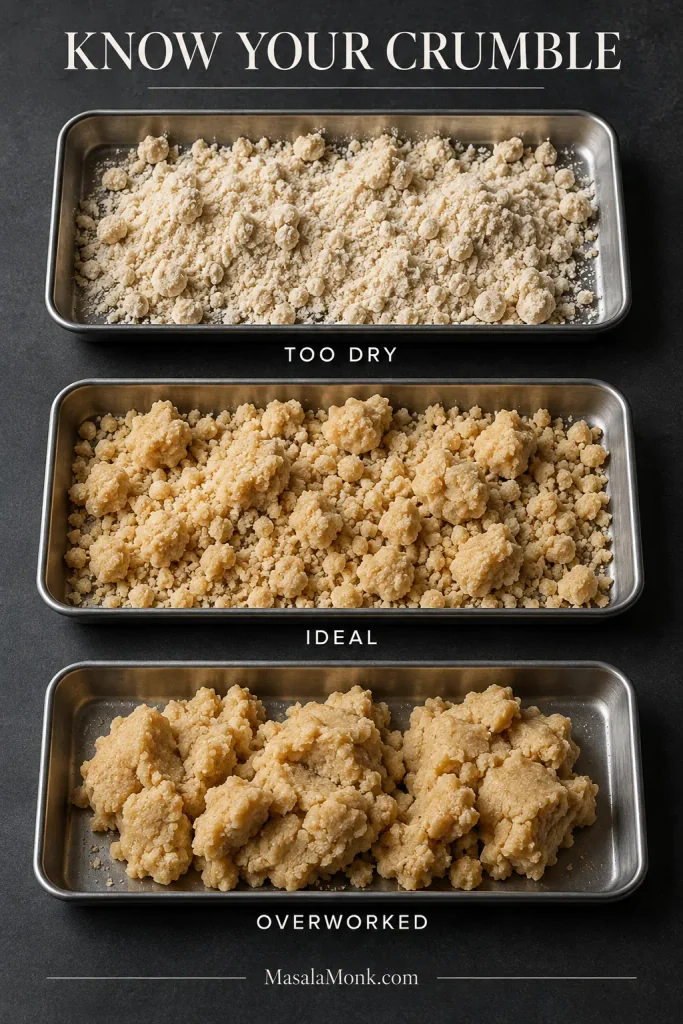
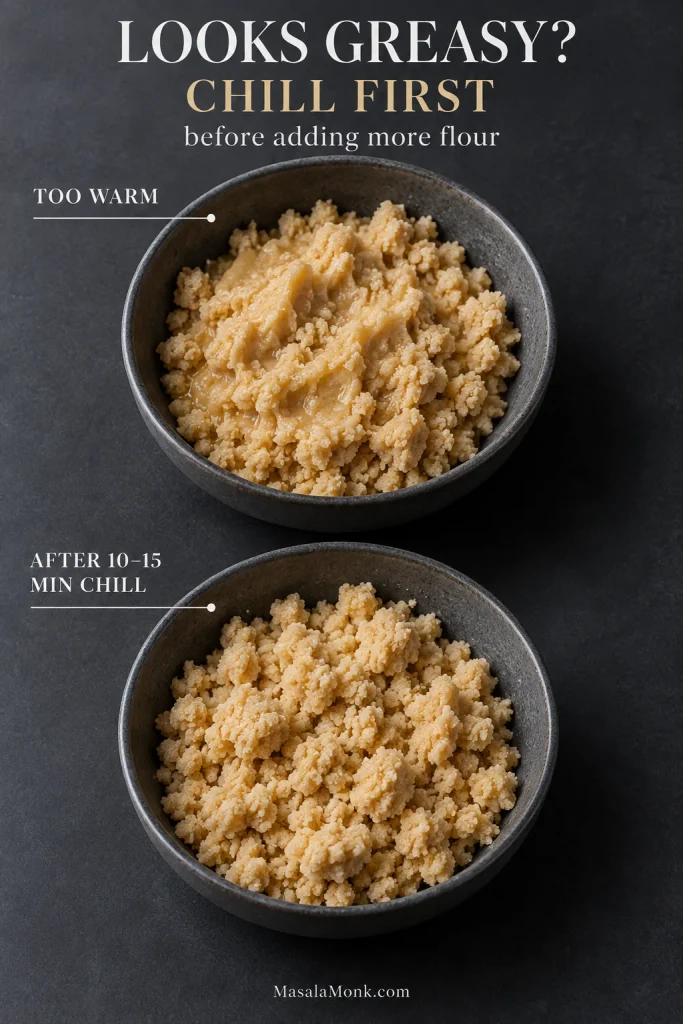
Topping rescue rule: chill first, change the ratio second. Warm butter can make a perfectly good mixture look greasy or doughy. Refrigerate it for 10–15 minutes before deciding it needs more flour.
A quick squeeze tells you more than appearance alone. The crumbs should hold together briefly in your hand and then fall apart when nudged. Loose flour at the bottom of the bowl needs better butter distribution. Smooth, smearable dough has gone too far.
Cold Butter vs Melted Butter
Cold butter gives the craggy topping used here. Melted butter makes a denser, more cohesive streusel-like crumb. Using a food processor? Pulse only until irregular crumbs appear so the butter stays cold.
Should Apple Crumble Have Oats?
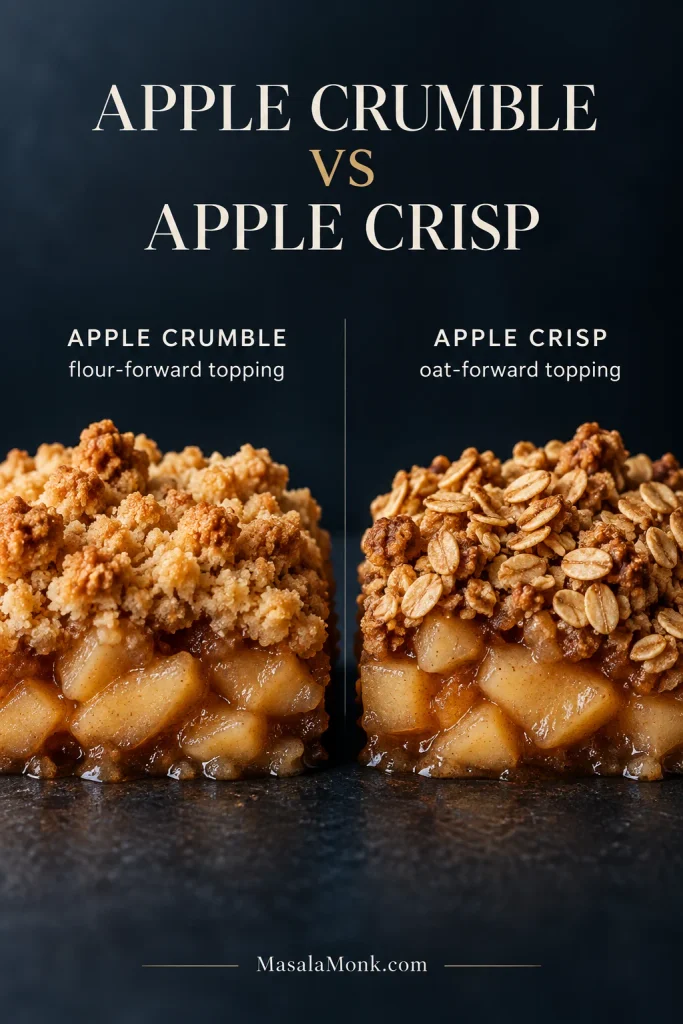
No. Apple crumble does not need oats. Flour, butter and sugar make the classic topping; rolled oats are optional when you want more chew and crunch. In North America, oat-heavy versions are often called apple crisp, although the names overlap.
In practice, the topping matters more than the label. If you want oats to be a major part of every spoonful, the Apple Crisp Recipe is built around that texture from the start.
For just a little oat crunch here, replace 1¾ oz / 50 g flour with 1¾ oz / 50 g old-fashioned rolled oats.
Should You Cook the Apples First?
No, not for this recipe. Raw, evenly cut apples cook through underneath the crumble. Pre-cooking is worth considering only for unusually firm fruit, very thick pieces or a particularly deep baking dish.
Pre-cooking also makes sense when you deliberately want a very soft filling. Let the fruit cool before adding the topping so the butter does not begin melting before the dish reaches the oven.
Can I Use Frozen or Unpeeled Apples?
Peels on: perfectly fine if the skins are thin and you enjoy a little more texture.
Frozen: use sliced apples without fully thawing. They soften more and release extra juice, so expect a little more baking time. Already thawed into a pool of watery liquid? Drain the obvious excess rather than automatically adding extra flour.
Your Baking Dish Changes the Crumble
Use the 8×8-inch / 20×20 cm dish if you have one. It gives this amount of fruit enough depth without making the center unnecessarily slow to cook.
A wide, shallow dish is the easier route to lots of crisp topping. A deep casserole traps more moisture around the fruit and takes longer through the middle.
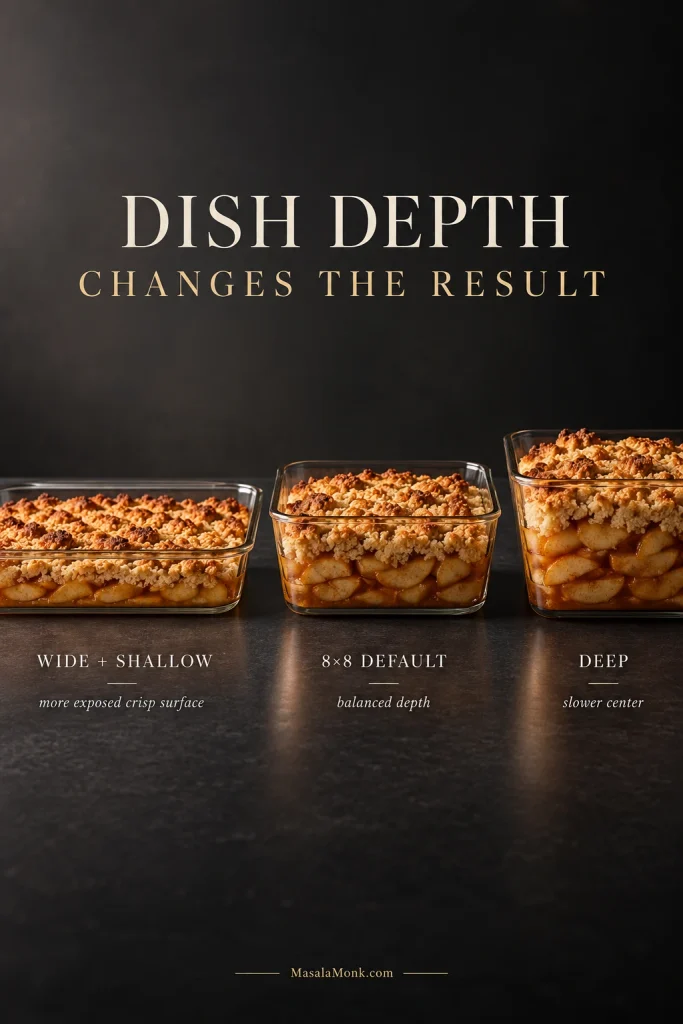
Dish depth matters more than material here, but heavy ceramic usually takes a little longer to heat through than metal. Let the apples, not the clock, make the final decision.
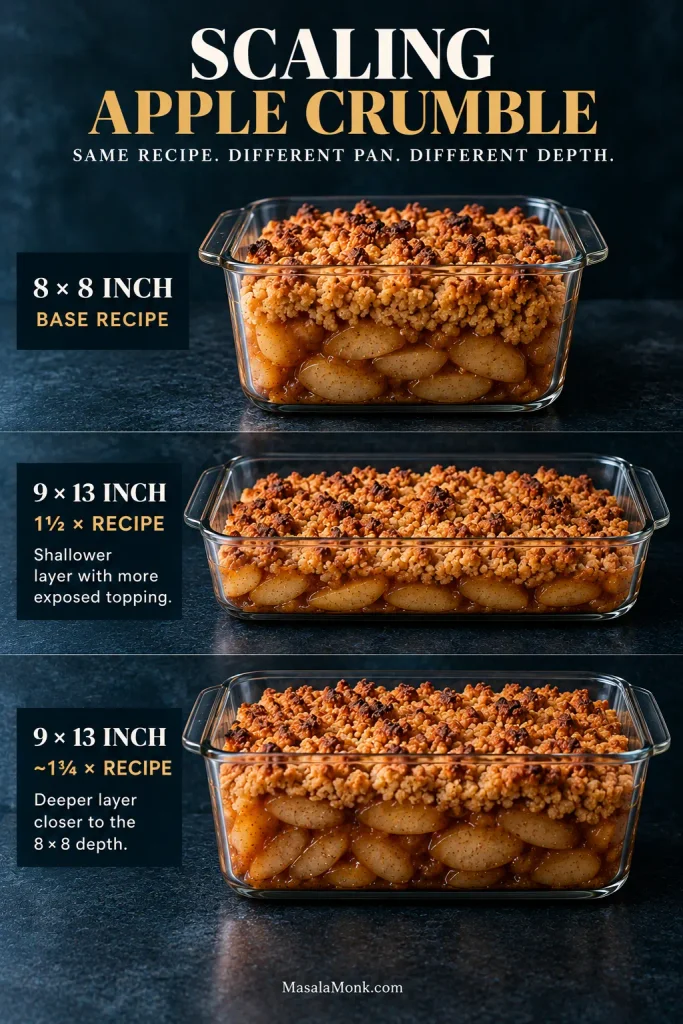
For a 9×13-inch / 23×33 cm dish, use a 1½× batch when you want a shallower crumble with more exposed topping. For something closer to the depth of the 8×8, use about a 1¾× batch.
How to Know Apple Crumble Is Actually Done
A brown top is not permission to stop while the apples are still hard.
- Golden crumbs: the high spots should be richly toasted.
- Bubbling juice: thick bubbles should appear in several places around the edge.
- Tender apples: a thin knife inserted near the center should pass through the fruit easily.
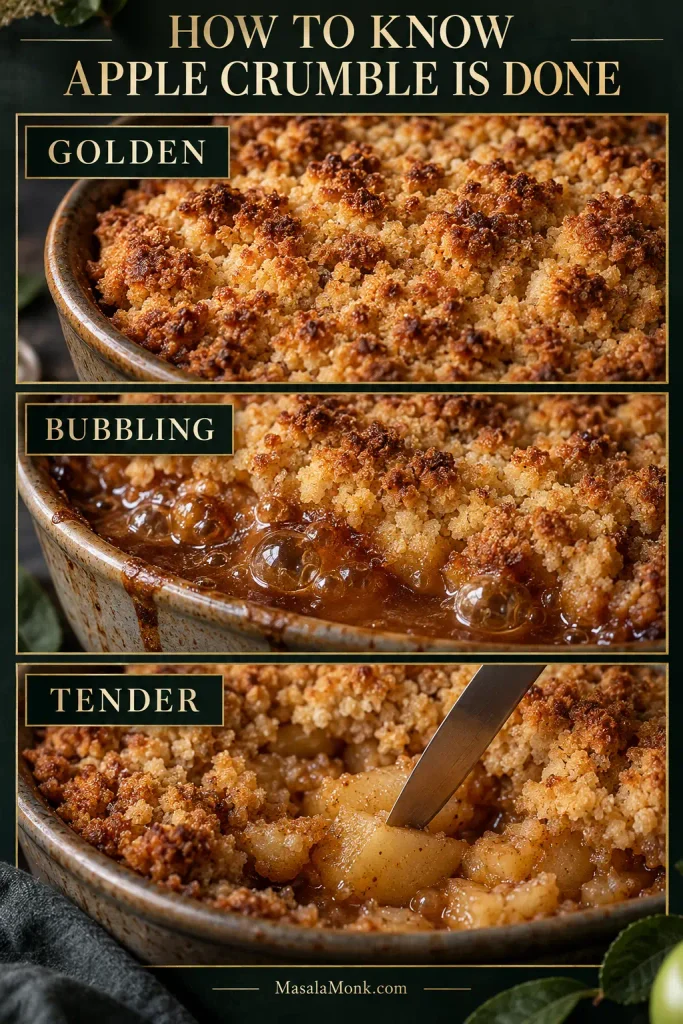
Tender does not have to mean collapsing. A firm apple can still hold its shape while being soft enough to cut with the side of a spoon.
Fix My Apple Crumble
Before It Goes In
Dusty crumbs: loose flour at the bottom of the bowl means the butter needs working through a little more.
The topping turned to dough: don’t reach for more flour yet. Chill it for 10–15 minutes, then break it back into irregular pieces. Too much extra flour can leave the baked topping chalky.
Greasy-looking crumbs: don’t panic and add flour straight away. Chill them first; warm butter can make a perfectly good mixture look much wetter than it really is.
While It Bakes
The topping melted flat: the butter was probably too warm or the mixture was overworked. It will usually still taste good. Next time start colder and stop sooner.
Brown top, hard apples: cover loosely with foil and keep going. Thick pieces, firm varieties and deep dishes are the usual reasons.
No juice at the edges yet: check the fruit near the center. Firm apples plus a quiet filling usually means the crumble needs longer; very dry fruit may simply release less visible juice.
After Baking
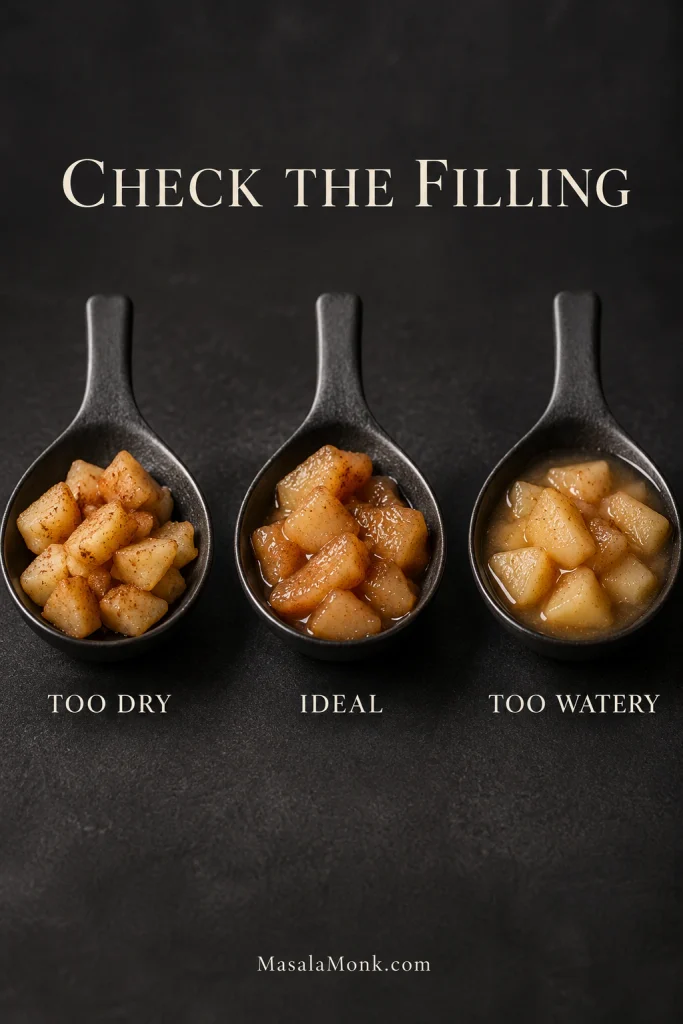
Watery filling: give it the full 15–20-minute rest first. If it is still thin and the apples are firm, return the crumble to the oven and keep baking until the fruit softens and the juices bubble properly.
Mushy apples: nothing will make them firm again now. Use firmer fruit or slightly larger pieces next time.
Dry fruit with hardly any sauce: add a spoonful of water next time and do not remove nearly all of the filling sugar.
When the problem is the liquid around the apples, look at what remains after a spoonful leaves the dish. Pooled juice points to a loose filling; almost no sauce points to fruit that has cooked dry.
Too sweet: reduce the sugar in the fruit layer before changing the topping.
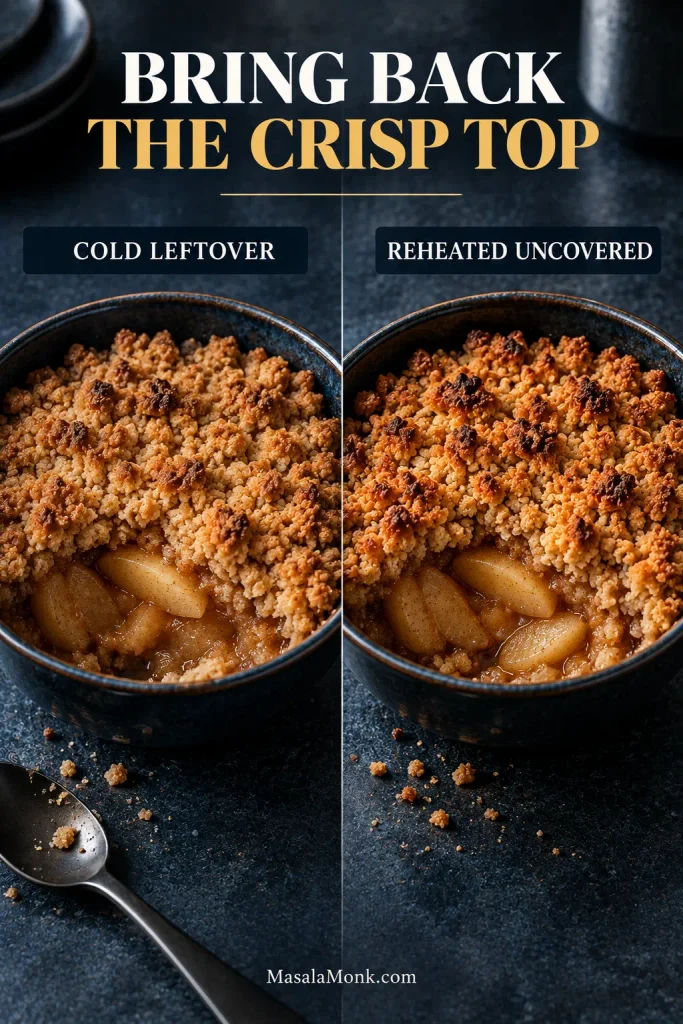
Soft topping the next day: reheat the crumble uncovered so trapped moisture can escape.
Apple Crumble Troubleshooting at a Glance
| Problem | Why It Happens | Fix Now | Next Time |
|---|---|---|---|
| Doughy or greasy crumbs | Butter got too warm or the mixture was overworked | Chill and break the crumbs back up | Start colder and stop mixing sooner |
| Brown top, hard apples | Fruit is firm or thick, or the dish is too deep | Cover loosely with foil and keep baking | Cut fruit thinner or use a shallower dish |
| Watery filling | Very juicy fruit, insufficient baking or no resting time | Rest first; if fruit is firm and filling stays thin, bake longer | Bake until the juices are bubbling well |
| Mushy fruit | Soft apples, very small pieces or too much cooking | Nothing to rescue now | Use firmer apples or larger pieces |
| Soft leftovers | Moisture has moved from the fruit into the topping | Reheat uncovered | Avoid covering during reheating |
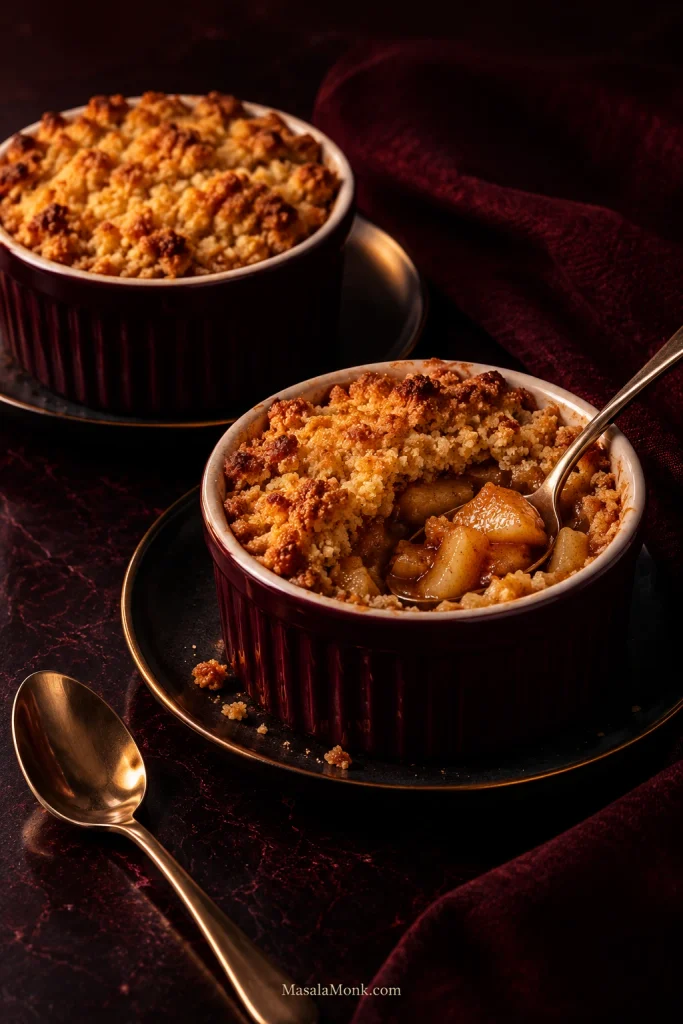
Apple Crumble for Two
Sometimes the correct amount of crumble is not a family dish. It is two ramekins on a Tuesday night.
Use about 10½ oz / 300 g prepared apples divided between two 8–10 oz / 240–300 ml ramekins, or use one small baking dish of similar capacity.
For the topping, use 2½ oz / 70 g all-purpose/plain flour, 1½ oz / 40 g cold butter and 1¼ oz / 35 g sugar with a pinch of salt. Season the fruit with about a tablespoon of sugar, a teaspoon of flour, a squeeze of lemon and a little cinnamon.
Bake at the same temperature as the full recipe and begin checking around 25 minutes. Most individual crumbles need roughly 25–35 minutes.
Air Fryer Apple Crumble
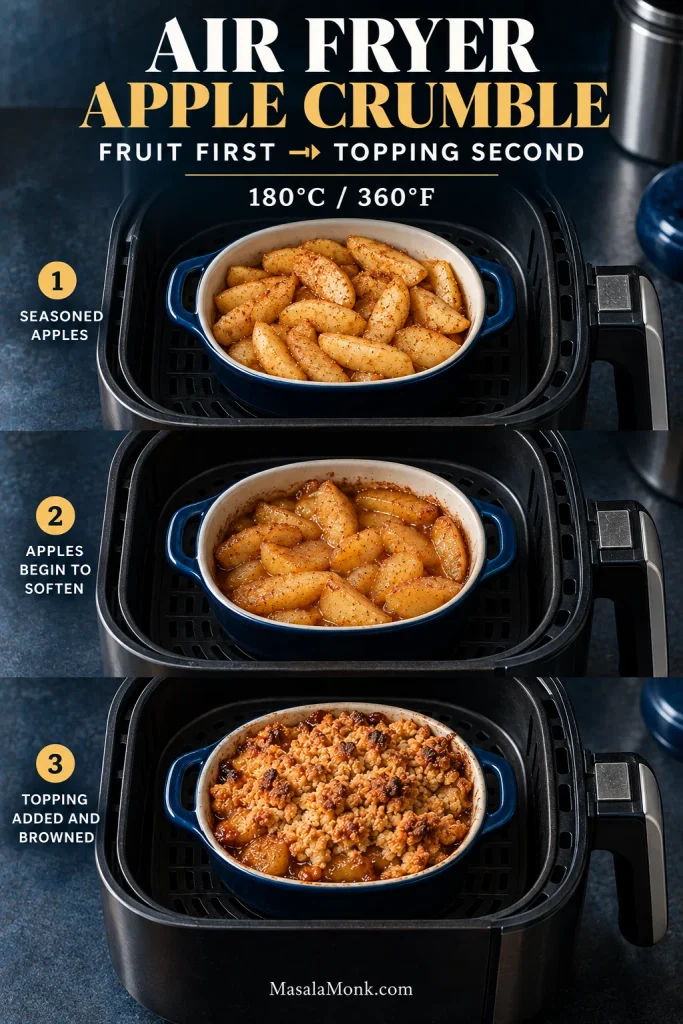
Air fryers brown the topping quickly, so the fruit needs a head start.
The two-portion version fits especially well in a small air-fryer-safe dish. Keep the fruit layer shallow; a heavy ceramic dish may take a little longer than a lighter metal or silicone one.
Cook the seasoned apples at about 360°F / 180°C until they are beginning to soften. Start checking at 10 minutes; depending on the apple, cut and dish, this will usually take about 10–15 minutes.
Add the topping and continue air frying until it is golden and the fruit is hot and tender underneath. Start checking after 8 minutes; many small crumbles need roughly 10–15 minutes more. Air fryers vary considerably, so use the color of the crumbs and tenderness of the apples as the final guide.
Keep it shallow. A deep air-fryer dish makes it much easier for the surface to brown while the center fruit is still firm.
Easy Variations That Don’t Change the Method
- Add oats: replace 50 g topping flour with 50 g rolled oats.
- Make it gluten-free: replace both the topping flour and the tablespoon of flour used with the apples with a 1:1 gluten-free baking blend.
- Make it dairy-free or vegan: use the same weight of a firm plant-based baking block rather than a soft tub spread. If it is salted, reduce or omit the added topping salt.
- Add pear: replace up to half the prepared apple weight with firm, not fully ripe pear.
- Use warmer spice: replace the cinnamon with 1–1½ tsp of homemade apple pie spice.
Blackberries and rhubarb are different. They change the moisture and acidity of the filling enough that they deserve their own balance rather than being treated as a casual handful stirred into this recipe.
Make Apple Crumble Ahead, Freeze It and Reheat It
The topping is the best part to make ahead. Cover it and refrigerate it overnight, then scatter it over freshly prepared apples before baking.
You can also prep the apples ahead. Peel and cut them, toss them with the lemon juice and refrigerate them well covered. Add the sugar, flour, cinnamon and salt closer to baking. Fully seasoned apples can sit overnight, but the sugar will draw out more juice.
Both frozen crumble topping and baked crumble are best used within about 2–3 months for quality.
Freezing Crumble Topping
Freeze the topping as loose crumbs. Spread it on a tray until firm, then transfer it to a freezer bag or airtight container. Scatter it over the apples while still frozen; it may need a little longer in the oven.
Freezing Baked Apple Crumble
Cool the crumble completely, wrap the dish well or divide it into airtight freezer containers, then freeze. Thaw in the refrigerator and reheat uncovered so the top has a chance to crisp again.
Storing Leftovers
Once cooled, cover the crumble and refrigerate it. The USDA’s guidance for cooked leftovers recommends using them within 3–4 days.
For several servings or the whole dish, reheat uncovered at about 300–325°F / 150–165°C until hot through and crisp at the surface, usually around 15–20 minutes. An air fryer works nicely for one or two portions. A microwave reheats the fruit quickly, but the crumbs will soften.
What to Serve With Apple Crumble
For the classic British finish, serve apple crumble with hot vanilla custard. It slips through the craggy crumbs and gathers around the cinnamon-scented fruit beneath them.
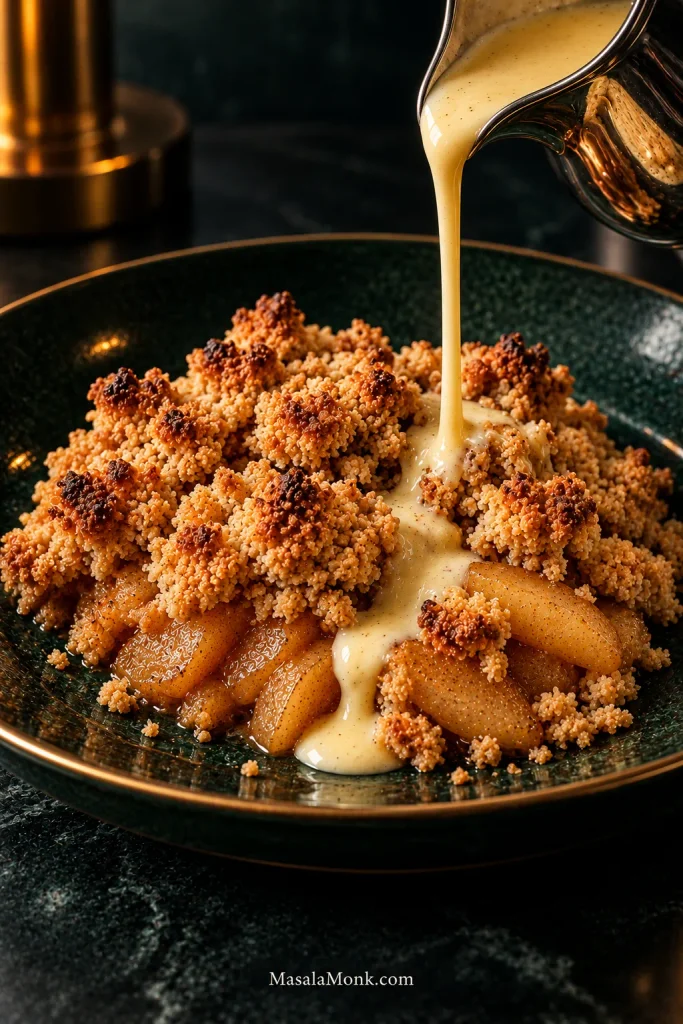
For the best hot-and-cold contrast, vanilla ice cream is hard to beat. It starts melting into the hot apples while the exposed topping stays crisp.
Softly whipped cream or cold pouring cream is the quieter choice when you want richness without much extra sweetness.
Whichever you choose, give the crumble its short rest first. You want cinnamon-apple sauce clinging to the spoon, not molten juice racing across the bowl.
Apple Crumble, Apple Crisp, Cobbler or Dutch Apple Pie?
In the simplest terms, crumble has a flour-forward crumb topping, crisp is usually more oat-forward, cobbler uses biscuit or batter, and Dutch apple pie adds pastry underneath.
The names vary between countries and cookbooks, so how the dessert is built is more useful than insisting on one universal definition.
| Dessert | What Is on Top? | Bottom Crust? |
|---|---|---|
| Apple crumble | Flour-forward butter-and-sugar crumbs; oats optional | No |
| Apple crisp | Usually a more oat-forward crumb topping | No |
| Apple cobbler | Biscuit, dumpling or batter-style topping | No |
| Dutch apple pie | Crumb topping | Yes |
If what you want is pastry underneath the fruit as well as crumbs above it, the Dutch Apple Pie Recipe is the closer match.
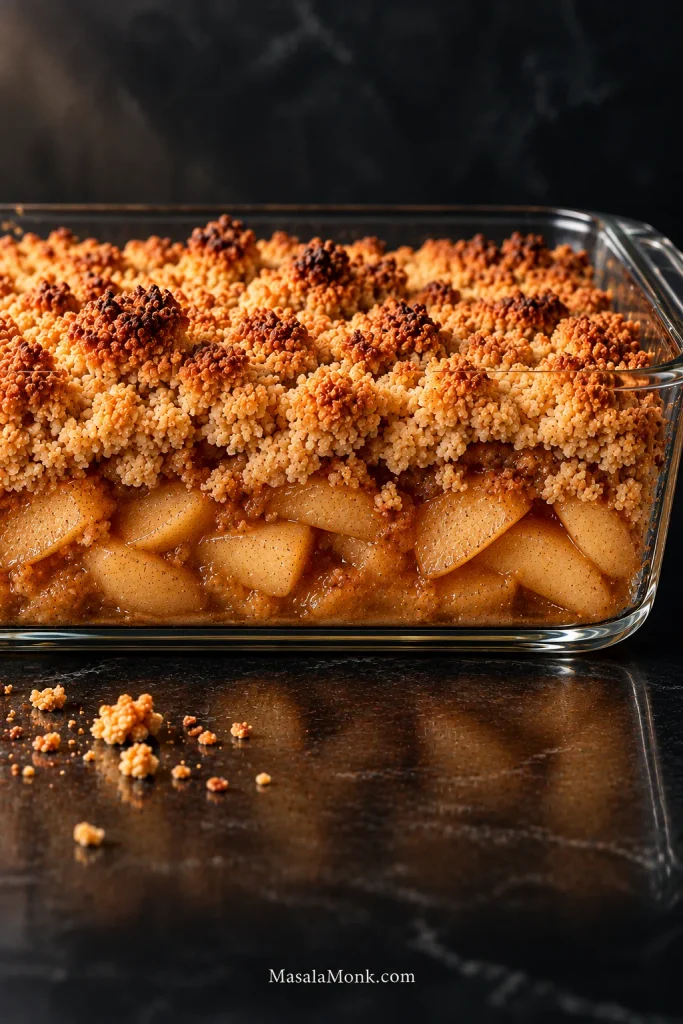
By this point, the target is easy to see: crisp crumble on top, tender apples underneath and just enough sauce to cling between the fruit.
Apple Crumble Recipe FAQs
1. What Are the Best Apples for Apple Crumble?
A firm-tart apple such as Granny Smith is an easy default when you want distinct pieces. Bramley and other cooking apples give a softer filling. The recipe works well with either style.
2. Can I Make Apple Crumble Without Peeling the Apples?
Yes. Thin apple skins can stay on if you enjoy a little more texture. Peeling gives a softer, more traditional filling.
3. Does Apple Crumble Need Oats?
No. All-purpose/plain flour, butter and sugar are enough for a classic crumble topping. For some oat texture, replace 50 g of the flour with 50 g rolled oats.
4. Why Is My Apple Crumble Watery?
Juicy apples, insufficient baking or serving too soon can all leave the filling thin. Rest it for 15–20 minutes; if the fruit is still firm and the filling stays watery, return it to the oven.
5. Why Is My Crumble Topping Floury?
A floury or powdery topping usually means the butter was not distributed thoroughly enough. Keep working it through until a squeezed handful briefly holds together, then breaks apart.
6. Can I Make Apple Crumble the Night Before?
Yes. Make the topping ahead and refrigerate it separately for the crispest result. Prepare the fruit closer to baking when possible.
7. How Do You Freeze Apple Crumble?
You can freeze either loose crumble topping or a fully baked, cooled crumble. For best quality, use either within about 2–3 months and reheat baked crumble uncovered.
8. Can I Use Frozen Apples?
Frozen apples work too. Use them without fully thawing, expect a softer filling and allow some extra baking time. Drain obvious excess liquid if they have already thawed.
There is no secret ingredient hiding in a good apple crumble. What matters is getting a handful of ordinary things to agree with one another: apples cut for the way they cook, sweetness adjusted to the fruit in front of you, crumbs that stay irregular instead of turning into dough, and enough oven time for the filling to catch up with the top.
Golden crumbs. Bubbling juice. Tender apples.
Once all three are there, bring out the custard.








