Posted on Leave a comment

Dutch Apple Pie Recipe

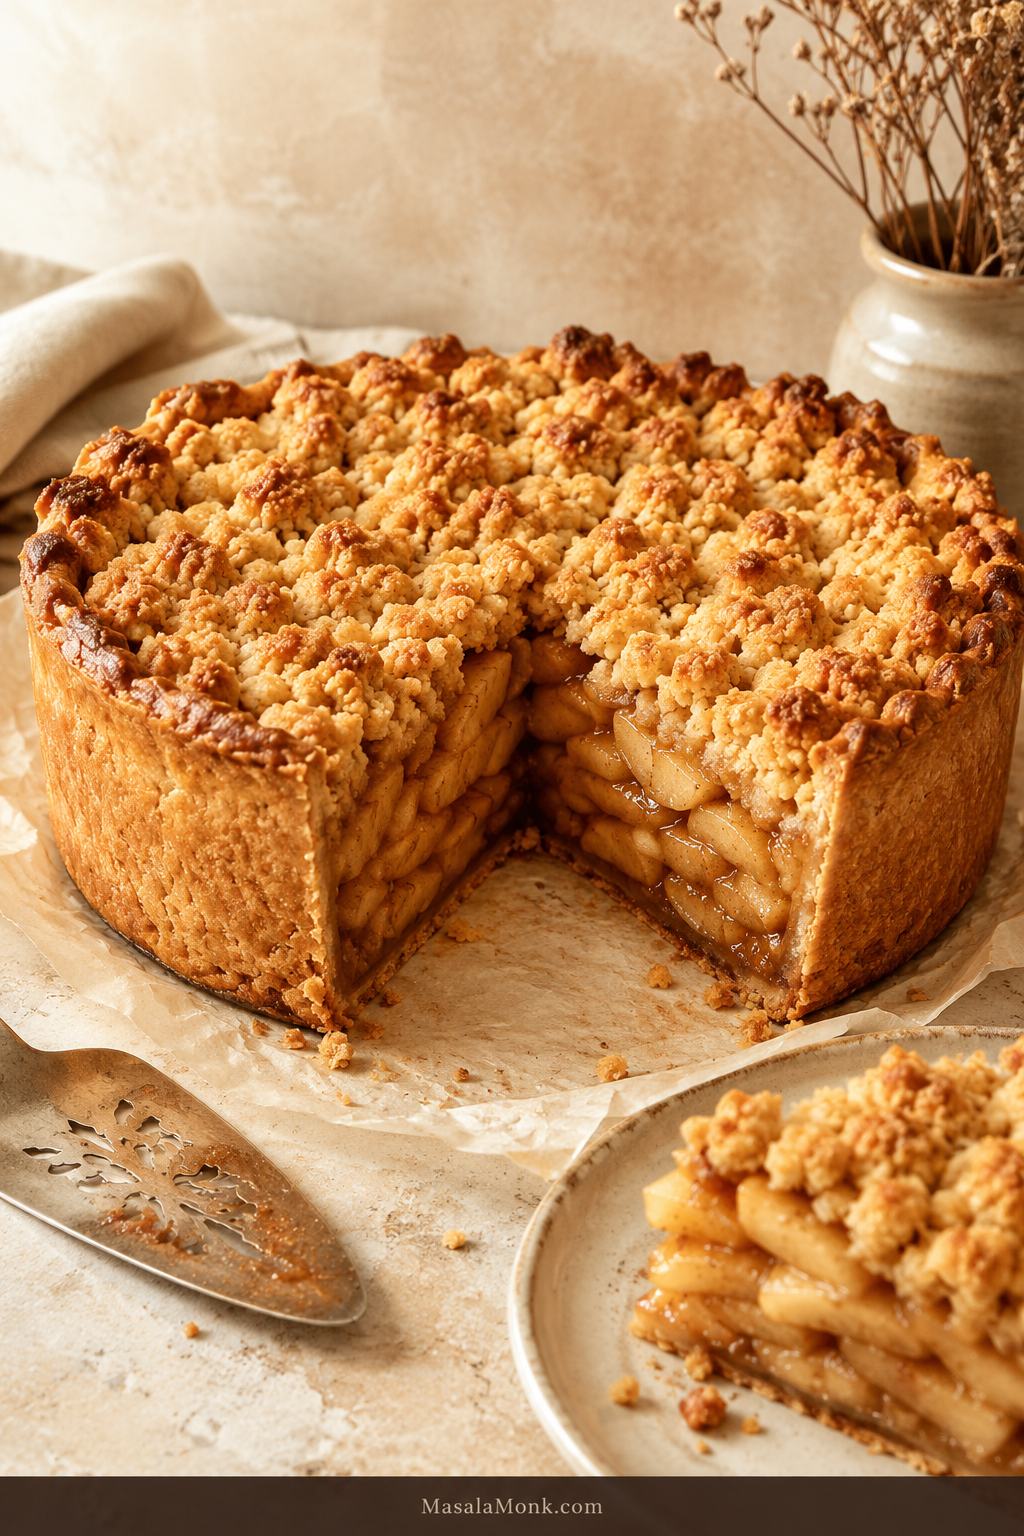
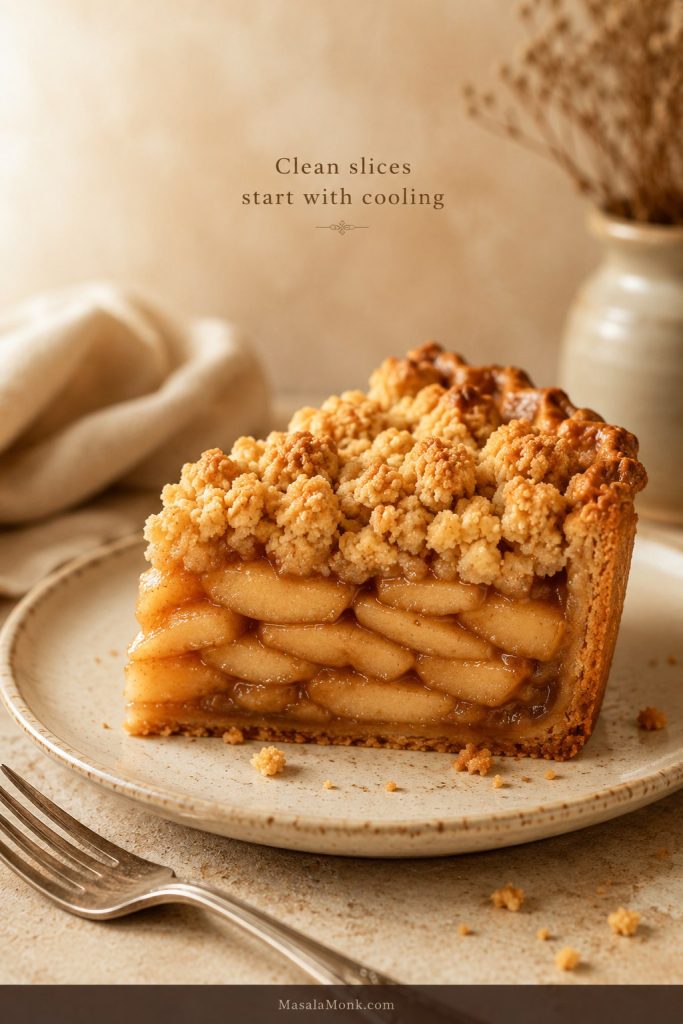
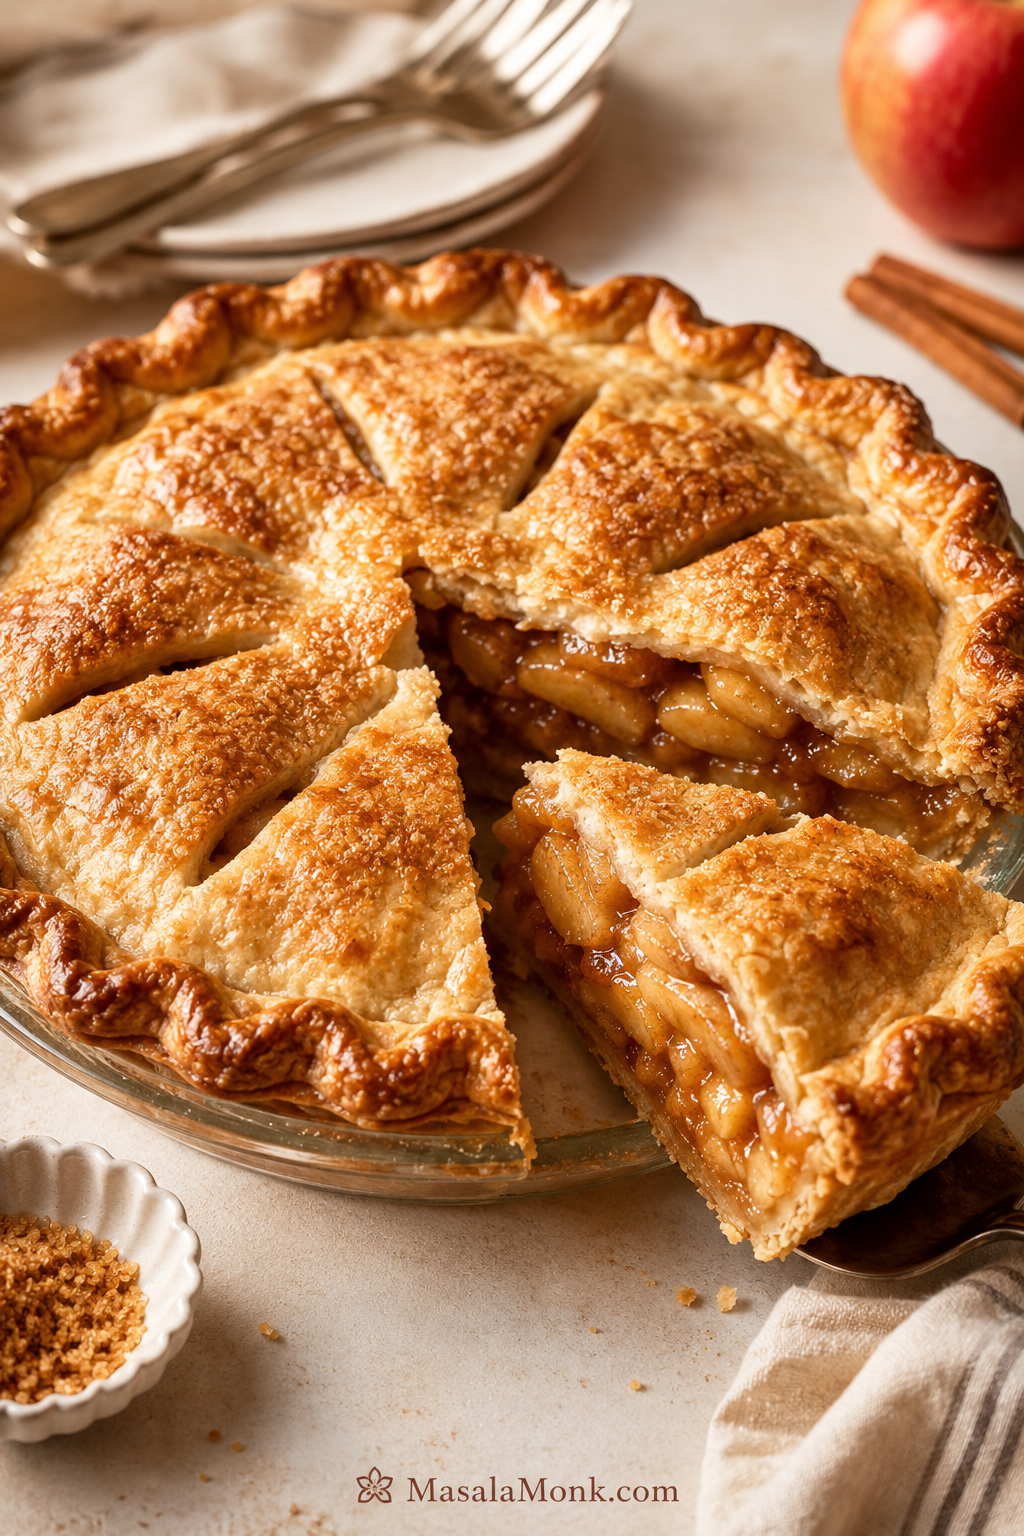
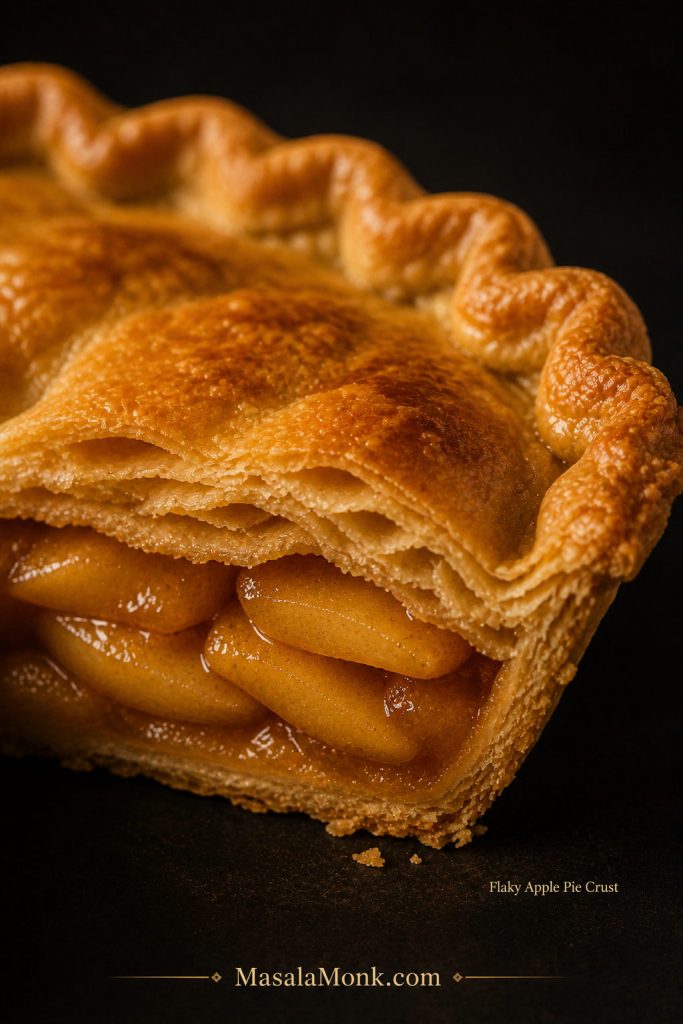
Deep-dish Dutch apple pie with golden crumb topping and a clean slice removed, showing apple filling and bottom crust.

This Dutch apple pie recipe is for the slice everyone wants: a flaky bottom crust, tender cinnamon apples that still hold their shape, and a buttery brown-sugar crumb topping that bakes into golden clusters. It is easier than a lattice apple pie, richer than a plain crumble, and sturdy enough to slice cleanly once it cools.

If you have seen this dessert called apple crumb pie, apple crumble pie, or apple pie with crumb topping, you are in the right place. Although the names overlap, the structure is simple: one bottom crust, a generous apple filling, and a thick layer of cinnamon crumbs on top.

A Sliceable Dutch Apple Pie, Not a Runny Scoop

The method below is built for the problems that usually ruin this kind of pie: a soft bottom crust, apples that shrink under the crumbs, and topping that browns before the center is done. A hot-start bake, lower oven rack, firm apple blend, and full cooling window give the pie its best chance to bake through and slice neatly.

When it works, every forkful gives you the whole point of the pie: flaky crust underneath, soft spiced apples in the middle, and golden buttery crumbs on top.

This is the version to make when you want the comfort of apple crisp, the structure of pie, and a slice that can actually stand up on a plate.

Clean Slice Cue

Clean slice cue: For a slice that stands up on the plate, let the filling settle before cutting. Serve it warm if you like, but not bubbling-hot from the oven.
Clean slice of Dutch apple pie on a plate, showing bottom crust, apple filling, and crumb topping.
Cooling turns the apple layer from loose and glossy into a filling that can hold a clean slice.

Why the Layers Matter

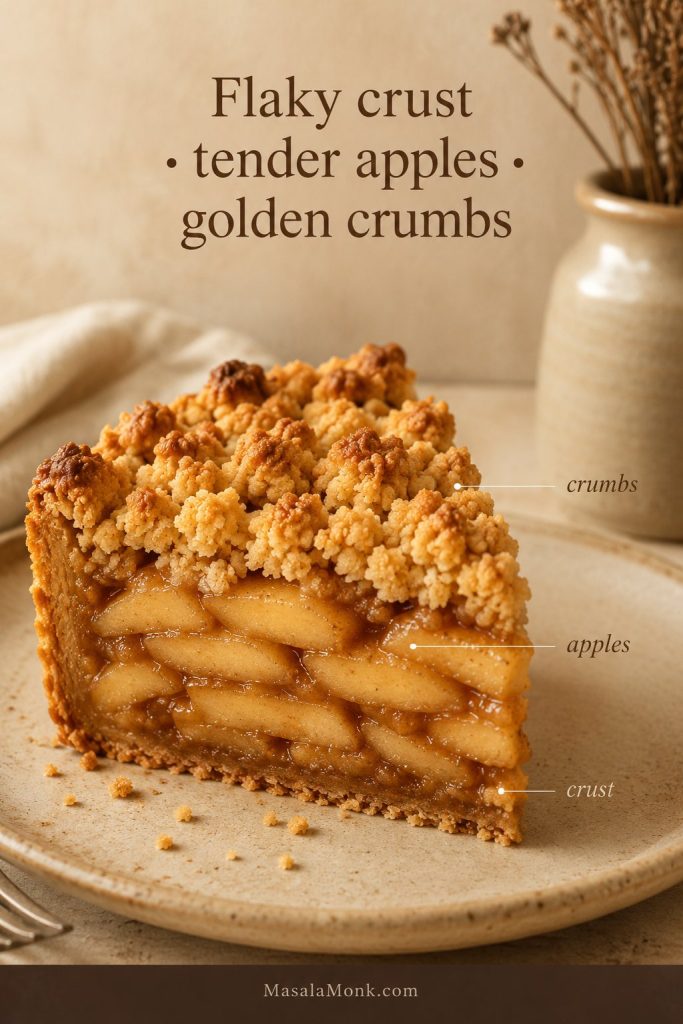
Layer cue: Before baking, check the three jobs: heat for the crust, structure from the apples, and enough butter for clustered crumbs.
Dutch apple pie slice with callouts showing flaky crust, tender apple filling, and golden crumb topping.
Use the layers as a quick check: structure below, tender apples in the middle, and clustered crumbs on top.

Quick Answer

This Dutch apple pie recipe is built around a single-crust apple pie topped with buttery crumbs instead of a second sheet of pastry. For the best homemade version, use about 3 lb / 48 oz / 1.35 kg firm apples sliced 1/4 inch / 6 mm thick. Add them to a chilled single crust in a 9-inch deep-dish pie plate, cover with crumb topping, and bake for 55–65 minutes.

The most reliable oven schedule is 400°F / 200°C for 20 minutes, then 375°F / 190°C for 35–45 minutes more. The pie is done when the topping is golden, the filling bubbles around the edges, and the apples are tender. Let it cool for at least 3 hours before slicing so the filling sets.

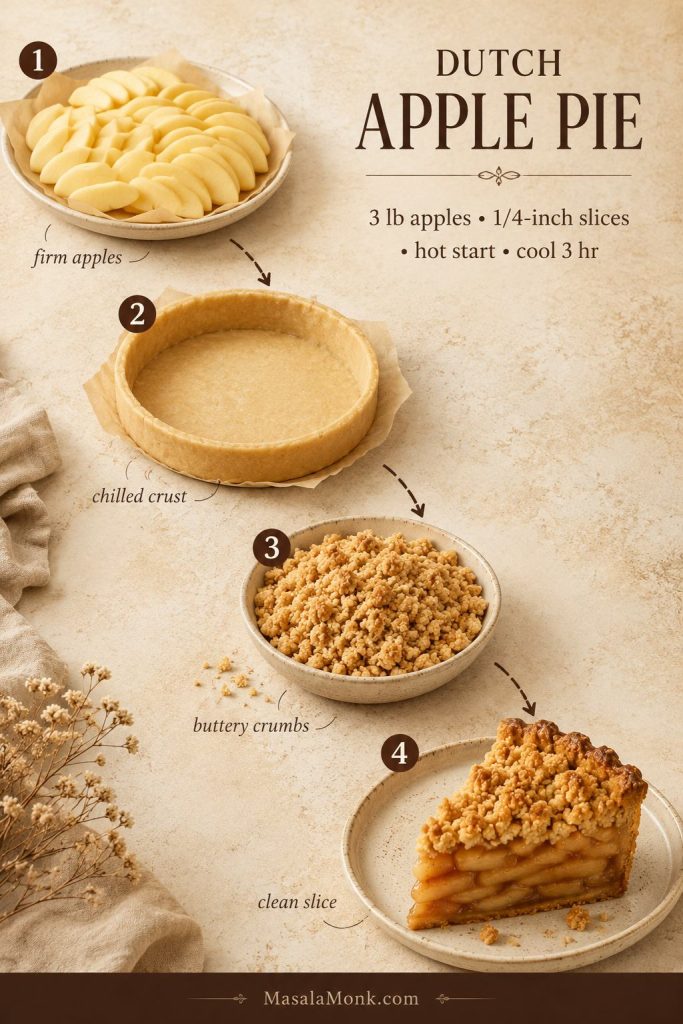
Formula cue: Keep the short version in mind before baking: firm apples, even slices, a hot-start oven, and a full cooling window.
Quick answer board showing firm apples, chilled crust, crumb topping, hot-start baking, and cooling time for Dutch apple pie.
When these four cues are in place, the pie has a better chance of baking through without turning loose or runny.

Need more help before baking? Check the best apples, crumb topping, or bake time sections before you start.

Why This Dutch Apple Pie Works

This pie is simple, but a few small details make the difference between a clean slice and a runny scoop. Too much loose apple juice softens the crust, too little butter makes the topping sandy, and soft apples can collapse before the filling sets. The method here keeps those problems in check so you get tender apples, crisp-edged crumbs, and slices that hold together.

Five Details That Protect the Pie

  • A hot-start bake gives the crust a head start. The first 20 minutes at 400°F / 200°C helps the bottom crust set before the apples release too much liquid.
  • Apples with structure keep the filling from collapsing. Granny Smith with Honeycrisp, Braeburn, or Pink Lady gives tartness, sweetness, and shape.
  • Flour thickens the apple juices gently. It gives the filling a classic apple pie texture without turning the center gummy.
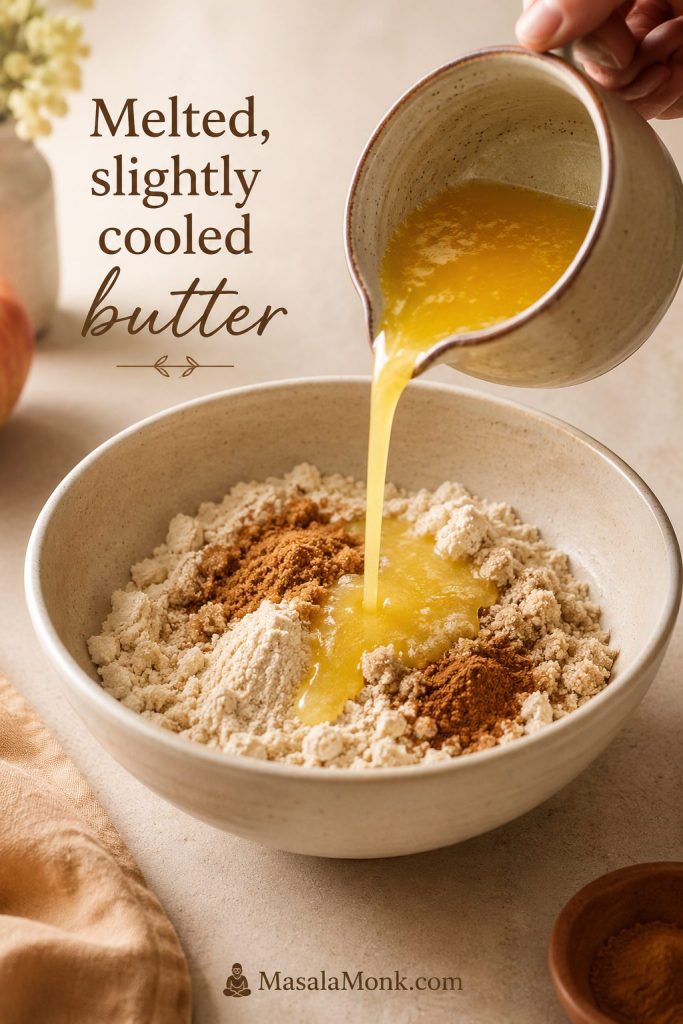
  • Melted, slightly cooled butter makes easy crumb clumps. The topping holds together without needing a pastry cutter.
  • A full cooling window gives cleaner slices. The pie tastes wonderful warm, but it slices much better after the filling has had time to settle.

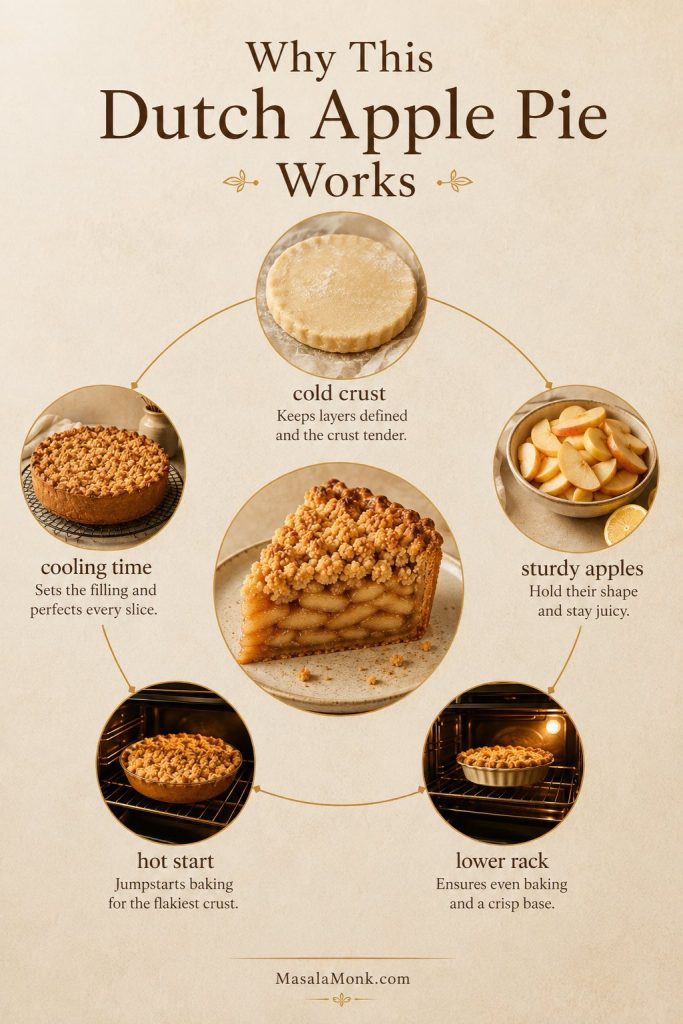
The method works because the protections stack: cold crust, sturdy apples, lower oven rack, hot-start bake, and enough cooling time. Skip one and the pie can still work; skip several and you are much more likely to get a soggy bottom or runny filling.

The Method at a Glance

Method cue: This recipe protects the usual weak spots: a soft bottom crust, collapsed apples, over-browned crumbs, and filling that runs when sliced too soon.
Method board showing cold crust, sturdy apples, lower oven rack, hot-start bake, and cooling time for Dutch apple pie.
Those safeguards work together, so the pie does not depend on one perfect step to bake and slice well.

If you are here because apple pies often turn runny or soft on the bottom, the two most useful sections are how to prevent a soggy bottom and troubleshooting Dutch apple pie.

What Is Dutch Apple Pie?

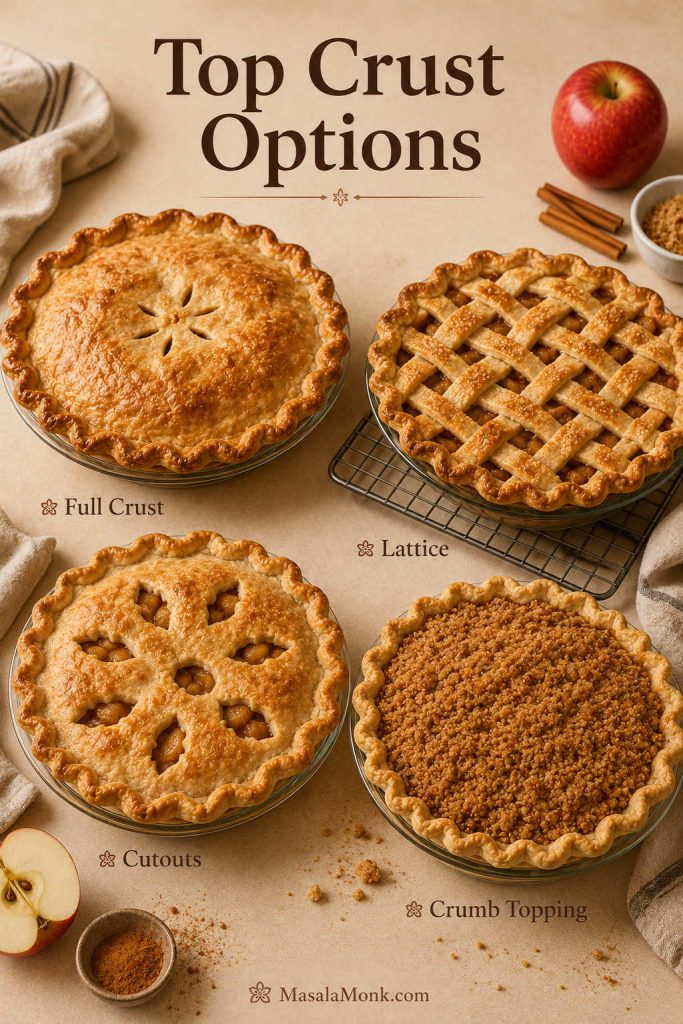
Dutch apple pie is the crumb-topped cousin of classic apple pie: the same bottom crust and spiced apple filling, but with buttery streusel instead of a second pastry crust. That makes it easier to assemble because you do not have to roll, lattice, vent, or seal a pastry top.

What makes this pie distinct is the topping. It bakes into buttery clumps with crisp edges and a soft cinnamon-brown-sugar center. Meanwhile, the apples underneath soften and release enough juice to make a saucy filling without turning into applesauce.

A chilled bottom crust gives structure, firm apples keep the filling shapely, and the cinnamon crumbs bring the buttery texture that makes this pie so comforting. That is why the top eats a little like apple crisp while the bottom still feels like pie.

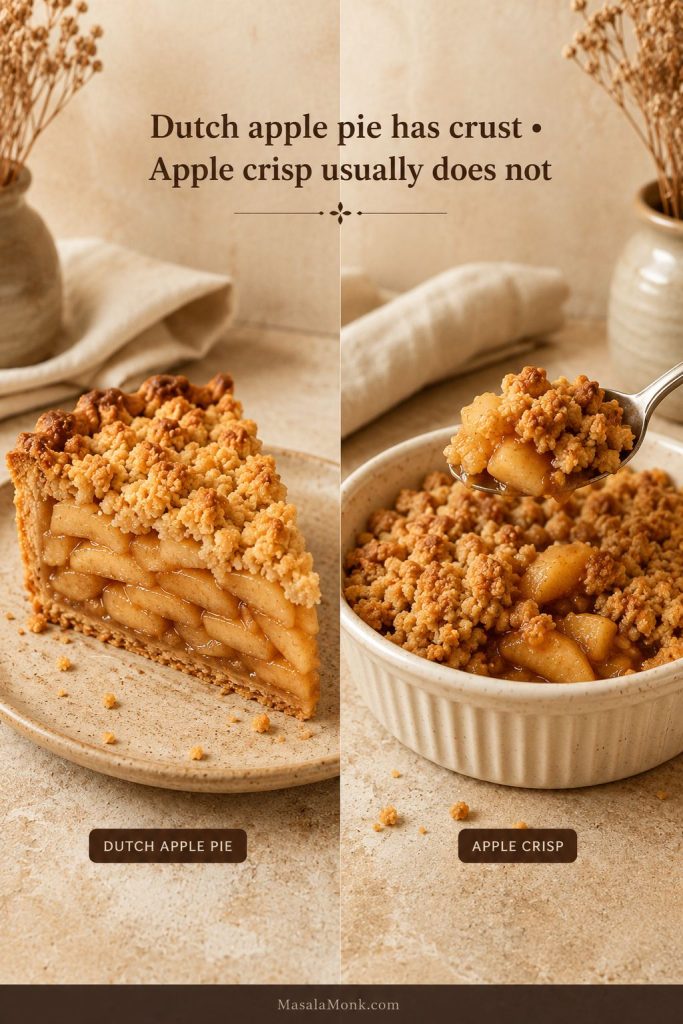
Pie vs crisp cue: If the topping reminds you of apple crisp, that is the point. The difference is underneath: Dutch apple pie has a bottom crust, while apple crisp usually does not.
Dutch apple pie slice compared with apple crisp, showing that Dutch apple pie has a bottom crust while apple crisp does not.
Dutch apple pie and apple crisp share a buttery crumb feel, but the bottom crust changes everything. That crust gives the dessert structure, sliceability, and a true pie identity.

Dutch Apple Pie vs Apple Crumble Pie vs Apple Crumb Pie

These names are often used for similar desserts, especially in home baking. The main idea is the same: apples, a bottom crust, and a crumb topping instead of a second pastry crust.

Name Usually Means What to Expect
Dutch apple pie Apple pie with a bottom crust and crumb topping The most common name for this style of pie
Apple crumb pie Apple pie with a crumb topping Same basic dessert, with emphasis on the topping
Apple crumble pie Apple pie with a crumble-style topping Often used when the topping is thicker or more rustic
Apple crisp Baked apples with a crisp or oat-style topping, usually without pie crust More of a baked fruit dessert than a pie

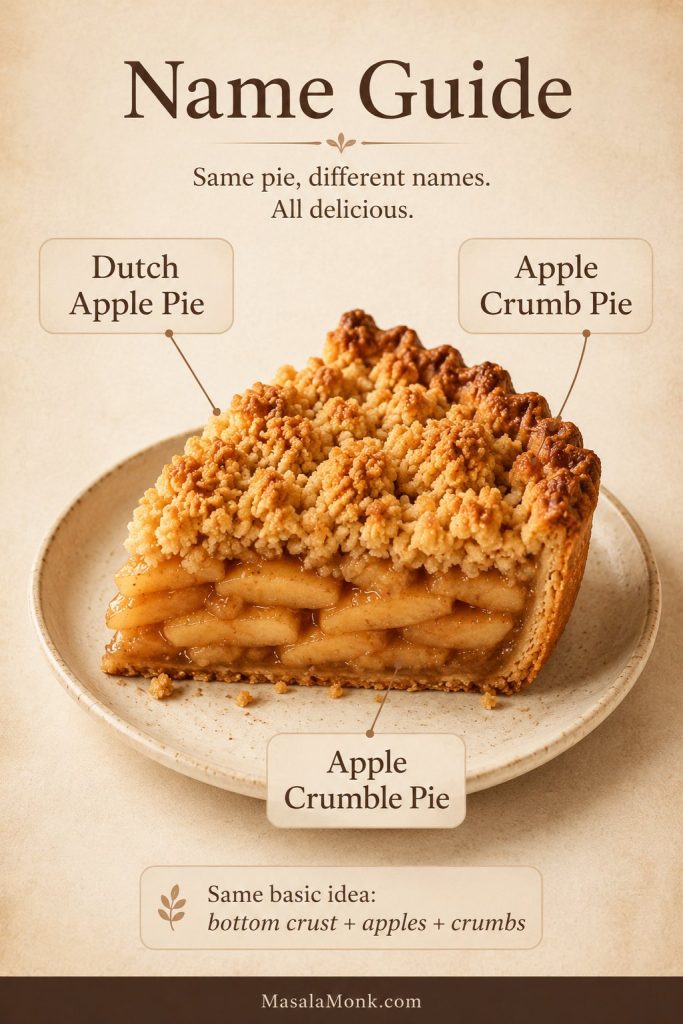
This version is a Dutch apple pie, but it also fits what many bakers mean by apple crumb pie or apple crumble pie: a flaky crust, tender apples, and a generous crumb topping.

Name cue: Searchers use these names differently, but most are looking for the same dessert style: apples in a bottom crust with a crumb, crumble, or streusel-style top.
One crumb-topped apple pie slice labeled Dutch apple pie, apple crumb pie, and apple crumble pie to show overlapping names.
The names often overlap, especially in home baking. Whether someone says Dutch apple pie, apple crumb pie, or apple crumble pie, they usually mean apples, bottom crust, and a crumb-style top.

Ingredients for Dutch Apple Pie

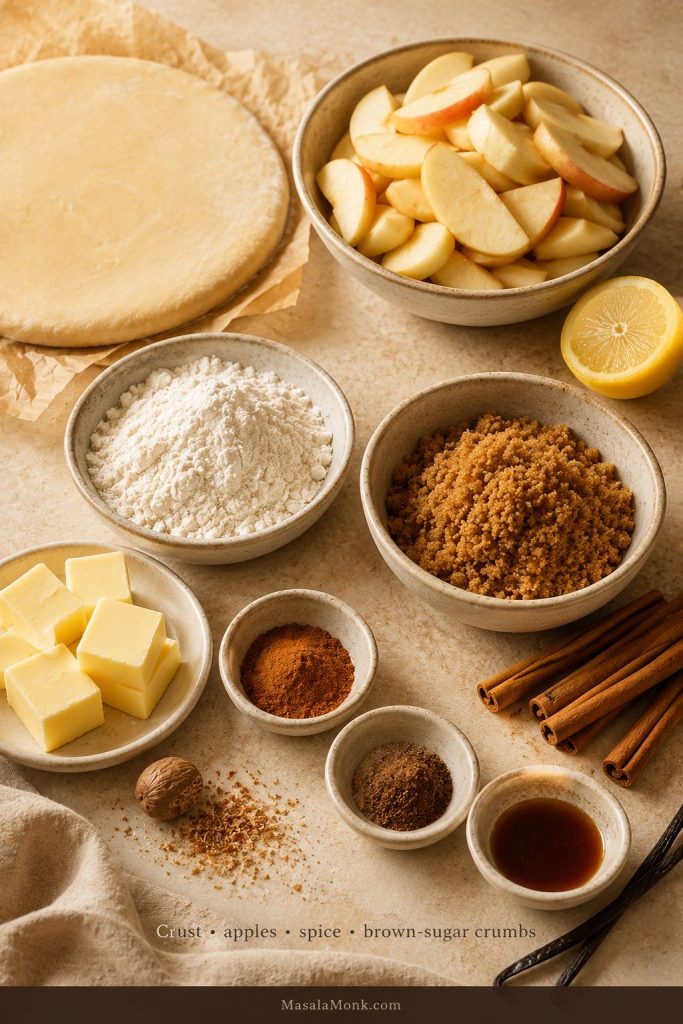
The ingredient list is short, but each part has to pull its weight. The crust needs to stay cold, the apples need enough structure, the filling needs just enough thickener, and the topping needs enough butter to bake into real crumbs instead of loose sugar-flour dust.

Ingredient cue: This recipe does not rely on a long ingredient list. Instead, the results come from handling the basics well: cold dough, firm apples, bright lemon, warm spice, flour, brown sugar, and butter.
Ingredients for Dutch apple pie including apples, pie crust, butter, flour, brown sugar, lemon, vanilla, cinnamon, and nutmeg.
The best results come from simple ingredients handled well: cold dough for structure, firm apples for shape, lemon for brightness, and butter for clustered crumbs.

One Bottom Pie Crust

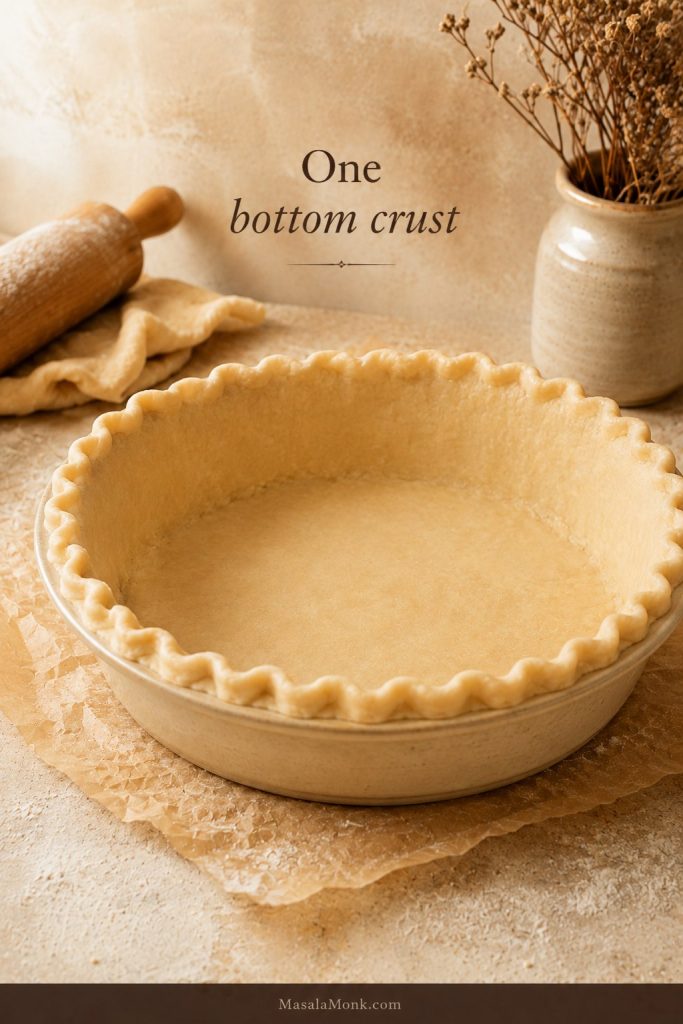
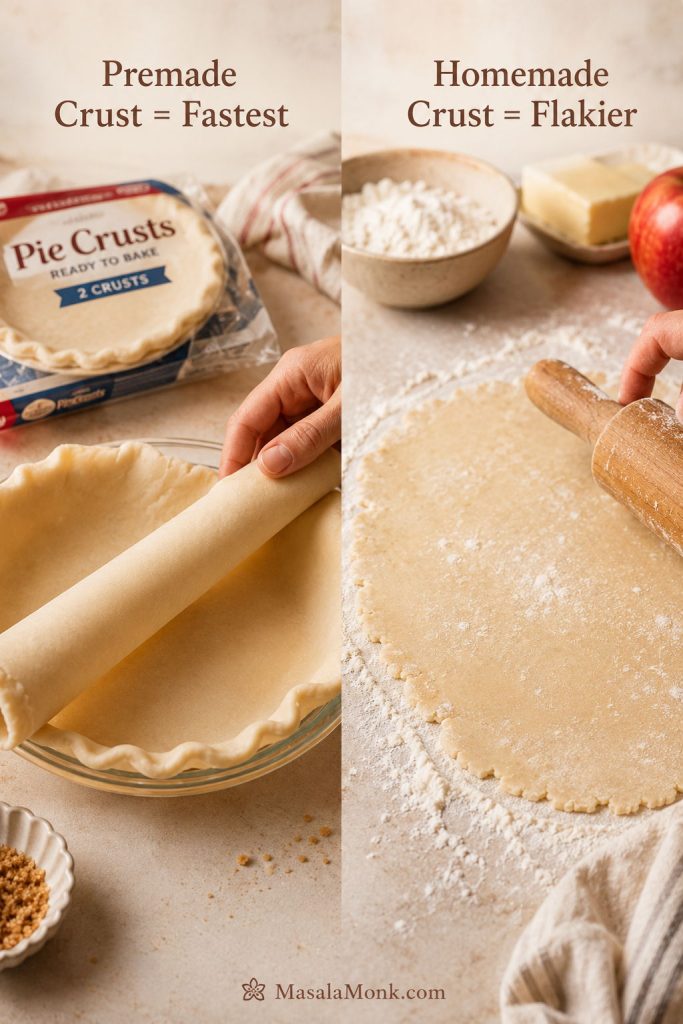
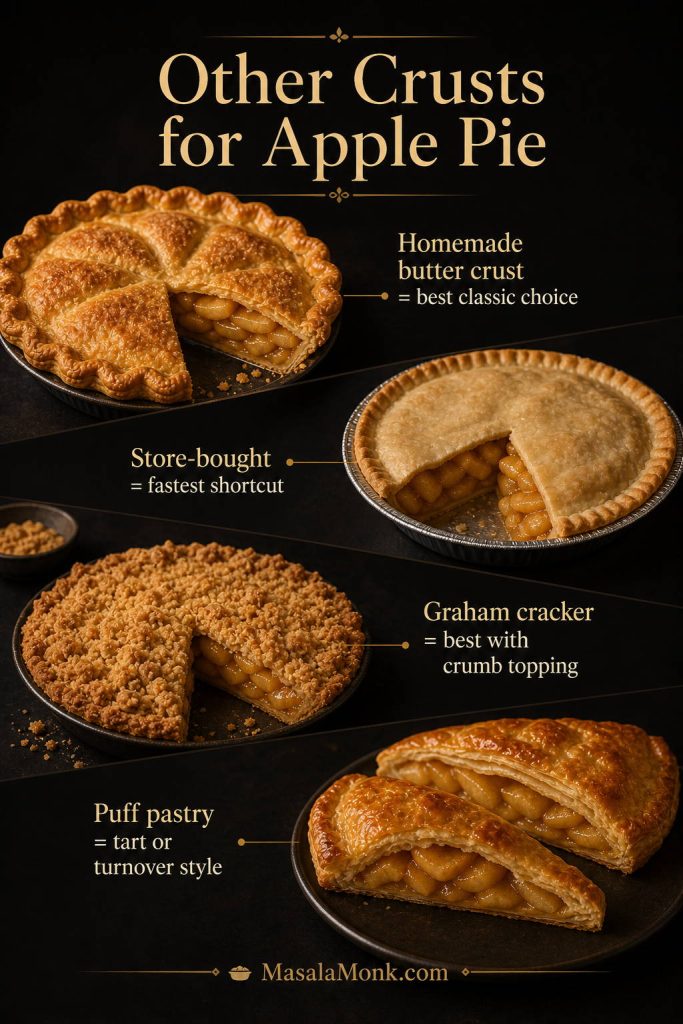
You need one chilled 9-inch pie crust. Homemade crust gives the best flavor and flake, but a good store-bought crust works if you are focused on the apple filling and crumb topping.

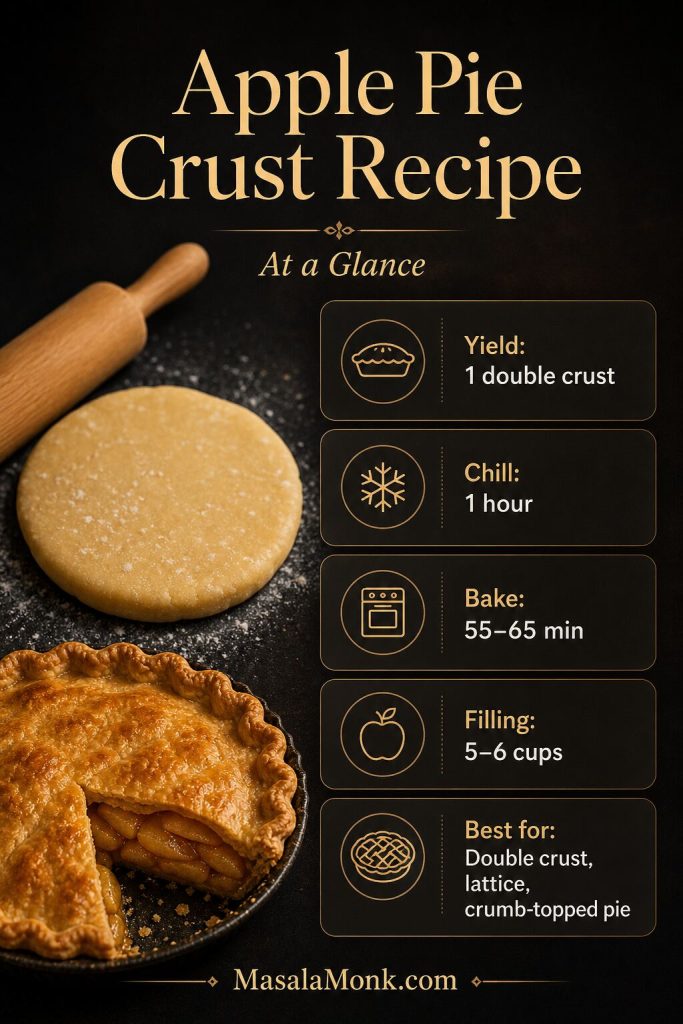
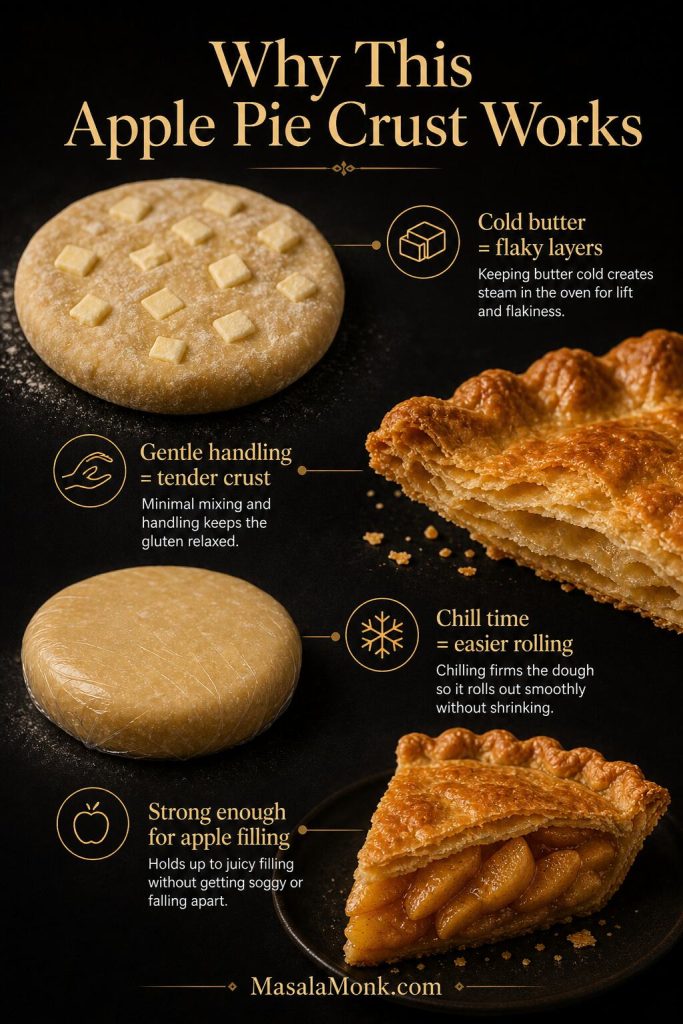
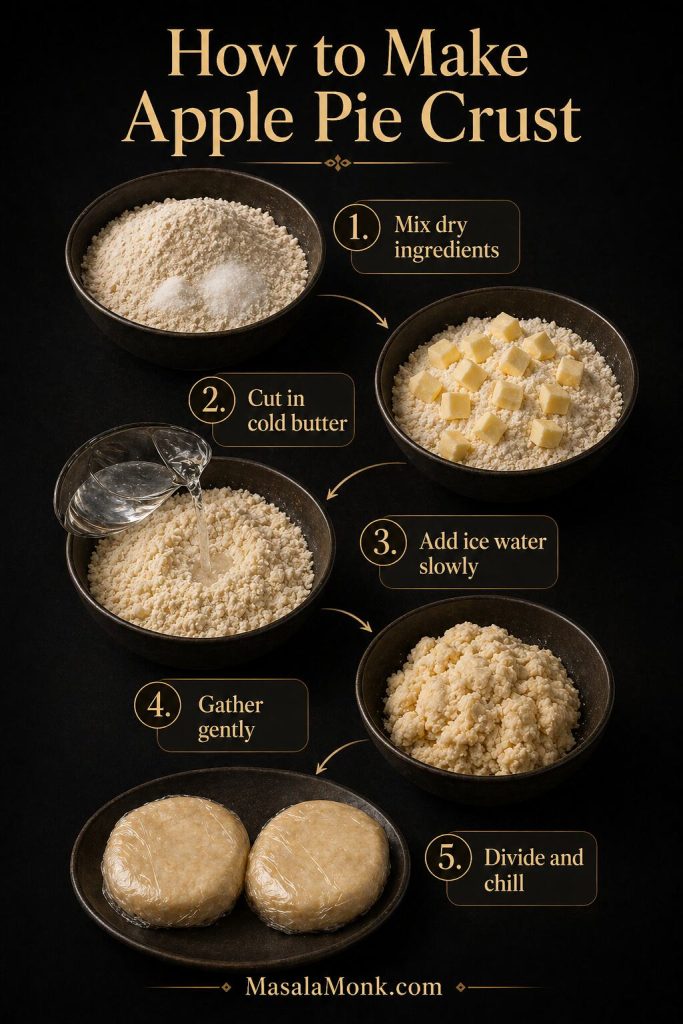
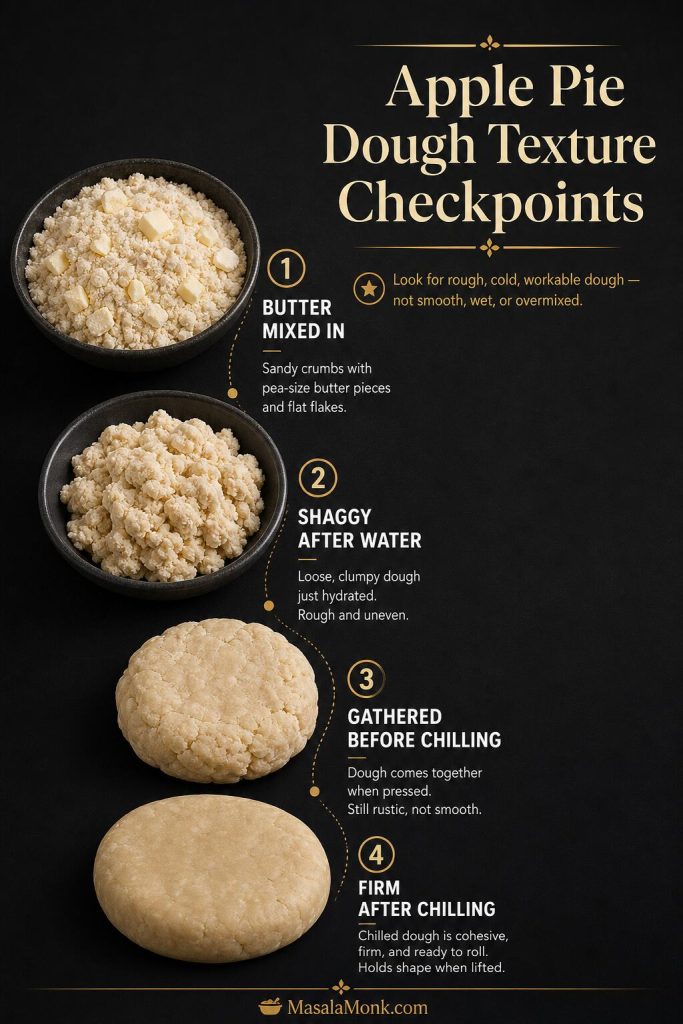
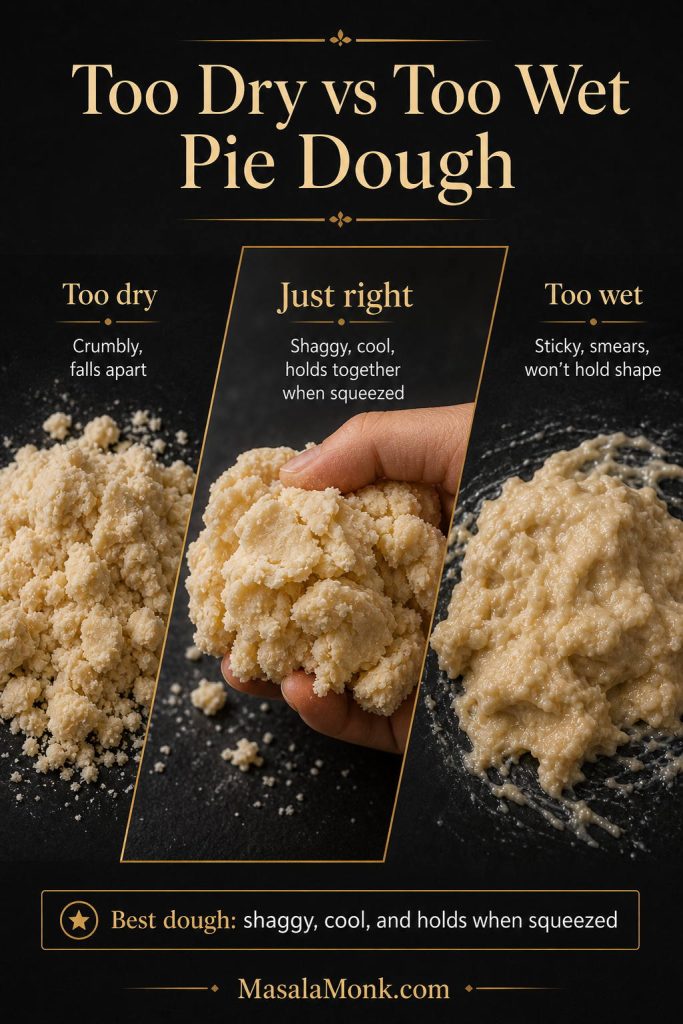
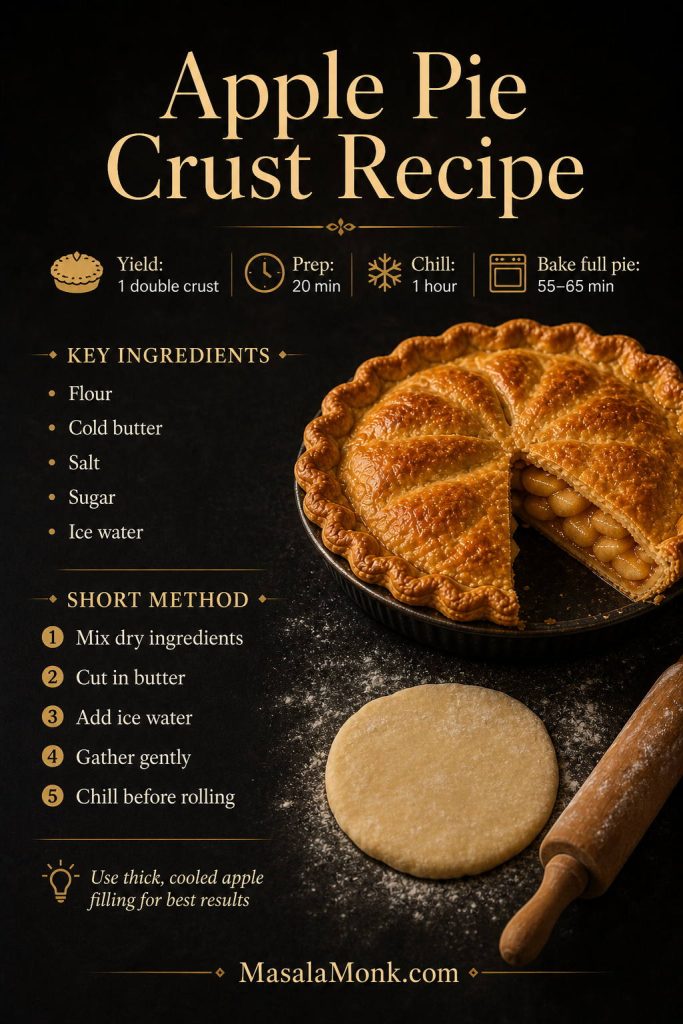
If you want a fully homemade base, use this apple pie crust recipe. For this style, you only need a single bottom crust, not a double crust.

Crust cue: Because there is no top pastry crust, the bottom crust has to carry the slice. Keep it chilled before filling so it has a better chance to set in the oven.
Single unbaked bottom pie crust in a deep-dish pie plate with crimped edges.
Since there is no top pastry crust, the bottom crust has to do the structural work while the crumb layer brings the buttery finish.

Using a shallow pie plate instead of deep-dish? Check the pan-size notes before adding all the apples.

Firm Apples

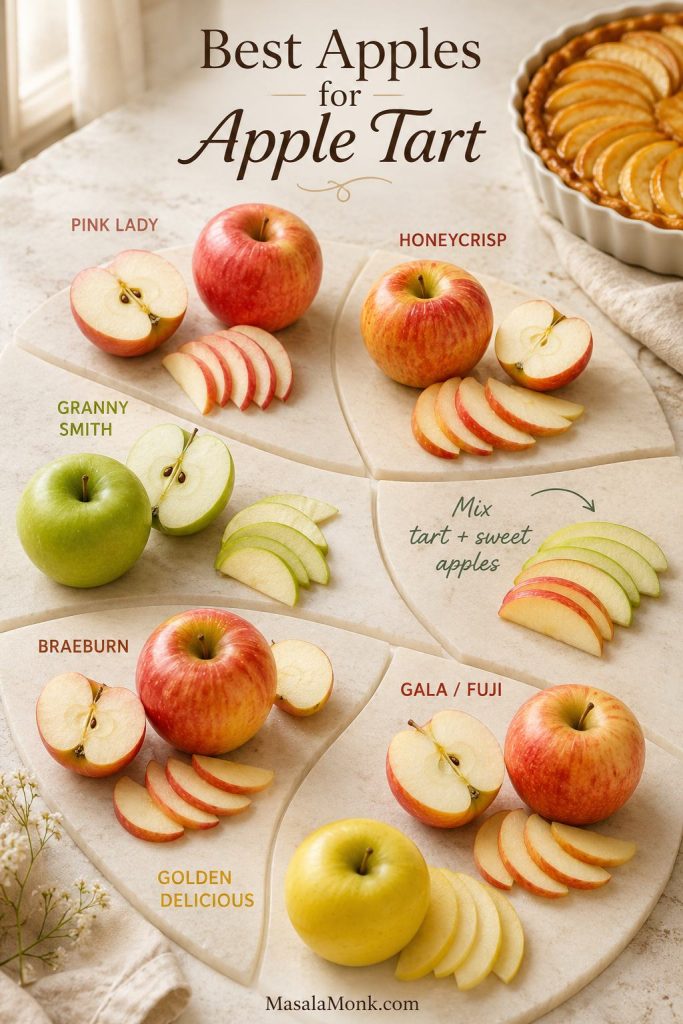
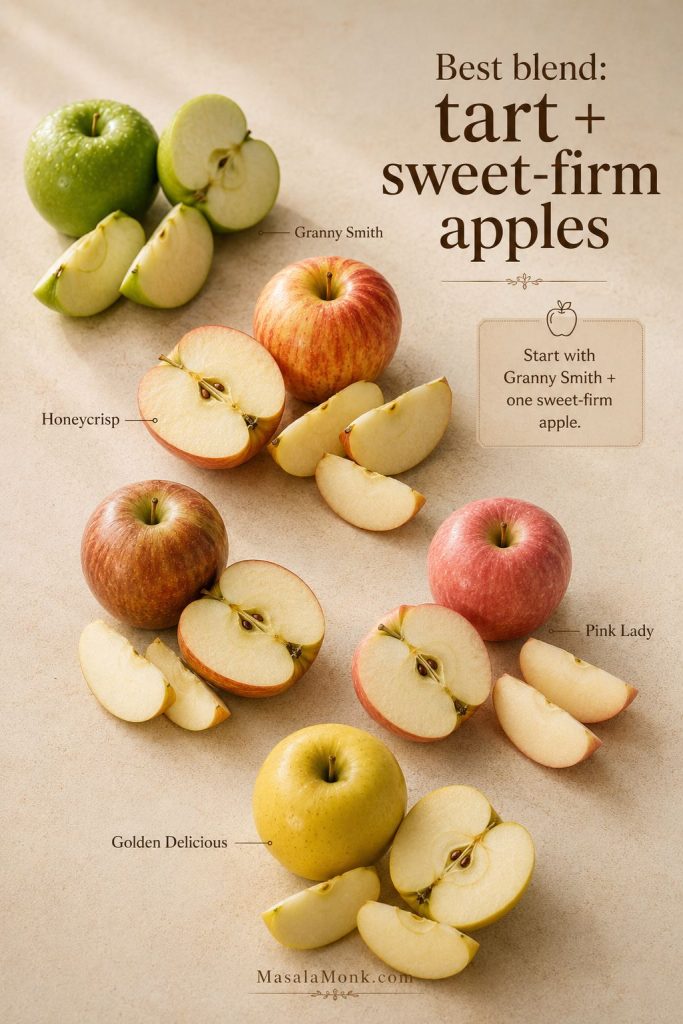
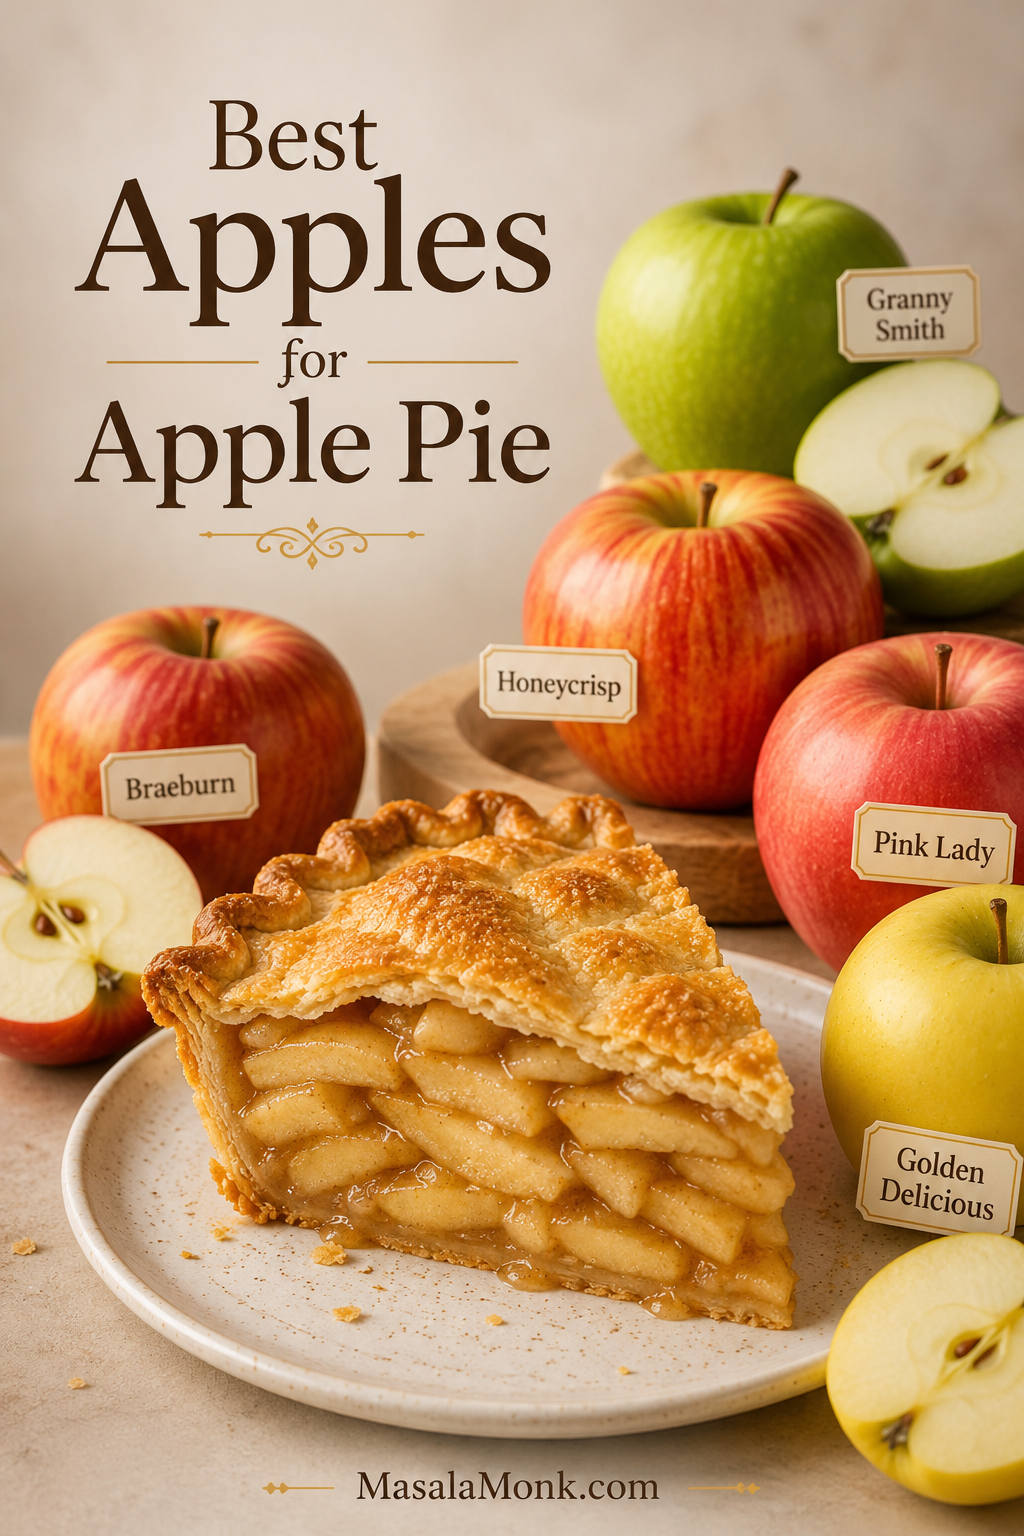
Use firm baking apples that hold their shape. Granny Smith gives tart structure, while Honeycrisp, Braeburn, Pink Lady, or Golden Delicious can round out the flavor.

The best all-purpose blend is 2 lb Granny Smith plus 1 lb Honeycrisp, Braeburn, or Pink Lady. For a sweeter pie, use half Granny Smith and half Honeycrisp or Golden Delicious.

For a deeper apple-by-apple breakdown, see this guide to the best apples for apple pie.

Peel the Apples for the Smoothest Filling

Peeling gives the smoothest, most classic filling. You can leave the skins on if you like a more rustic pie, but the slices will feel chewier and the skins may separate slightly from the softened apple flesh.

Sugar, Lemon, Flour, and Spices

Granulated sugar sweetens the apples, brown sugar adds warmth, lemon juice brightens the filling, and flour helps thicken the juices as the pie bakes. Cinnamon is essential, while a little nutmeg gives the filling a classic bakery-style aroma.

All-purpose flour works best here because it gives a classic apple pie texture. Cornstarch can work in many fruit fillings, but it can become gummy when overused in a long-baked apple pie.

Buttery Crumb Topping

The crumb layer is made with flour, brown sugar, a little granulated sugar, cinnamon, salt, and melted butter. Once mixed, it should hold together in soft clumps when squeezed. If it looks dusty or powdery, it needs to be worked together a little more.

Best Apples for Dutch Apple Pie

Apple Varieties That Hold Shape

Apple choice cue: A good apple blend needs both flavor and structure. Start with tart Granny Smith, then add one sweet-firm apple so the filling tastes balanced and still holds shape.
Apple selection board for Dutch apple pie with Granny Smith, Honeycrisp, Braeburn, Pink Lady, and Golden Delicious apples.
The best apple blend gives you both flavor and structure. Start with tart Granny Smith, then add a sweet-firm apple such as Honeycrisp, Braeburn, or Pink Lady.

The best apples are firm, flavorful varieties that can survive a long bake without collapsing. Because this pie spends nearly an hour in the oven, avoid soft, mealy, or overripe apples that break down too quickly.

Apple Best Use Flavor / Texture
Granny Smith Best tart backbone Firm, sharp, holds shape well
Honeycrisp Best sweet-tart partner Juicy, crisp, fragrant
Braeburn Best balanced baking apple Sweet-tart, firm, aromatic
Pink Lady Best bright flavor Tart-sweet, firm, lively
Golden Delicious Best softer sweet blend apple Mellow, sweet, less tart

Avoid very soft, mealy, or overripe apples here. They may taste fine raw, but they can collapse during the long bake and leave you with a flatter, wetter filling.

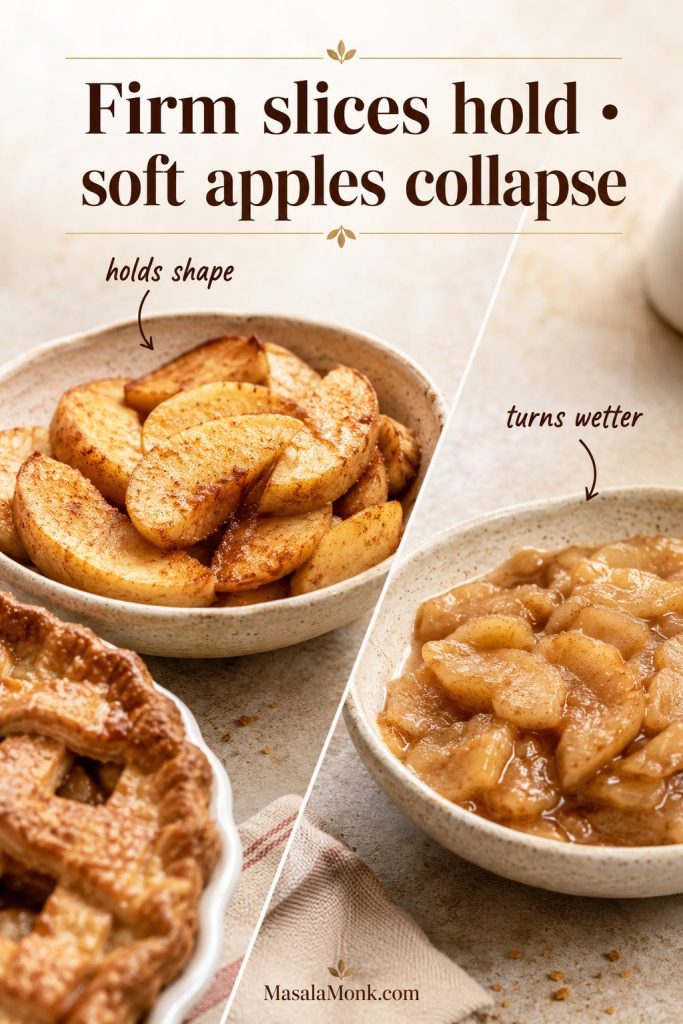
Apple structure cue: Soft apples can taste fine raw but collapse during a long bake. For this pie, firmer slices give you a filling that stays tender instead of turning flat and watery.
Firm apple slices holding shape compared with softer collapsed apple slices after baking.
Apples that taste good raw do not always bake well. For this long-baked apple pie, firm slices are safer because they soften without collapsing into a watery layer.

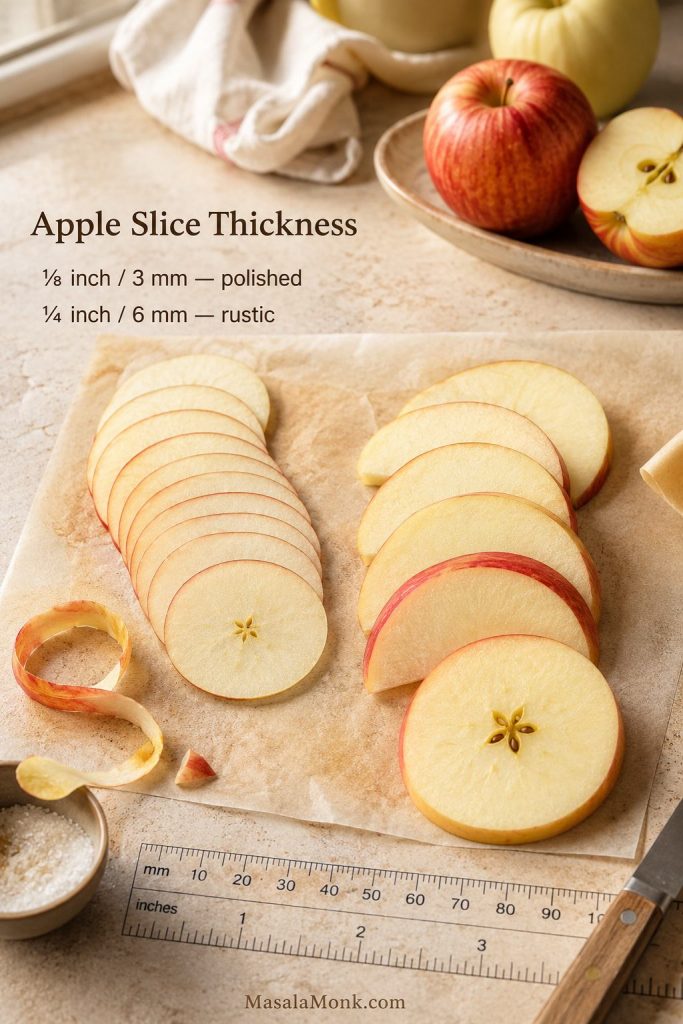
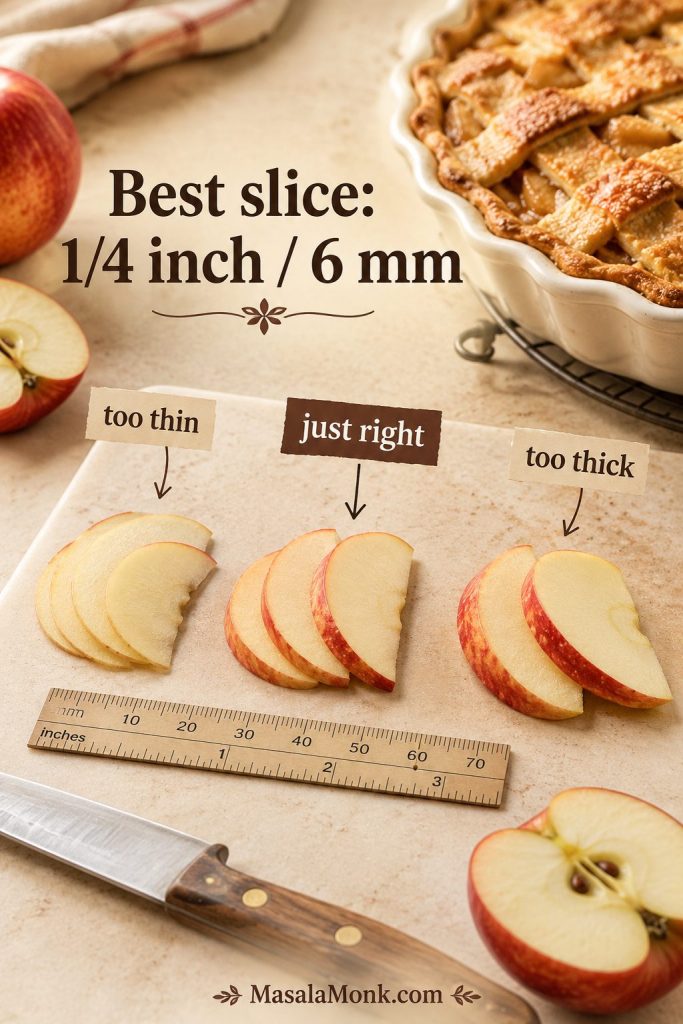
Slice the apples about 1/4 inch / 6 mm thick. Very thin slices soften faster but can turn compact and jammy. Thick slices can stay firm even when the crust and topping are done.

Slice Thickness for Even Baking

Slice thickness cue: The goal is not paper-thin slices or chunky wedges. Aim for even 1/4-inch slices so the apples soften at the same pace as the crust and crumb topping bake.
Apple slice thickness guide for Dutch apple pie showing too-thin slices, quarter-inch slices, and thick slices.
Even 1/4-inch apple slices bake more predictably. Thin slices can turn jammy, while thick slices may stay too firm after the crust and crumbs are already done.

If your apples are extra juicy or you want neater slices, compare the raw, pre-cooked, and canned filling options before assembling the pie.

Apple Crumb Topping for Dutch Apple Pie

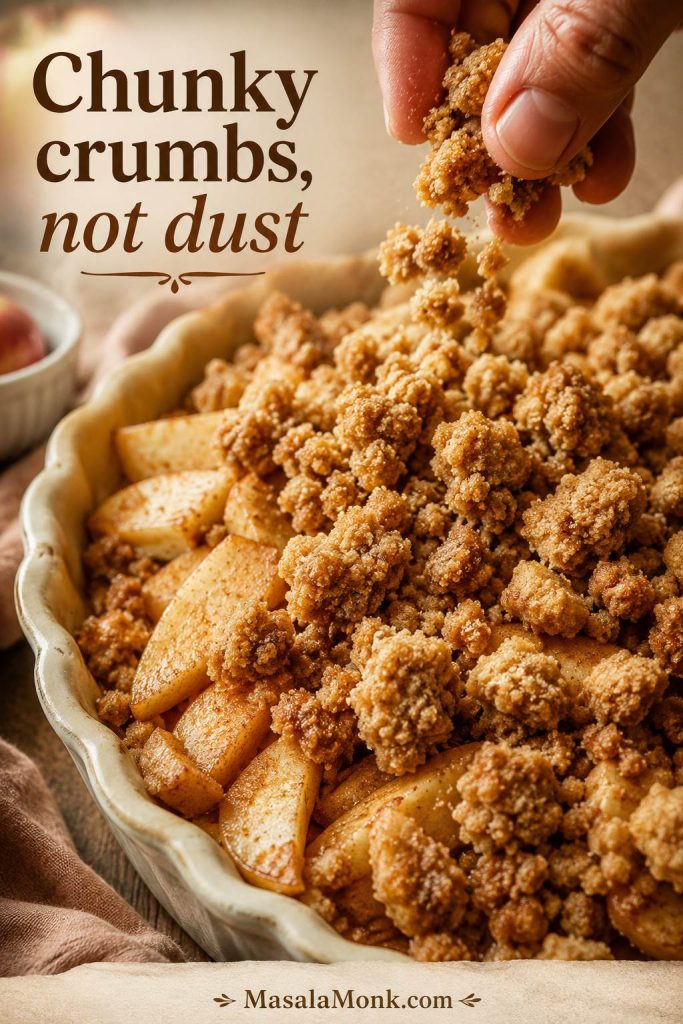
The crumble layer is not just decoration. It is the main reason this pie tastes different from a regular apple pie: buttery, cinnamon-scented, lightly crisp on top, and soft enough underneath to melt into the apples. The goal is chunky crumbs, not loose sugar-flour dust.

Crumb topping cue: The topping should already look like real crumbs before it goes into the oven. If it looks like dry flour and sugar, keep working in the butter until clusters form.
Chunky brown-sugar crumb topping scattered over sliced apples in an unbaked Dutch apple pie.
Once those clumps toast, they become the signature golden top of an apple crumb pie.

For one 9-inch deep-dish pie, use:

  • 1 cup / 4.4 oz / 125 g all-purpose flour
  • 1/2 cup / 3.5 oz / 100 g packed light brown sugar
  • 2 tablespoons / 0.9 oz / 25 g granulated sugar
  • 1 teaspoon ground cinnamon
  • 1/4 teaspoon fine salt
  • 1/2 cup / 4 oz / 113 g unsalted butter, melted and cooled slightly
  • Optional: 1/2 cup / 2 oz / 55–60 g chopped pecans or walnuts

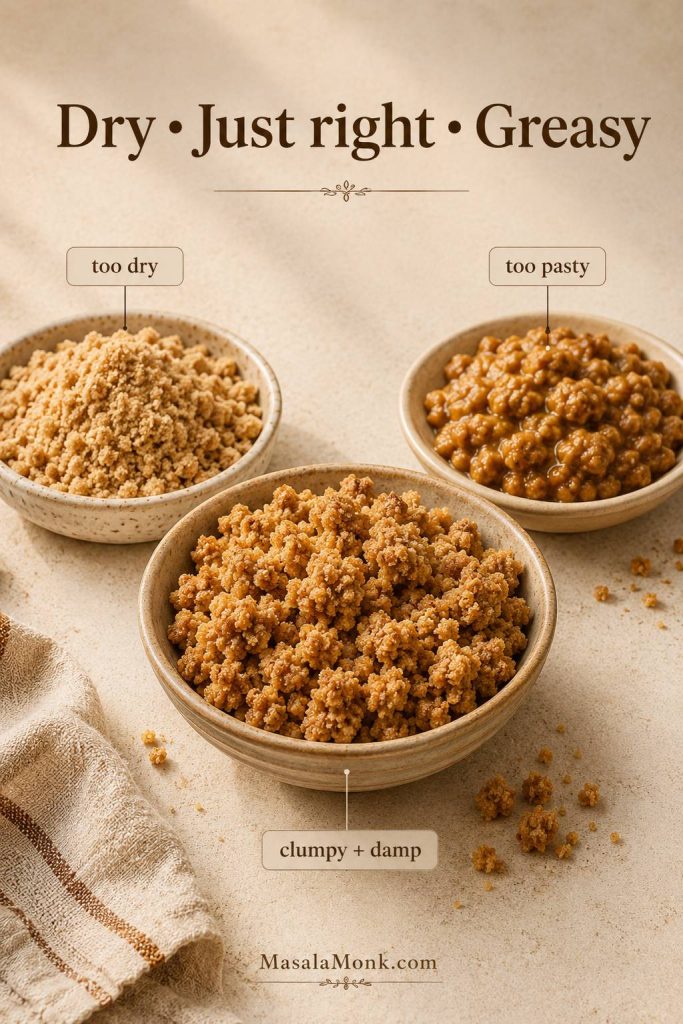
Stir the dry ingredients first, then add the melted butter. Mix until the topping forms damp crumbs. It should not look like loose flour, and it should not become one greasy paste. When squeezed, it should hold together, then break into chunky crumbs.

Melted Butter vs Cold Butter

Melted butter is easiest for this style of topping because it quickly coats the flour and sugar. Let it cool slightly before mixing. Boiling-hot butter can make the crumbs pasty or greasy instead of clumpy.

Butter cue: Melted butter is the easy route here, but it should be slightly cooled. Boiling-hot butter can make the topping pasty instead of crumbly.
Melted butter being poured into a flour, brown sugar, and cinnamon crumb topping mixture.
Slightly cooled butter coats the flour and sugar without turning the mixture greasy.

Oats or No Oats?

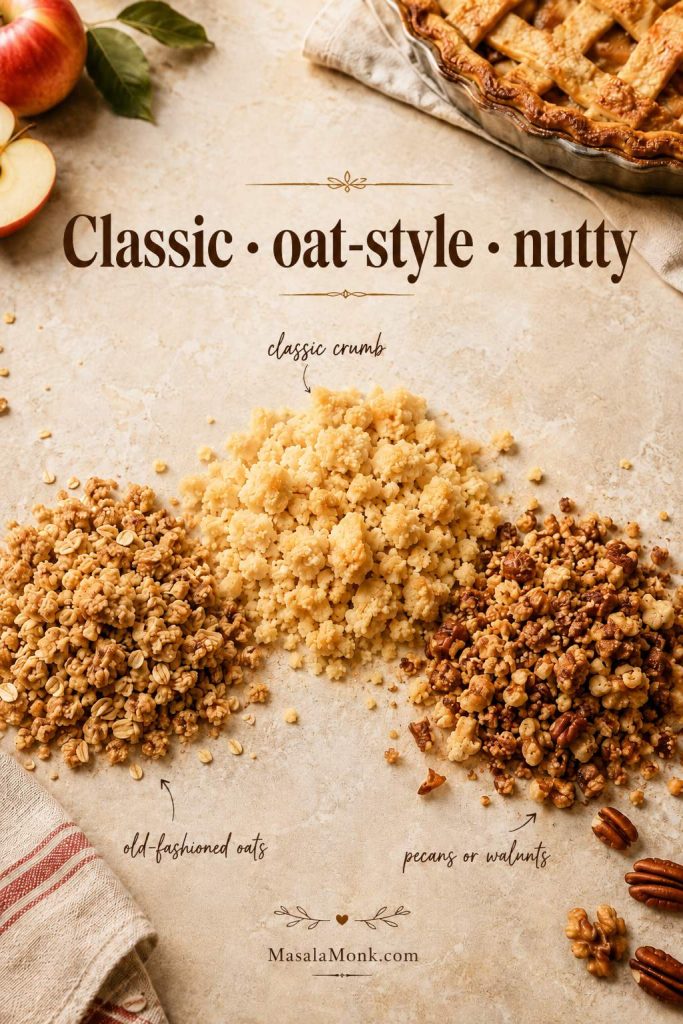
Classic Dutch apple pie often uses a flour-based topping without oats. For a more apple-crisp-style texture, replace 1/4 cup / 1 oz / 30 g of the flour with 1/4 cup / 0.9 oz / 25 g old-fashioned oats. Do not use instant oats; they can make the topping feel dusty.

Nuts or No Nuts?

Pecans or walnuts add crunch and a deeper toasted flavor. Leave them out for a smoother, more classic crumb topping, or add them when you want the pie to feel richer and more holiday-ready.

Variation cue: Keep the classic flour crumb for the most traditional Dutch apple pie texture. Add oats for a more apple-crisp feel, or nuts when you want extra toasted crunch.
Classic crumb topping, oat-style crumb topping, and nutty crumb topping variations for Dutch apple pie.
Classic crumbs keep the pie closer to a traditional Dutch apple pie. However, oats make the topping feel more like apple crisp, while nuts add toasted crunch.

Crumb Topping Texture Guide

Texture cue: Use the crumb texture as a quick check before assembly. Sandy topping needs more mixing, while greasy topping needs a brief chill so the crumbs separate again.
Crumb topping texture guide showing dry crumbs, just-right clumpy crumbs, and greasy pasty crumbs.
If the topping looks sandy, keep working in the butter; if it looks greasy, chill it briefly so the crumbs can separate again.
What You See What It Means How to Fix It
Dry and sandy The butter has not been worked in enough Press the mixture with your fingers until clumps form
Wet and pasty The butter was too hot or the topping was overmixed Chill 10 minutes, then break into crumbs
Huge greasy chunks The topping was over-compressed Break apart gently before adding to the pie
Browning too fast The topping is exposed to heat before the apples are done Tent loosely with foil once golden
Soft after storage The pie was covered warm or refrigerated Reheat slices uncovered in the oven
Crumb topping cue: The topping should feel like damp, clumpy sand. Keep mixing and pressing when it will not hold together after a squeeze. A greasy mixture only needs a brief chill before you break it back into crumbs.

For sandy, greasy, or overly dark crumbs, the troubleshooting section gives quick fixes without changing the whole recipe.

The Pan and Tools That Matter Most

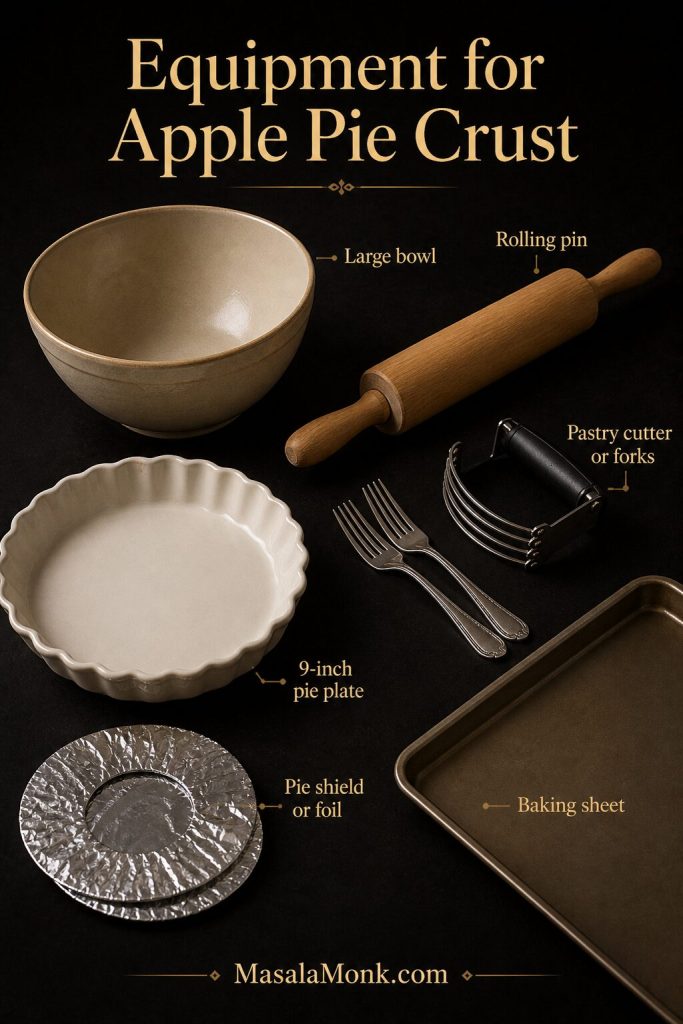
You do not need anything fancy. The three tools worth caring about most are a deep-dish pie plate, a rimmed baking sheet, and something to protect the crust edges if they brown early.

  • 9-inch deep-dish pie plate: holds the full 3 lb / 48 oz / 1.35 kg apple filling.
  • Rimmed baking sheet: catches drips and gives the pie a stable surface in the oven.
  • Foil or pie shield: protects the crust edge or crumbs if they brown before the apples are tender.
  • Large mixing bowl: gives the apples room to coat evenly with sugar, flour, lemon, and spices.
  • Small mixing bowl: keeps the topping separate until assembly.
  • Rolling pin: needed if you are using homemade pie crust.
  • Apple peeler, corer, or sharp knife: helps keep the slices even.
  • Instant-read thermometer: optional, but useful if you want a doneness cue beyond color and bubbling.

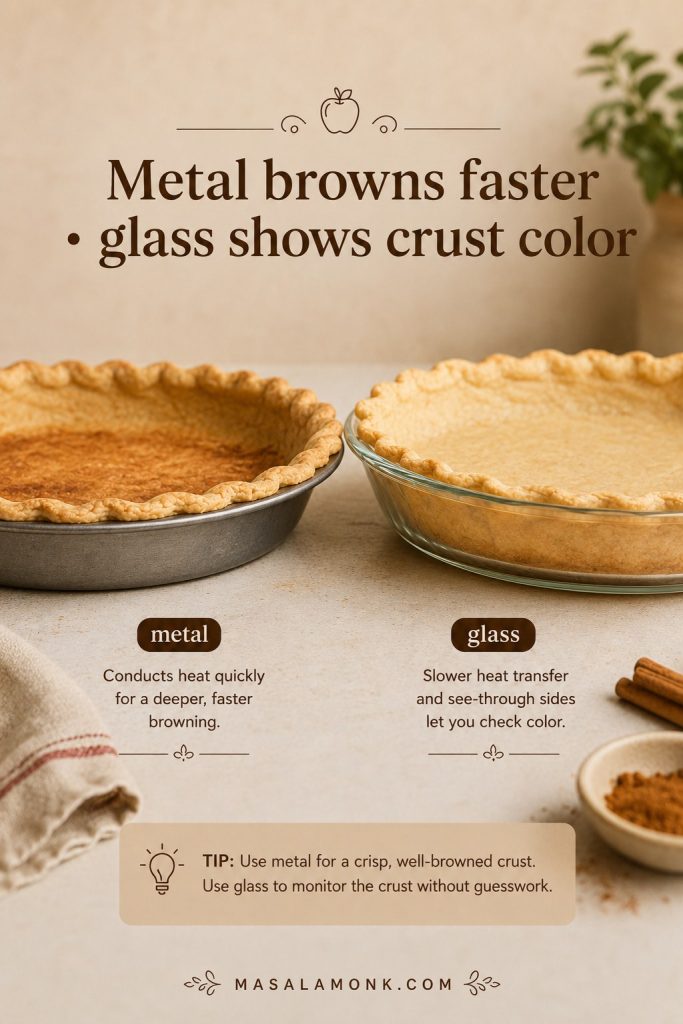
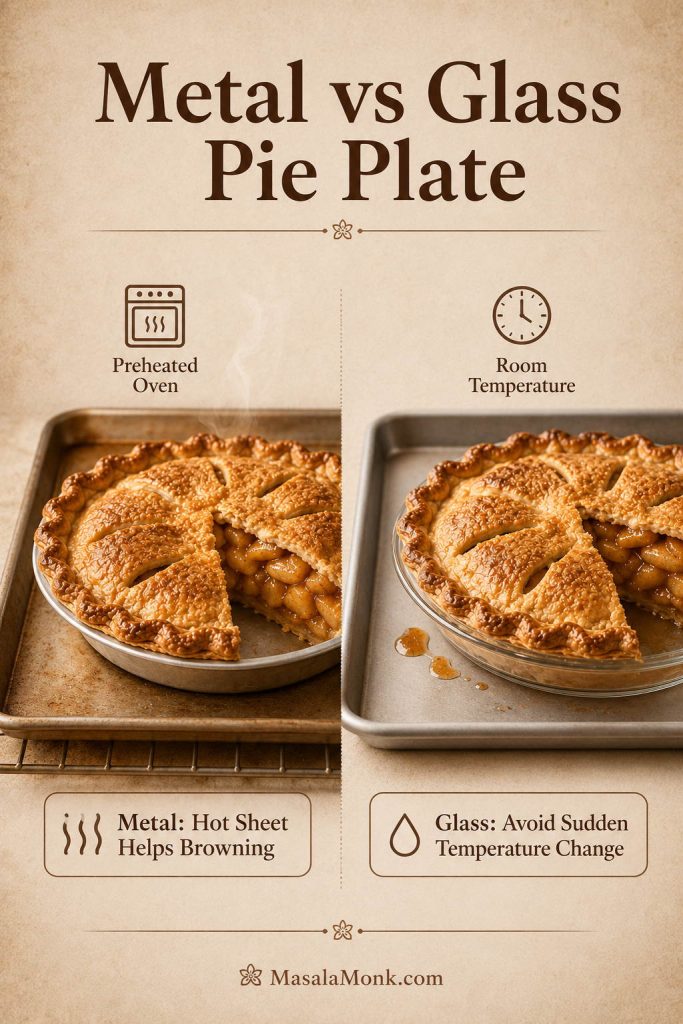
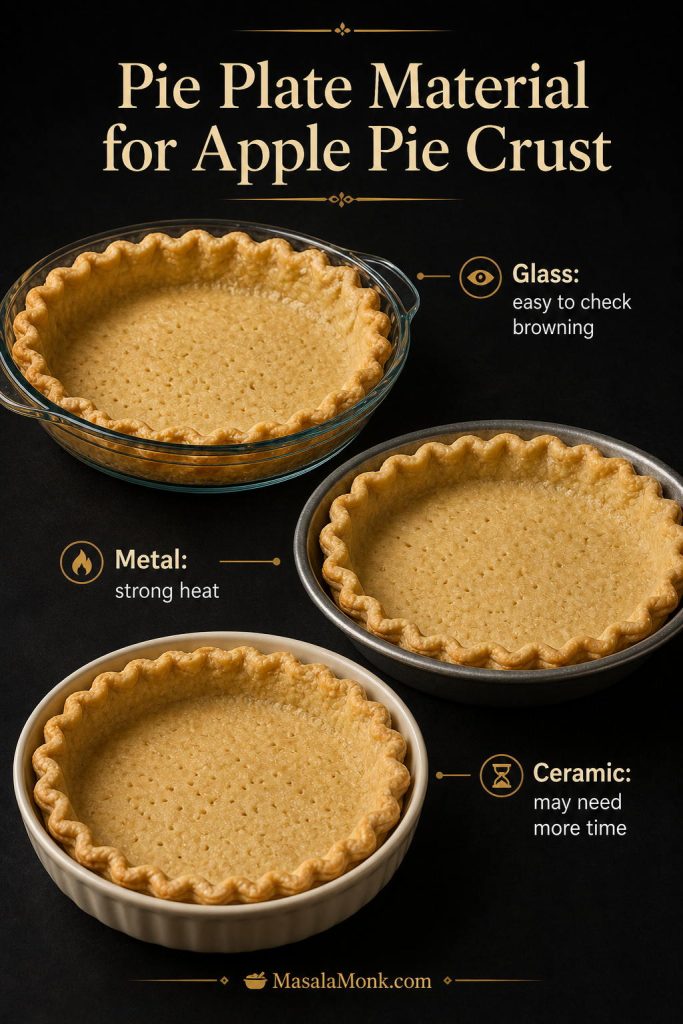
A metal pie plate browns the bottom crust more quickly, while glass lets you see the crust color but heats more slowly. With glass, the lower rack and full bake time matter even more.

Choosing Metal or Glass

Pan cue: Your pie plate changes how the bottom crust bakes. Metal gives the crust faster heat, while glass lets you check color but often needs the full bake time.
Metal and glass pie plates compared for Dutch apple pie, with crust-browning cues.
Metal gives the bottom crust a faster start, which helps browning. Glass lets you watch the crust color, but it usually needs the full bake time to perform well.

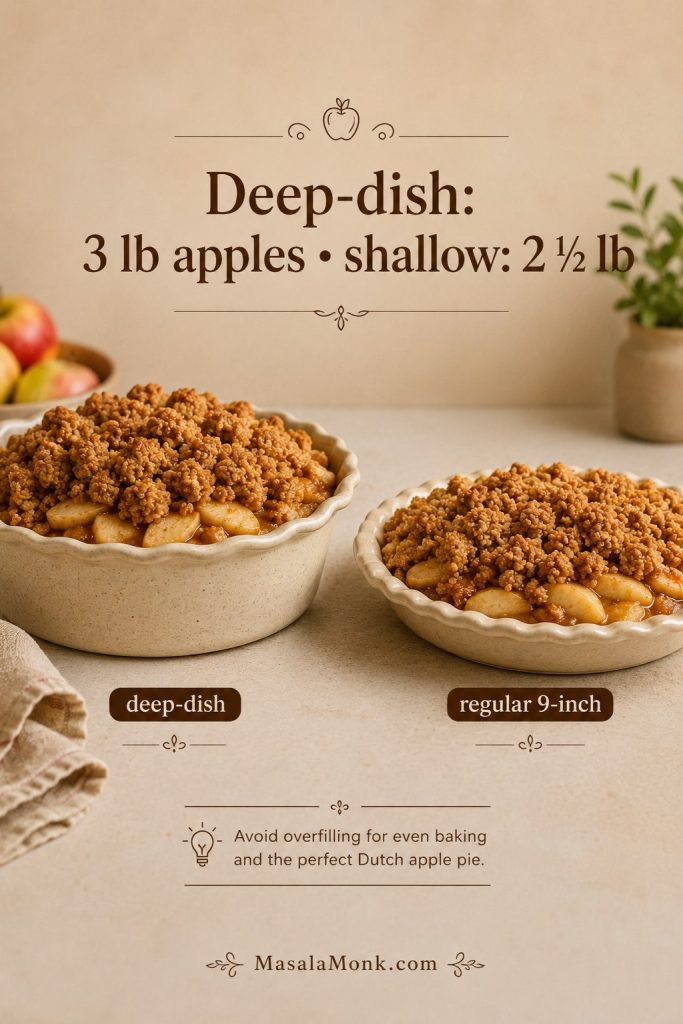
Using a Regular 9-Inch Pie Plate?

The amounts here are sized for a deep-dish 9-inch pie plate. For a shallow or standard-depth plate, use about 2 1/2 lb / 40 oz / 1.1 kg apples instead of the full 3 lb. Do not force every apple slice into the crust; an overfilled shallow pie can overflow, bake unevenly, and soften the bottom crust.

Pan-size cue: The apple amount depends on the depth of your plate. A deep-dish pan can take the full 3 pounds, but a shallow 9-inch plate needs less filling to bake cleanly.
Deep-dish pie plate and regular 9-inch pie plate compared with different apple filling amounts.
A deep-dish pie plate can handle more apples. In a shallow 9-inch plate, reduce the filling so the pie bakes evenly instead of overflowing or softening the bottom crust.

You can also use slightly less crumb topping if the pie is very full. Place the pie on a rimmed baking sheet and start checking for doneness around 50 minutes.

How to Make Dutch Apple Pie

Once the crust is cold, the apples are sliced evenly, and the crumbs hold together when squeezed, the assembly is straightforward. The main thing is to keep the crust chilled and give the pie enough time in the oven for the filling to bubble.

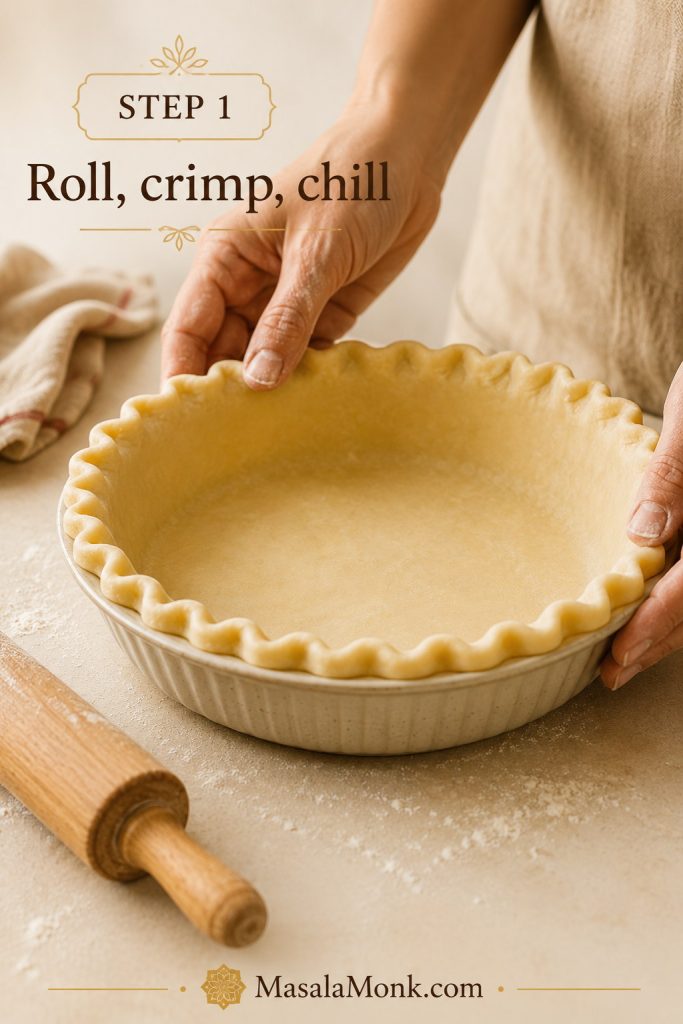
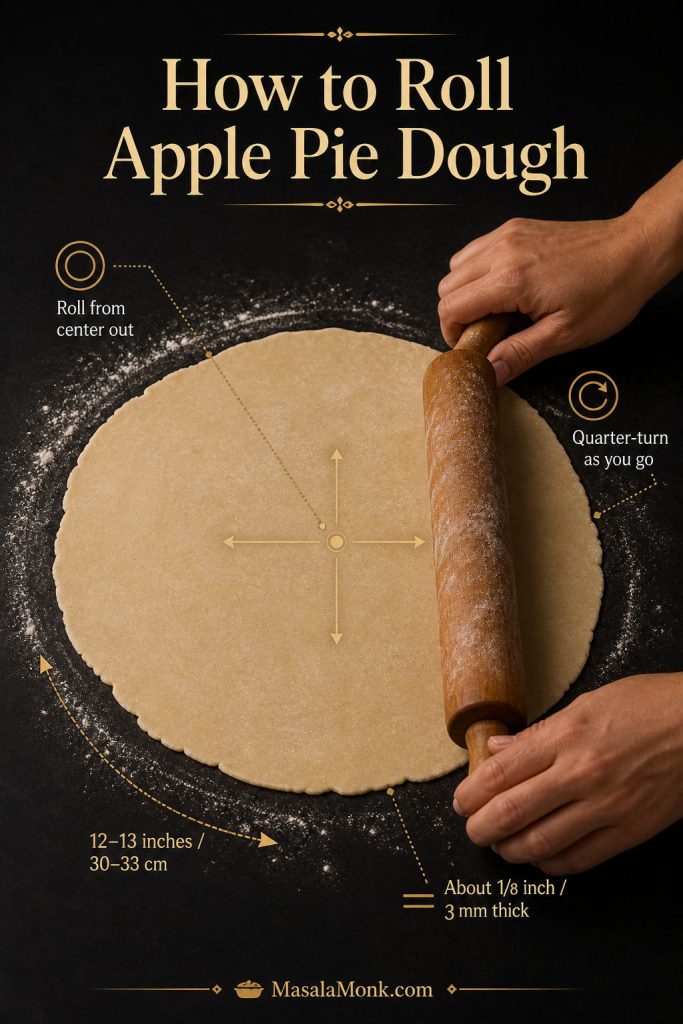
Step 1: Roll and Chill the Crust

Roll one pie crust into a 12-inch circle and fit it into a 9-inch deep-dish pie plate. Trim and crimp the edges, then chill the crust while you prepare the apples and crumb topping.

Chilling gives the bottom crust a better chance to set before the apple juices release fully.

Step 1 cue: Start with the crust cold and shaped before you deal with the filling. That gives the dough structure before the apples release moisture.
Hands crimping an unbaked pie crust in a deep-dish pie plate for Dutch apple pie.
A cold, crimped crust gives the pie a stronger base before the apples release moisture and the crumb topping begins to brown.

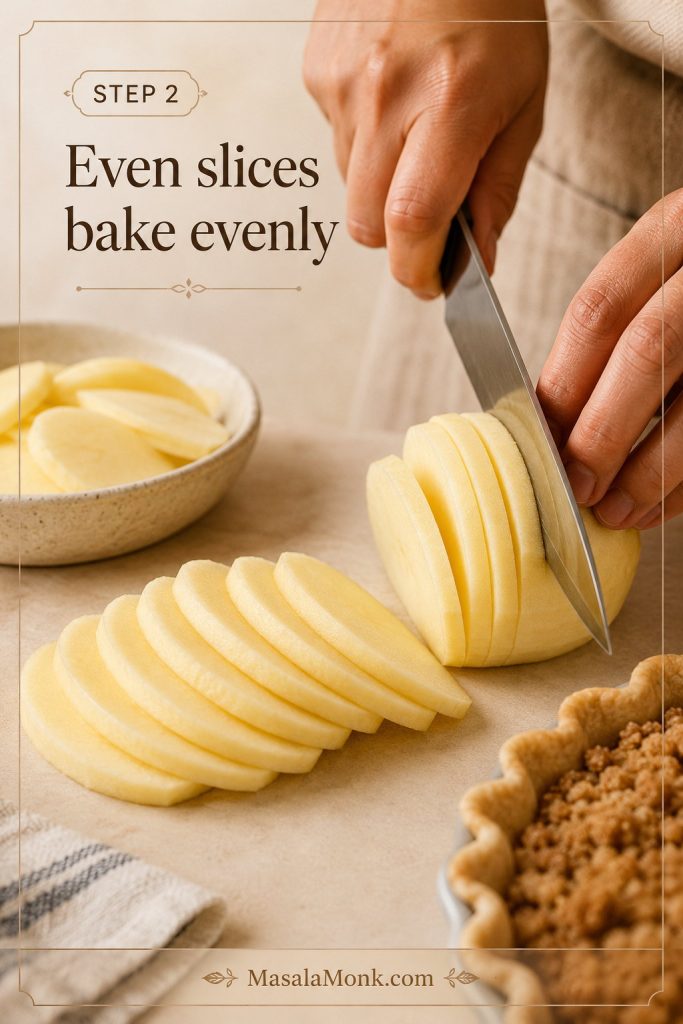
Step 2: Peel, Core, and Slice the Apples

Peel and core the apples, then slice them about 1/4 inch / 6 mm thick. Keep the slices as even as possible so they soften at the same rate.

Step 2 cue: Even slicing is more important than perfect-looking slices. When the apple pieces are similar in thickness, they soften together instead of baking unevenly.
Peeled apples being sliced evenly with a knife for Dutch apple pie filling.
Even apple slices soften at the same pace. As a result, the filling bakes more evenly and avoids the mix of mushy pieces and underbaked chunks.

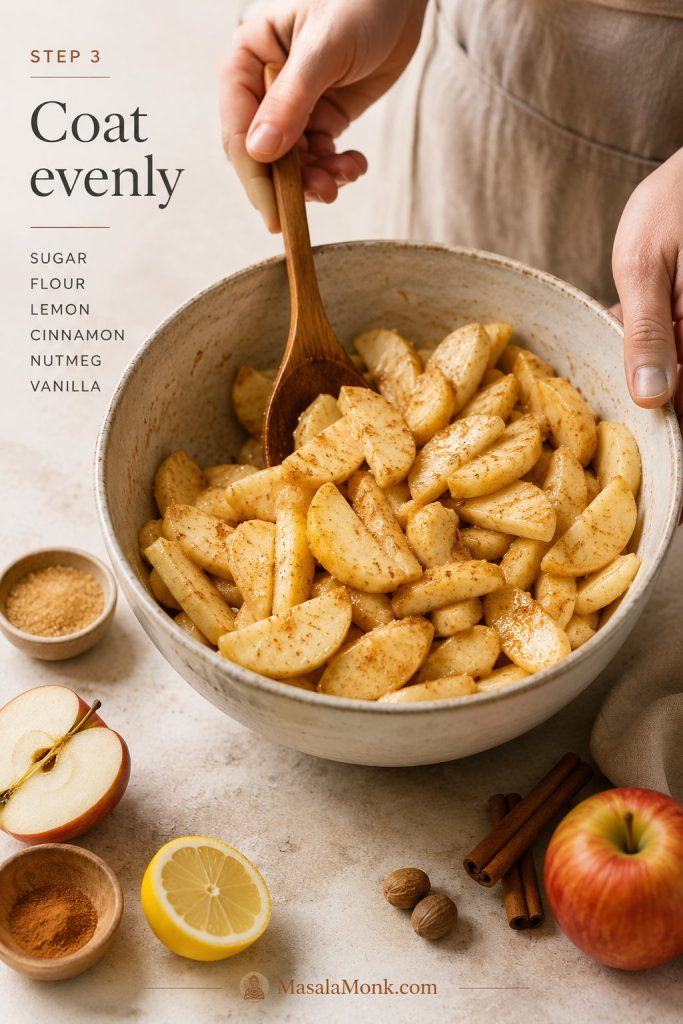
Step 3: Toss the Apple Filling

In a large bowl, toss the sliced apples with granulated sugar, brown sugar, flour, lemon juice, cinnamon, nutmeg, salt, and vanilla. Let the mixture sit for 10 minutes while you make the topping.

Step 3 cue: Coat the slices evenly before they go into the crust. Flour, sugar, lemon, and spice need to reach the apples throughout the bowl, not sit in dry patches.
Apple slices tossed in a bowl with sugar, flour, lemon, cinnamon, nutmeg, salt, and vanilla.
Even coating matters because the flour cannot thicken the apple juices properly if it stays in dry patches at the bottom of the bowl.

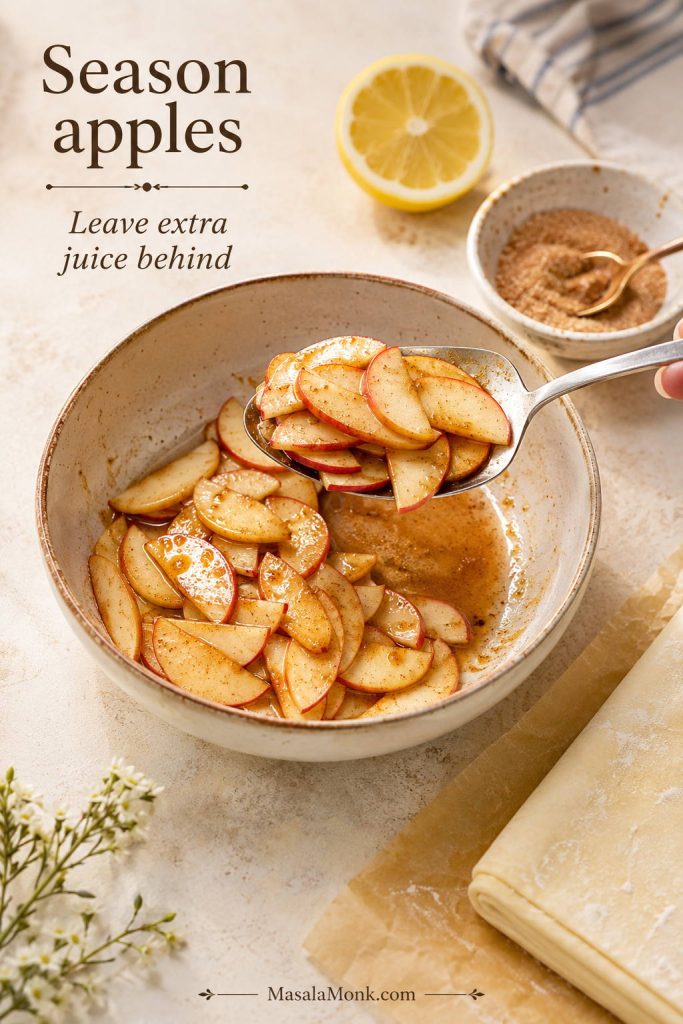
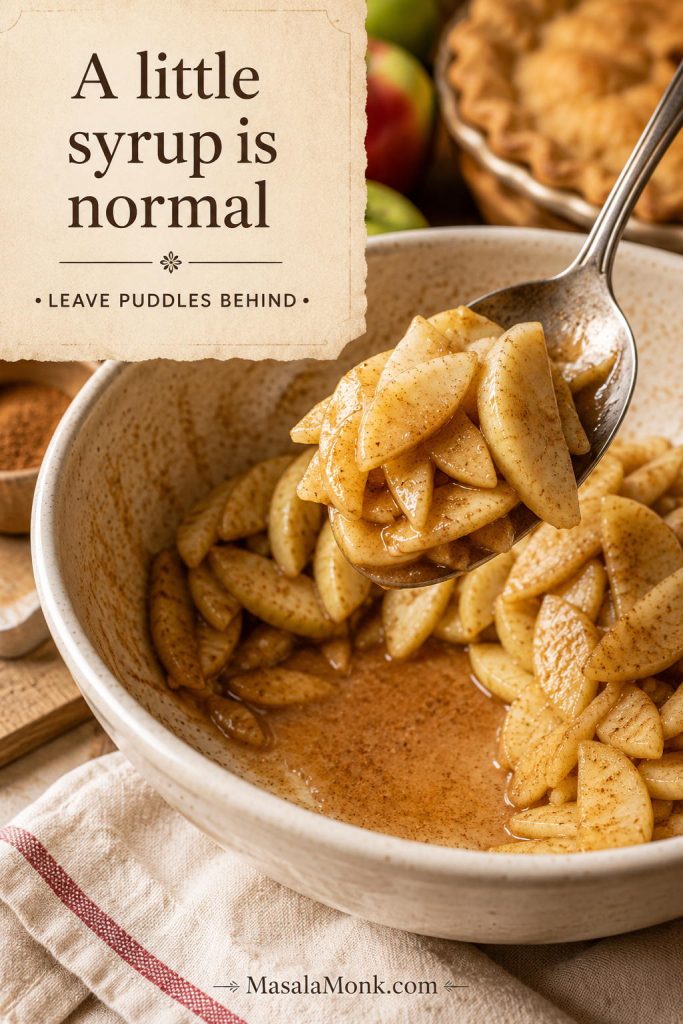
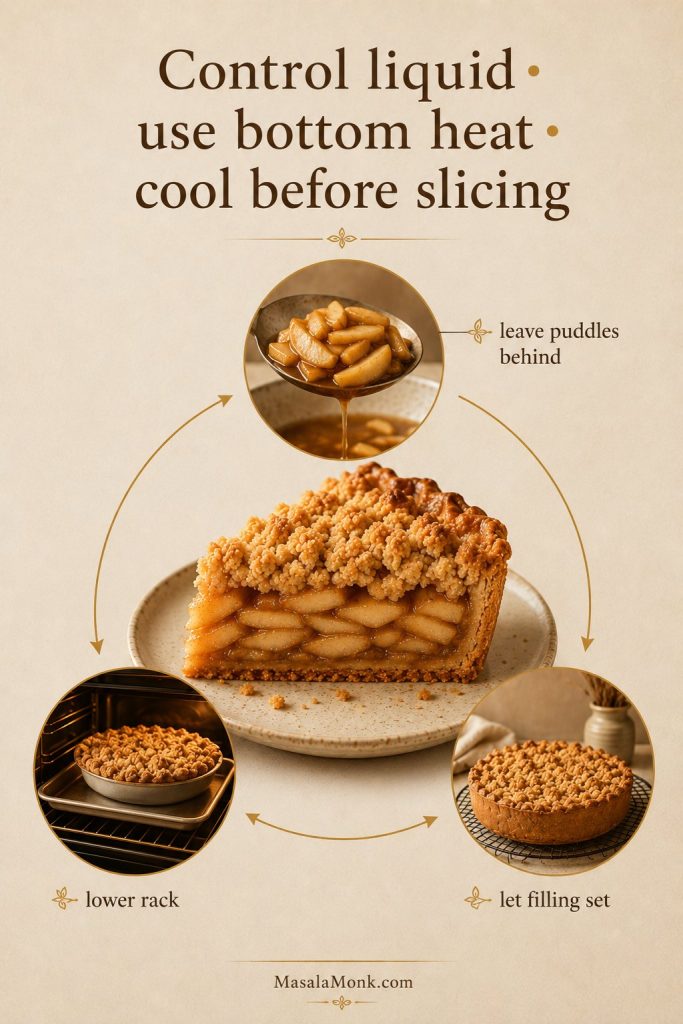
That short rest lets the sugar begin drawing moisture from the apples. A little syrup in the bottom of the bowl is normal; if the slices are sitting in a visible puddle, lift the apples into the crust and leave most of that liquid behind.

Liquid control cue: After the apples rest, some syrup is normal. When you see a real puddle, spoon the apples into the crust and leave the extra liquid behind.
Spoon lifting spiced apple slices from a bowl with syrup pooled at the bottom.
This is the moment to protect the crust: spoon in the apples, not the full syrup at the bottom of the bowl.

This liquid-control step is also one of the easiest ways to avoid a soft crust; for the full prevention list, see how to keep Dutch apple pie from getting soggy.

Step 4: Make the Crumb Topping

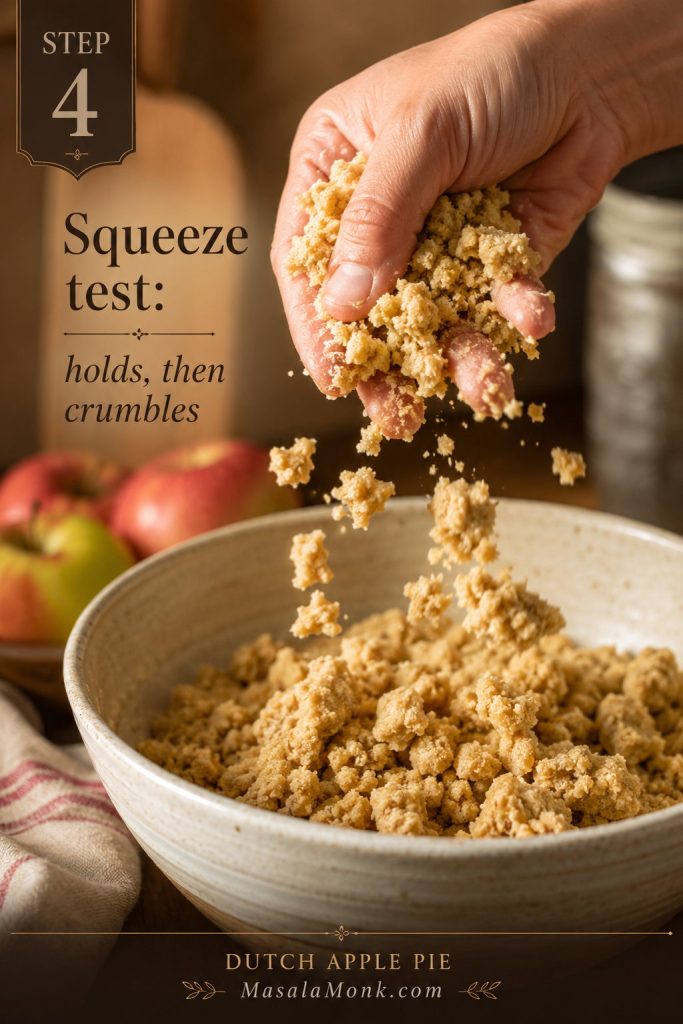
Stir flour, brown sugar, granulated sugar, cinnamon, and salt in a bowl. Add melted, slightly cooled butter and mix until the topping forms chunky crumbs. When squeezed in your hand, it should hold together, then break apart easily.

Step 4 cue: The squeeze test tells you if the topping is ready. It should hold together in your hand, then break apart into irregular brown-sugar crumbs over the apples.
Hand squeezing Dutch apple pie crumb topping to show clumps that hold together and crumble apart.
Use the squeeze test before topping the pie. The mixture should hold together in your hand, then break into chunky brown-sugar crumbs over the apples.

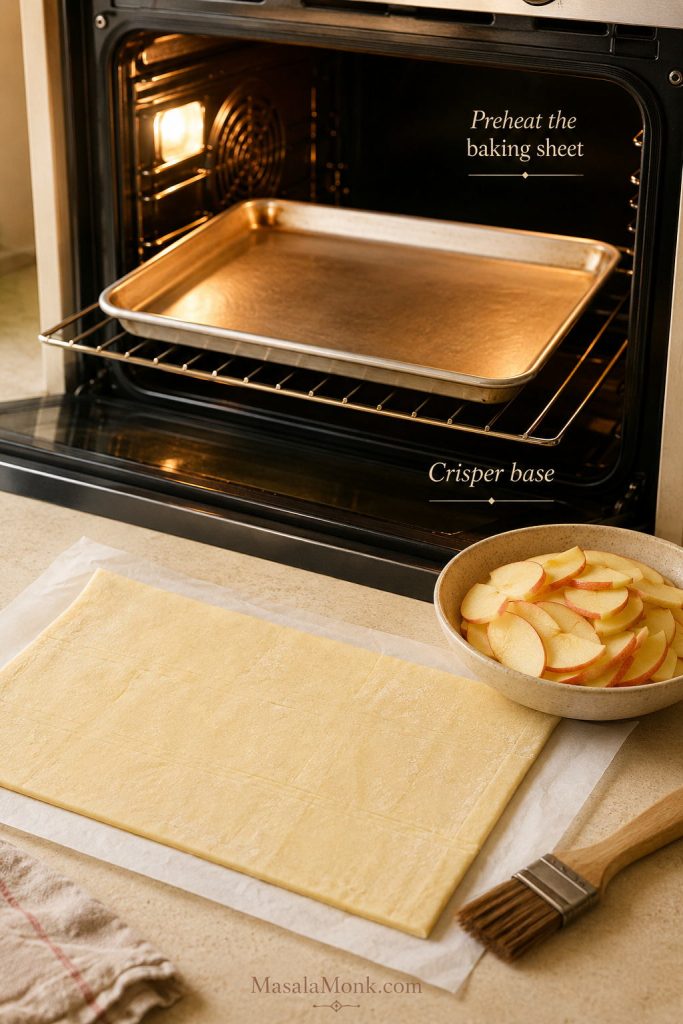
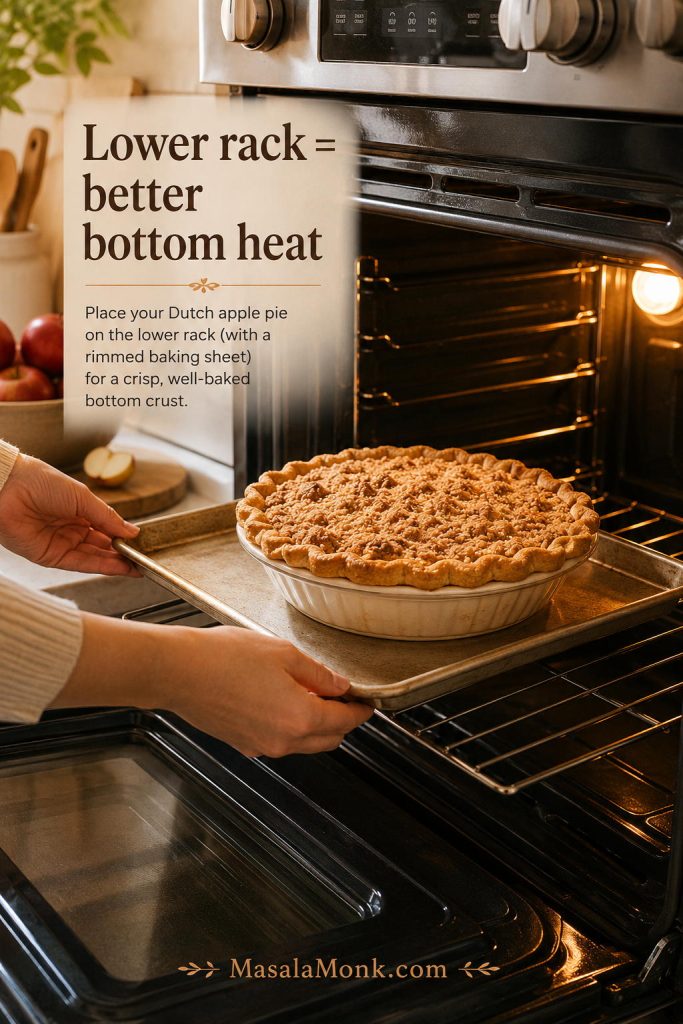
Now place a rack in the lower third of the oven and heat the oven to 400°F / 200°C. The lower rack gives the bottom crust more direct heat, while the crumbs still brown from above.

Oven rack cue: Use the lower rack for stronger bottom heat, and keep the pie on a rimmed baking sheet to catch bubbling juices.
Dutch apple pie on a rimmed baking sheet being placed on the lower oven rack.
Think of the rimmed sheet as support and insurance: it steadies the pie, catches drips, and lets the bottom crust get stronger heat.

Step 5: Fill the Pie

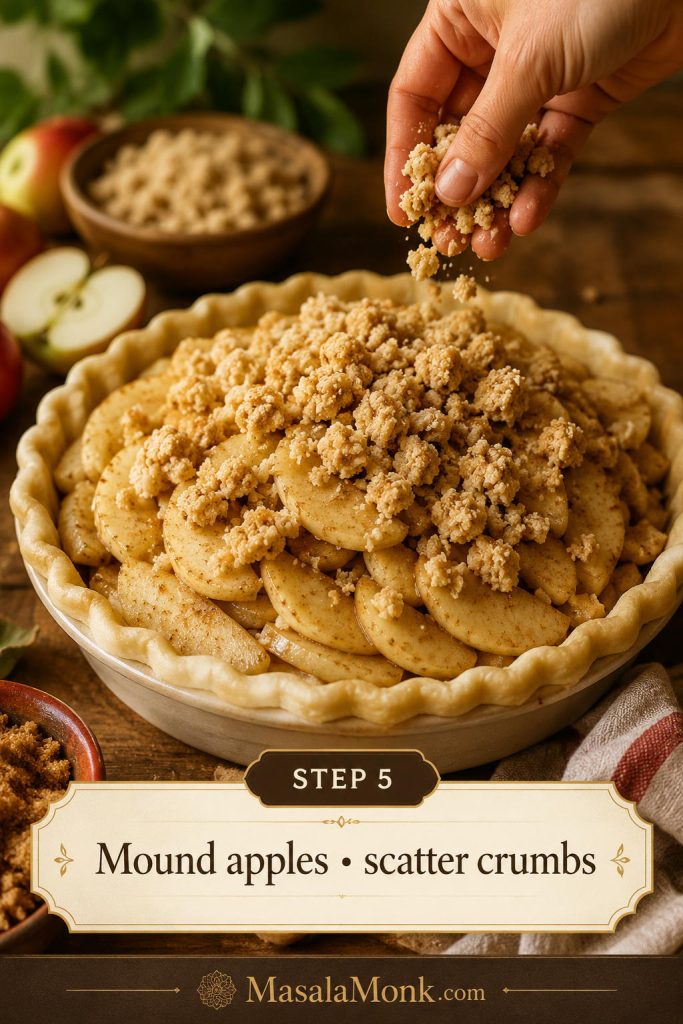
Spoon the apples into the chilled crust, mounding them slightly in the center. Do not worry if the apples sit a little high before baking; they settle as they soften. Scatter the crumb topping over the apples and press it just lightly enough to stay in place without compacting it.

Assembly cue: A slight apple mound is fine before baking because the slices settle in the oven. Scatter the crumbs gently so the topping stays textured instead of packed flat.
Dutch apple pie crust filled with mounded apple slices while crumb topping is scattered over the top.
Mound the apples gently, then scatter the crumbs without pressing hard; that way, the filling can settle while the topping keeps its texture.

Step 6: Bake Hot, Then Lower the Heat

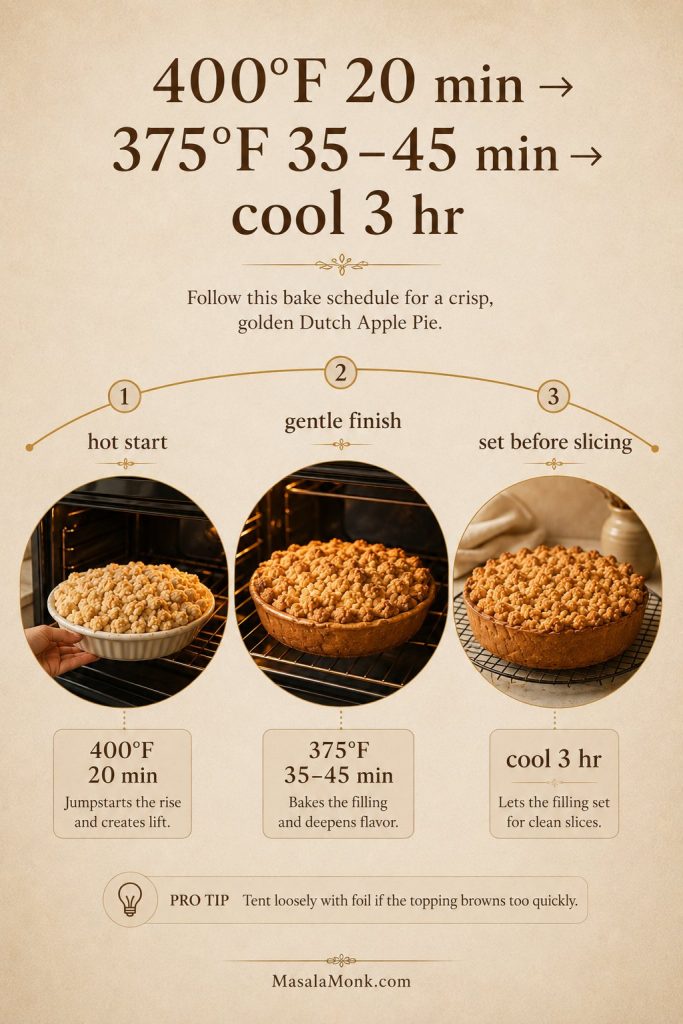
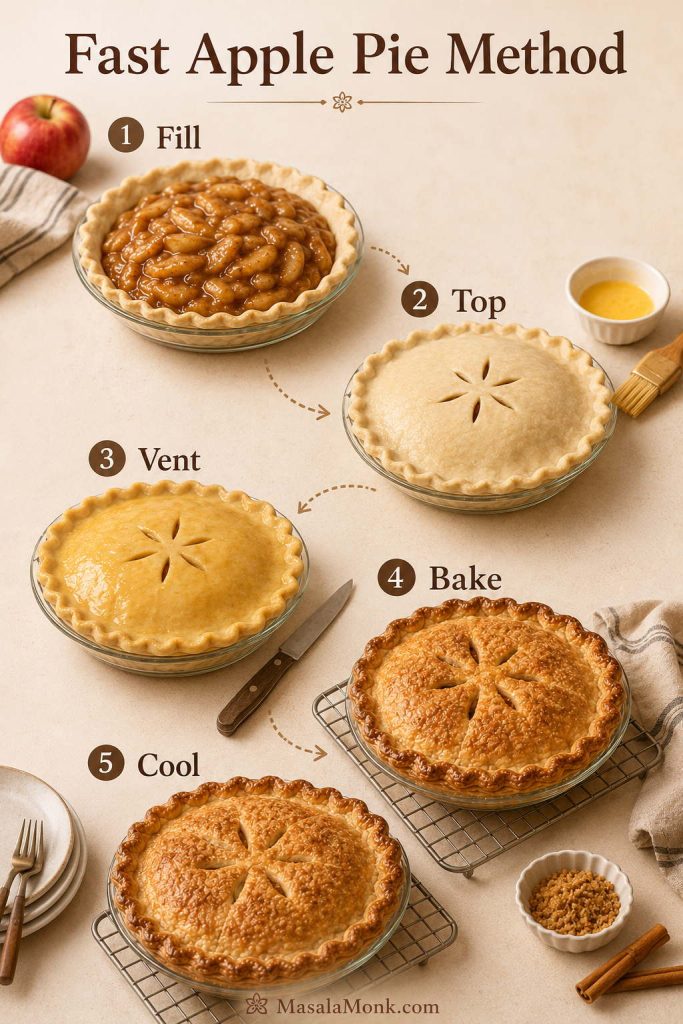
Place the assembled pie on a rimmed baking sheet and bake at 400°F / 200°C for 20 minutes. Without removing the pie, reduce the oven temperature to 375°F / 190°C and bake for 35–45 minutes more.

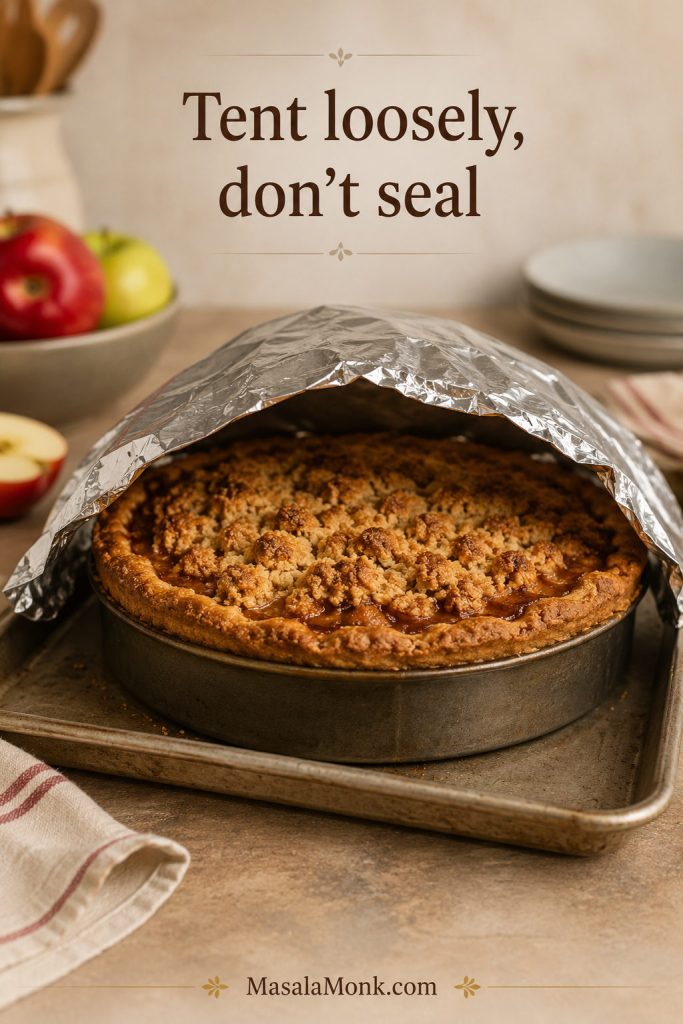
If the crumbs or crust edges brown too quickly, usually after the first 30–35 minutes, tent the pie loosely with foil. Do not seal it tightly, or trapped steam can soften the top.

Foil cue: Use foil as a shield, not a lid. A loose tent protects the crumbs and crust edge without sealing in steam.
Dutch apple pie on a baking sheet with foil loosely tented over the browned crumb topping.
The foil should hover over the pie, protecting the top while still letting steam escape.

Not sure whether the pie is fully baked? Use the bake time and doneness cues before pulling it from the oven.

Step 7: Cool Before Slicing

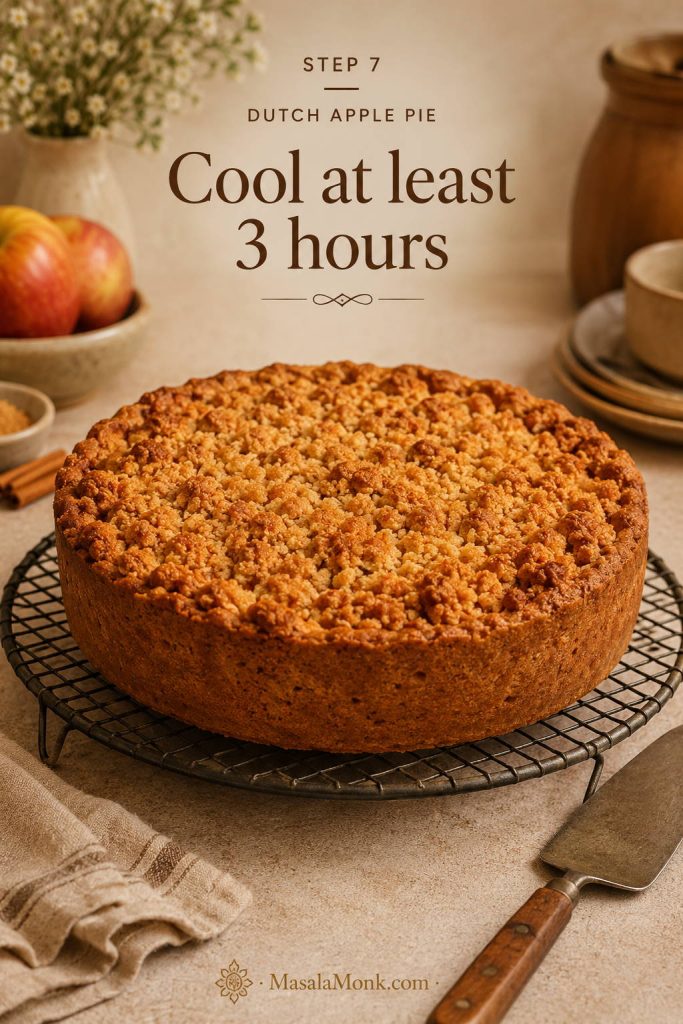
Cool the pie for at least 3 hours before slicing. As the pie cools, the filling keeps thickening. The pie can be warm when served, but not straight-from-the-oven hot if you want clean slices.

Cooling cue: When the pie comes out of the oven, the filling is still setting. Give it the cooling window so the apple layer thickens before you cut into it.
Finished Dutch apple pie cooling on a wire rack with golden crumb topping and an intact crust.
Treat cooling as part of the recipe; this is when the filling becomes sliceable.

How Long to Bake Dutch Apple Pie

A deep-dish pie made with raw sliced apples usually needs 55–65 minutes total bake time.

Two-Temperature Bake Schedule

Bake-time cue: The two-temperature bake has a purpose: strong heat first for the crust, then gentler heat so the apples can finish without scorching the crumb topping.
Dutch apple pie bake time guide showing 400°F for 20 minutes, 375°F for 35 to 45 minutes, and cooling for 3 hours.
The two-temperature bake gives the pie a better balance: strong heat first for the crust, then gentler heat so the apples finish without scorching the crumbs.
Stage Temperature Time What It Does
Hot start 400°F / 200°C 20 minutes Gives the crust a head start and begins browning
Gentle finish 375°F / 190°C 35–45 minutes Softens apples and thickens filling without burning topping
Cooling Room temperature At least 3 hours Lets the filling settle for cleaner slices

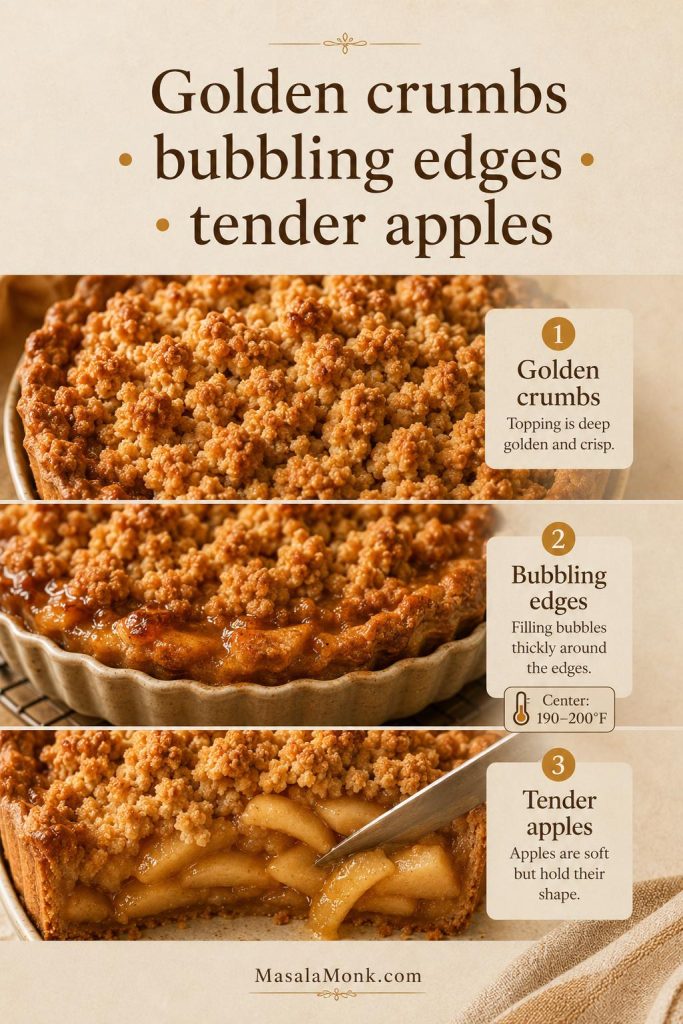
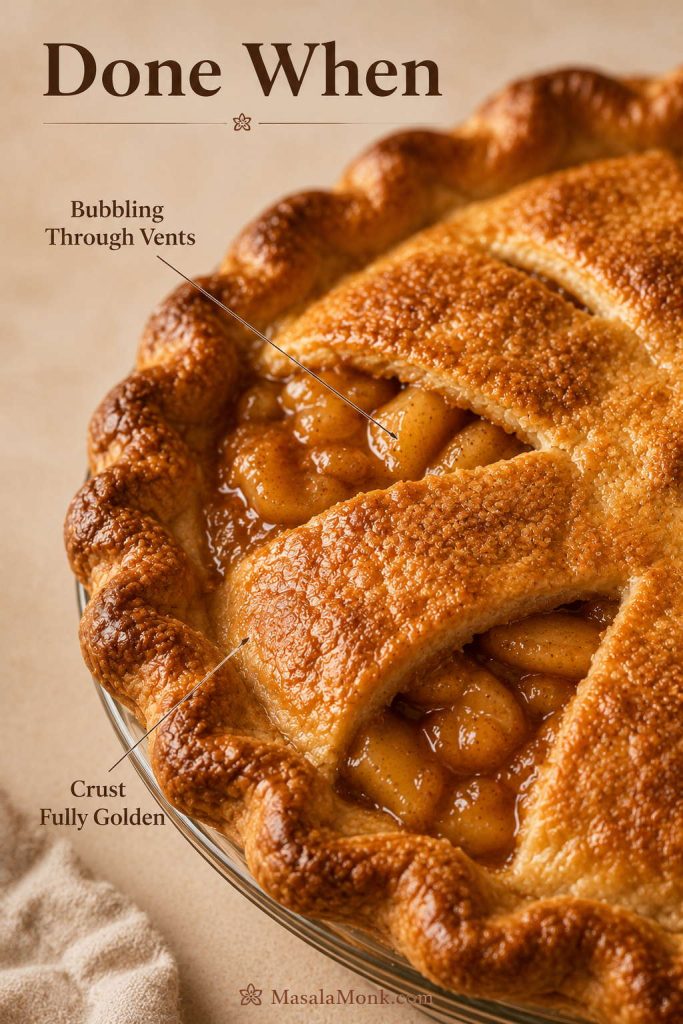
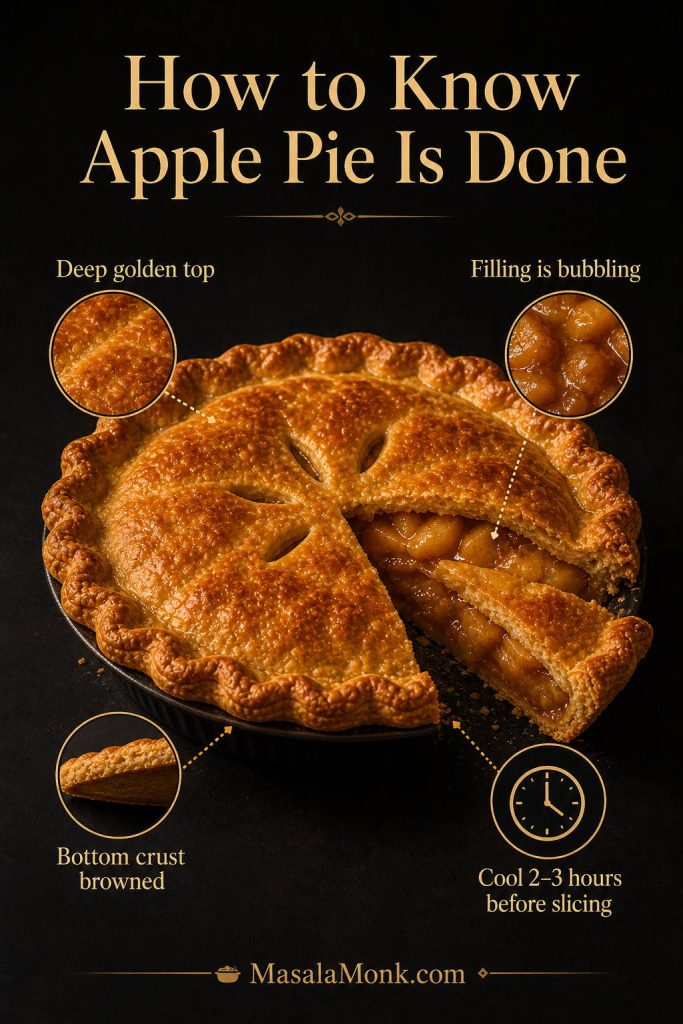
Do not pull the pie just because the crumbs look golden. The filling also needs to bubble and the apples need to feel tender; otherwise, the crust and topping may look done while the center still needs time.

Look for golden brown crumbs, bubbling juices around the edges, and apples that feel tender when pierced with a thin knife. An instant-read thermometer is optional, but the center of the filling should be about 190–200°F / 88–93°C.

Doneness Cues Beyond Color

Doneness cue: Golden crumbs are only part of the test. Look for bubbling edges and tender apples before pulling the pie from the oven.
Dutch apple pie doneness guide showing golden crumbs, bubbling edges, tender apples, and a center temperature of 190 to 200°F.
Color is only the first clue; bubbling edges and tender apples confirm the filling has had enough time to thicken.

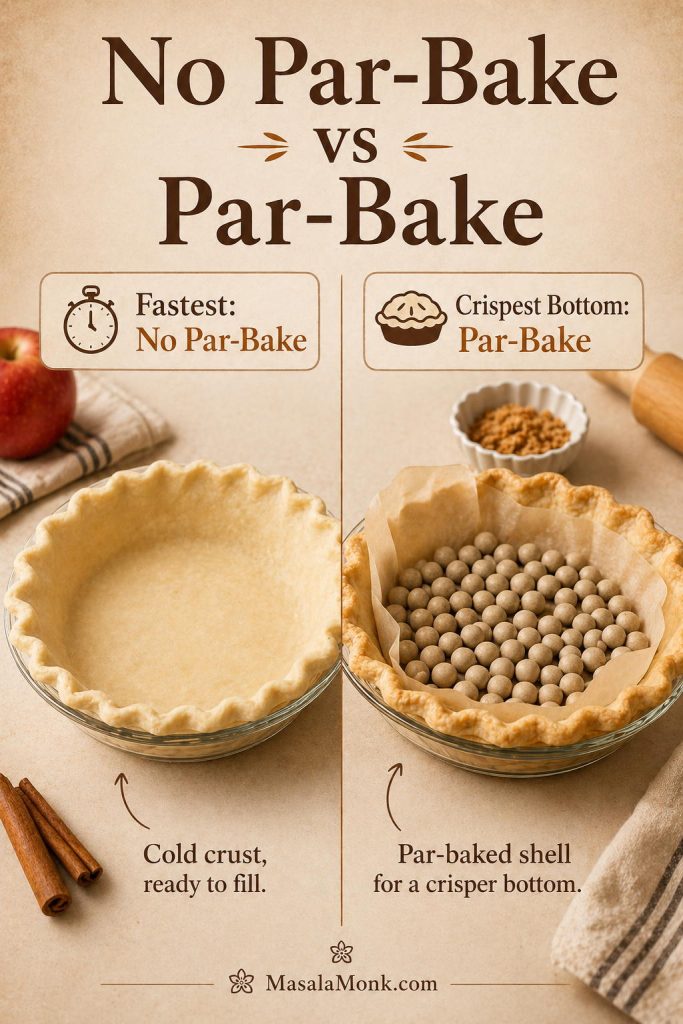
Should You Par-Bake the Crust for Dutch Apple Pie?

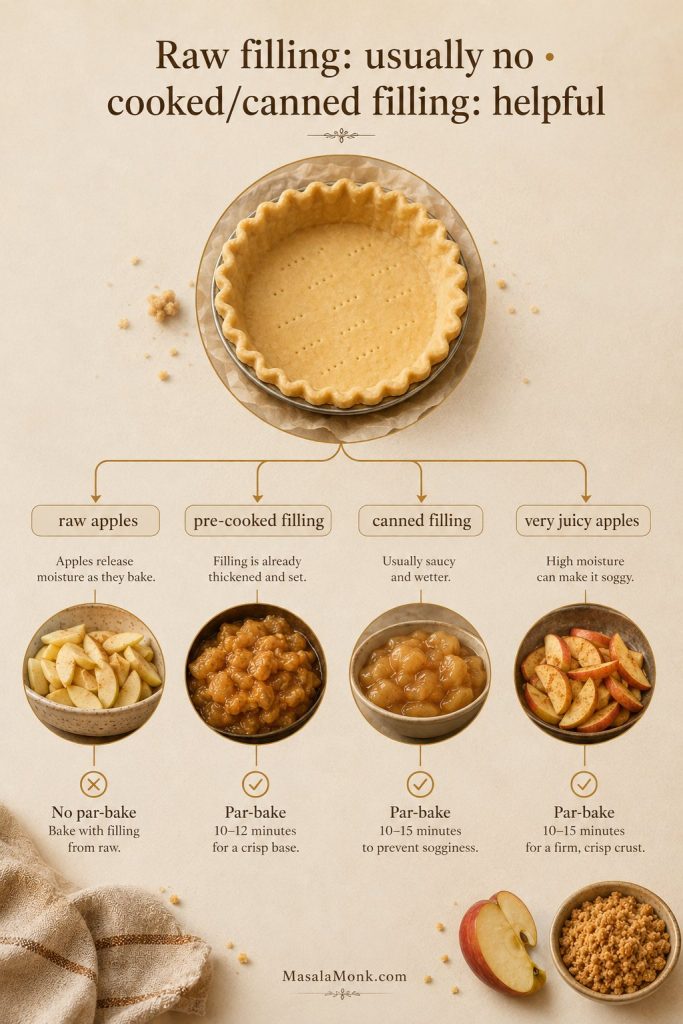
You can usually skip par-baking for this raw-apple Dutch apple pie recipe as long as the crust gets three protections: a cold start, a lower oven rack, and enough total bake time. The apples need nearly an hour in the oven anyway, so the bottom crust has time to cook through.

Par-baking becomes more helpful when the filling is already cooked, canned, or unusually wet. In those cases, the filling may not need as much oven time after assembly, so the crust benefits from a head start.

Par-bake cue: Par-baking is not a blanket rule for this pie. Raw apples need a long bake anyway, while cooked, canned, or very wet fillings may need extra crust protection.
Par-bake decision guide showing raw apples usually do not need par-baking, while pre-cooked, canned, or very juicy fillings may benefit from it.
Par-baking depends on the filling. Raw apples need the long bake, while pre-cooked or canned filling may benefit from giving the crust a head start.
Situation Par-Bake? Why
Raw apple filling, this recipe Usually no The long bake gives the crust enough time to cook
Pre-cooked apple filling Helpful The filling is already soft, so the assembled pie may bake for less time
Canned apple pie filling Helpful Canned filling is soft, sweet, and already thickened
Very juicy apples Optional Par-baking adds extra protection against a soft bottom crust
Glass pie plate More helpful Glass heats more slowly than metal
Metal pie plate Less necessary Metal conducts heat faster and helps the bottom crust brown

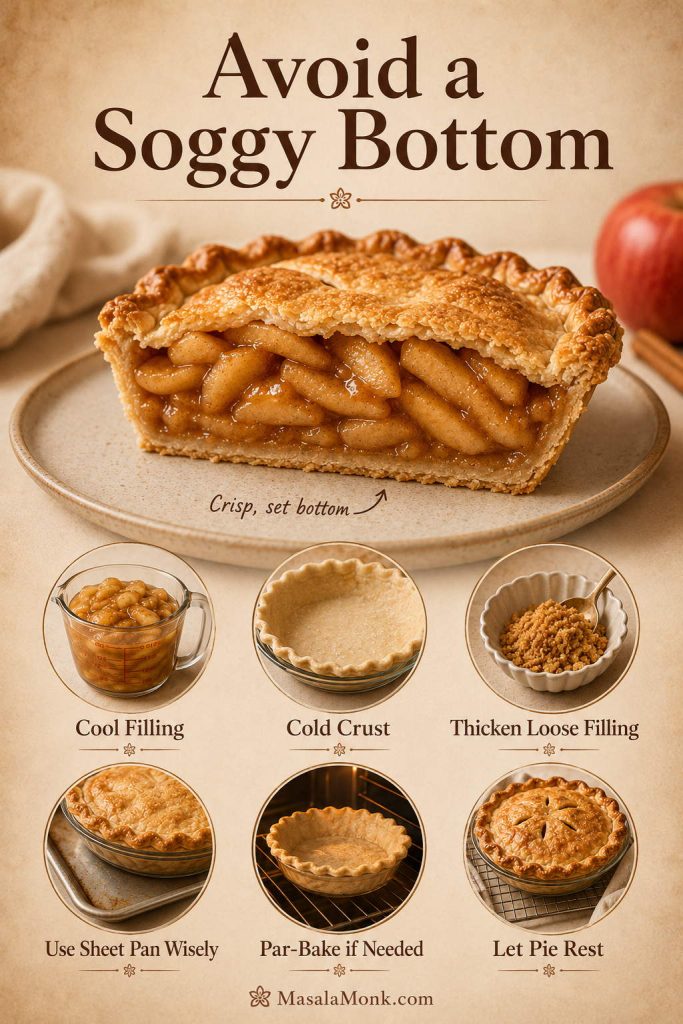
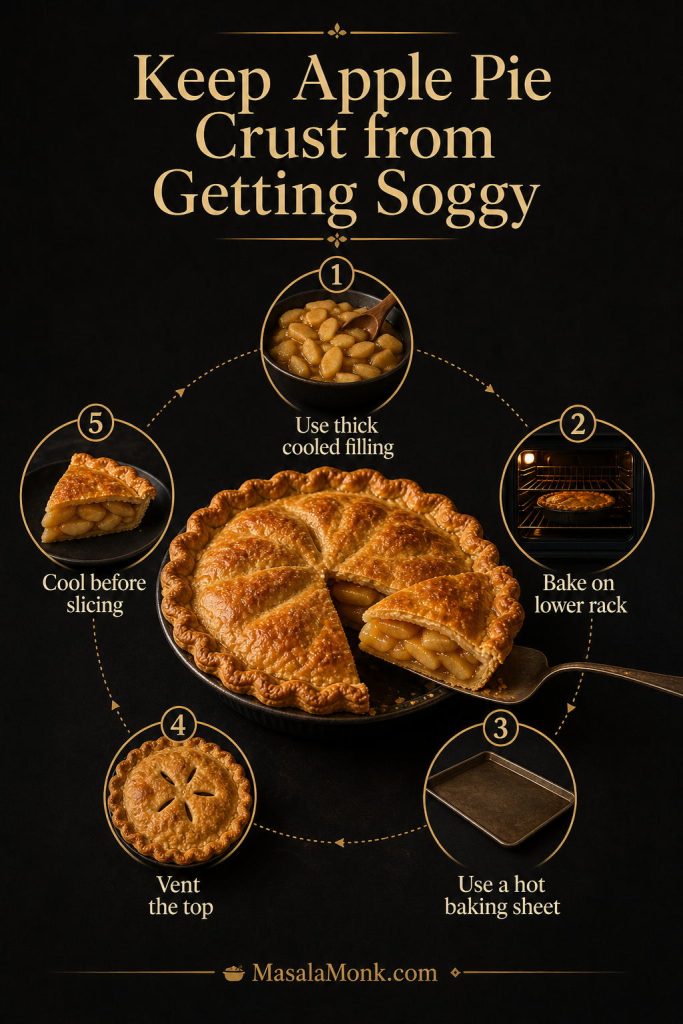
How to Keep Dutch Apple Pie from Getting Soggy

A soggy bottom usually comes from one of three places: too much loose apple juice, not enough heat under the crust, or slicing before the filling has settled. This style of pie is especially vulnerable because it has a juicy fruit filling and only one crust.

Three Causes to Control

Soggy-bottom cue: A soft bottom crust usually comes from too much loose apple juice, not enough heat under the pie, or slicing before the filling has set. Control those three points and the pie becomes easier to trust.
Soggy-bottom prevention board showing liquid control, lower oven rack baking, and cooling time for Dutch apple pie.
Use this as a quick pre-bake check: manage liquid first, then rely on lower-rack heat and cooling time.
  • Chill the crust before filling. Cold dough holds its structure better in the oven.
  • Choose apples with structure. Soft apples collapse quickly and release more liquid.
  • Do not pour in all pooled apple juice. Spoon in the apples, but leave excess liquid behind if the bowl is very wet.
  • Use enough thickener. Flour helps bind the juices as the pie bakes.
  • Bake on a lower rack. This gives the bottom crust more direct heat.
  • Use a rimmed baking sheet. It catches drips and keeps the pie stable.
  • Give the filling a full cooling window. Cutting too early makes even a well-baked pie look runny.
  • Do not cover while warm. Trapped steam softens the crumb layer and crust.

Optional Crust Barrier

For an extra barrier against fruit juices, King Arthur Baking suggests using a thin layer of “crust dust” on the bottom crust before adding fruit filling. It is optional, but useful if you often struggle with soggy pie bottoms. You can read their technique here: King Arthur Baking’s crust dust method.

Raw Apples vs Pre-Cooked Apple Filling

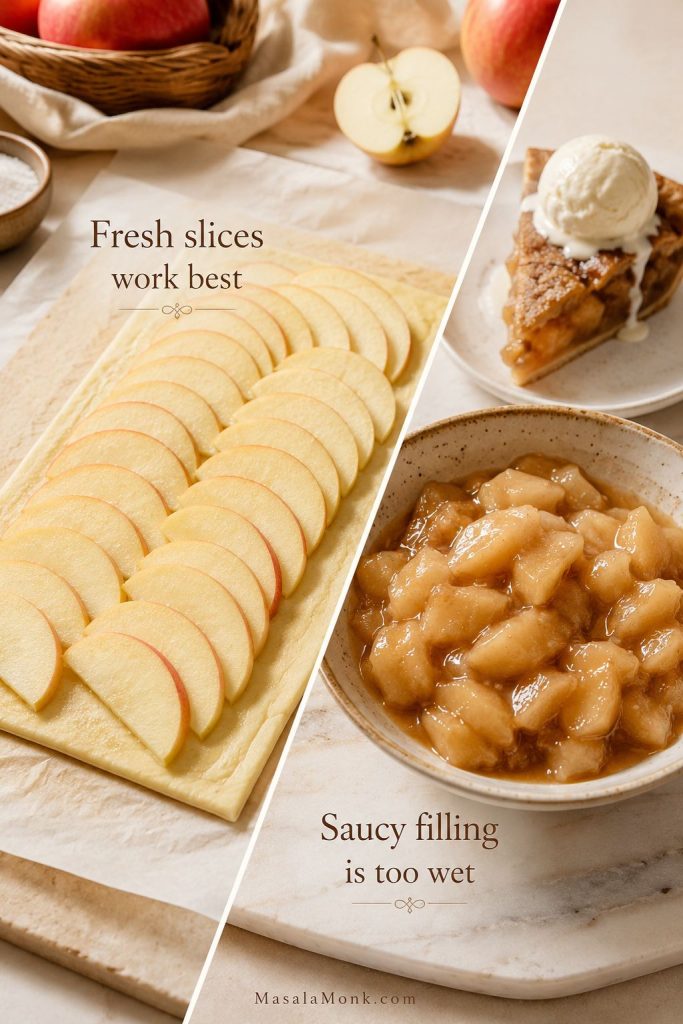
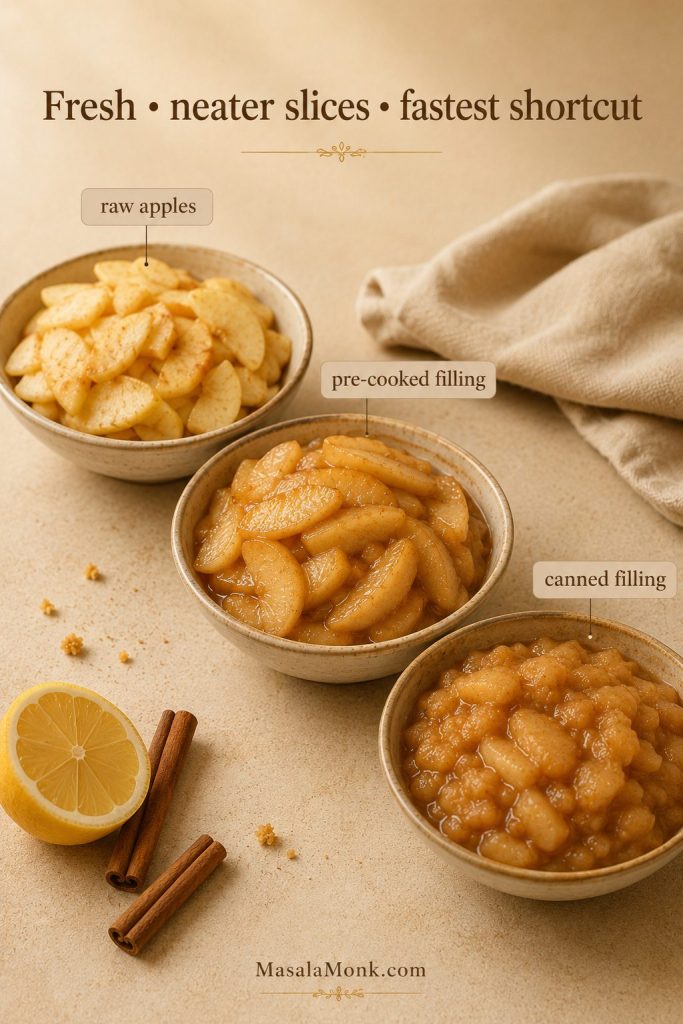
All three routes can work, but they give you different pies. Fresh apple slices taste brighter and more classic, pre-cooked filling slices more neatly, and canned filling is the fastest shortcut when you want the crumb-topped version with less prep.

Filling route cue: The filling route changes the final pie. Fresh slices taste brighter, cooked filling can slice more neatly, and canned apple pie filling is the fastest shortcut.
Three bowls comparing raw spiced apple slices, pre-cooked apple filling, and canned apple pie filling.
Choose fresh slices for brighter flavor, pre-cooked filling for neater pieces, or canned apple pie filling when time matters most.
Method Best For Tradeoff
Raw sliced apples Easiest classic pie More shrinkage and more juice management
Pre-cooked apple filling Neater slices, make-ahead baking, less gap under topping Extra step; filling must cool before going into crust
Canned apple pie filling Fastest shortcut Softer, sweeter, less fresh-tasting

I use raw apples here because the full 55–65 minute bake gives them enough time to soften while keeping the flavor fresher and less jammy. Even slices, enough thickener, and visible bubbling are the keys.

Pre-cooked filling is better when you want less shrinkage, fewer hollow gaps under the topping, or cleaner slices for a holiday table. It is also useful if you want to make the filling ahead. Just cool it completely before adding it to the crust; warm filling can melt the butter in the dough and make the bottom crust heavy.

If you want the make-ahead route, use cooled homemade filling from this apple pie filling recipe.

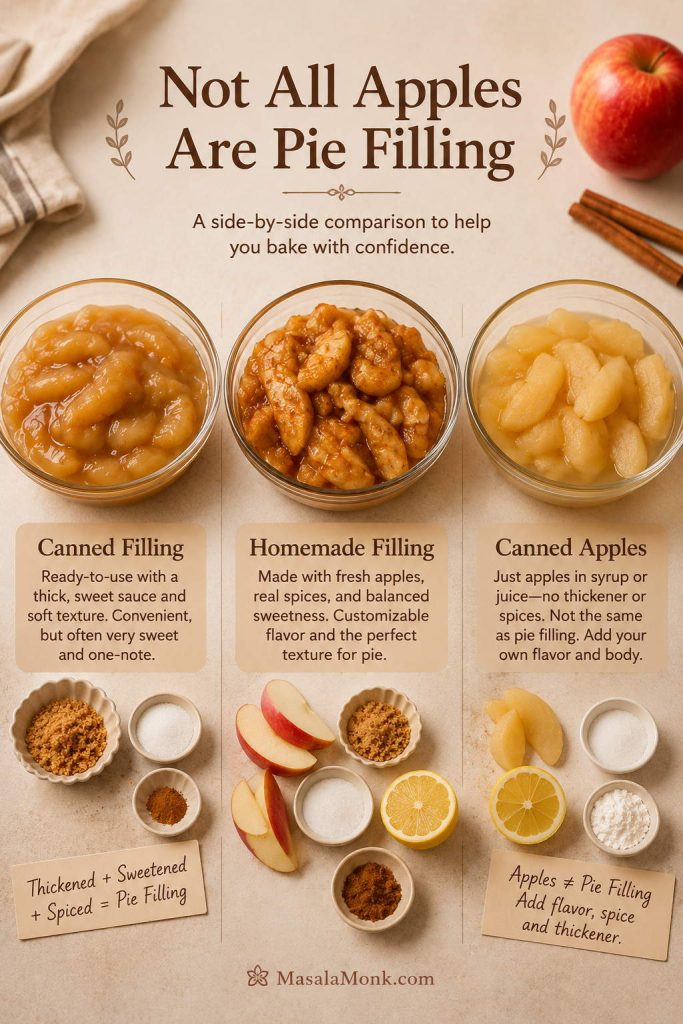
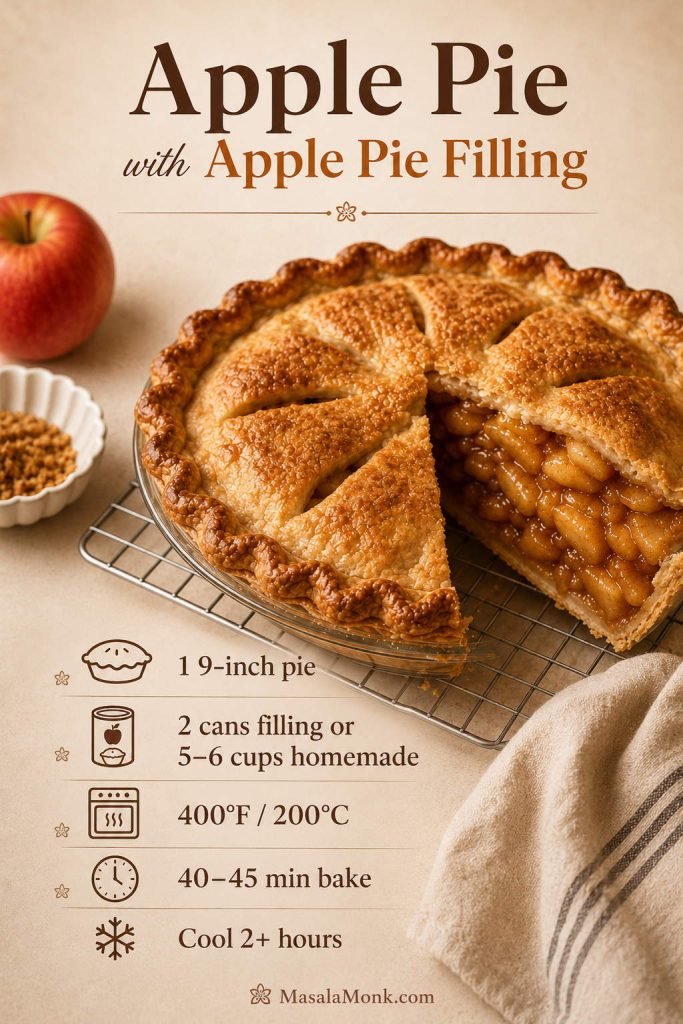
Dutch Apple Pie with Canned Apple Pie Filling

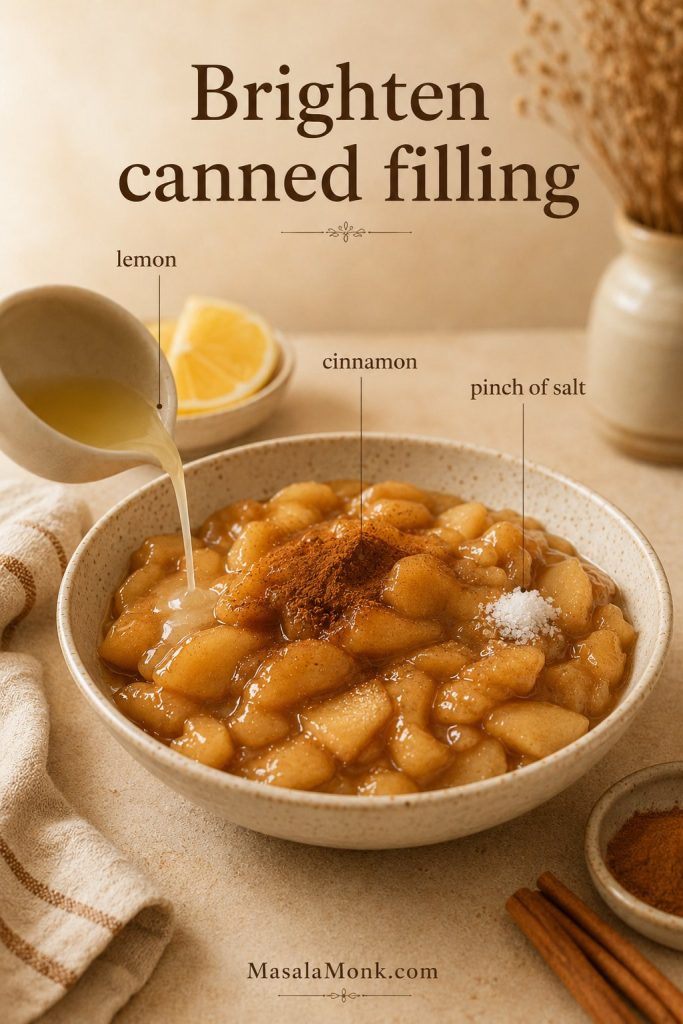
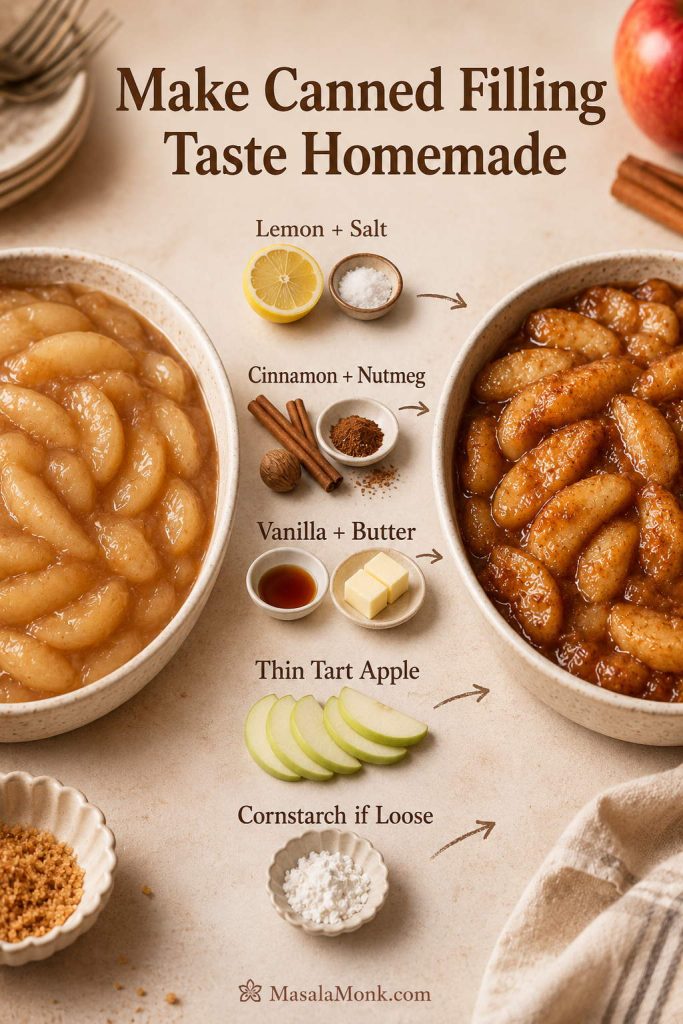
Canned apple pie filling works when you want the shortcut version, but it needs a lighter hand. Because it is already sweetened, softened, and thickened, skip the flour, reduce the sugar, and wake it up with lemon juice, cinnamon, and a small pinch of salt.

Shortcut cue: Canned filling is already soft, sweet, and thickened, so it needs balance more than more sugar. Lemon, cinnamon, and salt make the shortcut taste brighter.
Canned apple pie filling in a bowl with lemon juice, cinnamon, and a pinch of salt added.
Canned apple pie filling works better after a few small fixes. Lemon brightens it, cinnamon warms it, and a pinch of salt balances the sweetness.

If you are using canned filling because you need a faster pie, the par-bake section is worth checking before you assemble it.

How to Adjust Canned Apple Pie Filling

  • Use about 2 cans, 20–21 oz each, for one 9-inch pie.
  • Do not add the flour from the raw-apple filling.
  • Skip most or all of the added sugar in the apple layer.
  • Brighten the flavor with 1 tablespoon / 0.5 fl oz / 15 ml lemon juice.
  • Stir in 1/2 teaspoon cinnamon if the filling tastes flat.
  • Balance the sweetness with a small pinch of salt.
  • Use the same brown-sugar crumb topping listed above.
  • Consider par-baking the crust because canned filling needs less time in the oven.
  • If your pie plate is shallow, do not force in both full cans; leave a little behind rather than overfilling.

Bake Time for the Shortcut Version

A canned-filling version may bake closer to 45–55 minutes, depending on the crust, pan, and whether the filling went in cold or at room temperature. Bake until the crumb topping is golden and the filling bubbles. Cool fully before slicing, because canned filling can look thick while hot but loosen once cut.

For a full shortcut pie, see this apple pie with apple pie filling.

If you have extra filling after baking, it can also go into easy desserts like this apple cinnamon roll bake with apple pie filling.

How to Serve Dutch Apple Pie: Warm, Room Temperature, or Reheated

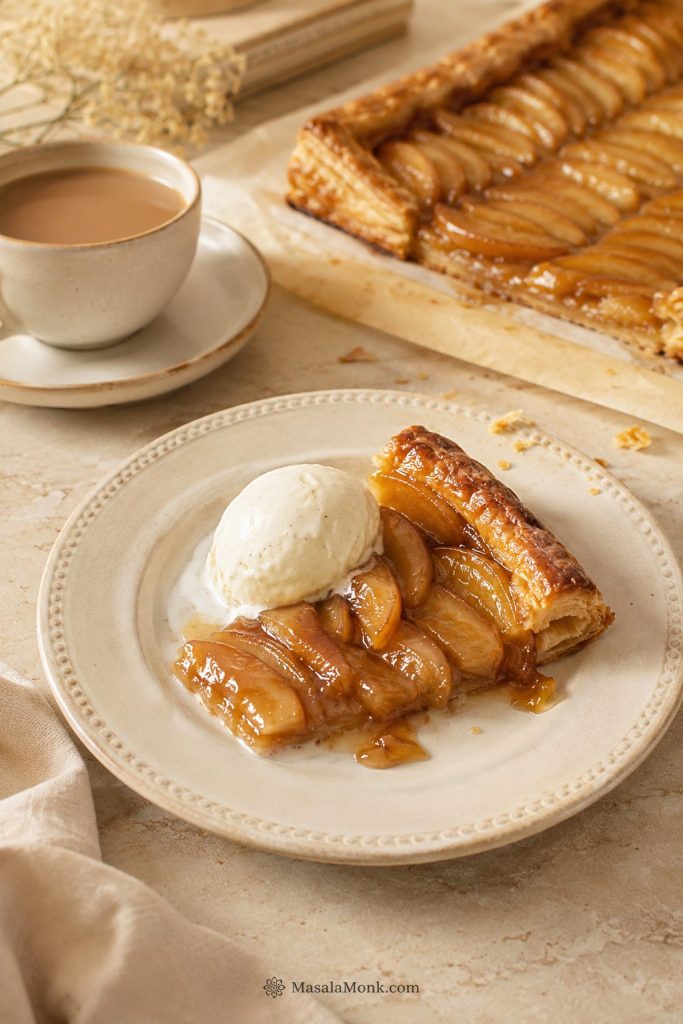
Dutch apple pie is best after it has cooled long enough to slice cleanly. Serve it at room temperature, gently warmed, or with vanilla ice cream if you want the contrast of warm apples and cold cream. A small drizzle of caramel works too, but the pie is already sweet enough that it does not need much.

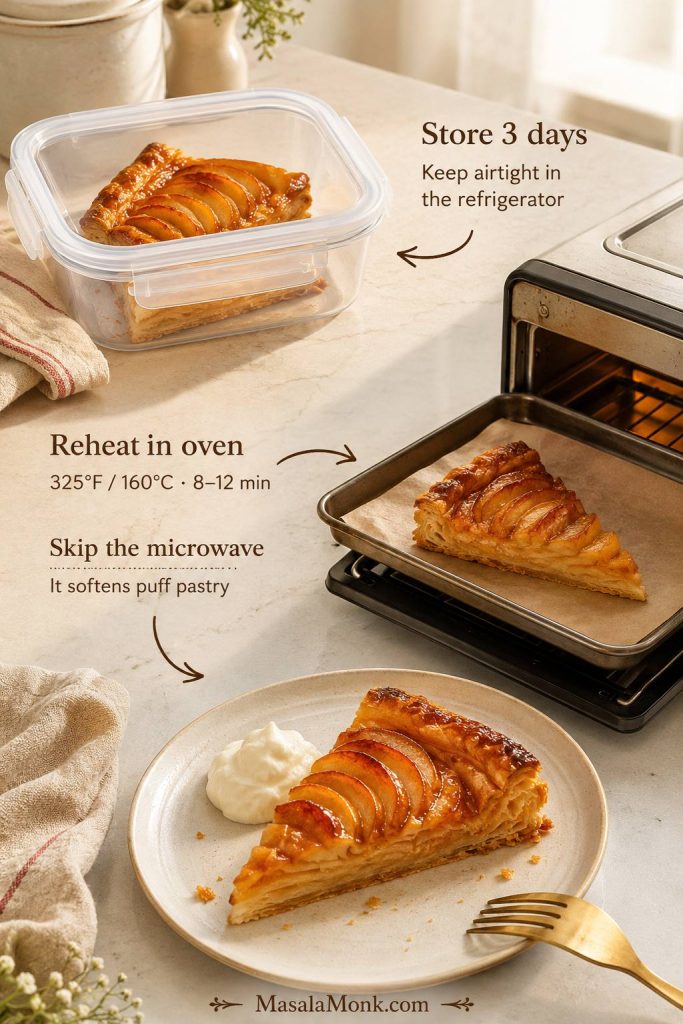
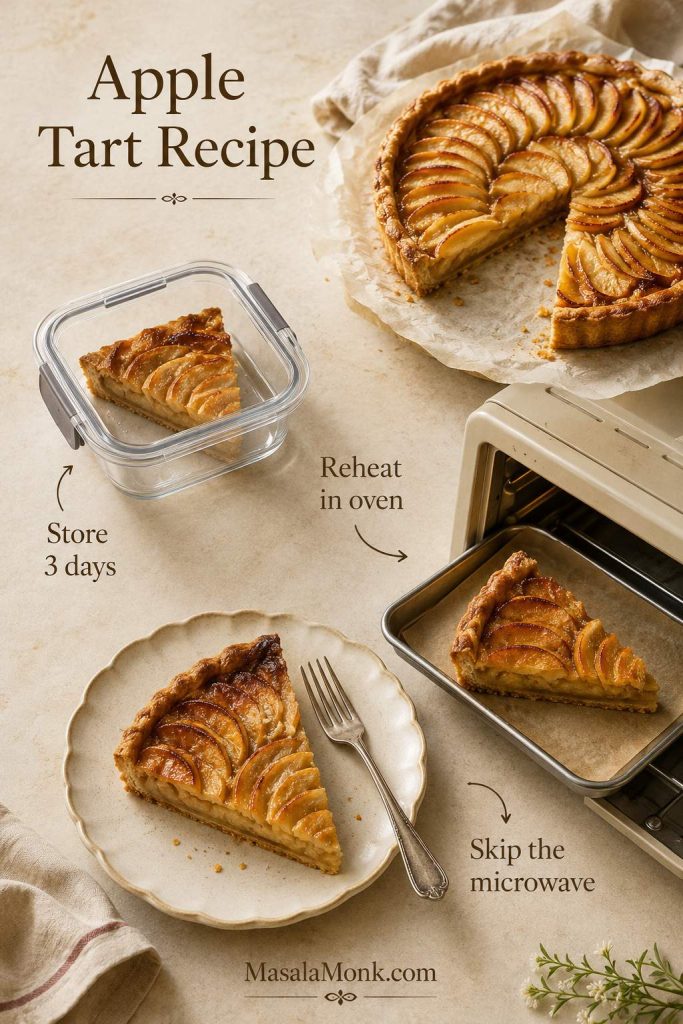
For the cleanest slices, cool the pie completely first, then rewarm individual pieces in a 325°F / 160°C oven for 10–15 minutes before serving.

Planning this for Thanksgiving or a holiday table? The make-ahead and reheating section gives the cleanest workflow.

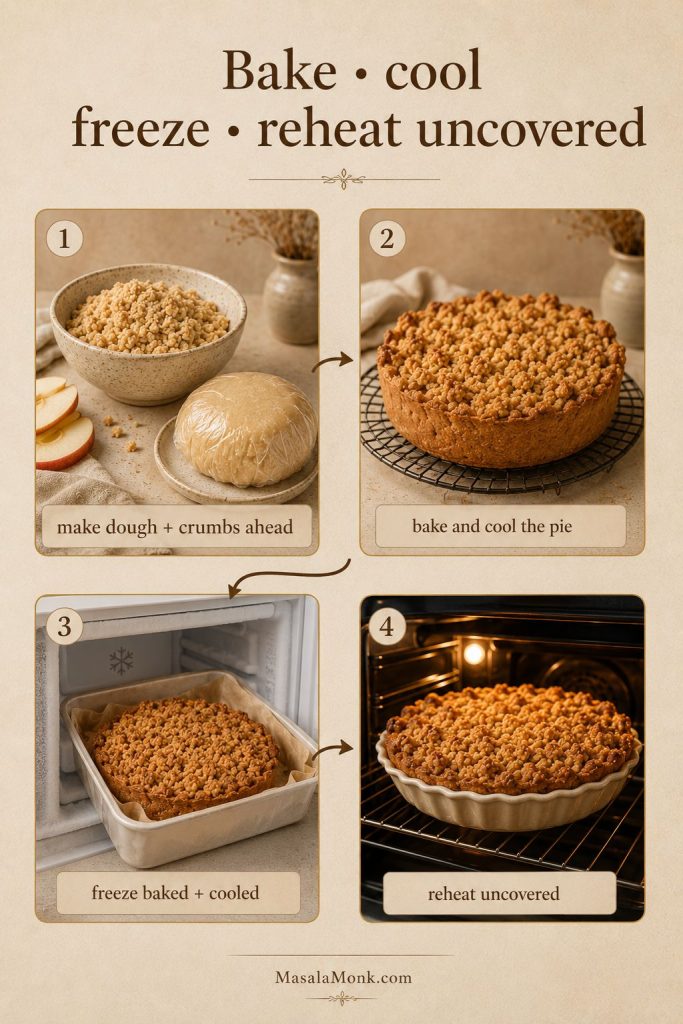
Make Ahead, Storage, Freezing, and Reheating

Dutch apple pie is best the day it is baked, after it has cooled enough to slice cleanly. You can still make several parts ahead, which is helpful for Thanksgiving, fall dinners, and holiday baking days.

Make-ahead cue: For a holiday workflow, do not wrap or freeze the pie while it is hot. Bake it, cool it fully, then freeze or reheat uncovered when needed.
Make-ahead workflow showing pie dough and crumbs prepared ahead, baked pie cooling, frozen pie storage, and reheating uncovered.
For the smoothest holiday workflow, prepare the dough and crumbs early, then bake the pie fully before freezing or reheating.

What to Prep Ahead

Part Make-Ahead / Storage What Matters
Pie dough Refrigerate 2–3 days or freeze up to 3 months Let it soften slightly before rolling
Crumb topping Refrigerate up to 2 days Break into crumbs again before using
Raw apple filling Best made the same day Apples release liquid as they sit
Cooked apple filling Refrigerate 2–3 days Cool completely before filling crust
Baked pie Room temperature up to 2 days; refrigerate leftovers 3–4 days Keep loosely covered once fully cool
Baked pie, frozen Freeze fully cooled pie up to 2–3 months Thaw overnight in the refrigerator, then reheat uncovered at 325°F / 160°C
Reheating 325°F / 160°C for 15–20 minutes Reheat uncovered to help the topping crisp

For a holiday workflow, make the pie dough and crumb topping ahead, then bake the pie the day before you need it. Let it cool fully, keep it loosely covered, and rewarm slices or the whole pie uncovered before serving.

Freezing and Reheating the Baked Pie

For the best texture, freeze the pie after baking and cooling. Wrap it well once completely cool, freeze for up to 2–3 months, thaw overnight in the refrigerator, and reheat uncovered so the buttery crumbs can crisp back up. An unbaked pie can be frozen too, but raw apples release more liquid as they thaw, so the baked-and-cooled route is easier to control.

Can You Make Dutch Apple Pie the Day Before Thanksgiving?

Yes. Bake the pie the day before, cool it completely, and keep it loosely covered. Reheat it uncovered at 325°F / 160°C until warmed through. The crumb topping is crispest the day the pie is baked, but reheating uncovered helps bring back some texture.

Refrigeration is useful after the first couple of days, but it will soften the crumb topping. For the best texture, reheat slices in the oven instead of the microwave.

For food-safety storage guidance, Iowa State University Extension notes that fruit pies made with sugar can be stored at room temperature for up to two days, then refrigerated for additional storage. See their pie storage guidance here: ISU Extension pie storage guide.

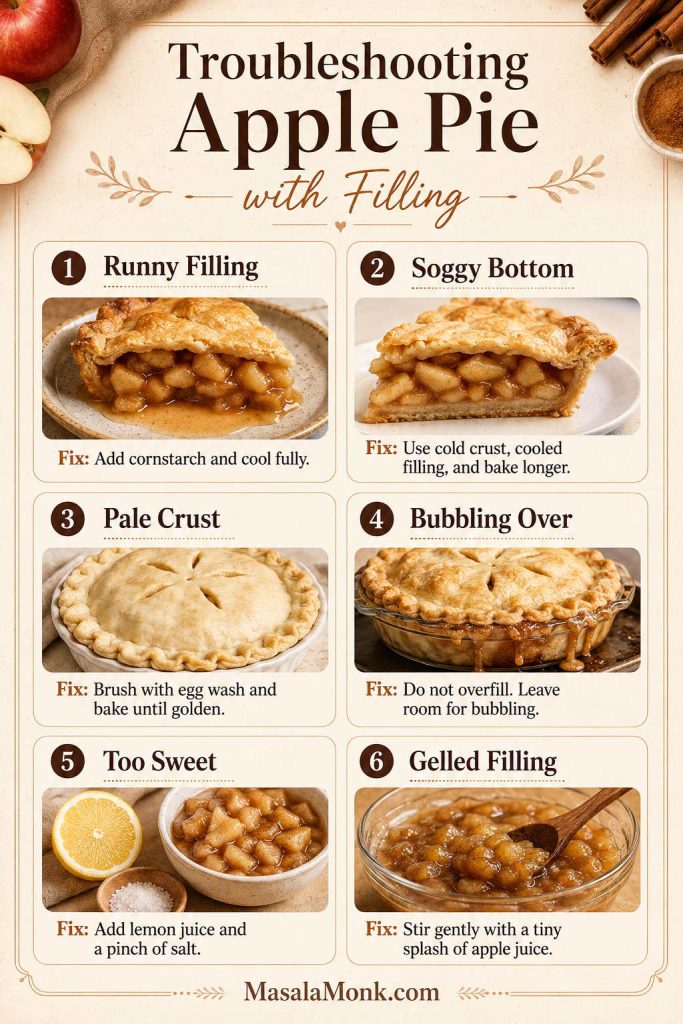
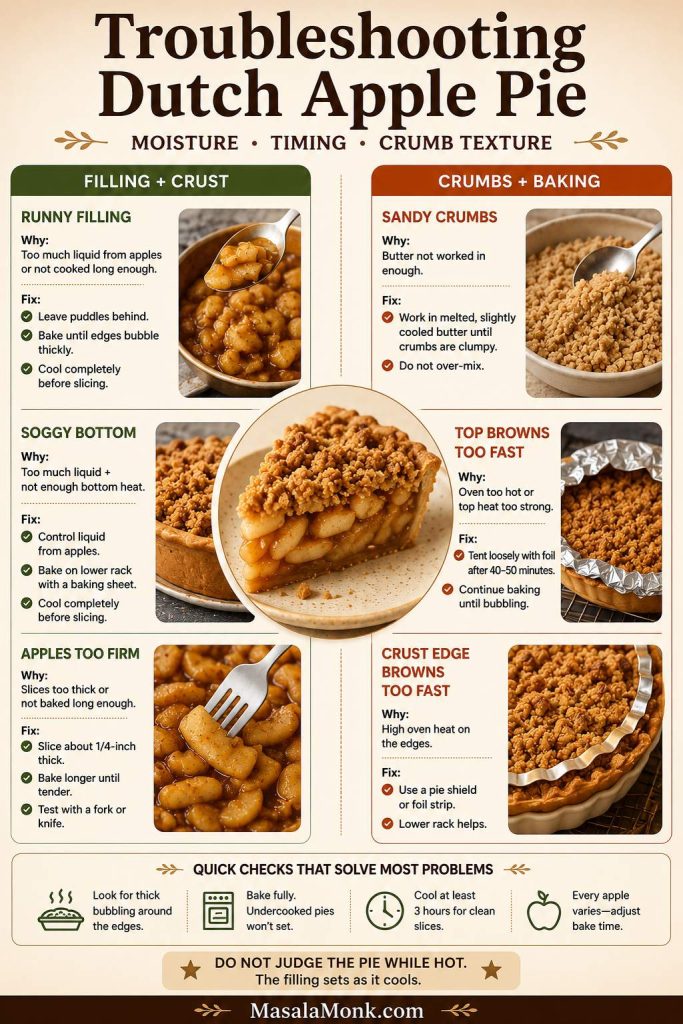
Troubleshooting Dutch Apple Pie

Do not judge the pie while it is still hot. Many problems that look serious right out of the oven, especially loose filling, improve as the pie cools and the juices thicken.

Most real issues come down to moisture, timing, or crumb texture. Once you know which one caused the problem, the fix is usually simple.

Troubleshooting cue: Most problems trace back to moisture, timing, or crumb texture. Match the symptom first, then adjust the next bake.
Troubleshooting guide for Dutch apple pie showing fixes for runny filling, soggy bottom, firm apples, sandy crumbs, over-browned topping, and browned crust edges.
Match the symptom first, then adjust moisture, timing, or crumb texture without rebuilding the whole recipe.

Filling and Crust Problems

Problem Likely Cause Fix
Soggy bottom crust Too much apple juice, underbaked crust, or pie cut too soon Use lower rack, hot start, sturdy apples, and a full cooling window
Runny filling Not enough thickener, underbaked apples, or sliced while too hot Bake until bubbling and let the filling fully settle before slicing
Apples stay too firm Slices too thick or bake time too short Slice 1/4 inch / 6 mm thick and bake until the juices bubble
Large gap under the crumbs Raw apples shrank during baking Mound the apples slightly, slice them evenly, or use cooled pre-cooked filling
Filling tastes flat Apples were very sweet or the filling needed more balance Add lemon juice and a pinch of salt next time

Crumb Topping and Baking Problems

Problem Likely Cause Fix
Crumb topping is sandy Butter was not worked into the dry ingredients enough Press the mixture into clumps, then break it into crumbs
Crumb topping is greasy Butter was too hot or the topping was overmixed Chill the topping for 10 minutes, then crumble it again
Topping burns before apples soften Top heat is too strong or the pie needs a longer bake Tent loosely with foil after the crumbs turn golden
Crust edge burns The edge was exposed too long Use foil or a pie shield after the first 20–30 minutes
Pie overflows Pie plate was too shallow or the filling had too much liquid Use a deep-dish plate, leave excess juice behind, and bake on a rimmed sheet

Most of these problems are easy to prevent once you control moisture, heat, and cooling time. With sturdy apples, a cold crust, and a full cooling window, the oven does most of the work; the reward is a pie that smells like cinnamon, cuts cleanly, and still tastes like real apples.

Before you slice: The pie should look settled, not loose and bubbling-hot. The crumbs will be golden, the apple juices will have thickened around the edges, and the filling will hold better after a full cooling window.

Dutch Apple Pie Recipe

This deep-dish Dutch apple pie has tender spiced apples, a flaky bottom crust, and a buttery brown-sugar crumb topping that bakes into golden clusters.

Yield1 deep-dish 9-inch pie
Servings8–10
Prep Time35 minutes
Bake Time55–65 minutes
Cooling Time3 hours
Total TimeAbout 4 hours 30–40 minutes
Oven400°F, then 375°F
Pan9-inch deep-dish pie plate

Ingredients

Crust

  • 1 unbaked 9-inch pie crust, chilled

Apple Filling

  • 3 lb / 48 oz / 1.35 kg firm apples, peeled, cored, and sliced 1/4 inch / 6 mm thick
  • 1/2 cup / 3.5 oz / 100 g granulated sugar
  • 2 tablespoons / 0.9 oz / 25 g packed light brown sugar
  • 3 tablespoons / 0.85 oz / 24 g all-purpose flour
  • 1 tablespoon / 0.5 fl oz / 15 ml fresh lemon juice
  • 1 1/2 teaspoons ground cinnamon
  • 1/4 teaspoon ground nutmeg
  • 1/4 teaspoon fine salt
  • 1 teaspoon / 5 ml vanilla extract
  • Optional: 1 tablespoon / 0.5 oz / 14 g melted unsalted butter

Crumb Topping

  • 1 cup / 4.4 oz / 125 g all-purpose flour
  • 1/2 cup / 3.5 oz / 100 g packed light brown sugar
  • 2 tablespoons / 0.9 oz / 25 g granulated sugar
  • 1 teaspoon ground cinnamon
  • 1/4 teaspoon fine salt
  • 1/2 cup / 4 oz / 113 g unsalted butter, melted and cooled slightly
  • Optional: 1/2 cup / 2 oz / 55–60 g chopped pecans or walnuts

Instructions

  1. Prepare the crust. Roll the pie dough into a 12-inch circle and fit it into a 9-inch deep-dish pie plate. Trim, crimp, and chill while you prepare the filling.
  2. Slice the apples. Peel, core, and slice apples about 1/4 inch / 6 mm thick.
  3. Make the filling. In a large bowl, toss apples with granulated sugar, brown sugar, flour, lemon juice, cinnamon, nutmeg, salt, vanilla, and melted butter if using. Let sit for 10 minutes; leave behind excess pooled liquid if the bowl looks very wet.
  4. Make the crumb topping. In another bowl, mix flour, brown sugar, granulated sugar, cinnamon, and salt. Add melted cooled butter and stir until clumpy crumbs form. Add nuts if using.
  5. Prepare the oven. Place a rack in the lower third of the oven and heat to 400°F / 200°C. Set a rimmed baking sheet nearby for baking the pie.
  6. Fill the crust. Spoon apples into the chilled crust, leaving behind excess pooled liquid if the bowl is very wet. Mound apples slightly in the center.
  7. Add topping. Sprinkle crumb topping evenly over the apples. Press lightly so the crumbs sit in place without compacting them.
  8. Bake. Place the pie on the rimmed baking sheet. Bake at 400°F / 200°C for 20 minutes. Reduce heat to 375°F / 190°C and bake 35–45 minutes more, until the topping is golden and the filling bubbles around the edges.
  9. Protect if needed. If the crumbs or crust edges brown too quickly, usually after the first 30–35 minutes, tent loosely with foil.
  10. Cool. Let the pie cool at least 3 hours before slicing.

Notes

  • Best apple blend: Use 2 lb Granny Smith plus 1 lb Honeycrisp, Braeburn, or Pink Lady.
  • Regular pie plate: For a shallow 9-inch pie plate, use about 2 1/2 lb / 40 oz / 1.1 kg apples.
  • Do not overfill: Extra apples in a shallow plate can cause overflow and a softer bottom crust.
  • Very juicy apples: Use 1 extra tablespoon / about 0.3 oz / 8 g flour and be strict about leaving pooled liquid behind.
  • Optional butter in filling: Add it for a slightly richer apple layer, or leave it out for a cleaner fruit flavor.
  • Salted butter: If using salted butter in the crumb topping, reduce the added salt to a small pinch.
  • Oat crumb variation: Replace 1/4 cup / 1 oz / 30 g flour with 1/4 cup / 0.9 oz / 25 g old-fashioned oats.
  • Canned filling shortcut: Use 2 cans of apple pie filling, skip the flour and most added sugar in the apple layer, and consider par-baking the crust.
  • Cleaner slices: Cool completely, then rewarm individual pieces before serving.

FAQs

What makes Dutch apple pie different from regular apple pie?

Dutch apple pie has a bottom crust and a crumb or streusel topping. Regular apple pie usually has a second pastry crust on top, either solid, vented, or arranged as a lattice.

Is Dutch apple pie the same as apple crumb pie or apple crumble pie?

In many home-baking recipes, yes. Apple crumb pie and apple crumble pie usually emphasize the crumb layer, while Dutch apple pie is the more common name for the full pie style with a bottom crust, apple filling, and streusel-style top.

Should the apples be cooked before baking?

Raw apples work well in this recipe because the pie bakes long enough for them to soften. Pre-cooked apples are useful when you want less shrinkage, fewer gaps under the topping, or a make-ahead filling.

Should the crust for this Dutch apple pie recipe be par-baked?

For the raw-apple version, par-baking is usually not required. A chilled crust, hot-start bake, and lower oven rack are enough for most pies. Par-baking is more useful with canned filling, pre-cooked filling, glass pie plates, or very juicy apples.

Do I have to peel the apples?

Peeling gives the smoothest, most classic filling. Unpeeled apples work if you like a rustic texture, but the skins can feel chewy after baking.

Why is there a gap under my crumb topping?

A gap usually means the raw apples shrank while baking. Mound the apples slightly, slice them evenly, and avoid overly soft apples. For the most compact filling, use cooled pre-cooked apple filling.

Why did my crumb topping turn sandy?

The butter probably was not worked into the flour and sugar enough. Press the mixture between your fingers until it forms clumps before sprinkling it over the apples.

How long should Dutch apple pie cool before slicing?

Give it at least 3 hours. The filling thickens as it cools, so a pie that would run if sliced hot can still cut beautifully later.

Can I bake Dutch apple pie the day before Thanksgiving?

Yes. Bake it the day before, cool it completely, and keep it loosely covered. Reheat uncovered at 325°F / 160°C before serving if you want the pie warm and the crumbs a little crisper.
Can I use canned apple pie filling?

Canned apple pie filling works well for a shortcut version, especially when you brighten it with lemon juice and balance the sweetness with a pinch of salt. Use about two 20–21 oz cans for a 9-inch pie, skip most added sugar, and do not add flour to the filling.

What is the best way to reheat Dutch apple pie?

Reheat slices uncovered in a 325°F / 160°C oven for 15–20 minutes. The oven helps revive the crumb topping better than the microwave.

If you make this pie, I’d love to know which apple blend you used. Did you go classic with Granny Smith and Honeycrisp, or sweeter with Golden Delicious?

Back to top

Posted on 1 Comment

Best Apples for Apple Pie

A slice of apple pie with layered apple filling beside Granny Smith, Honeycrisp, Braeburn, Pink Lady, and Golden Delicious apples.

The best apples for apple pie are not always the prettiest or sweetest apples in the bin. A good pie apple has a harder job: it needs to soften in the oven without collapsing, keep real apple flavor after baking, and balance the sugar, spice, butter, and crust around it.

The frustrating part is that apples can look perfect in the store and still bake into very different pies. Some stay firm, some turn saucy, some leak juice, and some taste bright when raw but disappear once cinnamon and sugar enter the picture.

That is why the safest answer is usually a blend. Granny Smith is the easiest tart anchor, but most homemade pies taste better when that tart apple is mixed with a sweeter, flavorful apple like Honeycrisp, Pink Lady, Braeburn, Jonagold, or Golden Delicious.

This guide is for the moment before you start peeling: which apples to buy, which ones to mix, which varieties to avoid, how thick to slice them, and what to do when you only have Gala, Fuji, McIntosh, Red Delicious, Honeycrisp, or Granny Smith at home.

Already know your apple variety? Jump straight to Using the Apples You Already Have. Still shopping? Start with the apple chart or the best apple blends.

Quick Answer: What Are the Best Apples for Apple Pie?

The best apples for apple pie are Granny Smith, Honeycrisp, Braeburn, Pink Lady, Golden Delicious, and Jonagold. For the easiest balanced pie, use Granny Smith with Honeycrisp. Granny Smith gives tartness and backbone, while Honeycrisp adds sweetness and fuller apple flavor.

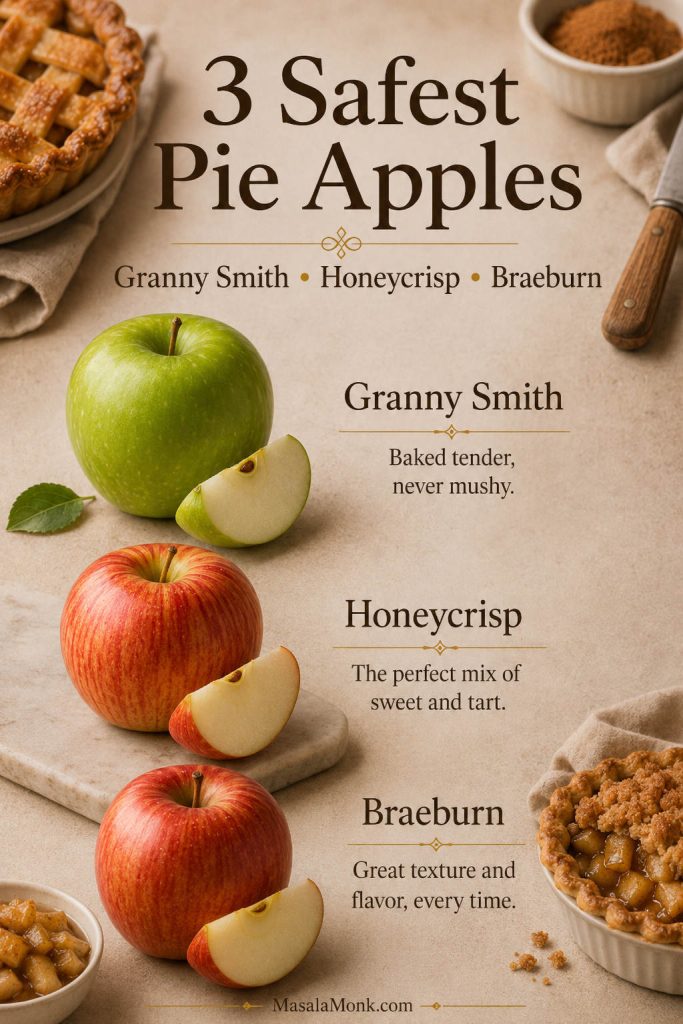
A quick-answer apple pie guide showing Granny Smith, Honeycrisp, and Braeburn as three reliable apples for pie.
If you want a fast starting point, begin with Granny Smith, Honeycrisp, or Braeburn. Together, these three cover the biggest pie needs: tartness, familiar sweetness, and stronger baked apple flavor.
The 3 safest apples for apple pie:
Granny Smith for tartness and backbone.
Honeycrisp for sweet-tart flavor and familiarity.
Braeburn for deeper baked apple flavor and good texture.

For a brighter pie, pair Granny Smith with Pink Lady. To build deeper apple flavor, bring in Braeburn, Golden Delicious, or another apple with rounded sweetness. And for neat slices instead of an applesauce-like filling, skip Red Delicious, overripe apples, and very soft apples that collapse quickly when baked.

Choosing apples in the store? Start with one tart apple and one apple you already like eating. That simple rule prevents most flat, mushy, or overly sharp pies before you even make the filling.

Best Pie Apples at a Glance

Best for Apple choice
Easiest balanced blend Granny Smith + Honeycrisp
Bright tart pie Granny Smith + Pink Lady
Deeper apple flavor Braeburn + Golden Delicious + Granny Smith
Firm, sliceable filling Granny Smith + Braeburn + Pink Lady
Better saved for other uses Red Delicious, very soft apples, bruised apples, overripe apples

The useful rule is simple: choose apples by job. One apple brings brightness, one keeps the filling sliceable, and one gives the pie a rounder apple flavor.

Best Apples for Apple Pie Chart

How to Use This Chart

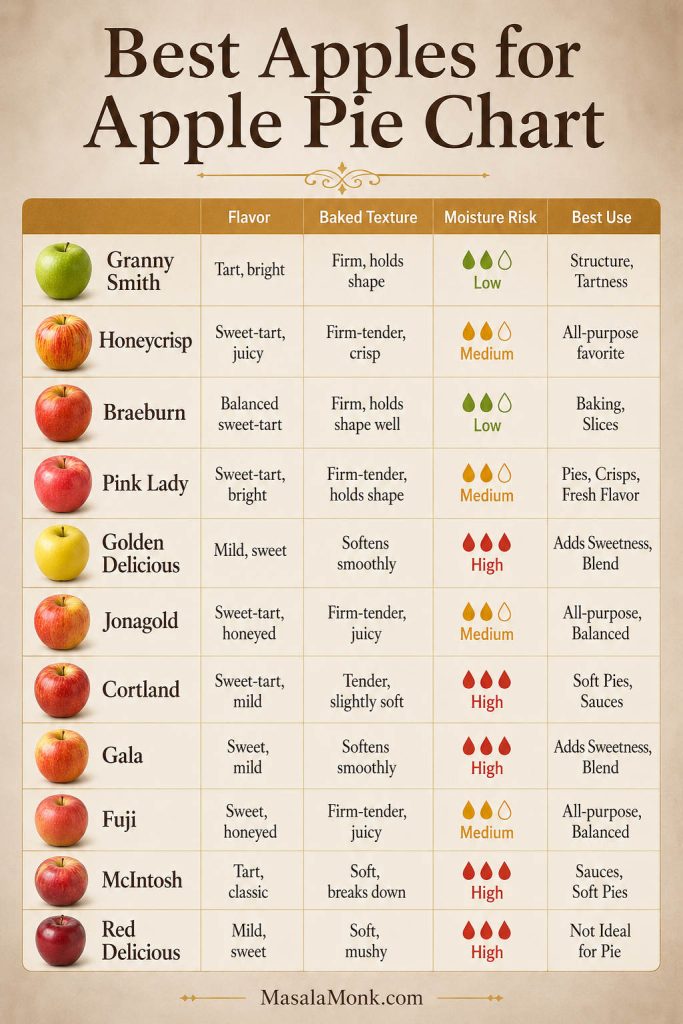
Use this chart when you are standing in front of apples and trying to decide what to buy. Instead of memorizing every variety, look at the apple’s role: main pie apple, blending apple, saucy accent, or one to skip for classic pie.

A comparison chart of apple varieties for pie, showing flavor, baked texture, moisture risk, and best use for each apple.
This chart helps you compare pie apples by the traits that matter most once they hit the oven. As a result, it is easier to see which apples are better for tartness, structure, softer filling, or a deeper apple flavor.
Apple Flavor Baked texture Moisture risk Best use Use alone or blend?
Granny Smith Very tart Firm Low Tart anchor Better blended
Honeycrisp Sweet-tart Holds well Medium Balanced pie Alone or blend
Braeburn Sweet-tart, complex Holds well Low-medium Serious baking apple Alone or blend
Pink Lady / Cripps Pink Bright, sweet-tart Firm Low-medium Fresh pie and filling Blend
Golden Delicious Mellow, sweet Softer Medium Flavor and depth Blend
Jonagold Sweet-tart Good Medium Balanced pie Blend
Cortland Aromatic, slightly tart Softer Medium Regional option Blend
Gala Sweet, mild Softens Medium Small amount only Blend only
Fuji Very sweet Can be juicy Medium-high With tart apples Blend only
McIntosh Sweet-tart Breaks down High Saucy component Small amount only
Red Delicious Mild/sweet Mealy or mushy High Avoid for pie Avoid

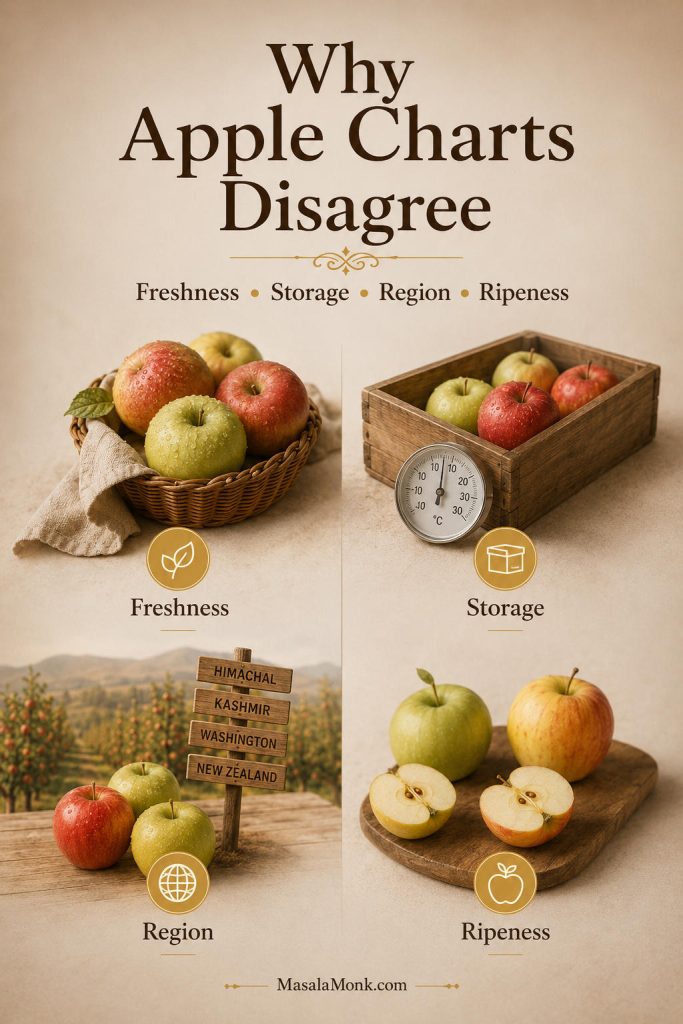
Why Apple Charts Can Disagree

Apple charts can disagree because freshness, storage, region, and ripeness change how each variety bakes. That is why this guide treats apples like Golden Delicious, Fuji, Gala, and McIntosh as role-based choices instead of universal best-or-worst answers.

An explainer image showing that apple pie apple recommendations can vary because of freshness, storage, region, and ripeness.
Apple charts often disagree because the fruit itself changes. Freshness, storage time, growing region, and ripeness can all affect whether an apple stays firm, releases more juice, or tastes brighter after baking.

Still, the pattern is reliable: apples with body, acidity, and clear flavor are safer for pie than soft, mild, mealy, or overripe apples. Serious Eats has a useful baked-apple comparison showing why raw flavor is not enough; a good pie apple also has to keep pleasant texture once it is cooked.

In other words, the best baking apples for pie are not just apples that taste good raw. They need enough acidity, body, and flavor to survive a long bake.

Choosing apples for cooked filling rather than a fresh pie? Jump to best apples for apple pie filling. Because cooked filling simmers before it reaches the crust, the apples need to hold up twice: first in the pan, then in the pie.

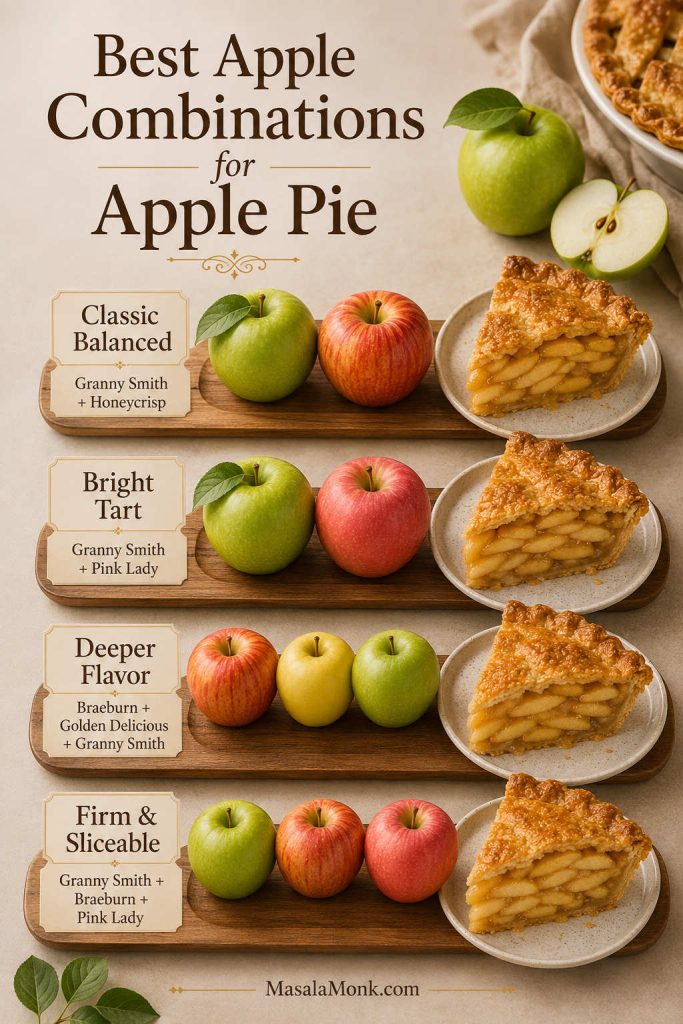
Best Apple Combinations for Apple Pie

Before choosing a blend, think about the pie you want. Brighter pies need more tart apple, while mellow pies need a sweeter one. For a clean sliceable pie, choose apples that hold their shape; for a softer old-fashioned filling, include one apple that cooks down slightly.

A guide to apple combinations for pie, showing blends for classic balanced, bright tart, deeper flavor, and firm sliceable fillings.
The best apple combinations for pie usually balance three jobs at once: tartness, sweetness, and structure. Instead of relying on one variety, blend apples so the filling tastes fuller and bakes more evenly.

Think of the apple blend like building a filling team. One apple brings tartness, another brings sweetness, and another keeps the slices from collapsing. You do not need a complicated mix, but you do need balance.

Best Blends by Pie Result

Pie result Apple combination Why it works
Classic balanced pie Granny Smith + Honeycrisp Tart backbone plus sweet-tart flavor.
Brighter tart pie Granny Smith + Pink Lady Sharp, lively, and good for people who like a less sugary pie.
Deeper apple flavor Braeburn + Golden Delicious + Granny Smith Complex flavor, mellow sweetness, and tart balance.
Firm, sliceable filling Granny Smith + Braeburn + Pink Lady Good bite with enough brightness.
Softer old-fashioned filling Golden Delicious + Jonagold Rounder flavor and a softer bite without going fully mushy.
Slightly saucier pie Golden Delicious + small amount of McIntosh + firm tart apple Soft apple depth, but still anchored by a sturdier variety.

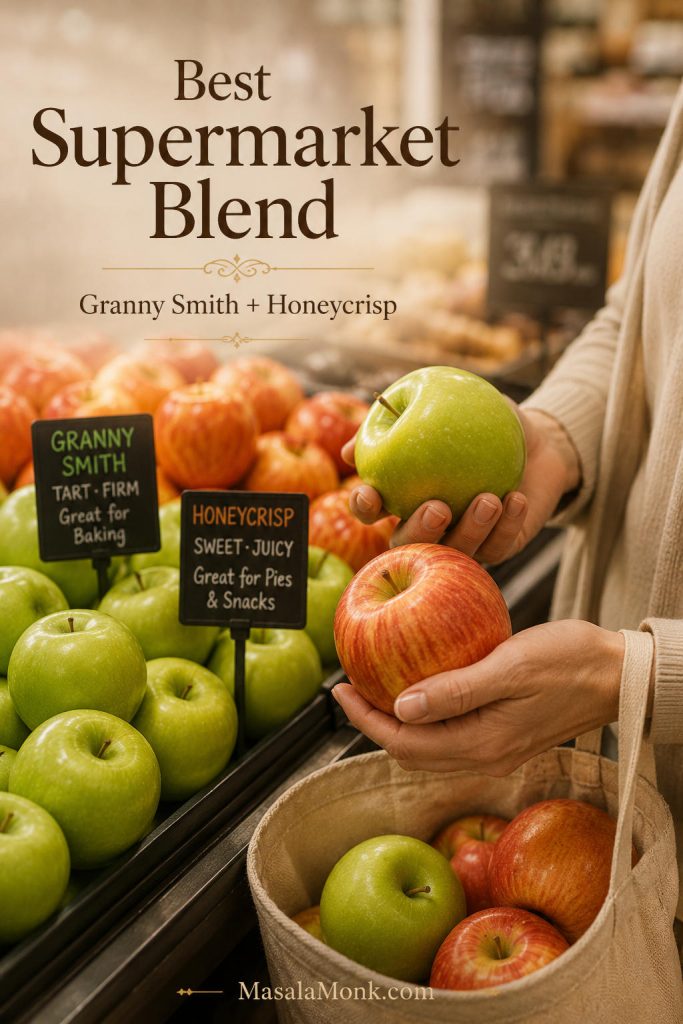
Best Supermarket Apple Blend for Pie

If you are baking on a normal grocery run, do not overthink it. A two-apple blend is enough for most pies. Granny Smith and Honeycrisp are the easiest pair because they give you tartness, sweetness, and enough structure without making the filling too sharp or too soft.

A grocery-store apple selection scene showing Granny Smith and Honeycrisp apples as an easy supermarket blend for apple pie.
For an easy supermarket apple pie, start with Granny Smith and Honeycrisp. This pair is popular for a reason: it gives the filling brightness, balance, and enough structure without making the pie too sharp or too sweet.

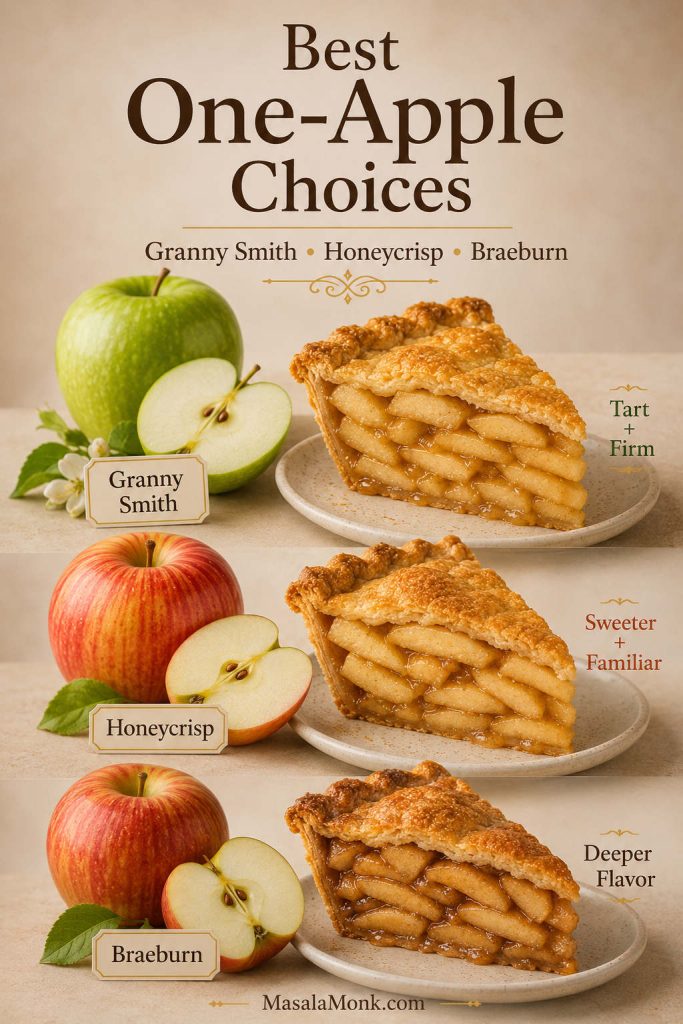
Best One-Apple Choices

Blends are better, but sometimes you only want to buy one kind of apple. In that case, choose based on the pie you want.

A one-apple choice guide for apple pie showing Granny Smith, Honeycrisp, and Braeburn as single-variety options.
A one-apple pie can still be good when you choose the variety with intention. Granny Smith gives a firmer tart pie, Honeycrisp makes a sweeter and more familiar filling, and Braeburn adds a deeper baked-apple note.
One-apple choice Best for
Granny Smith A tart, firm pie with strong structure.
Honeycrisp A sweeter, familiar pie with good flavor.
Braeburn A deeper, more apple-forward pie.

Choose Your Apple Blend by Pie Style

Pie style Best apple blend
Tart and bright Granny Smith + Pink Lady
Sweeter and family-friendly Honeycrisp + Golden Delicious + a little Granny Smith
Firm and sliceable Granny Smith + Braeburn
Softer and old-fashioned Golden Delicious + Jonagold, with a small amount of McIntosh if desired

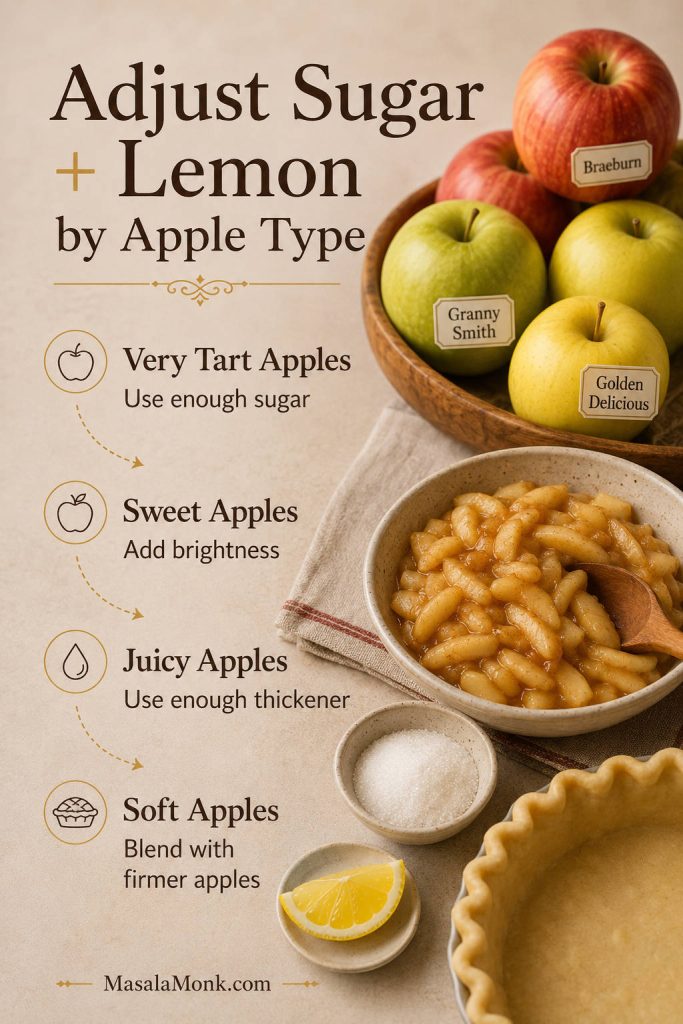
How to Adjust Sugar and Lemon by Apple Type

Apple mix What to adjust
Mostly Granny Smith or other very tart apples Use enough sugar and consider adding a sweeter apple for roundness.
Mostly Honeycrisp, Fuji, Gala, or other sweet apples Reduce sugar slightly and add lemon or a tart apple if the filling tastes flat.
Very juicy apples Use a recipe with enough thickener and bake until the filling bubbles.
Soft apples Expect a saucier filling or blend with sturdier apples for a neater slice.
A kitchen guide showing how to adjust sugar, lemon, thickener, or apple blending based on tart, sweet, juicy, or soft apples.
Not every apple needs the same filling treatment. Very tart apples usually need more sweetness, sweeter apples benefit from brightness, and juicy or soft apples need extra help from thickener or firmer partners.

The main thing to remember is that apples set the direction of the filling before sugar or spice does. Very tart apples need enough sweetness to round them out. Sweeter apples usually need brightness from lemon or a tart variety. Meanwhile, soft or juicy apples work better when they have a firmer partner in the bowl.

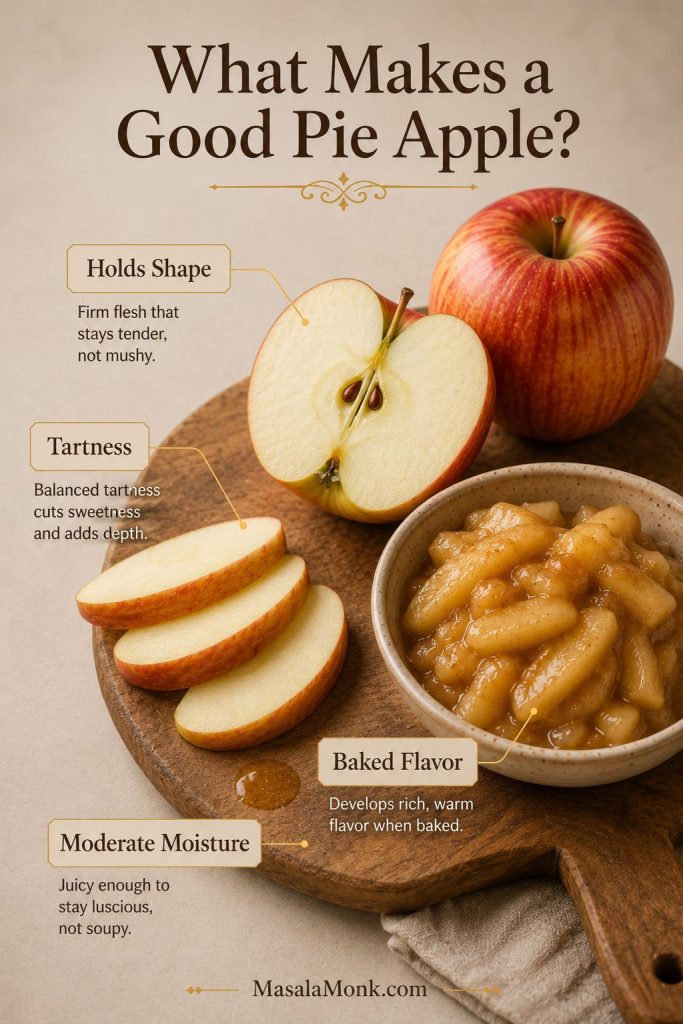
What Makes an Apple Good for Pie?

Think of this as the difference between a good snacking apple and a good pie apple. A snacking apple only has to taste good raw. A pie apple has to survive heat, sugar, spice, and time without losing itself.

Sliced apples and cooked apple filling with callouts for holding shape, tartness, baked flavor, and moderate moisture.
A good pie apple should hold shape, keep flavor after baking, and release enough juice without flooding the filling. In other words, the best apples for pie are judged by the baked result, not just the raw bite.
How this guide chooses pie apples:
The apples here are judged by baked texture, flavor after cooking, moisture level, tart-sweet balance, and how easy they are to find. A good pie apple should soften without collapsing, taste like apple after baking, and help the filling set instead of turning watery.

Texture That Holds

The apple should soften, but it should not disappear. When the pieces collapse completely, the filling turns saucy or mushy instead of sliceable. Granny Smith, Braeburn, Pink Lady, and many orchard baking apples are useful because they keep more bite.

Enough Tartness to Balance Sugar

Apple pie needs contrast. All-sweet apples can taste flat once sugar and spice are added, while all-tart apples can make the pie taste sharp. That is why a balanced blend usually gives the filling a fuller flavor.

Flavor That Survives Baking

Some apples taste wonderful raw but become mild after baking. For that reason, flavor apples like Honeycrisp, Braeburn, Golden Delicious, Jonagold, and Pink Lady are useful in blends.

Moderate Moisture

Very juicy apples can make the filling loose when the pie is underbaked or sliced too soon. However, juicy apples are not useless. They simply need balance from firmer tart apples and a recipe that gives the filling enough time to bubble and set.

Freshness

Fresh, crisp apples bake better than apples that are soft, wrinkled, bruised, or tired. Look for fruit that feels lively in the hand, has some acidity, and still tastes like apple after baking.

Best Apple Varieties for Apple Pie

Use this section when you want to know what each apple actually does in a pie. The best choice depends on whether you want tartness, sweetness, a neater slice, or a softer old-fashioned filling.

Granny Smith

Best role: tart anchor for a balanced apple pie.

Granny Smith is the tart apple many bakers reach for first, and for good reason. It is widely available, keeps its shape well, and stands up to sugar, cinnamon, butter, and a long bake.

The only catch is flavor balance. A pie made with only Granny Smith can taste sharp or a little one-note. For better depth, use it as the tart anchor and pair it with Honeycrisp, Pink Lady, Braeburn, Golden Delicious, or Jonagold.

Honeycrisp

Best role: familiar sweet-tart apple for easy blends.

Honeycrisp is the apple many readers will recognize immediately, and that is part of its advantage. It is crisp, sweet-tart, easy to find, and friendly enough for bakers who do not want a very sharp pie.

It is also a good “safe” apple when you are baking for people who do not love a very tart filling.

Although it can work on its own when fresh and crisp, it becomes more balanced when mixed with Granny Smith, Pink Lady, or Braeburn.

Braeburn

Best role: deeper flavor with strong baked texture.

Choose Braeburn when you want the pie to taste more deeply apple-forward, not just sweet and cinnamon-spiced. It has enough acidity to stay lively and enough density to hold up well in the oven.

Use Braeburn alone if you like its flavor, or mix it with Granny Smith and Golden Delicious for a pie that has tartness, bite, and mellow apple depth.

Pink Lady

Best role: bright, crisp apple for lively filling.

Pink Lady, also sold as Cripps Pink, is bright, crisp, and sweet-tart. It is excellent when you want a filling that tastes lively rather than heavy.

Pair it with Granny Smith for a tart pie or with Honeycrisp for a slightly sweeter one. It is also a strong choice for cooked apple pie filling because it keeps more shape than softer apples.

Golden Delicious

Best role: mellow flavor apple for softer blends.

Golden Delicious brings mellow, classic apple flavor. It is softer than Granny Smith or Braeburn, but that softness can be a strength when you want a rounder, more old-fashioned filling.

Think of it as a rounding apple rather than the main structure of the pie.

Use it as a flavor apple in a blend, especially with Granny Smith or Braeburn. It gives the pie a gentler sweetness without making the whole filling taste flat.

Jonagold and Jonathan

Best role: sweet-tart supporting apples with character.
Jonagold and Jonathan are useful sweet-tart apples when you can find them. Jonagold brings sweetness and acidity, while Jonathan has a sharper, more old-school apple flavor.
Both are good supporting apples in a blend, especially when you want more character than a basic sweet apple gives.
Cortland

Best role: softer regional apple for blended pies.

Cortland has good apple flavor and can be useful when you like a slightly softer homemade filling. It is especially helpful when you want tenderness without turning the whole pie into sauce. Because it is not always as firm as Granny Smith or Braeburn, it works best with a stronger baking apple.

Northern Spy, Winesap, Mutsu, Gravenstein, and Bramley

Best role: orchard options when available.

These are the kinds of apples you may see at orchards, farmers’ markets, or specialty stores. Availability depends heavily on where you live, but many regional baking apples can be excellent in pie.

When buying directly from a grower, ask which apples hold their shape when baked and which ones cook down into sauce. That answer is more useful than chasing a variety name that may not be available in your area.

Already have apples at home? Skip to Using the Apples You Already Have for Gala, Fuji, McIntosh, Red Delicious, Granny Smith, Honeycrisp, green apples, and sweet apples.

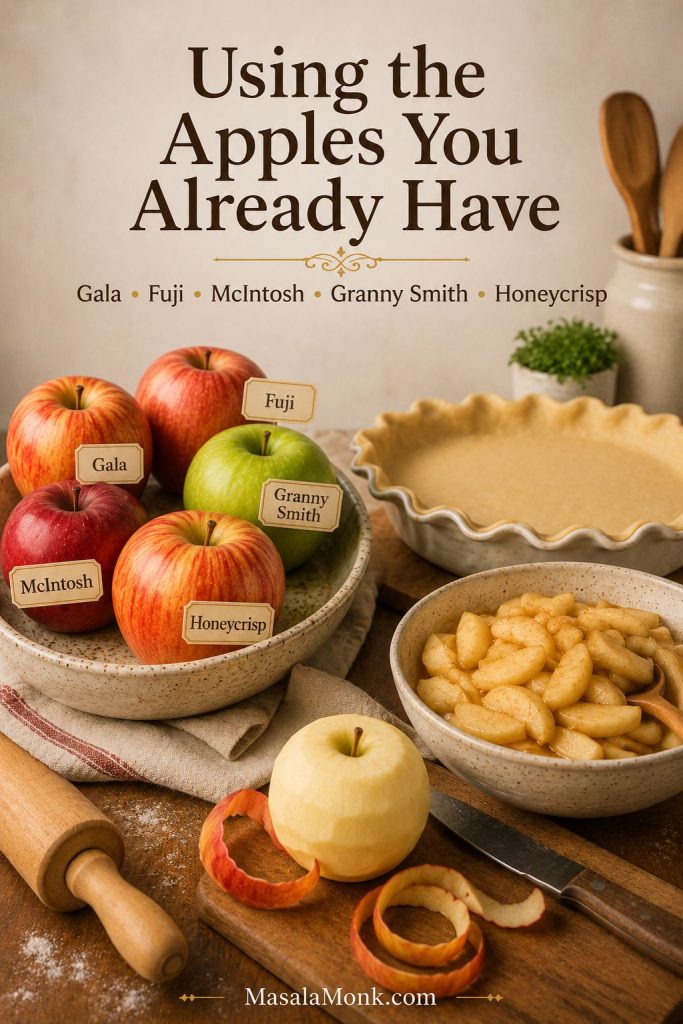
Using the Apples You Already Have

This is the section to use when you are staring at the fruit bowl and wondering whether the pie can still happen. You may not have the ideal apples at home, but many common varieties can still work when you give them the right role.

A kitchen counter with Gala, Fuji, McIntosh, Granny Smith, and Honeycrisp apples beside pie crust, sliced apples, and baking tools.
You do not need a perfect shopping trip to make pie happen. However, once you know whether your apples are best used as the main filling apple, a blending apple, or a softer support apple, the whole decision gets easier.

One-variety rescue guide:
Mostly Granny Smith? Keep the tartness, but add enough sweetness and consider pairing with a sweeter apple next time.
Mostly Honeycrisp? You can make a good pie, but add lemon only when the filling tastes too sweet or flat.
Mostly Gala or Fuji? Reduce sugar slightly and add a tart apple if you can.
Mostly McIntosh? Expect a softer filling, or use them for cooked apple pie filling, crisp, compote, or applesauce.

Gala Apples in Pie

Gala can work when it is what you have, especially in a blend. It is sweet and easy to find, but it can taste mild or bake softer than ideal in a full pie. Pair Gala with Granny Smith, Braeburn, or Pink Lady for better balance.

Fuji Apples in Pie

Fuji needs balance because it is naturally sweet and juicy. Pair it with Granny Smith or Pink Lady, then reduce the sugar slightly when the filling already tastes sweet.

McIntosh Apples in Pie

McIntosh is best when you like a softer, saucier filling. It breaks down quickly, so it should not be the main apple for a clean, sliceable pie. A small amount can add softness and flavor when balanced with apples that hold their shape.

Red Delicious Apples in Pie

Red Delicious is best avoided for pie. It often becomes mealy, mild, and weak after baking, so it is better as a fresh eating apple.

Using Only Granny Smith Apples

A pie made entirely with Granny Smith can work, but the filling may taste very tart and a little one-note. For better flavor, blend Granny Smith with Honeycrisp, Golden Delicious, Pink Lady, Braeburn, or Jonagold.

Using Only Honeycrisp Apples

Honeycrisp can make a good pie, especially when the apples are fresh and crisp. Because the filling may lean sweet, add Granny Smith or Pink Lady when you want more brightness.

Green Apples for Pie

In most grocery stores, “green apples” usually means Granny Smith, one of the most reliable tart apples for pie. Green apples are especially helpful when the rest of your apples are sweet or mild.

Sweet Apples for Pie

Sweet apples can work, but they need balance. Add a tart apple, a little lemon, or a less-sweet filling so the pie does not taste flat.

Worst Apples for Apple Pie

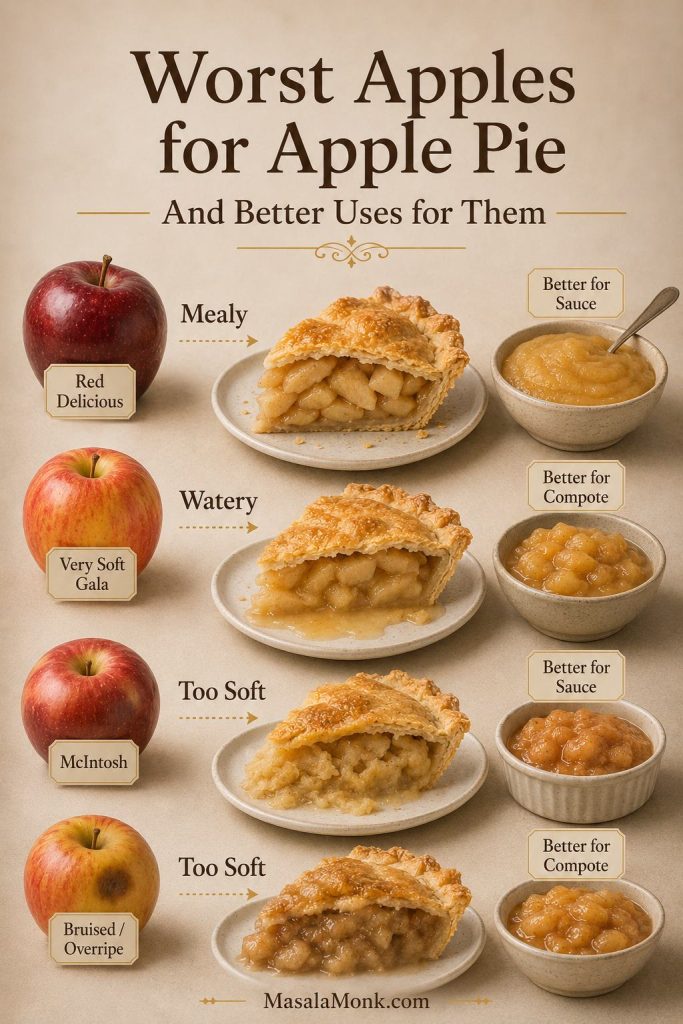
The worst apples for apple pie are not bad apples. They are just not the best choice for a clean, sliceable baked filling. Use them for snacking, applesauce, compote, cakes, or softer desserts instead.

Less ideal apples for pie, including Red Delicious, very soft Gala, McIntosh, and bruised apples, with better uses such as sauce or compote.
The worst apples for apple pie are usually the ones that turn mealy, watery, or overly soft in the oven. Even so, that does not make them useless — they are often better suited to applesauce, compote, or crisp-style desserts.
Apple Why it is not ideal for classic pie Better use
Red Delicious Often mealy, bland, and weak after baking. Fresh eating.
Very soft Gala Can become too soft and mild in a full pie. Blend in small amounts, apple cake, quick desserts.
Fuji used alone Can make the filling too sweet or juicy. Blend with tart apples.
McIntosh used alone Breaks down into sauce. Applesauce, saucier filling, compote.
Old or wrinkled apples Weak texture and dull flavor. Cooked sauce if still usable and not spoiled.


Bruised apples Uneven texture and poorer storage quality. Trim and use only if fresh; avoid for clean pie slices.

If one of these apples is all you have, the answer is not always to abandon the pie. Use it in a blend, make a softer filling, or turn it into crisp, compote, or applesauce where a less sliceable texture is not a problem.

How to Choose Apples for Pie at the Store

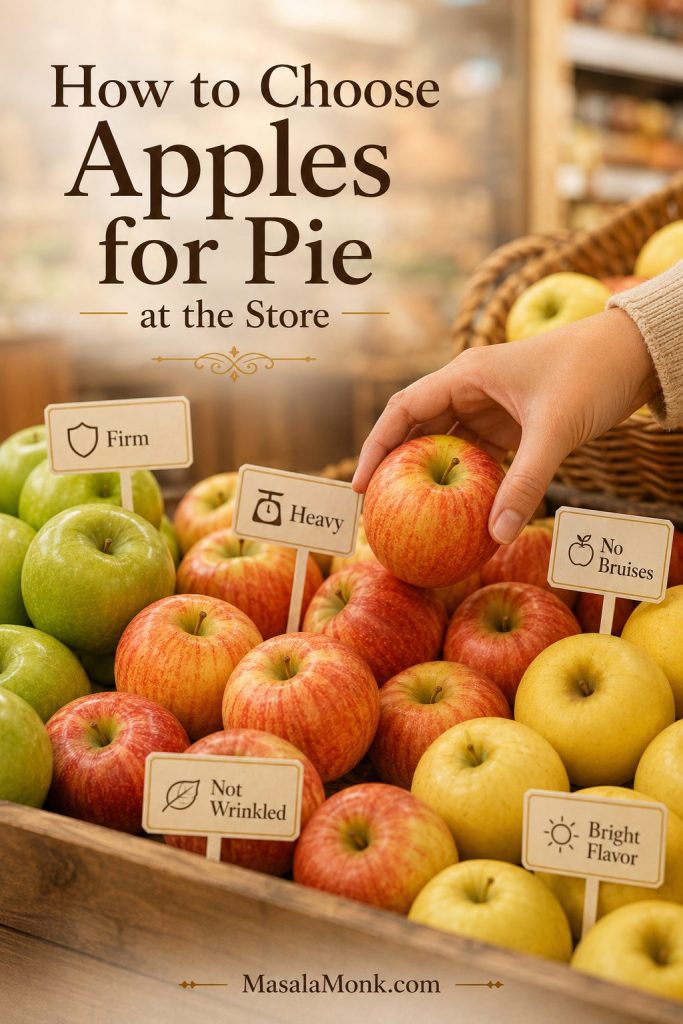
When you are buying apples for pie, do not choose by color alone. Choose by texture, freshness, and role in the filling. A glossy red apple may look tempting, but an apple with brightness and flavor will usually bake better.

A hand choosing fresh apples from a store display with labels for firm, heavy, no bruises, not wrinkled, and bright flavor.
Before you think about variety names, check the fruit itself. Firm, heavy, bruise-free apples usually bake better, while older or wrinkled apples are more likely to give you flatter flavor and weaker texture.
Good pie apple checklist:
  • Firm when pressed
  • Heavy for its size
  • No bruises or soft spots
  • Not wrinkled
  • Balanced, tart, or sweet-tart flavor
  • At least one tart apple in the mix

For a grocery-store pie, buy at least two varieties. A simple mix of Granny Smith and Honeycrisp is enough. At a farmers’ market or orchard, ask for apples that hold their shape when baked, not just the sweetest apples on the table.

Once you have your apples, use the apple quantity guide to estimate how much to buy and the slice thickness guide before you start cutting.

How Many Apples Do You Need for Apple Pie?

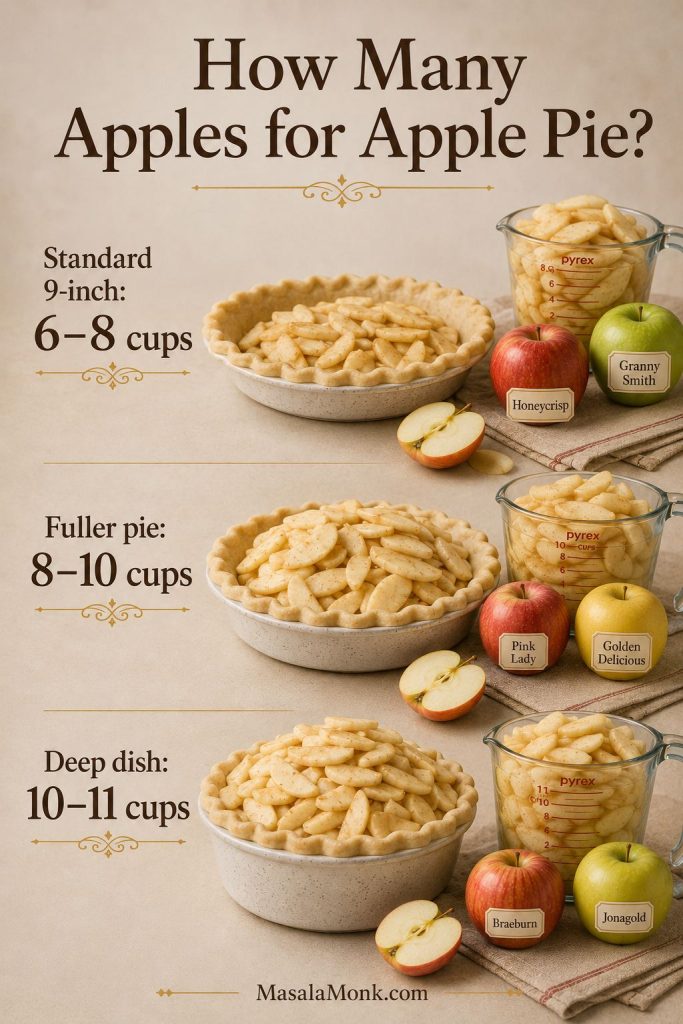
Counting apples is useful in the store, but it is not perfect. Six huge Honeycrisp apples and six small Granny Smith apples will not fill a pie dish the same way, so use the count as a shopping shortcut and the sliced cups as the real guide.

A quantity guide showing apple amounts for a standard 9-inch pie, a fuller pie, and a deep-dish apple pie.
How many apples you need depends on the pie dish and how full you want the filling. Because apple sizes vary so much, cups of sliced apples are more dependable than counting whole apples alone.
Pie style Amount of sliced apples Whole-apple shopping estimate
Standard 9-inch pie 6–8 cups sliced apples About 2½–3 lb whole apples
Fuller 9-inch pie 8–10 cups sliced apples About 3–3½ lb whole apples
Deep-dish pie 10–11 cups sliced apples About 3½–4 lb whole apples
Simple count estimate Varies by apple size Usually 6–8 large apples or 8–10 medium apples

These are whole-apple shopping weights before peeling and coring, so the final sliced amount will be lower. Thin slices pack down more tightly, while thick slices leave more air gaps in the pie dish. As a result, two pies can use the same weight of apples but look different before baking.

A deep pie dish, small apples, or a high mound of filling all call for buying extra. Any leftover sliced apples can go into oatmeal, pancakes, muffins, compote, or a small skillet crisp.

How Thin Should You Slice Apples for Pie?

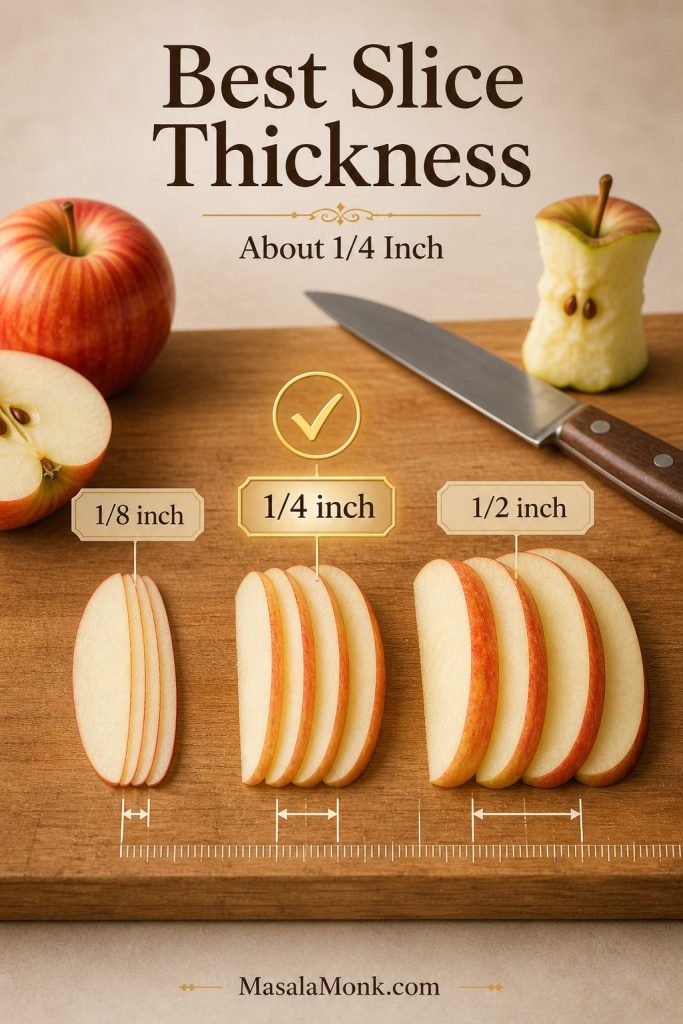
For most homemade apple pies, slice apples about 1/4 inch thick. That is thick enough to keep some texture, but thin enough to soften before the crust overbrowns.

A cutting board guide comparing 1/8-inch, 1/4-inch, and 1/2-inch apple slices for pie, with 1/4 inch marked as the best default.
Slice thickness changes how the filling bakes just as much as apple choice does. Around 1/4 inch is the best all-purpose thickness because the slices soften well while still looking and tasting like real apple pieces.
Slice thickness Result in apple pie
1/8 inch Softer, more compact filling. Good when you like a tighter pie slice.
1/4 inch Best default for most pies. Softens well but still looks like apple slices.
1/2 inch Chunkier texture. Needs a longer bake, pre-cooking, or a recipe designed for thicker pieces.

Uneven slicing is worse than choosing the wrong exact thickness. Thin pieces can turn mushy while thick pieces stay crunchy. Because each apple variety softens at a slightly different rate, uniform slicing matters even more when you are using a blend.

Also, avoid very thick chunks unless your recipe calls for pre-cooking. Otherwise, the apple centers can stay firm while the crust is already browned.

Half-mushy, half-crunchy pies usually need more than a new apple variety. The texture troubleshooting table shows how apple choice, slicing, baking, and cooling work together.

Best Apples for Apple Pie Filling

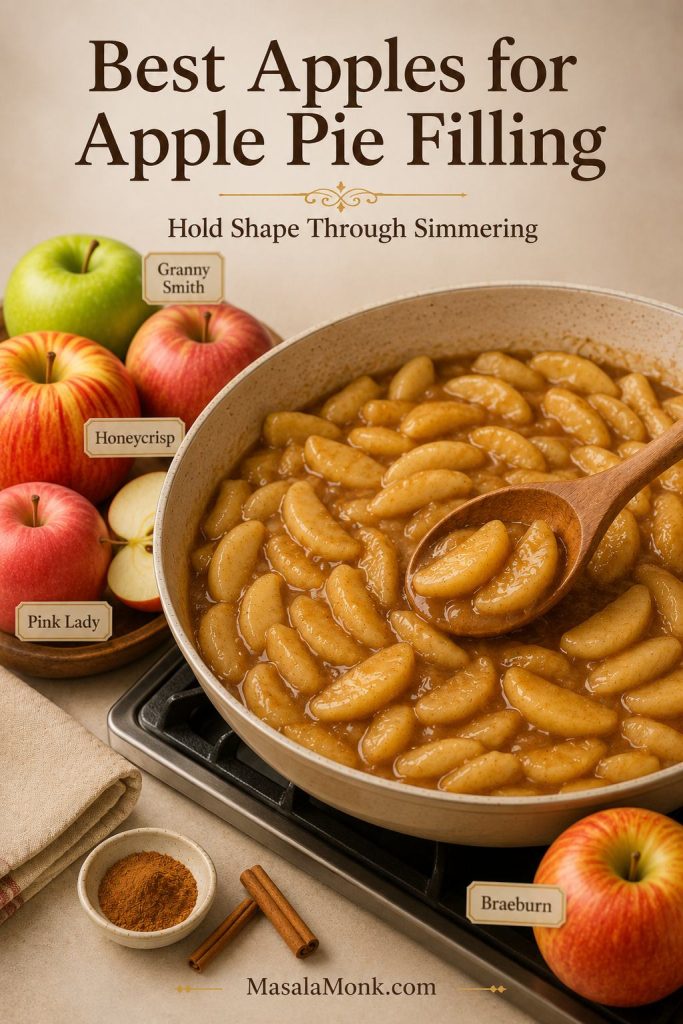
The best apples for apple pie filling are apples that can simmer without falling apart. Granny Smith, Honeycrisp, Pink Lady, Braeburn, and Golden Delicious are safe choices. Softer apples can still help in small amounts when you want a saucier filling.

A pan of glossy cooked apple pie filling with apple slices holding their shape, shown with Granny Smith, Honeycrisp, Pink Lady, and Braeburn apples nearby.
The best apples for apple pie filling are the ones that can handle simmering without collapsing. Since cooked filling goes through more heat before it reaches the crust, firm apples are usually the safest choice.

Stovetop filling behaves differently from raw filling because the apples are cooked before they ever reach a crust. For visible slices in a cooked filling, avoid making the whole batch from McIntosh, soft Gala, or overripe apples.

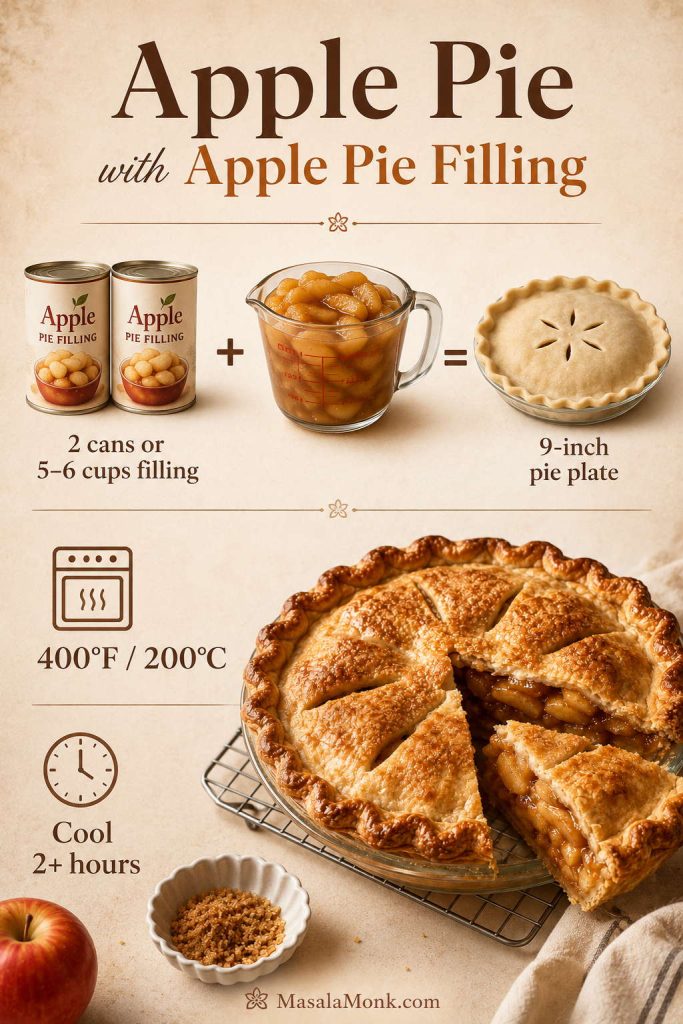
For a full cooked version, use this apple pie filling recipe. If you are making a shortcut pie with prepared filling, the guide to apple pie with apple pie filling explains how to use homemade or canned filling in a crust.

How Apple Choice Changes Pie Texture

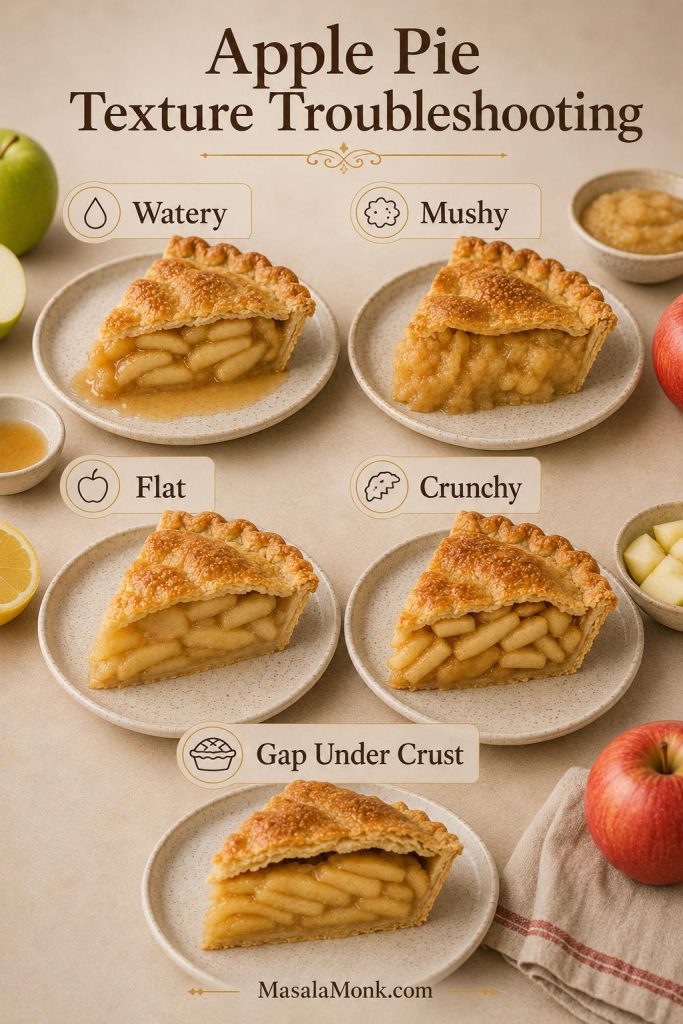
Many apple pie problems start before the pie goes into the oven. The apple variety, freshness, slice thickness, and blend all affect whether the filling turns sliceable, watery, mushy, flat, or crunchy.

A troubleshooting guide showing apple pie slices with watery, mushy, flat, crunchy, and gap-under-crust texture problems.
When an apple pie turns watery, mushy, flat, or oddly crunchy, the apples are only part of the story. Slice thickness, freshness, bake time, and cooling all work together, so fixing the texture starts with looking at the full process.

Common Apple Pie Texture Problems

Cut into a pie and find crisp apples in one bite and applesauce in the next? The apple variety is only part of the problem. Slice thickness, apple freshness, bake time, and cooling time all matter too.

Pie problem Apple-related cause Better move
Mushy pie Soft or mealy apples, overripe fruit, or too many apples that break down quickly. Use Granny Smith, Braeburn, Pink Lady, or another crisp baking apple.
Watery pie Very juicy sweet apples used alone, underbaked filling, or slicing too soon. Add tart apples with more body and bake until the filling bubbles through the vents.
Flat flavor Only mild sweet apples, not enough acidity, or dull older apples. Add Granny Smith, Pink Lady, Braeburn, or a little lemon depending on the recipe.
Too tart All Granny Smith or another very tart apple without enough sweetness. Blend with Honeycrisp, Golden Delicious, or Jonagold.
Crunchy apples Slices too thick or pie underbaked. Slice evenly around 1/4 inch and bake until the apples are tender.
Gap under the top crust Apples shrink, slices are too thick, or the filling was not packed well. Pack apples tightly and use uniform slices.

Cooling Matters More Than It Seems

Do not judge the filling while the pie is still hot. Even a good apple blend can look loose when the pie is sliced too soon. Let apple pie cool for at least 2–3 hours before cutting; longer gives cleaner slices.

Finally, when the filling is good but the crust keeps turning soggy, apple choice is only one part of the problem. A properly chilled crust, enough venting, and a fully baked filling matter too. This apple pie crust recipe goes deeper into crust structure, chilling, and baking.

Farmers’ Market and Orchard Apples for Pie

Some of the best pie apples are not always sitting in a supermarket display. At orchards and farmers’ markets, you may find Northern Spy, Winesap, Gravenstein, Bramley, Jonathan, Cortland, Mutsu, Crispin, or other local baking apples.

However, do not assume an unfamiliar orchard apple is automatically better for pie. Some are wonderful for baking, while others are better for sauce, cider, or eating fresh.

When buying from a grower, ask a more specific question than “which apple is sweet?” Ask: Which apples hold their shape in pie, and which ones cook down into sauce? That answer is more useful than chasing a variety name that may not be available in your area.

Best Apples by Dessert Type

Different apple desserts need different textures. Crisps can forgive a slightly softer apple, hand pies need smaller and neater pieces, and double-crust pies need the most structure.

Dessert Best apple direction
Classic double-crust pie Use a tart apple plus a crisp flavorful apple, such as Granny Smith with Honeycrisp, Pink Lady, or Braeburn.
Dutch-style pie Choose apples that hold their shape under a rich crumb topping.
Crumb-topped pie Use tart apples plus one sweeter apple so the topping does not make the pie taste too sweet.
Crisp or crumble Crisp apples are safest, although slightly softer blends can work because the dessert does not need clean pie slices.
Cooked pie filling Use apples that can simmer without collapsing into sauce.
Mini pies Use firm apples diced small, or a cooked filling that will not leak.
Hand pies Use small diced apples or thick cooked filling so the pastry seals cleanly.
Applesauce Softer apples like McIntosh are useful because breakdown is the goal.

Cooked or prepared filling is also useful beyond pie. For a quick dessert that uses apple pie filling instead of fresh sliced apples, this apple cinnamon roll bake with apple pie filling is a good shortcut-style option.

Can You Freeze or Can Apples for Pie?

Freezing and canning are related to apple pie, but they behave very differently from choosing fresh apples for a same-day pie.

You can freeze apples for pie, but frozen apples release more liquid, so they work best in recipes that account for extra moisture. Frozen apples are usually better for cooked filling, crisps, or pies where the filling has enough thickener and bake time.

Canning is different. For shelf-stable filling, use a tested canning recipe and the proper canning thickener. The National Center for Home Food Preservation uses Clear Jel® in its tested apple pie filling method. Do not treat a regular cornstarch-thickened stovetop filling as shelf-stable.

FAQs

Still deciding between two apples? These quick answers cover the most common last-minute pie questions.

What are the best apples for apple pie?

The best apples for apple pie are crisp, sweet-tart apples such as Granny Smith, Honeycrisp, Braeburn, Pink Lady, Golden Delicious, and Jonagold. A blend usually gives better flavor and texture than one apple alone.

Can you make apple pie with one kind of apple?

You can make apple pie with one kind of apple, but a blend usually gives better flavor and texture. For one-apple pies, Granny Smith is the firmest tart choice, Honeycrisp is sweeter and familiar, and Braeburn gives deeper apple flavor.

Are green apples good for apple pie?

Green apples are usually good for apple pie when they are Granny Smith. They bring tartness and structure, which helps balance sweeter apples and keeps the filling from tasting flat.

Are McIntosh apples good for apple pie?

McIntosh apples are better for a softer, saucier pie than a clean, sliceable pie. They break down quickly, so use them in small amounts with firmer apples or save them for applesauce, compote, crisps, or cooked filling.

What is the best apple combination for apple pie?

The easiest apple combination for apple pie is Granny Smith plus Honeycrisp. Granny Smith adds tartness and backbone, while Honeycrisp adds sweetness and fuller apple flavor. For deeper flavor, try Braeburn, Golden Delicious, and Granny Smith together.

Are Granny Smith apples good for apple pie?

Granny Smith apples are very good for apple pie because they are tart and hold shape well. They are especially useful as the tart apple in a blend, but an all-Granny Smith pie can taste sharp unless balanced with enough sugar or sweeter apples.

Are Honeycrisp apples good for apple pie?

Honeycrisp apples work well in apple pie because they are crisp, sweet-tart, and flavorful. They pair nicely with Granny Smith, Pink Lady, or Braeburn when you want a more balanced filling.

Are Gala apples good for apple pie?

Gala apples can work in apple pie, but they are better in a blend than alone. Gala is sweet and mild, so pair it with a firmer tart apple like Granny Smith or Braeburn for better texture and flavor.

Are Fuji apples good for apple pie?

Fuji apples can work in apple pie, but they are very sweet and juicy. Use them with tart apples and reduce sugar slightly when your filling is Fuji-heavy.

What apples should you not use for apple pie?

Avoid Red Delicious, very soft apples, bruised apples, wrinkled apples, and McIntosh used alone when you want a clean, sliceable pie. These apples are more likely to turn mealy, watery, bland, or saucy.

How many apples do you need for apple pie?

For a standard 9-inch apple pie, plan on about 6–8 cups sliced apples, or about 2½–3 lb whole apples before peeling and coring. For a fuller pie, use 8–10 cups sliced apples.

How thin should you slice apples for pie?

For most homemade apple pies, slice apples about 1/4 inch thick. Thinner slices make a softer, compact filling, while thicker slices need a longer bake and can stay crunchy when the pie is underbaked.

Should you peel apples for apple pie?

Most classic apple pies use peeled apples because the filling bakes more evenly and the texture is smoother. You can leave the skins on for a more rustic pie, but use thin, tender-skinned apples and slice them evenly.

Should you pre-cook apples for apple pie?

You do not have to pre-cook apples for every apple pie, but it can help with very crisp apples, deep-dish pies, or fillings that tend to shrink. Pre-cooking gives you more control over moisture, although it also makes the filling softer.

What are the best apples for apple pie filling?

The best apples for apple pie filling are apples that can cook without falling apart, such as Granny Smith, Honeycrisp, Pink Lady, Braeburn, and Golden Delicious. Softer apples can be used in small amounts when you want a saucier filling.

Final Thoughts

You do not need a rare orchard apple to make a good pie. Start with one tart apple, add one crisp apple you actually enjoy eating, slice them evenly, and bake the filling until it has time to bubble and settle. That simple approach will beat a random bag of sweet apples almost every time.

For most home bakers, the best place to start is simple: Granny Smith + Honeycrisp. From there, use Pink Lady for brightness, Braeburn for bite and depth, Golden Delicious for mellow apple flavor, and softer apples only when you want a more saucy filling.

Still unsure at the store? Buy Granny Smith plus one crisp, flavorful apple you already enjoy eating. That simple two-apple blend will get you closer to a balanced pie than a full bag of the sweetest apples on display.

Back to top

Posted on 1 Comment

Apple Pie with Apple Pie Filling: Easy Canned or Homemade Filling Pie

Whole apple pie with apple pie filling and one slice removed, showing thick cinnamon apple filling and a golden flaky crust.

This apple pie with apple pie filling is for the moment when you want real apple pie without peeling, slicing, simmering, and starting from scratch. Use canned filling for the fastest version, or homemade apple pie filling if you already have a batch ready. Premade crust keeps it easy; homemade crust makes it feel more from-scratch.

The trick is not just spooning filling into crust. A little lemon, spice, salt, butter, and enough cooling time can turn a shortcut pie into something golden, cozy, and sliceable, with flaky pastry, warm cinnamon-apple filling, and pieces that feel like dessert instead of a last-minute fix.

Below, you will find the easy no-par-bake method, a better-bottom-crust option, exact filling amounts, canned filling upgrades, premade crust tips, and fixes for the common problems: runny filling, pale crust, soggy bottoms, and slices that fall apart when you cut them.

Quick Answer

For a 9-inch apple pie with apple pie filling, use 2 cans of 20–21 oz filling or about 5–6 cups homemade apple pie filling. Add it to a chilled bottom crust, top with a second crust or lattice, vent well, brush with egg wash, and bake at 400°F / 200°C for 40–45 minutes, until the crust is deeply golden and the filling bubbles through the vents.

For the fastest version, skip par-baking and keep the crust cold before filling. For the crispest bottom crust, par-bake the base first. Either way, let the pie cool for at least 2 hours before slicing. The hardest part is waiting, but it is what helps the filling settle instead of running all over the plate.

Quick answer guide for apple pie with apple pie filling showing two cans or 5 to 6 cups of filling, a 400 degree Fahrenheit bake temperature, and a cooling time of at least 2 hours.
For a regular 9-inch pie, two cans of apple pie filling are usually the safest shortcut, while 5–6 cups works better when you are using homemade filling and want a fuller pie.

Need the exact amounts? Go to the recipe card, or check the filling amount guide first if you are using one can, two cans, or homemade filling.

Fastest version: canned filling + refrigerated pie crust.
Most homemade flavor: homemade filling + homemade pie crust.
Most reliable crust fix: par-bake the bottom crust before adding the filling.

What the Finished Apple Pie Slice Should Look Like

A well-rested pie should slice cleanly without looking dry or stiff. The filling can be glossy and soft, but it should still hold together enough to sit on the plate instead of spreading into a puddle.

Single slice of apple pie with apple pie filling on a plate, showing glossy apple filling and a flaky golden crust.
A clean slice tells you the filling has set properly; in other words, it should look soft and glossy, yet still hold its shape on the plate.

Why This Easy Apple Pie Works

A prepared-filling apple pie can taste flat or turn soggy when the filling is too sweet, the crust is too warm, or the pie is sliced before it has time to set. However, this version fixes those problems without making the recipe complicated.

  • Two cans give the pie enough body. One can usually makes a shallow pie, while two cans work better for most regular 9-inch pies.
  • Small upgrades do the heavy lifting. Lemon, salt, spice, vanilla, butter, and an optional tart apple make canned filling taste brighter and less one-note.
  • Cornstarch helps loose filling set. This is especially useful when canned filling looks syrupy.
  • Egg wash improves premade crust. It helps the top bake golden instead of pale.
  • Cooling gives cleaner slices. Even a properly baked pie needs time before cutting.

Apple Pie with Apple Pie Filling at a Glance

Detail Good Default
Pie size Standard 9-inch pie
Filling amount 2 cans for most regular 9-inch pies; 5–6 cups for a fuller homemade-filling pie
Crust Double crust, lattice, or crumb topping
Oven temperature 400°F / 200°C for the easy method
Bake time 40–45 minutes, or until the crust is fully golden and the filling bubbles
Cooling time 2 hours minimum; 3–4 hours for cleaner slices
Fastest version Canned filling + premade crust
Most homemade-style version Homemade apple pie filling + homemade crust
Crispest bottom Par-bake the bottom crust and use cooled filling

Ingredients for Apple Pie with Apple Pie Filling

This recipe can be as simple as crust, filling, and egg wash. Still, a few small additions make a big difference. Lemon juice keeps the pie from tasting overly sweet, salt wakes everything up, warm spices make the apples taste more homemade, and a little cornstarch helps loose filling set as the pie cools.

Ingredients for apple pie with canned filling arranged on a work surface, including pie crust, apple pie filling, lemon, cinnamon, nutmeg, salt, vanilla, cornstarch, butter, egg, and a tart apple.
These ingredients keep the recipe simple; however, the lemon, spice, vanilla, butter, and cornstarch are what help canned apple pie filling taste more balanced and bake more neatly.

For the Crust

  • 1 box refrigerated pie crusts, 14.1 oz / about 400 g, usually 2 crusts
  • Or 1 homemade double pie crust
  • 1 large egg, for egg wash
  • 1 tablespoon / 15 ml water or milk, for egg wash
  • 1–2 teaspoons coarse sugar or granulated sugar, optional, for sprinkling

For the Filling

  • 2 cans apple pie filling, 20–21 oz / 567–595 g each
  • 1 teaspoon ground cinnamon
  • ¼ teaspoon ground nutmeg
  • ⅛ teaspoon salt
  • 1 tablespoon / 15 ml lemon juice
  • 1 teaspoon / 5 ml vanilla extract, optional
  • 1 tablespoon / about 8 g cornstarch, or 2 tablespoons / 16 g if the filling looks loose
  • 1 tablespoon / 14 g butter, cut into small pieces
  • 1 small tart apple, optional, peeled and thinly sliced, about 100–120 g

The tart apple is optional, but it is one of the most useful upgrades if your canned filling tastes soft or flat straight from the can. A little fresh apple gives the pie more bite and makes the texture feel less processed.

Slice the fresh apple very thinly. Since canned filling is already cooked, thick fresh apple slices may stay too firm by the time the crust is done.

To avoid cornstarch clumps, mix the cornstarch with the cinnamon, nutmeg, and salt first, then fold that mixture into the filling. If the canned filling is very thick and gelled, loosen the cornstarch mixture with the lemon juice before stirring it in.

Using canned filling? The canned filling upgrade guide shows exactly how to fix filling that tastes too sweet, flat, runny, or overly gelled.

How Much Apple Pie Filling for One Pie?

One can looks tempting, but it usually makes a shallow pie. For most standard 9-inch pies, 2 cans of 20–21 oz apple pie filling work well, especially if you are using a regular pie plate. However, if you want a fuller, more generous pie, add one thinly sliced tart apple or use about 5–6 cups homemade filling.

Measurement guide showing how much apple pie filling to use for one pie, including one can, two cans, fuller 9-inch pie, and deep-dish pie amounts.
If you want to know how much apple pie filling for one pie, think beyond the can count: a standard 9-inch pie usually needs enough filling to look full before baking, but not so much that it bubbles over.

If you want to make the filling from scratch ahead of time, use this homemade apple pie filling recipe. It is cooked until glossy and spoonable, then cooled before going into pie crust.

Pie or Filling Use Amount to Use
1 can apple pie filling About 2–2½ cups; usually too shallow for a full 9-inch double-crust pie
2 cans apple pie filling About 4½–5 cups; enough for most regular 9-inch pies
Fuller 9-inch pie 5–6 cups filling, or 2 cans plus 1 small sliced tart apple
Shallow 9-inch pie 4–5 cups filling
Deep-dish 9-inch pie 6–7 cups filling
Homemade filling replacement Use 5–6 cups for one generous 9-inch pie

One Can vs Two Cans of Apple Pie Filling

One can may work for a shallow pie, small pie, or tart-style dessert. However, two cans usually give a regular 9-inch pie the fuller slice most people expect from a classic double-crust apple pie.

Comparison image showing a shallow apple pie made with one can of filling and a fuller apple pie made with two cans of filling.
This comparison shows why one can vs two cans of apple pie filling matters: one can often looks sparse, whereas two cans give the pie the fuller slice most readers expect.
Simple rule: use 2 cans for a regular 9-inch pie, or 5–6 cups if you are using homemade filling and want a fuller pie.

Leave a little headroom once the filling is in the crust. A pie that is packed all the way to the rim may look generous before baking, but it is more likely to bubble over in the oven.

Once you know how much filling you need, go straight to the step-by-step method.

Canned Apple Pie Filling vs Homemade Apple Pie Filling

Both work. The better choice depends on whether you want speed or texture. Canned filling is fast and reliable, but it often needs a little balancing. Meanwhile, homemade filling gives you more control over the apples, sweetness, and spice; however, it should be cooled before it goes into the crust.

Comparison of canned apple pie filling, homemade apple pie filling, and canned apples for use in apple pie.
Canned apple pie filling is the fastest option, homemade apple pie filling gives more control, and canned apples sit in between only if you are willing to season and thicken them first.
Filling Type Best For What to Know
Canned apple pie filling Fastest version Add lemon, salt, cinnamon, vanilla, and butter for better flavor.
Homemade apple pie filling Better texture and fresher apple flavor Use 5–6 cups and cool it before adding it to the crust.
Canned apples A separate shortcut when you do not have pie filling Usually need sugar, spice, lemon, and thickener because they are not already prepared as pie filling.
Fresh apples Best for a full from-scratch apple pie Use only a small amount here as a texture upgrade; a full fresh-apple filling needs a different method.

The most important difference is thickness. Apple pie filling is already sweetened and thickened. Canned apples are usually just apples in liquid or syrup, so they need more help before they behave like pie filling.

How to Make Canned Apple Pie Filling Taste Homemade

Canned filling is convenient, but it can taste too sweet, too soft, or a little flat. Do not panic if it tastes unimpressive straight from the can. That is exactly what the lemon, salt, spice, butter, and optional tart apple are here to fix.

Guide showing how to make canned apple pie filling taste homemade with lemon, salt, cinnamon, nutmeg, vanilla, butter, tart apple, and cornstarch.
To make canned apple pie filling taste homemade, focus on balance rather than sweetness: acid, spice, butter, and a little fresh apple texture usually do more than extra sugar.
Filling Problem What to Add Why It Works
Overly sweet filling 1 tablespoon lemon juice + ⅛ teaspoon salt Balances the syrupy sweetness and makes the apples taste brighter.
Flat flavor Cinnamon, nutmeg, and vanilla Adds warmth and makes the filling taste more like homemade apple pie.
Soft apple texture 1 small tart apple, very thinly sliced Adds fresh apple texture and a little bite.
Runny or loose filling 1–2 tablespoons cornstarch Helps syrupy filling set as the pie bakes and cools.
Canned flavor Butter, lemon, spice, and vanilla Rounds out the flavor and softens the processed taste.
Thick or gelled filling Stir gently; add a tiny splash of apple juice only if needed Loosens the texture without making the pie watery.

Cornstarch and Thin Apple Fixes for Canned Filling

These two small fixes solve different problems. Cornstarch helps loose filling set, while very thin tart apple slices add fresher texture without staying hard after the crust is baked.

Two-panel guide showing cornstarch mixed with spices and thin tart apple slices being added to canned apple pie filling.
These two small fixes help more than they seem: cornstarch improves structure, while very thin tart apple slices add fresher texture without staying hard after baking.

Taste the filling before it goes into the crust. If it tastes dull, add a little more lemon. If it tastes sharp, leave it alone; the crust and butter will soften the edges as it bakes.

Go easy on extra sugar. Most canned filling is already sweet enough. If you want a deeper flavor, use only 1–2 tablespoons brown sugar. If the filling already tastes very sweet, lemon and salt will help much more than more sugar.

Already happy with your filling? Skip ahead to the baking method, or use the soggy-bottom fixes if crust texture is your main worry.

Premade Pie Crust vs Homemade Crust for Apple Pie

For the fastest version, refrigerated premade crust is the easiest choice. It usually comes as a two-crust pack, so you can make a classic double-crust pie, a lattice top, or cutout shapes without mixing dough from scratch.

For better flavor and flake, use homemade crust. If you want a buttery crust that works for apple pie, lattice, and double-crust bakes, use this apple pie crust recipe as the base.

Comparison of premade pie crust and homemade pie crust for apple pie, showing packaged crust on one side and rolled homemade dough on the other.
Choose premade pie crust when speed matters most; meanwhile, homemade pie crust is worth the extra work if you want a flakier, more buttery finish.
  • Refrigerated pie crust: fastest and easiest. Let it soften just enough to unroll, then keep it cold once it is in the plate.
  • Homemade pie crust: better flavor and flake. Keep the dough cold and do not stretch it into the pie plate.
  • Frozen pie shell: useful for crumb-topped versions, but less flexible for a full double-crust pie.
  • Graham cracker crust: not ideal here. It is better for chilled or biscuit-base desserts, like banoffee pie, than bubbling apple filling.

Worried about the bottom crust? Read the soggy-bottom fixes before you bake.

How to Make Apple Pie with Apple Pie Filling

There are two good ways to make this pie. The fast method is for the easiest possible bake. The par-baked method is for anyone who wants more protection against a soft bottom crust.

No-Par-Bake vs Par-Bake Apple Pie

Use the no-par-bake route when speed matters most. However, if you care more about bottom-crust texture, par-baking gives the crust a head start before the prepared filling goes in.

Comparison guide showing no-par-bake and par-bake methods for apple pie, with a raw chilled crust on one side and a par-baked crust on the other.
Use the no-par-bake route for the easiest apple pie, but switch to par-bake when bottom-crust texture matters more than speed.

Fast Apple Pie with Canned Filling Method

This is the simplest route when you want a low-stress holiday dessert or a quick pie that still feels homemade.

Step-by-step guide showing the fast method for making apple pie with canned filling, including filling the crust, topping the pie, venting, baking, and cooling.
This fast method keeps the recipe approachable, yet the order still matters: fill the pie, vent the top, bake until bubbling, and then cool long enough for the filling to settle.

Choosing the Right Pie Plate: Metal vs Glass

Pie plate material changes how the crust bakes. A metal pan usually browns faster, while glass lets you see the crust but needs gentler handling around sudden heat changes.

Comparison guide showing a metal pie plate on a hot sheet pan and a glass pie plate on a room-temperature sheet pan for baking apple pie.
A metal pie plate usually promotes stronger bottom browning; by contrast, a glass pie plate gives visibility but needs gentler handling around heat changes.
  1. Heat the oven. Preheat to 400°F / 200°C. If using a metal pie plate, you can preheat a rimmed baking sheet and bake the pie on it for better bottom browning. If using a glass pie plate, avoid sudden temperature changes and use a room-temperature sheet pan underneath to catch drips.
  2. Prepare the crust. Fit one pie crust into a 9-inch pie plate without stretching it. Chill the crust while you mix the filling.
  3. Mix the filling. In a small bowl, mix the cornstarch with the cinnamon, nutmeg, and salt. Gently fold that mixture into the filling with the lemon juice, vanilla, and optional sliced tart apple.
  4. Fill the pie. Spoon the apple mixture into the chilled bottom crust, then dot the top with small pieces of butter.
  5. Add the top crust. Cover with the second crust, make a lattice, or add cutouts. Seal and crimp the edges.
  6. Vent and wash. Cut steam vents if using a full top crust. Whisk the egg with water or milk, brush lightly over the crust, and sprinkle with sugar if using.
  7. Bake. Start at 400°F / 200°C for 20 minutes. Then, tent the edges or top lightly with foil if browning too fast and continue baking for 20–25 minutes more.
  8. Cool. Let the pie rest for at least 2 hours before slicing. For the cleanest slices, cool 3–4 hours.

How to Tell When the Pie Is Done

For fruit pies, visual cues matter more than the timer. A properly baked pie should show active bubbling through the vents or lattice, and the crust should be fully golden, not pale. For another helpful bake-doneness cue, King Arthur Baking recommends waiting until the filling shows vigorous bubbling.

Close-up of a baked apple pie showing bubbling filling through the vents and a fully golden crust.
A pie is not done just because the timer says so; instead, look for active bubbling through the vents and a crust that has moved past pale beige into real golden brown.

If your filling looks loose or your pies often have a soft base, use the soggy-bottom guide or the par-baked crust option.

Better Bottom Crust Method

Use this method if your filling looks loose, your pie plate is deep, or you have had wet-bottom pies before. It adds time, but it gives the base a head start before the filling goes in.

  1. Fit and chill the bottom crust. Place the bottom crust in a 9-inch pie plate and chill for 20–30 minutes.
  2. Par-bake. Line the crust with parchment and fill with pie weights, dried beans, or rice. Bake at 375°F / 190°C for 15–18 minutes.
  3. Set the base. Remove the weights and parchment. If the crust looks damp, bake for another 2–3 minutes. For extra protection, brush the bottom lightly with egg wash and bake 2–3 minutes more.
  4. Add filling and top crust. Spoon in the upgraded filling, dot with butter, add the top crust or lattice, and seal the edges.
  5. Bake the filled pie. Increase the oven to 400°F / 200°C and bake for 35–45 minutes, until the top is golden and the filling bubbles through the vents.
  6. Rest before slicing. Let the pie settle fully so the filling holds better when cut.

A lattice or crumb topping is easiest with a par-baked bottom crust. If using a full top crust, brush the par-baked rim lightly with egg wash or water, press gently to seal, and shield the edges if they brown too quickly.

Good to know: you do not have to par-bake every time. But if your main worry is a soft bottom crust, par-baking is the most reliable fix.

How to Stop the Bottom Crust from Getting Soggy

A soggy bottom usually happens when the filling is too wet, the crust is too warm, the pie is underbaked, or the pie is sliced before the filling has settled. This version is especially vulnerable if the canned filling is soft and syrupy.

Guide showing how to avoid soggy bottom apple pie crust with cooled filling, cold crust, thickener, sheet pan guidance, par-baking, and resting time.
Preventing a soggy bottom crust starts before baking: use cold dough, avoid overly loose filling, and give the pie enough bake time and resting time to finish setting.
  • Use cooled filling. If using homemade filling, let it cool before adding it to the crust.
  • Thicken loose filling. Add 1 tablespoon cornstarch for normal canned filling or 2 tablespoons if it looks runny.
  • Keep the crust cold. Chill the bottom crust after fitting it into the pie plate.
  • Use a glass or metal pie plate. These usually brown the bottom crust better than flimsy disposable foil pans.
  • Use a sheet pan wisely. A hot sheet pan can help bottom browning with a metal pie plate. With glass, use a room-temperature sheet pan to avoid sudden temperature changes.
  • Do not underbake. Look for a deeply browned crust and active bubbling through the vents, not just the timer.
  • Par-bake when needed. This is the safest option when crust texture matters most.
  • Give the pie time to settle. This matters especially if you want neat pieces instead of a loose filling spill.

If you are making this for a holiday table, bake it earlier than you think. Apple pie slices better after it rests, and individual slices can always be warmed gently before serving.

Top Crust Options

A full top crust is the classic choice, but a lattice, cutout crust, or crumb topping can work beautifully too. Since the filling is already prepared, the top is mostly about texture, looks, and steam release.

Apple pie top crust options showing full crust, lattice crust, cutout crust, and crumb topping.
Each top crust changes the pie a little: a full crust feels classic, lattice vents more easily, cutouts add style, and crumb topping gives a softer Dutch-style finish.
  • Full top crust: classic apple pie look. Cut several vents so steam can escape.
  • Lattice crust: pretty, traditional, and naturally well-vented.
  • Cutout crust: great for holiday pies. Leave enough gaps for steam.
  • Crumb topping: easier than a top crust and gives the pie a Dutch-style feel. This is the direction to take if you want more buttery crumble than pastry.
  • No top crust: not ideal for this exact recipe unless you reduce the filling or turn it into a tart-style dessert.

If you use a full top crust, vents are not optional. Prepared filling still bubbles as it heats, and steam needs a place to escape.

Troubleshooting Apple Pie with Apple Pie Filling

Troubleshooting guide for apple pie with apple pie filling covering runny filling, soggy bottom, pale crust, bubbling over, overly sweet filling, and thick or gelled filling.
Most apple pie with apple pie filling problems are fixable; for example, runny filling usually needs more structure or more cooling time, while pale crust simply needs better browning.
Problem Likely Cause Fix
Bottom crust is soggy Filling was too wet, crust was warm, or pie was underbaked Use cooled filling, thicken loose filling, chill the crust, and par-bake next time.
Filling runs everywhere Pie was sliced too hot Let the pie rest fully before cutting; warm filling will always look looser.
Filling tastes canned Not enough acid, salt, spice, or fresh texture Add lemon juice, cinnamon, vanilla, salt, butter, and optional tart apple.
Pie is too sweet Canned filling is already sweet Add lemon juice and a tart apple. Avoid extra sugar unless the filling truly needs it.
Top crust browns too fast Edges are exposed to direct heat Tent loosely with foil or use a pie shield.
Pie bubbles over Too much filling or not enough headroom Bake on a sheet pan and avoid overfilling the crust.
Crust tastes bland Plain premade crust did not brown enough Use egg wash, a little sugar, and bake until deeply golden.
Filling is too thick or gelled Canned filling texture is very firm Stir gently before filling the pie and add only a tiny splash of apple juice if needed.

Ready to bake? Use the recipe card for the exact amounts, timing, and optional par-bake method.

How to Serve This Apple Pie So It Feels Homemade

This pie is best when it has cooled long enough to slice cleanly, then served slightly warm. If the pie has fully cooled, warm individual slices gently in the oven so the crust perks back up and the filling softens. Then, serve it with something creamy, crunchy, or caramel-like to make the shortcut feel more special.

Warm slice of apple pie with apple pie filling served on a plate with vanilla ice cream and a light caramel drizzle.
Serve the pie slightly warm rather than piping hot, because the crust stays neater, the filling tastes more rounded, and the slice still feels fresh from the oven.
  • Vanilla ice cream: the classic pairing, especially with a warm slice.
  • Whipped cream: lighter than ice cream and good when the pie is already sweet.
  • Caramel drizzle: great for a sweeter, holiday-style dessert, especially if you want the pie to lean more caramel-apple.
  • Toasted pecans or walnuts: add crunch if the filling is very soft.
  • Extra cinnamon sugar: sprinkle lightly over the crust before baking for a more bakery-style finish.

For the nicest serving moment, warm the slice instead of the whole pie. The crust stays neater, the filling softens gently, and the slice still holds its shape on the plate.

Make-Ahead, Storage, Freezing, and Reheating

This is a good make-ahead pie because it needs time to cool anyway. Bake it earlier in the day, let it rest fully, then warm slices before serving if you want that fresh-from-the-oven feeling.

  • Make ahead: bake the pie several hours before serving so the filling has time to settle.
  • Room temperature: for best crust texture, keep loosely covered the day it is baked. Fruit pies made with sugar are commonly kept at room temperature for up to 2 days, but refrigerate sooner if your kitchen is warm.
  • Refrigerator: store covered for 3–4 days.
  • Freezer: freeze baked pie or slices tightly wrapped. The filling freezes well, but the crust may soften slightly after thawing.
  • Reheating slices: warm in a 325°F / 160°C oven until heated through. An air fryer also works well for individual slices.
  • Microwave note: the microwave is fast, but it softens the crust.

For a deeper food-safety note, Iowa State Extension has a helpful guide to fruit pie storage.

More Desserts with Apple Pie Filling

If you have extra filling, you can use it in more than pie. For an easy breakfast-style dessert, try this apple cinnamon roll bake with apple pie filling. It uses the same shortcut idea but turns the filling into a soft, gooey cinnamon roll casserole.

Prepared apple filling also works well in crisps, dump cakes, hand pies, mini pies, turnovers, and puff pastry desserts. Once you know the right amount and texture, it becomes much easier to use across different apple desserts without making them watery or overly sweet.

Apple Pie with Apple Pie Filling Recipe Card

Recipe card image for apple pie with apple pie filling showing yield, filling amount, oven temperature, bake time, and cooling time.
Use this apple pie with apple pie filling recipe card as a quick memory aid: enough filling, a properly heated oven, full bake time, and cooling before slicing are the four details to remember.

Apple Pie with Apple Pie Filling Recipe

This easy apple pie uses canned or homemade filling, premade or homemade crust, and a few simple upgrades for better flavor, cleaner slices, and a golden crust.

Yield1 9-inch pie, 8 slices
Prep Time15 minutes
Cook Time40–45 minutes
Total TimeAbout 3 hours minimum

Equipment

  • 9-inch pie plate
  • Mixing bowl
  • Small bowl
  • Rimmed baking sheet
  • Pastry brush
  • Foil or pie shield
  • Cooling rack
  • Pie weights, dried beans, or rice if par-baking

Ingredients

  • 1 box refrigerated pie crusts, 14.1 oz / about 400 g, 2 crusts, or 1 homemade double pie crust
  • 2 cans apple pie filling, 20–21 oz / 567–595 g each
  • 1 teaspoon ground cinnamon
  • ¼ teaspoon ground nutmeg
  • ⅛ teaspoon salt
  • 1 tablespoon / 15 ml lemon juice
  • 1 teaspoon / 5 ml vanilla extract, optional
  • 1 tablespoon / about 8 g cornstarch, or 2 tablespoons / 16 g if the filling is loose
  • 1 tablespoon / 14 g butter, cut into small pieces
  • 1 small tart apple, peeled and very thinly sliced, optional
  • 1 large egg
  • 1 tablespoon / 15 ml water or milk
  • 1–2 teaspoons coarse sugar or granulated sugar, optional

Instructions

  1. Preheat the oven to 400°F / 200°C. If using a metal pie plate, preheat a rimmed baking sheet and bake the pie on it for better bottom browning. If using glass, use a room-temperature sheet pan underneath to catch drips and avoid sudden temperature changes.
  2. Fit one pie crust into a 9-inch pie plate. Do not stretch the dough. Chill the crust while you prepare the filling.
  3. In a small bowl, mix the cornstarch with the cinnamon, nutmeg, and salt. In a larger bowl, gently fold that mixture into the apple pie filling with the lemon juice, vanilla, and optional sliced tart apple.
  4. Spoon the filling into the chilled bottom crust. Dot the top with small pieces of butter.
  5. Add the second crust as a full top crust, lattice, or cutouts. Seal and crimp the edges. Cut vents if using a full top crust.
  6. Whisk the egg with water or milk. Brush lightly over the top crust and sprinkle with sugar if using.
  7. Bake at 400°F / 200°C for 20 minutes. If the edges brown quickly, cover them loosely with foil or a pie shield.
  8. Continue baking for 20–25 minutes more, until the crust is golden and the filling bubbles through the vents.
  9. Move the pie to a cooling rack. Cool at least 2 hours before slicing, or 3–4 hours for cleaner slices.

Optional Par-Baked Bottom Crust Method

  1. Fit the bottom crust into the pie plate and chill for 20–30 minutes.
  2. Line with parchment and fill with pie weights, dried beans, or rice.
  3. Bake at 375°F / 190°C for 15–18 minutes.
  4. Remove the weights and parchment. Bake 2–3 minutes more if the crust looks damp.
  5. For extra protection, brush the bottom lightly with egg wash and bake another 2–3 minutes.
  6. Add the filling and top crust, then bake at 400°F / 200°C for 35–45 minutes, until the pastry is golden and the filling is actively bubbling.

Notes

  • Two cans of apple pie filling work well for most regular 9-inch pies.
  • For a fuller pie, use 5–6 cups homemade apple pie filling, or add 1 small very thinly sliced tart apple to 2 cans of filling.
  • Before adding cornstarch, mix it with the cinnamon, nutmeg, and salt so it folds in more evenly.
  • If the filling looks loose, increase the cornstarch from 1 tablespoon to 2 tablespoons.
  • After baking, let the pie cool before slicing. Cutting too early is the most common reason the filling runs.
  • When crust texture matters most, use the par-baked method for a crisper bottom.

Storage

Cool completely before covering. Store leftovers in the refrigerator for 3–4 days. Reheat slices in a 325°F / 160°C oven for the best crust texture.

If you try this with a favorite canned filling brand, a crumb topping, or homemade apple pie filling, make a note of what worked best. Small changes in filling thickness can make a real difference in how neatly the pie slices.

FAQs

How much apple pie filling goes in a 9-inch pie?

A regular 9-inch pie usually works with 2 cans of 20–21 oz apple pie filling. For a fuller pie, use about 5–6 cups filling or add one small thinly sliced tart apple to the canned filling.

One can or two cans: which makes a better apple pie?

Two cans make a better standard 9-inch apple pie. One can may work for a shallow pie, small pie, or tart-style dessert, but it usually does not give enough filling for a classic double-crust pie.

What is the best way to thicken canned apple pie filling?

Use 1 tablespoon cornstarch for normal canned filling or 2 tablespoons if the filling looks loose. Mix the cornstarch with the cinnamon, nutmeg, and salt first so it does not clump when folded into the filling.

How do you make canned apple pie filling taste homemade?

Add lemon juice, a pinch of salt, cinnamon, nutmeg, vanilla, and a little butter. For fresher texture, stir in one small tart apple that has been peeled and thinly sliced.

Should the bottom crust be baked before adding apple pie filling?

It does not have to be baked first, but par-baking helps prevent a soft bottom crust. For the fastest version, chill the bottom crust and bake the pie fully. For the crispest base, par-bake before adding the filling.

How long should apple pie cool before slicing?

Cool apple pie for at least 2 hours before slicing. For cleaner slices, especially with canned filling, cool it for 3–4 hours. Slicing too early makes the filling run even if the pie was baked properly.

What is the difference between canned apples and canned apple pie filling?

Canned apple pie filling is already sweetened, spiced, and thickened. Canned apples are usually just apples in liquid or syrup, so they need sugar, spice, lemon, and thickener before they work like pie filling.

Is homemade apple pie filling better for this recipe?

Homemade filling usually gives better texture and fresher flavor, but canned filling is faster. If using homemade filling, cool it before adding it to the crust and use about 5–6 cups for one 9-inch pie.

What top crust works best for apple pie with filling?

A full top crust gives the most classic look, while a lattice crust vents steam better and looks more decorative. A crumb topping also works well if you want a Dutch-style pie.

How should leftover apple pie be stored?

Cool the pie completely, then cover and refrigerate leftovers for 3–4 days. Reheat slices in the oven for the best crust texture. The microwave works, but it softens the crust.

Posted on 4 Comments

Apple Pie Crust Recipe: Flaky Homemade Pie Dough for Apple Pie

A flaky apple pie crust starts with cold butter, gentle handling, and enough baking time. Once it is deeply golden, the crust can hold the apple filling without turning soft or heavy.

A good apple pie crust recipe should give you dough that is buttery, flaky, and strong enough to hold a juicy apple filling without turning tough or soggy. The crust is often the part that makes people nervous: butter softens, dough cracks, bottoms turn pale, and filling leaks where it should not. However, once the dough is cold enough and hydrated just enough, the whole process becomes much calmer.

This homemade pie dough is made for a classic 9-inch / 23-cm apple pie. It gives you enough for a bottom crust and a top crust, so you can make a full double-crust pie, a lattice pie, or a single-crust pie if you want to save the second disk for later. Because apple filling is heavier and juicier than many dessert fillings, the dough needs to be tender without being weak.

The method is simple, but the details matter. Keep the butter cold, add the water slowly, chill the dough before rolling, and avoid stretching it into the pie plate. Then, when you are ready to fill it, use a thick and cooled filling like this homemade apple pie filling recipe so the bottom crust has a better chance of baking up crisp and flaky.

The goal here is not a fancy pastry-school crust. It is a reliable apple pie crust that rolls without falling apart, seals cleanly around the filling, and bakes up flaky enough for a holiday pie. If the dough cracks a little or needs a patch, that is fine. Pie crust is more forgiving than it looks once you keep the butter cold and stop trying to make the dough perfectly smooth.

Quick Answer: The Best Crust for Apple Pie

The best crust for apple pie is a flaky, buttery pie dough that can hold fruit filling without collapsing, cracking apart, or turning soggy on the bottom. For a classic 9-inch / 23-cm apple pie, make a double batch of dough: one round for the bottom crust and one for the top crust or lattice.

This apple pie crust recipe uses all-purpose flour, cold butter, salt, a little sugar, and ice water. The butter gives the crust its rich flavor and flaky layers. Meanwhile, the chill time helps the dough relax, roll more cleanly, and shrink less once it hits the oven.

For a traditional double-crust apple pie, you usually do not need to prebake the bottom crust. Instead, use a filling that is thick rather than watery, let it cool before adding it to the pastry, vent the top crust, and bake until the crust is deeply golden. If you are making a single-crust apple pie with crumb topping, partial prebaking can sometimes help the bottom stay crisp.

A crust choice is not just decoration. It changes how the pie bakes, how steam escapes, and how sturdy the slices feel later. A double-crust pie, a crumb-topped pie, a graham cracker crust pie, and a puff pastry apple dessert all need slightly different handling, so it helps to choose the direction before you start rolling dough.

Apple Pie Crust at a Glance

Yield: this recipe makes enough crust for one 9-inch / 23-cm apple pie or two single-crust pies
Best for: classic apple pie, lattice pie, and crumb-topped single-crust pie
Dough chill time: at least 1 hour
Rest before rolling: 5 to 10 minutes if the dough is very firm
Assembled pie chill: 15 to 20 minutes if the dough has softened
Full pie bake time: about 55 to 65 minutes, plus 2 to 3 hours cooling
Filling amount: 5 to 6 cups / about 1.1 to 1.4 kg / 2.5 to 3 lb cooled apple pie filling
Prebake? Usually no for double-crust apple pie; sometimes yes for single-crust crumb pies
At-a-glance apple pie crust recipe board showing yield, chill time, bake time, filling amount, and best uses.
Before you start, check the timing and yield. This apple pie crust recipe makes one double crust, needs at least 1 hour of chilling, and works best with thick cooled apple filling.

Apple Pie Crust Help

Use these sections to make flaky pie dough, choose the right crust style, and fix the most common apple pie crust problems.

Why This Apple Pie Dough Works

Apple pie is harder on crust than it looks. The filling is juicy, the bake time is long, and the bottom pastry has to hold up while the apples soften and bubble. Because of that, a crust that works for a cream pie or a tiny tart may not always behave the same way under a heavy apple filling.

In this apple pie crust recipe, cold butter, careful hydration, and enough chill time work together. None of those details is complicated on its own, but together they make the dough easier to roll and much less likely to bake up tough or greasy.

Cold butter creates flaky layers

Cold butter does most of the visible work. As the pie bakes, the butter melts and releases steam, which helps separate the dough into flaky layers. That is why you want sandy crumbs, pea-size butter pieces, and a few flat flakes instead of a perfectly smooth mixture.

If the butter gets too warm before baking, it can melt into the flour too early. Then the crust may taste rich, but it will not have the same light, flaky structure. So whenever the dough feels soft or greasy, chilling is the fix.

Gentle handling keeps the crust tender

Flour gives the pastry enough structure to hold apple filling, but too much mixing can make the crust tough. The goal is to bring the dough together just until it holds when pressed, not to knead it until it looks smooth.

A little sugar helps with browning, while salt keeps the crust from tasting flat. Meanwhile, slow hydration helps you avoid adding too much water, which is one of the most common reasons homemade pie dough turns hard instead of tender.

Chill time makes the dough easier to roll

Resting the dough gives the flour time to hydrate and the butter time to firm up again. As a result, the dough rolls more smoothly, seals more easily, and shrinks less in the oven.

You do not need a food processor for this dough. A bowl, your fingertips, a pastry cutter, or two forks are enough, and working by hand also makes it easier to feel when the butter and water are right.

Once those details are handled, the crust becomes reliable enough for a classic apple pie: sturdy around the fruit filling, tender at the bite, and flaky enough to feel properly homemade.

Apple pie crust explanation board with dough, butter, flaky crust, and callouts for cold butter, gentle handling, chill time, and apple filling support.
This dough works because the butter stays cold, the dough is handled gently, and the chill time lets it relax. As a result, the crust rolls more easily and bakes into flaky layers.

Before You Start: What Matters Most

If you remember only three things, keep the butter cold, add water slowly, and do not stretch the dough into the pie plate. Everything else is easier to fix. A small crack can be patched, a sticky dough can be chilled, and uneven edges can be trimmed after the crust is in the plate.

A perfect-looking dough disk is not the goal. You want dough that is cold, lightly hydrated, and just gathered enough to roll. Once it rests, it becomes easier to handle.

Equipment You Need

You do not need special equipment for this apple pie crust recipe, but a few basic tools make the dough easier to handle. If you do not have a pastry cutter, use your fingertips or two forks instead.

Tool Why it helps
Large mixing bowl Gives you enough room to toss the flour, butter, and water without overworking the dough.
Pastry cutter, fork, or fingertips Helps cut cold butter into the flour without needing a food processor.
Rolling pin Rolls the dough into a 12- to 13-inch / 30- to 33-cm round.
9-inch / 23-cm pie plate The recipe is sized for a standard 9-inch apple pie.
Baking sheet Catches drips and can help give the bottom crust stronger heat.
Foil or pie shield Protects the edges if they brown before the center is done.
Apple pie crust equipment guide showing mixing bowl, rolling pin, pastry cutter or forks, 9-inch pie plate, baking sheet, and pie shield or foil.
You do not need fancy pastry tools for homemade apple pie crust. However, a rolling pin, mixing bowl, pie plate, baking sheet, and simple shield for the edges make the process much easier.

Can You Make Pie Crust in a Food Processor?

Yes, a food processor can make apple pie crust faster, but it also makes overmixing easier. Pulse the flour, salt, and sugar first, then add the cold butter and pulse only until pea-size pieces remain. After that, add ice water slowly and stop as soon as the dough begins to clump.

By hand, you get more control because you can feel the butter and dough changing as you work. In a food processor, the key is restraint: do not let the dough turn into a smooth ball in the machine. Once it reaches the shaggy stage, finish gathering it by hand.

Comparison board showing pie crust made in a food processor and by hand, with pea-size butter pieces and do-not-overmix reminders.
A food processor is faster, but mixing by hand gives you more control. Either way, stop when pea-size butter pieces remain, because overmixing can make the crust tough.

Apple Pie Crust Ingredients

You only need a few ingredients for this apple pie crust recipe, but each one affects the final texture. Since pie dough is so simple, measuring carefully and keeping everything cold will make a noticeable difference.

Apple pie crust ingredients board with flour, cold butter, salt, sugar, ice water, optional vinegar, and egg wash.
Because pie dough has so few ingredients, each one matters. Cold butter creates flakiness, flour gives structure, and ice water brings the dough together without making it tough.

All-purpose flour

All-purpose flour gives the crust enough strength to hold apple filling without making the pastry heavy. If you use cups, spoon the flour into the measuring cup and level it off. Otherwise, too much flour can make the dough dry, crumbly, and difficult to roll.

Cold unsalted butter

Butter gives the crust its best flavor. It also helps create those flaky layers that make homemade pastry worth the effort. Cut the butter into small cubes, then keep it cold until you are ready to mix. You want a mix of sandy crumbs, pea-size butter pieces, and a few flatter flakes of butter in the dough.

Most importantly, do not work the butter in until it disappears completely. Those visible butter pieces may look imperfect, but they help the crust bake up flaky instead of dense.

Close-up pie dough mixture showing sandy crumbs, pea-size butter pieces, flat butter flakes, and a do-not-blend-smooth reminder.
Instead of blending the butter completely into the flour, leave a mix of sandy crumbs, pea-size pieces, and a few flat flakes. Those uneven butter pieces help create a flaky pie crust.

Salt

Salt keeps the pastry from tasting dull. Even though apple pie is sweet, the crust still needs balance. Without enough salt, the butter flavor and apple filling will both taste flatter.

A little sugar

Sugar is not always necessary in pie crust, but it works well here because it helps the dough brown and adds a gentle warmth to the pastry. Use only a small amount, though. The crust should still taste like pastry, not like a cookie.

The crust itself stays simple, but the filling can lean warmer if you like more spice. Cinnamon is usually enough for apple pie, although a small pinch of homemade pumpkin pie spice can add ginger, nutmeg, allspice, and clove notes.

Ice water

Ice water brings the dough together. Add it slowly, because flour does not always absorb the same amount of water every time. On a humid day, you may need less. In a dry kitchen, you may need a little more. So the feel of the dough matters more than the exact tablespoon count.

The dough is ready when it holds together after you squeeze it in your hand. It should still look shaggy, not wet or smooth.

Optional apple cider vinegar

A small splash of apple cider vinegar can make the dough a little more forgiving. It is optional, and the crust will not taste sour. However, if you often end up with tough pastry, it can be a helpful backup.

Egg wash

Egg wash is used after the pie is assembled, not inside the dough. It helps the top crust bake up glossy and golden. For a simple finish, beat one egg with a tablespoon / 15 ml of milk or water, then brush it lightly over the chilled top crust before baking.

How to Make Apple Pie Crust

The main rule in any good apple pie crust recipe is simple: keep the butter cold and handle the dough gently. You are not kneading bread dough. Instead, you are bringing pastry together just enough so it can roll, chill, and bake into flaky layers.

If pie dough has ever cracked on you or turned sticky halfway through rolling, you are not doing anything unusual. Most crust problems are temperature problems. Chill the dough, use a little flour, patch what tears, and keep going.

Step-by-step apple pie crust board showing dry ingredients, cold butter, ice water, gathered dough, and chilled dough disks.
The method is simple, but the order matters. First mix the dry ingredients, then cut in cold butter, add ice water slowly, gather gently, and chill before rolling.

1. Mix the dry ingredients

Add the flour, salt, and sugar to a large mixing bowl. Then whisk them together so the salt and sugar are evenly distributed before the butter goes in.

This step is quick, but it matters. If the salt is not mixed evenly, some bites of crust can taste bland while others taste too salty.

2. Cut in the cold butter

Add the cold butter cubes to the flour mixture. Use your fingertips, a pastry cutter, or two forks to work the butter into the flour. Stop when the mixture has sandy crumbs, pea-size butter pieces, and a few thin, flat flakes of butter.

At this stage, the mixture should not look smooth. In fact, a little unevenness is useful because those butter pieces create steam pockets in the oven. If the butter starts to soften or smear, place the bowl in the refrigerator for 10 to 15 minutes before moving on.

3. Add ice water slowly

Drizzle in 1 tablespoon / 15 ml of ice water at a time, tossing the mixture with a fork after each addition. At first, the dough will look dry and loose. After several tablespoons, it will begin to clump together.

Stop adding water when a handful of dough holds together when squeezed. If the dough is sticky in the bowl, it has probably gone too far. On the other hand, if it falls apart completely, add another teaspoon or two of water and toss again.

4. Bring the dough together

Turn the shaggy dough onto a lightly floured surface. Then gather it gently with your hands and press it together until no large dry patches remain. Avoid kneading it smooth, because too much handling can make the crust tough.

If a few crumbly spots remain, press them into the dough with your hands. If needed, dampen your fingers lightly and pat the dry spots together. However, do not add water just to make the dough look neat. Pie dough should look a little rough before it chills.

5. Divide and chill the dough

Divide the dough into two equal pieces. Shape each piece into a flat disk about 1 inch / 2.5 cm thick. A disk chills faster and rolls more evenly than a ball of dough, so this small step makes rolling easier later.

Wrap each disk tightly and refrigerate for at least 1 hour. During that time, the flour hydrates, the butter firms up again, and the gluten relaxes. As a result, the dough becomes easier to roll and less likely to shrink in the oven.

Apple Pie Dough Texture Checkpoints

Pie dough is easier when you know what each stage should feel like. Instead of trying to make it look perfect, use these checkpoints as you work.

Stage What it should look or feel like What to do if it is wrong
Butter mixed into flour Sandy crumbs with pea-size pieces and a few flat flakes of butter If the butter smears, chill the bowl for 10 to 15 minutes.
After adding water Shaggy dough that holds together when squeezed If it falls apart, add water 1 teaspoon at a time.
Before chilling Rough but gathered, not smooth or sticky If sticky, dust lightly with flour and chill sooner.
After chilling Firm but rollable after a few minutes at room temperature If it cracks hard, rest it 5 more minutes before rolling.
Apple pie dough texture checkpoint board showing butter mixed in, shaggy dough after water, gathered dough before chilling, and firm chilled dough.
Each stage should look rough, cold, and workable rather than smooth or wet. Press a small handful together; when it holds without smearing, the dough is usually hydrated enough.
Comparison board showing too-dry crumbly pie dough, just-right shaggy dough held in a hand, and too-wet sticky dough.
Crumbly dough usually needs ice water a teaspoon at a time. Sticky or smeary dough usually needs chilling instead. The best pie dough is shaggy, cool, and firm enough to hold when squeezed.

How to Roll Apple Pie Dough

Let the chilled dough soften slightly

Once the dough has chilled, let one disk sit at room temperature for 5 to 10 minutes if it feels too firm to roll. It should be cool but not rock-hard. If it cracks immediately under the rolling pin, give it another minute or two.

Lightly flour your work surface and rolling pin. Then roll from the center outward, rotating the dough a quarter turn every few rolls. This keeps the round even and helps prevent sticking without forcing the dough into shape.

Hands rolling round apple pie dough with callouts for rolling from the center, quarter-turning, 12 to 13 inch size, and 1/8 inch thickness.
For a 9-inch apple pie, roll the dough from the center outward and turn it as you go. This keeps the crust round, even, and wide enough to fit the pie plate without stretching.

Roll to the right size and thickness

For a 9-inch / 23-cm apple pie, roll the bottom crust into a 12- to 13-inch / 30- to 33-cm round. Aim for a crust that is about 1/8 inch / 3 mm thick. If it is much thicker, it may bake up heavy; if it is much thinner, it can tear or soften under the filling.

For this apple pie crust recipe, that size gives you enough dough to settle into the pie plate and still leave a little overhang for trimming and crimping. Add small amounts of flour only as needed, because too much loose flour can make the crust dry.

Fit the dough without stretching it

To transfer the dough, loosely roll it around the rolling pin, then unroll it over the pie plate. After that, ease the dough into the bottom and sides without pulling it tight. Stretching may seem harmless, but it is one of the most common reasons pie crust shrinks while baking.

Three-step guide showing pie dough rolled onto a pin, unrolled over a pie plate, and gently eased into the dish without stretching.
Once the dough is rolled, move it gently instead of pulling it into place. Rolling it over the pin, unrolling it over the plate, and easing it in helps prevent shrinking.

If the dough tears, patch it with a small piece from the edge and press it gently into place. Once the filling goes in and the pie bakes, small patches will not matter.

Double Crust vs Single Crust Apple Pie

Classic apple pie is usually a double-crust pie, which means it has a bottom crust and a top crust. However, not every apple pie needs two pastry layers. A crumb-topped pie, for example, only needs a bottom crust, while a graham cracker crust pie behaves more like a no-roll dessert.

Crust style Best for What to know
Double crust Classic apple pie Uses one crust on the bottom and one on top. It is the most traditional choice for homemade apple pie.
Lattice crust Apple pies with juicy filling Looks beautiful and lets steam escape through the open spaces, which can help the filling bake evenly.
Single crust Crumb topping or Dutch apple pie Easier than a double crust and useful when you do not want to roll a top crust.
Graham cracker crust No-roll apple pie Better for crumb-topped apple pie than for a classic sealed double-crust pie.
Puff pastry Quick apple desserts More tart-like or turnover-like than traditional apple pie crust.
Comparison of double-crust apple pie, lattice apple pie, and single-crust crumb-topped apple pie on a dark background.
A double crust gives apple pie its classic look, while lattice helps steam escape. Meanwhile, a single crust works beautifully when you want a crumb-topped apple pie.

If you are making homemade apple pie for the first time, a double crust or lattice crust is the safest place to start. Both use the same dough, and both pair well with a thick apple filling.

Full Top Crust, Lattice, or Crumb Topping?

A full top crust gives apple pie its most traditional look. After adding the filling, roll out the second disk of dough, lay it over the apples, trim the overhang, seal the edges, and cut vents in the top. Those vents are important because apple filling releases steam as it bakes.

A lattice crust is slightly more decorative, but it is not only for looks. Because the top is open in places, steam can escape naturally. To make a lattice, roll the second disk of dough, cut it into strips, weave the strips over the filling, and then seal and crimp the edges.

A crumb topping changes the pie completely. Instead of covering the apples with pastry, you cover them with a buttery crumble. This is closer to Dutch apple pie or apple crumble pie. It is also a good choice when you want a single-crust apple pie or when you do not feel like rolling a top crust.

For a classic apple pie, this crust works as a full top, lattice, or single bottom layer with crumb topping. If you use only one disk for a crumb-topped pie, wrap and freeze the second disk for another bake.

Top crust options for apple pie showing a full top crust, lattice crust, and crumb topping with labels.
The top crust changes more than appearance. A full crust feels classic, a lattice lets steam escape, and crumb topping gives a softer, buttery contrast to the apple filling.

Should You Prebake Apple Pie Crust?

For a traditional double-crust apple pie, you usually should not fully prebake the bottom crust. Once the bottom crust is baked, it becomes harder to seal it to a raw top crust. In addition, a classic apple pie bakes long enough for the bottom crust to cook through as long as the filling is not too wet.

Instead of fully prebaking, focus on the details that help this apple pie crust recipe bake properly: use cooled filling, keep the dough cold, avoid stretching it, bake long enough, and place the pie where it gets enough bottom heat.

Single-crust apple pie is different. If you are making a pie with crumb topping, partial prebaking can help when your bottom crust often turns pale or soft. Since there is no raw top crust to seal, you have more flexibility. King Arthur’s guide to prebaking pie crust makes the same practical distinction between single-crust pies and double-crust fruit pies.

Also, do not poke holes in the bottom crust for a raw fruit pie unless you are blind baking it first. Docking is useful for some empty crusts, but in a juicy apple pie, those holes can let filling leak underneath the pastry.

Simple rule: do not fully prebake crust for classic double-crust apple pie. However, consider partial prebaking for a single-crust apple pie with crumb topping if soggy bottoms are a recurring problem.
Decision board explaining that double-crust apple pie usually does not need prebaking, while single-crust crumb pie sometimes does.
For classic double-crust apple pie, prebaking is usually not needed. However, a single-crust crumb pie may benefit from a partial prebake if soggy bottoms are a recurring problem.

How to Keep Apple Pie Crust from Getting Soggy

Soggy bottom crust usually comes from excess moisture, hot filling, weak bottom heat, or underbaking. Fortunately, most of those problems are easy to prevent once you know where the moisture is coming from.

Soggy apple pie crust prevention guide with thick cooled filling, lower oven rack, hot baking sheet, vented top crust, and cooling before slicing.
To avoid a soggy bottom crust, start with thick cooled filling, bake with enough bottom heat, vent the top, and let the pie cool before slicing. Together, these steps protect the crust.

Start with thick, cooled filling

First, use thick apple pie filling. If the filling is loose and watery, the crust will absorb that liquid before it has time to set. A cooked, glossy filling gives you more control because the apples have already released some of their moisture before the pie goes into the oven.

Second, cool the filling before adding it to the crust. Hot filling melts the butter in the dough too early, which can make the pastry soft or greasy before baking even begins. So the filling should be spoonable and glossy, not steaming hot, when it goes into the pie shell.

Give the bottom crust enough heat

Third, bake the pie long enough for the bottom crust to cook through. A golden top does not always mean the bottom is done. If your oven runs cool or your pie plate is thick, the bottom may need more time.

Finally, use bottom heat to your advantage. Bake on a lower oven rack or place the pie plate on a preheated baking sheet. For another helpful reference, this apple pie crust guidance from Martha Stewart also emphasizes giving the bottom crust enough heat and enough time to brown properly.

Choose the right pie plate

Pie plate material also matters. A glass pie plate makes it easier to check whether the bottom crust is browning, while metal usually conducts heat more quickly. Thick ceramic dishes can work beautifully, but they often need enough time and a lower oven rack so the bottom crust can finish baking.

Pie plate material guide comparing glass, metal, and ceramic dishes for apple pie crust browning and baking time.
The pie plate affects how the bottom crust bakes. Glass makes browning easier to check, metal conducts heat well, and ceramic may need a little more time.
Problem Best fix
Filling is watery Use thick apple pie filling and avoid pouring loose liquid into the crust.
Filling is hot Cool the filling before adding it to the dough.
Bottom crust is pale Bake on a lower rack or place the pie on a preheated baking sheet.
Top crust traps steam Cut vents in a full top crust or use a lattice crust.
Pie is sliced too soon Let the pie cool for at least 2 to 3 hours so the filling can thicken and settle.

For the easiest pairing, use this crust with cooled apple pie filling. The filling should be glossy and spoonable, not loose, watery, or steaming hot.

How to Know Apple Pie Crust Is Fully Baked

Apple pie is done when the top crust is deeply golden, the filling is bubbling through the vents or lattice, and the bottom crust has had enough time to brown. If the top looks ready but the bottom still seems pale, cover the edges loosely with foil and give the pie more time on the lower rack.

After baking, let the pie cool for at least 2 to 3 hours before slicing. Otherwise, even a well-baked crust can seem soft because the filling has not had time to thicken and settle.

Finished apple pie with callouts for deep golden top crust, bubbling filling, browned bottom crust, and cooling 2 to 3 hours before slicing.
A finished apple pie should be more than lightly golden. Look for a deep golden top, bubbling filling, and a browned bottom crust; then let it cool so the filling can settle.

Other Crusts You Can Use for Apple Pie

Homemade butter crust is the best choice for a classic apple pie, but it is not the only option. Sometimes convenience matters. Other times, you may want a no-roll crust, a crumb topping, or a quicker apple dessert. In those cases, the main thing is to match the crust to the kind of pie you are actually making.

For classic apple pie, use this homemade butter crust. If speed matters, store-bought crust can still make a good apple pie when the filling is thick and the crust stays cold. For a no-roll version, graham cracker crust works better with crumb topping than with a sealed top crust. For a faster pastry-style dessert, puff pastry is useful, although it behaves more like a tart or turnover than classic pie crust.

Other crusts for apple pie board showing homemade butter crust, store-bought crust, graham cracker crumb pie, and puff pastry turnovers.
Homemade butter crust is best for classic apple pie. Still, store-bought crust, graham cracker crust, and puff pastry can work when you match each one to the right style of dessert.

Can I use store-bought crust?

Yes. Keep the crust cold, use a filling that is thick rather than runny, and cut vents in the top so steam can escape. Homemade dough tastes better and usually bakes flakier, but a premade crust can still make a solid apple pie when the filling and baking are handled well.

Can I use graham cracker crust?

Yes, although it works better for a single-crust apple pie with crumb topping than for a traditional double-crust pie. Graham cracker crust cannot form a sealed pastry top, so treat it as a different dessert style rather than a direct swap for pie dough.

Can I use puff pastry?

Yes, but puff pastry gives you a quicker, more tart-like apple dessert. It works well for turnovers, slab-style bakes, and apple pie-inspired pastries. However, it does not have the same tender, sturdy bite as homemade apple pie crust.

Is shortcrust pastry the same thing?

In many kitchens, pie crust, pie dough, pie pastry, shortcrust pastry, and pie shell describe similar flour-and-fat doughs. The exact formula can vary, but the goal for apple pie is the same: a tender crust that can hold fruit filling and bake into a flaky shell.

Using This Dough for Mini Apple Pies and Hand Pies

This apple pie crust dough also works for mini apple pies and hand pies, but the handling changes slightly. Smaller pastries need a thinner roll, less filling, tighter sealing, and a closer eye in the oven because they bake faster than a full 9-inch / 23-cm apple pie.

For mini apple pies, roll the dough a little thinner than you would for a deep pie, then cut rounds large enough to fit a muffin pan, mini pie pans, or small tart tins. Press the dough in gently without stretching it, add a small spoonful of cooled apple filling, and avoid overfilling so the juices do not leak over the edges.

For hand pies, diced cooled apple filling works better than long apple slices because it fits neatly inside the dough and seals more easily. After filling, press the edges firmly with a fork, cut a small vent in the top, and chill the shaped pies briefly before baking. That short chill helps the crust hold its shape and gives the filling less chance to burst out.

The same rules still matter: keep the dough cold, use thick filling, and do not stretch the pastry. Since mini pies and hand pies are smaller, start checking them earlier and pull them when the crust is golden and the filling is bubbling.

Mini apple pies and hand pies made with golden flaky dough, diced apple filling, sealed edges, and one cut-open hand pie showing filling.
This same dough can also make mini apple pies and hand pies. Because smaller pastries bake faster, use diced cooled filling, seal the edges well, and watch the crust color closely.
Most apple pie crust problems come from five things: warm butter, too much water, overworking the dough, stretching the crust into the pie plate, or adding hot/watery filling.

Apple Pie Crust Troubleshooting

Pie crust problems are common, especially if your kitchen is warm or you are making dough for the first time. Still, most issues come from a few fixable causes: warm butter, too much water, overworking, stretching the dough, or using filling that is too wet.

What went wrong Likely cause How to fix it next time
Dough cracks while rolling Too dry or too cold Let it rest for 5 minutes, then patch small cracks with damp fingers.
Dough feels sticky Too much water or butter is warming Dust lightly with flour and chill the dough before continuing.
Crust is tough Too much water or too much handling Add water slowly and stop mixing once the dough holds together.
Crust shrinks Dough was stretched or not chilled Ease the dough into the plate without pulling, then chill before baking.
Butter leaks out Dough got too warm Keep the butter cold and chill the assembled pie before baking.
Bottom crust is soggy Wet filling, hot filling, or not enough bottom heat Use cooled thick filling and bake on a lower rack or hot baking sheet.
Edges brown too fast Edges are thinner than the rest of the crust Use a pie shield or loose foil once the edges are golden.
Filling bubbles over Pie is overfilled or not vented well Leave a little space, cut vents, and bake on a lined sheet pan.
Apple pie crust troubleshooting board showing cracked dough, sticky dough, tough crust, shrinking crust, butter leaks, soggy bottom, and over-browned edges.
Most apple pie crust problems trace back to temperature, moisture, or handling. Therefore, many fixes begin with colder dough, less water, gentler mixing, and enough time to chill.

If the dough gives you trouble, do not panic. Chill it, patch it, and keep going. Small cracks and rough edges usually disappear once the pie is filled, sealed, brushed with egg wash, and baked until golden.

Make Ahead, Freeze, and Store

Apple pie crust is a good make-ahead recipe because the dough actually benefits from chilling. You can make the disks in advance, keep them wrapped in the refrigerator, and roll them when you are ready to assemble the pie.

For short-term storage, wrap the dough disks tightly and refrigerate them for up to 3 days. For longer storage, place the wrapped disks in a freezer bag and freeze them for up to 3 months.

When you are ready to use frozen dough, thaw it overnight in the refrigerator. If it feels too firm to roll, let it sit at room temperature for a few minutes. However, do not let it become warm or greasy, because softened butter can make the crust bake up heavy.

You can also roll the bottom crust, fit it into the pie plate, cover it well, and refrigerate it before filling. This is useful when you want to prepare the crust ahead but assemble the apple pie closer to baking time.

If you have extra cooked apples or leftover filling, you do not have to make another pie right away. Spoon them over buttermilk pancakes with stewed cinnamon apples for a softer breakfast-style use.

Make-ahead apple pie crust storage guide showing wrapped dough disks, fridge storage, freezer storage, thawing overnight, and keeping dough cold.
Pie dough is a good make-ahead recipe because chilling helps it relax. For best results, refrigerate it up to 3 days, freeze it up to 3 months, and thaw it overnight in the fridge.

Apple Pie Crust Recipe Card

Apple Pie Crust Recipe: Flaky Homemade Pie Dough

This buttery apple pie crust recipe makes enough dough for one 9-inch / 23-cm double-crust apple pie or two single-crust pies.

Prep Time20 minutes
Chill Time1 hour
Total Dough Time1 hour 20 minutes
Yield1 double crust

Ingredients

  • 2 1/2 cups all-purpose flour, or 315 g / about 11 oz
  • 1 teaspoon fine salt
  • 1 tablespoon granulated sugar, or about 12 g
  • 1 cup cold unsalted butter, cut into cubes, or 226 g / 8 oz
  • 6 to 8 tablespoons ice water, or 90 to 120 ml / 3 to 4 fl oz, plus more only if needed
  • Optional: 1 teaspoon / 5 ml apple cider vinegar

For finishing and filling

  • 5 to 6 cups cooled apple pie filling, about 1.1 to 1.4 kg / 2.5 to 3 lb, if baking a full 9-inch / 23-cm apple pie
  • 1 egg
  • 1 tablespoon / 15 ml milk or water
  • Optional coarse sugar for sprinkling

Instructions

  1. Whisk the flour, salt, and sugar together in a large bowl.
  2. Add the cold butter cubes and cut them into the flour until the mixture has sandy crumbs, pea-size butter pieces, and a few flatter butter flakes.
  3. Add ice water 1 tablespoon / 15 ml at a time, tossing with a fork after each addition.
  4. Stop adding water when the dough holds together when squeezed. It should look shaggy, not wet or smooth.
  5. Turn the dough onto a lightly floured surface and gather it gently with your hands. Do not knead it smooth.
  6. Divide the dough into two equal pieces, flatten each into a disk about 1 inch / 2.5 cm thick, wrap tightly, and refrigerate for at least 1 hour.

To use this crust for a full apple pie

  1. Place a rack in the lower third of the oven and preheat to 425°F / 220°C. For extra bottom heat, place a baking sheet in the oven while it preheats.
  2. Roll one disk into a 12- to 13-inch / 30- to 33-cm round, about 1/8 inch / 3 mm thick, and fit it into a 9-inch / 23-cm pie plate without stretching.
  3. Add 5 to 6 cups cooled apple pie filling, about 1.1 to 1.4 kg / 2.5 to 3 lb, or enough to fill the pie without mounding it too aggressively.
  4. Roll the second disk for a full top crust, or cut it into strips for lattice. Then seal and crimp the edges.
  5. Chill the assembled pie for 15 to 20 minutes if the dough has softened.
  6. Beat the egg with milk or water, then brush lightly over the top crust. Sprinkle with coarse sugar if using.
  7. Bake at 425°F / 220°C for 20 minutes. Then reduce the heat to 375°F / 190°C and continue baking for 35 to 45 minutes, or until the crust is deeply golden and the filling is bubbling. If the edges brown too quickly, cover them loosely with foil or a pie shield.
  8. Let the pie cool for at least 2 to 3 hours before slicing so the filling can thicken and settle.

Notes

  • Keep the butter cold for the flakiest crust.
  • Add water slowly; too much water can make the crust tough.
  • Do not knead the dough until smooth. Gentle handling keeps the pastry tender.
  • For classic double-crust apple pie, do not fully prebake the bottom crust.
  • Use thick, cooled apple pie filling to help prevent a soggy bottom crust.
  • The dough can be refrigerated for up to 3 days or frozen for up to 3 months.
Apple pie crust recipe card with yield, prep time, chill time, bake time, key ingredients, short method, and a finished apple pie.
Use this quick recipe card when you need the basic apple pie crust steps in one place: mix, cut in butter, add ice water, gather gently, and chill before rolling.

FAQs

What makes this a good apple pie crust recipe?

It uses cold butter for flaky layers, enough dough for a 9-inch / 23-cm apple pie, and clear chilling, rolling, and baking cues so the crust stays tender instead of tough.

Is apple pie crust the same as pie dough?

Usually, yes. Apple pie crust, pie dough, pie pastry, and pie shell often mean the same basic flour-and-fat dough. For apple pie, however, the dough should be flaky but sturdy enough to hold fruit filling.

Do I need two crusts for apple pie?

For a classic double-crust pie, yes. You need one crust on the bottom and one on top. However, if you are making a crumb-topped or Dutch-style apple pie, one bottom crust is enough.

Should apple pie crust be prebaked?

For a traditional double-crust pie, usually no. Instead, use cooled filling, keep the dough cold, and bake the pie long enough for the bottom crust to brown. For a single-crust pie with crumb topping, partial prebaking can help if the bottom often turns soft.

Why is my apple pie crust tough?

Tough crust usually comes from too much water, too much mixing, or kneading the dough until smooth. So add water slowly and stop handling the dough once it holds together.

Why is my bottom crust soggy?

The filling may have been too wet or too hot, or the pie may not have baked long enough. Use cooled, thick filling and bake on a lower rack or preheated baking sheet so the bottom gets enough heat.

Can I use this crust for lattice apple pie?

Yes. This dough makes enough for a bottom crust and lattice top. Roll the second disk, cut it into strips, weave the strips over the filling, and then seal the edges well.

Can I use store-bought crust instead?

Yes. Keep the crust cold, use thick filling, and vent the top so steam can escape. Homemade dough usually tastes better, but premade crust can still make a good apple pie.

Can I use graham cracker crust for apple pie?

Yes, but it works best for a crumb-topped apple pie rather than a sealed double-crust pie. Since graham cracker crust cannot form a pastry top, treat it as a separate no-roll apple pie style.

Can I use puff pastry for apple pie?

Yes, but puff pastry works better for apple turnovers, slab-style apple desserts, or tart-like bakes than for a classic deep apple pie. Keep it cold, avoid overfilling it, seal the edges well, and cut vents so steam can escape.

Can I make apple pie crust ahead?

Yes. Wrap the dough disks tightly and refrigerate them for up to 3 days or freeze them for up to 3 months. Then thaw frozen dough overnight in the refrigerator before rolling.

Final Tips for Flaky Apple Pie Crust

A reliable apple pie crust recipe comes down to cold butter, gentle handling, enough chill time, and filling that is thick rather than watery. Once the dough is ready, add cooled apple pie filling, seal the edges well, vent the top, and bake until the crust is deeply golden.

Close-up of flaky golden apple pie crust layers with glossy apple filling inside.
A good apple pie crust should look flaky at the edges and sturdy around the filling. When the layers are golden and crisp, every slice feels more homemade.

If your first pie is not perfect, the fix is usually simple. Next time, chill the dough longer, add less water, avoid stretching the crust into the plate, and make sure the filling is not hot when it touches the pastry.

A perfect-looking crust is not the goal. A crust that tastes buttery, holds the filling, and flakes when you cut into it is already a win.

If you try this crust with a different apple pie filling, crumb topping, or pie plate, leave a note with what changed. Those small details often help the next baker more than a perfect-looking slice ever could.

Posted on 8 Comments

Cranberry Moscow Mule Recipe: A Festive Holiday Cocktail With Easy Variations

Cranberry Moscow Mule in a copper mug garnished with rosemary, cranberries, and lime, with text “Pitcher + Single Serve” and “Holiday party-ready.”

There are cocktails that feel like a project, and then there are cocktails that feel like a decision. The cranberry Moscow mule sits firmly in that second camp: you grab a bottle of ginger beer, you find a lime, you pour, you stir, and suddenly the glass looks like a holiday postcard.

That’s the quiet charm of this drink. It can be a cozy Christmas Moscow mule, a bright Thanksgiving cranberry mule, a casual cranberry mule cocktail after work, or the kind of holiday mule you make when friends “just happen” to stop by. Either way, you get the same three-note magic: ginger heat, citrus snap, and that tart-sweet cranberry glow that makes the whole thing taste like winter without tasting heavy.

Even better, it’s easy to steer. Want something sharper? You lean into lime. Prefer it rounder and sweeter? You choose cranberry cocktail instead of 100% juice or add a touch of syrup. Craving something more aromatic? Rosemary, thyme, or orange peel transforms the drink in seconds. And if you’re making cranberry moscow mules for a crowd, a pitcher base takes the stress out of hosting.

If you like having a dependable starting point before you riff, Masala Monk’s guide to the classic mule template is a great foundation: Moscow Mule Recipe: Master Ratio + 10 Easy Variations. From there, cranberry slides in naturally—like the drink was always meant to wear red.


Why Ginger Beer and Cranberry Juice Work So Well Together

At first glance, ginger beer and cranberry juice sounds almost too simple. Yet the pairing makes sense the moment you sip it.

Cranberry brings bright acidity and a clean fruit note. Ginger beer brings spicy fizz and a slight sweetness. Put them together, and you get a cranberry ginger beer cocktail that tastes lively instead of sugary—especially once lime shows up to keep everything crisp.

Infographic showing why ginger beer, cranberry juice, and lime create a balanced cranberry Moscow mule, highlighting tartness, spicy fizz, and crisp citrus balance.
Why ginger beer and cranberry juice work so well together: cranberry adds bright tartness, ginger beer brings spicy fizz, and lime keeps everything crisp—so the mule tastes lively, not sugary.

That balance is the real “secret” here. A mule is essentially a bright, gingery highball; cranberry gives it holiday color and a tart backbone, but ginger beer keeps it from turning into straight-up juice. Meanwhile, lime keeps the drink from getting flat or cloying, which is why moscow mule with cranberry juice almost always tastes better when you don’t skip the citrus.

If you’ve ever wondered why two “mule” drinks can taste wildly different, the answer is often hiding in the mixer. Ginger beer tends to be bolder and more ginger-forward, while ginger ale is usually softer and sweeter; Food & Wine’s breakdown of the difference explains why the swap changes the entire drink’s profile (Ginger Beer vs. Ginger Ale), and Epicurious dives into how production and flavor affect cocktails (Ginger Beer vs. Ginger Ale). In other words: both can work, but they won’t taste the same—and cranberry amplifies that difference.

So if you’re using ginger ale because that’s what you have, you can still make a cranberry mule drink you’ll love; you’ll just want a bit more lime to keep the drink sharp and mule-like.

Also Read: Baked Ziti Recipe Collection: 15 Easy Variations


Cranberry Moscow Mule Ingredients (And What Each One Does)

A good cranberry mule recipe doesn’t need many ingredients, but each one has a job. Once you know what those jobs are, you can tweak the drink confidently—whether you’re building a spiced cranberry mule, an apple cranberry moscow mule, or a big batch cranberry moscow mule.

Vodka (or your spirit of choice)

Vodka keeps the drink clean and neutral, which is why cranberry vodka mule recipes are the classic lane. If you want a specific bottle recommendation, you can absolutely make a cranberry mule recipe with Tito’s—its smooth profile works well with tart juice and spicy ginger.

That said, vodka isn’t your only option. Later on, you’ll see how easily this becomes a gin mule, a whiskey cranberry mule, or a tequila cranberry mule with one simple swap.

Cranberry juice (the fork in the road)

This is where people unknowingly choose their drink’s personality.

  • Cranberry juice cocktail (sweetened) gives you a crowd-pleasing holiday mule cocktail that’s easy to sip.
  • 100% cranberry juice makes the drink tarter, brighter, and more “grown-up,” but it often benefits from a touch of sweetener.

If you’re chasing the best cranberry mule recipe for a party, cranberry cocktail is typically the easiest win. On the other hand, if you love sharp drinks, 100% cranberry can be stunning—especially when you add a teaspoon or two of syrup to round the edges.

Ginger beer (the mule’s engine)

Ginger beer is what makes this drink a mule instead of a vodka cranberry with bubbles. It brings spice, fizz, sweetness, and a slightly fermented tang.

If you’re curious about classic proportions for a Moscow mule, Serious Eats lays out the familiar format—vodka, lime, and 4–6 ounces of ginger beer—clearly and simply (Moscow Mule). Liquor.com offers a similarly straightforward approach (Moscow Mule Cocktail Recipe). Those classics are useful here because cranberry is an add-on, not a replacement. You’re still building a mule; you’re just tinting and flavoring it.

Fresh lime juice (non-negotiable if you want the “mule” taste)

Bottled lime juice can work in a pinch, yet fresh lime gives the drink a brightness that plays beautifully with cranberry. More importantly, it keeps ginger beer and cranberry juice from tasting like a sweet soda.

Ice (more important than it looks)

A mule is at its best when it’s cold and crisp. Lots of ice keeps the ginger beer lively and slows dilution so the drink stays balanced.

Copper mugs (optional—and worth one safety note)

Copper mugs are fun and iconic, although a highball glass is perfectly fine. If you do use copper, it’s smart to choose a lined mug because acidic drinks (ginger, lime) can encourage copper to leach from unlined copper vessels. KFF Health News summarizes research and recommends lined mugs as a safer option (Don’t Nurse That Moscow Mule). You don’t need to panic; you just don’t want an unlined copper cup holding an acidic drink for a long time.

Also Read: Manhattan Cocktail Recipe (Classic + 6 Variations)


The Cranberry Moscow Mule Recipe (Single Drink)

This is the version you’ll come back to again and again—the one you can make by memory once you’ve done it twice.

Ingredients (1 drink)

  • 2 ounces vodka
  • 1 ounce cranberry juice (cocktail or 100%, your call)
  • 1/2 ounce fresh lime juice
  • 4–6 ounces cold ginger beer
  • Ice

Method

  1. Fill a copper mug or tall glass generously with ice.
  2. Add vodka, cranberry juice, and lime juice.
  3. Top with ginger beer.
  4. Stir gently, just enough to combine.
  5. Garnish and serve immediately.
Cranberry Moscow Mule recipe graphic showing a copper mug cocktail with rosemary, cranberries, and lime, plus measurements for single serve and an 8-drink pitcher.
Save this cranberry Moscow mule recipe: make one drink in minutes or mix a pitcher base for eight—then top each glass with ginger beer for the freshest fizz.

If you want the fastest possible route—almost a “dump and stir” approach—Food Network’s cranberry mule is famously minimal: vodka, cranberry juice, ginger beer, ice, garnish (Cranberry Mule Recipe). That style is great when you’re making drinks while chatting, because it’s nearly impossible to mess up. Still, adding lime makes the drink taste more like a true mule and less like a sweet highball, so consider it the small extra step that pays you back with every sip.

Also Read: Green Chutney Recipe (Coriander–Mint / Cilantro Chutney)


Garnishes That Make It Look Like a Holiday Moscow Mule

A cranberry mule already looks festive, but garnishes change the experience as much as they change the photo.

  • Fresh cranberries: classic, simple, and instantly “holiday.”
  • Rosemary sprig: the aroma hits before the sip, which makes it feel like a Christmas mule cocktail.
  • Thyme: softer than rosemary, more delicate, and quietly elegant.
  • Orange peel: warm citrus perfume that turns it into an orange cranberry moscow mule moment.
  • Lime wheel: keeps things bright and crisp.
Sugared cranberries on a cocktail pick with a cranberry mule drink in the background, featuring on-image instructions to dip in simple syrup, roll in sugar, and dry 10–15 minutes.
Sugared cranberries (5 minutes): dip fresh cranberries in simple syrup, roll in sugar, and let them dry—an instant “wow” garnish for cranberry Moscow mules and holiday drinks.

If you want to go all-in, sugared cranberries are the easiest “wow” garnish because they look fancy and take almost no effort. Alternatively, an orange peel and rosemary sprig together makes the drink smell like winter as soon as you lift the mug.

Also Read: Best Vermouth for a Negroni Cocktail Drink Recipe


Christmas Moscow Mule Recipe (The Holiday Mule Version)

The difference between an everyday cranberry mule and a Christmas moscow mule isn’t a new ingredient list—it’s the way you layer aroma and warmth.

Christmas cranberry Moscow mule in a copper mug with sugared cranberries, rosemary, and orange peel, featuring an on-image recipe with vodka, cranberry, lime, and ginger beer.
Christmas cranberry Moscow mule: rosemary and orange peel add instant holiday aroma—mix vodka, cranberry, and lime over ice, then top with ginger beer right before serving.

Start with the base cranberry Moscow mule recipe. Then:

  • Add a rosemary sprig and a handful of cranberries.
  • Express an orange peel over the mug (twist it to release the oils), then drop it in.
  • If you like a sweeter edge, add a small spoon of simple syrup before the ginger beer and stir lightly.

As the drink sits, rosemary perfumes the ginger, orange lifts the cranberry, and suddenly it tastes like a holiday mule without tasting like a candle. That’s the sweet spot.

Cranberry sauce Moscow mule in a tall glass with a spoonful of cranberry sauce, lime wheel, and rosemary, with an on-image recipe for a leftover cranberry sauce mule.
Cranberry sauce Moscow mule: stir a spoonful of leftover cranberry sauce into vodka and lime, then top with ginger beer for a smooth, bold mule with holiday flavor.

If your holiday table already includes cranberry-orange flavors, it’s also fun to pair this drink with something like Cranberry Sauce with Orange Juice, because the same flavor family shows up on both the plate and the glass. The result feels cohesive without feeling planned.

Also Read: Sandwich for Breakfast: Breakfast Sandwich Recipe + 10 Variations


Cranberry Lime Moscow Mule (For People Who Like It Crisp)

Sometimes you want the cranberry to be present but not sweet. In that case, pull the drink toward citrus.

Make the base recipe, then:

  • Use 100% cranberry juice, and
  • Increase lime slightly (a fuller half ounce, or even a touch more if your ginger beer is sweet).
Cranberry lime Moscow mule in a tall glass with lime wedge and wheel, with an on-image recipe highlighting extra lime for a crisp, tart mule.
Cranberry lime Moscow mule: the extra squeeze of lime keeps the drink sharp and mule-like—especially if your ginger beer or cranberry juice runs sweet.

What you get is a cranberry lime mule that drinks clean and bright. It’s the kind of mule that tastes refreshing even after a rich meal, which is exactly why it fits a holiday spread so well.

Also Read: Paper Plane Cocktail Recipe + Best Amaro Substitutes & Tips


Cranberry Orange Moscow Mule (Warm Citrus Without Heaviness)

Cranberry and orange is a classic duo, and it fits the mule format naturally. Instead of making the drink sweeter, orange adds perfume and warmth.

You can do it two easy ways:

  1. Orange peel garnish method: build the base drink, then add orange peel and stir.
  2. Orange juice method: replace a small portion of cranberry juice with orange juice (just enough to bring in the aroma without turning it into a brunch drink).
Cranberry orange Moscow mule in a tall glass with orange peel twist, cranberries, and ice, with an on-image recipe using vodka, cranberry, lime, and ginger beer.
Cranberry orange Moscow mule: add an orange peel twist for warm citrus aroma without making the drink heavy—then top with ginger beer for a crisp finish.

If you want inspiration from a more “designed” version, Bobby Flay’s cranberry-orange mule recipe leans into cranberry vodka and orange notes for a festive spin (Cranberry-Orange Mule). You don’t need to follow it exactly to enjoy the idea; even a simple orange peel garnish can shift your cranberry mule cocktail into a more holiday-forward direction.

Also Read: Strawberry Smoothie Recipes (12 Easy Blends + Bowls & Protein Shakes)


Apple Cranberry Moscow Mule (Cran-Apple, But Make It a Mule)

Apple and cranberry together taste like fall and winter in one sip. The trick is keeping the apple from making the drink taste like sparkling juice.

Here’s the approach that stays mule-like:

Apple Cranberry Mule (1 drink)

  • 2 ounces vodka
  • 1 ounce cranberry juice
  • 1 ounce apple cider (or cloudy apple juice)
  • 1/2 ounce lime juice
  • Ginger beer to top

Build it over ice, then garnish with apple slices and cranberries.

Apple cranberry Moscow mule in a copper mug with apple slice, cranberries, and cinnamon, with an on-image recipe using vodka, cranberry juice, apple cider, lime, and ginger beer.
Apple cranberry Moscow mule: a cozy cider twist on the classic—vodka, cranberry, apple cider, lime, then ginger beer for that signature mule sparkle.

Liquor.com’s apple cranberry moscow mule goes directly at the “cran-apple” idea using cran-apple juice and a smaller lime measure, then tops with ginger beer (Apple Cranberry Moscow Mule). It’s a great reference point if you want that specific flavor lane.

If you’re serving a mix of drinkers—some doing alcohol, some not—an apple-forward zero-proof option fits nicely alongside this version. Masala Monk’s apple juice mocktails are handy for that kind of table, since you can keep the same garnish style and make everything look intentional.

Also Read: Classic Rum Punch + 9 Recipes (Pitcher & Party-Friendly)


Spiced Cranberry Moscow Mule (Cinnamon, Thyme, and Winter Warmth)

A spiced cranberry mule should feel like winter, not like potpourri. The goal is warmth in the background, not a spice rack in the foreground.

Spiced Cranberry Mule, Cinnamon Style

Build the base drink, then add:

  • a tiny pinch of cinnamon, or
  • a cinnamon stick as garnish, or
  • a dash or two of aromatic bitters (if you keep them around)

Cinnamon plays especially well with cranberry and orange peel, so it’s also a natural fit for a Christmas mule cocktail.

Spiced cranberry mule in a crystal glass with cinnamon, thyme, and cranberries, with an on-image recipe using vodka, cranberry juice, lime, and ginger beer.
Spiced cranberry mule: cranberry, lime, and ginger beer with a cinnamon stick and thyme garnish for a warm holiday twist that still tastes crisp and bright.

Spiced Cranberry Thyme Moscow Mule

Thyme is subtler than rosemary, which means it’s easier to use without overpowering the drink.

Build the base drink, then:

  • clap a thyme sprig between your hands to wake up the aroma
  • garnish with the sprig and stir gently once

The result feels like a spiced cranberry thyme mule—fresh, herbal, slightly wintry—without losing that classic mule snap.

Also Read: 7 Pizza Sauce Recipes | Marinara, White Garlic, Alfredo, Buffalo, BBQ, Vodka & Ranch


Cranberry Rosemary Mule (That “Smells Like the Holidays” Version)

Rosemary is the garnish that does the most work with the least effort. It turns a cranberry moscow mule into a cranberry rosemary mule almost instantly.

Build the base drink, then:

  • garnish with rosemary and cranberries
  • stir lightly so the rosemary oils lightly perfume the top of the drink

Because rosemary is assertive, you don’t need to muddle it. In fact, muddling can make the herb taste woody. Instead, let it behave like a fragrant accent.

Cranberry rosemary mule in a dark glass with rosemary, cranberries, and lime, featuring an on-image recipe and a tip to clap rosemary before garnishing.
Cranberry rosemary mule: clap the rosemary sprig before garnishing so the drink smells like the holidays—then add ginger beer last for the brightest fizz.

If you enjoy herbal directions in drinks in general—especially for alcohol-free versions—Masala Monk’s guide to herbal infusions in mocktails is a fun rabbit hole to go down. Rosemary and thyme show up often for a reason: they’re instantly aromatic and pair well with citrus.

Also Read: Vodka Pasta (Penne alla Vodka) + Spicy Rigatoni, Chicken, and Gigi Recipes


Cranberry Pomegranate Moscow Mule (A Deeper, Brighter Fruit Twist)

Cranberry is tart. Pomegranate is tart in a different way—more jewel-toned, slightly floral, and a little rounder.

For a cranberry pomegranate mule:

  • Use half cranberry juice and half pomegranate juice in the base recipe
  • Keep lime and ginger beer the same
Cranberry pomegranate Moscow mule in a tall glass with lime and pomegranate arils, featuring an on-image recipe that uses half cranberry and half pomegranate juice.
Cranberry pomegranate Moscow mule: swap in a half-and-half cranberry–pomegranate juice blend for a deeper, jewel-toned mule that still finishes crisp with ginger beer and lime.

The drink stays crisp, yet the fruit layer feels more complex. It’s a great option when you want something that tastes a little more “special occasion” without adding steps.

Also Read: Mayo Recipe: 15+ Homemade Mayonnaise Variations


Cranberry Vanilla Moscow Mule (A Soft, Dessert-Leaning Option)

If your ginger beer is sharp and you want the drink to feel smoother, vanilla can give it a gentle “holiday dessert” vibe.

There are a few easy routes:

  • Use a small splash of vanilla syrup (the same kind you’d use in coffee), or
  • Use vanilla vodka, or
  • Add a tiny pinch of vanilla extract to a big batch base (very little goes a long way)
Cranberry vanilla Moscow mule in a stemless glass with cranberries and orange peel, with an on-image recipe including vodka, cranberry juice, lime, vanilla syrup, and ginger beer.
Cranberry vanilla Moscow mule: a softer, dessert-leaning twist—add just a teaspoon of vanilla syrup to round the cranberry and let ginger beer keep it crisp.

This turns the drink into a cranberry vanilla mule—still fizzy and gingery, just rounder at the edges. It’s especially nice with orange peel.

Also Read: Blueberry Pancakes (6 Recipes) + Homemade Pancake Mix


Choose Your Spirit: Vodka, Gin, Bourbon, Whiskey, or Tequila

One reason “mule” drinks are so popular is that the template welcomes substitutions. Once you’ve made a cranberry mule with vodka, you can spin it into several other crowd-pleasing directions.

Cranberry mule spirit swaps graphic showing four drinks labeled vodka, gin, bourbon, and tequila, with a base recipe ratio and flavor notes.
Cranberry mule spirit swaps: use the same mule base, then choose vodka (classic), gin (botanical), bourbon (warm), or tequila (bright) to match your mood and menu.

Cranberry Vodka Mule (Classic and Clean)

This is the standard cranberry mule recipe: vodka, cranberry, lime, ginger beer. It’s the most neutral, the most widely loved, and the easiest to batch.

If you like the idea of balancing citrus and sweetness in simple highballs, Masala Monk’s vodka with lemon guide explains the logic behind adding a little syrup to keep tartness bright rather than harsh—an idea that carries over beautifully when you use unsweetened cranberry.

Gin Mule (Cranberry Gin Mule)

Swap vodka for gin and you’ll get a cranberry gin mule that feels more aromatic and botanical. Rosemary garnish becomes even more compelling here, because gin and rosemary play beautifully together.

Cranberry gin mule in a tall glass with lime and rosemary, featuring an on-image recipe for a gin mule made with cranberry juice, lime, and ginger beer.
Cranberry gin mule (gin mule): a more botanical take on the mule—gin, cranberry, lime, then ginger beer, finished with rosemary for an aromatic holiday-ready sip.

This is a great “holiday mule” option when you want something that tastes a touch more complex without adding any extra ingredients.

Bourbon Cranberry Mule (Whiskey Cranberry Mule / Cranberry Kentucky Mule)

Swap vodka for bourbon (or whiskey) and the drink turns warmer and richer. That’s why bourbon cranberry mule and whiskey cranberry mule variations show up so often in colder months: the vanilla-caramel notes in bourbon make cranberry taste more like a winter fruit.

Bourbon cranberry mule (Kentucky mule) in a rocks glass with orange peel and cinnamon, with an on-image recipe using bourbon, cranberry juice, lime, and ginger beer.
Bourbon cranberry mule (Kentucky mule): swap vodka for bourbon to make cranberry taste warmer and richer—then finish with ginger beer and an orange peel twist.

If you want the drink to feel extra seasonal, add orange peel and a cinnamon stick and you’ve basically got a Christmas mule drink that tastes like it belongs next to a fire.

Tequila Cranberry Mule (Cranberry Mexican Mule)

Swap vodka for tequila blanco and you’ll get a brighter, punchier drink. The cranberry becomes sharper, the ginger feels louder, and orange peel suddenly makes a lot of sense.

Tequila cranberry mule (Mexican mule) in a tall glass with a salt-sugar rim, lime wheel, and orange peel, with an on-image recipe using tequila, cranberry, lime, and ginger beer.
Tequila cranberry mule (Mexican mule): tequila blanco makes the cranberry-and-ginger combo brighter and punchier—serve it icy cold with a lime wheel and ginger beer on top.

If you enjoy margarita-style flavors, this version is a natural bridge—especially with a salt-sugar rim or a chili-salt rim if you like heat.

Also Read: Whiskey Sour Recipe: Classic Cocktail, Best Whiskey & Easy Twists


Big Batch Cranberry Moscow Mule (Pitcher Recipe That Actually Works)

If you’re hosting, the best gift you can give yourself is a plan that doesn’t require you to play bartender all night. A cranberry moscow mule pitcher base does exactly that.

The most important rule: batch everything except the ginger beer.

Ginger beer is your fizz, so you want it fresh. Once it sits in a pitcher, it goes flat, and your big batch cranberry moscow mule turns into a sweet, diluted punch. Still tasty, but not the drink you meant to make.

Big Batch Cranberry Mule Base (About 8 Drinks)

  • 2 cups vodka
  • 1 cup cranberry juice
  • 1/2 cup fresh lime juice
  • Optional: 1/4 to 1/2 cup simple syrup (especially if using 100% cranberry juice)

Stir this base in a pitcher and chill it thoroughly.

To Serve

Fill each mug with ice, pour in the base, then top with ginger beer. Stir gently and garnish.

Big batch cranberry mule pitcher filled with cranberries and lime, with an on-image recipe for an 8-serving pitcher and a note to top each glass with ginger beer.
Big batch cranberry mule made for hosting: mix the vodka–cranberry–lime pitcher base, then top each glass with ginger beer so every serving stays cold and fizzy.

That’s it. Suddenly, cranberry moscow mule large batch service becomes effortless. You can chat, refill the snack table, and actually enjoy your own party.

If you want a reference point for a “no-fuss” cranberry mule direction, Food Network’s approach is as straightforward as it gets (Cranberry Mule Recipe), and it scales easily. Meanwhile, if you like a more styled holiday direction that leans orange and cranberry, Bobby Flay’s cranberry-orange mule is a fun idea to borrow elements from when you’re building your garnish bar (Cranberry-Orange Mule).

A Simple Hosting Rhythm (So You’re Not Stuck in the Kitchen)

Instead of pre-pouring full drinks, set up a “build your own” station:

  • a chilled pitcher of cranberry mule base
  • ginger beer bottles on ice
  • a bowl of cranberries
  • sliced limes
  • rosemary and thyme sprigs
  • orange peels or orange slices
Build-your-own cranberry mule bar setup with a pitcher of cranberry mule base, ginger beer on ice, sliced limes, orange peel, cranberries, and herbs, with on-image text.
Build-your-own cranberry mule bar: set out a chilled pitcher base, keep ginger beer cold, and let guests add lime, orange peel, and herb garnishes—easy hosting, fresher fizz.

That small setup makes holiday moscow mules feel abundant, even if you’re keeping things casual.

Also Read: Waffle Recipe Without Milk: Fluffy, Golden, and Crisp


Virgin Cranberry Moscow Mule (The Zero-Proof Version That Still Feels Festive)

A virgin cranberry moscow mule shouldn’t feel like a consolation prize. It should taste like a real drink—bright, fizzy, gingery, and finished with the same garnishes as the alcoholic version.

Virgin Cranberry Mule (1 drink)

  • 2–3 ounces cranberry juice
  • 1/2 ounce lime juice
  • Ginger beer to top
  • Ice

Build over ice, stir gently, and garnish with cranberries and rosemary.

Virgin cranberry Moscow mule mocktail in a crystal glass with cranberries, rosemary, and lime, plus an on-image recipe with cranberry juice, lime, and ginger beer.
Virgin cranberry Moscow mule (mocktail): all the ginger-lime sparkle with a ruby cranberry twist—perfect for kids, drivers, and anyone skipping alcohol.

If you want a clear, tested reference for the non-alcoholic format, Skinnytaste’s cranberry mule mocktail keeps it clean with cranberry juice, ginger beer, and lime (Cranberry Mule Mocktail). You can keep it that simple, or you can dress it up the same way you would a Christmas mule cocktail: rosemary, orange peel, sugared cranberries, the whole works.

For a more “grown-up” herbal direction—especially if you’re serving mocktails at a holiday gathering—Masala Monk’s piece on herbal mocktail infusions is a nice source of ideas. Even one sprig of rosemary can make a zero-proof drink feel intentional.

Also Read: Sheet Pan Chicken Fajitas Recipe (Easy One-Pan Oven Fajitas)


Ginger Ale, Ginger Beer, and Cranberry: Two Easy Routes

Sometimes the question isn’t “which cranberry mule recipe should I make?” It’s “what do I do with what’s already in my fridge?”

Portrait graphic comparing ginger beer vs ginger ale for a cranberry mule, showing how to adjust lime, plus a base recipe and quick tips for sweetness and scaling.
Ginger beer vs ginger ale for a cranberry mule: ginger beer gives sharper mule bite, while ginger ale is softer—so bump the lime and add bubbly last for the best fizz.

If you have ginger beer

You’re in classic mule territory. Build the drink normally. You’ll get more spice, more bite, and a more defined mule identity.

If you only have ginger ale

You can still make a moscow mule recipe with cranberry juice that tastes refreshing. It will be softer and sweeter, so lean into lime a little more. Those differences are exactly why guides like Food & Wine and Epicurious emphasize that ginger beer and ginger ale aren’t interchangeable without changing the result (Food & Wine’s comparison, Epicurious’ comparison).

Either way, cranberry and ginger is a winning pairing. You just steer the balance with lime and sweetness.

Also Read: Strawberry Mojito Mocktails – 10 Easy Variations


What to Serve With Cranberry Moscow Mules (So the Night Feels Complete)

A cranberry mule cocktail is fizzy, gingery, and slightly tart. That means it loves food that’s creamy, salty, crunchy, or gently spicy. In other words, it pairs beautifully with party snacks.

Instead of trying to cook ten things, aim for contrast:

  • one creamy dip
  • one crunchy bite
  • one “fresh” element
  • one cozy holiday side if you’re doing dinner

Here are combinations that work especially well.

Creamy dips and spreads

A creamy dip softens the ginger bite and makes the drink feel smoother.

  • A classic option is Easy Spinach Dip (Cold, Baked, Artichoke & 10 Variations). It’s rich enough to balance the drink, yet it still feels party-friendly rather than heavy.
  • If you want something bolder, Buffalo Chicken Dip is a natural match because spicy, tangy food and fizzy ginger drinks tend to make each other more exciting.
  • For something cool and bright, Greek tzatziki pairs beautifully with the lime and cranberry notes, especially alongside roasted or fried snacks.

One-bite, tidy appetizers

This is the category that makes a gathering feel effortless.

The “hot and crispy” anchor

Every snack table benefits from one warm, crisp tray that disappears quickly.

  • Air fryer chicken wings are ideal here: spicy wings plus a cranberry mule is the kind of pairing that keeps people hovering near the table.

Boards and grazing plates (the easiest party trick)

If you want the room to feel festive without cooking all day, a board does most of the work.

Masala Monk’s guide to charcuterie boards and the 3-3-3-3 rule makes it easy to build something abundant. Add crackers, cheese, something briny, something sweet, and a bowl of cranberries as a playful nod to the drink. With a holiday mule in hand, it feels like an event.

Holiday sides that make everything feel seasonal

If you’re serving these drinks with dinner—especially if you’re leaning into Christmas moscow mule vibes—cozy sides fit right in.

  • Green bean casserole is a classic companion to a holiday table, and it works surprisingly well with a crisp cranberry mule because the drink cuts through creamy, savory dishes.
  • If cranberry is already on your menu, cranberry sauce with orange juice ties the whole spread together, especially if you’re also making a cranberry orange mule variation.

And if you want something simple that helps dips disappear even faster, homemade garlic bread is a cozy, crowd-friendly move—particularly when the weather is cool and the drinks are icy.

Also Read: Katsu Curry Rice (Japanese Recipe, with Chicken Cutlet)


A Cranberry Mule You’ll Actually Make Again

The best thing about this drink is that it doesn’t ask you to commit. You can keep it simple—vodka, cranberry, lime, ginger beer—and it’s already delicious. Then, whenever you feel like it, you pivot:

  • rosemary and cranberries for a cranberry rosemary mule
  • orange peel for a cranberry orange moscow mule
  • apple cider for an apple cranberry mule
  • cinnamon and thyme for a spiced cranberry mule
  • bourbon for a whiskey cranberry mule
  • tequila for a cranberry mexican mule
  • a pitcher base when you’re making cranberry moscow mules for a crowd
  • zero-proof when you want a virgin cranberry moscow mule that still feels special

No matter which direction you choose, the drink keeps its personality: bright, fizzy, gingery, and unmistakably festive.

Also Read: Peanut Butter Cookies (Classic Recipe & 3 Variations)

FAQ

1) What is a cranberry Moscow mule?

A cranberry Moscow mule is a Moscow mule made with vodka, ginger beer, lime juice, and cranberry juice. Compared to a classic mule, it tastes fruitier, looks more festive, and often shows up as a holiday mule or Christmas mule cocktail.

2) What are the cranberry Moscow mule ingredients?

Typically you’ll need vodka, cranberry juice, fresh lime juice, ginger beer, and ice. Afterward, garnishes like cranberries, rosemary, lime, or orange peel make it feel more seasonal.

3) How do I make a cranberry mule cocktail taste less sweet?

If your cranberry mule tastes too sweet, first increase the lime juice slightly. Next, choose a less-sweet cranberry juice (or reduce the cranberry portion) and use a spicier ginger beer for more bite and balance.

4) Can I use 100% cranberry juice in a cranberry moscow mule recipe?

Yes—however, 100% cranberry juice is much tarter than cranberry juice cocktail. Because of that, many people add a small amount of simple syrup to soften the edges while keeping the drink bright.

5) What’s the best ginger beer for a cranberry ginger beer mule?

Since ginger beers vary a lot, pick based on your preference: a spicier ginger beer creates a sharper mule, while a sweeter ginger beer makes a smoother cranberry mule drink. Either way, fresh lime keeps it tasting like a mule.

6) Can I make a moscow mule recipe with cranberry juice and ginger ale?

You can. Even so, ginger ale is usually sweeter and less spicy than ginger beer, so the result will be softer and closer to a cranberry highball. To bring it back toward mule territory, add a bit more lime and use plenty of ice.

7) What vodka works best for a cranberry mule recipe?

Any smooth vodka works well. In particular, a cranberry mule recipe with Tito’s is popular because it’s clean and easy-drinking, letting ginger and cranberry stand out.

8) How do I make an easy cranberry moscow mule?

For an easy version, fill a mug with ice, add vodka and cranberry juice, then top with ginger beer and squeeze in lime. Finally, stir once and garnish—done.

9) How do I make a Christmas Moscow mule recipe?

To turn it into a Christmas mule drink, keep the base recipe and add holiday garnishes such as rosemary sprigs, fresh cranberries, and orange peel. Optionally, add a cinnamon stick for a cranberry cinnamon moscow mule feel.

10) What is an apple cranberry Moscow mule?

An apple cranberry Moscow mule is a cranberry mule variation that includes apple cider or apple juice along with cranberry, then finishes with ginger beer and lime. As a result, it tastes like a cran-apple mule with the classic mule fizz.

11) How do I make an apple cider cranberry Moscow mule?

Instead of using only cranberry juice, use a split—cranberry plus apple cider—then add vodka, lime, and ginger beer. In addition, cinnamon garnish pairs especially well with this version.

12) Can I make a spiced cranberry Moscow mule?

Absolutely. For instance, add aromatic bitters, a cinnamon stick, or a light dusting of cinnamon. Alternatively, use herbs like thyme for a spiced cranberry thyme Moscow mule that still tastes fresh.

13) What’s the difference between a cranberry rosemary mule and a cranberry thyme moscow mule?

Rosemary is more piney and bold, while thyme is gentler and more floral. Consequently, rosemary gives a stronger holiday aroma, whereas thyme keeps the drink lighter.

14) What is a cranberry pomegranate Moscow mule?

A cranberry pomegranate mule combines cranberry juice with pomegranate juice, then adds vodka, lime, and ginger beer. Because pomegranate is naturally tangy, it deepens the fruit flavor without making the drink heavy.

15) Can I make a cranberry mule with gin?

Yes—swap vodka for gin to make a gin mule or cranberry gin mule. Compared to vodka, gin adds botanical notes that taste especially good with rosemary or orange peel.

16) How do I make a bourbon cranberry mule or whiskey cranberry mule?

Replace vodka with bourbon or whiskey. Then build the drink the same way with cranberry, lime, and ginger beer. In turn, the flavor becomes warmer and richer, similar to a cranberry Kentucky mule style.

17) Can I make a tequila cranberry mule (Mexican mule)?

Definitely. Use tequila blanco instead of vodka, then add cranberry juice, lime, and ginger beer. For extra lift, garnish with orange peel or a lime wheel.

18) How do I make a big batch cranberry Moscow mule?

Make a pitcher base with vodka, cranberry juice, and lime juice, and chill it. Then, when serving, pour the base over ice and top each glass with ginger beer so the fizz stays lively.

19) What’s the best cranberry moscow mule pitcher recipe for a crowd?

A reliable approach is batching vodka + cranberry + lime in advance, then topping with ginger beer per glass. That method scales easily for a cranberry moscow mule for a crowd, a large batch cranberry mule, or a party pitcher.

20) How far ahead can I prep a cranberry moscow mule batch?

You can mix the vodka, cranberry juice, and lime juice several hours ahead and keep it refrigerated. Still, add ginger beer only at serving time to maintain carbonation.

21) Can I make a virgin cranberry Moscow mule?

Yes—a virgin cranberry mule uses cranberry juice, lime juice, and ginger beer over ice. For a more “holiday mule” feel, garnish with rosemary and cranberries just like the cocktail.

22) Can I use cranberry vodka in a moscow mule with cranberry vodka?

Yes. Cranberry vodka works well and reinforces the fruit notes. Even so, keep lime in the recipe so it doesn’t drift into overly sweet territory.

23) What can I use instead of lime in a cranberry mule recipe?

If you’re out of lime, lemon can work. Nevertheless, lime is the classic mule citrus and tends to pair best with ginger beer and cranberry.

24) Why does my cranberry mule taste flat?

Usually it’s because the ginger beer wasn’t cold, the drink sat too long, or it was stirred too aggressively. To fix it, use chilled ginger beer, add it last, and stir gently.

25) Can I serve cranberry mules for Thanksgiving and Christmas?

Yes—cranberry mules fit both. For Thanksgiving, apple cider and cinnamon variations feel especially fitting. For Christmas, rosemary, orange, and pomegranate versions look and smell extra festive.