Posted on — Leave a comment

Crockpot Turkey Breast Recipe: Juicy Slow Cooker Turkey Breast, Time & Temp

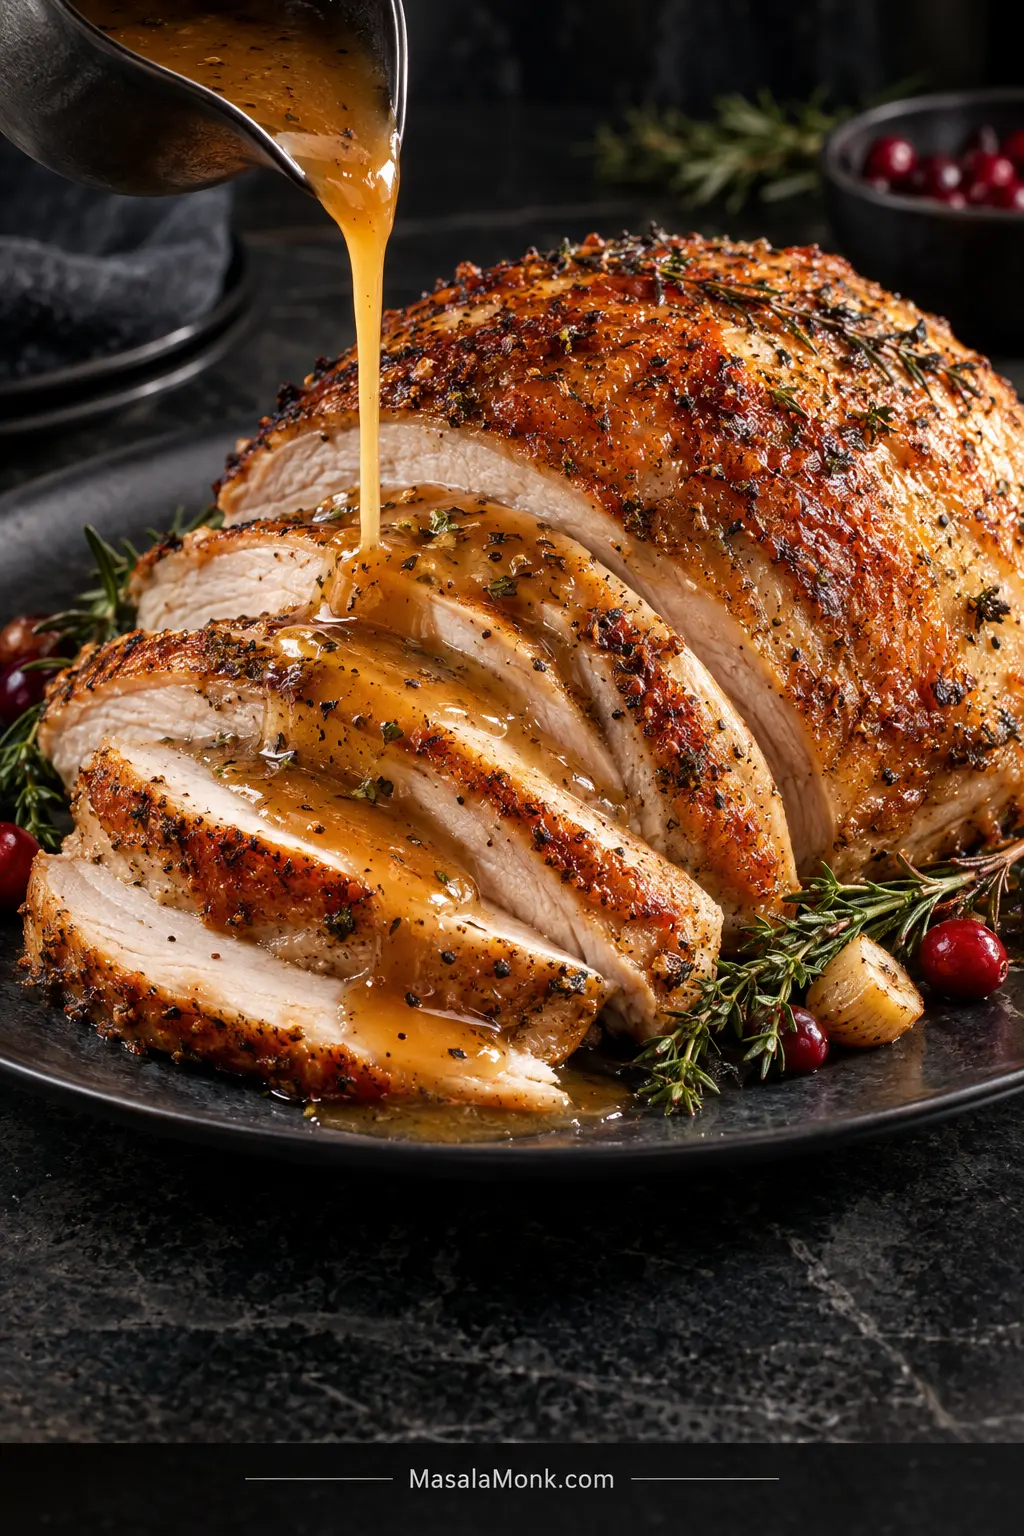
Carved golden turkey breast with moist slices while warm gravy is poured over the front of the platter.

A Crockpot can give you juicy, sliceable turkey breast without tying you to the kitchen all afternoon. The confusing part is knowing when your particular breast is actually done.

Dinner may be at six while one recipe says four hours and another says seven. Often, those recipes are not cooking the same thing. An intact boneless breast, a compact netted roast and a larger bone-in breast can carry almost the same name on the package while needing different handling—and the same weight does not always mean the same checking time.

What you need is not a more confident clock. You need to know which timing applies to your turkey, when to start checking it and when to take it out.

This crockpot turkey breast recipe does exactly that. The goal is juicy slices that stay together, savory herb-and-onion drippings for gravy, and golden skin at the end if yours came skin-on. It is especially handy for a smaller Thanksgiving dinner, or whenever a whole turkey is more than the table needs and the oven is already busy with the sides.

Time tells you when to check. Temperature tells you when to stop. Start checking before the expected finish and take the turkey out when the thickest meat reaches 165°F / 74°C.

Find Your Turkey Breast Before You Start

You do not need to decode every word on the wrapper. Two quick checks tell you which advice matters.

1. What Kind of Breast Did You Buy?

  • Intact boneless breast: one boneless breast rather than a formed/netted roast; usually flatter and relatively quick to cook.
  • Formed or netted boneless roast: often compact and sometimes made from several pieces held together with cooking mesh.
  • Bone-in breast: usually taller and heavier, so both cooker space and cooking time matter.
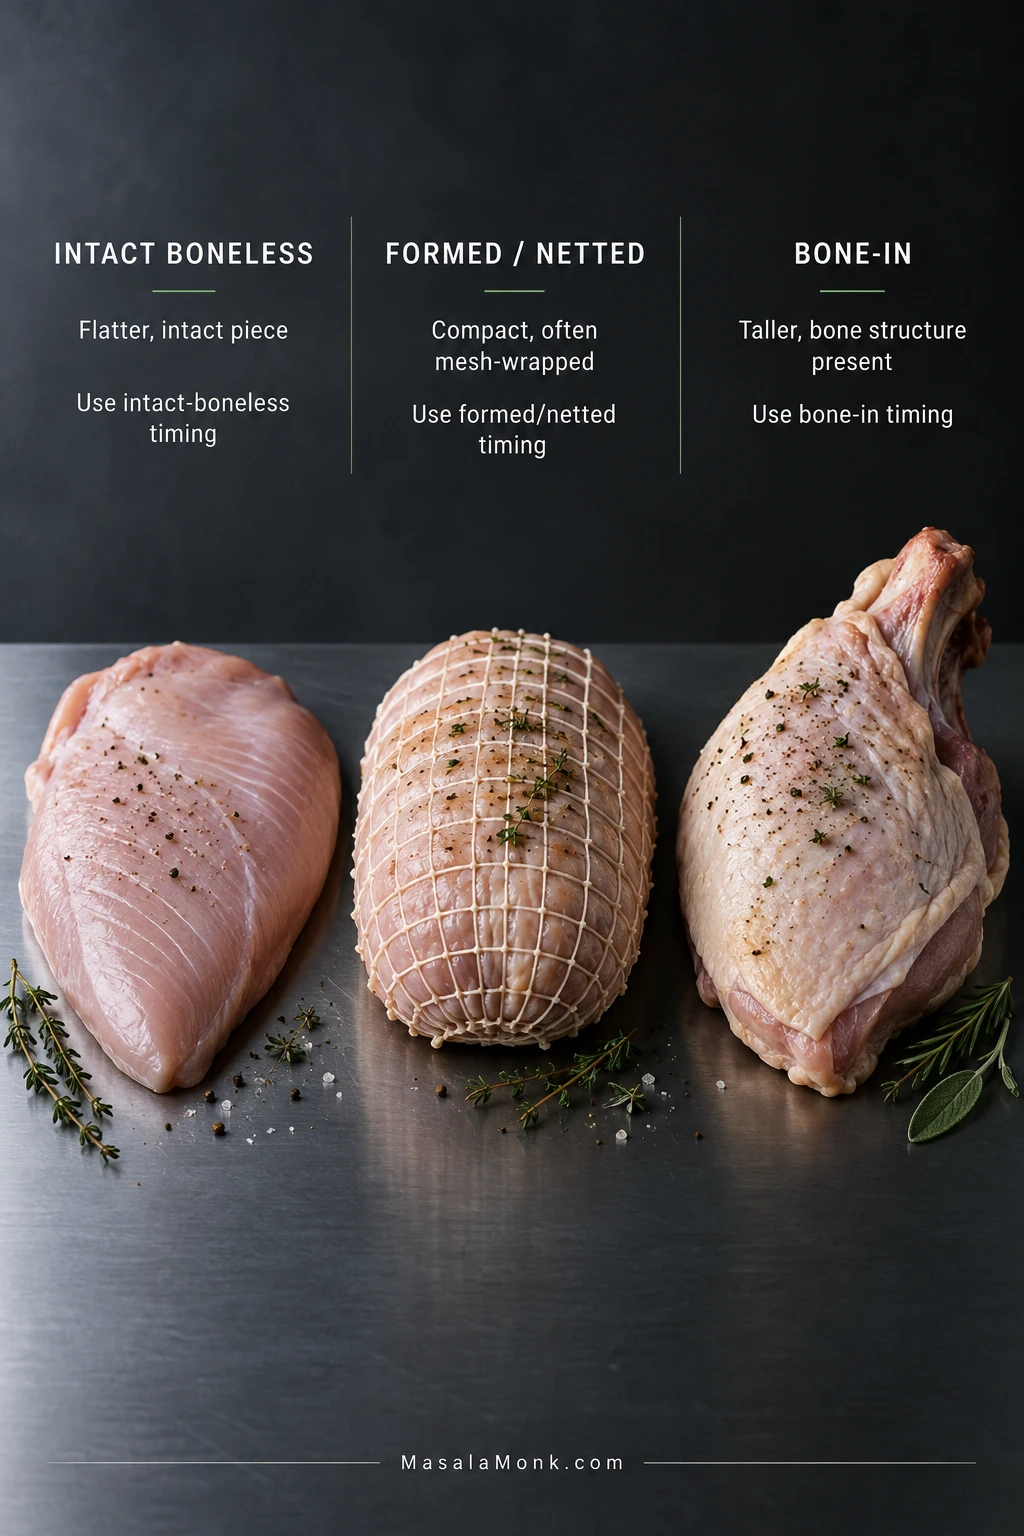
Raw intact boneless, formed netted, and bone-in turkey breasts shown side by side to compare their different shapes.
A netted roast can change more than timing: it may also come with product-specific instructions for mesh and added seasoning. Therefore, identify the breast construction before choosing either the time row or the salt level.

2. Check What Else Changes the Cook

If the package says turkey tenderloin, use the Turkey Tenderloin Recipe instead. Tenderloin is a smaller cut with its own timing.

Crockpot Turkey Breast: The Fast Time & Temp Answer

A 2–3 lb / 0.9–1.4 kg intact boneless breast often finishes in about 3–4 hours on LOW. Meanwhile, a 4–5 lb / 1.8–2.3 kg intact boneless breast often takes about 4½–6 hours, while many 4–6 lb / 1.8–2.7 kg bone-in breasts land around 5–6 hours.

Have an approximately 3 lb / 1.4 kg formed or netted roast? Start checking around 2¾–3 hours on LOW, and follow the package directions for inner netting and seasoning.

Those are useful ranges, not appointments. Use the timing table later in this guide for the full set of checking points. Turkey ready sooner? Take it out.

If this is your first turkey breast, the thermometer is your safety net. You do not need to judge doneness from meat color, clear juices or whether the Crockpot timer has finished.
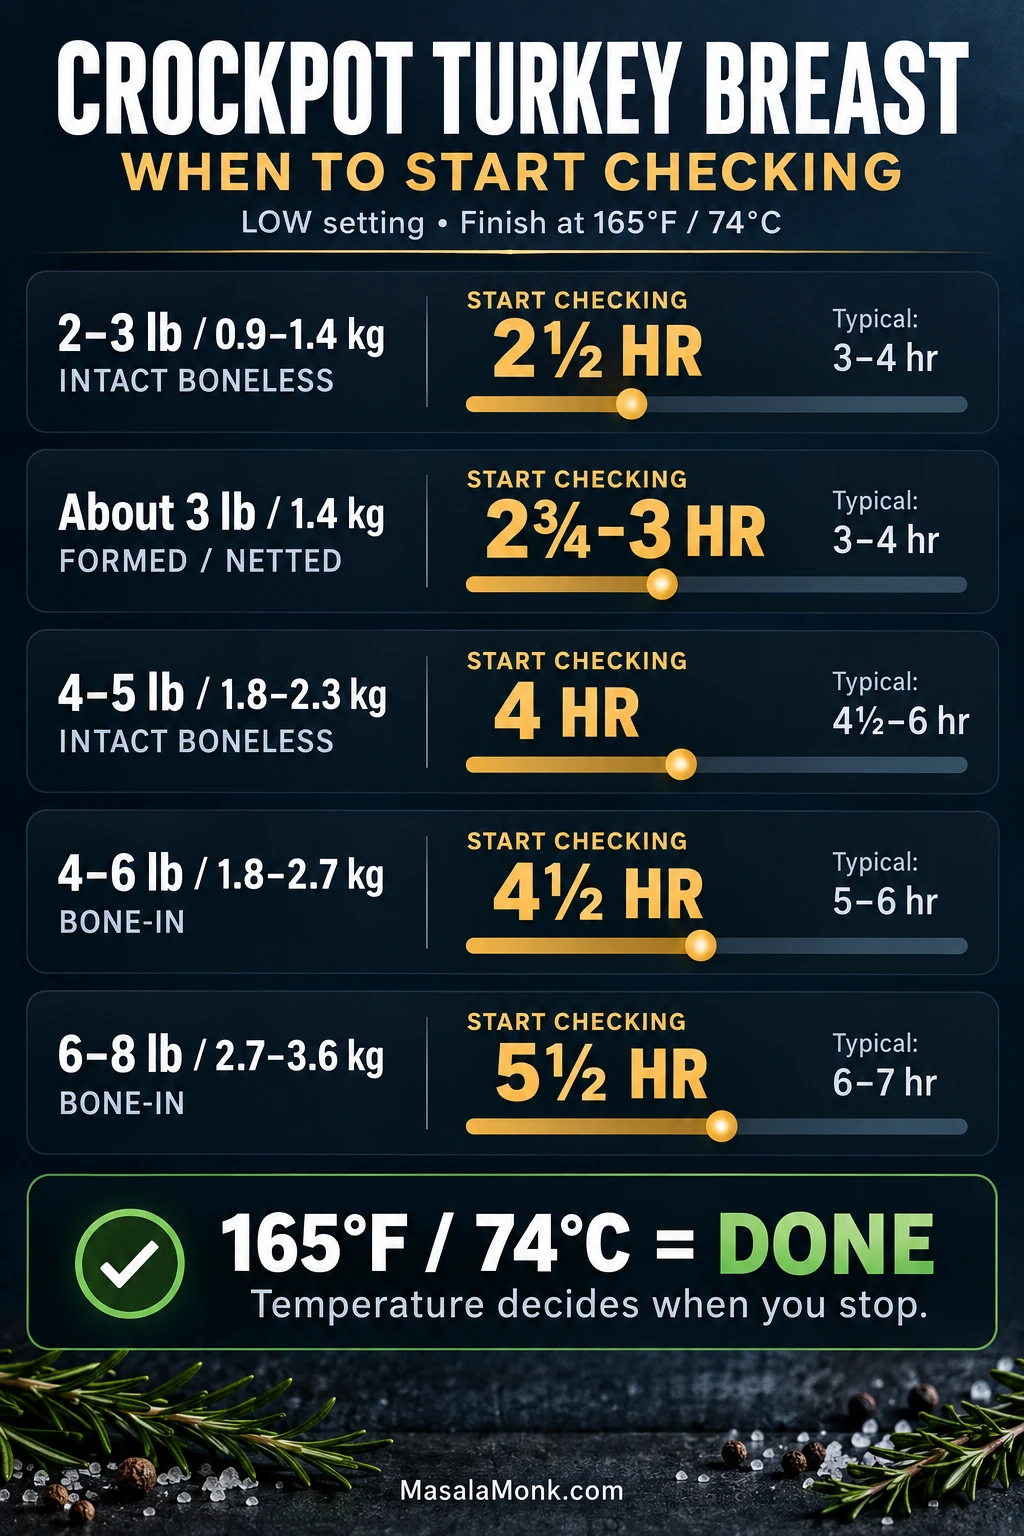
Timing guide showing when to begin checking different weights and types of turkey breast cooked on LOW, with 165°F as the finish temperature.
Use this chart to know when to start checking—not when dinner must be ready.

Juicy Crockpot Turkey Breast Recipe

For this crockpot turkey breast recipe, the seasoning quantities are built around a 4 lb / 1.8 kg breast. Cooking time depends on the breast you bought, so use the matching row in the timing table.

Before long, sage, thyme, rosemary and garlic make the kitchen smell like the holiday meal, even though most of the work is already done. At the right point, the breast carves into slices that hold their shape while the cut surface still looks moist rather than chalky or fibrous.

Slow Cooker Turkey Breast

Turkey4 lb / 1.8 kg

PrepAbout 15 minutes

Slow cookerAbout 6 qt / 5.7 L

Start checkingIntact boneless ~4 hr · Bone-in ~4½ hr

Done at165°F / 74°C

ServesAbout 7–8 boneless · 5–6 bone-in

Base recipe: this card is written around a plain, fully thawed 4 lb / 1.8 kg breast. The recipe and timing table use LOW throughout. For a formed/netted or enhanced breast, use its dedicated timing row and follow the package directions for inner netting, seasoning and any product-specific cooking restrictions.

Ingredients

  • 1 turkey breast, about 4 lb / 1.8 kg, fully thawed; intact boneless, bone-in, or formed/netted
  • 2 tbsp / 28 g unsalted butter, softened, or 2 tbsp / 30 ml olive oil
  • 1½ tsp garlic powder
  • 1 tsp onion powder
  • 1 tsp paprika
  • 1 tsp dried thyme
  • ½ tsp rubbed sage
  • ½ tsp dried rosemary, crushed between your fingers
  • ¾ tsp black pepper
  • about 1⅛ tsp / 7 g fine table salt, only for a plain, unenhanced 4 lb breast
  • 1 medium onion, about 7 oz / 200 g, cut into thick wedges
  • 4 garlic cloves, about 12 g, lightly crushed
  • 2 carrots, about 5 oz / 150 g, cut into large pieces, optional
  • 2 celery stalks, about 3 oz / 85 g, cut into large pieces, optional
  • ½ cup / 120 ml unsalted turkey or chicken stock, optional when you want more gravy

Read the label before adding salt. “Pre-brined,” “seasoned,” “enhanced,” or “contains up to X% solution” means the breast may already contain plenty. Formed/netted roasts are especially likely to come seasoned or enhanced, so package directions take priority for inner netting and added salt.
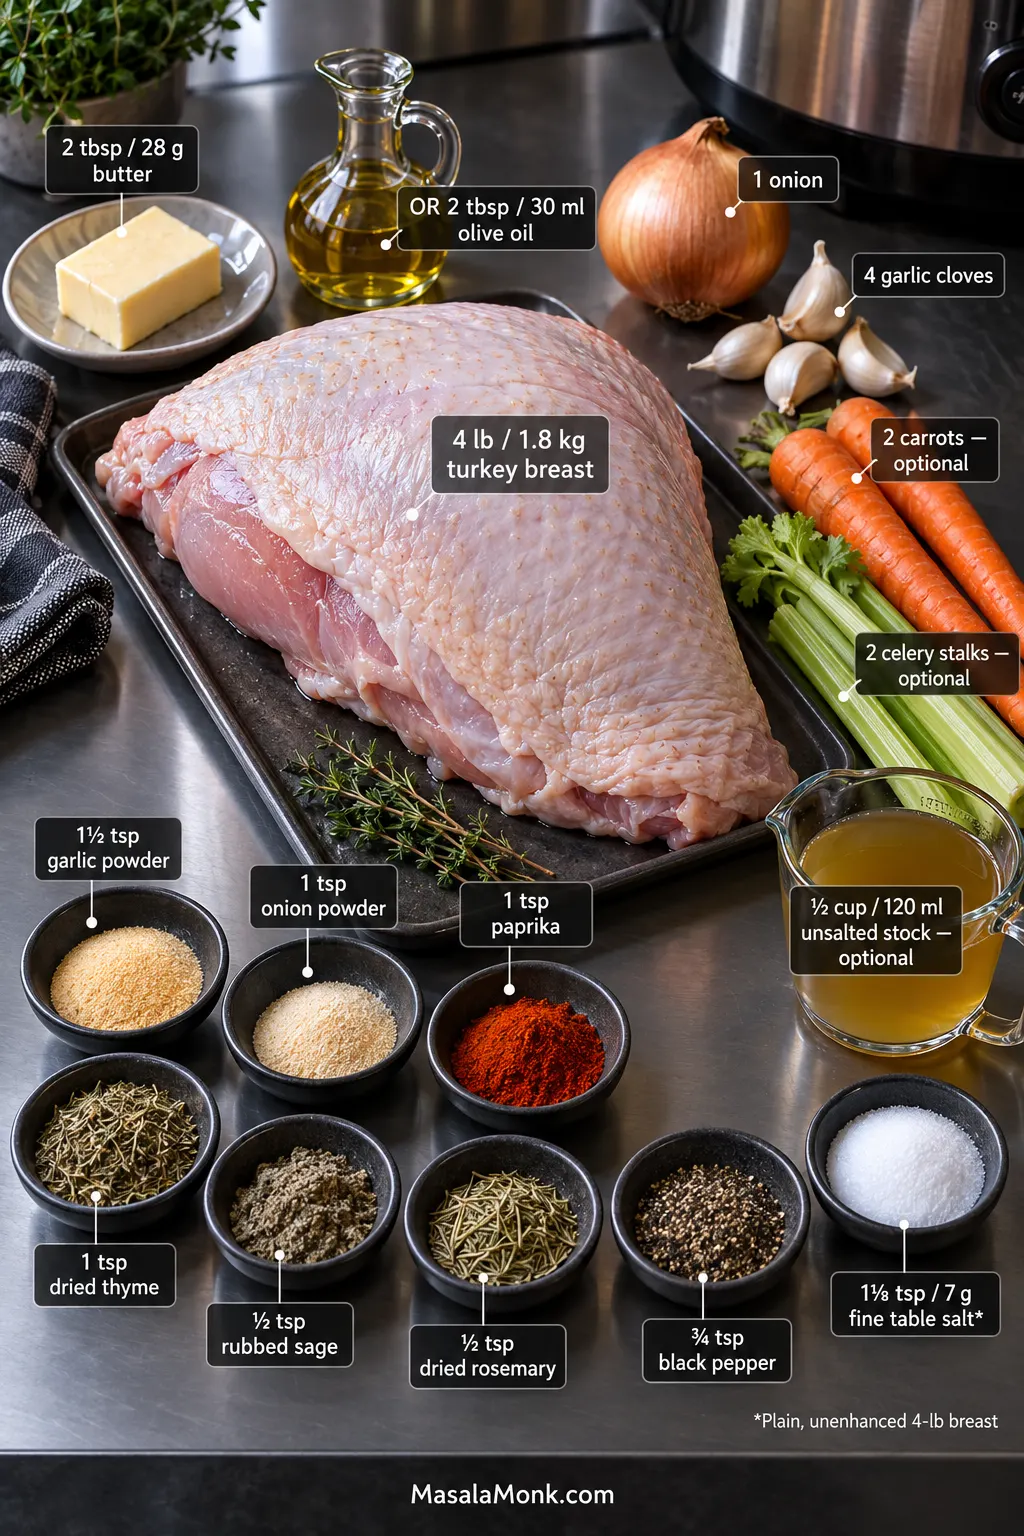
Four-pound turkey breast with butter, dried seasonings, onion, garlic, optional vegetables and optional unsalted stock arranged around it.
Optional stock gives you more gravy; it is not what keeps the breast moist.

Before You Start

Herbs: use about ¾ of the seasoning mixture for a 2–3 lb breast, the recipe as written around 4 lb, and roughly 1¼–1½ times the herbs for a 5–8 lb breast.

Salt: the 1⅛ tsp / 7 g amount is for a plain, unenhanced 4 lb breast. That amount does not scale cleanly with total turkey weight because bone, skin and product enhancement change how much meat you are actually seasoning. For a larger plain breast, increase cautiously; enhanced or pre-brined turkey may need little or none. If you use a coarse or kosher-style salt, weigh it rather than copying the fine-salt teaspoon amount.
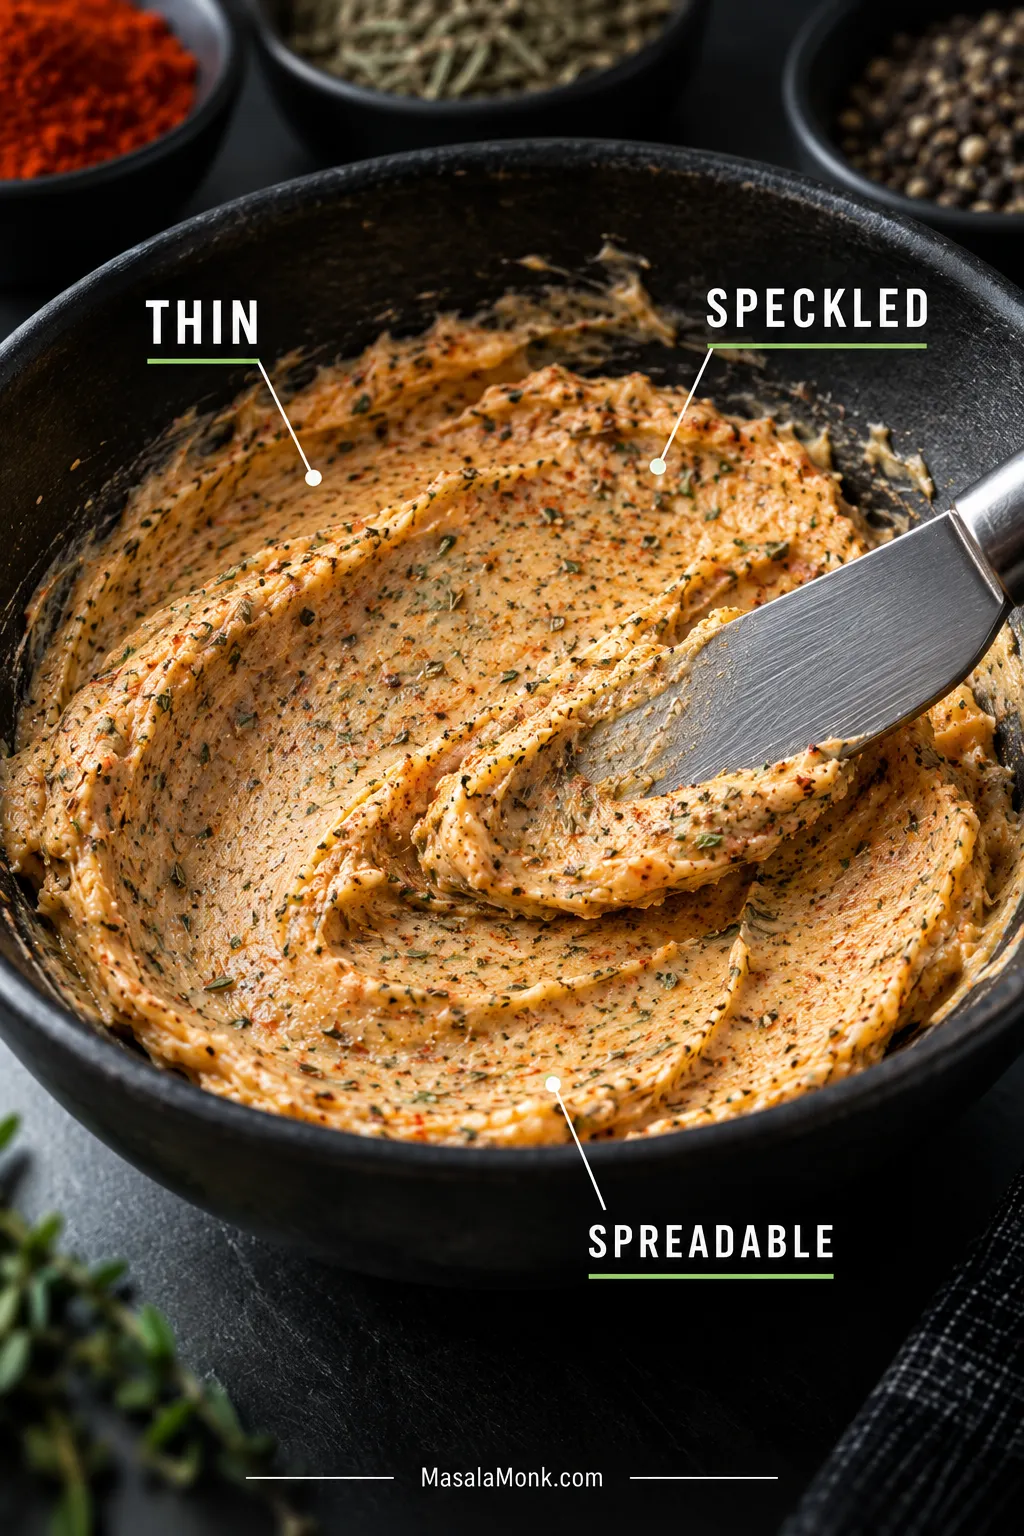
Close-up of soft paprika herb butter with fine seasoning flecks and a smooth swipe showing its spreadable texture.
Look for a soft, spreadable mixture that leaves a thin, speckled film rather than stiff ridges.

Equipment: a slow cooker large enough for the breast, an instant-read thermometer or leave-in probe, a broiler-safe tray for skin-on turkey, a sharp knife, and a saucepan plus whisk for gravy.

Want to prep the night before? You can season a fully thawed breast, cover it and keep it refrigerated overnight. Or make the herb mixture ahead and refrigerate it separately; if you used butter, let it soften before rubbing it over the turkey. Keep raw turkey refrigerated until cooking begins, and do not use a delayed-start timer.

Prep & Season

  1. Check what you bought. Make sure the breast is fully thawed and identify whether it is intact boneless, formed/netted boneless or bone-in.
  2. Read the salt information. Enhanced, injected, brined and preseasoned breasts need much less added salt.
  3. Pat the turkey dry. Remove the outer packaging and blot the breast with paper towels. Do not rinse raw poultry.
  4. Mix the seasoning. Stir the butter or oil with garlic powder, onion powder, paprika, thyme, sage, rosemary, pepper and the appropriate amount of salt. It should spread in a thin, speckled layer rather than sit in heavy clumps.
  5. Season the breast. Rub the mixture over the exposed meat and skin. Work a little underneath loose skin if it lifts easily. Leave a formed roast together rather than pulling it apart to reach every surface.
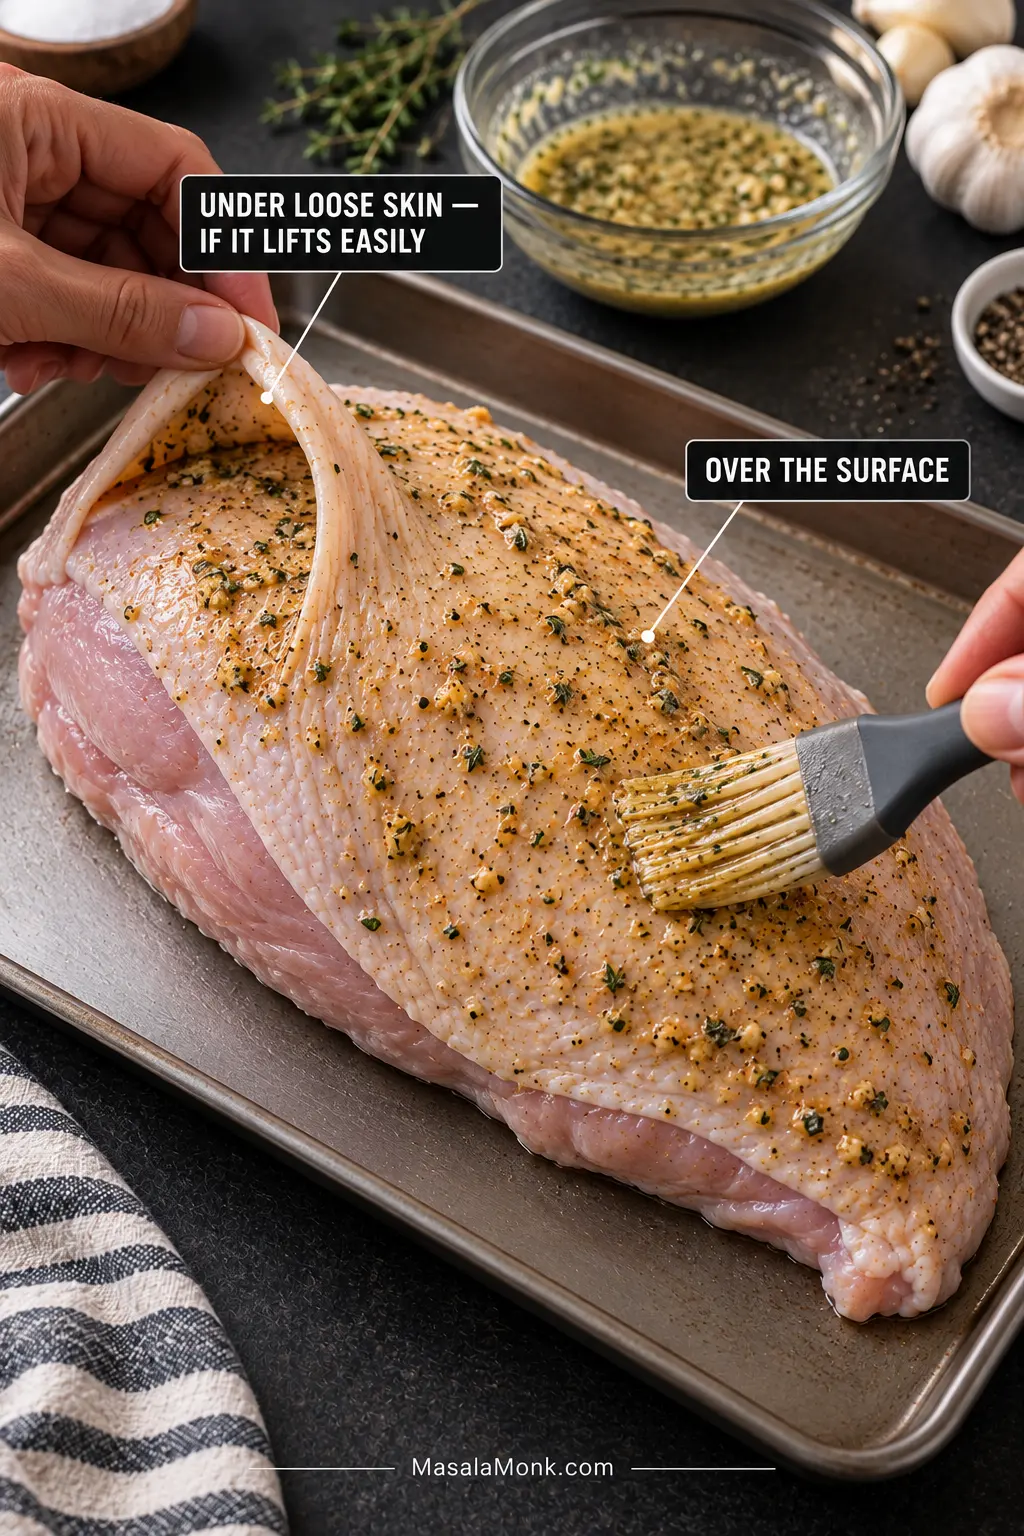
Skin-on raw turkey breast being lightly brushed with herb butter while loose skin is lifted to season underneath.
Season underneath only where the skin opens easily; otherwise, keep it intact for the finishing broil.

Slow Cook & Finish

  1. Make the onion base. Spread onion and garlic across the bottom to lift the breast slightly and flavor the juices that collect. Add carrots or celery if using, then set the turkey on top with the skin facing up.
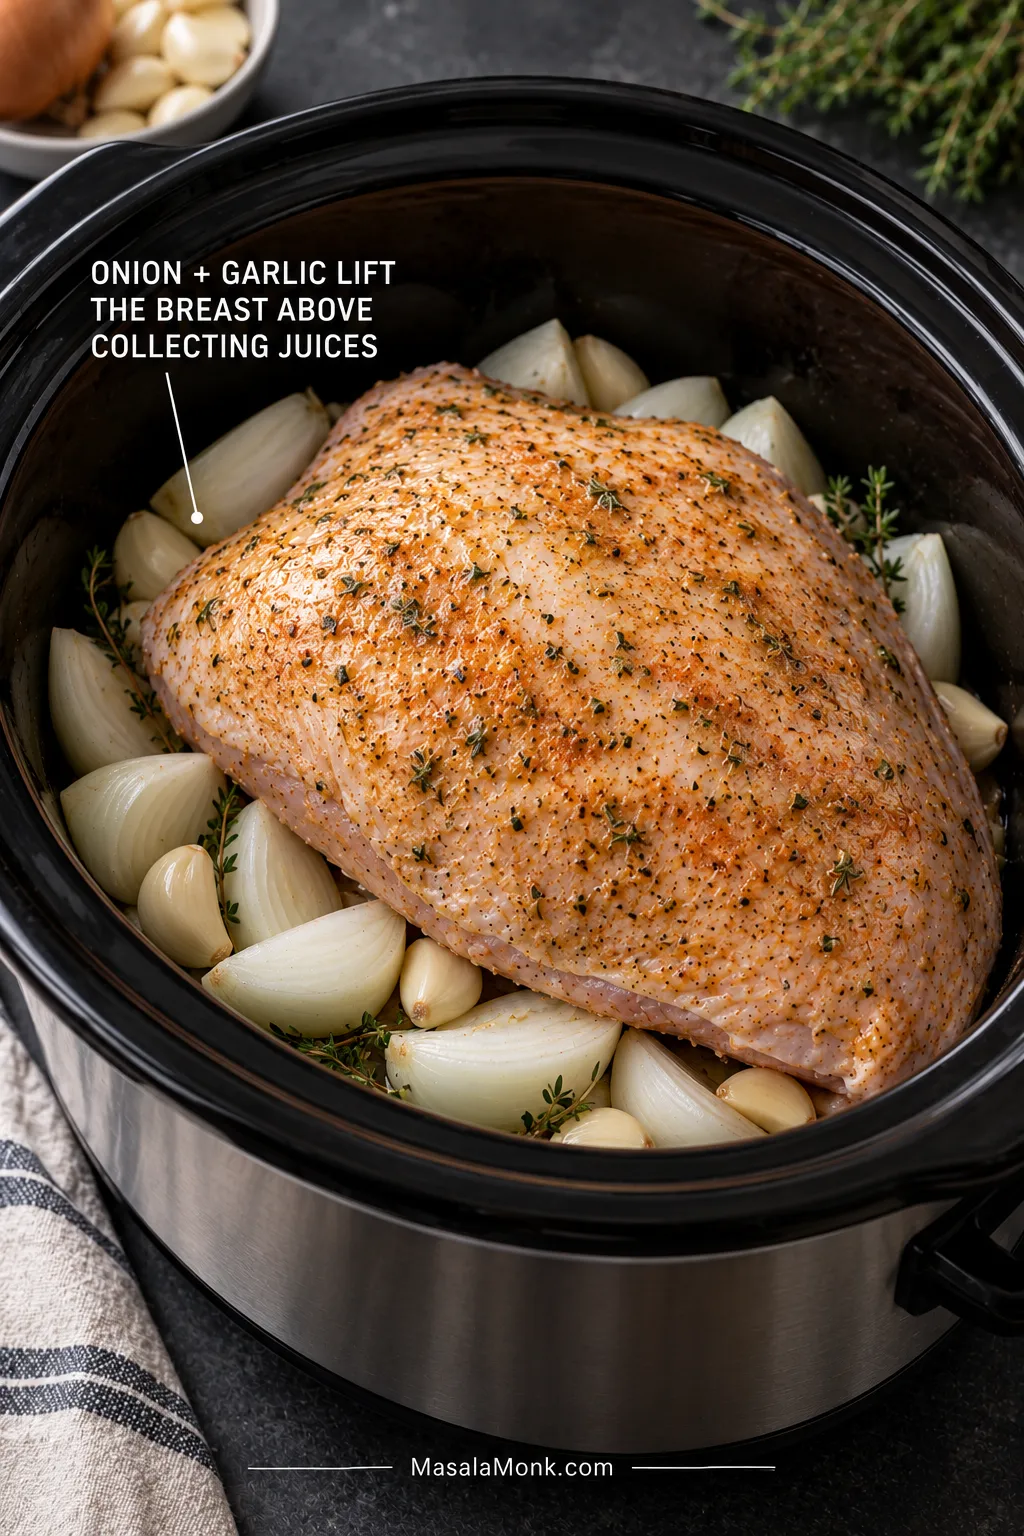
Seasoned raw turkey breast resting on large onion wedges and garlic cloves in a black slow cooker.
Thick onion wedges lift the turkey slightly while flavoring the drippings underneath.
  1. Check the fit. The turkey should sit below the rim with the proper lid closed normally. A breast that props the lid open needs a larger cooker or another cooking method.
  2. Slow cook on LOW with the lid closed. Use the matching start-check time in the table below rather than waiting for the end of the range.
  3. Check the thickest meat. Keep the thermometer away from bone and from gaps between pieces in a formed roast. On a large or uneven breast, check a second thick spot before calling it done. Take the turkey out at 165°F / 74°C.
  4. Finish according to the skin. For skinless turkey, rest immediately for 15–20 minutes. For skin-on turkey, move it straight to a broiler-safe tray, blot the skin and broil briefly until browned—usually about 2–4 minutes. Then rest for 15–20 minutes before carving.

LOW Setting, Lid & Liquid

USDA setting note: general USDA slow-cooker guidance says properly thawed food can cook safely on LOW throughout. Its turkey-specific guidance is more conservative: start turkey parts on HIGH for an hour or more, then switch to LOW. If you use that route, check earlier because the LOW table will not map exactly to your cook.

Keep the lid closed until you are near the first temperature check. A leave-in probe makes that easy.

No broth is required to keep the turkey moist in this method. The breast releases cooking liquid of its own. Add stock when you want more gravy. If your slow-cooker manual specifies a minimum amount of liquid for poultry, follow the appliance instructions.

Crockpot Turkey Breast Time & Temperature

Start with the kind of breast, then look at its weight. A compact 3 lb netted roast and an intact boneless breast can weigh the same without being identical cooking problems.

Every breast in the table finishes at 165°F / 74°C in the thickest meat. These are LOW times. The useful number is when to start checking.

Turkey breastStart checkingTypical LOW range
2–3 lb / 0.9–1.4 kg intact bonelessAbout 2½ hrAbout 3–4 hr
About 3 lb / 1.4 kg formed/netted roastAbout 2¾–3 hrAbout 3–4 hr
4–5 lb / 1.8–2.3 kg intact bonelessAbout 4 hrAbout 4½–6 hr
4–6 lb / 1.8–2.7 kg bone-inAbout 4½ hrAbout 5–6 hr
6–8 lb / 2.7–3.6 kg bone-inAbout 5½ hrAbout 6–7 hr

If a 5 lb breast reaches temperature at 4 hours 20 minutes, take it out. The clock does not get a vote after the turkey is done.

3 lb breast? Check whether it is intact boneless or a compact formed/netted roast. 9–10 lb breast? Cooker fit matters more than another timing estimate. A cramped breast or a lid that will not close normally is a sign to use a larger cooker or an oven method.

Boneless vs Bone-In: What Changes?

In general, boneless cooks faster; bone-in usually needs more room and more time. Intact boneless breasts tend to be flatter, while bone-in breasts are often taller. A 6-quart / 5.7-L oval cooker works for many average breasts, but fit matters more than the quart label.

Thickness matters as much as weight. Shape, bones, a formed versus intact roast, the amount of cold food around the turkey and the cooker itself can all move the finish time. Two smaller breasts are still two separate pieces, not one large roast.
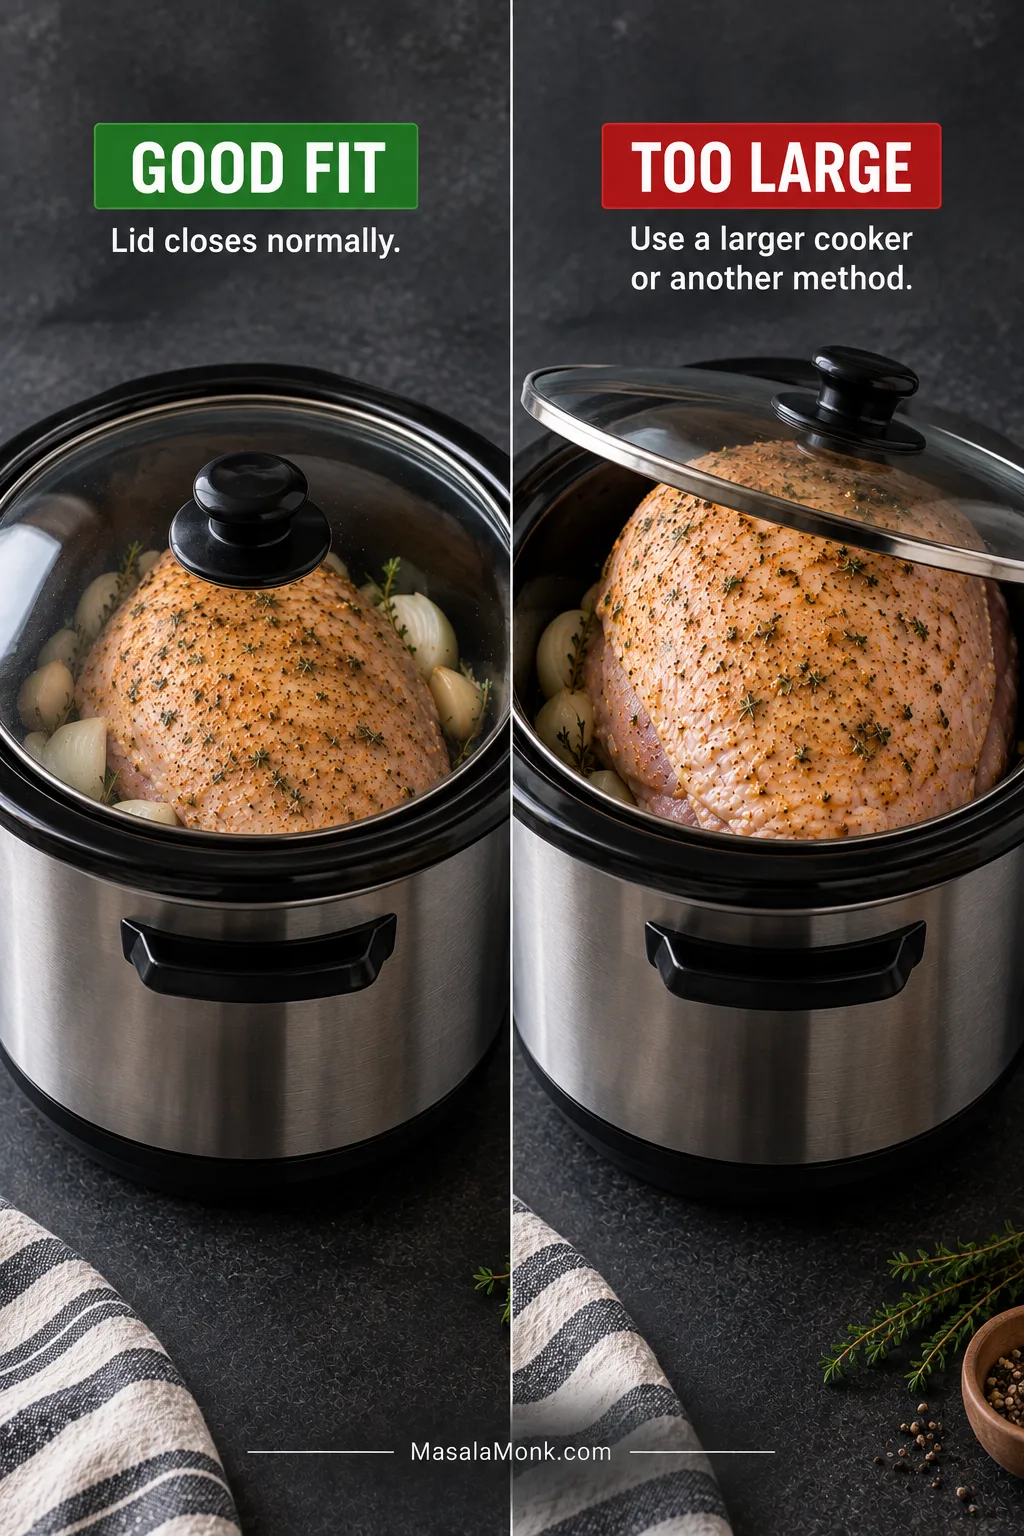
Comparison showing one turkey breast under a fully closed slow-cooker lid and an oversized breast preventing the lid from closing.
The real fit test is simple: the proper lid must close normally.

Seeing “LOW — 8 HOURS” on the display? That is the appliance program, not an instruction to cook a small turkey breast for eight hours.

Can You Cook Turkey Breast on HIGH?

Yes, but it can finish much sooner. A HIGH start is a different approach, so begin checking earlier rather than converting the LOW time with one fixed formula.

Back to Recipe · Thermometer Placement · Keep It Juicy · Back to Top

Where to Put the Thermometer

Turkey breast is done at 165°F / 74°C in the thickest meat. Put the sensing tip into the thickest part of the breast and keep it away from bone. With a formed roast, make sure the probe has not slipped into a gap between pieces.
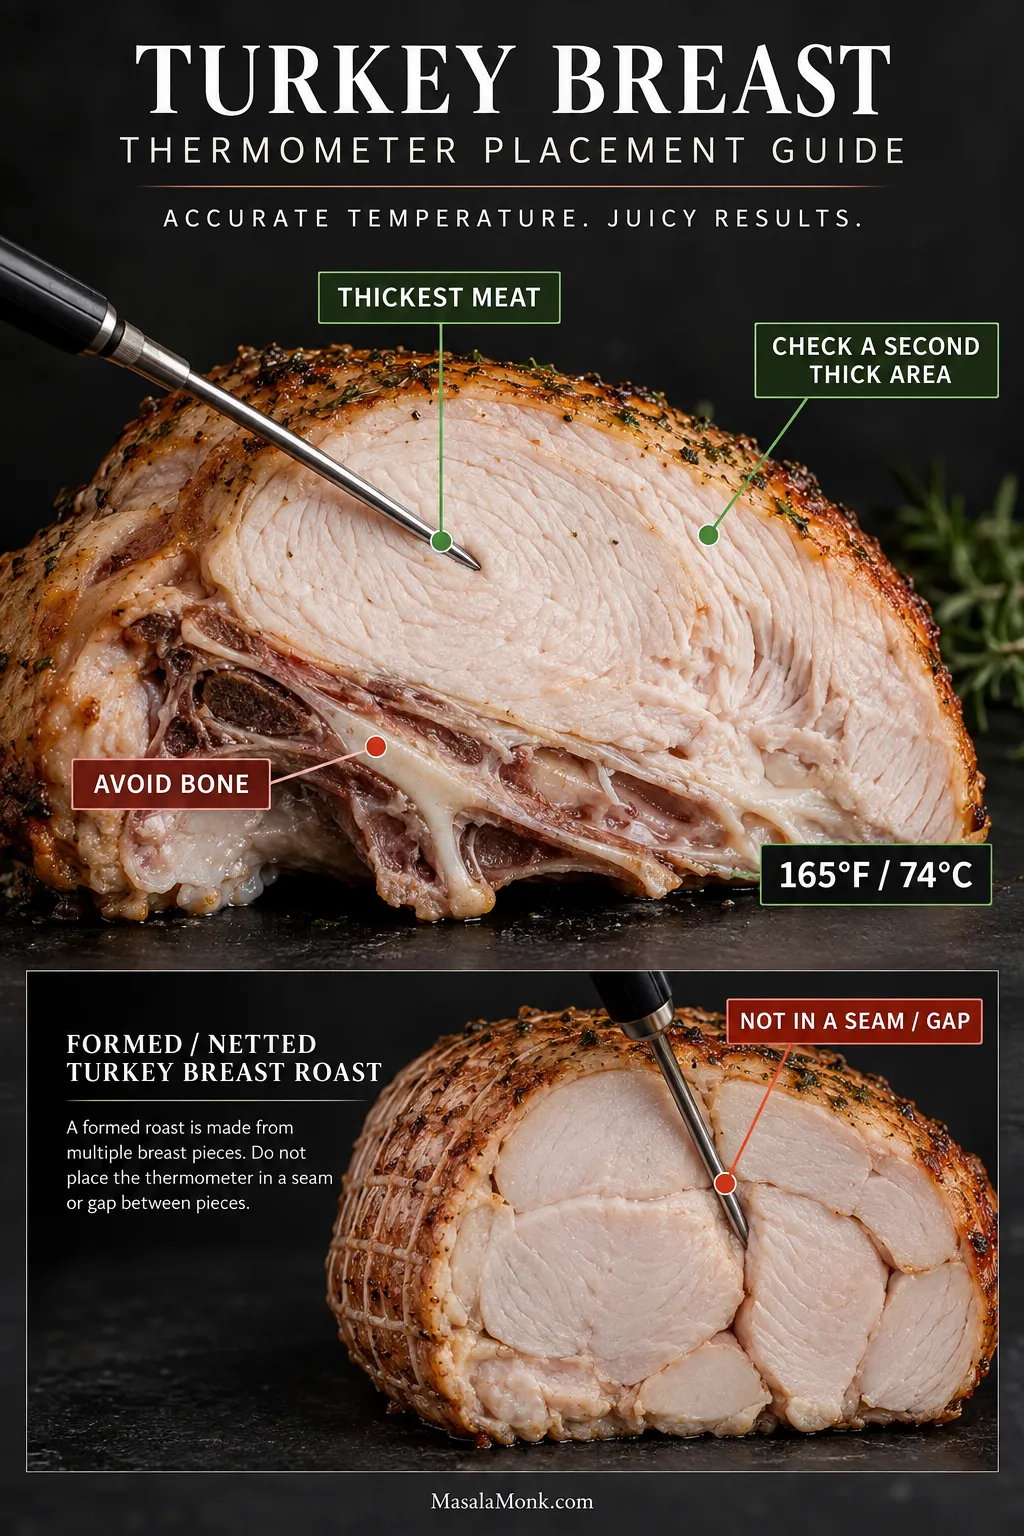
Cutaway showing a thermometer in the thickest turkey breast meat, away from bone, plus a netted roast example where a seam can give a misleading reading.
When two valid readings disagree, let the lower reading decide when the turkey is ready.

On a large or uneven breast, check a second thick spot before calling it done. One side can get there before the other. If the meat still looks a little pink, let the thermometer settle the argument; color alone does not tell you whether poultry is safely cooked.

Good slices should hold together while the freshly cut surface still looks moist. Chalky, fibrous meat points toward overcooking. A breast that collapses easily into strands has moved into pulled-turkey territory.

What Actually Keeps Crockpot Turkey Breast Juicy?

Mostly, stopping at the right time. Broth does not protect lean breast meat from cooking too long.

Turkey can stay tender while its texture keeps changing. First, the slices are moist and hold together. With more cooking they soften, then eventually begin to shred. That’s useful when pulled turkey is the goal; for a carving breast, it means you went past the best stopping point.
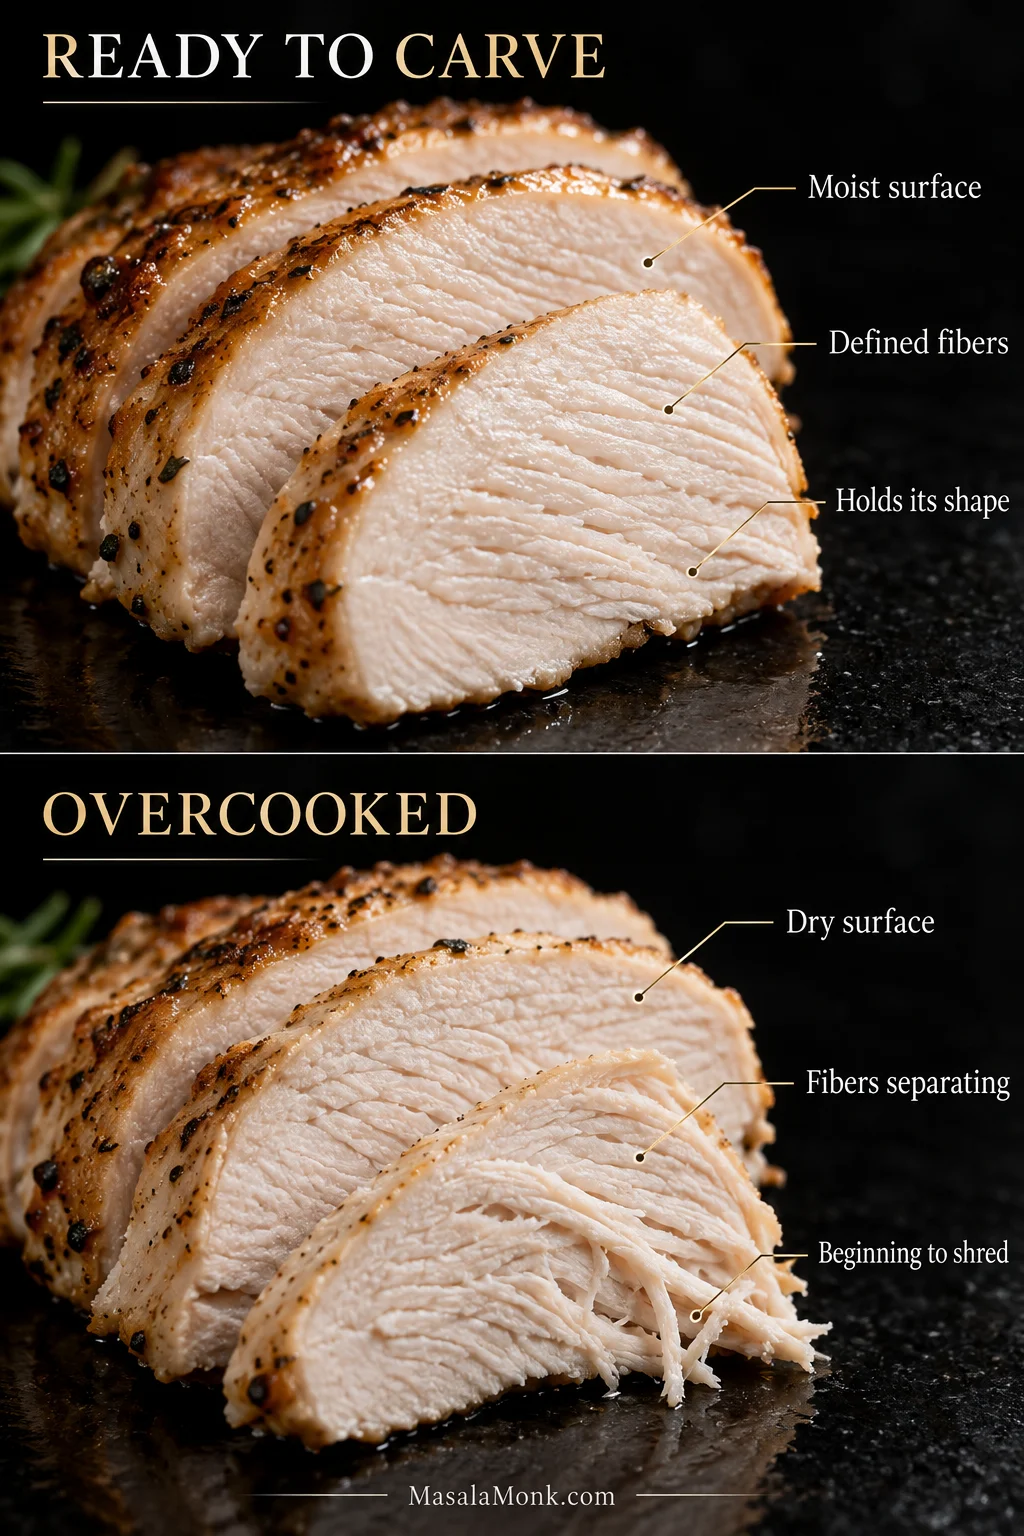
Comparison of moist turkey slices holding their shape and drier turkey with fibers separating and beginning to shred.
Neat slices turning ragged and fibrous are a useful warning to check sooner next time.

The breast also releases plenty of its own juices. A little unsalted stock gives you more liquid for gravy; several cups push the bottom toward a softer braised texture. The onion and garlic underneath keep more of the turkey above the liquid that collects and season those juices at the same time.

No separate brine is required. Many supermarket breasts have already been treated with a salted solution anyway, which is another reason to read the package before adding salt.

Can You Cook Frozen Turkey Breast in a Crockpot?

No. Thaw it first.

Some packaged roasts make this confusing because their instructions say “cook from frozen.” Those directions apply to the cooking method printed for that particular product, often an oven method. They do not automatically carry over to a slow cooker.

For refrigerator thawing, allow roughly 24 hours for every 4–5 lb / 1.8–2.3 kg. A cold-water thaw takes about 30 minutes per pound. Keep the turkey sealed, change the cold water every 30 minutes, and cook it immediately after thawing.
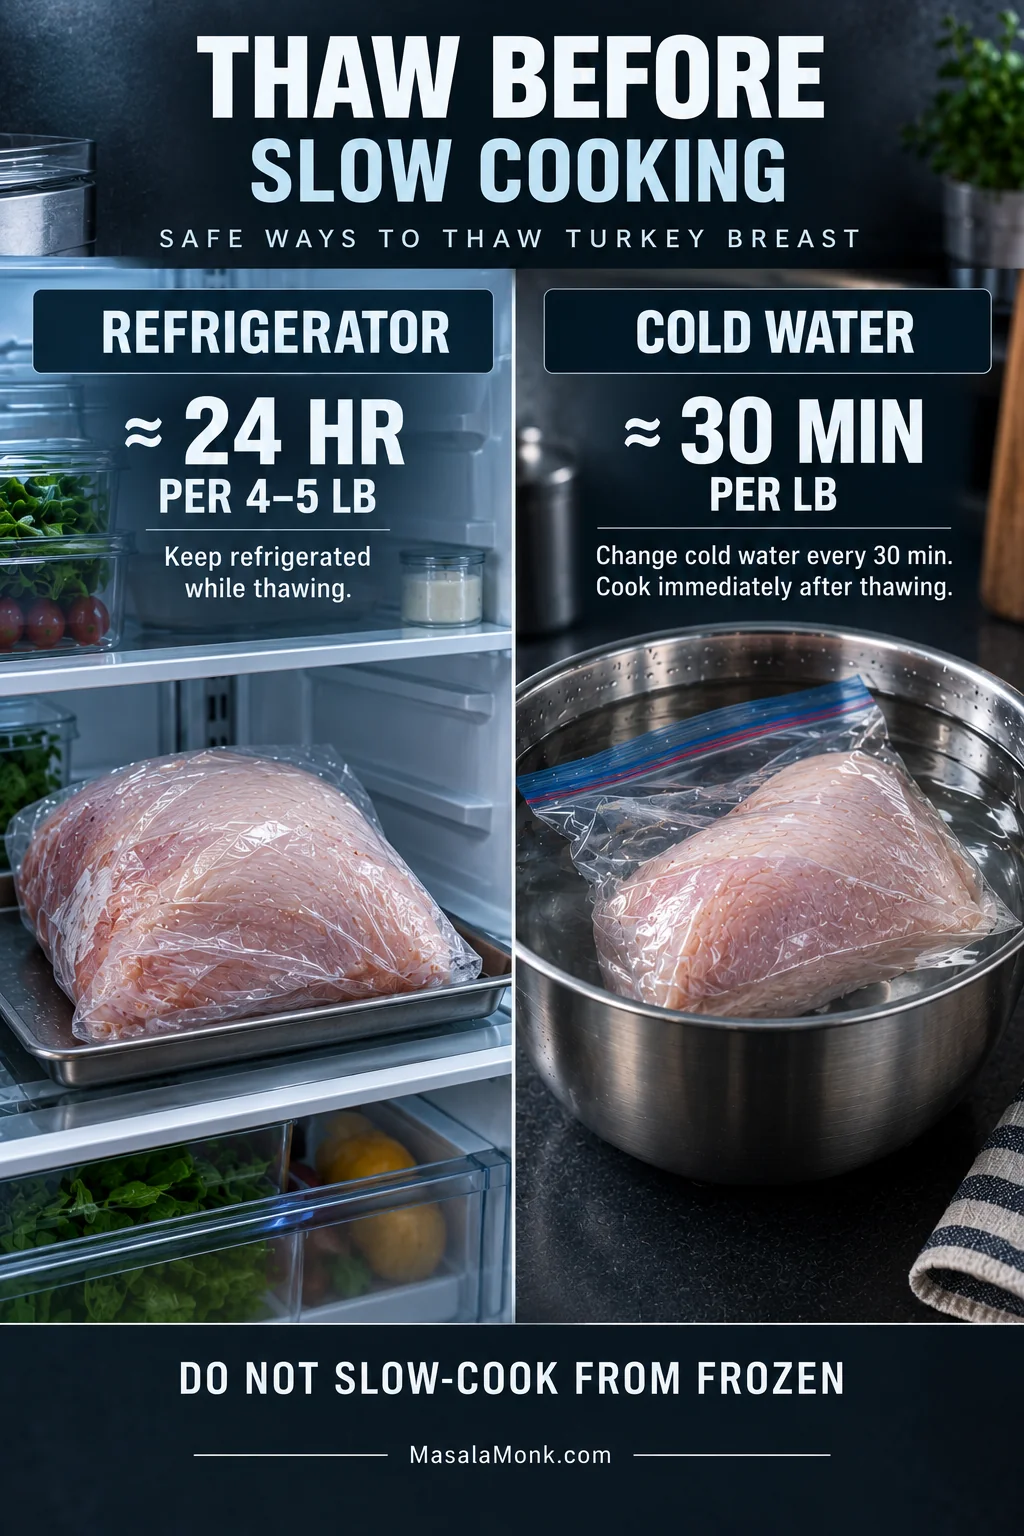
Turkey breast thawing safely in a refrigerator and in a sealed bag submerged in cold water.
Refrigerator thawing is slower and hands-off; cold-water thawing is faster but needs attention.

Still frozen and dinner is close? If there is not enough time left to thaw and slow-cook it safely, use a faster cooking method after safe thawing instead of trying to make up the difference with extra Crockpot hours.

Do You Remove the Netting From a Boneless Turkey Breast Roast?

This section is for the common compact formed roast wrapped in mesh. Some are several pieces of breast shaped together, so the netting can affect both shape and cooking behavior.

Remove the outer wrapper. For mesh touching the meat, follow the package directions. Some roasts use cooking-safe inner netting specifically to hold the pieces together.
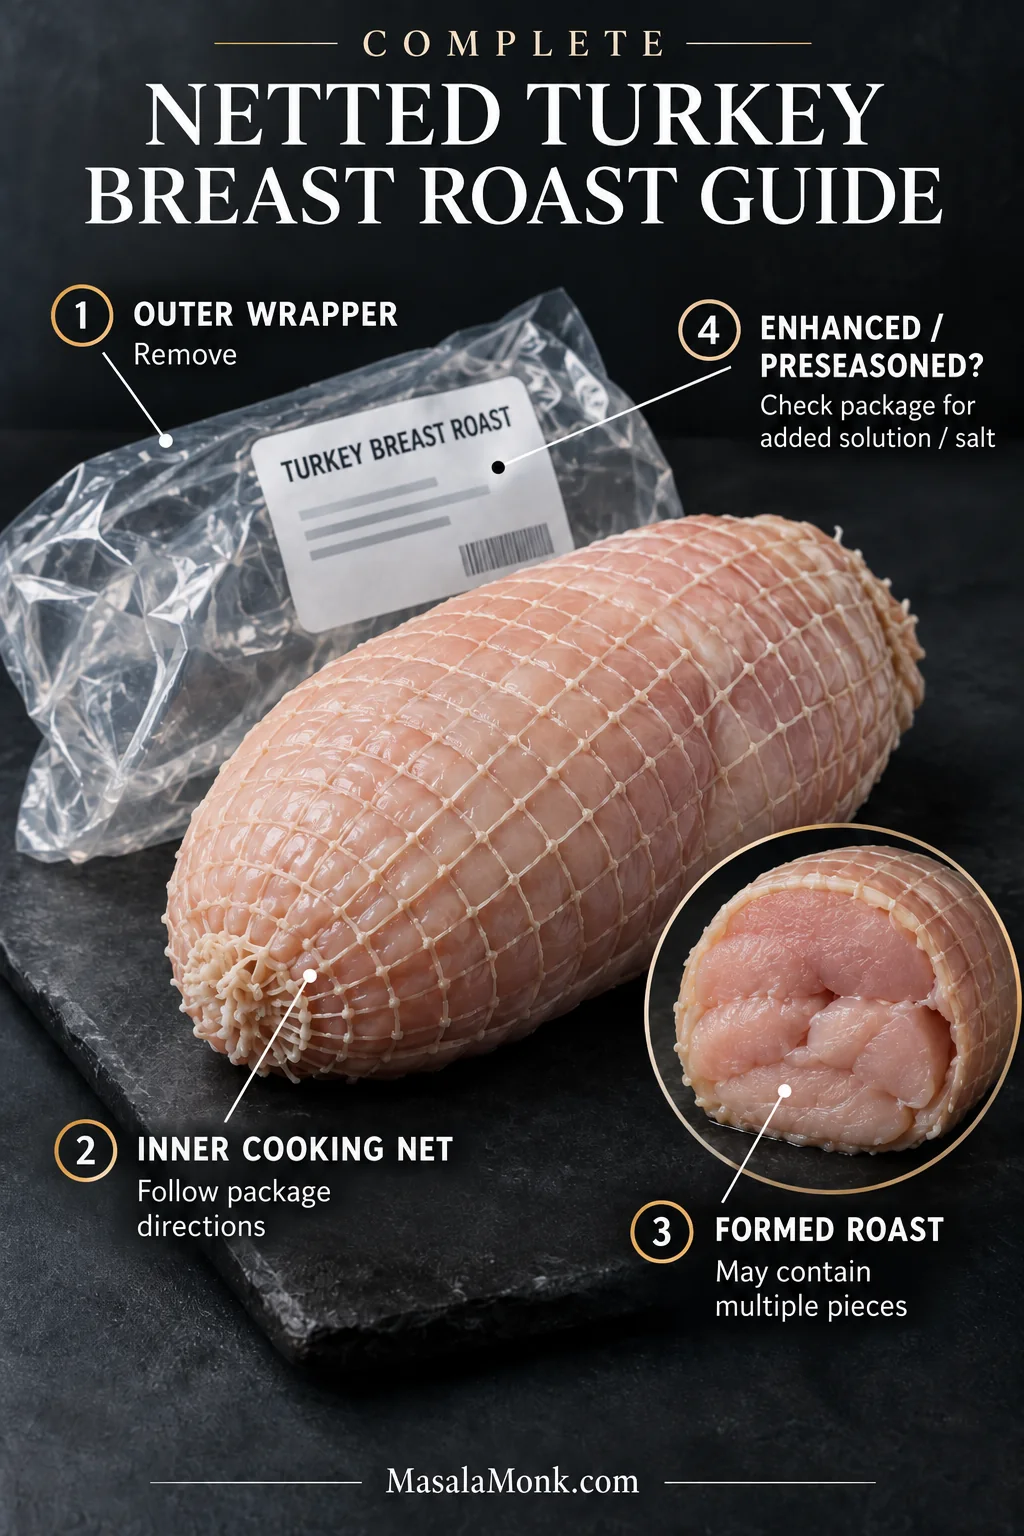
Netted raw turkey breast roast with the outer wrapper, inner cooking mesh, formed-meat cutaway and a package label for checking added solution or salt.
A netted roast can change both timing and seasoning. Check the package before choosing a timing row or adding salt.

When the package says that inner netting should stay on during cooking, leave it alone and remove it after the roast rests. Taking it off early may reveal several separate pieces that cook faster than one compact roast.

Check the seasoning label too. Formed roasts are often enhanced or preseasoned, and a packaged gravy concentrate can add another dose of salt.

Cooking Two Turkey Breasts

Two 3 lb breasts are two separate pieces, not one 6 lb roast. Check both according to their own thickness. When one is ready first, take it out.
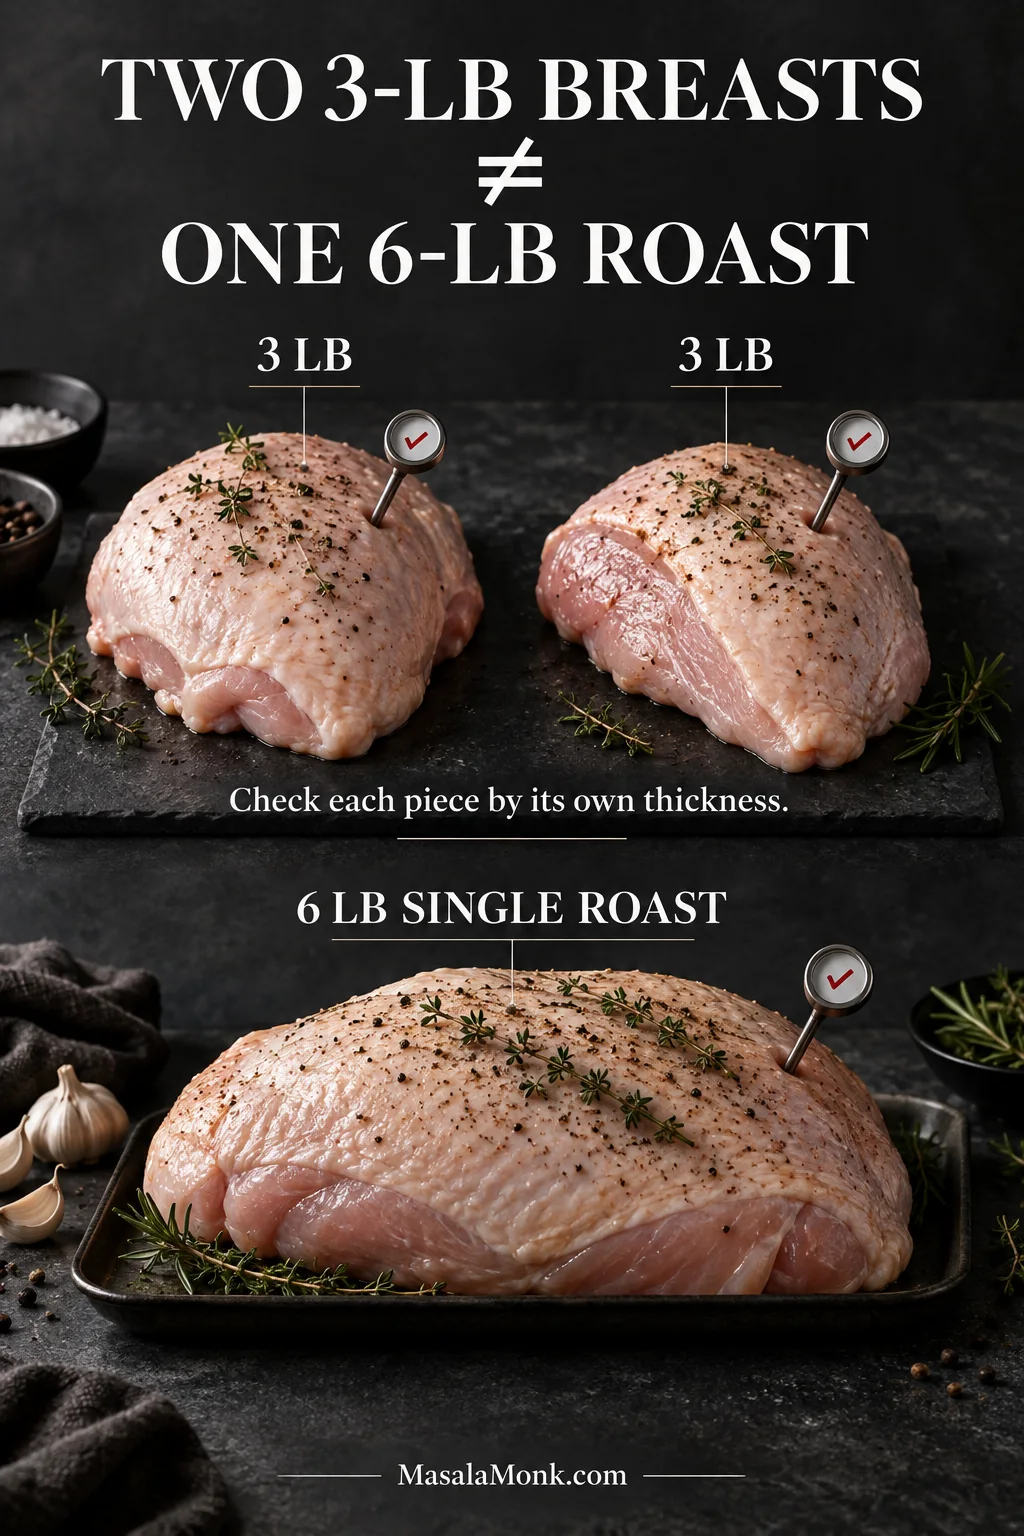
Two separate three-pound turkey breasts compared with one six-pound roast to show that separate pieces retain their own thickness and doneness.
Two breasts share a cooker, but they do not have to share a finish time.

A fuller Crockpot can take longer to heat. Carrots, celery, onion and small potatoes can cook around the turkey, with slower vegetables toward the bottom. Turkey ready, potatoes still firm? Take the breast out and let the vegetables finish without it. Do not punish the turkey for the potato.

Keep stuffing on the side. It is easier to control and gives you crisp edges instead of an entirely soft slow-cooker texture. Stuffing cooked with poultry still needs to reach 165°F / 74°C in its center. For a separate holiday side, use the Southern Cornbread Dressing Recipe.

Back to Recipe · Time & Temp · Crisp the Skin · Back to Top

How to Crisp Crockpot Turkey Breast Skin

The Crockpot will not crisp the skin. When the lid comes off, expect pale skin, a deeply savory herb-and-onion smell and plenty of juices below. That is what slow-cooked turkey is supposed to look like at this stage; the broiler handles the color.
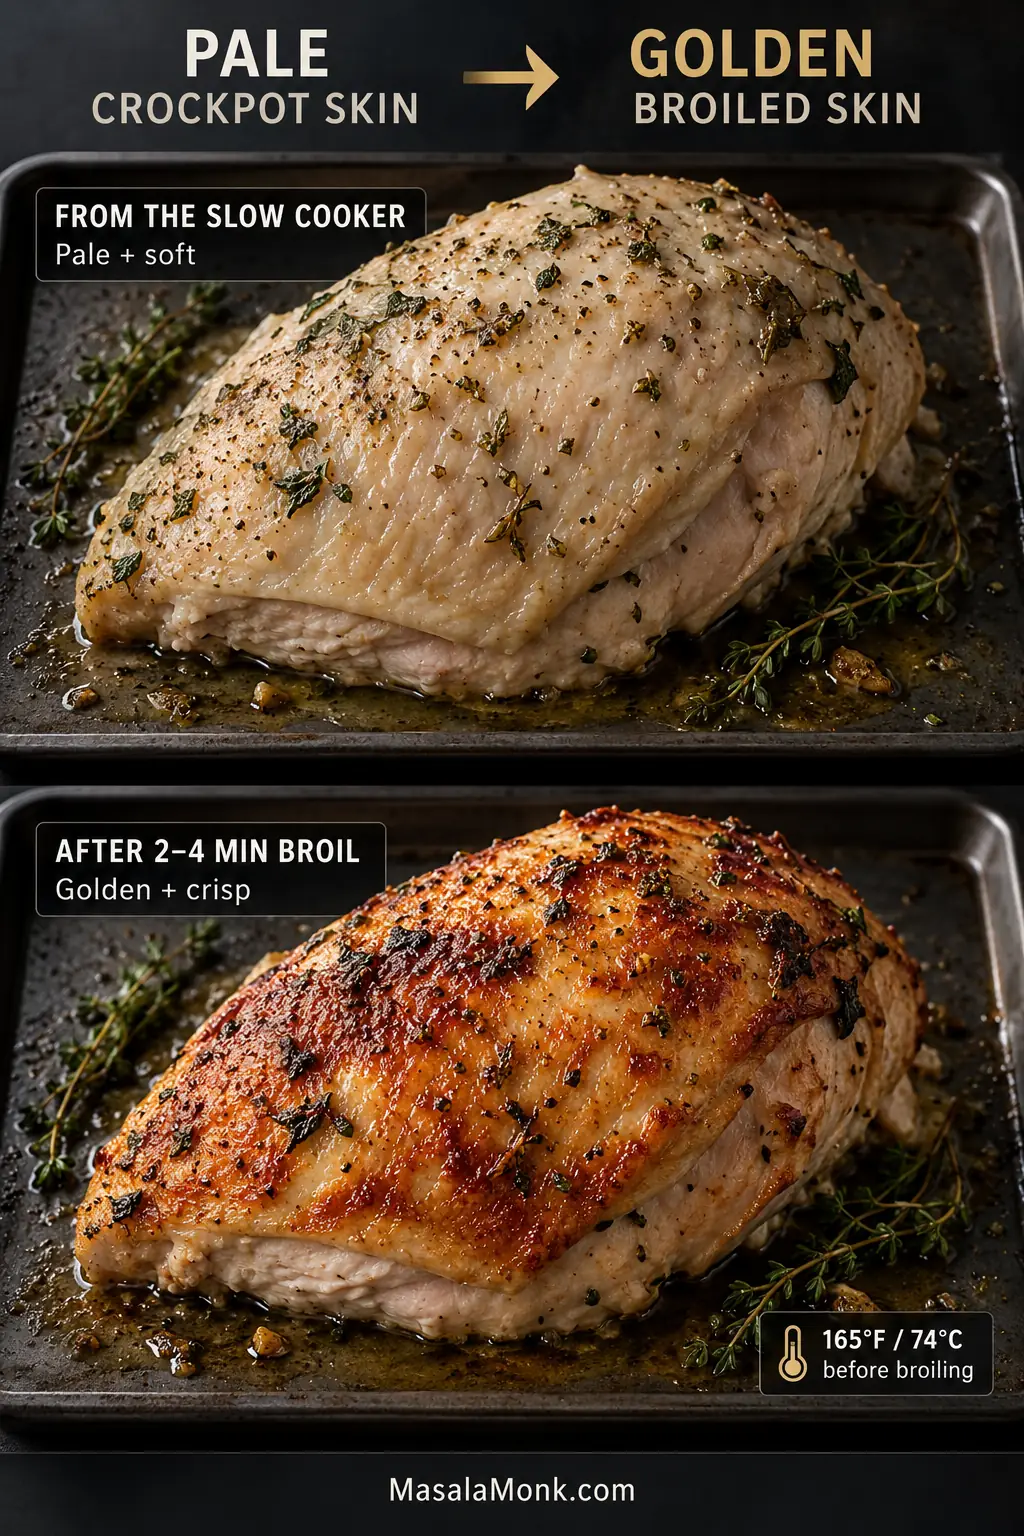
Same cooked turkey breast shown with pale soft skin from the slow cooker and golden crisp skin after brief broiling.
Blotting removes surface moisture so the broiler can brown the skin faster.

Once the thickest meat has reached 165°F / 74°C, move the breast straight to a broiler-safe tray and blot the skin dry. Broil for about 2–4 minutes, just until the raised areas turn deeply golden. This is primarily a browning step, so keep it brief—the breast is already safely cooked.

Stay nearby. This part moves much faster than the Crockpot did.

Then rest the breast for 15–20 minutes before carving. A skinless breast skips the broiler and goes straight from Crockpot to rest.

The brief finish leaves the oven free through almost the entire cook. A side such as Sweet Potato Casserole can use that space instead.

How to Carve Turkey Breast

For a boneless breast, remove cooking mesh or kitchen twine as appropriate, then slice across the grain about ¼–½ inch / 6–12 mm thick. A sharp knife and gentle sawing motion help a formed roast stay together.

For a bone-in breast, run the knife close to the breastbone and ribs and lift off each large section of meat. Put it flat-side down, then slice across the grain.
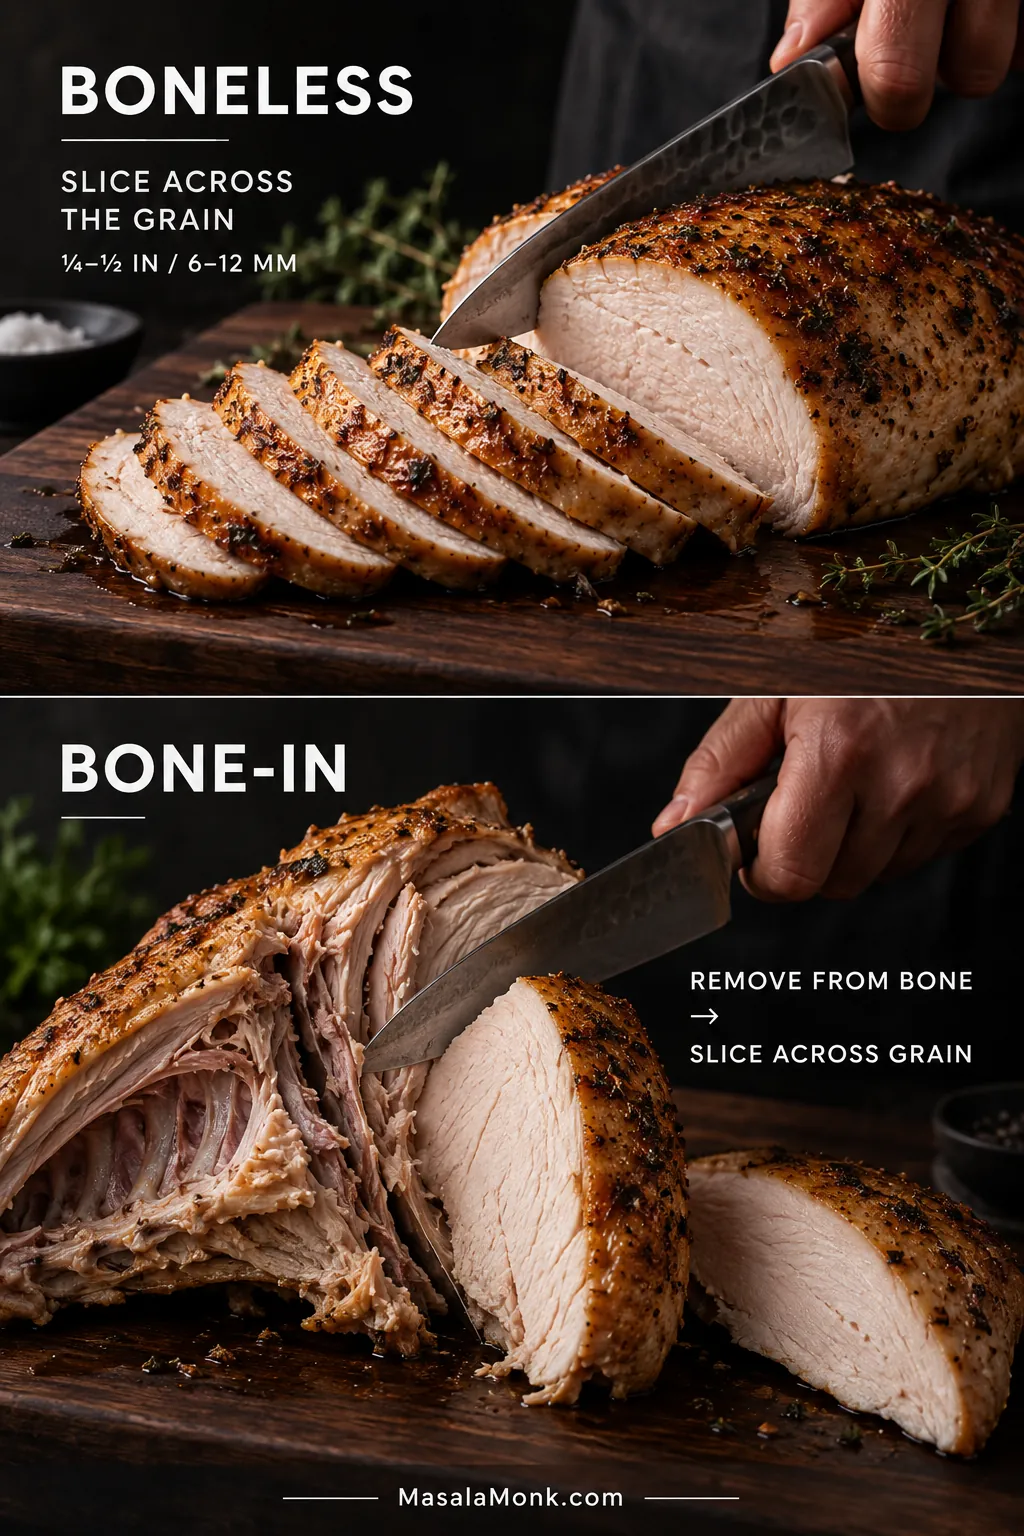
Boneless turkey sliced across the grain and bone-in turkey breast being separated from its ribs before slicing.
Remove a bone-in breast section from the ribs first; then slice across the grain.

Meat too soft for tidy slices? Stop fighting it. Serve larger pieces or pull it and pass the gravy. Dinner will still be good.

Turn the Crockpot Drippings Into Turkey Gravy

Measure the drippings, add unsalted stock if you need more, then use about 2 tbsp fat and 2 tbsp flour for each 1 cup / 240 ml of gravy liquid.

A small breast may leave less than a cup of liquid while a larger one can leave much more. Strain what you have into a measuring jug, let the rendered fat separate, and top up with stock to reach the amount of gravy you want.

A Gravy Ratio That Scales

LiquidButter or turkey fatAll-purpose flour
1 cup / 240 ml2 tbsp / 28 g2 tbsp / about 15–18 g
2 cups / 480 ml4 tbsp / 56 g4 tbsp / about 30–36 g
3 cups / 720 ml6 tbsp / 84 g6 tbsp / about 45–54 g

Melt the butter or turkey fat, whisk in the flour and cook for 1–2 minutes. Add the warm drippings and stock gradually while whisking, then simmer until the gravy looks glossy and lightly coats a spoon but still flows easily over the turkey and creamy mashed potatoes.
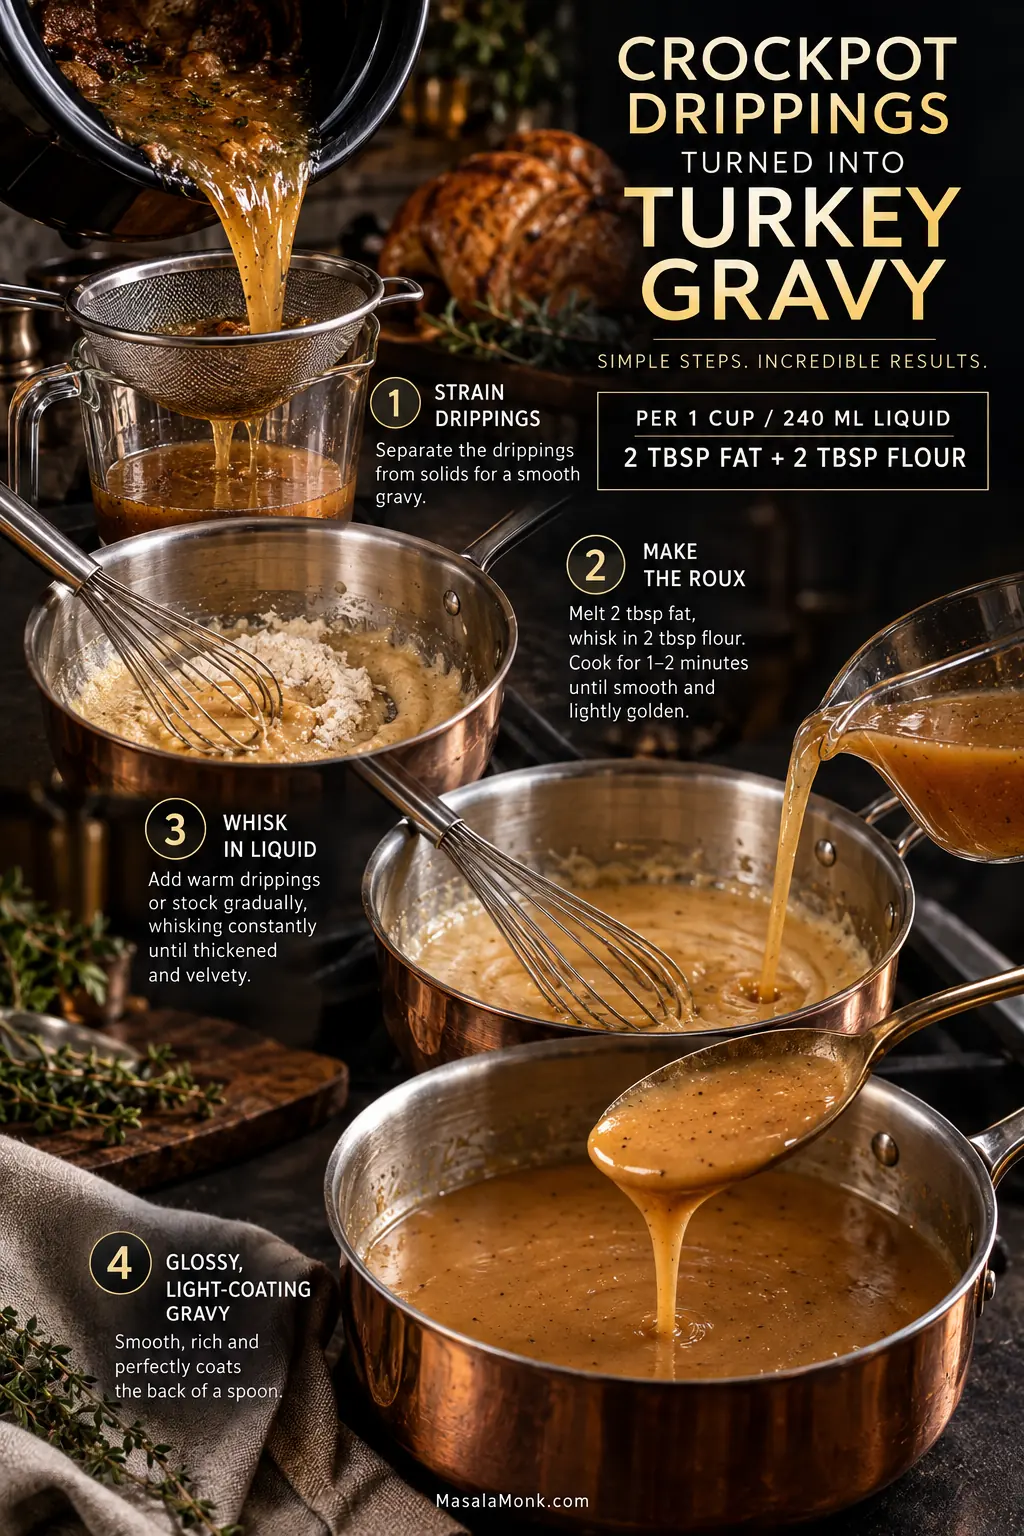
Turkey drippings being strained, thickened with a roux, whisked with liquid and finished as smooth pourable gravy.
Let the drippings settle before measuring the fat for your roux.

Stop while the gravy is still a little looser than you think you need; it thickens as it sits. Season at the end, especially when the breast was pre-brined. Too thick? Add hot unsalted stock. Too thin? Simmer longer. Greasy? Remove more fat. Too salty? Dilute with unsalted stock.

For more help with roux ratios and gravy rescue, continue with the Turkey Gravy Recipe.

Cranberry-Onion Turkey Breast

To make a tart-sweet holiday version, stir together 1 can whole-berry cranberry sauce, about 14–15 oz / 397–425 g, ¼ cup / 60 ml orange juice, 1 tbsp / 15 g Dijon mustard and 1 tsp finely grated orange zest for a 4 lb breast.

Spoon the mixture around the turkey rather than covering skin you plan to crisp. As it cooks, the cranberry loosens into the onion and juices below instead of forming a heavy blanket over the breast.
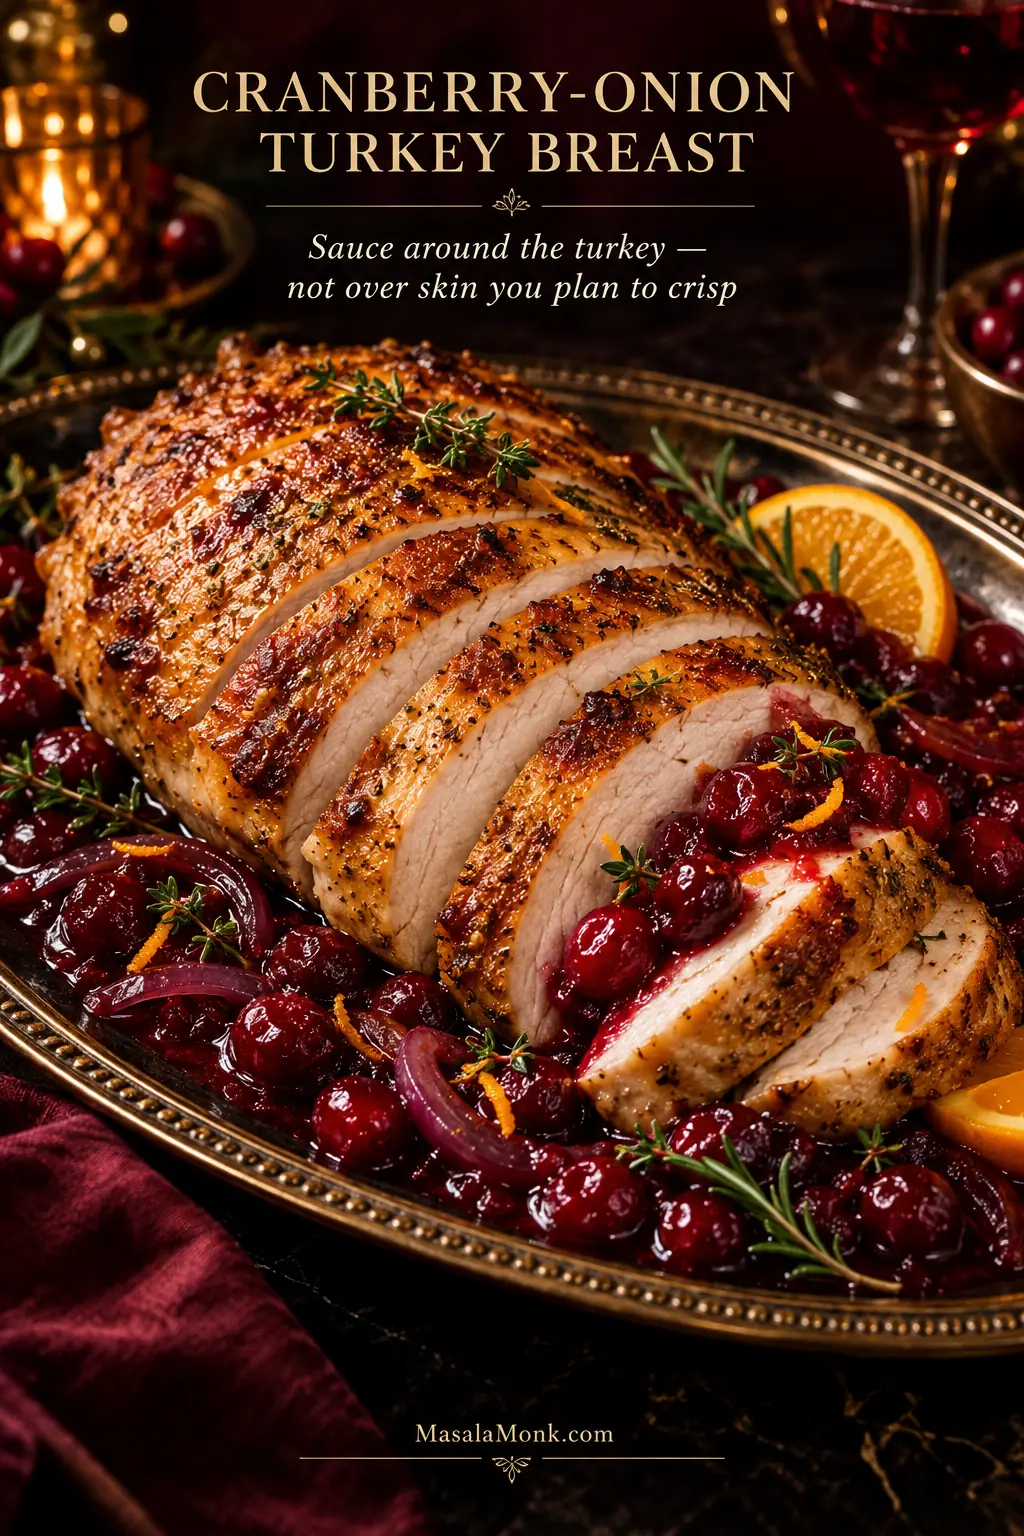
Golden sliced turkey breast surrounded by glossy cranberries, red onion, orange zest and herbs.
Dijon adds savory sharpness, while the cranberry-orange sauce brings acidity beside rich turkey and gravy.

If you already have homemade cranberry sauce with orange juice, use that as the base and taste before adding more citrus.

How Much Turkey Breast Per Person?

Plan on about ½ lb / 225 g raw boneless turkey per person, or roughly ¾ lb / 340 g raw bone-in turkey. For generous leftovers, move toward ¾ lb / 340 g boneless or 1 lb / 450 g bone-in per person.

A 4 lb boneless breast therefore feeds about seven or eight people with a full spread. By comparison, a 4 lb bone-in breast is more comfortable for roughly five or six.
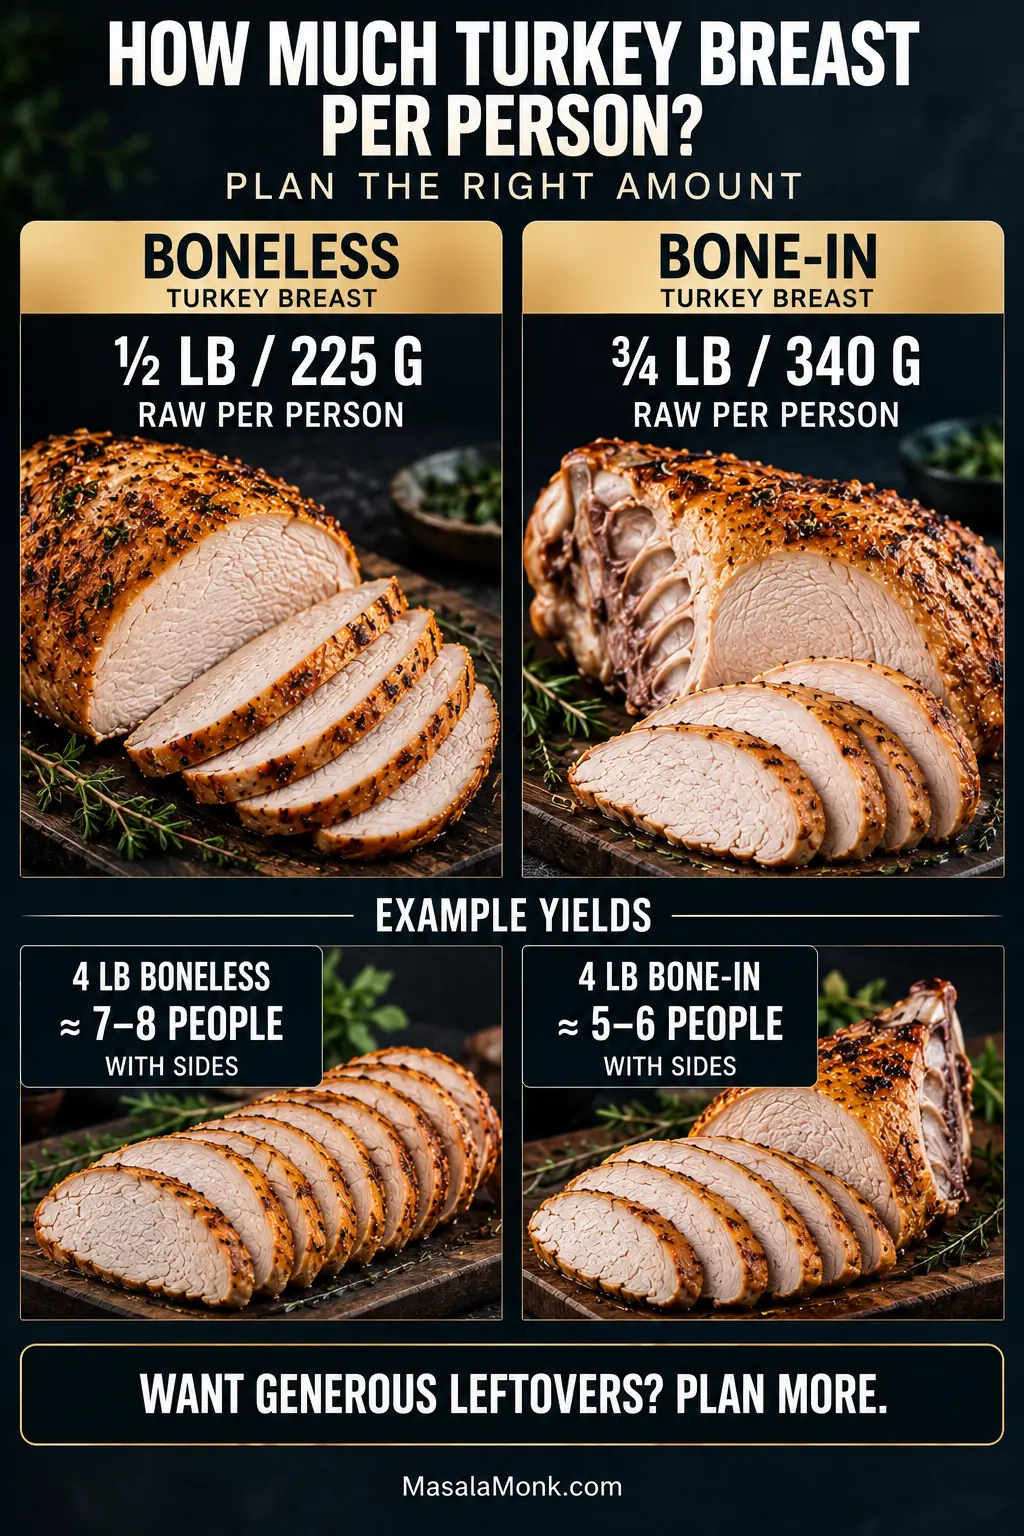
Portion guide comparing raw boneless and bone-in turkey breast amounts per person and example servings from four-pound breasts.
These are buying weights, not plated portions; bone-in turkey needs more because some of the weight is rib structure.

For a smaller holiday table, a platter of neatly sliced breast with hot gravy can make far more sense than carving a whole bird nobody really needed. Add mashed potatoes, dressing, cranberry sauce, rolls and something green; a green bean casserole brings a crisp topping beside all those softer sides.

Something Went Wrong With My Crockpot Turkey Breast

Most timing and texture problems are salvageable. Find the symptom and deal with that problem—not the clock.
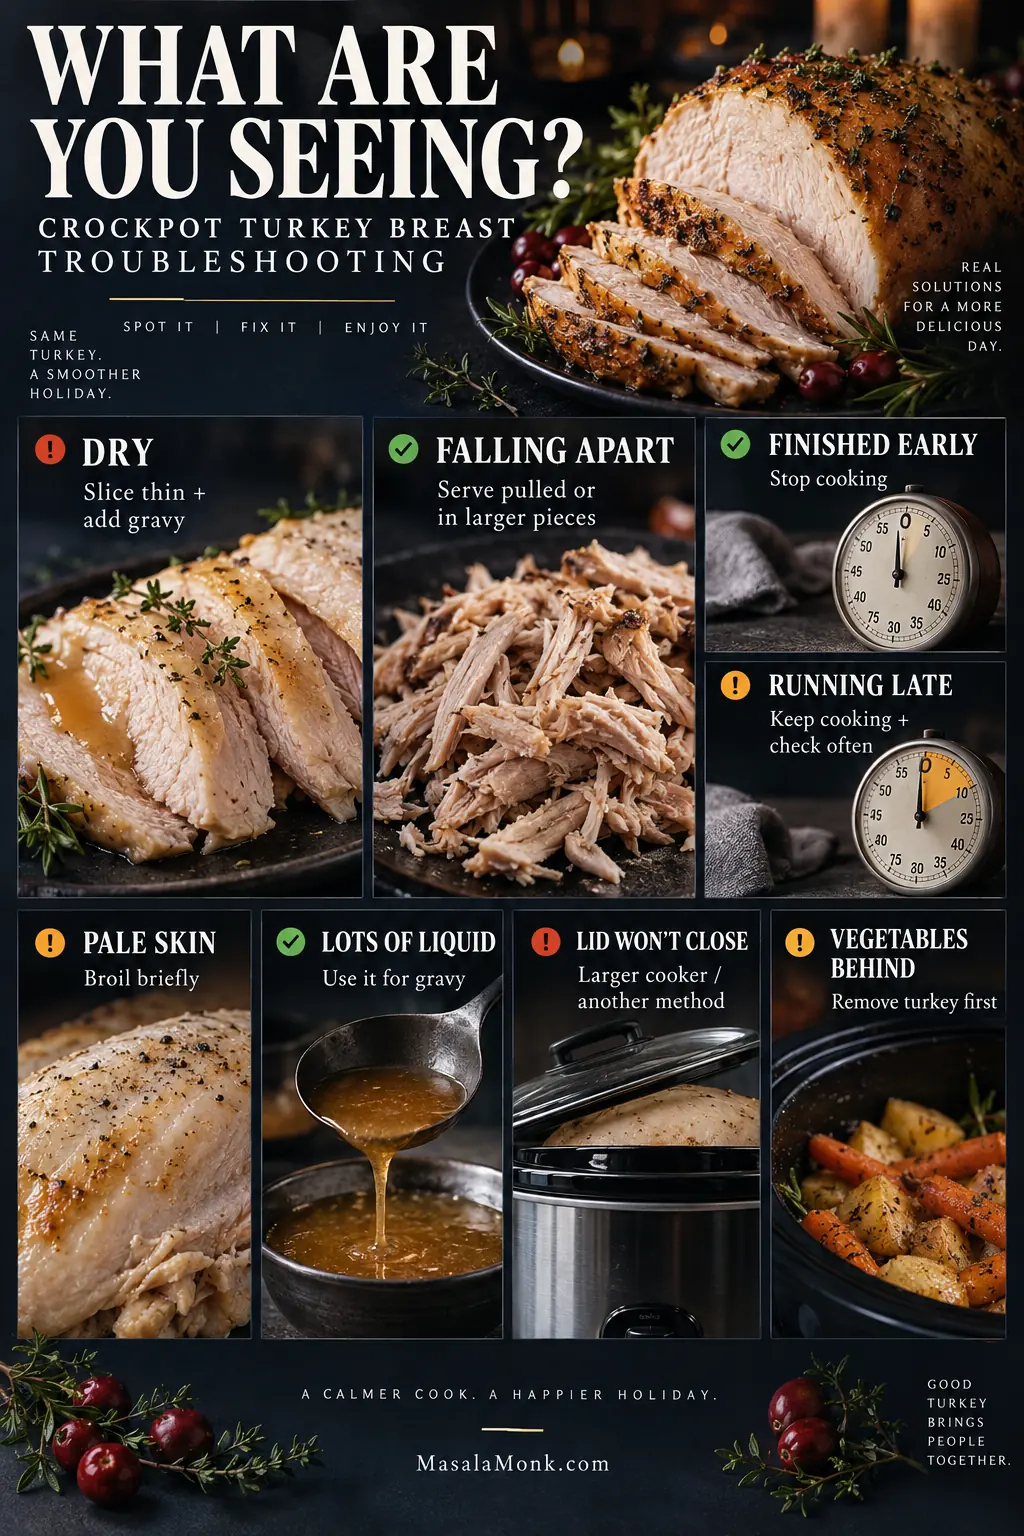
Troubleshooting guide showing dry turkey, falling-apart meat, early or late cooking, pale skin, excess liquid, poor lid fit and vegetables needing more time.
Name the problem first—temperature, texture, liquid, fit or timing—then choose the matching fix.

Timing & Texture Problems

What happenedLikely causeWhat to do
Turkey is running lateThicker breast, full cooker or cooler applianceKeep cooking; use HIGH if needed and check more often.
Turkey still looks slightly pinkColor can remain even in safely cooked poultryRecheck the thickest areas with a reliable thermometer.
Turkey finished hours earlySmall or thin breast; hotter cookerTake it out. Do not keep cooking just to match the schedule.
Breast is dryUsually overcookingSlice thinly and serve with warm gravy or drippings.
Turkey falls apartCooked beyond the clean-carving stageServe it pulled or in larger pieces.
Two breasts finish differentlyDifferent thicknesses or positionsRemove the finished one and leave the other cooking.
Vegetables are still firmLarge pieces or a heavily loaded cookerRemove the turkey and finish the vegetables while it rests.
Power went out during cookingInterrupted heatIf you were away and do not know how long the cooker was off, discard the food. If you are home and catch the outage promptly, finish the turkey immediately using another safe cooking method.

Salt, Liquid, Skin & Cooker Problems

What happenedLikely causeWhat to do
Turkey is extremely saltyEnhanced/pre-brined breast plus added saltUse unsalted gravy and sides; dilute salty drippings with stock.
Hardly any drippingsSmall or lean breastAdd unsalted stock when making gravy.
Turkey is sitting in lots of liquidNormal cooking juices collectedLift out the breast and use the liquid for gravy.
Skin is pale and softNormal Crockpot resultBroil briefly before resting.
Netting is stuckMesh tightened around the roastLet the roast rest, then remove the mesh gently according to the package directions.
Roast breaks into piecesIt is a formed roastHandle gently; separate pieces may also cook faster.
The proper lid will not closeBreast is too large or tallUse a larger cooker or another cooking method.
Display says LOW for 8 hoursThat is the appliance programStop cooking when the turkey is done; do not wait for the countdown.

Back to Recipe · Time & Temp · Dinner Timing · Back to Top

When the Turkey and Dinner Are on Different Schedules
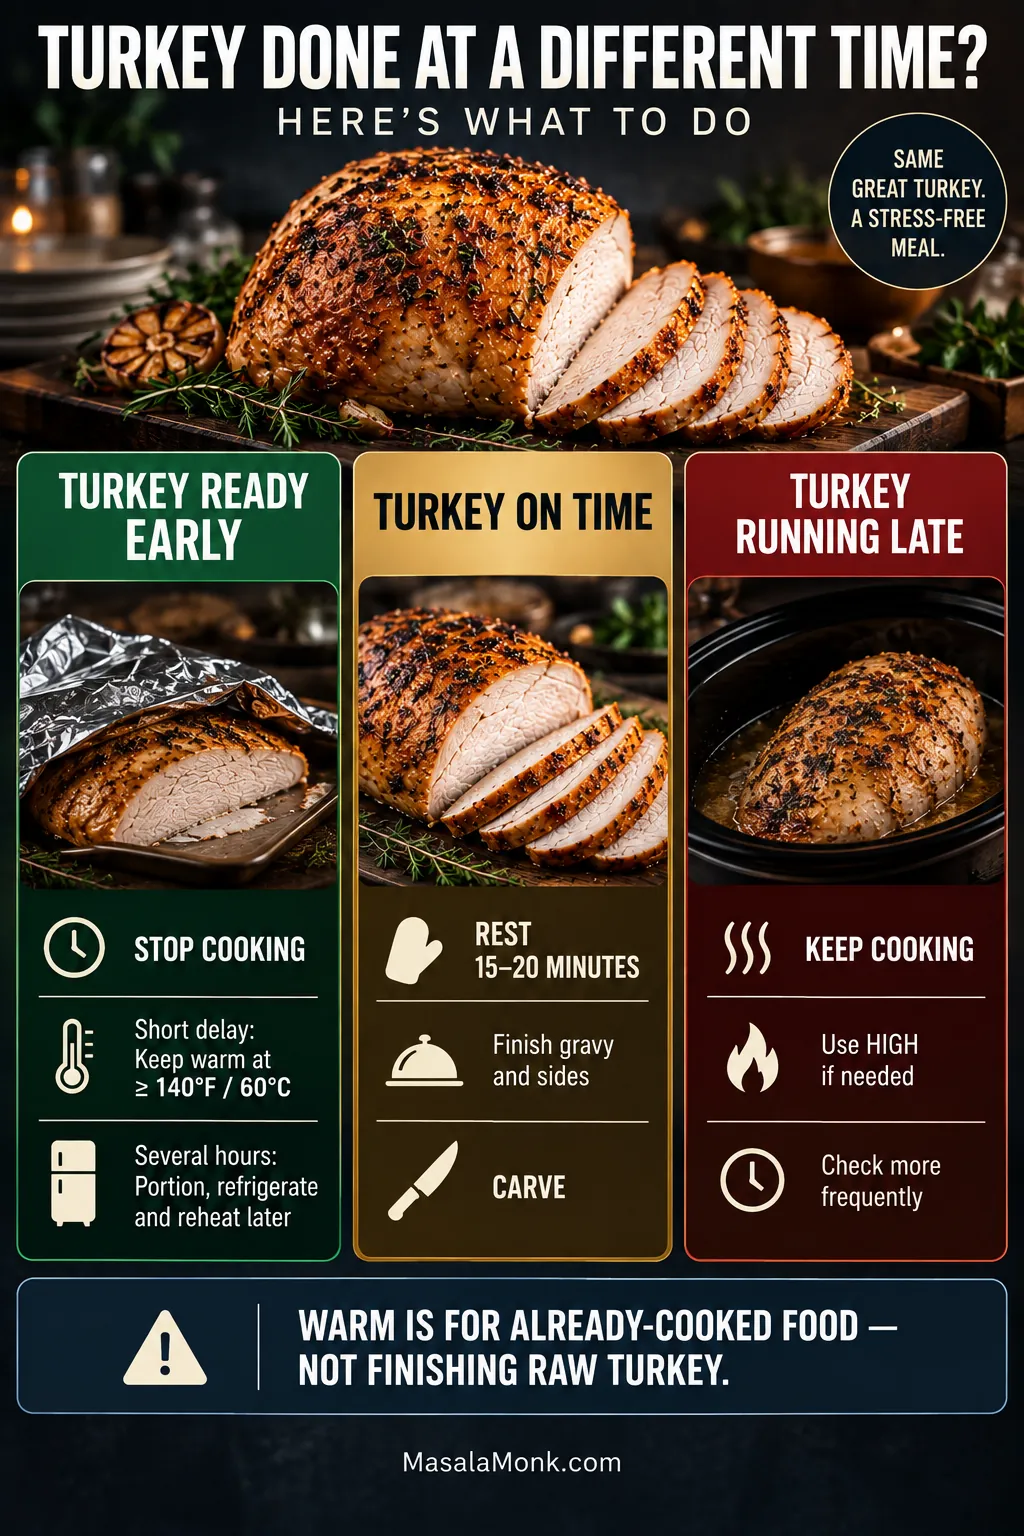
Guide showing what to do when turkey breast finishes early, finishes on time or is still cooking as dinner approaches.
Once the turkey is cooked, stop cooking decisions and switch to safe holding, chilling or reheating.

Turkey finished early: dinner is not ruined. Take the turkey out. For a short delay, keep fully cooked turkey at 140°F / 60°C or above. WARM is for already-cooked food, not for finishing raw or undercooked poultry.

A delay of several hours is different. Divide or carve the turkey into manageable portions, refrigerate promptly in shallow containers, and reheat it closer to dinner rather than holding the whole breast hot all afternoon.

Turkey running late: 30–60 minutes behind is annoying, not catastrophic. Keep cooking, use HIGH if needed, and check more frequently. Thick meat and a crowded cooker can simply take longer.

The Crockpot was never turned on: this is the timing problem you cannot fix by turning up the heat. Raw turkey should not sit at room temperature for more than 2 hours, or more than 1 hour above 90°F / 32°C. Past that limit, discard it.

Turkey that stayed safely refrigerated is another matter. Missed the slow-cooker start time but kept the meat cold? Use a faster cooking method instead.

The 15–20-minute rest gives the rest of dinner time to catch up. Finish the gravy, move the sides to the table and warm soft dinner rolls. Then carve and serve.

Store & Reheat Leftover Turkey

Cooked turkey breast keeps in the refrigerator for about 3–4 days. Cool leftovers promptly and store them covered. For longer storage, freeze useful portions with a little gravy or reserved cooking liquid; for best quality, use frozen cooked turkey within about 3–4 months.

Reheat cold leftovers to 165°F / 74°C outside the slow cooker. Put slices or portions in a baking dish with a little gravy, broth or reserved drippings, cover tightly, and use an oven set no lower than 325°F / 163°C.

After reheating, a preheated Crockpot can hold the already-hot food at 140°F / 60°C or above.

Cold slices work in sandwiches and salads, while warm turkey can go into soups, pasta or casseroles. If you also have gravy and vegetables left, the Turkey Pot Pie Recipe turns them into something worth looking forward to again.

Crockpot Turkey Breast FAQs

1. How long does turkey breast take in a Crockpot?

A 2–3 lb intact boneless breast often needs about 3–4 hours on LOW; a 4–5 lb intact boneless breast about 4½–6 hours; and many 4–6 lb bone-in breasts about 5–6 hours.

2. Can frozen turkey breast go straight into the slow cooker?

No. Thaw it first. “Cook from frozen” instructions apply only to the cooking method specified for that particular product.

3. Do I remove the netting from a boneless turkey breast roast?

Remove the outer wrapper. For inner mesh touching the meat, follow the package directions; some formed roasts use cooking-safe netting to hold the pieces together.

4. What temperature is Crockpot turkey breast done?

In this crockpot turkey breast recipe, take the turkey out when the thickest breast meat reaches 165°F / 74°C.

Then you no longer need the clock. Carve across the grain, spoon the glossy gravy over the slices, and get dinner to the table while the skin is still crisp.
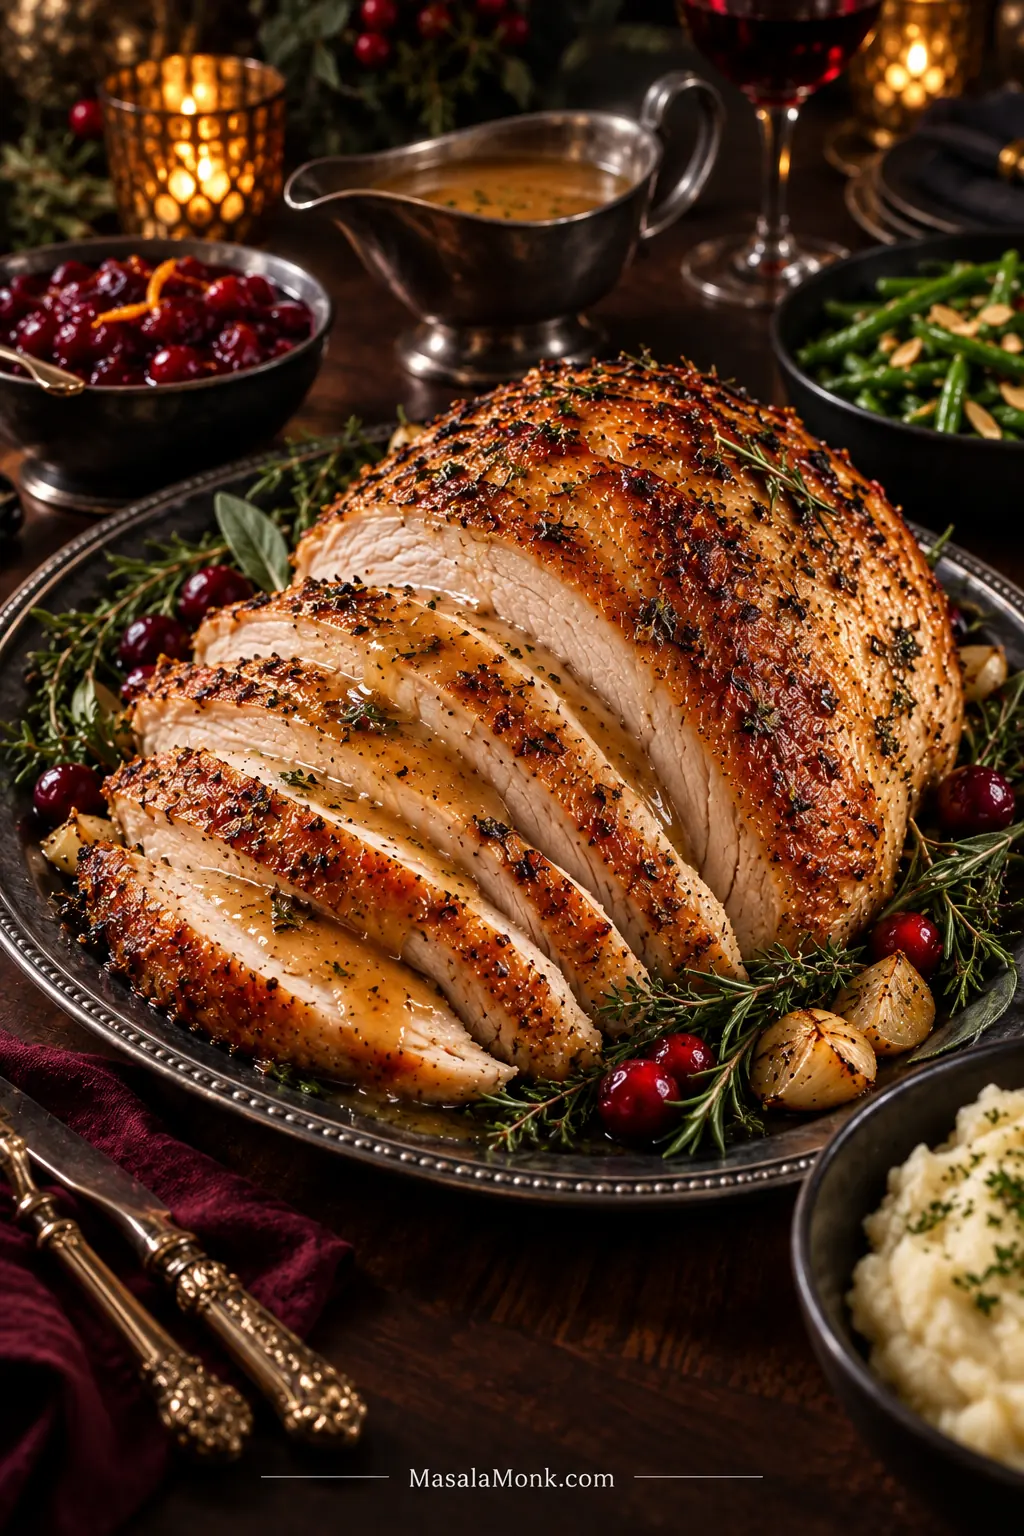
Holiday serving platter with carved golden turkey breast, gravy, cranberry sauce, green beans and mashed potatoes.
Spoon gravy over the cut surfaces and leave some crisp skin uncovered.

Back to Recipe · Time & Temp · Fix My Turkey · Back to Top

Posted on — Leave a comment

Orange Sauce for Duck Recipe

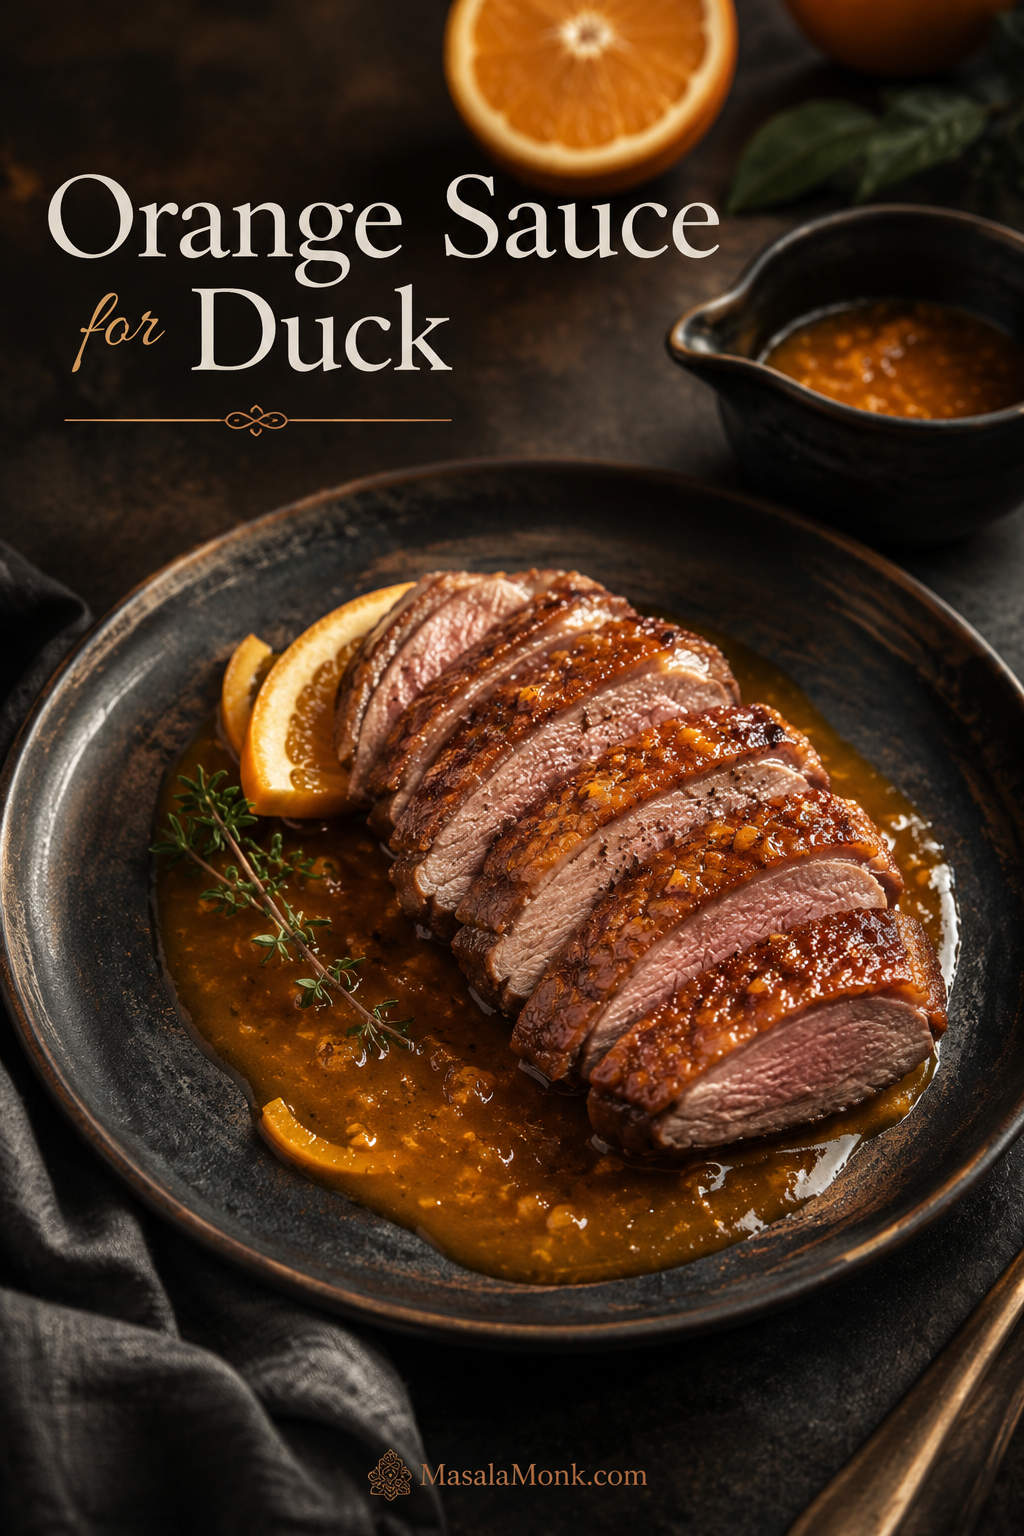
Sliced duck breast with crisp skin served over glossy orange sauce on a dark plate.

Duck already feels like the kind of dinner you do not want to waste: crisp skin, rich meat, maybe guests at the table. This orange sauce for duck gives you the classic sweet-sharp citrus lift without turning the plate sticky, syrupy, or restaurant-complicated.

Use it with pan-seared duck breast, roast duck, duck legs, leftover duck, or a simple duck à l’orange-style dinner. It comes together on the stovetop in about 25 minutes and should taste bright, savory, lightly sweet, and clean enough to wake up the duck rather than cover it.

You may also see this called orange gravy for duck, although the texture here is closer to a polished pan sauce than a flour-thickened gravy. It should be glossy and pourable, not gloppy, with enough body to sit beside the meat without soaking the crisp skin.

Quick Answer

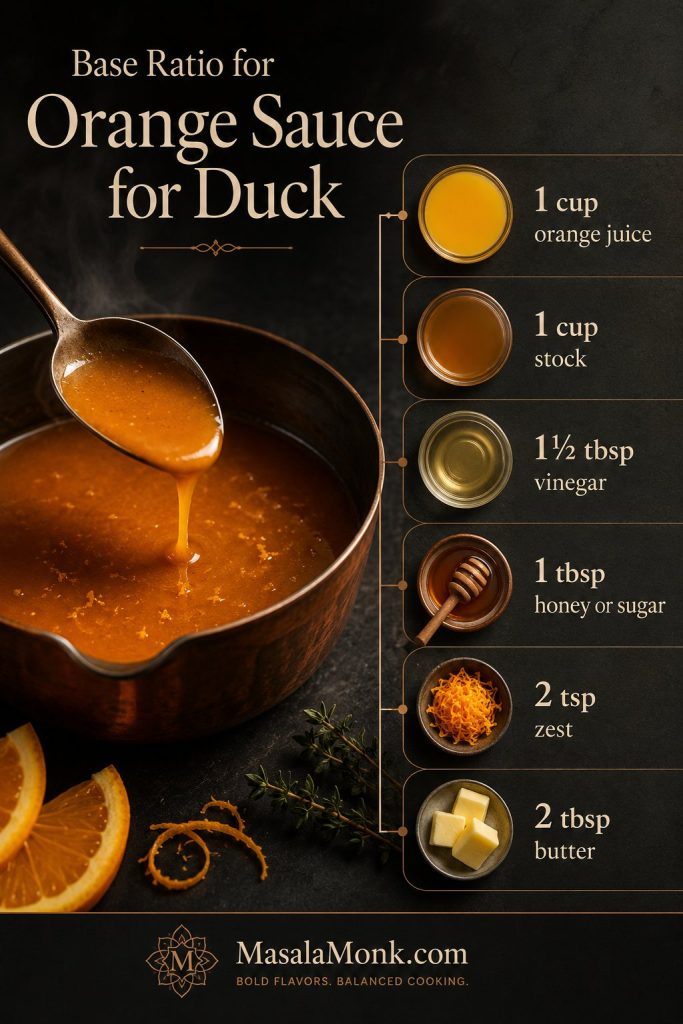
For about 1 cup / 240 ml sauce, simmer 1 cup / 240 ml orange juice, 1 cup / 240 ml duck or chicken stock, 1 1/2 tablespoons vinegar, 1 tablespoon honey or sugar, and 2 teaspoons orange zest until lightly reduced. Finish with 2 tablespoons / 28 g cold butter for a smooth citrus sauce that coats the spoon without turning sticky.

Base ratio for orange sauce for duck showing orange juice, stock, vinegar, zest, sweetener, and butter
Use this base ratio for orange sauce for duck as your starting point. Once it reduces, small adjustments with vinegar, stock, or butter can shift the flavor quickly.

Before serving, taste and adjust. Too sweet? Add a splash of vinegar. Too sharp? Add a little honey or butter. Too thin? Simmer it a few minutes longer before using cornstarch.

The target: glossy, pourable, orange-forward, and sharp enough to taste like dinner, not marmalade.

The point is not to make the sweetest orange sauce. The point is to make a sauce that feels right with duck: clean citrus edge, savory depth, gentle sweetness, and a finish that makes the plate feel special.

You can also make the base ahead, then warm it gently and whisk in the butter before serving. That takes pressure off the final minutes, especially when the duck itself already needs your attention.

Need the full measurements in one place? Jump to the recipe card. If your sauce is already too sweet, too sharp, or too thin, go straight to the fix guide.

Three rules for better duck sauce: reduce before thickening, taste before butter, and sauce the plate instead of the crisp skin.

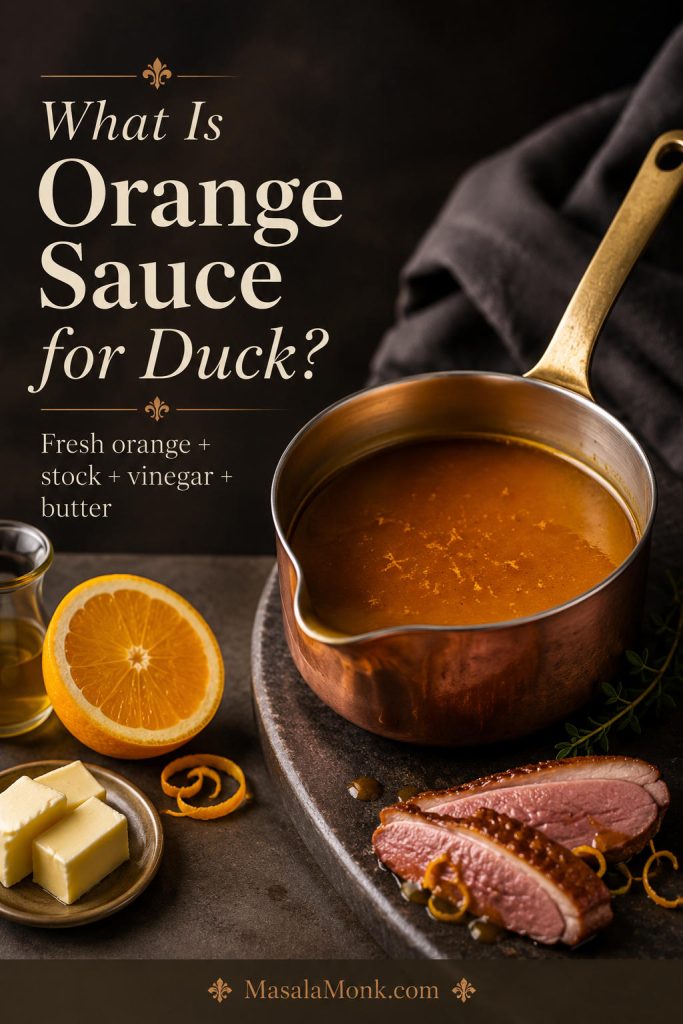
What Is Orange Sauce for Duck?

Orange sauce for duck is a warm citrus sauce served with rich duck meat. It usually combines orange juice or zest with stock, vinegar, a little sweetness, and butter. Some versions are simple and quick, while classic French versions use a sweet-sour base with rich duck or veal stock.

Sauce boat with orange sauce, oranges, stock, vinegar, butter, and duck on a dark surface
Orange sauce for duck is a warm savory citrus sauce, not a sweet dipping sauce. Stock and vinegar are what make the orange taste dinner-ready instead of syrupy.

For home cooking, the goal is simpler: make a sauce that brightens the duck without turning the plate sweet. Orange brings freshness, vinegar keeps the richness in check, and stock gives the sauce enough body to feel like part of the dish rather than a sweet topping.

This recipe is designed as an all-purpose duck sauce. It works with duck breast, roast duck, duck legs, leftover duck, and a simplified duck à l’orange plate. If you like bright sauces for rich holiday mains, MasalaMonk’s cranberry sauce with orange juice follows a similar sweet-tart logic, but this one is warmer and more savory.

Comparing it with the French classic? See the duck à l’orange section before choosing a variation.

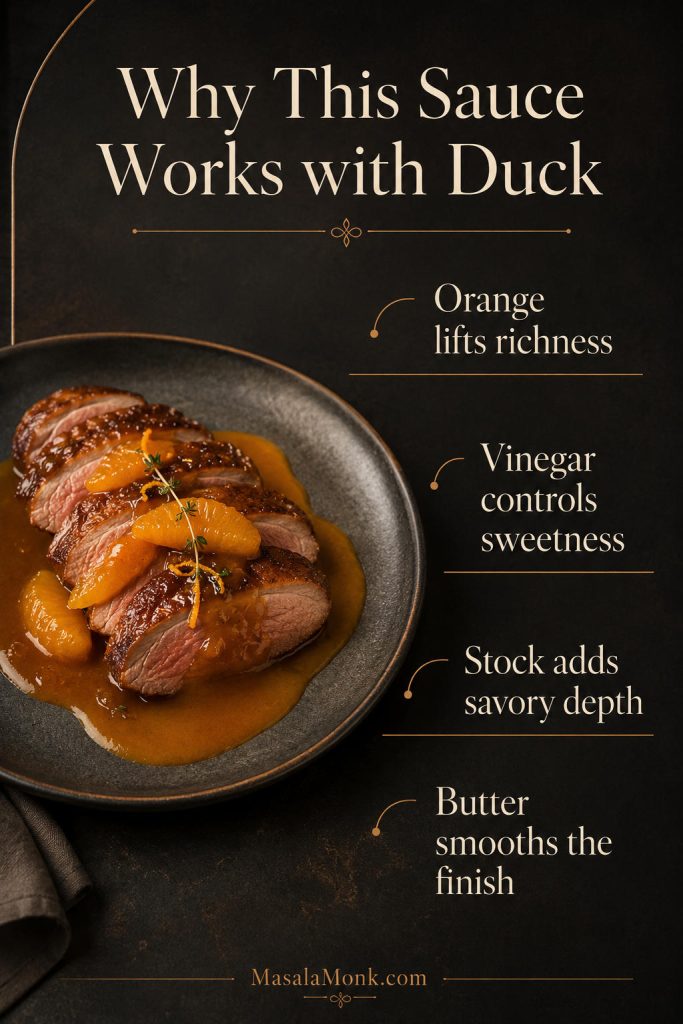
Why This Sauce Works with Duck

A good duck sauce has to do two things at once: cut through the richness and still taste like dinner. Orange brings the lift, vinegar keeps it from turning candied, stock gives it a savory backbone, and cold butter makes it feel polished on the plate.

  • Orange brightens rich meat: citrus gives the duck a clean edge instead of letting each bite feel heavy.
  • Vinegar controls the sweetness: it keeps the sauce sweet-sharp, not jammy.
  • Stock gives it backbone: it turns orange juice into a real pan sauce instead of a topping.
  • Cold butter finishes the texture: it softens the acidity and gives the sauce that silky, spoon-coating finish.
Board showing orange, vinegar, stock, and butter as the key parts of sauce for duck
The sauce works because it does more than add orange flavor. It cuts the richness, adds savory depth, and finishes smooth enough to belong on a dinner plate.

The good news is that this is not a one-shot sauce. Before the butter goes in, you can still pull it brighter, softer, saltier, thinner, or thicker.

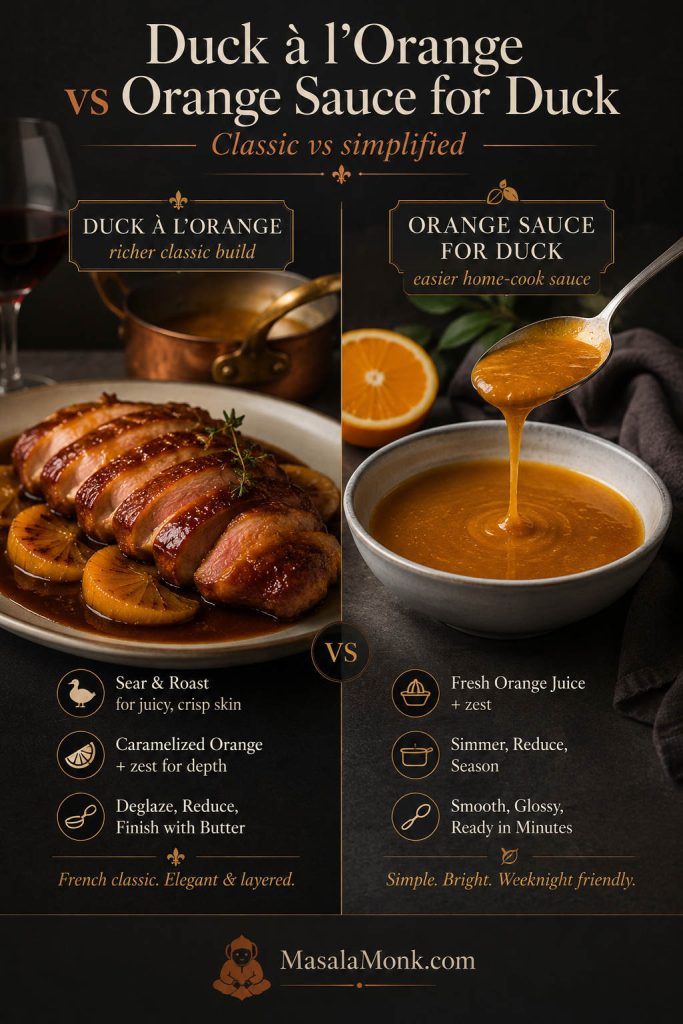
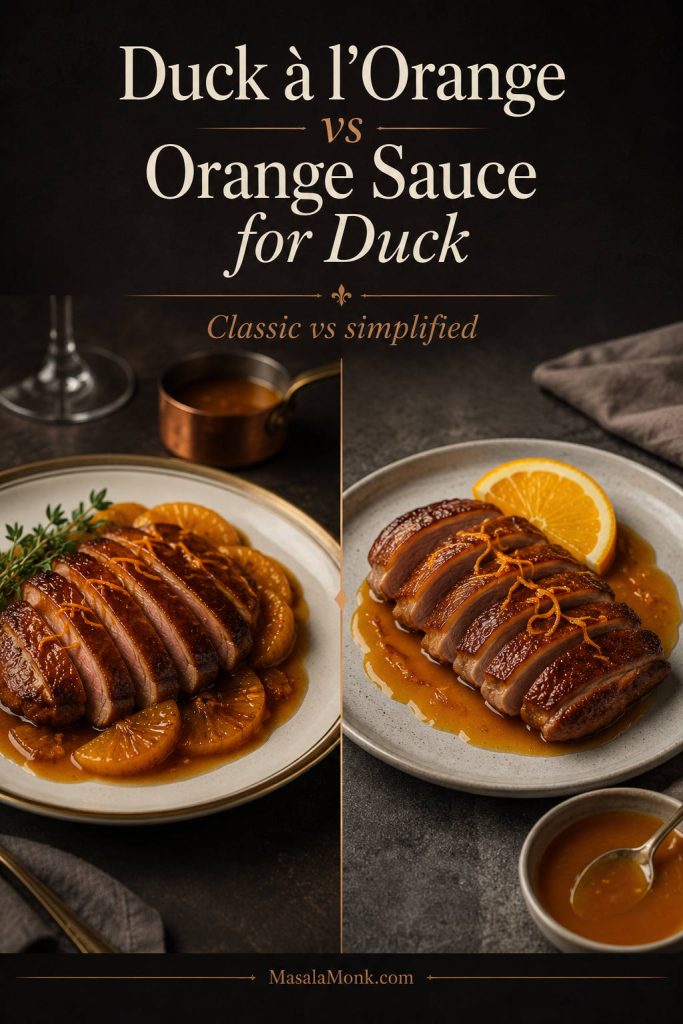
Is This the Same as Duck à l’Orange Sauce?

This is a simplified duck à l’orange-style sauce. Classic duck à l’orange often starts with a more formal sweet-sour base, sometimes called a gastrique, then builds flavor with orange, stock, and sometimes orange liqueur. It is beautiful, but it can feel like one more moving part when the duck itself already needs care.

This recipe keeps the part home cooks usually want most: citrus lift, controlled sweetness, savory depth, and a smooth finish. It skips the restaurant-style steps unless you want to dress it up with Grand Marnier, port, marmalade, or blood orange. For a more traditional, fully developed version, Serious Eats has a detailed guide to duck à l’orange.

Think of this as the calmer sauce-first version: familiar enough for duck à l’orange cravings, but simple enough to make while dinner is still moving.

Comparison board showing classic duck à l’orange and a simpler orange sauce for duck
Duck à l’orange is the more classical route, while this sauce-first version keeps the same sweet-sharp idea simpler. Both work best when citrus is balanced with a savory base.

Ingredients You Need

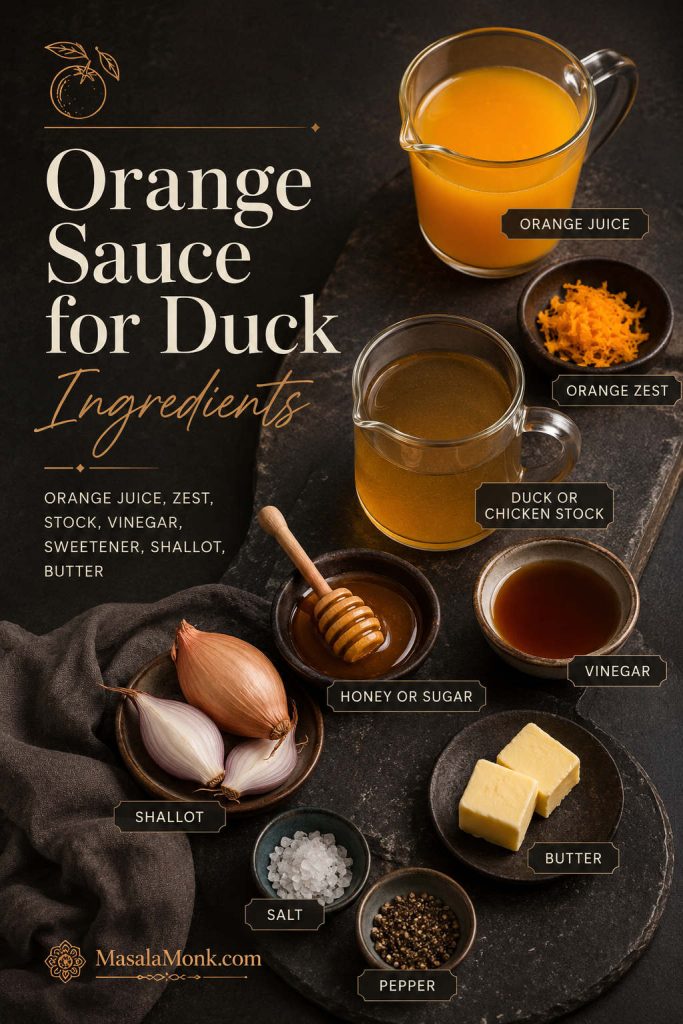
Ingredients for orange sauce for duck including orange juice, zest, stock, vinegar, honey, butter, shallot, salt, and pepper
This sauce is short on ingredients, but each one matters. Orange brings aroma, stock makes it savory, vinegar keeps it bright, and cold butter smooths the finish.

Orange Juice and Zest

Fresh orange juice gives the sauce its main flavor. Orange zest is just as important because it adds concentrated citrus aroma without making the sauce watery. You will usually need 2 to 3 medium oranges for 1 cup / 240 ml juice, depending on size and juiciness, plus zest. Zest one orange before juicing it, and avoid the bitter white pith underneath the peel.

Bottled orange juice can work in a pinch, but fresh juice gives a cleaner, brighter sauce. If your oranges are very sweet, start with less honey or sugar and adjust after the sauce reduces.

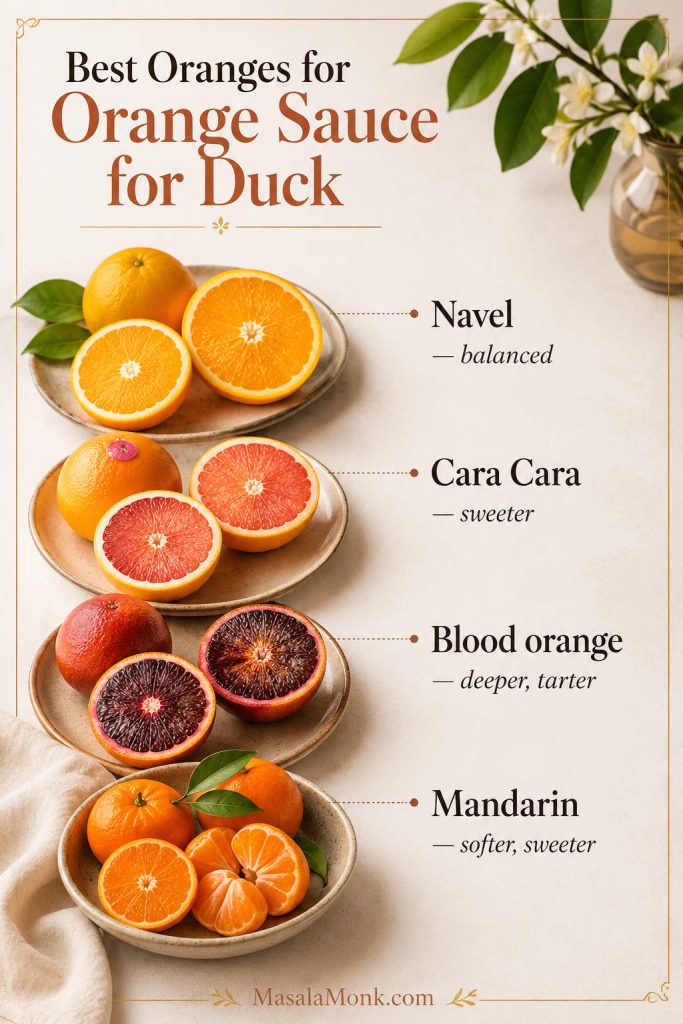
Navel, Cara Cara, blood orange, and mandarin oranges for making orange sauce for duck
The orange you choose changes the finished sauce. Navel is balanced, Cara Cara is sweeter, blood orange is deeper and tarter, and mandarin gives a softer citrus note.

Duck Stock or Chicken Stock

Stock is the quiet ingredient that makes the sauce taste like dinner, not dessert. Duck stock is ideal if you have it, but low-sodium chicken stock is easier to find and works well. Low-sodium stock is especially helpful because the sauce reduces as it cooks.

If you are cooking duck breast in a pan, you can also add a spoonful of the rendered duck juices or pan drippings. Skim or pour off excess fat first so the sauce tastes rich, not greasy.

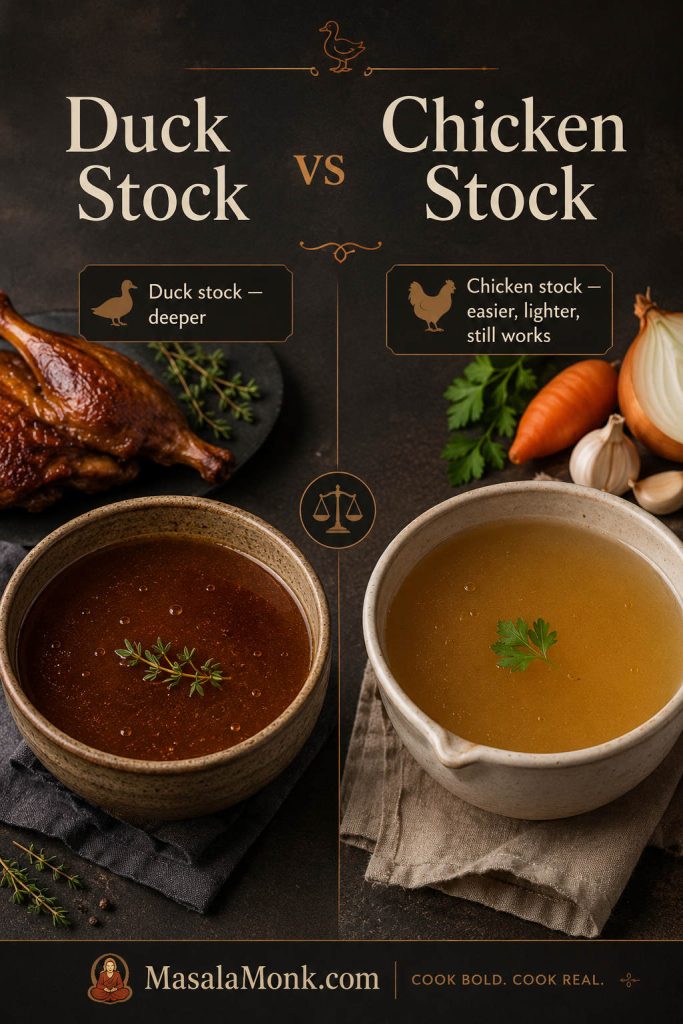
Duck stock and chicken stock comparison for orange sauce
Duck stock gives the deepest flavor, but low-sodium chicken stock is easier to find and still works well. Since the sauce reduces, starting with low-sodium stock gives you more control.

Vinegar for Balance

Duck needs acidity. Sherry vinegar and red wine vinegar are both excellent because they bring a rounded sharpness. White wine vinegar also works. Lemon juice can help in a pinch, although vinegar gives a more classic sweet-sour profile.

Use 1 1/2 tablespoons for a balanced base. Use closer to 2 tablespoons if your oranges are very sweet, if you are serving fatty roast duck, or if the finished sauce tastes too round and heavy.

Vinegar choices for orange sauce for duck including sherry vinegar, red wine vinegar, white wine vinegar, and lemon juice
Vinegar is the quiet fix that keeps orange duck sauce from tasting like marmalade. Sherry vinegar and red wine vinegar give rounded acidity, while lemon juice works when that is what you have.

Honey, Sugar, or Marmalade

You only need a little sweetness. Honey gives a rounded flavor, while sugar keeps the sauce cleaner. Start with 1 tablespoon, then add more only after the sauce has reduced and you have tasted it.

Orange marmalade can be used for a shortcut variation, but it should support the duck sauce rather than take over. Too much can push the flavor toward sticky glaze, so keep the base savory with stock and vinegar.

Honey and sugar comparison for sweetening orange sauce for duck
Sweetness should support the orange, not lead the plate. Honey tastes rounder, sugar tastes cleaner, and both should be added lightly until the sauce is reduced and tasted.

Butter for a Smooth Finish

Cold butter goes in at the end. It softens the acidity, gives the sauce a polished finish, and helps it feel complete. Add it off the heat or over very low heat and whisk until smooth.

Once the butter is added, avoid hard boiling. Butter should make the sauce silky, not oily. If the pan starts bubbling hard after the butter goes in, lower the heat immediately.

Equipment You Need

You only need a small saucepan, whisk, citrus zester, and juicer for the basic sauce. A fine-mesh sieve helps if you want a restaurant-smooth finish. A skillet only matters if you are making the orange pan sauce from duck drippings.

  • Small saucepan or saucier
  • Whisk
  • Fine grater or Microplane
  • Citrus juicer
  • Fine-mesh sieve, optional
  • Small bowl for cornstarch slurry, if using

Once the ingredients and basic tools are ready, start the step-by-step method.

How to Make Orange Sauce for Duck

The sauce is most flexible before the butter goes in. Taste there, adjust there, and the finish becomes much easier.

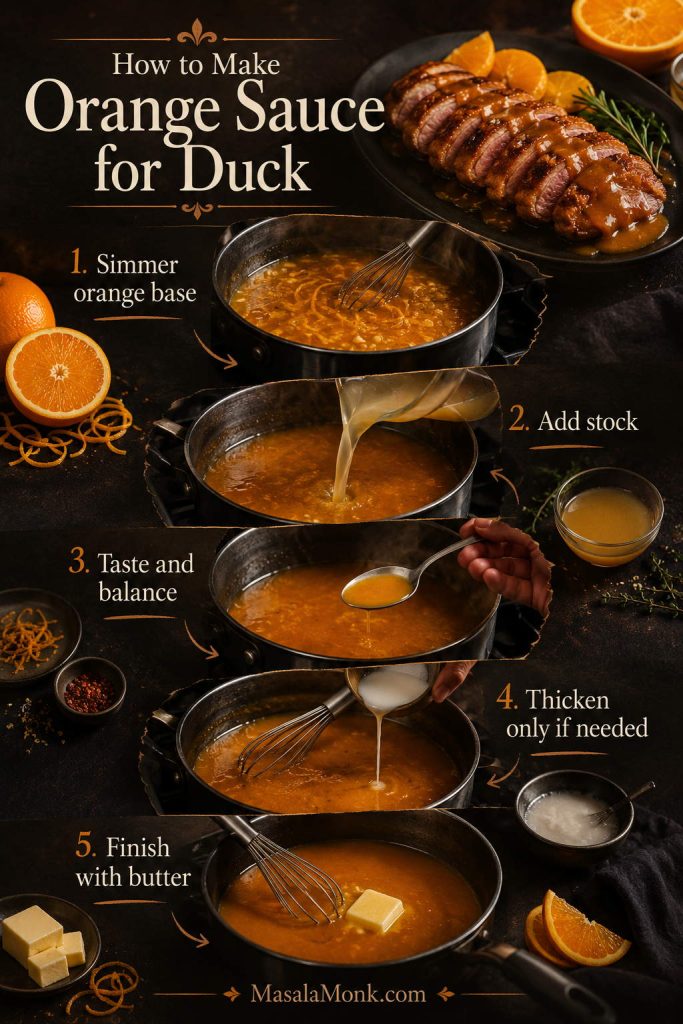
Step-by-step board showing orange sauce simmering, stock being added, sauce being tasted, thickened, and finished with butter
Think of the method as a sequence of control points. Build the citrus base, add savory body, correct the flavor, and only then decide whether the sauce needs help thickening.

1. Reduce the Orange Base

Add the orange juice, orange zest, vinegar, and honey or sugar to a small saucepan. If you are using shallot, add it here too. Bring to a simmer over medium heat, then cook for 5 to 7 minutes, until the mixture smells bright and citrusy and has reduced slightly.

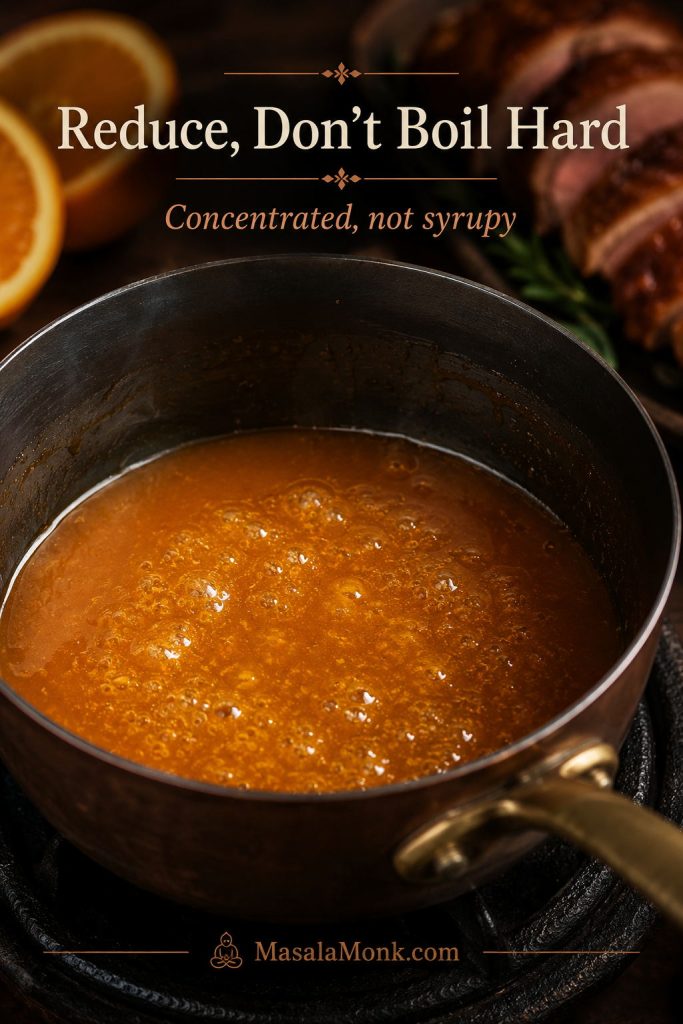
You are not trying to make caramel or a thick syrup at this stage. You just want to concentrate the orange flavor and soften the sharp edge of the vinegar.

Orange sauce gently reducing in a saucepan
The sauce should simmer gently until the orange flavor concentrates. If it boils hard, it can turn sticky before the stock and butter have a chance to round it out.

2. Add Stock and Simmer

Add the duck stock or chicken stock. Simmer for 8 to 12 minutes, stirring occasionally, until the sauce tastes savory and leaves a thin coating on the spoon.

If the sauce still feels thin, keep simmering. Reduction gives better flavor than thickening too early.

3. Balance Sweetness, Acidity, and Salt

Taste before adding butter. This is the moment where the sauce becomes yours: a little sharper for fatty roast duck, a little softer for leaner duck breast, or a touch sweeter if the oranges are tart.

  • Too sweet? Add a small splash of vinegar or lemon juice.
  • Too sharp? Add a little more honey or sugar.
  • Flat? Add a pinch of salt and a little more orange zest.
  • Thin? Simmer longer before using slurry.

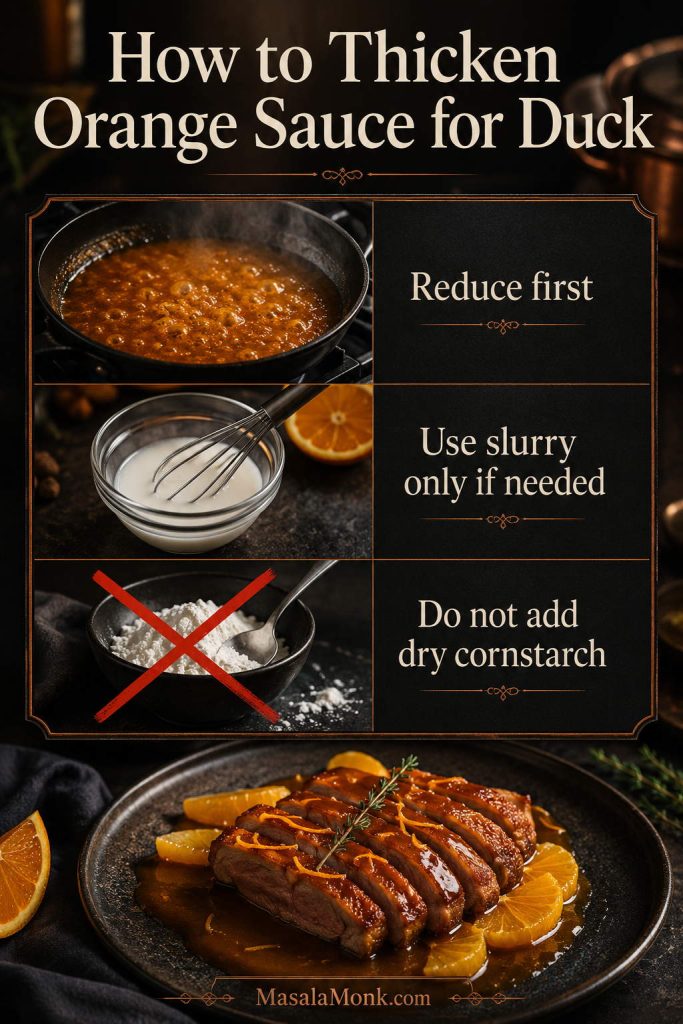
4. Thicken Only If Needed

If the sauce is still too thin after reducing, mix 1 teaspoon cornstarch or cornflour with 1 tablespoon cold water. Whisk a small amount of this slurry into the simmering sauce and cook for 30 to 60 seconds.

Do not add dry cornstarch directly to the pan. It can clump and make the texture uneven. Use only enough slurry to help the sauce coat the spoon lightly.

Thickening guide showing reduced sauce, cornstarch slurry, and a warning not to add dry cornstarch
Reduction gives better flavor than rushing to thicken. However, if the sauce still feels thin, mix cornstarch with cold water first so it blends smoothly instead of clumping.

If the sauce has already gone too thin, too thick, bitter, greasy, or broken, use the troubleshooting guide before adding more ingredients.

5. Finish with Butter

Lower the heat or remove the pan from the heat. Whisk in the cold butter, one small piece at a time, until the sauce is smooth. Taste again and adjust salt, pepper, vinegar, or sweetness as needed.

For a very smooth finish, strain it through a fine-mesh sieve before serving. For a more rustic sauce, leave the shallot and zest in.

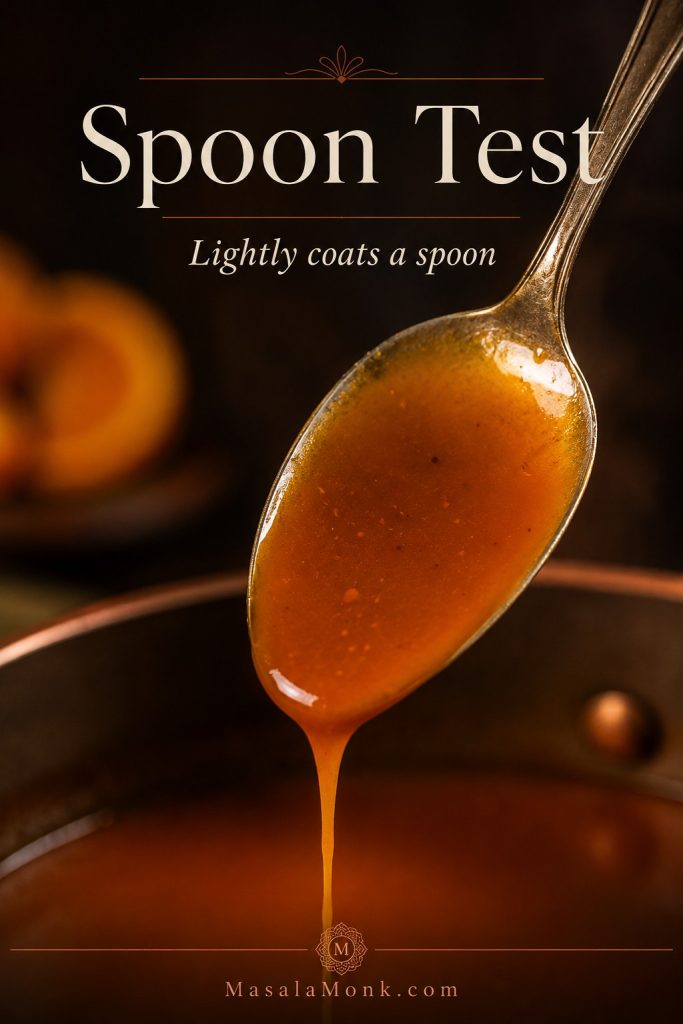
Glossy orange sauce lightly coating the back of a spoon
The right texture is glossy and pourable, not thick like glaze. When the sauce lightly coats a spoon, it is ready to finish or serve.
Do not worry if the sauce is not perfect on the first taste. As long as you taste before adding the butter, you can pull it back from too sweet, too sharp, too thin, or too flat without starting over.

Orange Sauce for Duck Recipe

Orange Sauce for Duck Recipe

This citrus sauce gives duck the classic sweet-sharp orange lift without turning the plate syrupy. It is smooth enough for duck breast, savory enough for roast duck, and simple enough for a duck à l’orange-style dinner at home.

Prep Time
10 minutes
Cook Time
15–20 minutes
Total Time
25–30 minutes
Yield
About 1 cup / 240 ml

Servings: 4, with about 1/4 cup sauce each

Category: Sauce

Method: Stovetop reduction

Cuisine: French-inspired

Ingredients

  • 1 cup / 240 ml fresh orange juice, from about 2–3 medium oranges, depending on size and juiciness
  • 2 teaspoons finely grated orange zest
  • 1 cup / 240 ml duck stock or low-sodium chicken stock
  • 1 1/2 tablespoons sherry vinegar or red wine vinegar, plus more to taste
  • 1 tablespoon honey or 12 g sugar, plus more only after tasting
  • 1 small shallot, finely chopped, optional, about 2 tablespoons
  • 2 tablespoons / 28 g cold unsalted butter, cut into small pieces
  • 1/4 teaspoon fine salt, plus more to taste
  • Freshly ground black pepper or white pepper, to taste

Optional Thickener

  • 1 teaspoon cornstarch / cornflour
  • 1 tablespoon cold water

Optional Upgrades

  • 1–2 tablespoons / 15–30 ml Grand Marnier, Cointreau, or another orange liqueur
  • 2–4 tablespoons / 30–60 ml port for a richer sauce
  • 1 tablespoon / about 20 g orange marmalade for a sweeter shortcut version

Instructions

  1. Start the orange base. Add orange juice, orange zest, vinegar, honey or sugar, and the optional shallot to a small saucepan. Bring to a simmer over medium heat.
  2. Reduce slightly. Simmer for 5 to 7 minutes, until the orange mixture smells bright and has reduced a little. Do not reduce it to a thick syrup yet.
  3. Add stock. Pour in the duck stock or chicken stock. Simmer for 8 to 12 minutes, stirring occasionally, until the sauce tastes savory and leaves a thin coating on the spoon.
  4. Balance the sauce. Taste before adding butter. Add a little more vinegar if it tastes too sweet, more honey or sugar if it tastes too sharp, or a pinch of salt if it tastes flat.
  5. Thicken only if needed. If the sauce is still too thin after reducing, stir cornstarch with cold water in a small bowl. Whisk a little slurry into the simmering sauce and cook for 30 to 60 seconds. Do not add dry cornstarch directly to the sauce.
  6. Finish with butter. Lower the heat or remove the pan from the heat. Whisk in the cold butter until the sauce is smooth. Do not hard-boil after adding butter.
  7. Strain and serve. Strain through a fine-mesh sieve for a smooth sauce, or leave the shallot and zest in for a more rustic sauce. Serve warm with duck.

Notes

  • Yield: About 1/4 cup sauce per person for 4 servings. Double it if you like extra sauce at the table or are serving roast duck.
  • Texture: Aim for glossy and pourable, with enough body to coat a spoon lightly.
  • Best adjustment point: Taste before adding butter, while the sauce is still easy to correct.
  • Optional upgrades: Choose one at a time. Add marmalade or port with the stock, or orange liqueur after the sauce has reduced.
  • Serving: For crisp duck breast, sauce the plate or spoon around the slices. For roast duck, serve the sauce warm on the side.
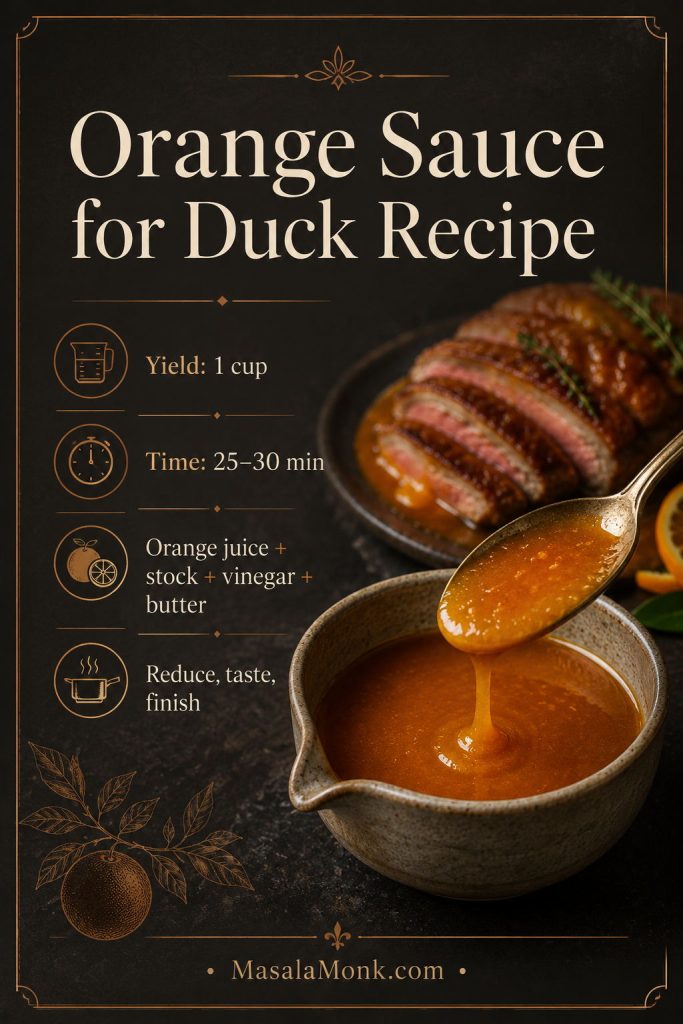
Saveable orange sauce for duck recipe card with yield, time, ingredients, and method cues
This saveable card keeps the sauce method simple at the stove. The important moment is tasting before the butter, while the sauce is still easy to adjust.

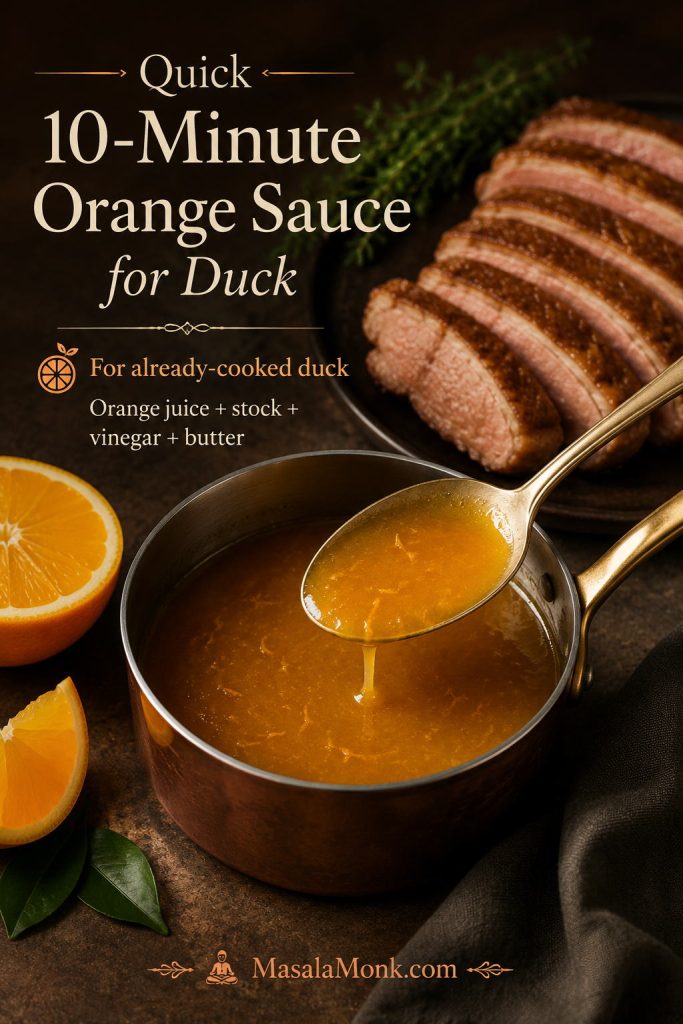
Making sauce for cooked duck? Use the quick 10-minute version. Cooking duck breast in the pan? Use the duck drippings version.

Quick 10-Minute Version

Use this when the duck is already cooked and you need a fast, warm citrus finish, not a full restaurant-style reduction. It is brighter and lighter than the main recipe, but it still gives the meat the orange lift it needs.

Quick version: Simmer 3/4 cup / 180 ml orange juice, 1/2 cup / 120 ml stock, 1 tablespoon vinegar, 1 tablespoon marmalade or 1 to 2 teaspoons honey, and 1 teaspoon orange zest for 8 to 10 minutes. Finish with 1 tablespoon cold butter and adjust with salt, vinegar, or honey.
Quick orange sauce for duck in a saucepan with sliced cooked duck nearby
The quick version is best when the duck is already cooked and you need a warm citrus finish. Keep the sauce in the pan or spoon, then add it lightly to the plate.

If you are cooking duck breast from scratch, the pan-sauce version below gives better flavor because it uses the browned bits and juices left in the skillet.

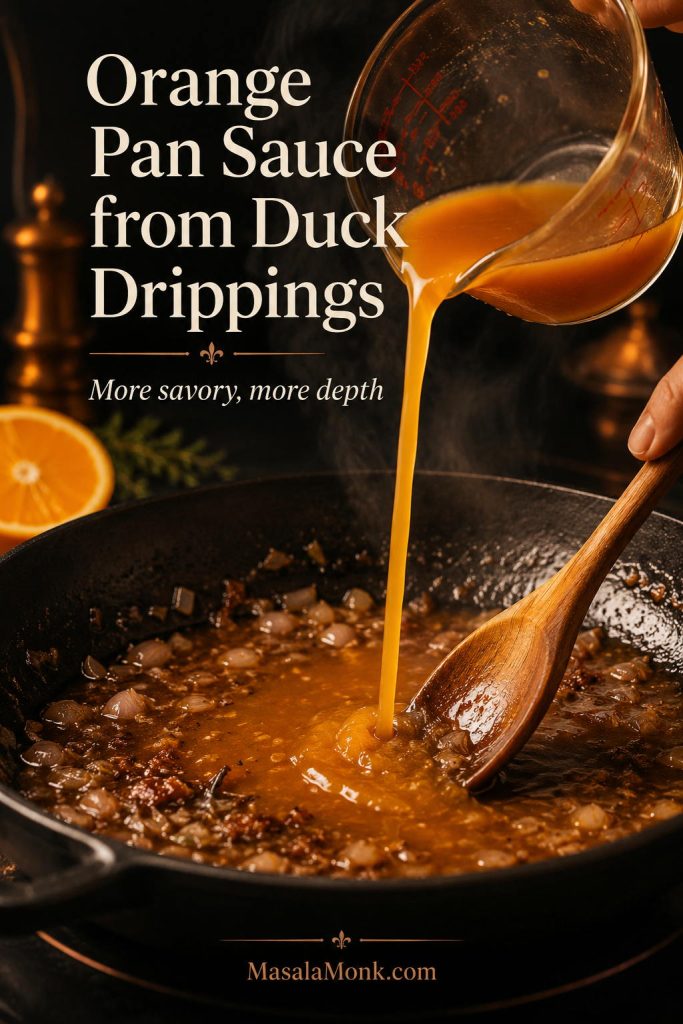
Orange Pan Sauce from Duck Drippings

If you are cooking duck breast, this is where the skillet gives you flavor you cannot get from orange juice alone. After cooking the duck, transfer the breast to a board to rest. Pour off most of the rendered duck fat, leaving the browned bits and about 1 teaspoon of fat in the pan.

Add the shallot, if using, and cook for 30 to 60 seconds over medium-low heat, just until softened. Pour in the orange juice, then scrape up the browned bits from the bottom of the pan. Add the zest, vinegar, honey or sugar, and stock, then simmer until the sauce tastes savory and lightly coats a spoon. Lower the heat, whisk in the cold butter, and strain if you want a smoother finish.

This route is especially good for duck breast because it captures the savory flavor left in the skillet. Just avoid leaving too much duck fat in the pan, or the sauce can taste greasy.

Orange pan sauce being made in a skillet with duck drippings, shallots, and browned bits
Duck drippings add savory depth that orange juice alone cannot give. Pour off excess fat first, then use the browned bits to build a richer orange pan sauce.

Once the sauce is ready, see how to serve it with duck breast without soaking the crisp skin.

How to Serve the Sauce with Duck Breast

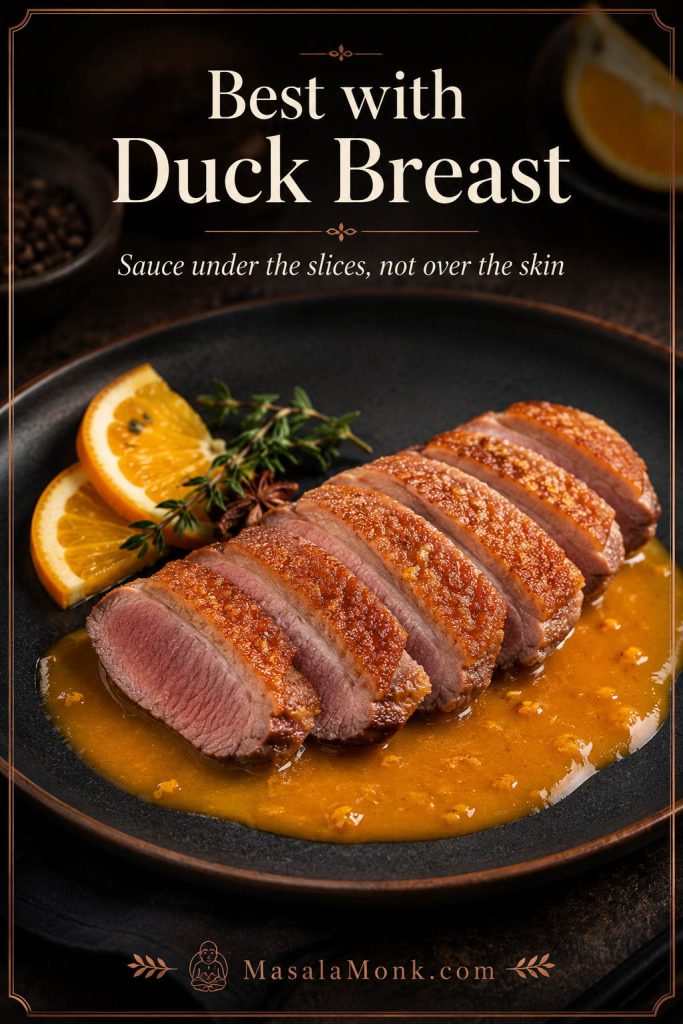
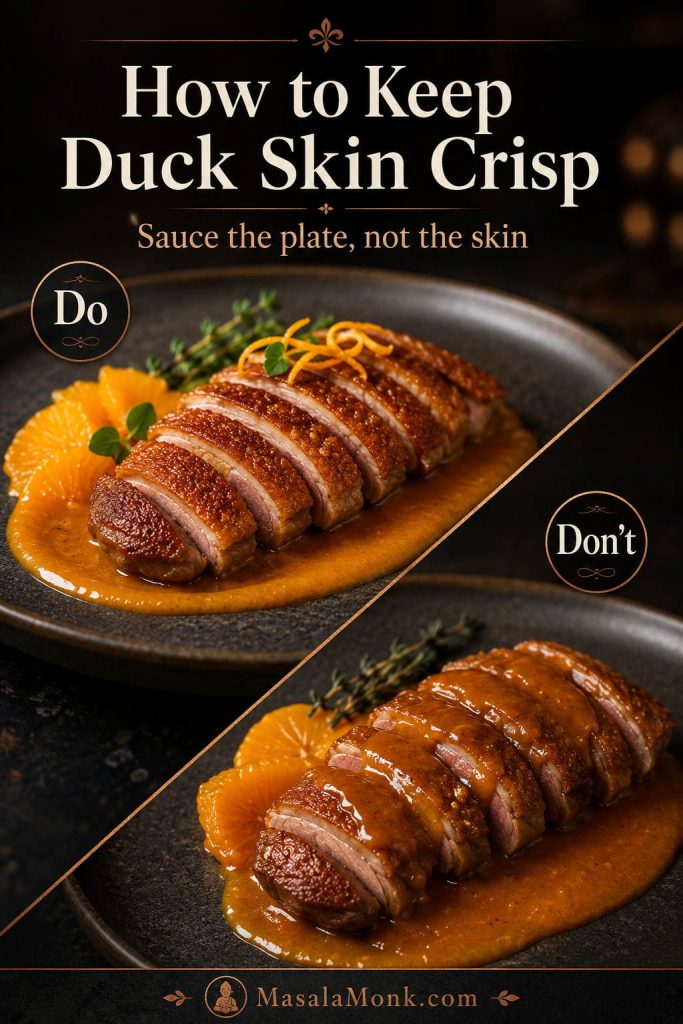
Duck breast is one of the best uses for this sauce because the contrast is so good: crisp skin, tender meat, and citrus sauce underneath. The skin is the prize. Once it is soaked, the plate loses its best texture.

Spoon the sauce onto the plate first, then lay the sliced duck breast over it. You can also spoon a little sauce around the slices and serve extra on the side. That way the first bite still has that crisp edge.

Sliced duck breast served over orange sauce with crisp skin kept dry
Duck breast needs contrast: crisp skin, tender meat, and citrus sauce below. Serving the sauce underneath gives flavor without softening the best texture.

If you are cooking duck breast from scratch, score the skin in a shallow crosshatch pattern without cutting into the meat. Start the breast skin-side down in a cold pan, then render the fat slowly over low to medium-low heat. This gives the fat time to melt and the skin time to crisp before the meat overcooks.

For the full meat-cooking method, use this duck breast recipe with crispy skin and orange sauce as the companion guide. This page focuses on the sauce, while that guide walks through the duck itself in more detail.

If you are only making the sauce for already-cooked duck, you can skip the temperature notes. If you are cooking duck breast at the same time, this section helps you time the meat before saucing the plate.

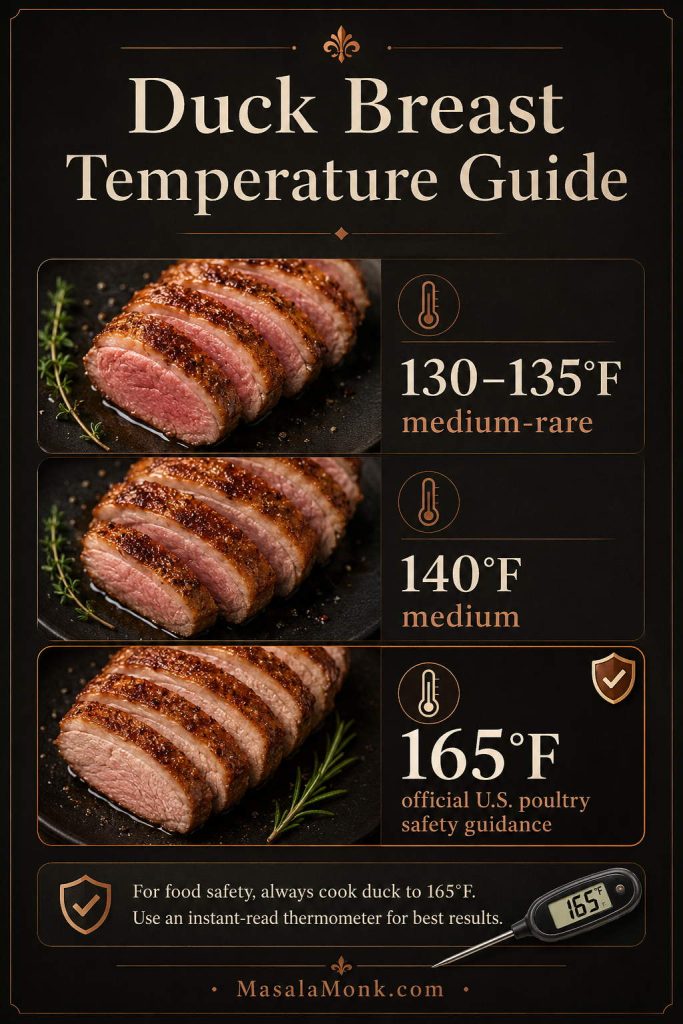
Duck Breast Temperature Guide

In restaurants and many home kitchens, duck breast is often served pink, but official U.S. poultry guidance is 165°F / 74°C. These lower temperatures are common doneness preferences, not official safety recommendations. If you choose a lower doneness target, use your own judgment and consider who you are serving, especially if cooking for children, pregnant guests, older adults, or anyone immunocompromised. You can also refer to the USDA’s safe minimum internal temperature chart for official guidance.

Duck breast temperature guide showing medium-rare, medium, and official United States poultry safety guidance
Duck breast is often served pink, but official U.S. poultry safety guidance is 165°F / 74°C. Use an instant-read thermometer and choose the doneness that suits your table.
Duck Breast Doneness Common Restaurant/Home Target Texture
Medium-rare 130–135°F / 54–57°C Pink, tender, steak-like
Medium 140°F / 60°C Lightly pink, firmer
Well done 155°F+ / 68°C+ Much firmer, less pink
Official U.S. poultry safety temperature 165°F / 74°C Fully cooked by official guidance

How to Keep the Duck Skin Crisp

  • Render the skin slowly instead of blasting it with high heat.
  • Rest the duck breast before slicing so juices settle.
  • Spoon sauce under or around the duck, not heavily over the skin.
  • Serve extra citrus sauce on the side so each person can add more.
  • If reheating leftovers, re-crisp the duck skin separately from the sauce.
Do and don’t comparison showing orange sauce under duck versus sauce poured over duck skin
The skin is the prize. Sauce the plate first, then set the duck on top so the meat gets the citrus lift and the skin keeps its crackle.

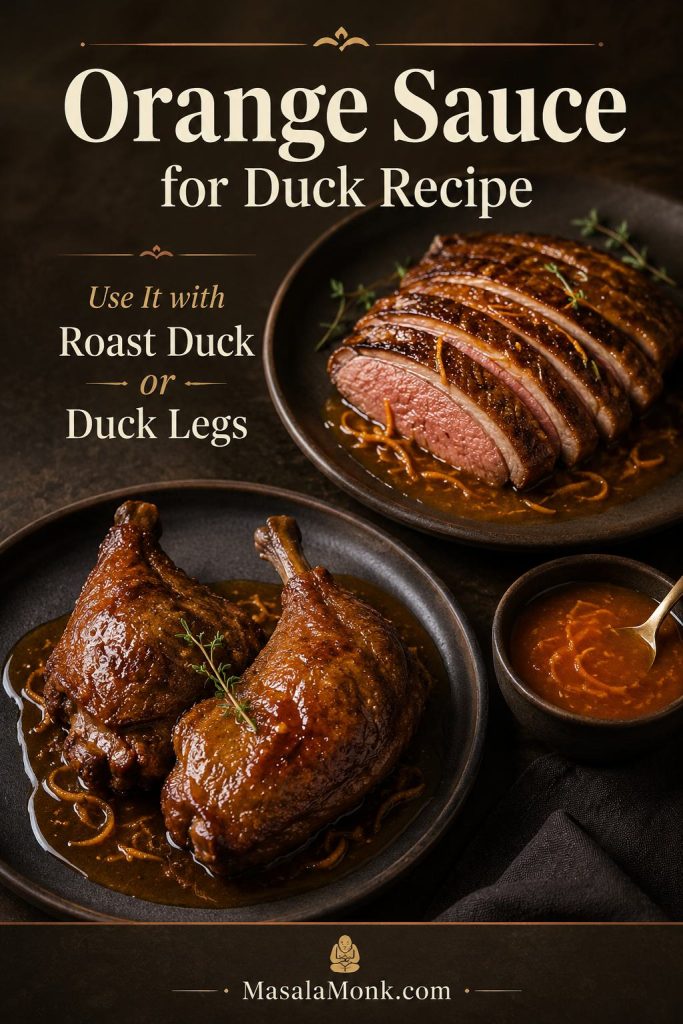
How to Use It with Roast Duck or Duck Legs

Roast duck can take a little more sauce than duck breast, especially once it is carved at the table. Still, crisp skin deserves respect. Keep the sauce warm and serve it beside the meat so people can add enough citrus lift without softening every piece.

If you have pan juices from roasting duck, add a spoonful to the sauce for deeper flavor. Skim off excess fat first; a little duck fat tastes luxurious, but too much can turn the sauce greasy.

Duck legs are more forgiving. Because the meat is darker and richer, you can spoon the sauce a little more generously, especially with roasted, braised, or confit-style legs.

Orange sauce served with sliced roast duck and duck legs on dark plates
This citrus sauce works beyond duck breast. With roast duck or duck legs, serve it warm on the side so guests can add more without softening all the skin.

For a bigger holiday table, keep the duck rich and the sides familiar: one citrus sauce, one potato dish, and one green side usually feel complete. If you want a classic make-ahead green side, MasalaMonk’s green bean casserole recipe ideas work better than adding another fussy main-style dish.

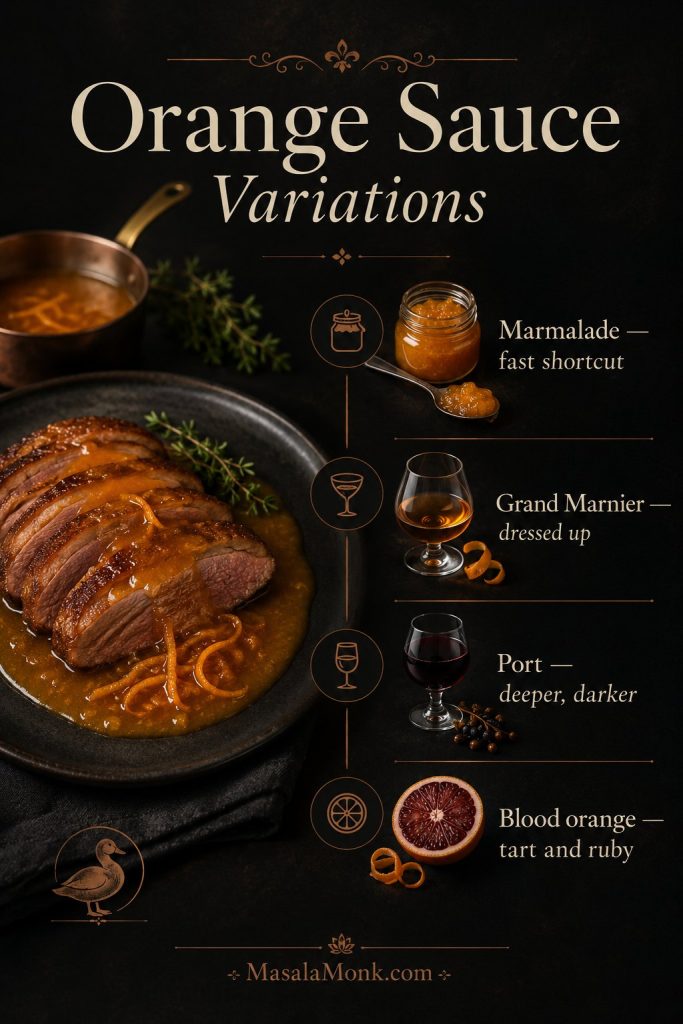
Orange Sauce Variations: Marmalade, Grand Marnier, Port, and Blood Orange

Orange sauce variation guide with marmalade, Grand Marnier, port, and blood orange options
Choose the variation by the dinner you want: marmalade for speed, Grand Marnier for elegance, port for depth, and blood orange for a sharper seasonal finish.

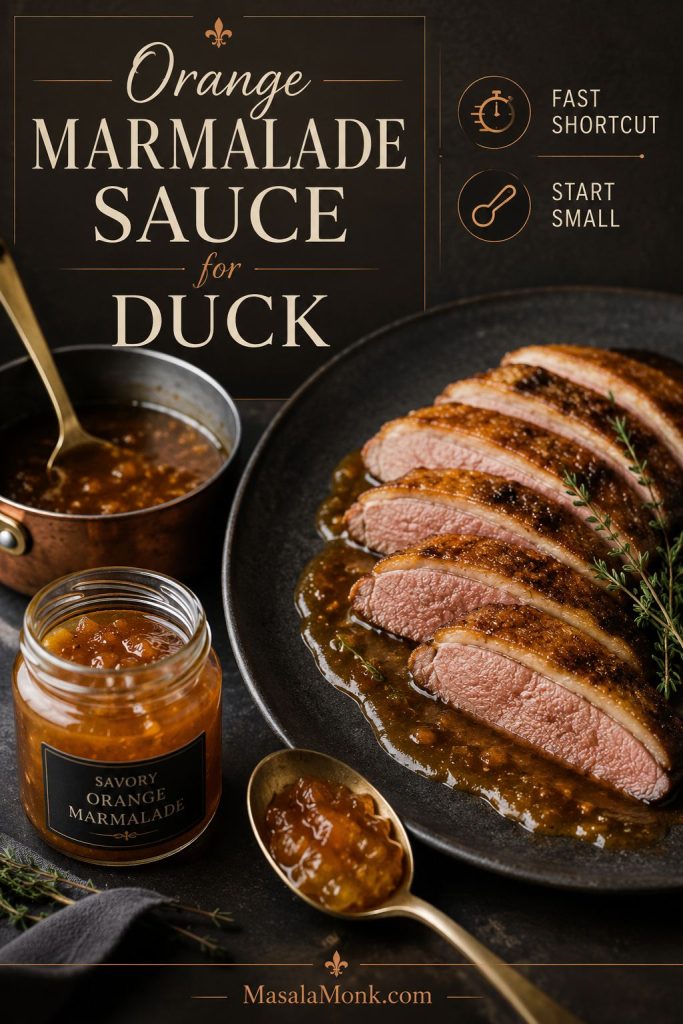
Marmalade Shortcut

Marmalade is the fast shortcut, not the whole personality of the sauce. Add 1 tablespoon with the stock for body, sweetness, and a slight orange-peel bitterness.

Too much marmalade pushes the sauce toward sticky glaze. Start small, keep the vinegar close, and remember: if it tastes good on toast, it is probably too sweet for duck.

Orange marmalade sauce for duck with marmalade, a saucepan, and sliced duck
Marmalade can make a fast orange sauce, but it is powerful. Start small, then use vinegar or stock if the flavor begins leaning more like jam than dinner.

Grand Marnier or Cointreau

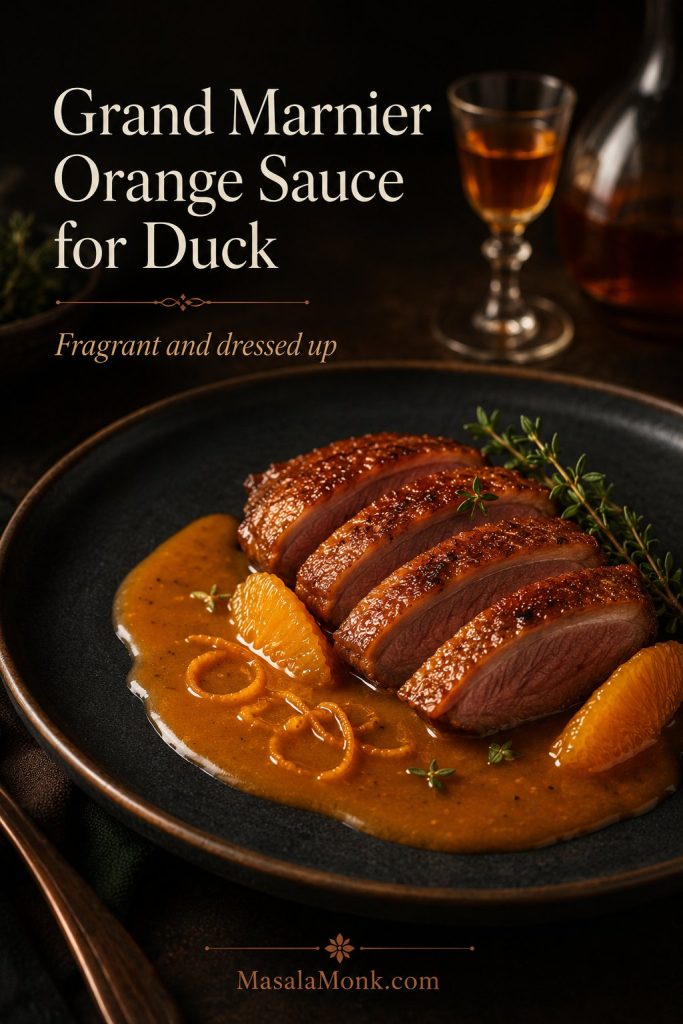
This is the dinner-party version: still bright and pourable, but with a warmer orange aroma that feels more dressed up. Add 1 to 2 tablespoons of Grand Marnier, Cointreau, or another orange liqueur after the sauce has reduced.


Simmer briefly to mellow the alcohol, then finish with butter. The result should feel fragrant, not perfumey, and richer without becoming heavy.

Grand Marnier orange sauce for duck with plated duck, glossy sauce, and a subtle liqueur glass
Grand Marnier or Cointreau gives the sauce a warmer orange aroma. Simmer briefly before finishing with butter so it tastes elegant rather than sharp.

Port and Orange

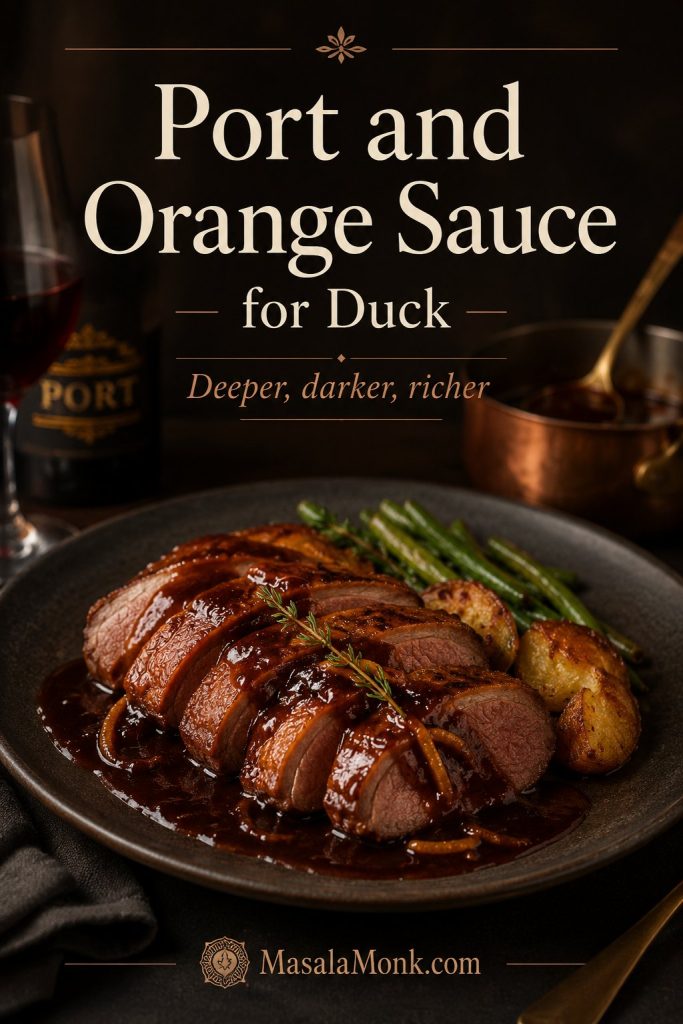
Port moves the sauce into a deeper, darker lane. Add 2 to 4 tablespoons with the stock, then taste before serving because port can make the orange feel rounder and sweeter.

This version suits roast duck especially well. If the sauce starts leaning too soft or sweet, a few extra drops of vinegar will wake it back up.

Port and orange sauce served with sliced duck and a darker glossy sauce
Port moves the sauce into a deeper dinner-party lane. Because it can add sweetness, taste before serving and sharpen with a few drops of vinegar if needed.

Blood Orange

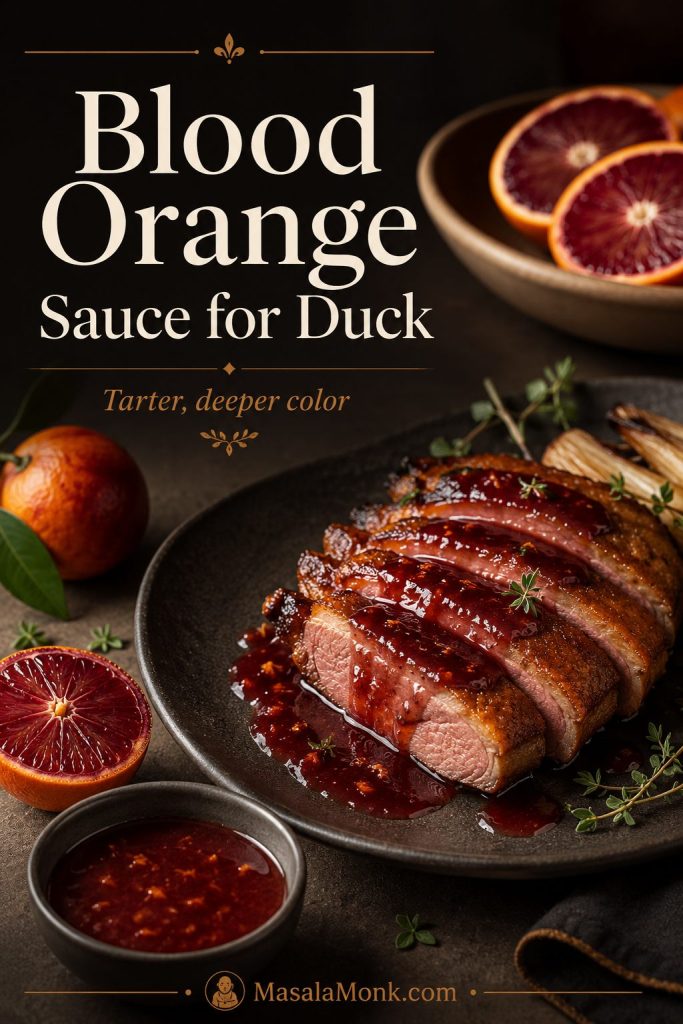
Blood orange gives the sauce a ruby-orange color and a slightly berry-like citrus note. Use it exactly as you would regular orange juice, then taste carefully because some blood oranges are less sweet and more tart.

If the finish tastes too sharp, soften it with a little honey or an extra piece of cold butter.

Blood orange sauce for duck with ruby-orange sauce, sliced duck, and cut blood oranges
Blood orange gives duck sauce a deeper color and a tarter citrus edge. If the finish tastes too sharp, soften it with honey or an extra piece of cold butter.

Use the table below as a quick chooser, then follow the same core method: reduce first, taste before butter, and keep the finish pourable rather than sticky.

Version Best For Flavor What to Adjust
Classic base Duck breast, roast duck, duck legs Bright, savory, balanced Taste vinegar and sweetness before butter
Marmalade Fast shortcut Sweeter, peel-like, slightly bitter Add extra vinegar if it tastes jammy
Grand Marnier or Cointreau Dinner-party plates Fragrant, festive, orange-forward Simmer briefly before butter
Port Roast duck or richer plates Darker, rounder, deeper Add acid if it becomes too sweet
Blood orange Seasonal dinners Tart, ruby-colored, berry-citrus Add honey if too sharp

If a variation tastes too sweet, too sharp, or too heavy after reducing, check the sauce fixes before serving.

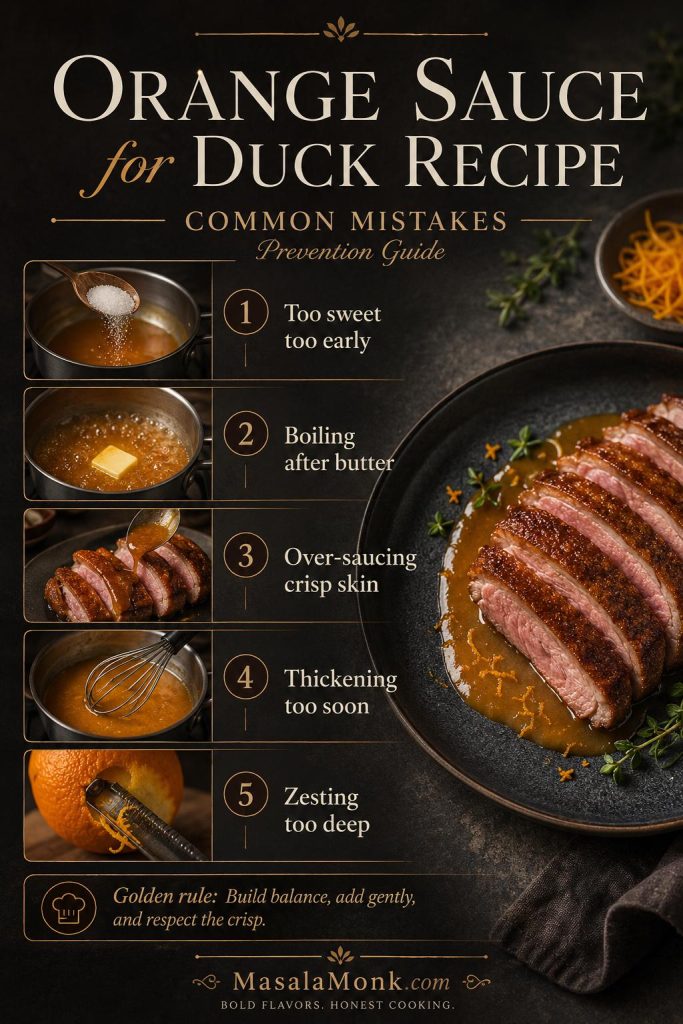
Common Mistakes to Avoid

These are the small moves that usually separate a polished orange duck sauce from one that tastes too sweet, too heavy, or slightly clumsy on the plate.

  • Adding too much sweetness early: reduce the sauce first, then decide if it needs more honey, sugar, or marmalade.
  • Boiling after butter: once the butter goes in, use gentle heat so the sauce stays smooth.
  • Covering crisp duck skin: spoon the sauce under or around duck breast instead of soaking the skin.
  • Thickening too soon: simmer first, then use cornstarch only if reduction is not enough.
  • Zesting too deeply: use only the colored orange peel, not the bitter white pith.
Common mistakes board for orange sauce for duck showing over-sweetening, boiling butter, over-saucing skin, thickening early, and zesting too deeply
Most orange sauce mistakes start small: too much sweetener, too much heat, or sauce poured over crisp skin. Add gently, taste often, and keep the crisp parts dry.

How to Fix Orange Sauce for Duck

Most problems with this sauce are balance problems, not failures. A splash of acid, a little sweetness, more reduction, or gentler heat can usually bring it back.

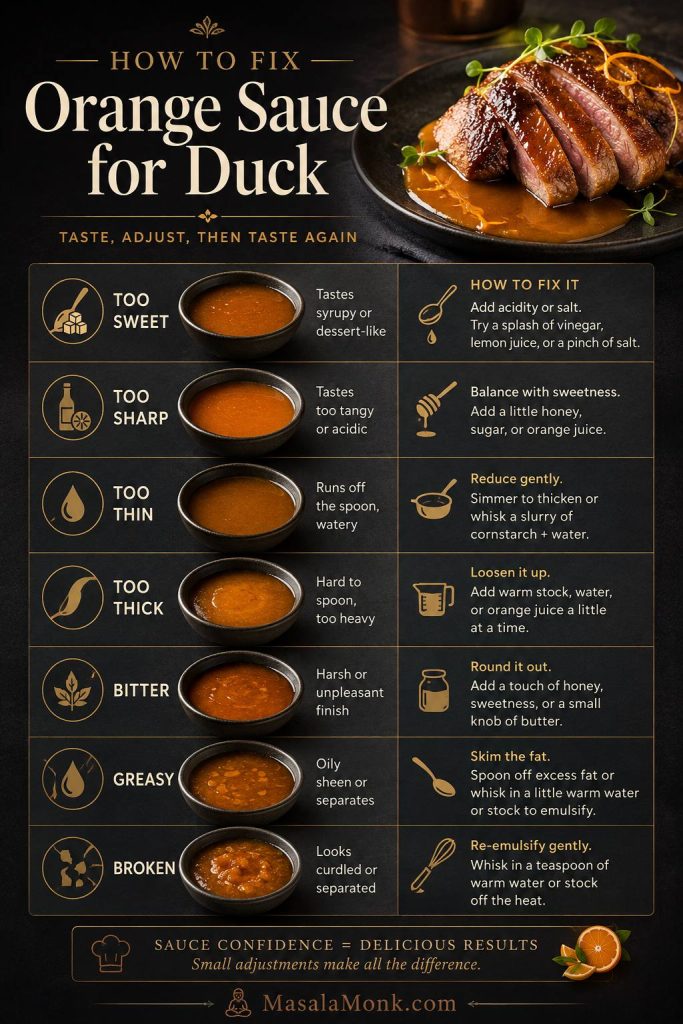
Use the table as a quick rescue guide rather than a second recipe. Find the problem, make the smallest adjustment, then taste again before adding more.

Troubleshooting board for orange sauce for duck with sweet, sharp, thin, thick, bitter, greasy, and broken sauce problems
Troubleshooting works best one fix at a time. Adjust sweetness, acidity, thickness, or fat gently, then taste again before changing anything else.
Problem Why It Happened How to Fix It
Too sweet Too much honey, sugar, marmalade, or very sweet orange juice Add a splash of vinegar or lemon juice, then loosen with a little stock if needed.
Too sharp Too much vinegar or very tart oranges Add a little honey or sugar, then finish with butter to round the edges.
Too thin Not reduced enough, or stock was very light Simmer longer. If still thin, whisk in a small amount of cornstarch slurry.
Too thick or sticky Over-reduced or too much marmalade/sugar Whisk in warm stock, water, or orange juice a tablespoon at a time.
Bitter Too much white pith from the orange peel, or over-reduced citrus Strain the sauce, add a little honey, and finish with butter.
Flat Not enough salt, zest, or acid Add a pinch of salt, more orange zest, and a few drops of vinegar.
Greasy Too much duck fat in the pan sauce Skim excess fat or whisk in a splash of warm stock to loosen the sauce.
Broken after butter The sauce boiled hard after the butter was added Take the pan off the heat and whisk in warm stock 1 teaspoon at a time until the sauce looks smoother.

Make-Ahead, Storage, and Reheating

You can make the citrus base ahead of time. Cook the sauce through the reduction stage, then cool and refrigerate it. For the best texture, add the butter when reheating, not before storing.

  • Fridge: Store in an airtight container for 3 to 4 days.
  • Freezer: Freeze before adding butter, and preferably before adding cornstarch slurry, for up to 2 months.
  • Reheating: Warm gently in a small saucepan. Add a splash of stock or water if it has thickened too much.
  • Butter finish: Whisk in cold butter after reheating for the smoothest sauce.
Make-ahead and storage board for orange sauce with container, saucepan, butter, and storage times
For a calmer dinner, make the sauce base ahead and finish it with butter after reheating. Gentle heat protects the texture better than boiling it hard.

When the sauce is ready, build the plate with sides that catch, freshen, or round out the duck.

If the sauce looks slightly separated after chilling, warm it gently and whisk well. A small splash of stock can help bring it back together.

Avoid boiling the sauce hard when reheating, especially after the butter has been added. Gentle heat keeps the finish smoother.

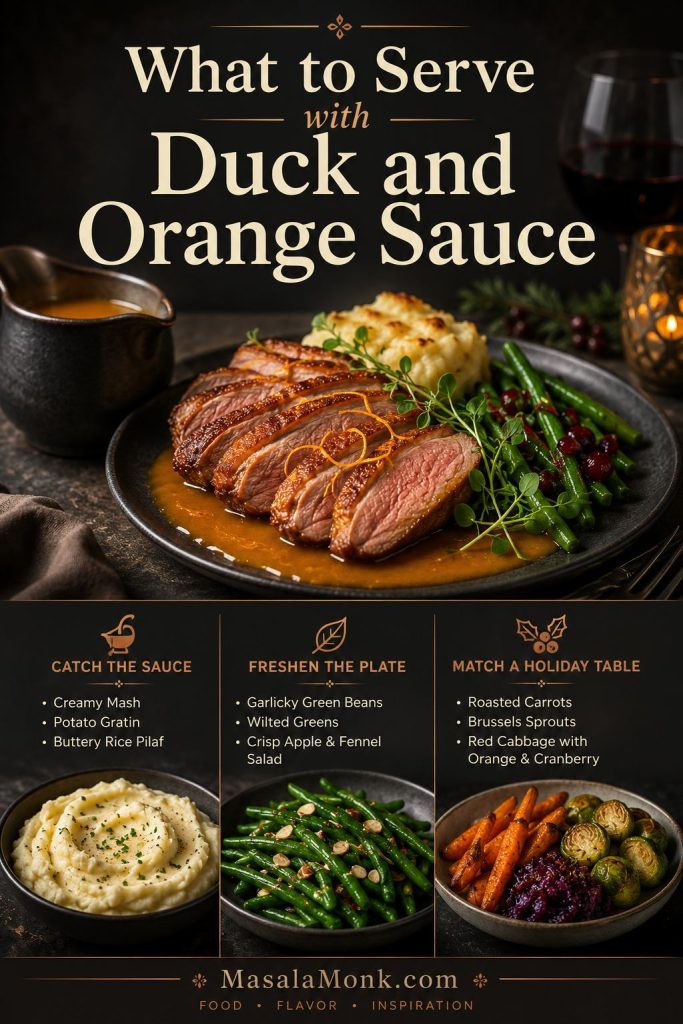
What to Serve with Duck and Orange Sauce

For duck breast, the best plate is usually simple: crisp skin, sliced meat, a spoonful of orange sauce, something potato-based, and one green side. That lets the sauce feel polished without making the plate busy.

Because duck and citrus sauce already bring richness, sweetness, and acidity, choose sides by the job they do on the plate.

Side Job Best Choices Why It Works
Catch the sauce Mashed potatoes, potato gratin, wild rice, rice pilaf Soft or starchy sides hold the orange pan sauce without competing with it.
Freshen the plate Green beans, bitter salad leaves, orange-fennel salad, wilted greens Green or bitter sides keep the duck from feeling too heavy.
Match a holiday table Roasted carrots, Brussels sprouts, hashbrown casserole, green bean casserole These make the meal feel generous without adding another complicated main.

MasalaMonk’s garlic mashed potatoes are especially useful when you want a soft, buttery side that can hold sauce without feeling dry. For a holiday table where you want one rich, make-ahead side, this hashbrown casserole recipe can sit beside roast duck without stealing attention.

Duck with orange sauce served with potatoes, green beans, roasted vegetables, and holiday side dishes
Build the plate by function: something starchy to catch the sauce, something green to freshen the richness, and a warm side if the meal is more festive.

Duck can feel like a high-stakes dinner, but the sauce does not have to be fragile. Reduce it, taste it before the butter, adjust the sweet-sharp balance, and keep it warm. Once the skin is crisp and the sauce is glossy, let the orange lift the duck instead of covering it.

FAQs

What is orange sauce for duck made of?

It is usually made with orange juice, orange zest, stock, vinegar, a small amount of sweetness, and butter. Some versions also include shallot, port, marmalade, wine, or orange liqueur.

Why does orange work so well with duck?

Orange cuts through duck’s richness. The sauce still needs stock and vinegar, though, so it tastes like a savory dinner sauce instead of a sweet glaze.

Should the sauce be sweet?

Lightly sweet, yes. Syrupy, no. The best version is bright, rounded, and savory, with enough acidity to keep the orange from tasting like candy.

What can I use instead of duck stock?

Low-sodium chicken stock is the easiest substitute. It gives the sauce savory depth without overpowering the orange.

Does bottled orange juice work?

It works in a pinch, but fresh juice and fresh zest give a cleaner flavor. If using bottled juice, add fresh zest if possible and taste before adding extra sugar.

How do I thicken orange sauce for duck?

Reduce it first. If it is still too thin, mix 1 teaspoon cornstarch with 1 tablespoon cold water, then whisk in a little slurry and simmer briefly.

Why does my orange duck sauce taste bitter?

Bitterness usually comes from white pith or over-reduced citrus. Use only the colored zest, strain if needed, then soften the sauce with a little honey and butter.

Do I need alcohol?

No. Grand Marnier, Cointreau, and port are optional upgrades. The base sauce gets its balance from orange, stock, vinegar, sweetness, and butter.

How do I scale it for more people?

Double all the ingredients and use a wider saucepan if possible. The sauce may take a few extra minutes to reduce to the same spoon-coating texture.

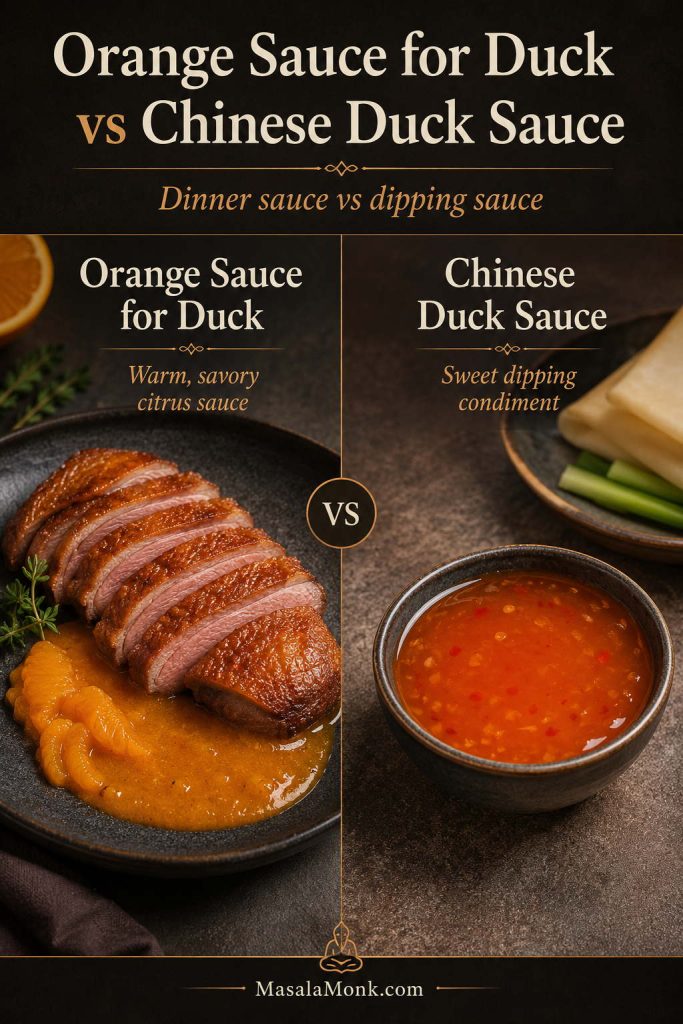
Is this the same as Chinese duck sauce?

No. This is a warm savory citrus sauce for cooked duck breast, roast duck, or duck à l’orange-style dishes. Chinese-American duck sauce is usually a sweet condiment or dipping sauce.

Comparison of savory orange sauce for duck and Chinese duck sauce as a sweet dipping condiment
Orange sauce for duck is a warm savory citrus sauce for cooked duck. Chinese duck sauce is usually a sweet dipping condiment, so the two are not interchangeable.

How far ahead can I make it?

Make it 3 to 4 days ahead and refrigerate it. For the smoothest finish, reheat gently and whisk in the cold butter just before serving.

What duck dishes work with this citrus sauce?

Use it with pan-seared duck breast, roast duck, duck legs, duck à l’orange, leftover duck, or sliced duck served with potatoes and greens.

Should I pour it over crispy duck skin?

Use a light hand. Spoon the sauce under or around sliced duck breast so the skin stays crisp, then serve extra sauce on the side.

Back to Quick Answer