Posted on Leave a comment

Orange Sauce for Duck Recipe

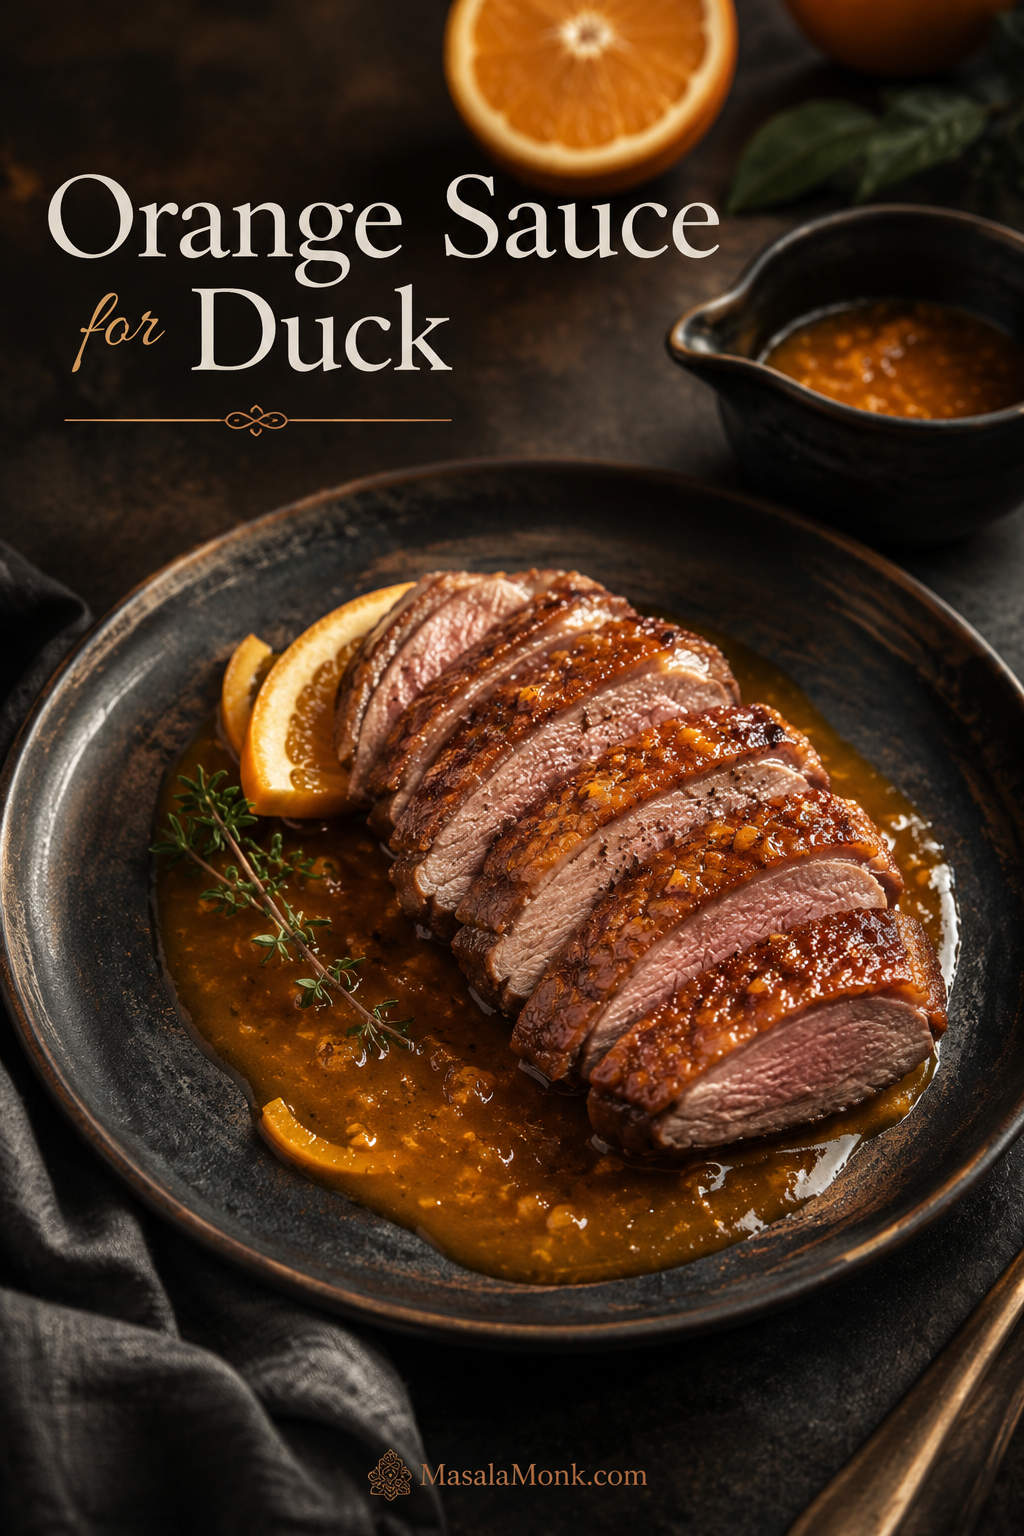
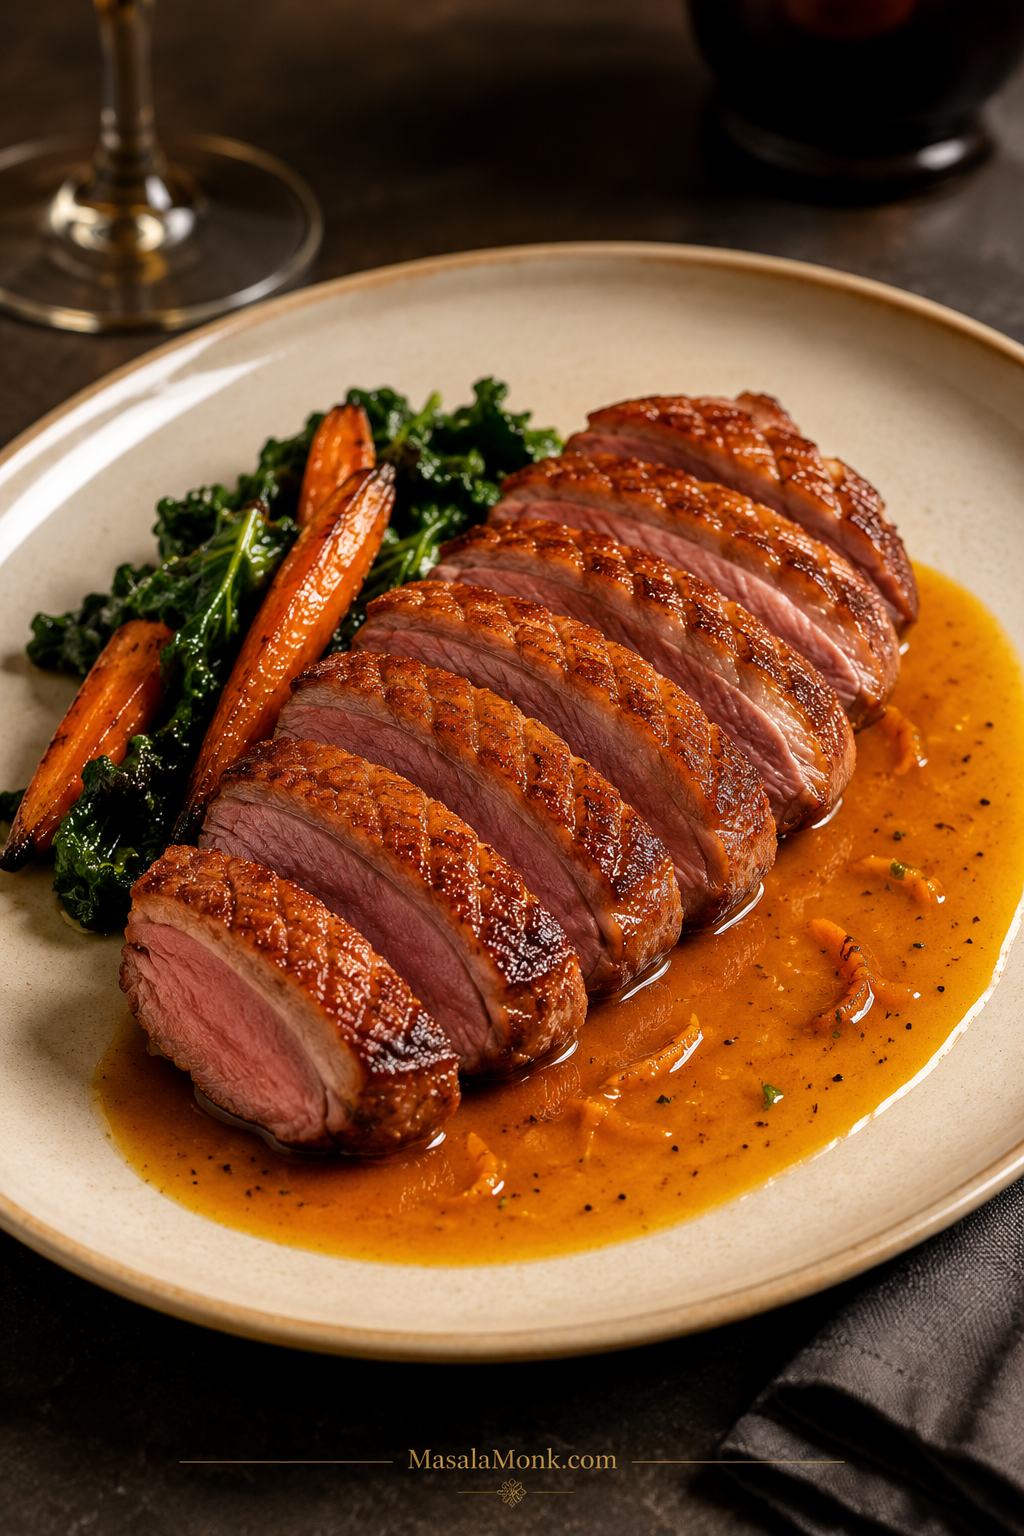
Sliced duck breast with crisp skin served over glossy orange sauce on a dark plate.

Duck already feels like the kind of dinner you do not want to waste: crisp skin, rich meat, maybe guests at the table. This orange sauce for duck gives you the classic sweet-sharp citrus lift without turning the plate sticky, syrupy, or restaurant-complicated.

Use it with pan-seared duck breast, roast duck, duck legs, leftover duck, or a simple duck à l’orange-style dinner. It comes together on the stovetop in about 25 minutes and should taste bright, savory, lightly sweet, and clean enough to wake up the duck rather than cover it.

You may also see this called orange gravy for duck, although the texture here is closer to a polished pan sauce than a flour-thickened gravy. It should be glossy and pourable, not gloppy, with enough body to sit beside the meat without soaking the crisp skin.

Quick Answer

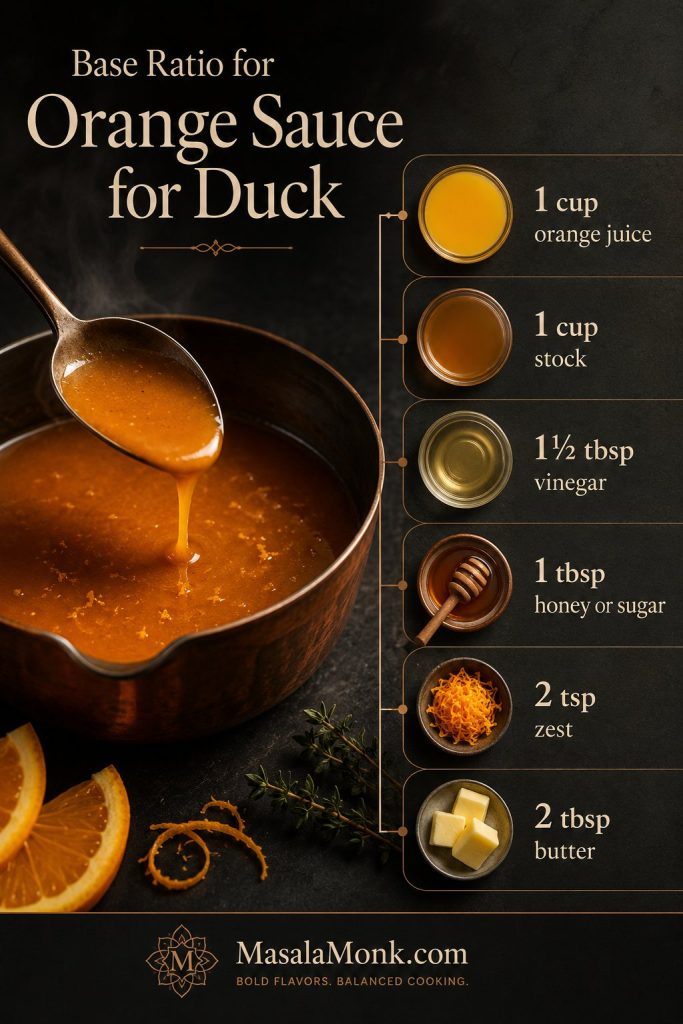
For about 1 cup / 240 ml sauce, simmer 1 cup / 240 ml orange juice, 1 cup / 240 ml duck or chicken stock, 1 1/2 tablespoons vinegar, 1 tablespoon honey or sugar, and 2 teaspoons orange zest until lightly reduced. Finish with 2 tablespoons / 28 g cold butter for a smooth citrus sauce that coats the spoon without turning sticky.
Base ratio for orange sauce for duck showing orange juice, stock, vinegar, zest, sweetener, and butter
Use this base ratio for orange sauce for duck as your starting point. Once it reduces, small adjustments with vinegar, stock, or butter can shift the flavor quickly.

Before serving, taste and adjust. Too sweet? Add a splash of vinegar. Too sharp? Add a little honey or butter. Too thin? Simmer it a few minutes longer before using cornstarch.

The target: glossy, pourable, orange-forward, and sharp enough to taste like dinner, not marmalade.

The point is not to make the sweetest orange sauce. The point is to make a sauce that feels right with duck: clean citrus edge, savory depth, gentle sweetness, and a finish that makes the plate feel special.

You can also make the base ahead, then warm it gently and whisk in the butter before serving. That takes pressure off the final minutes, especially when the duck itself already needs your attention.

Need the full measurements in one place? Jump to the recipe card. If your sauce is already too sweet, too sharp, or too thin, go straight to the fix guide.

Three rules for better duck sauce: reduce before thickening, taste before butter, and sauce the plate instead of the crisp skin.

What Is Orange Sauce for Duck?

Orange sauce for duck is a warm citrus sauce served with rich duck meat. It usually combines orange juice or zest with stock, vinegar, a little sweetness, and butter. Some versions are simple and quick, while classic French versions use a sweet-sour base with rich duck or veal stock.
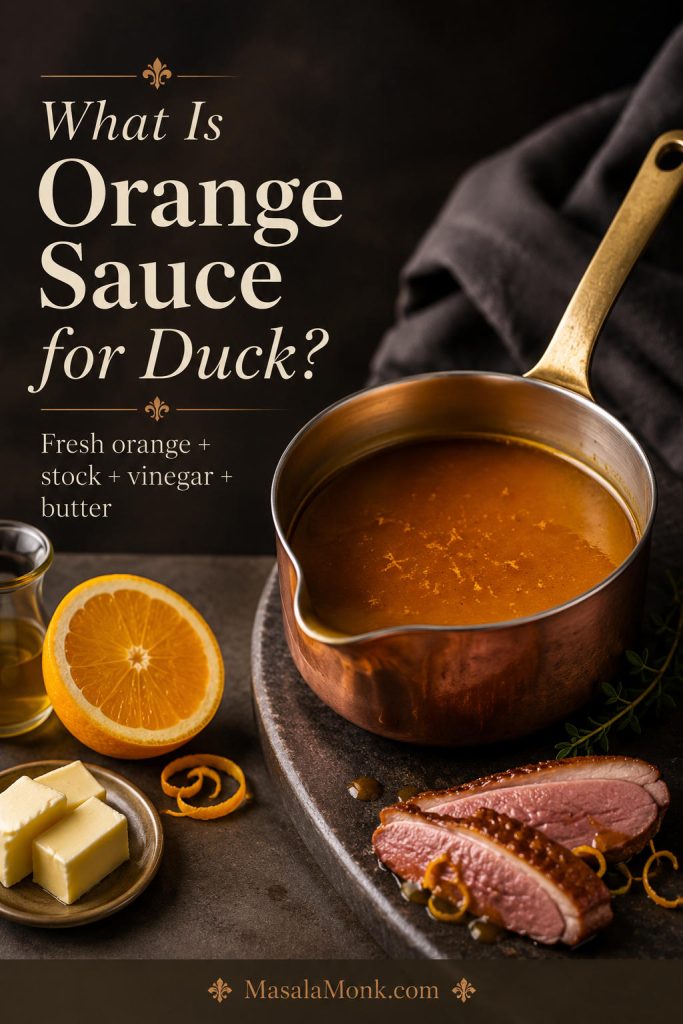
Sauce boat with orange sauce, oranges, stock, vinegar, butter, and duck on a dark surface
Orange sauce for duck is a warm savory citrus sauce, not a sweet dipping sauce. Stock and vinegar are what make the orange taste dinner-ready instead of syrupy.

For home cooking, the goal is simpler: make a sauce that brightens the duck without turning the plate sweet. Orange brings freshness, vinegar keeps the richness in check, and stock gives the sauce enough body to feel like part of the dish rather than a sweet topping.

This recipe is designed as an all-purpose duck sauce. It works with duck breast, roast duck, duck legs, leftover duck, and a simplified duck à l’orange plate. If you like bright sauces for rich holiday mains, MasalaMonk’s cranberry sauce with orange juice follows a similar sweet-tart logic, but this one is warmer and more savory.

Comparing it with the French classic? See the duck à l’orange section before choosing a variation.

Why This Sauce Works with Duck

A good duck sauce has to do two things at once: cut through the richness and still taste like dinner. Orange brings the lift, vinegar keeps it from turning candied, stock gives it a savory backbone, and cold butter makes it feel polished on the plate.

  • Orange brightens rich meat: citrus gives the duck a clean edge instead of letting each bite feel heavy.
  • Vinegar controls the sweetness: it keeps the sauce sweet-sharp, not jammy.
  • Stock gives it backbone: it turns orange juice into a real pan sauce instead of a topping.
  • Cold butter finishes the texture: it softens the acidity and gives the sauce that silky, spoon-coating finish.
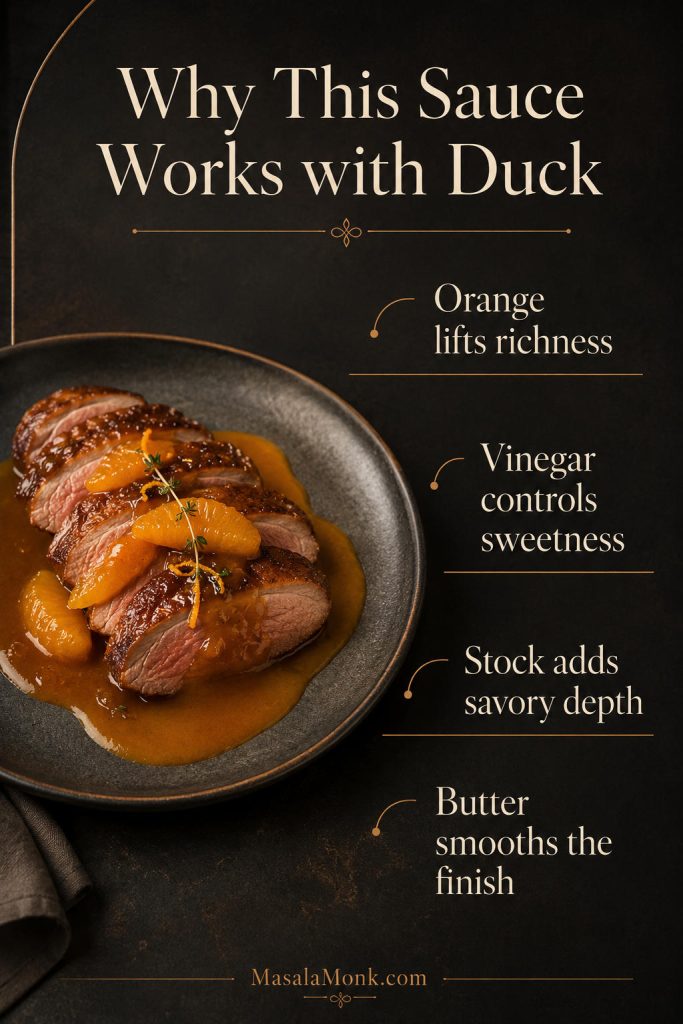
Board showing orange, vinegar, stock, and butter as the key parts of sauce for duck
The sauce works because it does more than add orange flavor. It cuts the richness, adds savory depth, and finishes smooth enough to belong on a dinner plate.

The good news is that this is not a one-shot sauce. Before the butter goes in, you can still pull it brighter, softer, saltier, thinner, or thicker.

Is This the Same as Duck à l’Orange Sauce?

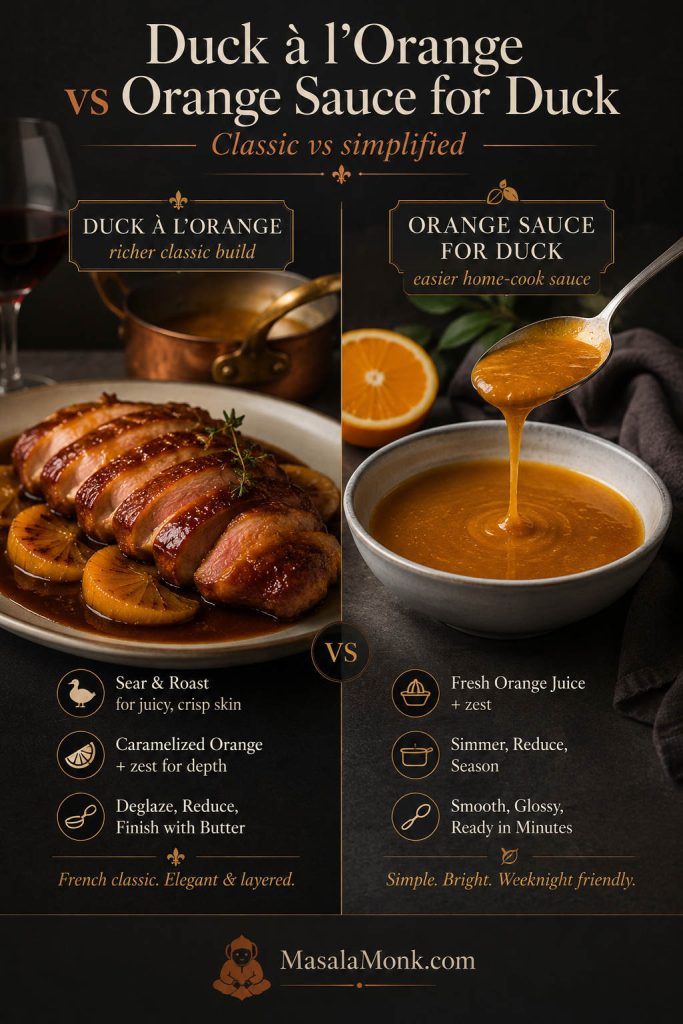
This is a simplified duck à l’orange-style sauce. Classic duck à l’orange often starts with a more formal sweet-sour base, sometimes called a gastrique, then builds flavor with orange, stock, and sometimes orange liqueur. It is beautiful, but it can feel like one more moving part when the duck itself already needs care.

This recipe keeps the part home cooks usually want most: citrus lift, controlled sweetness, savory depth, and a smooth finish. It skips the restaurant-style steps unless you want to dress it up with Grand Marnier, port, marmalade, or blood orange. For a more traditional, fully developed version, Serious Eats has a detailed guide to duck à l’orange.

Think of this as the calmer sauce-first version: familiar enough for duck à l’orange cravings, but simple enough to make while dinner is still moving.
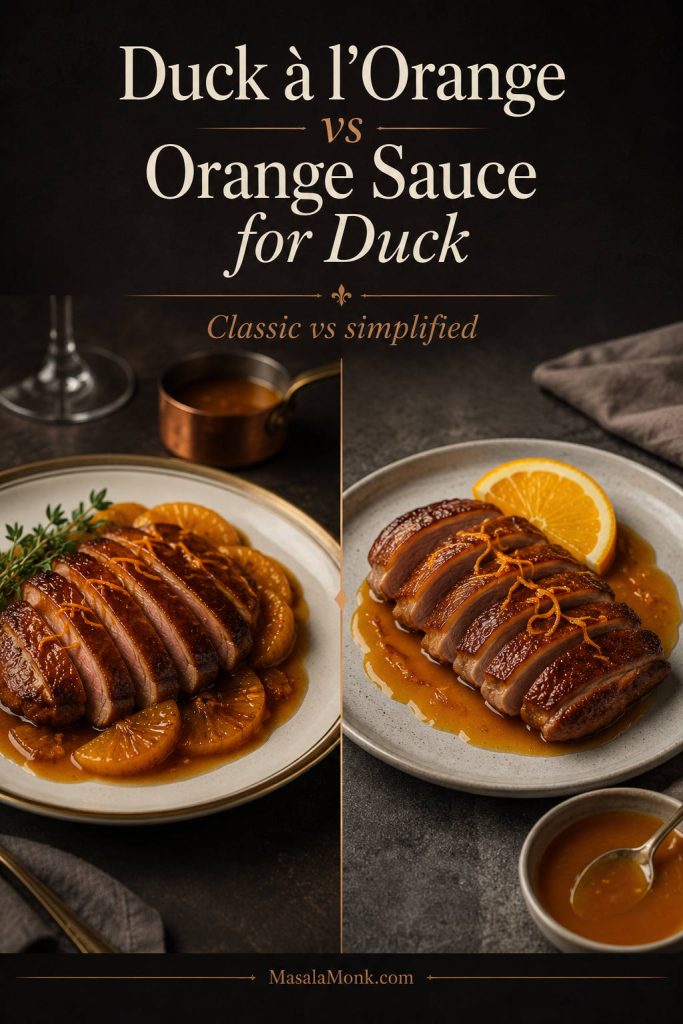
Comparison board showing classic duck à l’orange and a simpler orange sauce for duck
Duck à l’orange is the more classical route, while this sauce-first version keeps the same sweet-sharp idea simpler. Both work best when citrus is balanced with a savory base.

Ingredients You Need

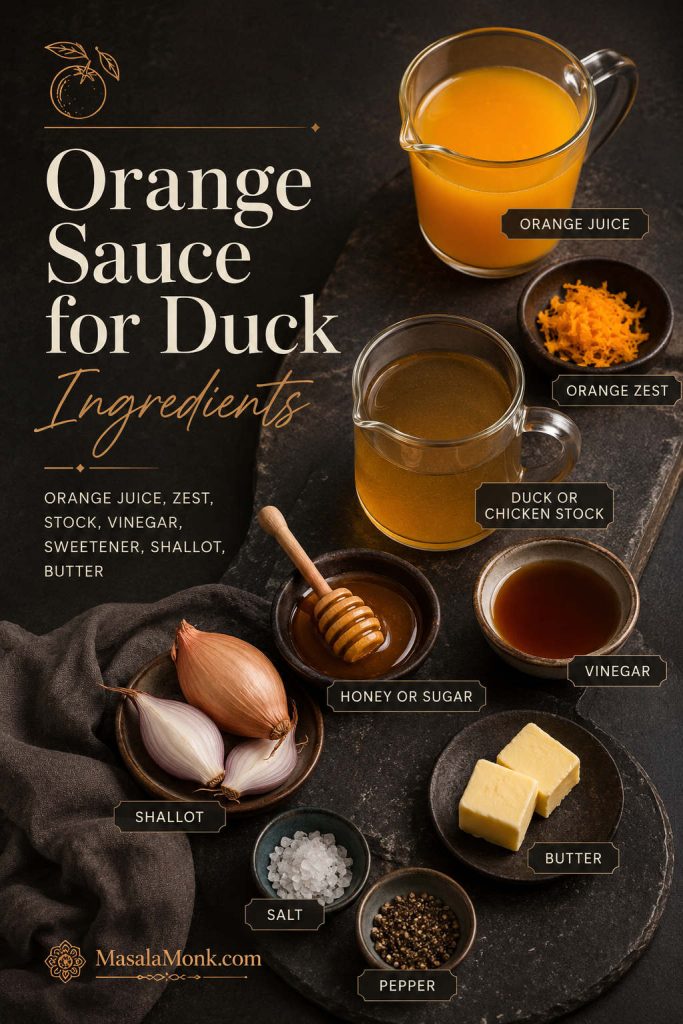
Ingredients for orange sauce for duck including orange juice, zest, stock, vinegar, honey, butter, shallot, salt, and pepper
This sauce is short on ingredients, but each one matters. Orange brings aroma, stock makes it savory, vinegar keeps it bright, and cold butter smooths the finish.

Orange Juice and Zest

Fresh orange juice gives the sauce its main flavor. Orange zest is just as important because it adds concentrated citrus aroma without making the sauce watery. You will usually need 2 to 3 medium oranges for 1 cup / 240 ml juice, depending on size and juiciness, plus zest. Zest one orange before juicing it, and avoid the bitter white pith underneath the peel.

Bottled orange juice can work in a pinch, but fresh juice gives a cleaner, brighter sauce. If your oranges are very sweet, start with less honey or sugar and adjust after the sauce reduces.
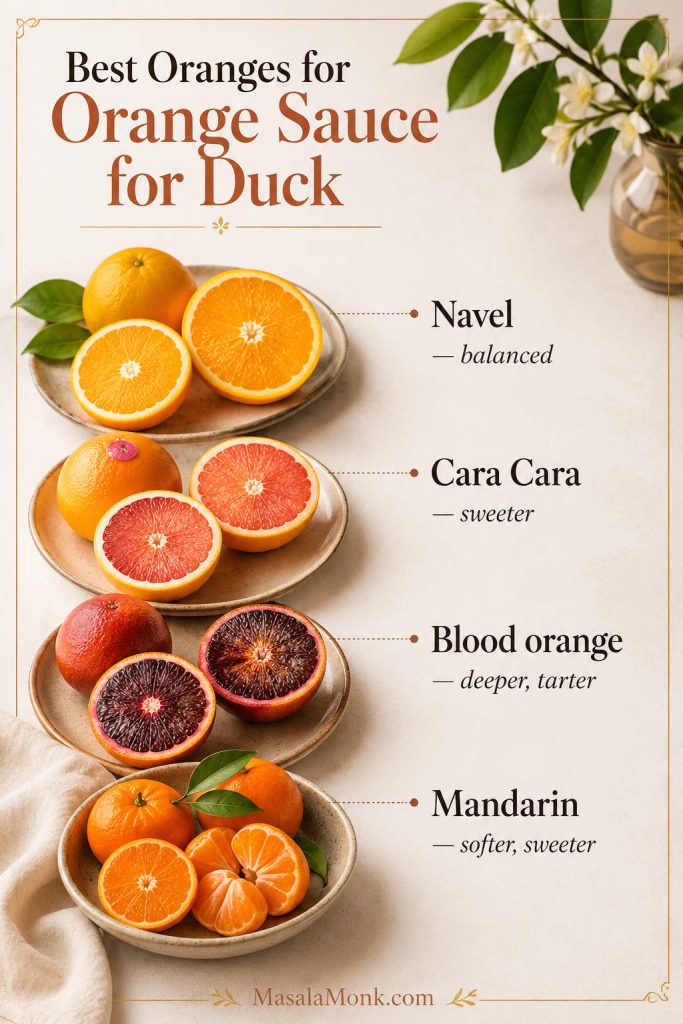
Navel, Cara Cara, blood orange, and mandarin oranges for making orange sauce for duck
The orange you choose changes the finished sauce. Navel is balanced, Cara Cara is sweeter, blood orange is deeper and tarter, and mandarin gives a softer citrus note.

Duck Stock or Chicken Stock

Stock is the quiet ingredient that makes the sauce taste like dinner, not dessert. Duck stock is ideal if you have it, but low-sodium chicken stock is easier to find and works well. Low-sodium stock is especially helpful because the sauce reduces as it cooks.

If you are cooking duck breast in a pan, you can also add a spoonful of the rendered duck juices or pan drippings. Skim or pour off excess fat first so the sauce tastes rich, not greasy.
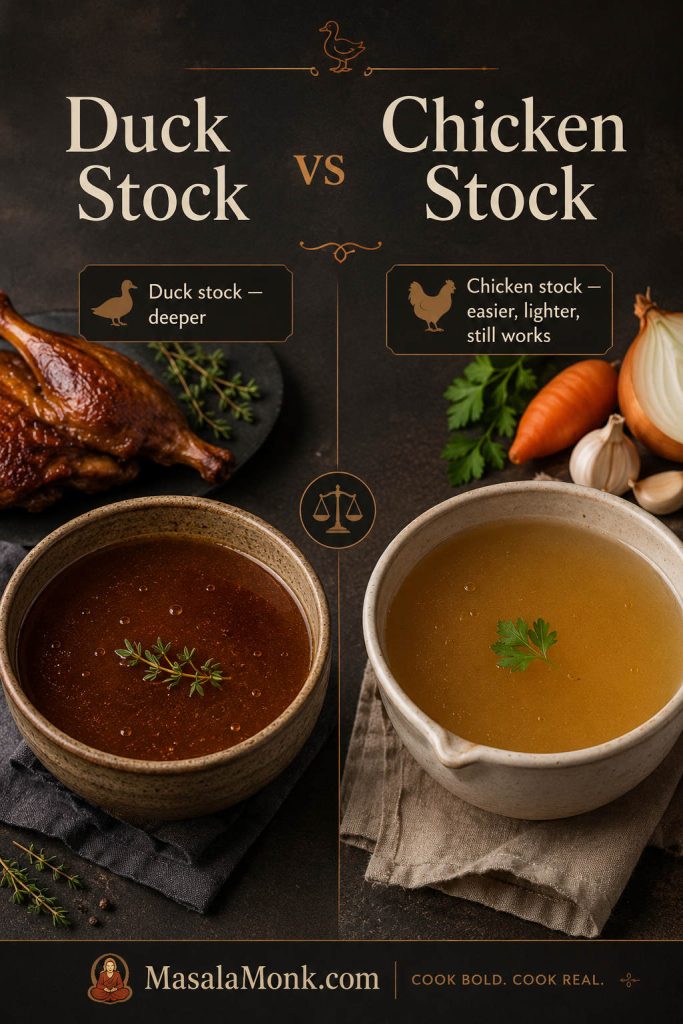
Duck stock and chicken stock comparison for orange sauce
Duck stock gives the deepest flavor, but low-sodium chicken stock is easier to find and still works well. Since the sauce reduces, starting with low-sodium stock gives you more control.

Vinegar for Balance

Duck needs acidity. Sherry vinegar and red wine vinegar are both excellent because they bring a rounded sharpness. White wine vinegar also works. Lemon juice can help in a pinch, although vinegar gives a more classic sweet-sour profile.

Use 1 1/2 tablespoons for a balanced base. Use closer to 2 tablespoons if your oranges are very sweet, if you are serving fatty roast duck, or if the finished sauce tastes too round and heavy.

Vinegar choices for orange sauce for duck including sherry vinegar, red wine vinegar, white wine vinegar, and lemon juice
Vinegar is the quiet fix that keeps orange duck sauce from tasting like marmalade. Sherry vinegar and red wine vinegar give rounded acidity, while lemon juice works when that is what you have.

Honey, Sugar, or Marmalade

You only need a little sweetness. Honey gives a rounded flavor, while sugar keeps the sauce cleaner. Start with 1 tablespoon, then add more only after the sauce has reduced and you have tasted it.

Orange marmalade can be used for a shortcut variation, but it should support the duck sauce rather than take over. Too much can push the flavor toward sticky glaze, so keep the base savory with stock and vinegar.

Honey and sugar comparison for sweetening orange sauce for duck
Sweetness should support the orange, not lead the plate. Honey tastes rounder, sugar tastes cleaner, and both should be added lightly until the sauce is reduced and tasted.

Butter for a Smooth Finish

Cold butter goes in at the end. It softens the acidity, gives the sauce a polished finish, and helps it feel complete. Add it off the heat or over very low heat and whisk until smooth.

Once the butter is added, avoid hard boiling. Butter should make the sauce silky, not oily. If the pan starts bubbling hard after the butter goes in, lower the heat immediately.

Equipment You Need

You only need a small saucepan, whisk, citrus zester, and juicer for the basic sauce. A fine-mesh sieve helps if you want a restaurant-smooth finish. A skillet only matters if you are making the orange pan sauce from duck drippings.

  • Small saucepan or saucier
  • Whisk
  • Fine grater or Microplane
  • Citrus juicer
  • Fine-mesh sieve, optional
  • Small bowl for cornstarch slurry, if using

Once the ingredients and basic tools are ready, start the step-by-step method.

How to Make Orange Sauce for Duck

The sauce is most flexible before the butter goes in. Taste there, adjust there, and the finish becomes much easier.
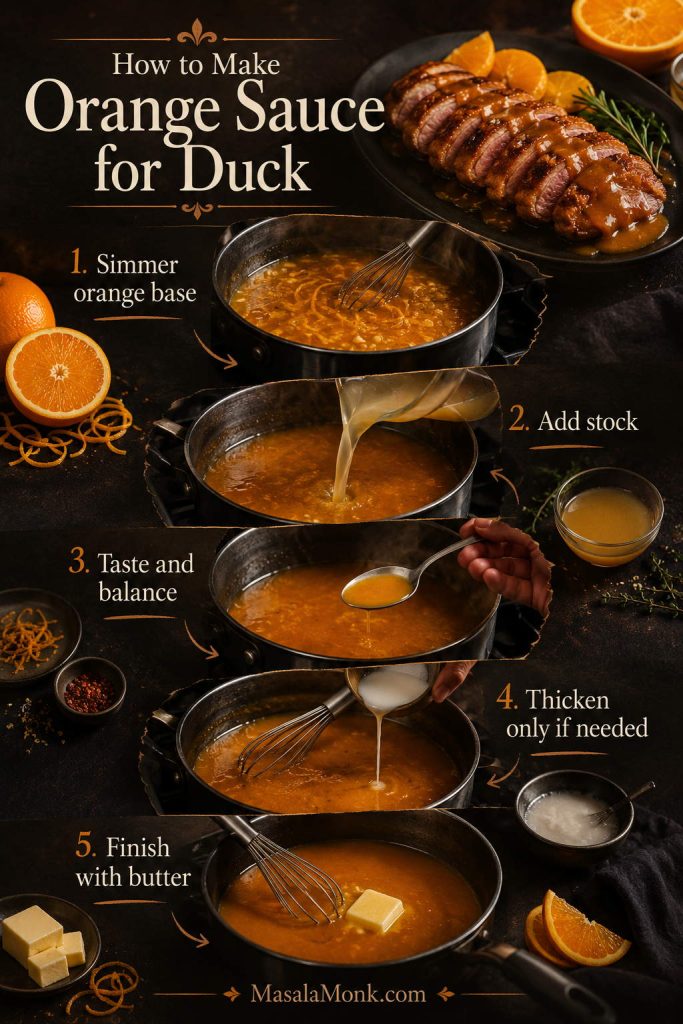
Step-by-step board showing orange sauce simmering, stock being added, sauce being tasted, thickened, and finished with butter
Think of the method as a sequence of control points. Build the citrus base, add savory body, correct the flavor, and only then decide whether the sauce needs help thickening.

1. Reduce the Orange Base

Add the orange juice, orange zest, vinegar, and honey or sugar to a small saucepan. If you are using shallot, add it here too. Bring to a simmer over medium heat, then cook for 5 to 7 minutes, until the mixture smells bright and citrusy and has reduced slightly.

You are not trying to make caramel or a thick syrup at this stage. You just want to concentrate the orange flavor and soften the sharp edge of the vinegar.
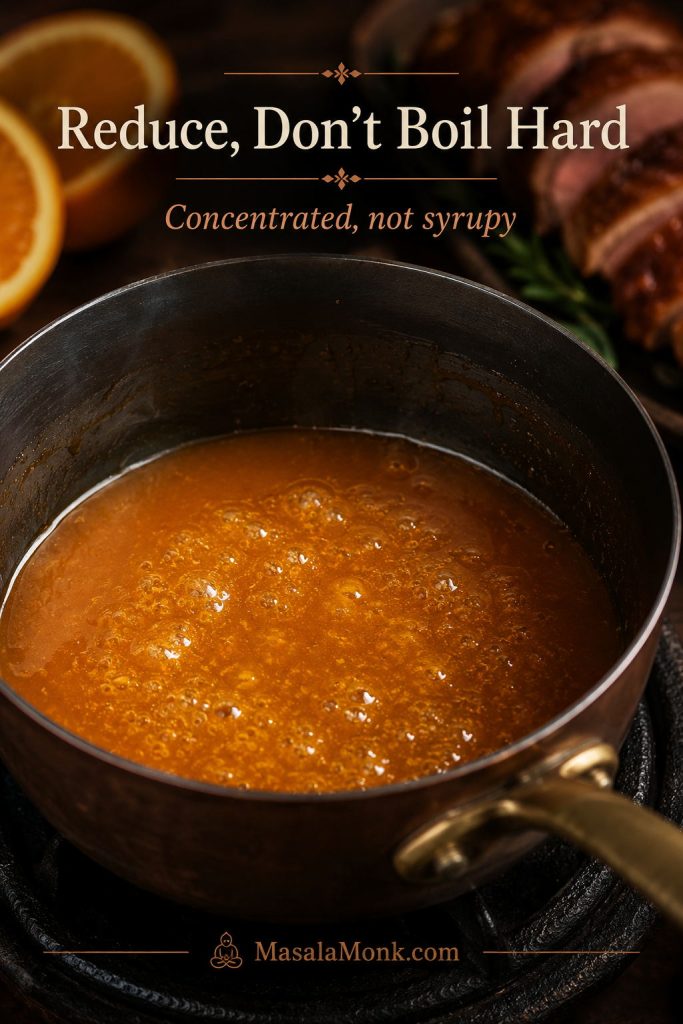
Orange sauce gently reducing in a saucepan
The sauce should simmer gently until the orange flavor concentrates. If it boils hard, it can turn sticky before the stock and butter have a chance to round it out.

2. Add Stock and Simmer

Add the duck stock or chicken stock. Simmer for 8 to 12 minutes, stirring occasionally, until the sauce tastes savory and leaves a thin coating on the spoon.

If the sauce still feels thin, keep simmering. Reduction gives better flavor than thickening too early.

3. Balance Sweetness, Acidity, and Salt

Taste before adding butter. This is the moment where the sauce becomes yours: a little sharper for fatty roast duck, a little softer for leaner duck breast, or a touch sweeter if the oranges are tart.

  • Too sweet? Add a small splash of vinegar or lemon juice.
  • Too sharp? Add a little more honey or sugar.
  • Flat? Add a pinch of salt and a little more orange zest.
  • Thin? Simmer longer before using slurry.

4. Thicken Only If Needed

If the sauce is still too thin after reducing, mix 1 teaspoon cornstarch or cornflour with 1 tablespoon cold water. Whisk a small amount of this slurry into the simmering sauce and cook for 30 to 60 seconds.

Do not add dry cornstarch directly to the pan. It can clump and make the texture uneven. Use only enough slurry to help the sauce coat the spoon lightly.
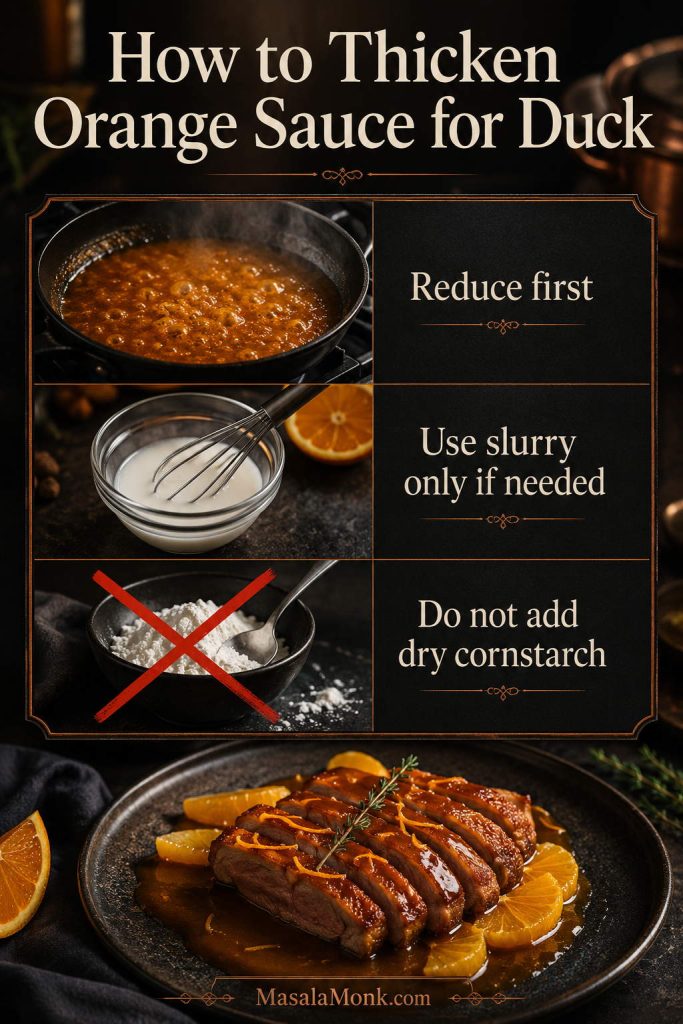
Thickening guide showing reduced sauce, cornstarch slurry, and a warning not to add dry cornstarch
Reduction gives better flavor than rushing to thicken. However, if the sauce still feels thin, mix cornstarch with cold water first so it blends smoothly instead of clumping.

If the sauce has already gone too thin, too thick, bitter, greasy, or broken, use the troubleshooting guide before adding more ingredients.

5. Finish with Butter

Lower the heat or remove the pan from the heat. Whisk in the cold butter, one small piece at a time, until the sauce is smooth. Taste again and adjust salt, pepper, vinegar, or sweetness as needed.

For a very smooth finish, strain it through a fine-mesh sieve before serving. For a more rustic sauce, leave the shallot and zest in.
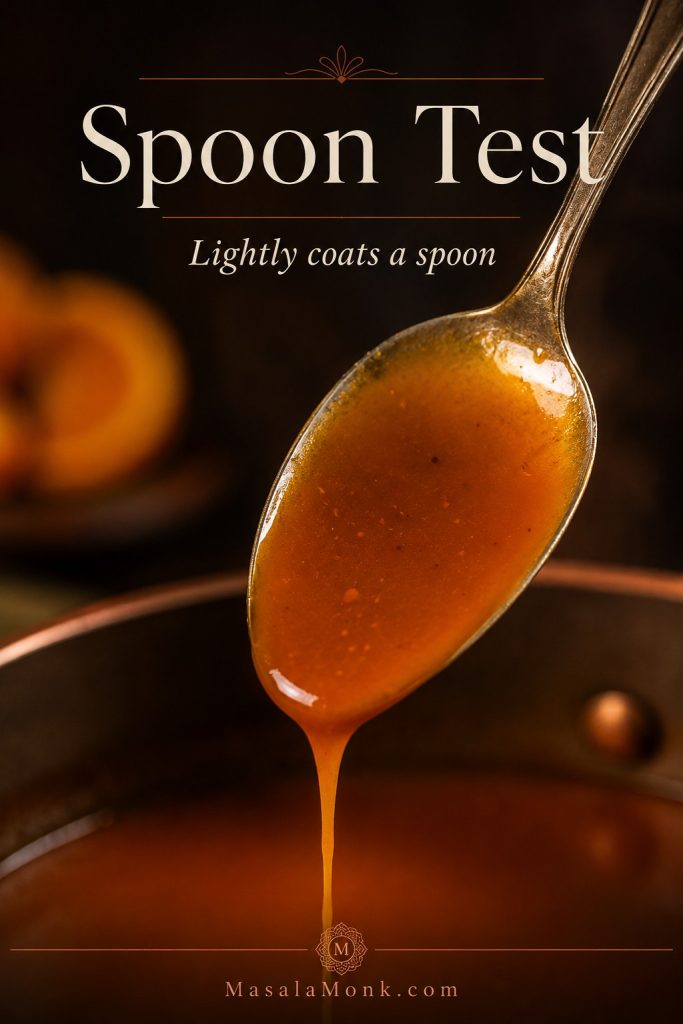
Glossy orange sauce lightly coating the back of a spoon
The right texture is glossy and pourable, not thick like glaze. When the sauce lightly coats a spoon, it is ready to finish or serve.
Do not worry if the sauce is not perfect on the first taste. As long as you taste before adding the butter, you can pull it back from too sweet, too sharp, too thin, or too flat without starting over.

Orange Sauce for Duck Recipe

Orange Sauce for Duck Recipe

This citrus sauce gives duck the classic sweet-sharp orange lift without turning the plate syrupy. It is smooth enough for duck breast, savory enough for roast duck, and simple enough for a duck à l’orange-style dinner at home.

Prep Time
10 minutes
Cook Time
15–20 minutes
Total Time
25–30 minutes
Yield
About 1 cup / 240 ml

Servings: 4, with about 1/4 cup sauce each

Category: Sauce

Method: Stovetop reduction

Cuisine: French-inspired

Ingredients

  • 1 cup / 240 ml fresh orange juice, from about 2–3 medium oranges, depending on size and juiciness
  • 2 teaspoons finely grated orange zest
  • 1 cup / 240 ml duck stock or low-sodium chicken stock
  • 1 1/2 tablespoons sherry vinegar or red wine vinegar, plus more to taste
  • 1 tablespoon honey or 12 g sugar, plus more only after tasting
  • 1 small shallot, finely chopped, optional, about 2 tablespoons
  • 2 tablespoons / 28 g cold unsalted butter, cut into small pieces
  • 1/4 teaspoon fine salt, plus more to taste
  • Freshly ground black pepper or white pepper, to taste

Optional Thickener

  • 1 teaspoon cornstarch / cornflour
  • 1 tablespoon cold water

Optional Upgrades

  • 1–2 tablespoons / 15–30 ml Grand Marnier, Cointreau, or another orange liqueur
  • 2–4 tablespoons / 30–60 ml port for a richer sauce
  • 1 tablespoon / about 20 g orange marmalade for a sweeter shortcut version

Instructions

  1. Start the orange base. Add orange juice, orange zest, vinegar, honey or sugar, and the optional shallot to a small saucepan. Bring to a simmer over medium heat.
  2. Reduce slightly. Simmer for 5 to 7 minutes, until the orange mixture smells bright and has reduced a little. Do not reduce it to a thick syrup yet.
  3. Add stock. Pour in the duck stock or chicken stock. Simmer for 8 to 12 minutes, stirring occasionally, until the sauce tastes savory and leaves a thin coating on the spoon.
  4. Balance the sauce. Taste before adding butter. Add a little more vinegar if it tastes too sweet, more honey or sugar if it tastes too sharp, or a pinch of salt if it tastes flat.
  5. Thicken only if needed. If the sauce is still too thin after reducing, stir cornstarch with cold water in a small bowl. Whisk a little slurry into the simmering sauce and cook for 30 to 60 seconds. Do not add dry cornstarch directly to the sauce.
  6. Finish with butter. Lower the heat or remove the pan from the heat. Whisk in the cold butter until the sauce is smooth. Do not hard-boil after adding butter.
  7. Strain and serve. Strain through a fine-mesh sieve for a smooth sauce, or leave the shallot and zest in for a more rustic sauce. Serve warm with duck.

Notes

  • Yield: About 1/4 cup sauce per person for 4 servings. Double it if you like extra sauce at the table or are serving roast duck.
  • Texture: Aim for glossy and pourable, with enough body to coat a spoon lightly.
  • Best adjustment point: Taste before adding butter, while the sauce is still easy to correct.
  • Optional upgrades: Choose one at a time. Add marmalade or port with the stock, or orange liqueur after the sauce has reduced.
  • Serving: For crisp duck breast, sauce the plate or spoon around the slices. For roast duck, serve the sauce warm on the side.
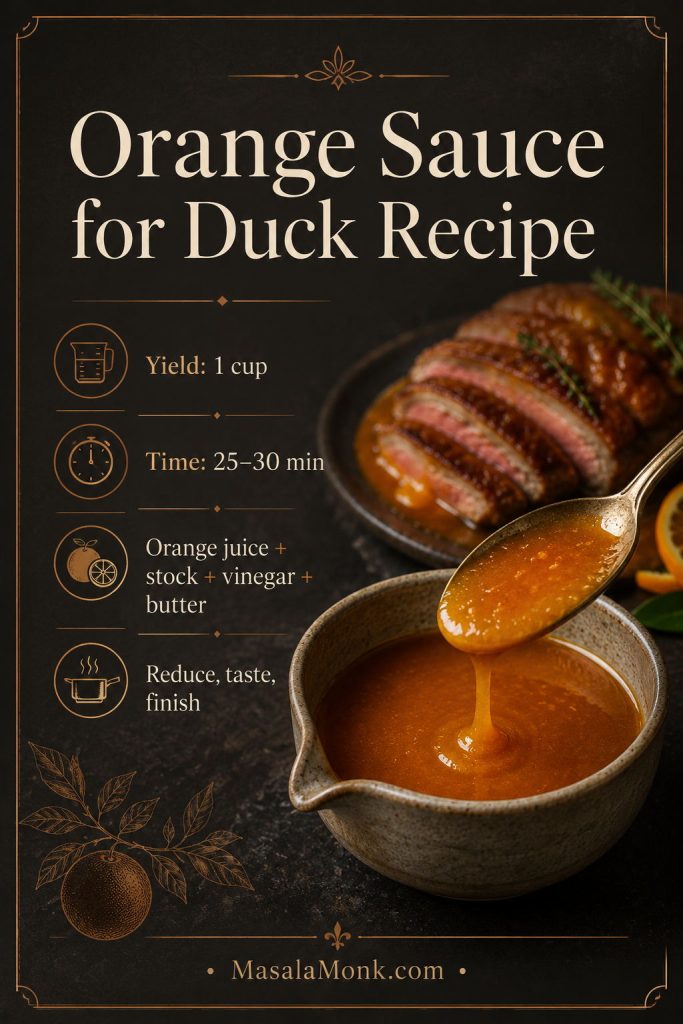
Saveable orange sauce for duck recipe card with yield, time, ingredients, and method cues
This saveable card keeps the sauce method simple at the stove. The important moment is tasting before the butter, while the sauce is still easy to adjust.

Making sauce for cooked duck? Use the quick 10-minute version. Cooking duck breast in the pan? Use the duck drippings version.

Quick 10-Minute Version

Use this when the duck is already cooked and you need a fast, warm citrus finish, not a full restaurant-style reduction. It is brighter and lighter than the main recipe, but it still gives the meat the orange lift it needs.
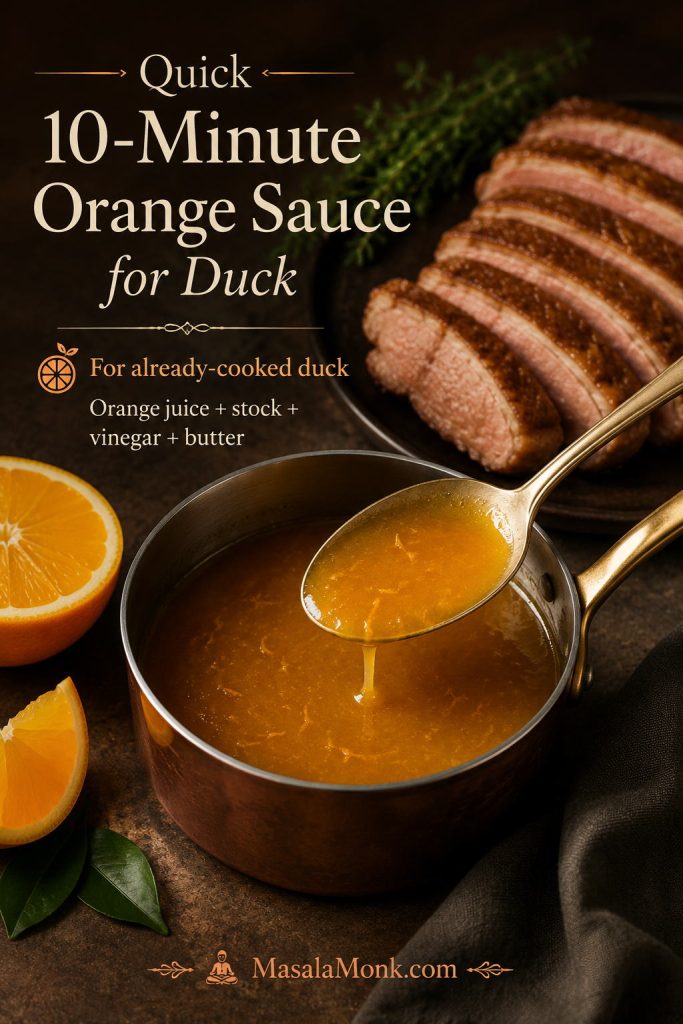
Quick version: Simmer 3/4 cup / 180 ml orange juice, 1/2 cup / 120 ml stock, 1 tablespoon vinegar, 1 tablespoon marmalade or 1 to 2 teaspoons honey, and 1 teaspoon orange zest for 8 to 10 minutes. Finish with 1 tablespoon cold butter and adjust with salt, vinegar, or honey.
Quick orange sauce for duck in a saucepan with sliced cooked duck nearby
The quick version is best when the duck is already cooked and you need a warm citrus finish. Keep the sauce in the pan or spoon, then add it lightly to the plate.

If you are cooking duck breast from scratch, the pan-sauce version below gives better flavor because it uses the browned bits and juices left in the skillet.

Orange Pan Sauce from Duck Drippings

If you are cooking duck breast, this is where the skillet gives you flavor you cannot get from orange juice alone. After cooking the duck, transfer the breast to a board to rest. Pour off most of the rendered duck fat, leaving the browned bits and about 1 teaspoon of fat in the pan.

Add the shallot, if using, and cook for 30 to 60 seconds over medium-low heat, just until softened. Pour in the orange juice, then scrape up the browned bits from the bottom of the pan. Add the zest, vinegar, honey or sugar, and stock, then simmer until the sauce tastes savory and lightly coats a spoon. Lower the heat, whisk in the cold butter, and strain if you want a smoother finish.

This route is especially good for duck breast because it captures the savory flavor left in the skillet. Just avoid leaving too much duck fat in the pan, or the sauce can taste greasy.
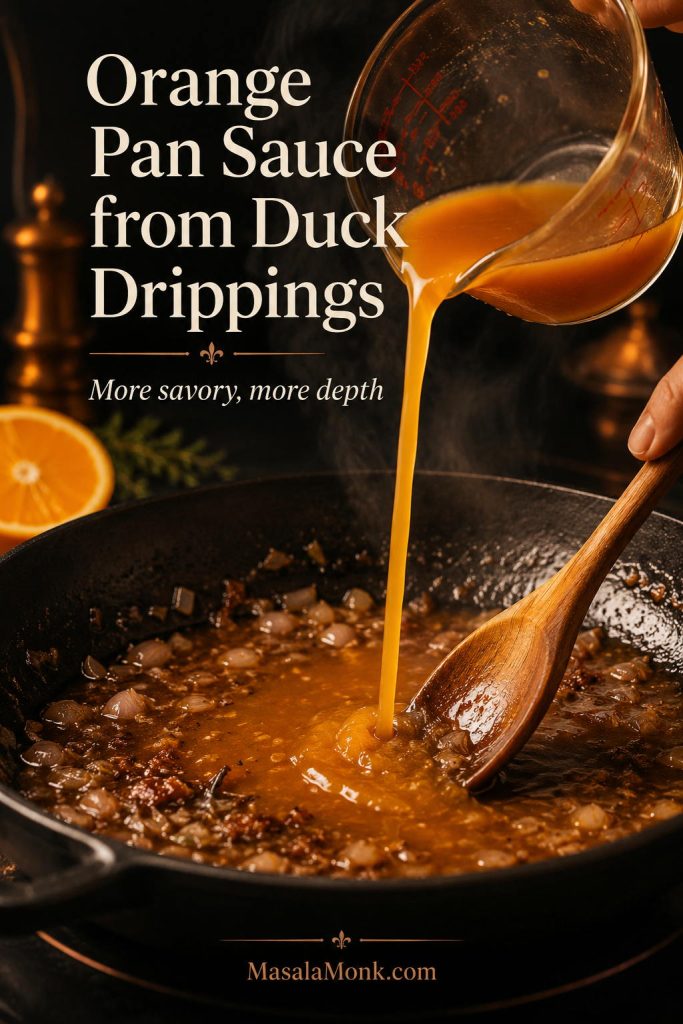
Orange pan sauce being made in a skillet with duck drippings, shallots, and browned bits
Duck drippings add savory depth that orange juice alone cannot give. Pour off excess fat first, then use the browned bits to build a richer orange pan sauce.

Once the sauce is ready, see how to serve it with duck breast without soaking the crisp skin.

How to Serve the Sauce with Duck Breast

Duck breast is one of the best uses for this sauce because the contrast is so good: crisp skin, tender meat, and citrus sauce underneath. The skin is the prize. Once it is soaked, the plate loses its best texture.

Spoon the sauce onto the plate first, then lay the sliced duck breast over it. You can also spoon a little sauce around the slices and serve extra on the side. That way the first bite still has that crisp edge.
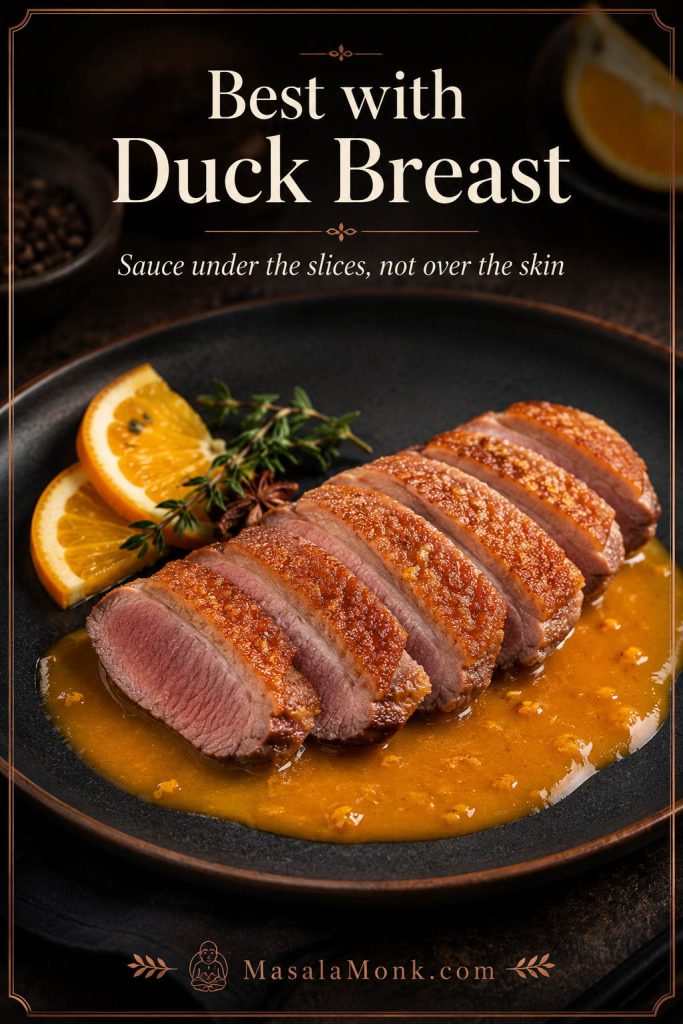
Sliced duck breast served over orange sauce with crisp skin kept dry
Duck breast needs contrast: crisp skin, tender meat, and citrus sauce below. Serving the sauce underneath gives flavor without softening the best texture.

If you are cooking duck breast from scratch, score the skin in a shallow crosshatch pattern without cutting into the meat. Start the breast skin-side down in a cold pan, then render the fat slowly over low to medium-low heat. This gives the fat time to melt and the skin time to crisp before the meat overcooks.

For the full meat-cooking method, use this duck breast recipe with crispy skin and orange sauce as the companion guide. This page focuses on the sauce, while that guide walks through the duck itself in more detail.

If you are only making the sauce for already-cooked duck, you can skip the temperature notes. If you are cooking duck breast at the same time, this section helps you time the meat before saucing the plate.

Duck Breast Temperature Guide

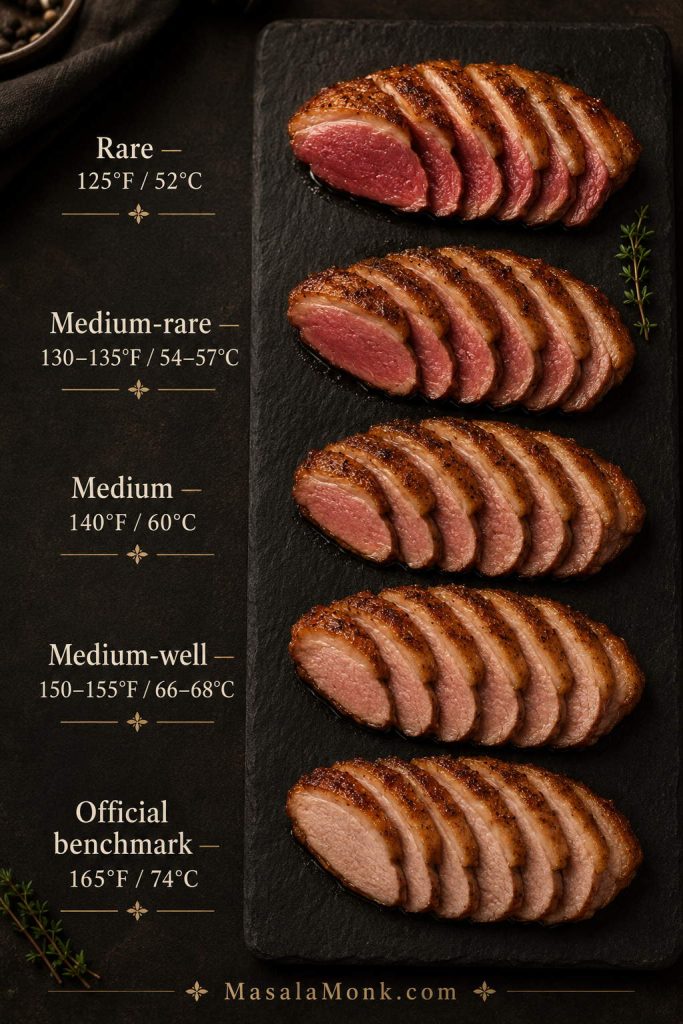
In restaurants and many home kitchens, duck breast is often served pink, but official U.S. poultry guidance is 165°F / 74°C. These lower temperatures are common doneness preferences, not official safety recommendations. If you choose a lower doneness target, use your own judgment and consider who you are serving, especially if cooking for children, pregnant guests, older adults, or anyone immunocompromised. You can also refer to the USDA’s safe minimum internal temperature chart for official guidance.
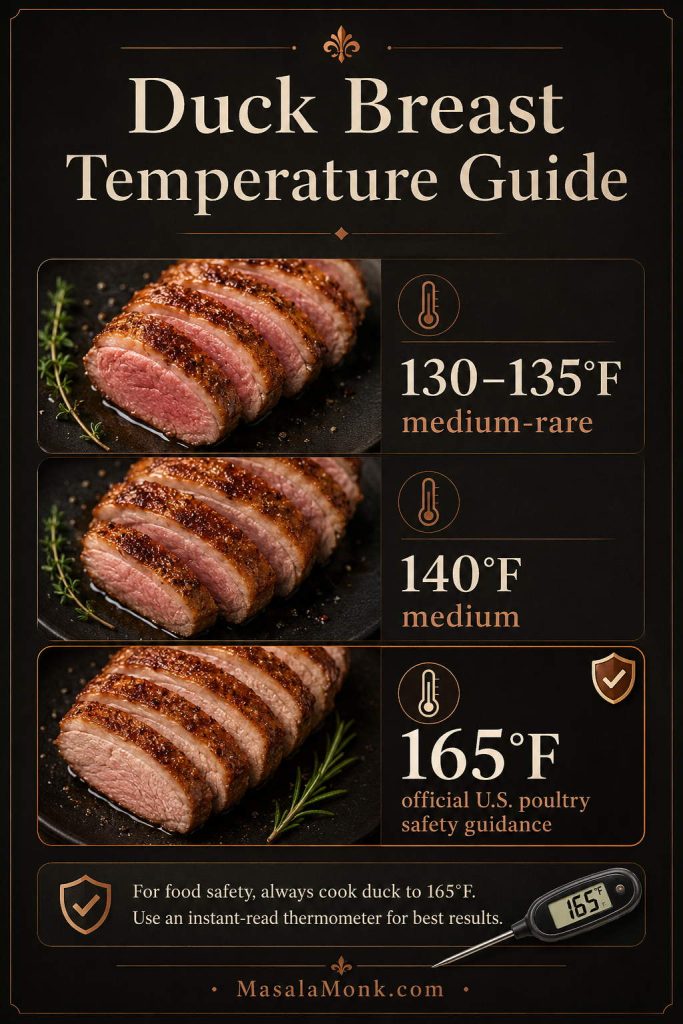
Duck breast temperature guide showing medium-rare, medium, and official United States poultry safety guidance
Duck breast is often served pink, but official U.S. poultry safety guidance is 165°F / 74°C. Use an instant-read thermometer and choose the doneness that suits your table.
Duck Breast Doneness Common Restaurant/Home Target Texture
Medium-rare 130–135°F / 54–57°C Pink, tender, steak-like
Medium 140°F / 60°C Lightly pink, firmer
Well done 155°F+ / 68°C+ Much firmer, less pink
Official U.S. poultry safety temperature 165°F / 74°C Fully cooked by official guidance

How to Keep the Duck Skin Crisp

  • Render the skin slowly instead of blasting it with high heat.
  • Rest the duck breast before slicing so juices settle.
  • Spoon sauce under or around the duck, not heavily over the skin.
  • Serve extra citrus sauce on the side so each person can add more.
  • If reheating leftovers, re-crisp the duck skin separately from the sauce.
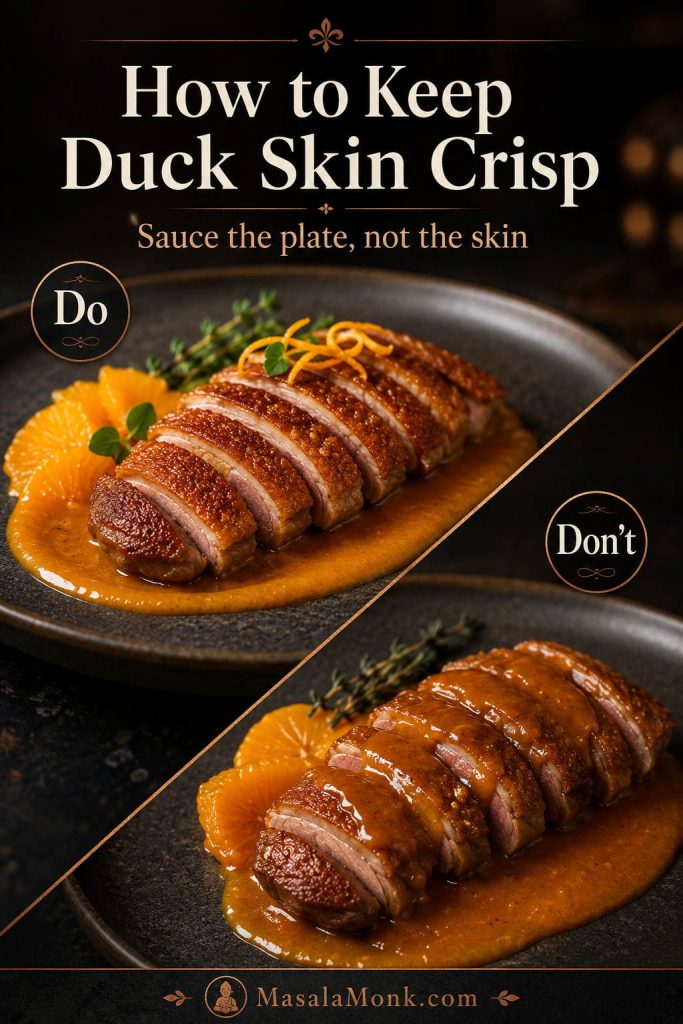
Do and don’t comparison showing orange sauce under duck versus sauce poured over duck skin
The skin is the prize. Sauce the plate first, then set the duck on top so the meat gets the citrus lift and the skin keeps its crackle.

How to Use It with Roast Duck or Duck Legs

Roast duck can take a little more sauce than duck breast, especially once it is carved at the table. Still, crisp skin deserves respect. Keep the sauce warm and serve it beside the meat so people can add enough citrus lift without softening every piece.

If you have pan juices from roasting duck, add a spoonful to the sauce for deeper flavor. Skim off excess fat first; a little duck fat tastes luxurious, but too much can turn the sauce greasy.

Duck legs are more forgiving. Because the meat is darker and richer, you can spoon the sauce a little more generously, especially with roasted, braised, or confit-style legs.

Orange sauce served with sliced roast duck and duck legs on dark plates
This citrus sauce works beyond duck breast. With roast duck or duck legs, serve it warm on the side so guests can add more without softening all the skin.

For a bigger holiday table, keep the duck rich and the sides familiar: one citrus sauce, one potato dish, and one green side usually feel complete. If you want a classic make-ahead green side, MasalaMonk’s green bean casserole recipe ideas work better than adding another fussy main-style dish.

Orange Sauce Variations: Marmalade, Grand Marnier, Port, and Blood Orange
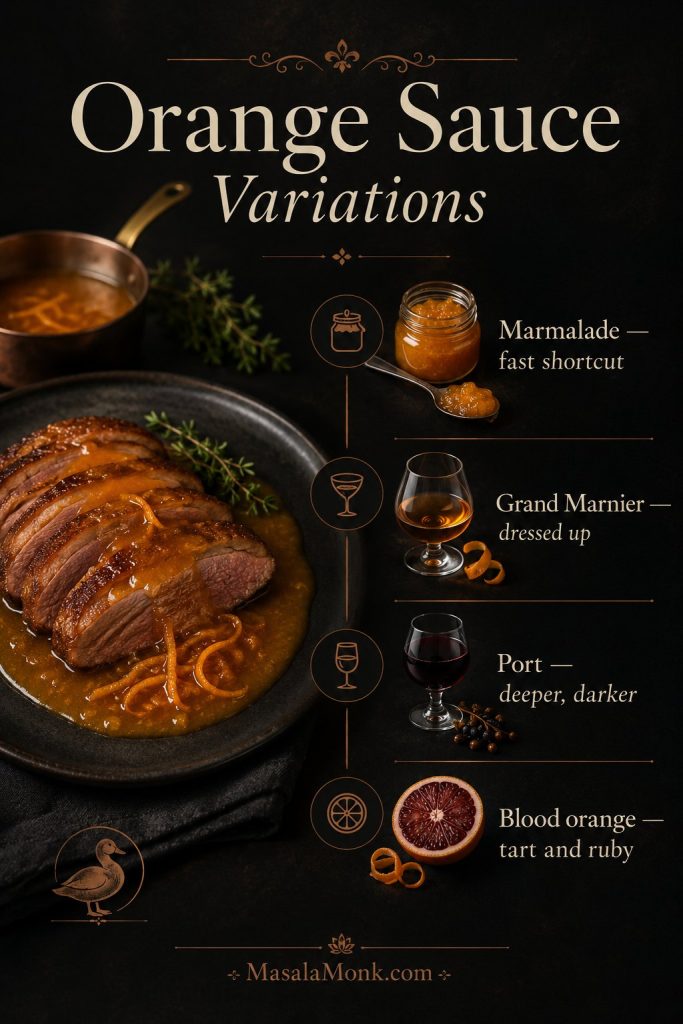
Orange sauce variation guide with marmalade, Grand Marnier, port, and blood orange options
Choose the variation by the dinner you want: marmalade for speed, Grand Marnier for elegance, port for depth, and blood orange for a sharper seasonal finish.

Marmalade Shortcut

Marmalade is the fast shortcut, not the whole personality of the sauce. Add 1 tablespoon with the stock for body, sweetness, and a slight orange-peel bitterness.

Too much marmalade pushes the sauce toward sticky glaze. Start small, keep the vinegar close, and remember: if it tastes good on toast, it is probably too sweet for duck.
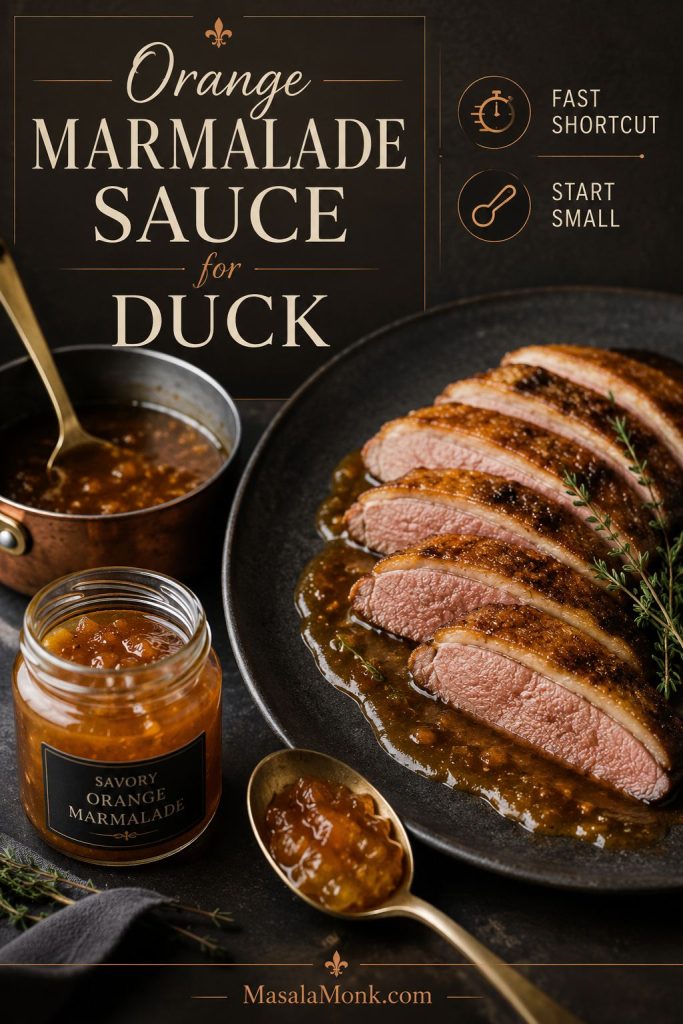
Orange marmalade sauce for duck with marmalade, a saucepan, and sliced duck
Marmalade can make a fast orange sauce, but it is powerful. Start small, then use vinegar or stock if the flavor begins leaning more like jam than dinner.

Grand Marnier or Cointreau

This is the dinner-party version: still bright and pourable, but with a warmer orange aroma that feels more dressed up. Add 1 to 2 tablespoons of Grand Marnier, Cointreau, or another orange liqueur after the sauce has reduced.

Simmer briefly to mellow the alcohol, then finish with butter. The result should feel fragrant, not perfumey, and richer without becoming heavy.
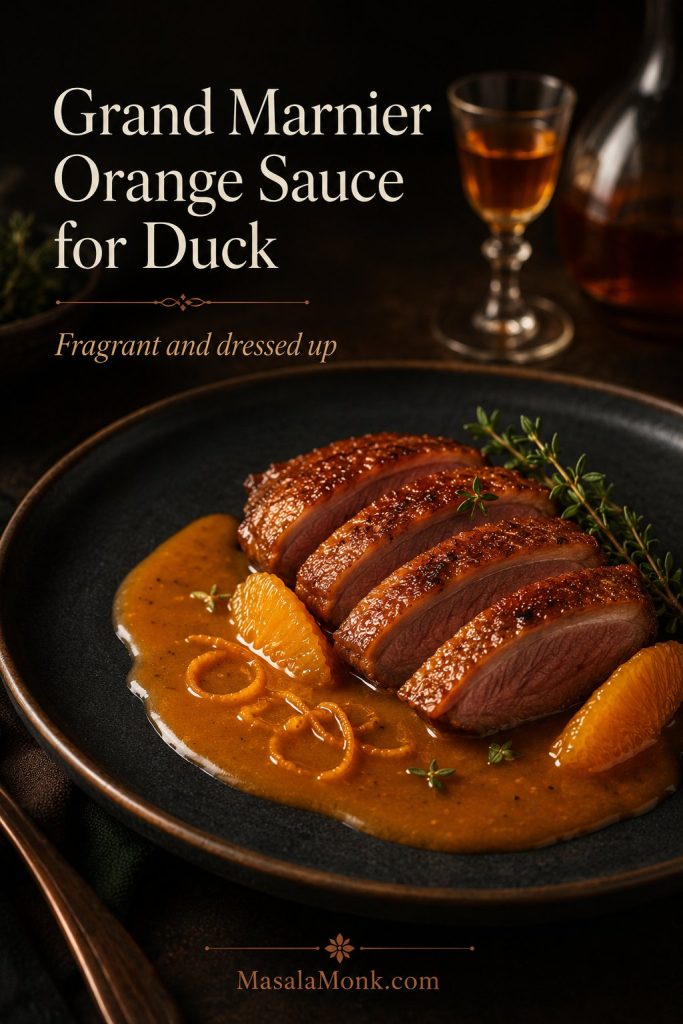
Grand Marnier orange sauce for duck with plated duck, glossy sauce, and a subtle liqueur glass
Grand Marnier or Cointreau gives the sauce a warmer orange aroma. Simmer briefly before finishing with butter so it tastes elegant rather than sharp.

Port and Orange

Port moves the sauce into a deeper, darker lane. Add 2 to 4 tablespoons with the stock, then taste before serving because port can make the orange feel rounder and sweeter.

This version suits roast duck especially well. If the sauce starts leaning too soft or sweet, a few extra drops of vinegar will wake it back up.
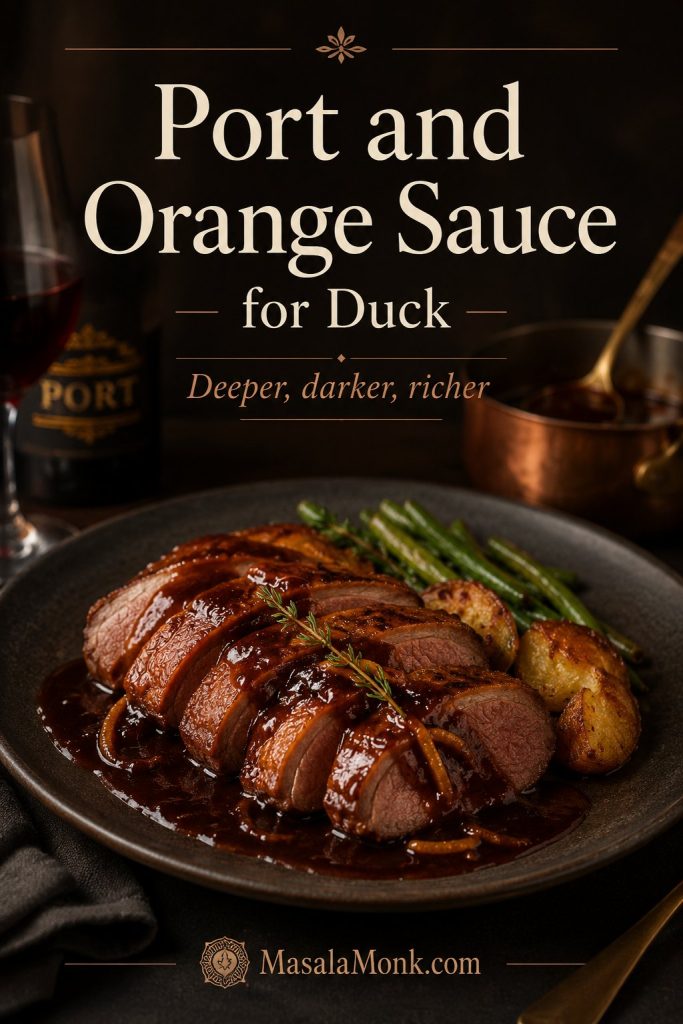
Port and orange sauce served with sliced duck and a darker glossy sauce
Port moves the sauce into a deeper dinner-party lane. Because it can add sweetness, taste before serving and sharpen with a few drops of vinegar if needed.

Blood Orange

Blood orange gives the sauce a ruby-orange color and a slightly berry-like citrus note. Use it exactly as you would regular orange juice, then taste carefully because some blood oranges are less sweet and more tart.

If the finish tastes too sharp, soften it with a little honey or an extra piece of cold butter.
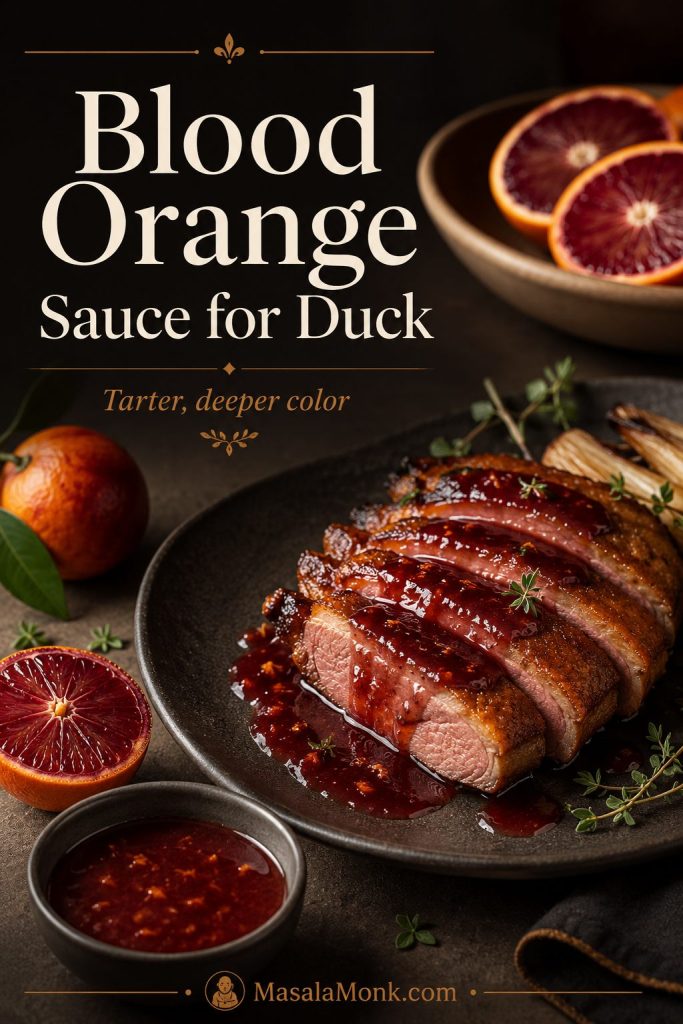
Blood orange sauce for duck with ruby-orange sauce, sliced duck, and cut blood oranges
Blood orange gives duck sauce a deeper color and a tarter citrus edge. If the finish tastes too sharp, soften it with honey or an extra piece of cold butter.

Use the table below as a quick chooser, then follow the same core method: reduce first, taste before butter, and keep the finish pourable rather than sticky.

Version Best For Flavor What to Adjust
Classic base Duck breast, roast duck, duck legs Bright, savory, balanced Taste vinegar and sweetness before butter
Marmalade Fast shortcut Sweeter, peel-like, slightly bitter Add extra vinegar if it tastes jammy
Grand Marnier or Cointreau Dinner-party plates Fragrant, festive, orange-forward Simmer briefly before butter
Port Roast duck or richer plates Darker, rounder, deeper Add acid if it becomes too sweet
Blood orange Seasonal dinners Tart, ruby-colored, berry-citrus Add honey if too sharp

If a variation tastes too sweet, too sharp, or too heavy after reducing, check the sauce fixes before serving.

Common Mistakes to Avoid

These are the small moves that usually separate a polished orange duck sauce from one that tastes too sweet, too heavy, or slightly clumsy on the plate.

  • Adding too much sweetness early: reduce the sauce first, then decide if it needs more honey, sugar, or marmalade.
  • Boiling after butter: once the butter goes in, use gentle heat so the sauce stays smooth.
  • Covering crisp duck skin: spoon the sauce under or around duck breast instead of soaking the skin.
  • Thickening too soon: simmer first, then use cornstarch only if reduction is not enough.
  • Zesting too deeply: use only the colored orange peel, not the bitter white pith.
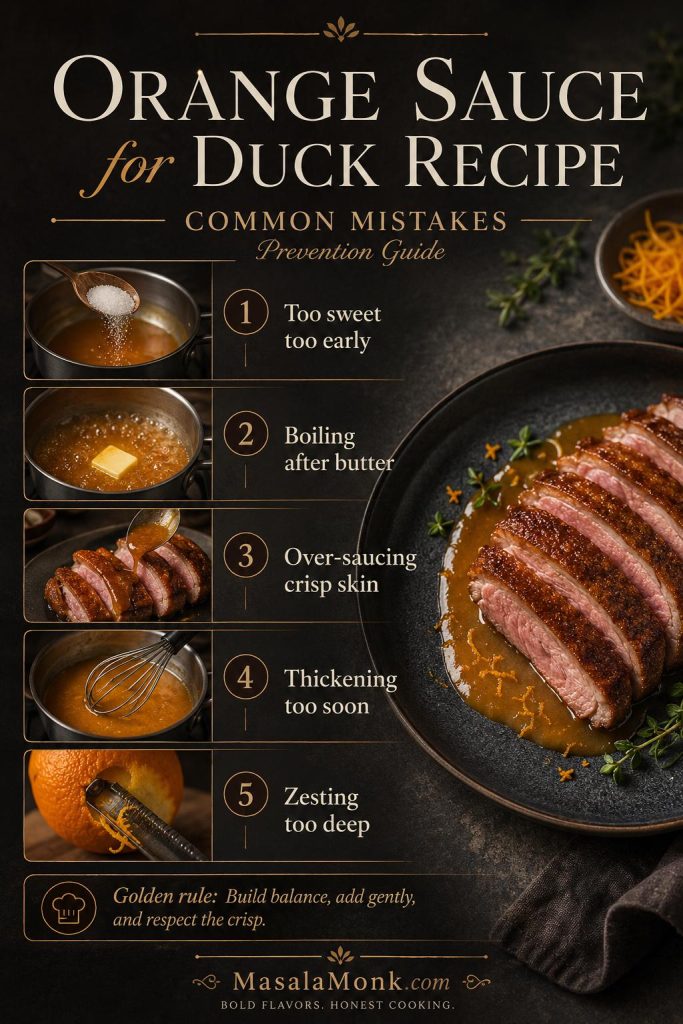
Common mistakes board for orange sauce for duck showing over-sweetening, boiling butter, over-saucing skin, thickening early, and zesting too deeply
Most orange sauce mistakes start small: too much sweetener, too much heat, or sauce poured over crisp skin. Add gently, taste often, and keep the crisp parts dry.

How to Fix Orange Sauce for Duck

Most problems with this sauce are balance problems, not failures. A splash of acid, a little sweetness, more reduction, or gentler heat can usually bring it back.

Use the table as a quick rescue guide rather than a second recipe. Find the problem, make the smallest adjustment, then taste again before adding more.
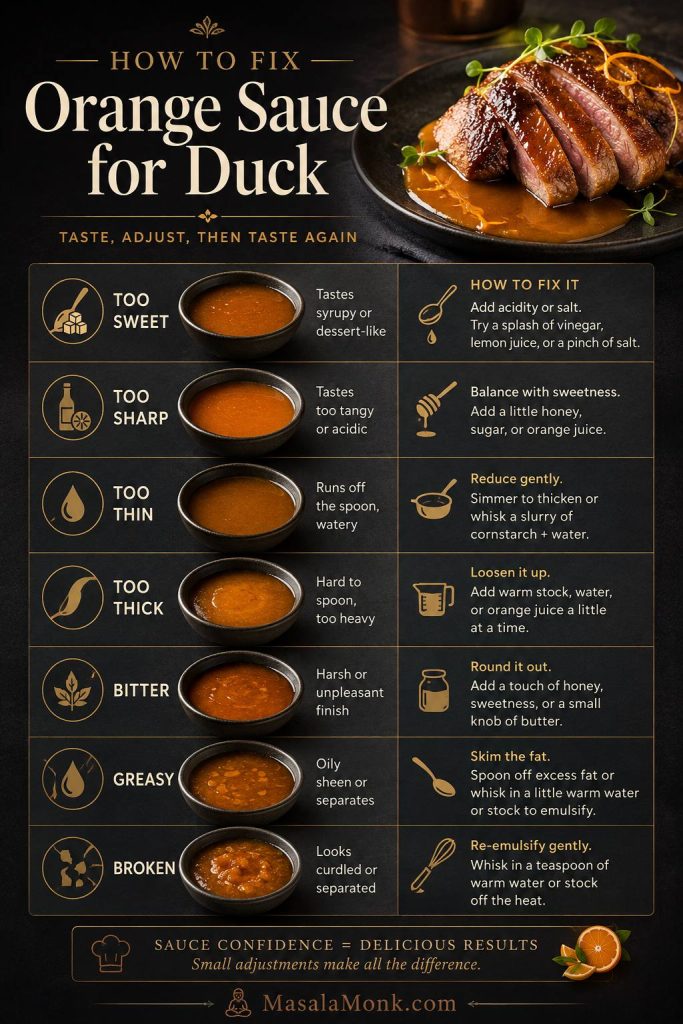
Troubleshooting board for orange sauce for duck with sweet, sharp, thin, thick, bitter, greasy, and broken sauce problems
Troubleshooting works best one fix at a time. Adjust sweetness, acidity, thickness, or fat gently, then taste again before changing anything else.
Problem Why It Happened How to Fix It
Too sweet Too much honey, sugar, marmalade, or very sweet orange juice Add a splash of vinegar or lemon juice, then loosen with a little stock if needed.
Too sharp Too much vinegar or very tart oranges Add a little honey or sugar, then finish with butter to round the edges.
Too thin Not reduced enough, or stock was very light Simmer longer. If still thin, whisk in a small amount of cornstarch slurry.
Too thick or sticky Over-reduced or too much marmalade/sugar Whisk in warm stock, water, or orange juice a tablespoon at a time.
Bitter Too much white pith from the orange peel, or over-reduced citrus Strain the sauce, add a little honey, and finish with butter.
Flat Not enough salt, zest, or acid Add a pinch of salt, more orange zest, and a few drops of vinegar.
Greasy Too much duck fat in the pan sauce Skim excess fat or whisk in a splash of warm stock to loosen the sauce.
Broken after butter The sauce boiled hard after the butter was added Take the pan off the heat and whisk in warm stock 1 teaspoon at a time until the sauce looks smoother.

Make-Ahead, Storage, and Reheating

You can make the citrus base ahead of time. Cook the sauce through the reduction stage, then cool and refrigerate it. For the best texture, add the butter when reheating, not before storing.

  • Fridge: Store in an airtight container for 3 to 4 days.
  • Freezer: Freeze before adding butter, and preferably before adding cornstarch slurry, for up to 2 months.
  • Reheating: Warm gently in a small saucepan. Add a splash of stock or water if it has thickened too much.
  • Butter finish: Whisk in cold butter after reheating for the smoothest sauce.
Make-ahead and storage board for orange sauce with container, saucepan, butter, and storage times
For a calmer dinner, make the sauce base ahead and finish it with butter after reheating. Gentle heat protects the texture better than boiling it hard.

When the sauce is ready, build the plate with sides that catch, freshen, or round out the duck.

If the sauce looks slightly separated after chilling, warm it gently and whisk well. A small splash of stock can help bring it back together.

Avoid boiling the sauce hard when reheating, especially after the butter has been added. Gentle heat keeps the finish smoother.

What to Serve with Duck and Orange Sauce

For duck breast, the best plate is usually simple: crisp skin, sliced meat, a spoonful of orange sauce, something potato-based, and one green side. That lets the sauce feel polished without making the plate busy.

Because duck and citrus sauce already bring richness, sweetness, and acidity, choose sides by the job they do on the plate.

Side Job Best Choices Why It Works
Catch the sauce Mashed potatoes, potato gratin, wild rice, rice pilaf Soft or starchy sides hold the orange pan sauce without competing with it.
Freshen the plate Green beans, bitter salad leaves, orange-fennel salad, wilted greens Green or bitter sides keep the duck from feeling too heavy.
Match a holiday table Roasted carrots, Brussels sprouts, hashbrown casserole, green bean casserole These make the meal feel generous without adding another complicated main.

MasalaMonk’s garlic mashed potatoes are especially useful when you want a soft, buttery side that can hold sauce without feeling dry. For a holiday table where you want one rich, make-ahead side, this hashbrown casserole recipe can sit beside roast duck without stealing attention.
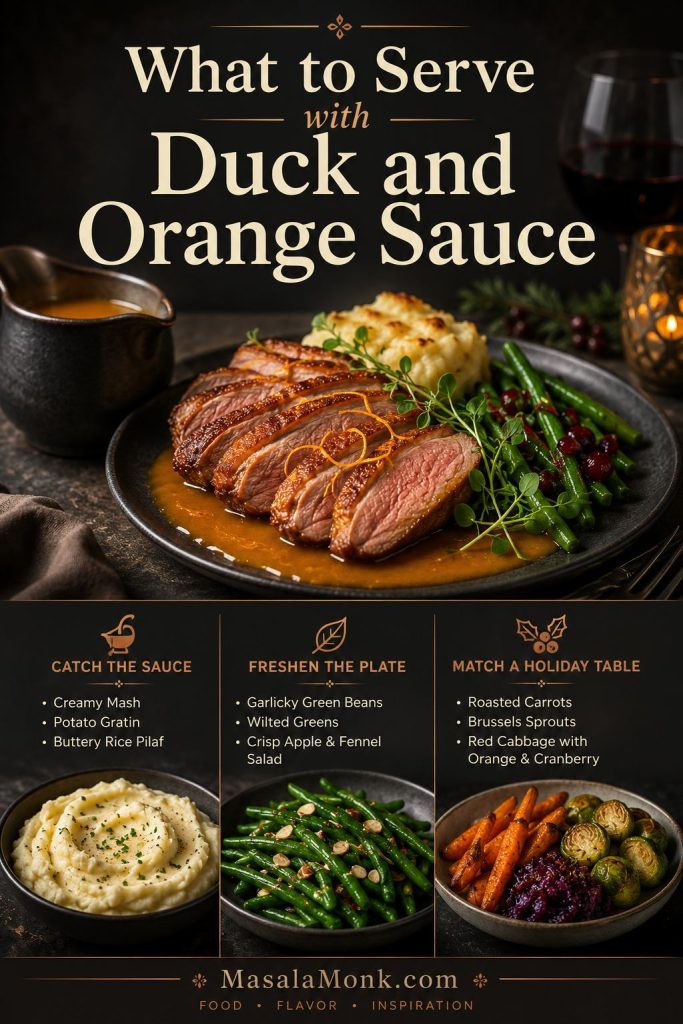
Duck with orange sauce served with potatoes, green beans, roasted vegetables, and holiday side dishes
Build the plate by function: something starchy to catch the sauce, something green to freshen the richness, and a warm side if the meal is more festive.

Duck can feel like a high-stakes dinner, but the sauce does not have to be fragile. Reduce it, taste it before the butter, adjust the sweet-sharp balance, and keep it warm. Once the skin is crisp and the sauce is glossy, let the orange lift the duck instead of covering it.

FAQs

What is orange sauce for duck made of?

It is usually made with orange juice, orange zest, stock, vinegar, a small amount of sweetness, and butter. Some versions also include shallot, port, marmalade, wine, or orange liqueur.

Why does orange work so well with duck?

Orange cuts through duck’s richness. The sauce still needs stock and vinegar, though, so it tastes like a savory dinner sauce instead of a sweet glaze.

Should the sauce be sweet?

Lightly sweet, yes. Syrupy, no. The best version is bright, rounded, and savory, with enough acidity to keep the orange from tasting like candy.

What can I use instead of duck stock?

Low-sodium chicken stock is the easiest substitute. It gives the sauce savory depth without overpowering the orange.

Does bottled orange juice work?

It works in a pinch, but fresh juice and fresh zest give a cleaner flavor. If using bottled juice, add fresh zest if possible and taste before adding extra sugar.

How do I thicken orange sauce for duck?

Reduce it first. If it is still too thin, mix 1 teaspoon cornstarch with 1 tablespoon cold water, then whisk in a little slurry and simmer briefly.

Why does my orange duck sauce taste bitter?

Bitterness usually comes from white pith or over-reduced citrus. Use only the colored zest, strain if needed, then soften the sauce with a little honey and butter.

Do I need alcohol?

No. Grand Marnier, Cointreau, and port are optional upgrades. The base sauce gets its balance from orange, stock, vinegar, sweetness, and butter.

How do I scale it for more people?

Double all the ingredients and use a wider saucepan if possible. The sauce may take a few extra minutes to reduce to the same spoon-coating texture.

Is this the same as Chinese duck sauce?

No. This is a warm savory citrus sauce for cooked duck breast, roast duck, or duck à l’orange-style dishes. Chinese-American duck sauce is usually a sweet condiment or dipping sauce.
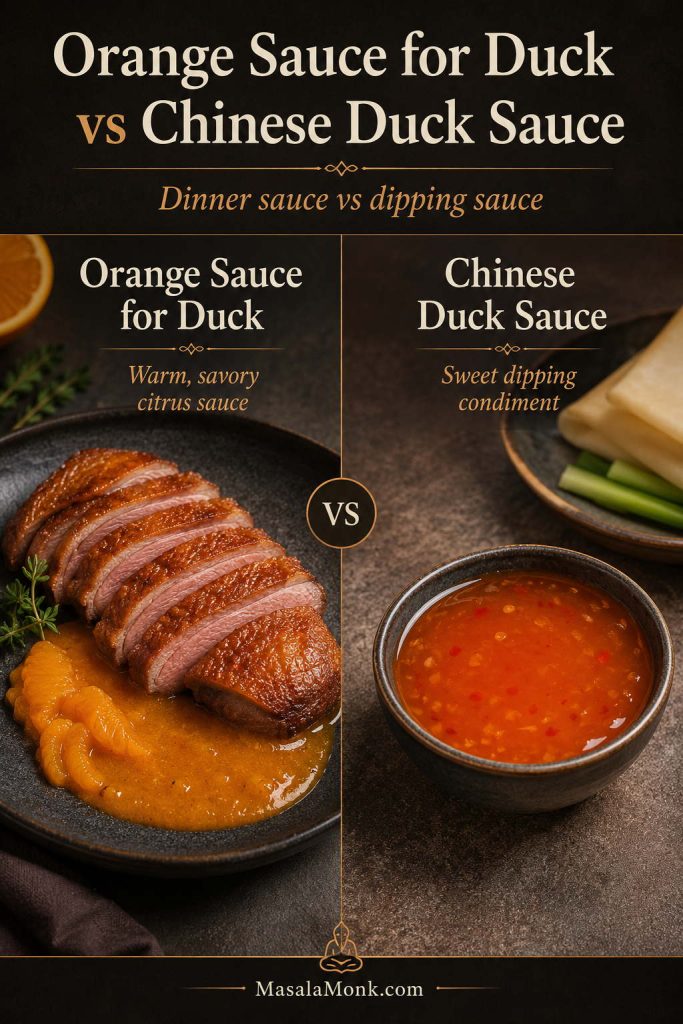
Comparison of savory orange sauce for duck and Chinese duck sauce as a sweet dipping condiment
Orange sauce for duck is a warm savory citrus sauce for cooked duck. Chinese duck sauce is usually a sweet dipping condiment, so the two are not interchangeable.

How far ahead can I make it?

Make it 3 to 4 days ahead and refrigerate it. For the smoothest finish, reheat gently and whisk in the cold butter just before serving.

What duck dishes work with this citrus sauce?

Use it with pan-seared duck breast, roast duck, duck legs, duck à l’orange, leftover duck, or sliced duck served with potatoes and greens.

Should I pour it over crispy duck skin?

Use a light hand. Spoon the sauce under or around sliced duck breast so the skin stays crisp, then serve extra sauce on the side.
Back to Quick Answer

Posted on 1 Comment

Duck Breast Recipe

Sliced duck breast with crispy scored skin, pink center, orange sauce, greens, and potatoes on a dinner plate

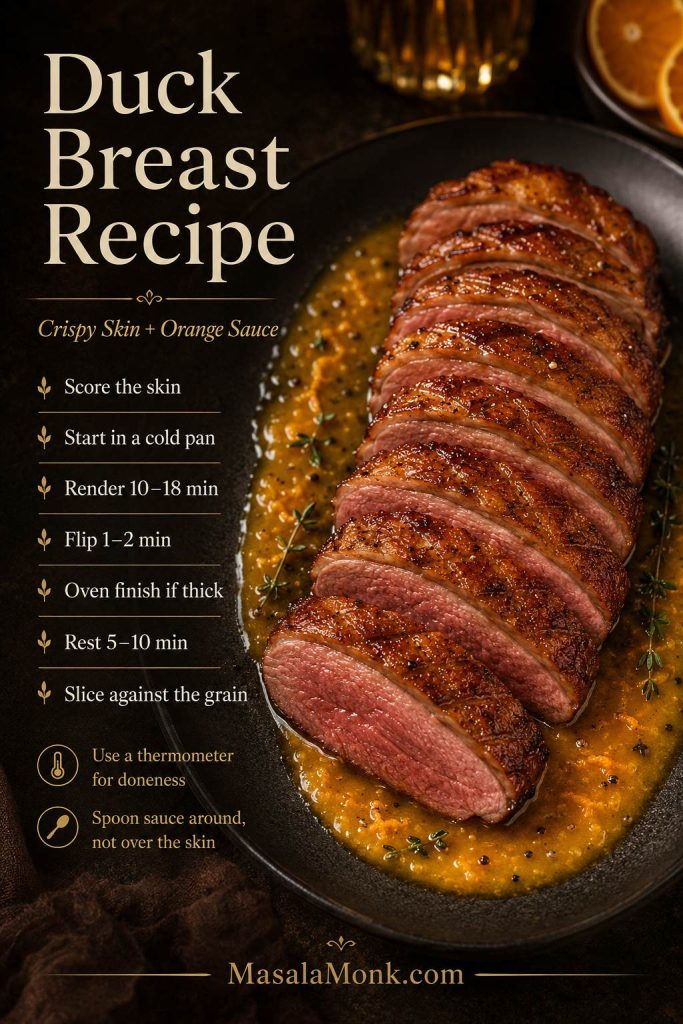
Duck breast can feel intimidating the first time: beautiful when it works, frustrating when the skin turns rubbery or the meat dries out. The good news is that the method is much calmer than it looks. You do not need a complicated marinade or a chef’s trick. You need to score the skin, start in a cold pan, render the fat slowly, finish gently, rest, and slice.

This duck breast recipe gives you crisp golden skin, a tender center, and a quick orange sauce you can make while the duck rests. More importantly, it shows you what to look for at each stage: how deep to score, how the fat should bubble, when the skin is ready to flip, and how to choose the right temperature for your table.

Because duck breast is rich and easy to overthink, this guide also covers sauces, sides, air fryer and sous vide notes, storage, reheating, leftovers, and troubleshooting. By the end, you should know how to avoid rubbery skin, greasy fat, and dry meat — and what to do if something starts going wrong.

The payoff is a plate that feels special without being frantic: crisp salted skin, a thin rendered fat layer, juicy slices, and a glossy sauce you make while the duck rests.

Before you start: the slow part is the skin-side render. It may feel like nothing is happening for the first few minutes, but that quiet start is exactly what helps the fat melt instead of trapping a chewy layer under the skin.

Quick Answer: Best Way to Cook Duck Breast

Duck breast usually cooks best when you score the skin, season it well, place it skin-side down in a cold dry pan, and slowly render the fat over low to medium-low heat until the skin is golden and crisp. Once most of the fat has melted, flip the breast briefly to cook the meat side, then finish in a 350°F / 180°C oven if the breast is thick or still under your preferred temperature.

Rest the duck skin-side up for 5–10 minutes, then slice it against the grain. Many cooks prefer duck breast medium-rare to medium for juicier slices, while the official poultry safety benchmark is 165°F / 74°C. Use a thermometer and choose the doneness that feels right for you and the people you are serving.

Not sure which doneness to choose? Use the duck breast temperature guide before you start cooking.

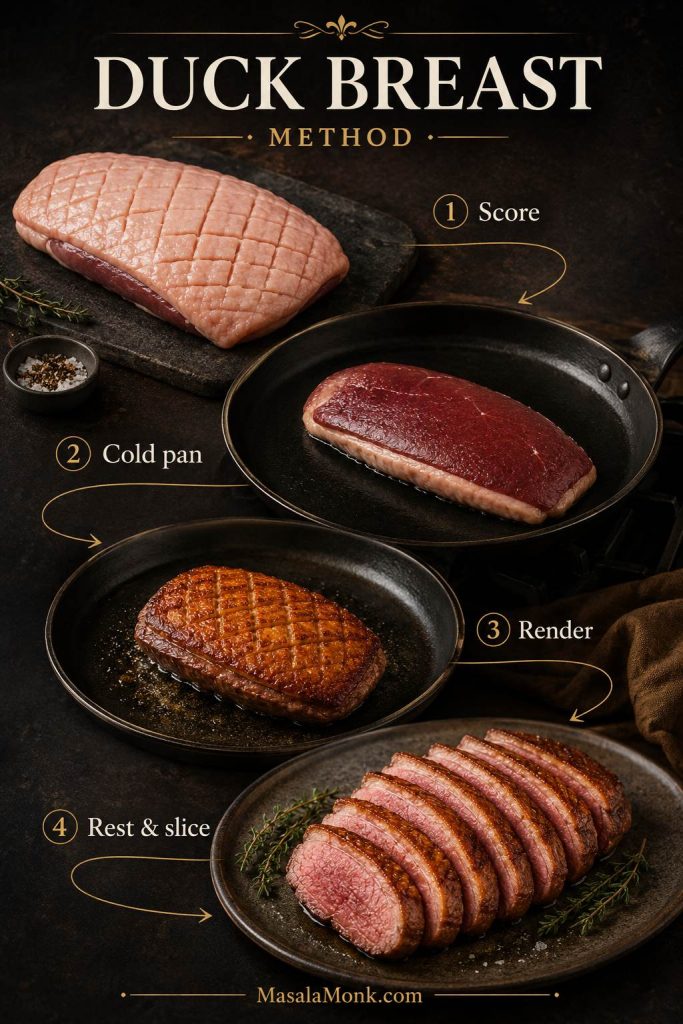
Four-step duck breast method showing scored breast, cold pan start, rendered skin, and sliced cooked duck
The method feels simpler when you see the rhythm: score the skin, start cold, render patiently, rest, and slice only after the juices settle.

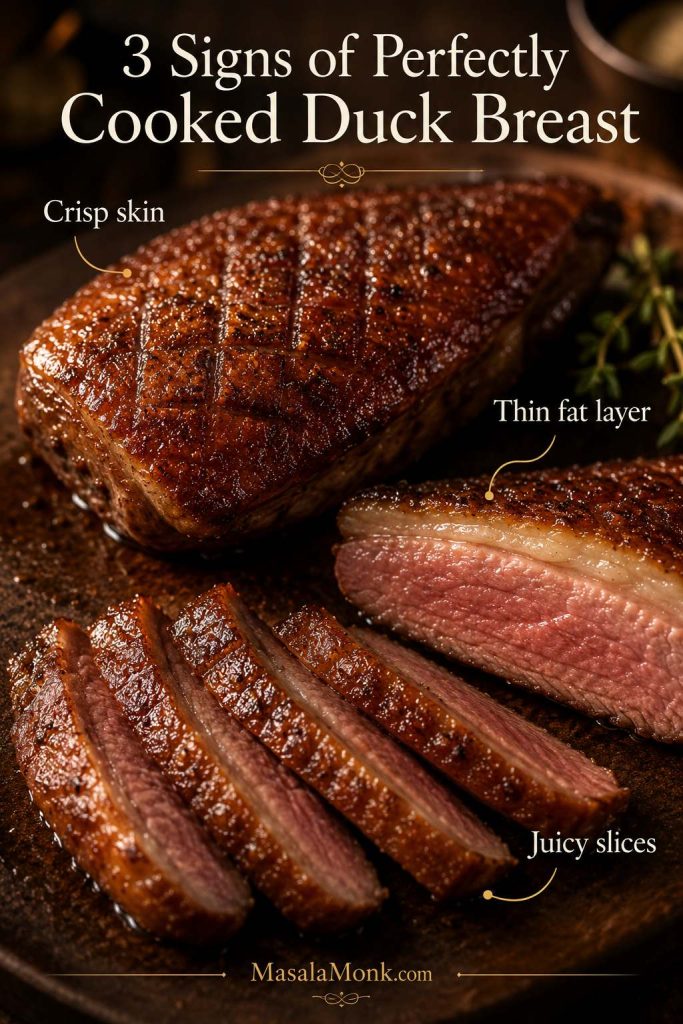
What success looks like: the skin should be deeply golden and crisp, the white fat layer should look much thinner, and the sliced meat should be juicy rather than dry. If the skin is browning fast but the fat still looks thick, lower the heat and keep rendering.

Close-up guide showing crispy duck skin, thin rendered fat layer, and juicy sliced duck breast
Before you rely on timing alone, check the visual cues: crisp skin, a thinner fat layer, and meat that still looks moist after slicing.

Quick cooking formula: score the skin, season, start skin-side down in a cold dry pan, render gently for 10–18 minutes, flip for 1–2 minutes, oven-finish thick breasts if needed, rest skin-side up for 5–10 minutes, then slice against the grain.

For the visual stage-by-stage version, jump to the duck breast rendering cues before you start cooking.

Duck Breast Recipe at a Glance

Best methodCold-pan pan-seared
Serves2
Total time35–50 minutes
Oil needed?No
Best panHeavy skillet, preferably oven-safe
Oven finishOptional, 350°F / 180°C
Best sauceOrange, cherry, plum, or red wine sauce
Main mistakeCooking too hot before the fat renders

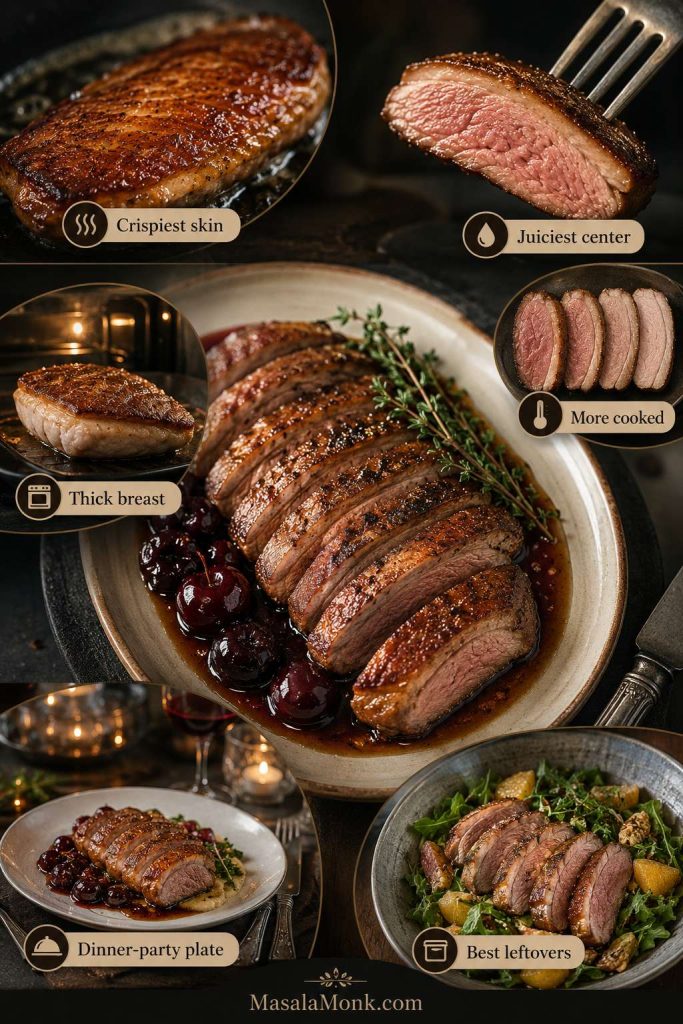
Choose Your Duck Breast Goal

Your goal Best move
Crispiest skin Render longer over low to medium-low heat, and spoon sauce around the slices rather than over the skin.
Juiciest center Use a thermometer, pull the duck a few degrees before your final target, and rest it skin-side up.
Less pink / more cautious doneness Cook closer to the official poultry benchmark, knowing the meat will be firmer.
Thick magret-style breast Render the skin on the stovetop first, then finish gently in a 350°F / 180°C oven.
Date-night or dinner-party plate Use orange or cherry sauce, crisp potatoes, and bitter greens to balance the richness.
Nervous beginner Trust the cues more than the clock: thinner fat layer, golden skin, gentle bubbling, and thermometer-confirmed doneness.
Best leftovers Slice cold or reheat gently, then add cooked duck near the end of rice, noodles, salads, or pasta.
Duck breast goal guide for crispy skin, juicy center, cautious doneness, thick breast, dinner plate, and leftovers
Before the pan heats up, decide what matters most: crispest skin, juiciest slices, cautious doneness, or a more polished dinner-party plate.

Why This Duck Breast Recipe Works

Duck breast cooks differently from chicken breast because it has a thick layer of fat under the skin. If you start with high heat, the skin can brown before that fat melts, leaving a chewy layer underneath. Starting in a cold pan gives the fat time to render gradually, so the skin crisps while the meat stays protected from harsh heat.

Scoring the skin gives the fat more places to escape. Drying the skin helps it brown instead of steam. Pouring off excess fat keeps the duck from sitting in a deep pool of hot fat. Resting skin-side up protects the crisp surface while the juices settle.

Once you understand those four ideas — score, dry, render slowly, rest properly — this cut becomes much easier to cook consistently.

That contrast is why duck breast feels special: the knife taps through crisp skin, the center stays tender, and the sauce belongs beside the slices instead of drowning them.

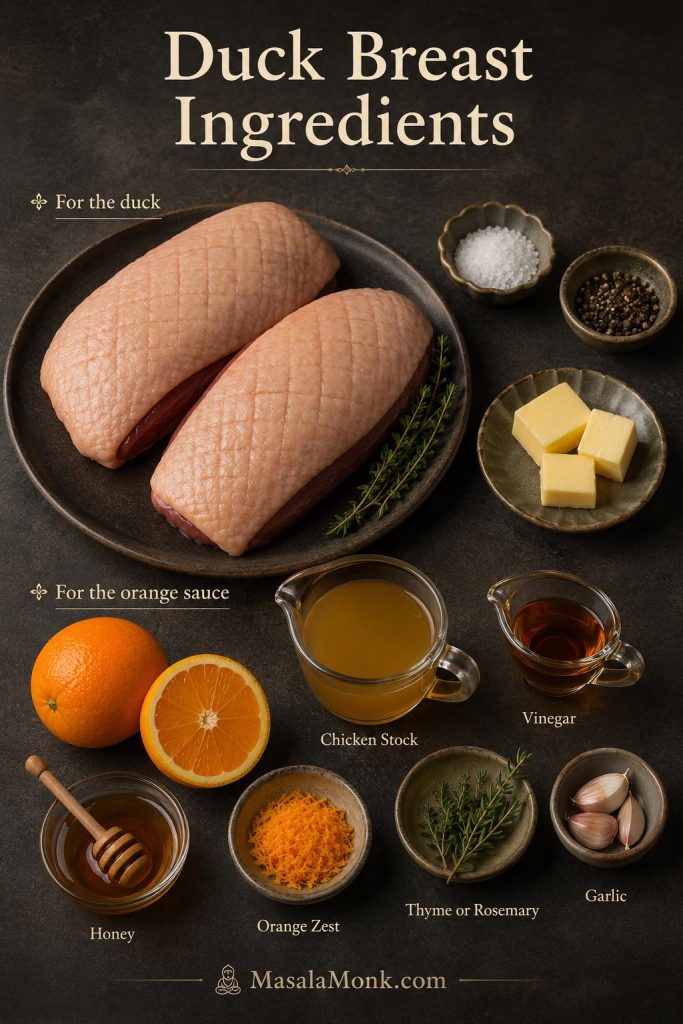
Ingredients for Duck Breast

You do not need much to make excellent duck breast. Salt, pepper, and a good pan do most of the work. The optional orange sauce makes the plate feel complete, but the cooking technique matters more than the sauce.

For the Duck Breast

  • 2 skin-on boneless duck breasts, about 6–8 oz / 170–225 g each
  • 1 tsp kosher salt, or about ½ tsp fine salt
  • ¼ tsp black pepper
  • Optional: 1 small thyme or rosemary sprig
  • Optional: 1 small garlic clove, lightly crushed

For the Optional Orange Sauce

  • ¼ cup / 60 ml fresh orange juice
  • ½ cup / 120 ml chicken stock
  • 1 tbsp white wine vinegar or red wine vinegar
  • 1–2 tsp honey or sugar
  • 1 tsp orange zest
  • 1 tbsp / 14 g cold butter
  • Salt and black pepper, to taste
Raw skin-on duck breasts with salt, pepper, orange, butter, stock, vinegar, honey, herbs, garlic, and orange zest
With duck breast, a short ingredient list works because salt, controlled heat, and a bright orange sauce do more than a complicated marinade.

No oil needed: Duck breast brings its own cooking fat. Starting in a dry pan lets that fat melt naturally, so the skin can crisp without adding oil.

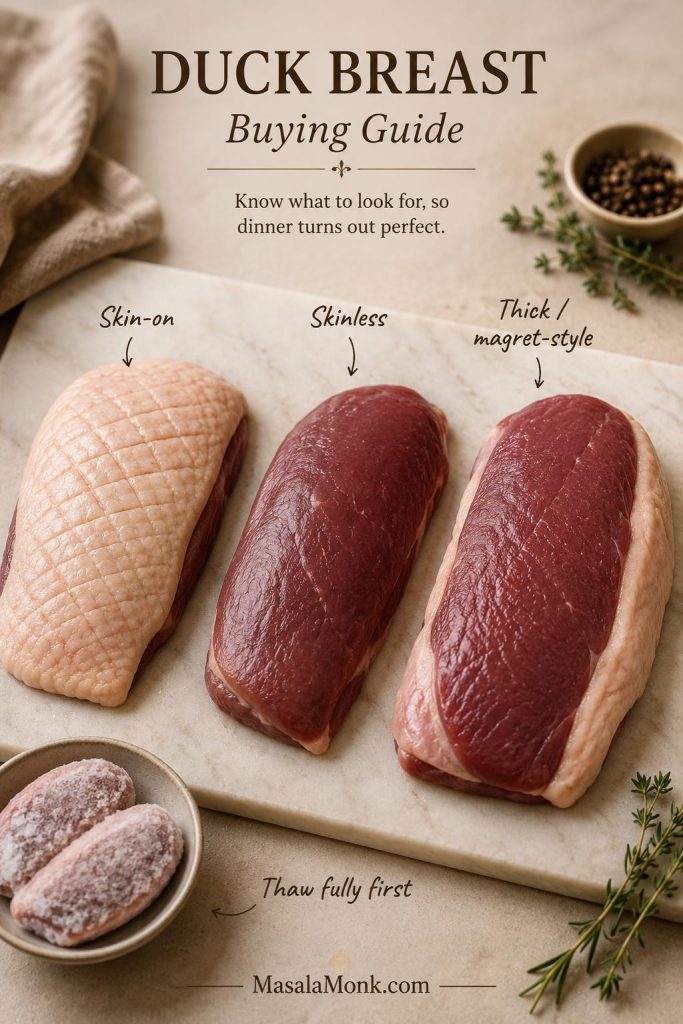
What Kind of Duck Breast to Buy

For this recipe, the best choice is skin-on boneless duck breast. The skin and fat are not a problem to avoid; they are the reason the recipe works. The goal is to slowly melt that fat so the skin becomes crisp and the meat stays juicy.

Type Best use What to know
Skin-on duck breast Best for this recipe The fat renders slowly and the skin crisps in the pan.
Skinless duck breast Leaner preparations It will not give crispy skin and cooks more like a lean steak.
Duck fillet Same general use Often another name for boneless duck breast.
Magret or moulard duck breast Larger, richer portions Usually fattier and thicker, so it often needs a longer render and oven finish.
Frozen duck breast Fine if thawed properly Thaw fully in the fridge and pat very dry before cooking.
Duck breast buying guide showing skin-on duck breast, skinless duck breast, frozen duck, and thick magret-style duck breast
Skin-on duck breast is the right starting point for crispy skin; thicker magret-style pieces simply need more rendering time and a gentler finish.

Smaller duck breasts, around 4–5 oz / 112–140 g each, may finish entirely on the stovetop. Larger breasts, around 7–8 oz / 200–225 g or more, often benefit from a short oven finish after the skin has rendered.

If the package has very different-sized breasts, cook to temperature rather than trying to make both pieces follow the same timing. The smaller one may need to come out of the pan first.

Equipment You Need

You do not need many tools, but a few of them make the recipe much easier to control. The most helpful one is an instant-read thermometer, especially if you are nervous about doneness.

  • Sharp knife: for scoring the skin cleanly.
  • Paper towels: for drying the skin very well.
  • Heavy skillet: cast iron, stainless steel, carbon steel, or heavy nonstick all work.
  • Instant-read thermometer: the easiest way to avoid overcooking.
  • Small pan, spatula, or cooking weight: useful if the duck breast curls as it renders.
  • Heatproof bowl: for pouring off rendered duck fat.
  • Small saucepan: optional, if making sauce separately.

Best pan choice: Use an oven-safe skillet if possible. That way, if the skin is crisp but the center is still under your target temperature, you can move the whole pan into the oven without transferring the duck.

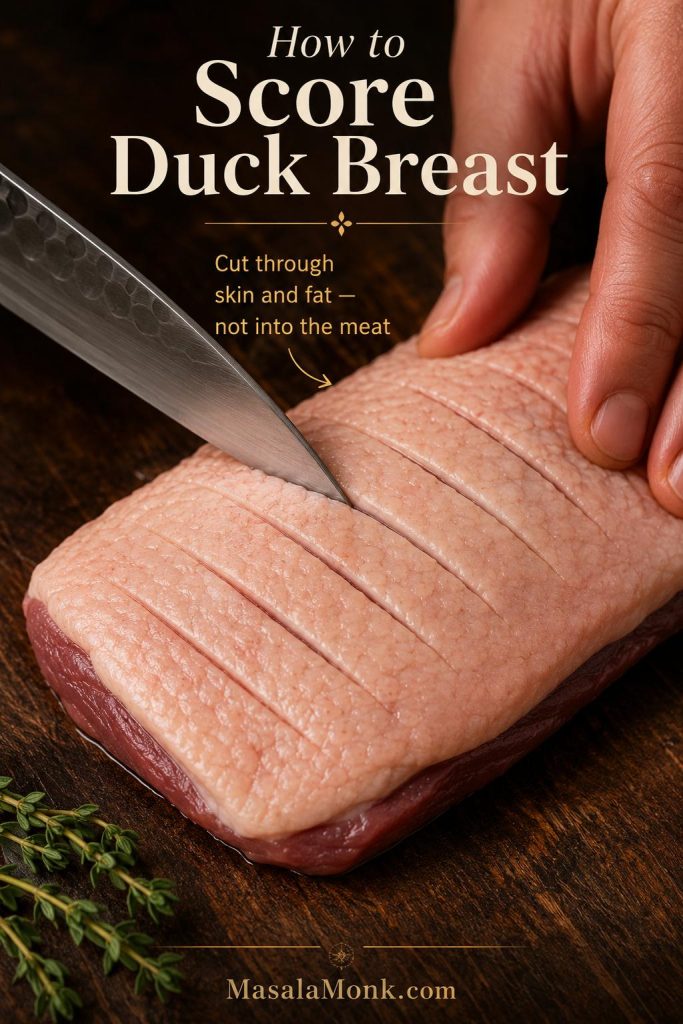
How to Score Duck Breast

Scoring means making shallow cuts through the skin and fat so the fat can render more evenly. The goal is to cut through the skin and fat, not into the meat. If you see red flesh through the cuts, you have gone too deep.

Knife scoring the skin and fat of a raw duck breast without cutting into the meat
Score through the skin and fat only, because cutting into the meat can release juices before the duck breast has finished cooking.

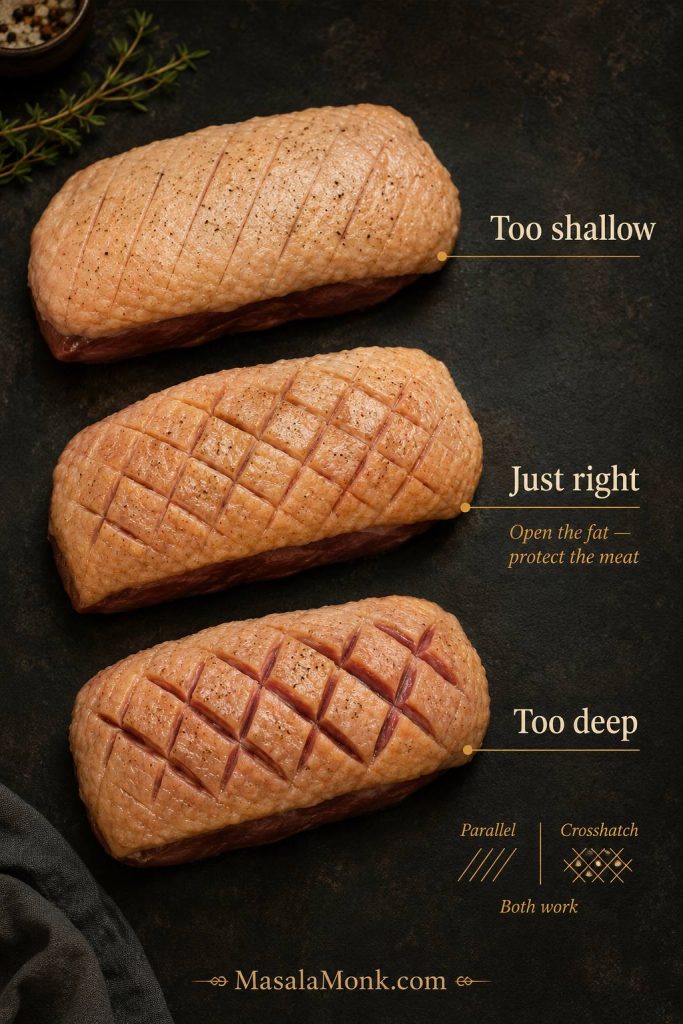
Parallel Score vs Crosshatch Score

A parallel score is easier for beginners: make diagonal lines across the skin about ¼ inch apart. A crosshatch score adds a second set of diagonal lines in the opposite direction. Both work, as long as the cuts are shallow enough to protect the meat.

How Deep Should the Cuts Be?

Deep enough to open the fat layer, but not so deep that the meat is exposed. This matters because cutting into the meat lets juices escape and can make the duck cook unevenly.

Scoring result What happens
Too shallow The fat does not render as evenly, so the skin can stay thick and chewy.
Just right The fat melts slowly, the skin crisps, and the meat stays juicy.
Too deep Juices leak out, the meat can cook too fast, and the skin may steam instead of crisp.
Duck breast scoring depth guide comparing too shallow, just right, and too deep cuts in the skin
The best scoring depth opens the fat layer without exposing the meat, which helps the skin render while the center stays protected.

How to Cook Duck Breast with Crispy Skin

Once you know what to look for, the method becomes much less stressful. Dry the skin, score the fat, start in a cold pan, let the fat render slowly, then flip, finish, rest, and slice. Each step has a visible cue, so you are not just guessing by the clock.

If you only remember one thing: do not rush the skin side. Crisp duck breast comes from slow rendering, not aggressive searing.

1. Pat the Duck Dry

Dry skin browns better. Pat the duck breasts very well with paper towels, especially on the skin side. For an even better result, season the duck and leave it uncovered in the fridge for a few hours or overnight, then bring it out for about 20–30 minutes before cooking.

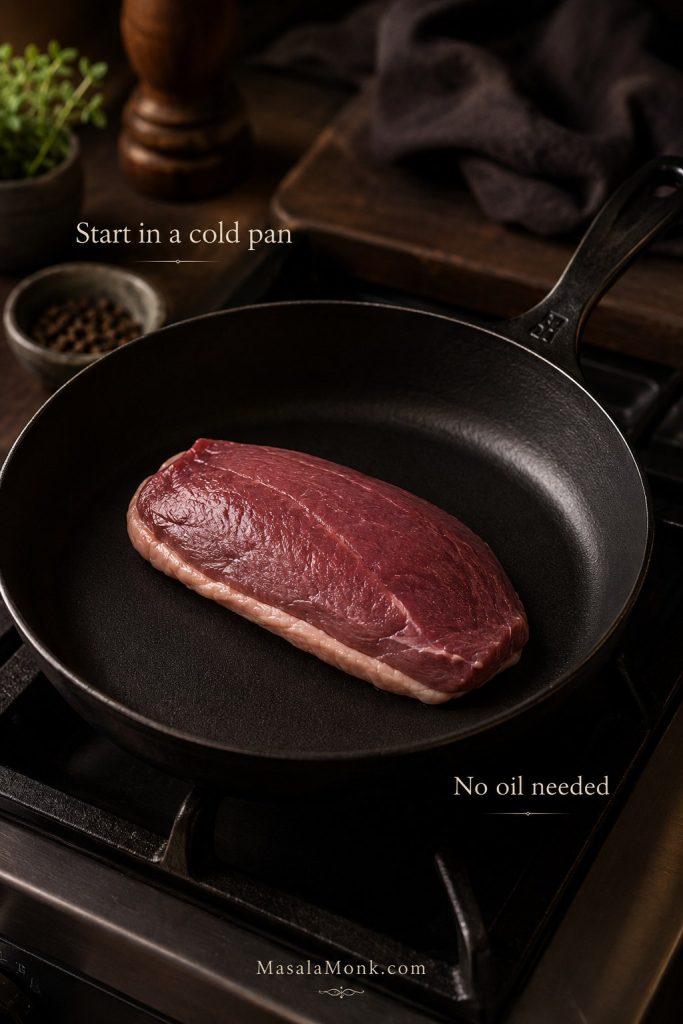
2. Start in a Cold Pan

Place the duck breasts skin-side down in a cold, dry skillet. Do not add oil. Turn the heat to low or medium-low.

Raw duck breast placed skin-side down in a dry skillet for a cold pan start with no added oil
Start cold and dry; the pan should look quiet before the fat begins to pool.

It will feel strange if you are used to searing steak in a ripping-hot pan, but duck breast is different. The pan starts quiet, then the fat gradually pools and the skin begins to crisp. If the heat is too high too early, the outside browns before the fat underneath has time to melt.

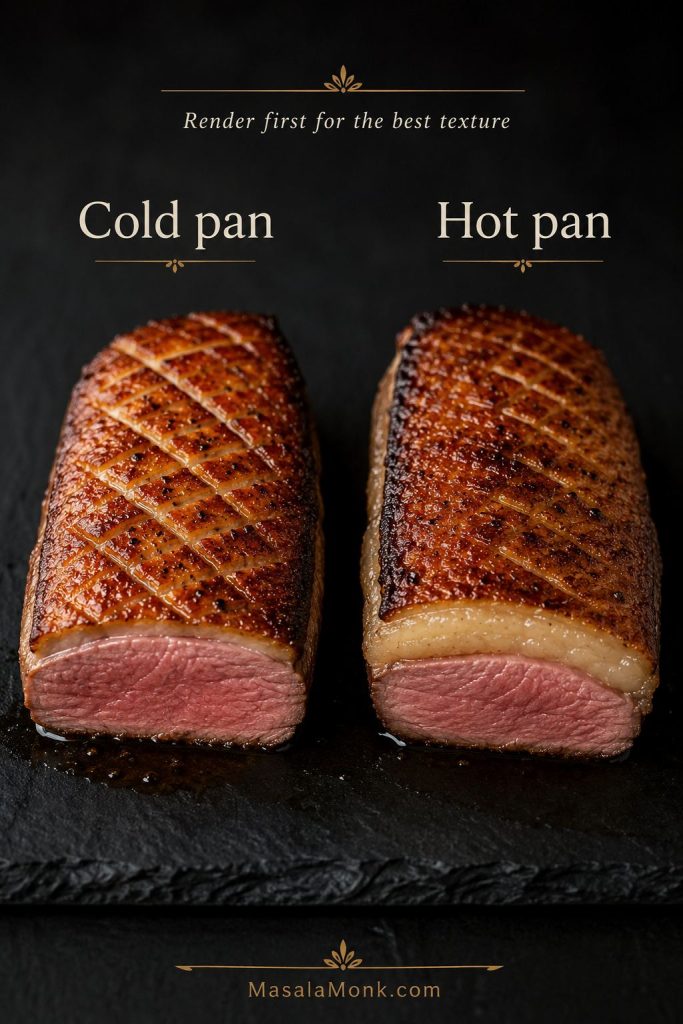
Cold Pan vs Hot Pan for Duck Breast

A hot pan can make duck breast look browned before it is actually well rendered. That is the trap. The skin may turn golden, but the fat underneath can stay thick and chewy. A cold pan gives the fat time to melt slowly before the skin gets too dark.

Method What happens Result
Cold pan The fat melts slowly before the skin browns too much. Crispier skin, thinner fat layer, juicier meat.
Hot pan The skin browns quickly while fat stays trapped underneath. Golden-looking skin with chewy fat and a higher risk of overcooked meat.
Comparison of cold pan duck breast with thin rendered fat and hot pan duck breast with thicker fat under browned skin
High heat can brown duck skin before the fat has melted; meanwhile, a cold-pan start gives the fat time to render more evenly.

For crisp skin, render first: before relying on the oven, grill, or air fryer, let the fat layer thin in a pan. Otherwise, the meat can cook before the skin has a chance to become properly crisp.

If the duck breast curls and the edges lift away from the pan, press gently with a spatula for the first few minutes or place a lighter pan on top. This keeps the skin flat against the pan so it crisps evenly instead of leaving pale, rubbery patches.

3. Render the Fat Slowly

Cook the duck skin-side down for about 10–18 minutes, depending on the size of the breast, the pan, and the heat level. Use the clock as a guide, but trust the visual cues more.

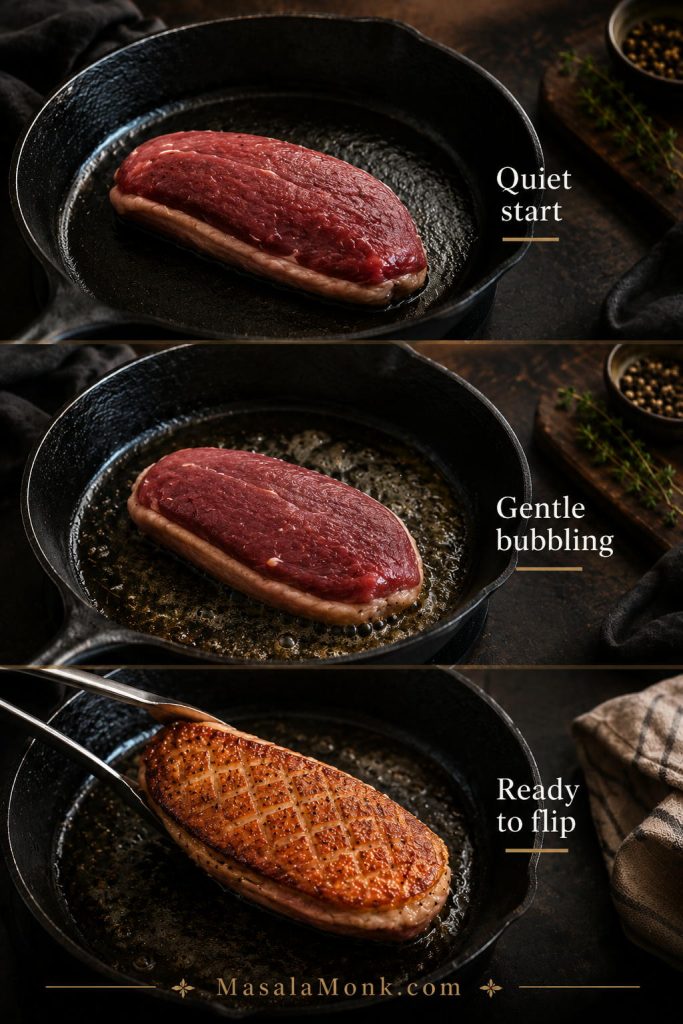
Duck Breast Rendering Cues

Before you flip, ask three things: is the skin golden, has the white fat layer thinned, and does the skin release from the pan? If yes, you are probably ready.

If you are standing over the pan wondering whether to turn up the heat, wait a little longer first. Duck fat starts slowly, then suddenly the pan becomes more active. That slow change is normal.

Stage What you should see What it means
First few minutes Little fat, quiet pan, skin beginning to warm Normal. The fat has not fully started rendering yet.
Mid-render Gentle bubbling and a shallow pool of clear fat The heat is working. Pour off excess fat if it pools deeply.
Almost ready to flip Golden skin, thinner white fat layer, skin releases from pan The skin is crisp and most of the fat has rendered.
Too hot Smoke, dark patches, loud spitting Lower the heat and pour off excess fat.
Too cool No bubbling after several minutes Increase the heat slightly, but do not jump to high heat.
Duck breast rendering guide showing quiet start, gentle bubbling fat, and golden skin ready to flip
The render starts quietly, then gentle bubbling appears; once the fat layer thins and the skin turns golden, the duck is ready to flip.

Save the duck fat: Pour rendered duck fat into a heatproof bowl, let it cool, then refrigerate it in a clean covered jar. Use it for roasted potatoes, fried rice, sautéed greens, eggs, or roasted vegetables.

Tiny heat adjustments matter here: if the fat is bubbling gently, stay patient. If it smokes or spits hard, lower the heat before the skin darkens.

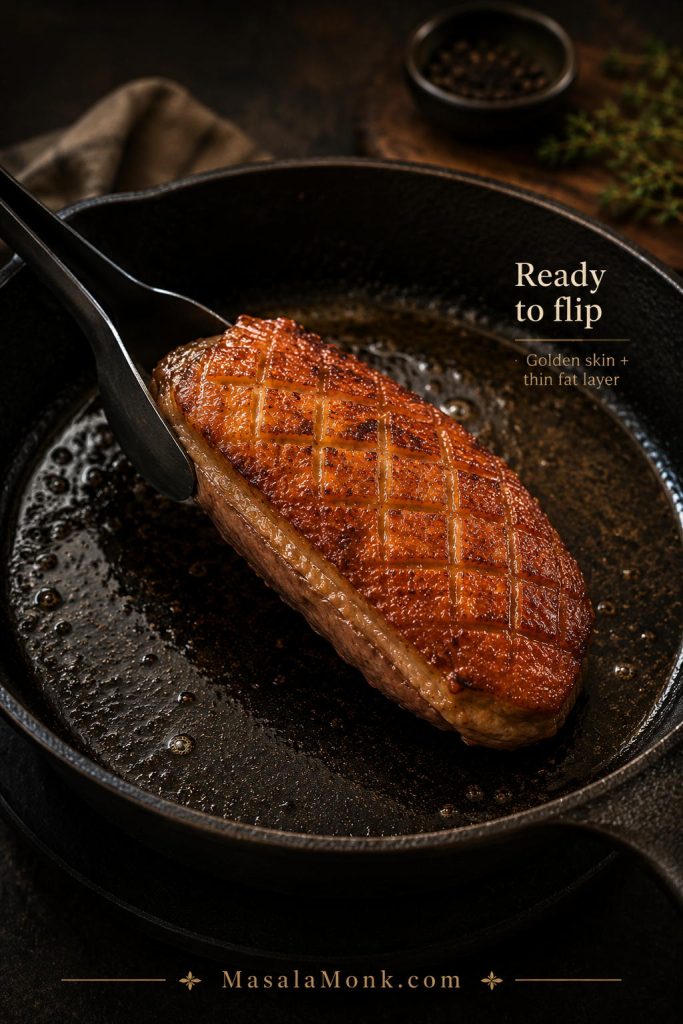
4. When to Flip Duck Breast

Flip the duck when the skin is golden, crisp, and releases from the pan. The thick white fat layer should look much thinner than when you started.

Duck breast lifted from a skillet to show golden crispy scored skin and a thin rendered fat layer
Wait for the skin to release easily from the pan; forcing the flip too early can tear the crust and leave fat under-rendered.

Cook the flesh side for 1–2 minutes if you are aiming for medium-rare to medium. Smaller breasts may finish here. Thicker breasts usually need the oven finish below.

If the skin is browning but the fat still looks thick, check the skin and fat troubleshooting table before flipping.

Stovetop Only vs Oven Finish

Use this finish Best for What to do
Stovetop only Smaller duck breasts, about 4–5 oz / 112–140 g Render the skin fully, flip, and cook the flesh side briefly until the center reaches your target.
Oven finish Larger or thicker breasts, about 6–8 oz / 170–225 g or more Render until the skin is crisp, flip briefly, then move the oven-safe pan to 350°F / 180°C.

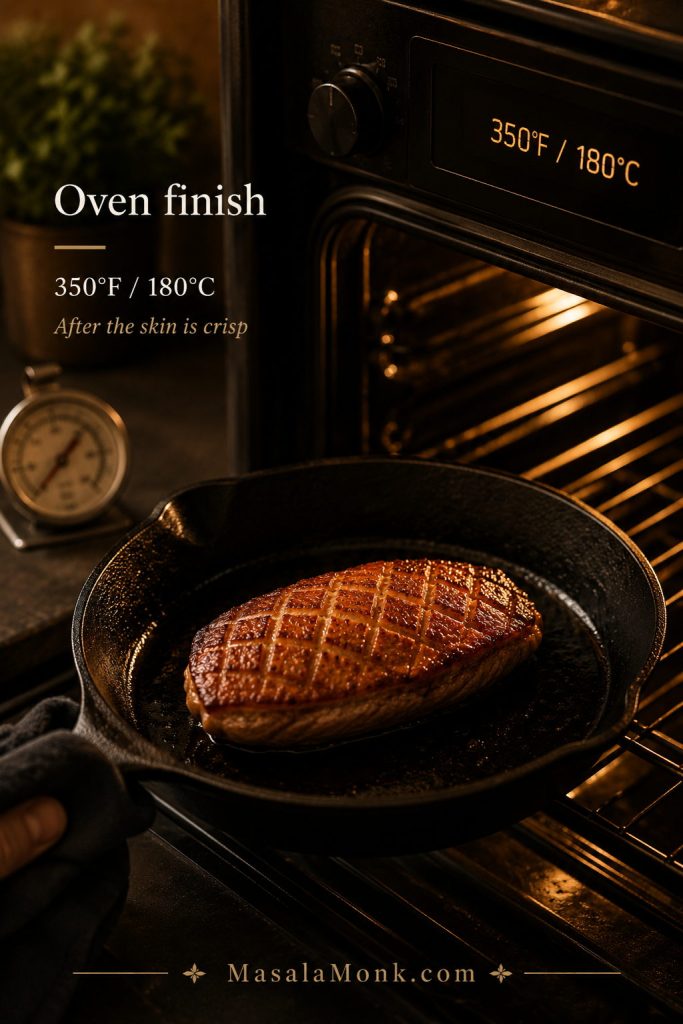
5. Oven-Finish Option

When the skin is crisp but the center is still under your preferred temperature, transfer the oven-safe skillet to a 350°F / 180°C oven.

Crisp-skinned duck breast in an oven-safe skillet being finished in a 350°F oven with a thermometer nearby
Once the skin is already crisp, the oven can gently finish a thicker duck breast without forcing the pan to overcook the outside.

Once you choose the oven finish, use the times below as a starting point and confirm with a thermometer.

Doneness preference Approximate oven finish after rendering
Medium-rare 5–6 minutes
Medium 7–8 minutes
More cooked 10–12 minutes, checking with a thermometer

These times are only guides. Duck breast size varies a lot, so a thermometer is much more reliable than the clock.

6. Rest and Slice

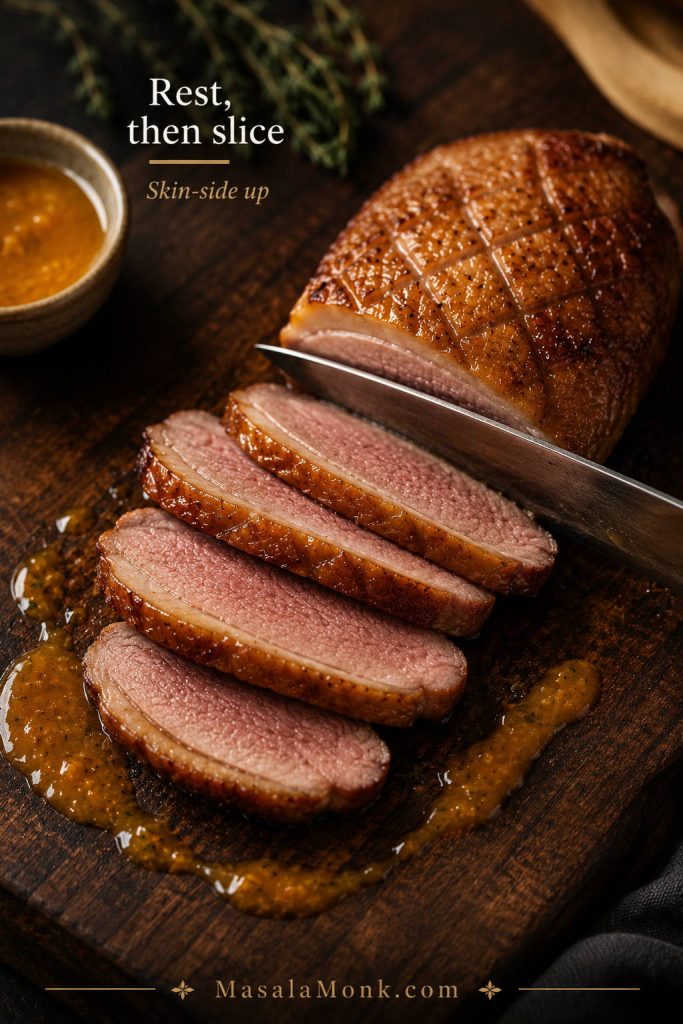
Transfer the duck to a cutting board and rest it skin-side up for 5–10 minutes. Resting lets the juices settle. Keeping the skin side up helps preserve the crisp surface.

This is the moment to be patient. Cut too early and the juices run; wait a few minutes and the slices look cleaner, calmer, and more luxurious.

Do not cover the duck tightly while it rests. Trapped steam can soften the skin you worked so carefully to crisp.

Slice against the grain into neat pieces. If you are serving with sauce, spoon the sauce around the duck rather than flooding the skin.

Rested duck breast being sliced against the grain with crispy skin, pink meat, and orange sauce nearby
Resting skin-side up protects the crisp surface, while slicing against the grain gives cleaner pieces with better texture.

Duck Breast Temperature Guide

Duck breast temperature can feel confusing because duck is poultry, but many cooks treat the breast more like steak for texture. The table below separates texture preferences from the official safety benchmark so you can make a clear choice.

Doneness Internal temperature Result
Rare 125°F / 52°C Deep pink and very soft; less common for cautious home cooks.
Medium-rare 130–135°F / 54–57°C Pink, juicy, and tender.
Medium 140°F / 60°C Lightly pink and firmer.
Medium-well 150–155°F / 66–68°C Much firmer, less pink, less juicy.
Official poultry safety benchmark 165°F / 74°C Meets the official poultry safety guideline; the meat will be much firmer.
Duck breast temperature guide with sliced examples for rare, medium-rare, medium, medium-well, and 165°F benchmark
Use duck breast temperatures as a guide, then choose the doneness that fits your table, texture preference, and food-safety comfort level.

For the neatest result, pull the duck a few degrees before your final target. The internal temperature can rise slightly as it rests, especially if the breast is thick or has been oven-finished.

Food safety note: Duck is poultry, and the official USDA/FSIS safe minimum for poultry is 165°F / 74°C, measured with a food thermometer. Many duck breast recipes use lower temperatures for a pinker, more tender result, so consider who you are serving and choose the doneness that feels appropriate. You can read the USDA/FSIS safe temperature chart.

Instant-read thermometer inserted from the side into the thickest part of a cooked duck breast
Check the thickest part from the side for the most accurate reading, instead of probing through the fat cap or touching the pan.

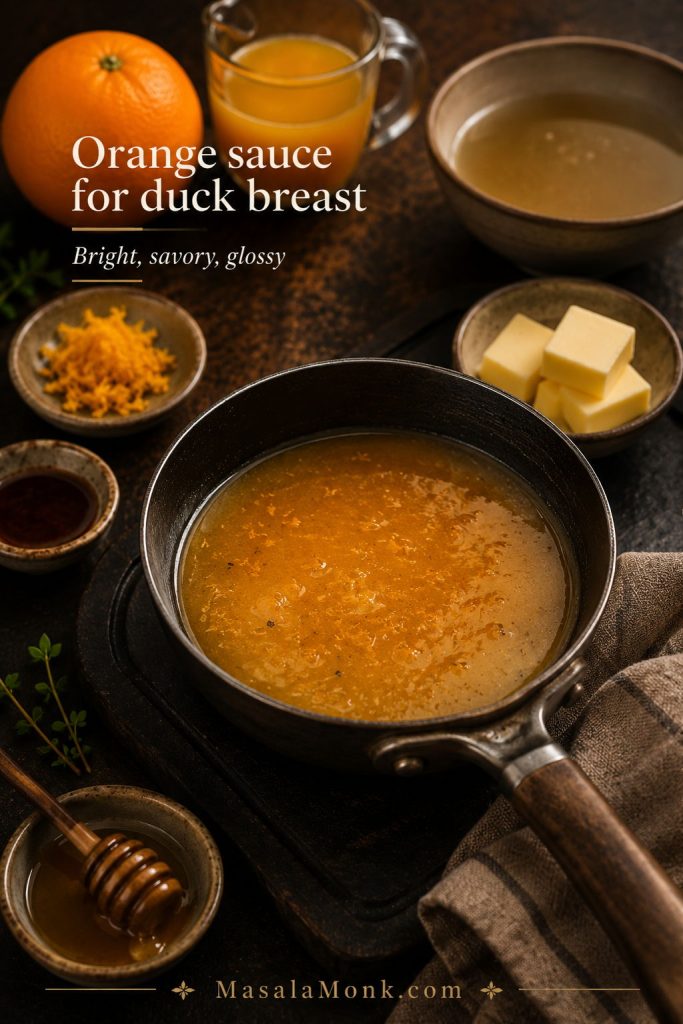
Quick Orange Sauce for Duck Breast

Once the duck is resting, you have the perfect window to make sauce. Keep it simple: a few minutes in the pan is enough.

Small pan of orange sauce with orange juice, zest, vinegar, stock, honey, and butter for duck breast
Orange sauce works best when it stays bright and savory, because duck needs acidity and gloss more than heavy sweetness.

Orange sauce works because duck needs brightness. The meat is rich, the skin is salty and crisp, and the sauce should bring citrus, acidity, and a little gloss without turning sticky or candy-sweet.

This should not taste like marmalade poured over meat. It should be bright, savory, and just sweet enough to round the edges of the vinegar. The pan drippings bring depth, the orange brings lift, and the butter gives it a glossy finish.

How to Make It

  1. After removing the duck to rest, pour off most of the fat from the pan.
  2. Add orange juice, chicken stock, vinegar, and honey.
  3. Scrape up the browned bits from the pan, avoiding any burnt bits.
  4. Simmer until the sauce is lightly syrupy.
  5. Turn off the heat and whisk in cold butter and orange zest.
  6. Taste and adjust with salt, pepper, vinegar, or honey.

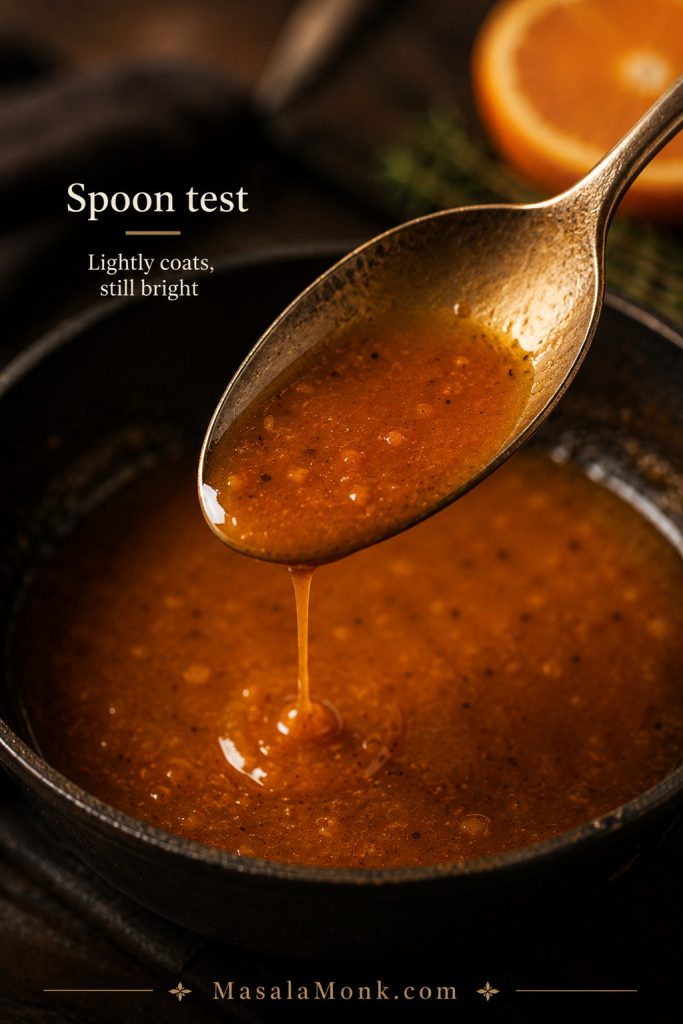
The sauce is ready when it lightly coats a spoon but still tastes bright. If it starts tasting sticky or jammy, loosen it with a splash of stock or orange juice.

Spoon lifted from orange sauce showing a light glossy coating on the back of the spoon
The sauce is ready when it lightly coats a spoon but still moves easily; reduce it too far and it can turn sticky.

Sauce Around the Duck, Not Over the Skin

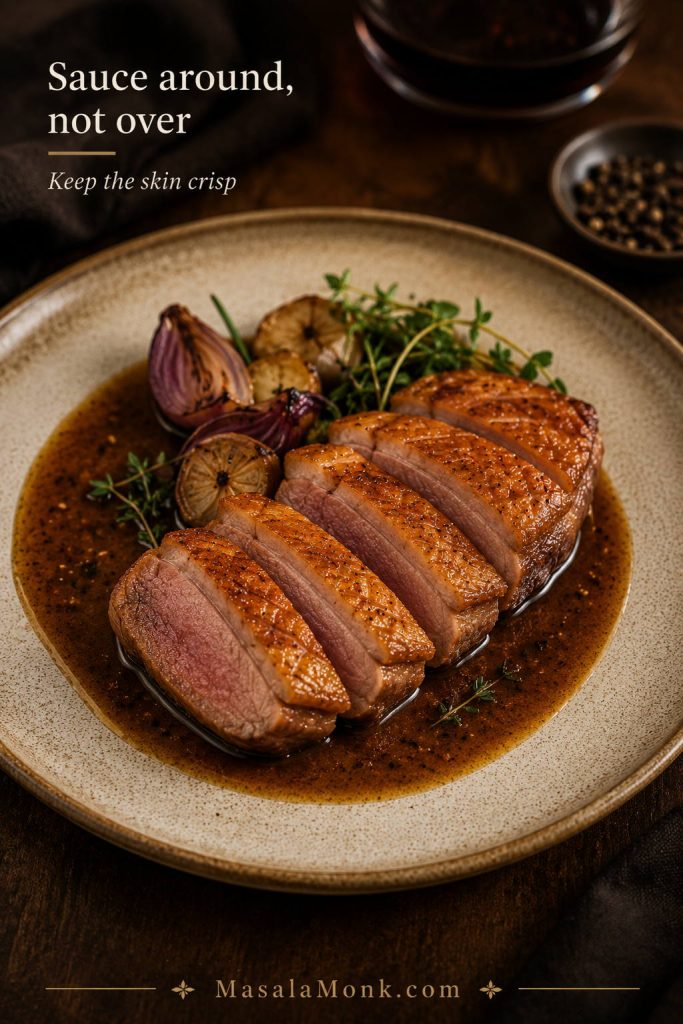
The sauce should flatter the duck, not hide it. Spoon it around the slices instead of over the crisp top, especially if you want the first bite to keep that rendered skin texture.

Sliced duck breast plated with orange sauce around the slices while the crispy skin stays uncovered
Spoon sauce around the slices instead of over the skin, so the crisp rendered top survives the first bite.

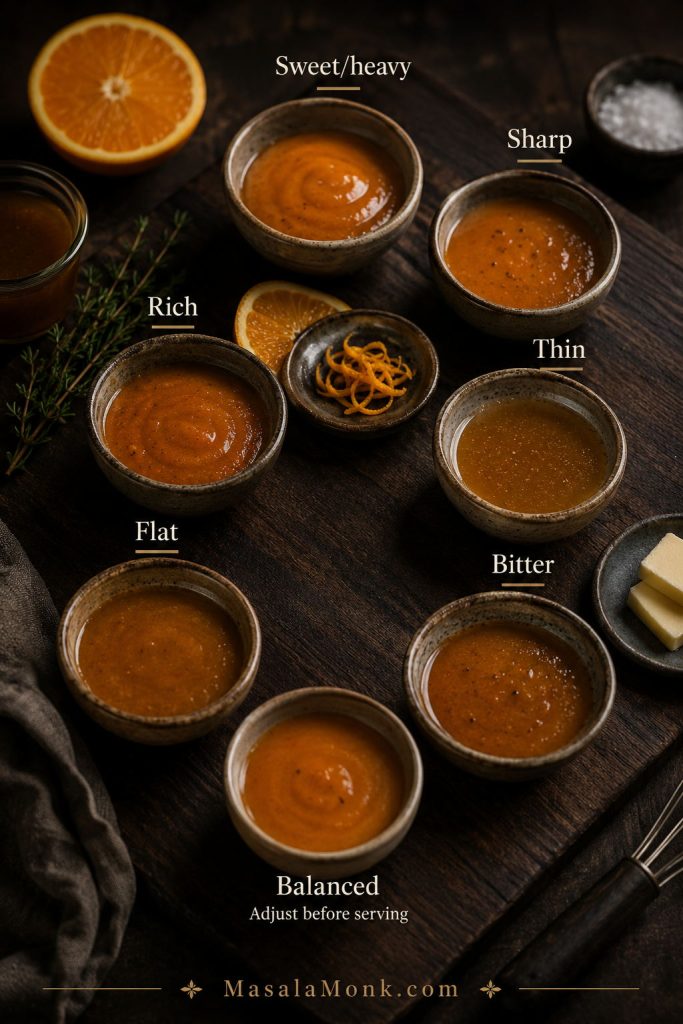
If the sauce tastes too sweet, sharp, thin, or flat, use the orange sauce fixes before serving.

How to Fix the Sauce

Sauce issue Fix
Sweet and heavy Balance it with a splash of vinegar, more orange zest, or a small pinch of salt.
Sharp or vinegary Round the edges with a little honey, sugar, or cold butter.
Thin and watery Keep simmering until the sauce lightly coats a spoon.
Rich or greasy Loosen it with a splash of orange juice, stock, or vinegar.
Flat tasting Wake it up with salt, black pepper, orange zest, or a tiny splash of vinegar.
Bitter edge Soften the bitterness with stock, butter, or a little honey, and avoid scraping up burnt pan bits.
Orange sauce troubleshooting guide with sweet, sharp, thin, rich, flat, bitter, and balanced sauce cues
If the pan sauce tastes off, adjust before serving: acid sharpens sweetness, butter softens edges, and salt wakes up flat flavors.

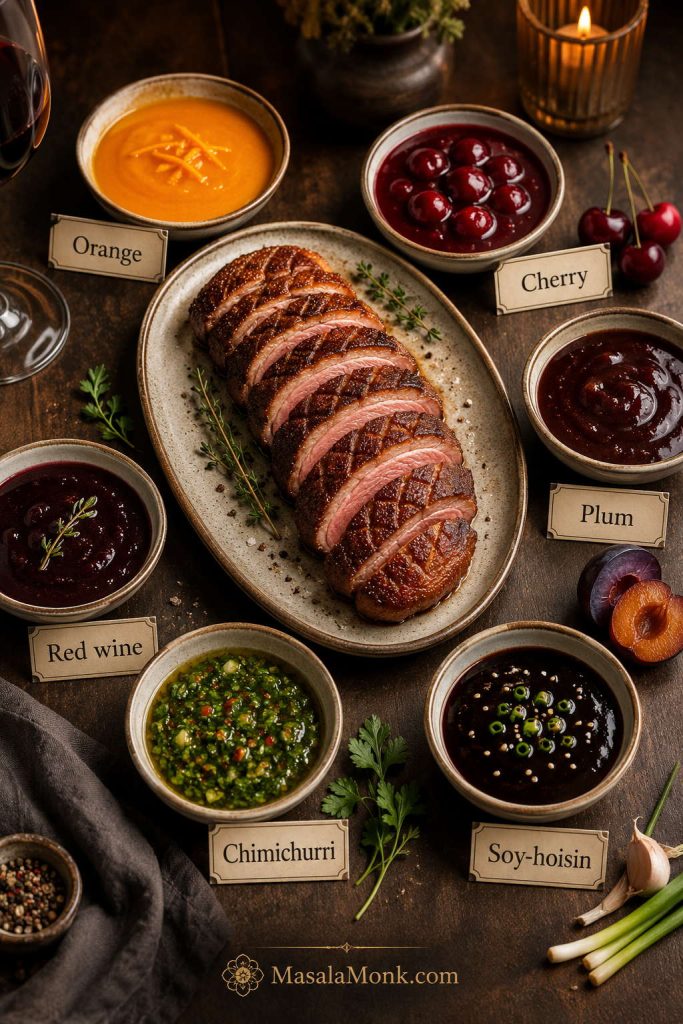
Best Sauces for Duck Breast

Because the meat is rich, the best sauces usually bring acidity, fruit, wine, herbs, spice, or a salty-sweet contrast. Orange sauce is the classic first choice, but the best sauce depends on the mood of the meal.

Sauce Choose it when Flavor direction
Orange sauce You want the classic bright version. Citrusy, lightly sweet, and balanced.
Cherry sauce You want a holiday, date-night, or dinner-party plate. Tart-sweet, rich, and elegant.
Plum sauce You want a sweet-sharp Asian-style direction. Fruity, glossy, and good with five-spice.
Red wine sauce You want less sweetness and more savory depth. Deep, wine-rich, and restaurant-style.
Berry sauce You want a quick fruit sauce without making orange sauce. Works with blackberries, raspberries, or mixed berries.
Chimichurri You want freshness instead of fruit. Herby, garlicky, acidic, and bright.
Soy-hoisin glaze You want duck with rice, noodles, pancakes, or cucumber. Salty-sweet, glossy, and Asian-style.
Sliced duck breast with bowls of orange, cherry, plum, red wine, chimichurri, and soy-hoisin sauces
From orange sauce to chimichurri, the best sauce should balance duck’s richness while leaving the crispy skin as the main event.

If fruit sauces are not your thing, a green herb sauce can make the plate feel fresher and less heavy. MasalaMonk’s chimichurri recipe is a useful direction when you want garlic, herbs, vinegar, and brightness instead of sweetness.

For an Asian-style duck breast, keep the glaze glossy but controlled. MasalaMonk’s teriyaki sauce recipe is a useful base to adapt with orange, ginger, garlic, sesame, chili, or extra vinegar so the duck stays balanced rather than overly sweet.

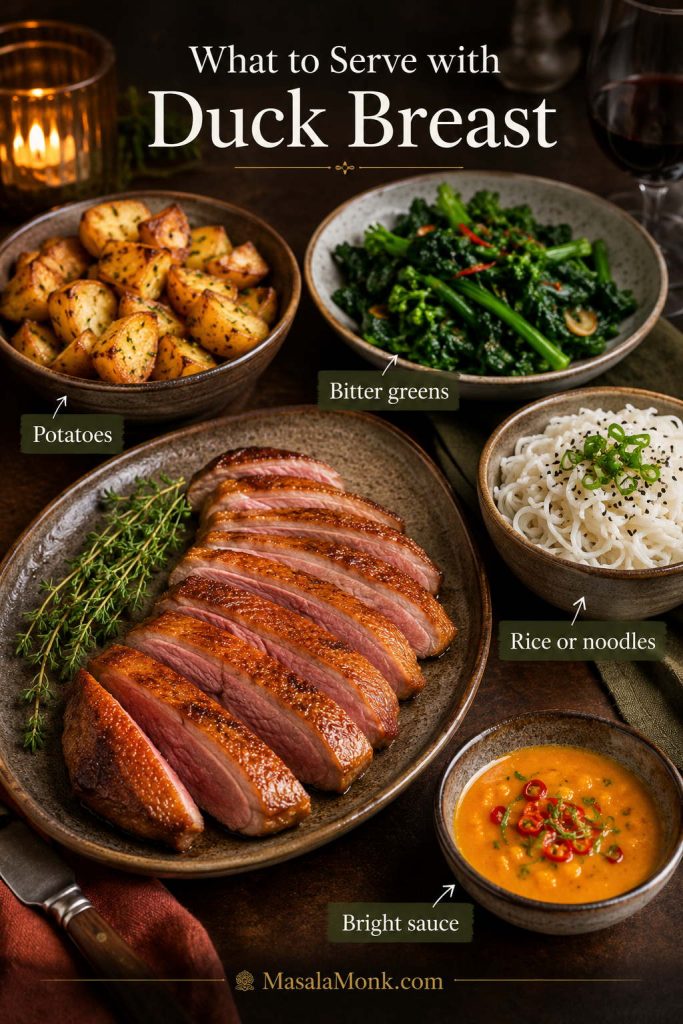
What to Serve with Duck Breast

Think in contrasts. Duck breast likes something crisp, something fresh, and something that can catch sauce. Potatoes make the plate cozy, bitter greens keep it from feeling heavy, and rice or noodles turn it into an easy bowl-style dinner.

Sliced duck breast served with potatoes, bitter greens, rice or noodles, and bright orange sauce
A balanced duck breast dinner needs contrast: something rich, something fresh, and something that catches sauce without making the plate heavy.

For complete meal ideas, jump to the easy duck breast plate formulas.

Classic Dinner Sides

  • Duck fat potatoes, when you want the richest bistro-style plate.
  • Mashed potatoes, when you want something soft to catch sauce.
  • Potato gratin, when the meal should feel more like a special dinner.
  • Roasted carrots, when you want sweetness without adding another sauce.
  • Green beans, when you need a familiar holiday-style vegetable.
  • Brussels sprouts, when you want bitterness and crisp edges against the rich duck.

If you want the plate to feel more like a holiday dinner than a weeknight skillet meal, MasalaMonk’s hashbrown casserole recipe gives you the creamy, golden potato side that can stand up to duck’s richness.

Fresh Sides

  • Arugula salad, especially with orange, lemon, or a sharp vinaigrette.
  • Orange and fennel salad, especially with orange sauce or cherry sauce.
  • Cabbage slaw, when you want crunch and acidity.
  • Cucumber salad, especially with soy-hoisin or plum sauce.
  • Bitter greens with vinaigrette, when the duck breast is very rich.

For a holiday-style green vegetable side, MasalaMonk’s green bean casserole recipe ideas give you a classic direction plus lighter and richer variations, depending on how heavy the rest of the meal feels.

Rice, Noodles, and Asian-Style Sides

  • Jasmine rice, especially with orange, plum, soy-hoisin, or ginger-garlic sauce.
  • Fried rice, when you have leftover sliced duck.
  • Garlic noodles, when you want something rich but fast.
  • Stir-fried greens, when you want a lighter plate.
  • Thin pancakes with plum or hoisin sauce, cucumber, and scallions.

If you are serving duck with orange sauce, plum sauce, or a soy-hoisin glaze, rice is one of the easiest bases. MasalaMonk’s how to cook rice guide is useful when you want fluffy rice that will not turn gummy under the sauce.

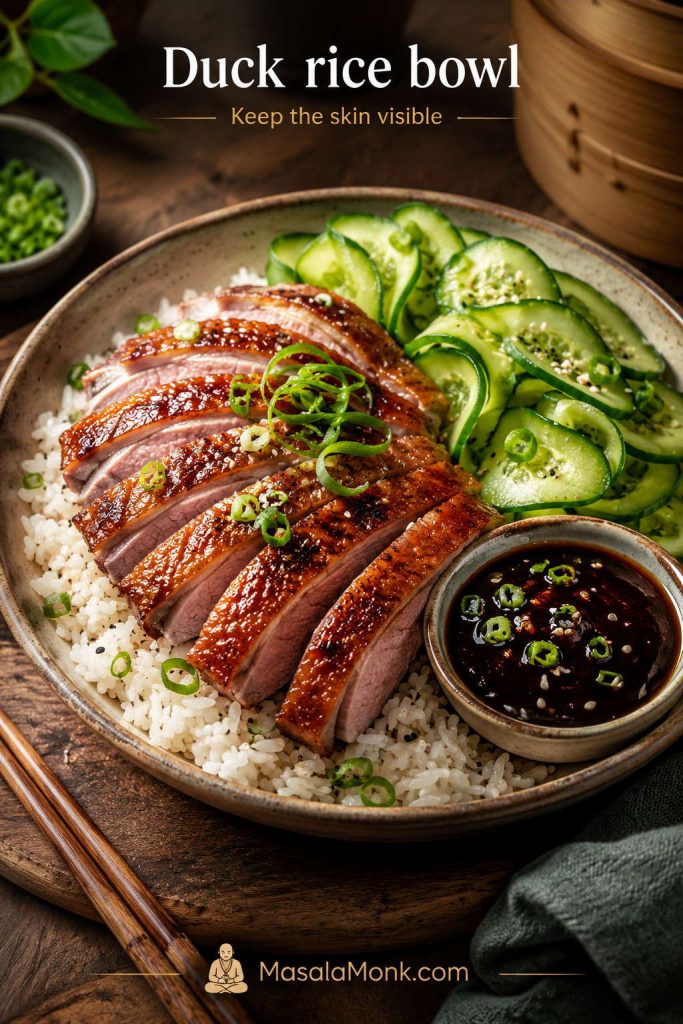
For a bowl-style meal, think rice, sliced duck, cucumber, scallions, sauce, and something crisp. Keep the duck sliced on top rather than buried under sauce so the skin stays the star.

Sliced duck breast over jasmine rice with cucumber, scallions, and dark soy-hoisin or plum glaze on the side
For an Asian-style duck breast bowl, keep the glaze controlled and the skin visible so the rice catches flavor without hiding texture.

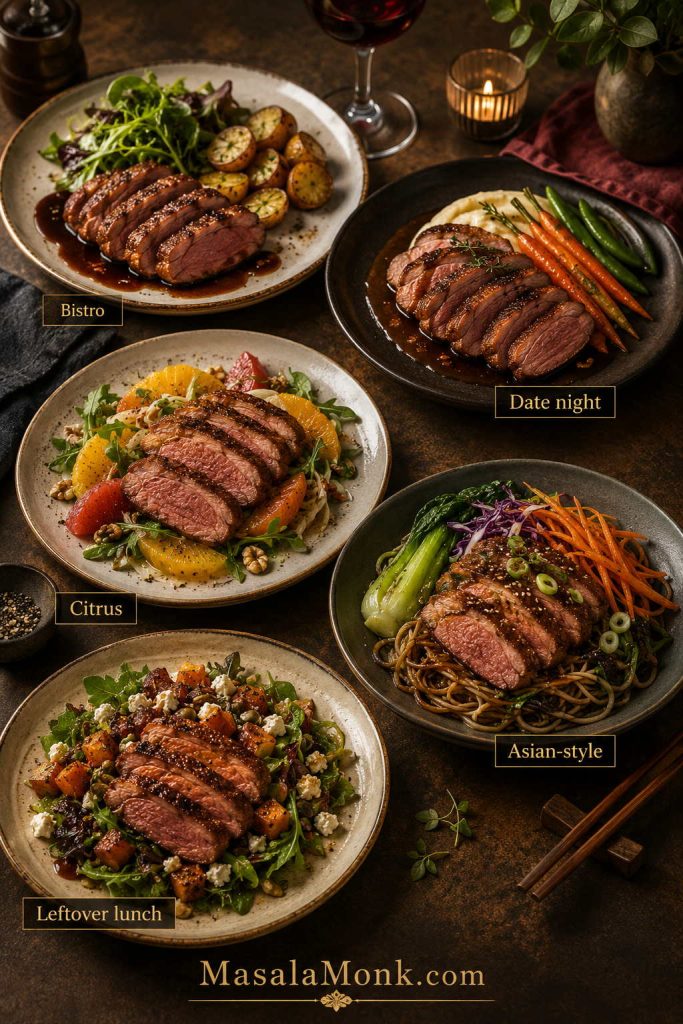
Easy Duck Breast Plate Formulas

Plate style What to serve
Classic bistro plate Duck breast, duck fat potatoes, green beans or bitter greens, and orange sauce.
Date-night plate Duck breast, potato gratin, arugula salad, and cherry or red wine sauce.
Fresh citrus plate Duck breast, orange-fennel salad, roasted carrots, and light orange pan sauce.
Asian-style plate Duck breast, jasmine rice, cucumber, scallions, and plum or soy-hoisin glaze.
Leftover lunch plate Cold sliced duck, bitter greens, potato salad, pickles, and a sharp vinaigrette.
Five duck breast meal ideas labeled bistro, date night, citrus, Asian-style, and leftover lunch
Once the duck is cooked well, the same method can become a bistro plate, date-night dinner, citrus salad, rice bowl, or next-day lunch.

Build the plate: for a classic dinner, pair duck breast with crisp potatoes and bitter greens. For a brighter plate, use orange sauce with rice or fennel salad. For an Asian-style version, slice the duck over rice or noodles and keep the glaze light.

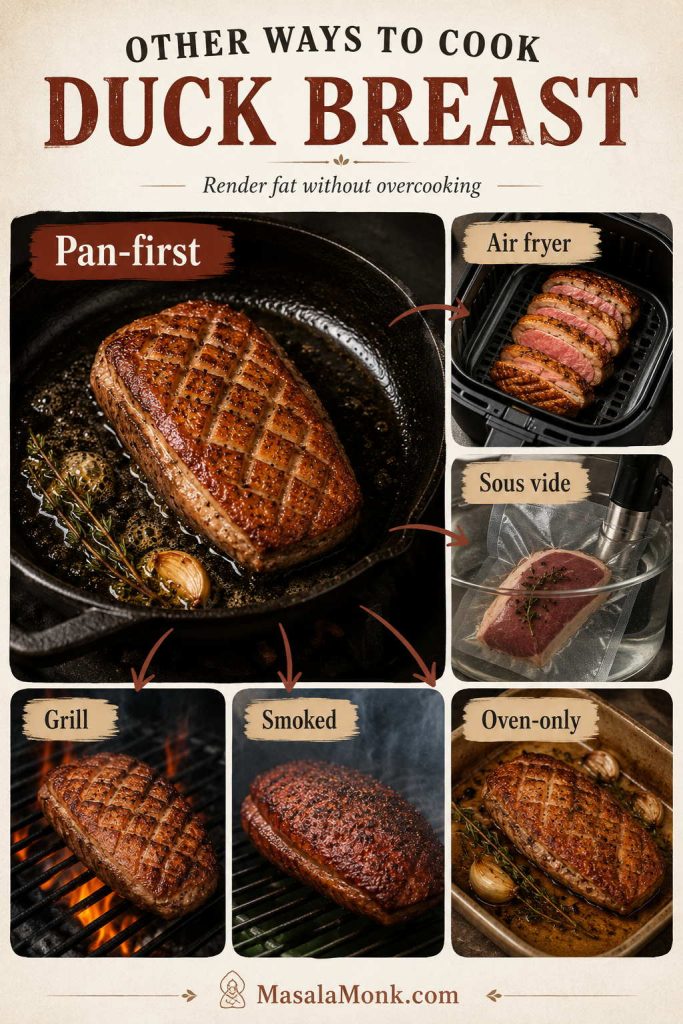
Other Ways to Cook Duck Breast

After you learn the cold-pan method, the other versions make more sense. Each one still has to answer the same question: how do you render the fat without overcooking the meat?

Duck breast cooking methods guide with pan-first, air fryer, sous vide, grill, smoked, and oven-only options
Air fryer, sous vide, grill, smoked, and oven-only methods can all work, but each one still has to manage the fat layer carefully.

If any method leaves the skin soft or the center dry, check common duck breast problems before changing the recipe.

Air Fryer Duck Breast

Air fryer duck breast is best for convenience, not necessarily for the crispiest skin. The fat still needs time to render, so thick duck breasts usually do better if you pre-render the skin in a pan before using the air fryer to finish. Use a thermometer because air fryer timing varies by model and breast size.

Sous Vide Duck Breast

Sous vide is best for precise doneness. The weakness is skin texture: the skin comes out soft, so the final pan render is not optional if you want crisp skin. Cook the duck sous vide to your preferred temperature, pat it very dry, then render and crisp the skin in a pan.

Grilled Duck Breast

Grilled duck breast is best for smoky flavor, but duck fat can flare over direct heat. Render some fat first or grill over controlled heat, then finish to temperature. Avoid blasting the skin over high heat before the fat layer has thinned.

Smoked Duck Breast

Smoked duck breast has a deeper flavor and works well when you want a richer, more savory result. The challenge is balancing smoke, rendered fat, and final skin texture. For the best finish, smoke gently and crisp the skin separately if needed.

Oven-Only Duck Breast

Oven-only duck breast is best avoided if crispy skin is the goal. Oven heat cooks the meat, but it does not manage the fat layer as precisely as a pan. If you want crisp skin, render the fat in a pan first, then use the oven only to finish the center.

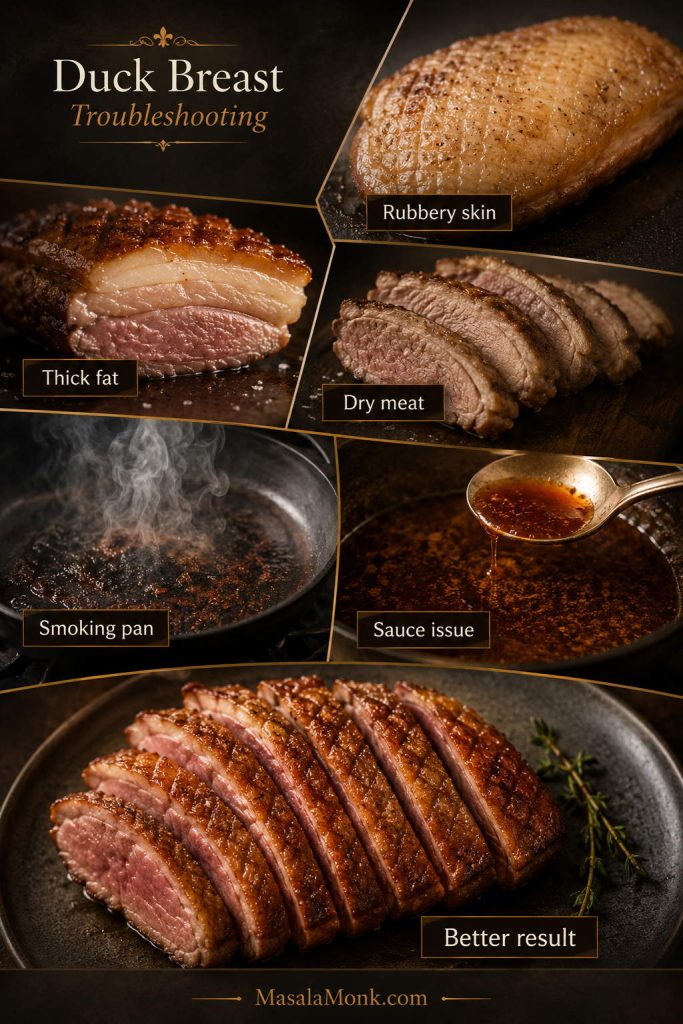
How to Fix Common Duck Breast Problems

Start by diagnosing the problem in order: skin first, fat layer second, center temperature third, sauce last. Rubbery skin usually points to moisture or rushed heat. A thick white fat layer usually means the pan got too hot too soon. Dry meat usually means the duck stayed on the heat after the center was already close to your target temperature.

If something looks off, do not panic. Most duck breast problems are fixable technique problems: wet skin, uneven pan contact, heat that climbed too fast, or sauce that reduced too far.

Duck breast troubleshooting guide showing rubbery skin, thick fat, dry meat, smoking pan, sauce issue, and better result
Most duck breast problems trace back to moisture, rushed heat, uneven pan contact, missed temperature, or sauce that reduced too far.

Skin and Fat Problems

Problem Why it happened Fix
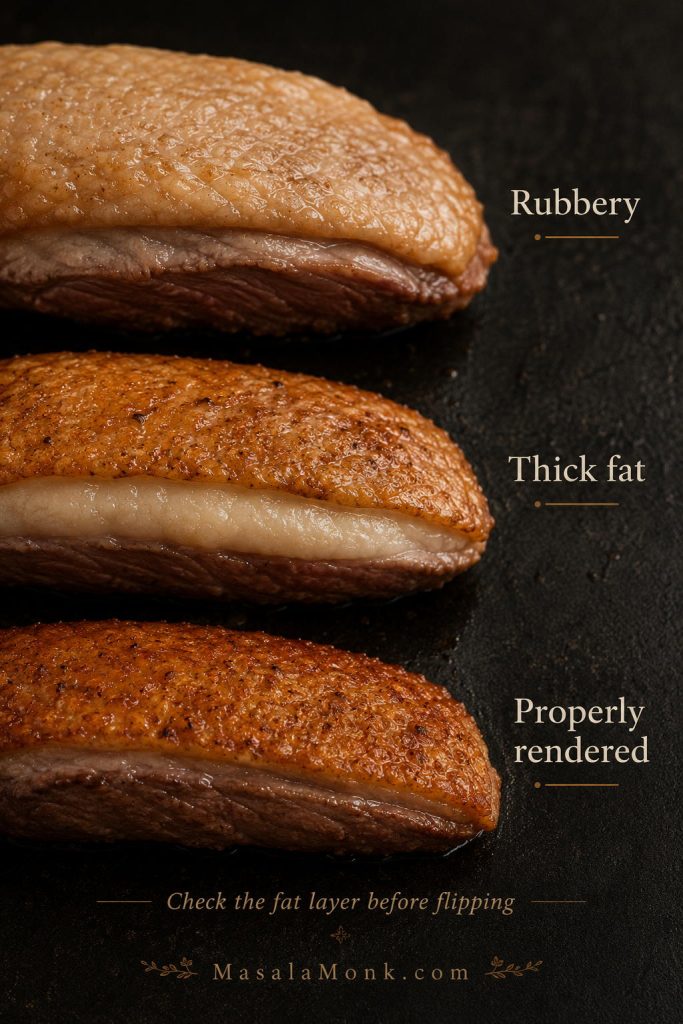
Rubbery skin The skin was wet, the heat climbed too fast, or the fat layer needed more time. Dry the skin well, start in a cold pan, and keep cooking skin-side down over lower heat.
Brown skin with thick fat underneath The pan was too hot before the fat had time to melt. Lower the heat and continue rendering skin-side down until the white layer looks thinner.
Pale patches on the skin The breast curled or did not touch the pan evenly. Press gently early in cooking or use a light pan or cooking weight to keep the skin flat.
Crisp skin that softens on the plate The duck was covered tightly, sauced over the skin, or rested skin-side down. Rest skin-side up, keep it uncovered, and spoon sauce around the slices instead of over the crisp top.
Close-up comparison of rubbery duck skin, thick fat under browned skin, and properly rendered thin fat layer
Brown skin does not always mean rendered fat, so check the side of the breast before deciding it is ready to flip.

Meat and Doneness Problems

Problem Why it happened Fix
Crisp skin but undercooked center The breast is thick, or the meat side did not get enough gentle finishing time. Move the oven-safe pan to a 350°F / 180°C oven and finish to your preferred internal temperature.
Dry or overcooked meat The duck stayed on the heat after the center was already near target. Use a thermometer and pull the duck a few degrees early, especially before resting.
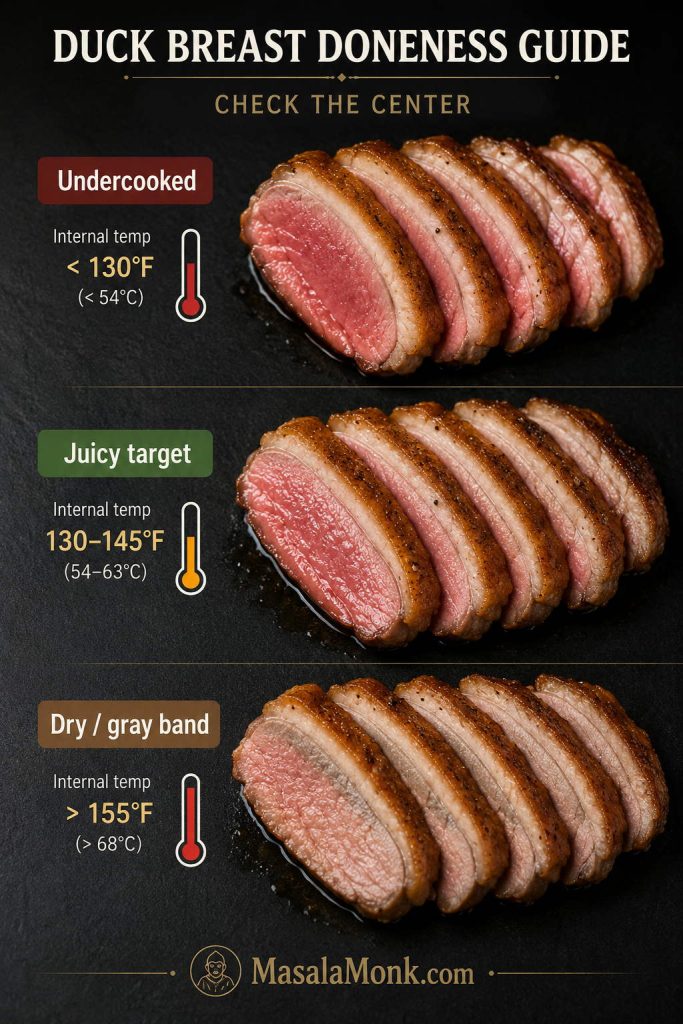
Gray band around the meat The heat was too aggressive or the oven finish went too long. Use gentler heat, avoid rushing the render, and check earlier with a thermometer.
Juices running across the board The duck was sliced before it had time to rest. Rest 5–10 minutes skin-side up, then slice against the grain.
Duck breast doneness guide comparing undercooked center, juicy target slices, and dry gray band
Timing helps, but the center tells the truth; checking doneness prevents both an undercooked middle and a dry gray band.

Pan and Cooking Problems

Problem Why it happened Fix
Smoking pan The heat is too high or too much rendered fat has pooled in the skillet. Lower the heat and carefully pour excess fat into a heatproof bowl.
Greasy-tasting duck The fat layer did not render enough before the meat finished cooking. Score more carefully next time and give the skin side more time over lower heat.
Duck breast curling in the pan The edges lifted away from the hot surface. Press gently with a spatula during the first few minutes or use a small pan as a light weight.
Skin sticking to the pan The duck was moved too early or the skin had not released naturally. Give it more time. Properly rendered skin usually releases more easily once it is ready.

Orange Sauce Problems

Problem Why it happened Fix
Thin sauce It has not reduced long enough. Simmer until it lightly coats a spoon.
Over-sweet sauce Too much honey, sugar, or sweet orange juice made it taste heavy. Add vinegar, orange zest, a pinch of salt, or a splash of stock.
Bitter sauce Orange pith, zest, or pan bits cooked too hard. Add stock, butter, or a little honey, and avoid scraping up burnt bits from the pan.
Flat sauce It needs more salt, acid, or brightness. Add a small splash of vinegar, more orange zest, black pepper, or a pinch of salt.

Make-Ahead, Storage, and Reheating

Duck breast is best right after cooking, when the skin is crisp and the meat is freshly rested. However, you can prep parts of the recipe ahead and store leftovers safely.

What You Can Prep Ahead

  • Score the duck breast up to 1 day ahead.
  • Season it and leave it uncovered on a plate or small rack in the fridge for a few hours or overnight to help dry the skin.
  • Make orange sauce, cherry sauce, plum sauce, or red wine sauce ahead and reheat gently.
  • Prep sides before cooking the duck, because duck breast is best served soon after resting.

How to Store Cooked Duck Breast

  • Cool cooked duck breast promptly.
  • Refrigerate within 2 hours of cooking, or within 1 hour if the room is very hot.
  • Store in an airtight container in the refrigerator.
  • Use within 3–4 days.
  • Keep sauce separate if possible so the skin does not soften.

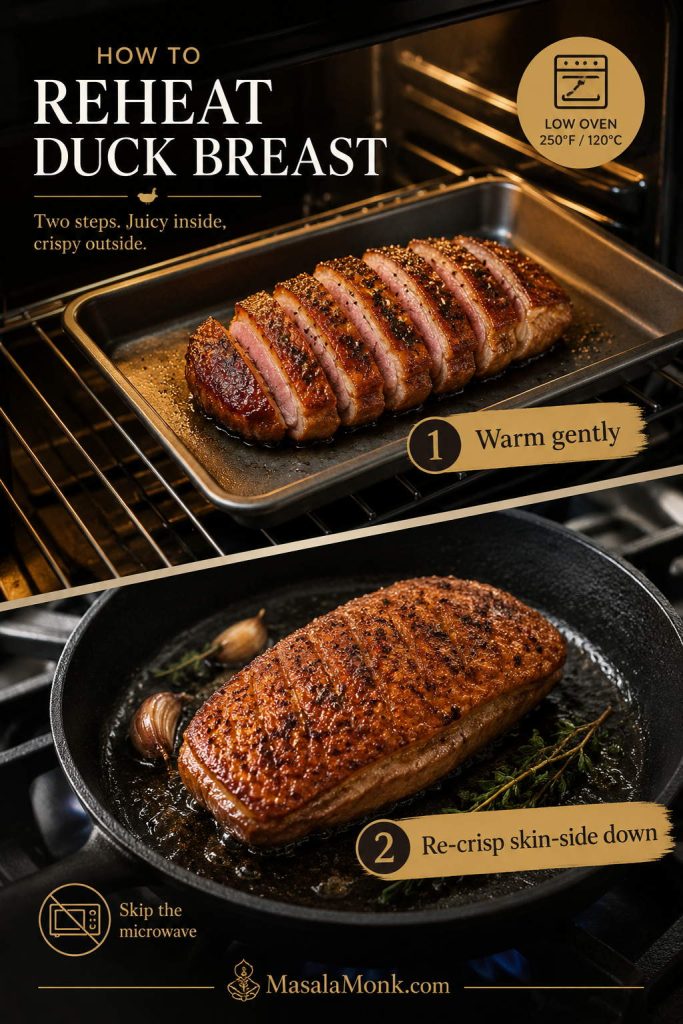
How to Reheat Duck Breast Without Ruining the Skin

  • For best texture, reheat gently in a low oven until warmed through, then re-crisp the skin in a skillet.
  • Place the duck skin-side down in a dry skillet over medium-low heat to bring back some crispness.
  • Avoid microwaving if you care about crisp skin; it softens the skin quickly.
  • For the official USDA/FSIS leftover safety guideline, reheat leftovers to 165°F / 74°C.
Two-step reheating guide showing duck breast warmed in a low oven and re-crisped skin-side down in a skillet
Warm leftover duck gently first, then re-crisp it skin-side down in a skillet instead of relying on the microwave.

For broader leftover storage and reheating safety, the USDA/FSIS food safety basics guide is a useful reference.

What to Do with Leftover Duck Breast

Leftovers are not a downgrade here. Thin slices of cooked duck can turn into excellent lunches as long as you add them gently and avoid cooking them a second time.

Planning to warm the duck later? Read how to reheat duck breast without ruining the skin before you start.

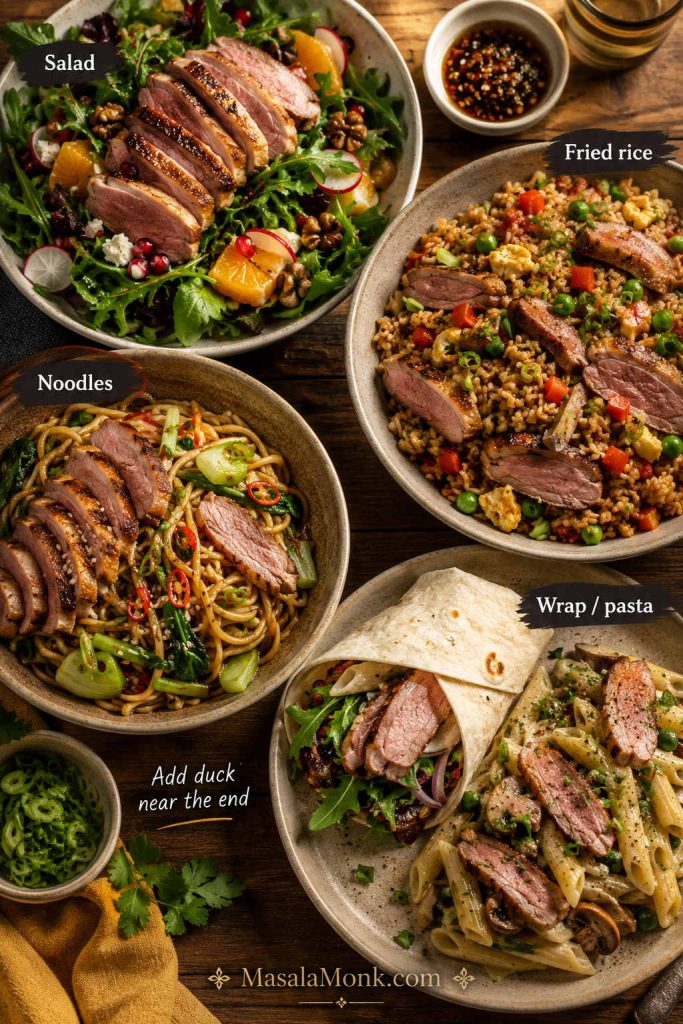
  • Add slices to salad with orange, arugula, and vinaigrette.
  • Use in fried rice with scallions and a little soy sauce. For the best rice texture, borrow the cold-rice method from MasalaMonk’s Spam fried rice recipe and fold sliced duck in near the end so it does not overcook.
  • Add to noodles with greens and chili oil.
  • Tuck into wraps or thin pancakes with plum sauce.
  • Serve cold with mustard, pickles, or fruit chutney.
  • Add to pasta at the very end, just to warm through. Duck works especially well with bright herb sauces, so MasalaMonk’s pesto recipe and variations can give you a fresh sauce direction for leftover duck pasta.
Leftover duck breast served in salad, fried rice, noodles, and a wrap or pasta dish
Add leftover duck near the end of salads, fried rice, noodles, wraps, or pasta so the slices warm without drying out.

For a cold lunch plate, leftover sliced duck also works with potato salad, pickles, bitter greens, and a sharp dressing. MasalaMonk’s potato salad recipes are useful if you want a creamy, tangy, or lighter side to build around.

Duck Breast Recipe with Crispy Skin

This duck breast recipe starts in a cold pan so the fat can render slowly and the skin can crisp without overcooking the meat. Serve it with the quick orange pan sauce, or use the sauce guide above to take it in a cherry, plum, red wine, herb-bright, or Asian-style direction.

Servings2
Prep Time10 minutes
Cook Time18–28 minutes
Rest Time5–10 minutes

Ingredients

  • 2 skin-on boneless duck breasts, about 6–8 oz / 170–225 g each
  • 1 tsp kosher salt, or about ½ tsp fine salt
  • ¼ tsp black pepper
  • Optional: 1 thyme or rosemary sprig
  • Optional: 1 garlic clove, lightly crushed

Optional Orange Sauce

  • ¼ cup / 60 ml fresh orange juice
  • ½ cup / 120 ml chicken stock
  • 1 tbsp white wine vinegar or red wine vinegar
  • 1–2 tsp honey or sugar
  • 1 tsp orange zest
  • 1 tbsp / 14 g cold butter
  • Salt and black pepper, to taste

Duck Breast Method

  1. Pat the duck breasts very dry with paper towels.
  2. Score the skin in diagonal lines or a crosshatch pattern, cutting through the skin and fat but not into the meat.
  3. Season both sides with salt and pepper, using a little more salt on the skin side.

  4. Place the duck breasts skin-side down in a cold, dry skillet.
  5. Turn the heat to low or medium-low. Cook slowly for 10–18 minutes, pouring off excess fat as needed, until the skin is golden and crisp and much of the fat has rendered.
  6. Flip the duck and cook the flesh side for 1–2 minutes.
  7. If the breast is thick or still below your preferred temperature, transfer the oven-safe skillet to a 350°F / 180°C oven for 5–8 minutes.
  8. Rest the duck skin-side up for 5–10 minutes.
  9. Slice against the grain and serve with orange sauce or your preferred duck breast sauce.

Orange Sauce Method

  1. Pour off most of the fat from the pan after removing the duck.

  2. Add orange juice, stock, vinegar, and honey.
  3. Scrape up browned bits and simmer until lightly syrupy, avoiding any burnt bits.
  4. Turn off the heat and whisk in cold butter and orange zest.
  5. Season to taste with salt, pepper, vinegar, or honey.

Notes

  • Use an instant-read thermometer for best results.
  • Pull the duck a few degrees before your final target because the internal temperature can rise slightly as it rests.
  • Rest the duck skin-side up and do not cover it tightly.
  • Keep sauce around the slices, not over the skin, if you want the crispest bite.
  • Save rendered duck fat for potatoes, vegetables, fried rice, greens, or eggs.
Duck breast recipe card with cold-pan method, timing, temperature, orange sauce, and sauce placement note
Keep the core method simple: score shallowly, start cold, render patiently, rest skin-side up, and spoon sauce around the crisp top.

Once the cold-pan render clicks, duck breast stops feeling like a restaurant trick. You are not forcing it; you are letting the fat melt, the skin crisp, and the center come up gently. Serve it with a light sauce, slice it cleanly, and it feels like a special-occasion dinner you can actually repeat.

FAQs About Duck Breast

Do you start duck breast in a cold pan?

Start duck breast in a cold pan when you want crisp skin. The gradual heat gives the fat time to melt before the surface browns, which helps prevent a golden-looking but chewy skin layer.

How long does duck breast take to cook?

Duck breast usually takes 18–28 minutes of cooking time: 10–18 minutes skin-side down to render the fat, 1–2 minutes on the flesh side, plus 5–8 minutes in the oven if the breast is thick. Use timing as a guide, but let the thermometer make the final decision.

Do you have to finish duck breast in the oven?

No. Smaller duck breasts can finish on the stovetop after the skin has rendered. Thicker breasts are easier to control with a short oven finish at 350°F / 180°C after the skin is already crisp.

Should duck breast be pink?

Many cooks prefer duck breast pink because the texture stays tender and juicy. However, duck is poultry, and the official safe minimum is 165°F / 74°C, so use a thermometer and choose based on your comfort level and who you are serving.

What temperature is best for duck breast?

For a softer, juicier texture, many cooks prefer 130–135°F / 54–57°C for medium-rare or about 140°F / 60°C for medium. The official poultry safety benchmark is 165°F / 74°C.

What sauce goes best with duck breast?

Orange sauce is the classic pairing for duck breast because citrus cuts through the fat without hiding the flavor of the meat. Cherry, plum, red wine, berry, chimichurri, and soy-hoisin sauces also work, depending on whether you want fruity, savory, fresh, or Asian-style flavors.

Why is my duck skin rubbery?

Rubbery duck skin usually means the surface was wet, the heat was too high too early, or the fat layer needed more time. Dry the breast well, start in a cold pan, and keep cooking skin-side down until the white fat layer looks much thinner.

Do you need oil to cook duck breast?

No. Duck breast has enough fat under the skin. Starting it in a dry cold pan lets that fat melt naturally and crisp the skin.

Can you cook duck breast from frozen?

Thaw it first for this method. Frozen duck breast releases moisture as it cooks, which makes crisp skin much harder to achieve.

How do you reheat duck breast and keep the skin crispy?

Reheat gently in a low oven until warmed through, then place the duck skin-side down in a dry skillet over medium-low heat to re-crisp the skin. Microwaving is faster, but it softens the skin.

What can I make with leftover duck breast?

Use thin slices in salads, fried rice, noodles, wraps, sandwiches, or pasta. Add cooked duck near the end so it warms without overcooking.

Is duck breast the same as duck fillet?

In many shops and recipes, duck fillet means boneless duck breast. For this crispy-skin method, choose skin-on duck breast or skin-on duck fillet.

Final Thoughts

Good duck breast is not about rushing a dramatic sear. It is about giving the fat enough time to render, watching the skin, checking the temperature, and resting the meat before you slice.

Once that rhythm makes sense, duck breast becomes one of the most satisfying restaurant-style dinners to cook at home: crisp skin, tender slices, a sauce that brightens the plate, and enough confidence to make it again.

What is your favorite way to serve duck breast — orange sauce, cherry sauce, potatoes, rice, bitter greens, or something else? Share it in the comments so other readers can try it too.