Posted on Leave a comment

Pecan Pie Recipe: Easy, Classic & Perfectly Gooey

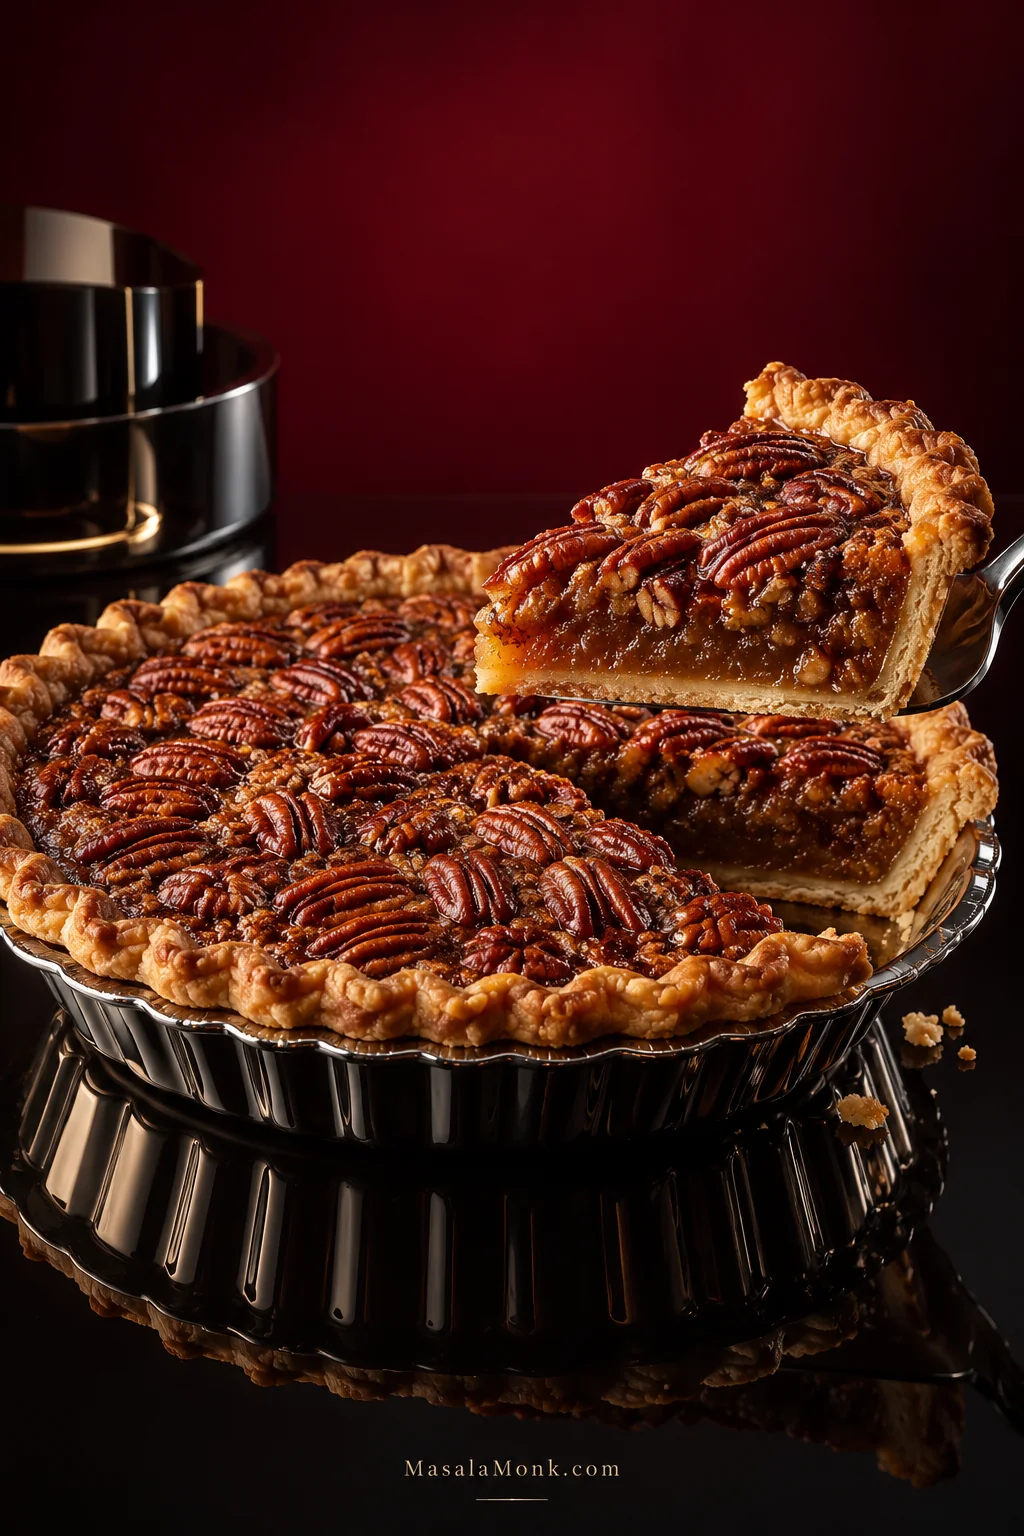
A slice of pecan pie lifted on a metal server above the remaining pie, showing flaky golden crust, toasted pecans and glossy caramel filling that holds its shape.

There is a moment with pecan pie when all the confidence disappears. The crust is browned, the pecans are glossy, the kitchen smells like butter and toasted nuts—and you still do not know what the middle will do when that first wedge comes out.

The goal with this pecan pie recipe is a soft, caramel-rich center that stays with the slice. It should not pour across the plate, but it should not be baked so firm that it eats like candy either. You want crisp pastry underneath, plenty of pecans in every forkful and a filling that gives easily when a fork goes in.

This is the familiar classic American holiday style: eggs, corn syrup, brown sugar, butter and plenty of pecans baked in a single pastry shell. The filling itself uses just seven ingredients. There is no stovetop caramel, no mandatory crust prebake and no need to arrange a perfect mosaic of pecan halves.

The important parts are simpler than that: the crust needs to bake through, the pecans need to taste toasted and the center needs to set soft.

Bake for the wobble. Cool for the slice.

Pecan Pie at a Glance

Quick answer: Pecan pie is done when the filling around the outside is set and the center moves together in one gentle wobble rather than sloshing. Bake this 9-inch / 23-cm pie at 350°F / 177°C on a rack in the lower third of the oven. Start checking around 45–50 minutes; most pies finish in about 50–60 minutes. Around 200°F / 93°C near the center is a useful extra check. Give the pie about 2 hours to cool and set before slicing.

Easy Classic Pecan Pie Recipe

A flaky 9-inch pie packed with buttery pecans and a glossy brown-sugar filling that stays gooey without flowing across the plate.

Yield: 1 9-inch pie

Serves: 8 generous or about 10 smaller slices

Prep: about 20 minutes with a prepared crust

Bake: about 50–60 minutes

Cool: about 2 hours

Total: about 3 hours 10–20 minutes with a prepared crust, including cooling

Oven: 350°F / 177°C

Before you start: Not every 9-inch pie plate holds the same amount. This filling fits most comfortably in a shell about 9 inches / 23 cm across and roughly 1½ inches / 3.8 cm deep. A shallow ready-made shell may need less filling.

Pecan Pie Ingredients

For the crust

  • 1 unbaked single 9-inch / 23-cm pie crust, homemade, refrigerated or frozen. Making the pastry yourself? Use one disc of our homemade flaky pie crust.

For the pecan pie filling

  • 8 oz / 225 g pecans, about 2 cups, divided between chopped nuts and larger pieces
  • 3 large eggs
  • 1 cup / 240 ml / 312 g corn syrup, light or dark
  • ½ cup packed light brown sugar / about 100 g
  • 4 tbsp / 2 oz / 56 g unsalted butter, melted and cooled until warm
  • 2 tsp / 10 ml vanilla extract
  • ½ tsp fine salt
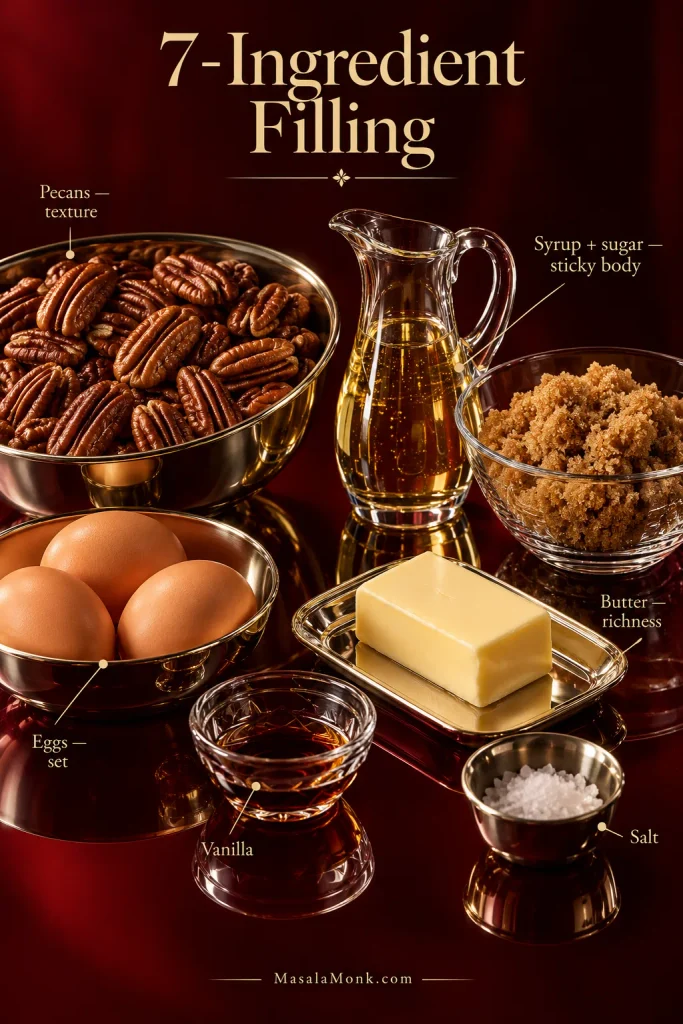
Pecans, eggs, corn syrup, brown sugar, butter, vanilla and salt arranged as the seven filling ingredients, with small labels showing the roles of eggs, syrup, sugar, butter and pecans.
A short pecan pie filling formula still depends on balance: eggs give it structure, syrup and sugar create body, and generous pecans keep the finished pie textured rather than simply sweet.

Equipment

  • 9-inch / 23-cm pie plate or deep-dish frozen pie shell
  • Rigid rimmed baking sheet if using a flexible disposable shell
  • Foil or pie-crust shield
  • Instant-read thermometer, optional

How to Make Pecan Pie

Prepare the Crust and Pecans

  1. Heat the oven. Set a rack in the lower third and heat to 350°F / 177°C. If you are using a flexible disposable pie shell, place it on a sturdy rimmed baking sheet before filling it.
  2. Fit and chill the crust. Press or roll homemade or refrigerated pastry into the plate and crimp the rim. Check the bottom and sides for cracks or paper-thin patches. For this method, do not prick or dock the raw shell; the liquid filling does not need extra openings where syrup could seep underneath. If the pastry has softened, refrigerate it for 15–20 minutes.
  3. Using a frozen shell? Follow its package directions for thawing. Some are filled from frozen; others are thawed first. Keep a flexible foil tin on its baking sheet while you fill and carry it.
  4. Prepare the pecans. Coarsely chop about two-thirds and leave the rest in larger pieces or halves. For deeper roasted flavor, toast the chopped nuts for 6–8 minutes at 350°F / 177°C, just until the kitchen smells distinctly nutty. Let them cool briefly. This step is optional.
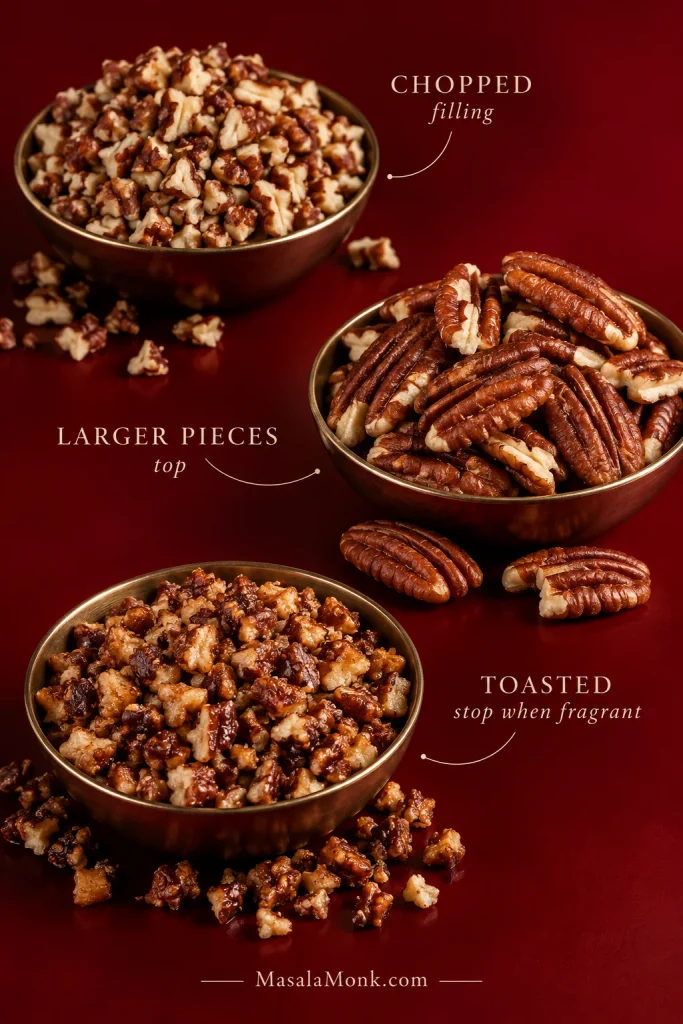
Three pecan preparations shown separately: coarsely chopped pecans for the filling, larger pecan pieces for the top and toasted chopped pecans.
Chopping most of the pecans does two useful things at once: it distributes nuts through more bites and makes clean slices easier; meanwhile, larger pieces give the top its crunch.

Mix, Fill and Bake

  1. Mix the filling gently. Whisk the eggs only until blended. Add the corn syrup, brown sugar, warm melted butter, vanilla and salt. Whisk until smooth and glossy. Too much beating can leave the filling pale and foamy.
  2. Fill the pie. Scatter the chopped pecans across the bottom, pour over the filling, then place the larger pieces loosely on top. Many pecans will rise or shift as the pie bakes. That is normal. There is no need to press them down.
  3. Leave a little room at the top. A shallow commercial shell may not take every last spoonful. Stop before the filling reaches the top of the pastry.
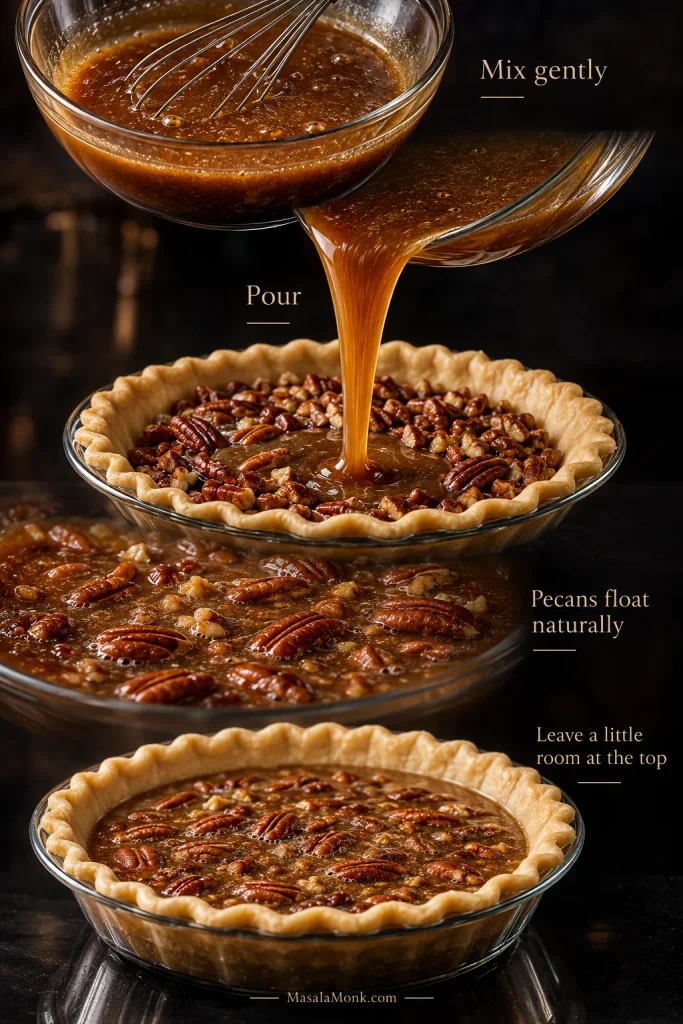
Vertical process showing pecan pie filling being mixed, poured over chopped pecans, pecans rising naturally toward the surface and the filled shell with space below the crust rim.
As pecans rise, they create the classic nut-heavy top without arranging a mosaic; meanwhile, chopped nuts left below keep pecans distributed through the filling.
  1. Bake. Put a sturdy metal, glass or ceramic pie plate directly on the lower-third rack. Keep a flexible disposable shell on its baking sheet for support. Begin checking around 45–50 minutes; most pies of this depth finish in roughly 50–60 minutes. Shield the rim once it is brown enough. If the pecans are getting dark first, tent the top loosely with foil and let the middle keep baking.

Read the Center, Then Let It Set

  1. Check the middle. The outer filling should look set and slightly puffed. Give the pan a gentle nudge. The center should move together in one gentle wobble. Loose syrup shifting independently under the pecans means it needs more oven time. For another check, look for roughly 200°F / 93°C near the center.
  2. Cool before cutting. Set the pie on a rack and let it cool for about 2 hours. That gives the filling time to finish setting. If you are not serving it after the cooling period, cover and refrigerate it promptly.

If the pie came out with that gentle wobble, the hard part is over.

Leave it alone.

A tiny “test slice” cut from a hot pie can make a perfectly good filling look underdone. The recipe above is all most bakers will need. The rest is here for the moments when the center, crust or timing has you wondering what to do next.

Need More Help With Your Pie?

How to Tell When Pecan Pie Is Done

Pecan pie is done when the filling around the edge is set and the center moves together in a gentle wobble, with no loose liquid sloshing underneath the pecans.

The timer tells you when to start paying attention. The center tells you when to stop.

Pecan Pie Bake Time: Start Looking Around 45–50 Minutes

At 350°F / 177°C, this 9-inch pie generally takes about 50–60 minutes. A shallow foil shell can finish sooner; a deeper pie or slower-heating dish may take longer.
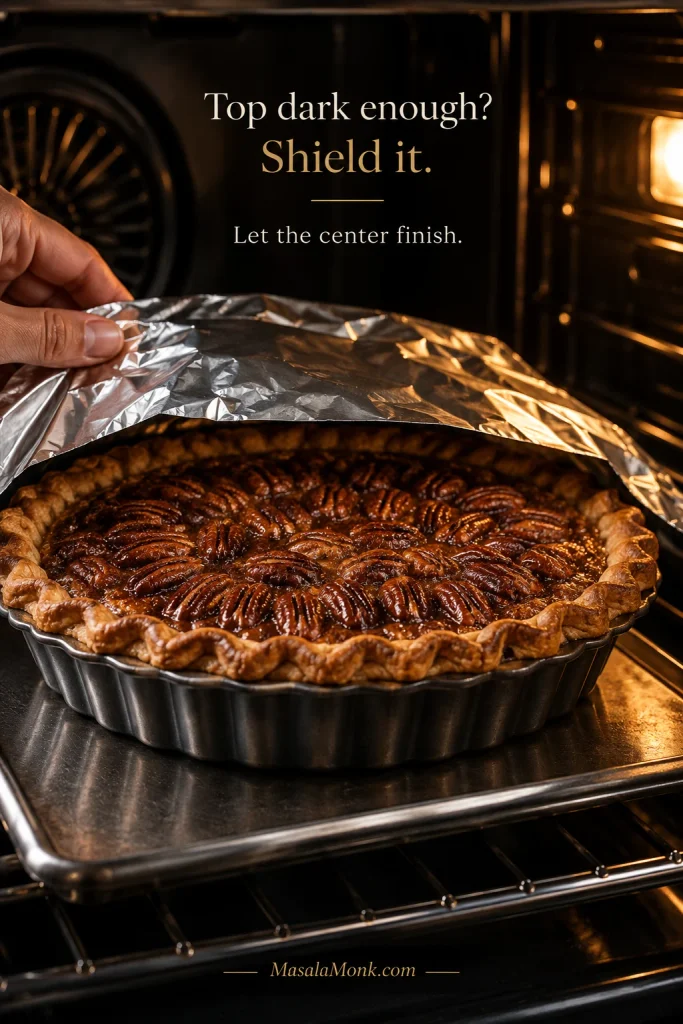
A browned pecan pie in the oven with aluminum foil shielding the crust and top while the center continues baking.
Browning and doneness do not always arrive together. Once the surface has enough color, foil buys the center more baking time without asking the crust and pecans to take more heat.

Look for a wobble, not a slosh. Nudge the plate. A ready center moves together like thick custard and settles quickly. If syrup shifts independently under or between the pecans, keep baking. The top may already look finished, so shield it if necessary and give the middle the time it needs.
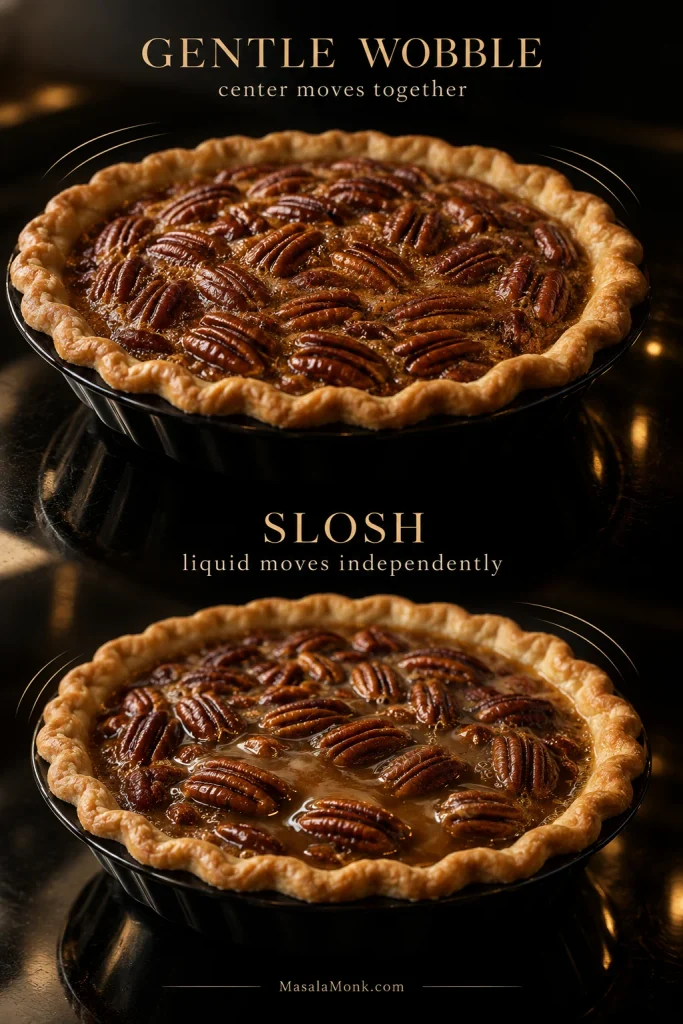
Two pecan pies compare doneness: one shows a gentle cohesive wobble in the center, while the other shows loose liquid moving independently between and beneath the pecans.
A gentle pan nudge reads the whole center without piercing or cutting a filling that is still setting; instead, the movement gives you a non-destructive doneness check.

What Temperature Is Pecan Pie Done? About 200°F / 93°C

An instant-read thermometer is useful when the visual cue still leaves you unsure. Check near the center and use the reading as confirmation. Avoid touching the pie plate with the probe.
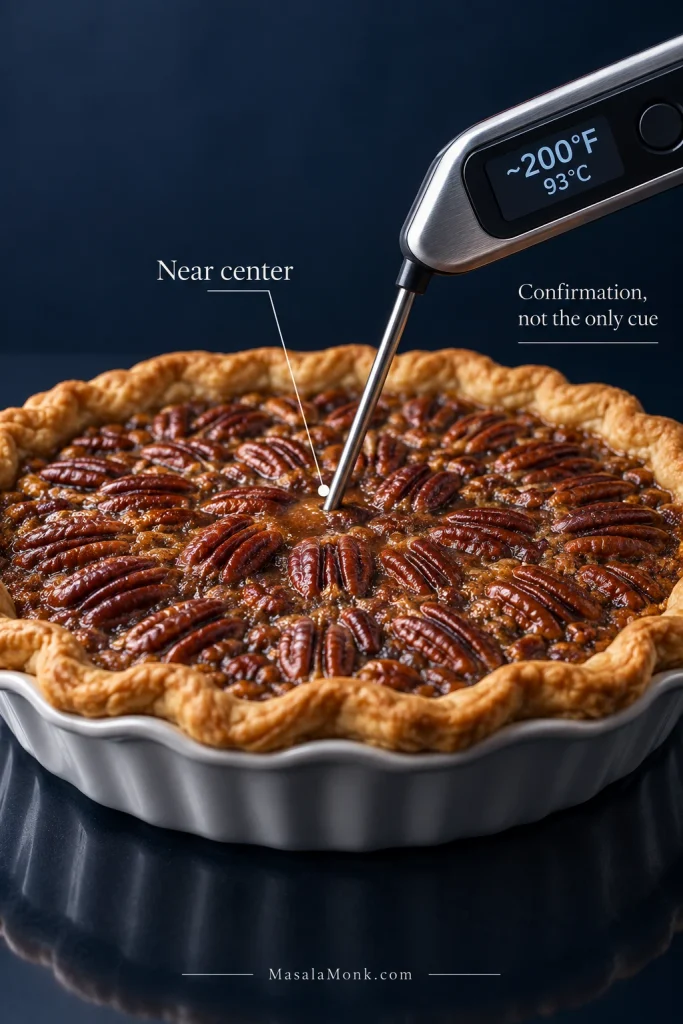
An instant-read thermometer inserted near the center of a pecan pie reads about 200°F and 93°C, with guidance that temperature is a confirmation of doneness.
Because the center is the last part to set, that is where a temperature check is most useful. Around 200°F / 93°C can confirm what the wobble is already telling you.

Gooey, Runny and Overbaked

A gooey pie keeps its shape when cut but stays moist and glossy at the edge. The filling yields under the fork without flowing into the space left behind.

A runny pie still releases syrupy filling after it has cooled. Take the bake too far and the center becomes firm, grainy, eggy or almost candy-like.

Skip the clean-knife test. This is not cake.

Back to Recipe Cooling & Slicing Fix a Runny Pie

How Long to Cool Pecan Pie Before Slicing

Give the pie about 2 hours on a cooling rack before cutting it. The filling is still settling as heat leaves the pie, so a center that looked soft from the oven can become exactly the texture you wanted.

Leave it uncovered while it is hot so steam can escape. If you are serving it after that cooling period, slice and serve. Otherwise, cover and refrigerate once it has cooled enough; treat roughly two hours at room temperature as the outer cooling window, not a minimum wait before refrigeration.
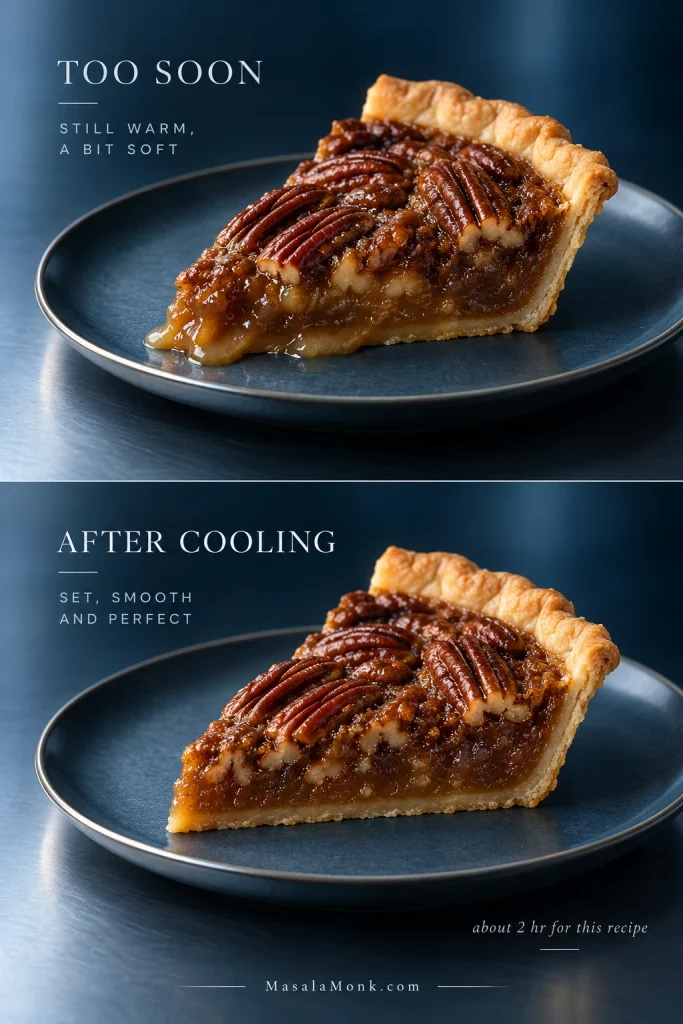
Matching pecan pie slices compare a softer, looser slice cut too soon with a cooled slice that has a cleaner edge while remaining glossy inside.
Warm filling can imitate underbaking. After the pie has cooled, however, the cut edge becomes more defined while retaining the moist gloss that separates a gooey center from a dry one.

Want the slice warm? Let the pie set first, then gently warm the wedge you are serving. A brief warm-up brings the butter and toasted-pecan aroma forward again without loosening the entire pie.

Vanilla ice cream gives you the classic hot-cold contrast. When the pie already feels sweet enough, lightly sweetened or unsweetened homemade whipped cream keeps the finish cooler and lighter.

Pecan Pie Crust: Crisp Underneath and Strong Enough for the Filling

A good bottom crust lifts with the filling instead of remaining glued to the plate.

If the underside looks wrong, notice what is actually there. Pale, soft pastry points toward weak bottom heat. A hard layer of caramelized syrup under the crust means the filling found a route beneath it.

Pan Depth Matters More Than “9 Inch”

A shallow 9-inch shell holds much less than a deeper plate with the same diameter. Around 1½ inches / 3.8 cm deep is comfortable for this filling. With a shallower shell, stop before the filling reaches the top.

Metal pie plates usually brown the bottom most readily. Glass and ceramic work too, although the underside may take longer. A sturdy pie plate bakes directly on the lower-third rack; a flexible foil shell stays on its baking sheet for support.
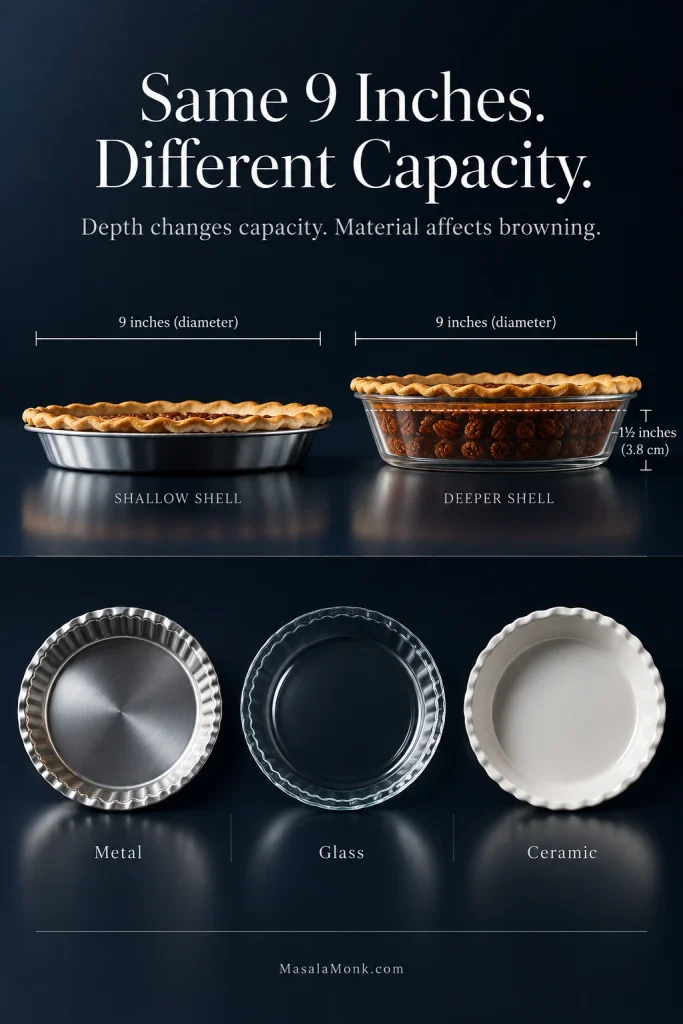
Pie pan guide comparing shallow and deeper 9-inch dishes, including a deeper dish about 1½ inches or 3.8 centimeters deep, with metal, glass and ceramic pan examples.
Before pouring the filling, look at the pan from the side. Two 9-inch dishes can have very different capacities, and metal generally gives the bottom crust a head start on browning.

Using a Frozen Pie Crust for Pecan Pie? Keep It Supported

Yes, a frozen pie crust works for pecan pie. Choose a deep-dish shell when possible, follow its package directions for thawing and inspect the pastry before filling it. A tiny crack can look harmless until syrup finds it.

Disposable foil shells become surprisingly floppy once they are full. Put the empty shell on a rigid baking sheet before adding the filling, then carry the pie by the sheet.
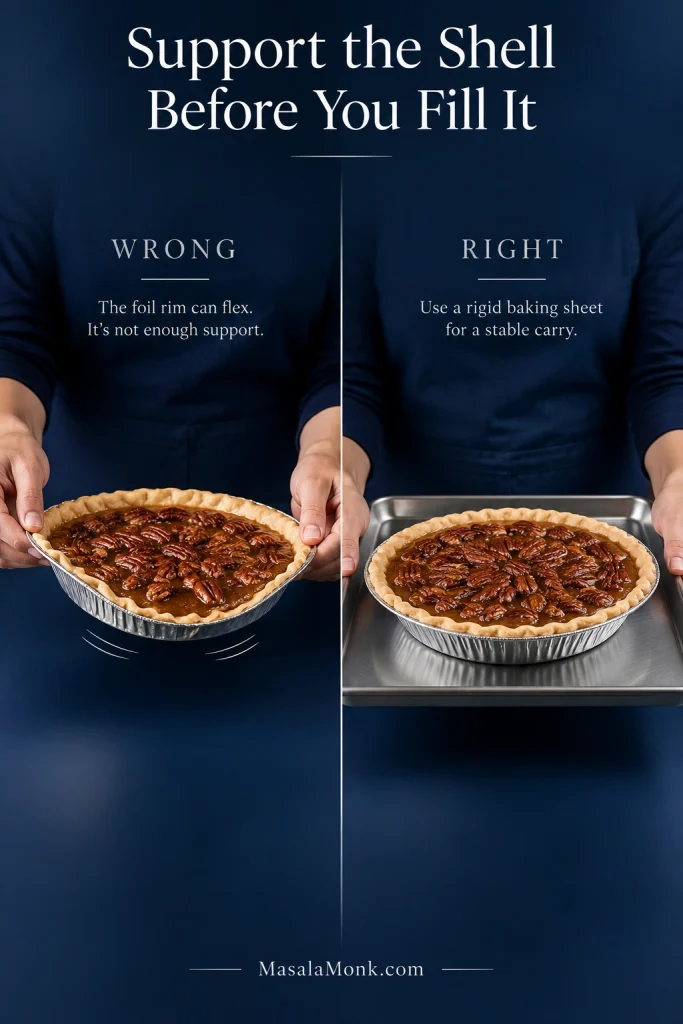
Comparison showing a filled disposable foil pie shell flexing when lifted by its rim and the stable method of supporting and carrying the shell on a rigid baking sheet.
With a frozen pie crust in a foil shell, support is preventive rather than cosmetic: once the pan flexes, a tiny crack can become a leak path during filling or transfer.

Blind bake? Not for this pie. This filling can go straight into a cold, unbaked shell. The lower-third rack gives the bottom useful heat without adding another pastry stage. A partial blind bake can help if your usual pie dish repeatedly leaves the bottom pale or if you switch to a thinner filling, but it also creates another chance for warm pastry to slump or shrink.

Soggy Bottom or Syrup Under the Crust?

Pale, soft pastry usually needs better bottom heat, colder dough or more time.

A hard, shiny layer of baked sugar underneath tells a different story. The filling probably found a crack, thin patch or opening and slipped below the crust.
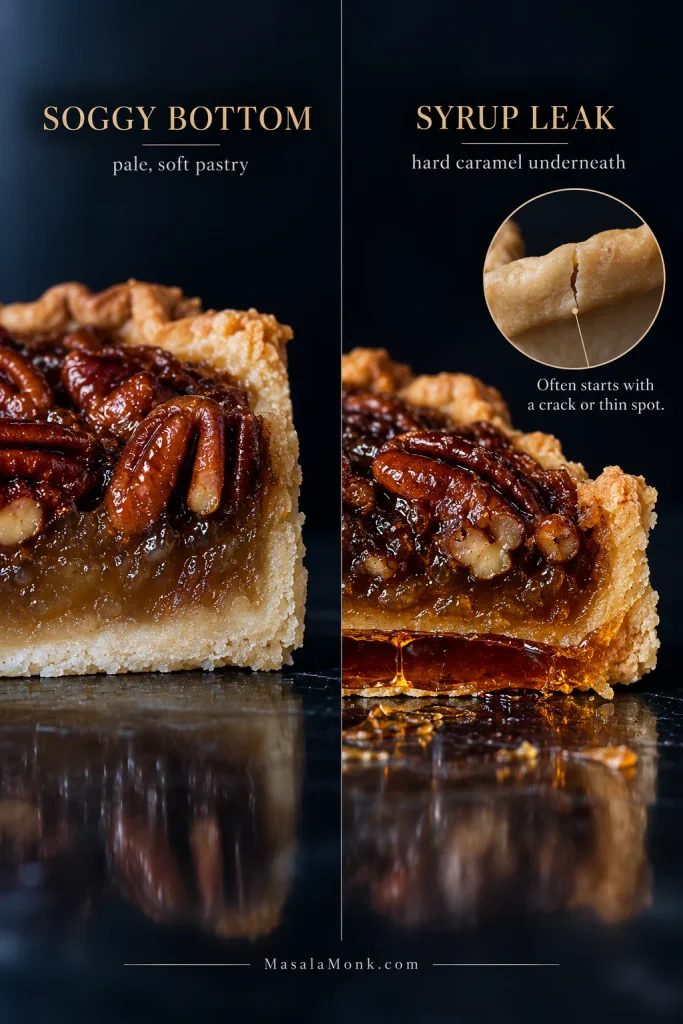
Two pecan pie cross-sections compare a pale, soft bottom crust with a hard caramelized syrup layer beneath the pastry; a small inset shows a crack where filling can leak through.
Use the underside to choose the fix: soft pastry points to a baking problem, while a hard amber sheet means syrup crossed the crust and set underneath.

Back to Recipe Pecan Pie Filling Troubleshooting

Pecan Pie Filling: Rich, Gooey and Packed With Pecans

Once the crust is sorted, the filling itself is simple: eggs, syrup, brown sugar, butter, vanilla, salt and pecans. Eggs are what let the filling set, while the syrup and sugar create its sticky body. Butter adds richness, and the pecans bring most of the texture and bulk. Corn syrup also reduces the chance of the sugar crystallizing as the filling cooks, helping the syrupy part of the filling stay smooth.

Many pecan pieces naturally rise toward the surface while the pie bakes. That is part of the classic look. What matters is using enough nuts that every forkful gets pecans along with the filling.

A good forkful catches crisp pastry, sticky filling and toasted pecan in the same bite.

The Best Pecans for Pecan Pie—and Which Ones to Toast

Start with fresh pecan halves or large pieces. Taste one before the bag goes into the recipe. Good pecans are sweet, buttery and clean; stale or paint-like flavors only become louder once the nuts are warm.

Use most of them coarsely chopped inside the filling, then save a smaller handful of halves or larger pieces for the top. Chopped nuts give you more pecan in each bite and make the finished pie easier to cut.

The nuts on top toast in the oven anyway. The chopped pecans under the syrup do not get that same exposure, so they are the ones worth toasting first. Give them 6–8 minutes at 350°F / 177°C and pull them when the aroma turns distinctly nutty; pecans can move from toasted to bitter quickly.

Light or Dark Corn Syrup?

Light corn syrup gives a cleaner sweetness and keeps vanilla and pecans prominent. Dark corn syrup brings a deeper, almost toffee-like flavor with some molasses character. Both work here, and dark brown sugar can also replace the light brown sugar when you want a stronger caramel note.

Two glass vessels compare pale golden light corn syrup with deeper mahogany dark corn syrup, labeled with their different flavor profiles.
Both light and dark corn syrup use the same 1 cup / 240 ml / 312 g amount in this pecan pie, so switching between them changes flavor rather than the mixing or baking method.

Pecan pie is supposed to be sweet. It just should not taste as though sweetness is the only thing happening.

Roasted pecan flavor, salt and darker syrup add contrast. Smaller slices suit a pie this rich. The generous 8 oz / 225 g pecans also keep the dessert tasting like pecans rather than simply sweet syrup in a crust.

Cut the sugar or syrup too far and the center can set differently, so save those changes for a formula built around them.

Making Pecan Pie Without Corn Syrup

Yes, you can make pecan pie without corn syrup—but use a filling built for the sweetener you choose. Golden syrup is a proven alternative in pecan-pie fillings, but do not assume every liquid sweetener can replace corn syrup cup for cup. Recipes built around golden syrup, maple syrup or honey may use different egg and sugar proportions.

Golden syrup, maple syrup and honey displayed in separate glass vessels, with text advising that pecan pie fillings should be formulated for the chosen sweetener rather than swapped cup for cup.
When making pecan pie without corn syrup, the key question is not which liquid looks similar; it is whether the filling’s egg-and-sugar balance was designed for that sweetener.

Pecan Pie Troubleshooting: Runny Filling, Soggy Crust & More

If a fully cooled pecan pie still pours from the cut edge, it was usually underbaked, or the amounts of eggs, sugar or syrup were changed enough to affect the set.

“Runny” is not much of a diagnosis on its own. What matters is when the filling looks loose and what the rest of the pie is doing.
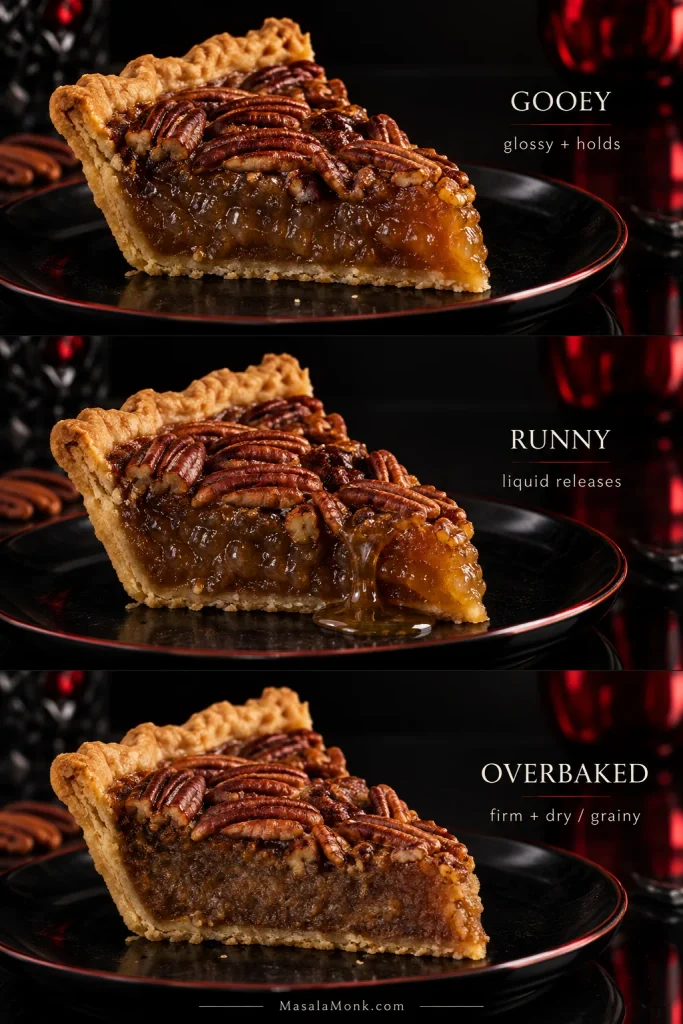
Three matching pecan pie slices compare a glossy gooey filling that holds, a runny filling releasing liquid and an overbaked filling with a firmer, drier, grainier texture.
The useful comparison happens after cooling: gooey filling remains soft but contained, runny filling still releases syrup, and an overbaked center has lost moisture and tenderness.
What You SeeLikely CauseWhat to Do
Center sloshes in the ovenUnderdoneShield browned areas and keep baking
Pie looks very soft while hotMay be completely normalGive it the full cooling time before judging the set
Cold pie still pours from the cut edgeUnderdone or filling amounts changedNext time, bake until the middle moves together in one gentle wobble
Top is dark, middle is liquidThe surface finished firstTent with foil and continue baking
Filling is pale and foamyToo much air was beaten inUsually still edible; whisk gently next time
Baked filling is grainy or eggyEggs overheated during bakingPull the next pie sooner; use the gentle wobble as the doneness cue
Bottom crust is pale and gummyWeak bottom heatUse the lower rack, colder dough or a metal pan
Hard syrup is baked under the pastryCrack, hole or thin spot in the crustKeep the shell intact and avoid unnecessary docking
Pie overflowedShell too shallow or overfilledUse a deeper plate or leave some filling behind
Pie is hard rather than gooeyOverbakedPull the next pie sooner
Top puffed dramatically or crackedFilling may have baked too farStart checking earlier and rely on the center movement

If the Filling Still Looks Wrong

If the raw filling curdles before it reaches the oven, the melted butter was probably too hot; starting again is usually simpler. An eggy or grainy baked filling points more toward too much heat during baking.

If your oven regularly finishes much earlier or later than recipes suggest, check it with an oven thermometer. Sometimes the problem really is the oven.

Serve It, Keep Baking or Start Again?

A slightly uneven top, an imperfect crimp or a pecan that browned more than its neighbors does not make a bad pie. If the filling holds and tastes good, serve it.

Keep baking while liquid still moves freely in the oven. Start again if you have time when the eggs scrambled badly before baking or a major break in the crust sent much of the filling underneath it. Everything else deserves a little perspective before it gets called a failure.

High-altitude note: Baking above about 3,000 feet / 915 metres? Pie pastry generally needs less adjustment than cakes or breads. Colorado State University Extension’s high-elevation baking guide notes that slightly more liquid can sometimes improve pastry texture and recommends baking pies in the lower third of the oven. Judge this filling by its center rather than borrowing adjustments from an unrelated recipe.

Back to Recipe Check Doneness Make Ahead & Store

Make-Ahead Pecan Pie: Bake It Before Thanksgiving Gets Busy

Bake it the day before and dessert is already handled before the Thanksgiving oven gets crowded.

After cooling, cover and refrigerate the pie. By the next day the filling will be thoroughly set and easy to portion. Serve it chilled or let some of the refrigerator chill come off before dessert.
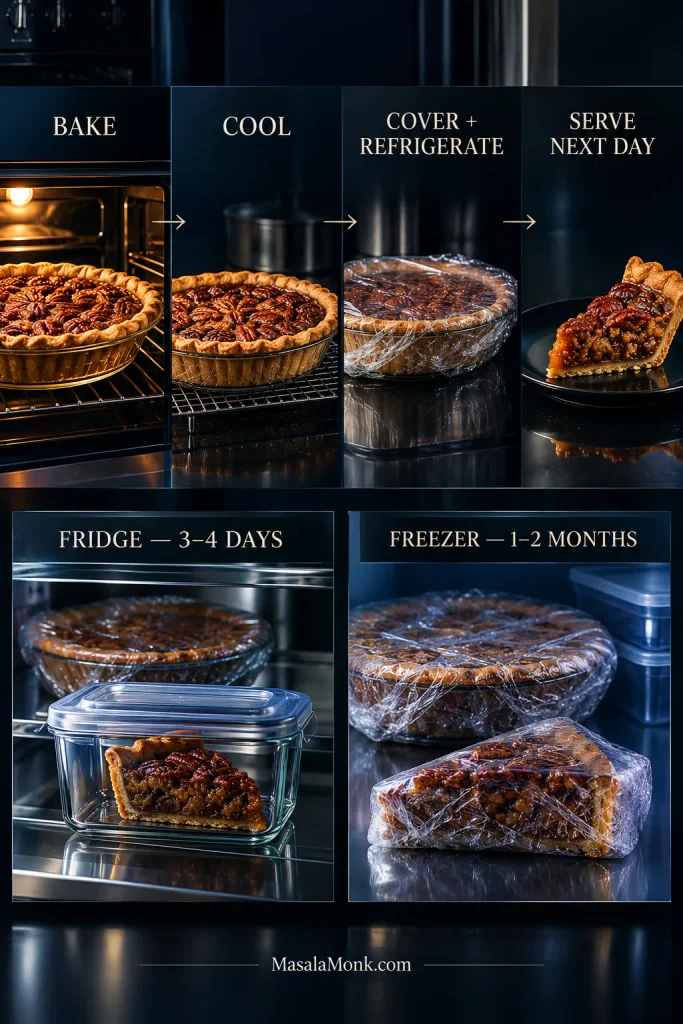
Pecan pie make-ahead guide showing bake, cool, cover and refrigerate, then serve the next day, with storage guidance of 3–4 days refrigerated and 1–2 months frozen.
For cleaner portions, serve the pie chilled or let some refrigerator chill come off first; if you want it warm, reheat individual wedges rather than loosening the whole pie.

Does Pecan Pie Need to Be Refrigerated?

Yes. The FoodSafety.gov cold-storage chart gives baked pecan pie about 3–4 days in the refrigerator. Because the filling contains eggs, cover and refrigerate it promptly once cooled; do not leave it sitting at room temperature overnight.

Can You Freeze Pecan Pie?

Yes. Cool the pie, wrap it well and freeze it whole or in portions. For best quality, use it within about 1–2 months. Thaw it in the refrigerator while still wrapped.

Need something easier to carry? Our pecan pie bars with shortbread crust turn the buttery pecan-and-caramel idea into sturdy squares. They are easier to pack, portion and pass around when a round pie would have twelve people negotiating wedges.

Pecan Pie FAQs

1. Can pecan pie sit out overnight?

No. Homemade pecan pie contains eggs. Cool it, cover it and refrigerate it; do not leave it on the counter overnight.

2. Why do pecans float to the top of pecan pie?

That is normal. Many pecan pieces rise through the egg-and-syrup filling as the pie bakes, which is how the familiar nut-heavy top forms. Chopping most of the nuts and using plenty of them still gives every forkful pecans with the filling.

3. Can I make pecan pie two days ahead?

Yes. Bake the pie, cool it and refrigerate it well covered. Two days ahead fits comfortably within the recommended 3–4-day refrigerated storage window, and the filling will be fully set by serving day.

The Slice You’re Waiting For
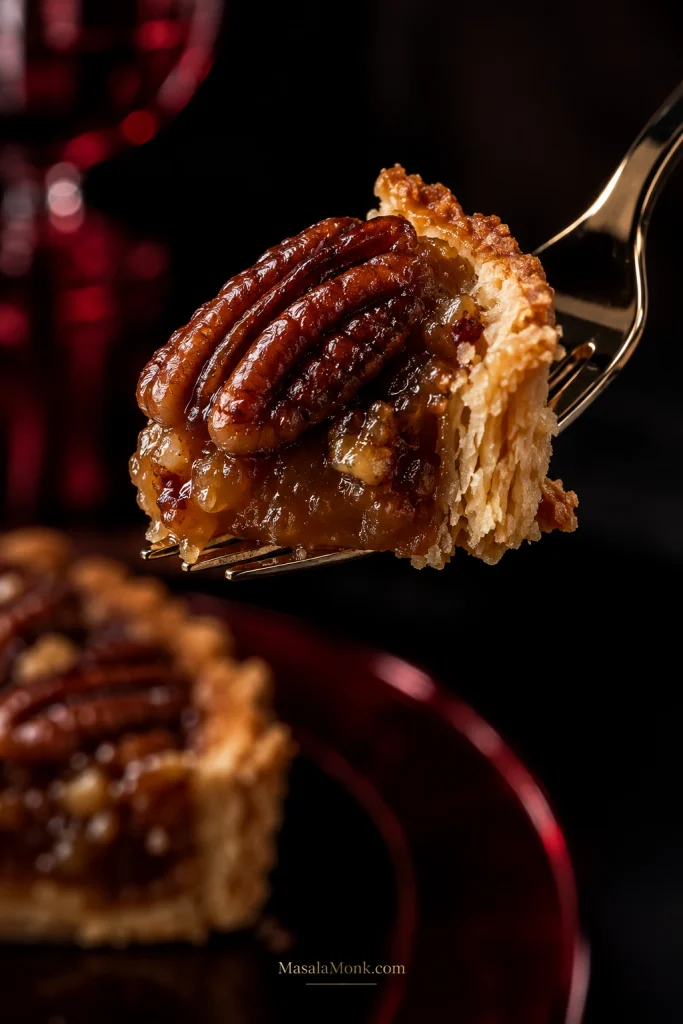
Extreme close-up of a fork holding pecan pie with visible flaky pastry, glossy caramel filling and toasted pecan against a dark garnet background.
The best bite starts with crisp, flaky pastry, moves into soft caramel filling and finishes with toasted pecan crunch, so the sweetness never lands by itself.

When the first wedge comes out, the crust lifts with it and the exposed edge of the filling stays moist and glossy instead of slowly spreading across the plate.

Once that first slice holds, you can stop thinking about temperatures and wobble. What’s left is crisp pastry, toasted pecans and a soft caramel middle that gives under the fork.

Back to Recipe Troubleshooting Back to Top

Posted on Leave a comment

Ham and Cheese Quiche Recipe: Creamy, Easy, Crustless Option

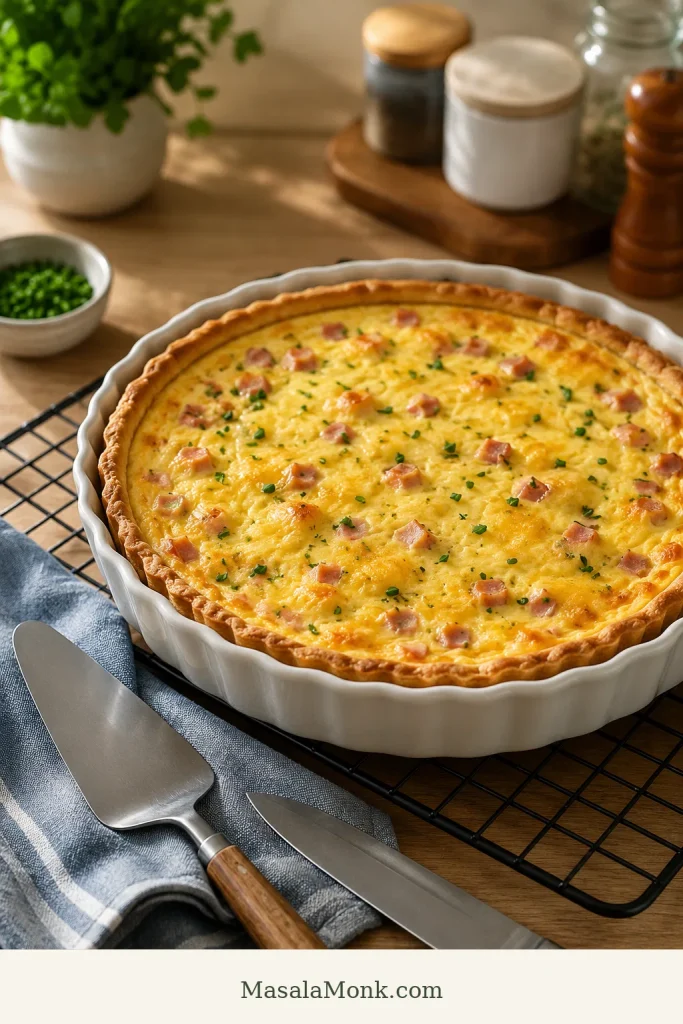
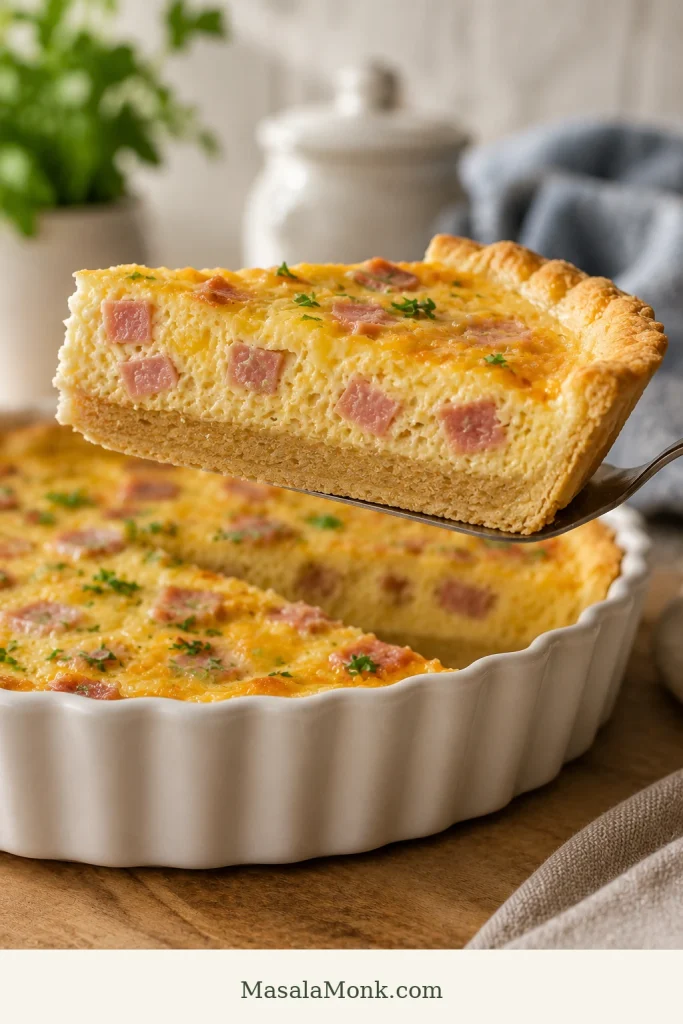
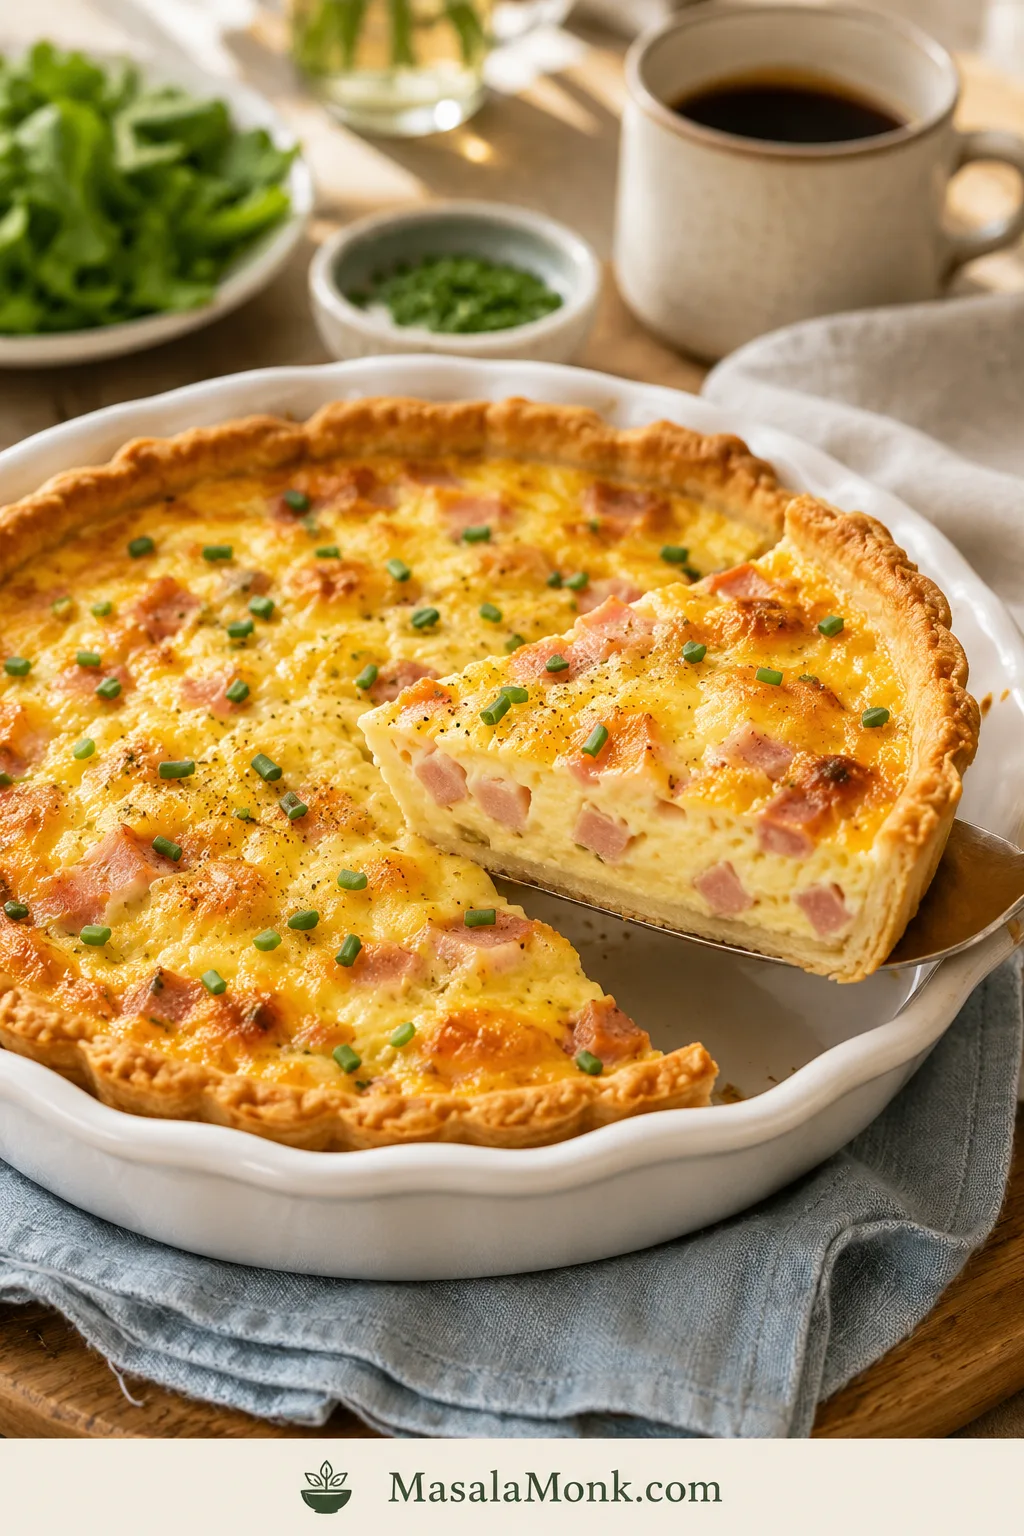
Whole ham and cheese quiche in a white ceramic pie dish with one slice lifted, showing golden crust, creamy custard, diced ham, melted cheese, and chives.

Ham and cheese quiche is what you make when brunch needs to feel special but you do not want to stand at the stove. It uses cooked ham, a simple egg custard, plenty of cheese, and a crust that can be homemade, refrigerated, frozen, or skipped completely.

The most satisfying bites have smoky ham, melted cheese, and soft custard against the flaky edge of the crust. This version is creamy without being loose, savory without being too salty, and practical enough for a holiday brunch, a quiet lunch, or a weeknight dinner with salad.

Close-up of a ham and cheese quiche slice on a white plate, with a fork cutting into the creamy custard and flaky crust.
A good slice should hold together but still look soft inside; that creamy custard is what keeps this from feeling like a firm egg bake.

This ham and cheese quiche is built for real kitchens: the kind with leftover holiday ham, a frozen crust in the freezer, or a bit of cheese that needs using. As long as the ham is cooked, diced small, and not wet, the recipe is flexible.

The base is simple: 5 large eggs, 1 cup dairy, 1½ cups diced ham, and 1½ cups cheese for one 9-inch / 23 cm quiche. That ratio keeps the center creamy but sliceable, so you do not end up with a stiff egg pie or a watery middle.

Start with the quick answer and recipe if you are ready to bake. The extra notes are there for frozen crusts, crustless baking, make-ahead timing, variations, and troubleshooting.

Quick Answer

For one 9-inch / 23 cm ham and cheese quiche, use 5 large eggs, 1 cup dairy, 1½ cups cooked diced ham, and 1½ cups shredded cheese. Par-bake the crust, fill it, bake at 375°F / 190°C until the edges are set and the center is soft-set, then rest for 10 minutes before slicing.

Quiche ElementUse This
Eggs5 large eggs
Dairy1 cup / 240 ml / 8 fl oz half-and-half, or cream + milk
Ham1½ cups / 200–225 g / 7–8 oz cooked diced ham, loosely measured
Cheese1½ cups / 150–170 g / 5–6 oz shredded cheese, loosely measured
Oven375°F / 190°C for a crusted quiche
Done whenEdges are set and the center is soft-set, not liquid

For a first bake, keep it simple: deep-dish frozen or refrigerated pie crust, half-and-half, 1 cup sharp cheddar, ½ cup Swiss, and diced cooked ham. Once you see how the center should wobble, the variations become much easier.

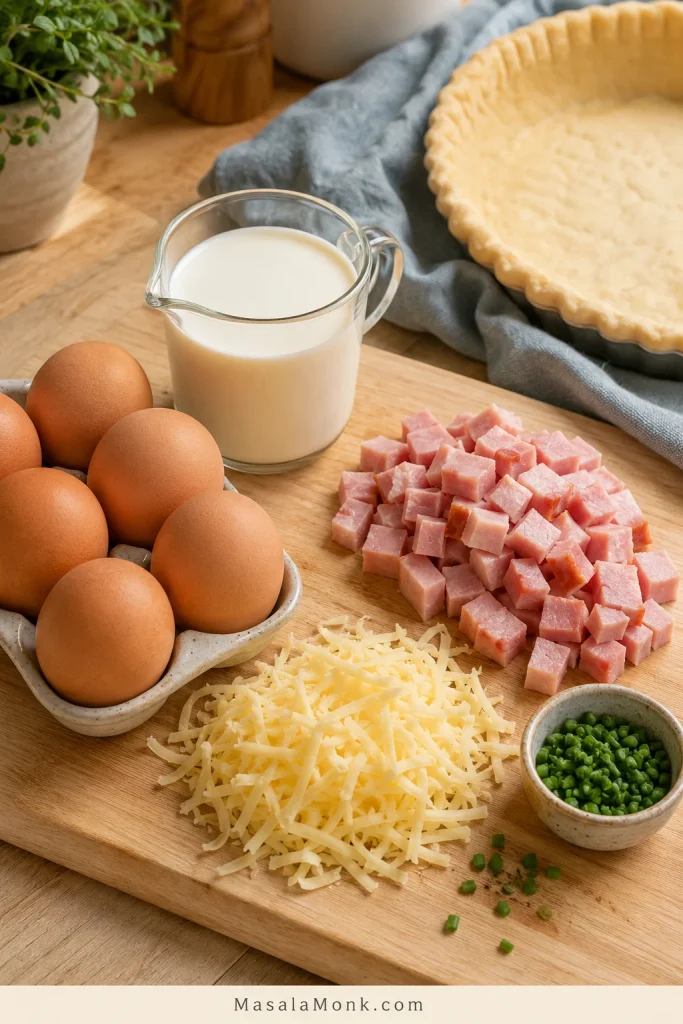
Eggs, dairy, diced cooked ham, shredded cheese, chopped chives, and a pie crust arranged on a kitchen prep surface.
Use the base as a balance check: eggs help the custard set, dairy keeps it tender, and ham and cheese make the filling generous without weighing it down.

Choose Your Ham and Cheese Quiche Path

Start with the same creamy base, then choose the version that fits your day: frozen crust for ease, crustless for meal prep, or extra vegetables when the fridge needs clearing.

If This Is Your SituationBest Path
You want the easiest brunchUse a deep-dish frozen crust, half-and-half, sharp cheddar, Swiss, and cooked diced ham.
You have leftover holiday hamDice it small, pat it dry if needed, reduce the salt, and balance sweet glaze with Dijon and black pepper.
You want no crustGrease the pie dish well and bake the same egg mixture at 350°F / 175°C until just set.
You want the creamiest textureUse half-and-half, or equal parts heavy cream and whole milk.
You are adding vegetablesCook, drain, and cool them before they touch the egg mixture.
You are meal-preppingBake the quiche first, cool it, slice it, then refrigerate or freeze the slices.

Ham and Cheese Quiche Recipe

Description

This easy quiche has a creamy egg custard, diced cooked ham, plenty of cheese, and a crisp-tender pie crust. Use a frozen deep-dish crust for the easiest version, or make it with homemade or refrigerated crust. Serve it for brunch, lunch, holidays, meal prep, or an easy dinner with salad.

Crustless note: For a no-crust version, use the same filling in a well-greased 9-inch / 23 cm pie dish and bake at 350°F / 175°C for 30–40 minutes. See the crustless ham and cheese quiche section for the full method.

  • Prep Time: 15 minutes
  • Par-Bake Time: 10–12 minutes
  • Final Bake Time: 35–45 minutes
  • Resting Time: 10 minutes
  • Total Time: About 1 hour 10 minutes to 1 hour 20 minutes
  • Servings: 6–8 slices

Equipment

  • 9-inch / 23 cm pie dish or 9-inch deep-dish frozen pie shell
  • Rimmed baking sheet
  • Mixing bowl
  • Whisk
  • Measuring cups and spoons
  • Fork
  • Foil or pie shield
  • Wire rack
  • Instant-read thermometer, optional

Ingredients

  • 1 9-inch / 23 cm deep-dish pie crust, homemade, refrigerated, or frozen
  • 5 large eggs
  • 1 cup / 240 ml / 8 fl oz half-and-half, or ½ cup / 120 ml heavy cream plus ½ cup / 120 ml whole milk
  • 1½ cups / 200–225 g / 7–8 oz cooked diced ham, measured loosely, not packed
  • 1½ cups / 150–170 g / 5–6 oz shredded cheese, measured loosely, not packed
  • 2–3 tablespoons chopped green onions or chives
  • 1 teaspoon Dijon mustard
  • ¼ teaspoon black pepper
  • ¼–½ teaspoon salt
  • Small pinch of nutmeg, optional
  • 1 tablespoon butter or oil, optional, if sautéing onion, mushrooms, spinach, or other vegetables

Use ¼ teaspoon salt if your ham or cheese is salty. Use ½ teaspoon only if your ham is mild and your cheese is not very salty.

Instructions

1. Preheat and Set Up

Heat the oven to 375°F / 190°C and set a rack in the middle or lower-middle position. Place the pie crust on a rimmed baking sheet so it is easier to move and any overflow is caught.

2. Par-Bake the Crust

Give the crust a short head start for 10–12 minutes, or follow the package timing if using a frozen shell. The surface should look dry and lightly set, even if it is still pale. Gently press down any puffed spots with a spoon.

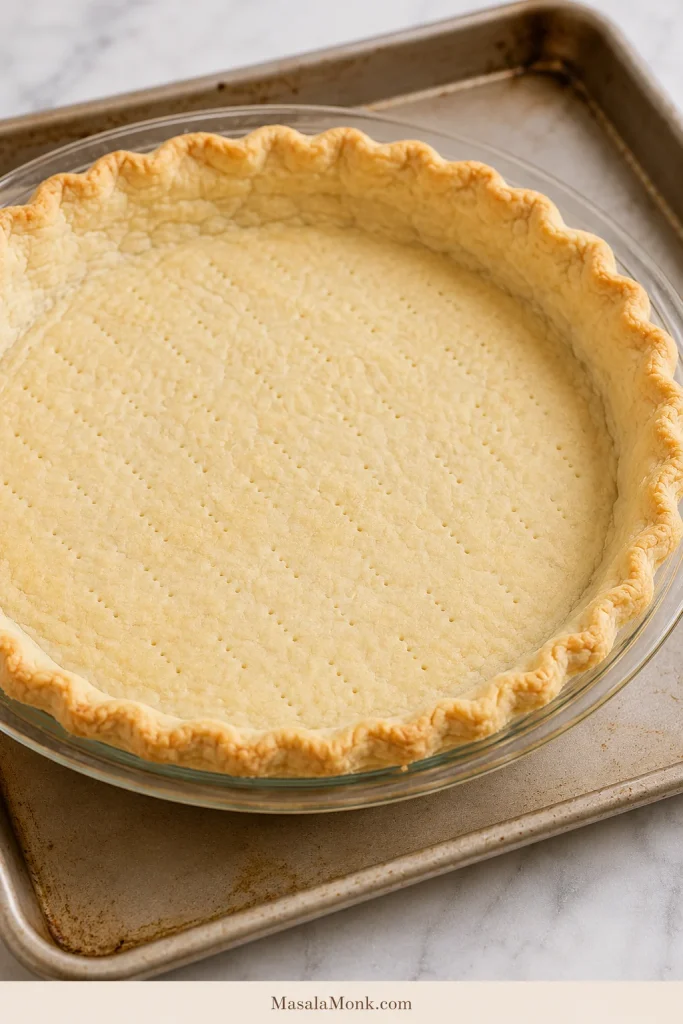
Lightly par-baked pie crust with fork holes in a pie dish on a rimmed baking sheet.
Par-bake the crust until the surface looks dry and lightly set; it should not be deeply browned yet because it bakes again with the custard.

3. Whisk the Custard

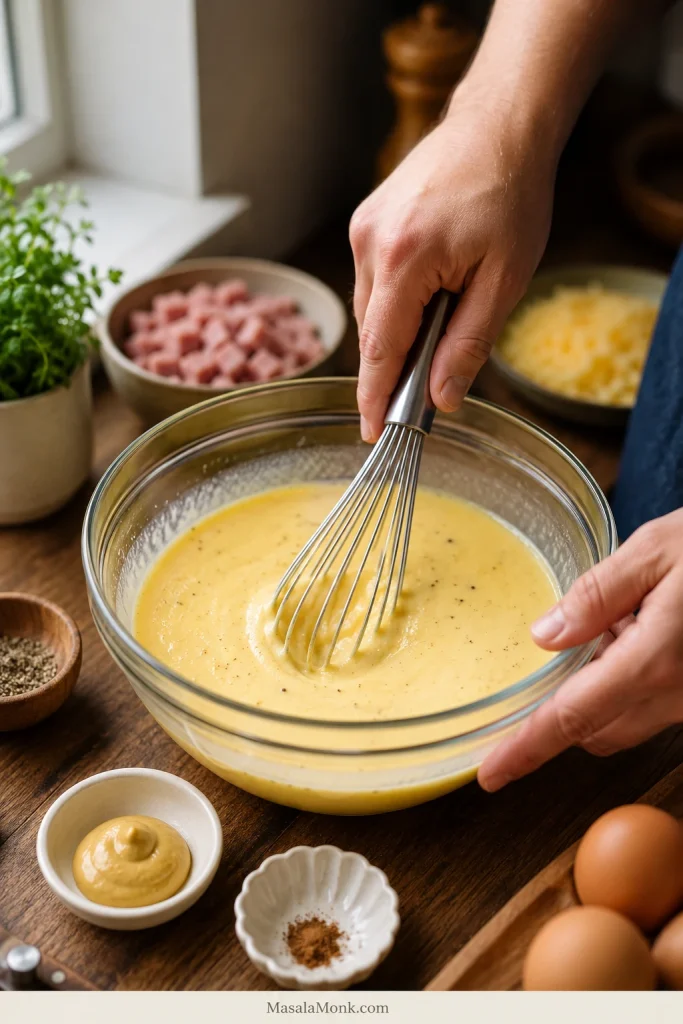
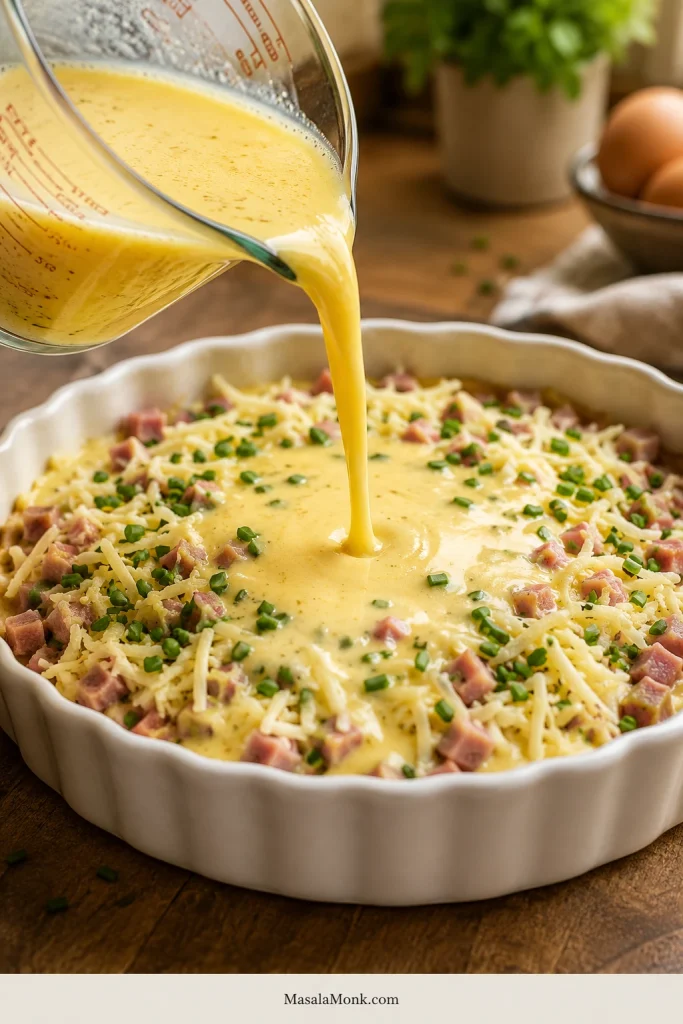
Combine the eggs, half-and-half, Dijon mustard, black pepper, salt, and nutmeg in a mixing bowl until the mixture looks smooth and evenly yellow. Stop once it is blended; the custard should not be bubbly or foamy.

Hands whisking a pale egg custard mixture in a glass bowl with dairy, Dijon mustard, pepper, and seasonings nearby.
Whisk the eggs and dairy just until smooth; a calm, even custard bakes more neatly than one whipped full of foam.

4. Layer the Ham, Cheese, and Chives

Scatter the diced ham evenly over the warm par-baked crust. Add the shredded cheese and green onions or chives so the filling is spread across the base before the custard goes in.

Diced ham, shredded cheese, and chopped chives spread evenly inside a par-baked pie crust.
Layer the ham, cheese, and chives before the custard goes in so every slice gets flavor throughout instead of one heavy layer at the bottom.

5. Pour Without Overfilling

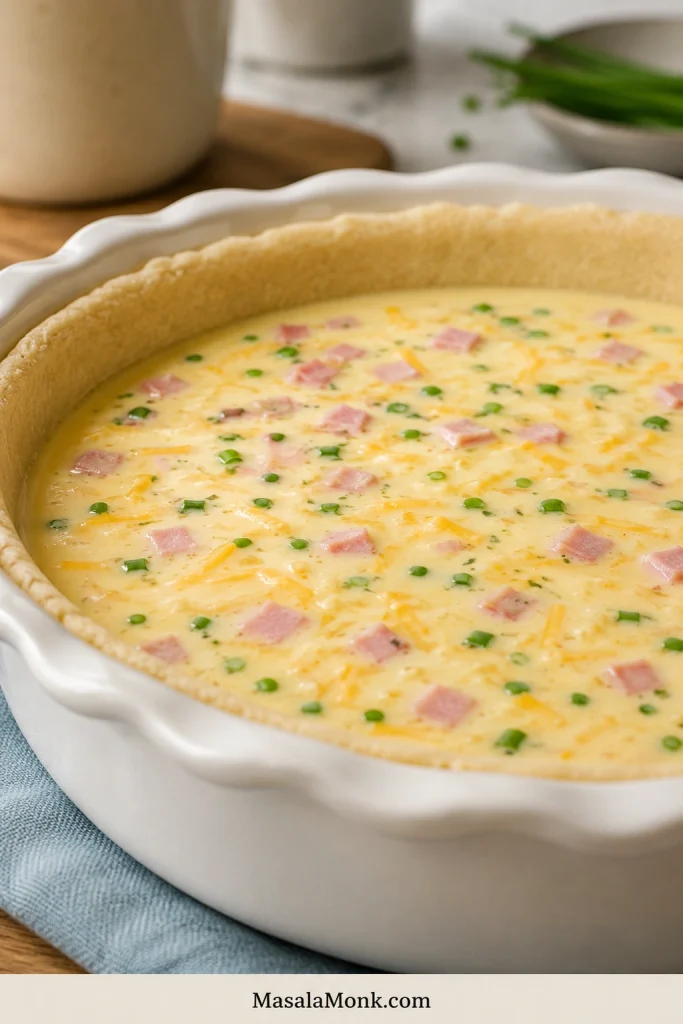
Add the egg mixture slowly over the ham and cheese so it can settle into the gaps. Stop before it touches the rim, especially if the crust is shallow. A clean oven is worth more than one extra spoonful.

Egg custard being poured from a glass measuring cup into a pie crust filled with ham, cheese, and chives.
Pour slowly so the custard settles between the ham and cheese; this helps the quiche bake evenly from the crust edge to the center.

A shallow crust may not hold every drop of custard. When the filling looks close to the top, save the extra for a greased ramekin instead of risking overflow.

Unbaked quiche filling sitting below the visible rim of a deep pie crust in a white ceramic dish.
Stop before the filling reaches the rim; leaving visible crust above the custard is one of the easiest ways to prevent overflow in a deep-dish quiche.

6. Bake Until Soft-Set

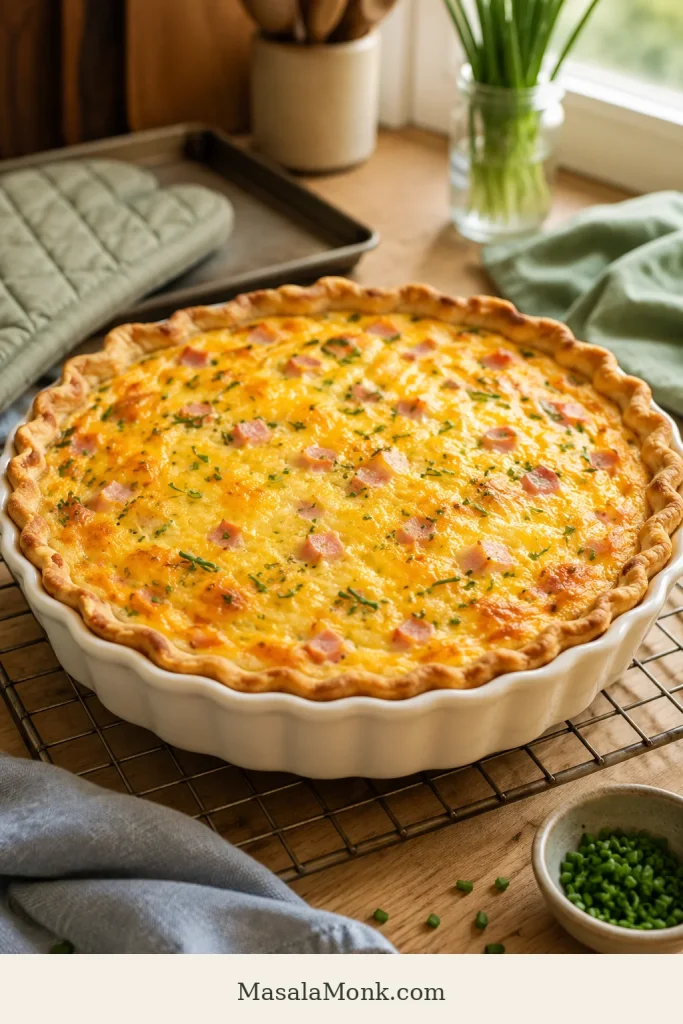
Slide the quiche into the oven for 35–45 minutes, until the edges are set and the center moves like soft-set pudding when you gently nudge the pan. Cover the crust edge with foil or a pie shield if it browns too quickly, and tent the whole quiche loosely if the top colors before the center is ready.

Whole baked ham and cheese quiche in a white ceramic pie dish resting on a wire cooling rack.
A softly puffed top, golden cheese spots, and a browned crust edge are better doneness clues than waiting for the center to look firm.

7. Rest Before Slicing

Set the quiche on a wire rack for 10 minutes before cutting. The center settles as it cools, which helps the slices lift cleanly instead of slumping.

8. Serve Warm or Room Temperature

Bring slices to the table warm or at room temperature for the creamiest texture. Chilled leftovers are fine for quick lunches, but the custard tastes better once the chill comes off.

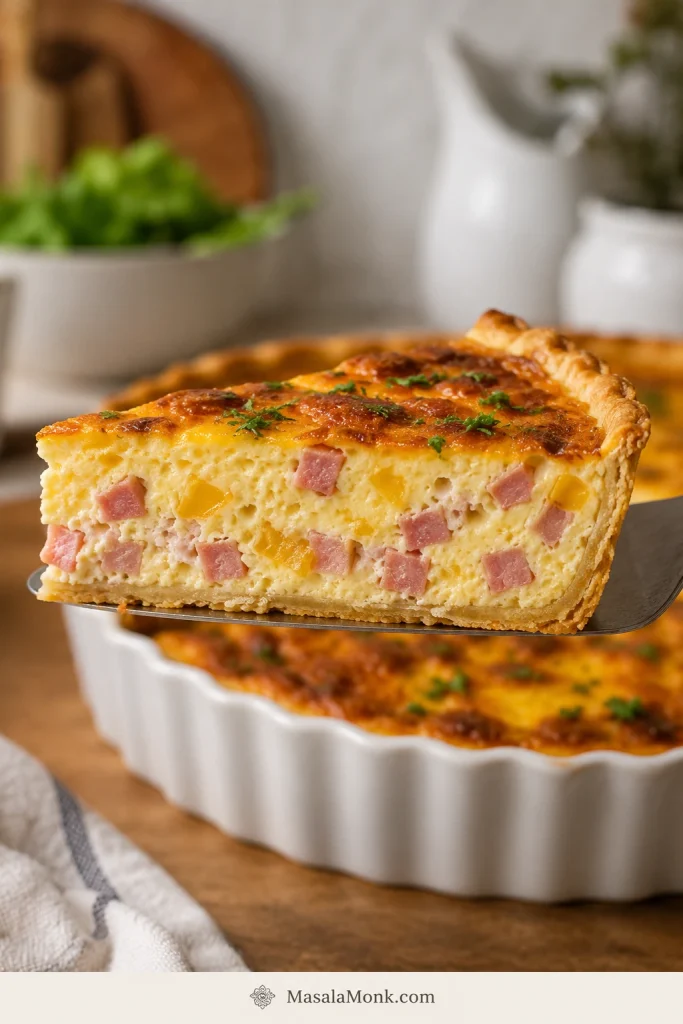
A good slice should look softly set in the center, with ham and cheese suspended through the custard instead of sunk into one dense layer.

Slice of ham and cheese quiche lifted on a pie server, showing creamy custard, diced ham, melted cheese, and an intact bottom crust.
A clean cross-section shows the target texture: ham suspended through the custard, a tender middle, and a crust strong enough to lift.

Recipe Notes

  • This recipe card is for the crusted version. For crustless baking, use the crustless note above or jump to the crustless quiche section.
  • If using frozen crust, make it deep-dish. Regular frozen shells can work, but they often cannot hold all the filling; the frozen crust notes explain why.
  • If using homemade or refrigerated pie dough, chill it in the dish, line it with parchment, add pie weights, dried beans, or uncooked rice, and par-bake until the edges begin to set. Frozen crusts can usually follow package directions.
  • Cook, drain, and cool vegetables before adding them so they do not throw off the texture.
  • Do not overfill a shallow crust. Extra egg mixture can be baked in a small greased ramekin.

Why This Recipe Works

That ratio does most of the work here: 5 large eggs + 1 cup dairy + 1½ cups ham + 1½ cups cheese. Five eggs give the slice structure, one cup of dairy keeps the center soft instead of omelet-like, and the ham and cheese stay generous without weighing down the custard.

The goal is a slice that lifts cleanly but still tastes soft and creamy, with little pockets of ham and melted cheese all the way through.

A short head start in the oven also protects the crust. It keeps the bottom from turning pale and soft once the wet custard goes in, and it helps you avoid the usual quiche problems: too much liquid, wet add-ins, a soft bottom crust, and eggs baked until rubbery.

Ingredients and Key Tips

Quiche is forgiving, but it is not random. Once you control moisture, salt, and bake time, the rest becomes flexible.

Ham

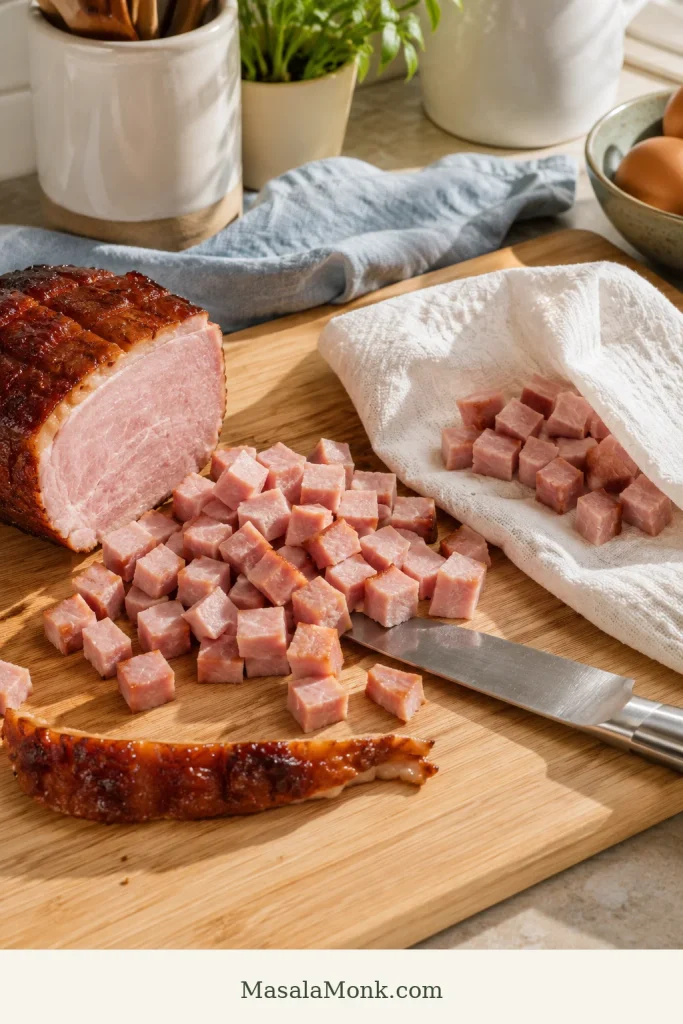
Almost any cooked ham works here: leftover holiday ham, ham steak, smoked ham, or thick-cut deli ham. Dice it small so it spreads evenly through the custard.

This is especially useful after a holiday meal, Sunday dinner, or any time you have cooked ham in the fridge. The ham is already seasoned and ready to help; you are not building brunch from nothing, just giving leftovers a better second life.

For deli ham, choose thicker slices and dice them small. Watery packages need a quick blot before the ham goes into the crust because extra moisture can affect the custard just like wet vegetables can.

Salty ham needs less salt in the egg mixture. You can always add a little salt at the table, but you cannot remove it once it is baked into the dish.

With sweet glazed ham, trim away any thick sticky edges before dicing. A little sweetness is fine, but too much glaze can make the quiche taste sweeter and more casserole-like than classic ham quiche. Dijon mustard, black pepper, cheddar, Swiss, or Gruyère will help balance it.

Diced cooked ham on a wooden cutting board with a towel blotting some pieces and a glazed ham edge being trimmed.
Blot wet ham before adding it; this small step helps prevent watery quiche, especially with deli ham or glazed leftovers.

Brown the ham if it is pale, wet, or mild. Skip this step if the ham is already smoky, dry, or strongly flavored. A quick 2–3 minutes in a dry skillet or a little butter gives the edges more savory flavor.

Eggs

Five eggs is the sweet spot for this size: enough structure to slice, but not so many that the center turns firm and omelet-like.

Dairy

For the creamiest everyday texture, half-and-half gives you the easiest balance. If half-and-half is not available where you live, use equal parts heavy cream and whole milk.

Whole milk also works for a lighter quiche. The center will be less rich, but it will still set if you keep the egg-to-dairy ratio steady.

Cheese

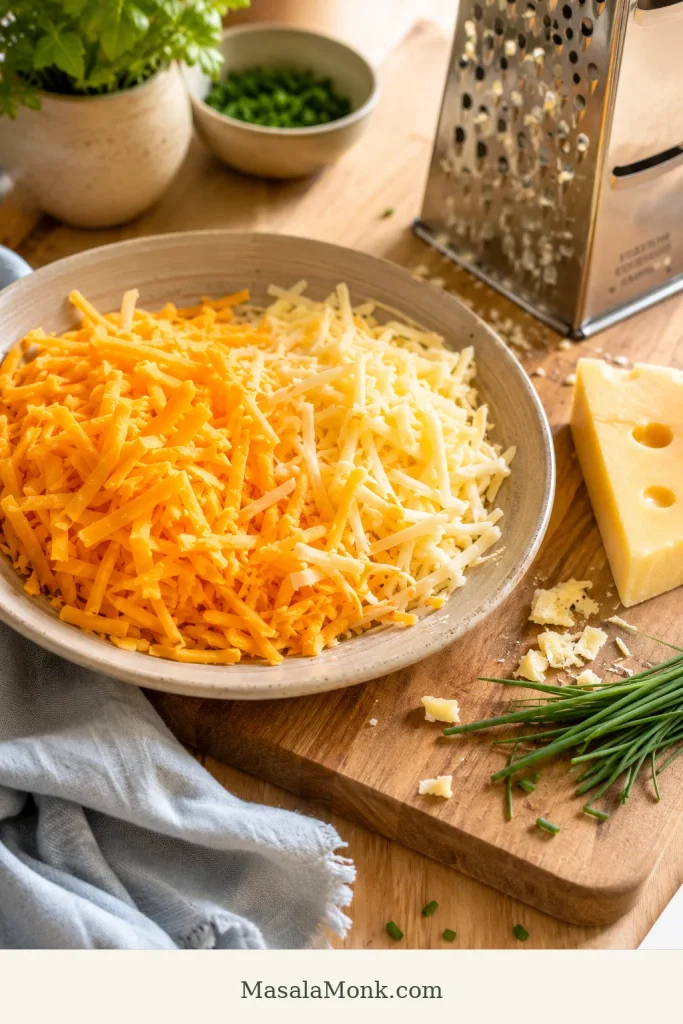
For cheese, stay with something that actually has flavor. Sharp cheddar gives the quiche that familiar melted ham-and-cheese pull, Swiss is mild and classic, and Gruyère makes the dish feel more brunch-table polished.

Measure shredded cheese loosely, not packed tightly into the cup. Too much cheese can make the quiche greasy, salty, or heavy. Freshly shredded cheese melts most smoothly, but pre-shredded cheese is fine when convenience matters.

Avoid fresh mozzarella unless it is very well drained. It can release water into the custard. Low-moisture mozzarella is safer, but it is mild, so it works better as part of a blend than as the main cheese.

Green Onions, Chives, Onion, or Garlic

Green onions and chives are the easiest because they can go straight into the egg mixture. If using yellow onion, shallot, or garlic, sauté them first so the flavor softens before baking.

Dijon, Pepper, and Nutmeg

Dijon mustard adds gentle sharpness without making the quiche taste mustardy. Black pepper keeps the custard from tasting flat. A tiny pinch of nutmeg is optional, but it works beautifully with eggs, cream, cheese, and ham.

Before You Bake, Check These 5 Things

If you remember only three things, par-bake the crust, control wet add-ins, and pull the quiche before the center turns firm. If the center still makes you nervous, the doneness cues below explain the wobble, resting time, and thermometer range.

  • The crust is par-baked and lightly set.
  • The ham is diced small and patted dry if it feels wet.
  • Any vegetables are cooked, drained, and cooled slightly.
  • The cheese and ham are measured loosely, not packed down.
  • The egg mixture sits below the rim of the crust.

Best Crust, Dairy, and Cheese Choices

This is where you can make the recipe fit your kitchen. Frozen crust, homemade crust, cream, milk, cheddar, Swiss, or Gruyère can all work — the goal is to keep the custard balanced and the crust from going soft.

Using a Frozen Pie Crust

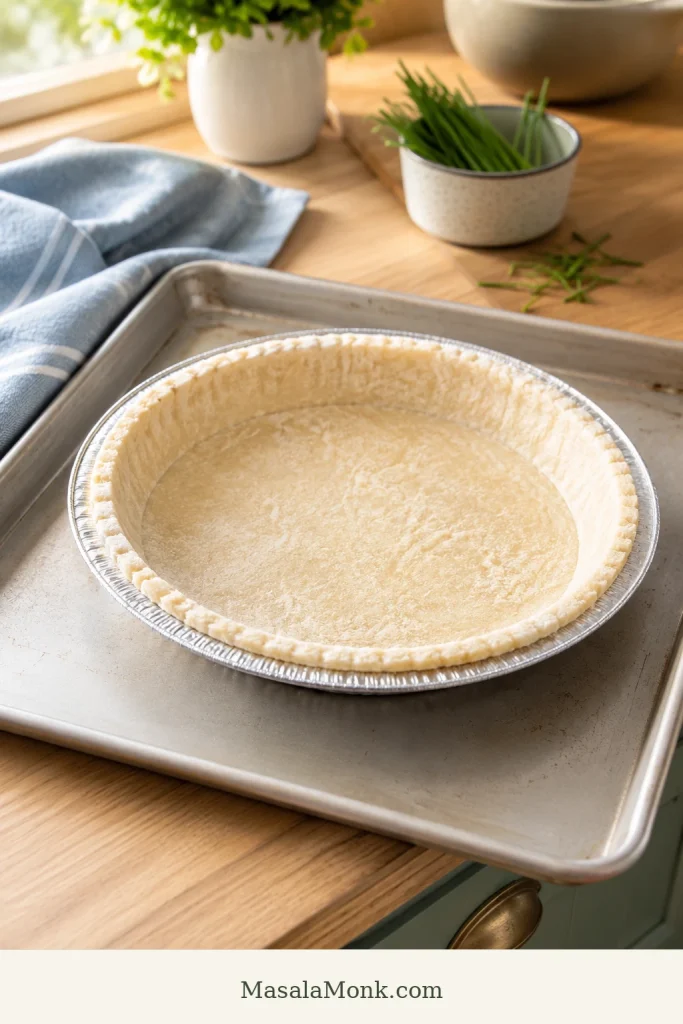
If you are using a frozen crust, you are not cheating; you are making brunch easier. Choose a 9-inch deep-dish frozen crust if you can. Regular frozen shells can work, but they often cannot hold all the filling.

Keep the crust in its tin if it comes that way, place it on a rimmed baking sheet, prick the base lightly, and par-bake for 10–12 minutes before filling. Do not worry if it is not deeply browned after the first bake. It will go back into the oven with the custard.

Deep-dish frozen pie crust in a foil tin set on a rimmed baking sheet on a kitchen counter.
A deep-dish frozen pie crust makes frozen crust quiche easier because it gives the egg custard enough room and helps reduce spillover.

Homemade or Regular Pie Crust

Not every 9-inch crust holds the same amount of custard. A regular 9-inch crust can still work, but you may not need every drop of the egg mixture.

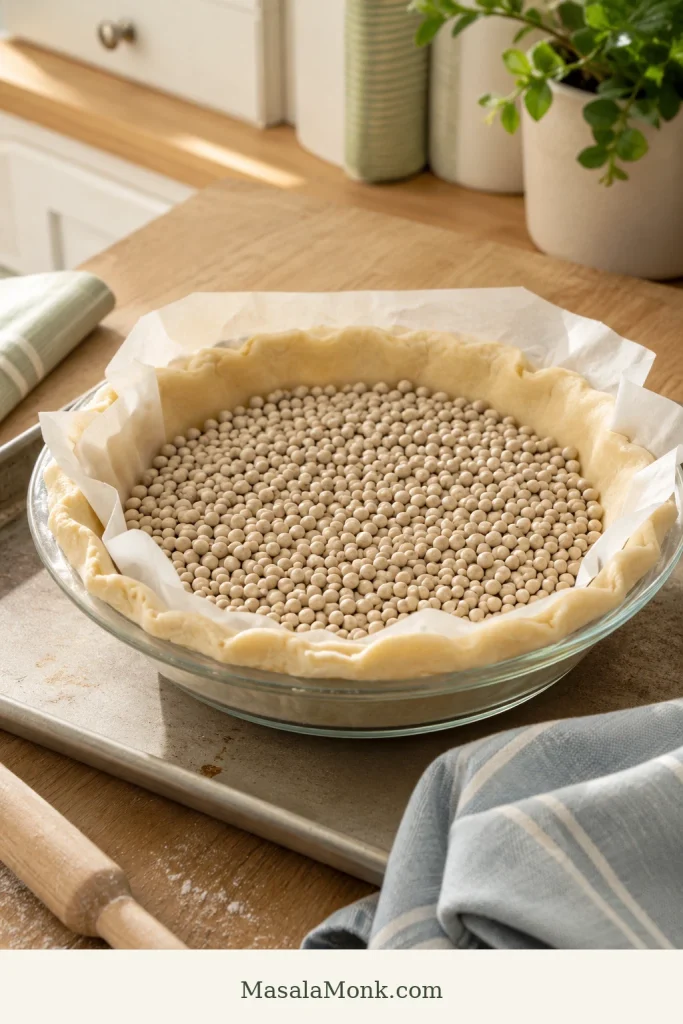
If using homemade pie dough, chill it in the dish before blind baking. Line it with parchment, fill with pie weights, dried beans, or uncooked rice, and bake until the edges begin to set before removing the weights.

Pie crust lined with parchment paper and filled with pie weights in a glass pie dish.
With homemade or refrigerated dough, blind-baking with parchment and pie weights helps the crust hold its shape before the wet filling goes in.

Do not fill the crust all the way to the rim. Quiche can puff as it bakes. If you have extra egg mixture, bake it in a small greased ramekin instead of forcing it into the crust.

What Dairy Makes the Creamiest Texture?

The dairy is where you can quietly change the whole personality of the quiche. Cream makes it rich, milk makes it lighter, and half-and-half sits comfortably in the middle.

DairyTexture and FlavorGood Use
Heavy creamRichest, softest, most custardySpecial brunch or holiday quiche
Half-and-halfCreamy but not too heavyEveryday choice
Whole milkLighter and less richLighter quiche that still sets
Low-fat milkLess creamy and slightly less forgivingUse only if you accept a lighter texture
½ cream + ½ whole milkRich and balancedEasy substitute for half-and-half

If you do not have half-and-half, use ½ cup / 120 ml heavy cream + ½ cup / 120 ml whole milk. To make the quiche without heavy cream, use 1 cup / 240 ml whole milk.

Cheddar, Swiss, or Gruyère?

Ham needs cheese with enough flavor to stand up to it. Sharp cheddar gives bold, familiar flavor. Swiss gives a mild, nutty, classic brunch taste. Gruyère makes the custard richer and deeper.

For an everyday version, use 1 cup sharp cheddar + ½ cup Swiss. For a richer brunch version, use 1 cup Gruyère + ½ cup cheddar or Swiss. A little Parmesan can also be added for salty, nutty depth, but use it lightly.

Shredded cheddar and pale Swiss or Gruyère cheese on a board with a grater and chopped chives nearby.
Sharp cheddar with Swiss or Gruyère gives ham quiche familiar melt plus a more brunch-ready finish.

Bake Time, Doneness, and Visual Cues

For a crusted quiche, use 375°F / 190°C for 35–45 minutes. A shallow quiche may finish closer to 35 minutes, while a deep-dish or vegetable-heavy one may need closer to 45–50 minutes.

Use 350°F / 175°C for the crustless version or a very deep filling. Save 400°F / 200°C mainly for par-baking crust or quick browning, not for the full custard bake.

Visual Doneness Cues

  • After par-baking: the crust should look dry and lightly set, not deeply browned.
  • After whisking: the egg mixture should look smooth and lightly yellow, not frothy.
  • Before baking: the egg mixture should sit below the rim, with a little breathing room.
  • Near the end: the top may puff slightly and turn golden in spots.
  • When done: the center should move like soft-set pudding, not ripple like raw liquid.
  • After resting: the center should look calmer, and the slice should hold when lifted.

If the crust browns too quickly, cover the edges with foil or a pie shield and keep baking until the center is set. If the top browns before the center is ready, tent the whole quiche loosely with foil.

The first time you bake quiche, the wobble can feel wrong. It is not. The quiche is done when the edges are puffed and set, the center is soft-set but not liquid, and the top is lightly golden in places.

Thermometer and Resting Cues

If using a thermometer, the center should reach at least 160°F / 71°C for egg safety. For a tender, sliceable quiche, start checking around 165°F / 74°C and avoid pushing far past 185°F / 85°C. Carryover heat and resting time will help the center finish setting.

Instant-read thermometer inserted into the center of a baked ham and cheese quiche in a white ceramic pie dish.
A thermometer gives extra confidence with quiche doneness: the center should be safe and set without baking until the eggs turn rubbery.

If you are unsure, give the quiche a few more minutes of rest before cutting rather than putting it back into the oven too quickly. Resting often fixes a soft-looking center; overbaking does not.

Whole baked ham and cheese quiche resting on a wire rack with a knife and pie server nearby.
Let the quiche rest before slicing; this pause helps the center settle so the slices lift cleaner and taste creamier.

Crustless Ham and Cheese Quiche and Easy Variations

Once the base is steady, this quiche is easy to bend toward the day: crusted for brunch, crustless for meal prep, mini for parties or lunchboxes.

If You Want…Do This
Classic ham and cheese quicheUse cheddar + Swiss in a par-baked crust
Richer brunch quicheUse Gruyère and a cream + milk mixture
Lighter quicheUse whole milk instead of cream or half-and-half
Crustless quicheGrease the dish well and bake at 350°F / 175°C
Vegetable quicheCook and cool vegetables before adding them
Mini quichesUse muffin tins and fill each cup about ¾ full
Leftover ham quicheDice ham small and reduce added salt if needed

Crustless Ham and Cheese Quiche

The crustless version is not just the fallback. It is the faster, lighter version for meal prep or for anyone skipping pastry.

To make it crustless, skip the pie crust and bake the egg mixture in a well-greased 9-inch / 23 cm pie dish. Use the same base: 5 eggs, 1 cup / 240 ml dairy, 1½ cups ham, 1½ cups cheese, Dijon, pepper, and herbs.

Bake at 350°F / 175°C for 30–40 minutes, or until the center is just set. The crustless version is softer than the crusted version, so let it rest for at least 10 minutes before slicing.

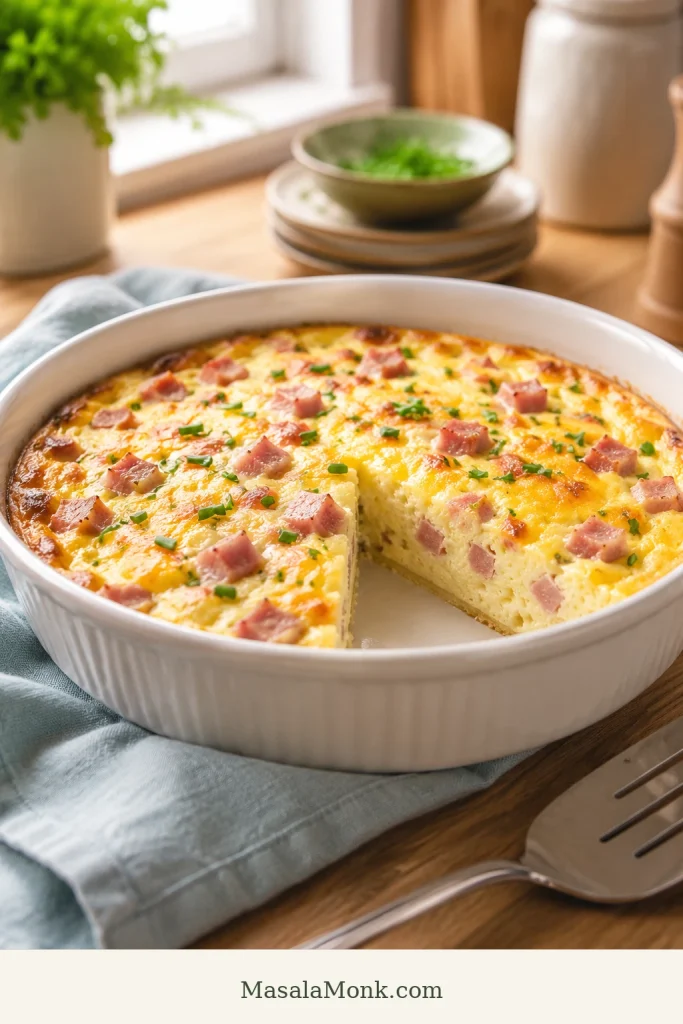
Crustless ham and cheese quiche in a white baking dish with one wedge removed, showing set custard, ham, cheese, and chives.
The lighter crustless ham and cheese quiche uses the same creamy filling but bakes directly in a greased dish.

For another no-crust egg bake, the frittata recipe is the skillet-style route; for muffin-tin meal prep, use the egg muffins recipe.

Ham and Swiss Quiche

Ham and Swiss quiche has a mild, nutty, classic brunch flavor. Use Swiss for all or part of the cheese. A good blend is 1 cup Swiss + ½ cup sharp cheddar. Dijon mustard and chives work especially well with this version.

Ham and Spinach Quiche

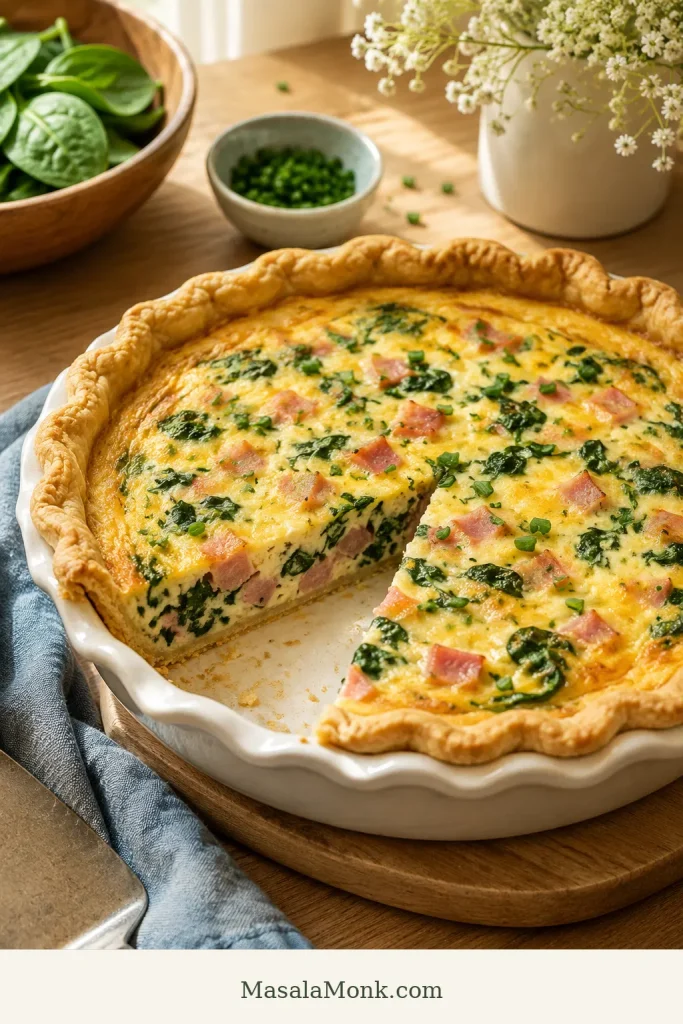
For ham and spinach quiche, use either 1 cup cooked fresh spinach or ½ cup frozen spinach that has been thawed and squeezed very dry. Spinach pairs well with Swiss, Gruyère, cheddar, feta, or goat cheese.

Wet spinach is not a small issue. It can make the center watery, even if the egg ratio is right.

Ham and spinach quiche with a wedge cut out, showing spinach ribbons, diced ham, creamy custard, and golden crust.
Cook or squeeze spinach dry before making ham and spinach quiche; the greens should add color and flavor, not extra water.

Broccoli Ham and Cheese Quiche

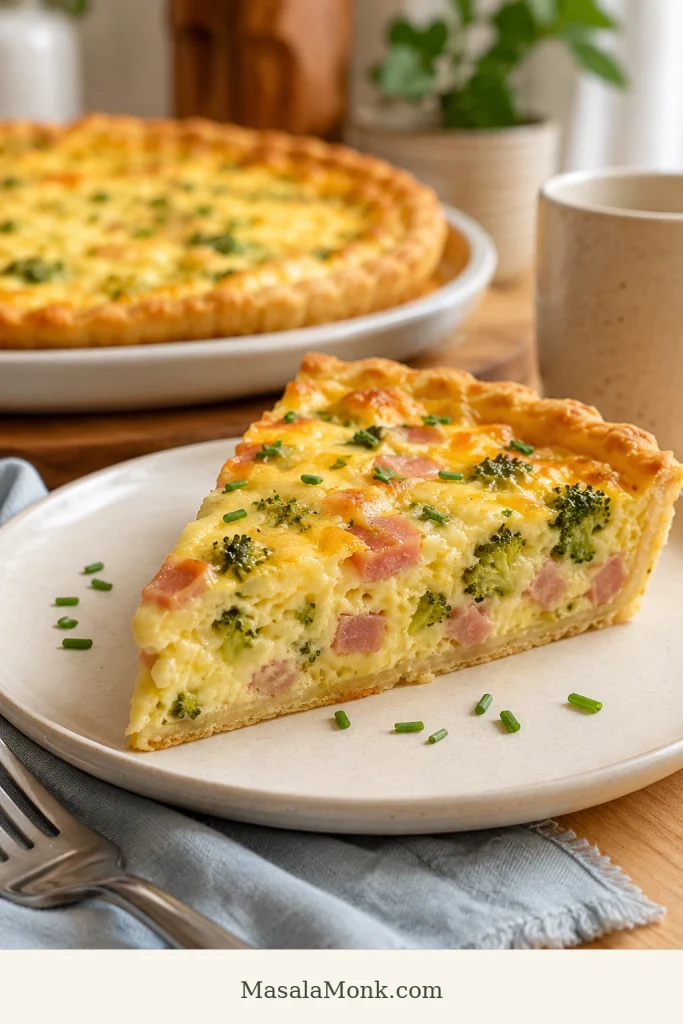
For broccoli ham quiche, use 1 cup small broccoli florets. Steam, blanch, microwave, or sauté them first, then drain well and chop small. Sharp cheddar is the easiest pairing, but Swiss or Gruyère also work.

Slice of broccoli ham and cheese quiche on a plate with visible broccoli florets, diced ham, creamy custard, and crust.
Small cooked broccoli florets keep broccoli ham and cheese quiche tender, balanced, and easy to cut.

Mushroom, Onion, Asparagus, and Other Add-Ins

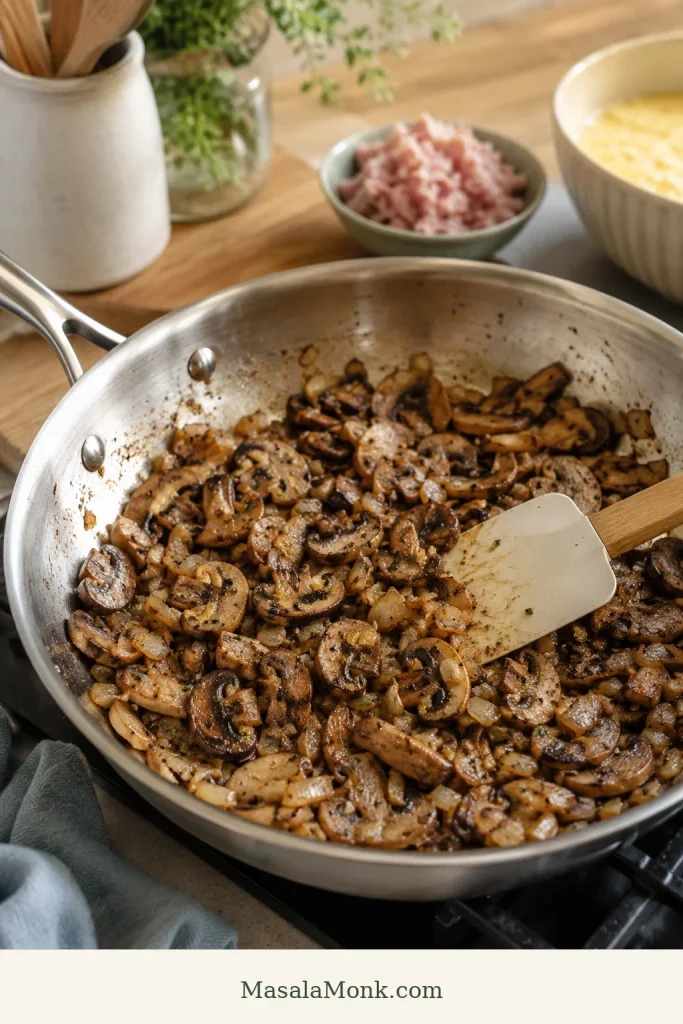
Add-ins are where a good quiche can go watery, so treat them before they reach the crust. A few minutes in a skillet can save the whole dish.

Add-InAmountPrep
Mushrooms¾–1 cup slicedSauté until the moisture evaporates
Onion or shallot¼–½ cup choppedSauté until softened
Asparagus¾–1 cup choppedBlanch or sauté if thick
Bell pepper½ cup dicedSauté for better texture
TomatoSmall amountRemove seeds and excess moisture

Let cooked vegetables cool for a few minutes before adding them. Hot add-ins can start setting the eggs unevenly before the dish even reaches the oven.

Sautéed mushrooms and onions in a skillet with a spatula, browned and cooked down with no pooled liquid.
Sauté mushrooms and onions until their moisture cooks off; this is a simple fix for watery quiche.

Mini Ham and Cheese Quiche

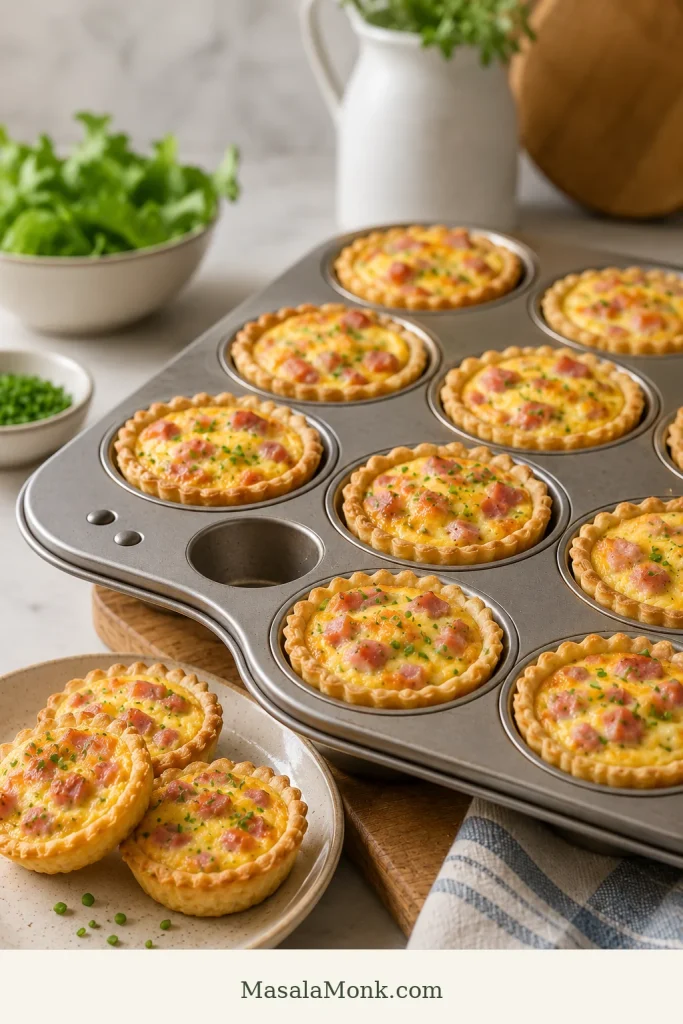
Mini ham and cheese quiches are best when you want party bites, brunch trays, lunchboxes, or freezer-friendly portions. Use the same egg mixture, but cut the ham and add-ins smaller so each bite gets ham, cheese, and custard. For leftovers, use the make-ahead, storage, and reheating cues below.

The full filling usually makes about 10–12 regular muffin-size mini quiches or 24–30 mini muffin-size bites, depending on how much crust and add-ins you use.

  • Regular muffin tin: bake at 350°F / 175°C for 18–25 minutes.
  • Mini muffin tin: bake at 350°F / 175°C for 14–20 minutes.
  • With crust: press small pie crust or puff pastry rounds into greased cups before filling.
  • Without crust: grease the tin very well or use silicone liners.
  • Filling level: fill each cup about ¾ full so the egg mixture has room to puff.

Let mini quiches cool for 5 minutes before loosening them with a small knife. They freeze well after baking; reheat from chilled or thawed in a 325°F / 160°C oven until warmed through.

Mini ham and cheese quiches with small golden pastry crusts baked in a muffin tin, with a few placed on a nearby plate.
Party-size mini ham and cheese quiches work best with small pastry crusts, visible ham, and room for the custard to puff.

Other Shortcut Variations

Puff pastry works well for mini quiches and party bites. Crescent dough gives a softer, breadier crust. A Bisquick-style ham and cheese bake is closer to an impossible pie than a classic quiche, so it is better treated as a separate recipe rather than a small swap.

For an old-fashioned ham and cheese quiche, keep it simple: pie crust, cooked ham, cheddar and Swiss, half-and-half, green onions or chives, and black pepper.

Make Ahead, Storage, and Reheating

Quiche is one of the rare egg dishes that actually likes being made ahead. It can rest, settle, reheat, and still taste good when everyone finally reaches the table.

This is also why quiche works so well for hosting: it gives you something generous to serve without asking you to cook every egg to order. When the timing is sorted, jump to what to serve with it for plate ideas.

For a crisper crust, do not pour the raw egg mixture into the shell many hours before baking. The crust can absorb moisture and soften before it ever reaches the oven. If you want to prep ahead, par-bake the crust, dice the ham, shred the cheese, cook any vegetables, and keep the egg mixture separate until baking.

For safety, cooked egg dishes should not sit at room temperature for more than 2 hours; the FDA gives the same basic egg-safety guidance.

Fridge

Let the quiche cool completely, then cover it and refrigerate for 3–4 days, whole or in slices. That timing lines up with USDA leftover food safety guidance.

Freezer

Quiche freezes more cleanly after baking. Cool it completely, wrap it tightly, and freeze it whole or sliced for up to 2 months for the creamiest texture.

The crust may soften slightly after freezing, but reheating in the oven helps bring it back. If freezing slices, wrap them individually or place parchment between them so they do not stick together.

For a freezer breakfast that reheats faster than quiche, MasalaMonk’s breakfast burrito recipe is the better handheld option.

Reheating

For a better texture, reheat slices in a 325°F / 160°C oven until warmed through. Reheat loosely covered with foil, then uncover for the last few minutes if the crust needs crisping.

The microwave works for individual slices when speed matters, but it will soften the crust. If reheating from frozen, thaw overnight in the refrigerator first.

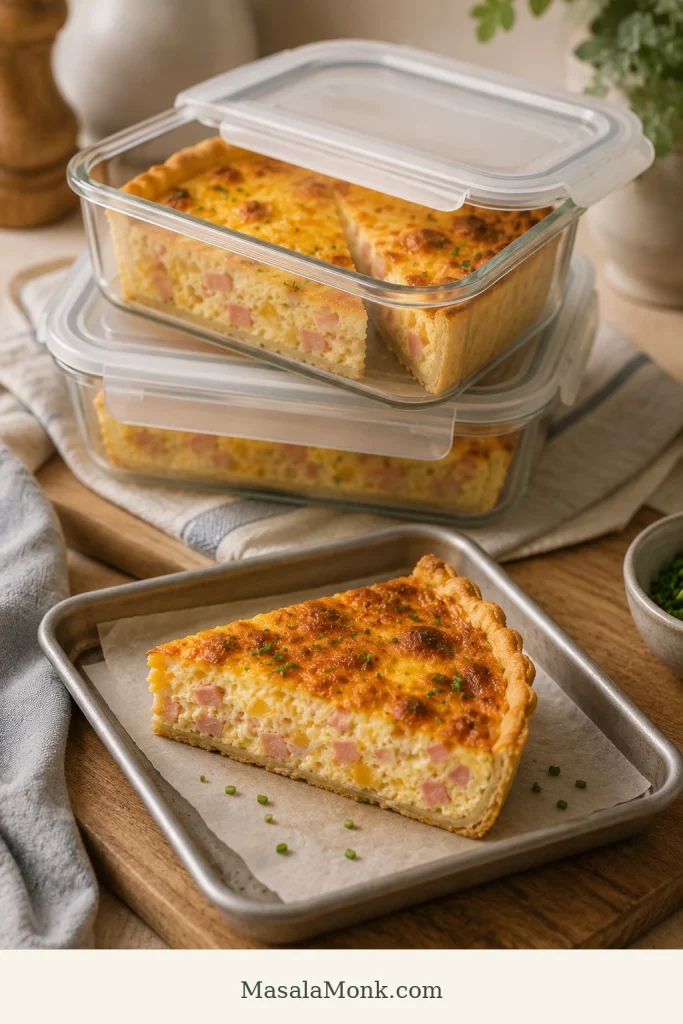
Slices of ham and cheese quiche stored in clear containers with one slice on a parchment-lined reheating tray.
Make-ahead ham and cheese quiche slices store well once cooled; reheat them in the oven or toaster oven when you want the crust to stay crisp.

What to Serve with Ham and Cheese Quiche

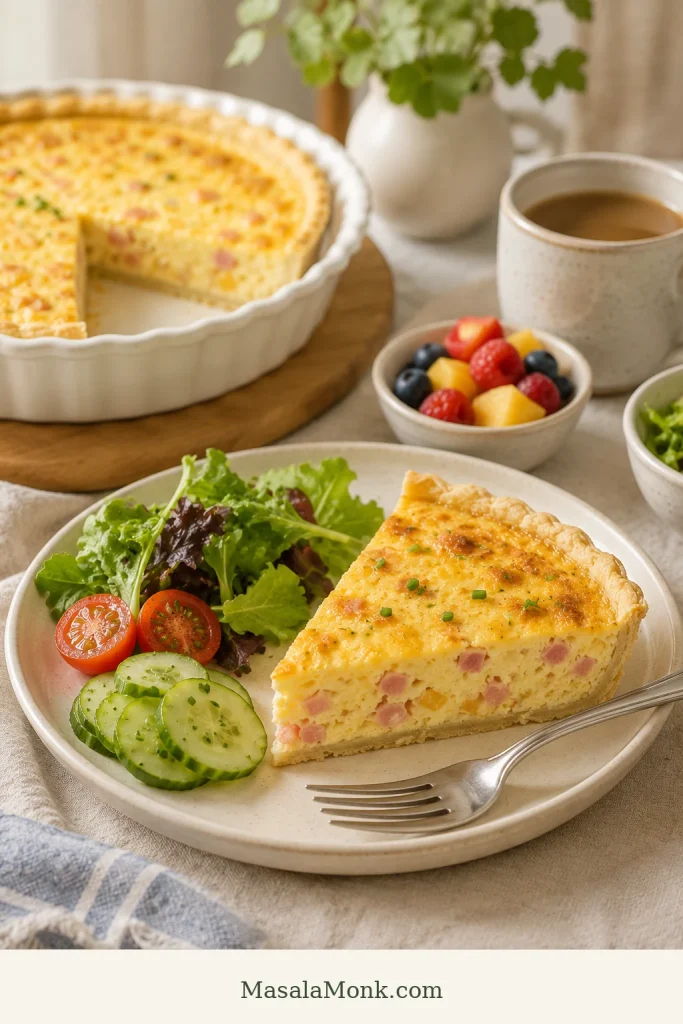
The quiche already brings richness, salt, and comfort. The best sides simply make the plate feel fresher. A crisp salad or fresh fruit keeps each creamy, salty bite from feeling heavy.

Plated slice of ham and cheese quiche served with greens, cucumber slices, tomatoes, fruit, and coffee on a brunch table.
Serve the rich quiche with fruit, greens, cucumber, or coffee so the creamy, salty slices feel balanced.

How to Avoid Watery, Soggy, or Rubbery Quiche

When quiche goes wrong, it usually gives you clues. A watery middle, soggy bottom, rubbery texture, or salty bite can almost always be traced back to moisture, timing, salt, or overfilling — not to quiche being difficult.

Once you know what the center should look like, quiche stops feeling mysterious.

ProblemMost Likely CauseFix Next Time
Watery centerWet vegetables, watery ham, too much dairy, or underbakingCook and drain add-ins, keep the ratio steady, and rest before slicing
Soggy crustCrust not par-baked or custard sat in crust too longPar-bake first and assemble close to baking
Rubbery textureOverbakingPull while the center is still soft-set
Too saltySalty ham and cheese plus full added saltUse ¼ teaspoon salt or less with salty ham
OverflowShallow crust or filling too close to rimUse deep-dish crust and stop below the rim

The 3 Biggest Quiche Mistakes

  • Skipping the par-bake: this is the fastest path to a soft bottom crust.
  • Adding wet ingredients: watery ham, spinach, mushrooms, and tomatoes can loosen the custard.
  • Baking until fully firm: pull it while the center is still soft-set, then let it rest.

Why is my quiche watery?

Watery quiche is almost always a moisture or timing problem. The usual culprits are wet spinach, raw mushrooms, watery ham, too much dairy, underbaking, or slicing before the center has had time to settle.

  • Cook and drain vegetables before adding them.
  • Squeeze spinach very dry.
  • Pat wet ham dry.
  • Use the 5 eggs to 1 cup dairy ratio.
  • Bake until the center is just set.
  • Rest for 10 minutes before slicing.

Why is my crust soggy?

A soggy crust usually means the crust was not par-baked, the egg mixture sat in the crust too long before baking, or wet ingredients released moisture into the bottom. Par-bake the crust, cook and drain vegetables, and avoid assembling the raw custard in the crust too far ahead.

Lifted slice of ham and cheese quiche showing a clean, firm bottom crust, creamy custard, diced ham, melted cheese, and golden edge.
The best no-soggy-bottom proof is underneath: the crust should look firm enough to lift, not pale, wet, or collapsed.

Why is my quiche rubbery?

Rubbery quiche is usually overbaked. Eggs become firm and tough when they cook too long. Remove the quiche when the center still has a gentle wobble. It will finish setting as it rests.

Why did the center not set?

The center may not set if the quiche is very deep, the oven temperature is too low, the mixture has too much liquid, or it simply needs more time. Cover the crust edges with foil if needed and continue baking until the center no longer looks liquid.

Why is it too salty?

Ham and cheese both bring salt. If your ham is salty, use less salt in the egg mixture. Dijon, black pepper, green onions, chives, and a small amount of cream can help balance the flavor without adding more salt.

Why did it overflow?

The crust may have been too shallow or filled too close to the top. Use a deep-dish crust when possible, stop before the egg mixture reaches the rim, and always bake the quiche on a rimmed baking sheet.

FAQs

Does ham and cheese quiche work without crust?

Yes. Grease a 9-inch / 23 cm pie dish, add the filling, and bake at 350°F / 175°C for 30–40 minutes. Rest before slicing so the center can settle.

Milk instead of cream: will the quiche still set?

Yes. Whole milk works. Keep it to 1 cup / 240 ml so the center still slices cleanly. It will taste lighter than a cream version, but it will still be a proper, sliceable quiche.

Best substitute for half-and-half

Use ½ cup / 120 ml heavy cream plus ½ cup / 120 ml whole milk. You can also use 1 cup / 240 ml whole milk for a lighter version.

Best cheese for ham quiche

Sharp cheddar gives bold flavor, Swiss gives a classic ham quiche taste, and Gruyère makes it richer. A cheddar-Swiss blend is the easiest everyday choice.

Frozen pie crust: deep-dish or regular?

Deep-dish is better because regular frozen shells may not hold all the filling. Par-bake the crust first, place it on a rimmed baking sheet, and avoid overfilling it.

Spinach in quiche: fresh, frozen, cooked, or raw?

Fresh spinach should be wilted first, and frozen spinach should be thawed and squeezed very dry. Raw or wet spinach can make the quiche watery.

Make-ahead quiche: bake first or assemble later?

Bake it first for the easiest make-ahead plan. To prep parts ahead, keep the par-baked crust, cooked add-ins, cheese, ham, and egg mixture separate until baking.

Freezing ham and cheese quiche: whole or sliced?

Both work. Bake it first, cool it completely, then freeze it whole or in slices. Slices are easier for quick meals. Thaw overnight in the refrigerator and reheat in the oven for the best texture.

Doneness cues for creamy, sliceable quiche

The edges should be set, and the center should look soft-set, not liquid. A gentle wobble is okay. If using a thermometer, the center should reach at least 160°F / 71°C.

Watery quiche: what went wrong?

Quiche usually turns watery because of wet vegetables, watery ham, too much dairy, underbaking, or slicing too soon. Cook and drain add-ins, use the right egg-to-dairy ratio, and rest it before slicing.

Is ham and cheese quiche the same as quiche Lorraine?

Not exactly. Quiche Lorraine is traditionally made with bacon or lardons and a savory custard. Ham and cheese quiche has a similar creamy egg base, but uses cooked ham and usually includes cheese like cheddar, Swiss, or Gruyère.

Final Thoughts

Once the ratio makes sense, this stops feeling like a recipe you have to follow tightly and starts feeling like a brunch formula you can use. Cooked ham after a holiday, spinach from the fridge, cheddar one week, Swiss the next, crusted for brunch, crustless for meal prep — it all works as long as the base stays steady.

That is the kind of recipe worth keeping: calm, flexible, and good enough for both leftover ham and a proper brunch table. Slice it warm, serve it with something crisp or fresh, and let the ham, cheese, custard, and flaky crust do the quiet work.

If you make it, start with the cheddar-Swiss version once, then tell me where you took it: crustless, extra herbs, leftover holiday ham, spinach, broccoli, or a different cheese blend.