A good tray of ham and cheese sliders comes apart warm and glossy, with browned buttery tops, folds of hot ham, and Swiss stretching at the center seams. The rolls stay soft where they should, while the bottoms hold together instead of sitting in a puddle of butter.
They look almost impossible to mess up. The catch is that sweet rolls can brown before a cold center has melted, while too much glaze—or too much time sitting in it—can leave the bottom softer than you wanted.
What you want is a hot, fully melted middle and a bottom that stays soft without turning soaked. Keep the filling sensible, put Swiss on both sides of the ham, and brush on only as much glaze as the tops need.
For 12 sliders, split one connected pack of Hawaiian rolls. Layer half of 8 oz / 225 g Swiss cheese over the bottom rolls, add 10 oz / 285 g thinly sliced ham, then cover the ham with the remaining Swiss. Replace the tops, brush them with the buttery Dijon glaze, and bake at 350°F / 175°C.
Begin checking at about 18 minutes with the pan still covered. Once the cheese in the middle is soft and melting, uncover the pan for another 4–6 minutes to brown the tops, then rest the sliders for about 5 minutes before pulling them apart.
Ham and Cheese Sliders Recipe
This makes 12 warm ham and Swiss sliders with soft rolls and a savory butter glaze. The recipe is written for a standard connected 12-roll pack and a 9 × 13-inch / 23 × 33 cm baking dish.
Recipe at a Glance
Makes
12 sliders
Prep
About 15 minutes
Bake
Usually about 22–31 minutes
Rest
5 minutes
Total
About 45–50 minutes; allow a few extra minutes for a refrigerator-cold tray or slower-heating pan
Oven
350°F / 175°C
Pan
9 × 13 in / 23 × 33 cm, or another snug-fitting baking dish
Equipment
You’ll need: a 9 × 13-inch / 23 × 33 cm baking dish, long serrated bread knife, small bowl, pastry brush or spoon, and aluminum foil.
Heavy ceramic dishes can take longer to heat than metal. Keep the foil on until the cheese in the middle has actually melted, even if the tray needs a few extra minutes.
Ingredients
For the Sliders
12 Hawaiian sweet rolls, about 12 oz / 340 g, kept connected
10 oz / 285 g thinly sliced deli ham
8 oz / 225 g thinly sliced Swiss cheese
For the Buttery Dijon Glaze
5 tbsp / 70 g unsalted butter, melted
1 tbsp / 15 mL Dijon mustard
1 tsp / 5 mL Worcestershire sauce
½ tsp onion powder
¼ tsp garlic powder
1–1½ tsp poppy seeds, optional
There is no added salt in the glaze. Ham, Swiss, and Worcestershire already bring plenty of their own.
This is the repeatable 12-roll tray formula. When you need more sliders, repeat the same ham, Swiss, and butter proportions in another pan rather than making the first tray heavier.
Instructions
Build the Ham and Swiss Layers
Build the slab in loose, even layers so the center heats predictably and the outer sliders get the same filling as the middle.
Heat the oven to 350°F / 175°C. Lightly grease the baking dish if food tends to stick to it.
Split the rolls as one slab. Keep all 12 connected and cut horizontally with a long serrated knife, leaving the bottom slab slightly thicker than the top. Very soft rolls squashing under the knife? Chill the connected slab for 10–15 minutes and try again.
Keep the rolls connected; their original seams become your cutting guide later.
Add the first layer of Swiss. Put the lower slab cut-side up in the pan and arrange roughly half the cheese across it, taking the slices close to the edges. That lower layer also keeps the wetter ham directly off the bread.
Add the ham in loose folds. Some packaged ham comes out surprisingly wet. Give visibly wet slices a quick blot, then fold or ruffle the ham over the cheese instead of pressing it into one dense sheet.
Add the remaining Swiss and replace the tops. Take the filling right to the outer edges so the corner sliders are as well filled as the ones in the middle.
Glaze, Bake and Finish
From here, use the center cheese—not the color of the roll tops—as the cue for when to uncover and finish browning.
Mix the glaze. Stir together the melted butter, Dijon, Worcestershire, onion powder, garlic powder, and poppy seeds if using.
Brush the tops. Coat the surface and work a little glaze into the seams. Once every top looks glossy, stop. A spoonful left in the bowl is better than a puddle under the bread.
Glossy is enough. Stop before glaze begins pooling under the bread.
Cover and bake. Cover the dish with foil and start checking at 18 minutes. Look between two sliders near the center. If the cheese still holds the firm shape of a cold slice, cover again and continue in 3–5 minute increments. Many trays need roughly 18–25 minutes covered.
Uncover and brown. Once the Swiss in the middle has lost its neat slice shape and is melting into the seams, remove the foil. Bake another 4–6 minutes, until the tops are golden and well browned around the edges. Sweet rolls can darken quickly near the end.
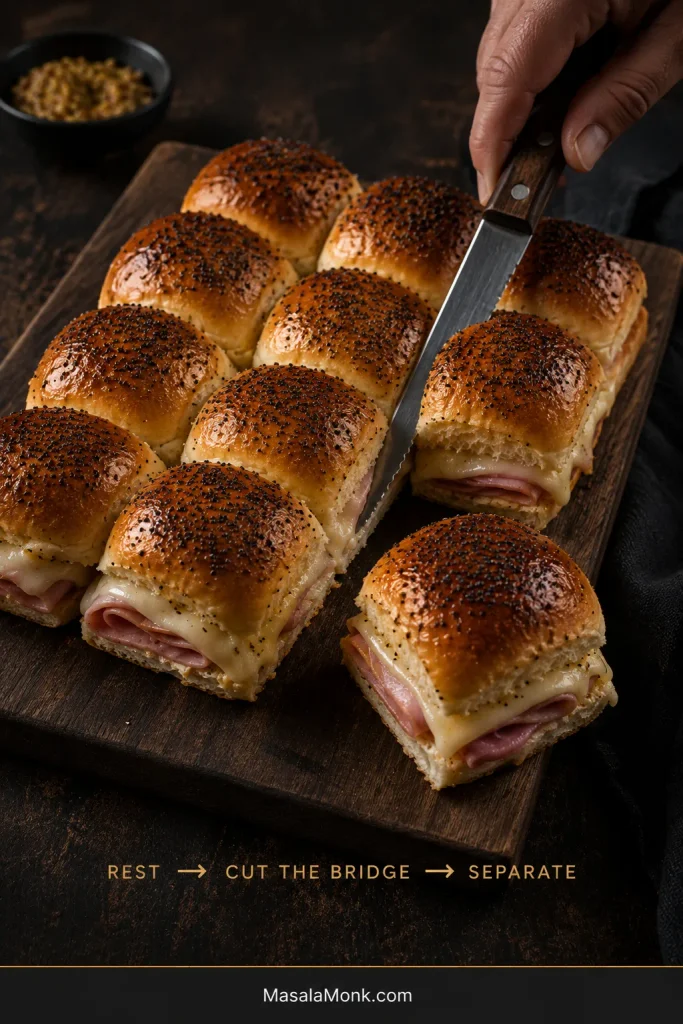
Rest for about 5 minutes. Follow the original roll lines to separate the sliders. If a slice of ham or melted cheese bridges two sandwiches, cut through it with the knife instead of pulling hard. Serve while the cheese is still warm and soft.
Cut through any ham or cheese bridging the seams before serving.
Recipe Notes
If the tops darken early, put the foil back on. Darker bread will not make the center melt any faster.
Making only 4–6 sliders or using a toaster oven? Start checking earlier. Small batches heat quickly, and the sweet tops may sit much closer to the upper element.
When using leftover cooked ham, slice it thinly and reheat the filling in the center to 165°F / 74°C.
King’s Hawaiian is the familiar choice, but another soft connected Hawaiian-style, potato roll, or dinner-roll slab works too. Potato rolls and plain dinner rolls are handy when you want less sweetness around the ham and cheese.
Homemade bread works as well. These soft dinner rolls make 12 fluffy pull-apart rolls in the same 9 × 13-inch pan; let them cool completely before slicing them horizontally for sliders.
Thin Ham Works Best
You don’t need a special ham from a special deli. What matters most is getting it thin enough to warm quickly and bite through cleanly. Buying it at the deli counter? Ask for thin or shaved slices.
Black Forest or smoked ham is especially good against sweet Hawaiian rolls. Honey ham pushes the tray sweeter, while plain deli ham stays mild. Leftover baked ham works beautifully too—just slice it thinly across the grain.
The recipe targets 10 oz / 285 g, but anywhere around 9–11 oz / 255–310 g works well. A much thicker pile will simply need more time for the middle to heat.
Blot obvious surface moisture; the ham should still stay soft and supple.
Leftovers from a honey glazed ham are an easy way to make another tray; resist stacking thick carved slices just because there is plenty left in the refrigerator.
Swiss is mild enough to let the ham and Dijon come through, but it still gives you that soft pull when the sliders separate. Provolone is the easiest milder swap; Havarti makes the middle softer and creamier. Cheddar brings a sharper bite and may melt a little less smoothly, while American cheese stays mild and melts with almost no effort.
Whatever you choose, thin slices disappear into the filling more easily and cover the slab better than a few thick pieces.
Keep roughly the same total cheese weight if you swap varieties; a flavor change does not need a thicker center.
The Buttery Dijon Glaze
The butter gives the rolls their shiny, buttery top; Dijon keeps the finished slider from tasting like nothing but sweet bread, ham, and melted cheese. Worcestershire adds a little more savory depth, while the small amounts of onion and garlic season the butter without making the sliders noticeably garlicky.
Poppy seeds add the familiar speckled top but are completely optional. One tablespoon of Dijon is spread across twelve sliders, so the mustard should come through as tang rather than take over. Prefer it gentler? Use 2 tsp / 10 mL. No Worcestershire? Leave it out.
Want a creamier sandwich? Spread about 2–3 tablespoons of mayo thinly over the cut sides of the rolls. Store-bought is fine, or use homemade mayonnaise if you already have it on hand.
Choose Your Glaze
You want…
Make this change
Savory buttery Dijon
Use the recipe as written
A sweeter finish
Add 1–2 tsp light brown sugar or honey
Honey mustard
Replace Dijon with honey mustard and skip extra sugar
Everything bagel seasoning
Use a light sprinkle instead of poppy seeds and check the blend for salt
No mustard
Omit the Dijon for a milder, more butter-forward glaze
The rolls already bring sweetness, so brown sugar is an option, not a requirement. Prefer honey mustard on the side? This honey mustard dressing can be kept bright and tangy or made thicker for dipping.
How to Keep the Bottoms From Getting Soggy
Blot visibly wet ham, add the butter glaze just before baking, and stop brushing once the tops are glossy. Want a firmer bottom? Pre-toast the lower roll slab for 3–5 minutes at 350°F / 175°C before filling it.
If the bread still turns soft, the useful question is: when did it become wet? Straight from the oven points to a different problem than sliders that soften overnight or during transport.
Diagnose before changing the recipe: reducing glaze will not fix sliders that left the oven well but softened later under trapped steam.
What happened
Likely cause
Next time
Greasy straight from the oven
Too much glaze ran underneath
Brush only until the tops are evenly coated
Wet despite modest glaze
Ham carried excess surface moisture
Blot visibly wet slices before assembly
Softened overnight
The bread sat in glaze for hours
Assemble ahead but glaze just before baking
Good from the oven, soft later
Steam condensed under a tight cover
Shorten the sealed hot hold
Soggy after transport
Hot bread sat in trapped condensation
Keep the trip short or bake/reheat at the destination
Making these ahead? See the 24-hour make-ahead plan so the glaze stays off the bread until baking.
How Long to Bake Ham and Cheese Sliders at 350°F
Start checking after about 18 minutes covered. Many normally filled trays need roughly 18–25 minutes covered, followed by another 4–6 minutes uncovered. Refrigerator temperature, cookware, filling thickness, and the oven itself can move that timing.
If the cheese in the middle is still firm after 25 minutes, leave the foil on and check again in another 3–5 minutes.
How to Know They’re Done
Look between two sliders near the center rather than judging by an edge sandwich.
The Swiss in the middle should be soft and glossy, losing its square slice shape and beginning to melt into the seams.
Once the center is melted, uncover the pan and let the tops finish golden.
If the bread colors too quickly, put the foil back on. The center matters more than getting the tops darker.
Quick Rescue Guide
Something went sideways? Use the shortest fix that solves the problem.
Problem
Do this
Bottom is soggy
Lift the sliders out of any pooled butter, serve promptly, and skip extra sauce. Use the soggy-bottom diagnosis before the next tray.
Tops are dark, center is cold
Re-cover the pan and keep heating; the cold-center fix below shows what to watch for.
They feel greasy
Leave pooled butter behind in the pan. Next time, stop glazing once the tops are evenly coated.
They taste too sweet
Add sharp mustard or pickles. Next time, use smoked ham or less-sweet rolls.
They fall apart
Rest briefly, then cut through any ham or cheese bridging the roll seams instead of pulling hard.
Once the rolls are as brown as you want, stop using top color as the doneness signal. Re-cover the pan and check the center Swiss again after a short interval; the middle still decides when the tray is finished.
Once the tops are brown enough, foil buys the center more time.
Make Them Ahead — Up to 24 Hours
Yes—you can assemble the sliders up to 24 hours ahead. Layer the rolls, Swiss, and ham, replace the tops, cover the dish, and refrigerate. Mix the glaze separately and brush it on just before baking so the soft bread does not spend the night soaking in butter.
A refrigerator-cold tray may need about 5 extra covered minutes as a starting point. Keep the foil on until the center cheese melts. Assemble the tray the night before and you also avoid layering sandwiches while people are already walking through the door.
Do the layering ahead; keep the glaze separate until baking.
Sliders for a Party or Crowd
Plan on about 2 sliders per person when plenty of other food is being served, or about 3 per person when the sliders are the meal. With a large appetizer spread, 1–2 each may be plenty. Feeding a very hungry crowd with little else on the table? Allow 3–4.
One tray is easy. With three or four, oven space and timing begin to matter almost as much as ingredient amounts. Small hot sandwiches also have a habit of disappearing without anyone keeping very careful count.
Scale the Recipe for 12, 24, 36 or 48
Sliders / pans
Ham
Swiss
Butter
12 / 1 pan
10 oz / 285 g
8 oz / 225 g
5 tbsp / 70 g
24 / 2 pans
1¼ lb / 570 g
1 lb / 450 g
½ cup + 2 tbsp / 140 g
36 / 3 pans
1 lb 14 oz / 850 g
1½ lb / 680 g
¾ cup + 3 tbsp / about 210 g
48 / 4 pans
2½ lb / 1.13 kg
2 lb / 900 g
1¼ cups / about 280 g
Multiply the Dijon, Worcestershire, onion powder, garlic powder, and poppy seeds by the same factor as the number of pans. Double the recipe, not the thickness of one pan.
Plan the Oven Before You Need It
Two pans may fit comfortably while four can block circulation or force trays onto very different rack levels. With several trays to bake, assemble them ahead and work in rounds.
If guests are already in the kitchen, don’t chase perfect synchronization. Get one hot tray onto the table and let the next one bake.
Leave enough rack clearance to check centers and remove foil safely.
Transporting and Holding Them
For a short drive, bake the sliders, rest them briefly, cover the pan, and serve reasonably soon after arrival. If the trip is longer and there is an oven at the destination, taking the assembled tray cold and baking it there usually gives you better bread than sealing hot sliders in steam for an extended ride. Taking it cold? The make-ahead method shows how to keep the glaze separate until baking.
Hot sliders should be held at 140°F / 60°C or warmer. Otherwise, refrigerate perishable food within 2 hours, or within 1 hour when the surrounding temperature is above 90°F / 32°C, following USDA buffet food-safety guidance.
A quick note on “funeral sandwiches.” The name is commonly used for baked ham-and-cheese sandwiches served at Southern church suppers, funerals, potlucks, and family gatherings. Some versions deliberately let a buttery mustard sauce soak into the bread before baking. Here, the glaze goes on at the end of assembly for a more defined bottom.
The easiest party sides are the ones that do not compete for oven space.
What to Serve With the Sliders
The sandwiches already bring soft bread, melted cheese, salty ham, butter, and a little sweetness. Crunchy, acidic, or fresh sides keep the plate from feeling heavy.
When oven space is tight, sides that are cold or stay warm somewhere else earn their place. A make-ahead potato salad can be ready before the first tray goes in, while a crockpot buffalo chicken dip can stay warm in the slow cooker without competing for oven space.
Coleslaw is especially good here because it brings something cold, crisp, and tangy beside the warm bread. For a fuller dinner, crispy roasted Brussels sprouts add browned edges and enough bitterness to balance the filling.
Dijon, honey mustard, spicy mustard, or a tangy pickle dip all work on the side. For sweet heat, stir a little hot honey sauce into Dijon.
Store, Freeze and Reheat
Leftovers can be eaten cold, but these sliders are much better warm while the Swiss is soft and the buttered tops still have some life in them. For a picnic or lunchbox, build cold sandwiches from the start instead of baking this tray just to chill it again.
Refrigerate Leftovers
Refrigerate leftovers promptly in a covered container or well-covered pan and use them within about 3–4 days, in line with USDA leftovers guidance.
Freezing
Freeze the assembled, unbaked sliders before adding the glaze. Wrap them well, thaw overnight in the refrigerator, then glaze and bake as a refrigerator-cold tray. For best texture, use them within about 1–2 months—before the package disappears into the back of the freezer until nobody remembers what it was.
Keep the assembled slab flat while wrapping so the 3×4 arrangement survives freezing and thawing.
Best Way to Reheat Them
Oven or toaster oven: Heat at 325°F / 165°C, loosely covered, until the center reaches 165°F / 74°C. A small batch often takes around 8–10 minutes.
Air fryer: For one or two sliders, use about 325°F / 165°C and start checking around 3–4 minutes. The sweet tops can color quickly, so continue only until the center reaches 165°F / 74°C.
Microwave: Fastest, but softer. Heat until the center reaches 165°F / 74°C and let it stand briefly before eating.
Reheat only what you plan to eat; smaller batches heat more evenly and spare the rest from repeated warming.
Pull Apart the First One While They’re Warm
Give the pan those few minutes out of the oven, then follow the original lines between the rolls. The tops should still feel warm and buttery, the Swiss should stretch without pouring out, and the ham in the middle should be just as hot as the sandwiches around the edge.
Then put the tray on the table. If these are the main hot food for a hungry crowd, the second pan usually stops looking excessive somewhere around the moment the first one is half gone.
You bought the ham. Now the job is to make it juicy, warm all the way through, glossy enough for the table, and calm enough that you are not fighting the oven at the last minute.
That sounds simple until the real questions start: is the ham already cooked, should you cover it, when does the glaze go on, how do you stop spiral slices from drying out, and why does brown sugar burn so fast?
This is the recipe for that moment. It uses a ready-to-eat spiral ham, warms it gently under foil, then finishes it with a brown sugar honey mustard glaze that clings to the slices without scorching. You also get slow cooker notes, pineapple variation, a copycat Honey Baked Ham-style sugar crust, gammon guidance, temperature cues, store-bought comparison, and leftover ideas, so you can adjust the method to the holiday ham you actually bought.
The main idea is easy to remember: warm first, glaze late, caramelize briefly. Covered heat keeps the ham juicy. Uncovered heat makes it beautiful. That is how you get tender slices instead of dry edges and a lacquered finish instead of burnt sugar.
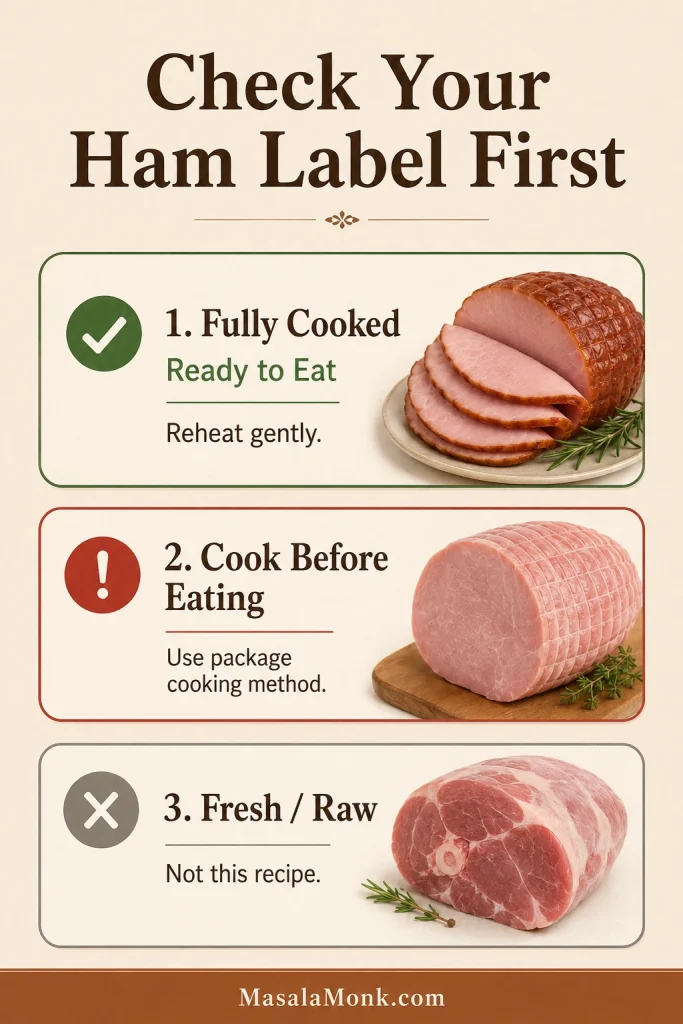
Before you start: if your package says fully cooked or ready to eat, you are reheating the ham and glazing it. If it says cook before eating or fresh ham, this glaze can still inspire the flavor, but you need the package’s full cooking method first.
Start with the package label because “fully cooked,” “ready to eat,” “cook before eating,” and “fresh” all mean different cooking decisions.
That one label check removes most of the stress. A ready-to-eat spiral sliced ham needs gentle reheating, moisture, and late glazing. Raw or cook-before-eating ham needs a different safety plan.
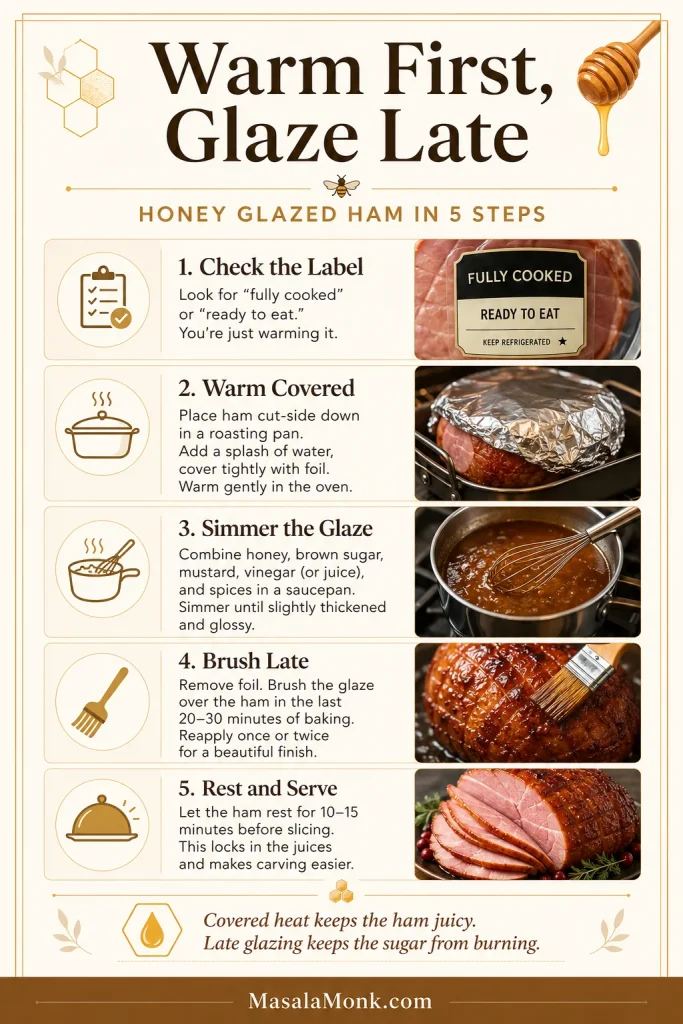
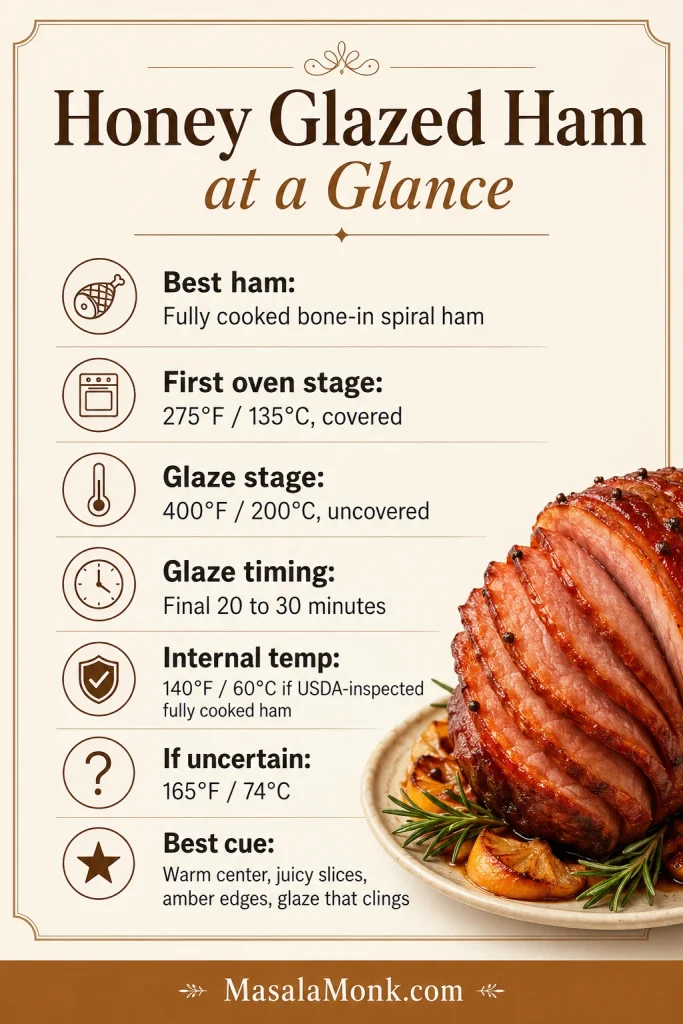
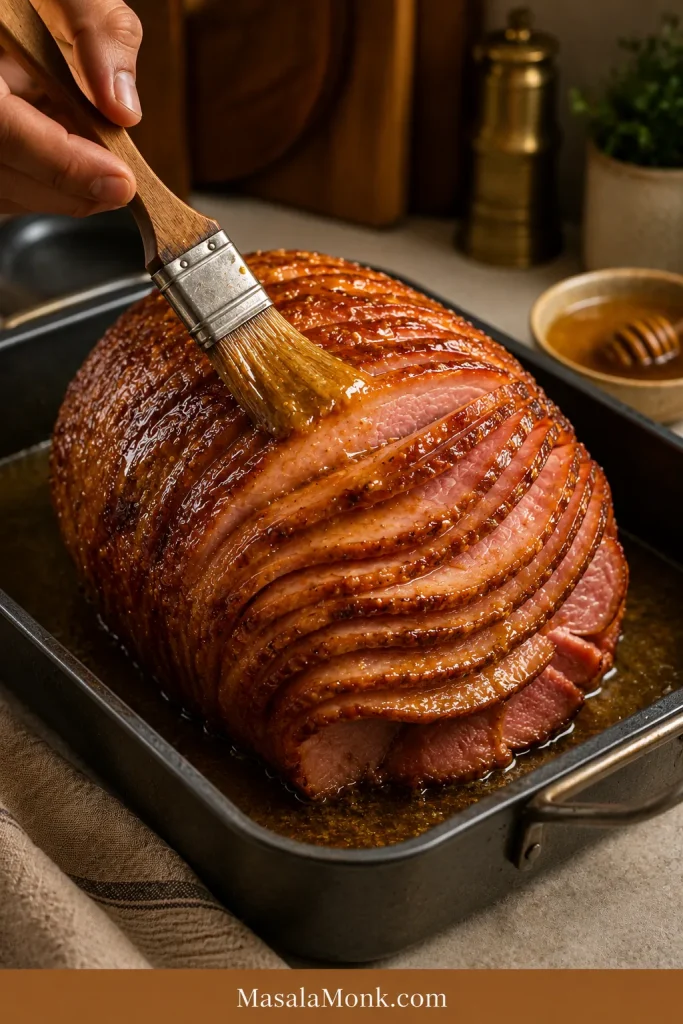
To make honey glazed ham, place a fully cooked spiral ham cut-side down in a roasting pan with a little liquid, cover it with foil, and reheat gently at 275°F / 135°C until nearly warm. Simmer honey, brown sugar, Dijon mustard, butter, vinegar, juice, and spices into a spoon-coating glaze. Brush it over the ham during the final 20 to 30 minutes, then finish uncovered until the edges are amber and caramelized.
For most supermarket hams, you are not cooking raw pork. You are protecting an already cooked centerpiece from drying out while giving it a sweet-tangy finish at the end.
Check the label. Ready-to-eat ham is reheated; cook-before-eating ham needs a different full method.
Warm covered. Place the ham cut-side down with a little liquid and cover tightly with foil.
Simmer the glaze. Cook it until it coats a spoon and falls in a slow ribbon.
Brush late. Add the honey mustard coating during the final 20 to 30 minutes.
Rest and serve. Let the slices settle, then spoon over warm pan juices or extra glaze.
This five-step method keeps the process calm: confirm the label, warm gently, thicken the glaze, brush near the finish, and let the ham rest.
That is the whole rhythm: label decides the method, covered heat keeps it juicy, and the final uncovered heat makes it look like a showpiece.
At a Glance
Best ham
Fully cooked bone-in spiral ham
Best size
8 to 10 lb / 3.6 to 4.5 kg
First oven stage
275°F / 135°C, covered
Glaze stage
400°F / 200°C, uncovered
Glaze timing
Final 20 to 30 minutes
Main glaze
Honey, brown sugar, Dijon, butter, vinegar or juice
Internal temperature
140°F / 60°C for USDA-inspected fully cooked ham; 165°F / 74°C if repackaged or uncertain
Best cue
Warm center, juicy slices, amber edges, glaze that clings
Keep this table open if you are cooking while the oven is busy. It gives you the guardrails; the thermometer and the look of the slices tell you when to stop.
Keep this guide nearby while cooking; the clock gives you a range, but the slices and thermometer tell you when to stop.
This recipe is designed around the ham most people bring home for Christmas, Easter, Thanksgiving, or a big Sunday meal: a fully cooked bone-in spiral ham. It is already cooked, already sliced, and already salty-smoky enough to taste good. What it needs is careful reheating and a glaze that tastes sweet, tangy, warm, and balanced.
If you are planning the full table around it, start with one soft, reliable side like garlic mashed potatoes. A sweet glaze always feels better when there is something creamy on the plate to catch the juices.
The method protects the meat early and makes it beautiful at the end. During the first stage, the ham warms covered and cut-side down so the slices stay moist. Then the syrupy finish goes on late, once the center is nearly warm, so the sugar can caramelize without scorching.
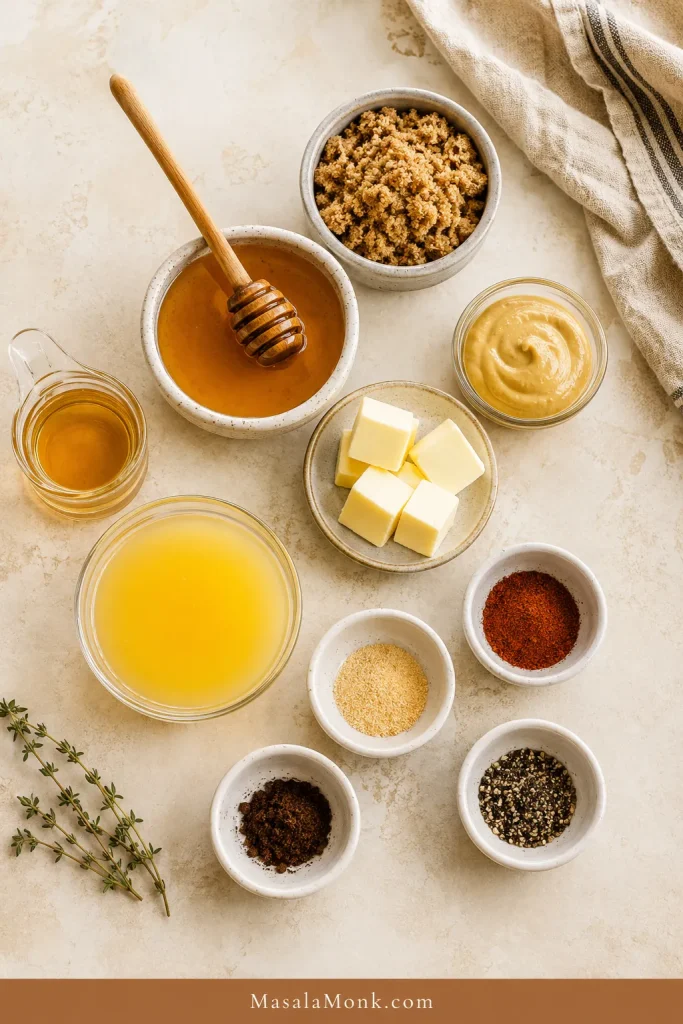
Ham: fully cooked bone-in spiral ham, 8 to 10 lb / 3.6 to 4.5 kg
Glaze: honey, brown sugar, Dijon mustard, butter, vinegar or juice, and warm spices
Oven method: low covered warming, then short uncovered caramelizing
Main texture goal: juicy slices, amber edges, and a sweet-tangy coating that clings
Main failure to avoid: dry spiral slices and burnt sugar
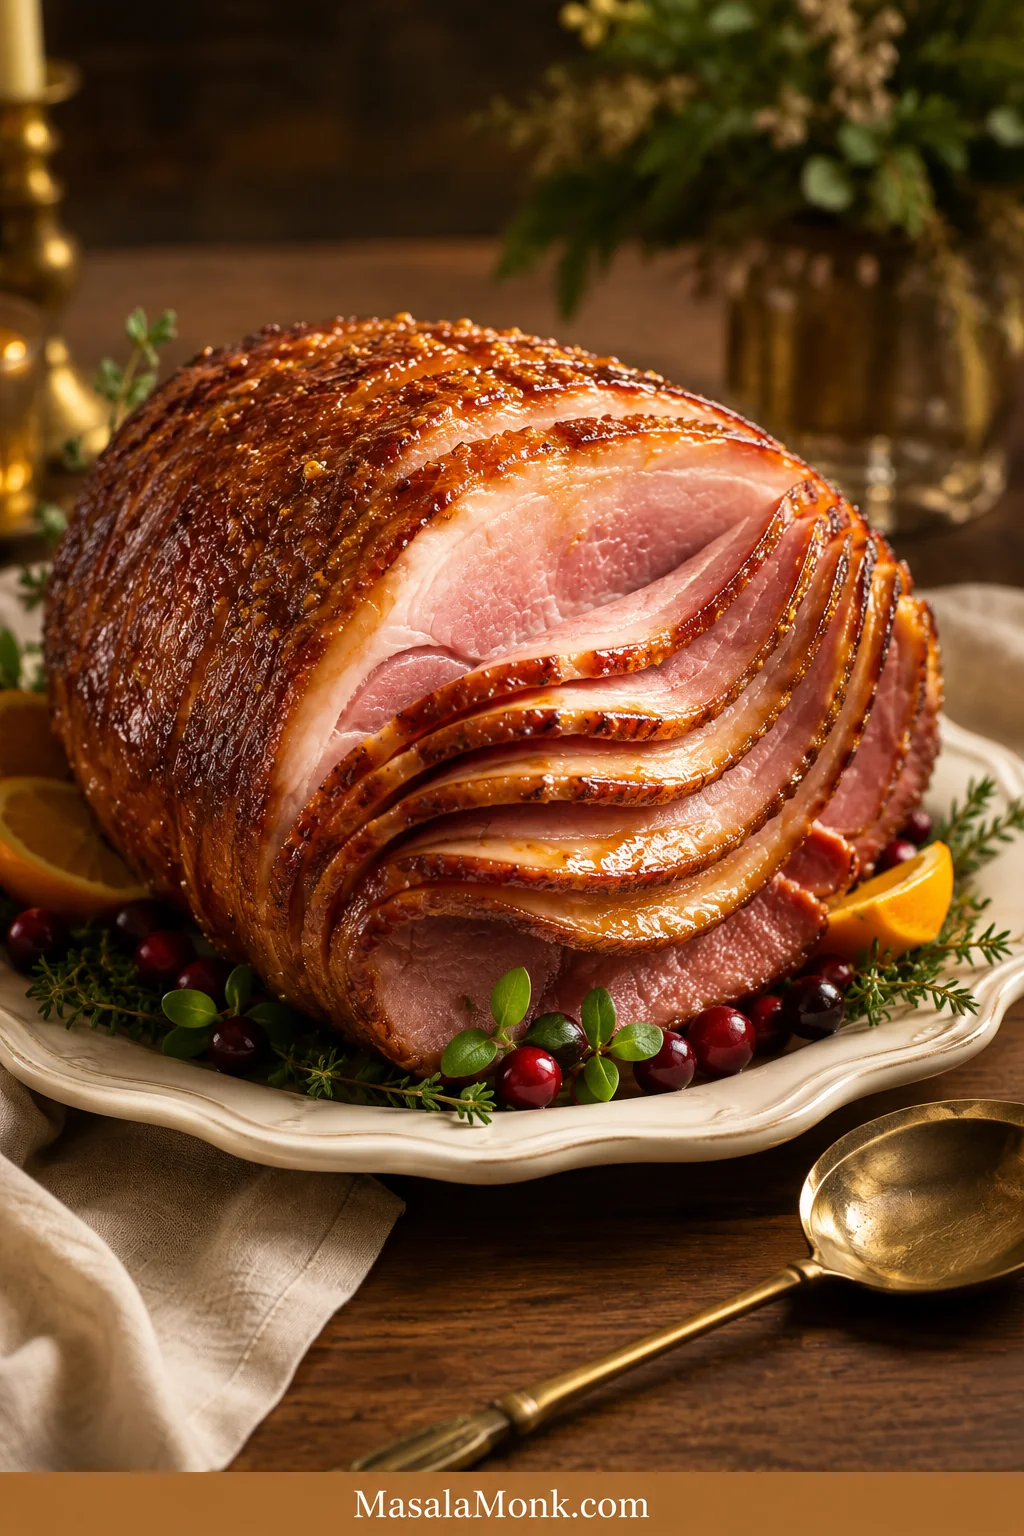
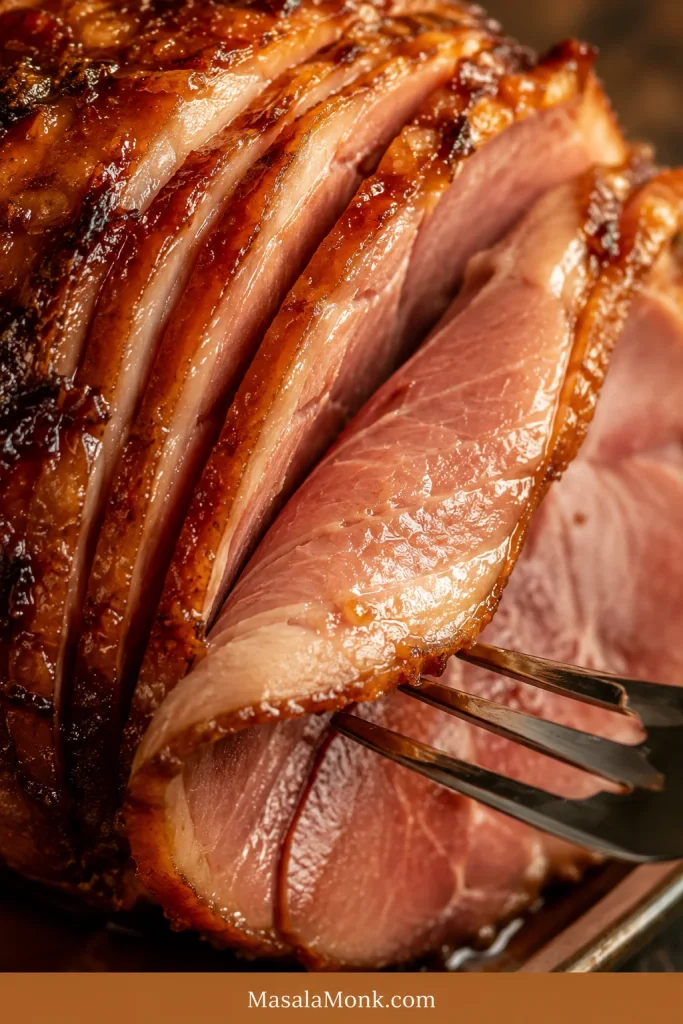
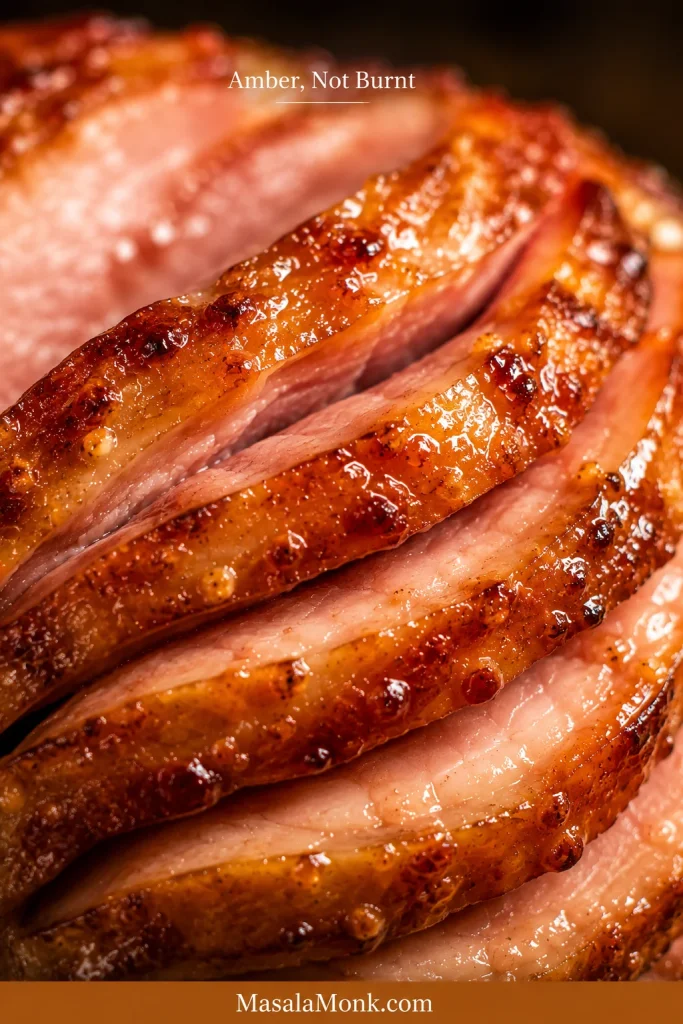
The best finished ham should not look matte or tight. Its slices should be warm and flexible, the edges should be browned but not black, and the pan juices should be spoonable instead of burnt into hard syrup.
Aim for slices that bend easily and hold a little glaze between the layers; stiff, curled edges usually mean the ham has been heated too aggressively.
Is Your Ham Already Cooked?
Most supermarket spiral hams are already cooked. That turns this recipe into a reheating-and-glazing job, not a raw pork cooking project, and that is why gentle heat matters so much.
Temperature note: According to USDA/FSIS ham safety guidance, cooked hams packaged in USDA-inspected plants should be reheated to 140°F / 60°C. Cooked hams repackaged elsewhere should be reheated to 165°F / 74°C. Fresh or raw ham is a different product and needs different cooking instructions.
For “cook before eating” ham, pause here and follow the package cooking directions. If the packaging is unclear, use the higher reheating target and follow the label.
Honey Glazed Ham Recipe Card
Honey Glazed Ham with Brown Sugar Honey Mustard Glaze
A fully cooked spiral ham warmed gently, brushed with brown sugar honey mustard glaze, and finished until the edges are caramelized and the slices stay juicy.
Important: This card is for a fully cooked ham. For “cook before eating” or fresh ham, follow the package’s full cooking method first.
Prep Time
15 minutes
Cook Time
2 to 3 hours, depending on ham size
Total Time
About 2 1/2 to 3 1/4 hours, including resting
Servings
14 to 18 servings, depending on sides
Course
Main Course
Method
Oven, with slow cooker option
Ingredients
For the Ham
1 fully cooked bone-in spiral ham, 8 to 10 lb / 3.6 to 4.5 kg
1/2 to 1 cup pineapple juice, apple juice, stock, or water, for the roasting pan
For the Brown Sugar Honey Mustard Glaze
3/4 cup honey / 180 ml
1 cup packed light brown sugar / about 200 g
1/3 cup Dijon mustard / 80 ml
4 tbsp unsalted butter / 56 g
2 tbsp apple cider vinegar / 30 ml
1/4 cup pineapple juice or orange juice / 60 ml
1 tsp garlic powder
1/2 tsp paprika or smoked paprika
1/8 to 1/4 tsp ground cloves
1/2 tsp black pepper
Instructions
Remove the ham from the fridge 30 to 60 minutes before baking so it warms more evenly.
Preheat the oven to 275°F / 135°C.
Remove all packaging from the ham, including any plastic cap, button, or disc attached near the bone.
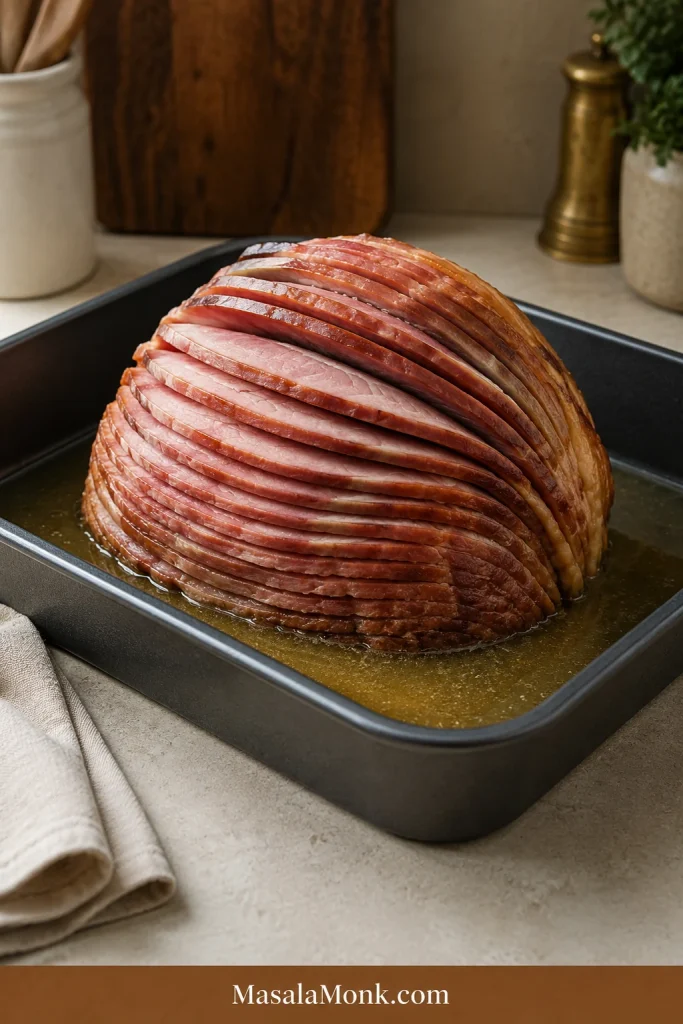
Place the ham cut-side down in a roasting pan or deep baking dish. Add 1/2 to 1 cup pineapple juice, apple juice, stock, or water to the pan.
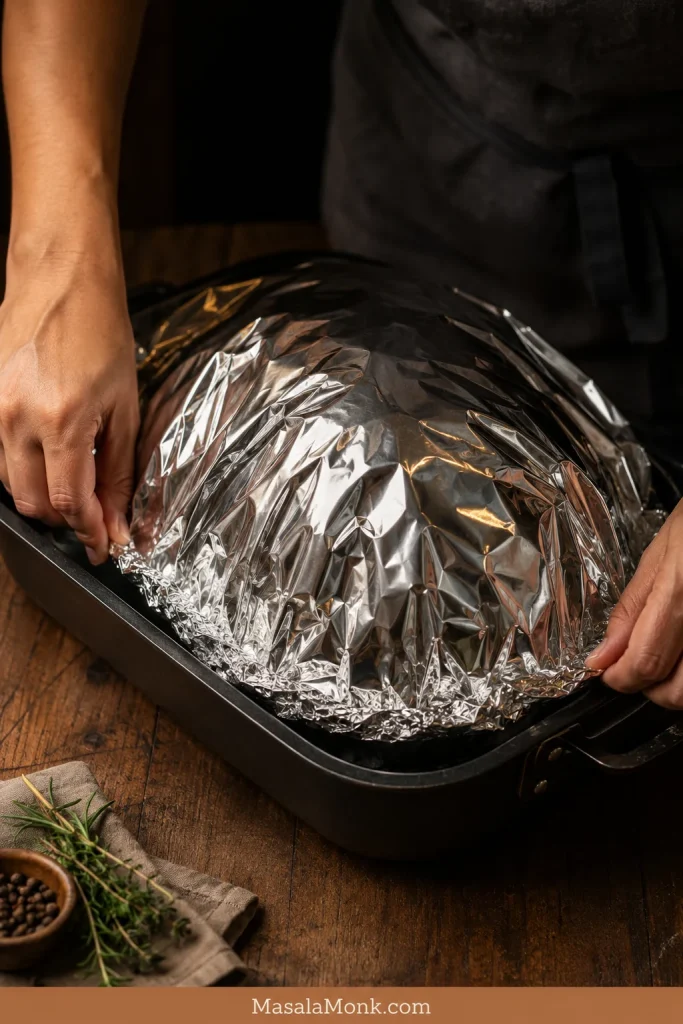
Cover the pan tightly with foil. Warm the ham for about 12 to 15 minutes per pound, until it is almost heated through.
While the ham warms, add honey, brown sugar, mustard, butter, vinegar, juice, garlic powder, paprika, cloves, and black pepper to a saucepan.
Simmer over medium-low heat for 5 to 10 minutes, stirring often, until the glaze is shiny and slightly syrupy.
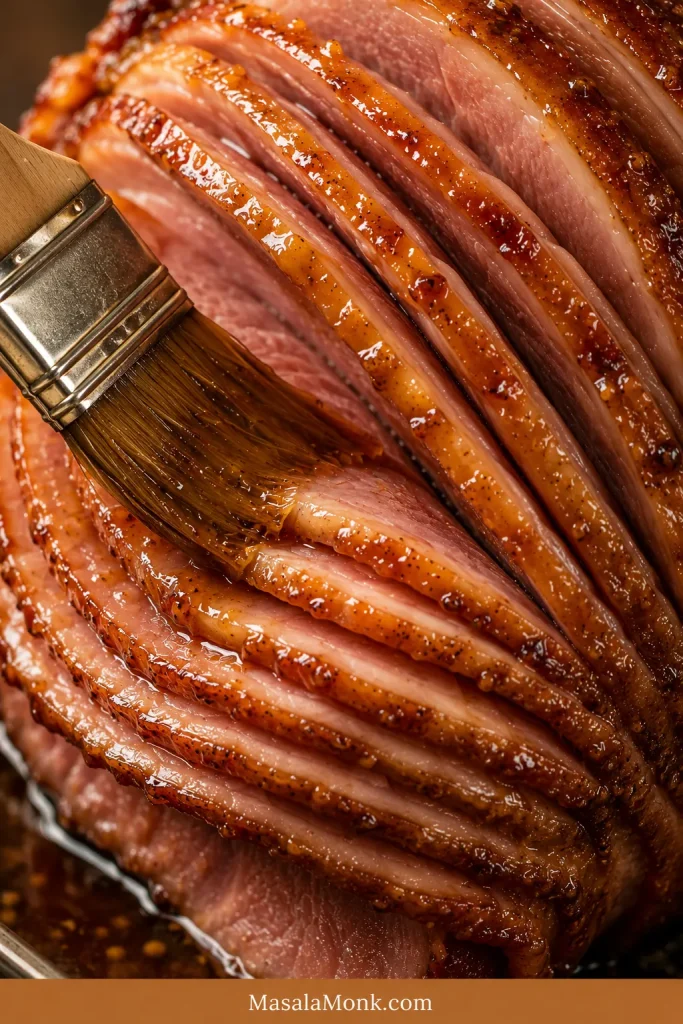
When the ham is mostly warm, uncover it. Brush the glaze over the outside and gently between the spiral slices.
Increase the oven temperature to 400°F / 200°C. Bake uncovered for 10 to 15 minutes.
Brush with more glaze and bake another 10 to 15 minutes, until the outside is burnished and caramelized at the edges.
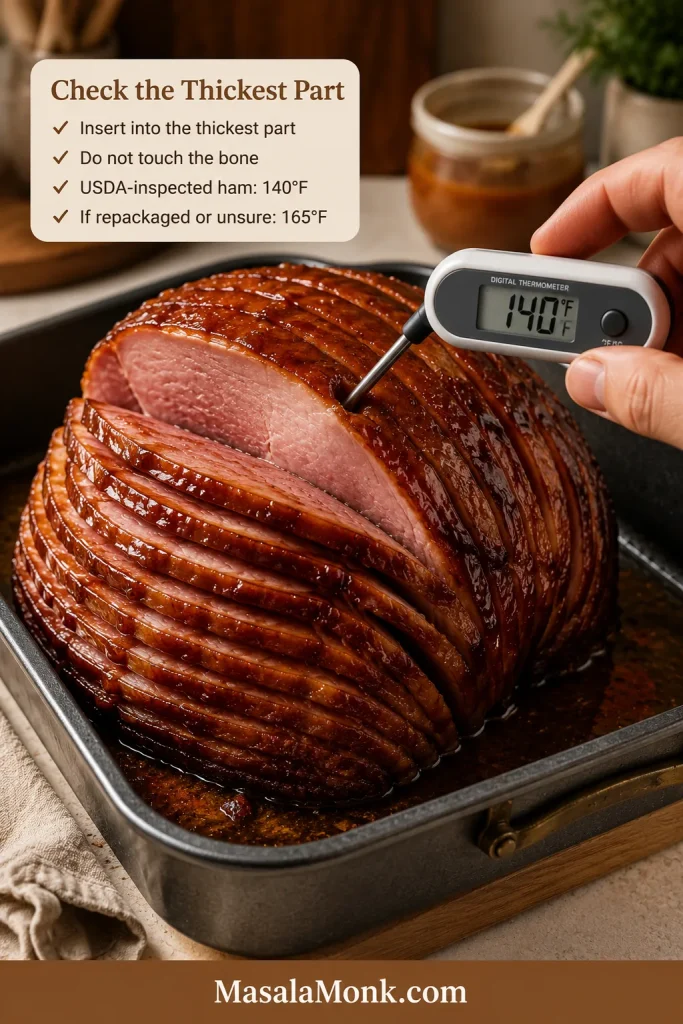
Check the internal temperature in the thickest part of the ham without touching the bone. For fully cooked USDA-inspected ham, reheat to 140°F / 60°C. If the ham was repackaged elsewhere or you are unsure, reheat to 165°F / 74°C.
Rest for 10 to 15 minutes before serving.
Recipe Notes
Do not glaze from the beginning. Honey and brown sugar can burn before the center is warm.
Do not pour all the glaze into the pan at the start. It can thin out, burn at the edges, or never cling properly.
For spiral ham, brush some glaze between the slices near the end, not at the start.
Save a little glaze or reduced pan juice for serving with the sliced ham.
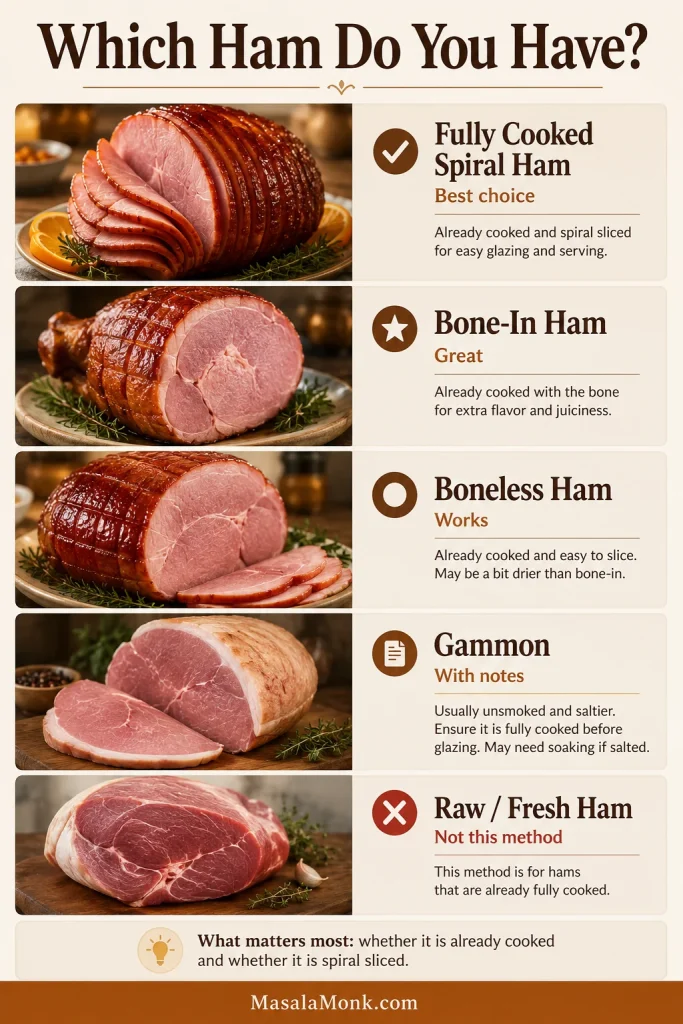
You do not need to know every butcher term to make this work. The two things that matter most are whether the ham is already cooked and whether it is spiral sliced, because those decide the safety target and how carefully you need to protect the slices.
Ham Type
Use It Here?
What to Know
Fully cooked spiral ham
Best choice
Easy to serve, but the slices need gentle covered reheating.
Bone-in half ham
Great
Juicy, flavorful, and classic for holidays.
Shank-end ham
Great
Classic look, easier carving, and usually a strong holiday choice.
Butt-end ham
Works
Often meatier, but it can be a little trickier to carve around the bone.
Boneless ham
Works
Easier to slice and quicker to heat, but less dramatic on the table.
Pre-glazed ham
Not ideal
The packet glaze may be very sweet and can clash with this homemade glaze.
Raw or fresh ham
No
This needs a separate cooking method and different timing.
Gammon joint
With notes
Often needs simmering or boiling before glazing, depending on the product.
Ham steak
Different method
Good for a quick glazed meal, but not this full holiday roast.
Once the label and shape are clear, the recipe stops feeling like a guess. You know whether you are reheating, how gently to handle the slices, and when the glaze should go on.
Choose the method based on the ham you bought because spiral, bone-in, boneless, gammon, and raw ham do not all cook the same way.
Do You Need to Score Ham?
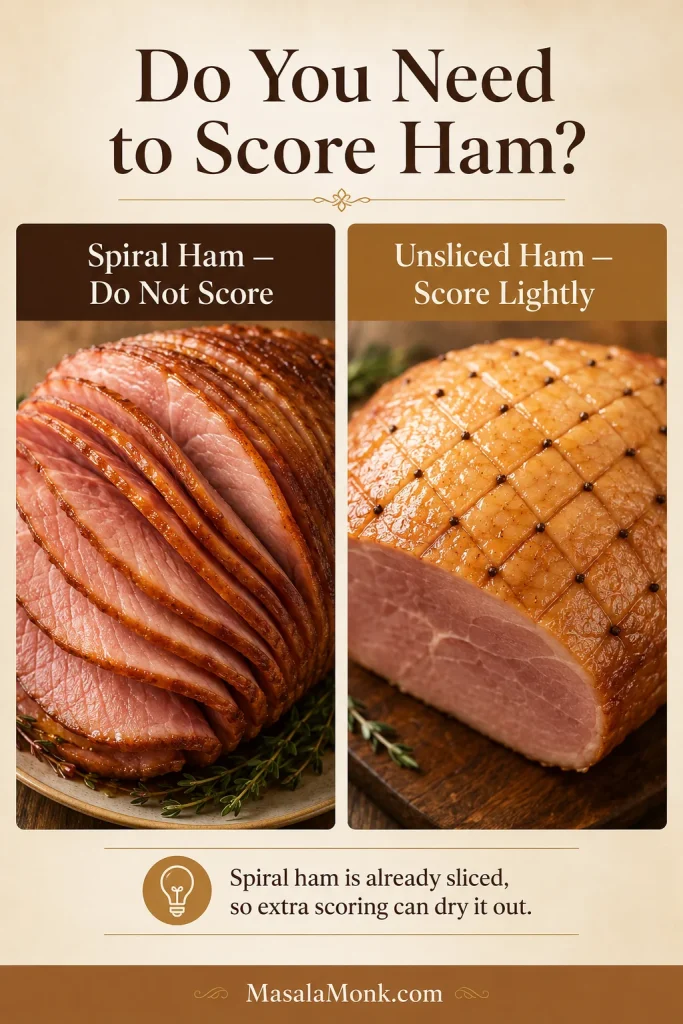
You do not need to score a spiral ham. It is already sliced, so the glaze can slip between the layers during the final part of baking. Scoring a spiral ham can make the slices loosen too much and dry faster.
With spiral ham, restraint is your friend. The slices are already open enough for flavor, and extra cutting only gives the oven more edges to dry out.
For an unsliced ham with a fat layer, shallow scoring can help the glaze cling and make the surface look more dramatic. Cut a light diamond pattern through the fat, not deep into the meat. For gammon, score the fat after removing the skin if your recipe or package directions call for it.
Spiral ham is already cut into layers, so extra scoring can create more dry edges; however, an unsliced ham with a fat cap can be scored lightly.
How Much Ham Per Person?
Plan more generously for bone-in holiday ham, especially if you want leftovers. That is not a bad thing here; leftover glazed ham is easy to use in sandwiches, eggs, fried rice, soup, casseroles, and sliders.
An 8 lb bone-in ham usually serves about 10 to 14 people generously. A 10 lb ham can serve 14 to 18 people, especially if you have plenty of sides on the table.
Buying extra on purpose? Save the leftover ham ideas for tomorrow’s breakfast, soup, fried rice, or sandwiches.
Ingredients for Honey Glazed Ham
The flavor is simple: salty ham, sweet glaze, enough tang, and gentle warmth from spice. A good brown sugar ham glaze should taste sweet at first, then buttery, sharp, and lightly savory so the meat never feels heavy.
Each glaze ingredient has a job: honey brings shine, brown sugar adds caramel depth, mustard sharpens the sweetness, and vinegar or juice keeps it balanced.
Ham
Use a fully cooked bone-in spiral ham, ideally 8 to 10 lb / 3.6 to 4.5 kg. Bone-in ham gives a classic Christmas ham or Easter ham look and usually better flavor. Spiral slices make serving easier, but they also need protection from dry oven heat.
Honey
Honey brings shine and helps the coating cling. Mild honey is best here. Strong floral honey can fight the mustard and make the glaze taste perfumed instead of balanced.
Brown Sugar
Brown sugar gives the glaze its caramel depth. Light brown sugar keeps the flavor balanced, while dark brown sugar makes it deeper and more molasses-like.
Dijon Mustard
Dijon mustard cuts through the sweetness and gives the glaze a clean tang. Yellow mustard also works if you want a more familiar honey mustard flavor.
Butter
Butter gives the glaze body and helps it brush smoothly over the ham. It also gives the finish that rounded, glossy look that makes the slices feel generous instead of sticky and flat.
Vinegar, Pineapple Juice, or Orange Juice
Apple cider vinegar makes the glaze tangier. Pineapple juice makes it fruitier and more classic-holiday. Orange juice gives a softer citrus note. Vinegar is the sharp edge; juice is the softer holiday sweetness. A little of both gives the best balance.
That sweet-tangy balance is the same reason a bright side like cranberry sauce with orange juice works so well beside ham. It cuts through the richness instead of adding more heaviness.
Spices
Garlic powder, paprika, black pepper, and a tiny pinch of ground cloves make the glaze warmer and more savory. Go carefully with cloves. A little tastes festive; too much can make the ham taste medicinal.
Equipment You’ll Need
You do not need special gear for this ham, but do not skip the foil or thermometer. Foil protects the slices while the center warms, and the thermometer keeps you from guessing when the outside already looks done.
A roasting pan, saucepan, pastry brush, and cutting board are enough. For the slow cooker method, use a 6 to 7 quart cooker or larger, and make sure the lid closes fully.
How to Make the Brown Sugar Honey Mustard Glaze
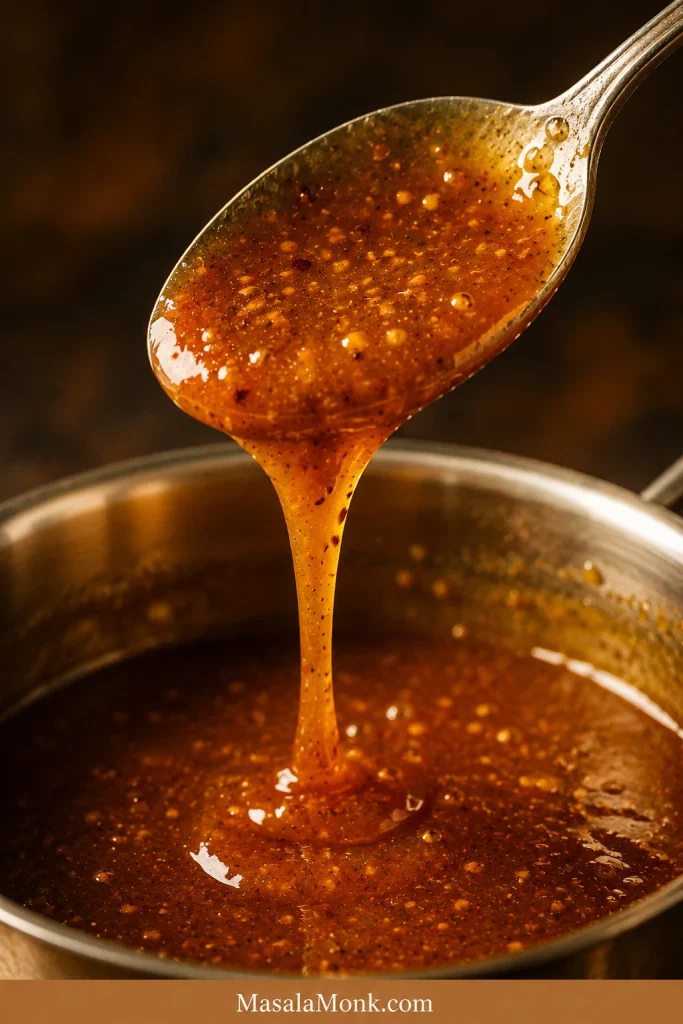
The glaze is ready when it looks like it wants to cling to the ham. It should coat the back of a spoon, fall in a slow ribbon, and look glossy and loose in the pan. Avoid taking it so far that it turns watery at one extreme or candy-like at the other. Think sticky syrup, not hard caramel.
Add honey, brown sugar, Dijon mustard, butter, apple cider vinegar, pineapple juice or orange juice, garlic powder, paprika, cloves, and black pepper to a saucepan.
Warm over medium-low heat, stirring often, until the butter melts and the sugar dissolves.
Simmer gently for 5 to 10 minutes, until the mixture looks shiny and lightly syrupy.
Remove from the heat and let it cool for a few minutes before brushing. Slightly cooled glaze clings better than very hot glaze.
A thin-looking mixture may only need a few minutes off the heat. It thickens slightly as it cools. A too-thick glaze only needs a splash of juice, water, or pan liquid to loosen it again.
The glaze is thick enough when it coats the spoon and falls in a slow ribbon, which helps it cling to the ham instead of sliding into the pan.
How Much Glaze Do You Need?
Because spiral ham is sliced, it needs a little more glaze than an unsliced ham. Some should go between the slices, some should coat the outside, and a little extra is useful for serving.
Ham Size
Glaze Needed
4 to 5 lb
1 to 1 1/4 cups
8 to 10 lb
2 to 2 1/2 cups
10 to 12 lb
2 1/2 to 3 cups
The glaze in this recipe is sized for an 8 to 10 lb spiral ham. Smaller hams will not need every spoonful, but extra glaze rarely goes to waste at the table.
From here, the recipe becomes less about decisions and more about timing. Keep the ham protected first, then let the glaze take over at the end. That separation is what gives you juicy slices and browned edges instead of dry meat and burnt sugar.
Step 1: Take the Chill Off the Ham
Remove the ham from the fridge 30 to 60 minutes before baking. A very cold ham takes longer to heat through, and that can leave the outer slices dry before the center is warm.
Step 2: Set Up the Pan
Preheat the oven to 275°F / 135°C. Remove the packaging and any plastic cap, button, or disc from the ham. Place the ham cut-side down in a roasting pan or deep baking dish. Pour 1/2 to 1 cup pineapple juice, apple juice, stock, or water into the pan.
The pan should look moist but not flooded. A little steam under the foil is good; a hard boil in the bottom of the pan is not.
Place the spiral ham cut-side down with a small splash of liquid so the exposed sliced surface stays protected as the ham warms.
Step 3: Cover and Warm Gently
Cover the pan tightly with foil. Warm the ham for about 12 to 15 minutes per pound. For an 8 to 10 lb ham, this usually takes around 1 1/2 to 2 1/2 hours before the final glazing stage, depending on the shape of the ham, how cold it was, and your oven.
Do not rush this quiet part of the recipe. High heat can make the edges tough before the center is ready. If the spiral slices start curling outward or looking matte, the ham is getting too much dry heat.
Foil is your moisture shield during the first stage, especially for spiral ham slices that can dry out faster than a whole unsliced ham.
Step 4: Simmer the Glaze
While the ham warms, make the glaze. Simmer the ingredients until the sugar dissolves and the mixture looks polished and spoon-coating. It should fall in a smooth ribbon, not run like water.
Step 5: Glaze Near the End
When the ham is mostly warm, uncover it. The first rush of steam should smell salty, sweet, buttery, and sharp from the mustard and vinegar. Brush the glaze over the outside and gently between the spiral slices. Increase the oven temperature to 400°F / 200°C and bake uncovered for 10 to 15 minutes.
The edges should start turning amber, not black. Darkening too fast is your cue to reduce the heat or cover those areas loosely with foil.
Add the glaze near the finish so it has time to turn glossy and caramelized without burning before the center is warm.
Step 6: Glaze Again and Finish
Brush with more glaze and bake for another 10 to 15 minutes. The outside should look burnished, with caramelized edges but no blackened sugar. Check the internal temperature before serving.
Dark outside with a cool center means the oven needs patience, not more drama. Cover the ham loosely, lower the heat, and keep warming gently. A beautiful outside is not worth a cold center.
Look for amber, glossy edges rather than blackened sugar; that color means the glaze has caramelized without turning bitter.
Step 7: Rest Before Serving
Let the ham rest for 10 to 15 minutes. This makes the slices easier to serve and gives the juices time to settle. The first slice should look shiny and flexible, not dry, tight, or curled at the edges.
When to Glaze Ham
Glaze ham during the final 20 to 30 minutes of baking, not at the start. The ham needs time; the sugar does not. This is the warm-first, glaze-late rule in action.
The best timing: warm the ham covered first, uncover once it is almost hot, brush with glaze, then finish briefly at higher heat until the outside looks lacquered and lightly caramelized.
For darker edges, broil for 1 to 3 minutes at the very end and stay close. A honey glaze can move from beautiful to burnt in seconds.
How to Keep Spiral Ham from Drying Out
Spiral ham is easy to serve because it is already sliced, but those slices are also the reason it dries out. More exposed surface area means more chances for the edges to lose moisture. The fix is not complicated; protect the ham until it is almost ready.
Use low heat first. A gentle oven gives the center time to warm before the outer slices dry out.
Place the ham cut-side down. This protects the sliced side and keeps the juiciest part from facing direct heat.
Cover tightly with foil. Keep the ham covered for most of the reheating time.
Add a little liquid to the pan. Pineapple juice, apple juice, stock, or water helps create a moist environment.
Brush between slices near the end. This gives flavor without drying the slices from the start.
Use a thermometer. Time is useful, but temperature tells you what is actually happening.
Rest before serving. A short rest keeps the slices juicier and easier to handle.
For better flavor in every serving, brush a little glaze between the spiral layers near the end without pulling the ham apart too early.
A ham glaze packet can be skipped here. Packet glazes are often very sweet and do not usually give you the same control over tang, thickness, and timing.
Cook Time and Temperature Chart
Use this chart as a starting point, not a promise. Hams are awkward shapes, ovens run differently, and the thermometer gets the final vote. Insert it into the thickest part of the ham without touching the bone.
Ham Cook Time Chart
Ham Type
Weight
Oven / Method
Approx. Time
Target Temperature
Fully cooked spiral ham
7 to 9 lb / 3.2 to 4.1 kg
275°F / 135°C, covered
12 to 15 min/lb, plus glazing time
140°F / 60°C if USDA-inspected
Fully cooked spiral ham, extra gentle
8 to 10 lb / 3.6 to 4.5 kg
250°F / 120°C, covered
15 to 20 min/lb, plus glazing time
140°F / 60°C if USDA-inspected
Boneless fully cooked ham
4 to 6 lb / 1.8 to 2.7 kg
275°F / 135°C, covered
10 to 15 min/lb, plus glazing time
140°F / 60°C if USDA-inspected
Boneless fully cooked ham
4 to 5 lb / 1.8 to 2.3 kg
Slow cooker LOW
4 to 6 hours
140°F / 60°C
Spiral fully cooked ham, if it fits
7 to 10 lb / 3.2 to 4.5 kg
Slow cooker LOW
4 to 5 hours, check early
140°F / 60°C
Raw or fresh ham
Varies
Not this method
Use a separate recipe
145°F / 63°C plus rest
Temperature Targets and Final Check
Smaller or boneless hams may be ready sooner, especially if they sat out before baking. If the edges look ready before the center is warm, cover the ham again and slow down. A calm finish beats a rushed one.
When packaging is unclear, use the safer 165°F / 74°C target and let the label guide you.
Check the thickest part without touching bone, since a fully cooked ham and an uncertain or repackaged ham do not use the same final temperature target.
Common Honey Glazed Ham Mistakes to Avoid
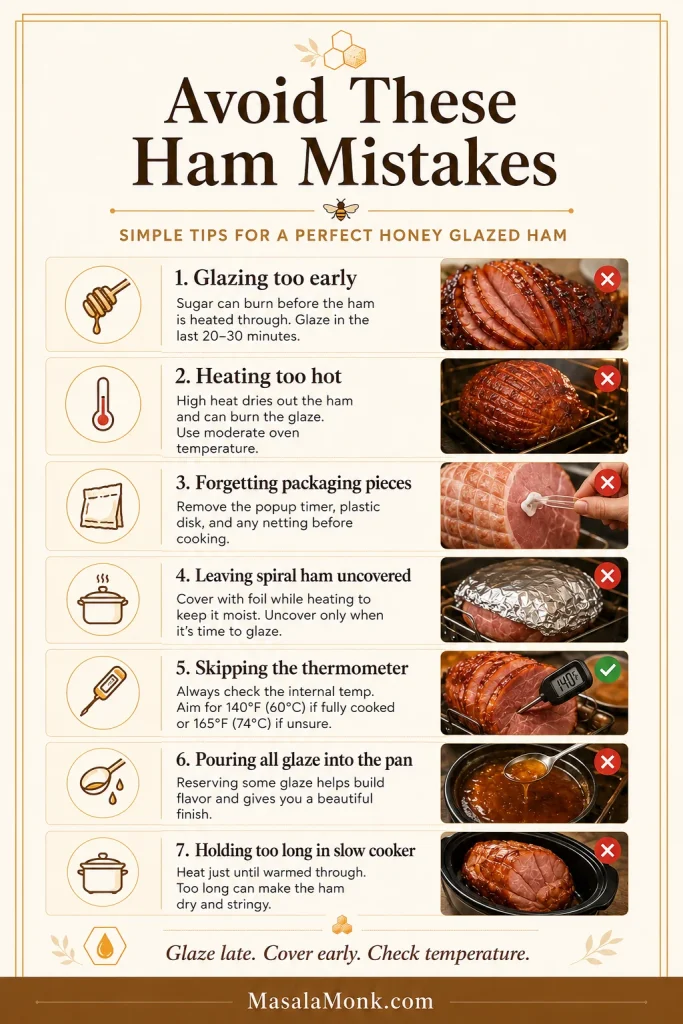
Glazing from the start: the sugar can burn before the center warms.
Using high heat the whole time: the outer slices can turn dry and tight.
Forgetting the plastic cap or disc: remove all packaging pieces before baking.
Heating spiral ham uncovered too long: sliced ham loses moisture quickly.
Trusting only the clock: time estimates help, but temperature confirms.
Letting slow cooker ham sit on warm for hours: it can dry out after reaching temperature.
Pouring all the glaze into the pan: it thins out instead of clinging to the ham.
None of these mistakes are dramatic if you catch them early. Cover, lower the heat, reduce the glaze, or brush on a fresh layer near the end.
The biggest ham mistakes are simple to avoid: protect the slices, save the glaze for the finish, use moderate heat, and verify the temperature.
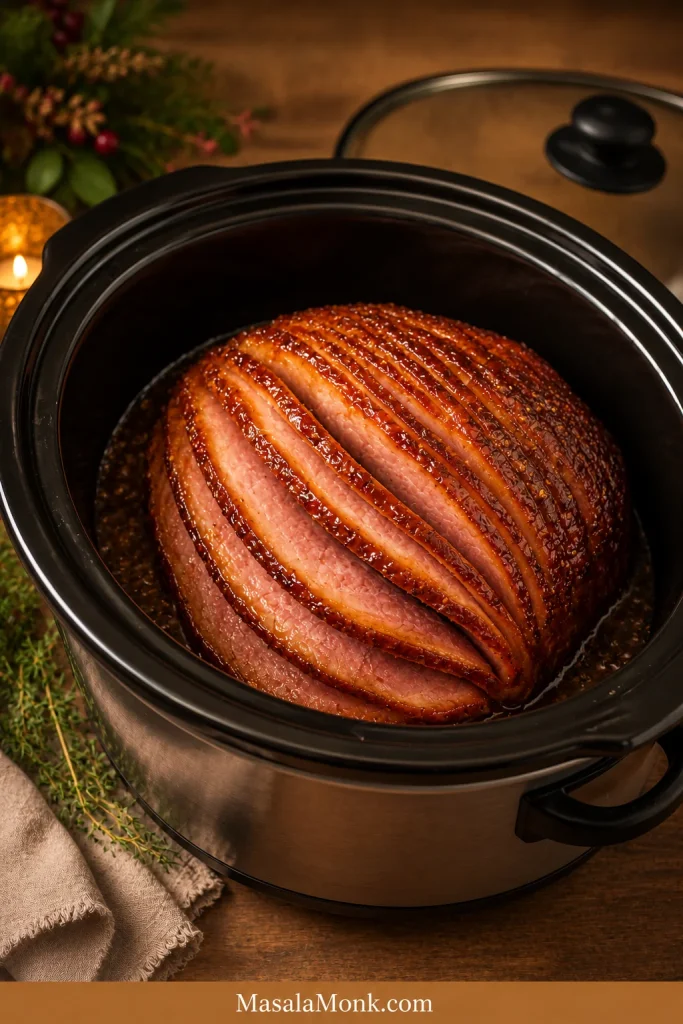
When the oven is already full of casseroles, rolls, or dessert, the slow cooker can take over the ham. It is best for boneless hams or smaller hams that fit easily under the lid. Spiral ham can work, but it needs earlier checking because the slices are more delicate.
The lid matters more than people think. A ham wedged in so tightly that the lid does not seal will heat unevenly, and the top can dry out before the center is ready.
Think of the slow cooker as the moist, convenient option. The oven gives a better roasted finish. A quick broiler finish after slow cooking gives you the best compromise.
Slow Cooker Method
Use a slow cooker large enough for the ham to fit with the lid fully closed.
Place the ham cut-side down or on its side, depending on shape.
Add the glaze and 1/4 to 1/2 cup liquid.
Cook on LOW just until warmed through. Avoid HIGH, which can make the edges tough.
Baste once or twice if possible.
Check the internal temperature. Aim for 140°F / 60°C for fully cooked ham, or 165°F / 74°C if unsure.
For a caramelized finish, transfer the ham to a broiler-safe pan, brush with more glaze, and broil briefly.
Every slow cooker varies. A 4 to 5 lb boneless ham usually takes about 4 to 6 hours on LOW. Larger spiral hams may take about 4 to 5 hours if they fit properly, but shape matters as much as weight.
Use the slow cooker when the oven is full, but make sure the ham fits comfortably instead of being forced under the lid.
Slow cooker tip: stop once the ham is warmed through. Leaving it on warm for hours can undo all the moisture you protected.
Once the main method is clear, the next sections are only there if they match the ham or holiday table you want. Keep the regular glaze for the cleanest result, add the sugar crust for drama, use pineapple for a retro-holiday version, or check the gammon notes if that is the joint you bought.
Copycat Honey Baked Ham-Style Sugar Crust
This sugar-crust finish is optional. The main glaze does not need it, but it is useful when you want a sweeter, crackly, store-bought-style finish. Use a light hand and stay close to the oven or torch, because this finish is less forgiving than the regular glaze.
Mix this sugar crust in a small bowl:
1/2 cup granulated sugar
1/2 tsp cinnamon
1/4 tsp nutmeg
1/8 tsp ground cloves
1/4 tsp paprika
1/4 tsp onion powder
After the ham is warmed and glazed, sprinkle a light layer of the sugar mixture over the outside. Broil for 1 to 3 minutes or use a kitchen torch until the sugar melts and caramelizes. Watch constantly. The difference between a caramelized crust and burnt sugar can be only a few seconds.
Use this finish when you want the ham to feel a little more dramatic than everyday dinner. For a simpler family meal, the regular glaze is enough.
Homemade Honey Glazed Ham vs Store-Bought Ham
There is nothing wrong with buying the ham already done, especially when the rest of the table is enough work. The reason to glaze it yourself is control: you can serve it warm, keep the sweetness balanced, make the mustard sharper, and stop while the slices are still juicy instead of just accepting whatever came in the packet.
Option
Best For
Tradeoff
Store-bought holiday ham
Convenience and less day-of work
Less control over sweetness, warmth, and texture
Homemade glazed ham
Better balance and fresher finish
Needs timing and thermometer checks
Copycat-style sugar crust
Showpiece presentation
Sweeter and easier to burn if unattended
Homemade also helps when you do not want the glaze packet that came with the ham. Many packet glazes are mostly sweet. This brown sugar honey mustard glaze is still rich and festive, but the mustard, vinegar, pepper, and optional fruit juice keep it from tasting flat.
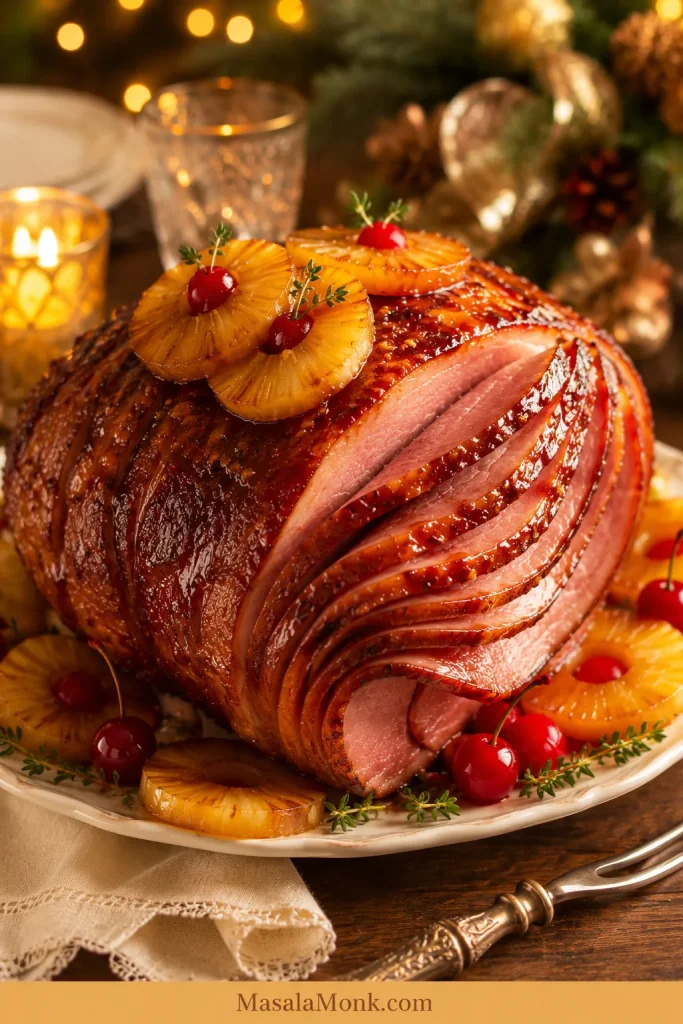
Pineapple Honey Glazed Ham Variation
Pineapple makes the ham feel a little brighter and more old-school holiday — the kind of version that looks right with glossy rings, cherries, and a sweet-salty pan sauce.
For pineapple honey glazed ham, use pineapple juice as the liquid in the glaze and in the roasting pan. Add pineapple rings during the final part of baking so they stay bright and do not overcook. Because pineapple adds sweetness, keep the mustard and vinegar in the glaze so the ham still tastes balanced.
Pineapple gives the glaze a brighter, old-school holiday flavor; meanwhile, mustard and vinegar keep the sweetness from tasting flat.
If you are leaning into the sweeter holiday side of the menu, sweet potato casserole fits that same mood, especially when the ham glaze has enough mustard or vinegar to keep the plate from becoming too sweet.
Honey Glazed Gammon Notes
Gammon can absolutely take this honey mustard glaze, but the starting point is different. Many UK-style gammon joints need simmering or boiling first, then the glaze goes on after the meat is cooked and the fat is ready to brown.
Once the gammon is cooked according to its package directions, remove the skin if needed, score the fat, brush with honey mustard glaze, and roast until caramelized and browned. The same honey, mustard, and brown sugar flavor works beautifully; the initial cooking method is the part that changes.
Flavor Variations
Once the base glaze works, the variations are mostly mood changes. Pineapple feels retro and holiday-bright, orange feels softer, maple feels deeper, and hot honey makes the ham more playful without changing the method.
Variation
How to Adjust the Glaze
Honey mustard ham
Use Dijon or yellow mustard generously for a tangier glaze.
Pineapple honey ham
Use pineapple juice in the glaze and roasting pan.
Orange honey ham
Use orange juice and a little orange zest.
Maple honey ham
Replace part of the honey with maple syrup.
Bourbon honey ham
Add a splash of bourbon to the glaze and simmer well.
Hot honey ham
Add cayenne, chili flakes, or hot honey.
Clove-spiced ham
Add a tiny pinch of ground cloves. Use restraint.
Mustard-free glaze
Add extra vinegar or citrus so the glaze does not taste too sweet.
Brown-sugar-free glaze
Use more honey or maple syrup, but expect a softer, less caramel-like finish.
The sweeter you take the glaze, the more the plate needs contrast. Add something green, sharp, creamy, or crisp so every bite does not land in the same sweet-rich place.
Troubleshooting Honey Glazed Ham
Most ham problems are fixable if you catch them early. Usually, one of three things happened: the ham got too hot, the glaze went on too early, or the glaze was too thin or too thick.
Problem
Why It Happened
Fix
Ham is dry
Too hot, uncovered too long, or overheated
Use lower heat, cover tightly, add a little liquid, and stop at the right temperature.
Thin glaze
It was not simmered long enough
Simmer longer, or use 1 tsp cornstarch mixed with 1 tbsp water.
Over-thickened glaze
It reduced too far
Add pineapple juice, orange juice, water, or pan juices a spoonful at a time.
Burned glaze
It was added too early or broiled too long
Glaze near the end and broil only briefly while watching closely.
Sliding glaze
The glaze is too hot or too thin
Let it cool slightly so it thickens before brushing.
Cold center
The ham was too cold or not warmed long enough
Cover again and continue warming gently until the center reaches temperature.
Sweet-heavy glaze
Not enough acid or mustard
Add more mustard, vinegar, or citrus to the glaze.
Salty ham
The ham itself is salty
Serve with mild sides and avoid very salty pan liquid.
Watery slow cooker glaze
Condensation diluted the glaze
Reduce the liquid in a saucepan before serving.
Fix the cause rather than fighting the whole recipe. Dry ham needs gentler heat. Burnt glaze needs later glazing. Thin glaze needs more simmering or a quick reduction.
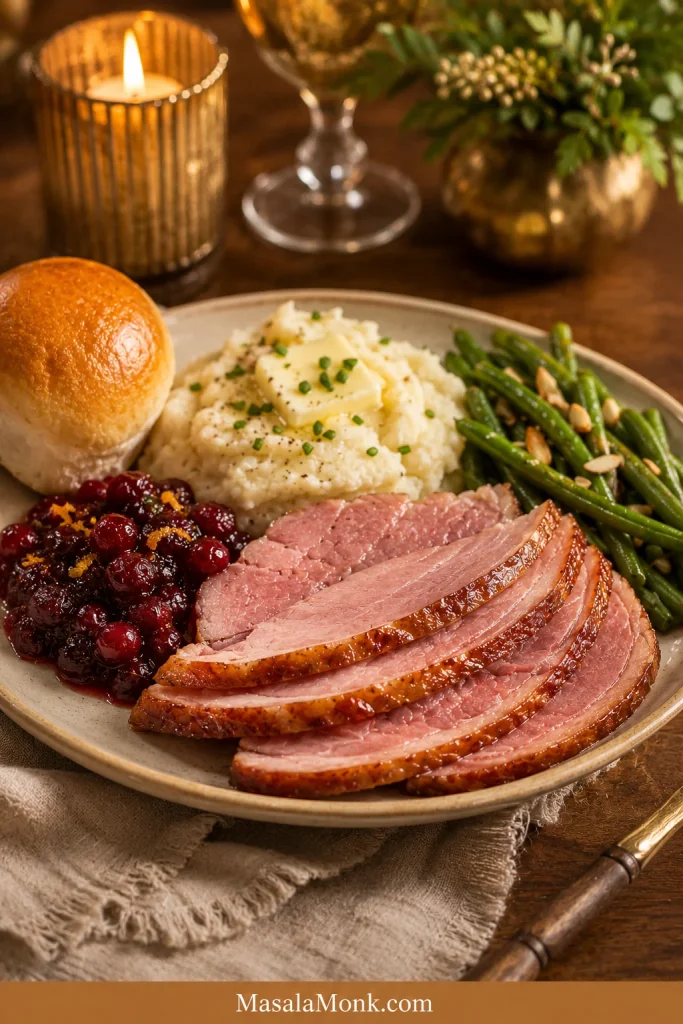
What to Serve with Honey Glazed Ham
Honey glazed ham is sweet, salty, smoky, and rich, so it pairs best with sides that are creamy, green, buttery, or lightly acidic. A good ham plate needs contrast: something creamy to catch the juices, something green to cut the sweetness, and something bread-like for the extra glaze.
For comfort, add hashbrown casserole or green bean casserole. To add contrast, bring in something tart, crisp, or lightly dressed. Mac and cheese, dinner rolls, roasted vegetables, and simple salads all work well beside the sweet glaze.
Scalloped potatoes
Dinner rolls
Roasted carrots
Brussels sprouts
Simple salad
Baked beans
Roasted sweet potatoes
Green beans
For a colder buffet-style plate, a creamy potato salad works better than another hot, sweet side. On a holiday table, aim for one creamy side, one green vegetable, one bread or roll, and one bright or tangy contrast.
Build the plate with contrast: something creamy, something green, something bright, and bread or rolls to catch the extra glaze.
Make Ahead, Storage, and Reheating
Holiday ham is easier when the little decisions are handled early. The glaze can be made ahead, the pan can be ready, and the ham can come out of the fridge before the oven gets busy.
Simple Holiday Timing Plan
When
What to Do
2 to 3 days before
Make the glaze and refrigerate it.
1 day before
Check the ham label, roasting pan, foil, thermometer, and serving platter.
30 to 60 minutes before baking
Take the ham out of the fridge so it warms more evenly.
Final 20 to 30 minutes
Brush on the glaze and caramelize briefly.
Before serving
Rest for 10 to 15 minutes, then spoon over warm glaze or pan juices.
Can You Make the Glaze Ahead?
Yes. Make the glaze 2 to 3 days ahead and refrigerate it in a covered container. Warm it gently before brushing so it becomes smooth and pourable again.
Can You Make Honey Glazed Ham Ahead?
You can warm the ham ahead if needed, but the best texture comes from glazing close to serving. Reheat covered with a splash of liquid, then refresh with warm glaze before serving.
How to Store Leftover Ham
Store leftover ham in an airtight container in the refrigerator for 3 to 4 days. Keep slices covered so they do not dry out. For a broader guide to how long cooked foods keep in the fridge or freezer, use the FoodSafety.gov cold food storage chart.
Can You Freeze Honey Glazed Ham?
Yes. Freeze sliced ham in portions, wrapped tightly, for up to 2 months for best quality. Thaw overnight in the refrigerator before reheating.
How to Reheat Leftover Ham
Reheat slices gently with a splash of water, stock, or juice. Use a covered skillet, low oven, or microwave in short bursts. Avoid reheating the whole ham repeatedly, because that dries it out.
For a next-day dinner that does not feel like reheated holiday leftovers, chop the ham into a pot of bean stew or use the smoky pieces anywhere you would normally want a salty, savory boost.
Leftover Honey Glazed Ham Ideas
Leftover honey glazed ham is one of the best reasons to make a larger ham. The next-day meals are part of the reward, not just a way to use things up. A few slices can become breakfast, sandwiches, soup, fried rice, or a quick dinner before anyone feels like they are eating the same holiday plate again.
Ham and cheese sliders
Ham sandwiches with mustard
Breakfast omelets
Ham fried rice
Ham and potato hash
Mac and cheese with chopped ham
Ham and bean soup
Split pea soup with ham bone
Ham quiche
Ham and cheese breakfast casserole
If your ham has a bone, save it before clearing the platter. The bone adds deep flavor to soups, beans, and broths. If you like that smoky beans-and-meat direction, red beans and rice is another useful comfort-food path for ham pieces or a ham bone.
Leftover honey glazed ham can turn into sandwiches, breakfast, soup, beans, fried rice, or hash, so the next-day meals feel planned instead of patched together.
By this point, the big decisions are handled: label, heat, glaze timing, serving, and leftovers. The quick answers below are for the small questions that tend to come up while the oven is already on.
FAQ
Is honey glazed ham already cooked?
Most supermarket spiral hams are fully cooked, so you are usually reheating and glazing them rather than cooking from raw. The package still gets the final word. “Cook before eating” or “fresh ham” needs different cooking instructions.
Do you cover ham while baking?
Yes. Keep the ham covered while it reheats so the slices stay moist, then uncover it only for the final glaze stage. That short uncovered finish gives you the caramelized outside without drying out the center.
When should I glaze ham?
Glaze during the final 20 to 30 minutes of baking. The ham needs time to warm gently; the sugar only needs a short finish to turn glossy and caramelized.
What temperature should honey glazed ham reach?
For a fully cooked USDA-inspected ham, use 140°F / 60°C. If the ham was repackaged elsewhere, or you are unsure about it, use 165°F / 74°C. Raw or fresh ham needs a different cooking method.
Do I need to score spiral ham?
No. Spiral ham is already sliced, so scoring usually adds more exposed edges without adding much benefit. Unsliced ham with a fat layer can be scored lightly so the glaze clings better.
Can I use the glaze packet that came with the ham?
You can, but homemade glaze gives you more control. Packet glazes are often very sweet and may not have enough mustard, vinegar, or spice to balance the ham. This brown sugar honey mustard glaze gives you a fresher, less flat finish.
Can I make honey glazed ham the day before?
The glaze can be made ahead, and the ham can be warmed ahead if needed. For the best texture, save the final glaze stage for close to serving, then refresh the slices with warm pan juices or extra glaze.
Can I make honey glazed ham in a slow cooker?
Yes, as long as the ham fits with the lid fully closed. Cook on LOW just until warmed through, then finish under the broiler if you want a more roasted, caramelized outside.
What is the difference between ham and gammon?
In many UK recipes, gammon is a cured pork joint that often needs cooking before it is glazed. A fully cooked American spiral ham is usually already cooked and only needs reheating. The glaze can work for both, but the starting method may be different.
Why did my ham glaze burn?
Your glaze was probably added too early or exposed to high heat for too long. Honey and brown sugar caramelize quickly, so glaze near the end and broil only briefly while watching closely.
How do I keep honey glazed ham moist?
Use gentle heat, place the ham cut-side down, add a little liquid to the pan, and keep it covered for most of the reheating time. The goal is to warm it through, not roast it hard twice.
Before You Serve It
Honey glazed ham looks dramatic on the table, but it rewards calm cooking more than fuss. Keep it covered while it warms, wait until the end to glaze, and let the sweet, tangy smell tell everyone dinner is close. When the slices are warm, the edges are burnished, and the glaze is clinging in all the right places, the ham is ready for the table.
Once the ham has done the heavy lifting, dessert can stay simple. A tender apple cake fits the cozy holiday mood, while key lime pie gives the meal a colder, brighter finish.