Posted on — Leave a comment

Cheeseburger Sliders Recipe: Easy, Cheesy Hawaiian Roll Sliders

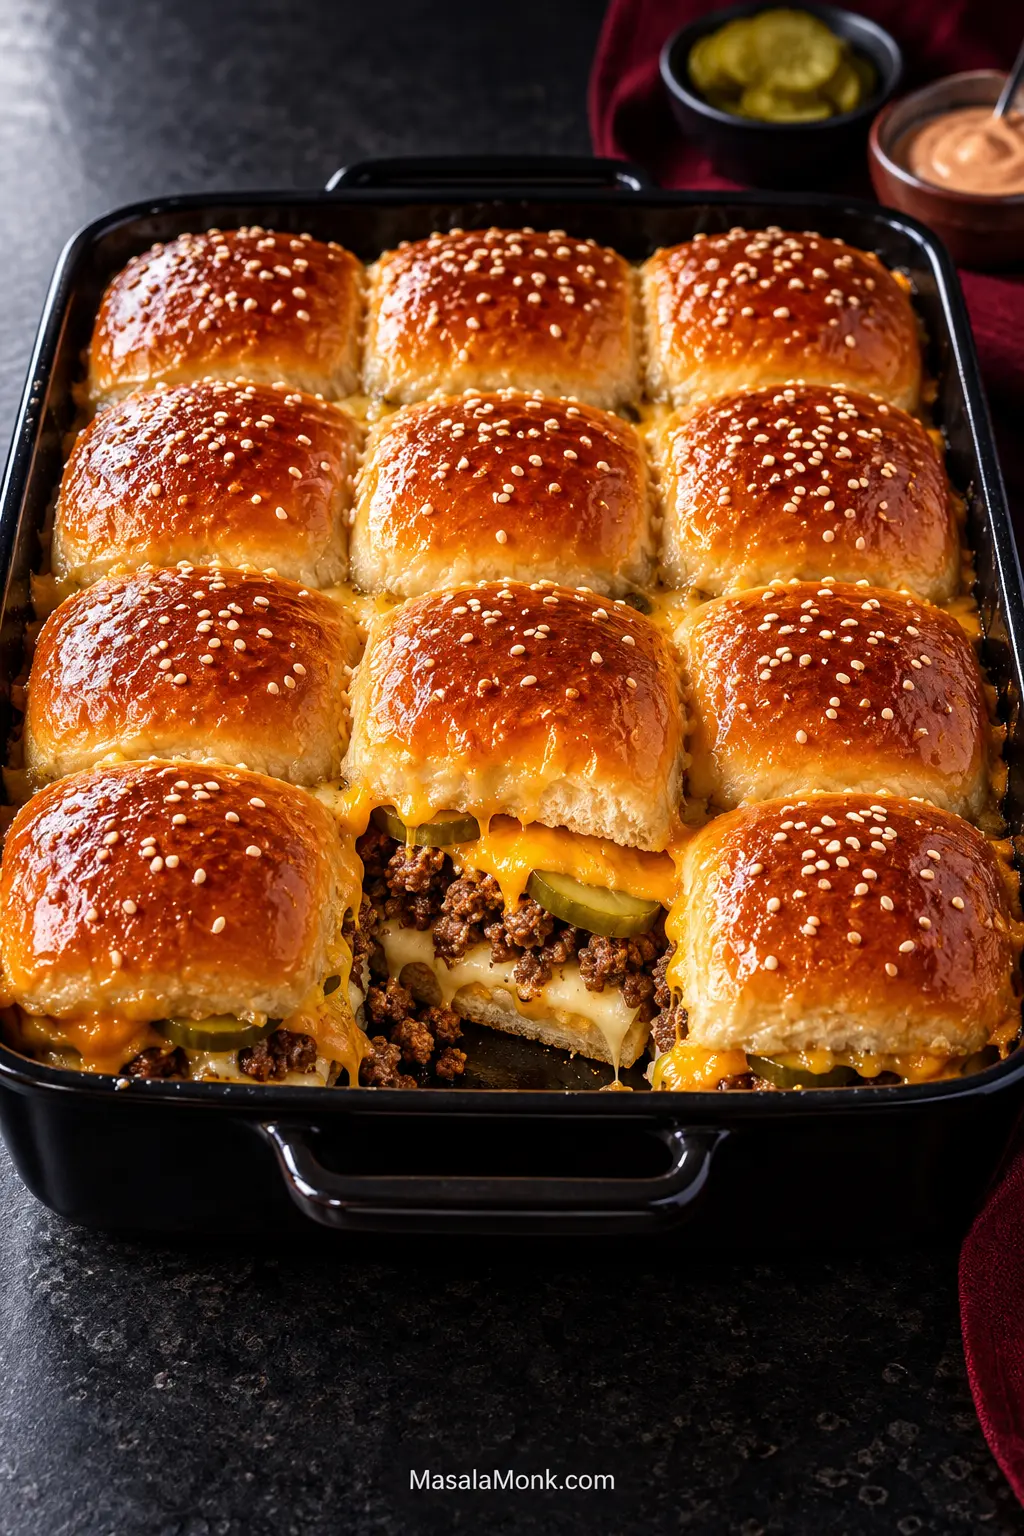
Twelve sesame-topped cheeseburger sliders arranged in four rows of three in a black baking dish. A front slider is opened to show American cheese, crumbled ground beef, dill pickles and melted cheddar between golden Hawaiian rolls.

Cheeseburger sliders are easy until the beef juices reach the bottom rolls. Then a tray that looked perfect can turn greasy underneath while the tops are still beautifully golden.

This cheeseburger sliders recipe keeps the beef juicy but gets rid of the liquid the bread does not need. You get browned beef under two layers of melted cheese, a sharp bite of dill pickle, and soft buttery Hawaiian rolls with sesame-speckled tops. The bottom stays tender enough to pull apart, but sturdy enough to hold the filling.

These baked cheeseburger sliders use crumbled ground beef, so you cook the beef once and assemble all 12 together instead of shaping and flipping tiny patties. They work for an easy dinner, but they are especially handy when you are feeding a group. If you want a more traditional burger bite with one cohesive layer of meat, there is a sheet-pan patty option farther down.

What a Good Tray Looks Like

Keep the beef juicy; keep its liquid off the bread.

  • Beef: browned and juicy, with no puddle of fat or cooking liquid.
  • Bottom rolls: tender and intact, without a greasy or waterlogged underside.
  • Center: hot, with cheese visibly melted at the seams.
  • Top: golden, buttery and still tender.

Easy Cheeseburger Sliders with Hawaiian Rolls

Ground beef, melted cheese and dill pickles baked between connected Hawaiian rolls for an easy tray of pull-apart cheeseburger sliders.

Yield
12 sliders

Serves
4 as a meal
6–12 in a larger appetizer spread

Prep
15 minutes

Cook
20–25 minutes

Rest
5 minutes

Total
About 40–45 minutes

Equipment

  • 9 × 13-inch / 23 × 33 cm baking dish
  • Large skillet, ideally about 12 inches / 30 cm
  • Long serrated bread knife
  • Instant-read food thermometer

Ingredients

  • 12 connected Hawaiian sweet rolls, about 12 oz / 340 g
  • 1 lb / 454 g 90/10 ground beef
  • 1 tsp / 5 ml neutral oil, optional
  • 1 small-to-medium onion, finely diced, about ⅔ cup / 100 g
  • 1 tbsp / 15 ml Worcestershire sauce
  • 1 tsp / about 3 g garlic powder
  • ½ tsp / about 1 g freshly ground black pepper
  • ½ tsp / about 3 g fine sea salt, plus more only if needed after tasting
  • 6–8 slices American cheese, enough to cover most of the bottom roll slab
  • 1¼ cups / 5 oz / 140 g freshly grated medium or sharp cheddar
  • ¾ cup / about 100 g sliced dill pickles, drained and blotted dry
  • 2 tbsp / 28 g unsalted butter, melted
  • 2 tsp / about 6 g sesame seeds

Optional Burger Sauce Ingredients

  • ¼ cup / 60 ml mayonnaise
  • 2 tbsp / 30 ml ketchup
  • 1 tbsp / 15 ml dill or sweet pickle relish
  • 1 tsp / 5 ml yellow mustard or Dijon mustard

Instructions

  1. Heat the oven. Preheat to 350°F / 175°C. Lightly grease a 9 × 13-inch / 23 × 33 cm baking dish.
  2. Slice the rolls. Leave all 12 connected. Use a long serrated knife to cut horizontally through the slab. If practical, leave the bottom half slightly thicker than the top. Put the bottom slab in the baking dish.

Brown and Season the Beef

  1. Brown the beef. Heat a large skillet over medium-high. If the pan tends to stick, use the neutral oil. Spread the beef across the skillet and leave it undisturbed for 1–2 minutes, until the underside has browned in spots and the pan sounds more like a sizzle than a simmer.
  2. Add the onion. Scatter in the diced onion and break the beef into small crumbles. Cook for another 4–6 minutes, stirring as needed, until the onion is soft and the beef is nearly cooked through.
  3. Drain the skillet. Remove the rendered fat and watery cooking liquid. A slotted spoon works well. Return the drained beef to the skillet.
  4. Season the beef. Add Worcestershire, garlic powder, black pepper and salt. Cook for 30–60 seconds, until the Worcestershire has disappeared into the beef and there is no obvious free liquid. Push some crumbles into a small mound around the thermometer probe and check the center without touching the skillet. Ground beef should reach 160°F / 71°C; if it has not, cook briefly until it does.
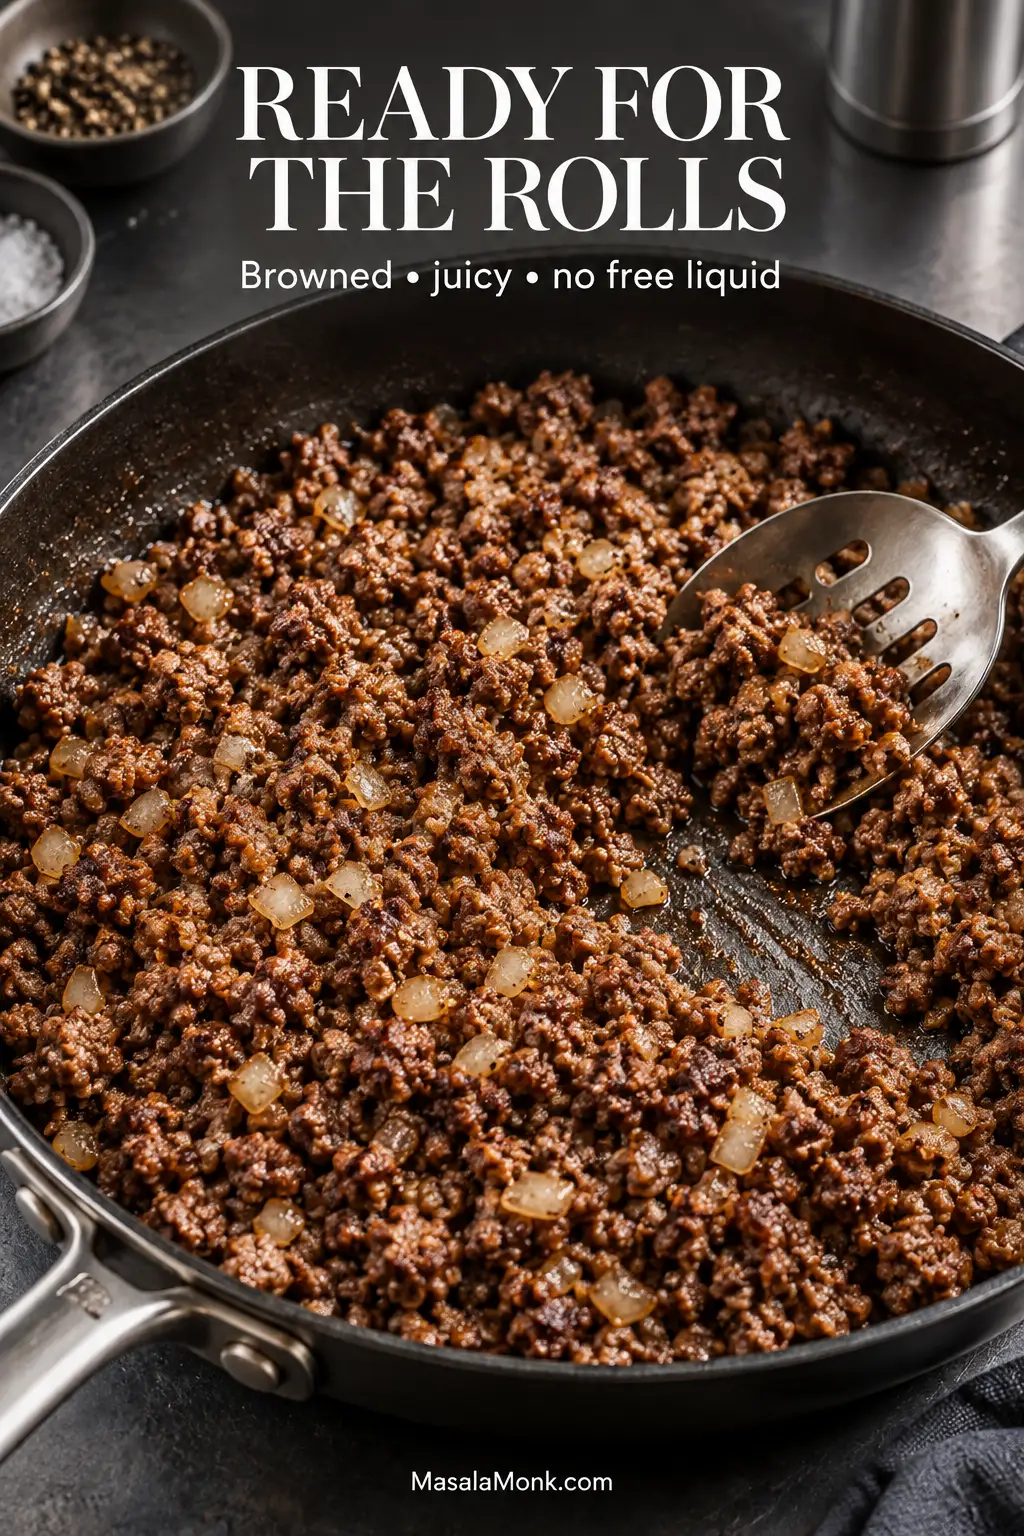
Skillet of browned ground beef and onion with a clear area showing no pooled cooking liquid. Text reads “Ready for the rolls — Browned, juicy, no free liquid.”
Once the skillet has no puddle of cooking liquid, the beef is ready for the rolls.

Layer the Filling

  1. Layer the cheese. Arrange enough American cheese over the bottom rolls to cover most of the cut surface. Six large slices may do it; use eight if yours are smaller.
  2. Add the filling. Spread the beef all the way to the edges so the outside sliders are not shortchanged. Scatter the blotted dill pickles over the meat, then cover with the grated cheddar.
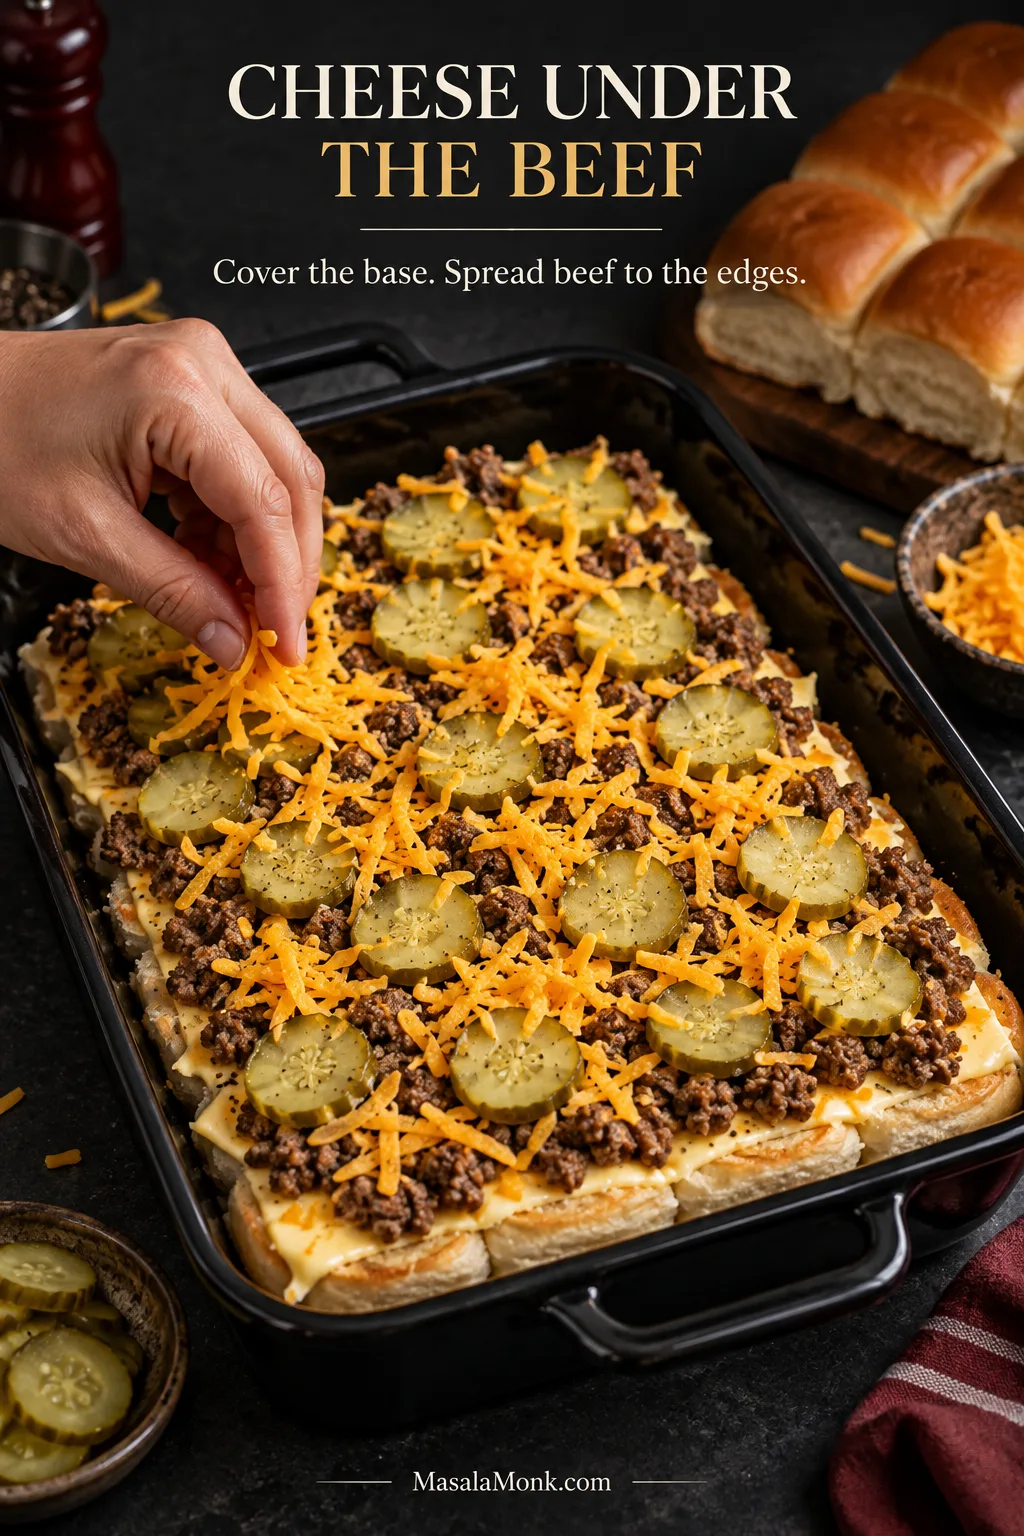
Open Hawaiian roll slab layered with American cheese, crumbled beef, dill pickles and shredded cheddar.
Carry the beef right to the outer edges so the corner sliders get the same filling as the middle ones.

Finish and Bake

  1. Add the tops. Replace the upper slab of rolls. Brush lightly with melted butter and sprinkle with sesame seeds.
  2. Bake. With warm beef, bake uncovered for 12–15 minutes. The cheese should be visibly melted at the seams, the center hot and the tops evenly golden. If the tray was assembled with cooked, chilled beef, cover loosely with foil for about 10 minutes, then uncover and continue for another 5–10 minutes, or until the center reaches 165°F / 74°C, the cheese is fully melted and the tops are golden.
  3. Rest and cut. Leave the tray for 5 minutes. The cheese settles slightly during that time, so the filling stays put more easily when you cut through the original roll seams.

Burger Sauce

Stir the mayonnaise, ketchup, relish and mustard together. Dill relish gives you a sharper pickle bite; sweet relish makes the sauce taste a little more like a classic fast-food burger sauce. Keep it on the side and let everyone add their own.

Recipe Notes

  • For a meatier tray: increase the beef to 1½ lb / 680 g. Use about 1½ tbsp / 22 ml Worcestershire, 1½ tsp garlic powder, ¾ tsp black pepper and ¾ tsp fine sea salt. Keep the onion, cheese and pickles at the listed amounts for a deliberately beefier slider. Brown the meat in batches if your skillet is crowded.
  • Using 85/15 beef: keep the seasoning the same and drain the beef thoroughly.
  • A firmer base: broil the bottom roll slab cut-side up for 1–2 minutes, watching constantly. This is optional; the recipe does not depend on toasting the bread.
  • Making them ahead: cool the beef completely before it touches the rolls. Add the butter and sesame seeds just before baking.
  • Toppings: leave pickles out of the oven if you want them cooler and crunchier. Add lettuce, tomato and avocado only after baking.
  • Burger sauce: when made with commercial mayonnaise, it can be mixed 3–4 days ahead, covered and refrigerated.

Rolls, Cheese and Beef: Why the Order Matters

Build from the bottom up: cheese first, then beef, pickles and more cheese. The lower cheese gives the bread some protection, while the cheddar above melts into the crumbles and helps hold everything together when the tray is cut.

Keep the Hawaiian rolls connected while you assemble the sliders. Their soft texture and slight sweetness work especially well with salty cheese and dill pickles. Brioche or plain soft dinner rolls are the easiest substitutes when you want something less sweet.

American cheese underneath and cheddar above give the tray a useful balance: a creamy melt against the bread and stronger cheese flavor over the beef. American works on both layers if that is what you have, while Colby Jack or pepper Jack are easy swaps. Freshly grated cheddar melts more evenly than pre-shredded.

By the time the tray comes out of the oven, the cheddar should have melted into the beef in places rather than sitting on top as a separate stiff layer. That helps the filling stay with the slider when you pull one away.
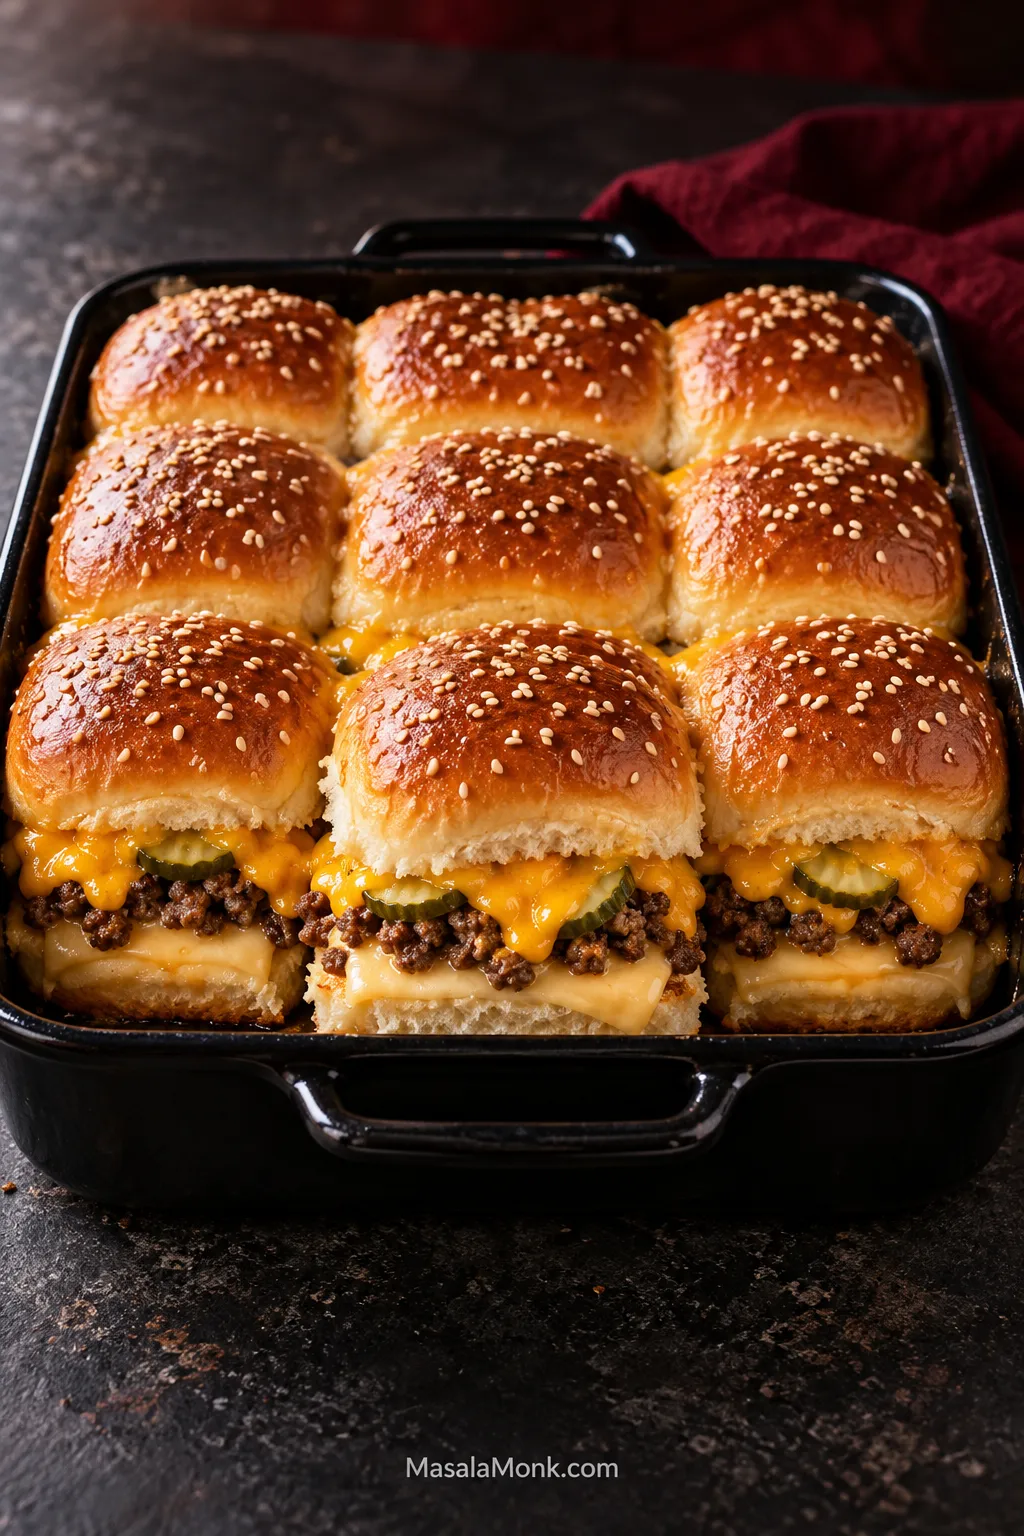
A cheeseburger slider lifted from the tray with beef, pickles and melted cheese visible between the rolls.
A clean pull-apart is the payoff: the bun stays intact and the filling comes with it.

How much beef to use

One pound / 454 g is enough to cover all 12 small rolls without turning them into oversized burgers. Use 1½ lb / 680 g when you deliberately want a meatier beef-to-bread ratio.

For this style of slider, 90/10 ground beef is easy to work with. An 85/15 blend gives you a richer filling but needs more draining. With 80/20 beef, the extra rendered fat becomes more important because all of it is sitting above soft bread.

Why Browning Comes Before Seasoning

Give the beef a short head start in a hot skillet before the onion goes in. Those browned spots bring more flavor than meat that immediately starts simmering in onion moisture. When the onion is soft and the beef is nearly done, drain the pan before adding Worcestershire and the dry seasonings.

Ground beef should reach 160°F / 71°C on a food thermometer. Color alone is not a reliable doneness test. The USDA safe internal temperature guidance also lists 165°F / 74°C for ground poultry.

How to Keep Cheeseburger Sliders From Getting Soggy

To keep cheeseburger sliders from getting soggy, drain the beef until no grease or cooking liquid is pooling, cover the bottom rolls with cheese, blot the pickles, and save generous amounts of sauce for after baking.

Most soggy sliders start with the filling. Ground beef and onions release water as well as fat, while pickle slices can bring more brine than they appear to. Control those liquids and the cheese can protect the base without the bread becoming saturated.

Sauce can wait too. A thin smear is fine when the sliders are going straight to the table, but spoonfuls of burger sauce are better added after baking. Warm beef also traps steam inside an assembled make-ahead tray; as the tray cools, that steam condenses into the rolls.

Soft is good. Soggy is not. A warm Hawaiian roll should stay tender. The problem begins when enough grease, water or brine soaks in that the bottom loses its structure.
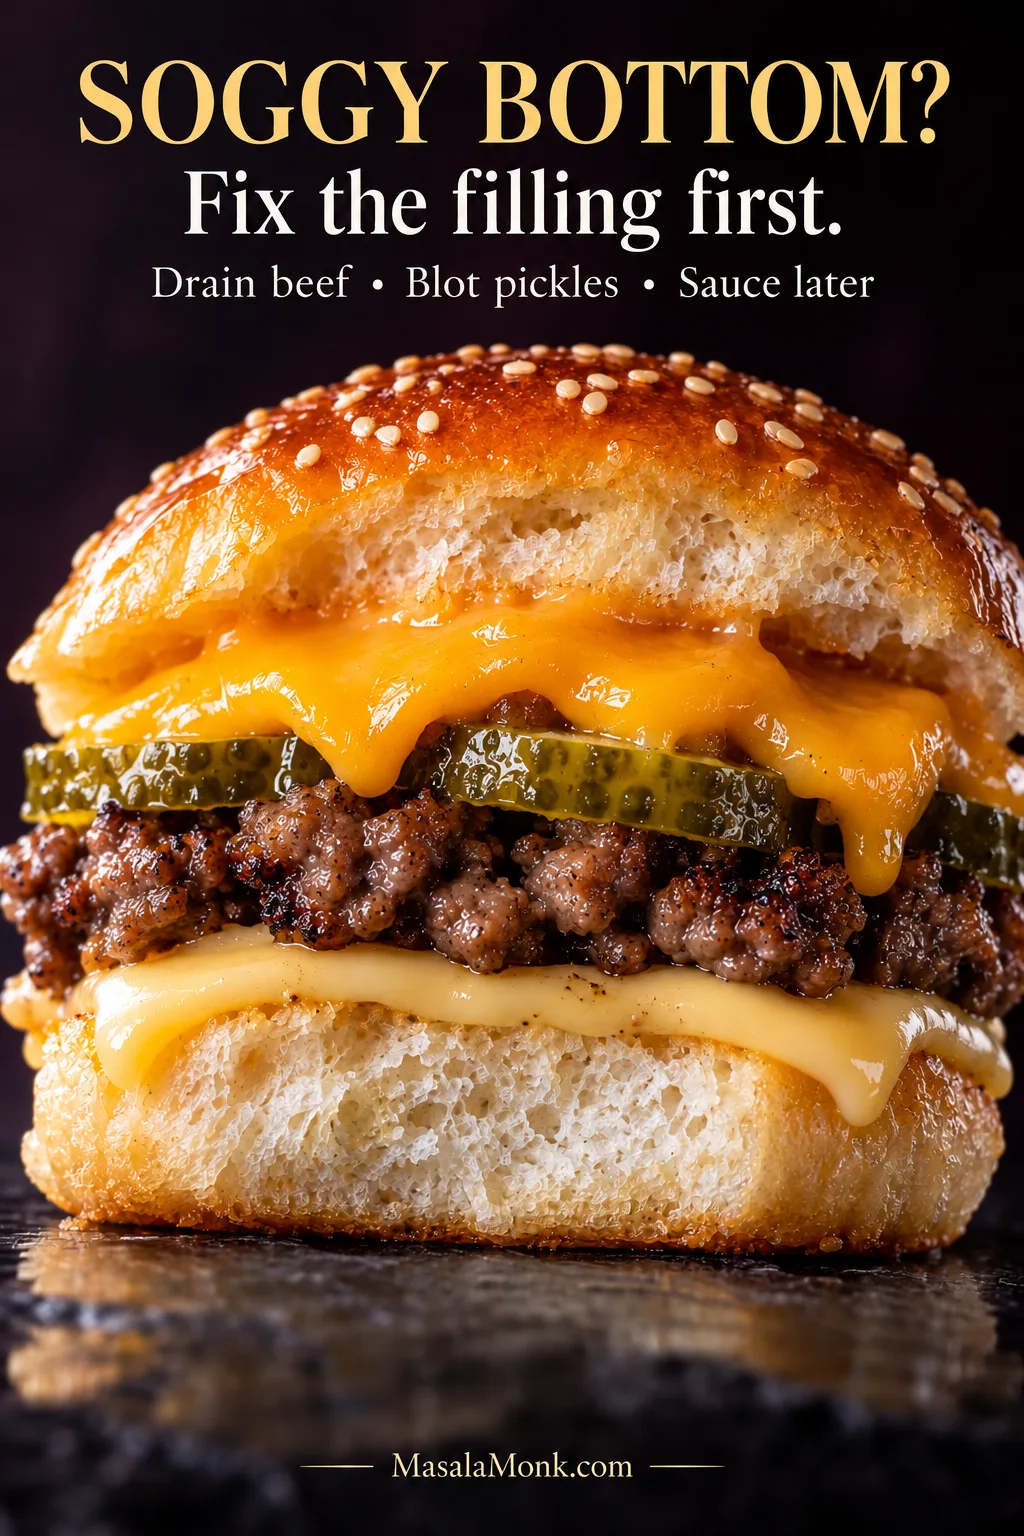
Cross-section of a cheeseburger slider with an intact bottom roll beneath beef, cheese and pickles. Text reads “Soggy bottom? Fix the filling first. Drain beef, blot pickles, sauce later.”
A sound bottom starts with the filling: drain the beef well, blot the pickles and keep excess sauce away from the rolls until serving.

Do you need to toast the bottom rolls?

No. You don’t have to toast the rolls first. A quick 1–2 minute broil, cut-side up, gives the base a little more firmness when the sliders will be eaten straight away. Keep an eye on them; Hawaiian rolls brown quickly.

Skip the extra toast when the tray needs to travel or sit for a while. Small toasted rolls can become hard as they cool.

Back to Recipe · Making them ahead? See Party Prep

Make-Ahead Cheeseburger Sliders and Party Prep

You can assemble cheeseburger sliders overnight, but the bread holds up better when the cooked beef is refrigerated separately and the tray is built closer to baking. Cool the beef completely either way. When the whole tray has to be assembled ahead, leave off the melted butter until just before it goes into the oven.

Getting the beef cooked early also means nobody has to stand over a skillet once people start arriving. With the filling ready, assembly is mostly a matter of layering the rolls, cheese, beef and pickles before the tray goes into the oven.
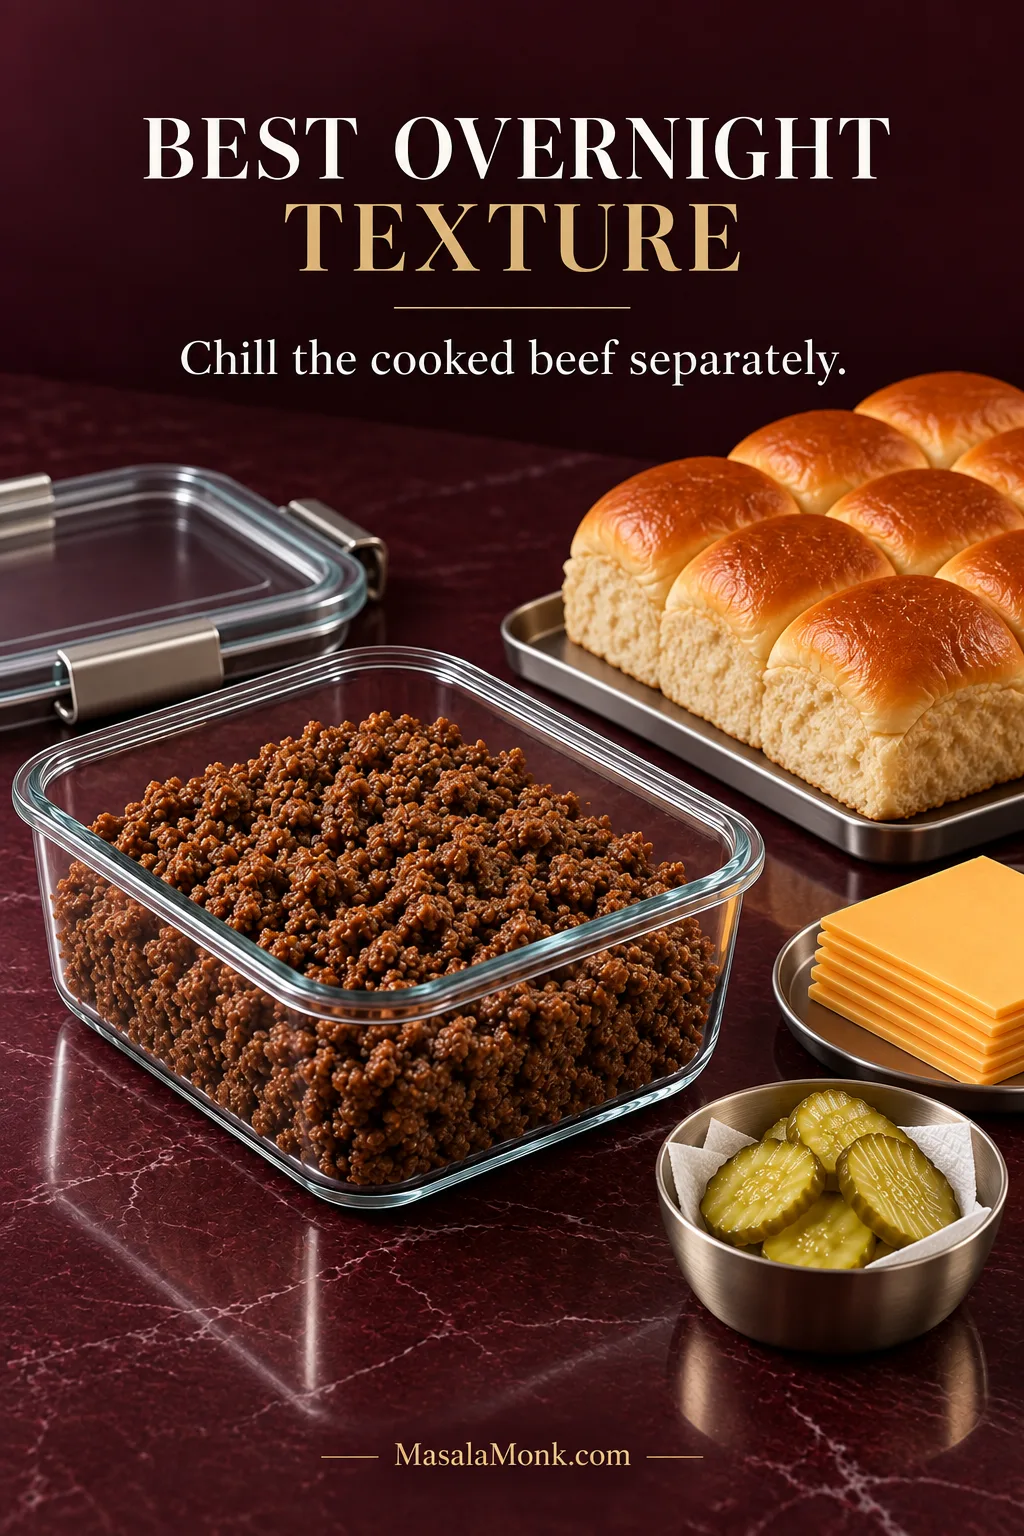
Container of cooled cooked beef beside Hawaiian rolls, cheese and pickles. Text reads “Best overnight texture — Chill the cooked beef separately.”
For the best overnight texture, chill the cooked beef separately and assemble the tray closer to baking.

How Far Ahead Can You Make Them?

SituationBest Approach
OvernightFor the strongest bread texture, cook and chill the beef separately. A fully assembled tray works when needed, but the rolls will usually be softer.
A few hours aheadUse completely cooled, well-drained beef and refrigerate the assembled tray.
Cold assembled trayCover for the first 10 minutes, then uncover for another 5–10 minutes, or until the center reaches 165°F / 74°C.
Transporting unbakedKeep chilled and bake at the destination when practical.
Transporting bakedRest about 5 minutes before covering; cut close to serving.

Baking at the destination gives the rolls their best chance of staying soft without spending the trip steaming under foil. When that is not practical, let the finished tray rest for about 5 minutes before covering it. Sealing a steaming-hot pan tightly can leave condensation dripping back onto the tops.

Fresh lettuce, tomato, avocado and plenty of burger sauce are better added at the table. They stay fresher, and the sliders travel more cleanly without them tucked inside.

Once the sliders are on a buffet, food safety matters more than keeping them perfectly crisp. Keep hot food at 140°F / 60°C or above. Otherwise, perishable food should not remain in the 40–140°F / 4.4–60°C danger zone for more than 2 hours, or more than 1 hour when the surrounding temperature is above 90°F / 32°C. The USDA Danger Zone guidance explains those limits in more detail.

Back to Recipe · Feeding a crowd? See Sliders Per Person

How Many Cheeseburger Sliders Per Person?

Twelve sliders disappear very differently at dinner than they do on a table full of wings, dips and sides.
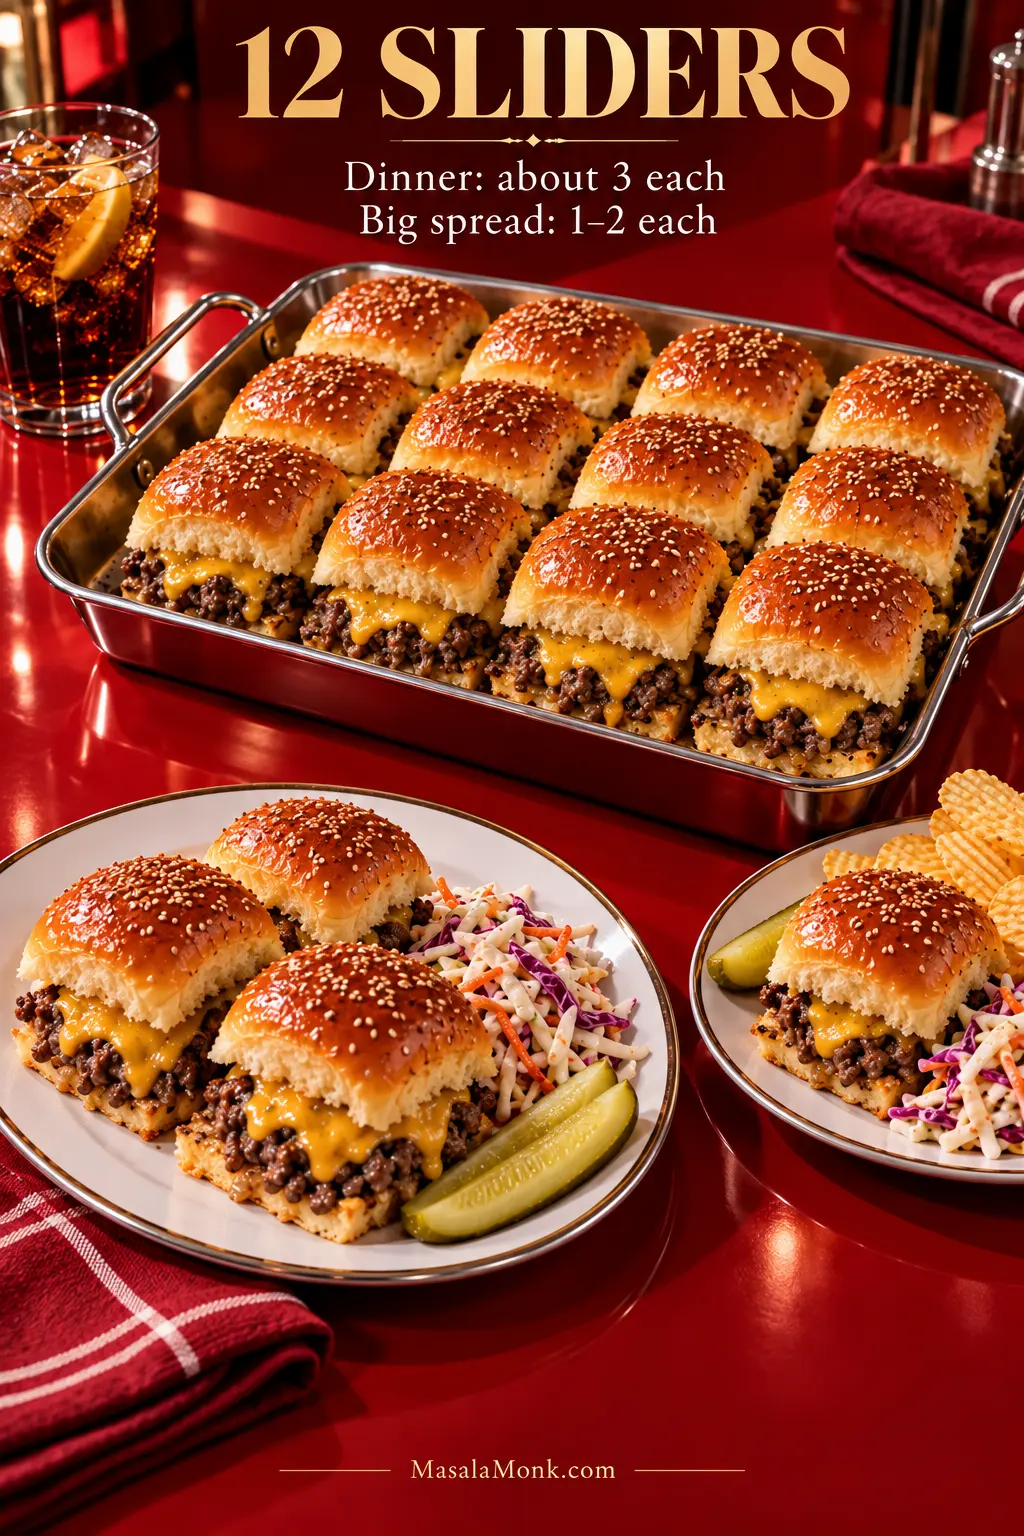
Tray of 12 cheeseburger sliders with a plate holding three sliders and sides. Text reads “Dinner: about 3 each — Big spread: 1–2 each.”
The fuller the spread, the farther 12 sliders go: plan about 3 each for dinner, or 1–2 each with substantial sides.
Serving SituationPlan Per Person
Large appetizer spread1–2 sliders
Sliders are a major appetizer2–3 sliders
Main meal with sidesAbout 3 sliders
Teenagers or very hungry adults3–4 sliders

In practice, one 12-slider tray works for roughly 6–12 people in a larger spread, or about 4 people when sliders are the main meal. With substantial sides such as creamy coleslaw, plan on 1–2 sliders each. One tray can then feed closer to 12 people.

Need 24 or 36? Make two or three normal trays instead of one enormous slab.

Scale the tray, not the skillet. Several pounds of ground beef crowded into one domestic pan release water faster than the pan can evaporate it. Brown large quantities in batches, drain each batch, then combine the cooked beef before assembling the trays.

Want a solid beef layer? See the Sheet-Pan Patty · Back to Top

Easy Cheeseburger Slider Variations

Pick one direction and leave the basic build alone. A slider tray is easier to eat when every topping is not competing for space. When tastes around the table differ, a straightforward beef-and-cheese tray with pickles, lettuce, tomato and sauces served separately is often the easiest answer.

  • Bacon cheeseburger: add about 6 cooked bacon strips, crumbled and well drained, before the upper cheese layer.
  • Jalapeño cheeseburger: add about ¼ cup / 35–40 g well-drained pickled jalapeños and swap some or all of the cheddar for pepper Jack.
  • Caramelized onion: replace the diced onion with 1 medium onion cooked slowly until deeply golden, then spread it over the beef before adding the upper cheese.
  • Extra pickle and burger sauce: add more well-drained dill pickles to taste and keep most of the relish in the sauce. Homemade ketchup also works as the tomato base when you are making the sauce from scratch.
  • Ground turkey: cook ground poultry to 165°F / 74°C. It dries out faster than beef, so stop cooking once it reaches temperature.
  • Less-sweet rolls: use brioche or plain soft dinner rolls instead of Hawaiian rolls.
  • Everything seasoning: replace the sesame seeds with everything-bagel seasoning. Keep the listed salt amount, then taste the cooked beef before adding any more.

Sheet-Pan Burger Patty Option

Choose the sheet-pan version when you want every slider to bite through one clean layer of beef rather than loose crumbles.

Use 1½ lb / 680 g 90/10 ground beef. Season it with ¾ tsp fine sea salt, ¾ tsp black pepper, 1¼ tsp garlic powder and 1 tsp onion powder. Onion powder spreads the onion flavor evenly without pieces interrupting the slab, while leaving out the Worcestershire keeps the mixture a little drier.

Mix gently, just enough to distribute the seasoning, then press the meat into an even rectangle on a parchment-lined rimmed baking sheet. Shape it about 1 inch / 2.5 cm larger than the roll slab on every side so it still fits after shrinking. Avoid packing the meat firmly.
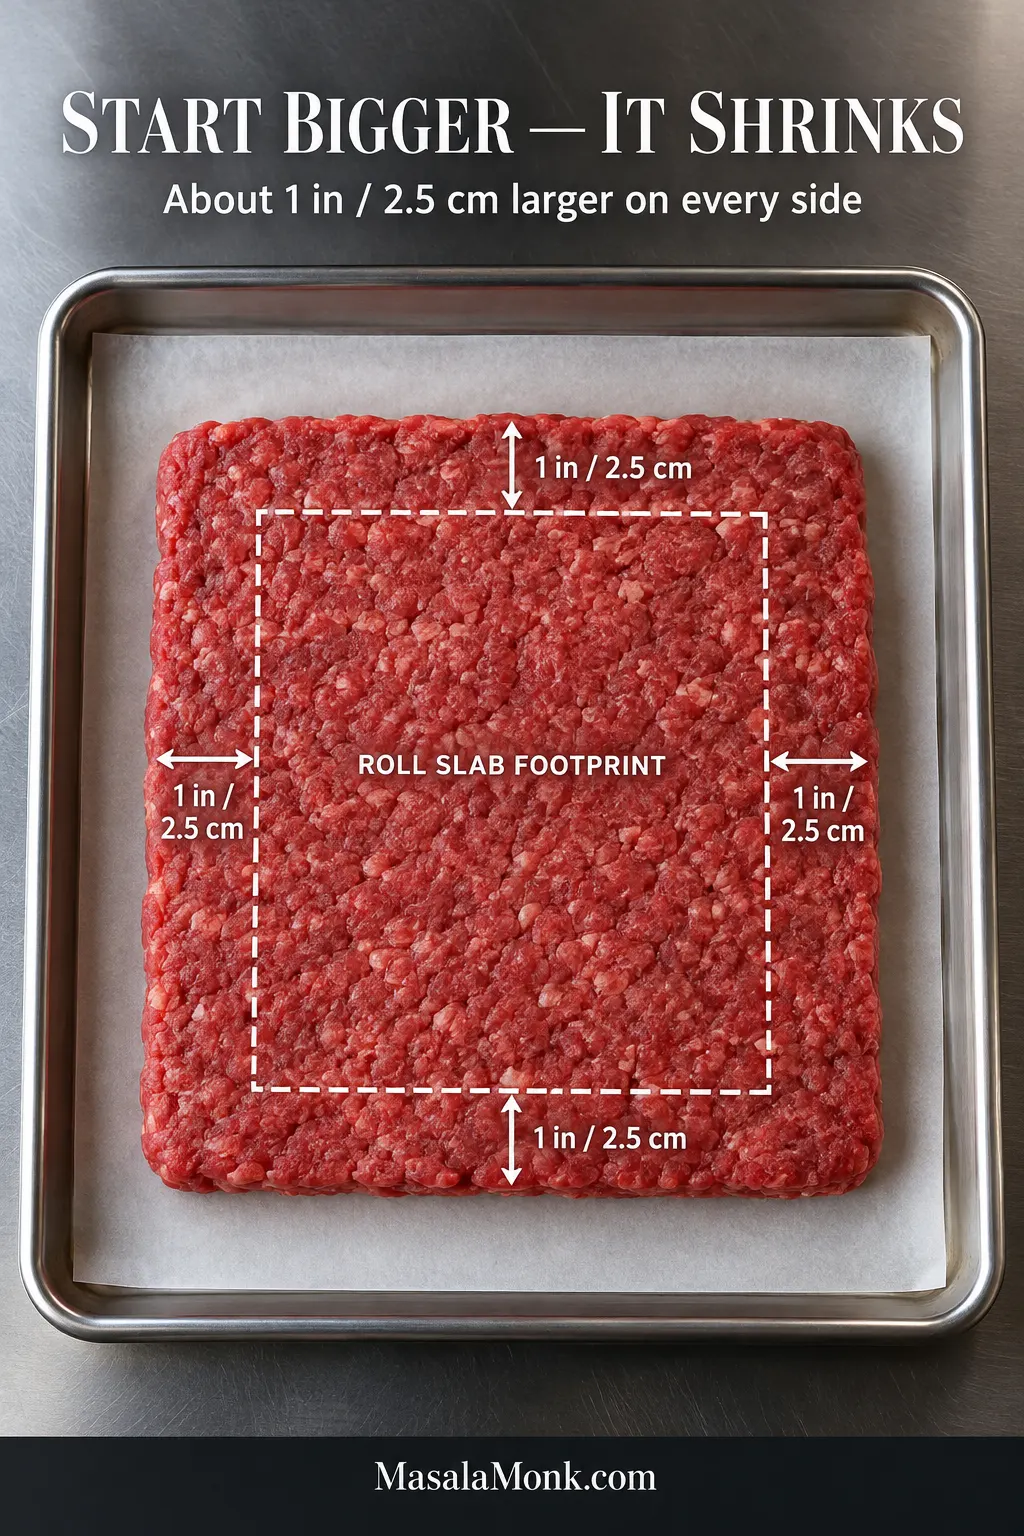
Raw rectangular beef slab on a sheet pan with a marked roll footprint and a 1 inch / 2.5 cm border shown on every side.
Shape the raw beef larger than the rolls on every side; that extra border compensates for shrinkage in the oven.

Bake at 375°F / 190°C and begin checking around 12 minutes. If a noticeable pool of liquid forms around the patty during baking, carefully drain it away so the beef keeps roasting rather than sitting in liquid. Depending on the shape of the slab and your oven, total cooking time may be roughly 12–18 minutes. The center needs to reach 160°F / 71°C.

When the patty is cooked, reduce the oven to 350°F / 175°C. Move the beef onto the American-cheese-covered rolls, add the pickles and cheddar, replace the tops and finish the tray as directed in the main recipe.

Individually shaped burgers need a different approach. Our burger patty recipe goes deeper into sizing, shrinkage, shaping, dimpling and cooking.

Back to Recipe

Troubleshooting the Tray

When a tray misses the mark, the symptom usually points straight to the cause.

ProblemLikely CauseFix
Bottom buns are greasy or mushyToo much beef fat or cooking liquidDrain the cooked filling more thoroughly or use leaner beef.
Buns are wet even after toastingThe filling is still too wetReduce beef liquid, pickle brine or sauce before worrying about the bread.
Beef is dryLean meat stayed in the skillet too longStop cooking once it reaches 160°F / 71°C.
Rolls turn hard while sittingThey were toasted too muchUse only a light broil for sliders served immediately.
Tops brown before the center gets hotThe tray started cold, the rack is too high, or the oven has strong top heatCover a cold tray initially; move it lower in the oven if the tops are browning too quickly.
Sliders taste too saltySalt from cheese, pickles, Worcestershire and toppings has accumulatedUse unsalted butter and season the beef conservatively.
Beef falls out when cuttingLarge crumbles, uneven upper cheese, or cutting before the 5-minute restBreak the beef smaller, spread the cheddar evenly and give the tray time to settle before cutting.
Wet spots form around the picklesExcess pickle brineDrain and blot the slices before layering.
Sheet-pan patty shrinks too farThe raw rectangle started too smallMake it about 1 inch / 2.5 cm larger than the roll slab on every side.
Sheet-pan beef looks grey and wetReleased liquid is steaming the meatCarefully drain significant pooled liquid during baking.
Leftover bread feels rubberyMicrowave-only reheatingFinish with oven, toaster-oven or air-fryer heat.

Golden Tops, Cool Center?

If the rolls already have the color you want before the middle is hot, treat it as a heat-management problem. Protect the surface you have already browned and give the center more time.
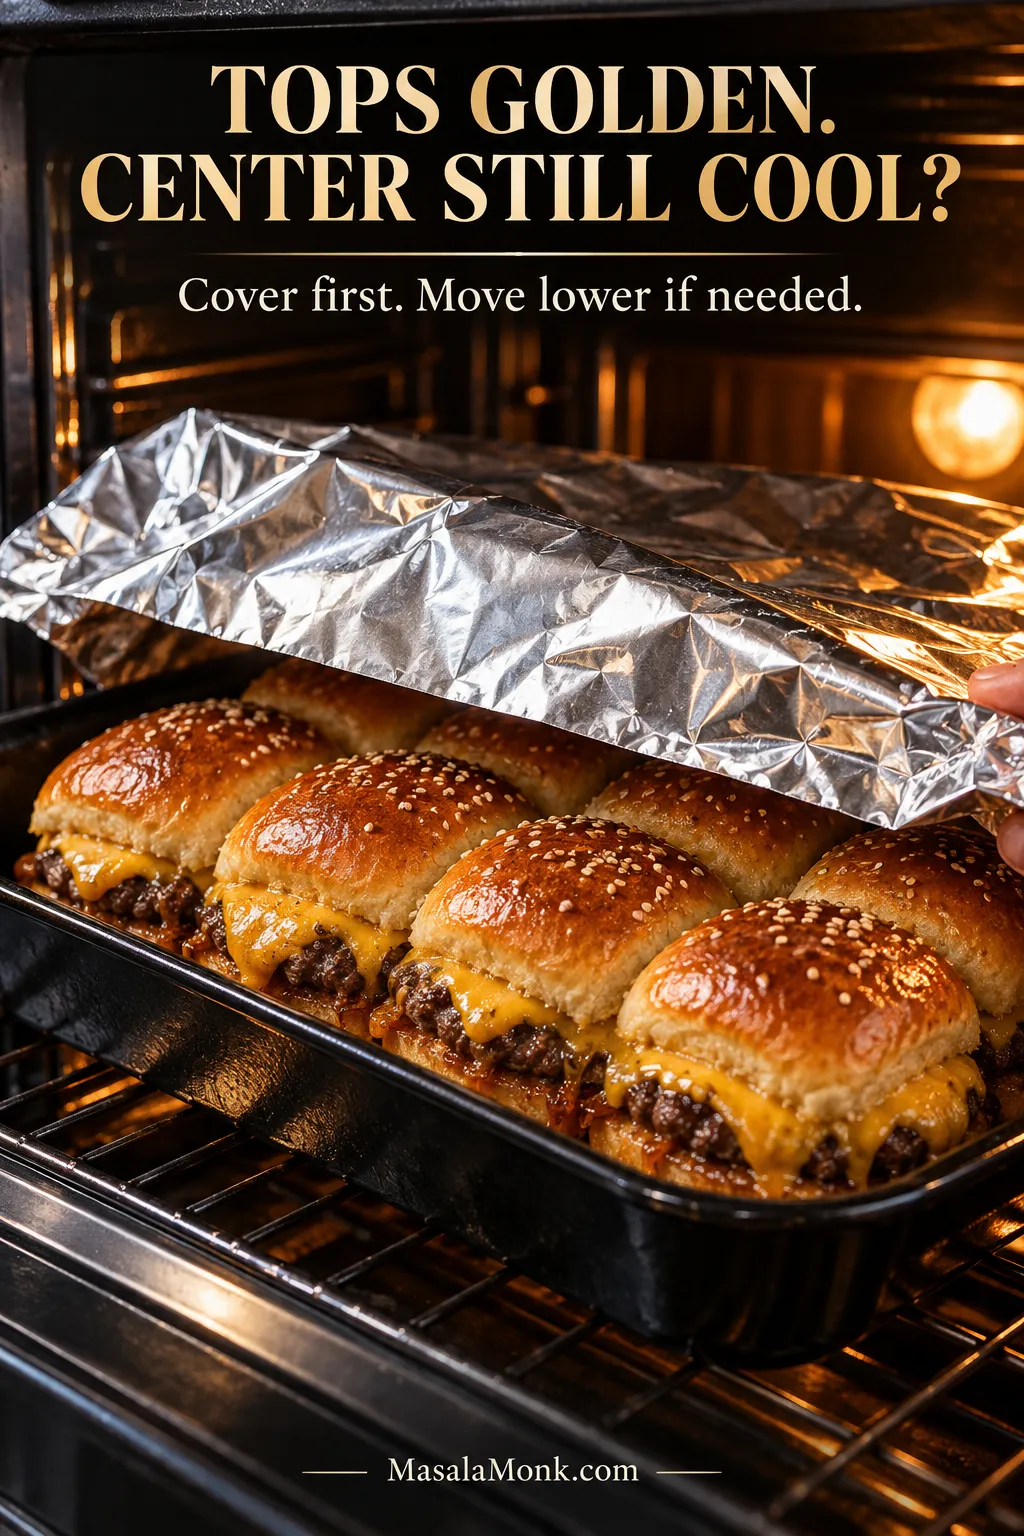
Golden cheeseburger sliders being loosely covered with foil in the oven. Text reads “Tops golden. Center still cool? Cover first. Move lower if needed.”
Foil is a shield here, not a seal: protect the color you already have while the center catches up.

Back to Recipe · Reheating leftovers? See Storage & Reheating

Storage and Reheating

Cool leftover sliders promptly and refrigerate them in an airtight container. Use them within 3–4 days.

The oven does the best job of restoring the rolls. Reheat cheeseburger sliders covered at 350°F / 175°C, then uncover briefly near the end. Individual sliders usually need about 10–15 minutes; a larger batch can take longer. Bring the center to 165°F / 74°C.
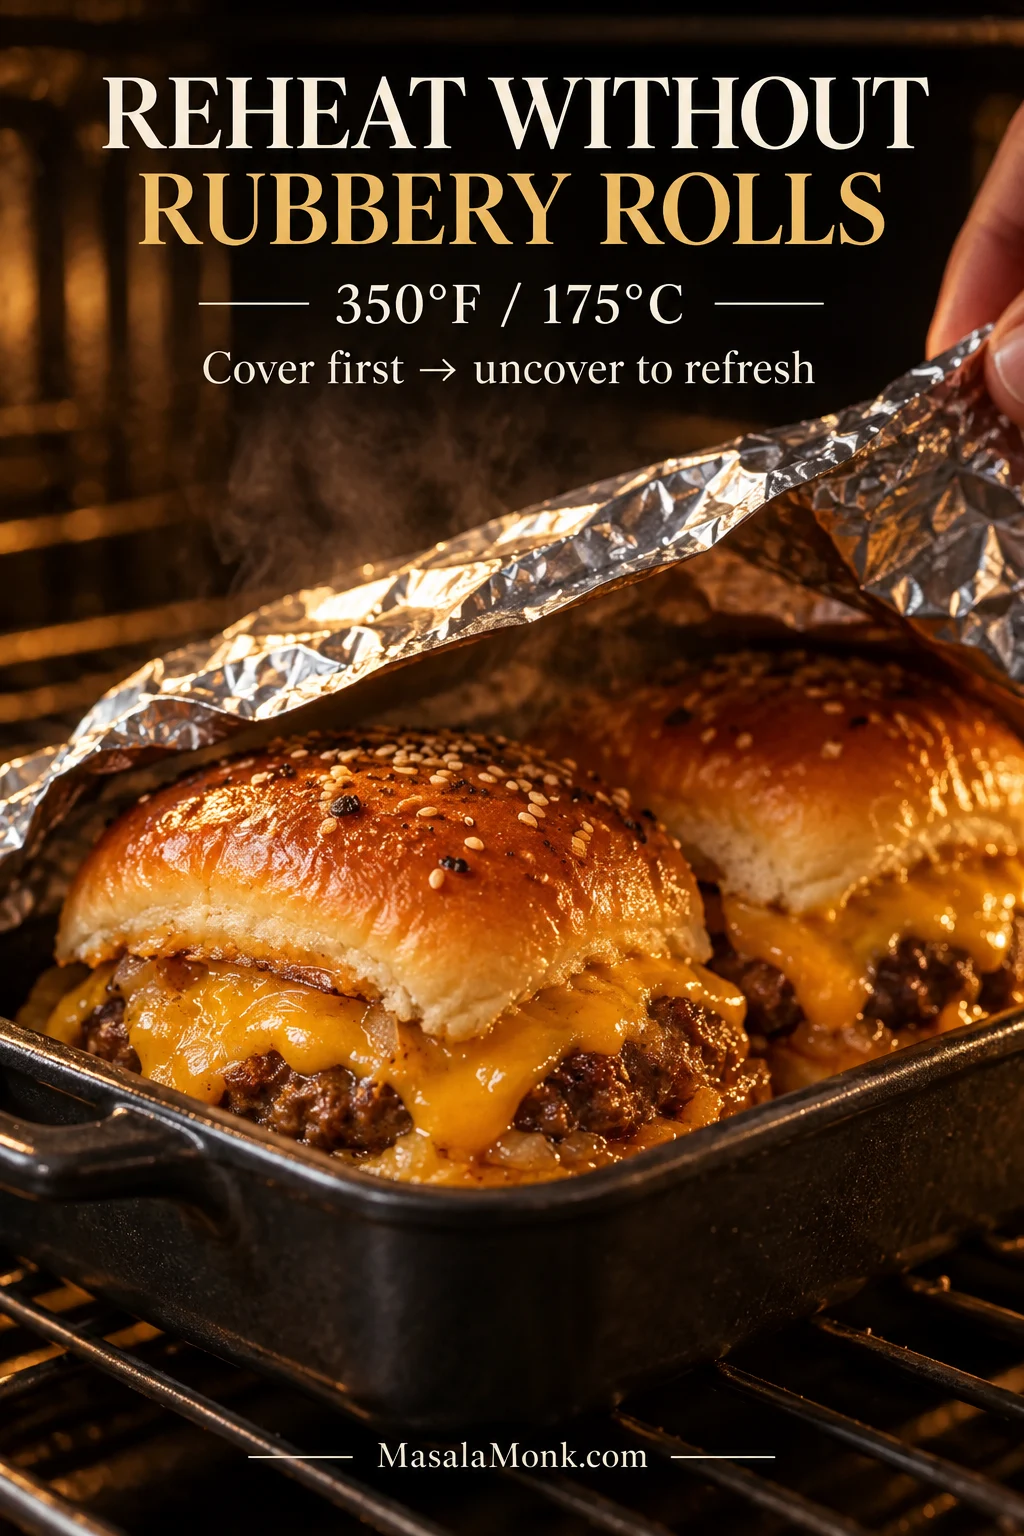
Cheeseburger sliders reheating in the oven as foil is lifted away. Text reads “350°F / 175°C — Cover first, uncover to refresh.”
Covered heat warms the center gently; the short uncovered finish brings the surface of the rolls back.

An air fryer is handy for one or two sliders at about 350°F / 175°C; start checking early because the sweet tops brown fast. The microwave gets the middle hot quickly, but it does not do the rolls any favors. When speed matters, microwave briefly and finish with a minute or two of dry heat.

Freezing

The rolls hold up better when the cooked beef is frozen separately and fresh sliders are assembled after thawing. Fully baked sliders can also be frozen when convenience matters more. Wrap them well, use within about 3 months for best quality, thaw in the refrigerator and reheat with dry oven heat. Expect the bread to be softer than it was on baking day.

What to Serve With Cheeseburger Sliders

Good sides for cheeseburger sliders include fries, coleslaw, potato salad, baked beans, pickle spears, chicken wings and a crisp green or cucumber salad. Because the sliders already bring beef, melted cheese and buttery bread, the easiest balance comes from something cool, crunchy or acidic.
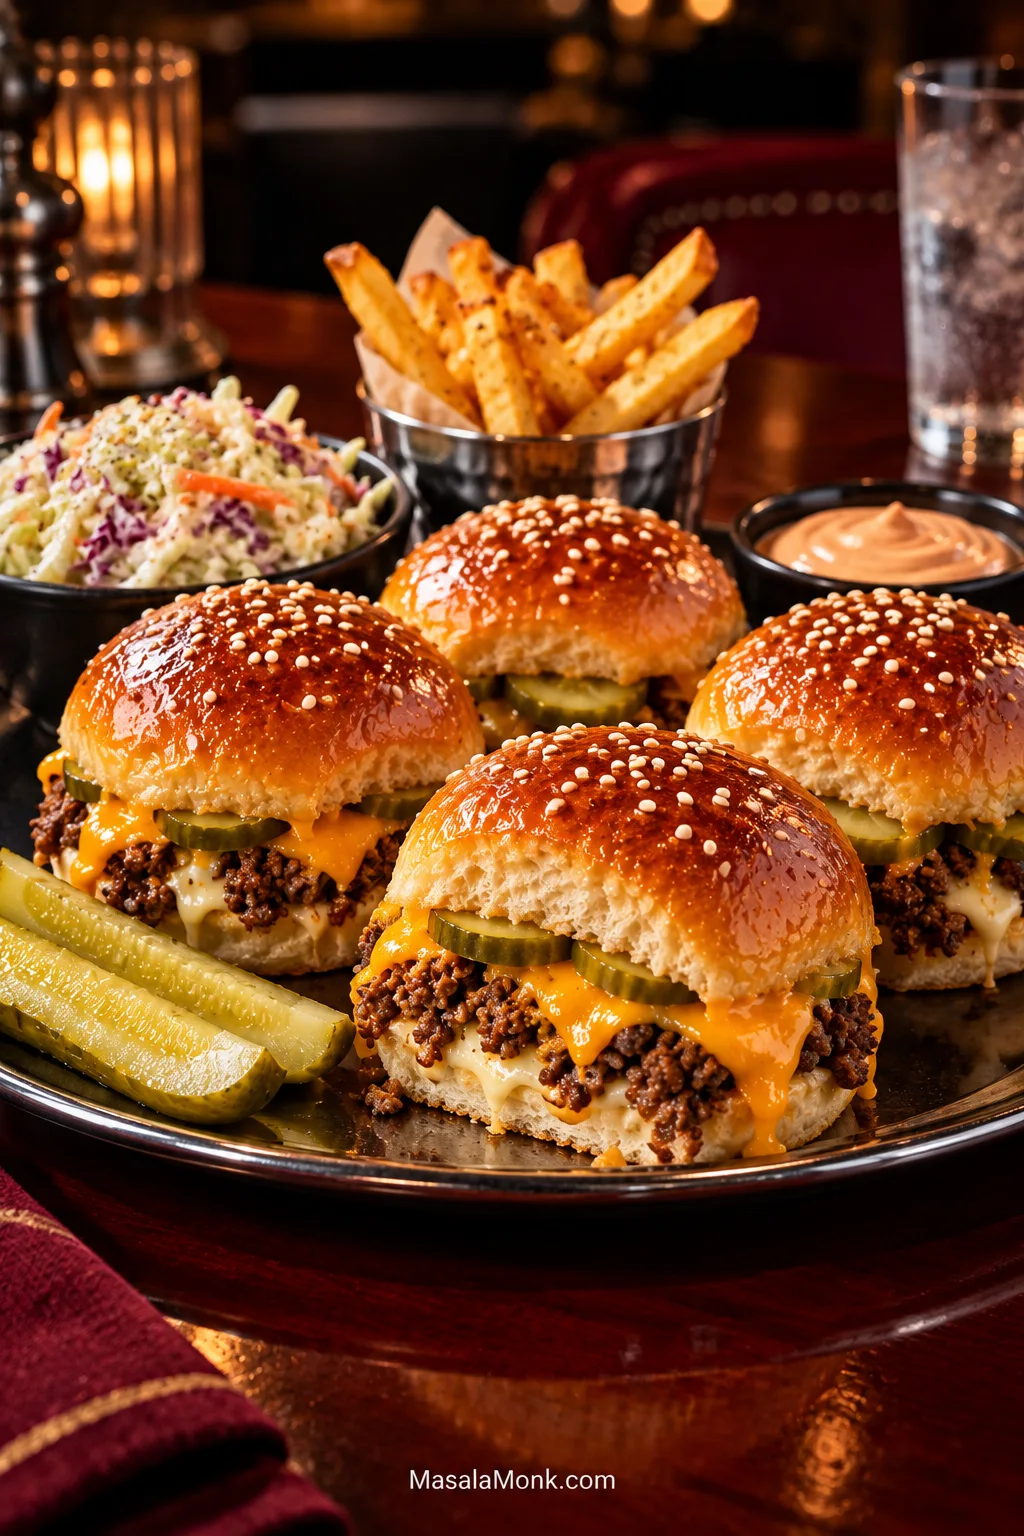
Cheeseburger sliders served with pickle spears, coleslaw, fries and burger sauce.
The sliders already bring the richness. Use the sides for crunch, coolness or acidity.

Crispy baked chicken wings give a game-day table a completely different texture, while pickle spears, raw vegetables and chips fill things out without requiring another last-minute recipe.

A cool potato salad adds a tangy, creamy contrast and can be finished well before the sliders need the oven.

You do not need much else. Put the tray down while the cheese is still soft and molten, keep pickles and burger sauce nearby, and let people pull apart a slider while the rolls are warm. That is when these are at their best.

Back to Recipe · Back to Top

Posted on — Leave a comment

Ham and Cheese Sliders Recipe: Easy Hawaiian Roll Sliders With Swiss & Buttery Dijon Glaze

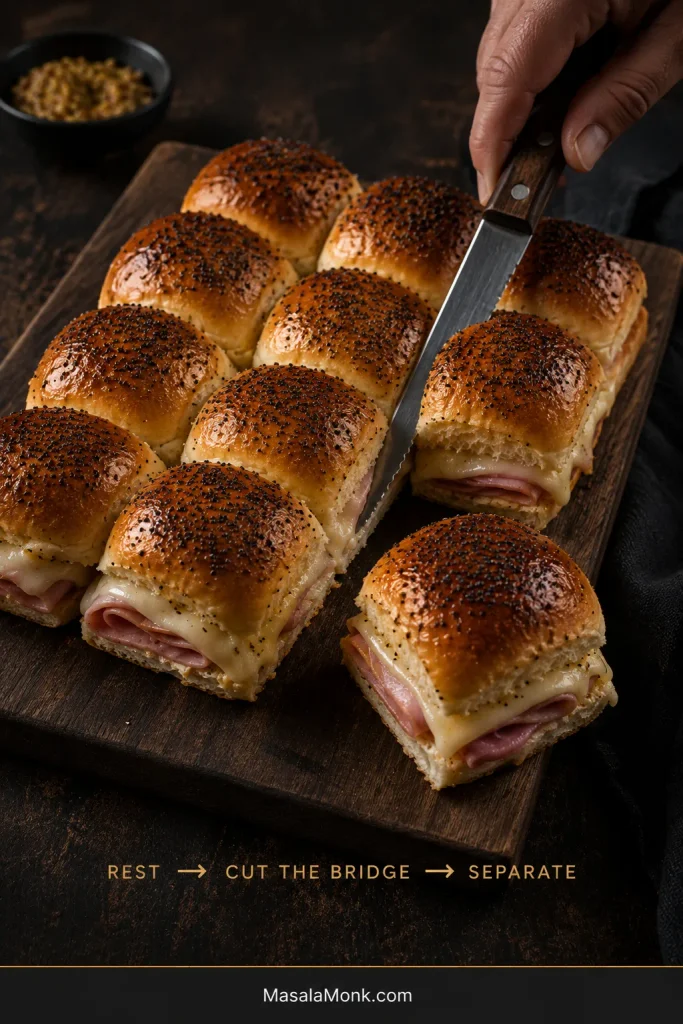
Tray of 12 baked Hawaiian roll ham and Swiss sliders with browned poppy-seed tops; one slider is pulled forward to reveal melted Swiss and folded pink ham.

A good tray of ham and cheese sliders comes apart warm and glossy, with browned buttery tops, folds of hot ham, and Swiss stretching at the center seams. The rolls stay soft where they should, while the bottoms hold together instead of sitting in a puddle of butter.

They look almost impossible to mess up. The catch is that sweet rolls can brown before a cold center has melted, while too much glaze—or too much time sitting in it—can leave the bottom softer than you wanted.

What you want is a hot, fully melted middle and a bottom that stays soft without turning soaked. Keep the filling sensible, put Swiss on both sides of the ham, and brush on only as much glaze as the tops need.

Heat the middle first. Brown the tops second.

Quick Answer: How to Make Ham and Cheese Sliders

For 12 sliders, split one connected pack of Hawaiian rolls. Layer half of 8 oz / 225 g Swiss cheese over the bottom rolls, add 10 oz / 285 g thinly sliced ham, then cover the ham with the remaining Swiss. Replace the tops, brush them with the buttery Dijon glaze, and bake at 350°F / 175°C.

Begin checking at about 18 minutes with the pan still covered. Once the cheese in the middle is soft and melting, uncover the pan for another 4–6 minutes to brown the tops, then rest the sliders for about 5 minutes before pulling them apart.

Ham and Cheese Sliders Recipe

This makes 12 warm ham and Swiss sliders with soft rolls and a savory butter glaze. The recipe is written for a standard connected 12-roll pack and a 9 × 13-inch / 23 × 33 cm baking dish.

Recipe at a Glance

Makes12 sliders
PrepAbout 15 minutes
BakeUsually about 22–31 minutes
Rest5 minutes
TotalAbout 45–50 minutes; allow a few extra minutes for a refrigerator-cold tray or slower-heating pan
Oven350°F / 175°C
Pan9 × 13 in / 23 × 33 cm, or another snug-fitting baking dish

Equipment

You’ll need: a 9 × 13-inch / 23 × 33 cm baking dish, long serrated bread knife, small bowl, pastry brush or spoon, and aluminum foil.

Heavy ceramic dishes can take longer to heat than metal. Keep the foil on until the cheese in the middle has actually melted, even if the tray needs a few extra minutes.

Ingredients

For the Sliders

  • 12 Hawaiian sweet rolls, about 12 oz / 340 g, kept connected
  • 10 oz / 285 g thinly sliced deli ham
  • 8 oz / 225 g thinly sliced Swiss cheese

For the Buttery Dijon Glaze

  • 5 tbsp / 70 g unsalted butter, melted
  • 1 tbsp / 15 mL Dijon mustard
  • 1 tsp / 5 mL Worcestershire sauce
  • ½ tsp onion powder
  • ¼ tsp garlic powder
  • 1–1½ tsp poppy seeds, optional

There is no added salt in the glaze. Ham, Swiss, and Worcestershire already bring plenty of their own.

Ingredient poster with Hawaiian rolls, ham, Swiss cheese, and butter beside “The Tray Formula — 12 rolls, 10 oz ham, 8 oz Swiss, 5 tbsp butter.”
This is the repeatable 12-roll tray formula. When you need more sliders, repeat the same ham, Swiss, and butter proportions in another pan rather than making the first tray heavier.

Instructions

Build the Ham and Swiss Layers

Build the slab in loose, even layers so the center heats predictably and the outer sliders get the same filling as the middle.

  1. Heat the oven to 350°F / 175°C. Lightly grease the baking dish if food tends to stick to it.
  2. Split the rolls as one slab. Keep all 12 connected and cut horizontally with a long serrated knife, leaving the bottom slab slightly thicker than the top. Very soft rolls squashing under the knife? Chill the connected slab for 10–15 minutes and try again.
Connected Hawaiian rolls being sliced horizontally with a serrated knife.
Keep the rolls connected; their original seams become your cutting guide later.
  1. Add the first layer of Swiss. Put the lower slab cut-side up in the pan and arrange roughly half the cheese across it, taking the slices close to the edges. That lower layer also keeps the wetter ham directly off the bread.
  2. Add the ham in loose folds. Some packaged ham comes out surprisingly wet. Give visibly wet slices a quick blot, then fold or ruffle the ham over the cheese instead of pressing it into one dense sheet.
  3. Add the remaining Swiss and replace the tops. Take the filling right to the outer edges so the corner sliders are as well filled as the ones in the middle.
Exploded slider diagram labeled roll top, Swiss, folded ham, Swiss, and bottom roll.

Glaze, Bake and Finish

From here, use the center cheese—not the color of the roll tops—as the cue for when to uncover and finish browning.

  1. Mix the glaze. Stir together the melted butter, Dijon, Worcestershire, onion powder, garlic powder, and poppy seeds if using.
  2. Brush the tops. Coat the surface and work a little glaze into the seams. Once every top looks glossy, stop. A spoonful left in the bowl is better than a puddle under the bread.
Pastry brush coating slider tops with butter-Dijon glaze beside “Glossy = Enough” and a butter pool marked “Too far.”
Glossy is enough. Stop before glaze begins pooling under the bread.
  1. Cover and bake. Cover the dish with foil and start checking at 18 minutes. Look between two sliders near the center. If the cheese still holds the firm shape of a cold slice, cover again and continue in 3–5 minute increments. Many trays need roughly 18–25 minutes covered.
  2. Uncover and brown. Once the Swiss in the middle has lost its neat slice shape and is melting into the seams, remove the foil. Bake another 4–6 minutes, until the tops are golden and well browned around the edges. Sweet rolls can darken quickly near the end.
  3. Rest for about 5 minutes. Follow the original roll lines to separate the sliders. If a slice of ham or melted cheese bridges two sandwiches, cut through it with the knife instead of pulling hard. Serve while the cheese is still warm and soft.
Serrated knife cutting through ham and melted Swiss between two baked sliders.
Cut through any ham or cheese bridging the seams before serving.

Recipe Notes

  • If the tops darken early, put the foil back on. Darker bread will not make the center melt any faster.
  • Making only 4–6 sliders or using a toaster oven? Start checking earlier. Small batches heat quickly, and the sweet tops may sit much closer to the upper element.
  • When using leftover cooked ham, slice it thinly and reheat the filling in the center to 165°F / 74°C.
In This Guide

Choose the Rolls, Ham and Cheese

Hawaiian Rolls and Other Options

King’s Hawaiian is the familiar choice, but another soft connected Hawaiian-style, potato roll, or dinner-roll slab works too. Potato rolls and plain dinner rolls are handy when you want less sweetness around the ham and cheese.

Homemade bread works as well. These soft dinner rolls make 12 fluffy pull-apart rolls in the same 9 × 13-inch pan; let them cool completely before slicing them horizontally for sliders.

Thin Ham Works Best

You don’t need a special ham from a special deli. What matters most is getting it thin enough to warm quickly and bite through cleanly. Buying it at the deli counter? Ask for thin or shaved slices.

Black Forest or smoked ham is especially good against sweet Hawaiian rolls. Honey ham pushes the tray sweeter, while plain deli ham stays mild. Leftover baked ham works beautifully too—just slice it thinly across the grain.

The recipe targets 10 oz / 285 g, but anywhere around 9–11 oz / 255–310 g works well. A much thicker pile will simply need more time for the middle to heat.

Side-by-side deli ham slices labeled “Wet” and “Blotted,” showing surface moisture before and after blotting.
Blot obvious surface moisture; the ham should still stay soft and supple.

Leftovers from a honey glazed ham are an easy way to make another tray; resist stacking thick carved slices just because there is plenty left in the refrigerator.

Concerned about excess moisture? Jump to the soggy-bottom diagnosis before baking.

Swiss Is Classic, but Not Mandatory

Swiss is mild enough to let the ham and Dijon come through, but it still gives you that soft pull when the sliders separate. Provolone is the easiest milder swap; Havarti makes the middle softer and creamier. Cheddar brings a sharper bite and may melt a little less smoothly, while American cheese stays mild and melts with almost no effort.

Whatever you choose, thin slices disappear into the filling more easily and cover the slab better than a few thick pieces.

Cheese comparison graphic showing Swiss, provolone, Havarti, cheddar, and American cheese with melting notes.
Keep roughly the same total cheese weight if you swap varieties; a flavor change does not need a thicker center.

The Buttery Dijon Glaze

The butter gives the rolls their shiny, buttery top; Dijon keeps the finished slider from tasting like nothing but sweet bread, ham, and melted cheese. Worcestershire adds a little more savory depth, while the small amounts of onion and garlic season the butter without making the sliders noticeably garlicky.

Poppy seeds add the familiar speckled top but are completely optional. One tablespoon of Dijon is spread across twelve sliders, so the mustard should come through as tang rather than take over. Prefer it gentler? Use 2 tsp / 10 mL. No Worcestershire? Leave it out.

Want a creamier sandwich? Spread about 2–3 tablespoons of mayo thinly over the cut sides of the rolls. Store-bought is fine, or use homemade mayonnaise if you already have it on hand.

Choose Your Glaze

You want…Make this change
Savory buttery DijonUse the recipe as written
A sweeter finishAdd 1–2 tsp light brown sugar or honey
Honey mustardReplace Dijon with honey mustard and skip extra sugar
Everything bagel seasoningUse a light sprinkle instead of poppy seeds and check the blend for salt
No mustardOmit the Dijon for a milder, more butter-forward glaze

The rolls already bring sweetness, so brown sugar is an option, not a requirement. Prefer honey mustard on the side? This honey mustard dressing can be kept bright and tangy or made thicker for dipping.

How to Keep the Bottoms From Getting Soggy

Blot visibly wet ham, add the butter glaze just before baking, and stop brushing once the tops are glossy. Want a firmer bottom? Pre-toast the lower roll slab for 3–5 minutes at 350°F / 175°C before filling it.

If the bread still turns soft, the useful question is: when did it become wet? Straight from the oven points to a different problem than sliders that soften overnight or during transport.

Diagnostic graphic with four branches labeled “Straight from the oven,” “Overnight,” “After holding,” and “After transport,” each showing a likely moisture cause.
Diagnose before changing the recipe: reducing glaze will not fix sliders that left the oven well but softened later under trapped steam.
What happenedLikely causeNext time
Greasy straight from the ovenToo much glaze ran underneathBrush only until the tops are evenly coated
Wet despite modest glazeHam carried excess surface moistureBlot visibly wet slices before assembly
Softened overnightThe bread sat in glaze for hoursAssemble ahead but glaze just before baking
Good from the oven, soft laterSteam condensed under a tight coverShorten the sealed hot hold
Soggy after transportHot bread sat in trapped condensationKeep the trip short or bake/reheat at the destination

Making these ahead? See the 24-hour make-ahead plan so the glaze stays off the bread until baking.

How Long to Bake Ham and Cheese Sliders at 350°F

Start checking after about 18 minutes covered. Many normally filled trays need roughly 18–25 minutes covered, followed by another 4–6 minutes uncovered. Refrigerator temperature, cookware, filling thickness, and the oven itself can move that timing.

If the cheese in the middle is still firm after 25 minutes, leave the foil on and check again in another 3–5 minutes.

How to Know They’re Done

  • Look between two sliders near the center rather than judging by an edge sandwich.
  • The Swiss in the middle should be soft and glossy, losing its square slice shape and beginning to melt into the seams.
  • Once the center is melted, uncover the pan and let the tops finish golden.
Three ham and Swiss sliders labeled “Cold,” “Softening,” and “Ready,” ending with melted center cheese and “Uncover now.”

If the bread colors too quickly, put the foil back on. The center matters more than getting the tops darker.

Quick Rescue Guide

Something went sideways? Use the shortest fix that solves the problem.

ProblemDo this
Bottom is soggy Lift the sliders out of any pooled butter, serve promptly, and skip extra sauce. Use the soggy-bottom diagnosis before the next tray.
Tops are dark, center is cold Re-cover the pan and keep heating; the cold-center fix below shows what to watch for.
They feel greasy Leave pooled butter behind in the pan. Next time, stop glazing once the tops are evenly coated.
They taste too sweet Add sharp mustard or pickles. Next time, use smoked ham or less-sweet rolls.
They fall apart Rest briefly, then cut through any ham or cheese bridging the roll seams instead of pulling hard.
They softened during transport Serve promptly. For a longer trip, use the transport and holding plan below.

Dark Tops but a Cold Center

Once the rolls are as brown as you want, stop using top color as the doneness signal. Re-cover the pan and check the center Swiss again after a short interval; the middle still decides when the tray is finished.

Dark-browned slider with firm unmelted Swiss inside beside the instruction “Dark top ≠ hot center — Cover again.”
Once the tops are brown enough, foil buys the center more time.

Make Them Ahead — Up to 24 Hours

Yes—you can assemble the sliders up to 24 hours ahead. Layer the rolls, Swiss, and ham, replace the tops, cover the dish, and refrigerate. Mix the glaze separately and brush it on just before baking so the soft bread does not spend the night soaking in butter.

A refrigerator-cold tray may need about 5 extra covered minutes as a starting point. Keep the foil on until the center cheese melts. Assemble the tray the night before and you also avoid layering sandwiches while people are already walking through the door.

Assembled slider tray beside separate butter-Dijon glaze, brush, and foil under “Assemble Ahead” and “Glaze Before Baking.”
Do the layering ahead; keep the glaze separate until baking.

Sliders for a Party or Crowd

Plan on about 2 sliders per person when plenty of other food is being served, or about 3 per person when the sliders are the meal. With a large appetizer spread, 1–2 each may be plenty. Feeding a very hungry crowd with little else on the table? Allow 3–4.

One tray is easy. With three or four, oven space and timing begin to matter almost as much as ingredient amounts. Small hot sandwiches also have a habit of disappearing without anyone keeping very careful count.

Scale the Recipe for 12, 24, 36 or 48

Sliders / pansHamSwissButter
12 / 1 pan10 oz / 285 g8 oz / 225 g5 tbsp / 70 g
24 / 2 pans1¼ lb / 570 g1 lb / 450 g½ cup + 2 tbsp / 140 g
36 / 3 pans1 lb 14 oz / 850 g1½ lb / 680 g¾ cup + 3 tbsp / about 210 g
48 / 4 pans2½ lb / 1.13 kg2 lb / 900 g1¼ cups / about 280 g

Multiply the Dijon, Worcestershire, onion powder, garlic powder, and poppy seeds by the same factor as the number of pans. Double the recipe, not the thickness of one pan.

Three slider pans compare one overstuffed tray with two normally filled trays under “Double the Recipe, Not the Thickness.”

Plan the Oven Before You Need It

Two pans may fit comfortably while four can block circulation or force trays onto very different rack levels. With several trays to bake, assemble them ahead and work in rounds.

If guests are already in the kitchen, don’t chase perfect synchronization. Get one hot tray onto the table and let the next one bake.

Oven with two 12-slider pans on separate racks and a third waiting outside under “Work in Rounds.”
Leave enough rack clearance to check centers and remove foil safely.

Transporting and Holding Them

For a short drive, bake the sliders, rest them briefly, cover the pan, and serve reasonably soon after arrival. If the trip is longer and there is an oven at the destination, taking the assembled tray cold and baking it there usually gives you better bread than sealing hot sliders in steam for an extended ride. Taking it cold? The make-ahead method shows how to keep the glaze separate until baking.

Hot sliders should be held at 140°F / 60°C or warmer. Otherwise, refrigerate perishable food within 2 hours, or within 1 hour when the surrounding temperature is above 90°F / 32°C, following USDA buffet food-safety guidance.

A quick note on “funeral sandwiches.” The name is commonly used for baked ham-and-cheese sandwiches served at Southern church suppers, funerals, potlucks, and family gatherings. Some versions deliberately let a buttery mustard sauce soak into the bread before baking. Here, the glaze goes on at the end of assembly for a more defined bottom.

Hands reaching for ham and cheese sliders beside coleslaw, potato salad, pickles, chips, and dip.
The easiest party sides are the ones that do not compete for oven space.

What to Serve With the Sliders

The sandwiches already bring soft bread, melted cheese, salty ham, butter, and a little sweetness. Crunchy, acidic, or fresh sides keep the plate from feeling heavy.

  • Crunchy coleslaw
  • Dill or bread-and-butter pickles
  • Green salad with a sharp vinaigrette
  • Fresh fruit
  • Kettle chips
  • Tomato soup
  • Roasted vegetables

When oven space is tight, sides that are cold or stay warm somewhere else earn their place. A make-ahead potato salad can be ready before the first tray goes in, while a crockpot buffalo chicken dip can stay warm in the slow cooker without competing for oven space.

Coleslaw is especially good here because it brings something cold, crisp, and tangy beside the warm bread. For a fuller dinner, crispy roasted Brussels sprouts add browned edges and enough bitterness to balance the filling.

Dijon, honey mustard, spicy mustard, or a tangy pickle dip all work on the side. For sweet heat, stir a little hot honey sauce into Dijon.

Store, Freeze and Reheat

Leftovers can be eaten cold, but these sliders are much better warm while the Swiss is soft and the buttered tops still have some life in them. For a picnic or lunchbox, build cold sandwiches from the start instead of baking this tray just to chill it again.

Refrigerate Leftovers

Refrigerate leftovers promptly in a covered container or well-covered pan and use them within about 3–4 days, in line with USDA leftovers guidance.

Freezing

Freeze the assembled, unbaked sliders before adding the glaze. Wrap them well, thaw overnight in the refrigerator, then glaze and bake as a refrigerator-cold tray. For best texture, use them within about 1–2 months—before the package disappears into the back of the freezer until nobody remembers what it was.

Freezing workflow showing assembled unglazed sliders, a wrapped tray, freezer storage, thawing, separate glaze, and the final baked tray.
Keep the assembled slab flat while wrapping so the 3×4 arrangement survives freezing and thawing.

Best Way to Reheat Them

Oven or toaster oven: Heat at 325°F / 165°C, loosely covered, until the center reaches 165°F / 74°C. A small batch often takes around 8–10 minutes.

Air fryer: For one or two sliders, use about 325°F / 165°C and start checking around 3–4 minutes. The sweet tops can color quickly, so continue only until the center reaches 165°F / 74°C.

Microwave: Fastest, but softer. Heat until the center reaches 165°F / 74°C and let it stand briefly before eating.

Reheating guide comparing oven or toaster oven, air fryer, and microwave, with a final center-temperature target of 165°F / 74°C.
Reheat only what you plan to eat; smaller batches heat more evenly and spare the rest from repeated warming.

Pull Apart the First One While They’re Warm

Give the pan those few minutes out of the oven, then follow the original lines between the rolls. The tops should still feel warm and buttery, the Swiss should stretch without pouring out, and the ham in the middle should be just as hot as the sandwiches around the edge.

Close-up of a finished ham and Swiss slider with a glossy golden top, melted cheese, folded ham, and intact bottom.

Then put the tray on the table. If these are the main hot food for a hungry crowd, the second pan usually stops looking excessive somewhere around the moment the first one is half gone.