Posted on Leave a comment

Ranch Oyster Crackers Recipe

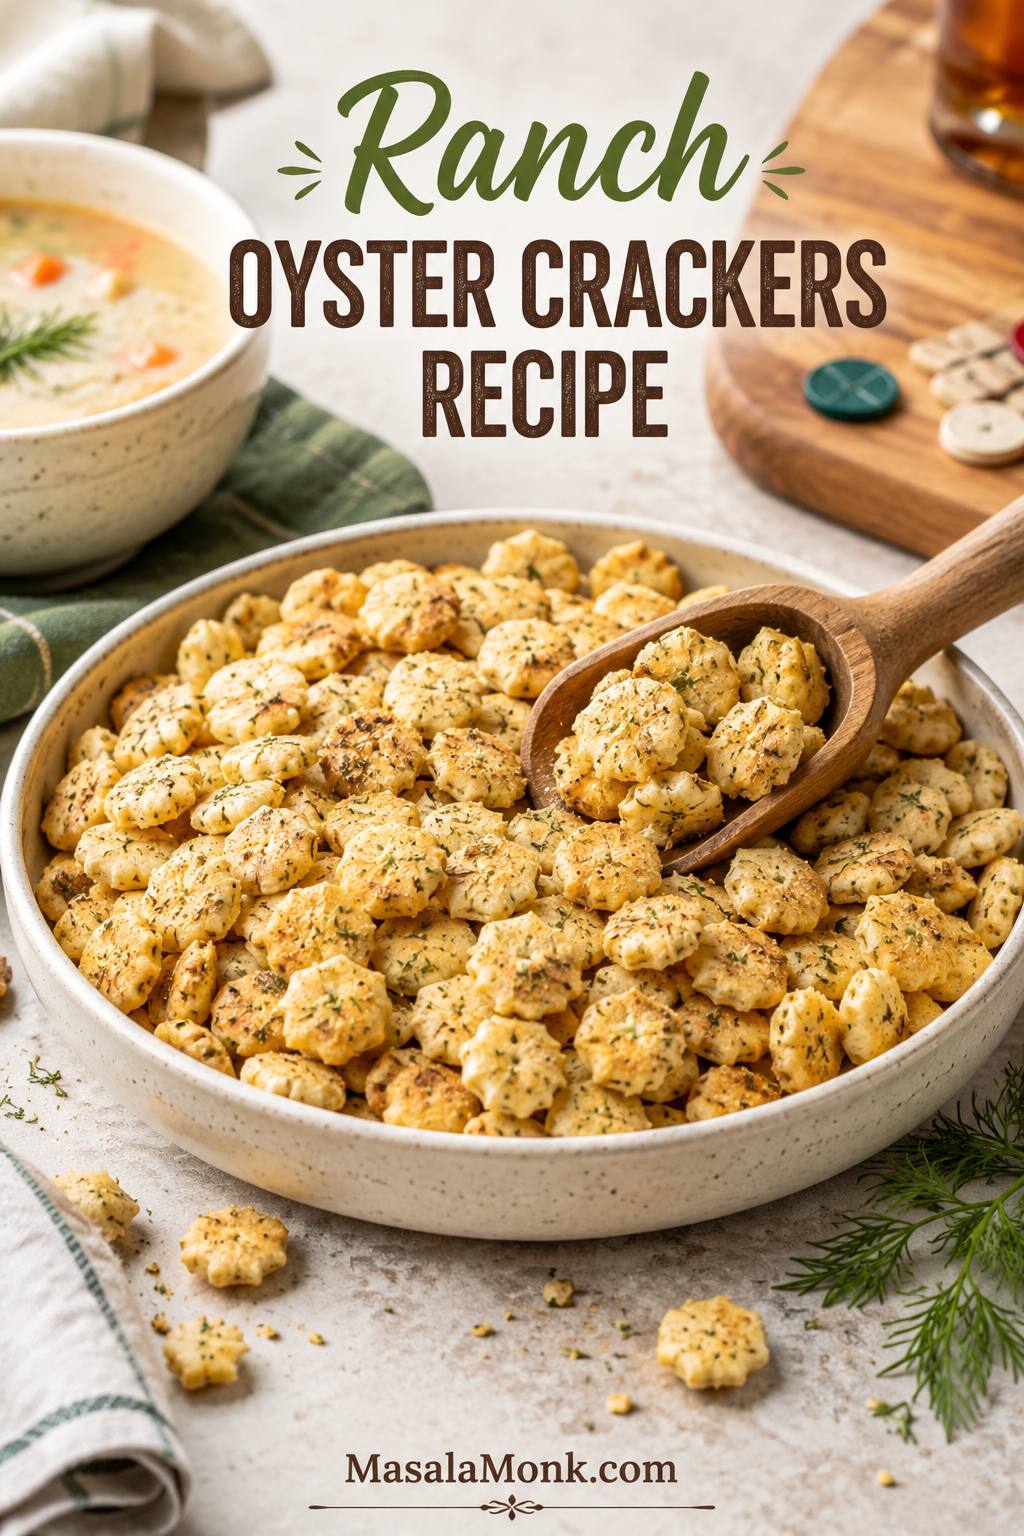
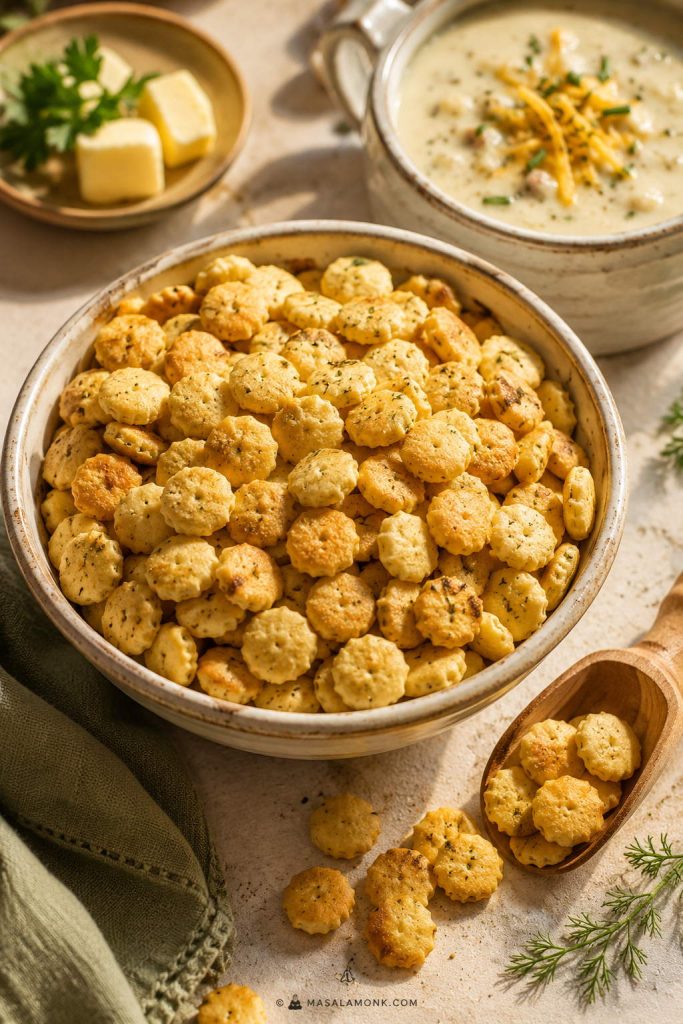
Bowl of golden ranch oyster crackers with herb flecks, scoop, and cozy snack-table sides.

Ranch oyster crackers are the kind of snack that disappears quietly. You set out a bowl before the game starts, beside a pot of soup, or on a holiday snack table, and somehow everyone keeps drifting back for another salty, herby handful. They are crisp, tiny, ranch-seasoned, and just rich enough to feel like a treat without asking much from you.

The recipe itself is easy. The confusing part is everything around it: whether “ranch dressing” means bottled dressing or the dry ranch packet, how much seasoning to use for a 9 oz, 12 oz, or 16 oz bag, whether oil or butter gives a better crunch, whether the crackers really need to be baked, and what to do if they turn out greasy, salty, or soft.

Once those little decisions are clear, the batch is easy to get right. The baked method gives the snappiest result, and the ratio table helps you adjust for whatever bag you have. From there, choose oil or butter, dill or no dill, a gentle ranch coating or a bolder party-snack bowl. The result should be bold but not harsh, coated but not oily, and crunchy enough that people keep reaching back into the bowl.

Quick Answer: The Best Ranch Oyster Crackers Formula

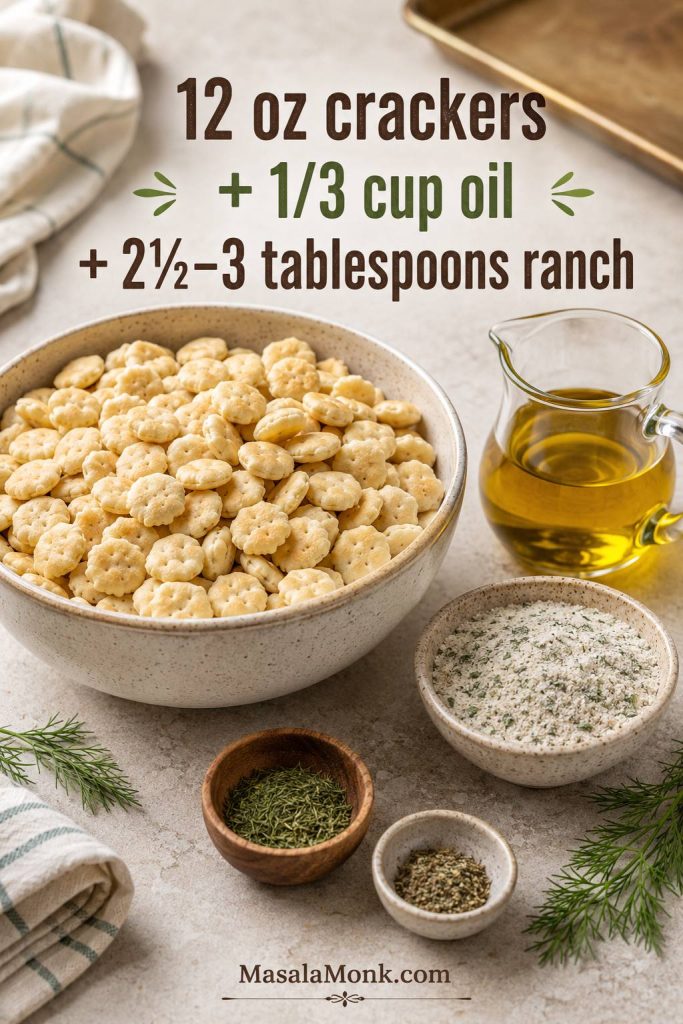
For 12 oz / 340 g oyster crackers, use ⅓ cup / 80 ml neutral oil, 2½ tablespoons dry ranch seasoning for a balanced batch or up to 3 tablespoons for a bolder batch, 1 teaspoon dried dill, ½ teaspoon garlic powder, and ½ to 1 teaspoon lemon pepper.

Toss well, spread on a rimmed baking sheet, bake at 250°F / 120°C for 18–22 minutes, stir once halfway, and cool fully before storing. The first handful should taste salty, herby, crisp, and evenly coated — never dusty in one bite and oily in the next.

Quick pick: Use neutral oil for the best crunch, melted butter for the richest flavor, the air fryer for the fastest small batch, the no-bake method when you want to skip the oven, and a 16 oz batch for parties, gifting, game day, or bigger soup nights.

If you are using a full 1 oz / 28 g ranch packet with a 12 oz bag, expect a bold, salty party-snack flavor. For a safer first batch, start with 2½ tablespoons, bake, taste, and dust the crackers with a little more seasoning while they are still warm on the tray.

Using a 9 oz or 16 oz bag? Check the ranch seasoning ratios before mixing the coating.
Prep scene with oyster crackers, oil, dry ranch seasoning, dill, garlic powder, lemon pepper, and sheet pan.
Start with this 12-ounce ranch oyster crackers formula, then adjust the next batch toward bolder seasoning, richer butter, or more heat.

Why This Recipe Works

The best batches come out lightly toasted, evenly seasoned, and crisp after cooling. That does not happen by dumping ranch powder over crackers; it comes from the order, the ratio, and a little low-heat baking time.

  • Dry ranch seasoning keeps the crackers crisp. Bottled dressing adds moisture, while dry mix gives flavor without making the crackers soggy.
  • Whisking the seasoning into the oil first prevents clumps. The ranch powder, dill, garlic, and lemon pepper spread more evenly when they are suspended in oil before they touch the crackers.
  • A low oven sets the coating instead of scorching it. At 250°F / 120°C, the crackers have time to toast gently while the oil or butter settles into a clean, savory finish.
  • The ratio table protects the batch. Oyster cracker bags vary, and using the same seasoning amount for every bag can make one batch bland and another too salty.
  • Cooling on the tray finishes the texture. The crackers firm up as the seasoning settles into the surface.

The goal is simple: every handful should taste seasoned, not dusty in some bites and oily in others. Mix the coating first, bake low, and let the crackers cool on the pan, and the bowl lands crisp, salty, herby, and clean.

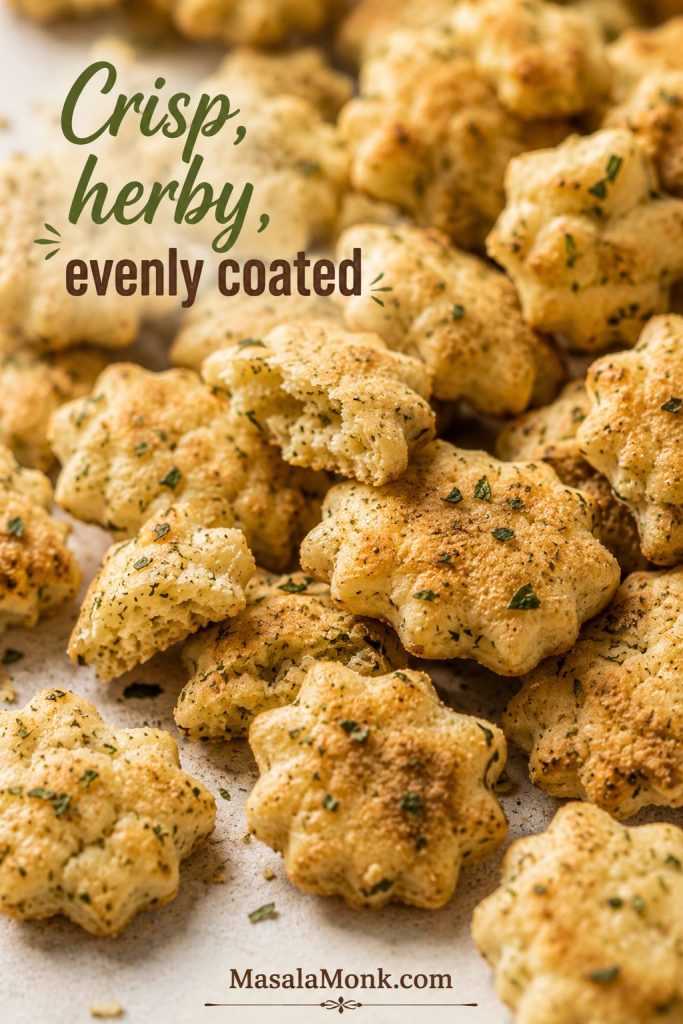
Close-up of crisp ranch oyster crackers with toasted edges, broken pieces, and green herb flecks.
Look for a matte, herby surface with lightly toasted edges; that finish tells you the seasoning has settled instead of sitting on the crackers as oil.

What Are Ranch Oyster Crackers?

Ranch oyster crackers are small oyster crackers tossed with dry ranch seasoning, oil or melted butter, and simple seasonings like dill, garlic powder, lemon pepper, and onion powder. They are usually baked at a low temperature until the seasoning clings and the crackers become crunchy again.

They are one of the most common versions of seasoned oyster crackers: the ranch packet gives the base flavor, while dill, garlic, lemon pepper, Parmesan, or heat can push the batch in different directions.

Despite the name, oyster crackers usually do not contain oysters. They are small soup crackers traditionally served with oyster stew, chowder, chili, and other soups. That soup-and-stew background is also why they make so much sense with creamy bowls and chili today. For a little more history, this history of oyster crackers explains where the name comes from.

Think of them as a snack mix shortcut. They are easier than Chex mix, less fussy than homemade crackers, and more interesting than plain soup crackers. Once baked and cooled on the pan, they are sturdy enough for snacking but still small enough to scatter over tomato soup, chili, chowder, salad, or a dip board.

Dry Ranch Seasoning vs Bottled Ranch Dressing

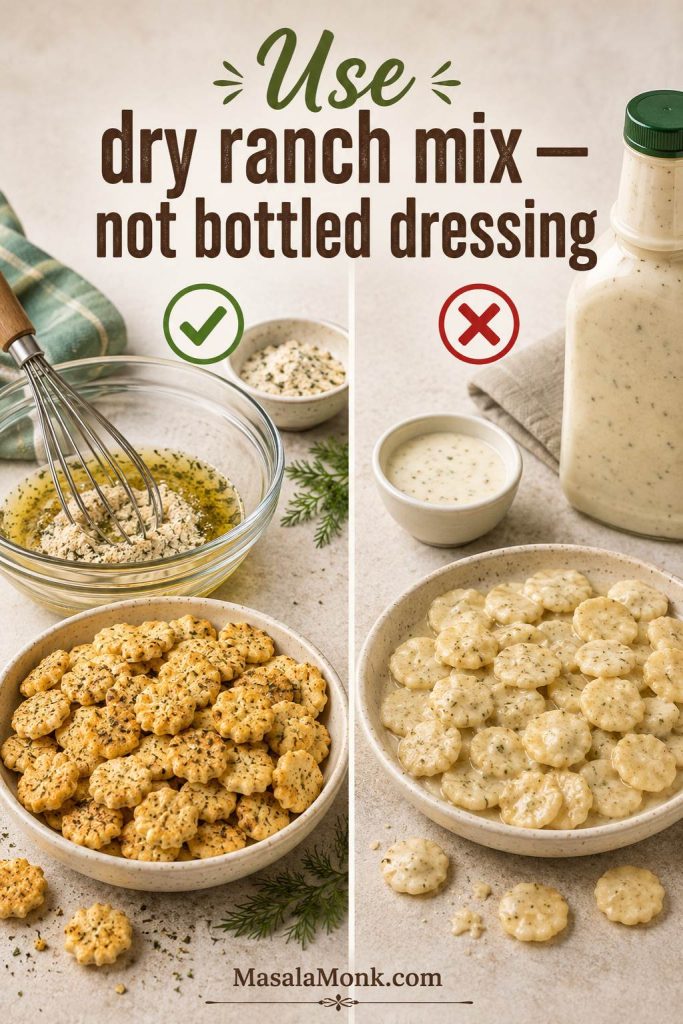
Use dry ranch seasoning here. It gives concentrated ranch flavor without the moisture that comes from bottled dressing. Creamy ranch dressing may sound tempting, but it can turn the crackers soft instead of snappy.

Split comparison of dry ranch seasoning mixed with oil and bottled ranch dressing with softer crackers.
Dry ranch mix seasons the crackers without adding water or cream, which is why it gives a cleaner crunch than bottled dressing.
Ranch productCan you use it?What to know
Dry ranch seasoning packetYes, best choiceClassic, easy, and bold. Use the packet weight and taste for saltiness.
Ranch seasoning shakerYesMeasure by tablespoons. Start with less if the blend is salty.
Dry ranch dip mixUsually yesCan be saltier or stronger than dressing mix. Start with a little less.
Bottled ranch dressingNot recommendedAdds moisture and can make the crackers soft.
Homemade ranch-style dry mixYesGood if you want more control over salt, dill, garlic, onion, and herbs.

Helpful rule: When people say “ranch dressing crackers,” they often mean crackers made with dry ranch dressing mix, not creamy dressing from a bottle.

Homemade Dry Ranch-Style Mix

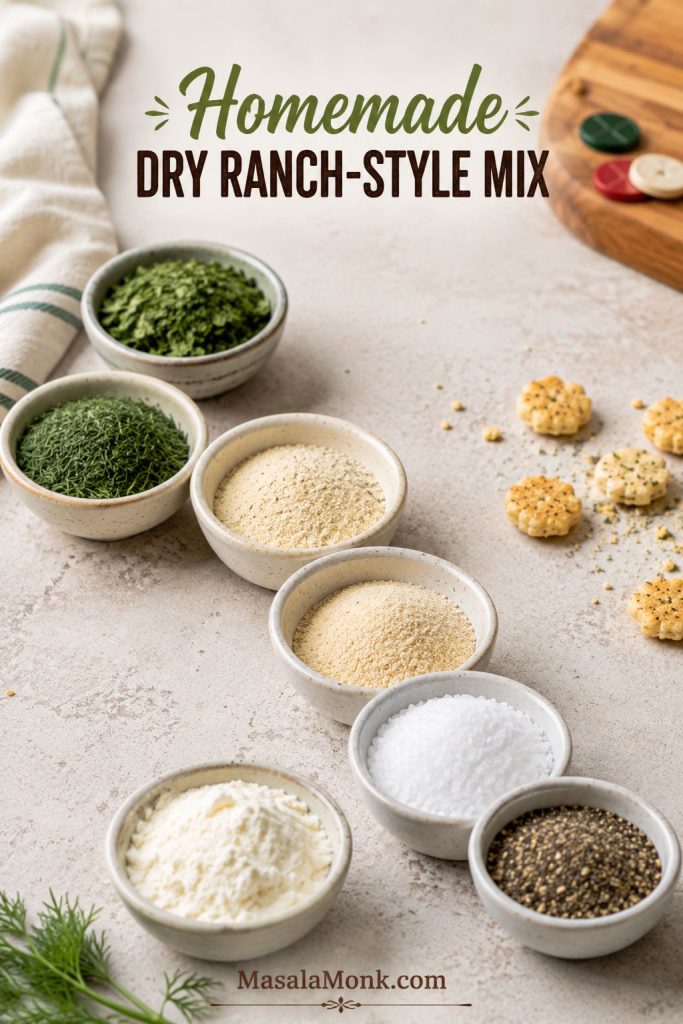
A homemade ranch-style dry mix can work too, especially if it includes parsley, dill, garlic powder, onion powder, salt, pepper, and optional buttermilk powder. Without buttermilk powder, the flavor will be more herby-garlicky than creamy-ranch, but it can still make a good seasoned cracker batch.

Small bowls of parsley, dill, garlic powder, onion powder, salt, pepper, and buttermilk powder for dry ranch mix.
A homemade dry ranch-style mix lets you control salt, herbs, and garlic, which is helpful when serving kids, low-salt guests, or lighter soup-night batches.

Ingredients and What Each One Does

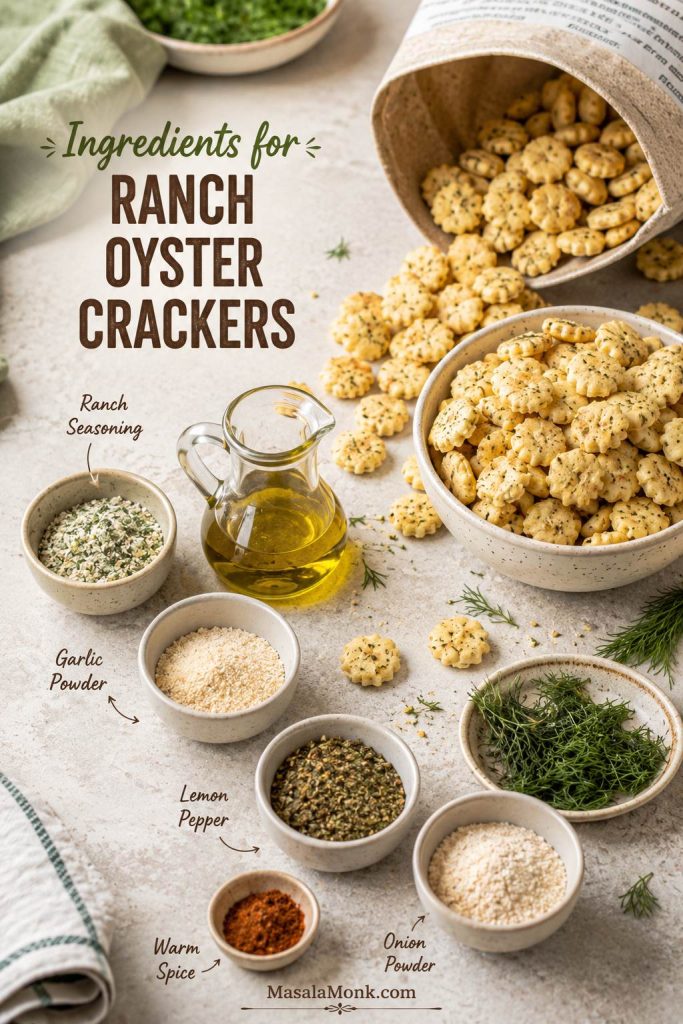
If you have oyster crackers, dry ranch mix, and a neutral oil, you are most of the way there. The crackers bring the crunch, the ranch mix brings the salty-herby flavor, and the oil or butter decides how light or rich the final batch feels.

Oyster crackers with oil, dry ranch seasoning, dill, garlic powder, lemon pepper, and onion powder in small bowls.
Every flavoring in this mix is dry, so the crackers can pick up ranch, dill, garlic, and lemon pepper while still baking into a snackable texture.

Oyster crackers

Use plain oyster crackers. Common bags are 9 oz / 255 g, 12 oz / 340 g, and 16 oz / 454 g. Cup counts vary by brand, but 9 oz is usually about 4–5 cups, 12 oz about 5½–6 cups, and 16 oz about 7–8 cups. Weight is more reliable than cups, so use the ratio table if your bag size is different.

Dry ranch seasoning

A standard dry ranch packet gives the classic flavor most people expect: tangy, salty, herby, garlicky, and slightly creamy-tasting even though there is no bottled dressing in the recipe. Store-brand ranch seasoning also works. The familiar green-label style packets are common, but the brand matters less than the salt level and packet size.

Dry ranch mix is useful beyond snack crackers too; it brings the same shortcut flavor to easy dinners like one-pot chicken bacon ranch pasta. Here, though, the seasoning needs to stay dry enough to cling to crackers instead of turning into a sauce.

Unsure how much of the packet to use? Jump to the ranch packet adjustment notes before you season the crackers.

Neutral oil or melted butter

Neutral oil gives the lightest, snappiest batch. Canola, vegetable, avocado, or another mild oil works well. Melted butter gives richer flavor and makes the kitchen smell more like party mix. Use unsalted butter if your ranch mix is already salty; if you only have salted butter, start with less seasoning.

Dried dill and other seasonings

Dill gives the crackers that old-school ranch snack-mix flavor. Garlic powder deepens the ranch flavor, lemon pepper adds lift, and onion powder rounds everything out. Cayenne, red pepper flakes, smoked paprika, Parmesan, parsley, taco seasoning, or Italian seasoning can all work too; add salty extras carefully because ranch packets already bring plenty of salt.

How Much Ranch Seasoning to Use for Oyster Crackers

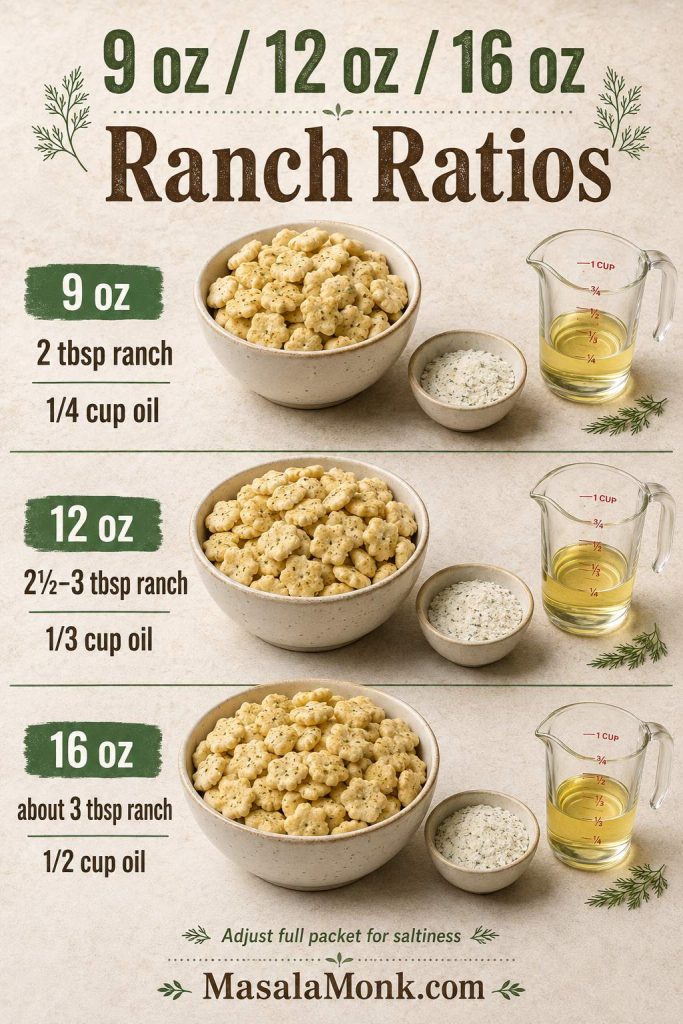
The seasoning gets easier once you match it to the bag size. Some recipes use cups, some use ounces, some say one packet, and ranch packet sizes are not always identical. Use this table as the practical guide.

Ranch Ratios by Bag Size

Oyster crackersMetricRanch seasoningOil or butterBake time at 250°F / 120°C
9 oz255 g2 tbsp mild
2½–3 tbsp bold
¼ cup oil for lighter coating
⅓ cup oil or 5 tbsp butter for richer coating
15–20 min
12 oz340 g2½ tbsp balanced
3 tbsp bold
⅓ cup oil
up to ½ cup butter for richer coating
18–22 min
16 oz454 gAbout 3 tbsp
or most/all of a standard 1 oz / 28 g packet, adjusted for saltiness
½ cup oil or ½ cup melted butter20–25 min
2 × 16 oz908 gAbout 6 tbsp
or 2 standard 1 oz / 28 g packets, adjusted for saltiness
1 cup oilUse 2 sheet pans
Three ranch oyster cracker ratio sections for 9 ounce, 12 ounce, and 16 ounce batches with ranch and oil measurements.
Bag size matters: the same ranch packet can taste bold in a 12-ounce batch but more balanced in a larger 16-ounce party batch.

How to Adjust the Ranch Packet

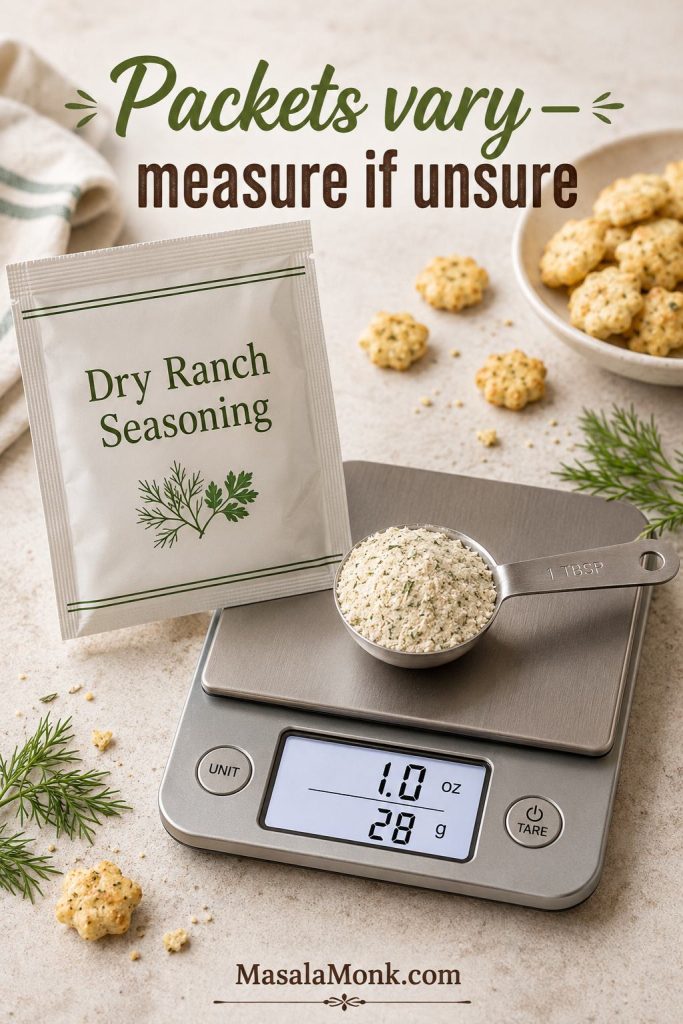
A ranch packet is sold by weight, not by tablespoons, and brands vary. The same 1 oz / 28 g packet can make a bold 12 oz batch or a more moderate 16 oz batch; it depends on how salty and intense you want the bowl.

Dry ranch seasoning packet, tablespoon measure, kitchen scale, and oyster crackers for checking packet weight.
Since ranch packets are sold by weight, measuring once helps you match the recipe instead of guessing from packet to packet.

Balanced for Soup, Bold for Parties

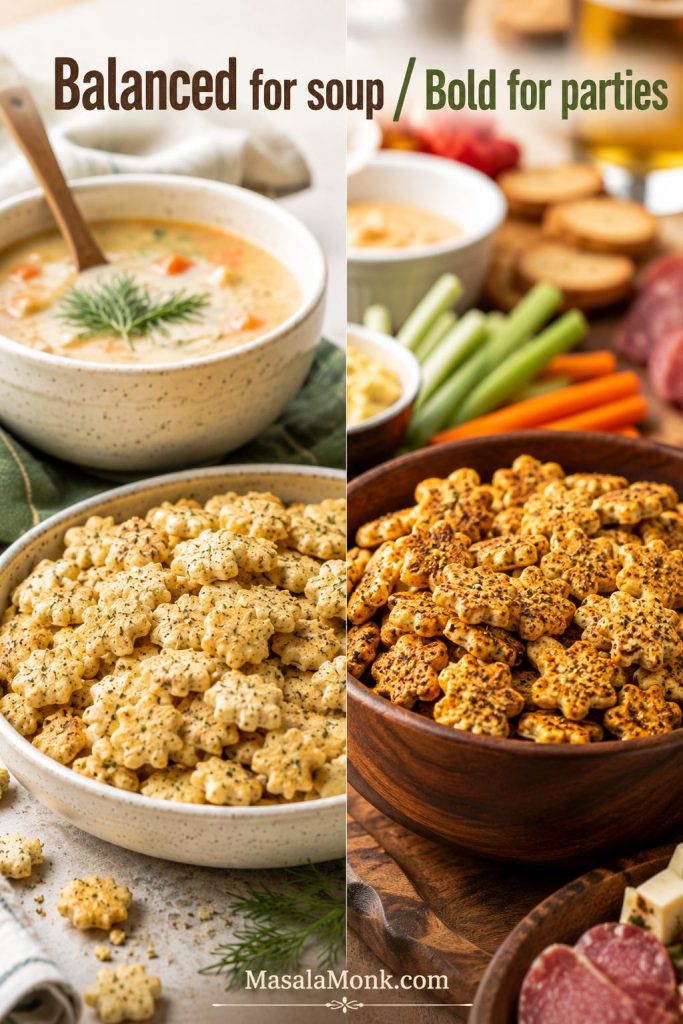
Making these for soup? Stay closer to the balanced ranch amount so the crackers add crunch without taking over the bowl. Making them for a party snack? Go bolder, especially if the crackers will sit beside dips, wings, cheese, or other strong flavors.

Lighter ranch oyster crackers for soup beside a bolder seasoned batch for parties.
Keep the seasoning lighter for soup so it does not overpower the bowl; go bolder when the crackers need to stand beside dips, wings, and cheese.

Best starting point: For a 12 oz / 340 g bag, use ⅓ cup oil and 2½ tablespoons ranch seasoning. After that, adjust toward extra dill, more butter, or a bolder packet-style coating depending on how your house likes them.

For batch size, think of 9 oz as a small test batch, 12 oz as the one-pan standard, and 16 oz as the party or gifting size. If you double a 16 oz batch, use two sheet pans so the crackers have room to toast evenly.

Once the bag size and seasoning amount are clear, move to the baked method and mix the coating.

Oil vs Butter for Ranch Oyster Crackers

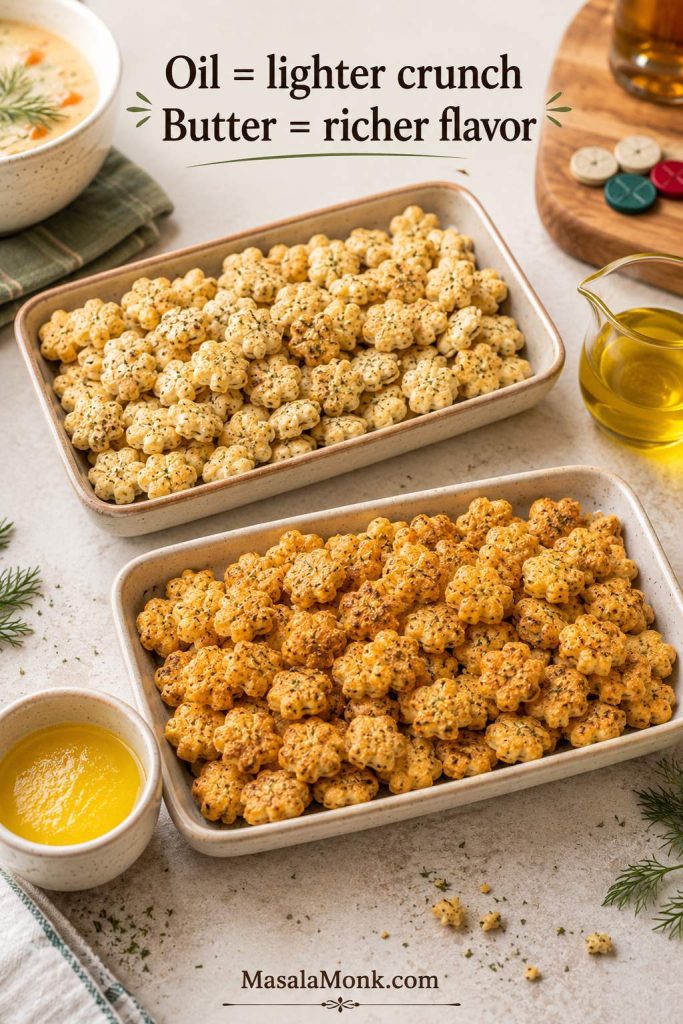
Neither oil nor butter is wrong; they just make different snack bowls. Oil gives you the light, crunchy version people keep grabbing from between sips of soup. Butter gives you the richer bowl that smells like party mix coming out of the oven.

Two ranch oyster cracker batches comparing a lighter oil-coated version with a richer butter-coated version.
Oil keeps the bite lighter and drier, whereas melted butter gives a deeper, party-mix flavor that feels richer while still warm.
ChoiceResultBest forWatch out for
Neutral oilSnappy, light, evenly coatedMain recipe, make-ahead snacks, soup toppingUse a measured amount so the crackers do not feel greasy
Melted butterRicher, more savory, slightly heavierParty bowls, warm snacking, buttery flavorUse unsalted if your ranch mix is salty
Half oil, half butterBalanced flavor and crunchBest compromiseGive it enough baking time for the coating to settle
Olive oilMore noticeable flavorSmall batches or herby versionsUse a mild one so it does not fight the ranch flavor
Popcorn oilOld-school snack flavorHeavier party mixTaste first because some brands are extra salty

For the main recipe, use oil if you want the cleanest crunch. Use melted butter for a richer snack, then give the crackers enough space and baking time so the coating settles instead of feeling heavy.

How to Make Ranch Oyster Crackers

Once you choose the fat, the method is simple: whisk the seasoning into the oil or butter first, toss the crackers gently, spread them in one layer, bake low, stir once, and let them sit on the tray. This is snack food, not pastry; the goal is seasoned, easy, and good by the handful.

If the coating looks a little uneven or the first batch tastes slightly light, you can usually fix it with a few more minutes in the oven or a small dusting of seasoning while the crackers are warm.

Step 1: Heat the oven

Heat the oven to 250°F / 120°C. This low temperature gives the seasoning time to settle onto the crackers without burning the ranch powder, dill, garlic, or lemon pepper.

Step 2: Mix the seasoning oil

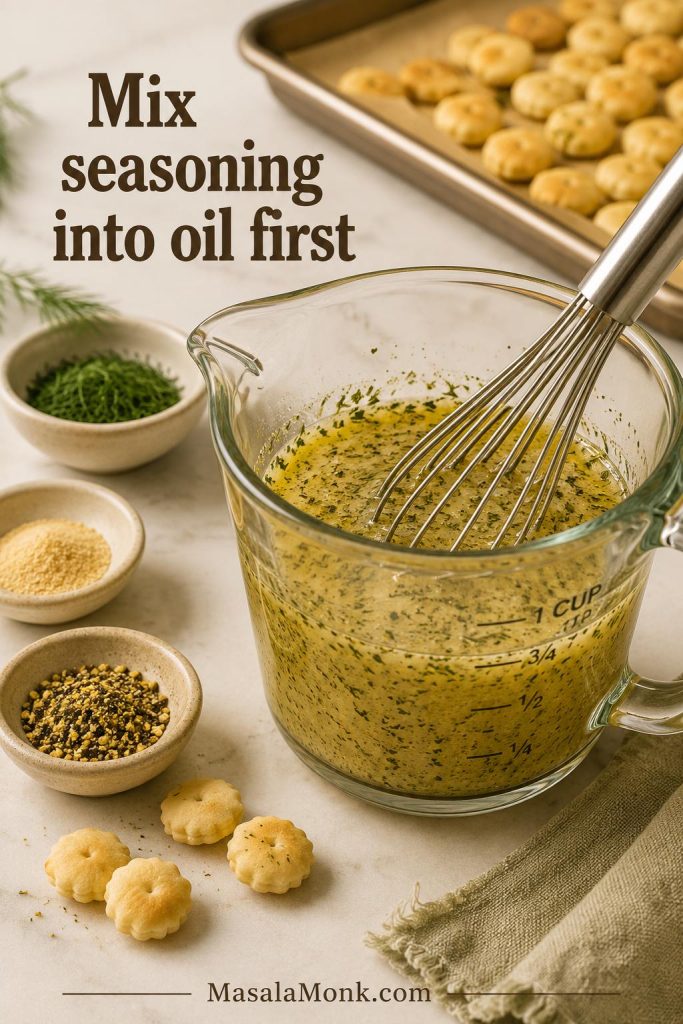
In a small bowl or measuring cup, whisk together the oil, dry ranch seasoning, dried dill, garlic powder, lemon pepper, and any optional onion powder, smoked paprika, or cayenne. Mixing the seasonings into the oil first helps prevent salty clumps and bare patches.

Dry ranch seasoning, dill, garlic powder, and lemon pepper being whisked into oil in a glass bowl.
Mixing the ranch seasoning into the oil first helps the herbs and powders move evenly through the batch instead of clinging in salty clumps.

Step 3: Coat the crackers gently

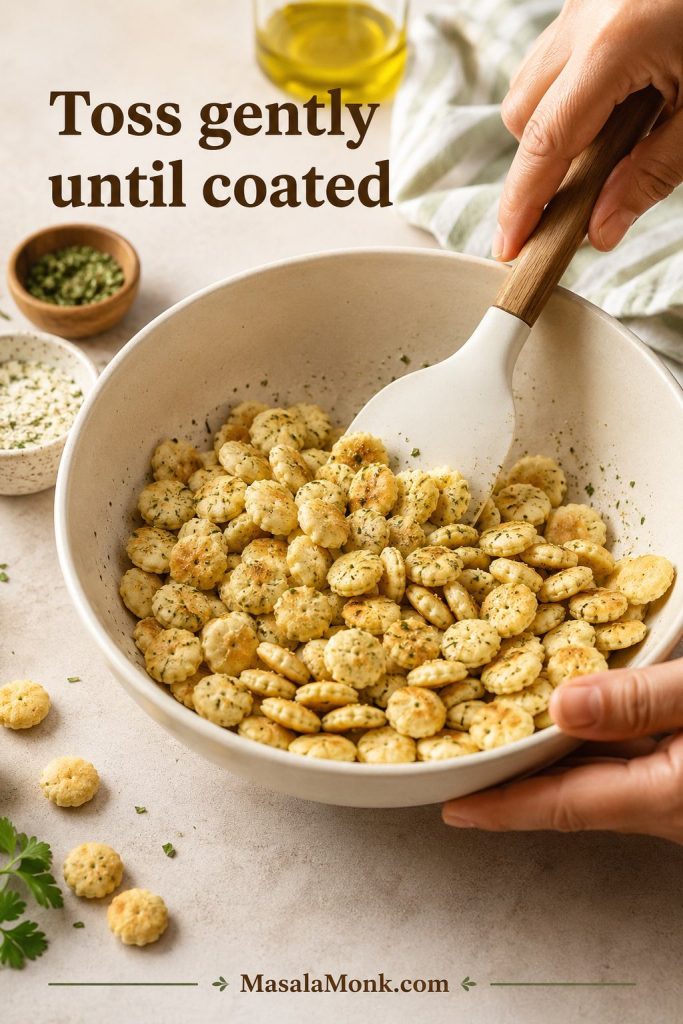
Add the oyster crackers to a large mixing bowl or a gallon zip-top bag. Pour the seasoning oil over them and toss gently until the crackers look evenly coated. A bowl is gentler and reduces breakage. A zip-top bag is faster and less messy, but shake softly rather than crushing the crackers.

Hands gently tossing oyster crackers with ranch seasoning oil in a large cream mixing bowl.
Use a wide bowl and gentle folds so the oyster crackers pick up seasoning without breaking into too many crumbs.

Step 4: Spread on a rimmed baking sheet

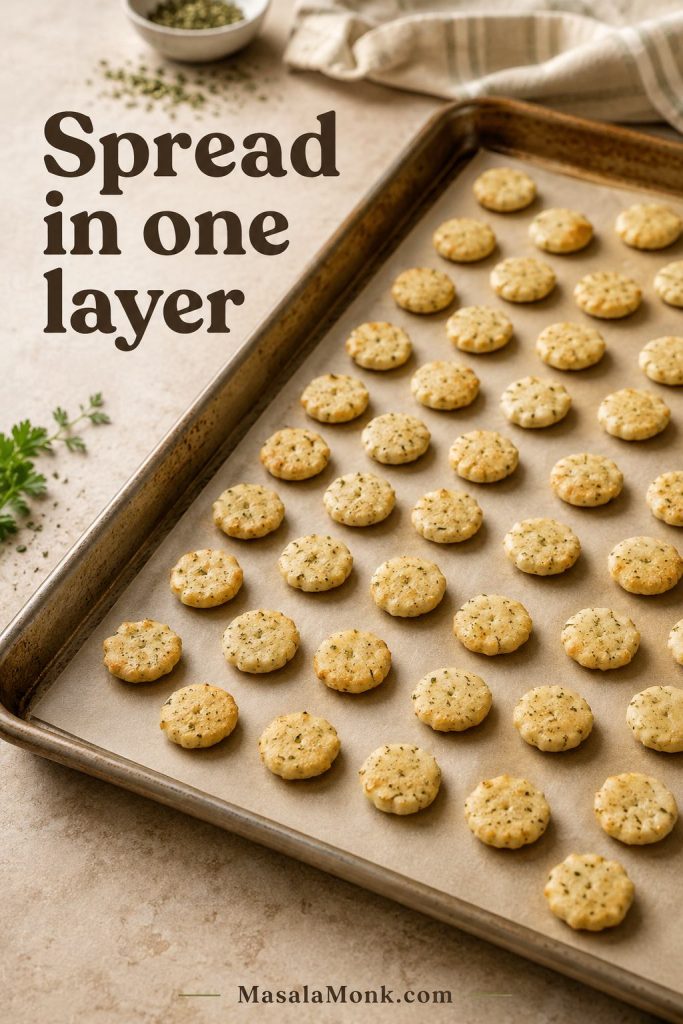
Spread the crackers on a rimmed baking sheet in as even a layer as possible. Parchment makes cleanup easier, and space on the pan helps the coating set evenly.

Ranch oyster crackers spread in a single layer on a parchment-lined rimmed baking sheet.
A single layer gives each cracker space to dry and toast, while crowded spots can stay heavy even after baking.

Step 5: Bake low and stir once

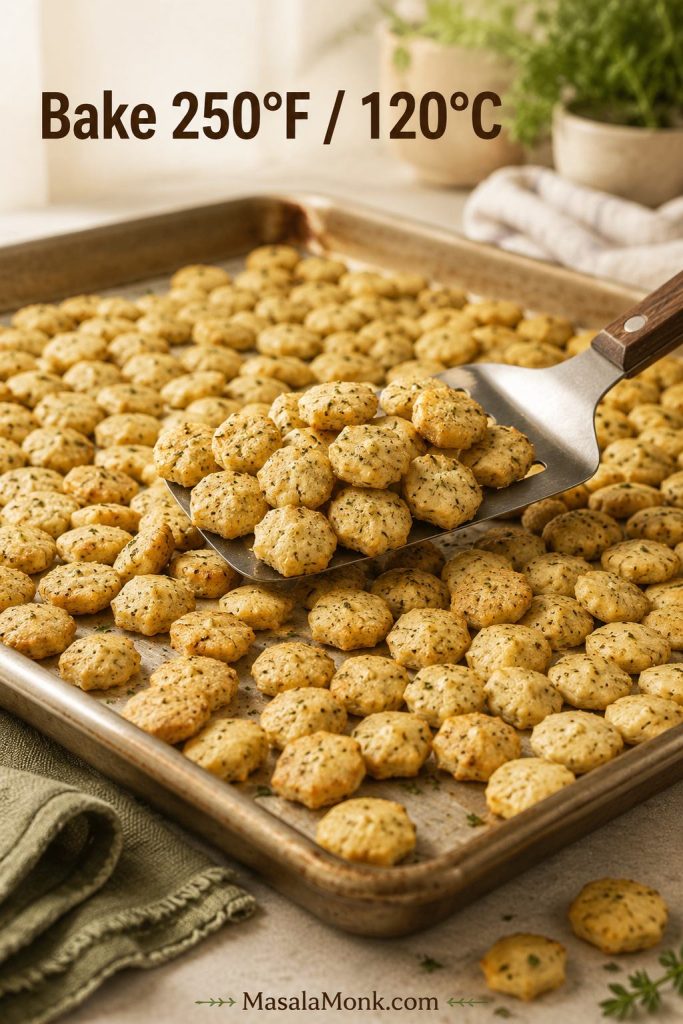
Bake for 18–22 minutes, stirring after about 10 minutes. A smaller or lightly coated batch may be ready closer to 15–18 minutes. A butter-heavy or 16 oz batch may need 20–25 minutes. The crackers should smell toasted and look set rather than wet or shiny.

Baked ranch oyster crackers on a sheet pan with toasted edges, herb flecks, and a spatula lifting some crackers.
The best doneness cue is not deep browning; instead, the crackers should smell toasted and look set, dry, and evenly speckled.

Step 6: Let the crackers cool on the pan

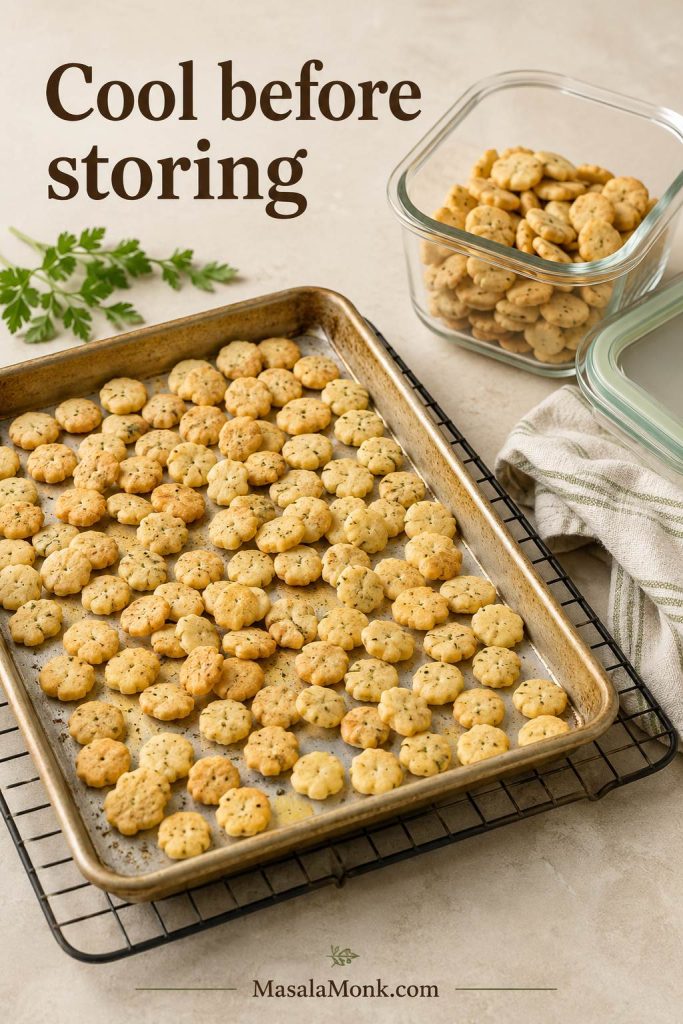
Leave the crackers on the pan until they are no longer warm. Once cooled, they should be evenly seasoned and ready to store.

Ranch oyster crackers cooling on a sheet pan beside an open glass storage container and lid.
Leave the crackers on the pan until the warmth fades, then move them into storage so the finished texture stays clean.

Texture cue: If the crackers still look glossy after baking, give them another 3–5 minutes at the same low temperature. They should look coated, not shiny with oil.

Equipment note: A large bowl is gentler, a zip-top bag coats faster, a rimmed baking sheet keeps the crackers contained, parchment helps cleanup, and a thin spatula makes stirring easier.

Want to skip the oven or use the air fryer instead? Compare the baked, no-bake, and air fryer methods before choosing.

Baked, No-Bake, and Air Fryer Methods

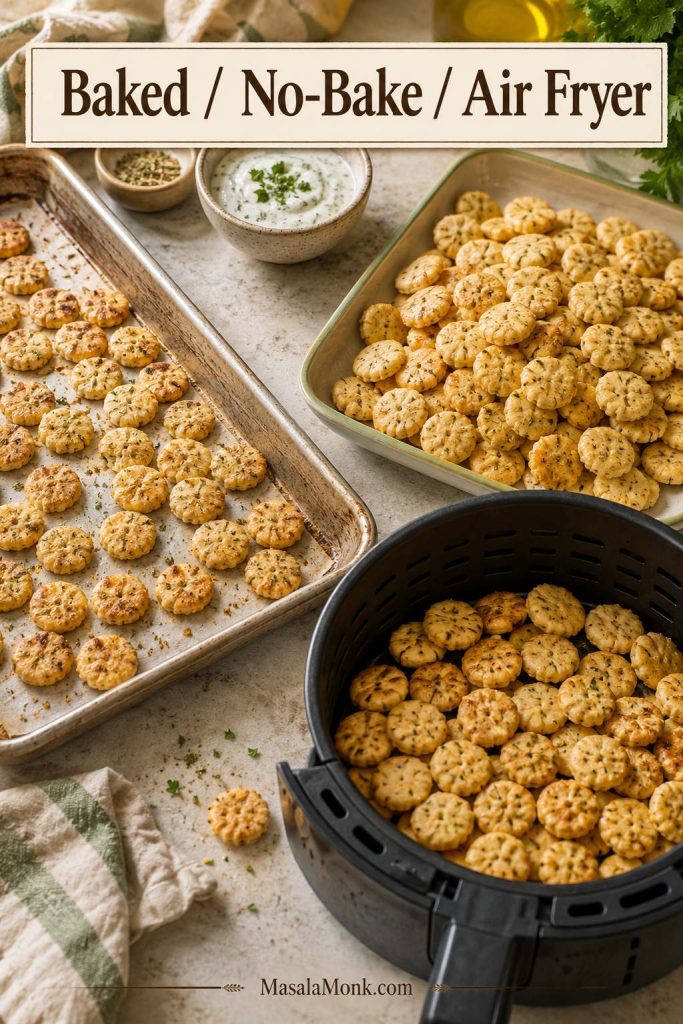
If you want the most reliable crunch, use the oven. No-bake and air-fryer versions are useful when you are short on time, avoiding the oven, or making a small batch. The microwave is included only as a backup.

Baked, no-bake, and air fryer ranch oyster crackers shown with a sheet pan, resting tray, and air fryer basket.
Pick the oven for an even full batch, the air fryer for speed, or the no-bake method when make-ahead ease matters more than maximum crunch.
MethodTimeTextureBest for
Baked18–22 minMost even and snappyMost reliable crunch
No-bake2–4 hours sitting timeGood, but slightly softerNo oven, prep-ahead snack
Air fryer7–10 minVery crisp, small batchesQuick small batch
Microwave backup2–3 minFast but less evenOnly when speed matters most

No-bake version

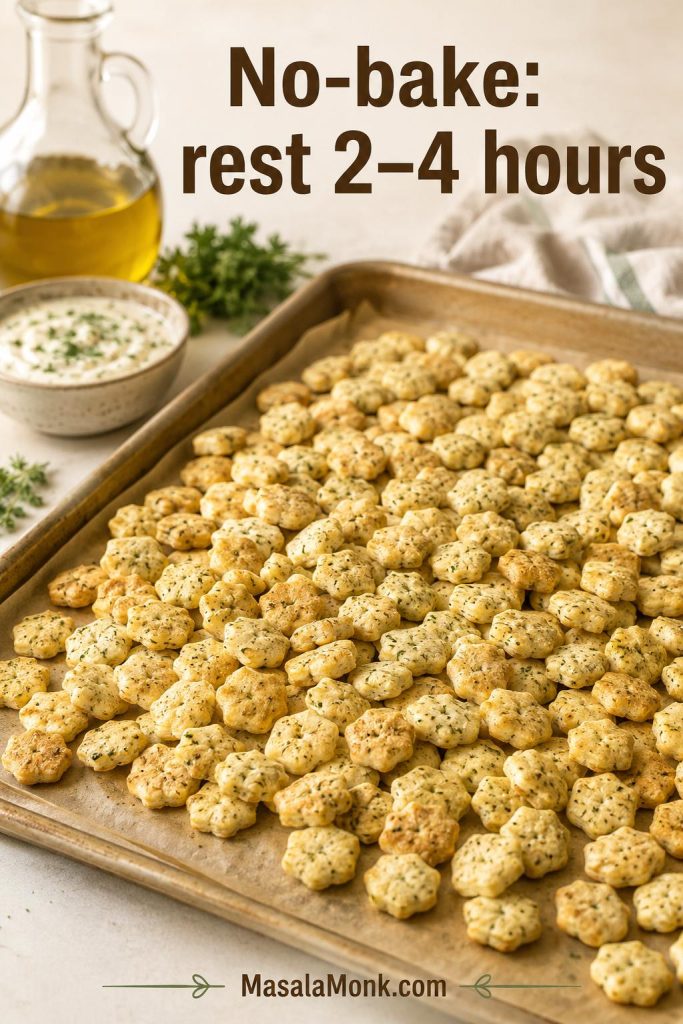
Choose this when you need the snack made ahead and do not mind a slightly softer crunch. Toss the oyster crackers with the seasoned oil, spread them on a sheet pan, and let them sit for 2–4 hours, stirring occasionally. They are ready when the surface no longer feels slick. Oil works better than butter here because it coats without setting up heavy as it cools.

No-bake ranch oyster crackers resting on a sheet pan with oil and seasoning nearby.
The no-bake method needs patience: spreading the crackers out gives the seasoned oil time to settle before serving.

Air fryer version

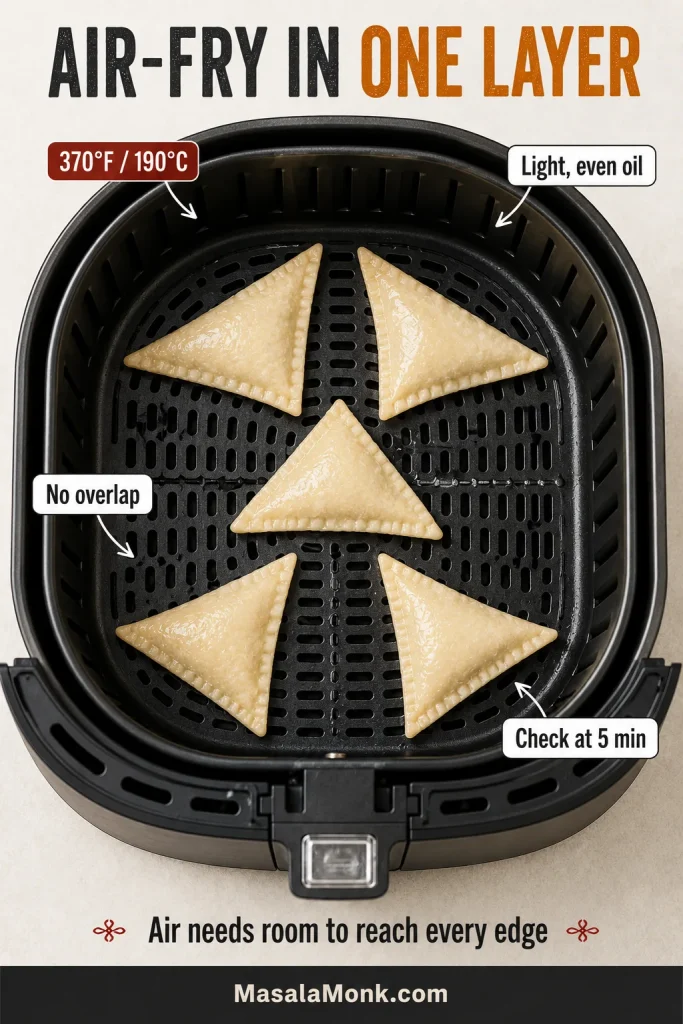
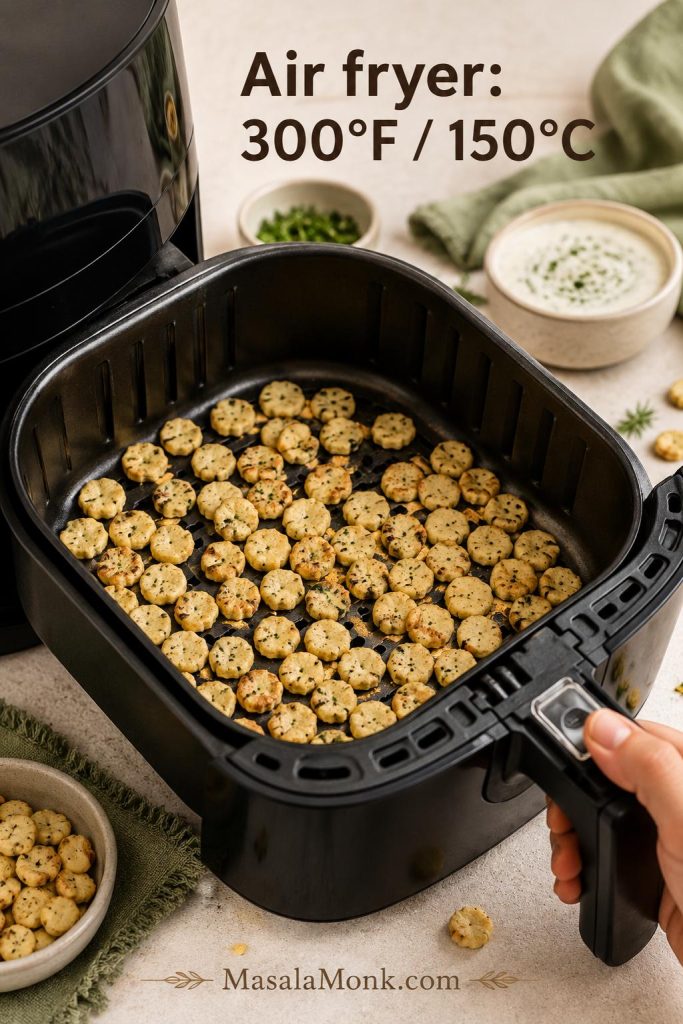
For the air fryer, cook small batches at 300°F / 150°C for 5 minutes, shake the basket, then cook another 2–5 minutes until set and lightly toasted. Air fry only 3–4 cups at a time unless you have a large basket. A little less oil usually works better in smaller baskets.

Ranch oyster crackers cooked in a thin layer inside an air fryer basket.
Keep air fryer batches shallow, because the crackers need moving air around them to toast rather than simply warm through.

If the air fryer is already out, you can keep the same snack-table rhythm going with air fryer chicken wings while the crackers cool.

Microwave backup

The microwave is the fastest backup, not the best texture method. Work in short bursts, then spread the crackers out afterward so steam does not soften them.

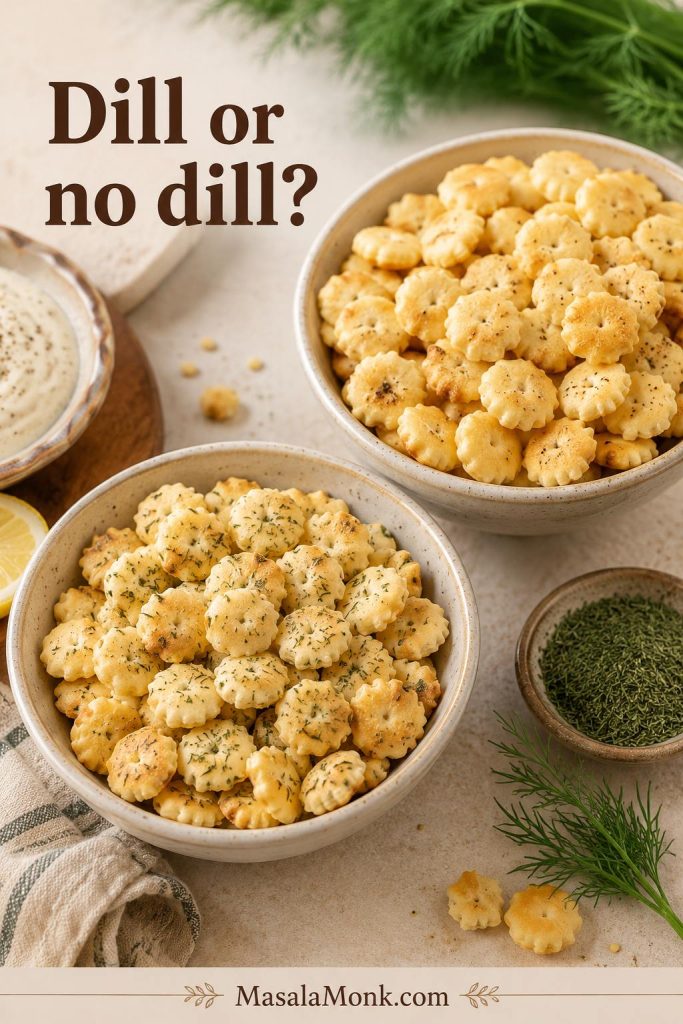
Dill or No Dill?

Dill is the old-school choice here. It gives these crackers their classic ranch snack-mix flavor, although the batch still works without it. For 9 oz / 255 g, use about ¾–1 teaspoon; for 12 oz / 340 g, use 1 teaspoon; for 16 oz / 454 g, use 1½–2 teaspoons. If you skip dill, replace it with dried parsley, chives, extra onion powder, or a little more lemon pepper.

Two bowls of ranch oyster crackers comparing a dill-speckled batch with a cleaner no-dill batch.
Dill gives the classic old-school ranch snack flavor, though parsley, chives, onion powder, or extra lemon pepper can still round out the batch.

Flavor Variations

Treat the base recipe like a blank snack mix. Keep the crackers, fat, and low oven steady; change the personality with the seasonings. This is where the batch starts to feel like yours.

Need the base formula first? Jump to the ranch oyster crackers recipe card, then come back and choose a variation.

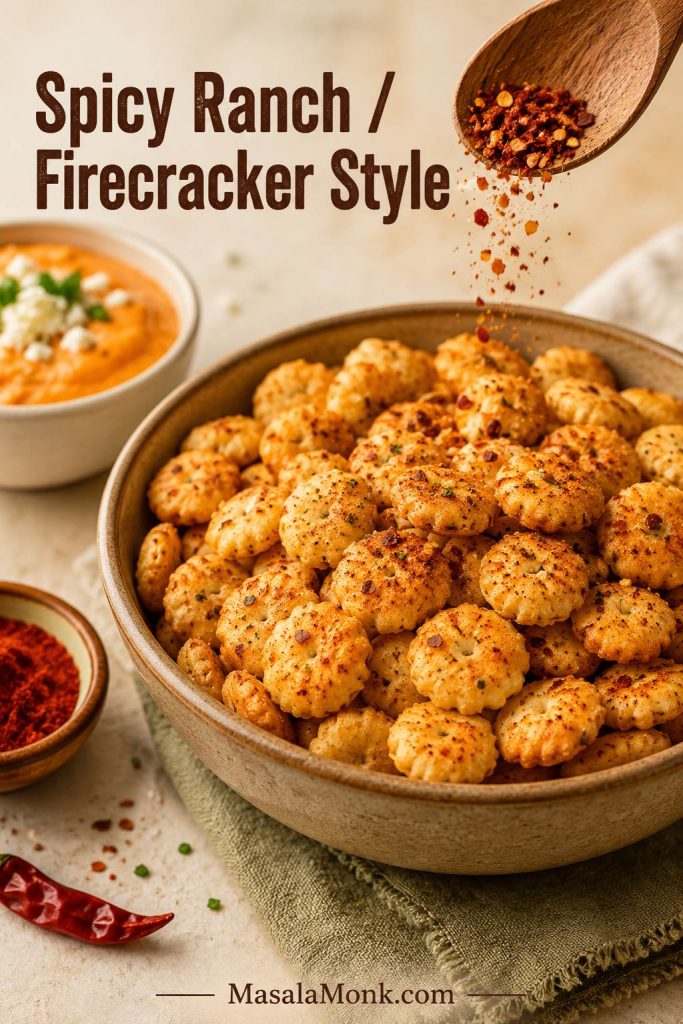
Spicy Ranch Oyster Crackers, or Firecracker Style

Add ¼ teaspoon cayenne for mild heat, ½ teaspoon cayenne for a stronger kick, or 1 tablespoon red pepper flakes for a more obvious spicy snack. Classic firecracker oyster crackers are usually hotter, red-pepper-forward, and more heavily seasoned than regular ranch crackers, so keep them milder here unless you know your crowd wants heat.

For a hotter game-day table, pair the spicy crackers with a scoopable dish like buffalo chicken dip. The crackers are better for topping and nibbling, while sturdier chips or bread can handle the heaviest scoops.

Dry heat is easier than wet hot sauce. Cayenne, smoked paprika, chili powder, and red pepper flakes keep the batch punchy without adding extra moisture.

Spicy ranch firecracker oyster crackers with red pepper flakes, cayenne, and a buffalo-style dip nearby.
For firecracker-style oyster crackers, dry heat such as cayenne and red pepper flakes adds punch without softening the snack.

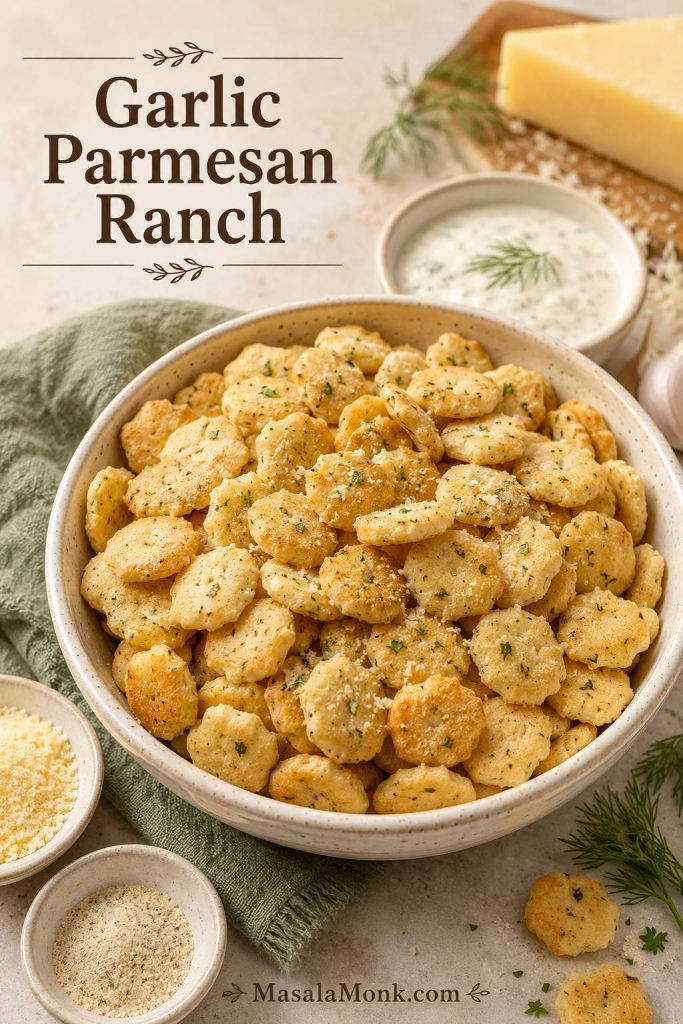
Garlic Parmesan ranch oyster crackers

Add a little extra garlic powder to the seasoning oil. After baking, while the crackers are still warm, toss with finely grated Parmesan and dried parsley. Adding Parmesan after baking keeps the cheese from scorching and gives the crackers a salty, savory finish.

Garlic Parmesan ranch oyster crackers in a bowl with grated Parmesan, garlic powder, parsley, and Parmesan wedge.
Add Parmesan after baking so the cheese stays savory and delicate instead of scorching on the sheet pan.

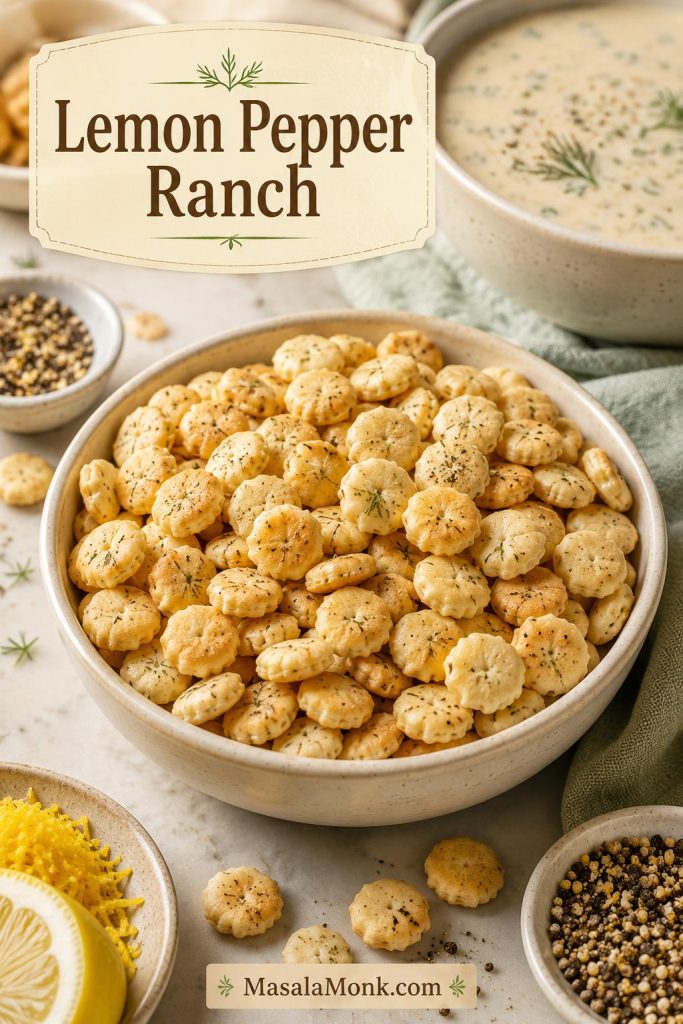
Lemon pepper ranch oyster crackers

Increase the lemon pepper to 1½ teaspoons for a 12 oz batch. This version is especially good as a soup topping because the citrusy pepper flavor cuts through creamy soups, chowder, and chili. If you like that bright, peppery flavor, it also makes a natural game-day pairing with lemon pepper chicken wings.

Lemon pepper ranch oyster crackers with lemon zest, lemon slice, pepper seasoning, and creamy soup in the background.
Lemon pepper lifts the ranch flavor, making this variation especially useful with creamy soups, chowders, and richer dips.

Taco ranch oyster crackers

Use ranch seasoning plus a small amount of taco seasoning, smoked paprika, and cayenne. Start lightly because taco seasoning can be salty. This version works well for movie-night bowls, game-day spreads, pretzels, corn chips, and roasted nuts.

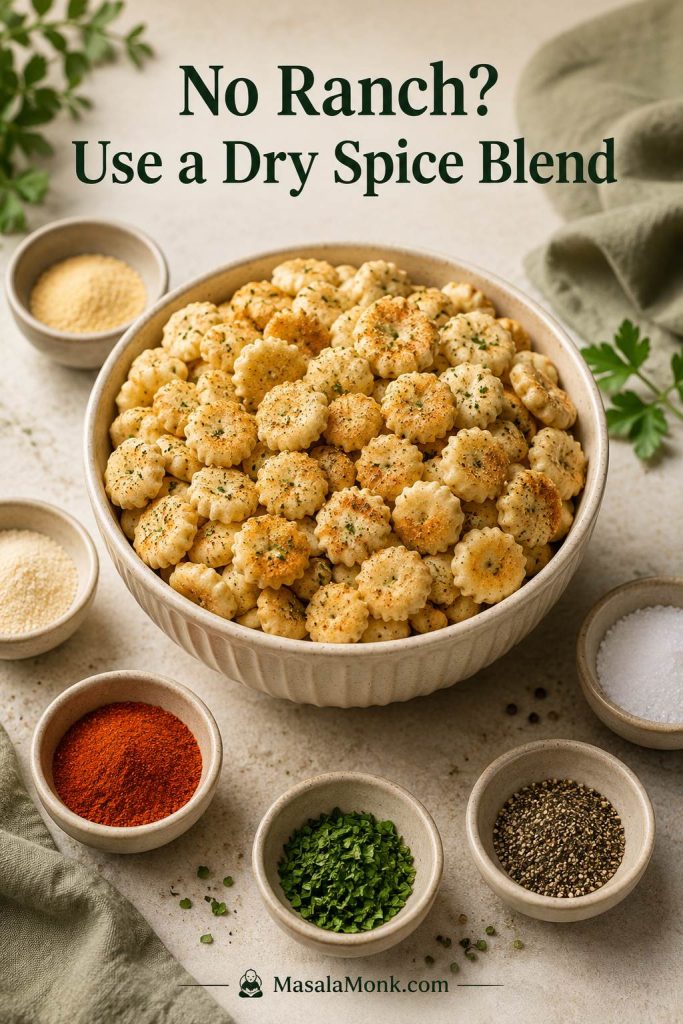
No-ranch seasoned oyster crackers

If you want a ranch-free seasoned oyster cracker batch, keep the same method and use a dry homemade seasoning blend. For 12 oz / 340 g oyster crackers, whisk together:

  • ⅓ cup / 80 ml neutral oil or melted butter
  • 1 teaspoon garlic powder
  • 1 teaspoon onion powder
  • 1 teaspoon dried parsley or Italian seasoning
  • ½ teaspoon dried dill, optional
  • ½ teaspoon smoked paprika or sweet paprika
  • ¼–½ teaspoon fine salt, depending on how salty your crackers are
  • ¼ teaspoon black pepper

Toss with the crackers and bake the same way. If you want a Parmesan version, add finely grated Parmesan after baking while the crackers are still warm.

Seasoned oyster crackers with bowls of paprika, parsley, black pepper, salt, garlic powder, and onion powder.
A ranch-free dry spice blend keeps the same easy method while giving readers a packet-free way to season oyster crackers.

Cinnamon sugar oyster crackers are a separate sweet snack direction. They usually use butter, sugar, cinnamon, and a slightly different baking rhythm, so treat that as its own snack bowl rather than folding it into this ranch version.

How to Serve Ranch Oyster Crackers

Ranch oyster crackers are easy to snack on straight from a bowl, but they are more useful than that. They can act like tiny croutons, party mix, soup crackers, or the salty crunch on a larger appetizer table.

Making them ahead for a party or snack table? Read the storage tips before you seal the batch.

Best Ways to Serve Them

UseHow to serve them
Soup toppingScatter over tomato soup, chowder, potato soup, chicken soup, or a cozy bowl like crock pot lasagna soup. Add them right before eating so the first spoonful is still crunchy.
Chili crunchUse instead of plain crackers for a salty ranch finish.
Party bowlServe in a big bowl with a small scoop or spoon so people can grab handfuls easily.
Snack mixCombine with pretzels, Chex, Goldfish-style crackers, roasted nuts, or mini saltines.
Dip boardUse as one crunchy element beside chips, vegetables, and bread pieces.
Cheese boardPair with a make-ahead cheese ball, cheddar cubes, soft cheese, pickles, and sliced vegetables.
Lunchbox snackPack only once the crackers are dry and no longer warm.
Road-trip snackStore in a zip-top bag or airtight snack container.
Holiday snack jarFill small jars or tins once the crackers have cooled and feel dry to the touch.

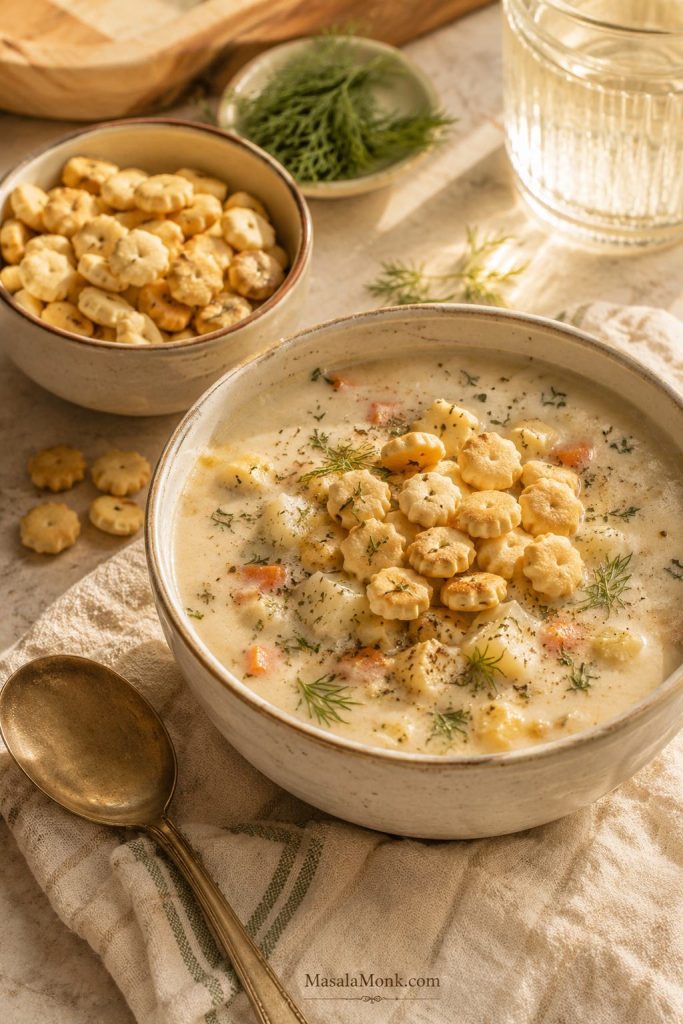
Use Ranch Oyster Crackers as a Soup Topping

For soup, add the crackers right before eating rather than letting them sit in the bowl. That keeps the first spoonful creamy underneath and crunchy on top.

Creamy soup topped with ranch oyster crackers, with extra crackers in a small bowl nearby.
Think of these as tiny ranch croutons: they work especially well on creamy soups where plain crackers can taste flat.

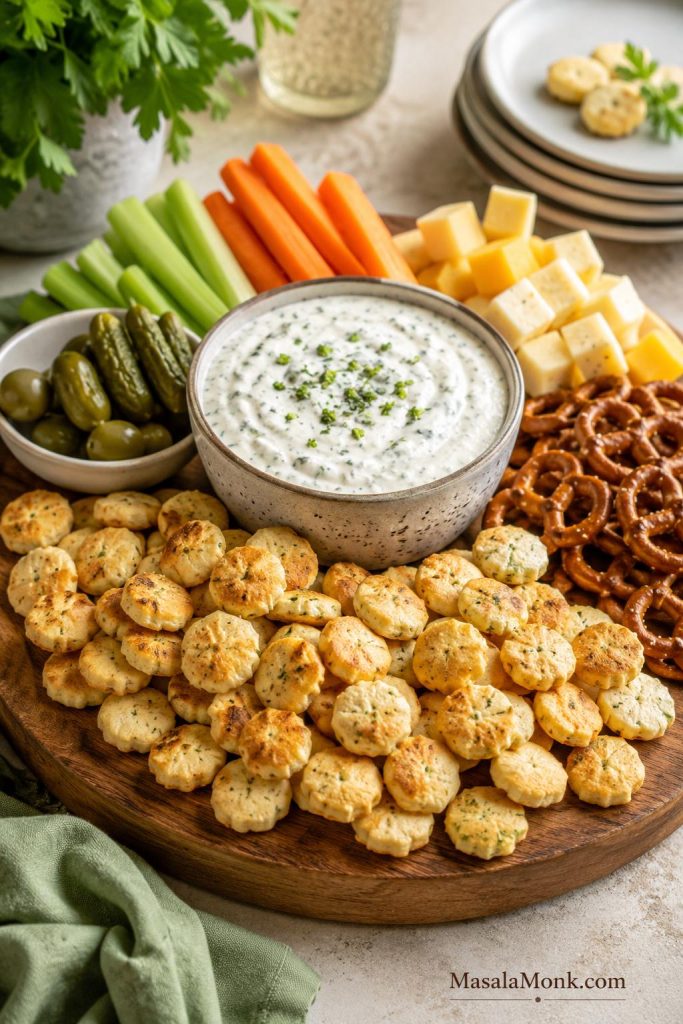
Dip Boards and Appetizer Tables

For a hot appetizer table, set a bowl of these crackers near a bubbling spinach artichoke dip. They are best for nibbling alongside it or sprinkling over individual scoops, while sturdier chips, bread, or vegetables can handle the heaviest dips.

Ranch oyster crackers served on an appetizer board with creamy dip, cheese cubes, carrots, celery, pretzels, pickles, and olives.
On an appetizer board, ranch oyster crackers shine as a nibble or topping, while sturdier chips, bread, and vegetables can handle heavy dips.

They also fit neatly into a larger snack board or casual charcuterie board, especially when you want one seasoned, crunchy element beside cheeses, pickles, fruit, nuts, and plain crackers.

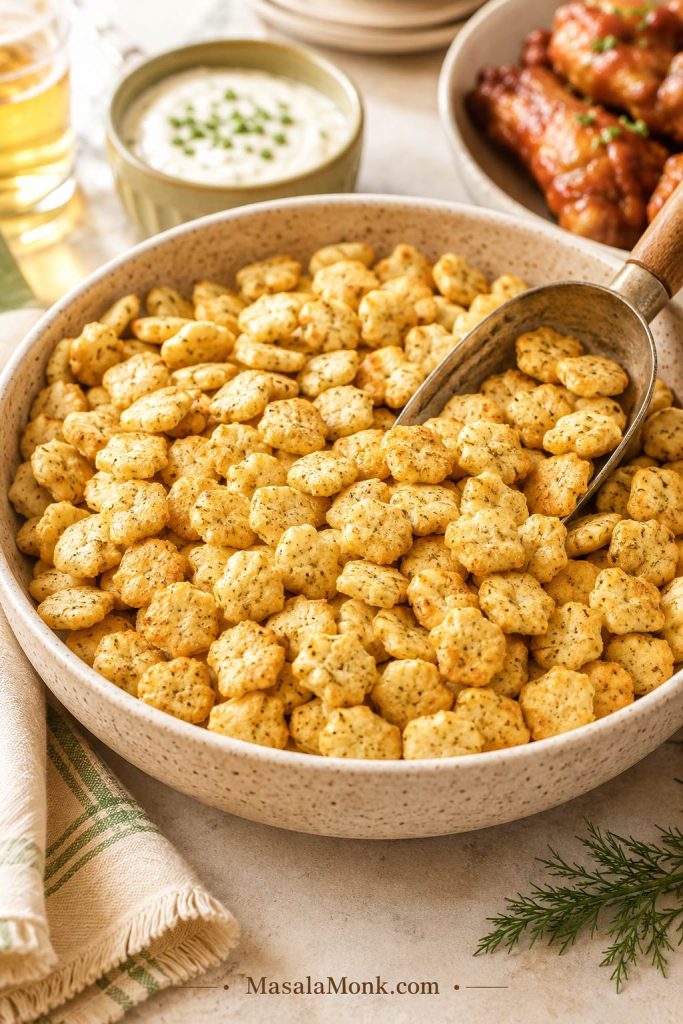
Party Bowl for Game Day and Snack Tables

If you are building a bigger game-day spread, serve them near wings, deviled eggs, cheese cubes, crunchy vegetables, and a few stronger crackers for heavier dips. Oyster crackers are excellent for sprinkling, topping, and casual snacking, but they are not always sturdy enough for very thick dips.

Large bowl of ranch oyster crackers with a scoop, dip, drinks, and party snacks in the background.
A small scoop keeps the party bowl cleaner and makes the crackers easier to serve beside dips, wings, and snack-board extras.

Storage and Make-Ahead Tips

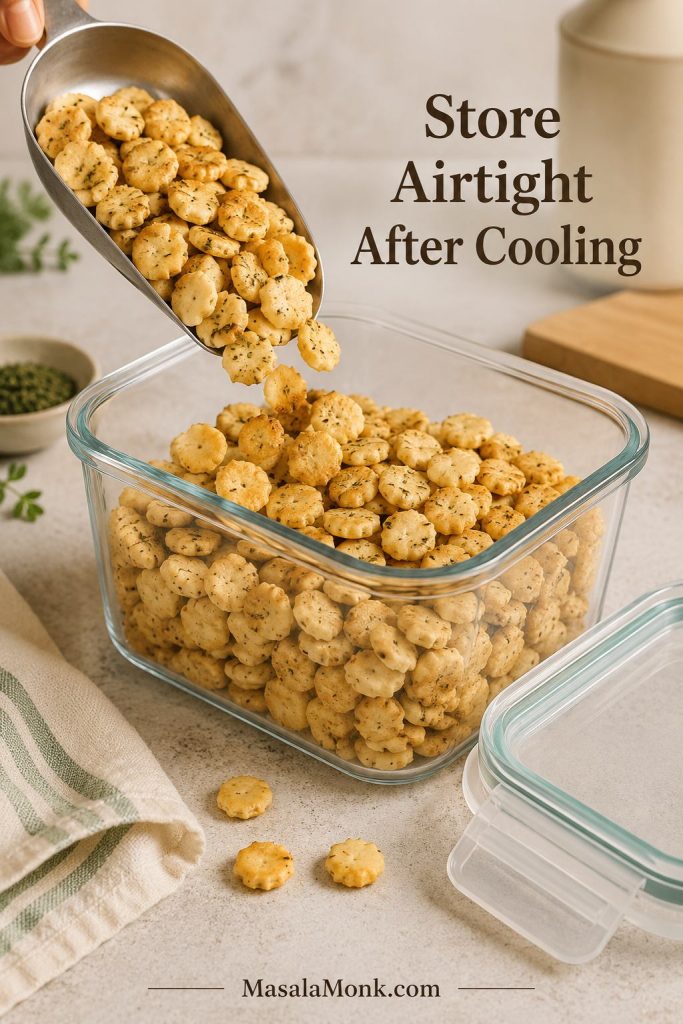
Ranch oyster crackers are a good make-ahead snack as long as they are cool before they go into a container. Once cooled, store them airtight at room temperature and use them within the first several days for the cleanest crunch.

Ranch oyster crackers being poured into an open airtight glass container with the lid nearby.
A wide, airtight container protects the seasoning better than a loose bag when you are making the snack a day ahead.
  • Best storage: Use a sealed container, jar, tin, or zip-top bag.
  • Room temperature only: The fridge can make crackers stale faster.
  • Longer storage: If baked dry and stored airtight, they usually keep about 1 week, depending on humidity and coating.
  • Gift jars: Use only crackers that feel dry to the touch, and never seal them warm.
  • Refresh if needed: Bake at 250°F / 120°C for 5–8 minutes, then cool on the pan again.
  • Freshness check: If they smell stale, taste flat, or feel soft even after refreshing, make a fresh batch.

Gift Jars

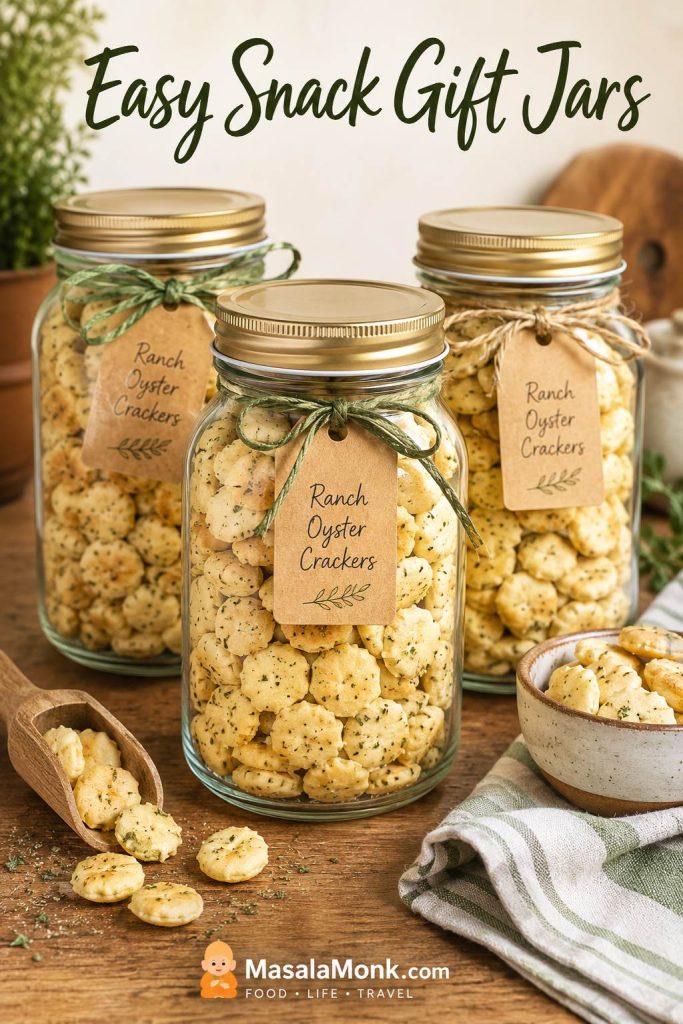
For gifting, pack only fully cooled crackers into clean jars or tins. A simple label and tight seal matter more than fancy packaging because the texture is the real gift.

Glass jars filled with ranch oyster crackers, kraft tags, ribbons, scoop, and small bowl of crackers.
For gift jars, leave a little headspace and use a tight lid so the crackers stay neat, crisp, and easy to pour.

They are especially useful because you can make them before people arrive, then put out a bowl when the table still feels like it needs one more salty, crunchy thing.

If you are making these for a party, prep one or two other make-ahead bites too. A tray of classic deviled eggs gives the table something creamy and tidy while the crackers bring the crunch.

Freezing is not worth it for most batches. The crackers can pick up moisture and lose their clean crunch, so make them a few days before the party and store them well instead.

If a stored batch turns soft or oily, use the troubleshooting guide before deciding it is a loss.

Troubleshooting the Batch

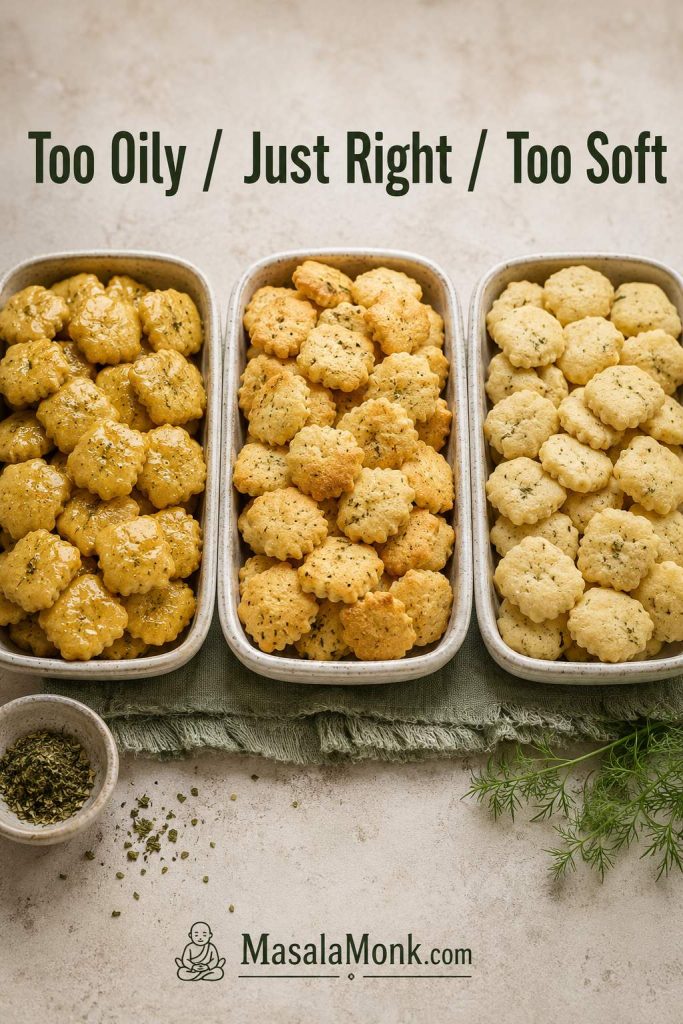
If a batch does not come out quite right, it is usually one of four things: too much fat, too much salt, not enough baking time, or uneven coating. The good news is that many batches can be saved, especially if the flavor is right but the texture is off.

Three trays of ranch oyster crackers showing too oily, just right, and too soft textures.
Use the texture as your guide: shiny crackers need more drying time, pale crackers may need better mixing, and the ideal batch looks evenly coated.

Common Problems and Fixes

ProblemWhy it happenedFix nowFix next time
Greasy crackersToo much oil or butter, or not baked long enoughSpread on a pan and bake 5–8 minutes more at 250°F / 120°CUse less fat and spread in one layer
Soggy crackersBottled ranch dressing, too much fat, or stored while warmBake low until dry, then let the tray coolUse dry ranch mix only and wait until the crackers are no longer warm before storing
Too saltyFull packet plus salty crackers, ranch dip mix, or salty add-insAdd more plain crackers and toss; if you do not have extra crackers, mix the batch into unsalted pretzels or plain cerealStart with ¾ packet or fewer salty extras
BlandToo many crackers or too little seasoningDust while warm on the tray, then let cool before storingUse the ratio table and taste your seasoning mix
Seasoning clumpedDry powder hit oily crackers unevenlyToss longer, break up clumps gently, and add a handful of plain crackers if some bites are too saltyWhisk seasoning into oil before adding to crackers
Burnt edgesOven too hot, thin pan, or not stirredRemove dark pieces before they flavor the batchUse 250°F / 120°C and stir halfway
Crackers brokeBag shaken too hard or crackers were fragileUse broken pieces as soup toppingToss in a bowl with a spatula instead of shaking hard
Soft after storageStored warm, humid room, or container not airtightRe-crisp at 250°F / 120°C for 5–8 minutesCool on the pan and store airtight

Fix Greasy Crackers

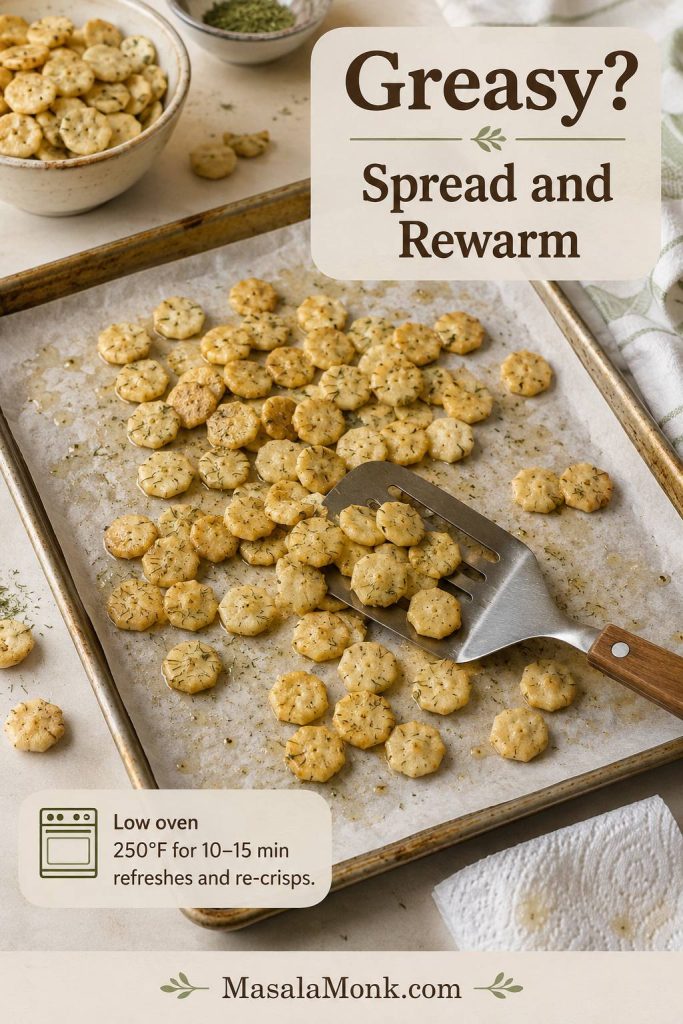
If the flavor is good but the crackers feel slick, spread them back onto a pan and warm them gently. This gives the extra coating a chance to settle instead of sitting on the surface.

Greasy ranch oyster crackers spread on a parchment-lined baking sheet with a spatula and paper towel nearby.
Use low heat for a greasy batch; the goal is to dry the surface gently, not brown the crackers further.

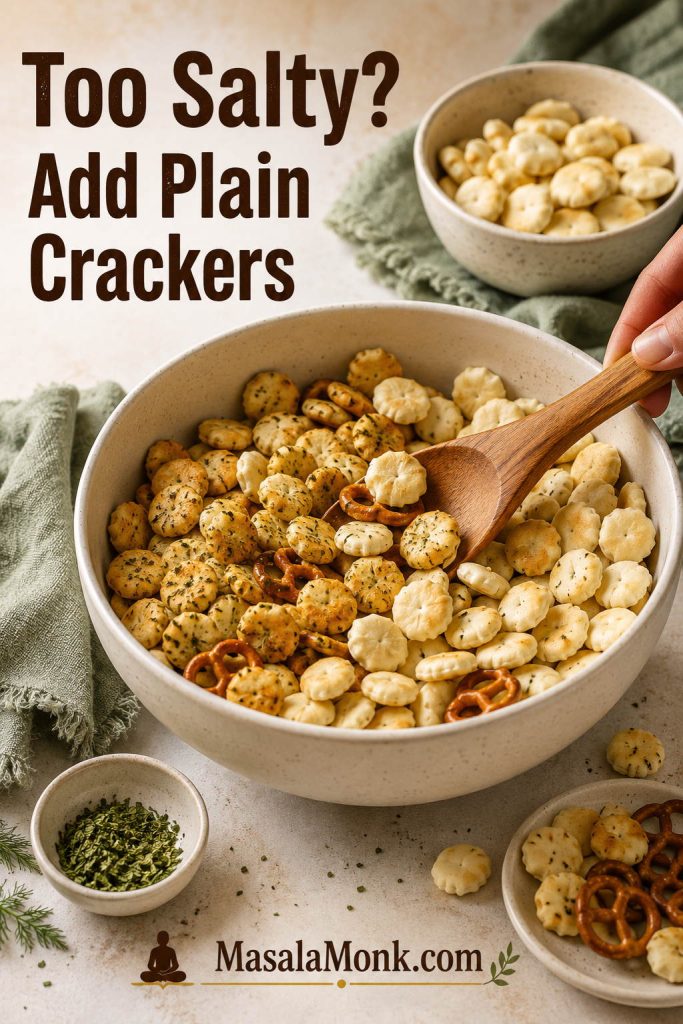
Too Salty? Stretch the Batch

If the seasoning tastes too strong, stretch the batch with plain crackers, pretzels, or unsalted cereal. Diluting the coating is usually better than trying to scrape seasoning off.

Seasoned ranch oyster crackers mixed with plain crackers and pretzels in a bowl to reduce saltiness.
When ranch oyster crackers taste too salty, stretch the seasoning with plain crackers, pretzels, or cereal instead of tossing the batch.

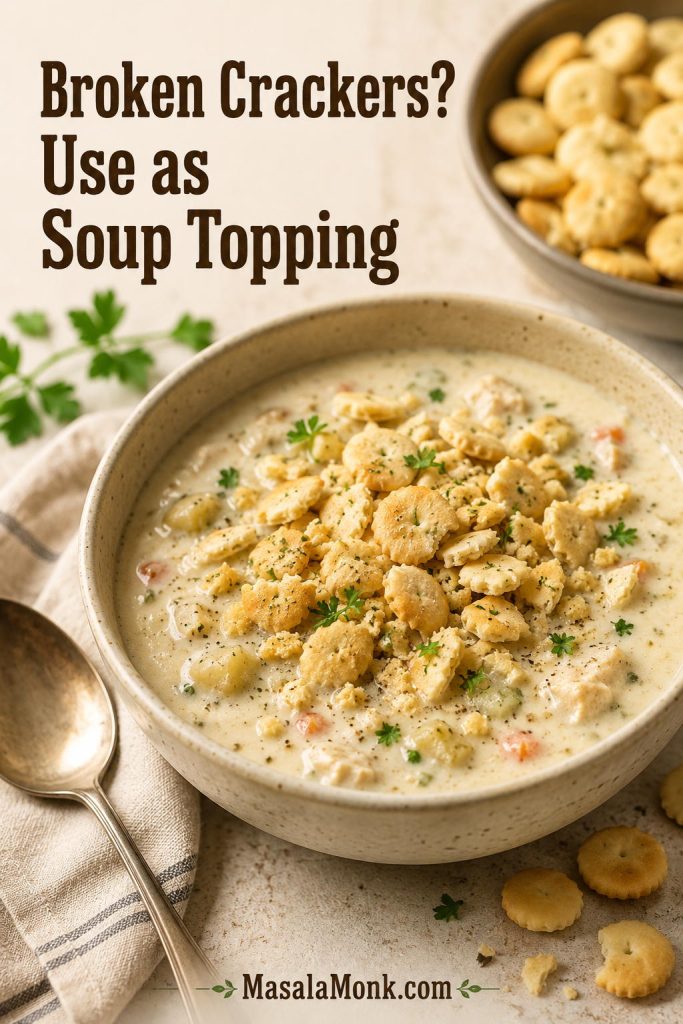
Use Broken Crackers as Soup Topping

The most reassuring part: even imperfect batches rarely go to waste. If the flavor is good, the broken, softer, or extra-seasoned crackers can still become excellent soup toppers.

Broken ranch oyster crackers sprinkled over creamy soup with whole crackers and a spoon nearby.
Broken pieces still bring crunch and ranch flavor, so save them for soup instead of reserving only the perfect whole crackers.

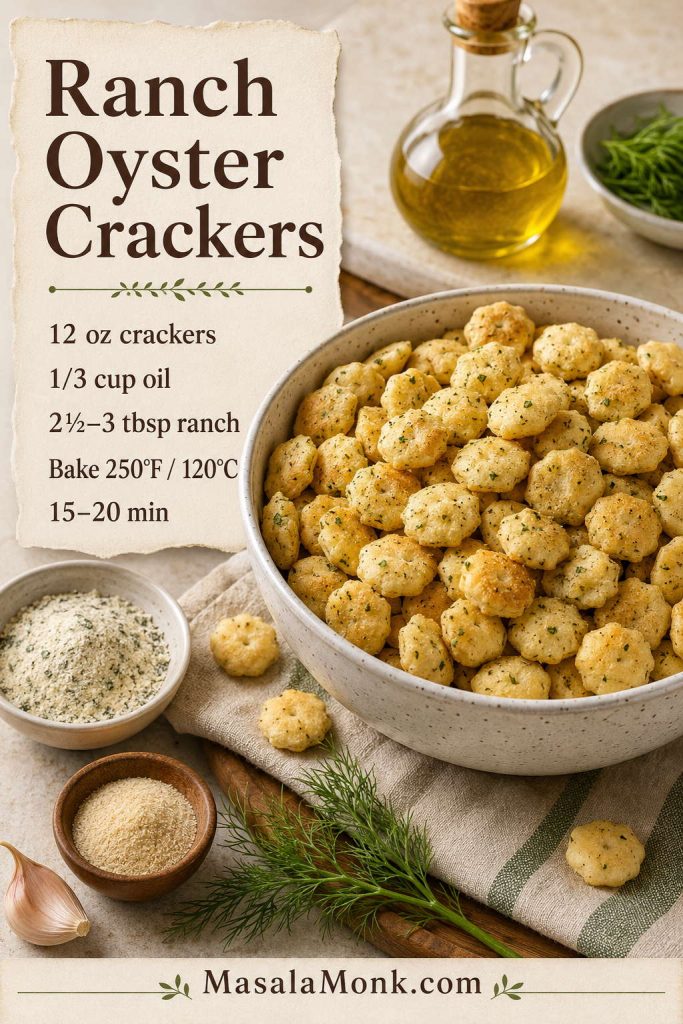
Ranch Oyster Crackers Recipe

These baked ranch oyster crackers make about 5½–6 cups of crisp, savory snack crackers for soup, parties, road trips, and make-ahead appetizer bowls.

Saveable recipe card with ranch oyster crackers, oil, dry ranch seasoning, garlic powder, dill, and bake time.
Use this base formula as your starting point, then adjust future batches with more dill, butter, heat, Parmesan, or a ranch-free spice blend.
Prep Time5 minutes
Cook Time18–22 minutes
Total Time25–30 minutes
YieldAbout 5½–6 cups / 8–10 snack servings

Equipment: Large bowl or gallon zip-top bag, small bowl or measuring cup, rimmed baking sheet, parchment paper, and a spatula.

Ingredients

  • 12 oz / 340 g oyster crackers, about 5½–6 cups depending on brand
  • ⅓ cup / 80 ml neutral oil, such as canola, vegetable, or avocado oil
  • 2½ tablespoons dry ranch seasoning for balanced flavor, or up to 3 tablespoons for a bolder batch
  • 1 teaspoon dried dill
  • ½ teaspoon garlic powder
  • ½–1 teaspoon lemon pepper
  • ½ teaspoon onion powder, optional
  • ¼ teaspoon smoked paprika or cayenne, optional

Instructions

  1. Heat the oven to 250°F / 120°C. Line a rimmed baking sheet with parchment if you want easier cleanup.
  2. In a small bowl or measuring cup, whisk together the oil, ranch seasoning, dried dill, garlic powder, lemon pepper, and any optional onion powder, smoked paprika, or cayenne.
  3. Add the oyster crackers to a large mixing bowl or gallon zip-top bag. Pour the seasoning oil over the crackers.
  4. Toss gently until the crackers are evenly coated.
  5. Spread the crackers in a single layer on the prepared baking sheet.
  6. Bake for 18–22 minutes, stirring after about 10 minutes, until the crackers smell toasted and look dry rather than glossy.
  7. Let the crackers cool on the pan before serving or storing.

Notes

  • For a 9 oz / 255 g bag, use 2 tablespoons ranch seasoning for mild flavor or 2½–3 tablespoons for bold flavor. Use ¼ cup oil for a lighter coating, or ⅓ cup oil / 5 tablespoons melted butter for a richer snack.
  • For a 16 oz / 454 g bag, use ½ cup oil and about 3 tablespoons ranch seasoning, or most/all of a standard 1 oz / 28 g packet adjusted for saltiness.
  • For a butter version, use up to ½ cup / 113 g melted unsalted butter instead of oil.
  • Dry ranch mix gives the crispest coating; bottled dressing softens the crackers.
  • If the crackers need more flavor, dust them while warm on the tray.

Ranch Oyster Crackers FAQs

Can I use bottled ranch dressing instead of dry ranch mix?

Skip bottled ranch for this recipe. Dry ranch mix gives you the ranch flavor without adding the moisture that makes crackers soften.

How much ranch seasoning is in one packet?

Many packets are about 1 oz / 28 g, but the tablespoon amount can vary. For a 12 oz bag, 2½ tablespoons is balanced and 3 tablespoons gives a bolder snack-bowl flavor.

Can I use ranch dip mix instead of ranch dressing mix?

Yes, with a light hand. Dip mix can taste saltier or stronger, so start with a little less and add more after baking if the crackers need it.

Do I have to use a specific brand?

No. Store-brand ranch seasoning, shaker seasoning, classic packets, or homemade dry ranch-style seasoning can all work. The salt level matters more than the label.

Do they have to be baked?

Not always. Baking gives the snappiest batch, but the no-bake method works when you have time to let the crackers sit for a few hours.

Can I skip the dill?

Yes. Dill gives the old-school ranch-snack flavor, but parsley, chives, onion powder, or extra lemon pepper can take its place.

Is butter better than oil?

Choose butter for richer flavor and oil for a lighter crunch. For make-ahead batches, oil is the safer default because it stays cleaner and less heavy.

Why are mine greasy?

They can usually be rescued. Spread them out and bake at 250°F / 120°C for another 5–8 minutes so the coating has time to settle.

How long do they stay fresh?

They are best in the first several days. If baked dry, cooled fully, and stored airtight, they usually keep about a week.

Can I make them in the air fryer?

Yes. Cook a small batch at 300°F / 150°C for 5 minutes, shake, then cook another 2–5 minutes. Give the crackers room in the basket so they toast evenly.

Can I turn them into snack mix?

Absolutely. Once the crackers are baked and cool, fold them into pretzels, Chex-style cereal, cheese crackers, roasted nuts, or mini saltines.

Can I use another cracker?

Yes — just watch the timing. Mini saltines, small pretzels, Chex-style cereal, cheese crackers, and Goldfish-style crackers can all brown or dry at different speeds.

Are oyster crackers made with oysters?

Usually, no. They are small soup crackers traditionally served with oyster stew and chowder. Always check the package if you have allergy concerns.

Can I make them ahead?

Yes. Make them a day or two ahead, cool them fully, and store airtight at room temperature. Re-crisp at 250°F / 120°C for 5–8 minutes if needed.

Final Bite

Once the ratio makes sense, this becomes one of those repeat snacks you barely need to think about. It can sit beside soup on a quiet night, fill the extra bowl on an appetizer table, travel in a road-trip bag, or turn into a holiday jar without much work.

Make them once as written, then adjust the next batch to fit your table: extra dill for the old-school version, cayenne for the spicy bowl, Parmesan for a savory finish, or a no-ranch blend when you want something more homemade. However you season them, the job is the same: give soup a little crunch, give the snack table one more reason to linger, and make sure the bowl empties before anyone quite notices.

Final serving bowl of ranch oyster crackers with a wooden scoop, creamy soup, butter, herbs, and soft green linen.
Serve the finished bowl near something creamy or soft, and the tiny crackers bring the salty crunch that makes the table feel complete.

Back to top

Posted on 10 Comments

10 Easy Potato Appetizers: Crispy, Cheesy & Party-Perfect

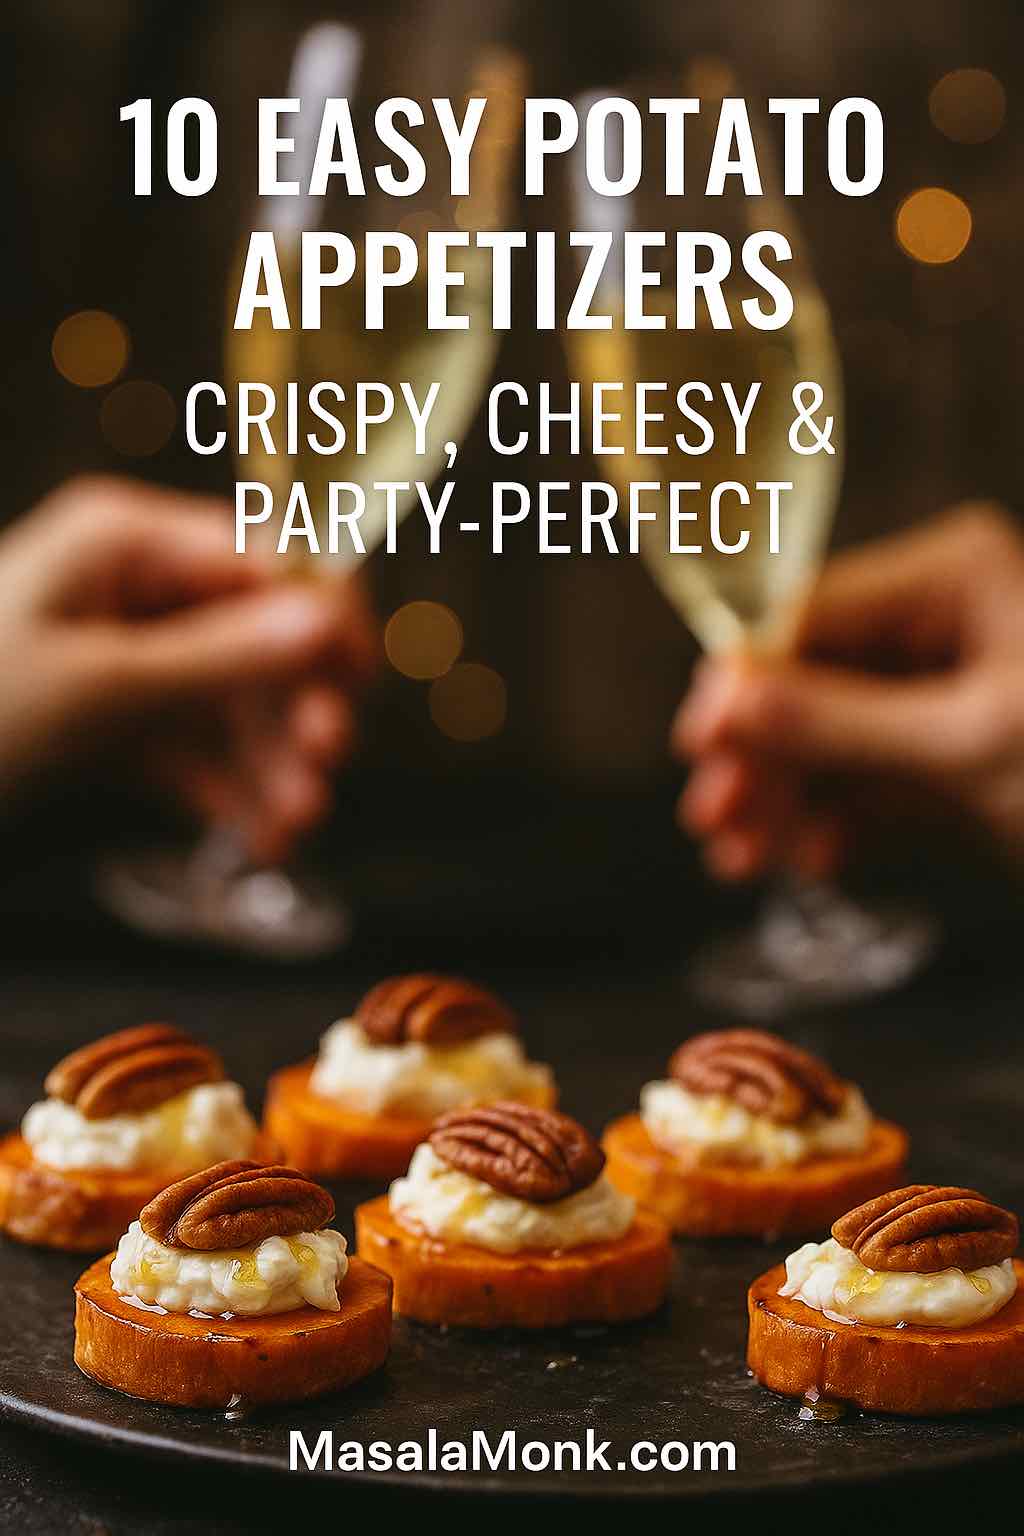
Cover image for potato appetizers: sweet-potato rounds topped with whipped goat cheese and pecans on a platter, with champagne toasts blurred in the background.

Potatoes are the great equalizer. They delight picky kids and impress seasoned food lovers; they soothe weeknights and energize parties. More importantly, they deliver drama for pennies: shattering edges, buttery interiors, and aromas that make people drift toward the platter. Yet truly memorable potato appetizers don’t happen by accident. Instead, they rely on three repeatable disciplines—dryness, direct heat, and bold finishing—that turn humble spuds into the first tray to disappear.

Why Potato Appetizers Win (Speed, Texture, Crowd-Love)

First, dryness. After boiling or rinsing, water clings to starch. However, a quick steam-dry in a colander (or on a warm sheet pan) drives off surface moisture. Consequently, oil clings, seasoning sticks, and browning starts immediately instead of after a texture-killing wait.

Second, direct heat. A preheated, lightly oiled sheet pan (or a hot grill, or an uncrowded air-fryer basket) mimics restaurant sizzle. Therefore, you get fast contact browning and true crisp edges. Similarly, spacing matters; if pieces touch, they steam. Besides, shaking once mid-cook exposes new sides to hot air and evens color.

Third, bold finishing. Richness loves lift. So, add acid, add herbs, add something cool and bright. A squeeze of lemon on croquettes. A cool dairy dip with bacon-wrapped bites. A tuft of dill on canapés. Moreover, contrast—crisp vs. creamy, hot vs. cool, salty vs. sweet—keeps guests returning to the board of potato appetizers.

Crisp rule (memorize this): Parboil, steam-dry, and cook on a preheated, lightly oiled surface—or air-fry in a single, uncrowded layer. Consequently, edges shatter while centers stay plush.


1) Loaded Potato Skins — The Icon of Potato Appetizers

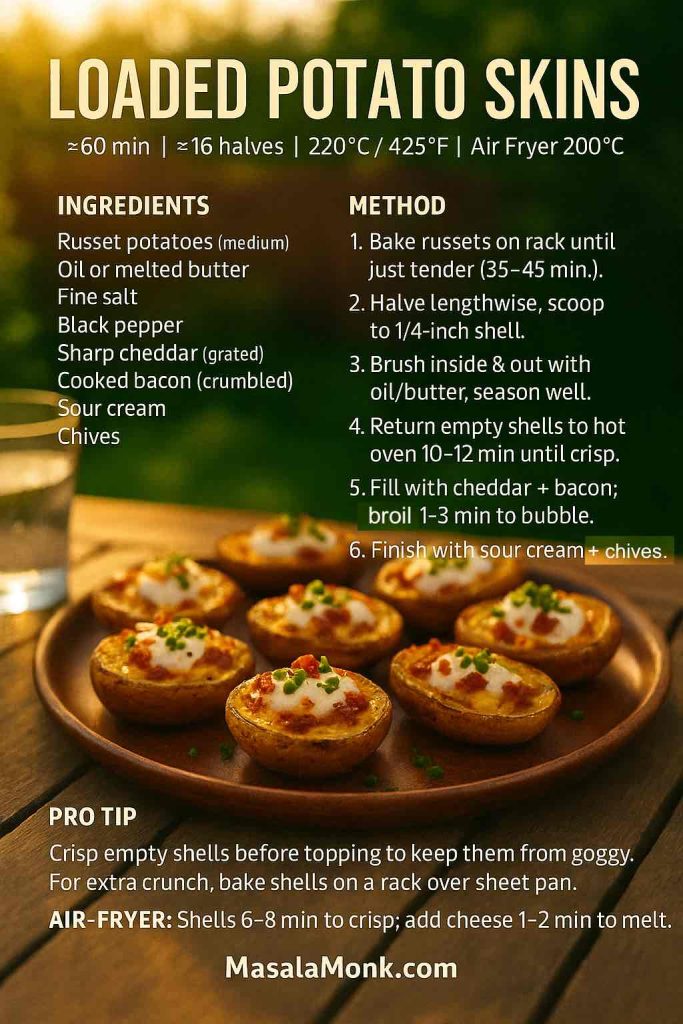
At a glance — Time: ~60 min • Yield: 16 halves • Oven: 220°C / 425°F • Air fryer: 200°C / 390°F
How to: Bake russets, scoop to a ¼-inch shell, crisp empty shells, then fill and broil.

Intro
Among potato appetizers, loaded skins are nostalgic and—done right—surprisingly elegant. The trick isn’t the topping; it’s the shell. Crisp the empty shell first, then melt the cheese. Consequently, every bite lands hot, crunchy, and creamy at once.

Ingredients
Russet potatoes (medium), butter or neutral oil, fine salt, pepper, sharp cheddar (grated), cooked bacon (crumbled), sour cream, chives.

Loaded potato skins recipe card showing ingredients and 6-step method—crispy shells with cheddar, bacon, sour cream, and chives; oven and air-fryer times.
Crispy Loaded Potato Skins: Game-day friendly—prep and scoop russets ahead, then re-crisp empty shells 10–12 min before guests arrive (or air-fry 6–8 min). Broil to melt cheddar + bacon, and garnish tableside with sour cream and chives for shatter-crisp edges and creamy centers.

Method

  1. Scrub and prick; bake on a rack until just tender (35–45 min).
  2. Halve lengthwise; carefully scoop to a ¼-inch shell.
  3. Brush inside and out with butter/oil; season assertively.
  4. Return empty shells to the oven 10–12 min until glassy-crisp.
  5. Add cheddar and bacon; broil briefly until bubbling.
  6. Finish with sour cream and chives.

Air-Fryer Option
Crisp empty shells 6–8 min; fill; air-fry 1–2 min to melt.

Why This Order Works
Crisping the shell first blocks moisture from seeping back. For bar-style upgrades (including “potato cups”), see Serious Eats’ better potato skins; for smoke, adapt grilled potato skins.

Variations & Swaps
Jalapeño-cheddar; buffalo chicken + blue-cheese drizzle; black beans + corn + scallion + lime.

Make-Ahead & Storage
Bake and scoop shells up to 2 days ahead; keep chilled. Re-crisp, then top. Hold briefly on a low oven rack.

Serve & Pairing
Drizzle or dunk in blue cheese dip; the tang cuts cheddar and bacon without dulling the crunch. If you’re pouring, a bright Lemon Drop Martini resets the palate between bites.


2) Crispy Baby Potato Bites — Crowd-Proof Potato Appetizers

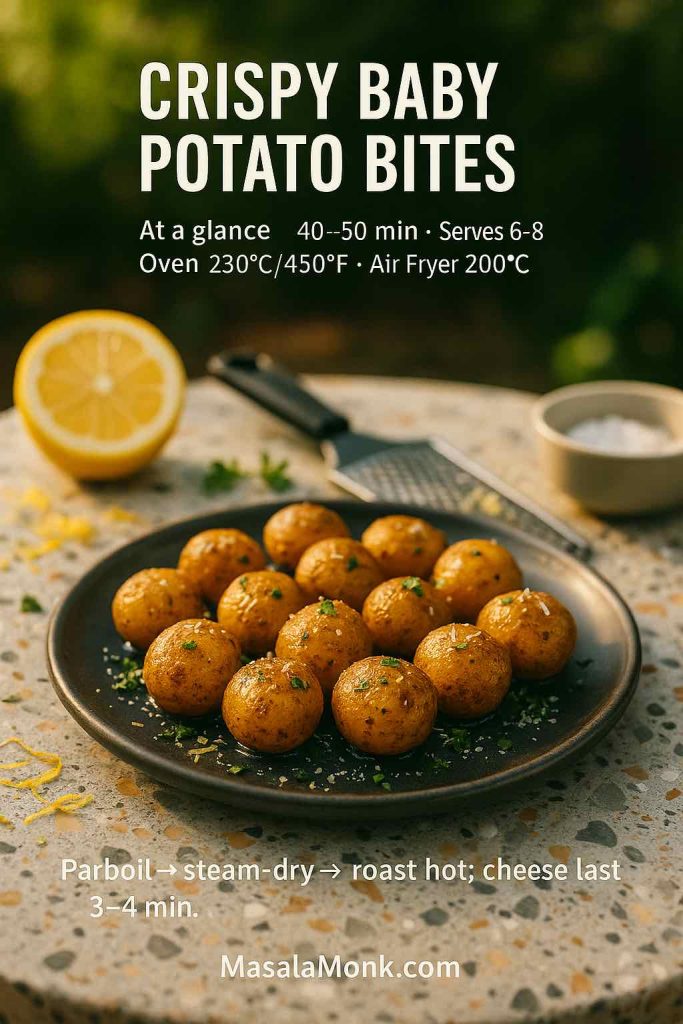
At a glance — Time: 40–50 min • Serves: 6–8 • Oven: 230°C / 450°F • Air fryer: 200°C / 390°F
How to: Parboil → steam-dry → roast on a preheated, oiled tray; add cheese at the end.

Intro
These low-effort, high-glory potato appetizers thrive on dryness and heat. Parboil, steam-dry, and roast on a hot, oiled tray. Then, in the last minutes, shower with parmesan so it fuses into a lacy crust.

Ingredients
Baby potatoes, oil, salt, garlic powder (optional), finely grated parmesan (optional), lemon.

Golden baby potato bites on a dark plate with lemon zest and herbs; minimal recipe card overlay showing time and temps.
Caterer’s trick for even color: after parboil, leave potatoes in the colander 5–10 minutes until the skins look matte; then go onto a preheated, lightly oiled tray. Finish with lemon zest right before plating so the aroma lands at the table.

Method (oven)

  1. Parboil 8–10 min until just tender; drain.
  2. Steam-dry 5 min until surfaces look matte.
  3. Toss with oil, salt, and optional garlic powder.
  4. Preheat an oiled sheet pan; roast 20–25 min, shaking once.
  5. In the final 3–4 min, add parmesan so it melts and crisps.
  6. Finish with lemon zest and a squeeze of juice.

Air-Fryer Option
Single layer; 14–18 min; shake once; cheese in the last 2 min.

Why They Crisp
Dryness + hot contact = fast browning. The same logic powers smashed potatoes—see RecipeTin Eats’ ultra-crispy method.

Variations & Swaps
Lemon-pepper + parsley; Cajun + lime; ranch + chive; peri-peri + a touch of honey.

Make-Ahead & Storage
Parboil ahead; roast to finish just before serving. Re-crisp on a hot tray for 5–7 min if needed.

Serve & Pairing
Keep it simple: lemon wedges at the ready, and a pitcher of watermelon mocktails on ice—clean, cold, and refreshing alongside the crust.


3) Mashed Potato Bites — Mini-Muffin Potato Appetizers

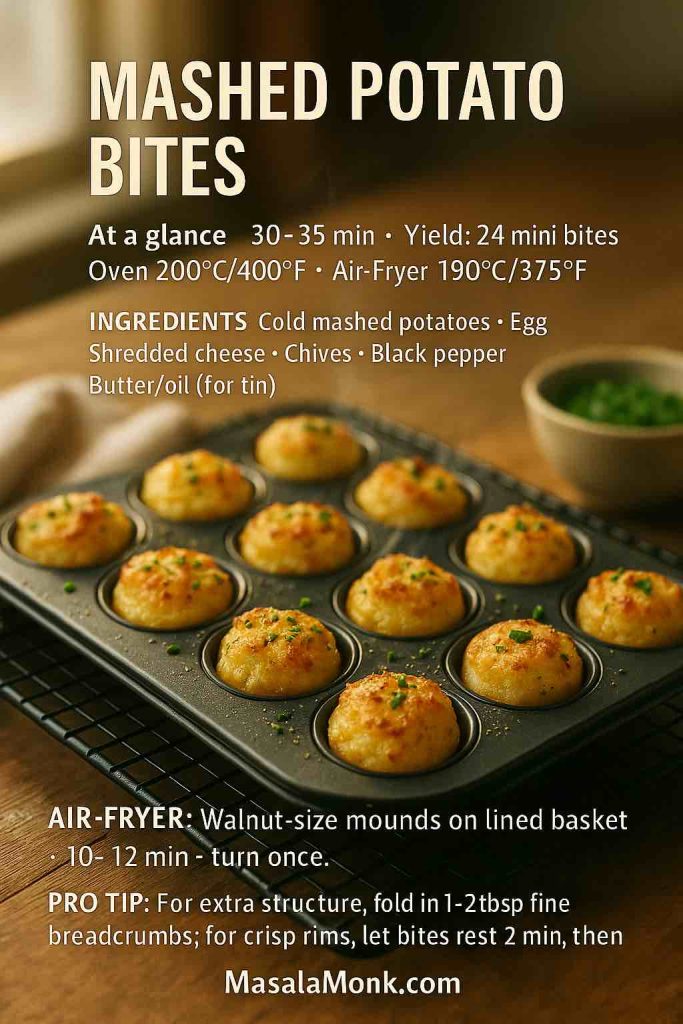
At a glance — Time: 30–35 min • Yield: 24 mini bites • Oven: 200°C / 400°F • Air fryer: 190°C / 375°F
How to: Mix cold mash + egg + cheese, portion into a mini-muffin tin, bake until puffed and bronzed.

Intro
Cold mash is a blank canvas. With egg and cheese, it behaves like soft dough that puffs and bronzes in mini-muffin wells. Consequently, you get crisp rims and creamy centers—without deep-frying. For the base approach, see The Kitchn’s mashed-potato puffs.

Ingredients
Cold mashed potatoes, egg, shredded cheese, chives, black pepper, butter or oil for greasing.

Golden mashed potato bites puffed in a mini-muffin tin with chives; cozy indoor light; minimal recipe card overlay.
Best texture hack: use cold mash, then pack the wells to the rim so the tops dome and the edges crisp. Loosen while warm, rest 2 minutes on a rack, then return to a hot oven for 3–4 minutes to re-crisp before serving.

Method

  1. Mix mash, egg, cheese, chives, and pepper until cohesive.
  2. Grease a mini-muffin tin; pack to the rim.
  3. Bake 18–22 min until bronzed and lightly puffed.
  4. Loosen while warm so rims stay crisp.

Air-Fryer Option
Walnut-sized mounds on a lined basket; 10–12 min, turning once.

Variations & Swaps
Caramelized onions; crisp bacon; roasted corn; finely chopped spinach + nutmeg. Add a spoon of fine breadcrumbs if you want extra structure.

Make-Ahead & Storage
Bake, cool, and refrigerate up to 24 hours; re-crisp 6–8 min in a hot oven.

Serve & Pairing
These are plush, so contrast lightly—chives, lemon, and a grown-up zero-proof lane from lychee mocktails (crisp, floral, not cloying).


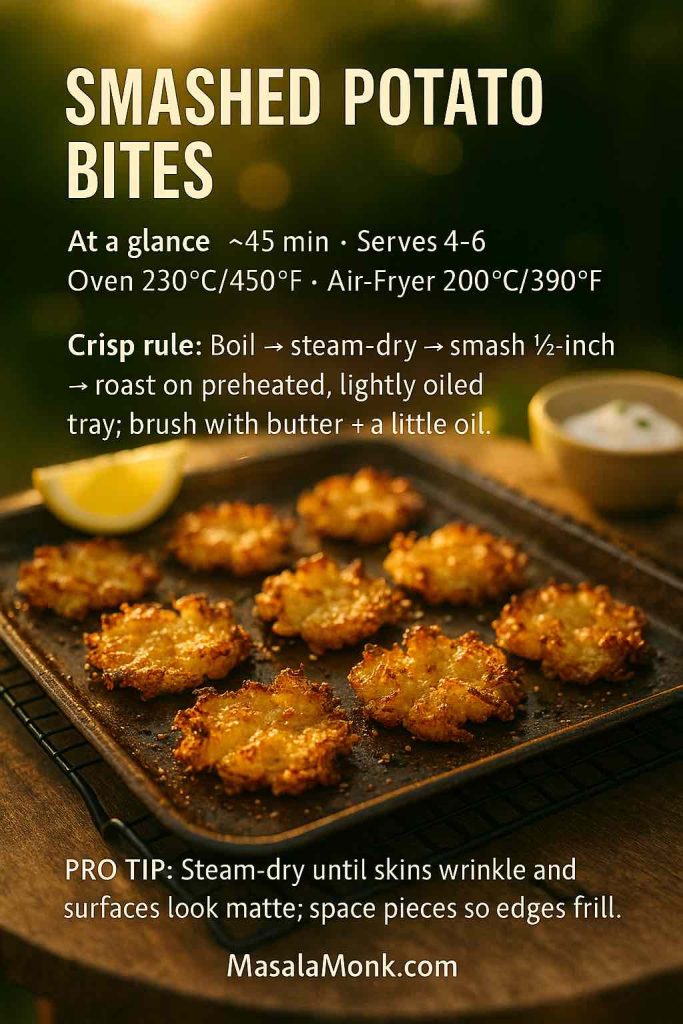
4) Smashed Potato Bites — Shatter-Crisp Potato Appetizers

At a glance — Time: ~45 min • Yield: 4–6 servings • Oven: 230°C / 450°F
How to: Boil → steam-drysmash to ½-inch → roast with butter + a little oil.

Intro
When you want “how are these so crispy?” reactions, make smashed bites. Boil; steam-dry; smash thin; roast on a hot, oiled tray. Thus the edges frill like lace while the centers remain plush. For a masterclass, see RecipeTin Eats’ smashed potatoes.

Ingredients
Small waxy potatoes, butter, oil, salt, pepper.

Smashed potato bites with frilly, crisp edges on a hot sheet pan outdoors; lemon wedge and dip in background.
For maximum “lace”: steam-dry until skins wrinkle, then smash to ½-inch on parchment and slide the sheet onto a preheated pan—no sticking, faster browning. Salt as soon as they come out; hold on a wire rack in a low oven so edges stay shattery.

Method

  1. Boil until just tender; drain.
  2. Steam-dry thoroughly so skins wrinkle and surfaces roughen.
  3. Transfer to a hot, oiled tray; smash to ½-inch with a glass.
  4. Brush with butter + oil; season generously.
  5. Roast 20–25 min until undersides are deep gold and edges frill.

Air-Fryer Option
Smash on a board; move carefully to the basket; cook in one layer 12–16 min, turning once.

Variations & Swaps
Luxe: crème fraîche + chive. Bold: chili crisp + scallions. Bright: lemon zest + parsley + olive oil.

Make-Ahead & Storage
Boil and smash earlier; hold covered (not stacked). Roast to finish just before service so edges stay shattery.

Serve & Pairing
Serve while they’re shatter-crisp; a dot of lemon is enough. If you’re pouring, a citrus-forward Lemon Drop Martini works beautifully between bites.


5) Potato-and-Cheese Balls (Croquettes) — Party Croquette Potato Appetizers

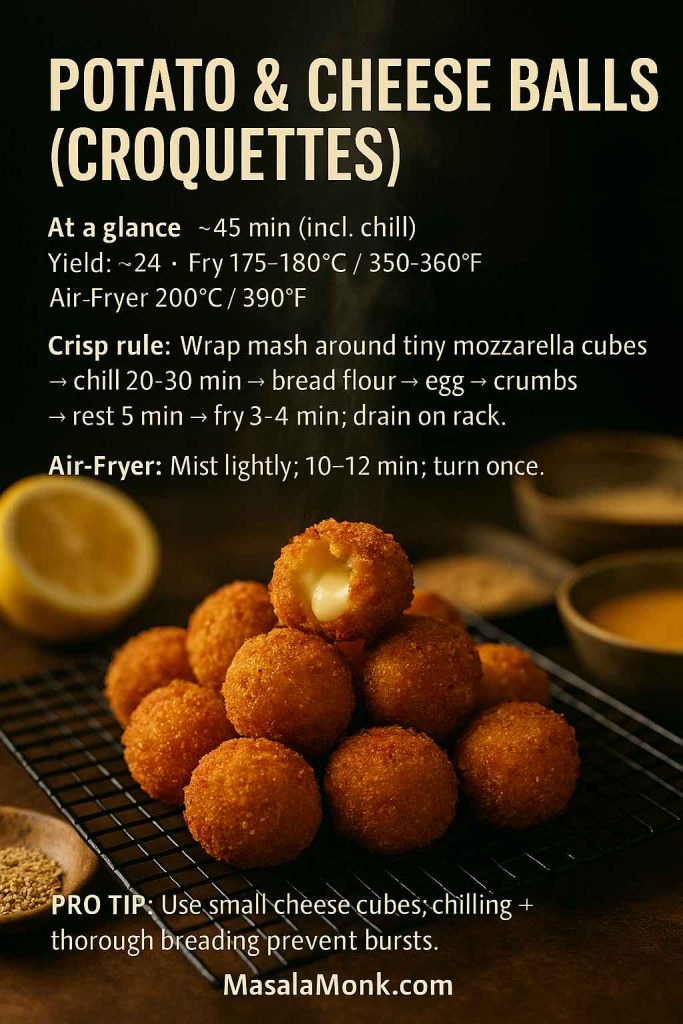
At a glance — Time: ~45 min (incl. chill) • Yield: ~24 • Fry: 175–180°C / 350–360°F • Air fryer: 200°C / 390°F
How to: Wrap seasoned mash around tiny mozzarella cubes, chill, bread thoroughly, then fry or air-fry.

Intro
Plush inside, crackly outside, and endlessly adaptable—these croquettes are party catnip. Because the centers turn molten, you need a firm exterior. Therefore, chilling and thorough breading matter most.

Ingredients
Mashed potatoes, salt, pepper, tiny mozzarella cubes (or cheddar), flour, eggs, breadcrumbs, oil.

Golden potato-and-cheese croquettes on a rack, crisp crumb outside and molten cheese center; lemon and herbs nearby.
Burst-proof method: form around tiny cheese cubes, chill 20–30 min, then bread flour → egg → crumbs and rest 5 min so crumbs hydrate. Fry at 175–180°C (oil recovers faster in a Dutch oven). For air-fryer batches, mist lightly and flip once; season while hot. Make-ahead: bread and freeze on a tray; cook from frozen, +1–2 min.

Method

  1. Wrap mash around cheese cubes; roll tight.
  2. Chill 20–30 min so balls set.
  3. Bread: flour → egg → crumbs; rest 5 min to hydrate crumbs.
  4. Fry 3–4 min to deep gold; drain on a rack.

Air-Fryer Option
Mist lightly; cook 10–12 min, turning once.

Variations & Swaps
Cheddar cubes; smoked mozzarella; feta folded into the mash; herbs in the crumb.

Make-Ahead & Storage
Form and bread; freeze on a tray; fry from frozen, adding 1–2 min.

Serve & Pairing
Set croquettes on a warm board and pass lemon wedges; for game-night energy that still reads fresh, shake up watermelon margarita variations.


6) Bacon-Wrapped Potato Bites — Smoky-Savory Potato Appetizers

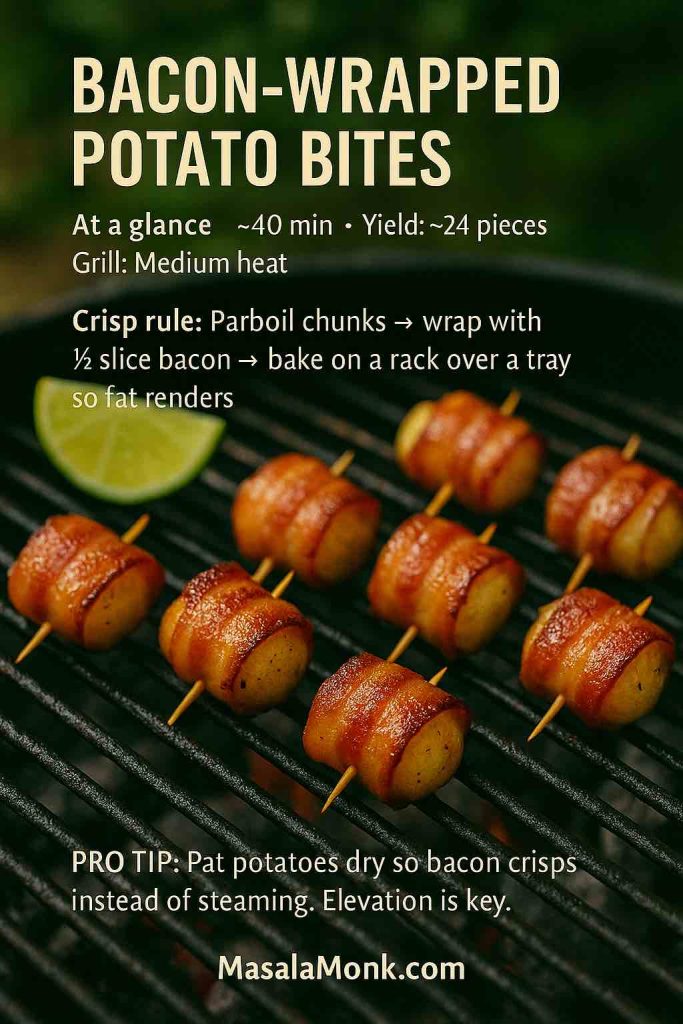
At a glance — Time: ~40 min • Yield: ~24 pieces • Oven: 220°C / 425°F
How to: Parboil chunks → wrap with ½ slice bacon → bake on a rack over a tray so fat renders.

Intro
Salty-smoky bacon around tender potato is simple, yes, yet irresistible. However, if you bake on a flat tray, bottoms stew. On a rack, fat renders away and edges lacquer instead.

Ingredients
Potato chunks, bacon halves, toothpicks, black pepper, optional maple-chili glaze, lime.

Bacon-wrapped potato bites skewered and sizzling on grill grates with a lime wedge; minimal recipe card overlay.
Render, then lacquer: parboil and pat dry, wrap with ½ slice bacon, and cook elevated (grill grates or a rack over a tray) so fat drains and the bacon crisps. Brush a thin maple-chili glaze in the last 2–3 minutes, rest on a wire rack 3–4 minutes, then finish with cracked pepper and lime.

Method

  1. Parboil chunks; pat completely dry.
  2. Wrap each with half a slice of bacon; secure with a pick.
  3. Arrange on a rack over a tray; roast until mahogany.
  4. Finish with pepper; rest 3–4 min.

Air-Fryer Option
If your basket has a raised grate, cook 12–16 min, turning once.

Variations & Swaps
Brush a thin maple-chili glaze during the last 2–3 min; or keep it simple with pepper + lime.

Make-Ahead & Storage
Parboil and wrap earlier; chill on a rack. Roast just before serving for maximum crisp.

Serve & Pairing
Let the bacon lead, then finish with cracked pepper and lime; for the zero-proof crowd, pour from these low-sugar summer mocktails—cold, bright, and not syrupy.


7) Sweet-Potato Rounds — Color-Forward Potato Appetizers

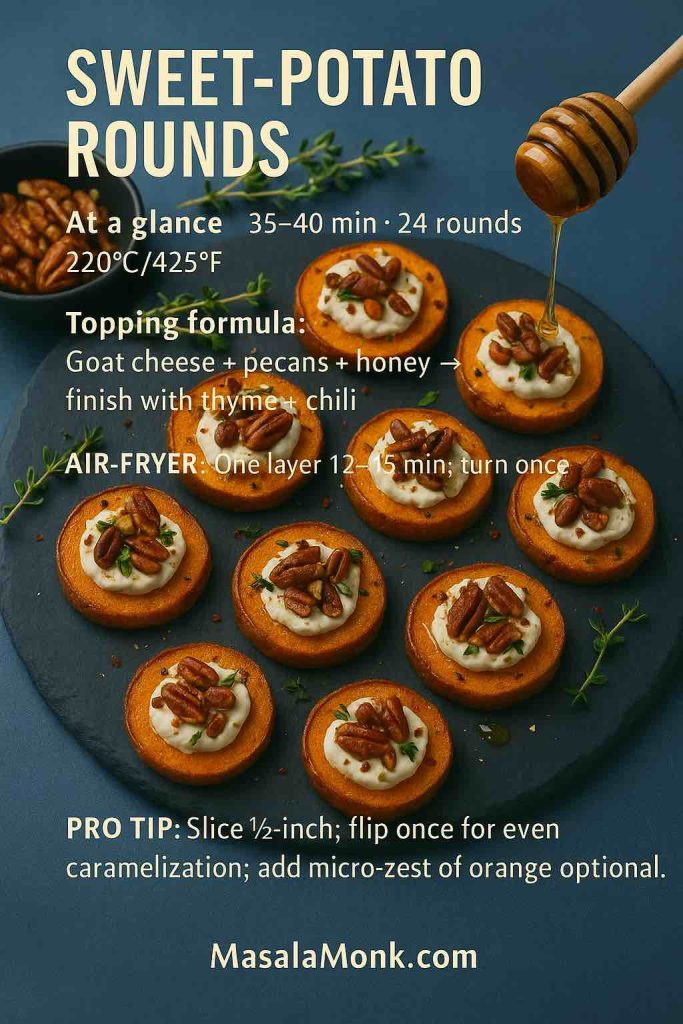
At a glance — Time: 35–40 min • Yield: ~24 rounds • Oven: 220°C / 425°F
How to: Roast ½-inch rounds → top with whipped goat cheese + pecans + honey → finish with thyme + chili.

Intro
Not every platter should be brown and crunchy. These glossy coins bring color, perfume, and balance. Moreover, their sweet-salty-creamy-crunchy profile resets the palate between heavier potato appetizers. For ratios and presentation cues, see Well Plated’s sweet-potato rounds and Recipe Runner’s goat-cheese bites.

Ingredients
Sweet potatoes, oil, salt, goat cheese, toasted pecans, honey, thyme, chili flakes.

Roasted sweet-potato rounds topped with whipped goat cheese, toasted pecans, thyme and chili, finished with a honey drizzle on a slate platter.
Toast pecans first (5–7 min at 175°C/350°F) so they stay crisp on the creamy topping. For lift, whip the goat cheese with a spoon of yogurt and a pinch of salt, then add a micro-zest of orange right before serving—sweet + acid keeps the bites bright.

Method

  1. Slice into ½-inch rounds; toss with oil and salt.
  2. Roast 18–22 min, flipping once for even caramelization.
  3. Cool briefly; pipe or spoon whipped goat cheese.
  4. Top with pecans; thread on honey; finish with thyme + chili.

Air-Fryer Option
One layer; 12–15 min, turning once.

Variations & Swaps
Whipped feta; walnuts; date syrup; orange zest; microgreens.

Make-Ahead & Storage
Roast rounds; cool and chill. Rewarm briefly; pipe cheese and finish at the last minute.

Serve & Pairing
The goat cheese and honey want something lifted and clean; add a tiny squeeze of orange zest and, if readers ask nutrition questions, point them (once) to sweet-potato benefits & nutrition.


8) Twice-Baked Mini Potatoes — Elegant Potato Appetizers

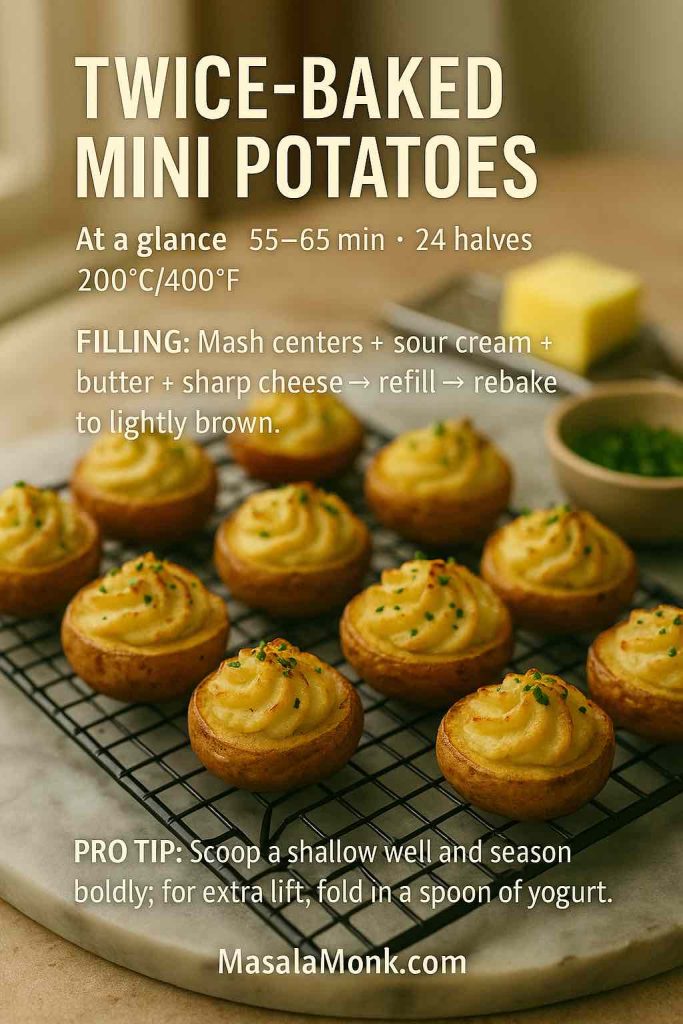
At a glance — Time: 55–65 min • Yield: ~24 halves • Oven: 200°C / 400°F
How to: Roast → scoop a shallow well → mash centers with sour cream + butter + cheese → rebake.

Intro
These read like tiny jackets with whipped, tangy centers. Because they’re structured, they travel well and hold heat. Additionally, they welcome endless flavor detours and pair seamlessly with other potato appetizers. For a flame-kissed direction (easy to scale to minis), see Serious Eats: grilled, loaded twice-baked potatoes.

Ingredients
Small potatoes, sour cream, butter, sharp cheese, salt, pepper, chives.

For tall, tidy swirls: pass the mash through a ricer, season boldly, then pipe while warm. Brush the peaks with a touch of melted butter before the second bake—faster browning, glossy finish. Hold on a wire rack in a low oven so the bottoms stay dry.

Method

  1. Roast until tender; cool slightly; halve.
  2. Scoop a shallow well; mash centers with sour cream, butter, and cheese; season boldly.
  3. Refill neatly; bake again until peaks brown lightly.
  4. Top with chives.

Air-Fryer Option
If the oven is crowded, set tops in a preheated basket 3–5 min.

Variations & Swaps
Caramelized onions + gruyère; jalapeño + cheddar; harissa + feta + mint. Russets yield fluffier fillings; baby yellows lean creamy.

Make-Ahead & Storage
Assemble to the second bake; chill on a tray; bake to finish right before service.

Serve & Pairing
If dairy comes up in comments, a calm sidebar on sour cream & keto answers it without derailing the recipe.


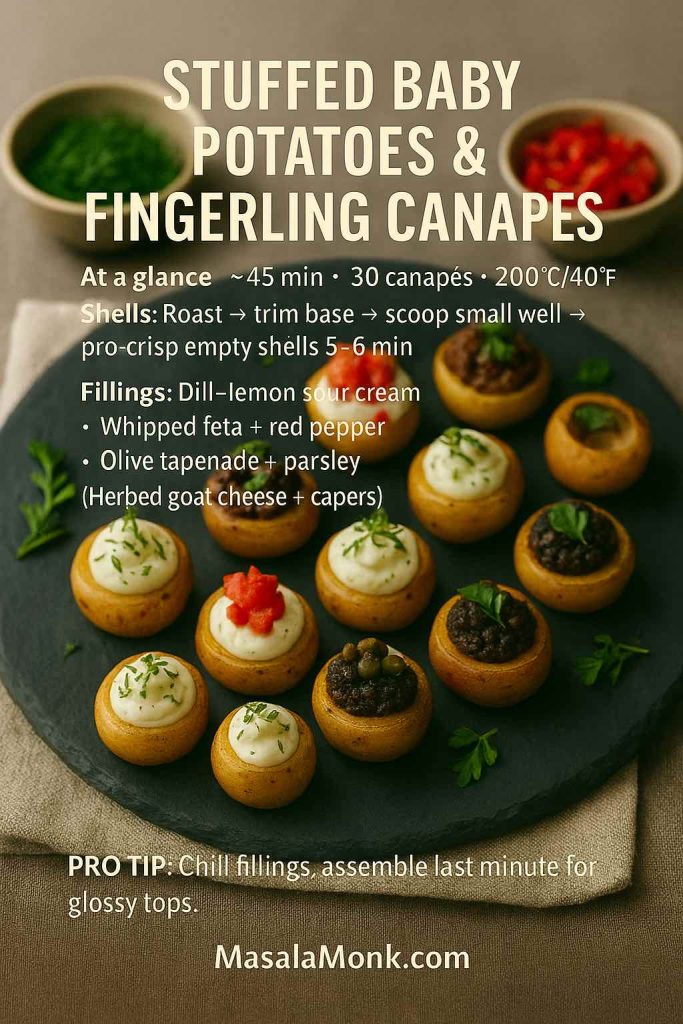
9) Stuffed Baby Potatoes & Fingerling Canapés — Polished Potato Appetizers

At a glance — Time: ~45 min • Yield: ~30 canapés • Oven: 200°C / 400°F
How to: Roast tiny potatoes → trim a tiny base to stand → scoop a small well → pipe fillings.

Intro
When you want one-bite elegance, make these. They look expensive yet stay simple. Meanwhile, because you control the filling, the flavor can skew Mediterranean, American, or Nordic without changing the base—useful when you’re composing a board of mixed potato appetizers. Prefer a lacy base? Pan-fry bite-size boxty using Serious Eats’ template.

Ingredients
Petite potatoes, oil, salt, dill, lemon zest, sour cream or yogurt, feta, roasted red pepper, olive tapenade, parsley, goat cheese, capers.

Standing baby potatoes and fingerling canapés on a slate platter with three fillings—dill-lemon sour cream, whipped feta with red pepper, and olive tapenade with parsley—minimal recipe card overlay.
For perfect “stand-up” canapés, trim a 2–3 mm base before scooping the well, then pre-crisp empty shells 5–6 min so they don’t weep. Pipe chilled fillings right before serving and finish with a pinch of lemon zest + flaky salt to wake up the potatoes.

Method (shells)

  1. Roast until just tender; cool briefly.
  2. Trim a tiny base so each stands; scoop a small well from the top.
  3. Pipe fillings: dill-sour cream + lemon zest; whipped feta + roasted red pepper; olive tapenade + parsley; herbed goat cheese + capers.

Air-Fryer Option
Crisp the empty shells 5–6 min to “set” them before filling.

Variations & Swaps
For a cold platter, chill shells; spoon in a tangy potato-salad spoonful just before guests arrive.

Make-Ahead & Storage
Prepare shells and fillings separately; keep chilled. Assemble at the last minute so everything looks glossy, not weepy.

Serve & Pairing
Go bright and modern with a mango martini—fruity nose, clean finish, easy to batch for a crowd.


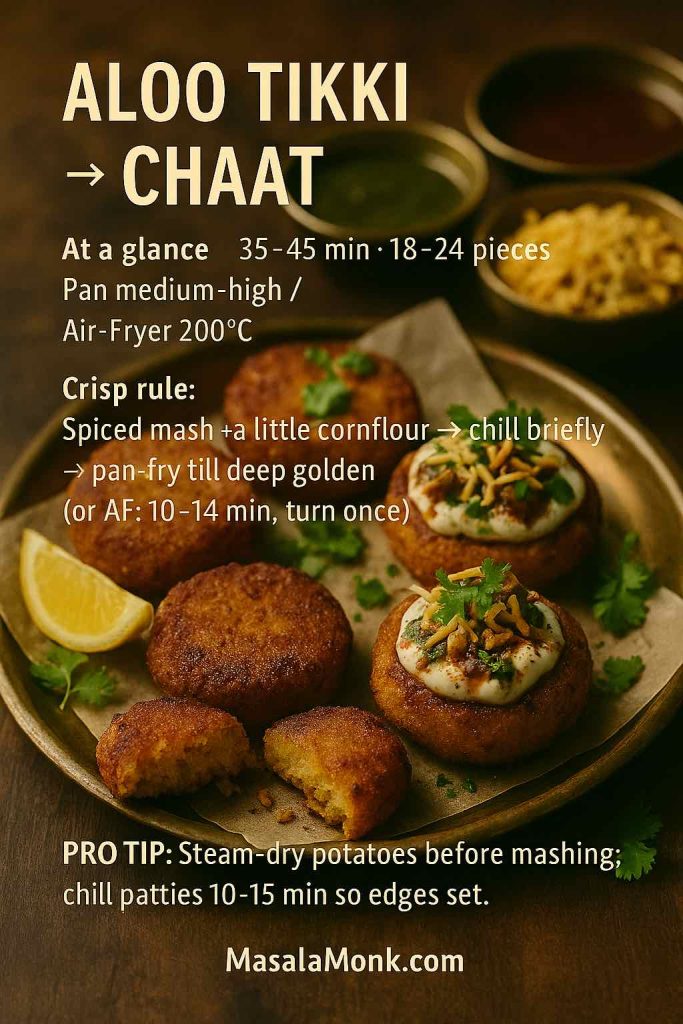
10) Indian Aloo Starters — Aloo Tikki → Chaat (Festival-Style Potato Appetizers)

At a glance — Time: 35–45 min • Yield: 18–24 • Pan or Air fryer: medium-high / 200°C
How to: Mix spiced mash with ginger, chilies, coriander + a bit of cornflour → form patties → pan-fry/air-fry → turn into chaat with chutneys + yogurt + sev.

Intro
This is the show-stopper path: simple spiced patties that transform into chaat with chutneys, yogurt, sev, and onion. Because textures contrast wildly—hot vs. cool, crisp vs. creamy—the plate feels like a mini festival of potato appetizers. For garnish cadence and proportion cues, use Bon Appétit’s aloo tikki as a frame.

Ingredients
Boiled potatoes, grated ginger, chopped green chilies, coriander leaves, garam masala, cumin, chaat masala, salt, cornflour, oil; plus yogurt, tamarind and green chutneys, sev, onion for chaat.

Golden aloo tikki on a brass plate—two plain, two topped as chaat with yogurt, green and tamarind chutneys, sev, onion, and coriander; minimal recipe card overlay.
For chaat that pops: keep yogurt thick (hung or Greek) and layer tamarind → green chutney → yogurt → sev → onion → chaat masala. Salt the tikkis the moment they leave the pan, then plate and finish fast so the sev stays crisp.

Method

  1. Mash potatoes with spices and herbs; season confidently.
  2. Add cornflour; form small patties; chill briefly so edges set.
  3. Pan-fry in shallow oil until deep golden; or brush with oil and air-fry, flipping once.
  4. For chaat, plate hot tikkis; spoon tamarind + green chutneys; add thick yogurt, sev, onion, and a final dusting of chaat masala.

Air-Fryer Option
Lightly oil both sides; cook 10–14 min, turning once; rest 2 min.

Variations & Swaps
Stuff with a pea masala; add beet for color; or swap some potato with sweet potato.

Make-Ahead & Storage
Form patties and chill up to a day. Fry to order. Hold cooked tikki briefly in a low oven.

Serve & Pairing
Because the plate is lively—hot, cool, crisp, creamy—keep drinks crisp and not sweet: digestive-leaning ACV & cranberry mocktails pair surprisingly well.


Smarter Hosting for Potato Appetizers (Make-Ahead, Reheat & Flow)

  • Skins: bake, scoop, and pre-crisp empty shells up to two days ahead; re-crisp 5–7 min, then top and broil.
  • Croquettes: form and bread; freeze on a tray; fry from frozen, adding 1–2 min.
  • Smashed: boil and smash earlier; roast right before serving so edges keep their shatter.
  • Canapés: keep bases and fillings separate; assemble last minute so textures stay lively.
  • Air-fryer juggling: when the oven is full, finish small trays in the air fryer; however, never stack or they’ll steam. Crowding kills crisp; if color stalls, this roundup of common air-fryer mistakes is a fast rescue.

Fast fixes
If skins feel limp, give empty shells more high heat before topping. And if croquettes threaten to burst, chill longer and bread thoroughly. Bites look pale? Raise heat and spread them out. If the air fryer under-browns, add a minute or two and shake once. Therefore, service stays smooth while stress stays low.


Ingredient Notes That Actually Help Potato Appetizers

Potatoes

  • Russet: drier flesh, fluffy interiors—ideal for skins and twice-baked minis.
  • Waxy baby reds or yellows: hold shape—best for bites, smashed, and canapés.
  • Yukon Gold: creamy all-rounder—great for mash-based fillings and croquettes.
    For diet-minded readers, one calm pointer is enough: how potatoes can fit a weight-loss plan—portioning and cooking method matter more than panic.

Cheese
Cheddar for melt and flavor; parmesan for lacy finishes; gruyère for nutty depth; feta or goat cheese for salty brightness; mozzarella for stretch. Additionally, grate fresh—pre-shredded blends often resist quick melt.

Acid & Heat
Balance richness with lemon or lime. Add chili (fresh or flake) or a cool dairy dip for lift. Instead of heavy sauces, offer small bowls so guests tune their own bite of potato appetizers.

Scaling Smart
Double trays; stagger oven times by 10 minutes. As a result, hot food flows without bottlenecks. For board layout sanity, the charcuterie 3-3-3-3 rule keeps things balanced without overbuying.


Conclusion: Small Bites, Big Joy

Ultimately, potato appetizers multiply delight while minimizing effort. Once you lean into dryness and direct heat, the rest becomes play—choose a cheese, pick an herb, add a spark of acid, and finish confidently. Meanwhile, the structure of these recipes lets you prep ahead and still serve crisp food without guarding the oven door. Consequently, the platters return empty, the room gets louder, and you—finally—enjoy your own party.

FAQs

1) What are the best potatoes for potato appetizers (skins, bites, and hors d’oeuvres)?

For crispy shells and fluffy centers, russets win; their drier flesh makes loaded potato skins and twice-baked minis sing. Meanwhile, waxy baby reds or yellows hold shape beautifully for crispy potato bites, smashed bites, and stuffed baby potatoes. Yukon Golds sit happily in the middle—creamy enough for mashed potato bites and croquettes, yet sturdy enough for pan work.

2) How do I keep potato skins extra crisp and not soggy?

First, bake whole potatoes until just tender. Then, scoop to a ¼-inch shell, brush inside and out with oil or butter, and—crucially—re-crisp the empty shells before filling. Consequently, moisture won’t creep back in, and the final broil merely melts cheese instead of steaming the shell.

3) Oven vs. air fryer: which method is best for potato appetizers?

Both shine, but differently. The oven handles big trays and yields even browning; the air fryer delivers fast, concentrated heat for small batches. Therefore, use the oven for parties and the air fryer when you want a quick round of baked potato bites or air-fryer potato appetizers before guests arrive.

4) What temperatures and times should I start with (so I don’t guess)?

As a starting grid:

  • Loaded potato skins: 220°C / 425°F until tender; re-crisp shells 10–12 minutes; broil to finish.
  • Crispy potato bites: 230°C / 450°F for 20–25 minutes; shake once.
  • Smashed potato bites: 230°C / 450°F for 20–25 minutes after smashing thin.
  • Mashed potato bites (mini muffin): 200°C / 400°F for 18–22 minutes.
  • Croquettes: fry at 175–180°C / 350–360°F for 3–4 minutes.
    Adjust by a few minutes for size and spacing; if color stalls, spread pieces out.

5) How do I adapt these potato appetizers for the air fryer?

Go single-layer, preheat if your model suggests it, and avoid crowding. Generally: bites 14–18 minutes at ~200°C / 390°F; smashed 12–16 minutes; mashed-bite mounds 10–12 minutes; skins 6–8 minutes to crisp shells, then 1–2 minutes after topping. Shake once mid-cook and, moreover, add cheese in the final 1–2 minutes so it melts without over-browning.

6) Can I make potato appetizers ahead for a party?

Absolutely. Bake and scoop skins a day or two ahead, then re-crisp just before service. Boil and smash smashed bites in advance; roast to finish right before serving. Form and bread croquettes earlier and freeze; fry from frozen, adding 1–2 minutes. As a result, you get hot platters with almost no last-minute stress.

7) What’s the secret to truly crispy potato bites?

Dryness + direct heat. After parboiling, let potatoes steam-dry until surfaces turn matte. Next, roast on a preheated, lightly oiled tray (or a hot air-fryer basket) with room to breathe. Finally, season assertively; salt draws out a touch of moisture and helps browning, while a last-minute sprinkle of finely grated hard cheese creates a lacy crust.

8) How do I prevent croquettes, cheese balls, or potato and cheese balls from bursting?

Chill the formed balls so they firm up, bread thoroughly (flour → egg → crumbs), and rest 5 minutes so crumbs hydrate. Fry hot enough to set the crust quickly, but not so hot the outside browns before the center warms. Similarly, tiny cheese cubes inside behave better than large ones.

9) What about sweet potato appetizers—any quick rules?

Because sweet potatoes run moister and sweeter, slice thicker (about ½-inch) for rounds and roast hot for caramelized edges. Pair with salty, tangy toppings—goat cheese, feta, herbs, citrus—to balance sweetness. Consequently, sweet potato bites feel bright and modern, not dessert-like.

10) Which cheeses melt best for cheesy potato bites and skins?

Sharp cheddar melts smoothly and tastes assertive. Parmesan turns lacy and crisp in the final minutes. Gruyère adds nutty depth; mozzarella brings stretch but needs salt and acid for balance. For twice-baked minis, a mix (cheddar + a little parmesan) gives both flavor and texture.

11) What are easy vegetarian or gluten-free swaps for potato hors d’oeuvres?

Skip bacon and lean on smoked paprika, roasted peppers, or crisped mushrooms for savory depth. Most recipes are naturally gluten-free if you avoid breadcrumbs; for croquettes, use gluten-free crumbs or a thin rice-flour coating. Likewise, plant-based yogurt or cashew cream can stand in for sour cream on canapés.

12) Can I freeze any of these potato appetizers?

Yes—especially croquettes and mashed potato bites. Freeze in a single layer until firm, then bag. Bake/fry from frozen, adding a minute or two. As for loaded potato skins, freeze the empty, pre-crisped shells; thaw briefly, re-crisp, fill, and broil.

13) How many pieces per person should I plan for party potato appetizers?

For a spread with multiple items, plan 3–4 pieces per person per hour—more at the start, fewer later. For a game-day or all-apps party, scale to 6–8 pieces per person total, mixing rich bites (skins, croquettes) with lighter or zesty options (smashed bites with lemon, sweet-potato rounds).

14) What are smart seasoning lanes that always work?

Go “bright and salty”: lemon zest, parsley, and olive oil. Or “spicy and cool”: chili flakes plus a creamy element on the side. Alternatively, try “herby and nutty”: dill, chive, and a dusting of parmesan. Meanwhile, a squeeze of citrus just before plating wakes up every one of these potato appetizers.

15) My air-fryer potato appetizers aren’t browning—what now?

First, reduce the load and cook in two rounds; crowding traps steam. Next, pat drier and add a teaspoon more oil to help conduction. Finally, raise the temperature slightly or extend 1–3 minutes. Therefore, you’ll get color without overcooking the centers.

16) Which dips pair well (besides the usual suspects) with appetizers made with potatoes?

Think “contrast, not camouflage.” Blue cheese dip adds tangy punch to loaded potato skins and bacon-wrapped bites. A lemony yogurt or thin sour-cream sauce lifts smashed potato bites and twice-baked minis. For sweet potato hors d’oeuvres, go clean—whipped feta or light goat cheese with herbs.

17) Any quick plating tips so my potato party snacks look premium?

Yes—group by texture and temperature. Put hot-and-crisp items together so aromas stack; nearby, set warm-and-creamy bites for contrast. Add a color break with sweet-potato rounds. Garnish sparingly: chives, dill, thin radish slices, and lemon wedges. Consequently, your board looks intentional, not crowded.

18) How do I keep baked potato appetizers hot without losing crunch?

Use a low oven (90–100°C / 200–210°F) and a wire rack so air circulates under the pieces. Instead of holding for long stretches, serve in waves—small trays every 10–15 minutes. As a result, guests always meet crisp edges and creamy centers.

19) What’s the simplest way to turn leftovers into tomorrow’s potato appetizer bites?

Chill leftover mash, fold in an egg and a little grated cheese, then portion into a mini-muffin tin and bake until puffed. Alternatively, form patties and pan-sear for quick mashed potato bites. Meanwhile, leftover skins re-crisp beautifully; refill with whatever cheese or veg you have.

20) Lastly, what are the biggest mistakes to avoid with easy potato appetizer recipes?

Overcrowding trays, skipping the steam-dry step, and adding cheese too early (it over-browns before the potatoes crisp). Also, scooping skins too thick (they eat heavy) or too thin (they collapse). Fix these, and—therefore—your potato appetizers will reliably steal the show.