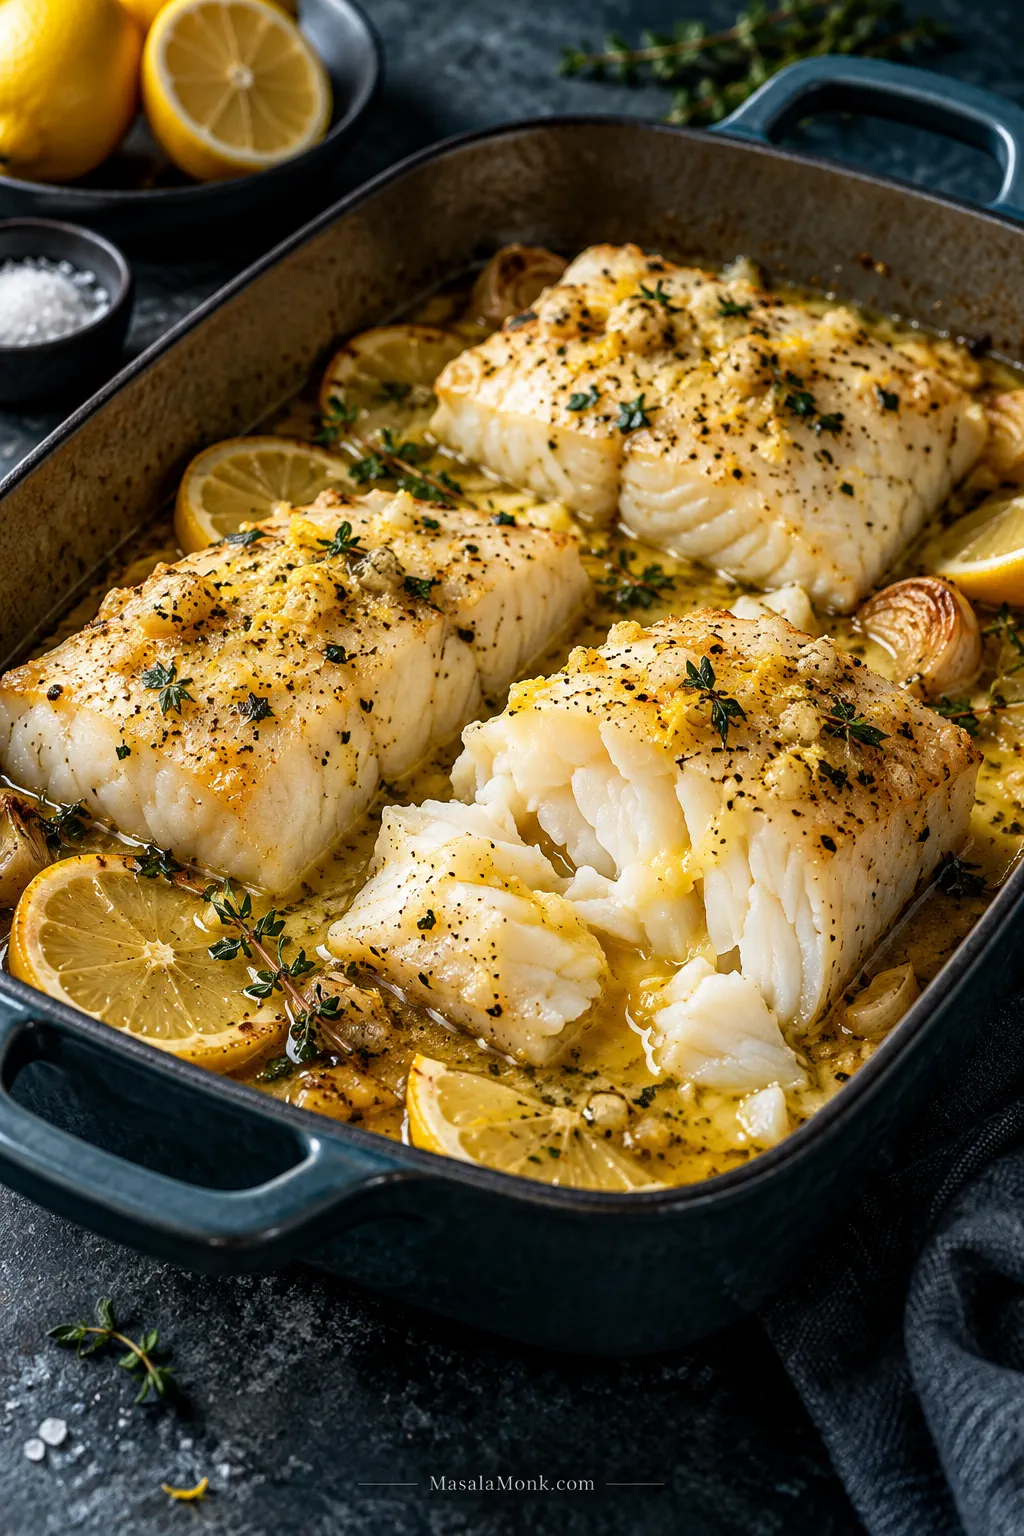
Tender white flakes, warm lemon garlic butter and a squeeze of fresh lemon just before you eat. That’s what this baked cod recipe is about. A handful of familiar ingredients, one baking dish and plenty of buttery pan juices to spoon over the fish.
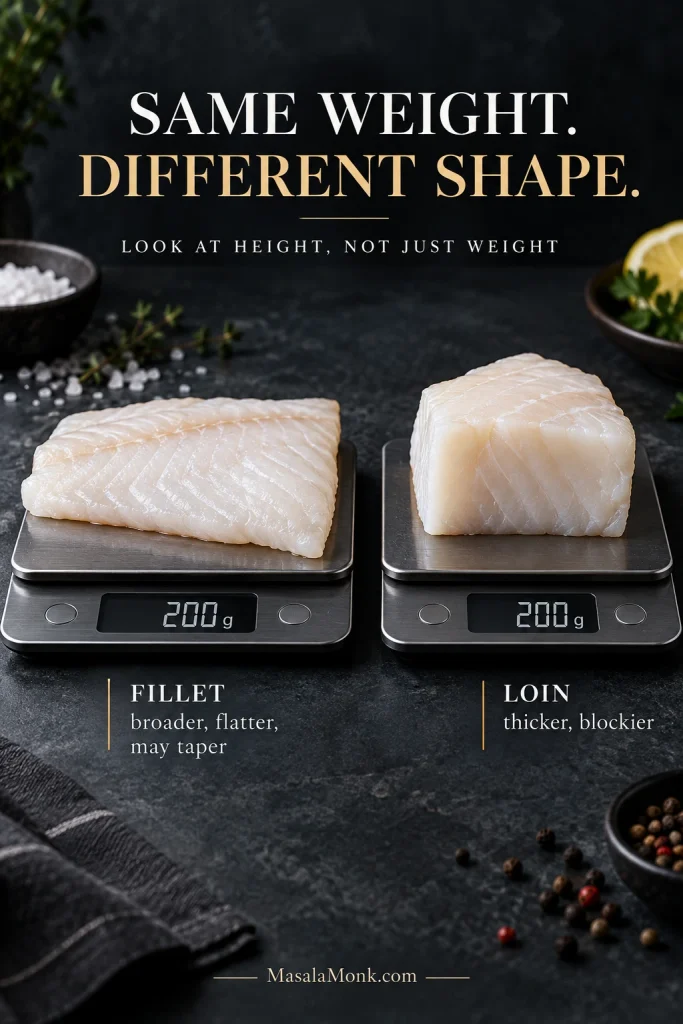
The only tricky part is the cod itself. It doesn’t always come in neat, matching pieces, and two portions of the same weight can cook quite differently when one is broad and thin and the other is a thick loin. This recipe gives you the lemon-garlic butter; the useful bit is knowing how to read the piece of fish you actually bought.
Cod is mild and lean, with large, tender flakes when it’s cooked well. Pat it dry, season it directly and bake it uncovered at 400°F / 205°C. There’s no breading, flipping or skillet sear to manage. The timer tells you when to start paying attention; the thickest part tells you when dinner is ready.
Choose four portions that are reasonably similar in thickness and a shallow baking dish that holds them comfortably in one layer.
Serves 4
Prep About 10 minutes
Cook About 10–20 minutes for most portions
Total About 20–30 minutes
Oven 400°F / 205°C
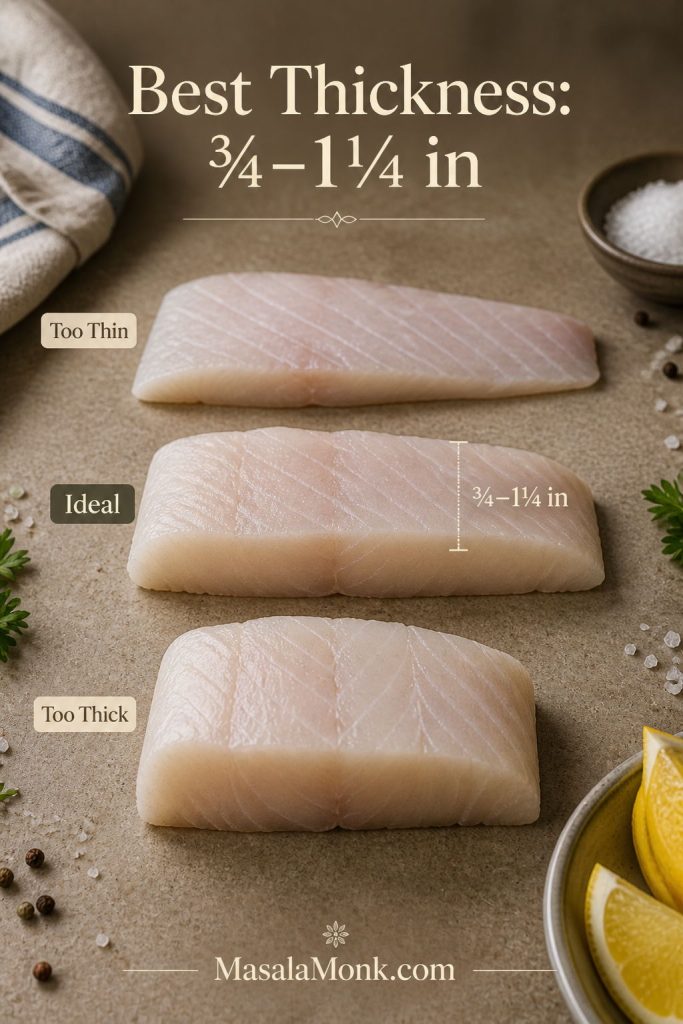
Typical Thickness About ¾–1¼ in / 2–3 cm
Doneness 145°F / 63°C
Equipment: shallow 9×13-inch / 23×33-cm baking dish or similarly sized pan, small bowl, paper towels and an instant-read thermometer.
Ingredients
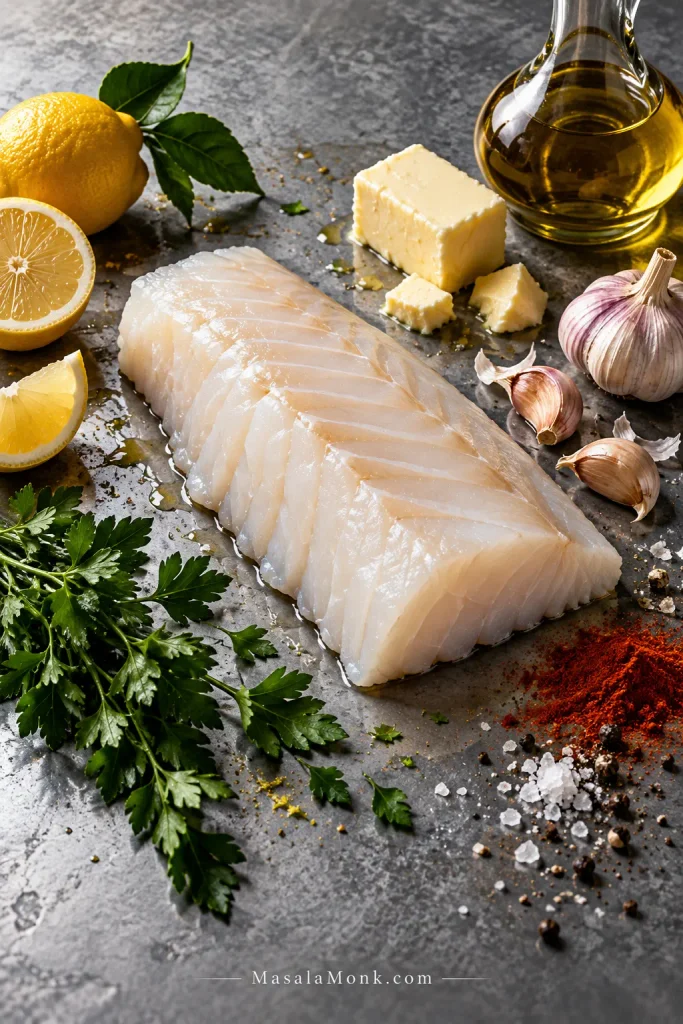
1½ lb / 680 g skinless cod fillets or loins, divided into 4 portions of about 6 oz / 170 g each
3 tbsp / 42 g unsalted butter, melted
1 tbsp / 15 ml olive oil
3 medium garlic cloves, finely minced or grated
1½ tbsp / 22 ml fresh lemon juice, divided, plus lemon wedges for serving
1 tsp finely grated lemon zest
¾ tsp fine sea salt
½ tsp sweet paprika
¼ tsp freshly ground black pepper
2 tbsp chopped fresh parsley
Each ingredient has a different job here: zest brings aroma, juice brings acidity, butter carries the garlic, and paprika adds gentle warmth without overwhelming the mild cod.
Check the package before adding salt. Some frozen cod may contain added salt or brine. If yours does, start with less.
How to Make It
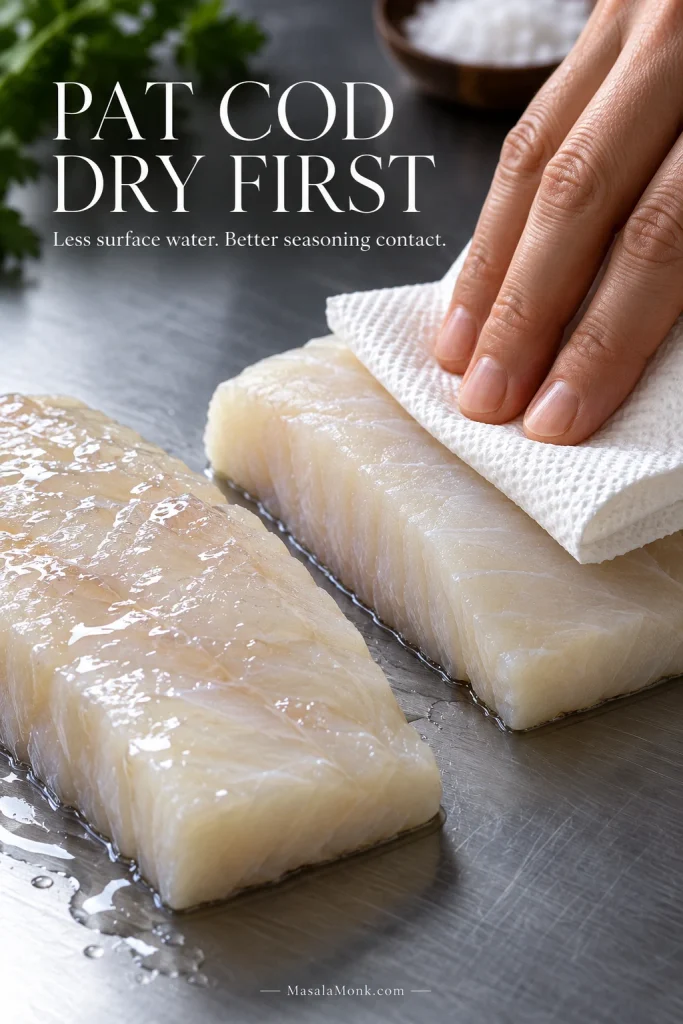
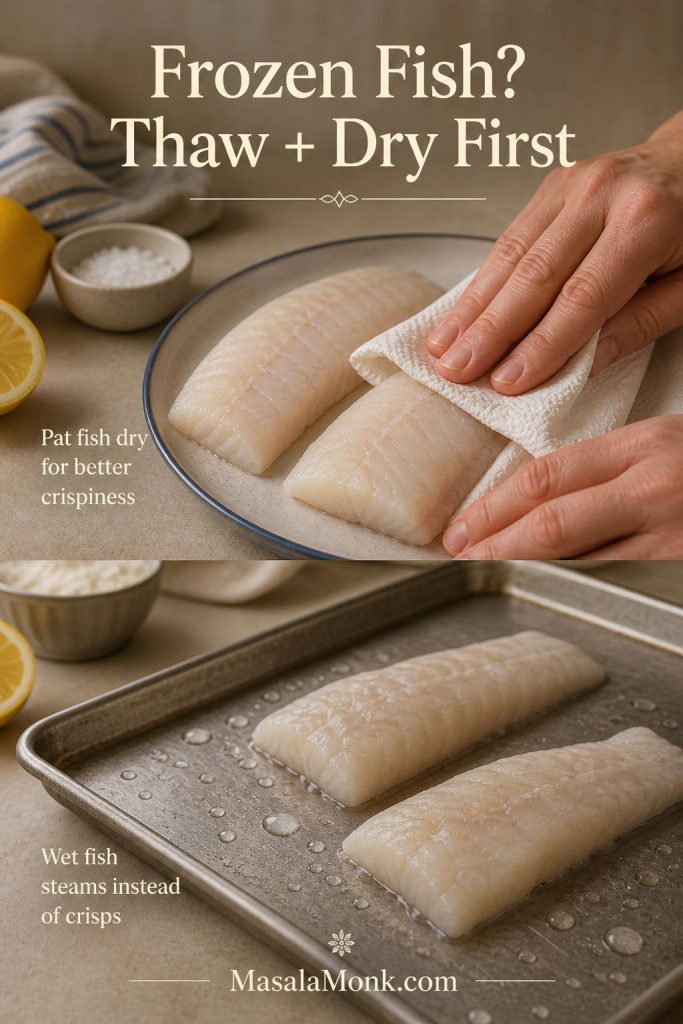
Preheat and dry. Heat the oven to 400°F / 205°C and lightly grease the baking dish. Remove any obvious pin bones, then pat the cod thoroughly dry on every side.
First, dry until the surface loses its wet shine. That gives the seasoning direct contact with the cod and reduces the amount of stray water entering the baking dish.
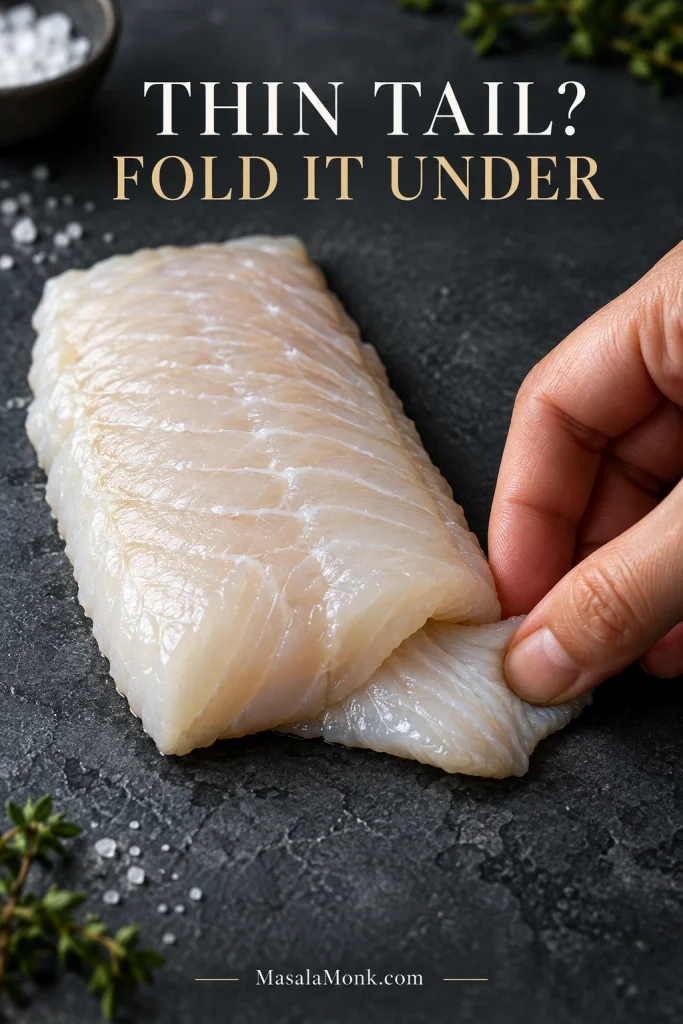
Arrange and season. Set the portions in a single layer with a little room between them. Fold a very thin tail underneath itself so it doesn’t dry out before the thicker part is done. Season the fish directly with salt, paprika and black pepper.
If only the last inch or two becomes dramatically thinner, tuck just that section underneath. The goal is a more even profile, not a doubled-up lump of fish.
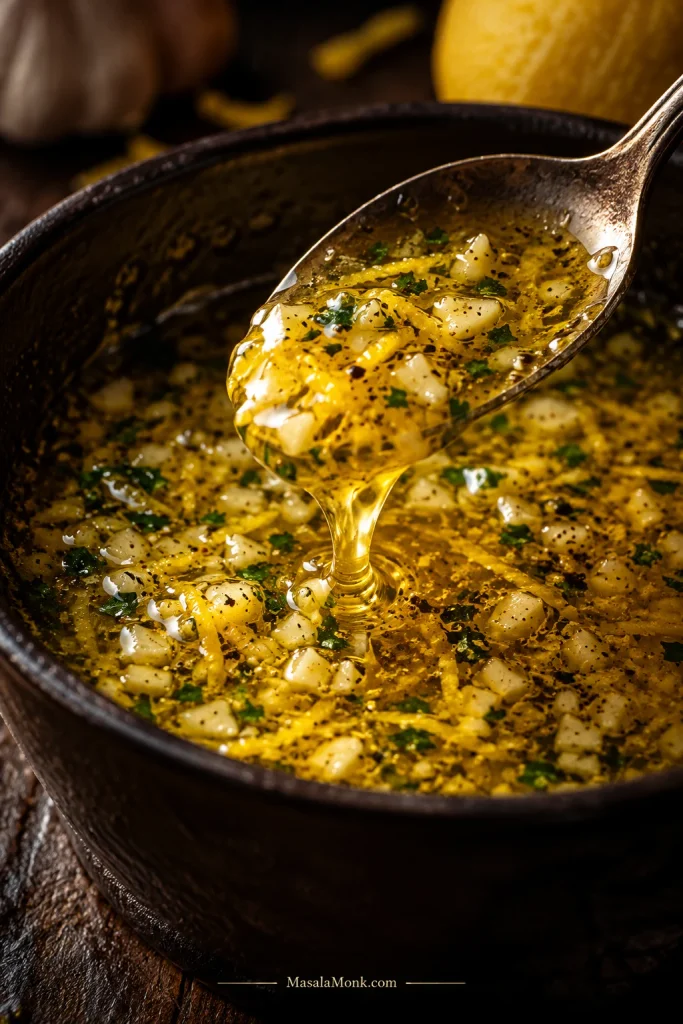
Mix the butter. Stir together the melted butter, olive oil, garlic, lemon zest and 1 tbsp / 15 ml of the lemon juice.
For even flavor, disperse the garlic and lemon zest through the melted butter before spooning it over the fish; otherwise the aromatics tend to collect unevenly between portions.
Spoon it over. Coat each piece with the lemon-garlic butter, letting a little run into the dish. Leave the pan uncovered.
Bake, Check and Finish
Bake and check. Begin checking according to the thickness guide below. Uneven pieces may be ready at different times.
Finish. Take each portion out when the center reaches 145°F / 63°C. Add the remaining ½ tbsp / 7 ml lemon juice and scatter with parsley.
No flipping needed. Cod becomes delicate as it cooks. Leave it alone in the oven, then slide a broad spatula underneath each piece when you’re ready to serve.
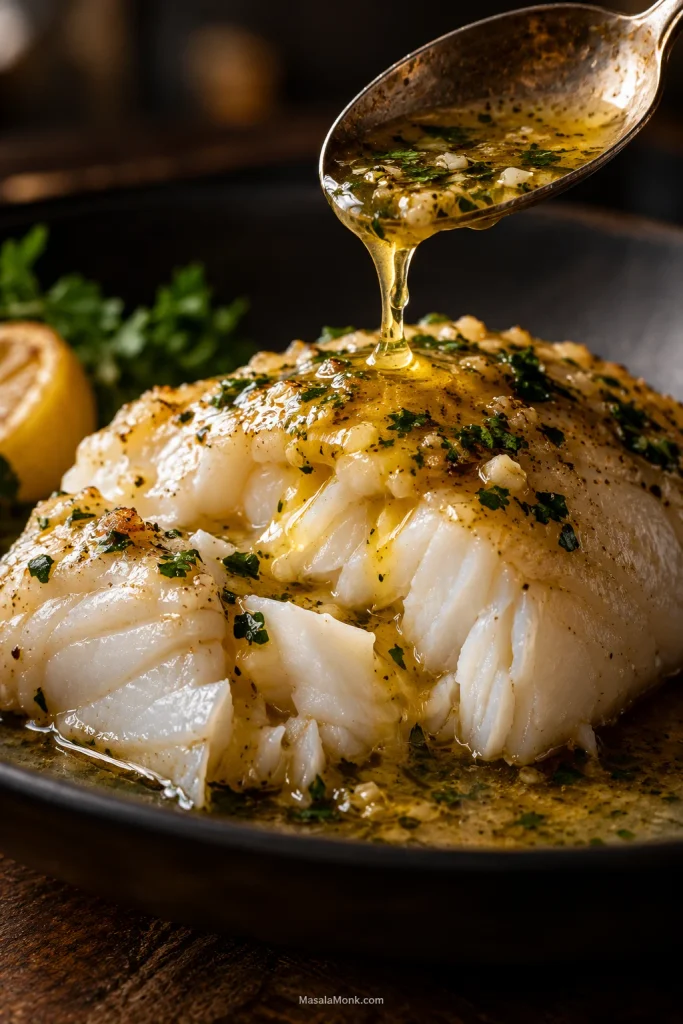
Don’t leave the butter behind. Spoon those warm, garlicky juices over the flakes before the plates reach the table.
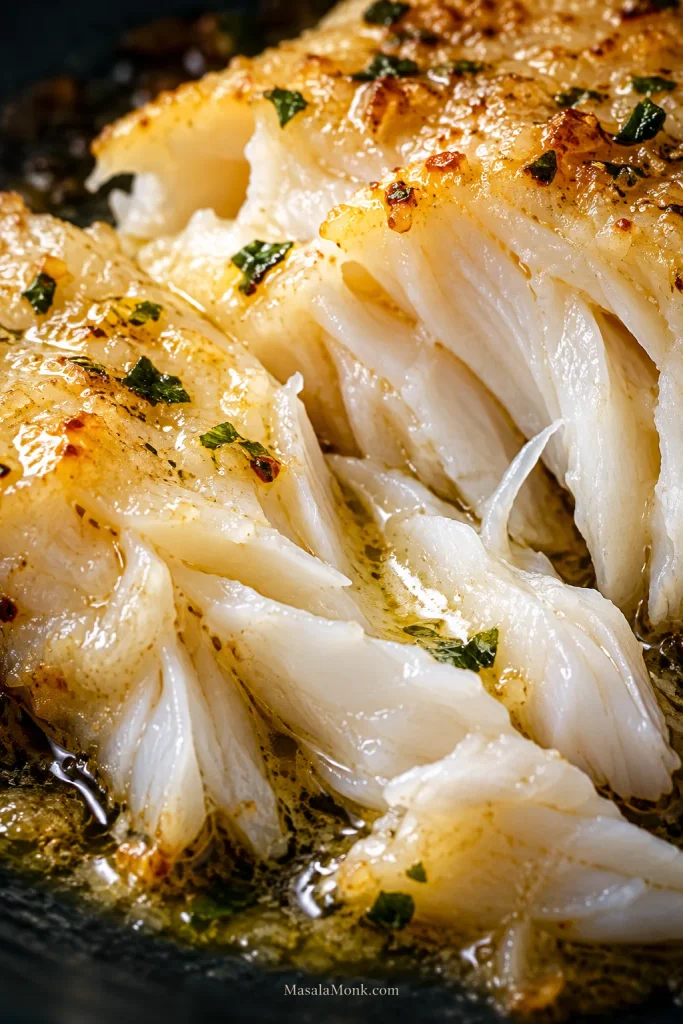
Warm pan butter slips into the opened flakes instead of sitting only on the surface.
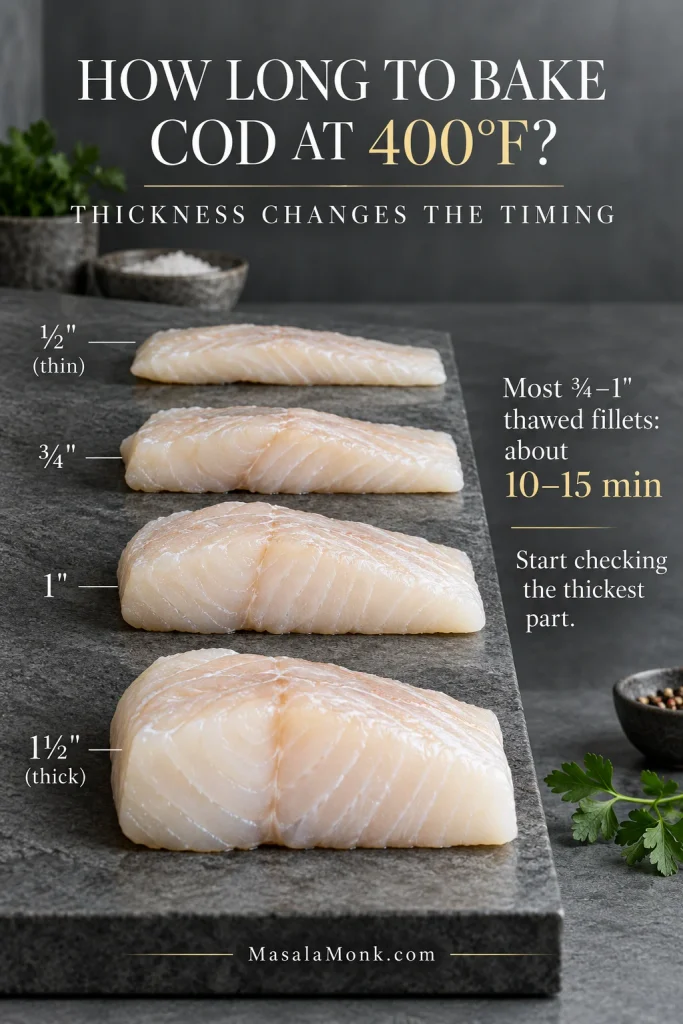
At 400°F / 205°C, most fully thawed cod fillets around ¾–1 inch thick take approximately 10–15 minutes. A thin tail may finish sooner; a substantial loin can need 15–20 minutes or more.
Thickness
Typical piece
Start checking
Approximate bake time
½ in / 1.3 cm
Thin fillet or tail
About 7 min
About 7–10 min
¾ in / 2 cm
Regular fillet
About 9 min
About 9–13 min
1 in / 2.5 cm
Thick fillet
About 11 min
About 11–15 min
1¼–1½ in / 3–4 cm
Thick loin
About 14 min
About 15–20+ min
You don’t need to predict the exact finishing minute. Start checking at the first number in the table. If you’re not sure how your piece compares, see how fillet and loin shape change the timing.
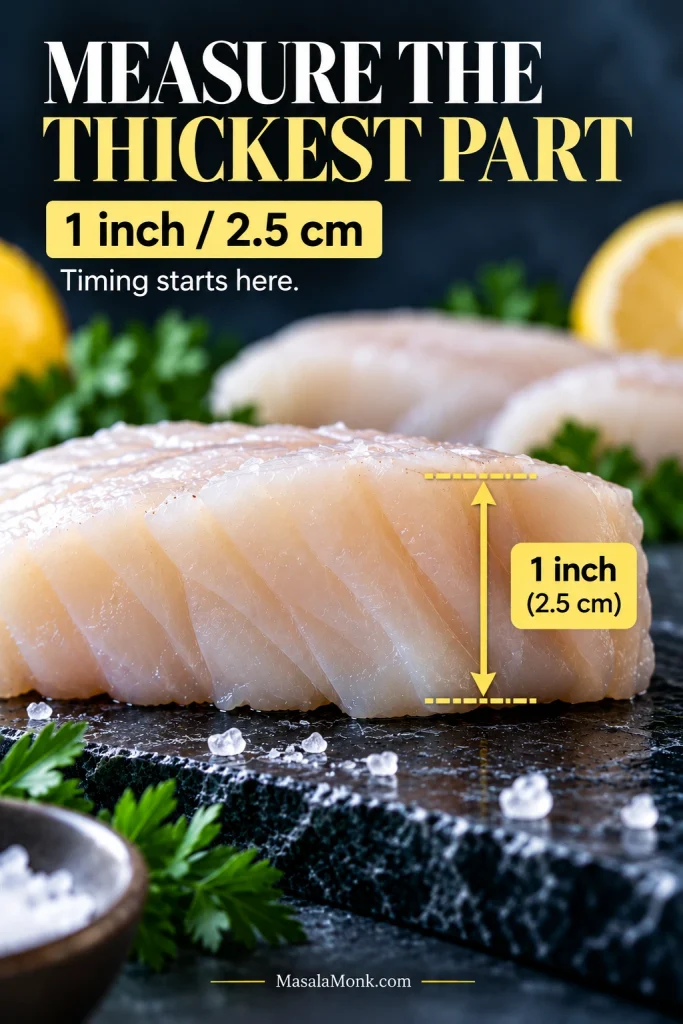
At 400°F, the height of the fish is more useful than its weight for deciding when to start checking. Use the thickest part of the fillet as your guide.
Measure the fish at its thickest point before you compare it with the timing guide.
Take the thickness vertically through the deepest section of flesh; width, length and the sloping top surface do not tell you how far heat must travel to reach the center.
Cod Fillet vs Loin: Look at the Shape
These equal-weight pieces illustrate why cod loin and cod fillet timing can diverge: the blockier loin concentrates the same mass into a deeper center.
That’s why shape matters as much as the label. A loin is usually the thick, blockier center cut. A fillet may be broad and flat or taper sharply toward the tail. At the fish counter, look at height as much as weight. If you’re cooking several pieces together, choosing similar thicknesses makes the timing much easier.
What About 375°F or 425°F?
The timing above assumes 400°F / 205°C, the temperature this version is built around. At 375°F / 190°C the fish cooks more slowly; at 425°F / 220°C, begin checking earlier.
How to Tell When Cod Is Done
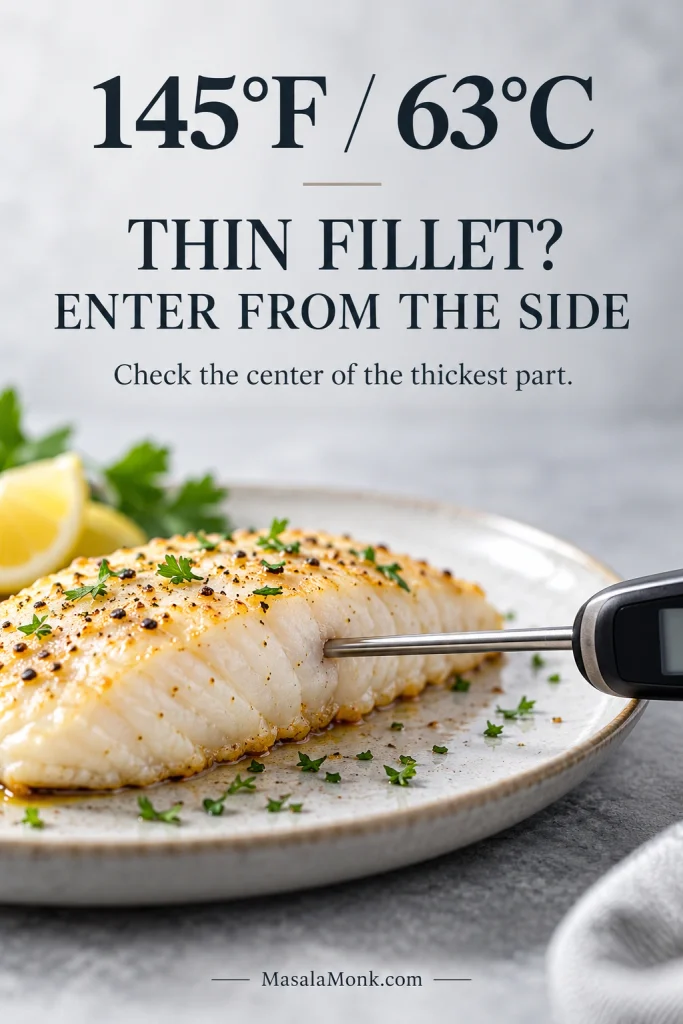
Whatever shape you’re cooking, the center settles the question. For food safety, cook fin fish to 145°F / 63°C in the center, following the USDA safe temperature guidance.
Keep the thermometer tip inside the center of the thickest flesh and clear of the hot baking dish; touching the pan can give a misleadingly high reading.
For a thin fillet, insert the thermometer from the side. That makes it easier to place the tip in the middle instead of passing straight through.
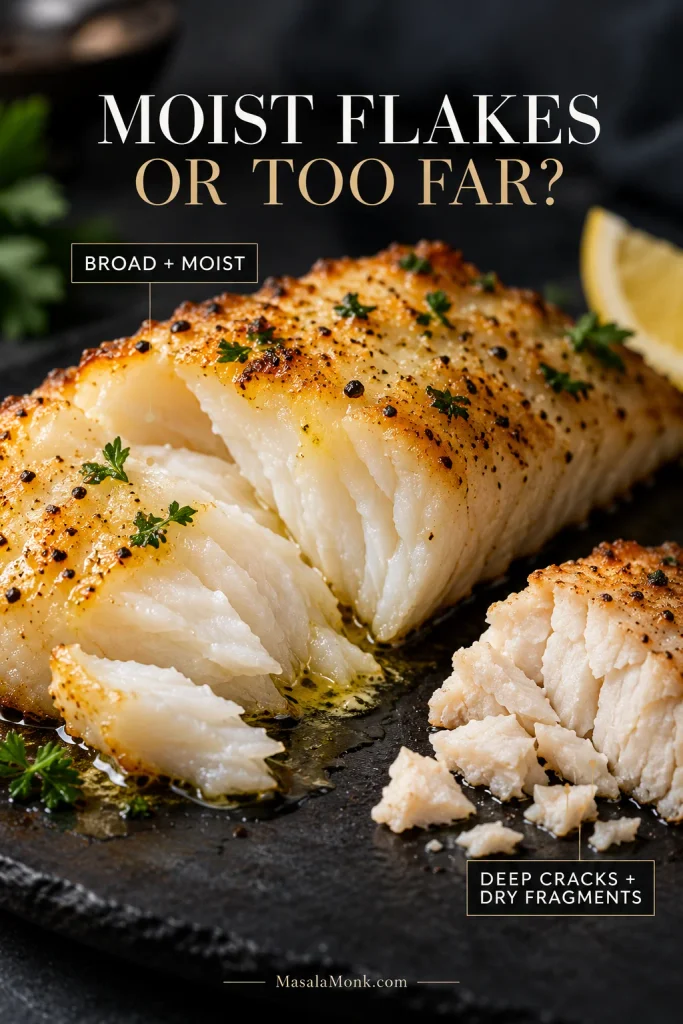
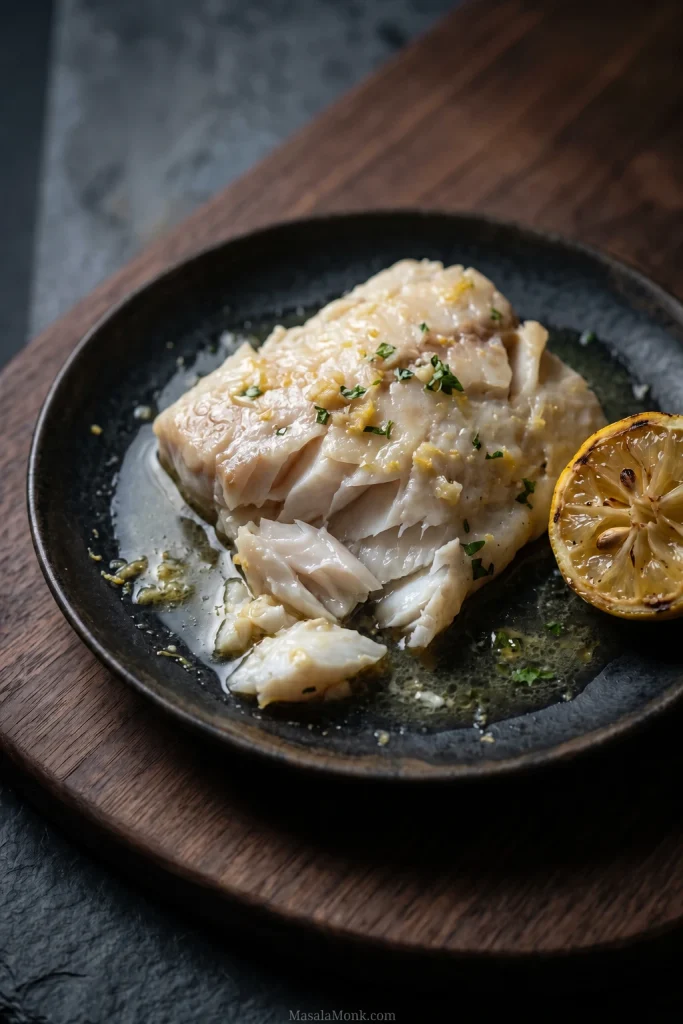
When it’s ready, the flesh should look opaque and open into broad, moist flakes with gentle pressure from a fork. Deep cracks, a chalky surface or lots of small dry fragments mean it has gone too far.
By contrast, doneness should be judged from the center, not the driest edge. Thin areas can look overcooked even while the thickest part still needs another moment.
As those flakes separate, spoon a little of the hot garlic butter into the openings. It slips between the layers while the fish is still warm instead of simply sitting on top.
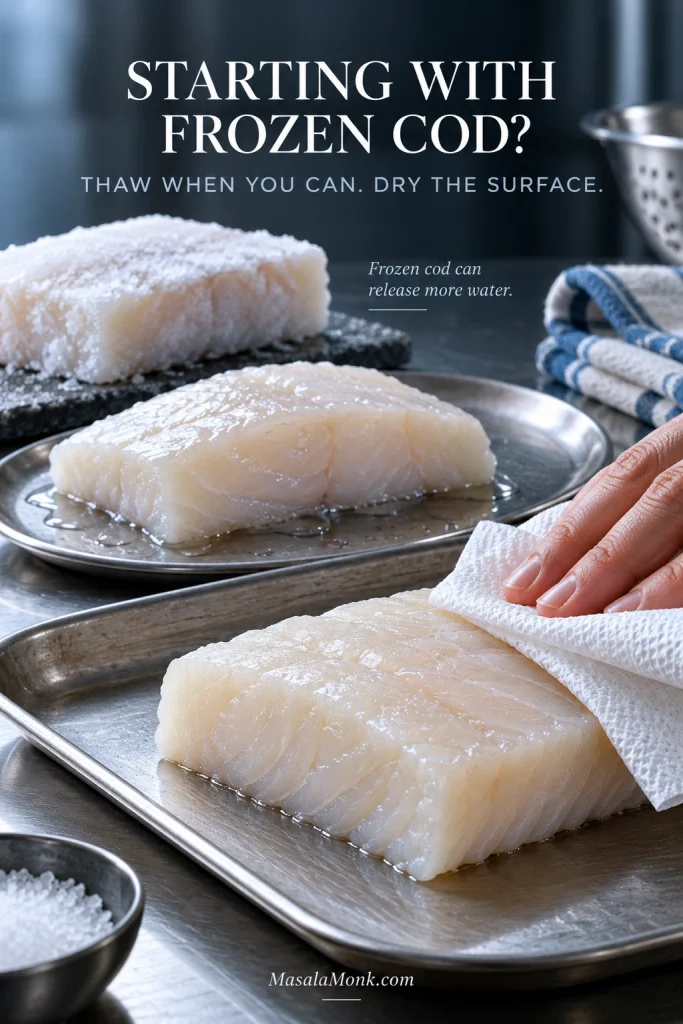
Frozen cod works here too. The complication is water. A puddle in the baking dish doesn’t automatically mean you overcooked the fish; sometimes that water arrived with the cod.
Thaw first when you can. It makes the timing easier to judge and lets you dry the surface properly before the butter goes on. If thawing is not practical tonight, jump to the straight-from-frozen guidance.
When thawing frozen cod, moisture often collects underneath the fillet and between natural folds. Check those hidden areas before seasoning, not just the exposed top surface.
Thawing Cod Safely
The FDA’s seafood-handling guidance recommends thawing frozen seafood in the refrigerator. When you need it faster, use cold water and a leakproof bag according to the product’s handling directions, then cook the fish promptly. Counter thawing isn’t a safe shortcut.
Vacuum-packed cod needs a label check. Follow the package directions carefully. Some reduced-oxygen packaged fish must be removed from the original packaging before thawing.
Can You Bake Cod Straight From Frozen?
Yes, but frozen cod needs its own timing. Remove loose surface ice, season the fish and follow the package’s cooking directions where provided. The center will take longer to heat and the fish may release more water, so check it with a thermometer rather than adding an arbitrary number of minutes.
Should You Cover Cod When Baking?
Not for this recipe. Leave the dish uncovered so some released moisture can escape. A sealed foil or parchment packet traps steam and gives you softer, steam-cooked fish—a different style of cod with different timing.
If the Cod Didn’t Come Out Right
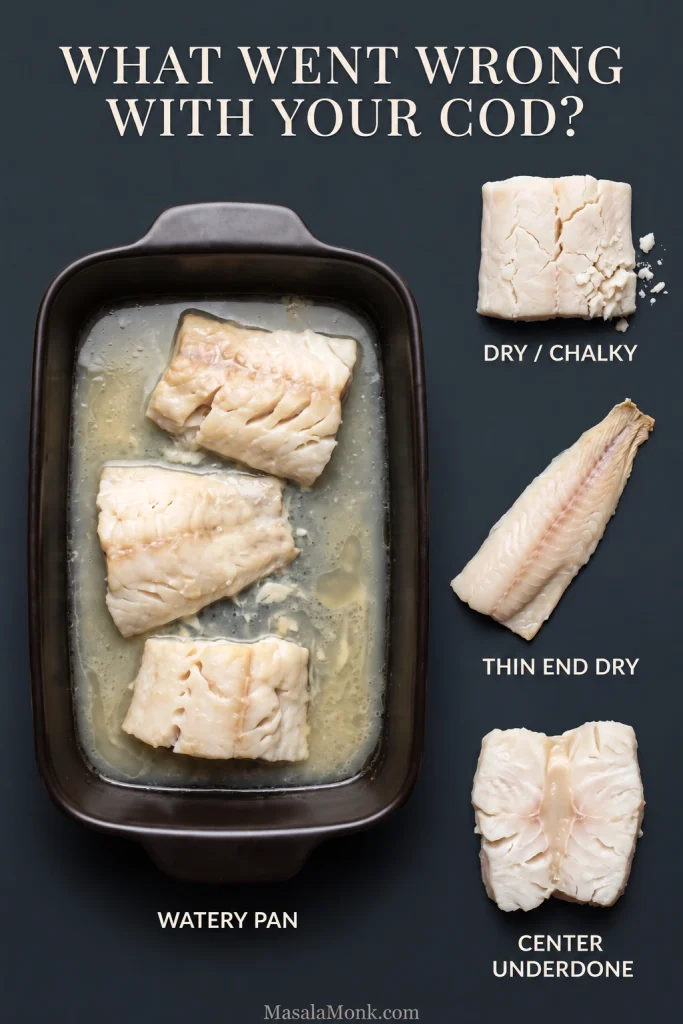
Don’t change five things at once. Find the symptom that looks most like yours and start there.
One clue can prevent the wrong fix: a watery pan does not necessarily mean undercooked cod, and dry fish can still sit in excess liquid if it released a lot of moisture.
What happened?
Likely reason
What to do
Dry or rubbery
It cooked too long for its thickness.
You can’t put moisture back into overcooked cod. Add fresh lemon and begin checking earlier next time.
Watery pan
The cod was wet, crowded or released a lot of water.
Dry it thoroughly, give the portions some room and bake uncovered.
Mushy or mealy
Excess moisture or damage from freezing and thawing.
Check how it was thawed. If the same product repeatedly disappoints, try another source.
Bland
The fish wasn’t seasoned directly.
Season the cod itself before the lemon-garlic mixture goes on.
Thin end dry
The tail finished before the thicker part.
Fold it underneath before baking, or remove smaller pieces as soon as they’re done.
Outside cooked, center translucent
A substantial or partly frozen center needs longer.
Return it to the oven briefly, then check the center again.
Cooking took much longer
A thick loin, cold center or oven variation.
Keep cooking in short intervals and judge the center, not the clock.
Fish broke apart
Cooked cod is delicate and was handled too much.
Lift it from underneath with a broad spatula. Already have loose flakes? Turn them into fish tacos.
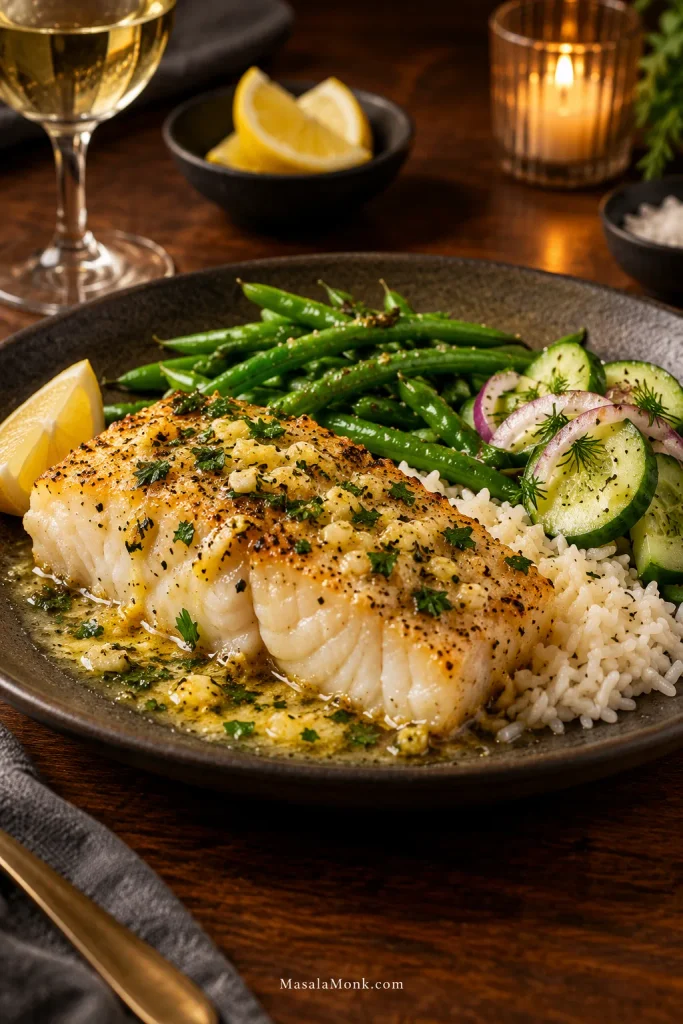
Hot rice may be the easiest answer. Start it first; the cod cooks quickly, and the rice gives all that lemon-garlic butter somewhere to go. If you want the timing sorted before the fish goes into the oven, use our guide to cooking rice.
For a balanced cod dinner, pair one element that absorbs the lemon butter with another that adds crunch, acidity or coolness; that keeps the plate from becoming uniformly soft and rich.
For something green, green beans almondine add toasted-almond crunch beside the soft fish. A crisp cucumber salad goes the other way: cool and sharp against the warm cod.
Potatoes work beautifully too. Our Greek lemon potatoes need a much longer head start, so get them well underway before the cod goes into the oven.
Small Changes That Work
Want it brighter? Swap the parsley for fresh dill and lean on the lemon wedges at the table. Want something warmer and smokier? Use smoked paprika instead of sweet. Two garlic cloves make the flavor gentler; four bring the garlic forward.
The zest and juice do different jobs. Lemon zest brings citrus aroma without adding much liquid; the final squeeze gives the hot fish its sharper citrus edge.
For a dairy-free version, replace the 3 tbsp butter with 3 tbsp additional olive oil. That version won’t have quite the same richness, but the garlic, paprika, zest and finishing lemon still carry plenty of flavor.
The same seasoning also works with other mild white fish; just reset the timing for the fish you choose. For a crisp, browned topping rather than lemon-garlic butter, our baked haddock recipe is built around that style.
Storing and Using Leftover Cod
Refrigerate leftover cod promptly in a shallow, covered container and use it within 3–4 days. When reheating, bring leftovers to 165°F / 74°C, following USDA food-safety guidance.
Because cod is lean, stop once the leftovers are safely heated through; prolonged reheating dries the flakes quickly.
If the fish is already in pieces, don’t try to reconstruct the fillet. Fold the flakes into fish cakes and let that become tomorrow’s dinner.
For tonight, serve the cod while the butter is still warm and loose in the dish. Spoon it over the fish, squeeze fresh lemon across the top and let the tender flakes do the rest.
Good fish cakes should give you three things at once: a crisp golden crust, soft but not mushy potato, and real flakes of fish inside. This fish cakes recipe starts with cod because it is easy to find, gentle in flavor, and perfect with lemon, herbs, mustard, and breadcrumbs. However, the same method also works with haddock, pollock, hake, tilapia, leftover cooked white fish, or carefully thawed frozen fish.
These little cakes are the kind of dinner that can feel old-fashioned in the best possible way: a little potato, a little fish, a hot pan, and suddenly the meal feels generous. Still, the texture matters. Too much potato and they taste flat. Too much wet fish and they collapse. This recipe keeps the middle soft and flaky while giving you the crisp edge everyone reaches for first.
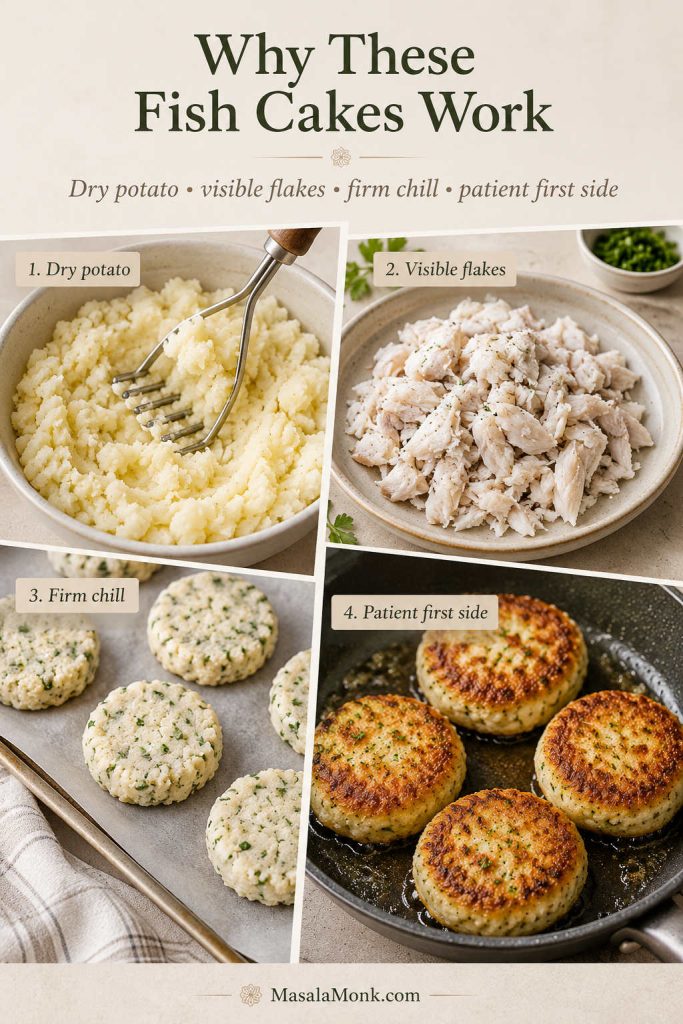
The method is simple once you know what matters: dry potato, visible fish flakes, a firm chill, and a crust that sets before you flip. Even if the mixture feels a little soft at first, it is usually easy to save with a spoonful of breadcrumbs and a short rest in the fridge.
What Good Fish Cakes Should Look Like
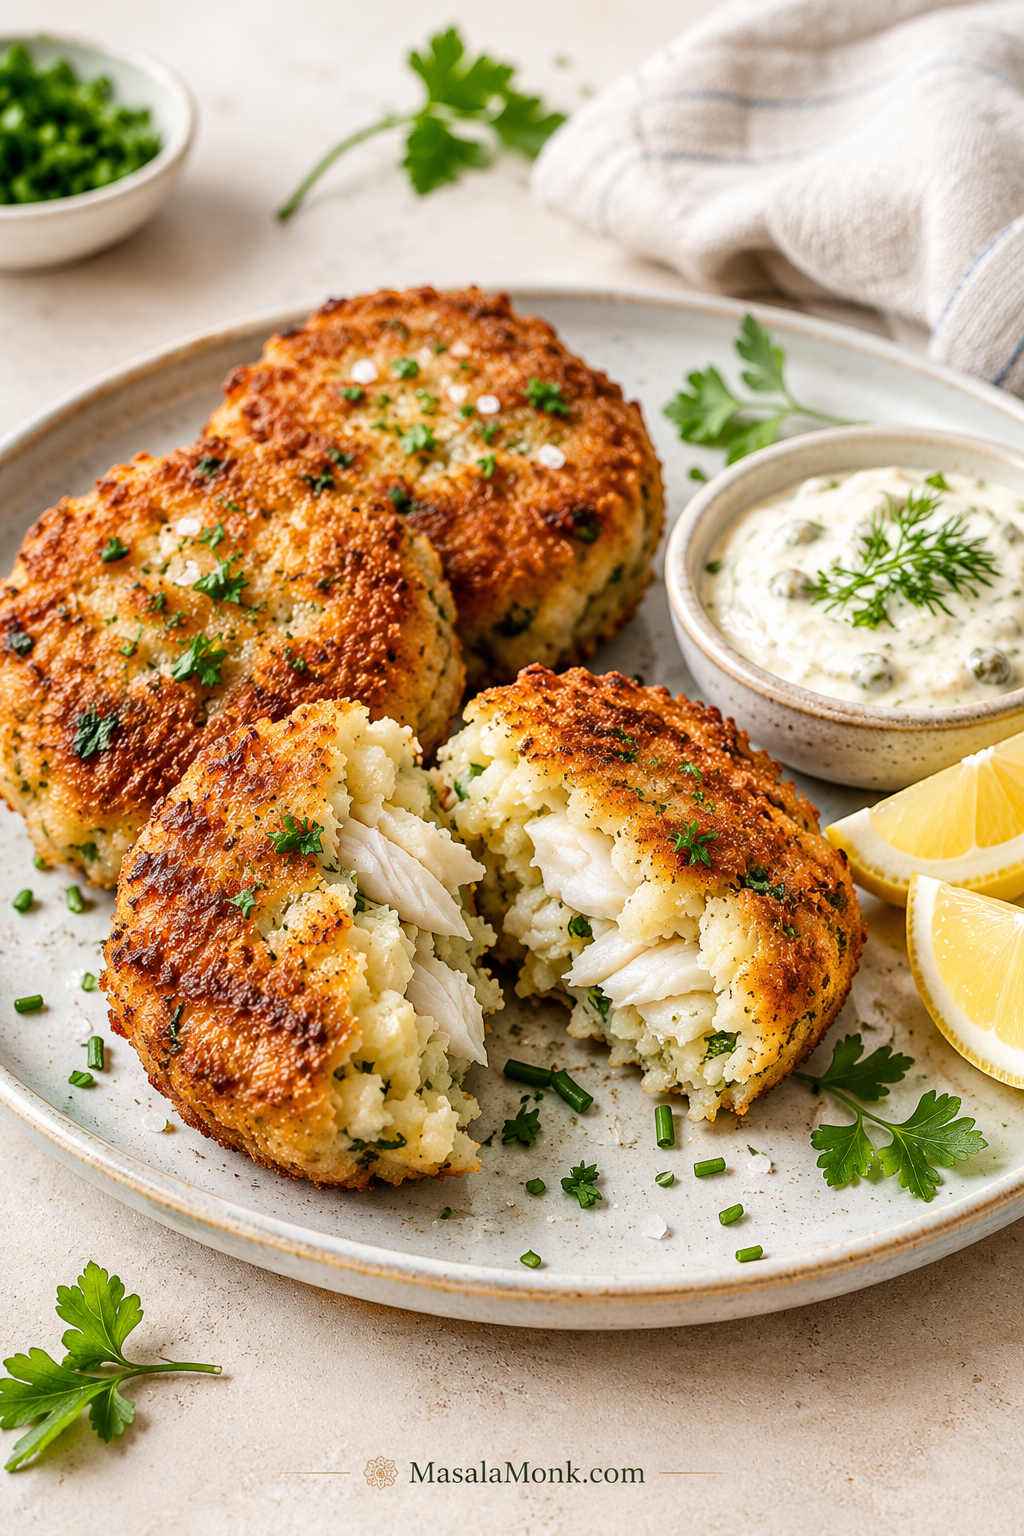
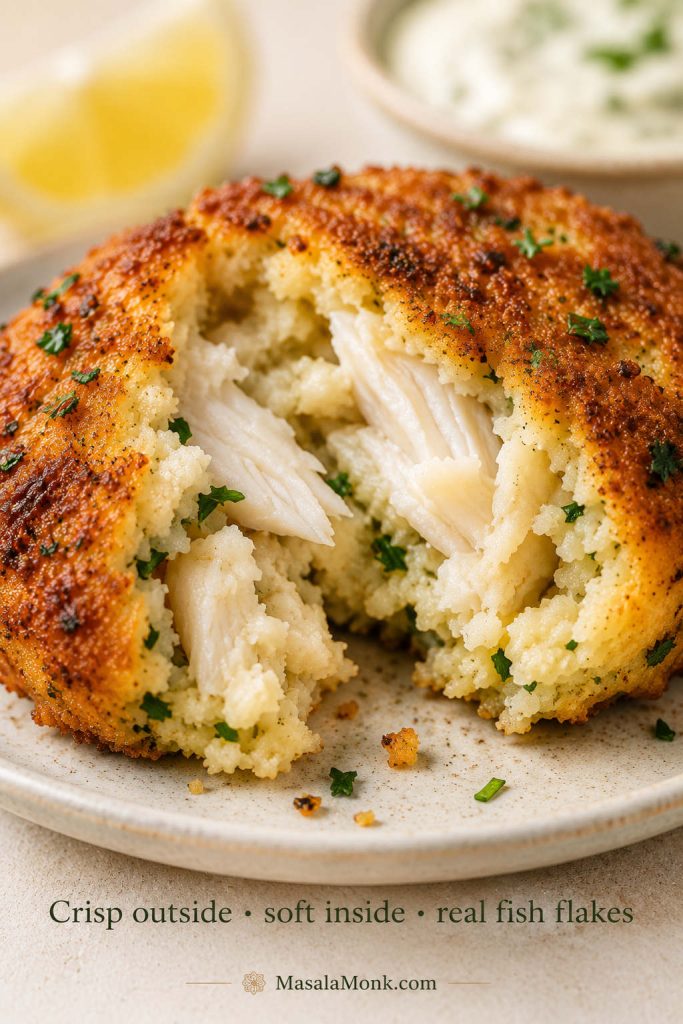
Before you start cooking, it helps to know the texture you are aiming for: crisp outside, soft inside, and fish that stays visible instead of disappearing into the potato.
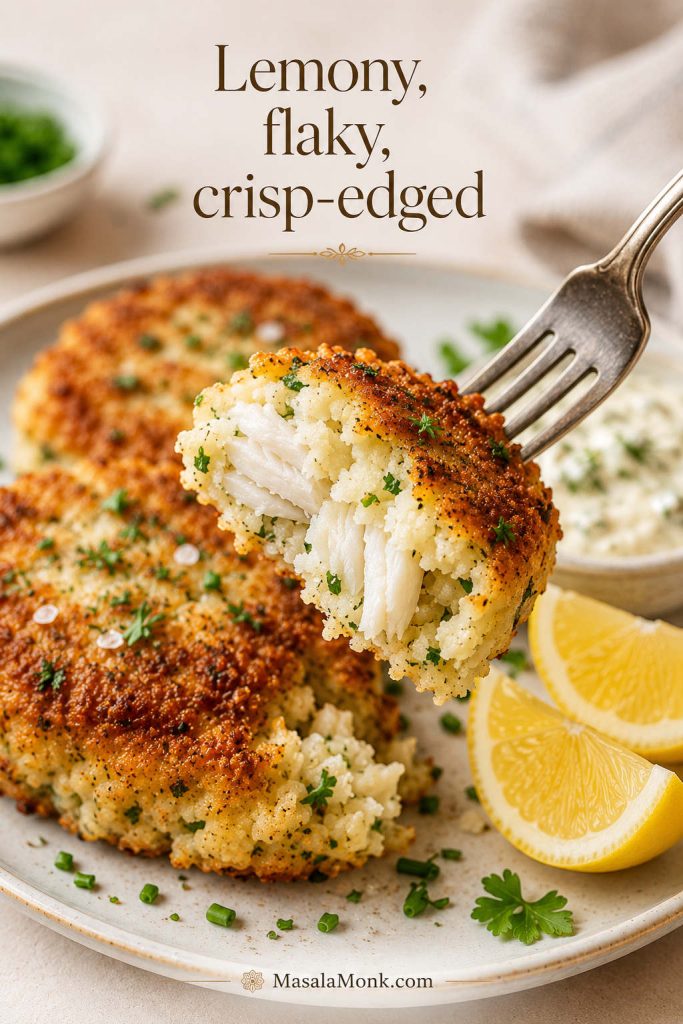
A good fish cake should not look smooth inside. Instead, the best texture shows tender potato, real fish flakes, and a crust that breaks cleanly.
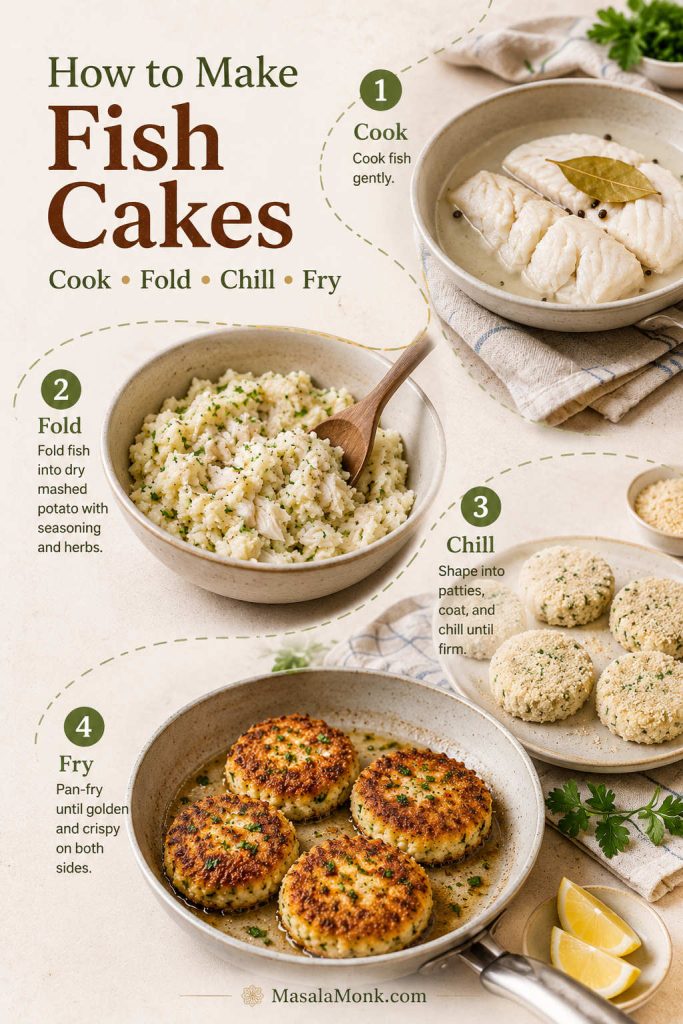
To make crispy fish cakes, cook cod or another firm white fish until it flakes, then mix it gently with dry mashed potato, egg, lemon, herbs, mustard, and seasoning. Shape the filling into patties, chill for at least 30 minutes, coat with flour, beaten egg, and breadcrumbs, then pan-fry until golden on both sides.
Once you understand the basic flow — cook, fold, chill, and fry — this fish cakes recipe becomes easier to adjust without guesswork.
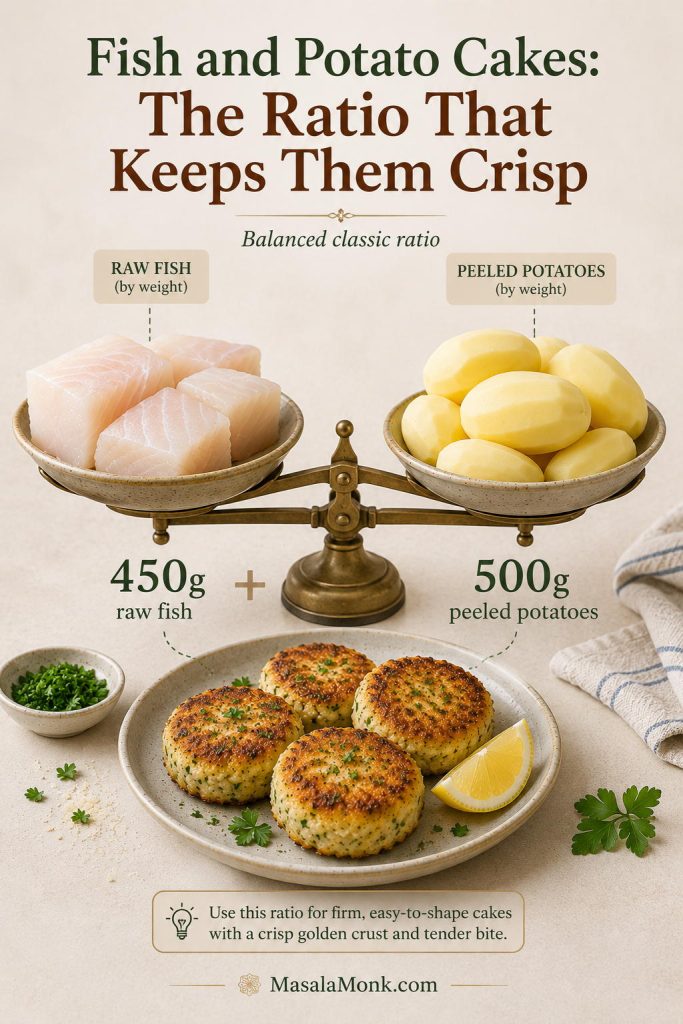
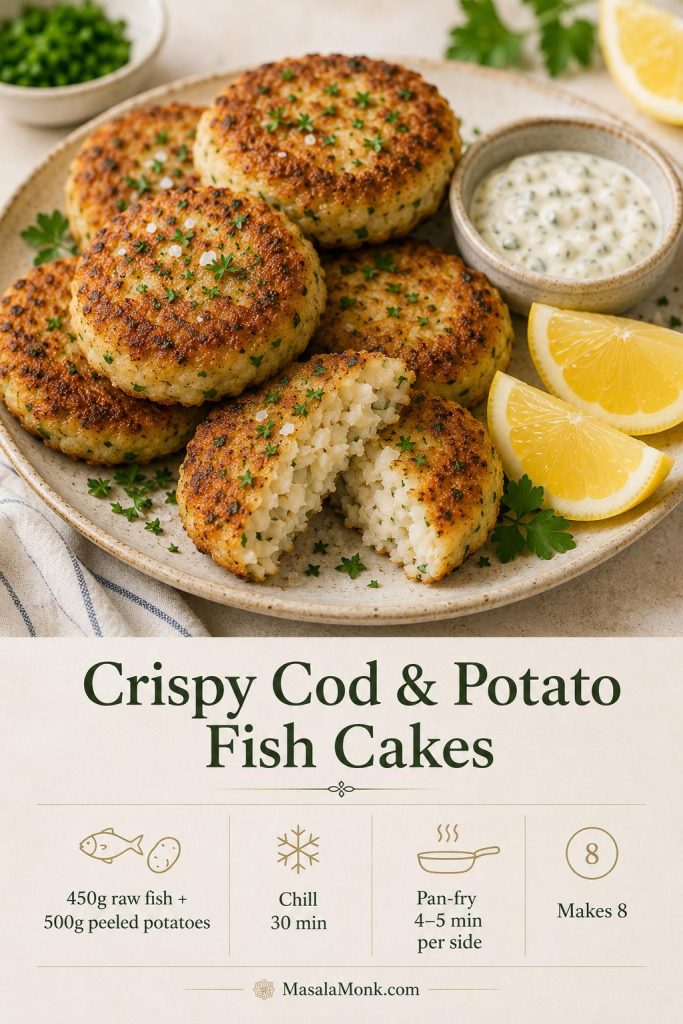
For 8 medium cakes, use about 450g / 1 lb raw fish and 500g / 1.1 lb peeled potatoes. That ratio gives enough potato to bind the patties without hiding the fish. When you break one open, you should see soft potato, clear flakes of fish, and a crunchy golden edge rather than a smooth, heavy paste.
If your mixture already feels too wet, too soft, or likely to break, use the fixing section before shaping the whole batch.
These are especially good when you want something comforting without making a heavy meal. A few crisp cakes, a sharp salad, lemon wedges, and a cold creamy sauce can feel like a proper dinner without needing much else.
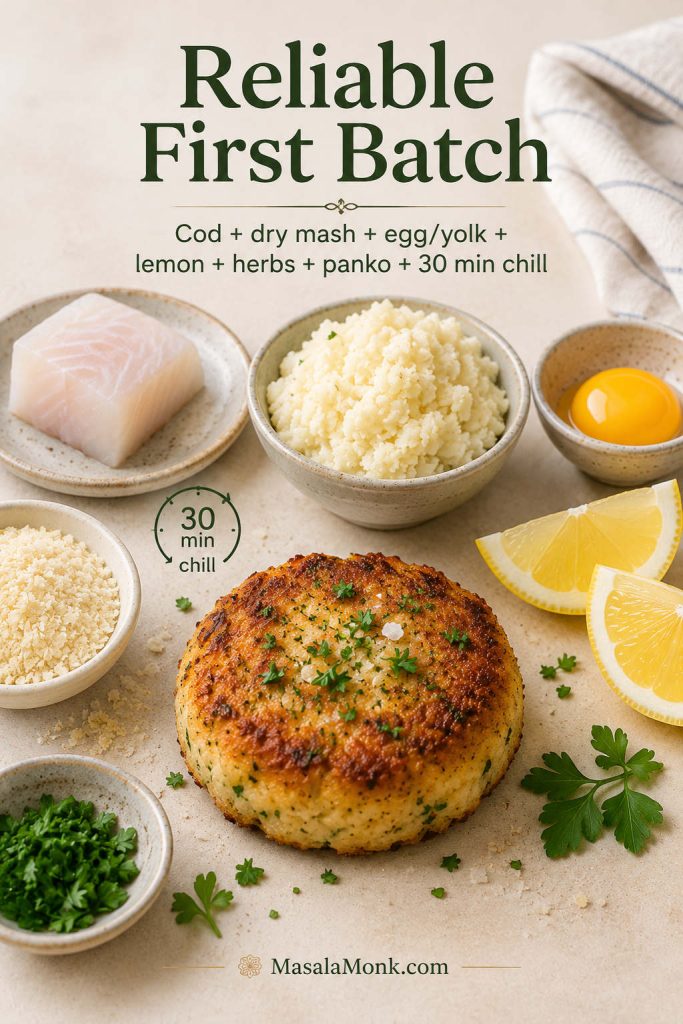
Reliable first batch
Use cod or haddock, dry mashed potato, one egg or yolk, lemon zest, parsley, panko, and a 30-minute chill. Pan-fry over medium heat and let the first side fully set before flipping. If this is your first time, use the pan-fried method before trying the baked or air fryer versions.
For the safest first batch, keep the formula simple: mild cod, dry potato, enough binder, bright lemon, fresh herbs, panko, and a proper chill.
At a Glance
Main fish
Cod, haddock, pollock, hake, or firm white fish
Best potatoes
Starchy potatoes such as Russet, Maris Piper, King Edward, or Yukon Gold
Yield
8 medium fish cakes
Serves
4
Fish-to-potato ratio
About 450g raw fish to 500g peeled potatoes
Chill time
30 minutes
Pan-fry time
4–5 minutes per side
Optional oven finish
200°C / 400°F for 8–10 minutes
Air fryer
190–200°C / 375–400°F for 10–14 minutes
Fish doneness
145°F / 63°C, or opaque and flaking easily
Good sauces
Tartar sauce, lemon dill mayo, garlic mayo, green chutney mayo, sweet chili sauce
Why This Fish Cakes Recipe Works
The real secret is not a complicated ingredient. It is moisture control. Dry potato gives the cakes structure, gently flaked fish keeps the middle light, and a short chill gives each patty enough firmness to survive the pan.
That is why a fish cake that looks simple on the plate can feel so satisfying: the crust, filling, and flakes all do different jobs. The coating gives crunch, the potato keeps everything tender, and the fish stays present instead of disappearing into the mash.
Think of these as the four control points: dry potato builds structure, visible flakes keep texture, chilling firms the patties, and patient frying protects the crust.
Flour helps the egg cling, egg helps the crumbs stick, and breadcrumbs give you that crisp outside. Panko makes the lightest crunch, while fresh breadcrumbs give a softer, more old-fashioned fishcake crust.
Just as importantly, the filling is folded instead of mashed into a paste. That small choice keeps the inside tender and textured, so every bite has a little potato, a little fish, and a clean lemony finish.
What They Should Taste Like
The finished fish cakes should taste clean, lemony, and savory, not heavy or fishy. The crust should give a quiet crunch when you cut in, while the middle stays warm and soft with visible flakes of fish and little pockets of potato. Add a squeeze of lemon and a spoonful of tartar sauce, dill mayo, or green chutney mayo, and the whole plate should feel bright rather than rich.
The best bite should feel balanced: crunchy outside, soft inside, lightly lemony, and savory enough that the potato supports the fish instead of hiding it.
Texture checkpoint
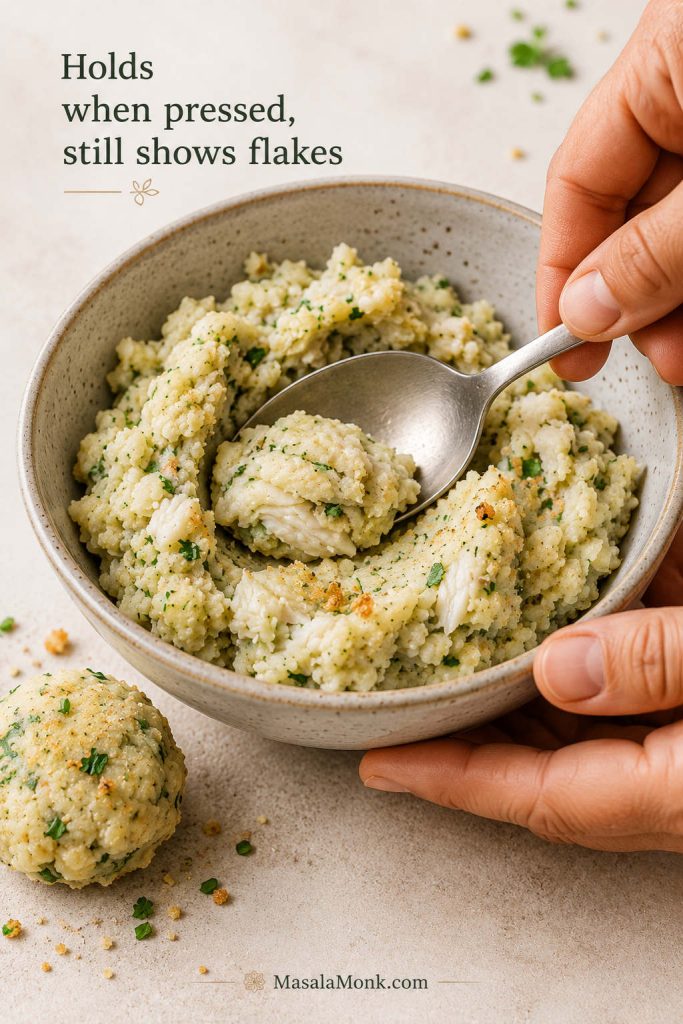
Before chilling, the mixture should hold together when pressed but still show flakes of fish. If it looks smooth like paste, it has been overmixed. If it slumps on the tray, it needs breadcrumbs.
Before shaping, the mixture should press together while still looking rustic. If it turns smooth or gluey, the finished patties will feel heavy.
Best Fish for Fish Cakes
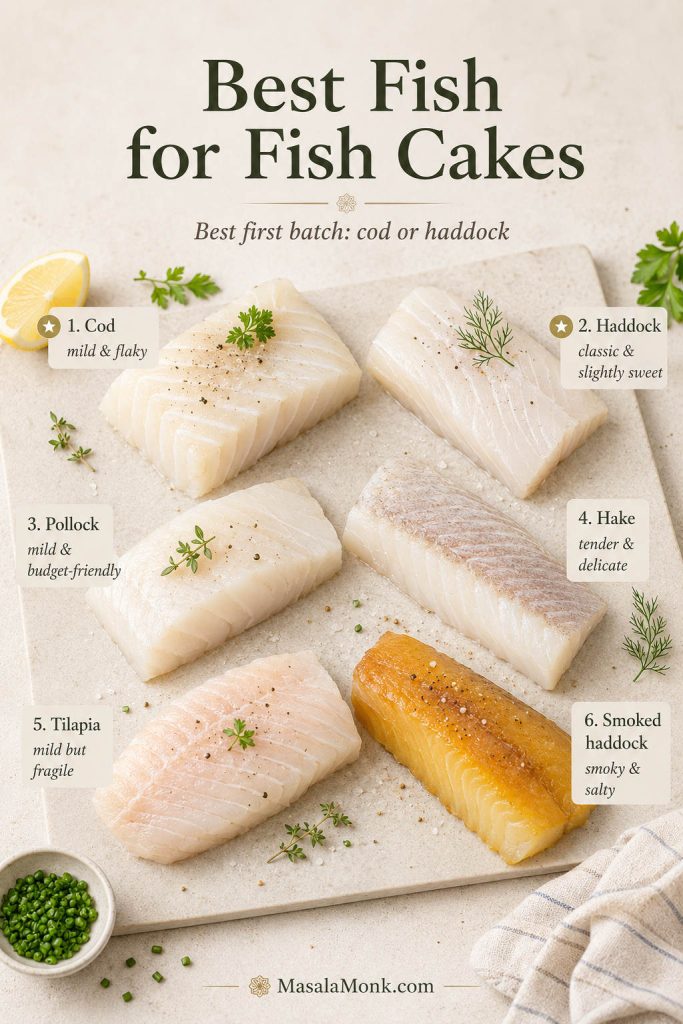
For most home cooks, cod is the easiest place to start. It flakes cleanly, tastes gentle rather than strong, and pairs naturally with potato, lemon, herbs, mustard, and breadcrumbs. Haddock is just as classic and slightly sweeter. Pollock and hake are good budget-friendly white fish options, while tilapia works if you handle it gently and avoid overcooking.
If you are standing at the fish counter, do not overthink it. Choose a mild white fish that looks fresh, smells clean, and flakes easily when cooked. Cod and haddock are the safest choices, but pollock, hake, and other firm white fish can make excellent cakes too.
Mild white fish is the easiest starting point because it flakes cleanly and lets the lemon, herbs, potato, and crisp coating do their jobs.
If you would rather turn cod or haddock into a battered fillet dinner instead of patties, start with this fish and chips recipe.
Fish choice shortcut
First batch: cod or haddock. Budget batch: pollock or hake. Stronger flavor: half smoked haddock, half plain white fish. Leftover option: cooked cod, haddock, salmon, or trout, folded in large flakes.
Why Cod Works So Well for Fish Cakes
Cod is especially good in fish cakes because it stays clean-tasting even after poaching, folding, chilling, and frying. It gives you real flakes inside the cake without making the filling taste heavy or oily.
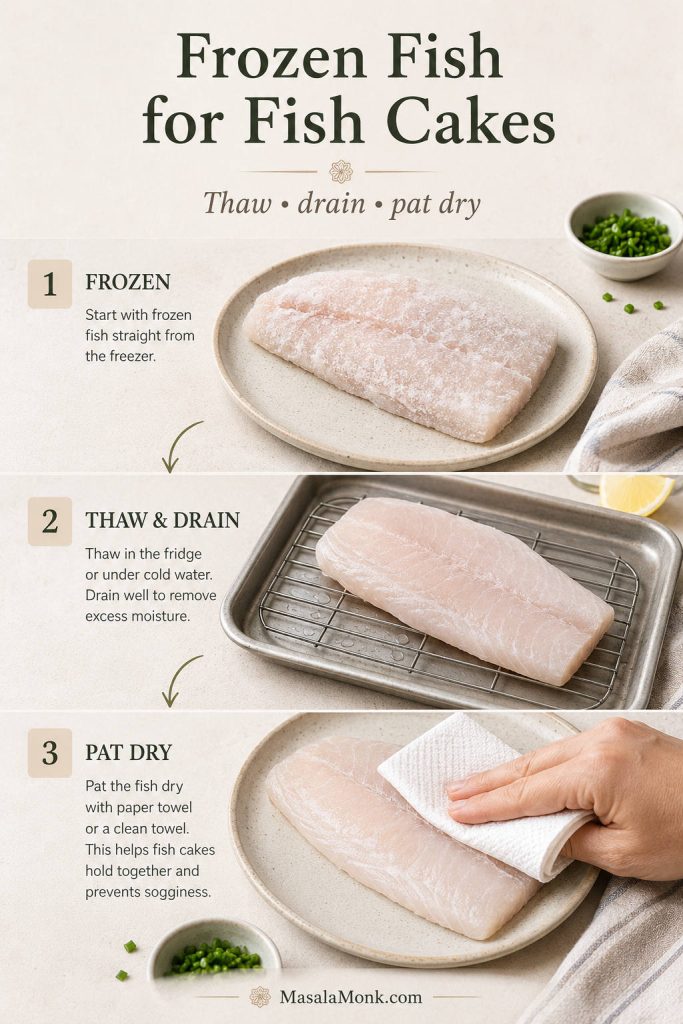
If using frozen cod, thaw it fully, drain away any liquid, and pat it dry before cooking. Wet fish is one of the quickest ways to make the filling soft, loose, or difficult to brown. For full make-ahead storage and cooking guidance, use the frozen fish cakes guide later in the post.
Fish
How it behaves
Best use
Cod
Clean-tasting and flaky
A clean, reliable choice for classic cod fish cakes.
Haddock
Firm, classic, slightly sweeter
Excellent for traditional fish and potato cakes.
Pollock
Mild and budget-friendly
Good when you want an affordable white fish.
Hake
Soft and delicate
Works well if folded gently.
Tilapia
Mild but more fragile
Useful when cod or haddock is not available.
Smoked haddock
Bold and salty
Use partly with plain white fish or potato for a stronger flavor.
Salmon
Richer and oilier
Use a richer binder and brighter seasoning; canned salmon works especially well in croquettes.
Tuna
Drier and more compact when canned
Use mayo, mustard, egg, and breadcrumbs to keep canned tuna from tasting dry.
Mackerel
Strong and oily
Balance it with lemon, herbs, mustard, and a crisp coating.
Frozen Fish
Frozen fish works for this recipe, but it must be thawed and dried well. Thaw it in the refrigerator, drain off any liquid, then pat the fish dry before cooking. If frozen fish goes into the filling wet, the patties are more likely to break, taste watery, or refuse to brown.
Frozen fish works well once the extra moisture is handled. After thawing, drain and pat it dry so the mixture stays firm instead of watery.
For freezing shaped cakes, reheating leftovers, and choosing whether to thaw first or cook from frozen, use the full freezing guide below.
Leftover Cooked Fish
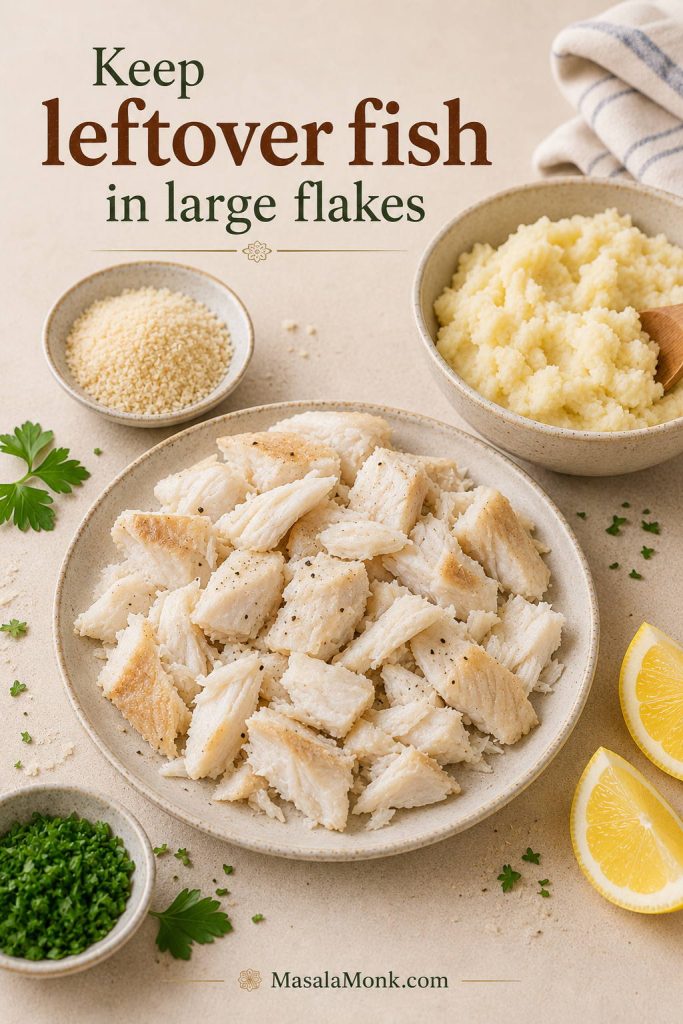
Leftover cooked cod, haddock, pollock, salmon, trout, or other flaky fish can work well. Keep the flakes fairly large and fold them in gently near the end. If the fish is already seasoned, taste the mixture before adding more salt.
Leftover fish is easiest to use when the flakes stay large. That way, the finished fish cakes still taste like fish, not only potato.
If you are also starting with leftover mashed potato, use the leftover mash section for the better ratio before you shape the patties.
Using Salmon or Tuna
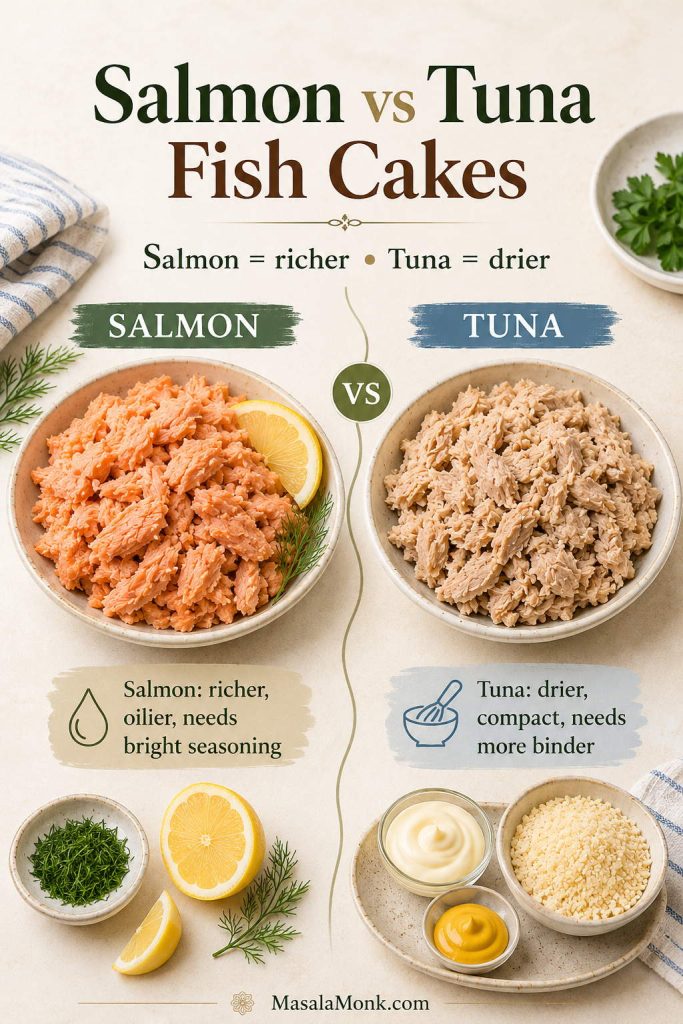
Both salmon and tuna can make good patties, but they behave differently from poached white fish. Because salmon is richer and canned tuna is drier and more compact, both usually need slightly different seasoning and binding. For a salmon-specific recipe, especially with canned salmon and Southern-style patties, use the salmon croquettes recipe.
Salmon and tuna can both work, but they need different handling. Salmon benefits from bright seasoning, while tuna usually needs more moisture and binder.
Fish and Potato Cakes: The Ratio That Keeps Them Crisp
The best fish and potato cakes use enough potato to bind the filling, but not so much that the fish disappears. A reliable working ratio is:
Reliable starting ratio
450g / 1 lb raw cod or white fish + 500g / 1.1 lb peeled starchy potatoes
This fish-to-potato ratio keeps the batch balanced. The potato gives structure, while the fish stays visible enough to make the cakes taste clean and flaky.
Think of the potato as the frame, not the main event. It should hold the fish together, soften the bite, and help the crust brown. It should not bury the fish so completely that the cakes taste like leftover mash with a little seafood mixed in.
You are not chasing a perfect formula so much as a filling that presses together without turning into paste. A wet filling usually needs breadcrumbs, added one tablespoon at a time, followed by a short chill. A dry, crumbly base needs a little more binder, such as egg yolk, Dijon, mayo, or a tiny splash of poaching liquid.
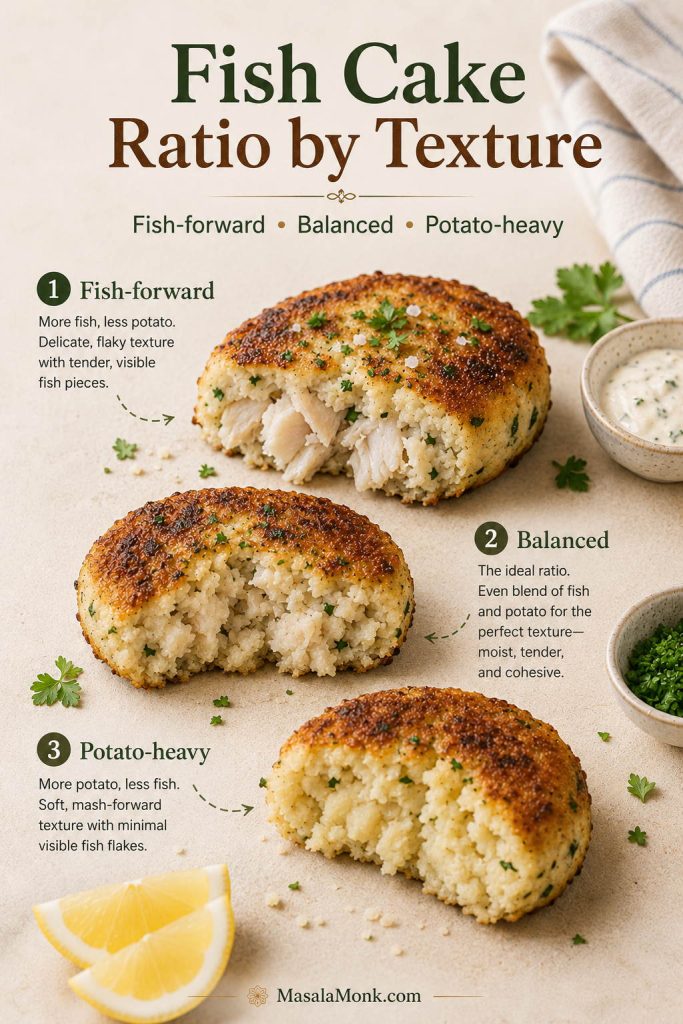
Adjust the Ratio by Texture
The table below is not meant to make the recipe fussy. It simply shows why some batches feel flaky and delicate while others feel soft, sturdy, and more potato-forward.
Changing the ratio changes the bite. Fish-forward cakes are flakier and more delicate, while potato-heavy cakes are softer, sturdier, and less fish-forward.
These weights follow the same basis as the main recipe: raw fish weight and peeled potato weight.
Style
Raw fish
Peeled potatoes
Result
Fish-forward
500g
400g
Flakier, more delicate, and a little harder to handle.
Balanced classic
450g
500g
The most reliable first batch.
Potato-heavy
350g
600g
Softer, cheaper, and less fish-forward.
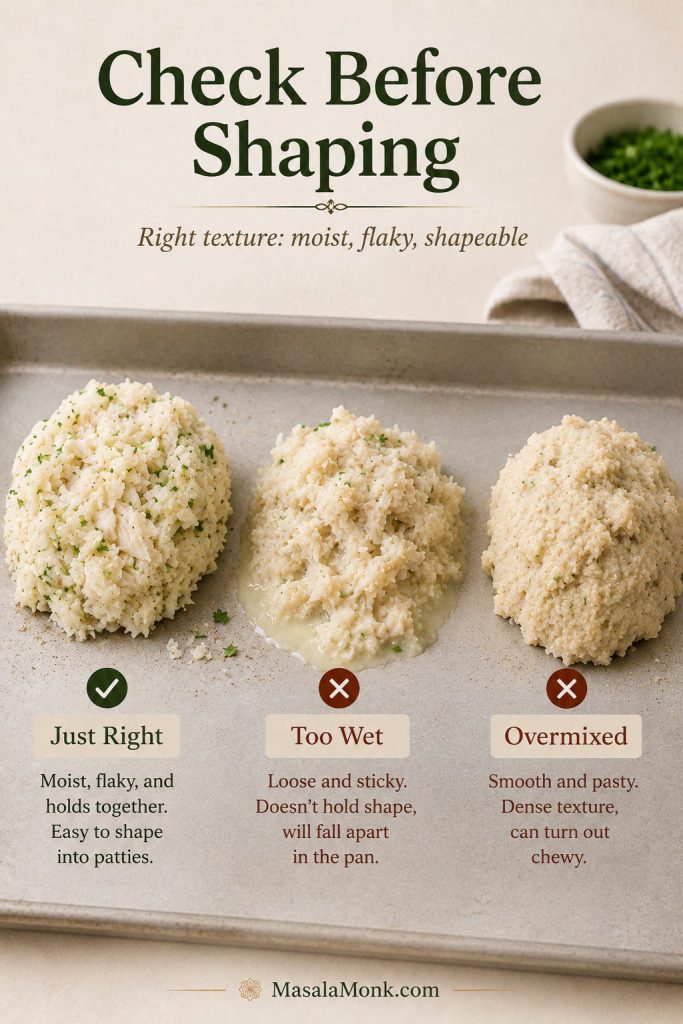
Check the Mixture Before Shaping
The goal is not smooth mashed potato. The most satisfying cakes have a mixture of soft potato, a few small potato lumps, and visible flakes of fish. If you mash the potato until gluey or crush the fish into paste, the inside becomes heavy instead of light and flaky.
Avoid loose, creamy mashed potatoes for this recipe. Mash made with lots of milk, cream, or butter can make the filling soft. If you are using leftover mashed potato, start with a drier mash and add breadcrumbs until the patties keep their shape.
Check the mixture before shaping, because this is where most fish cakes are saved. Shapeable and flaky is ready; wet or pasty needs crumbs, binder, or a chill.
If the mixture already looks wet, slumpy, or crumbly, the troubleshooting table gives faster fixes before you start coating.
Mixture texture
What it means
What to do
Holds shape but feels moist
Right where you want it
Chill, coat, and cook.
Slumps on the tray
Too wet
Add breadcrumbs 1 tablespoon at a time.
Crumbles when pressed
Too dry
Add egg yolk, Dijon, mayo, or a tiny splash of poaching liquid.
Looks smooth and pasty
Overmixed
Stop mixing. If available, fold in a few extra fish flakes.
Sticky and gluey
Potato was overworked or too wet
Add breadcrumbs and chill longer; avoid heavy stirring next time.
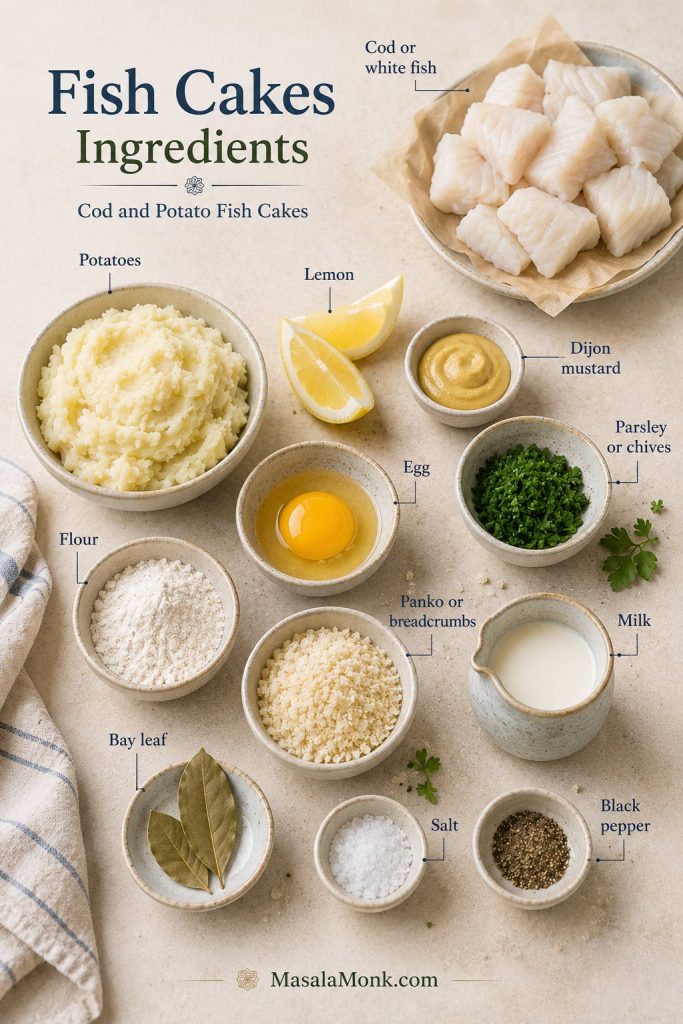
Ingredients for Cod and Potato Fish Cakes
The ingredient list is short, so the small choices matter: dry potato instead of creamy mash, enough lemon to wake up the fish, and a coating that protects the soft center while it fries.
Because the ingredient list is simple, each choice matters. Dry potatoes, mild fish, lemon, herbs, and breadcrumbs create the flavor, structure, and crust.
Fish
Use cod, haddock, pollock, hake, or another firm white fish. Cod is the easiest starting point because it flakes cleanly and has a gentle flavor that works with lemon, herbs, mustard, and breadcrumbs.
Fresh fish works well, but good frozen white fish is also a smart choice because it will be cooked, flaked, and folded into potato rather than served as a whole fillet. If sustainability labels matter where you shop, the Marine Stewardship Council haddock guide is a useful reference for certified haddock and related white fish choices.
Potatoes
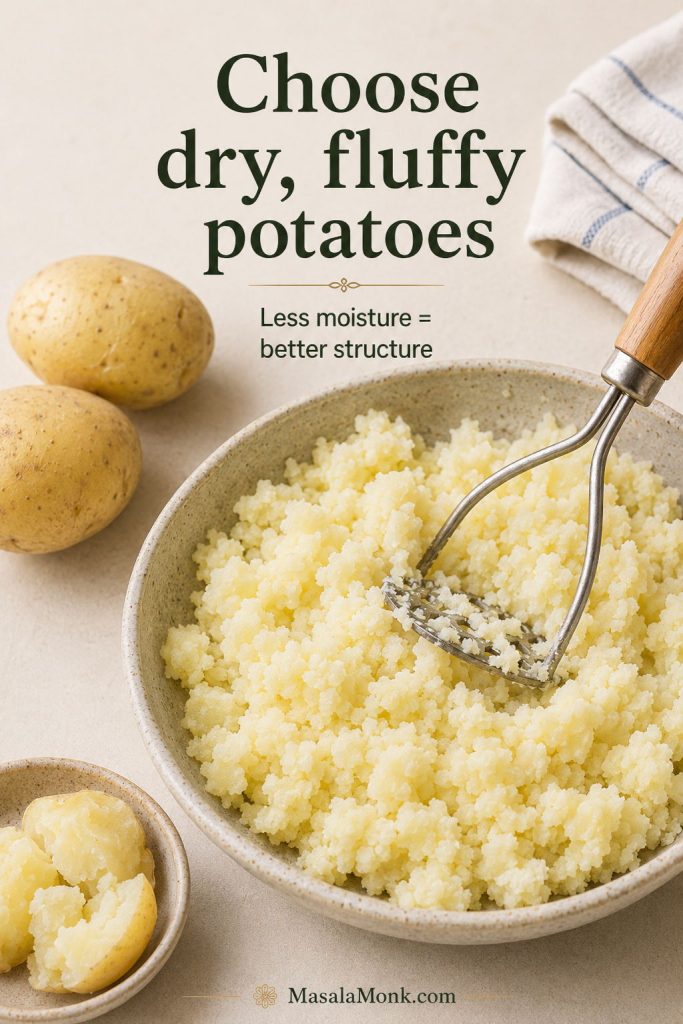
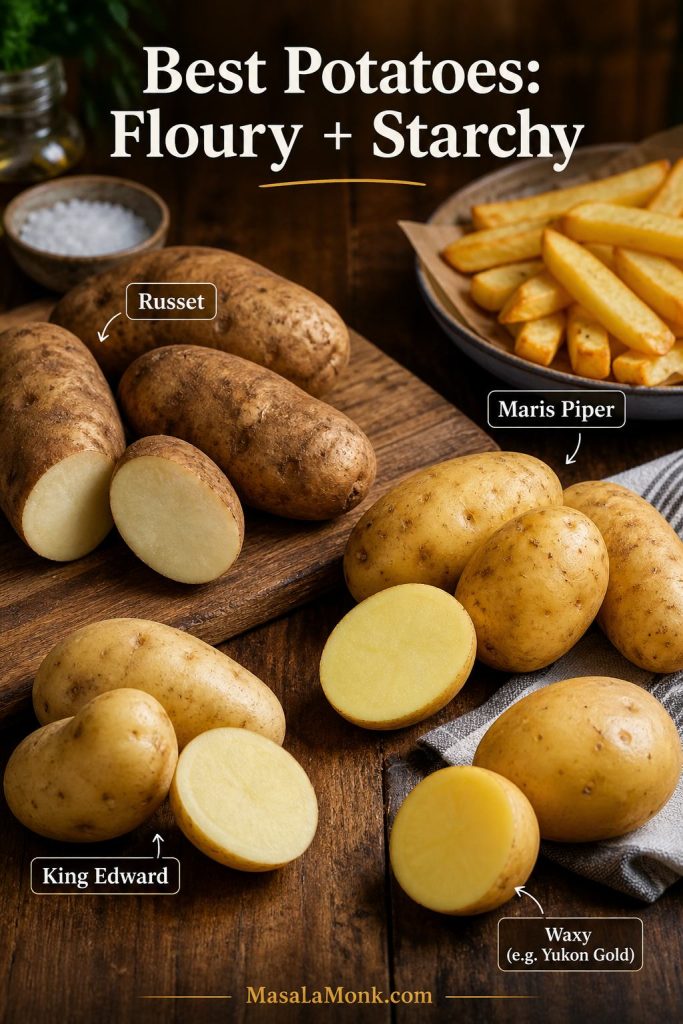
Starchy potatoes are your friend here. Russet, Maris Piper, King Edward, or Yukon Gold mash into a dry, fluffy base that holds together well. Waxy potatoes can work, but they make the filling denser and a little stickier.
Starchy potatoes give potato fish cakes better structure because they mash fluffy and dry instead of turning creamy, loose, or gluey.
Milk, Water, and Bay Leaf
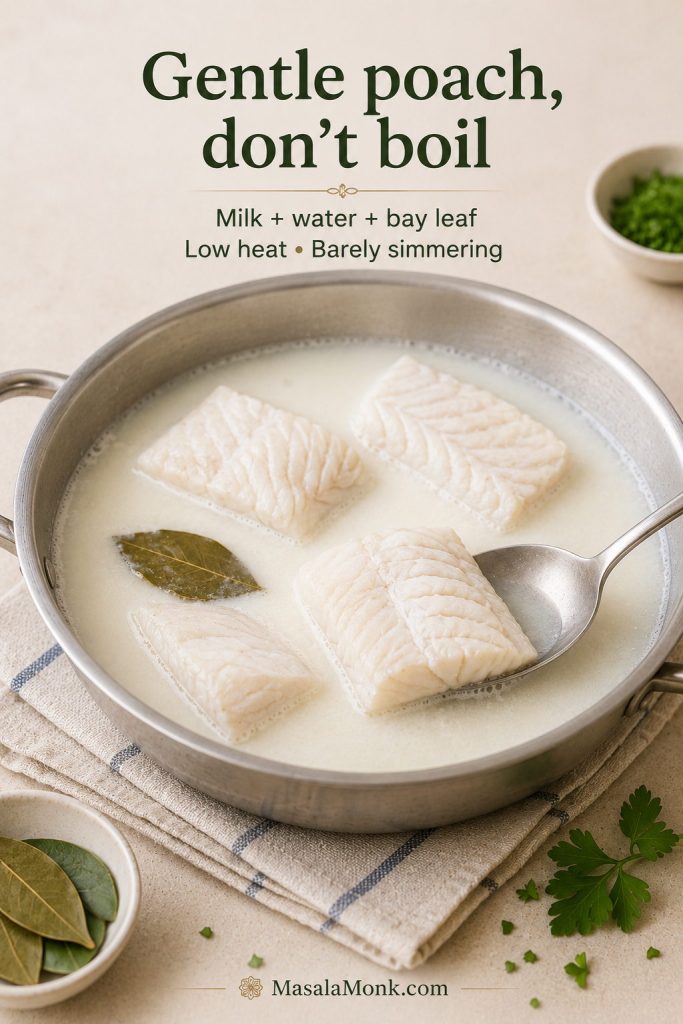
A simple poaching liquid of milk, water, and bay leaf keeps the fish gentle and lightly seasoned. You can use all water if needed, but milk gives the cod a softer, rounder flavor.
Gentle poaching keeps the fish tender enough to flake. However, boiling too hard can make it tight, dry, and harder to fold cleanly.
Egg
Use one small egg or one egg yolk in the filling. A whole egg gives more binding, while a yolk gives richness with slightly less wetness. If your mixture is already soft, use a yolk instead of a full egg.
Lemon, Mustard, and Herbs
Lemon zest, lemon juice, Dijon mustard, parsley, and chives or spring onion keep the filling bright. Fish cakes need more seasoning than plain fish because the potato and breadcrumb coating soften the flavor.
Breadcrumb Coating
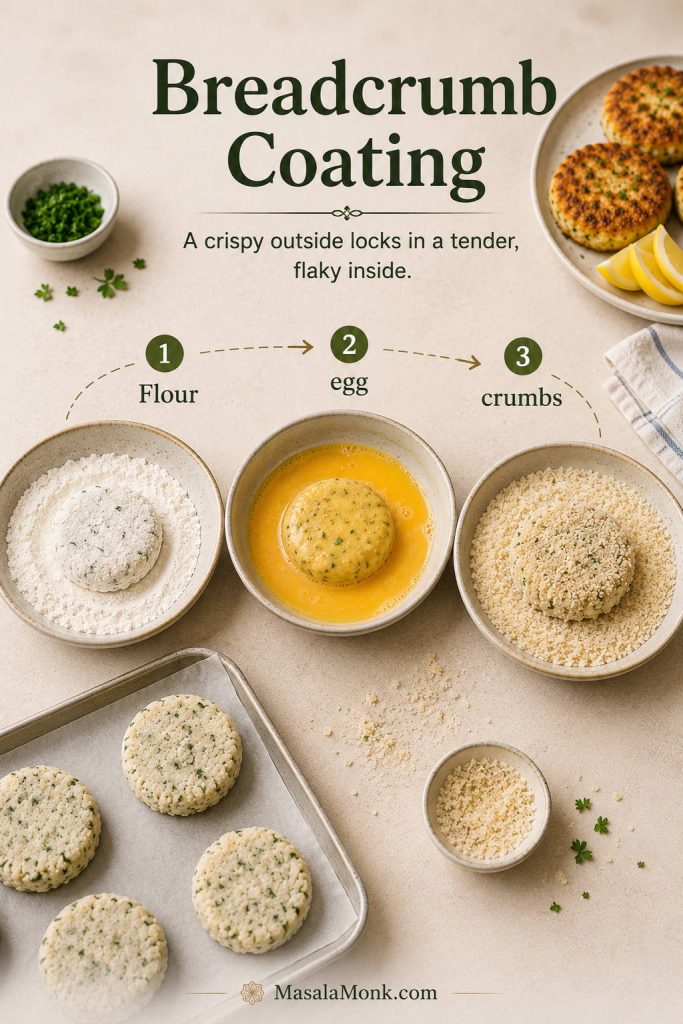
For the crispest finish, use a flour, egg, and breadcrumb coating. Panko gives a lighter crunch. Fresh breadcrumbs give a more traditional homemade fishcake crust. If you like crispy coatings, you may also enjoy the separate fish batter recipe for fried fish.
The coating works in layers: flour dries the surface, egg helps crumbs cling, and breadcrumbs create the crisp shell that protects the soft center.
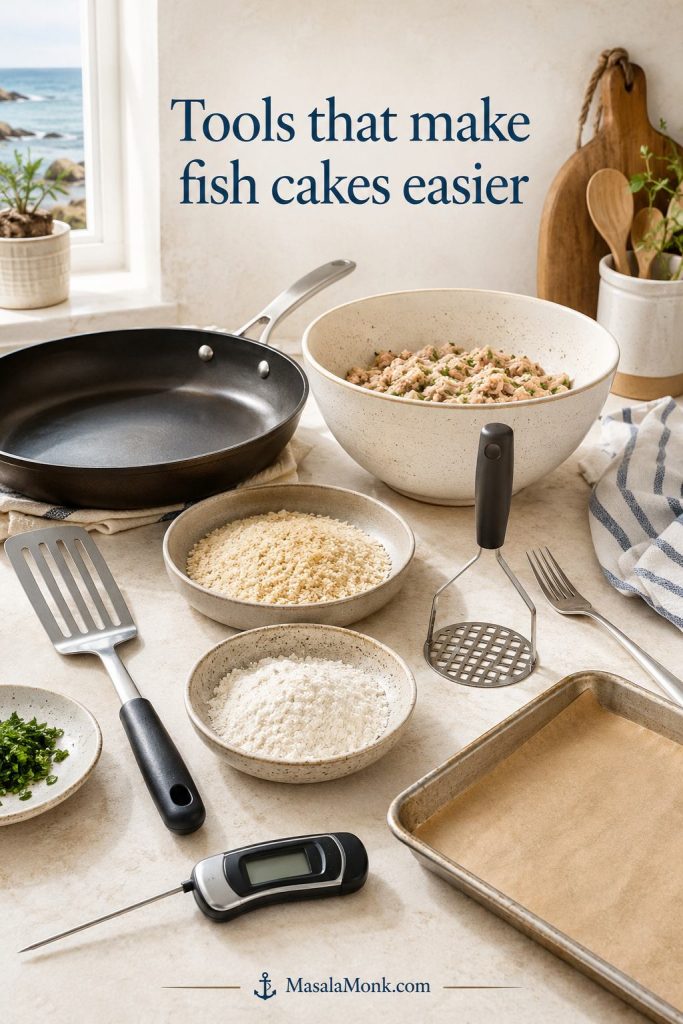
You do not need special equipment, but the right basic tools make the patties easier to handle. A wide skillet gives them room to brown, shallow bowls keep coating neat, and a fish spatula makes flipping less stressful.
Simple tools make the recipe calmer. A wide skillet, shallow bowls, and a thin spatula help with coating, frying, and gentle flipping.
Saucepan: for boiling the potatoes.
Shallow pan or skillet: for gently poaching the fish.
Colander: for draining the potatoes well.
Fork or potato masher: for rough mashing.
Mixing bowl: for folding the filling.
Tray or large plate: for chilling shaped cakes.
Three shallow bowls: for flour, egg, and breadcrumbs.
Large skillet: for pan-frying.
Fish spatula: for easier flipping.
Instant-read thermometer: optional, but useful for checking fish and reheated leftovers.
How to Make Fish Cakes Step by Step
Step 1: Cook the Potatoes
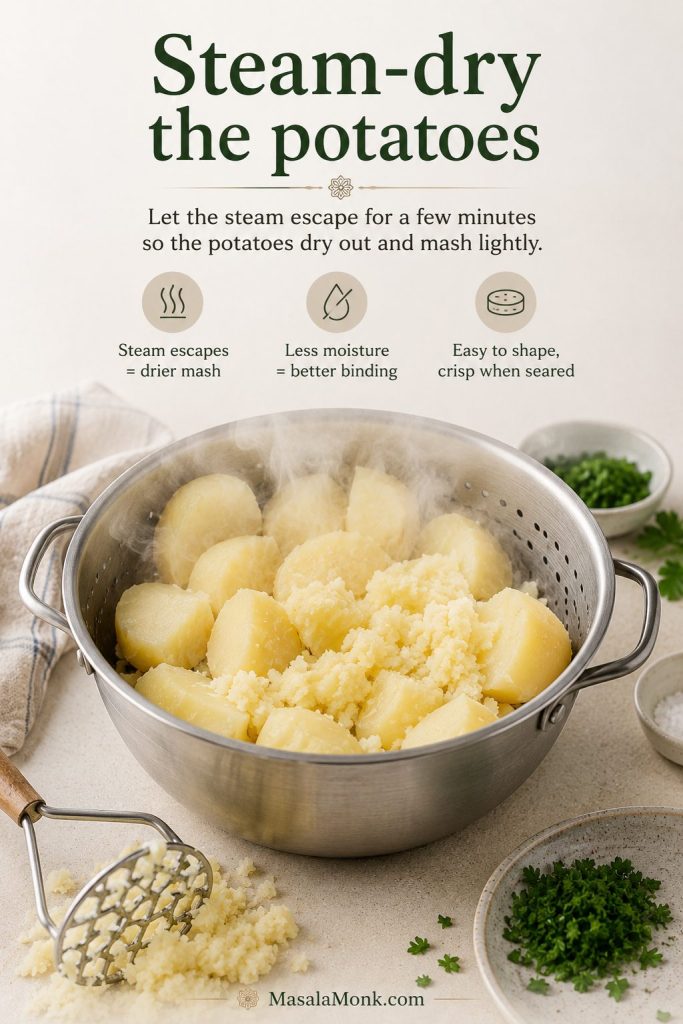
Peel and cut the potatoes into even chunks. Simmer in salted water for 10–15 minutes, or until tender enough to crush with a fork. Drain well, then return the potatoes to the hot pan for 1–2 minutes so excess steam escapes. Mash roughly. Do not add milk, cream, or butter.
Letting potatoes steam-dry removes extra moisture. As a result, the mash binds better and the patties are less likely to slump.
The potatoes are ready when they crush easily and look dry rather than glossy after steaming off. A rough mash is better than a perfectly smooth one because a little texture helps the cakes feel light.
Step 2: Poach the Fish
Place the cod or white fish in a shallow pan with milk, water, bay leaf, and a little black pepper. Bring just to a gentle simmer, then cook for about 4–6 minutes, depending on thickness. Turn off the heat, cover, and let the fish stand for 5 minutes. It should reach 145°F / 63°C, or be opaque and flake easily with a fork.
Step 3: Cool and Flake
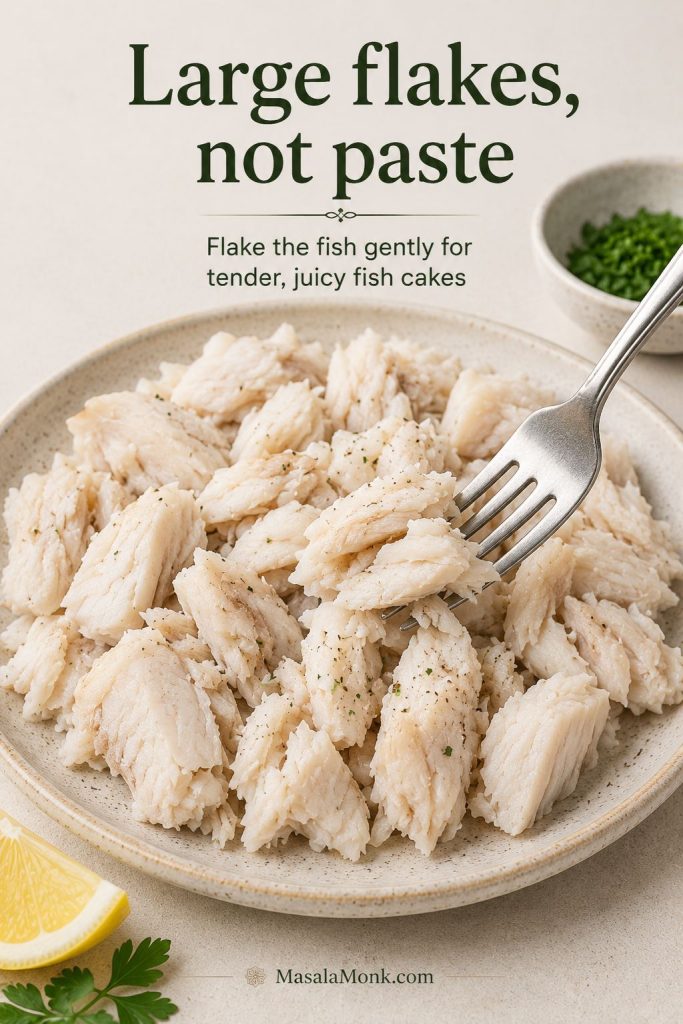
Lift the fish out of the poaching liquid and let it cool slightly. Flake it into large pieces, removing any skin or bones. Do not mash the fish into the potato. Visible flakes are what make the cakes feel like fish cakes instead of plain potato patties.
Keep the cod in large flakes rather than shredding it finely. Those pieces give homemade fish cakes a lighter, more satisfying texture.
Step 4: Mix the Filling
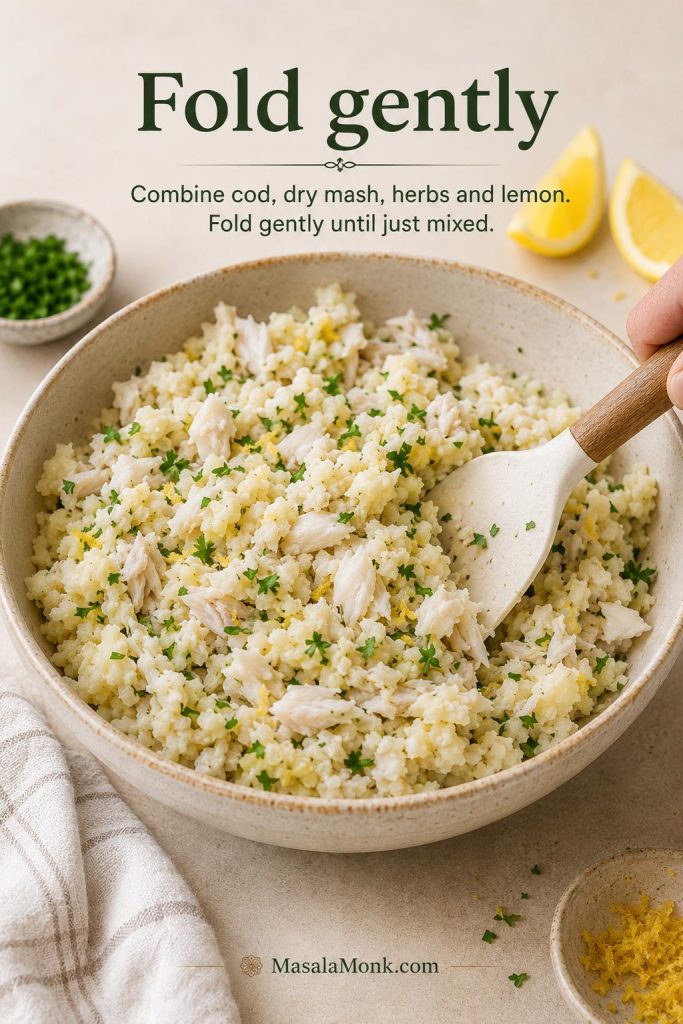
In a large bowl, combine the mashed potato, lemon zest, lemon juice, Dijon mustard, parsley, chives or spring onion, salt, pepper, and egg or egg yolk. Fold in the fish gently. The mixture may feel softer than burger patties, and that is okay. Once chilled and coated, it firms up enough to handle.
Fold gently so the fish stays visible. Overmixing may seem tidy, but it can turn the filling dense and paste-like.
Step 5: Shape and Chill
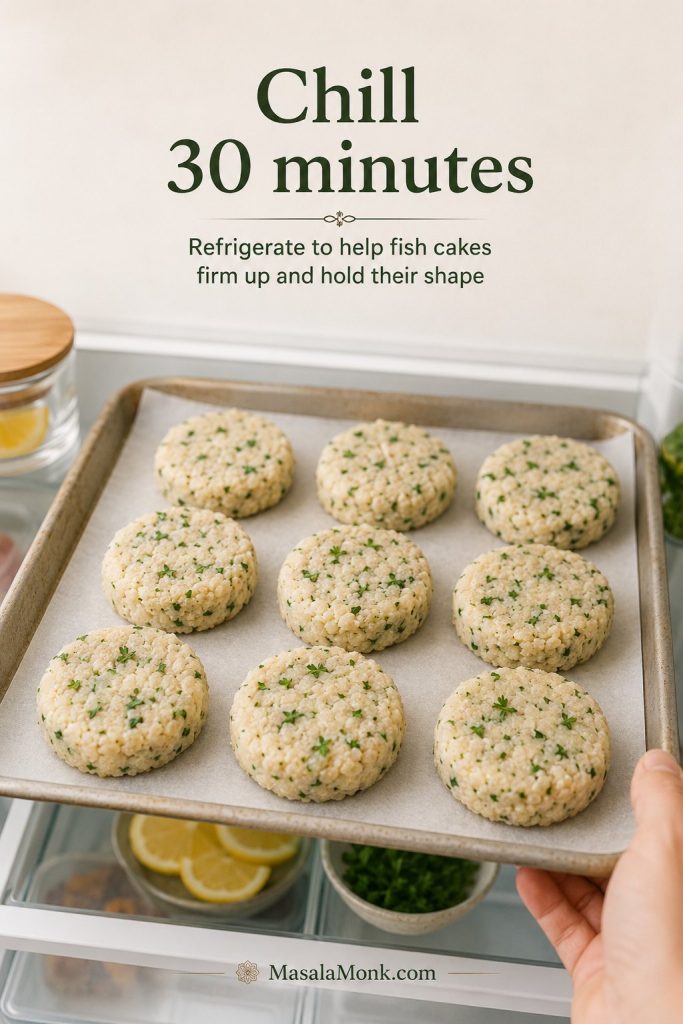
Divide the filling into 8 cakes, about 75–90g each. Shape each one about 2cm / ¾ inch thick. Place on a tray and chill for at least 30 minutes. Chilling firms the patties and makes them easier to coat and fry. If you want to make the batch ahead instead of frying right away, use the make-ahead timeline.
That short fridge rest makes the patties easier to coat and flip. Once chilled, the mixture behaves more like a cake and less like soft mash.
Do not worry if the shaped cakes look a little rustic. Neat edges are nice, but a chilled, well-coated patty matters more than a perfect circle.
Step 6: Coat
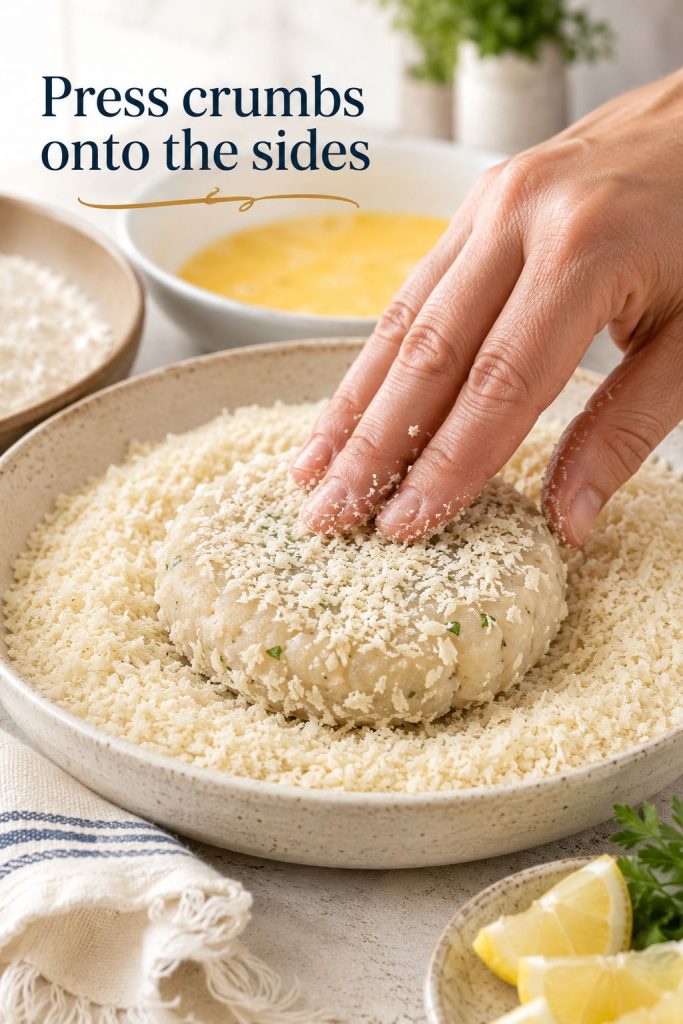
Set up three shallow bowls: flour, beaten egg, and breadcrumbs. Coat each round lightly in flour, dip in egg, then press into breadcrumbs. Make sure the sides are coated too.
Press crumbs onto the sides as well as the top and bottom. This helps the crust protect the soft filling during frying.
Step 7: Fry
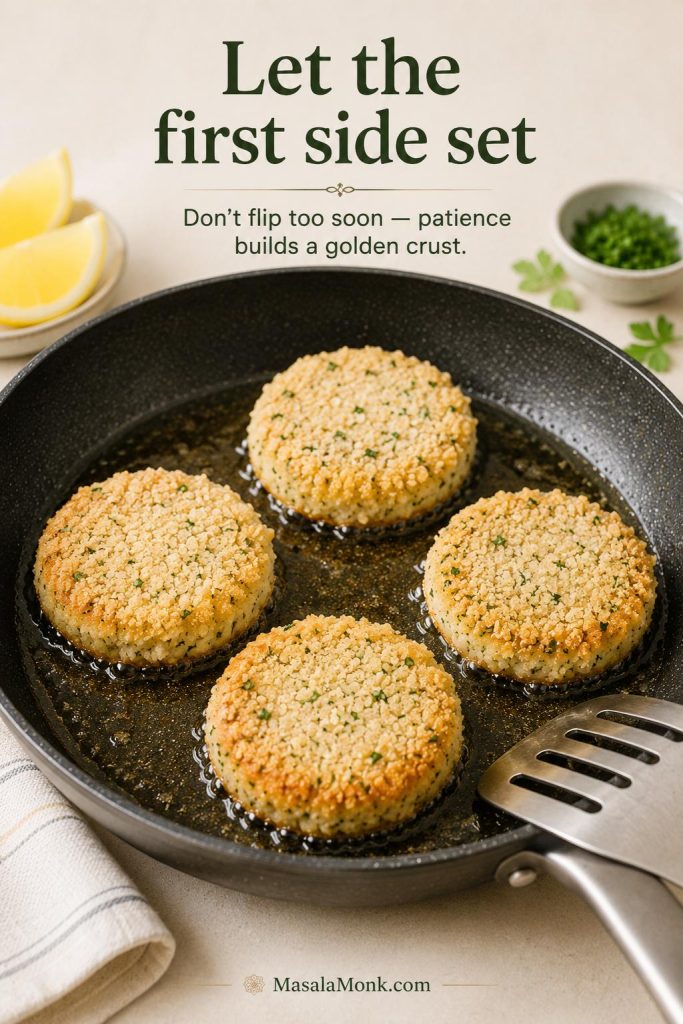
Heat oil in a large skillet over medium heat. Fry the cakes for 4–5 minutes per side, or until golden, crisp, and hot through. The first side is the patience side. Let it build a crust before you move it.
Wait until the first side forms a real crust before moving the patties. That small pause helps crispy fish cakes release cleanly instead of tearing.
Fish Cakes Recipe: Crispy Cod and Potato Fish Cakes
This fish cakes recipe makes crispy cod and potato patties with dry mashed potato, lemon, herbs, egg, and a golden breadcrumb coating. Pan-fry them for the crispiest crust, or use the baked and air fryer notes below.
Keep the core numbers handy: 450g raw fish, 500g peeled potatoes, 30 minutes chilling, and 4–5 minutes per side.
Yield8 fish cakes
Serves4
Prep Time30 minutes
Chill Time30 minutes
Cook Time25 minutes
Total Time1 hour 25 minutes
Main MethodPan-fried
Best FishCod or haddock
Ingredients
Fish and Potatoes
450g / 1 lb raw cod, haddock, pollock, hake, or firm white fish
500g / 1.1 lb peeled starchy potatoes, cut into chunks
150ml / ⅔ cup milk
150ml / ⅔ cup water
1 bay leaf
¾ teaspoon fine salt, divided, plus more for potato water
¼–½ teaspoon black pepper
Binder, Lemon, and Herbs
1 small egg or 1 egg yolk
1 teaspoon lemon zest
1–2 teaspoons lemon juice
1 teaspoon Dijon mustard
2 tablespoons chopped parsley
2 tablespoons chopped chives or spring onion
Coating and Frying
50–60g / ½ cup flour
1 large egg, beaten
85–100g / 1½–2 cups panko or fresh breadcrumbs
3–4 tablespoons neutral oil, or enough for a thin shallow-fry layer
Lemon wedges, for serving
Tartar sauce, lemon dill mayo, or green chutney mayo, for serving
Instructions
Cook and Mix
Cook the potatoes. Put the potato chunks in a saucepan, cover with cold water, add salt, and simmer for 10–15 minutes until tender. Drain well, then return to the hot pan for 1–2 minutes to steam dry. Mash roughly and let cool slightly.
Poach the fish. Place the fish in a shallow pan with the milk, water, bay leaf, and a little black pepper. Bring just to a gentle simmer. Cook for 4–6 minutes, depending on thickness, then turn off the heat, cover, and rest for 5 minutes. The fish should reach 145°F / 63°C, or be opaque and flake easily with a fork.
Flake the fish. Lift the fish from the poaching liquid, cool slightly, then flake into large pieces. Remove any skin or bones.
Mix the filling. In a bowl, combine the mashed potato, egg or yolk, lemon zest, lemon juice, Dijon mustard, parsley, chives or spring onion, remaining salt, and pepper. Fold in the fish gently, keeping visible flakes.
Adjust texture. A wet mixture needs breadcrumbs, added 1 tablespoon at a time. For a dry or crumbly mixture, add 1 teaspoon of reserved poaching liquid, mayonnaise, or Dijon.
Shape, Coat, and Fry
Shape. Divide into 8 cakes, about 75–90g each and about 2cm / ¾ inch thick. Place on a tray.
Chill. Refrigerate for at least 30 minutes. This helps the patties keep their shape.
Coat. Put flour, beaten egg, and breadcrumbs in three shallow bowls. Coat each cake in flour, dip in egg, then press into breadcrumbs.
Pan-fry. Heat oil in a skillet over medium heat. Fry for 4–5 minutes per side until golden and crisp. Flip gently and only once if possible.
Finish if needed. When the crust is ready before the center is hot, place the batch in a 200°C / 400°F oven for 8–10 minutes.
Serve. Serve hot with lemon wedges, tartar sauce, lemon dill mayo, garlic mayo, green chutney mayo, or sweet chili sauce.
Recipe Notes
For the driest potato texture, bake the potatoes instead of boiling them, then scoop and mash the flesh.
If using frozen fish, thaw fully and pat dry before cooking.
If using leftover mashed potato, avoid very creamy mash or add breadcrumbs to firm it up. See the leftover mashed potato section for the better ratio.
Panko gives the lightest crunch. Fresh breadcrumbs give a softer, classic crust.
Pan-Fried Fish Cakes: How to Get a Golden Crust
For your first batch, pan-frying is the best teacher because you can see how the crust sets. Baking is calmer for a full tray, and the air fryer is useful when you want less oil and easier cleanup, but the skillet gives you the clearest feedback. If you already know you want a hands-off batch, use the baked method; if you want less oil, use the air fryer method.
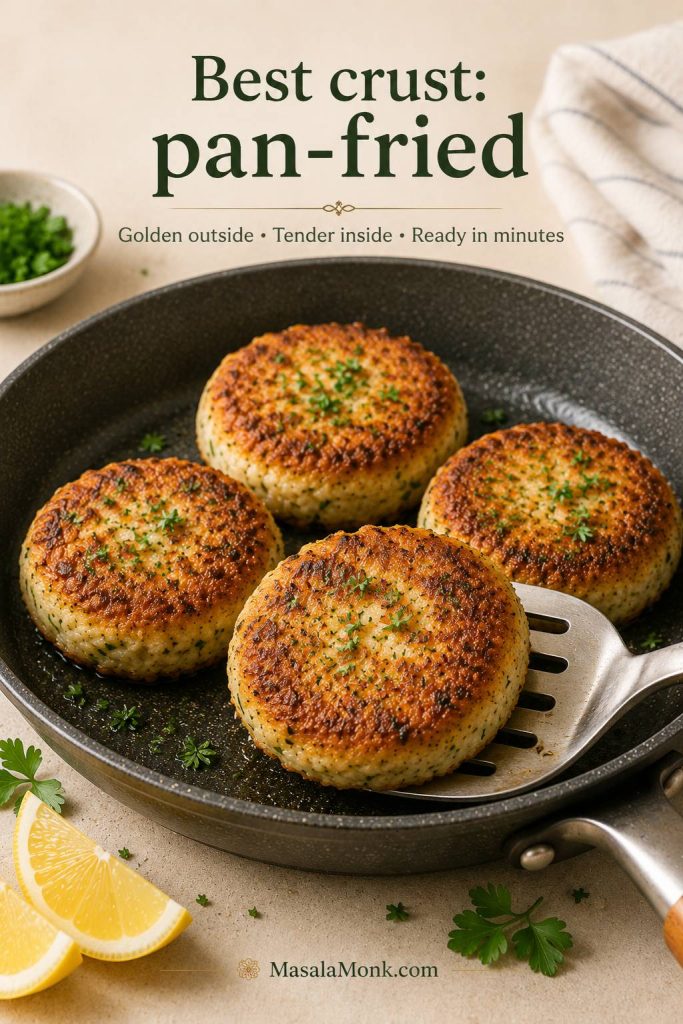
Pan-frying gives the strongest crust because the crumbs stay in direct contact with hot oil and steady heat.
Use a nonstick skillet, cast iron skillet, or heavy-bottom frying pan. Add enough neutral oil to coat the base generously, usually 3–4 tablespoons. For a deeper crust, use a shallow 1cm / 0.4 inch layer of oil.
You are looking for a steady sizzle, not aggressive frying. If the pan hisses hard or the crumbs darken within a minute, lower the heat. Fish cakes brown best when the crust has time to set before the inside overheats.
Add the patties in a single layer, leave space between them, and cook for 4–5 minutes on the first side before turning gently. The crust should sound gently crisp when you tap it with the spatula, not soft or oily.
When the crust is ready before the center is hot, the oven can finish the job without burning the crumbs. Transfer the batch to a 200°C / 400°F oven for 8–10 minutes, especially if the cakes are thick, very cold from the fridge, or made ahead.
Baked Fish Cakes
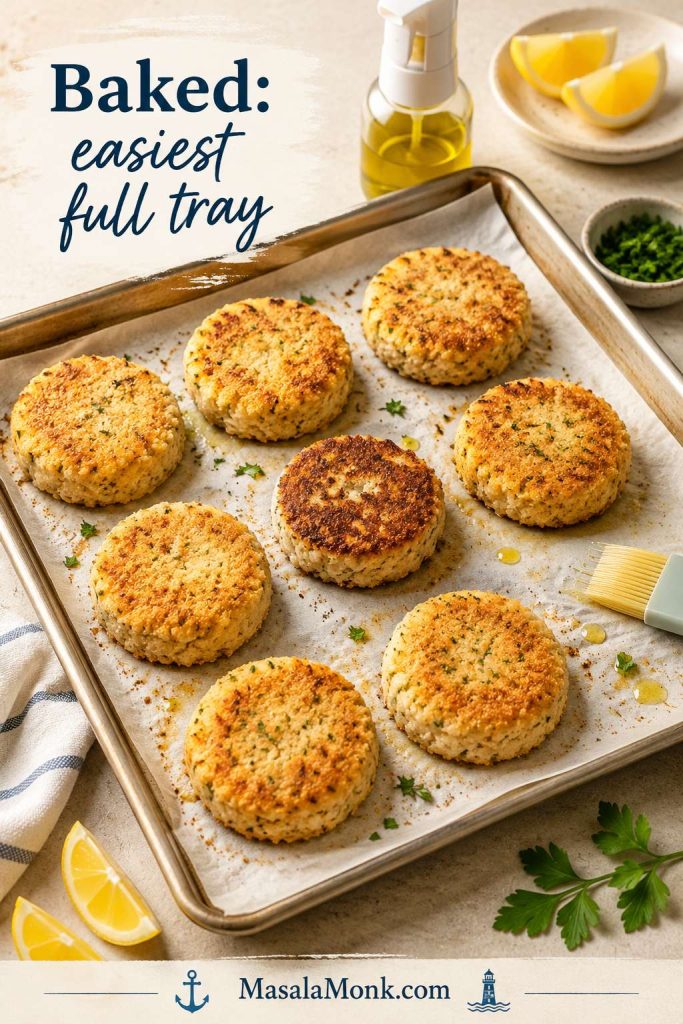
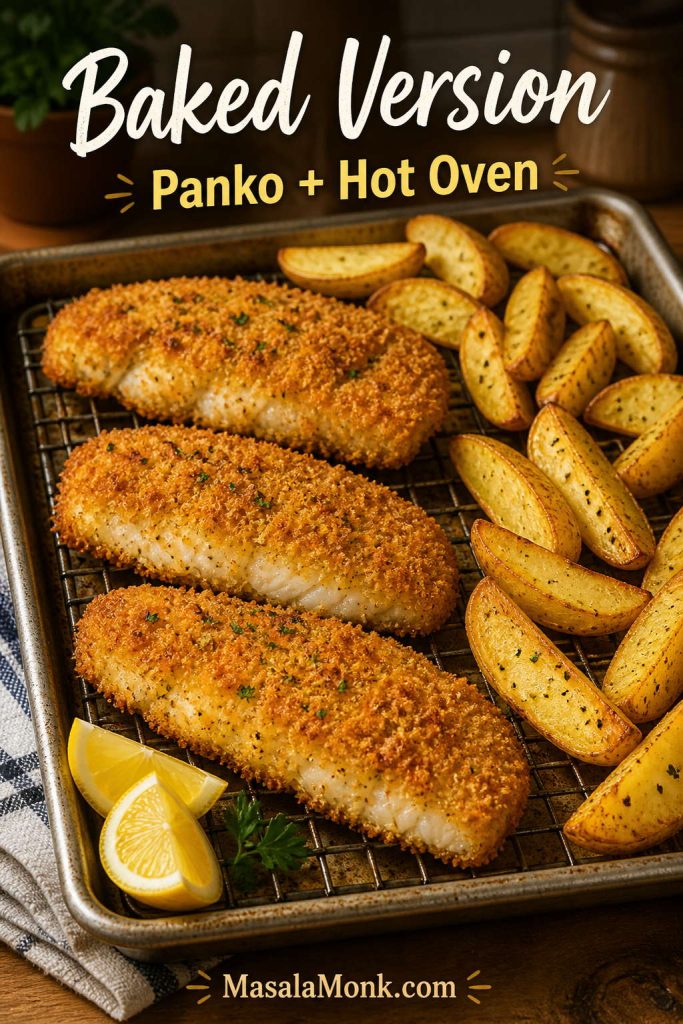
When you want the whole batch done at once, baking is the calmest route. The crust will not be quite as crackly as pan-fried, but a hot tray, a little oil, and a halfway flip still give you a golden finish. For a crisper but less hands-off result, use the pan-fried method instead.
Baked fish cakes are useful when you want the whole batch done together. For better browning, oil the crumb coating and flip the tray halfway through.
This is the method to choose when you care more about an easy full tray than the loudest crunch.
Heat the oven to 200°C / 400°F.
Place breaded fish cakes on a parchment-lined or lightly oiled baking sheet.
Brush or spray both sides with oil.
Bake for 18–22 minutes, flipping halfway.
For extra browning, broil or grill for 1–2 minutes at the end.
If the cakes are very thick, use a thermometer to check that the center is hot. Fish cooked from raw should reach 145°F / 63°C, or be opaque and flake easily with a fork. Leftovers should be reheated to 165°F / 74°C.
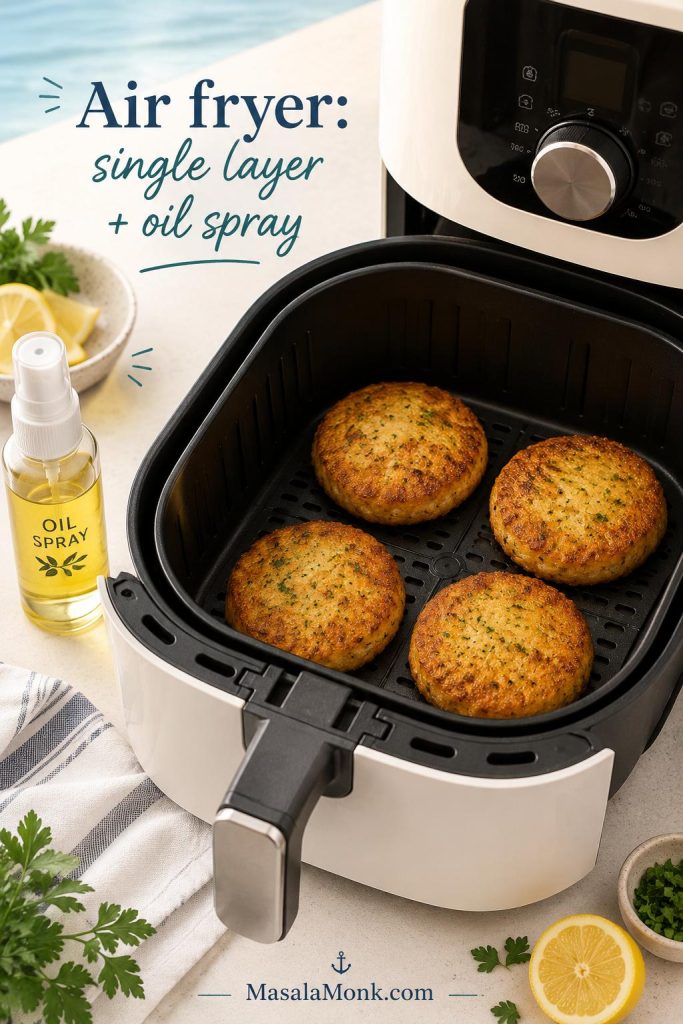
Air Fryer Fish Cakes
The air fryer is best when you want a neater, lighter version and do not want to babysit a skillet. The trade-off is texture: good crunch, but not the same shallow-fried crust.
Air fryer fish cakes crisp best when the basket is not crowded. A little oil helps the crumbs brown, while open space prevents steaming.
Think of the air fryer as a crisping tool, not a deep fryer. A little oil on the crumbs still matters.
For the best homemade air fryer fish cakes, chill them first, spray both sides with oil, and keep them in a single layer. Crowding traps steam and softens the crumb.
Type
Air fryer temperature
Time
Notes
Homemade chilled fish cakes
190–200°C / 375–400°F
10–14 minutes
Spray with oil and flip halfway.
Homemade frozen fish cakes
180–190°C / 360–375°F
14–18 minutes
Thicker cakes need longer; check the center.
Store-bought frozen fish cakes
180°C / 360°F
8–11 minutes
Cook in a single layer and flip or shake halfway.
Reheating cooked leftovers
190°C / 375°F
4–6 minutes
Best for restoring crispness. Reheat leftovers to 165°F / 74°C.
Air fryer models vary, so treat the times as a range. Smaller, flatter cakes brown faster. Larger or very cold patties may need a few extra minutes. The coating should look golden and crisp, and the center should be hot all the way through. If you are cooking a freezer batch, use the cook-from-frozen section for thaw-first versus frozen guidance.
Frozen Fish Cakes: How to Freeze, Cook, and Reheat
This is a recipe worth doubling. Once the cakes are shaped and coated, they freeze neatly and can become a quick dinner later with very little effort. Future-you will thank you for freezing them flat first; it keeps the coating neat and makes weeknight cooking much easier.
Fish cakes reward a little planning because chilling is not wasted time here. It is what makes the patties easier to coat, freeze, and fry without drama.
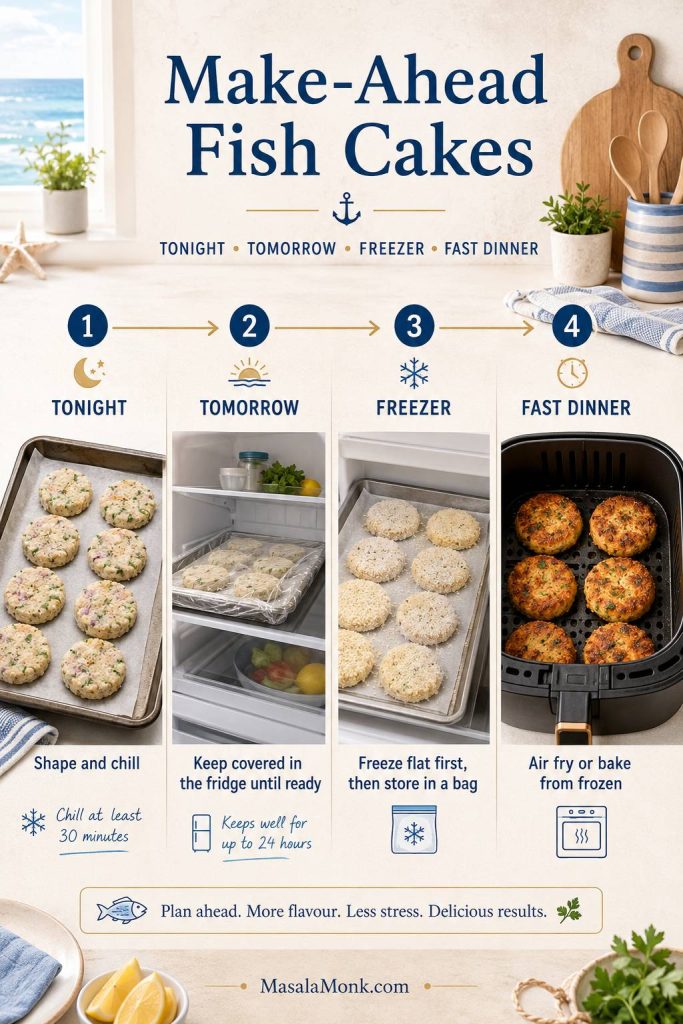
Make-Ahead Timeline
Make-ahead fish cakes work best when you plan around chilling. Shape tonight, cover for tomorrow, or freeze flat for a faster dinner later.
Plan
What to do
Cook tonight
Shape, chill 30 minutes, coat, and fry.
Prep 1 day ahead
Shape and refrigerate covered; coat before frying.
Freeze for later
Shape, coat, freeze on a tray, then bag.
Cleanest crust from frozen
Thaw overnight, then pan-fry.
Fastest frozen dinner
Air fry or bake from frozen, checking the center.
If the batch feels too soft before freezing, fix the mixture first so the patties do not break later.
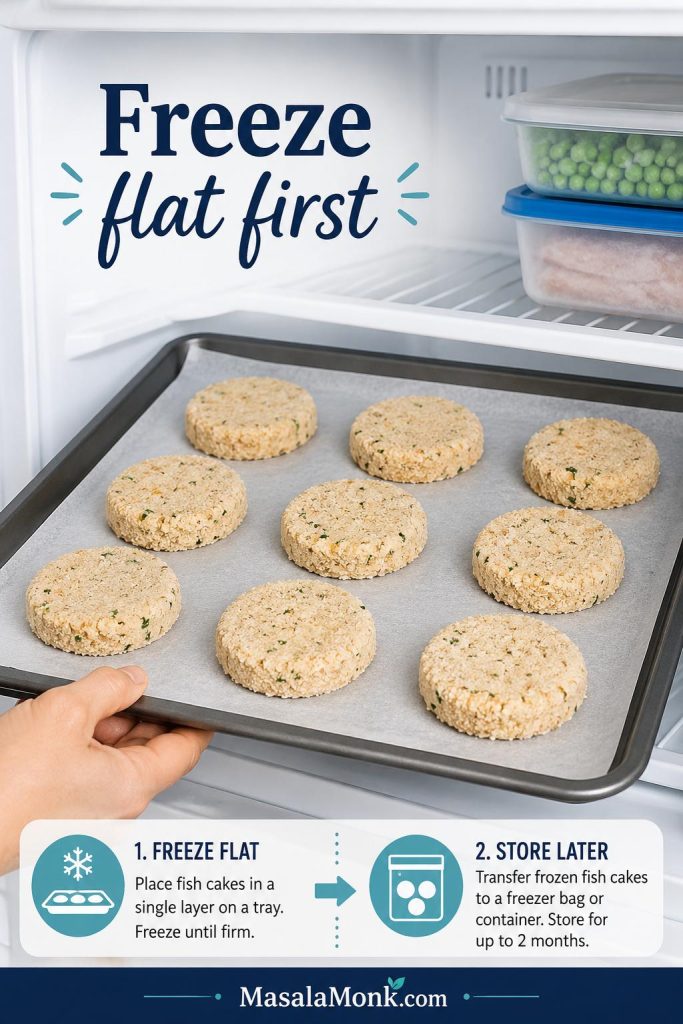
How to Freeze Them
Freeze the breaded patties flat before storing them. That simple step protects the coating and makes it easier to cook only what you need later.
Shape the fish cakes.
Chill for 30 minutes.
Coat with flour, egg, and breadcrumbs.
Place on a tray and freeze until firm.
Transfer to a freezer-safe container or bag.
Label with the date and use within 2–3 months for best texture.
Should You Freeze Fish Cakes Before or After Cooking?
For this potato fish cakes recipe, the best texture usually comes from freezing the cakes after shaping and coating, but before frying. Freeze them on a tray until firm, then store with parchment between layers. Thaw overnight before pan-frying for the crispiest crust.
If your fish was previously frozen and you are worried about refreezing, cook the patties first, cool them quickly, then freeze the cooked cakes. Reheat from frozen in the oven or air fryer until hot through.
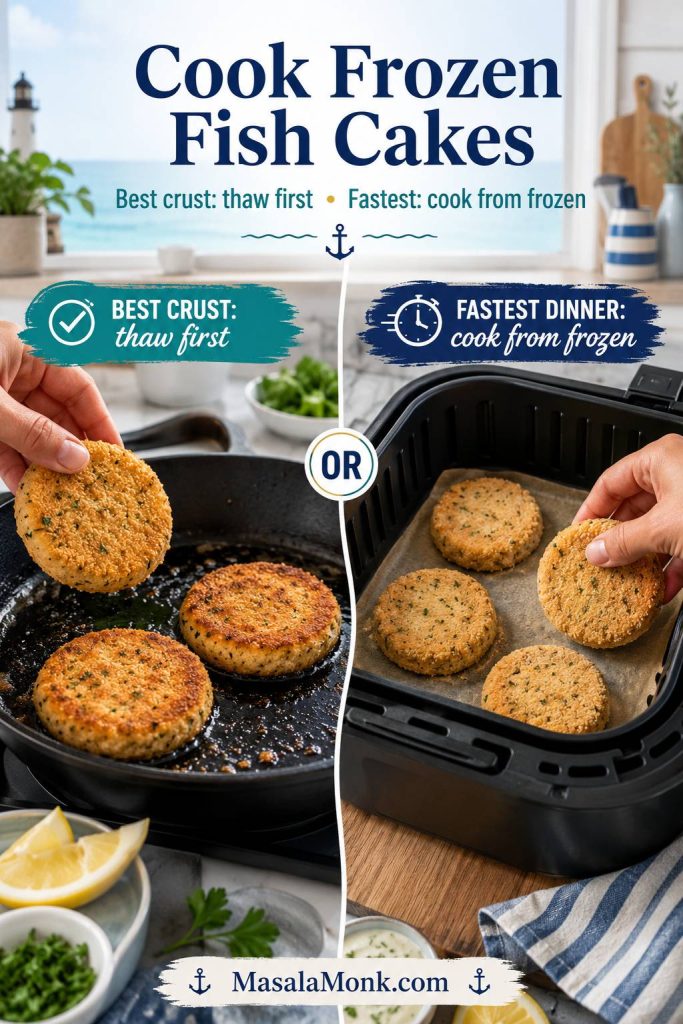
Cook From Frozen or Thaw First?
For the cleanest crust, thaw fish cakes overnight in the fridge, then pan-fry, bake, or air-fry. If cooking from frozen, use a gentler temperature and allow more time so the outside does not brown before the center heats through.
For the cleanest crust, thaw first and pan-fry. However, baking or air frying from frozen is faster for weeknight dinners.
Method
Temperature
Time from frozen
Oven
200°C / 400°F
25–30 minutes, flipping once
Air fryer
180–190°C / 360–375°F
14–18 minutes
Skillet + oven finish
Medium skillet, then 200°C / 400°F oven
Brown first, then bake 10–15 minutes
Leftover Mashed Potato Fish Cakes
Leftover mashed potato can be a gift here, as long as it is not too loose. Cold, dry mash gives the fish something sturdy to hold on to, which means the cakes are easier to shape and less likely to fall apart.
Leftover mashed potato can save time, but it should be cold and fairly dry. If it is creamy, add breadcrumbs and chill longer.
Use about 2 cups cold mashed potato with 300–350g cooked flaked fish for a balanced leftover batch. If you have closer to 450g / 1 lb cooked fish, add another ½–1 cup mash or extra breadcrumbs until the mixture holds its shape.
Leftover mash rule
If the mashed potato tastes creamy enough to eat as a side dish, it may be too soft for fish cakes. Add breadcrumbs, chill longer, and shape smaller cakes.
Why Fish Cakes Fall Apart
Diagnose the Problem First
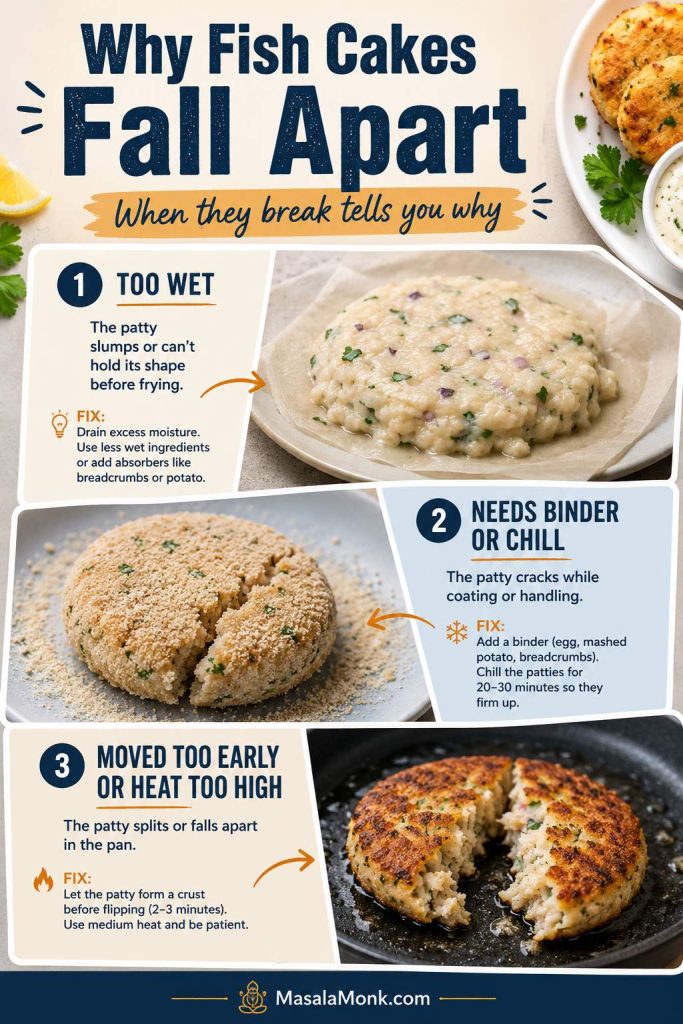
Fish cakes usually fall apart because the mixture is too wet, the patties were not chilled, the binder is weak, or the crust was moved before it had time to set. If the first cake breaks, do not panic. Most broken fish cakes are a moisture, binder, or timing problem, and the moment they break tells you what to fix.
When fish cakes fall apart, notice when it happens. Slumping points to moisture, cracking points to binder or chilling, and splitting in the pan points to heat or early flipping.
Look at when they break. Slumping before frying points to too much moisture. Cracking during coating usually means the patties need more binder or more time in the fridge. Splitting in the pan usually means the crust was moved too early or the heat was too aggressive.
For extra insurance, fry one small test cake before shaping the whole batch. Cracks mean the rest needs a spoonful of breadcrumbs and more chilling. A flat-tasting test cake means you should adjust the salt, lemon, mustard, or herbs before coating the remaining patties.
Quick Fixes for Common Problems
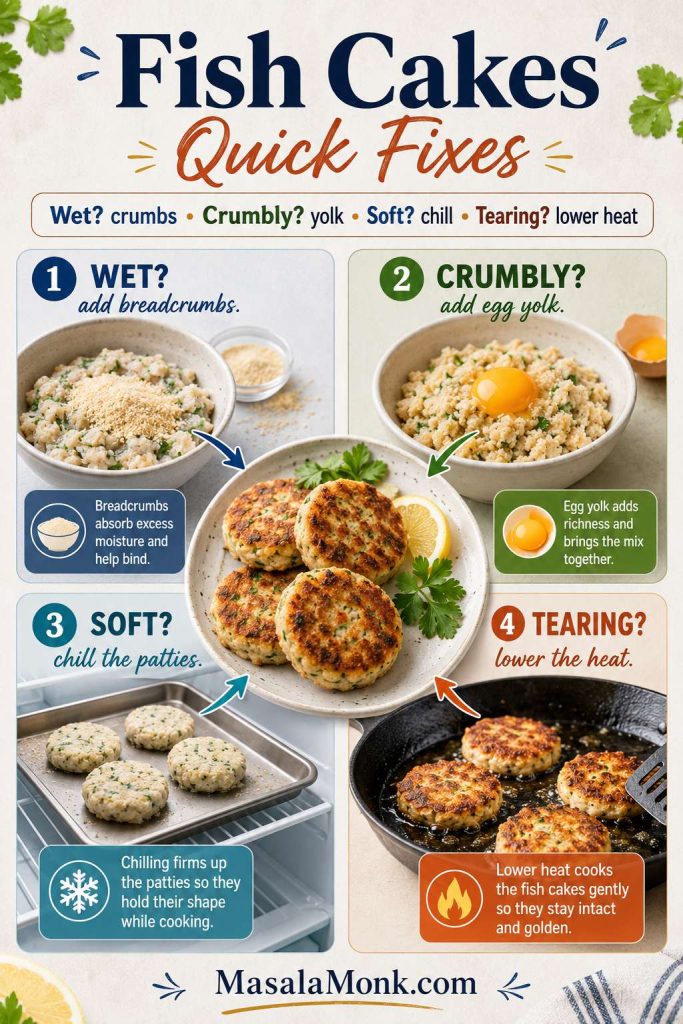
A broken first cake does not ruin the batch. Instead, use it as a test and adjust moisture, binder, chill time, or heat before frying the rest.
Problem
Likely cause
Fix
Fish cakes fall apart
Mixture too wet, not chilled, or weak binder
Add breadcrumbs, chill 30–60 minutes, and use egg or egg yolk.
Cakes are mushy
Wet mashed potato or overmixed filling
Steam-dry potatoes, avoid creamy mash, and fold fish gently.
Cakes taste bland
Potato diluted the seasoning
Add more salt, lemon zest, herbs, mustard, or a sharper sauce.
Outside browns too fast
Heat too high
Lower heat and finish thick cakes in the oven.
Cakes absorb oil
Oil too cool or pan overcrowded
Use medium heat, wait for a steady sizzle, and fry in batches.
Coating falls off
Surface too wet or coating not pressed in
Dust lightly with flour first, dip in egg, then press breadcrumbs firmly.
Center is cold
Cakes too thick or too cold from fridge/freezer
Finish in a 200°C / 400°F oven for 8–10 minutes.
Panic fix
If the first cake breaks, stop and adjust the rest: breadcrumbs for wetness, egg yolk for crumbling, longer chilling for softness, and lower heat for tearing. Once the batch is holding together, go back to coating and frying.
How to Keep Fish Cakes from Falling Apart
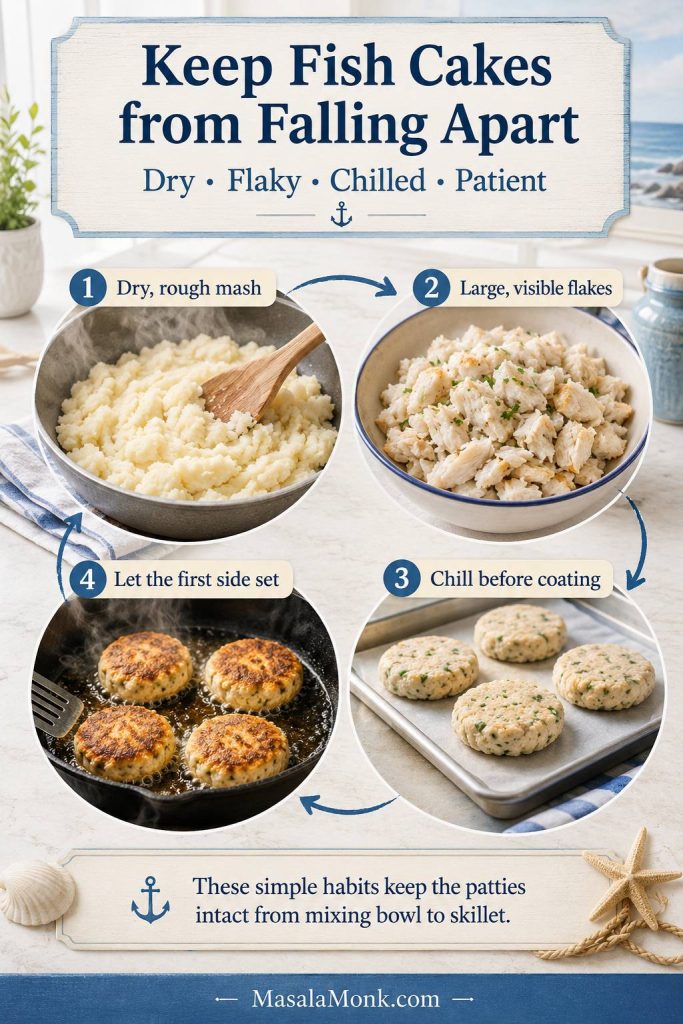
Prevention starts before the pan: dry mash, large flakes, chilled patties, and a patient first side make the batch easier to handle.
Use dry mashed potato, not loose creamy mash.
Drain and pat fish dry before mixing.
Keep fish flakes visible instead of mashing everything smooth.
Use egg or egg yolk as a binder.
Chill shaped cakes for at least 30 minutes.
Make cakes about 2cm / ¾ inch thick, not huge and heavy.
Flip only after the first side is golden and set.
Sauces for Fish Cakes
A good sauce makes fish cakes feel complete. You want something bright, creamy, tangy, or a little spicy to cut through the fried crust and wake up the potato.
Fish cakes need a sauce with contrast. Creamy, herby, tangy, or spicy sauces make the potato and fish taste brighter.
For tartar sauce, garlic mayo, or lemon dill mayo, the sauce tastes best when the base is rich but balanced. If you want to make the creamy base yourself, use this homemade mayonnaise recipe before adding pickles, herbs, lemon, capers, or mustard.
For the first batch, keep it simple: tartar sauce and lemon. Once you know you like the texture, try green chutney mayo for a sharper finish or mango mustard sauce when you want something brighter and more playful.
Sauce Ideas by Flavor
Sauce
Use it with
Tartar sauce
Classic cod fish cakes, chips, peas, salad
Lemon dill mayo
Cod, haddock, and lighter fish cakes
Garlic mayo
Crispy pan-fried fish cakes and fries
Green chutney mayo
Indian-spiced or herb-heavy fish cakes
Sweet chili sauce
Thai-inspired or spicy fish cake variations
Caper yogurt sauce
Lighter plates with salad or roasted vegetables
Sriracha mayo
Spicy fish patties, sandwiches, sliders
Need a full plate idea? The serving section below pairs these sauces with sides.
What to Serve with Fish Cakes
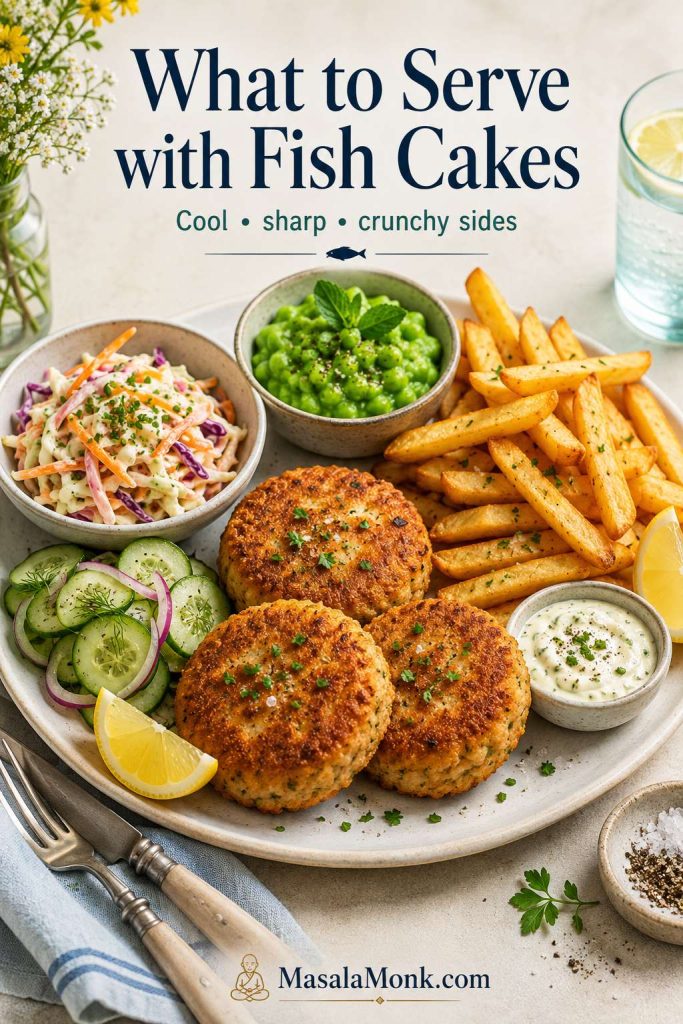
Fish cakes can be a light meal, a dinner plate, or part of a bigger seafood spread. Because they are crisp and savory, they pair best with something fresh, sharp, creamy, or crunchy. A simple green salad is enough, but coleslaw, cucumber salad, or fries can make the plate feel more complete.
Pair crisp fish cakes with cool sides, lemon, sauce, and something crunchy. That contrast keeps the plate bright instead of heavy.
The best plate has contrast: hot crisp cakes, something cool or sharp, and enough sauce or lemon to keep each bite bright.
Easy Sides and Pairings
Green salad: Best for a lighter dinner.
Coleslaw: Crunchy, creamy, and great with tartar sauce.
Cucumber salad: Cool, crisp, and bright enough to cut through the fried crust.
Peas or mushy peas: Classic with cod and potato fish cakes.
Battered fries or chips: Makes the plate feel closer to fish and chips, especially with tartar sauce and lemon.
Roasted vegetables: Good for a simple dinner plate.
Rice: Useful if you are serving the fish cakes with chutney, curry-style sauce, or sweet chili sauce.
Soup: Pair one or two smaller fish cakes with tomato soup, vegetable soup, or chowder.
If you want a spiced version instead, the variations section has Indian-spiced and Thai-style directions.
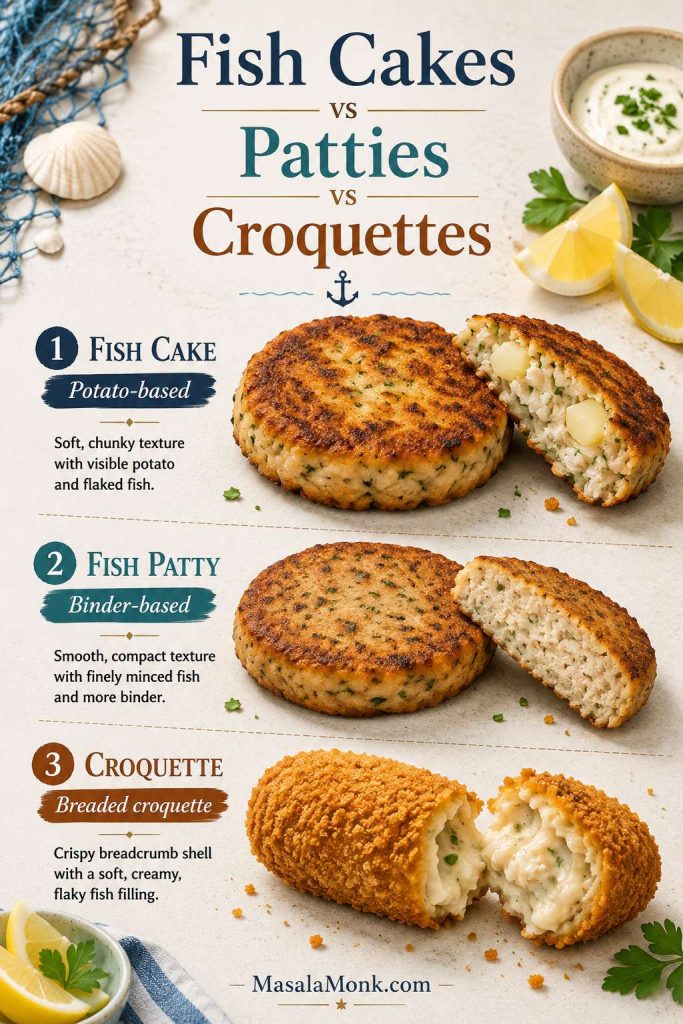
Fish Cakes vs Fish Patties vs Croquettes
The names overlap because all three are built around the same idea: a soft filling shaped into something you can fry or bake. In everyday cooking, fish cakes usually include fish and potato, while fish patties often rely more on breadcrumbs, egg, mayo, or soaked bread instead of mash.
The names overlap, but the texture changes. Fish cakes usually lean on potato, patties use more binder, and croquettes have a breaded shell.
Croquettes are usually breaded and fried with a softer filling, so fish cakes can feel like a simpler, flatter cousin of croquettes. If you like the breaded-and-fried style, you may also enjoy this broader croquettes recipe guide.
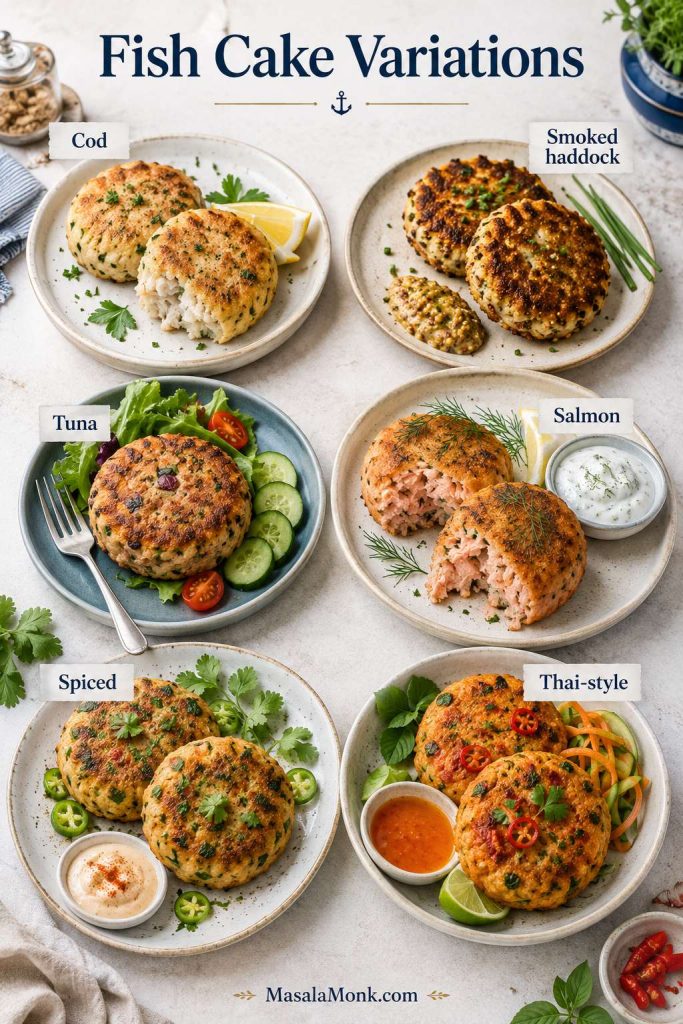
Variations When You Want a Different Fish or Flavor
Once the basic texture is right, the fish and seasoning can change. Keep the same rules — dry base, visible flakes, enough binder, and a proper chill — then adjust the flavor around the fish you are using.
Once the base texture is right, the flavor can change. Cod, smoked haddock, tuna, salmon, spiced, and Thai-style versions all need the same structure.
Cod Fish Cakes
Use cod as written in the main recipe for a clean, gentle, familiar version. It is the safest starting point if you want fish cakes that taste bright, flaky, and not too strong.
Smoked Haddock Fish Cakes
Replace half the cod with smoked haddock for a stronger flavor. Taste before adding salt because smoked fish is already seasoned.
Salt Cod Fish Cakes
Salt cod fish cakes are a separate regional style. Soak the salt cod properly first, then mix with potato, herbs, and binder. Do not use salt cod without soaking or the cakes will be far too salty.
Mackerel Fish Cakes
Mackerel gives a stronger, oilier fish cake. Use more lemon, herbs, mustard, or a sharp sauce to balance the richness.
Tuna Fish Cakes
Canned tuna can work, but tuna patties usually need a slightly different formula because canned tuna is drier and more compact than poached cod. Add mayo, mustard, egg, and breadcrumbs for structure.
Salmon Fish Cakes
Salmon patties and croquettes are close cousins of fish cakes, but they have their own binder, texture, and seasoning logic. Canned salmon usually needs a richer binder and a brighter seasoning profile than poached white fish.
Thai Fish Cakes
Thai fish cakes are a different style. They usually use fish paste or finely processed fish, red curry paste, fish sauce, makrut lime leaves, and green beans. The texture is springier and bouncier than potato fish cakes, so they deserve their own recipe rather than being treated as a small variation here.
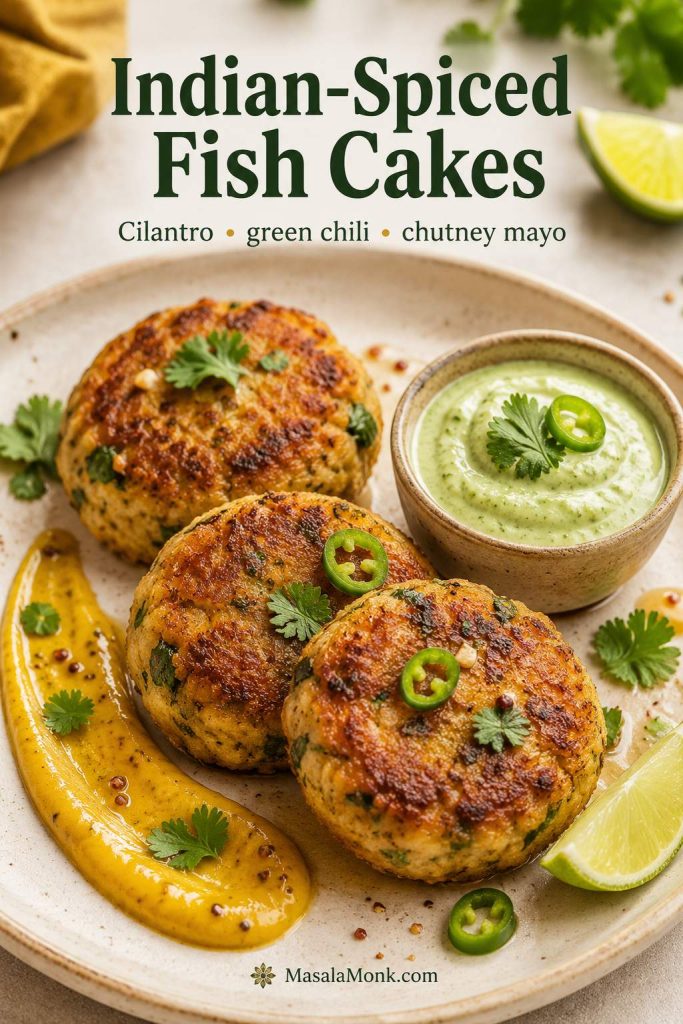
Indian-Spiced Fish Cakes
For an Indian-style version, add a little ginger, green chili, cilantro, cumin, or garam masala to the mixture. Keep the spices modest so the fish still comes through. Serve with green chutney mayo or a spoonable mango mustard sauce for a tangy, sweet, mustard-forward finish. For more pairing ideas, go back to the sauces section.
Indian-spiced fish cakes work best when the spices brighten the fish rather than cover it. Cilantro, green chili, chutney mayo, and lime do that well.
Fish Tacos Instead of Fish Cakes
If you have thin fillets and want a fresher, tortilla-style dinner instead of potato fish cakes, make this fish tacos recipe with slaw, sauce, and quick-cooked fish.
Fish Cakes Without Potato
You can make fish cakes without potato, but the texture changes. Instead of mashed potato, use breadcrumbs, soaked bread, egg, mayo, or another binder. The cakes will be more like fish patties than classic potato fish cakes.
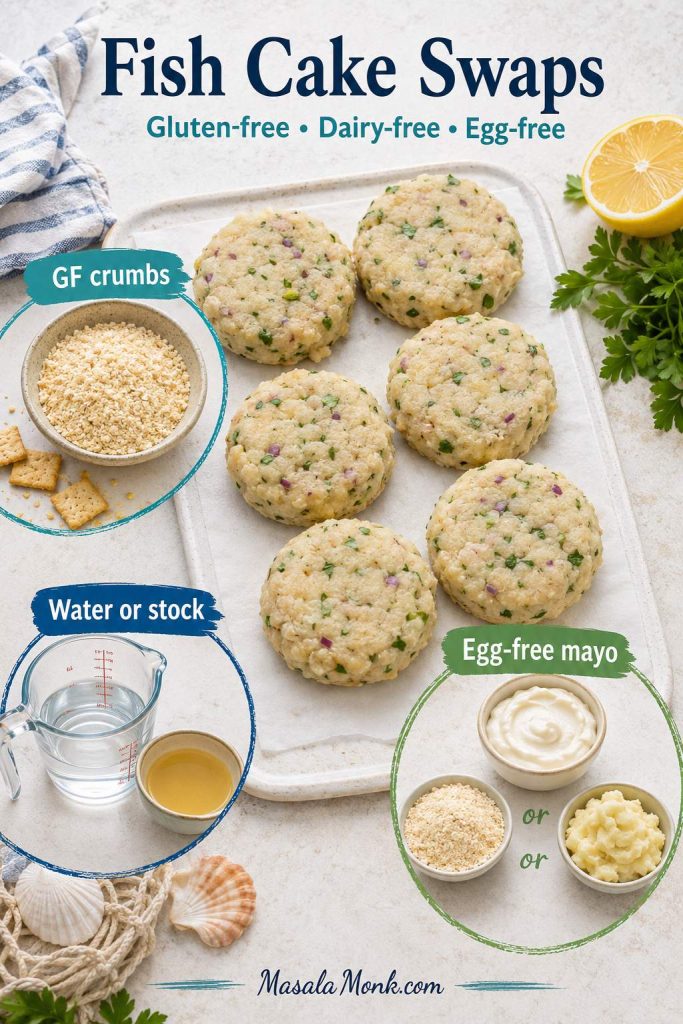
Gluten-Free, Dairy-Free, and Egg-Free Adjustments
These swaps work best when you keep the same texture goal: a filling that presses together, chills firm, and can be flipped without falling apart.
Dietary swaps still need the same texture goal. Use gluten-free crumbs, water or stock, and egg-free mayo while keeping the patties firm enough to flip.
Gluten-free: Use gluten-free flour and gluten-free breadcrumbs or crushed gluten-free crackers.
Dairy-free: Poach the fish in water or light stock instead of milk. Use unsweetened dairy-free milk only if its flavor is neutral.
Egg-free: Use egg-free mayo, extra breadcrumbs, or a little extra mashed potato to help bind. Chill the cakes longer and flip gently because they will be more delicate.
No panko: Use fresh breadcrumbs, dry breadcrumbs, crushed crackers, or a light cornmeal coating.
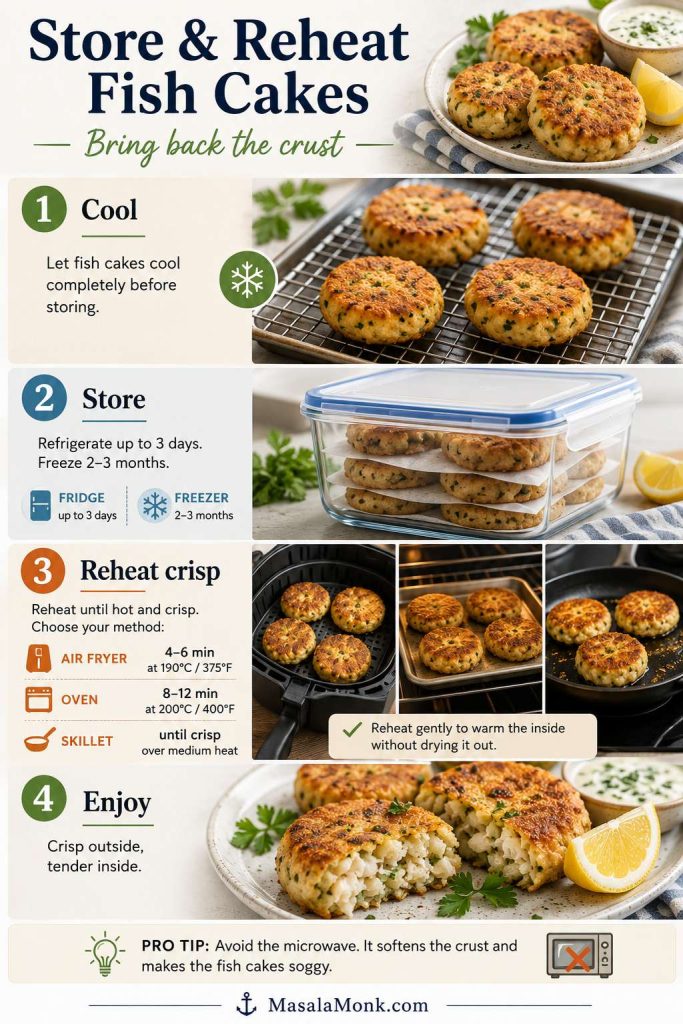
How to Store and Reheat Without Losing the Crust
The main goal with leftovers is to bring back the crust without drying out the middle. The microwave is fastest, but the oven, skillet, or air fryer will give you a much better second-day fish cake. If you are freezing uncooked cakes instead of leftovers, use the freezing guide above.
Let leftovers cool before storing, then reheat with dry heat. This brings back the crust while keeping the center soft and tender.
Refrigerator
Store cooked fish cakes in an airtight container in the refrigerator for up to 3 days. Let them cool before covering so trapped steam does not soften the crust too much.
Freezer
Freeze uncooked breaded fish cakes on a tray until firm, then transfer to a freezer bag or container. Use within 2–3 months for best texture.
How to Reheat Fish Cakes
Air fryer: 190°C / 375°F for 4–6 minutes.
Oven: 190–200°C / 375–400°F for 8–12 minutes.
Skillet: Medium heat with a thin film of oil until crisp and hot.
Microwave: Fast, but it softens the crust.
Reheated well, the outside should crisp back up while the center stays soft and flaky. Fish cooked from raw should reach 145°F / 63°C, or be opaque and flake easily with a fork. Leftovers should be reheated to 165°F / 74°C. You can check the official FoodSafety.gov internal temperature chart for current guidance.
Once you understand the texture cues, fish cakes become much less fussy. Keep the potato dry, leave the fish in flakes, chill before coating, and let the first side set in the pan. Those four habits matter more than the exact fish you choose.
FAQs
Best fish for a first batch
Cod is the easiest first choice because it flakes cleanly, tastes mild, and holds together well with potato. Haddock, pollock, hake, and tilapia also work. Smoked haddock gives a stronger flavor, while salmon and tuna need slightly different seasoning and binding.
Frozen fish: what matters most?
Thaw it fully, drain it well, and pat it dry before cooking. Frozen fish releases extra moisture, so drying it properly helps the cakes hold together and brown better.
Leftover fish works, but keep the flakes large
Leftover cooked fish is useful as long as it is not too wet. Fold it into the potato mixture near the end so the pieces stay visible instead of disappearing into the mash.
Leftover mashed potato: when it helps and when it hurts
Cold, dry mashed potato is helpful. Very creamy mash can make the mixture loose, especially if it contains lots of milk, cream, or butter. Add breadcrumbs until the mixture holds its shape.
Why the cakes break
Most broken fish cakes are not a disaster; they are a moisture or timing problem. Add breadcrumbs if the mixture is wet, chill longer if the patties feel soft, and wait until the first side is set before turning.
Egg, yolk, or no egg?
A whole egg gives more binding, while a yolk adds richness with slightly less wetness. Egg-free cakes can work with egg-free mayo, extra breadcrumbs, or a little more mashed potato, but they are more delicate.
Baking instead of frying
Bake breaded fish cakes at 200°C / 400°F for 18–22 minutes, flipping halfway. Brush or spray both sides with oil so the crumbs brown instead of drying out.
Air fryer timing for homemade cakes
Air fry chilled homemade fish cakes at 190–200°C / 375–400°F for 10–14 minutes, flipping halfway. Spray the coating lightly with oil and keep the cakes in a single layer.
Freezing before or after cooking?
For the cleanest crust, freeze shaped and breaded fish cakes before frying. If the fish was previously frozen and you prefer not to refreeze it uncooked, cook the cakes first, cool them quickly, then freeze.
Fish cakes, patties, and croquettes — the difference
The terms overlap. Classic versions usually include fish and potato, fish patties may use breadcrumbs, egg, mayo, or other binders instead of potato, and croquettes are usually breaded and fried with a softer filling.
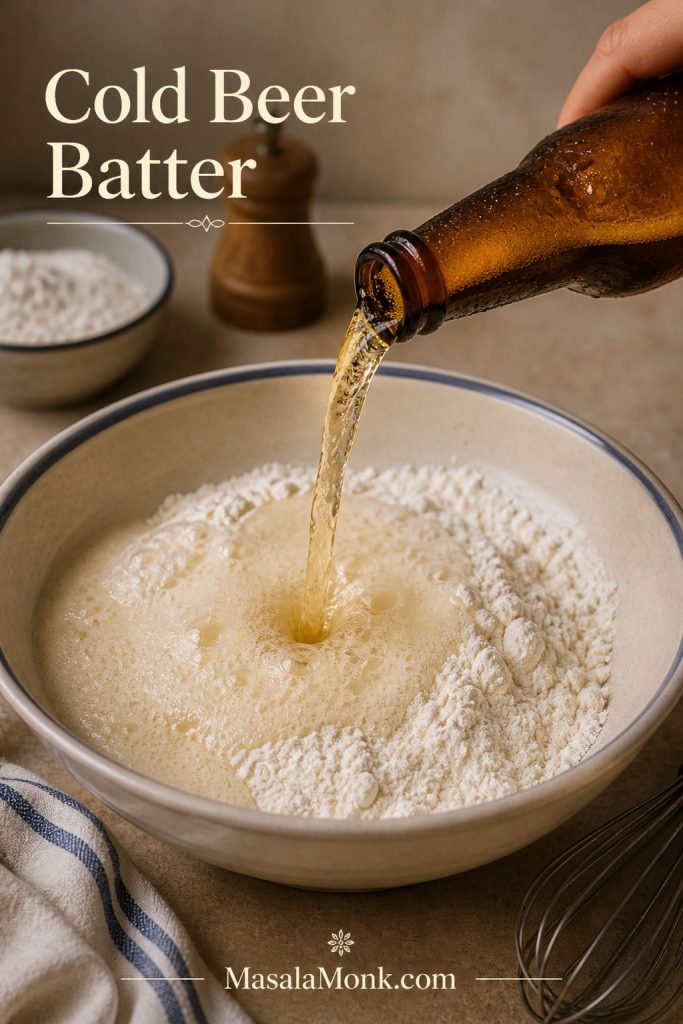
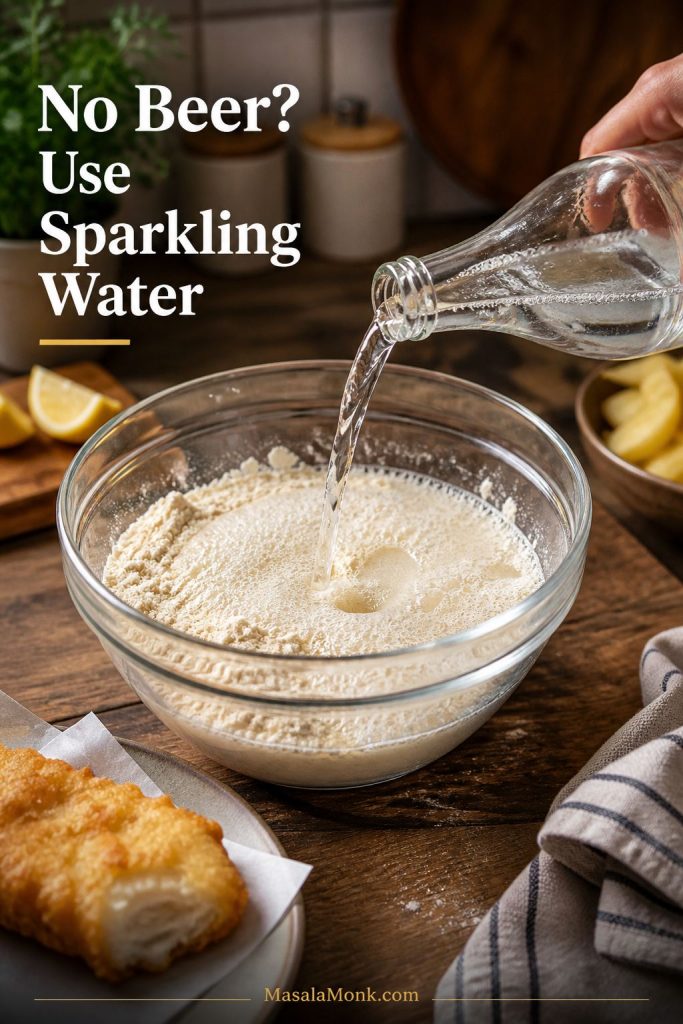
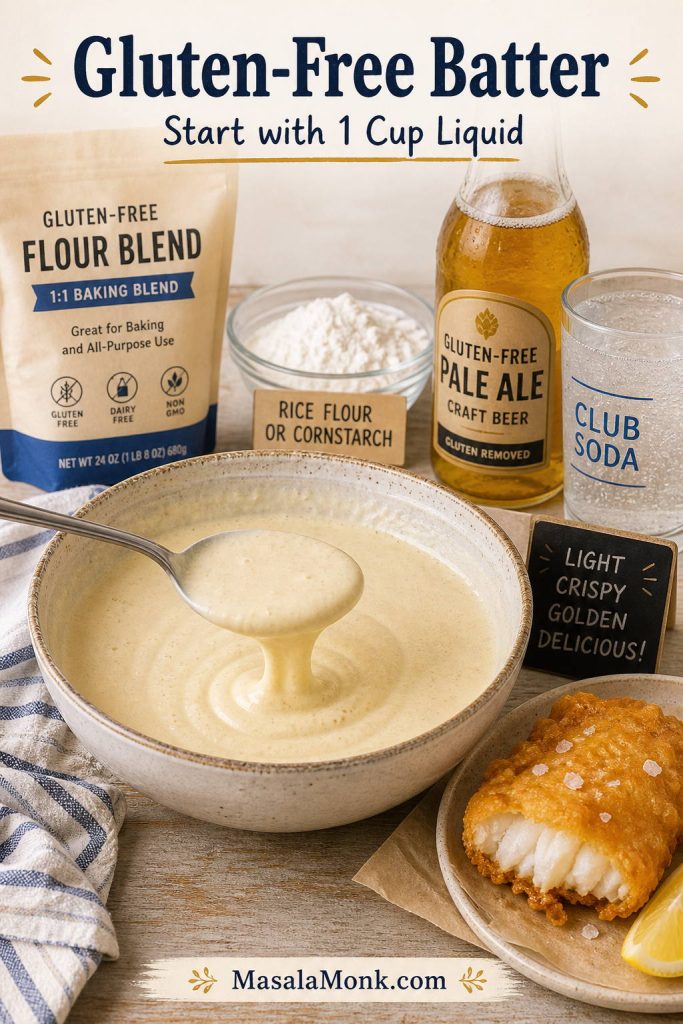
This fish batter recipe gives you crisp, golden fried fish with a light coating that actually sticks. The main version is made without beer, using flour, cornstarch, baking powder, and ice-cold sparkling water, with a beer batter option included if you want a more classic fish-and-chips-style crust.
The goal is simple: flaky fish inside, a thin crunchy shell outside, and no soggy, greasy, or sliding batter. Below, you will find the exact batter ratio, cups and metric measurements, the right oil temperature, the best fish to use, and quick fixes for common problems like batter falling off, turning bready, or going soft after frying.
Quick Answer: What Makes This Fish Batter Recipe Crispy?
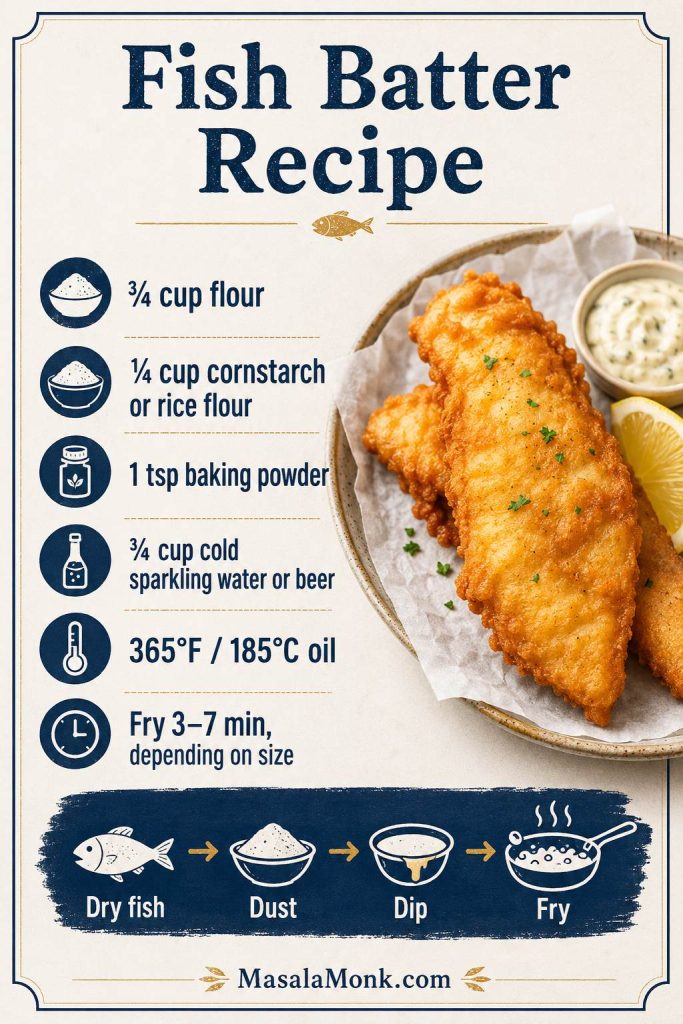
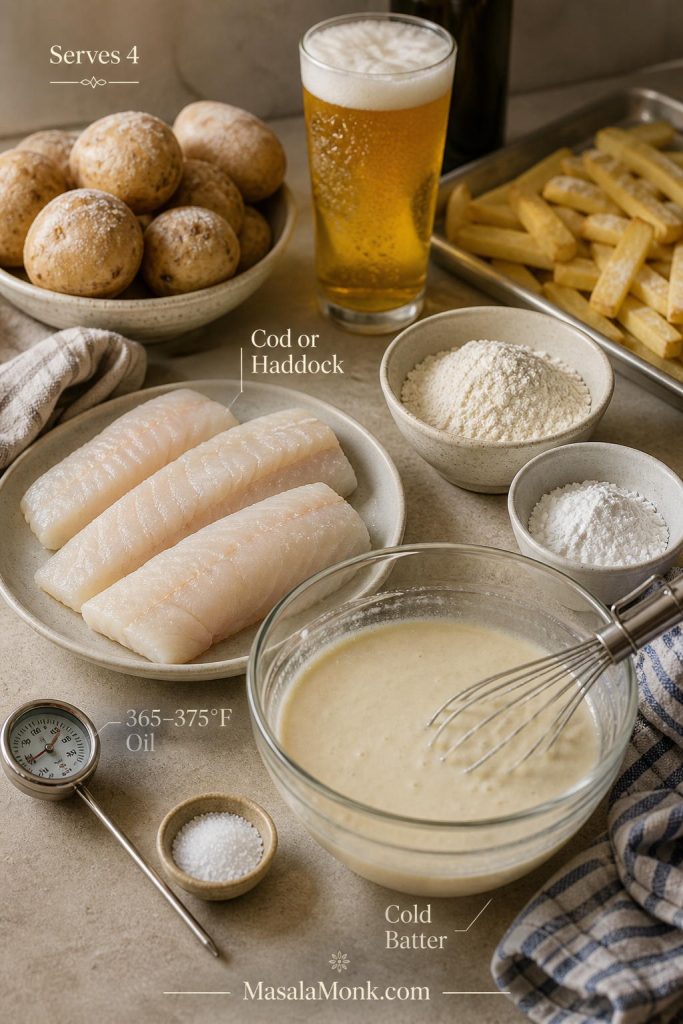
The crispiest coating comes from a mix of flour and cornstarch or rice flour, a little baking powder for lift, very cold sparkling water or beer, and hot oil. Pat the fish dry, dust it lightly with flour or cornstarch, dip it in cold batter, then fry at about 365°F / 185°C, keeping the oil between 350–375°F / 175–190°C.
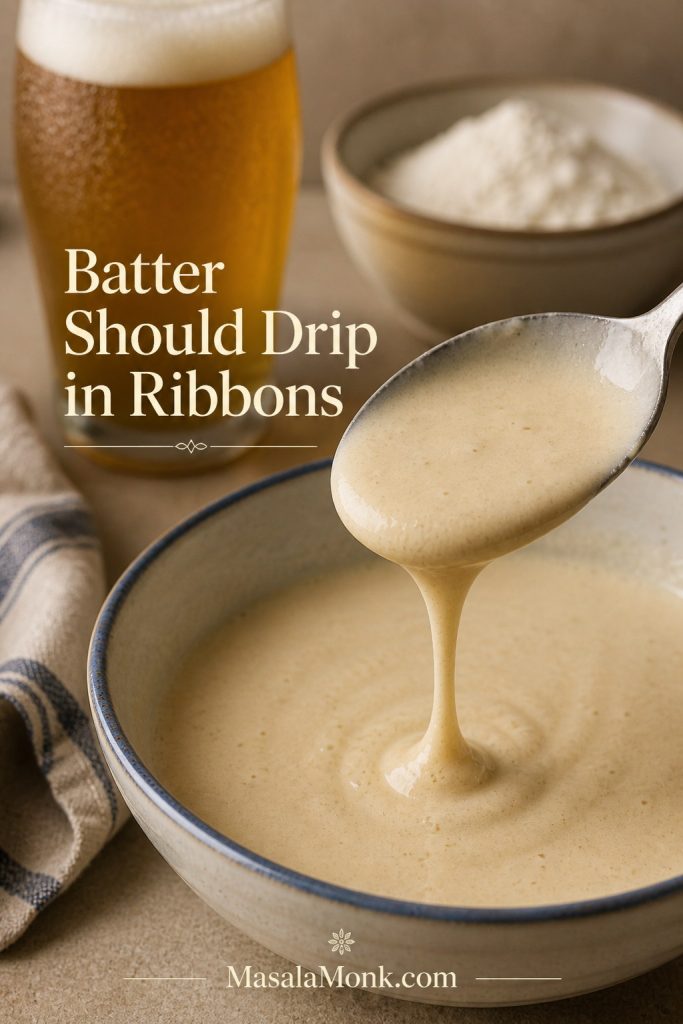
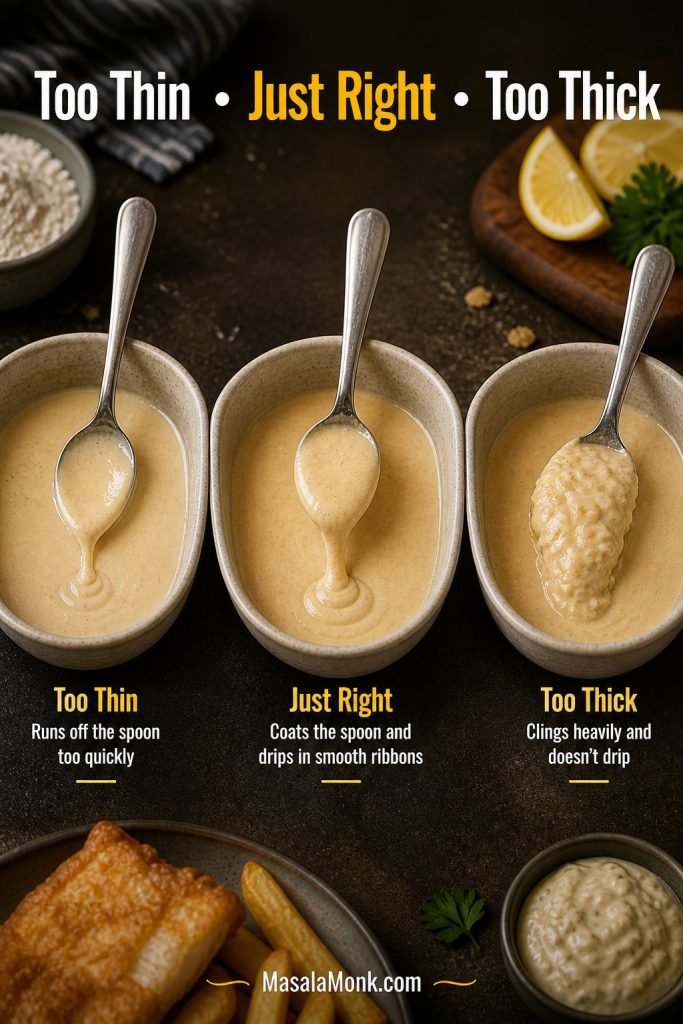
The batter should look like heavy cream or loose pancake batter. It should cling to the fish, drip slowly, and leave a thin coating instead of running off instantly or piling up in thick, bready clumps.
Best first version: Use ice-cold sparkling water or club soda for a crisp no-beer coating. Use cold lager or pale ale when you want a more classic beer-battered fish-and-chips style.
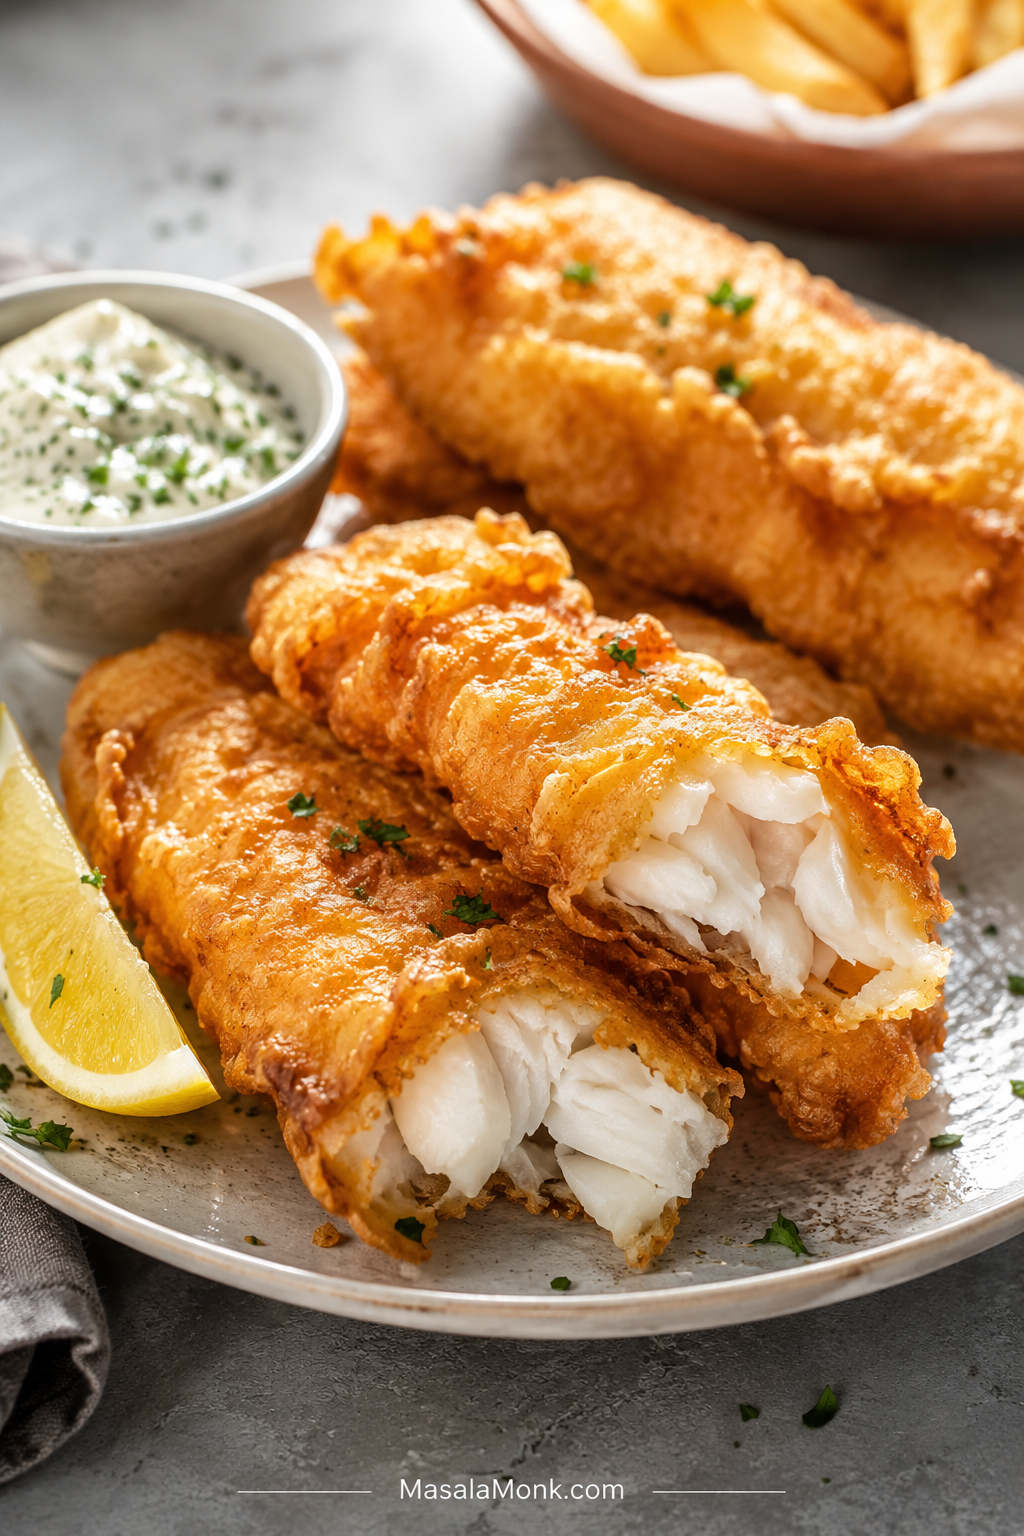
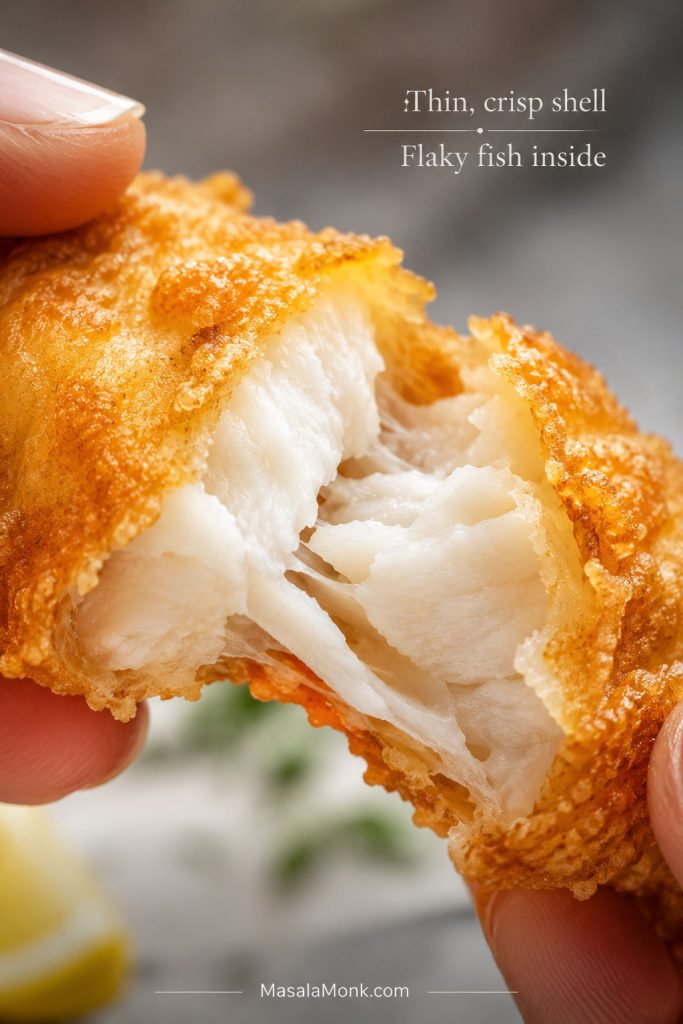
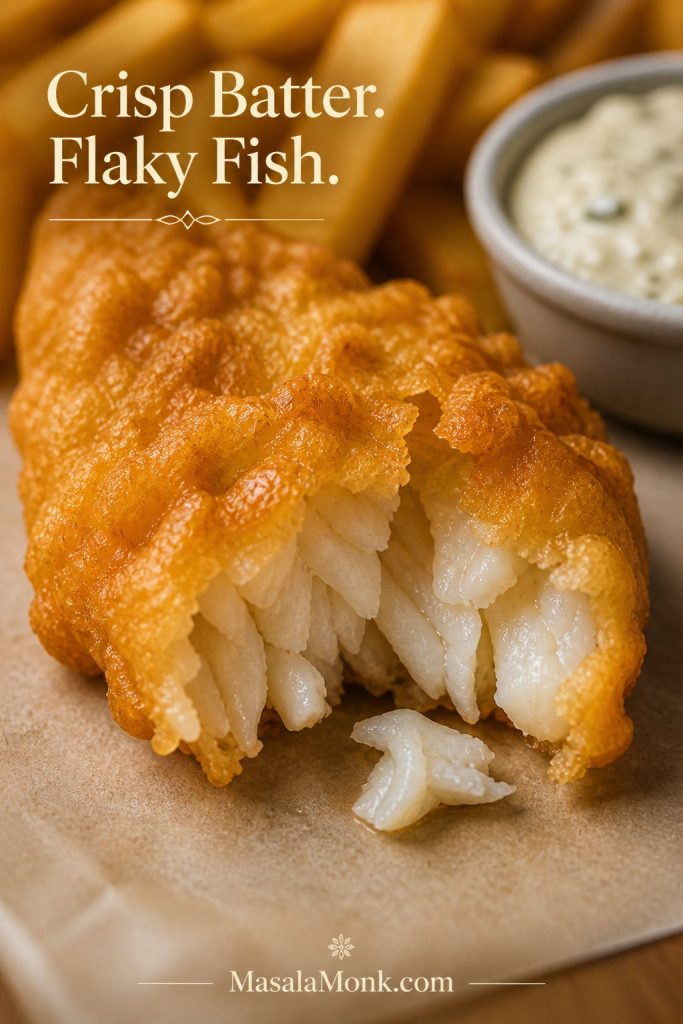
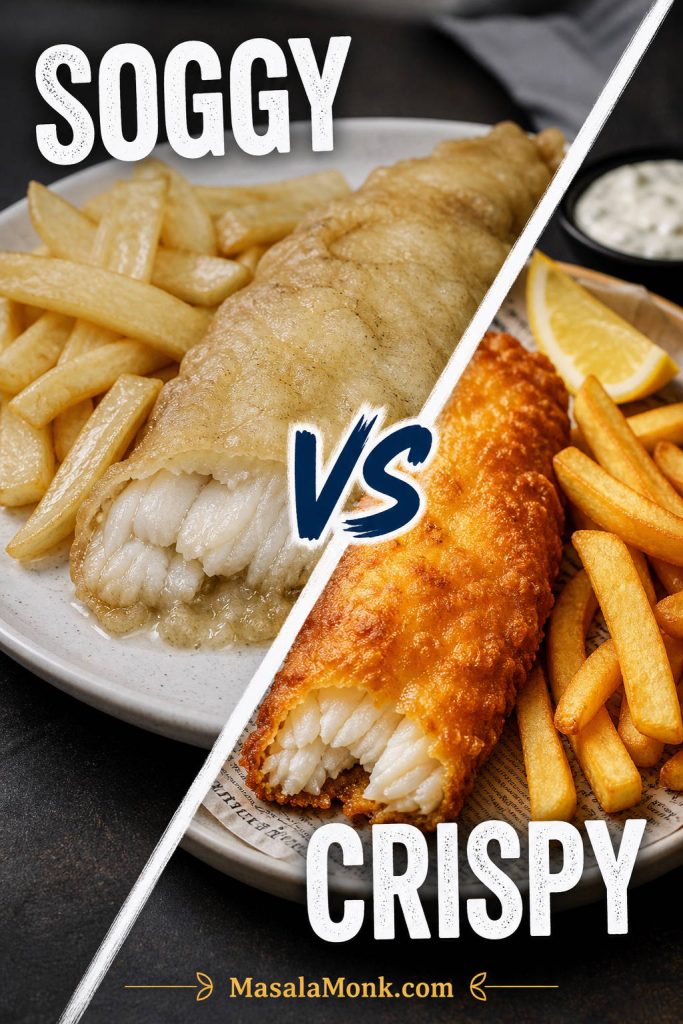
A close look at the crust tells you a lot — the best crispy fish batter forms a thin shell that cracks cleanly around tender flakes.
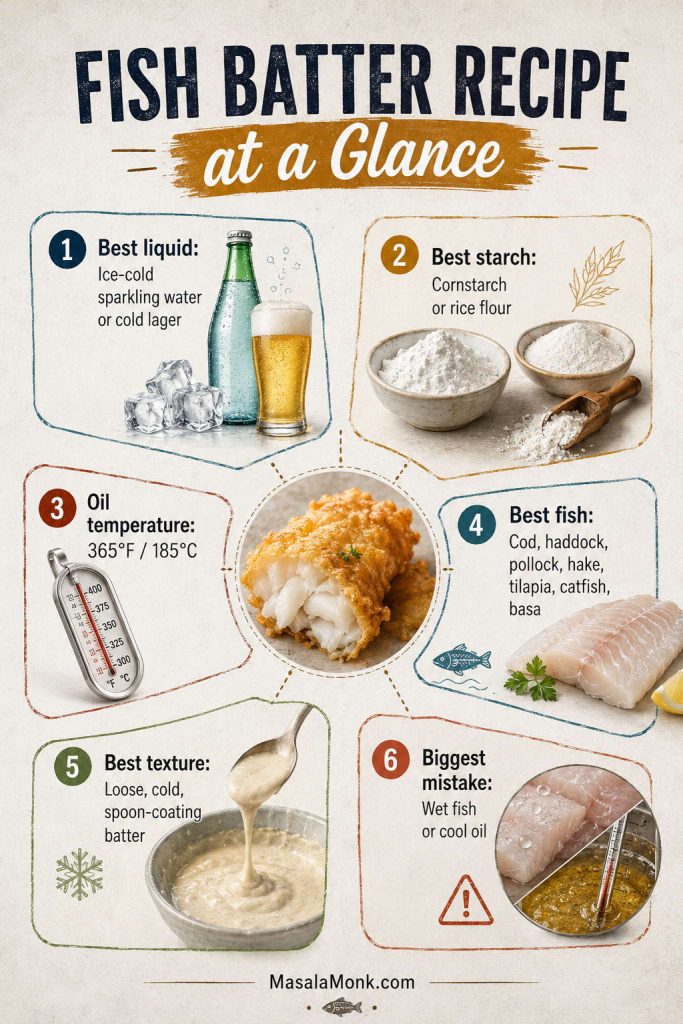
Before getting into the full method, here are the numbers and choices that matter most for this fish batter recipe: the liquid, starch, oil temperature, batter texture, and the mistake most likely to make the coating fail.
Best liquid
Ice-cold sparkling water, club soda, or cold lager
Best starch
Cornstarch for easy crispness; rice flour for a longer-lasting crunch
Best oil temperature
365°F / 185°C target, with a working range of 350–375°F / 175–190°C
Best fish
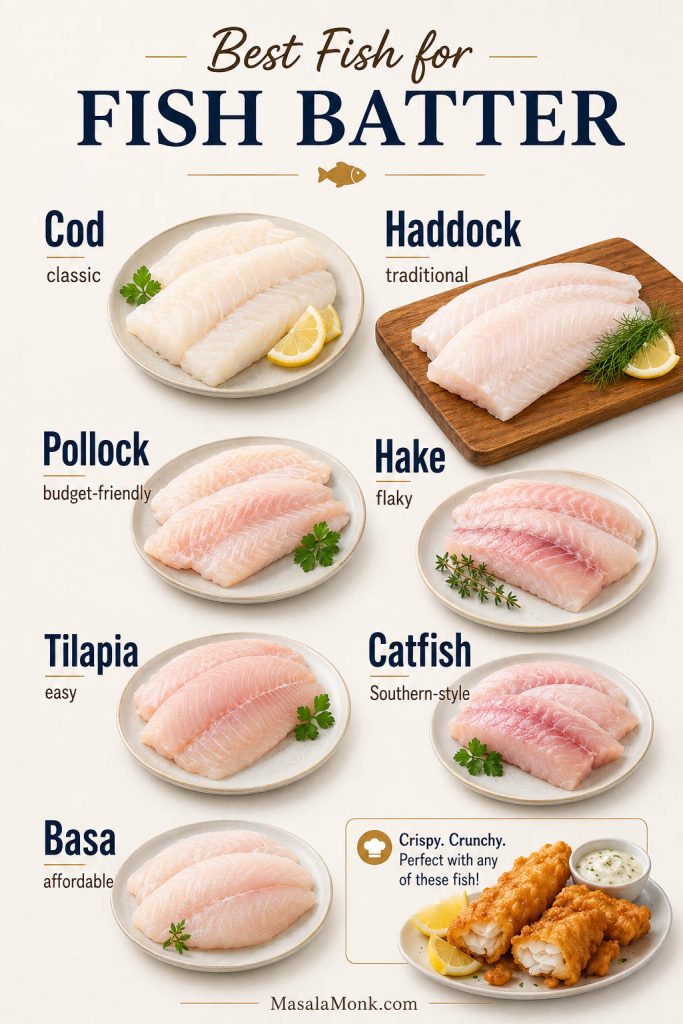
Cod, haddock, pollock, hake, tilapia, catfish, basa, or other firm white fish
Best texture
Loose, cold, lightly bubbly, and thick enough to coat the back of a spoon
Biggest mistake
Battering wet fish or frying in oil that is not hot enough
Before you start, line up the real success cues: the right starch, dry fish, spoon-coating batter, and oil hot enough to set the crust fast.
Why This Fish Batter Recipe Works
The reason this fish batter recipe works is simple: it balances structure with lift. Flour gives the mixture enough body to hold around the fish, while cornstarch or rice flour keeps the finished crust from feeling heavy. Baking powder and ice-cold bubbles help the coating puff and set quickly when it hits hot oil.
The other key is technique. Dry fish, a light dusting of flour or starch, hot oil, and a wire rack after frying all help the coating stay attached and crisp. Skip any one of those, and even a good batter can turn soggy, greasy, or patchy.
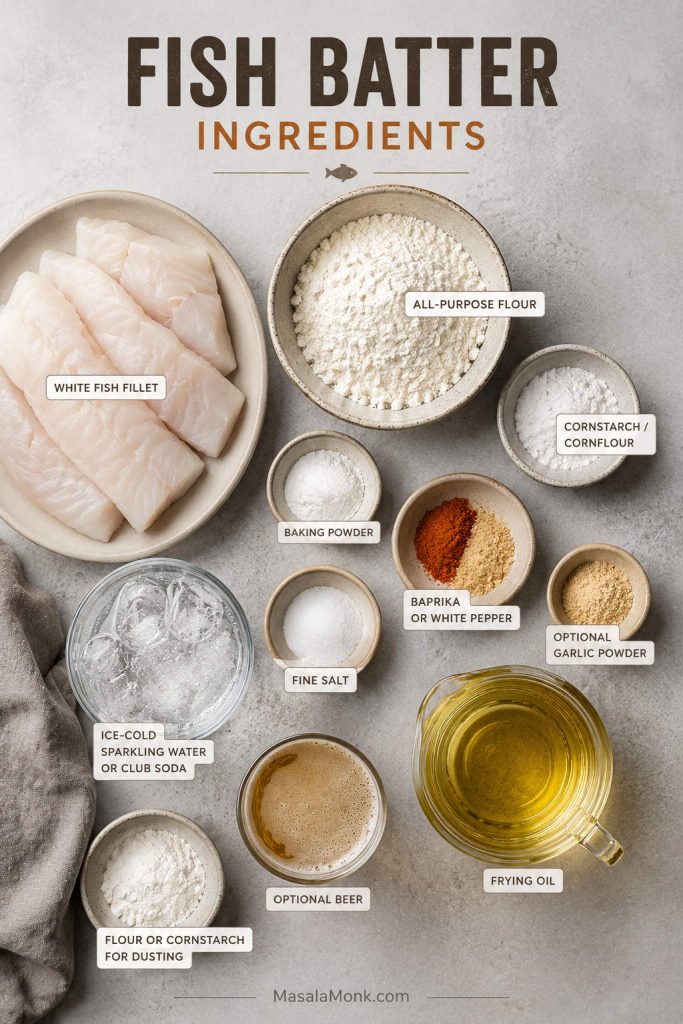
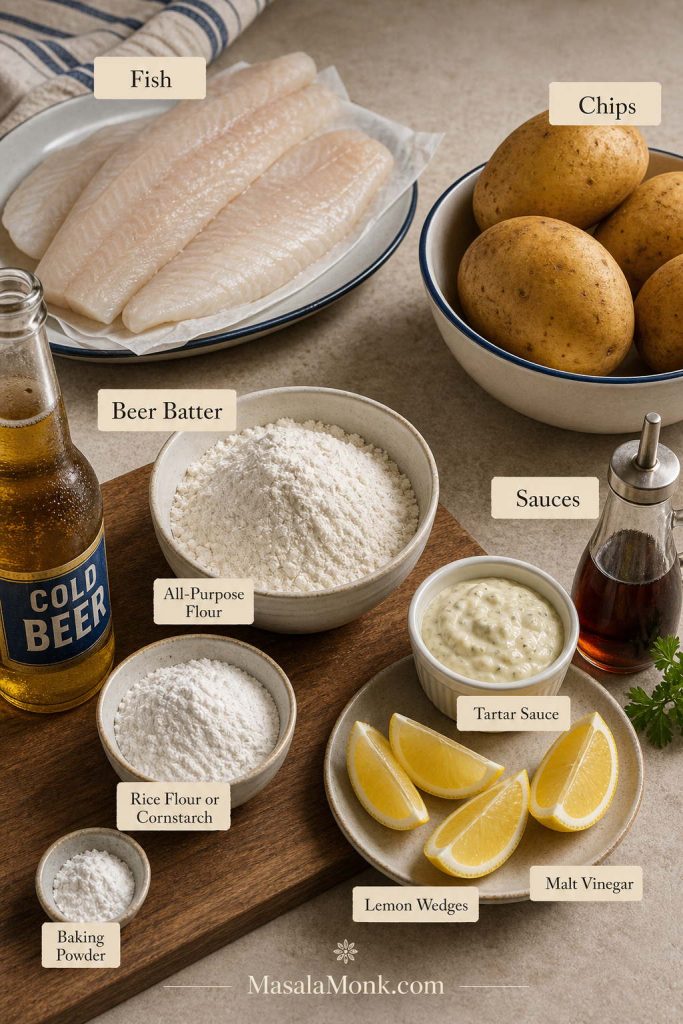
Fish Batter Ingredients You Need
The ingredient list for this fish batter recipe is short, but each part has a job. Use the table below to see what each ingredient does and where you can adjust the batter without ruining the texture.
Ingredient
Amount
Why it matters
White fish fillets
1¼ lb / 550–600g
Firm white fish works best because it holds together and flakes cleanly after frying.
All-purpose flour
¾ cup / about 90g
Builds the base of the batter and helps the coating brown.
Cornstarch / cornflour
¼ cup / about 30g
Use cornstarch, also called cornflour in many countries. Do not use coarse cornmeal here.
Baking powder
1 teaspoon / about 4g
Adds lift so the crust fries up airy instead of dense.
Fine salt
¾ teaspoon / about 4g
Seasons the batter from the inside.
Paprika or white pepper
½ teaspoon
Adds gentle flavor and color without overpowering the fish.
Garlic powder, optional
¼–½ teaspoon
Adds a little savory depth, especially for fish tacos or casual fried fish plates.
Ice-cold sparkling water or club soda
¾ cup / 180ml, plus more if needed
Creates a light no-beer batter. Add a little more only if the mixture feels too thick.
Extra flour, cornstarch, or rice flour for dusting
¼ cup total / about 30g
Gives the wet coating something dry to grip so it does not slide off the fish.
Neutral oil
Enough for 2–3 inches depth
Canola, vegetable, sunflower, peanut, rice bran, or another neutral high-heat oil works well.
Each ingredient has a specific job here: flour builds structure, starch adds crunch, baking powder gives lift, and cold bubbles keep the coating light.
Once the basic ingredients are clear, the main choice is which starch to use for the crispest finish.
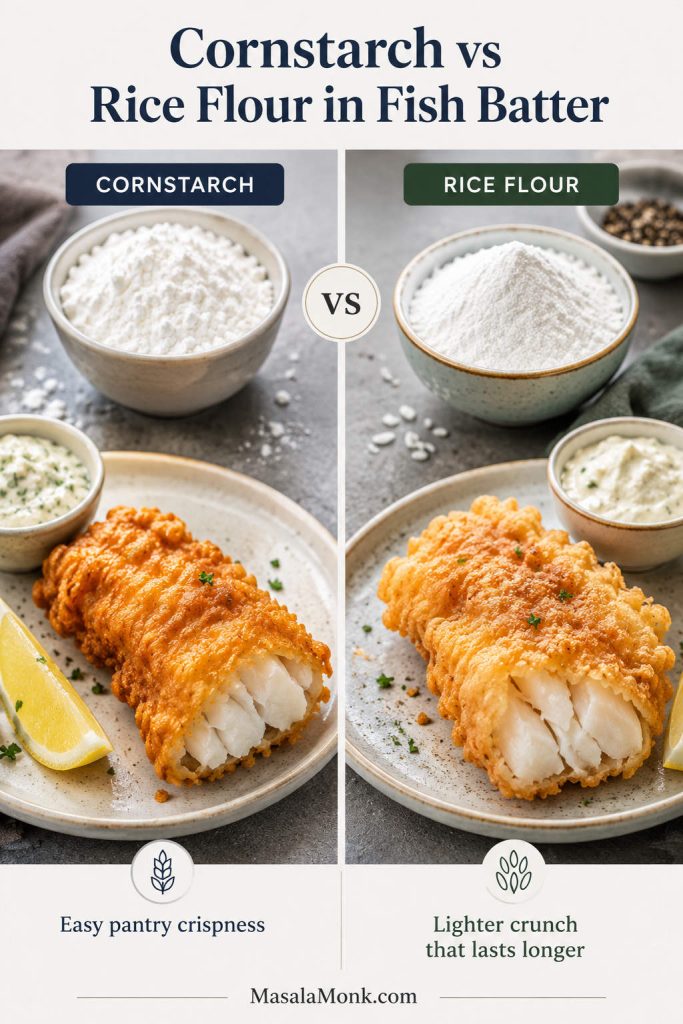
Cornstarch vs Rice Flour in Fish Batter
Cornstarch is the easiest pantry choice for a light, crisp coating. Rice flour is the upgrade when you want a more delicate crunch that stays crisp a little longer after frying. You can use either one in the same amount.
Cornstarch gives an easy crisp coating for everyday fried fish, while rice flour is useful when you want a lighter, more delicate crunch.
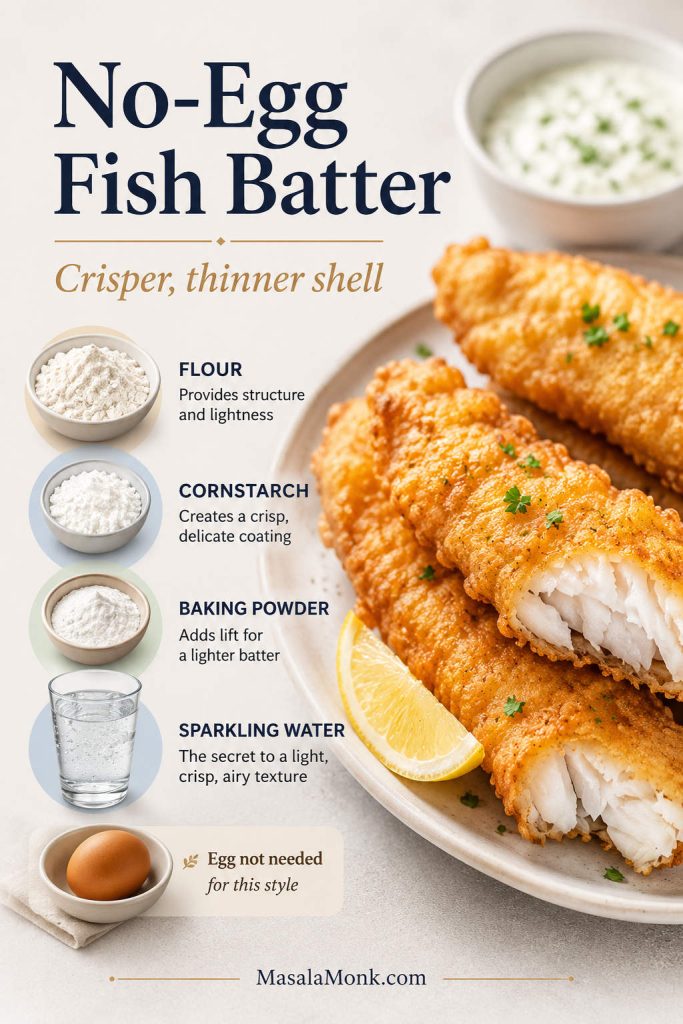
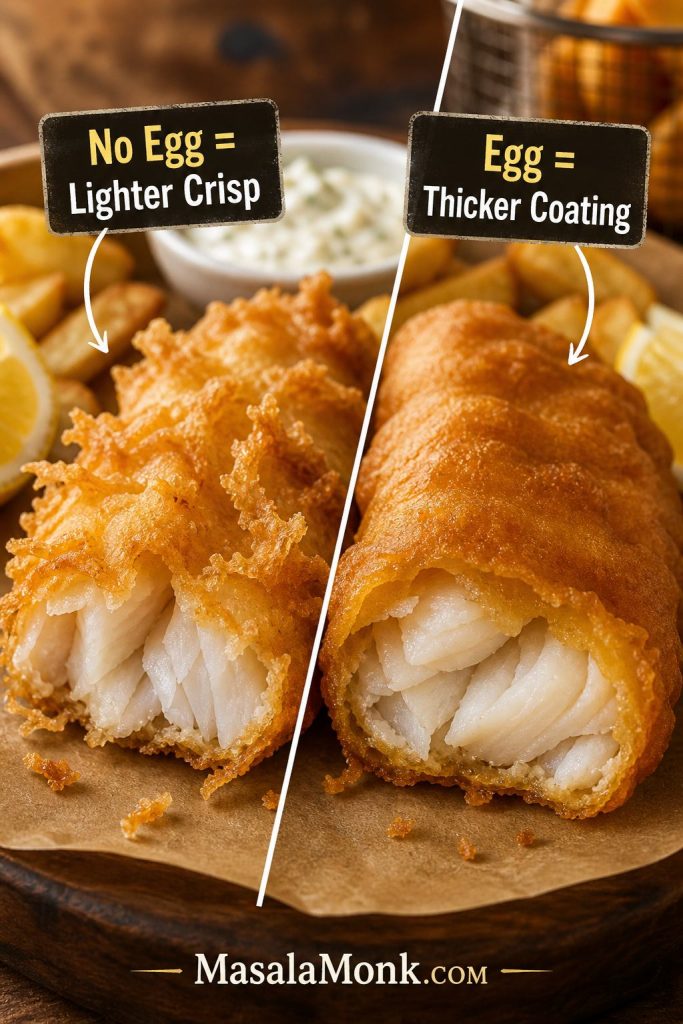
Do You Need Egg in Fish Batter?
No. For this style of no-egg fish batter recipe, skipping the egg gives you a thinner, crisper shell. Egg makes the coating richer and puffier, but it can also make the crust more cakey or chewy. Add egg only if you prefer a thicker, softer coating.
Instead of using egg, this batter relies on starch, baking powder, and cold sparkling water for a thinner, crisper shell.
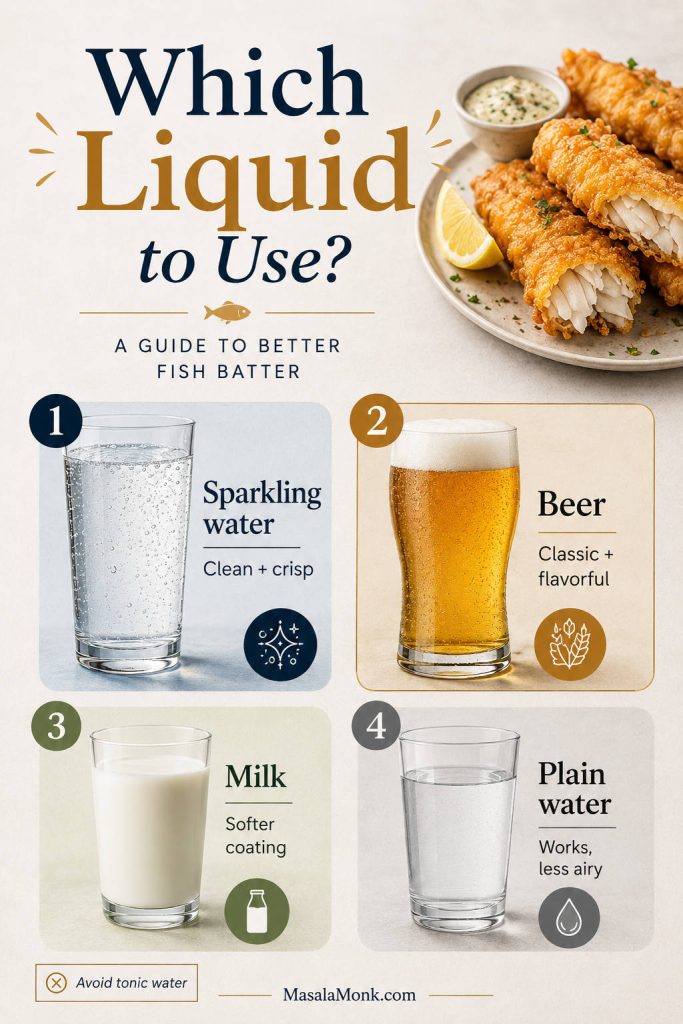
Milk, Water, Sparkling Water, or Beer?
The liquid changes the personality of the batter. Milk makes a softer, slightly richer coating, but it is not the best choice when you want the lightest crunch. Plain cold water works, but the crust is usually less airy. Sparkling water, club soda, seltzer, or cold beer gives the batter bubbles, which helps the coating fry up lighter.
For the cleanest no-beer version, use sparkling water or club soda. For a pub-style flavor, use cold lager or pale ale.
Avoid tonic water unless you specifically want bitterness and sweetness in the coating. For a neutral crispy fish batter, sparkling water, club soda, or seltzer is a better choice.
Choose the liquid based on the result you want: sparkling water for clean crispness, beer for classic fish-and-chips flavor, and milk only for a softer coating.
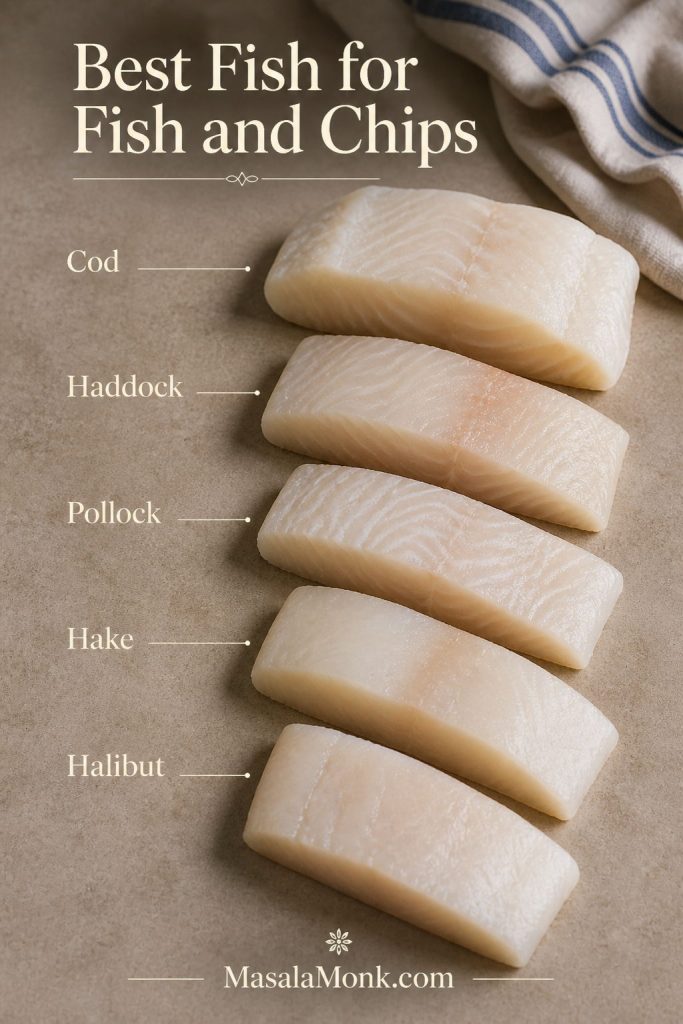
The best fish for this fish batter recipe is firm, mild, and not too wet. White fish fillets are the safest place to start because they cook quickly, flake nicely, and let the golden crust stay the main event.
Fish
Why it works
Cod
Classic choice for battered fish and fish and chips; firm, mild, and flaky.
Haddock
Traditional, flavorful, and excellent with a crisp golden coating.
Pollock
Budget-friendly, mild, and easy to fry in strips.
Hake
Soft and flaky, especially good for fish-and-chips-style dinners.
Tilapia
Accessible, thin, and quick-cooking; dry it very well before battering.
Catfish
Great for a Southern-style fried fish direction.
Basa
Mild and affordable; works well if it is patted very dry first.
Halibut
Firm and premium, but watch the cook time so it does not dry out.
Shrimp or calamari
The same batter works, but the frying time will be shorter than fish fillets.
Firm white fish works best because it can handle dipping, frying, and turning without falling apart in the batter.
If you are planning to use the fried fish in tortillas instead of serving it with chips, this same coating works beautifully as a crisp base for fish tacos.
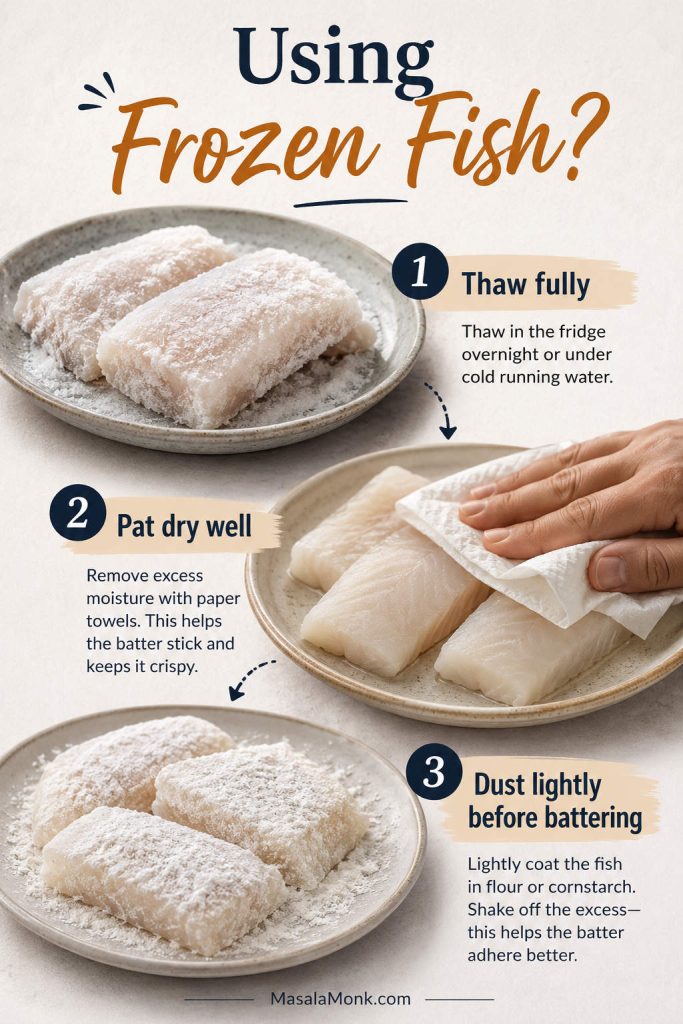
Can You Use Frozen Fish?
Yes, frozen fish can work well, but it needs extra attention before it goes anywhere near the batter.
Thaw it completely first and dry it very well. Frozen fish often releases extra moisture, and that moisture can make the batter slide off or turn soft in the oil. For best results, thaw the fish in the refrigerator, pat it dry with paper towels, let it sit uncovered for a few minutes if it still feels wet, then dust it lightly before dipping. Do not batter fish while it is still icy or partially frozen.
Frozen fish needs one extra step before battering: thaw it fully, remove surface moisture, then dust it lightly so the coating can grip.
Optional Pro Step: Lightly Salt the Fish First
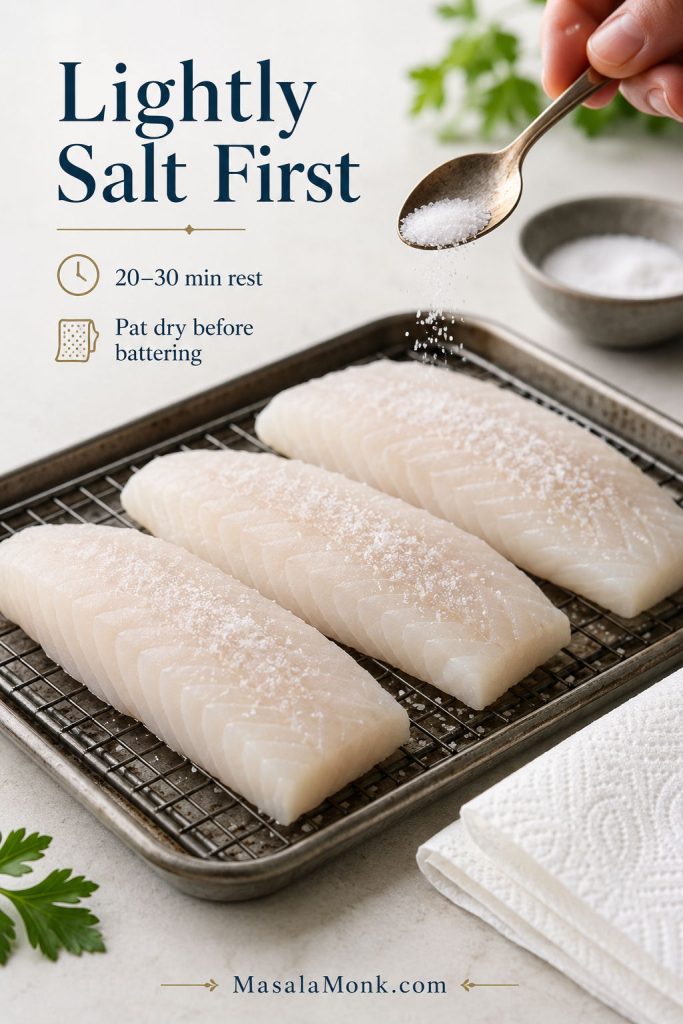
If you have extra time, lightly salt the fish before battering. Use about ¼ teaspoon fine salt per 1 lb / 450g fish, then let the pieces rest uncovered in the refrigerator. Even 20–30 minutes helps draw a little moisture from the surface. If you are planning ahead, you can salt thicker fillets a few hours earlier, then pat them dry before dusting and dipping.
This step is not required for a quick dinner, but it gives you firmer, better-seasoned fish and helps reduce the watery layer that can make batter slide off.
A short salted rest seasons the fish from the surface inward and helps draw away moisture before dusting and dipping.
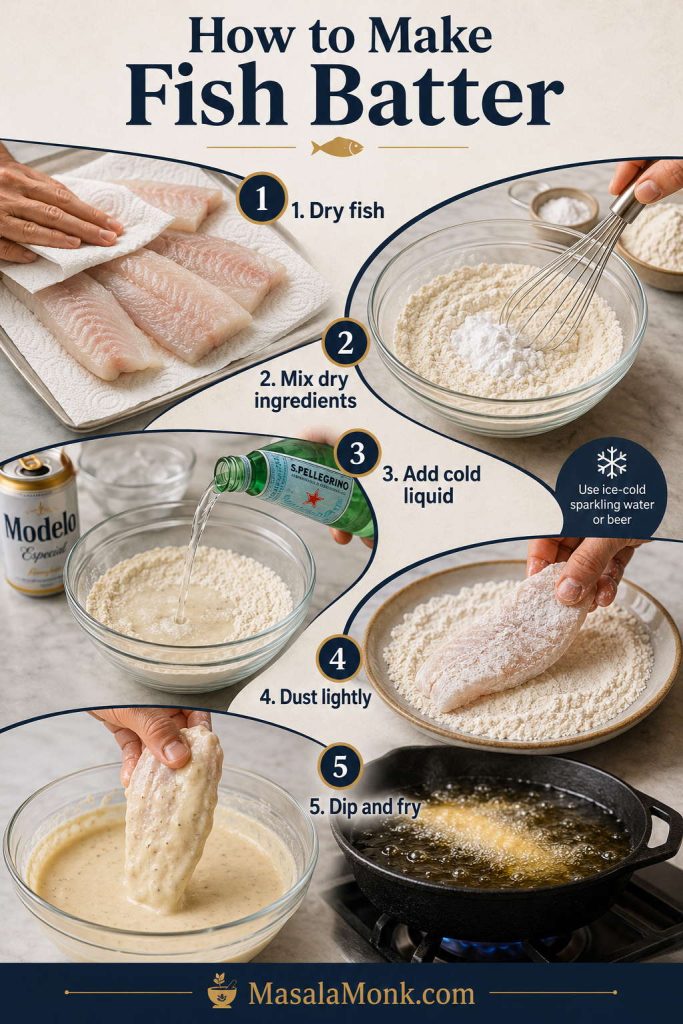
When you are ready to fry, make this fish batter recipe right before the fish goes into the oil. Once the sparkling water or beer is added, the bubbles start fading, so a freshly mixed, cold batter gives you the lightest crust.
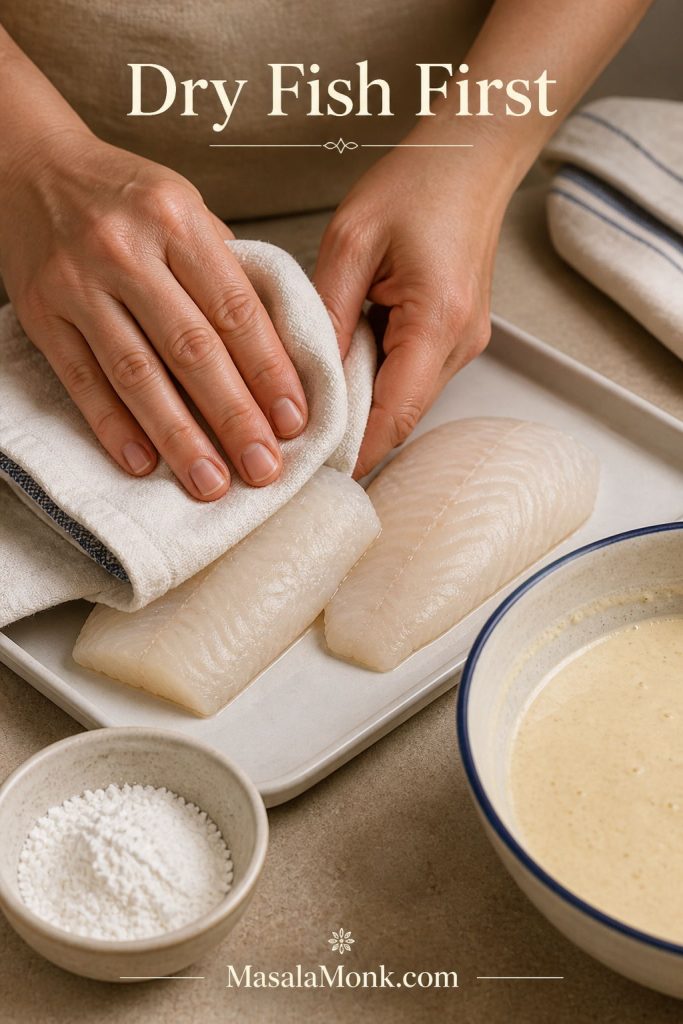
Dry the fish well. Pat the fillets with paper towels until the surface no longer feels wet. Moisture is one of the main reasons batter slips off.
Cut even pieces. Slice the fish into strips about 1 inch wide, or into batons around 3 x 1¼ inches / 7–8 x 3cm.
Mix the dry ingredients. Whisk the flour, cornstarch, baking powder, salt, and seasoning in a bowl.
Add cold liquid. Pour in ice-cold sparkling water or club soda and whisk only until combined. Small lumps are fine.
Dust the fish. Lightly coat each piece with flour, cornstarch, or rice flour, then shake off the excess.
Dip and coat. Lower the fish into the batter, turn to coat, and let the extra drip off for a second.
Fry right away. Slide the fish gently into hot oil and let the crust set before moving it.
Once the fish is dry and the oil is heating, mix the wet batter last so the bubbles are still active when the fish goes in.
Texture cue: The batter should be thinner than pancake batter but thicker than milk. It should coat the back of a spoon and drip slowly.
Should You Rest Fish Batter?
For this quick sparkling-water batter, use it soon after mixing. The bubbles are part of what makes the coating light, and they fade as the batter sits.
Some traditional fish-and-chips recipes rest the batter for 30 minutes or longer, especially when using beer and a thicker flour-cornflour mixture. That can work, but for the lightest no-beer version here, mix the wet batter only when the fish is dry, the oil is heating, and your rack is ready.
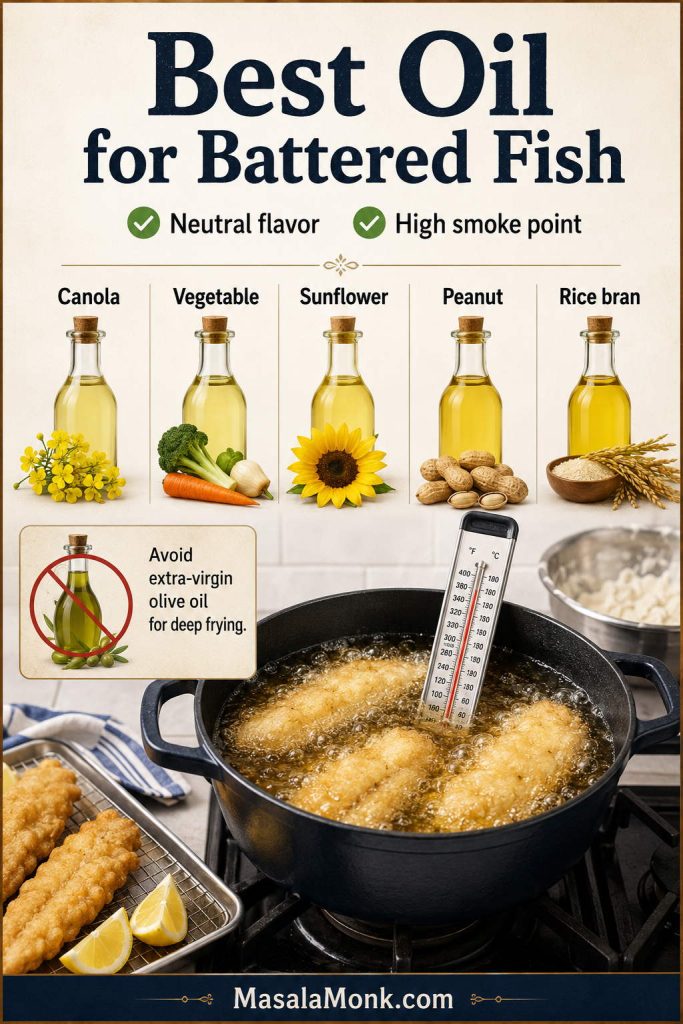
Use a neutral, high-heat oil such as canola, vegetable, sunflower, peanut, or rice bran oil. These oils let the fish and crisp coating stay the focus instead of adding a strong flavor.
Choose an oil with a high smoke point and a neutral flavor so the batter can brown cleanly without tasting heavy, burnt, or oily.
Avoid extra-virgin olive oil for deep frying this batter because its flavor is stronger and it is not the easiest choice for holding a steady frying temperature. Whatever oil you use, give it enough time to return to the right temperature between batches.
If the oil smells strongly fishy, looks dark, or has a lot of burnt batter bits floating in it, strain it carefully after cooling or discard it. Old, dirty oil can make fresh fish taste heavy and bitter.
A neutral high-heat oil lets the fish batter brown cleanly, while strong or overheated oil can make the crust taste heavy.
How to Fry Battered Fish So It Stays Crispy
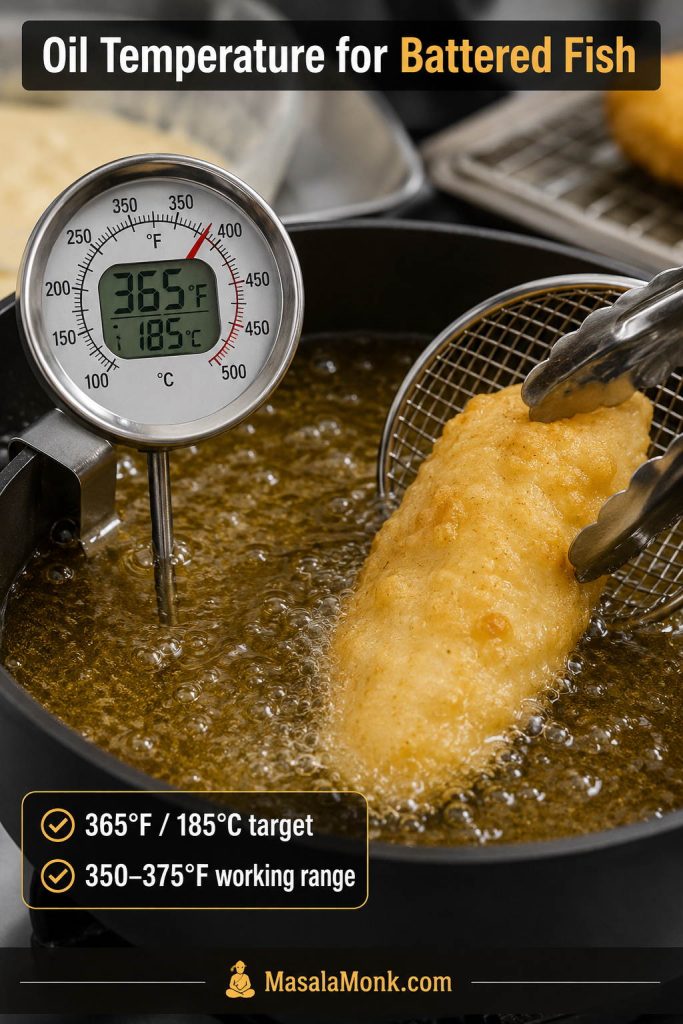
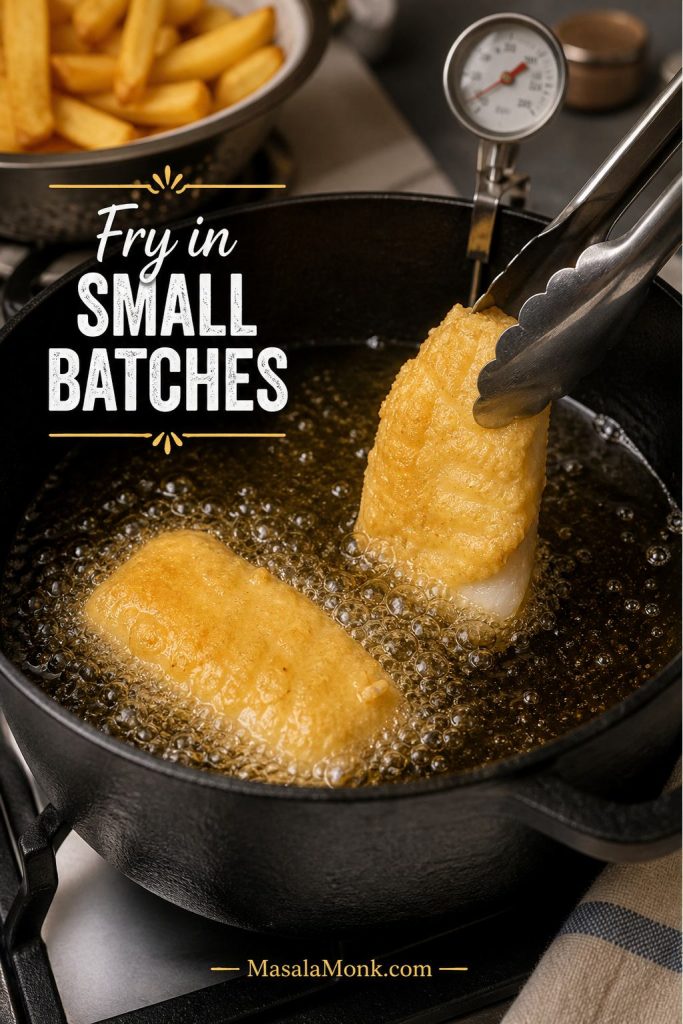
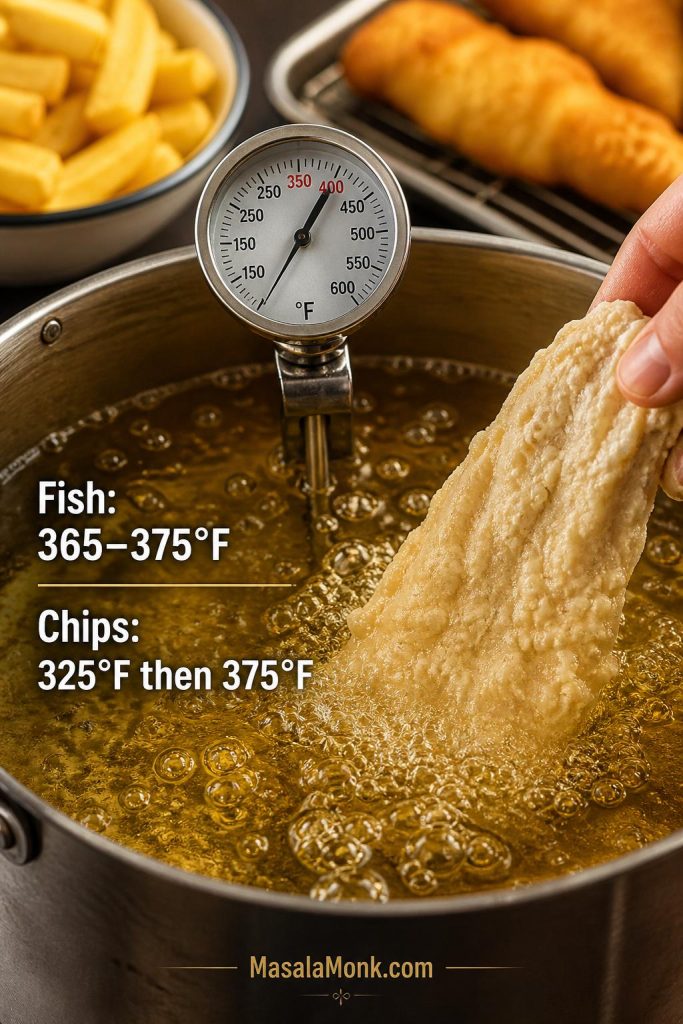
Heat the oil to 365°F / 185°C, then keep it between 350–375°F / 175–190°C as the fish fries. Oil that runs too cool makes the coating greasy; oil that runs too hot browns the outside before the fish cooks through.
Aim for 365°F / 185°C before the first piece goes in, then let the oil recover between batches for a crisp, non-greasy coating.
A few small habits make a big difference once the fish hits the oil.
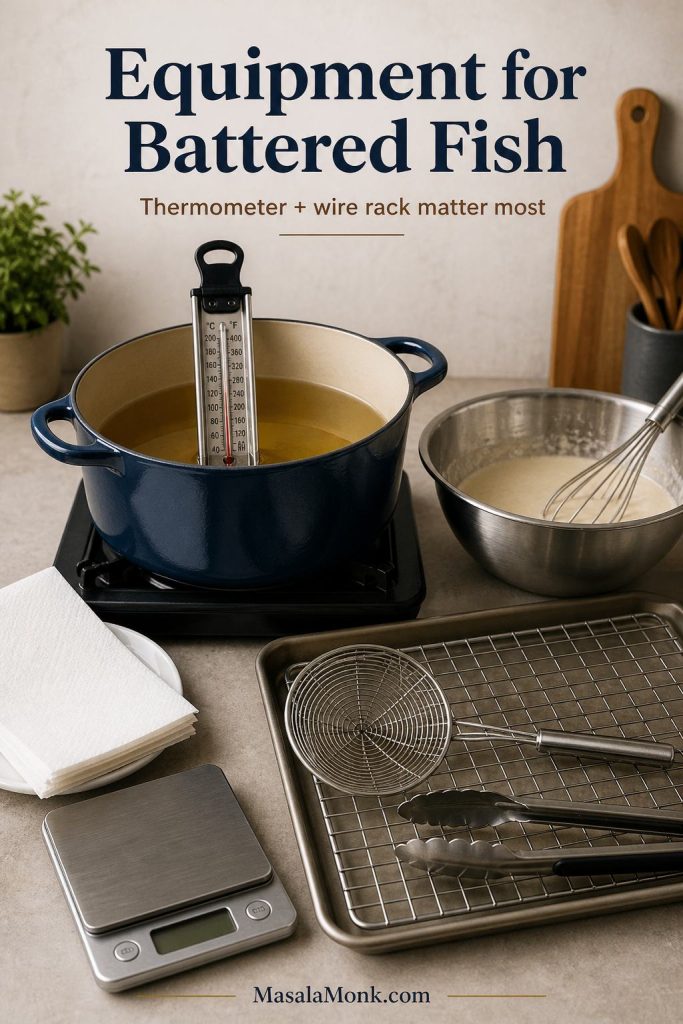
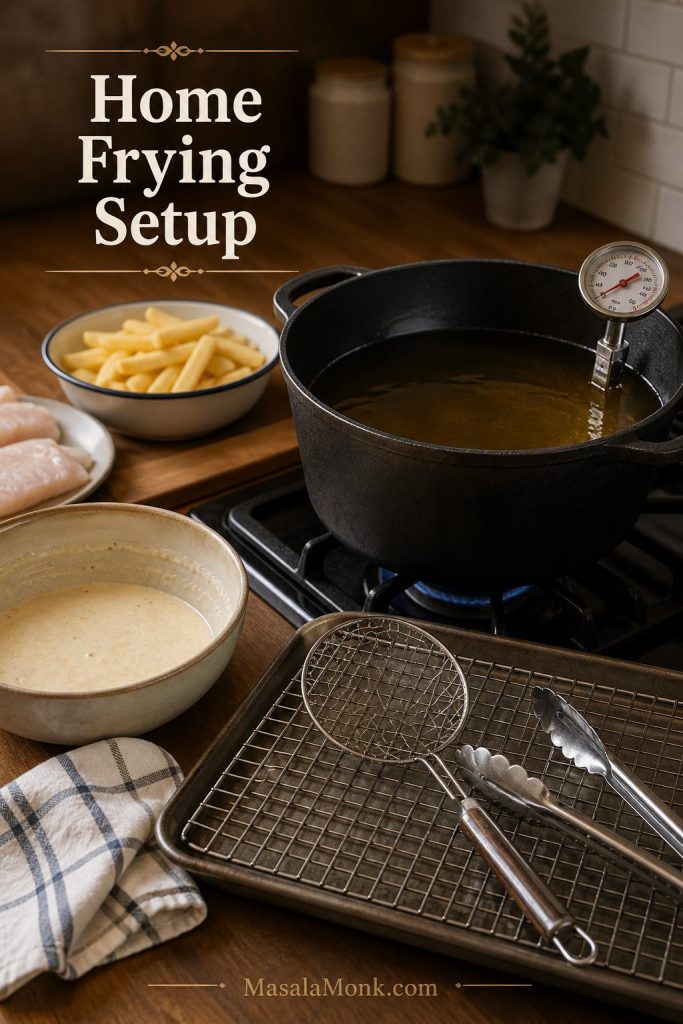
Use a Dutch oven, deep heavy pot, or deep fryer.
Add enough oil for a 2–3 inch depth, without filling the pot more than halfway.
Use a thermometer instead of guessing by sight.
Fry in small batches so the oil temperature stays steady.
Give the crust a moment to set before turning or moving the fish.
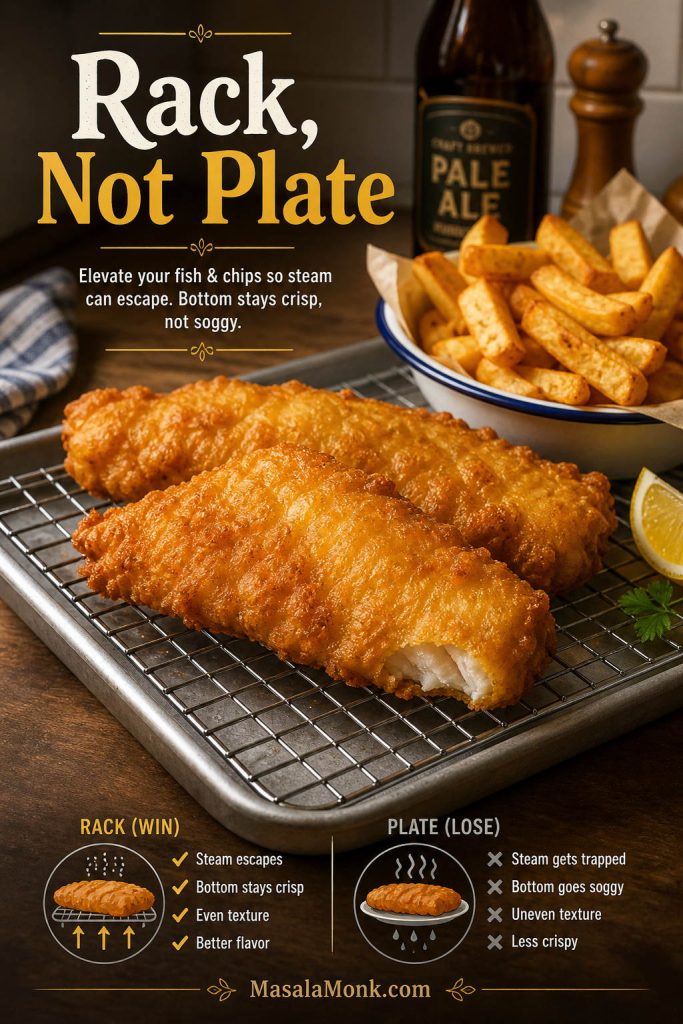
Drain on a wire rack set over a baking sheet, not directly on a flat plate.
Salt lightly while the fish is hot.
Leave the fried fish uncovered so steam does not soften the crust.
For unevenly cut pieces, fry one test piece first. That first piece shows whether the oil is hot enough, whether the batter texture is right, and how long the rest of the batch needs.
How Long to Fry Battered Fish
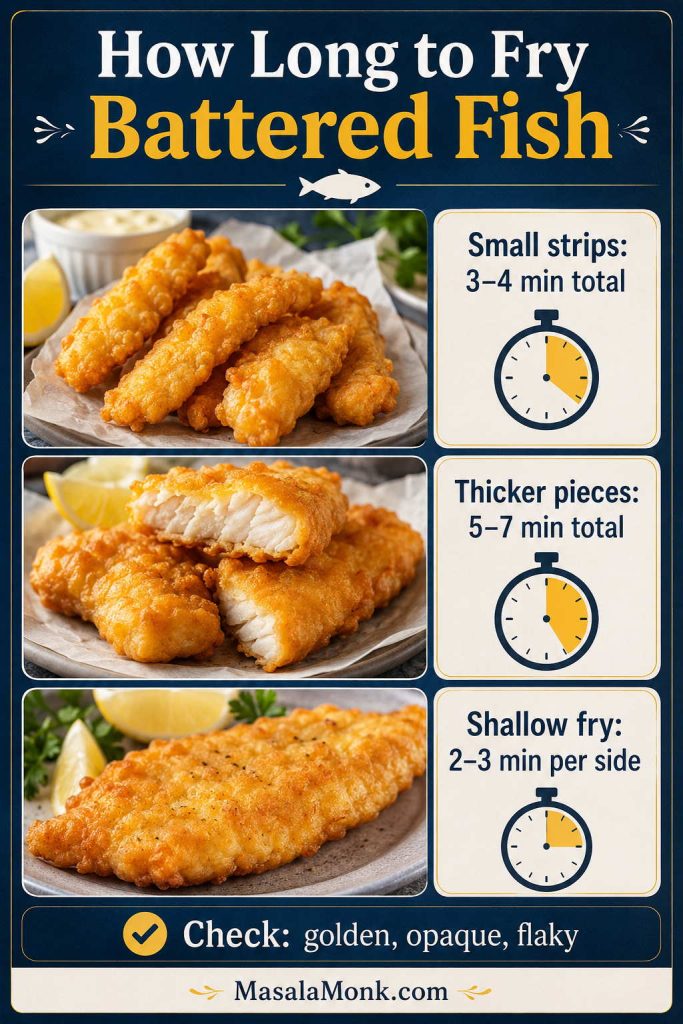
Most small battered fish strips take about 3–4 minutes total in deep oil. Thicker fillets or larger fish pieces may take 5–7 minutes total, depending on thickness. For shallow frying, plan on roughly 2–3 minutes per side.
Use color and doneness together. The crust should be golden and crisp, and the fish inside should look opaque and flake easily when checked with a fork.
Fry time changes with thickness: small strips cook quickly, thicker pieces need longer, and shallow-fried fish needs careful turning.
How to Keep Battered Fish Warm Between Batches
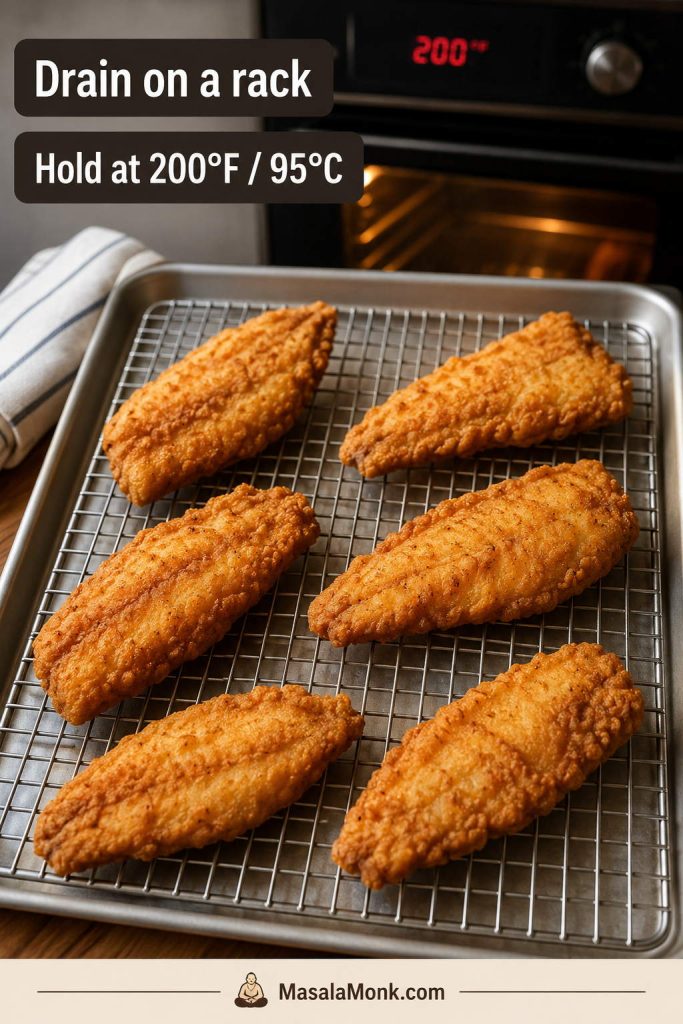
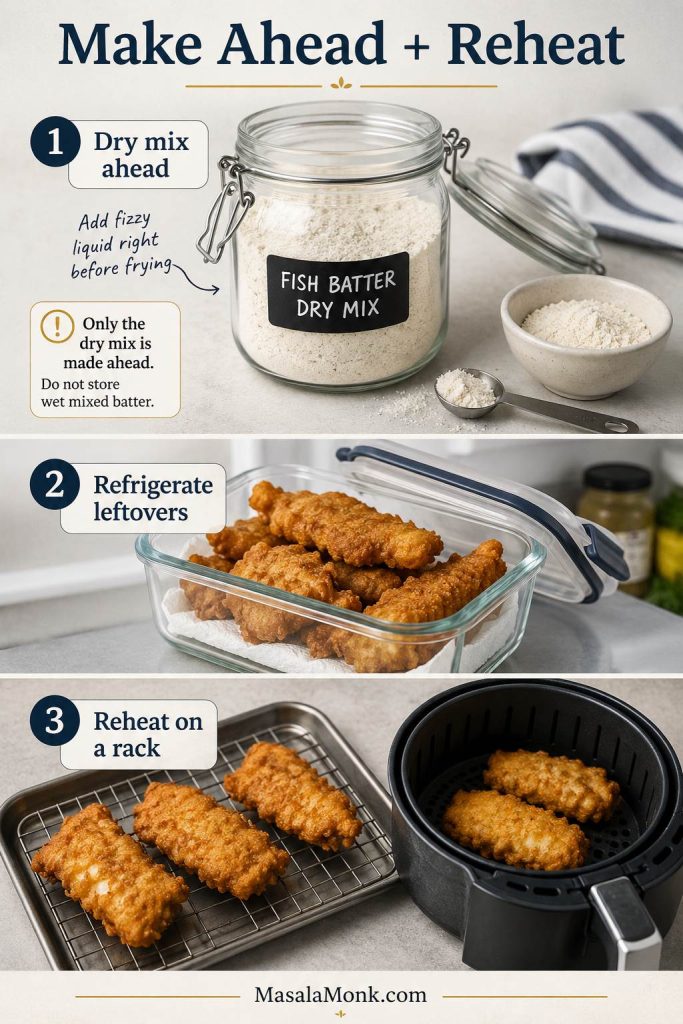
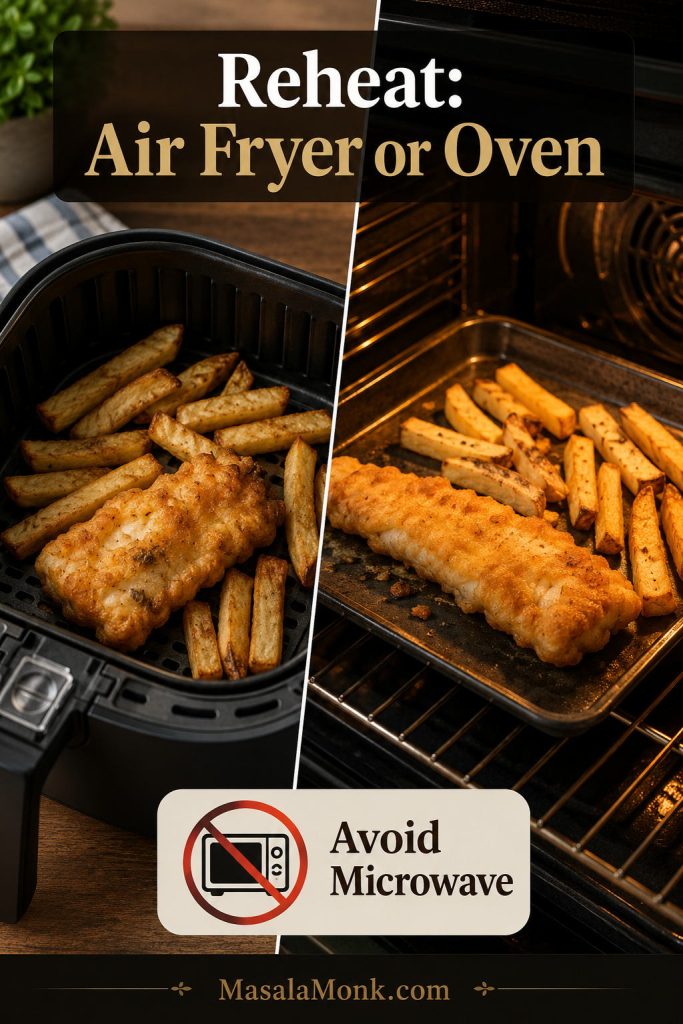
When frying in batches, place the cooked fish on a wire rack set over a baking sheet and keep it in a 200°F / 95°C oven while the next batch cooks. Keep the pieces in a single layer and avoid covering them tightly, or steam will soften the crust.
After frying, a wire rack keeps the underside from steaming, which helps the battered fish stay crisp while the next batch cooks.
Deep frying also needs basic safety. Use a deep pot, do not fill it more than halfway with oil, lower the fish gently, keep children and pets away from the stove, and never leave hot oil unattended. If oil ever smokes heavily, turn off the heat and let it cool; never add water to hot oil.
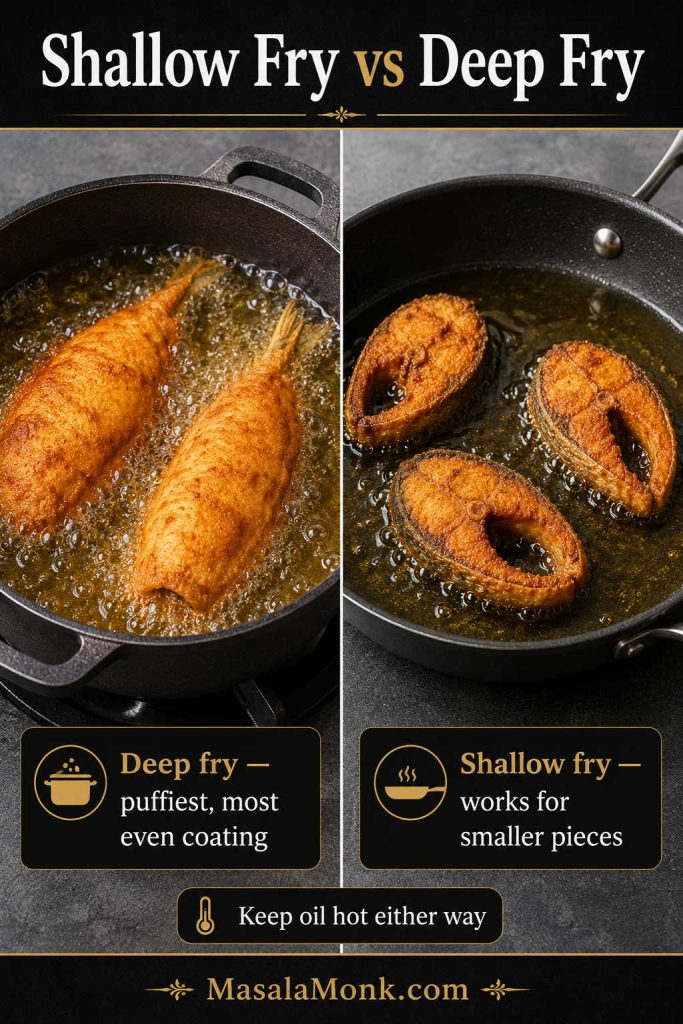
Shallow Fry vs Deep Fry for Battered Fish
For the most even coating, deep frying is the easier route because the fish is surrounded by hot oil. It is the simplest way to get a fully puffed, crisp shell on all sides.
Shallow frying can still work, especially with smaller pieces. Use enough oil to come at least halfway up the fish, let the first side set before turning, and flip gently so the coating does not tear. The crust may be a little flatter than deep-fried batter, but it can still be crisp and golden if the oil stays hot.
Best home compromise: Use a deep heavy skillet with 1–1½ inches of oil for smaller fish pieces. It uses less oil than deep frying but gives the batter more room to puff than a very shallow pan-fry.
Deep frying gives the most even puffed coating, but shallow frying can still work well when the pieces are smaller and the oil stays hot.
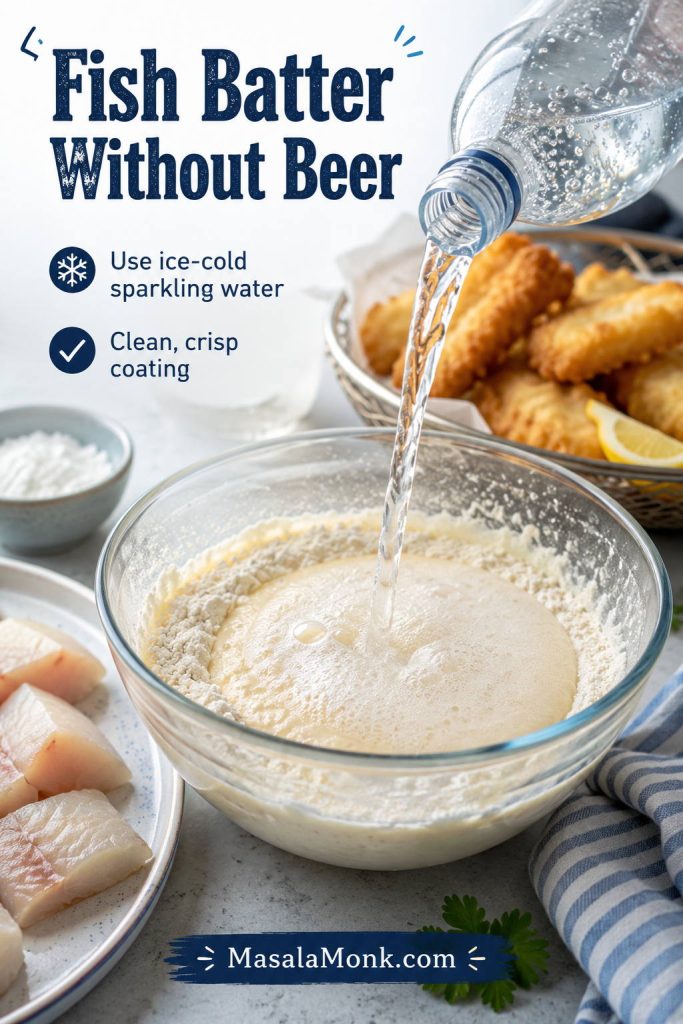
Fish Batter Without Beer
For a no-beer fish batter recipe, sparkling water is the easiest swap. Use ice-cold sparkling water, club soda, or seltzer so the batter still fries up light and delicate without beer flavor. Plain cold water works in a pinch, but the crust will usually be a little less airy.
This is the easiest version to start with because it works for fried fish, fish tacos, seafood, and fish-and-chips-style dinners. It also keeps the flavor clean, so the fish, seasoning, sauce, and sides can do more of the work.
No-beer shortcut: Start with ¾ cup / 180ml ice-cold club soda. Add 1 tablespoon more at a time only if the batter is too thick.
For fish batter without beer, club soda or sparkling water keeps the coating light while letting the fish stay clean and mild.
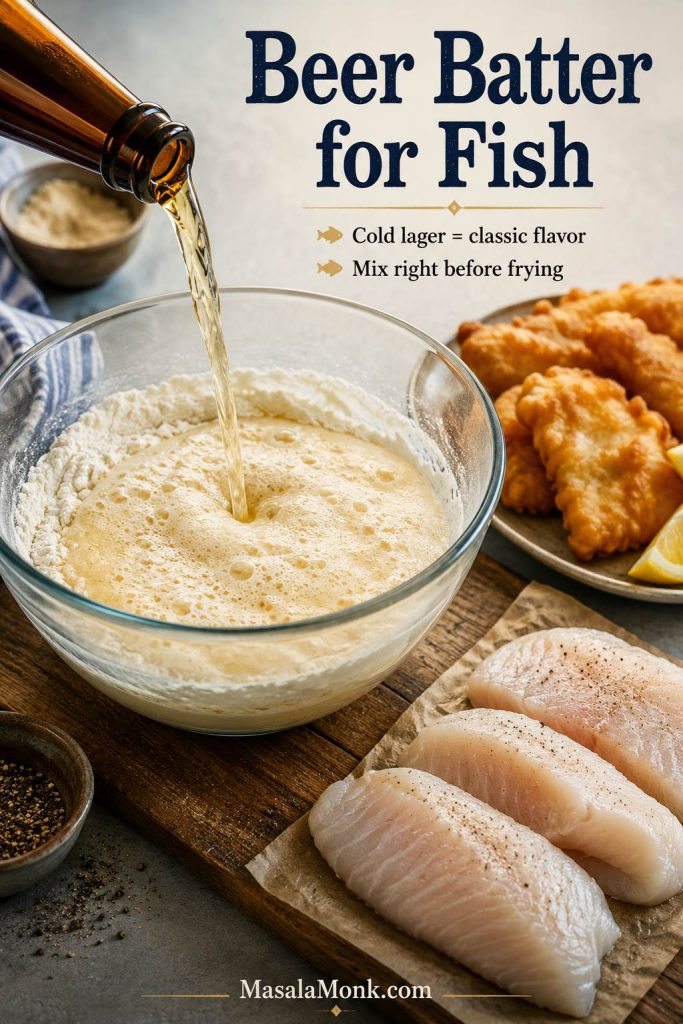
Beer Batter for Fish
To make a beer-battered version, replace the sparkling water with ¾ cup / 180ml very cold lager or pale ale. Keep the beer cold, whisk only until the batter comes together, and fry right away while the mixture is still lively.
Lager is the safest first choice because it gives a clean, crisp finish without taking over the fish. Pale ale adds a little more flavor. Very dark beers can make the coating taste heavier or more bitter, so save them for times when you specifically want that deeper flavor.
Beer batter works because cold lager or pale ale brings both bubbles and flavor; mix it right before frying so the coating stays light.
Extra-Crisp Beer Batter Upgrade
For a more delicate, extra-crisp beer batter, use rice flour instead of cornstarch and replace 2 tablespoons / 30ml of the beer with vodka. This is not an alcohol-free option; it is simply an advanced crispness upgrade. The vodka helps the coating fry up lighter because it evaporates quickly and limits gluten development. Keep this as an upgrade, not the basic version, because the sparkling-water batter above is easier and more flexible for everyday cooking.
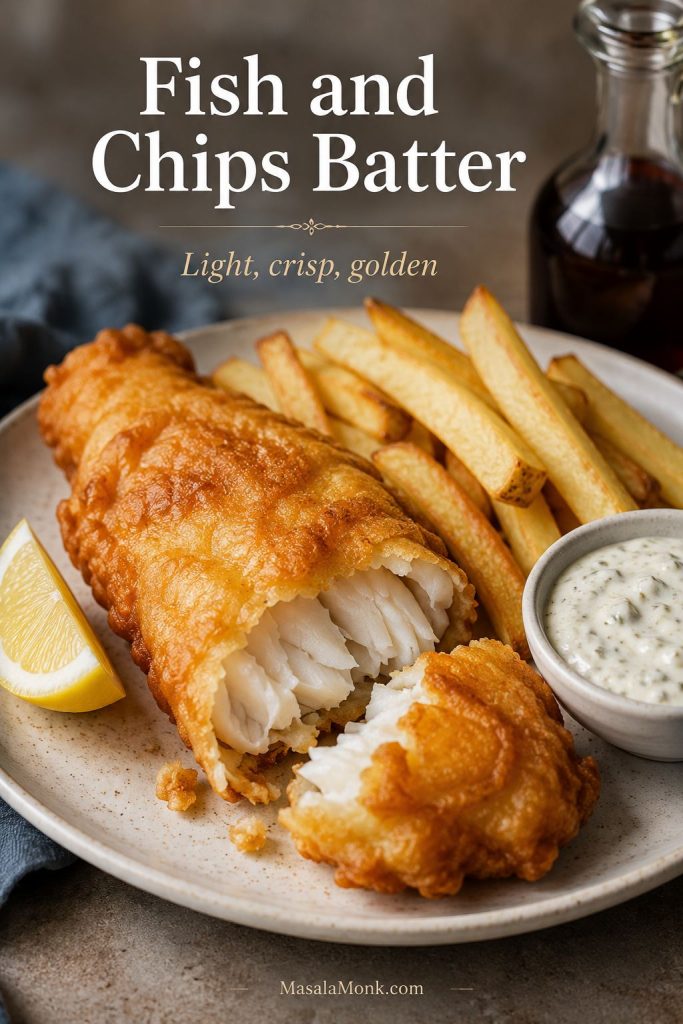
Fish and Chips Batter
For fish and chips, the coating should be light, bubbly, and crisp enough to hold up beside hot chips and tartar sauce. Cod, haddock, and hake are especially good choices because they give you thick flakes inside a golden shell.
A fish-and-chips-style batter often uses flour, cornflour or cornstarch, baking powder, and either cold beer, sparkling water, or a mix of both. The recipe on this page works well for that style, especially if you use lager instead of sparkling water and keep the batter very cold.
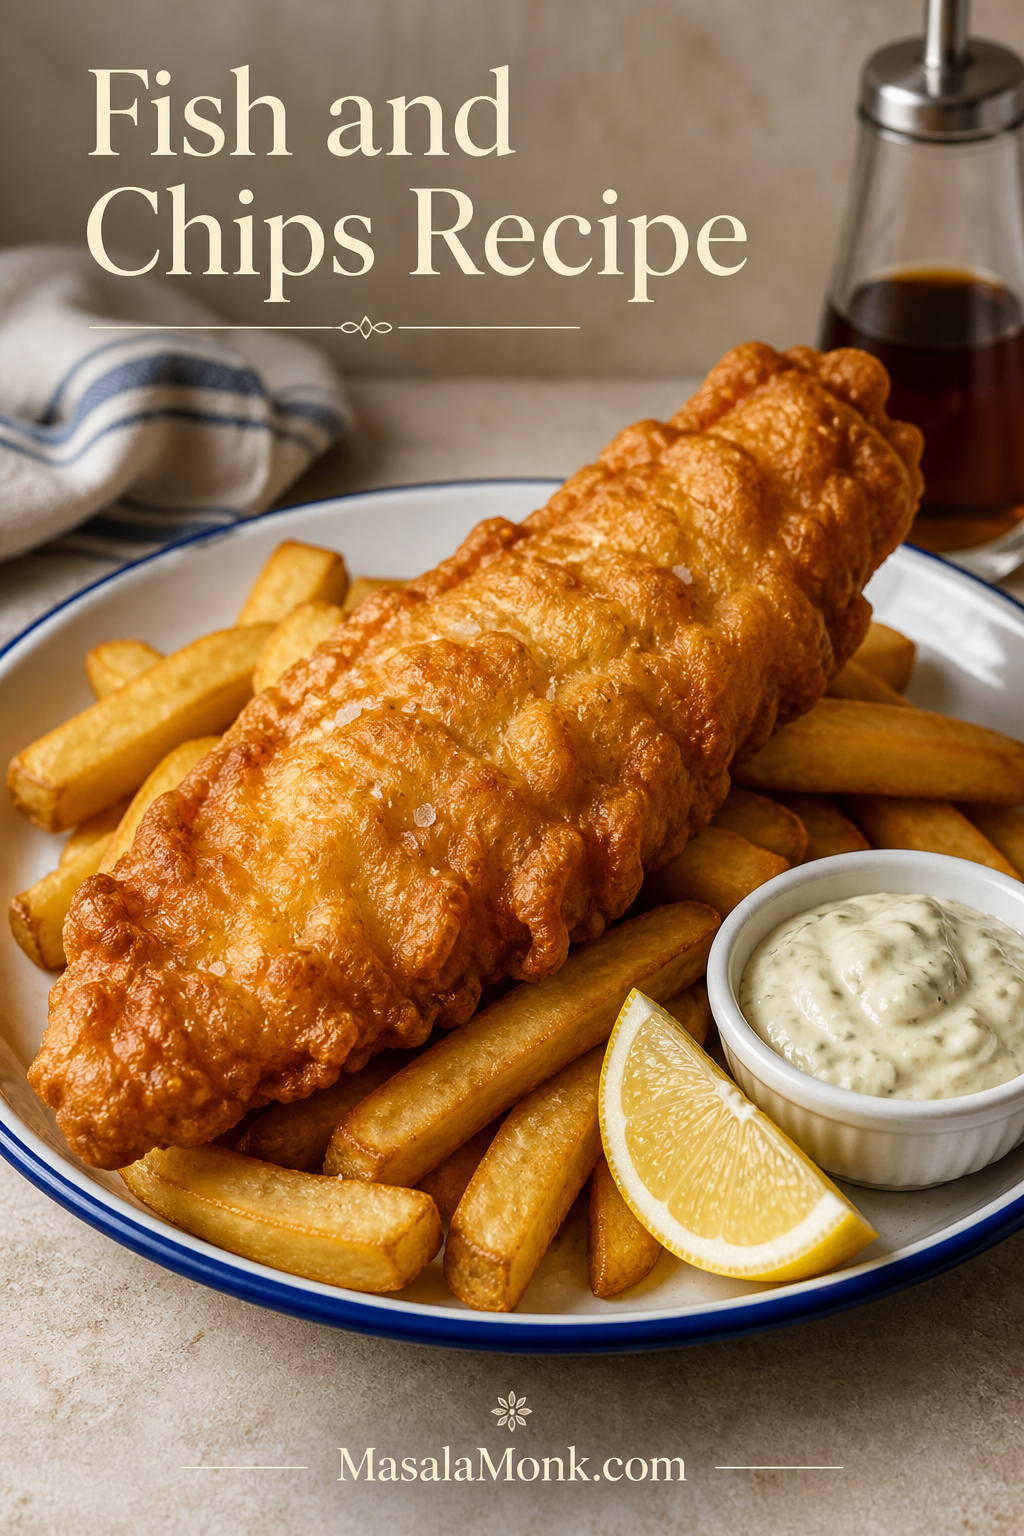
If you are making the full plate with chips, tartar sauce, timing, and serving ideas, see our fish and chips recipe. For a bolder plate with chutney dips, masala seasoning, and Indian-style serving ideas, you can also try these fish and chips with Indian twists.
Fish and chips batter should be sturdy enough to hold its crunch beside fries and sauce, but still thin enough to let the fish flake cleanly.
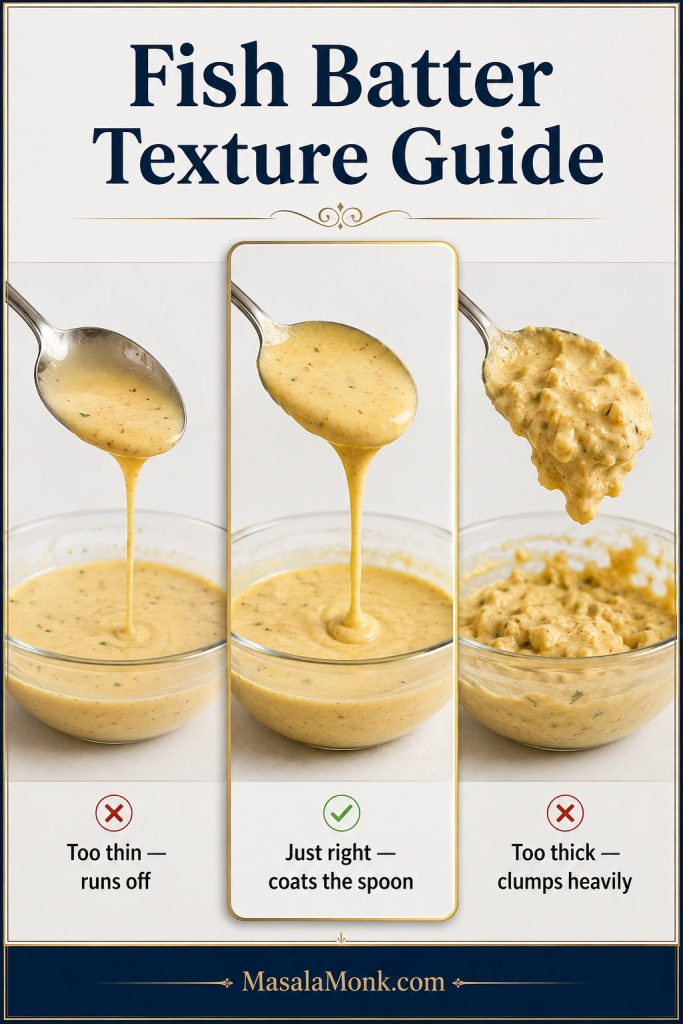
Fish Batter Texture Guide
Texture matters as much as the ingredient list. If the mixture is too thin, it slides off. If it is too thick, it fries into a heavy, bready layer. Aim for a loose, cold batter that coats the fish lightly and drips slowly.
Batter texture
What it looks like
How to fix it
Too thin
Runs off the fish immediately.
Add 1 tablespoon flour or cornstarch at a time.
Just right
Coats like heavy cream and drips slowly.
Use it immediately while cold and bubbly.
Too thick
Clings in heavy blobs or makes a bready crust.
Add 1 tablespoon ice-cold sparkling water or beer at a time.
Lumpy
Small lumps, but no dry pockets of flour.
Usually fine. Do not overmix just to make it perfectly smooth.
Flat or warm
No bubbles, no lift, heavy coating.
Chill briefly or remake with fresh cold fizzy liquid.
Batter texture matters as much as the recipe ratio: too thin slides off, too thick turns bready, and just right coats the spoon in a slow ribbon.
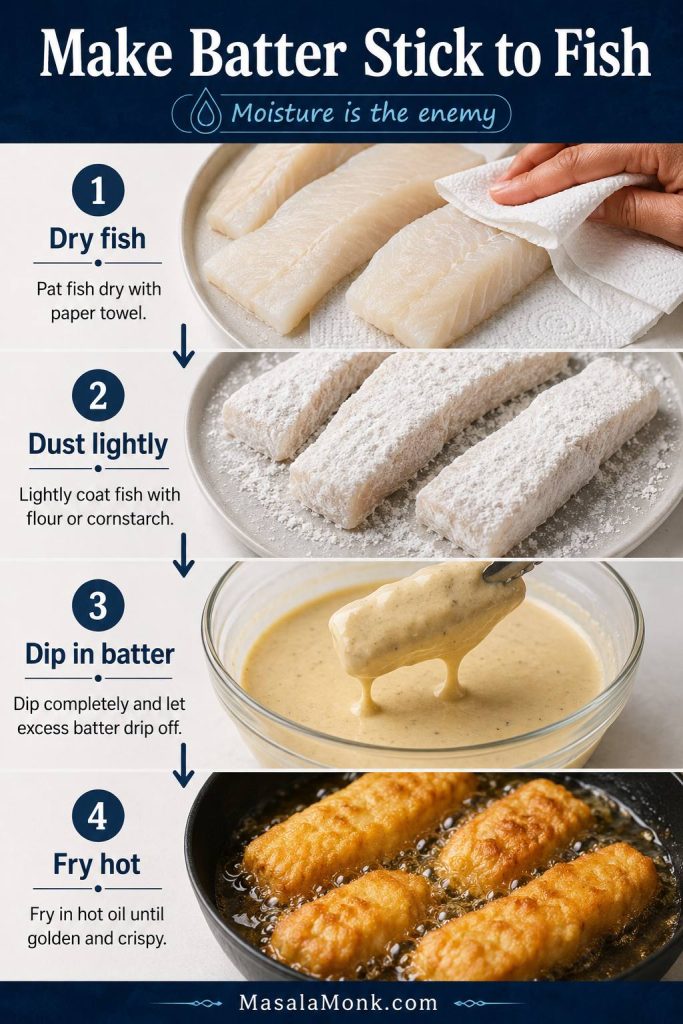
How to Make Batter Stick to Fish
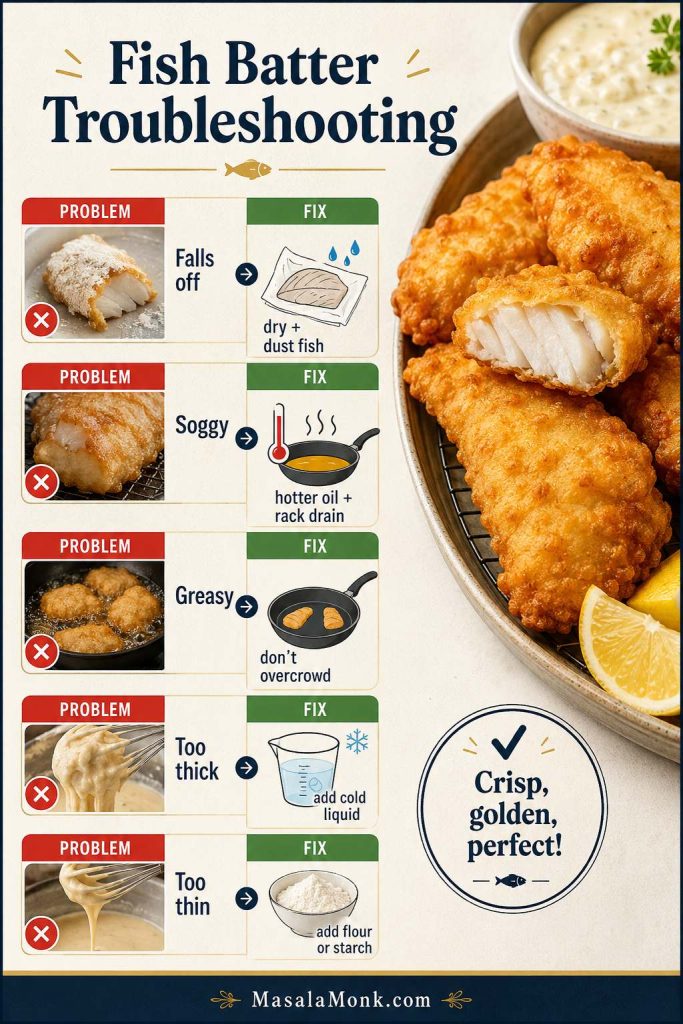
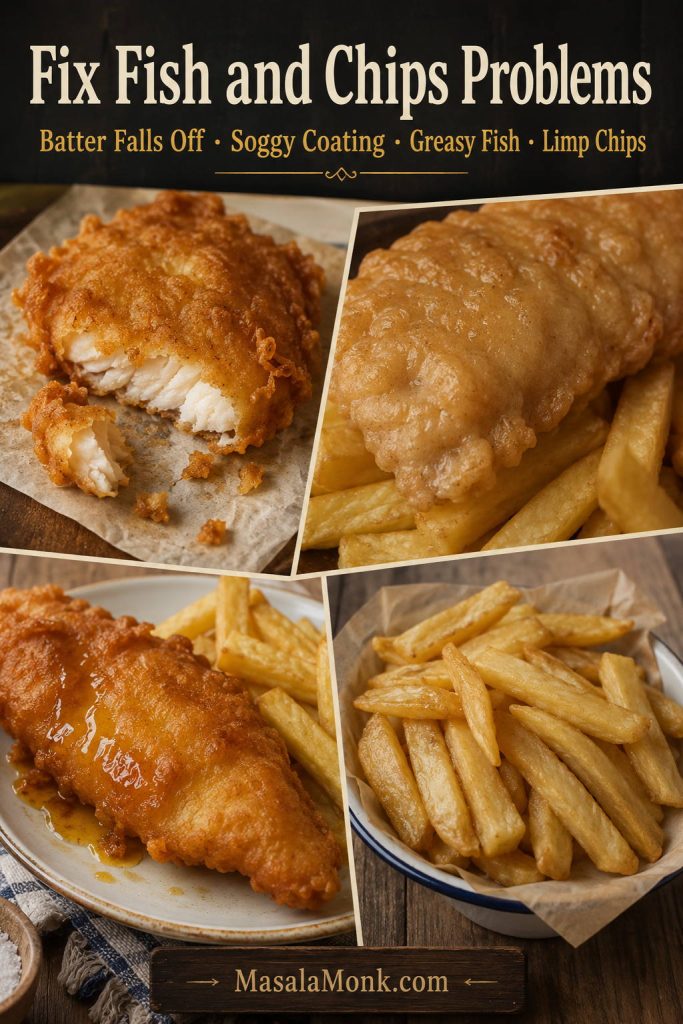
When batter falls off, the recipe usually is not the real problem. Most of the time, the fish was too wet, the surface was not dusted first, the coating was too watery, or the oil was not hot enough when the fish went in.
Before dipping, dry the fish well and give it a light dusting of flour, cornstarch, or rice flour. That dry layer acts like a bridge between the fish and the wet batter, helping the crust set quickly instead of sliding away in the oil.
Pat the fish very dry before seasoning.
Dust with flour, cornstarch, or rice flour before dipping.
Shake off extra dusting flour so the coating is not pasty.
Make sure the batter is not watery.
Keep the oil in the 350–375°F / 175–190°C range.
Lower the fish into the oil gently and away from you.
Do not poke, flip, or drag the fish before the crust sets.
When batter falls off fish, moisture is usually the problem; drying and dusting create the grip the wet batter needs.
What to Serve with Battered Fish
For the best crunch, serve the fish within a few minutes of frying. Battered fish can be held briefly in a low oven, but it is always crispiest right after it leaves the oil.
Serve battered fish hot, while the crust is still crisp. For a classic plate, pair it with chips, tartar sauce, lemon wedges, and a simple slaw. For tacos, tuck the pieces into warm tortillas with cabbage, lime, a creamy sauce, and something bright like mango salsa.
You can also serve the fried pieces with rice bowls, salad bowls, wraps, or a quick dipping sauce. The coating is mild enough to work with lemon, hot sauce, garlic mayo, tartar sauce, chutney, or a spicy yogurt dip.
If you like malt vinegar, add it lightly right before eating instead of soaking the fish. A quick drizzle, or even a small spray bottle, gives you the classic sharp finish without softening the crust too quickly.
Once the fish is fried, it can go several ways: classic fish and chips, fish tacos, rice bowls, or a sauce-and-slaw plate.
How to Fix Fish Batter Problems
A good batter is easy to adjust once you know what went wrong. Use this table before you throw out a batch or keep adding flour and liquid without a plan.
Problem
Likely cause
Best fix
Batter falls off fish
Fish was wet, not dusted, or oil was too cool.
Dry fish well, dust before battering, and fry in hotter oil.
Batter is soggy
Oil too cool, overcrowding, or steam trapped after frying.
Fry smaller batches and drain on a wire rack.
Batter is greasy
Oil temperature dropped too low.
Let the oil return to at least 350°F / 175°C between batches.
Batter is too thick
Too much dry mix or batter sat too long.
Whisk in 1 tablespoon cold sparkling water or beer at a time.
Batter is too thin
Too much liquid.
Add 1 tablespoon flour or cornstarch at a time.
Batter browns before fish cooks
Oil is too hot or fish pieces are too thick.
Lower oil temperature slightly and cut fish into thinner pieces.
Batter tastes floury
Batter is too thick or underfried.
Thin the batter slightly and fry until deeply golden.
Batter gets soft after frying
Steam is trapped under the crust.
Use a wire rack and avoid covering the fish while hot.
Most fish batter problems have a clear fix: adjust moisture, batter thickness, oil heat, batch size, or draining method before changing the whole recipe.
If you want another crisp fish dinner that is pan-fried instead of battered, try these salmon croquettes; they use a shaped patty method rather than a wet coating.
Equipment You Need
You do not need restaurant equipment, but a thermometer and a wire rack make a huge difference. The thermometer keeps the oil in the right range, and the rack keeps the crust from steaming underneath after frying.
Deep heavy pot, Dutch oven, or deep fryer
Deep-fry thermometer or instant-read thermometer
Wire rack set over a baking sheet
Tongs or spider strainer
Mixing bowls
Whisk
Paper towels for drying fish and catching oil under the rack
Kitchen scale, optional but useful for consistent batter
The most useful tools are simple ones: a thermometer for steady oil and a wire rack so the crust does not steam underneath.
Make-Ahead, Storage, and Reheating
Can You Make the Batter Ahead?
You can mix the dry ingredients ahead, but wait to add the sparkling water or beer until just before frying. Once the liquid goes in, the bubbles start fading and the batter loses some of its lift.
How to Store Leftover Fried Fish
Let leftover fried fish cool, then store it in an airtight container in the refrigerator for up to 2 days. The crust will soften as it sits, but it can crisp up again with the right reheating method.
How to Reheat Battered Fish
Reheat battered fish on a rack in a hot oven or in an air fryer until the coating is crisp again. Avoid the microwave if you care about crunch, because it steams the coating and makes it soft.
Make the dry mix ahead, but keep the wet batter fresh; later, reheat leftover battered fish on a rack so the crust can crisp again.
Once the fish is dry, the batter is cold, and the oil is hot, the actual cooking moves quickly. Keep your rack ready before the first piece goes into the pot, then use the recipe card below for the exact amounts and steps.
Keep this fish batter recipe ratio handy: flour, starch, baking powder, cold liquid, hot oil, and the dry-dust-dip-fry method.
Fish Batter Recipe for Crispy Fried Fish
This fish batter recipe works with sparkling water for a clean no-beer version, or cold lager for a more classic beer-battered coating. Either way, keep the liquid cold and fry the fish as soon as the batter is mixed.
Prep Time15 minutes
Cook Time10–15 minutes
Total Time25–30 minutes
Servings4
Ingredients
1¼ lb / 550–600g white fish fillets, such as cod, haddock, pollock, hake, tilapia, catfish, or basa
¾ cup / about 90g all-purpose flour
¼ cup / about 30g cornstarch, also called cornflour in many countries, or rice flour
1 teaspoon baking powder
¾ teaspoon fine salt
½ teaspoon paprika or white pepper
¼–½ teaspoon garlic powder, optional
¾ cup / 180ml ice-cold sparkling water or club soda, plus 1–2 tablespoons more only if the batter is too thick
¼ cup extra flour, cornstarch, or rice flour for dusting
Neutral oil for frying, enough for 2–3 inches depth
Beer Batter Option
Replace the sparkling water with ¾ cup / 180ml very cold lager or pale ale. For an extra-crisp beer batter, use rice flour instead of cornstarch and replace 2 tablespoons / 30ml of the beer with vodka. This upgrade is not alcohol-free.
Method
Pat the fish very dry, then cut it into even strips or batons.
Add 2–3 inches of oil to a deep heavy pot and heat to 365°F / 185°C.
Whisk flour, cornstarch, baking powder, salt, paprika or pepper, and optional garlic powder in a bowl.
Add the ice-cold sparkling water or beer and whisk only until combined. Small lumps are fine.
Dust each piece of fish lightly with flour, cornstarch, or rice flour. Shake off the excess.
Dip the fish into the batter, let extra batter drip briefly, then lower gently into the hot oil.
Fry in small batches for 3–4 minutes total for smaller strips or 5–7 minutes total for thicker pieces, turning as needed, until golden and crisp.
Drain on a wire rack set over a baking sheet. Salt lightly while hot and serve immediately.
Notes
Keep the batter cold and use it right after mixing.
Do not overcrowd the pot or the oil temperature will drop.
Fry one test piece first if your fish pieces vary in thickness.
If the batter is too thick, add cold sparkling water 1 tablespoon at a time.
If the batter is too thin, add flour or cornstarch 1 tablespoon at a time.
Fish is done when opaque, flaky, and 145°F / 63°C in the thickest part.
To hold batches, keep fried fish on a rack in a 200°F / 95°C oven for a short time.
Leftover fried fish is best reheated on a rack in a hot oven or air fryer until crisp again. Avoid microwaving if you want to keep the coating crunchy.
Once you understand the texture, temperature, and dusting step, this fish batter recipe becomes easy to adjust. The answers below cover the most common swaps and problems people run into while frying fish at home.
Fish Batter Recipe FAQs
Can I make this fish batter recipe without beer?
Absolutely. Use ice-cold sparkling water, club soda, or seltzer instead of beer. The bubbles help the coating fry up light and crisp without adding alcohol or beer flavor.
Is beer or sparkling water better for fish batter?
Beer gives the batter more flavor and a classic fish-and-chips feel. Sparkling water gives you a cleaner no-beer coating that still fries up light and crisp. Both work well as long as the liquid is very cold.
What makes fish batter crispy?
A crisp coating needs starch, lift, cold liquid, and hot oil. Flour gives structure, cornstarch or rice flour adds crunch, baking powder helps the batter puff, and cold sparkling water or beer keeps the mixture light.
Should fish batter have egg?
For the crispest version, skip the egg. Egg can make the coating richer and puffier, but it can also make the crust more cakey or chewy. This no-egg fish batter recipe gives you a thinner, crisper shell.
Why does my batter fall off fish?
Batter usually falls off when the fish is wet, the fish was not dusted first, the batter is too thin, or the oil is too cool. Pat the fish dry, dust it lightly with flour or starch, and fry in properly hot oil.
Why is my fish batter soggy?
Soggy batter usually comes from oil that is too cool, overcrowding the pot, or trapping steam after frying. Fry in small batches, let the oil recover between batches, and drain the fish on a wire rack instead of stacking it.
What temperature should oil be for battered fish?
Aim for 365°F / 185°C, and keep the oil between 350–375°F / 175–190°C while frying. Oil below that range can make the coating greasy, while oil that is too hot can brown the outside before the fish cooks through.
How long do you fry battered fish?
Small battered fish strips usually take about 3–4 minutes total in deep oil. Thicker fillets may take 5–7 minutes total. For shallow frying, plan on roughly 2–3 minutes per side, then check that the fish is opaque and flakes easily.
Can I shallow fry battered fish?
Shallow frying works best with smaller pieces. Use enough oil to come at least halfway up the fish, let the first side set before turning, and flip gently so the coating does not tear.
Can I use this batter for shrimp or other seafood?
This batter also works for shrimp, calamari, and some other seafood. The frying time will be shorter than fish fillets, so remove the pieces as soon as the coating is golden and the seafood is cooked.
Can I make this fish batter recipe ahead?
Mix the dry ingredients ahead, but do not add sparkling water or beer until right before frying. Once the liquid goes in, the bubbles start fading and the batter loses some of its lift.
Can I use self-rising flour?
Self-rising flour can work, but reduce or skip the baking powder because self-rising flour already contains leavening. Plain all-purpose flour gives you more control over the final texture.
Can I use milk instead of sparkling water?
Milk gives a heavier, softer coating. For a lighter crunch, sparkling water, club soda, seltzer, or cold beer is a better choice.
Can I make this fish batter gluten-free?
The main recipe is not gluten-free because it uses all-purpose flour. For a gluten-free version, use a good gluten-free all-purpose flour blend, certified gluten-free rice flour, and sparkling water or gluten-free beer. The texture may vary by flour blend, so start with slightly less liquid and thin the batter until it coats the fish like heavy cream. If you are cooking for someone with celiac disease, make sure all ingredients, oil, tools, and surfaces are free from gluten cross-contact.
Can I bake or air fry wet battered fish?
Wet batter is designed for hot oil, not dry oven or air fryer heat. In an air fryer, it can drip before it sets and leave bare patches on the fish. For baking or air frying, use a breaded coating with flour, egg, and breadcrumbs or panko instead, and avoid the common airflow and overcrowding issues covered in this guide to air fryer mistakes.
This fish and chips recipe is built for the plate everyone actually wants: crisp beer-battered cod or haddock, thick golden chips, tartar sauce, malt vinegar, optional curry sauce, and no soggy coating sliding off the fish.
The method is classic, but the instructions are practical for a home kitchen. You will dry the fish properly, mix the batter cold, keep the oil in the right temperature range, and time the chips so the whole plate lands hot instead of one part waiting while the other goes soft.
Use the fried version as the main recipe. Then use the no-beer batter, air fryer, baked, and gluten-free notes when you want a different route without pretending every method gives the exact same chip-shop crunch.
The coating should break cleanly while the fish stays moist and flaky inside. If both happen together, your batter thickness and oil temperature are working.
Quick Answer: How to Make This Fish and Chips Recipe
To make crispy fish and chips, use firm white fish like cod or haddock, pat the fish very dry, dust it lightly with flour, dip it in cold beer batter, and fry it in hot oil at about 365°F to 375°F / 185°C to 190°C. Meanwhile, cut floury potatoes into thick chips, rinse or soak them, dry them well, and fry until crisp and golden.
At a glance: Serves 4. Use 1½ lb / 680 g cod or haddock, 2 lb / 900 g floury potatoes, very cold beer batter, and oil at 365°F to 375°F / 185°C to 190°C for the fish. Mix the batter only when you are ready to fry.
Before frying, set up the essentials first: firm white fish, floury potatoes, cold batter ingredients, and a thermometer so the oil stays in the crisp zone.
Serve everything immediately with tartar sauce, malt vinegar, lemon wedges, and optional curry sauce. Fish is best checked with a thermometer and should reach 145°F / 63°C, or be opaque and flaky.
A great plate of fish and chips is not about a complicated ingredient list. Instead, it comes down to moisture control, cold batter, hot oil, and good timing.
Surface moisture is one of the biggest reasons batter slips. Patting the fish dry first gives the dusting flour something to grip.
Dry fish holds batter better. Moisture on the surface makes batter slide off, so the fish is patted dry before seasoning and dusting.
A light flour dusting gives the batter grip. The coating clings instead of peeling away in the oil.
Cold beer or sparkling water makes a lighter batter. Cold carbonated liquid helps the batter puff quickly when it hits hot oil.
Rice flour, cornflour, or cornstarch improves crispness. A little starch lightens the coating and helps avoid a heavy, doughy crust.
Baking powder gives lift. It helps the batter puff instead of lying flat against the fish.
A thermometer protects the texture. Oil that is too cool makes greasy fish; oil that is too hot browns the batter before the fish cooks.
A wire rack keeps the underside crisp. Draining fried fish on a plate traps steam underneath.
Do this, not that: Dry the fish instead of battering it wet. Use cold beer or sparkling water instead of warm liquid. Fry in small batches instead of crowding the pot. Drain on a rack instead of a plate. Salt the chips while hot instead of after they cool.
Fish and Chips Recipe Ingredients
The ingredients are simple, but each one affects the final crunch: firm white fish, floury potatoes, very cold liquid, starch, baking powder, and clean high-heat oil.
The ingredient list is simple, but each choice affects texture: firm fish for clean flakes, floury potatoes for better chips, and starch for a lighter coating.
Fish
Cod or haddock: Cod is the easiest all-purpose choice. However, haddock gives a more classic British-style fish and chips flavor.
Salt and black pepper: Season the fish directly before battering.
Rice flour, cornflour/cornstarch, or all-purpose flour: This is used for dusting the fish so the batter clings.
Beer Batter
All-purpose flour: Gives the batter structure.
Rice flour, cornflour, or cornstarch: Keeps the coating lighter and crisper.
Baking powder: Adds lift.
Fine salt: Seasons the batter.
Very cold lager or pale beer: Adds carbonation and lightness.
Optional turmeric or paprika: Adds a warmer golden color and mild flavor.
Chips
Russet potatoes, Maris Piper, or another floury potato: These give a fluffy inside and crisp outside.
Neutral oil: Use sunflower, canola, vegetable, or peanut oil.
Salt: Add it immediately after frying.
Optional malt vinegar: A small amount in the chip water can help the potatoes hold together before frying.
Serving Sauces and Sides
Tartar sauce
Malt vinegar
Lemon wedges
Chip-shop-style curry sauce
Mushy peas
Pickles or coleslaw
Best Fish for Fish and Chips
The best fish for fish and chips is a firm white fish that stays moist inside while the batter crisps outside. Cod and haddock are the two most common choices, although they are not the only options.
Cod is mild and beginner-friendly, while haddock gives a more classic chip-shop flavor. Either way, choose firm white fish that can hold its shape in hot oil.
Fish
Best For
Notes
Cod
Easiest first choice
Mild, flaky, widely available, and very beginner-friendly.
Haddock
Classic British-style fish and chips
Slightly stronger flavor than cod and excellent in beer batter.
Pollock
Budget-friendly batches
Good texture when battered and fried, usually more affordable.
Hake
A softer, delicate version
Works well, but handle gently because it can be more delicate.
Halibut
Premium fish and chips
Firm, thick, and excellent, but more expensive.
Whiting or ling
Traditional-style alternatives
Good options where available, especially for thinner fillets.
For the main version, cod is the safest first choice. However, haddock is better when you want a more classic pub-style flavor. The same fish also works beautifully in Baja-style fish tacos, where it is paired with slaw, lime crema, and a lighter taco-style build.
Can You Use Frozen Fish?
Yes, frozen cod or haddock can work well, but thaw it completely and pat it very dry before seasoning. Frozen fish releases extra moisture as it thaws, and that moisture can make the batter slide off or turn soft in the oil.
Frozen fish can work, but it needs extra care. Thaw it fully, then dry it well so the batter does not loosen as it fries.
Fish thickness cue: Aim for pieces that are thick enough to stay moist, but not so thick that the batter browns before the center cooks.
Fish that is too thin dries quickly, while very thick pieces can brown outside before cooking through. Moderate thickness gives the batter and fish time to finish together.
Best thickness: Aim for fish pieces about ¾ to 1¼ inches / 2 to 3 cm thick. Very thick fish can brown outside before cooking through, while very thin fish can dry out quickly.
The batter should shatter lightly when you bite into it, not sit on the fish like a thick doughy coat. You are looking for a mixture that feels loose but not watery — closer to thin pancake batter or double cream than a heavy fritter mix.
It should coat the back of a spoon, then drip off in ribbons. If it runs off like water, it is too thin. If it clings in a heavy layer, it is too thick.
Batter texture cue: The batter should coat the spoon and drip in slow ribbons before you dip the fish.
The right fish batter should coat the spoon and fall in slow ribbons. If it runs off or clumps heavily, adjust before dipping the fish.
Beer Batter for Fish and Chips
Cold beer adds bubbles and lightness to the batter. Mix it just before frying so the batter stays cold, active, and ready to puff in the oil.
For the main version, use cold lager or pale beer. The beer should be chilled, and the batter should be mixed just before frying. Do not overmix it; a few tiny lumps are fine.
A good basic beer batter for fish and chips uses:
¾ cup / 95 g all-purpose flour
¼ cup / 40 g rice flour, cornflour, or cornstarch
1¼ teaspoons baking powder
½ teaspoon fine salt
1 cup / 240 ml very cold lager or pale beer
Lighter beers give the cleanest flavor and the most classic golden color. Save stout or porter for a darker, more bitter batter.
Fish and Chips Batter Without Beer
Sparkling water or club soda is the best no-beer swap because it still brings carbonation. Keep it ice-cold so the coating fries lighter and crisper.
To make fish and chips batter without beer, use the same dry ingredients and replace the beer with 1 cup / 240 ml ice-cold sparkling water or club soda. Then add an extra ¼ teaspoon baking powder to help the batter puff.
The no-beer version tastes less malty, but it can still fry up crisp if the liquid is ice-cold and the oil is hot.
Should Fish and Chips Batter Have Egg?
Egg makes fish batter sturdier, but it can also make the coating heavier. For classic crispy fish and chips, the lighter egg-free version is the better first choice.
For the crispiest classic fish and chips batter, skip the egg. Egg can make the coating richer and sturdier, but it also pushes the batter toward a heavier, chewier, more cakey texture. This recipe uses flour, rice flour or cornstarch, baking powder, salt, and very cold beer or sparkling water for a lighter crisp shell.
If you prefer a thicker, more old-fashioned coating, you can add 1 beaten egg, but start with 2 to 3 tablespoons less beer or sparkling water and thin the batter only if needed. For a crisp pub-style finish, the egg-free batter is the better first choice.
Optional Extra-Crisp Batter Upgrade
For an extra-crisp batter, replace 2 to 4 tablespoons / 30 to 60 ml of the beer with vodka. This is optional, not required. The standard beer batter already works well for a home kitchen.
How to Fix Batter Thickness Before Frying
Batter texture is easier to judge by sight than by mixing time. Aim for a smooth coating that clings lightly, then drips slowly.
Batter Problem
What It Looks Like
Fix
Too thin
Runs straight off the fish and leaves bare patches.
Add flour or rice flour 1 tablespoon at a time.
Just right
Coats the fish and drips slowly in ribbons.
Use immediately while cold.
Too thick
Clings in a heavy, doughy layer.
Add cold beer or sparkling water 1 tablespoon at a time.
You do not need a restaurant fryer for homemade fish and chips, but the right setup makes a big difference. A heavy pot, thermometer, and wire rack will do more for crispness than extra batter ever will.
A heavy pot, thermometer, and wire rack are the real crispness tools. Control the oil first, then drain the fish where steam can escape.
Equipment
Why It Helps
Dutch oven, deep heavy pot, wok, or deep fryer
Holds heat better and gives the fish enough room to fry.
Deep-fry thermometer
Keeps the oil in the crisp zone instead of guessing.
Wire rack and rimmed baking sheet
Lets steam escape so the underside of the fish stays crisp.
Spider skimmer or tongs
Makes lowering and removing fish safer.
Mixing bowls
Useful for dredging flour, batter, and sauces.
Kitchen towels or paper towels
Dry fish and potatoes before frying.
Kitchen scale
Gives better accuracy for flour and fish weight.
Instant-read thermometer
Confirms the fish has reached 145°F / 63°C.
How to Make Fish and Chips Step by Step
This homemade version works best when you cook in the right order. Prepare the sauce first, start the chips next, mix the batter only when the oil is ready, then fry the fish and finish the chips close to serving.
Small batches protect the oil temperature. As a result, the batter sets quickly instead of absorbing oil and turning greasy.
Make the sauce first. Tartar sauce and curry sauce can sit while you fry.
Cut the potatoes. Slice them into thick chips about ½ to ⅝ inch / 1.2 to 1.5 cm thick.
Rinse or soak the chips. This removes excess starch.
Dry the chips very well. Wet potatoes splatter and soften in the oil.
Pat the fish dry. This is one of the most important steps.
Season the fish. Use salt and black pepper before dusting.
First-fry or par-cook the chips. This softens the inside before the final crisping step.
Mix the cold batter. Do this just before frying the fish.
Dust the fish with flour or starch. Use rice flour, cornflour, cornstarch, or plain flour.
Dip the fish in batter. Let excess batter drip off.
Fry the fish. Cook until deeply golden, crisp, and flaky inside.
Finish the chips. Fry or final-fry them hot until crisp and golden.
Serve immediately. Add salt, tartar sauce, malt vinegar, lemon, and curry sauce if using.
How to Make Crispy Chips for Fish and Chips
The chips need to earn their place on the plate: crisp-edged, fluffy inside, salted while hot, and sturdy enough for malt vinegar or curry sauce.
Best Potatoes for Fish and Chips
Floury potatoes make chips with fluffy centers and crisp edges. Waxy potatoes can still fry, but they usually taste denser.
The best potatoes for fish and chips are floury or starchy potatoes because they cook up fluffy inside and crisp outside. Use russet potatoes in the U.S., Maris Piper or King Edward in the U.K., or another floury potato where you live. Waxy potatoes can work, but they usually make denser chips with less fluffy centers.
There are two good ways to handle the potatoes: double-fry them, or parboil them first and then fry. You do not have to do both unless you want the extra step.
Option 1: Double-Fry Chips
The first fry cooks the potato through; the second fry builds the golden edge. That is why double-fried chips hold up better with vinegar or curry sauce.
Cut chips about ½ to ⅝ inch / 1.2 to 1.5 cm thick.
Rinse or soak until the water is mostly clear.
Dry the chips very well before frying.
First-fry at 325°F / 160°C until softened but pale.
Rest briefly, then final-fry at 375°F / 190°C until golden.
Salt immediately after frying.
Option 2: Parboil, Dry, Then Fry
Parboiling helps chips turn fluffy inside, but drying is the step that makes frying work. Wet potatoes soften and splatter instead of crisping.
Cut the potatoes into thick chips.
Simmer in salted water with 1 teaspoon malt vinegar for 8 to 10 minutes, until just tender at the edges but not falling apart.
Drain carefully and dry very well.
Chill if you have time, then fry once at 375°F / 190°C until crisp and golden.
Salt immediately after frying.
For a deeper potato-only guide with double-fry timing, air fryer fries, oven fries, cuts, coatings, and seasoning ideas, use MasalaMonk’s crispy homemade French fries guide alongside this fish and chips recipe.
Oil temperature is where homemade fish and chips usually succeed or fail. Too cool, and the batter drinks oil. Too hot, and the coating browns before the fish turns flaky inside.
Oil temperature decides whether fish batter crisps or turns greasy. Let the oil recover between batches rather than rushing the next piece in.
Item
Temperature
Time
First-fry chips
325°F / 160°C
3 to 5 minutes
Final-fry chips
375°F / 190°C
2 to 4 minutes
Fry fish
365°F to 375°F / 185°C to 190°C
4 to 6 minutes for 5 to 6 oz pieces
Fish doneness
145°F / 63°C internal temperature
Until opaque and flaky
Start the oil slightly hotter than your minimum target because the temperature drops when cold battered fish goes in. Then fry in small batches and let the oil recover between batches.
Vinegar timing cue: Add malt vinegar at the table or right before eating so the chips keep their crisp edges longer.
Vinegar timing: Add malt vinegar at the table or right before eating. If the fish or chips sit too long after vinegar is added, the crisp coating softens quickly.
Malt vinegar gives fish and chips their sharp finish. However, add it right before eating so the chips stay crisp longer.
The danger zone is not the frying itself; it is letting one part of the meal sit while the other finishes. Fish and chips should land on the plate hot, crisp, and uncovered, with the chips salted while they are still fresh from the oil.
A wire rack keeps fried fish crisp underneath because steam can escape. By contrast, a plate traps moisture and softens the coating.
Use this order:
Make tartar sauce and curry sauce first.
Cut, rinse, and dry the chips.
Pat the fish dry and portion it.
First-fry or par-cook the chips.
Heat the oil for fish.
Mix the cold batter right before frying.
Fry the fish and drain it on a wire rack.
Final-fry or finish the chips while the fish rests briefly.
Salt the chips and serve everything immediately.
If needed, keep cooked chips warm in a low oven around 250°F / 120°C while you finish the fish. However, do not cover fried fish tightly or it will steam and soften.
Keep the main method simple: dry the fish, mix the batter cold, fry in hot oil, then drain on a rack before serving.
Crispy Fish and Chips Recipe
This homemade fish and chips recipe uses cod or haddock, a cold beer batter, thick-cut chips, and a clear frying method so the fish turns crisp outside and flaky inside. It also includes no-beer, air fryer, baked, and gluten-free notes.
Servings4
Prep Time30 minutes
Cook Time30 minutes
Total Time1 hour
Best texture targets: Fry fish at 365°F to 375°F / 185°C to 190°C, keep the batter ice cold, cut fish into 5 to 6 oz pieces, and drain on a wire rack instead of a plate.
Ingredients
Fish
1½ lb / 680 g cod or haddock fillets, cut into 4 large pieces or 6 to 8 smaller pieces
½ teaspoon fine salt
¼ teaspoon black pepper
¼ cup / 40 g rice flour, cornflour, cornstarch, or all-purpose flour, for dusting
Chips
2 lb / 900 g russet potatoes, Maris Piper, or other floury potatoes
1 teaspoon malt vinegar, optional for parboiling
Fine salt, to taste
1½ to 2 litres neutral high-heat oil, or enough for 2 to 3 inches / 5 to 7 cm depth
Beer Batter
¾ cup / 95 g all-purpose flour
¼ cup / 40 g rice flour, cornflour, or cornstarch
1¼ teaspoons baking powder
½ teaspoon fine salt
¼ teaspoon turmeric, optional for color
½ teaspoon paprika, optional
1 cup / 240 ml very cold lager or pale beer
Serving Sauces and Sides
Tartar sauce
Malt vinegar
Lemon wedges
Curry sauce, optional
Mushy peas, optional
Instructions
Prep the Sauces, Chips, and Fish
Start with the sauces. Prepare tartar sauce and curry sauce, if using, before anything comes out of the oil.
Cut the chips. Peel if desired, then cut the potatoes into thick chips, about ½ to ⅝ inch / 1.2 to 1.5 cm wide.
Rinse or soak. Rinse until the water is mostly clear, or soak in cold water for 20 to 30 minutes.
Dry well. Drain and dry the potatoes thoroughly with a clean kitchen towel.
Prepare the fish. Pat the fish very dry, then season with salt and black pepper.
Cook the Chips
Choose your chip method. For double-fried chips, first-fry at 325°F / 160°C until softened, then final-fry at 375°F / 190°C until crisp. Alternatively, parboil with 1 teaspoon malt vinegar for 8 to 10 minutes, until just tender at the edges, dry very well, then fry once at 375°F / 190°C until crisp and golden.
Heat the oil safely. Keep the pot no more than halfway to two-thirds full. Use 325°F / 160°C for the first fry, or 375°F / 190°C for the parboil-and-fry method.
Cook the chips. Use your chosen method, transfer to a rack or tray, and salt while hot.
Mix the Batter and Fry the Fish
Raise the oil temperature for fish. Aim for 365°F to 375°F / 185°C to 190°C.
Mix the batter just before frying. Whisk together the flour, rice flour or cornstarch, baking powder, salt, turmeric, and paprika. Add the cold beer and whisk briefly. Do not overmix; a few small lumps are fine.
Dust the fish. Coat each piece lightly in rice flour, cornflour, cornstarch, or plain flour, then shake off the excess.
Batter the fish. Dip the fish into the batter and let the excess drip off in ribbons.
Fry the fish. Fry for 4 to 6 minutes for 5 to 6 oz pieces, turning once after the batter has set. The coating should be deep golden, crisp at the edges, and firm enough that it does not dent easily when lifted from the oil; the fish inside should be opaque, flaky, and 145°F / 63°C if checked with a thermometer.
Drain properly. Move the fish to a wire rack set over a baking sheet. Do not stack or cover tightly.
Finish and Serve
Finish the chips if needed. If you double-fried them, do the final fry now at 375°F / 190°C for 2 to 4 minutes. If you used the parboil method and already fried once, briefly refresh in hot oil only if needed.
Serve hot. Salt the chips immediately and serve this fish and chips recipe with tartar sauce, malt vinegar, lemon wedges, and curry sauce if using.
No-Beer Batter Note
Replace the beer with 1 cup / 240 ml ice-cold sparkling water or club soda. Add an extra ¼ teaspoon baking powder. The batter will be lighter and less malty but still crisp.
Egg Note
For the crispiest coating, skip the egg. If you prefer a thicker, sturdier batter, add 1 beaten egg but start with 2 to 3 tablespoons less beer or sparkling water.
Frozen Fish Note
Frozen cod or haddock can work, but thaw it completely and pat it very dry before seasoning, dusting, and battering.
Air Fryer Note
For air fryer fish and chips, do not use wet beer batter. Use a flour, egg, and panko coating instead. Air fry at 375°F to 400°F / 190°C to 200°C for about 10 to 12 minutes, flipping halfway.
Baked Note
For baked fish and chips, use a panko coating and bake in a 400°F / 200°C oven. Bake the chips first, then add the coated fish and bake until crisp and flaky.
Gluten-Free Note
Use a gluten-free flour blend, rice flour or cornstarch, gluten-free baking powder, and gluten-free beer or club soda. Start with 1 cup / 240 ml liquid, then add 1 to 3 tablespoons more only if needed. Dust the fish with rice flour before battering.
Storage Note
This fish and chips recipe is best fresh. Refrigerate leftovers up to 2 days and reheat in an oven or air fryer. Avoid microwaving if you want the coating to stay crisp.
Fish and Chips Sauce: Tartar Sauce, Curry Sauce, and Vinegar
Fish and chips need contrast: creamy tartar sauce, sharp malt vinegar, lemon for brightness, and curry sauce if you want that proper chip-shop comfort-food finish.
Sauces complete the plate: tartar sauce adds creaminess, lemon adds brightness, malt vinegar cuts the fried coating, and curry sauce brings chip-shop comfort.
Tartar Sauce for Fish and Chips
For a quick tartar sauce, stir together:
½ cup mayonnaise
2 tablespoons finely chopped cornichons or pickles
1 teaspoon chopped capers
1 tablespoon lemon juice
1 tablespoon chopped parsley or dill
½ teaspoon Dijon mustard, optional
Black pepper, to taste
If you want to make the creamy base from scratch, start with this homemade mayonnaise guide, then fold in pickles, capers, lemon, herbs, and mustard for tartar sauce.
Curry Sauce for Fish and Chips
For a simple chip-shop-style curry sauce, use:
1 tablespoon butter or neutral oil
¼ small onion, finely chopped
1 small garlic clove, grated or minced
½ teaspoon grated ginger, optional
1½ teaspoons mild curry powder
¼ teaspoon turmeric
¾ cup stock
1 teaspoon malt vinegar
1 teaspoon cornstarch mixed with 1 tablespoon water
Salt, pepper, and a small pinch of sugar, to taste
First, soften the onion in butter or oil. Next, add the garlic, ginger, curry powder, and turmeric, then stir in the stock. After that, simmer for a few minutes, add the cornstarch slurry, and cook until glossy and pourable. Finally, finish with malt vinegar and adjust salt, pepper, and sweetness.
This does not need to be fiery. A good fish and chips curry sauce should be warm, savory, lightly sweet, and loose enough to spoon over chips.
Quick Mushy Peas
For a quick green-pea version, simmer 2 cups peas with 1 tablespoon butter, a pinch of salt, black pepper, and 1 to 2 tablespoons water until hot. Mash roughly with lemon juice and chopped mint or parsley. Keep them chunky rather than completely smooth so they feel like a proper side, not a puree.
Quick mushy peas add freshness and color beside fried fish. For better texture, keep them chunky instead of turning them into a smooth puree.
For air fryer fish and chips, switch from wet beer batter to a panko coating. Wet batter needs hot oil to set instantly; in an air fryer, it drips before it crisps.
Air fryer fish and chips need panko or breadcrumbs because wet batter drips before it sets. It is a different method, not a direct deep-fried copy.
Instead, use a breadcrumb or panko coating:
Pat cod or haddock dry and cut into pieces.
Season flour with salt, pepper, paprika, and garlic powder.
Dip fish in flour, then beaten egg, then panko breadcrumbs.
Spray lightly with oil.
Air fry at 375°F to 400°F / 190°C to 200°C for about 10 to 12 minutes, flipping halfway, until the coating is crisp and the fish is opaque, flaky, and 145°F / 63°C inside.
Cook air fryer chips separately or start them first so they finish around the same time.
Air fryer rule: Use panko or breadcrumbs, not wet beer batter, for the cleanest result. Also, keep fish in a single layer and do not block airflow with heavy parchment or foil.
If air-fried food often turns pale, soft, or uneven in your kitchen, check these common air fryer mistakes before adjusting the fish recipe itself.
Want the classic fried version instead? Go back to the beer batter guide. Having air fryer issues? Check the fixes section.
Baked Fish and Chips
Baked fish and chips works best as its own version: panko-coated fish, a hot oven, a lightly oiled tray, and chips or wedges that crisp while the fish cooks. It will not mimic deep-fried beer batter, but it can still be a very good weeknight version.
Baked fish and chips work best with panko, a hot oven, and space on the tray. Instead of imitating beer batter, this version gives you a crisp weeknight alternative.
Use this method:
Heat the oven to 400°F / 200°C.
Cut potatoes into wedges or thick fries, toss lightly with oil and salt, and bake until partly tender.
Coat the fish in flour, egg, and panko breadcrumbs.
Place fish on a lightly oiled rack or lined tray.
Bake until the coating is crisp and the fish is opaque, flaky, and 145°F / 63°C inside.
For better browning, spray or brush the coated fish lightly with oil before baking.
Gluten-Free Fish and Chips
For a gluten-free version of this fish and chips recipe, build the batter around rice flour, cornstarch, gluten-free flour, and cold carbonated liquid.
Gluten-free batter varies by flour blend, so start with less liquid and loosen slowly. The goal is still a ribbon-like batter that coats the fish.
Use:
1 cup gluten-free flour blend
¼ cup white rice flour or cornstarch
1 teaspoon baking powder
½ to 1 teaspoon salt
Paprika, garlic powder, or black pepper, optional
1 cup / 240 ml gluten-free beer or club soda, plus 1 to 3 tablespoons more only if needed
Start with 1 cup / 240 ml liquid, then add more only until the batter coats the back of a spoon and drips off in ribbons. Gluten-free flour blends vary, so the texture matters more than the exact final tablespoon count.
Before battering, dust the fish with rice flour. Then fry in small batches at about 375°F / 190°C, knowing the oil will drop once the fish goes in.
Also, check that your baking powder, sauces, and serving sides are gluten-free.
How to Fix Common Fish and Chips Recipe Problems
Most fish and chips problems come from moisture, batter thickness, or oil temperature. Before changing the whole recipe, use this table to identify the likely issue.
Most fish and chips problems trace back to moisture, batter thickness, oil temperature, or crowding. Once you find the cause, the fix is usually simple.
Problem
Likely Cause
Fix
Batter falls off
Fish was too wet or not dusted first.
Pat fish very dry and dust lightly with flour or rice flour before battering.
Batter is soggy
Oil was too cool or the pot was crowded.
Fry fewer pieces and keep oil above 350°F / 175°C.
Fish is greasy
Oil temperature dropped too much.
Let the oil recover between batches.
Batter browns too fast
Oil was too hot.
Lower heat slightly and use pieces that are not too thick.
Fish is undercooked
Pieces were too thick or oil was too hot outside.
Cut fish into thinner portions and check for 145°F / 63°C inside.
Batter is too thick
Too much flour or not enough liquid.
Add cold beer or sparkling water 1 tablespoon at a time.
Batter is too thin
Too much liquid.
Add flour or rice flour 1 tablespoon at a time.
Chips are limp
Potatoes were wet or only fried once.
Dry thoroughly and double-fry, or parboil, dry, and fry.
Fish tastes bland
Only the batter was seasoned.
Season the fish, the dredge, and the batter lightly.
Soggy vs crispy cue: If the coating turns pale, greasy, or soft, check moisture, oil temperature, batch size, and draining method first.
Crispy fish and chips need hot oil, small batches, and proper draining. Otherwise, the coating can turn pale, greasy, or soft before serving.
What to Serve with Fish and Chips
Classic fish and chips can be served simply with tartar sauce, malt vinegar, lemon, and salt. To make the plate fuller, add mushy peas, coleslaw, pickles, or curry sauce.
A cold cucumber salad recipe works especially well on the side because it is crisp, tangy, and quick enough to make while the potatoes soak.
When you want a bolder version with masala batter, chutney dips, and chaat-style chips, try MasalaMonk’s Indian twists on fish and chips. Keep this classic version as the base, then use that guide for a spicier variation.
Storage and Reheating
Fish and chips are best eaten fresh. Over time, the batter softens, especially if the fish is stacked or covered while hot.
Reheat leftovers in an air fryer or oven when you want some crispness back. The microwave is faster, but it makes the batter and chips soft.
Fridge: Store leftover fish and chips in separate airtight containers for up to 2 days.
Air fryer reheating: Reheat at 350°F / 175°C for 4 to 6 minutes, or until hot and crisp.
Oven reheating: Reheat on a wire rack at 375°F / 190°C until hot.
Avoid the microwave: It makes the batter and chips soft.
Leftover cooked fish or extra potatoes can also be folded into patties or a croquettes recipe, especially when the pieces are still flavorful but no longer crisp enough to serve as fish and chips.
Fish and Chips Recipe FAQs
What is the best fish for fish and chips?
Cod is the easiest all-purpose fish for fish and chips because it is mild, flaky, and widely available. Haddock is the classic British-style choice with a slightly stronger flavor. Pollock, hake, halibut, whiting, and ling can also work.
Is cod or haddock better for fish and chips?
Cod is milder and easier to find, while haddock has a more traditional fish-and-chip-shop flavor. Use cod for the easiest first batch and haddock when you want a more classic taste.
How do you make fish and chips batter crispy?
To make this fish and chips recipe crisp, use very cold beer or sparkling water, add rice flour or cornstarch to the batter, avoid overmixing, pat the fish dry, dust it before battering, and fry at the correct oil temperature.
Can I make fish and chips batter without beer?
Yes. Replace the beer with ice-cold sparkling water or club soda and add an extra ¼ teaspoon baking powder. The batter will be lighter and less malty but still crisp.
Should fish and chips batter have egg?
For a lighter crisp coating, skip the egg. Egg makes the batter richer and sturdier, but it can also make the coating heavier or more cakey. If you add one, reduce the beer or sparkling water slightly and thin only if needed.
What beer is best for fish batter?
A cold lager or pale ale is best for fish batter. Avoid very dark beers for the main recipe because they can make the batter taste heavier and look darker.
Can I use frozen fish for fish and chips?
Yes, but thaw it completely and pat it very dry before seasoning and battering. Extra surface moisture can make the batter slide off or turn soft.
Why is my fish batter soggy?
Soggy batter usually means the oil was too cool, the pot was crowded, or the fish was too wet before battering. Keep the oil hot, fry in small batches, and dry the fish well.
Why does batter fall off fish?
Batter falls off when the fish is wet or not dusted first. Pat the fish dry and coat it lightly in flour, rice flour, cornflour, or cornstarch before dipping it in batter.
Can I make fish and chips in an air fryer?
Yes, but use a breadcrumb or panko coating instead of wet beer batter. Wet batter can drip in an air fryer before it sets.
Can I bake fish and chips instead of frying?
Yes. Baked fish and chips work best with panko-coated fish and oven-baked potato wedges or chips. It will be lighter than deep-fried fish and chips, but not exactly the same texture.
What sauce goes with fish and chips?
Tartar sauce, malt vinegar, lemon, curry sauce, mushy peas, garlic mayo, ketchup, and coleslaw all work well with fish and chips.
Is fish and chips the same as fish and fries?
In British-style fish and chips, “chips” usually means thicker fried potatoes. In the U.S., the same dish is sometimes described as fish and fries, especially when served with thinner fries.
Can I make gluten-free fish and chips?
Yes. Use a gluten-free flour blend, rice flour or cornstarch, gluten-free beer or club soda, and gluten-free baking powder. Also check sauces and sides for hidden gluten.
What temperature should oil be for fish and chips?
For the fish, aim for 365°F to 375°F / 185°C to 190°C. Do not let the oil fall below 350°F / 175°C, or the batter can turn greasy.
How do I reheat fish and chips?
Reheat fish and chips in an air fryer at 350°F / 175°C for 4 to 6 minutes, or in an oven at 375°F / 190°C until hot and crisp. Avoid the microwave if you want the batter to stay crisp.