Posted on — Leave a comment

Bouillabaisse Recipe: French Seafood Soup with Homemade Rouille

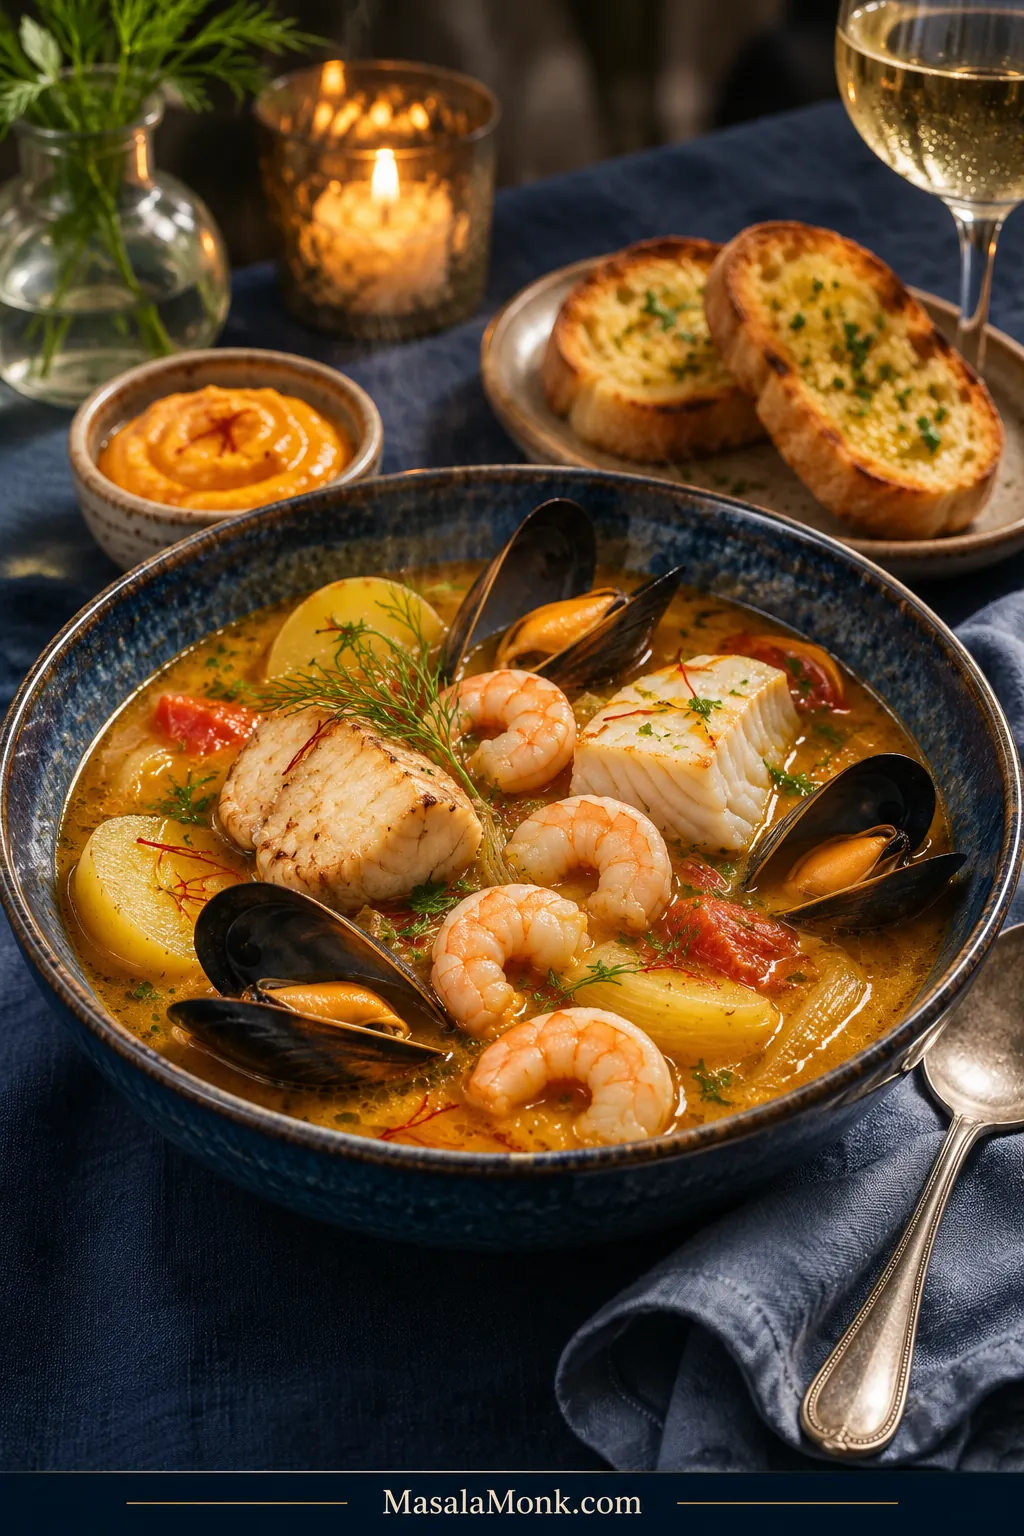
A blue ceramic bowl of golden-orange bouillabaisse containing firm white fish, flaky cod, peeled pink shrimp, opened dark mussels and potato slices; rouille and garlic toast sit behind the bowl.

Spread a little rouille on garlic-rubbed baguette and dip it into a bowl of hot saffron broth. The crisp bread softens at the edges, catching the flavors of fennel and garlic, while generous pieces of fish and shrimp make the soup a meal worth sitting down for.

Bouillabaisse is Marseille’s famous French fish soup, traditionally made with Mediterranean fish and served with rouille and garlic croutons. This bouillabaisse recipe brings those Provençal flavors into the home kitchen with monkfish, cod, shrimp, mussels and prepared fish stock. It’s a Marseille-inspired version using seafood more widely available outside southern France.

When making bouillabaisse for guests, much of the work can be done ahead. The broth develops with fennel, tomatoes and saffron while you prepare the bread-based rouille. Then the fish and shellfish cook in a short, carefully timed finish. Using prepared stock avoids a separate rockfish-stock preparation, and staggering the seafood protects the more delicate pieces.

Bouillabaisse Recipe: Ingredients and Step-by-Step Method

This makes four generous main-course servings. Monkfish and cod provide the main portions of fish; shrimp and a smaller quantity of mussels add shellfish flavor and variety. Potatoes, garlic croutons and homemade egg-free rouille complete the meal.

Servings4 generous main courses
Prep timeAbout 25–30 minutes with cleaned, prepared seafood
Total timeAbout 90–105 minutes, with tasks overlapping
Cooking methodStovetop, plus oven or skillet for toast
DifficultyIntermediate; manageable for confident beginners
To serveEgg-free bread-based rouille and garlic croutons

At a glance: Prepare the ingredients; soften the aromatics and simmer the broth for 20–25 minutes, making the rouille during that simmer. Once the broth is balanced, cook the potatoes and seafood. Toast the sliced baguette closer to serving, while the potatoes cook or just before the final seafood stage.
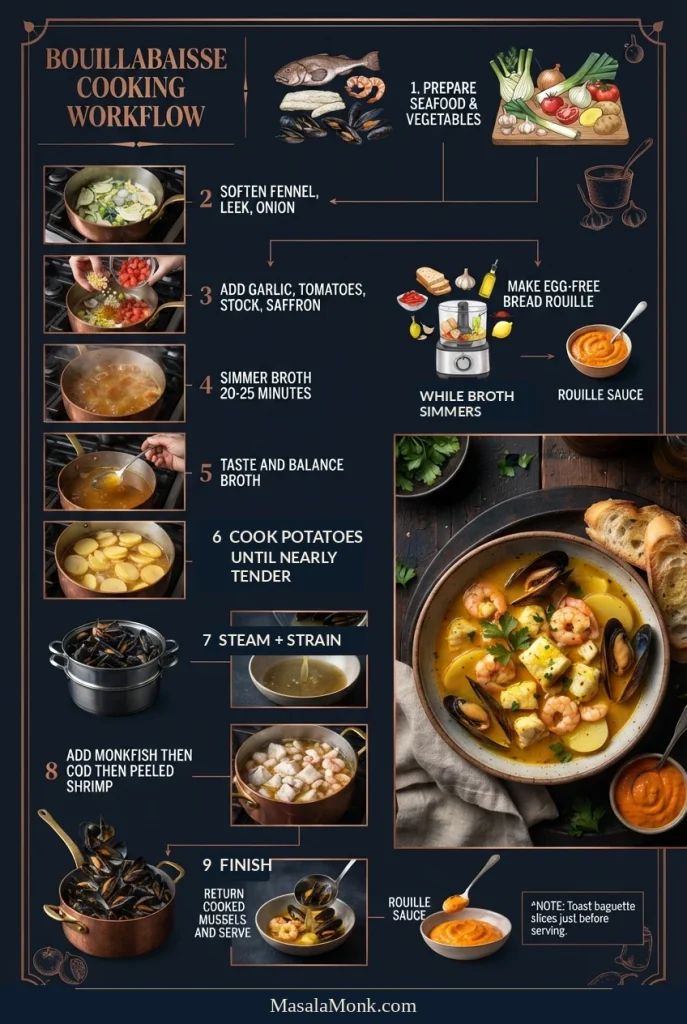
A vertical bouillabaisse cooking-flow graphic with photographed broth stages, a parallel rouille task, potato cooking, separately steamed mussels and the final seafood sequence.
The best pause point is after the saffron broth is balanced but before potatoes and seafood finish cooking. If guests are delayed, pause here; meanwhile, keep prepared raw seafood chilled until you are ready for the short final cooking stages.

The time estimate assumes the fish is already filleted, the shrimp peeled and deveined, and the stock ready to use. Cleaning whole seafood, thawing frozen ingredients or preparing homemade stock takes extra time.

Equipment

Use a wide, heavy pot holding about 5–6 litres (5–6 US quarts). Base width matters more than height: thick fish pieces need room for broth to circulate. Have a separate covered saucepan for steaming mussels, plus a fine strainer, slotted spoon, knife and cutting board. Use a mortar or small processor for rouille. An instant-read thermometer helps check thick fish pieces.
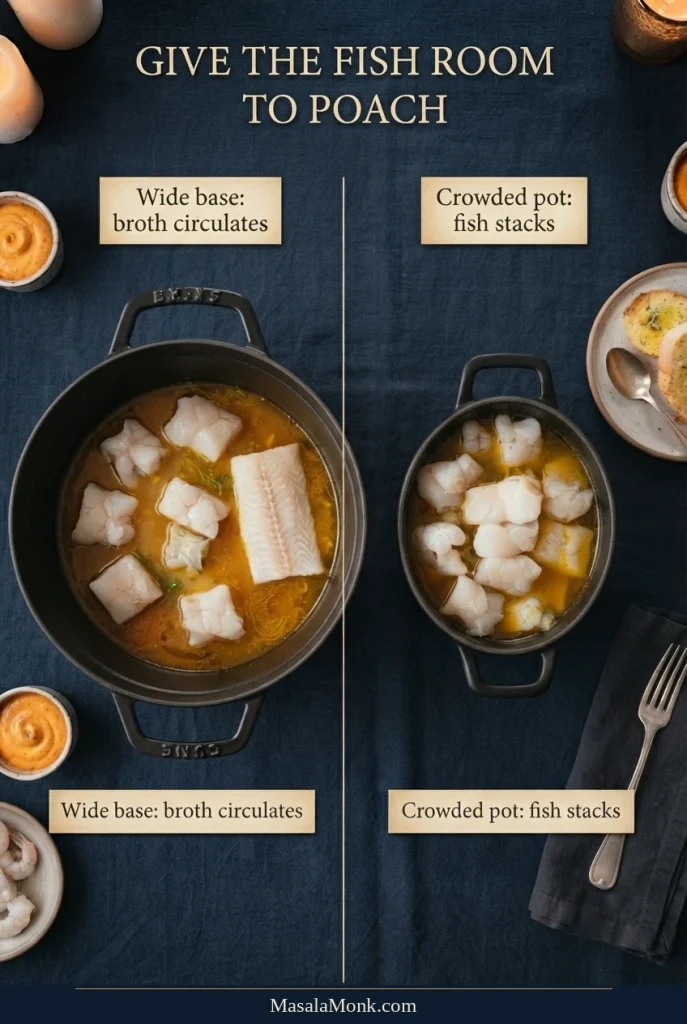
Side-by-side cooking-pot comparison: spaced white-fish pieces in a wide pot on one side and crowded, stacked pieces in a narrower pot on the other.
The wide pot leaves space around each fish piece, whereas the crowded pot stacks delicate portions together. This difference matters most when lifting cooked cod: fewer pieces need to be moved or disturbed.

Fish and Seafood

  • 500 g (about 1 lb 2 oz) monkfish, trimmed and boneless, cut into roughly 4 cm (1½-inch) pieces
  • 300 g (about 10½ oz) cod, boneless, cut into roughly 4–5 cm (1½–2-inch) pieces
  • 200 g (about 7 oz) raw shrimp, peeled, deveined and with tails removed
  • 400 g (about 14 oz) live mussels, weighed with shells, scrubbed and debearded

At the fish counter: Think 500 g firm white fish plus 300 g softer, flaky white fish. Monkfish and cod are one option, not a requirement. Choose locally priced substitutes with similar textures; the fish-buying guide explains how. The shell-on mussels contribute a few pieces per bowl rather than a large mussel course.

Four labeled raw seafood groups for bouillabaisse: pale monkfish, cod fillets, peeled grey shrimp and closed dark mussels, with separate weights for four servings.
At the fish counter, ask whether each price and weight refers to whole fish or trimmed boneless fillets. Otherwise, a purchase that looks ample may yield less usable seafood; the mussel allowance, unlike the fish and peeled shrimp, includes shell weight.

Optional before Step 1: If you buy shell-on raw shrimp, save clean shells for the shrimp-shell stock infusion. This is unnecessary when using peeled shrimp and prepared fish stock.

For the Saffron Fish Broth

  • 1,200 ml (about 5 US cups) unsalted or low-sodium fish stock
  • 45 ml (3 tbsp) olive oil
  • 150 g trimmed fennel bulb, thinly sliced
  • 100 g leek, white and pale-green parts, washed and sliced
  • 120 g onion, chopped
  • 15 g garlic, about 4 cloves, minced
  • 250 g ripe tomatoes, chopped
  • 20 g tomato paste, about 1 tbsp plus 1 tsp
  • 100 ml dry white wine (scant ½ US cup), or the same amount of water
  • 300 g waxy or all-purpose potatoes, peeled and sliced about 1 cm (⅜ inch) thick
  • 0.15 g saffron threads
  • 2 thin strips of orange zest, each about 5 cm (2 inches), without bitter white pith
  • 1 bay leaf
  • 2–3 fresh thyme sprigs
  • 10 g chopped flat-leaf parsley
  • Fine salt and freshly ground black pepper, to taste
  • 1 lemon wedge, optional, for balancing acidity

Have up to 250 ml (about 1 US cup) additional warm, unsalted fish stock or water available. This is a reserve for adjustments, not part of the initial measured broth.

For the Egg-Free Rouille

  • 35 g soft white bread, crust removed
  • 1 small garlic clove, about 3–4 g
  • 60–75 ml (4–5 tbsp) mild olive oil
  • 30–45 ml (2–3 tbsp) warm water, divided
  • 0.05 g saffron threads
  • ⅛ tsp cayenne pepper or mild ground chili
  • 5 ml (1 tsp) lemon juice, optional
  • Fine salt, to taste

Bread gives the egg-free sauce its body. The finished rouille should hold its shape on a spoon but spread readily on toast.

For the Garlic Croutons

  • 1 small baguette, about 180–200 g, sliced 1–1.5 cm (⅜–⅝ inch) thick
  • 15 ml (1 tbsp) olive oil
  • 1 garlic clove, peeled and halved
  • A pinch of salt, if needed

Allergens: This version contains fish, shrimp (crustaceans), mussels (mollusks) and wheat in the bread and baguette. The bread-based rouille contains no egg, but the optional mayonnaise shortcut may. Check stock and packaged ingredients for allergens, and avoid cross-contact.

How to Make Bouillabaisse

Broth first, potatoes next, seafood last. The rouille can be finished in advance; the toast is best crisped closer to serving. Once the seafood enters the pot, stay nearby.

Step 1: Prepare the Seafood and Vegetables

Check the monkfish and cod for bones, cut them into the specified pieces and keep refrigerated in covered containers. Keep the raw shrimp chilled until needed.

Scrub live mussels under cold running water and remove their beards. Discard mussels with broken shells and those that stay open after a gentle tap. Refrigerate live mussels in breathable packaging, not submerged in fresh water.
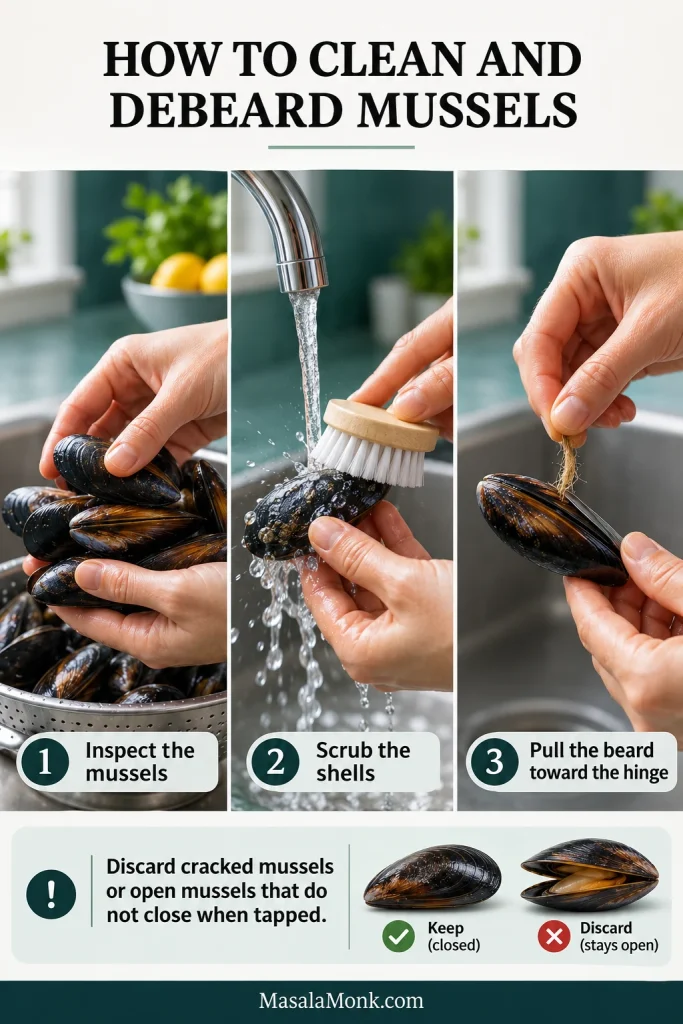
Three photos show hands inspecting dark mussels, brushing a shell under a faucet and pulling out its beard; below, a closed mussel is compared with one that stays open.
Cleaning and inspecting mussels are different jobs. Scrubbing removes dirt, while checking shell damage and whether an open live mussel closes when tapped helps identify those to discard before cooking.

Prepare the fennel, leek, onion, garlic, tomatoes and potatoes. Cut two thin strips of orange zest, avoiding the bitter white pith.

Crush the broth’s 0.15 g saffron lightly and steep it in 30 ml (2 tbsp) warm fish stock taken from the measured 1,200 ml. Keep the remaining 1,170 ml for Step 3. Saffron tip: A normal kitchen scale cannot reliably measure 0.05 g. Divide a pre-weighed 0.2 g packet approximately three-quarters for the soup and one-quarter for the rouille.
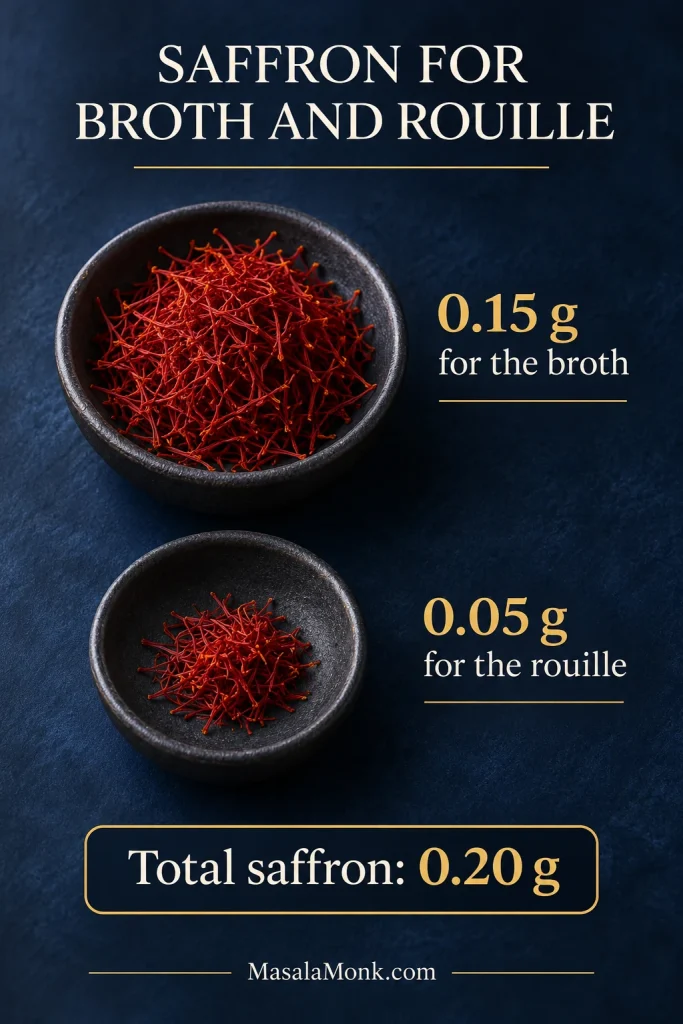
Two dark bowls holding unequal amounts of red saffron threads, labeled 0.15 g for broth and 0.05 g for rouille; the graphic gives a 0.20 g total.
Keep the saffron for broth and rouille separate. A pre-weighed 0.20 g packet makes the tiny quantities easier to divide; however, the appearance of saffron threads alone cannot verify their weight.

Wash your hands, knives, boards and surfaces with soap and water after handling raw seafood. Prepare the ready-to-eat rouille and toast using clean utensils.

Step 2: Soften the Aromatics

Heat the 45 ml olive oil in the wide pot over medium heat. Add fennel, leek and onion. Cook for 8–10 minutes, stirring occasionally, until softened and glossy. The raw onion smell should mellow, and the fennel should begin to smell sweet.
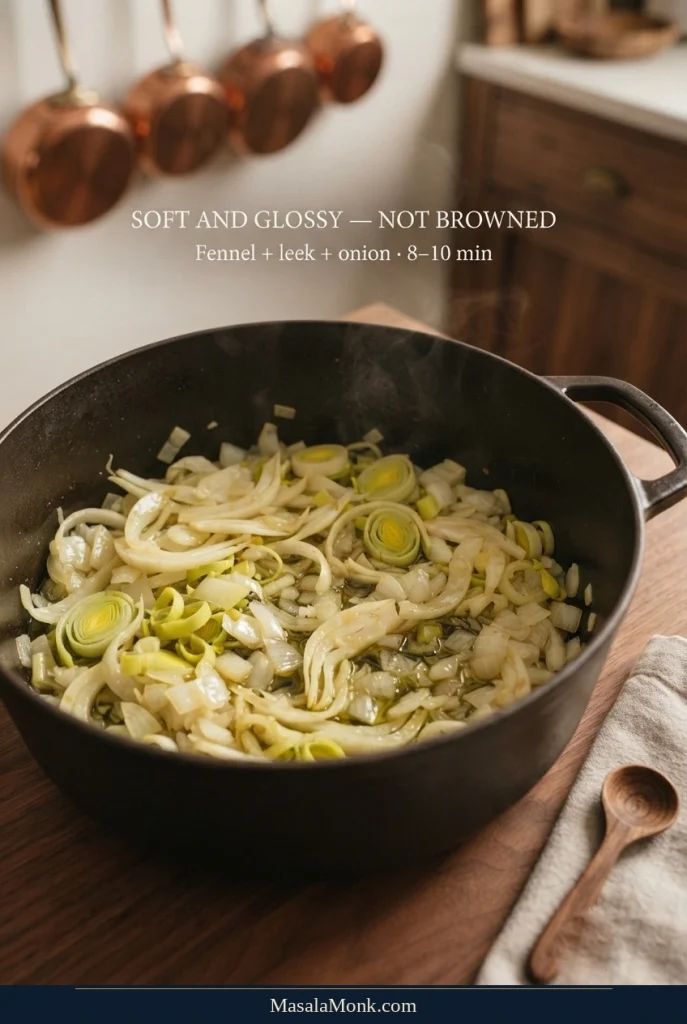
A wide pot of pale, glistening sliced fennel, leek and onion softened in olive oil, without browned edges.
Look for vegetables that have turned glossy and supple without dark edges. At this stage, fennel and onion should soften slowly rather than brown; this keeps the seafood broth delicately flavored.

Add the minced garlic and stir for 30–60 seconds until fragrant. Lower the heat if the garlic starts browning.

Step 3: Make and Simmer the Saffron Broth

Stir in the tomato paste and cook for about 1 minute. Add chopped tomatoes and cook another 3–4 minutes until they soften.

Pour in the wine and simmer for 2–3 minutes. For a wine-free version, use the same 100 ml of water.

Add the remaining 1,170 ml fish stock plus the 30 ml saffron-soaking stock. Next, add the orange zest, bay leaf, thyme and a little black pepper. Bring just to a boil, reduce the heat and simmer partly covered for 20–25 minutes.

While the broth simmers, make the rouille (Step 4) and slice the baguette. You can toast it later, during the potato stage or just before serving. Don’t add potatoes until the rouille and broth are ready; if necessary, remove the broth from the heat while you finish the sauce.

At the end of the simmer, the vegetables should be fully soft and small pieces should still be visible. Saffron and fennel should lead the aroma, with just a subtle lift from the orange. This version leaves the vegetables in the broth. For a smoother finish, carefully blend and strain the base now, before the potatoes and seafood.
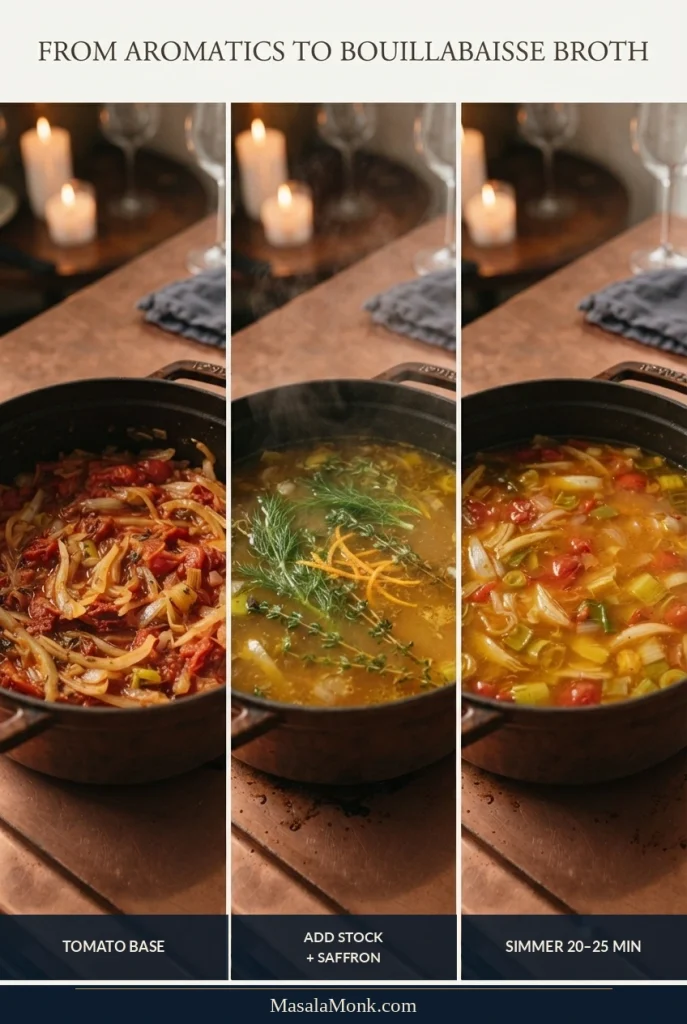
Three cooking views show softened tomato and aromatics, stock being incorporated, and a golden-orange saffron broth with visible vegetables.
The important change is texture as much as color: stock loosens the tomato base, while gentle simmering leaves the vegetables very soft but still recognizable. This is a rustic fish broth, not a puréed tomato sauce.

Wine note: Water replaces wine’s volume but not its acidity. When balancing the broth in Step 6, use a small squeeze of lemon if needed. Simmering wine does not guarantee removal of all alcohol.

Step 4: Make the Rouille

The bread forms a thick paste that holds the oil. It doesn’t need to be perfectly smooth; a slightly coarse, spreadable rouille is welcome here.
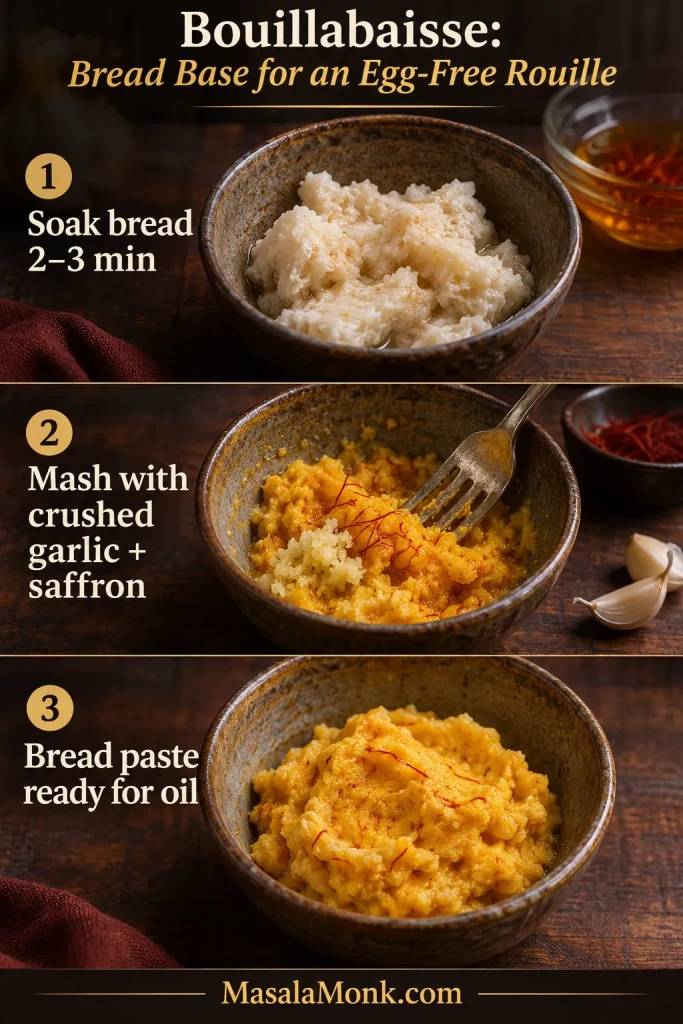
Three stages of egg-free rouille preparation: crustless bread moistened in a bowl, mashed with crushed garlic and saffron, then formed into a thick orange paste ready for oil.
The important bread-paste cue is moisture without a pool of free water. Soft bread should mash into a thick base that holds together when the garlic and saffron are added.
  1. Soften the bread. Add about 25 ml warm water to the crustless bread, rest for 2–3 minutes and mash to a thick paste without standing water.
  2. Bloom the saffron. Steep the rouille’s 0.05 g saffron in about 5 ml warm water. These two water portions count toward the 30–45 ml in the ingredients.
  3. Work the garlic. Crush garlic with a pinch of salt in a mortar. Add the bread paste, saffron water and cayenne; mash to combine.
  4. Incorporate the oil. Begin with a few drops, mixing until they disappear into the paste. Add more in small portions, aiming for about 60 ml. Stop if oil begins pooling; work it in before continuing. Add up to 15 ml more only if the paste remains cohesive. The endpoint is a thick sauce that spreads easily on toast.
  5. Finish. Taste for salt and add optional lemon juice. For a sauce that feels too stiff, mix in the remaining warm water one teaspoon at a time.
Finish, Adjust and Store the Rouille

If the sauce later turns oily or separates, see how to recover broken rouille. For a small food processor, blend the bread, garlic, saffron and chili first. Add oil gradually in short pulses, scraping down the bowl. If this small batch collects on the sides and won’t combine, finish it by hand.

For bread-based rouille, the next spoonful of oil can go in when the surface looks evenly combined rather than glossy with separate droplets. The illustration below shows the slow addition that helps keep the sauce cohesive.
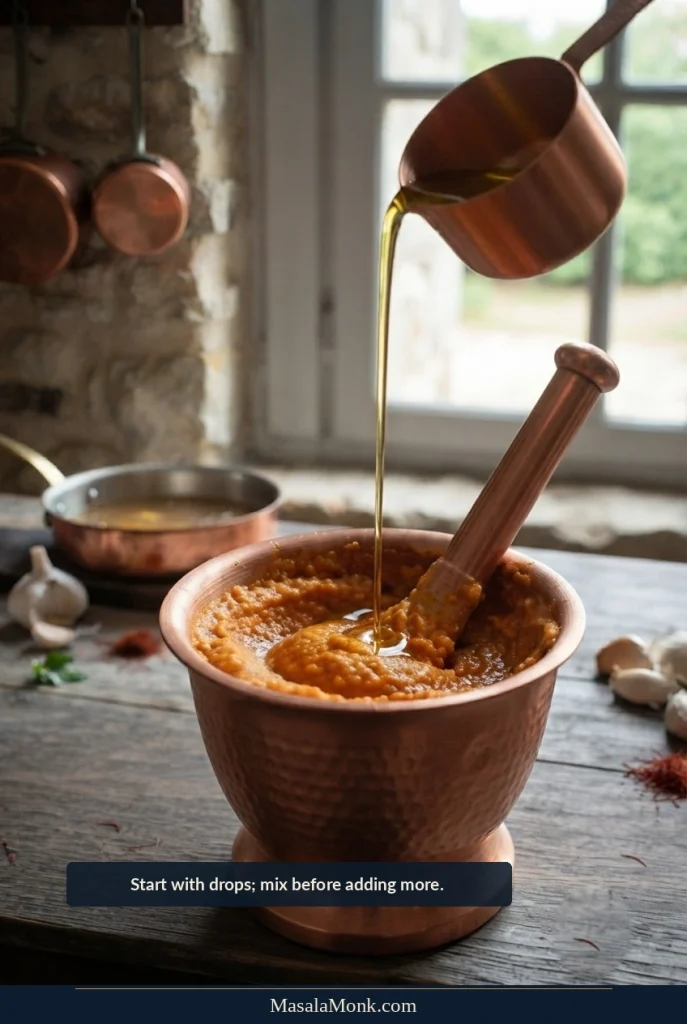
A thin stream of olive oil enters a bowl of saffron-colored bread rouille as a utensil mixes the thick paste.
Add more olive oil only after the previous addition has disappeared into the bread paste. A lasting oily sheen means the rouille needs more mixing, not another pour.

Cover and refrigerate the rouille until serving. Shortcut: Mix about 60 g mayonnaise with grated garlic, the rouille’s saffron steeped in a little warm water, and a pinch of chili. Ordinary mayonnaise contains egg; use egg-free mayonnaise if needed. This produces a quicker, smoother mayonnaise-based sauce, not the same texture as bread rouille.

The finished egg-free rouille should sit in a soft mound on a spoon yet spread across crisp baguette without running off the edges. Use the next image as a visual check before you refrigerate the sauce.
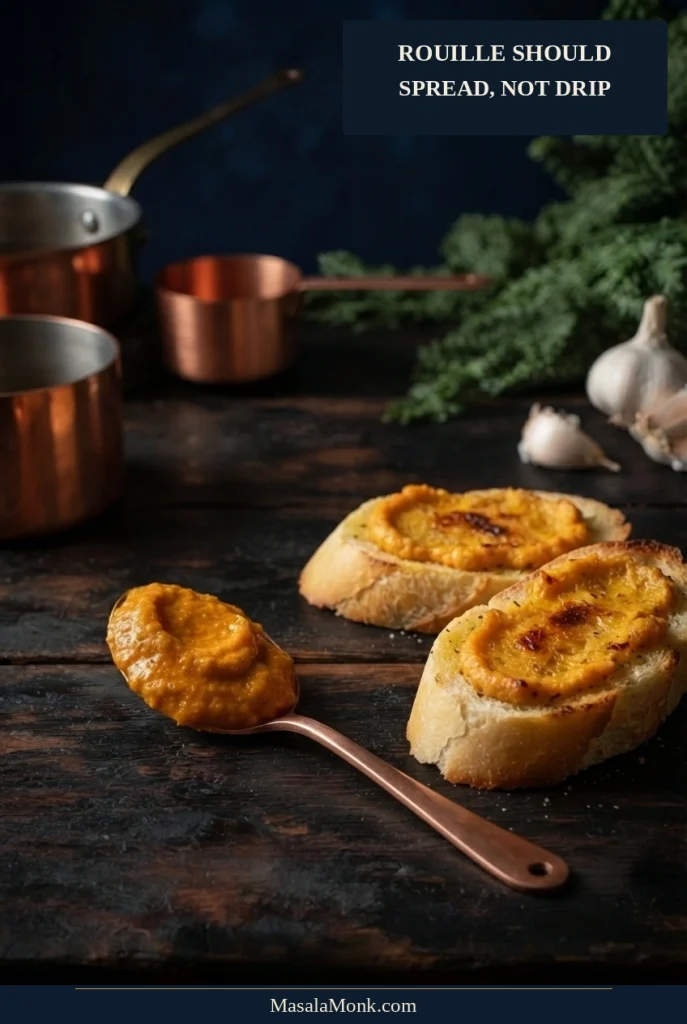
A spoon holds a mound of thick orange rouille next to crisp baguette slices spread with the same sauce.
Proper bread-based rouille should hold on a spoon and spread easily across crisp garlic toast without running or separating.

Step 5: Prepare the Garlic Baguette

Slice the baguette now if you haven’t already. Toast it closer to serving—while the potatoes cook in Step 7 or immediately before the final seafood stage—so it reaches the table crisp.

Heat the oven to 190°C (375°F) conventional or about 170°C (340°F) fan. Brush the slices lightly with the 15 ml olive oil and bake for 10–12 minutes, turning as needed, until golden and crisp. Alternatively, toast in a skillet over medium heat for about 2–3 minutes per side.

Rub one side of each warm slice with the cut garlic clove. Keep toasted slices dry and uncovered until serving; if prepared early, briefly recrisp in a warm oven. For serving ideas, see how rouille toast accompanies the broth.
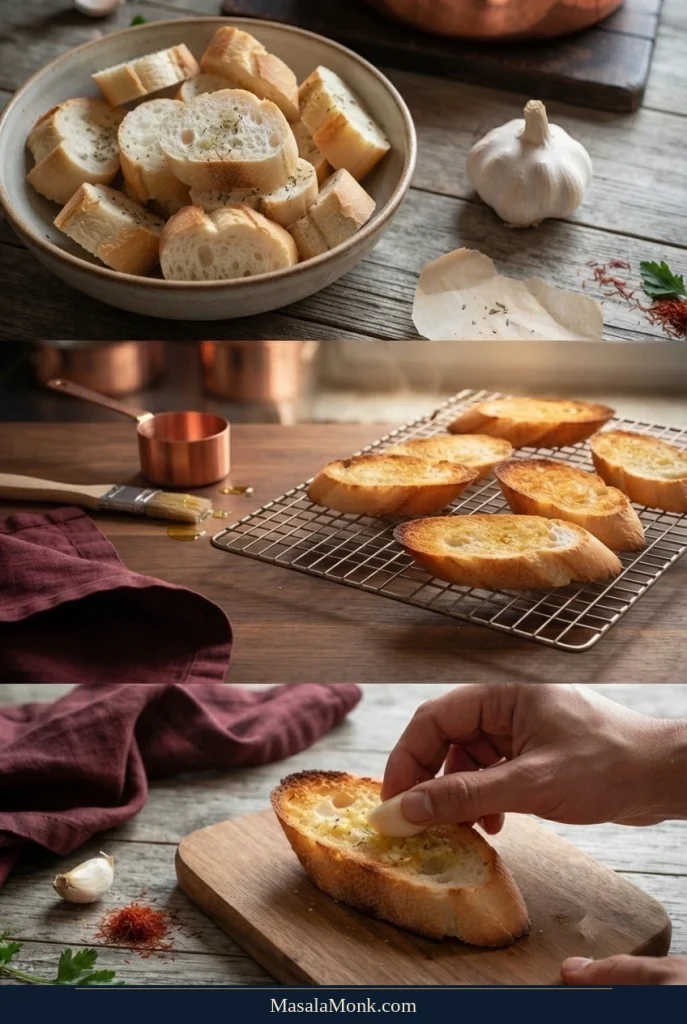
Three images show sliced baguette, crisp golden toast and a hand rubbing garlic over the toasted cut surface.
The porous, toasted cut side holds rouille better than a smooth crust. Rub garlic over that warm surface; then, keep the croutons dry until dinner so they soften in the saffron broth rather than beforehand.

Step 6: Taste and Balance the Broth

Remove the bay leaf, thyme stems and orange zest. Taste the broth before adding the seafood. You’re looking for a clean, savory seafood flavor, with fennel and saffron in support; tomato should add brightness rather than dominate.

Use one correction at a time: first identify whether the broth lacks seasoning, seafood depth, concentration or balance. The adjustments below address these different problems before the delicate fish goes into the pot.

  • Bland, but seafood flavor is present? Add a pinch of salt and taste again.
  • Flavorful but diluted? Simmer uncovered briefly to concentrate, unless it is already salty.
  • Little seafood flavor despite seasoning? Add some stronger unsalted fish stock if you have it.
  • Heavy or flat? Try a small squeeze of lemon, then taste.
  • Too salty? Dilute gradually with unsalted stock or water; don’t reduce further.
  • Too tomato-forward? Add mild unsalted fish stock to restore balance.

Be conservative with salt for now: the mussels’ strained cooking liquid will return to the pot later. The final salt check comes in Step 10.

Discard stock or seafood with sour, rancid or ammonia-like odors. Longer cooking and seasoning cannot make spoiled seafood safe.

A spoonful of golden fish broth beside a flavor-troubleshooting guide listing remedies for bland, diluted, flat, weak and overly salty broth.
Saffron color cannot tell you whether the fish broth is salty, flat or diluted. Taste it before the seafood goes in, adjust one problem at a time, and remember that returning strained mussel liquid may change the final seasoning.

This is your pause point. The broth is balanced, the rouille is ready, and the raw seafood remains refrigerated. If guests are delayed, stop here and begin cooking the potatoes when you are ready to finish the meal.

Final cooking order: Potatoes → mussels → monkfish → cod → shrimp → serve.

Step 7: Cook the Potatoes

Bring the broth to a gentle simmer. Add the sliced potatoes and cook for 10–15 minutes, checking the thickest piece with a small knife. Stop when they are almost tender, with a little resistance in the center; they’ll continue cooking in the hot broth.
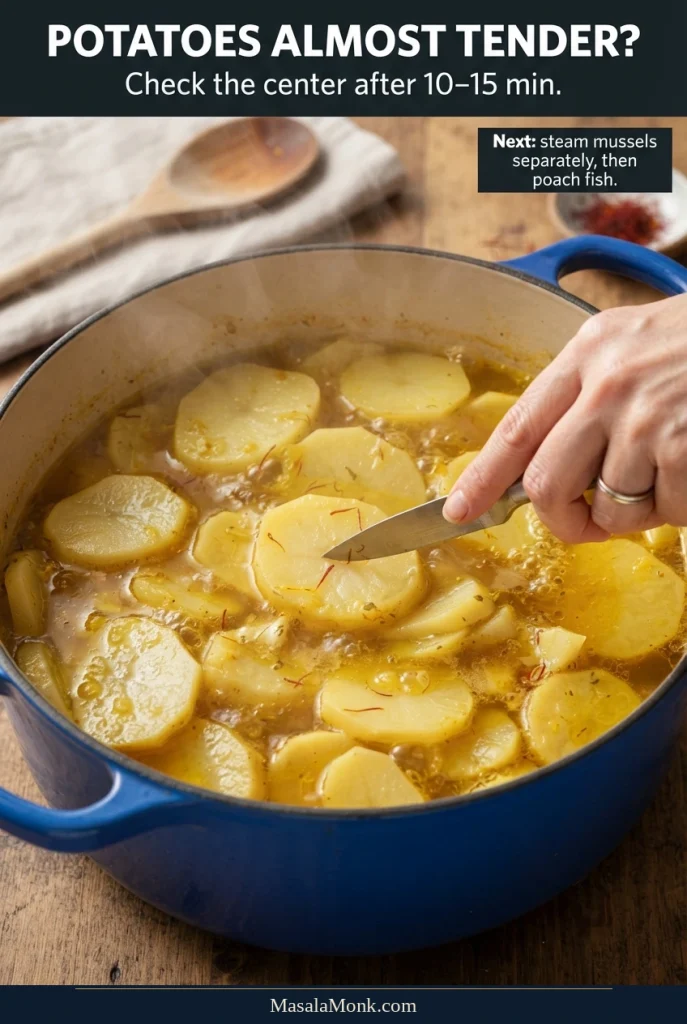
A small knife testing a thick, round potato slice in a pot of golden broth, surrounded by other cooking potato slices.
Test one of the thickest potato slices rather than the thinnest. It should yield to a knife but remain intact; otherwise, fully softened slices may break down while the monkfish, cod and shrimp finish poaching.

This is a convenient time to toast the prepared baguette. Reduce the broth to very low heat or briefly take the main pot off the burner while you steam the mussels.

Step 8: Steam the Mussels

Transfer about 150 ml (roughly ⅔ US cup) hot broth into a separate covered saucepan and bring to a lively simmer. Add the cleaned mussels, cover and steam for about 4–6 minutes, gently shaking the saucepan once or twice.

Remove mussels as they open; discard any that remain closed after cooking. Strain the mussel cooking liquid through a fine sieve to remove grit, then pour the strained liquid back into the main broth. Taste its saltiness before making further adjustments.

Keep the cooked mussels covered only for the short interval while the fish finishes, and return them briefly to the hot soup in Step 10. Steaming separately helps control their cooking and lets you keep any gritty mussel liquid out of the soup.

Two-step illustration of mussels steaming in a small saucepan and their cooking liquid being strained through a fine sieve into the main soup pot.
Mussel liquid can contain fine sand or grit even when the shells were scrubbed. Therefore, strain it carefully and leave any settled sediment behind rather than pouring every last cloudy drop into the bouillabaisse.

Step 9: Poach the Monkfish, Cod and Shrimp

Keep the main pot uncovered at a gentle simmer, with small bubbles at the surface. Don’t crowd the fish. Arrange the pieces in a single layer where possible; enough hot broth should circulate around them. Spoon liquid over small exposed patches, but if much of a piece sits above the broth, use smaller batches or a better-fitting pot.
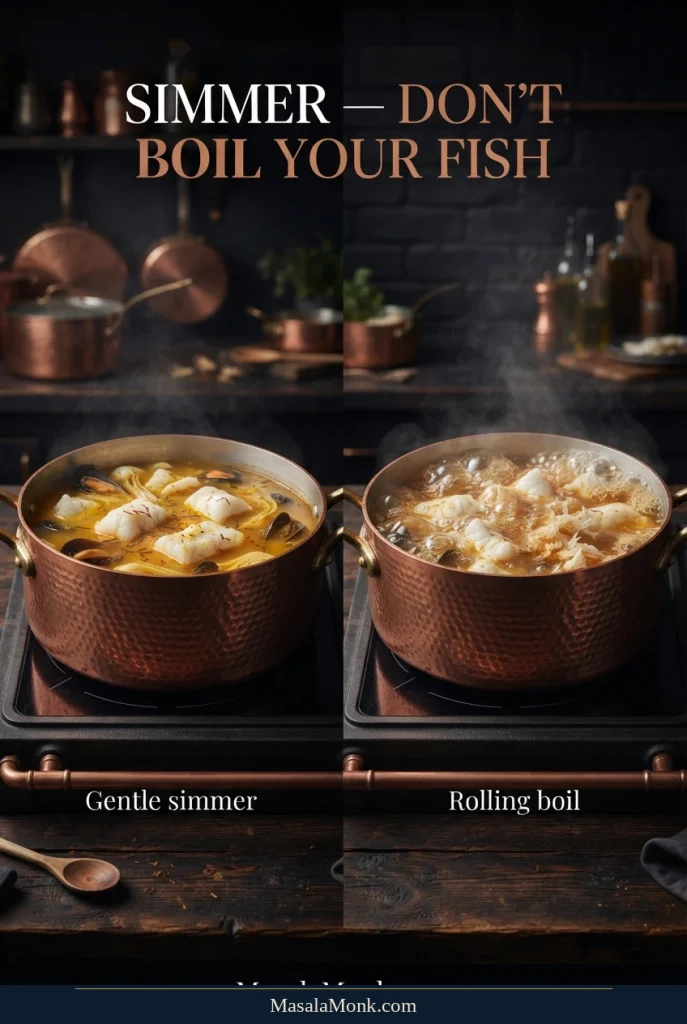
Two wide fish-soup pots contrasted: occasional small bubbles at a gentle simmer on the left and large churning bubbles at a rolling boil on the right.
Watch how vigorously the liquid moves around the fish. Small, occasional bubbles disturb the pieces less; by contrast, a rolling boil pushes them against one another and can break delicate cod before it is ready to serve.

The minutes below are starting checkpoints, not guaranteed finishing times. Follow the order shown here, while adjusting for the thickness and doneness of each piece.
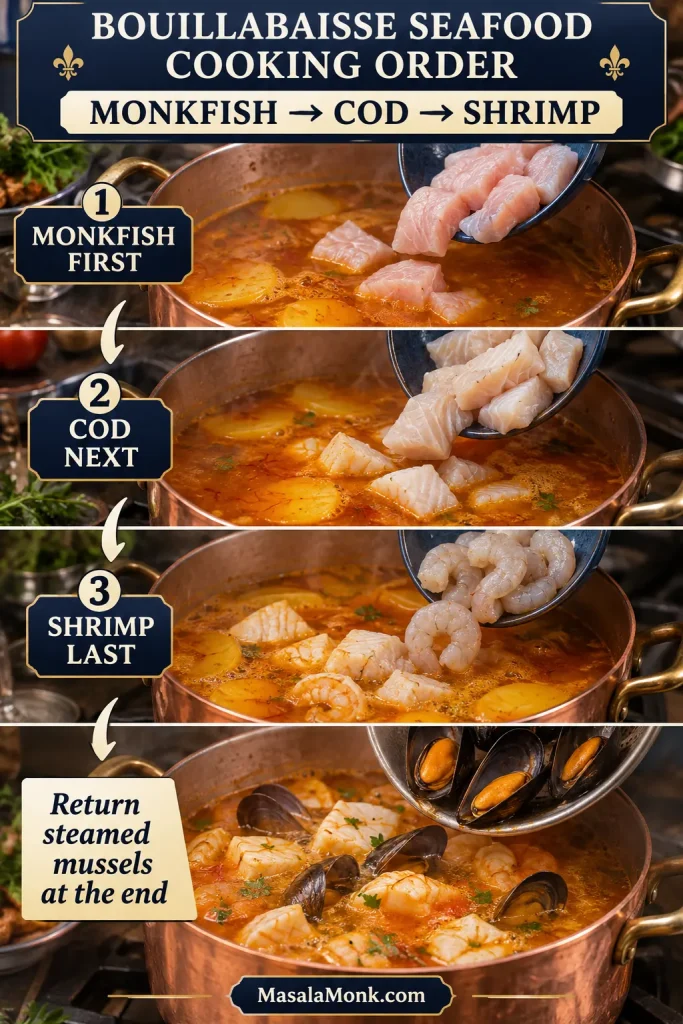
A photographed cooking-order graphic showing monkfish entering broth first, cod next, peeled shrimp last, and already steamed mussels returning before serving.
The cooking order is a starting guide rather than a fixed schedule. Because fillet thickness varies, remove an individual piece as soon as it is done instead of leaving it in hot broth.
  1. Start with monkfish. Add the monkfish and cook about 3 minutes. The outsides will begin turning opaque while the centers continue cooking.
  2. Add cod. Lower the cod into the broth carefully and cook about 2 minutes before checking. Avoid stirring the delicate pieces.
  3. Check both fish. Cod may flake before the thicker monkfish is done. That’s fine: lift out cooked cod, keep it covered briefly and let monkfish finish.
  4. Add shrimp last. When the remaining fish is nearly done, add raw shrimp. They generally need another 2–4 minutes, depending on size, to become firm, pearly and opaque.
  5. Finish by doneness. Remove finished seafood as necessary. Return pieces removed early to the hot broth only briefly for serving.
Check Doneness and Remove Finished Seafood

Fish should reach 63°C (145°F) internally, or be opaque and separate easily with a fork. Shrimp should be firm, pearly and opaque. See the FDA guidance on selecting and cooking seafood safely for seafood handling and doneness indicators.
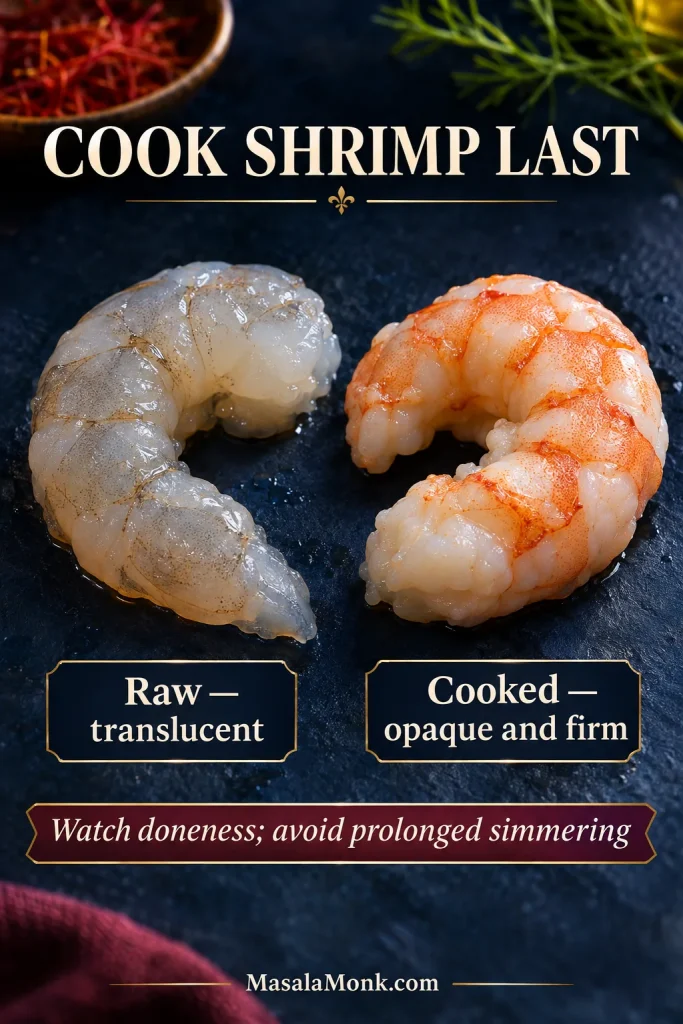
Close-up side-by-side comparison of grey translucent raw peeled shrimp and opaque coral-pink cooked peeled shrimp, both without hard tail shells.
The thick center gives a more useful visual cue than the tail curl: shrimp flesh changes from translucent to opaque. However, visual appearance alone does not guarantee safety, so use appropriate doneness guidance and avoid prolonged simmering.

Thickness, starting temperature and crowding all affect cooking time. Once a piece is cooked, don’t leave it simmering while the rest catches up. Compare properly cooked and overcooked fish if you are unsure what the finished texture should look like.

Step 10: Finish and Serve

Return the cooked mussels and any fish pieces removed early to the hot broth just long enough to warm through. Don’t bring the finished seafood to a vigorous boil.

Now that the strained mussel liquid is in the soup, make the final salt adjustment. If necessary, loosen the broth with a little reserved warm stock or water. Finish with chopped parsley and black pepper.

Divide the potatoes, fish, shrimp and mussels among four warmed deep bowls. Ladle hot saffron broth around the seafood.

Serve rouille and garlic toast separately. The broth is lovely on its own; a little rouille on the bread or stirred into a bowl adds garlic, chili warmth and body. Diners can choose their own balance.
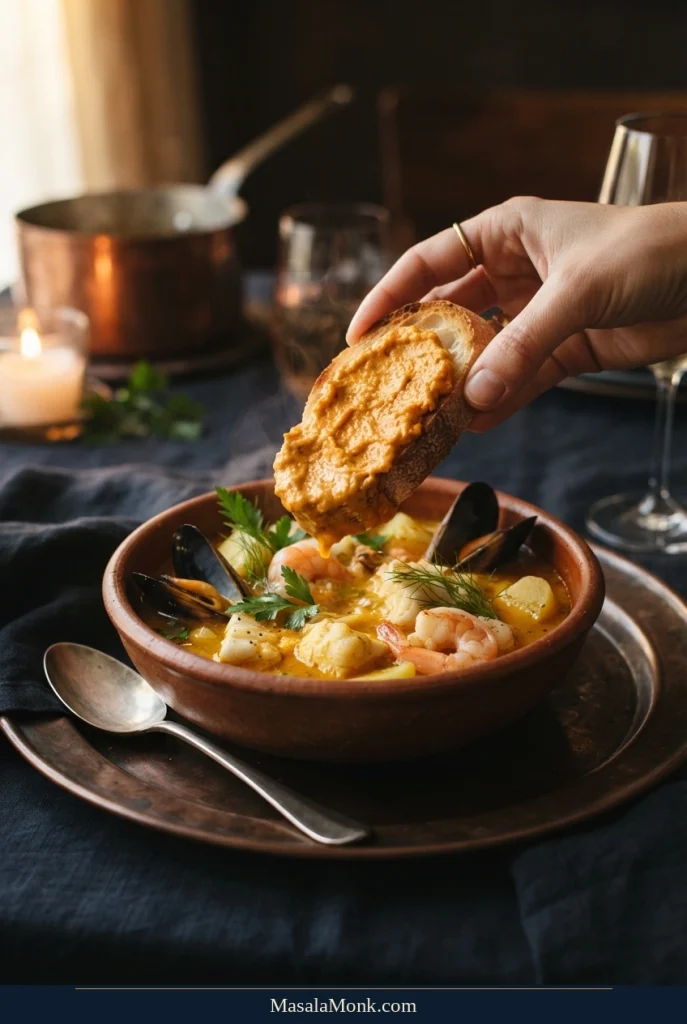
A hand holds toasted baguette generously spread with orange rouille above a bowl of golden bouillabaisse containing fish and shellfish.
Keeping rouille on the toast lets each diner decide how much garlic and chili to bring into a bite. First taste the saffron broth alone; then add a little rouille-coated toast for a richer mouthful without altering the entire pot.

What’s the Best Fish for Bouillabaisse?

Buy by texture, not solely by species name. One firm white fish supplies substantial pieces that hold together in broth; one softer white fish gives tender flakes. Ask for fresh-smelling, thick boneless fillets that can be cut into generous pieces. You don’t need to find monkfish specifically.
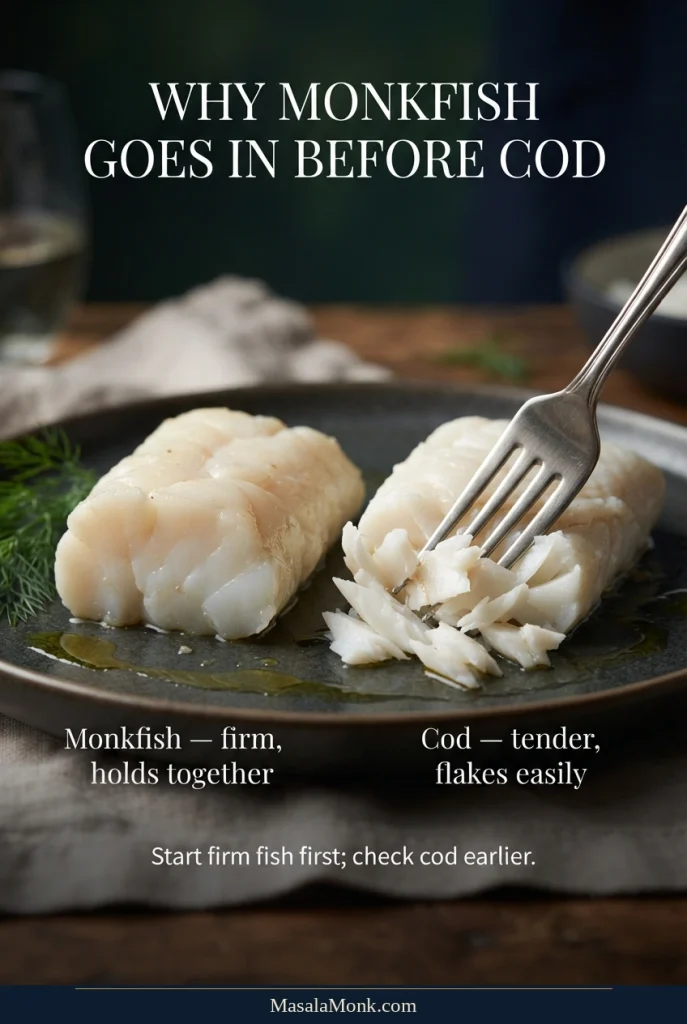
Close-up comparison of cooked monkfish holding together in a dense white piece and cooked cod separating into moist white flakes beneath a fork.
Cod can separate into moist flakes when cooked, whereas monkfish remains denser and more cohesive. Therefore, a monkfish piece is not automatically underdone simply because it does not flake like cod; judge each fish by the appropriate doneness cues.
FishHow it works
MonkfishFirm and meaty; a good first addition
GrouperFirm, mild alternative; check local price
SnapperModerately firm; use substantial pieces
HalibutFirm and lean; watch closely for doneness
CodFlaky, delicate; add later
HaddockDelicate, flaky white fish; add late and handle gently
HakeSoft and delicate; handle carefully
Sea bassMild; firmness varies by species
SalmonRicher and oilier; changes the broth

Buying Fish in the US, UK and India

In the United States, monkfish, cod, snapper, grouper and halibut are possibilities depending on local price. UK shoppers may find monkfish, cod, hake and sea bass more readily.

At an Indian fish market, ask for thick, boneless pieces of white fish and check whether the flesh is firm or delicate. Sea bass, snapper and grouper may be available, but market names don’t always identify a single species. Confirm the fish’s identity and bone structure rather than relying on a direct name translation.
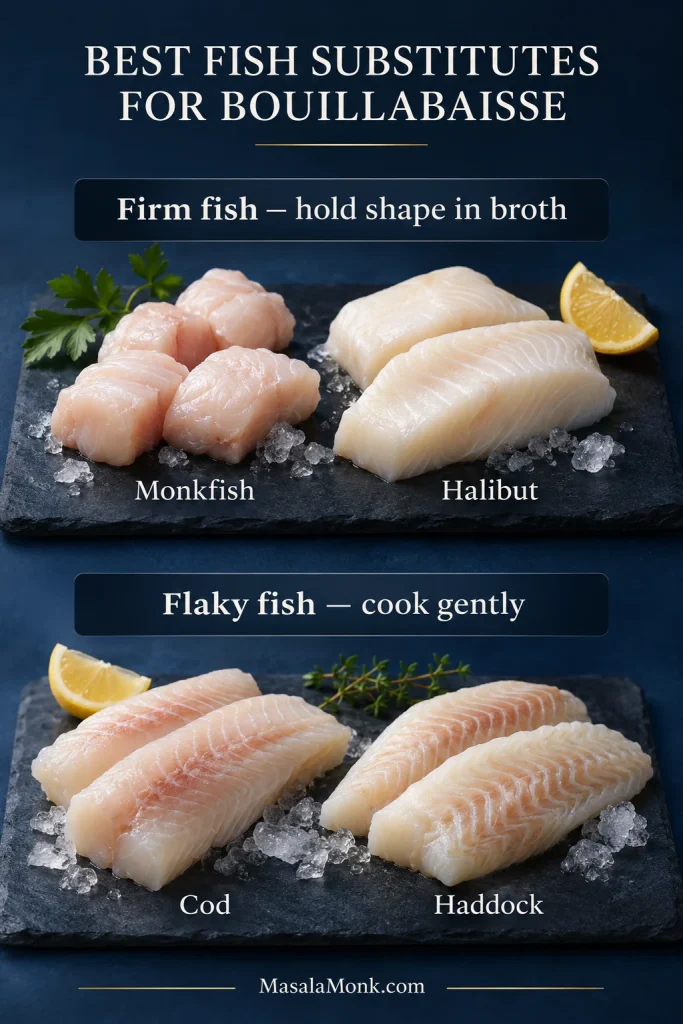
Two tiers of raw white-fish fillets on dark boards: monkfish and halibut labeled firm, with cod and haddock labeled flaky.
Monkfish and cod are the reference fish in this recipe; halibut and haddock illustrate alternative textures. Even so, similar firmness does not mean identical poaching times—compare the thickness of the actual boneless fillets before cooking.

European sea bass, also sold as branzino, can work. Our whole roasted branzino recipe explains handling a whole fish; for bouillabaisse, use carefully boned fillets.

Can You Use Frozen Fish?

Yes. Properly frozen fish and shrimp can work well. Thaw in the refrigerator and drain any excess moisture. For faster thawing, place seafood in a sealed bag in cold water and cook promptly afterward. Keep raw seafood chilled until needed.

This method assumes raw shrimp. If using already-cooked shrimp, reheat them thoroughly near the end rather than cooking them for the full raw-shrimp interval.

How Much Seafood Do You Need Per Person?

The recipe uses 800 g boneless fish and 200 g peeled shrimp: about 250 g (8.8 oz) of raw fish and shrimp per person. It also uses 400 g shell-on mussels, or 100 g purchased shell-on weight per person—not 100 g of mussel meat.

The mussels are a smaller accompaniment. If leaving them out, adding another 100–150 g boneless fish or peeled shrimp to the entire batch gives slightly fuller portions. Replacing all 400 g shell-on mussel weight with boneless fish would produce substantially larger servings.

Back to the recipe · Back to top

How to Make a Rich, Balanced Bouillabaisse Broth

For this home version, start with clean-tasting, unsalted fish stock. The saffron, fennel and tomatoes develop its aroma; they cannot disguise spoiled stock or create a strong seafood base from water alone.

Which Fish Stock Works Best?

StockResult
Unsalted fish stockRecommended: easiest seasoning control
Low-sodium seafood stockUseful substitute; taste before using
Homemade white-fish fumetLight, clean fish flavor
Stock infused with shrimp shellsAdds shellfish flavor
Mild vegetable stockWorks as a lighter adaptation with less seafood flavor
Strong chicken stockCan compete with the fish aromatics

Fish sauce is a concentrated, salty seasoning, not a one-for-one fish-stock replacement. Use concentrated clam juice cautiously; it can quickly make the broth too salty or clam-dominant.

Three clear glass containers of pale-to-amber fish stock with a comparison of low-sodium stock, homemade white-fish stock and stronger commercial seafood stock.
Fish-stock color is not a flavor-strength test: a pale homemade stock can be aromatic, while a darker commercial one may simply be salty. Instead, taste for clean seafood flavor and leave room for the seasoned liquid released by the mussels.

Optional Shrimp-Shell Stock Infusion

If you bought whole raw shrimp, save about 40–60 g clean shells and simmer them gently in the recipe’s measured 1,200 ml fish stock for 10–15 minutes. Strain well. Do this before Step 1, not during seafood cooking.

Measure the strained liquid and top it up with unsalted stock or water to return to 1,200 ml total. Then proceed as written. If you bought peeled shrimp and have no shells, skip this completely.
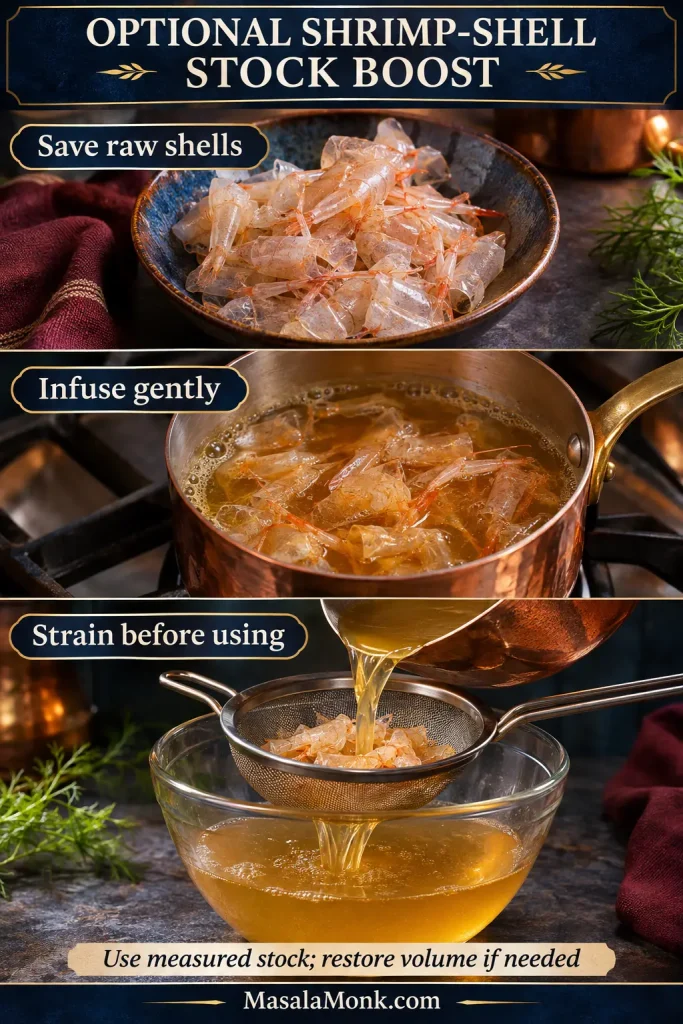
Three-step graphic showing raw shrimp shells, shells heating in a small pan of stock, and the liquid being strained through a fine sieve into an unmarked bowl.
The final straining stage is what makes an optional shrimp-shell infusion usable: aroma goes into the measured stock, but shell fragments stay out. After straining, restore the stock to the original measured volume rather than adding extra liquid to the recipe.

Fish Fumet and Traditional Rockfish Broth

White-fish fumet uses clean fresh fish bones and aromatics, gently simmered and strained. Traditional Marseille bouillabaisse may instead develop a fuller stock from small Mediterranean rockfish, sometimes processing the cooked base before carefully straining it.

These methods are not interchangeable: delicate white-fish frames generally need a shorter, gentler extraction. Use properly cleaned fish bones and heads, remove gills where appropriate and strain thoroughly so no hard bones reach the soup.

Why Saffron and Fennel Matter

Saffron brings an earthy aroma and golden tint; fennel becomes sweet as it softens. Tomatoes add acidity, and the orange zest provides a subtle lift. For this version, keep the orange restrained so it doesn’t turn the soup citrusy.

Fennel already supplies an anise note. Extra fennel seed, star anise or Pernod isn’t needed; if added, use sparingly.

Should Bouillabaisse Broth Be Thick or Clear?

A traditional rockfish base can be cloudy and full-bodied. Prepared white-fish stock usually creates a lighter, more pourable broth. This recipe leaves softened vegetable pieces in the soup; blend and strain the base before the seafood stage if you prefer it smooth.

Back to the recipe · Back to top

How Marseille Traditionally Makes Bouillabaisse

In Marseille, bouillabaisse is often presented in two parts: broth with rouille or aïoli and croutons first, then larger fish pieces and potatoes. The custom reflects the role of both the broth and the fish as substantial components of the meal.

Originating in Mediterranean fishing communities, the dish turned local catches and aromatics into a filling meal. Over time, formal restaurant traditions established expectations about the species used and how the soup is served.

Traditional selections can include scorpionfish, monkfish, conger eel, John Dory and other regional catches. The Marseille tourism authority’s guide to bouillabaisse explains the customary fish selection, service and restaurant charter.

This home version isn’t a charter-compliant Marseille bouillabaisse. Traditional rockfish can give the broth a different body and depth; prepared stock makes the method accessible, while saffron, fennel, garlic and rouille give it recognizable Provençal flavors.
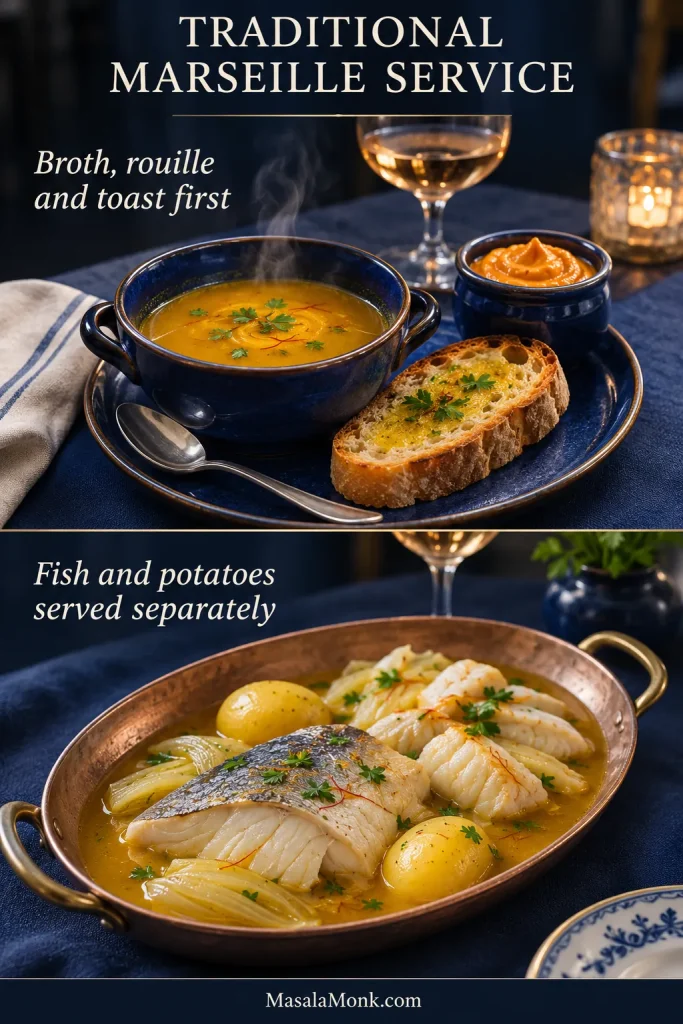
Two-part traditional Marseille bouillabaisse service: saffron broth with rouille and toast above a separate platter of poached fish and potatoes.
These are two serving stages of the same traditional dish, not two recipes. Marseille-style service may offer saffron broth and rouille first, followed by fish and potatoes; by contrast, this practical home version serves the components together in bowls.

What Is Rouille, and How Is It Different from Aioli?

Rouille is a garlicky, lightly spicy sauce served with bouillabaisse. Versions can use bread, potato or egg yolk for body, often alongside saffron and chili. On toast, it enriches each mouthful; stirred into broth, it adds garlic heat and a thicker mouthfeel.

Aioli is another garlic-based sauce with its own traditions and modern variations. It can accompany seafood but won’t necessarily supply rouille’s saffron-and-chili flavor. See our garlic aioli guide for another approach.

Bouillabaisse Troubleshooting: What Went Wrong?

How to Recognize Overcooked Fish in Bouillabaisse

Check the texture of the fish before leaving it in the hot broth any longer. Moist cod should separate into tender flakes, while monkfish remains more compact. If the pieces are dry, tight or crumbling, further simmering will not restore their tenderness; remove cooked seafood promptly and avoid stirring it unnecessarily.
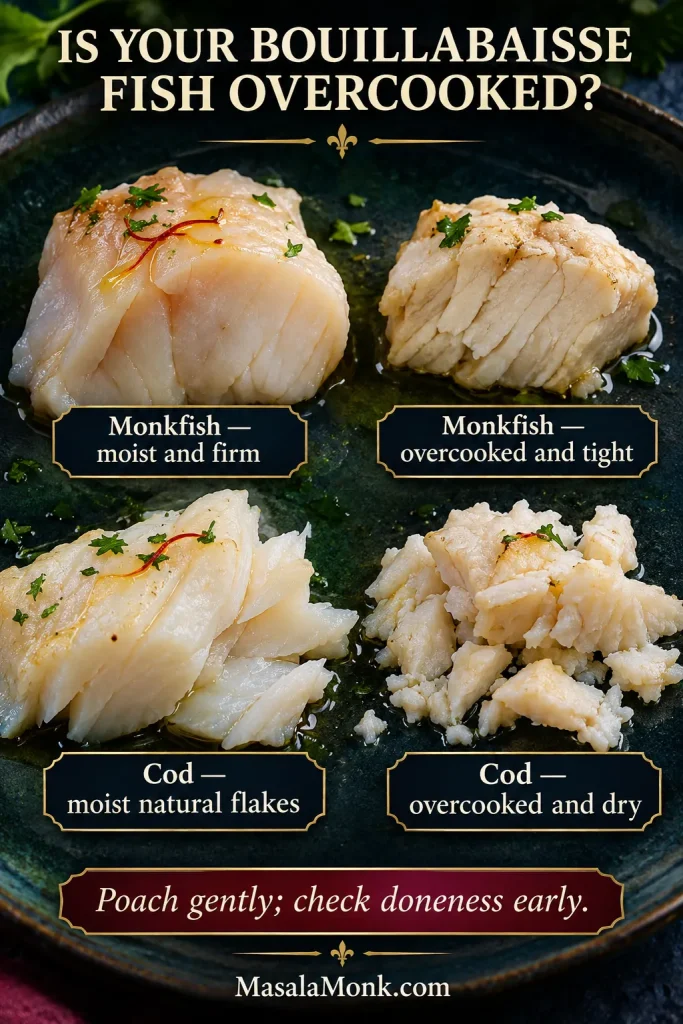
Four close-up white-fish portions comparing moist, cohesive monkfish and flaky cod with drier, tighter or more fragmented overcooked examples.
Overcooked cod tends to lose moisture and fragment, whereas monkfish becomes tighter and less tender. These textures are warnings rather than goals; check fish before it dries out, including an appropriate food-safety check for thicker portions.
ProblemWhat helps
Broth tastes dilutedReduce briefly, provided it is not salty
Weak seafood flavorAdd stronger unsalted fish stock
Too saltyDilute with unsalted stock or water
Too much tomatoBalance with mild unsalted fish stock
Strong anise tasteRemove aromatics; dilute cautiously
Bitter brothCheck for burned garlic, paste or orange pith
Fish breaks apartUse larger pieces and stir less next time
Rubbery shrimpStop cooking; longer simmering won’t restore tenderness
Grainy brothStrain the base before seafood next time
Rouille separatesWork into a little new softened bread paste
Rouille too stiffAdd warm water one teaspoon at a time

The Stock Smells Unpleasant

Discard any stock or seafood with sour, rancid or ammonia-like odors. Spoiled seafood cannot be made safe by longer cooking or stronger seasoning. A natural cloudy appearance, however, is not by itself a sign of spoilage.

The Rouille Separates or Tastes Bitter

If oil collects on the surface, stop adding it and mix thoroughly. For stubborn separation, make a little fresh softened bread paste and gradually incorporate the separated sauce into it.
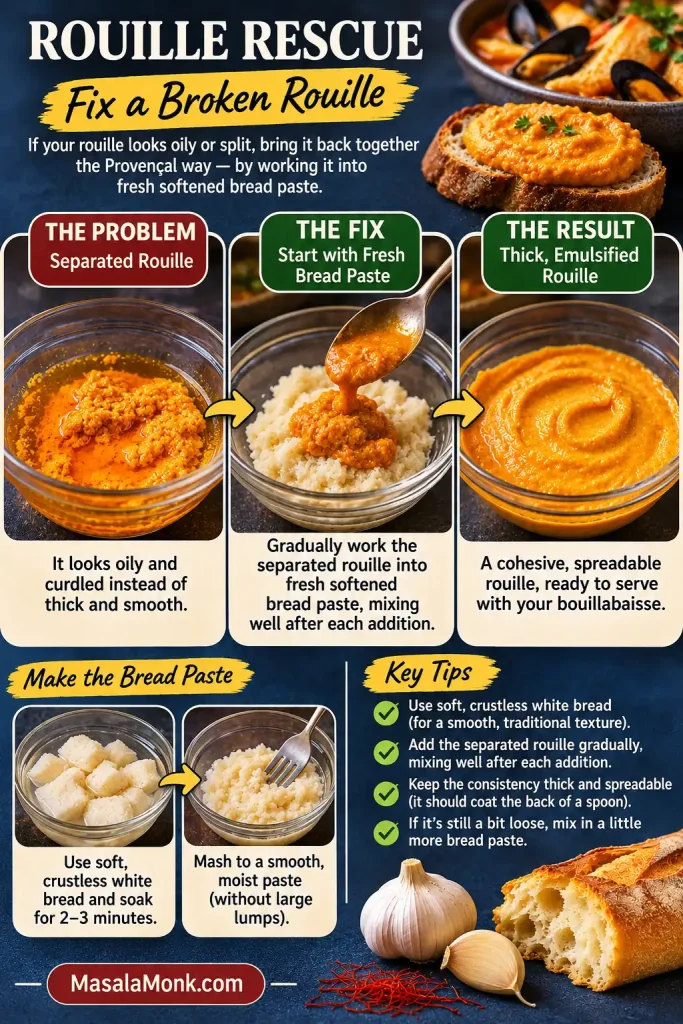
Three-stage egg-free rouille repair guide: oily separated orange sauce, broken sauce added to new moist bread paste, and the resulting cohesive rouille.
The sign of recovery is a fading oil slick as the split rouille is gradually mixed into fresh softened bread paste. If oil remains visibly separate, continue incorporating the mixture slowly instead of adding more oil.

Strong olive oil, excessive raw garlic or prolonged high-speed blending can taste harsh. A mild olive oil and small garlic clove give better control. Water helps a stiff sauce; it will not correct bitter ingredients.

Back to the recipe · Back to top

Shortcuts and Substitutions That Work

Changing the fish is the easiest adjustment. Mussels can be omitted from this home version. Fish stock and saffron matter more to the broth’s distinctive flavor, so replacing them changes the result more noticeably.

  • Only one white fish available? Use 800 g of it and cook thick pieces before thinner ones.
  • Monkfish too expensive? Choose locally affordable firm white fish instead; snapper or grouper may work depending on market price.
  • No mussels? Omit them or add 100–150 g more boneless fish or peeled shrimp for the whole batch.
  • No wine? Use 100 ml water and adjust the finished broth with a small squeeze of lemon if needed.
  • No fresh tomatoes? Use 250 g plain canned chopped tomatoes, checking the salt content.
  • No saffron? The soup will lack saffron’s characteristic aroma. Turmeric gives yellow color, not the same flavor.
  • No fish stock? Mild vegetable stock produces a lighter adaptation, without equivalent seafood flavor.

Salmon makes a richer and oilier soup. If salmon is the fish you want to use, Finnish salmon soup is an alternative built around potatoes, leek and dill.

For a shellfish-free adaptation, omit shrimp and mussels and check the fish stock’s ingredients. Some prepared stocks contain crustaceans or mollusks. Prevent cross-contact and check any other dietary restrictions before serving.

Back to the recipe · Back to top

Serving Bouillabaisse and Planning Ahead

Traditional Service or Family-Style Bowls?

For two-part service, offer broth with rouille and garlic toast first; bring out the larger cooked fish pieces and potatoes afterward, keeping them properly hot.

Alternatively, for family-style service, divide fish and potatoes among warmed bowls and ladle the broth around them. Pass rouille and bread separately so each person can taste the soup plain or with the sauce.
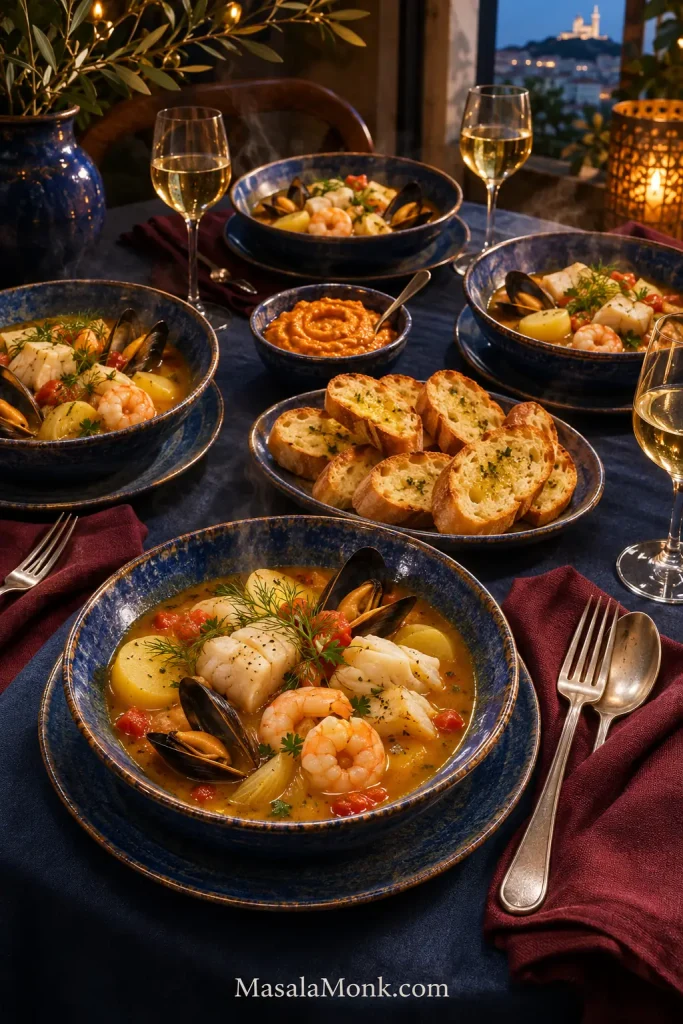
Four bowls of golden seafood bouillabaisse served on a dining table with garlic baguette and a shared bowl of orange rouille.
Warmed bowls help keep bouillabaisse hot while the four portions are served. Pass rouille and garlic toast separately so diners can control the garlic richness and preserve the bread’s crispness.

Crisp baguette is ideal. A sliced, thoroughly toasted homemade garlic bread loaf can also accompany the meal.

Making Bouillabaisse for Eight

Double the ingredient quantities for eight similar servings. Use two wide vessels or cook the seafood in batches rather than piling it into one tall pot. Fish cooking times do not double; check the doneness of each piece.

Make-Ahead Plan for Guests

  • The day before: Make the broth without potatoes or seafood. Cool promptly in shallow containers and refrigerate at or below 4°C (40°F). Prepare the rouille and keep it covered and chilled.
  • Before dinner: Set out bowls and clean utensils, slice the bread and organize the ingredients. Keep raw seafood refrigerated.
  • Near serving: Bring the broth back to a boil, reduce to a gentle simmer, cook potatoes and seafood in order, and toast the bread close to serving.
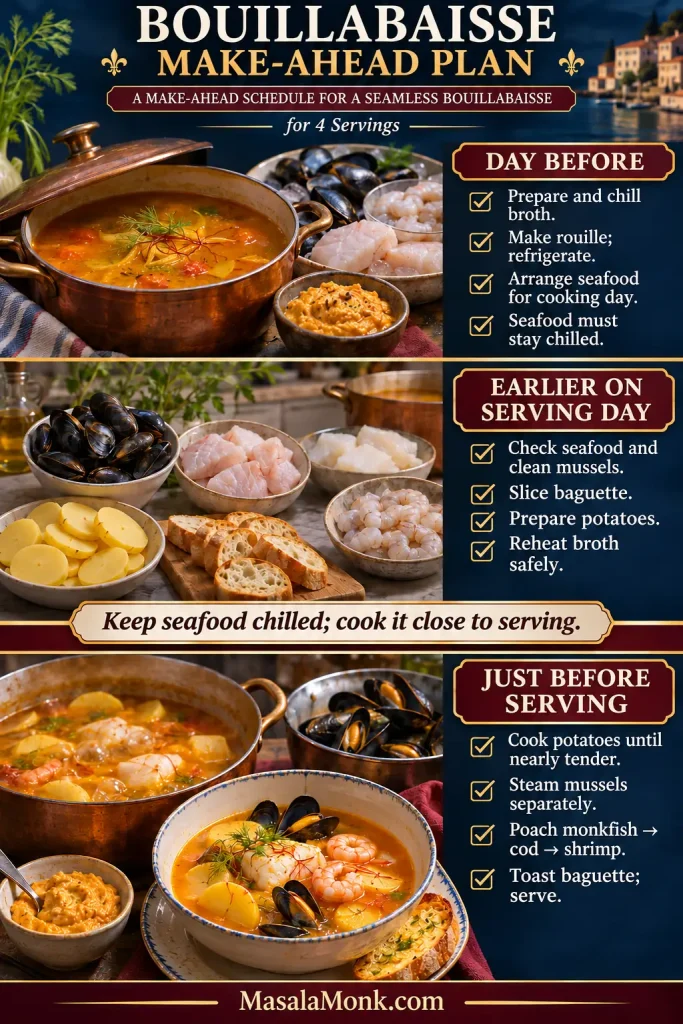
A three-part bouillabaisse make-ahead infographic with broth and rouille preparation, seafood and bread prep, and a final cooking-and-serving checklist.
Preparing the broth and rouille ahead leaves only potatoes, seafood and toast for the final cooking window. Meanwhile, keep the raw fish and shellfish refrigerated until they are needed.

Storing and Reheating Leftovers

Cool leftovers promptly in shallow, covered containers. Don’t leave seafood soup at room temperature for longer than two hours, or one hour when the surrounding temperature exceeds 32°C (90°F).

For the best quality and texture, aim to eat refrigerated leftovers within one or two days at or below 4°C (40°F). This is a quality preference: properly refrigerated cooked seafood is commonly given a three-to-four-day storage window. Reheat leftovers thoroughly to 74°C (165°F), and warm only what you plan to eat.

The prepared broth freezes better than a completed seafood soup. Freeze the broth separately; add fresh or properly thawed seafood when making the dish again. For the cooking sequence when you are ready, return to the complete recipe.

Back to the recipe · Back to top

Bouillabaisse FAQs

Can You Make Bouillabaisse with Cod and Shrimp?

Yes. For four servings, use about 800 g cod and 200–300 g raw peeled shrimp with the same broth. Add cod first, then shrimp near the end. Check actual doneness rather than relying on a fixed minute count.

Is Bouillabaisse a Soup or a Stew?

Traditionally it is a French fish soup. Large portions of fish and shellfish can make it resemble a stew, especially when everything is served together, but the aromatic fish broth remains central.

What’s the Difference Between Bouillabaisse and Cioppino?

Bouillabaisse comes from Marseille and is associated with Mediterranean fish, saffron, fennel and rouille. Cioppino emerged among Italian immigrant fishing communities in San Francisco and is typically more tomato-forward.

Can You Make Bouillabaisse Without Saffron?

Yes. The soup will still have fennel, garlic and tomato flavors, but not saffron’s distinctive aroma. Turmeric changes the color, not the flavor in the same way.

Can You Make Bouillabaisse Without Mussels?

Yes. Omit them or add 100–150 g extra boneless fish or peeled shrimp to the whole batch.

Can Bouillabaisse Be Made Ahead?

Make the broth the day before, cool and refrigerate promptly, and keep rouille chilled. Cook potatoes and seafood close to serving; toast bread shortly before dinner.

More Seafood Recipes to Explore

Made bouillabaisse with a different local fish? Tell us what it was called at your fish market and whether it stayed firm or flaked in the broth. Your experience may help another reader choose seafood when monkfish or cod isn’t available.
Posted on — Leave a comment

Baked Cod Recipe: Easy, Flaky Oven Cod with Lemon Garlic Butter

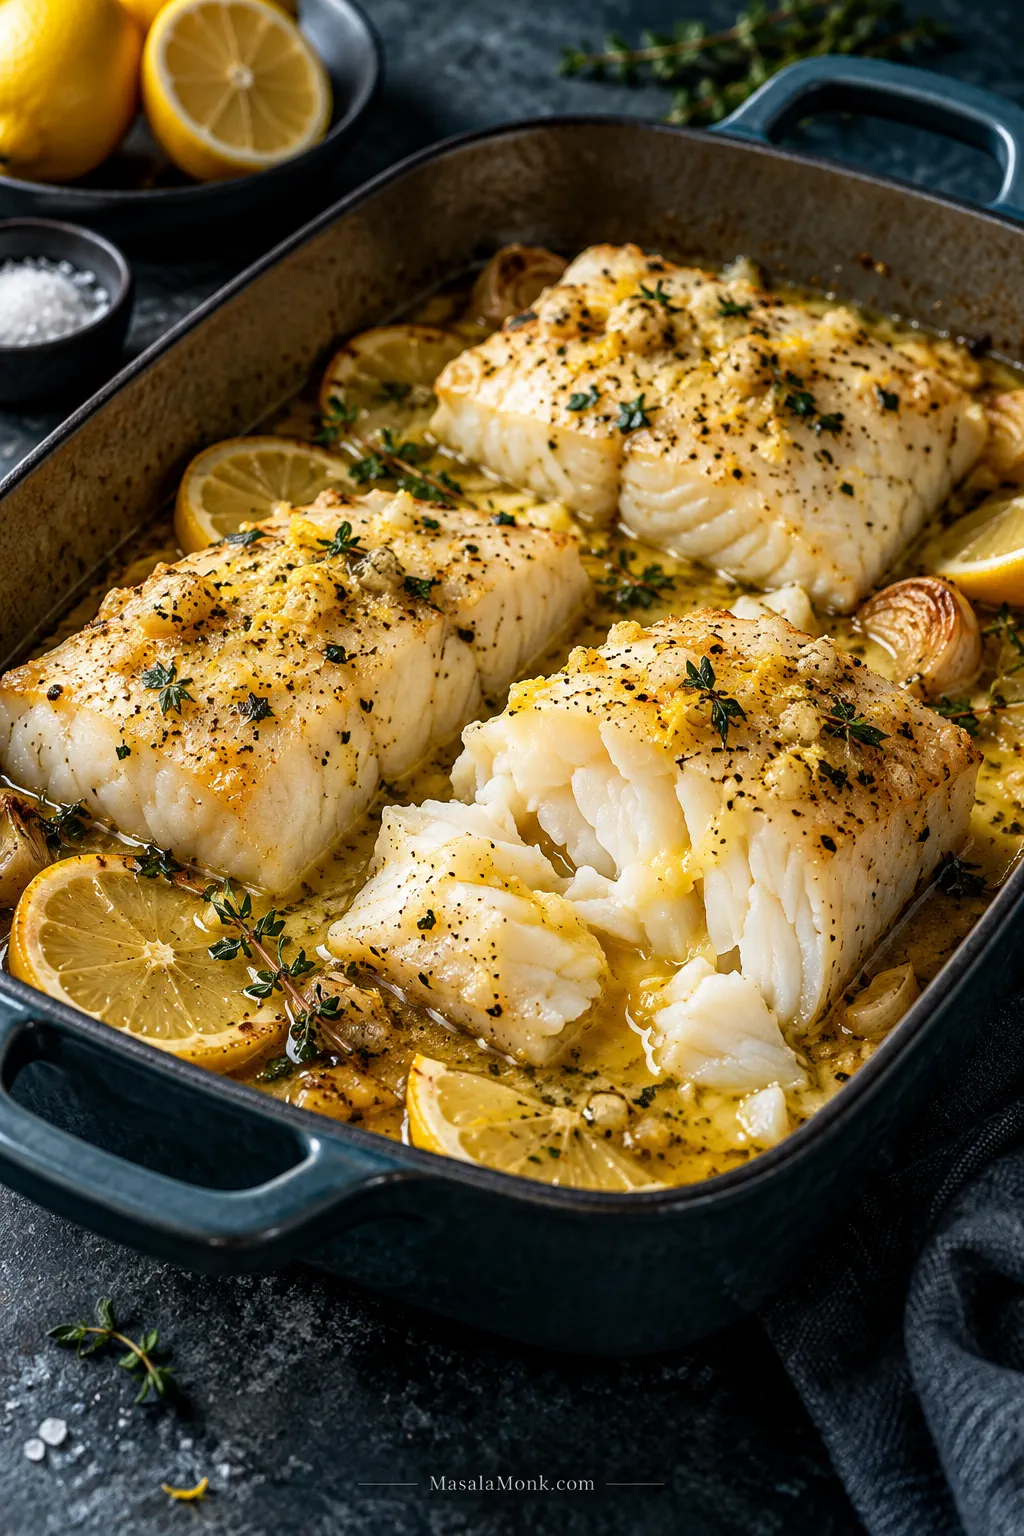
Baked cod portions in a dark roasting dish with moist white flakes, lemon slices, herbs and golden lemon garlic butter pooled around the fish.

Tender white flakes, warm lemon garlic butter and a squeeze of fresh lemon just before you eat. That’s what this baked cod recipe is about. A handful of familiar ingredients, one baking dish and plenty of buttery pan juices to spoon over the fish.

The only tricky part is the cod itself. It doesn’t always come in neat, matching pieces, and two portions of the same weight can cook quite differently when one is broad and thin and the other is a thick loin. This recipe gives you the lemon-garlic butter; the useful bit is knowing how to read the piece of fish you actually bought.

Cod is mild and lean, with large, tender flakes when it’s cooked well. Pat it dry, season it directly and bake it uncovered at 400°F / 205°C. There’s no breading, flipping or skillet sear to manage. The timer tells you when to start paying attention; the thickest part tells you when dinner is ready.

Lemon Garlic Butter Baked Cod

Choose four portions that are reasonably similar in thickness and a shallow baking dish that holds them comfortably in one layer.

Serves
4

Prep
About 10 minutes

Cook
About 10–20 minutes for most portions

Total
About 20–30 minutes

Oven
400°F / 205°C

Typical Thickness
About ¾–1¼ in / 2–3 cm

Doneness
145°F / 63°C

Equipment: shallow 9×13-inch / 23×33-cm baking dish or similarly sized pan, small bowl, paper towels and an instant-read thermometer.

Ingredients

  • 1½ lb / 680 g skinless cod fillets or loins, divided into 4 portions of about 6 oz / 170 g each
  • 3 tbsp / 42 g unsalted butter, melted
  • 1 tbsp / 15 ml olive oil
  • 3 medium garlic cloves, finely minced or grated
  • 1½ tbsp / 22 ml fresh lemon juice, divided, plus lemon wedges for serving
  • 1 tsp finely grated lemon zest
  • ¾ tsp fine sea salt
  • ½ tsp sweet paprika
  • ¼ tsp freshly ground black pepper
  • 2 tbsp chopped fresh parsley
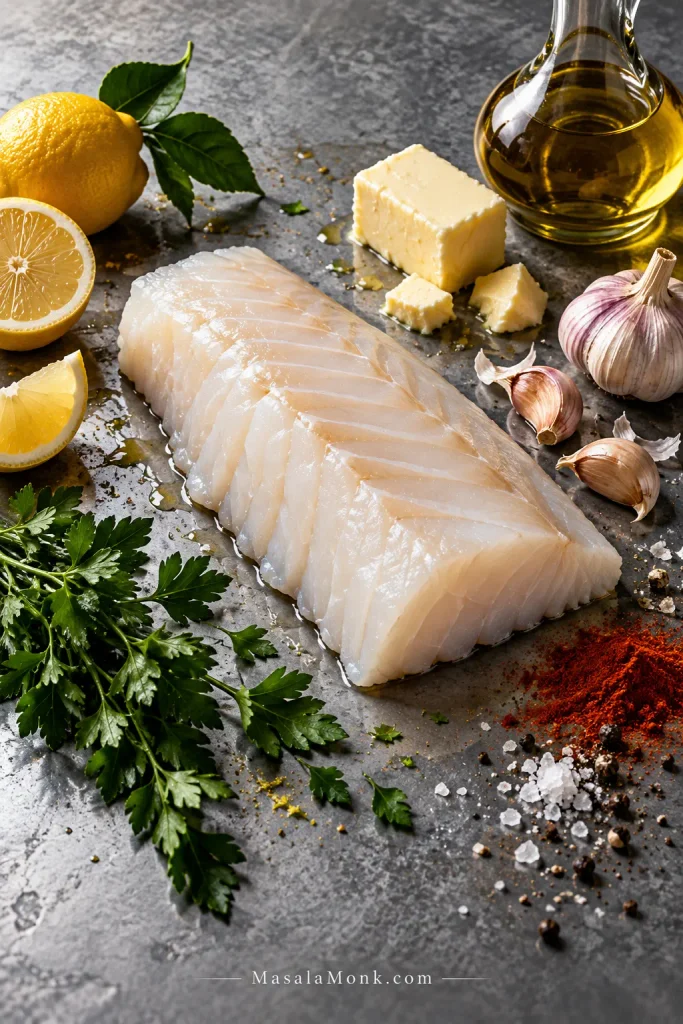
Raw cod fillet arranged with butter, olive oil, lemon, garlic, parsley, paprika, salt and black pepper on a cool grey surface.
Each ingredient has a different job here: zest brings aroma, juice brings acidity, butter carries the garlic, and paprika adds gentle warmth without overwhelming the mild cod.

Check the package before adding salt. Some frozen cod may contain added salt or brine. If yours does, start with less.

How to Make It

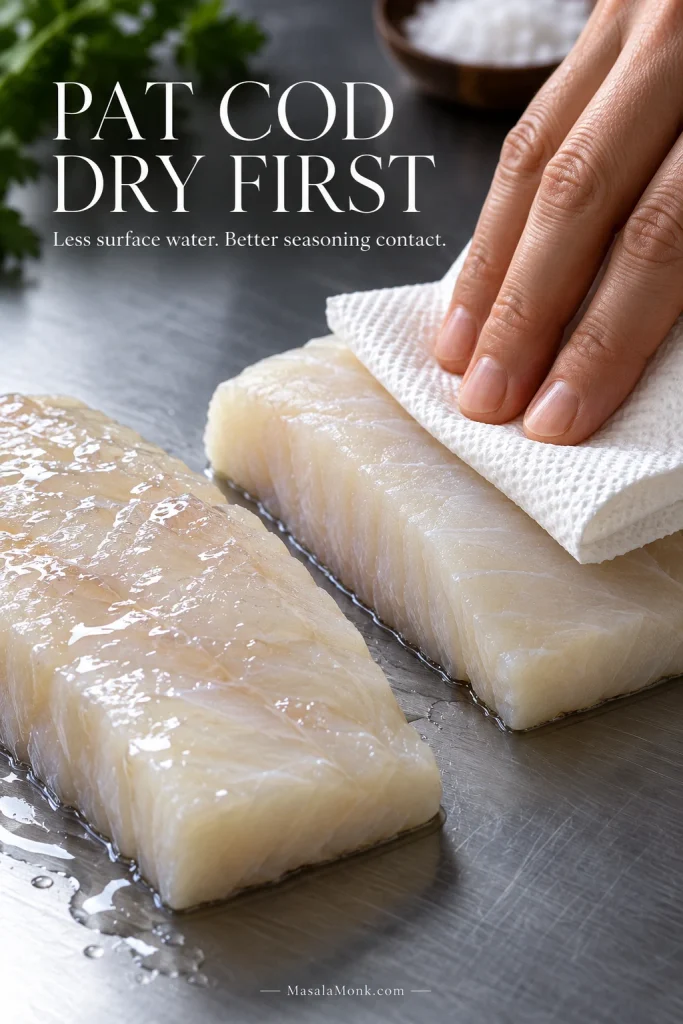
  1. Preheat and dry. Heat the oven to 400°F / 205°C and lightly grease the baking dish. Remove any obvious pin bones, then pat the cod thoroughly dry on every side.
A hand presses paper towel onto a raw cod portion beside a visibly wetter fillet to show how to dry cod before baking.
First, dry until the surface loses its wet shine. That gives the seasoning direct contact with the cod and reduces the amount of stray water entering the baking dish.
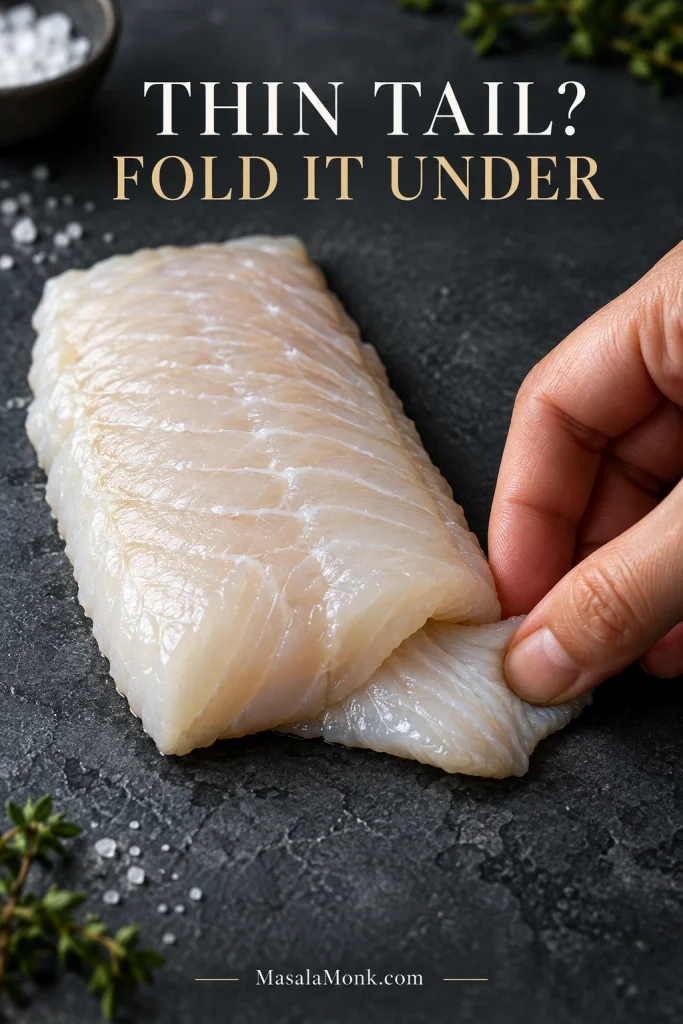
  1. Arrange and season. Set the portions in a single layer with a little room between them. Fold a very thin tail underneath itself so it doesn’t dry out before the thicker part is done. Season the fish directly with salt, paprika and black pepper.
A hand tucks the thin tapered end of a boneless cod fillet underneath to make the piece more even in thickness.
If only the last inch or two becomes dramatically thinner, tuck just that section underneath. The goal is a more even profile, not a doubled-up lump of fish.
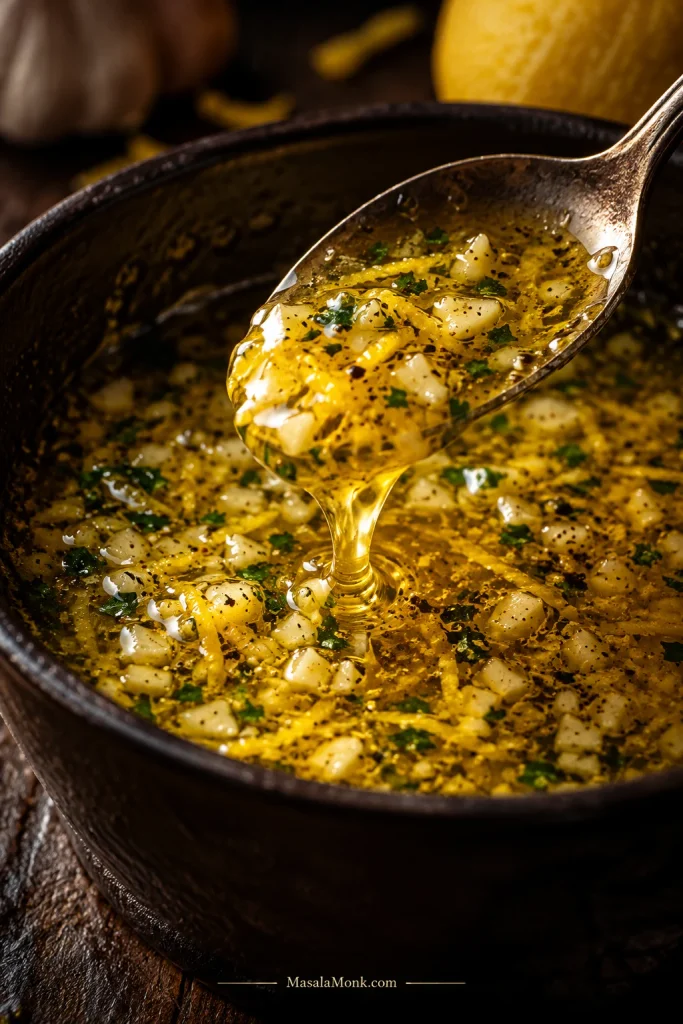
  1. Mix the butter. Stir together the melted butter, olive oil, garlic, lemon zest and 1 tbsp / 15 ml of the lemon juice.
Close-up of melted butter with olive oil, chopped garlic, lemon zest and herbs being lifted with a spoon.
For even flavor, disperse the garlic and lemon zest through the melted butter before spooning it over the fish; otherwise the aromatics tend to collect unevenly between portions.
  1. Spoon it over. Coat each piece with the lemon-garlic butter, letting a little run into the dish. Leave the pan uncovered.

Bake, Check and Finish

  1. Bake and check. Begin checking according to the thickness guide below. Uneven pieces may be ready at different times.
  2. Finish. Take each portion out when the center reaches 145°F / 63°C. Add the remaining ½ tbsp / 7 ml lemon juice and scatter with parsley.

No flipping needed. Cod becomes delicate as it cooks. Leave it alone in the oven, then slide a broad spatula underneath each piece when you’re ready to serve.

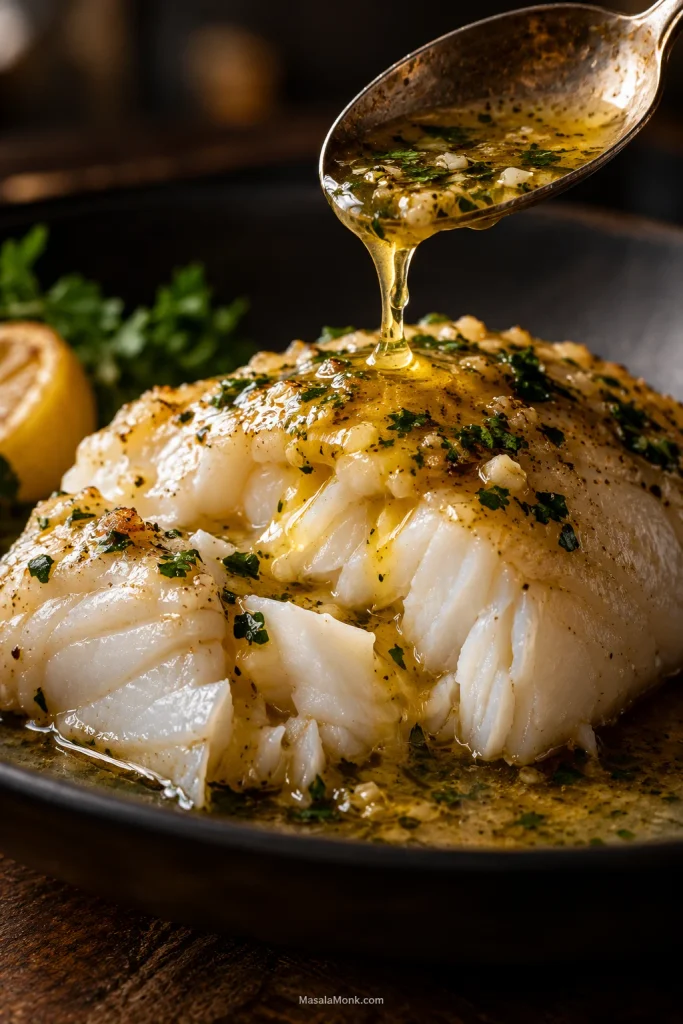
Don’t leave the butter behind. Spoon those warm, garlicky juices over the flakes before the plates reach the table.
A spoon pours golden lemon garlic butter over the open moist flakes of a cooked cod portion.
Warm pan butter slips into the opened flakes instead of sitting only on the surface.

Making dinner now? The recipe above is enough. Keep reading if your cod is unusually thick, still frozen, unevenly shaped or simply isn’t behaving the way you expected.

How Long to Bake Cod at 400°F

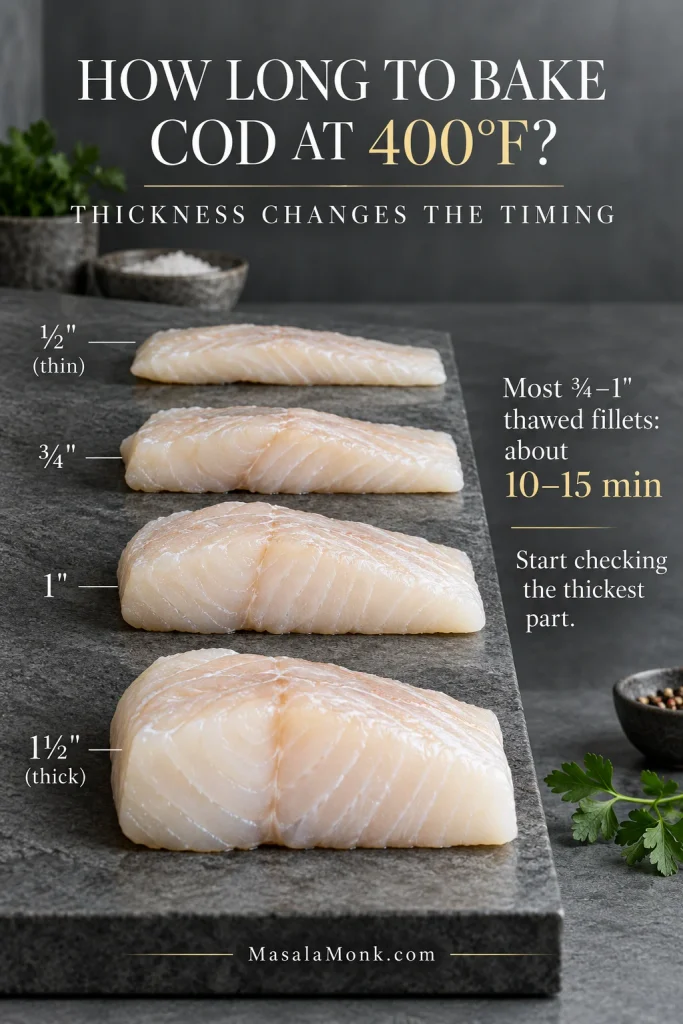
At 400°F / 205°C, most fully thawed cod fillets around ¾–1 inch thick take approximately 10–15 minutes. A thin tail may finish sooner; a substantial loin can need 15–20 minutes or more.

ThicknessTypical pieceStart checkingApproximate bake time
½ in / 1.3 cmThin fillet or tailAbout 7 minAbout 7–10 min
¾ in / 2 cmRegular filletAbout 9 minAbout 9–13 min
1 in / 2.5 cmThick filletAbout 11 minAbout 11–15 min
1¼–1½ in / 3–4 cmThick loinAbout 14 minAbout 15–20+ min

You don’t need to predict the exact finishing minute. Start checking at the first number in the table. If you’re not sure how your piece compares, see how fillet and loin shape change the timing.
Four raw cod portions arranged from thinner to thicker, illustrating how cod thickness affects baking time at 400°F.
At 400°F, the height of the fish is more useful than its weight for deciding when to start checking. Use the thickest part of the fillet as your guide.

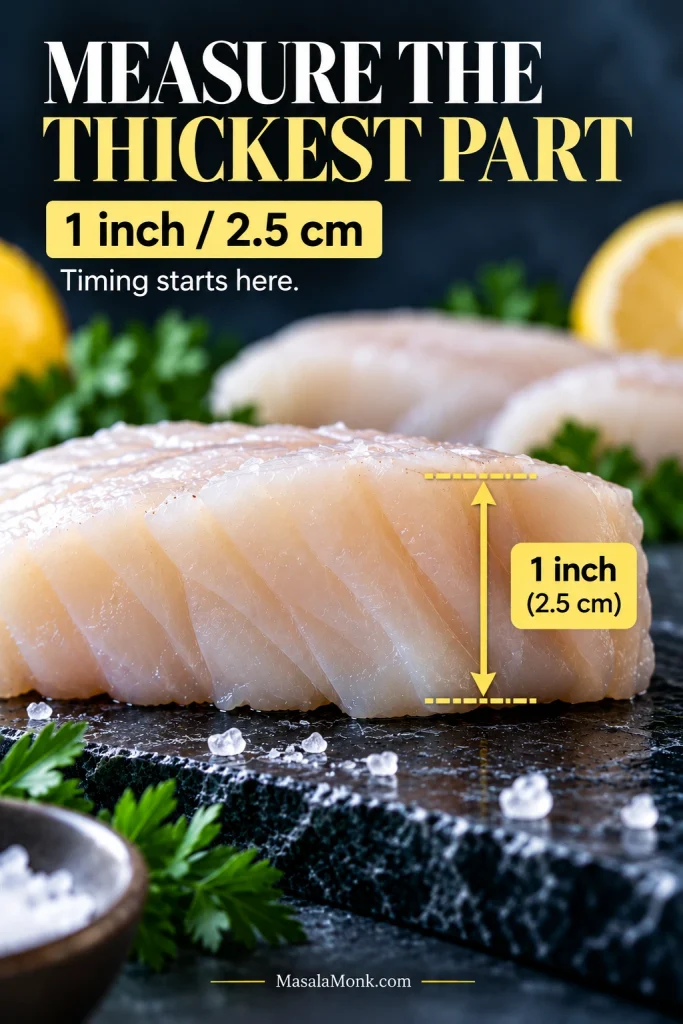
Measure the fish at its thickest point before you compare it with the timing guide.

Side view of a raw cod fillet with a vertical bracket marking its thickest section at about 1 inch or 2.5 centimeters.
Take the thickness vertically through the deepest section of flesh; width, length and the sloping top surface do not tell you how far heat must travel to reach the center.

Cod Fillet vs Loin: Look at the Shape

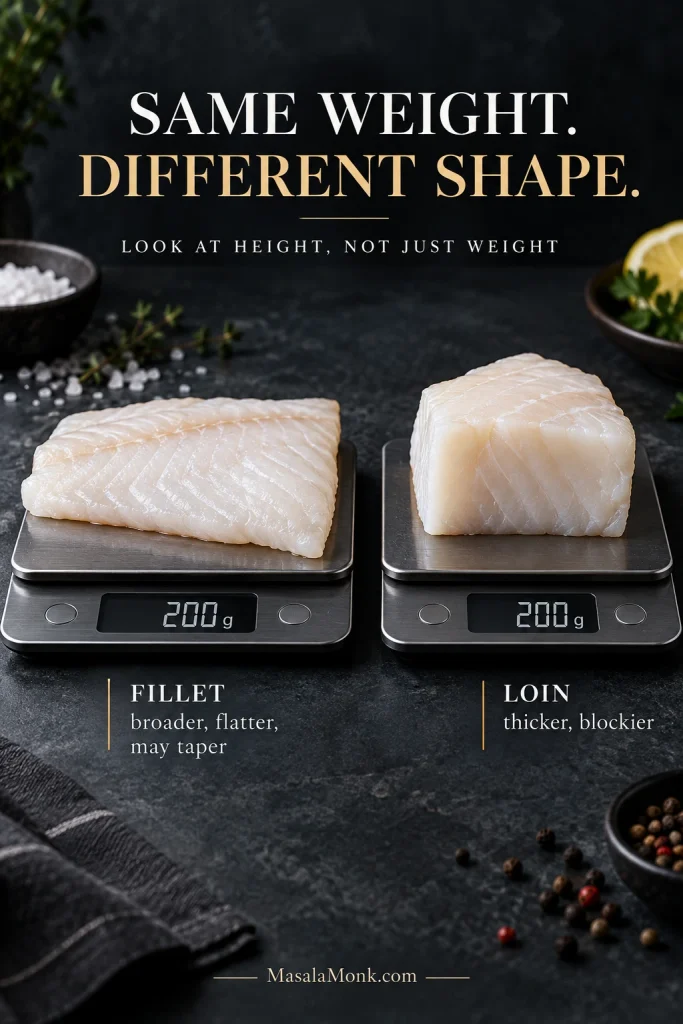
Two 200-gram raw cod portions on digital scales, comparing a broad flat fillet with a shorter thicker cod loin.
These equal-weight pieces illustrate why cod loin and cod fillet timing can diverge: the blockier loin concentrates the same mass into a deeper center.

That’s why shape matters as much as the label. A loin is usually the thick, blockier center cut. A fillet may be broad and flat or taper sharply toward the tail. At the fish counter, look at height as much as weight. If you’re cooking several pieces together, choosing similar thicknesses makes the timing much easier.

What About 375°F or 425°F?

The timing above assumes 400°F / 205°C, the temperature this version is built around. At 375°F / 190°C the fish cooks more slowly; at 425°F / 220°C, begin checking earlier.

How to Tell When Cod Is Done

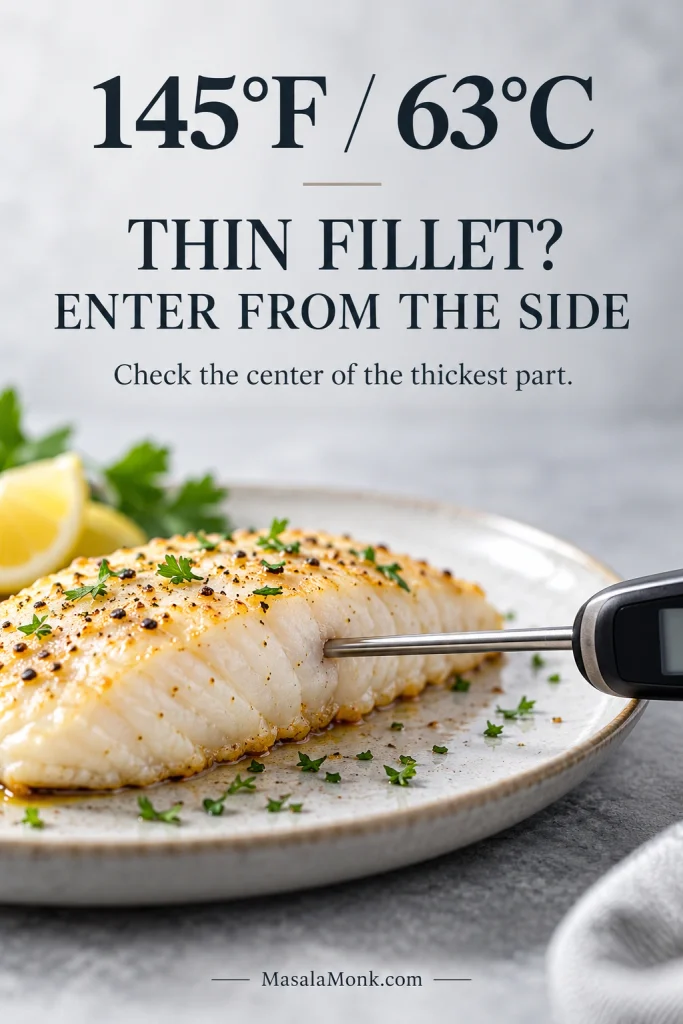
Whatever shape you’re cooking, the center settles the question. For food safety, cook fin fish to 145°F / 63°C in the center, following the USDA safe temperature guidance.

Instant-read thermometer inserted horizontally from the side of baked cod toward the center of its thickest part, showing 145°F.
Keep the thermometer tip inside the center of the thickest flesh and clear of the hot baking dish; touching the pan can give a misleadingly high reading.

For a thin fillet, insert the thermometer from the side. That makes it easier to place the tip in the middle instead of passing straight through.

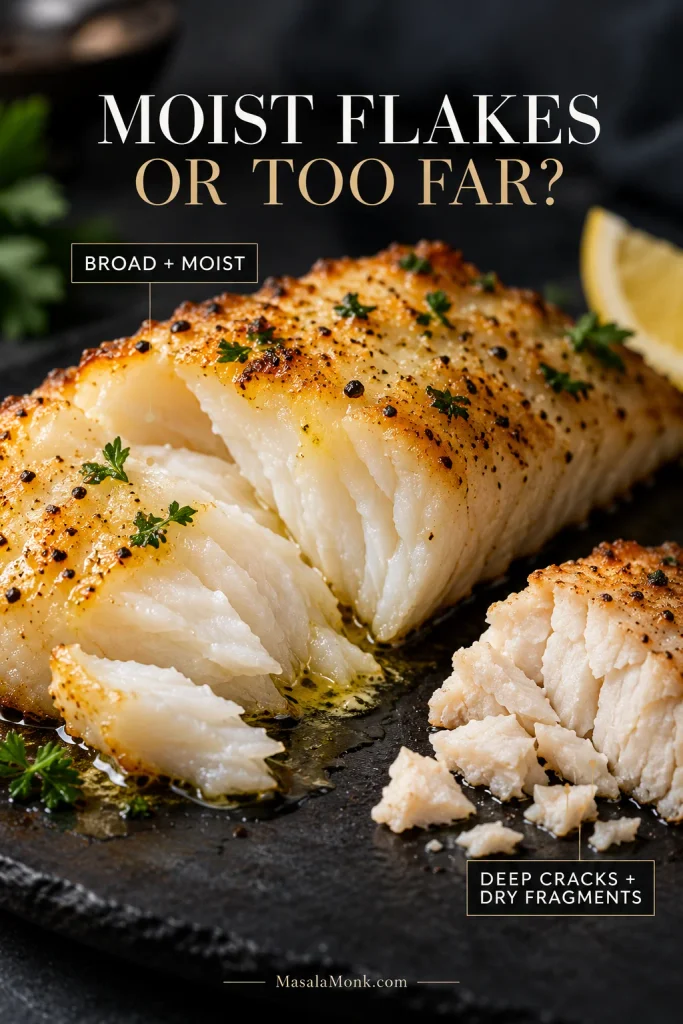
When it’s ready, the flesh should look opaque and open into broad, moist flakes with gentle pressure from a fork. Deep cracks, a chalky surface or lots of small dry fragments mean it has gone too far.

Side-by-side comparison of moist baked cod with broad glossy flakes and overcooked cod with deep cracks and dry broken pieces.
By contrast, doneness should be judged from the center, not the driest edge. Thin areas can look overcooked even while the thickest part still needs another moment.

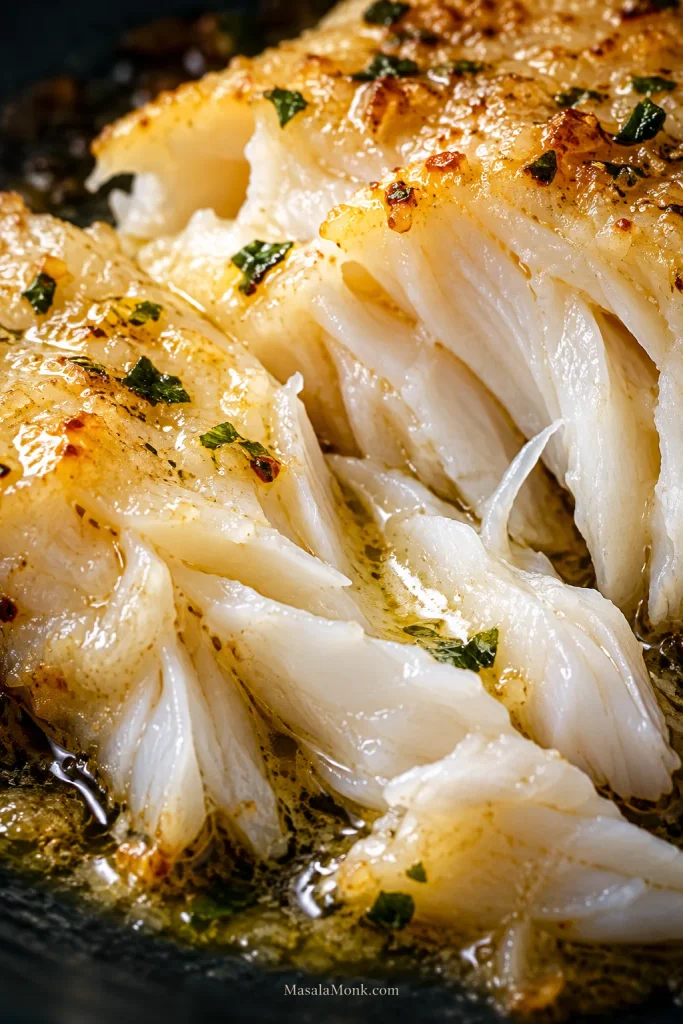
As those flakes separate, spoon a little of the hot garlic butter into the openings. It slips between the layers while the fish is still warm instead of simply sitting on top.

Extreme close-up of large pearly baked cod flakes with golden butter visible between the moist layers.

↑ Back to Recipe  ·  ↑ Back to Top  ·  Troubleshoot Dry or Watery Cod →

If Your Cod Came From the Freezer

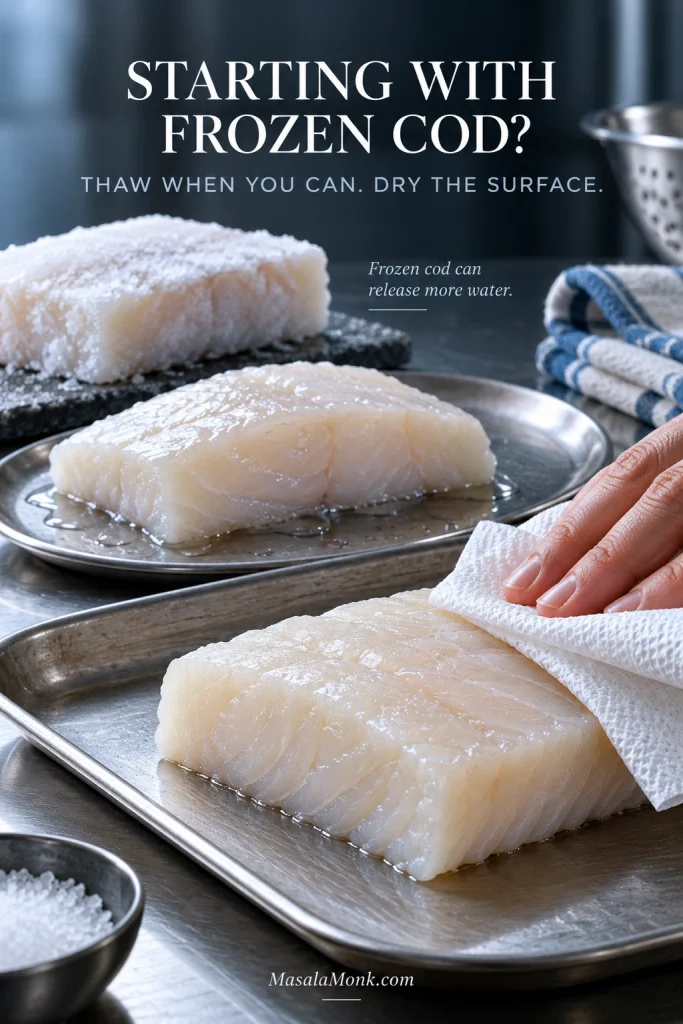
Frozen cod works here too. The complication is water. A puddle in the baking dish doesn’t automatically mean you overcooked the fish; sometimes that water arrived with the cod.

Thaw first when you can. It makes the timing easier to judge and lets you dry the surface properly before the butter goes on. If thawing is not practical tonight, jump to the straight-from-frozen guidance.

Frozen cod with surface frost, thawed cod with visible moisture, and a hand drying a thawed portion with paper towel.
When thawing frozen cod, moisture often collects underneath the fillet and between natural folds. Check those hidden areas before seasoning, not just the exposed top surface.

Thawing Cod Safely

The FDA’s seafood-handling guidance recommends thawing frozen seafood in the refrigerator. When you need it faster, use cold water and a leakproof bag according to the product’s handling directions, then cook the fish promptly. Counter thawing isn’t a safe shortcut.

Vacuum-packed cod needs a label check. Follow the package directions carefully. Some reduced-oxygen packaged fish must be removed from the original packaging before thawing.

Can You Bake Cod Straight From Frozen?

Yes, but frozen cod needs its own timing. Remove loose surface ice, season the fish and follow the package’s cooking directions where provided. The center will take longer to heat and the fish may release more water, so check it with a thermometer rather than adding an arbitrary number of minutes.

Should You Cover Cod When Baking?

Not for this recipe. Leave the dish uncovered so some released moisture can escape. A sealed foil or parchment packet traps steam and gives you softer, steam-cooked fish—a different style of cod with different timing.

If the Cod Didn’t Come Out Right

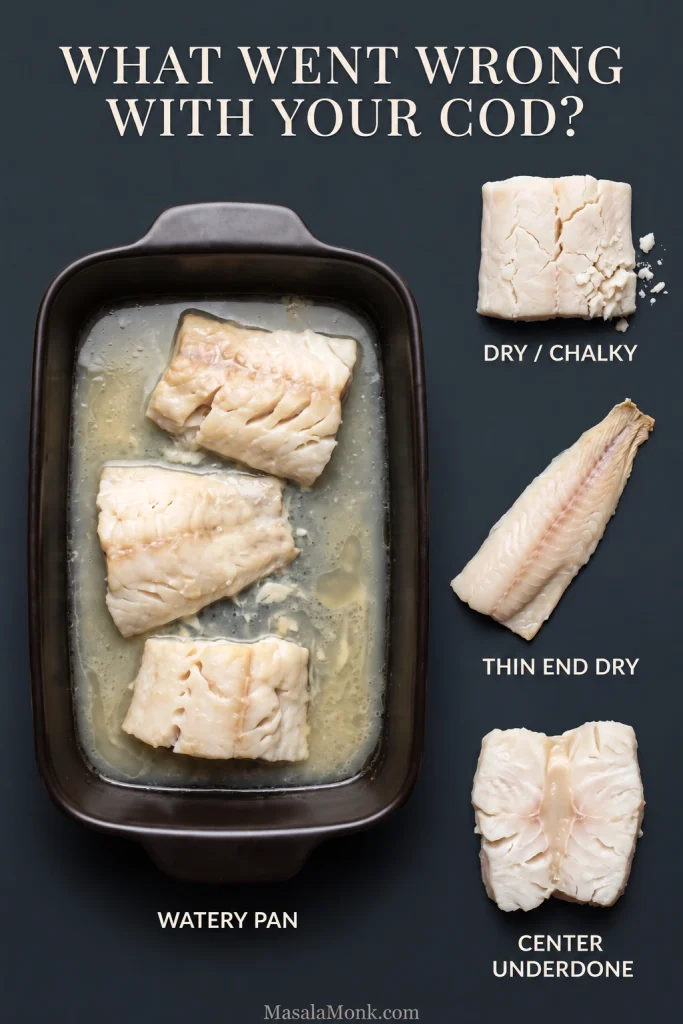
Don’t change five things at once. Find the symptom that looks most like yours and start there.

Baked cod troubleshooting graphic showing excessive watery liquid, dry cracked cod, a fillet with an overcooked thin end, and cod with a slightly underdone center.
One clue can prevent the wrong fix: a watery pan does not necessarily mean undercooked cod, and dry fish can still sit in excess liquid if it released a lot of moisture.
What happened?Likely reasonWhat to do
Dry or rubberyIt cooked too long for its thickness.You can’t put moisture back into overcooked cod. Add fresh lemon and begin checking earlier next time.
Watery panThe cod was wet, crowded or released a lot of water.Dry it thoroughly, give the portions some room and bake uncovered.
Mushy or mealyExcess moisture or damage from freezing and thawing.Check how it was thawed. If the same product repeatedly disappoints, try another source.
BlandThe fish wasn’t seasoned directly.Season the cod itself before the lemon-garlic mixture goes on.
Thin end dryThe tail finished before the thicker part.Fold it underneath before baking, or remove smaller pieces as soon as they’re done.
Outside cooked, center translucentA substantial or partly frozen center needs longer.Return it to the oven briefly, then check the center again.
Cooking took much longerA thick loin, cold center or oven variation.Keep cooking in short intervals and judge the center, not the clock.
Fish broke apartCooked cod is delicate and was handled too much.Lift it from underneath with a broad spatula. Already have loose flakes? Turn them into fish tacos.

↑ Back to Recipe  ·  ↑ Back to Top  ·  Got it sorted? Finish the plate →

What to Serve With Baked Cod

Hot rice may be the easiest answer. Start it first; the cod cooks quickly, and the rice gives all that lemon-garlic butter somewhere to go. If you want the timing sorted before the fish goes into the oven, use our guide to cooking rice.

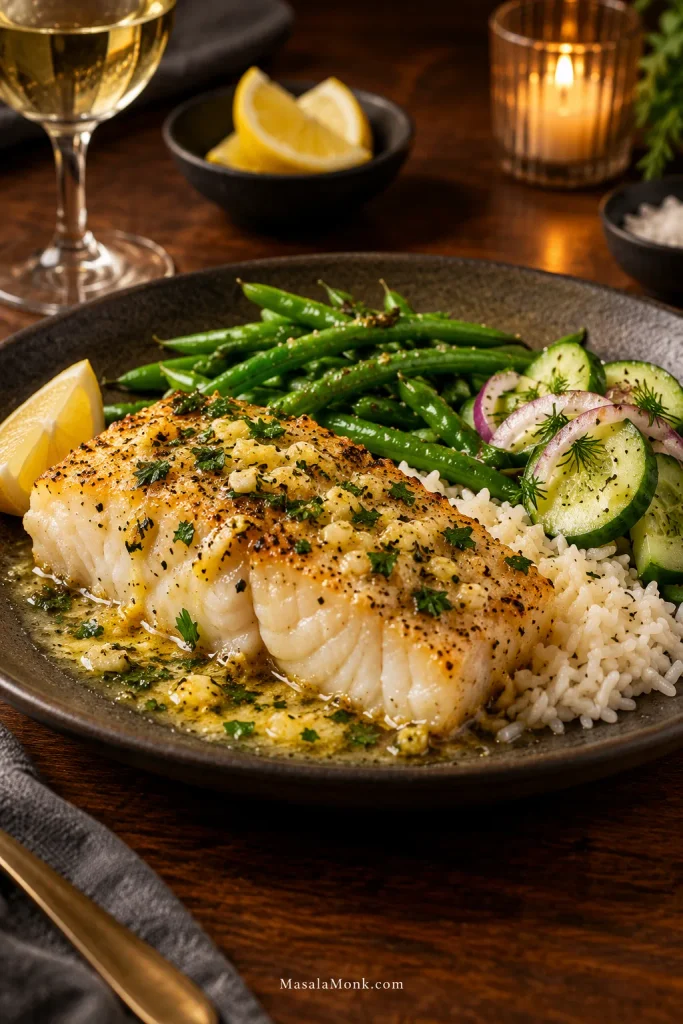
Plated baked cod dinner with rice, green beans, cucumber salad, lemon and golden pan butter on a warm dark table.
For a balanced cod dinner, pair one element that absorbs the lemon butter with another that adds crunch, acidity or coolness; that keeps the plate from becoming uniformly soft and rich.

For something green, green beans almondine add toasted-almond crunch beside the soft fish. A crisp cucumber salad goes the other way: cool and sharp against the warm cod.

Potatoes work beautifully too. Our Greek lemon potatoes need a much longer head start, so get them well underway before the cod goes into the oven.

Small Changes That Work

Want it brighter? Swap the parsley for fresh dill and lean on the lemon wedges at the table. Want something warmer and smokier? Use smoked paprika instead of sweet. Two garlic cloves make the flavor gentler; four bring the garlic forward.

The zest and juice do different jobs. Lemon zest brings citrus aroma without adding much liquid; the final squeeze gives the hot fish its sharper citrus edge.

For a dairy-free version, replace the 3 tbsp butter with 3 tbsp additional olive oil. That version won’t have quite the same richness, but the garlic, paprika, zest and finishing lemon still carry plenty of flavor.

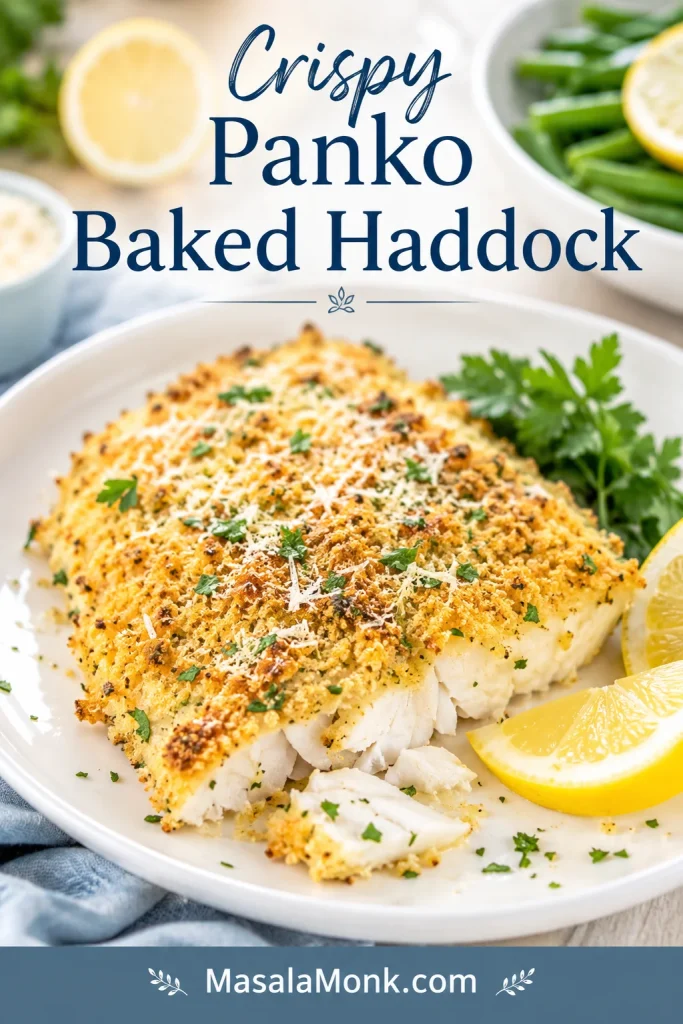
The same seasoning also works with other mild white fish; just reset the timing for the fish you choose. For a crisp, browned topping rather than lemon-garlic butter, our baked haddock recipe is built around that style.

Storing and Using Leftover Cod

Refrigerate leftover cod promptly in a shallow, covered container and use it within 3–4 days. When reheating, bring leftovers to 165°F / 74°C, following USDA food-safety guidance.

Because cod is lean, stop once the leftovers are safely heated through; prolonged reheating dries the flakes quickly.

If the fish is already in pieces, don’t try to reconstruct the fillet. Fold the flakes into fish cakes and let that become tomorrow’s dinner.

For tonight, serve the cod while the butter is still warm and loose in the dish. Spoon it over the fish, squeeze fresh lemon across the top and let the tender flakes do the rest.

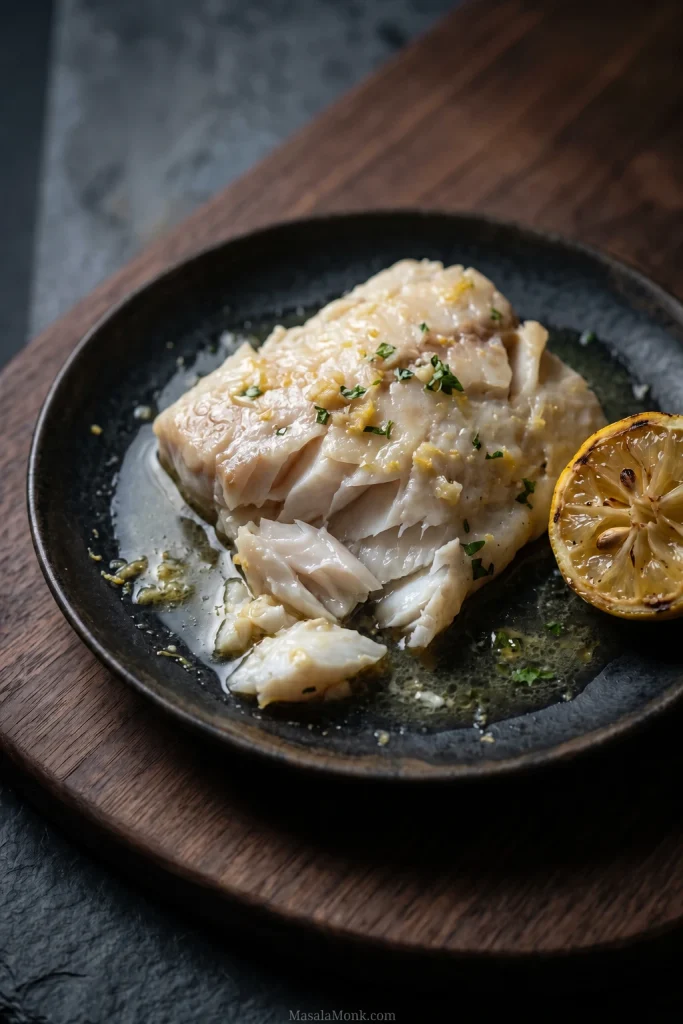
Single serving of pale baked cod opened into moist flakes on a dark plate with loose lemon garlic butter, herbs and a halved lemon.

↑ Back to Recipe  ·  ↑ Back to Timing Guide  ·  ↑ Back to Top

Posted on — Leave a comment

Baked Haddock Recipe: Easy Oven Haddock with Buttery Ritz or Panko Topping

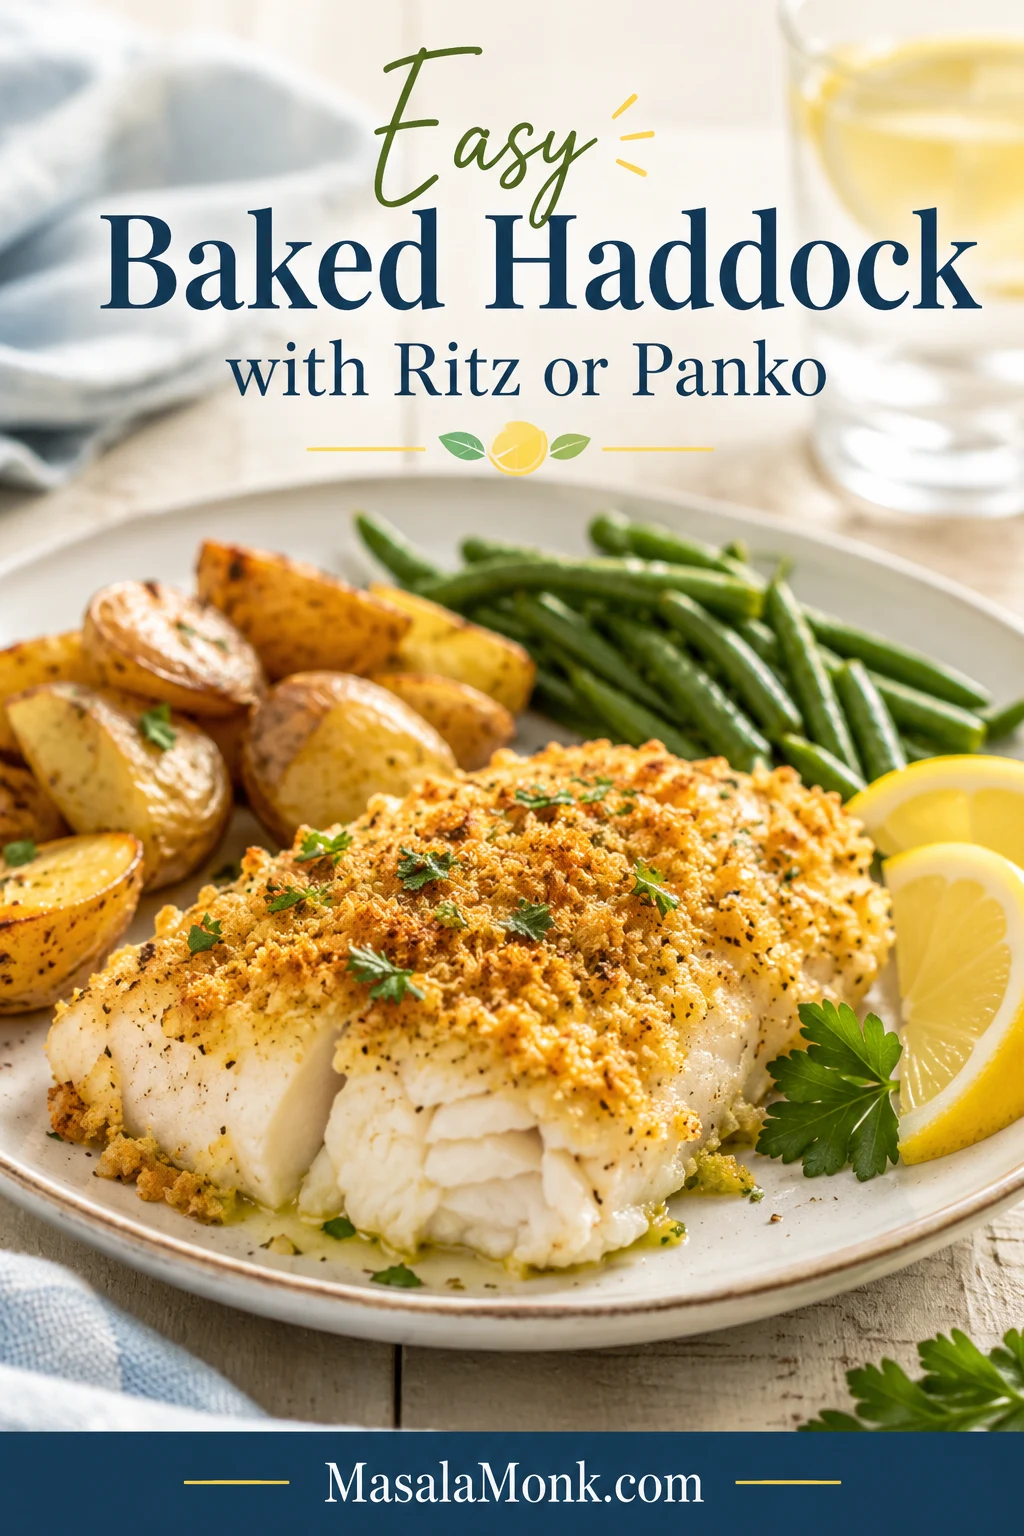
Baked haddock fillet with golden crumb topping served with lemon wedges, roasted potatoes, green beans, and tartar sauce.

This baked haddock recipe gives you tender, flaky white fish with a golden buttery topping in about 25 minutes. It is simple oven fish, but with the small details that keep haddock from turning dry, watery, bland, or hidden under soggy crumbs.

Haddock cooks quickly, which can feel a little unforgiving at first. The rhythm is simple: dry the fish, season it directly, add a buttery topping, and stop baking when the fish is done. After that, it becomes one of the easiest weeknight seafood dinners.

Quick Answer: Bake Time, Temperature, and Doneness

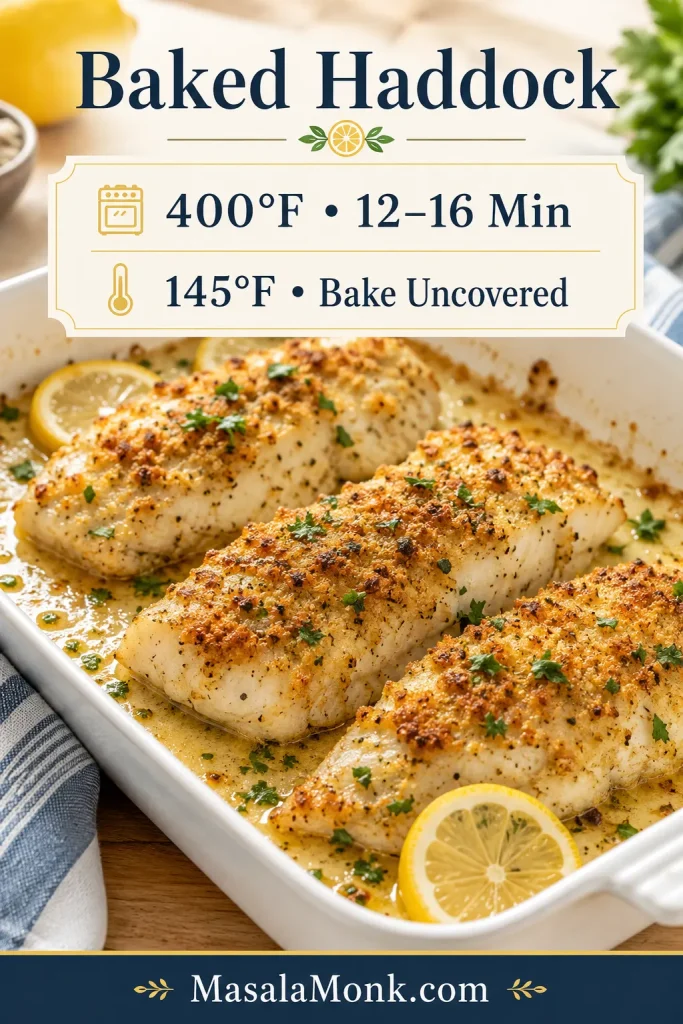
Bake haddock fillets at 400°F / 200°C for 12 to 16 minutes, depending on thickness. The fish is done when it turns opaque, flakes easily with a fork, and reaches 145°F / 63°C in the thickest part.

  • 400°F / 200°C is the easiest everyday temperature for quick, flaky baked haddock.
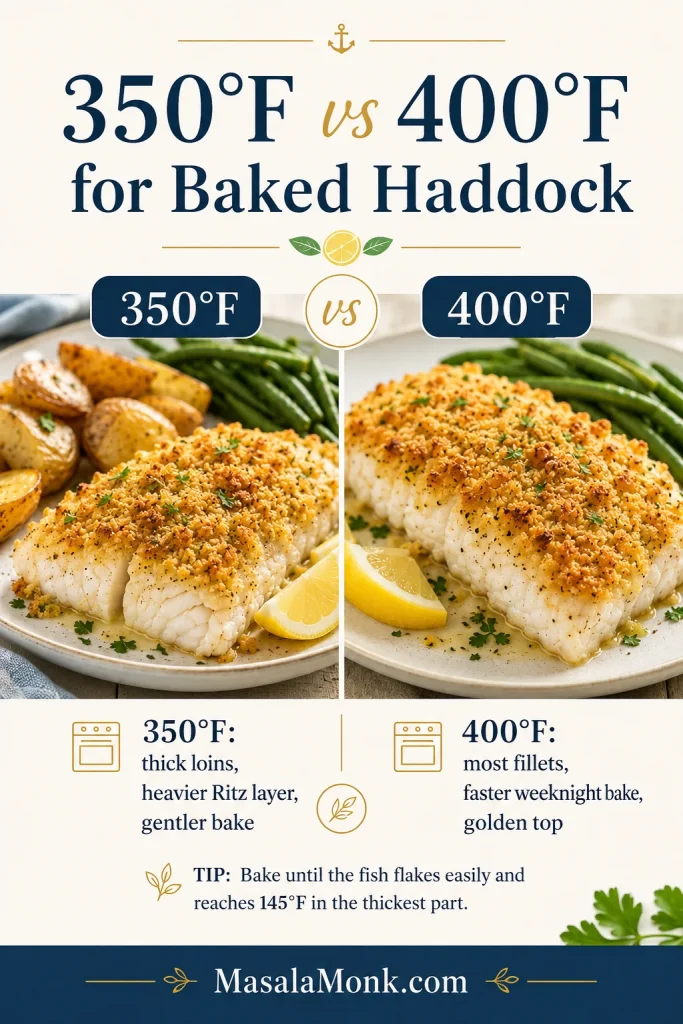
  • 350°F / 175°C is gentler for thick haddock loins, a heavier Ritz cracker topping, or a more traditional New England-style bake.
  • Bake uncovered when using panko, breadcrumbs, or Ritz crackers.
  • The fish comes first. The crumbs come second. Pull the haddock when it is done; the broiler can finish a pale surface in a minute.

A pale topping can be fixed. Overcooked fish cannot. That one idea makes this recipe much easier.

Recipe guide card showing baked haddock timing of 400°F for 12 to 16 minutes and doneness at 145°F.
For most haddock fillets, 400°F gives a fast oven bake; then 145°F confirms the center is cooked without drying out.

Easy Baked Haddock Recipe

Easy Baked Haddock with Buttery Ritz or Panko Topping

Mild haddock fillets baked with lemon, butter, herbs, and your choice of panko, breadcrumbs, or crushed Ritz crackers. The fish turns soft and flaky while the surface becomes golden and savory.

Prep Time10 minutes
Cook Time12 to 16 minutes
Total TimeAbout 25 minutes
Servings4
Yield4 baked haddock fillets
Oven Temperature400°F / 200°C
Doneness145°F / 63°C, opaque, and flaky

Ingredients

  • 4 skinless boneless haddock fillets, about 6 oz / 170 g each, or about 1 1/2 lb / 680 g total
  • 1 tablespoon olive oil or melted butter, for the baking dish and fish
  • Fine salt, to taste: about 3/4 teaspoon for plain crumbs, or 1/4 to 1/2 teaspoon for Ritz crackers, salted butter, or Parmesan
  • 1/4 teaspoon black pepper
  • 1 tablespoon lemon juice / 15 ml, plus lemon wedges for serving
  • 1 teaspoon lemon zest, optional but excellent in the topping
  • 1/2 teaspoon garlic powder
  • 1/2 teaspoon paprika
  • 2 tablespoons chopped parsley, plus more for serving

For a Breadcrumb or Panko Topping

  • 3/4 to 1 cup panko or breadcrumbs
  • 4 tablespoons melted butter / 56 g
  • 1/4 cup grated Parmesan / about 22 g, optional

For a Ritz Cracker Topping

  • 1 sleeve Ritz crackers, about 34 crackers / roughly 90 to 100 g, crushed
  • 3 to 4 tablespoons melted butter / 42 to 56 g
  • 1/4 to 1/2 teaspoon fine salt total, added only after tasting the cracker mixture

Instructions

  1. Preheat the oven. Heat the oven to 400°F / 200°C. Lightly grease a 9×13-inch / 23×33 cm baking dish.
  2. Dry the haddock. Pat the fillets very dry with paper towels. Dry fish before the oven means better texture after the oven.
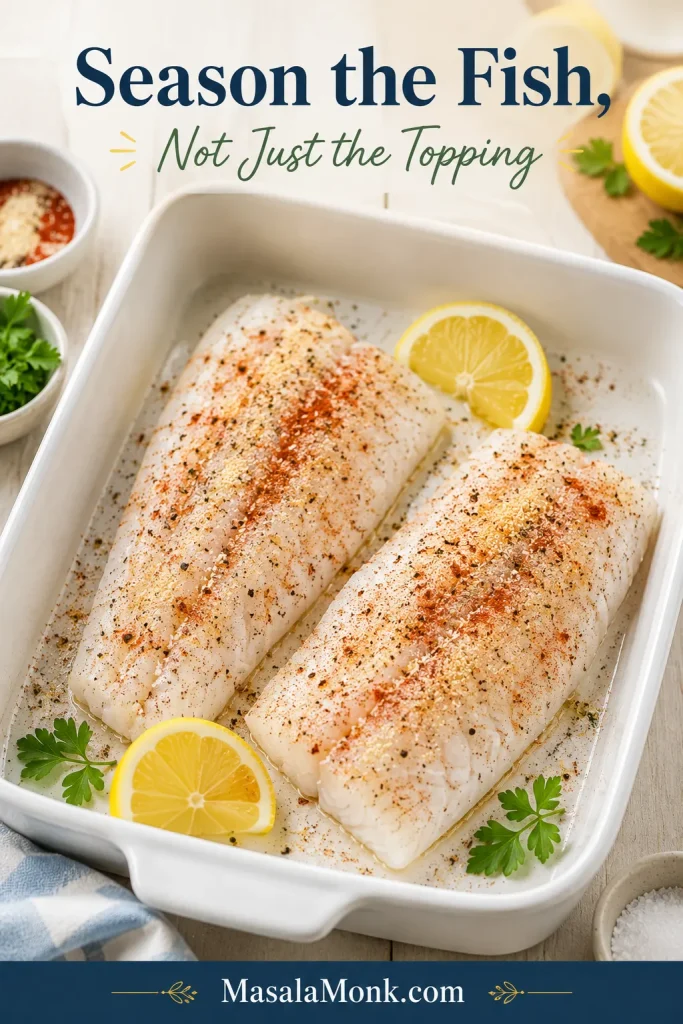
  3. Season the fish. Arrange the fillets in one layer. Brush lightly with olive oil or melted butter, then season with salt, pepper, lemon juice, garlic powder, and paprika.
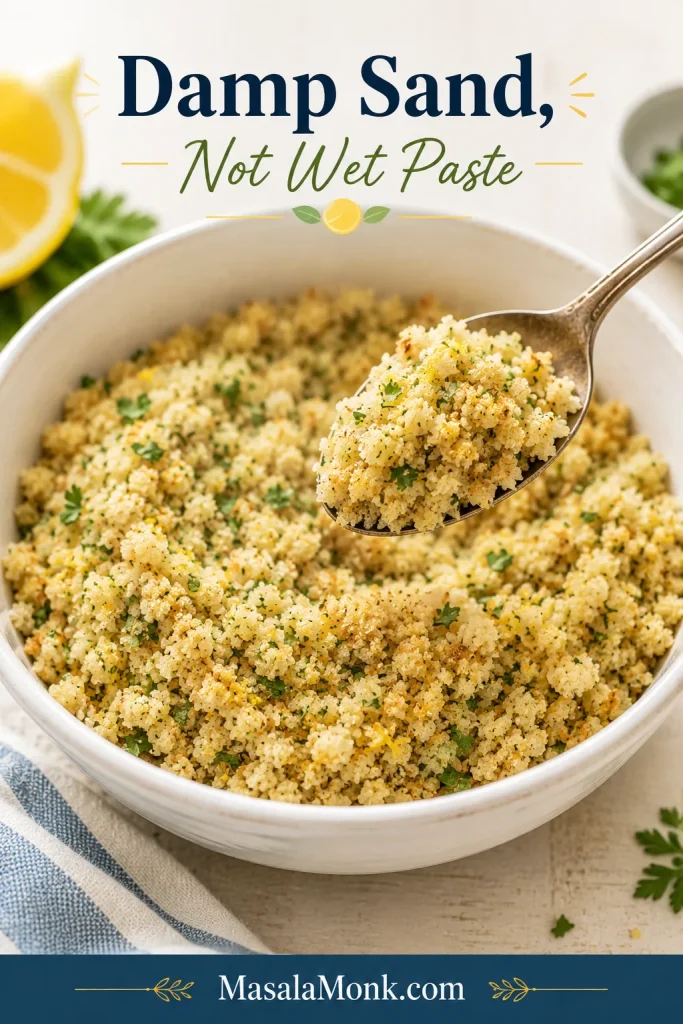
  4. Make the topping. Mix panko, breadcrumbs, or crushed Ritz crackers with melted butter, lemon zest, parsley, and Parmesan if using. The mixture should look like damp sand, not wet paste.
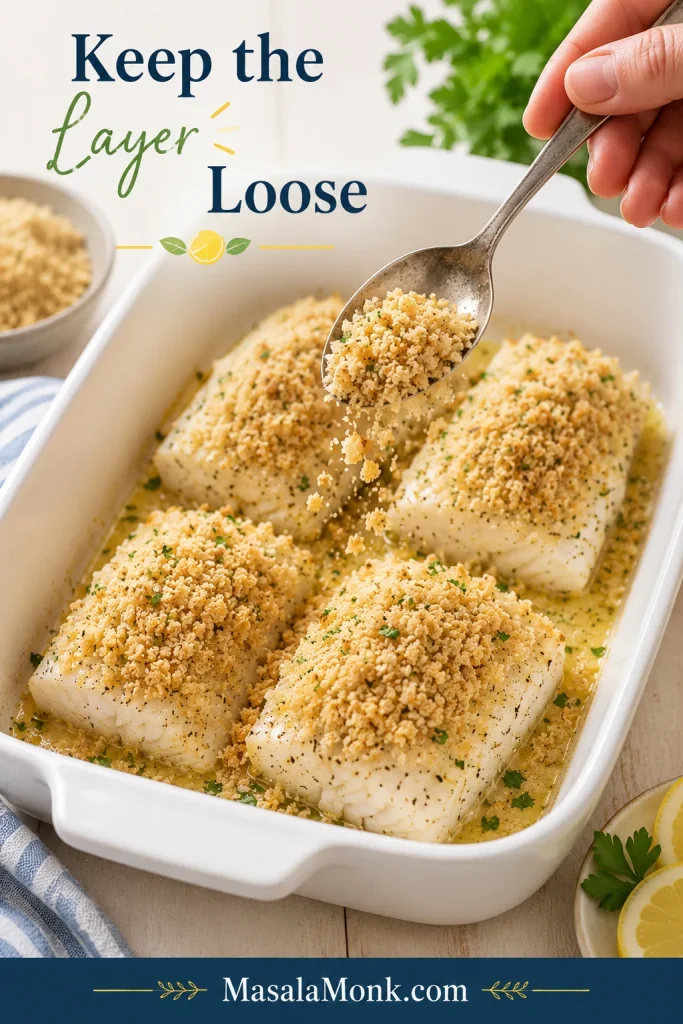
  5. Top the fillets. Spoon the mixture over the fish and press gently so it sticks. Keep the layer loose rather than packed down.
  6. Bake uncovered. Bake for 12 to 16 minutes, depending on thickness, until the fish is opaque and flakes easily.
  7. Check doneness. For the most reliable result, check the thickest part with an instant-read thermometer. Haddock is done at 145°F / 63°C.
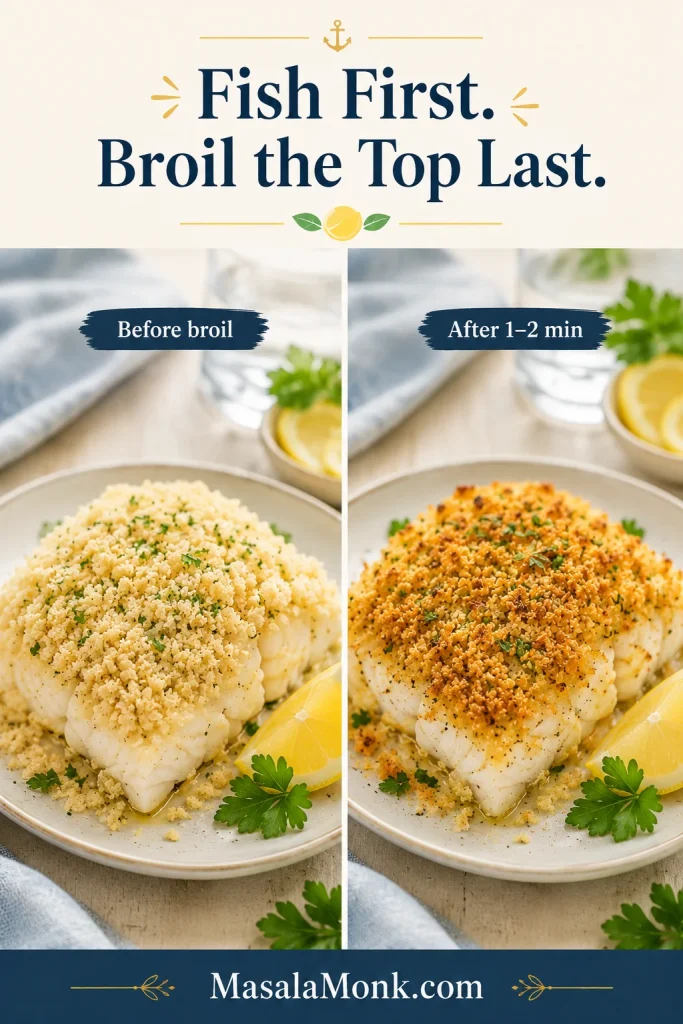
  8. Brown only if needed. If the fish is done but the topping is pale, broil, or use the oven grill, for 1 to 2 minutes. Watch closely.
  9. Rest and serve. Let the fish rest for 2 minutes, then serve with lemon wedges and more parsley.

When it is right, the fish should lift in soft flakes, the center should look opaque and moist, and the buttery layer should be golden without feeling greasy.

Recipe Notes

  • For thicker haddock loins or a heavier Ritz layer, bake at 350°F / 175°C for 18 to 25 minutes instead.
  • Thin fillets may be done in less than 12 minutes, so start checking early.
  • If using a fan or convection oven, begin checking 2 to 3 minutes early.
  • Mixed-size fillets need mixed timing: lift out thinner pieces first and let thicker ones finish.
  • Serve soon after baking. The fish stays moist, but the golden layer is best while warm and fresh.
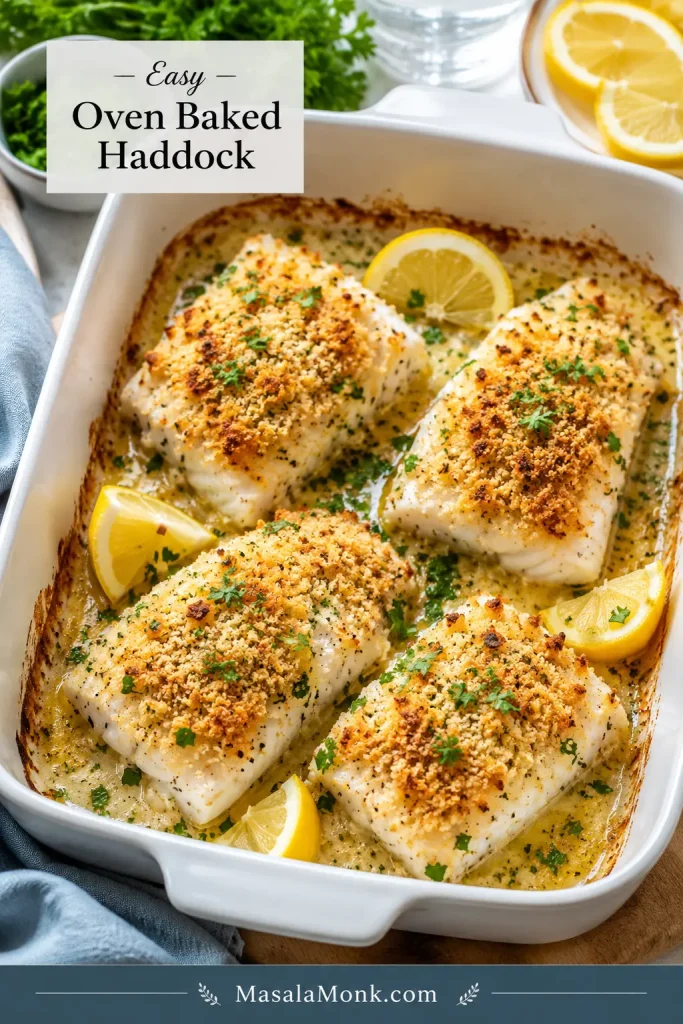
Four baked haddock fillets in a white baking dish with golden topping, parsley, and lemon wedges.
Baking the fillets uncovered helps the topping toast while the haddock underneath stays tender, moist, and easy to lift from the dish.

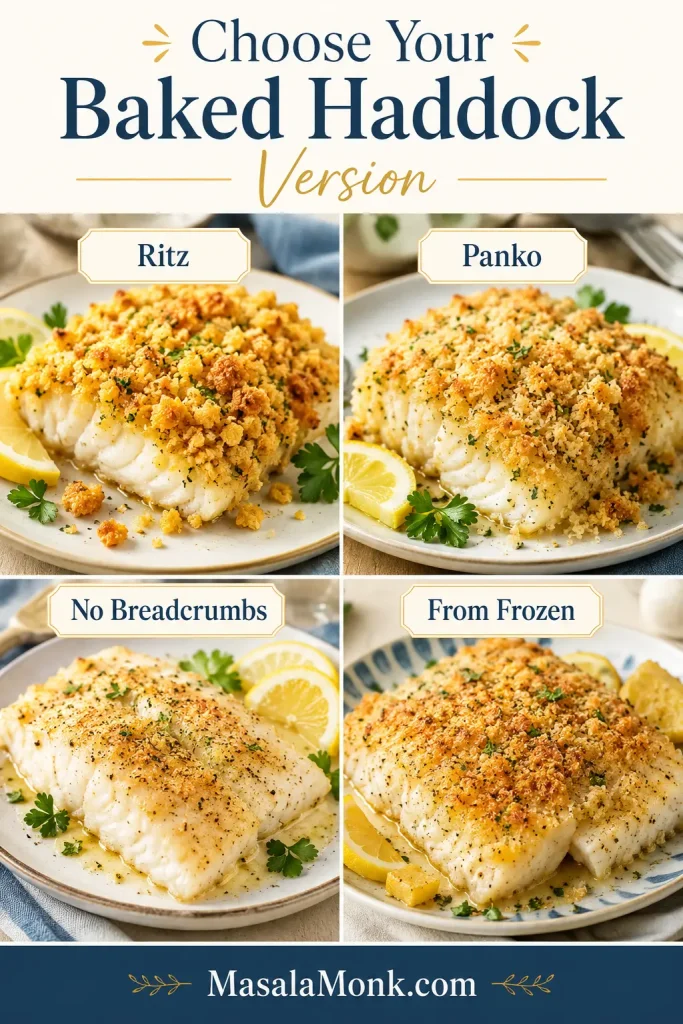
Choose Your Baked Haddock Version

Start with the dinner you want, then choose the topping. Ritz gives you buttery New England comfort, panko gives you crunch, breadcrumbs keep it classic, and lemon butter keeps the plate lighter.

Four-panel guide showing baked haddock versions with Ritz, panko, no breadcrumbs, and a from-frozen method.
Once you know the style you want, this guide helps you choose between Ritz, panko, no breadcrumbs, or a from-frozen method.

Best Topping by Dinner Style

What You WantUseBest TemperatureWhy It Works
New England baked haddockCrushed Ritz crackers350°F or 400°FButtery, cozy, and classic with lemon and parsley.
Crispy baked haddock without fryingPanko and Parmesan400°FLight crunch without a pot of oil.
Soft classic baked fishPlain breadcrumbs375°F or 400°FGentler texture and familiar flavor.
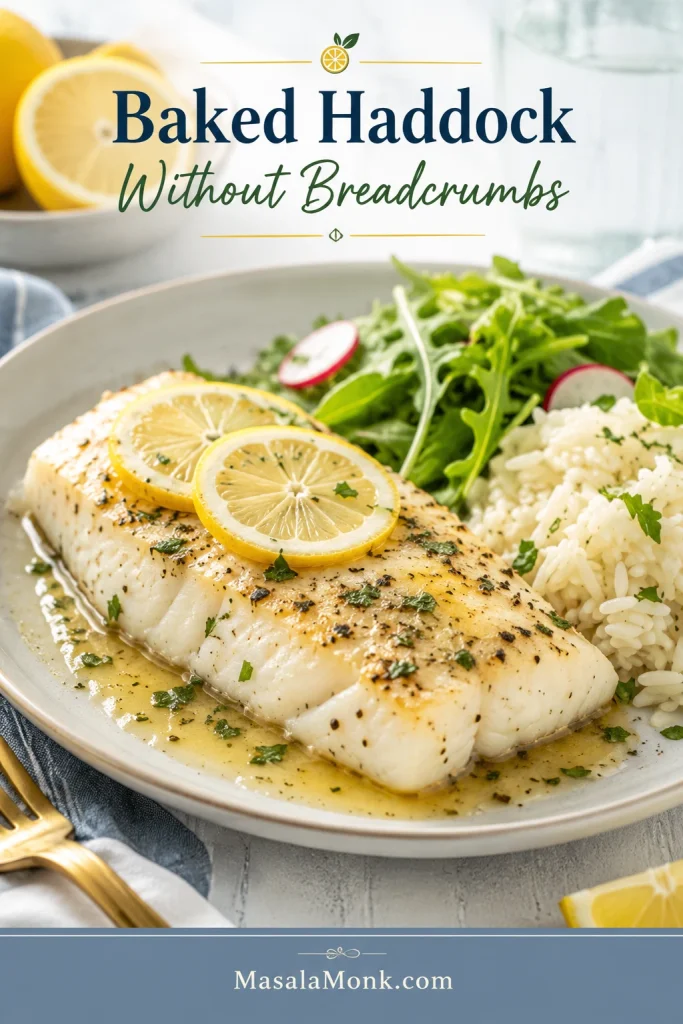
Baked haddock without breadcrumbsLemon, butter or olive oil, herbs400°FClean, bright, and lighter.
Thick center-cut haddockHaddock loins350°F or longer 400°F timingThicker fish needs gentler timing.
Baked haddock from frozenEmergency frozen method400°FBake briefly first, blot moisture, then season.

Use this topping comparison to choose the texture you want before you bake: buttery Ritz, crisp panko, or softer breadcrumbs.

Comparison board showing Ritz crackers, panko, and breadcrumbs as three topping options for baked haddock.
Choose Ritz for buttery New England baked haddock, panko for a crisp finish, or breadcrumbs for a softer classic crust.

For a first try, choose Ritz if you want the coziest fish dinner and panko if you want the crispest finish. Both make mild haddock feel more complete than plain baked fish.

Craving fried fish instead of baked fish? This fish batter recipe is the better path.

More Baked Haddock Tips

Why This Baked Haddock Works

Haddock needs three things: a dry surface, seasoning on the fish itself, and the confidence to stop baking before the fillets turn firm. The buttery layer adds flavor and comfort, but the fish is still the main event.

If baked fish has disappointed you before, it was probably not because you did anything dramatic wrong. Delicate white fish simply rewards early checking. Once you learn that, this recipe feels relaxed instead of risky.

The buttered surface protects the fish, the lemon keeps the flavor bright, and the broiler gives you a backup plan when the fish is done before the surface looks perfect.

Ingredients You’ll Need

The ingredient list is short, so balance matters. Haddock is mild; it needs direct seasoning and enough butter in the topping to brown without turning greasy.

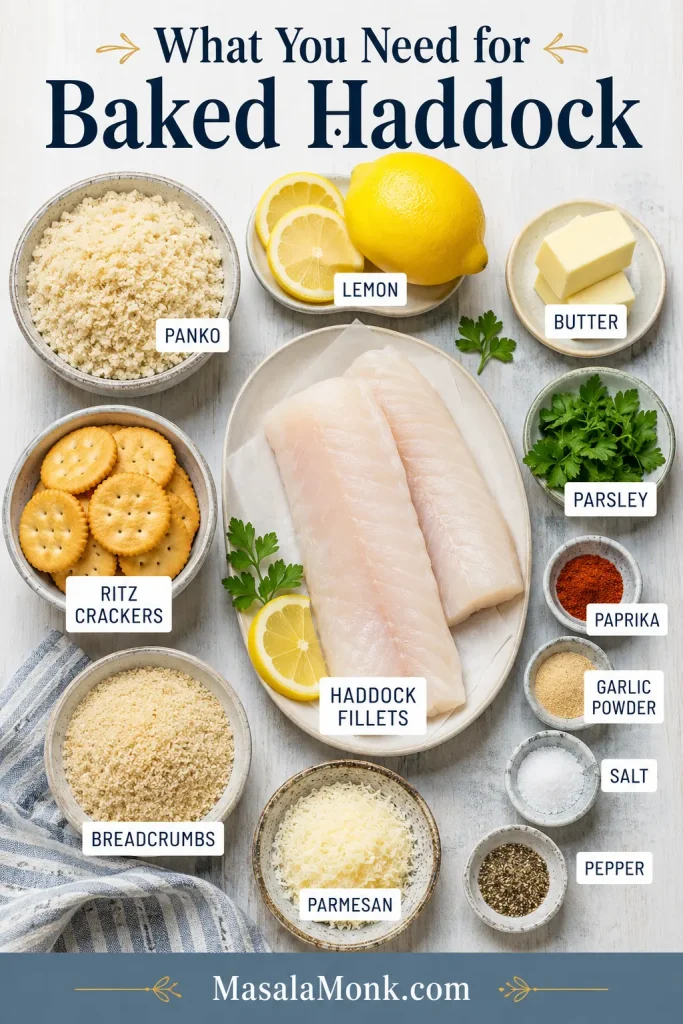
Ingredients for baked haddock arranged overhead, including haddock fillets, lemon, butter, parsley, Ritz crackers, panko, breadcrumbs, Parmesan, and spices.
Before choosing your topping, gather the essentials: mild haddock, lemon, butter, herbs, and either Ritz crackers, panko, or breadcrumbs.

Haddock Fillets

Skinless boneless haddock fillets are easiest. Four fillets, about 6 oz / 170 g each, fit well in a 9×13-inch baking dish. Thinner pieces cook quickly; thick haddock loins need more time. Skin-on haddock can still be baked skin-side down.

Butter or Olive Oil

Butter gives the most classic flavor and helps the surface turn golden and savory. Olive oil works when you want a lighter plate, especially with plenty of lemon and herbs.

Panko, Breadcrumbs, or Ritz Crackers

Panko gives the lightest crunch. Fine breadcrumbs make a softer classic crust. Ritz crackers bring buttery New England comfort and need a lighter hand with salt.

Crush Ritz crackers into coarse pieces, not powder. You want little buttery bits that toast on top of the fish.

Lemon, Garlic, Paprika, and Herbs

Lemon brightens the fish, garlic powder seasons evenly, paprika adds color, and parsley keeps the plate fresh. For a seafood-seasoning flavor, replace the paprika with a small pinch of seafood seasoning and reduce the salt.

Parmesan

Parmesan is optional, but it works beautifully with panko. It adds savory depth and helps the panko crust taste more finished.

Step-by-Step Tips for Better Baked Haddock

The recipe card gives you the fast version. These cues help with thin fillets, thick loins, frozen fish, and heavier toppings.

1. Start with dry fillets

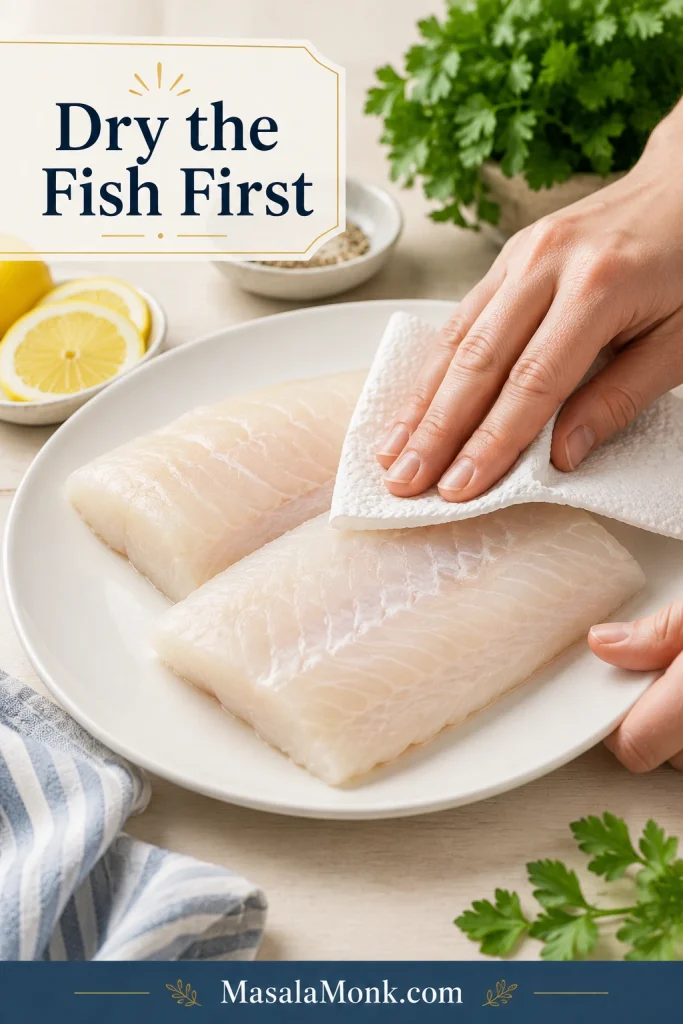
Pat both sides of the fish with paper towels. This one step helps seasoning stick and keeps the dish from turning watery.

Raw haddock fillets being patted dry with paper towels on a light surface before baking.
First, pat the haddock dry; otherwise, extra surface moisture can make the fish steam and soften the topping.

2. Season the fish, not just the topping

Add salt, pepper, lemon juice, garlic powder, and paprika before the topping goes on. The golden layer should support the fish, not carry all the flavor by itself.

Haddock fillets in a white baking dish being seasoned with lemon, paprika, garlic powder, salt, and pepper before topping.
Next, season the haddock itself with lemon, salt, pepper, garlic, and paprika so the fish tastes good beneath the topping.

3. Keep the topping loose

Mix the panko, breadcrumbs, or crushed crackers with melted butter until the texture looks like damp sand. Spoon it over the fish, press gently, and stop there. A loose layer browns better than a packed one.

Bowl of buttered panko breadcrumb topping with herbs and lemon zest, lifted with a spoon to show a damp sand texture.
The topping should feel like damp sand because that texture browns better than dry crumbs or a greasy butter paste.

After mixing the crumbs, keep the layer loose on top of the fillets so the heat can move through the fish.

Loose breadcrumb topping being spooned over seasoned haddock fillets in a white ceramic baking dish.
Spoon the topping on lightly instead of pressing it down, because a loose layer leaves room for heat to cook the fish evenly.

4. Bake uncovered

An uncovered dish gives the surface a chance to toast. Covering traps steam, which is useful for some foods but not for buttery topping on delicate fish.

5. Let the fish win

Pull the haddock when it flakes, even if the top is not quite as golden as you hoped. A minute under the broiler can fix the color.

Before and after comparison of baked haddock topping before broiling and after becoming golden brown.
If the haddock is done but the surface looks pale, broil the topping briefly instead of extending the bake time.

Once the topping choice is clear, the only real timing question is temperature.

350°F vs 400°F: Which Is Better?

Both temperatures can work. Choose based on thickness and topping.

Oven TemperatureBest ForTypical Timing
350°F / 175°CThicker fillets, haddock loins, heavier Ritz layer, gentler New England-style bake18 to 25 minutes
375°F / 190°CA middle path when the topping browns quickly but the fish is thick14 to 20 minutes
400°F / 200°CMost everyday baked haddock fillets12 to 16 minutes
425°F / 220°CVery thin fillets or quick browning at the end8 to 12 minutes

For most weeknight dinners, 400°F / 200°C is the easiest default. For a thicker loin or a heavy Ritz layer, 350°F / 175°C gives the fish more time to cook gently.

Infographic comparing 350°F and 400°F oven temperatures for baked haddock with notes for thick loins and most fillets.
Use 400°F for most weeknight haddock fillets; however, thicker loins or a heavier Ritz layer often bake better at 350°F.

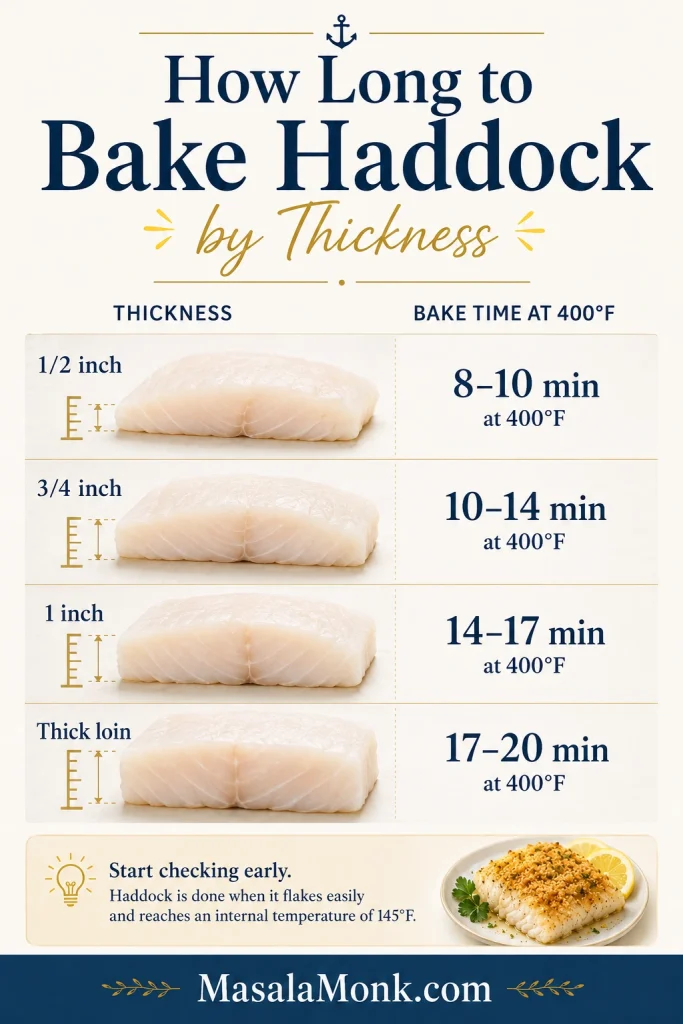
How Long to Bake Haddock by Thickness

Thickness matters more than weight. A thin 6 oz fillet can cook faster than a smaller but thicker haddock loin.

Fillets vs Loins

Haddock fillets are usually thinner and cook quickly, while haddock loins are thicker center-cut pieces that need more time and often do better with gentler heat.

If your dish has mixed sizes, remove the thinner fillets as soon as they are done and let the thicker pieces finish. This simple move prevents dry edges and underdone centers.

Haddock ThicknessAt 400°F / 200°CAt 350°F / 175°C
Thin fillet, about 1/2 inch8 to 10 minutes12 to 15 minutes
Medium fillet, about 3/4 inch10 to 14 minutes15 to 18 minutes
Thick fillet, about 1 inch14 to 17 minutes18 to 22 minutes
Very thick haddock loin17 to 20 minutes22 to 25 minutes

Start checking at the early end of the range. Haddock rewards early checking more than extra oven time.

Bake time chart for haddock by thickness, showing 1/2 inch, 3/4 inch, 1 inch, and thick loin timing at 400°F.
Because thickness changes bake time more than weight, thin fillets need early checking while thick haddock loins need extra minutes.

How to Know When Haddock Is Done

Haddock is done when the center is opaque, moist-looking, and flakes with gentle pressure. The most reliable check is an instant-read thermometer in the thickest part.

  • Temperature: 145°F / 63°C in the thickest part
  • Fork test: soft flakes separate without force
  • Visual cue: opaque center, not translucent or glossy

The first time, a thermometer is helpful. After that, you will start recognizing the soft flakes and opaque center by sight.

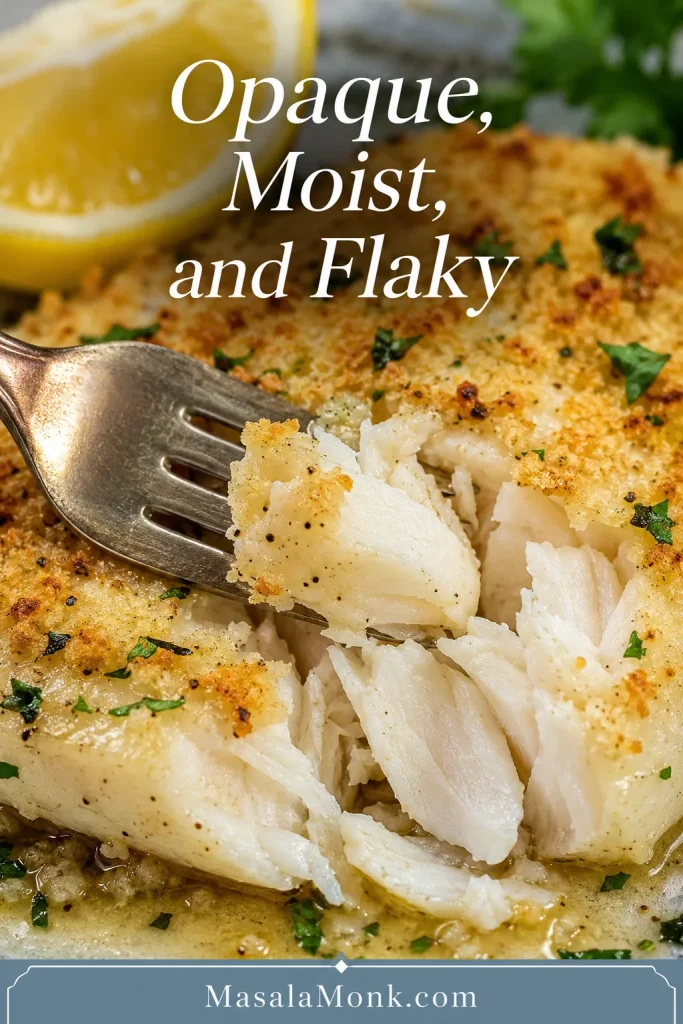
Close-up of baked haddock flaking apart with a fork, showing a moist opaque center and golden topping.
When the center turns opaque and separates into soft flakes, pull the haddock from the oven before the delicate fish overcooks.
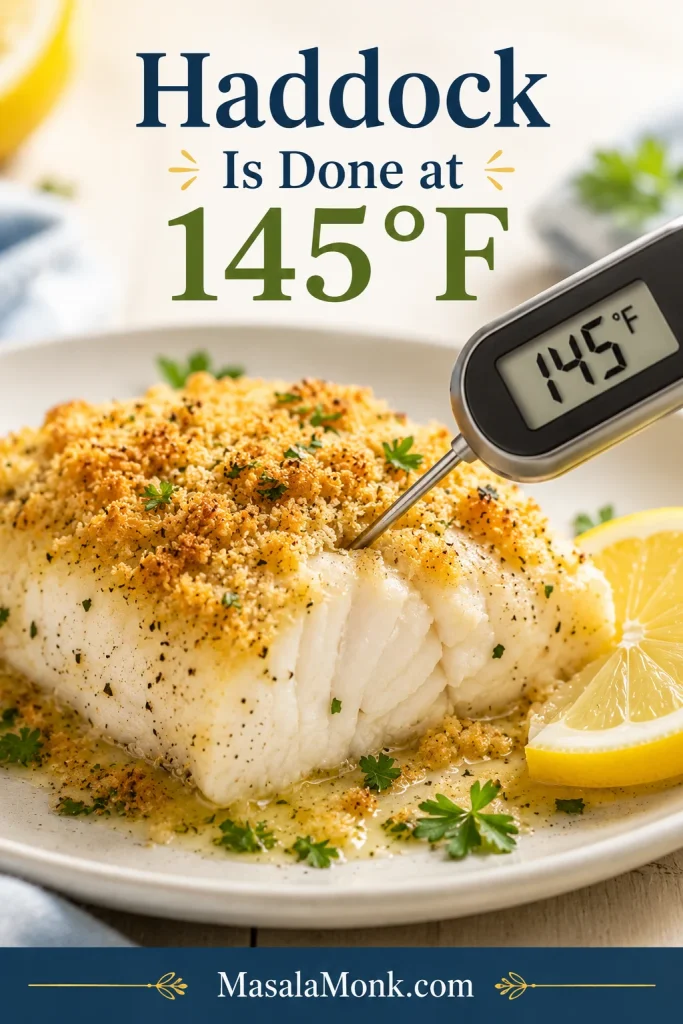
Instant-read thermometer inserted into baked haddock, showing doneness at 145°F with lemon and parsley nearby.
A thermometer gives the clearest first-time answer: haddock is done when the thickest part reaches 145°F.

The safe minimum internal temperature for fish is 145°F / 63°C. Once haddock looks firm, dry, or heavily shrunken, it has probably gone too far.

Fresh vs Frozen Haddock

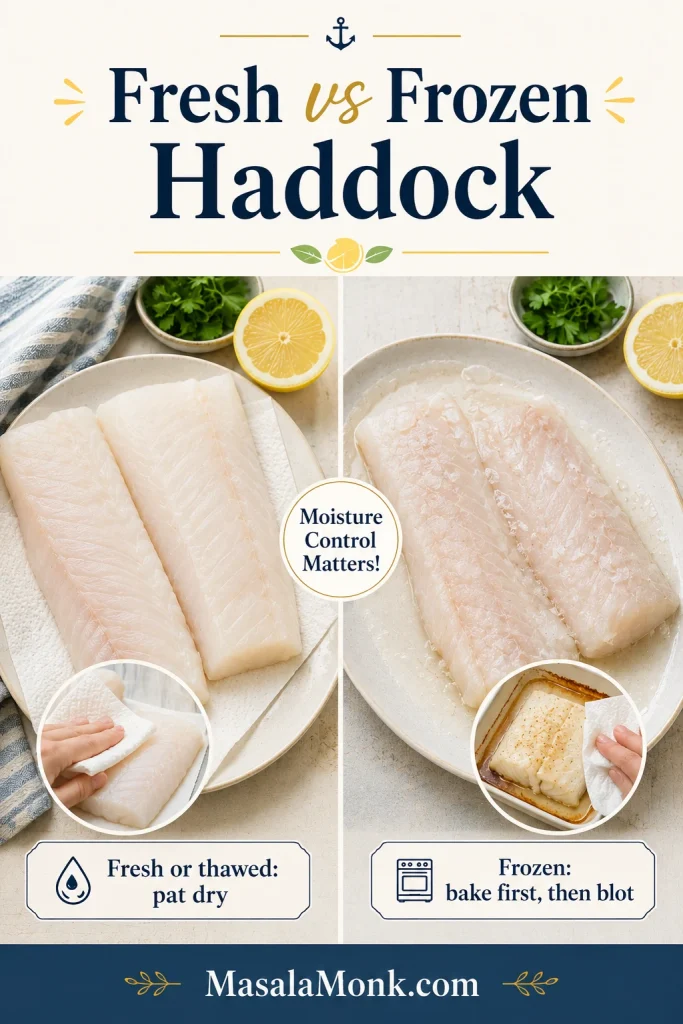
Fresh haddock is easiest, but frozen haddock works well when it is thawed and dried properly. Crumb-topped fish needs a dry surface more than extra liquid in the dish.

Side-by-side comparison of fresh or thawed haddock patted dry and frozen haddock needing moisture control before baking.
Fresh or thawed haddock needs a dry surface; for frozen haddock, a short first bake and a quick blot help control moisture.

Best Method: Thaw First

Thaw frozen haddock overnight in the refrigerator. For a faster method, keep the fish sealed and thaw it in cold water, changing the water every 30 minutes. The USDA describes refrigerator thawing, cold-water thawing, and microwave thawing as safe defrosting methods. Fish thawed by cold water or microwave should be cooked right away.

After thawing, unwrap the fillets and pat them dry before seasoning. That is the difference between a golden top and a wet crust.

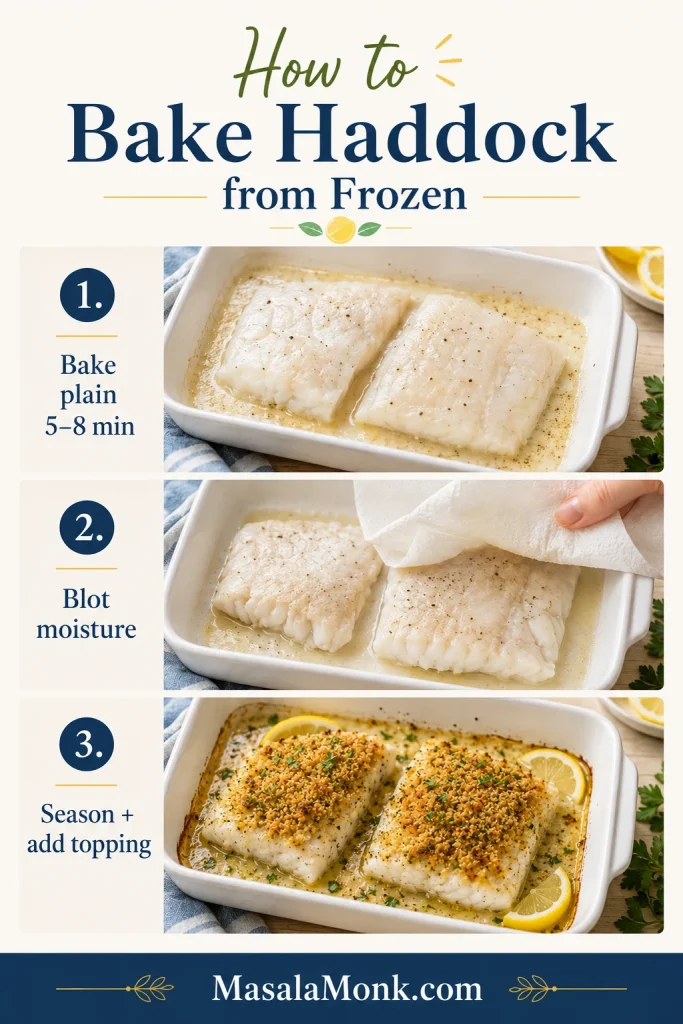
Emergency Method: Baking Haddock from Frozen

Thawed fish gives the best texture, but frozen fillets can still become dinner. Keep the topping off at first.

  1. Heat the oven to 400°F / 200°C.
  2. Place frozen fillets in a lightly greased baking dish.
  3. Bake plain for 5 to 8 minutes, just until surface ice melts and moisture starts to release.
  4. Blot or drain the dish carefully.
  5. Season the fish, add the topping, and continue baking until the center reaches 145°F / 63°C.

This will get dinner on the table, but thawed fish gives you a drier surface and a better topping.

Three-step guide showing how to bake haddock from frozen by baking plain, blotting moisture, then seasoning and adding topping.
When baking haddock from frozen, bake it plain first, blot the released moisture, and only then add seasoning and topping.

Flavor Variations

Choose one flavor direction and keep it simple. Haddock is mild, so it does not need a crowded topping.

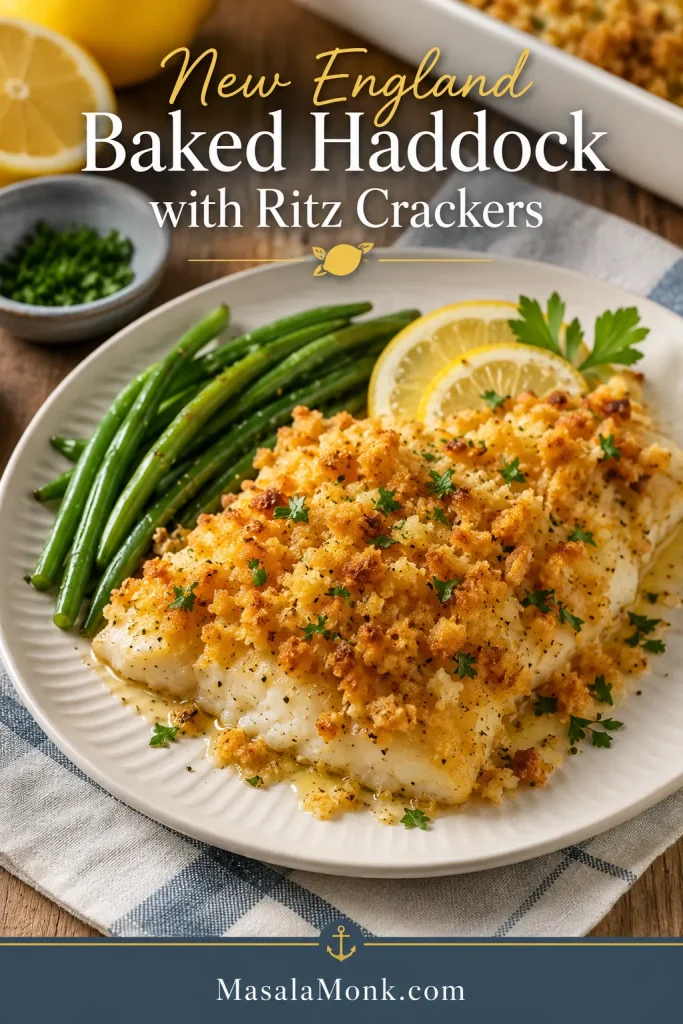
New England Baked Haddock with Ritz Crackers

This is the buttery comfort version: crushed Ritz crackers, melted butter, lemon, and parsley over mild white fish. Bake at 350°F for a gentler old-school feel, or 400°F when you want dinner faster. Keep the salt light and let the crackers do their job.

New England baked haddock with buttery Ritz cracker topping served on a plate with lemon and parsley.
Crushed Ritz crackers give this New England baked haddock its buttery comfort, while lemon and parsley keep each bite balanced.

Panko Parmesan Baked Haddock

Panko and Parmesan give you the crunch of fried fish without pulling out a pot of oil. This version is best at 400°F so the panko crust can toast while the fish stays tender.

Panko Parmesan baked haddock with a crisp golden crust, lemon wedge, and parsley garnish on a plate.
Panko and Parmesan add crispness without frying, so this baked haddock version works well when you want crunch with less mess.

Lemon Butter Haddock

Skip the crumbs and let lemon butter lead. This is the lightest path, especially when the fish is fresh and you want a clean, bright dinner.

Lemon butter baked haddock without breadcrumbs served with herbs, lemon, and a light side.
For a lighter baked haddock variation, skip the crumbs and let lemon butter, herbs, and gentle oven heat carry the flavor.

Garlic Butter Haddock

Add garlic powder or a little finely grated garlic to the melted butter, then finish with parsley and lemon. Fresh garlic can burn under the broiler, so use a light hand.

Warm Paprika or Chili Crumb Haddock

Add a small pinch of smoked paprika, mild chili powder, or Kashmiri chili powder to the buttered crumbs. Keep the warmth gentle; haddock tastes best when the spice supports the fish instead of taking over.

Healthy Baked Haddock

Use olive oil instead of some of the butter, keep the topping thin, and add lemon, herbs, and quick-cooking vegetables around the fish. The plate stays lighter, but the golden finish still makes it feel like dinner.

Cod or Another White Fish

This method also works with cod, pollock, hake, or another mild white fish. Cod is often thicker and meatier than haddock, so use the thickness chart instead of only the clock.

For a crisp battered dinner instead, save this fish and chips recipe for another night.

What to Serve with Baked Haddock

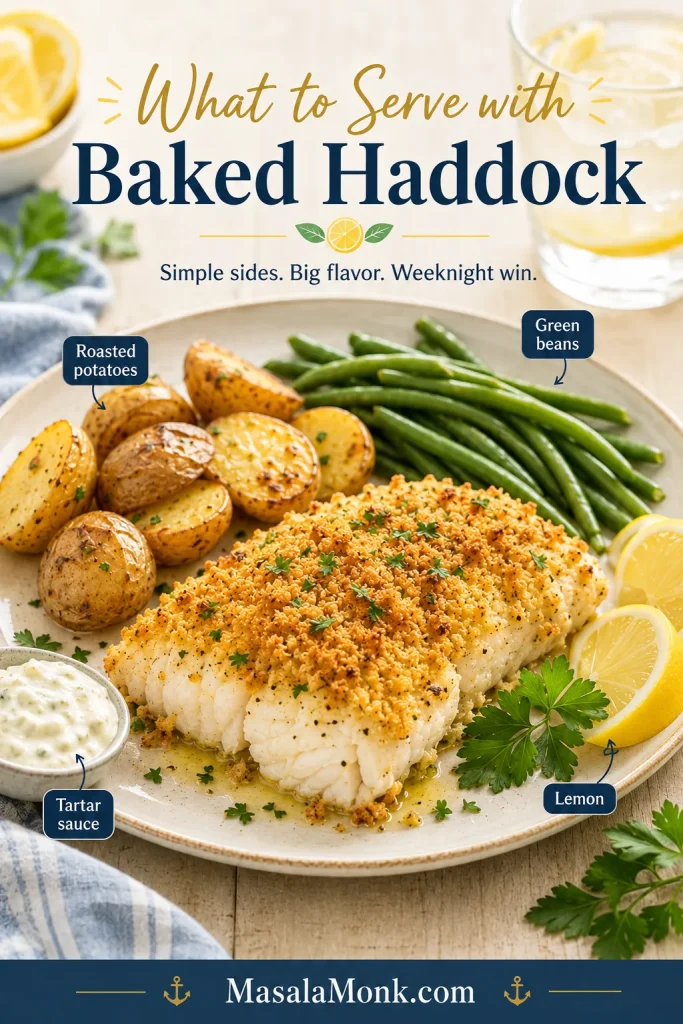
For the easiest comfort plate, serve the haddock with roasted potatoes, green beans, lemon wedges, and a spoonful of tartar sauce. It feels classic, but still light enough for a weeknight.

Baked haddock served with roasted potatoes, green beans, lemon wedges, parsley, and tartar sauce on a dinner plate.
To make baked haddock feel like a full dinner, pair the flaky fish with roasted potatoes, green beans, lemon, and tartar sauce.

Cozy Sides

Fresh Sides

  • Green beans
  • Peas
  • Cucumber salad or simple green salad
  • Coleslaw
  • Roasted carrots

Sauces and Extras

  • Lemon wedges
  • Tartar sauce
  • Lemon butter sauce
  • Herb yogurt sauce
  • Crusty bread

Keep the sides simple so the fish still feels like the center of the plate. For something brighter than tartar sauce, spoon a little mango salsa over the lemon-butter version, especially with rice or salad.

Troubleshooting

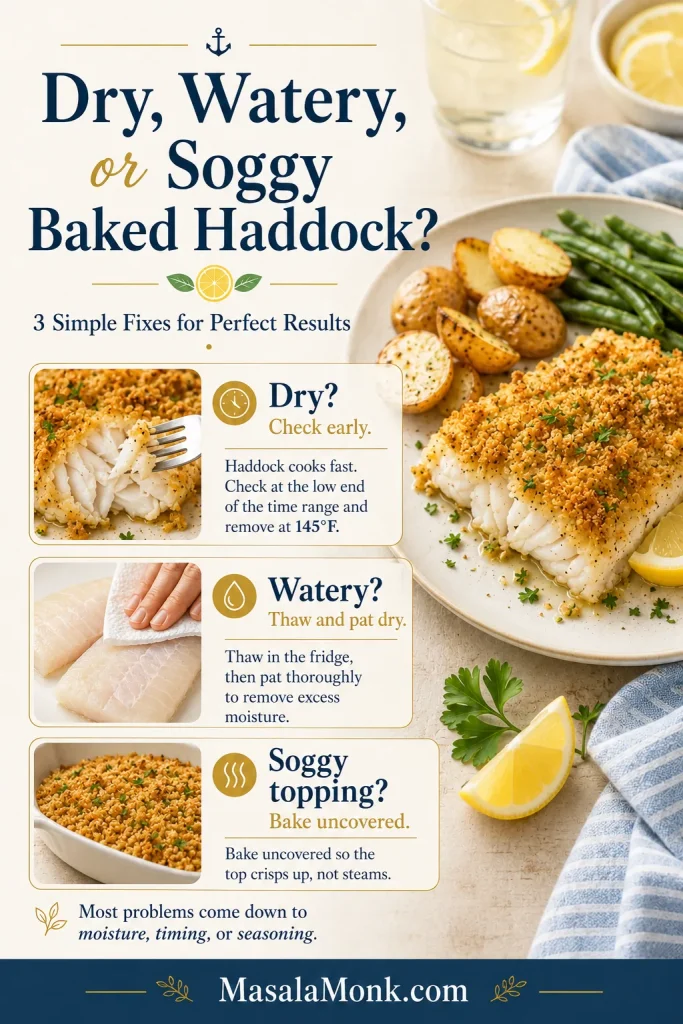
Most baked haddock problems come down to moisture, timing, or seasoning. The fix is usually simple.

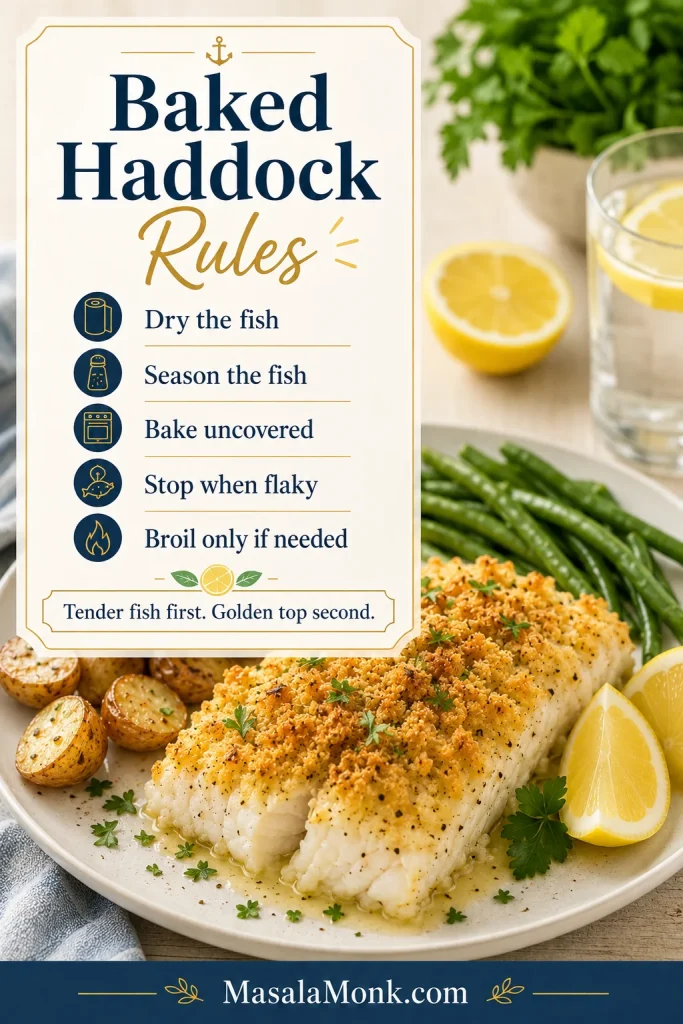
Three things to remember: Start with dry fillets, bake uncovered when using a topping, and pull the fish when it is done. The surface can always be browned for one more minute.

Troubleshooting guide for baked haddock with fixes for dry fish, watery fish, and soggy topping.
If baked haddock turns dry, watery, or soggy, adjust the timing, dry the fillets better, and bake uncovered next time.
ProblemLikely CauseHow to Fix It
Haddock is dryIt baked too long or the fillets were thin.Check early and pull the fish when it reaches 145°F / 63°C.
Fish is wateryThe fish was frozen, not fully thawed, or crowded in the dish.Thaw fully, pat dry, and leave space between fillets.
Topping is soggyToo much moisture or a covered dish.Bake uncovered and avoid adding extra liquid under the topping.
Topping is paleThe fish cooked before the surface browned.Broil for 1 to 2 minutes after the fish is done.
Fish tastes blandOnly the topping was seasoned.Season the fish directly before adding the top layer.
Fish fell apartIt was overcooked or lifted too roughly.Rest for 2 minutes and use a thin fish spatula.
Topping is greasyToo much butter, especially with crackers.Use less butter with Ritz and keep the layer loose.
Fish smells too strongThe fish may not be fresh or was stored too long after thawing.Use fresh-smelling fish and cook soon after thawing.

Make Ahead, Storage, and Reheating

Can You Make It Ahead?

Assemble this recipe right before baking. You can thaw the fish ahead and mix the dry topping ahead, but add butter, seasoning, and the final layer close to oven time.

How to Store Leftovers

Store leftovers in an airtight container in the refrigerator for up to 2 days. Keep extra lemon wedges separate and add fresh lemon after reheating.

Flaked leftovers are useful, not wasted. Fold them into potato and herbs for simple fish cakes, or tuck them into fish tacos with slaw, lime, and a creamy sauce.

Three-panel guide showing leftover baked haddock as flaked fish, golden fish cakes, and fish tacos with slaw and lime.
Leftover baked haddock still has options: flake it into bowls, shape it into fish cakes, or tuck it into tacos with slaw and lime.

How to Reheat It

Reheat gently in a low oven or air fryer until warmed through. The microwave works in a pinch, but it softens the topping and can make fish smell stronger.

Can You Freeze Cooked Haddock?

Cooked crumb-topped haddock does not freeze beautifully. The fish can turn watery and the topping usually softens. For best texture, freeze raw haddock, thaw it safely, and bake it fresh.

FAQ

What temperature is best for baked haddock?

For most fillets, 400°F / 200°C is the easiest everyday temperature. It cooks the fish quickly while giving the topping time to turn golden. For thicker loins or a heavier Ritz cracker topping, 350°F / 175°C gives a gentler bake.

How long does haddock take in the oven?

Most medium fillets take 12 to 16 minutes at 400°F / 200°C. Thin pieces may be ready in 8 to 10 minutes, while thick loins may need 17 to 20 minutes or more.

Should baked haddock be covered or uncovered?

Bake it uncovered when using a crumb topping. Covering traps steam, which helps some dishes but makes buttery crumbs soft instead of golden.

Can I bake frozen haddock?

Yes, but thawing first gives a drier surface and a better topping. For a frozen emergency, bake the plain fish briefly, blot the released moisture, season, add the topping, and continue baking until done.

Can I use cod instead of haddock?

Yes — cod works well here, but it is often thicker and meatier than haddock. Use the thickness chart and doneness cues instead of relying only on the clock.

Is haddock done at 145°F?

Yes. For safety, fish should reach 145°F / 63°C in the thickest part. It should also look opaque and flake easily with a fork.

Why did my baked haddock turn watery?

Watery haddock usually means the fish carried too much moisture into the oven. Fully thaw frozen fillets, pat them dry, and leave space in the dish so the fish bakes instead of steaming.

Can I make baked haddock without breadcrumbs?

Yes. Use melted butter or olive oil, lemon juice, lemon zest, parsley, salt, and pepper. Bake just until the fish is opaque and flaky. It will be lighter and softer, more lemon-butter fish than crisp-topped fish.

What is the best topping for baked haddock?

Ritz crackers give the buttery New England-style finish. Panko gives the crispest bite. Plain breadcrumbs give a softer, classic baked-fish texture.

Can I use smoked haddock for this recipe?

You can, but reduce the salt because smoked haddock is already salty and stronger in flavor. Smoked haddock is also excellent in chowder, Cullen skink, fish pie, and kedgeree.

A Few Last Tips Before You Bake

Baked haddock should feel simple, not stressful. Dry the fish, season the fish, bake it uncovered, and stop when the center is flaky and moist. The surface can always get one more minute under the broiler; the fish cannot be uncooked.

Baked haddock rules card listing dry the fish, season the fish, bake uncovered, stop when flaky, and broil only if needed.
Finally, remember the core baked haddock rules: dry the fish, season it directly, bake uncovered, stop when flaky, and broil only if needed.

Whether you choose buttery Ritz crackers, crisp panko, plain breadcrumbs, or lemon butter, the goal is the same. You want tender haddock with enough golden flavor on top to make it feel like a proper dinner.

If you make this baked haddock, leave a comment and tell us which version you chose: Ritz, panko, breadcrumbs, or lemon butter. Also mention whether you used thin fillets, thick loins, or frozen haddock. Your notes help other readers choose their own path.